michael101
-
Posts
441 -
Joined
-
Last visited
Content Type
Profiles
Forums
Gallery
Events
Everything posted by michael101
-

accurate-armour micro saw
michael101 replied to michael101's topic in Modeling tools and Workshop Equipment
The only problem with the x-acto its the teeth are very big and im not sure if they will cut a clean line on walnut planks of 1mm can someone check it out for me? i mean to try cutting a 1mm walnut plank from the side Bets regards Michael. -
Hello there , is someone has experience with this micro saw? need it for cutting planks in the gun ports https://accurate-armour.com/model-supplies/modelmaking-tools/mt011 best regards, Michael.
-
just build it up to pay 26 USD for piece of plywood and few screws... i think its a lot !!!! Michael.
-
second plank
michael101 replied to michael101's topic in Building, Framing, Planking and plating a ships hull and deck
Thank you Moxis interesting idea but maybe I will leave it in the same color and use the same method that you wrote before -
second plank
michael101 replied to michael101's topic in Building, Framing, Planking and plating a ships hull and deck
Thank you Mtaylor, yes i have read the tutorials but all of them taking about the first plank , and no one talk about the issue below —————————— Thank you Moxis , that what though at the first , but a friend told me if i choose this method all the line will have the same color and the segments will no be show , but maybe i will pick this method if i will not find other solution -
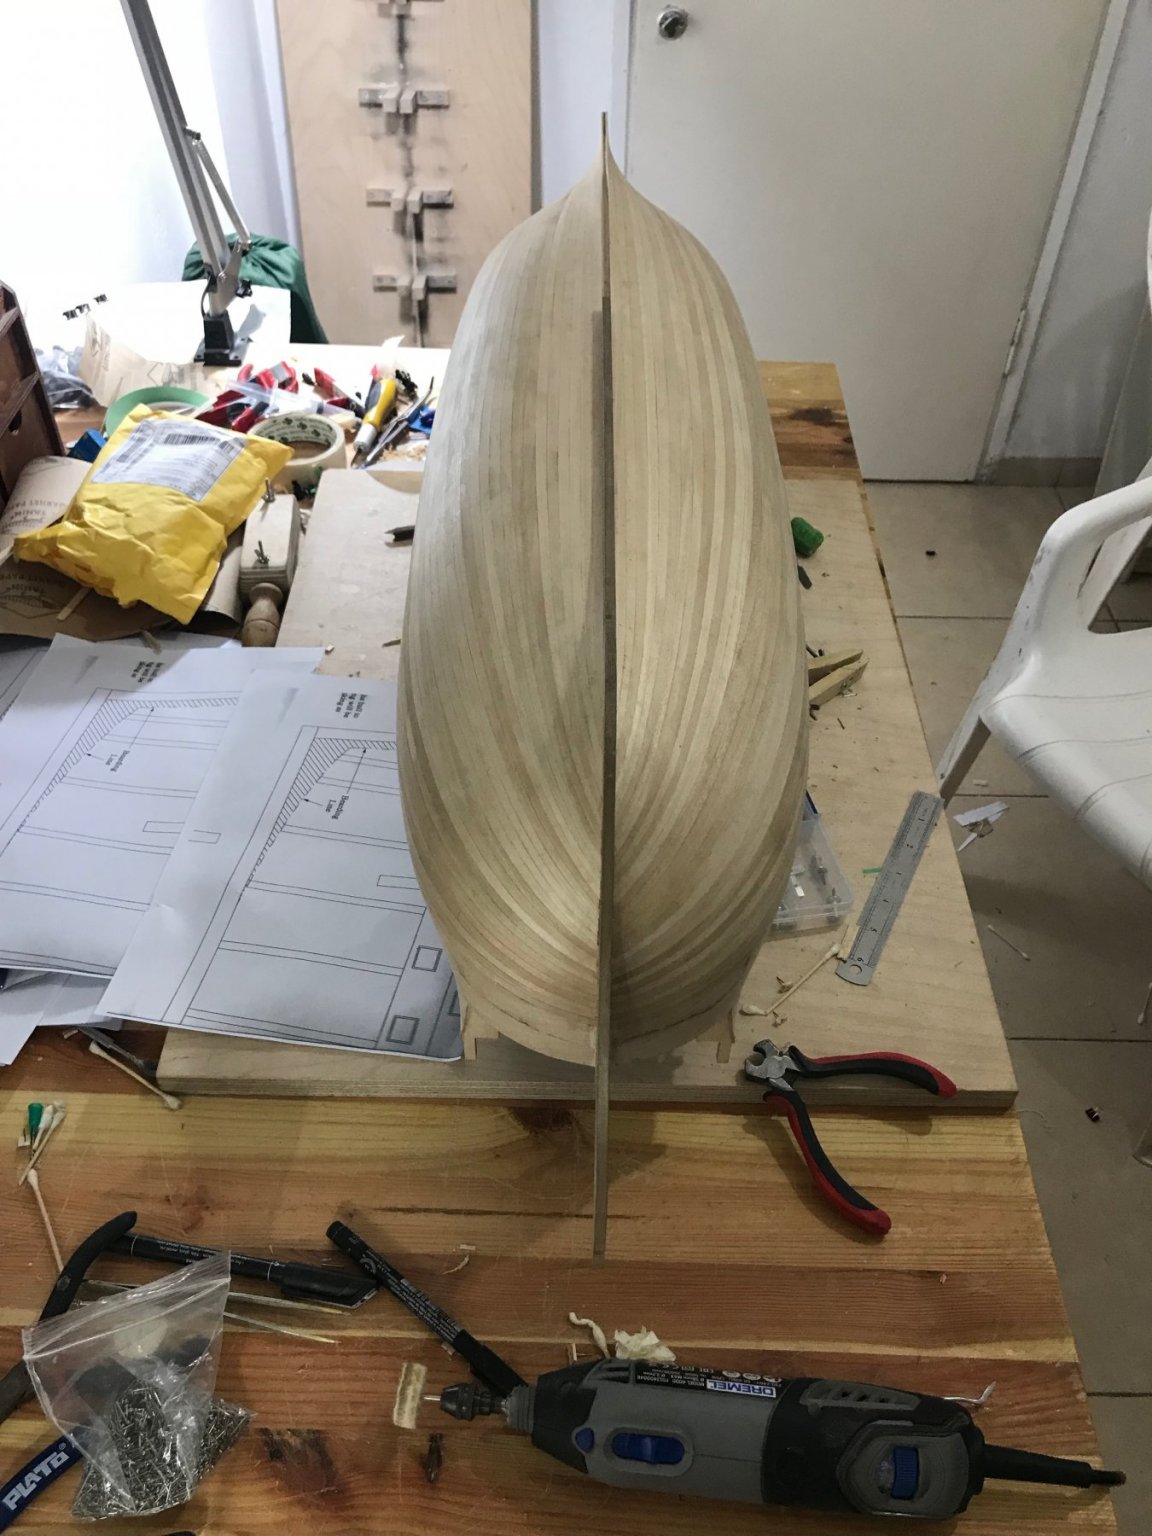
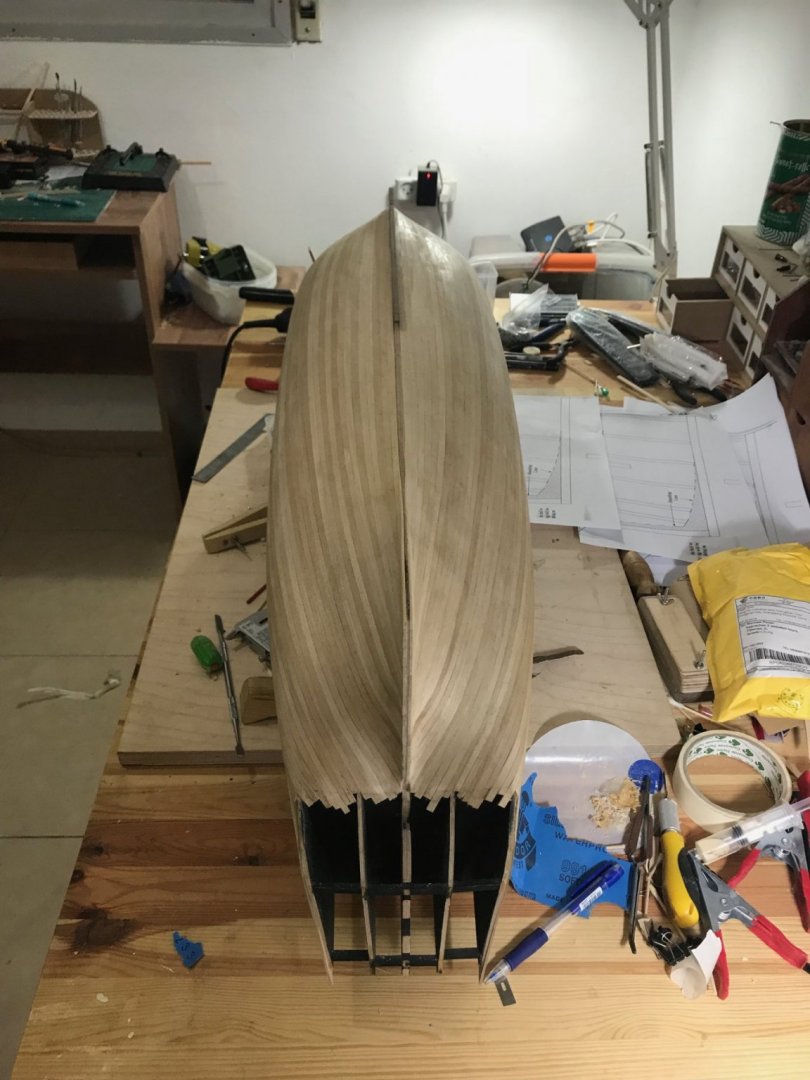
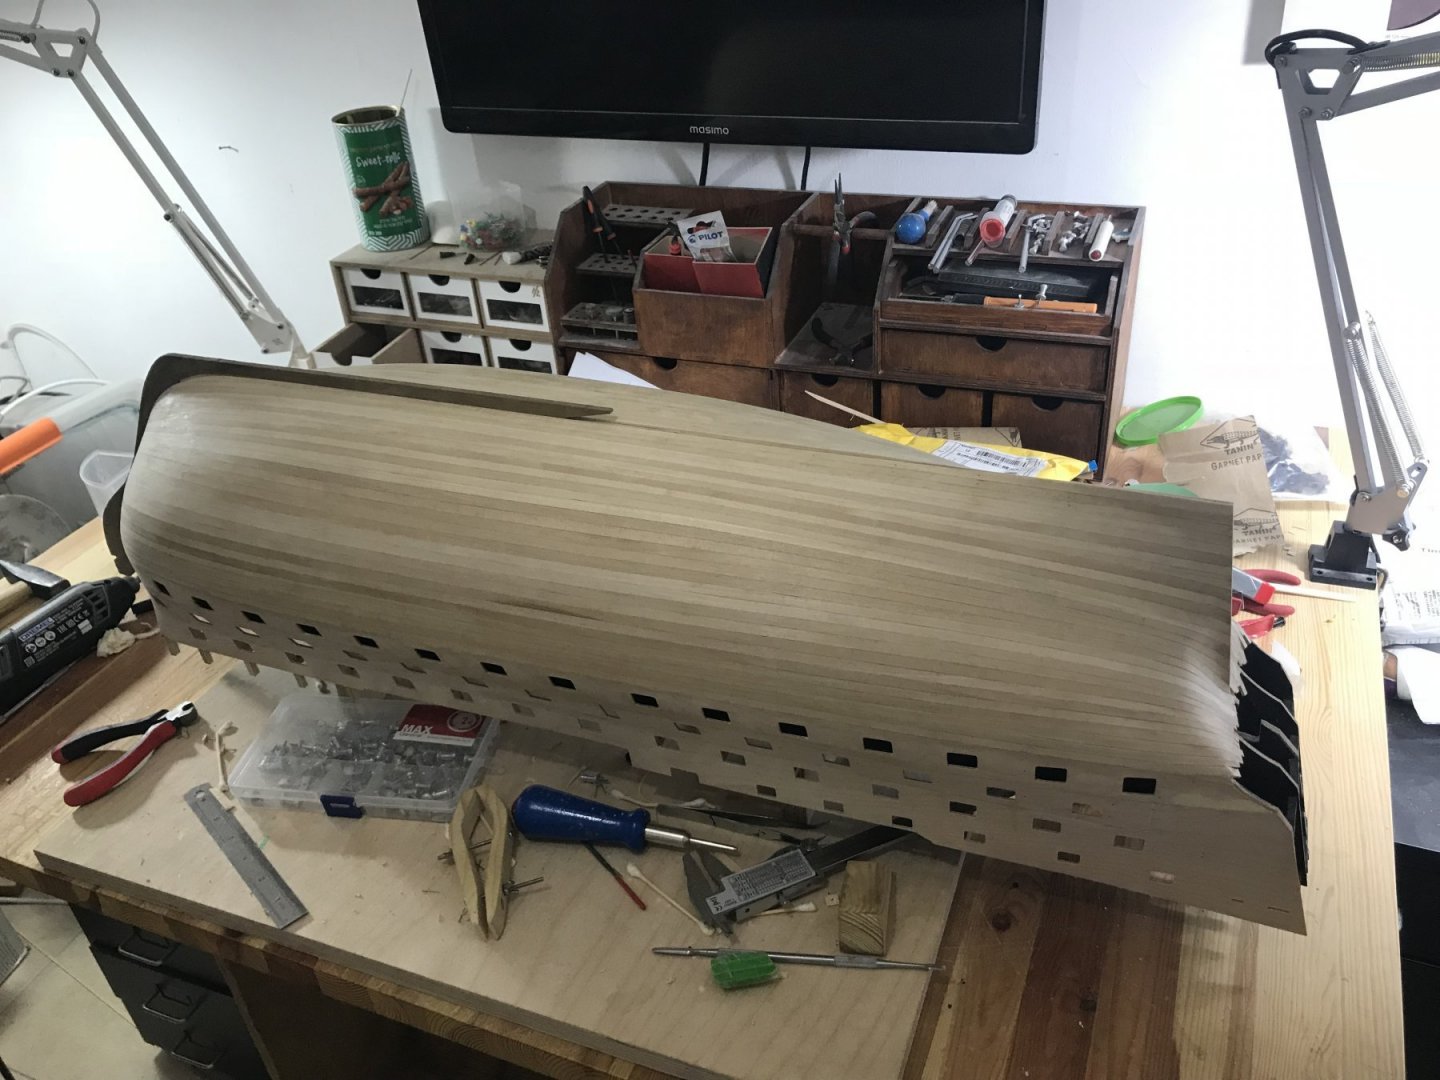
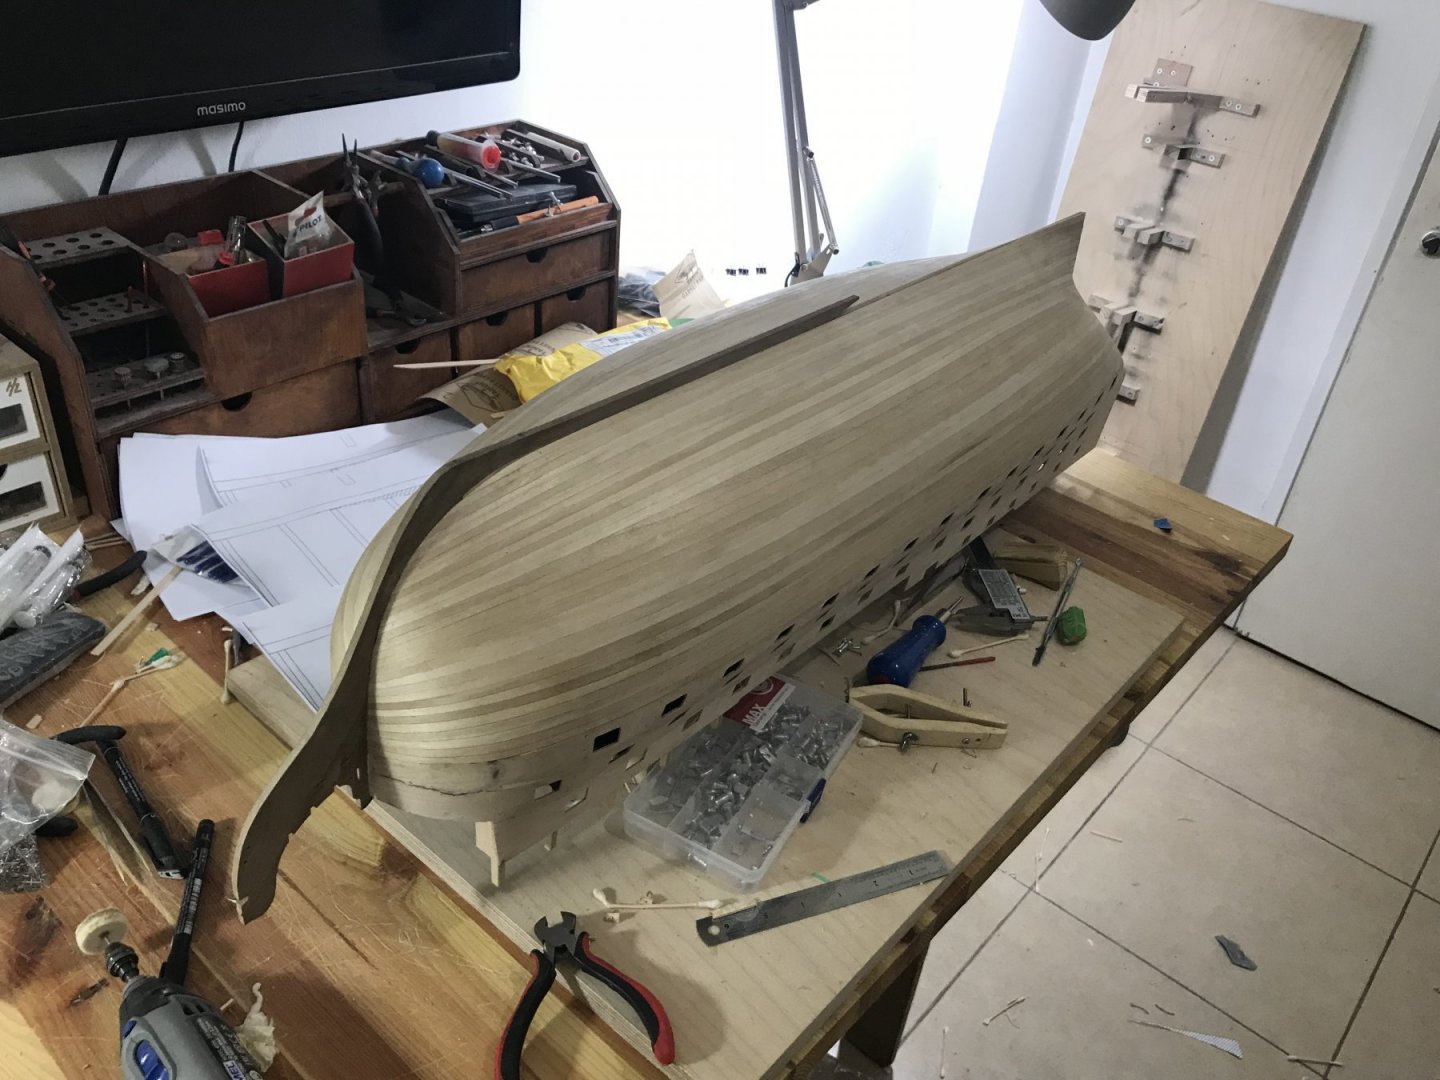
Hello friends, i have finish the first plank of my H.M.S VICTORY and soon i will start the second plank ( walnut wood ) the thing is, i want to make it as the real ship i mean to make the plank from segments of 127 mm the real ship used 30 ft. of plank for the ship (9.144 miter) so if my model is 1/72 it will give us exact 12.7 cm i will be more than happy to receive some advices for this method i think the big problem will be to make the connecting edges between the segments to be in exact same wide for not having small spaces when installing the next line of the planks but maybe its not even a problem (i never did it before so i dont know ) also what method you used for holding the second plank in place any why ... any advices are welcome !!!!! here is some pictures of my first plank i was explaining my method in my building , if you interesting you can visit the link below : Best regards, Michael.


-
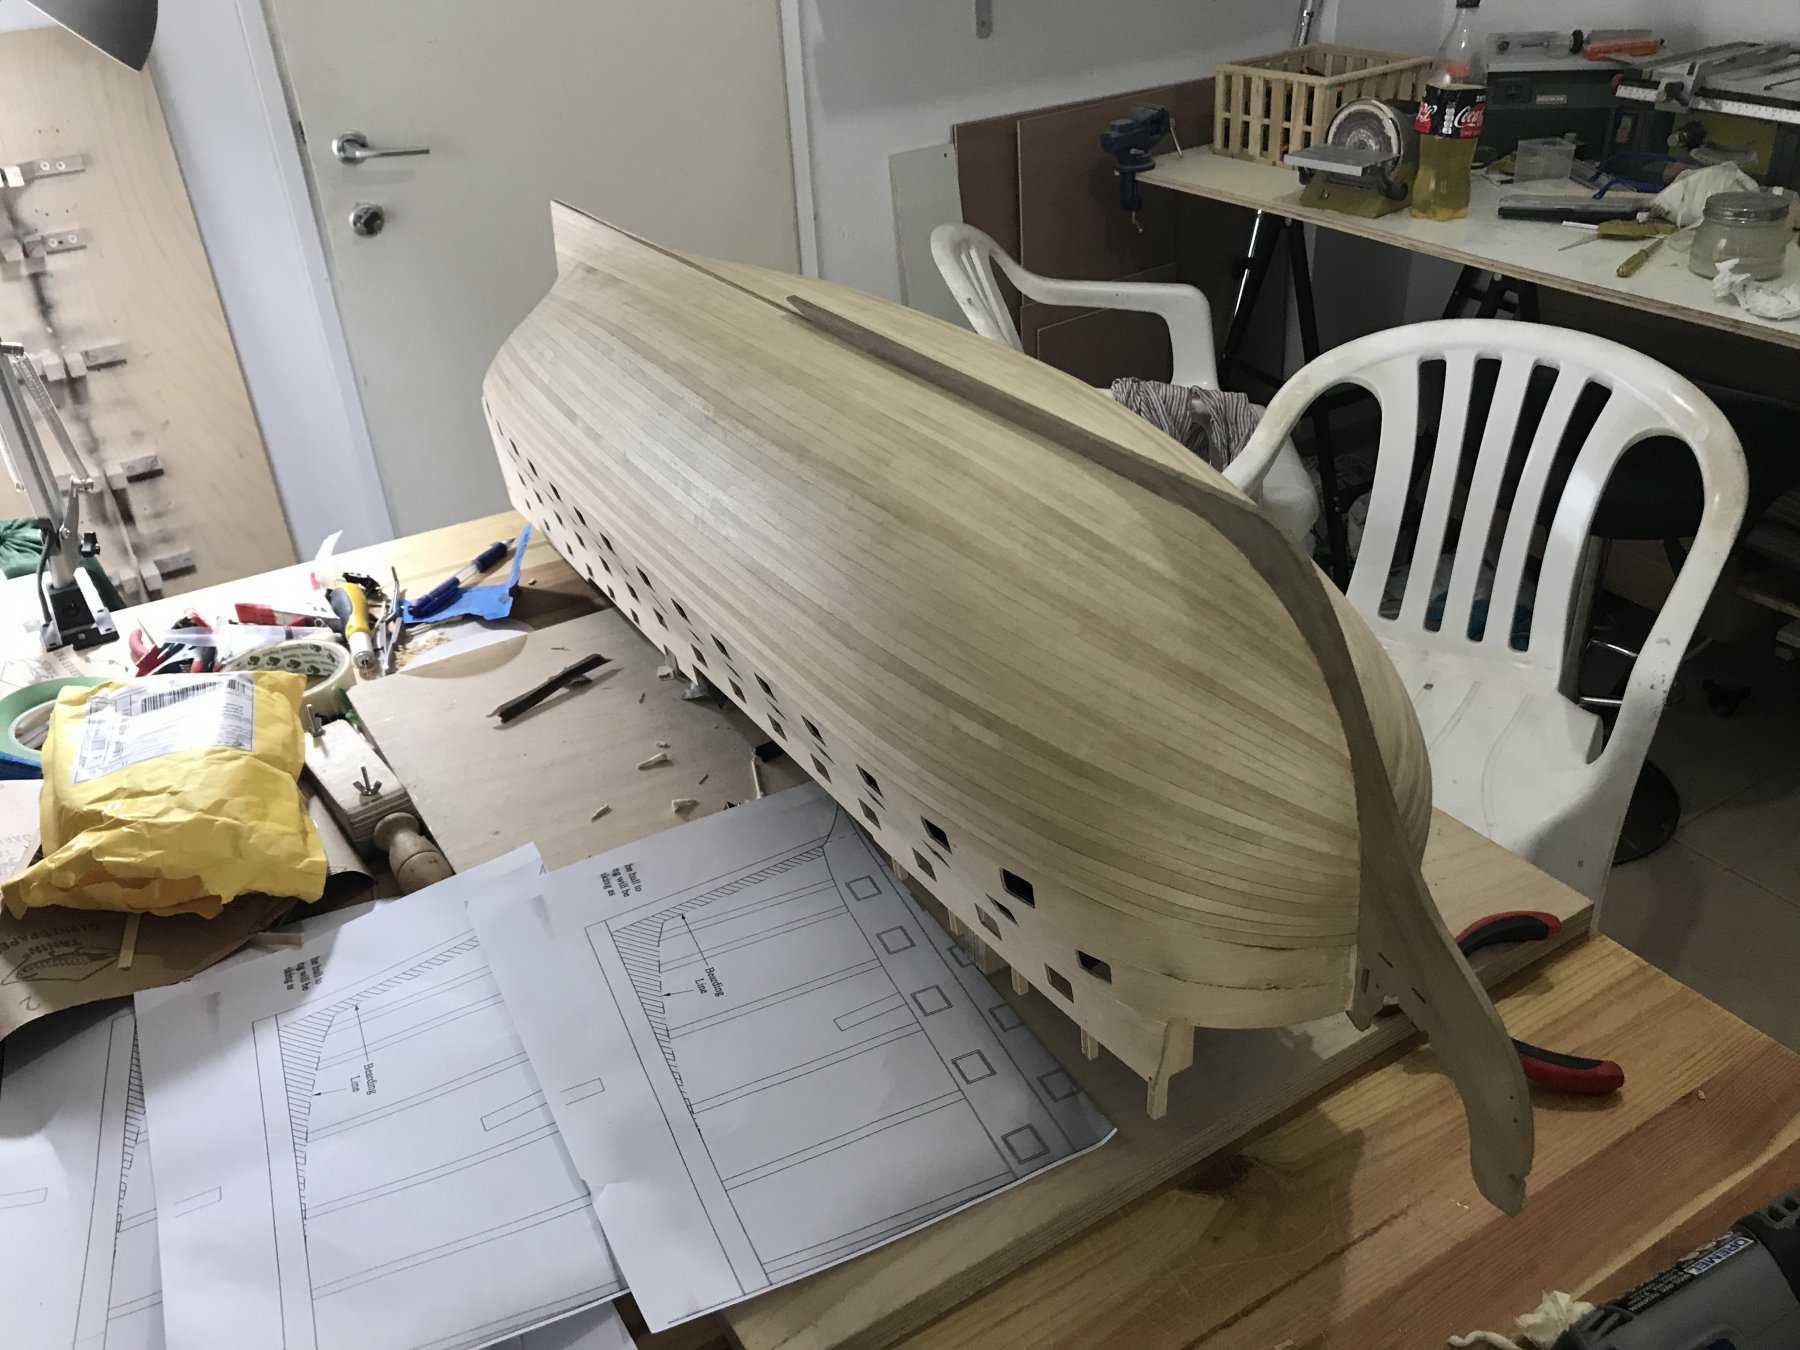
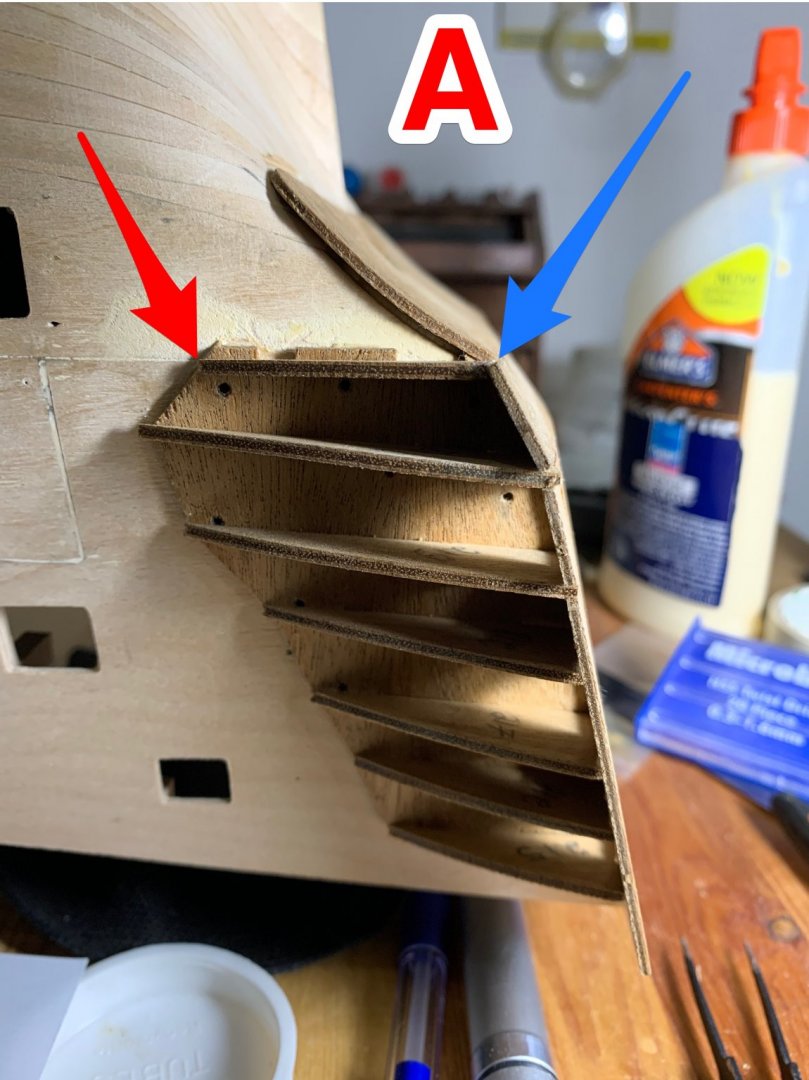
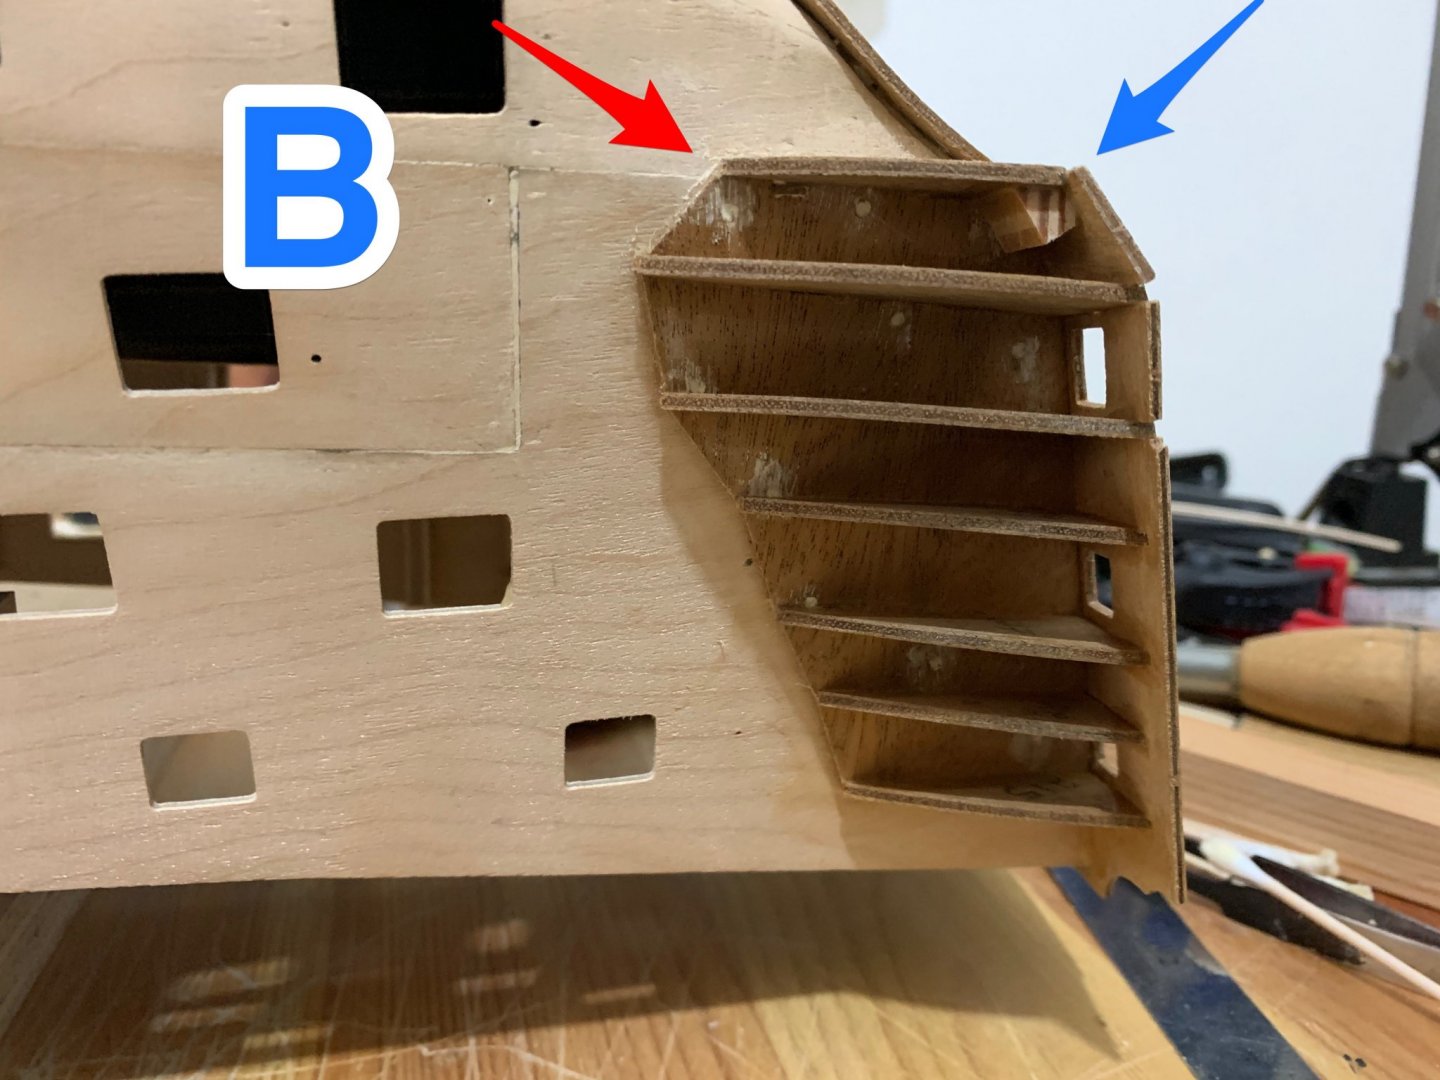
Hello Mort , sorry for the delay (i just saw your question) i did trim the part 373 but not flush with 270 line ! if it will be flush the space between the side gallery supports (the last one and the one before the last one ) you can see the problem in pic A So the way to do it its to trim it diagonal i mean to leave the corner of the last side gallery flush with the corner of the 373 part, and to make the slot near the blue Arrow deeper to make the last side gallery support to be flush with back panel (pic B ) Best regards, Michael.
-
How to maintenance Byrnes table saw
michael101 replied to michael101's topic in Modeling tools and Workshop Equipment
Thank you Bob ! -
Micro sanding tool
michael101 replied to michael101's topic in Modeling tools and Workshop Equipment
You welcome Moab im happy to hear it serve you Just like to share my ideas 💡 when its posible (not all of them works LOL 😂 But when it does im just posting them) Best regards , Michael. -
Micro sanding tool
michael101 replied to michael101's topic in Modeling tools and Workshop Equipment
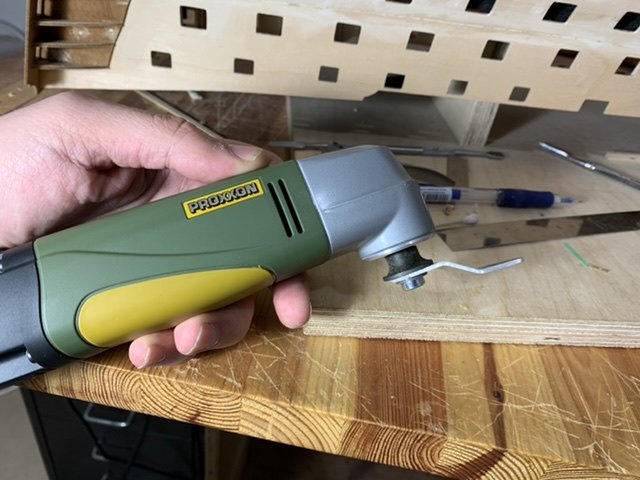
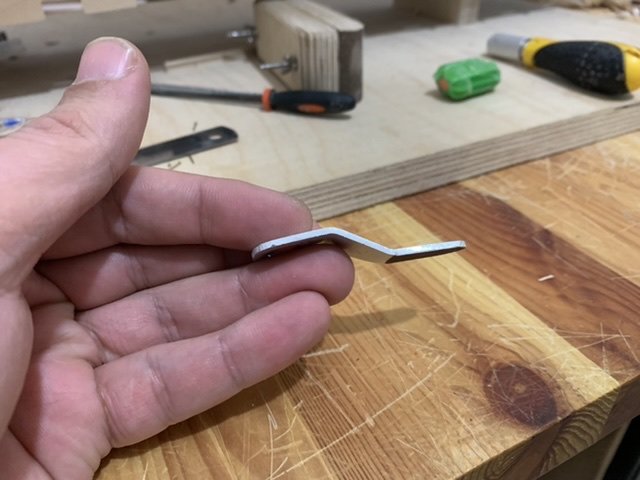
Y.T that is true when you have access to that aria but in my case you cant reach the spot without risking the model ,but with this tool you can get a perfect sanding very quick and must important without taking any risk -
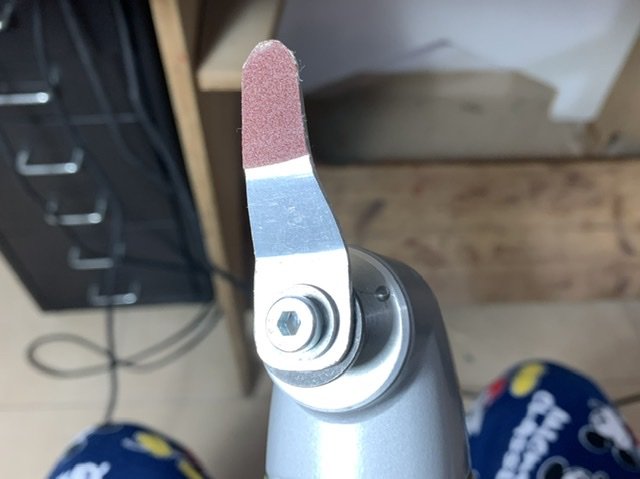
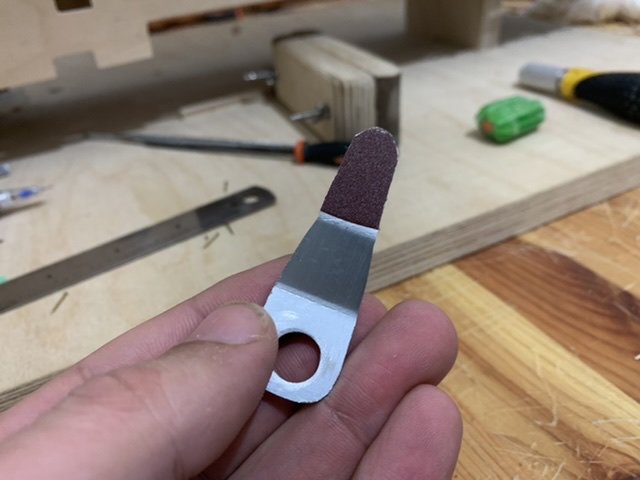
Hello friends long time ago i had the chance to buy few brand new tools of proxxon from some guy who bought them and never used them ... one of the tools called Delta its a bit big for our hobby.. but I knew a day would come and I would find use of this tool so today i had to sand some aria in the ship but it was very difficult to reach this spot.. so i made a very handy and precise tool for my Delta i used an aluminum strip for the tool firs i made an hole of 10 mm to feat the delta screw than i cute the shape that i want (by using a table saw , and sanding disc) and after all i twisted the aluminum to useful shape and after all i used an sticky sand paper and its working amazing !!!!!!!!!!! i hope you will find it useful Best regards, Michael.

-
How to maintenance Byrnes table saw
michael101 replied to michael101's topic in Modeling tools and Workshop Equipment
Thank you Jaager are you doing that weakly on your table saw ? -
What brand of #11 blades do you use
michael101 replied to bigcreekdad's topic in Modeling tools and Workshop Equipment
The best thing its to buy a pack of 100 from AliExpress for a few dollars with shipping ..... a have a pack that I bought something like 3 years ago and still have a lot of them left -
How to maintenance Byrnes table saw
michael101 replied to michael101's topic in Modeling tools and Workshop Equipment
/ -
How to maintenance Byrnes table saw
michael101 replied to michael101's topic in Modeling tools and Workshop Equipment
This what it says about lubrication In the manual of the table saw . is there anyone how doing that ? If so what brand of oil do you use ? best regards , Michael.
-
How to maintenance Byrnes table saw
michael101 replied to michael101's topic in Modeling tools and Workshop Equipment
Thank you dear friends ! and what about the oil ? It says that you need to oil some parts in the saw weekly are you doing that ? -
Hello There , I Bought the Byrnes table saw few month ago , and just start to work with the machine :) im wondering if someone can make a video about how to change the blade and also i saw in the instructions that you need to oil some parts of the table saw , so i will be more than happy if someone can explain how to do it :) Best regards, Michael.
-
Best tool for Cutting Windows for gunports
michael101 replied to michael101's topic in Modeling tools and Workshop Equipment
Thank you all for your tips !!!! i have some time until i will gate to this stage but waiting for me a lot of gun ports in my victory ... Best regards Michael. -
Best tool for Cutting Windows for gunports
michael101 replied to michael101's topic in Modeling tools and Workshop Equipment
Y.T thank you for replying , the problem with the x acto knife is that you cant really cut a a clean line when the planks are glue to the ship .... i saw long time ago a micro saw (looks like a blade of x acto ) after searching in micro mark i have found it the question is if someone has use it before for that method ... ? also i saw in a very old build log some Chinese micro saw but i cant found it At the moment .. -
Hello there what is the best tool / method for cutting windows of gunports ?
-
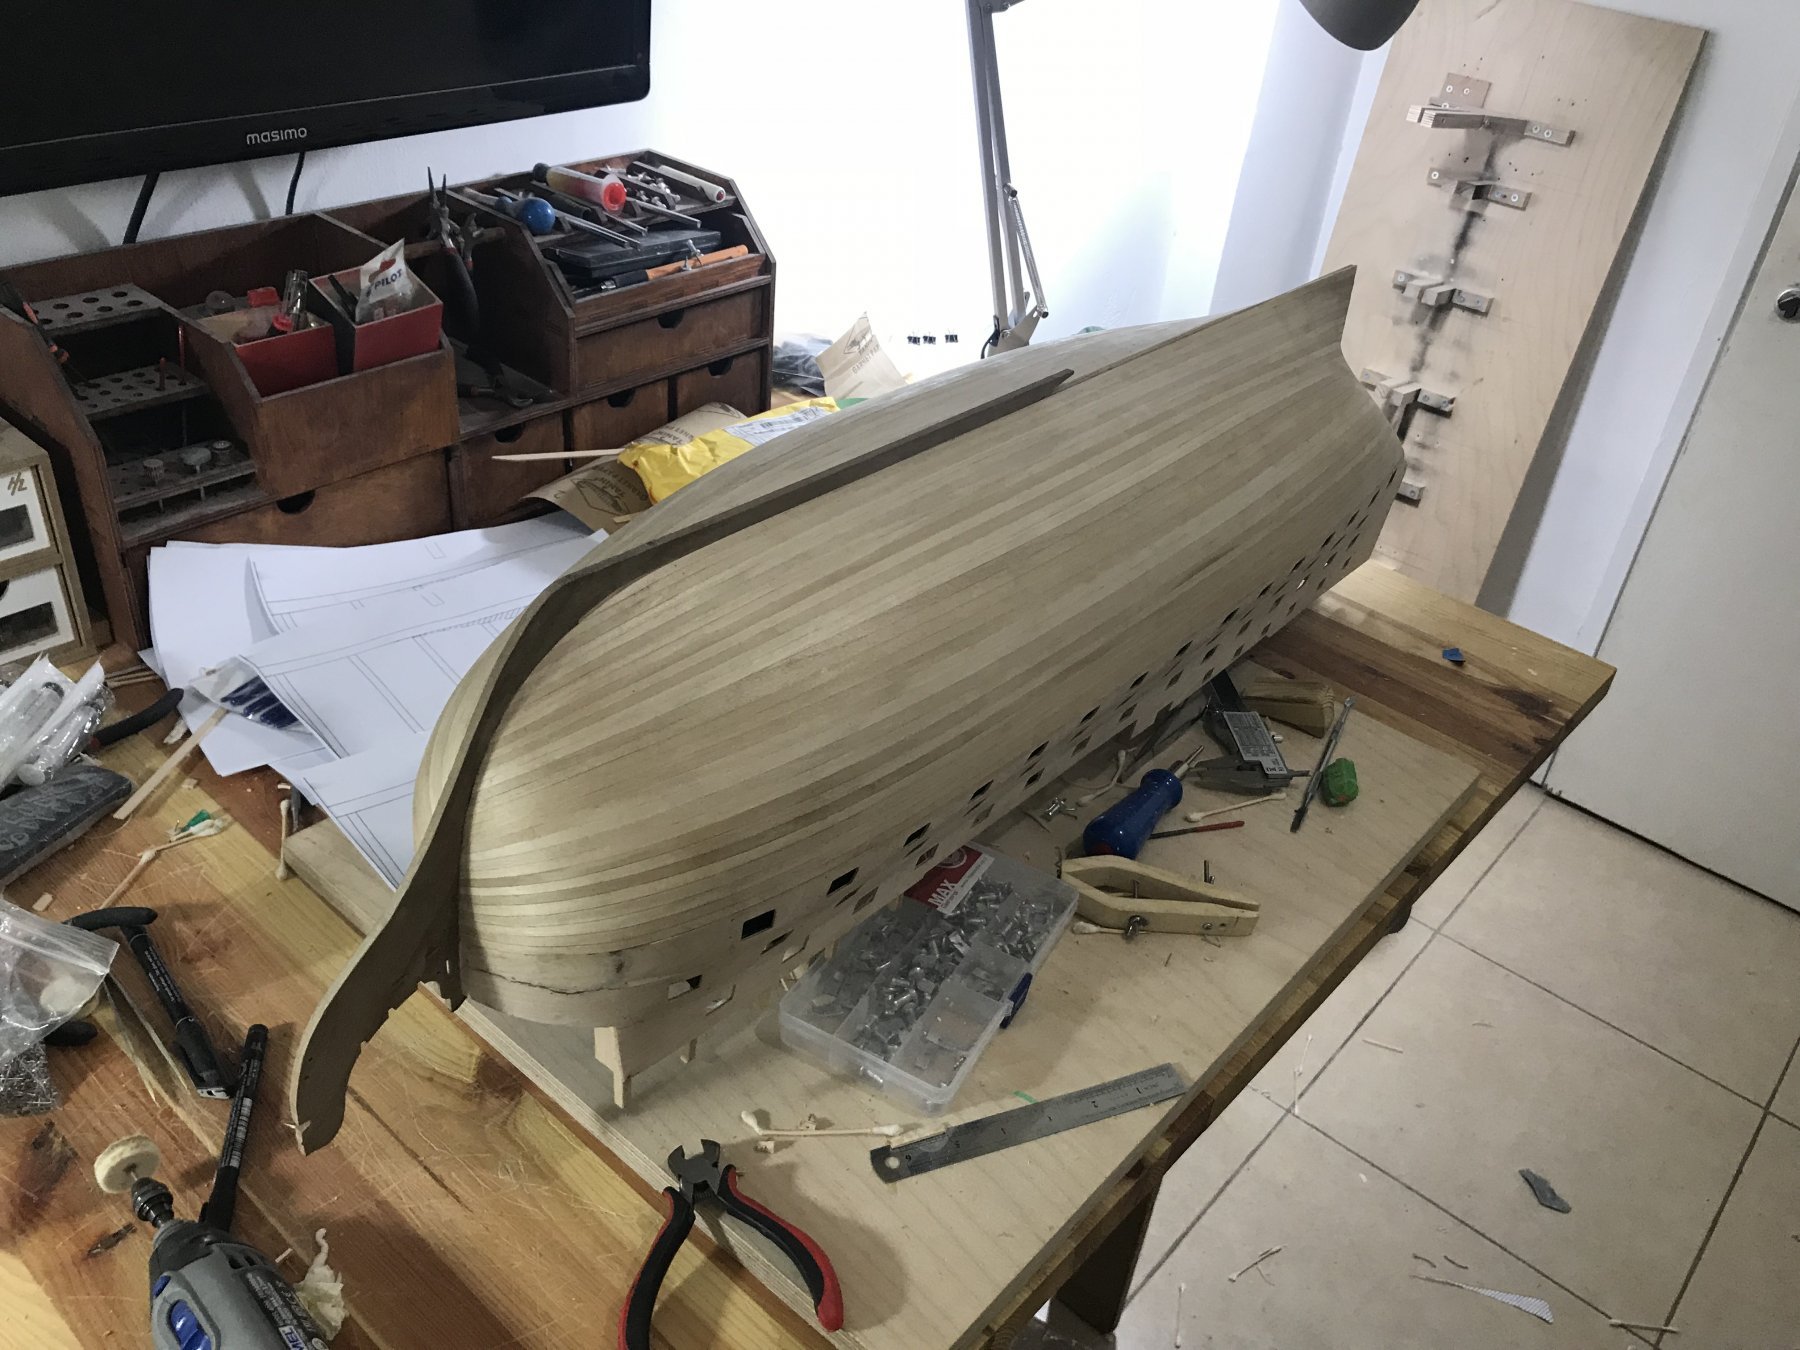
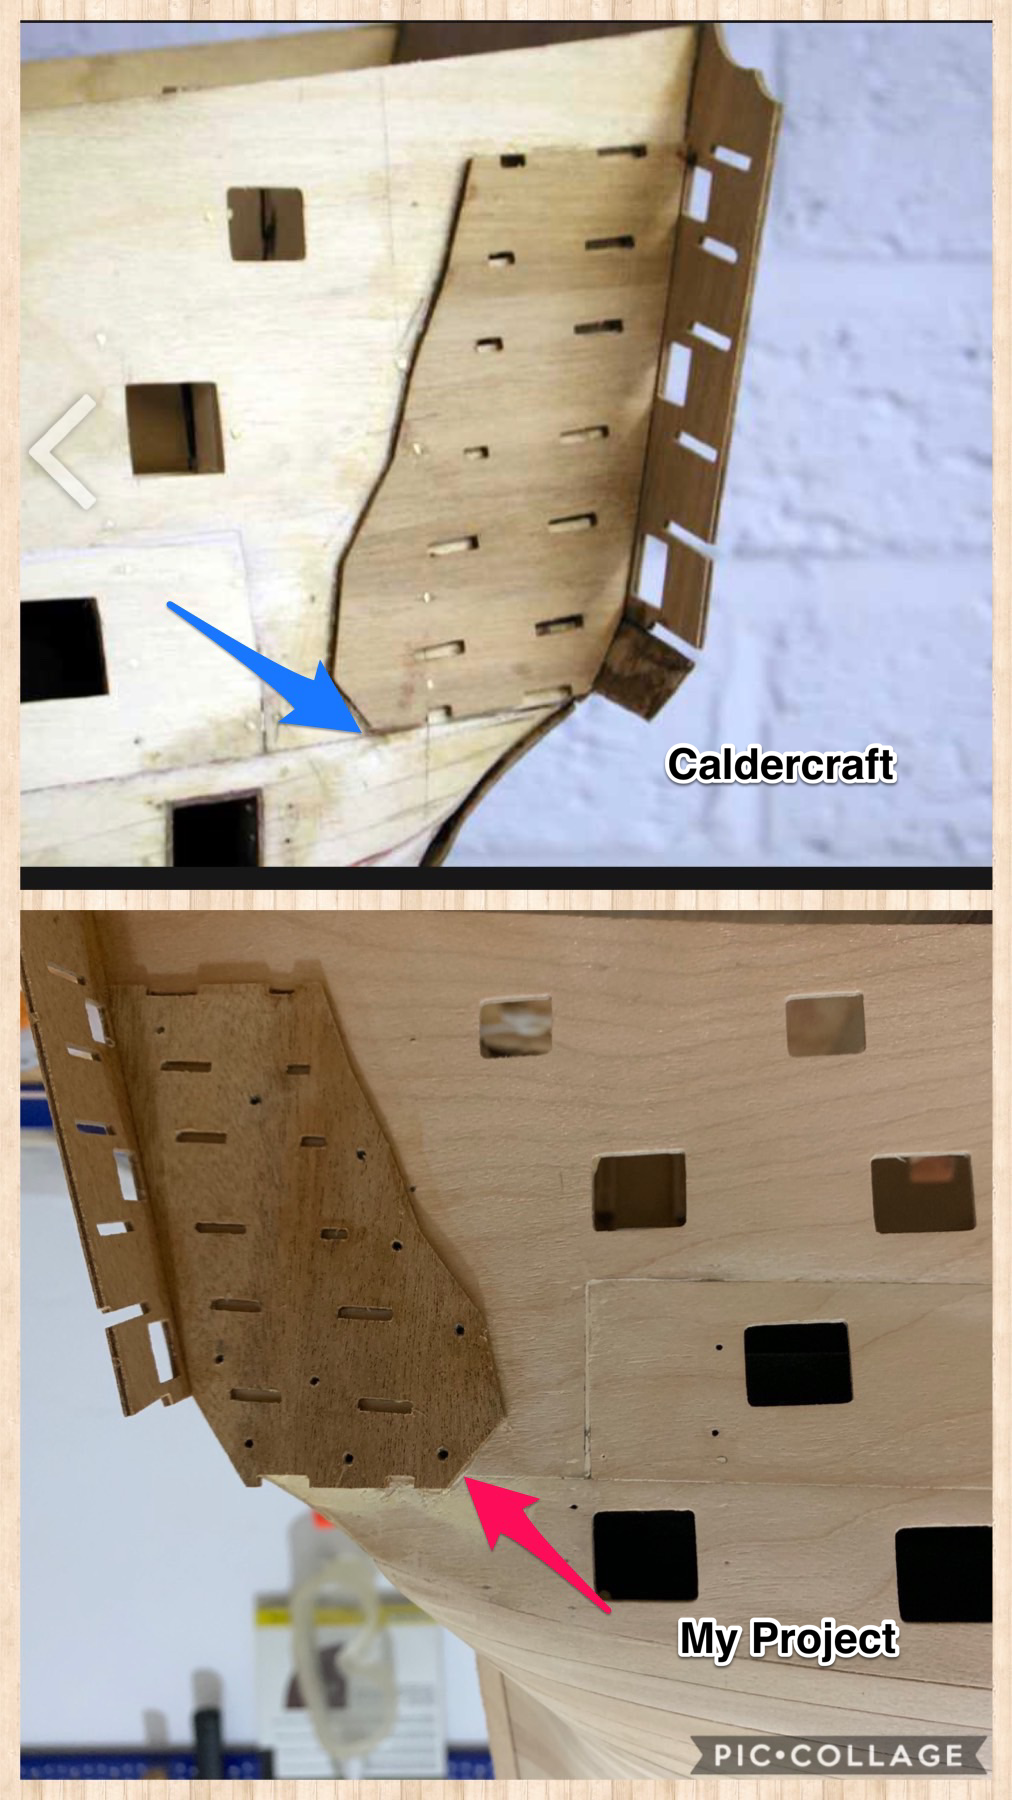
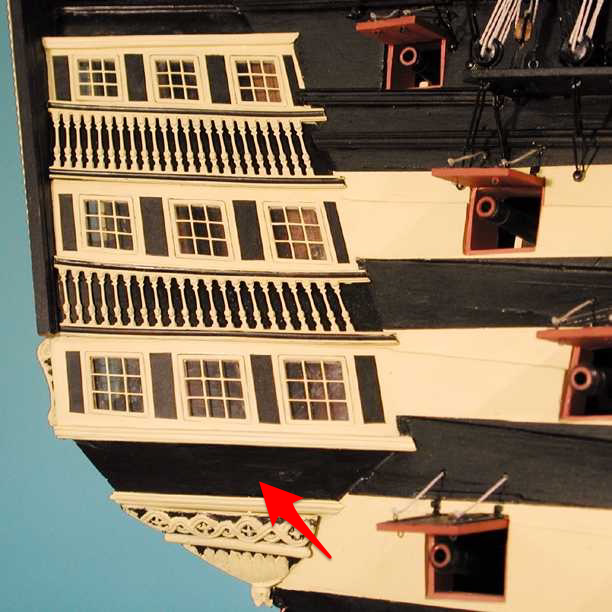
After a lot of thinking … I think I have found the problem , if you will look carefully you will see the piece 373 came bigger , here is a 2 pictures for comparing (my build and the Calder craft build ) The caldercraft piece finished with the line of the first gun ports pattern blue arrow and mine finish about 2.5 mm Downstairs red arrow so the best solution it’s to cut the end off part 373 and bring it to the same line of the first gun ports pattern anyway it will not make any changes for the finishing panel ( even if I will need to take off from the panel. Because that panel will be painted black without any decoration here is a picture from caldercraft of a finishing model)

-
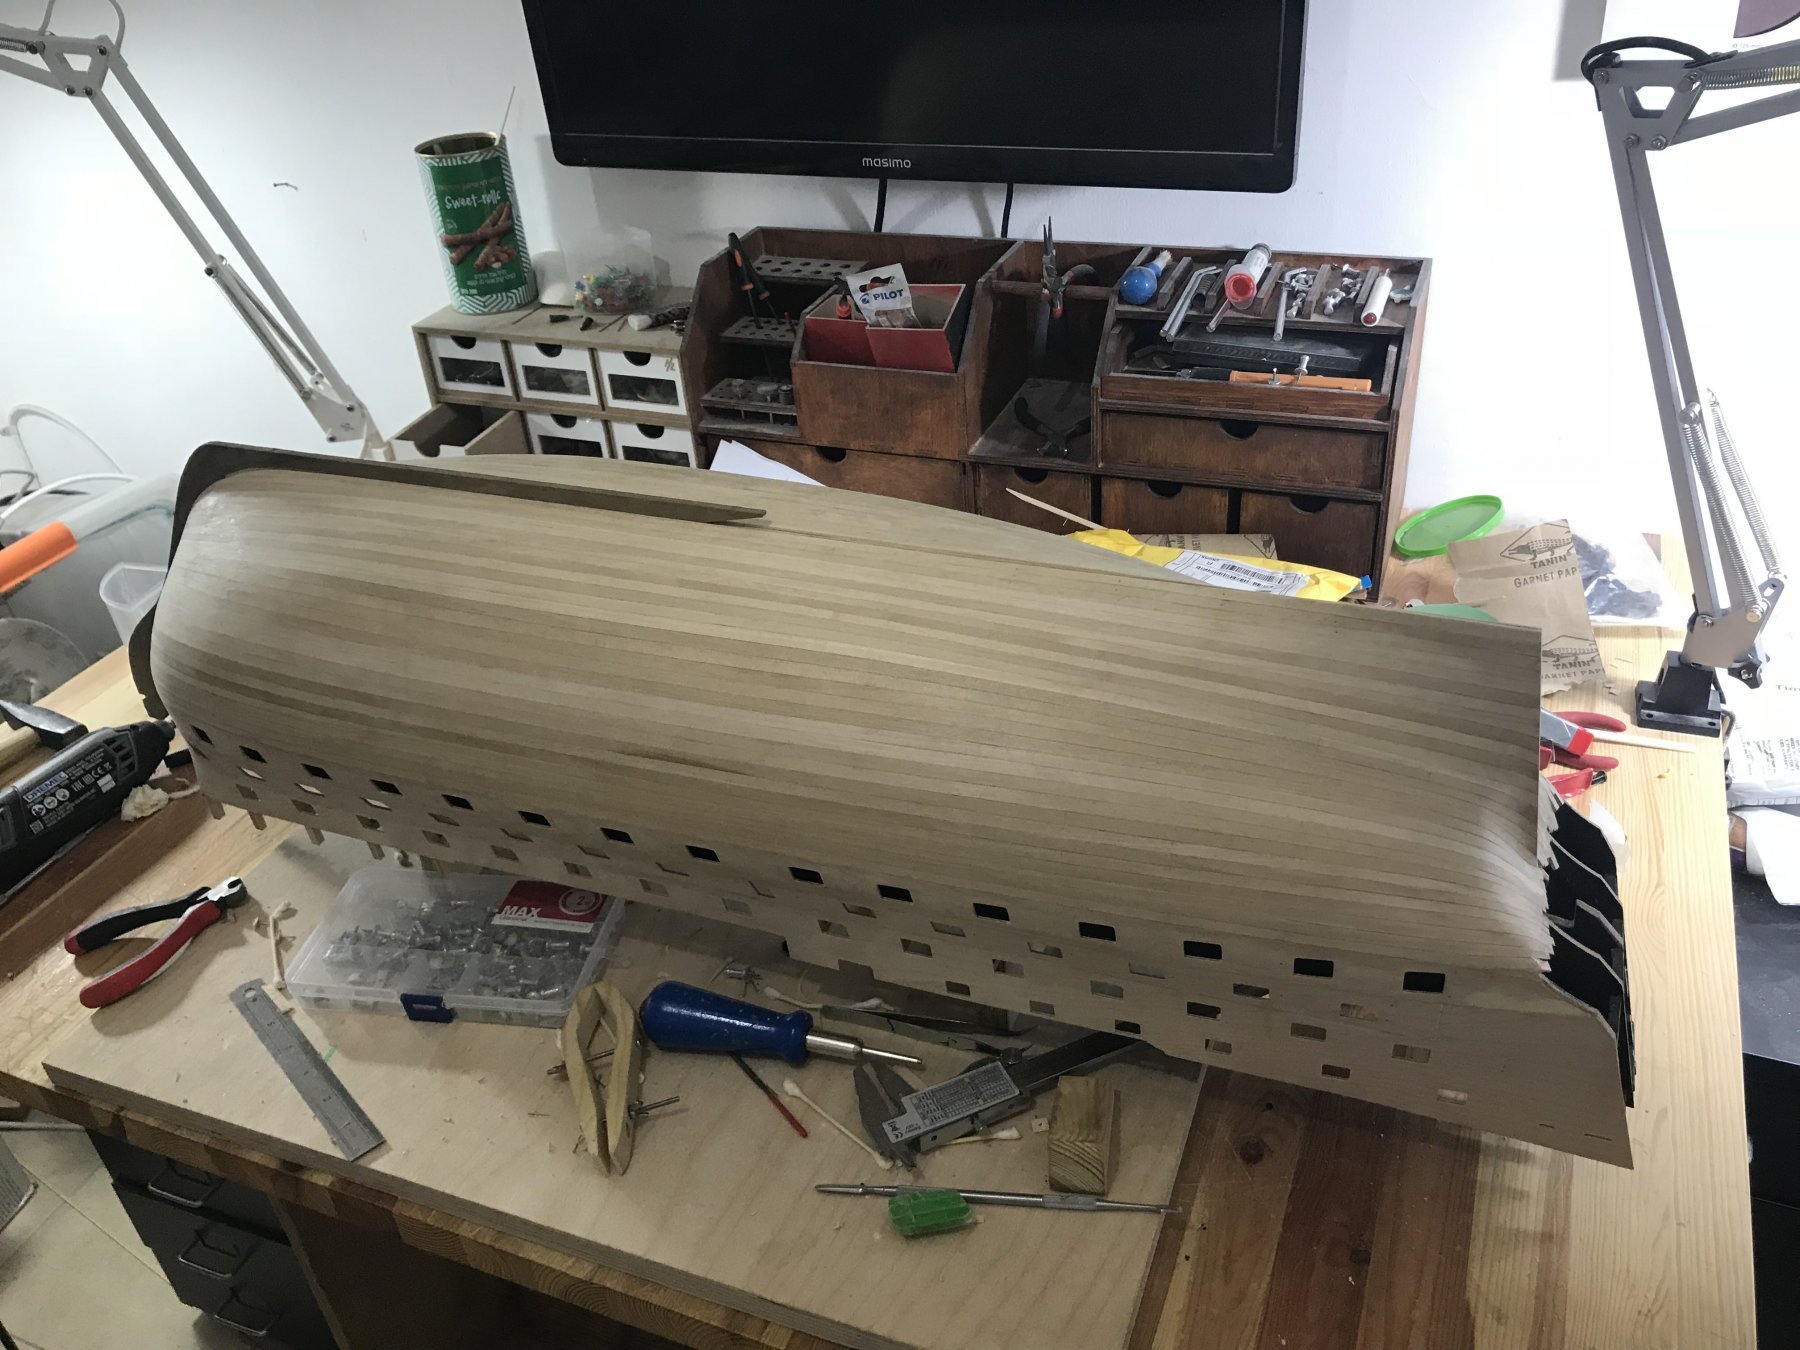
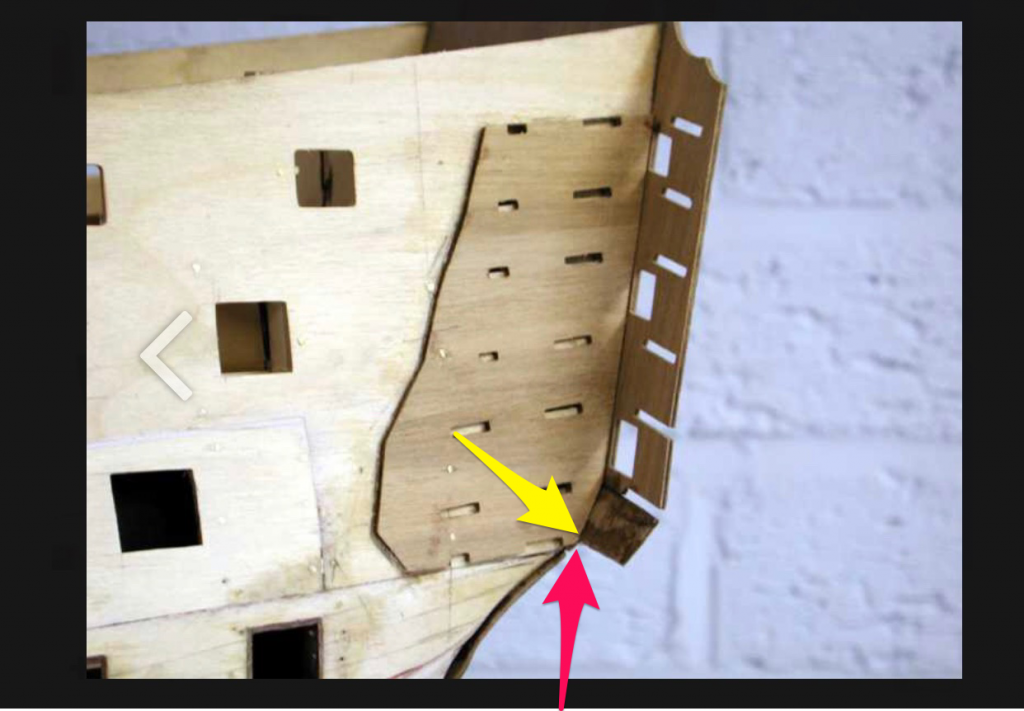
Hello there working on the back gallery and got some issues .. i have fixed and glue the windows pattern of the gallery (part no.374)and also the stern fascia inner skin (part no.373) in the right position regarding the line of the top quarter gallery pattern (part no.215) and now i have a problem with part no.371 this pare is about 2 mm up from the last slot that old the part no 220.. here is a picture from joitica the part no.371 need to be flash with the corner as the red Arrow but in my case it finished in about 2 mm up (at the point of the yellow arrow ) the thing is , i saw the same problem in other build logs but they fix it without to talk about that i have some idea show to fix it but any idea will cause other problems ...
-
Hello Jonesey , me too , I think I will leave it without the plates but will see
-
Thank you md1400cs about the plates im not sure may be leave it without the plates like Berto it looks more serious with wood finishing but there is a time to decide ...
-
Etnz thank you