HOLIDAY DONATION DRIVE - SUPPORT MSW - DO YOUR PART TO KEEP THIS GREAT FORUM GOING!
×


michael101
-
Posts
441 -
Joined
-
Last visited
Content Type
Profiles
Forums
Gallery
Events
Everything posted by michael101
-
 Thank you E.J
 -
Thank you Scott
-
Thank you all !!! i have installed the block fillers and now working on the fairing of the bow section , hop to update picture tomorrow... Best regards , Michael.
-
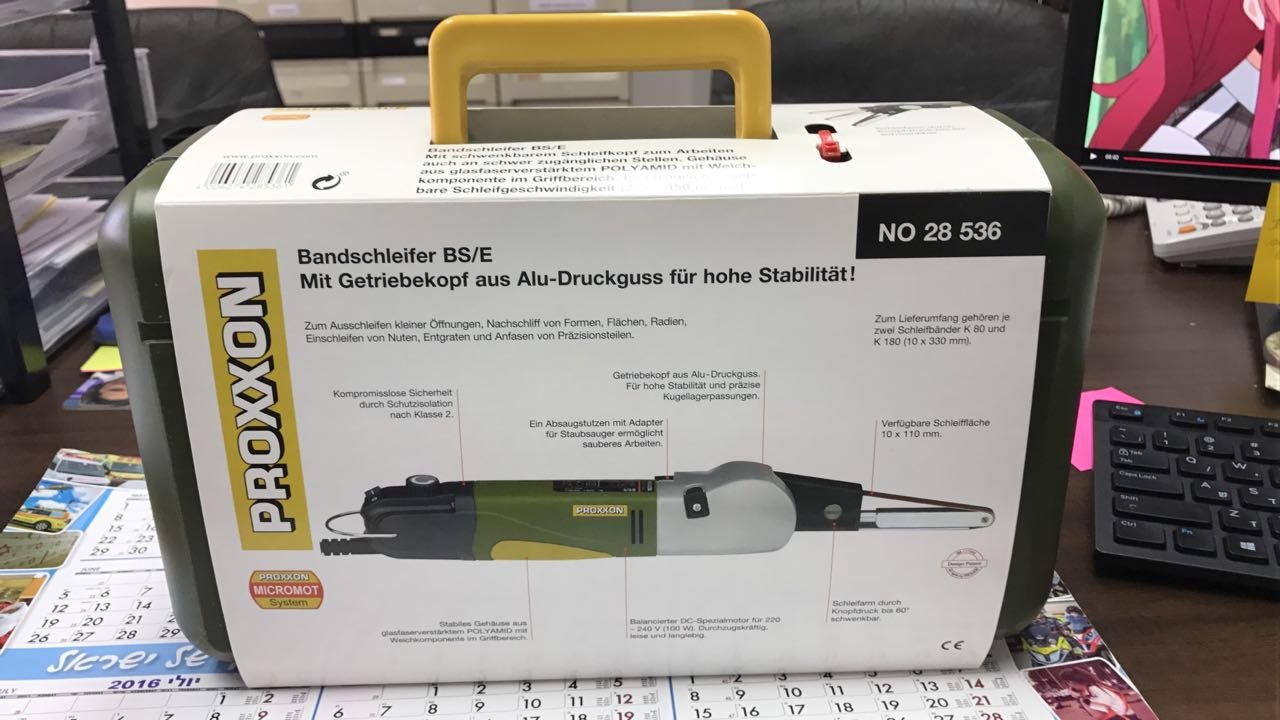
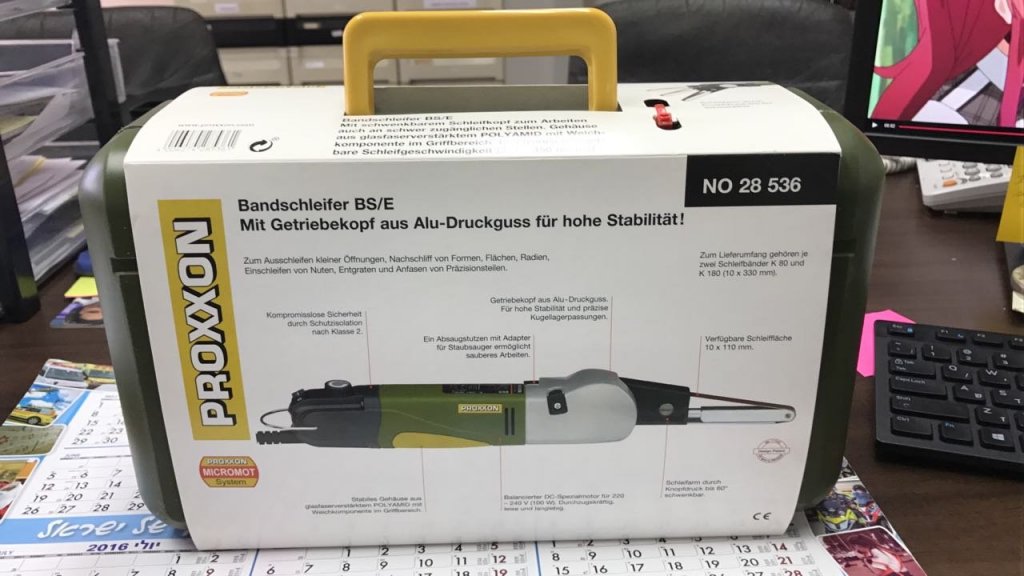
Belt sander proxxon 28 536
michael101 replied to michael101's topic in Modeling tools and Workshop Equipment
Thank you that is very good idia to taper planks with that machine i will check it when i will get to that stage -
Just love your work! please keep update your build log with any step that you doing Best regards , Michael.
- 527 replies
-
- 3
-

-
- caldercraft
- victory
- (and 1 more)
-
Hello friends i bought the proxxon belt sander and very happy with the tool i will be more that happy to here from you for what are you using the tool beside fairing the hull and tapering planks.. also if there is some tips and tricks please write me on this post Best regards Michael.
-
SAT BERLIN ׂPROXXONׁ
michael101 replied to michael101's topic in Modeling tools and Workshop Equipment
after searching in that web i didnt fined the tool that i want.. any way i bougt the tool in my country the belt sander little review : perfet tool for our hobby ! from fairing the hull until sanding a little parts on the ship ! best regards , michael. -
SAT BERLIN ׂPROXXONׁ
michael101 replied to michael101's topic in Modeling tools and Workshop Equipment
THANK YOU ALL !!!!!!! -
Hello friends , i bought a lot from sat berlin any tools of proxxon but now its look like they dont sell proxxon anymore ... someone know where is the best and cheap place to buy proxxon tools over Europa ? im looking for Delta sander OZI/E or Belt sander BS/E not sure what to choose .. i think the delta is better because you can cut with that machine also they have 14mm and 8mm blades/saw and for our hobby its will do very good job ..
-
Thank you Backer
-
Beautiful work Pete !!! Now im working on a new system for making block filler very easy i hop and it will work well and if so .. i will publish a little guide in my victory build log about the wood im using the is : pine wood, i took the advice from my best friend Matti Pilola he also a member in that forum (one of the best builders ) and like i wrote God willing and it will work then i will publish the guide Best regards , Michael.
-
Thank you Ian , so the best way is to make the block fillers first without touching the bulkheads by fairing.. than to install the block and after all to start fairing ... is the same as i thought Hellk Backer , yes the question is about the block fillers , but from your pictures i cant see if you fair the bulkheads before or after installing the blocks fillers
-
Hello friends I'm going to make the bow fillers in the bow and also on the second bulkhead but what is the order of the block fillers : firs to make the filers and than to fair the bulkheads or to fair the bulkhead and than to make the block filler? i was thinking the best way is to make the bow fillers firs for getting a symmetrical line in both sides of the keel ... but it will be better to hear that from someone how is did it before best regards Michael.
-
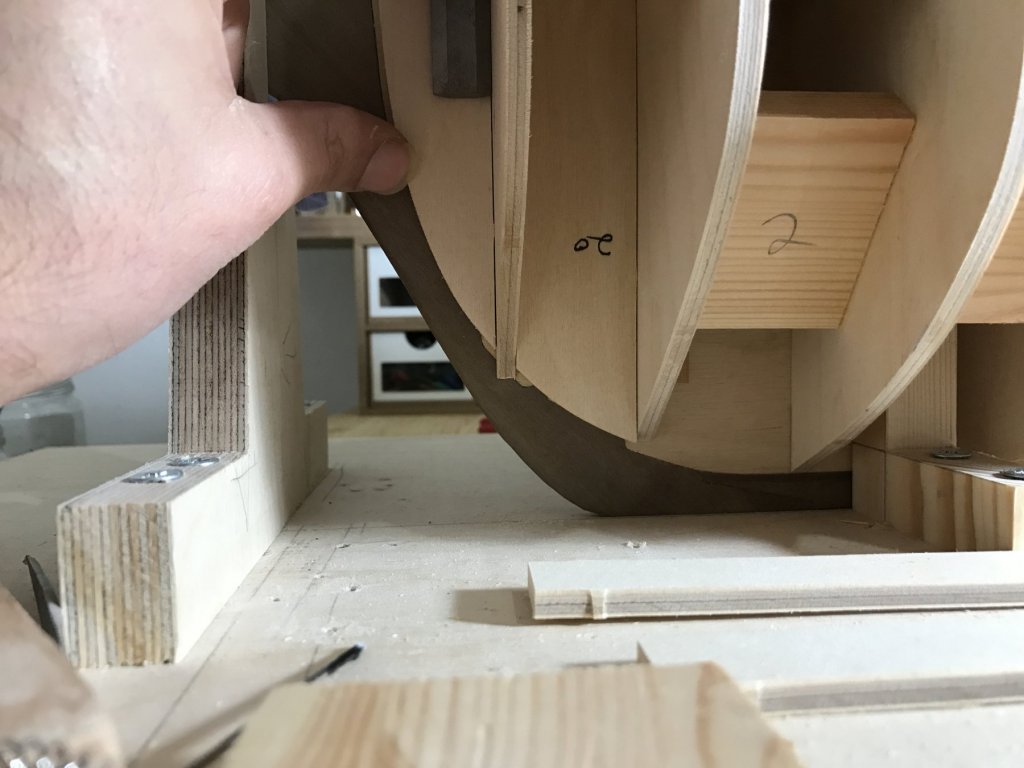
now I'm about starting the shape of the ship i mean the fairing progress , i want to do that before installing the patterns of the gun ports for not getting any damage on the patterns ... i have ask before about the shape of the bow forward supports (40 – 42) and after fairing... i got it straight with the bulkheads 1 and 2 now the only problem is the level between bulkhead 1 to bulkhead 3 i mean the bulkhead no.2 is a bit up ... i saw in all of the victory build logs the same level ! but I'm not sure if i need to put some plank on that bulkhead no.2 or to sand bulkhead no.3 for getting nice and smooth curve down the bow here is the picture :
-
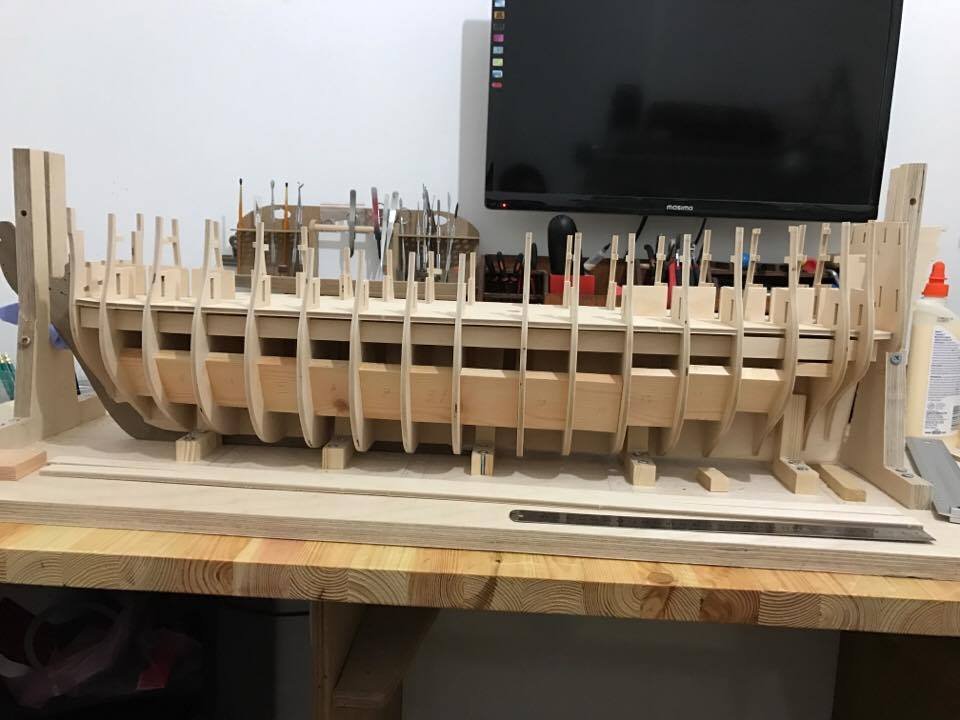
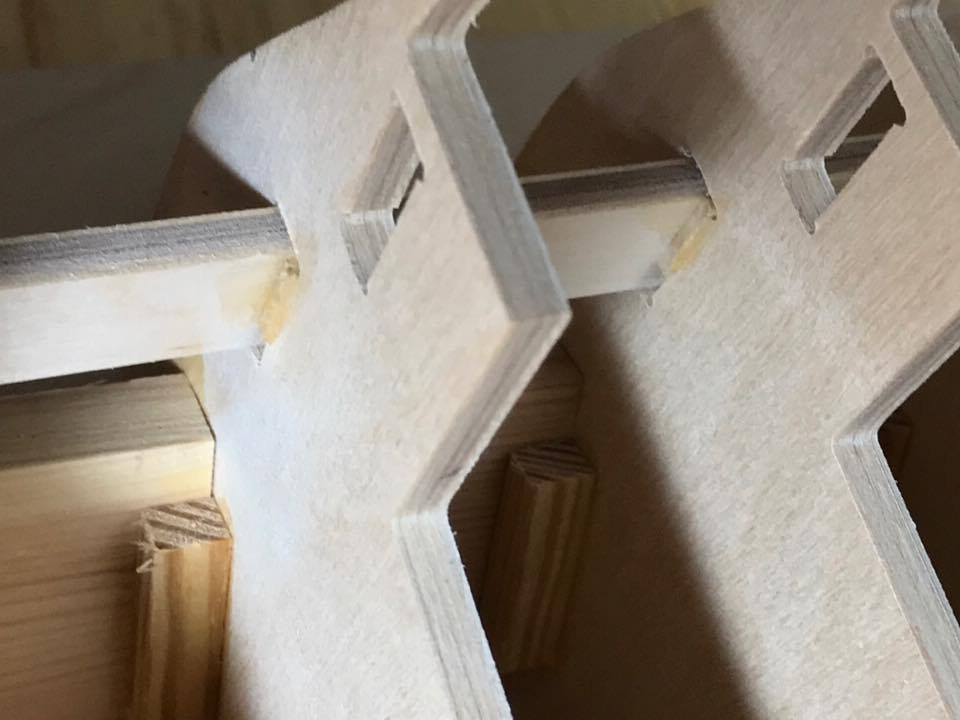
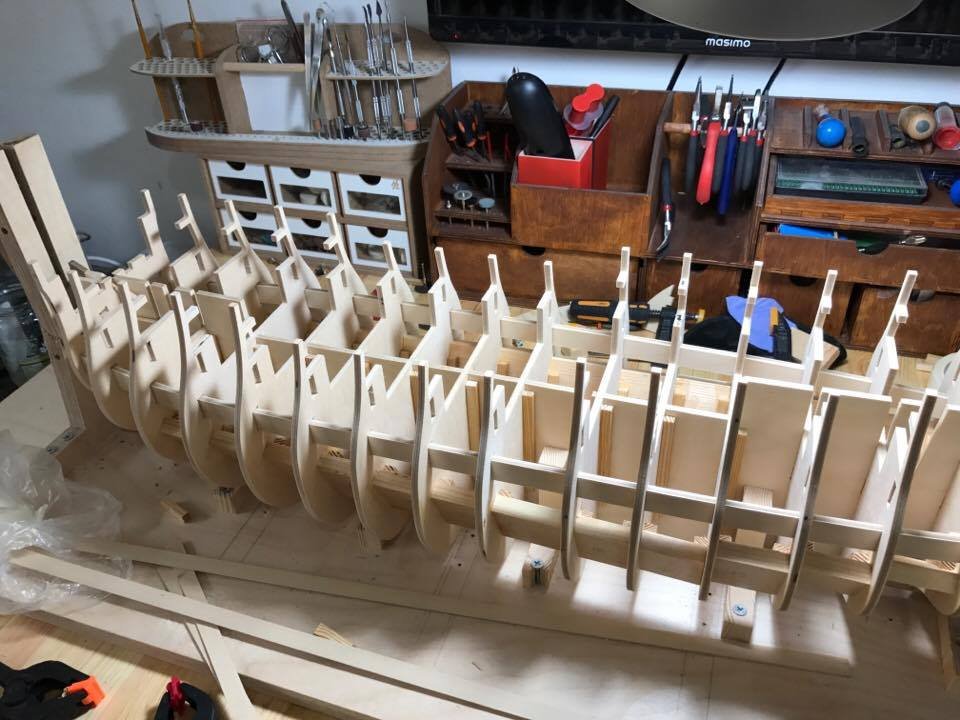
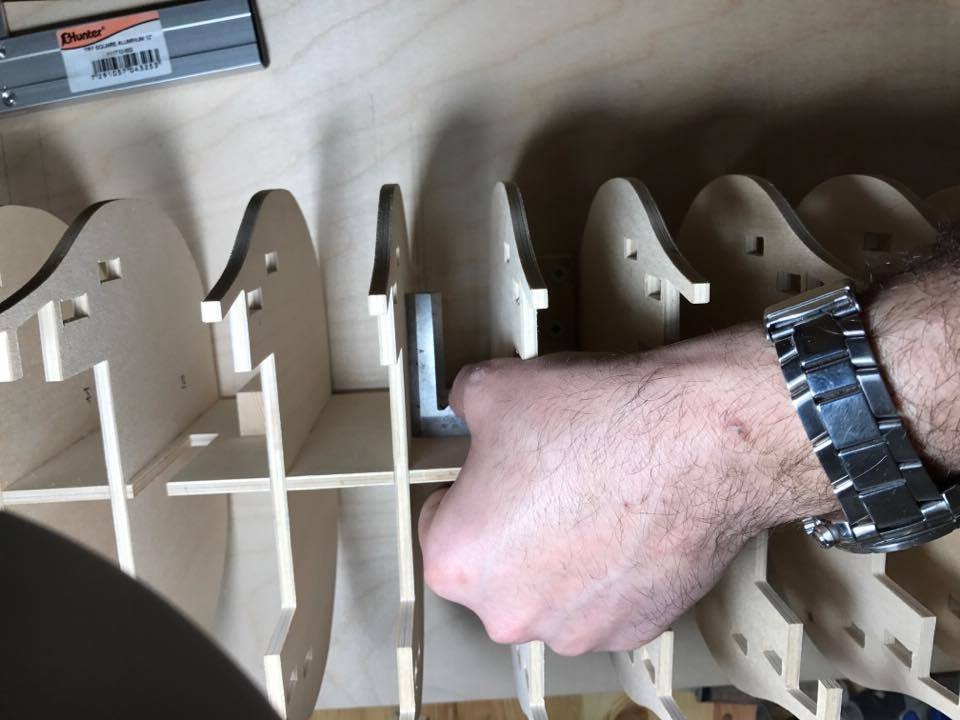
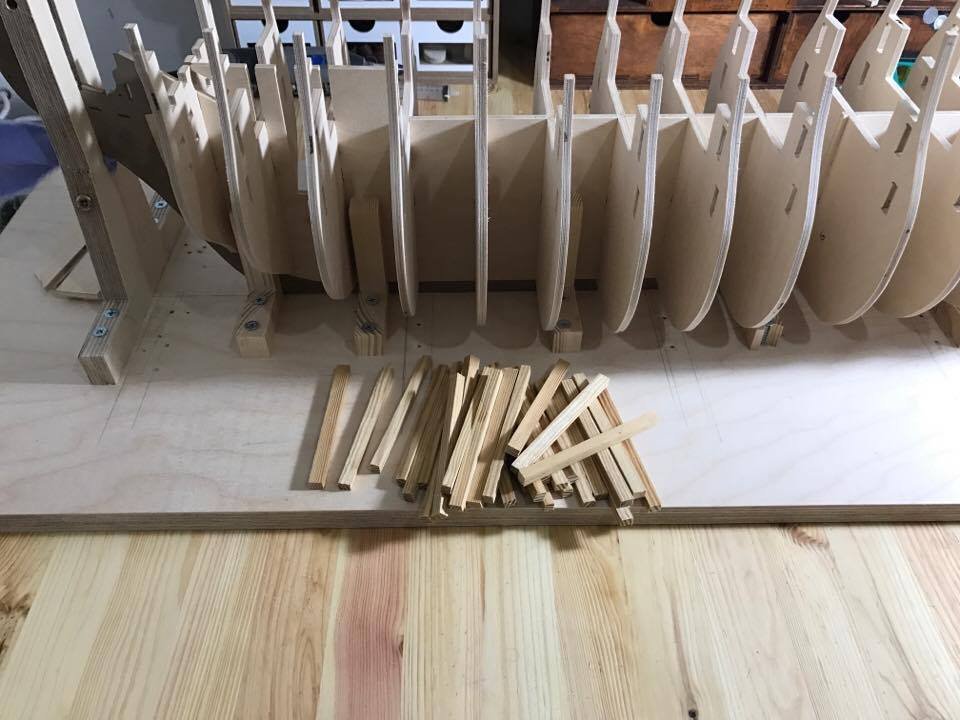
A little update The building going a bit slowly because I'm working on the Ship Skeleton... I come back late in the evening and do not have much power to work on the construction of the ship also the table saw making a lot of noise at the evening lol most of my time build right now is in Friday that i have all a day free to build here is some pictures of my progress , i installed blocks between the bulkheads also behind the barrel strip i glue some wood (1mm thick ) to push the strip outside in the slots ...

-
Thank you David ! In that picture there is the same level.. its mean that the keelson line is not the border line of the plank ? I mean when i will install the plank i will still see the whait aria okf the keel in the corner of the bow ...
-
Hello friends tomorrow i wont to work on the bow stage but i saw the the line of the second bulkhead that is going up of the keelson line also something looks a bit weird with the line of the bow forward supports (40 – 42) here is a picture that i took ( dry fit ) please advice btw the second bulkhead are good fit ! The middle gun deck is 45mm from the bottom as the plans ! best regards , Michael.
-
Thank you David
-
Thank you David for the comment i asked you on the p.m about the dummy barrel strip (that has a 5mm thick ) how did you bend them ? I was thinking of putting them in water but not sure if its a good idea because they will be fatter after that proses .. and I'm not sure if they will go in the bulkheads holes nicely and smooth ... so what did you do?
-
Hello Reach good to see you in my build log thank you for your comment and yes i will do that 4 plank shift on the lower deck , My observation about our hobby its to take the time and to work slowly and do my best on any stage , to be honest if i wanted to have that ship at home i could fined it on eBay ready to put it in the show box but for me to have that ship in the show box its only a bonus and for sure you agree with me, my proof is your build log and you doing a best job !
-
Hello friends i asked before in other post about the middle gun deck plank .. and i got some answers , but i just find in the constructions manuals the exact length and the distance between the beginning of plank one to the beginning of plank 2 I'm talking about four butt shift system my question is if the middle gun deck has the same length ..? here is the text from the manual about the upper gun deck : Note: If you wish to accurately represent the plank length and four butt shift system used on Victory, each plank should be either cut to a length of 85mm (approximately 20ft) or the planks can be laid full length and scored with a craft knife every 85mm, this latter method often looks the most convincing at this scale. The four butt shift system simply implies that the end of each neighbouring plank is offset by 1/5 of twice the length of the planks (34mm) such that the end of every fifth plank athwartships only is aligned (i.e. separated by a four plank shift).
-
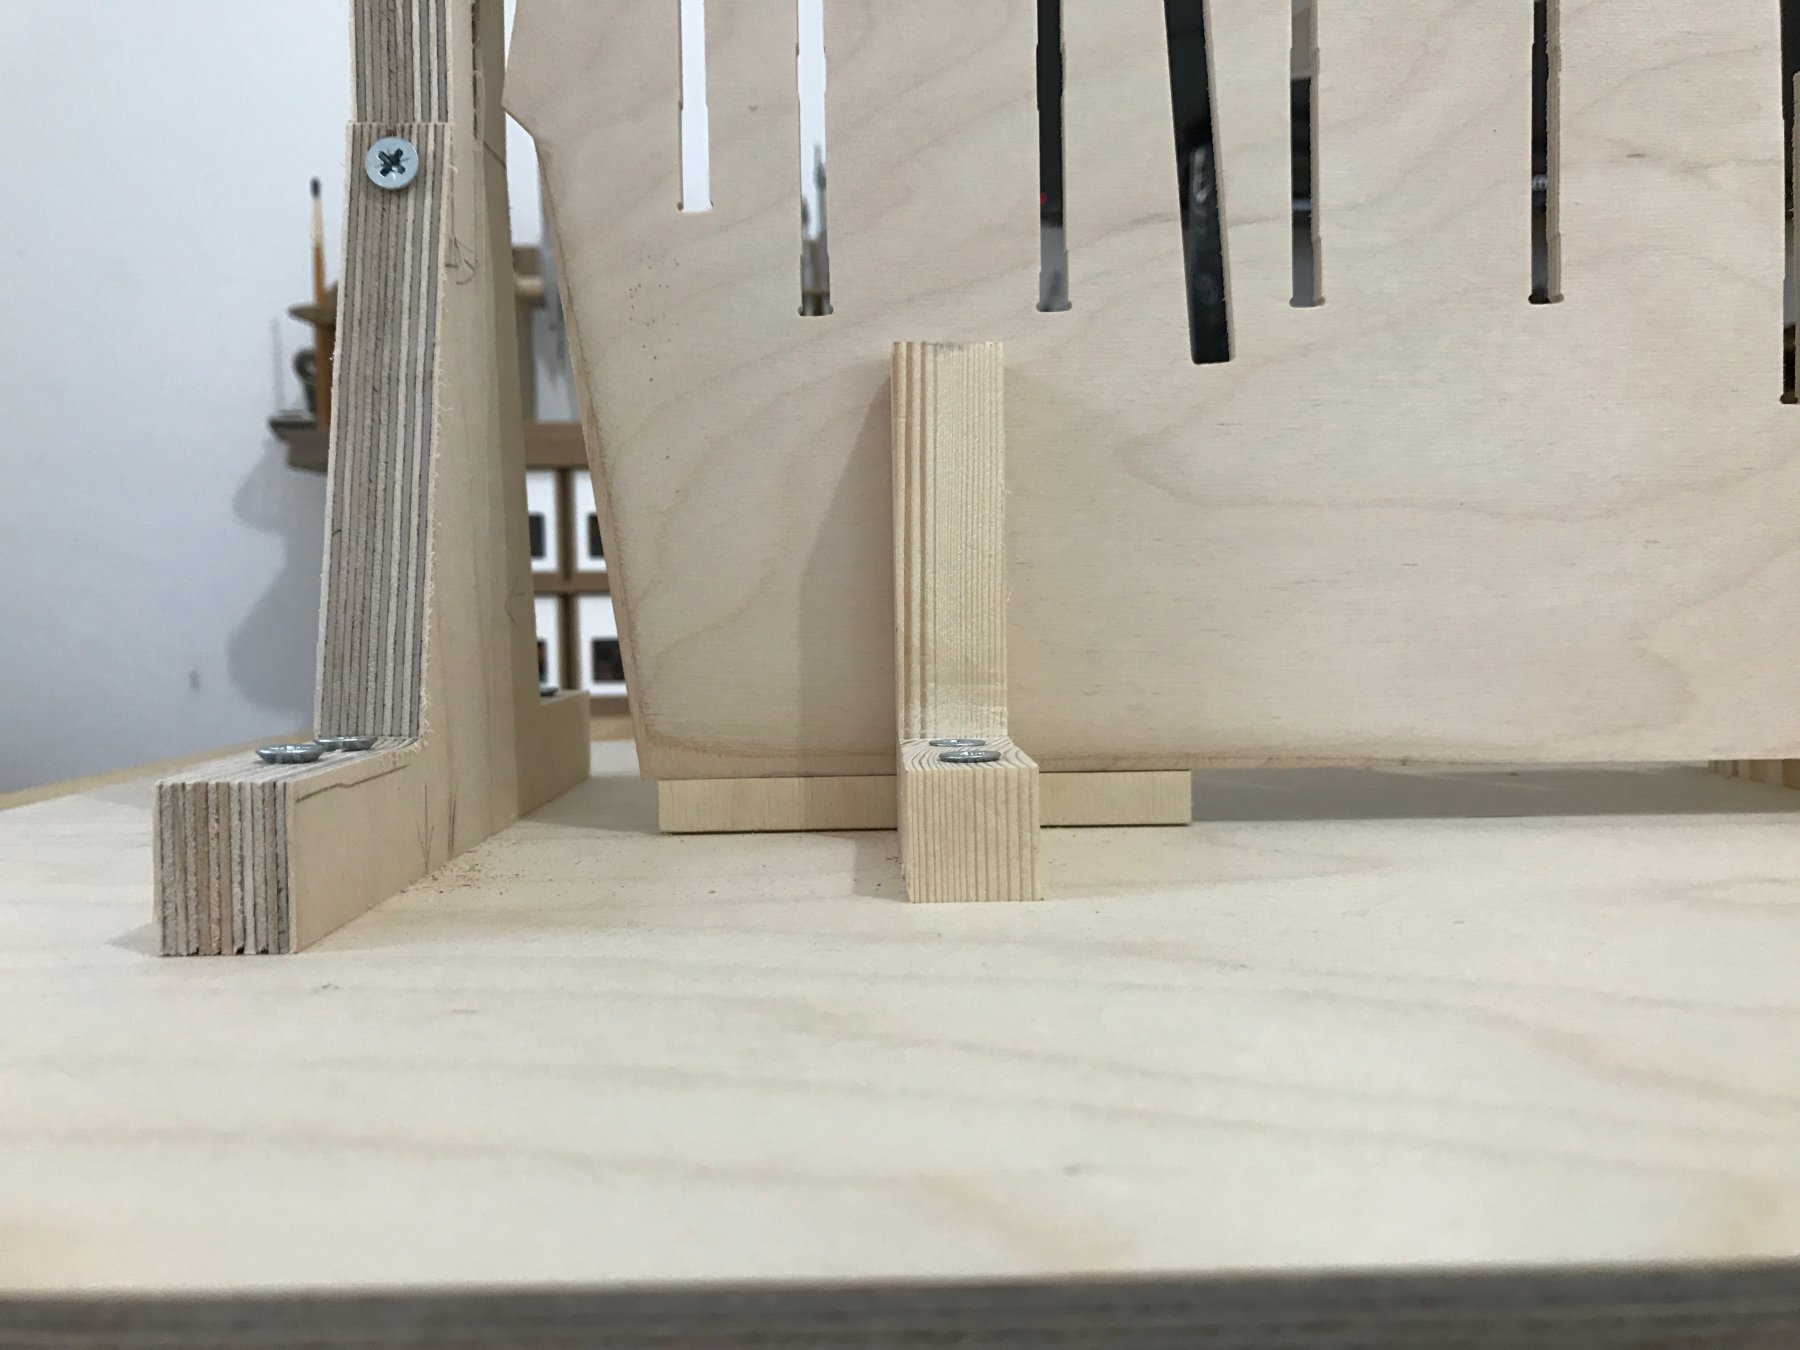
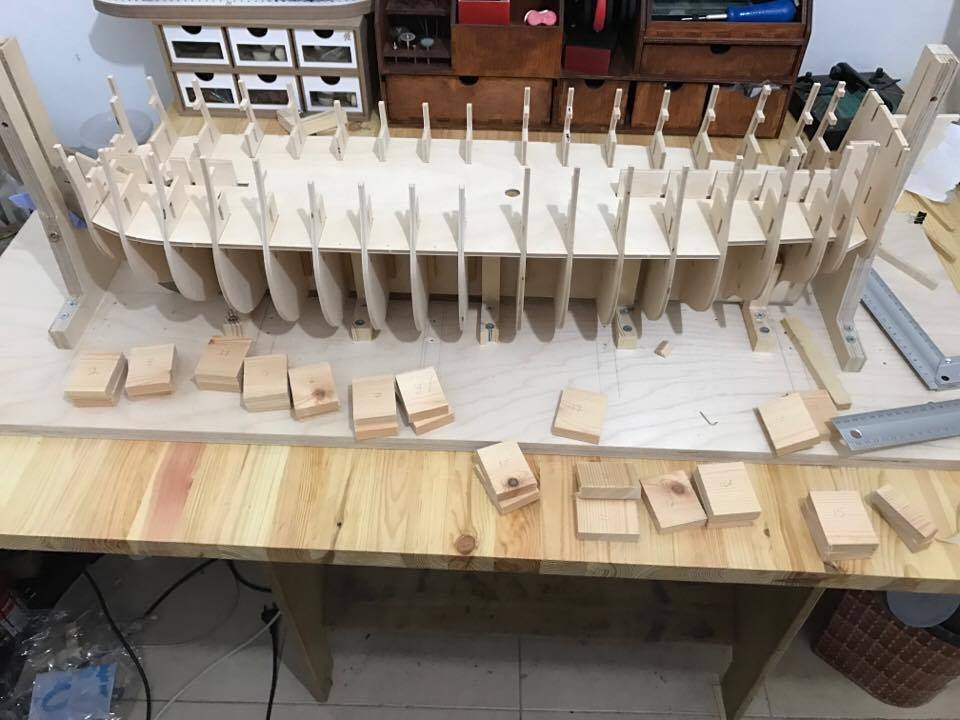
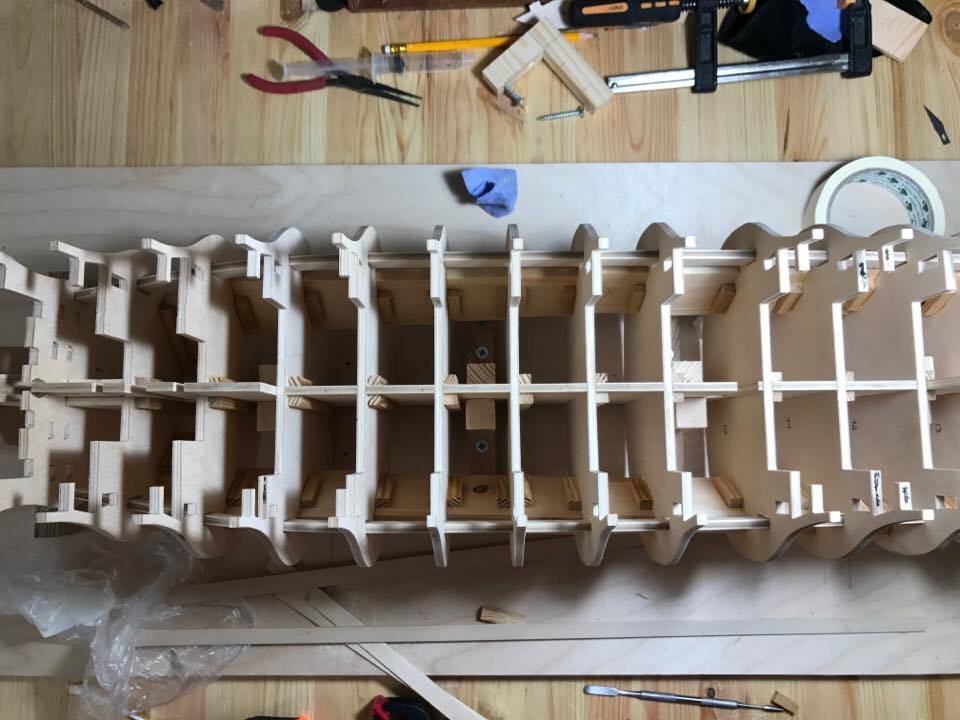
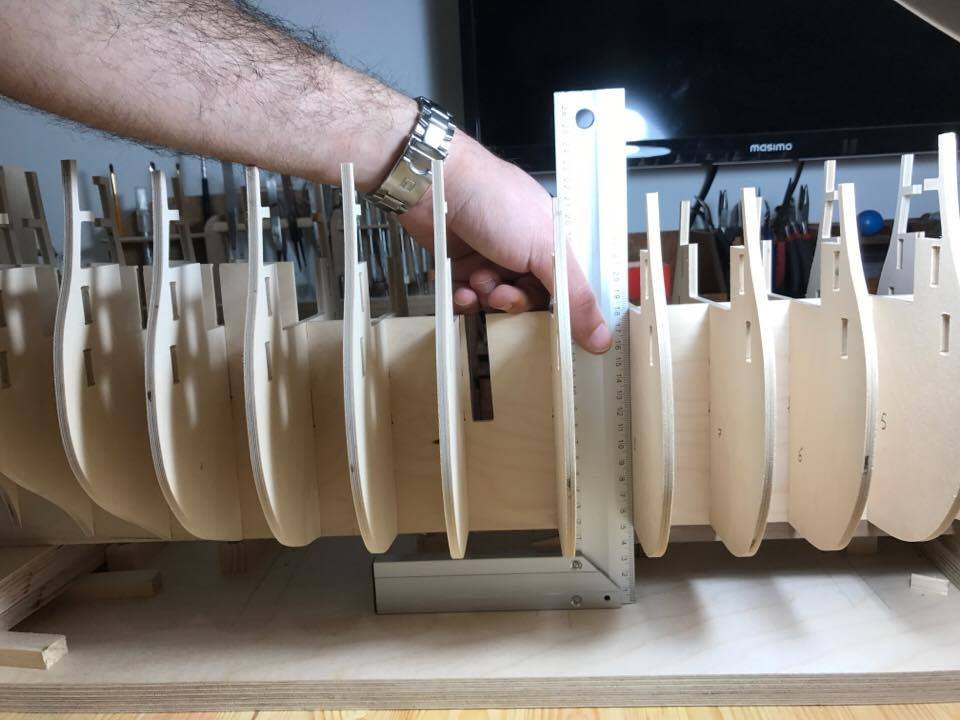
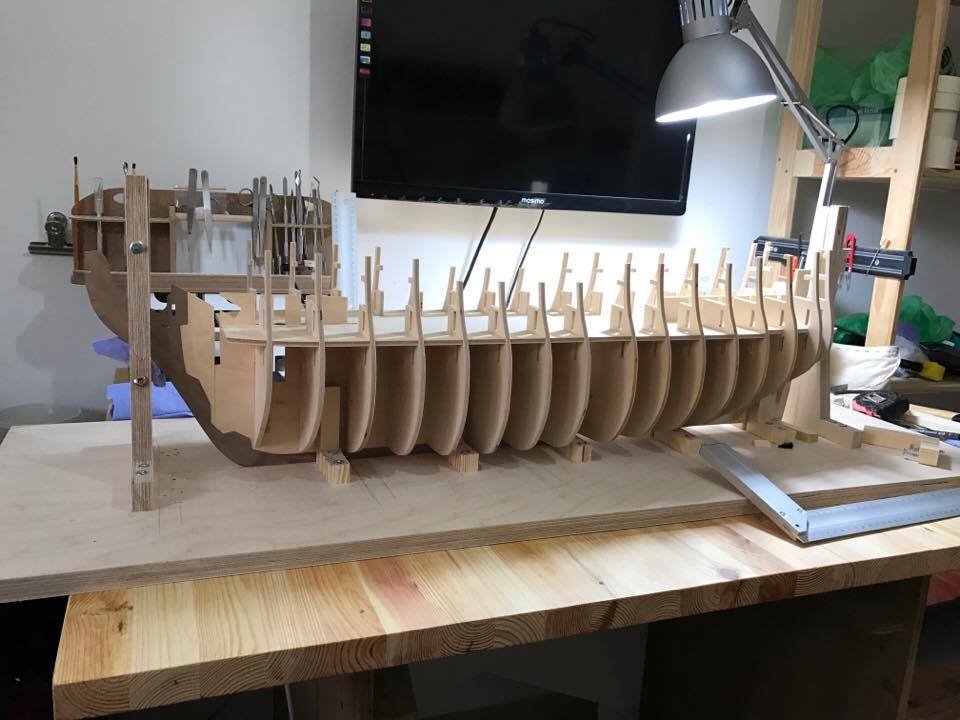
a little update today i glued the bulkheads in positions i had to fix bulkhead no. 13 , and to put all of the bulkhead in position my advice : never trust the laser cut !!! check in the plans what is the highest of the water line or in our case the middle gun deck.. and hold the keel in 90 degrees to some board , and start measuring every bulkhead than double check all the walls/decks act. For more accuracy i cut 2 pieces of 11 mm (the same size as the keelson that installed in the front ) and i have put on that to pieces of plywood and did the same thing in the bow i have put 2 pieces of plywood but without the extra pieces of the 11mm becouse there is a keelson , than i had enough space to put the 90 degrees ruler to check the bulkheads and because of that model its huge, i had to put all the bulkheads in the right place then i glue them from out side by timbers the deck is in , but without glue (not had time to glue that today ) my next stage before putting the patterns of the gun ports its to make it ready for fairing the hull proses by putting columns between the bulkheads i think to use 17mm plywood (that what i have in stock lol) but becoase the bulkheads are very big i will make the wide of the columns 5cm wide by 17mm and to glue them in a diagonal position .. but will see Cheers Michael.

-
Thank you Heinz! i got answer from caldercraft i posted the answer in my build log http://modelshipworld.com/index.php?/topic/15501-hms-victory-by-michael101-caldercraft-scale-172/ Regards, Michael.
-
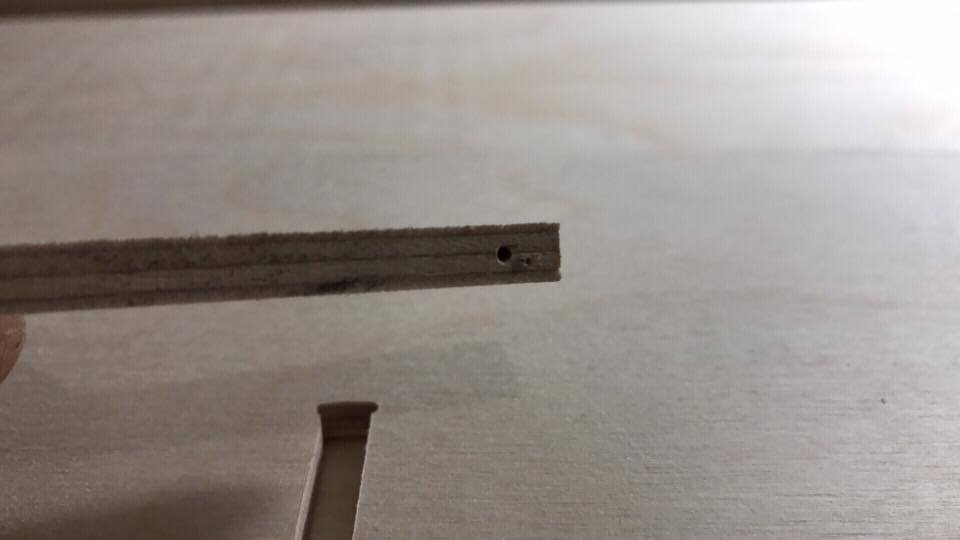
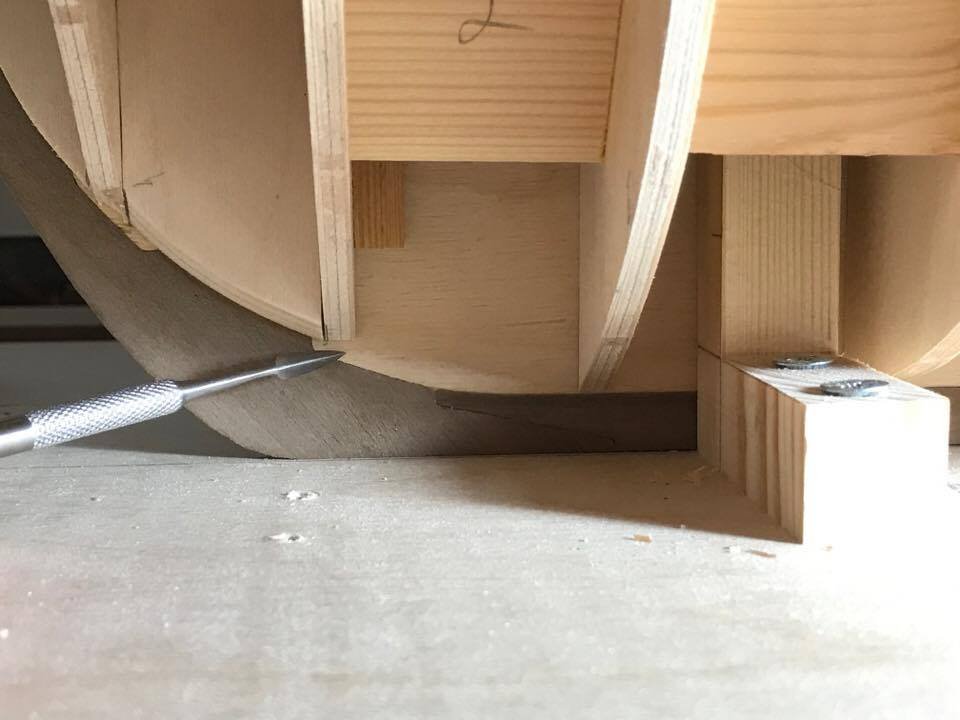
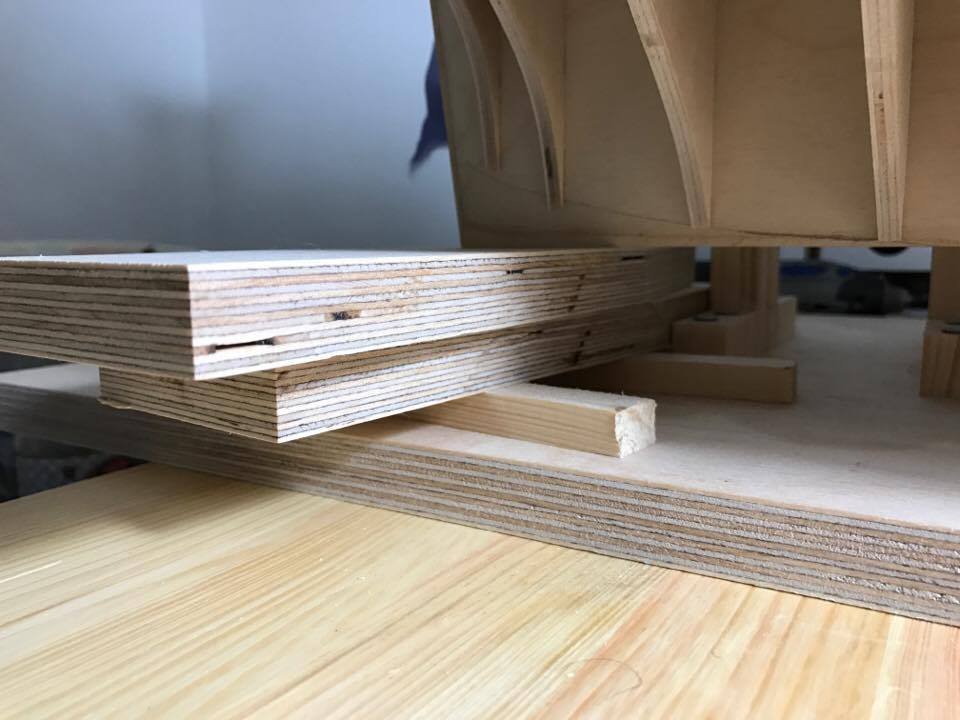
Thank you David i did the sanding in the firs stage by the way before sanding i made an external support for the corner of the keel in the manual they say that the secunde keelson will be install after doing the second plank ... its mean that aria of sanding will be without support because the L supports that i made on the construction board not going to support that aria they will touch the keel above the sanding aria , and the corner of the keel can get curve until you will finish plank the first plank so first of all i cute some plywood same thick as the keel and same hight as the first keelson (11mm) and drilled exactly in the middel of that plywood to the bottom of the keel then i connect the external plywood by brass pin and now the L support are holding the sanding aria exactly in the middle of the L supports here some pictures : and for the pillars for sure i will follow your advice ! Regards , Michael.