-
Posts
632 -
Joined
-
Last visited
Content Type
Profiles
Forums
Gallery
Events
Everything posted by Hank
-

Converting a Backyard Shed into a Model Workshop
Hank replied to Hank's topic in Modeling tools and Workshop Equipment
Actually, I have given thought about a vacuum system to suck up sawdust and deposit it out back behind the shop. Depending on how I lay out (that part oaf the design is rather fluid at this point and nothing is nailed down) the shop equipment along the workbench on the right side of the bldg. may also determine whether or not a single PVC suction pipe along (or under) with smaller branches from each tool might work and where to station the vacuum itself. Your idea has a lot of merit; I'll give it some thought. A fellow modeler over in Greensboro, NC has various old Electrolux bag vacuums for each of his tools - effective, but quite noisy I would imagine. Now that I've cleared out the back area behind the shop of anything manmade, I could very well add a small lean-to type "caboose" that could be built very simply for that one purpose. I guess just running a 100 VAC med. wt. extension out to it would suffice for power. This might also prompt me to give more thought to how the tools are arranged so that those needing vacuum take-off would be arranged adjacent rather than spread out, etc. Very cool thinking - I appreciate it! Now, explain the electronics, as I'm totally unfamiliar with that end of it!!!! Hank -

Converting a Backyard Shed into a Model Workshop
Hank replied to Hank's topic in Modeling tools and Workshop Equipment
Mark, The Frollicky One and I are ole buddies - he can take it!!! All comments welcomed - we can handle it!!!! Mr. Frollick - I liked your original reply better (it was in my email....) And you are correct, Sir!!! But, we'll just share that joke ourselves!!! Today, I actually got a bit more paneling work done: After supper I may get back out for an hour or two. I would like to get started on the painting again and get the back of the shop all primed/painted and ready for flooring. -

Converting a Backyard Shed into a Model Workshop
Hank replied to Hank's topic in Modeling tools and Workshop Equipment
I might have known that sooner or later The Frolicky One would chime in with one of his scurrilous comments meant to distract and instill doubt amongst the crew! This behavior will not be tolerated and punishment will be dealt out at the highest level: LOL!!!!!!!!!! -

Converting a Backyard Shed into a Model Workshop
Hank replied to Hank's topic in Modeling tools and Workshop Equipment
Thanks, Dr. Per!! Slowly, but surely it's getting put together. Hope to be out there later today to continue....! Hank -

Converting a Backyard Shed into a Model Workshop
Hank replied to Hank's topic in Modeling tools and Workshop Equipment
After a morning of flower gardening with The Admiral, I got into the shop after lunch and built a 4' wide partition and located it on the right side of the bldg. The Liq. Nails should be set by tomorrow so I can finish nailing the upper paneling to the studs. This was about a 4.5 hr job from start to finish. Not much else accomplished except a bit of further cleanup. So, here is today's work: I'll see if I have some corner trim but I don't think I've got enough so tomorrow may be a Lowe's one & done! -

Converting a Backyard Shed into a Model Workshop
Hank replied to Hank's topic in Modeling tools and Workshop Equipment
Maury...….You're killin' me!!!!! LOL!!! Duh, I think it's 1:1 otherwise I'm in big trouble!!!! -
Bob, Much appreciate the video and explanation of terminology. Got it!! OK, without my very fine bits available (packed up) I put a 1/8" Dremel wood bit in the chuck and turned the machine on. It ran very smoothly, quietly, and I could discern no visible wobble of the bit. I have the belt set to the middle tension pulleys and noticed that the speed was about the same as the older Delta d.p. So, I'm thinking that for the small work with hardwoods that I may be doing in the future, I may go ahead and reset the belt to the highest speed while the d.p. is still in an unused state and I can play around with it and see if the change makes a positive difference. As for your concerns, I'll look into that and see if my modeler/machinist friend can stop by and give the unit a proper setup. He's good for things like this. I'm going to do the same with my Jim Byrnes table saw as he (my friend) has done setups on all of our fellow modeler's Byrne's Saws (except mine). I'll post any results on the d.p. when I'm able. Thanks again, Hank
-

Converting a Backyard Shed into a Model Workshop
Hank replied to Hank's topic in Modeling tools and Workshop Equipment
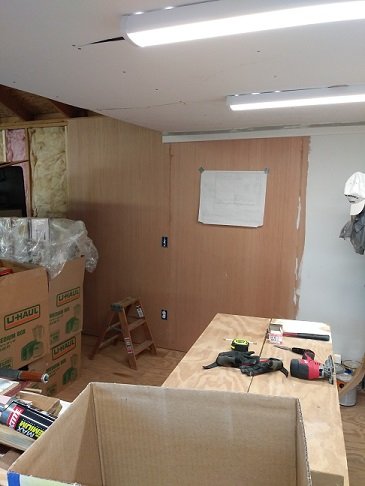
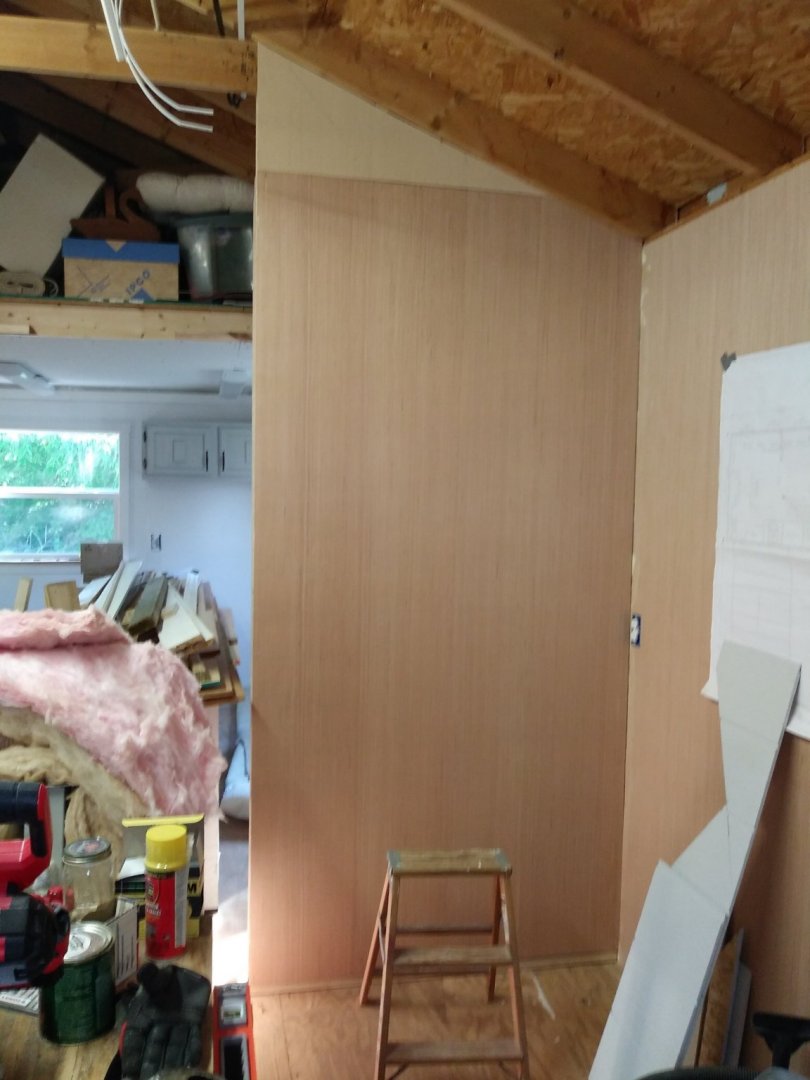
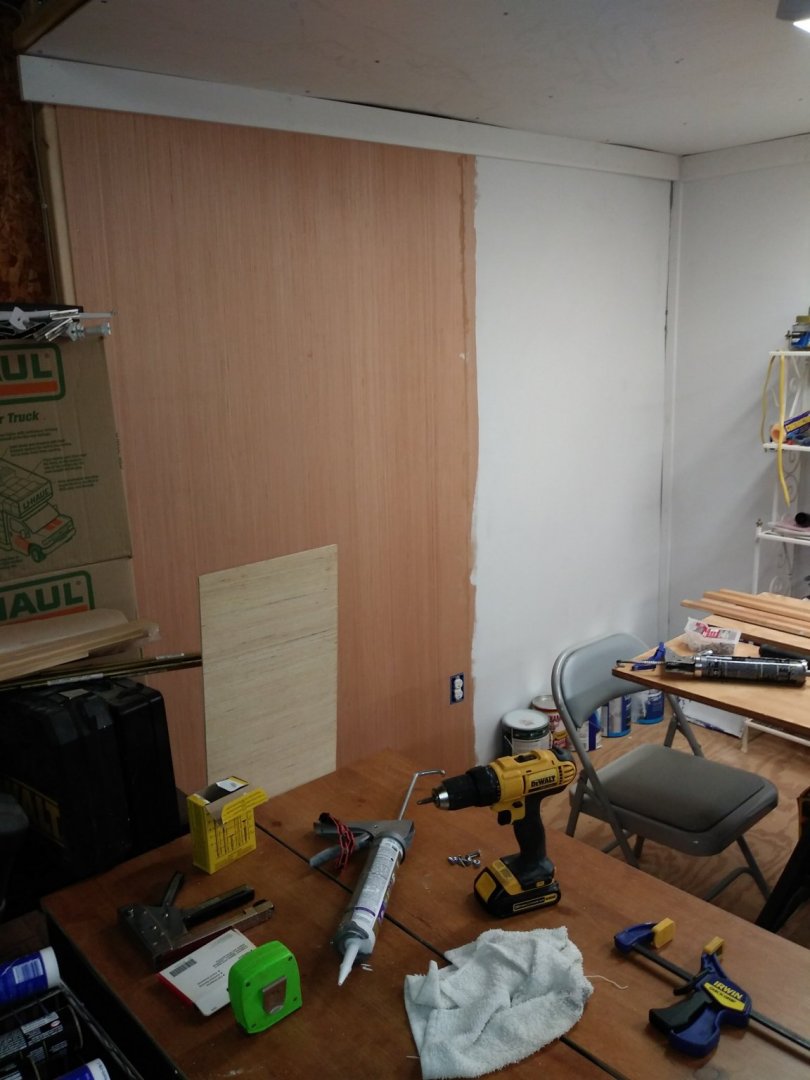
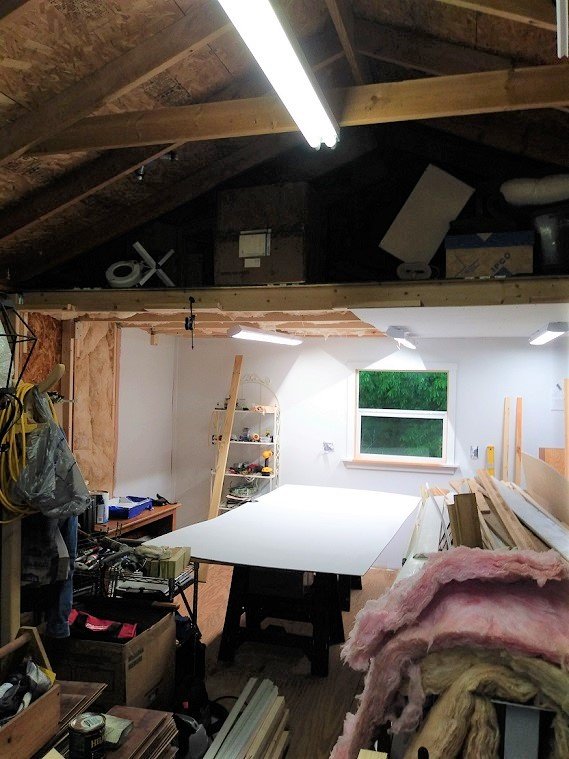
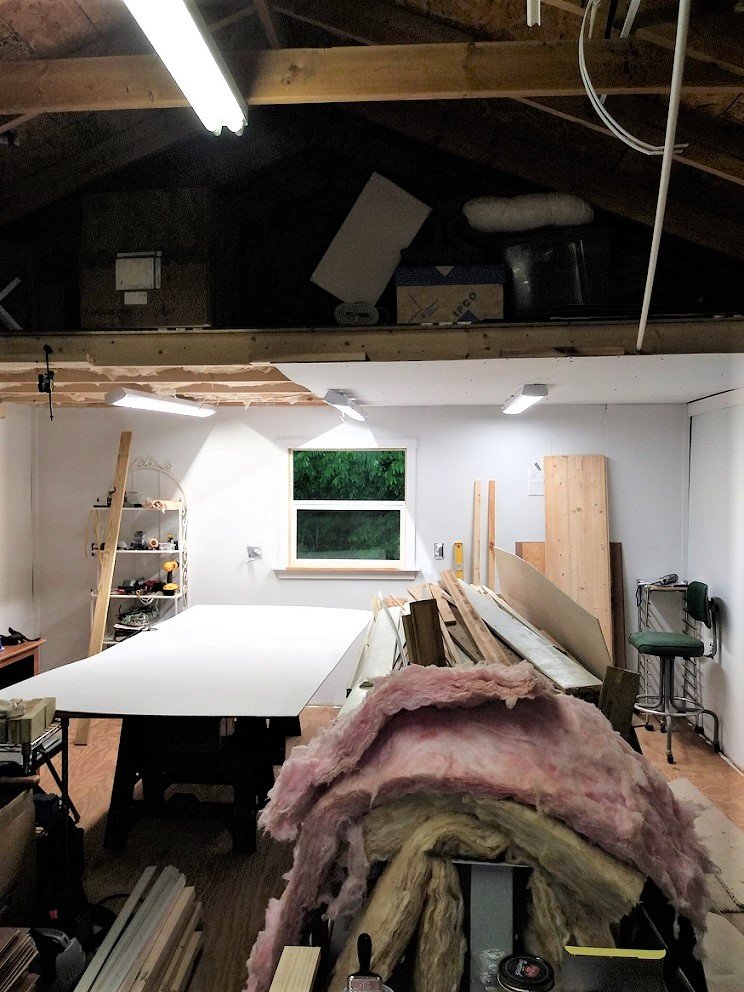
With "honey-do" tasks completed by lunch, I spent the afternoon in the shop finally getting the last 2 ceiling panels under the loft area located and installed. I then installed one more wall panel on the left side, some more trim boards, and got the 3 LED fixtures back in place. I did a bit of touch up on the cabinets and more caulking on the wall panels (seams, nail holes, etc.). With possibility of frost tonight, I got a couple pix made and then locked up for the night. Got the plants covered and hope that they make it without problems. I hate replanting stuff!!!! I'm hoping to continue work in the shop in the morning, but one never knows when The Admiral is afoot . So, here is today's progress: Sat. a.m. - hope to get some general clean up & rearrangement of "stuff" again before tackling further construction! -
OK, I understand that. Some of my stamped flat countersunk wood bits have an almost triangular shape to the base which makes for a drawn out process to get them "true" in the chuck. I'll check the "wobble" with a couple very small bits in a little while. I have moved the D.P. to the garage for an initial test run. Thanks for the clarification!!
-
OK, imagine we're in the scene from 2001 - A Space Odyssey and I'll play the part of H.A.L. and you (Bob) play the part of Dave. Dave is outside the Pod Bay Door and asking for H.A.L. to open the Pod Bay doors. Only, for our purposes we'll be talking about the Drill Press, stuff Bob mentioned to me about the drill press (above quote) and we'll take it from there: h.a.n.k. - Bob, all those nasty things you just mentioned to me about the drill press....you know, the quill, and the run out?? Well, those kind of words...those kind of words hurt me Bob!!! B.O.B. - Well, I'm sorry h.a.n.k., I thought everyone knew about that stuff. I didn't know you were a pancake short of a stack when it came to 'chinery!!! h.a.n.k. - Your smartass comments regarding breakfast choices don't help this situation, either!!! Here Bob, stand a bit closer in that puddle of water....that's right....now, take this extension cord in your hand.... I guess the Chorona, Chorona has got to me!!! Sorry, but I don't have a quill, I use gel point pens and how far should I run out??? Where .....?? You're talking to someone who has little in the way of tool adjustment, micro-fiddling with precision instruments, etc. And....I don't have a dial test indicator, at least I don't think I do. I'm basically an out of the box tool guy - and hope it works like advertised. So, enlighten me as to what you're looking for and I'll try to find out. Hank
-

Converting a Backyard Shed into a Model Workshop
Hank replied to Hank's topic in Modeling tools and Workshop Equipment
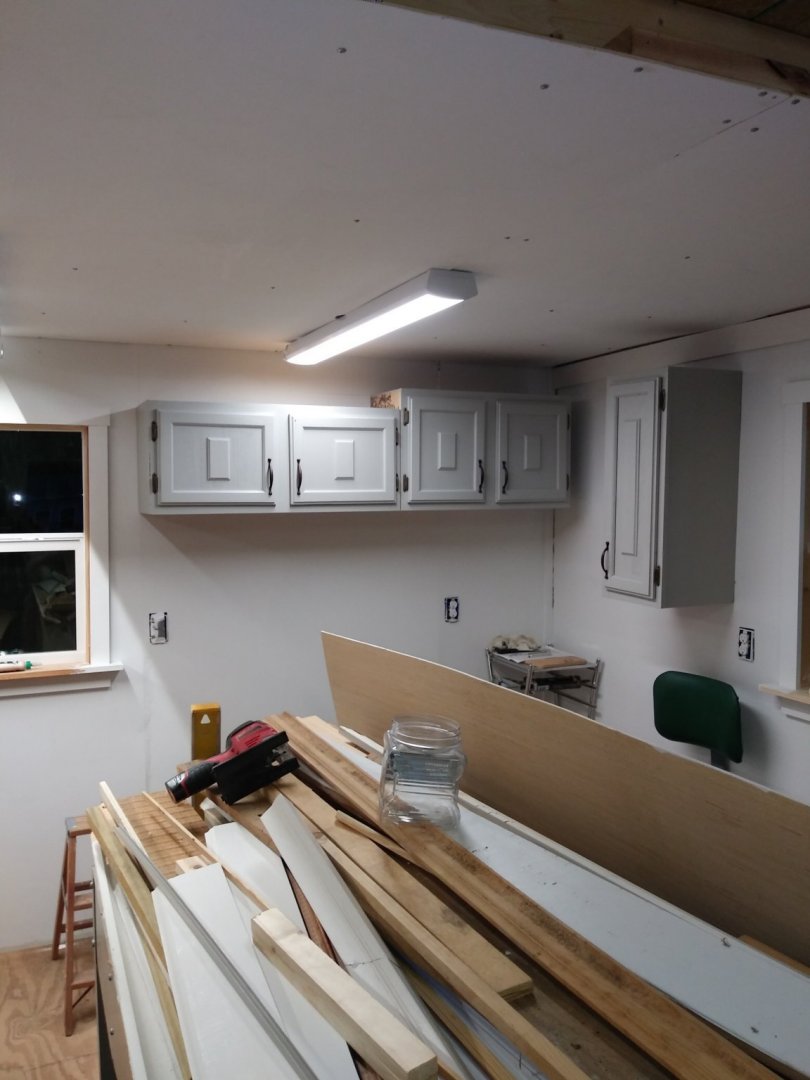
The last week has been nuts trying to actually get out to the shop to get anything done!!! But, I did manage over the last week to get 3 wall cabinets that were given to me repaired, repainted, and tonight hung in the right side of the back corner of the shop. They were the typical trailer trash particle board construction and it took a bit of work to repair & rebuild, but they'll work out - I put new REAL plywood shelves in them and that was a big improvement. A coat of paint and they're useable!!! I then filled them up with packed up tools in small boxes that I had packed up in 2018 when I was preparing for my 2019 Spring retirement and move back to the Triad of NC from the eastern part of the state where I worked. Here are the cabinets in place: A bit of touch up paint and finishing the painting on the left side of the taller cabinet unit should have things wrapped up. Now, before you start in on the arrangement, I'll add this - I put in a flush mtd. top on the small unit to use for storage and that's why I arranged it the way you see it. Hopefully, I will finally get time to finish the other 2 ceiling panels (to the left out of the picture) that remain. I have them both pre-painted and only need to position & screw into place. However, I have a feeling that Honey-Do items are on the immediate horizon as The Admiral bought new plants today and you know what that means!!! It may be another week until I get back out here to continue things. -
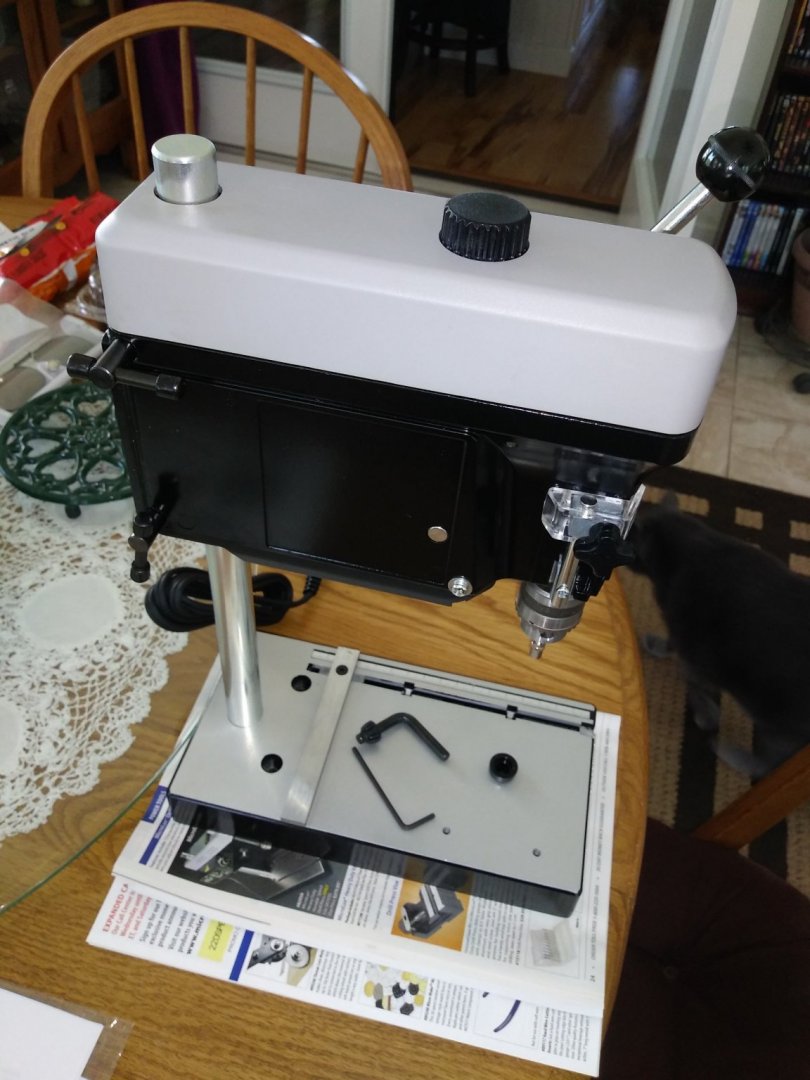
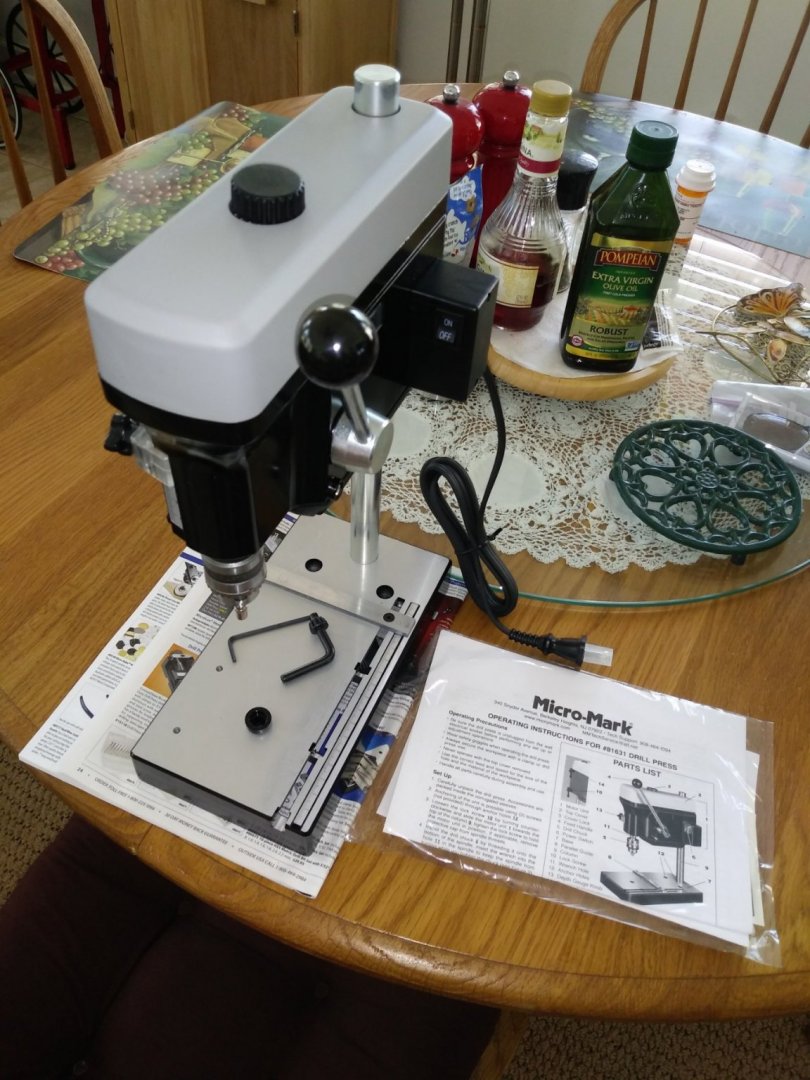
Delivery Day was TODAY!! This was delivered by USPS this morning and I just got around (5pm) to getting it set up as I "may" decide to start using it on a new project very soon!!! I have not plugged it in yet, so I don't know what it's running characteristics are yet. Maybe after supper. So, here is the Micro Lux 3 speed Drill Press: It's sitting on the dining room table and in case it catches fire, I have plenty of oil & vinegar to toss on it...along with salt, pepper, …..🙄 This way The Admiral can cuss me at supper tonight and then I can disappear with it not to be seen again for....who knows how long!!!
-
Alan, Well, actually I'm a native Winstonian, lived in Davidson County for 30 years (Wallburg area) and now in Mocksville (2018-). We'll have to see what's what once the Chrome-Doma is on the down side and so forth. Happy modeling! Hank
-
Alan, Indeed - Welcome to Model Ship World! I guess most of us in our 70s remember applying dope to balsa & paper, etc. You'll find a lot of help on this forum, so don't hesitate to ask questions, etc. I too, have had my hands in other forms of woodworking and have one Emperor Clock on the wall, to boot! Just curious, but where in NC are you residing? Here in the Triad, we have a loose knit group of modelers (not a formal club) who know each other, get together from time to time, and once or twice a year, descend on Beaufort, NC to carry out mayhem, pillage, and the sort on the local museum denizens much to their dismay!!! We have a few adjunct members from the Triangle as well as New Bern, so it's not a defined linear boundary, but all who share common interests.
-

Converting a Backyard Shed into a Model Workshop
Hank replied to Hank's topic in Modeling tools and Workshop Equipment
Ron, Thanks so much for the interest in PEACOCK, NEW JERSEY, and my workshop!!! As a former FLETCHER class DD alumni, I am planning on kit-bashing the Revell 1/144 scale FLETCHER class DD kit into USS STODDARD (DD-566) in her 1966-67 guise. I served in her from 1966-68 and have always wanted to build a model of her as she appeared during my service. Several years ago I started her research (mostly on The Ship Model Forum as they are more modern USN oriented, etc.) and have already drawn up several scaled CAD drawings of her 01 Level, secondary 3"/50 gun mounts, and tripod mast & RADARs. So, that will be my first project in the new shop once it's been commissioned! Then, 1/200 scale kit-bash ARIZONA to 1940 PENNSYLVANIA waterline model, and possibly a resurrection of my research & development of drawings to build a 1:48 hull w/lower masts model of U.S. Frigate BOSTON (1798). This would be a hybrid construction of both POB & POF in order to show internal framing in a central area of the model. At least, that's my theoretical plan. Hank -

Converting a Backyard Shed into a Model Workshop
Hank replied to Hank's topic in Modeling tools and Workshop Equipment
Dr. Per, Yes, indeedie!! but, I fear at the present rate it may still be later this year before things are to a point where I can actually get back to work. However, not to be shy, I just purchased a new drill press for exclusive use in the model shop and I already have its first task in mind on the next project. I appreciate your kind remark and hope you're able to get the chips flyin' soon, also! Hank -

Converting a Backyard Shed into a Model Workshop
Hank replied to Hank's topic in Modeling tools and Workshop Equipment
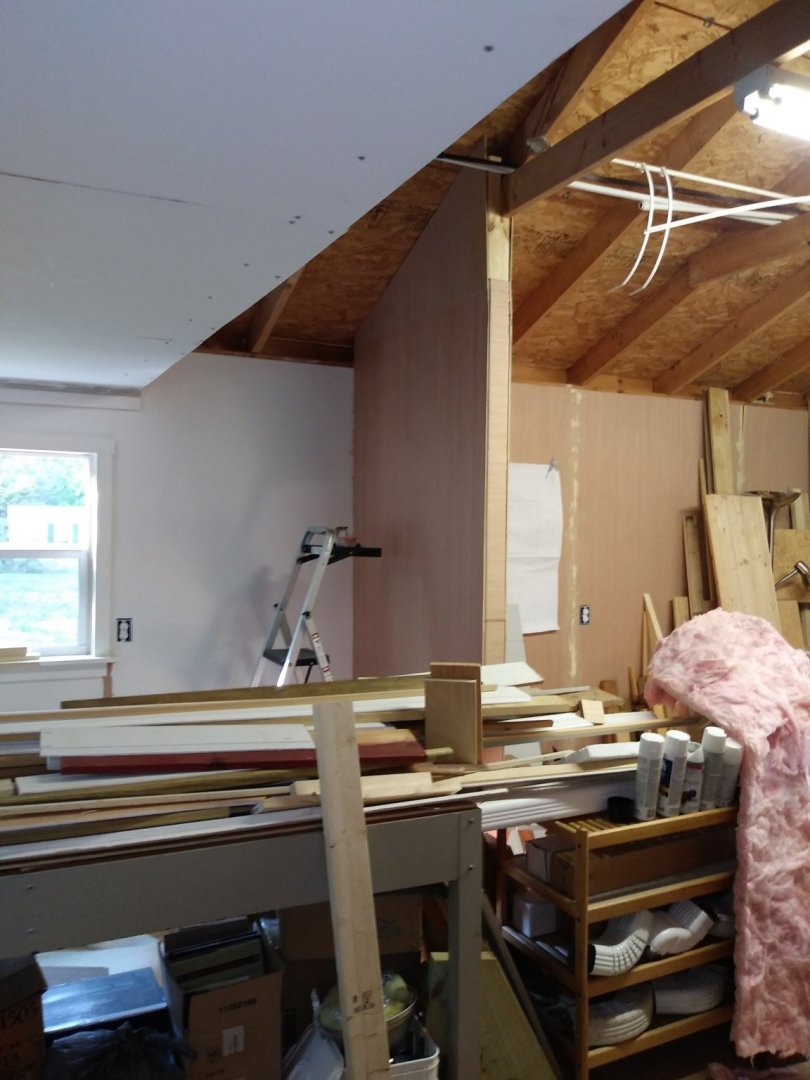
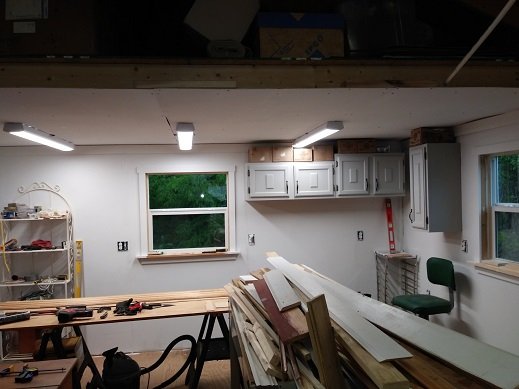
Finally....I did get some work done yesterday on the back & right side interior walls and the ceiling under the loft. I've now got all the insulation batts in place under the loft and have 2 more panels to install and that part of the interior will be done. The two pictures show this work - I've had to temporarily move the LED fixtures to one side or another in order to put the ceiling panel into place and then reinstall the light fixture. Once the ceiling is completed I'll then do trim work and hang lathe strips for the wall cabinets on the right side. Another "free-bie" from my contractor/realtor/friend who had no use for 3 of these cheepo units that were gutted from a renovation job. No problem, I've got them in the garage and rebuilding them for my use. They will work fine for my purposes. Hope to get some base cabinets from him, as well from another renovation job he has upcoming. Anyhow, it looks a mess, but progress IS being made: If the weather cooperates and we get back from the city in time tomorrow, possibly another ceiling panel or 2 will go up!! -
Kurt, Much appreciate it - I've noted the column dimensions on my downloaded M-L 3sp D.P. owner's manual for future reference. Finding a short piece of suitable stock shouldn't be too difficult - and my machinist/modeler friend w/3 fingers should be able to fashion a lower shaft for me with no problem. Like his parrot, he works for peanuts..... Hank this COVID-19 thing has got me goofy!!!!😷
-
Gaetan, Thanks - a very sensible solution at a minimum of modification! I'll presume that this will only require a shop OP-ORD change and not involve an actual SEA-ALT in order to effect the change as this drill press will more than likely never taste salt water. NAVY TALK!!!!! Sorry, I couldn't restrain myself - must be COVID-19 Cabin Fever!!!! Hank
About us
Modelshipworld - Advancing Ship Modeling through Research
SSL Secured
Your security is important for us so this Website is SSL-Secured
NRG Mailing Address
Nautical Research Guild
237 South Lincoln Street
Westmont IL, 60559-1917
Model Ship World ® and the MSW logo are Registered Trademarks, and belong to the Nautical Research Guild (United States Patent and Trademark Office: No. 6,929,264 & No. 6,929,274, registered Dec. 20, 2022)
Helpful Links
About the NRG
If you enjoy building ship models that are historically accurate as well as beautiful, then The Nautical Research Guild (NRG) is just right for you.
The Guild is a non-profit educational organization whose mission is to “Advance Ship Modeling Through Research”. We provide support to our members in their efforts to raise the quality of their model ships.
The Nautical Research Guild has published our world-renowned quarterly magazine, The Nautical Research Journal, since 1955. The pages of the Journal are full of articles by accomplished ship modelers who show you how they create those exquisite details on their models, and by maritime historians who show you the correct details to build. The Journal is available in both print and digital editions. Go to the NRG web site (www.thenrg.org) to download a complimentary digital copy of the Journal. The NRG also publishes plan sets, books and compilations of back issues of the Journal and the former Ships in Scale and Model Ship Builder magazines.


