-
Posts
632 -
Joined
-
Last visited
Content Type
Profiles
Forums
Gallery
Events
Everything posted by Hank
-

New US carrier to be named for a WWII hero, not a president
Hank replied to mtaylor's topic in Nautical/Naval History
I've seen that thread also, as I am a member on that forum, as well. And, normally I would be in agreement with naming a new FFG class after Miller or even another ARLEIGH BURKE DDG. But, to be quite honest, I've had about one too many carriers named JFK, etc. While I fully understand the current naming scheme the Navy uses for selecting ship names, I won't say that I personally agree with it. When submarines started taking on state names, I lost interest. And how John Stennis ever became the name of a CVAN I'll never know!!! Since it appears that the conventional naming of USN ships has, in modern times, been turned on it's head, why NOT name the next CVAN after Miller? He's certainly deserving of it. Just my thoughts on the subject, nothing more... -

New US carrier to be named for a WWII hero, not a president
Hank replied to mtaylor's topic in Nautical/Naval History
And, I might add - LONG OVERDUE - both honoring Enlisted as well as Minorities who have served above and beyond the Call of Duty to our country. -
The Frollicky One wrote: "Hank-borg, we will expect a full film review from you ! " My copy arrives later next week. I will invite fellow geezer modelers over, pop popcorn, watch the movie, and give a totally un-biased critique after polling the inmates on hand!!!
-
And one further precaution: if using the pine tar/natural fibers, etc. - make sure the NO SMOKING LAMP is lit!!!
-
Great!! I ordered a copy of the DVD from Amazon about an hour ago. So, NO MORE SPOILERS!!!!!Poor Seeburg……. Hank
-
I'd like to find a copy (DVD?) of that movie...looks like it would really be worth seeing. Hank
-
Ferit, As of this evening a bit more info has been located. In a 2016 article (Iver P. Cooper) in Granville Gazette (online) there seems to be archeological evidence of candlestick holders being found on several seventeenth century merchant ships using a variety of fuel sources - tallow (animal fats) and beeswax. The link to this article is: https://grantvillegazette.com/article/life-at-sea-in-the-old-and-new-time-lines-part-3-shipboard-lighting-and-fire-prevention/ Later in the 18th century, oil lamps came into use with various types of whale oils used as the fuel source. See the same article link above. Hope this helps, Hank
-
Ferit, Well, I'm sorry to report that the books I thought might have information re. lanterns, etc. - in fact, do not! I've only been able to find a reference in Falconer's regarding a lantern used for signaling but it doesn't describe the fuel source. I will keep researching this, but right now I don't have anything that would be helpful to you. Hank
-
Ferit, I may have some info on ship's lanterns packed away in a small book - I'll look tomorrow. But, my feeling is that candles were used up until the 19th century on most ships. Right whale oil was used in some lanterns until it was determined that Sperm Whale oil burned cleaner and brighter - obviously, this was one of the main factors in whale hunting - the oil was prized by everyone! Whether or not ship lanterns used this form of fuel, I don't know. I'm hoping there will be some information in the book I think I may have on early ship fittings, etc. Hank
-

Converting a Backyard Shed into a Model Workshop
Hank replied to Hank's topic in Modeling tools and Workshop Equipment
Per, Actually, the picture is not that great, but thanks, all the same! I plan to build a 7'x7' porch with roof in place of the small ramp/deck that was built for the original centered single door. It was totally rotted out when we bought this property in 06/18 and I had it replaced with the 2 door unit in 07/18 in order to lock the shed and also keep the weather out. The ramp/deck never worked with the new door unit and was destined for the recycle pile at that point. I may give the shed framework a day or so to dry out - I noticed it being damp when the old wood was removed and I want that moisture gone before going any further. We'll also replace the flashing under the door unit with new material that covers all of it not just where the old unit was located. Of course, my mental schedule does NOT concur with the actual schedule of reality and holidays, etc. etc. - 😭 -

Converting a Backyard Shed into a Model Workshop
Hank replied to Hank's topic in Modeling tools and Workshop Equipment
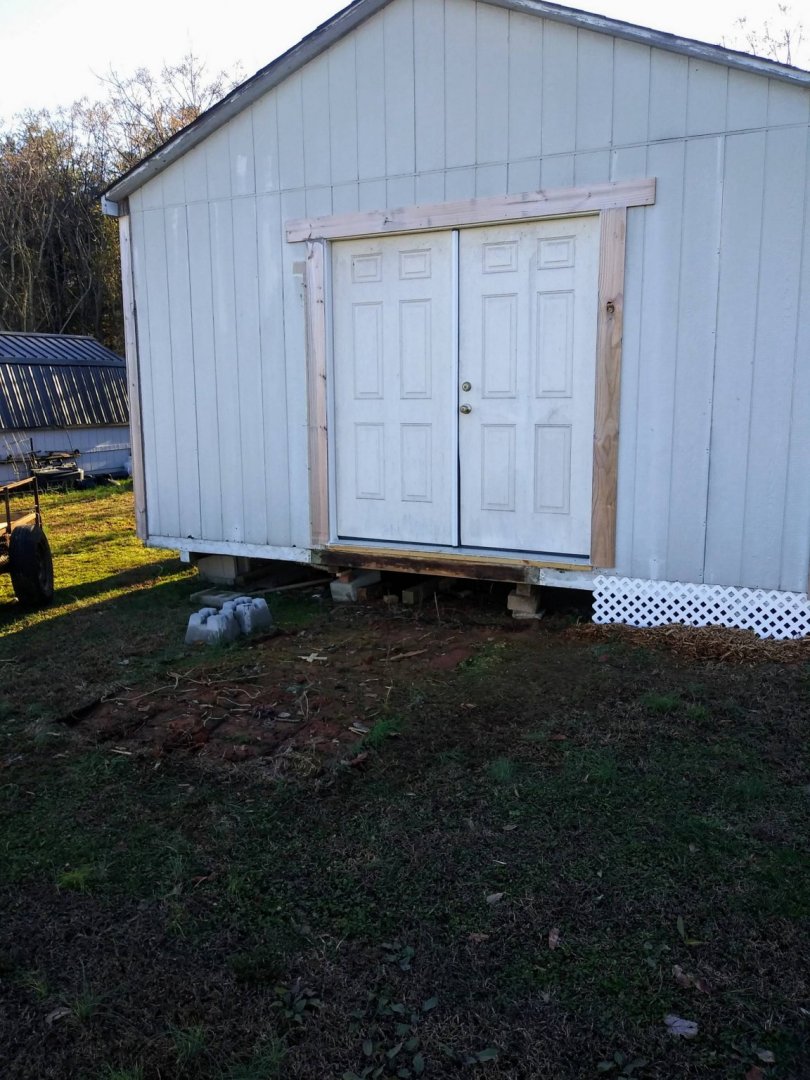
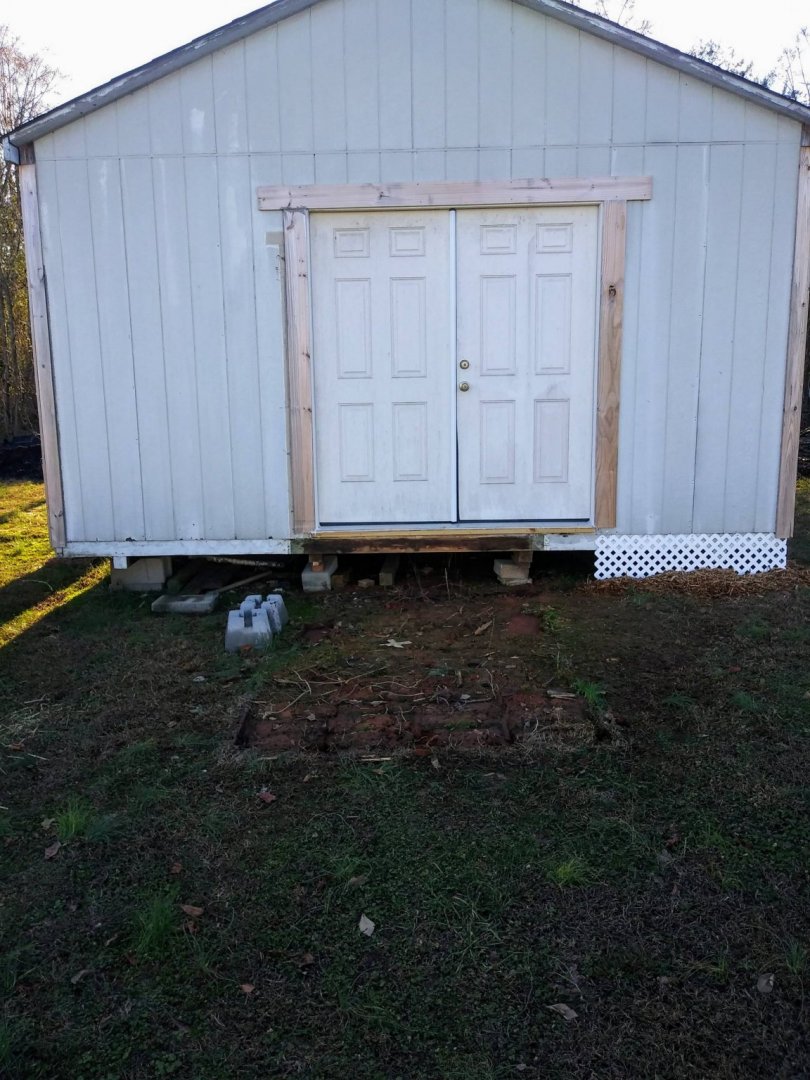
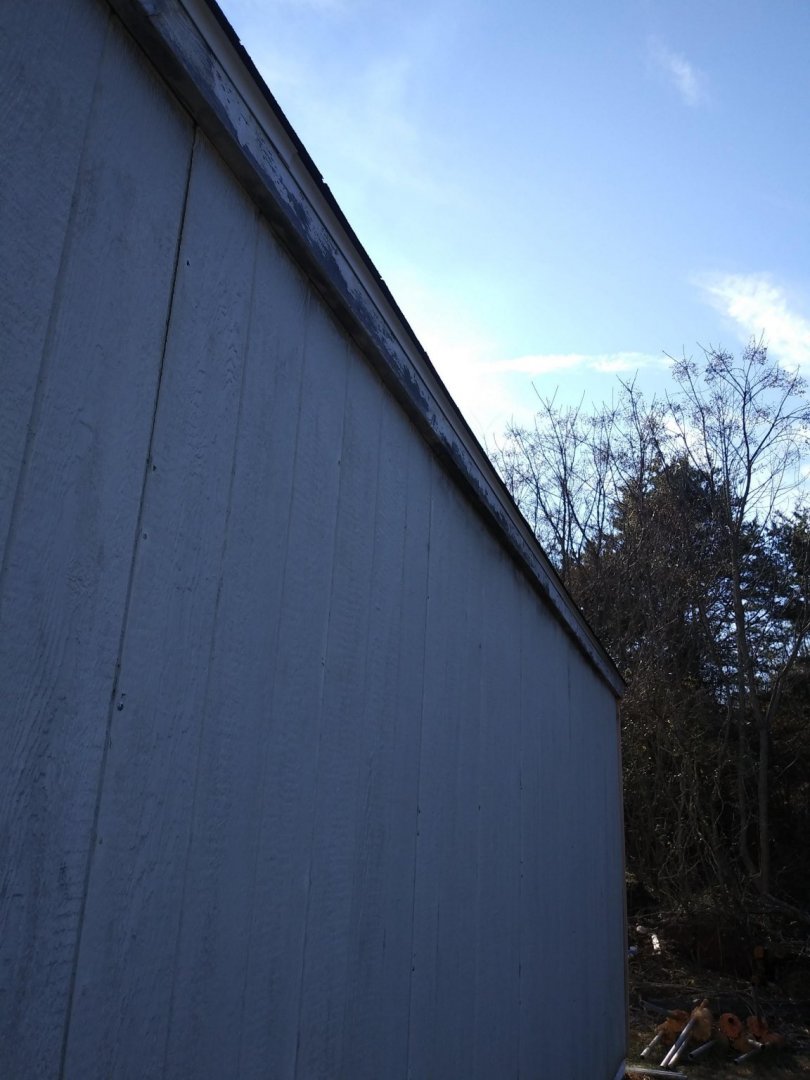
Well, this afternoon was the perfect day for busting my butt removing the old (and rotted) ramp/deck in front. It was low 70s and sunny - took me around 3 hours of manual labor with crow & pry bars, and hammer - but the job is done. Well, the removal, not getting the old wood etc. to the recyclers. So, I'm going to let the front frame work dry out before reframing my new porch - probably Thurs/Friday. Here's a couple photos: -

Converting a Backyard Shed into a Model Workshop
Hank replied to Hank's topic in Modeling tools and Workshop Equipment
Nirvana/PopDavid - Yes, the wildlife are a Plus when considering where to move - we also have a small herd of deer that come around in the back yard and munch on the small crabapples on the tree out near the shed. Woodchucks have (I guess for years) taken up semi-permanent warm weather residence under the shed - NO MORE!!! I will make sure they've been evicted for good before finishing a skirting around the base. Thanks, PD for the kind remarks. Well, it is indeed warm/cloudy and already in the 60's, so I'll be out in a little while for morning "destruction" activities on the ramp/deck in front. Will update this post later this evening. -

Converting a Backyard Shed into a Model Workshop
Hank replied to Hank's topic in Modeling tools and Workshop Equipment
Well, that certainly is a nice Christmas gift to yourself!!! Nothing like having it ready made, right? -

Converting a Backyard Shed into a Model Workshop
Hank replied to Hank's topic in Modeling tools and Workshop Equipment
Ron, I'll certainly consider that - I'm going to remove the latticework on the right side anyhow prior to doing the lower siding replacement. I need latticework for my small equipment shed to the left so it won't go to waste! I was out in the shed earlier today during a lull in the light rain - no leaks this time!!! So, the roofwork and caulking has proven to be what was needed (at least at this point). Depending on the weather, I may get out there tonight for some further work, providing of course, that the Admiral approves my OT chit for Sunday work. I've got the porch deck framing in the garage so will probably begin dismantling the existing ramp/deck on the shed front. All this wood will go to the landfill as it is way too old to be of any further use to me. That and the old window and framing, etc. Of course, I've still got wiring to complete - well, actually - I have EVERYTHING to complete - this party's just getting started!!! -

Converting a Backyard Shed into a Model Workshop
Hank replied to Hank's topic in Modeling tools and Workshop Equipment
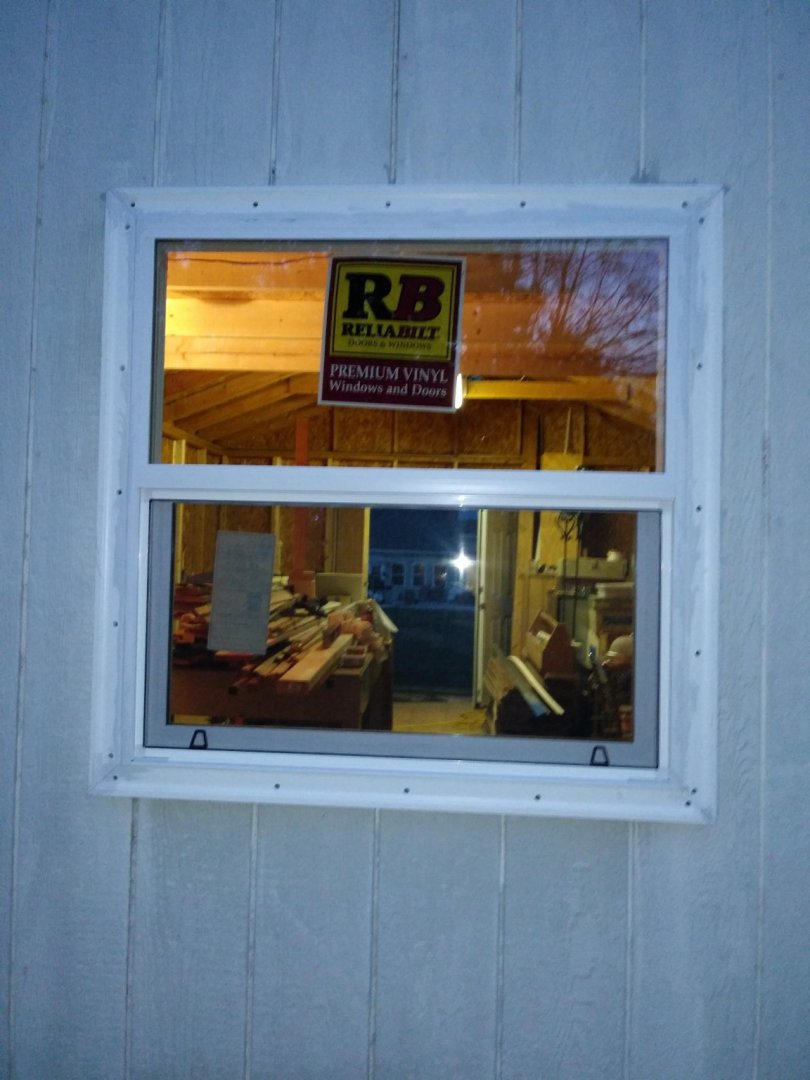
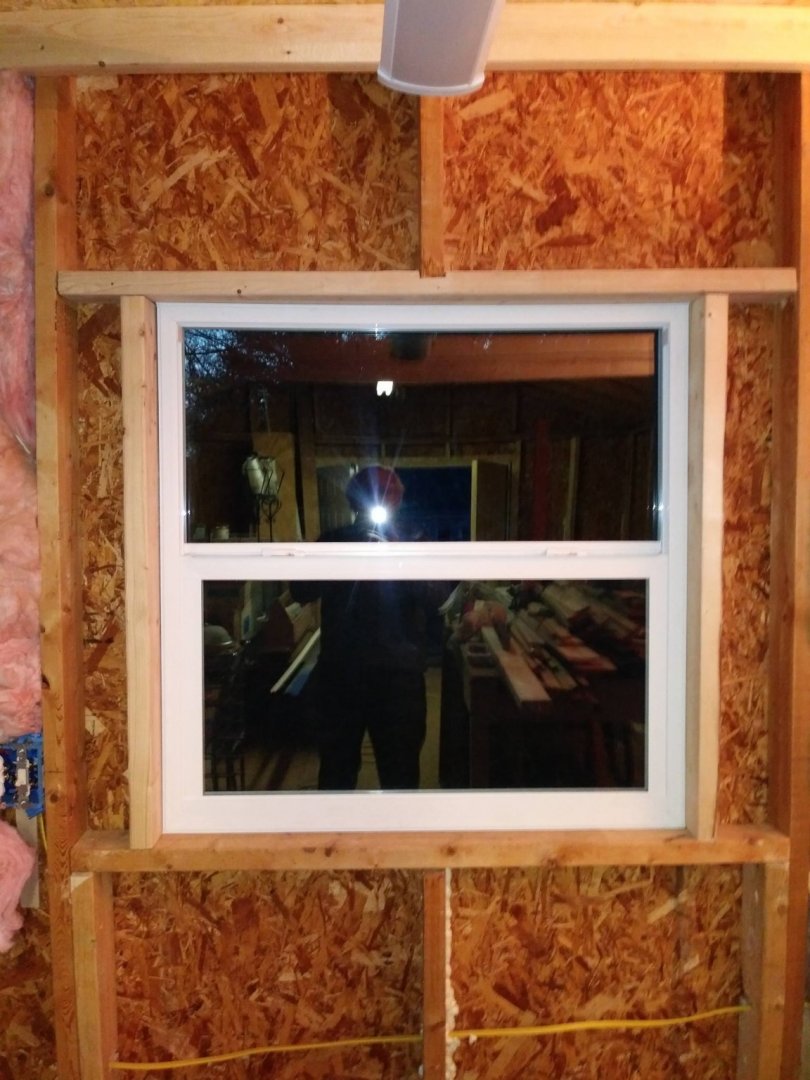
Well, yesterday afternoon (Saturday) I had some rethinking on the dampness issue with the siding/floor. It appears the bottom 1-2 inches of siding is rotted all around, so my realtor/contractor and I have come up with a way to eliminate this and the water problem. We will cut off the bottom 9" of siding all the way around - requiring removing the lattice, side trim boards, and brickmold on the front door frame. It will be replaced with new siding 12" high which will cover the exposed frame of the shed at the bottom and thus eliminate water getting in from the exterior. The new siding will also be installed with construction adhesive in addition to screws and a Z channel flashing (also caulked) will provide a waterproof junction at the joint between the old siding and new. We hope to get this accomplished this week - perhaps Wed/Thurs - once the rains have departed. This afternoon's mid-60s weather was perfect for performing a windowectomy on the old back window unit. I removed the old unit and right away saw that the opening siding edges were rotted so having to trim approx. 1/2" all around actually was a positive move in removing rotted wood. I replaced all the framing with new 2x4 material and making sure this framing is level and the left side at a true 90° - I set in the new unit and framed the remaining 2x4s both level and also at a true 90° - all this without having to shim the unit. Once properly secured with 1" sharp point screws, I cut vinyl brickmold to fit all around, caulked it and secured into countersunk holes with exterior deck screws. So, here is today's product: Nice to have a nice, clean, waterproof window to look out thru and to provide daylight on a sunny day! I am considering the same type/style of windows for the right side of the shop - may go with 2 or possibly 3 units (22" wide). Tomorrow afternoon I hope to finish insulating the back wall, do some interior cleanup, and rearrangement again of "stuff". Also plan to get the remaining receptacles wired and be able to possibly tie in that circuit to the panel next week some time. -

Converting a Backyard Shed into a Model Workshop
Hank replied to Hank's topic in Modeling tools and Workshop Equipment
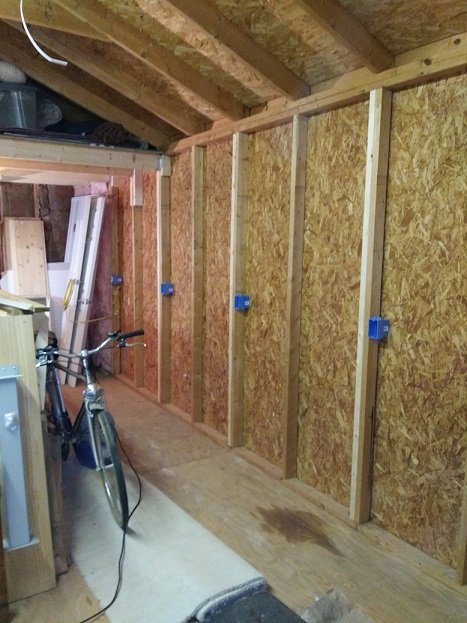
Well, I actually did get some unexpected work done yesterday (Christmas) afternoon and continued with it today. It has been in the upper 50s low 60s and I took advantage of this mild weather. Yesterday I finished drilling holes in studs for elec. receptacle wiring and then cleaned things up and made a list for a supply run to Lowe's. Today's run included alum. drip edge trim and receptacles and a few odds & ends. Once CaddyWagon was moored at her normal anchorage, I began work on repairing the roof eaves - a 3' section of shingles on the 1st course was missing (it should always be doubled up) so that was replaced and the new drip edge trim installed along both sides the entire length of the roof. I also filled in a couple slots in the shingles where the underlayment was visible and obviously wet. Having that completed, I then made notes for the continuation of latticework/mulch on the left side and back of the shed. We have rain forecast for Sunday so I want this all completed by then. It was then time to go inside and pick up where I left off - finishing the elec. wiring circuit for the receptacles and then on to applying foam insulation to all the joints where siding meets framework, etc. Tomorrow I will continue on the ladder to complete the upper wall where the roof meets the studs/plate and make sure those joints are all sealed. Then, it will be on to replacing the back window. I have a small amount of work done on new framing, so this will continue once the old window is out for good. -

Converting a Backyard Shed into a Model Workshop
Hank replied to Hank's topic in Modeling tools and Workshop Equipment
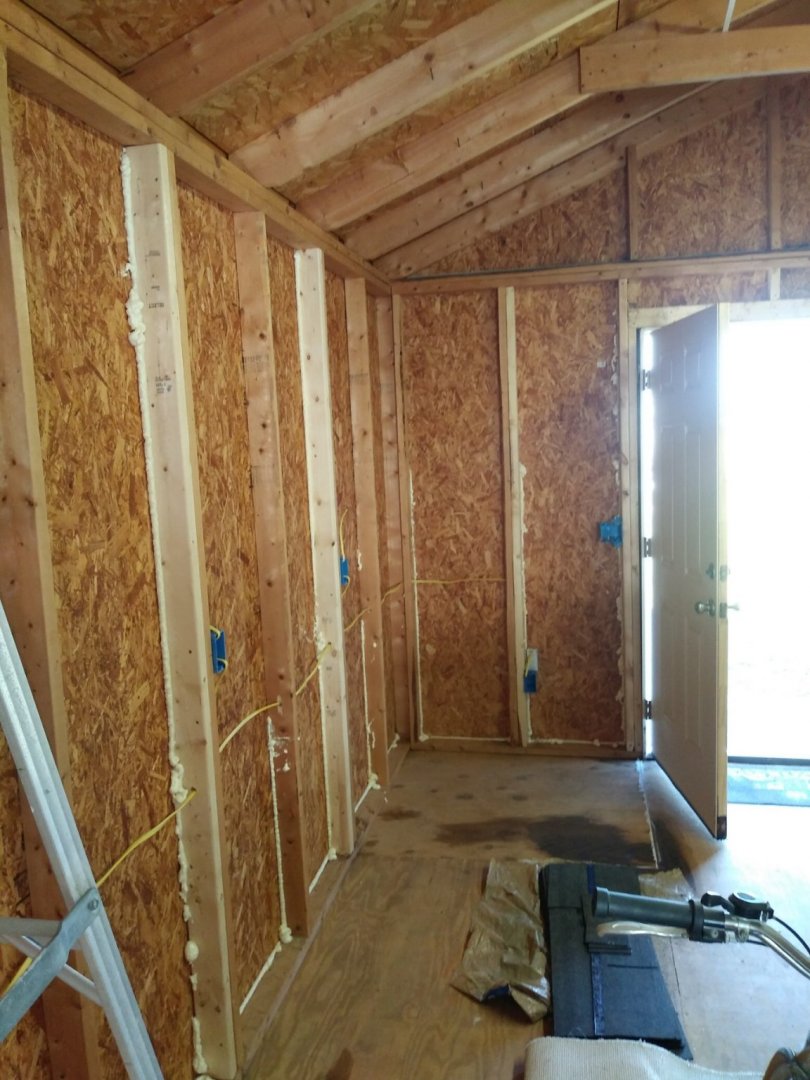
Ron, Yes, I can caulk along that edge and will. I've done so inside, as well. Another thing is that I've applied the expandable foam insulation into all the cracks/joints along the inside studs & plates and where ever the siding joints meet up. Good idea, by the way. Stuglo, Really don't have an answer - perhaps you could start a new thread with your question. So, today's report is: After watching 3 quarters of the Panthers getting their butts handed to them by the Colts, I went out back and started once again relocating "stuff" from the right side of the shed to other areas in order to continue with the receptacle wiring circuit on the right wall coming forward. While moving "stuff" I took notice at the amount of laminate flooring I had been able to retain from our 2018 house renovation and I do believe I will have more than enough to do the shop floor in the back half of the bldg. The front portion of the floor will be carpeted with the roll of berber carpet that was also removed & retained from the small bedrooms. It is in excellent condition and will work well in the front portion of the bldg. I plan to use laminate at the entrance in an 8'wide x 6' deep area at the doors. Using the recycled materials also cuts down on the cost of this whole thing which is one of the secondary goals - not spending more than I have to in this whole project. So here's what it looks like this evening: I put in a chit with my neighbor for a supply run to Lowe's tomorrow morning and he (being a retired E-9 Aviation Chief) handily approved it. His F-150 will be warmed up and ready for a morning sojourn into M'ville, probably TAD until lunch. This is a rather large supply run including porch decking/trusses/framing, latticework, mulch, and possibly a couple more evergreens for our natural border which is also in progress. Of course, Tuesday going forward will be Admiralty time and we all know what THAT means, right?!!! I doubt that I will see the inside of the shed until after Christmas so this project will pick up sometime next week. Hank Monday Update: Well, it's been raining steady since very early morning and the mulch/latticework did NOT work as planned. The inside back corner and both door corners are wet inside and I'm scratching my head!!! Later this week (providing I can escape the Xmas scrutiny of the Admiral) when dry weather is back, I will see if Ron's caulking suggestion is feasible. I'm also going to contact my realtor/contractor friend and squarely place the blame on him - I mean, isn't that what we do these days? LOL!!!! - seriously, I will contact him for further advice and see what we can come up with to dry these areas out. -

Converting a Backyard Shed into a Model Workshop
Hank replied to Hank's topic in Modeling tools and Workshop Equipment
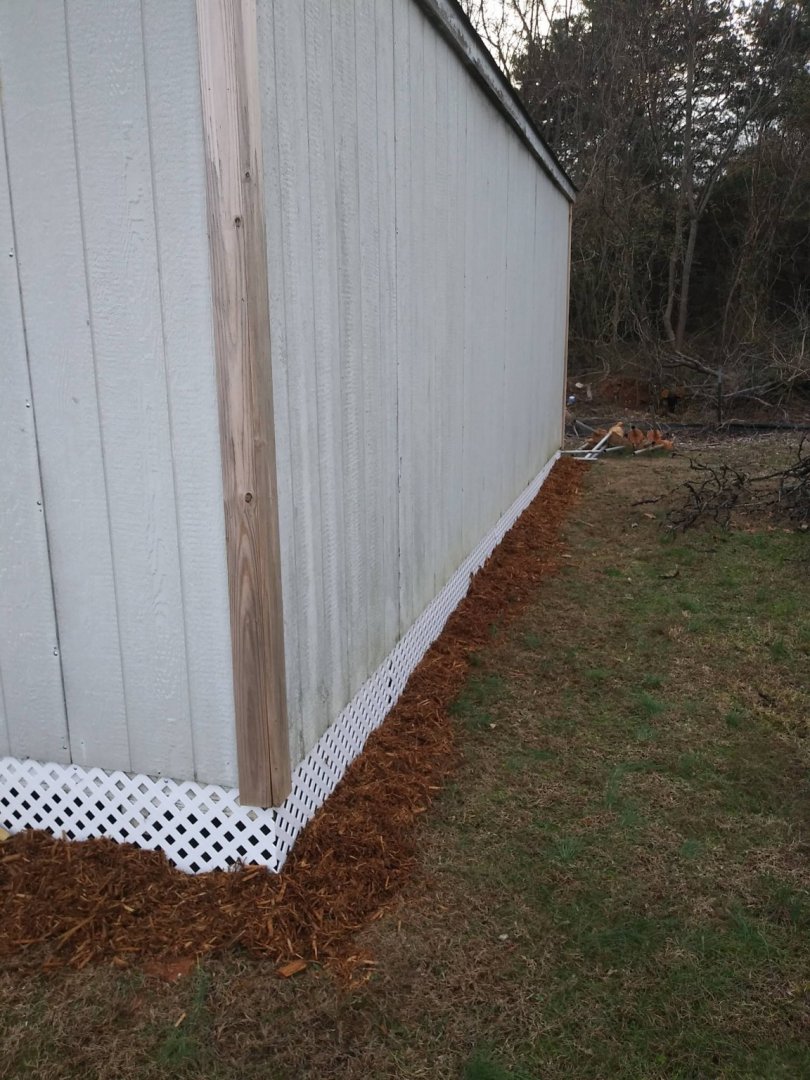
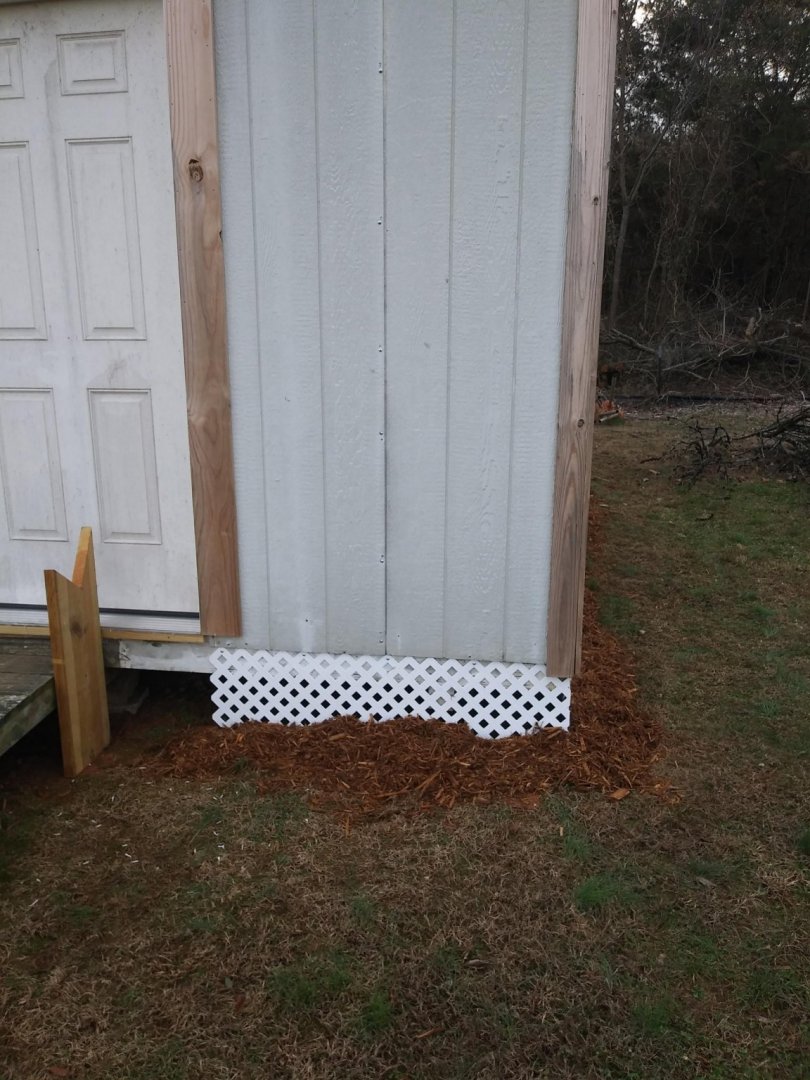
OK, so today was "outside chores for the Admiral" day and after I concluded her things, I started work on an exterior procedure to prevent further rain water splash up on the lower siding resulting in the interior flooring getting wet around the perimeter. I had previously removed old and nasty latticework from the bottom of the shed and today replaced it with new, plastic latticework, followed with cypress mulch to keep the splashback from occurring from steady or heavy rains. This was suggested by my realtor/contractor - and he should know!!! After about 3 hours of work, 3 bags of cypress mulch, and one partial sheet of 4'x8' lattice, here's what it looks like: Note - the picture on the right: I intentionally left the space in order to build a new front porch deck which will come below the door unit (the old ramp/deck will be given the deep-6 at the county landfill). If I'm able to make another trip to Lowe's tomorrow or Monday, I intend to get the remainder of the left side/back done. We are scheduled for rain either Sunday or Monday, so the next dry day; I may have to wait until after Christmas, but I hope not! Hank -
Justin, Your last paragraph triggered a response which I hope won't be taken the wrong way - I agree with you regards VICTORY - her British caretakers seem to have a much more historical bent on preserving their museum ships than we do. I hate to say this but - CONSTITUTION, being a commissioned vessel, is subject to budgetary restraints approved by Congress, whether or not her caretakers in Boston desire otherwise. I would suspect that they are forced to accept solutions/materials for her periodic upkeep and repair that may not exactly be what they really desire. (now let's see how many of the gov't bureaucrats chime in to denounce this comment as heretical!!!). All our battleships are in private caretaker hands whose only purpose is the money they can make off tourists - maintaining the ship in a historical appearance is not a priority - at least, that's what I've seen. But, that's another story for another day/forum topic. I will say that USS KIDD (DD-661) is maintained in quite an exemplary fashion, her caretakers restoring her to her WWII appearance which has been no easy task. Were I to be asked to restore a ship model that was in poor or dilapidated condition, I think my first concern would be what materials could I use that would be closest to the historical ship it represents in terms of appearance and longevity. Secondly, do those materials come close to matching the model's original material. Hank
-
Wow! A most interesting and Dust-busting topic of discussion! Two points are made here and two ways of thinking - Conservation vs Restoration. It's obvious that this is one of those debates where both major points are positive and negative and either are productive or counter-productive at the same time, depending. Now, doesn't that sound like something right out of Wash. D.C. ???😱 Could this same question be applied to either VICTORY or CONSTITUTION, for example? I don't think so - in reality, both ships need to be constantly maintained with new material, indicating restoration (out of necessity). In the application of a model sitting inside, perhaps only gathering time and dust, it's quite possible that conservation would be the thrust of the caretaker to see that the model is maintained in it's intended (or original) state. It now dawns on me that I may have just stuka'd (my own term that I just invented for this situation 😒) this topic - not intended!!! I'm simply saying that a given situation may dictate an other than normal response to the immediate need. To replace rather than repair (or vice versa) may be best answered on a case by case basis rather than a generalized standard approach. Oh, and her presentation and visual aids were first class!! Hank
-

Converting a Backyard Shed into a Model Workshop
Hank replied to Hank's topic in Modeling tools and Workshop Equipment
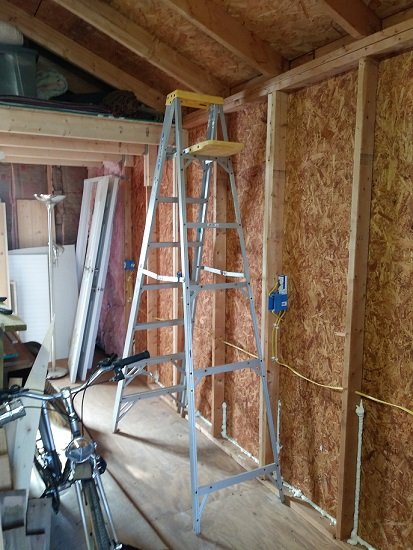
In regards the above photos and (obvious) sub-zero freezing, I can only say..... 🥶 - I'm just glad it AIN'T ME!!!!! Seriously, I'm feeling for you guys, but I remember a time in the '50s & '60s when our winters here in NC were quite cold, at least a foot of snow a couple times each season, and I-C-Y!!!! Certainly not as extreme as your present conditions, but times are changin'....we all have to adjust. Sad fact today. Today was an insulation installation day - it's ugly, and messy, so no pix!!!! I had 4 rolls of various pink insulation sitting around that I used on the back wall of the shed. Crammed it in, doesn't matter!!! Fill the void, raise the temp!!!! Later, I'll buy some 23" wide stuff to continue with, but I couldn't see letting this stuff go to waste. Wish the replacement window was here but that won't happen until the 20th. So, not a lot to report further. Tomorrow - starting to dig up fence posts one by one (12 total) until gone. And, perhaps some MORE rearrangement of "stuff" in order to continue the wiring around the right side of the shed. Stay warm & dry....happy modeling! Hank -

Converting a Backyard Shed into a Model Workshop
Hank replied to Hank's topic in Modeling tools and Workshop Equipment
Druxey - Ah yes, I'm just a 73 year old naïve SOB!!! 😭 But....I'll get over it!😁 Roger - Thanks for the tip - the HVAC situation will be addressed well before any UN-packing occurs!!! BetaQDave - Very nice shop!!! Yea, I really appreciate all the comments to date - all very good advice and well worth looking into in the very least. I have a couple short strips on my current garage workshop for just those very reasons! Hank -

Converting a Backyard Shed into a Model Workshop
Hank replied to Hank's topic in Modeling tools and Workshop Equipment
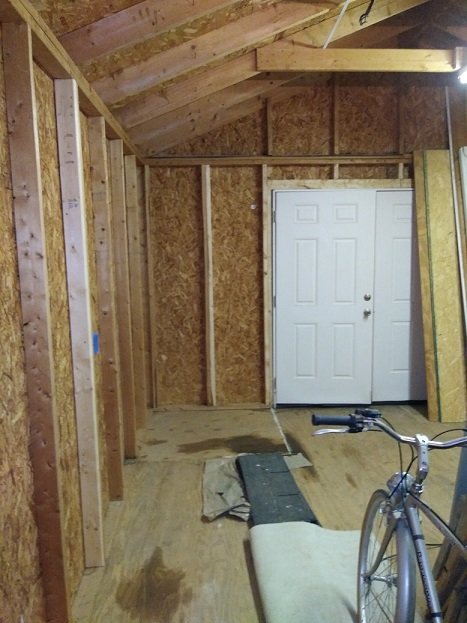
PopDavid - So, I'm NOT alone in this type of situation.....GOOD to know!!! You, of course, failed to mention that the real reason you want the covered and lighted walkway was because of Bigfoot, possibly lurking in the woods nearby, just waiting to snatch your latest ship model out of your hands and play with it down at the lake. LOL!!!! Moab - NO 2nd floors!!!! Been there, done that!!! There's actually a story about having a bed near a working area, but I'll leave that for a later time. It is 154 steps from the current shop ramp to the edge of my deck, so not that bad. Of course in the cold rain.....THAT could present a problem!!!! OK, so I just came in from 2 1/2 hours of more wiring and receptacle installation in the shop. Several replies ago it was suggested that I make sure some of the elec. receptacles are positioned on the outside of the workbench and I agree. So, I've provided a lower recept. at the right side of the bench in order to plug in a power strip which I'll install on the front frame of my workbench which should suffice for this need. I've found one with 8 outlets and a 6' power cord, so this should work excellently in the center of the framing. I'll do the same for the bench running down the right side of the shop (continuous bench along back wall and down the right side wall about half way). I love it when a plan comes together!!! Didn't I just quote Hannibal Smith from the A-Team????? LOL!!! The replacement window for the back wall is on order but I am still looking for like windows but narrower for the right side. If only the studs had been spaced properly from the git-go!!! Oh well, it's always something! Hank -

Converting a Backyard Shed into a Model Workshop
Hank replied to Hank's topic in Modeling tools and Workshop Equipment
Wefalck, Thanks for your comments. Down-sizing involved the house, not the shed. Unfortunately, the shed has become part of the down-sizing - not part of the original plans! Regards the flooring, it depends on how much of the old laminate flooring I actually have to work with. It's currently buried under "stuff"!!! Hank -

Converting a Backyard Shed into a Model Workshop
Hank replied to Hank's topic in Modeling tools and Workshop Equipment
Mark, Jud - thanks for the additional comments, ideas, etc.! Interior walls - I am considering some form of light colored wood paneling or OSB painted white. I am trying to do this as economically as possible, so trying to avoid the work and cost of drywall finishing, etc. Jud, your "workshop palace" is way past what I'm envisioning at this point. You make good points re. getting older, etc. but at this point keeping things simple is the order of the day. Hank
About us
Modelshipworld - Advancing Ship Modeling through Research
SSL Secured
Your security is important for us so this Website is SSL-Secured
NRG Mailing Address
Nautical Research Guild
237 South Lincoln Street
Westmont IL, 60559-1917
Model Ship World ® and the MSW logo are Registered Trademarks, and belong to the Nautical Research Guild (United States Patent and Trademark Office: No. 6,929,264 & No. 6,929,274, registered Dec. 20, 2022)
Helpful Links
About the NRG
If you enjoy building ship models that are historically accurate as well as beautiful, then The Nautical Research Guild (NRG) is just right for you.
The Guild is a non-profit educational organization whose mission is to “Advance Ship Modeling Through Research”. We provide support to our members in their efforts to raise the quality of their model ships.
The Nautical Research Guild has published our world-renowned quarterly magazine, The Nautical Research Journal, since 1955. The pages of the Journal are full of articles by accomplished ship modelers who show you how they create those exquisite details on their models, and by maritime historians who show you the correct details to build. The Journal is available in both print and digital editions. Go to the NRG web site (www.thenrg.org) to download a complimentary digital copy of the Journal. The NRG also publishes plan sets, books and compilations of back issues of the Journal and the former Ships in Scale and Model Ship Builder magazines.


