DONATION DRIVE - SUPPORT MSW - DO YOUR PART TO KEEP THIS GREAT FORUM GOING!
×


rschissler
-
Posts
94 -
Joined
-
Last visited
Content Type
Profiles
Forums
Gallery
Events
Everything posted by rschissler
-
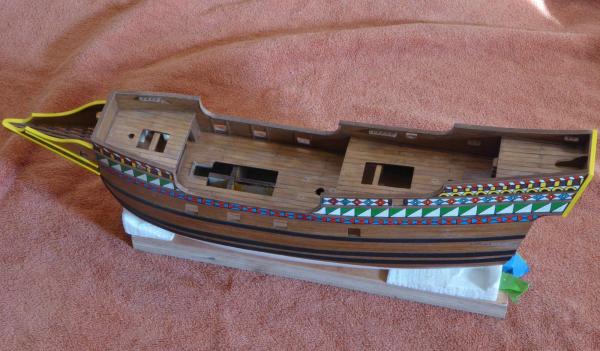
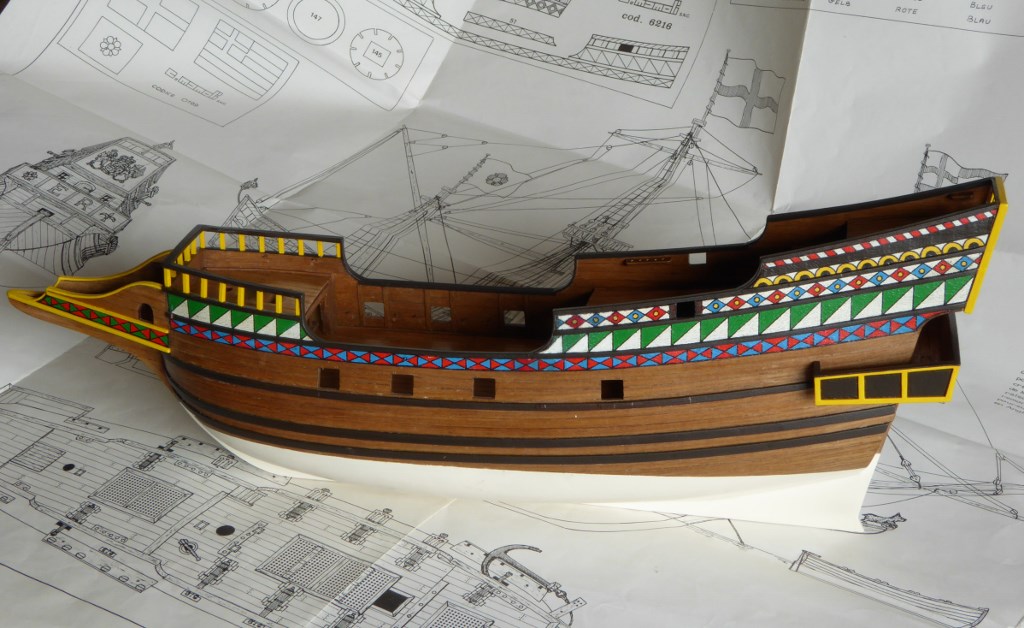
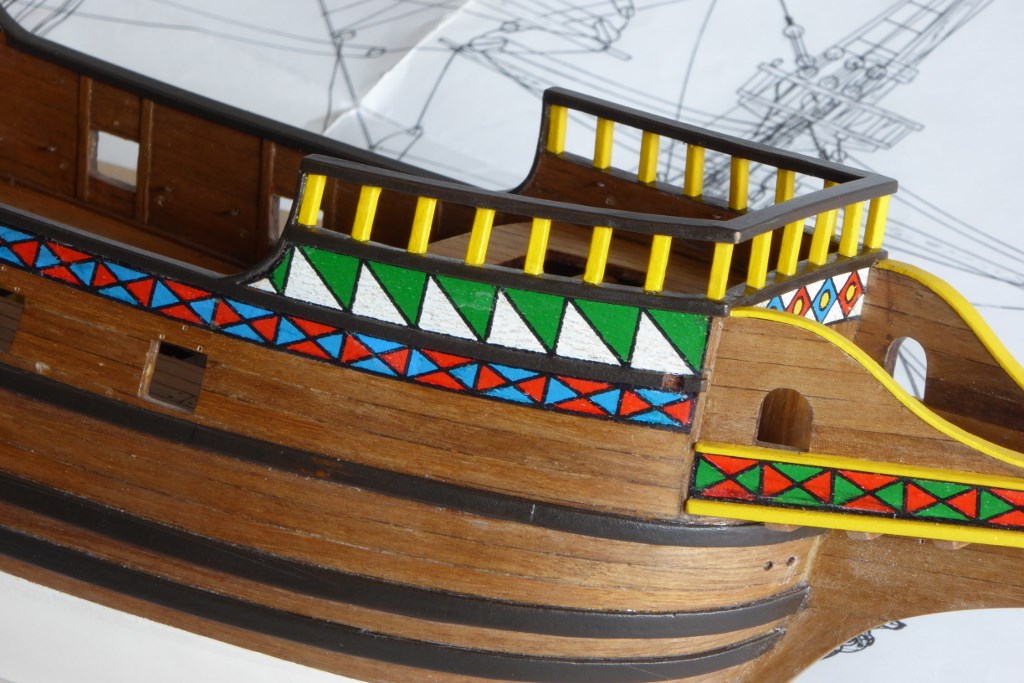
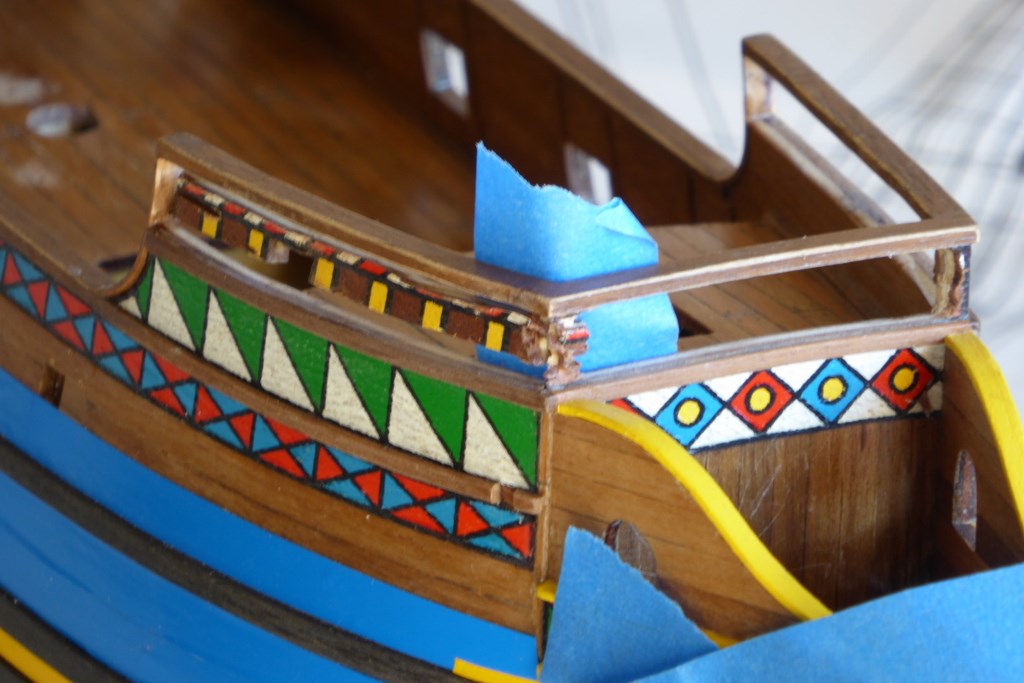
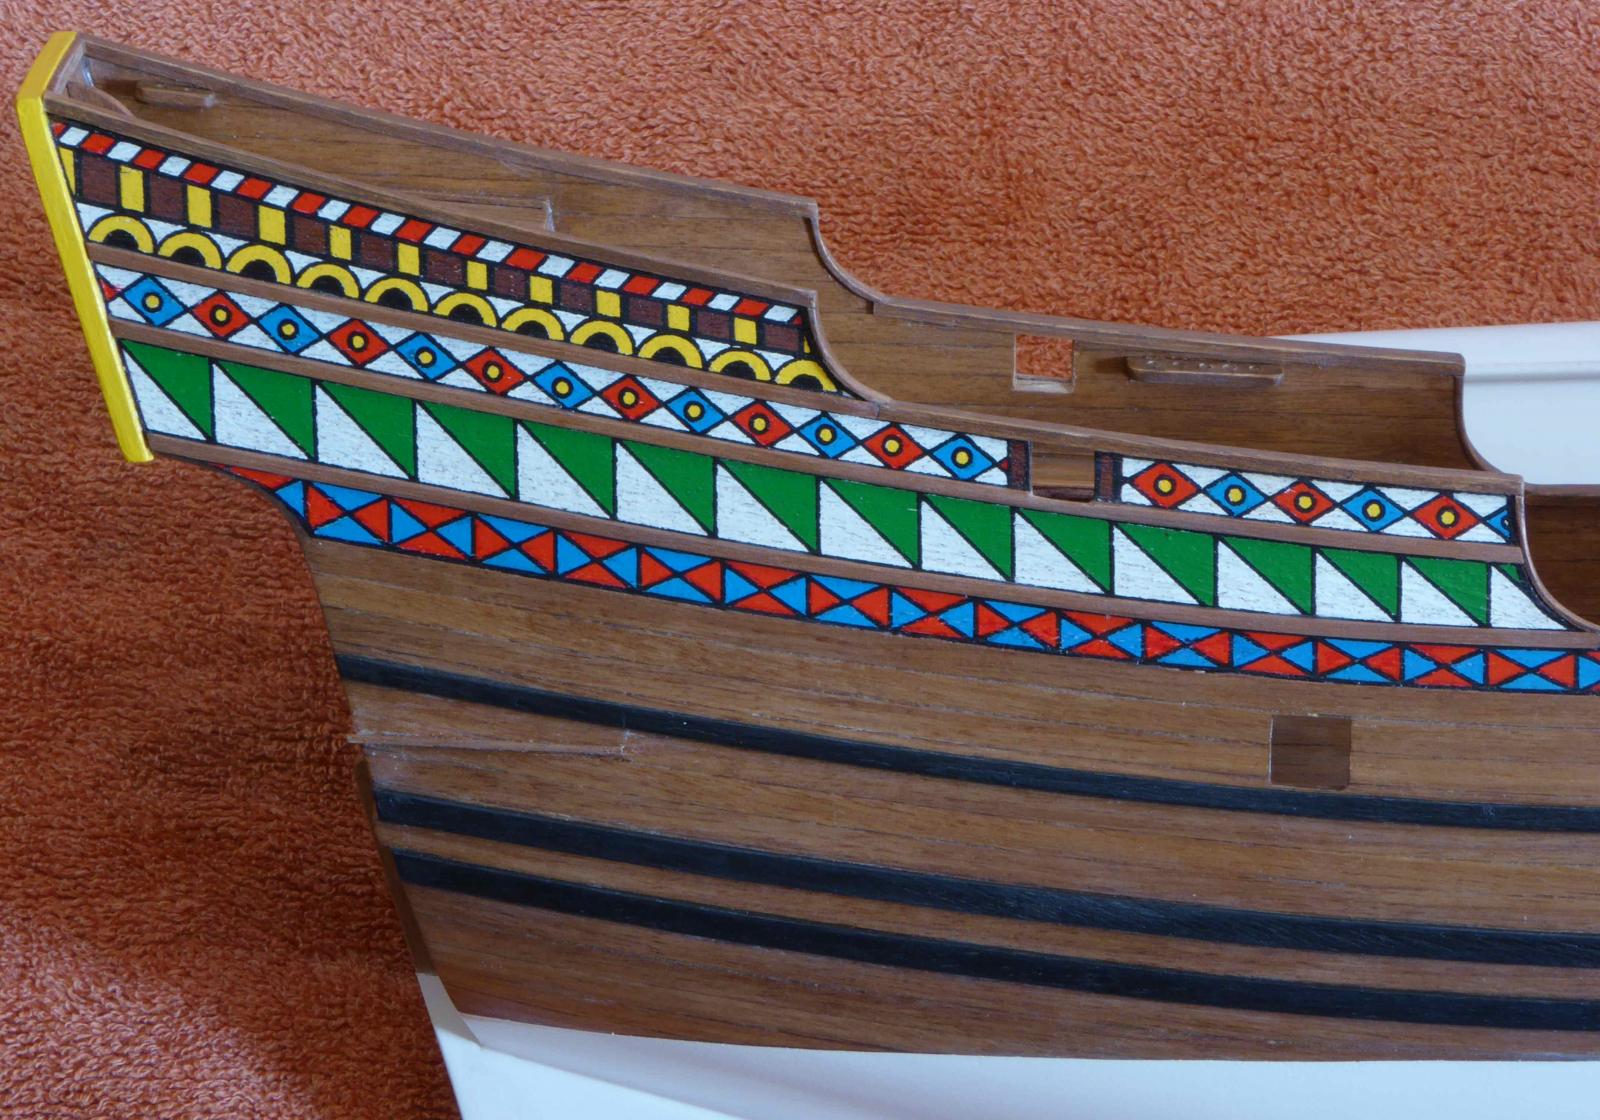
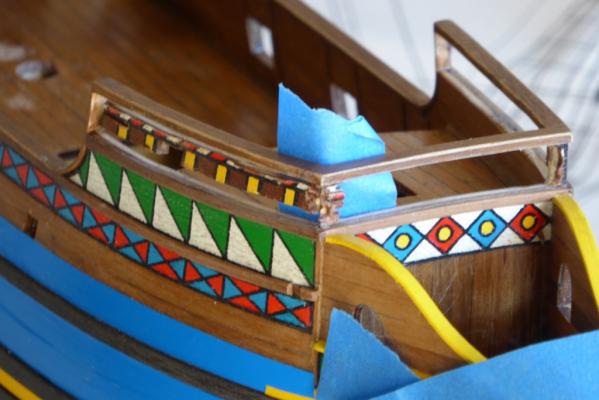
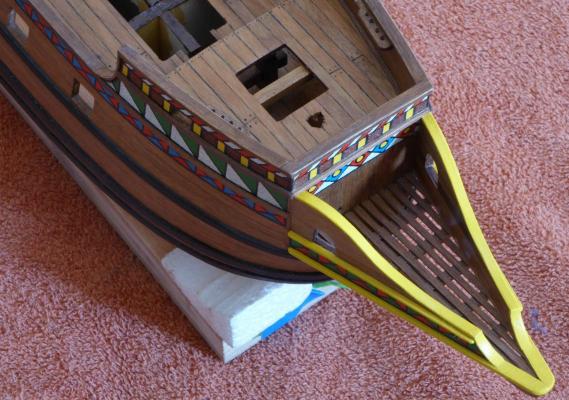
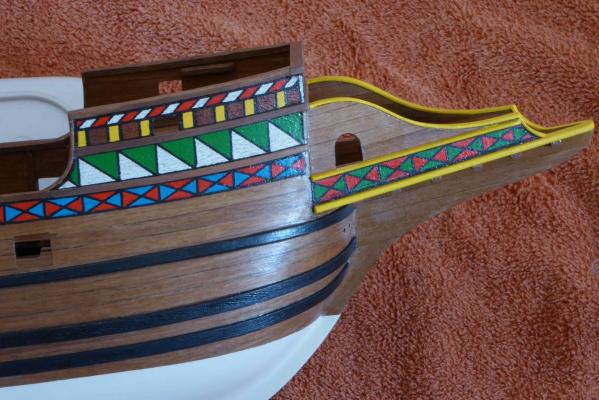
If you go back to my first post for this log and look at the pictures there, you will see what I have changed. The painted on railing stanchions just seemed kind of goofy to me, so I cut out the entire front section and the upper transom. I mainly used a Dremel cutoff tool to do it. I painted 2mm x 2mm strip matching yellow, and then cut individual stanchions from it. On some of them, I had to sand the ends at an angle, so they would fit appropriately. If you look at the rear upper sides, you will see that I didn't cut out that section of the painted on stanchions. Instead I just painted over it. The problem was that the front half of the poop deck was directly in the middle on the other side of that section. It's an obvious flaw with this kit. I couldn't see how to resolve it, so it would look decent, so I just painted it over. I may add some type of decoration there later. Another thing I didn't like was the black wales, and I wanted to add a little more pizzazz, so I changed that color, and added the same to all the railings, the dividing lengths between the decorations, and the areas on the rear that are surrounded by yellow. The color is bittersweet chocolate, a very dark brown, and I think it gives some nice contrast, and goes well with the yellow.


-
I decided to make some rather major changes...
-
That's impressive that you were able to keep them so straight and uniform. --Randy
-
Mike (Stuntflyer), I look forward to seeing your tops and other updates! msberkman, your San Francisco is looking very nice! --Randy
-
Mike, nice job on your grates! I did my tops. You'll have to check my log, as I can't seem to insert a link...
-
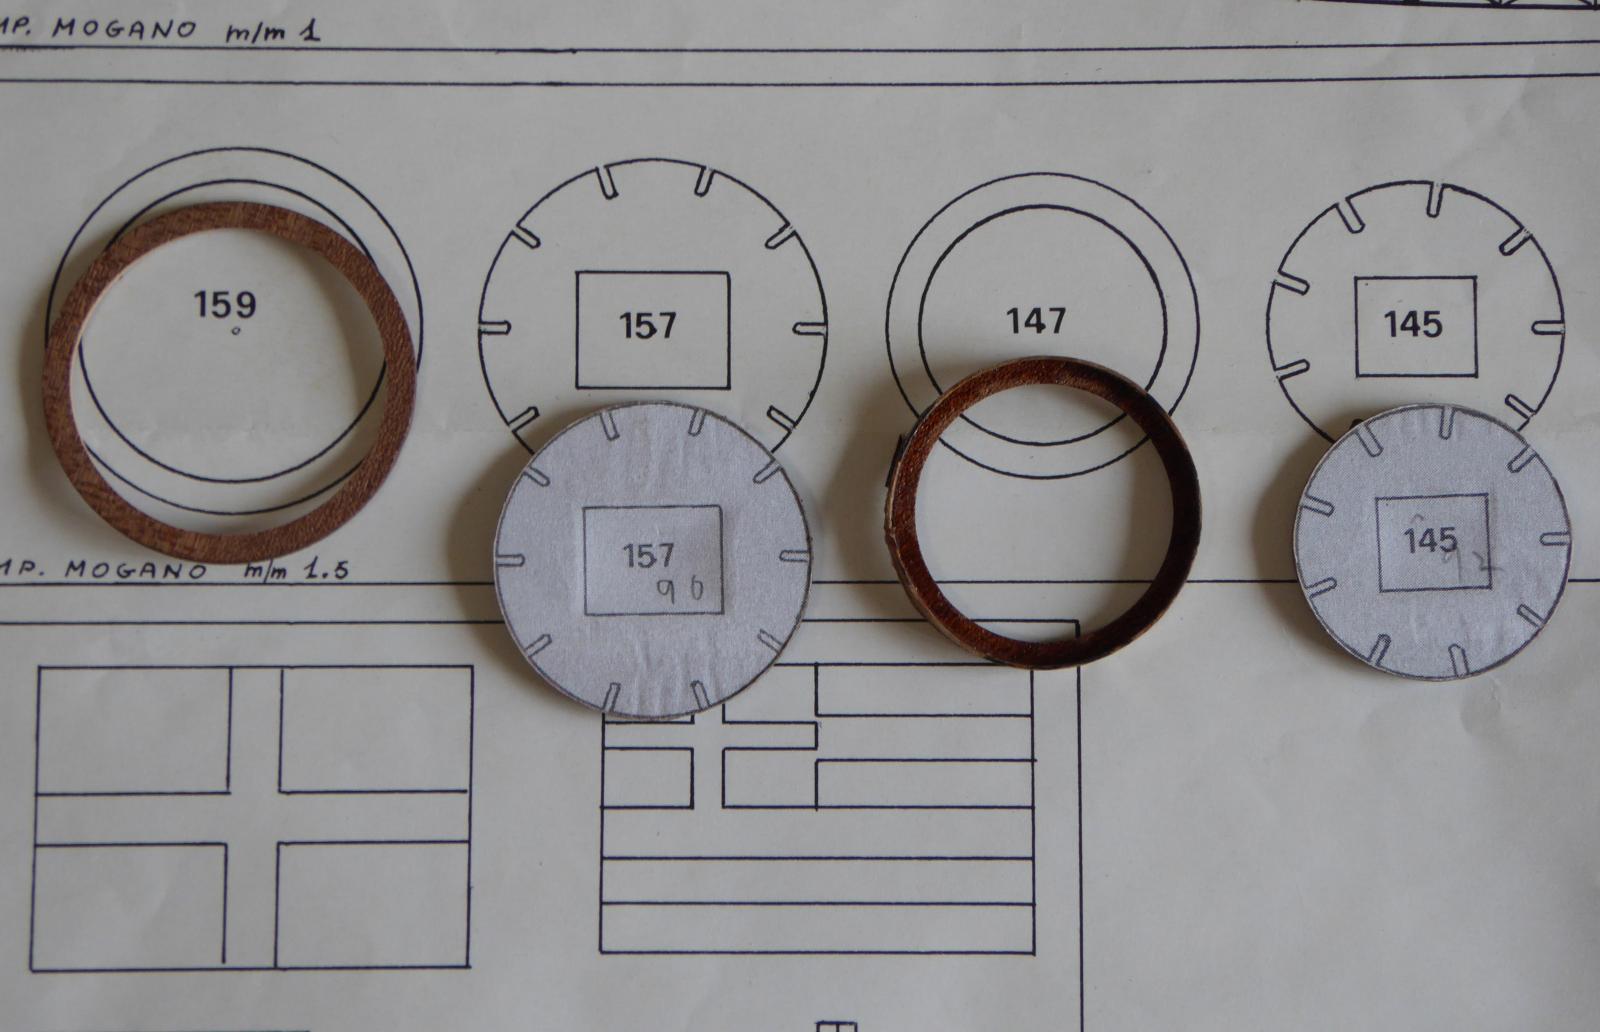
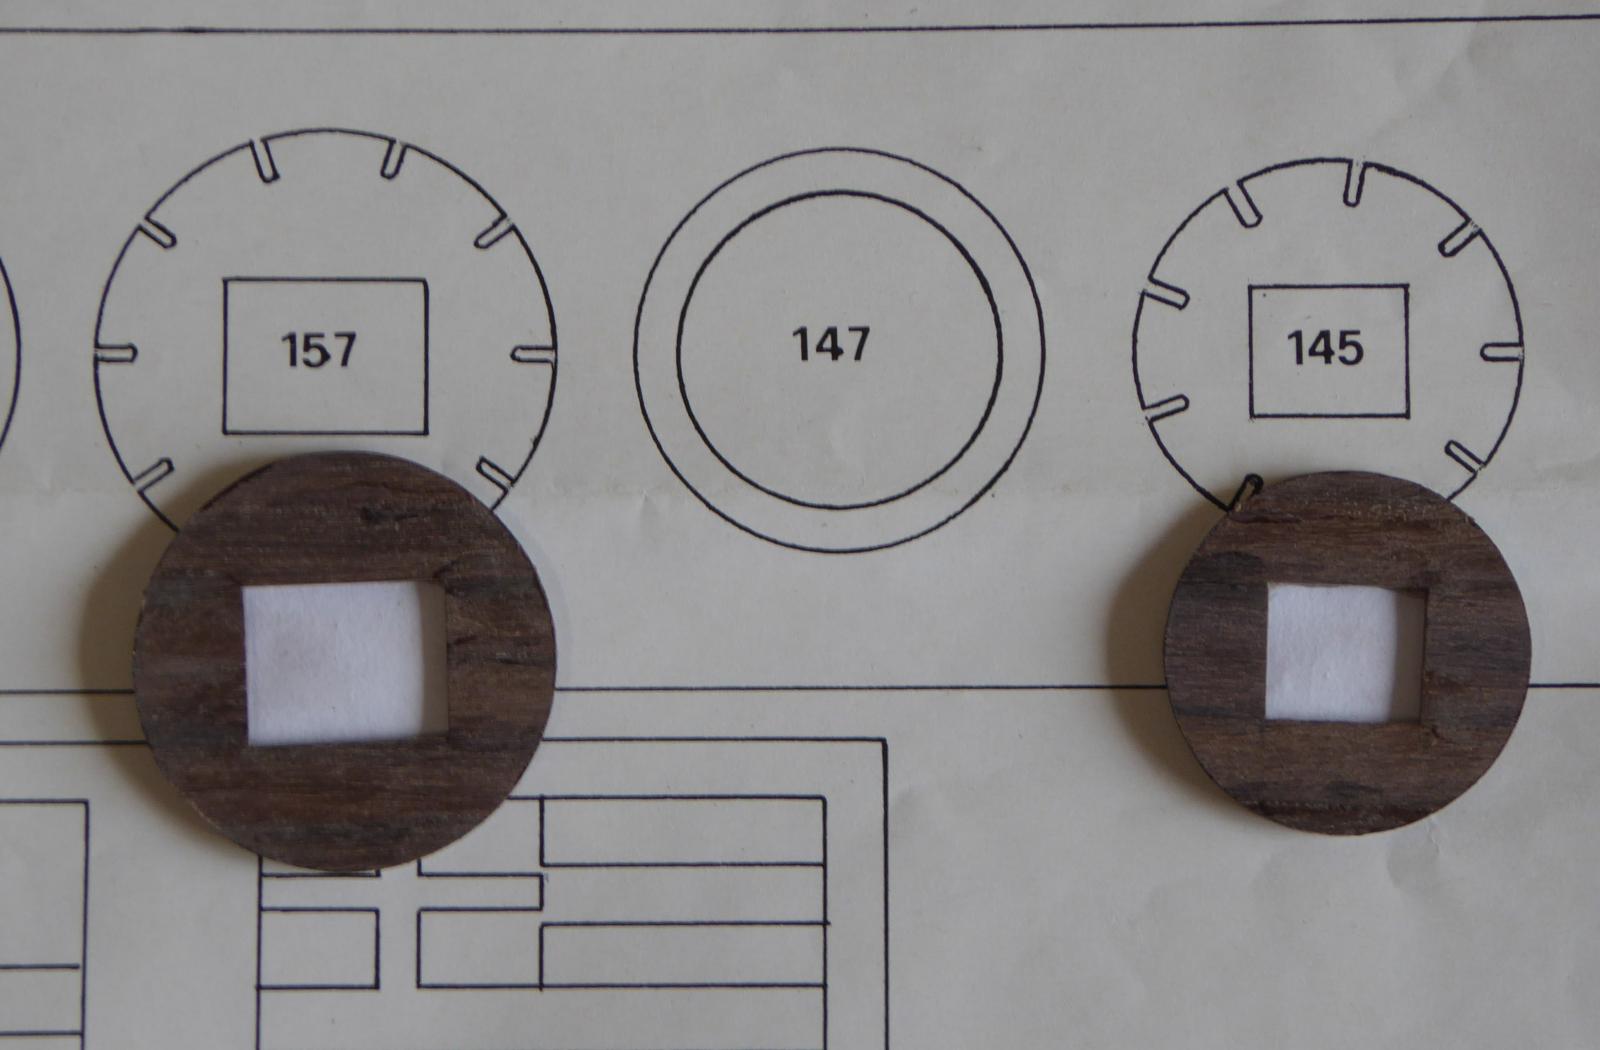
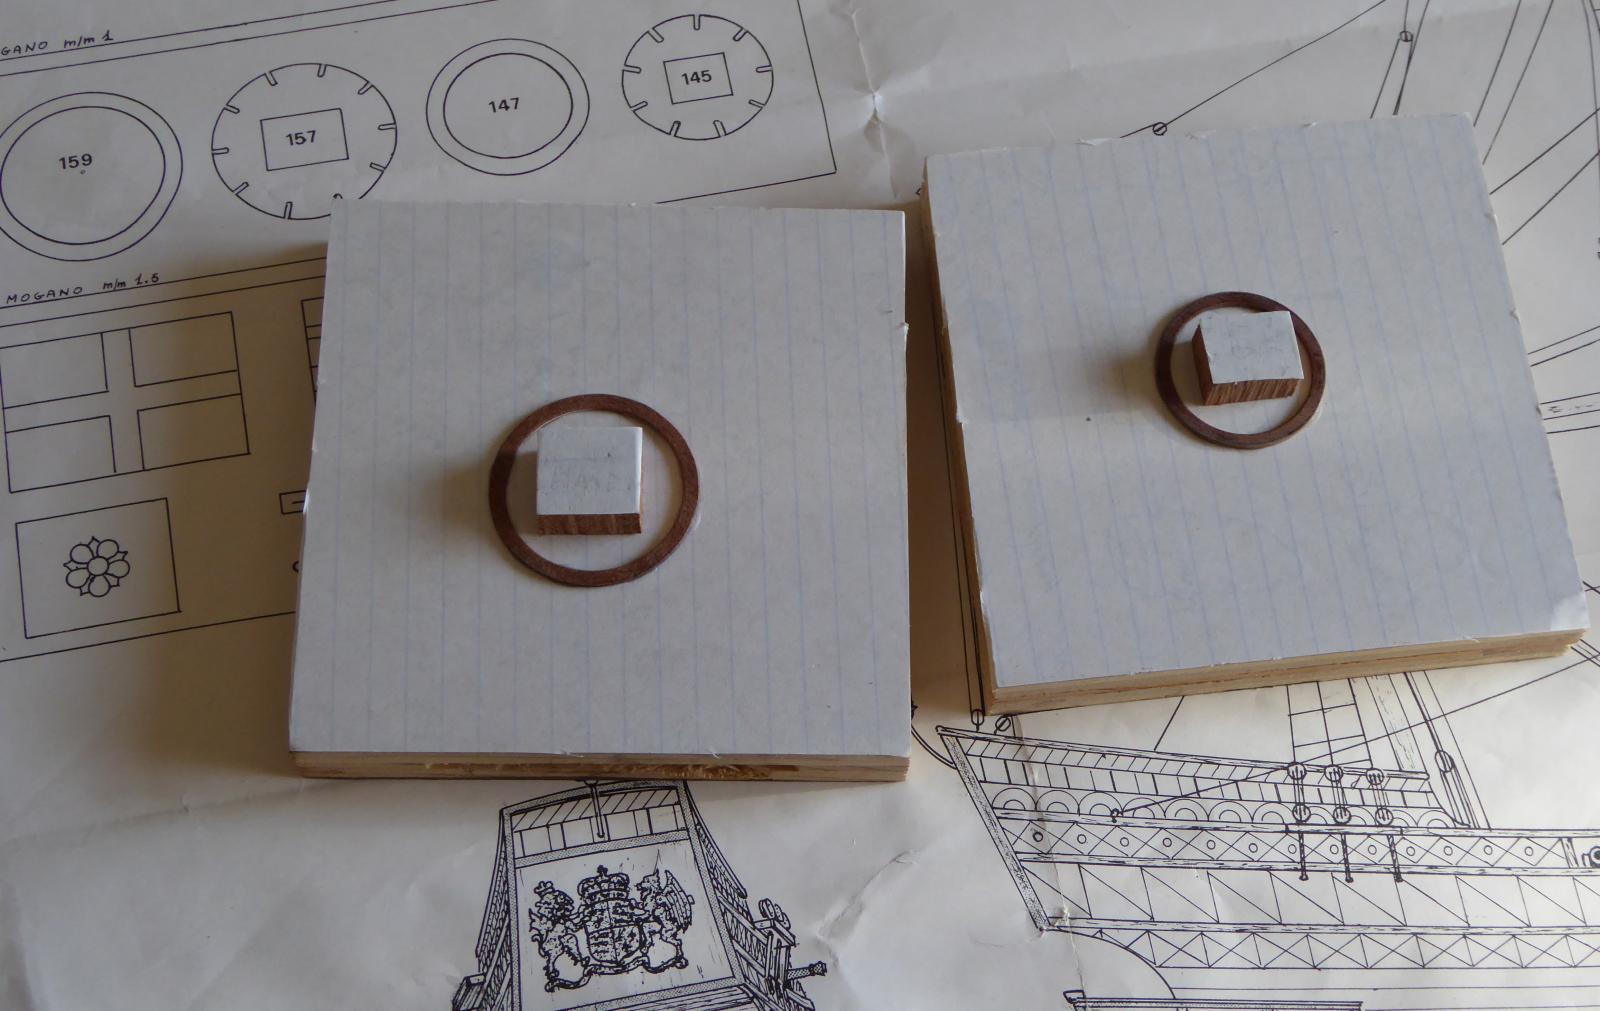
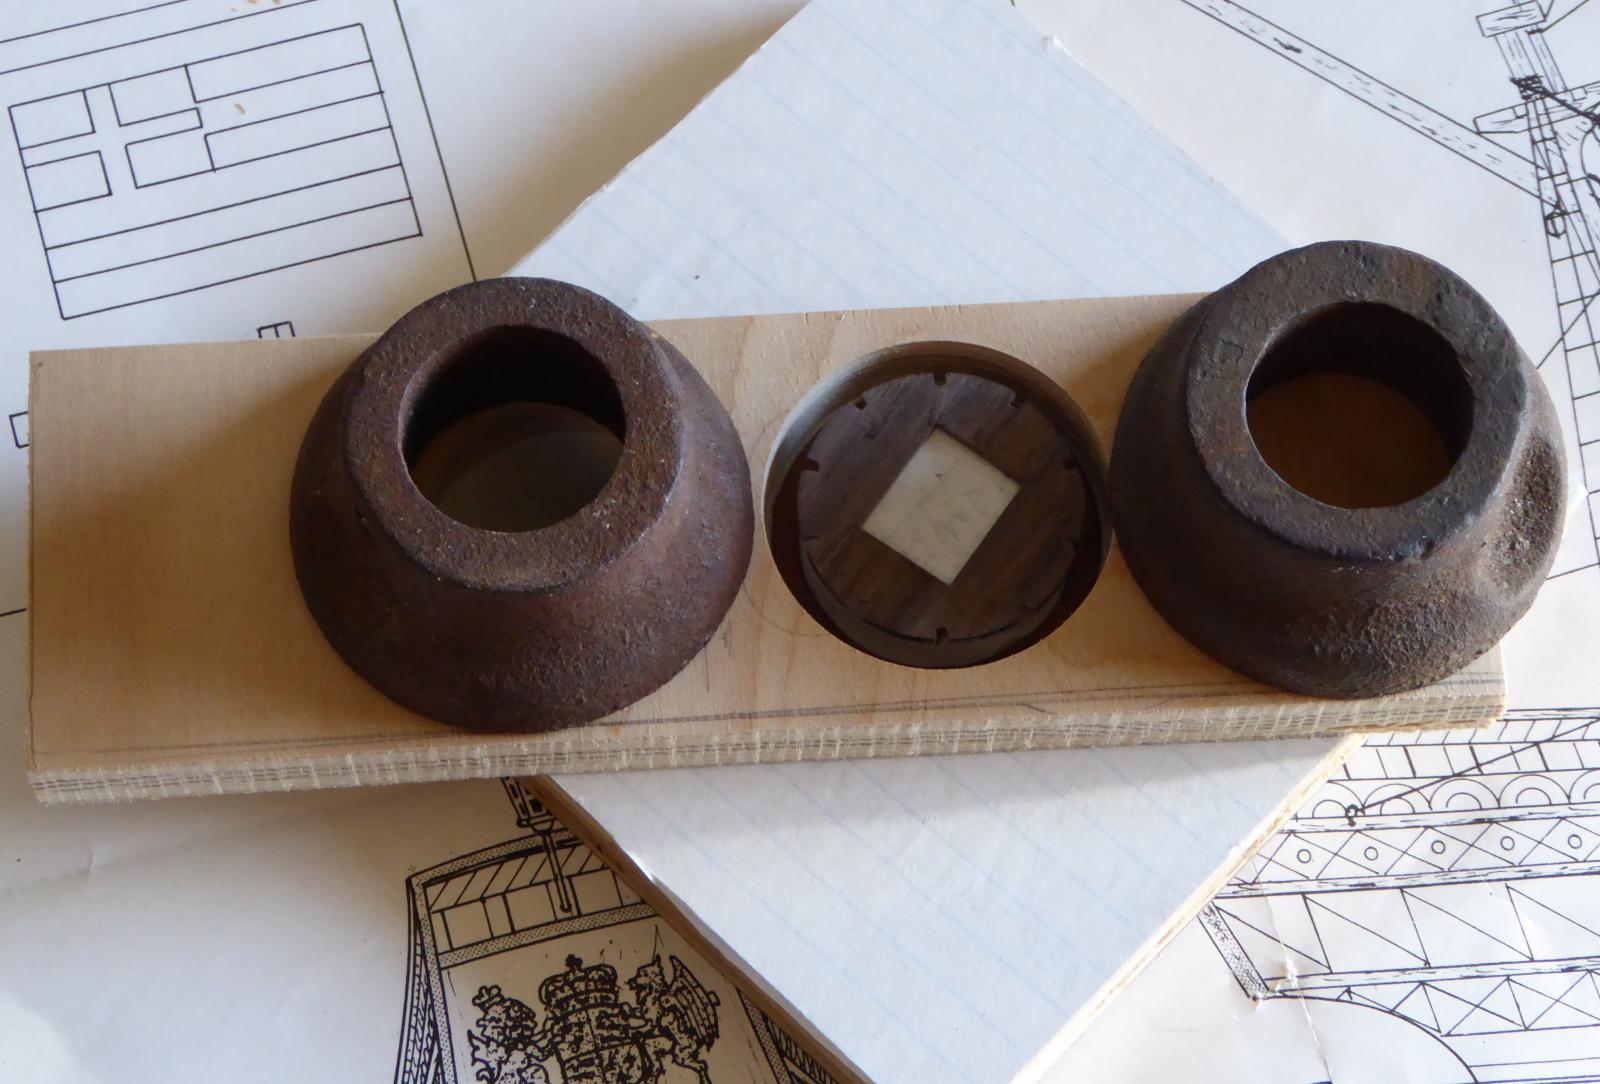
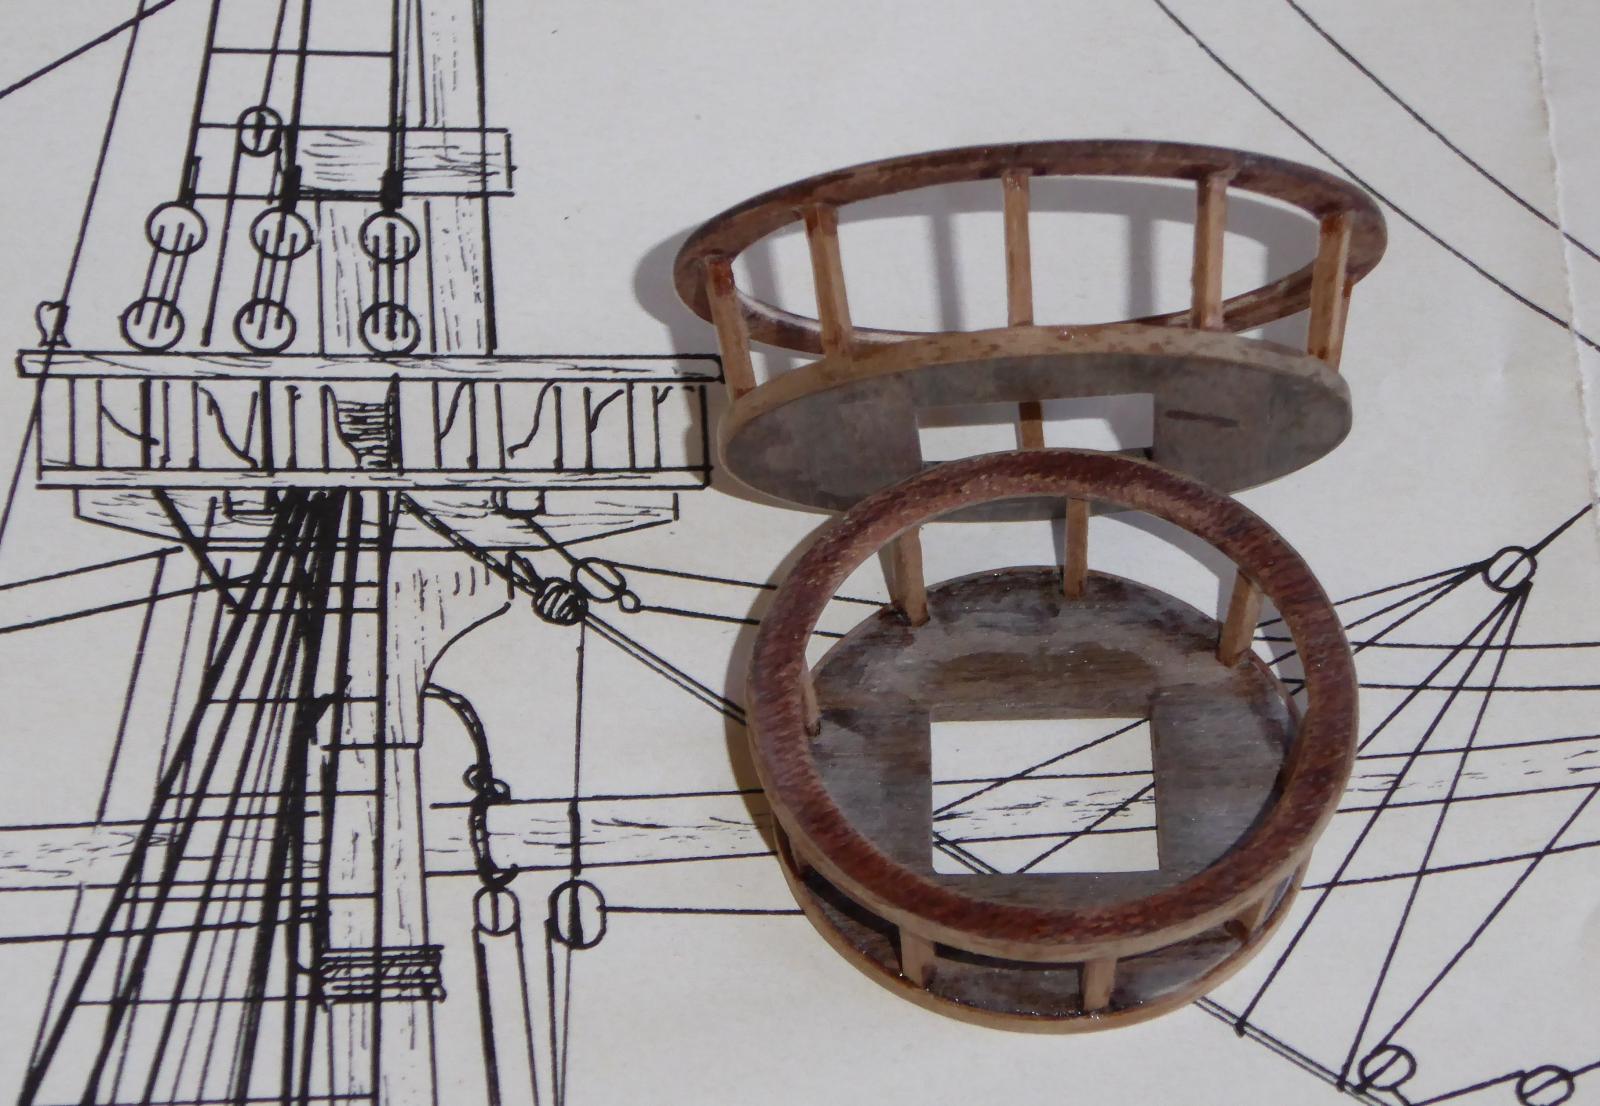
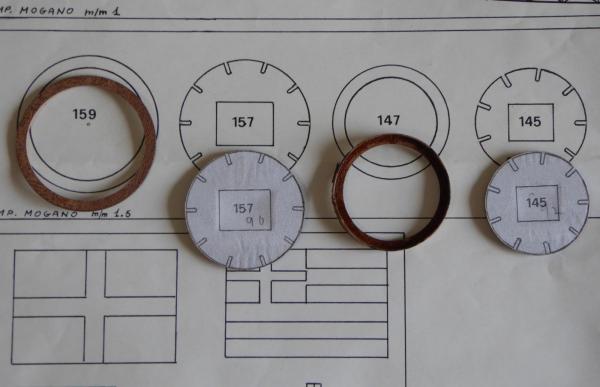
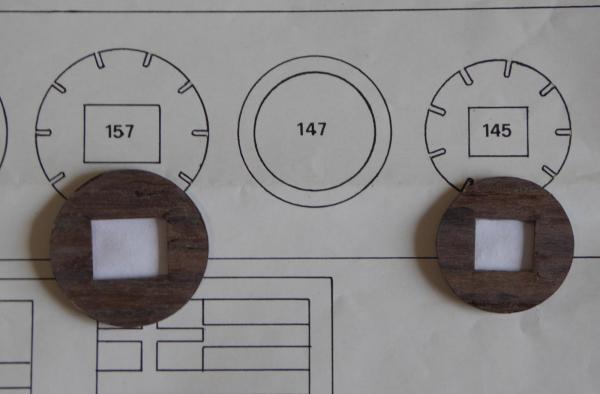
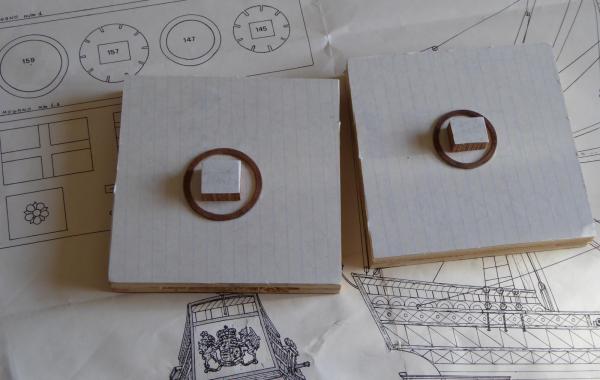
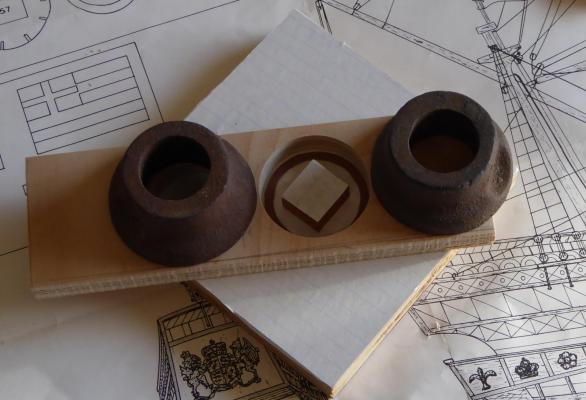
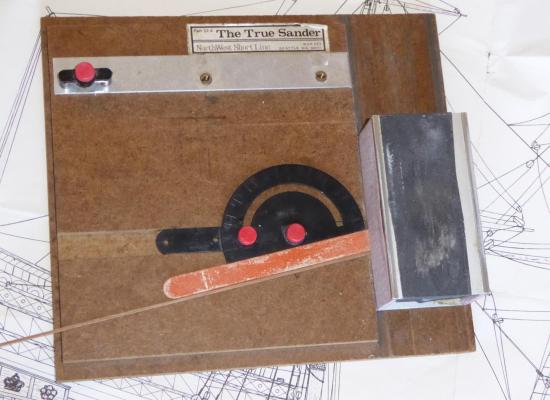
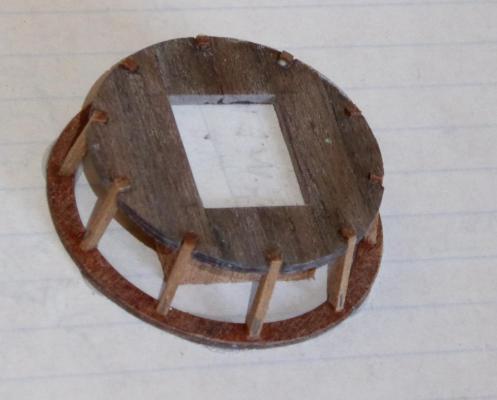
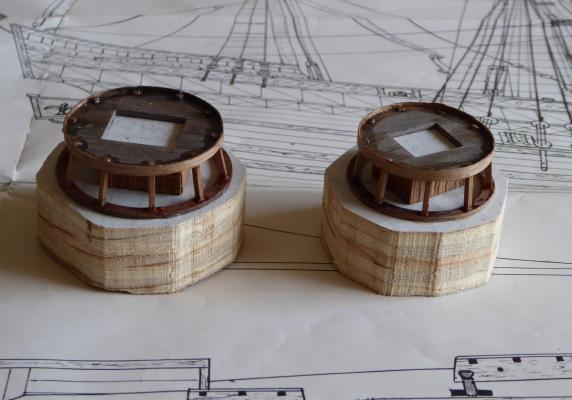
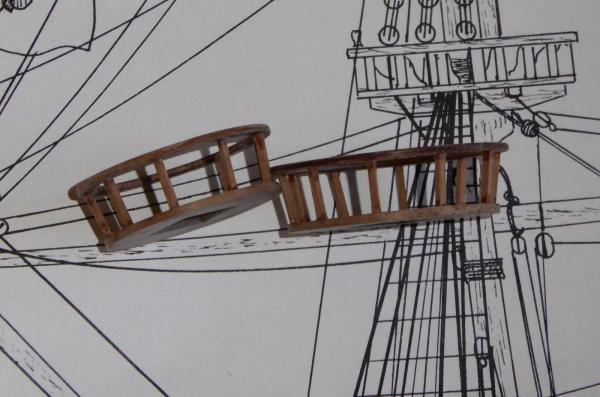
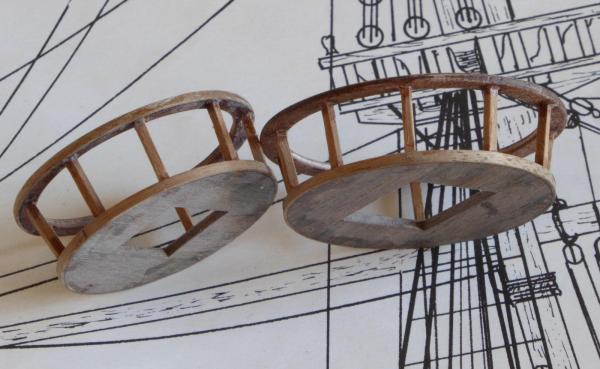
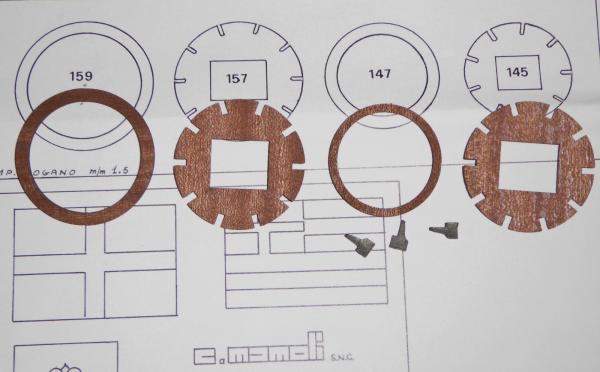
I completed the tops on this, making them mostly from scratch. I used the mahogany railing rings, but adjusted them some. The larger one, I reduced the interior width a bit with a spindle sander. For the smaller one, I increased the outer diameter by adding a strip of .05mm walnut, then sanded it smooth. Since these rings were going to be painted, I wasn't worried about the unmatching wood showing through. Next I redid the floors, using 1.5mm x 7mm strips glued together. I wanted the stanchions to have more of a slant from the railing to the floor, than the plans had, so I made the floors smaller. I did this by photocopying the plans to a smaller diameter and then gluing it to the glued together strips with white glue. Since the white glue is water soluble, I could easily remove it from the wood later. Though I reduced the overall size of the floor, I kept the rectangular hole the original size. Though I don't have any pictures that show it, I did this by narrowing a couple of the 1.5x7 strips to the proper size of the sides, and then glued the pieces together to form the rectangular hole. Then I could glue the photocopied floor plan to the glued strips. Now, I rounded the floors to the lines and cut the grooves, angling the grooves slightly for the stanchions. I then glued the rings to a piece of paper that was glued to a piece of plywood. This was also with a very small amount of white glue, so I could remove them later. I wanted the height of the railings to be a little higher than the plans showed, but not too much, so I cut a small block of wood that was the right height and glued it to the inside of the ring. I also glued a piece of paper to it. Then I used a forstner bit that was slightly bigger than each ring, and cut holes in a piece of wood that was about the same height as the tops. This would be used to keep the ring and floor centered. I put the piece of wood with the hole in it around the ring. Then with white glue, I attached the floors to the small blocks of wood, keeping it centered to the hole in the piece of wood. I made my stanchions from 1.5mm x 1.5mm walnut. With a True-Sander, I sanded each stanchion to the angle it sits on the railing. The emery board in the picture, is because I needed a spacer, otherwise my cut would have been over the miter slot. This time I made sure to use a waterproof glue when gluing them, and left them a little long, to be shaved off later. After that, I glued a strip of 0.5mm walnut to the bottom edge of the floor, to make it seem like the stanchions are embedded in the floor. Then I cut and filed the bottoms. I wet the paper, let it set a bit, and then carefully pried up the tops with a chisel blade. After some scrubbing with a sponge pad and some sanding, I was done. At some later date, I will paint them, so I'm not worried about the glue traces. --Randy


-
Thanks, I've been looking at Ilhan's log on this. His tops came out very nice, though a little larger scale. --Randy
-
Very nice job on the small parts! I look forward to seeing how you do your tops, as I'm debating what to do about the tops on my model. --Randy
-
Here's a new dilemma with this model. There are two tops, but the main problem seems to be with the mizzen mast top. Mamoli screwed up by supplying the same bottom piece that goes with the mainmast. Also, the top rail looks a lot narrower, compared to the drawing and the top rail for the main mast. They are also a little warped. Another issue is with the metal stanchions, or whatever they are called. What's weird is that they don't match what is on the box picture, or all but one of the drawings. In those pictures, they are wood and a different shape. On some of these items, it looks like I may have to redo them from scratch.
-
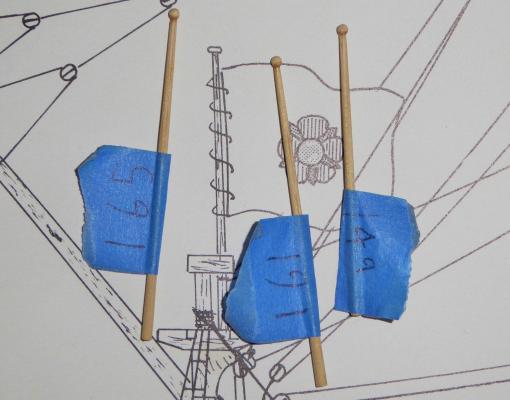
Here are the completed flagpoles. Ah, the picture shows that the one on the right needs some more rounding on top.
-
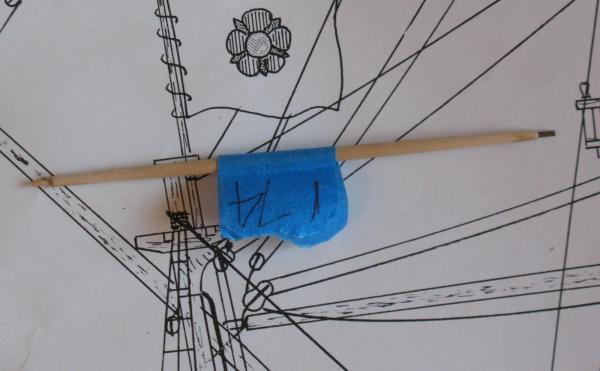
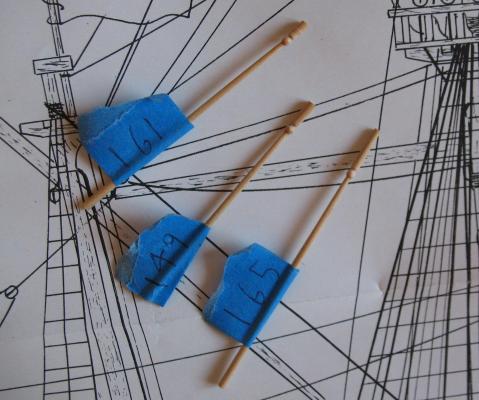
I've been jumping around on this, while waiting for some parts, and contemplating a couple issues. The first picture of the spar: While turning these, some of them get down to 1mm at the ends, like this one. Well, a couple broke off before I could finish, so I did this trick. I drilled out the end and inserted a 1mm walnut dowel. Since these are going to be painted, I wasn't worried about the color difference. The next picture shows the flag poles. I knew there was no way I was going to be able turn these as one piece, without ruining the end of the pole or the finial ball. These poles are only 60mm long and the little balls are 2mm diameter. So, I did the poles separately, and then did the little balls by some turning, filing, and sanding, while it was still attached to the sprue piece. Since the little balls were so small, I knew it would be impossible to glue them to the end of the poles and expect them to stick. So, with the sprue attached, I drilled and inserted a small piece of .015" brass rod between the two sections, and then glued them all together with CA. Now, I can cut off the sprue end, then do a final sanding to round them off. Randy
-
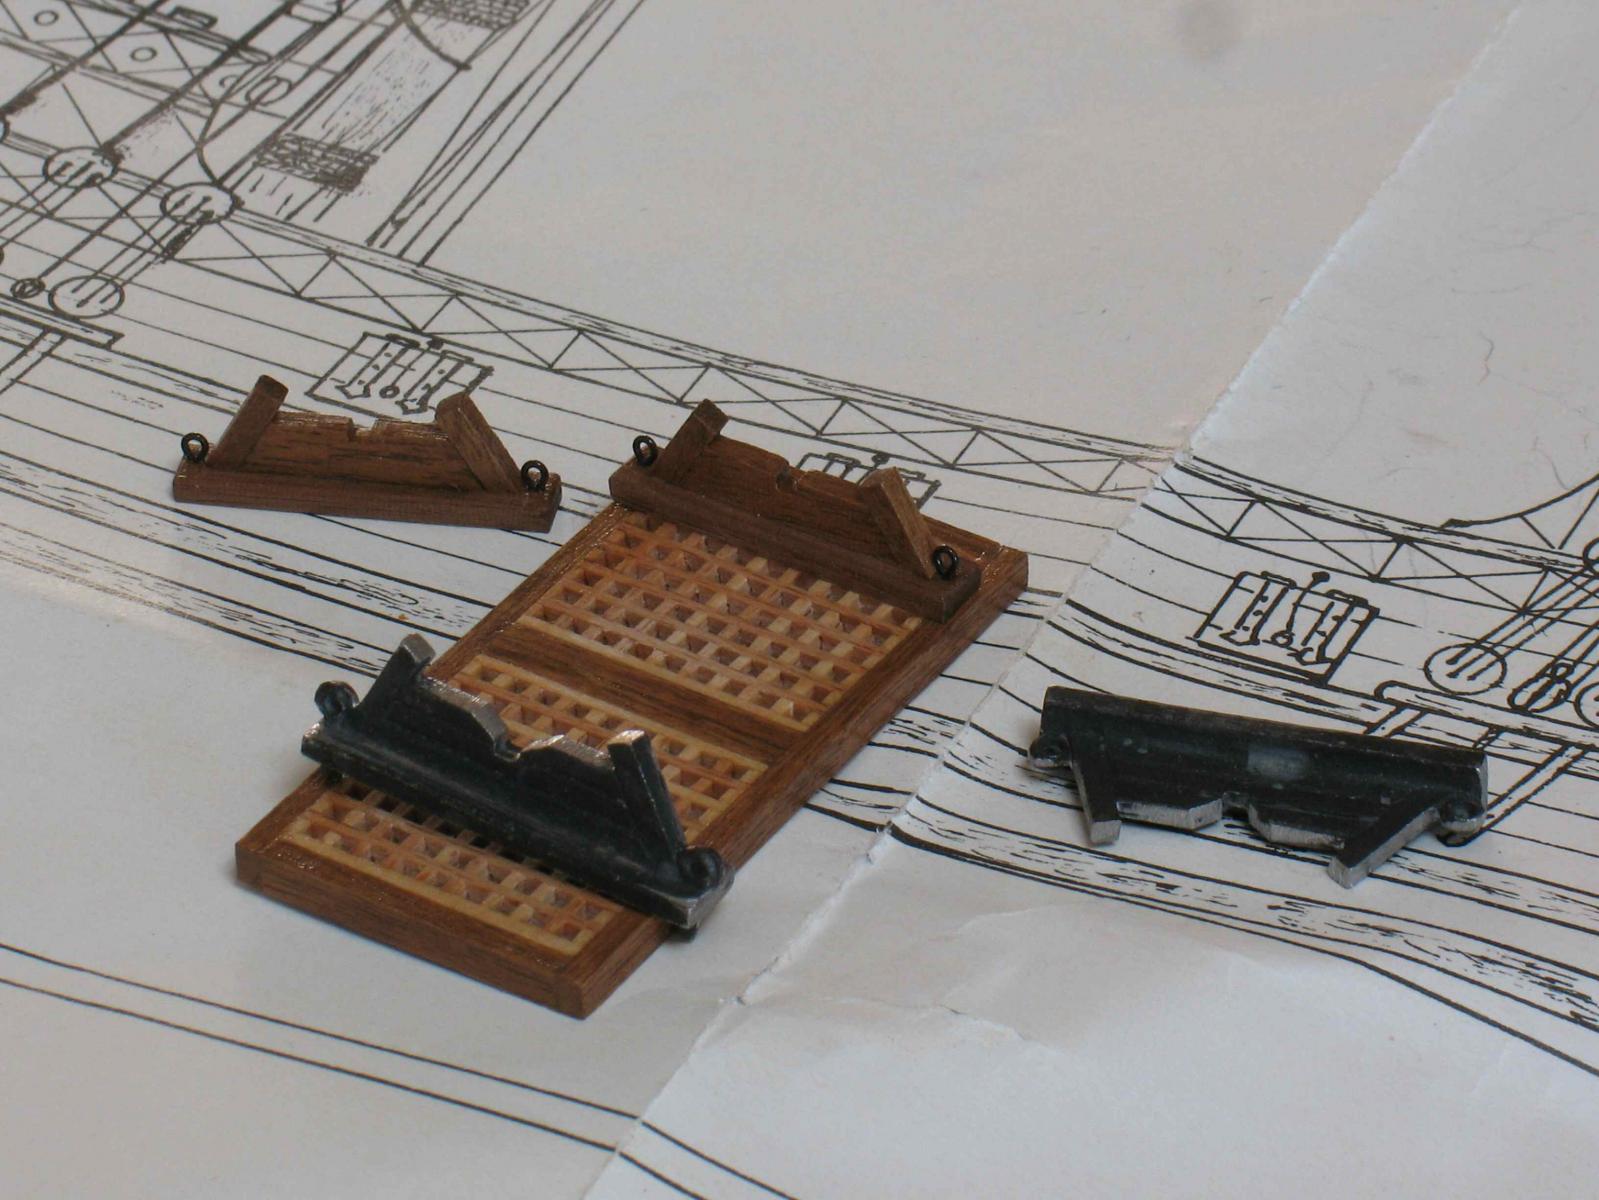
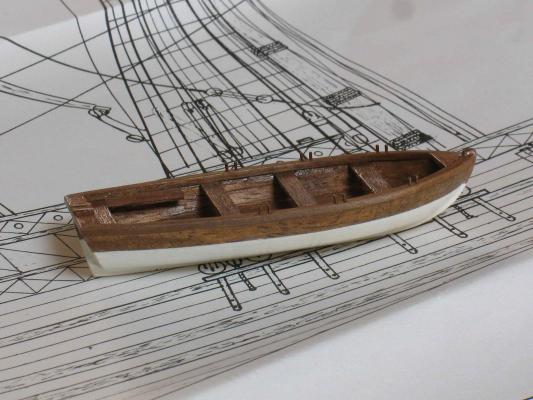
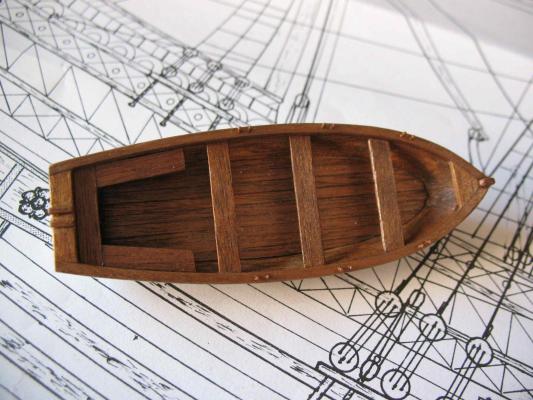
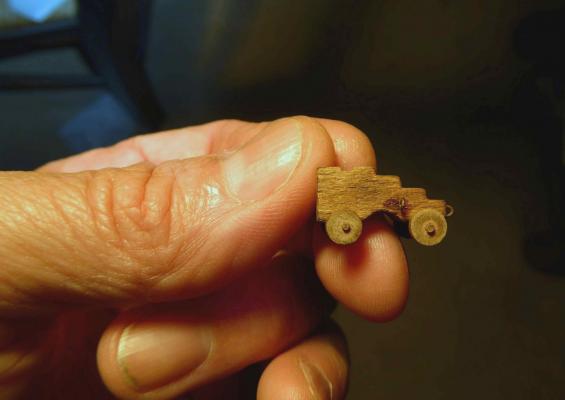
I built up the ship boat. Overall I think it looks pretty nice, though I could have added some interior ribs and done a better job on the floor. The boat in the kit was a solid piece, and although I thinned out the sides, I should have thinned out the bottom too, as it seems kind of shallow. For the oar lock pins(?) I used some brass rod and painted them. The kit storage brackets were metal, but they were too big, as I reduced the size of the grating it is supposed to go on top of, to create more space for the gun runout. So, I made some smaller ones from some strip and inserted a couple eyebolts.

-
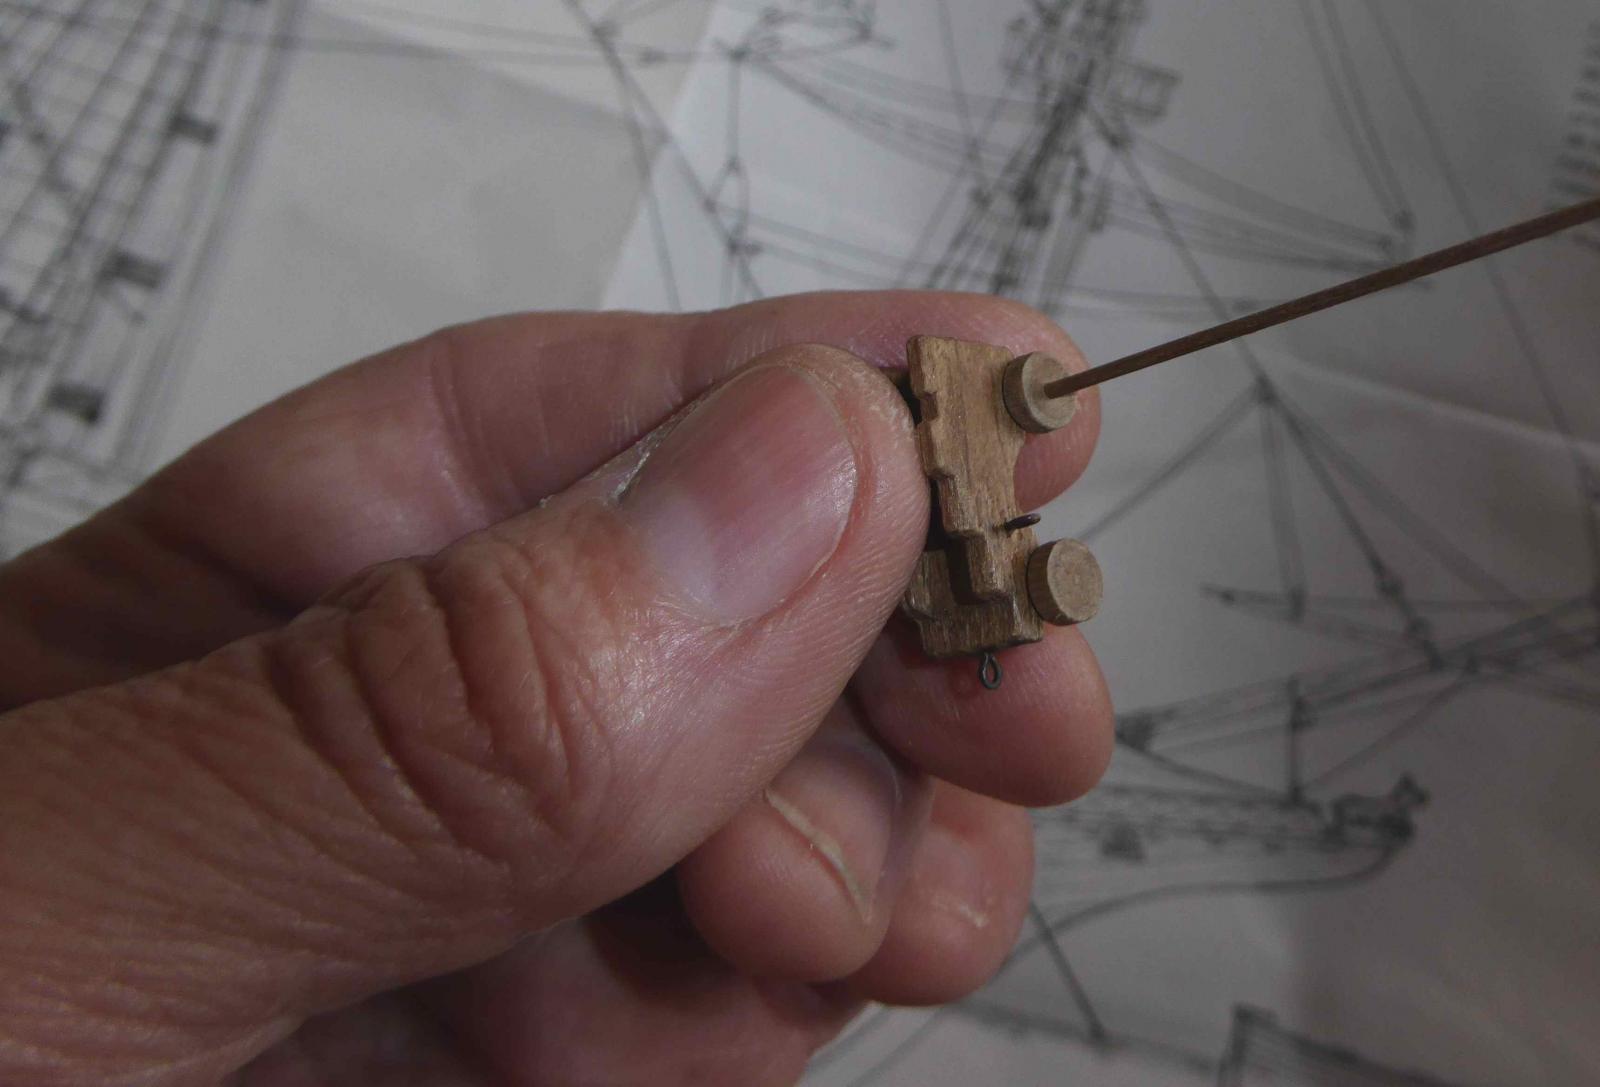
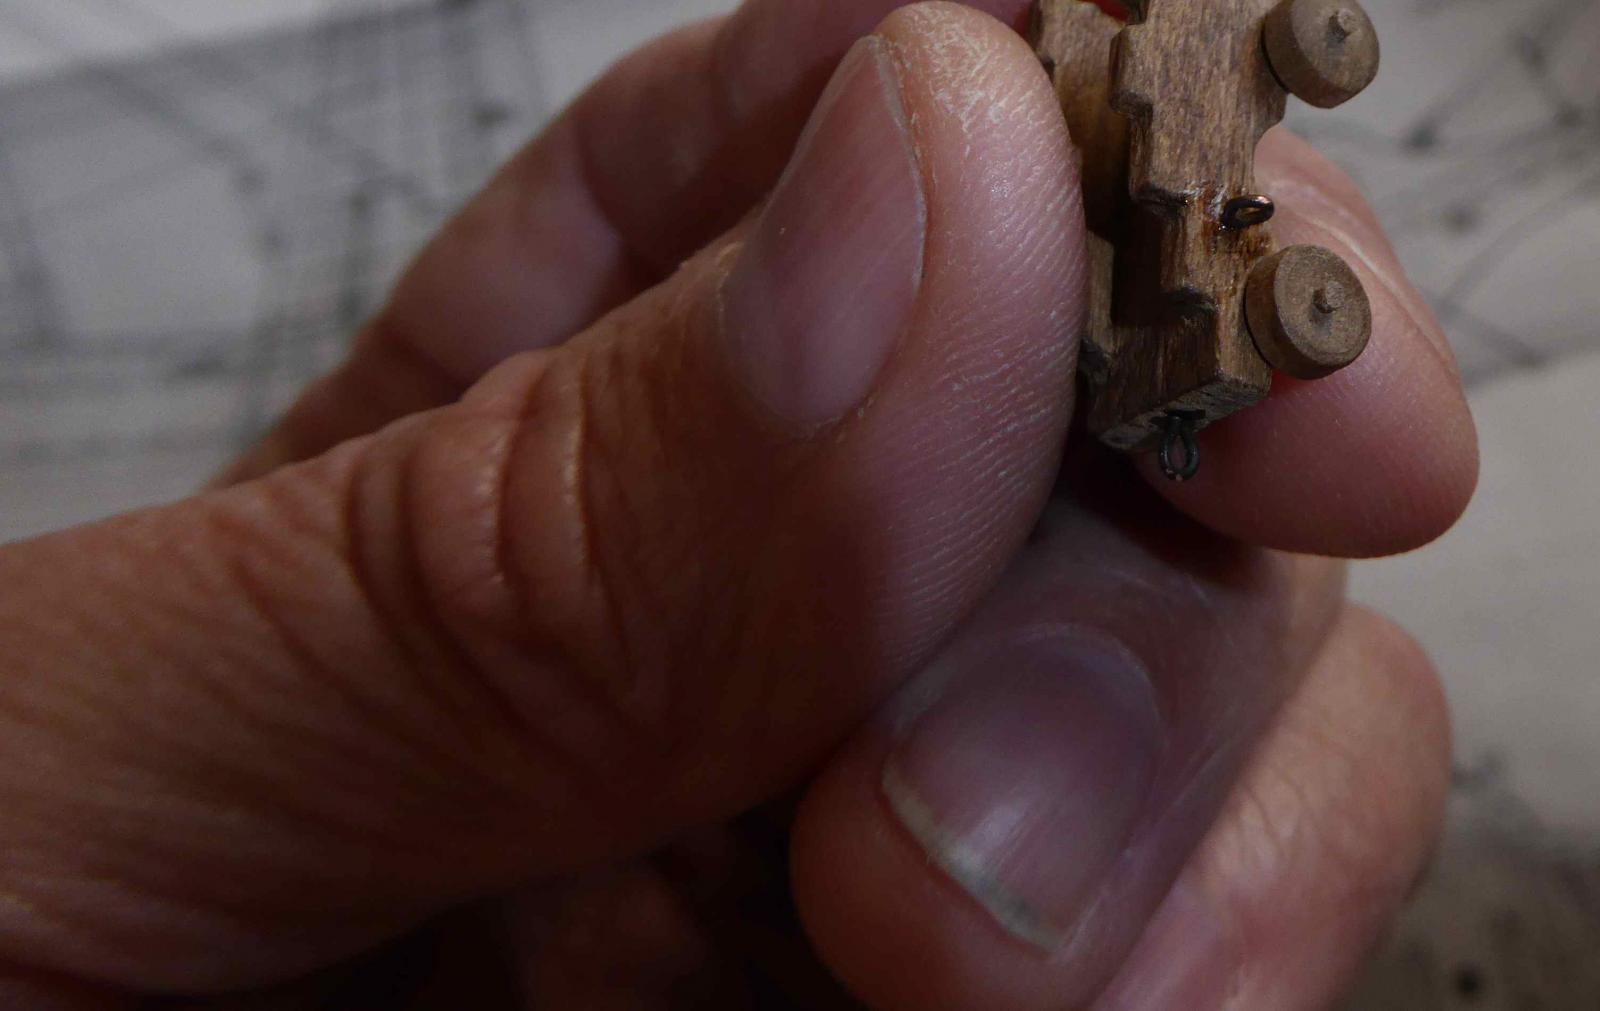
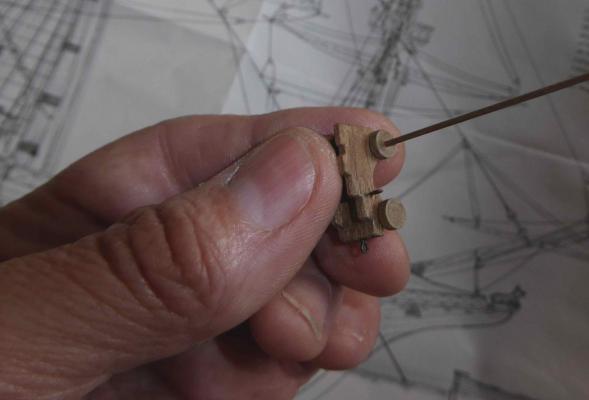
Here's something neat I did today. Some people may have done this before, but I hadn't seen it. The wheels for the gun carriage in the kit, come with one piece turned items. The axel is attached to the wheels as one piece, so none of the axel is sticking through the wheel, like real carriage wheels. To simulate that, I first used a pin to poke the center point in the wheel. Then I used a #70 drill bit and drilled a small hole, only a little over 1/32" deep. I made the hole larger with a #58 (or 1mm) drill bit. I pressed in a 1mm walnut dowel, then supported the dowel on a piece of wood and cut it off with a x-acto chisel blade. The dowel was a tight fit, so I didn't need to glue it. If it stuck out too far, I filed it down. This was surprisingly easy to do, and I think it makes the gun carriages look so much better.

-
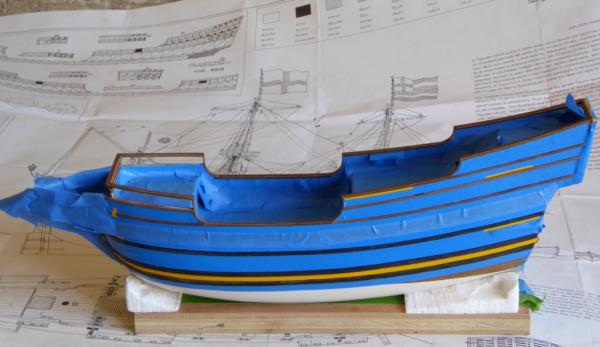
I wish I had planked the big mahogany area behind the crest casting on the transom. I was just following the plans, but I wonder why Mamoli did it this way with this kit.

-
One thing I noticed with the decorative strips is that there are little rectangles where unpainted mahogany is showing. It's like maybe you have the option of cutting them out, to mimic posts in a railing. It doesn't show cutting these out in the plans, so I didn't do it. It does seem odd not having open railings, but the replica of the Golden Hind in Brixham has the forcastle closed, and most of the poop deck, so I don't know.

-
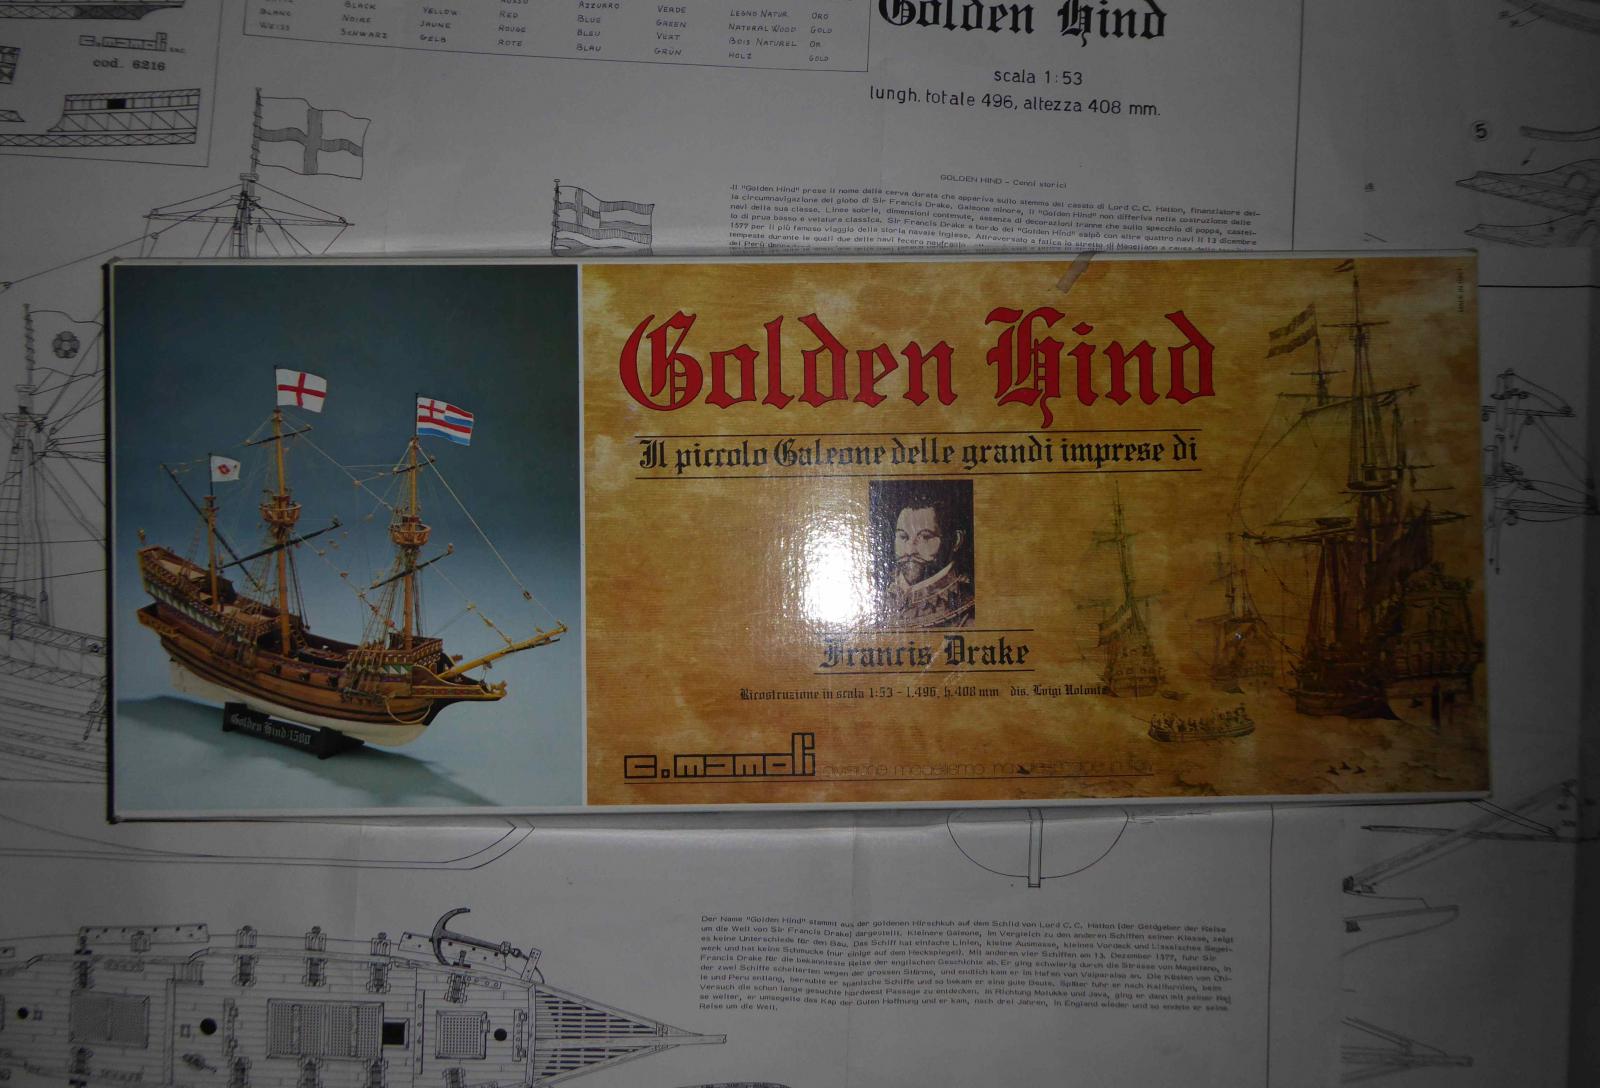
A little late with my log, but oh well. I've had this kit for about 10 years, and finally decided to get going on it. I've had a lot of experience building models, since I was a kid, but my best work has been HO model trains. I'd also say I'm an experienced woodworker, with mostly furniture type stuff. The Golden Hind is my second wood ship model built. The first was a Mini-Mamoli of the Pinta, which I extensively modified. I should post a few pictures of it someday. Anyway, after coming this far on it, there are a few things I wish I could have done better. One, I should have spent more time making sure all the frames and decks were square. If you look at the model at an angle it looks OK, but when you try to line things up, it's a little off. The waterline should have been a bit higher. Oh well, most people won't notice. For the deck planks, I used the tanganyka that came with the kit. Unfortunately, after applying some oil based polyurethane it's darker than I'd like. Maybe I should have tried a water based poly instead, or used a different wood like basswood, like most people do. I'll admit though, most of the decks of ship models I've seen, look too light to me. The biggest problem with my deck is that there is little contrast between the deck and the bulwarks. --Randy Mamoli was a little stingy with the wood in this kit. I was short on many of the different sizes, and some of the smaller sizes had quality issues. Although I used wood glue for large pieces, my glue of choice is usually CA. If you get the larger container it's not that expensive, it dries fast, it can be used as a filler, and sands well. Also, if you get a little messy with it, it's OK since it has ambering properties like oil based poly, so they go well together. A wood glue like Titebond can cause a cloudy finish, unless it is removed to bare wood. When I need a slow setting glue, or something I may need to reposition, I'll use Aleene's tacky glue, acrylic caulk, or CA gel. CA is also good for hardening brittle edges, like the decorative mahogany pieces in this kit. What I did to keep from ruining them while cutting them out from the sheet, was first to spray on some clear finish to protect the paint. Then with an x-acto knife, I cut them to about 1/32 to the edge, applied CA to the edges, then sanded the rest of the way to the lines. Then I added a little more CA to the edges, to keep them from splintering. One thing I've wondered with this kit, is it really 1:53 scale? To me, it seems a little smaller, like about 1:64 or so. I say this because of the door heights, steps, dingy, and just the height of the cap rails. The important thing though, is that most of the small pieces seem proportional to the model, so I'm fine whether the scale is right or not.