HOLIDAY DONATION DRIVE - SUPPORT MSW - DO YOUR PART TO KEEP THIS GREAT FORUM GOING! (Only 20 donations so far - C'mon guys!)
×


rschissler
-
Posts
94 -
Joined
-
Last visited
Content Type
Profiles
Forums
Gallery
Events
Everything posted by rschissler
-
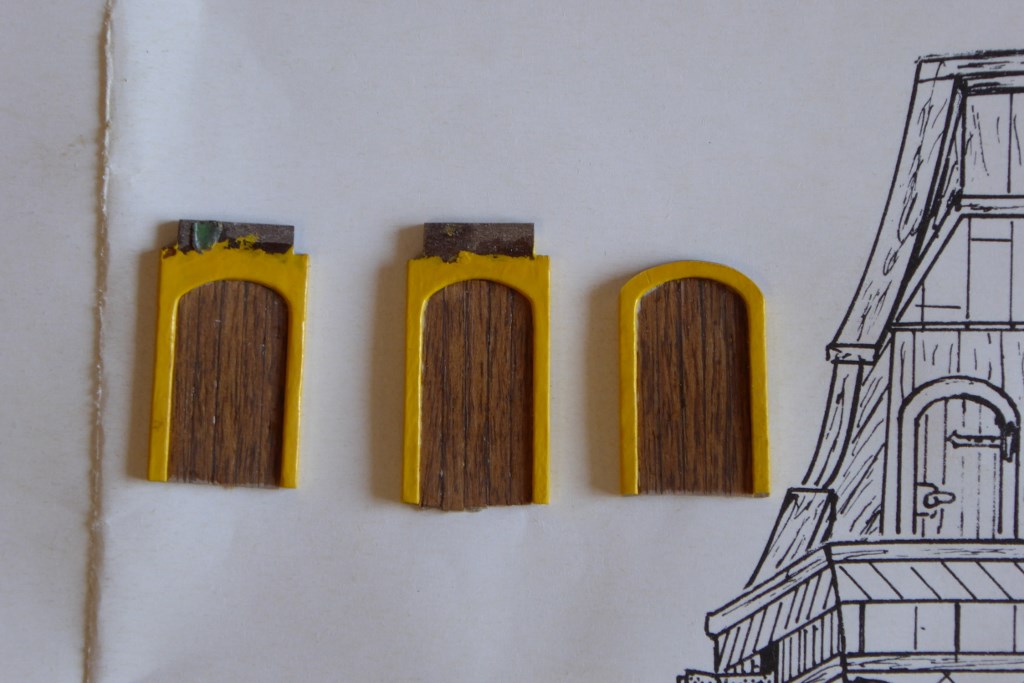
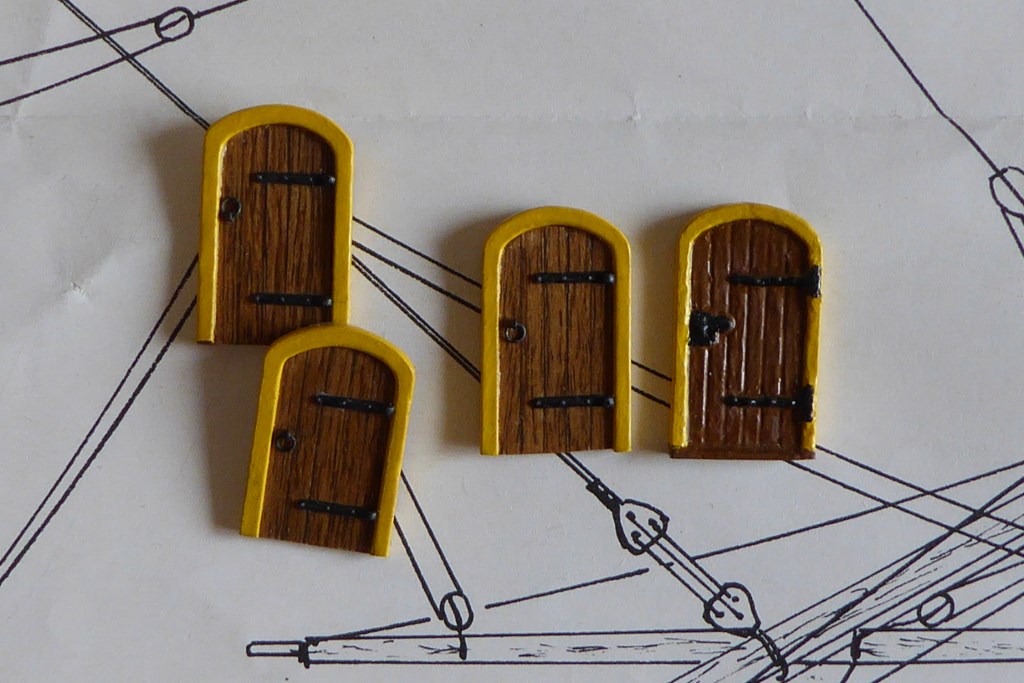
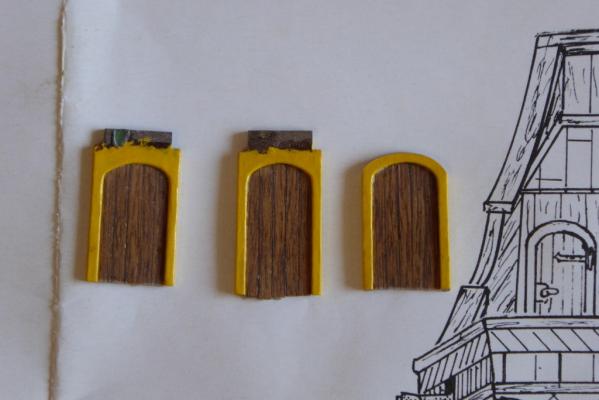
Another thing I just changed were the three doors. The kit came with metal castings for these, and no matter how much time I spent painting them, I always thought they looked crude and sloppy. So, I pried the glued items off the model and made new ones from scratch. The first and last pictures show the metal doors for comparison. I started with 1.5mm x 1.5mm posts and glued them to small pieces of 1.5mm x 7mm strip. I did it this way because I knew it would be impossible to bend wood that extreme of a curve. This made the outer frame. I only cut and filed the inner curve of the frame at this time, because I thought it would break from being so fragile. I painted the frame with the same yellow paint I used on the ship trim. For the door itself, I glued strips of 1mm x 2mm strip together. I finished the doors by staining and then applying some clear filler to fill the ugly gaps. I then filed them to fit the frames. Then I glued them to the frames, filed off the outer curve and painted that. For the hinges I used some HO scale Grandt Line hinges, and modified them a bit. For the door handle, I made from scratch with .012" brass wire. The bottom of the three doors is slightly different. One in shorter, and one has to be at an angle somewhat to match the deck. The door size reinforces my thoughts that that the listed scale of 1:53 for this kit, can't be right. It has to be more like 1:64 or smaller.


-
OK, I have a question. Is your bowsprit and the yard for the sail not tapered?
- 80 replies
-
- 1
-

-
- mayflower
- constructo
- (and 2 more)
-
Ciaran: I noticed this too with the chainplates, as I have with a few other items from the kit--drawings and instructions not matching items in the kit. Anyway, I've decided to make my own chainplates, since I think the kit ones are too bulky and odd. I'll detail at some date. Also, since I'm going to use triangular deadeyes, the round link in the kit won't work, so I'll have to make my own with that too. Randy
-
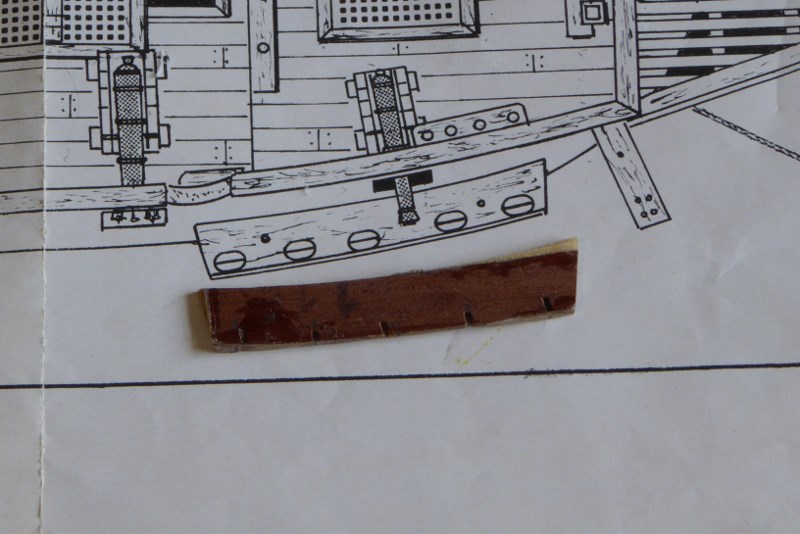
I made the channels. There were premade channels in the kit, made from mahogany, but I thought they were a little too thin at 1.5mm. Instead I made my own from 2mm thick walnut. You can see where I used one of the stock channels as a template, but added extra wood to fit the curve of the hull, and also to make the outer profile straighter, but still allowing a bit of a curve to the edge. I also drilled holes to accept cut lengths of steel nails, to give them some strength and stability. I also drilled mating holes in the wales, making sure not to drill clear though the hull in the areas that would show though the inner bulwarks. I then used epoxy to glue them in place, and painted them to match the wales. You can also see the slots I cut in the sides of the channels, so the deadeyes would have the proper angles to the mast.
-
Have you tried one of those plank benders that is basically a soldering iron with a wide round head, that you apply to a wood curve, after the plank has been soaked in water for a bit? The one I have works pretty well. Model Expo has one. Before I got it, I tried the soak and microwave method, with poor results. Like this: http://www.modelexpo-online.com/product.asp?ITEMNO=MS7205
-
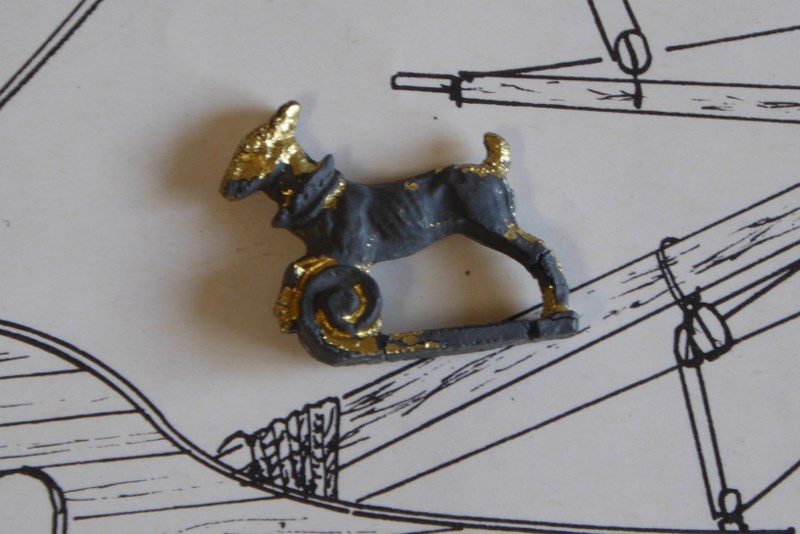
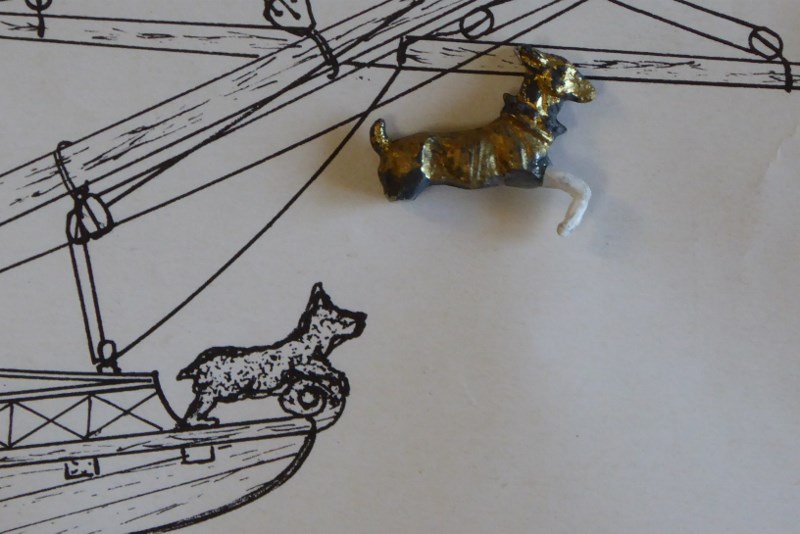
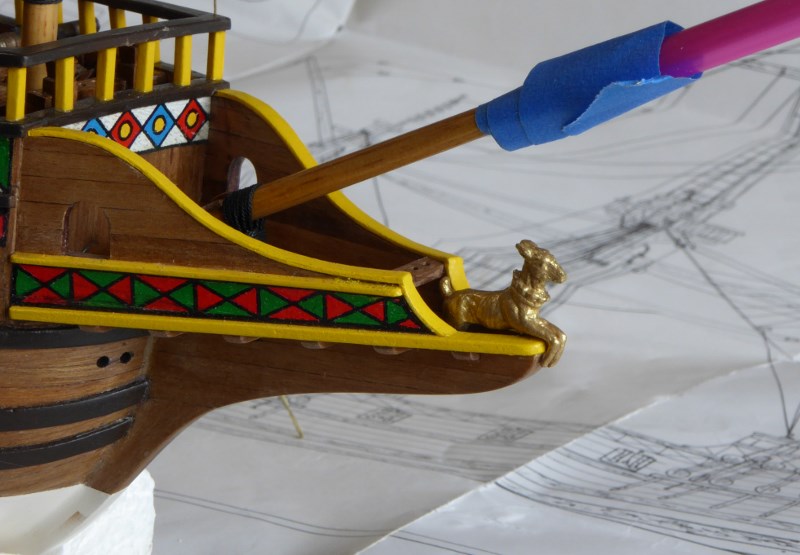
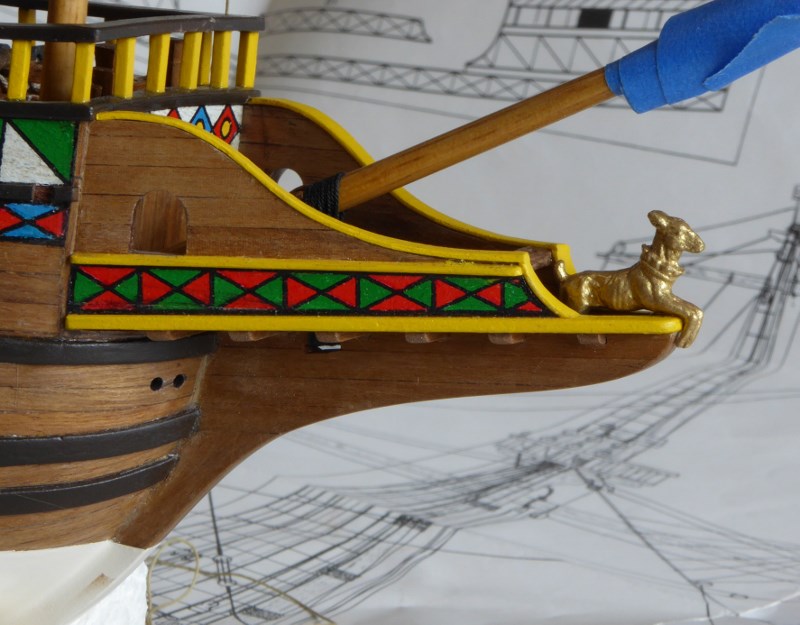
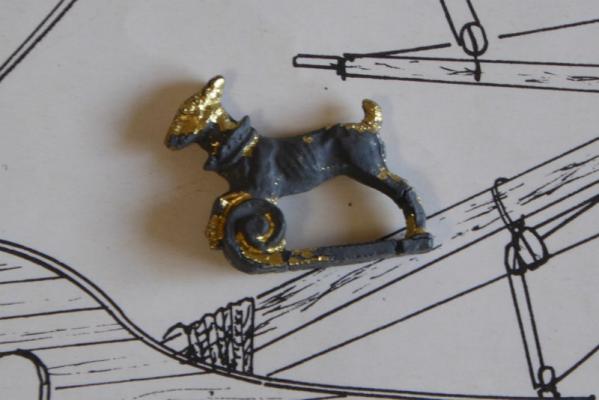
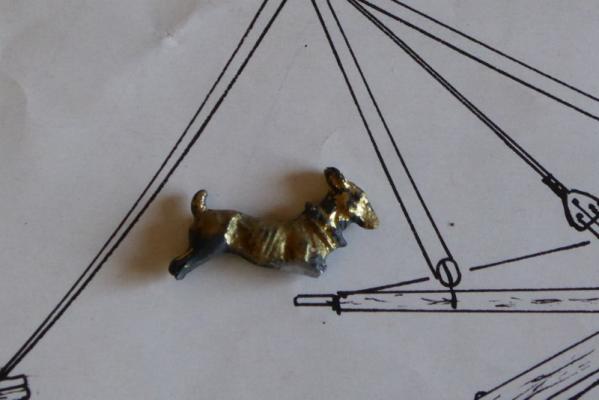
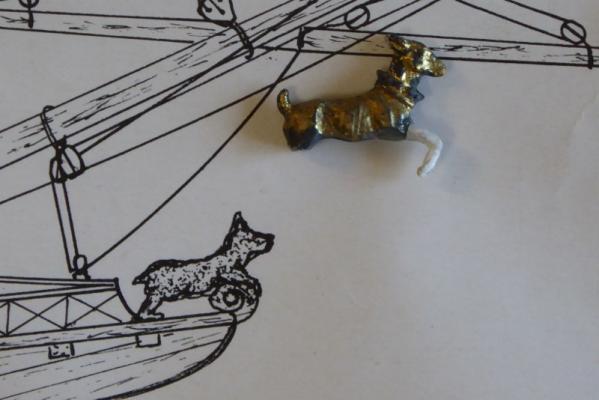
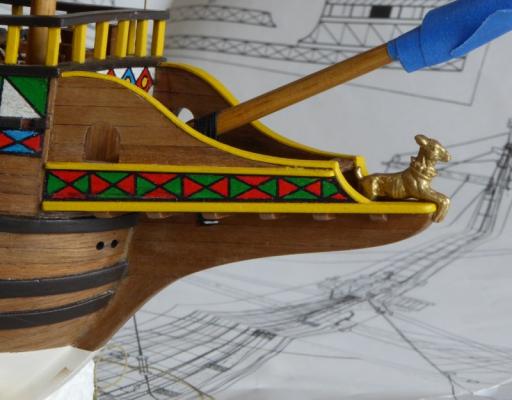
Another dilemma I had was what to do about (literally) the golden hind? Isn't it a deer of sorts? A lot of the paint was off of it and it had a very large base attached to it. I thought it would look sloppy to put it up there like the plans had it (maybe looking a little too dramatic as well?), so I though to at least cut off the base. However, the metal was very hard and brittle, and I ended up breaking off both the front and back legs in the process. The broken pieces seemed too difficult to try and fix, while still grinding off more of the excess. For the front legs, I got the idea to use the legs from some HO scale figures I had. I modified them and glued them on with epoxy. Also, I ground down the rear legs, so that I could have the hind resting on it's body, rather than it's legs. I also created some separation between the ears, with some additional grinding.

-
Landlubber Mike's technique for furled sails
rschissler replied to Landlubber Mike's topic in Masting, rigging and sails
Your Fair American is amazing, Ken! -
Landlubber Mike's technique for furled sails
rschissler replied to Landlubber Mike's topic in Masting, rigging and sails
Thanks Mike, I have the zu Mondfeld book, and I don't know what I would do without it. It's pretty good at showing the differences from the centuries. I bought some Amati sail cloth, which seems pretty thin, but who knows for sure. Since I have plenty of the material, I think I will try out a couple sample sails first, starting with a half size sail, and then try your radical cut sail design, and see how they furl. Since you said you included all the blocks, what did you do with the clew lines and blocks for it? I really couldn't see what you did, once you attached the yard to the mast. Randy -
Landlubber Mike's technique for furled sails
rschissler replied to Landlubber Mike's topic in Masting, rigging and sails
Just wondering if Mike or anyone else has anymore comments on this topic? I'm planning to do furled sails on my model and will probably follow some of the guide here. Any opinions on what lines and blocks for the sails to eliminate, or definitely keep? The instructions on my model don't have any sails at all, or any of the blocks associated with the sails, so I'm up for any more ideas. -
I think you are doing a really nice job on this, and will follow your updates on a regular basis.. Your tops are very similar to mine. One concern I see is whether the holes in the base of your tops is large enough to thread the stay and all the shrouds? That is one thing I've worried about on my model, so I have waited adding the tops until the shrouds and stay are on. Because, I think I may have to enlarge the hole in the base, plus it will make it easier to thread without the tops in the way.
- 80 replies
-
- 1
-
-
- mayflower
- constructo
- (and 2 more)
-
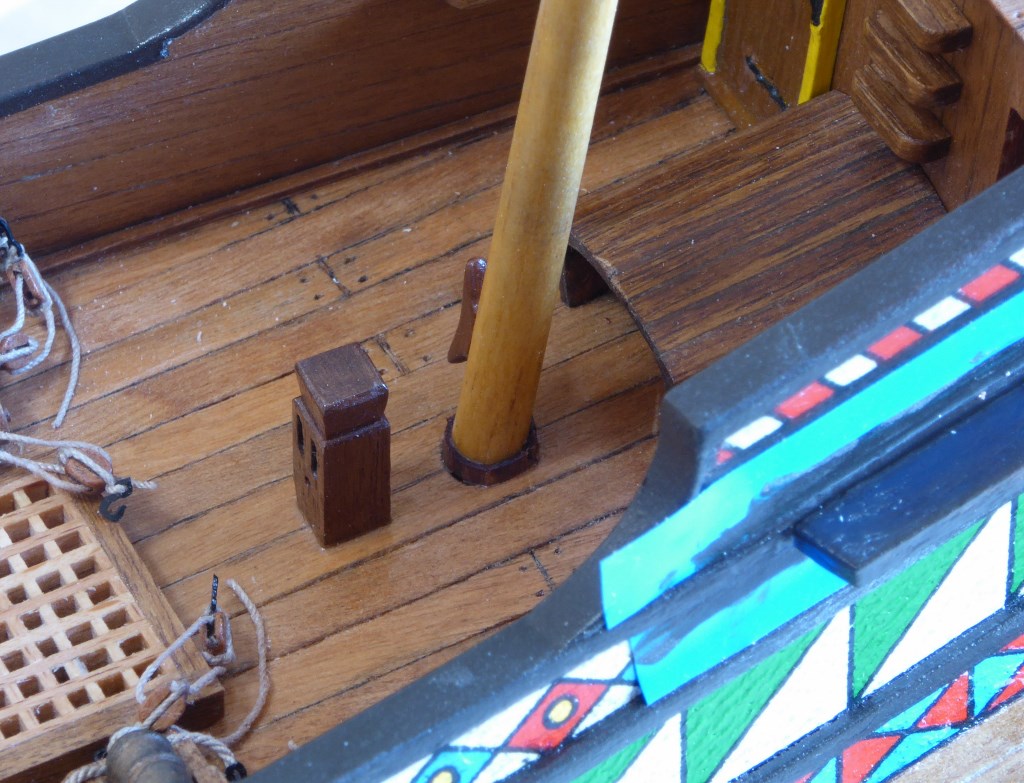
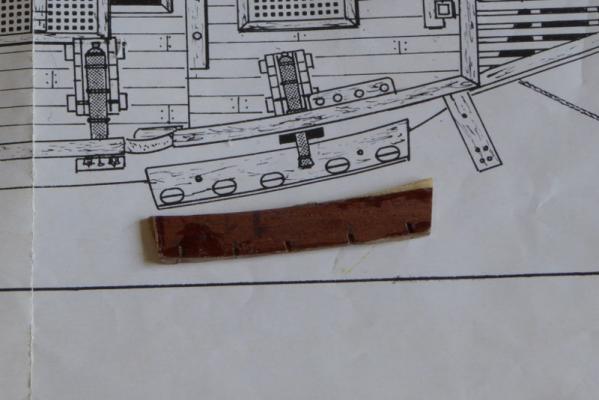
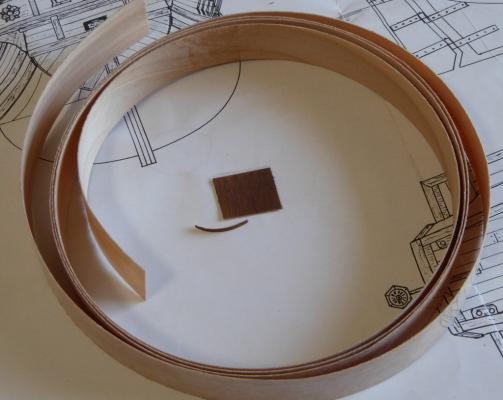
One dilemma I faced was whether to add mast wedges. The plans did have anything and there was a little gap around the masts, when installed in the deck. For such a small scale item, I couldn't see doing anything too elaborate. The main mast is 8mm diameter at the base, and the others are even smaller. I searched and asked for some ideas here on the forum, but didn't really find anything that seemed suitable for the small size. Anyway, I got an idea to use 3/4" wood banding material for cabinets and shelves, some that I already had on hand. I'm talking about the kind with the peel away adhesive backing, not the iron on. I cut off a one inch piece and stained it, then cut off a small strip, with the grain vertical. I used a brown marker pen to touch up the cut edge. Then I peeled off the cello backing and wrapped it around the mast base. With the adhesive backing, It was easy to set in place and wrap it around. I even used a knife to make a few cuts around it. I think it looks convincing to pass for wood wedges, and I'll say for 1580, it probably wouldn't have had the canvas coat covering it, that later ships did.


-
What wood do deadeye manufacturers use to make their deadeyes? I think I need to make my own deadeyes, since I need triangular deadeyes smaller than 5mm. My thought was to use walnut, since that is the main wood in my build, and it seems like all the manufacturers of deadeyes list their deadeyes as walnut. However, when looking at them they seem to be a finer wood that walnut, so I'm wondering if they are using boxwood or something similar and just coloring them to look like walnut? Walnut can be somewhat brittle and has open grain so I am somewhat leery of using walnut to make these small parts. Randy
-
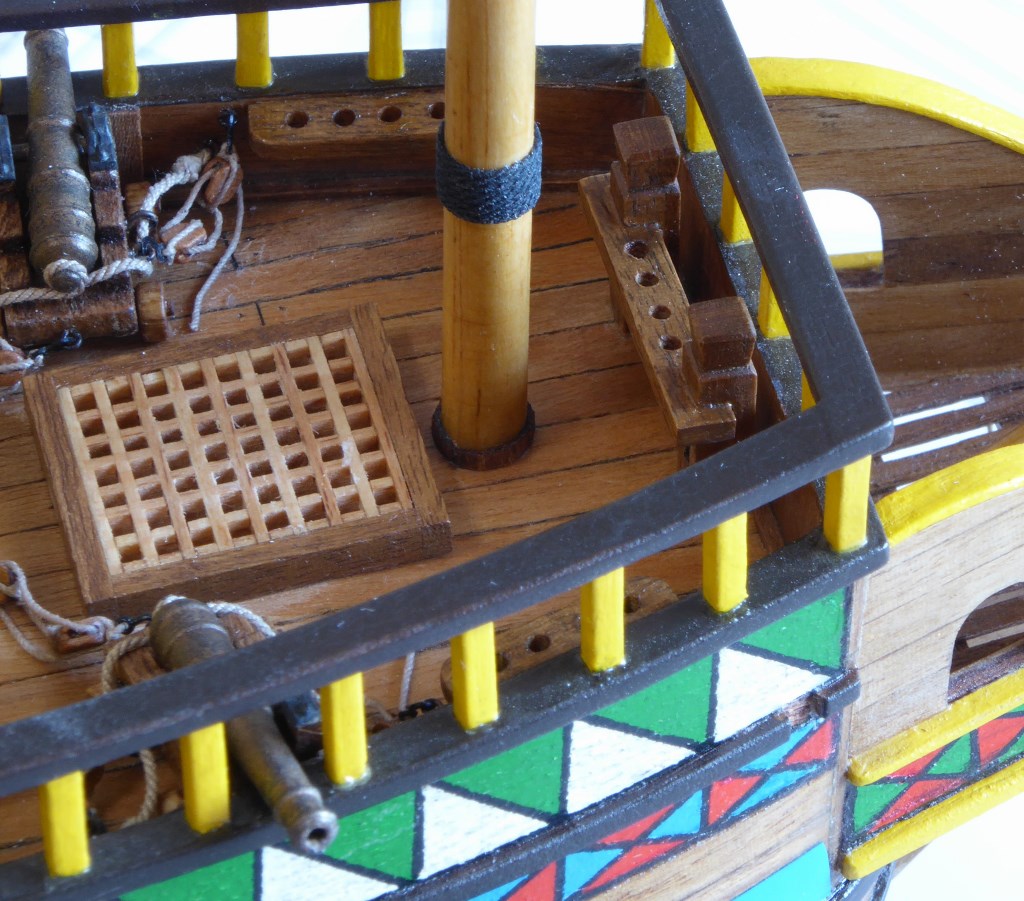
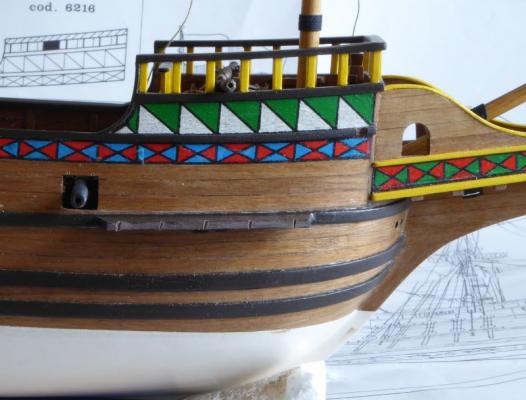
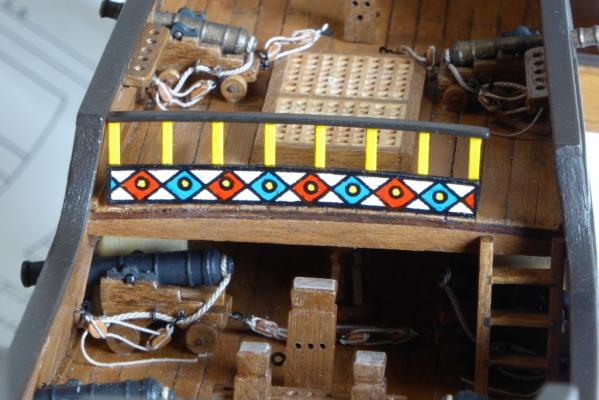
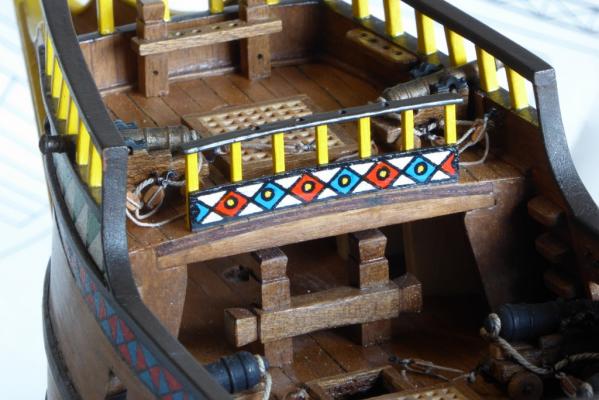
I installed the two little inner deck railings with the decorative strips. I deviated by not including an upper red and white stripe strip. I did this so that it would blend with the outer railings I previously changed. I also used 1.5mm x 1.5mm posts instead of 2mm x 2mm the plans called for.
-
How much rebuilding do you want to do? It may come to a point to where you should just fix the broken parts and consider it as a decorative, as opposed to a historically accurate model. I agree the house on the poop should be removed.
-
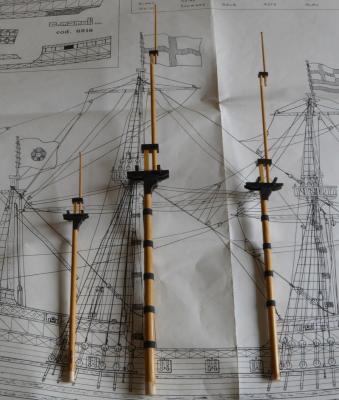
Here are the masts, minus the tops and upper trestletrees on the main and foremast. I thought all the caps for the kit were too oversized, so I reduced them significantly. I made the masts as shown in the plans, but think the diameter of the lower main and foremast seem oversized in relation to the hull, and don't seem in proportion to the uppers.
-
Nisseofsweden: Plan on getting a lot of extra wood, in a lot of different sizes. I was short on several sizes, plus some of the dowels too. Also, I found the quality of the wood somewhat poor, especially in the smaller sizes, which also meant extra wood purchases. LN is walnut. Good luck, and let me know if you have any questions.
-
Thanks Weatim! Since there is no reliable blueprint to follow, I feel I can take more liberty with changes I think are appropriate. It's interesting to see pictures of the two full size replicas, one at Brixham and the other in London, and this model here, and note how very different they all are. I wish I had been more analytical and critical at the start of this model build, and experienced too, as there are some flaws that crept into the building of this model.
-
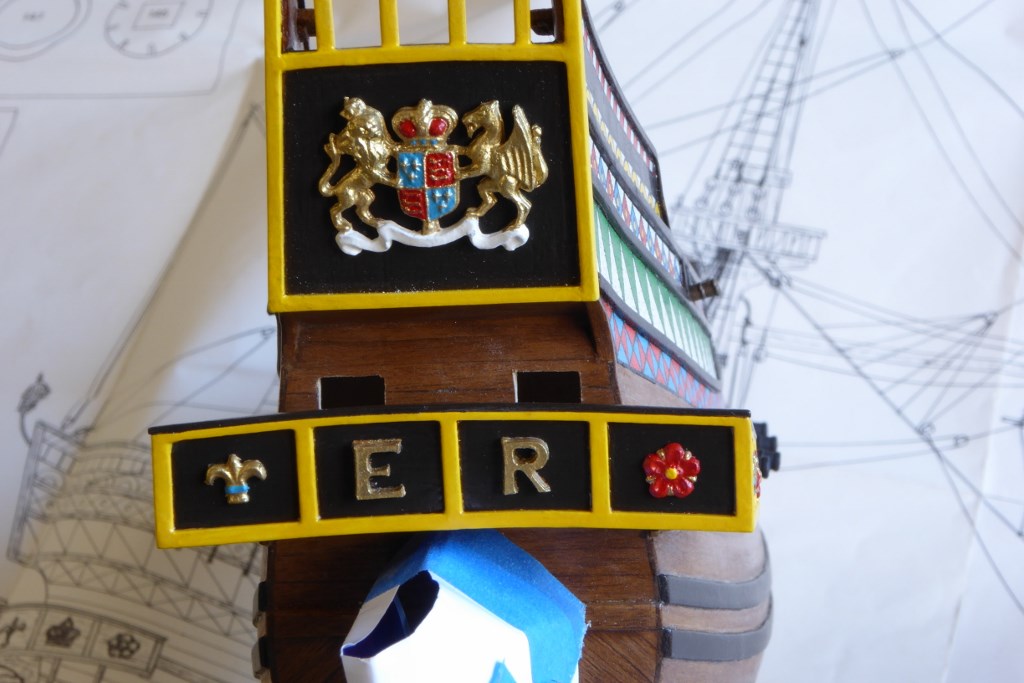
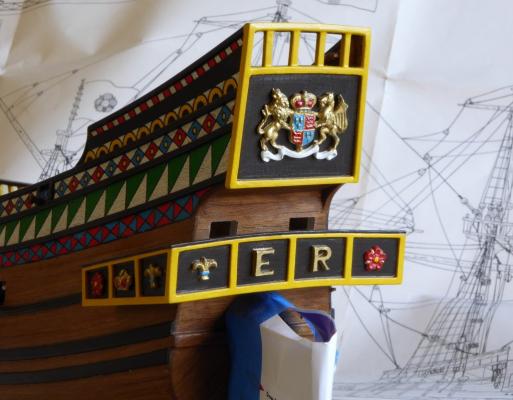
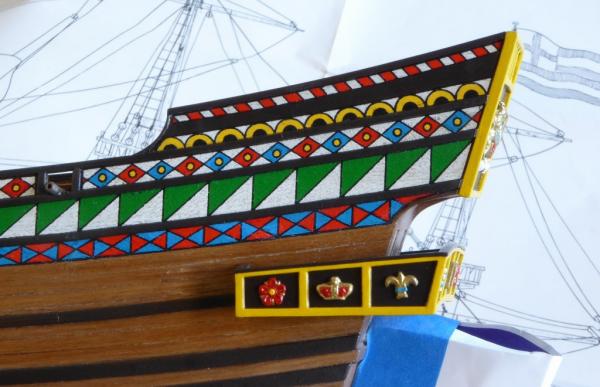
I did some detail painting on the ornamental items on the transom and the rear balcony(?). The plans had these all painted gold, but I thought to liven them up a bit.

-
That's looking really nice! Randy
-
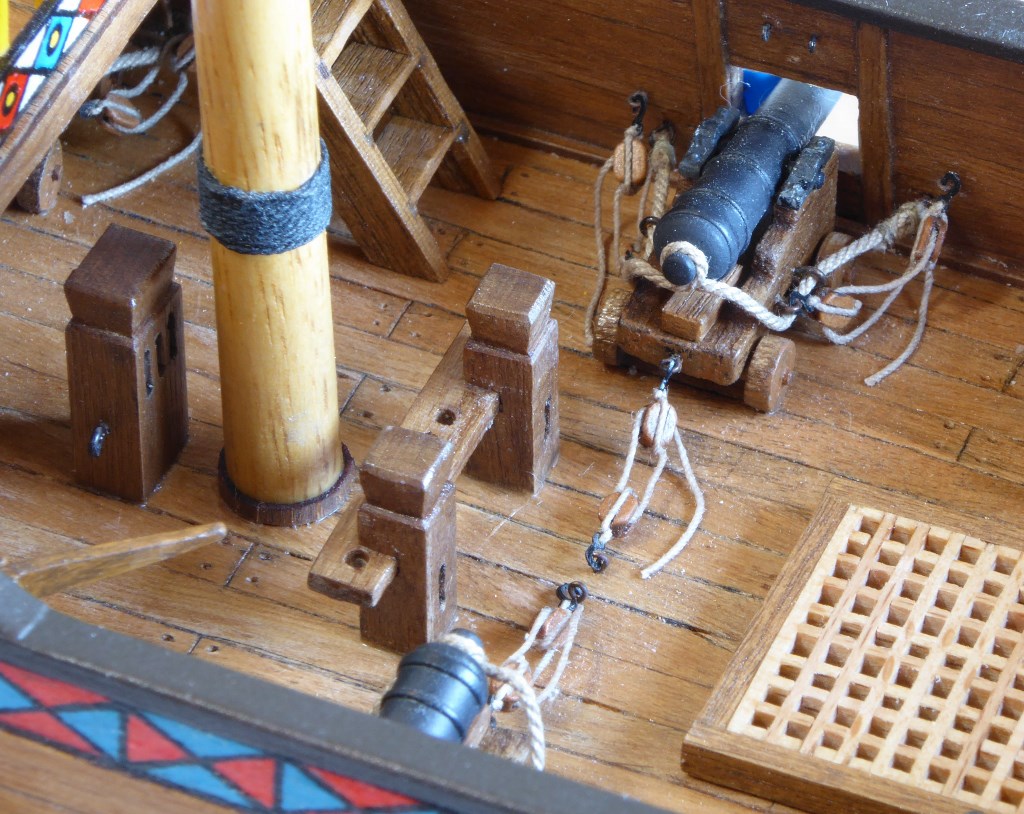
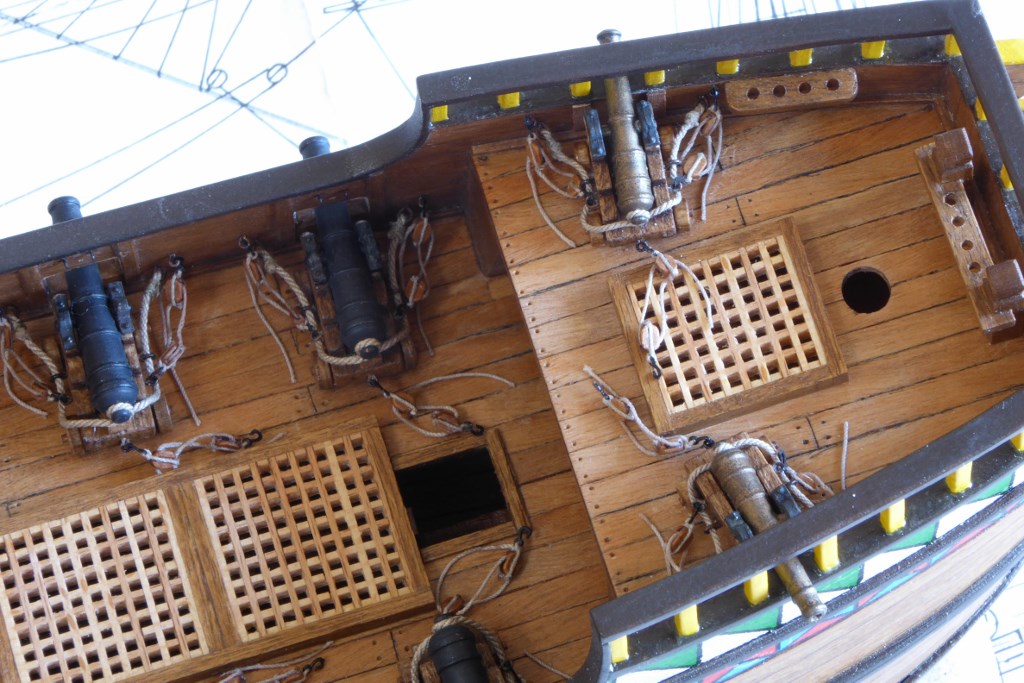
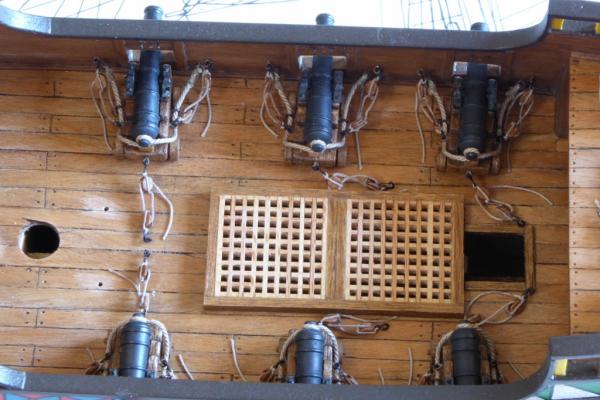
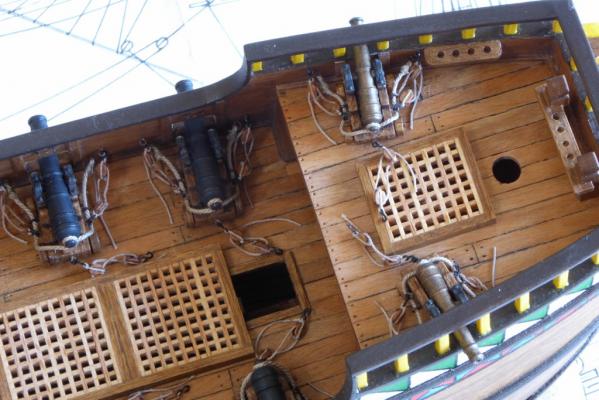
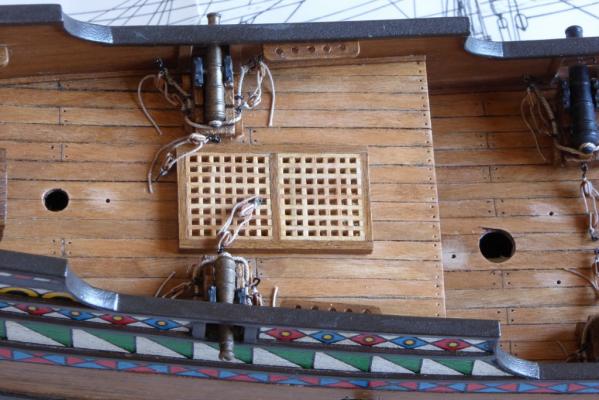
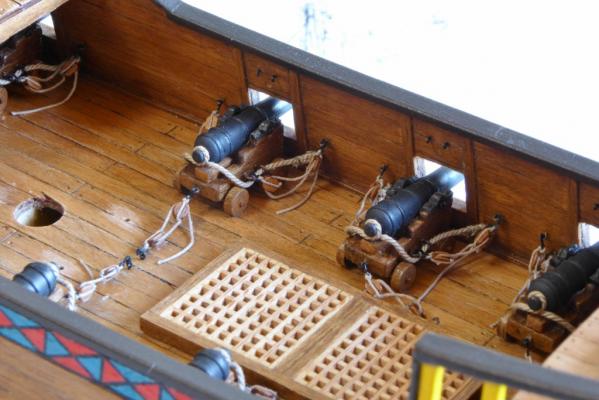
Thanks! I was also going to say that I made the gratings a little bit smaller than the plans called for, thinking of the minimal runout for the guns available. But, it didn't make much of a difference anyway.
-
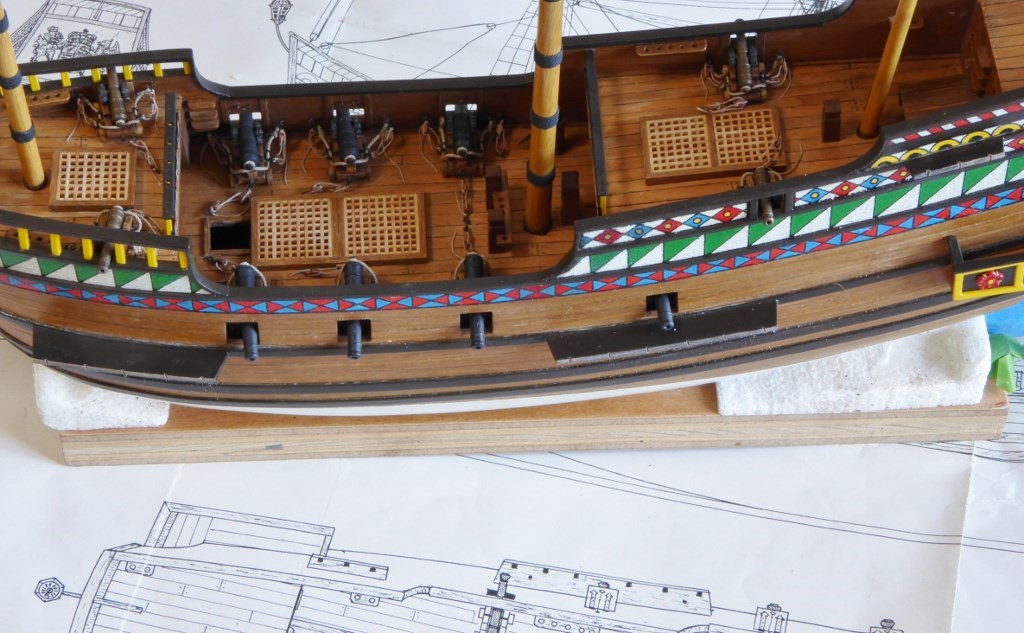
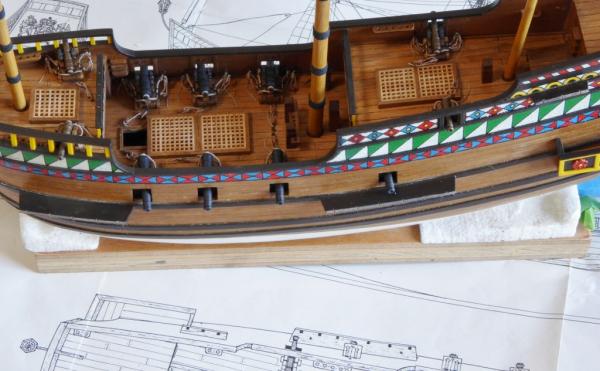
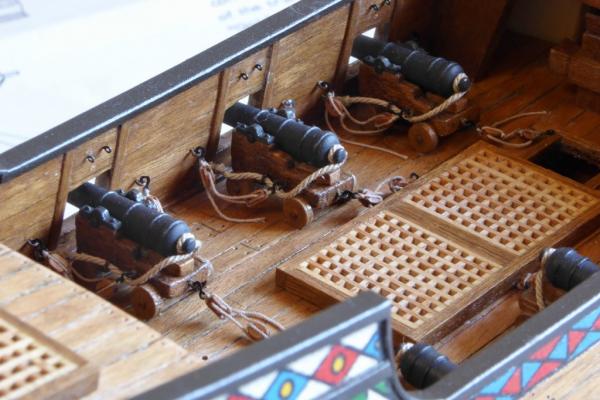
I finished all the guns. I knew the Golden Hind had a mixture of iron and bronze guns, so I made the large guns as iron and the four small guns as bronze. Another think I was concerned about was whether the carriages for 1580 could be typical four wheeled ones. After seeing a couple pictures from a research site, I was confident that the four wheeled carriages in the kit would be OK. I did note that instead of a quoin, a rectangular block was used for that time period, and that was easy to add. One problem I ran into for the small guns is that the opening on the hull were too high, so that meant that those guns were at a rather steep angle, and the front wheels had some air instead of deck underneath. With the painted decorations on the hull, I saw no good way to fix it, so I said "Oh, well!" The model plans didn't have any gun tackle at all, even breeching rope, so I looked at a couple books and came up with it. I'm using blocks from Syren Ship Models. I thought all the blocks in the kit were junk, so these are really nice. I'm also using his rigging line, which is very high quality as well. I also used his 3mm hooks for the hooks shown. I left the tackle kind of loose. Another problem is that with the gratings, there is no room for runout with the rear tackle for all but four guns. For those, I just attached it to the back end of the carriage, and let it lie.
-
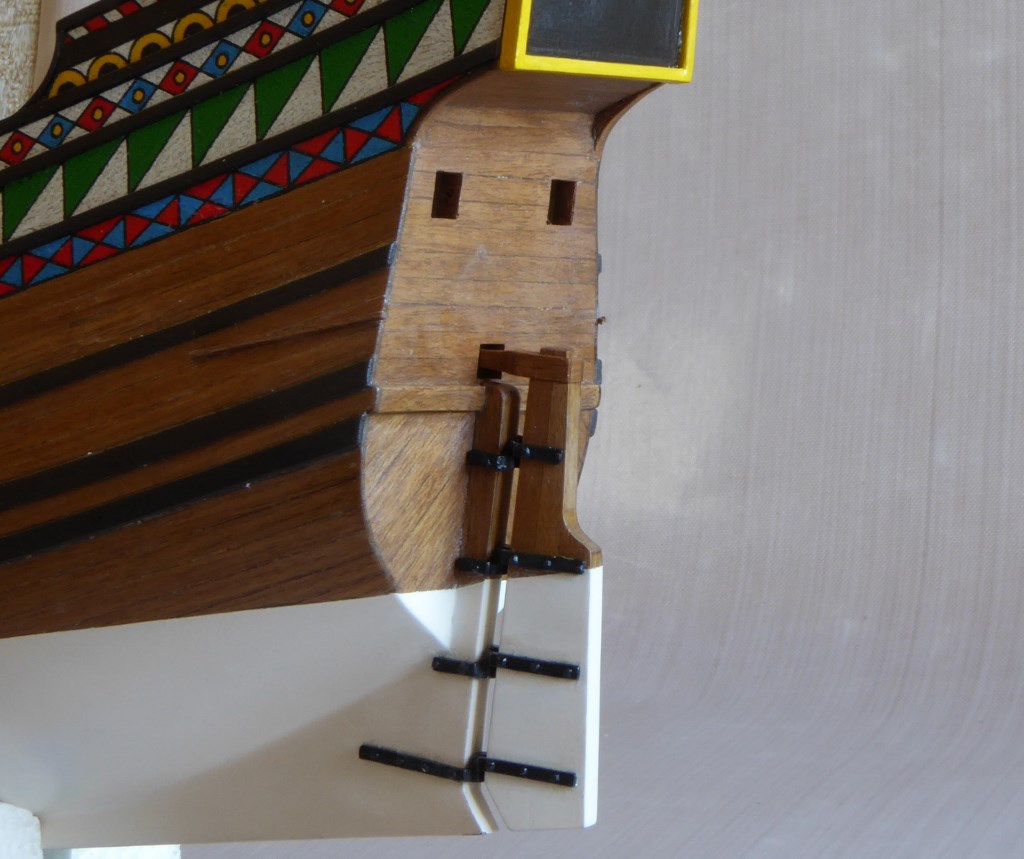
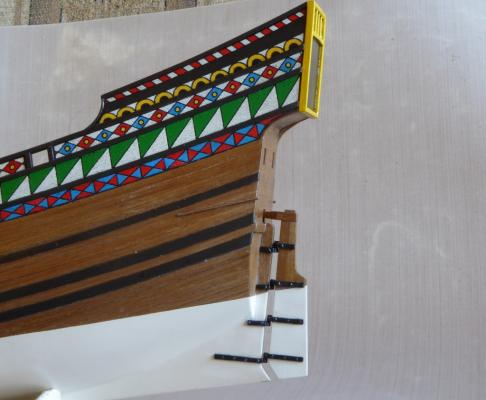
I attached the rudder to the ship. The hinges were soft lead like metal castings, and a little bit thick. The biggest problem with them was that they made the rudder stick out too far from the ship. I cut and filed them as much as I could, without breaking through the pin holes, but it still seems a little far off. The pins and pin holes were too big, but oh well, I did the best I could.

-
Thanks! I'm trying to evaluate every detail now, but even then I feel the need to compromise. For example, the hinges for the gunport lids. The pot metal pieces that come with the kit are very oversized in thickness, yet I still plan to use them.