KeithAug
-
Posts
3,986 -
Joined
-
Last visited
Content Type
Profiles
Forums
Gallery
Events
Everything posted by KeithAug
-
 Hi Kes A lot of interesting techniques - beautiful work.
- 434 replies
-
- 4
-

-
- pelikaan
- beamtrawler
- (and 2 more)
-
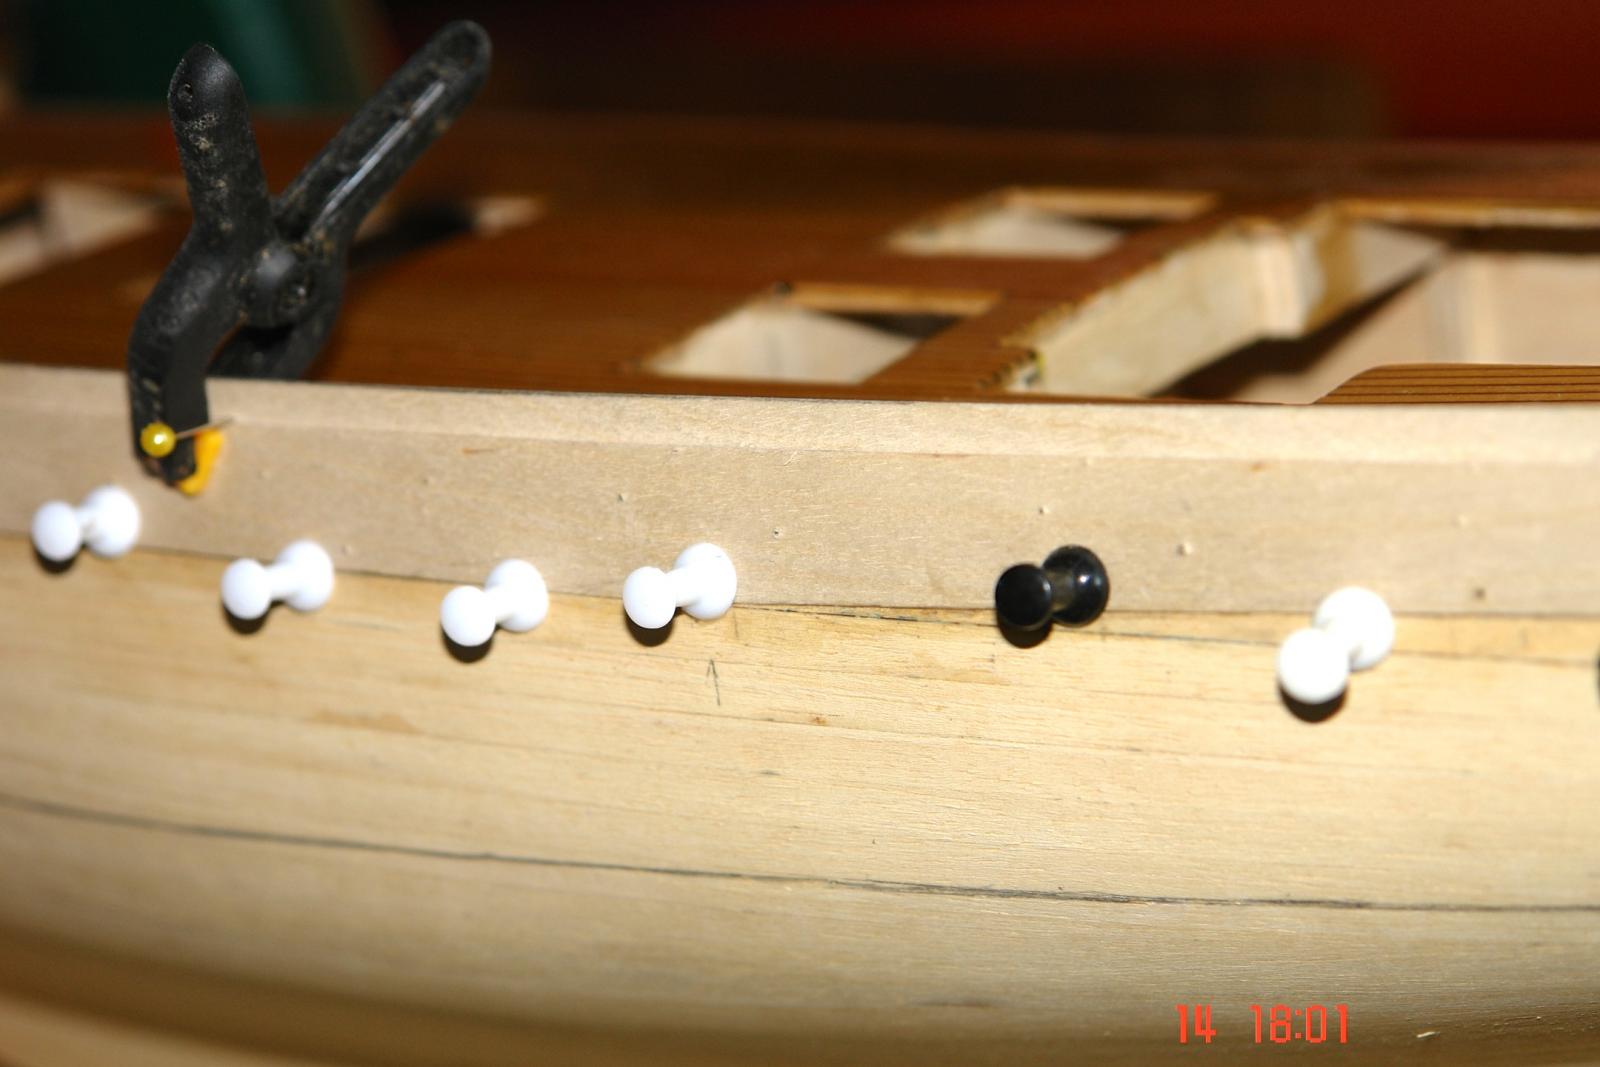
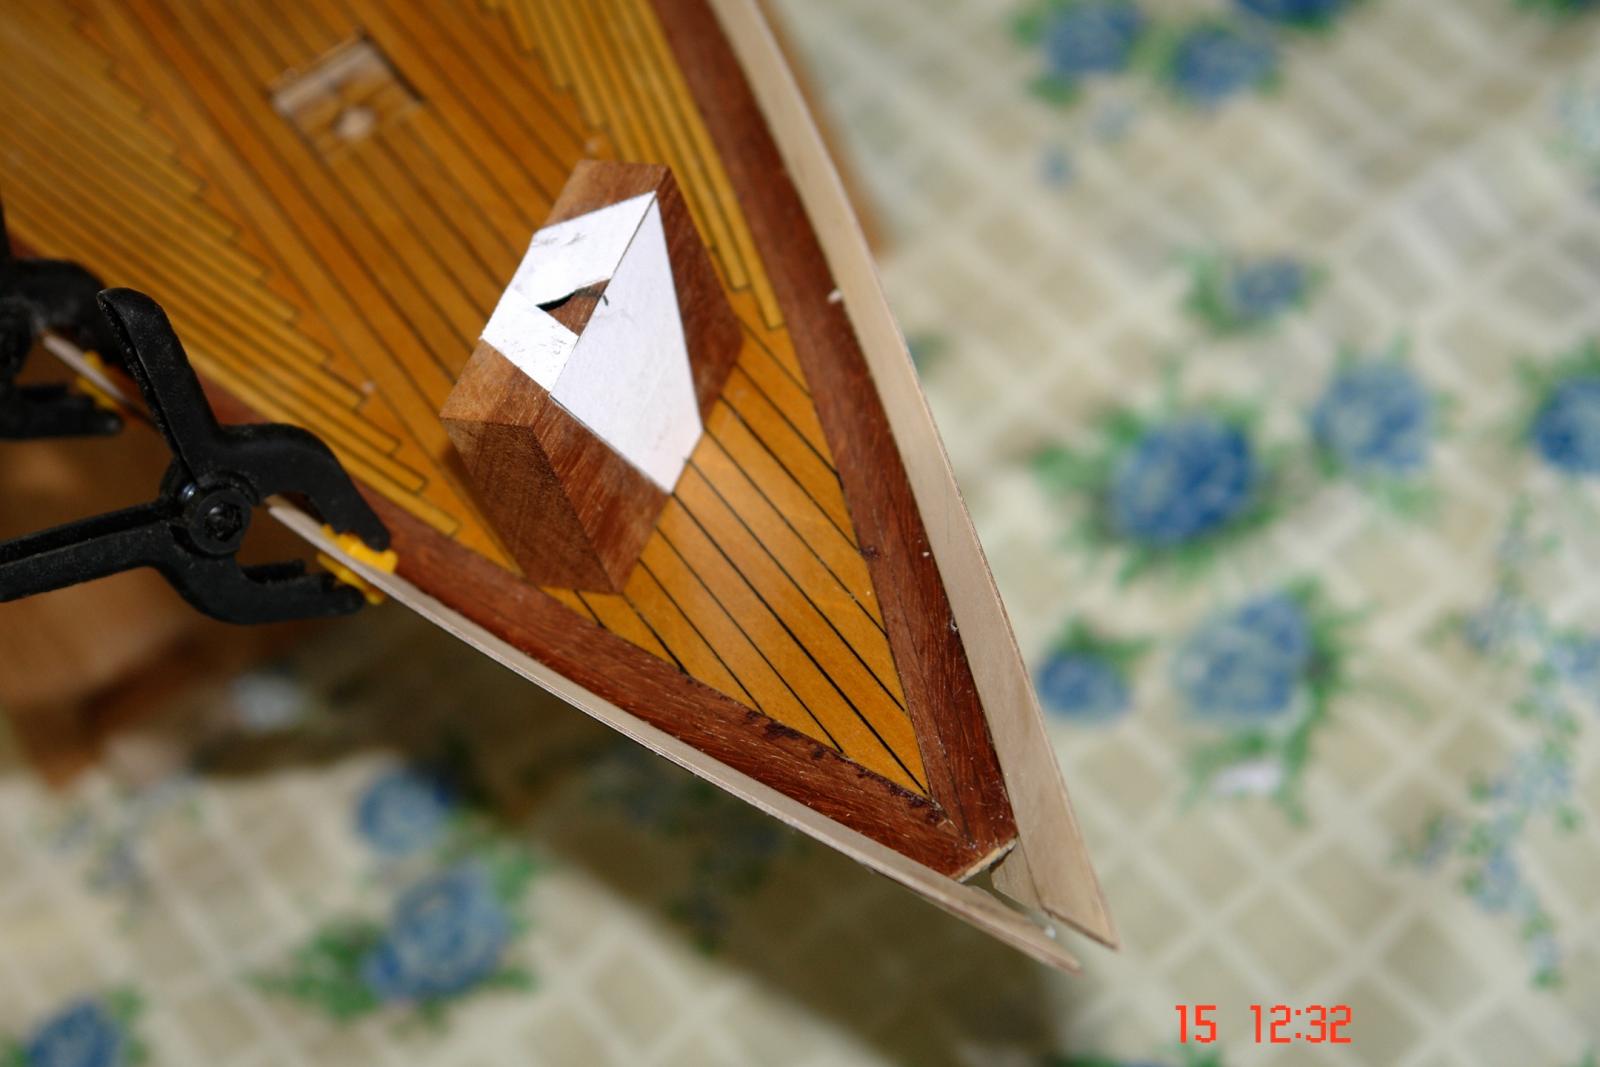
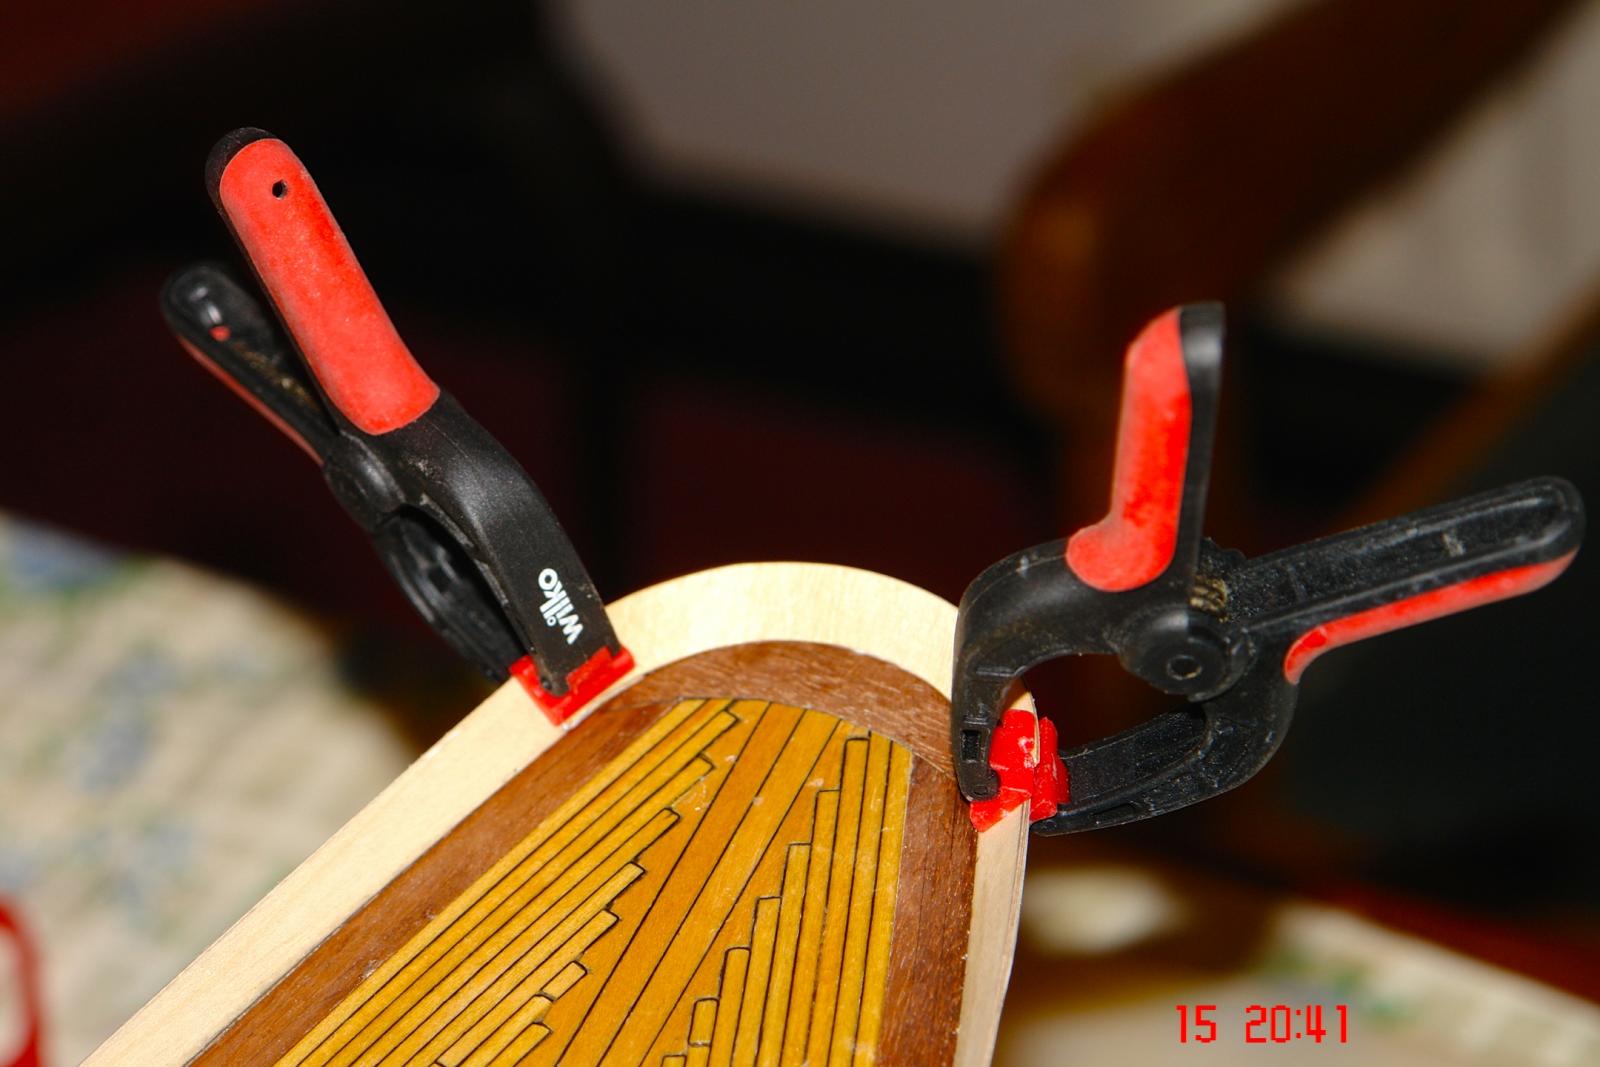
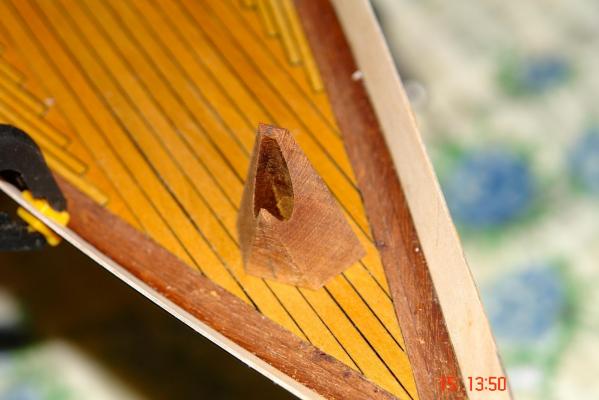
Bulwarks continued. It feels like I am taking a long time over this. Accurately shaping the 6 bulwark pieces took a lot of time but now it is done. The the middle of the 3 layers went on first and fortunately it went on well. The inner layer went on next - thus creating the first sculpture line on the hull. The bow where the bow sprit passes through is very heavily built on Altair and I wanted to reproduce this on the model. The transom also has a fairly subtle shape which I will try to reproduce. But first I needed to get the stern bulwark in place. And that is how far I have got at present.


- 882 replies
-
- 10
-
-
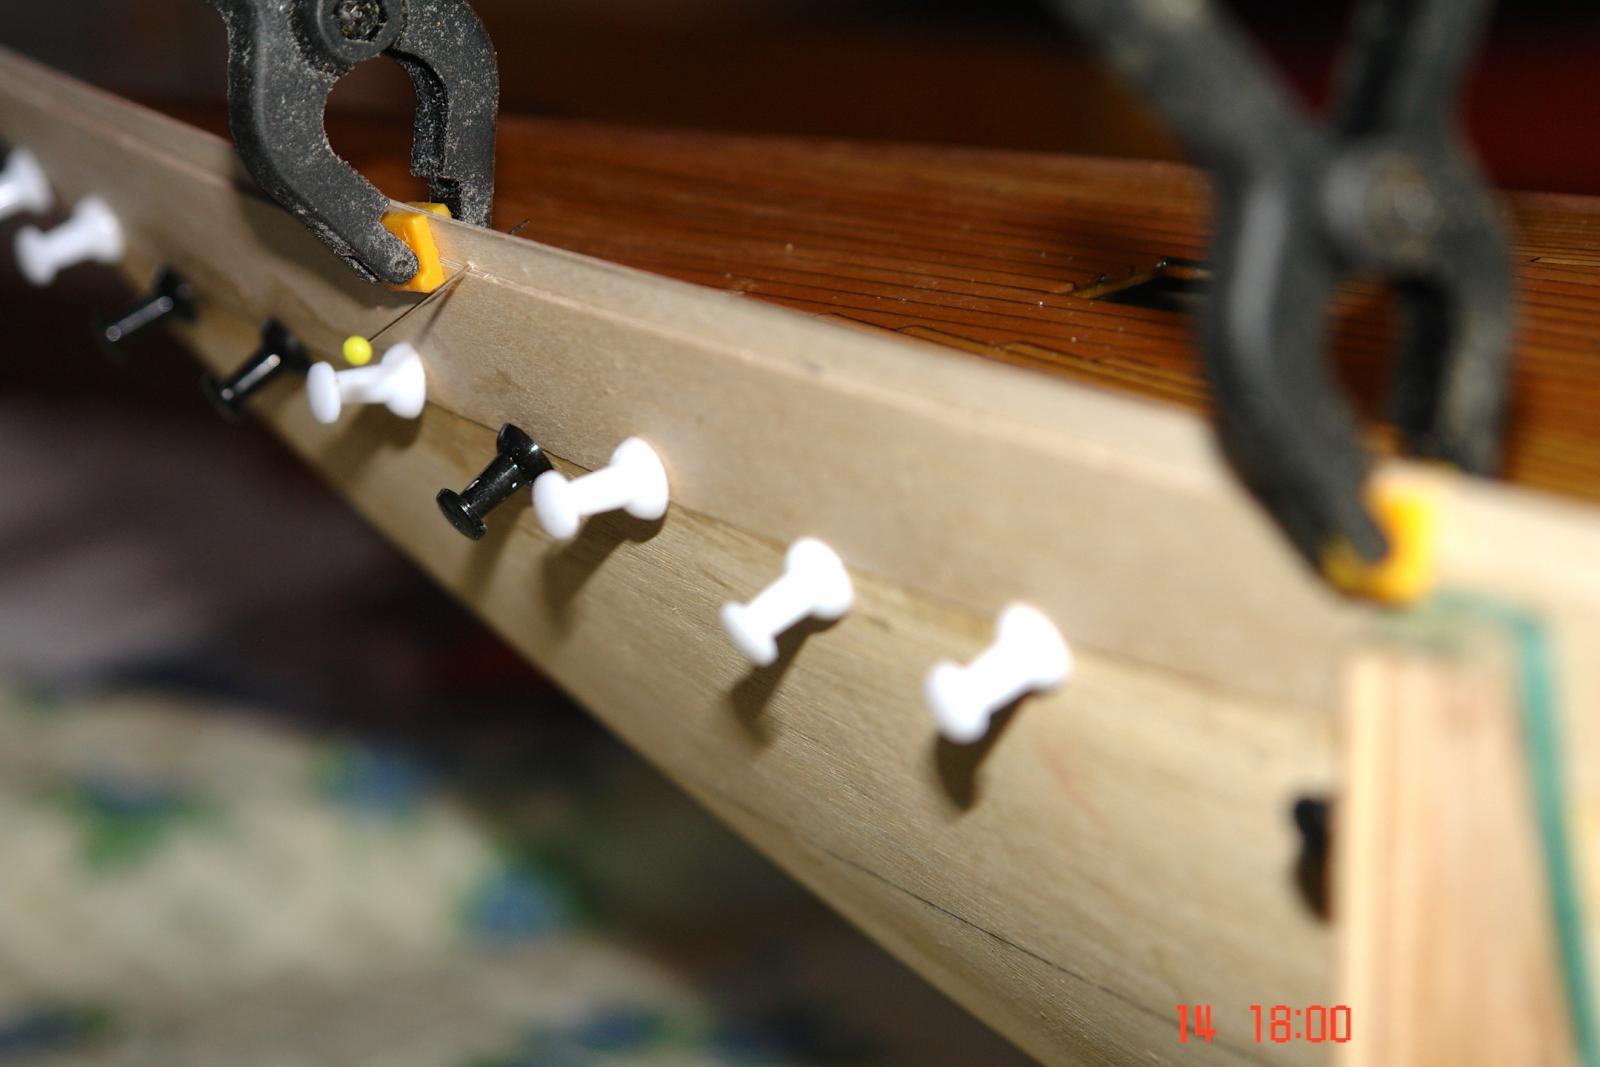
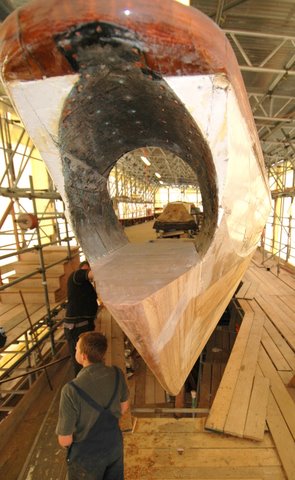
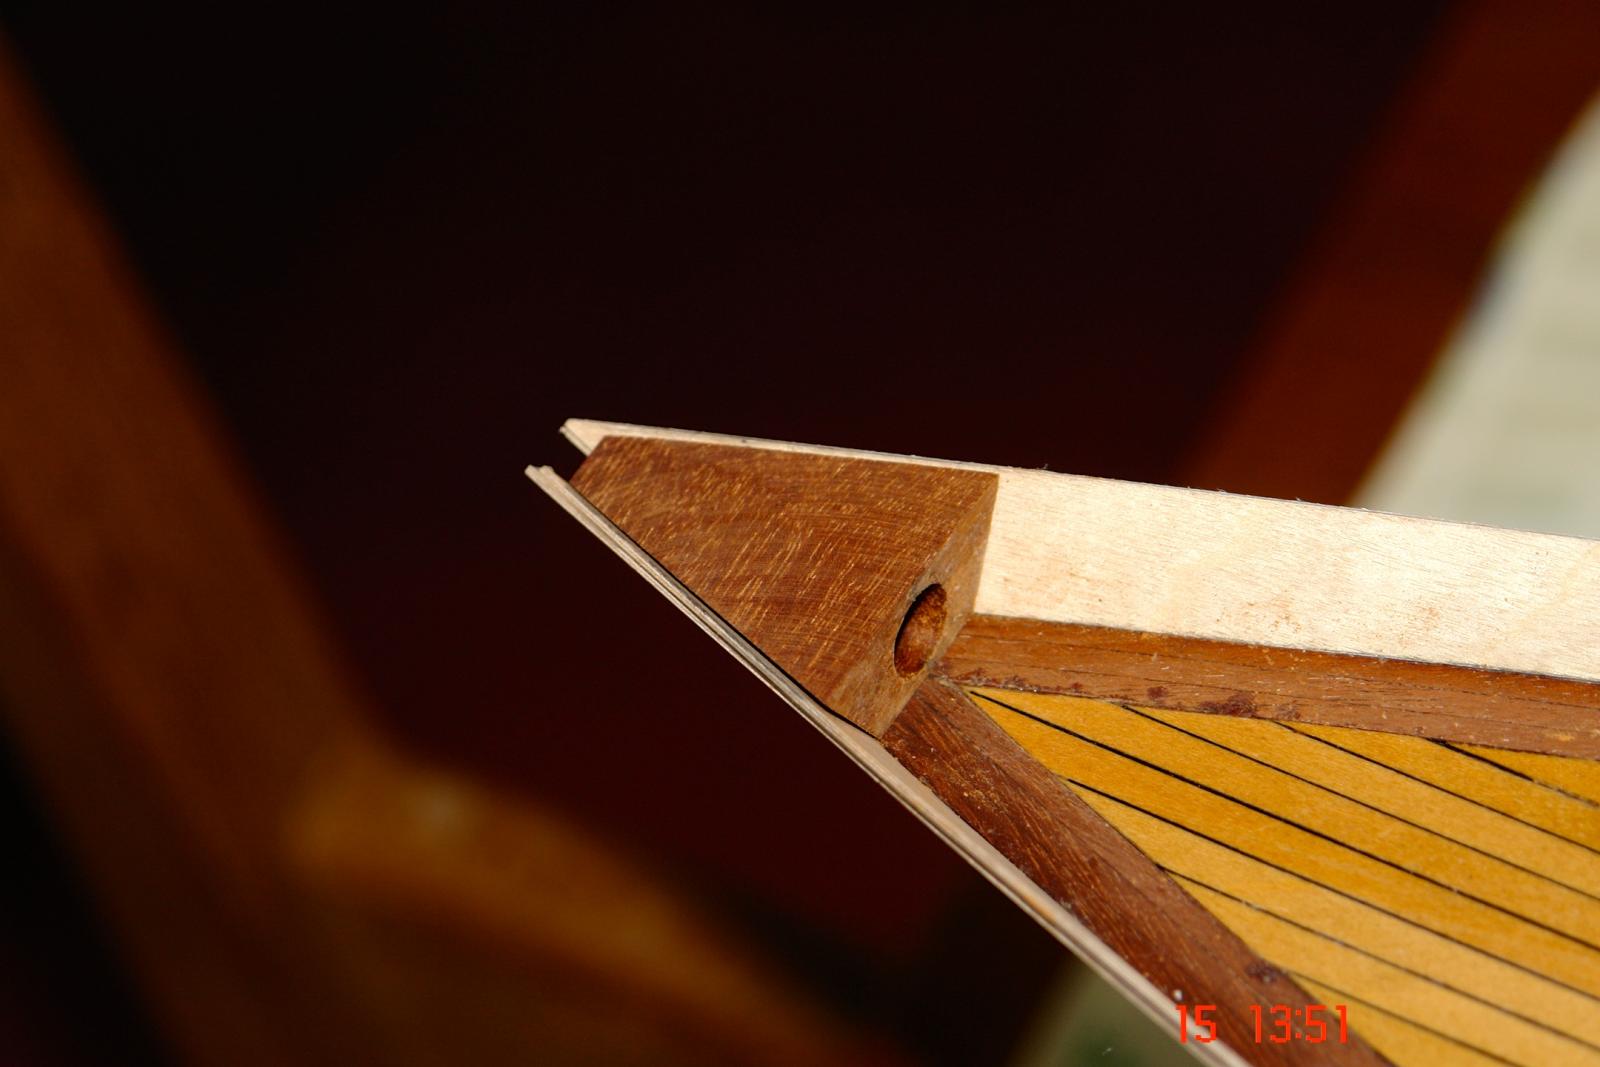
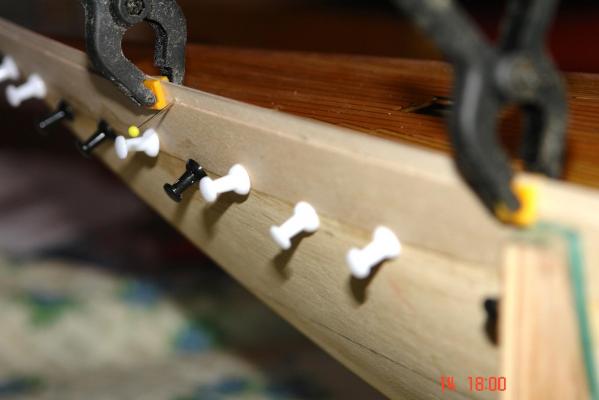
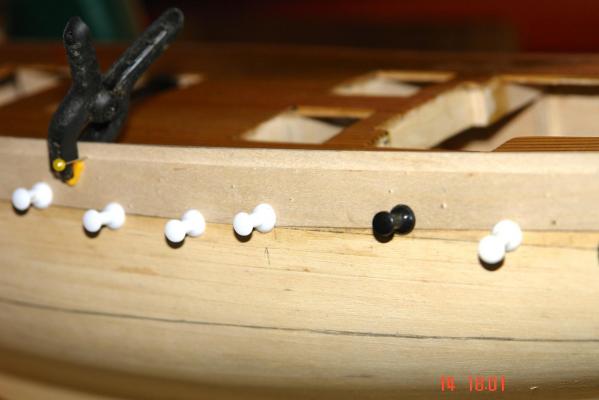
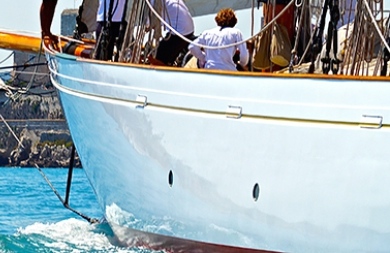
Bulwarks!! So I finally got round to making a start on the Bulwarks. From earlier posts it is apparent that I was approaching this with some trepidation. The sculpturing of the hull on the outside of the bulwarks (see photo) is something I have not done before and I tend to explore options in my head for weeks before attempting something like this. In the end I have to get on with it before I go mad. I had done a bit of preplanning in that I had left the upper edge of the hull un-planked so that the recess could take the lower edge of the bulwark. To create the sculpturing the bulwark is going to be laid up in 3 layers of .032 inch ply. The middle of the 3 layers is going on first and fits in the un-planked recess. This middle layer will form the upper sculptured line and the outer layer the lower sculptured line. A bit difficult to explain but I'm sure it will become clear as I work through the process over the coming days. Anyway the starting operation was to make up a cardboard template to get an accurate representation of the hull recess. The shape of the bulwark pieces is quite complex and it took a lot of assembling, removing, sanding etc etc before I was happy with the shape. After the best part of a days work I now have 2 parts almost complete and temporarily pinned in place. Only 4 more pieces to go.


-
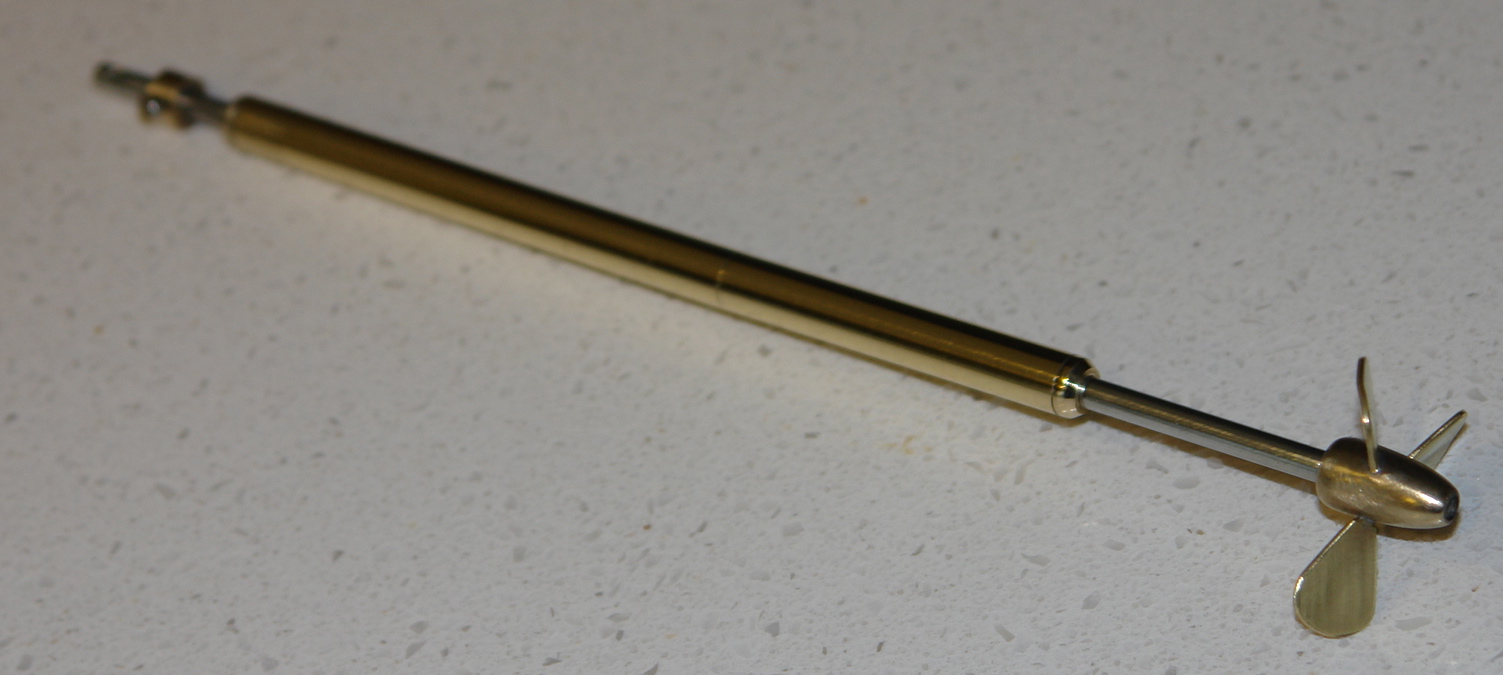
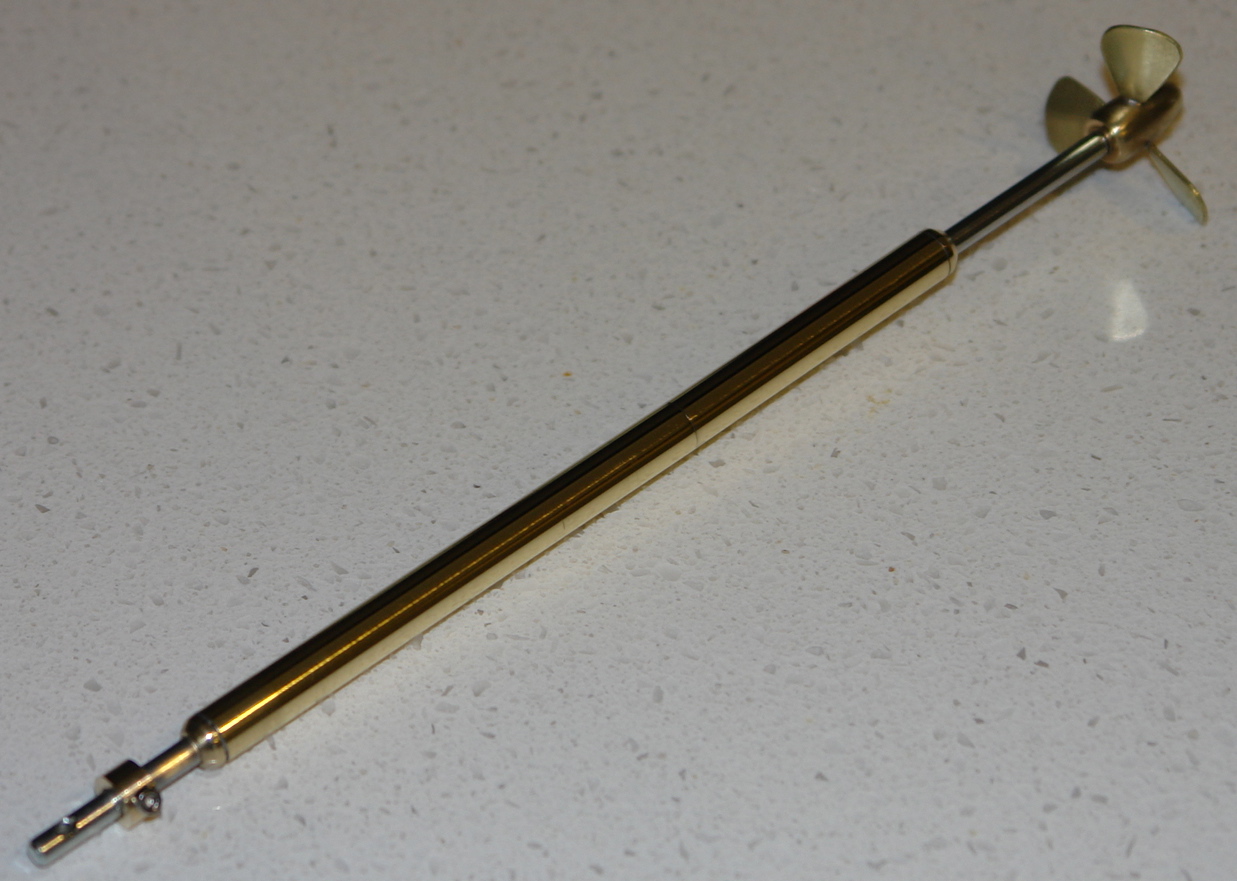
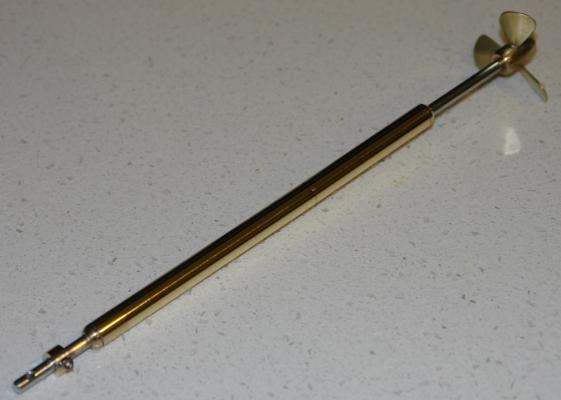
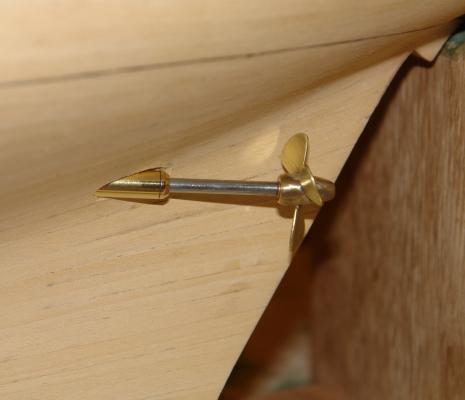
I'm still watching varnish dry. The second and third coats have gone on and each dried in 10 hours. The 24 hours drying of the first coat must have had something to do with absorption of the varnish into the wood. Anyway it gave me time to finish off the prop shaft. I still have to make the "A" frame for supporting the rear bearing.

- 882 replies
-
- 12
-
-
Thanks Mark, I used to do naps but Maisie is only 10 months and like your dog has banned all restful activity.
-
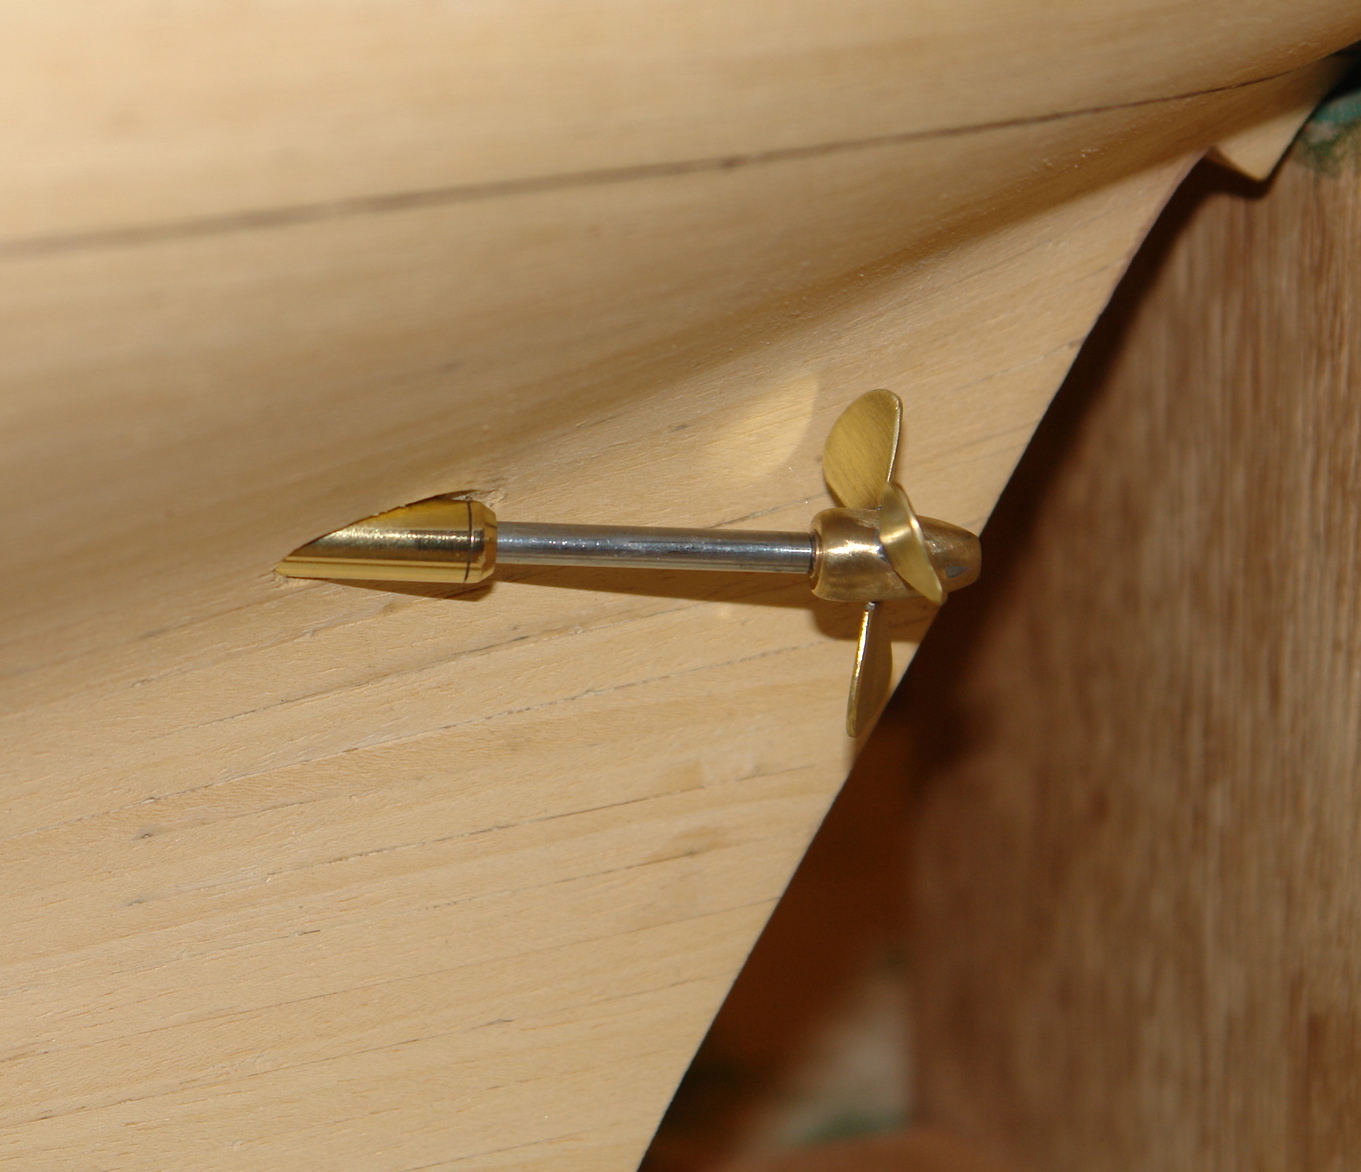
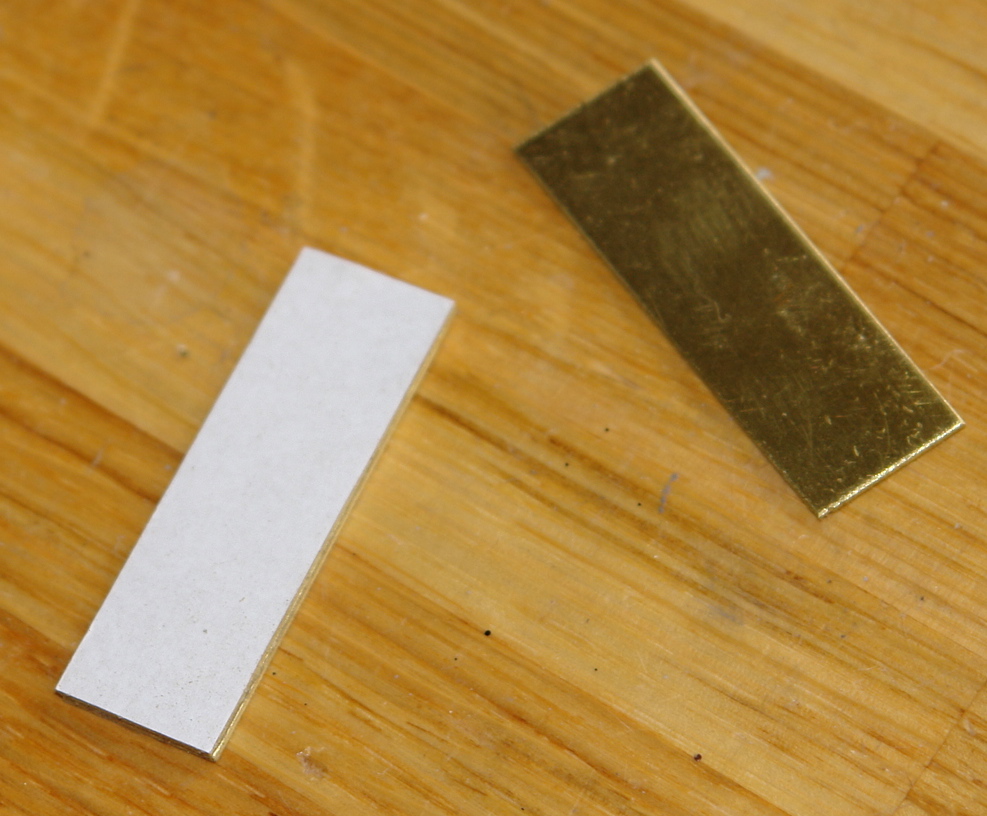
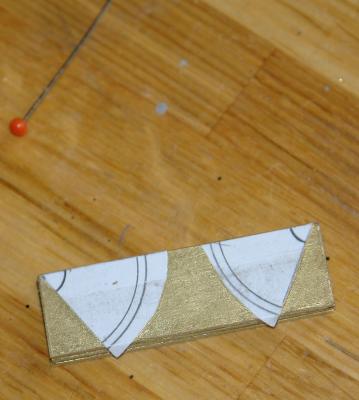
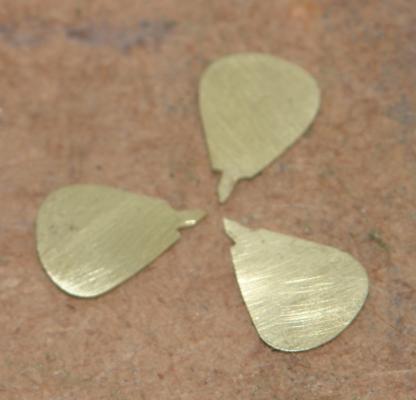
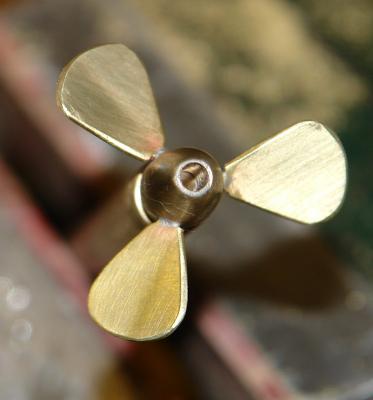
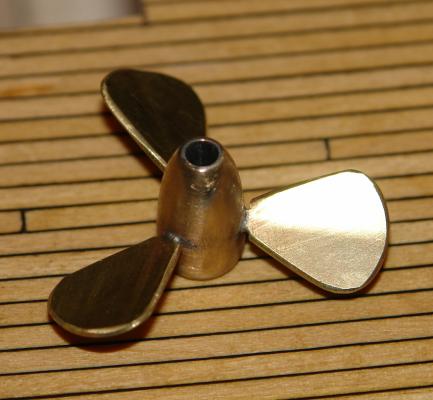
Today I had to find something to amuse myself as watching varnish dry isn't a very stimuating pass time (it has dried finally after 24 hours). I thought I would have a go at making the propeller. I have not made one before and the fall back option was going to be to buy one. I don't however like buying fittings as it always feels like cheating. This is what I did. Firstly to make the blades I cut 3 identical strips of brass .040 inch thick. The 3 strips were fastened together using double sided tape as I intended cutting out all 3 blades at the same time. A paper template was fastened to the brass strips again using double sided tape . Confidence / experiences was low so I marked out 6 blades. The pin in one of the photo's gives an idea of scale. I din't need the reserve set of 3 blades as the first lot turned out ok. The small peg at the bottom of each blade was to locate / fasten them in the hub. The hub was turned on the lathe and 3 equi-spaced holes were drilled around the circumference to take the pegs on the blade. Each blade was given a slight curvature by bending it around a bar - using the vice to apply the pressure. The whole lot was then assembled and soldered together.

- 882 replies
-
- 17
-
-
Thanks Mark - I'll try wipe on poly on the hull. Hello Bedford - As you say it may be the wood. If I left the deck untreated I be constantly annoyed with family and friends when they pawed it. Hopefully the miniature crews deck boots will cope!
-
Mark / Pete - thank you. The deck varnish is still tacky some 18 hours after application so I don't think I am going to be making much progress today. Modern oil based varnishes don't seem to dry as quickly as they seemed to when I was younger. I keep thinking I should try water based varnishes which claim to dry much quicker. I wonder what you all use?
-
Thank you Michael and Michael. As I explained the deck planking isn't exactly to scale - I find it difficult to achieve this at 1:32 scale but I still need to get comfortable with the compromise. May be I will have to move to larger scales at some time.
-
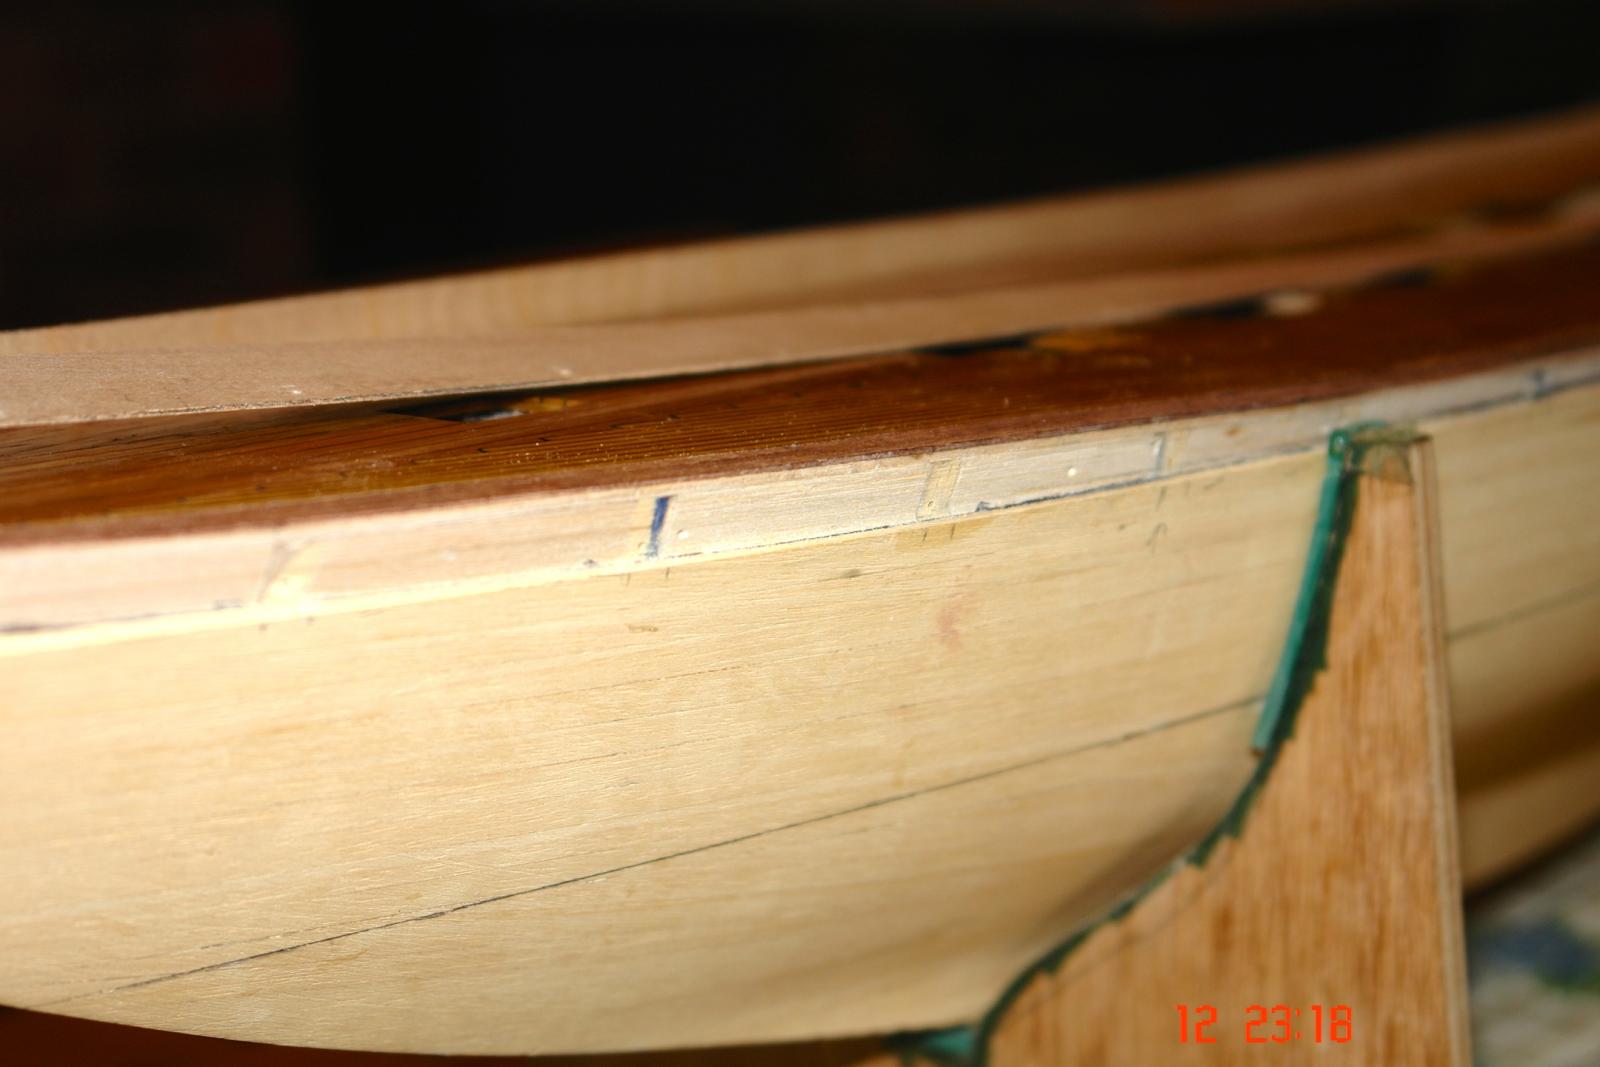
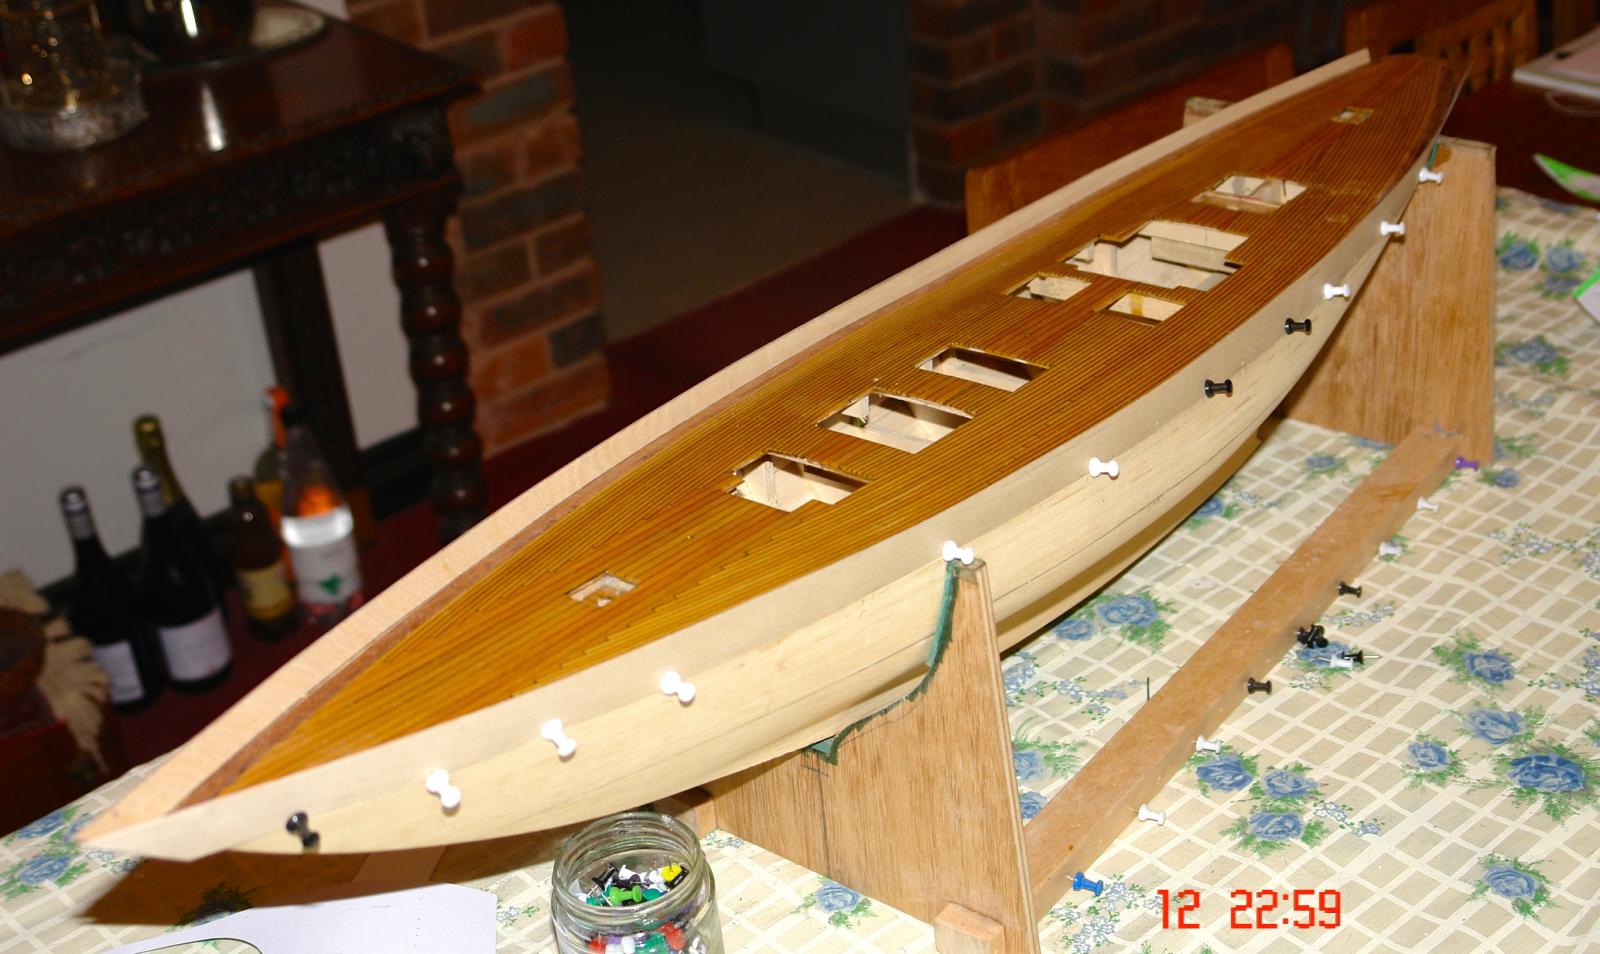
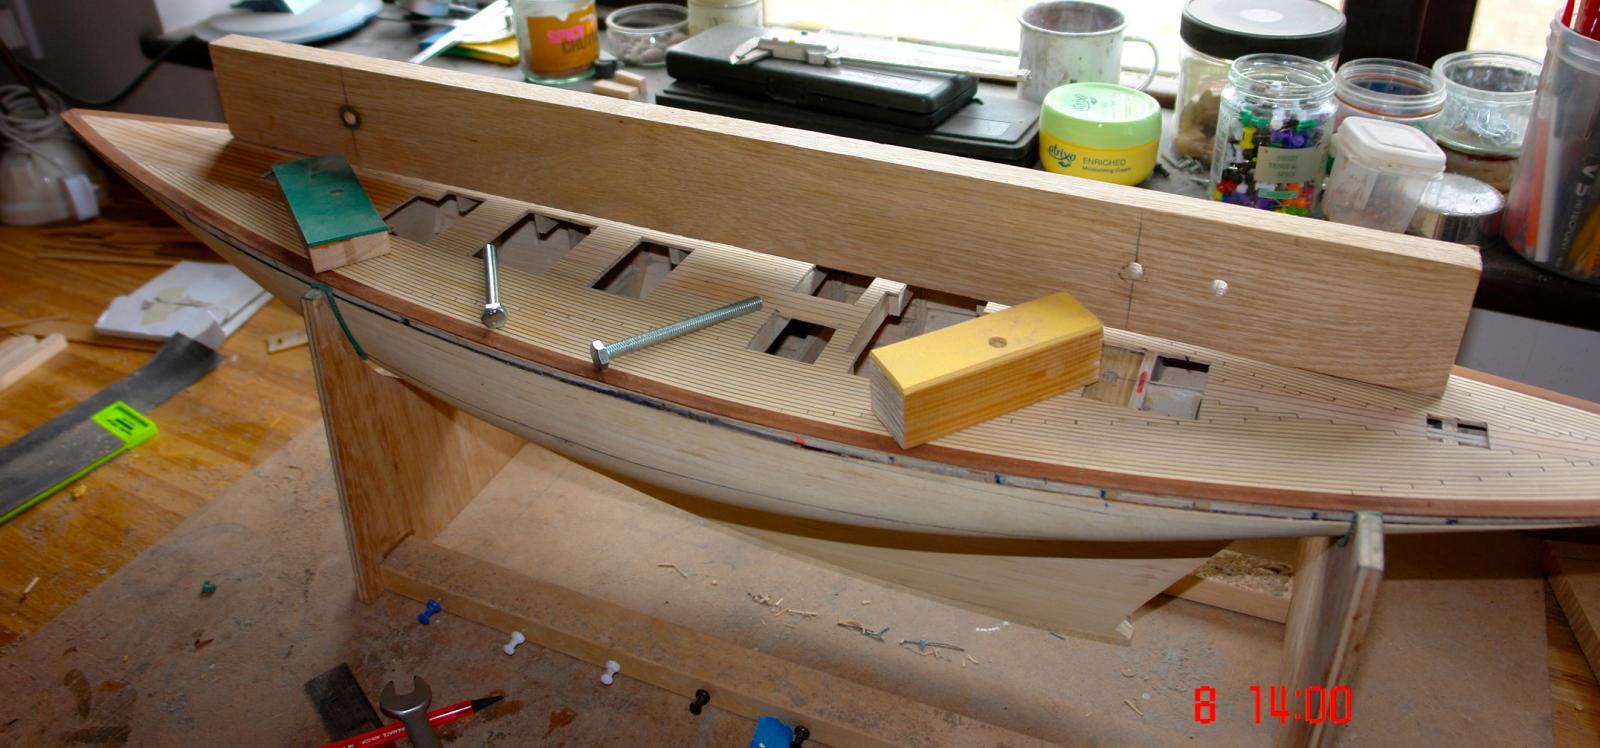
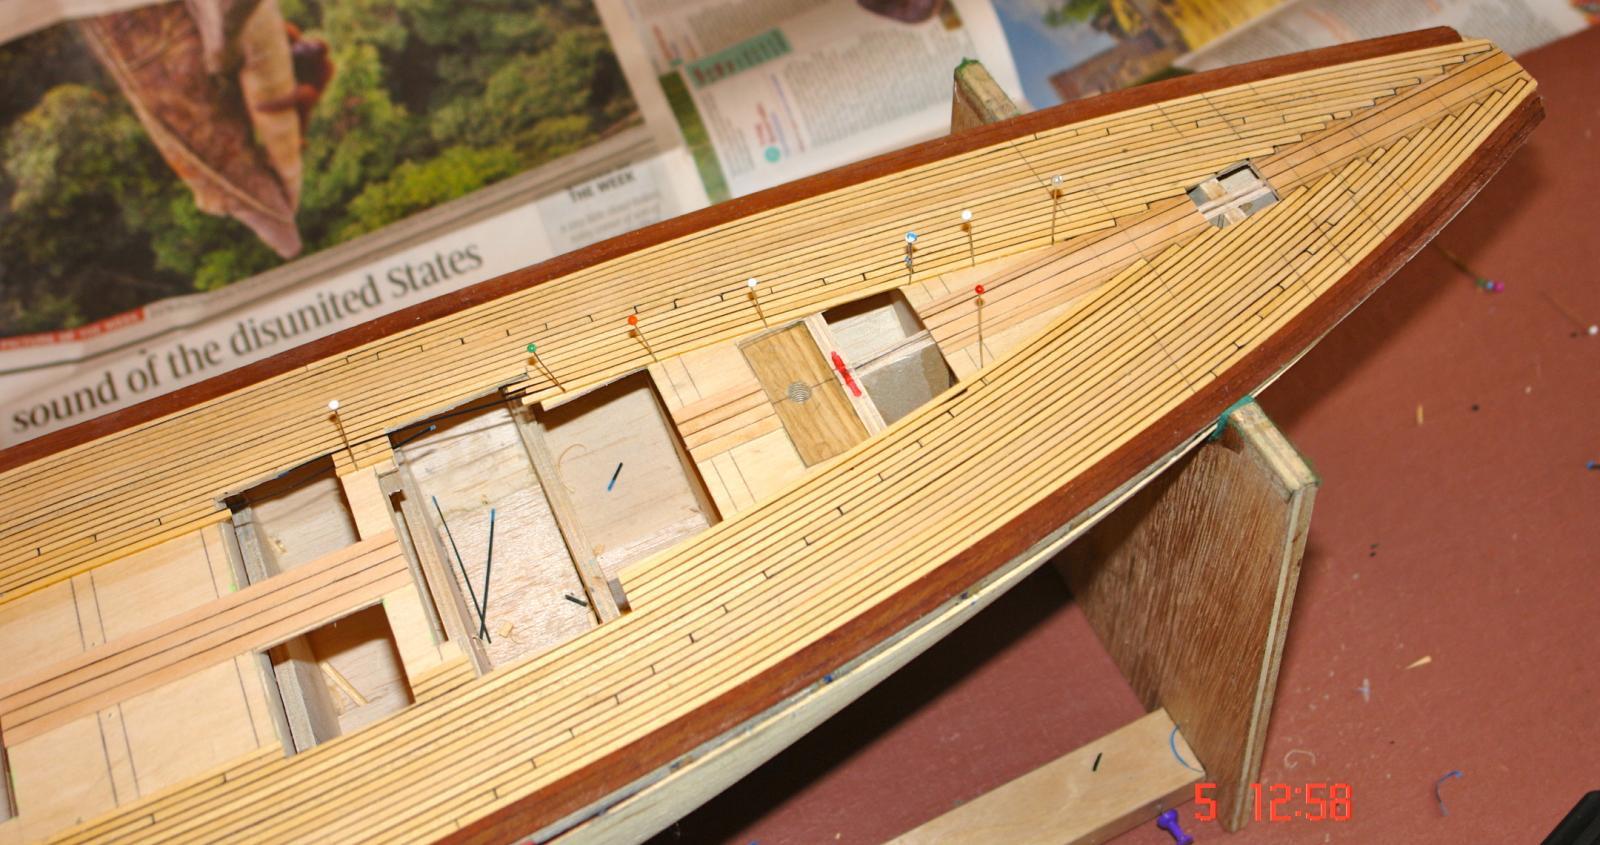
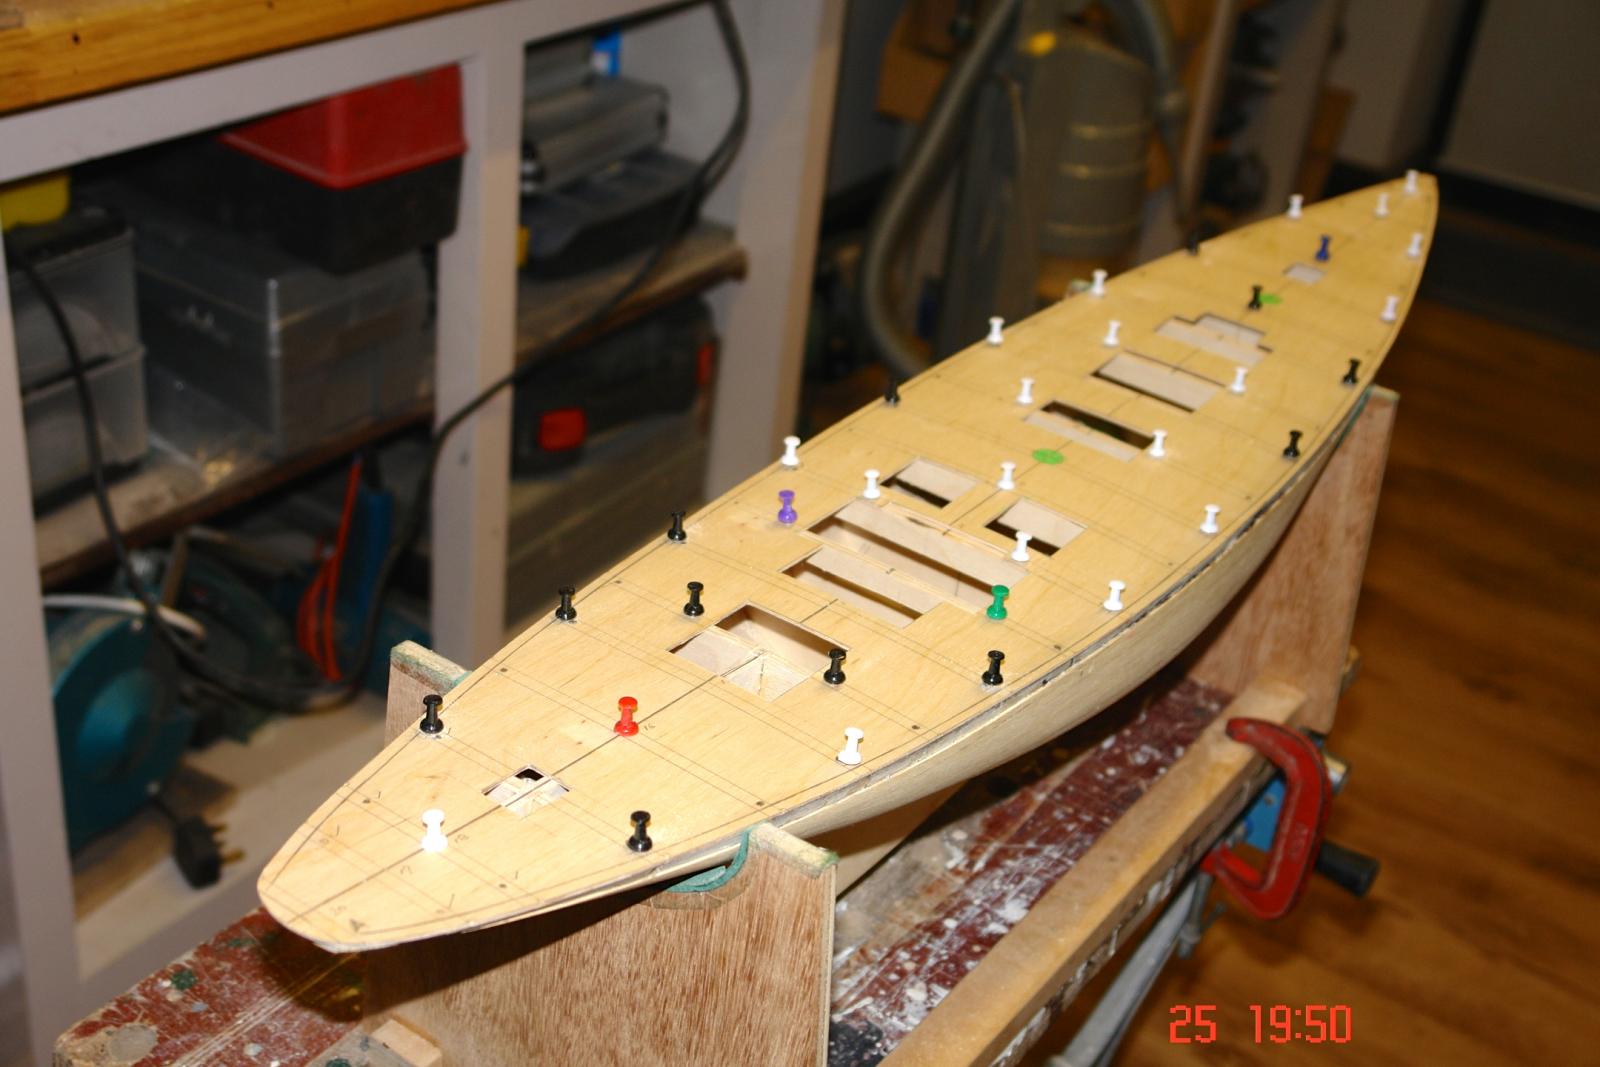
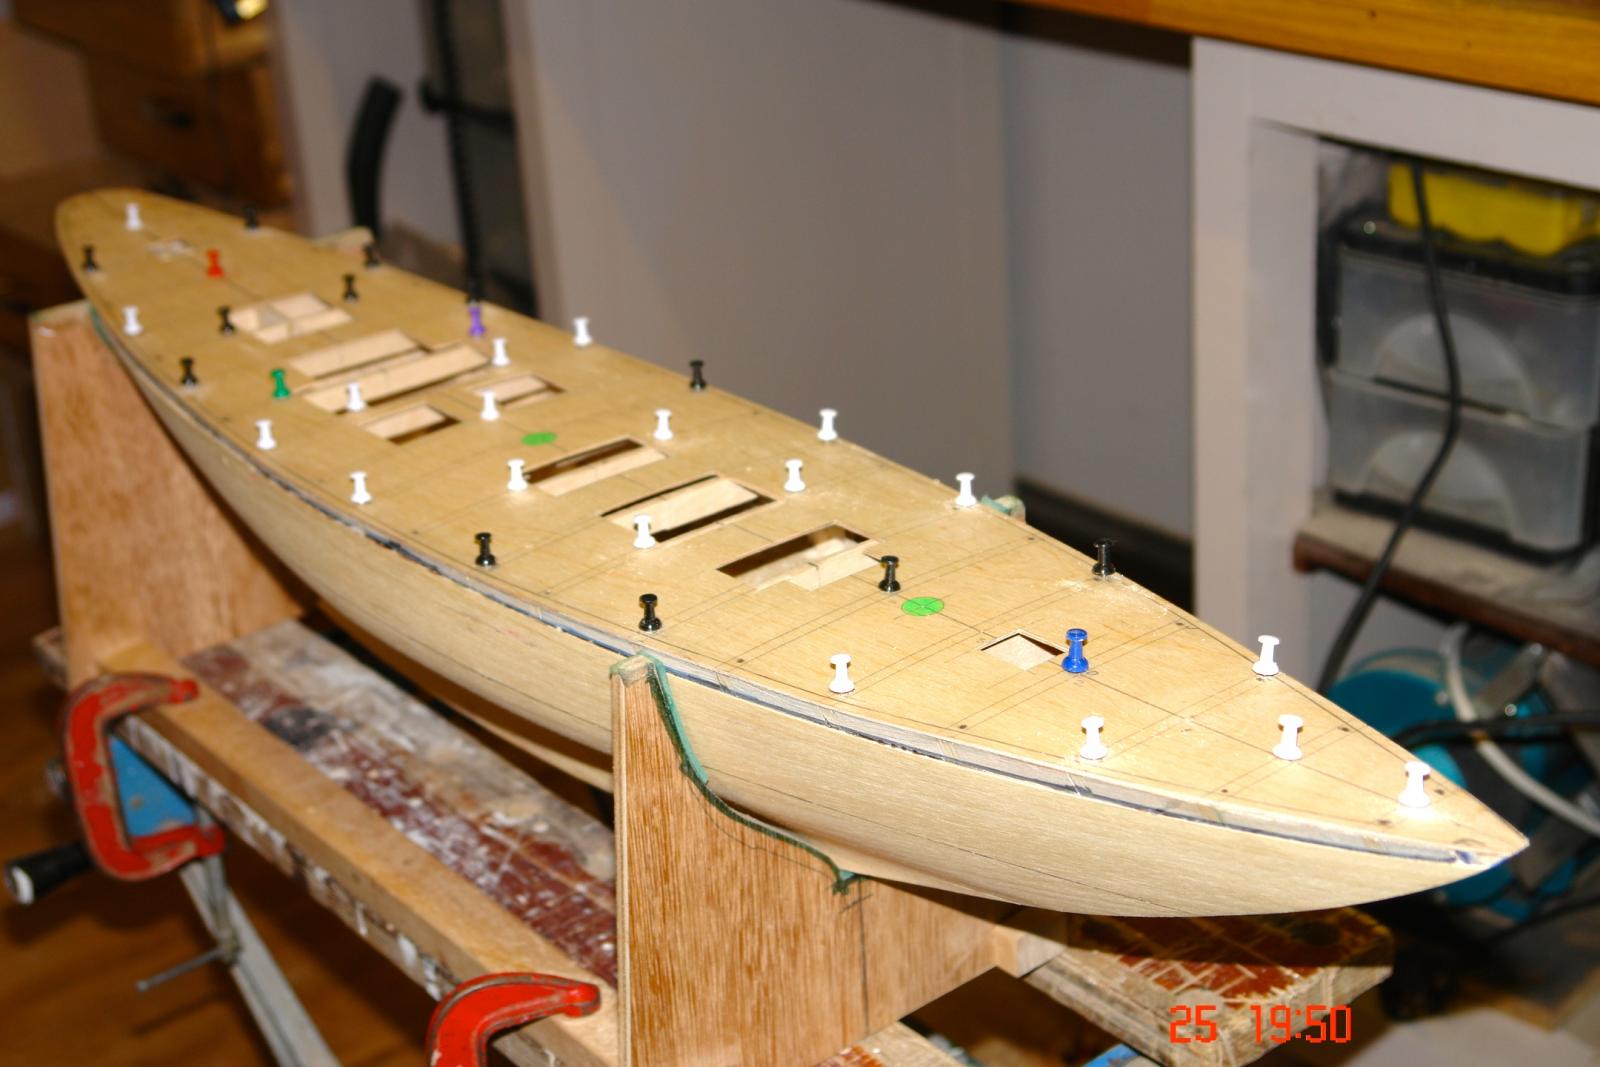
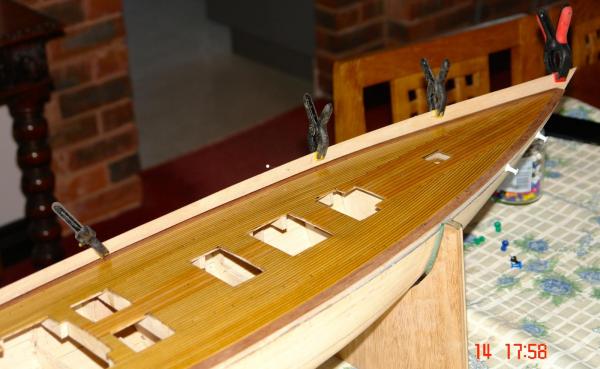
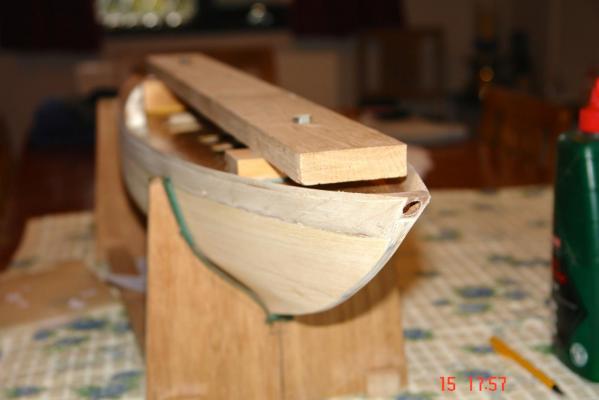
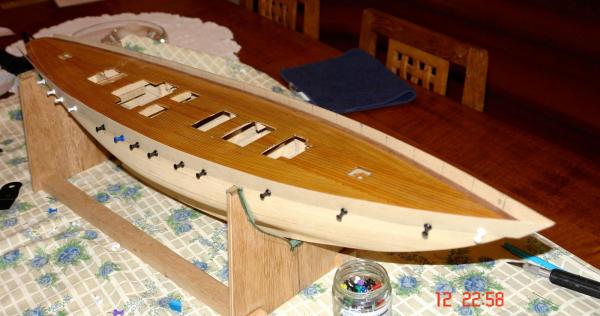
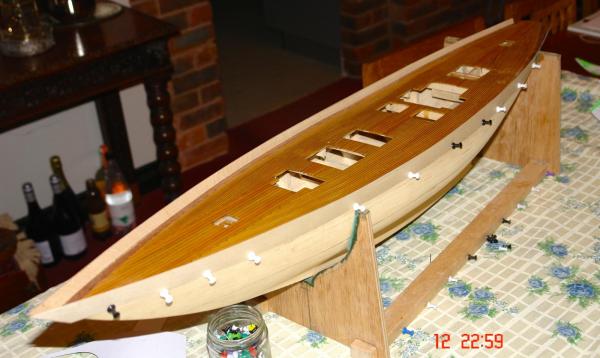
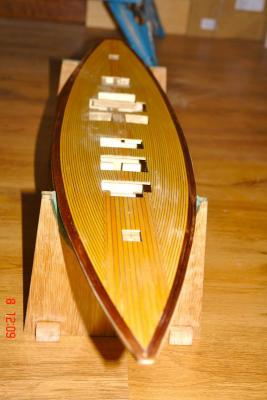
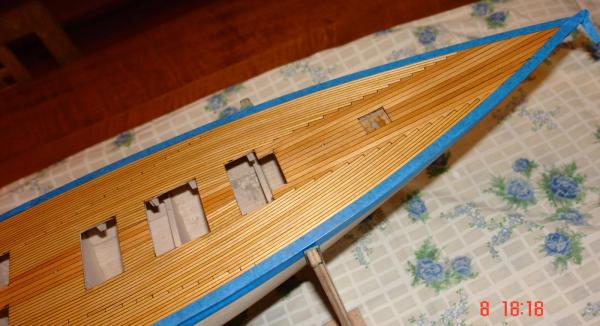
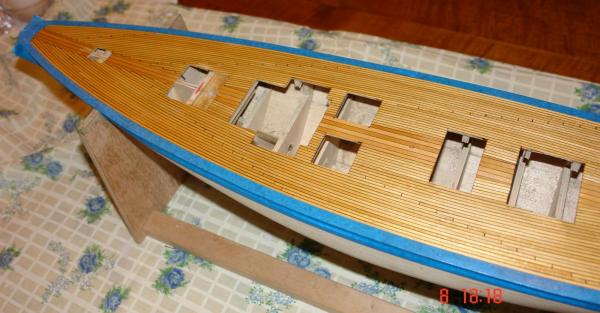
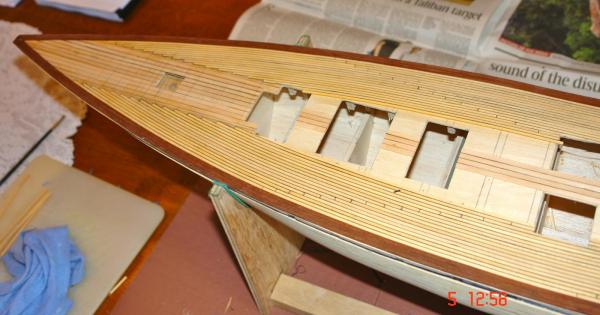
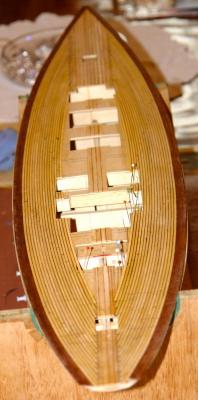
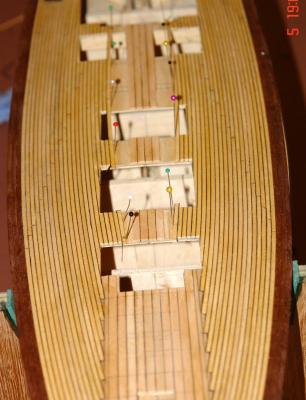
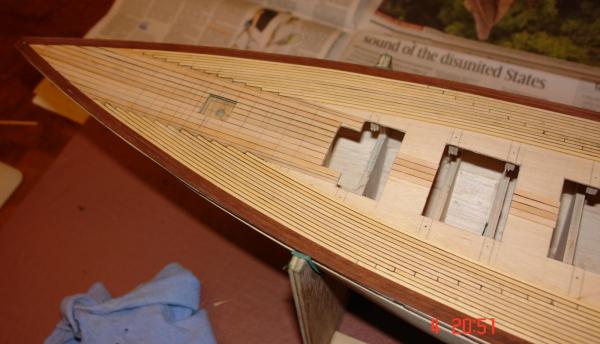
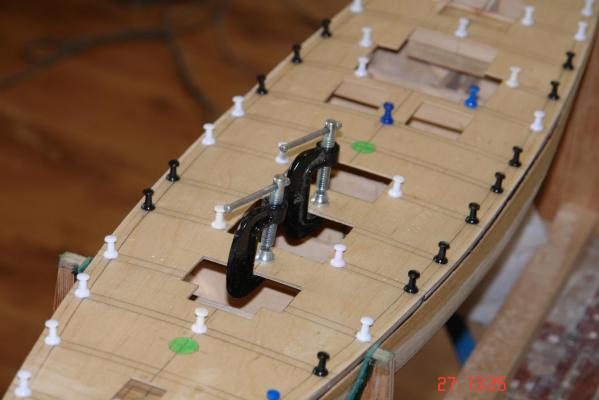
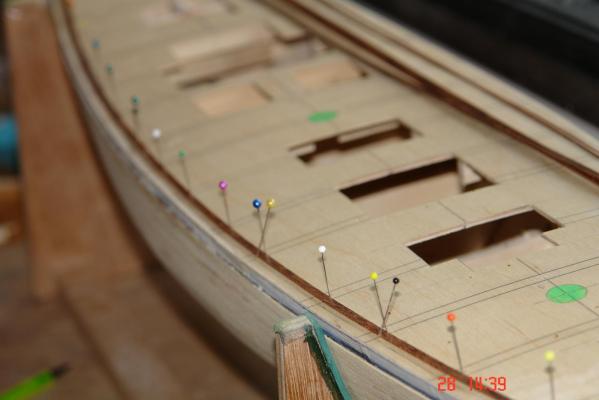
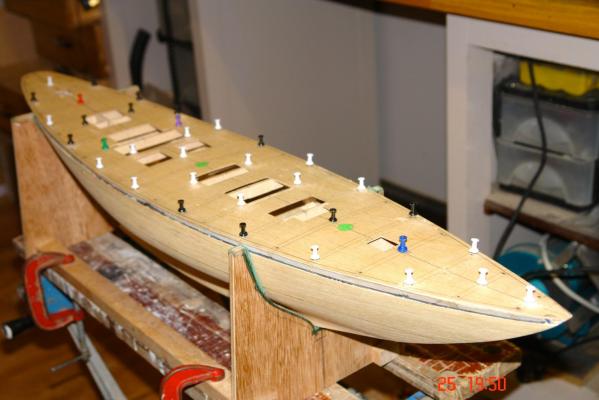
Slow progress but I did finish sanding the deck. I started with 120 grit emery cloth and removed all the plank thickness irregularities. I then used 400 grit wet and dry paper (used dry) to give a silky smooth finish. I used a damp cloth wiped over the deck to raise the nap and when dry I again used the 400 grit wet and dry. I repeated this twice. I also sorted out the stern planking detail. Time is drawing near when I will need to address the bulwarks so I decided to mount the plank required for inverted handling of the hull. To protect the deck rubber pads are attached to the bearers where they bolt to the hull. The plank is mounted parallel to the waterline so that the setting out of hull details (portholes etc) will be easier later on. Having completed the deck sanding I wanted to protect the deck from workshop grime. I decided to give it a few coats of satin finish varnish. I need to glue ribs etc to the deck edge once the bulwarks are in place so I masked the deck edge mahogany planks so that gluing would not be a problem at a later stage. The photos were taken with the 1st coat of varnish still wet.


- 882 replies
-
- 14
-
-
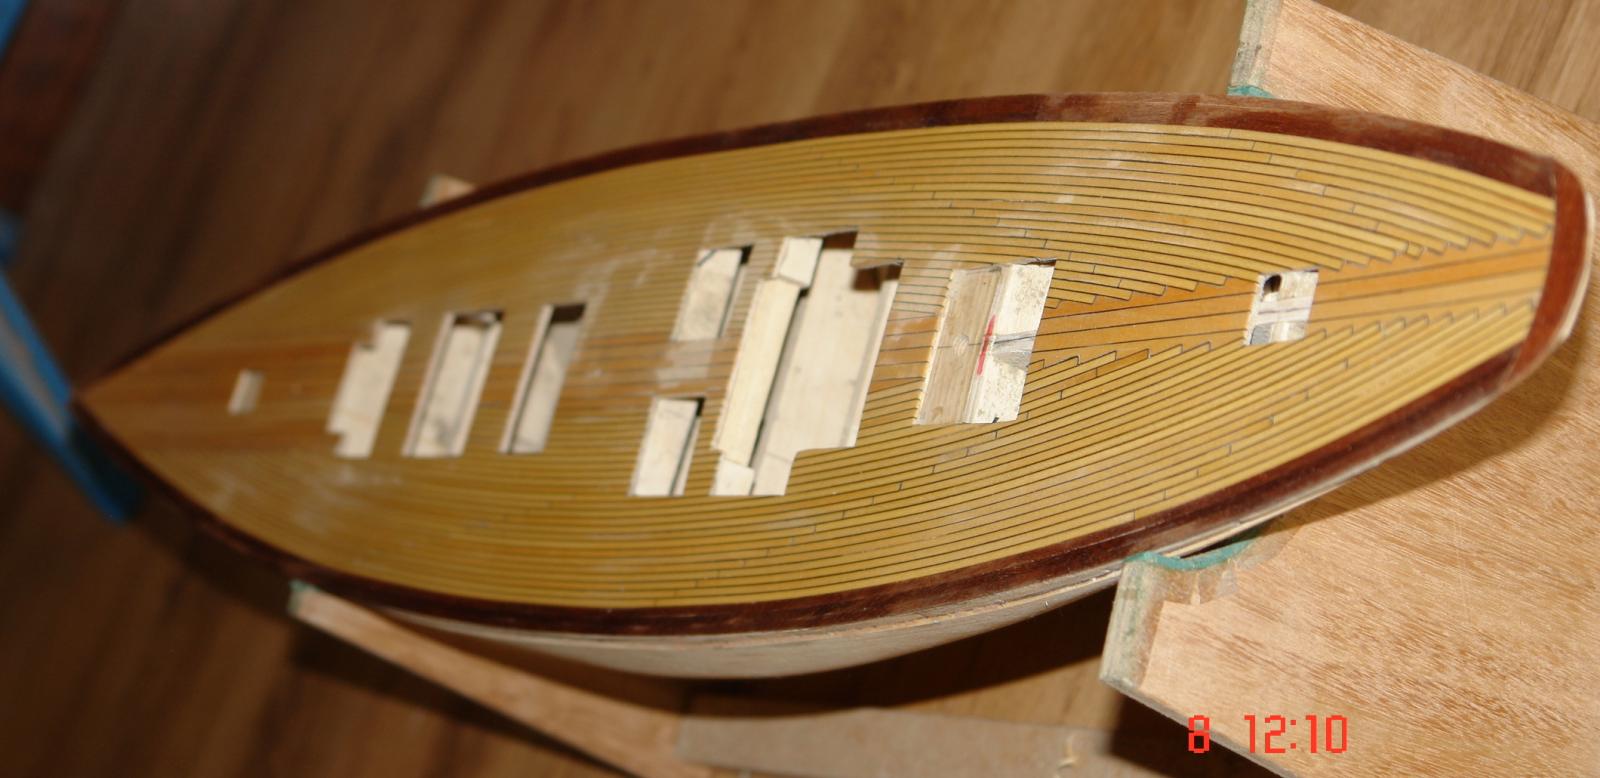
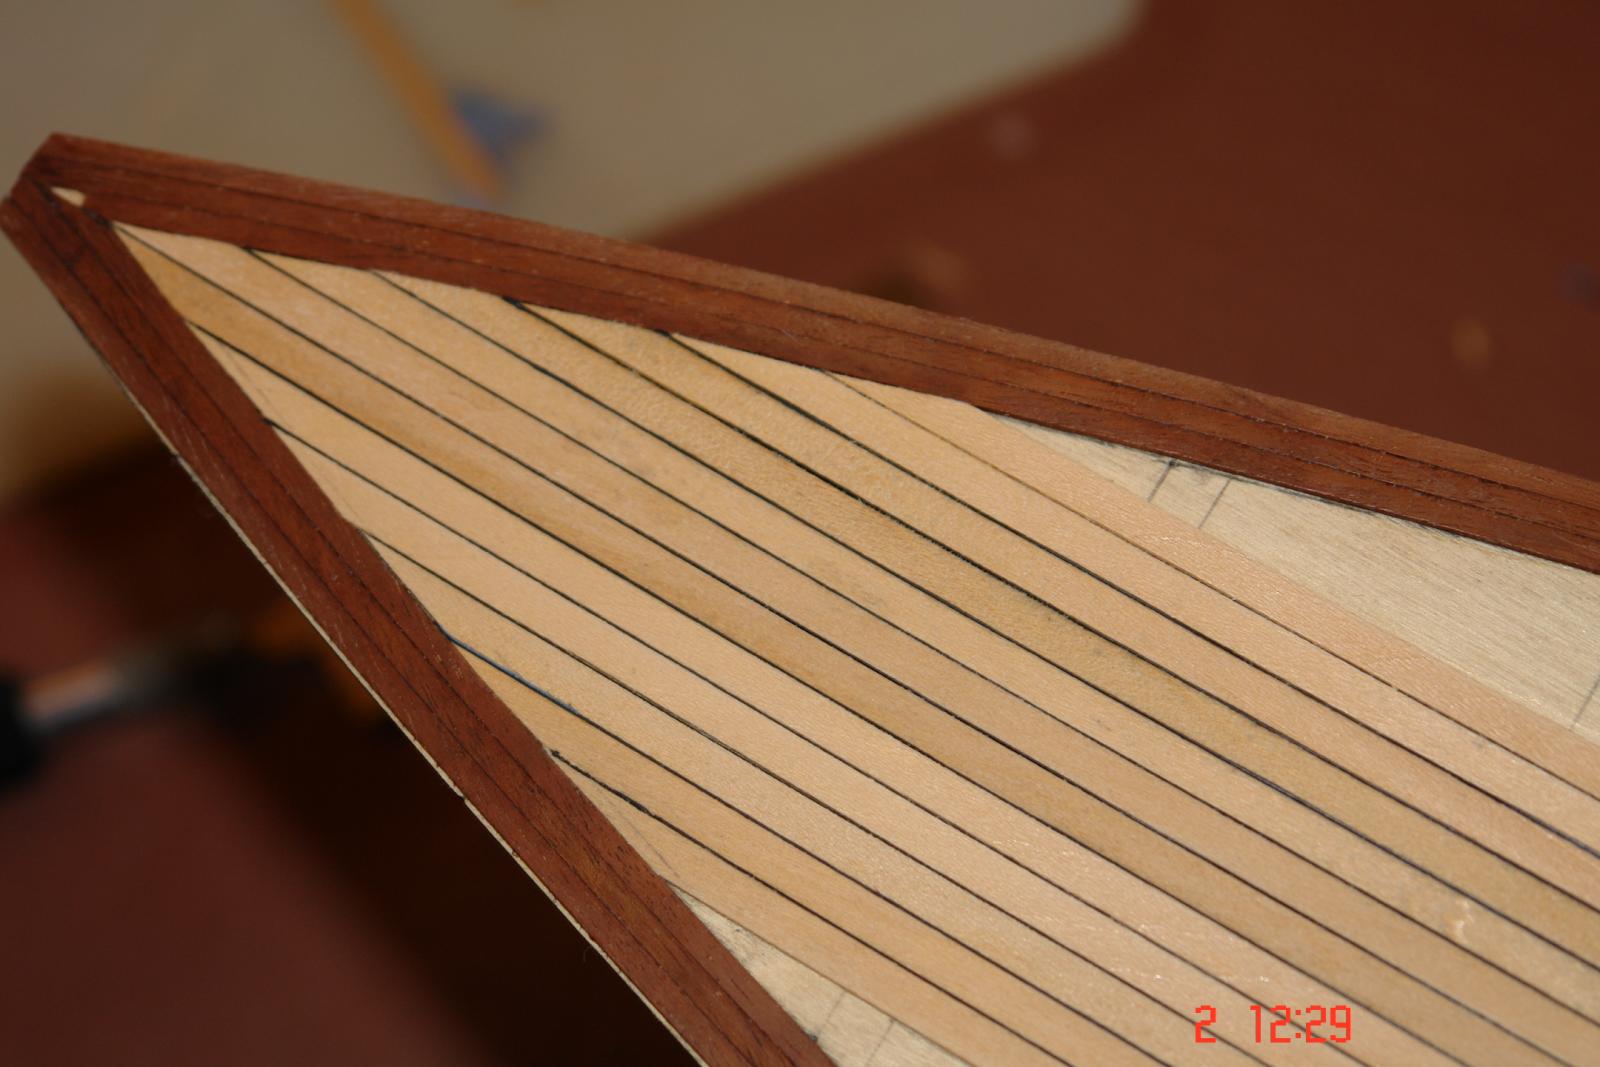
Hi Pete / Michael, I'm not really very quick - I just stuck at it, all day and some of the night. Putting the caulking in makes it quite fiddly and slow. Their must be a better way of simulating caulking but I don't know what it is. I bet their is a thread somewhere. Thank you for the comments.
-
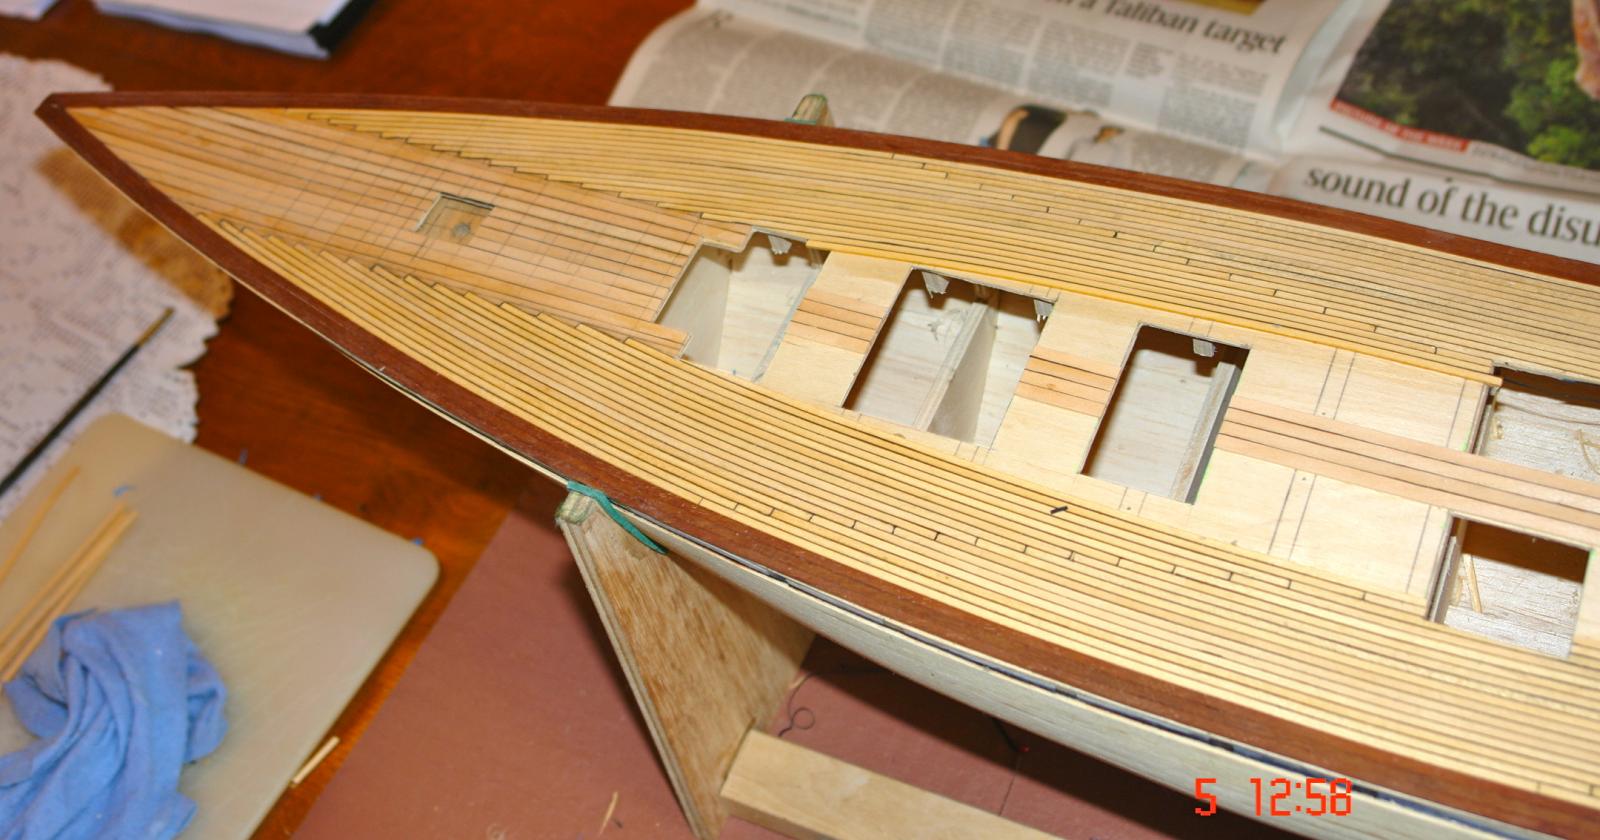
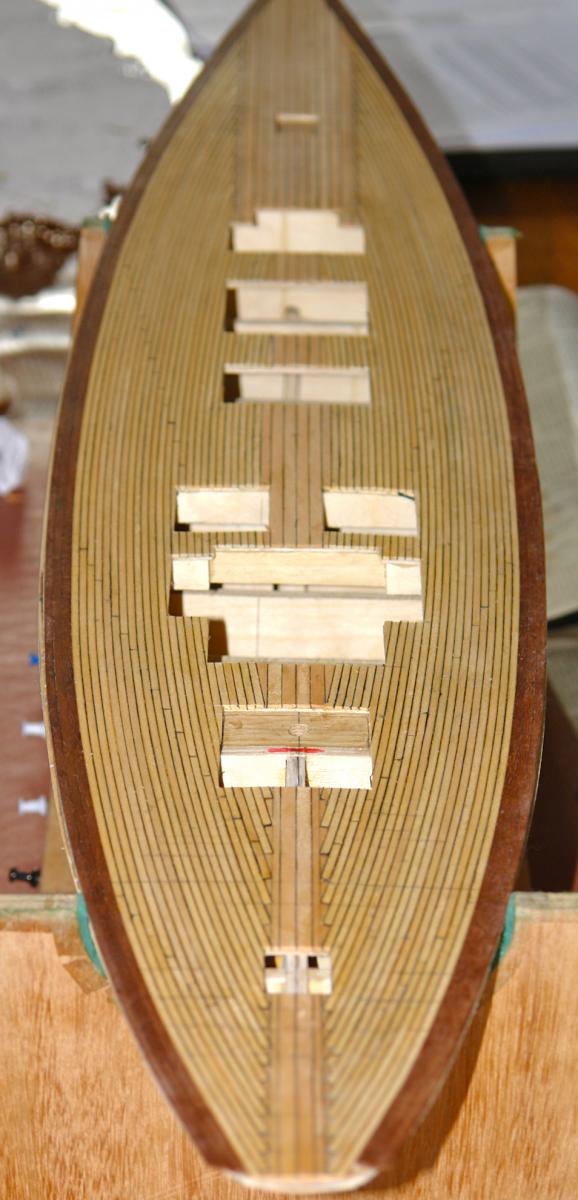
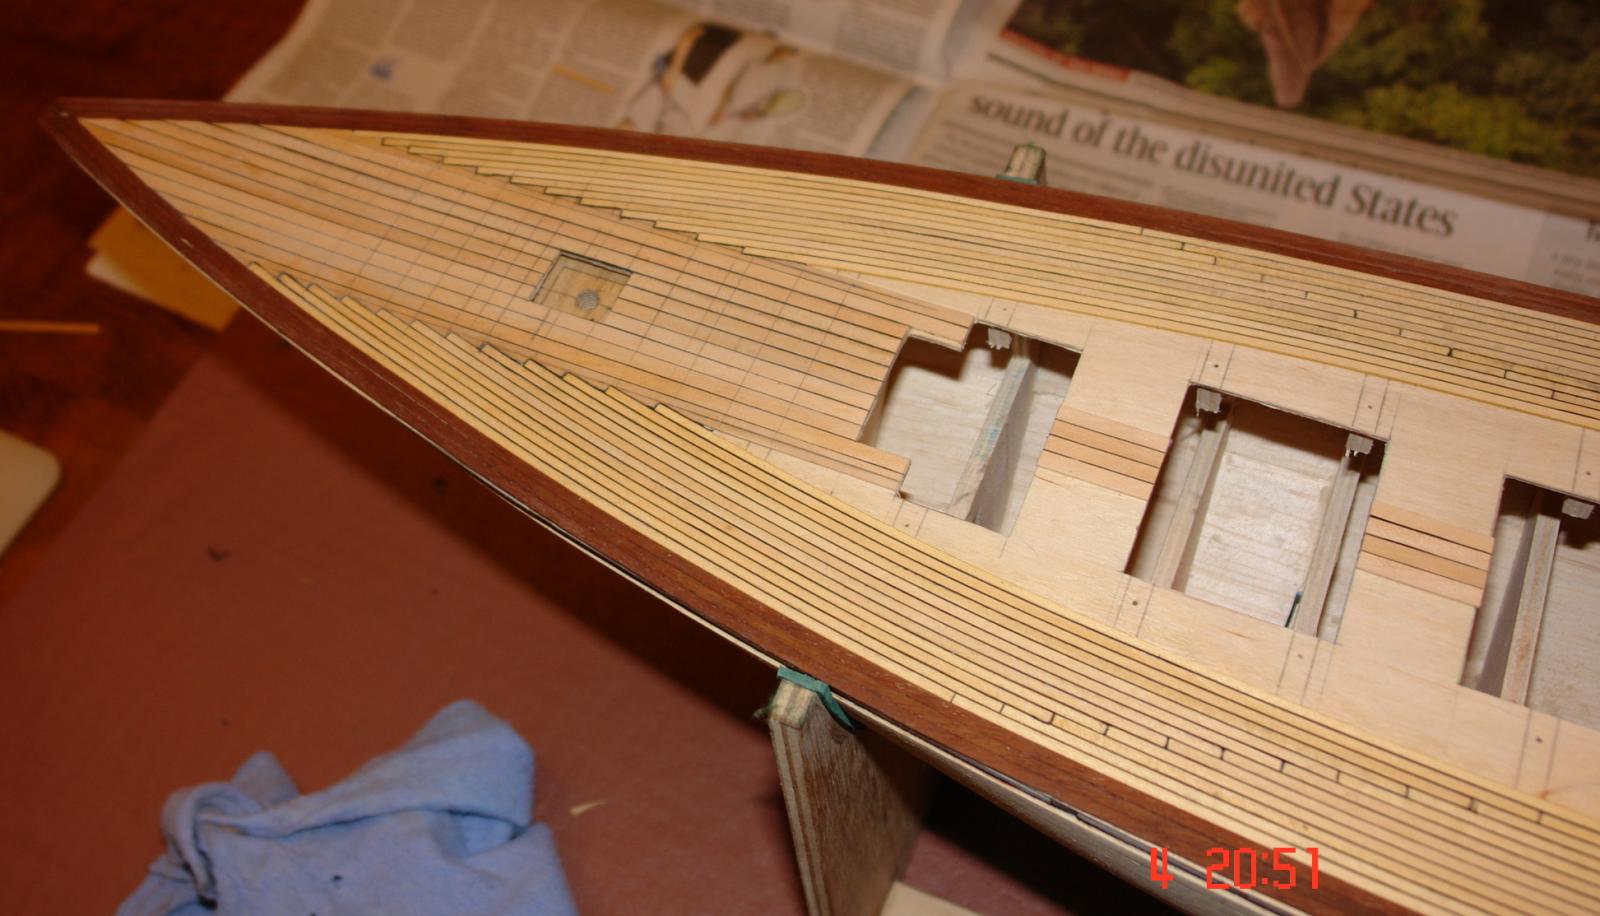
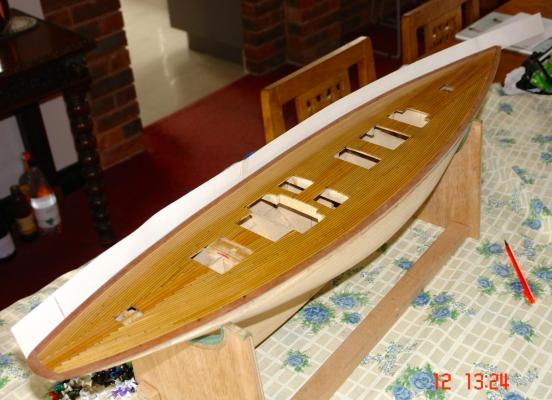
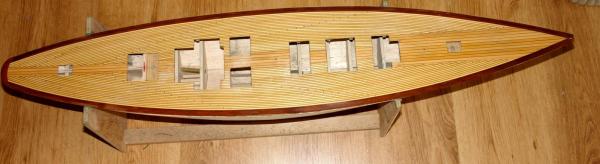
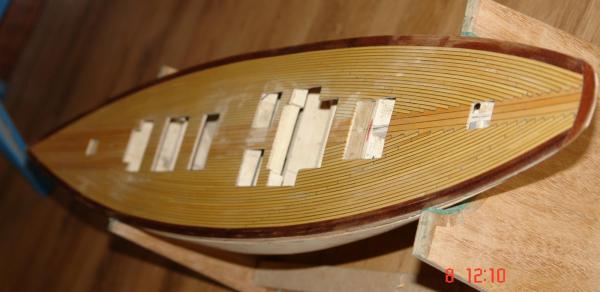
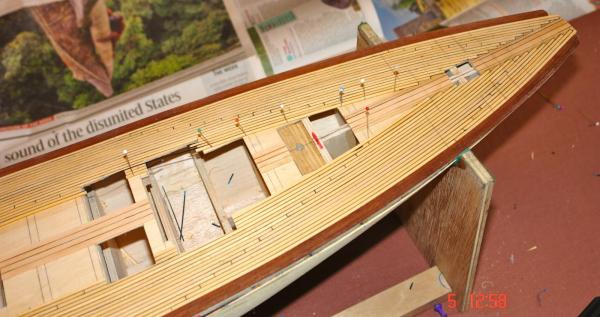
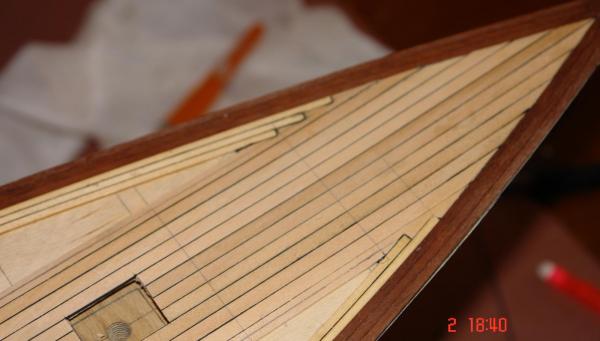
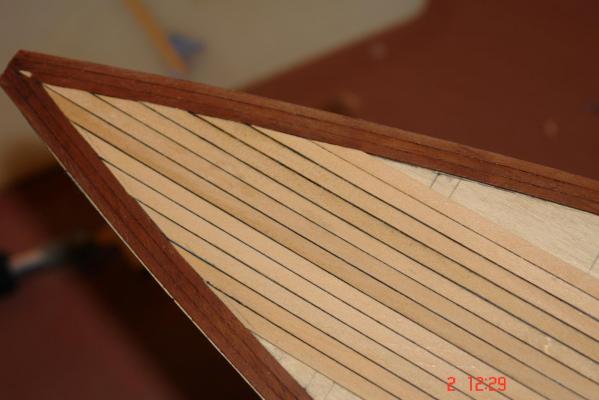
Deck planking complete - but as yet not sanded:- A quick post this time consisting mainly of photographs. Yesterday afternoon / evening and earlier today I completed the deck planking the initial photographs show where i started yesterday. The accurate marking and positioning of the deck edge planks paid dividends and by the time I reach the deck centre line the symmetry was virtually spot on. No doubt an element of luck played its part. Deck sanding tomorrow...........

- 882 replies
-
- 16
-
-
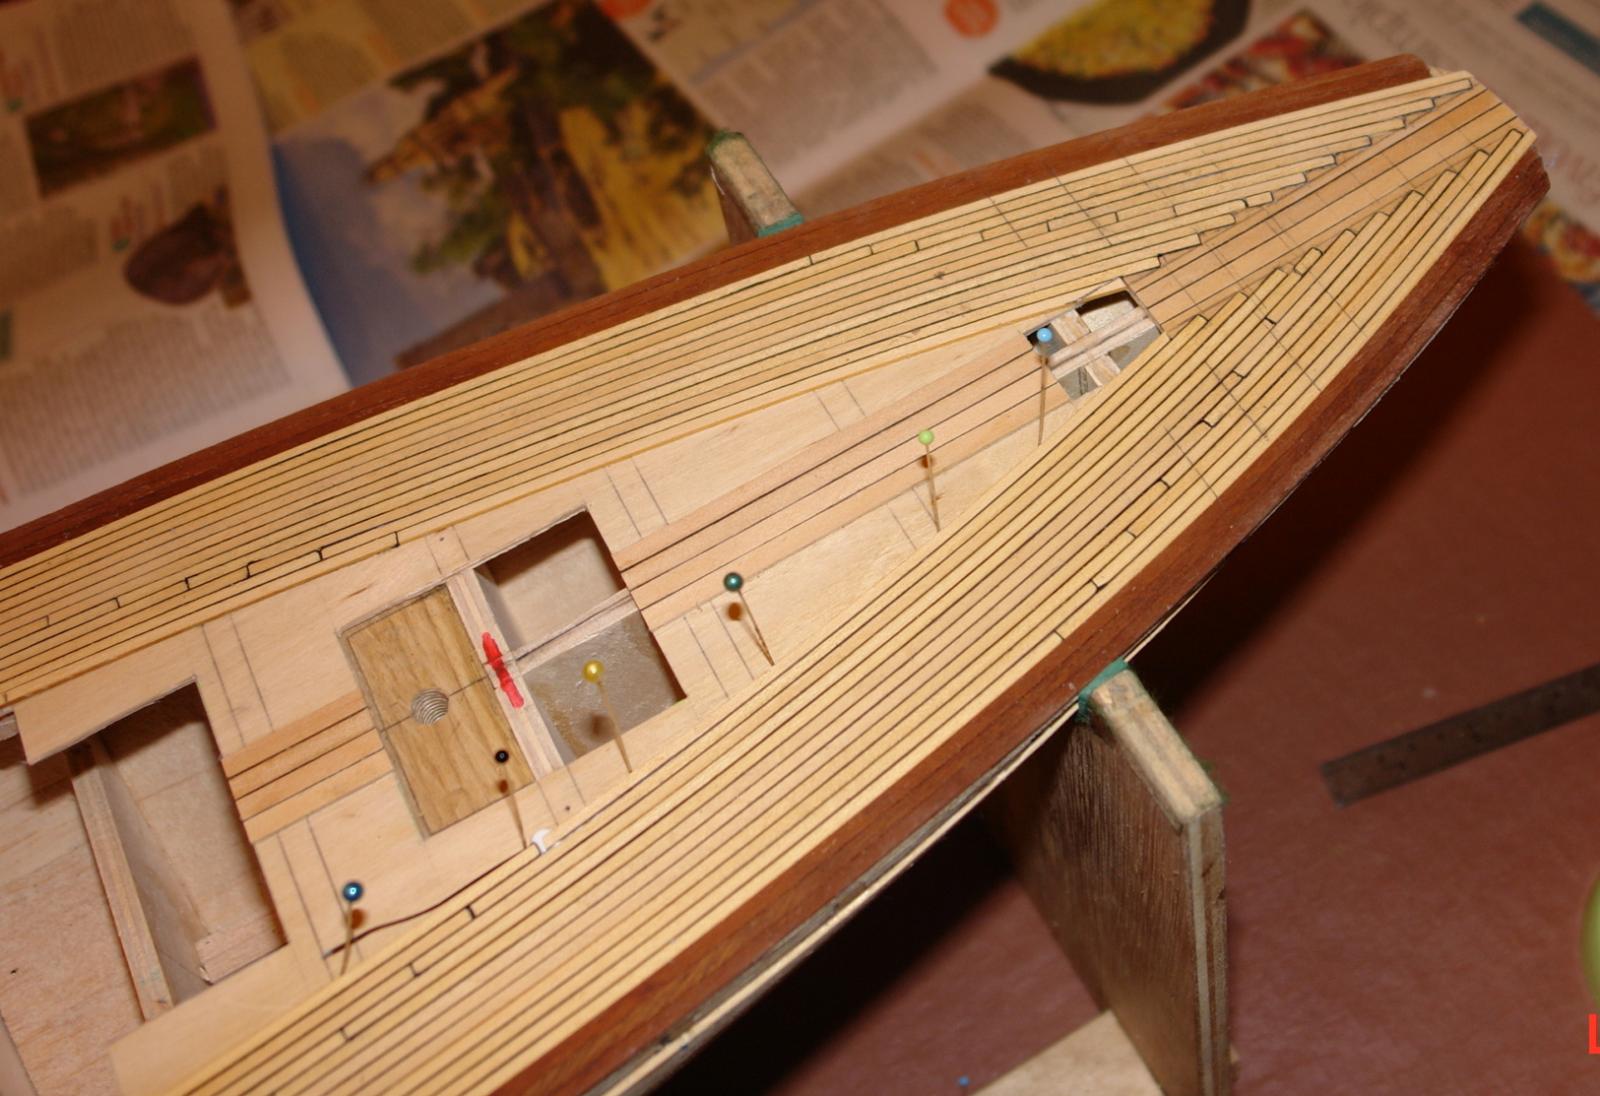
Hi Mark Yes the deck planking pattern is a bit unusual. I'm not sure why they would do it like that but it may just have been a consequence of the timber they had available in the ship yard. Hello Pete Altair is a beautiful yacht and I hope I do it justice.
-
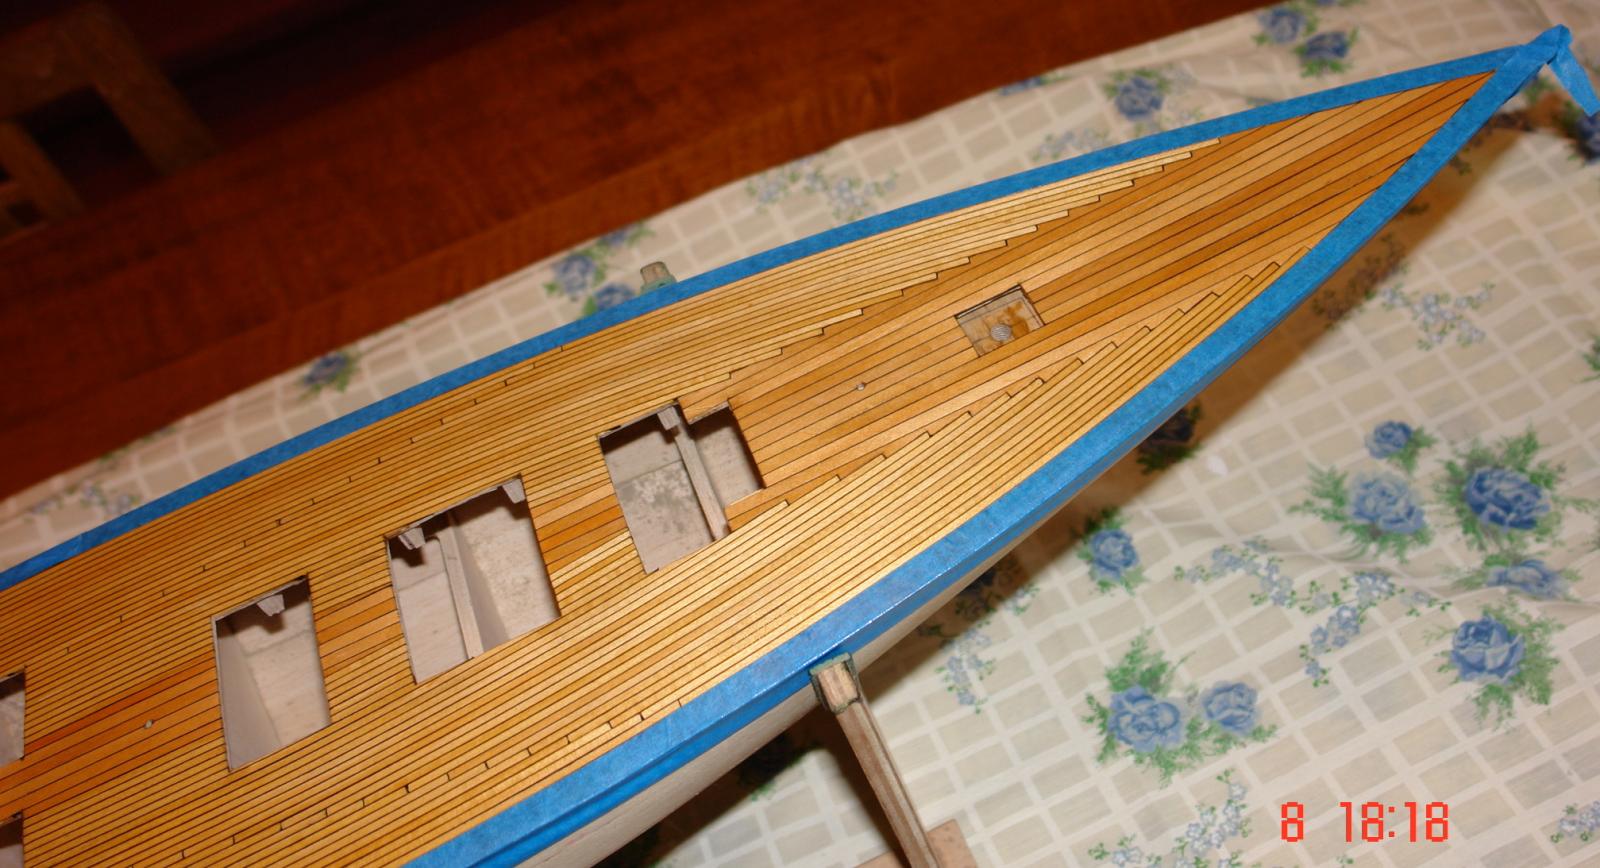
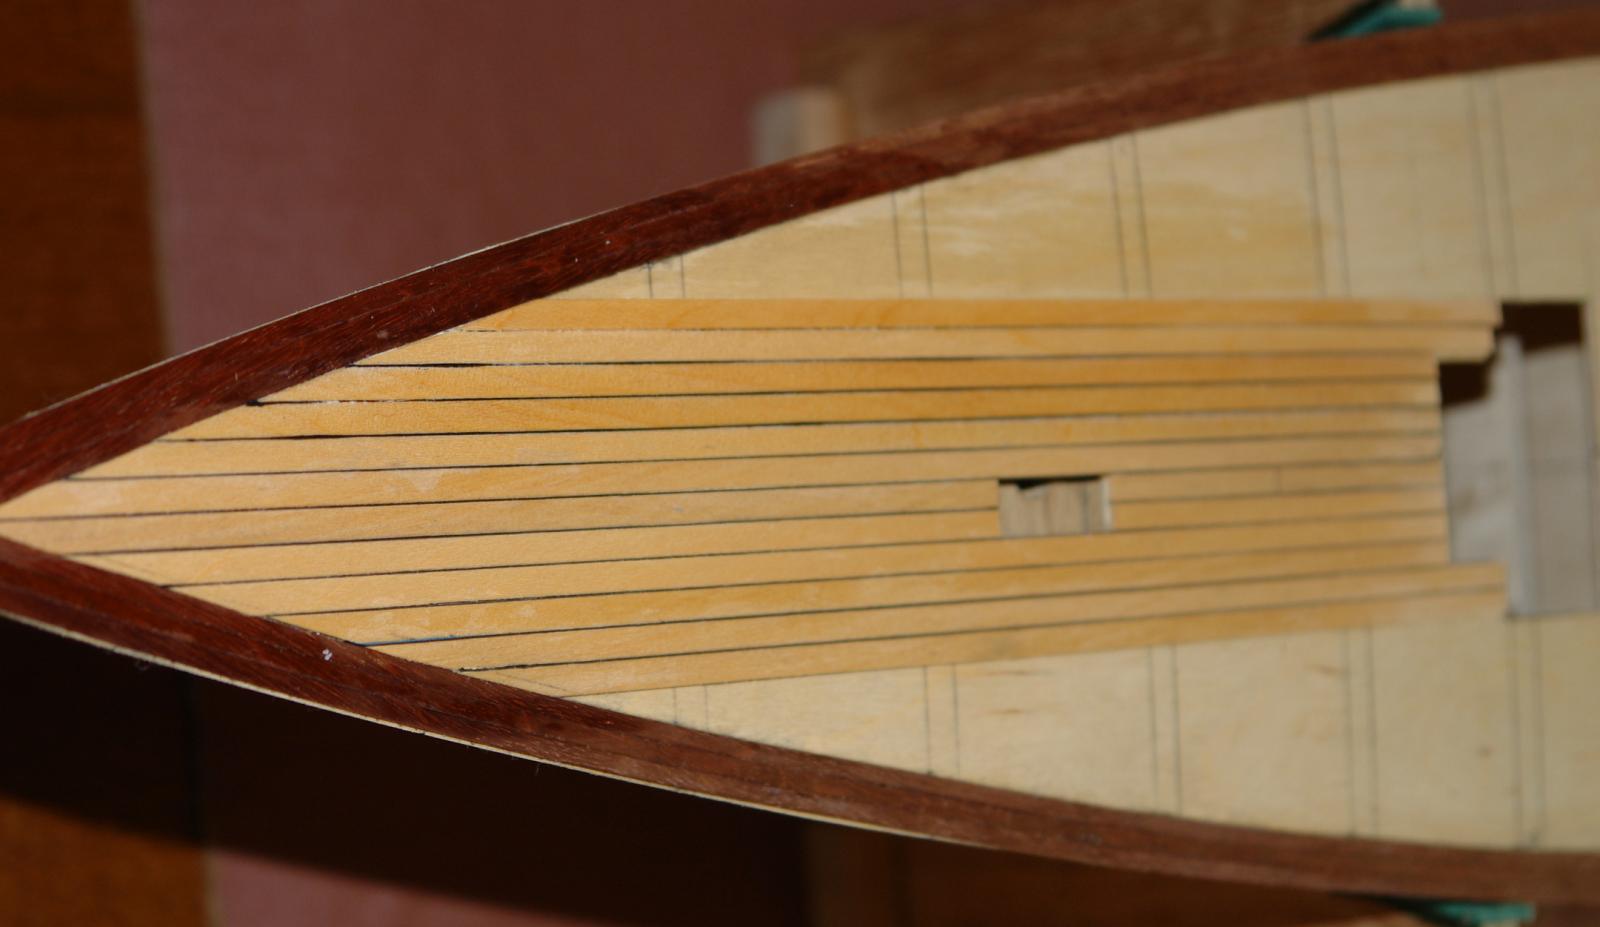
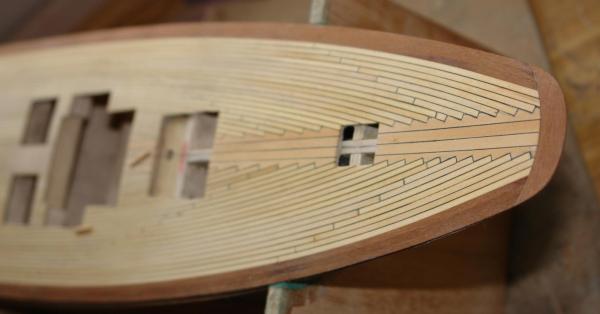
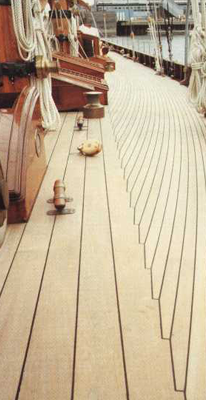
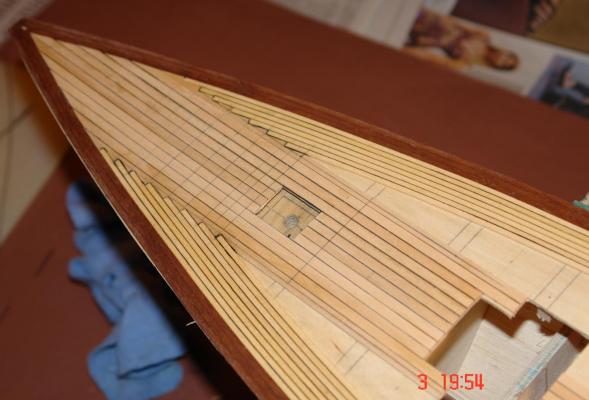
More deck planking:- I made a start on the planking which follows the contour of the deck edge. As explained previously these planks are much narrower. I made the planks .108 inch wide x 10 inch long which is 3.5 inch by 26 foot at full size. It's probably worth posting a few images of the real thing at this point:- I wanted the deck to be representative of the real thing but accepted that absolute accuracy wasn't quite achievable. So here are a few images of progress to date:- I was progressing well until my helper arrived and demanded some exercise!


- 882 replies
-
- 20
-
-
Help my boat is bent !
KeithAug replied to maltbyguy's topic in Building, Framing, Planking and plating a ships hull and deck
Nicely done - you wouldn't notice unless told. -
Hi Jond I think using the balsa method to create a plug is a possibility. I like wood finishes so for me it wasn't an option. My plan is to second plank in mahogany and then finish above the waterline in white enamel with a polished mahogany finish below the waterline. As you say the hull is very light at the moment. Thank you Bedford / John for your feedback.
-
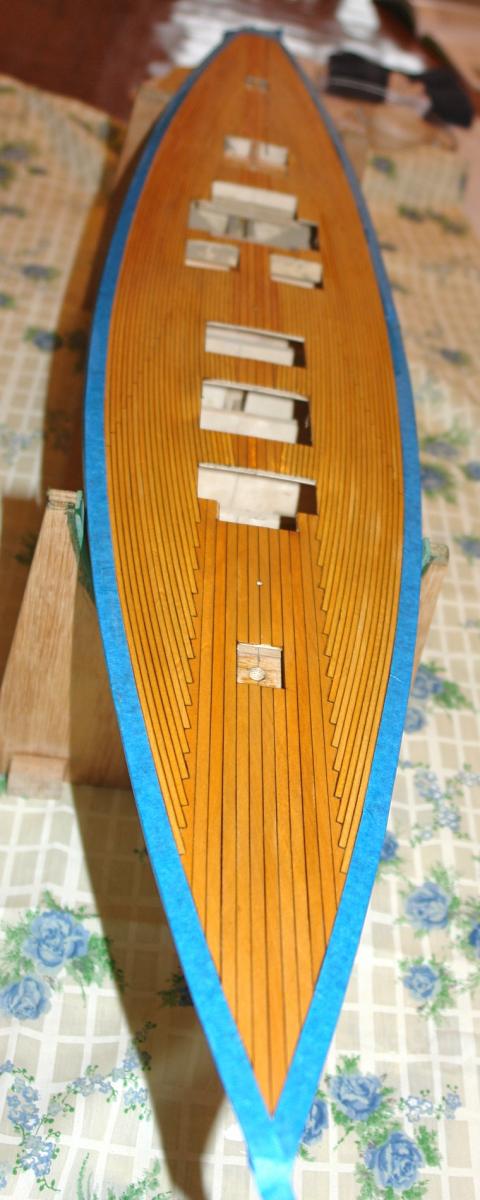
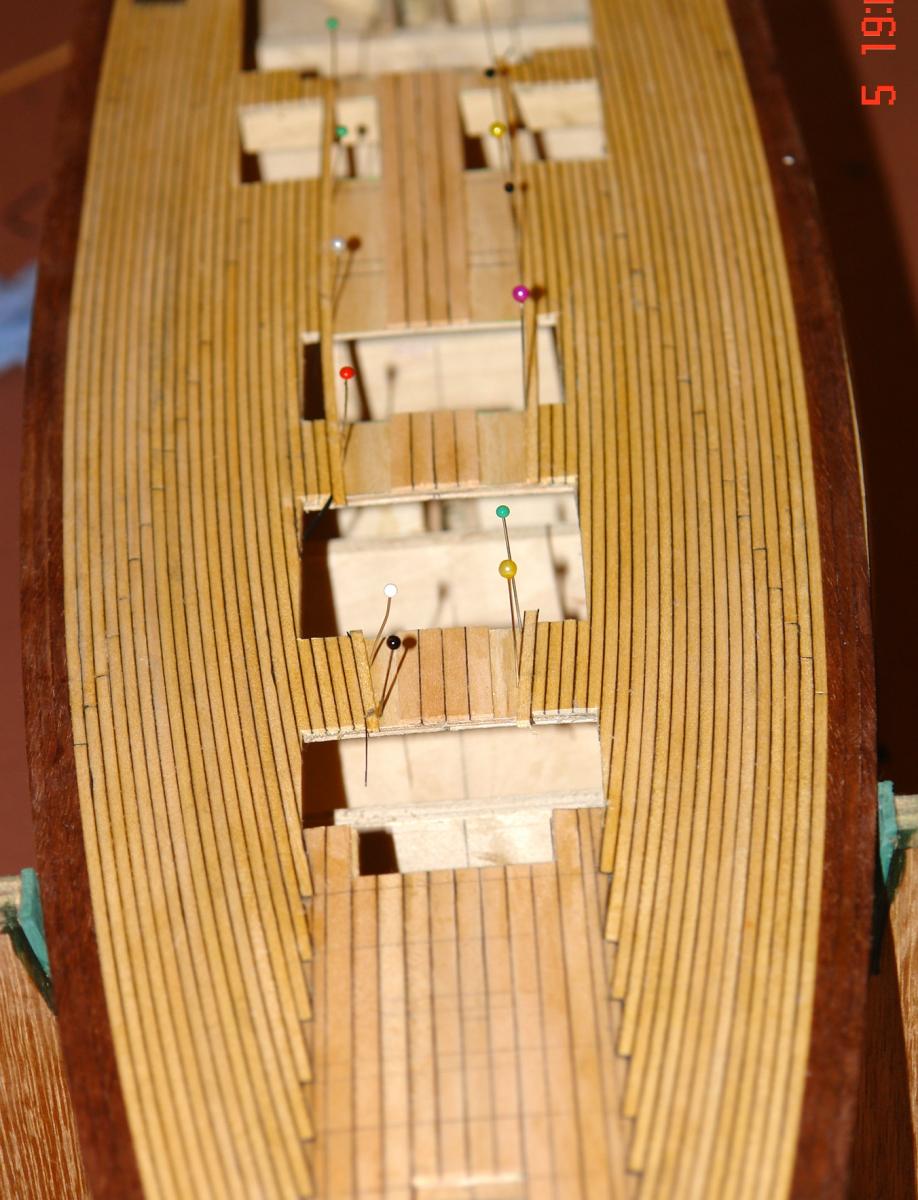
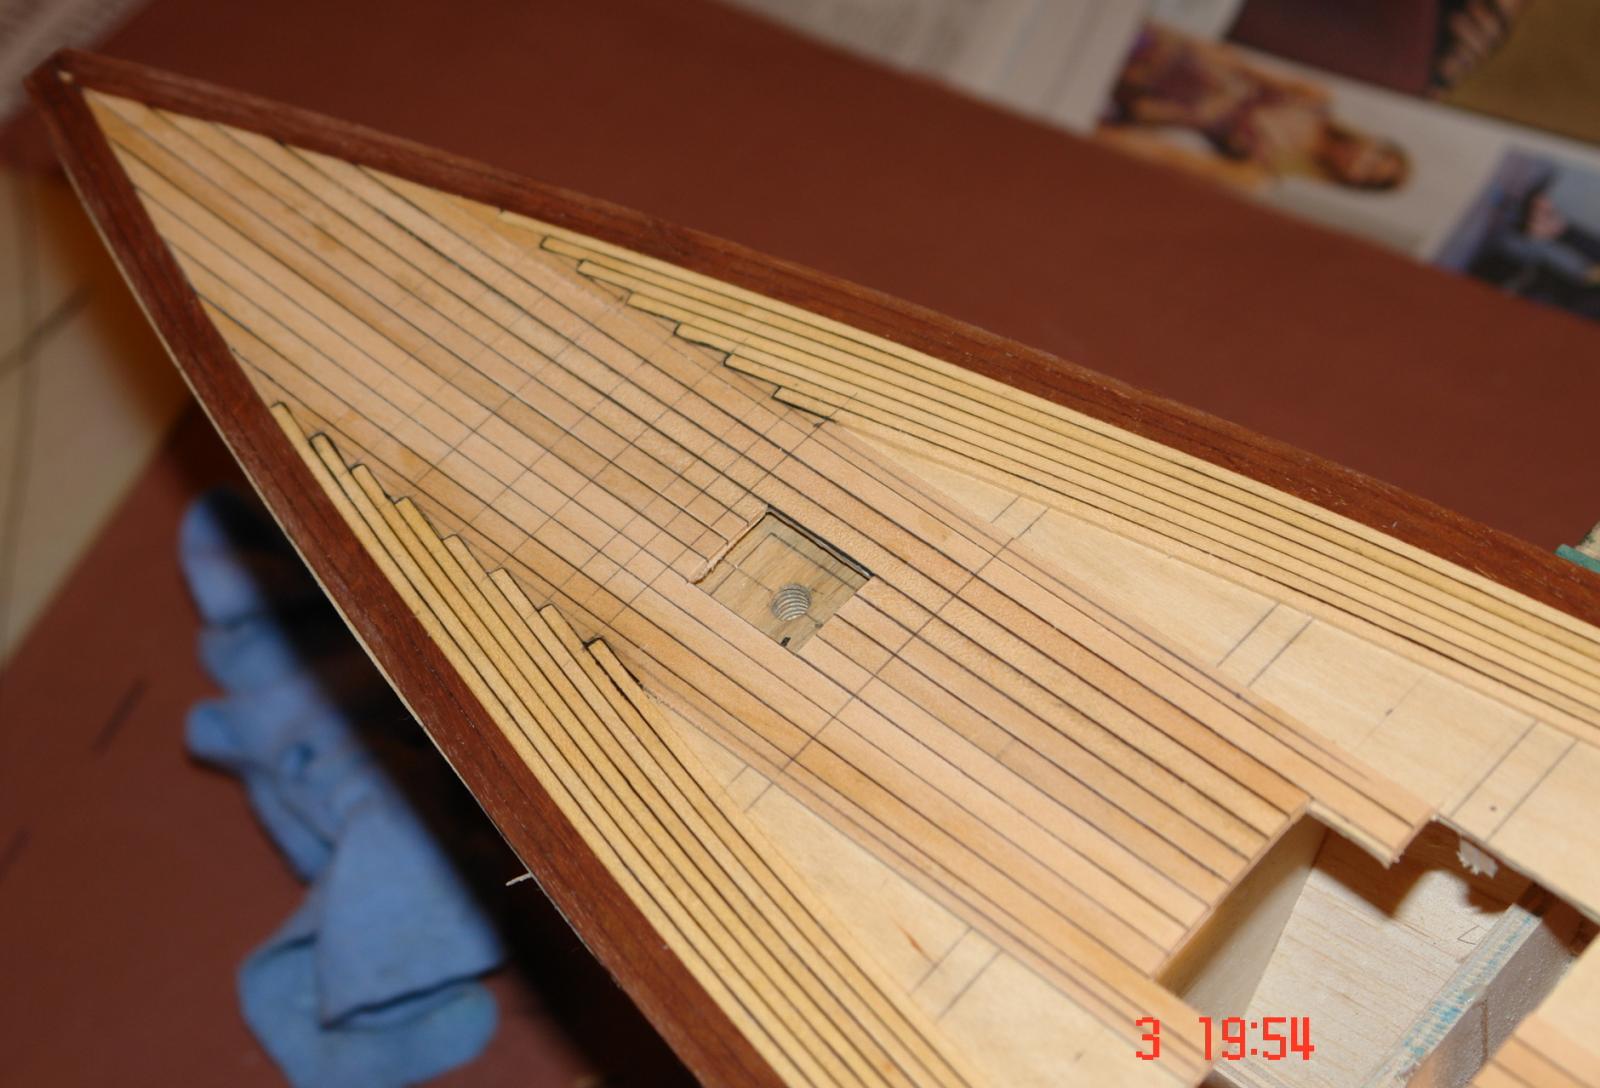
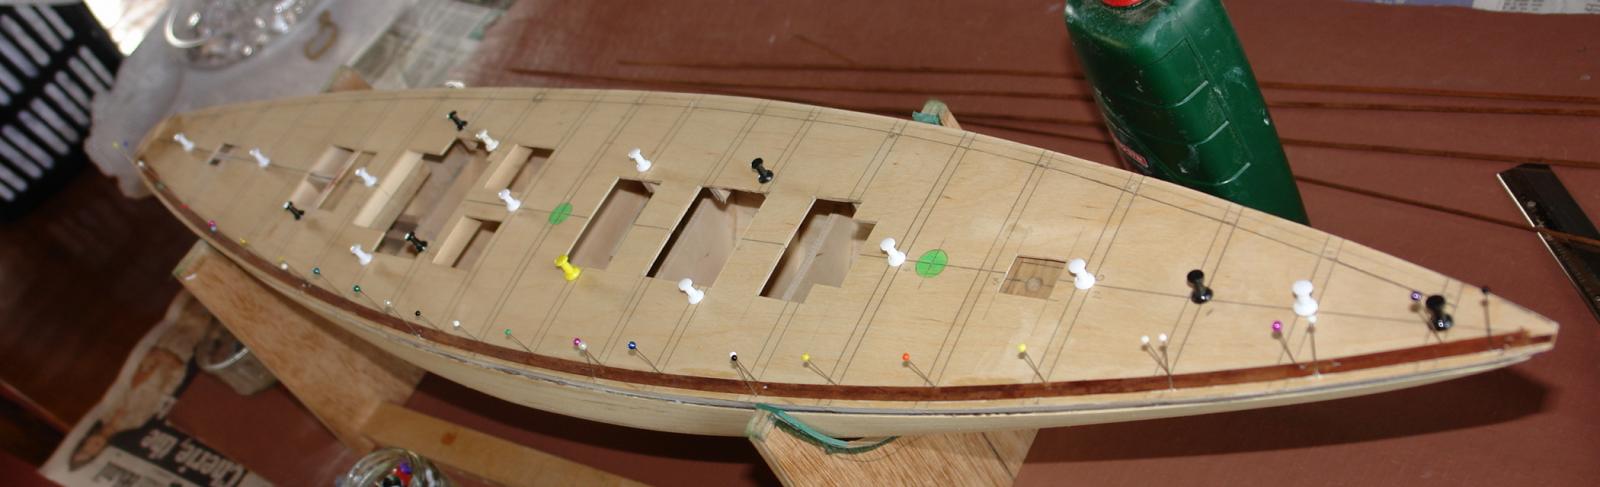
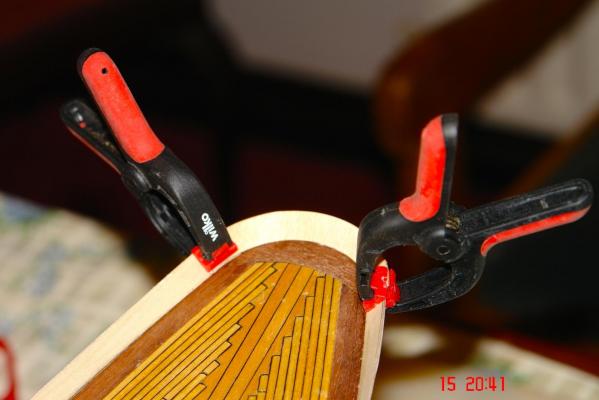
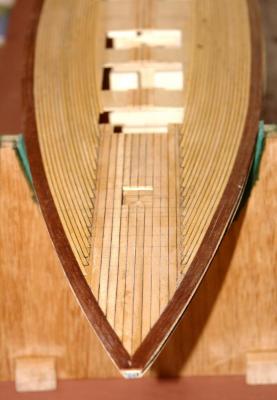
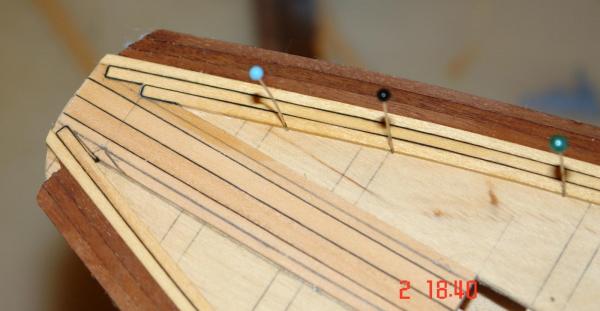
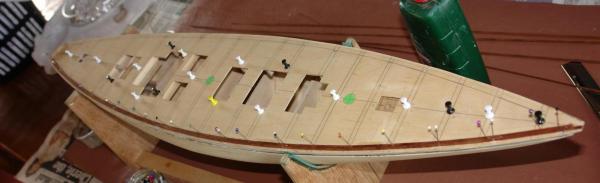
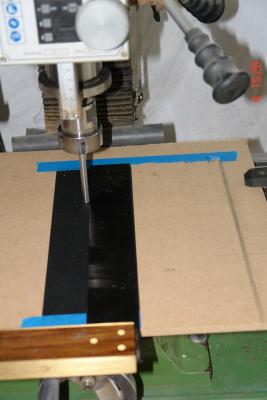
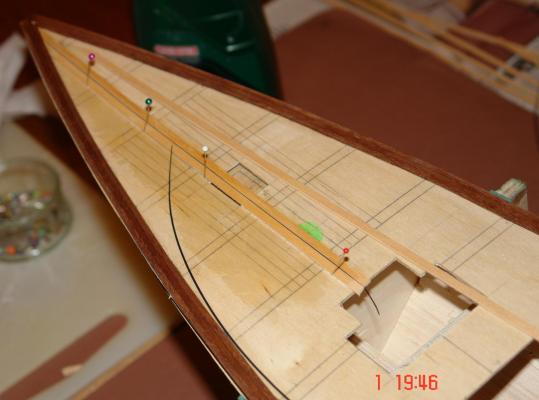
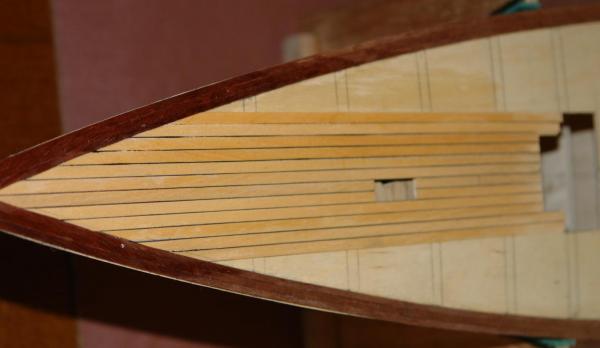
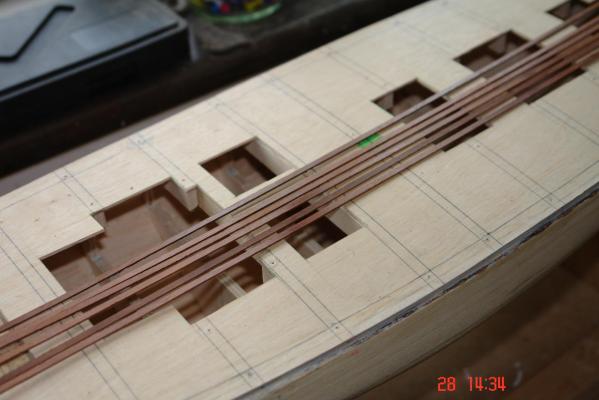
Starting the deck planking:- I decided to make the deck planking .045 inch thick. This is thicker than the previous build (Endeavour) which was circa .030 thick. The additional thickness should make the caulking easier. The mahogany deck edge planks were glued in place taking great care to make sure they were equidistant from the centre line. It's really easy for the deck planking to become unsymmetrical about the centre line and this can look pretty bad. I wanted something that looked like teak for the deck planks and the nearest thing I had were slats recovered from a broken wooden venetian blind. The deck planking is a bit unusual in design in that the centre line planks on the fore deck are greater in number than over the remainder of the deck. The centre line planks are also wider than the other deck planks. I decided to go for a width of 0.188 inch for the centre line planks which equates to a scale width of 6 inch. I decided to caulk between the planks using .008 inch thick black card. This equates to a thickness of 1/4 inch which is about right fro deck caulking. The caulking was accurately cut into strips .045 inch wide using a set up on the mill. This consists of a MDF board clamped to the mill table with a steel bar clamped into the chuck to form a guide. With the card taped to the MDF the steel bar is positioned a couple of thou above the card and this forms the back stop for the set square. The mill table is then indexed in .045 inch steps and at each step a strip is cut from the card using a craft knife. The centre line planks are then glued in place - making sure they are symmetrical about the centre line. In the photos below you can see one of the caulking strips laid on the deck and the tail of one of the installed strips. The centre line planks are now complete but at this stage not sanded. The caulking effect looks pretty good.

- 882 replies
-
- 13
-
-
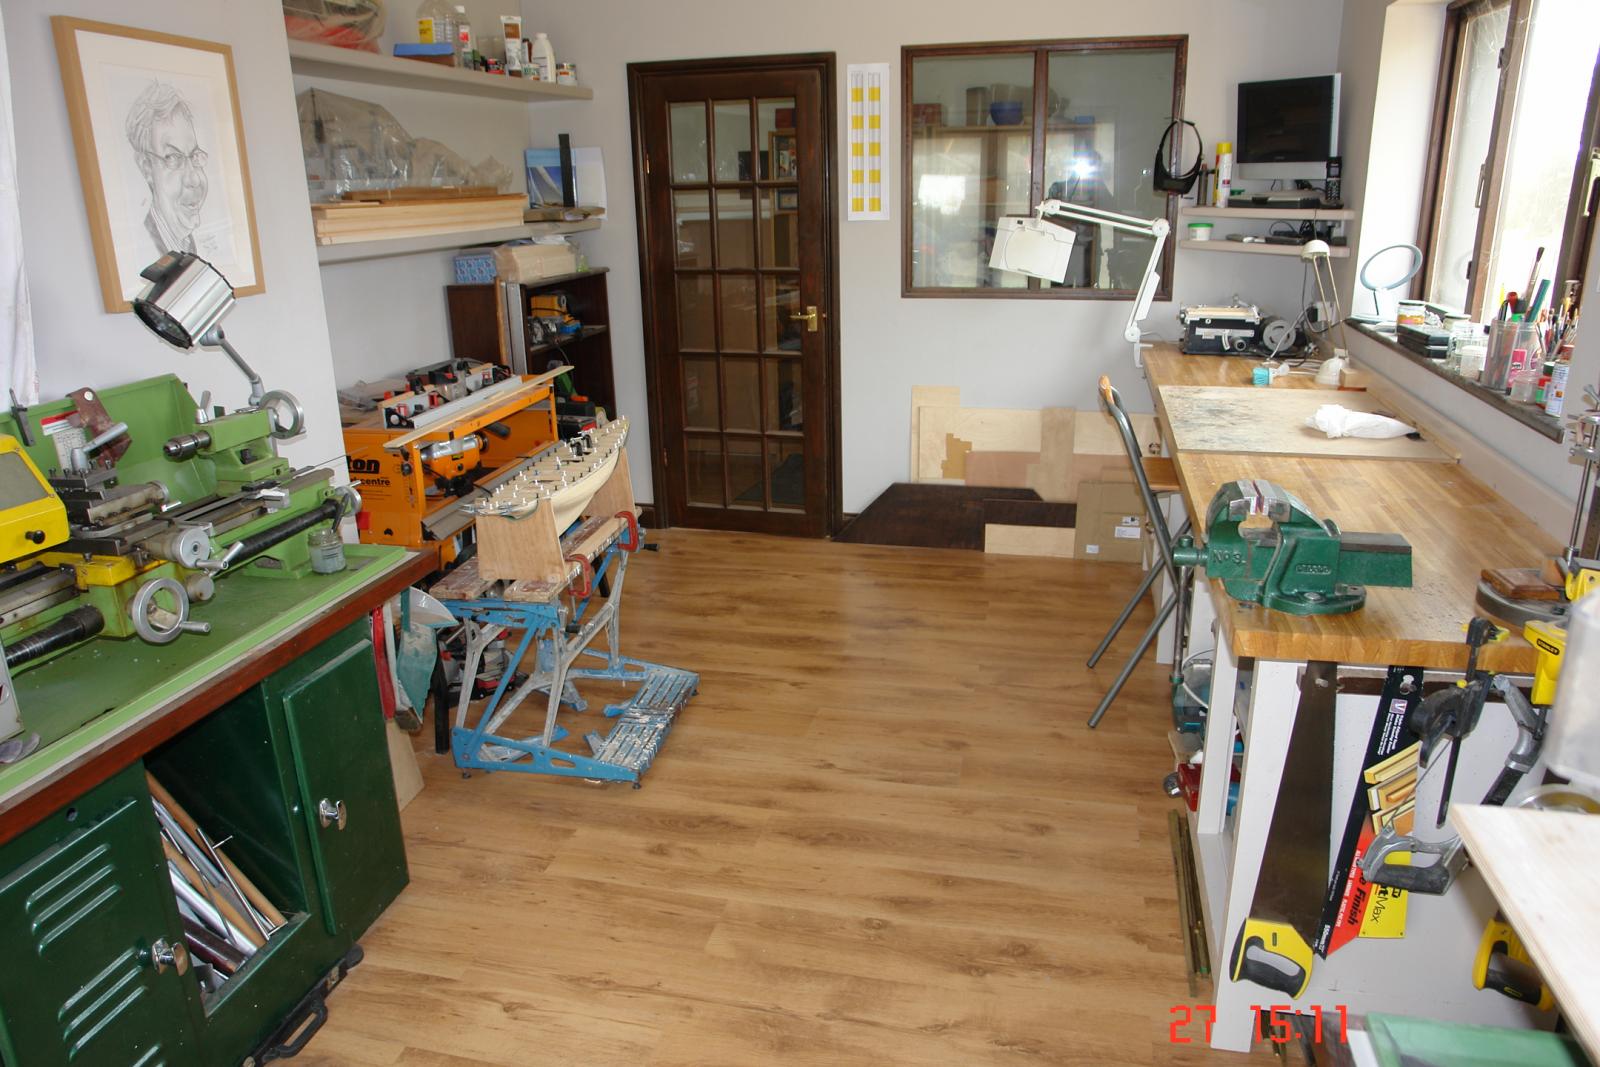
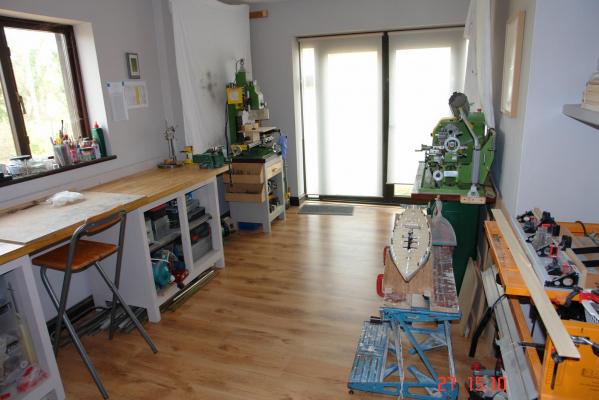
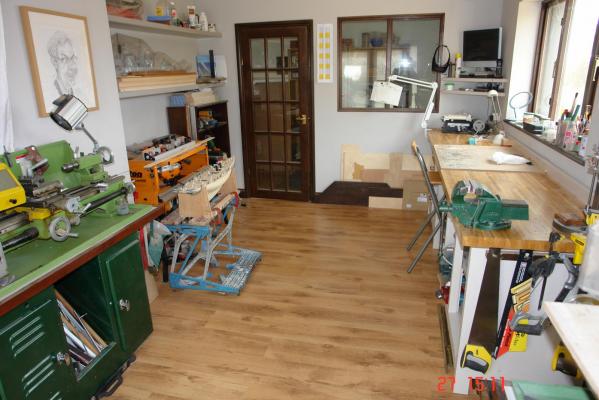
Thanks Pete I stayed at Coeur d'Alene once on the way to visit the Scablands and Glacier NP. A nice part of the world. Progress of a different kind! Having glued the deck in place and strengthened the areas unsupported by frames (g clamps in photo), I thought I had better take stock. For the deck edge planks I needed to cut .040" x .130" mahogany strips from a 40"x12"x7/8" former table top. This involved planing and sawing operations on my full size wood machines as well as sawing on the Byrnes saw using TCT and slitting saw blades. Multiple operations and setting on different machines is always something I am inclined to put off. This instance was no different and I found myself looking for something else to do. My diversion project started out as cleaning up the workshop (photos attached) but very quickly expanded into clearing out my tool draws. I set myself the challenge of throwing out all the tools that I couldn't remember having used in the last 20 years. It was quite a haul but I failed with a few items that I thought might come in useful some day!!! They will probably be thrown out by the kids when they come to sort out my affairs in another 20 years time. The up side though is that I discovered stuff that would be useful if I had only remembered that I had it. Having exhausted all my diversionary jobs I made the 6 deck edge planks, yawn! I have a question for all you experienced posters. I see that when you sign off your posts you frequently attach reference to all your past, ongoing an future builds. I assume that you don't type this stuff out every time and that somehow you have set it up automatically. How do you do this please? Keith

- 882 replies
-
- 12
-
-
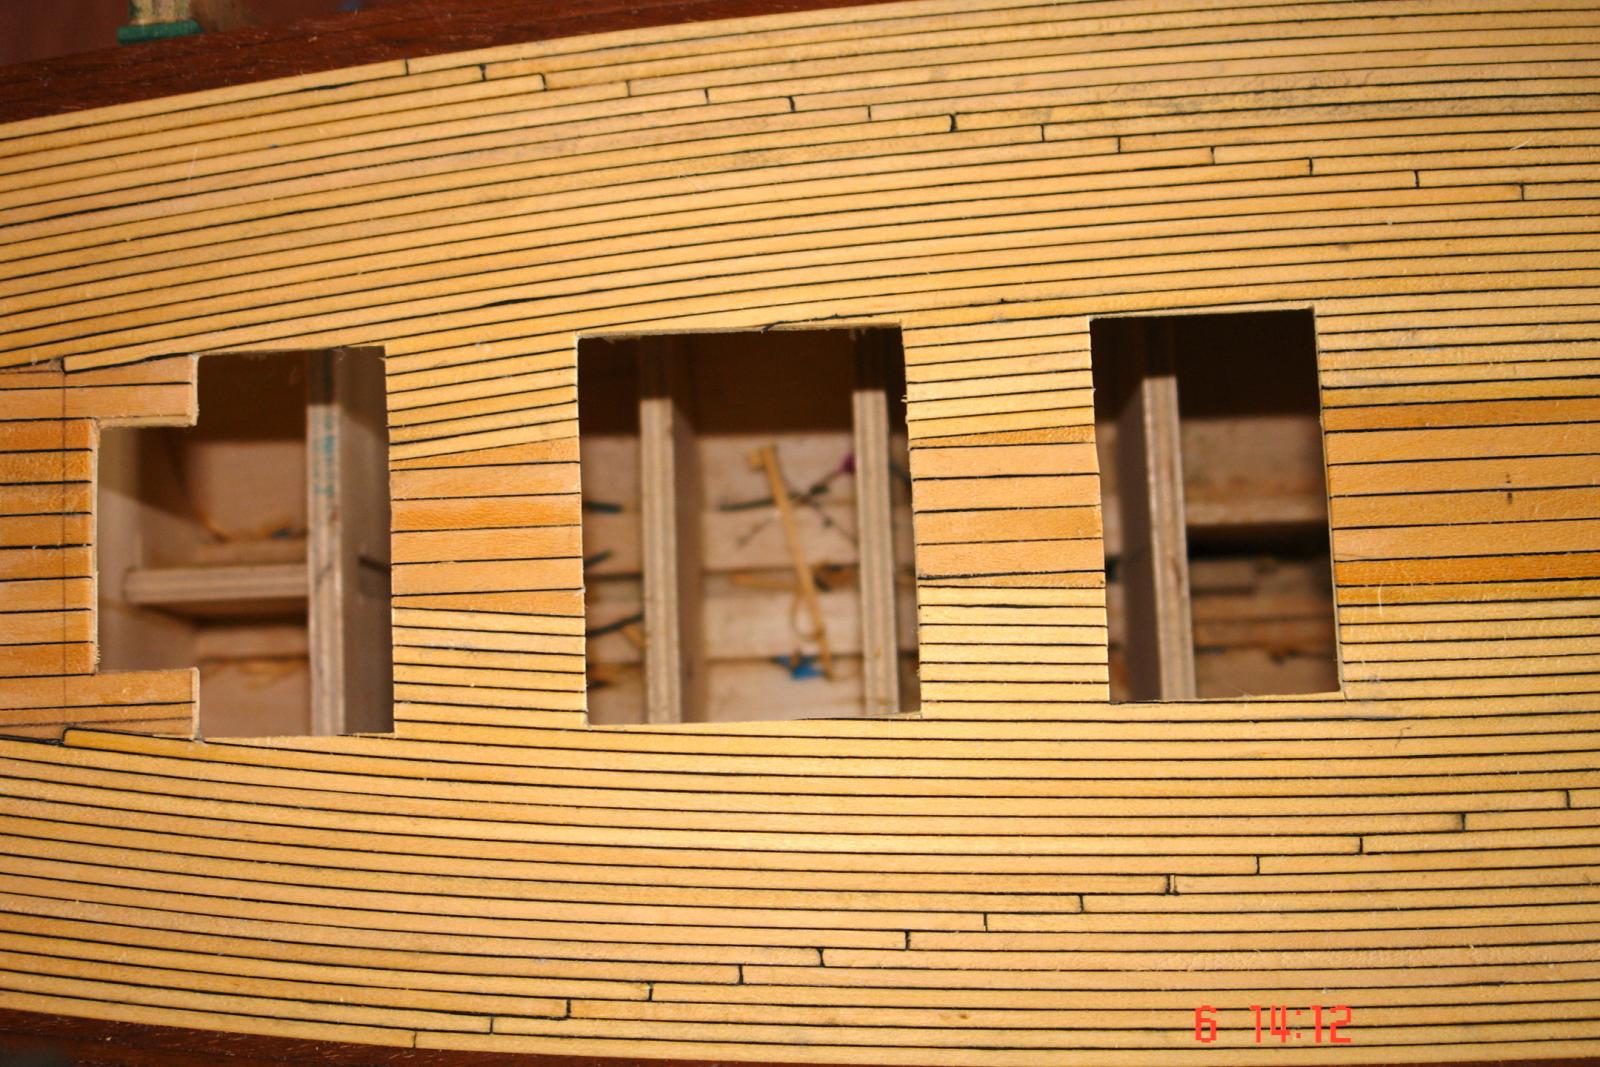
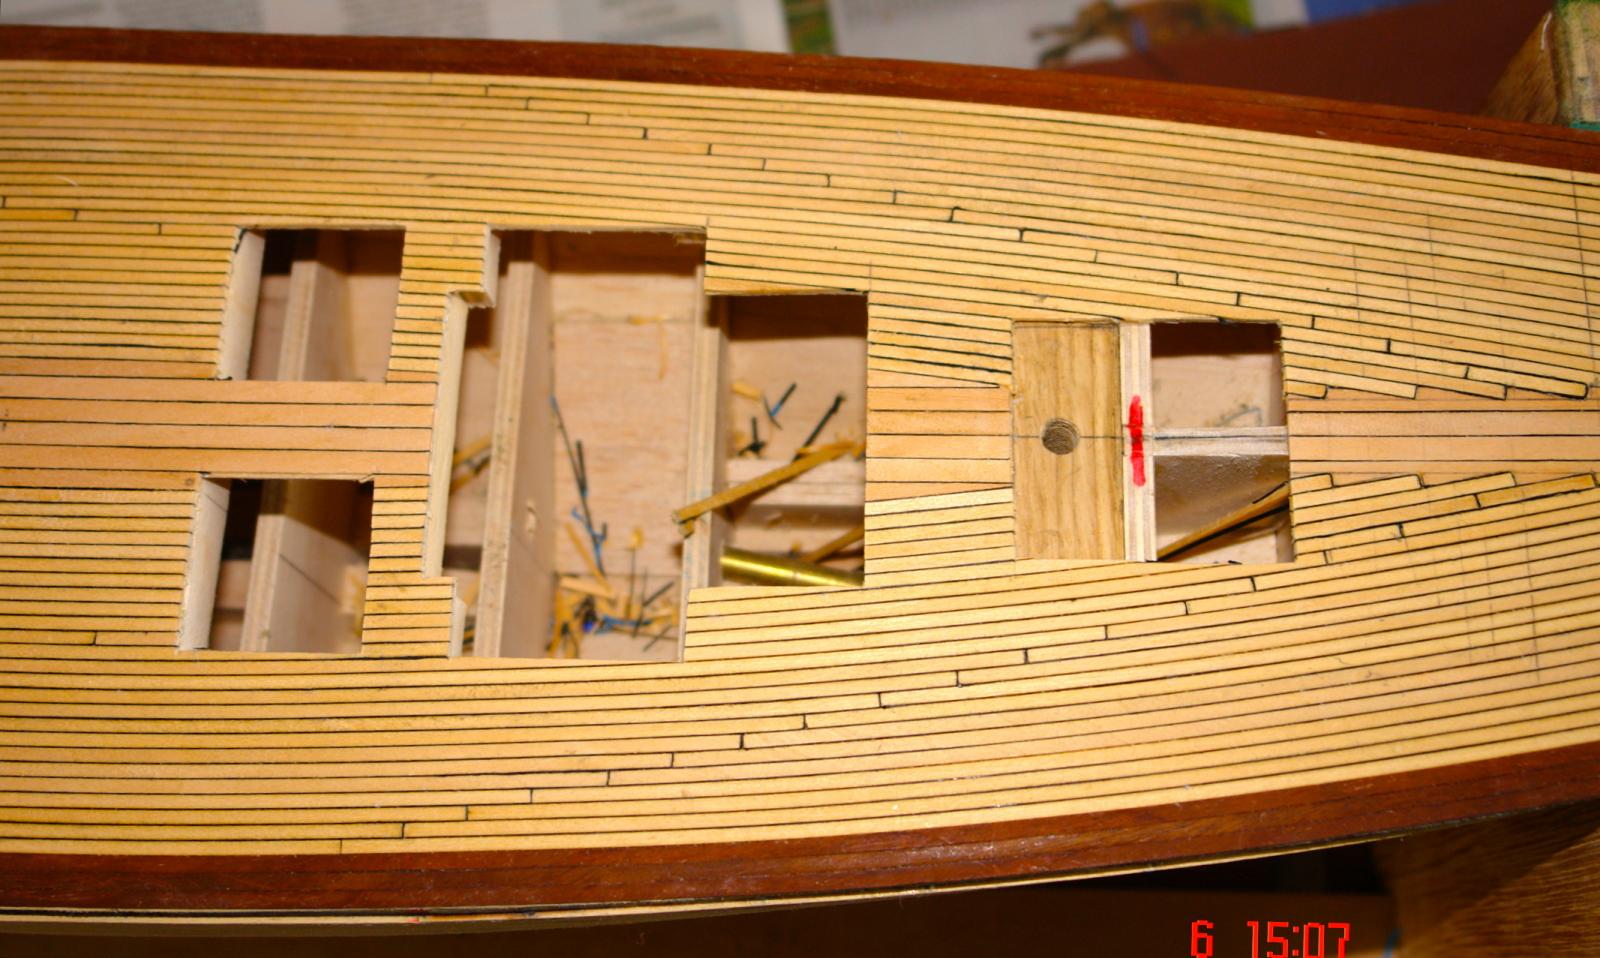
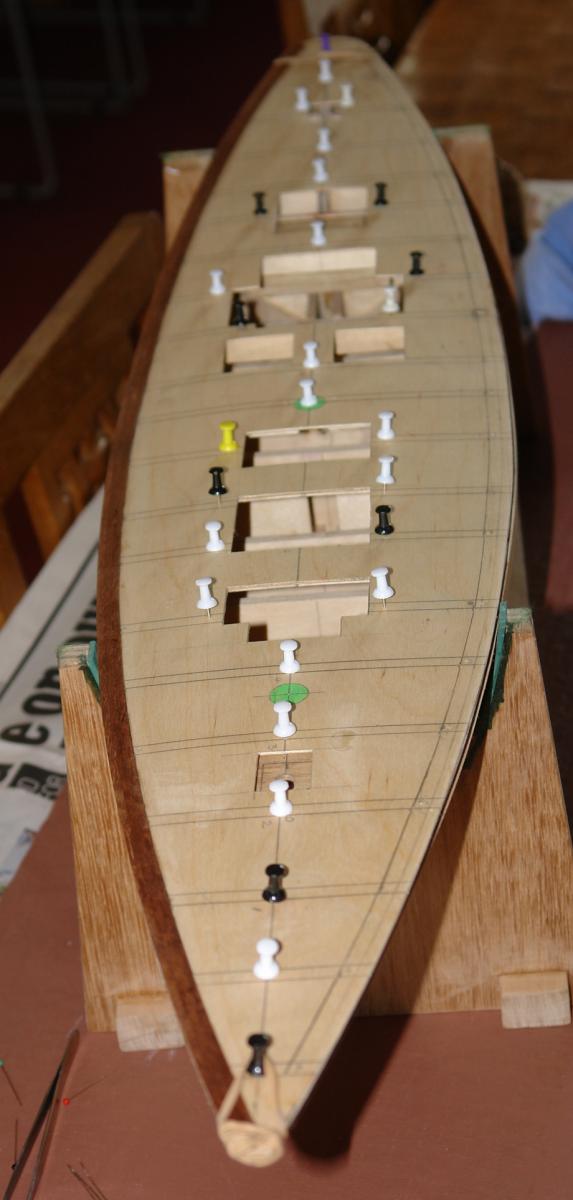
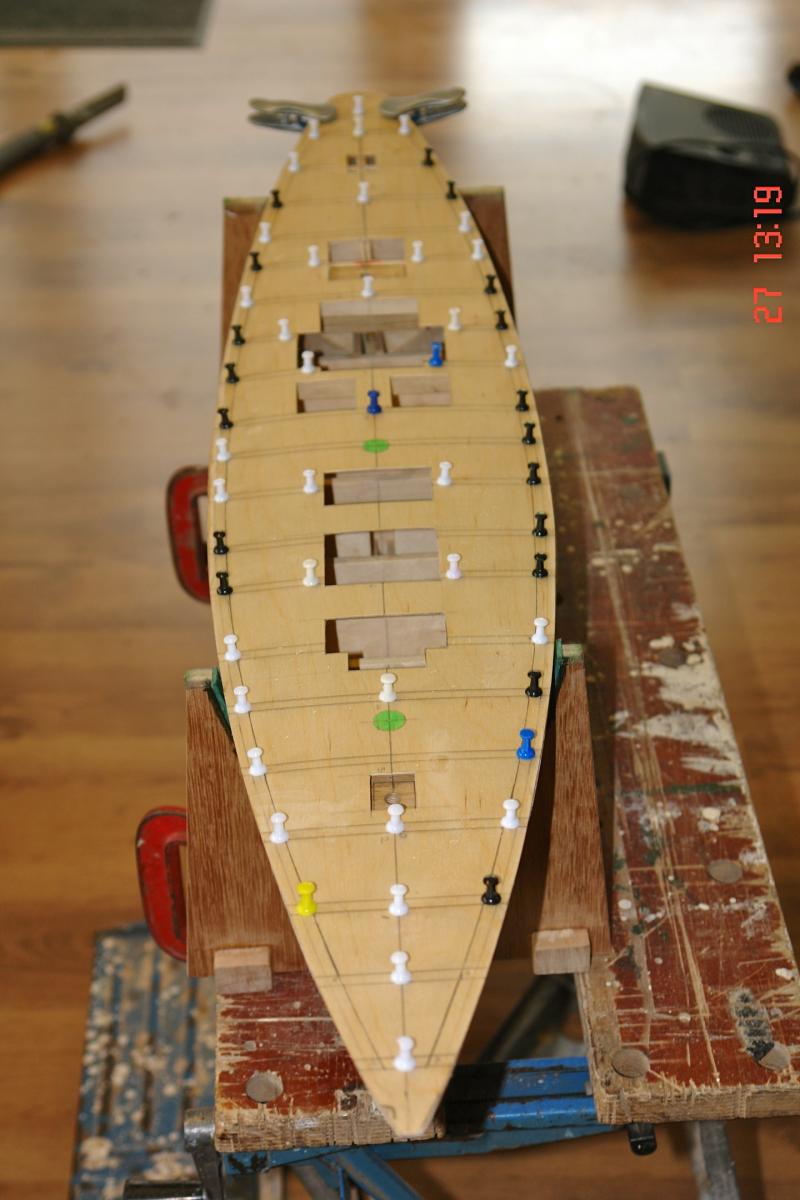
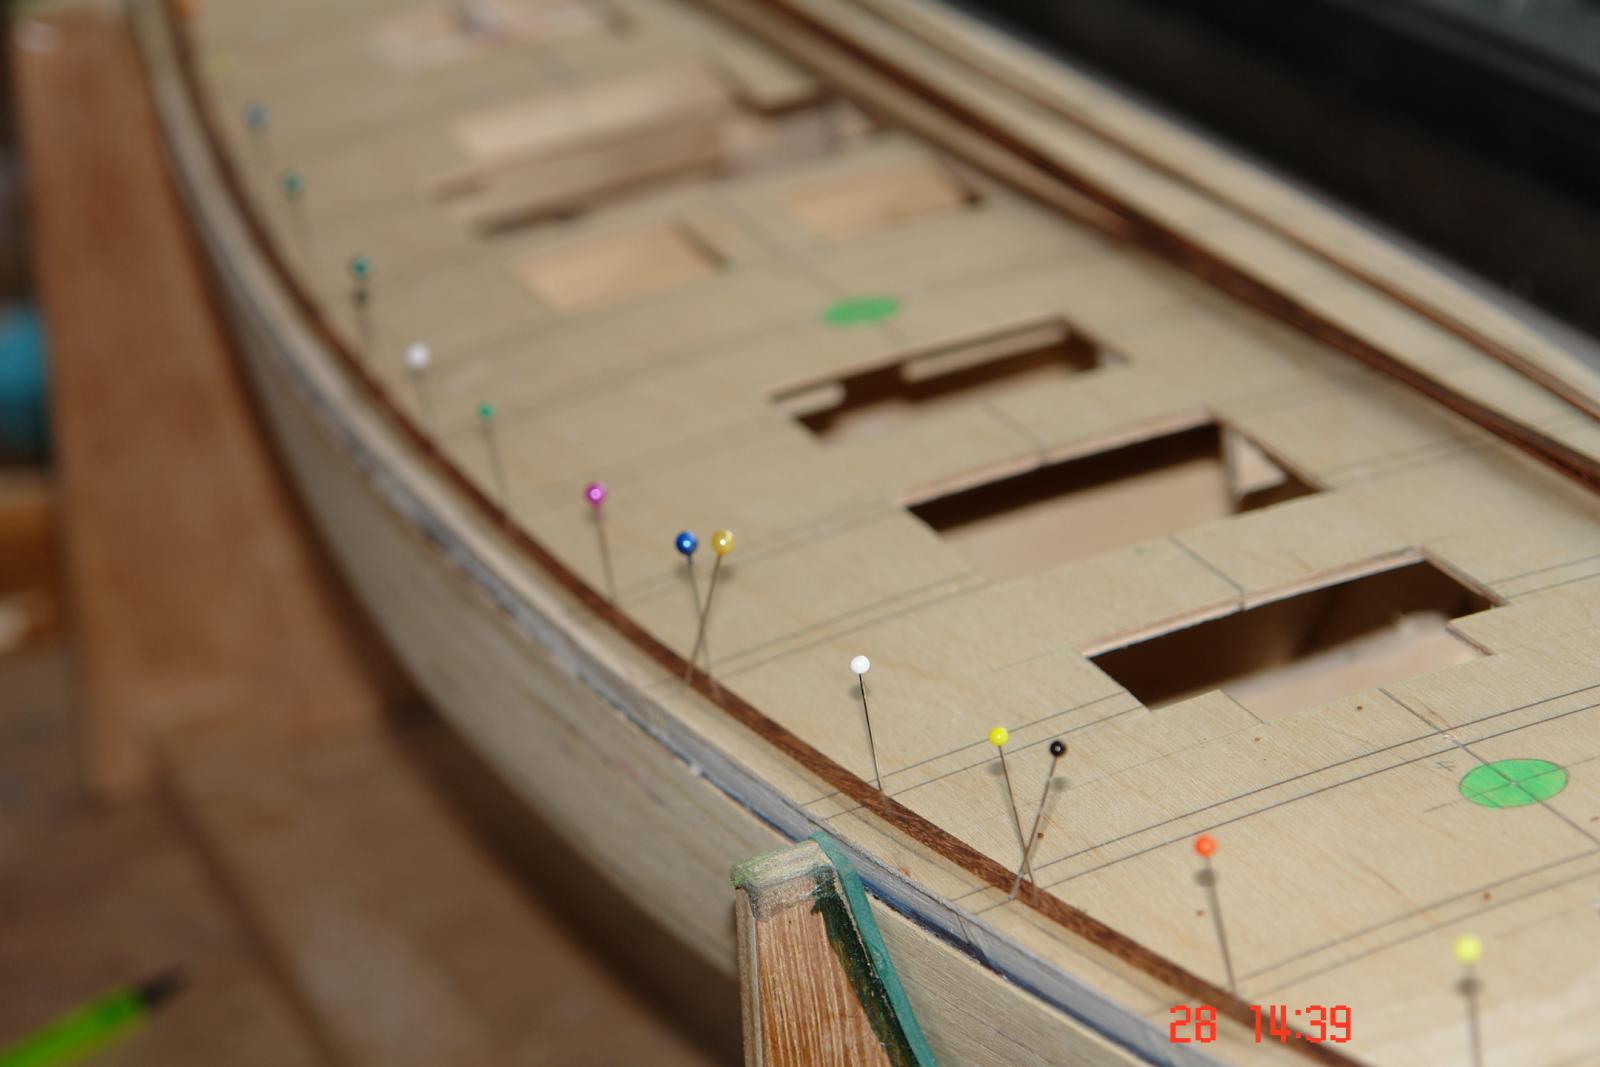
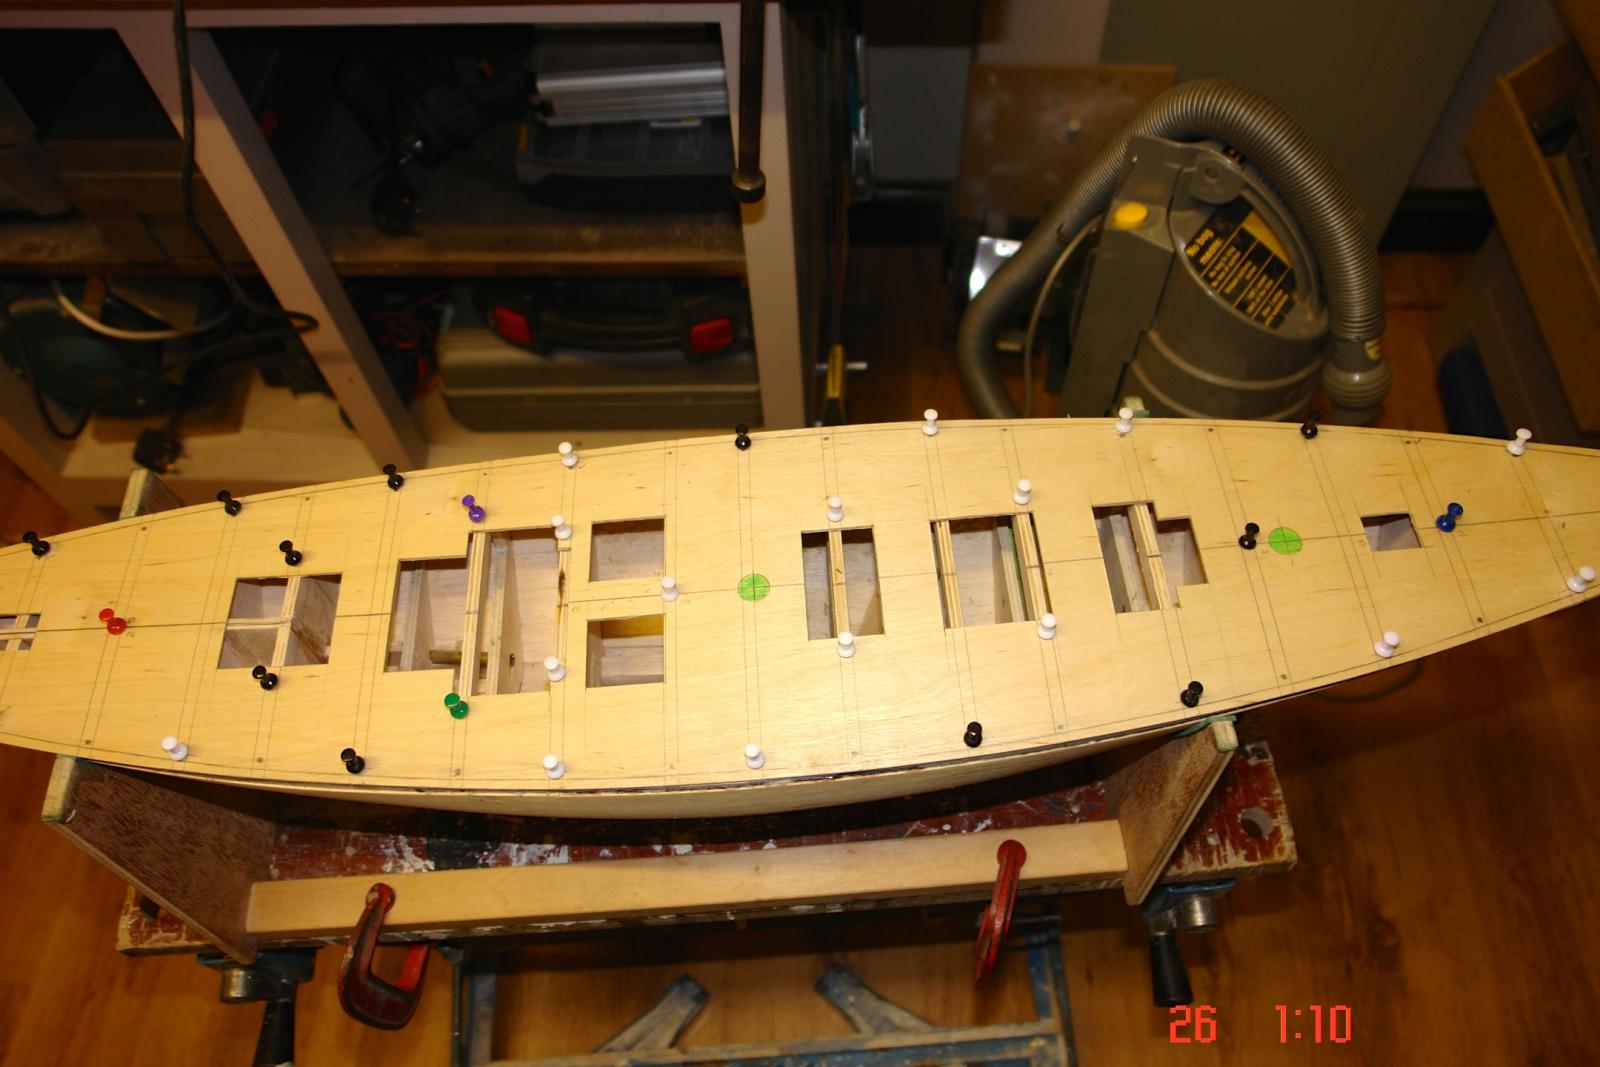
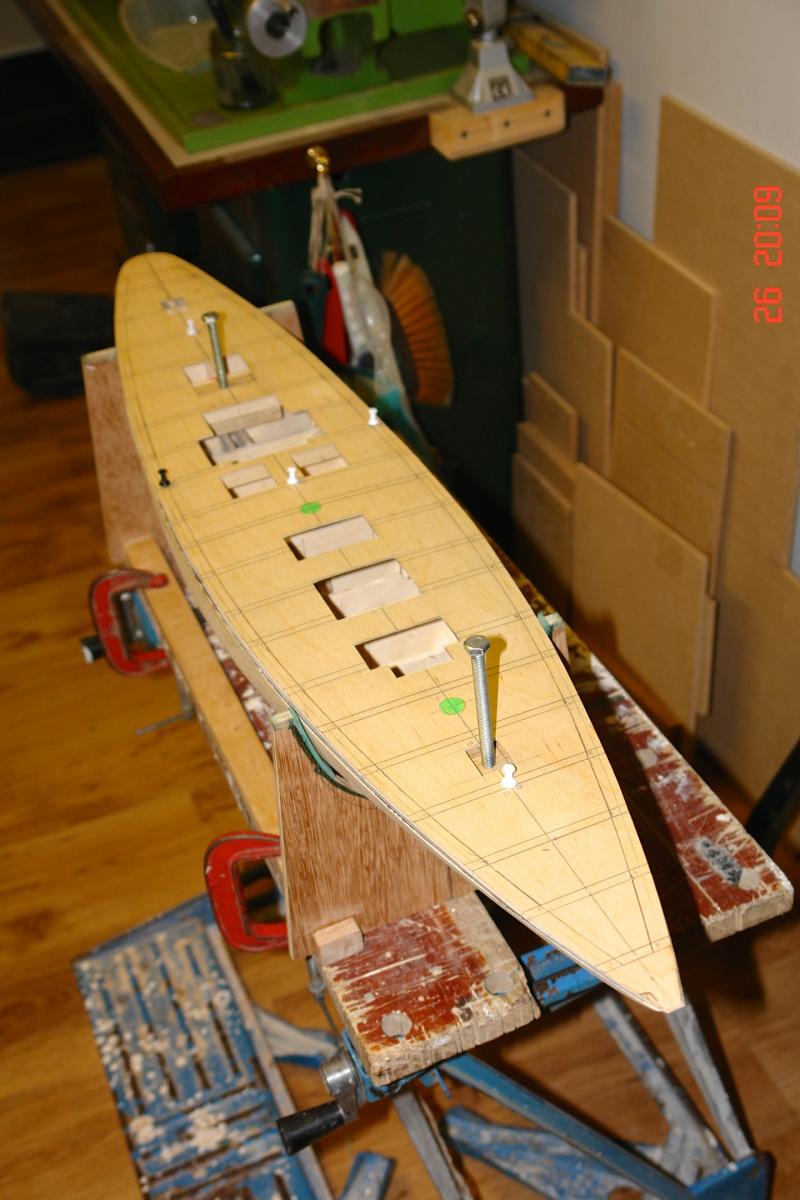
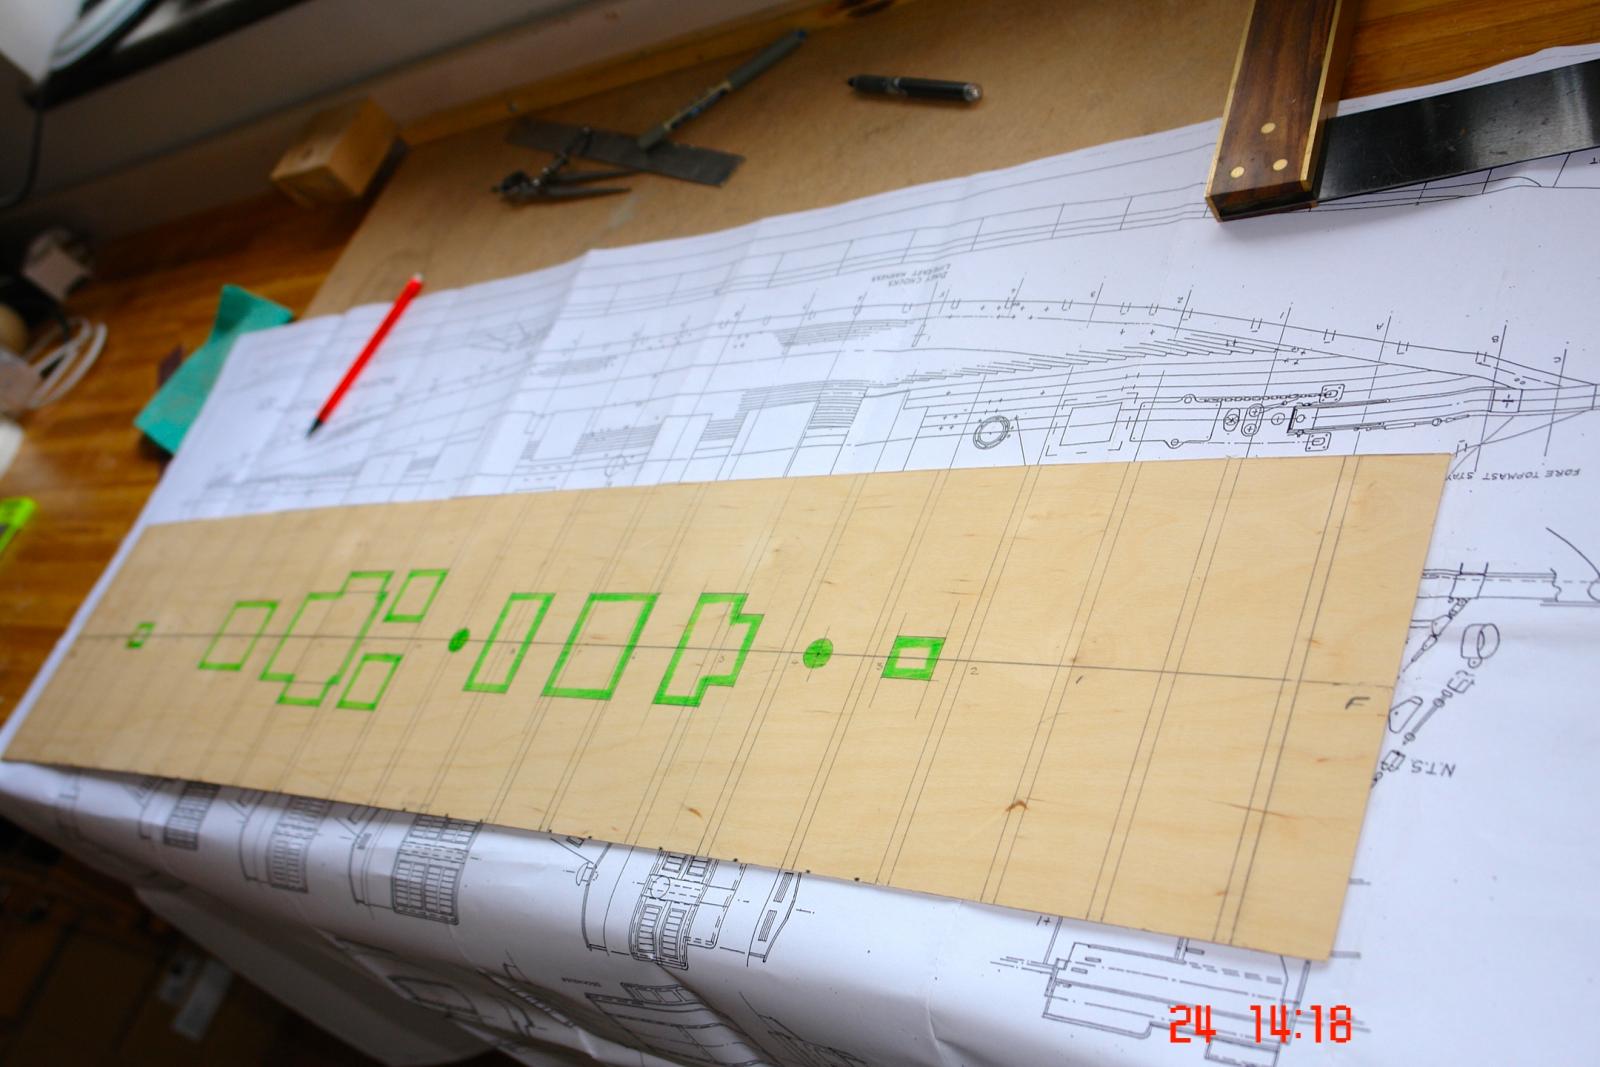
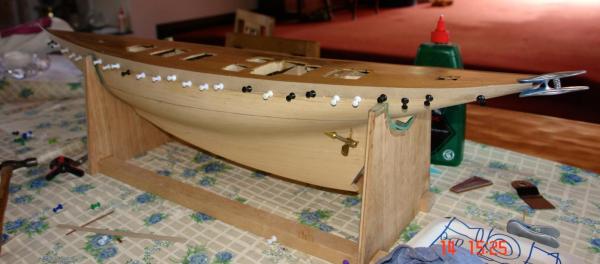
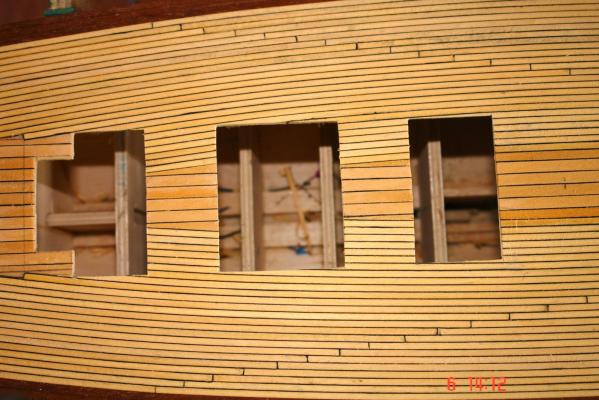
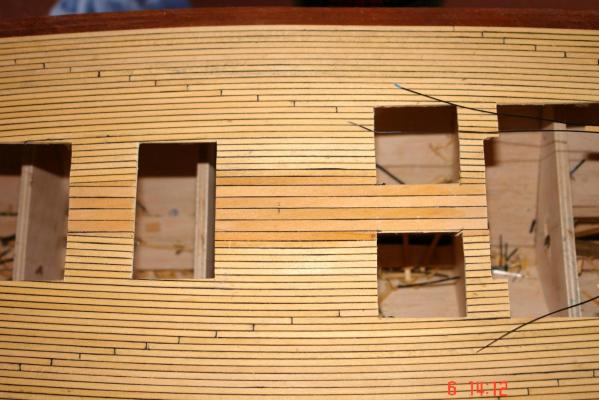
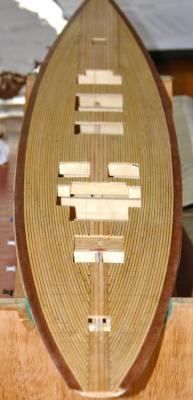
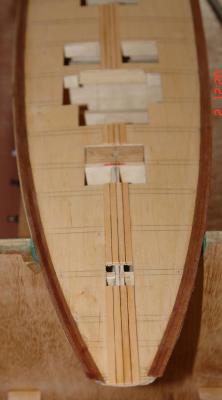
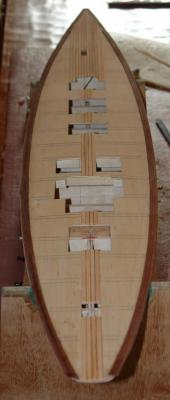
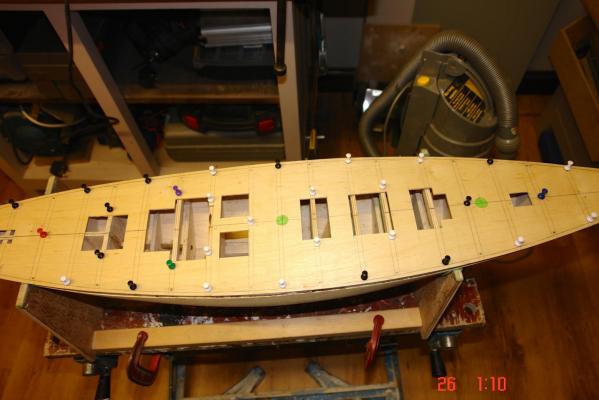
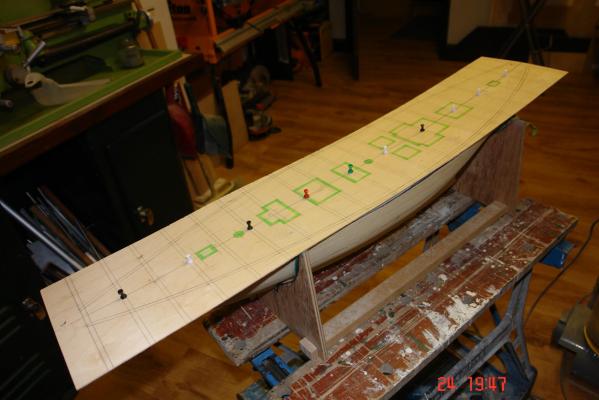
The sub deck:- The various apertures for the chart house, skylights, hatches etc were cut out using a craft knife before hacking the deck roughly to shape using the jigsaw. I left about 1/8 inch all round for final adjustment. A prolonged process of plane a bit, pin in place, check, remove, plane a bit more then ensued until I was happy with the fit. With the sub deck in place I drilled through it into the frames at multiple positions. As explained earlier the deck is concave longitudinally and convex across the beam. Some force is needed to hold the shape while gluing and the multiple holes will take the holding pins during in the gluing operation. The photos show the deck temporarily in place. I mentioned in a previous post that the frames were spaced randomly on the plan and I had thought that this was for some greater purpose - to be revealed later in the build. It would have been sensible if the frames had been organised around the deck apertures but this wasn't the case - so the mystery of the random spacing continues. With the deck temporarily in pace I marked the aperture positions on the frames and then removed the deck and cut the frames away with a razor saw. In one position I reinstalled an offset deck beam to support the deck. In two other positions I intend reinforcing the ply to compensate for local removal of the frames. I decided to install 2 oak blocks threaded and tapped (M8) to take the bolts for later installation of plank to handle the hull inverted for the 2nd planking operation. I find oak takes a thread well and shows no tendency to strip. Finally I marked the edge of the deck on the line where the mahogany deck planks meet the teak planks. Nothing to do now but glue the deck.


- 882 replies
-
- 10
-
-
Thank you bedford - not quite on the scale of Miane but big enough for my house. I have built RC models in the past but I rarely got round to sailing them. Maybe I'll reconsider when I see your finished model. Regards Keith
-
Help my boat is bent !
KeithAug replied to maltbyguy's topic in Building, Framing, Planking and plating a ships hull and deck
Hi Andy What stage are you at with hull. If its finished I can understand why you would want to accept the bow and try to make the best of it when planking the deck. The best solution is always to try to remove the bow. If you don't want to do this then working from a straight centre line is probably going to be easier than trying to follow the bend. Keith -
Hi Pete, Michael, John. Thanks for the continuing interest. Hopefully I'll get round to attaching the deck in the next few days but in the mean time I need to figure out how I am going to make the mounting points for a strong back (so that I can work on the hull inverted). I find myself laying awake at night planning how I am going to approach some of the trickier bits. Invariably my mind turns to attaching the bulwarks and I start to worry. Eventually dawn breaks. Keith
-
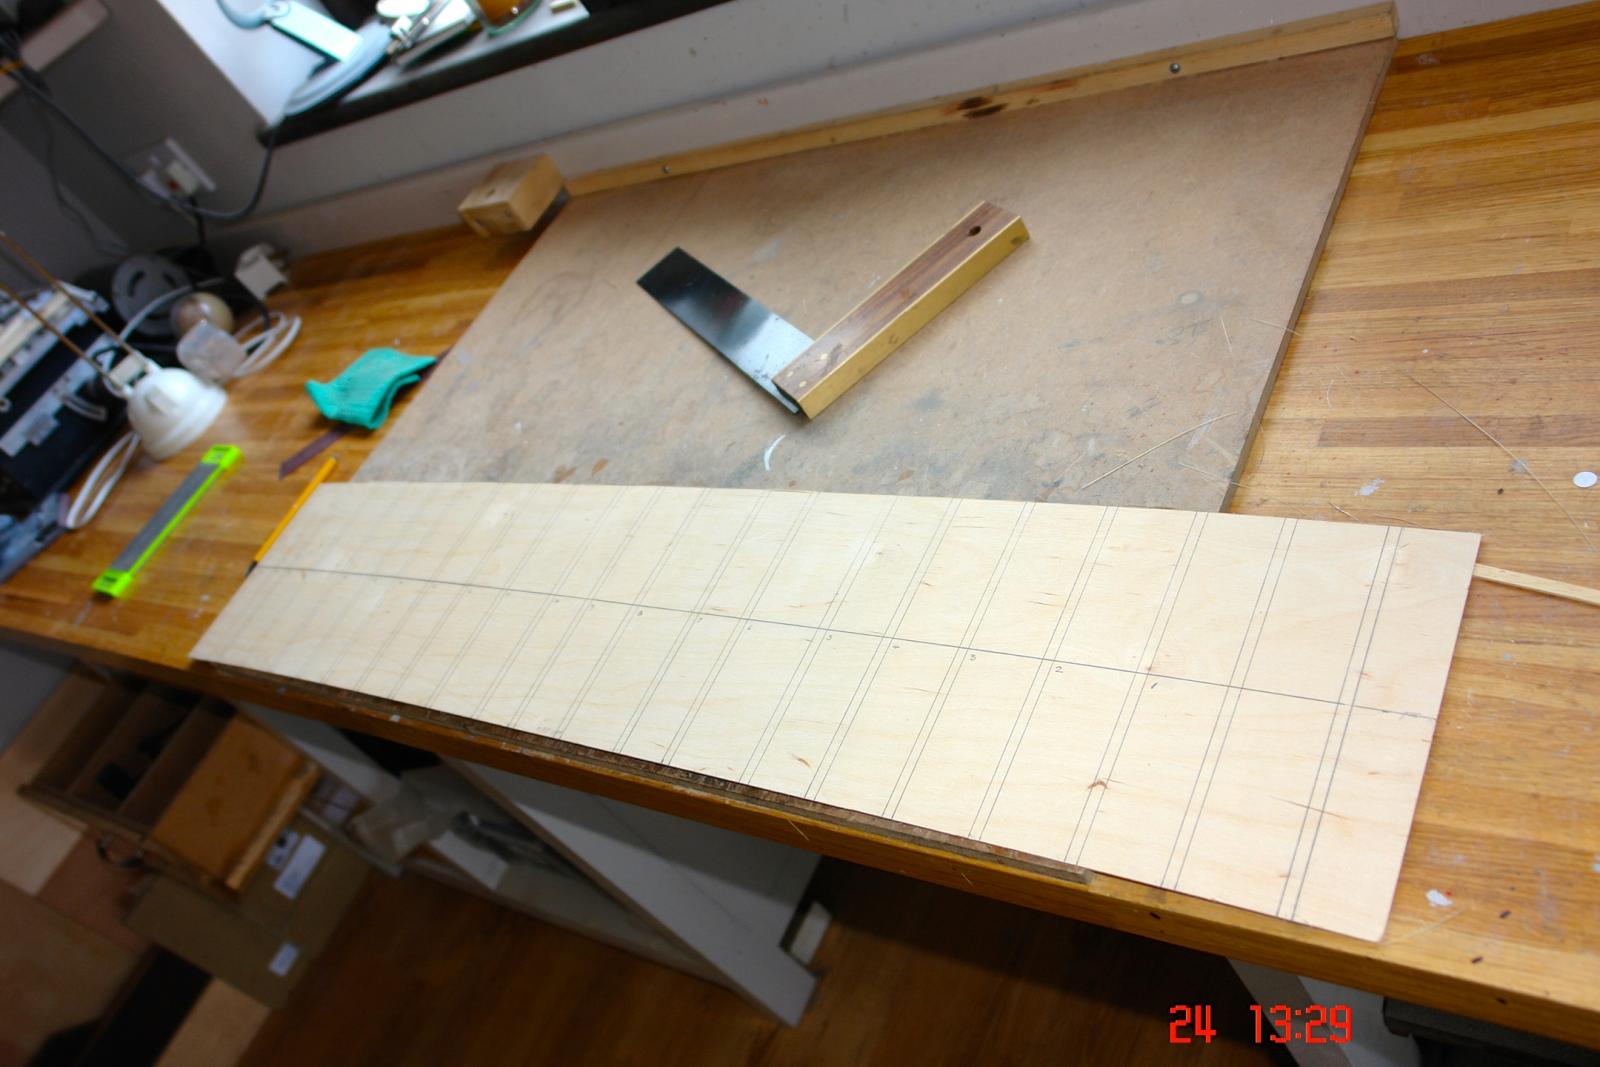
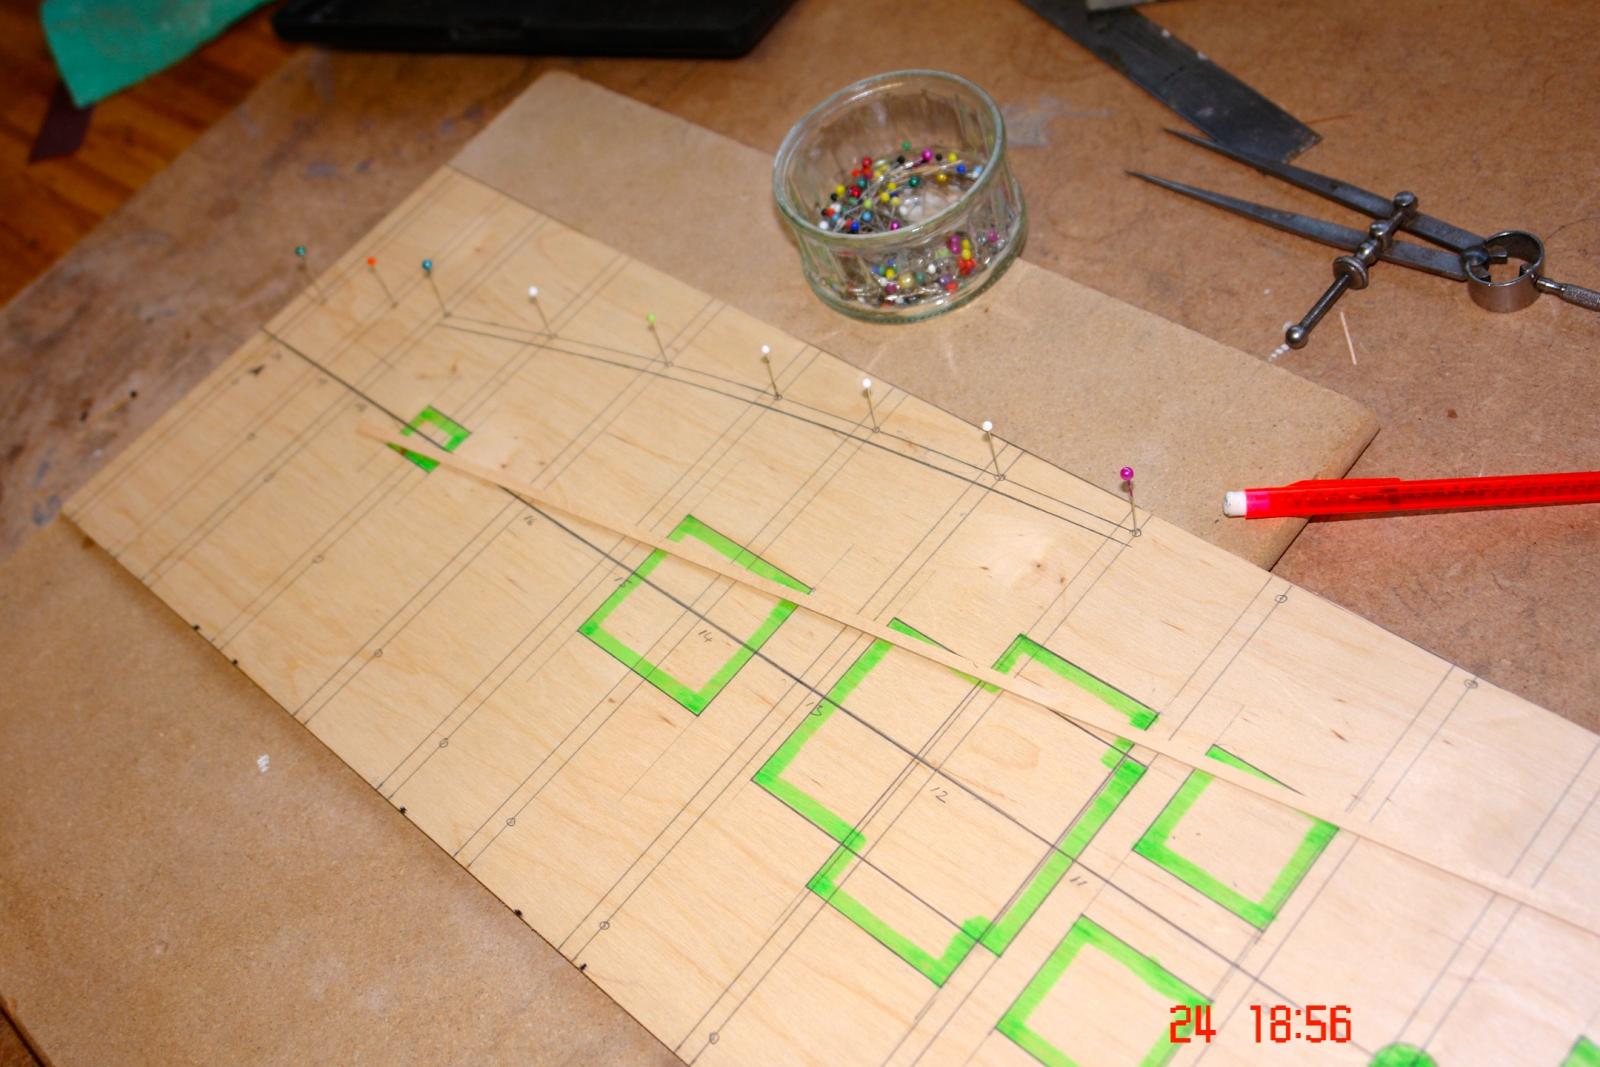
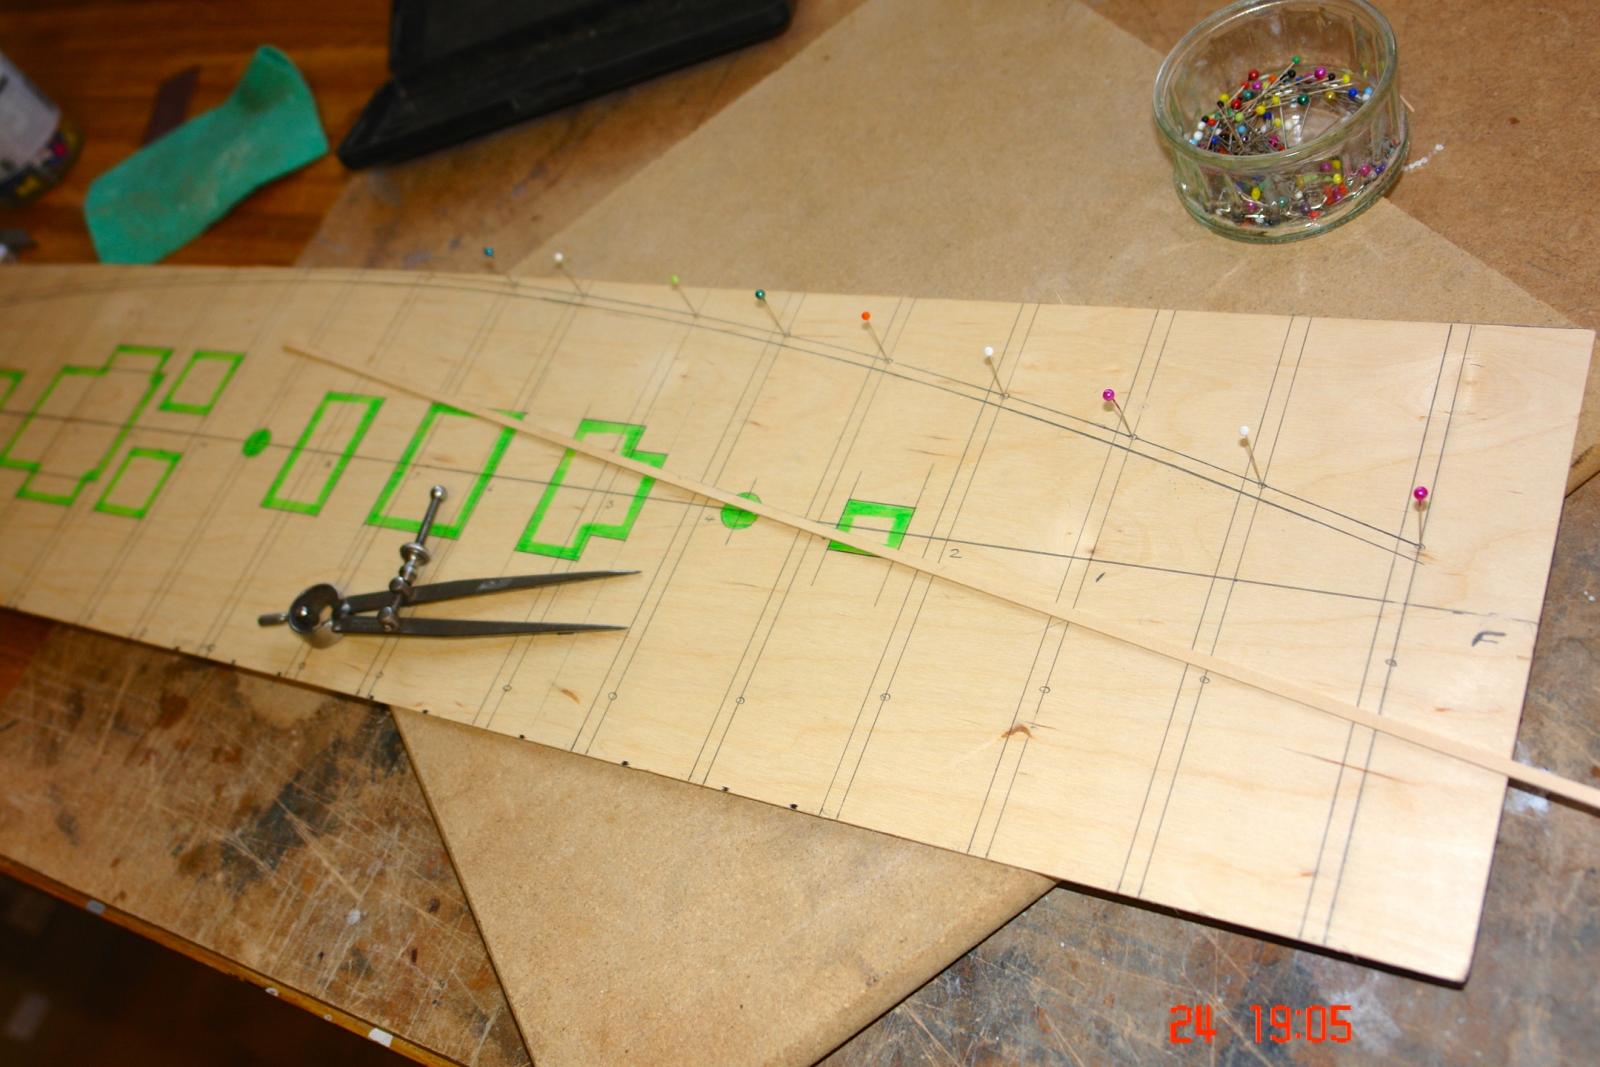
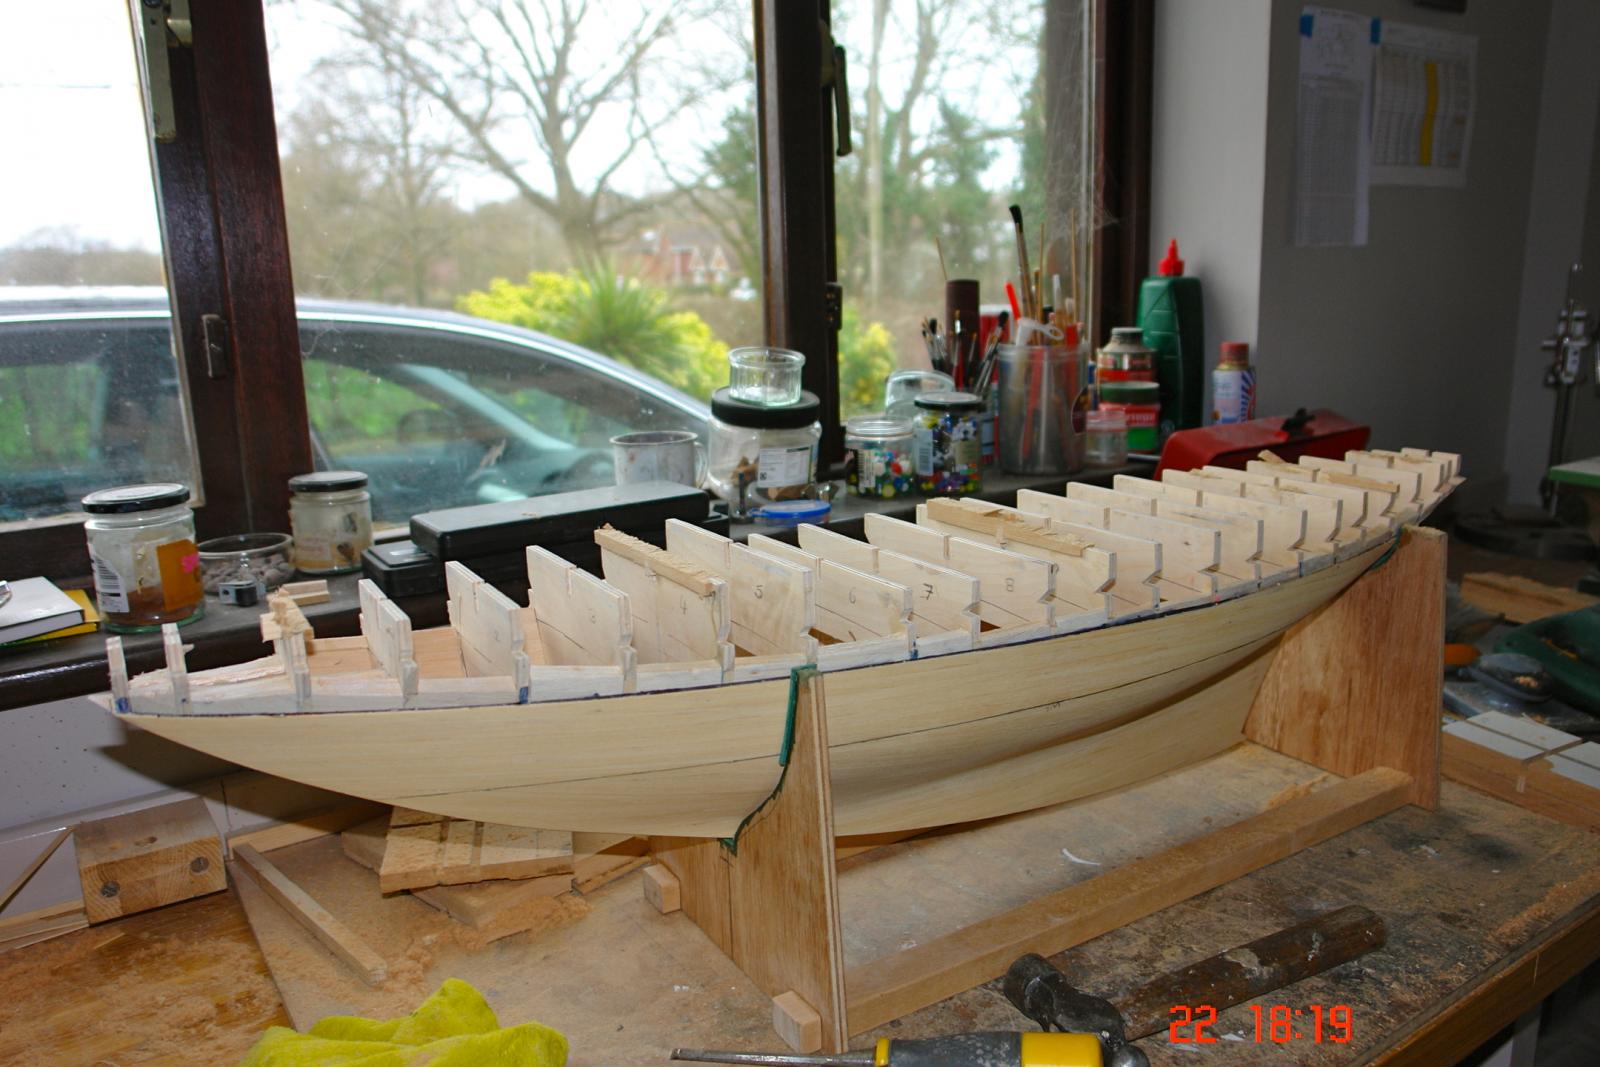
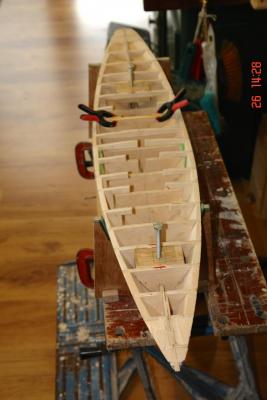
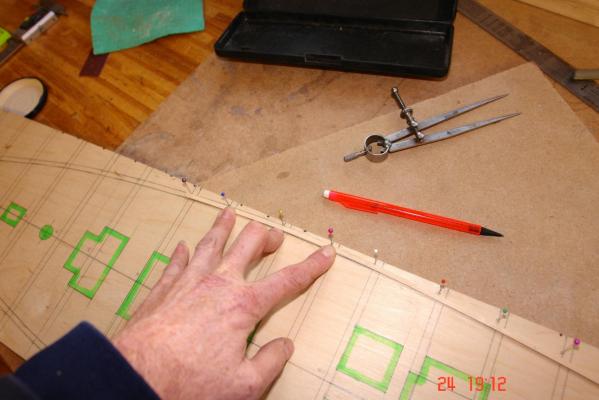
Removal of up stands and a start on the deck:- I had part cut the frames at deck level so removal of the up-stands wasn't a difficult process. I started by hand cutting but soon abandoned this in favour of a recently acquired multi tool fitted with a plunge blade. It worked a treat and I wonder why I hadn't bought one ages ago. I sanded the frames until I was comfortable with the deck profile which is concave bow to stern and convex across the beam. I used one of the left over planks laid across the frames to test the deck shape. I decided to make the sub deck from 1/16 inch ply. Having cut a rectangular piece large enough to cover the hull I laid one of the long edges on the centre line of the hull and marked the position of the frames. I then drew the frame positions across the ply. Having established the frame positions I used dividers to transfer the shapes of the deck cut outs from the plans on to the plywood. Again using dividers I transferred the width of the hull on to the plywood at each frame position. The frames width dimensions were taken from the actual hull and not the plans. I then used pins to give reference points against which a plank could be bent enabling the deck edge profile to be marked. Having marked the deck profile I temporarily attached the plywood to the hull along the centre line. I then marked the hull profile on the underside of the plywood using the hull as a template - thus checking the accuracy of the deck profile previously drawn. All was well. Keith


- 882 replies
-
- 12
-
-
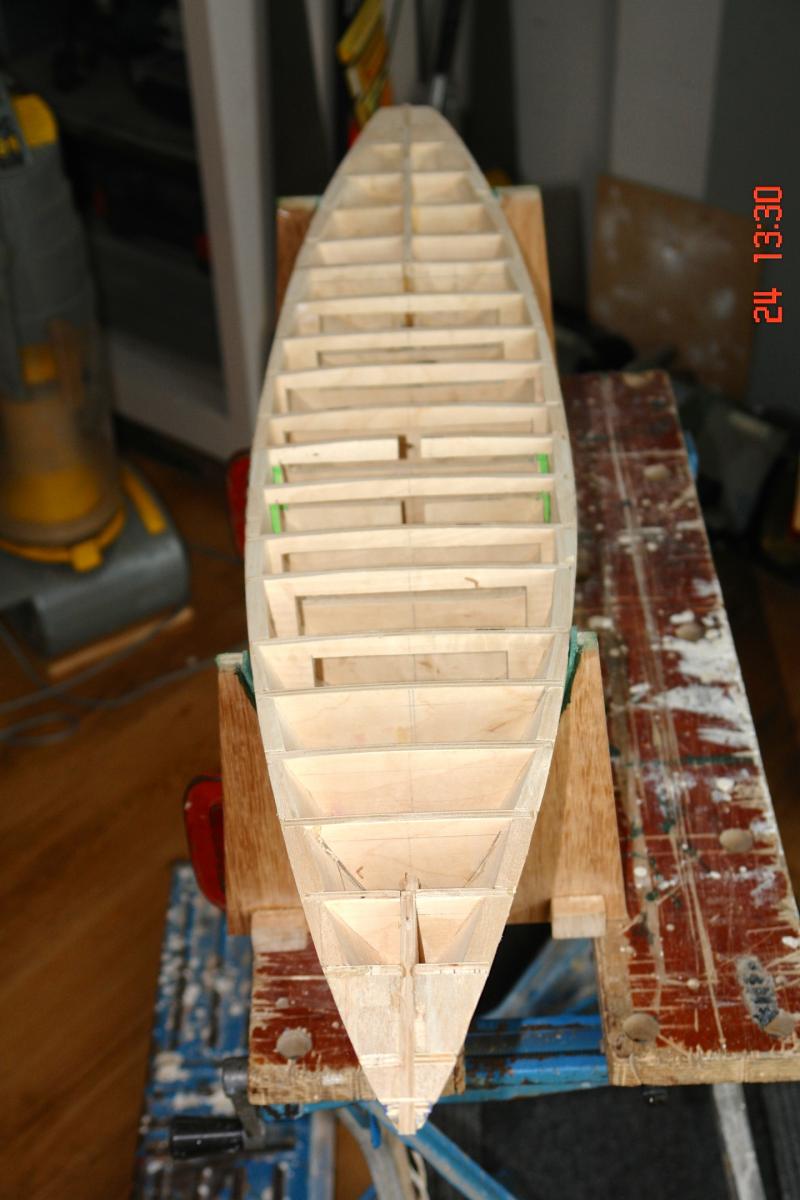
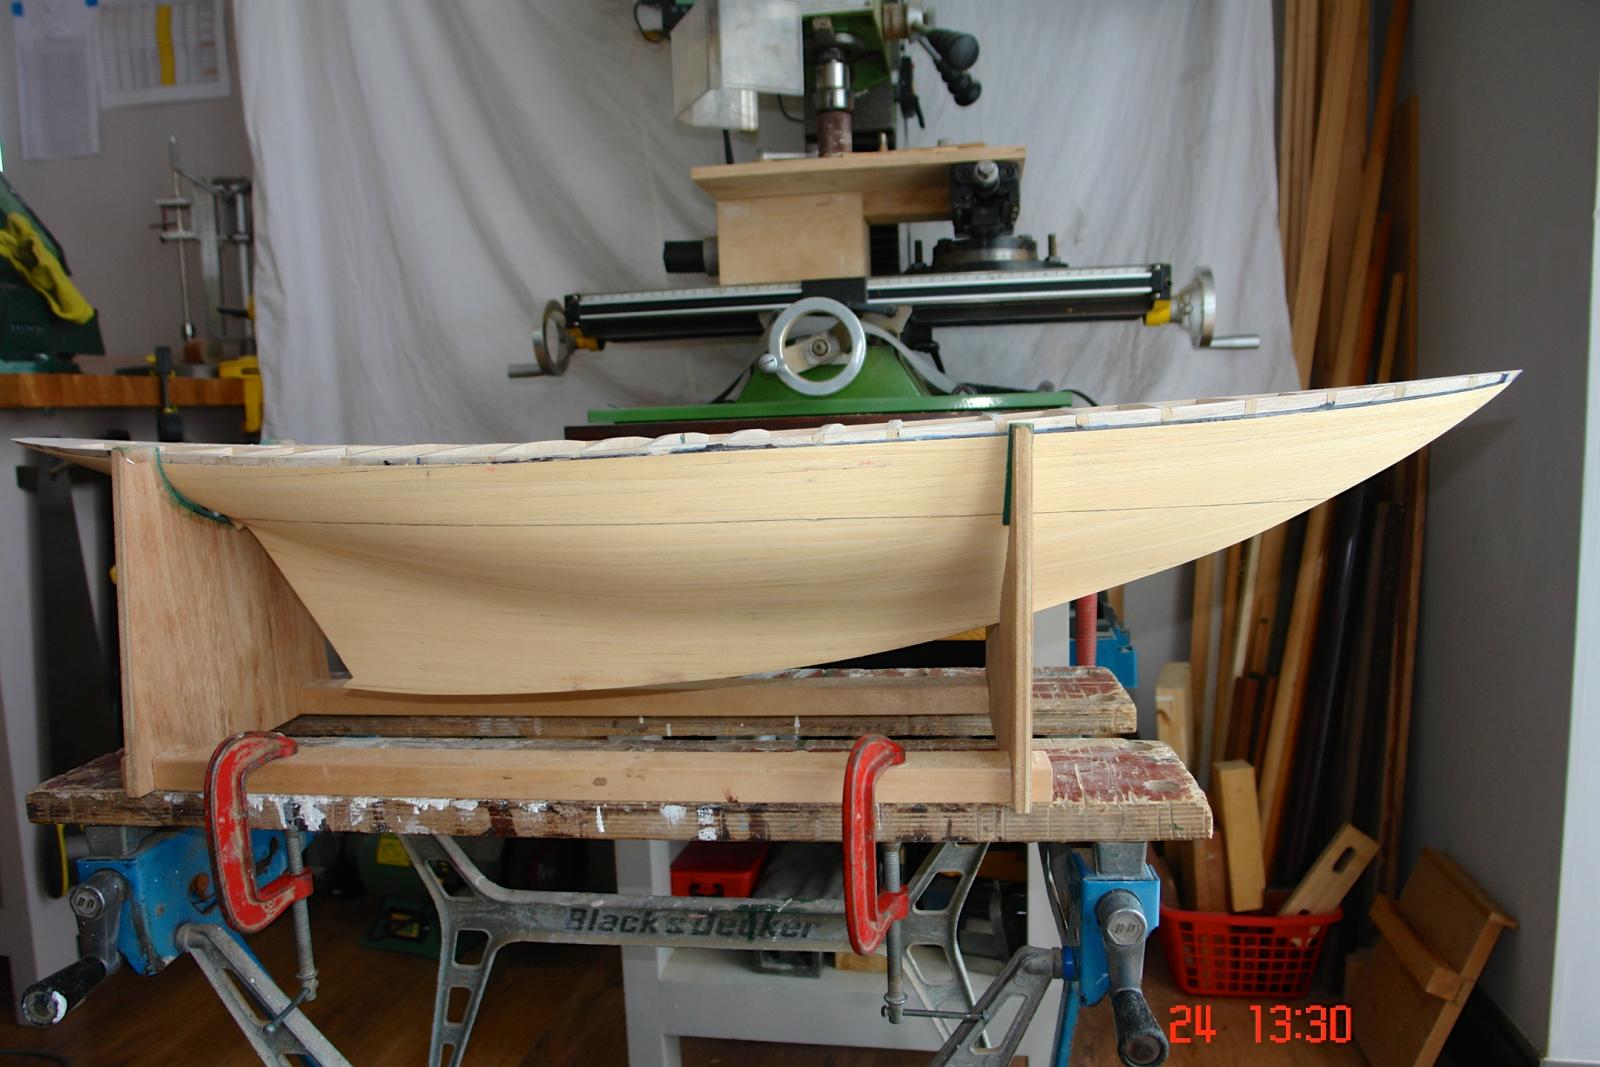
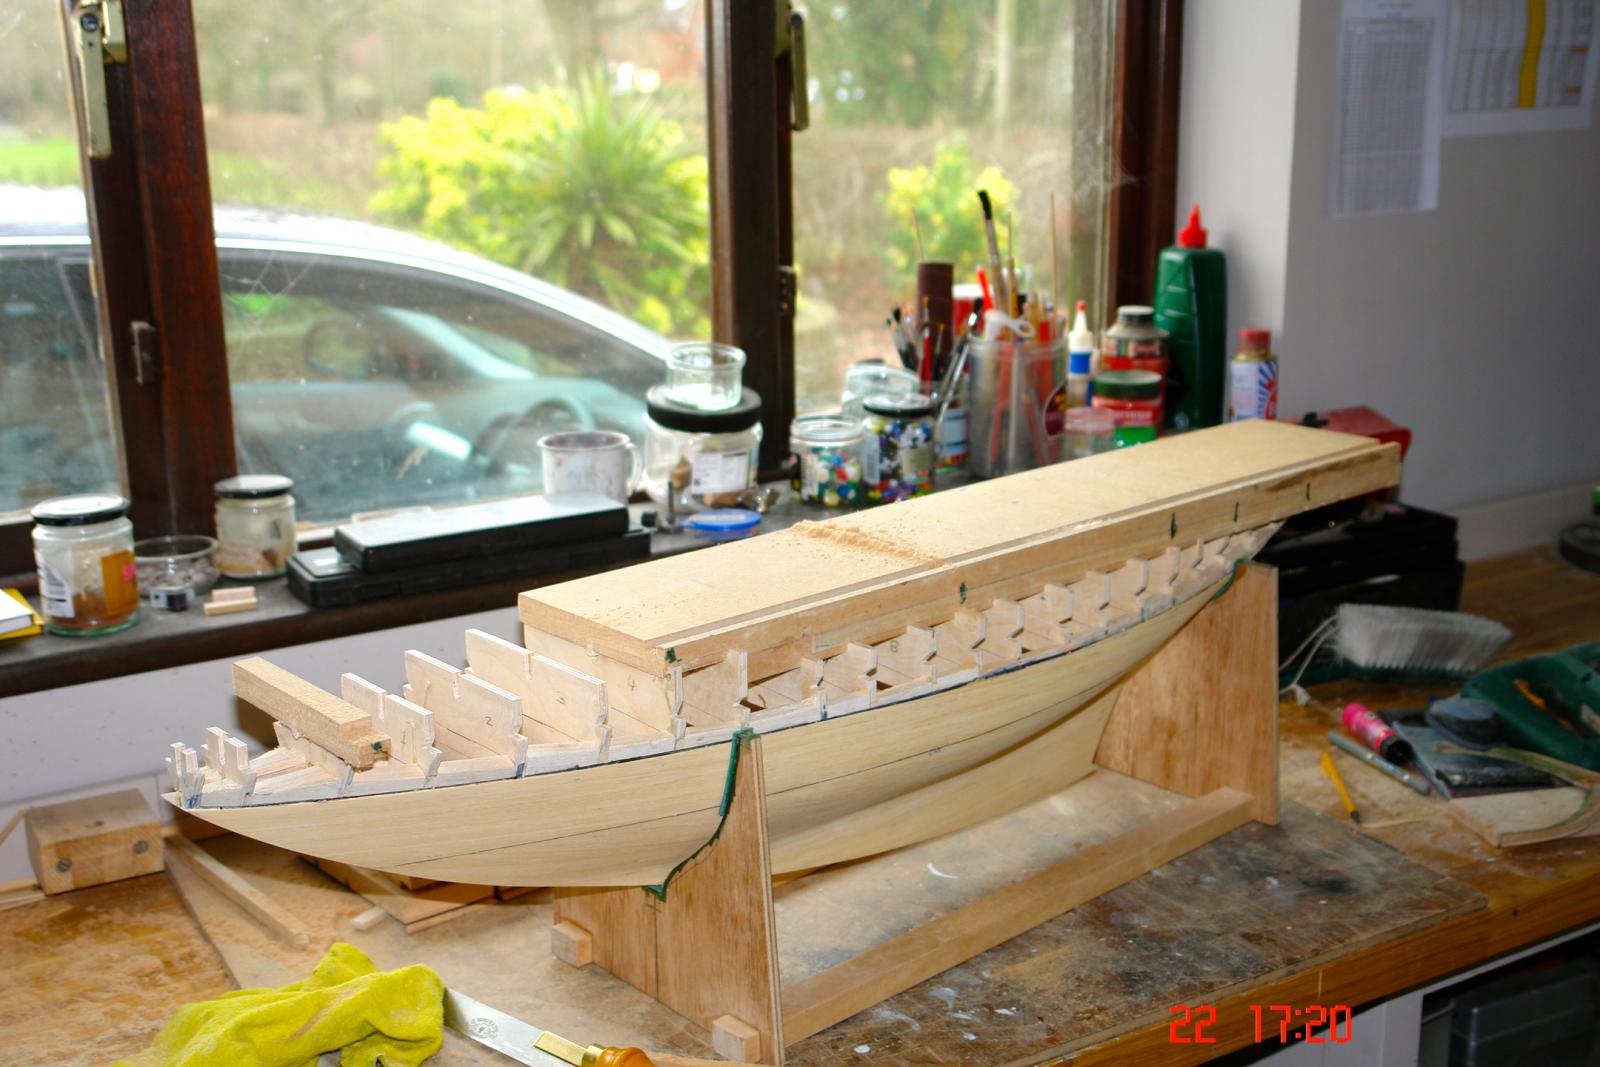
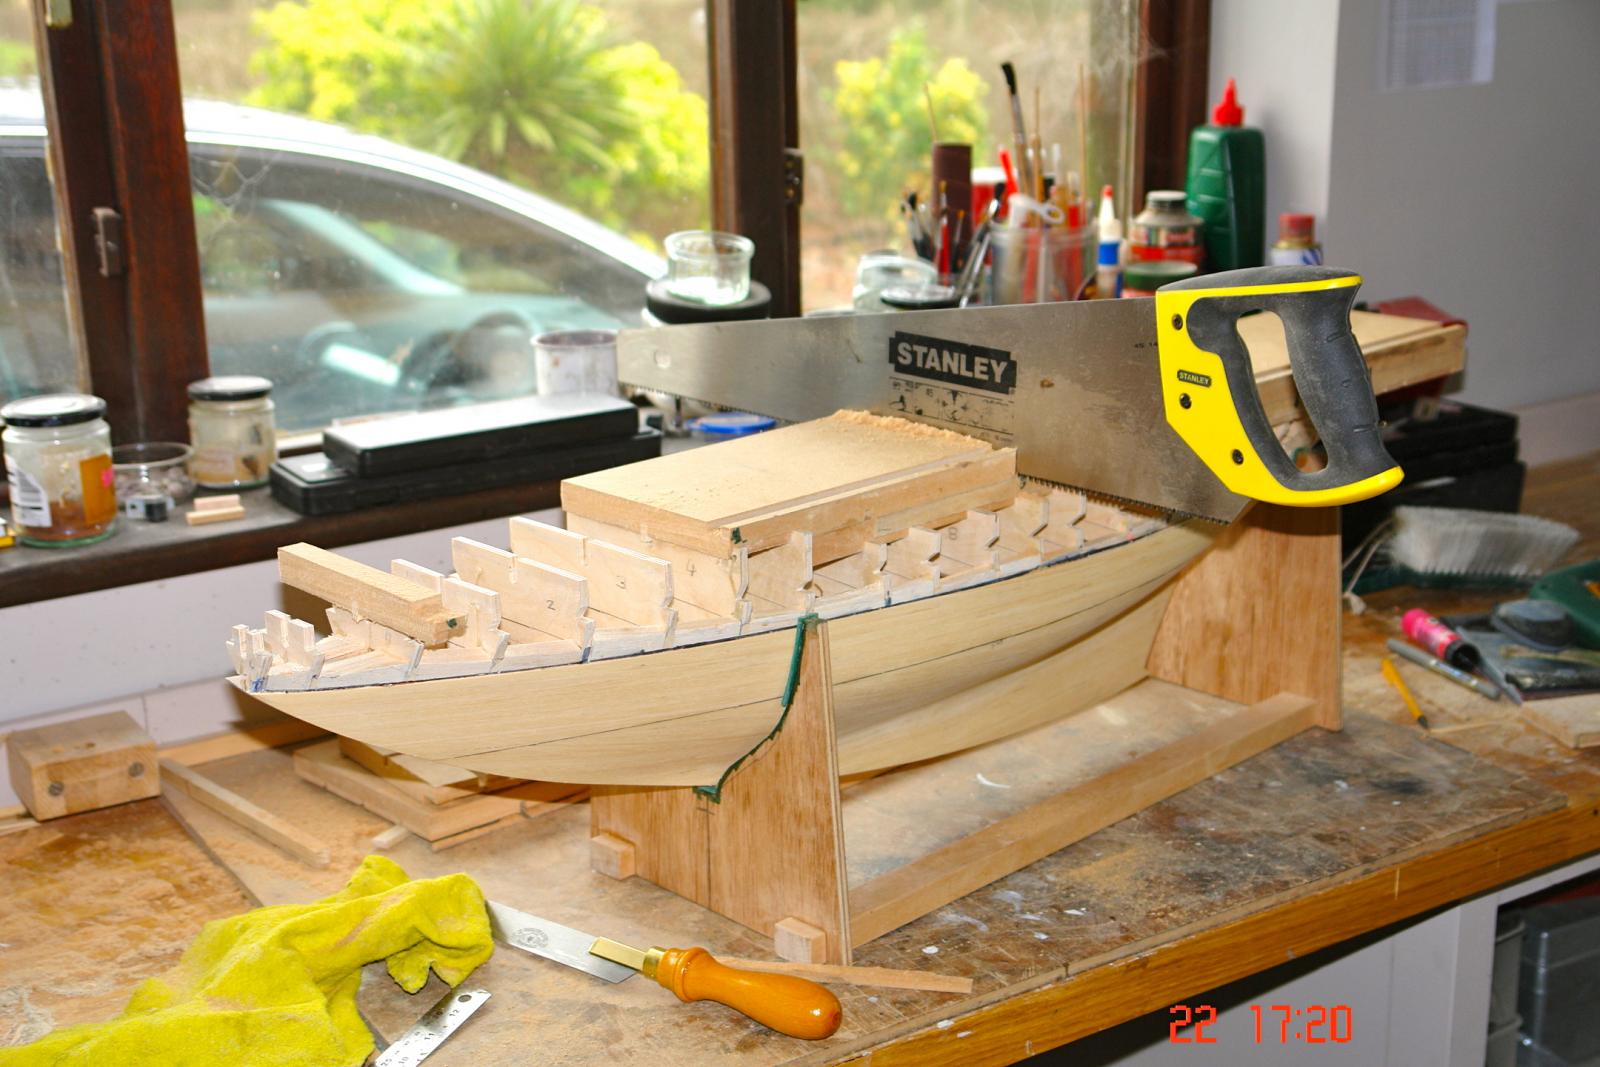
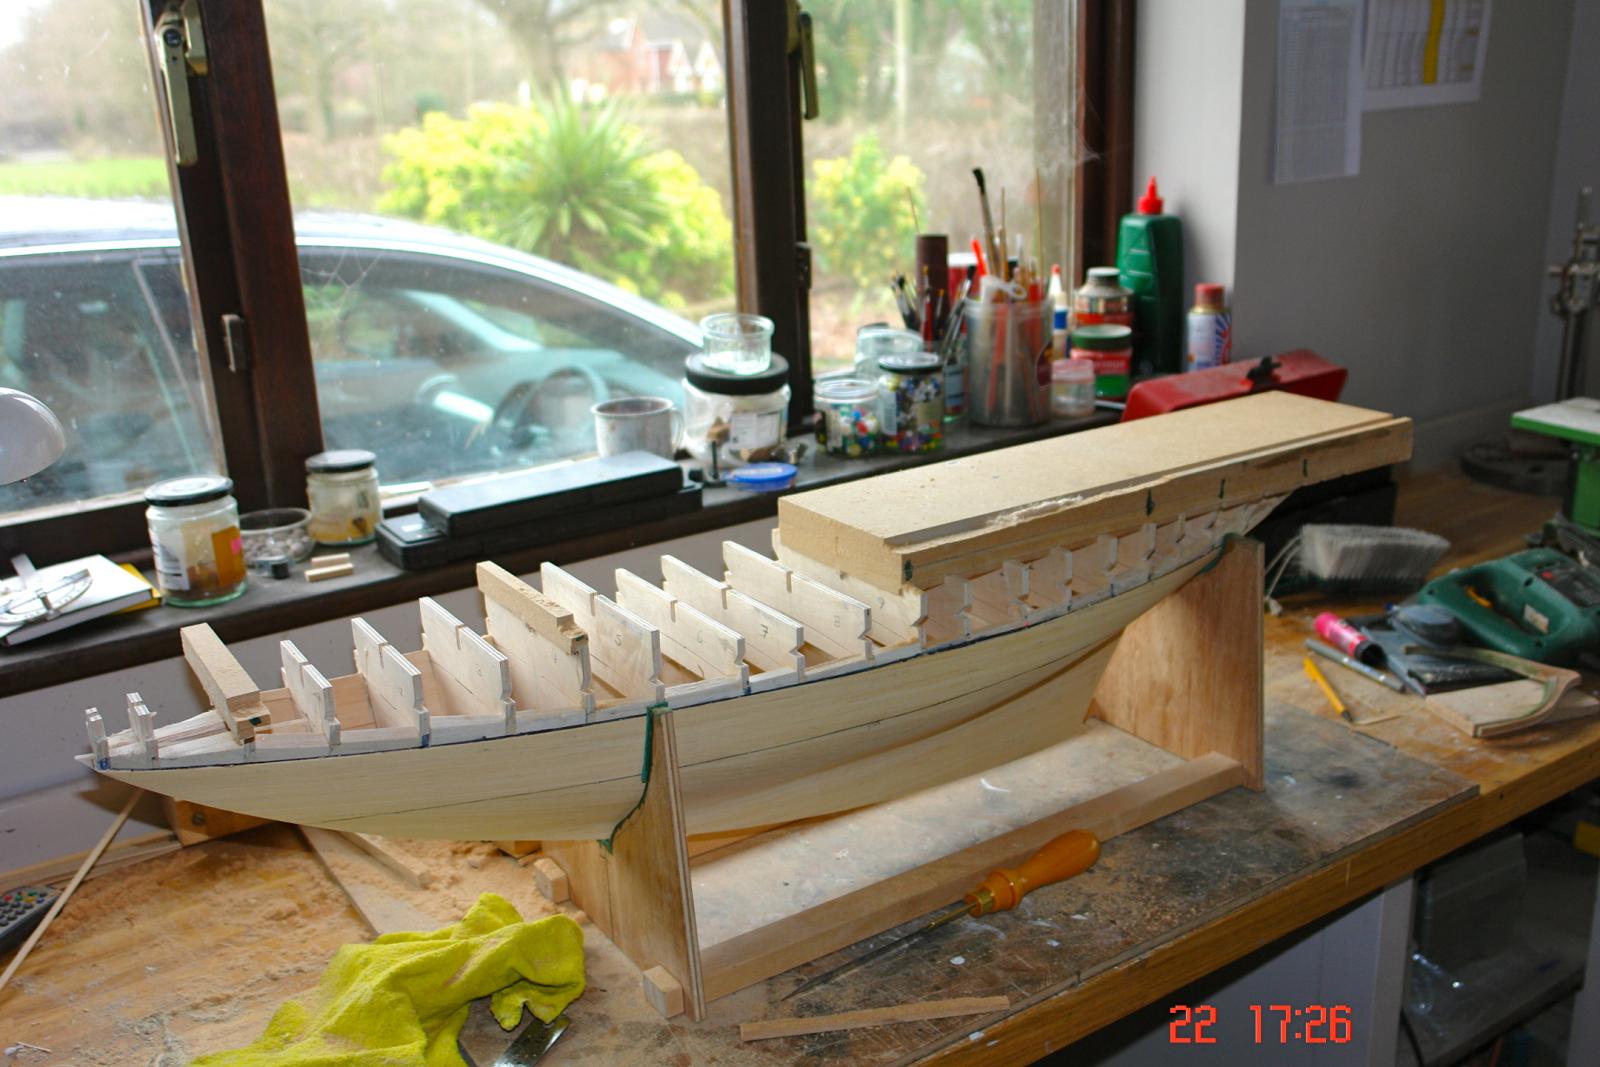
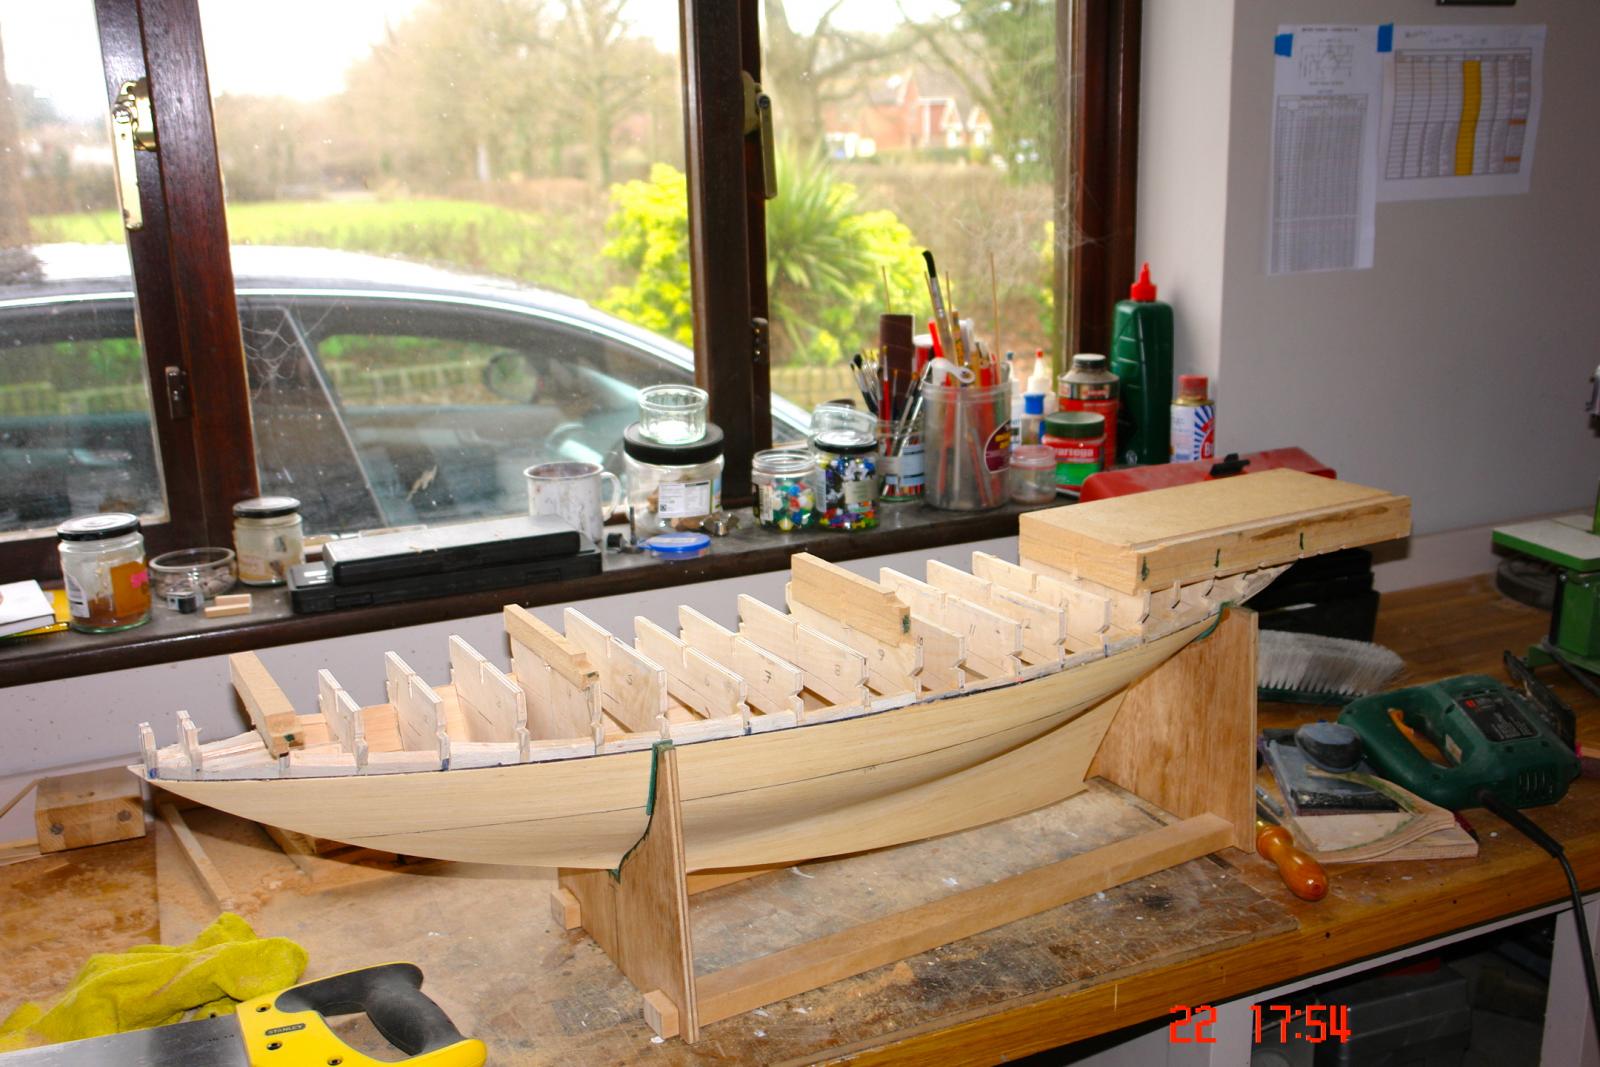
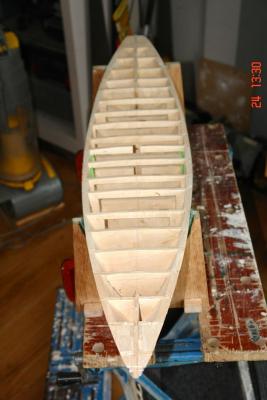
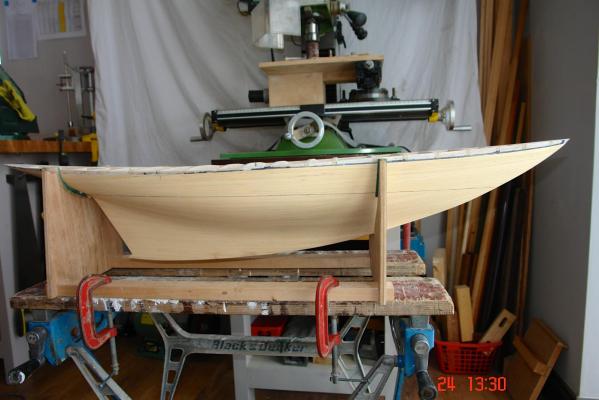
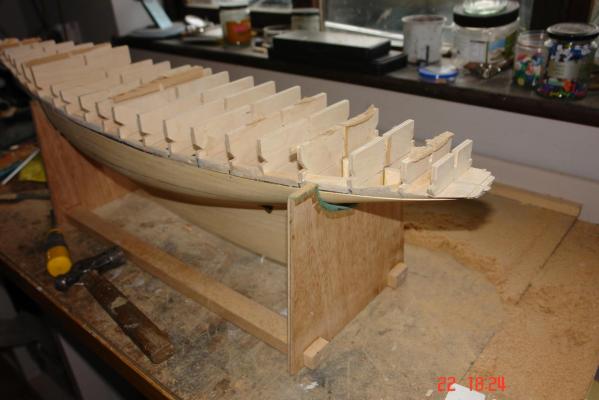
A little more progress.......... Having marked the waterline on the hull I realised my previous sequence had missed the vital step of making a building cradle. I had a look around the workshop and came across the discarded cradle from Endeavour. The fuller hull of Altair was fortuitous as a few quick cuts with the jigsaw transformed the cradle into one suitable for this build. (I used the frame templates from earlier to get the correct cradle profile). With the hull finally the correct way up I set about the task of removing the building board. You may recall not all the frames were glued to the board and I had marked the glued frames so I knew where to cut. While cutting away the building board I mused on the various removal stages and decided to name them for fun:- 1 THE AIRCRAFT CARRIER STAGE. (Illustrious class I think) 2 SAWING THE FAT LADY IN HALF STAGE. (Taking care not to get carried away) 3 THE CHINESE JUNK PHASE. 4 THE GALLEON PHASE (Forecastle still to be built) Having removed all of the building board I started on the frames - the aft most frame removed to deck level.


- 882 replies
-
- 10
-