MORE HANDBOOKS ARE ON THEIR WAY! We will let you know when they get here.
×

bryanc
-
Posts
218 -
Joined
-
Last visited
Content Type
Profiles
Forums
Gallery
Events
Everything posted by bryanc
-
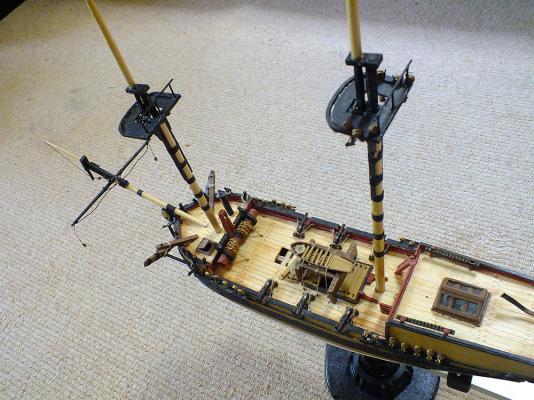
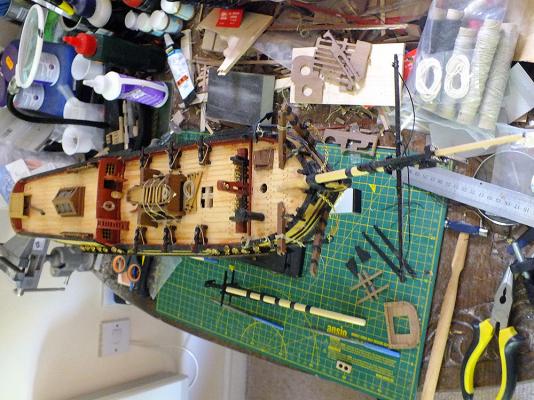
 Masts are up... Both masts now completed and erected (well, nearly completed, various blocks need adding here and there), but next to be constructed and added are the yards and booms of course before and, as Frank so succinctly put it; "... the fun starts"! I.e. shrouds, ratlines and rigging (groan)! Bryan
- 75 replies
-
- 2
-

-
- Caldercraft
- Supply
- (and 1 more)
-
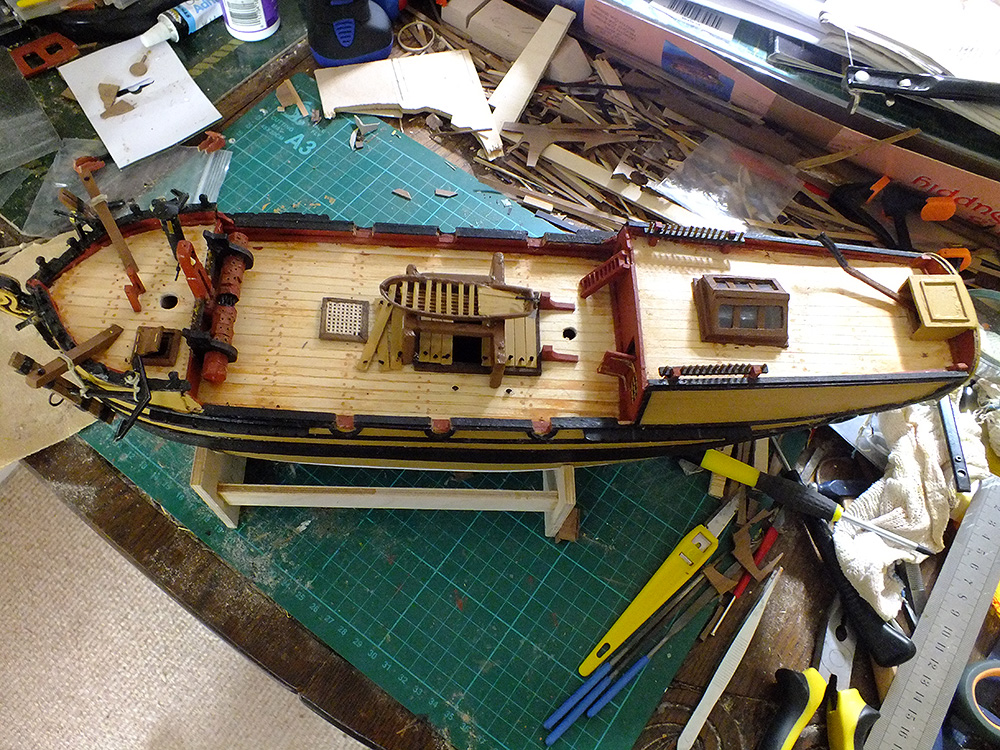
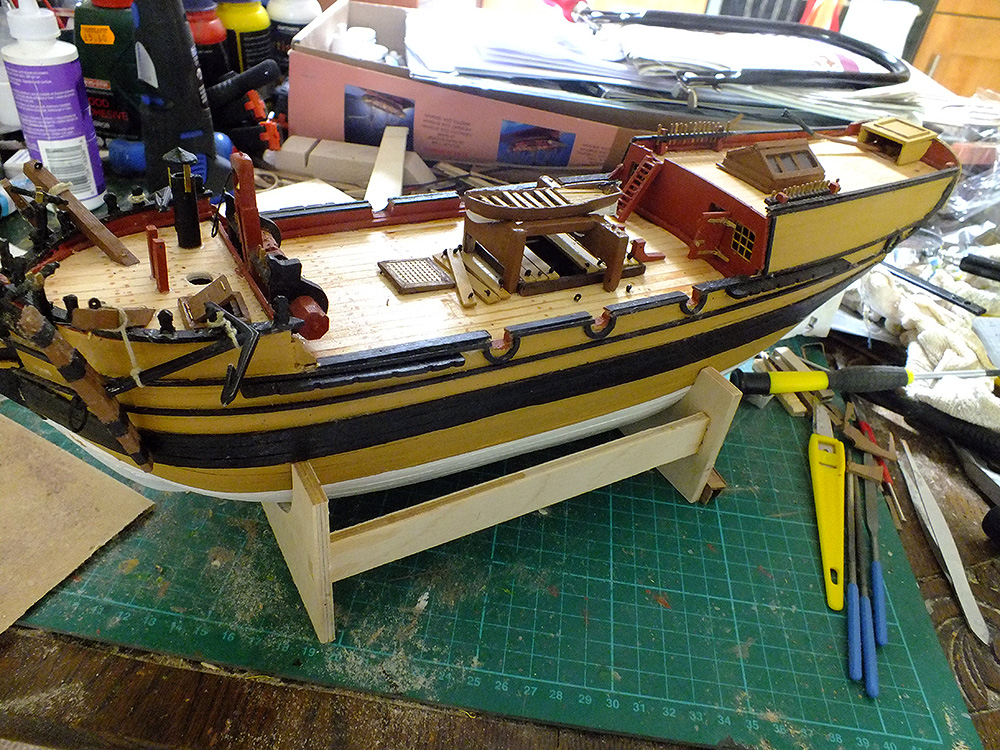
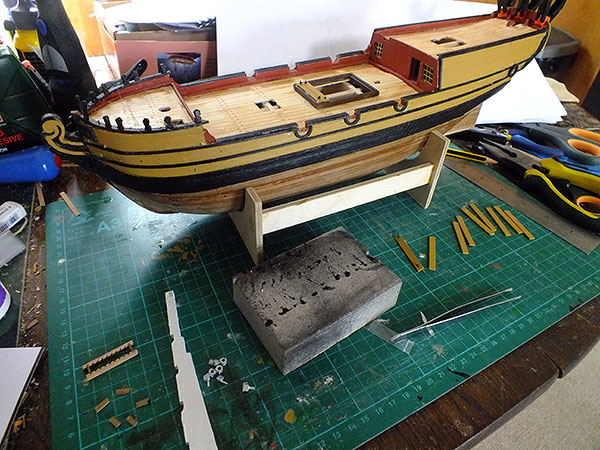
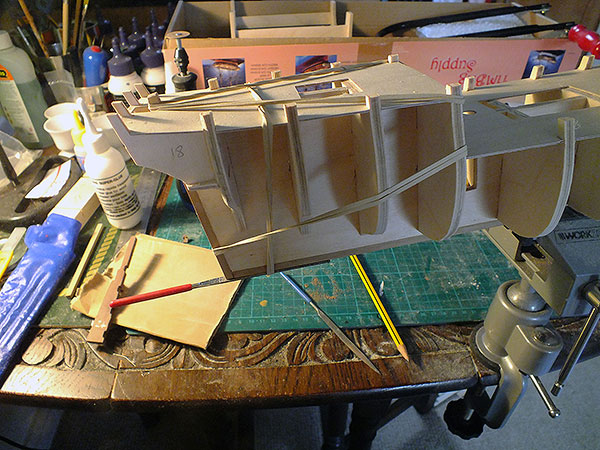
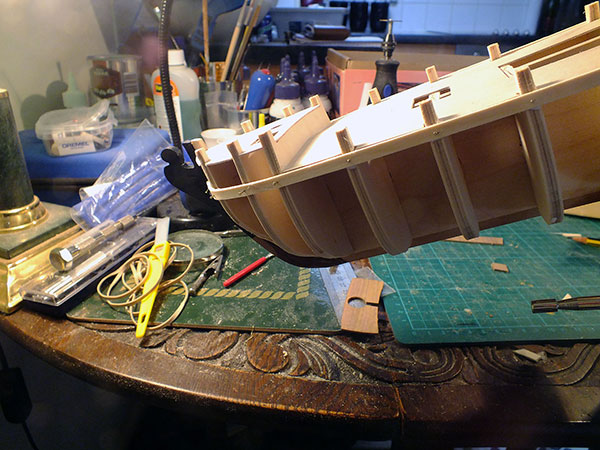
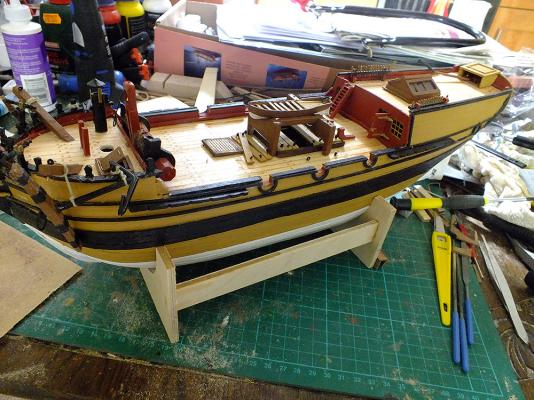
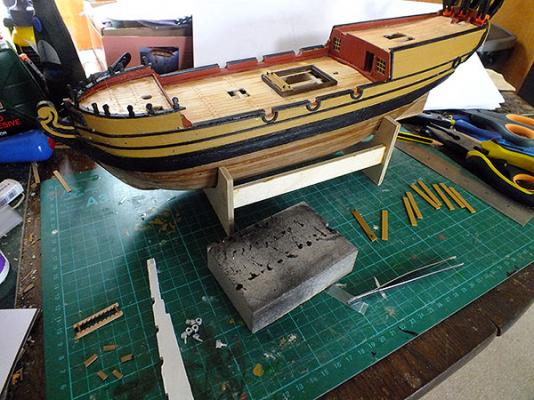
Moving up to the masts Just a quick update as things are moving on. Deck fittings almost complete - I've removed the forward hatch covering and intend replacing it with something more interesting, although I don't know what yet! I replaced the supplied cannon with better ones, I wasn't happy with the originals. Similarly I bought replacement deadeye strops; I was tearing my hair out with the rubbish supplied ones. You will also note the proportionally oversized anchor rope has been replaced with chain. Now I'm the first to admit that, while I believe anchor chain was employed at the time this ship was constructed, there is no way brass chain would be used! I did try to paint it black, but it didn't take kindly to it. I am particularly pleased with the bowsprit assembly; with its addition suddenly the ship has life! The eagle eyed may just notice the ship now stands in a keel clamp. It’s the over expensive Amati one. Now I've not been particularly impressed with Amati products, but must admit the clamp is good, and what a difference it makes to the construction process. It’s expensive, but recommended. But now up to the masts! You'll notice in the one photo (apologies for just one, I took several, but the others didn't do the work justice), the lower foremast is well underway, and it soon became apparent they (the complete masts) should be fully constructed before being permanently placed in position. Onward and (literally) upward! Bryan
- 75 replies
-
- 3
-
-
- Caldercraft
- Supply
- (and 1 more)
-
Thank you, praise indeed Frank, I'm sure you have not missed my boat cradle and windowed hatch covering is not unlike your own ;-) Yours is very much amongst the ones I look to for inspiration. I hope I'm brave enough to tackle the 'weathering' like yours come the day.
- 75 replies
-
- 1
-
-
- Caldercraft
- Supply
- (and 1 more)
-
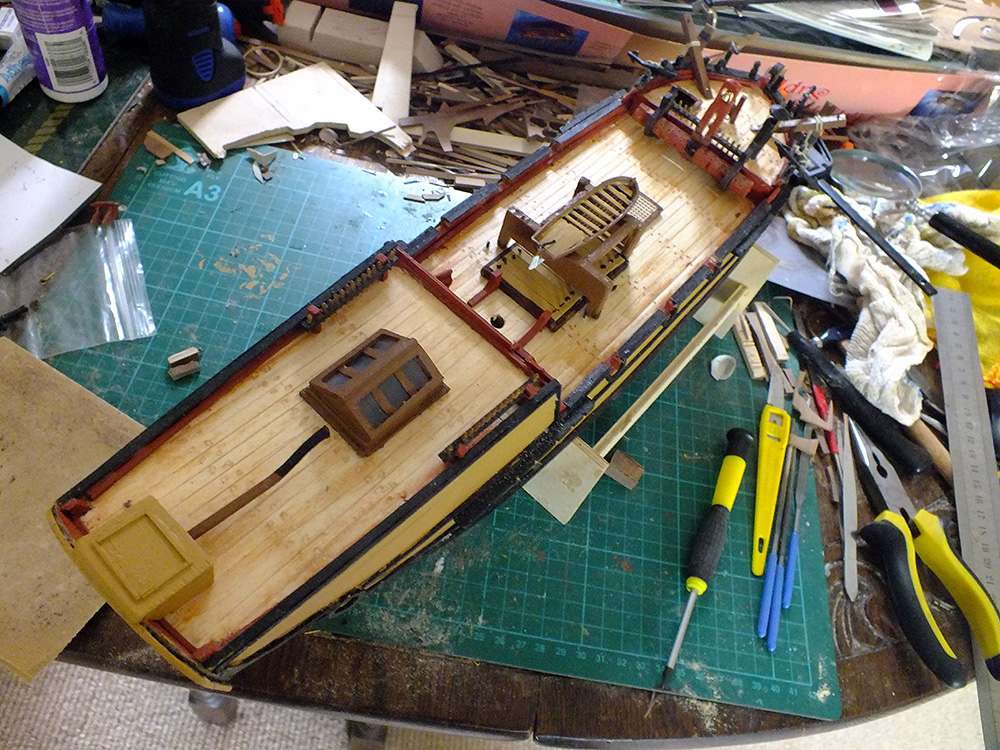
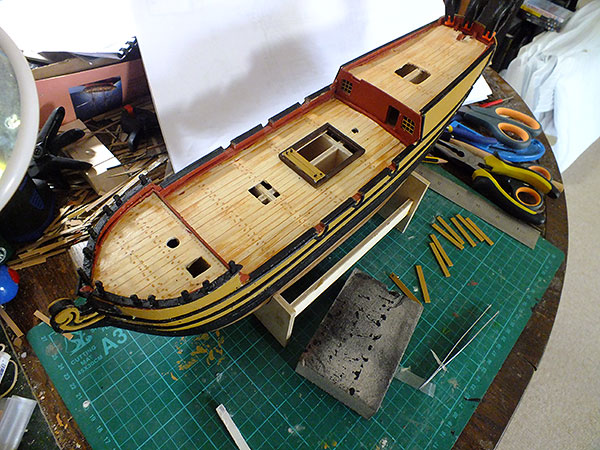
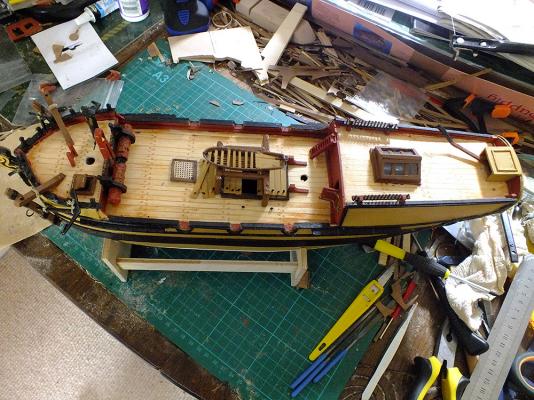
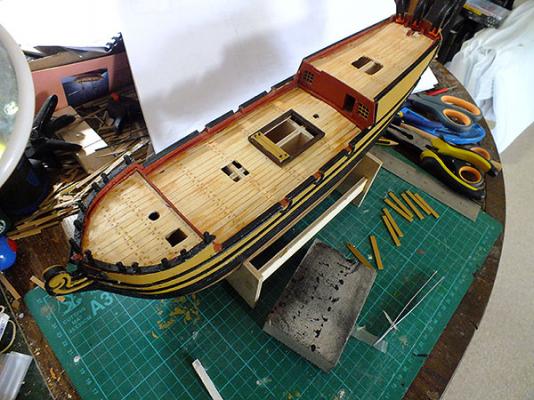
The build continues... ….mostly with deck fittings and furniture. But I’ve been beset with problems hence the slow progress, the ship’s boat and its cradle for one caused no end of grief. The cradle itself (its “bashed” of course) is currently on its third design as previous ones proved unsuitable, mostly because of potentially fouling the cannon placement, which, as observed before, is a little unreal anyway. When the latter happens that is, because the cannon assembly is another cause for concern; the cannon and especially the wheels are so tiny and awkward to assemble I’m beginning to despair. I’ve even looked online for ready built cannon but can’t find any at this scale. I’d be interested to know how others got on with the construction of these. But we must persevere of course… Onwards and upwards. Bryan

- 75 replies
-
- 5
-
-
- Caldercraft
- Supply
- (and 1 more)
-
On the deck Working on the deck fittings and furniture, usually my favorite bit; I love the detail. However this time a little more taxing; what sadist thought up the hatch covering eyelets and bolts? Probably the same one that thought up the ladders! Still enormously good fun though. I'm not sure about the colour of the hatch coverings, attractive, but hardly the colour they would have been. However most of it will be obscured by the ships boat which I intend will sit there. I'm still well aware I haven't yet painted the lower keel (white) which I should do before I develop the deck much further of course. And the rudder, I always neglect the rudder! Bryan

- 75 replies
-
- 4
-
-
- Caldercraft
- Supply
- (and 1 more)
-
Thanks for the advice guys. I'll investigate the face masks, in fact have just checked out Amazon and they have a good selection. Similarly with the Titbond Frank, but I am currently awaiting delivery (from across the pond!) of some Aleene's "Fast grab tacky glue"! We'll see how that performs. Bryan
-
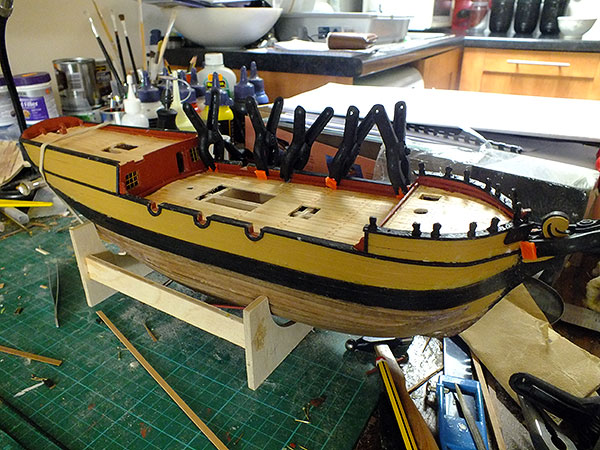
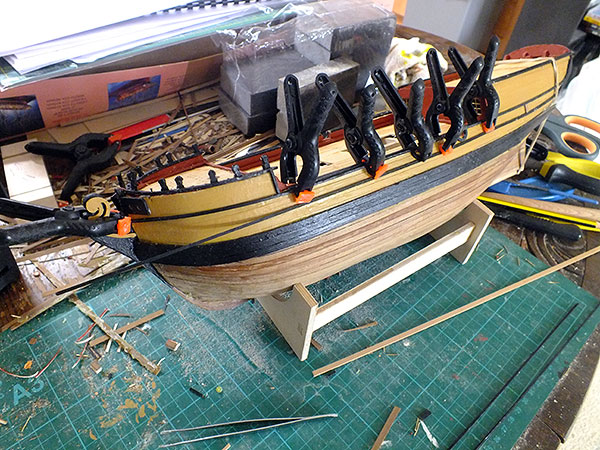
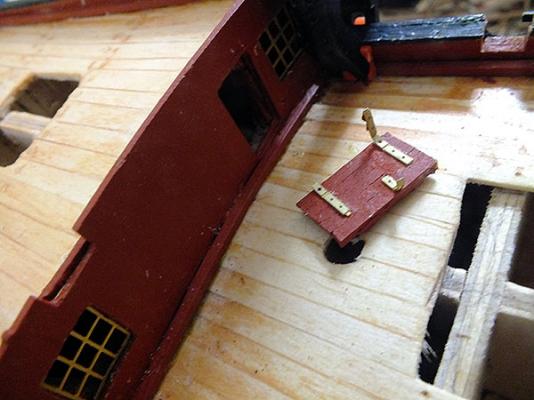
Hull Embellishments Continue... My apologies, I realise I have done quite a lot of work without documenting it, sorry. I completed planking the hull, I did finish treenailing the deck (after a fashion), although my process has left the deck randomly stained with the filler used; I cannot decide whether it looks a mess, or it actually enhances the appearance! I completed some of the more basic deck and bulwark fittings - including prematurely adding the bashed facia c/w half open brass hinged door, which I proceeded to demolish accidentally whilst manhandling the ship! I think it’s repairable. Then I part painted the hull and started adding the unique fittings (in the Victory livery). And that is where I'm at. One (of the many) things troubling me is adding fiddly bits without the use of CA glue; it really is frustrating trying to secure things while they dry and cure, rather than just holding them for a couple of seconds. But then I don't want those flu symptoms again, which, believe it or not, haven't completely disappeared after a whole week! Now, after completing the hull (and rudder etc.), I move back up to the deck to add all the furniture and more interesting bits! There are quite a few 'creative' ideas to be implemented here! Bryan


- 75 replies
-
- 3
-
-
- Caldercraft
- Supply
- (and 1 more)
-
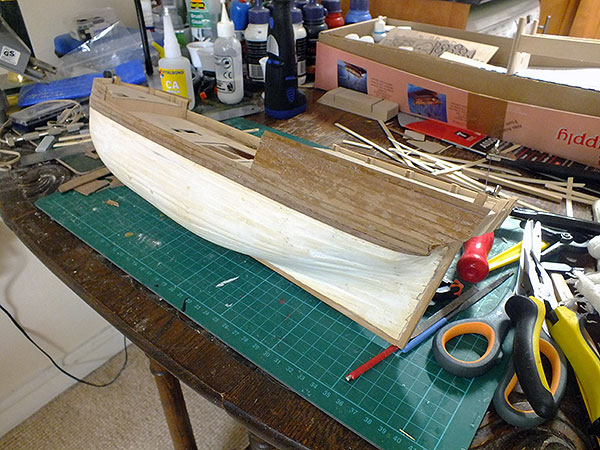
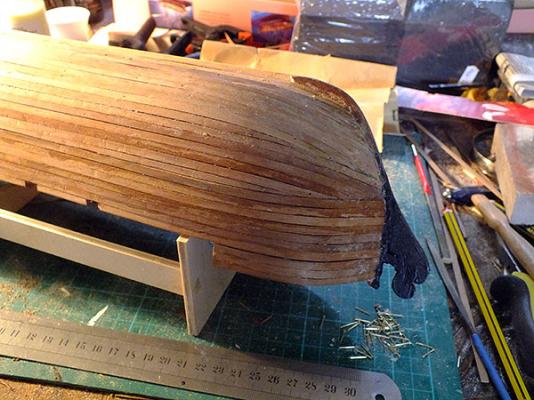
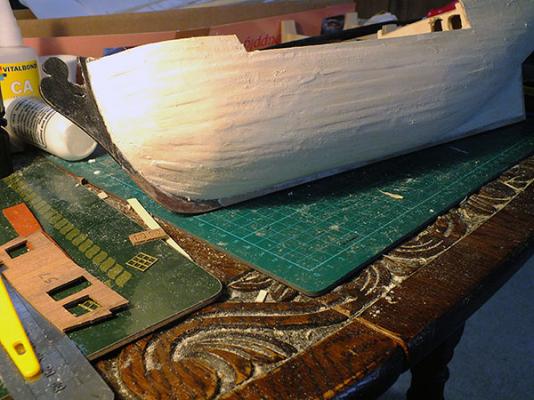
Hull Planking Complete Nearly...just a little filler and a lot of sanding, then its complete. Because of my super glue problems I've had to use pins quite a lot, certainly more than I wanted to, but it won't look too bad filled, sanded and painted. I've elected to go for the Geoffrey Ingleton (Powerhouse Museum.com) colour scheme or a variation of it, the Victory touch, black on yellow! With white below the waterline. Should be interesting. Now it gets a little more involved... Bryan

- 75 replies
-
- 4
-
-
- Caldercraft
- Supply
- (and 1 more)
-
Yes I think you're right Steve, and your reasoning is spot on. Like you I intend adding a ship's boat to the mix! But the most telling thing you said was the last sentance, I couldn't agree more :-) Bryan
- 75 replies
-
- 1
-
-
- Caldercraft
- Supply
- (and 1 more)
-
Hi Mike, Thanks for the compliment, she's hardly beautiful, but she's coming along. This is the Caldercraft version and indeed it does appear to be a different ship to the Artesania Latina version. I was prompted to have a look and found some pics of that kit being built, and yes that version appears to be a much different bird; the main deck appears a longer and with three hatchways in it for starters. Referring to "the bible"; the Powerhouse Museum Collection (http://www.powerhousemuseum.com/collection/database/?irn=238338&img=154993), it would appear from that standpoint alone, the Artesania version is the more correct! Bryan
-
PVA v CA (continued) The decision whether I use PVA or CA (Superglue) for keel planking has been very decisively taken for me; I have become very intolerant to CA glues! After two evenings heavy use of the stuff I suddenly 'came down with' very bad flu symptoms, and after a drastically sleepless night when I became convinced I was close to expiring(!), I have sworn off it! But I’m finding using ordinary wood glue or (the recently purchased) Aliphatic glue quite frustrating especially for the planking, where the use of pins has now become obligatory especially towards the prow where the bend in the planks is too much for wood glue. I used the CA simply because it eliminated the pin holes (mostly), but the flu has decided otherwise! It did raise the issue of clamps, and I had recently ordered a set of Amati Fast Clamps. I found them worse than useless! Has anyone any opinion on these things? What a waste of money, they don’t clamp anything, barely hanging on, never mind holding fast. Luckily I had spotted some cheap and cheerful Silverline Mini Clamps in my local hardware store. At less than £4.00 the pair, they do exactly what the Amati clamps were meant to do. Now they are intended as carpentry clamps, and with anything more demanding than model building I suspect they would be a bit of a joke, but for model building I find them superb – limited on curving keels, but they outperformed the Amati without question. The observant may spot my attempts at treenailing on the foredeck of the ship. A lot of cleaning up needs to be done, but I think I will stick with this method. Drilled holes filled with white woodfiller. I have experimented with mixing a darker wood stain with the filler (hence the staining on the deck!), but eventually opted for the plain white. It ‘suggests’ the treenails without overemphasising them, a trap many people fall in. Bryan


- 75 replies
-
- 4
-
-
- Caldercraft
- Supply
- (and 1 more)
-
I take your point and will look into getting some of the woodfiller mentioned - if only to minimise the very real risk of me gluing my fingers to the ship! Thanks! Bryan
- 75 replies
-
- 1
-
-
- Caldercraft
- Supply
- (and 1 more)
-
The 'walnut strip' is 1mm thick whereas the limewood is 1.5mm, so its significantly thinner - and feels it! Bryan
-
Second Planking The second planking continues apace. It's going well thus far and I think it will look good when fettled and finished properly. Of course I've made errors which I'll have to make good before too long. In an effort to avoid pin holes, I've used superglue for the planking (except at the very tip of the prow, where the curvature of the planks was too much for the glue to hold initially), but its wicked stuff to work with. This type (the yellow labelled bottle) is a tad too runny, and resolutely fast and hard drying. Its hell for the finger tips! A lot of work yet before I can turn my attention to the more interesting deck planking. Bryan
-
Hi Hornet, I've just checked my settings, and while they are a little confusing, as far as I can make out I should be able to receive messages - in fact I have an old one from ages ago. !?
-
...and I'm sure you're right, its obviously just a base for the second and more important one. I was just waxing a little lyrical because its such an improvement on my first ship:-) Mind you having just completed the sanding, its not quite so pristine looking now! Bryan
-
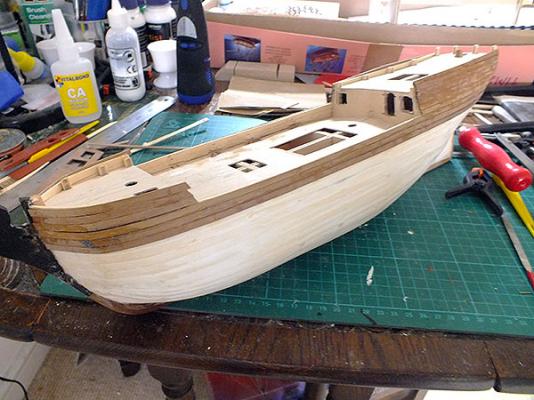
Port side (first) planking complete. I cracked on, encouraged by things going fairly well. Very enjoyable build this is proving to be. Of course mine is far from perfect, but my word I'm improving! Photos below show the port side complete and filled, but not yet sanded and much of it is little more than a 'wash'. Now I know filler covers a multitude of sins, but its so much better than my last build. Now a good sanding session, then the starboard side gets the same treatment! Bryan
- 75 replies
-
- 2
-
-
- Caldercraft
- Supply
- (and 1 more)
-
Yes Thunder, its proving to be a really enjoyable build. The errant rear bulkhead is probably the one refered to above. Thats a really kind offer, and yes Burton on Trent is not too far, perhaps when the weather (eventually) picks up? Bryan
-
Yes Hornet, I think bulkhead 3 caused me a bit of grief and I wish I had the foresight to reinforce it a little. Didn't get your PM (as far as I can tell!!).
-
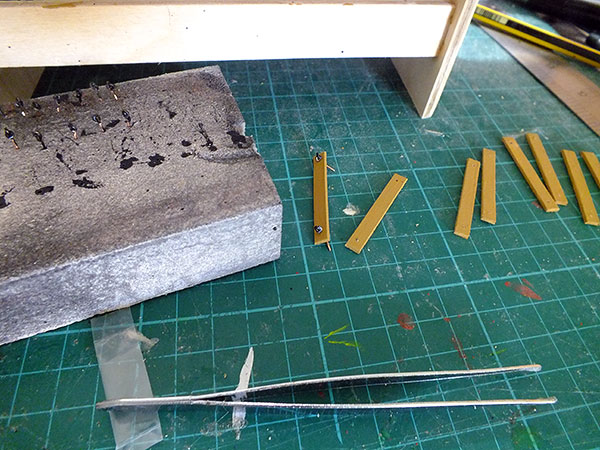
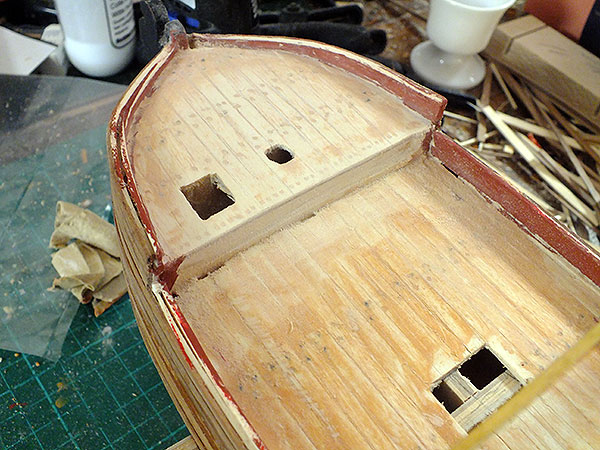
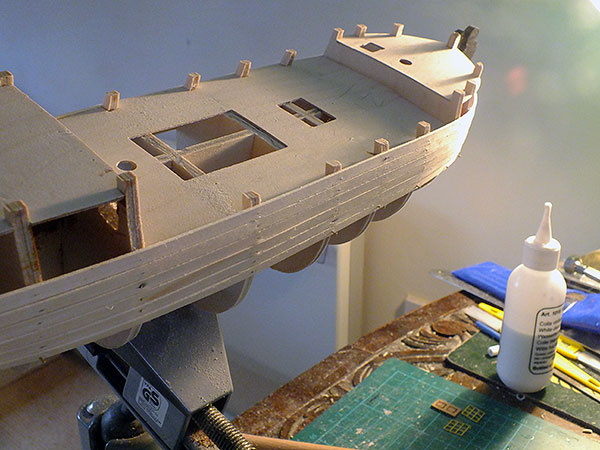
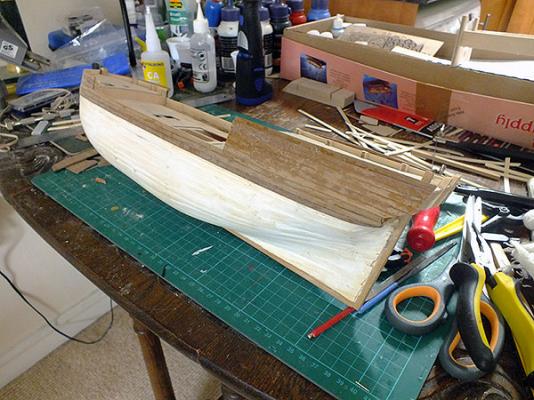
Planking Begins! And so to the planking. As discussed, something I'm always apprehensive about, but I'm feeling a tad more confident than previously. The photos will speak more loudly than I can... Stern post and keel edge to be glued on first (I know, I know, the keel should be longer and the stern post sit on it, my first mistake, but hardly vital. I hope). ...and the planking proper begins... ...and continues. The eagle eyed will notice a hole 'carved' into the aft deck facia. This is part of my first attempt at 'bashing'. The hole is an aperture for one of the two windows (plus a door) in the aft deck 'wall'. I'm completely replacing the facia with a home made one, and got completely carried away in an attempt to make the windows (and door) 'see-through'! You can actually see the brass 'windows', and the door (which will also be replaced I think) on the mat at the bottom right. It remains to be seen how successful it is! But, plenty of planking to be done yet...


- 75 replies
-
- 4
-
-
- Caldercraft
- Supply
- (and 1 more)
-
Hi Hornet, Thanks for the message. I can't find your build log, I'd love to see it. I can't remember how I stumbled upon it, but I'm already familiar with the Powerhouse Museums superb photos of the 'Supply', and have plundered them unmercifully. I have grave doubts my work is going to end up of a similar standard though! Bryan
-
Thanks Anton, Yes the quality of this Caldercraft has impressed me very much - mostly. The aft deck facia is actually quite pathetically bad! For the first time I'm going to have to indulge in some quite dramatic 'bashing'! I'll try and photograph it all. Bryan
-
Hi again Frank, Yes its planking the hull that always tests me! I'm taking it more slowly and deliberately, but am still struggling! Bryan
-
Thanks Nigel, a really helpful little video. Like he admits though, what a shame a camera couldn't be behind him. Good tips though. Bryan
-
Thank you so much Frank, you've no idea how much help thats going to be to me - and to others. What a wonderful job you did with her, so many hints and tips there, and I've only briefly skimmed through it for now. And thats got to be a masterclass in weathering!! Wonderful. Thanks again, I'll be referring to it constantly, Bryan