-
Posts
218 -
Joined
-
Last visited
Content Type
Profiles
Forums
Gallery
Events
Everything posted by bryanc
-
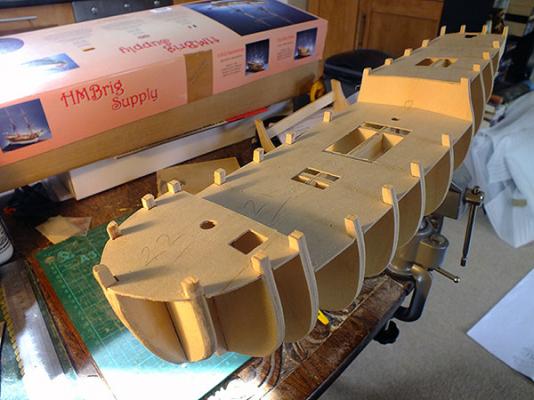
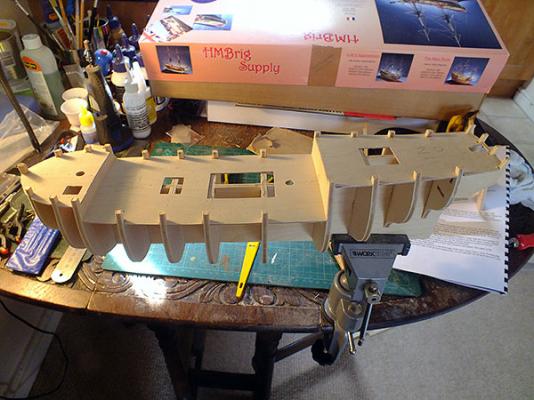
The Build Continues I got straight down to work, and was mostly impressed by the quality of materials. The hull construction went ahead without any problems and I continue to be impressed by the robustness of the thing (at this stage anyway). I'm quite convinced that if I dropped it, the floor would suffer, not the ship ;-) I ploughed straight on with the false decking which did need some 'fettling' to make it fit, but nothing unexpected. But thats the easy bit, now to move onto the first planking, which I always approach with some trepidation, because as usual, the instructions for terminating plank ends, by which I mean where and how, is woefully inadequate. But this time I'll do more research into other peoples planking experiences, and the tips to be found in the 'Technique and Research' part of the site. Bryan
- 75 replies
-
- Caldercraft
- Supply
-
(and 1 more)
Tagged with:
-
Hi Frank, did you do a build log, or have any construction pics? I need all the help I can get ;-) Bryan
- 75 replies
-
- Caldercraft
- Supply
-
(and 1 more)
Tagged with:
-
Absolutely not Nigel, I'd be honoured if you sail along ;-) Its a good, solid kit, should be interesting, but please bear in mind I'm no expert. First set of pics and update coming shortly. Bryan
- 75 replies
-
- Caldercraft
- Supply
-
(and 1 more)
Tagged with:
-
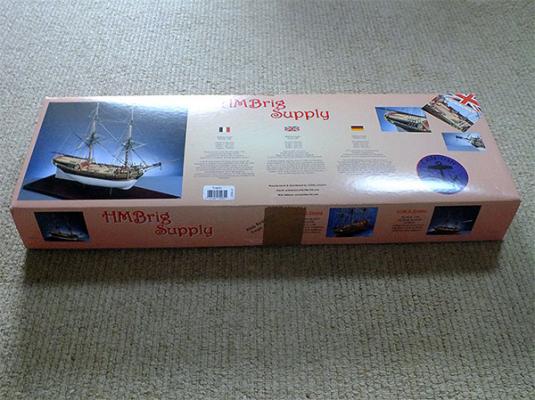
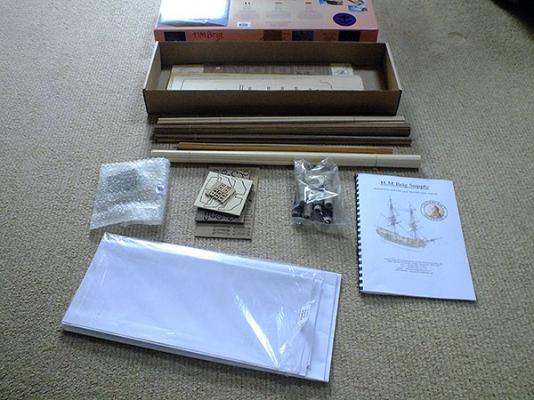
HM Brig Supply 1759 Yard Transport / Convict Ship - the ship that, ahead of the first convict fleet, was first to enter Australian waters and what became Sydney harbour. First impressions; a very long, heavy box (the delivery note claimed it was 3Kg!), on opening I was surprised first by the amount of sawdust(!) then the reason for all the weight; copious amounts of 5mm thick ply and walnut panels very much in evidence, not to mention a staggering amount of planking, doweling etc. The quality of the wood and indeed the fittings appears good and that is very encouraging. The instructions; well, the actual written instructions little more than adequate, but the 6 huge sheets comprising the plans do seem very comprehensive and well produced. Time will tell! Construction has already begun, so my next post will be quite soon. Bryan
- 75 replies
-
- Caldercraft
- Supply
-
(and 1 more)
Tagged with:
-
On Thursday I received the (heavy) box containing my Caldercraft HM Brig "Supply". I've also incidentally won a bidding war on Ebay for the Caldercraft HM Mortar Vessel Convulsion, which is coming next week!! The "Supply" has already been started however, so I'd better start a new build log for her. See you there! Bryan
- 57 replies
-
- Lady Nelson
- Victory Models
-
(and 2 more)
Tagged with:
-
Thanks Gunther! However it isn't going to be the gunboat, out of stock and I can't wait, need my ship building fix!!
- 57 replies
-
- Lady Nelson
- Victory Models
-
(and 2 more)
Tagged with:
-
Oh if things continue as I anticipate scratch building may be on the cards one day. For now though my next build, for a variety of reasons, will be the Caldercraft HM Brig "Supply", just ordered - from Model Dockyard this time. Bryan
- 57 replies
-
- Lady Nelson
- Victory Models
-
(and 2 more)
Tagged with:
-
Well I certainly share your admiration for cross-sections and the great detail they provide, and have given the likes of the Panart Victory Bow Section much consideration, but scratch building?! I think you asume I have far more skill than I in fact do. No, I need far more basic hands on experience before I attempt the lofty heights of scratch building, so I'm still searching for the next kit... Bryan
- 57 replies
-
- Lady Nelson
- Victory Models
-
(and 2 more)
Tagged with:
-
Thanks Tony! Yes it is, a very satisfying feeling. The trouble is I now need quite desperately to continue to build, and my chosen next kit seems to be out of stock everywhere, so I'm frantically seeking a suitable next build that I can afford, and someone has in stock for immediate delivery! Bryan
- 57 replies
-
- Lady Nelson
- Victory Models
-
(and 2 more)
Tagged with:
-
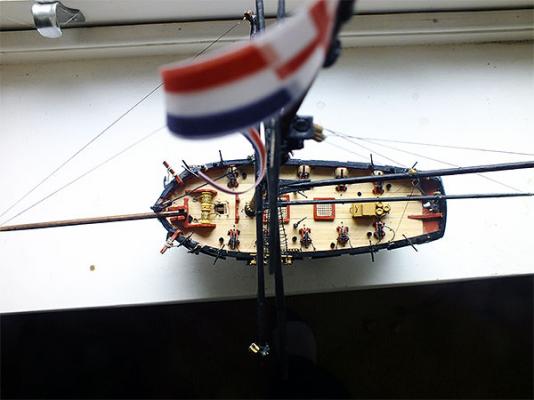
The Lady Nelson completed Photos attached as promised of my first completed ship; The Lady Nelson. A hugely enjoyable experience, she is far from perfect, but I take great pleasure in her. But, onwards and upwards, and I am currently awaiting delivery of my next project - Caldercraft HM Gunboat William 1795 1:32 scale model kit. Thanks, Bryan
- 57 replies
-
- Lady Nelson
- Victory Models
-
(and 2 more)
Tagged with:
-
Many thanks indeed Thunder, just going there now *Update. I've had an in depth study, and feel I would quite like to have a go! Now to find the cheapest option. Many thanks indeed for your invaluable help. Bryan
- 4 replies
-
- Caldercraft
- Gunboat
-
(and 1 more)
Tagged with:
-
Finished! A little bit of tidying up and I'll post the pics, but; As in the nature of these things I am already casting about for my next project. It was going to be the HM Bomb Vessel Granado (probably the Victory Model version which is a lot cheaper than the Caldercraft, but opinions on that would be welcome), but I've come across the Caldercraft HM William Gunboat. Its a bit of an odd one, which in itself is intreguing, but its also 1:32 which has really got my attention. Has anyone any experience of this kit, or even built it? A search on site has come up with nothing! Any comments welcome, thanks. Bryan
- 57 replies
-
- Lady Nelson
- Victory Models
-
(and 2 more)
Tagged with:
-
Hi Guys, The Caldercraft HM William Gunboat 1:32 I was just wondering if anyone had any experience of, or have indeed built this ship? For the first time a search on site has produced no hits or information at all (apart from another gentleman asking similar questions 2 years ago). I've virtually finished my last build (Lady Nelson) and am searching for my next. Its a bit of an odd one but I find it intreguing. This is a Caldercraft, so should be of good quality, but I must confess one reason its attracted me is its scale; its a big 1:32 which I find most interesting after fiddling about with the 1:64 Lady Nelson. Any help, information or direction much appreciated. Thanks, Bryan
- 4 replies
-
- Caldercraft
- Gunboat
-
(and 1 more)
Tagged with:
-
Thanks guys, its good of you and encouraging when ones feeling maybe a tad discouraged - like I was yesterday struggling with the mainstay! Grrr! But in no way totally discouraged, as I am already relishing my second ship; it was always intended to be a large scale Victory, but I think I will hone my skills a little further first, hmmm, now which ship... Thanks, Bryan
- 57 replies
-
- Lady Nelson
- Victory Models
-
(and 2 more)
Tagged with:
-
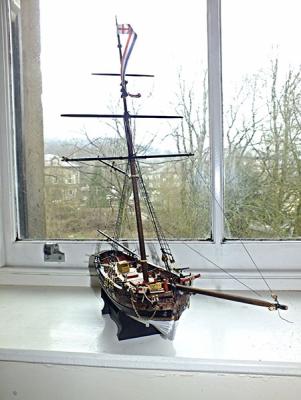
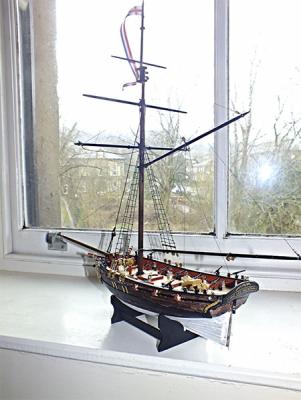
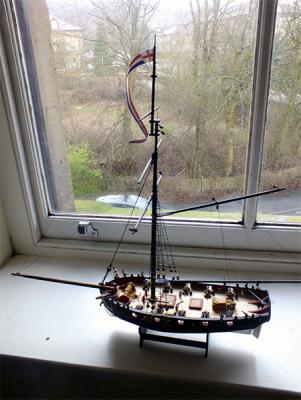
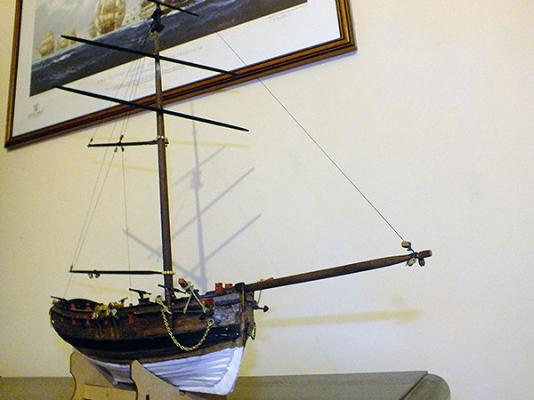
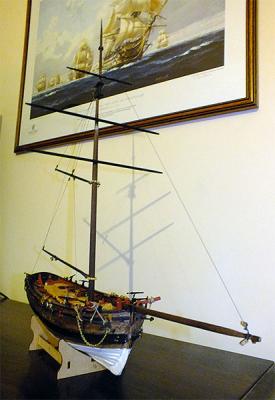
The end is in sight It was a strange moment when the mast went up, it was suddenly a ship, and it was quite a defining moment! Obviously some big strides have now taken place and the end is in sight, although still a lot to do. Working with the blocks and lines is so fiddly, but strangely satisfying, and although I’ve taken short-cuts purists will shudder at, it’s been good fun and I’m enjoying it. And I even dare to say it looks OK – from a distance! It is after all my first ship and I’m aware there are mistakes and in some cases shoddy workmanship, but its all a big and enjoyable learning experience, and I’m already relishing my next ship. Note the careful posing; in front of my limited edition Smitheman print “HMS Victory Leading the Line at Trafalgar”! Bryan
- 57 replies
-
- Lady Nelson
- Victory Models
-
(and 2 more)
Tagged with:
-
Tapering masts, spars and yards
bryanc replied to bryanc's topic in Modeling tools and Workshop Equipment
Thanks guys, all welcome suggestions, but I've already started with my own typically rough and ready method. I've clamped my cordless Dremel 7700 securely in a vice with a sander drum in the chuck and, at low speed, wearing safety specs, moved and rotated the spars etc delicately across the drum. Its probably not a very health & safety accredited method and great care has to be taken, but its done a fair job. The spars will now be finished with sandpaper. -
Hi, I'm seeking advice regarding the preferred way of tapering masts and spars etc. Are spokeshaves a sensible option, and if so where (in the UK) is the best place to acquire them? Any other methods used by members? Bryan
-
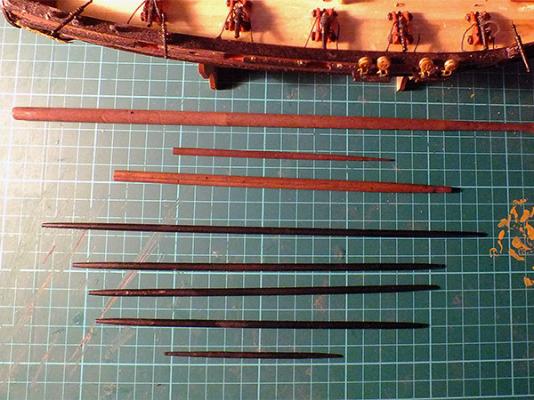
Should have done a more effective search, as there is a bit of stuff already written about tapering of yards and spars :-) I must just add I was a little unfair to Victory Models, the dimensions of the masts, spars etc were on the drawings, and they were shown more or less full size which was helpful, but there are no instructions at all what to do with them. However, as mentioned elsewhere, I've come up with my own typically rough and ready method of tapering them; I clamped my cordless Dremel 7700 securely in a vice with a sander drum in the chuck and, at low speed, wearing safety specs, moved and rotated the spars etc delicately across the drum. Its probably not a very health & safety accredited method and great care has to be taken, but its done a fair job. Medium then fine sandpaper completed the task, and with the possible exception of the bowsprit, painted or stained they don't look too awful. Now to read up on fitting them! Bryan
- 57 replies
-
- Lady Nelson
- Victory Models
-
(and 2 more)
Tagged with:
-
Moving on... A bit of general tidying up to be done, but otherwise about ready to move up from the deck. Masts and spars all sized, but how does one effectively taper said spars without access to a mini lathe!? Is it all patiently sandpapered? The instructions are woefully inadequate about the tapering itself - length thereof and stuff. Bryan
- 57 replies
-
- Lady Nelson
- Victory Models
-
(and 2 more)
Tagged with:
-
Adrian, maybe the Kit No. is the same. Although probably not as I've just had a look on the box. Not only does it say "New Edition Kit" in several places, there is also an actual photograph on the side clearly showing the nameplate. It looks like yours maybe the original edition if it hasn't got that. I can't imagine the deck furniture has changed much, remember I've been a tad "creative" with mine. Bryan
- 57 replies
-
- Lady Nelson
- Victory Models
-
(and 2 more)
Tagged with:
-
Hi, Yes if your kit is No. 1300/01 - its the revised edition. (The main difference is you have two sets of conflicting instructions!). The name plate is a piece of pressed brass(?) in a small plastic envelope with the few other brass pieces (including the notoriously flimsy deadeye fittings). The nameplate is intended to be painted yellow on black, but being brass, I painted the whole lot matt black then when dry, with a fine needle file, I filed off the relief which picks out the raised name and scroll work beautifully.
- 57 replies
-
- Lady Nelson
- Victory Models
-
(and 2 more)
Tagged with:
-
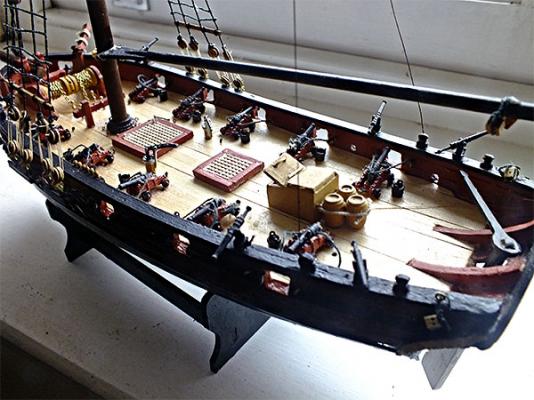
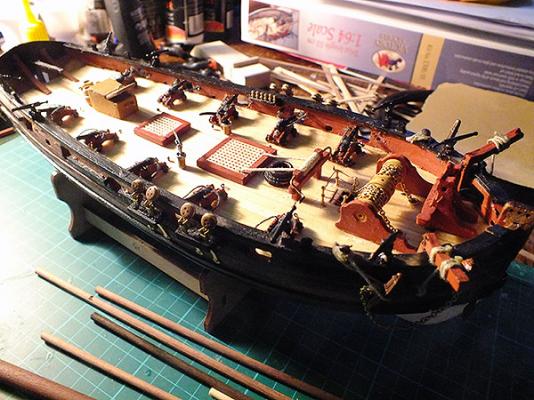
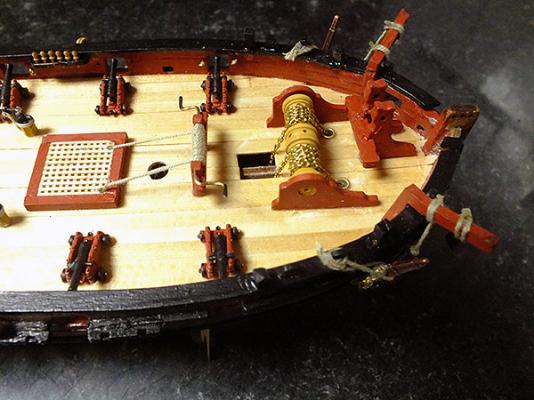
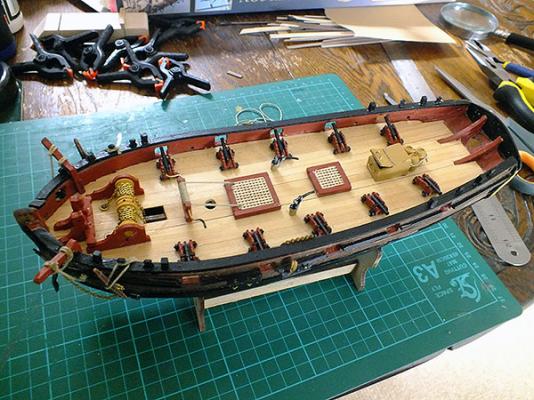
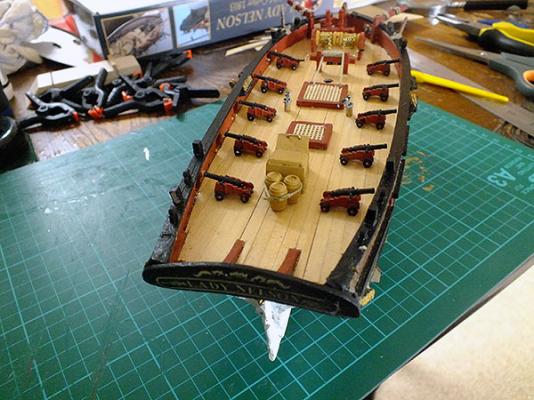
Up to date photos The latest photos as promised; things are moving on, I’ve had a lot of fun with somewhat “creative” deck fittings, all kidology, and not out of the manual, but hey…! Now to the less fun activities of the cannon rigging and the creating of “new” deadeyes etc. Then the rudder….. Bryan
- 57 replies
-
- Lady Nelson
- Victory Models
-
(and 2 more)
Tagged with:
-
The stern is planked Adrian, (albeit not very well) and just doesn't show in the photos. I've got to clean it up and add the rudder of course yet (something I didn't make a very good job of first time round, so must redo). I've a horrible feeling you may be right about the decking, as I said before the cannon foul the gun port openings (too high to fit through), so it must be because the deck is set too high (or the bulwarks too low). I can't really see how it is the case though, as the decking was laid directly on the supports as far as I remember, but if its meant to curve downwards as you say that would explain it. Lack of emphasis in the instructions! You'll see from the photos I'm about to post, I've had to set the guns back from the ports. Too late to do anything now though! The decking is absolutley solid with no give whatsoever. All a learning experience! Bryan
- 57 replies
-
- Lady Nelson
- Victory Models
-
(and 2 more)
Tagged with:
-
Hi Anthony, Many thanks, looking at them now, I'm having a go at doing my own (at least the deadeyes) with brass wire as Tony suggested, but will get some chainplates from your source if I can't think of a way of fabricating them myself. Thank you. Bryan
- 57 replies
-
- Lady Nelson
- Victory Models
-
(and 2 more)
Tagged with:
-
Hi Tony, Many thanks for coming to the rescue again. I've bookmarked the sites mentioned for later, and will, in the first instance, have a look at making my own! Thanks for the inspiration. I am actually waging ahead and fitting out the deck, c/w my own inovations! My camera is misbehaving or I would post some pics, but hopefully soon. Thanks again, Bryan
- 57 replies
-
- Lady Nelson
- Victory Models
-
(and 2 more)
Tagged with:
About us
Modelshipworld - Advancing Ship Modeling through Research
SSL Secured
Your security is important for us so this Website is SSL-Secured
NRG Mailing Address
Nautical Research Guild
237 South Lincoln Street
Westmont IL, 60559-1917
Model Ship World ® and the MSW logo are Registered Trademarks, and belong to the Nautical Research Guild (United States Patent and Trademark Office: No. 6,929,264 & No. 6,929,274, registered Dec. 20, 2022)
Helpful Links
About the NRG
If you enjoy building ship models that are historically accurate as well as beautiful, then The Nautical Research Guild (NRG) is just right for you.
The Guild is a non-profit educational organization whose mission is to “Advance Ship Modeling Through Research”. We provide support to our members in their efforts to raise the quality of their model ships.
The Nautical Research Guild has published our world-renowned quarterly magazine, The Nautical Research Journal, since 1955. The pages of the Journal are full of articles by accomplished ship modelers who show you how they create those exquisite details on their models, and by maritime historians who show you the correct details to build. The Journal is available in both print and digital editions. Go to the NRG web site (www.thenrg.org) to download a complimentary digital copy of the Journal. The NRG also publishes plan sets, books and compilations of back issues of the Journal and the former Ships in Scale and Model Ship Builder magazines.


