HOLIDAY DONATION DRIVE - SUPPORT MSW - DO YOUR PART TO KEEP THIS GREAT FORUM GOING! (Only 20 donations so far - C'mon guys!)
×


bryanc
-
Posts
218 -
Joined
-
Last visited
Content Type
Profiles
Forums
Gallery
Events
Everything posted by bryanc
-
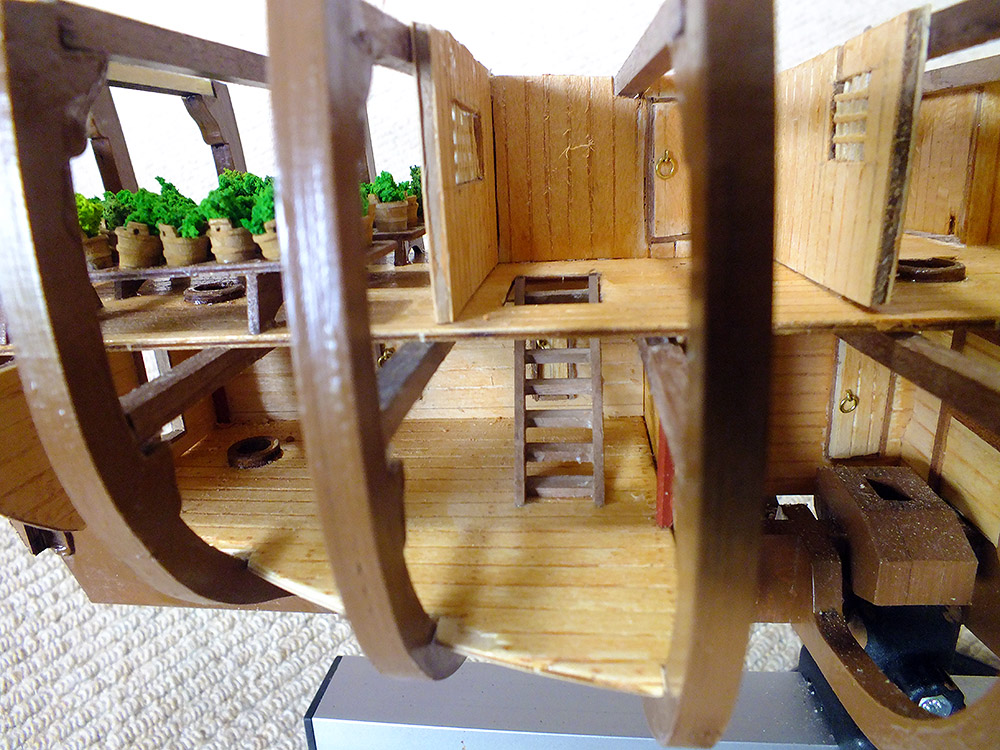
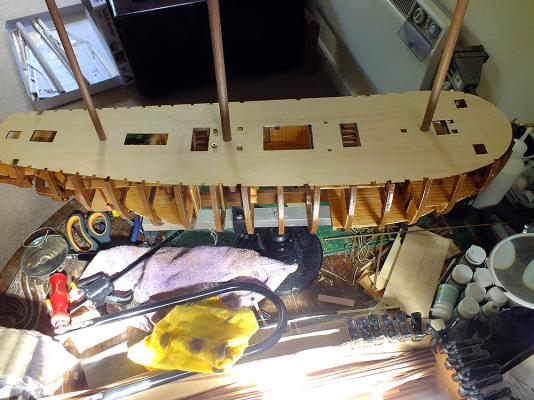
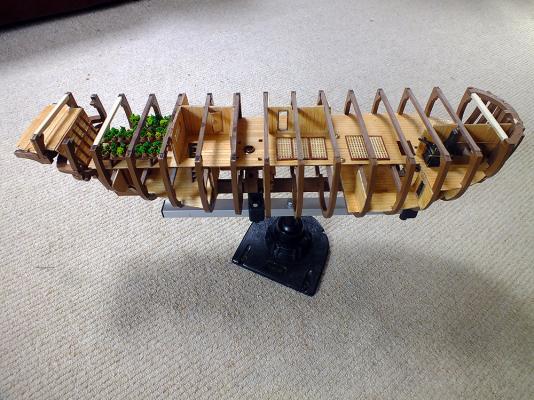
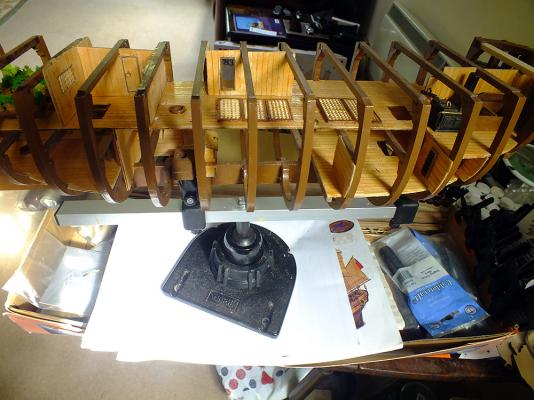
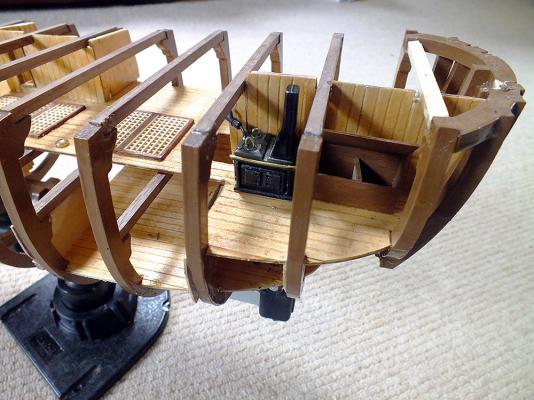
 Maindeck fitted The top deck was fitted last night after a lot of work "finishing" the companionways. "Finishing" in inverted commas because I'm not completely happy with them, (although now the upper deck is fixed, I'm more limited in what I can do with them). I originally had the actual steps complete with banister railings and balustrades, but just couldn't convince myself the actual ship would have bannister rails, but rather just rope, if anything. The actual decision was aided by the fact some of them weren't very good anyway, so off they came and "rope" has been used extensively both as "banisters" and hatch guard railings. Its the latter that may yet change back! I was largely pleased with the deck until I dry fitted the masts and bilge pump pipes once again. The first time I did this, before the deck went on properly, all fitted well. Now less so; the bilge pump pipes fit all too well, dropping right through to the keel. But this isn't an issue, and can easily be remedied. Less so the Mizzen Mast. The fore and main masts are fine, but the mizzen mast has become slightly misaligned, and is just a tad off centre down on the lower deck (see the last photo). I think with a bit more sanding, and judicious use of lateral force on the far side of the mast, I can ease the mast into its anchor hole, but it’s disappointing when I went to the trouble of ensuring all was OK before fitting the deck proper. Hopefully it will not affect the trim of the masts in general. The deck itself fitted relatively well, certainly on the starboard side, less well on the port side where two frames and associated (bashed) interior walls, are disappointingly proud, and will need some considerable work later. A couple of shims were required on the starboard side, to ensure there are no gaps between deck and ribs, which is to be expected really. The port side (definitely my worse side!) will require rather more I think. Planking the main deck is the next big job.
-
Al, your opinion is worth a great deal! I quite anticipate encountering issues fitting the main deck. I've just dry fitted it just to see the extent of my problems, and wish I hadn't. One immedite problem encountered was one my bashed walls has pushed a beam / frame out too far. I'd better put that right before anything else. At first quick look there doesn't seem to be too much shiming up or down to do, rather a matter of the whole deck being a tad out of plumb i.e. something has twisted the keel (just a little). But I'll refer back to your advice when I get there, I've still quite a lot still to do before I get there. While I take your advice re. things like the coal bin (I've divided mine, coal in one half, twigs in the other!), I won't be adding any other detail apart from the ballusters and chocks which I feel will be much easier done now than with the deck on.
-
I am quite familiar with your build log Thomas, its your turned chocks that have inspired me to go down the same road, and encounter much frustration trying to emmulate your ballusters! I can't find any photos showing the beams dowel install, although one photo shows eveidence they are there.
-
Hi guys, lots of helpful comments, so I'll mention them all in the one minor update. Thomas; many thanks for pointing out my error with the upper deck support beams, and yes, thank god I hadn't added the main deck before the error was realised! I've now replaced the beams with the correct kit provided ones. Its a little bit worrying that they didn't fit as well as the handmade ones (either too big or too short), but that’s understandable I suppose. I'm just hoping the upper deck now fits OK, but I'm a little apprehensive. At least when the beams were removed I was able to take advantage of the opportunity and get at those bilge pipe holes more easily. I think the pipes will be OK now, although I've still to notch the upper beams themselves. It’s a testament to how good basic white wood glue is, oh I did have a job removing them, and yes Thomas, it was down to patient "sawing" with a scalpel that helped most. Mind you when lifting the beam affixed to the "bashed" wall against which the stove and chest were placed, the whole lot came out in one piece, wall, stove, chest the lot! They remained intact and went back together as one piece! The plant material was from a UK company; http://www.serious-play.co.uk/, and is material intended for model railway enthusiasts scenic creations. They have some excellent and sometimes quiet bizarre items, and I also have additionally acquired some "mixed stone" for down in the bilges as ballast and even some "coal" to go in the chest next to the stove! The plant material I think was intended for railway cutting bushes and the like, but gently separating bits and gluing them in place proved quite effective. In fact I've oodles of the plant material left, I've only used a tiny amount from the one container and I've two of them! I can hardly imagine I'll ever have need for any more of it, and if it would be cost effective to send some over the pond to you, I happily would. I seriously doubt it would be though. Thanks for the compliment Anthony, I do wonder if I do work too fast, as shown by the mistake made recently, I obviously do. And pay the price! Al, that’s a clever way of preparing and working planking, and one I'll look towards when the more serious hull planking commences - something I'm not relishing, and never do. There is nowhere in this country going to give me wooden rulers for free however! But I'll cost them, because I can see the principal being applied to many things. But the planking; very clever. I've previously relied on the trusty scalpel and steel rule, but that’s not always as precise or effective. So thanks guys. I've now got to persevere with the lathe and get all the balusters etc done, before I can move upward and assemble and mount the upper deck! YouTube now I think to look up wood turning by lathe for dummies....
-
Hi Captain Al and Thomaslambo, just an update really; I have now notched the upper deck beams (but the work will have to be undone now - see below), and am in the process of notching the lower deck beams with a round needle file, laborious, but safer than attempting to take a drill to it! But (Thomas), I had completely missed the the fact that the upper deck supports are made from supplied curved beams! What a costly mistake! Its hardly any wonder I ran out of 5 x 5 material. But now I've got the difficult task of removing the existing beams and replacing them with the supplied ones.The dangers of making assumptions! Groan. Thanks Thomas. And Al, thanks for the tip re. the thumb plane. I've checked, they are available over here (the UK) as well. Thanks guys.
-
Thanks for that Thomas. And really good tips! The alignment of the masts I have kept an eye on, and all is well. The bilge pipes less so (see my last post). I will do as you say on the main or upper deck cross beams, but its too late for the lower ones. Some dexterous drilling is called for I think. Deciding what detail to add prior to hull planking and what not to is really taxing, but basically I think I've added all I intend to for now. Thaks again, Bryan
-
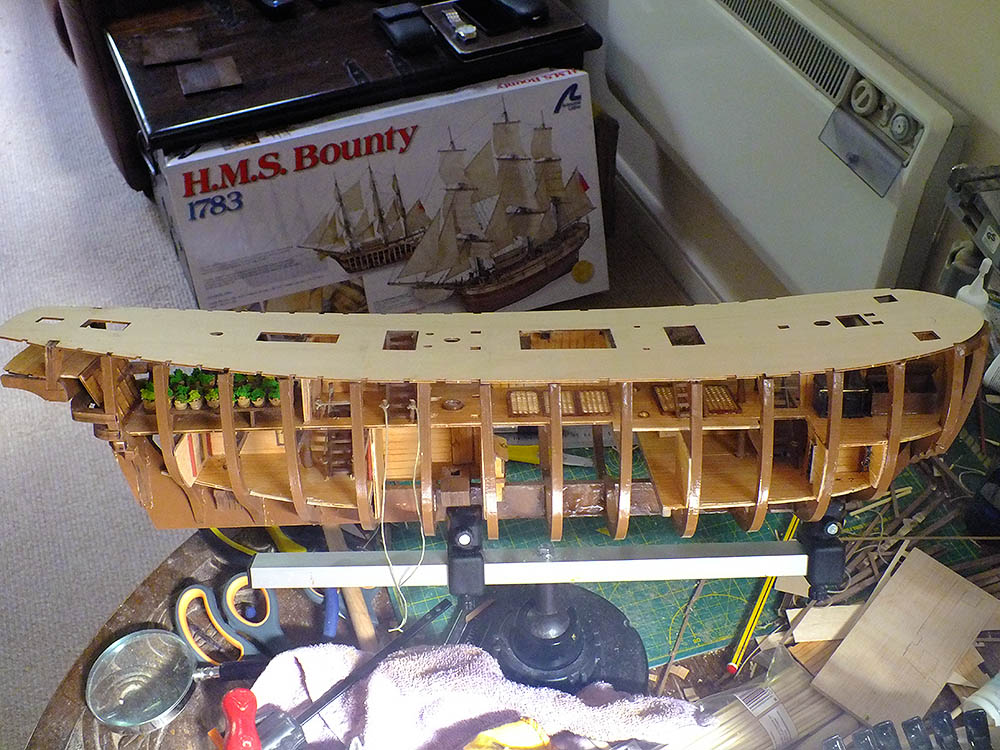
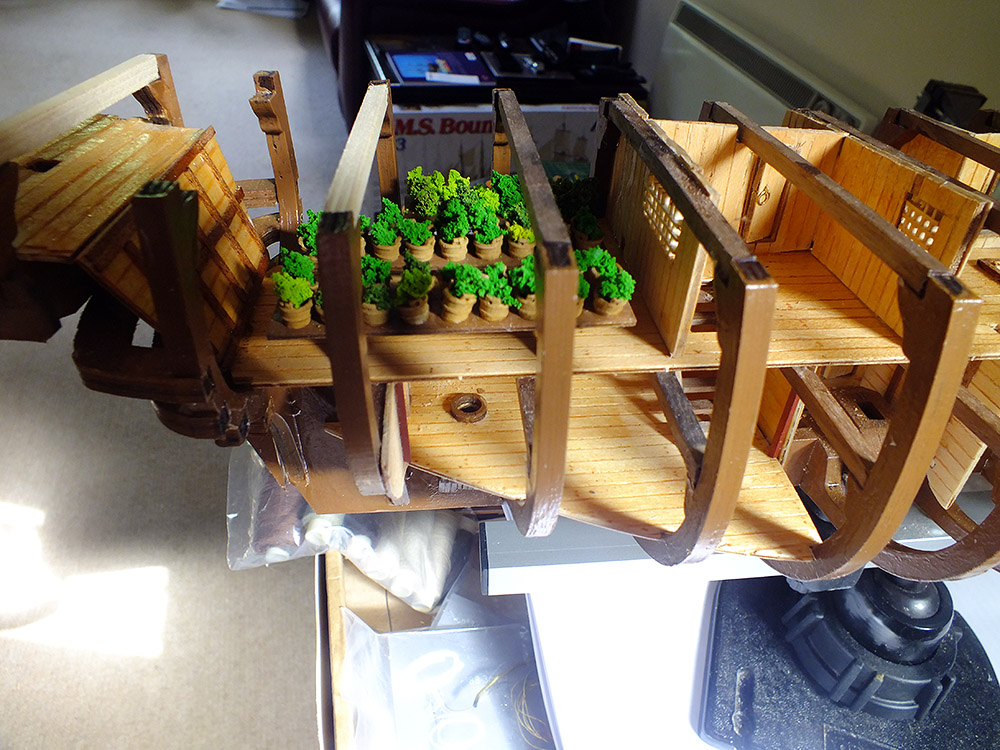
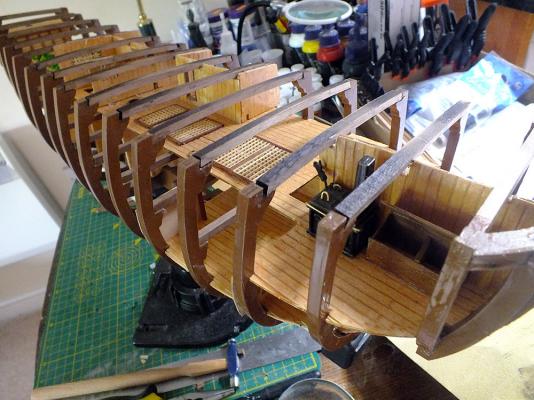
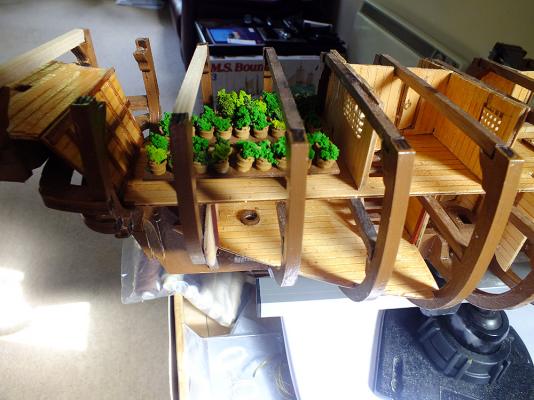
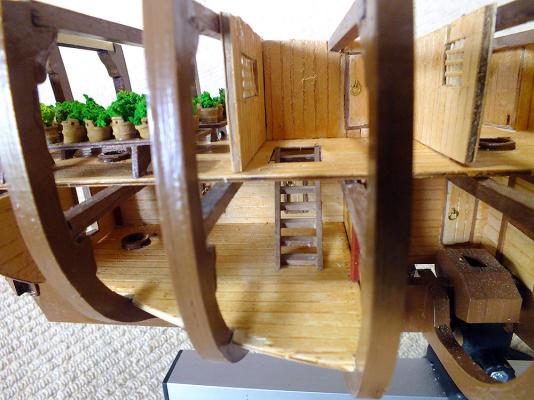
Lower Deck Complete – well nearly The build continues, slowly, and some of my enthusiasm for the kit quality is taking a knocking and the truth of the comments by others (including Captain Al) regarding the quality, or not, of the instructions are really revealing themselves. The instructions first; the real detailed instructions you require are definitely beginning to peter out just when you need them most, and some items do not warrant any instruction at all. The photographs themselves are suddenly getting very involved without any specific help directed to them. But one soldiers on, or sailors on! The build quality is also beginning to cause concern. For instance the pre-cut out holes for the bilge pump tubes (completely over the top high quality brass) are directly above the deck support beams in both lower and upper decks. Or is that my fault I wonder? And that stove! What a struggle getting that thing constructed and again, not a word of instruction. Although in the case of the stove, maybe it was considered obvious what was required. The quality of the items is still generally very good, sometimes too good i.e. the stove and the bilge pump piping. But sometimes it’s the lack of materials that is upsetting. I completely ran out of the 5 x 5 walnut pieces with which the deck beams / supports are constructed, and with several still to fabricate. Granted I did waste a little trying to produce artistic chocks, but hardly that much. I’ve used scrap wood as alternatives. But I’m sounding disenchanted, and I’m not, I’m still thoroughly enjoying myself, it’s just that the problems are beginning to emerge a little too often. I have blissfully continued to make embellishments as and when the mood takes me, and some more successful than others; I have added extra interior walls to suggest more cabins and storage space and even increased the number of breadfruit. In reality there was infinitely more space given over for the storage of these plants than the kit suggests and supplies. (On the original Bounty there was space given over for well over 1000 “pots” as near as I can estimate. The kit provides 36.) I have however added a further row of the plants to the existing plan. I have no more “pots”, and merely put the “plants” on a fabricated table at the rear of the existing ones. The lack of pots won’t be discernible when the upper deck is in position. Further detail will be added later, as the kit will have to be upended for the planking sooner or later, and I don’t want to endanger any embellishments. I couldn’t however resist adding some leg irons to the wall of the tiny “brig” :-) Of course there is one specific still absent; some of the companionways, and specifically the associated “furniture”; fancy turned balusters and the like. My mini lathe at long last arrived, but to my absolute horror there is quite a steep learning curve involved in mastering the thing. I’ve advanced as far as being able to produce a reasonable looking “turned” baluster, but I am completely foxed as to how to replicate identical ones! Is there any kind soul out there that has any “wood turning for dummies” suggestions? Bryan
-
Hi Jeff, An update on the hold cabins / storerooms in my latest update! Regarding painting the ply and laser cut marks, I found it near impossible to paint the latter! Where the laser had actually cut the wood, the "blackened" burns will just not accept paint. As some will be visible, the frames (ribs) and elsewhere, I strongly suggest they be well sanded prior to painting.
-
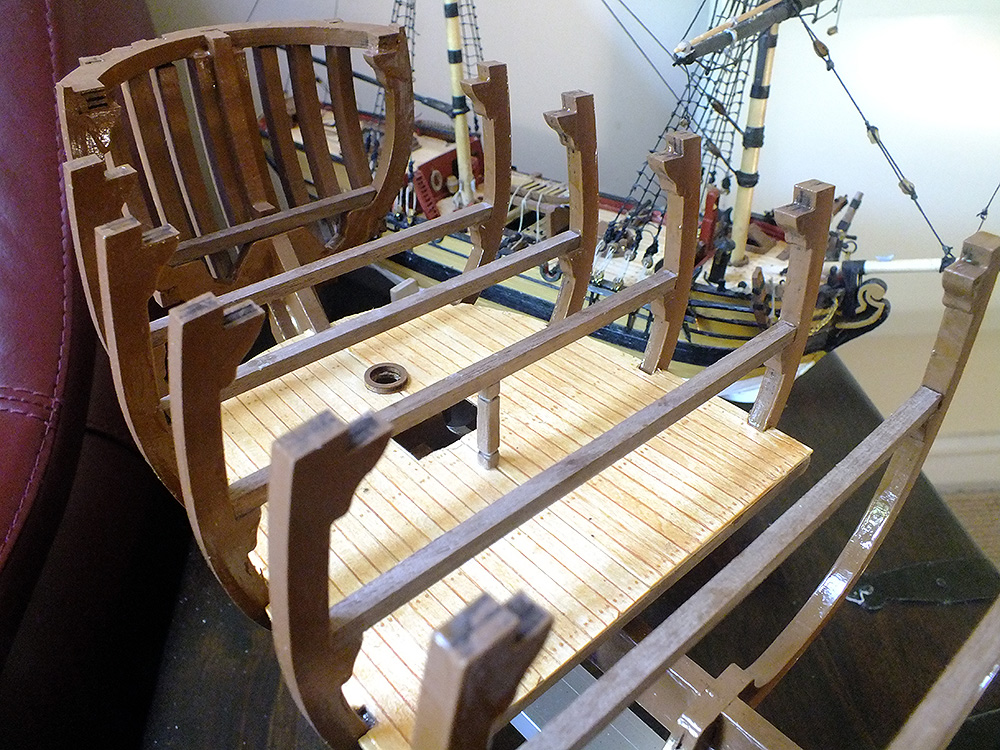
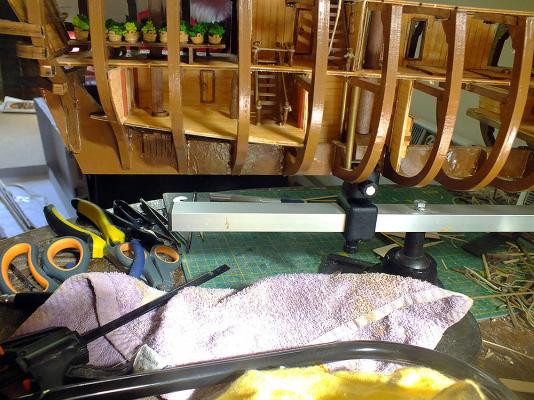
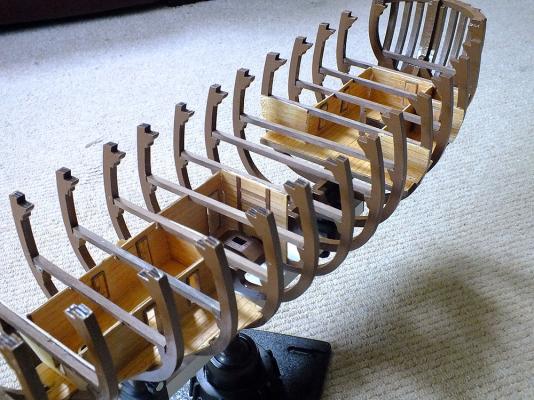
Lower Deck The lower deck is now in place, and again it fitted with relative ease; no great "persuasion" needed, and bearing in mind the size of the thing and the fact the deck is in two halves (lengthwise), that is no mean feat - on the part of the kits quality, not my skill. However I've a horrible feeling the upper, top deck is not going to fit as well. The lower deck was then varnished, but with a new make of varnish, and it's not as good as the one used on the other bits of deck in the hold etc., it doesn't bring out the tone, detail and colour as much, dammit! With the lower deck in place one thing became immediately obvious; the port side (the exposed side) bashed "cabins" in the holds beneath immediately became an impediment. There was nothing wrong with them, but they would have made the construction of the companionways near impossible and would anyway have obscured that and other detail. I should have realised this of course. Sadly they had to go. The starboard side cabins remain intact, and look OK, though I may now add further detail to them. There is now a lot of lower deck detail to add, and the companionways, but I'm already feeling frustrated as I will still be thwarted in producing ornamental chocks and companionway balusters, as I am still waiting for my lathe! It is was ordered nearly two weeks ago and is coming from Germany, obviously being transported by 17th century sailing ship, as it is not due for a further two weeks! Bryan

-
"Bashing" on... There's not much evidence of all the considerable work which has been going on recently. I finished the lower decks and I added to the central "well" which is in the plans, with a lot of "cabins" which definitely aren't. I came across some old drawings of the Bounty (I can't remember where, I apologise if it was from someone else's build log) which show how accurate the "well" is, and also shows an array of cabins on this deck and the one above. One of the features of this particular kit is the "diorama", the fact that the majority of the keel on the port side is exposed, revealing the interior. There is little point in that if there isn't much detail there to see. Hence the cabins. I must admit much of the work will not actually be really visible once the decks are in place, but it will be more "complete". Theoretically the deck above is now fitted (in two pieces) after the planking thereof, but I'm a bit concerned about the fitting of some of the lower stairwell furniture, so will have to investigate before continuing, as I fear it will be tricky to do with the deck in place. Bryan
-
Thanks Jeff, To be honest the "straightness" of the frames is more a testament to the quality of the kit as much as it is to me. As I said previously, I've dry fitted the next deck(s) up, and they fit with very little "persuasion", which with a build of this size is quite remarkable. The frames are painted with Admiralty Paints Wood (Walnut) Brown! As you may know the instructions suggested they be stained, but I found slight discolourations in the wood showed through, hence paint and satin varnish. And thanks for the "hold well" info. I must get "The Anatomy" book. Bryan
-
Thanks guys, a lot of very generous comments, and much appreciated. I think the whole point is that the whole exercise is a learning process, hopefully the things I've learnt will reap rewards with the Bounty - and it will be interesting to see if, or how much, that is true in the coming weeks and months! Thank you, Bryan
- 75 replies
-
- 1
-

-
- Caldercraft
- Supply
- (and 1 more)
-
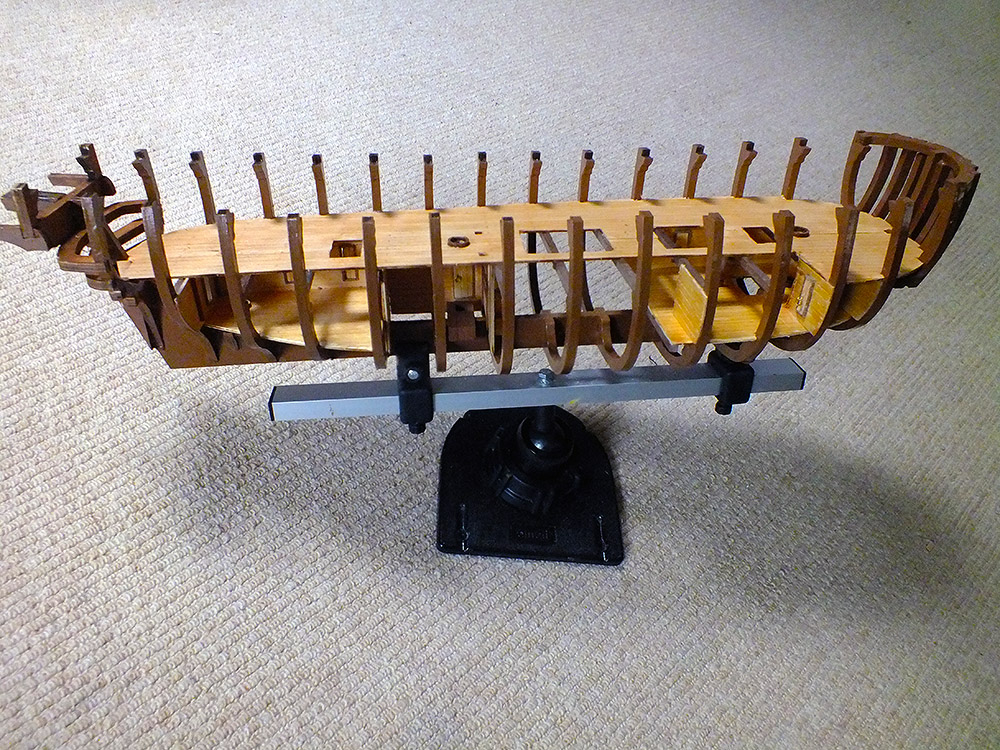
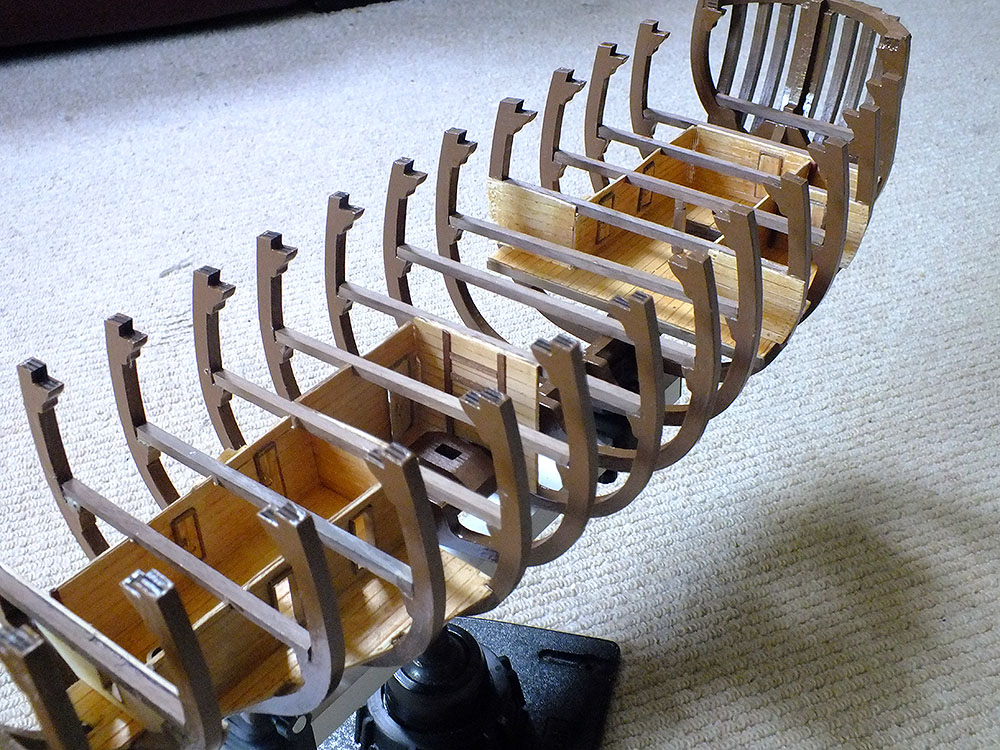
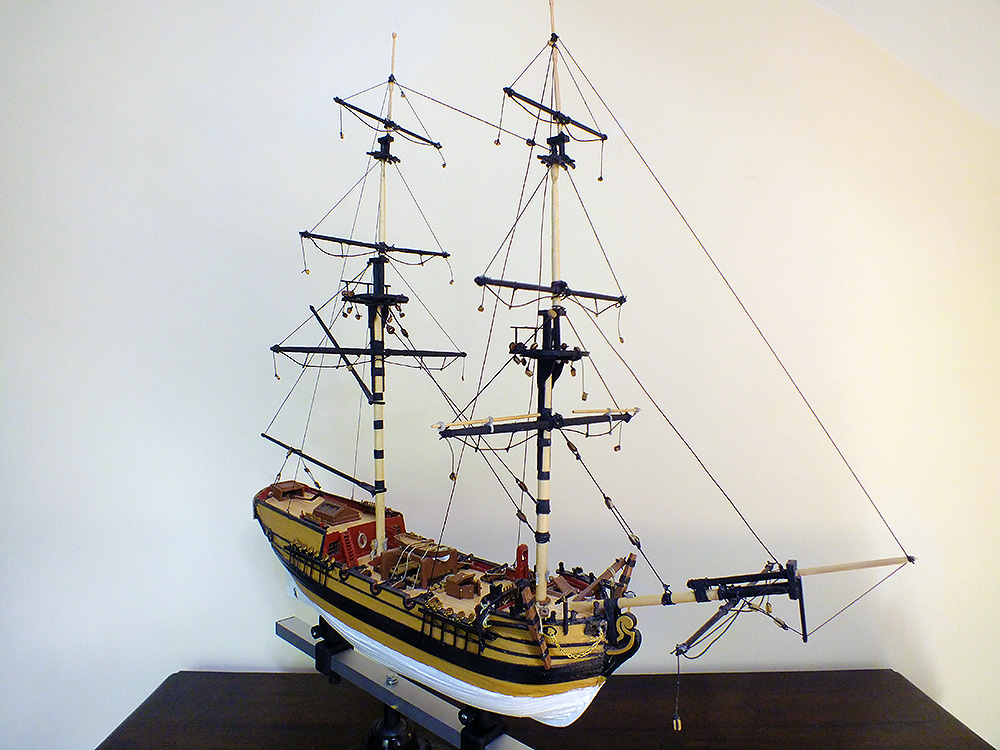
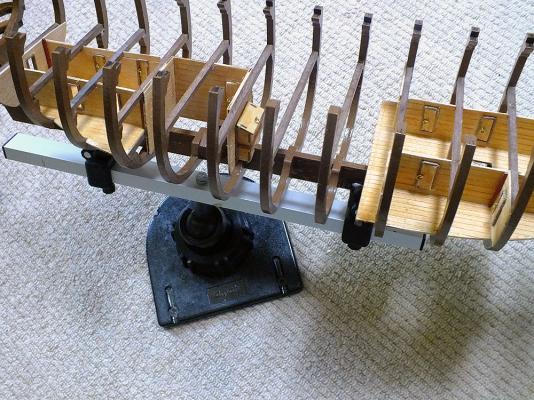
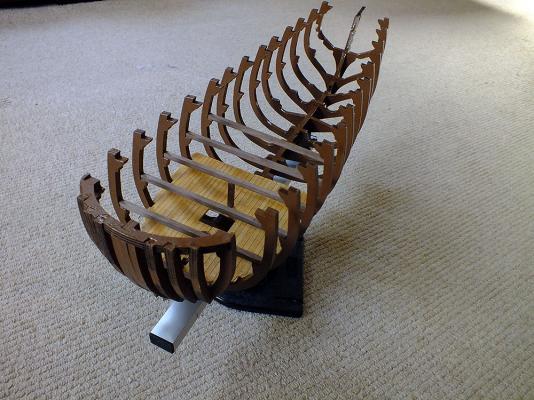
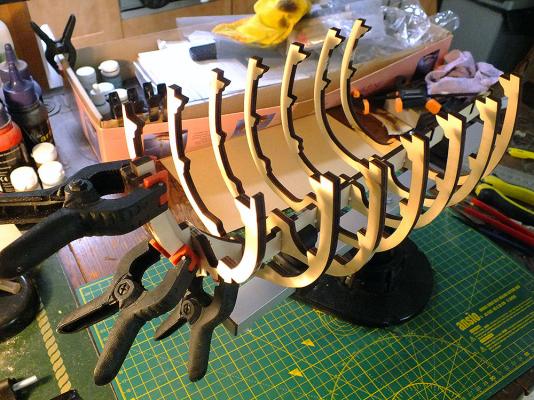
Quite a lot of work has been done; all the keel frames (ribs) have been fitted and the fore and aft lower deck pieces are complete. The deck beams for the next (proper) lower deck are fitted, including the one and only chock or deck support detailed in the plans. I have a micro lathe on order, and this original chock will be replaced by a "proper" turned one shortly. No doubt I'll get carried away and the fancy turned chocks will appear all over the place! As I mentioned, I elected to paint and varnish the frames as opposed to staining them, a decision I don't regret, but it took some time. The decks were scored to simulate the planking, and I made slight indentations with a small drill bit to indicate the treenails. I then applied a light oak wood filler to the decks, finger rubbing it well in, then removing the majority with a damp rag, obviously this filled in the scored lines and "nail" holes. The result isn't perfect, but the appearence is quite good I think, without being overstated. (Note "The Supply", my previous ship stood behind the Bounty. It gives a good idea of the scale, the Supply being 1:64, while the Bounty is 1:48 - even allowing for foreshortening, its quite a difference in size)! As one part of the keel is going to be exposed, I've every intention of "bashing" additional cabins on these lower decks and others, otherwise any attempt at even vague authenticity is redundant. The only "construction" in this lower part of the kit, is the "well" around the mid mast (photo later). I've no idea what the function of this well is, although it is authentic, appearing in old drawings and plans of the ship - as do the cabins! Bryan

-
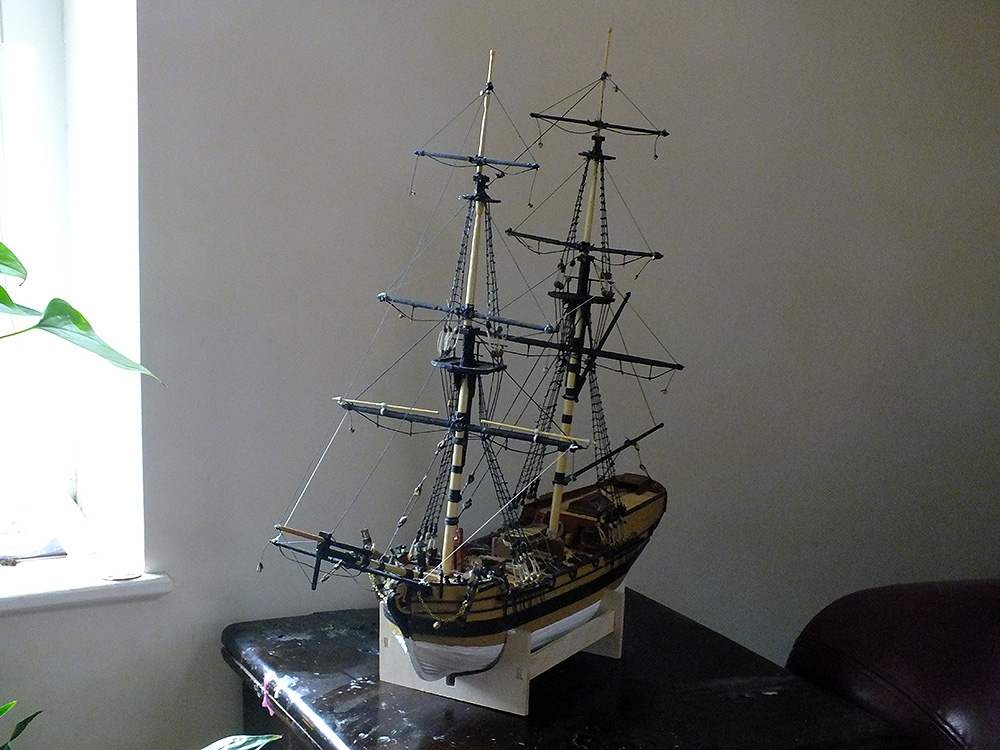
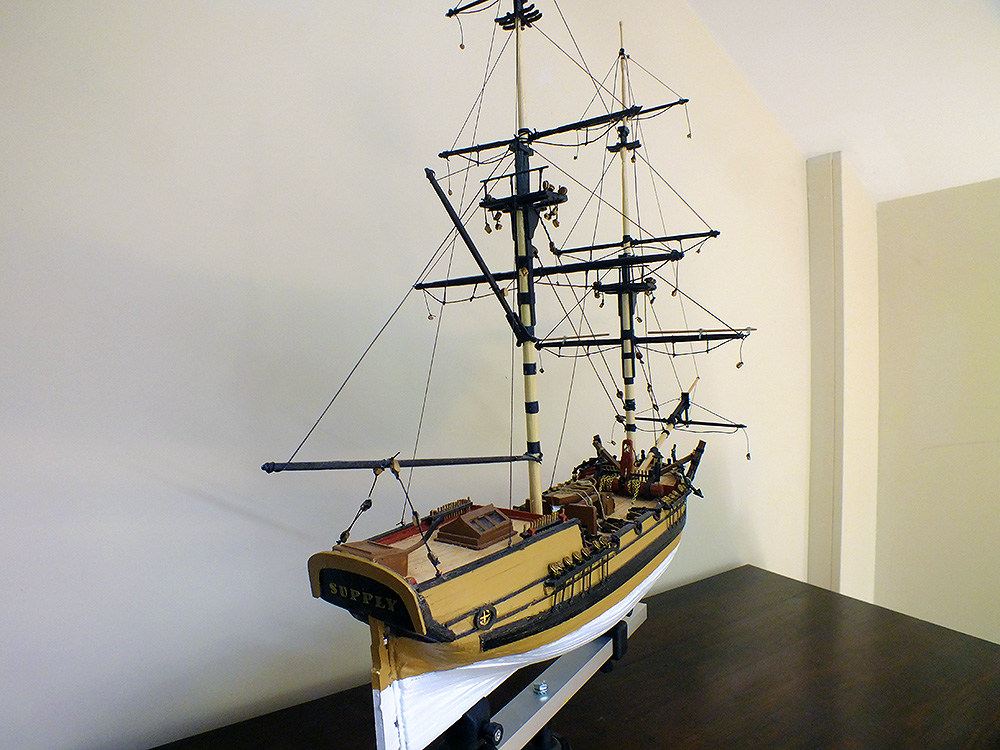
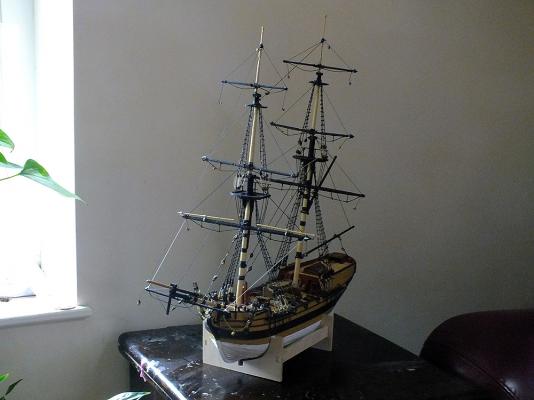
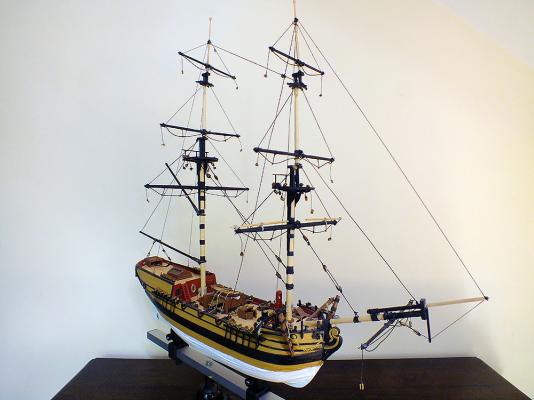
Finished! Well, almost an anti-climax, as I have already started on my next project, the Artesania Latina HMS Bounty, and am enjoying it so much, my previous all consuming love The Supply, sadly took a back seat. But I wrenched myself from The Bounty and have for all intents and purposes, now finished the Supply. In all honesty, it was only replacing damaged stays and rigging which suffered as I struggled with the shrouds (as many people had predicted) plus general "fettling". It's sat on an old chest (not an original sea chest!), and the stains on the chest are candle wax, which is somehow appropriate! There are many weaknesses and many faults and ill conceived shortcuts that were taken, but it was only my second ship, and I'm not totally disappointed with her, and god only knows, I learnt such a lot! Bryan
- 75 replies
-
- 7
-
-
- Caldercraft
- Supply
- (and 1 more)
-
Several good observations there Al. I'm certainly impressed up to now, and really enjoying myself with the build, but I'm well aware this is the easiest bit, both build and instructions thereof, but we'll see. My false keel isn't warped, I've gone so far as to dry test the first (lower) deck, and all the cutouts fit all the ribs pretty well considering how easy it would be not to. Thanks for the translation tips!
-
Yes Don, that one layer of planking is going to be a tester I think. It may well spoil an otherwise impessive (so far) build design. I wonder why they opted for that, something to do with the open side perhaps, although I can't really see it would take anything from it, it would add to it more like)! Bryan
-
Hi Anthony, Thanks for that. I have continued with the build, somewhat guiltily as my last ship, The Supply, isn't quite finished, but I am enjoying The Bounty so much I cannot resist. I'll say a lot more later, but thus far I am amazed at the high quality of the materials and the quality of the build. Much more later. Thanks, Bryan
-
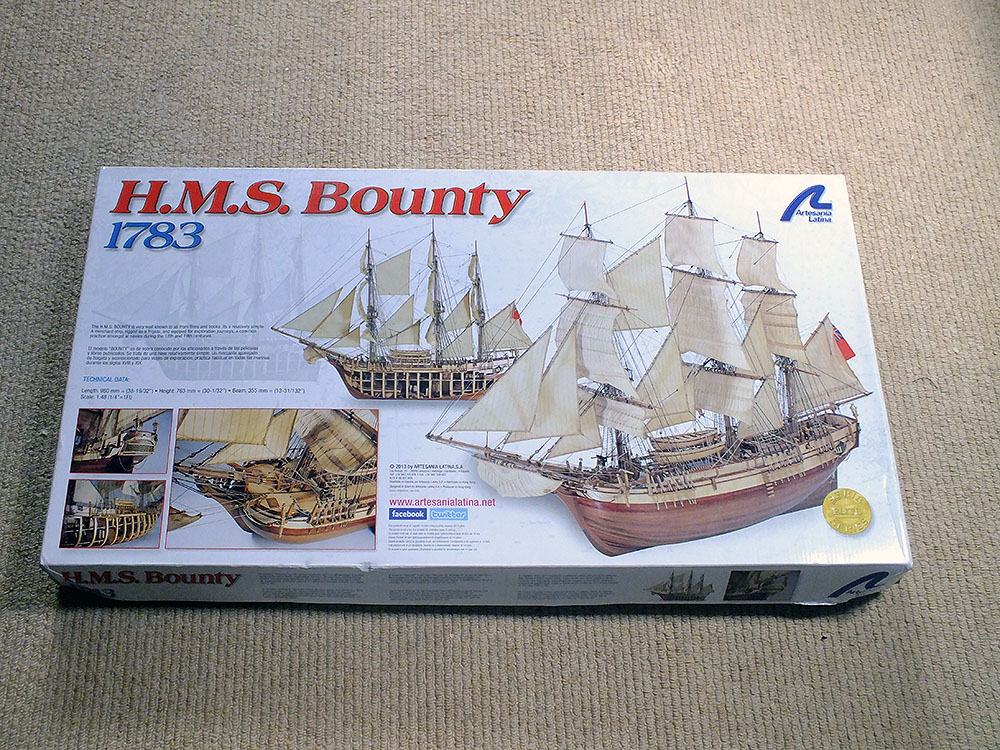
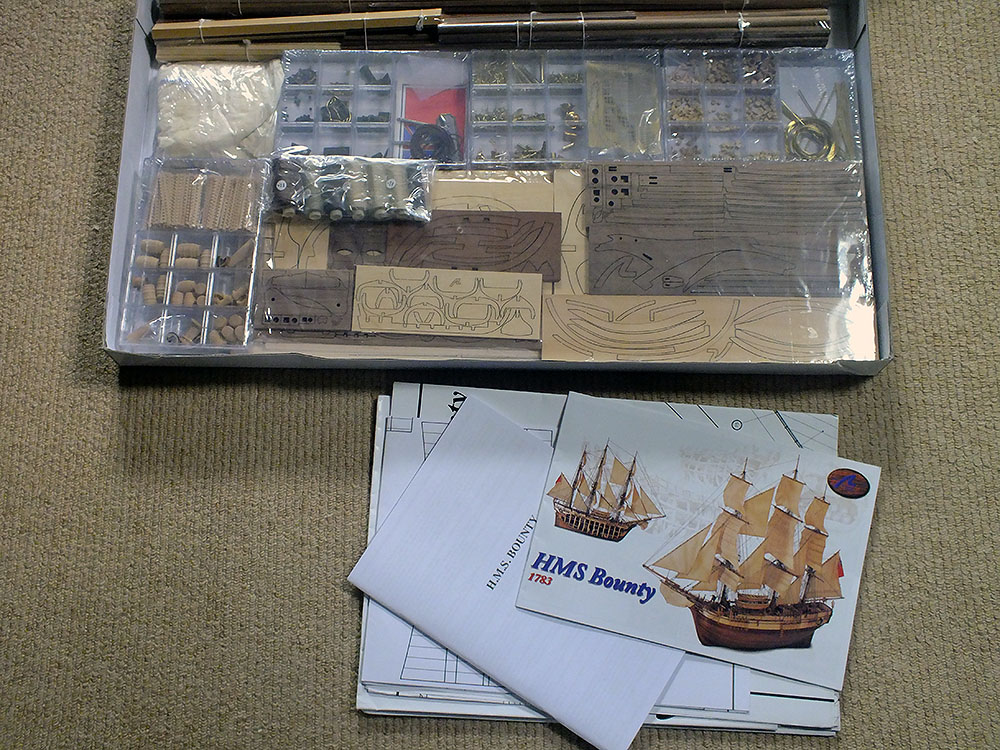
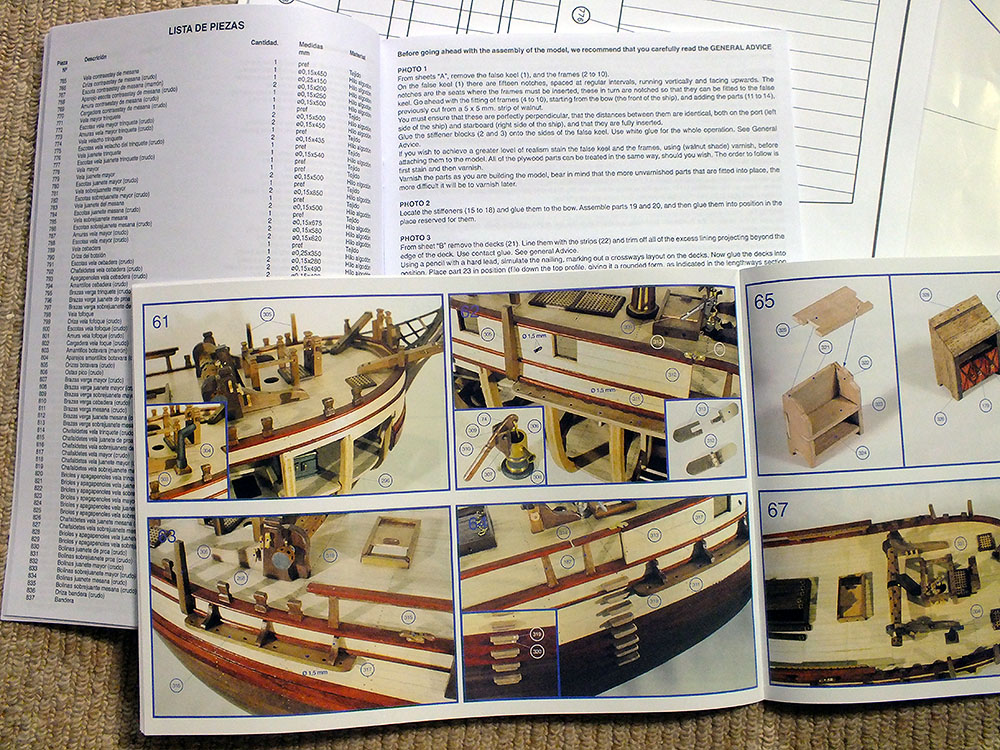
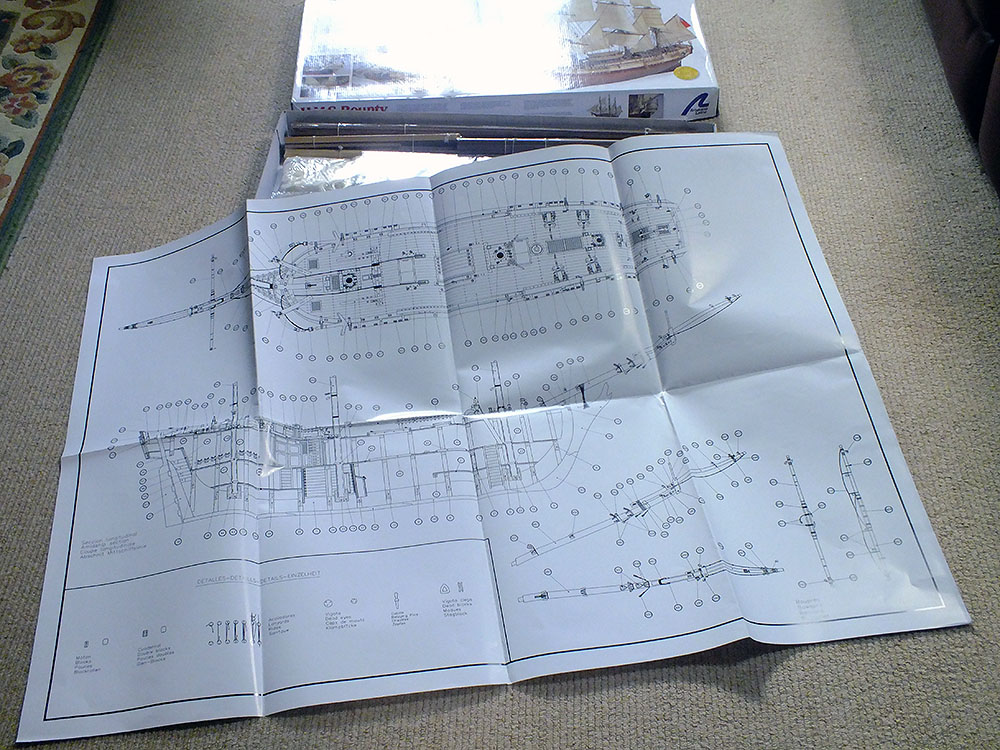
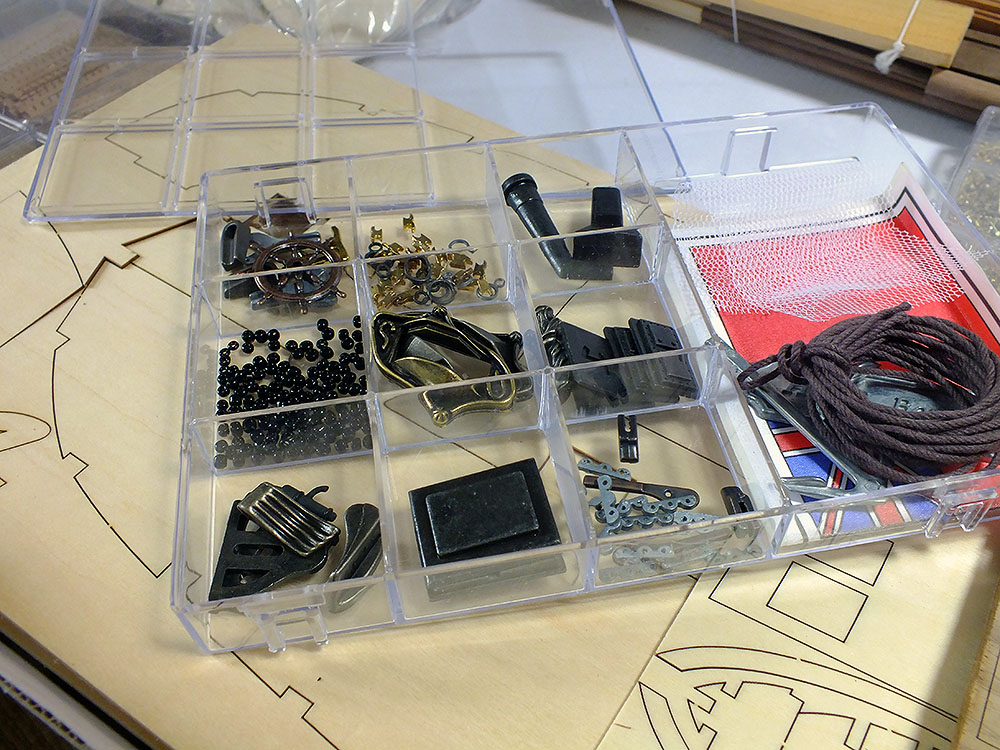
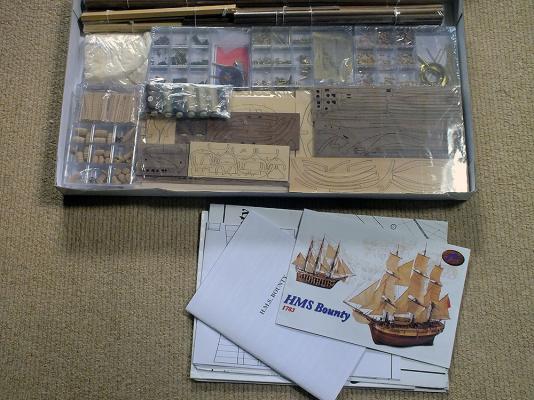
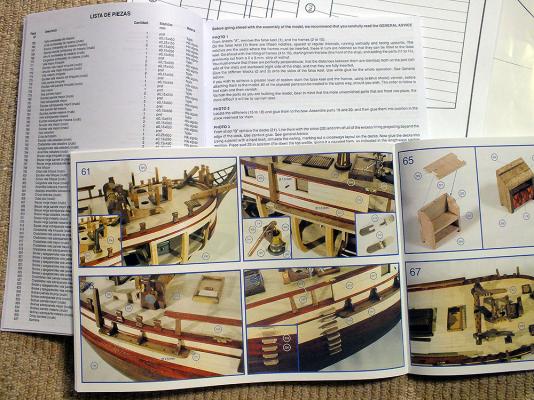
Open the box! First impressions; Artesania Latina do not appear to have the best of reputations, and on doing research, to find out that the Bounty kit is only single plank on frame rather than the more acceptable double planking, didn't help that reputation. Aparently the manuals weren't up to much either, badly translated for one thing (AL are Italian of course), and I did come across veiled suggestions the kit quality had a lot to be desired. However the ship had already been ordered, a gift from my children, so there was no going back, the box arrived... ...and what an impressive box it was to! 30 x 17 x 2.5 inches (76 x 43 x 7 cms) and heavy with it. On opening the box, I couldn't help but be quite impressed. At the top of the pile was a package containing the manuals (yes two!) and the drawings. The manuals were relatively impressive, the first was a full colour and seemingly very detailed book containing a host of photographs each part in each photograph numbered. The second manual was the instruction booklet (in several languages). Each paragraph in the manual makes reference to each photograph, thereby illustrating every step, but how accurately remains to be seen. So far, quite impressed. I was then shocked to discover how huge the actual scale drawings were! Given the box is 30 inches long, the size of the drawing is indicated in the photograph below. There are three sheets, but each has content on both sides, and very detailed content it appears to be. So far very impressed. Then the rest of the contents. The usual laser cut sheets of different thicknesses of wood, all seemingly excellent quality, and the wooden strips and dowling. It became obvious the ship only has single planking, as the obvious keel planking strips seemed relatively few. The other contents included all the many bits and pieces, all neat and tidy in individual plastic trays rather than plastic bags! I later discovered these trays are actually quite robust and reusable, which should prove very handy. The qualty of the components, especially the turned brass ones, appeared excellent. Still impressed! Eventually I did make a start on the build. As I was still finishing my previous ship, I only undertook this because the instructions recommended, for absolute realism, the first keel items should be stained and varnished before being built, and I could continue with my original ship as this was drying. As it transpired I have elected to paint then varnish, as the stain didn't cover the imperfections of the wood. As the painting / varnishing could be done after the initial bit of build, I did actually commence. The pIeces; false keel and first frames, were removed from their sheet easier than any I have come across before, and the quality seems very good indeed. The frames all fitted into the keel well. Now to paint and varnish. Bryan


-
Almost there After a long silence I thought I'd better throw in an update, given that I intend starting a new build log of my next ship very shortly. My "Supply" is almost finished; as several people wisely pointed out, I was going to have a lot of trouble completing the shrouds as I had already completed the masts and stays, ratlines etc. They were right! It proved very tricky indeed, and has taken a lot of time. The Amati Rigging Jig did help but that can't create shrouds that can go around all the other ship impedimentia! I was hoping to be able to say "Complete!" about now, as all eight shrouds were created and fitted, but yesterday the main mast starboard lower set collapsed as I was trying to fit the "crowsfeet" (I hope I'm using that expression correctly), and the whole think collapsed rendering the upper shroud useless to! I'm already working to replace it, and the stays and ratlines that were inadvertantly and inevitably broken as I struggled to fit the shrouds. I estimate another day or so! During the latter part of this build, I was foolish enough to open the box of my next project, the AL HMS Bounty. Pandora having opened the box now paid the price, and I could not resist having a good look, and even making a start while things on the Supply dried etc. Hopefully back very shortly with pictures of the completed Supply! Bryan
- 75 replies
-
- 2
-
-
- Caldercraft
- Supply
- (and 1 more)
-
Yes Frank this does seem to be the general consensus, and I'm afraid its largely my ignorance, but it is a learning process. The penultimate paragraph in the manual indicates clearly that the yards are to be done first with the "rigging" being the very last paragraph in it (the manual). Of course if you read said paragraphs properly it does say do the shrouds THEN the rigging of the stays etc etc. Oh well. I'll have to see how this last hurdle develops. Bryan
- 75 replies
-
- 1
-
-
- Caldercraft
- Supply
- (and 1 more)
-
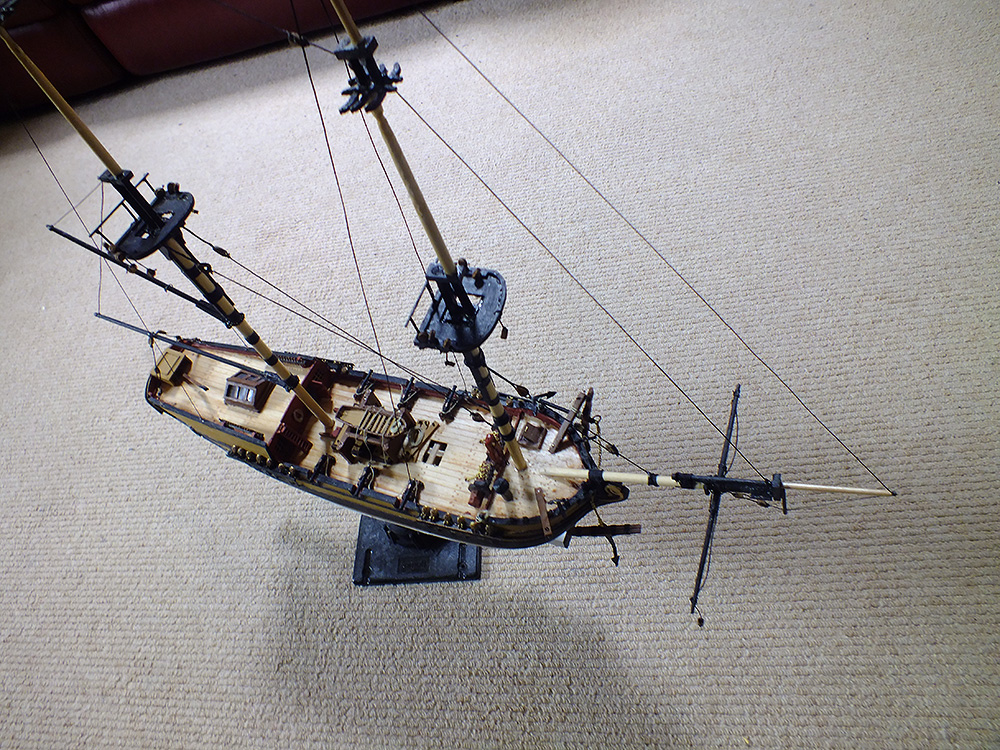
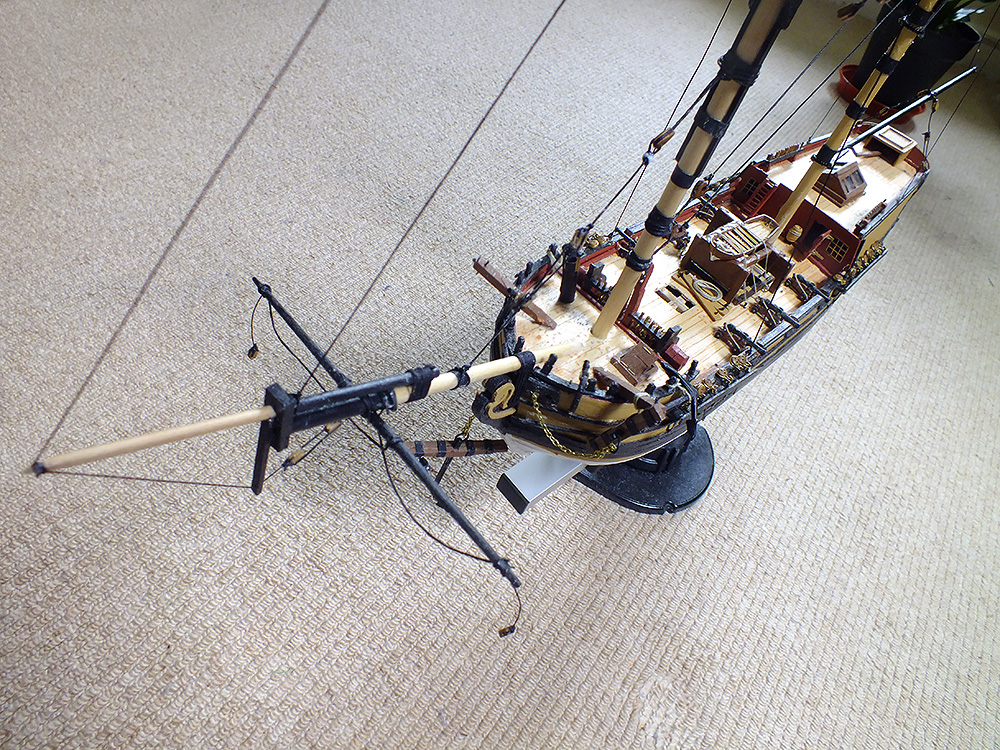
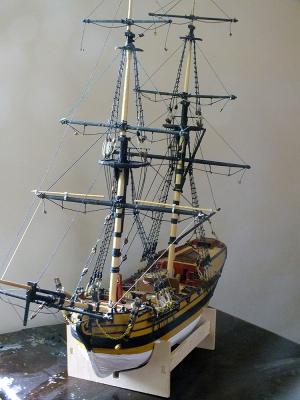
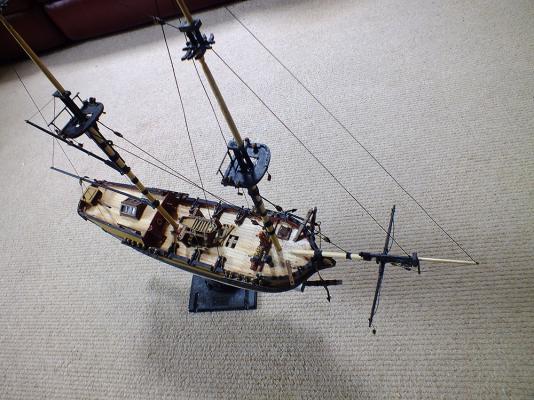
Nearly there... Just a couple of photos before I start on the shrouds; the last and aurgueably the toughest lap. But don't photos reveal detail the eye chooses not to see!? I'm going to have to tidy up the paintwork on the keel for a start. And one or two things need attention. Oh well. Bryan

- 75 replies
-
- 6
-
-
- Caldercraft
- Supply
- (and 1 more)
-
Many thanks Thunder, I suspect your right re. the fiddly work so I've ordered the Amati rigging jig. Hopefully that will help me a little. Thanks for the advice re. the next ship. Needless to say I have been looking and must say HMS Snake has caught my eye!
- 75 replies
-
- 1
-
-
- Caldercraft
- Supply
- (and 1 more)
-
Thanks Mike, But "pink box"! Do you mean the (bashed) cover on the tiller? Yes I did wonder if it was a bit "obvious". Bryan Hi Thunder, Too late he cried! I've just logged on for the first time since posting the last update - to say I've now finished the yards and allied rigging and am about to start on the shrouds and ratlines!! And yes, in retrospect I do worry I will have enough room to manoeuvre. Oh well, committed now. Being ever aware my ship building will come to a grinding halt when the shrouds are done, I actually logged on to have a nosey about for inspiration for my next build. Anyone any ideas for the "next stage up" after The Suppy? Bryan
- 75 replies
-
- 1
-
-
- Caldercraft
- Supply
- (and 1 more)
-
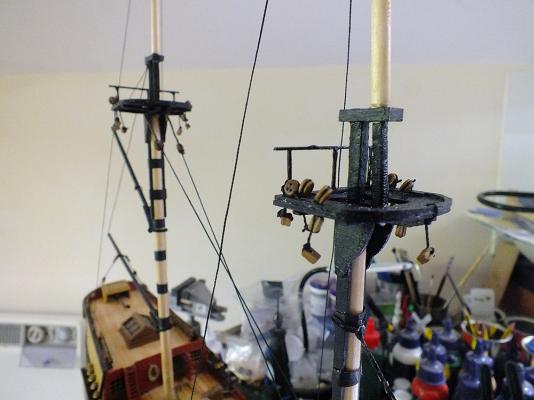
Stays etc. nearly completed The fitting of the stays, backstays, running rigging etc. continues apace. Alternatives had to be found to some involved items, cleats for instance were too tiny to hold in place under the tension of the ropes. I’ve still not come up with an alternative to the removed hatchway covering, and the starboard anchor, despite being roped to the wooden cleats several times, steadfastly works free and just wants to dangle in space. I might just let it! Of course construction has not gone entirely to plan; the fore topgallant mast is about version 5. Three went the way of botched creation (“over-turned” or snapped while “turning”), while the forth snapped off as stays were being fitted! Now while I admit to uttering a nautical phrase or two when it happened, it’s interesting to note that rather than immediately turning to the rum, I took a deep breath and continued; I simply sawed the old ‘stump’ off, delicately drilled a hole into the existing mast, “turned” another topgallant mast, varnished it and when dry glued it into the prepared hole! I should just mention I haven’t got a lathe, and topgallant masts are I’m sure, too small to be turned as such anyway. I simply hold my Dremel 757 with one hand and work the doweling to and fro with the other. Hardly very accurate (or safe!), but it does the job, mostly. Occasionally I'll clamp it into the vice to work the doweling over, which is more accurate and certainly safer, but the Dremel is badly designed in that claming it in this way can actually dismount the power pack, which isn't very helpful! The Dremel will of course be used in part to “turn” the yards, which are next on the list. According to the manual, they should be fitted before the rigging shrouds. So be it. Bryan

- 75 replies
-
- 4
-
-
- Caldercraft
- Supply
- (and 1 more)
-
Hi Frank, You're quite right of course, there are quite a few blocks missing. Now I know it may not make sense, but in a lot of cases I hold fire until the moment of fitting, and do them as I go along, as in many cases I work backwards and fit whatever the blocks are attached to before the blocks themselves. I hope that makes sense, although I doubt it rereading it!
- 75 replies
-
- 1
-
-
- Caldercraft
- Supply
- (and 1 more)