
Lt. Biggles
-
Posts
346 -
Joined
-
Last visited
Content Type
Profiles
Forums
Gallery
Events
Everything posted by Lt. Biggles
-
 Hey all, have another question if anyone has any experience with the Pontos hull draft mark dry transfers. Will they survive all the enamel washes and effects and white spirits? Or do I need to seal them in? normally I weather straight on acrylic paint as I’ve had issues with the acrylic clear varnish getting eaten through and turning into muck. Thanks in advance.
- 211 replies
-
- 5
-

-
- prince of wales
- tamiya
- (and 2 more)
-
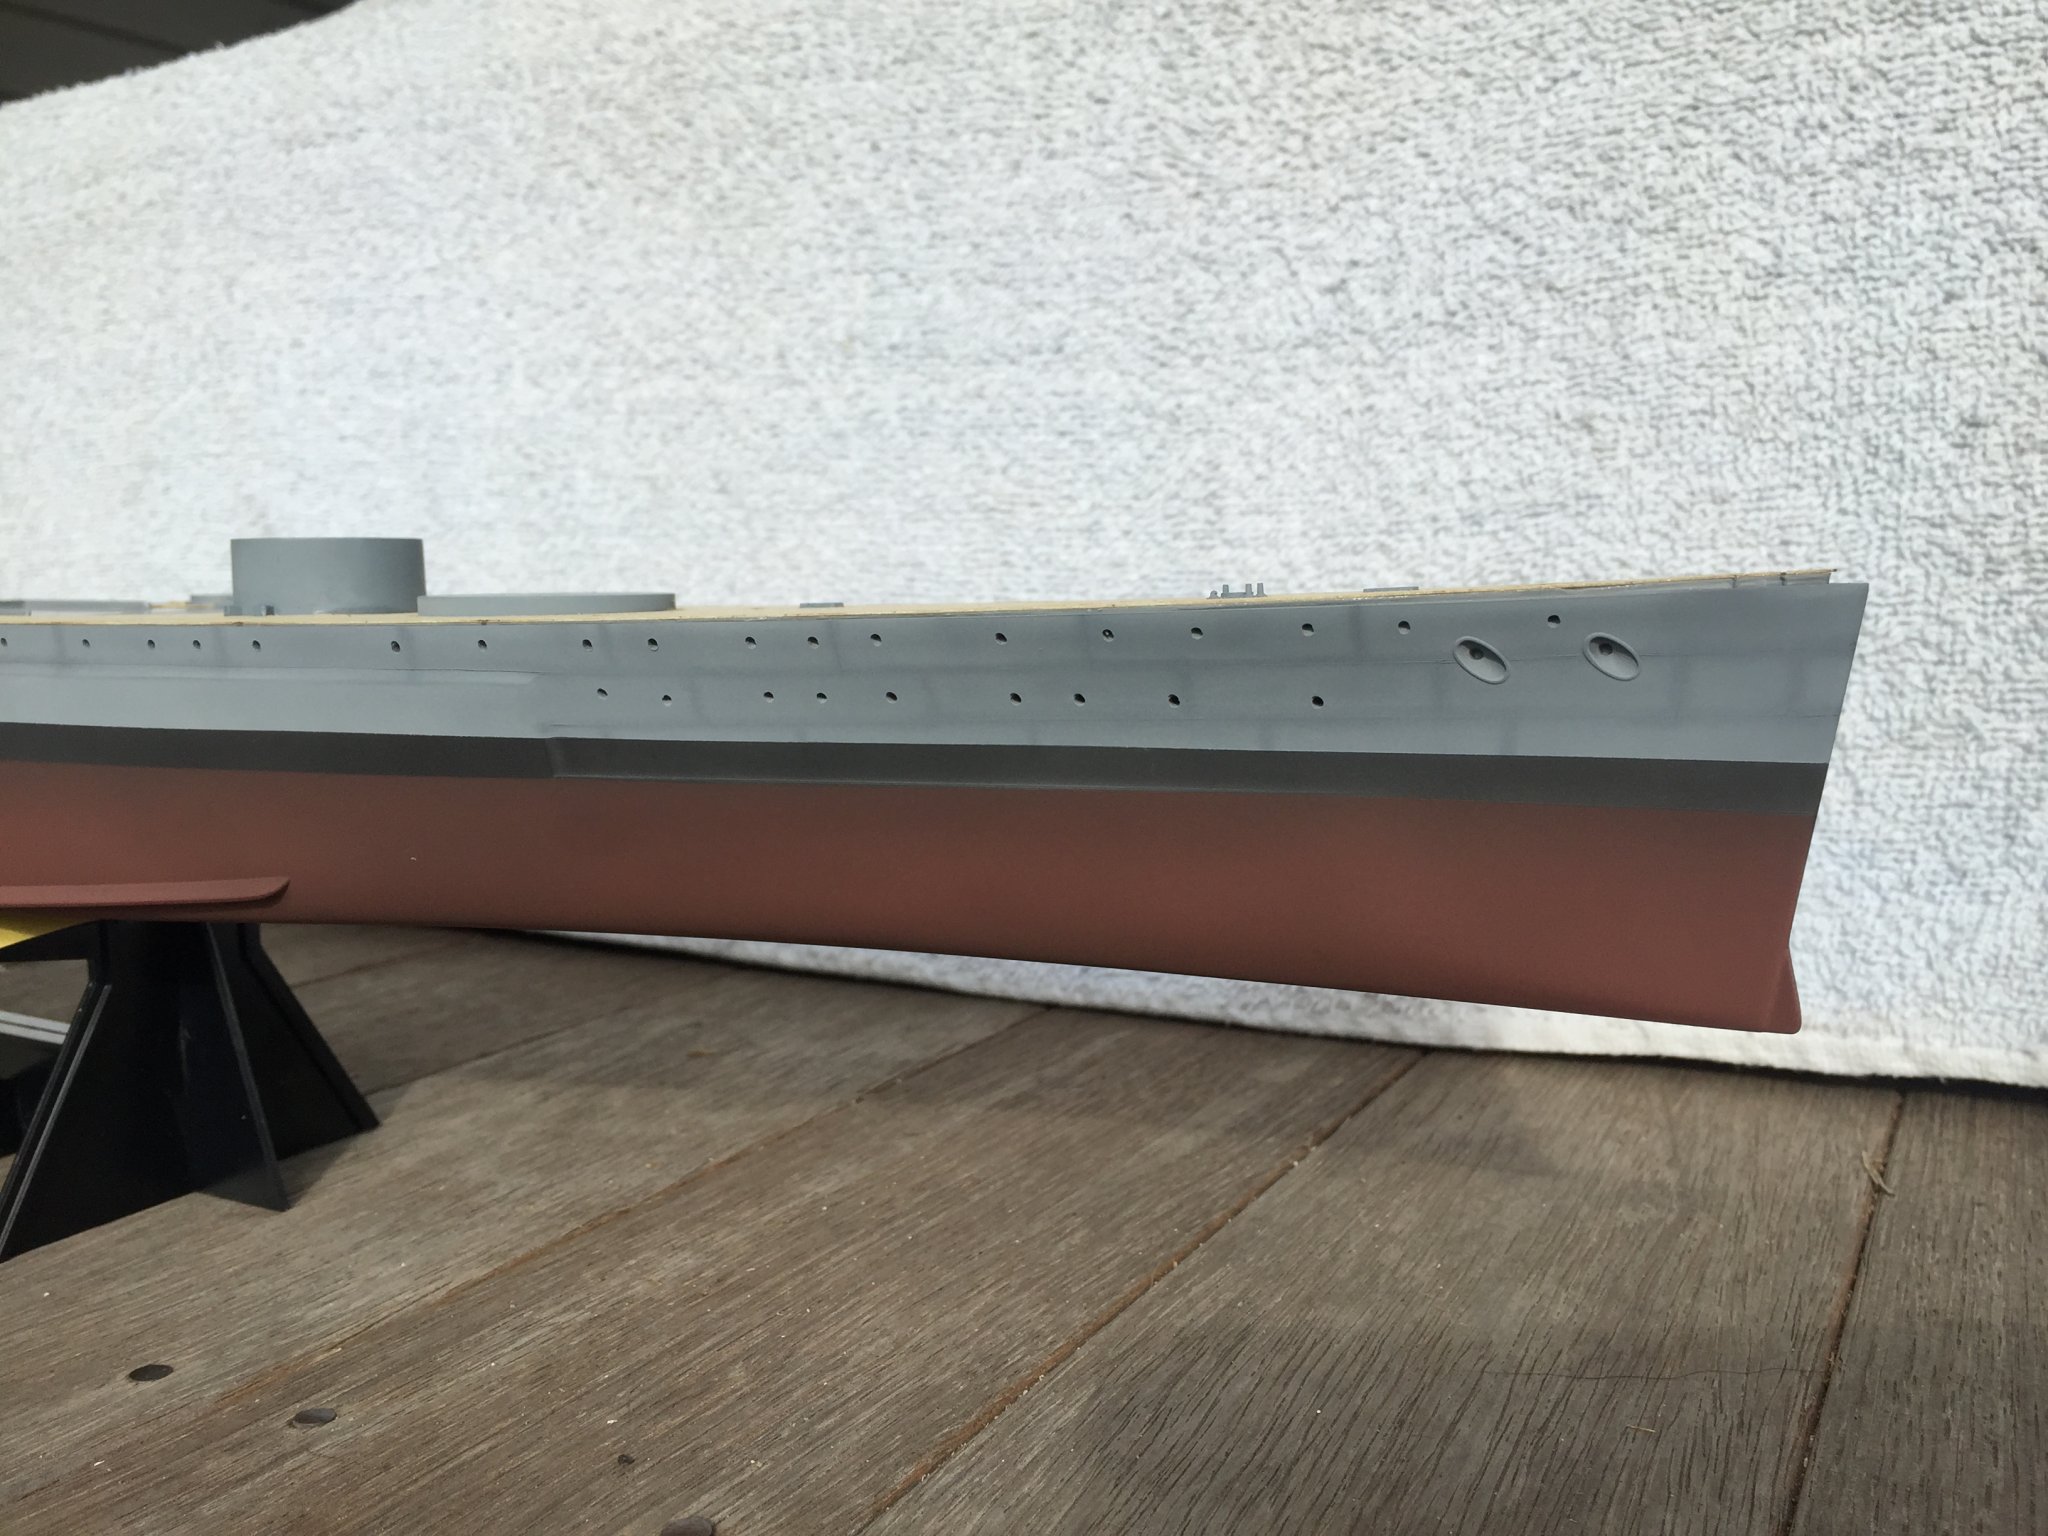
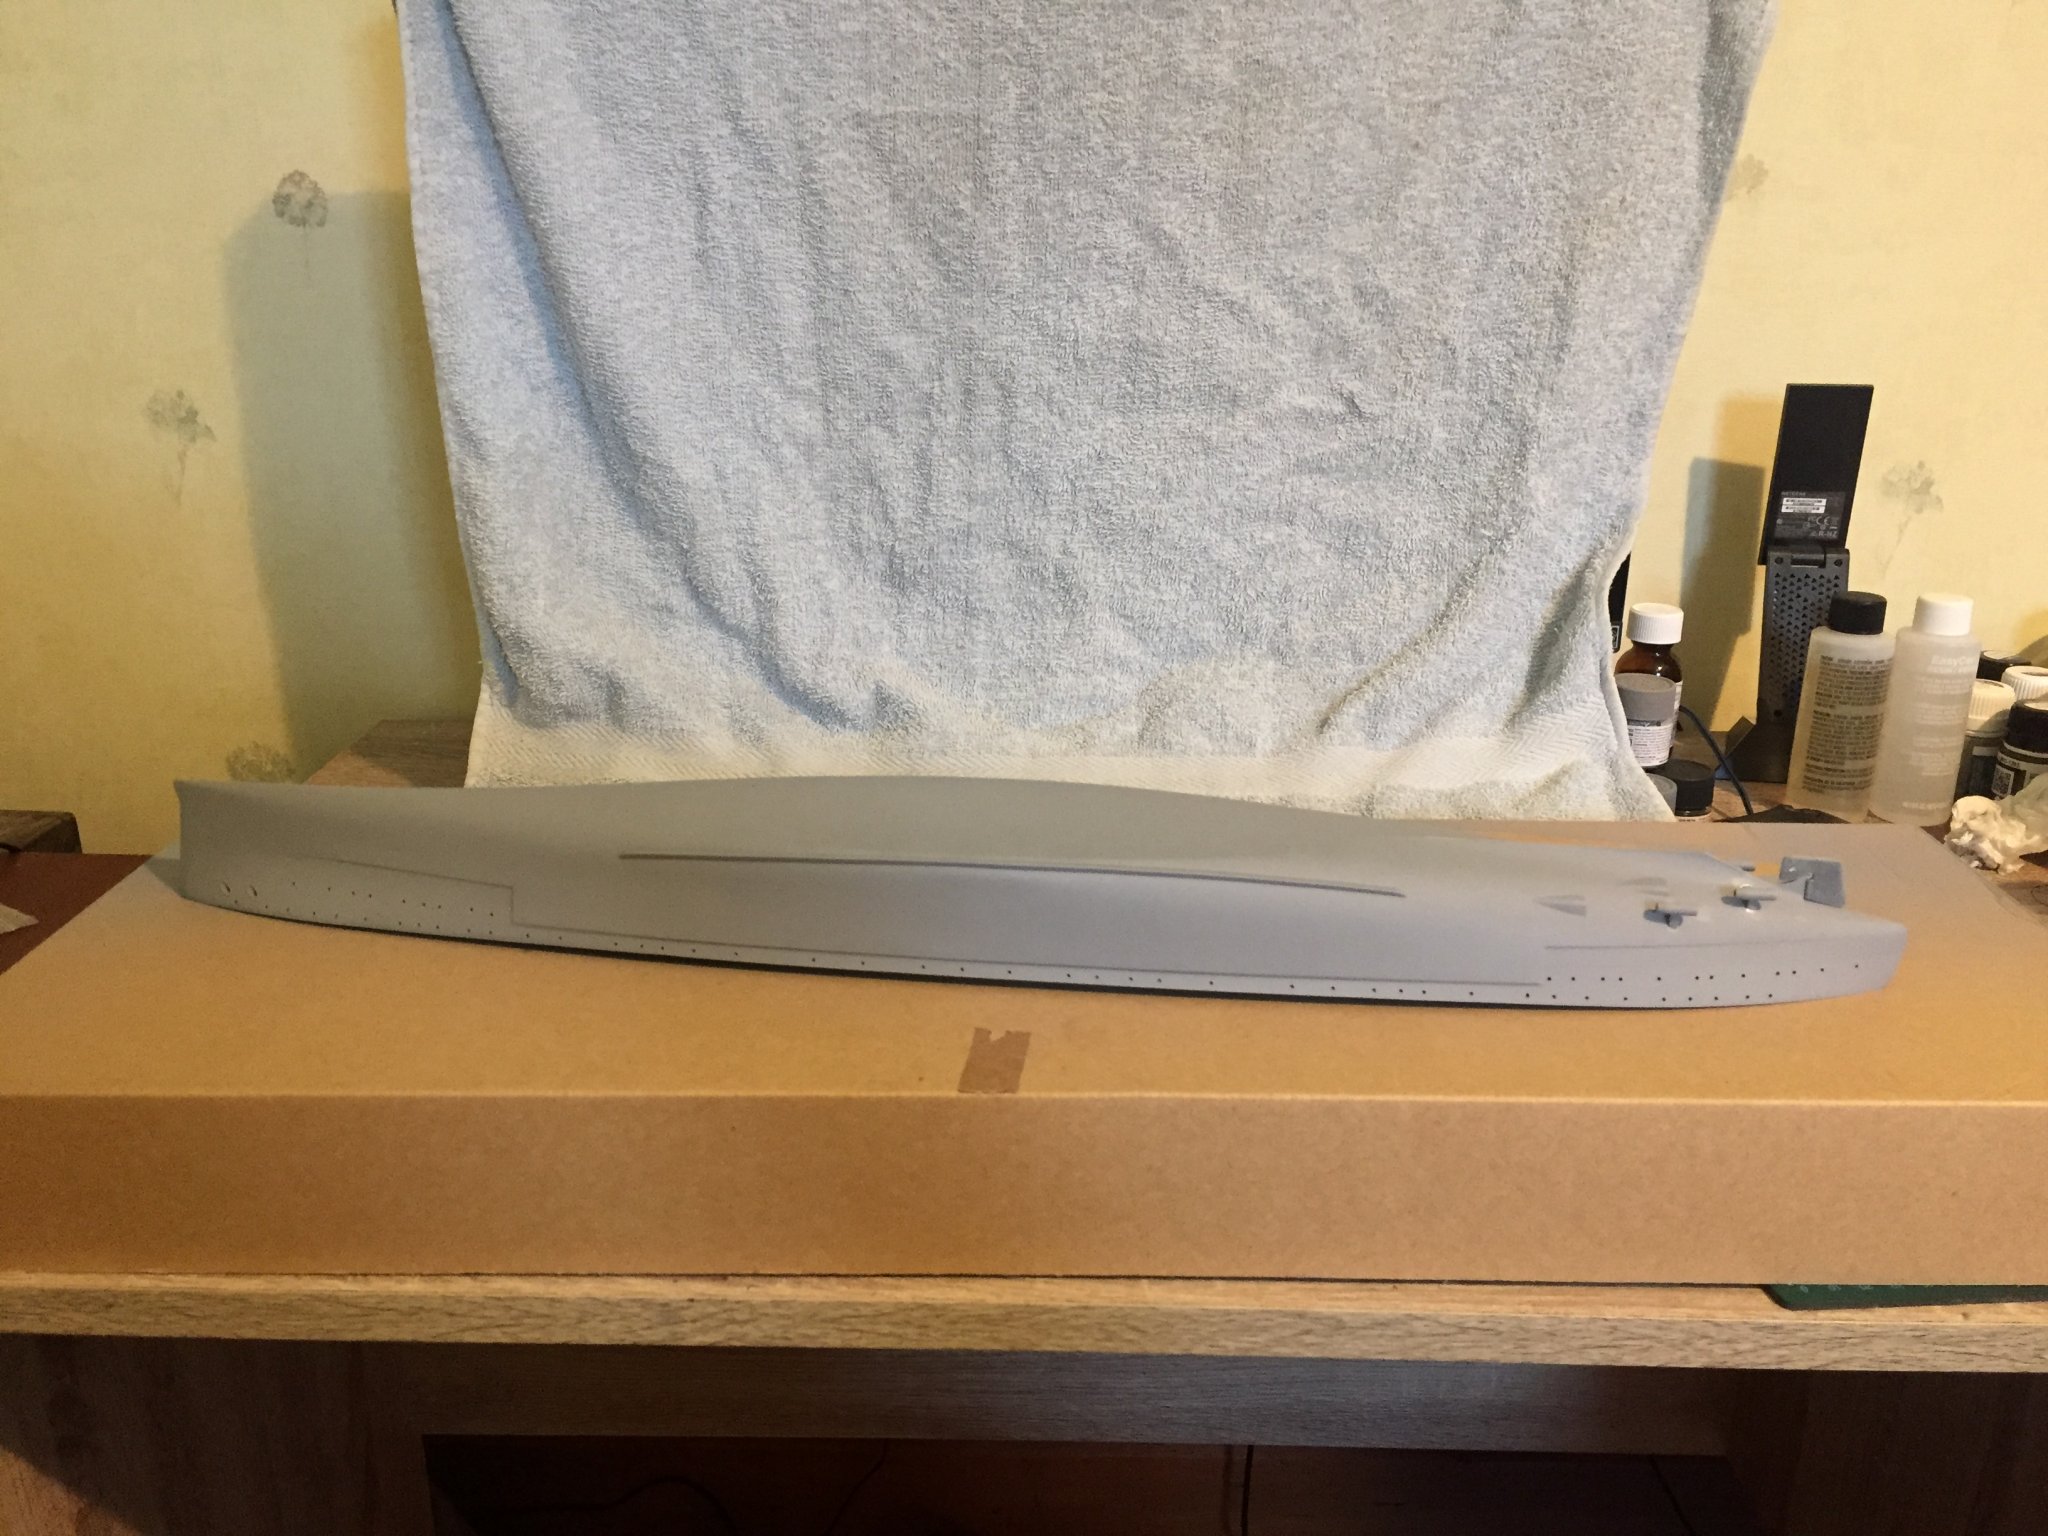
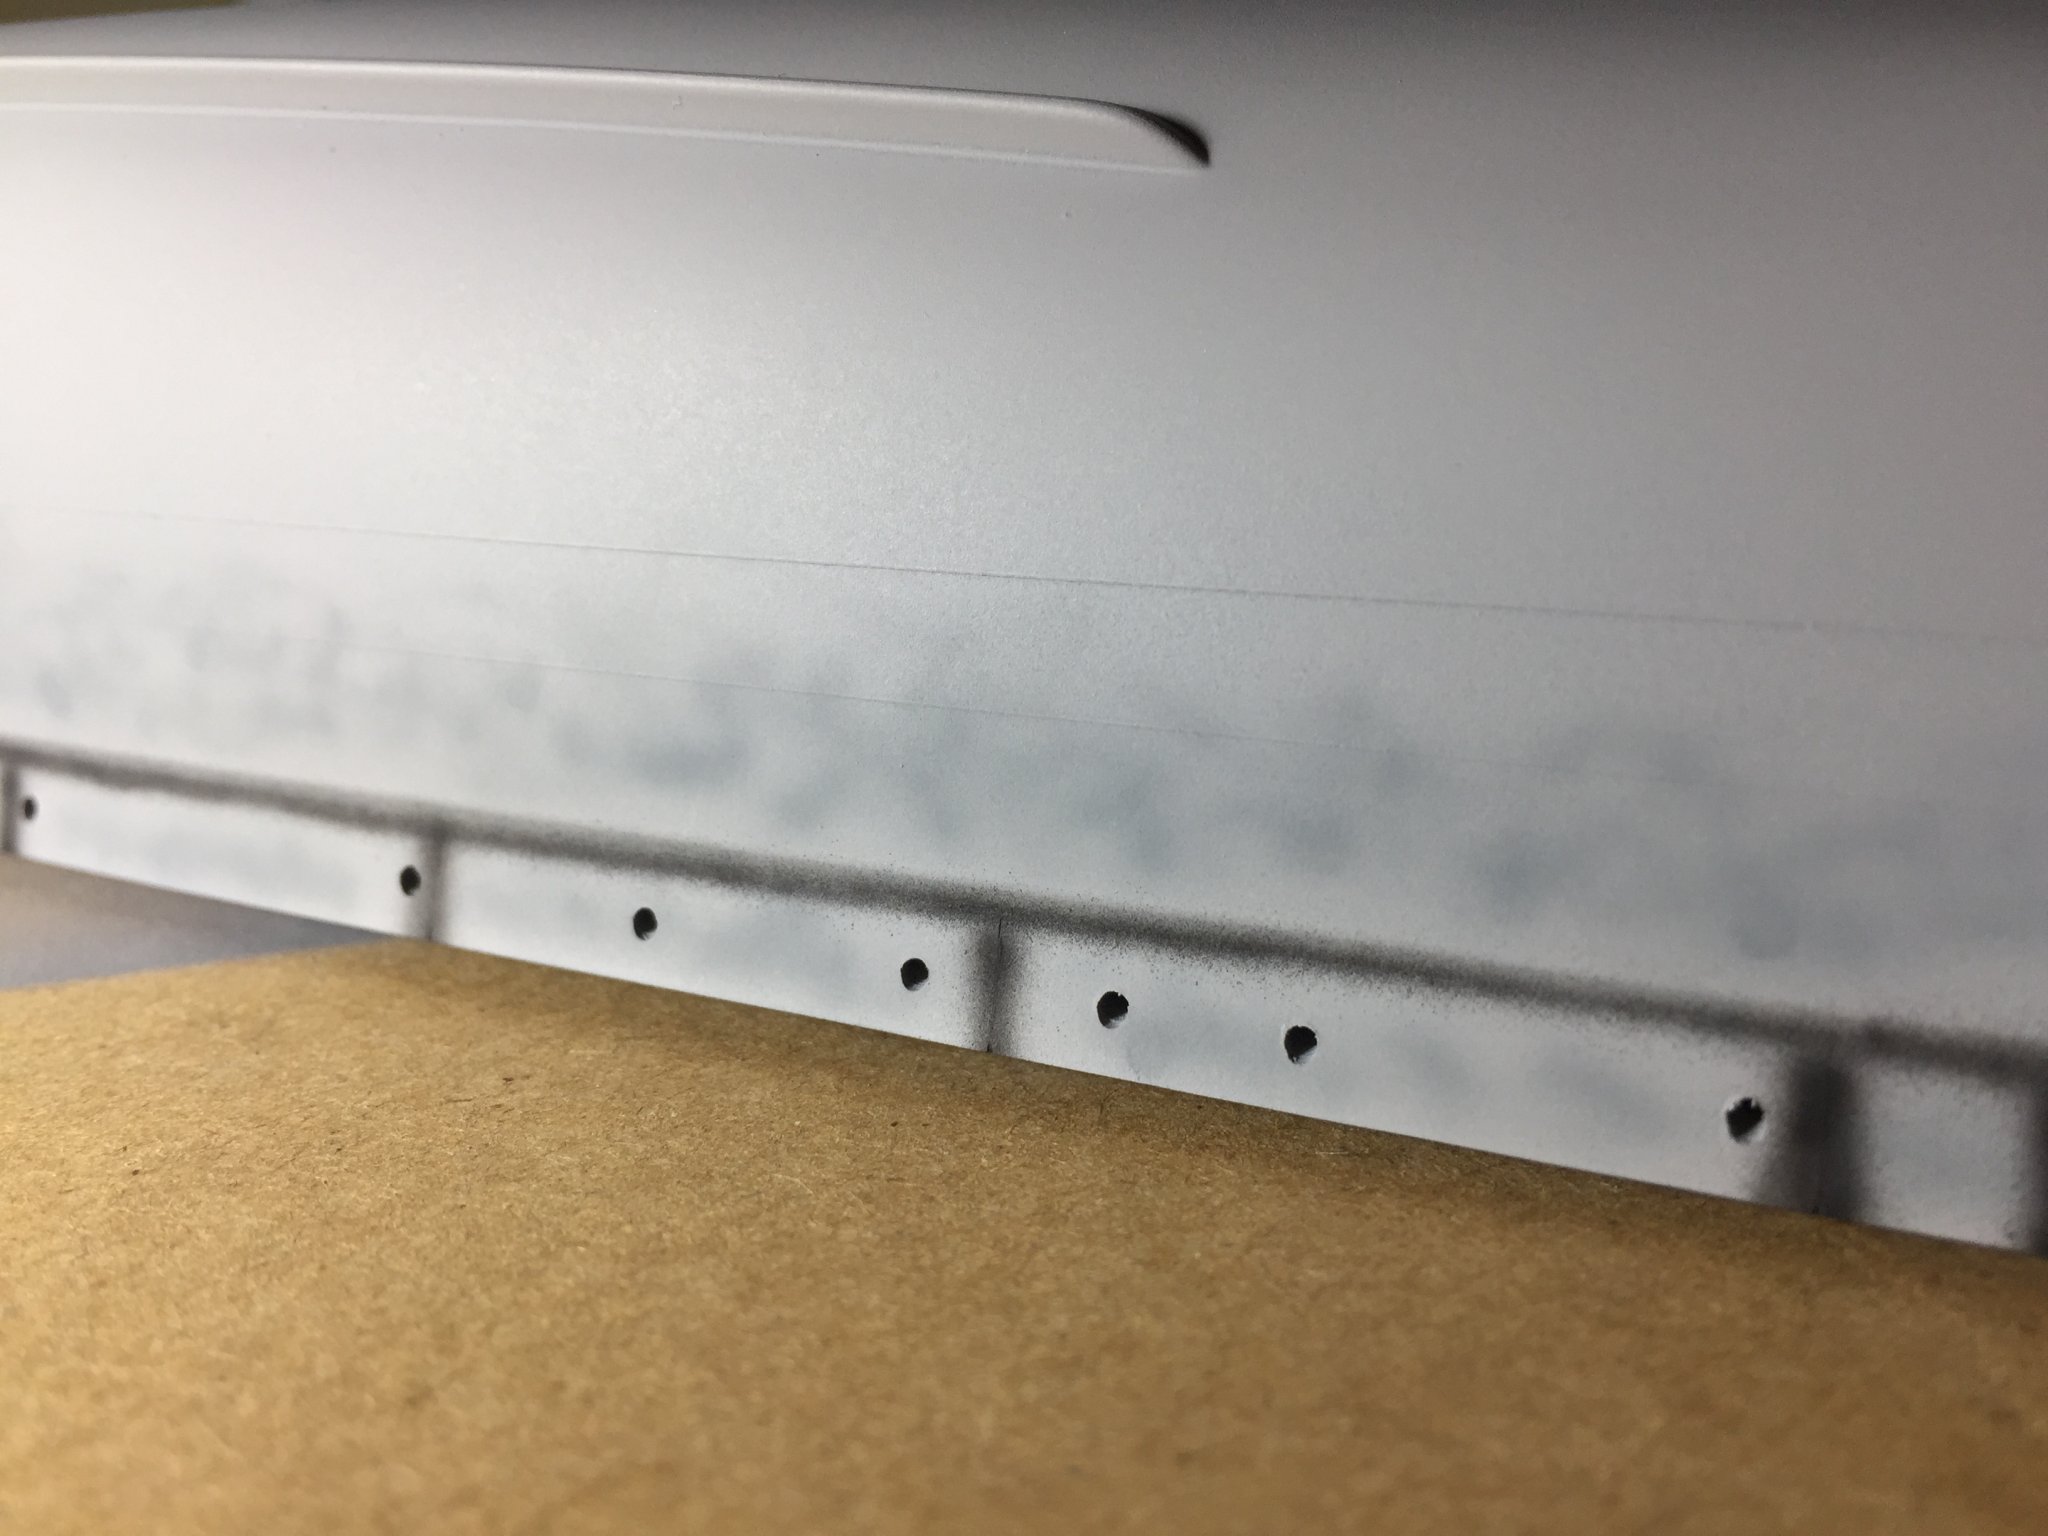
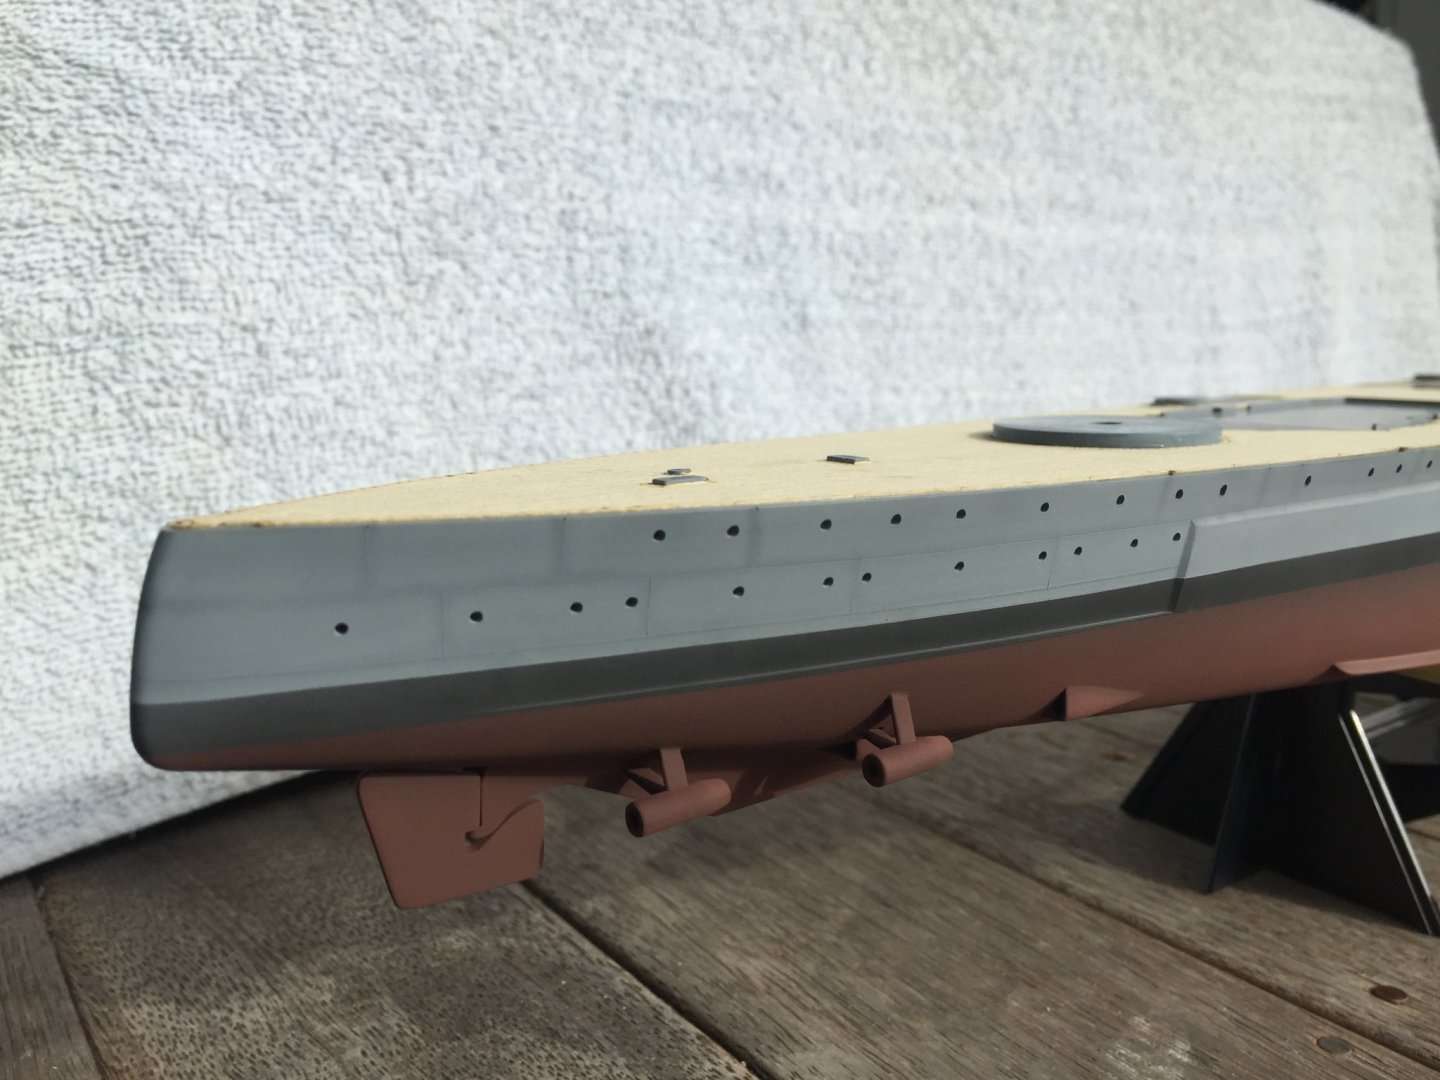
Base coat on the hull is done. No washes, effects or weathering yet just a plain canvas. From a few test I’ve done I found it super easy to get carried away with weathering and over do it, so will try my hardest to not do that! One way to find out though!!


- 211 replies
-
- 10
-
-
- prince of wales
- tamiya
- (and 2 more)
-
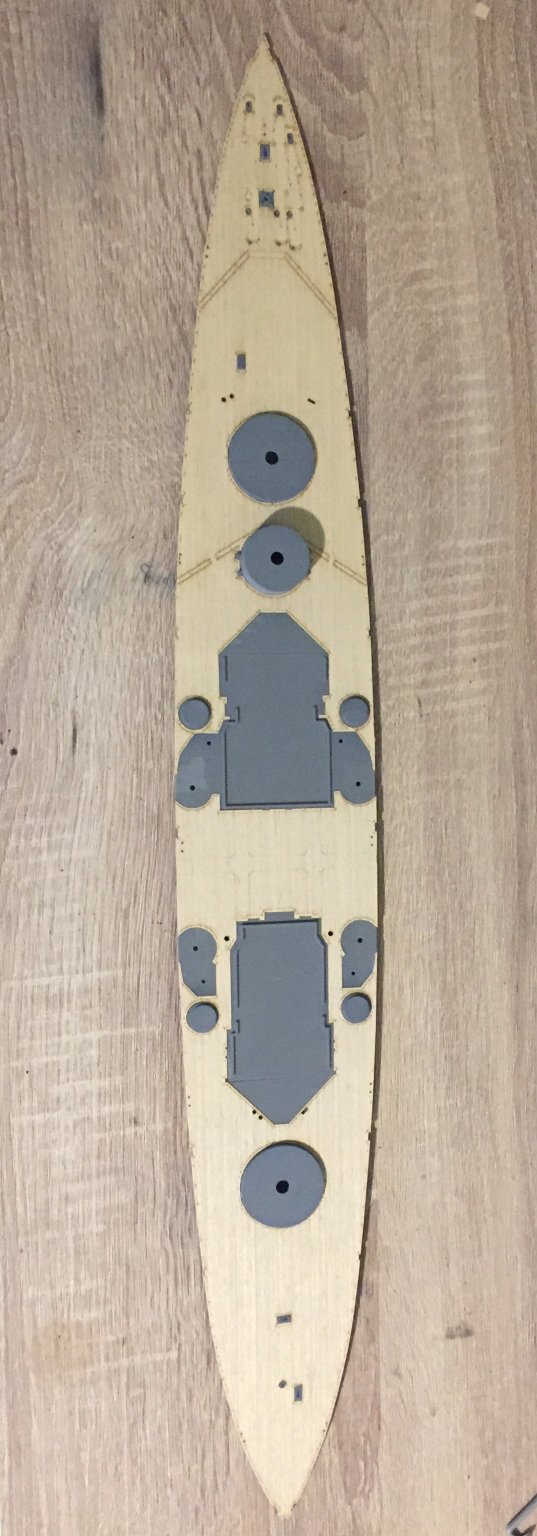
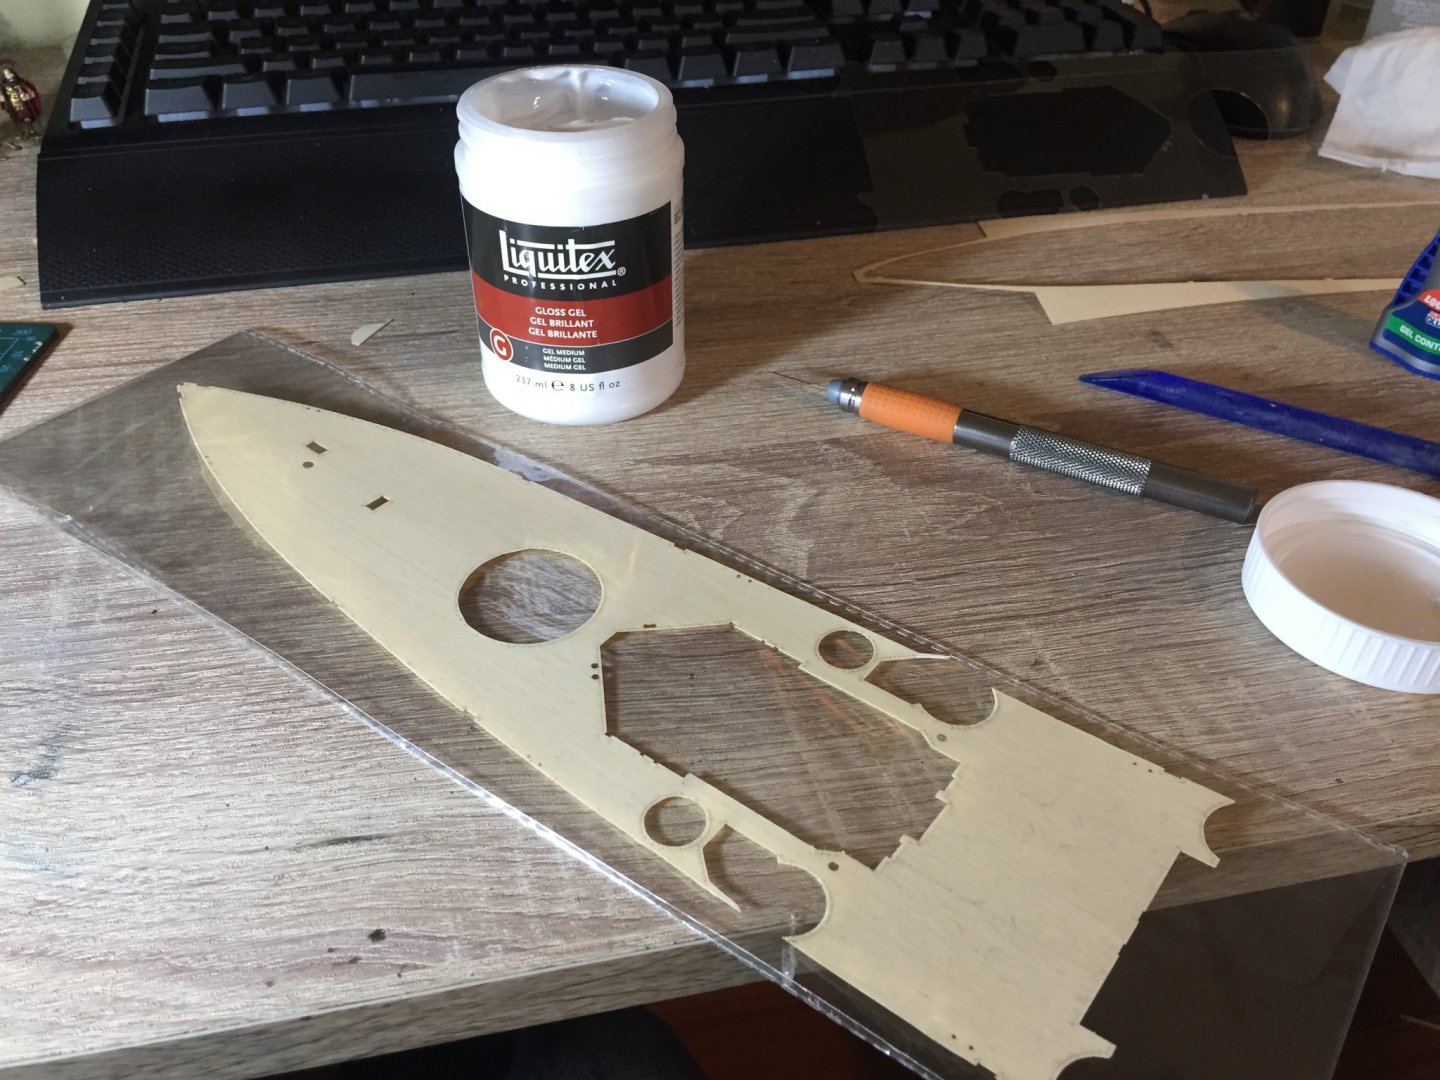
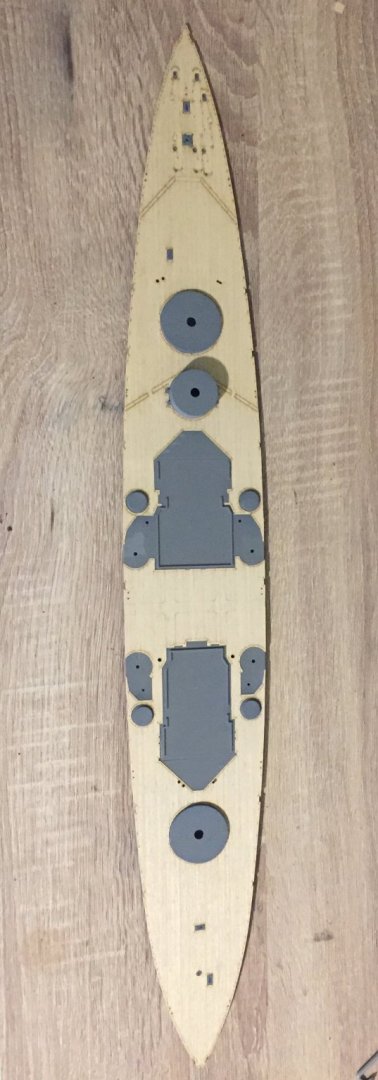
After lots of research and dry fittings the wooden deck is in place and I’m pretty happy with it. I coated the sticky side with some gel medium and the glued it down with more medium so I could get it right where I wanted. Ill do some tested once it’s dried and work out how to weather the deck on the scrape parts. Seems people say to use a light grey wash? Any tips as to the best way to get it looking right with the least chance of overdoing it and ruining the whole thing would be much appreciated? It needs something to take the “brand new” look away even though they would have been kept looking pretty new.
- 211 replies
-
- 7
-
-
- prince of wales
- tamiya
- (and 2 more)
-
Hey Mate, thanks. I’m a Tauranga boy, but due work have found myself in Gisborne... so needed to find a hobby!! Used to do plastic planes as a teenager so thought I’d do something similar but this time have some money so can buy paint! Haha your HMS Endeavour looks amazing! The replica sailed here few months back and looked great anchored in the bay! I wouldn’t know where to start on a all wood model.
- 211 replies
-
- 6
-
-
- prince of wales
- tamiya
- (and 2 more)
-
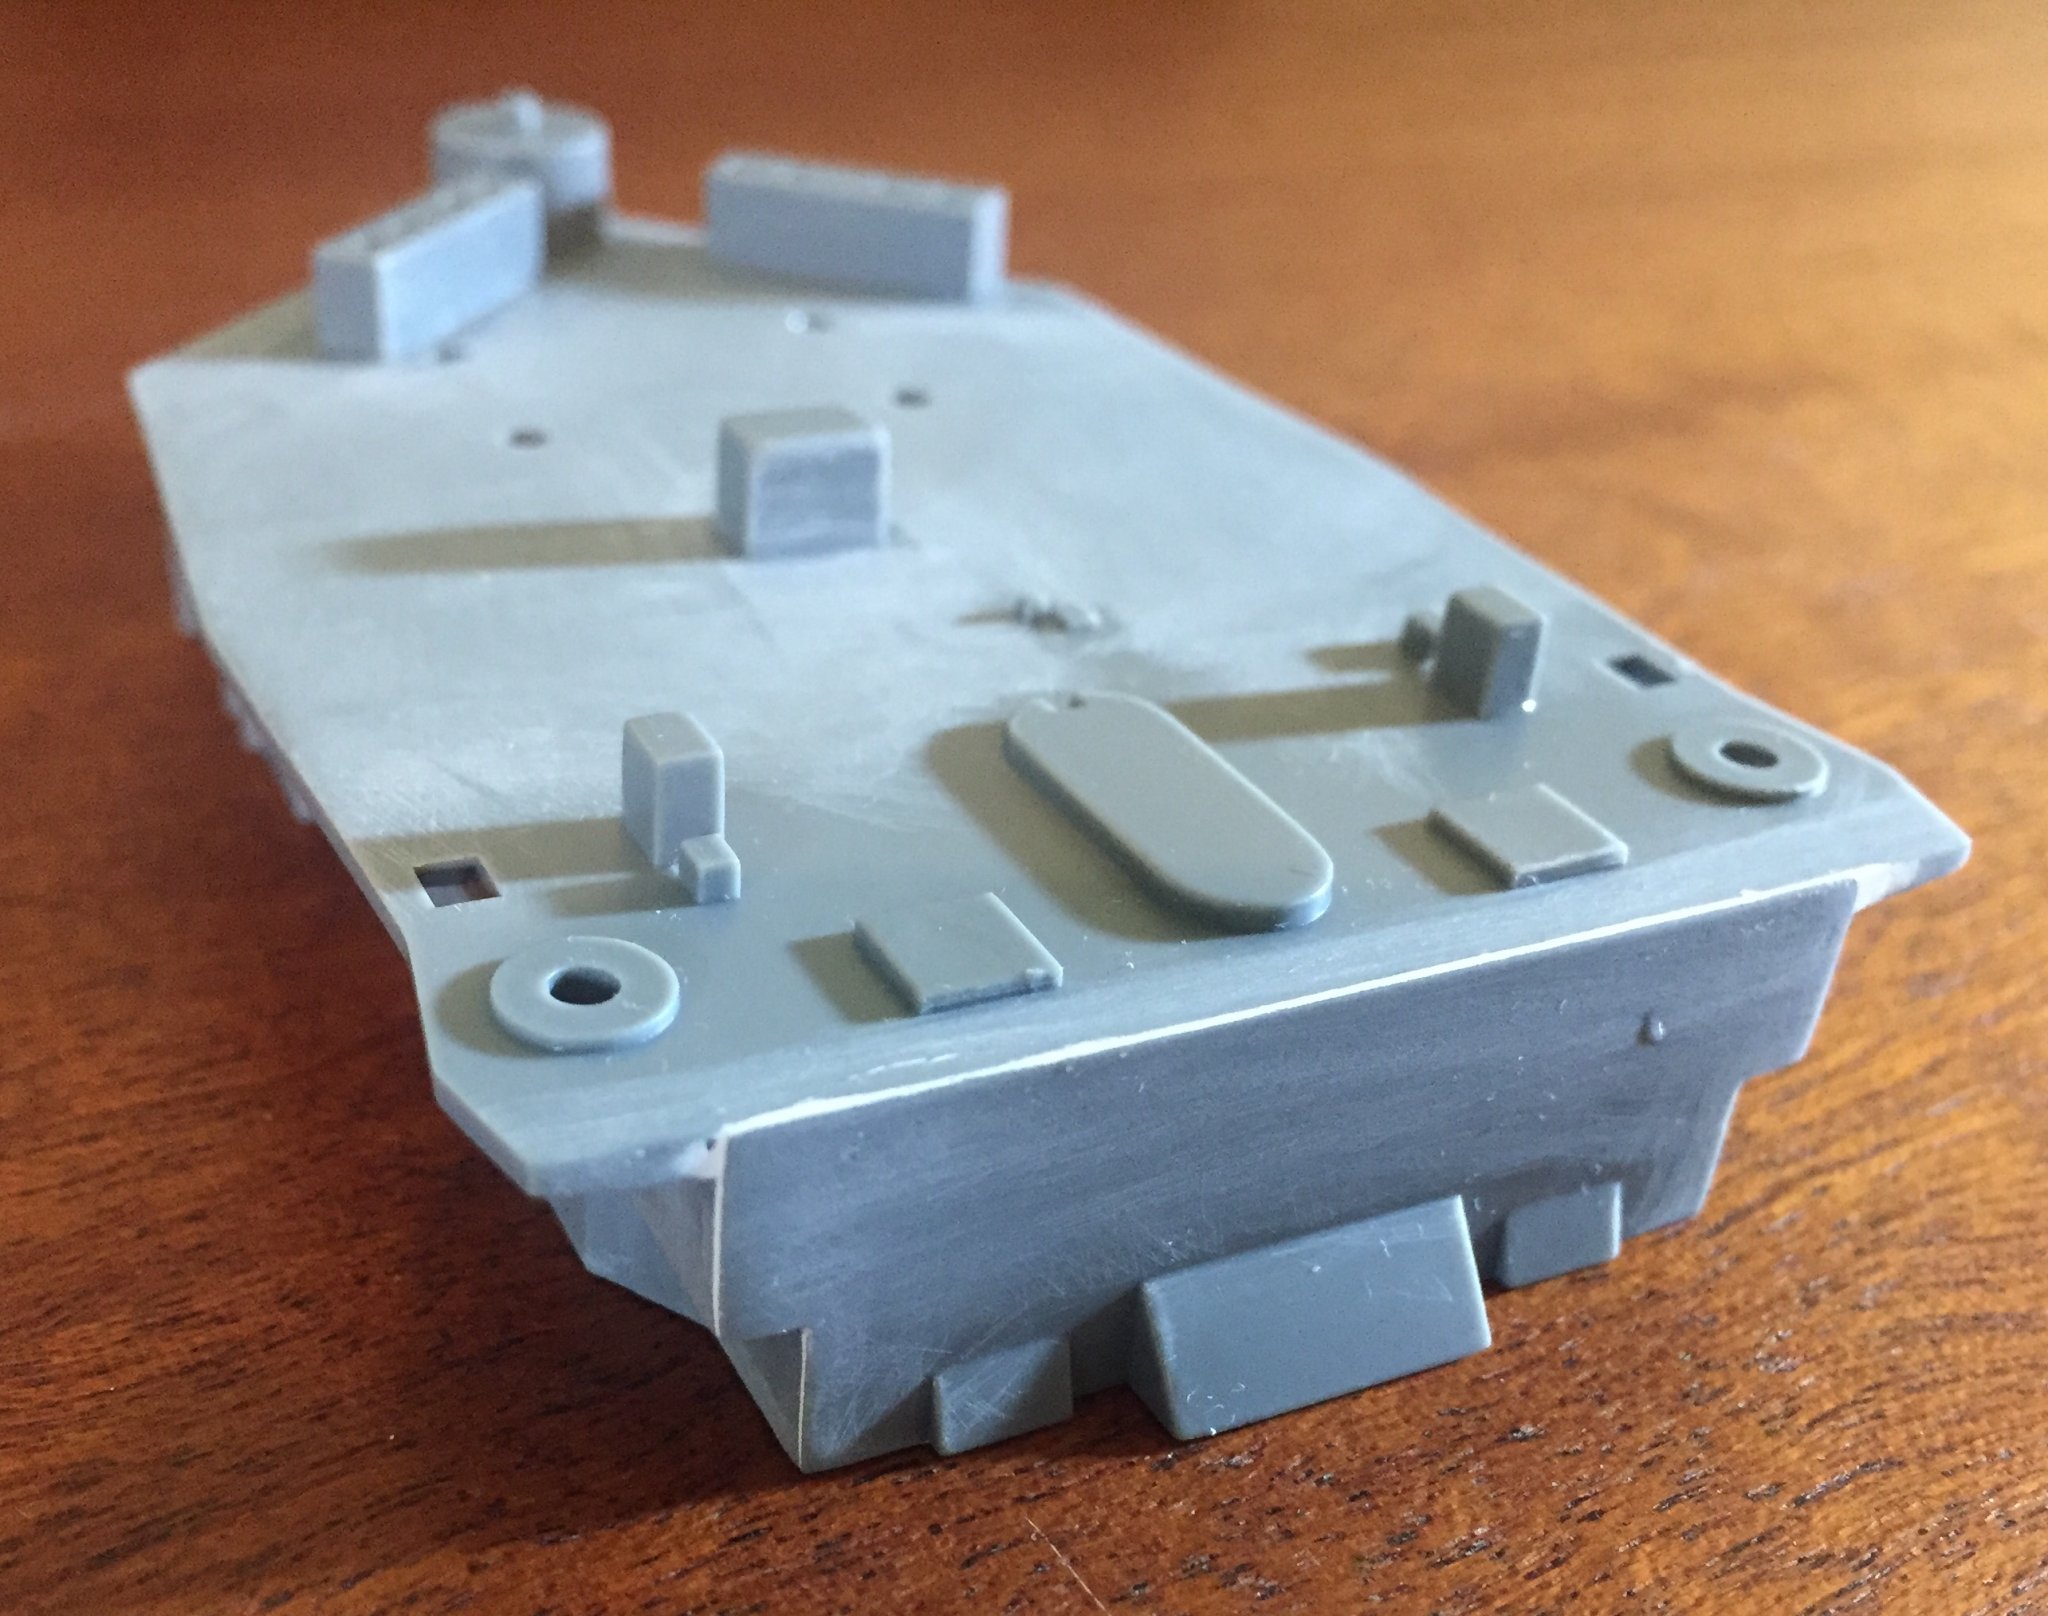
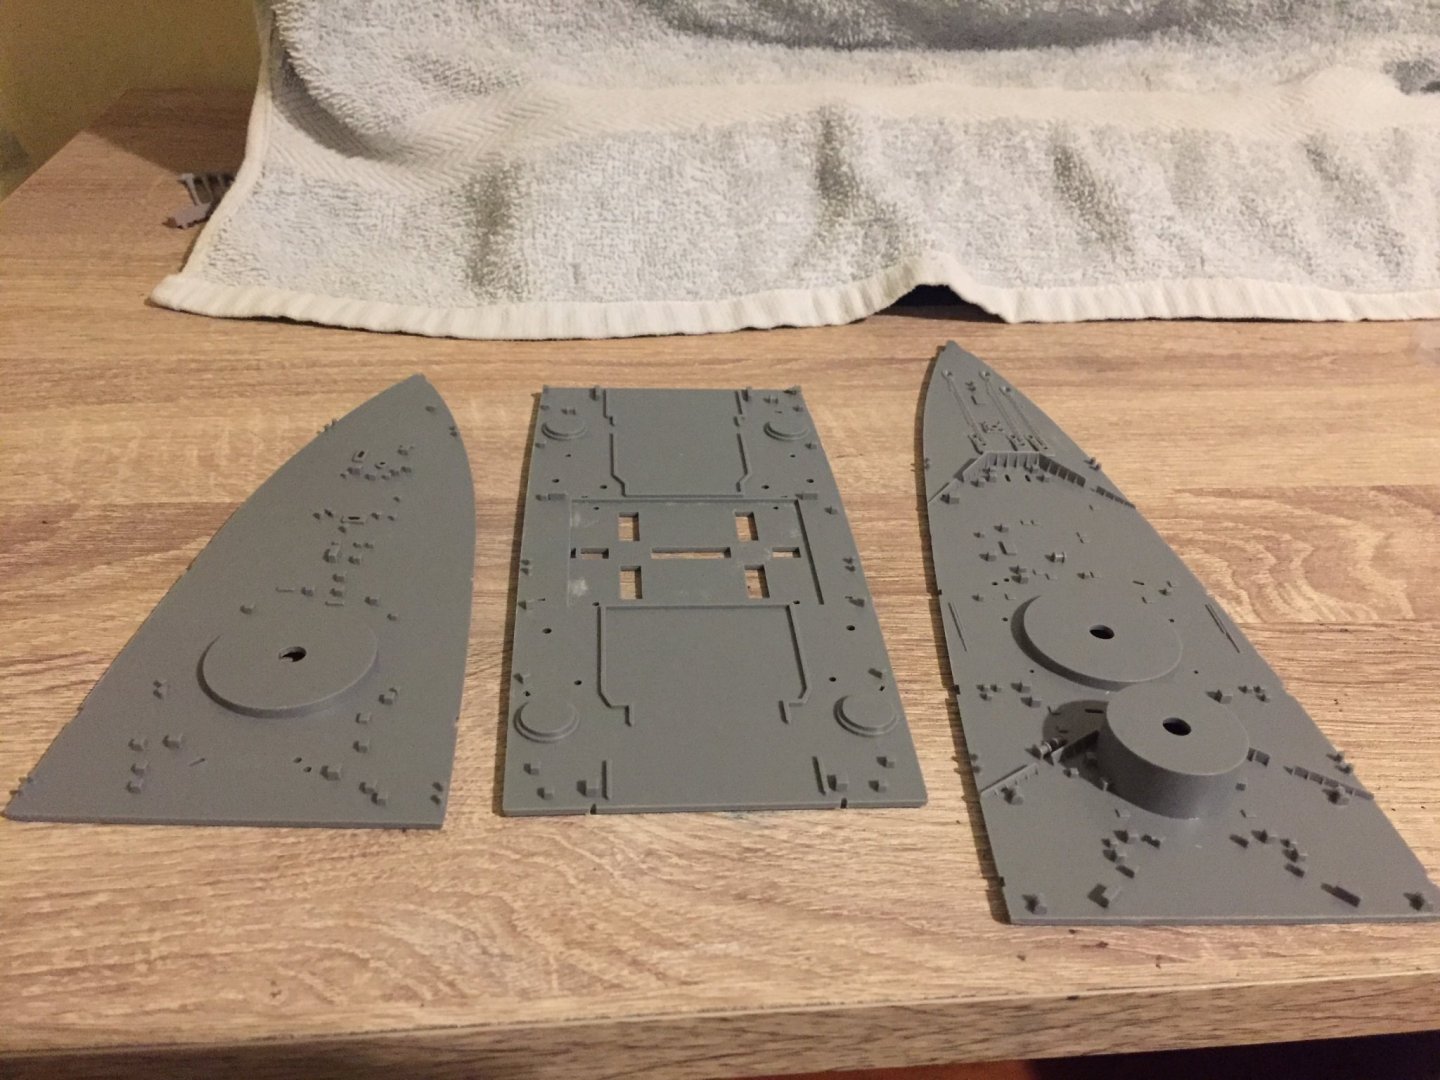
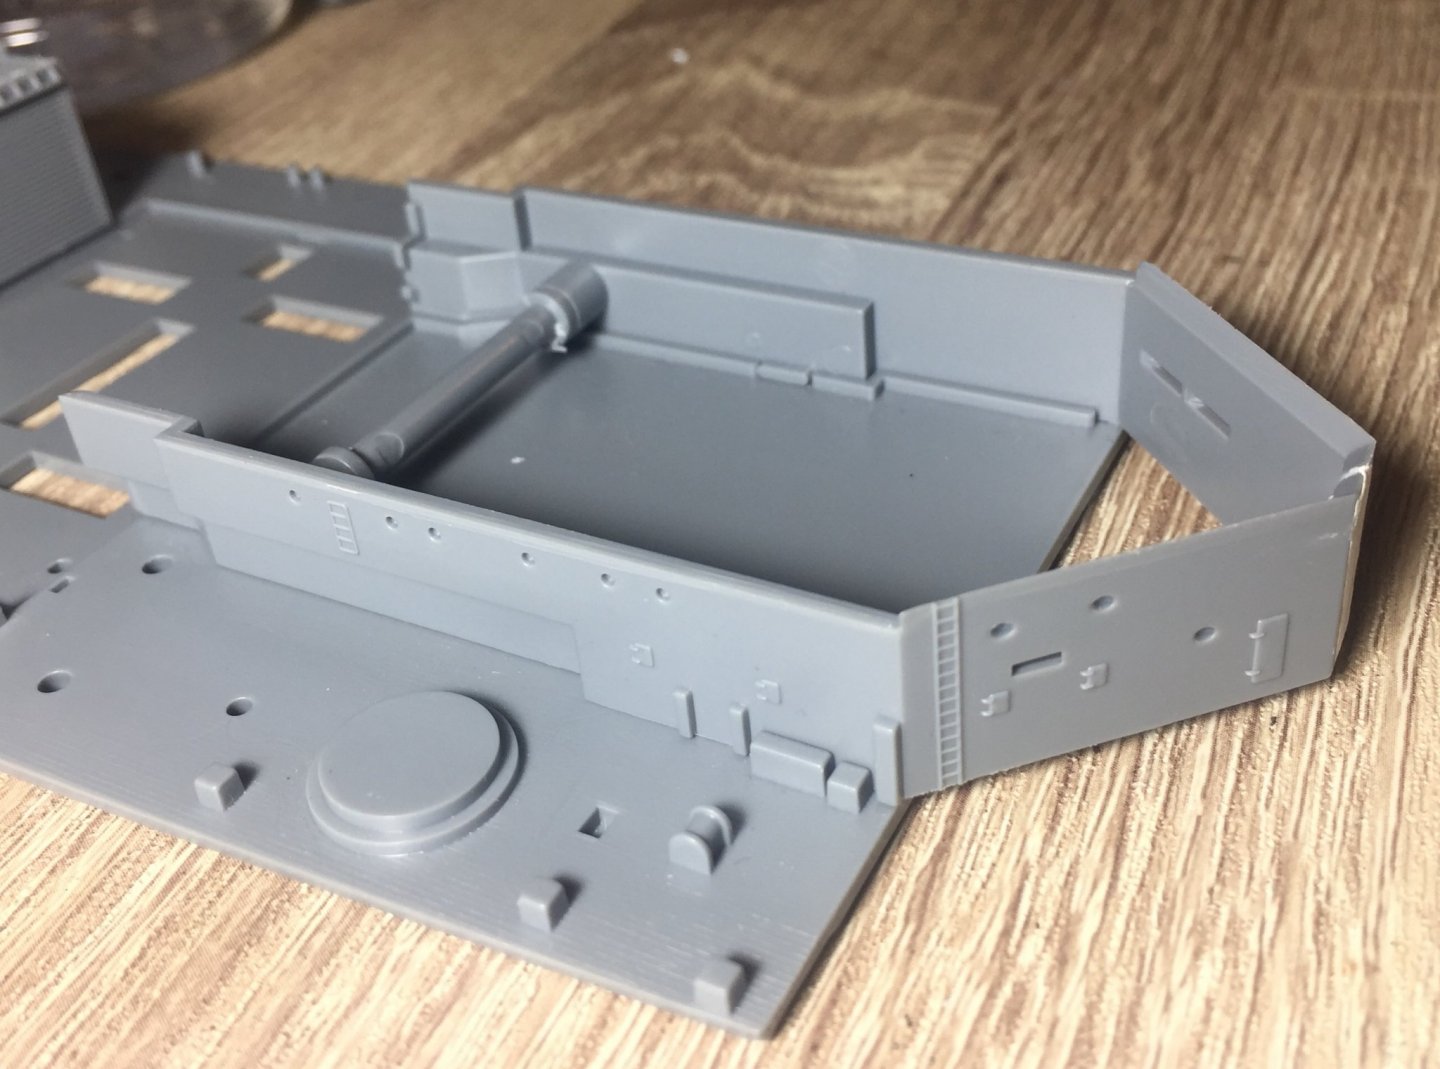
Lots of little things being done, all pretty time consuming so in a stage where progress is steady but not visible. Ive cleared the decks ready for the wood to go down once I’ve got everything ready will glue the 3 parts together but off the hull so I can get the 3 main guns attached correctly. Then once the hull is painted with main coat I’ll add the hull and deck together before I do any weathering and washes. Also doing odd bits and pieces off PE so slow but steady progress at this stage.

- 211 replies
-
- 11
-
-
- prince of wales
- tamiya
- (and 2 more)
-
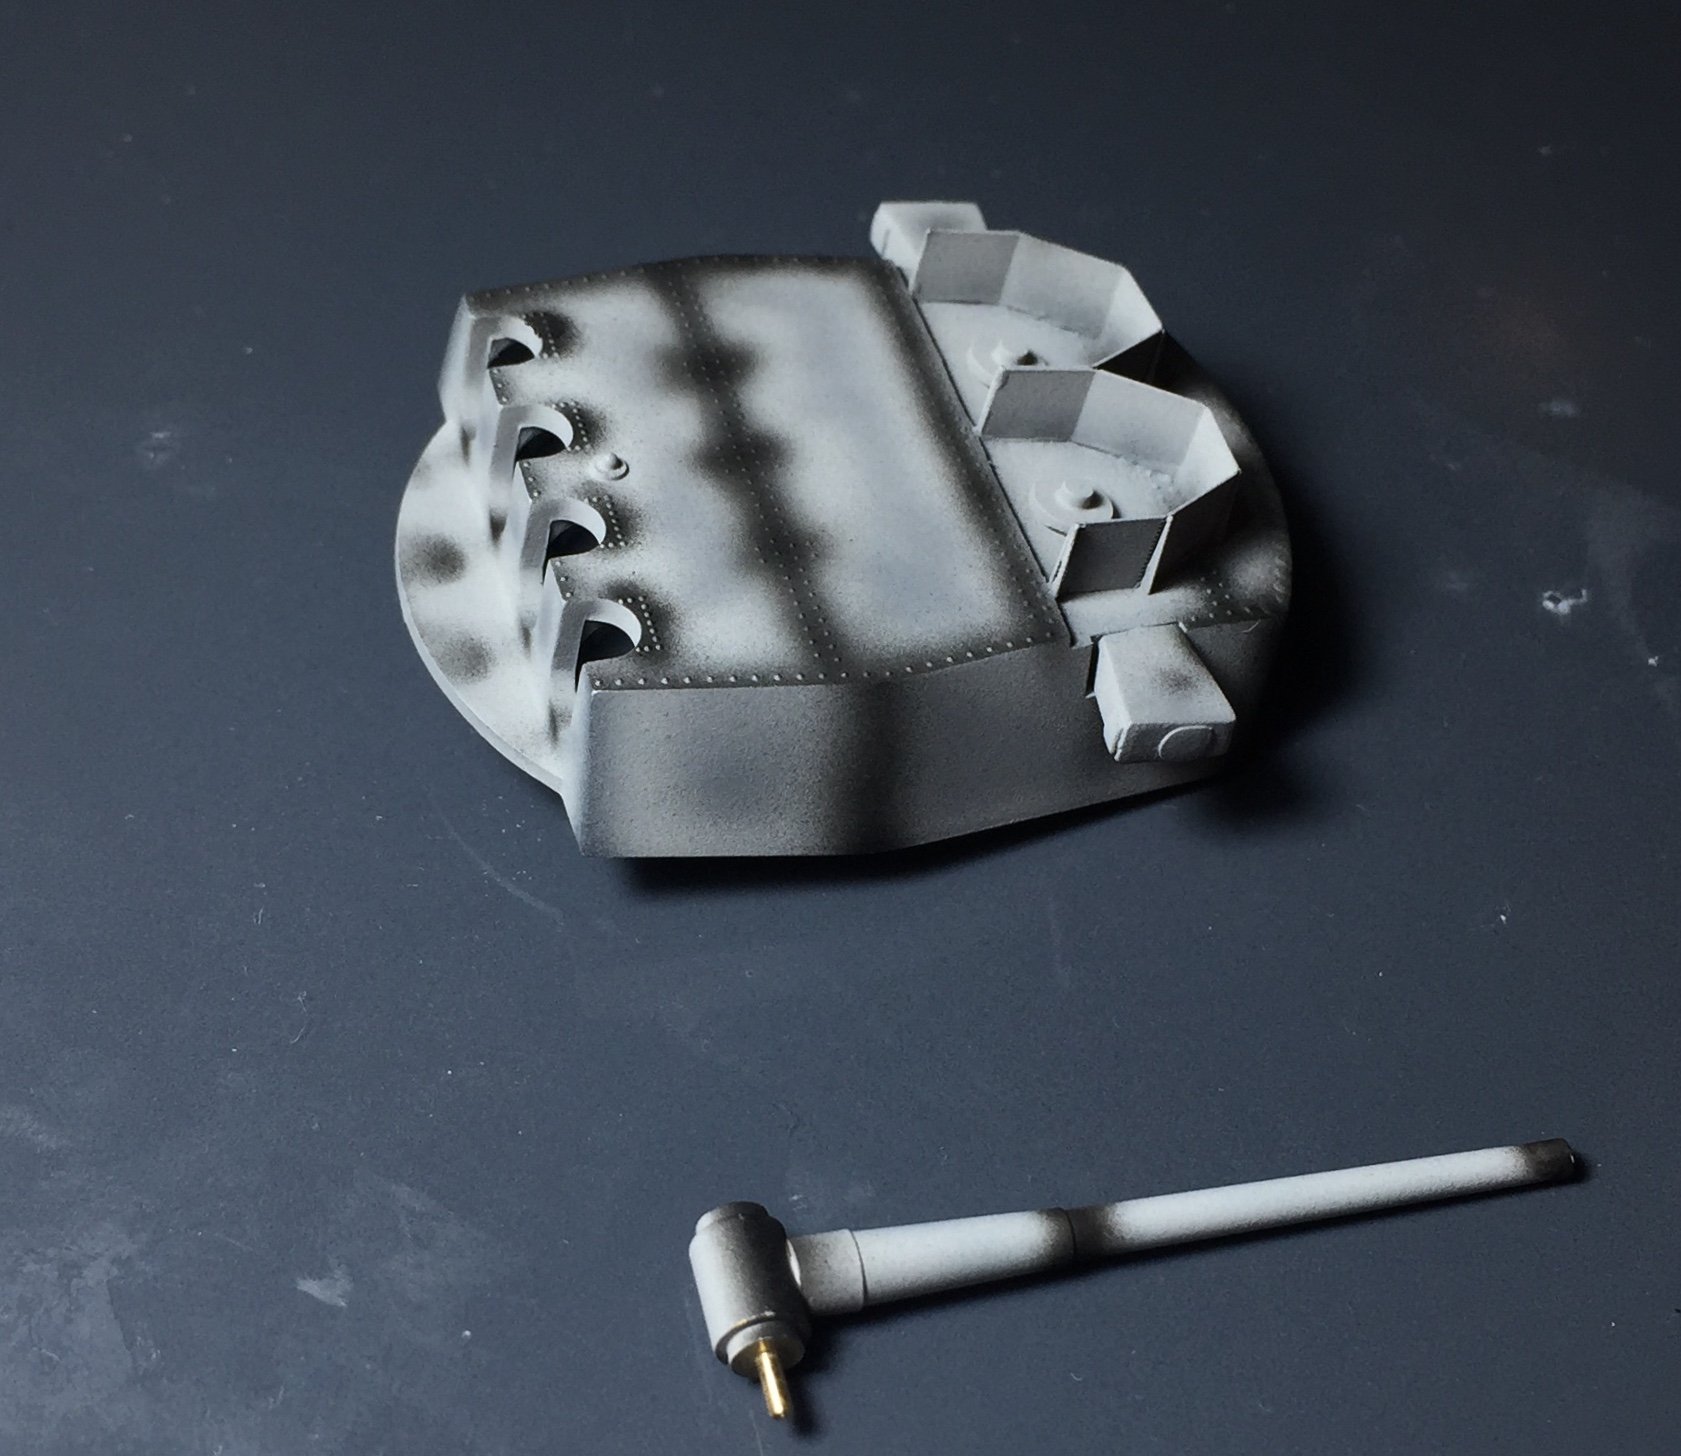
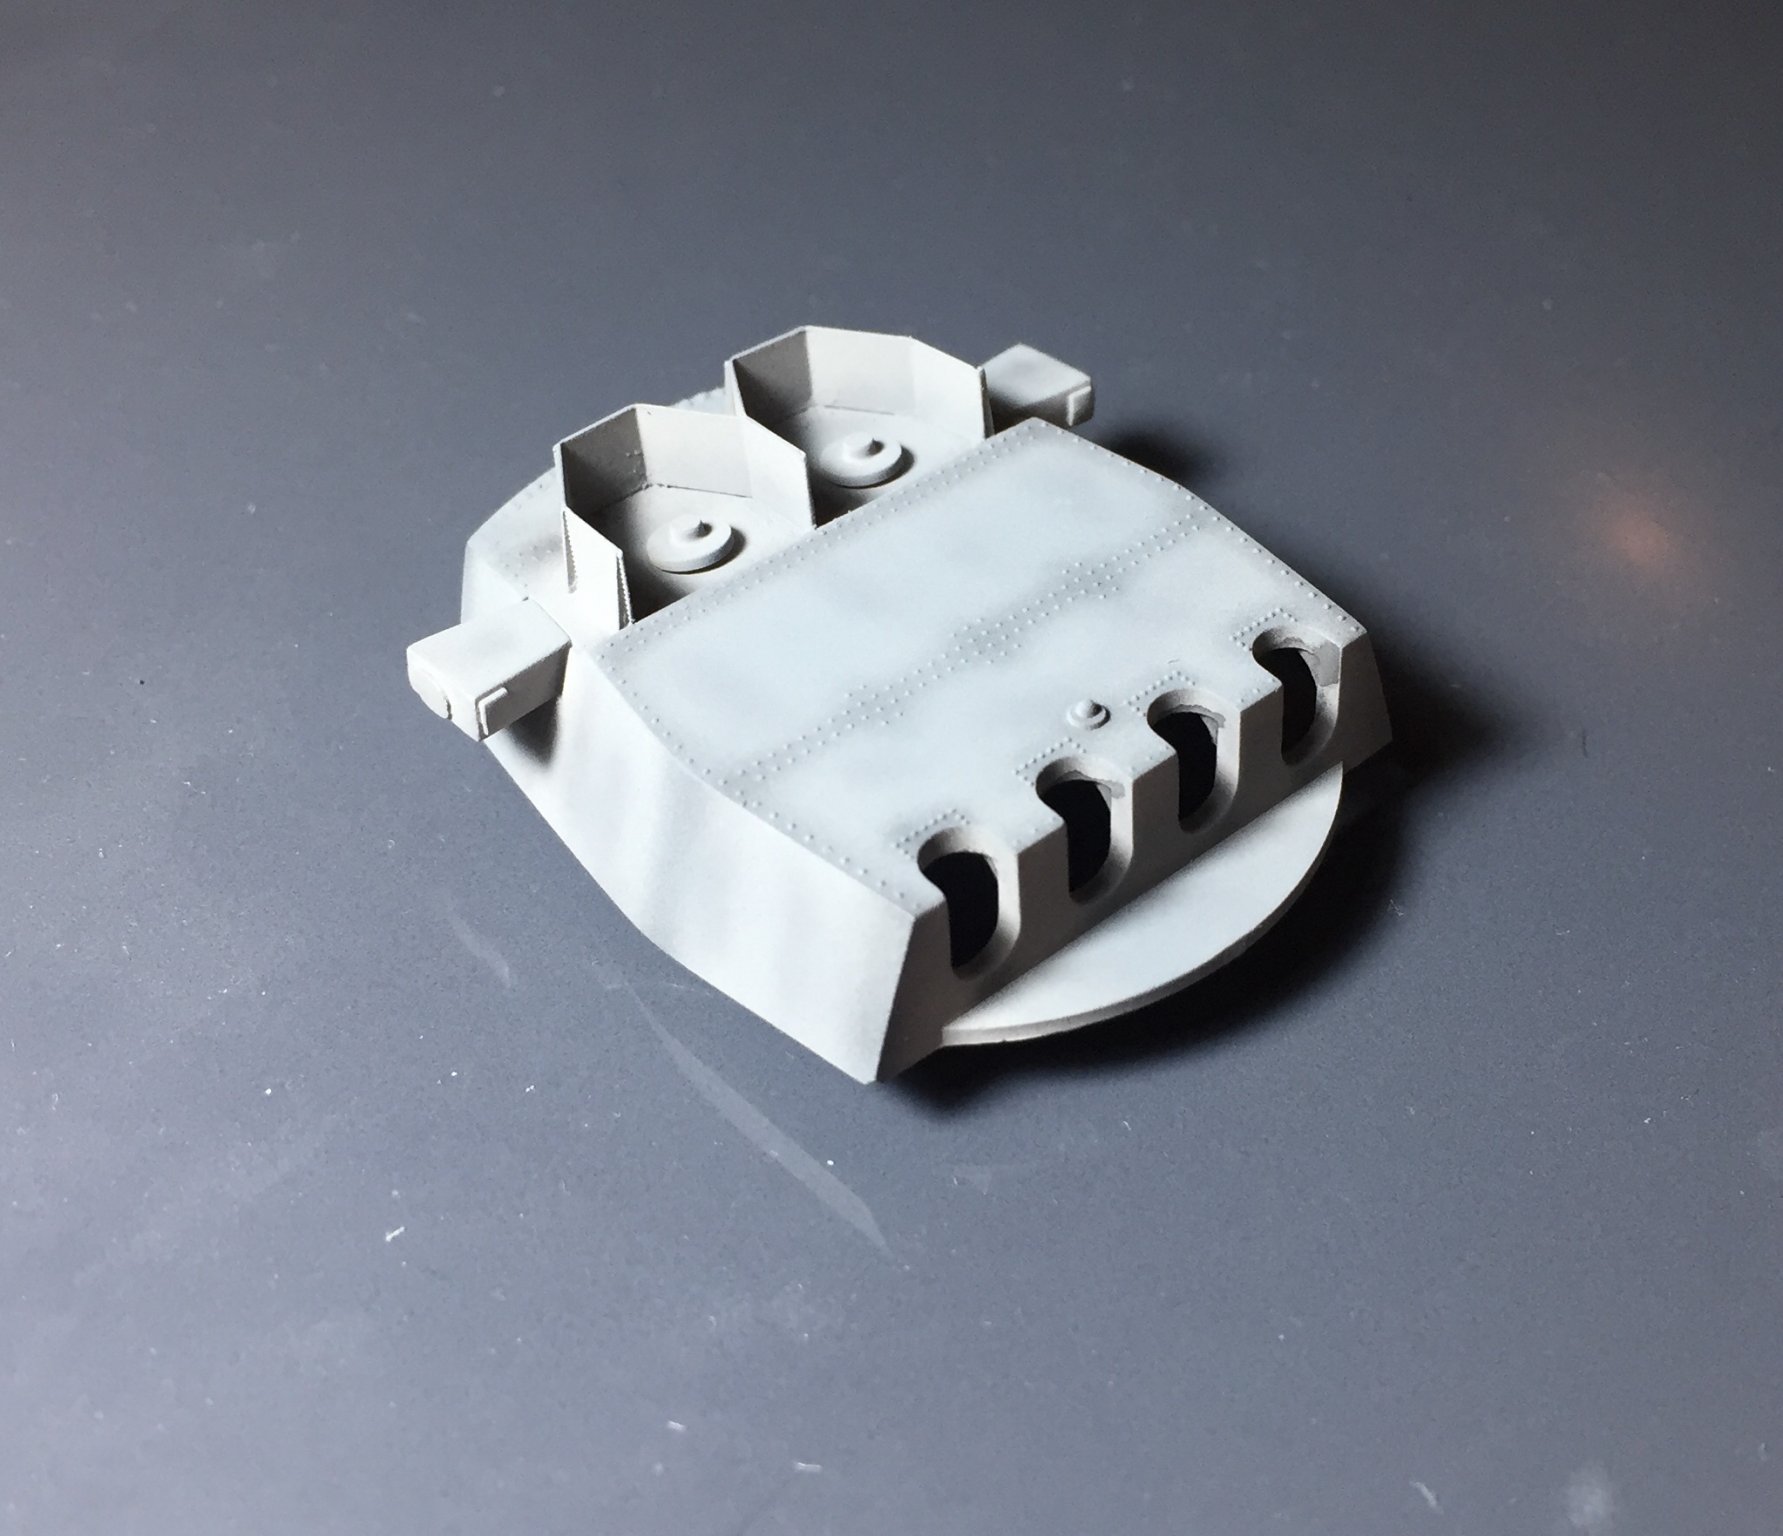
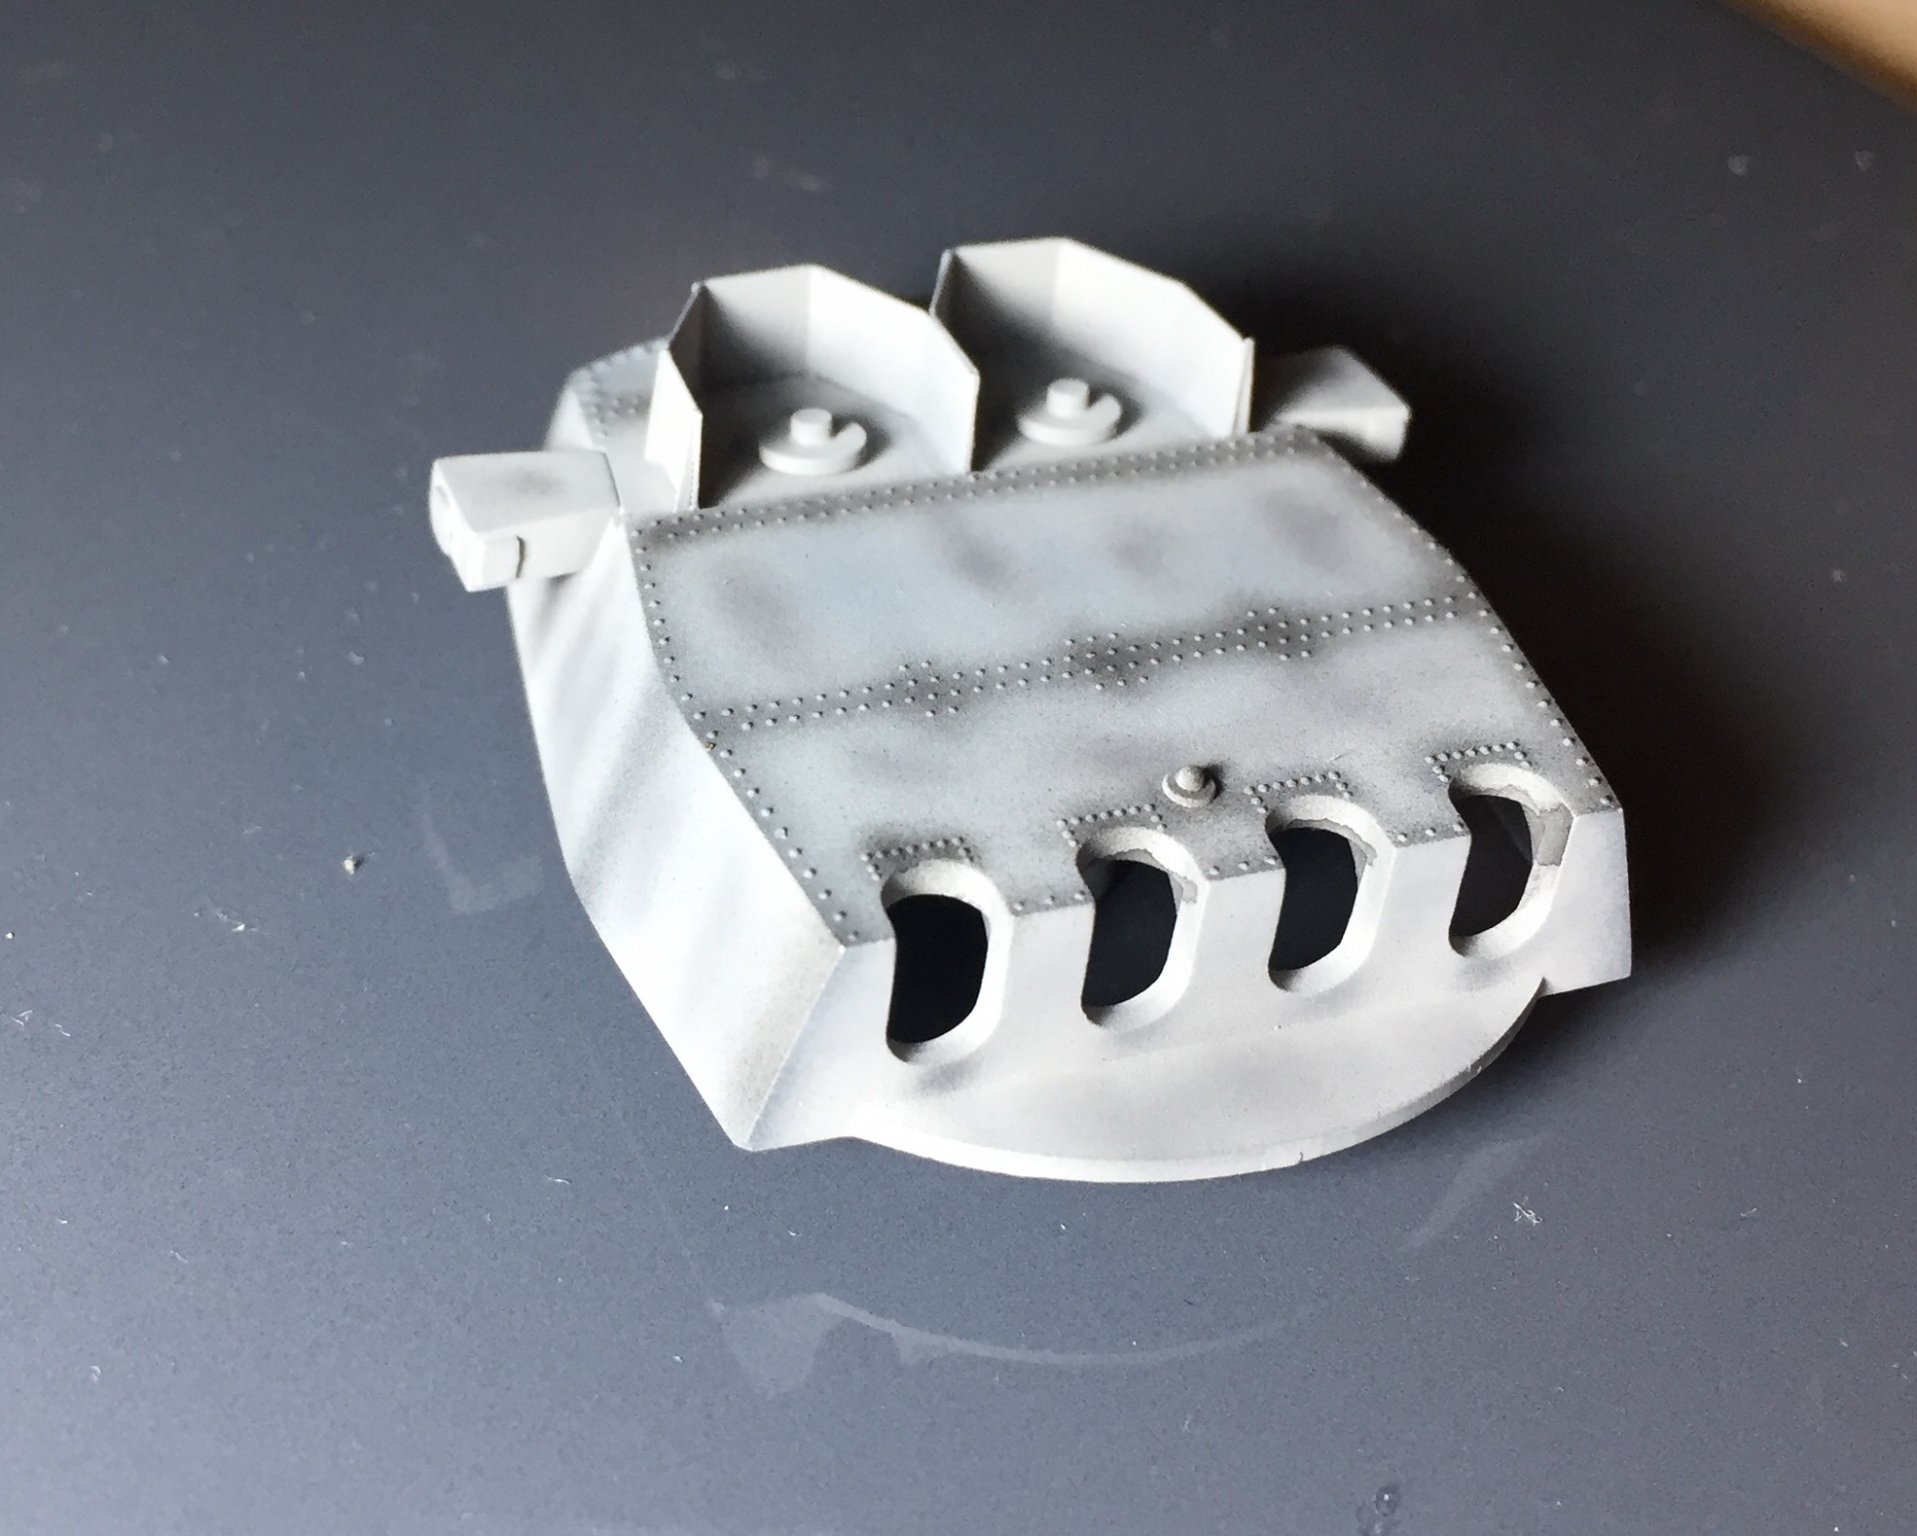
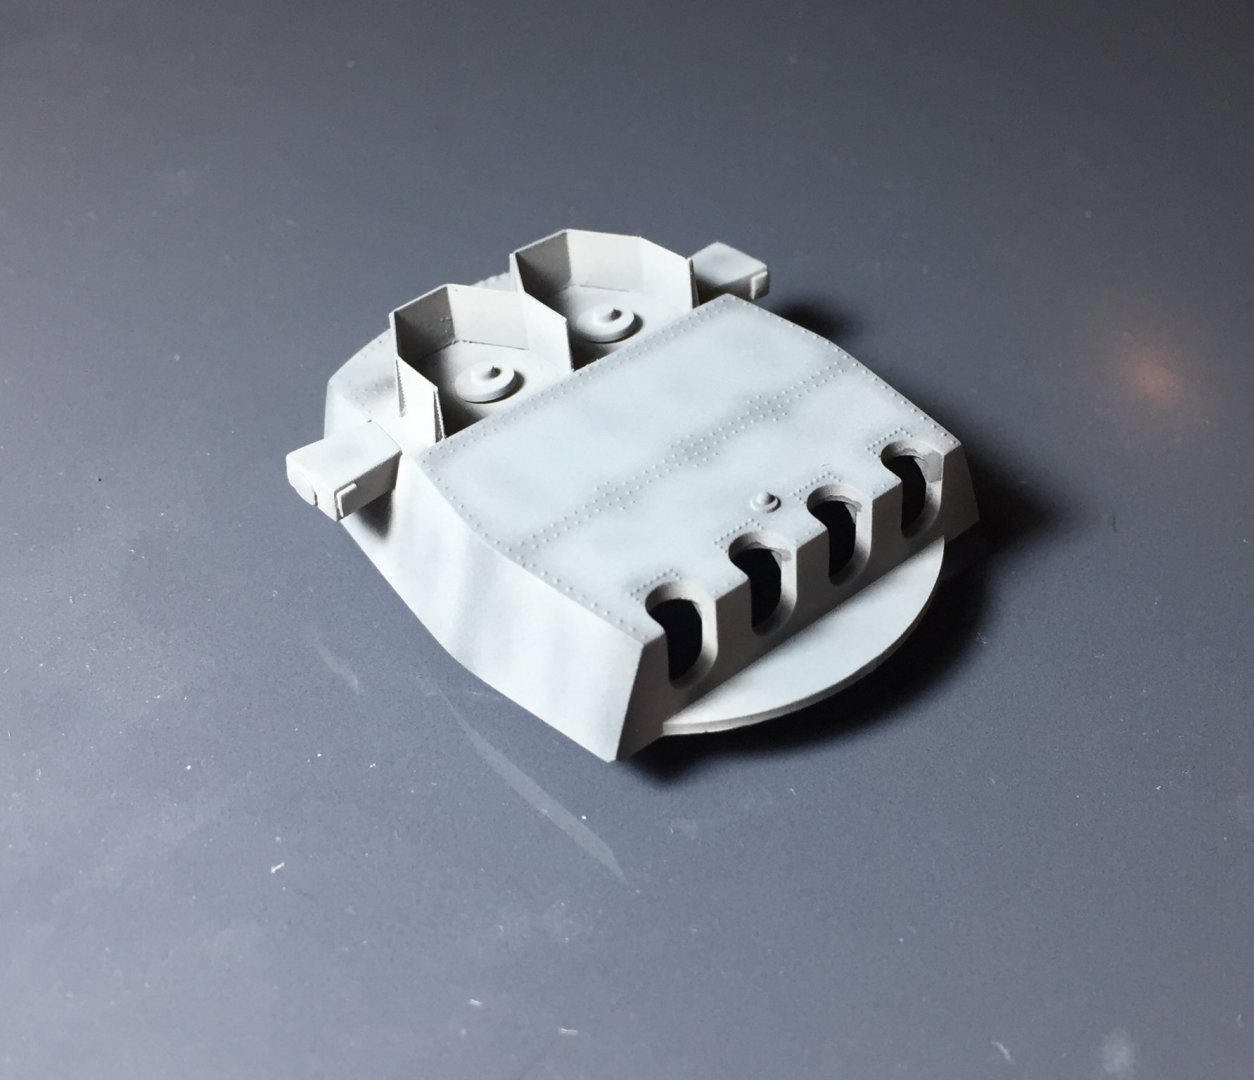
So decided probably not the best idea to experiment with new painting ideas on the hull. Instead made the rear big gun and did some test painting. Ended up pretty much getting what I wanted after the second attempt. all my modulating of the grey disappeared by the time the black panel lines were at the level I was after. So over sprayed the panel lines until they were almost done then modulated then over sprayed again I’ll overspray a tiny bit of lighter colour for highlighting and then it will be down to washes and weathering. Just have to work on getting the under shades to look convincing as I found that part the hardest of it all! Once I’ve worked out some sort of pattern I think I’ll be quite happy with it.


- 211 replies
-
- 9
-
-
- prince of wales
- tamiya
- (and 2 more)
-
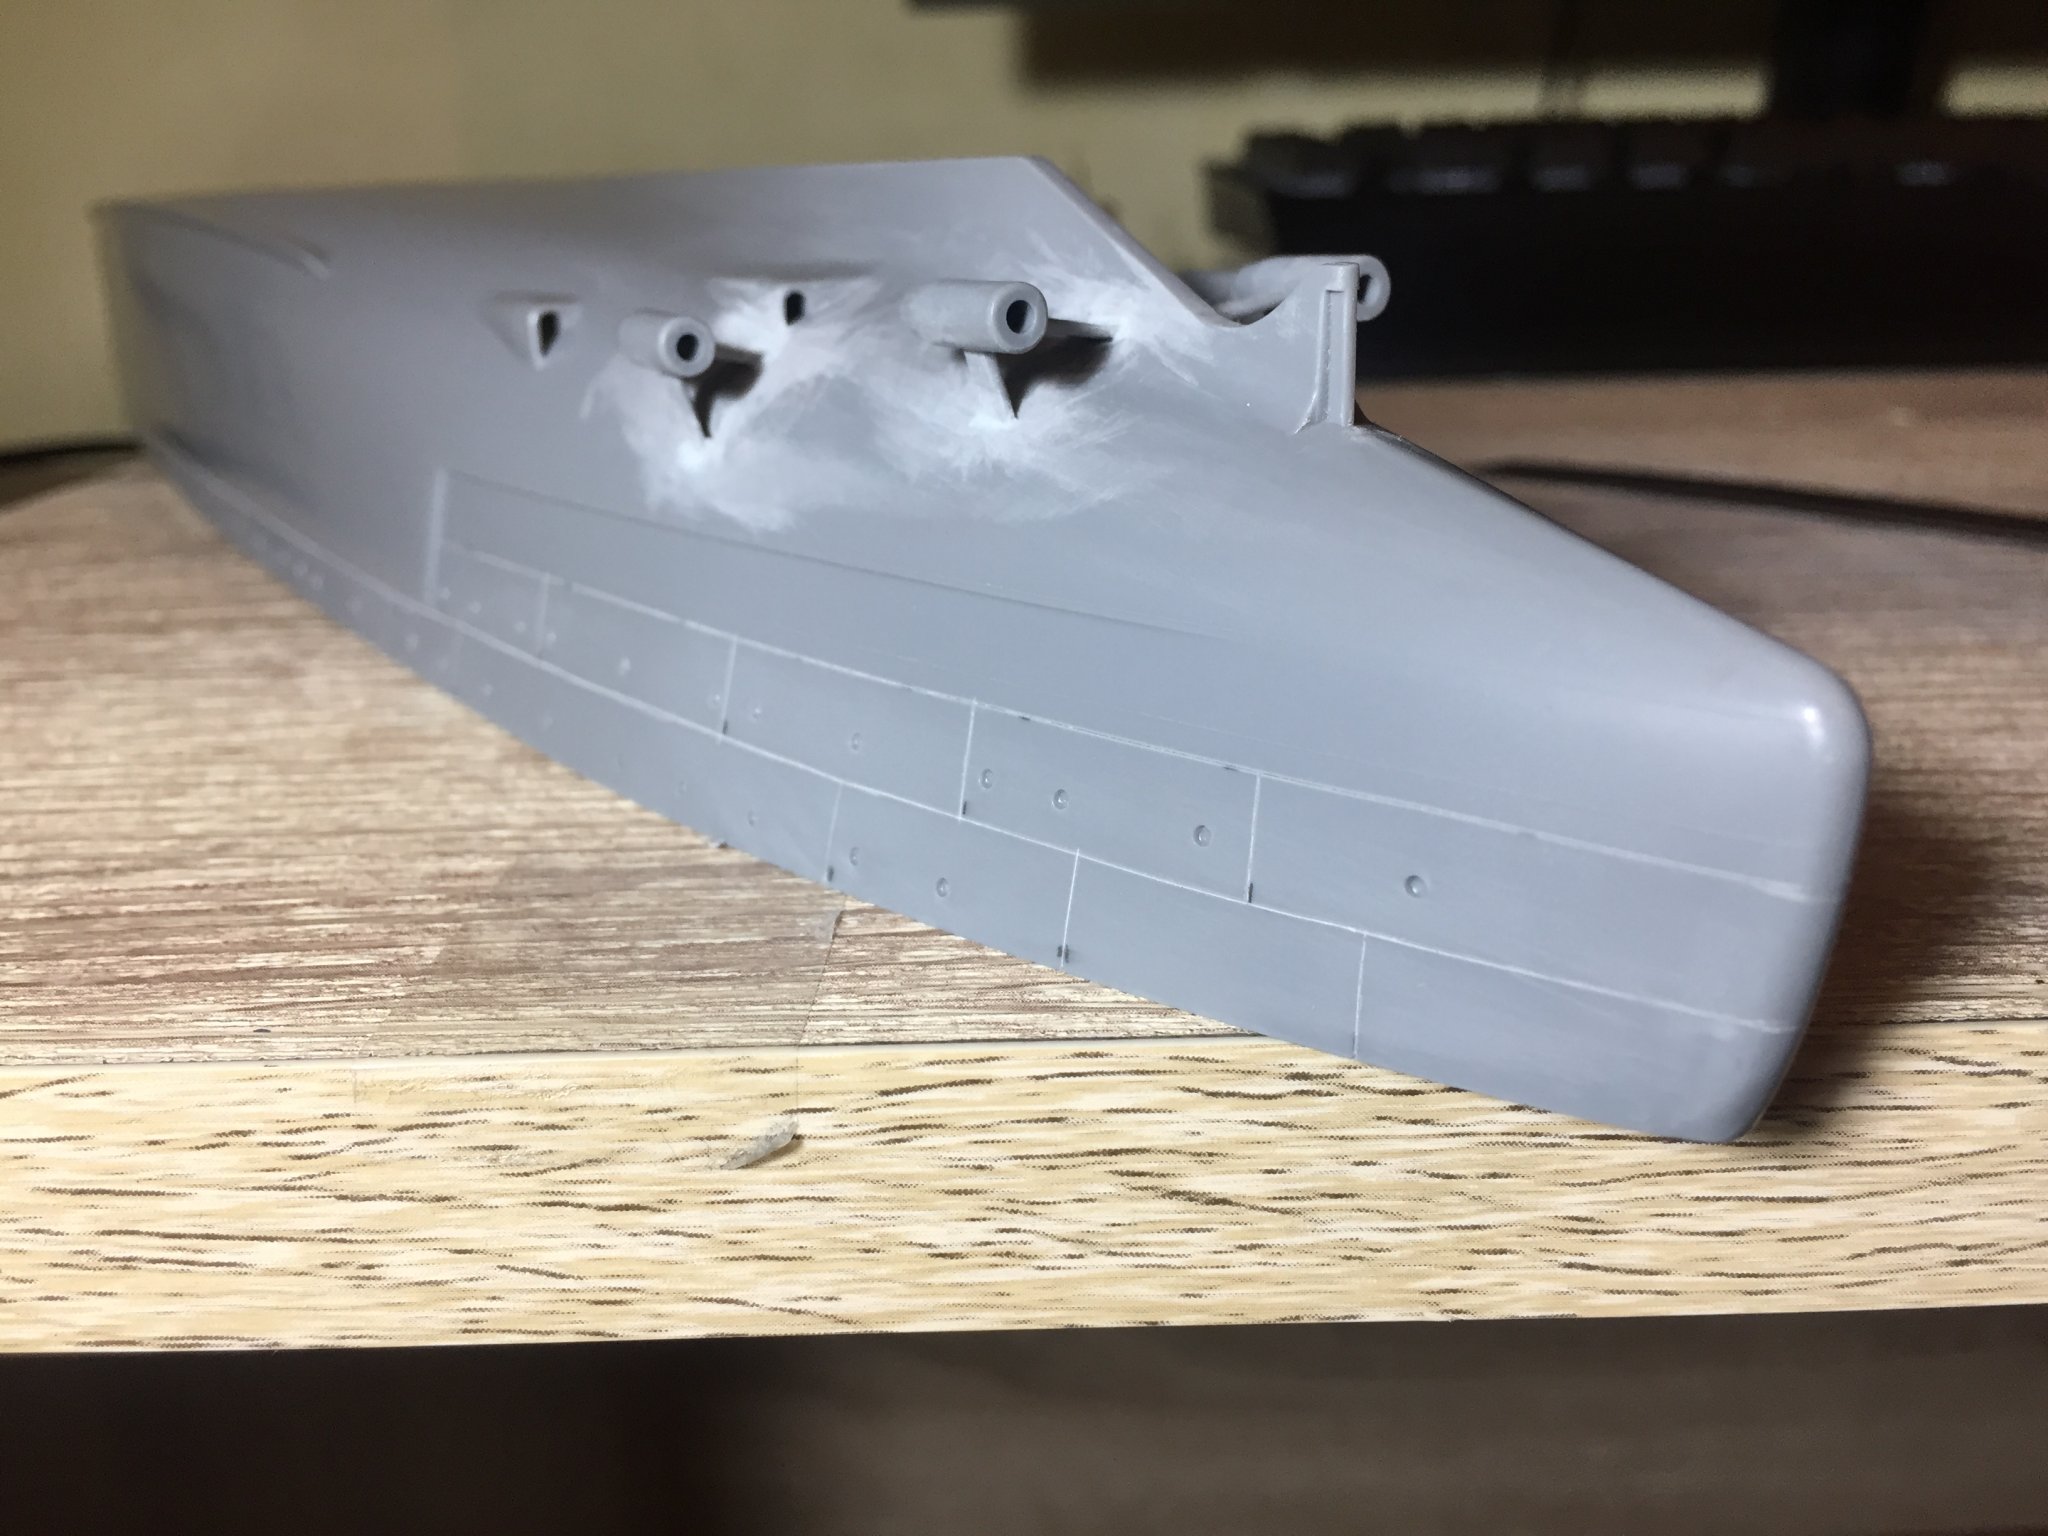
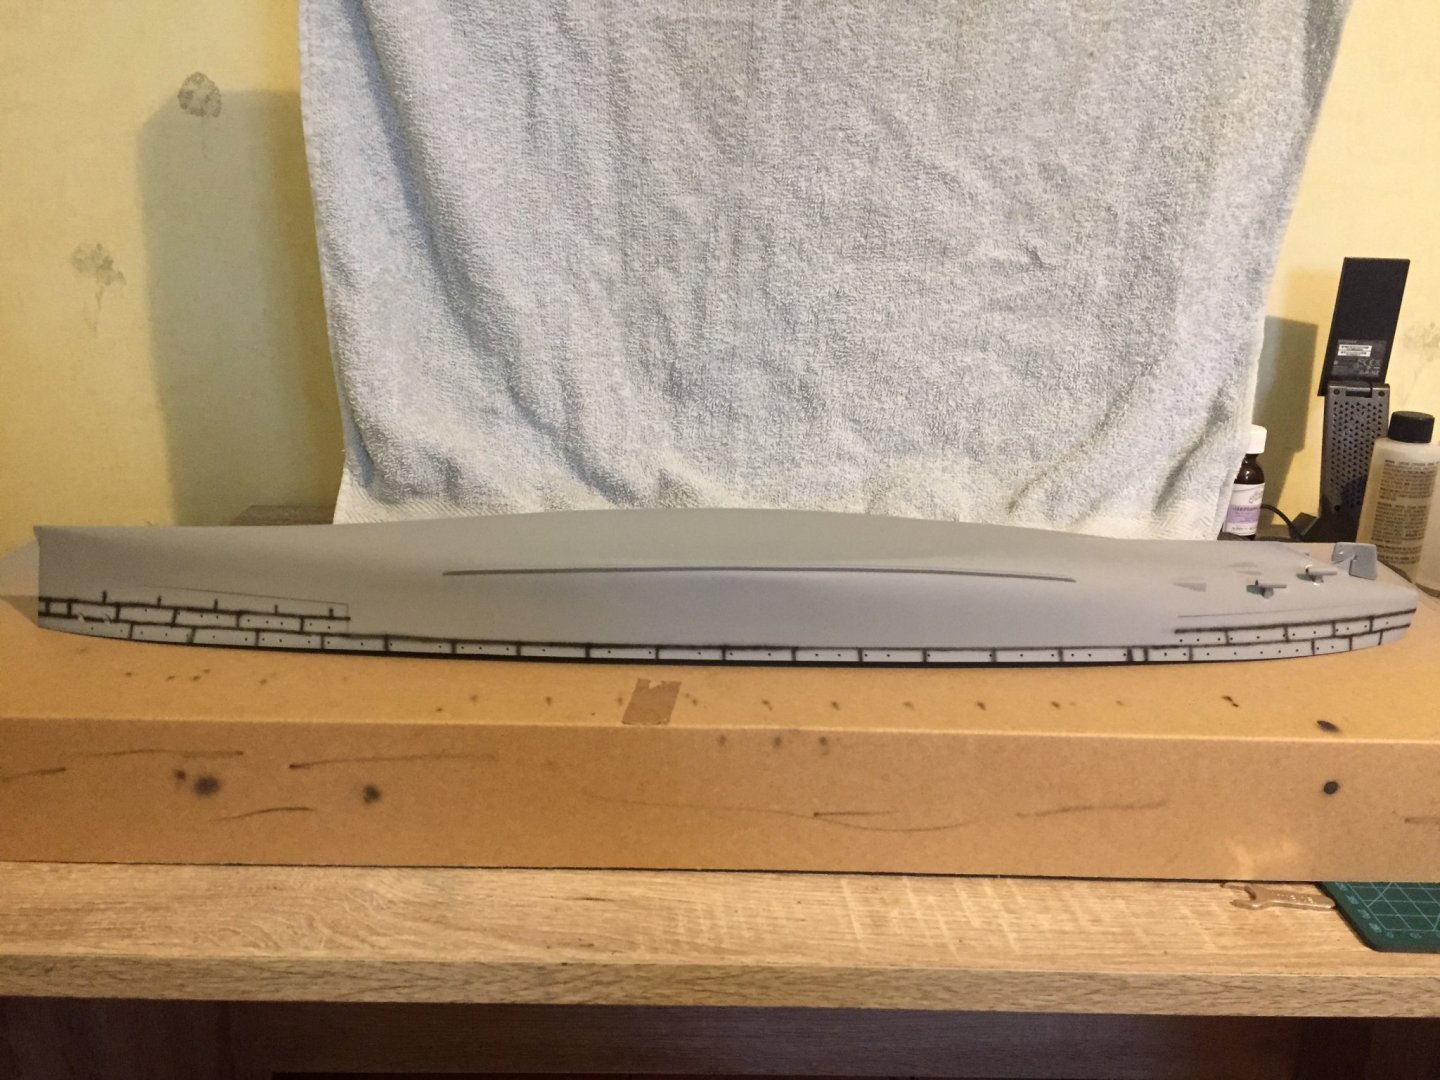
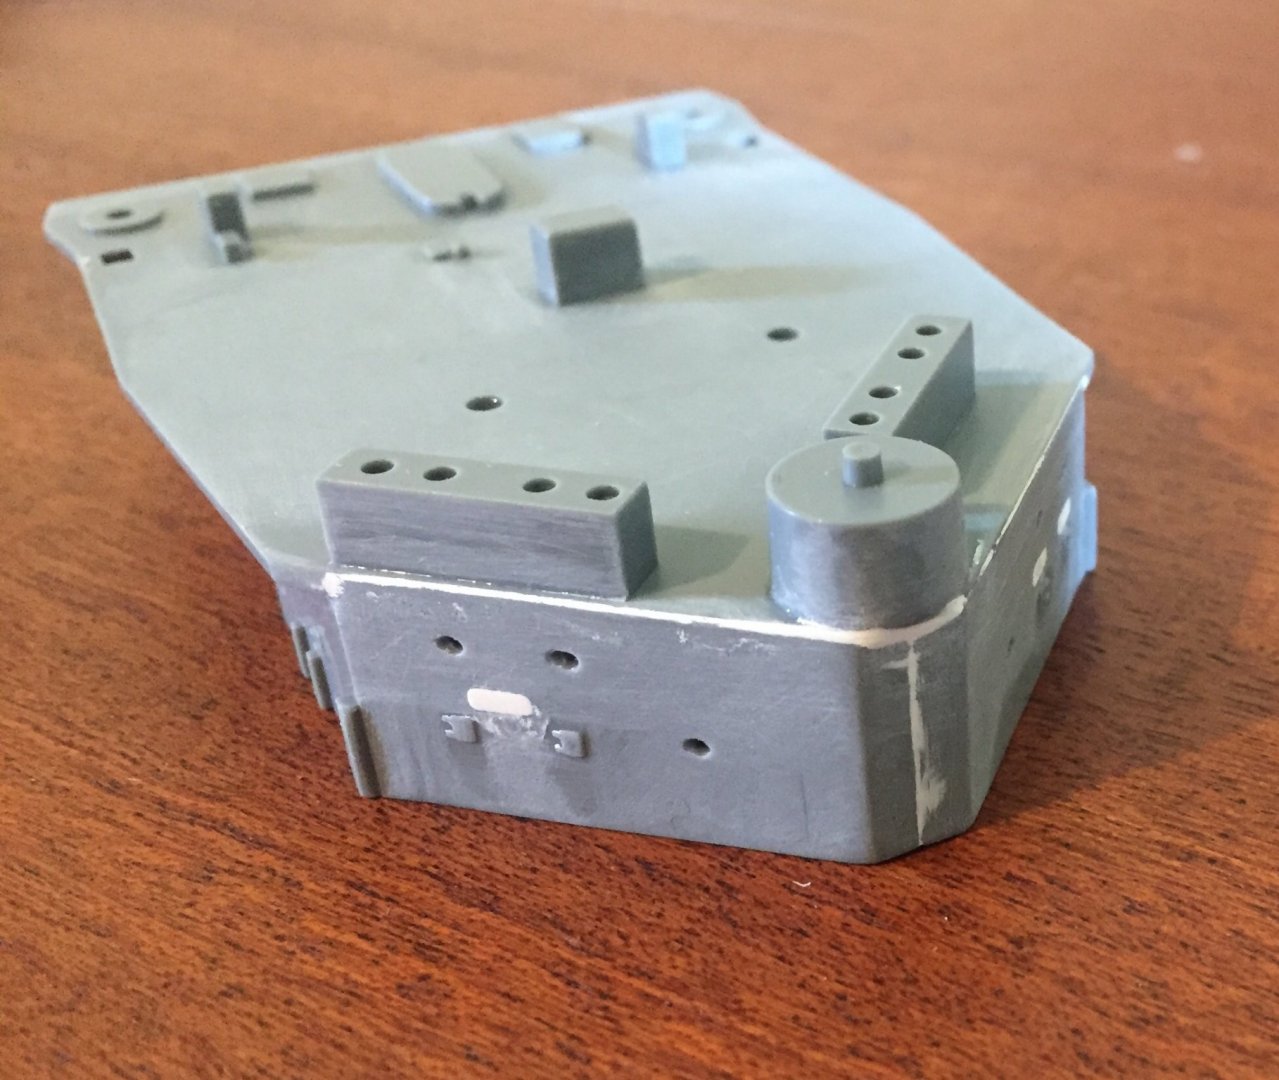
So didn’t end up making the Walrus... instead made a start on the hull. If I can paint the hull to a good level I think I’ll be pretty happy! first I scribed some panel lines. Have a plan about the end so won’t do scribing below waterline but will still preshade and paint fully. and once happy I primed. And then started on the preshade. Not sure if there is a proper order but I’ll paint the upper hull first then the lower hull and end with the black. or black then red... will see. Next I’ll do different shades of grey in side the panel lines so once I lay the base coat on the grey doesn’t have a perfect one shade look. I know this ship was pretty fresh so the finally weathering will be light as I dont want a brand new look. But hopefully if I get it right will give it some character, plus I really enjoy the weathering part and subtle is really effective... but first I’ve got to get this base coat right!! First layer of the modulation, will do this with different shades before the base coat. It’s an experiment really with mixing techniques so will see if it works or not soon enough. it takes a lot of air as it’s a big surface so my poor compressor, will have to spread it over a few days to help keep it cool.


- 211 replies
-
- 10
-
-
- prince of wales
- tamiya
- (and 2 more)
-
I think the size of the build has started to sink in as today I was very tempted to just build the Walrus plane and leave the rest!
- 211 replies
-
- 2
-
-
- prince of wales
- tamiya
- (and 2 more)
-
Thanks, takes awhile but the improvements it makes is well worth it I think! Great build there! I don’t have enough knowledge in the ship world to even know what most of the extra details on the hull you did are!! Thanks, I shall order some and give it a go.
- 211 replies
-
- 4
-
-
- prince of wales
- tamiya
- (and 2 more)
-
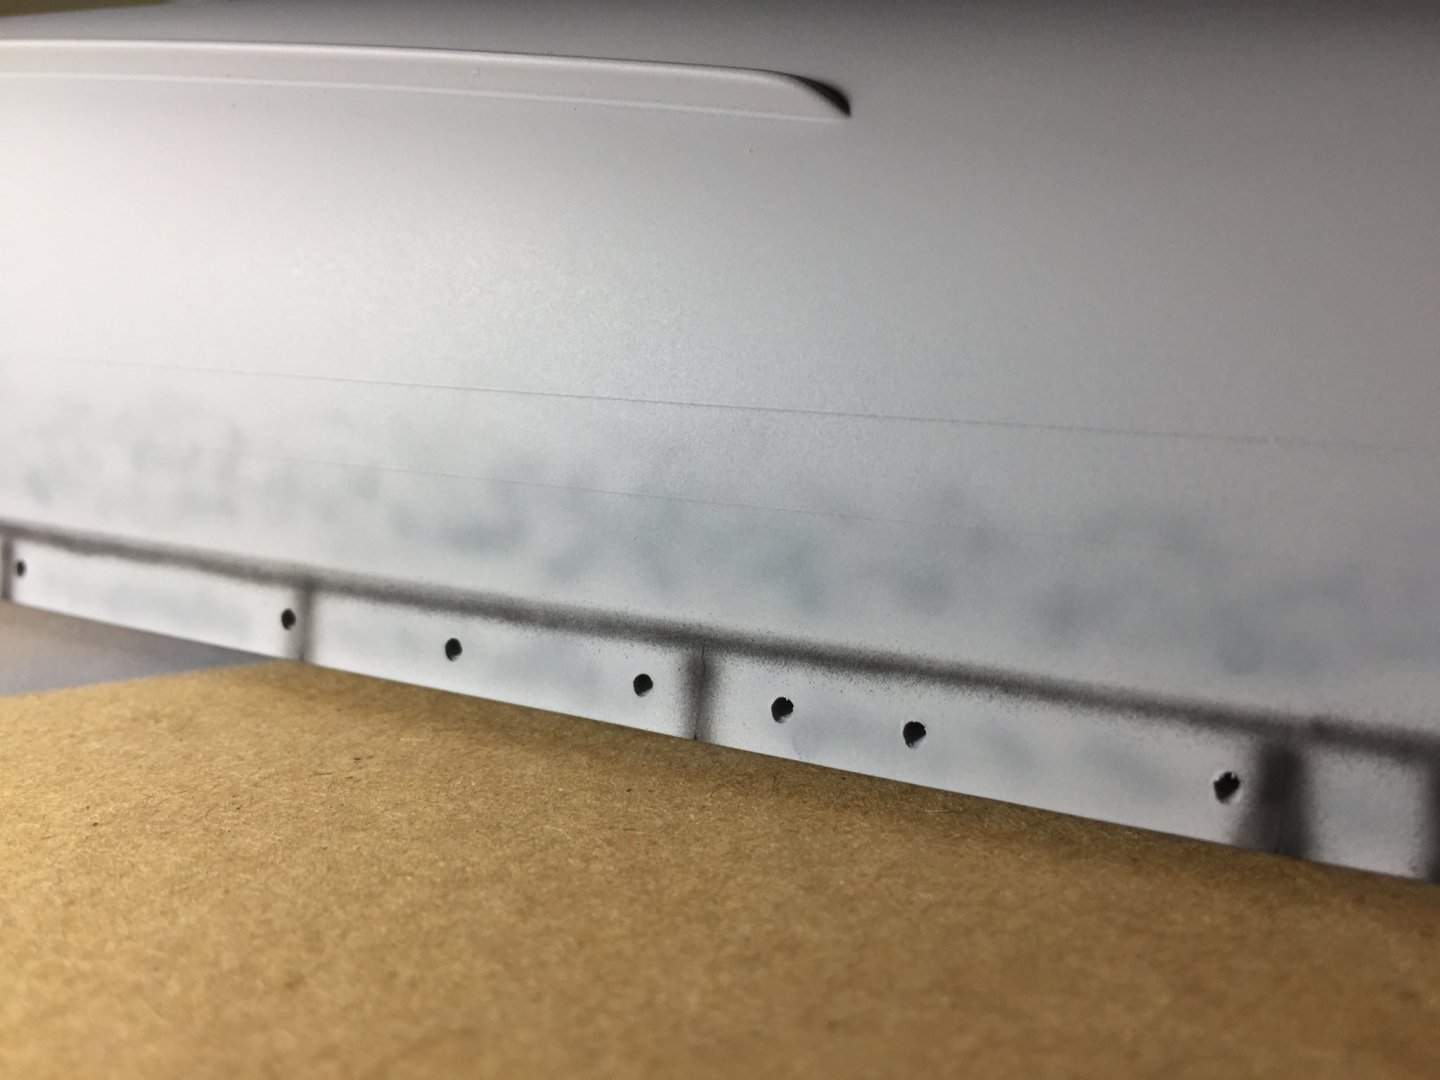
Thanks Steven, Had a watch learnt even more and found a few photos... in full 1941 style HD. The hull panel lines really stand out! I have to get on with scribing those so I can get painting!
- 211 replies
-
- 5
-
-
- prince of wales
- tamiya
- (and 2 more)
-
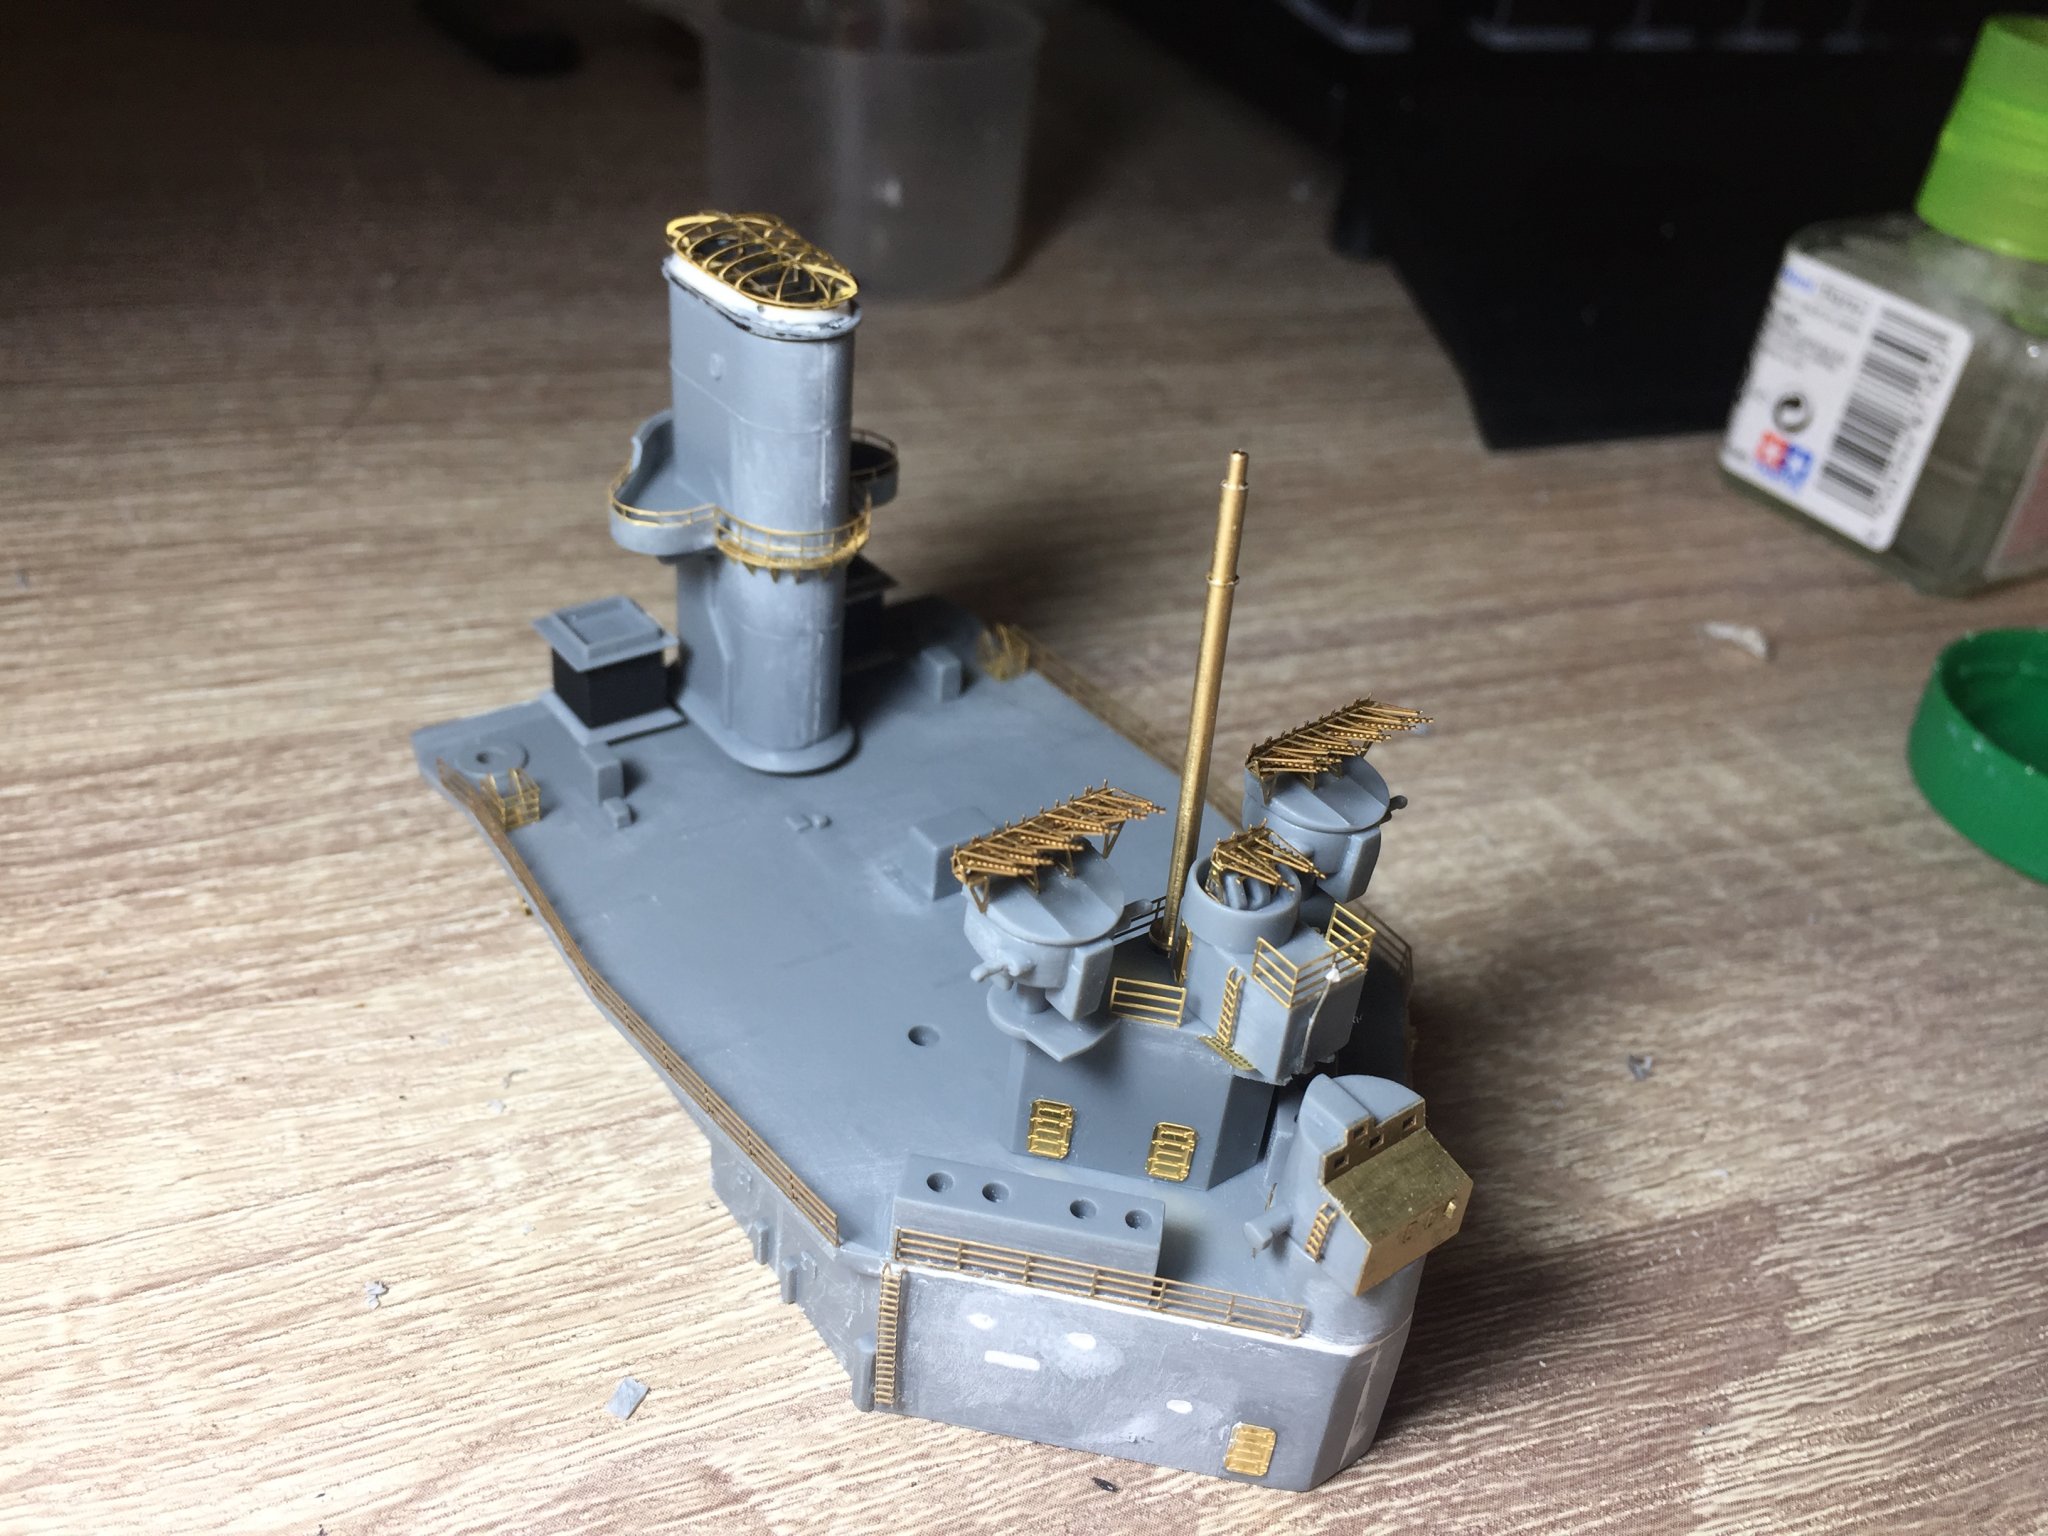
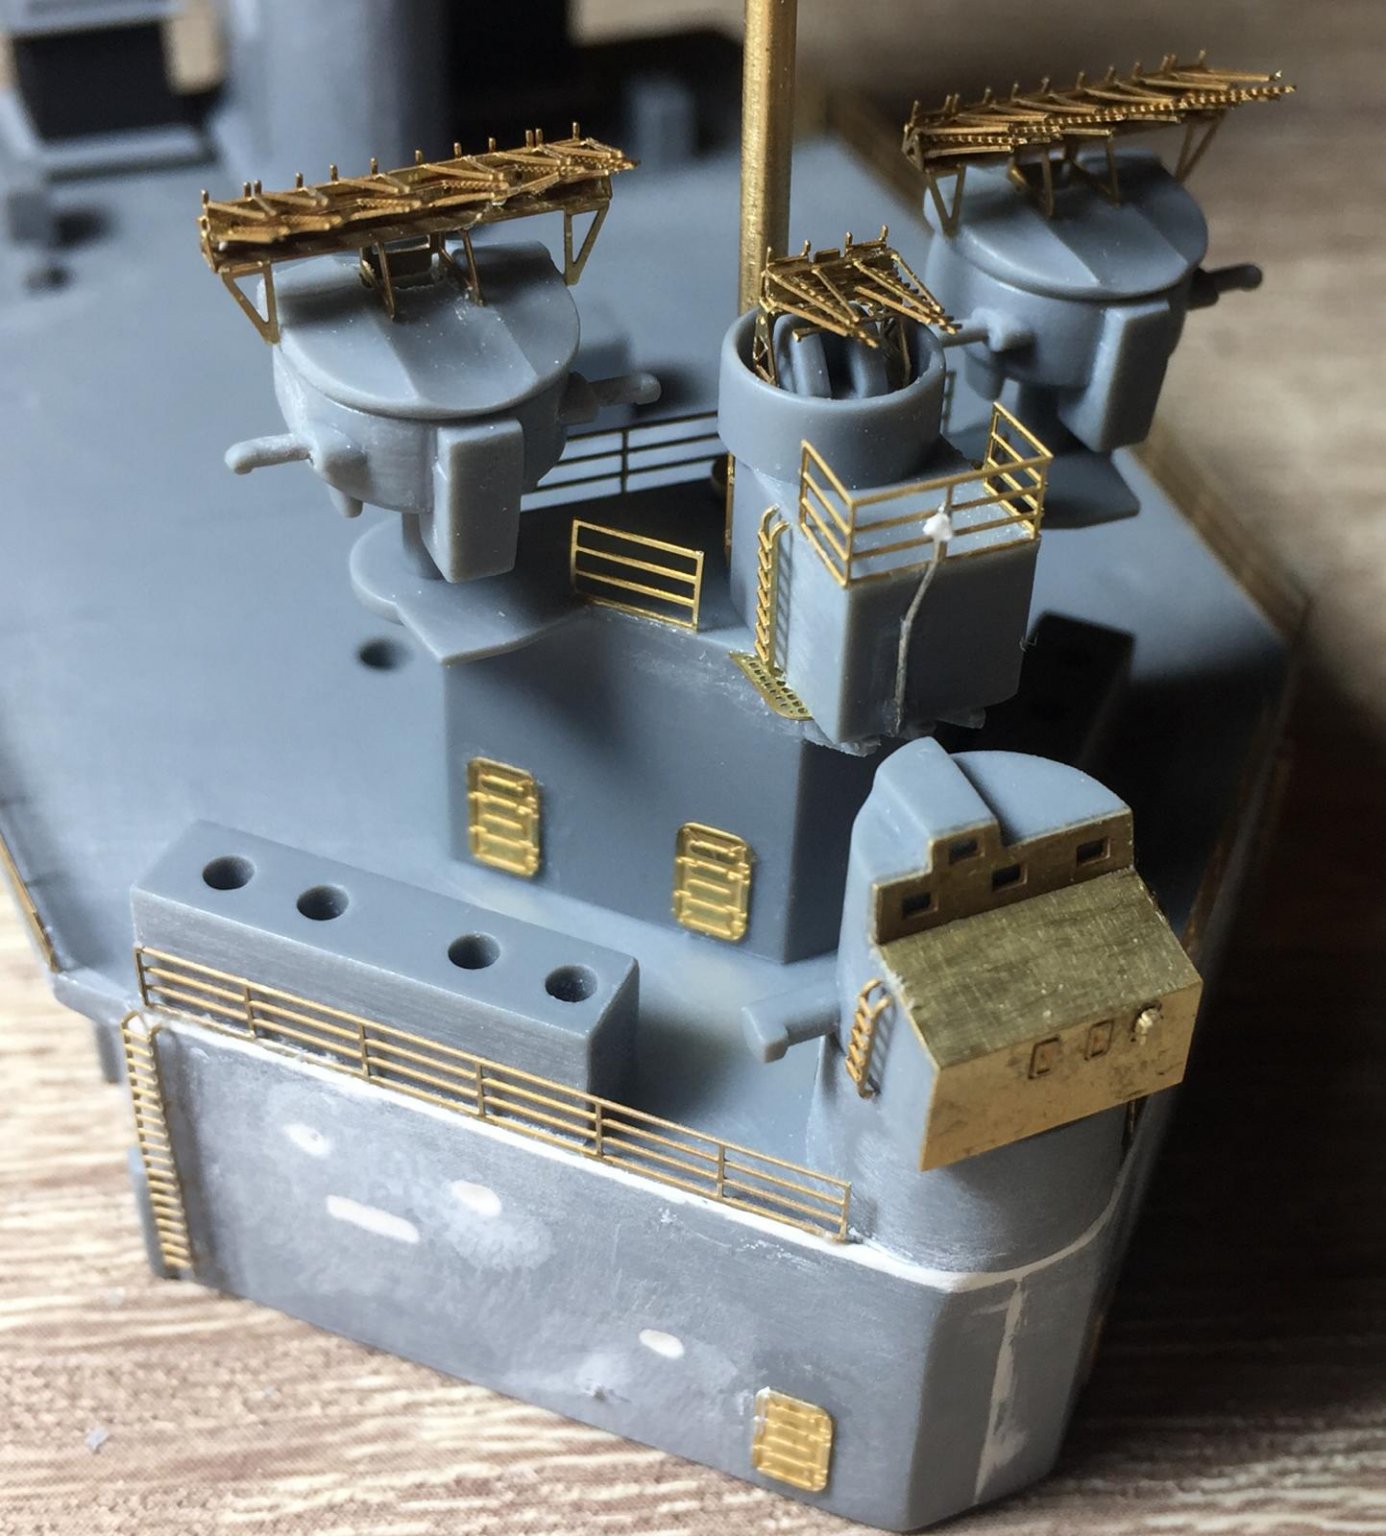
My plans finally arrived and so can look over what I’ve done and only found a few bits to change, a couple of ladders in the wrong place type thing. I’ll fix the main big ones but the rest will be ok. the kits funnel Vs the PE one on a milk bottle lid. a few details to add once they arrive in the mail and the rear superstructure will be ready to paint. i did some test painting and learnt it’s best to use primer on the brass as the Tamiya acrylics seem to scratch off pretty easy.


- 211 replies
-
- 13
-
-
- prince of wales
- tamiya
- (and 2 more)
-
BNA is where I got my Pontos set from, I quite like them. From what I can tell their Denier line is thin wire? Is it better than EZ line? Wire dodges me out alittle bit as a little kink is impossible to remove! Thanks, I’ve been using google a lot to try find out bits of info. Quite crazy how much you learn about a ship when you are trying to find out all the little details! I’d never thought about a crane on a battleship before... and here I am now trying to scour the web and plans to find out how their cables are rigged and what they were made out of!
- 211 replies
-
- 6
-
-
- prince of wales
- tamiya
- (and 2 more)
-
Thanks Tigerdvr. from what I can find looks like I’ll do it in a dark grey with maybe a splash of red or blue. My build is not from a specific time, but I like the idea of painting her in light grey instead of camo, that way I can try some shading and layering in the paint so it’s not one solid colour but 10 shades of the same colour. It’s the thing I want to try during this build as a new challenge. Which means technically I’m building the early version of her around the Bismarck time. But I looked into EZline and will see if I can get some, seems good but these things are almost impossible to get in NZ or the shipping is twice the price and the 1 month wait haha!
- 211 replies
-
- 5
-
-
- prince of wales
- tamiya
- (and 2 more)
-
I’ve got 2 questions if anyone can help.. 1. Apart from the real wood main deck, what colour are the superstructure upper decks? From what I can tell maybe a dark grey? 2 once I’ve put the Pontos wood deck on how do you get under the deck to secure the main guns? Is it strong enough to lift the 3 deck parts off, secure the main guns then glue the deck down in one go?
- 211 replies
-
- 6
-
-
- prince of wales
- tamiya
- (and 2 more)
-
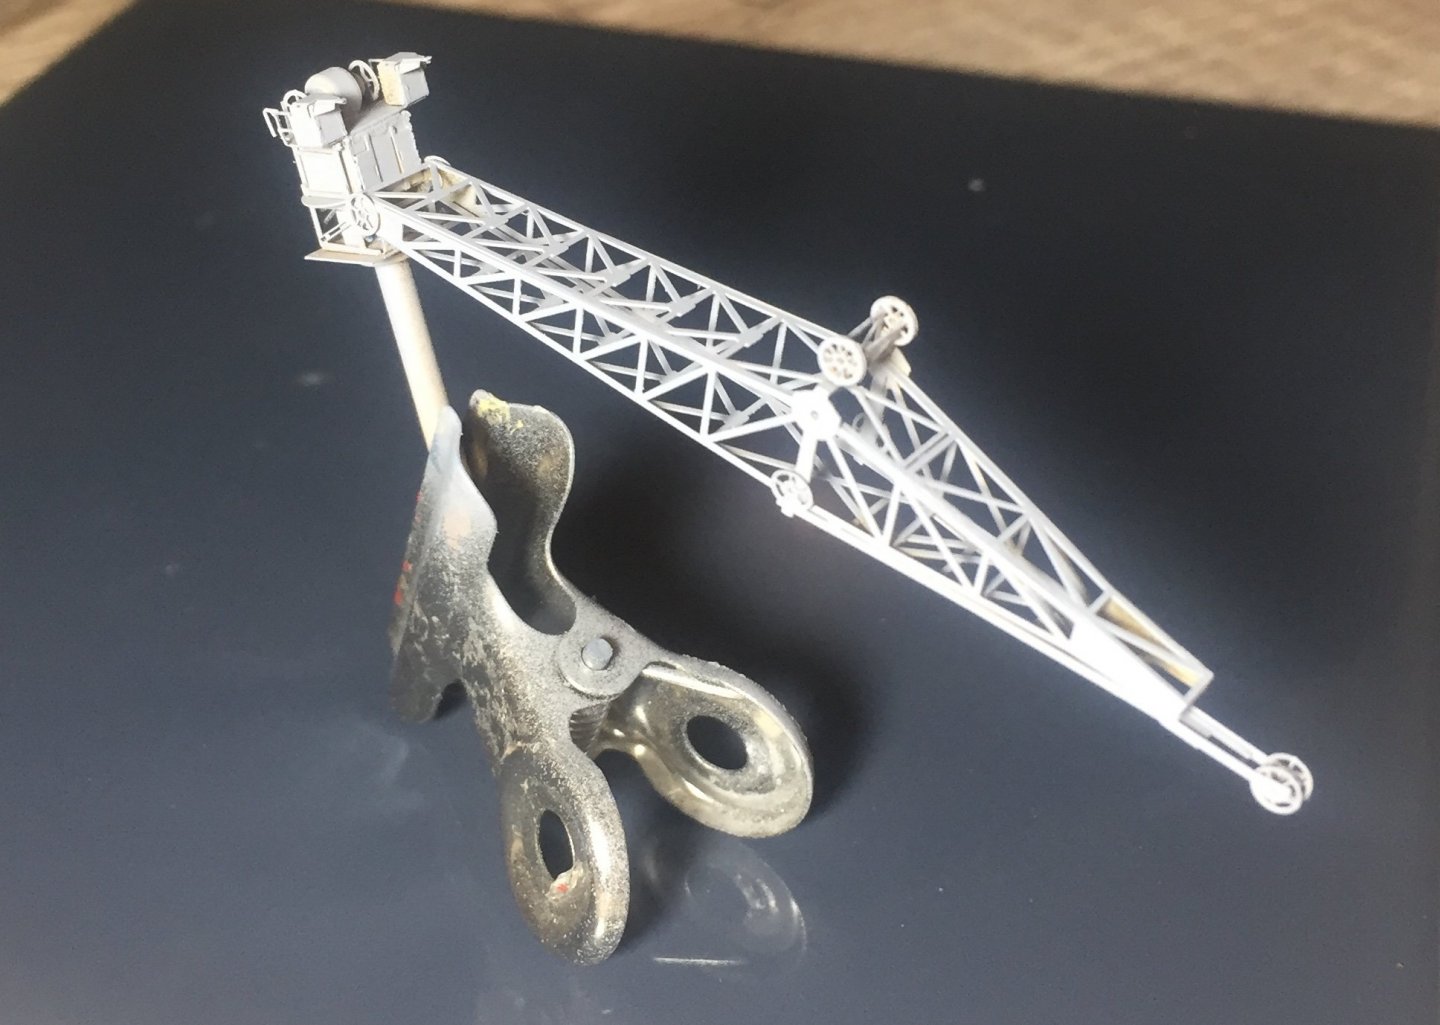
Thanks man, I did zoom in as much as I could on your KGV crane build pics to help me out and a lot of the other PE parts I’ll be referring to that build to help me make sense of it! Haha yea already I’m not happy with the crane rigging as it’s gone saggy so will have to take it off and find a better way! Subsections is a good idea, I’ll do the rear super structure and then get the hull underway.
- 211 replies
-
- 6
-
-
- prince of wales
- tamiya
- (and 2 more)
-
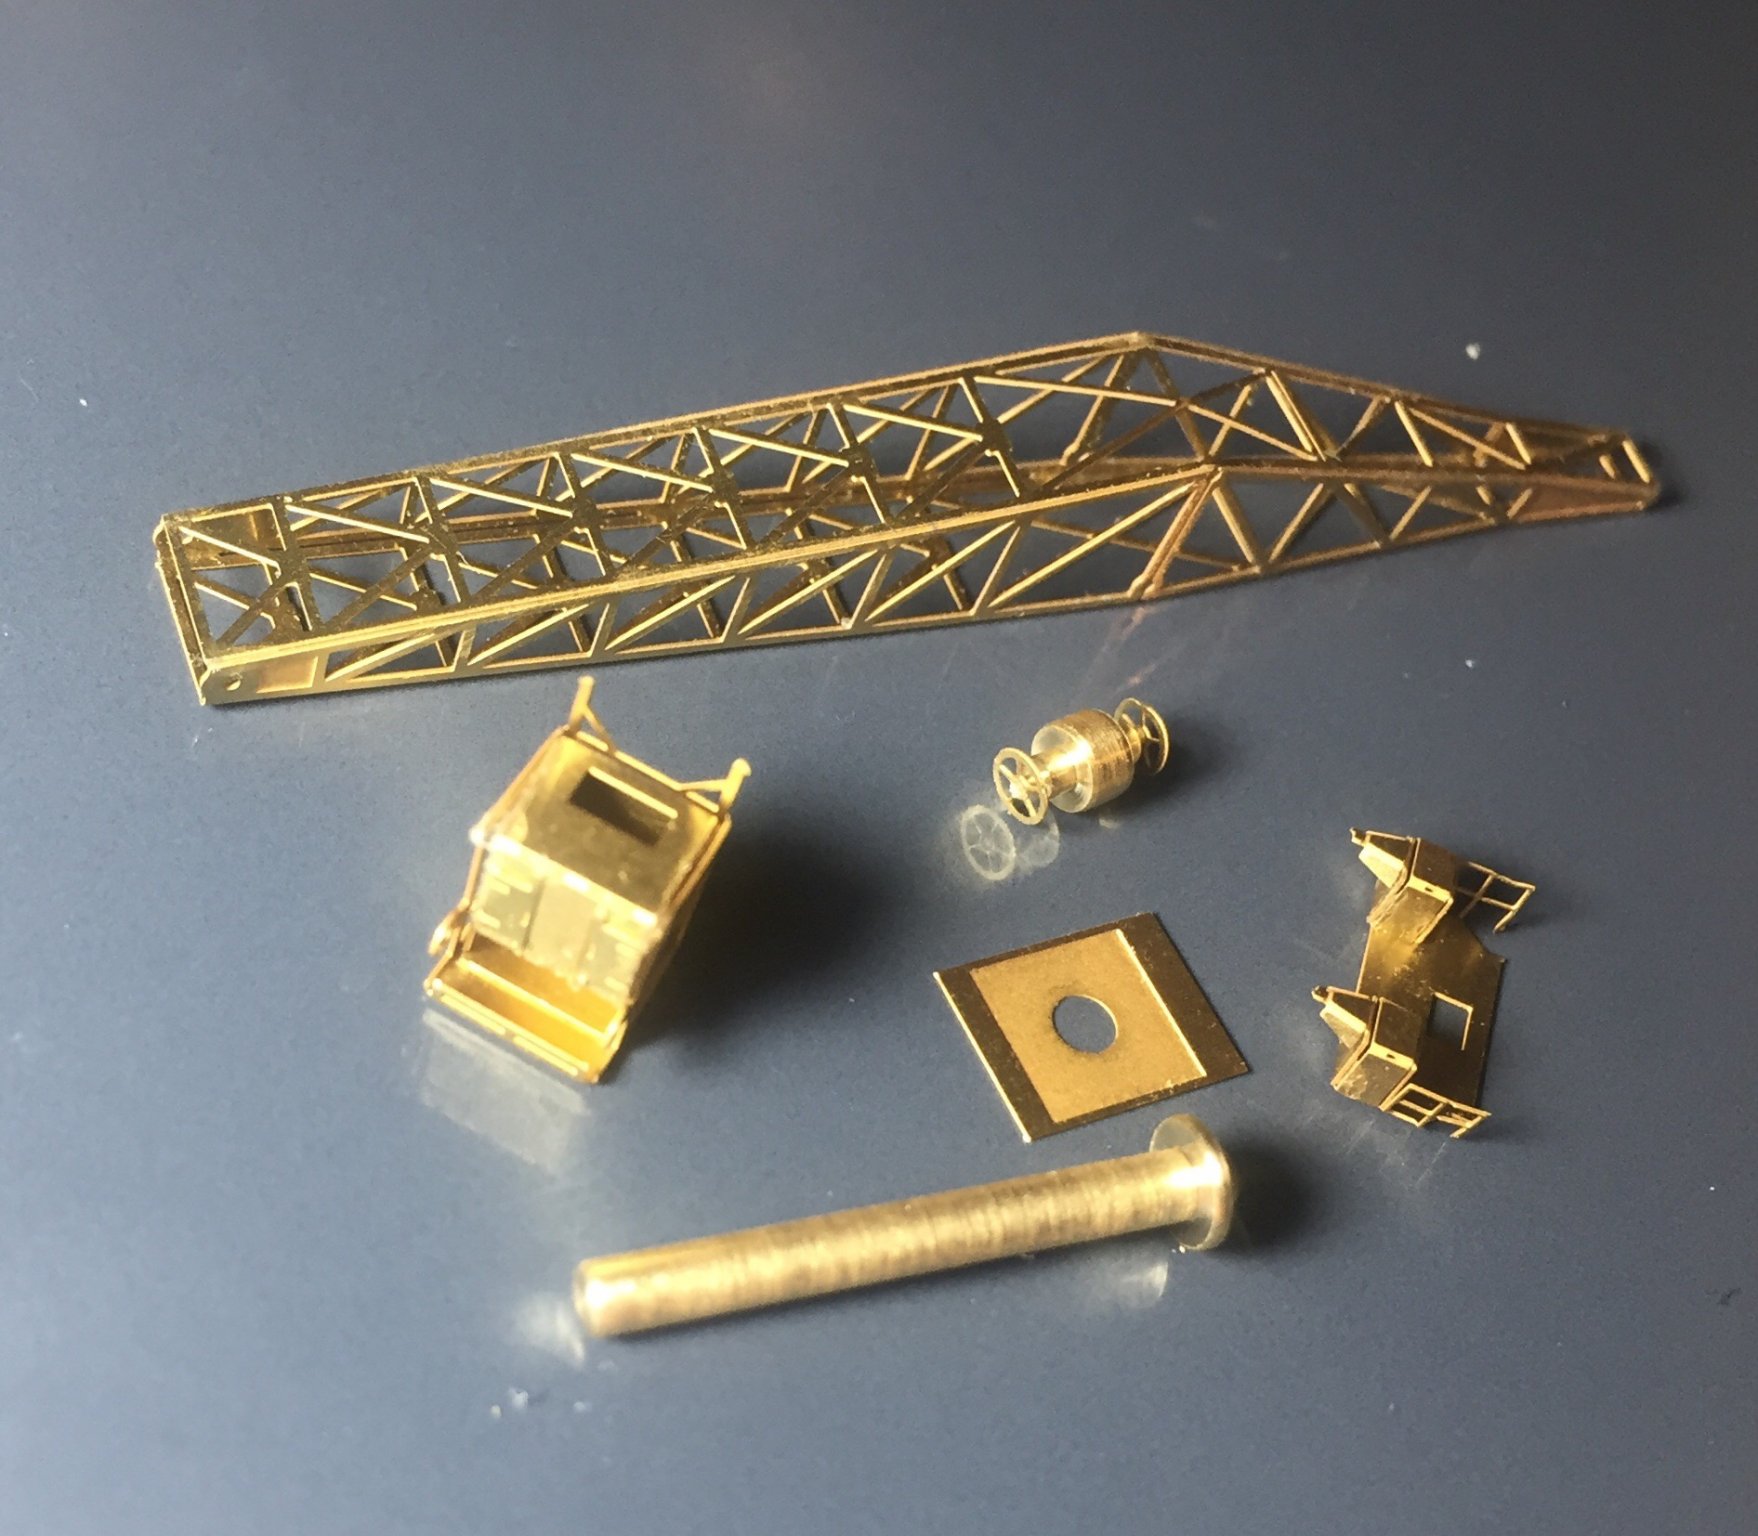
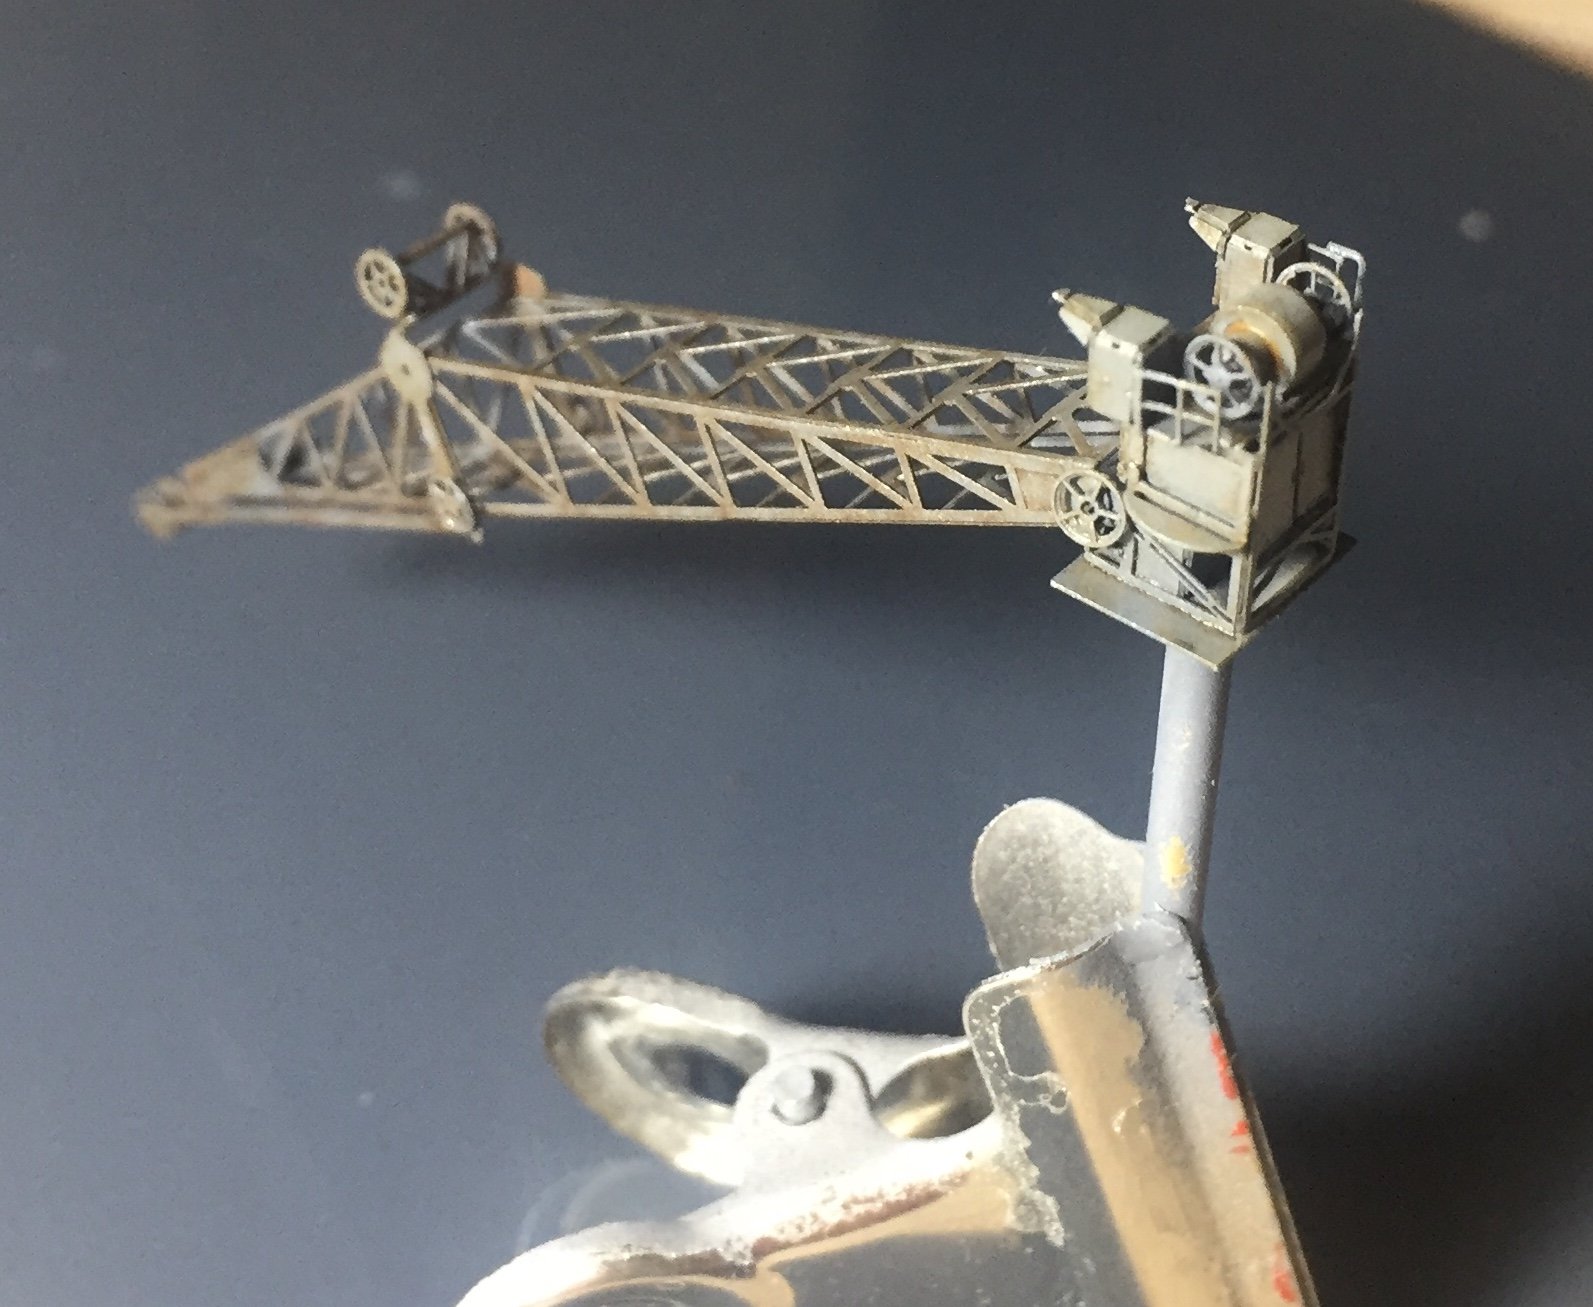
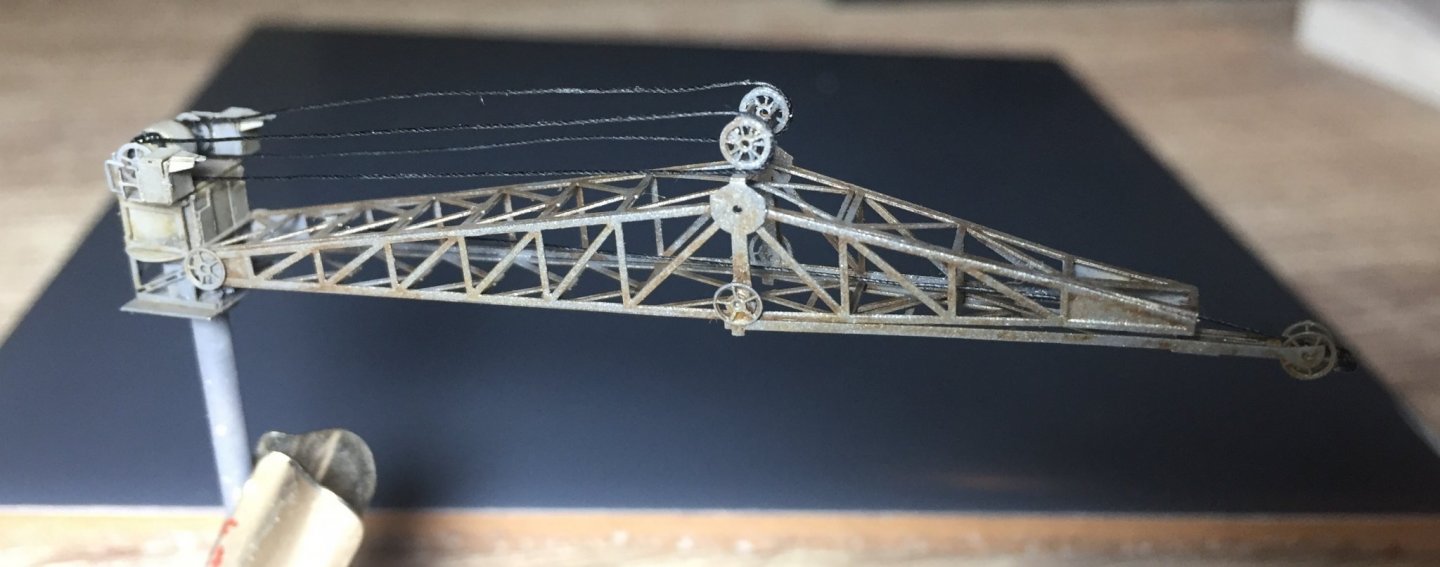
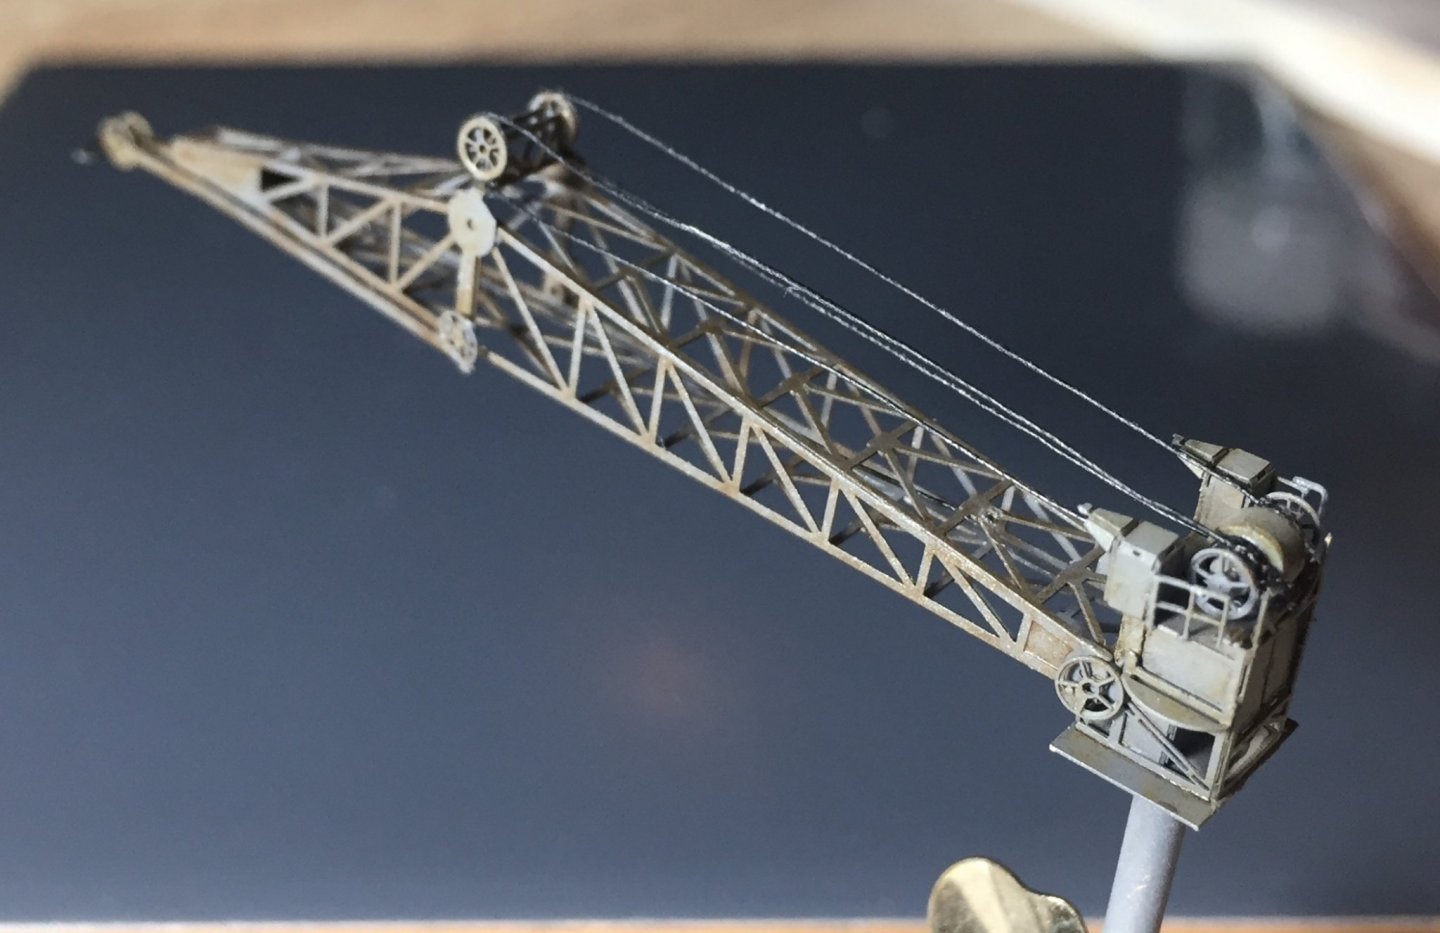
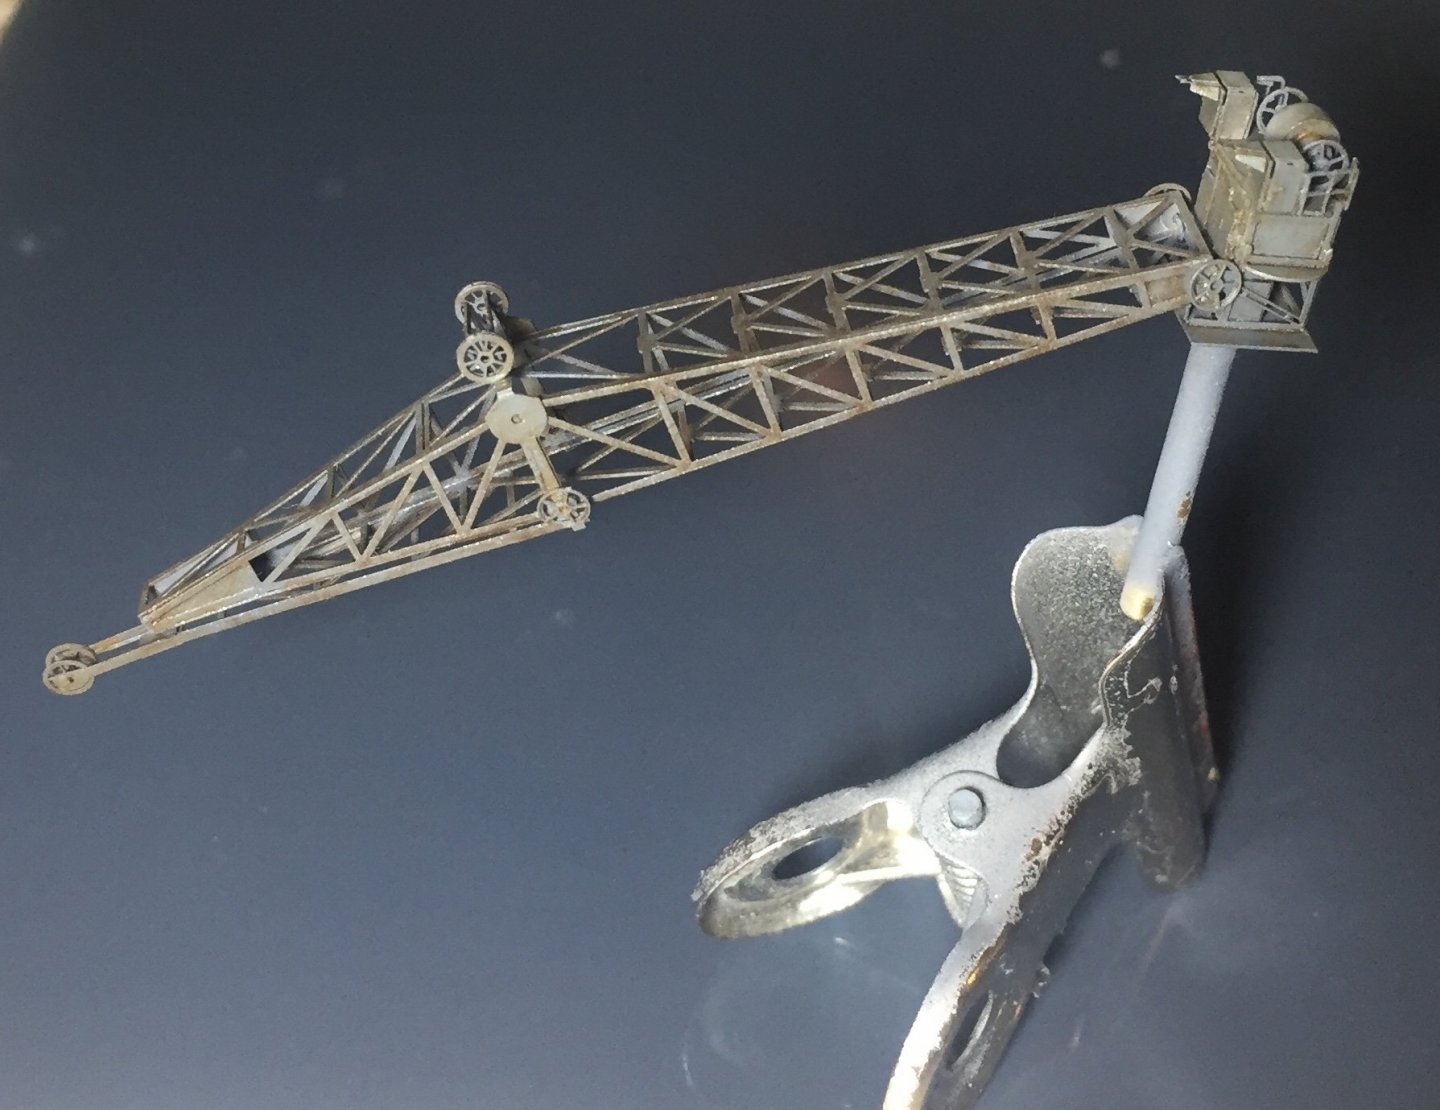
Had better call that one complete crane, otherwise I’ll keep tinkering with it forever while I have a whole ship to build! At this rate I might be done by Christmas!!
- 211 replies
-
- 15
-
-
- prince of wales
- tamiya
- (and 2 more)
-
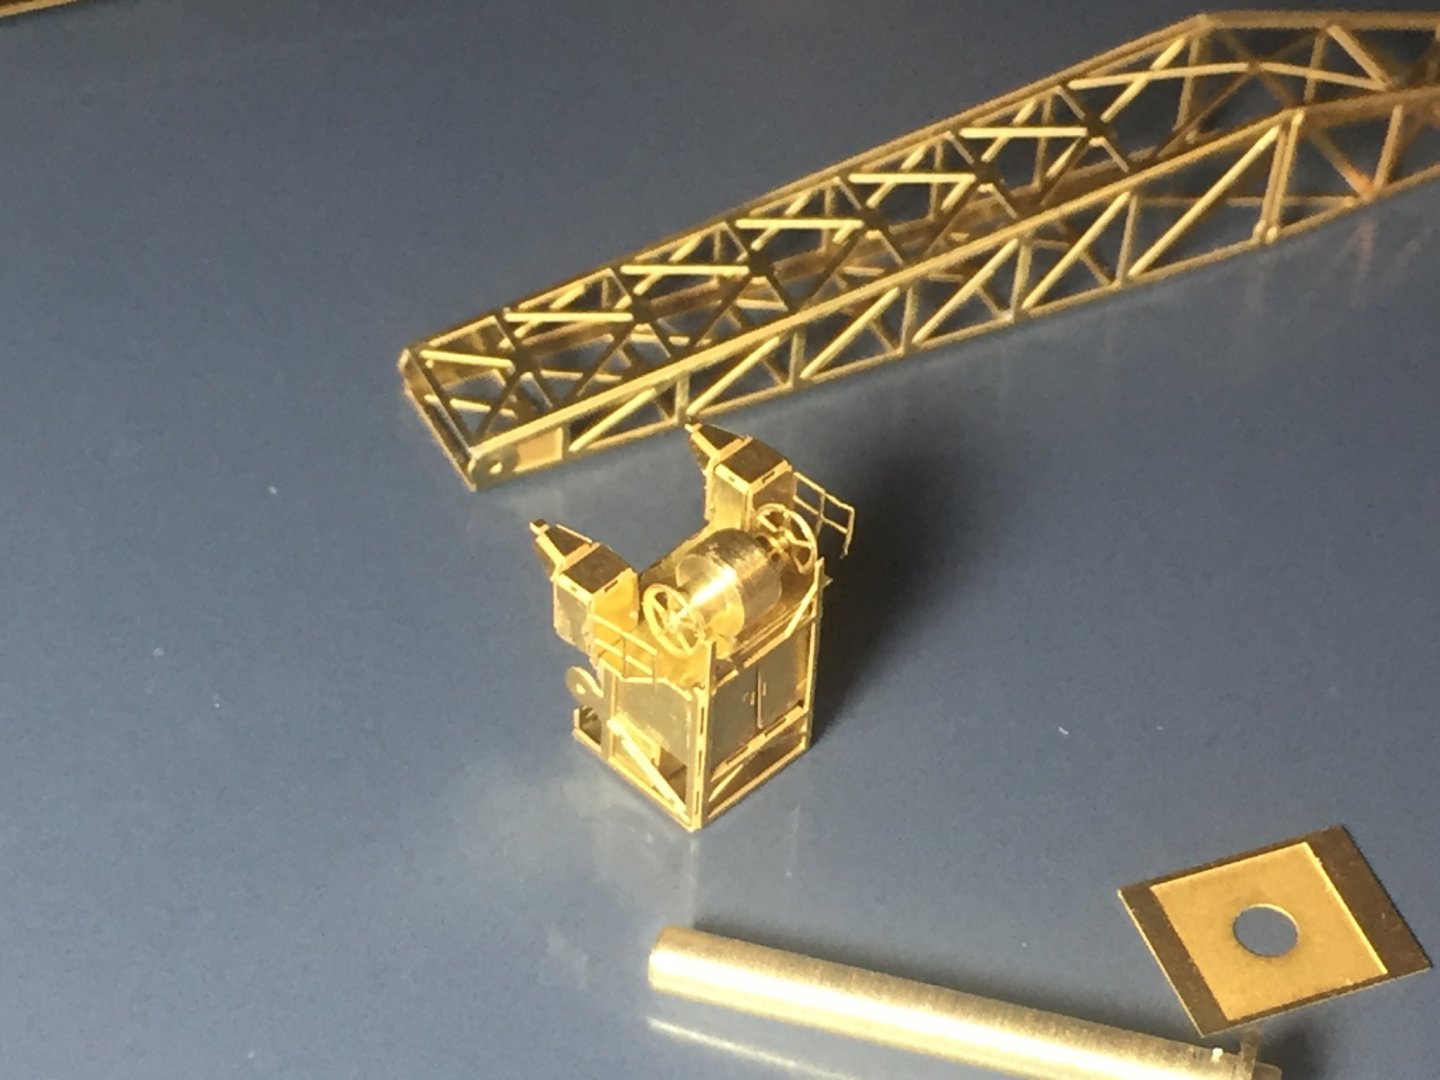
Thanks mate, it good fun so far and yea very fiddly. PE is a game for patient people I think! Started making a crane today, basically no instructions so took hours! Next one should go together much quicker.


- 211 replies
-
- 13
-
-
- prince of wales
- tamiya
- (and 2 more)
-
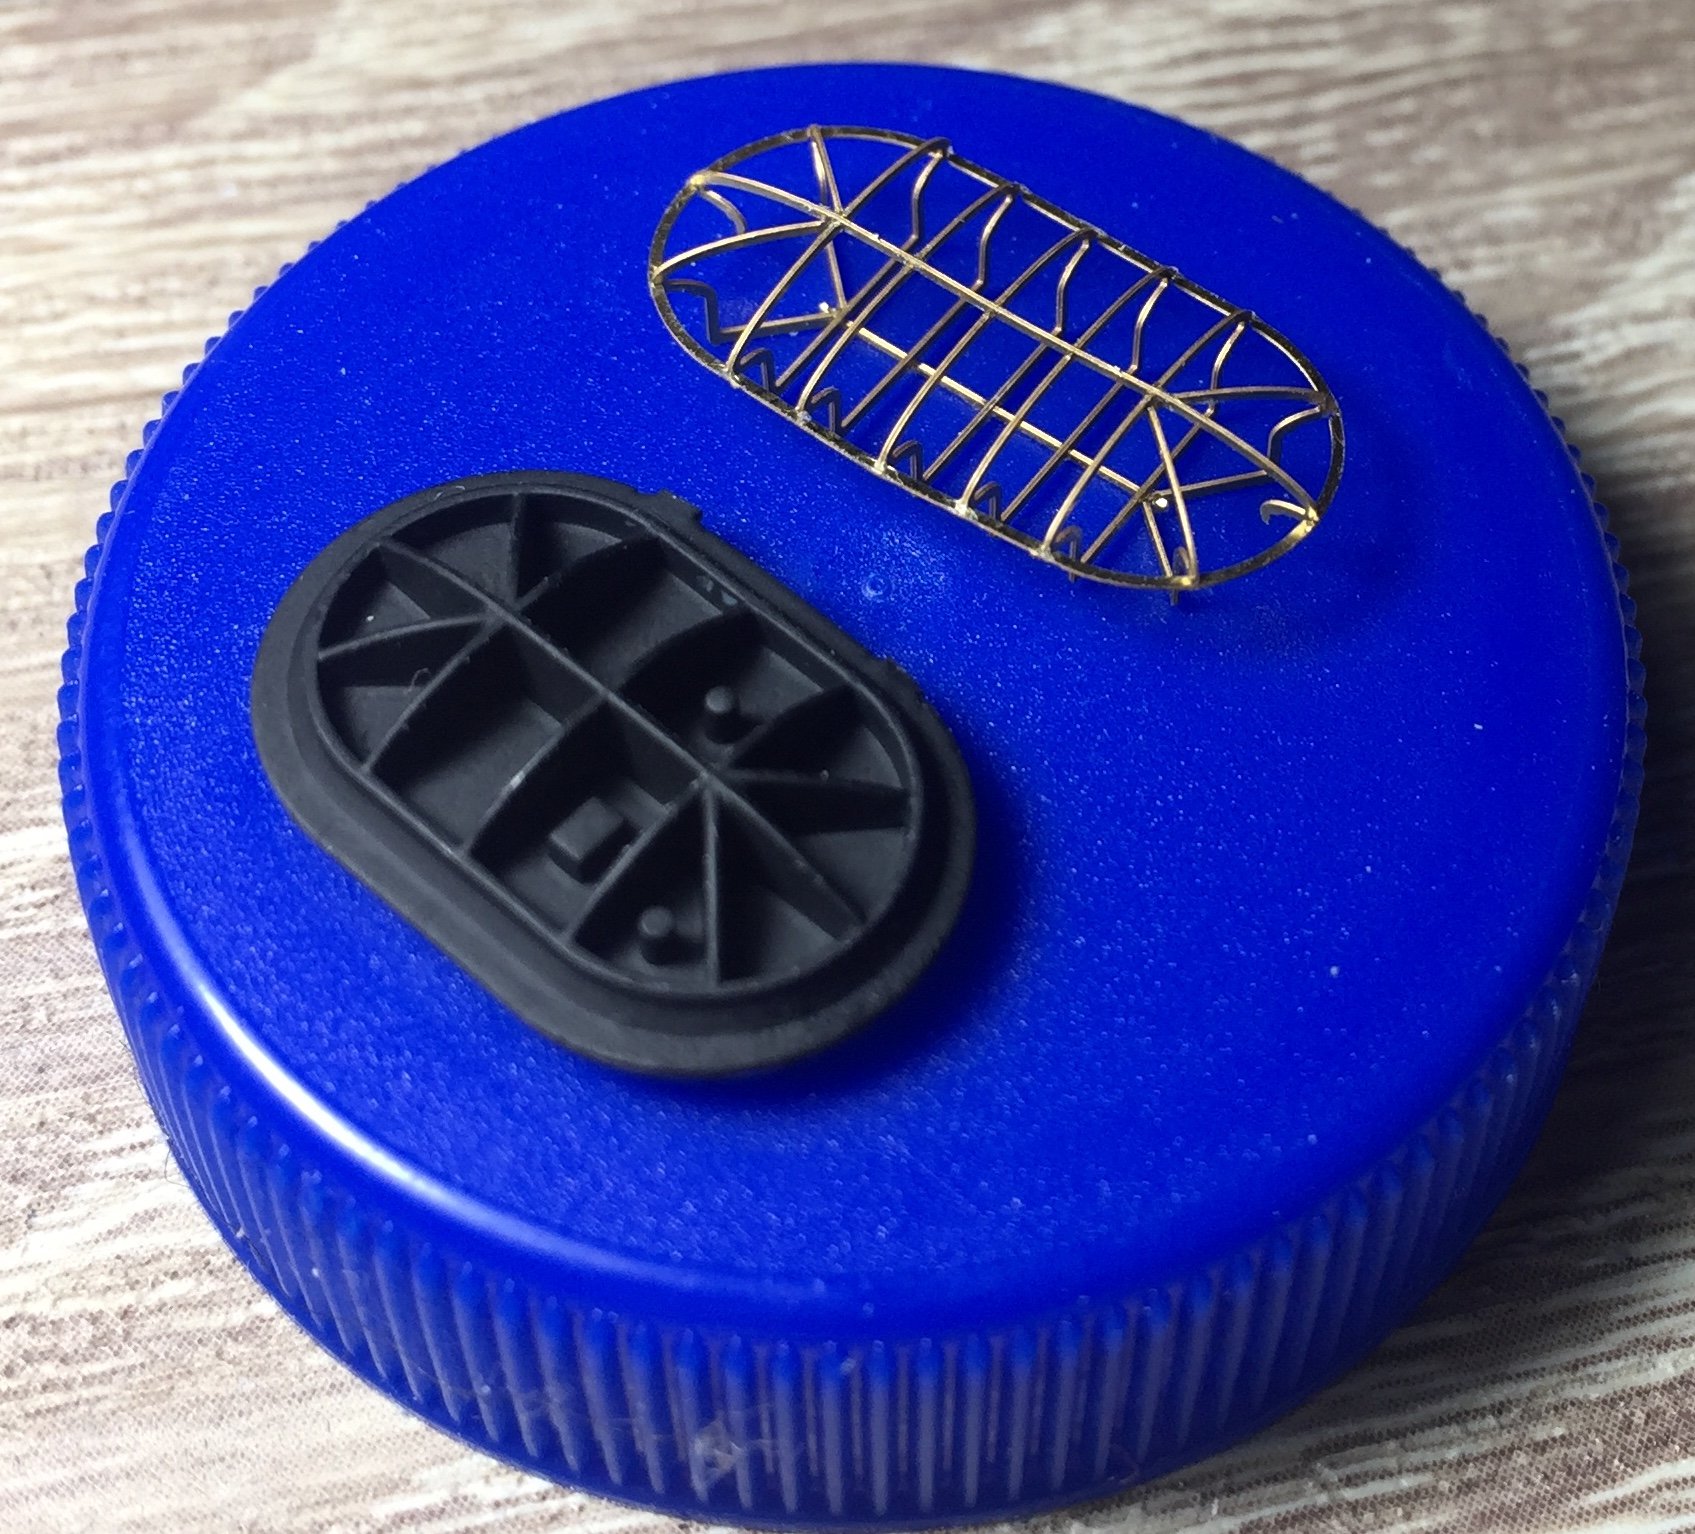
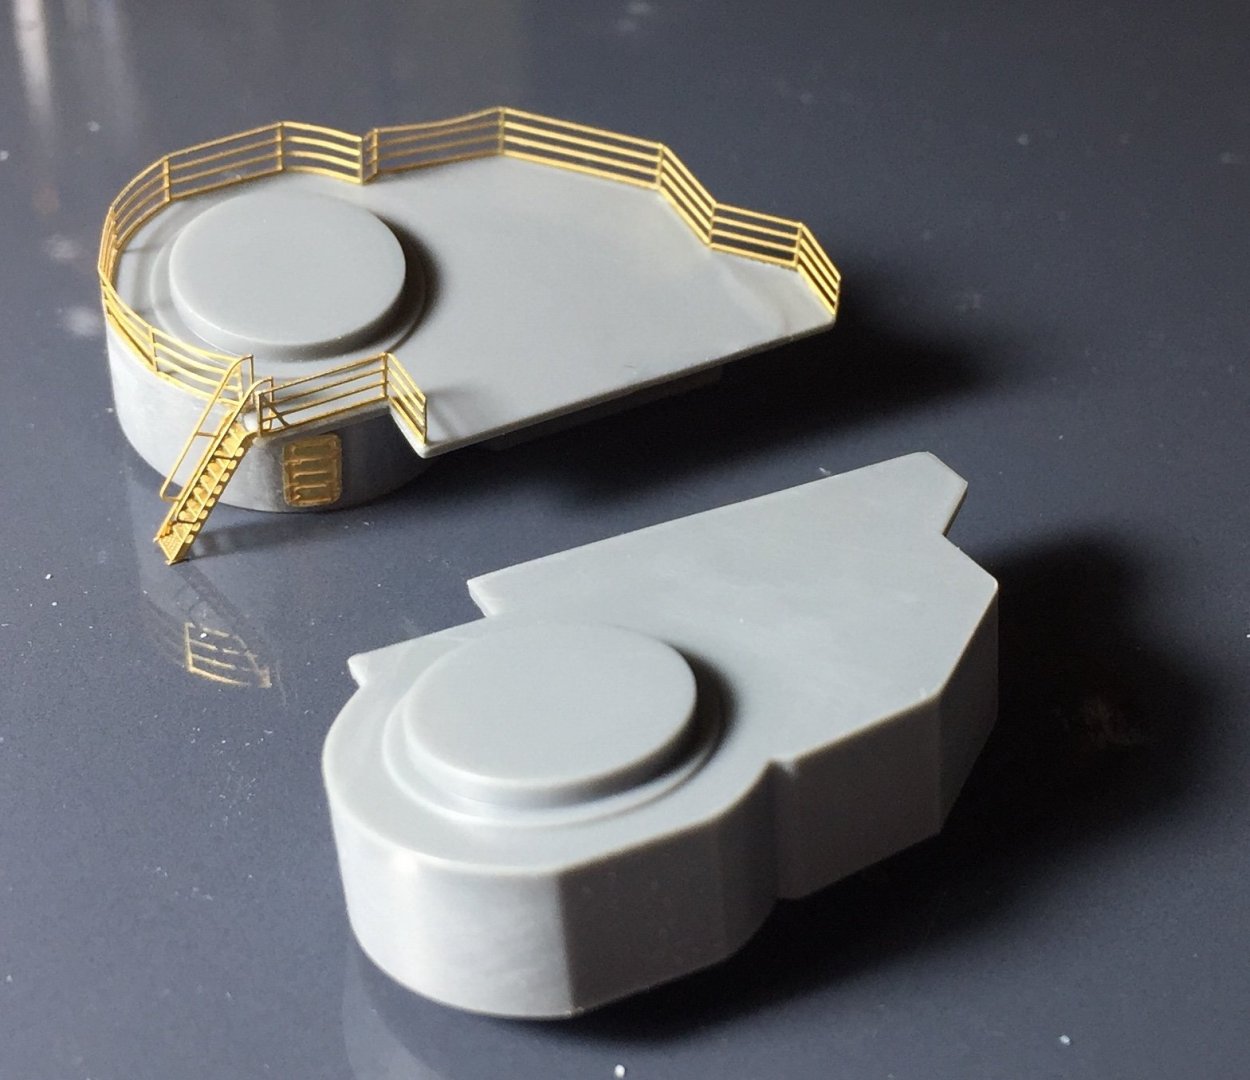
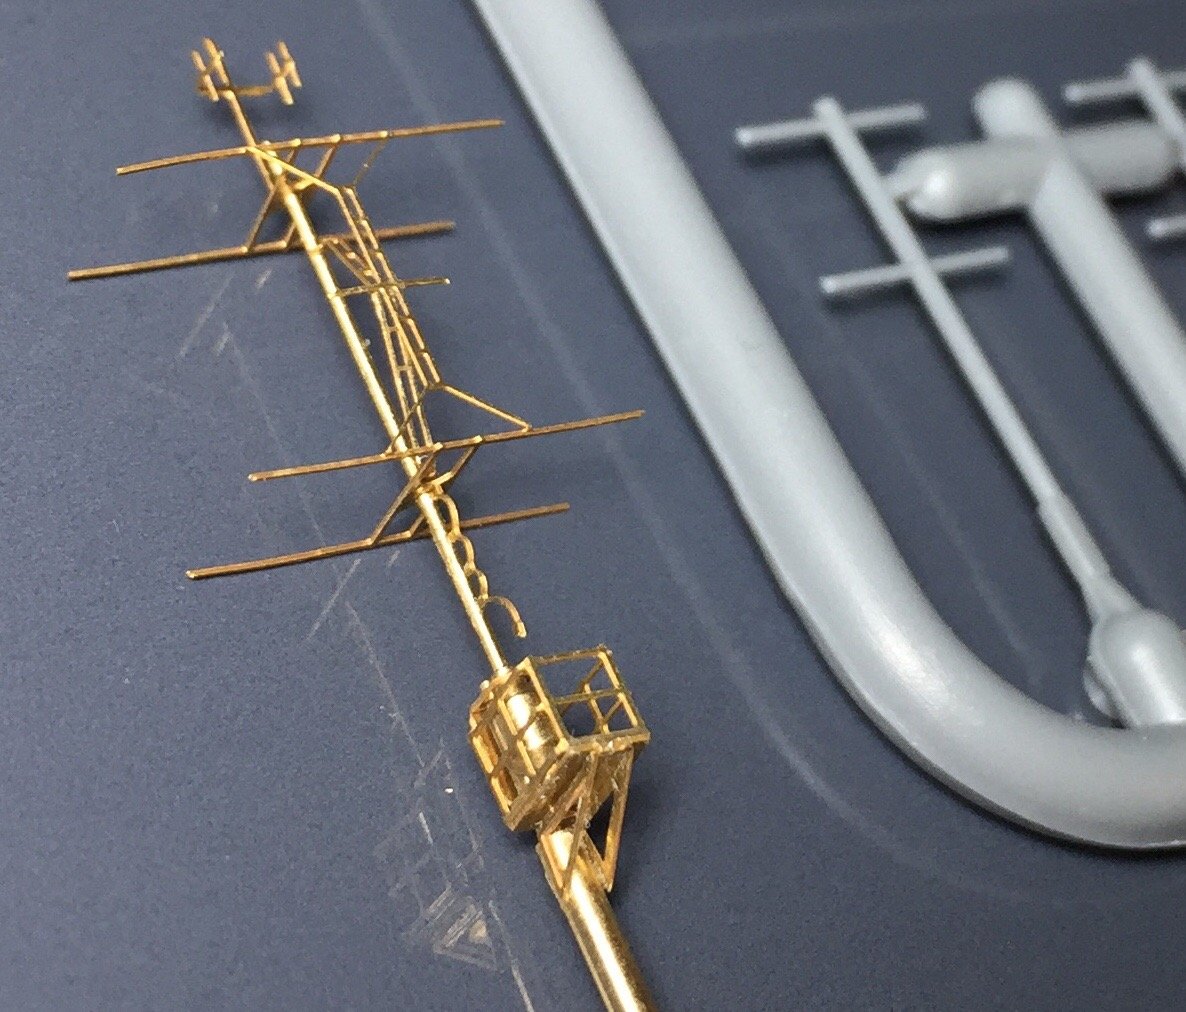
So begins some PE construction, Pontos instructions are quite awful and I almost emailed them to confirm half the instructions weren’t missing from my set... but once sorted out the increase in quality is huge!! The top section of the main mast in PE next to the same part of the original kit part
- 211 replies
-
- 15
-
-
- prince of wales
- tamiya
- (and 2 more)
-
While I wait for supplies, plans and other stuff I will start on the rear superstructure as the two sides were already glued together. I just cleaned up the edges and used some putty to deal to gaps

- 211 replies
-
- 9
-
-
- prince of wales
- tamiya
- (and 2 more)
-
Hello, This is my first ever build log and my first ‘proper’ ship build attempt. Ive followed a few builds on here as research and to see how things go together so thought I’d show my build too. It will be a slow one I think as I’ll try give it a good go and also tough to find much info on Her except low res pics from far awayso it won’t be a super accurate one as I’ll just have to wing bits I don’t know about. I got this kit for lockdown and from someone that had cut a few bits off but hadn’t really done any building.
- 211 replies
-
- 11
-
-
- prince of wales
- tamiya
- (and 2 more)