Lt. Biggles
-
Posts
339 -
Joined
-
Last visited


-
 AJohnson reacted to a post in a topic:
De Havilland Tiger Moth by Lt. Biggles - Airfix - 1/48 - PLASTIC
AJohnson reacted to a post in a topic:
De Havilland Tiger Moth by Lt. Biggles - Airfix - 1/48 - PLASTIC
-
 Danstream reacted to a post in a topic:
De Havilland Tiger Moth by Lt. Biggles - Airfix - 1/48 - PLASTIC
Danstream reacted to a post in a topic:
De Havilland Tiger Moth by Lt. Biggles - Airfix - 1/48 - PLASTIC
-
Landlubber Mike reacted to a post in a topic:
De Havilland Tiger Moth by Lt. Biggles - Airfix - 1/48 - PLASTIC
-
Old Collingwood reacted to a post in a topic:
De Havilland Tiger Moth by Lt. Biggles - Airfix - 1/48 - PLASTIC
-
Lt. Biggles reacted to a post in a topic:
USS Essex 1799 Frigate by rlwhitt - FINISHED - Model Shipways - 1:76
-
cotrecerf reacted to a post in a topic:
De Havilland Tiger Moth by Lt. Biggles - Airfix - 1/48 - PLASTIC
-
thibaultron reacted to a post in a topic:
De Havilland Tiger Moth by Lt. Biggles - Airfix - 1/48 - PLASTIC
-
thibaultron reacted to a post in a topic:
De Havilland Tiger Moth by Lt. Biggles - Airfix - 1/48 - PLASTIC
-
thibaultron reacted to a post in a topic:
De Havilland Tiger Moth by Lt. Biggles - Airfix - 1/48 - PLASTIC
-
thibaultron reacted to a post in a topic:
De Havilland Tiger Moth by Lt. Biggles - Airfix - 1/48 - PLASTIC
-
Charter33 reacted to a post in a topic:
De Havilland Tiger Moth by Lt. Biggles - Airfix - 1/48 - PLASTIC
-
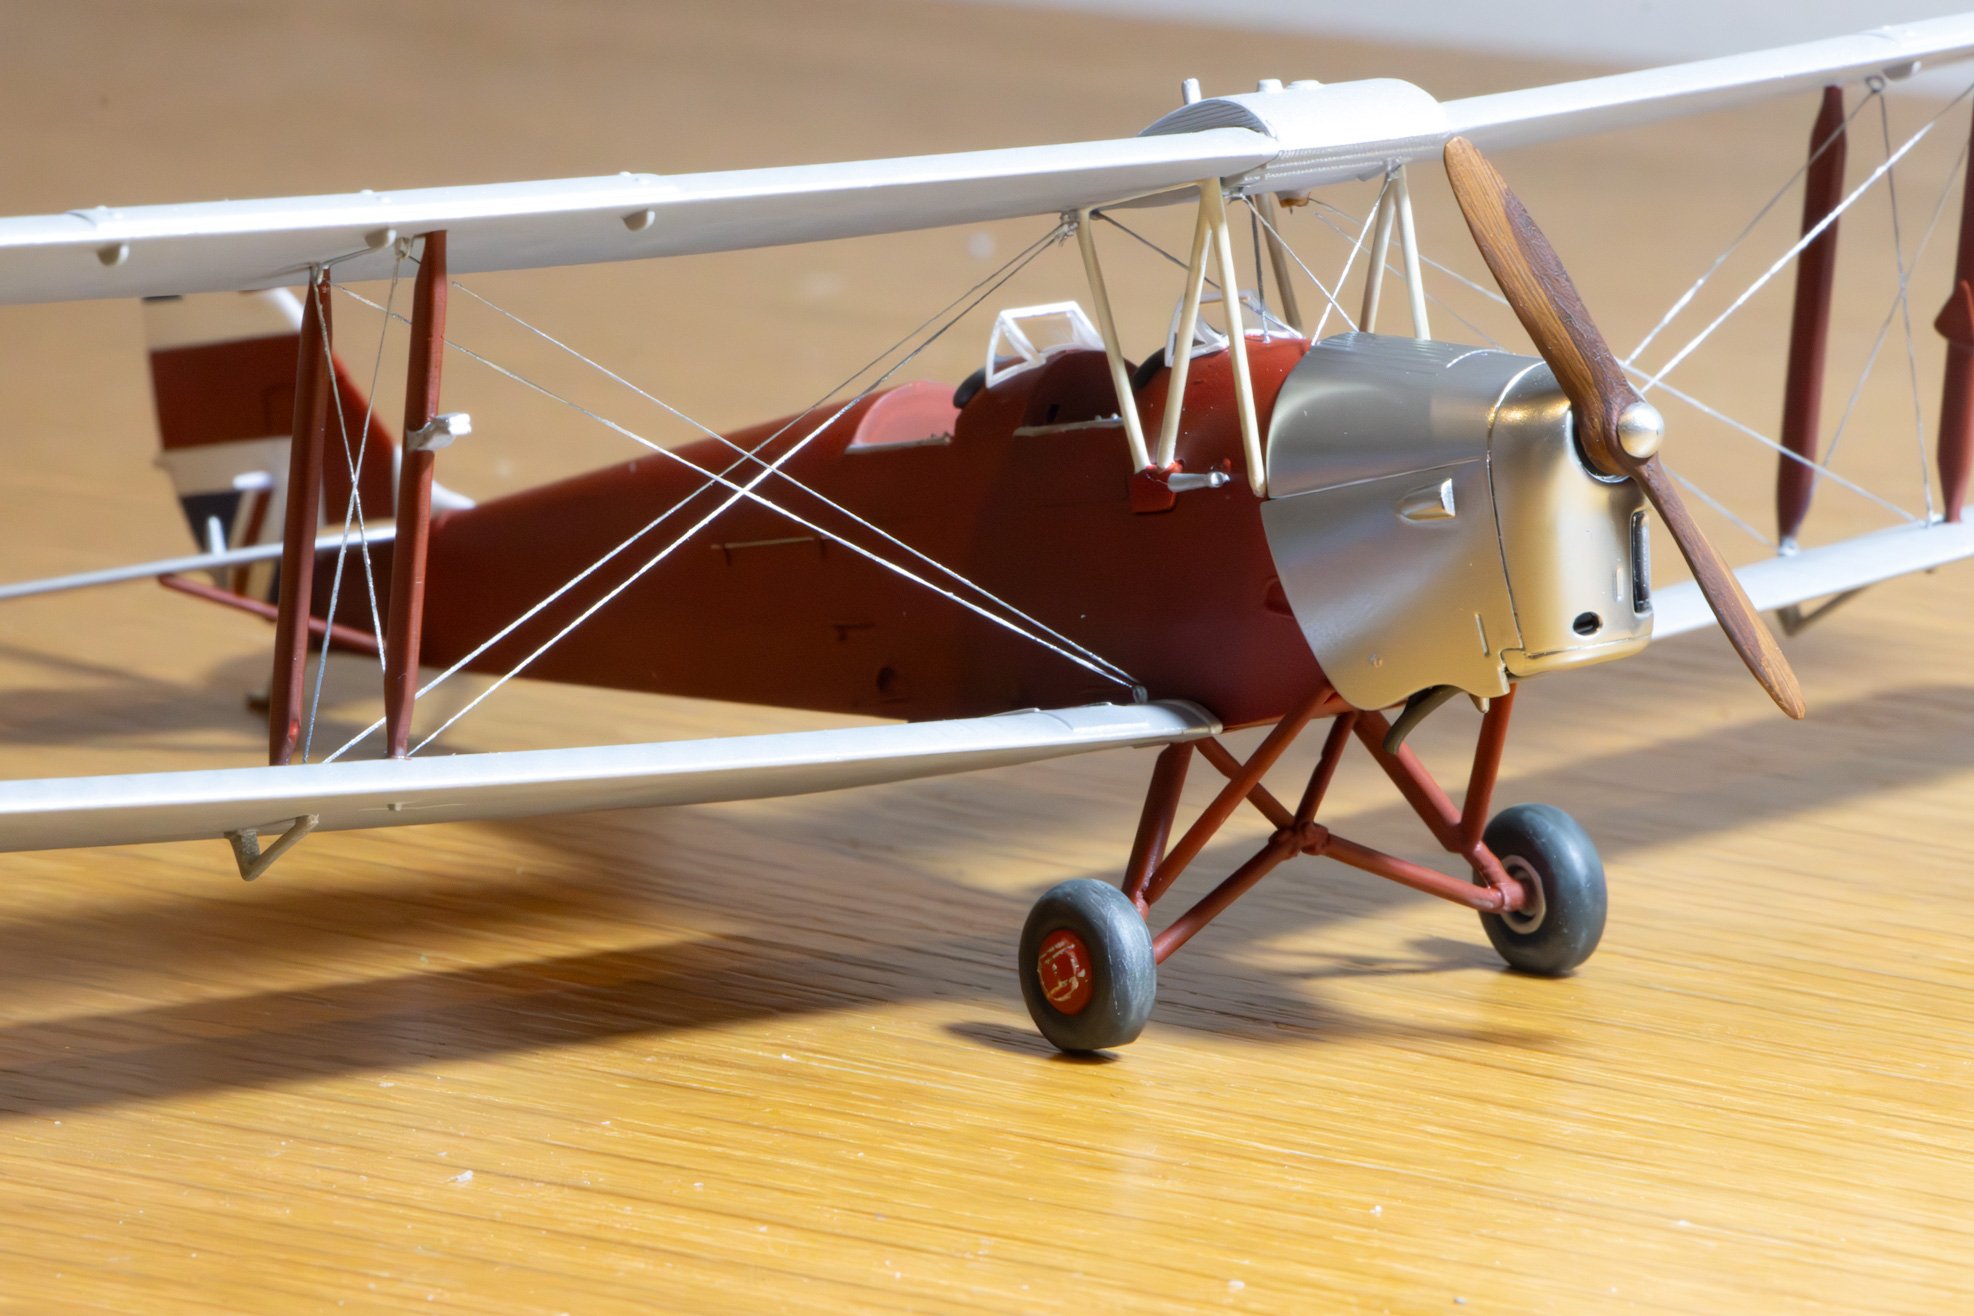
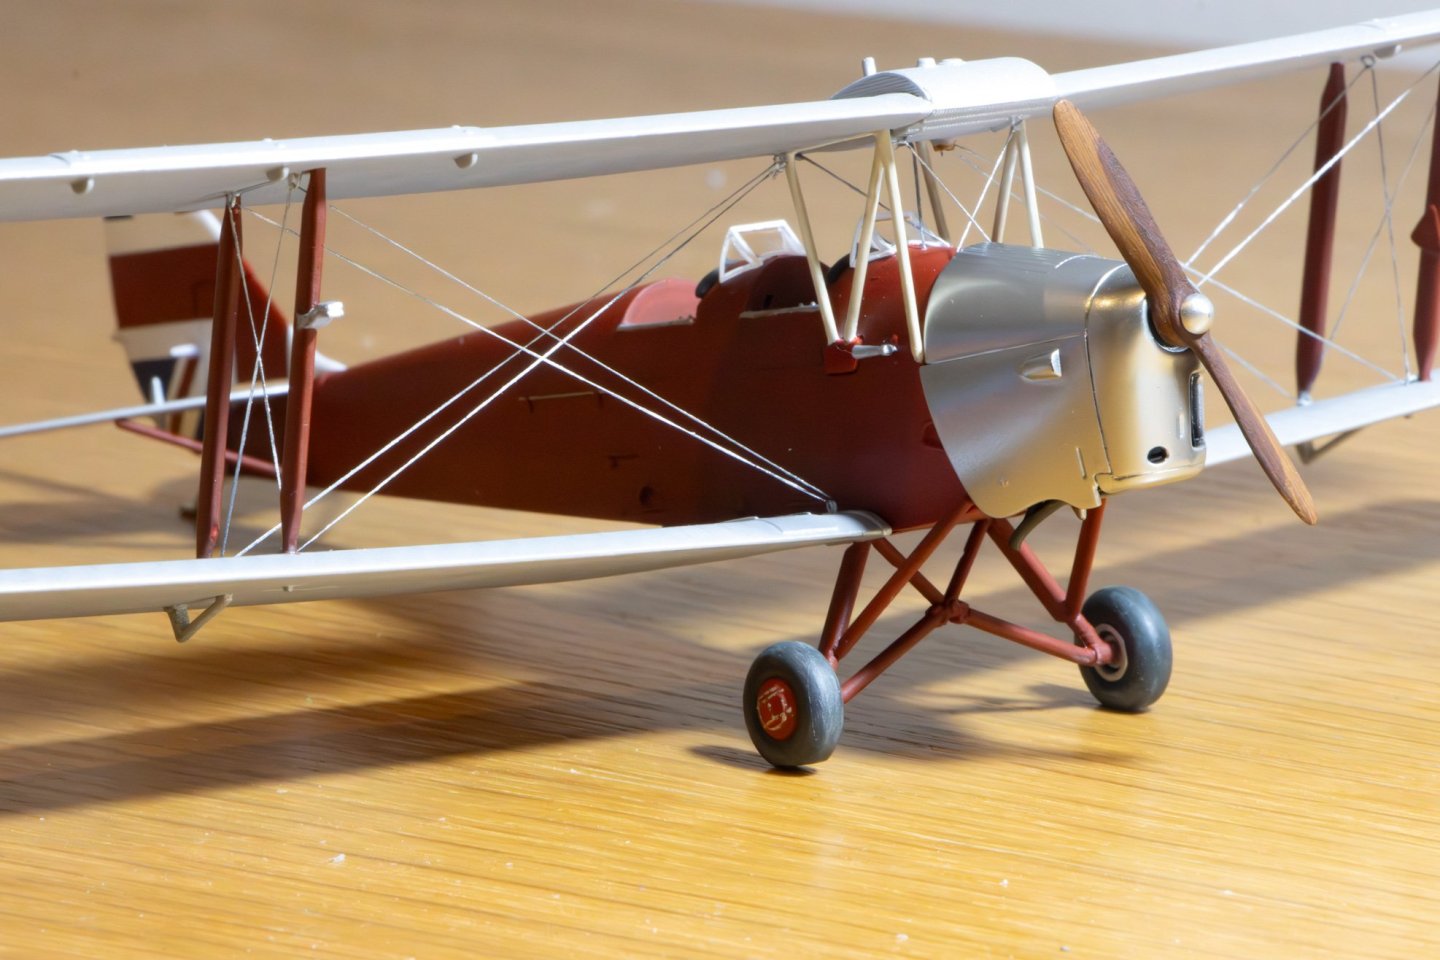
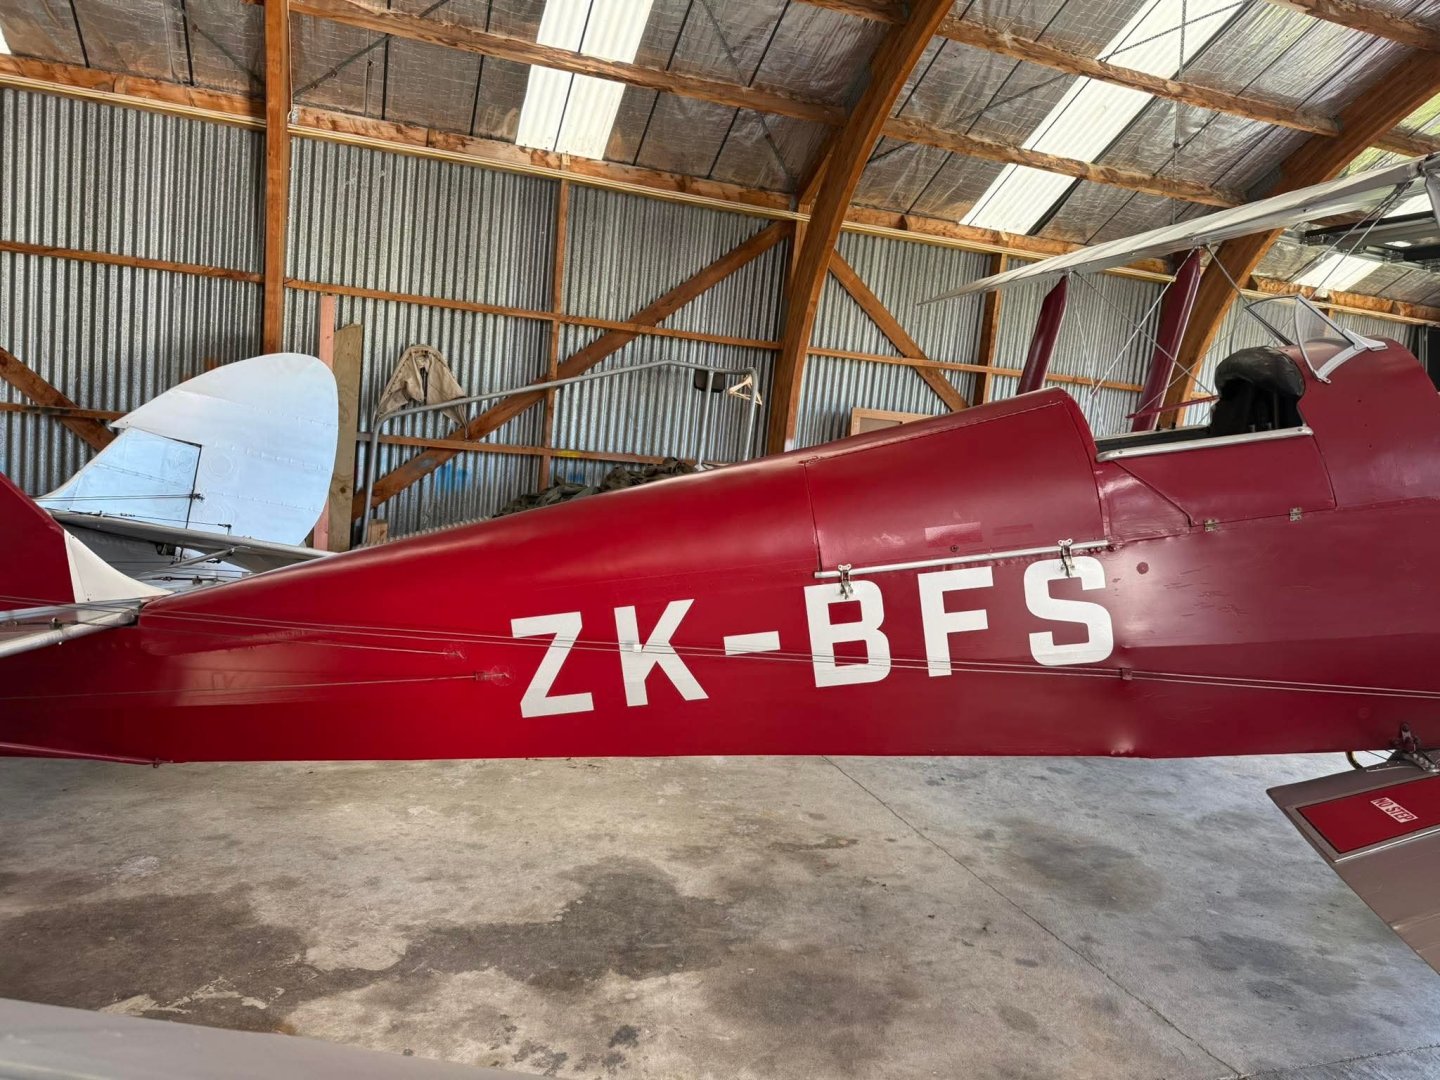
 Haven’t been able to do too much work on it lately but slowly it’s come together. Did the wing rigging and used diluted paint to bring the colour to what’s needed. Paining it did thicken them but it’s ok, also painting the rigging showed the twisting a lot more too which surprised me. I am just waiting on the decal paper and then need to make a rego stencil, put on the elevator and rudder control cables. Which will remain black. And then try to decide if it should get a light oil wash. I’m undecided there yet… Took a few close up pics, I find they really bring out the little defects. What looks great to the eye can look horribly messy on a photo! One thing that shows up is the kits flat spot on the wheels don't line up with the ground. So I’ll have to sort that out.
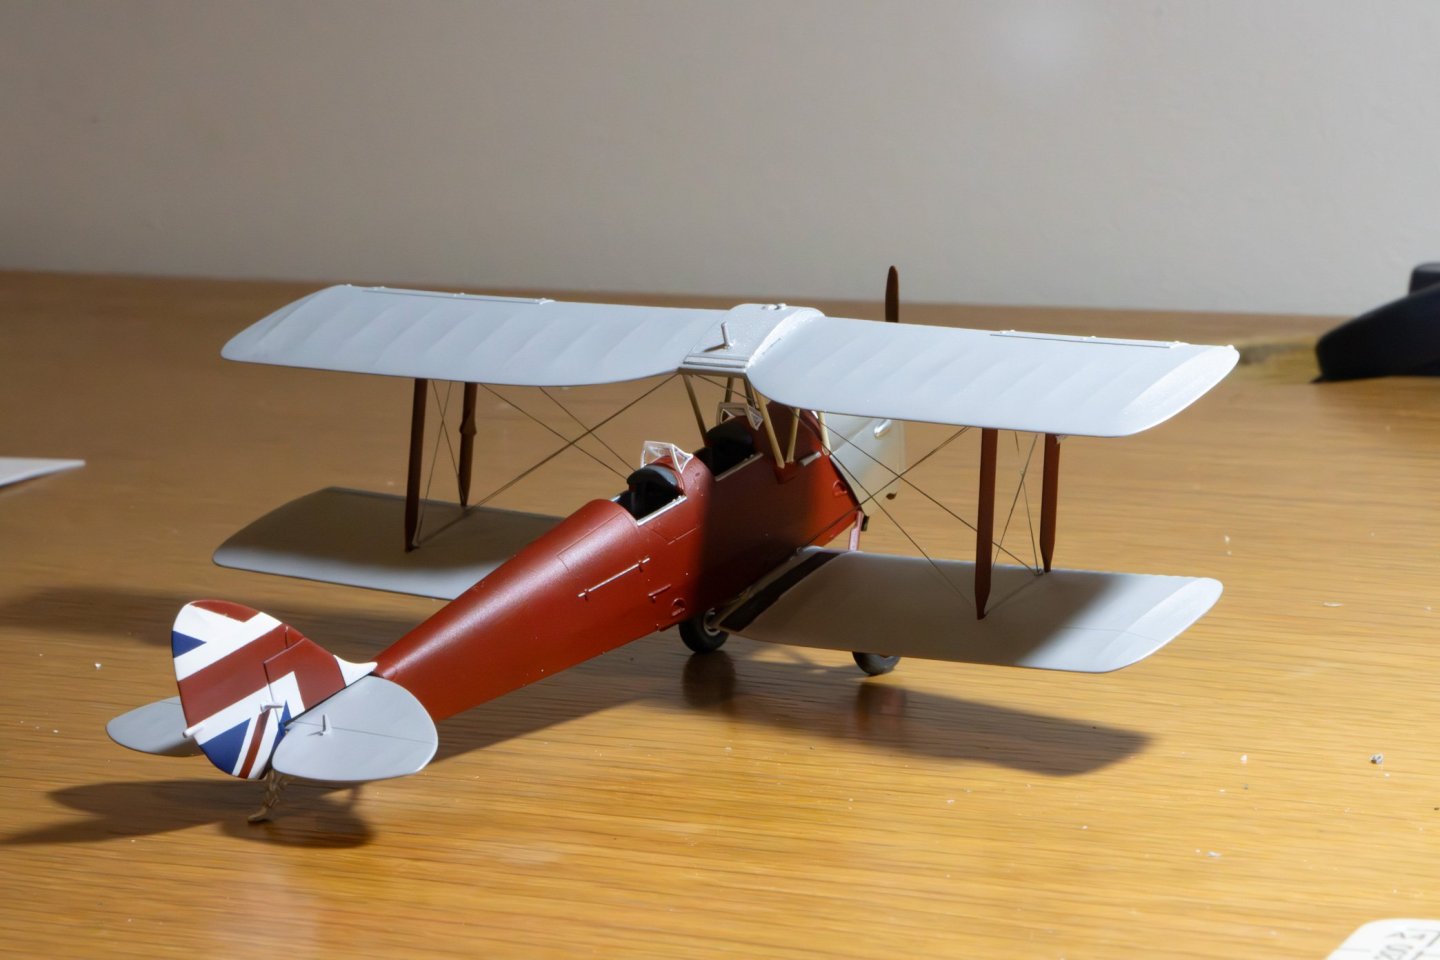
- 33 replies
-
- 15
-
-
-
Lt. Biggles reacted to a post in a topic:
De Havilland Tiger Moth by Lt. Biggles - Airfix - 1/48 - PLASTIC
-
Thanks for the options! Perhaps I can cut out my own stencils on Tamiya tape carefully for the rego. I looked at your link but they are over booked so shut down till they have caught up! I’ll order some super thin decal paper and print the nose decal and “no step” one. But the rego might be best to try paint! I’ll print out lots of different sizes till I get the right size and then can cut them out. I think I’ve got a good plan now!
-
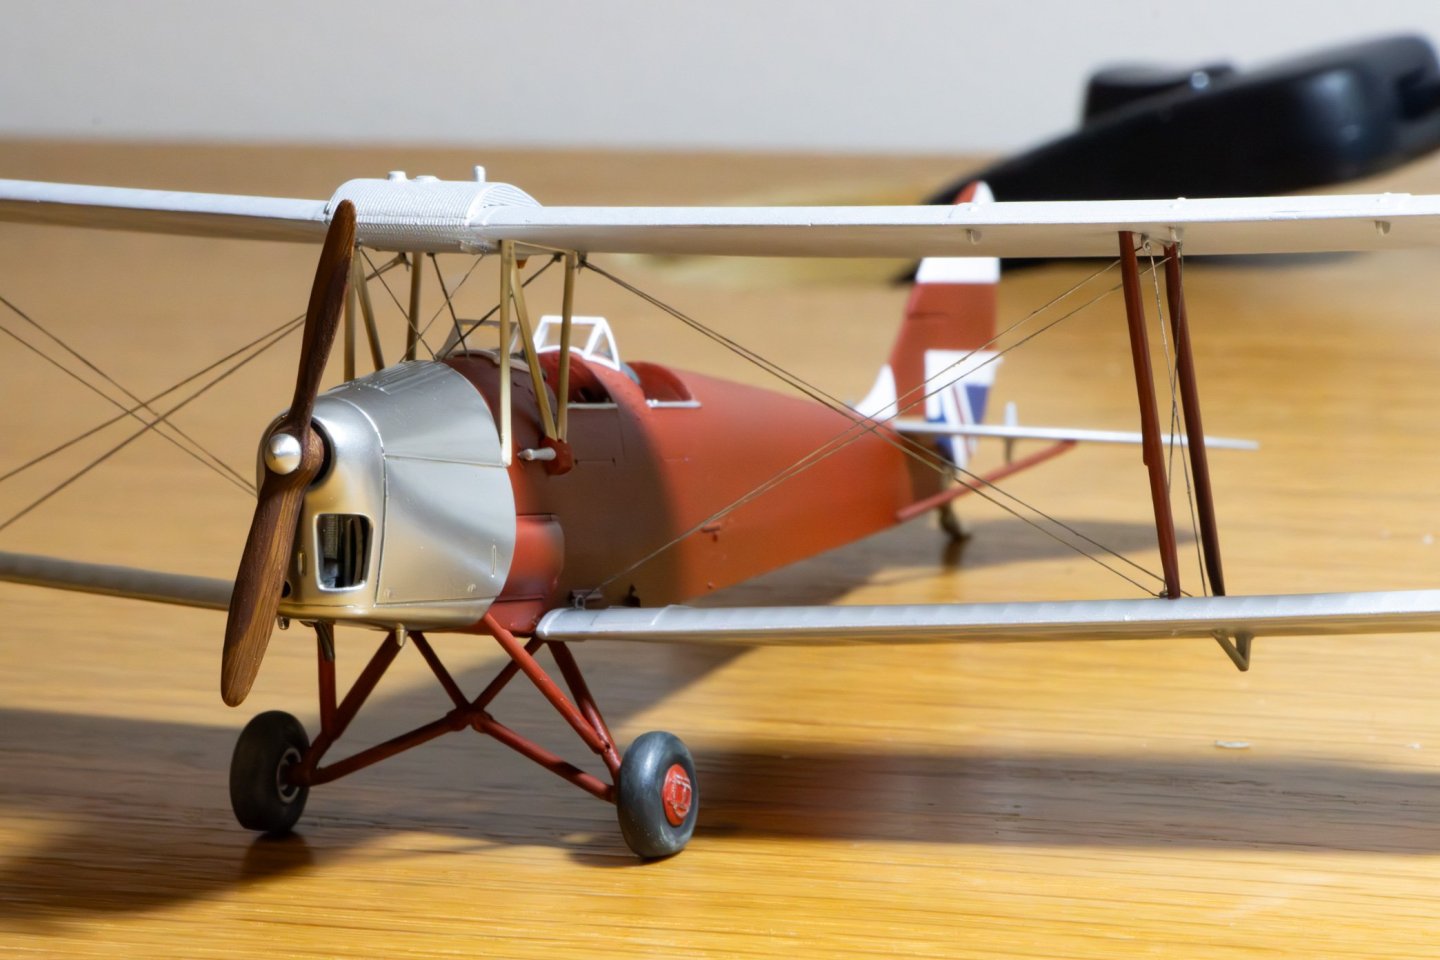
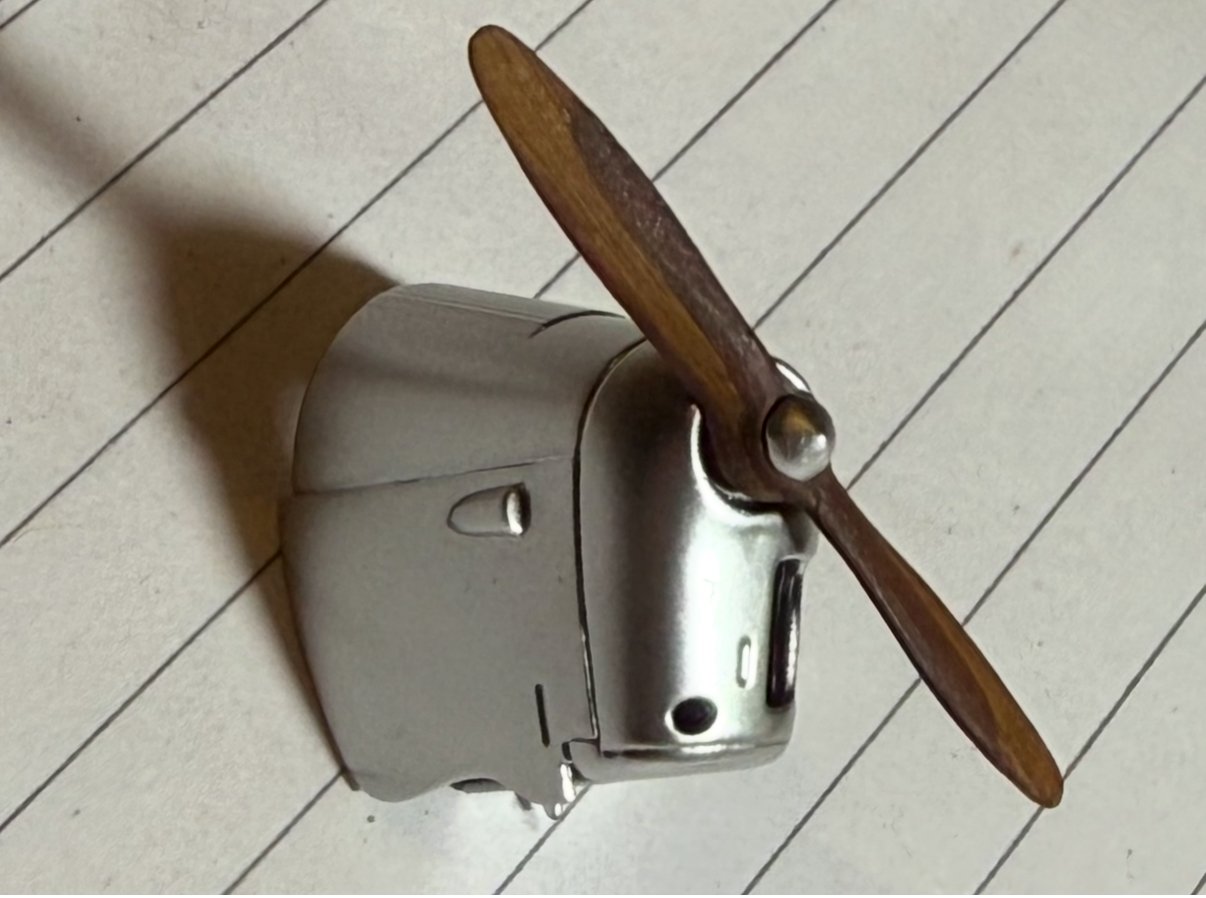
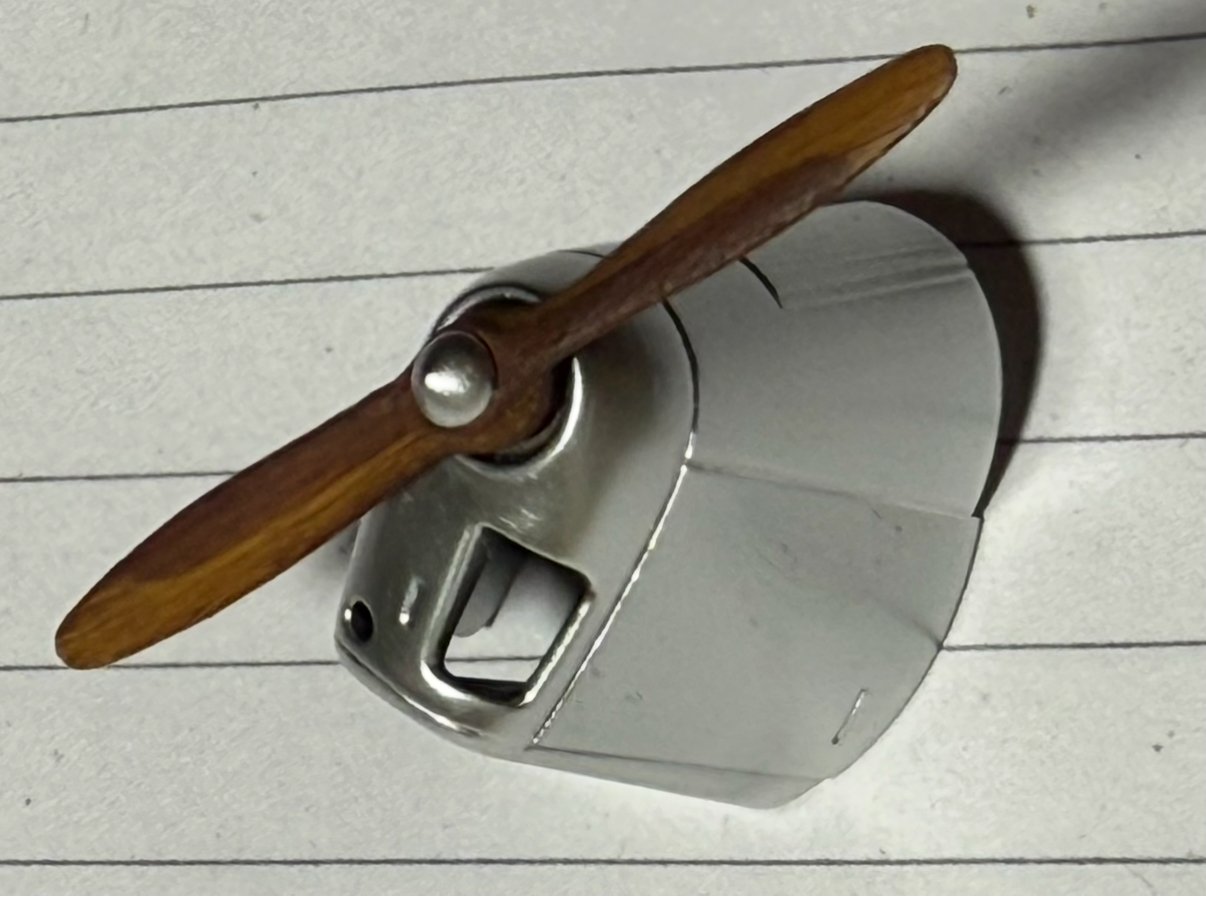
For the engine cowl I used the Super Metallic 2 paint from my P-51d build. Either super fine silver or Duralumin. Both are great looking colours! It stands out well against the silver and white dope mix on the wings. Hard to take good pics of it but it looks the part so I’m happy. Everything is coming together now! Next lot of pictures will be with it all together but before the rigging! Only the rigging on the nose I’m not sure how I’ll attach to the fuselage just in front of the windshield. Maybe I’ll drill tiny holes and hope I don’t smear CA glue everywhere while trying to get the ez line in the hole before the glue dries!!

-
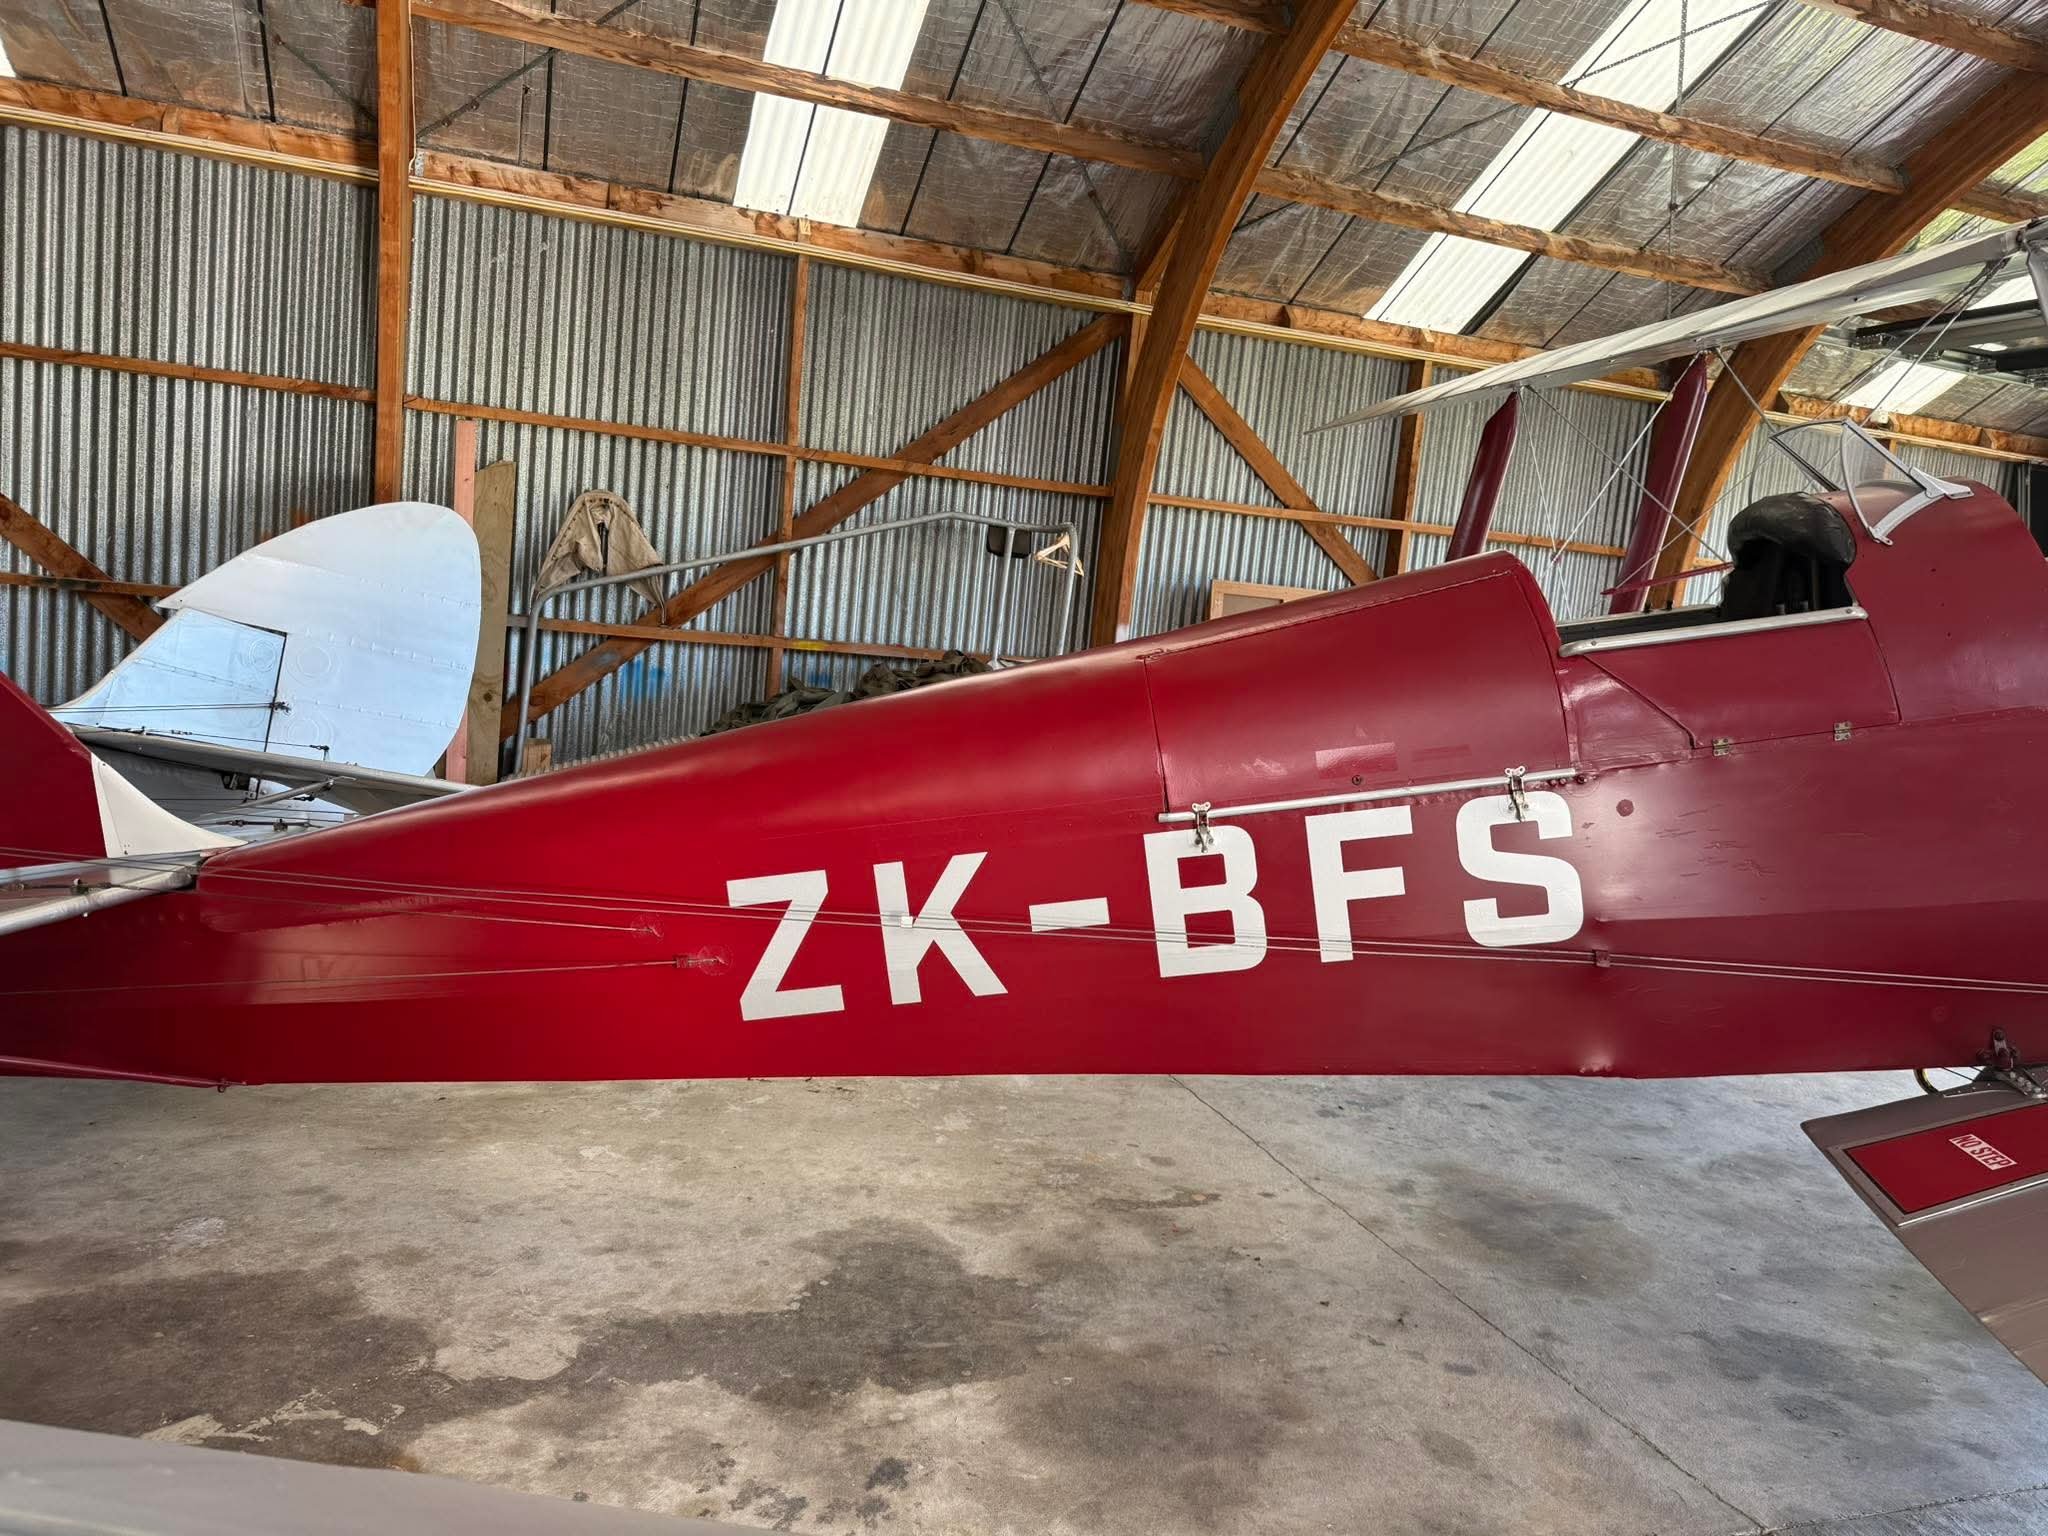
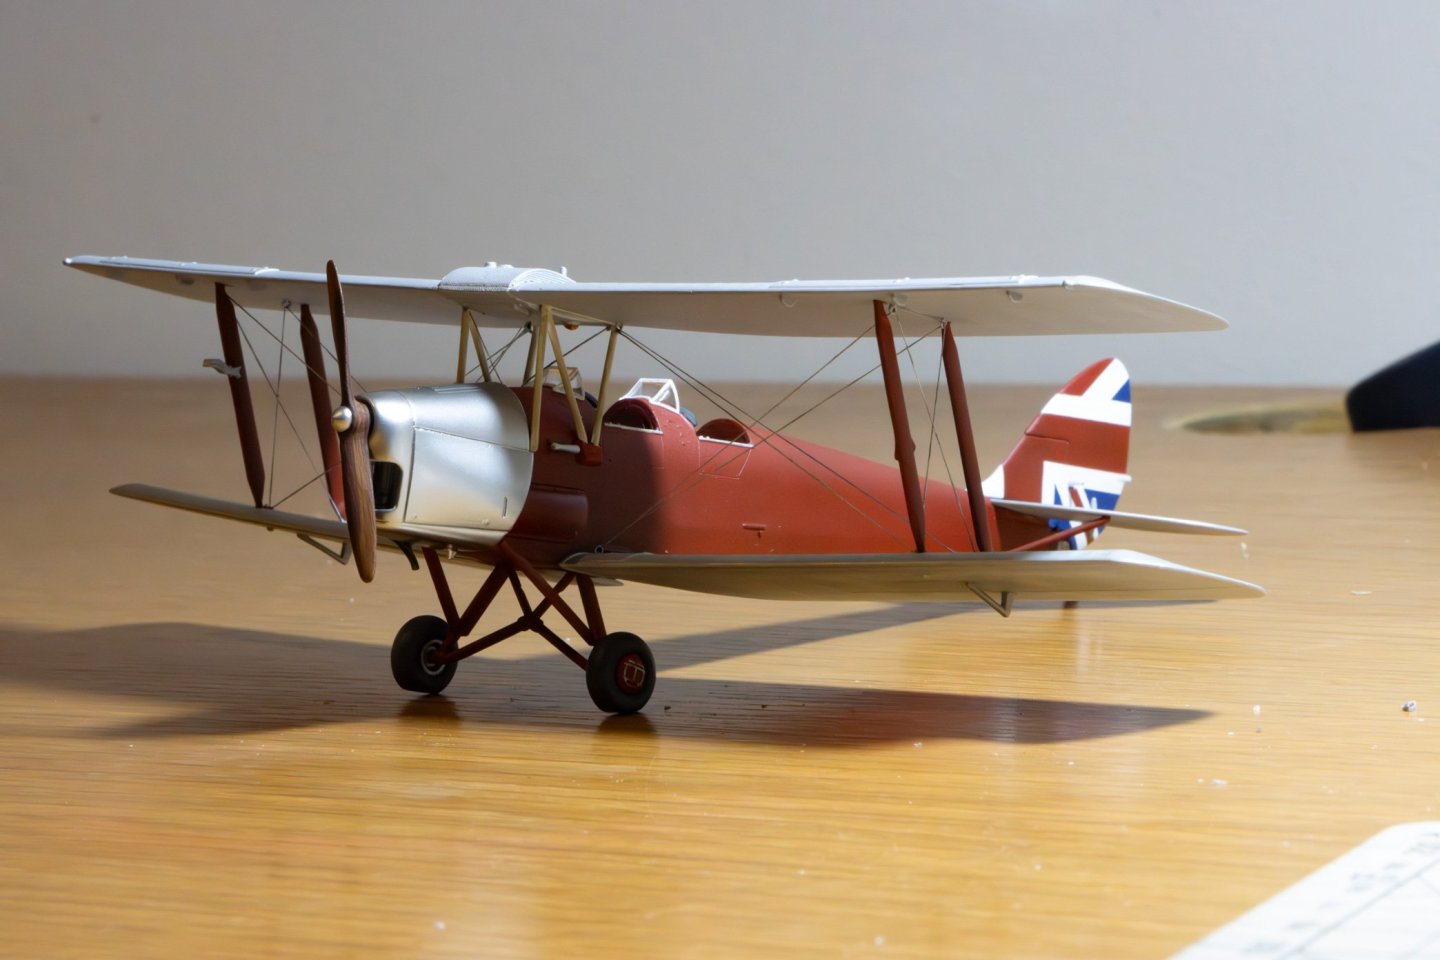
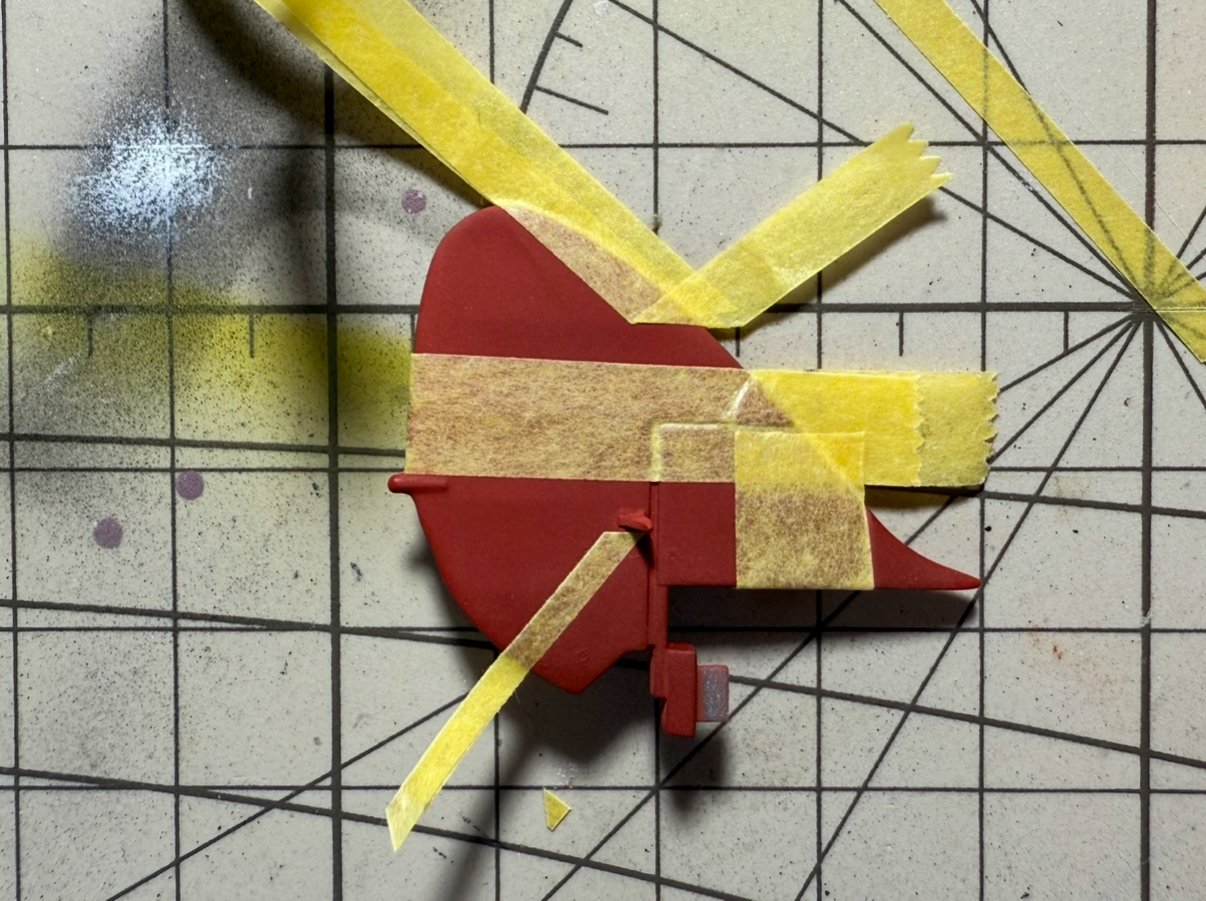
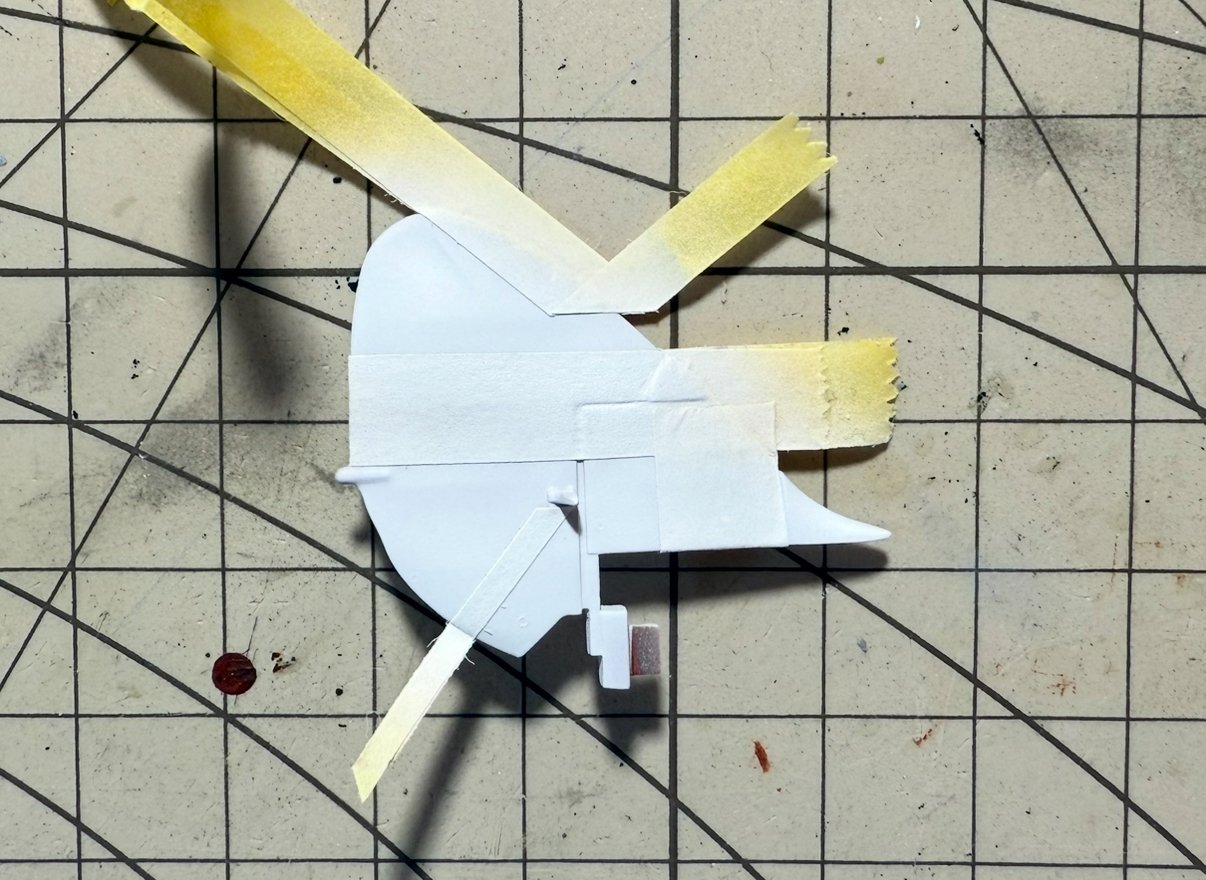
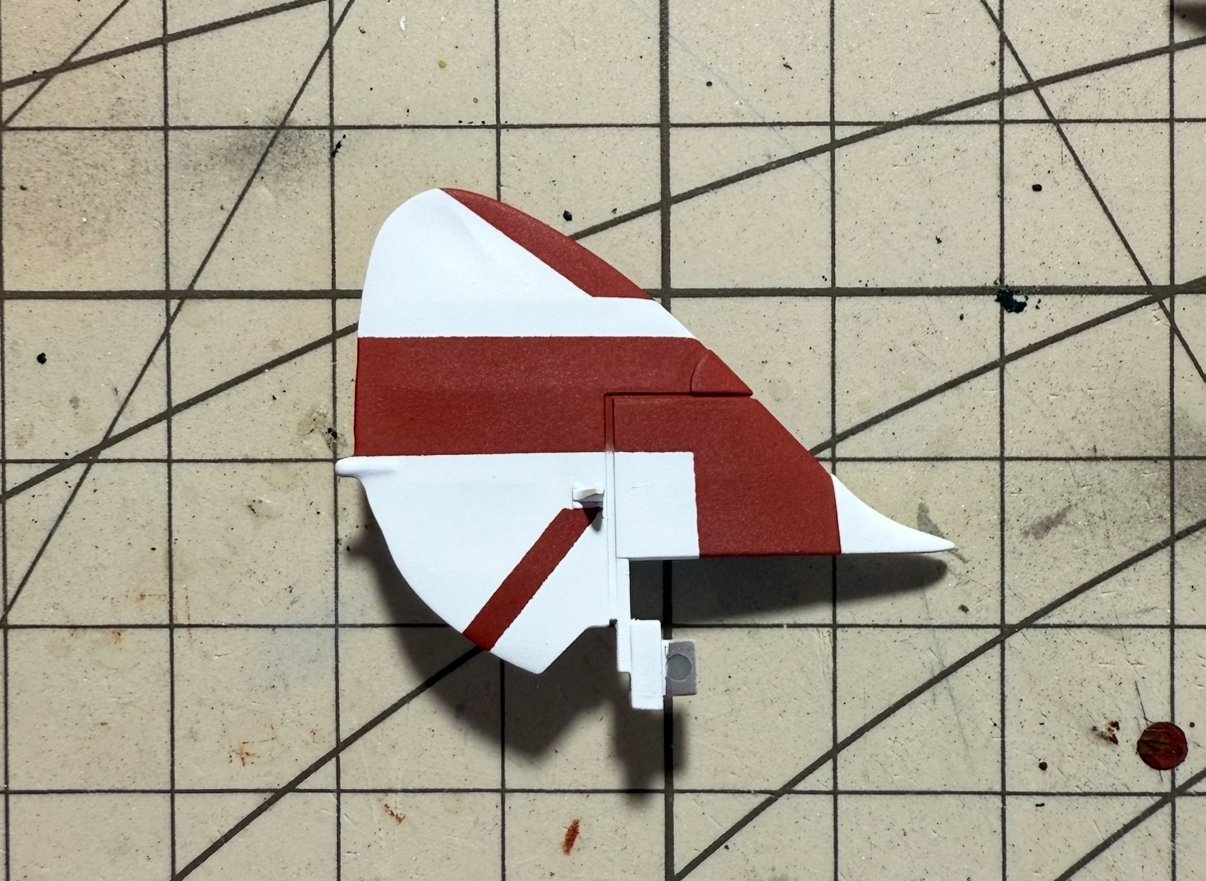
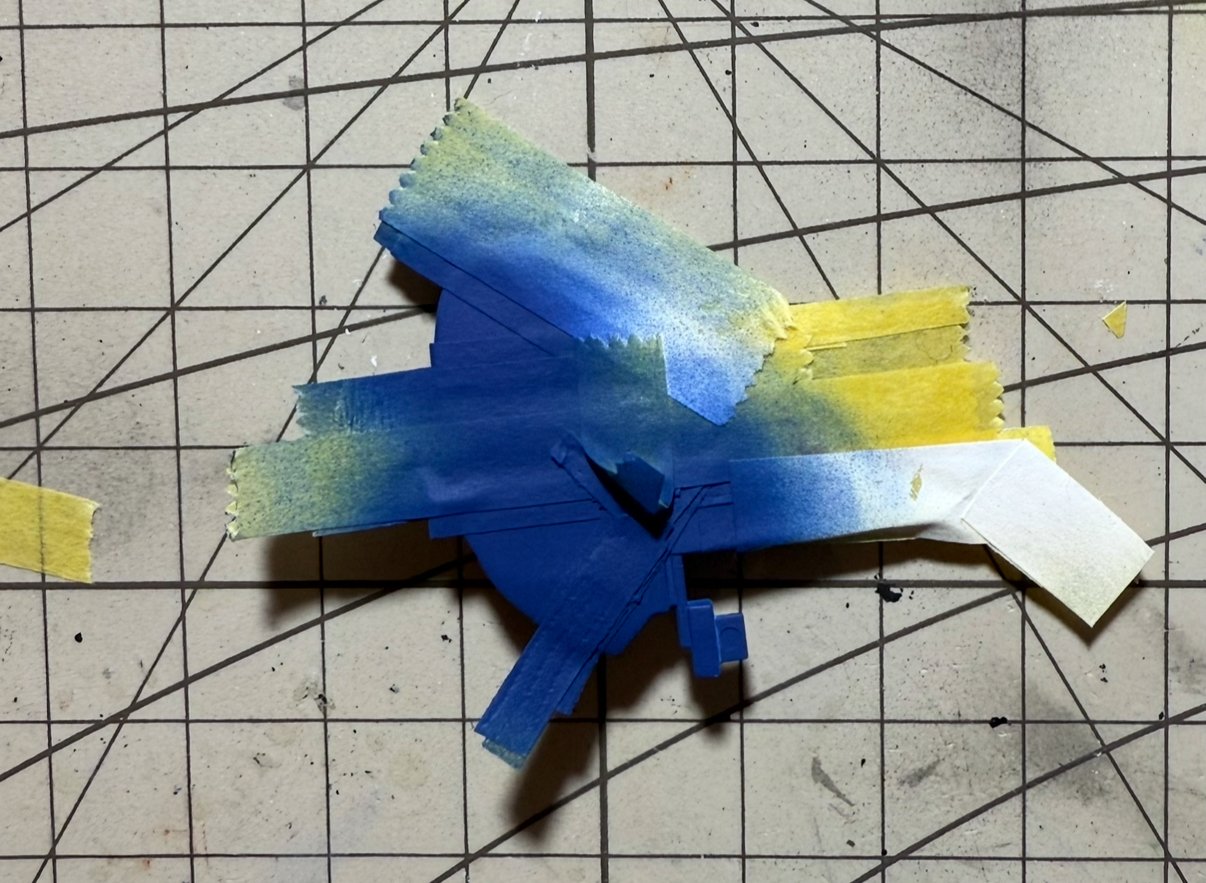
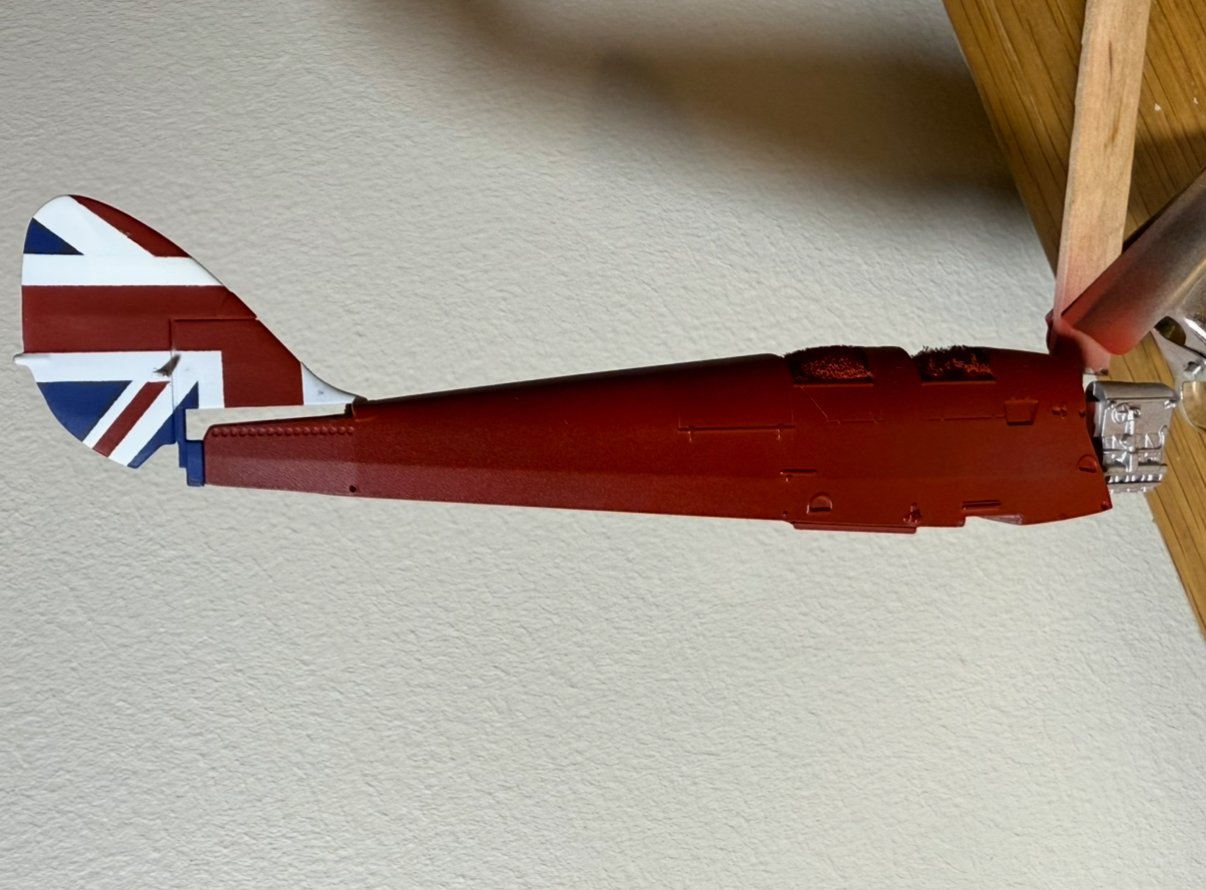
Managed to have some spare time so got into the Union Jack on the tail. Lots of taping. I had the reference picture on my computer and made is small till it matched the size of the real one. Then used a ruler on my screen to measure the colour bands thicknesses and cut tape to size. Then managed to somehow put a white finger print on the red.. so will need to touch that up later. It’s hidden on the other side haha. A few places need a touch up but for just taking the tape off it came out pretty good! Will do the job nicely I think!

- 33 replies
-
- 13
-
-
-
Lt. Biggles reacted to a post in a topic:
De Havilland Tiger Moth by Lt. Biggles - Airfix - 1/48 - PLASTIC
-
Thanks, I’ve had a look around and will order some decal sheets made for aircraft models. Should be able to get the files sorted and vary the size slightly and the shade of colour so hopefully one of them is the right scale and get them printed at a print shop in town. Will be something new!
-
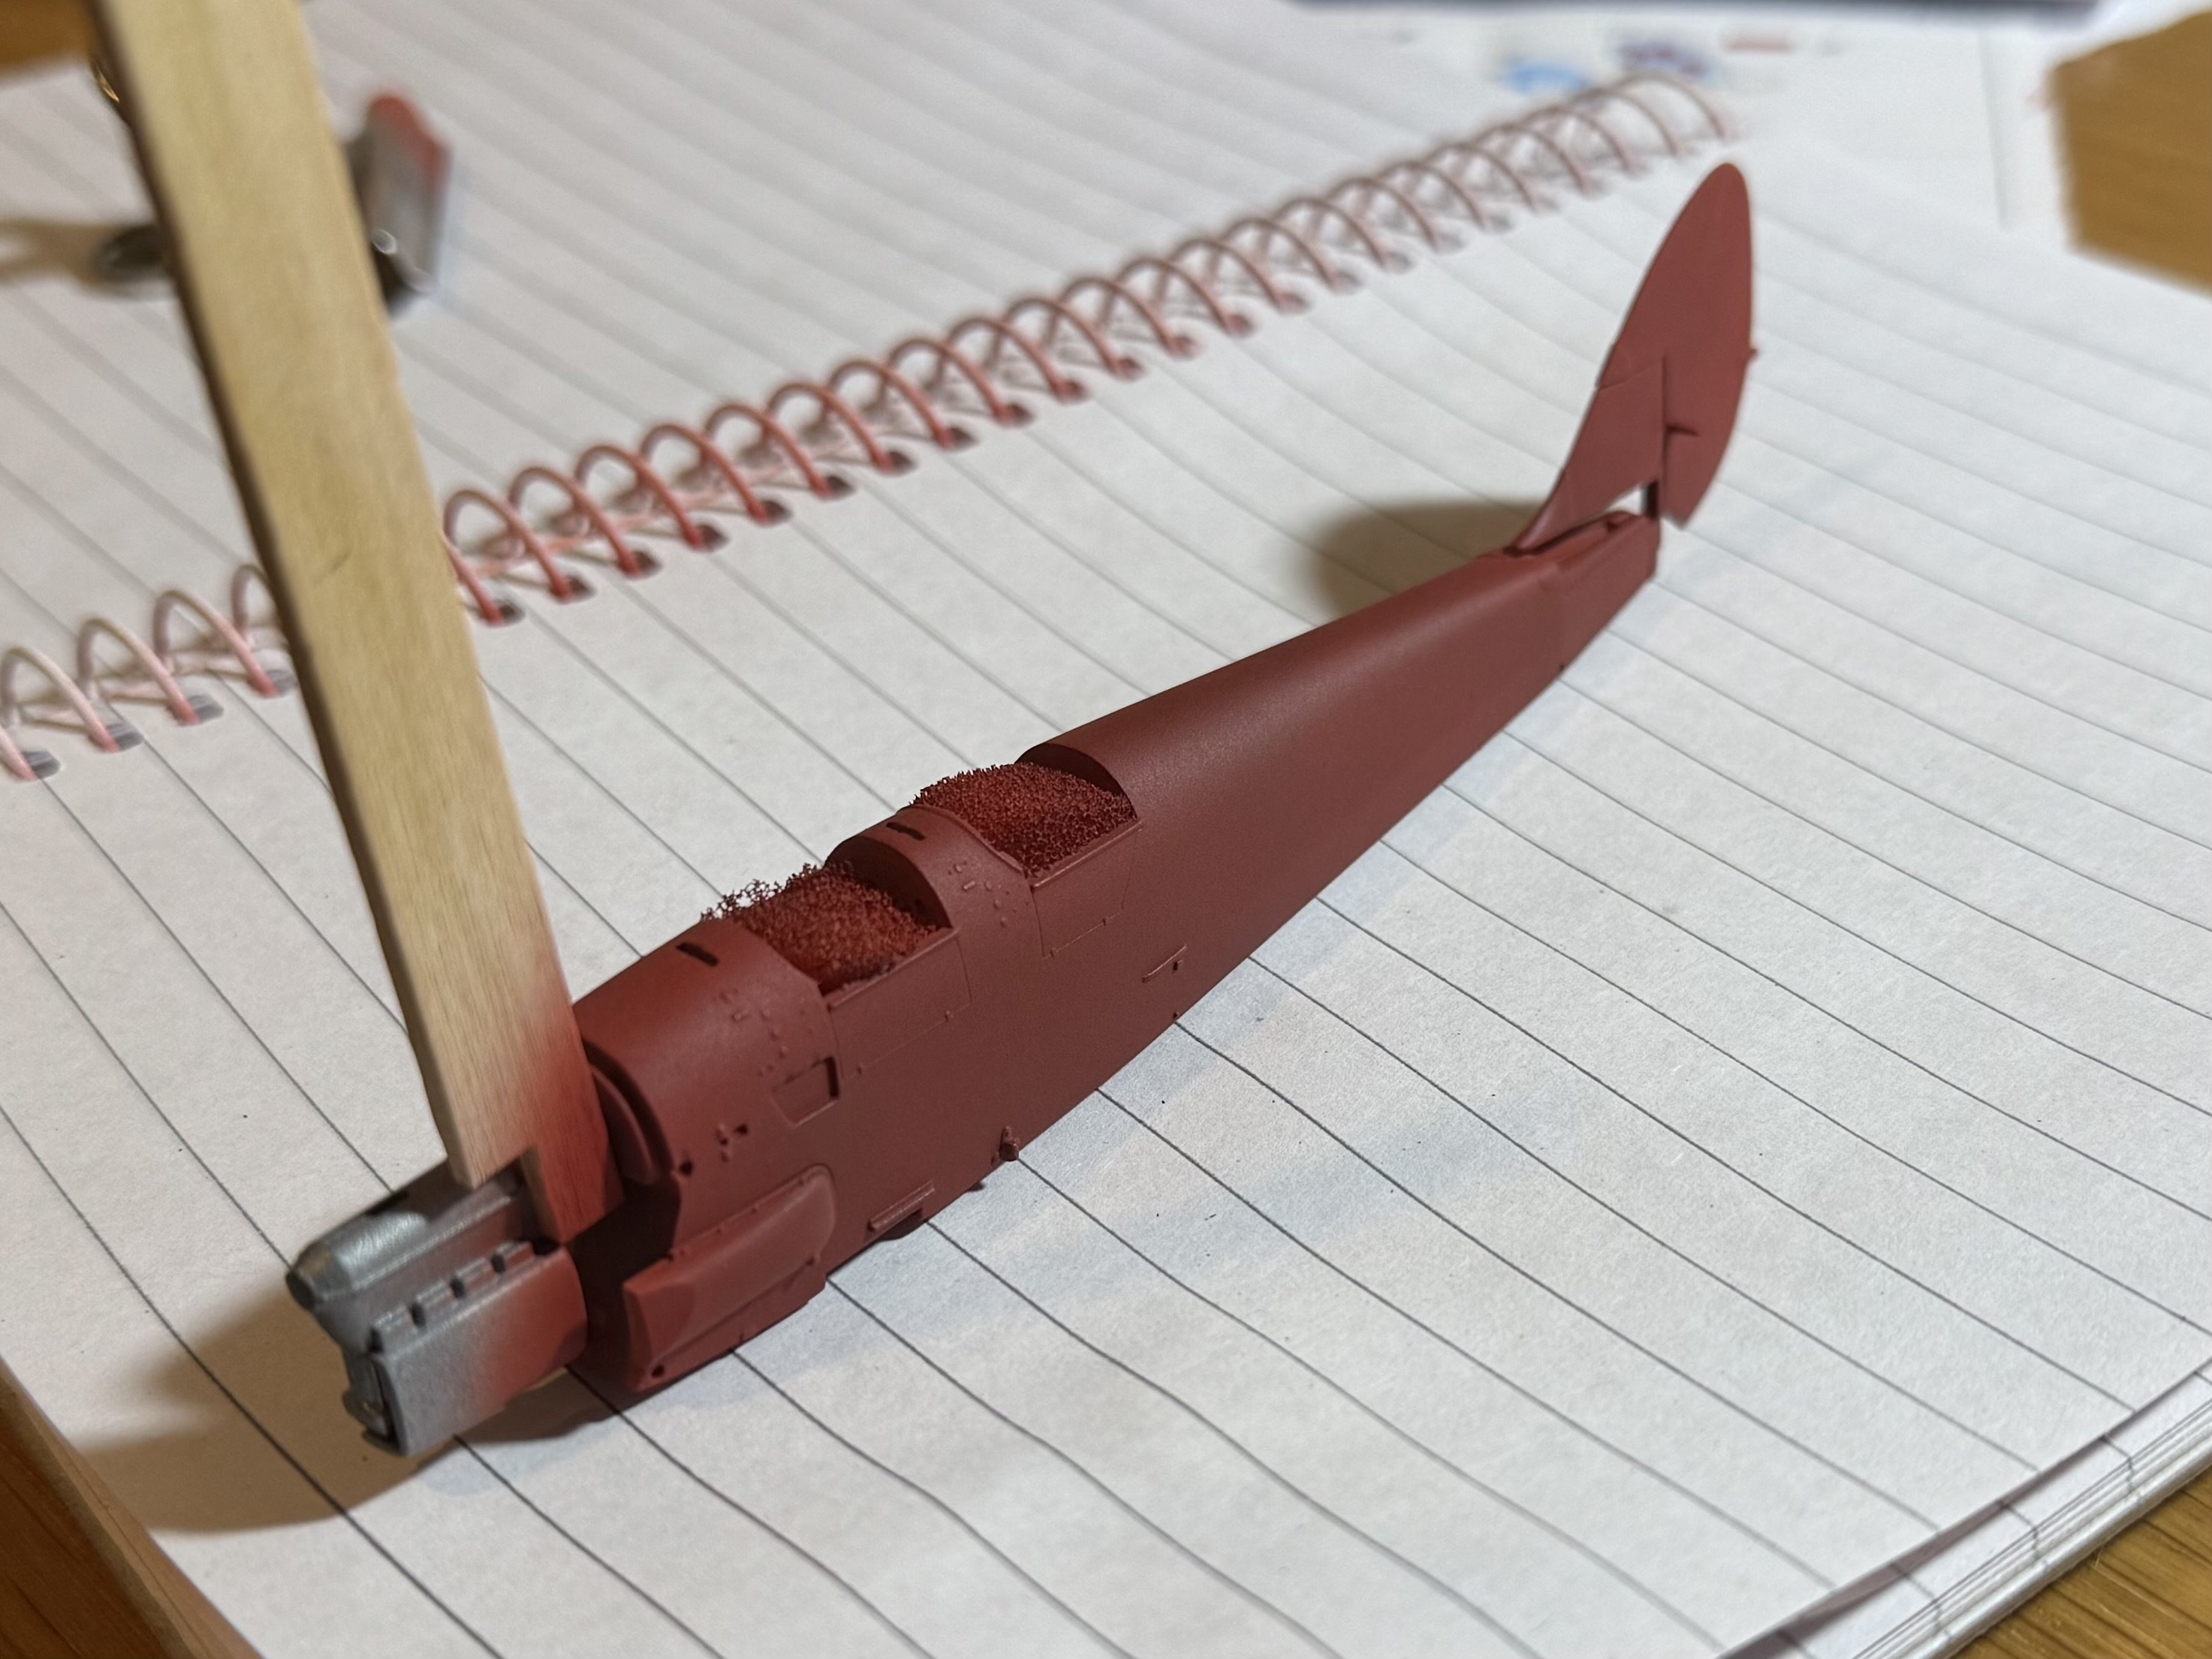
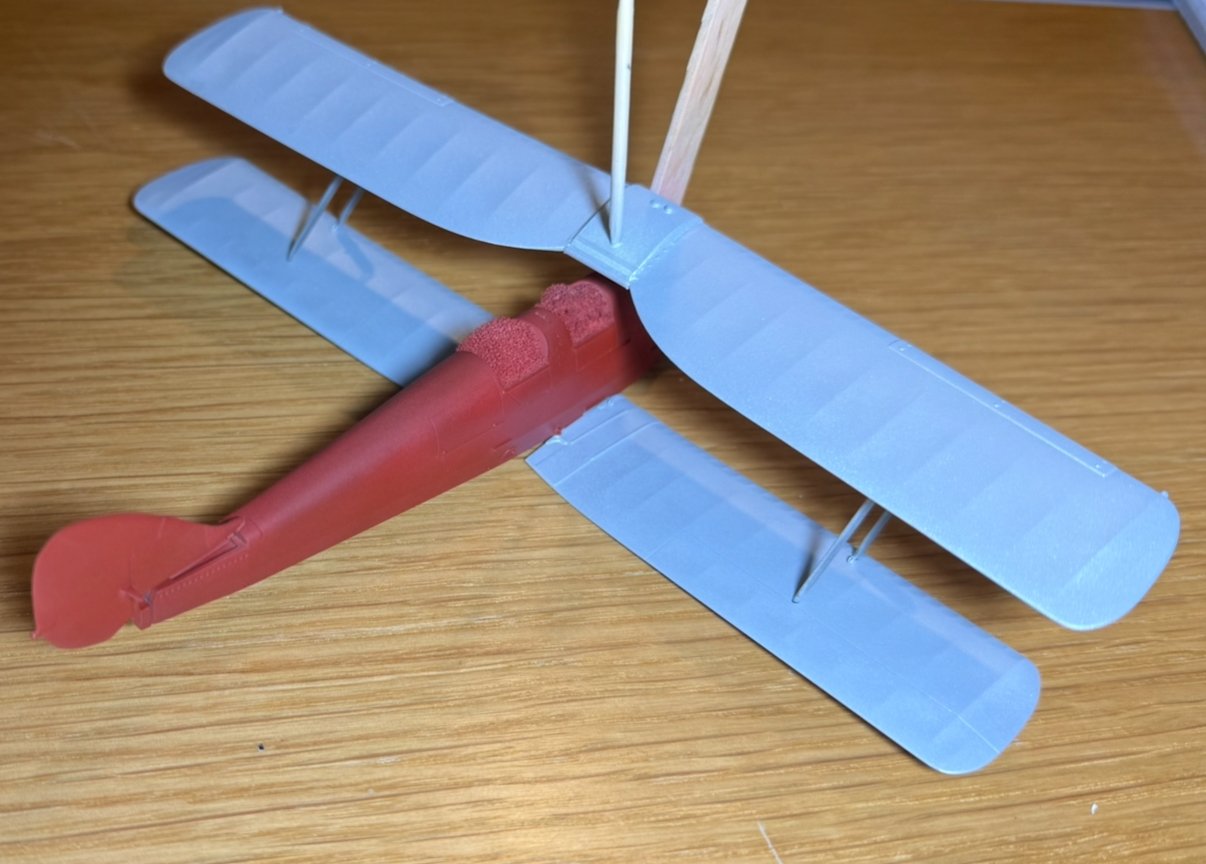
Heading off again this afternoon for a week so managed to sit down and get abit more work on it completed. Painted it straight red and then added abit of blue to bring it to a cherry colour. It’s abit of a challenge. The plane looks quite bright and I’m finding to get the right cherry colour comes at the cost of the brightness! So it’s the right shade of red in the sun now but I need to find a way to brighten it. I put a clear coat on it and that helped but still needs to brighten up. Maybe I’ll do a light coat of red on top to try freshen it up and clear coat that. Maybe just shoot it straight down for shadowing effect. Or a lighter shade of blue. Perhaps add some white with the blue. Colour mixing is fascinating with shades and tints. Anyway I roughly put the wings on that I’ve painted so it’s starting to look like a plane! Once it’s all together I’ll give it a very light wash as it’s a fairly new paint job so it’s in great condition.

-
I’m starting to think ahead and wonder how I’m going to do the custom decals. i guess I can make/buy stencils and paint them on. Or send the details away for a company to print custom decals. I’ve a feeling this part is the trickiest part of the build! But if anyone has any ideas or knows a company that does them I’d appreciate the into and ideas. This one on the nose on one side will be tough as I’ll not be able to hand make a stencil at all so need it printed or laser cut. For the rego, worst case I could make my own stencil but it won’t be as crisp and nice as a professional one. These will either make the final result or bring it down a few notches. If there is a place that I can pay to print custom decals I’d go down that road
-
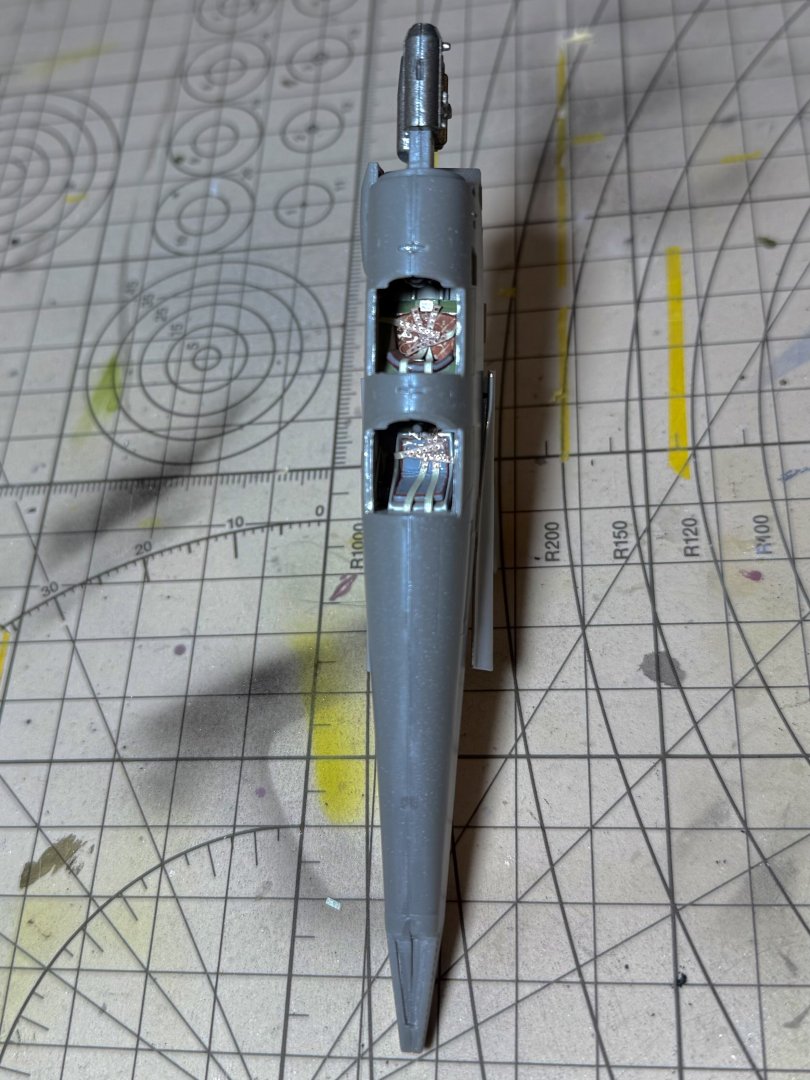
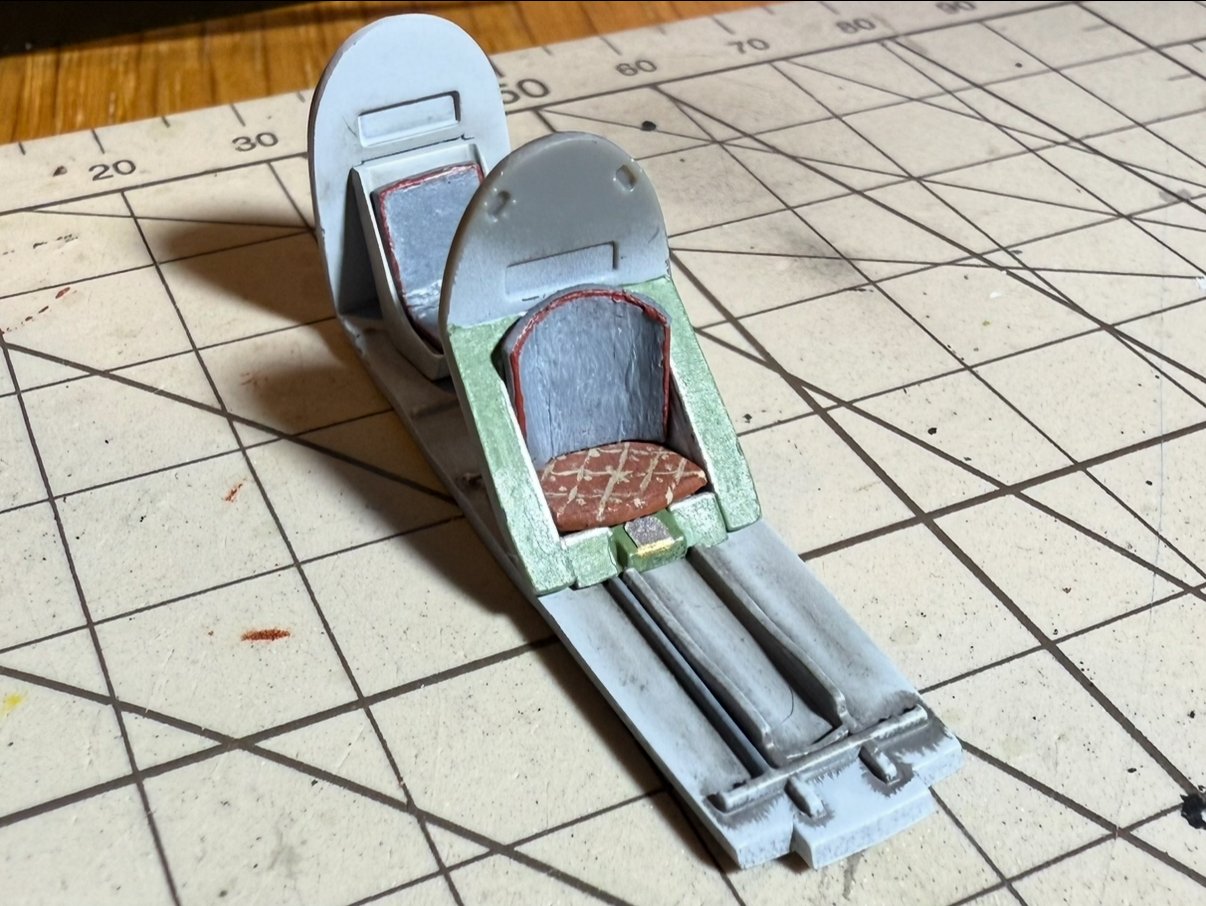
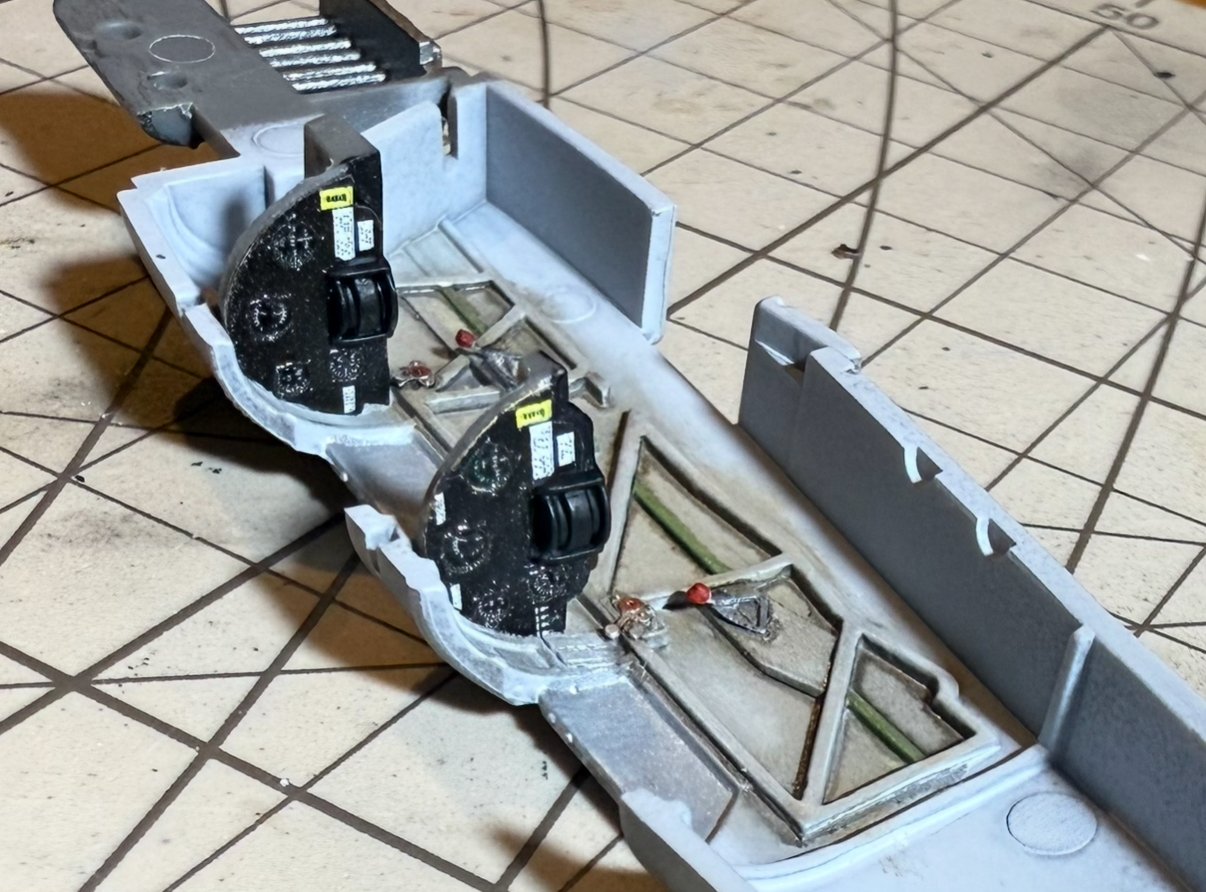
Hey, been awhile, been away most weeks and home just a few days at a time some slowed down build progress! But I’ve been doing what I can. Finished the cockpit as best I could with the reference pics. And sealed the fuselage together. Difficult to get good pics into the cockpits with light and shadows. But I’m happy. just not sure how the rigging will connect to the nose yet, but my attachments on the wings I think will work well. So will see what happens when that time comes and hope for the best at this stage!
-
Looks great! Nice work! The washes brought it all together very well!
-
Lt. Biggles reacted to a post in a topic:
Kawanishi N1K2-J Shiden "George" by Javlin - FINISHED - Hasegawa - 1/32 - PLASTIC
-
Lt. Biggles reacted to a post in a topic:
USS Missouri by wglasford - Trumpeter - 1/200 - PLASTIC
-
Lt. Biggles reacted to a post in a topic:
De Havilland Tiger Moth by Lt. Biggles - Airfix - 1/48 - PLASTIC
-
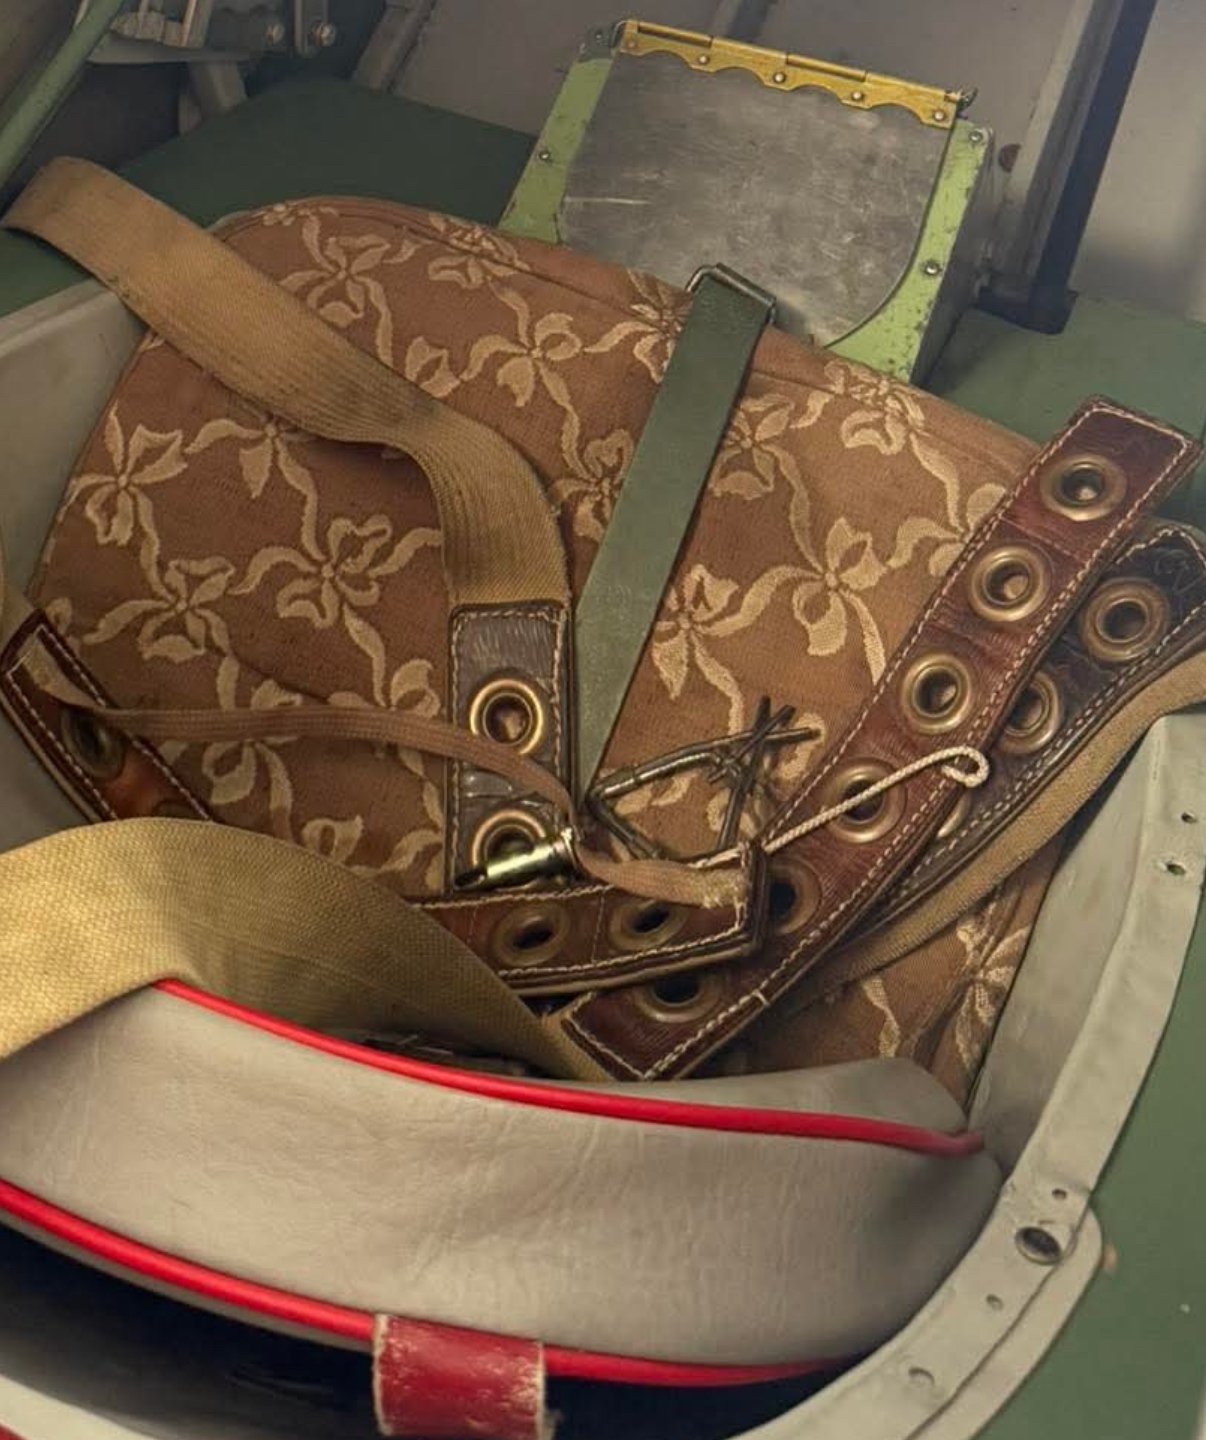
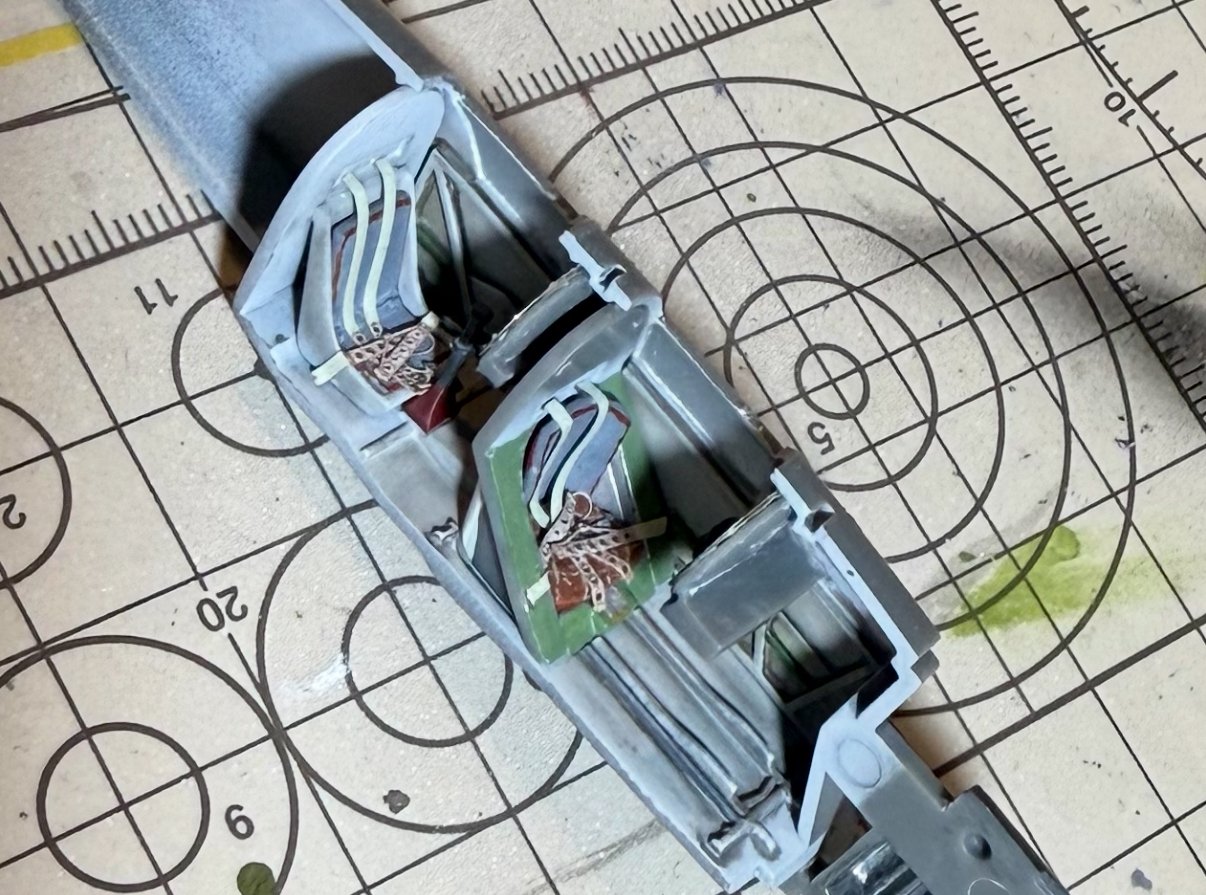
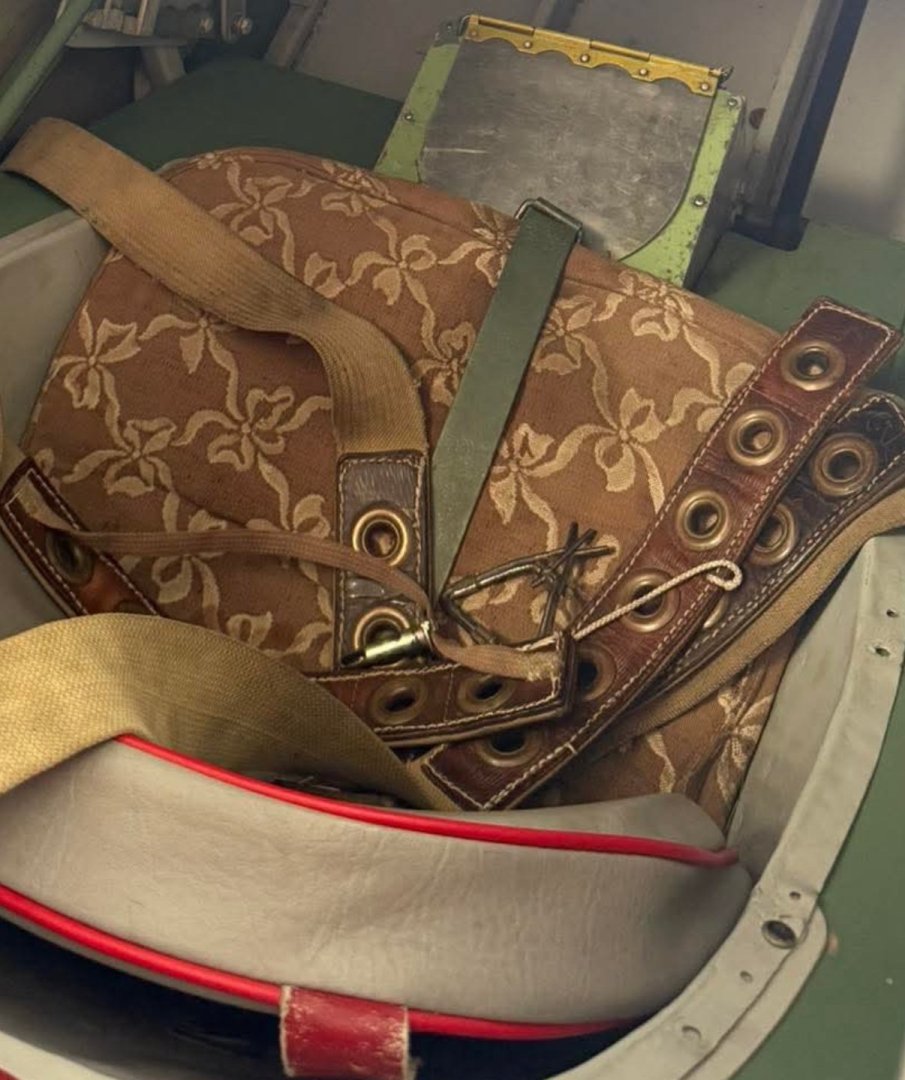
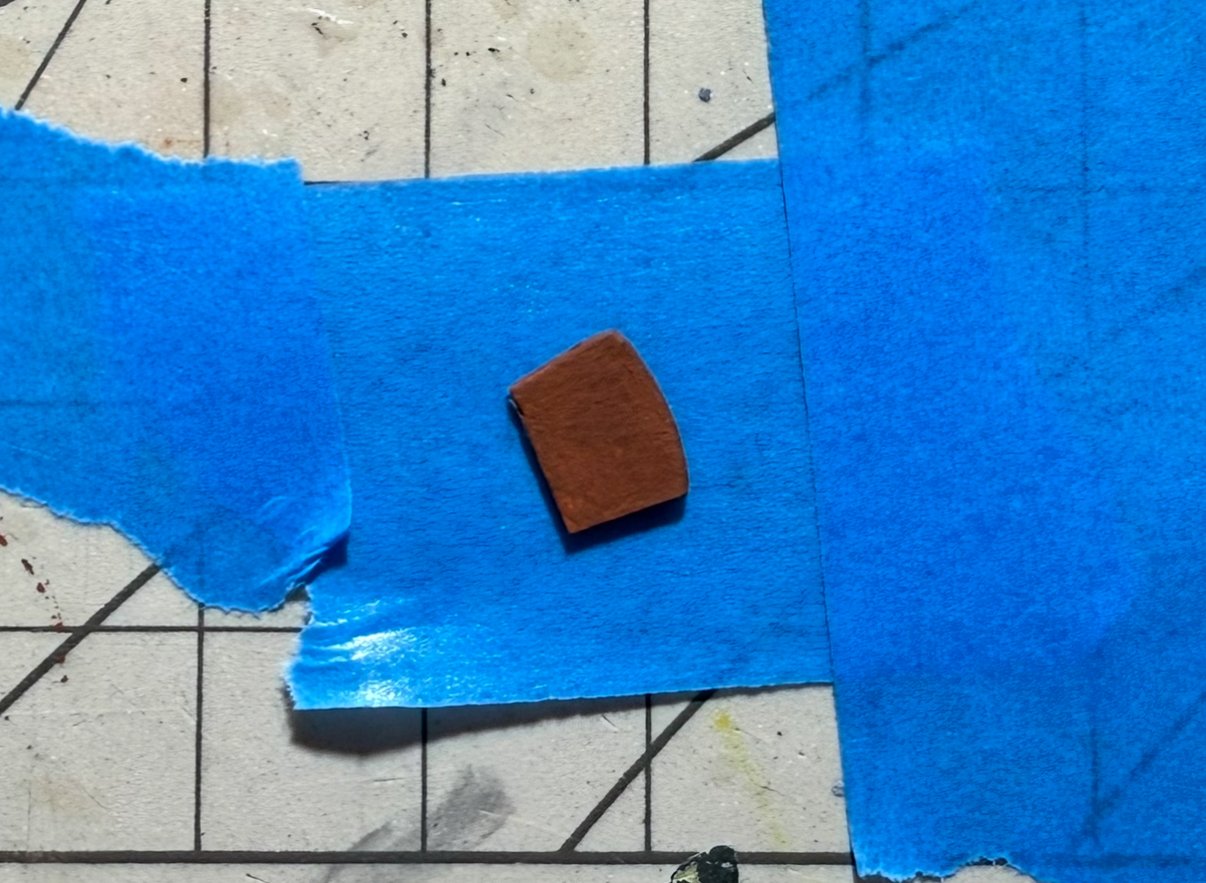
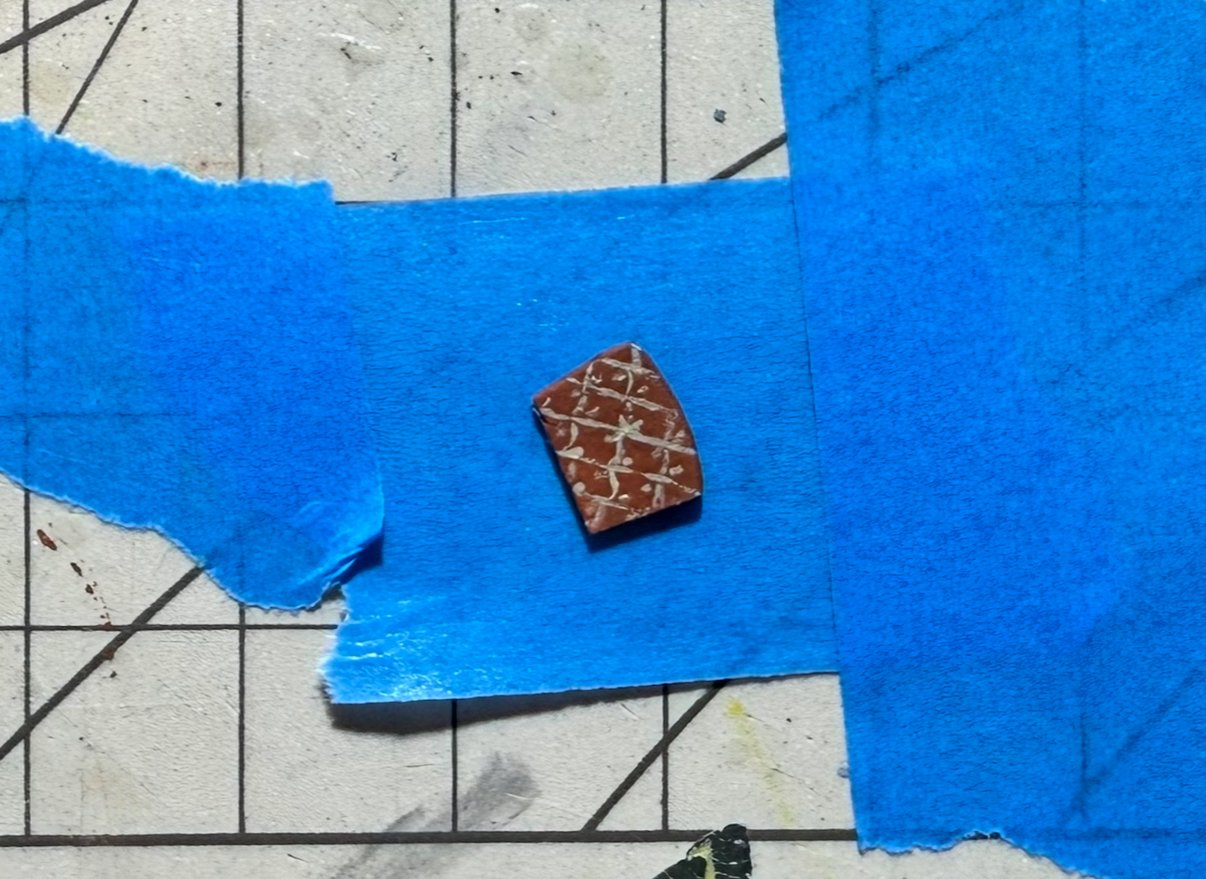
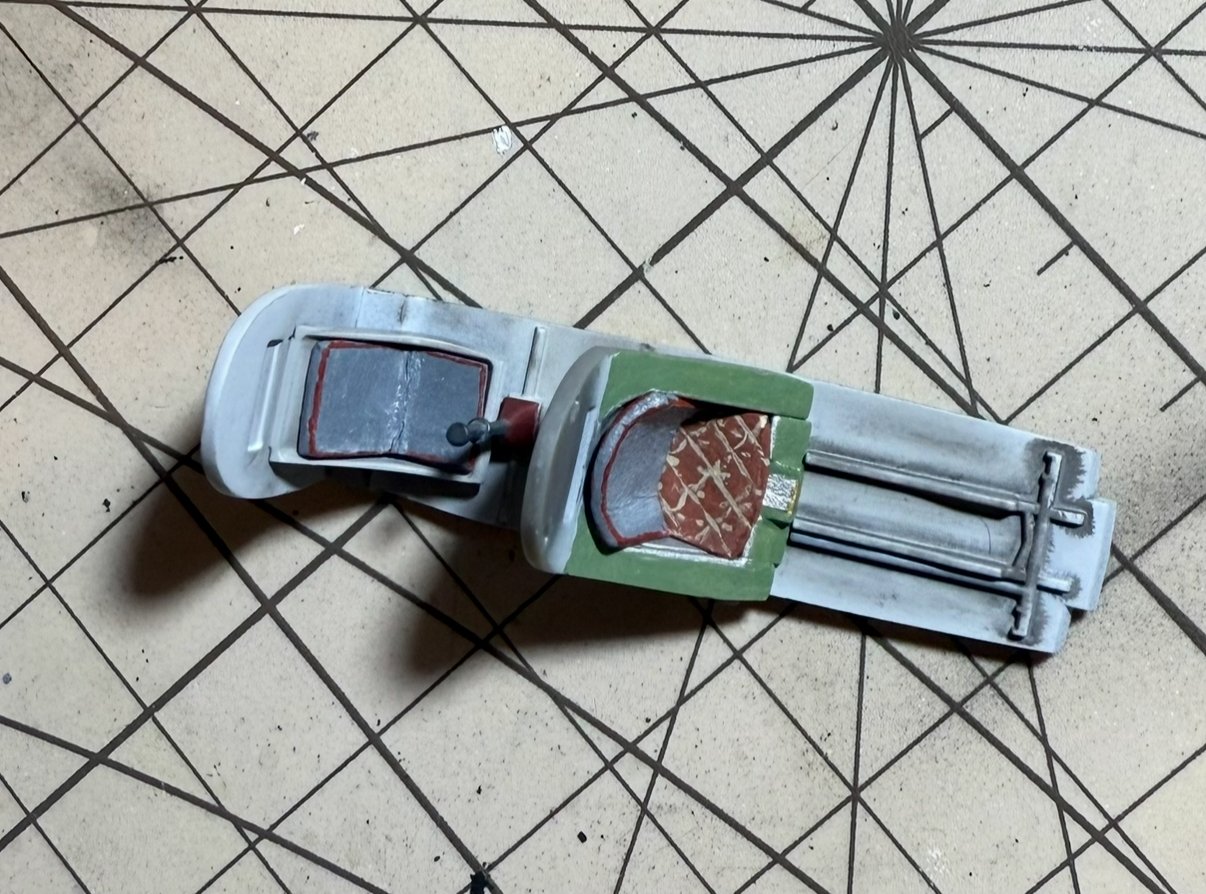
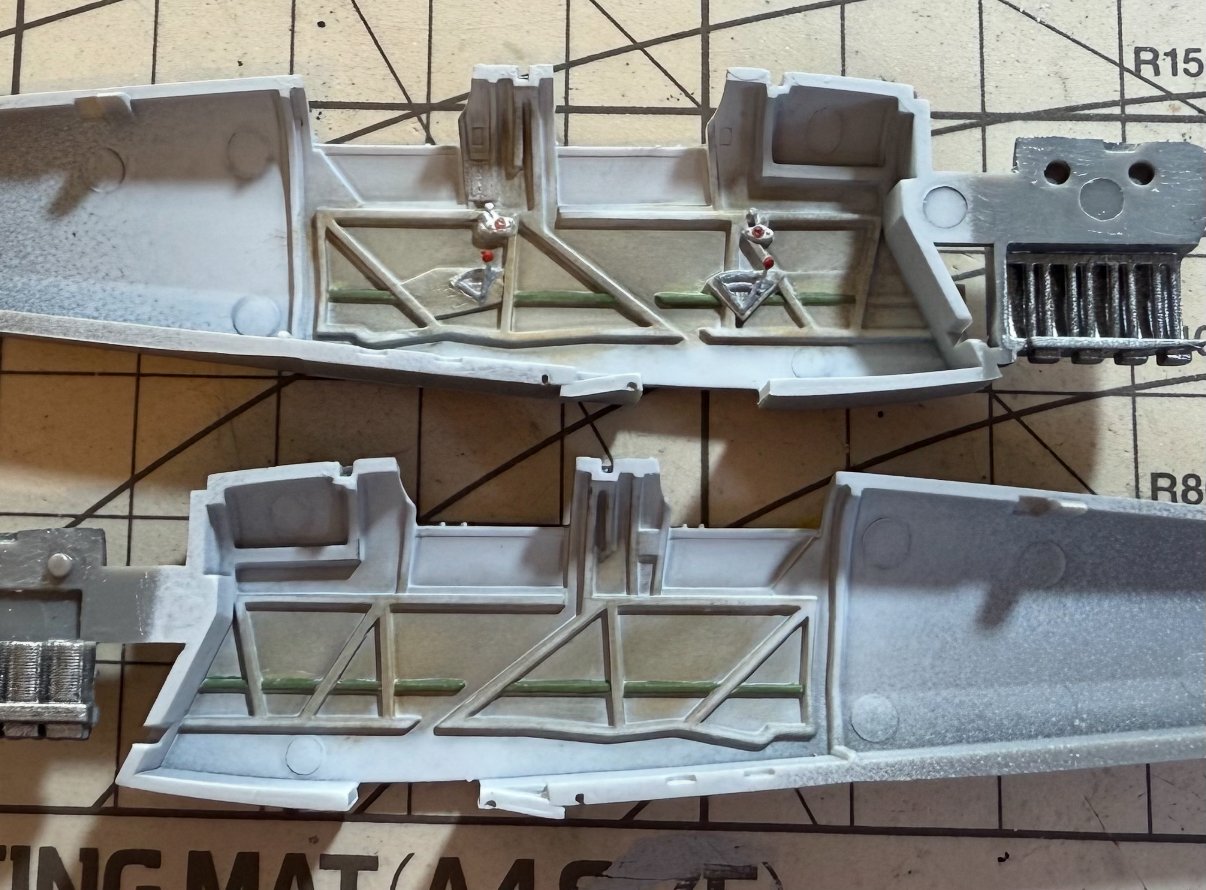
Started on the seat cushions as they are an extra and these types of details help make it unique. This is a pic of the front seat. the back seat is just the same as the back rest cushion which is grey with a red rim for both. So just this one with the pattern I’ve spent a few days thinking about. It’s really small and will have the seatbelt to cover it so not spending time getting it perfect. Each of the squares on the background is a cm square so gives an idea of its size. I think I got the gist of the pattern. Also in the picture you can see the front seat has the control column removed and a cover installed, so I also followed along. Hopefully a nice detail for when anyone looks inside. Just the seatbelts to add and about ready to close up!
- 33 replies
-
- 11
-
-
Thanks, it’s actually a really nice break from the more complex ones I’ve been doing. Get to try get the basics right as there is not much else.
-
Looking great! You are right it is quite similar to the P-47!
-
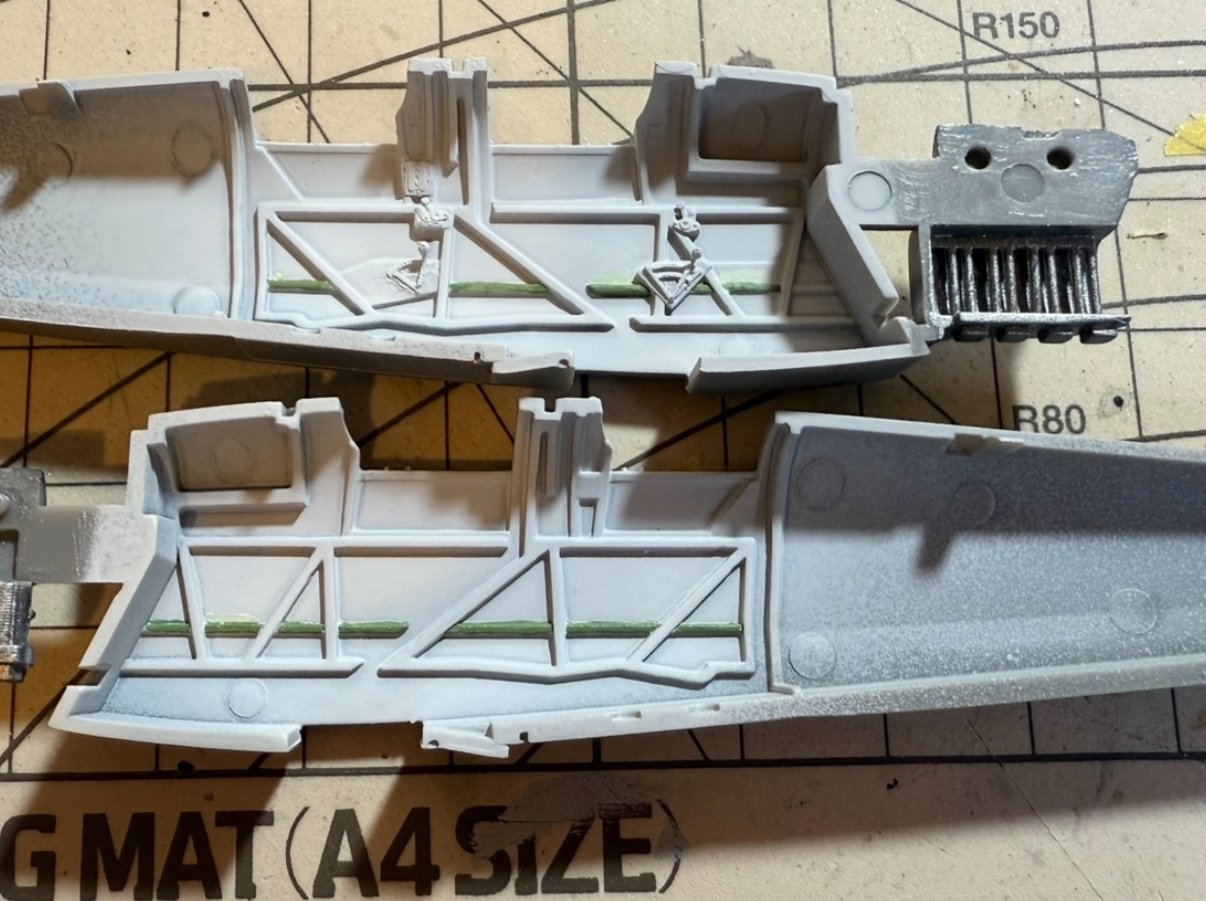
Cockpit reference pics arrived so was able to make a start! A nice simple and uncluttered aircraft! In some ways it makes it a challenge I. Its own way. Trying not to busy it up and over weather for the sake of a lot of room to fill. The Edward instrument panels always give it that extra boost! I'll have to make some seat cushions to match the pics but it’s coming together well. As I’ve completed more models I’ve been able to just get on with them and not fuss about on things that aren’t visible. Get the effect I want and cut down on a lot of time that I’ve wasted while doing previous projects.
- 33 replies
-
- 13
-
-
I’m intrigued to try a 1:32 scale model at some stage! I’ve never tried one! You always do amazing work with your builds and the aftermarket parts! I look forward to seeing your one take space when you get around to it!
-
Well you learn something everyday! Landing on a carrier must be a pretty unique experience! In the right conditions it must have been more like a hover landing!