HOLIDAY DONATION DRIVE - SUPPORT MSW - DO YOUR PART TO KEEP THIS GREAT FORUM GOING! (83 donations so far out of 49,000 members - C'mon guys!)
×
Lt. Biggles
-
Posts
346 -
Joined
-
Last visited
Content Type
Profiles
Forums
Gallery
Events
Everything posted by Lt. Biggles
-
 Thanks, there are so many tutorials online nowadays it’s great! Some of them I wonder how they came up with the idea in the first place!
 -
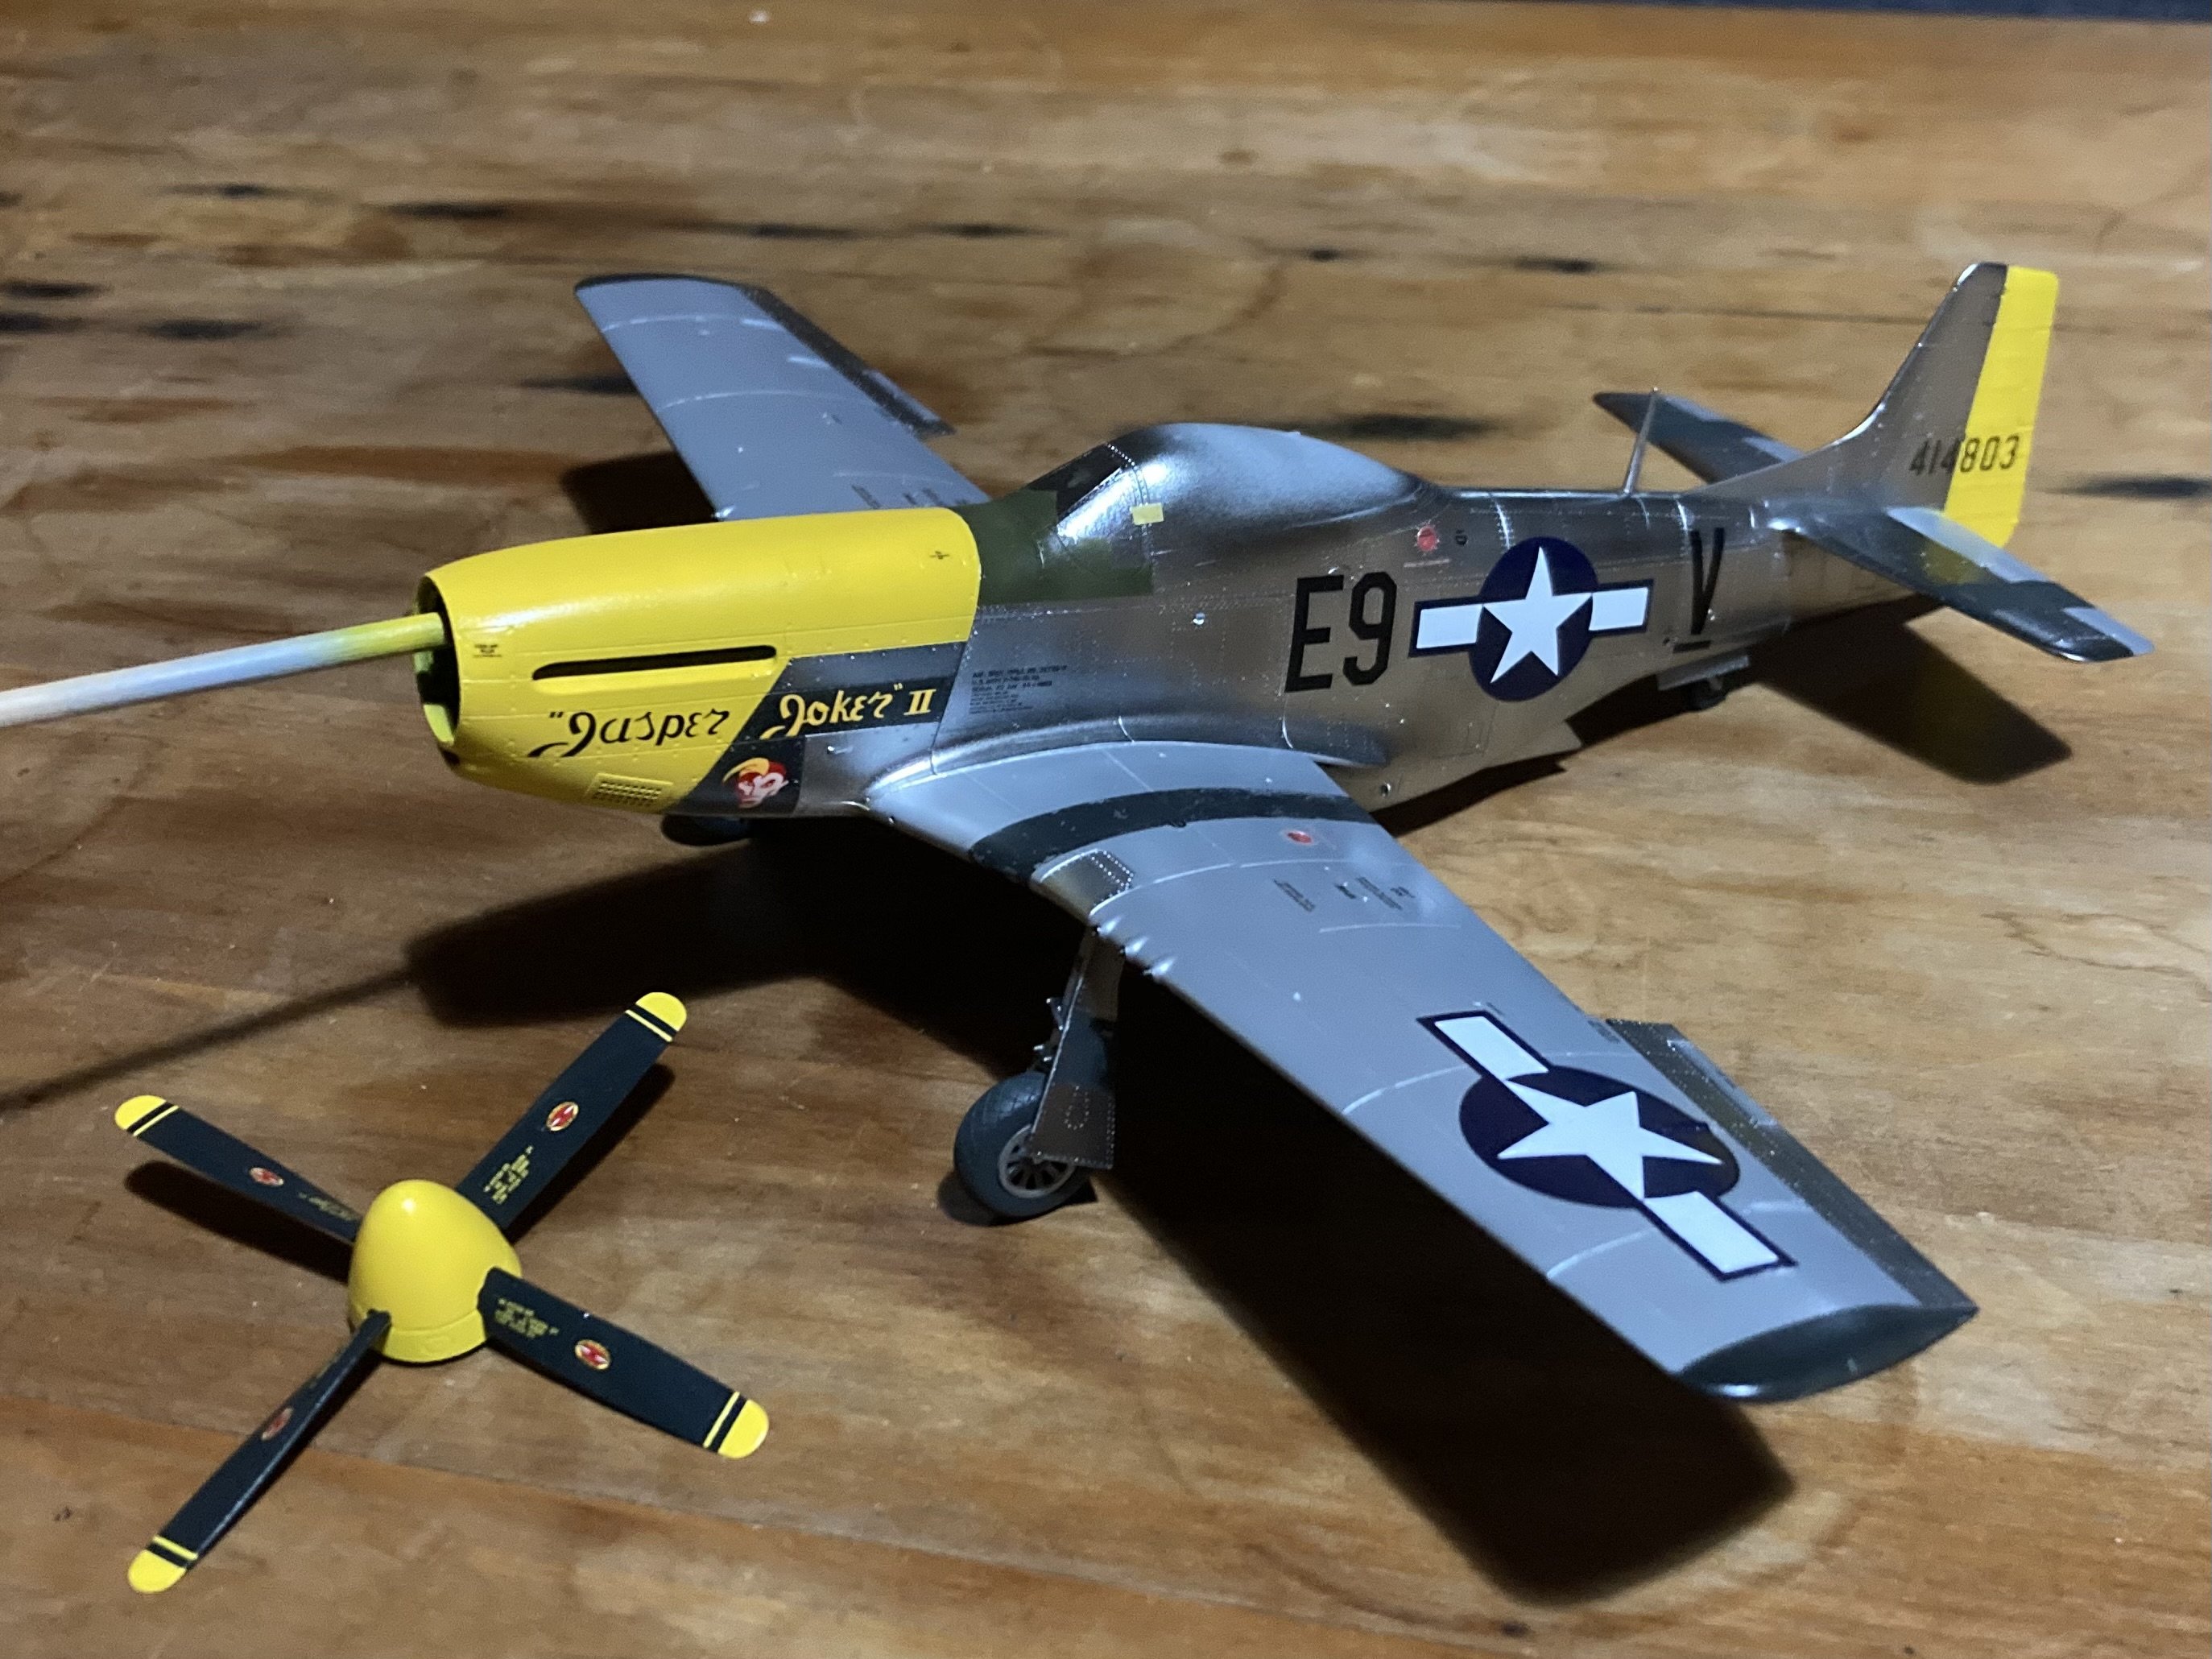
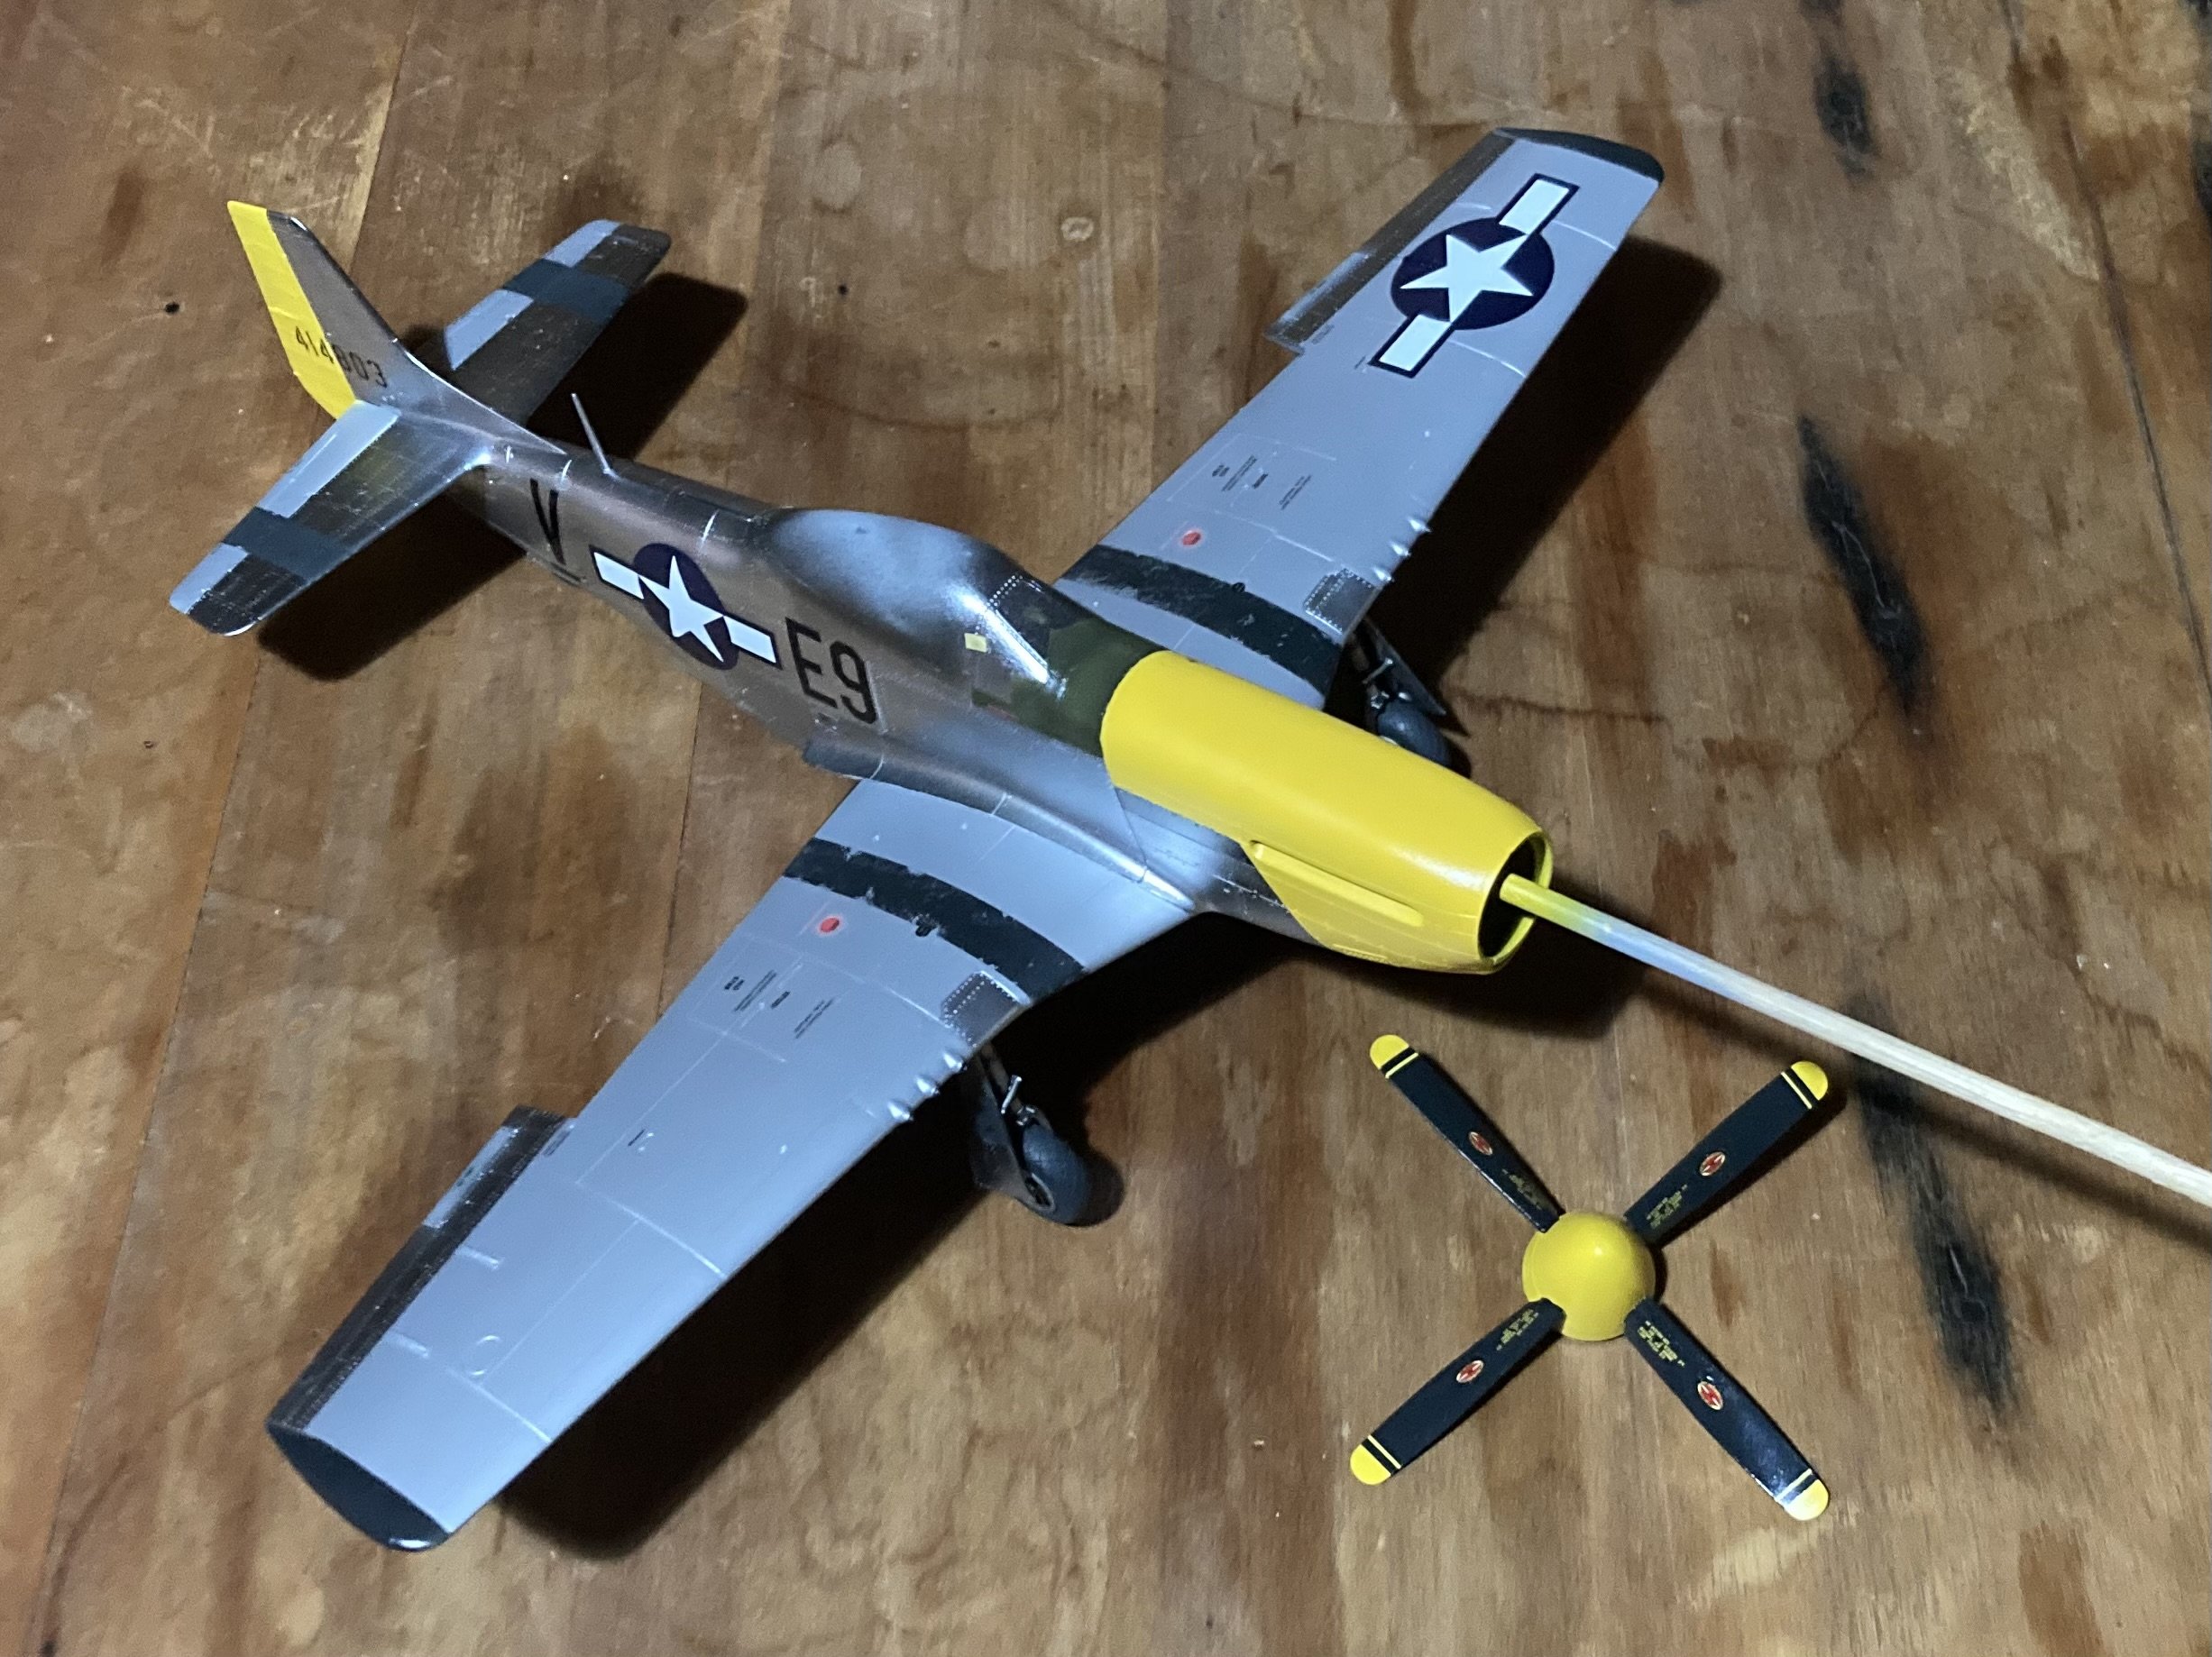
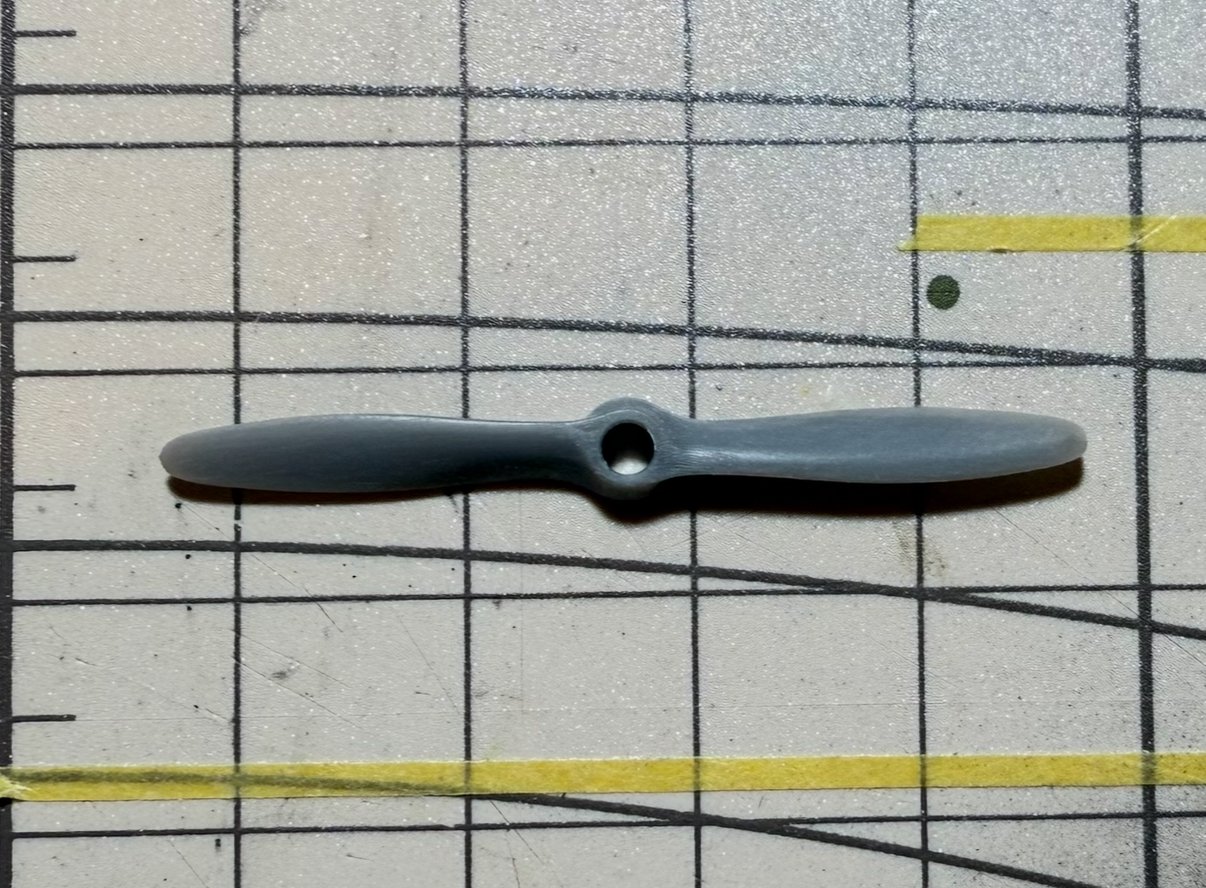
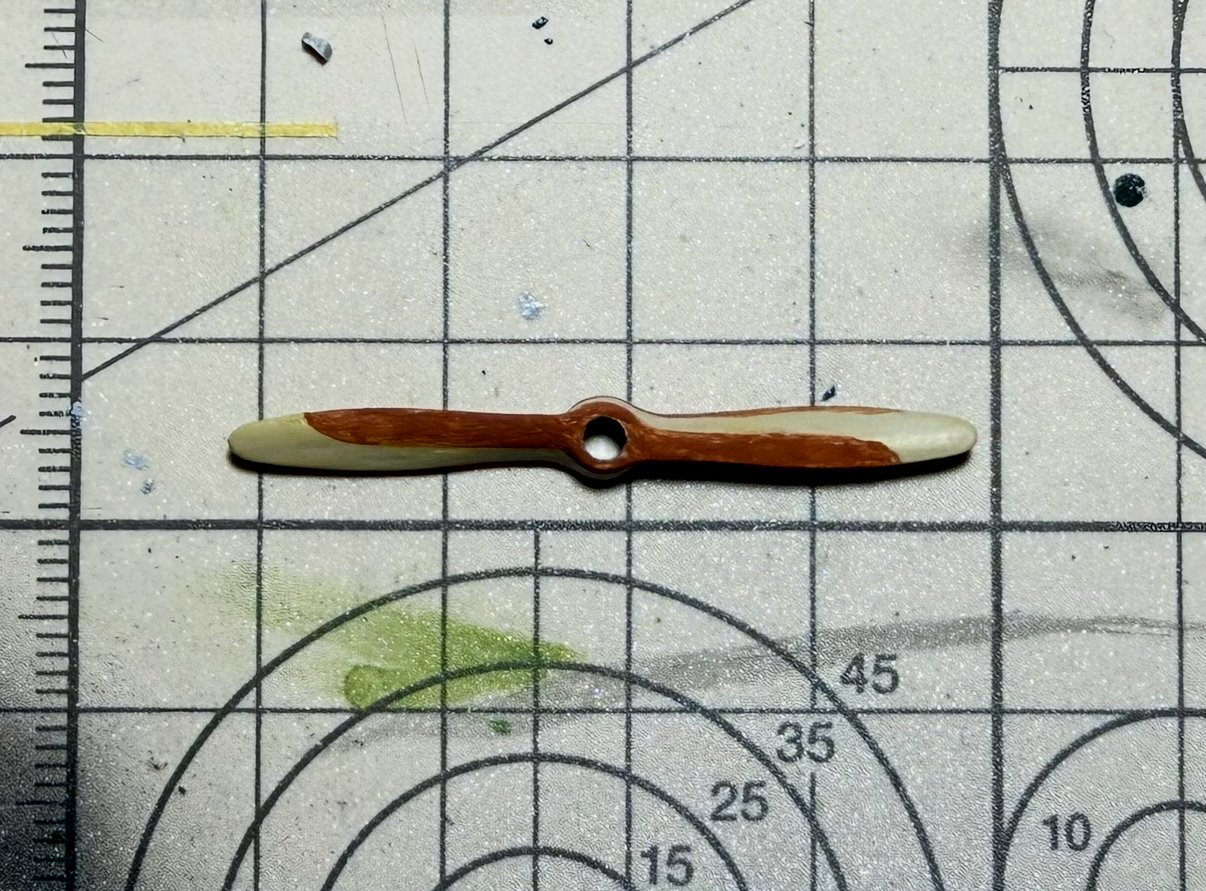
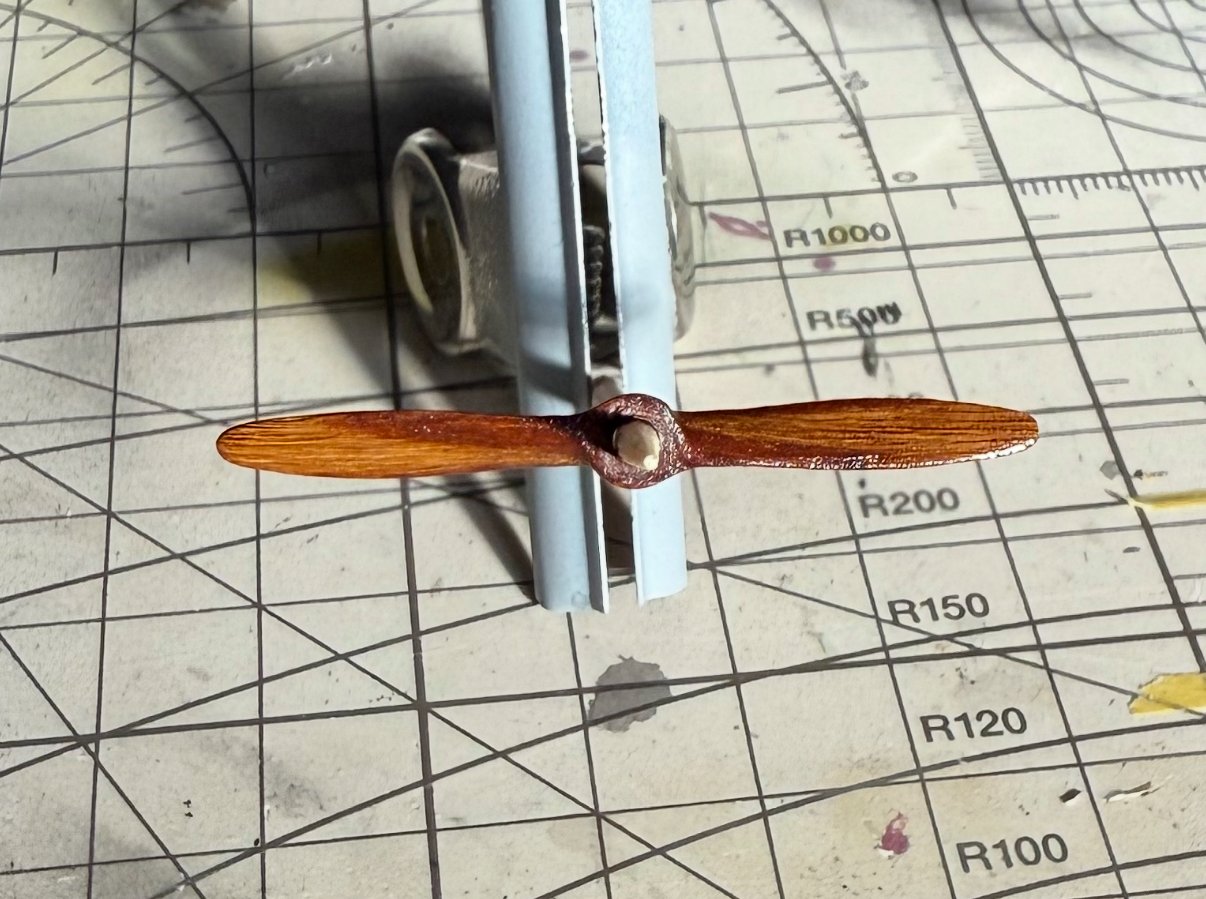
Naturally the first step is to paint the propellor… from the pics I’ve found it’s a wooden laminated prop. I painted the propellor buff colour and used a stationary pencil and moved the propellor against it to draw 2 lines to show the layers. It’s 4cm long so was a bit fiddly. From the pics the middle layer is the light colour, so painted the outer layers with a darker brown acrylic. Then once dry covered it with dark brown oils and let it dry for a bit before brushing the oil off to try give a wood grain effect. I’m fairly happy with it and will give it a few days before I seal it in after any touch ups I think it needs with a clear coat. It blends the two shades together well! To me it looks like a wooden prop
- 49 replies
-
- 15
-

-

-
They really are! It’s great to see them flying around on the nice weather weekends!
-
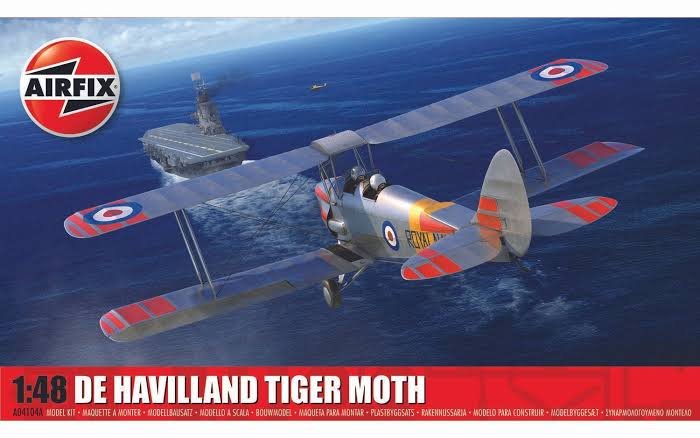
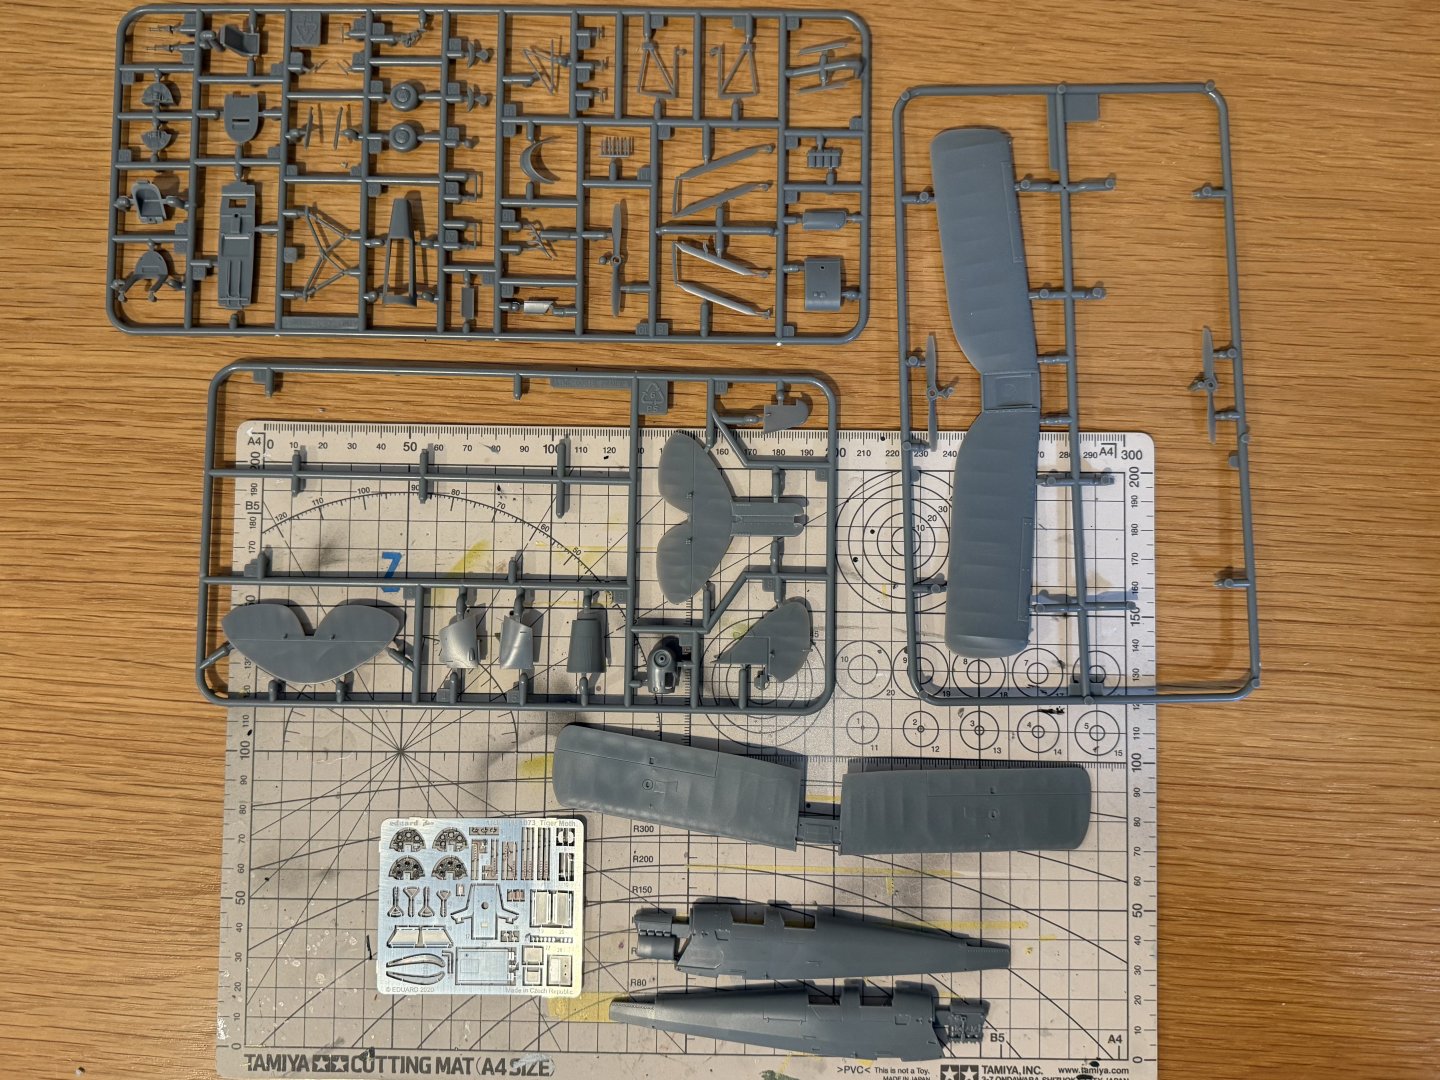
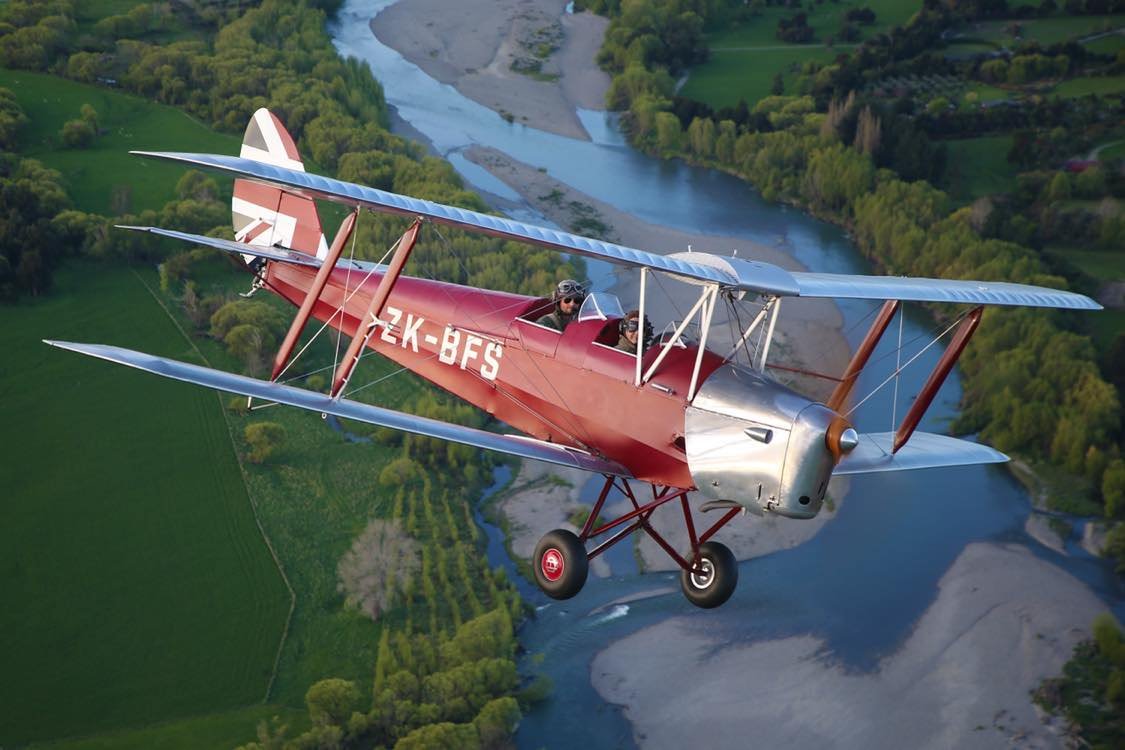
Hey, Feels like ages ago since I’ve been able to think about doing any models. But I’ve got things settled and have some time to spare so I’m back. It will probably be a slower build! But slow and steady. I’ve been asked to replicate a specific plane. This one… Queenie A classic tiger moth. So just waiting for them to send me some references pics of the cockpit so I can really get things going. Airfix have a 1/48 scale kit. And I’ve got the Eduard aftermarket PE set with a few bits to help make it that much better (hopefully). It has a few challenges, mainly the Union Jack on the tail which I’ll have to mask and paint, matching the red paint scheme and knowing its ratio for the inevitable touch ups and on the left side nose it has a very specific logo. Which I’ll have to make a custom decal for… new territory! The kit instructions come with detailed drawings on how to rig it. So that should really finish it well! Thanks for taking a look
- 49 replies
-
- 11
-
-
Looks amazing! You did a great job with the painting! First time I’ve ever seen a Tempest not in camo!
-
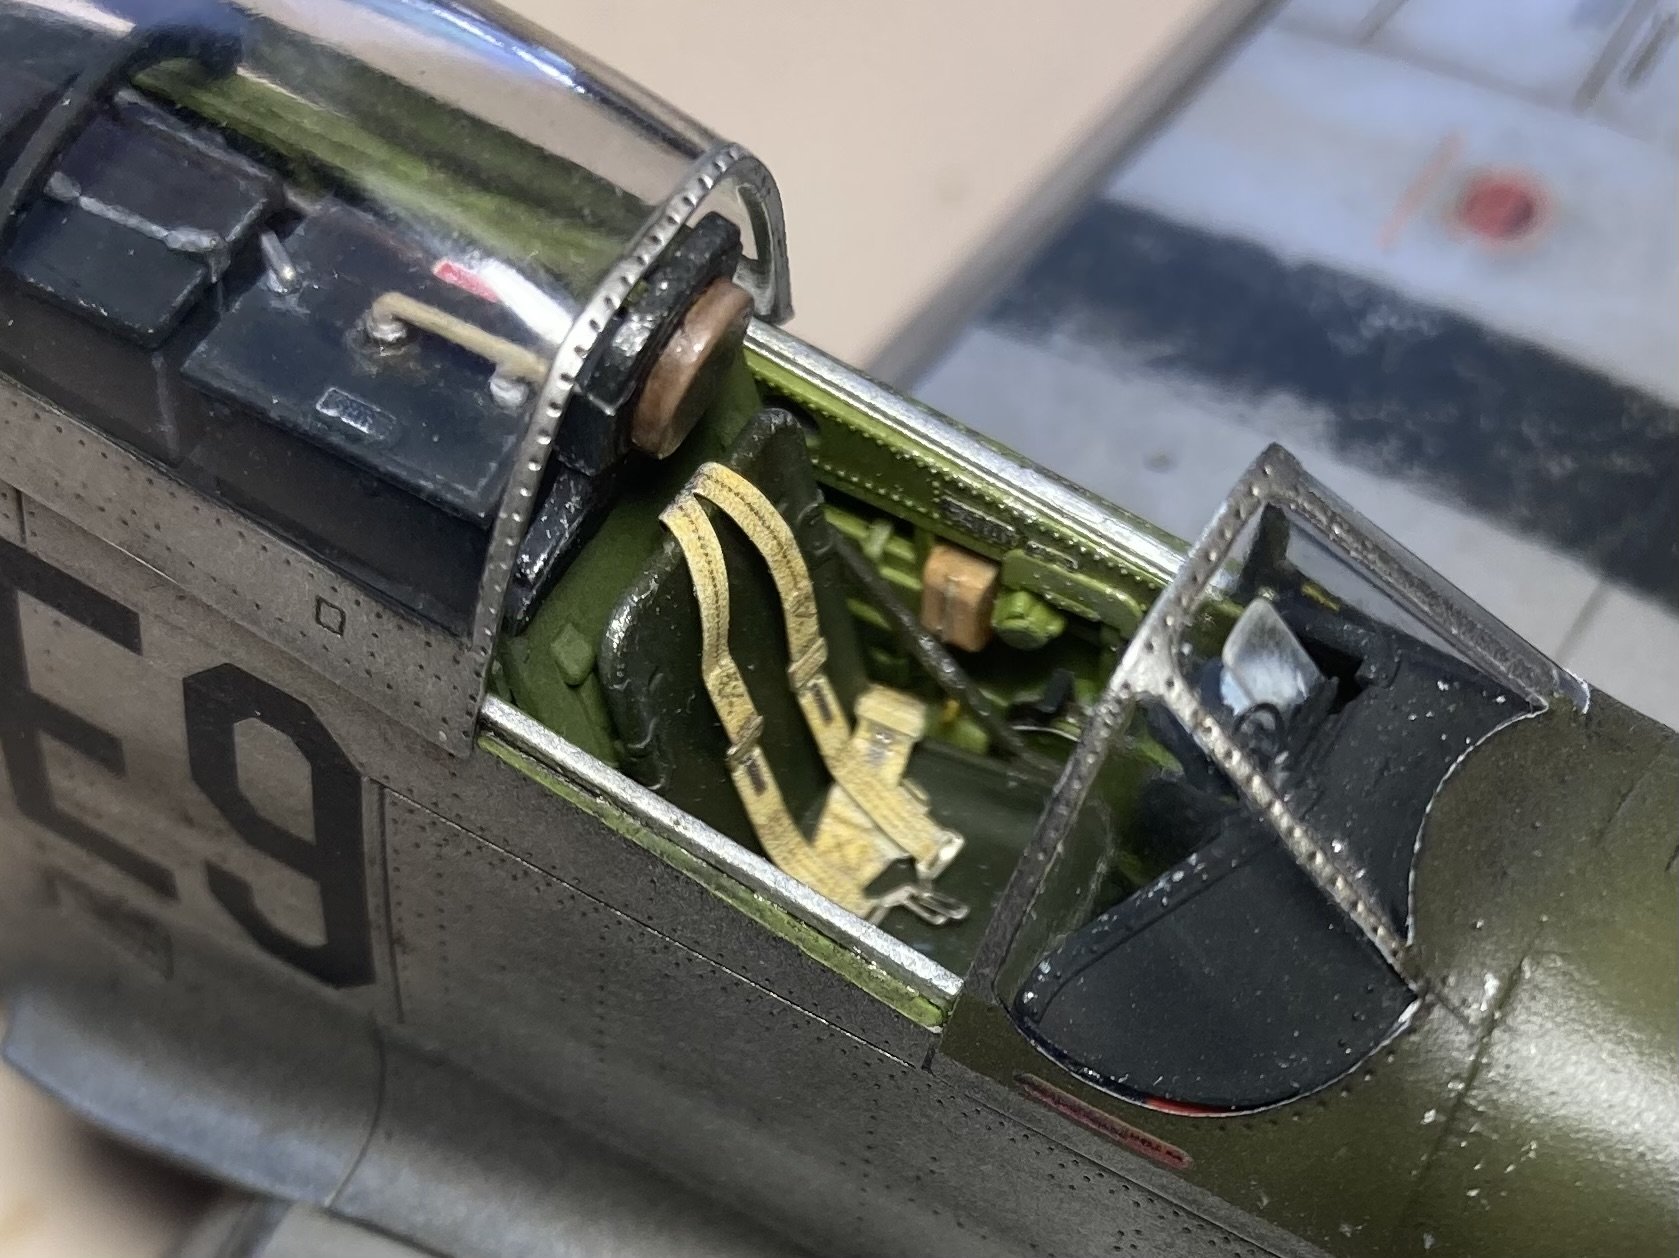
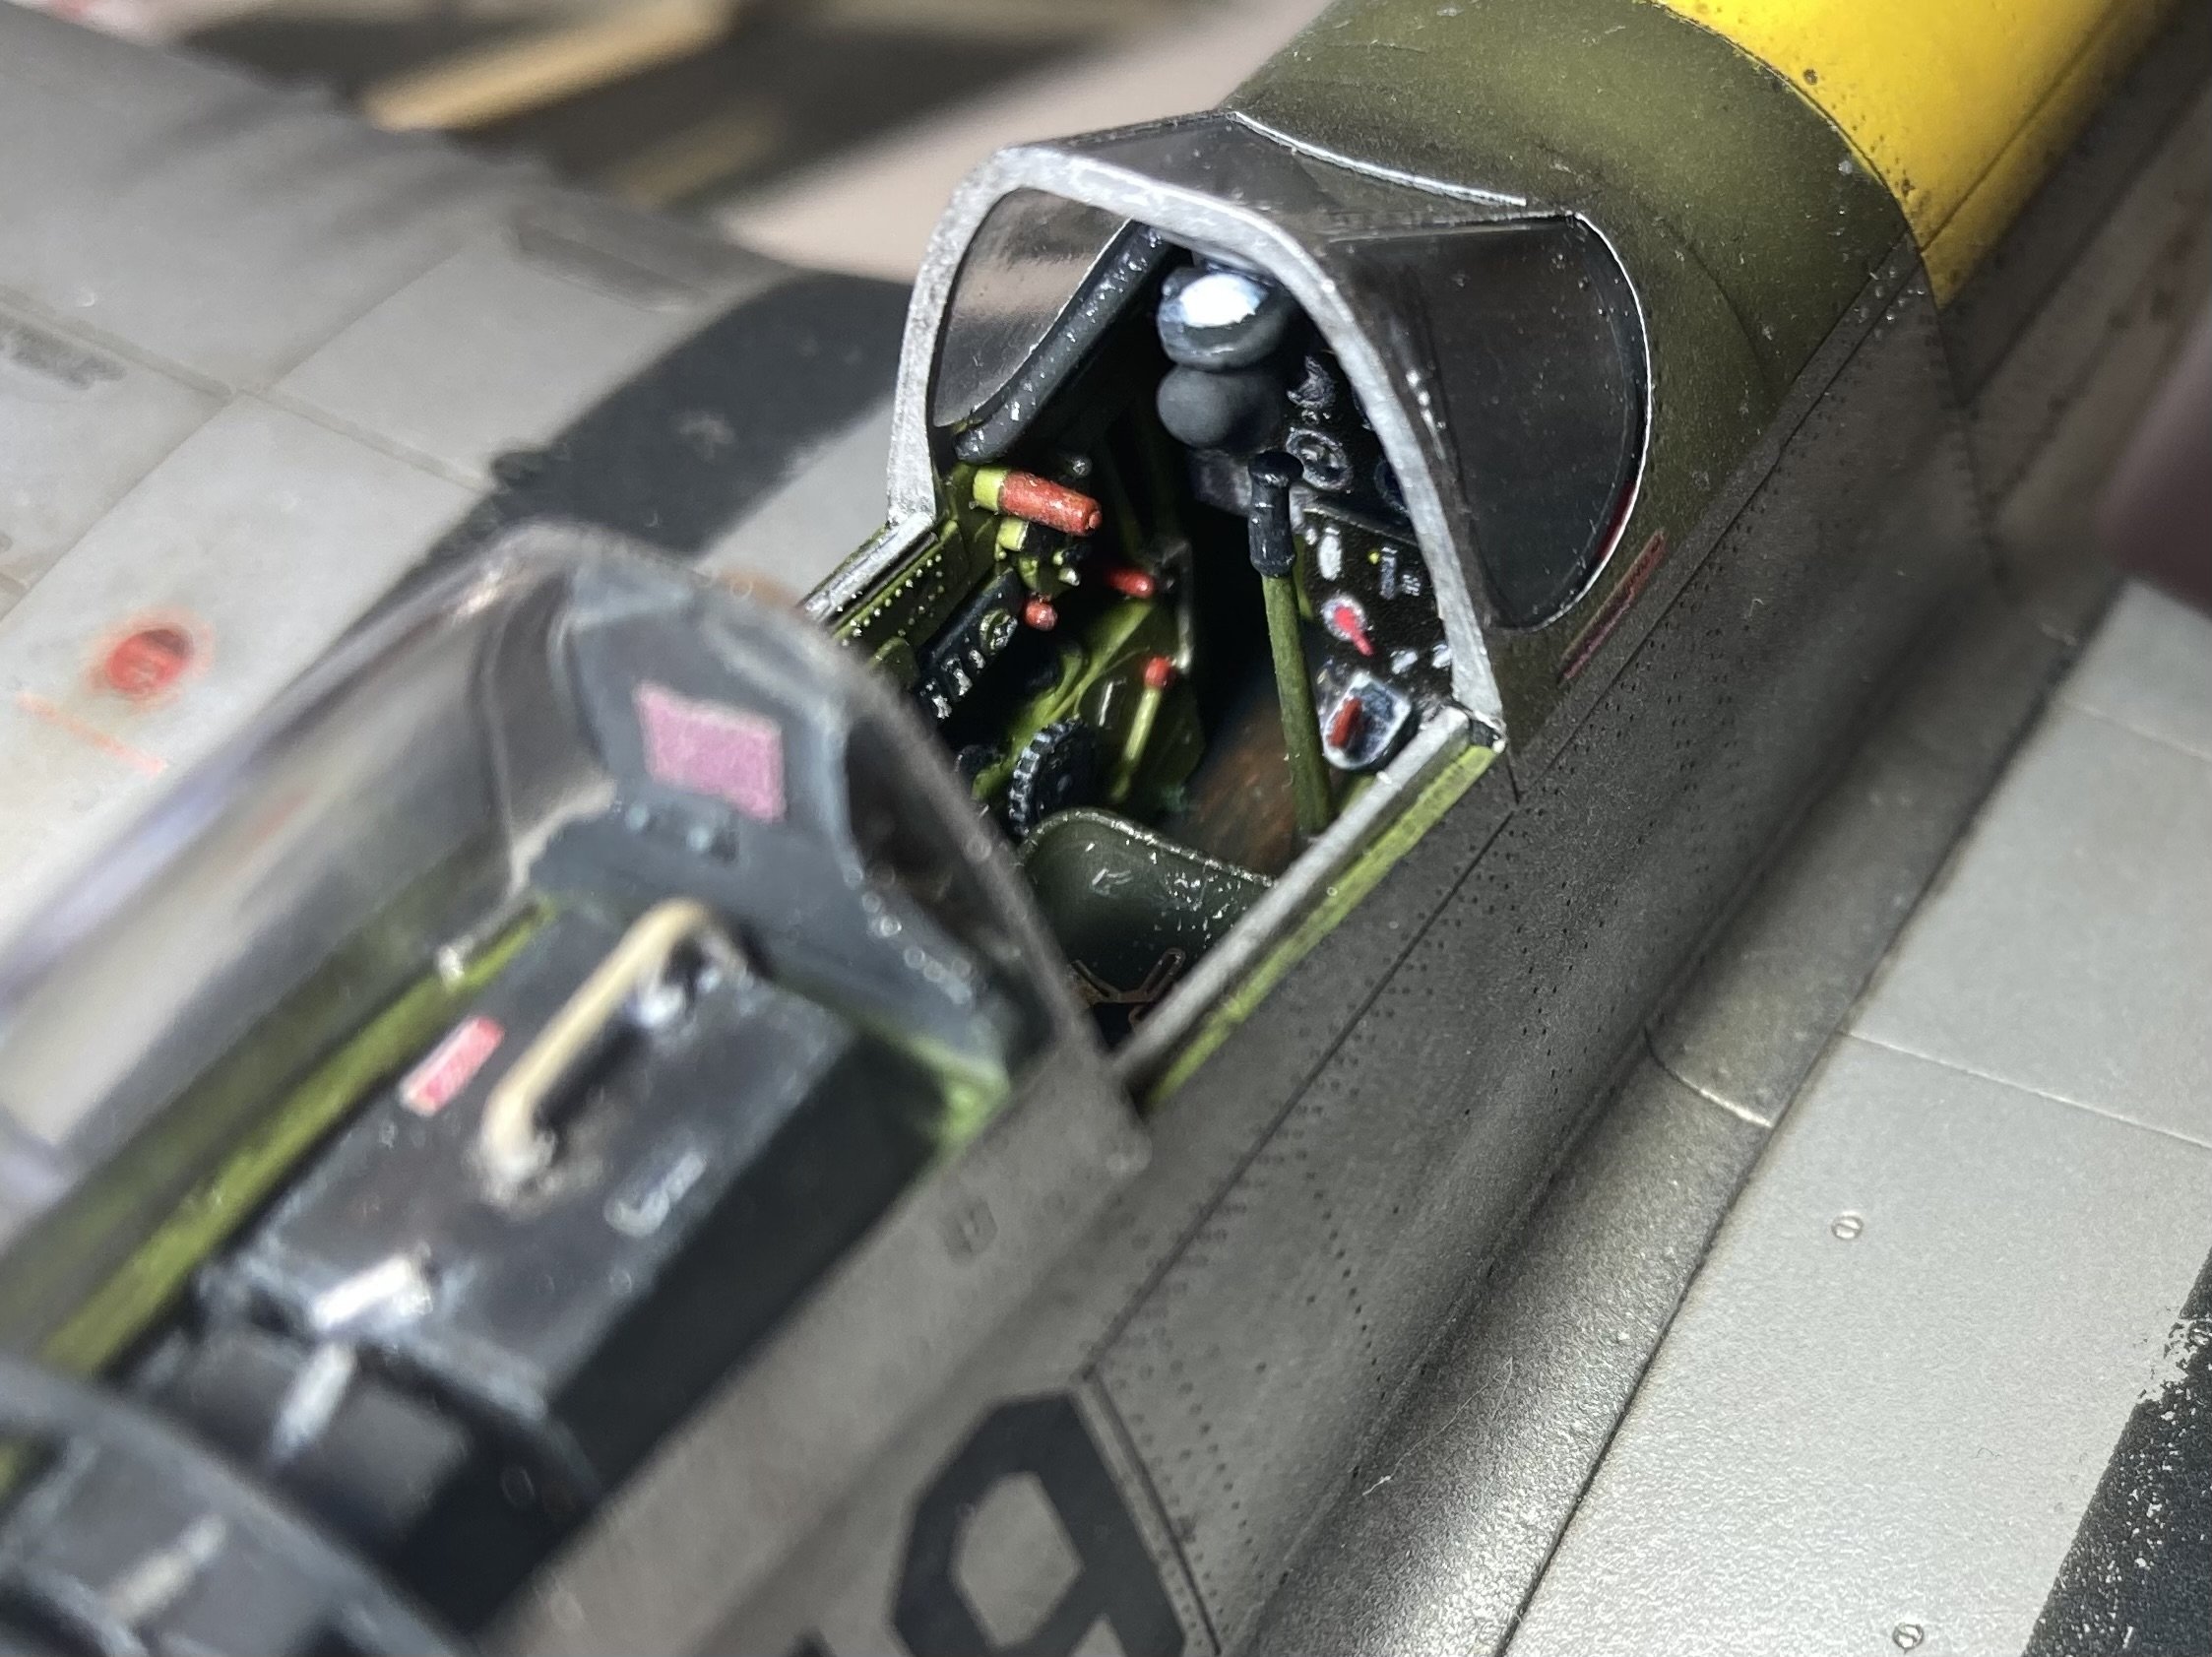
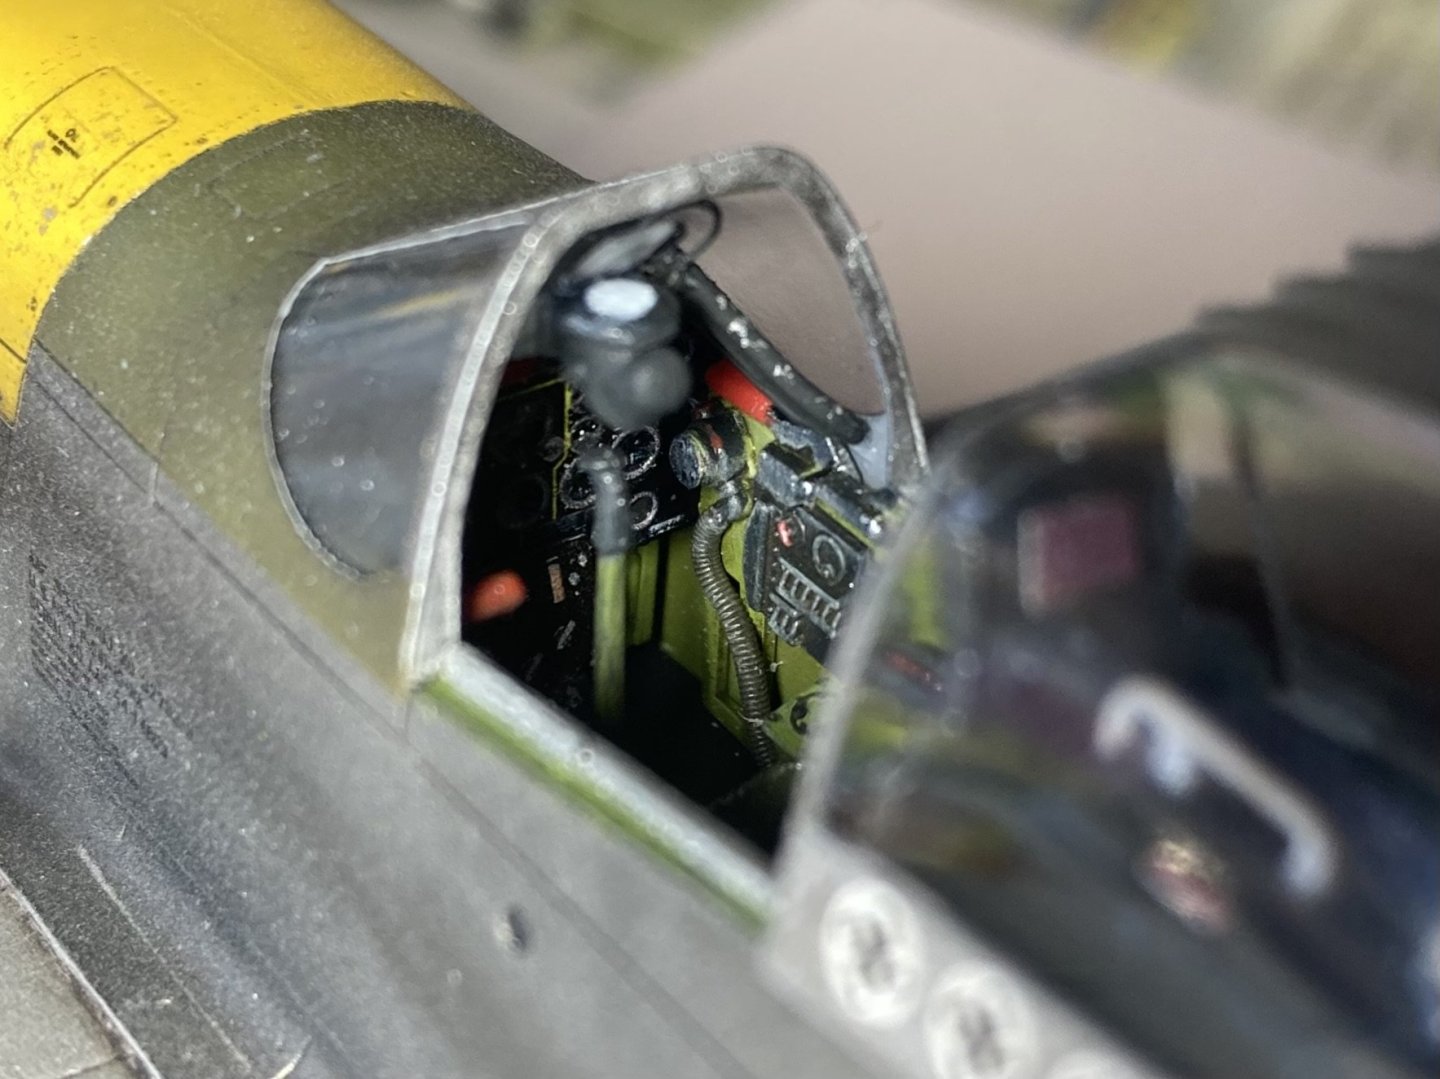
Thanks all for the kind words! Enjoyed your company through it! A bit late but here are a few close ups of the cockpit area.


- 74 replies
-
- 12
-
-
-
Glad you are ok! That paint job looks amazing! You have done a great job, NMF is a big learning curve!
-
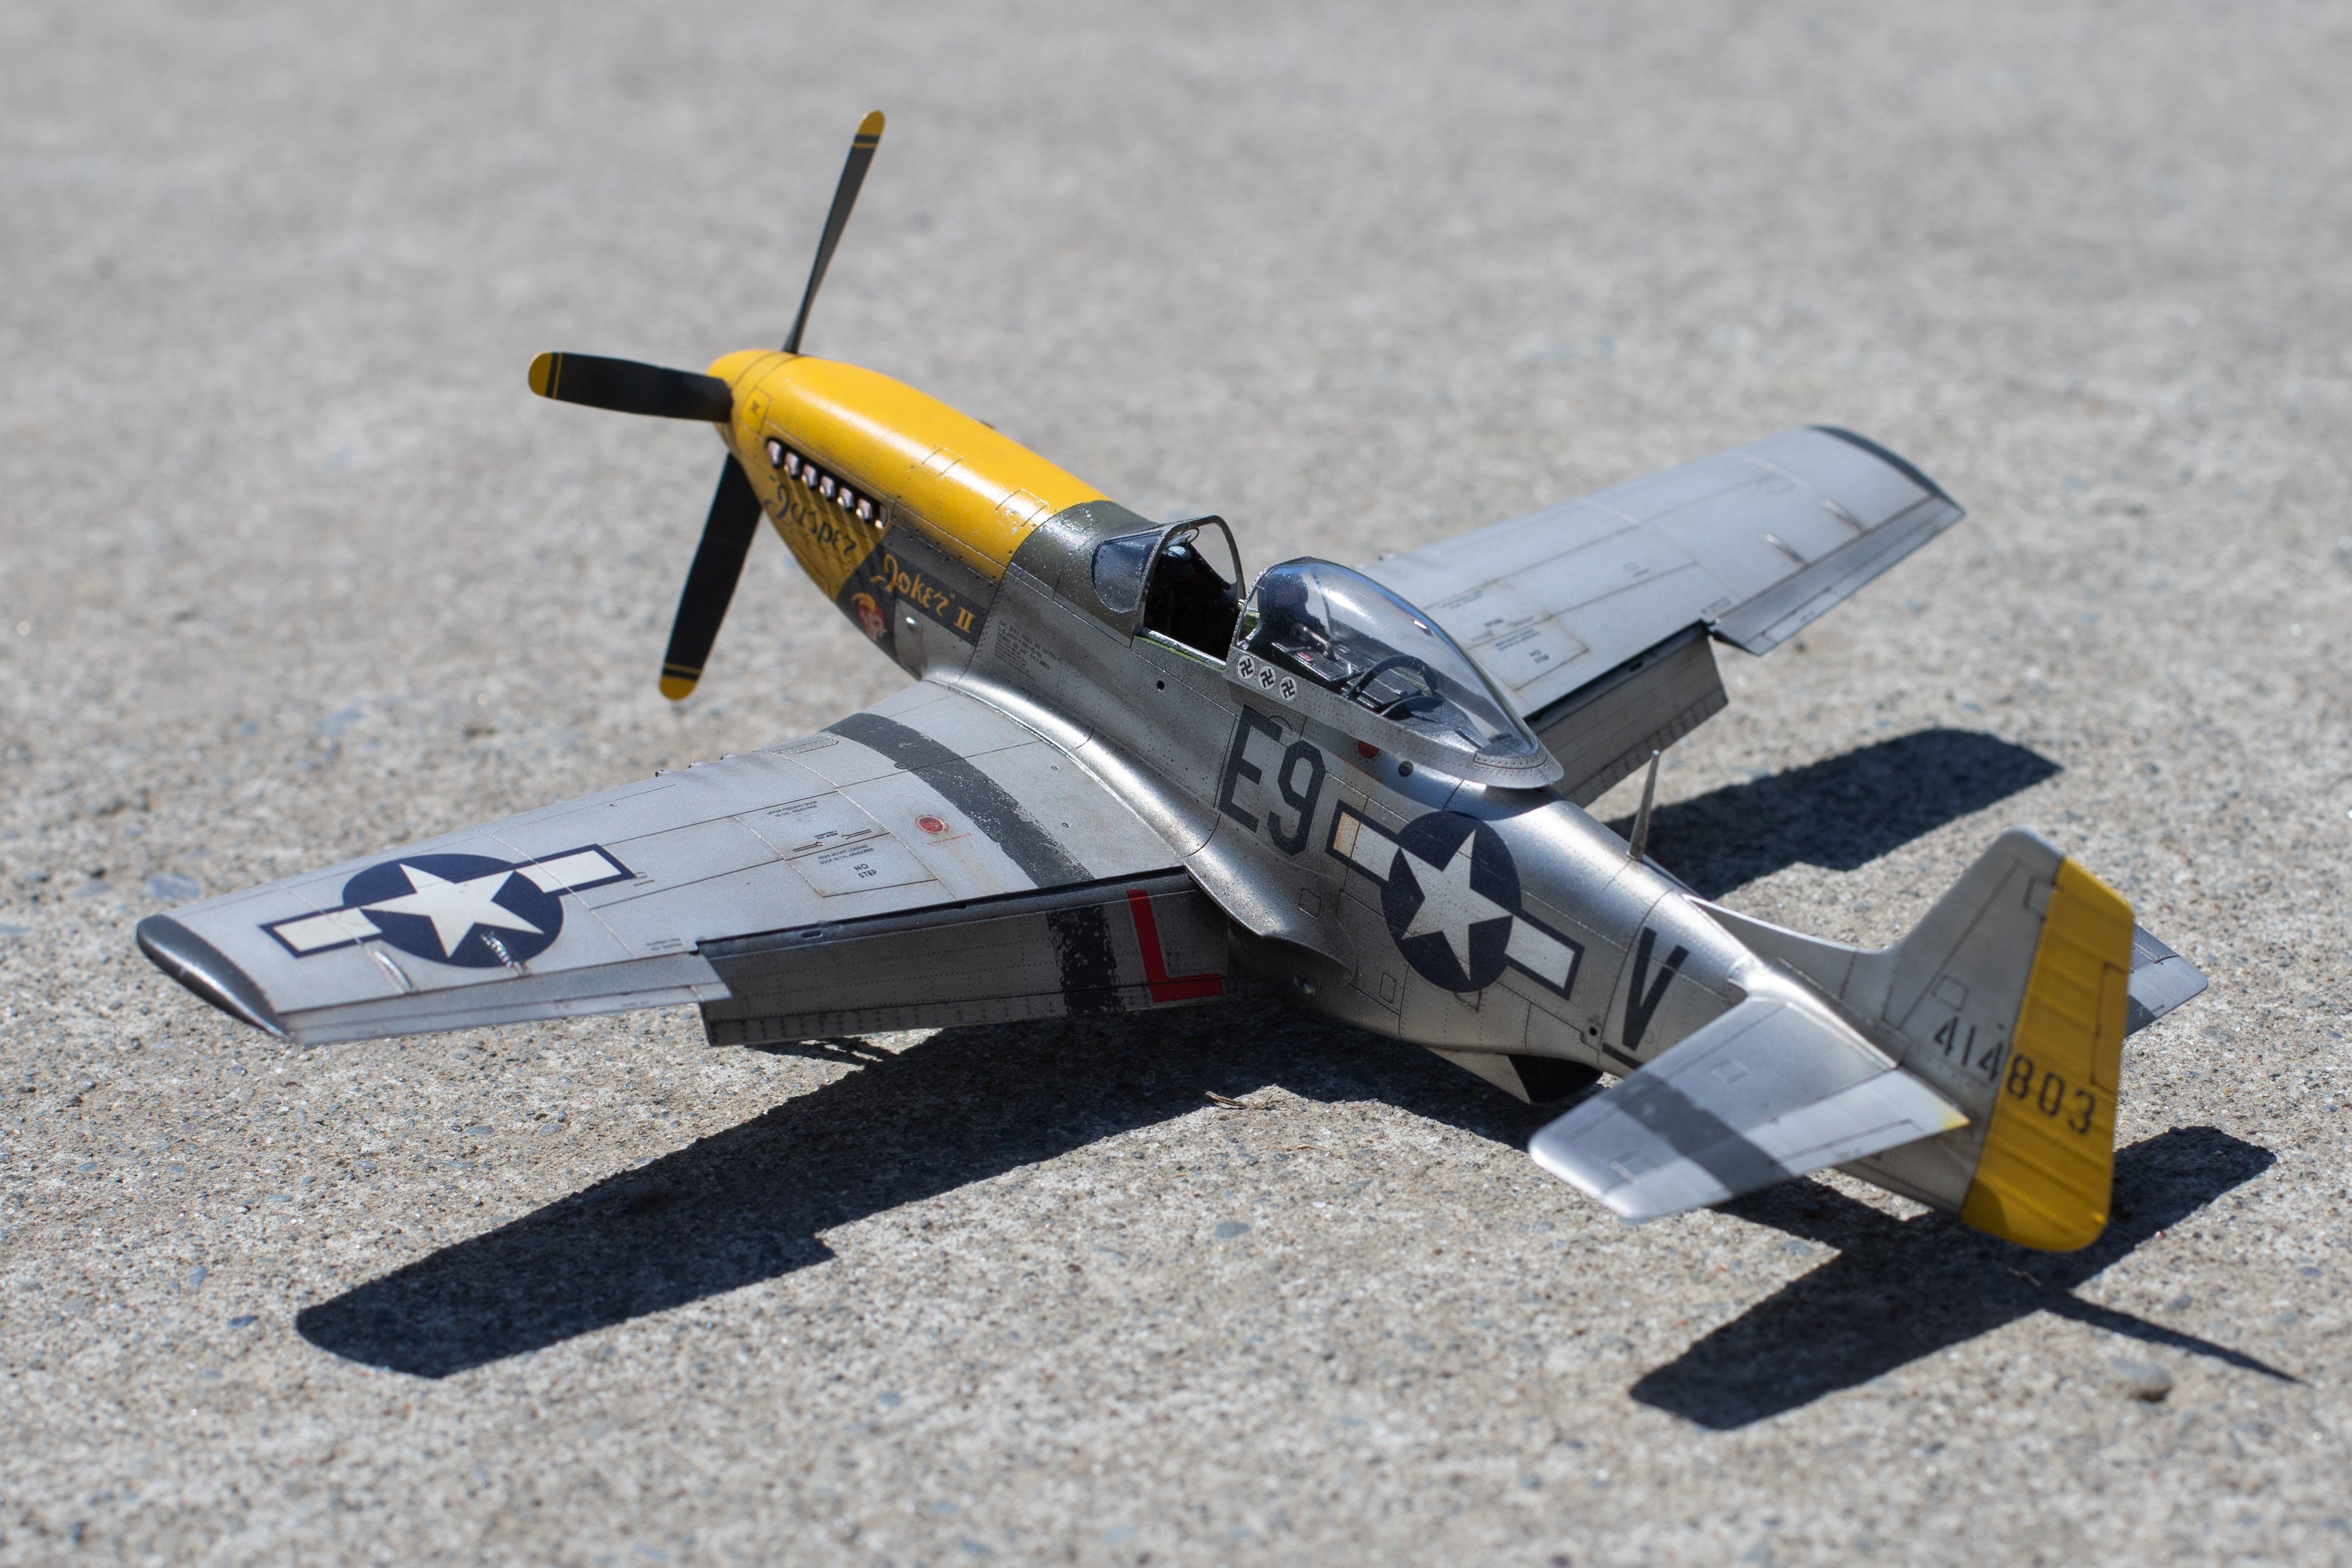
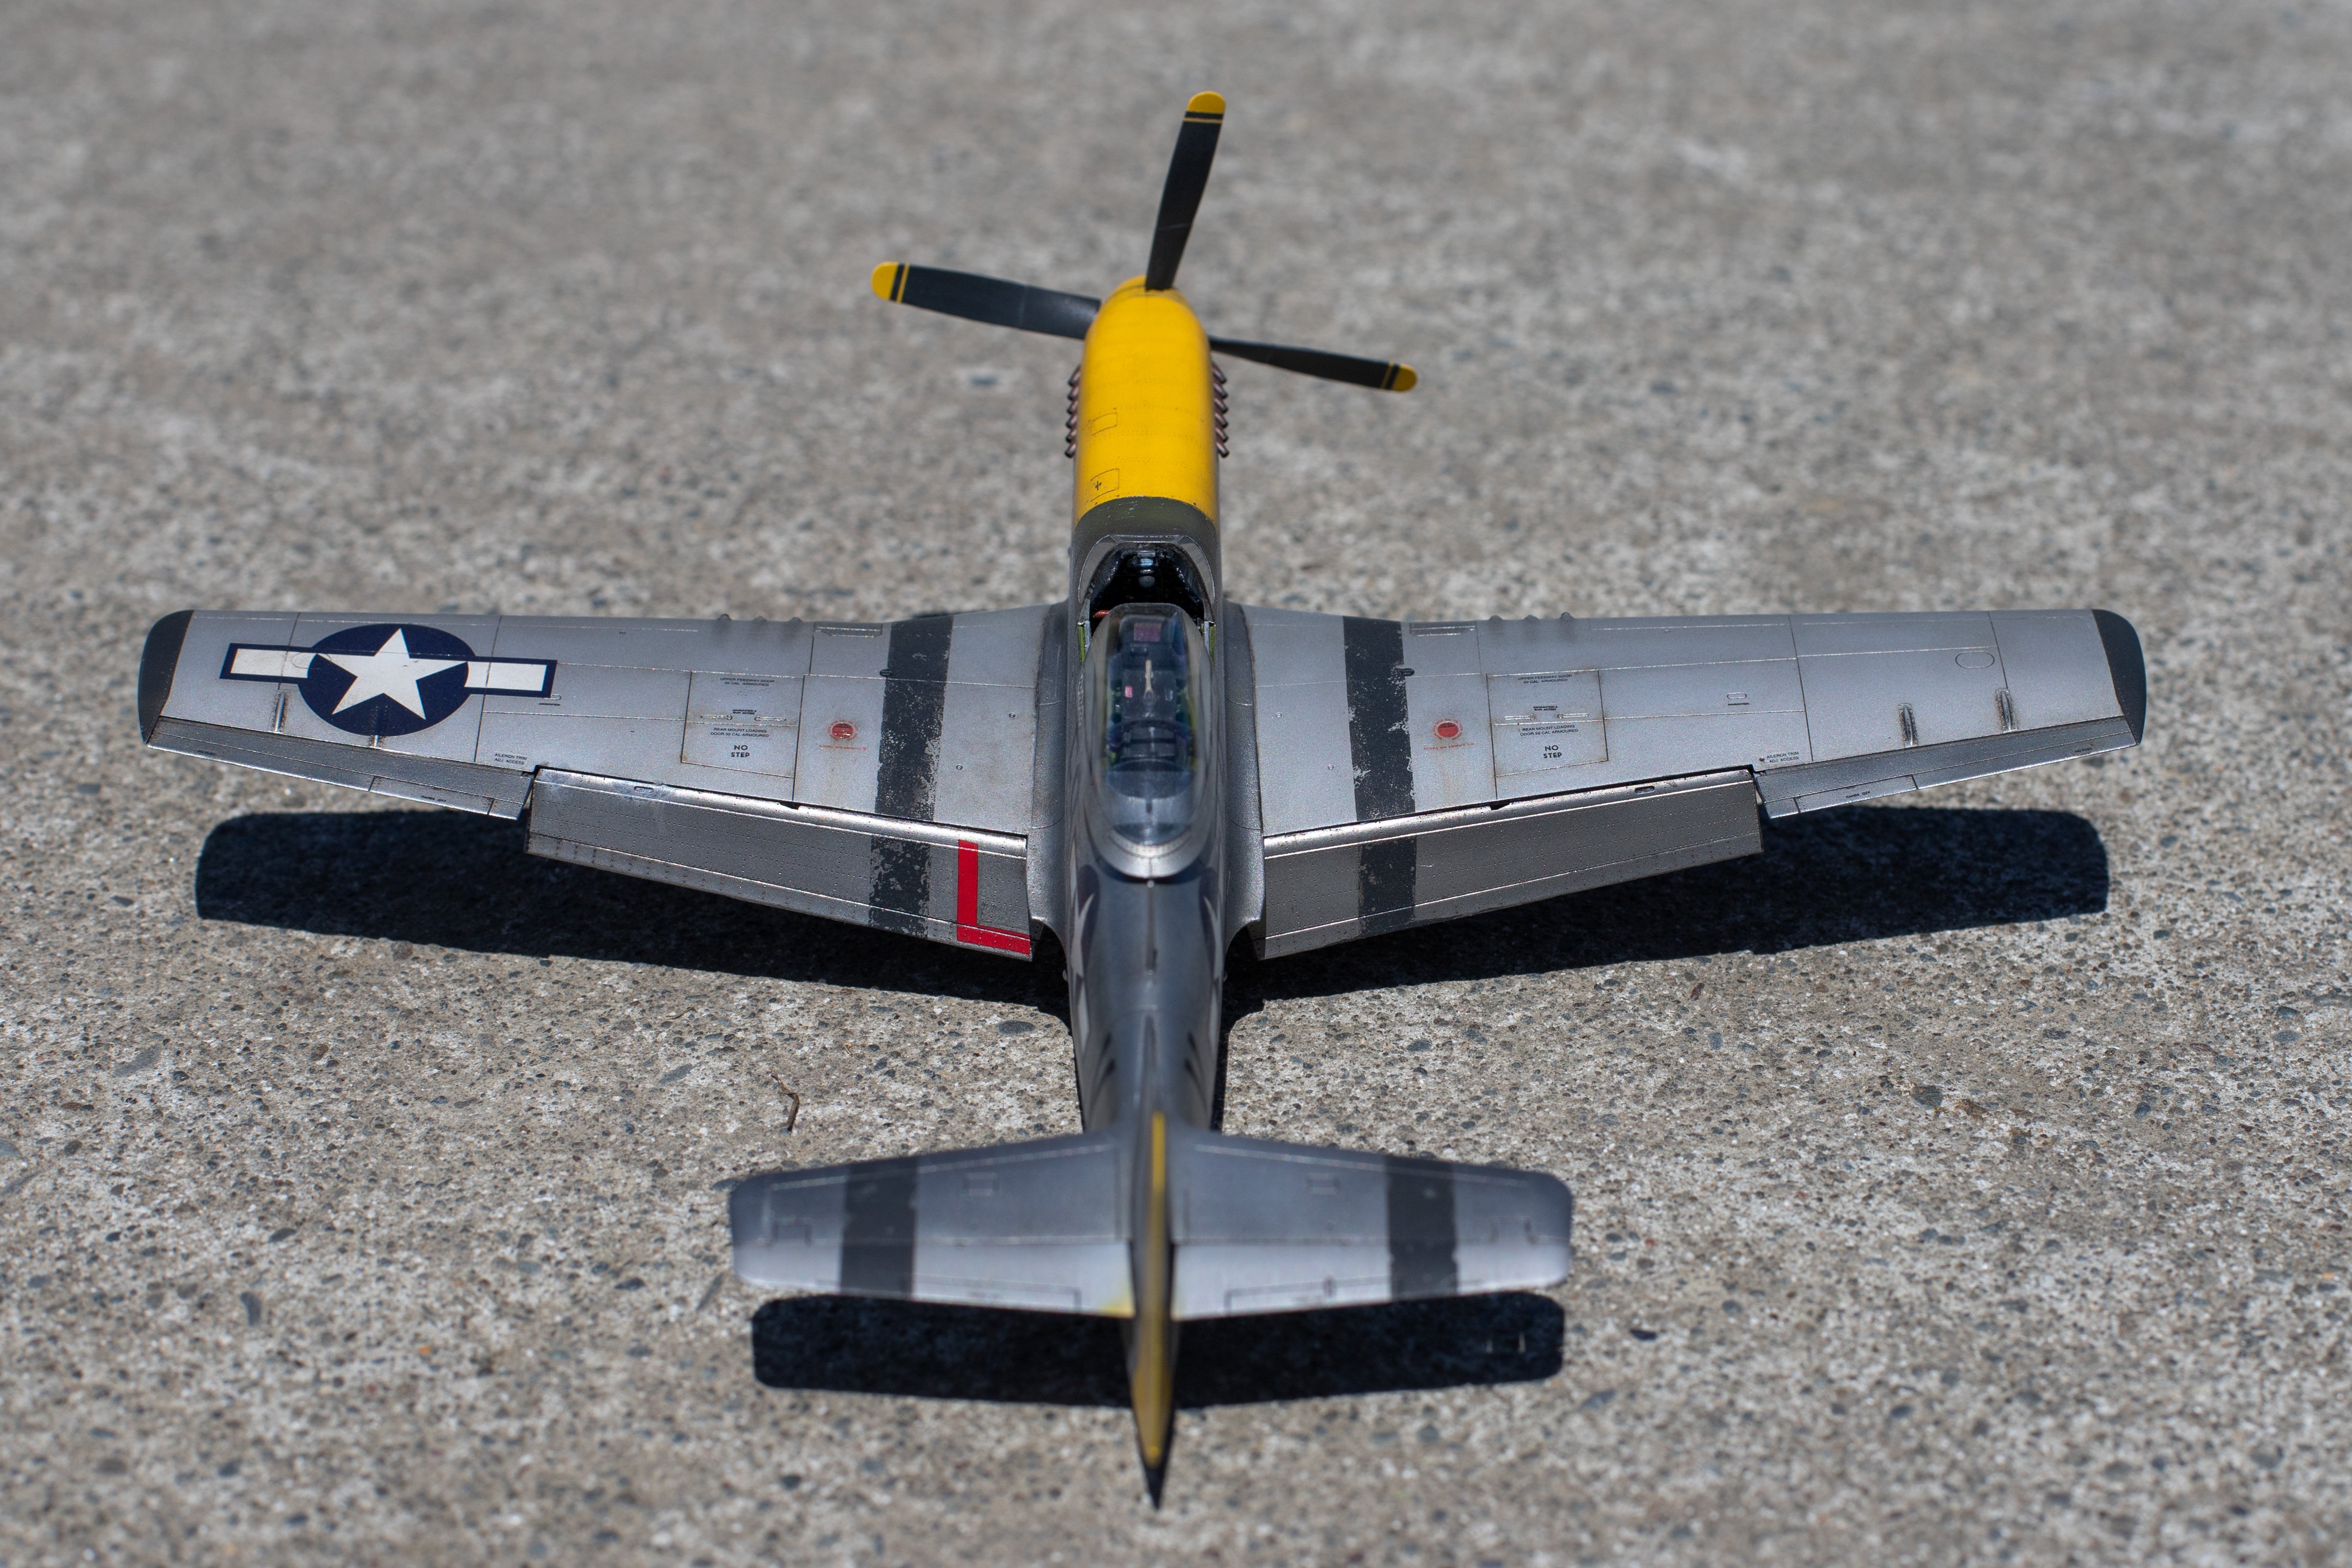
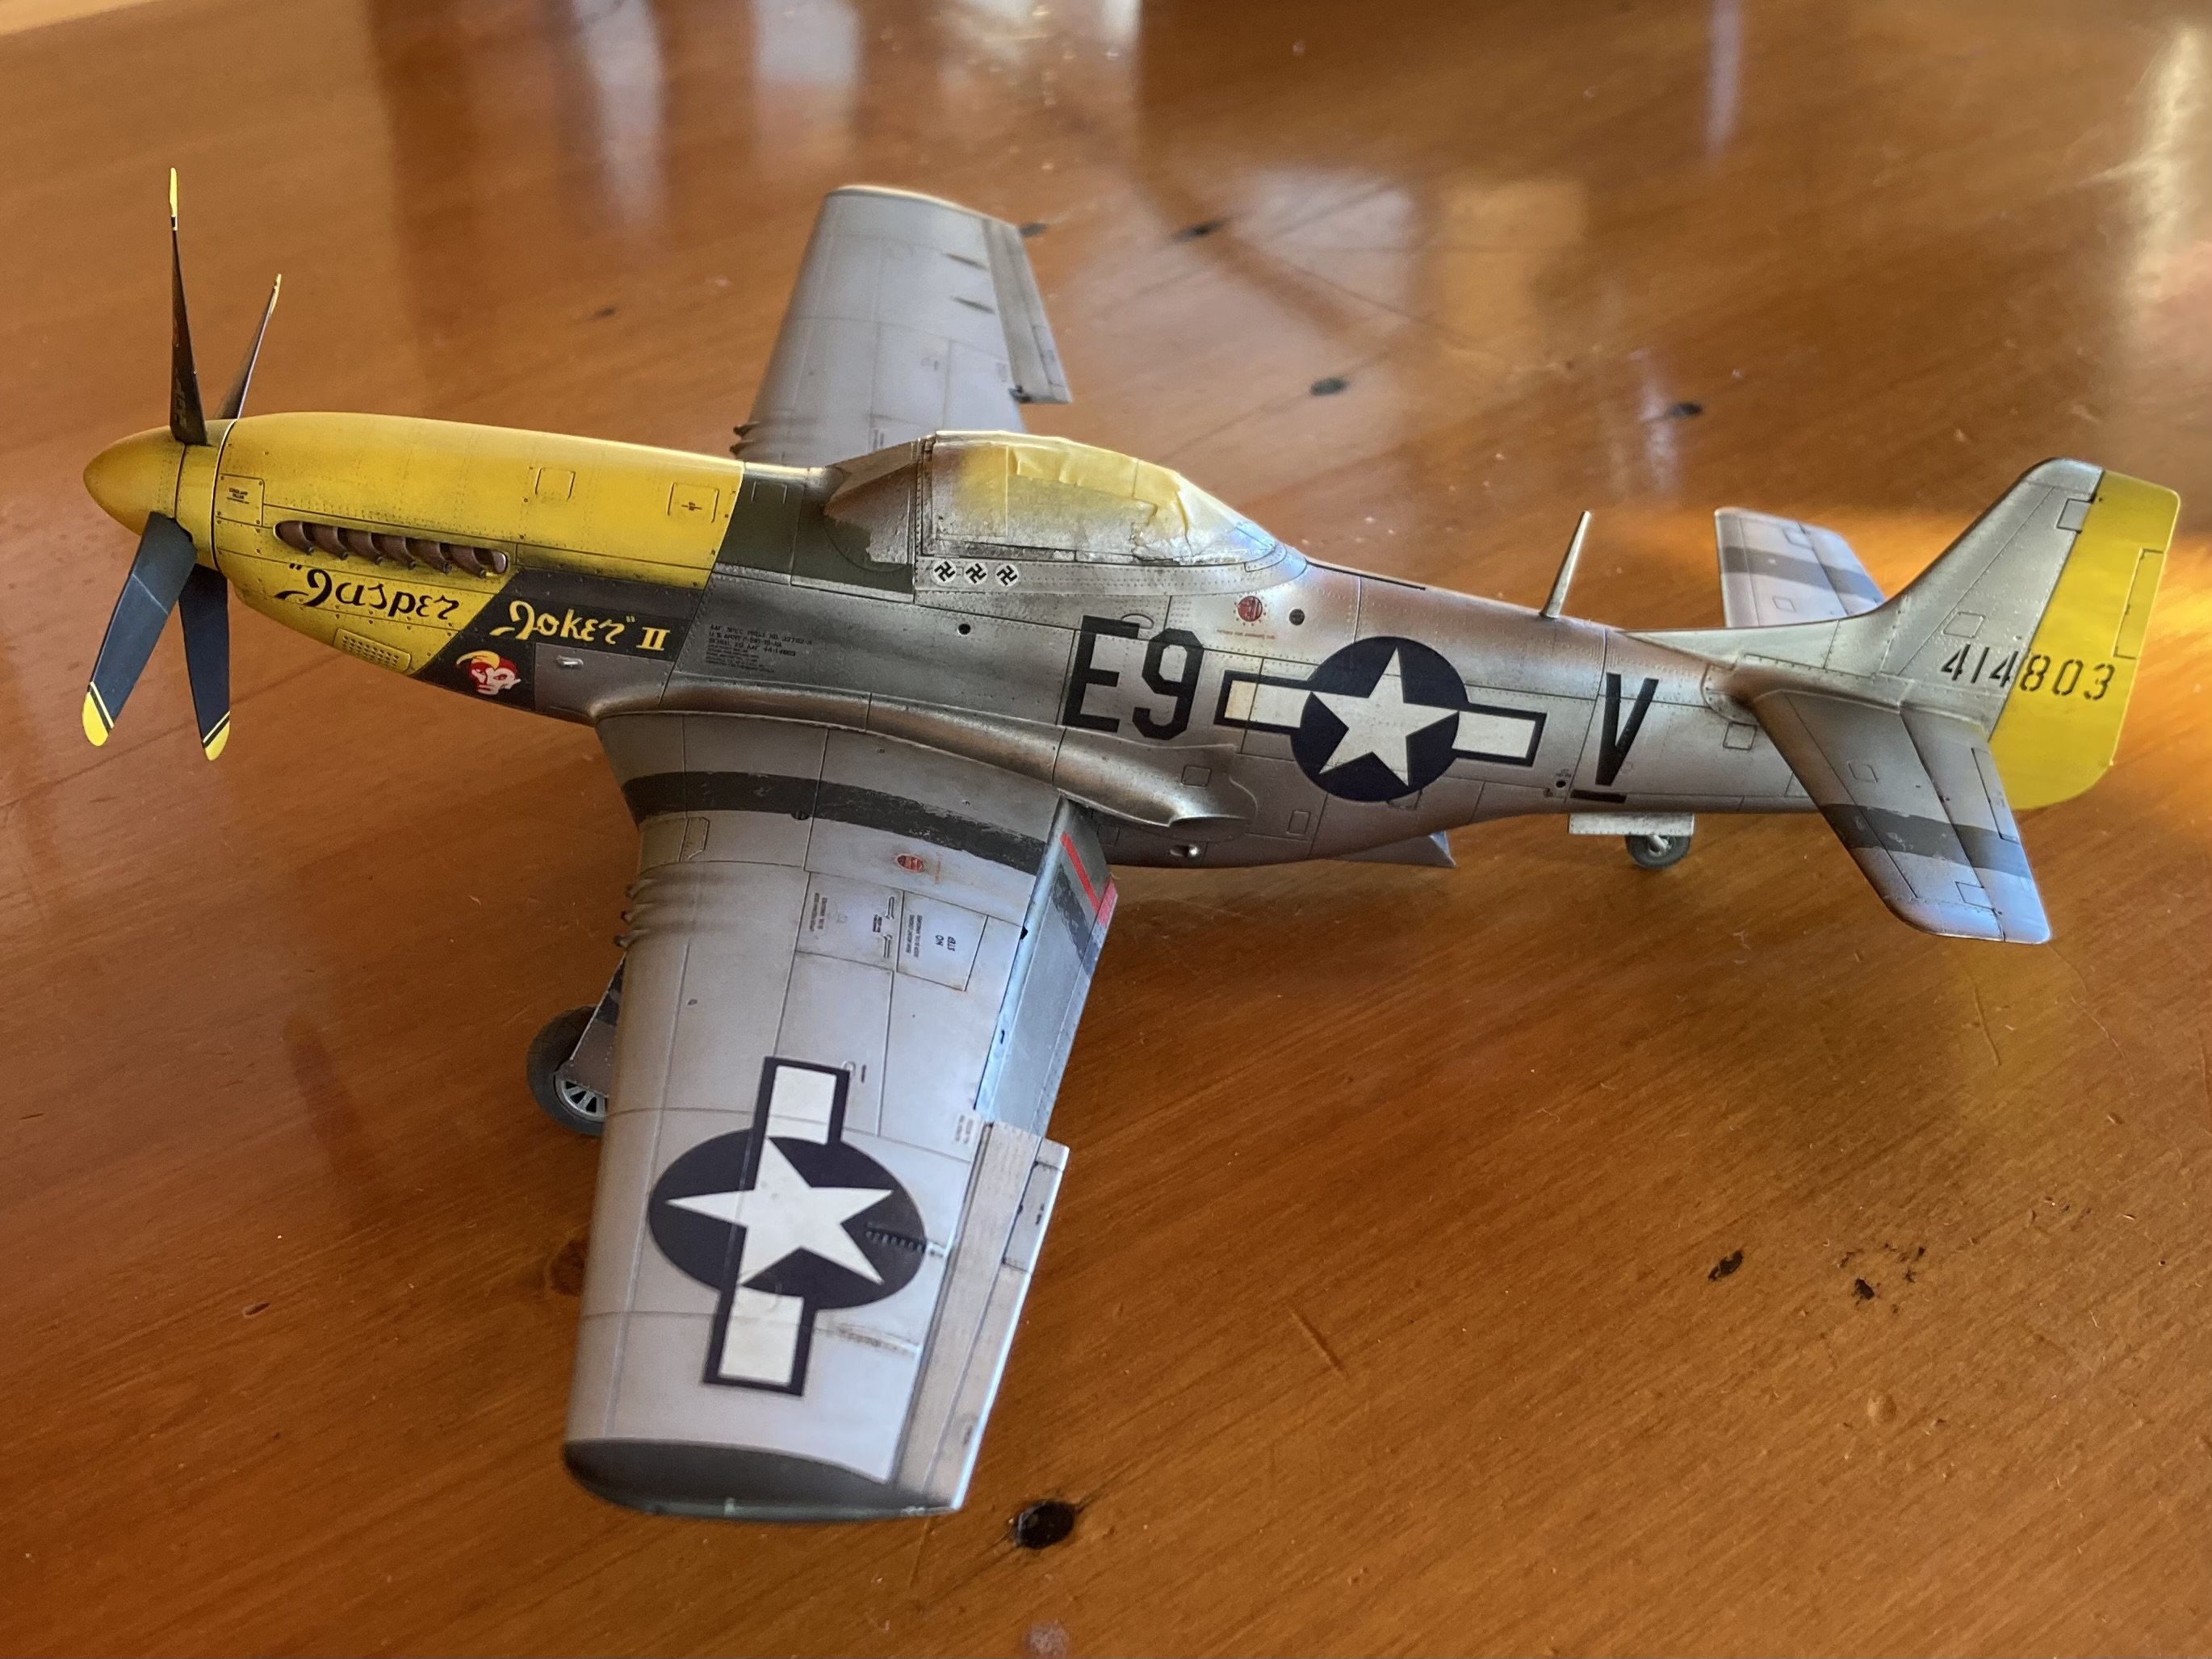
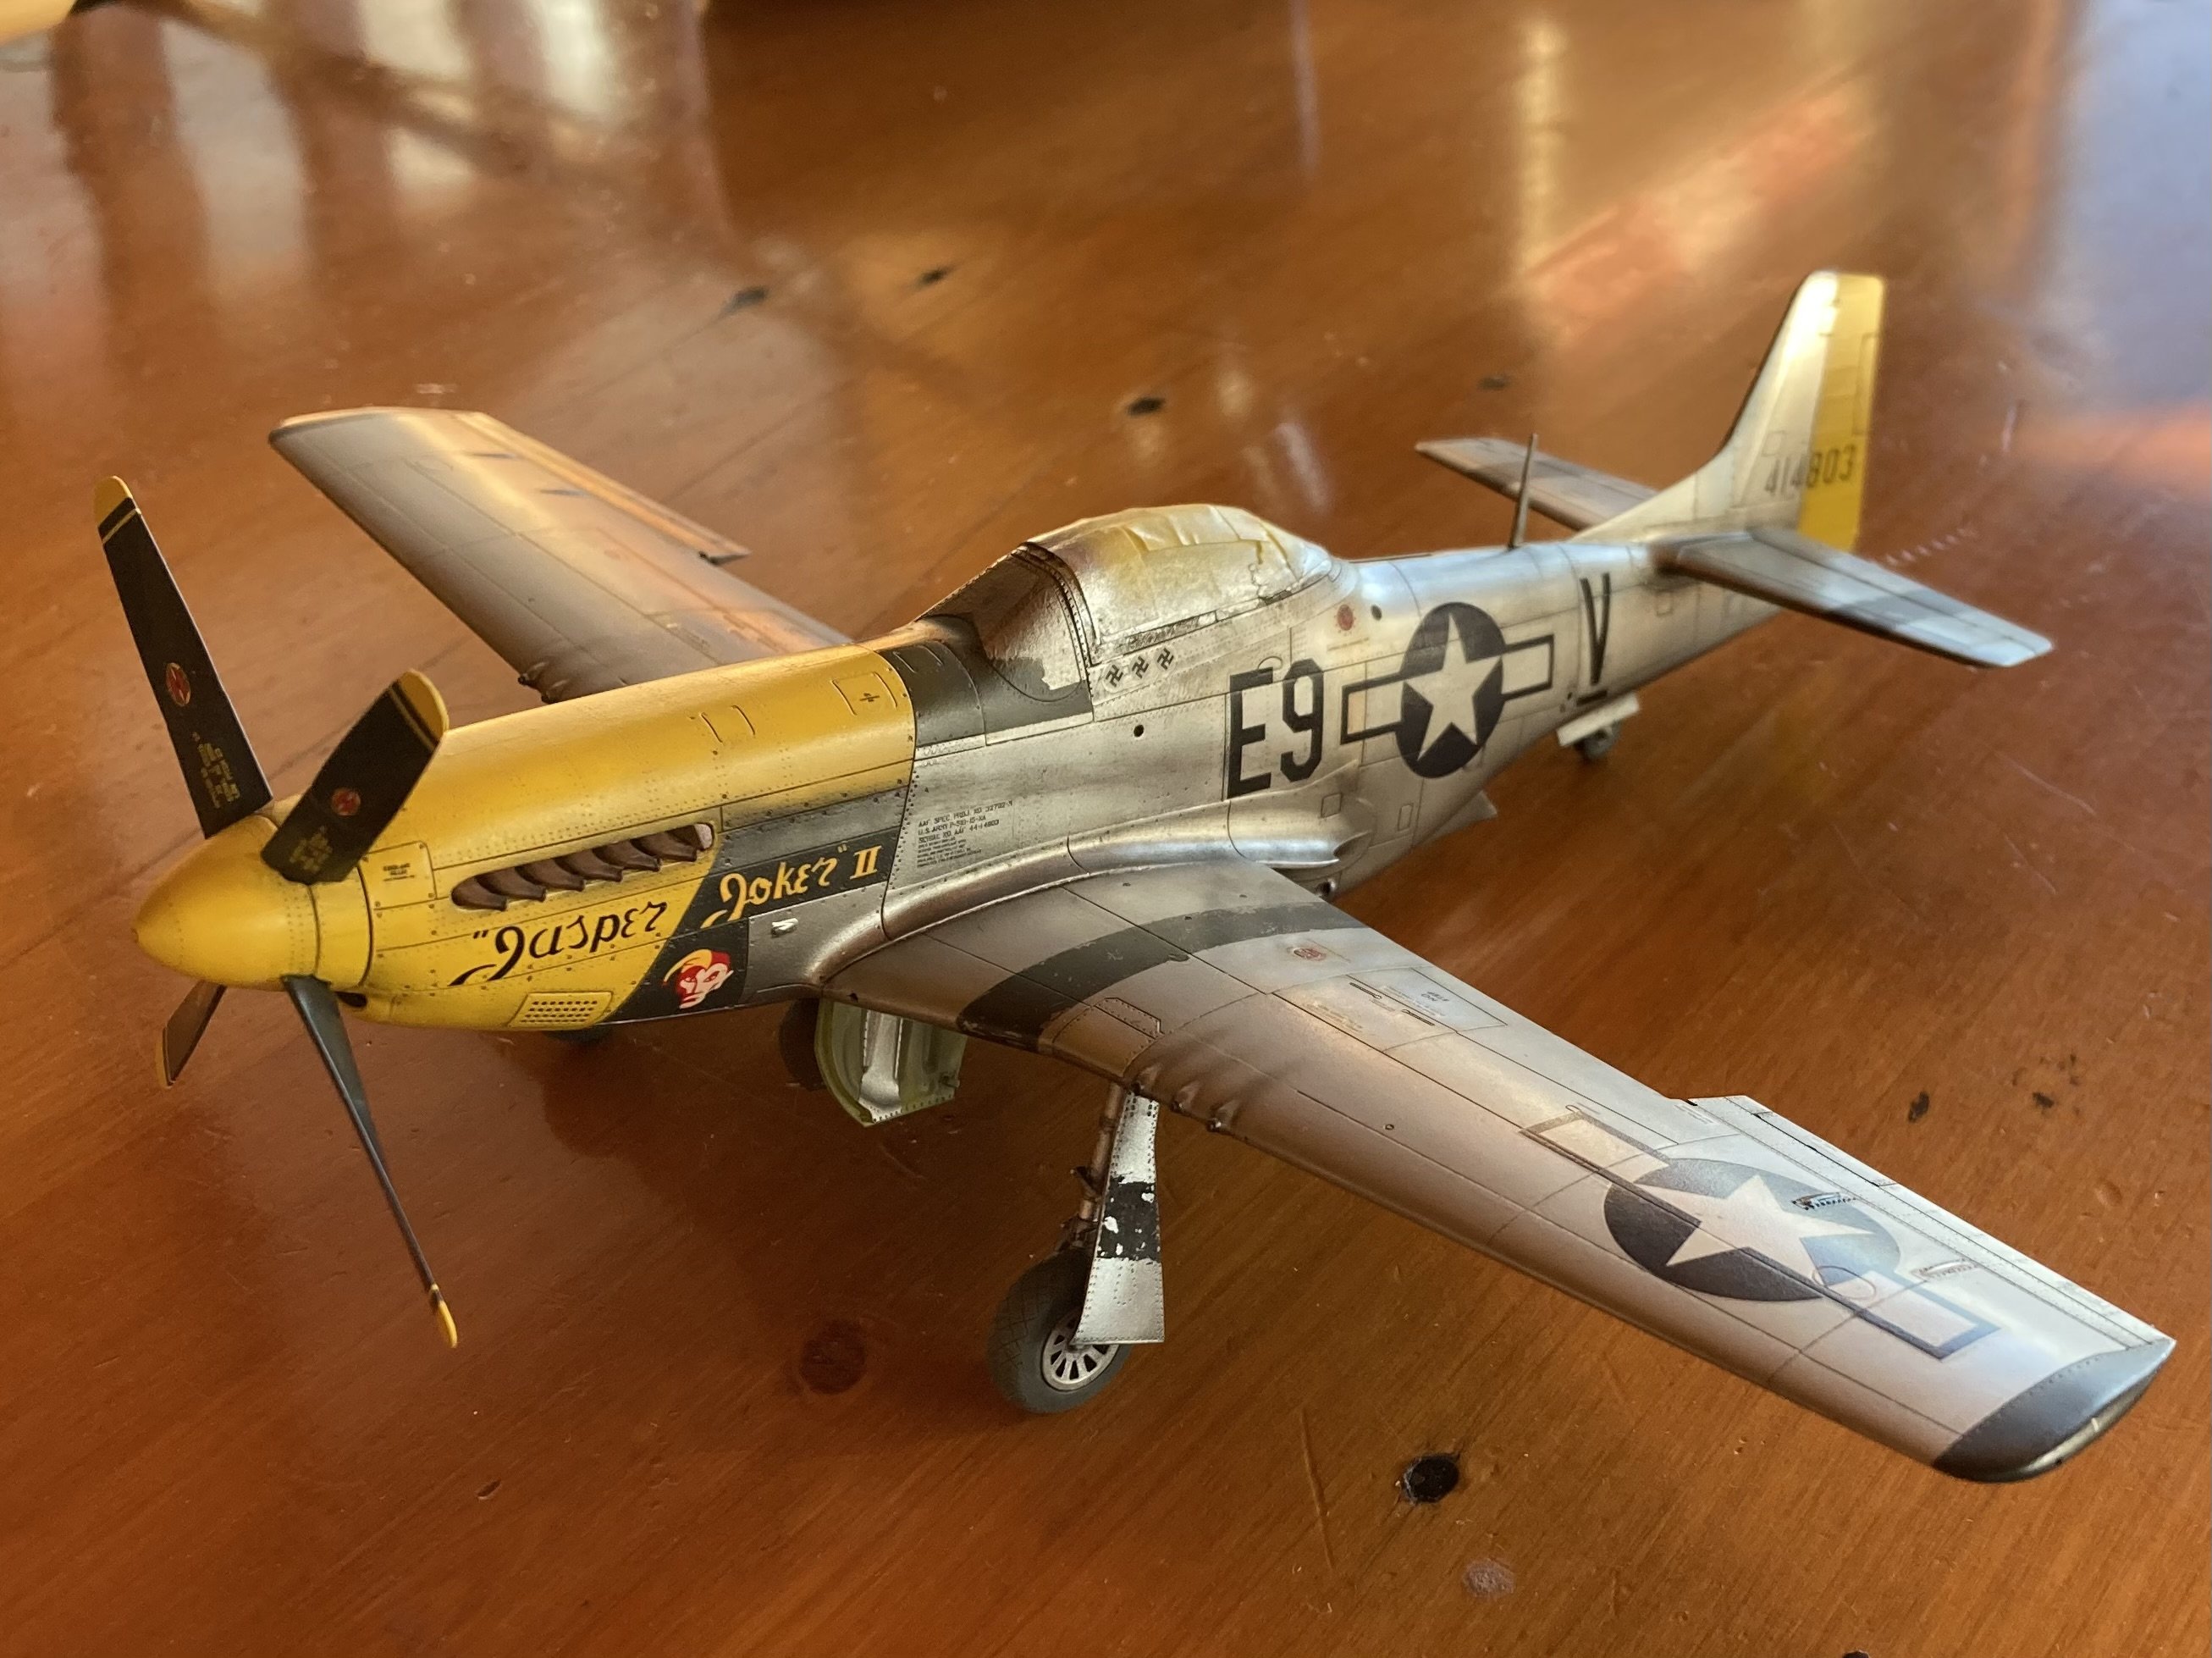
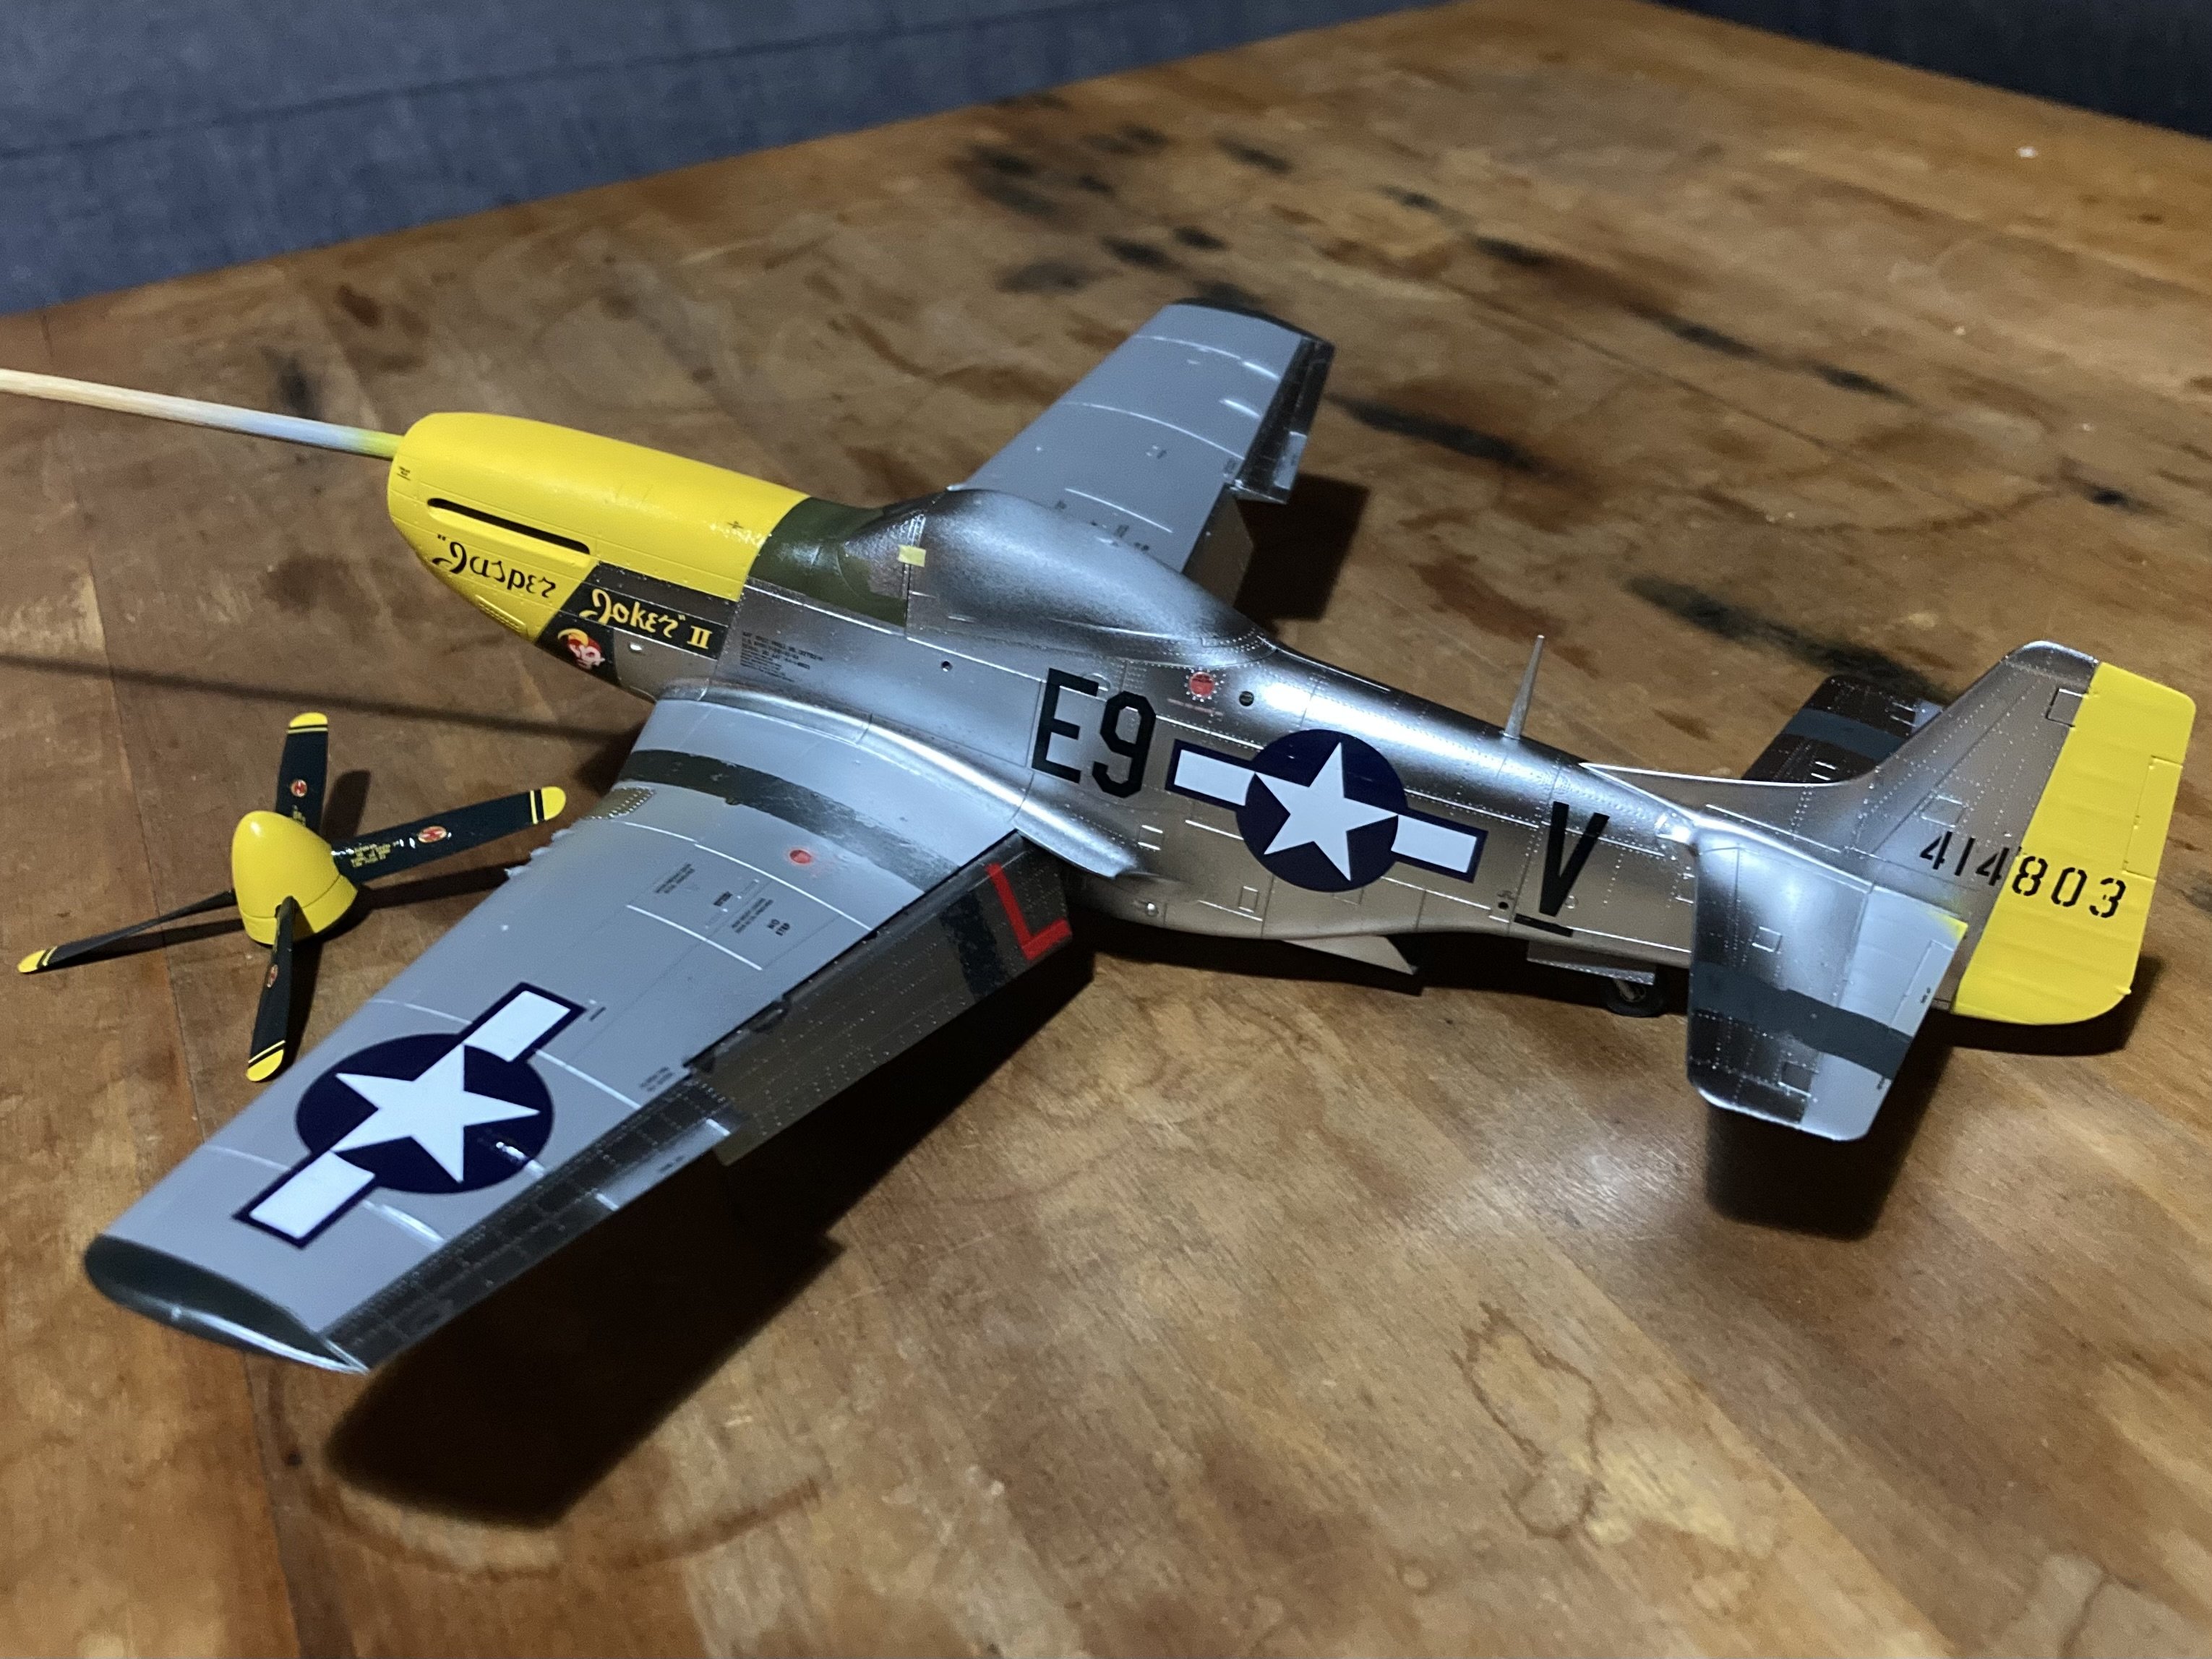
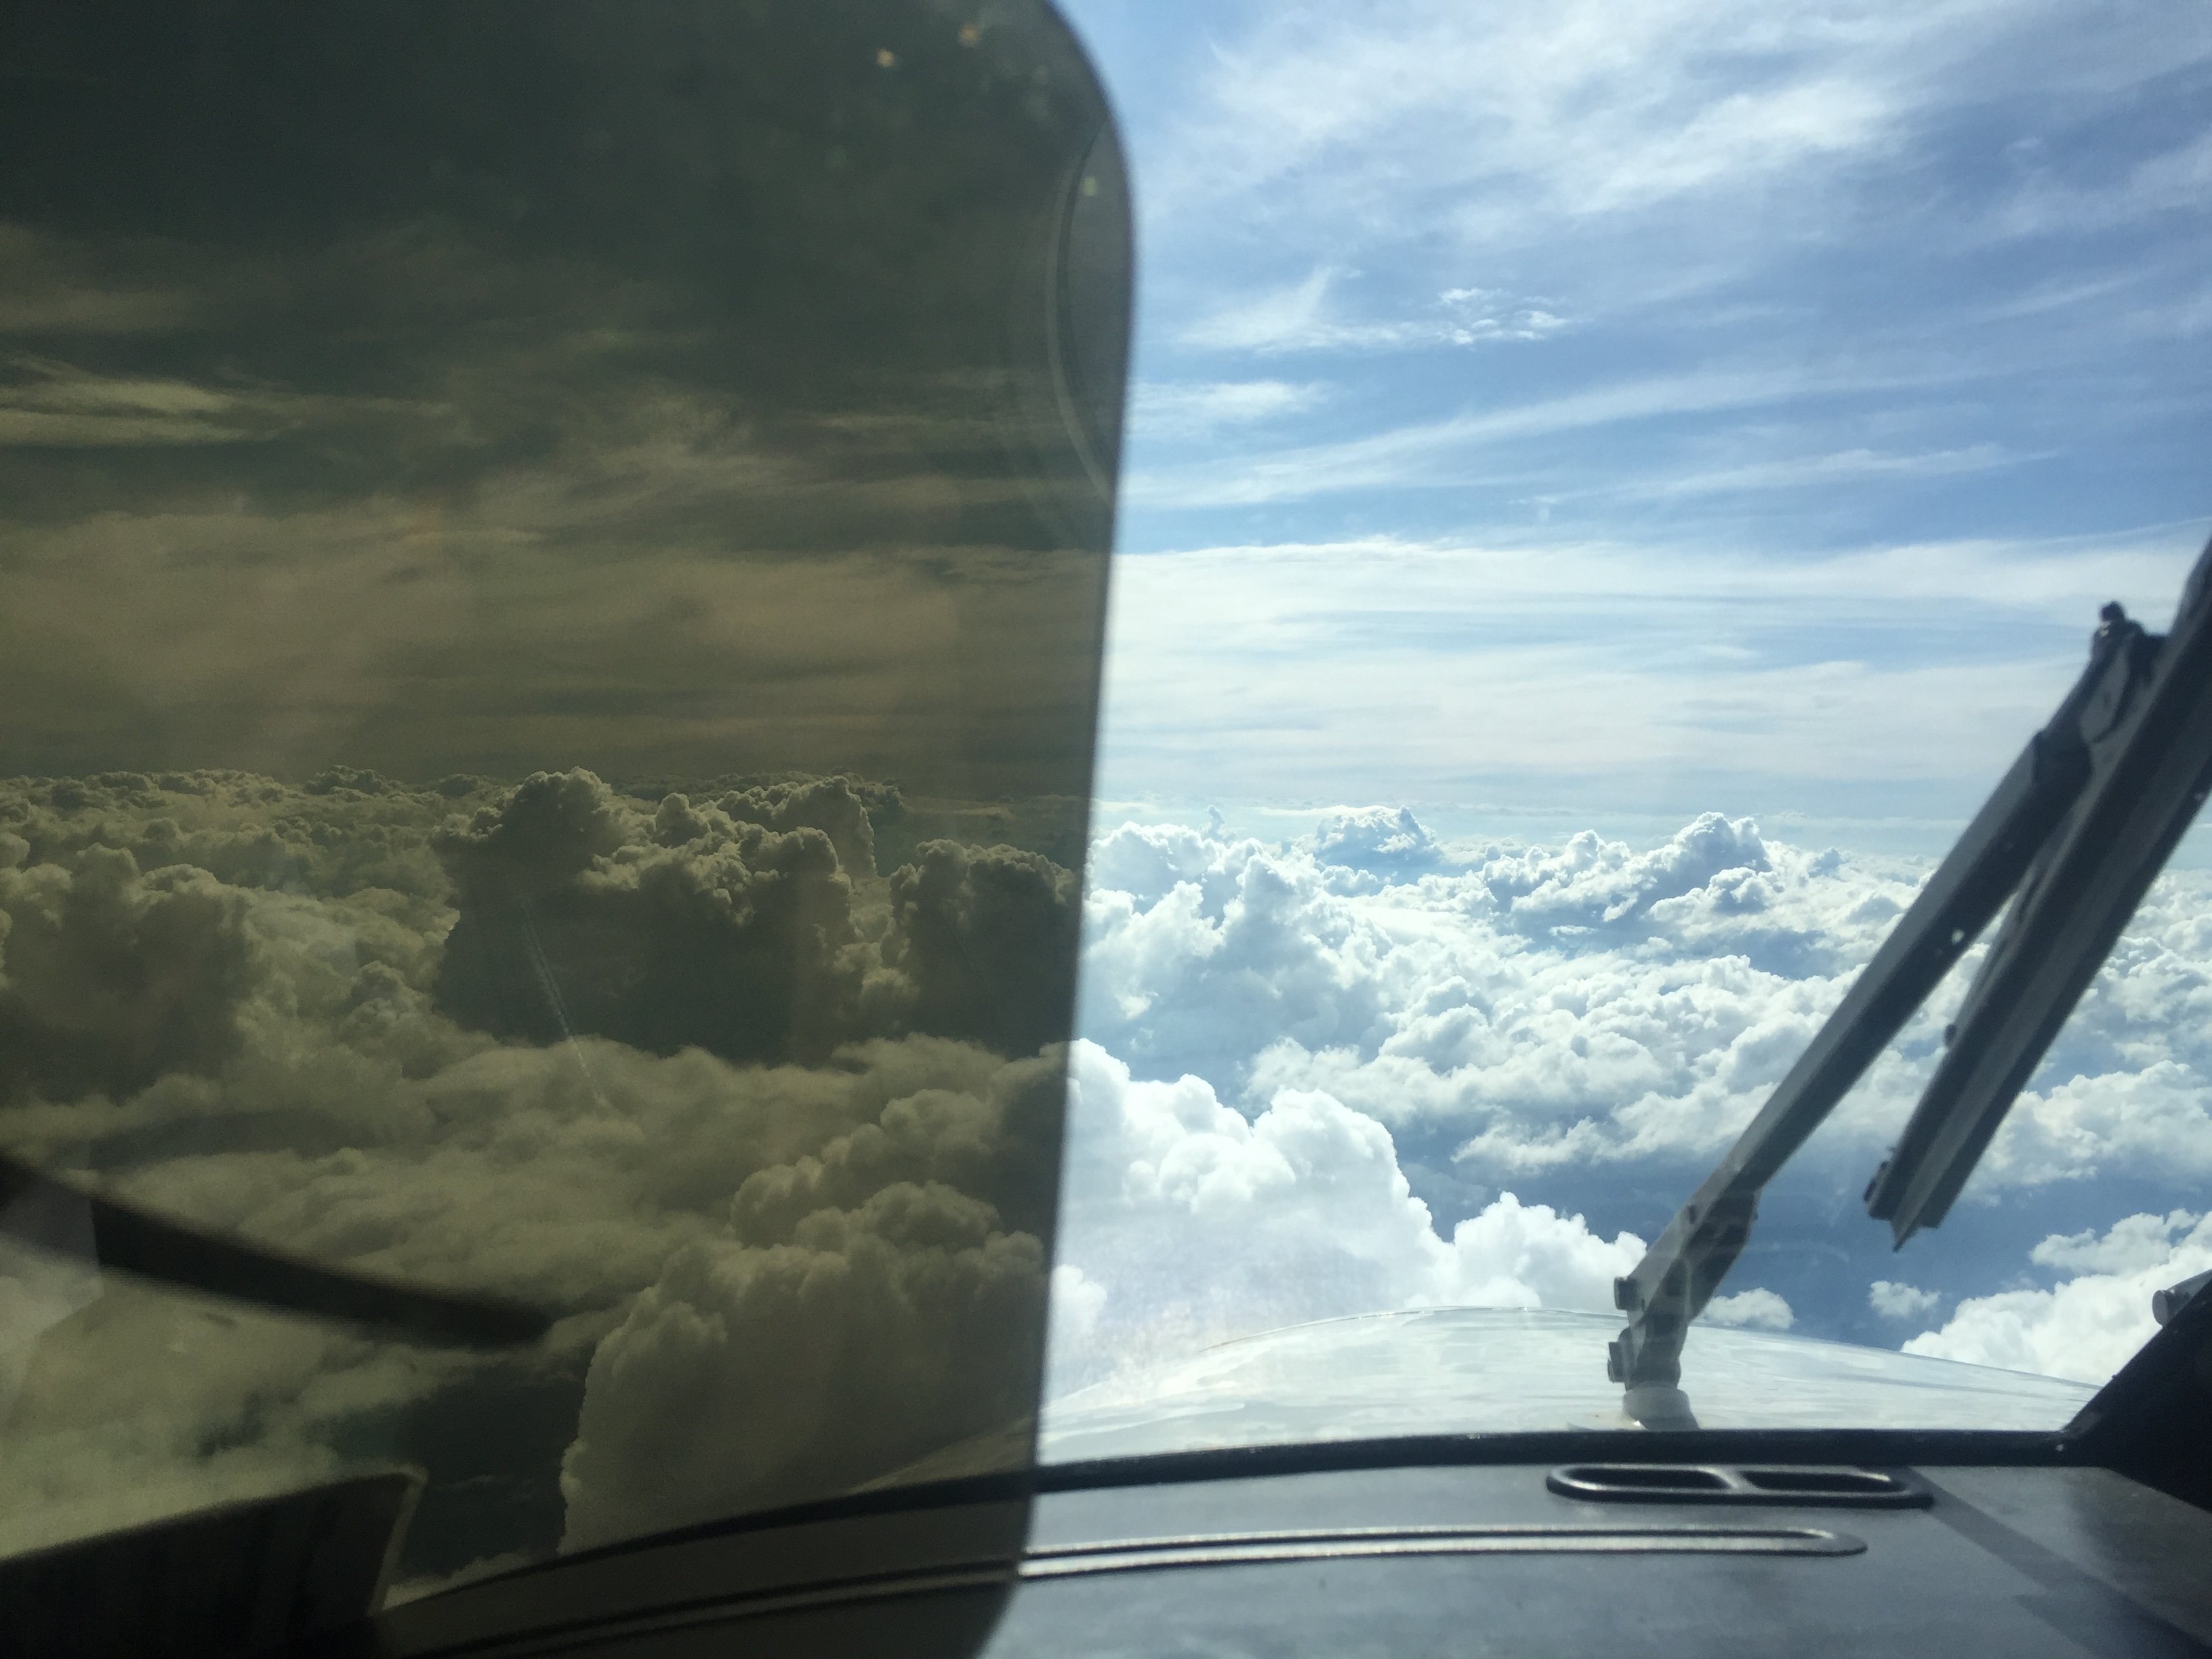
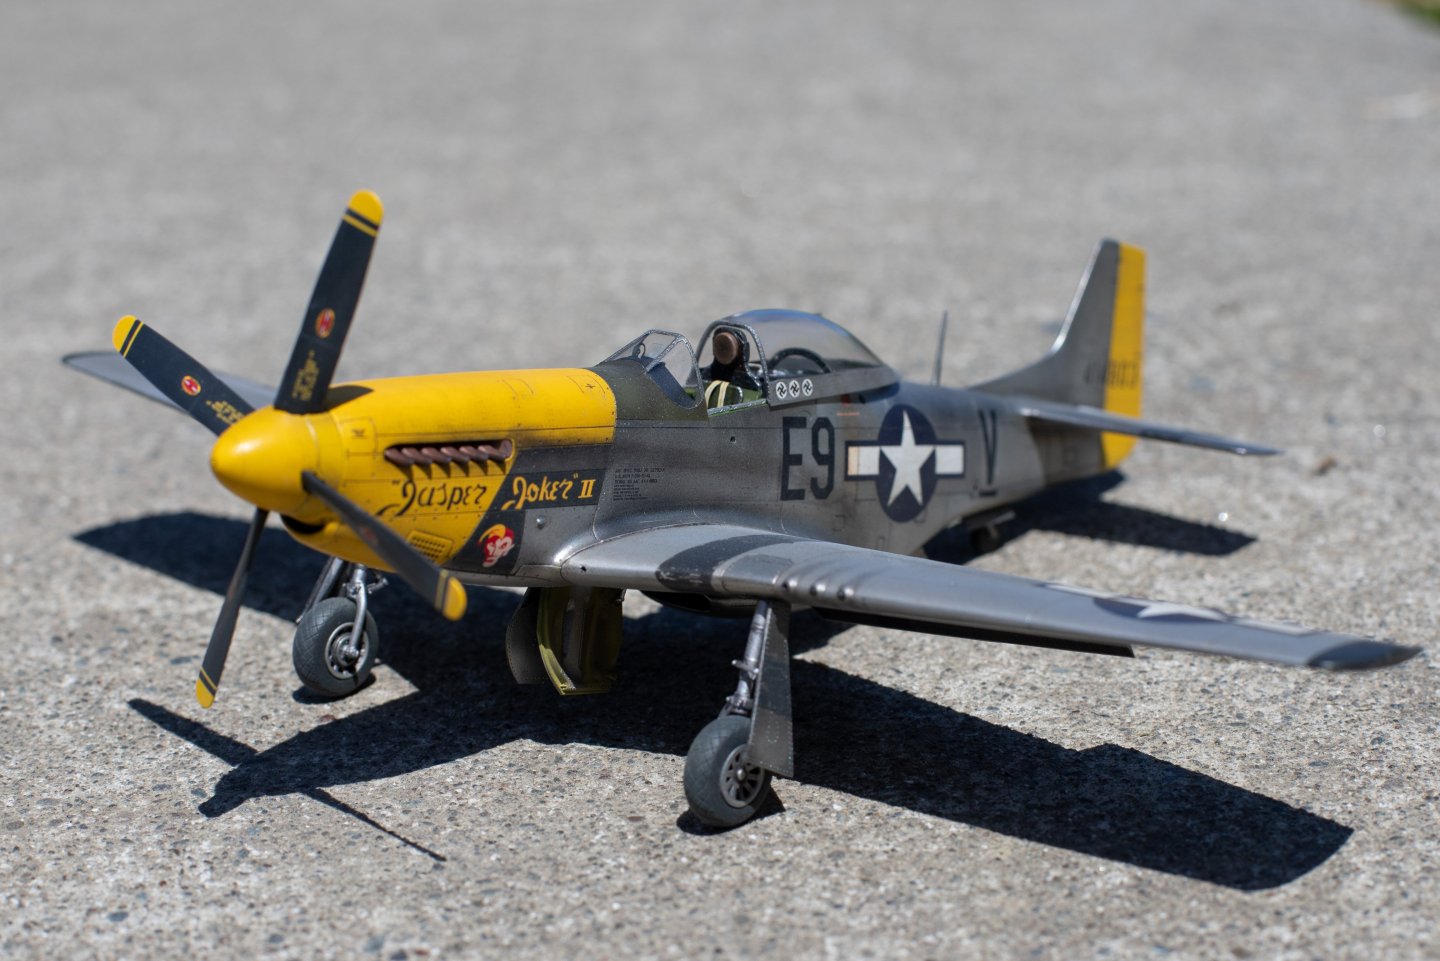
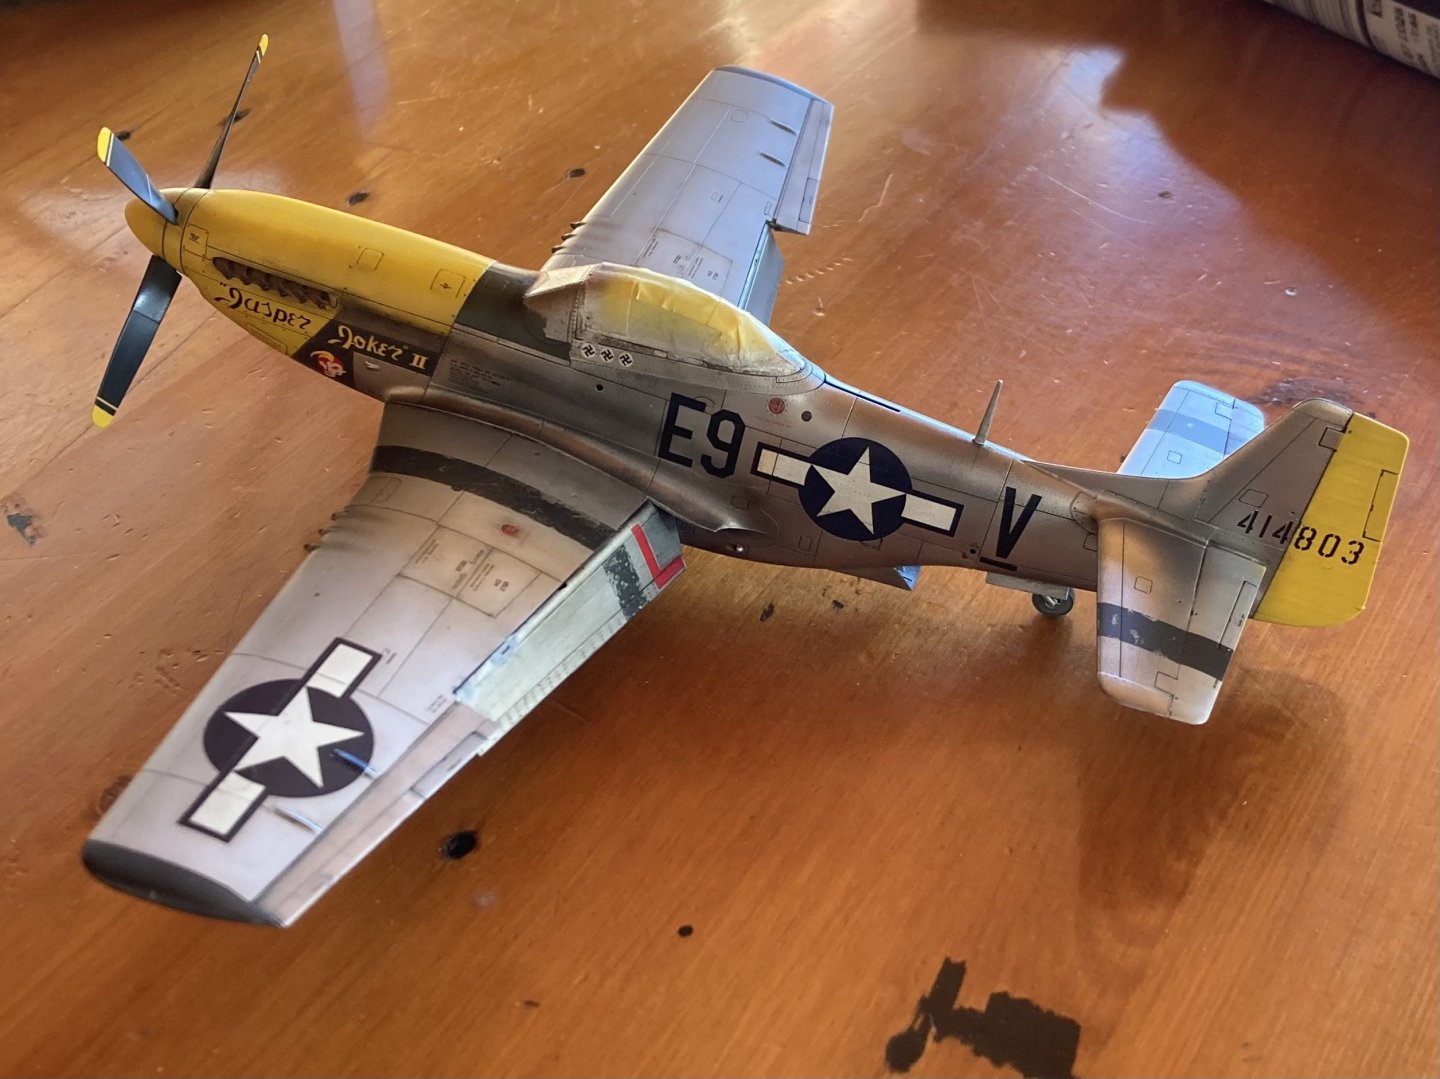
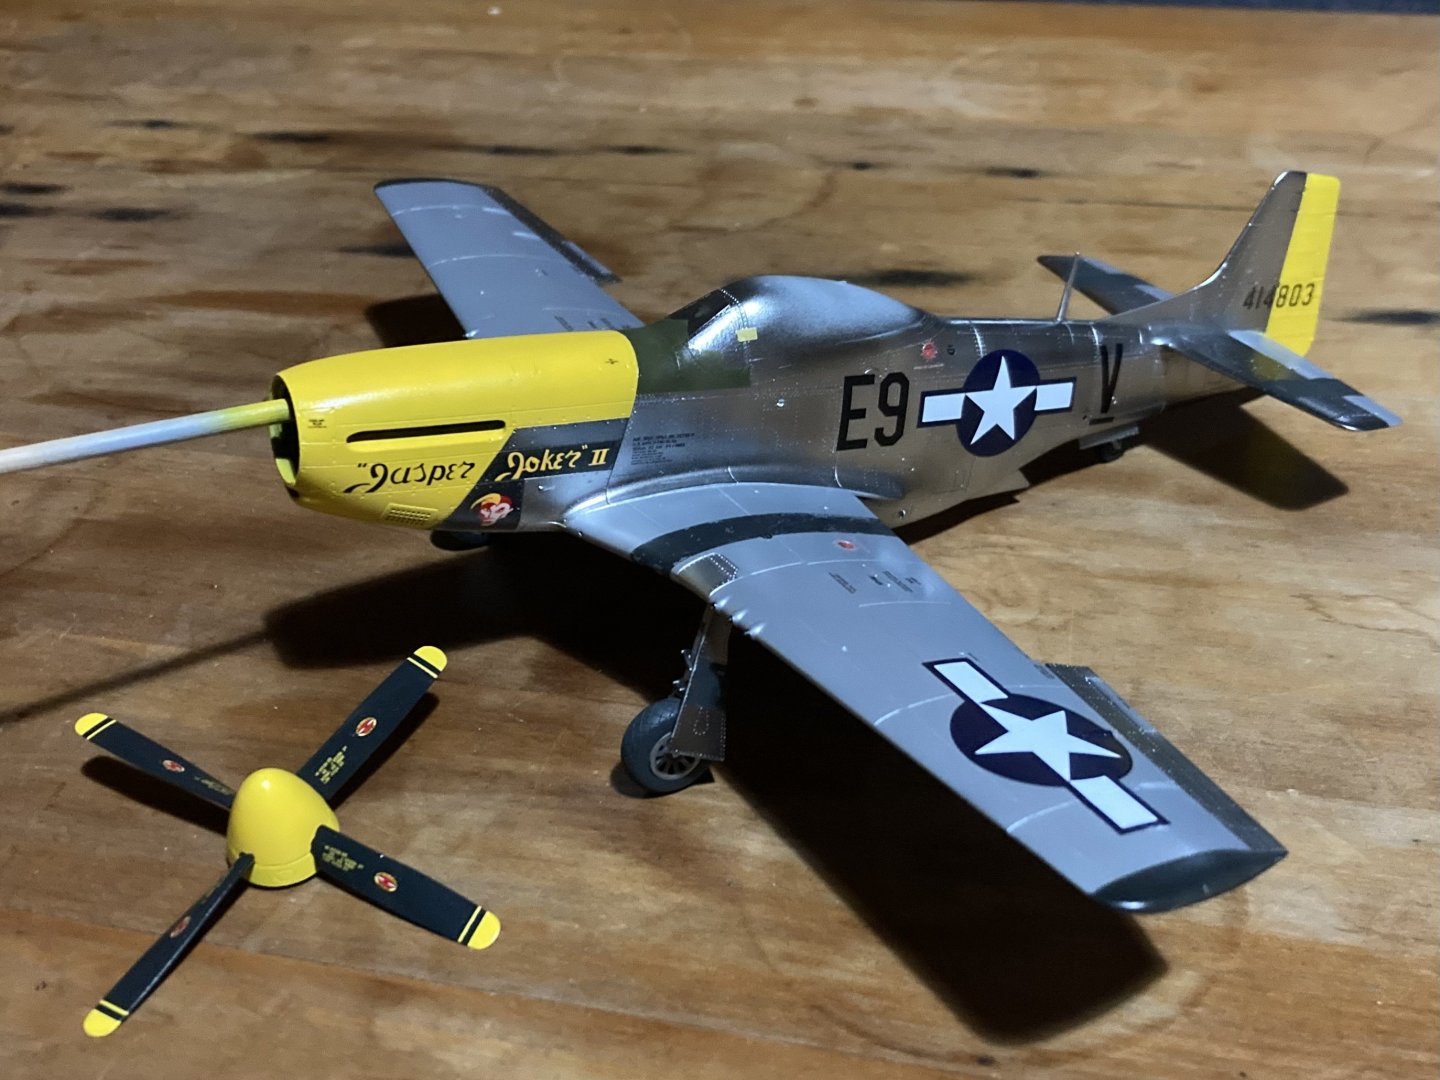
And FINISHED!! Thanks all for the tips, feed back and encouraging words through out, I really appreciate it and makes the build a lot more enjoyable. I’m about to start quite a few months of training to fly another aircraft type for work which also involves moving, so I’ll not be able to begin another project until at least the 2nd quarter of next year! But already thinking of a project. Perhaps try a diorama of a plane at the bottom of the English Channel in resin. Something different but early days in the ideas area. Anyway back to this build! After taking the pics I realised I hadn’t added the Nav lights or taken off the masks from the 3 underwing identification lights, so I’ve since done those. The matte varnish works well I think, didn’t dull it down much. Really hard to photograph a NMF plane as a slight change in angle makes it look so different. I learnt a lot and in the end I’m happy with how it looks. Thanks again for joining me. I hope you like it too


- 74 replies
-
- 19
-
-
-
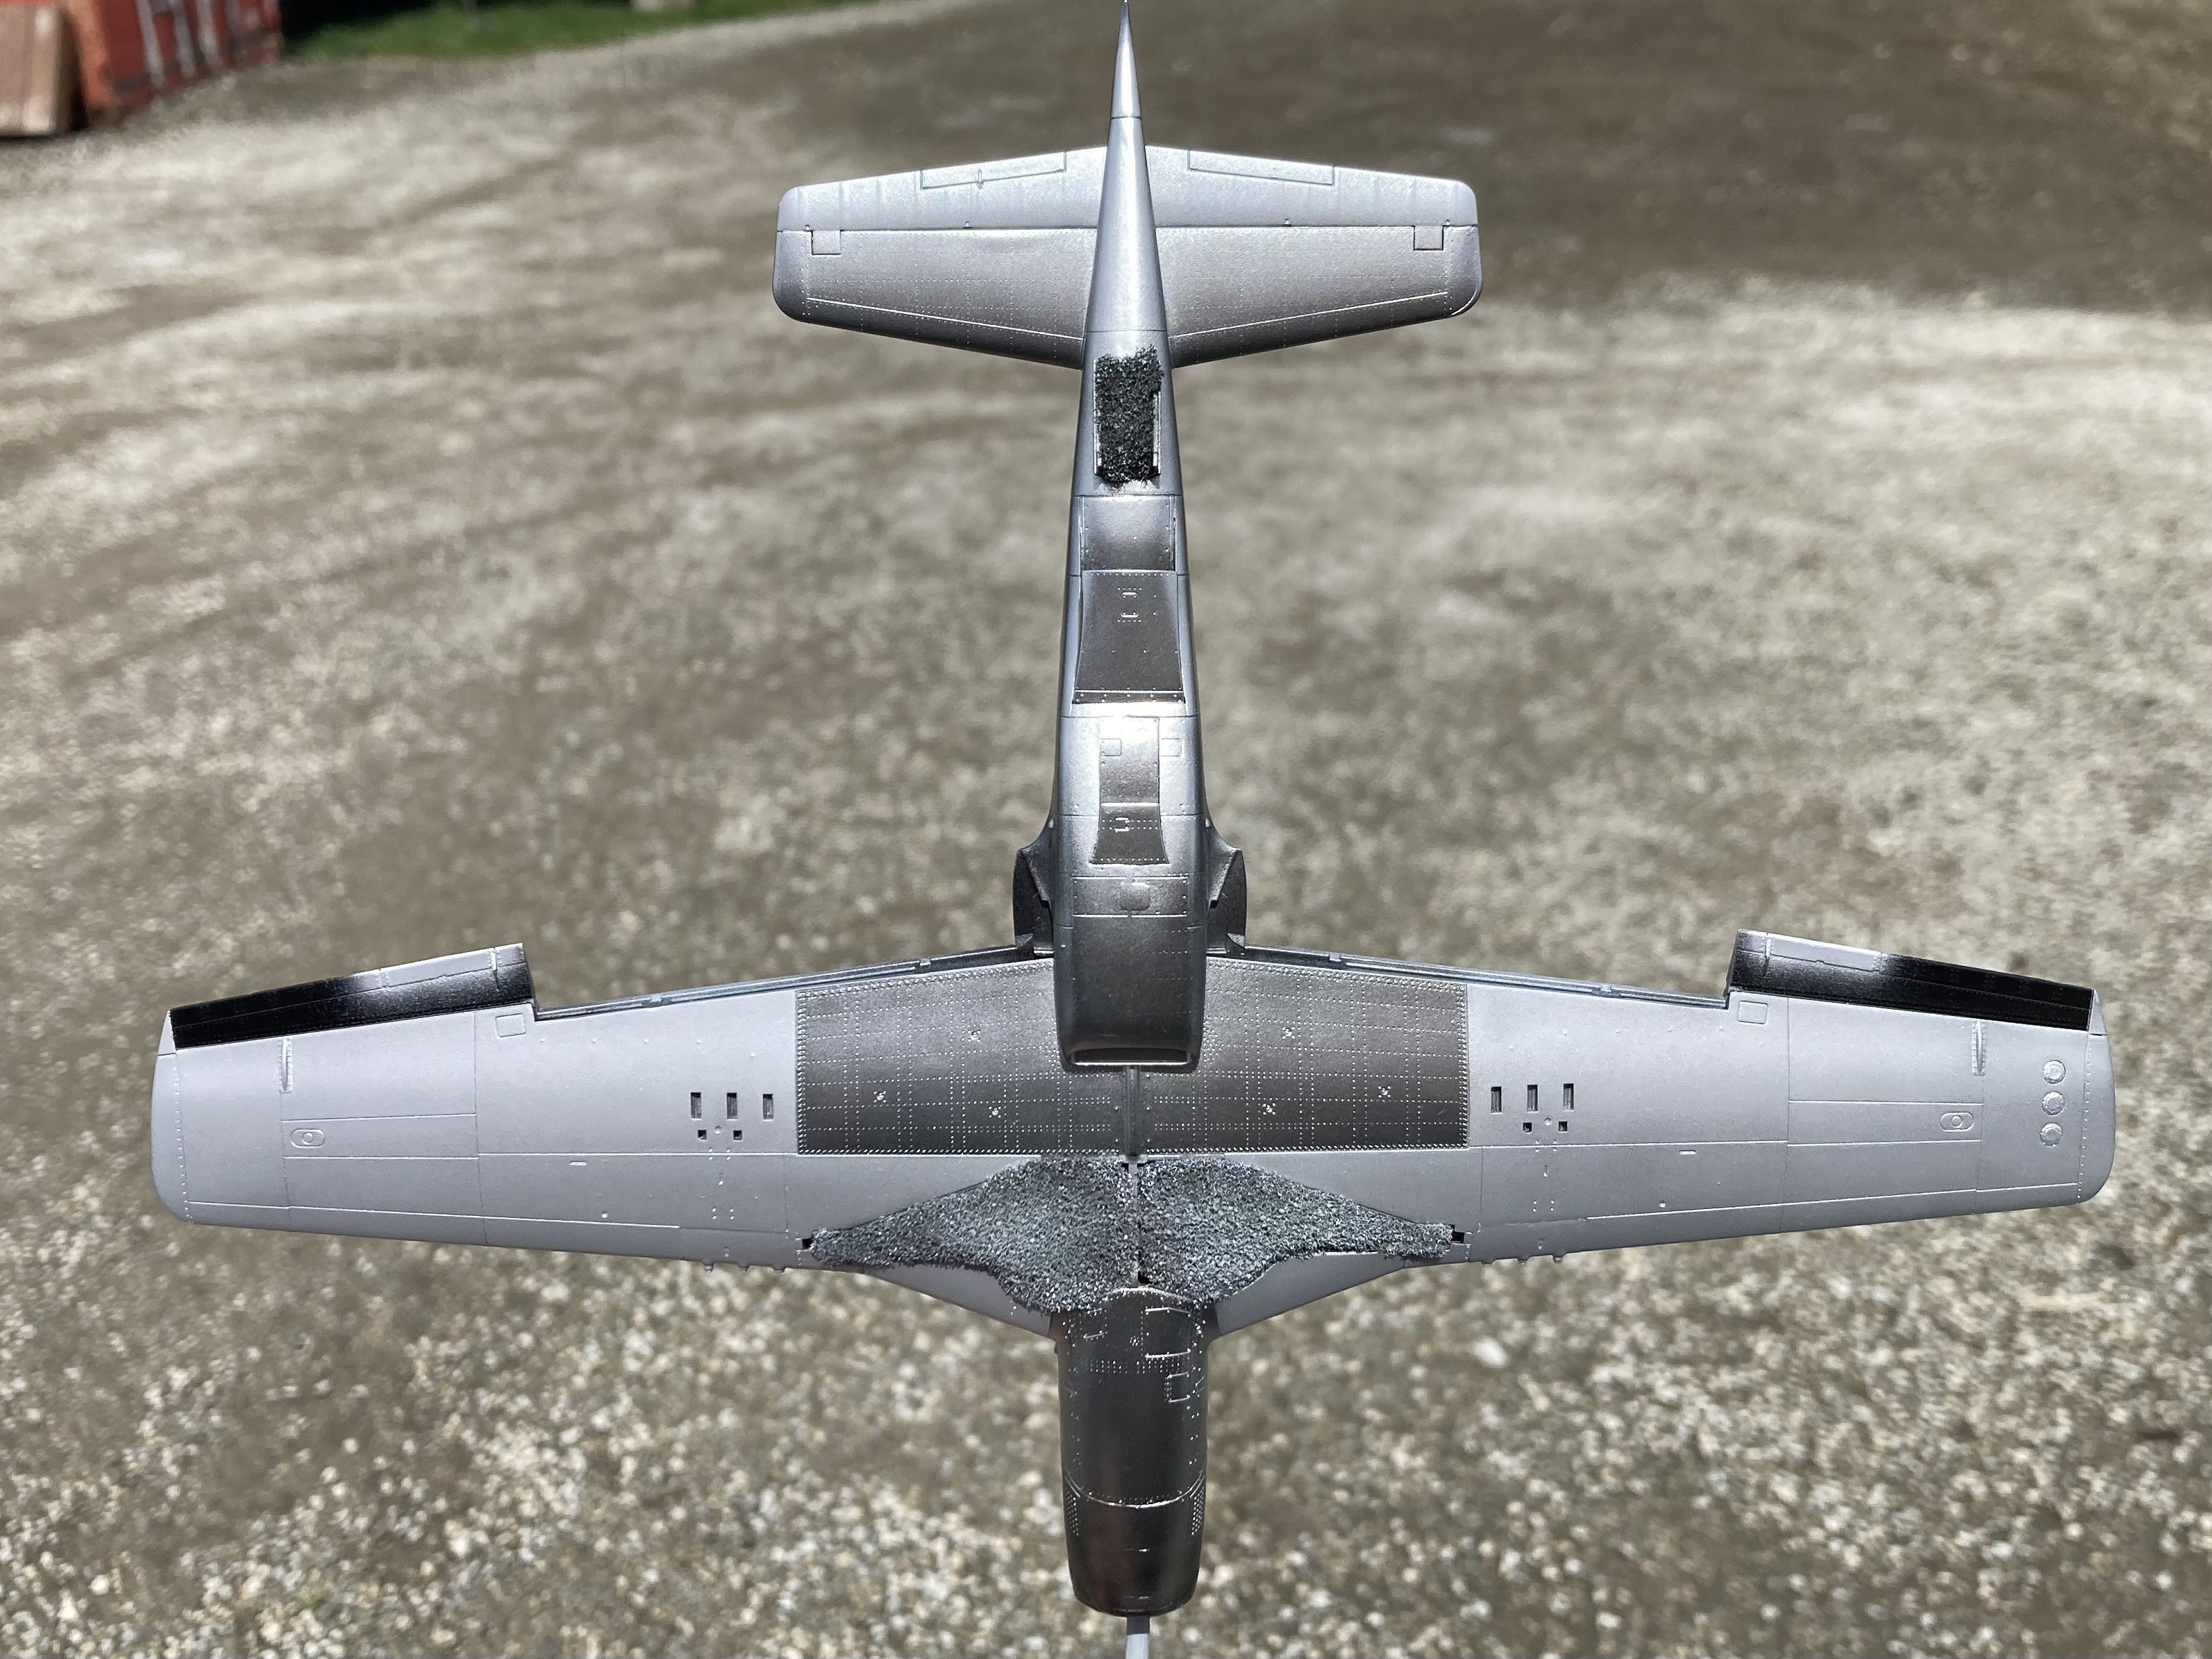
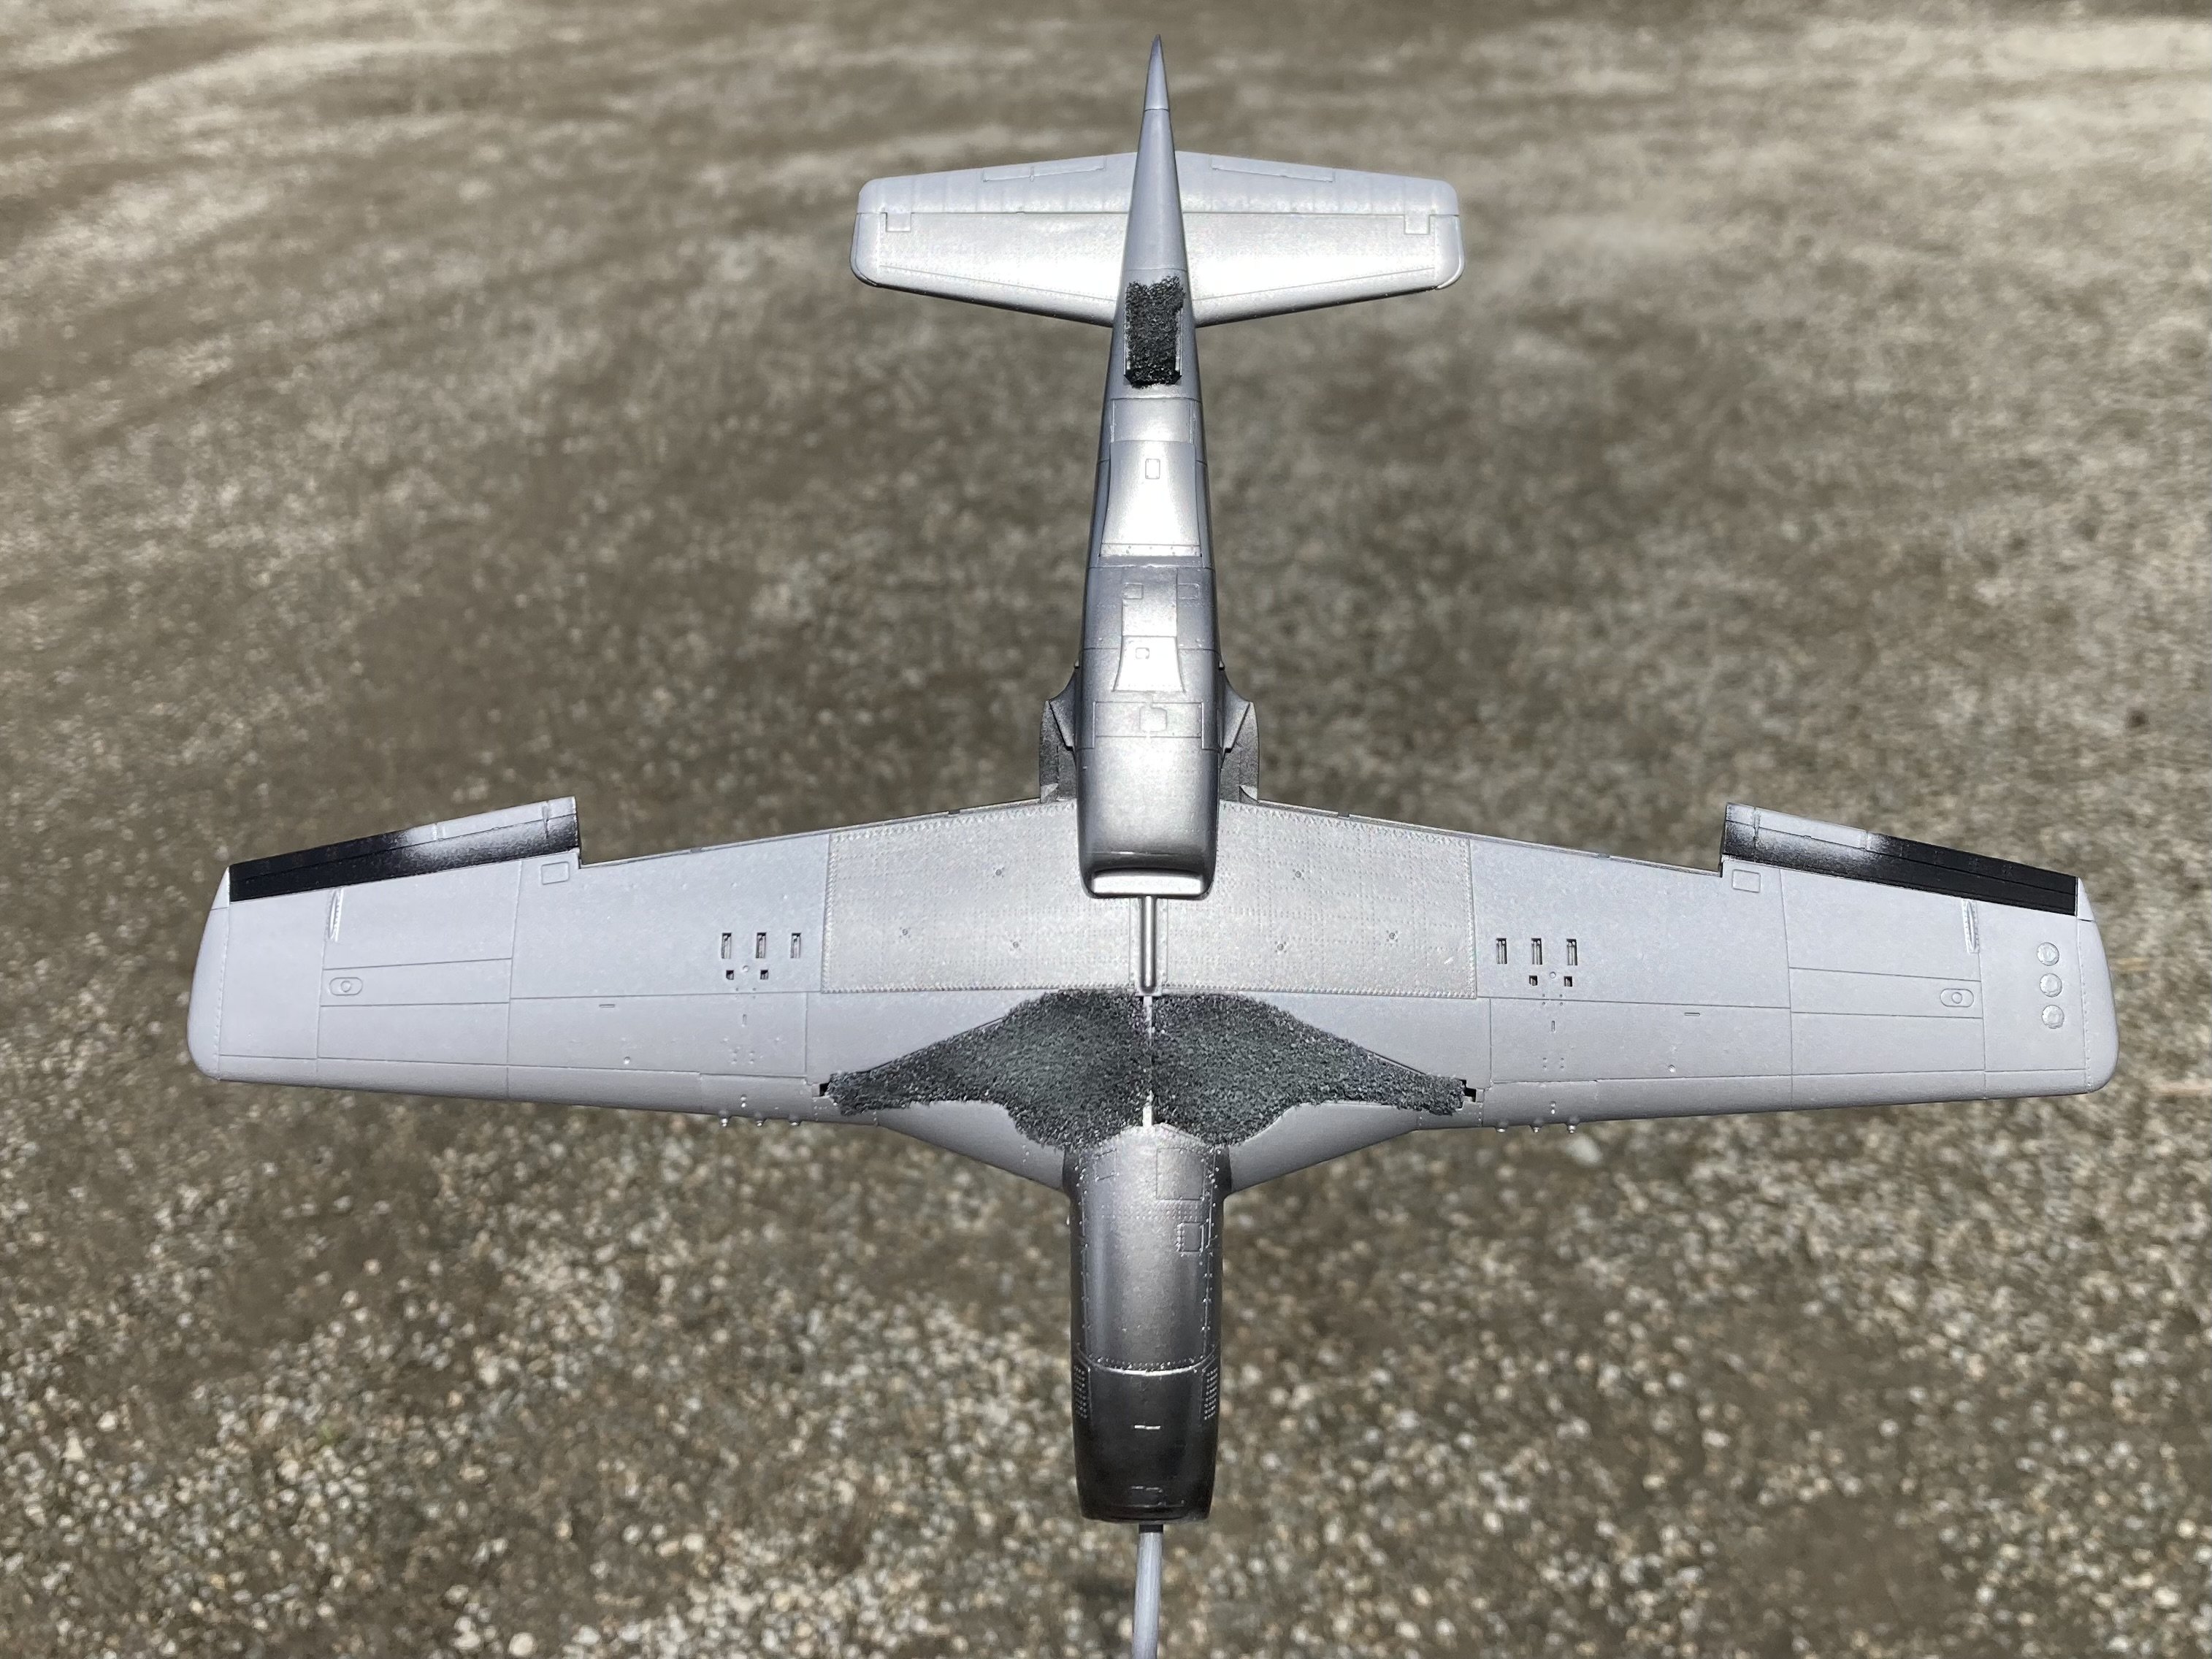
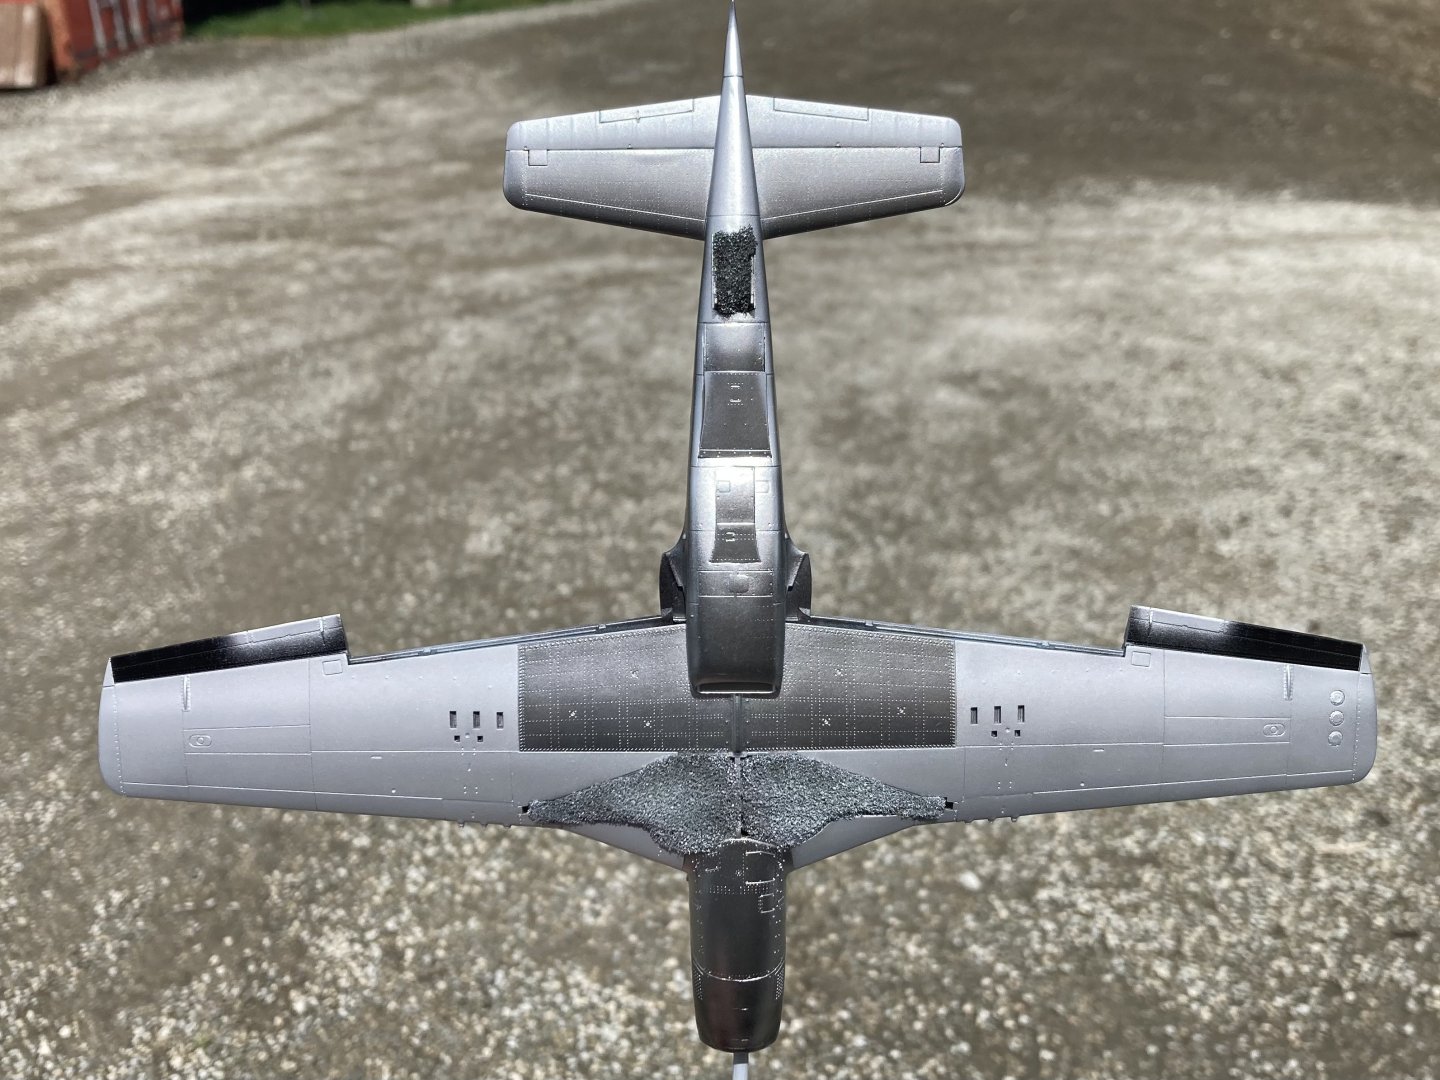
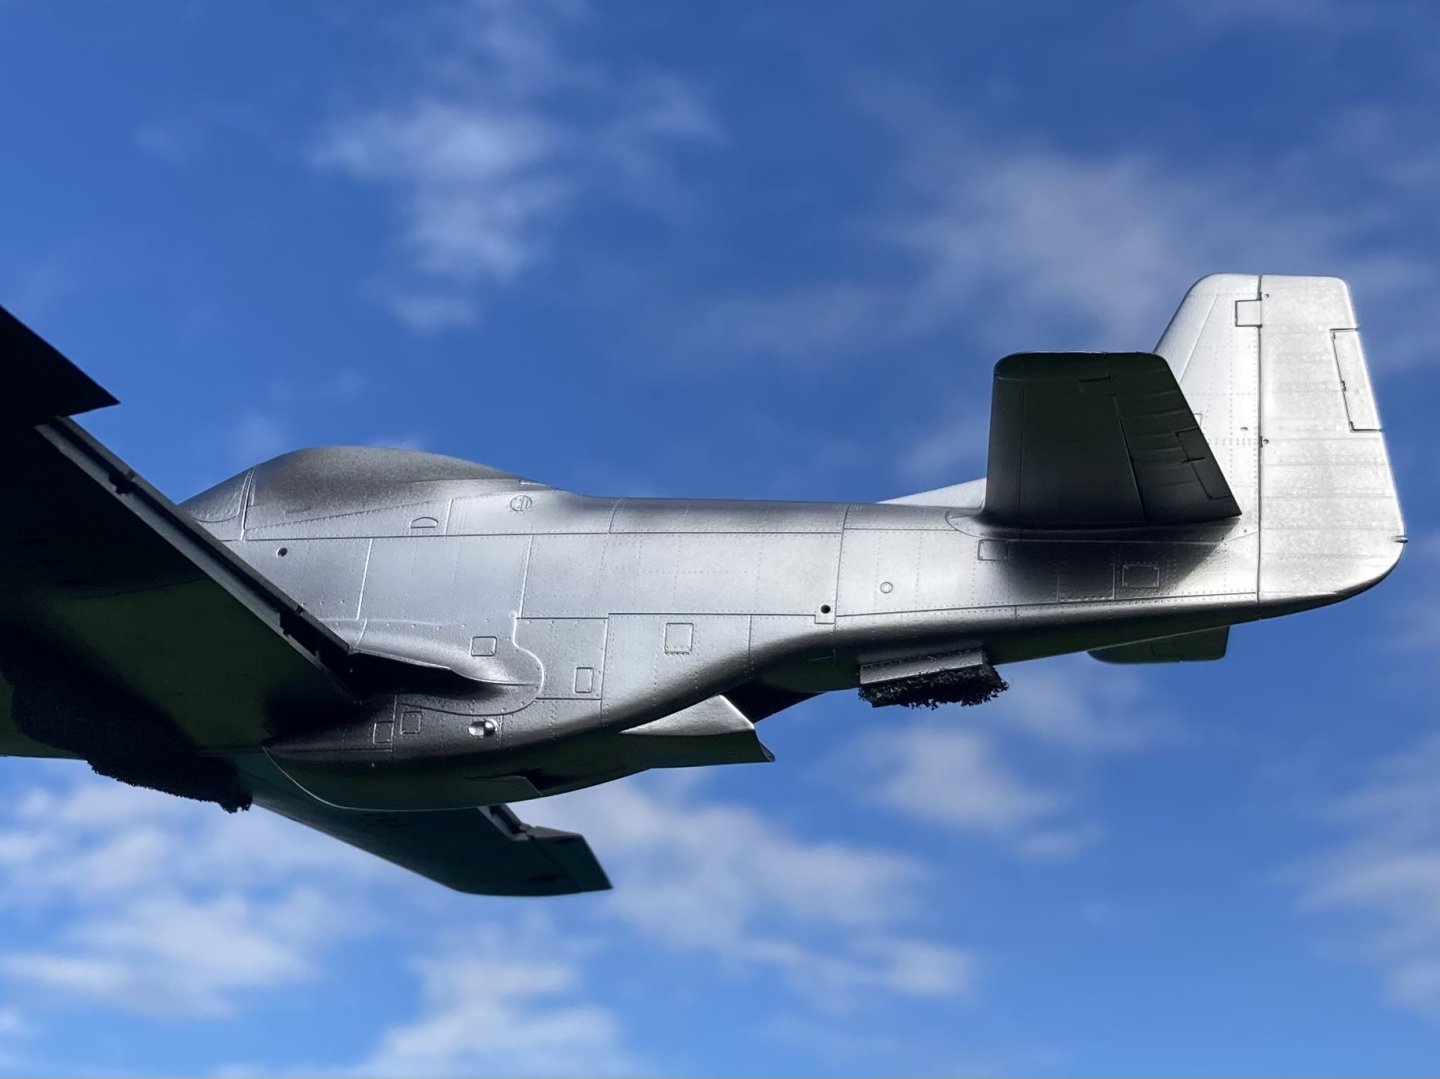
I’ve now added the exhausts and light exhaust stains by just a light brushing of soot pigments. It’s only visible from some angles and it’s very fine so it’s a nice effect. I played abit more with light grubbing up the inboards of the wings and around a few panels. It’s very interesting to weather a NMF paint job. From one angle it’s in your face visible and move your head slightly and it vanishes! So I’ve gone very light with the oils. I think this is all the weathering I’ll do now. Reduced some of the effects like the fuel stains and where foot wear would be just added another light layer. Tomorrow I’ll start on the matte varnish layers and if I get that right should give a slight chalky effect which will tone it down and also add a tinge of oxidised effect… or ruin everything!.. one way to find out!


- 74 replies
-
- 12
-
-
-
Thanks, so do I! I just wish I’d not added so much white to the silver paint on the wings. But with washes have been able to blend them closer!
-
Thanks, I’m relieved it’s come out ok. Always an unknown when doing something new that’s alittle complex
-
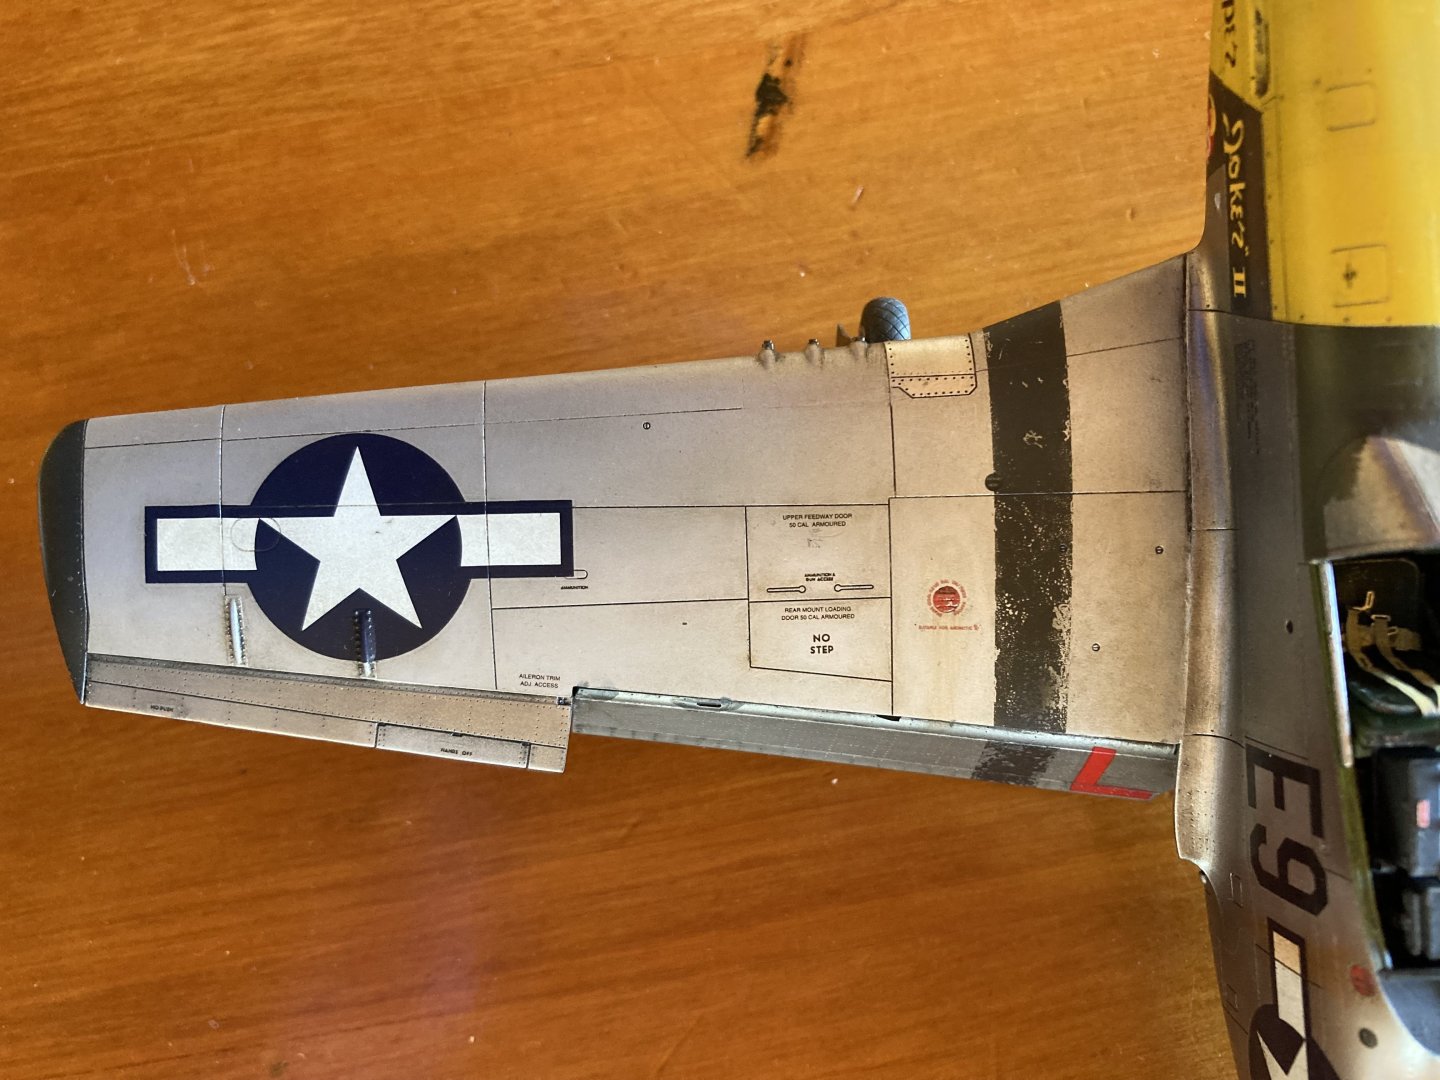
Thanks for the input! I took your advice and took the fuel stains right back so almost totally gone. But did keep the stains on the ensign bar as I read a big blog about the p51d weathering and so many shots show the results of fuel especially visible on the bar of the ensign so that was the only reason I added them. But you are right in saying it was overdone and the beauty of oils is after a day I just wiped 98% of it off! Hope you approve abit more how it is. its been a fun but big learning curve working with NMF and looking used but not dirty can be a very fine line
-
Thanks, I’ve learnt a lot and if I ever do another NMF it will be a lot less daunting and hopefully turn out better!
-
Been giving it some time between each oil wash session to help avoid removing to previous work! But did an all over wash to help with panel lines and just tone the new shine down. I’ll not do much more apart from some work around the underside and engine exhausts and stains. I’m hoping the matte varnish will nicely tone it down to an oxidised look rather than a grubby look as they were kept in not bad condition so can’t grime too much. Its in the final stages now


- 74 replies
-
- 13
-
-
-
Decals went on, Eduard ones are quite strange! Very thin which is nice but unusual sized clear parts over the decal. But being thin meant my solutions could do a pretty good job of softening them. The USA stars and as many other parts as possible were from the after market set as they seemed pretty nice. Clear coat is on so once dry will be set to do some oil washes and have a go at oxidation to make it look like it’s been used and then finish with a matte clear coat to dull it right off.


- 74 replies
-
- 10
-
-
-
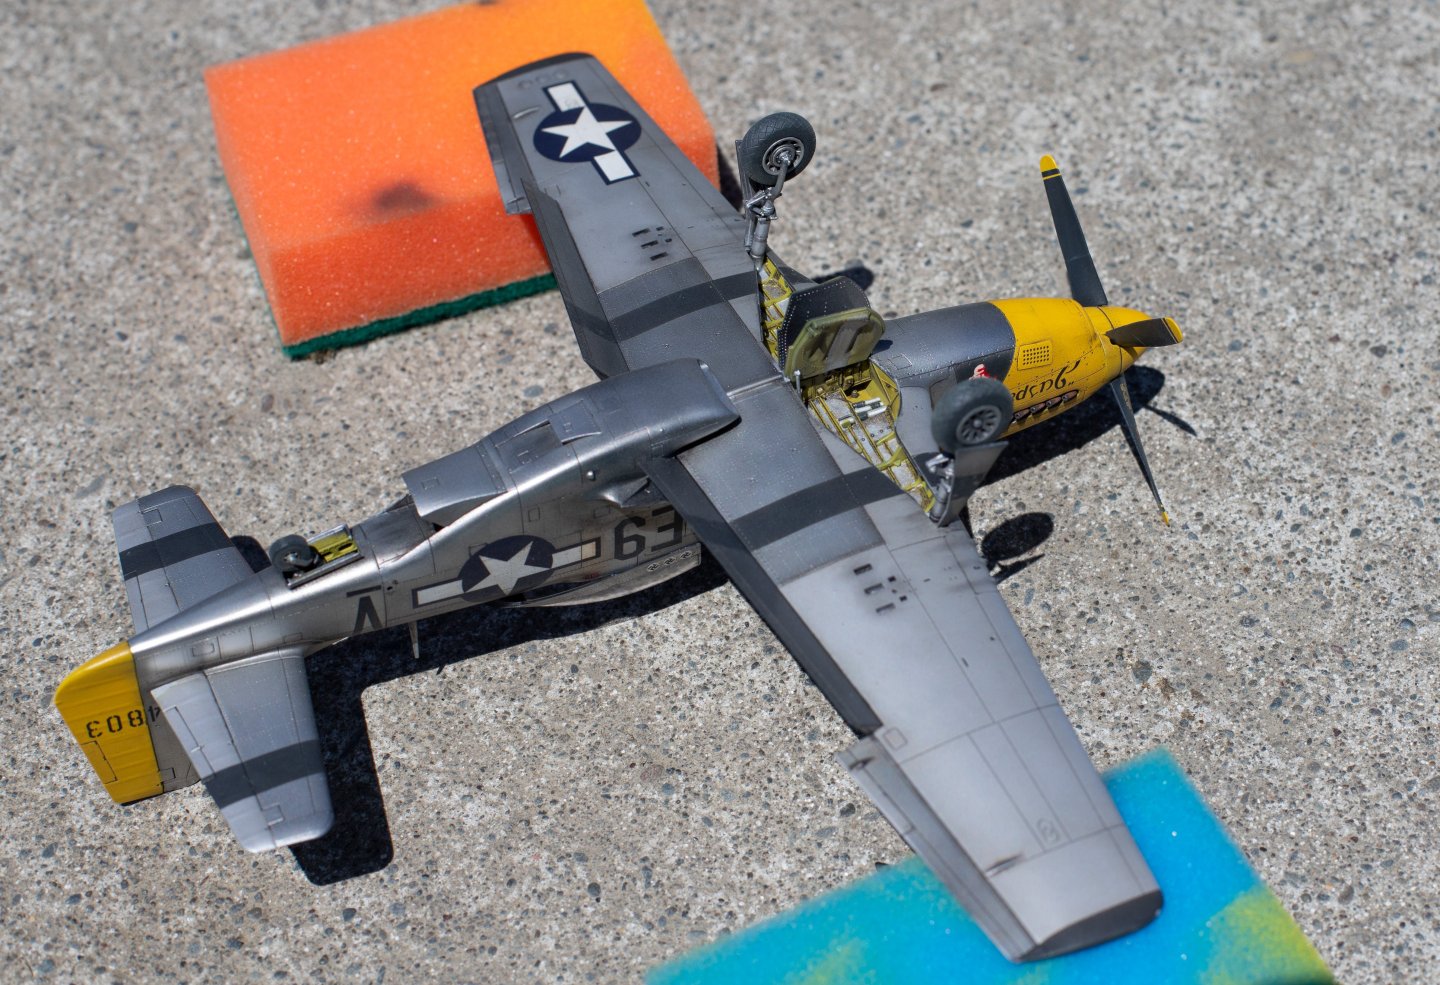
Thanks for the replies. I did my usual thing and left them alone for 24 hours and just pondered solutions so I didn’t do anything stupid in the moment. It payed off. Thanks for the ideas and tips. I did shave just alittle off the plug as suggested. And then took a risk and applied some cement on the undercarriage and let it for a min to soften the plastic and then just forced it in and hoped for the best. I didn’t want to dry fit it incase it was the one shot I got for a good fit before broken bits started to compromise the join. I managed to get them into place and glued a good solid join I hope, later I’ll fill it up with thin CA to give it more strength. All the fits for this kit are super precise so I had that in mind and if the undercarriage legs were installed during the wheel well construction I think it would be another perfect fit (but not sure if the legs would fit through the underside of the wing to install at that point) Just incase anyone reads this before making their own. So the undercarriage is installed and managed to do it without breaking any of the delicate details! all the parts are installed now and the yellow nose and tail is painted. Starting on the decals

- 74 replies
-
- 10
-
-
So does any one know how to get the landing gear clipped into place? I went for a dry fit but it’s too tight. And everything is so delicate it’s tough to get a good amount of force. I used my tweezers and gripped it but I could feel the wings flexing and creaking and I think I’d rip the wings off before the it clips into place. It’s an important join as it’s important it’s really strong but I’m abit stuck and crushing my undercarriage legs would be a real shame with how much work I’ve put into building them. Any tips would be really appreciated
-
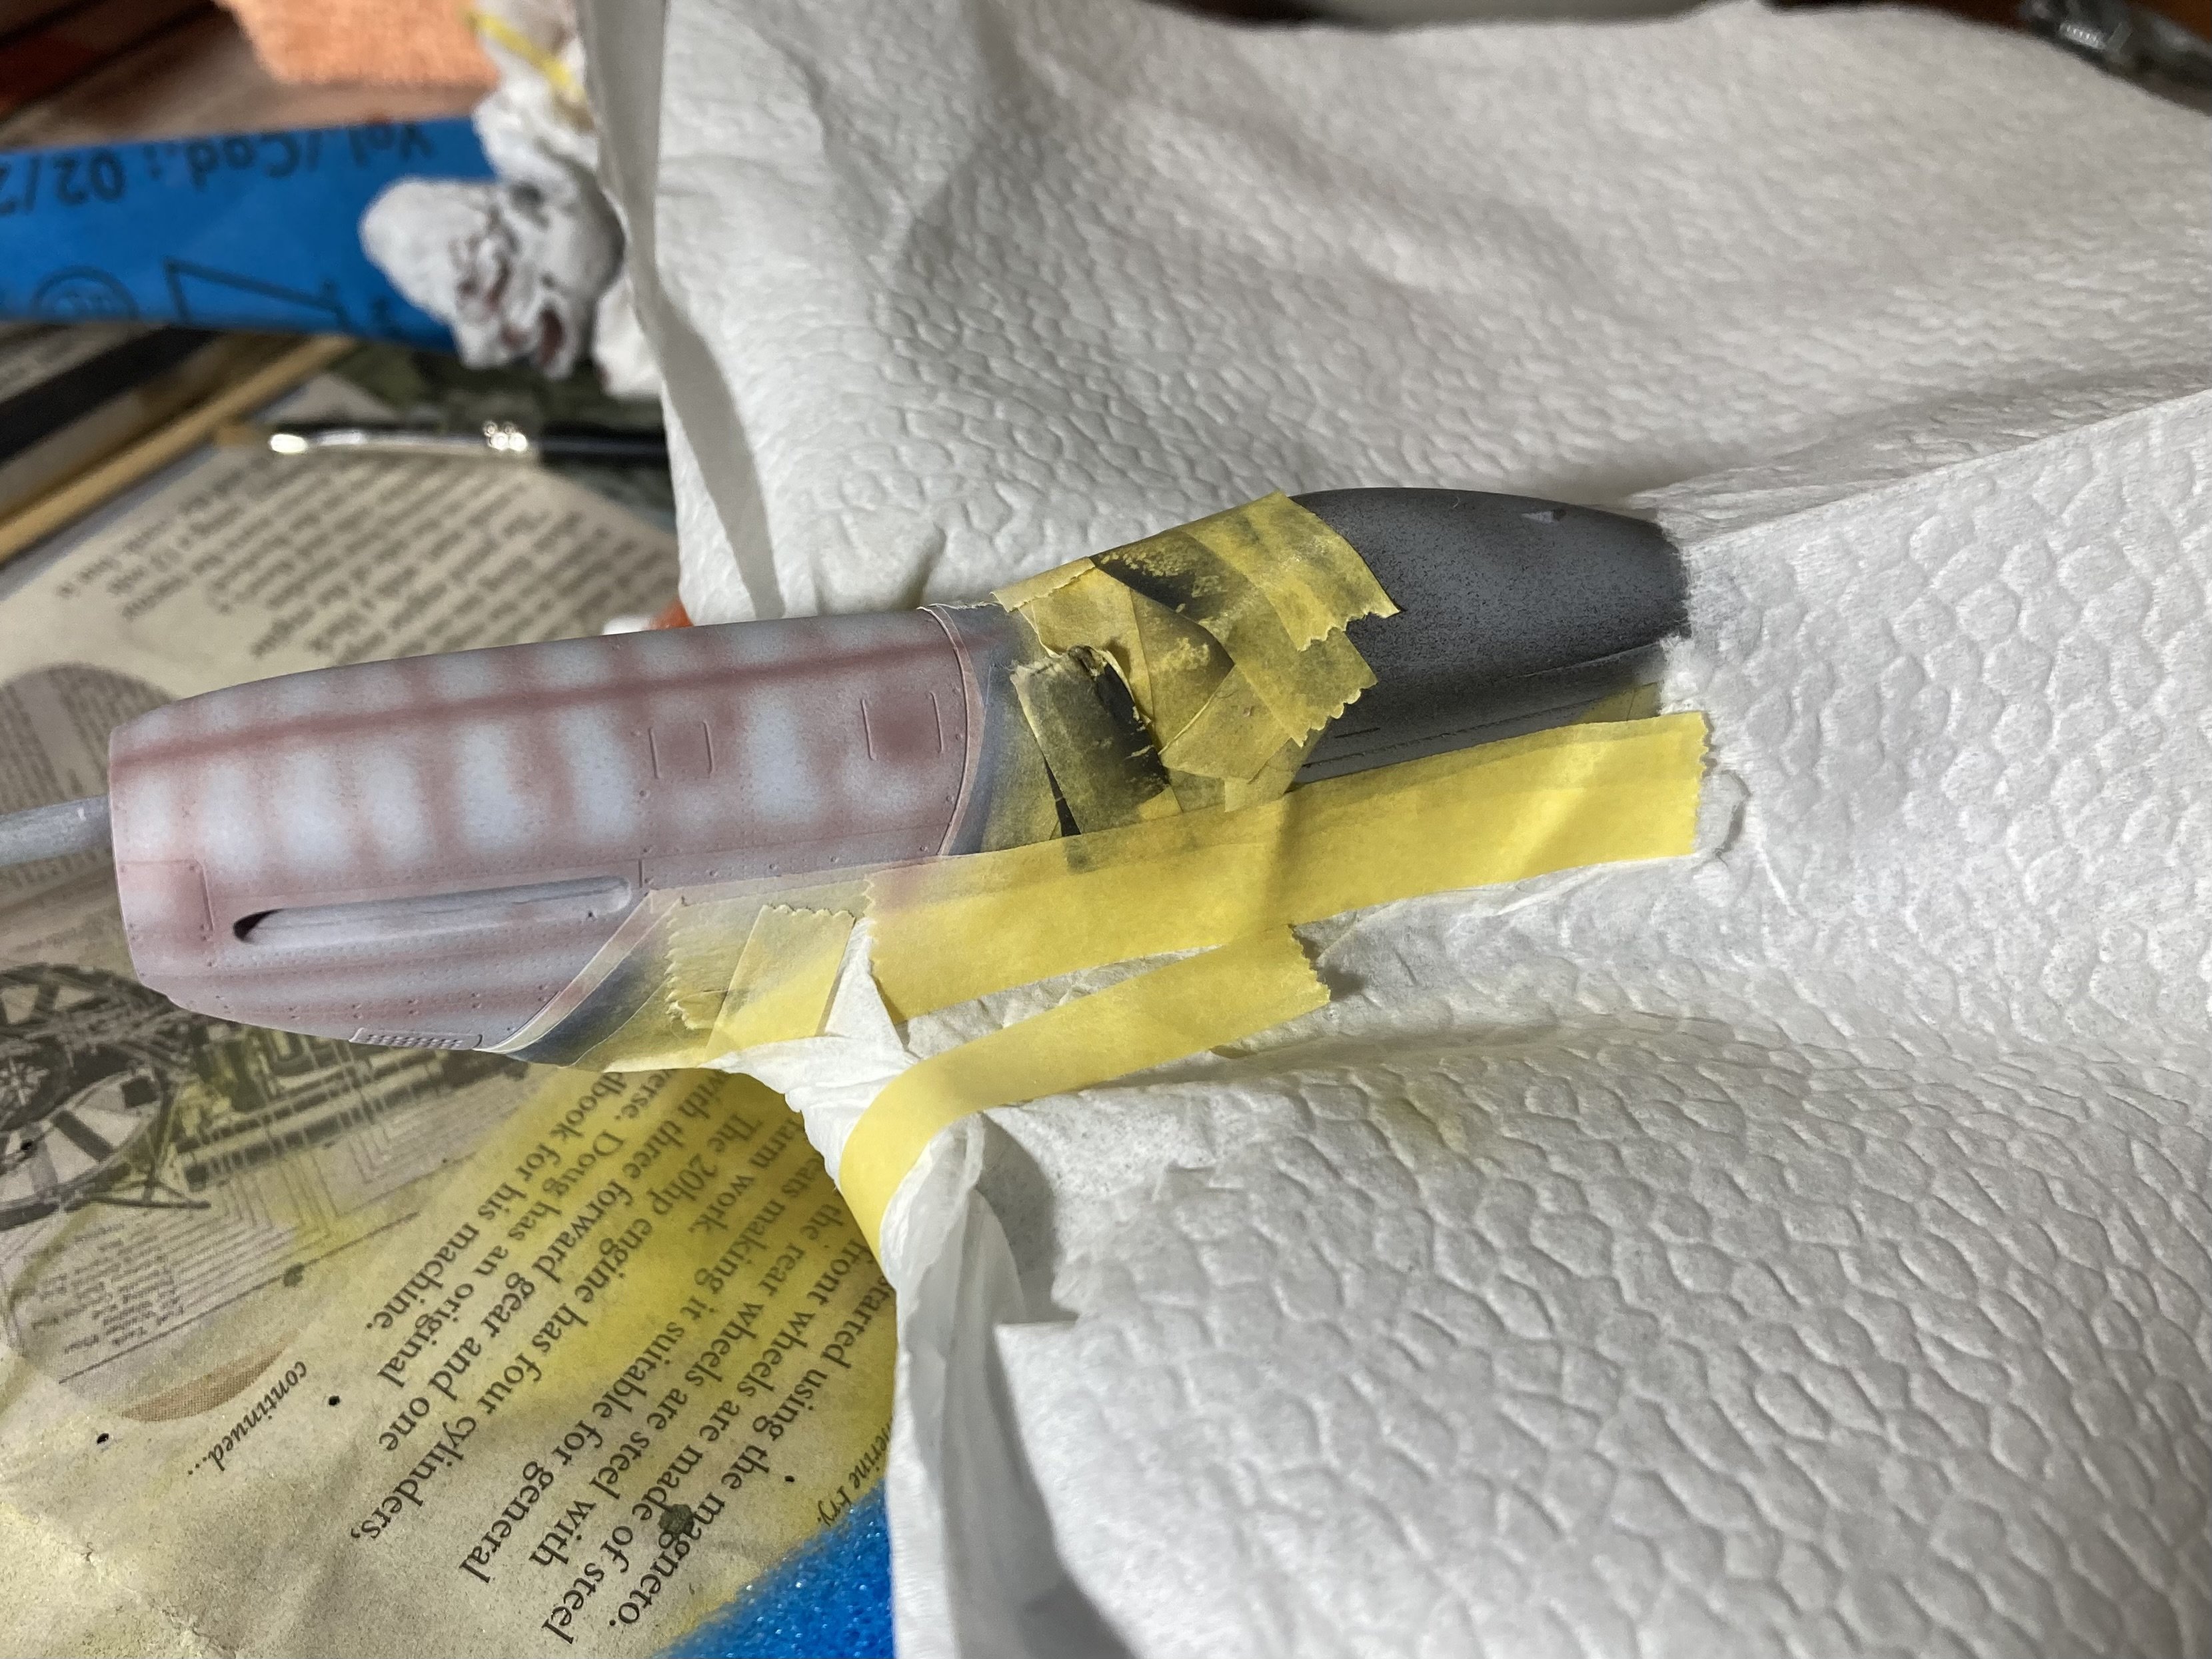
Added the steel part around the exhaust. And chipped up the black lines abit so they aren’t perfectly new. I’ll let it sit for a few days and cure well and on Monday will add on the yellow nose and tail. Also the olive drab anti glare bit and see how it looks.
-
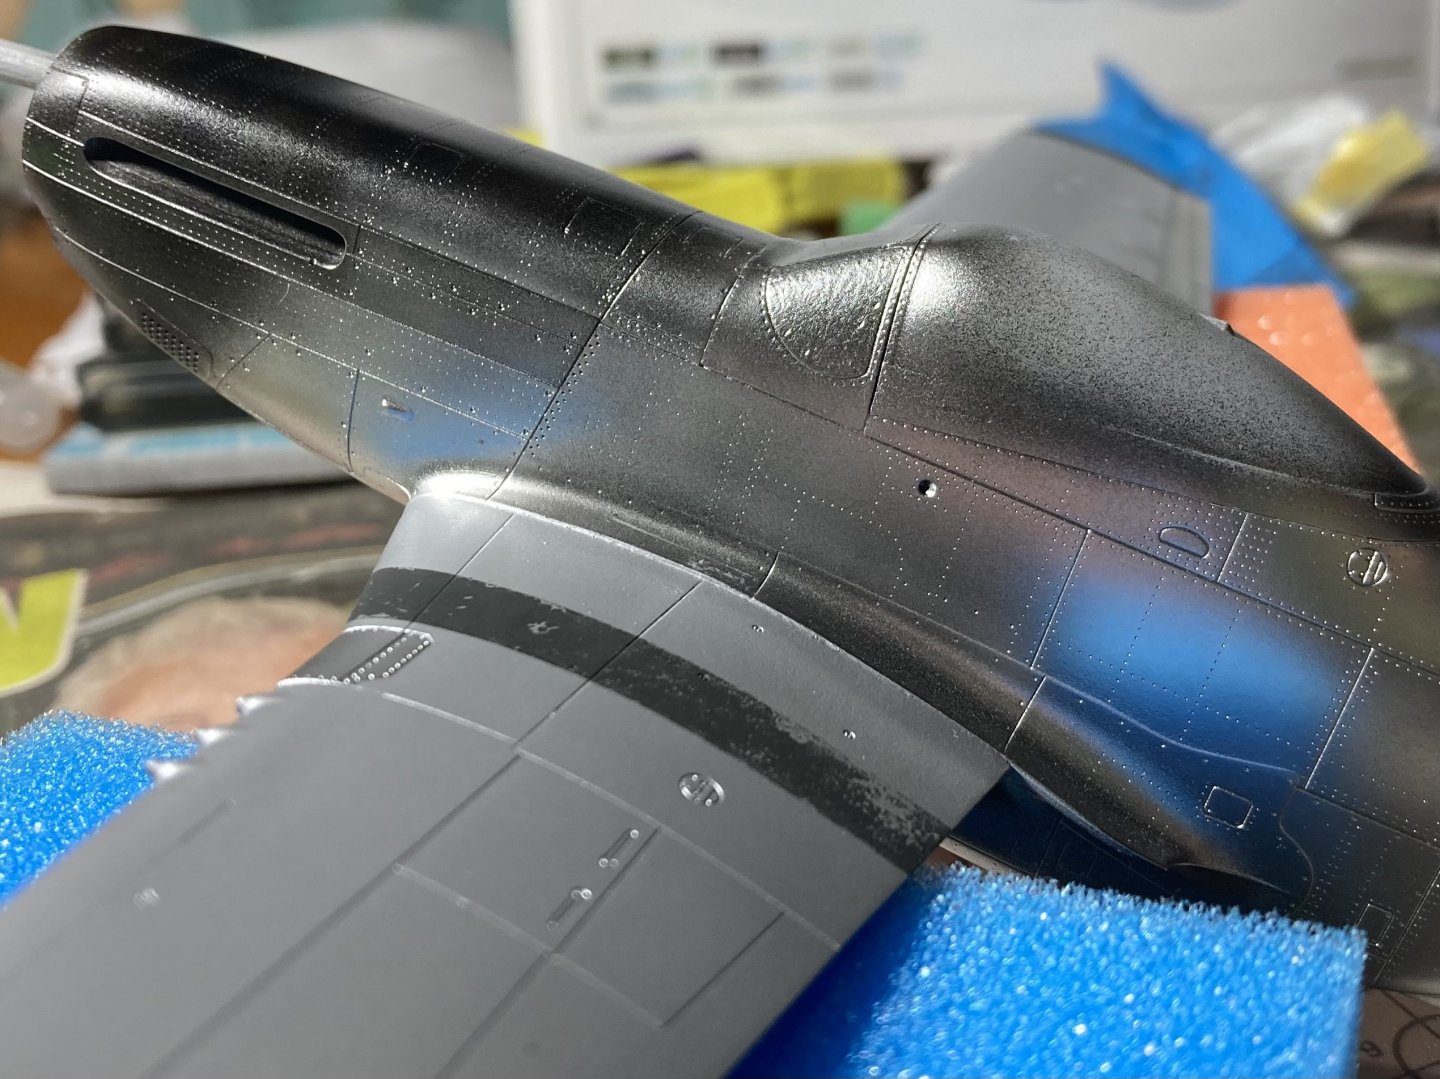
Thanks for the reminder, when I got the super fine silver and duralumin I also got some super iron just for that part. I’ve heard the colour can be hard to tell apart easily so I’ll paint it black underneath and so a very thin coat until it looks right. I'm still wondering if the silver paint had too much white and needs toning down back to be abit more silvery. At some angles it’s great at other angles it’s quite a late contrast! But I’m not sure. added the black stripes. Under the main wing strips I’ve got some chipping fluid. So I’ll roughen those up shortly

- 74 replies
-
- 10
-
-
-
He has some great stuff! Amazing info! To me the D model is the prettiest! But those super prop planes are pretty much as fast as you can go with a prop and they weren’t that far after flying was invented really!!
-
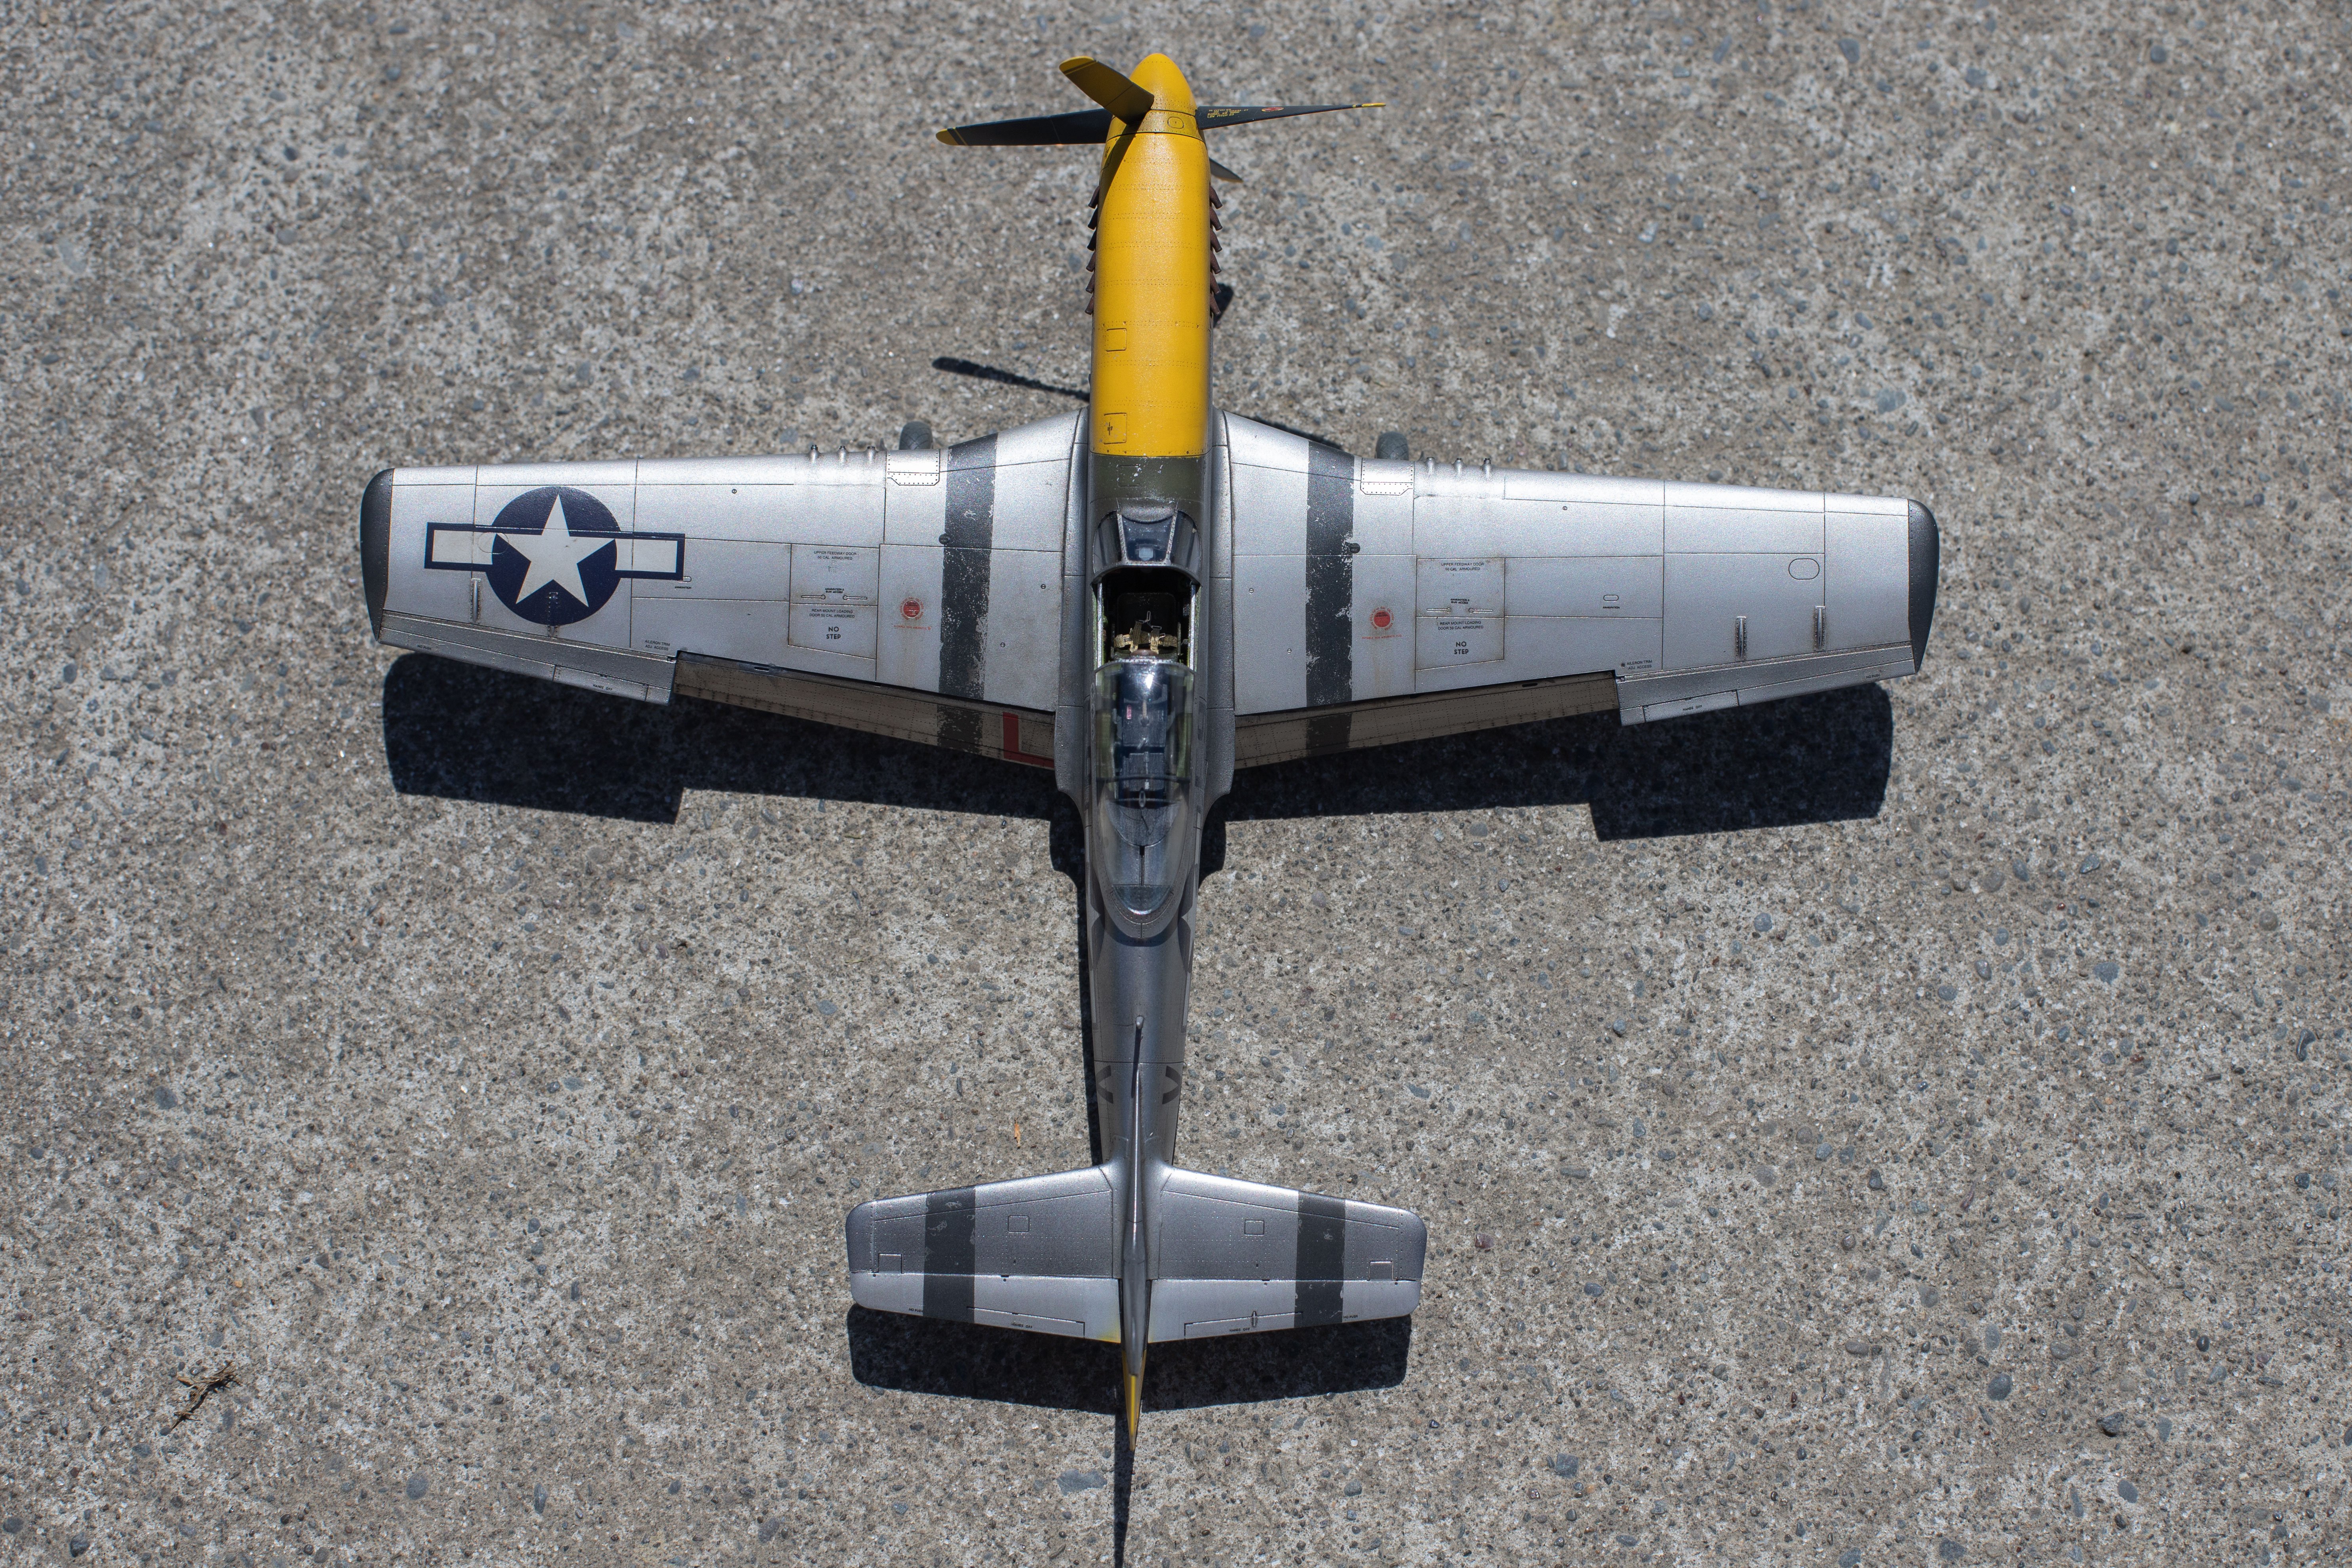
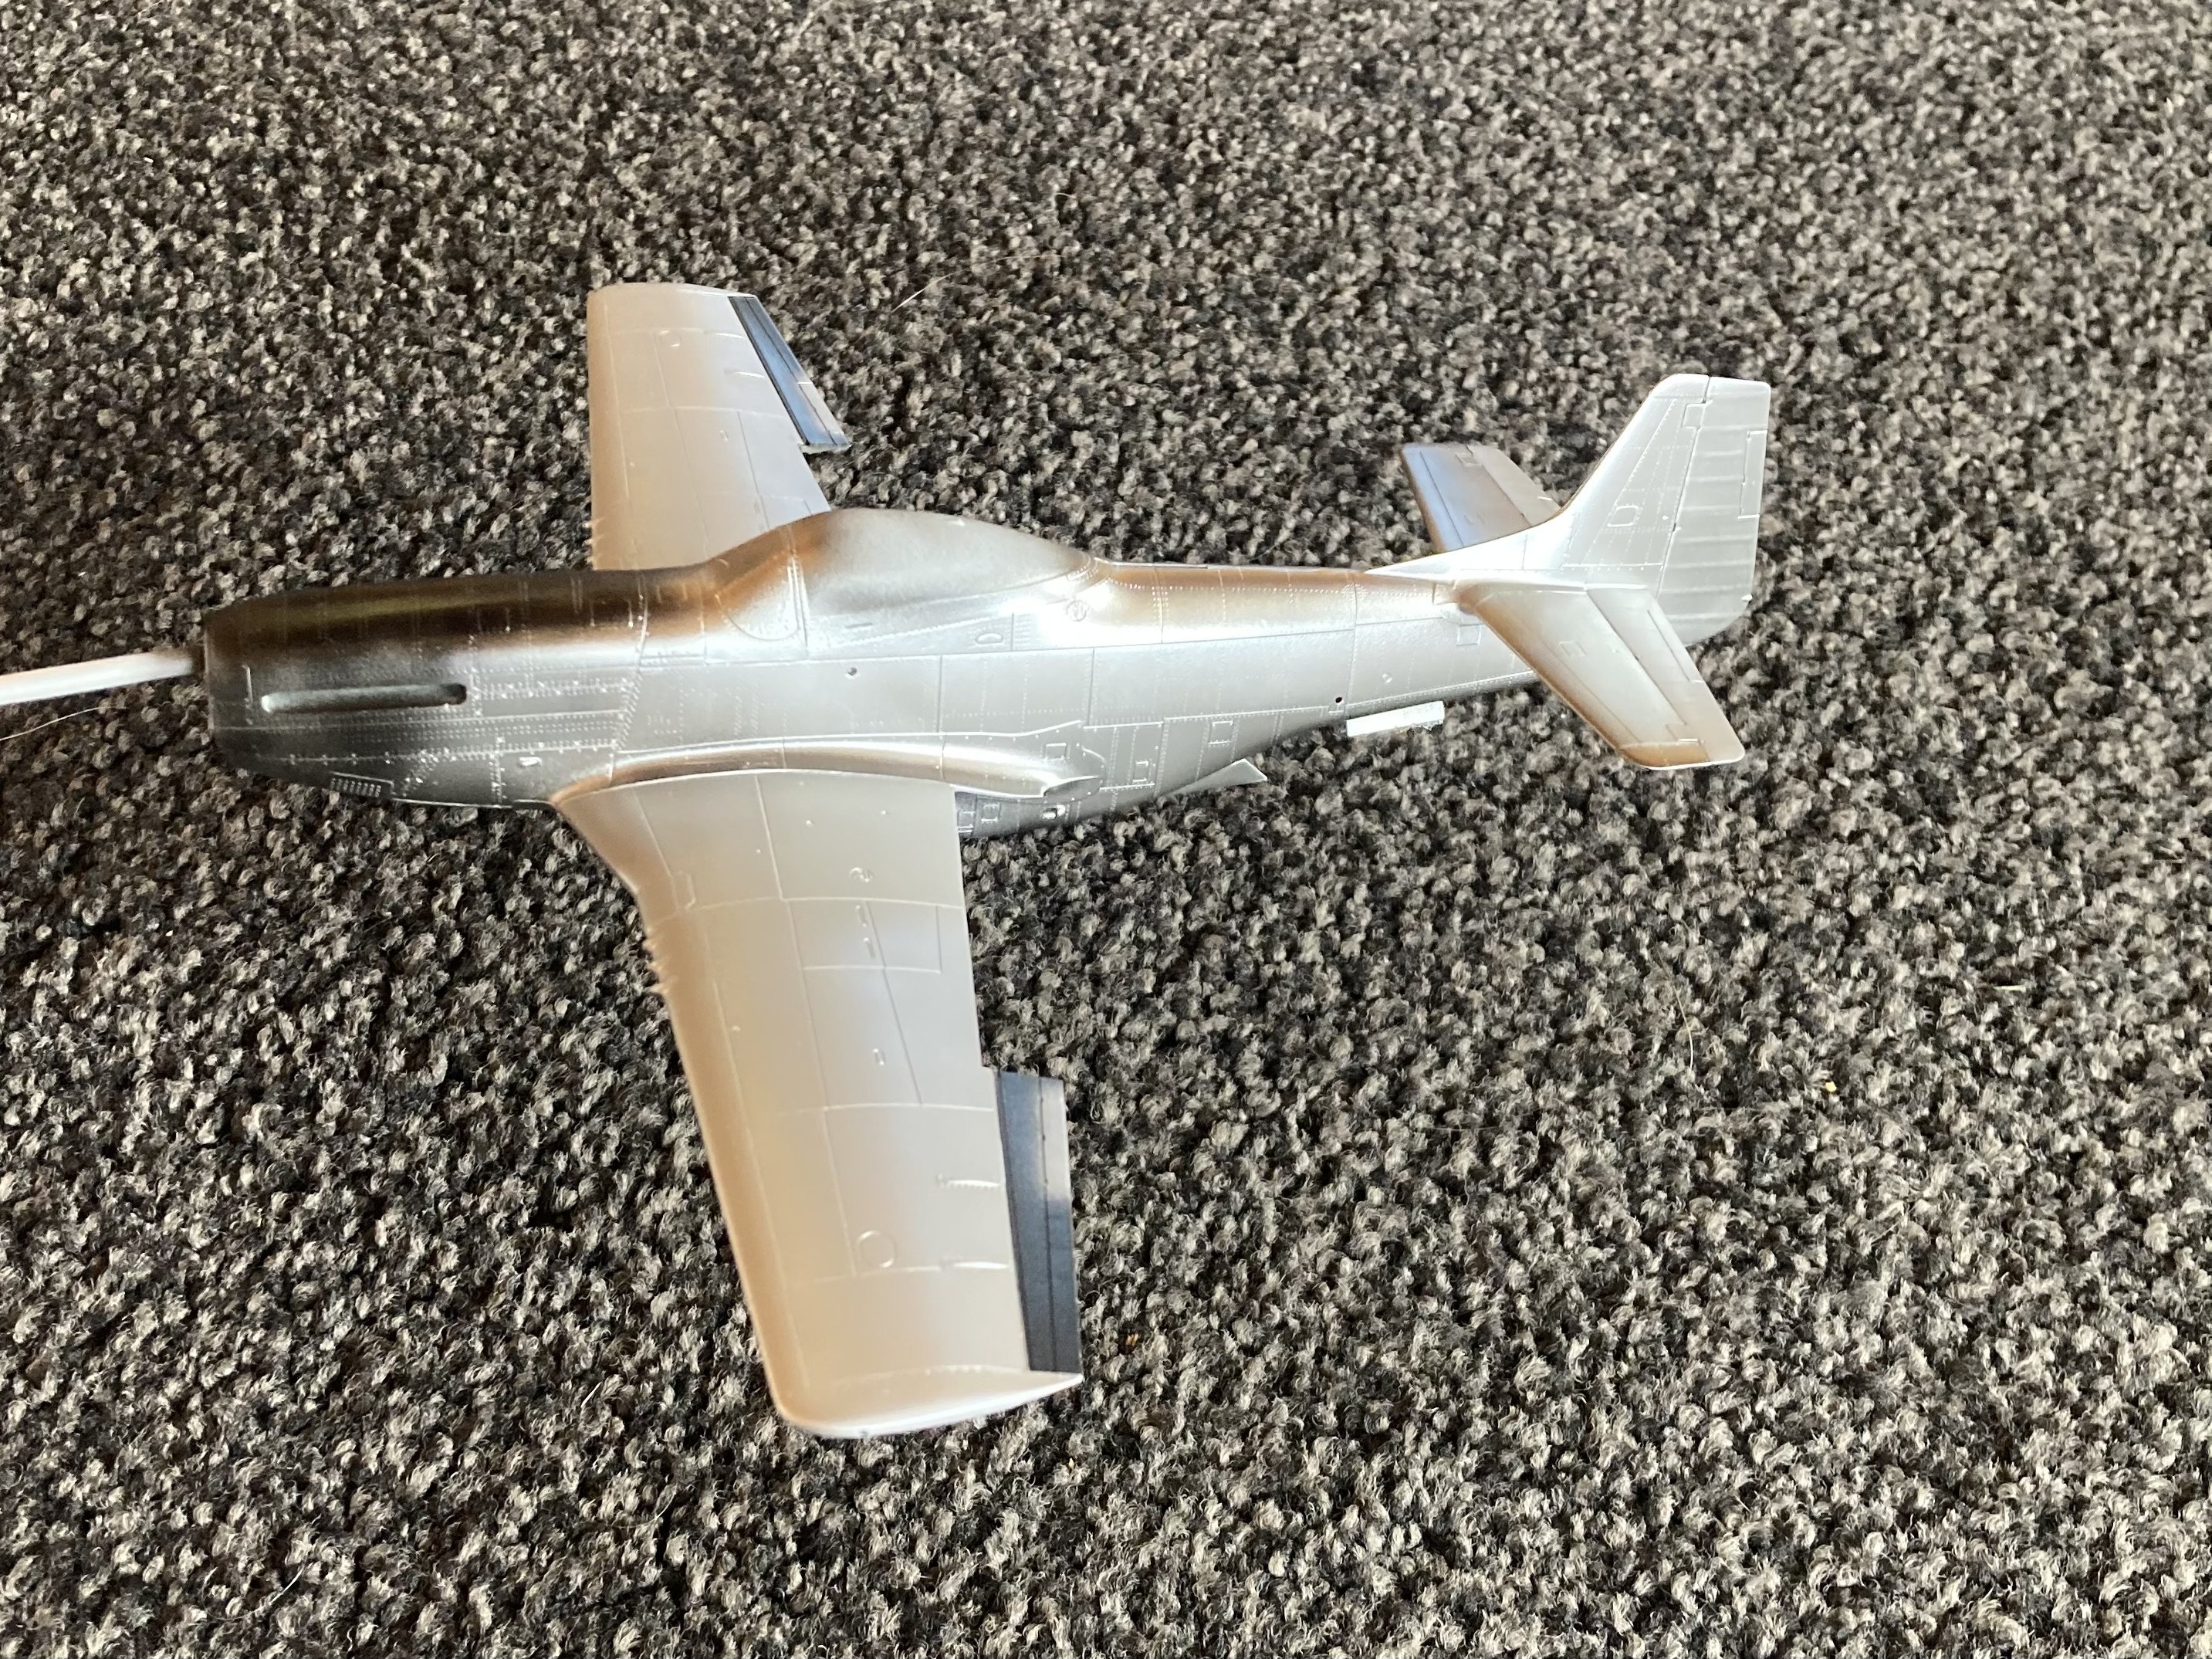
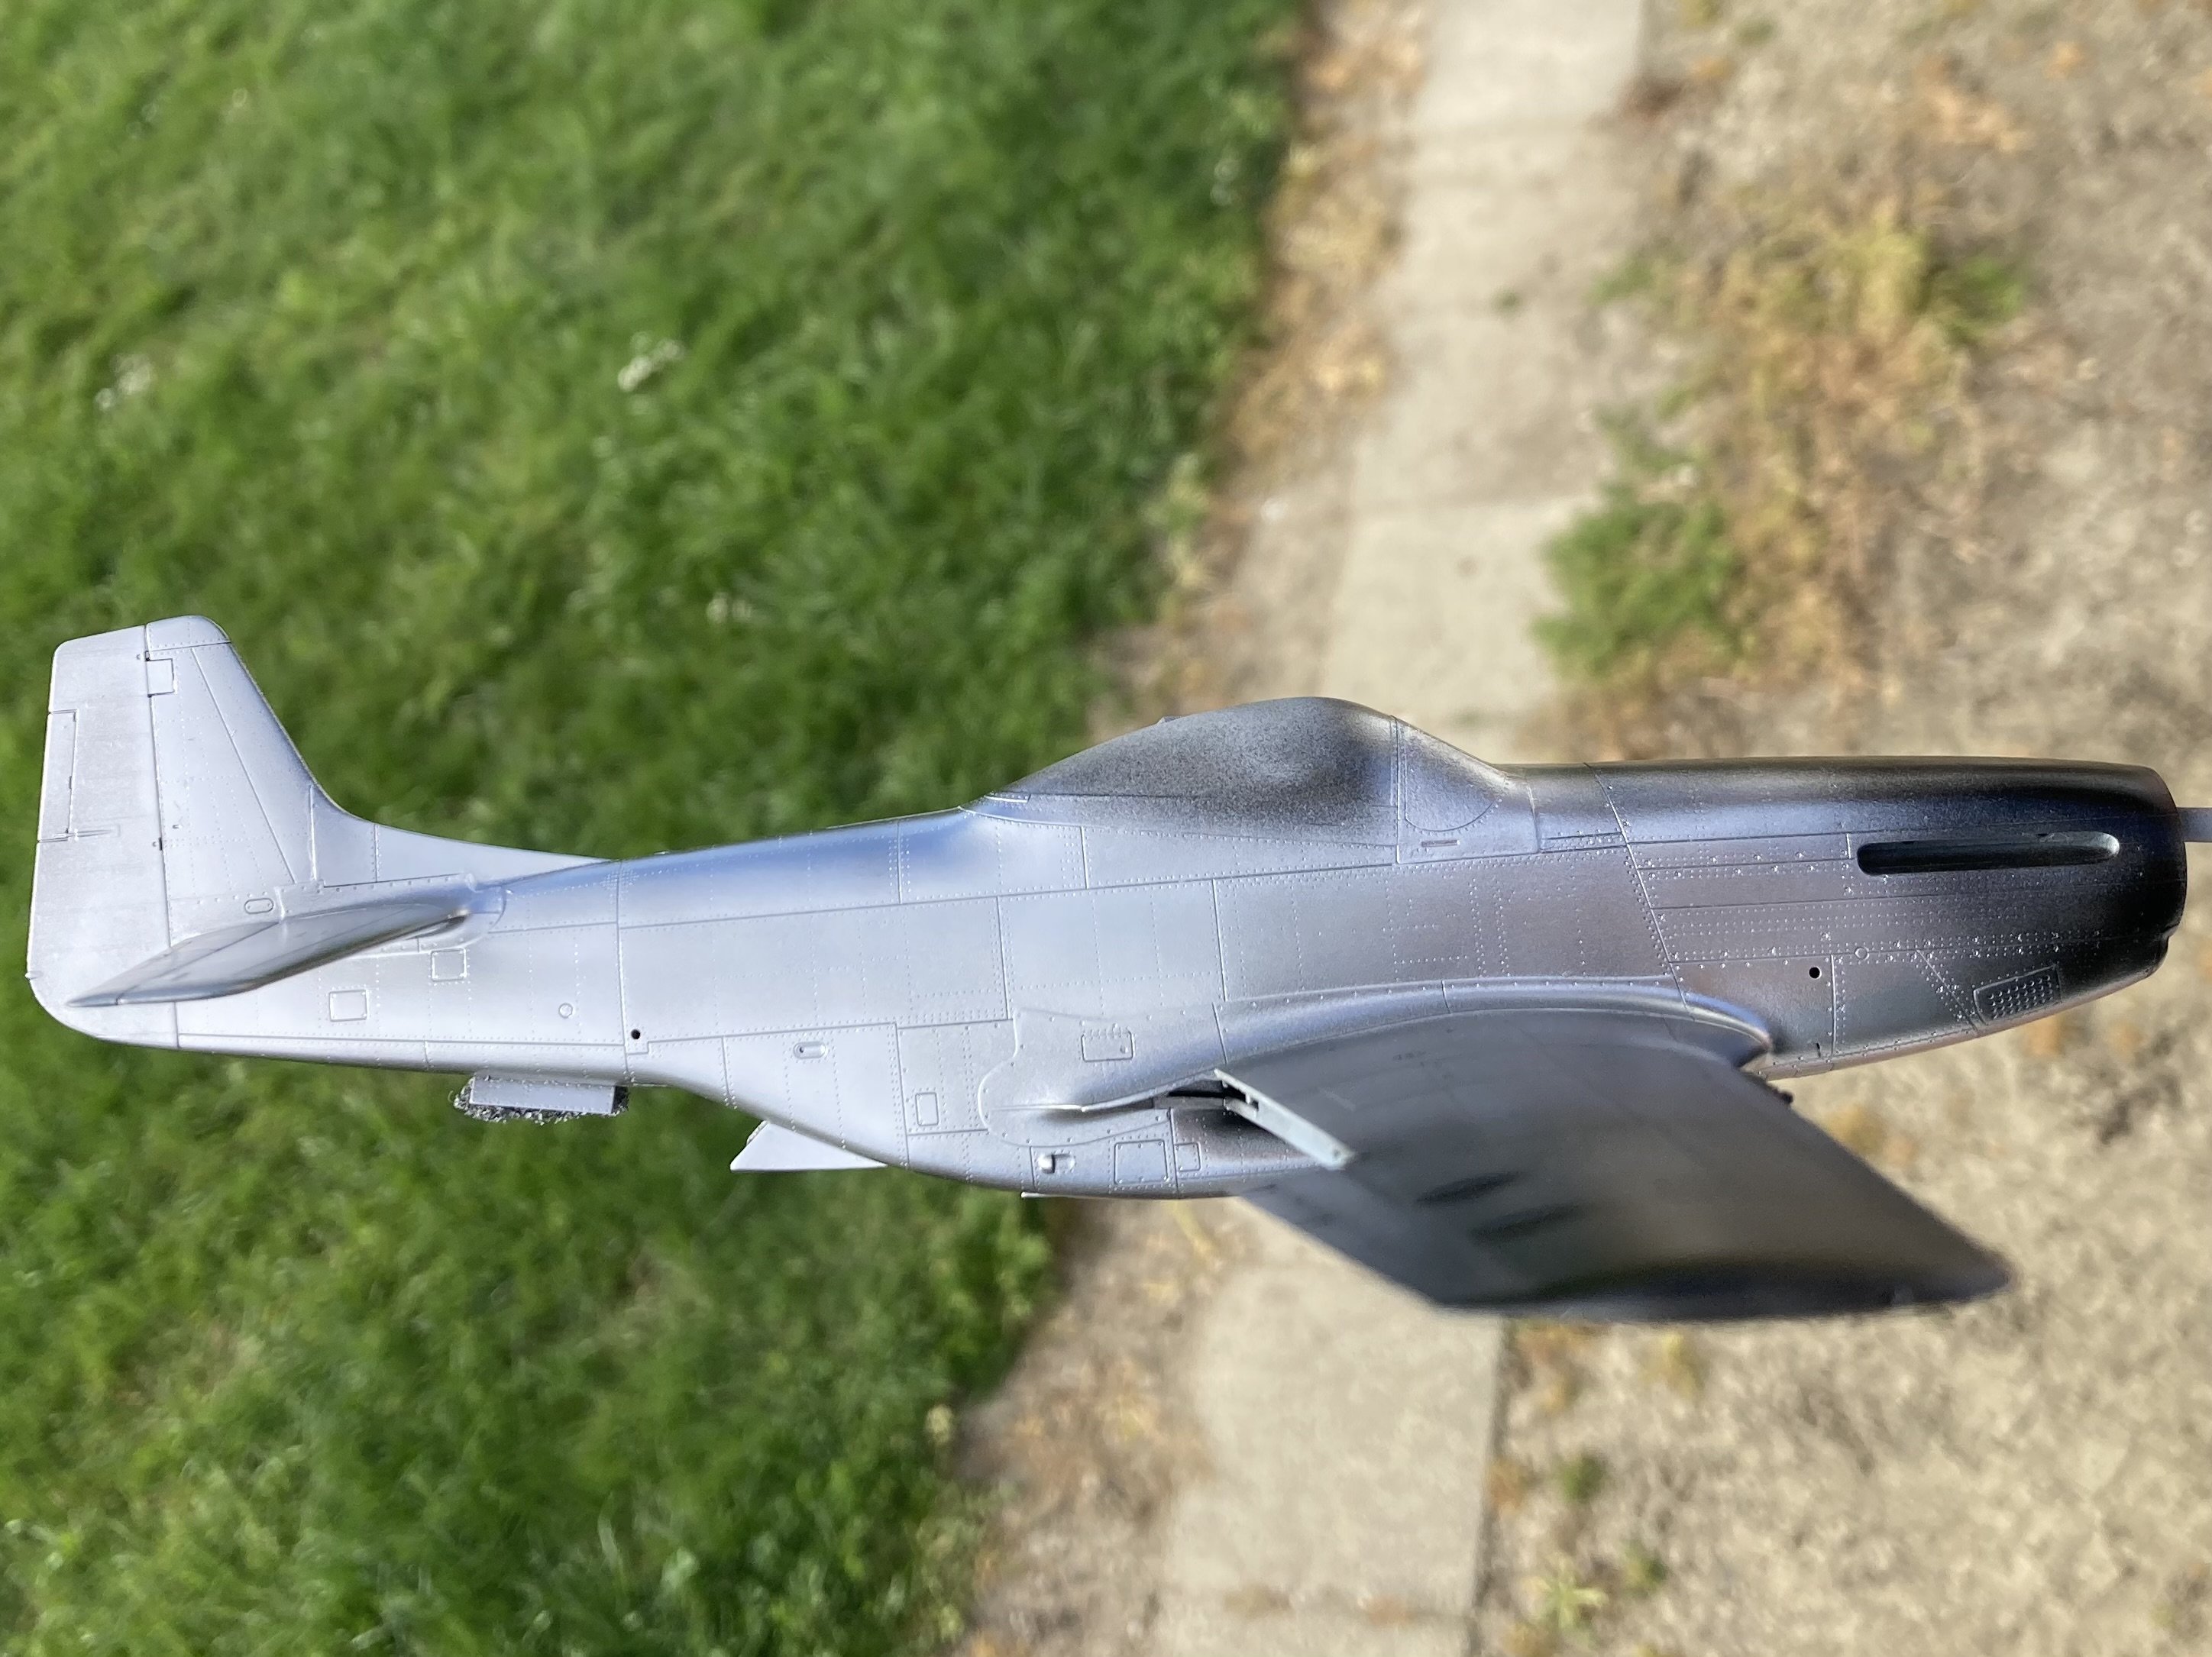
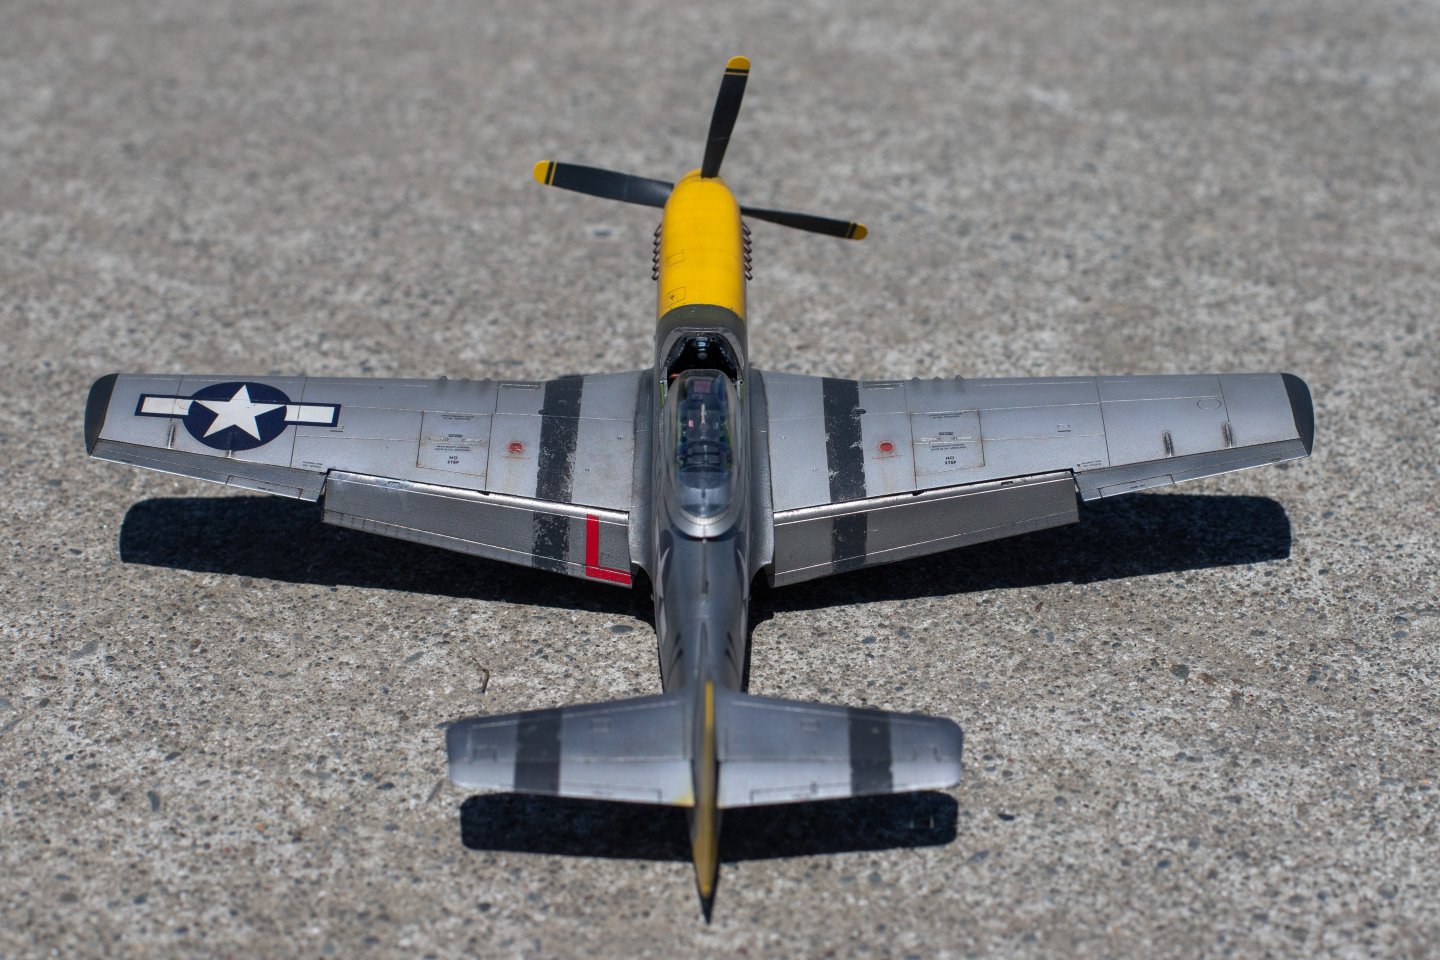
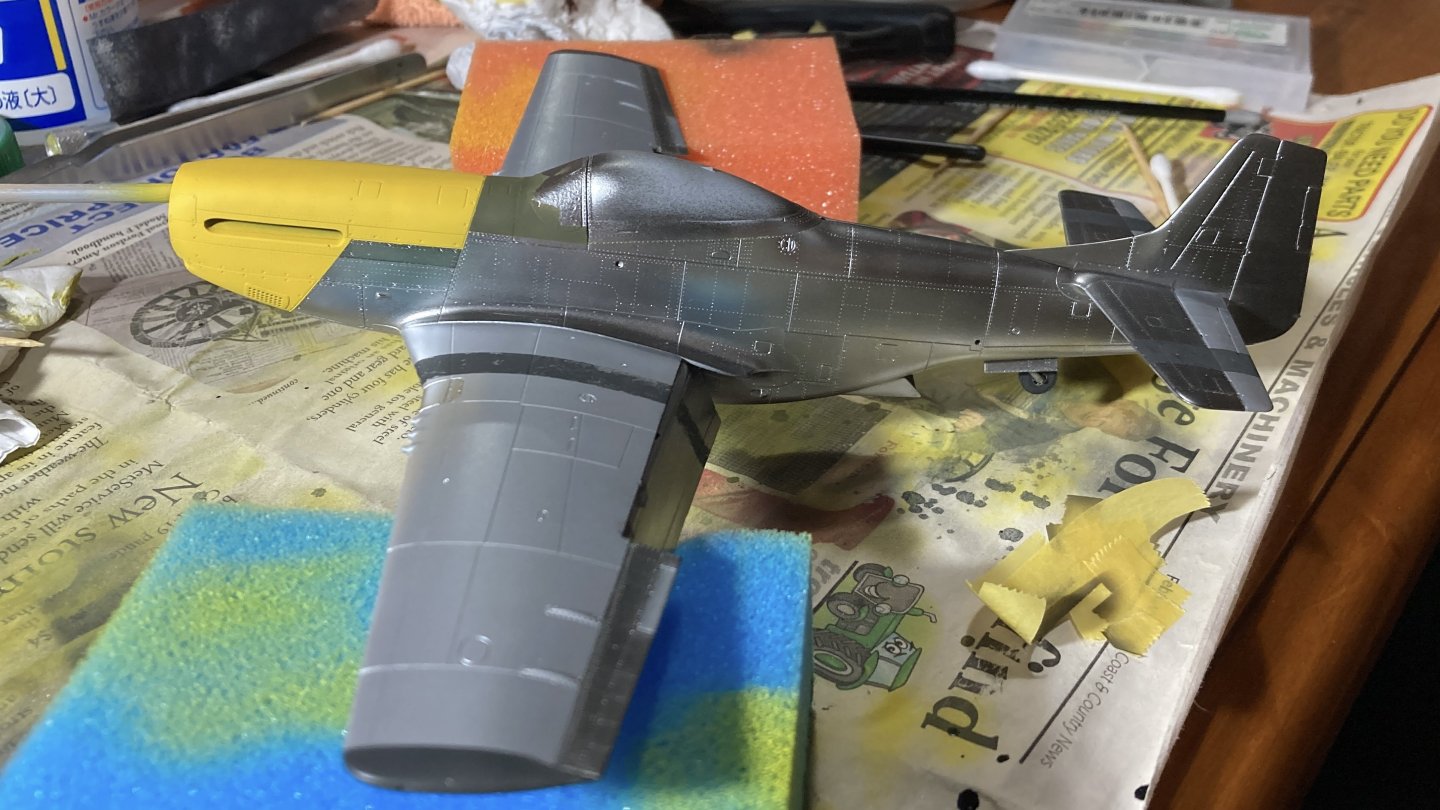
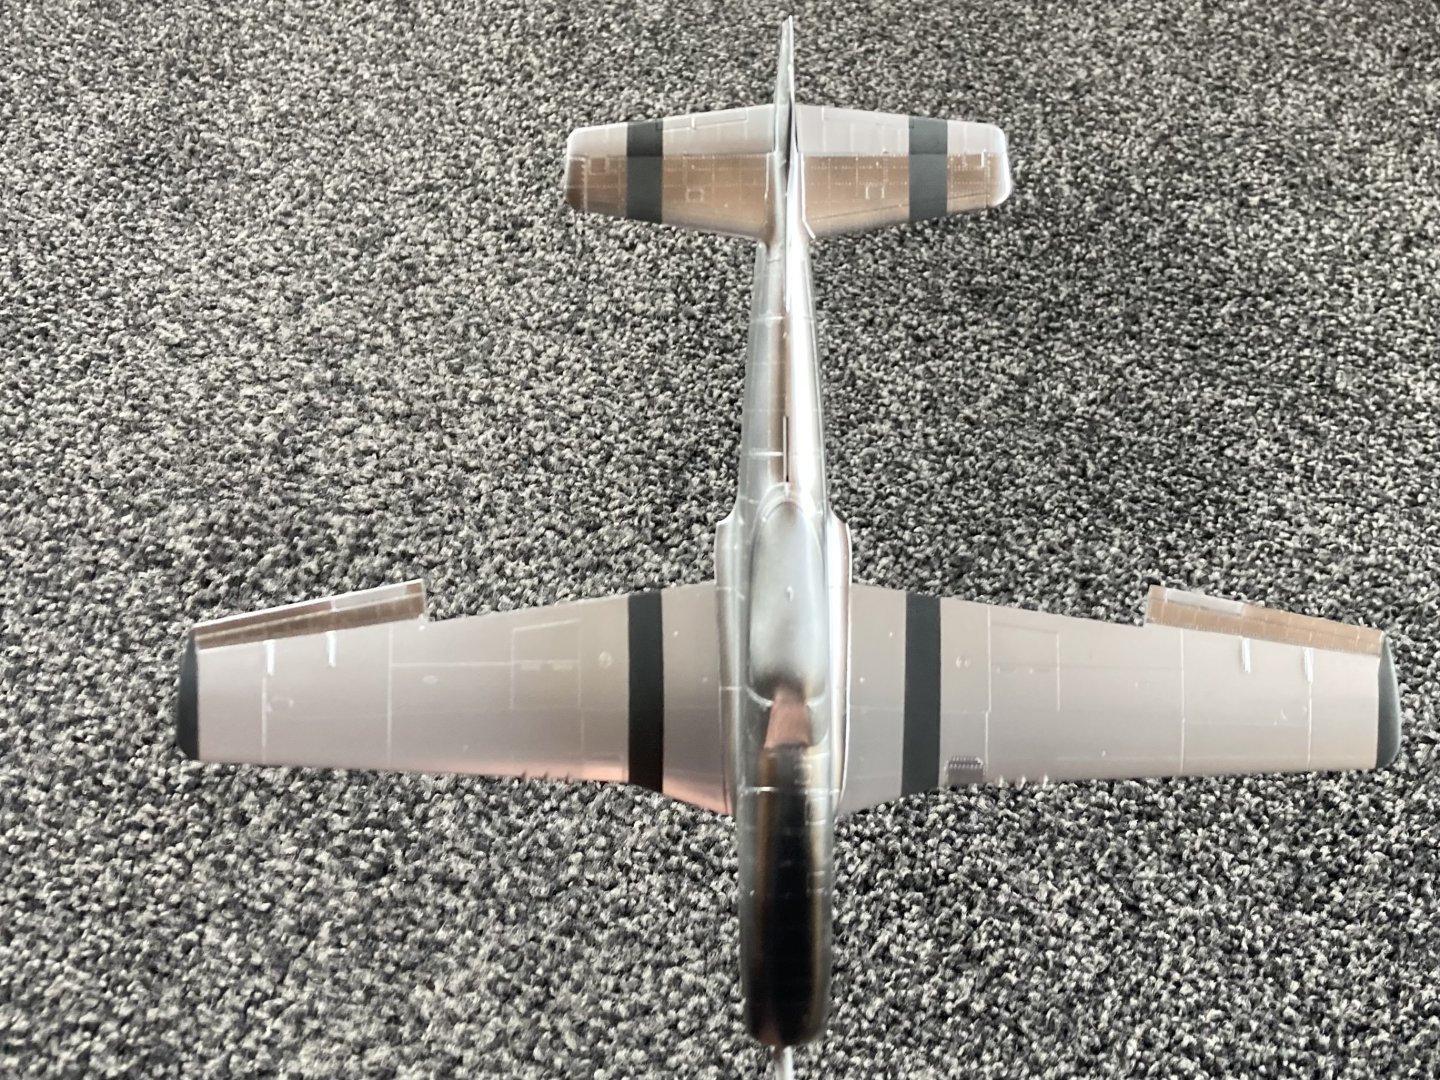
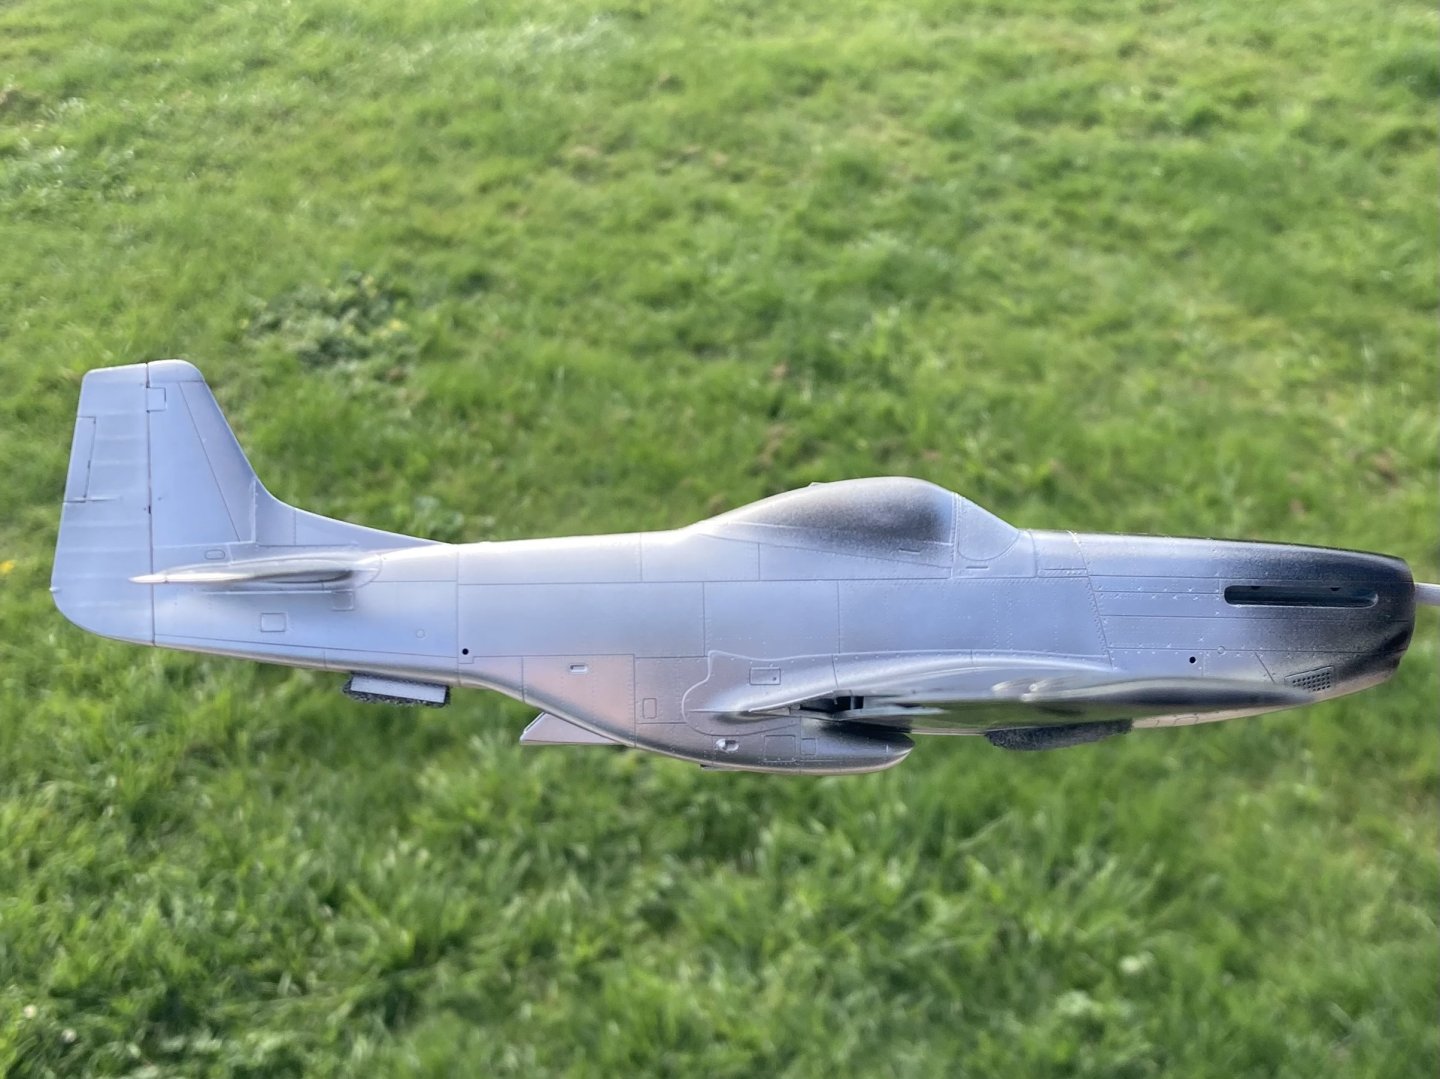
First time trying mr, Color standard lacquer paints. Only thing (apart from the smell) is how thick they are! Normally drop paint from a tooth pick to get ratios. 4 drops of this with one drop of that so I get the same colour each time. No way with these paints! Just had to scoop paint out and good luck to me to try match it again! painted the wings with silver and a good dashing of white. If I could have controlled the colours more maybe I’d have added less white. But it’s ok. Ailerons aren’t painted so still black. They need to be aluminium but I forgot about them when doing the fuselage! It’s amazing how hard it is to photograph! A small change in angle is a whole new look! And again outside in the sun. I’m afraid you will never really know what this plane looks like in real life! Ailerons and flaps to paint and the yellow once the paint has had a good while to dry. Yellow is hard so will probably be done over a good few hours to build it up to the right thickness

- 74 replies
-
- 10
-
-
That was a really interesting watch! Amazing how different altitudes affect the two aircraft!
-
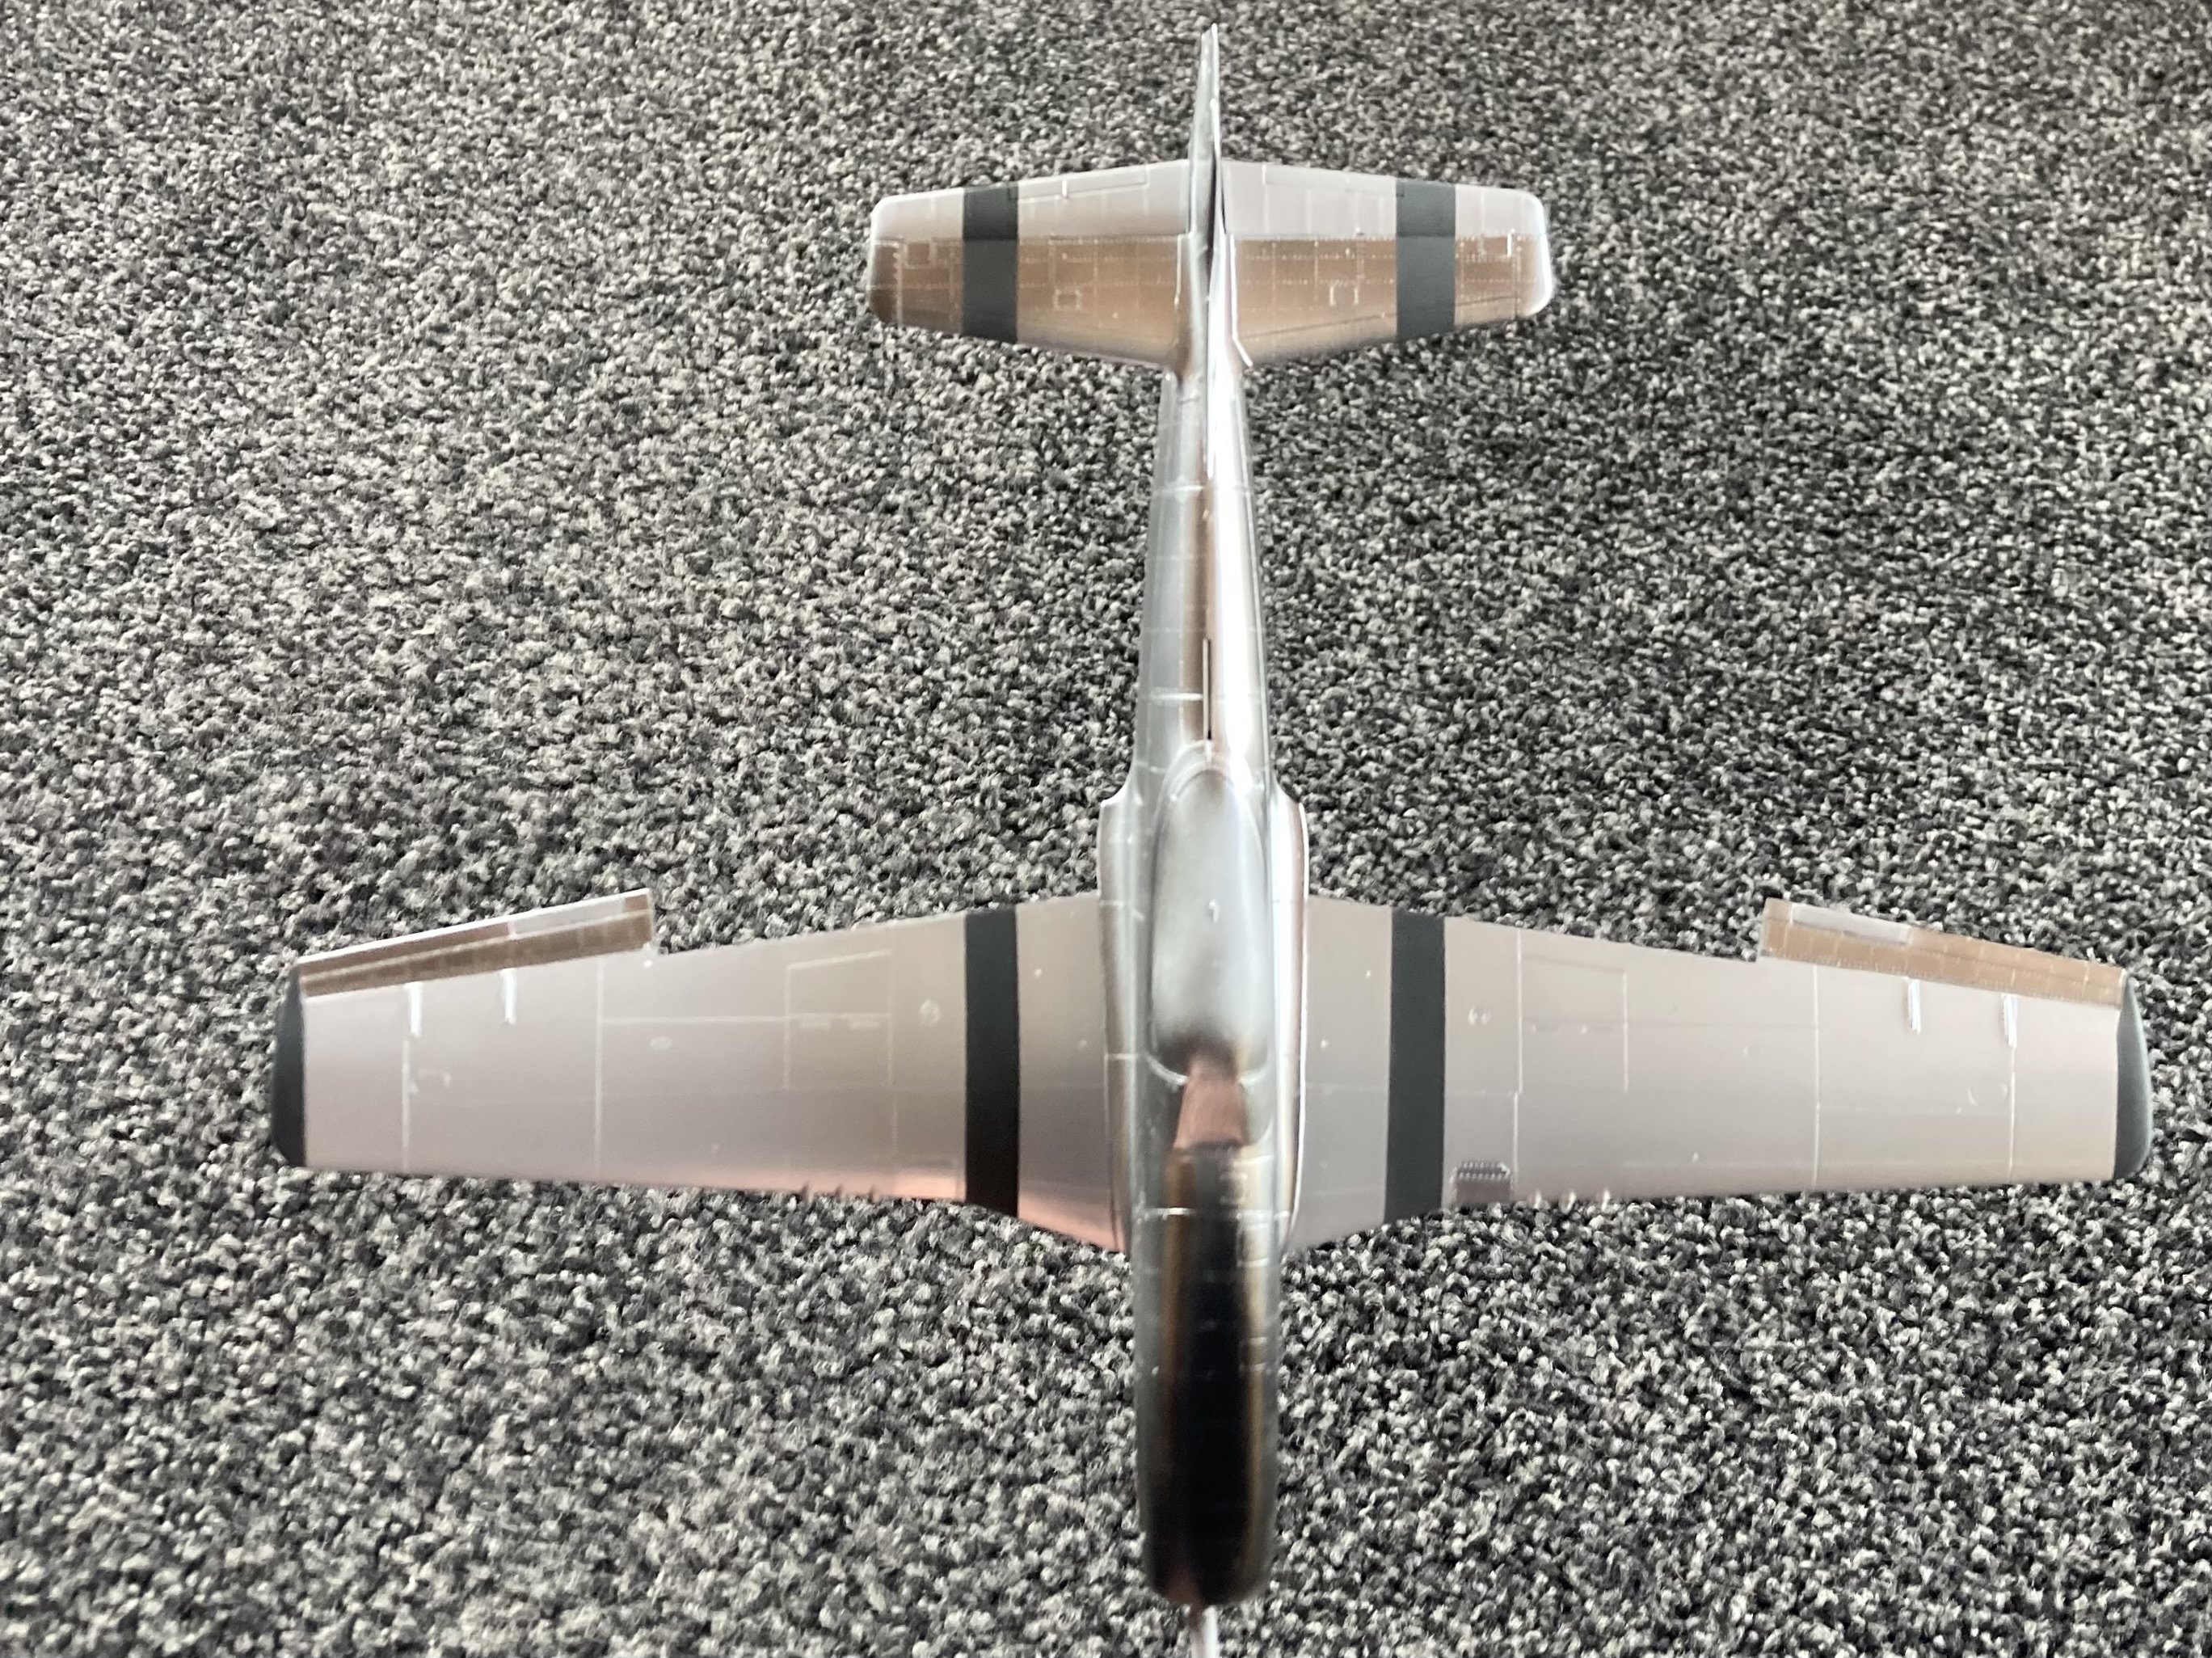
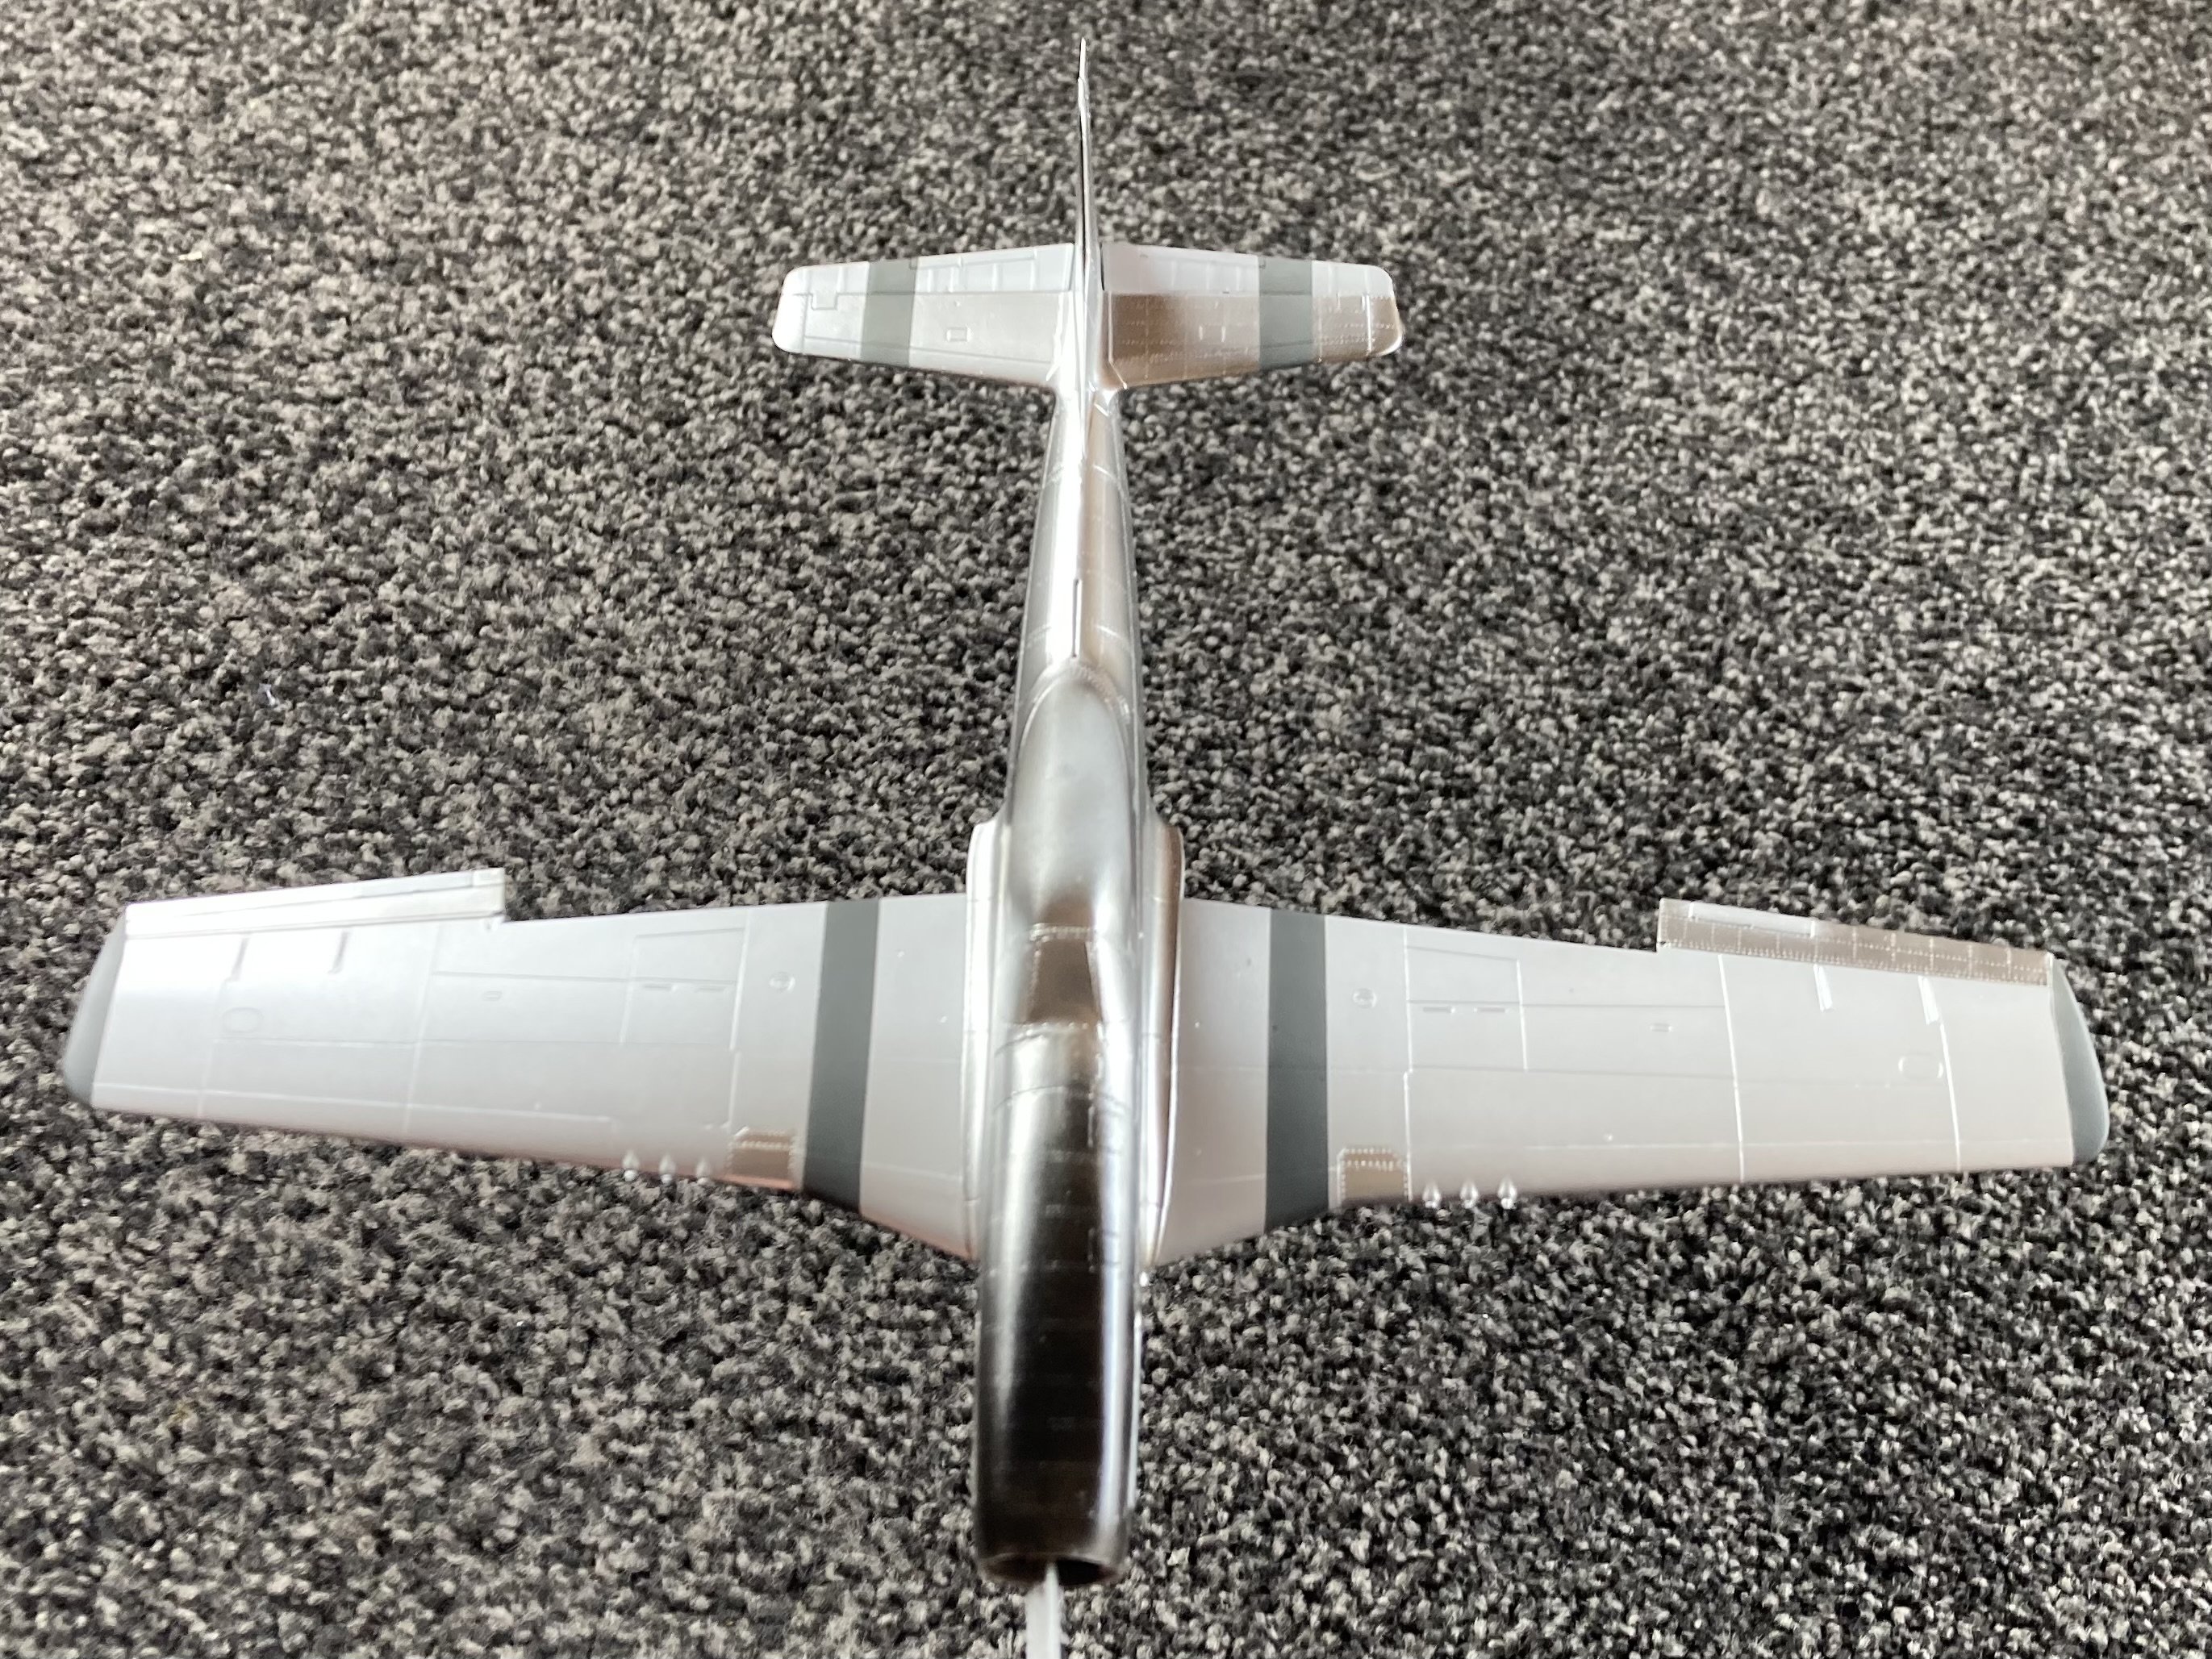
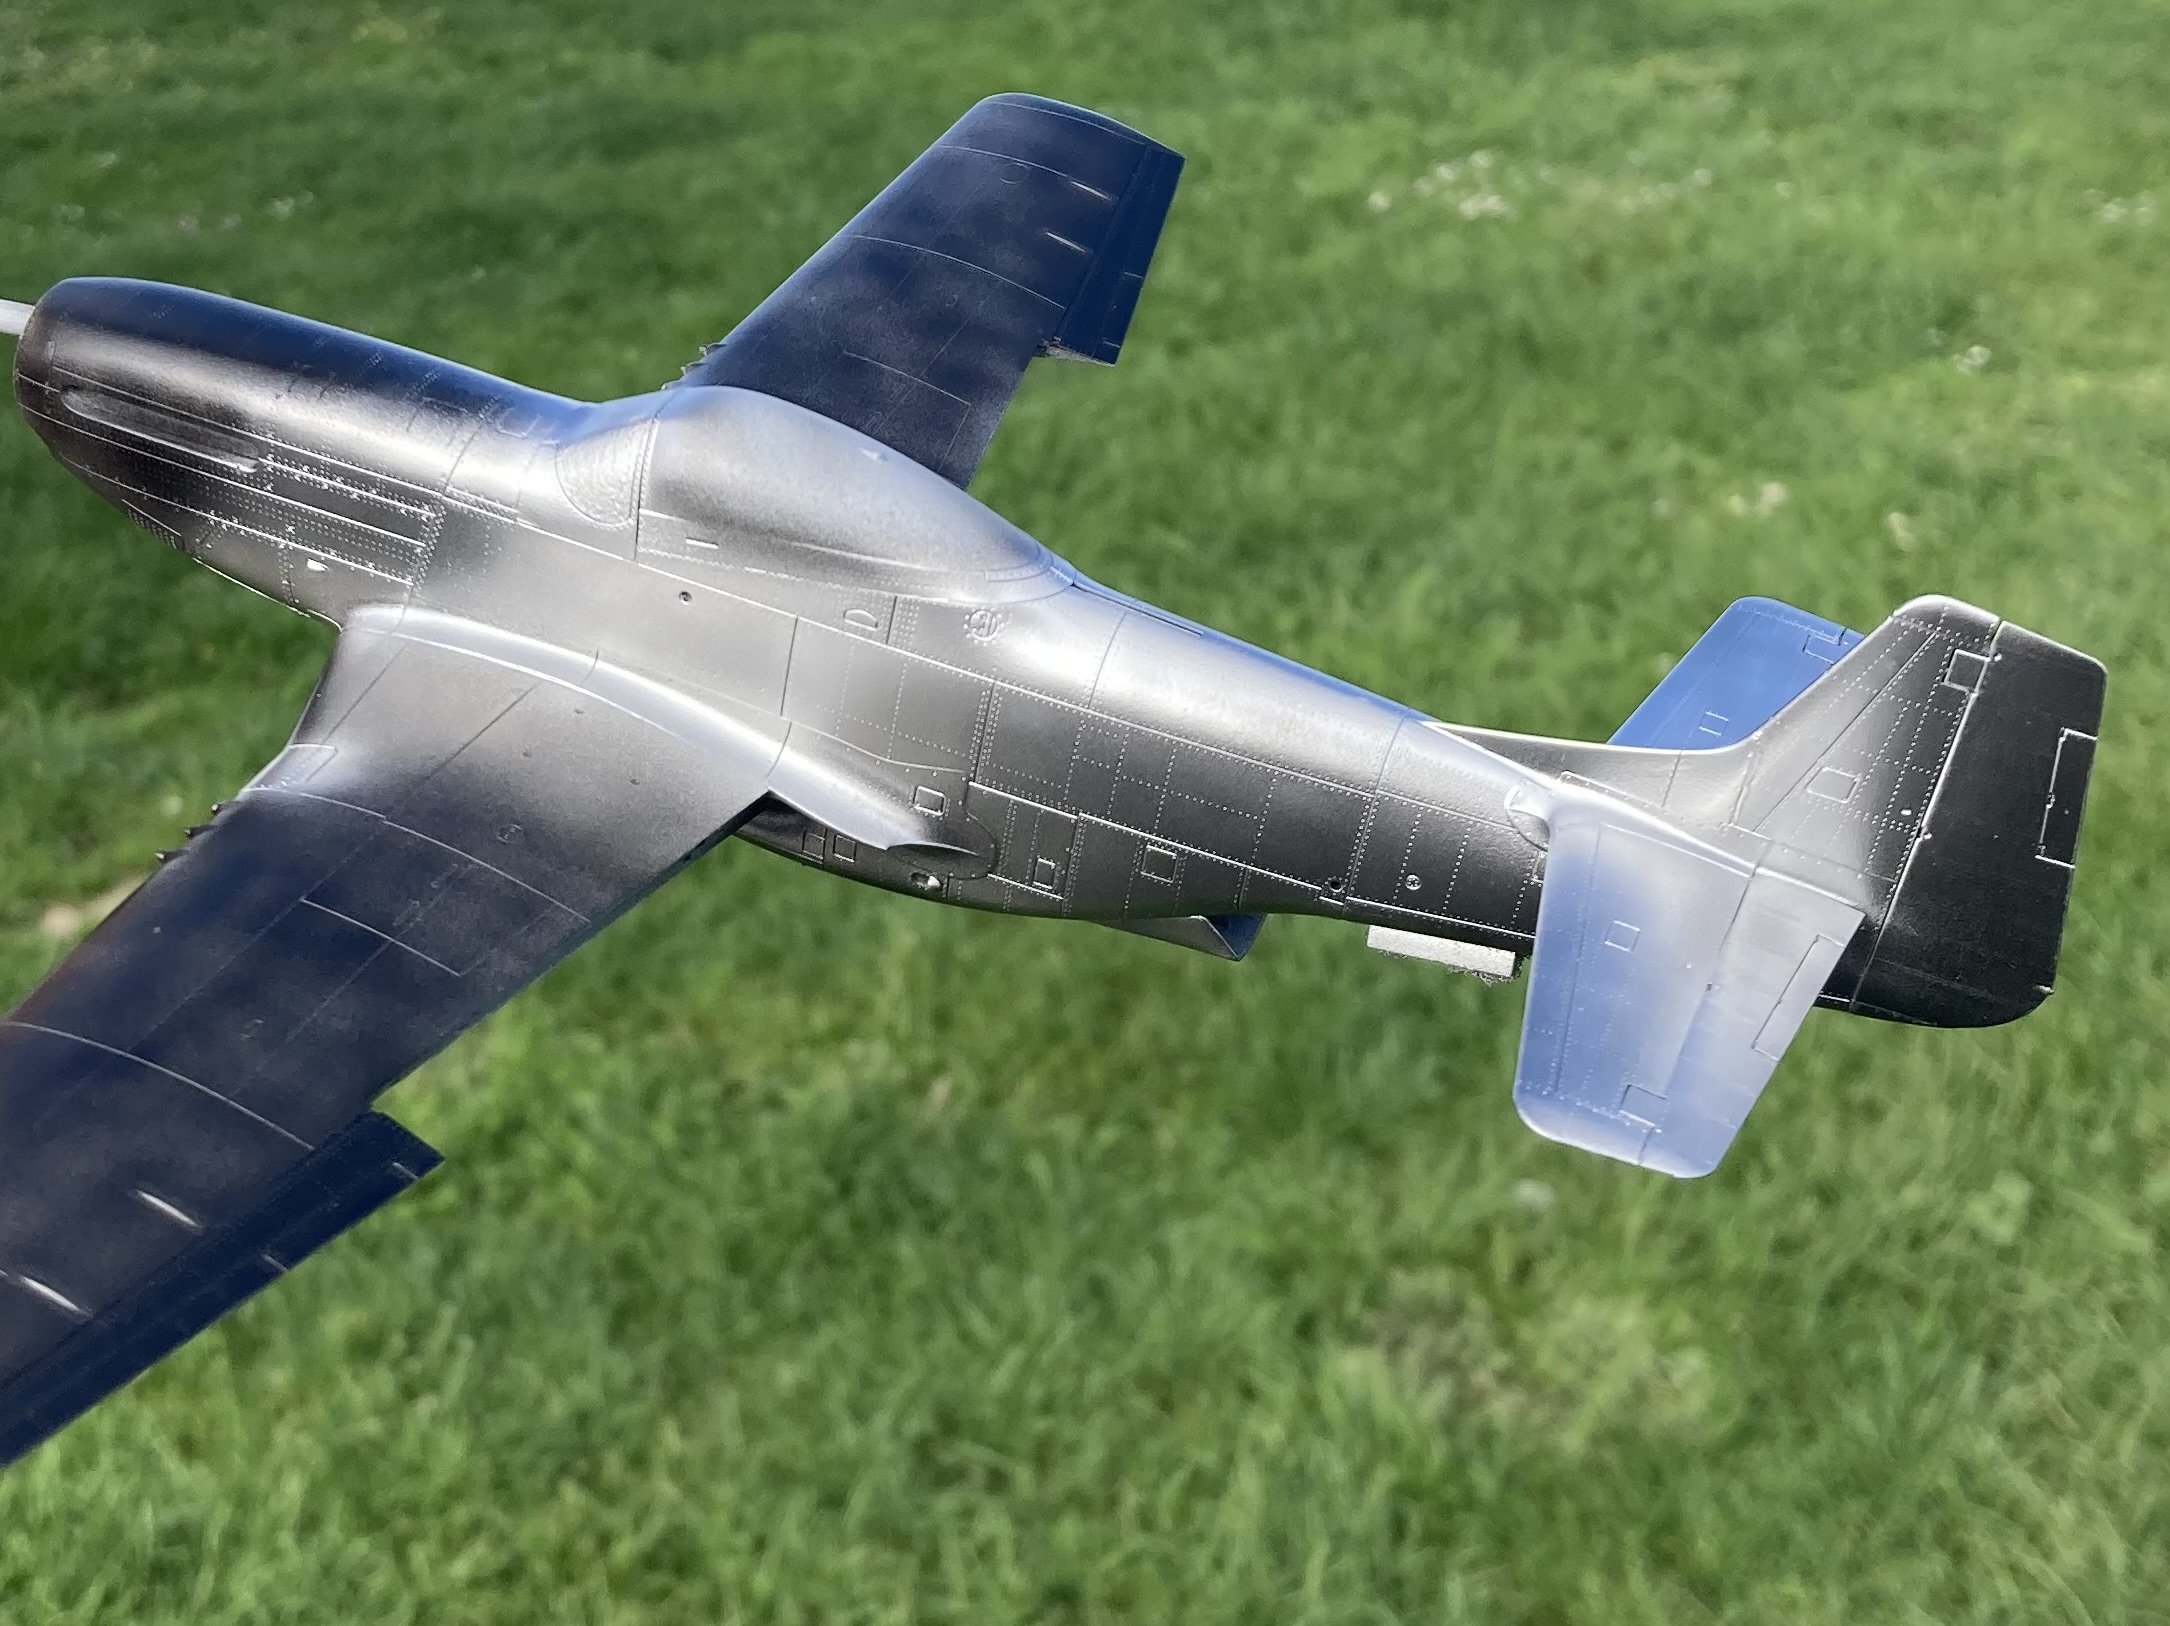
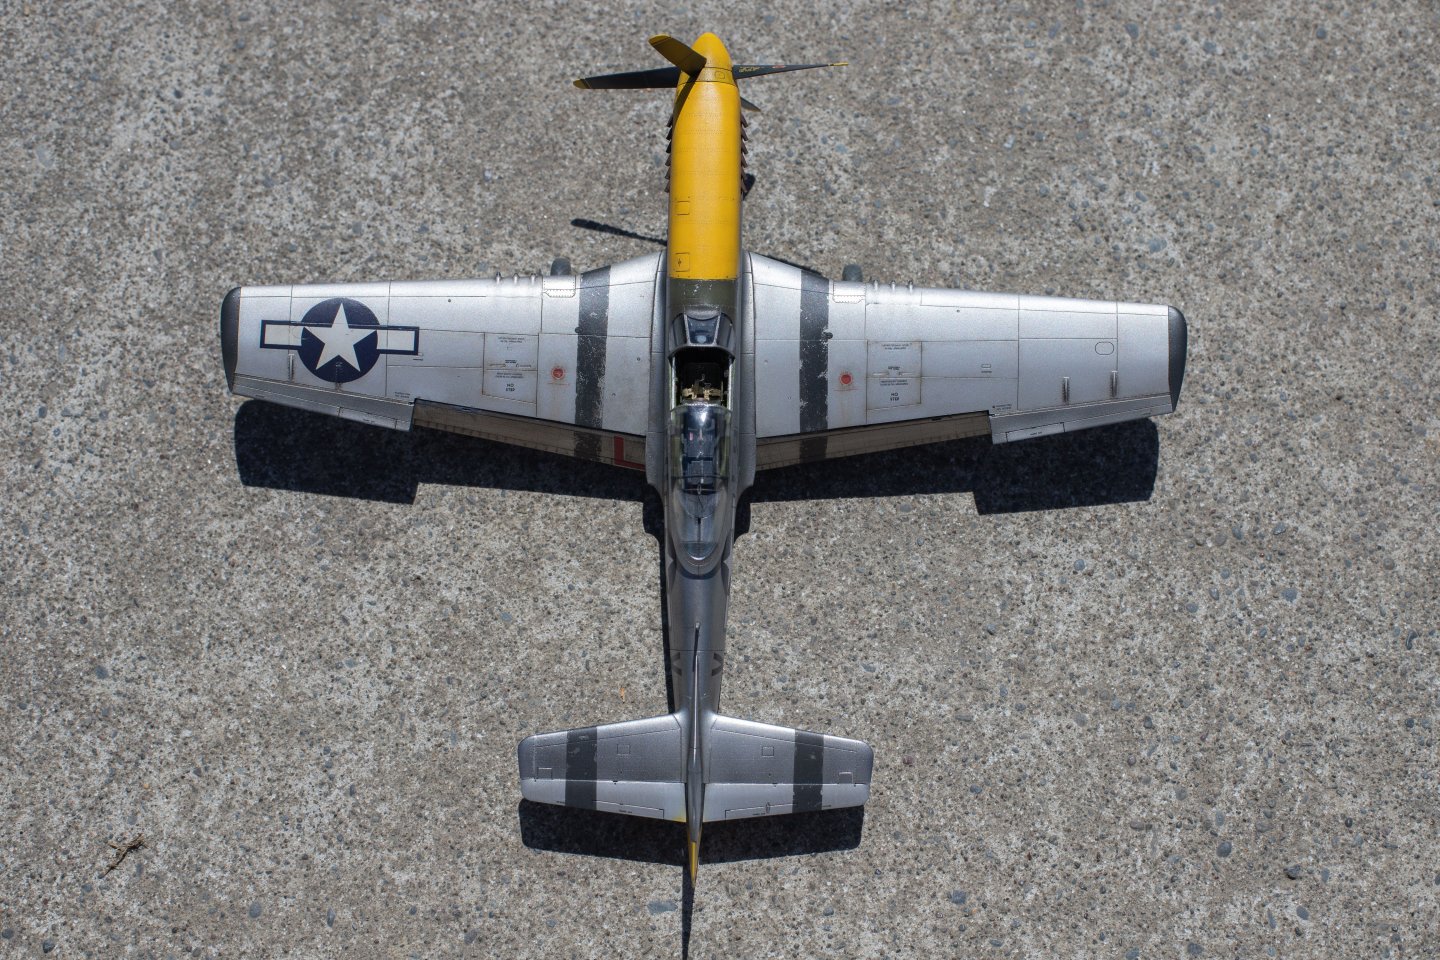
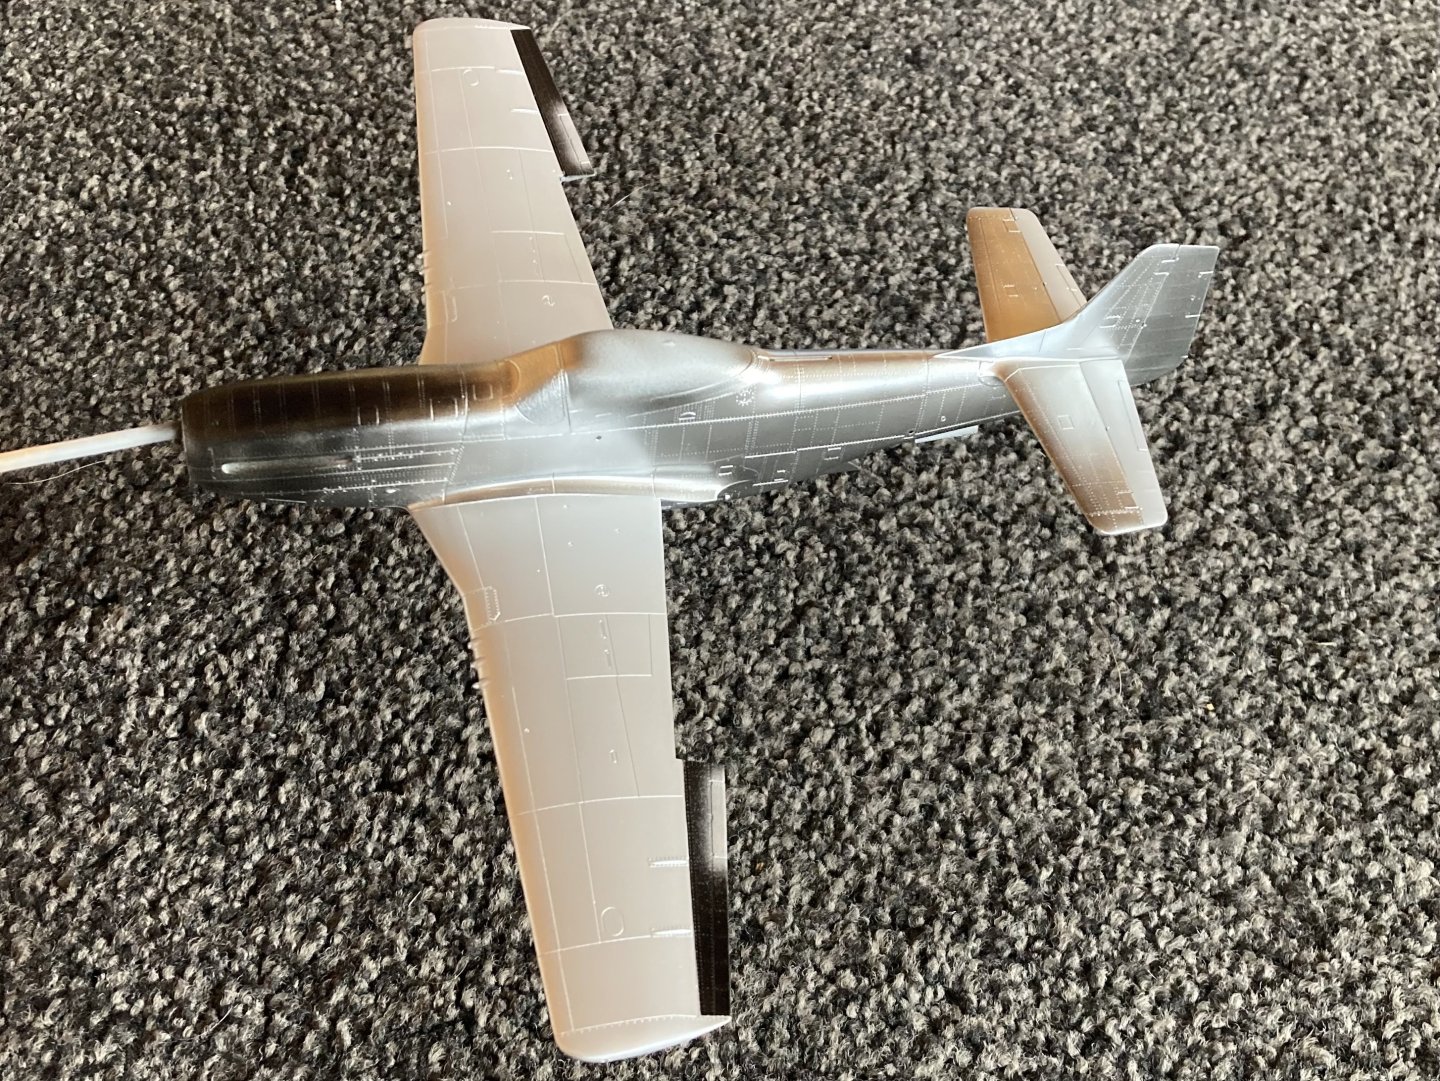
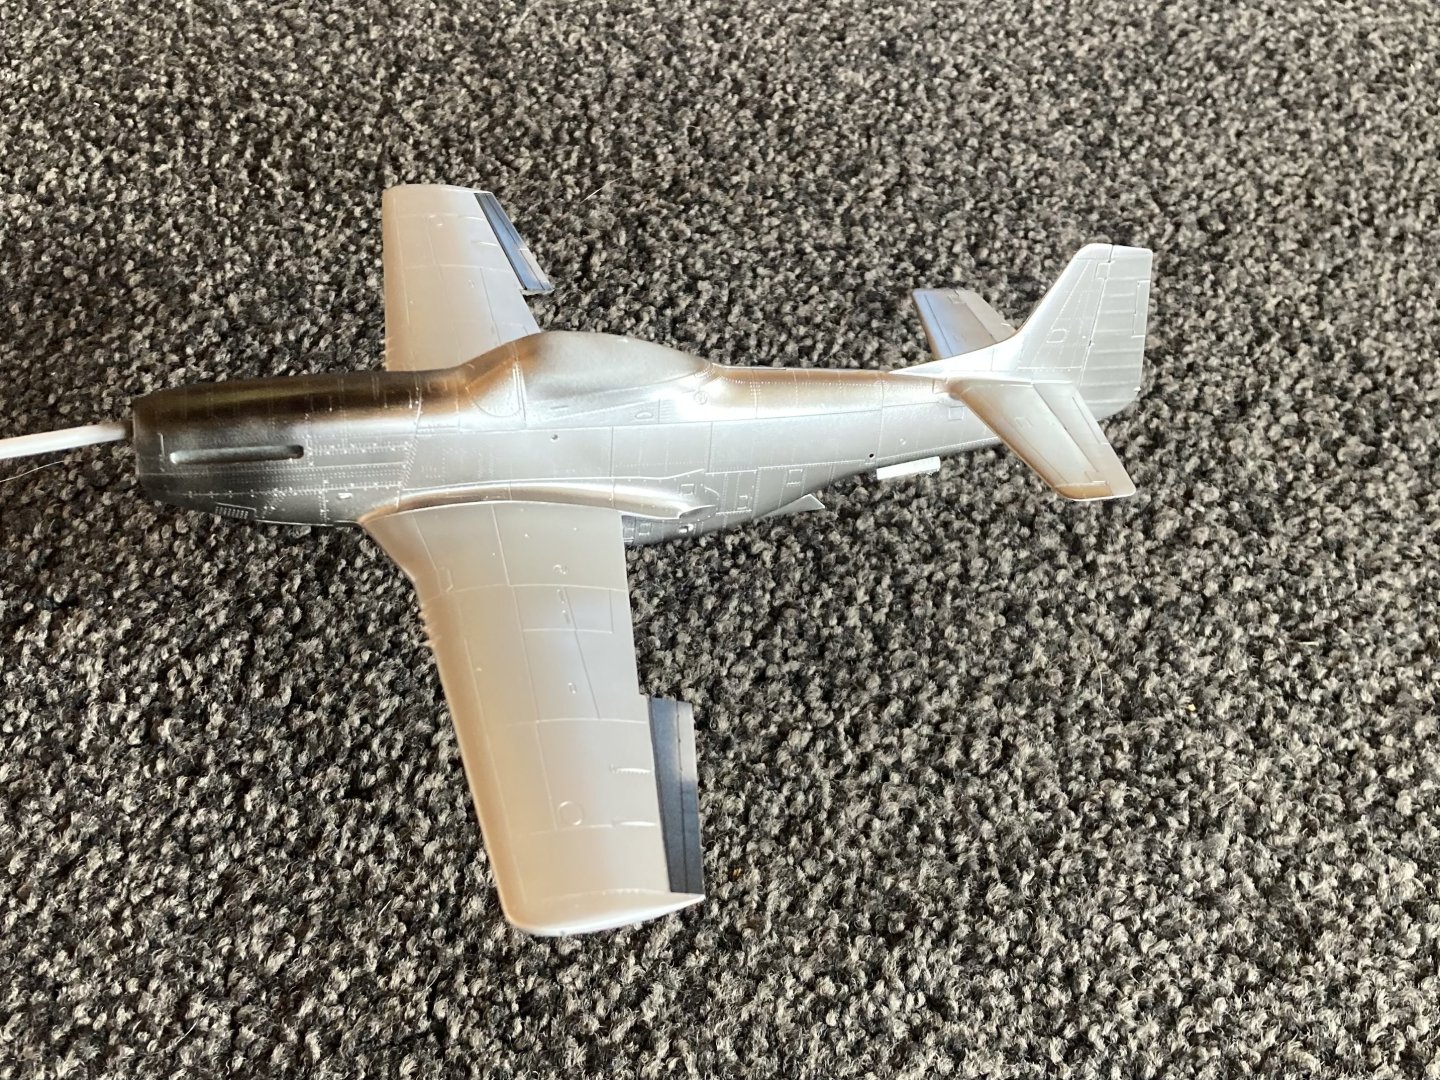
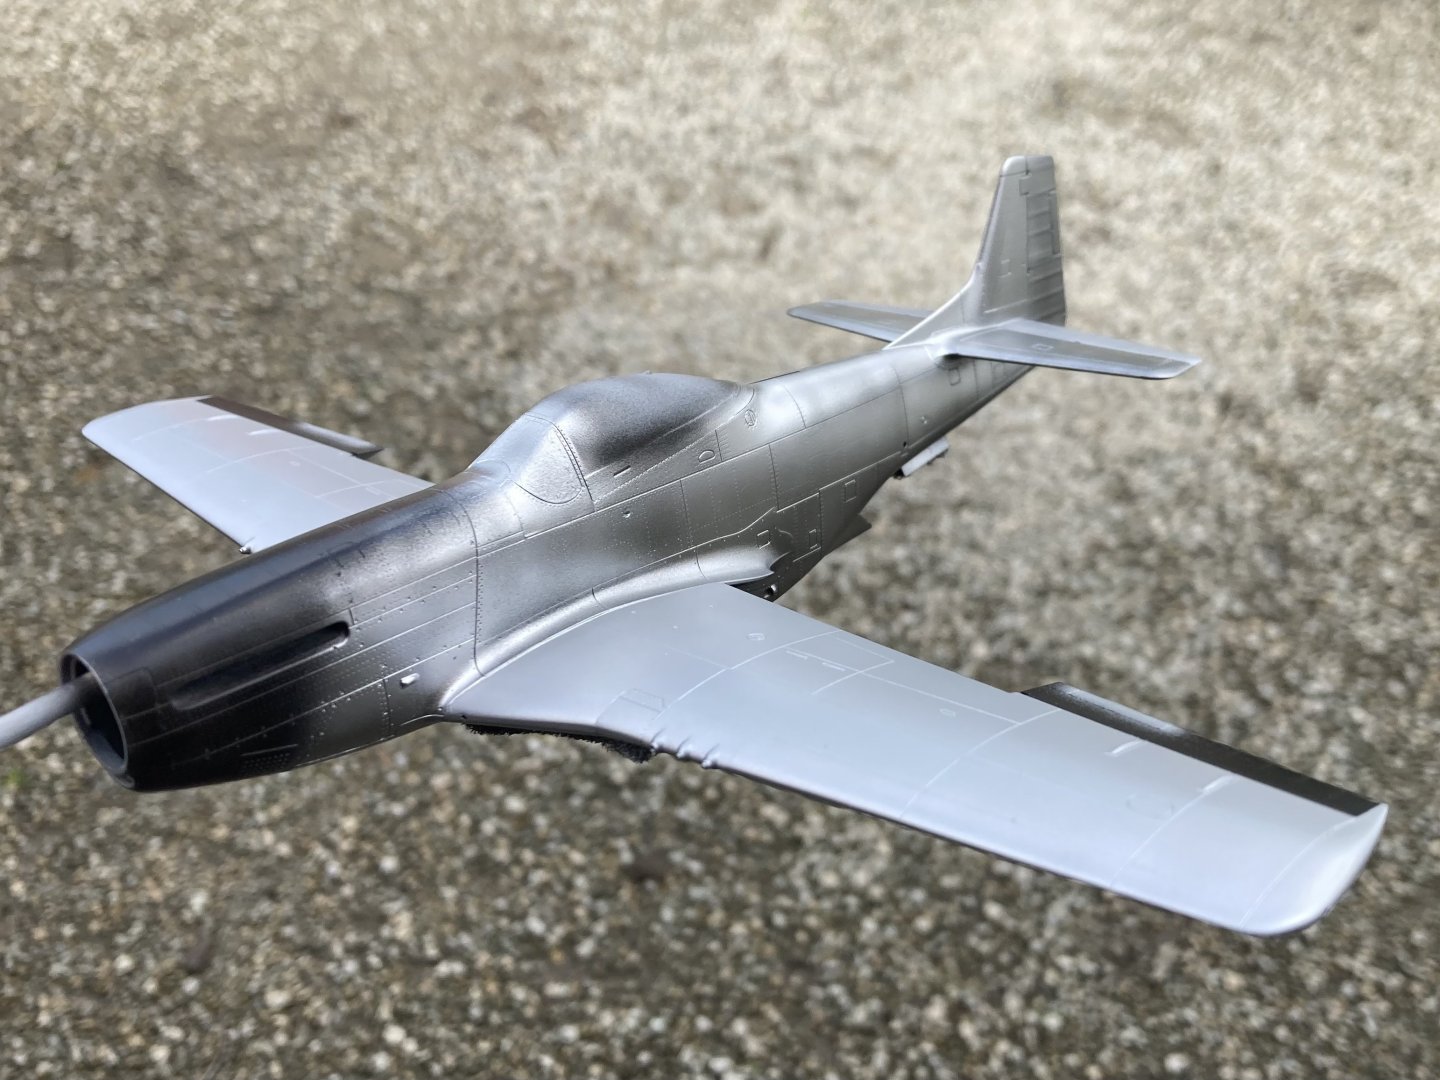
Some great aero discussions going on! I do enjoy them! I’d love to have had a fly in an F-4! Unfortunately just civilian planes except I once flew a Harvard but I don't class them as a warbird but still fun doing buzz and breaks! One of our aircraft had leading edge vortex generators and according to the flight manual if more than 3 were missing the stall speed was a good bit higher. I've always enjoyed the theory and how quickly things get complex! While digesting it all I filled in the panel lines on the wings. And also bit the bullet and gave the fuselage its coat of aluminium. I was a bit nervous and was starting to delay for no reason apart from being scared of ruining the whole thing. It’s really hard to take a good pic of it. But I think it does the job. once dry I’ll paint the wings with silver mixed with a touch of gloss white to make the difference more noticeable and also nose and tail yellow. Then the next step starts… how to weather… I’m assuming you can’t do oil washes over a nmf! Another part to learn! I don’t want to weather it much, just make it dulled down in an oxidised way.


-
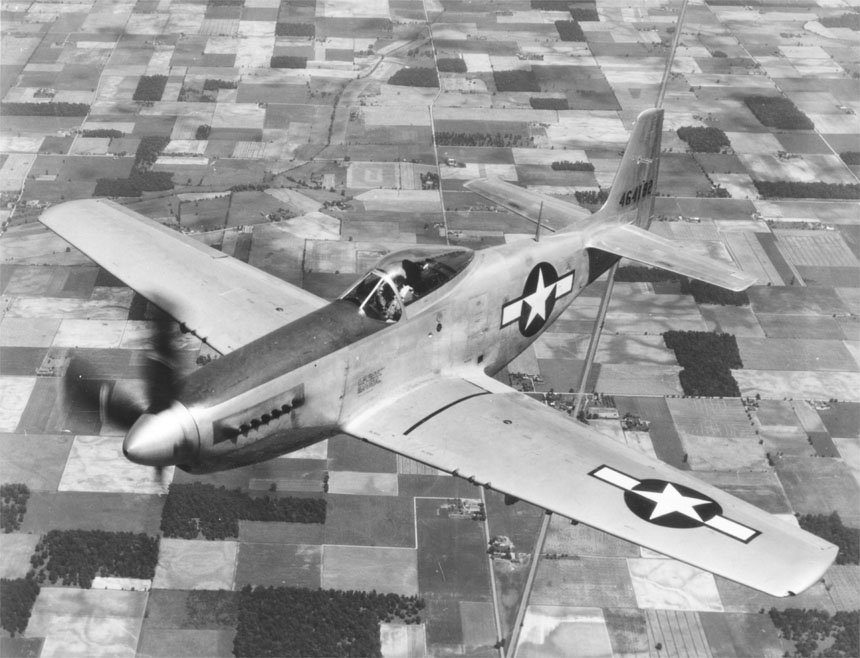
Is it!? 😬 what gave it away as being a H model? To me it looks identical to a D model… but that’s only because I can only tell mustangs apart because the earlier ones didn’t have a bubble canopy! After that I’m clueless haha! I had a good look after reading your reply and all I could see was the battery behind the pilot looks slightly different?
-
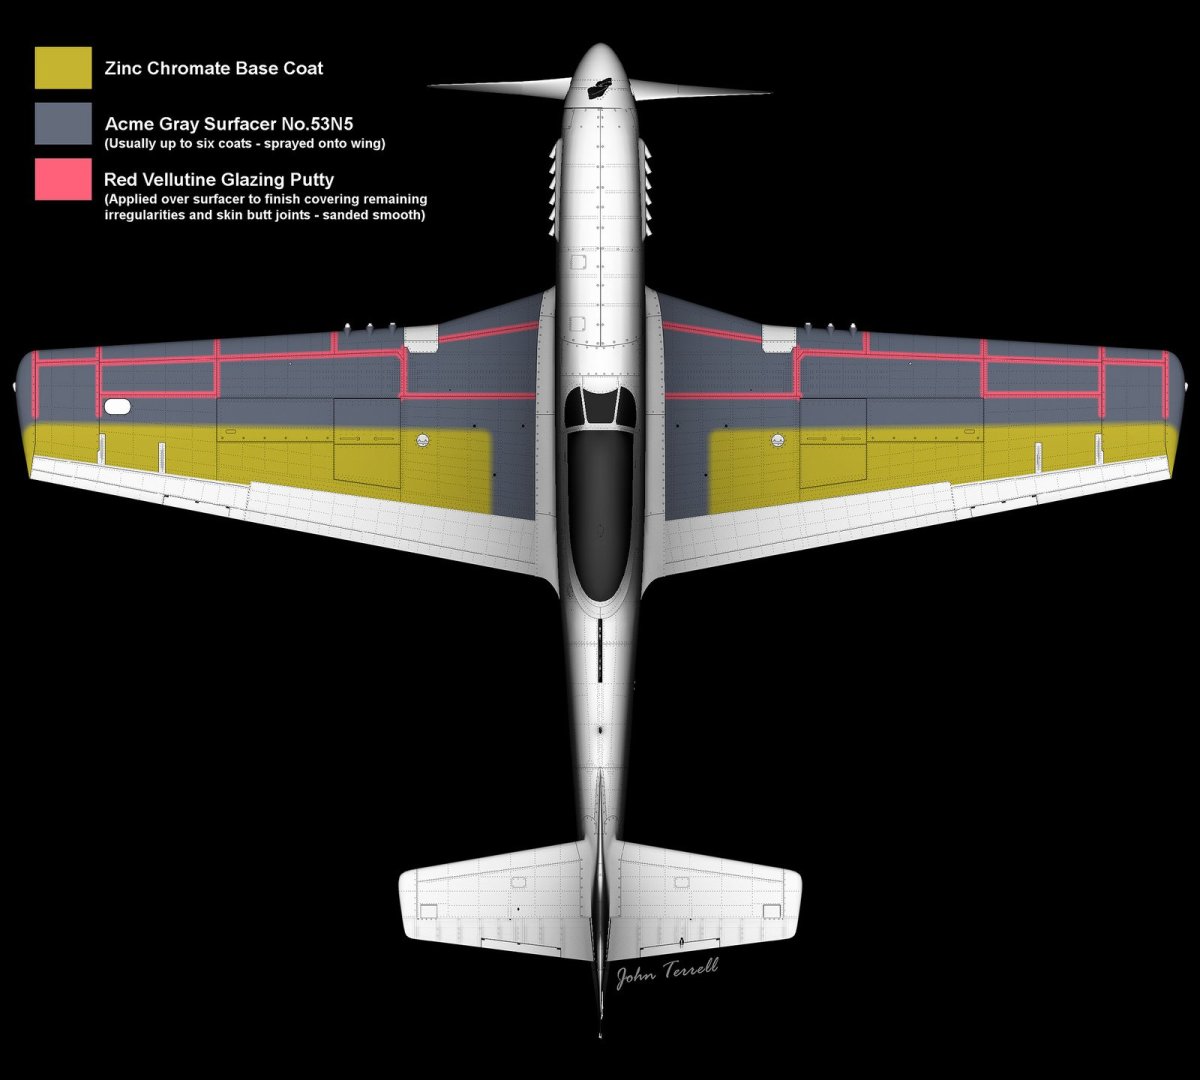
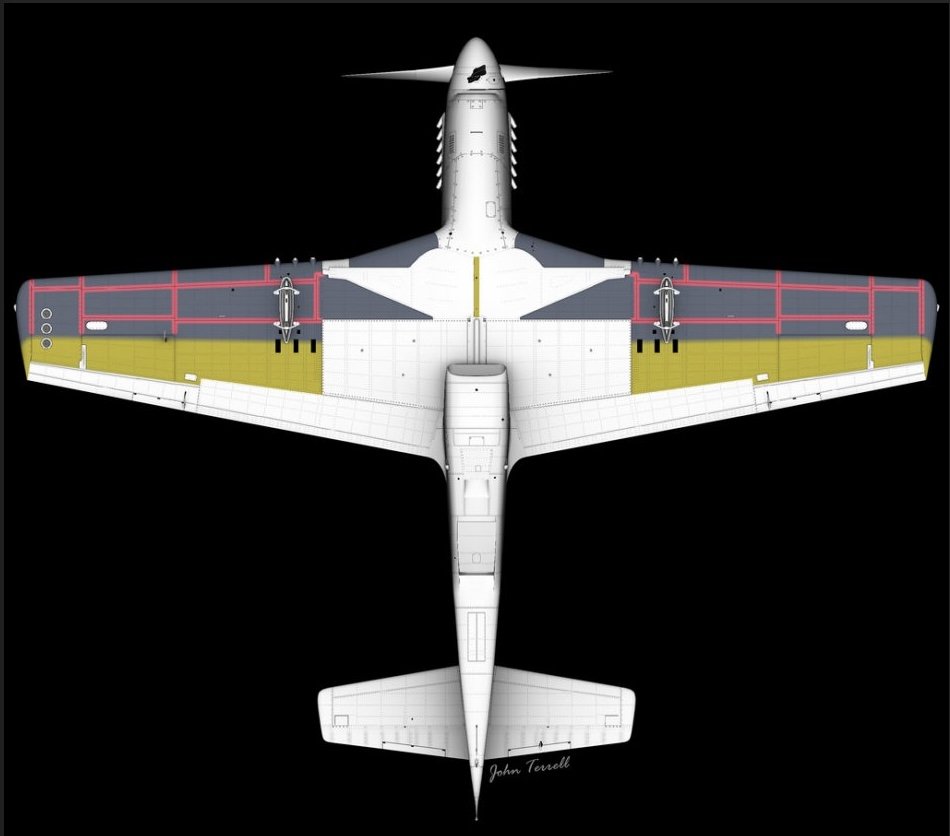
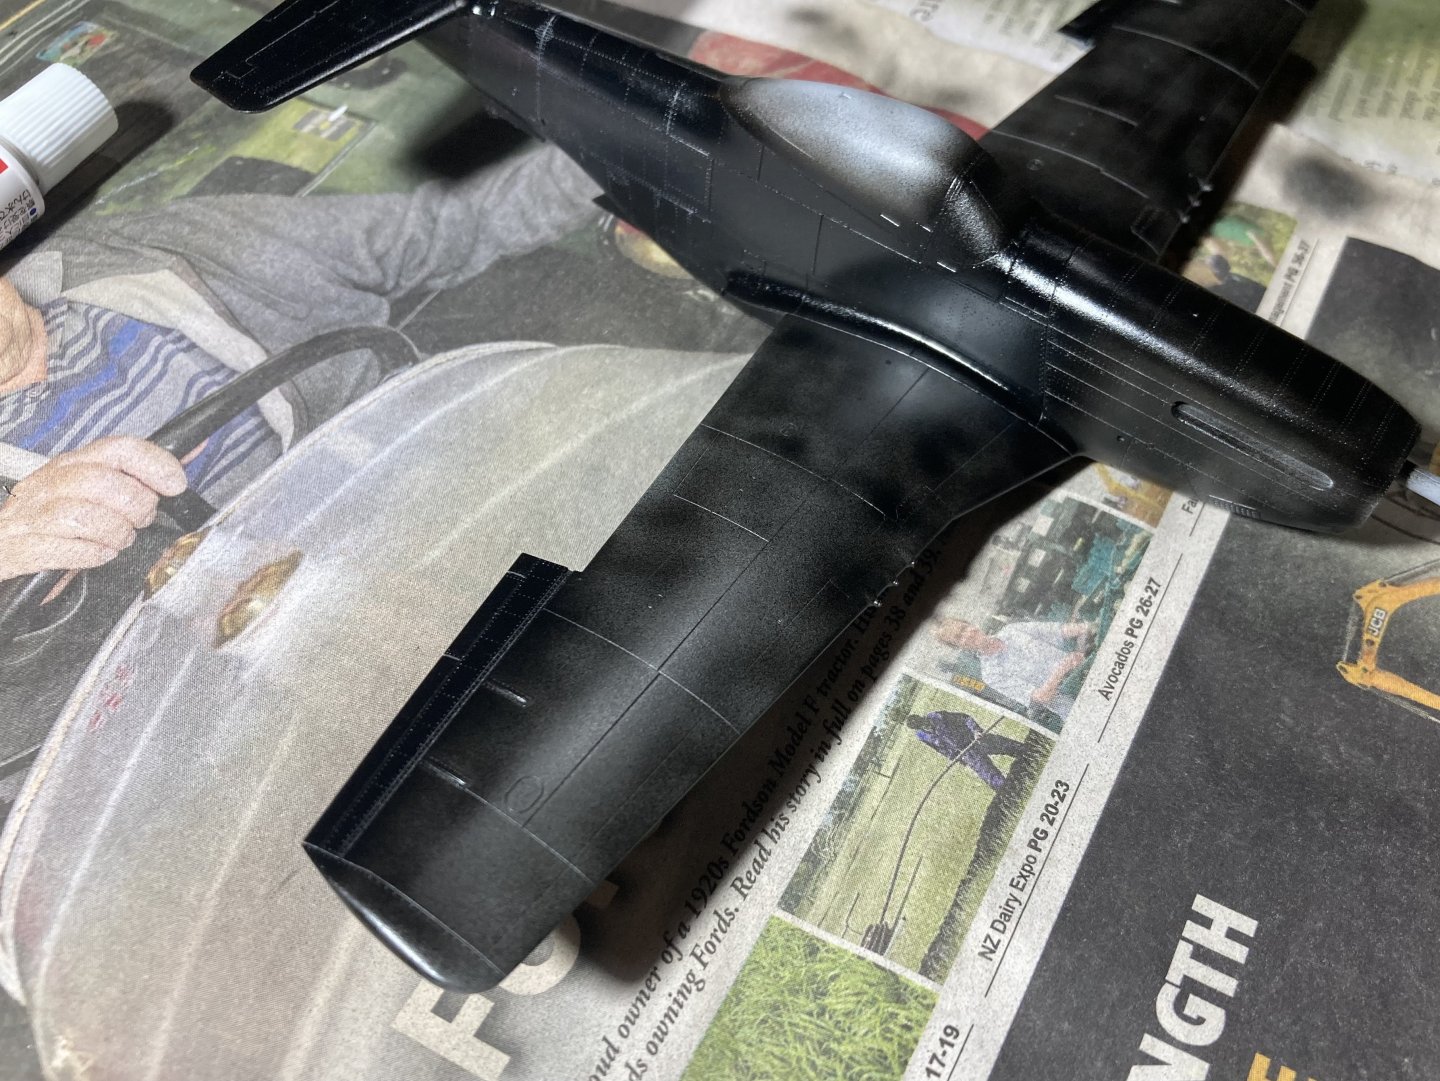
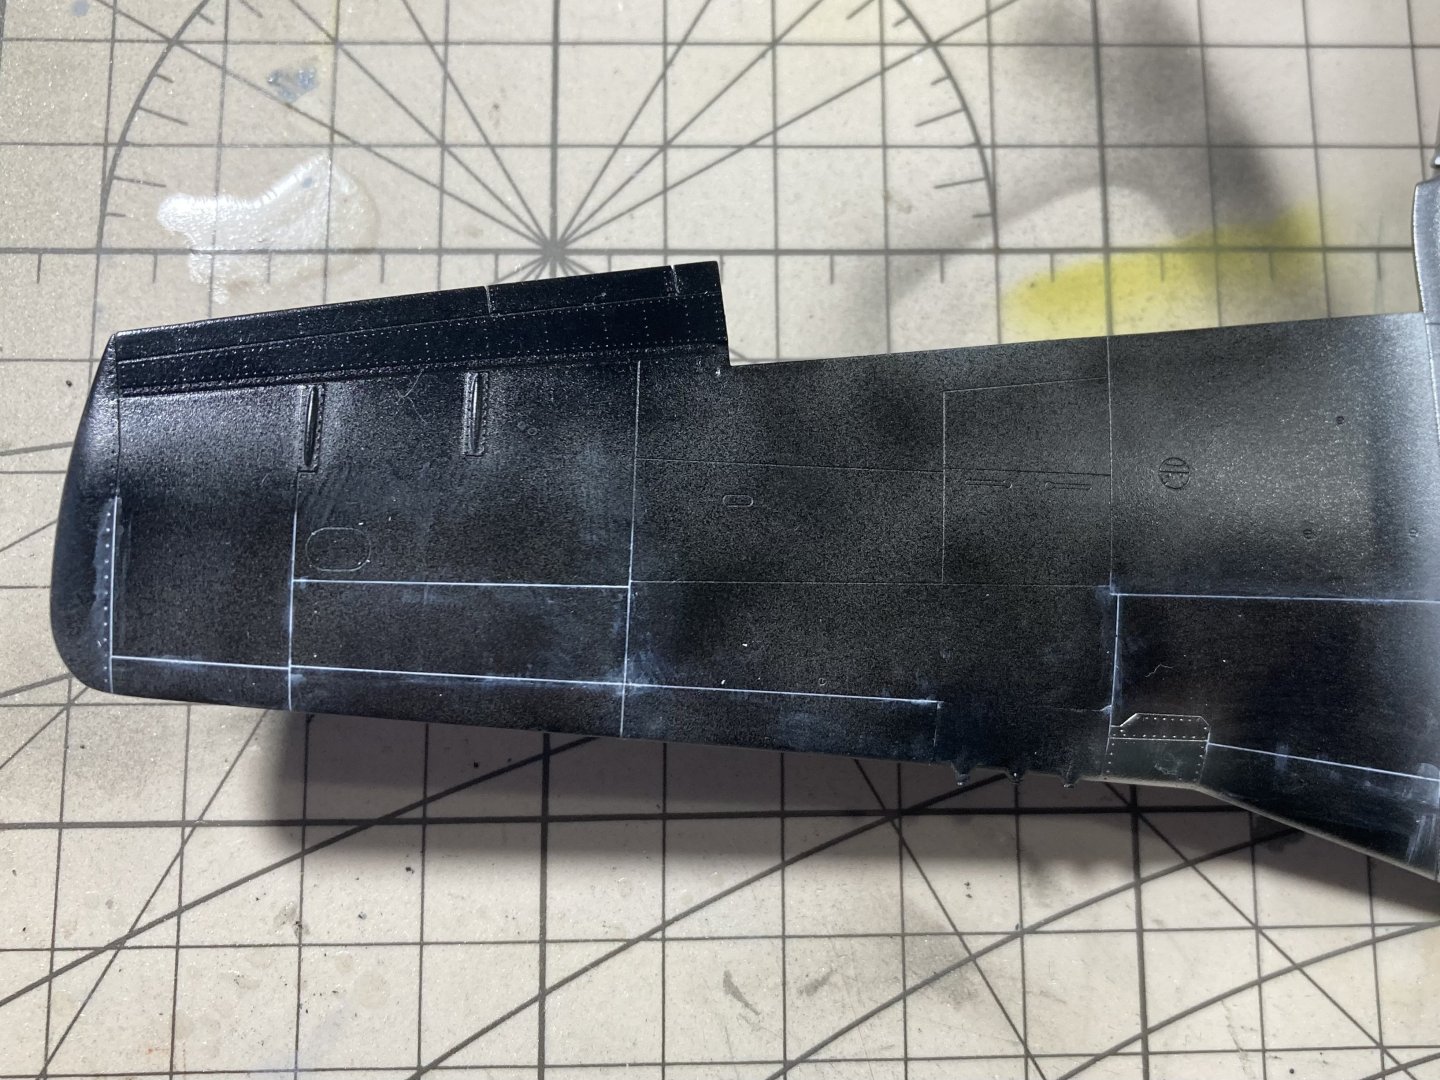
Thanks for the in-depth reply! I didn’t know they feed compressed air over the leading edge of the wing to reenergise the airflow and delay separation. That’s pretty complex for a 1940s plane! I just thought a laminar flow aerofoil was as smooth as possible to keep the flow laminar for as long as possible. Have you got any links to how they piped the compressed air and released it? It would be really interesting to learn about! That they were able to delay the separation point until 40% chord is pretty impressive. Here are the plans I had seen with regards to the laminar section being puttied and smoothed out. And below that is a pic of my model with the wings having their panel lines which the real plane just didnt have and all the pictures I’ve seen shows a very smooth wing surface. I was just on the fence if I should fill in the panel lines and also make my wing laminar too. As this shows my wings covered in panel lines