Check out our new MSW Sponsor Innocraftsman
×

Lt. Biggles
-
Posts
342 -
Joined
-
Last visited
Content Type
Profiles
Forums
Gallery
Events
Everything posted by Lt. Biggles
-
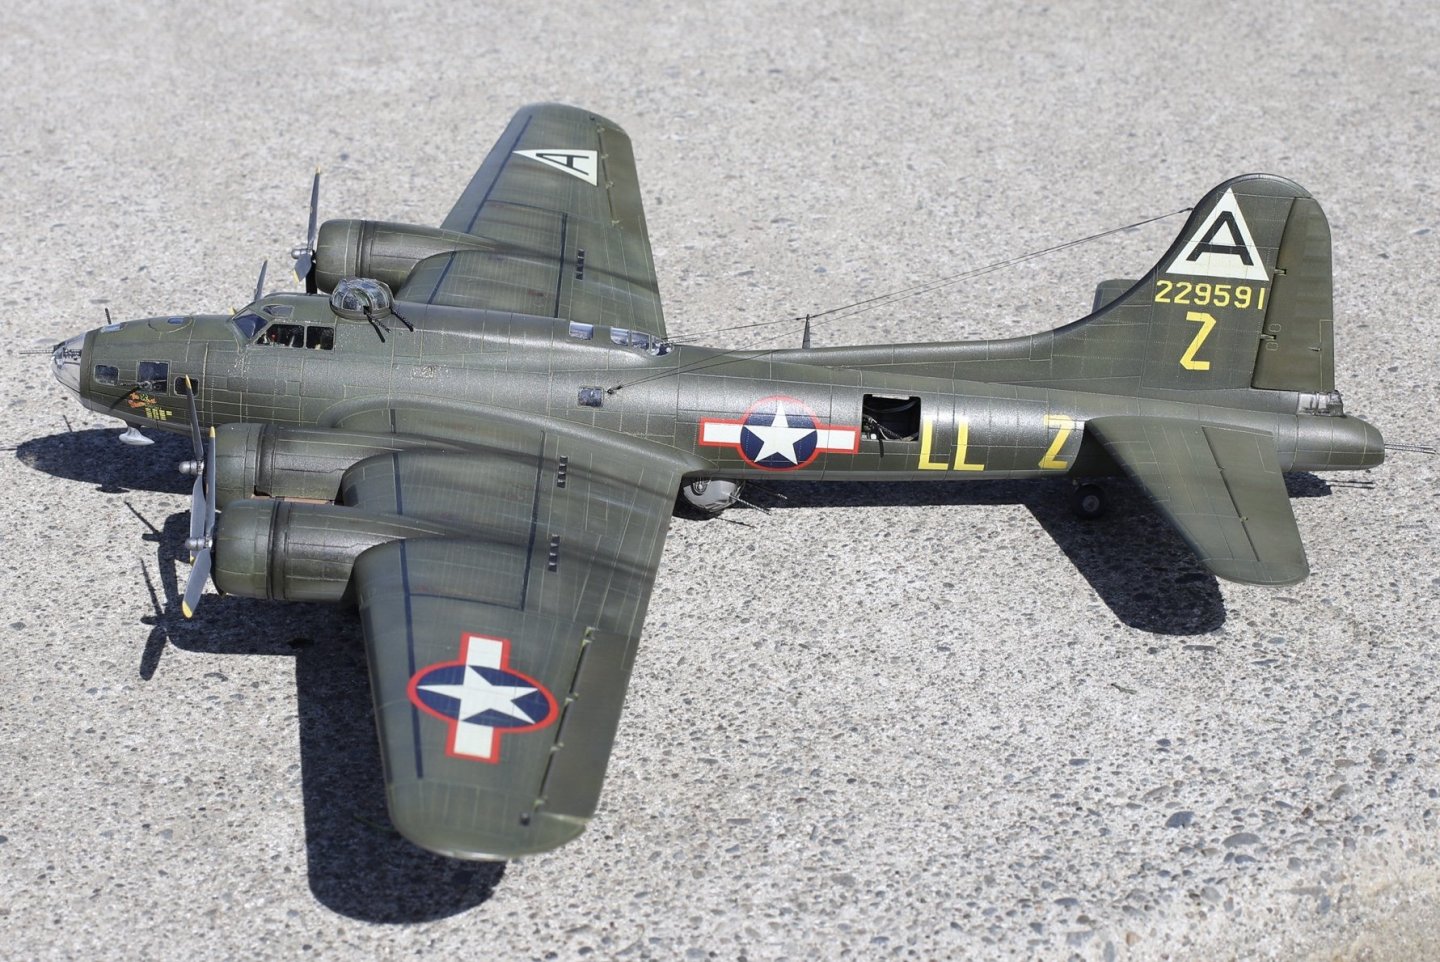
 I just made my own green shade of olive drab with yellow and black oil paints and just made sure it was a good few shades lighter than the plane. I should have painted with a more faded paint in the first place and darkened it but doing it the other way around still did the trick.
 -
Thanks all! Was nice having you along for the build! I am pleased with how it came out and learned a few more tricks.
-
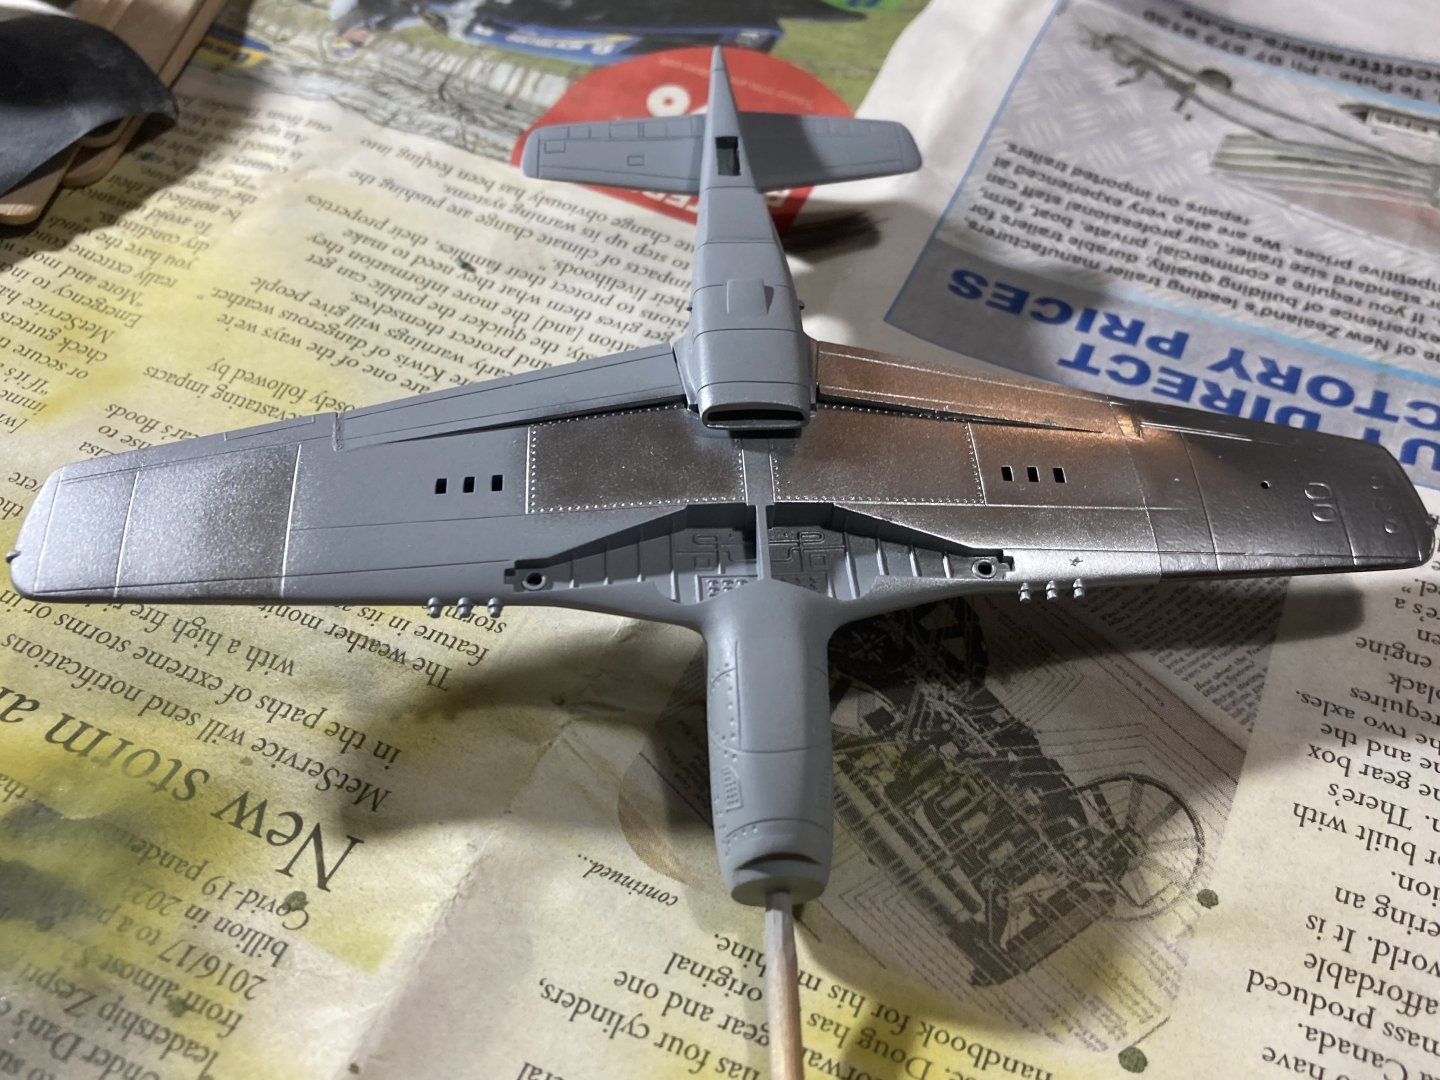
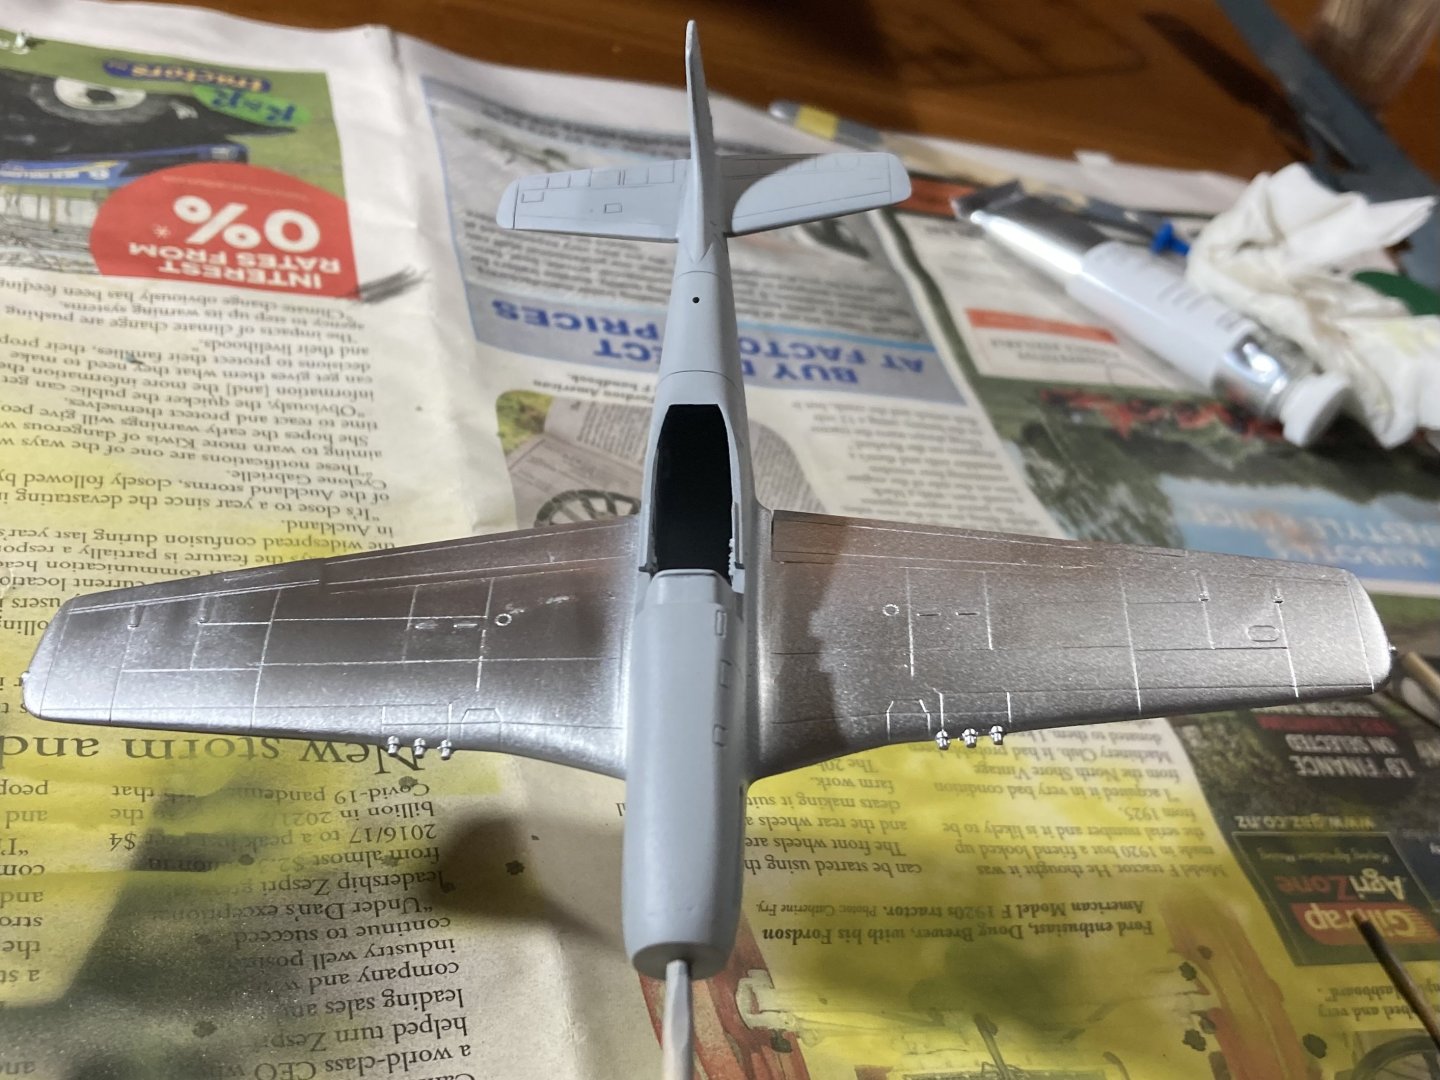
Two fuselage halves have been sewn together! A few PE details to add but it has come together well! Will have to think how best to deal with the seam along the nose so I don’t loose too much detail there. The canopy will be in the open position so for painting I’ll attach one of the spare ones in the closed position and paint then remove it and attach the actual canopy at the end. And regarding the prop, I’ve begun making an attachment so that it can spin!


- 74 replies
-
- 14
-

-

-
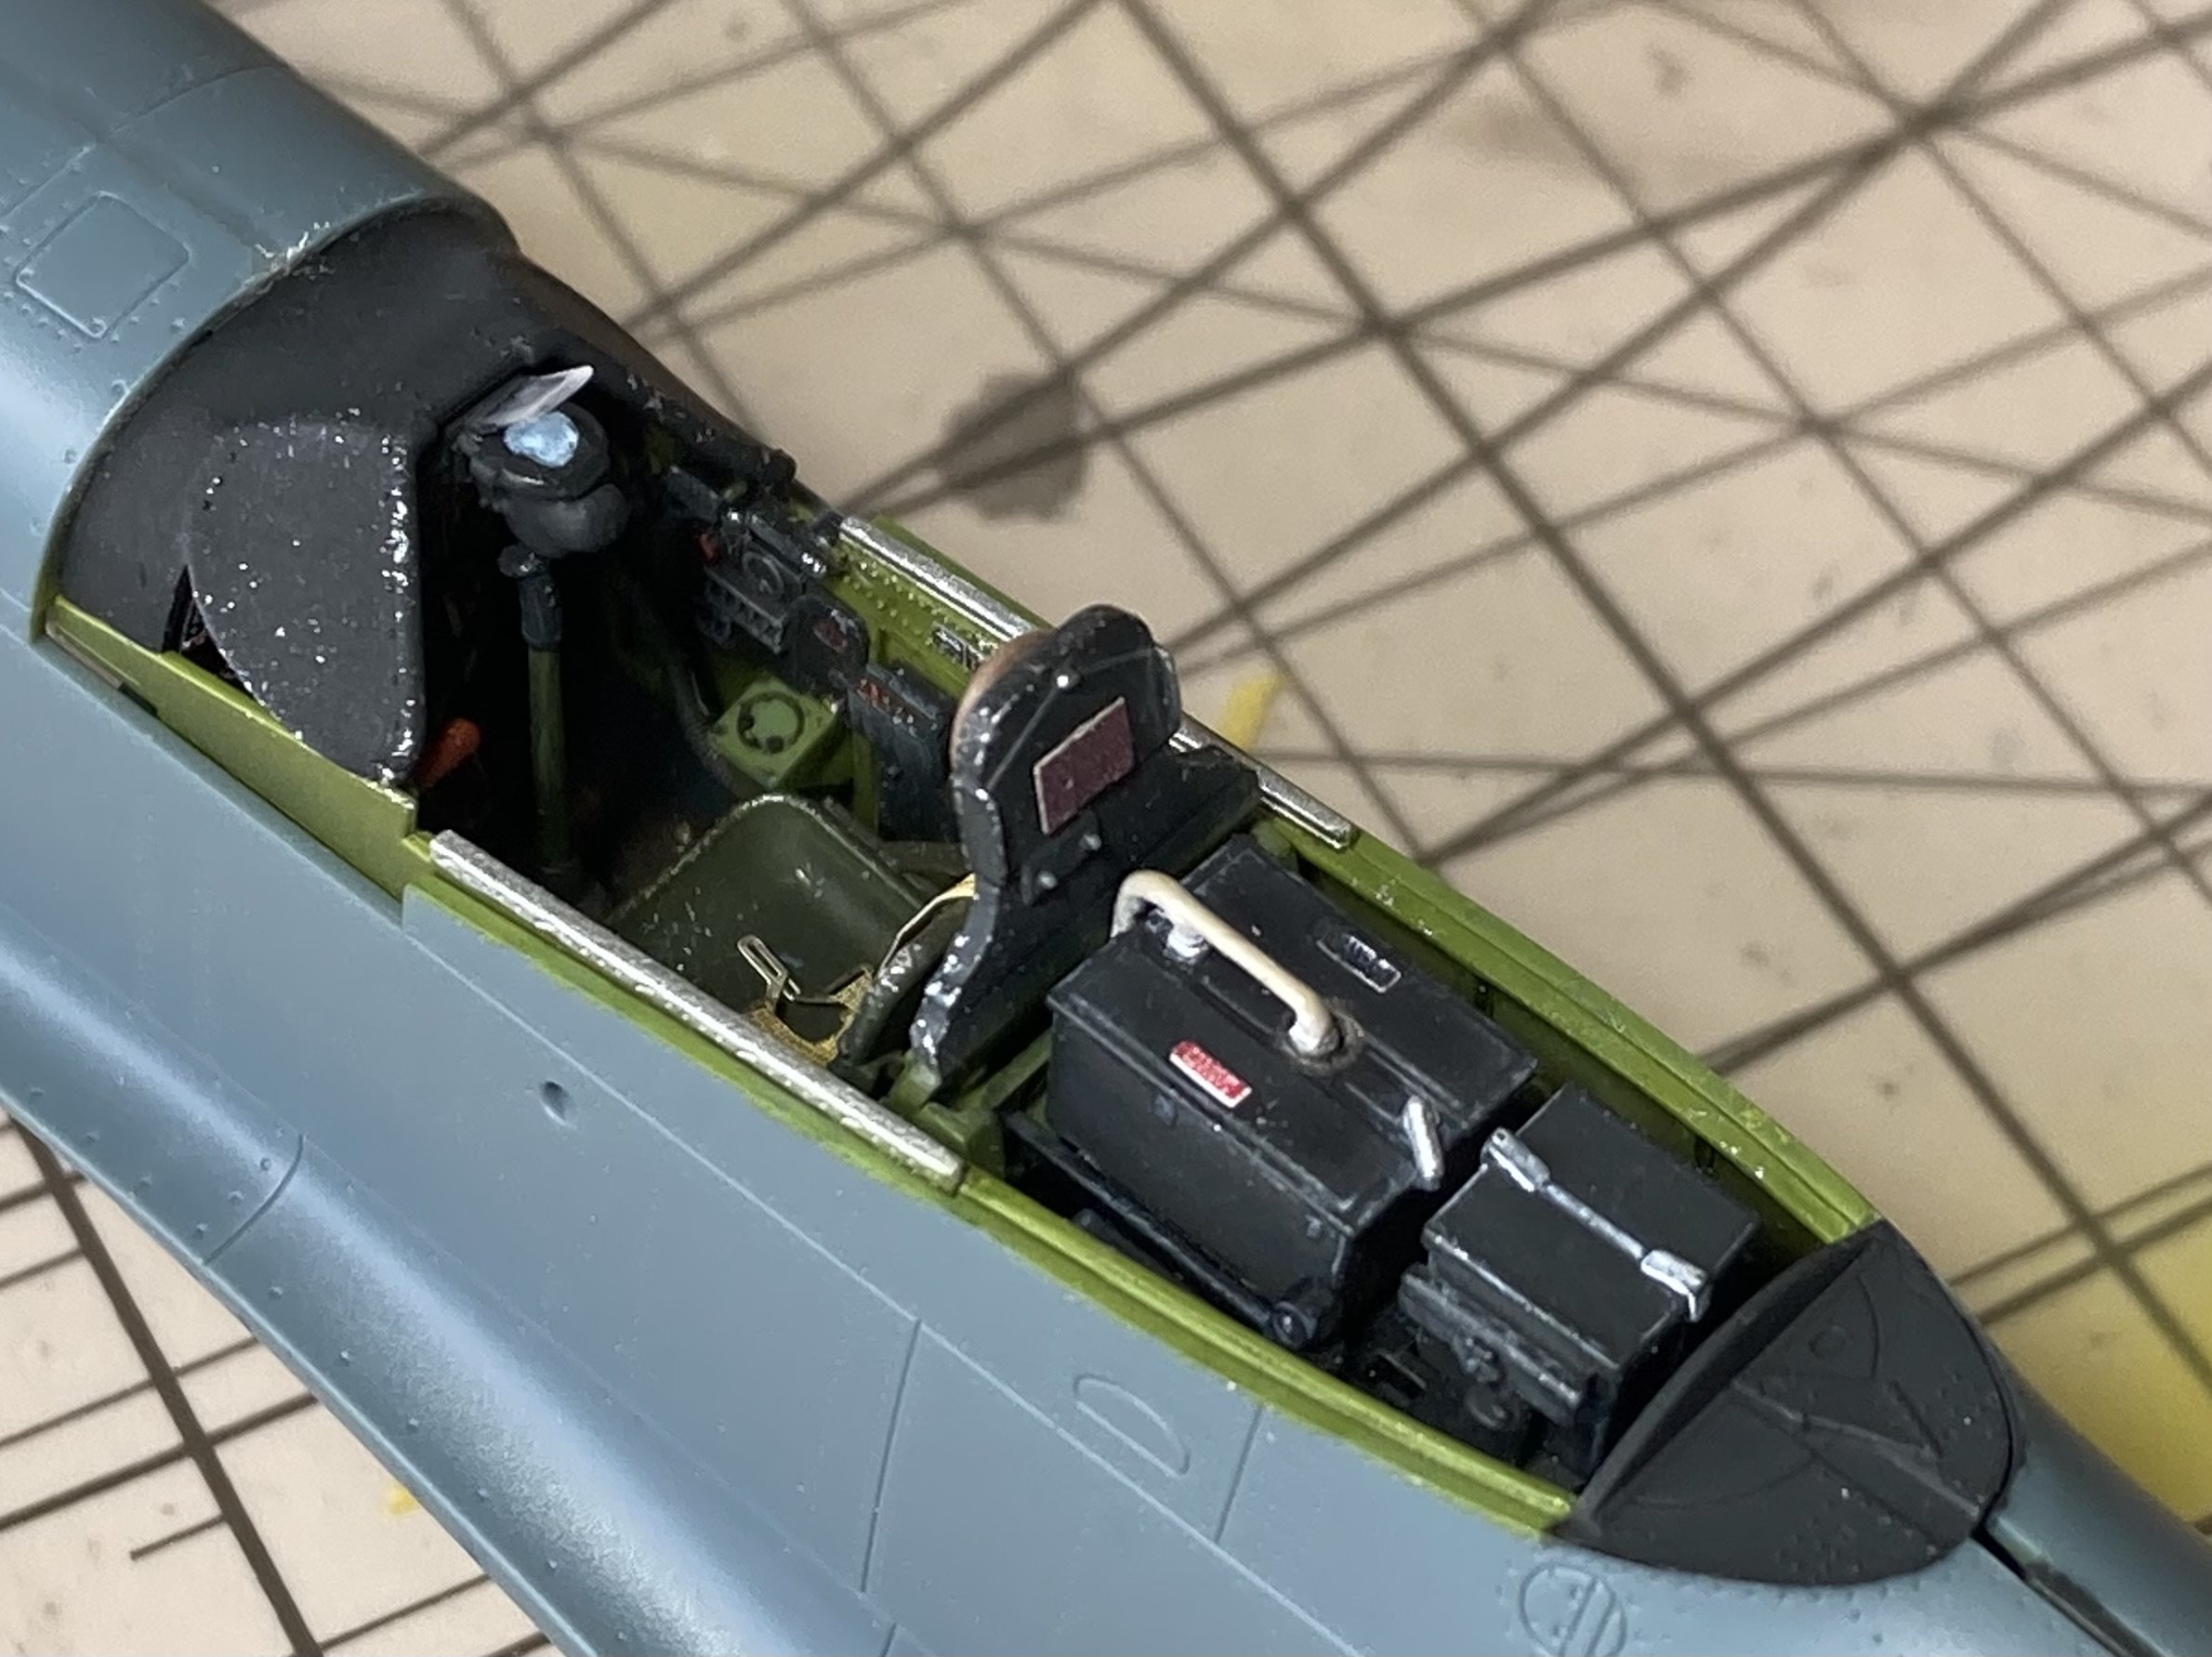
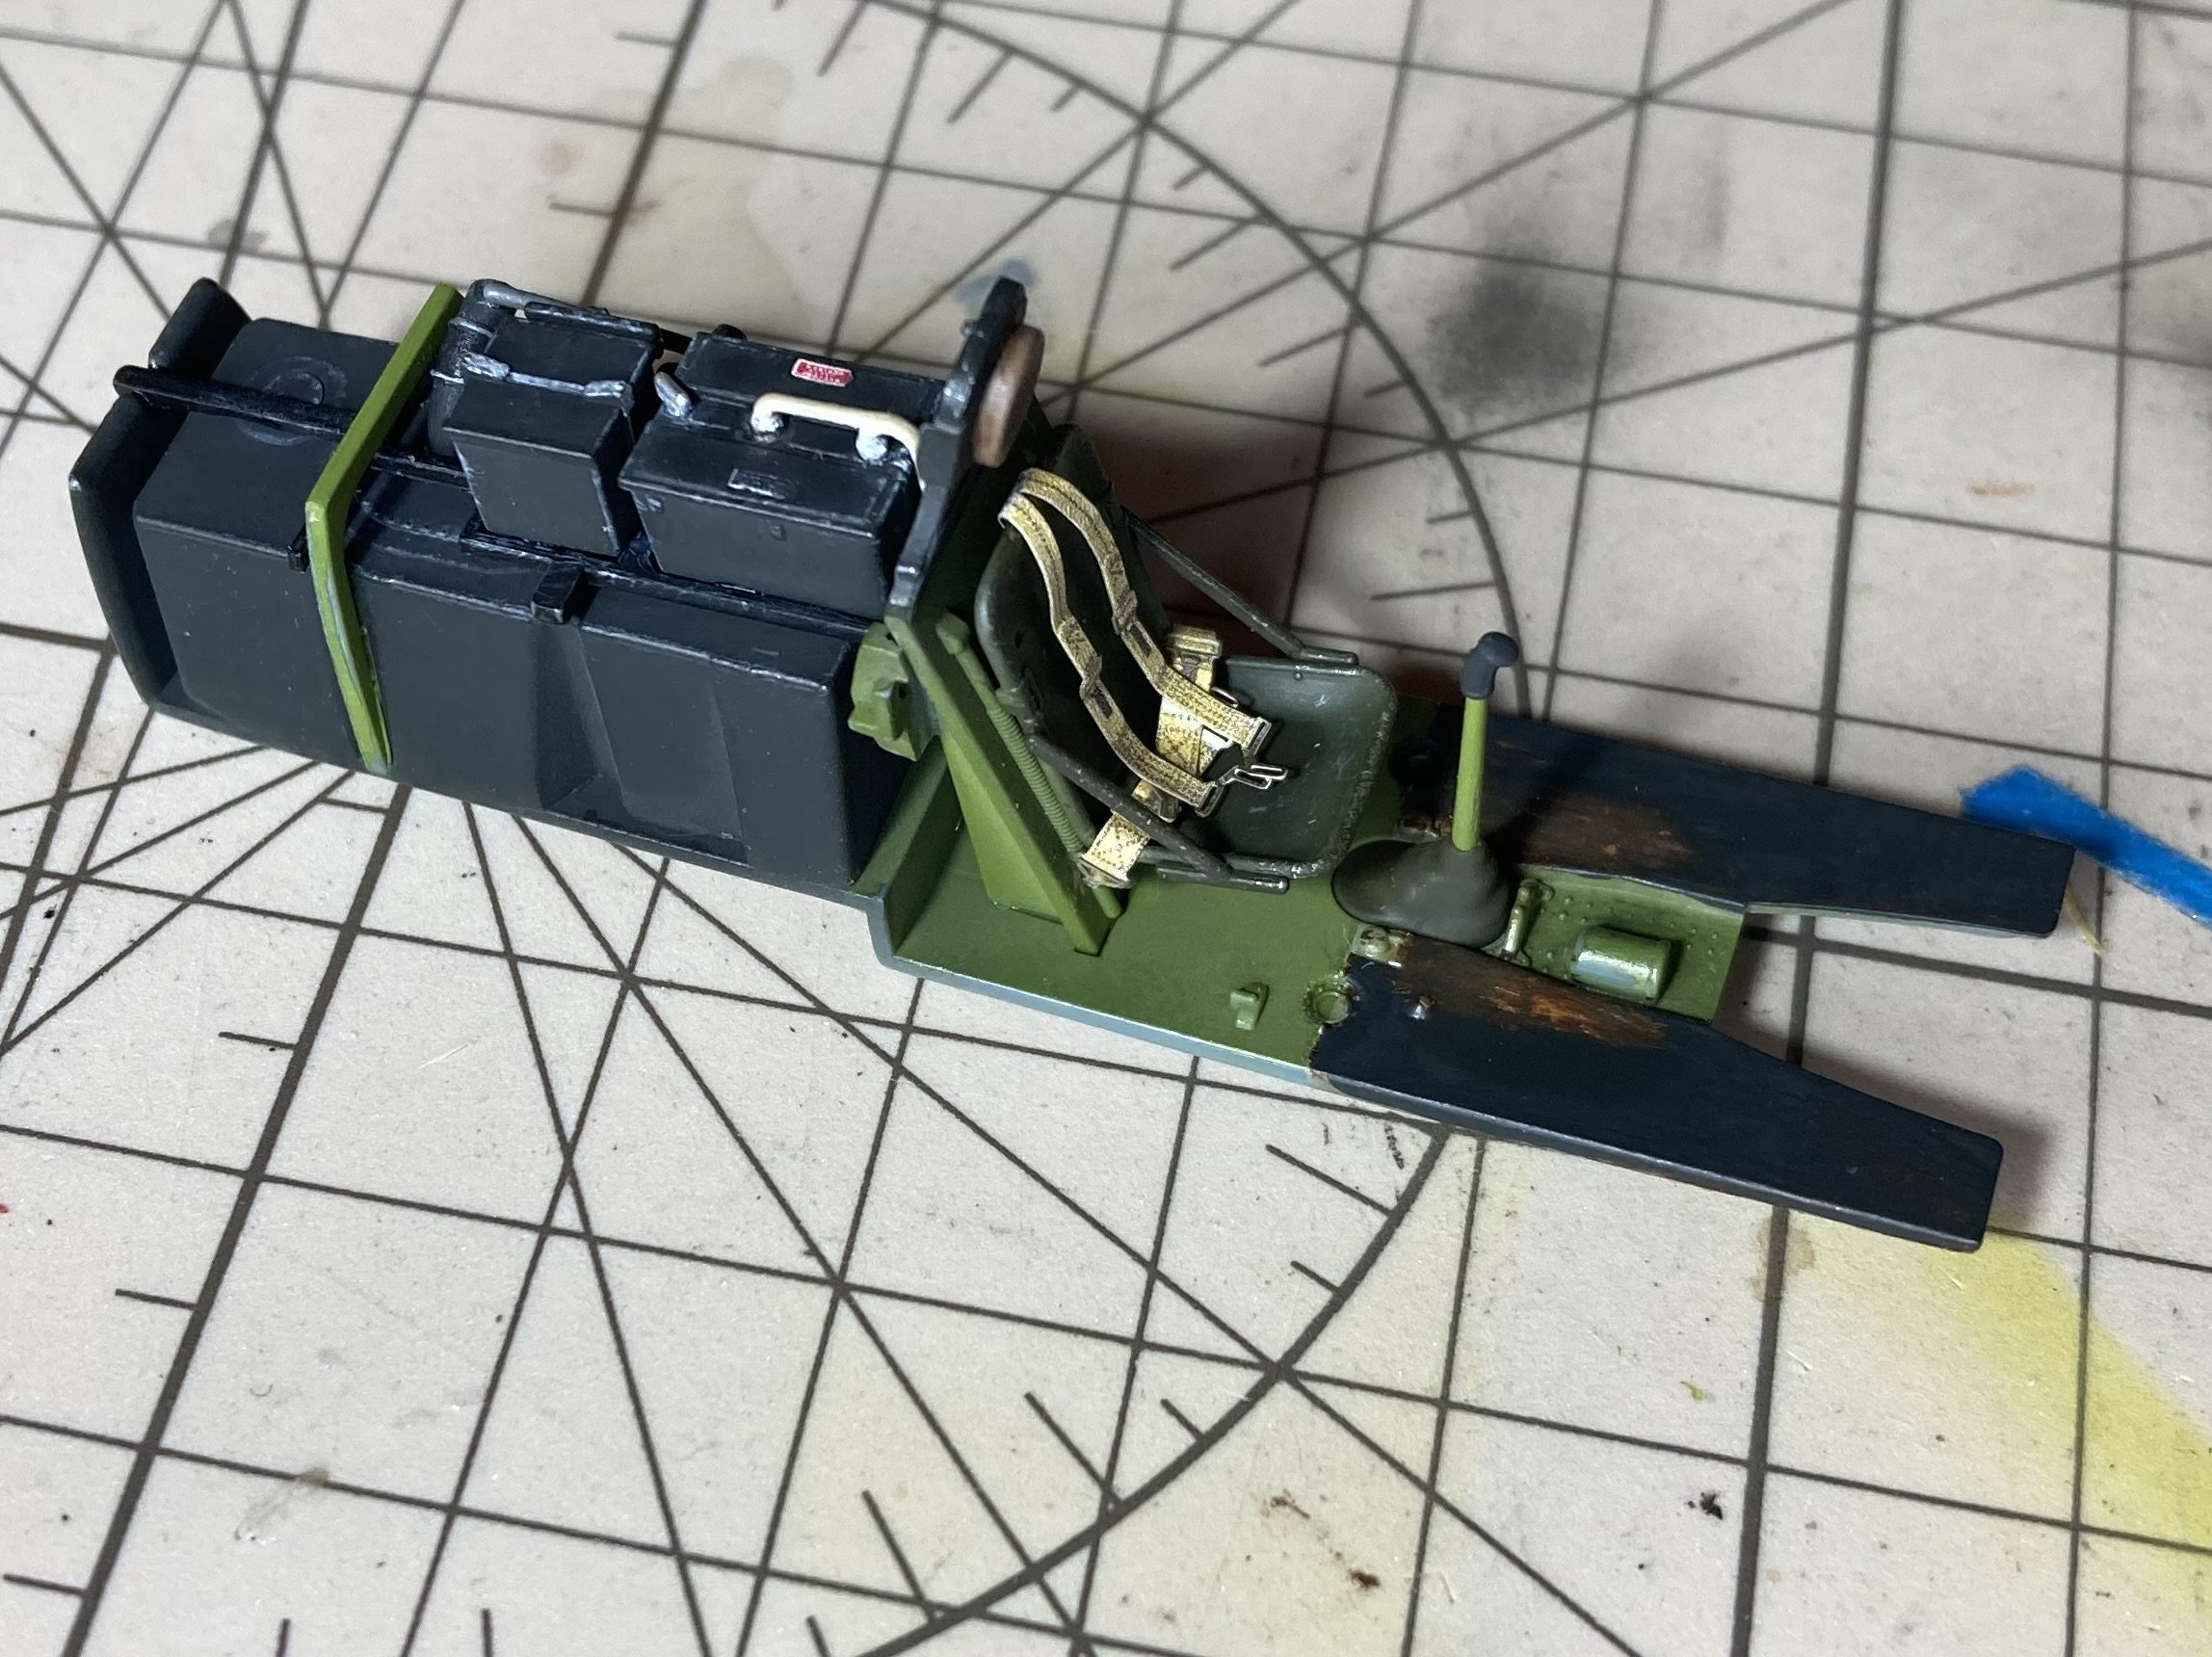
Did a good amount on the cockpit. seems like there is nothing to do after doing the insides of a b17! But there is something rewarding about detailing a cockpit. Almost ready to close up. The fit is really good! So good Infact that if you put something slightly in the wrong place then nothing goes together! Had to take one part off behind the seat and lower it by half a mil to get it to go together! But once in the right place it’s such a nice fit! I’ll get the plane together pretty fast I think and spend some good time on the sanding and prep for painting stage! I have a 3000grit sanding sponge now. So will prime and then use that to get super smooth. For anyone that has done this kit… is there a way to make the prop spin or do I have to glue it? The usual piece at the back to lock it in place but free to spin isn’t a thing on the instructions! I’ll make one anyway as I was a spinning prop! Just really surprised me!


- 74 replies
-
- 14
-
-
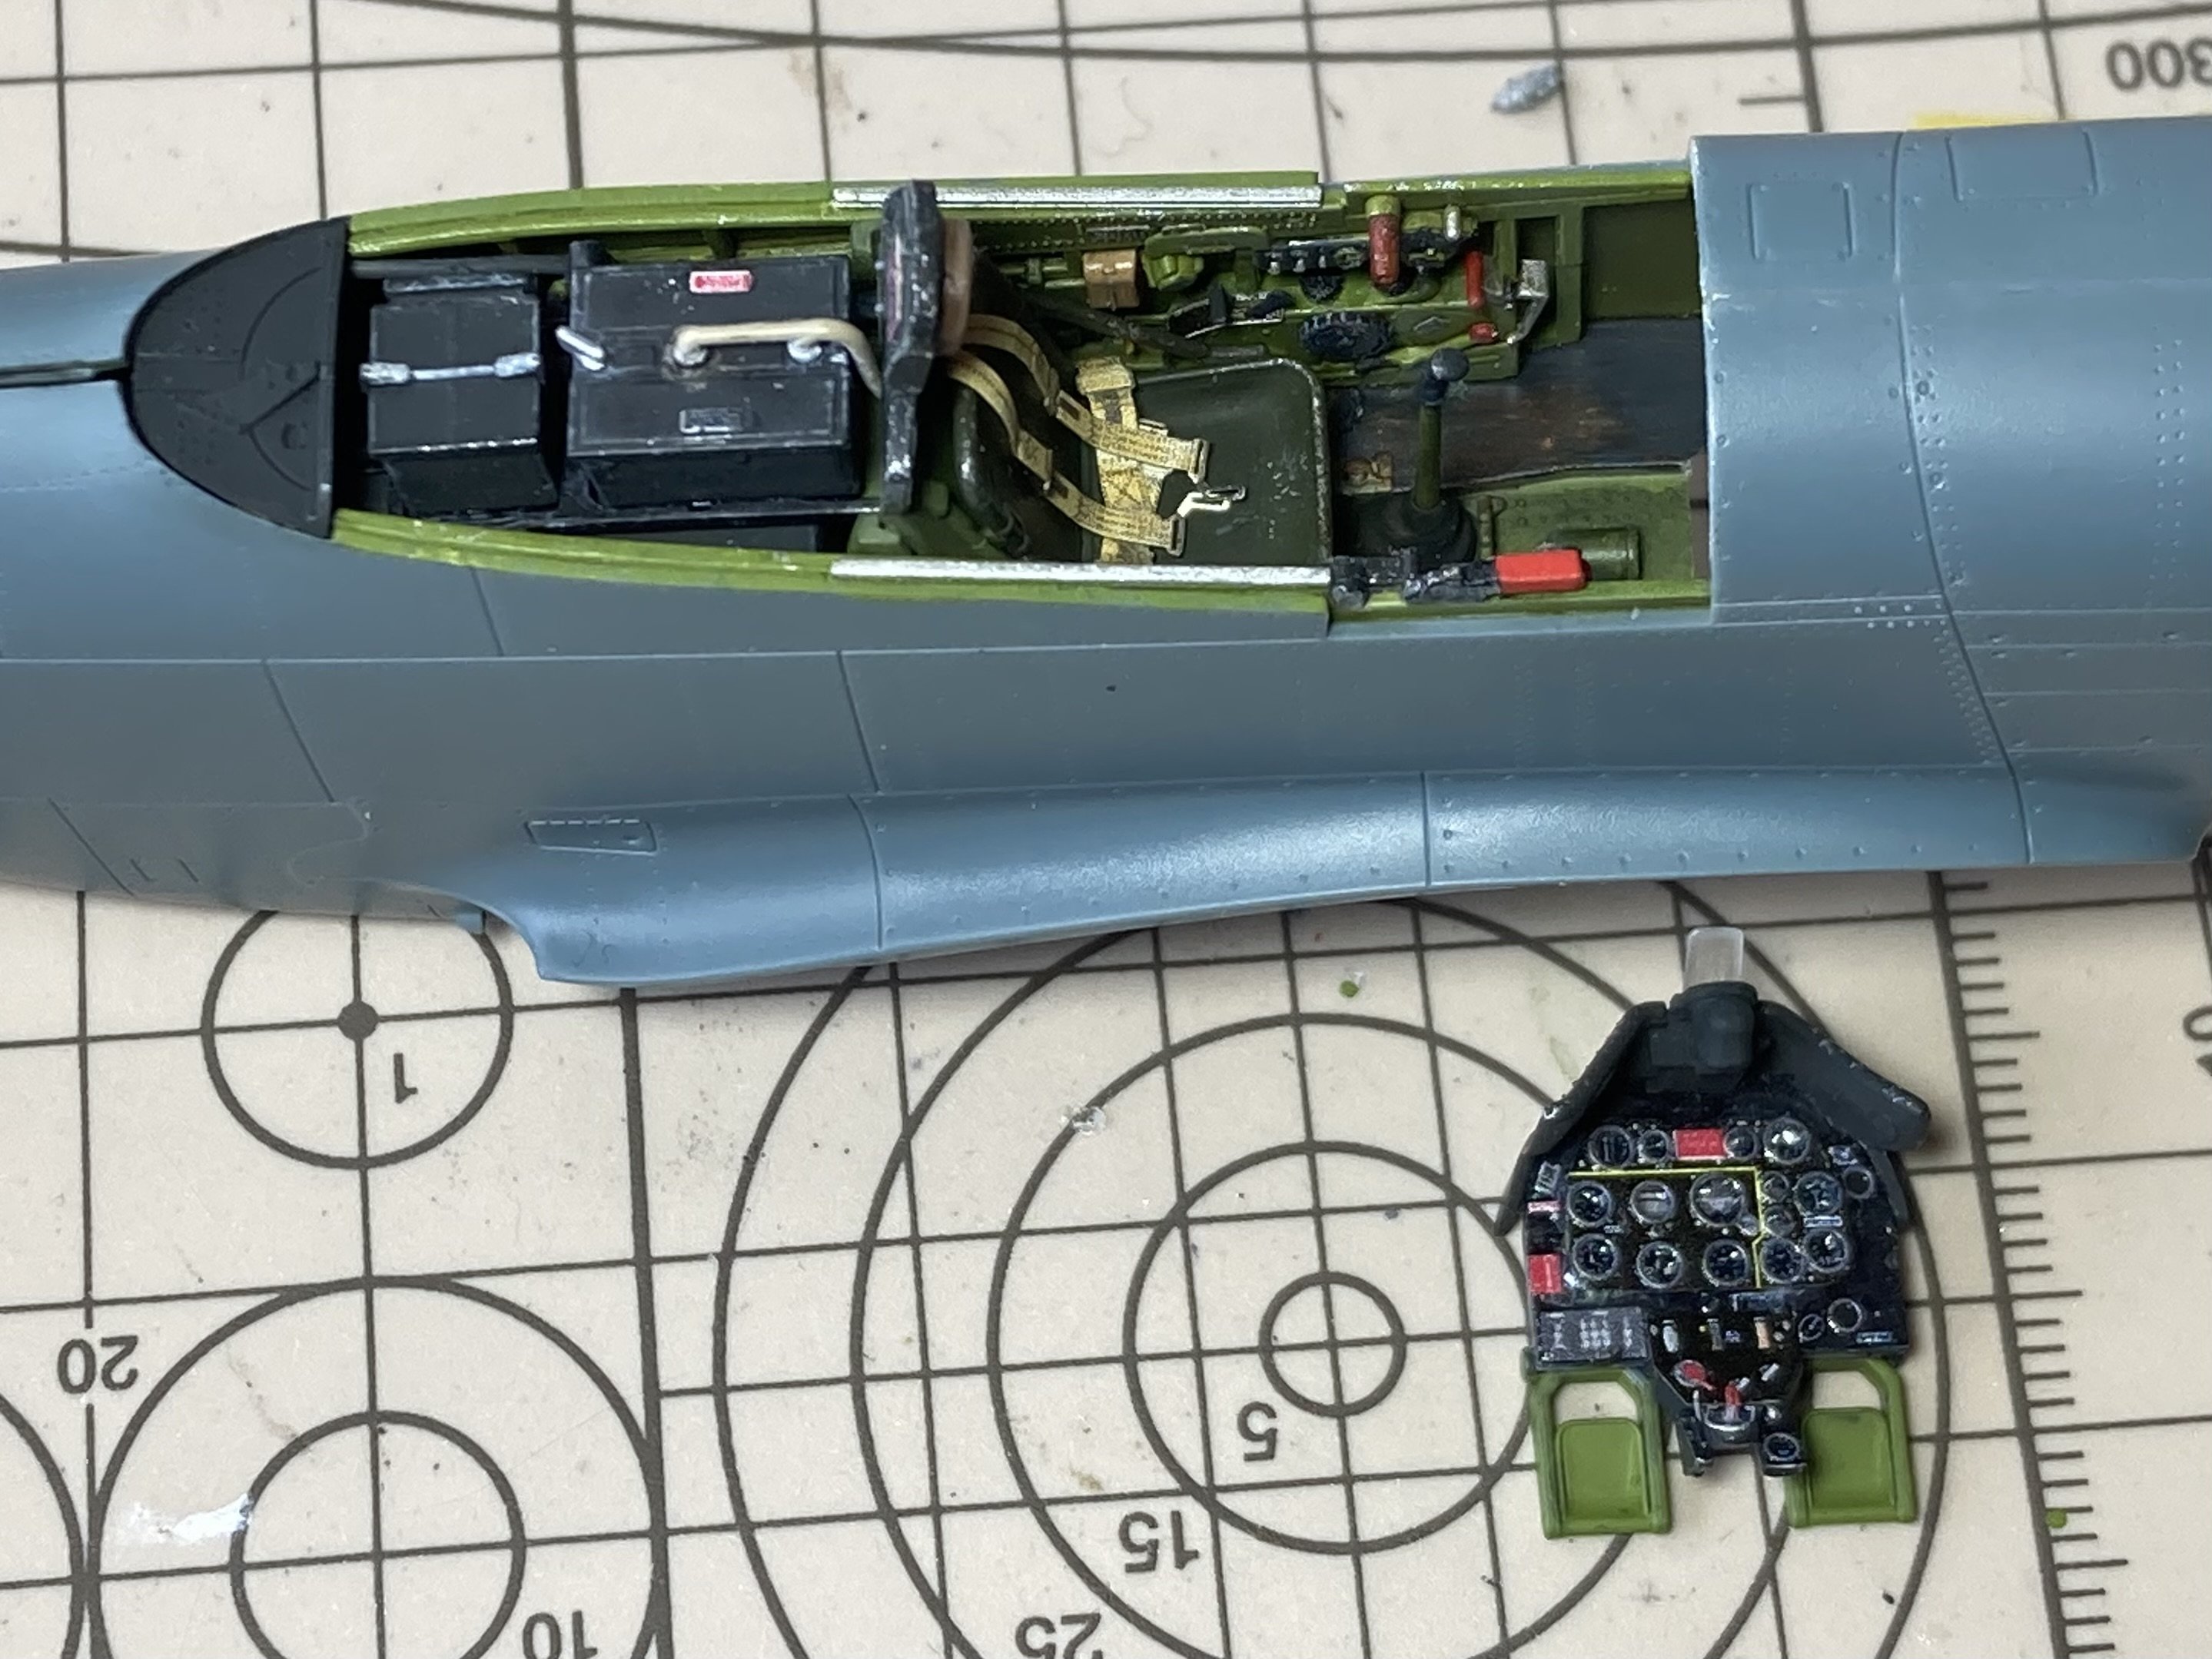
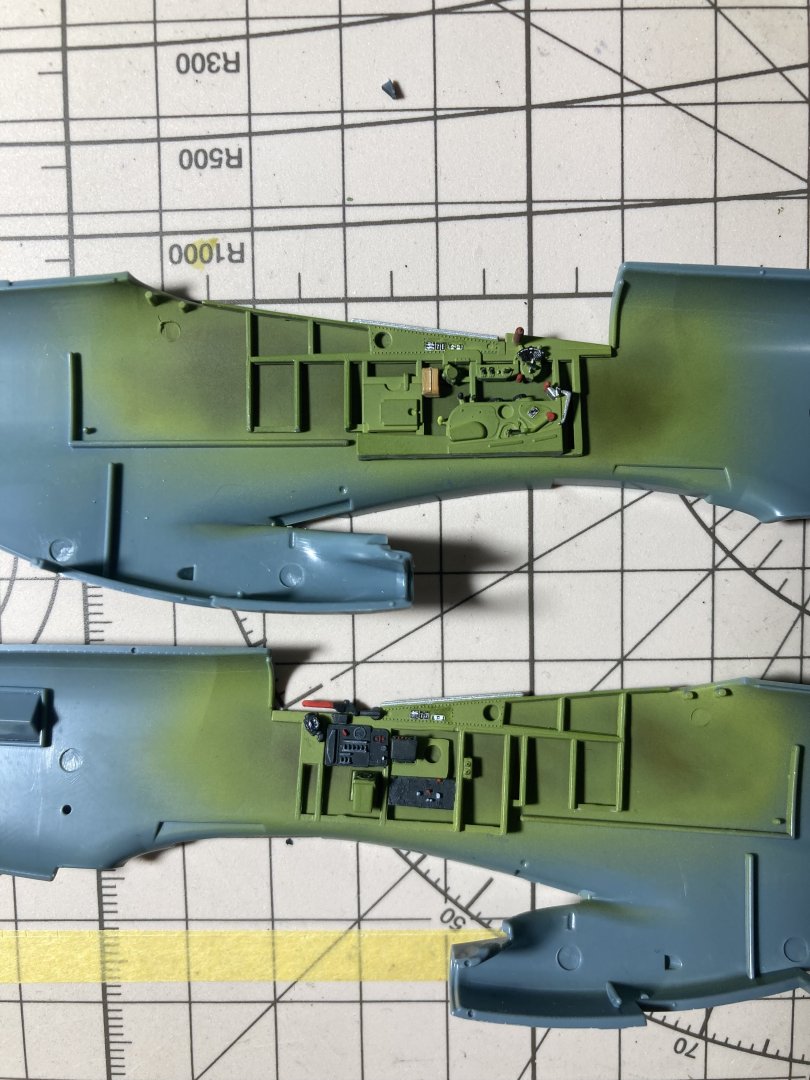
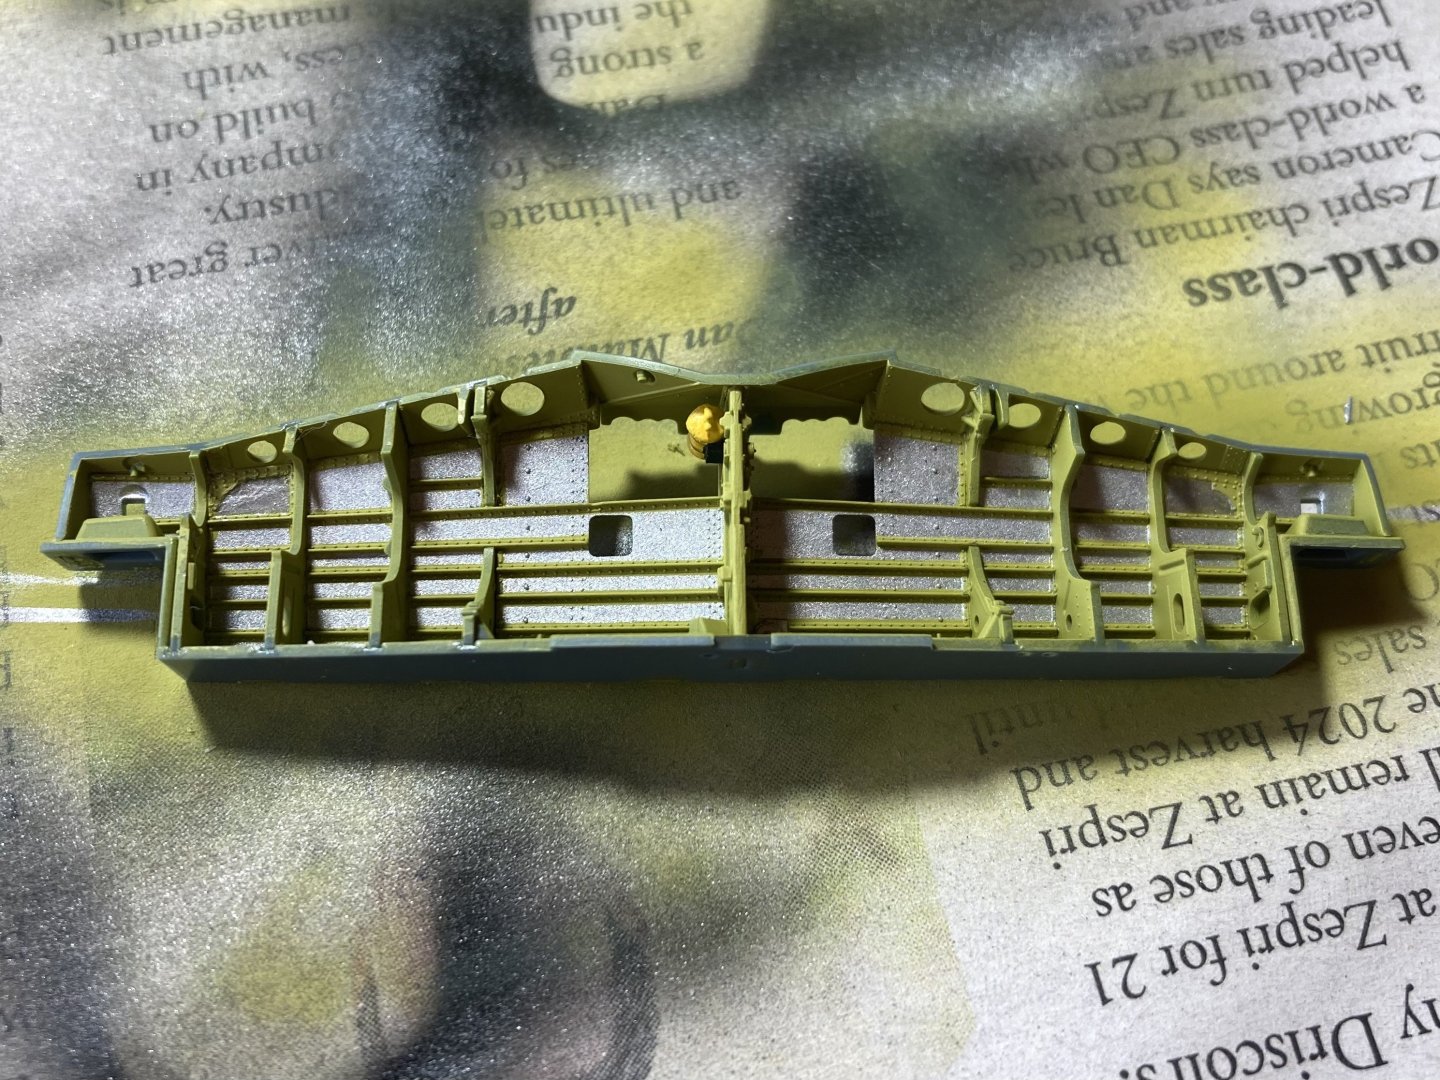
Thanks everyone for all the tips and links! I’ve been going through them and will answer in the coming days. Things with my new job have been fast tracked so instead of waiting till next year I’ll be starting in just over a month! But I should finishing this project before then! A little update. been working on the cockpit and wheel wells and they are both coming along well. Quite a fun part of the kit and is an effect that looks really nice too I think. A lot of debate about what was painted and when and what colours but this seemed to be a scheme that came up a lot and as far as I could tell fit in with the time period I’m building. Dirtied up a little and I won’t add any more details or piping even though the extra details really look nice, they are just hard to justify for how little it will be picked up and looked at. Now it’s just the cockpit to complete before the internals are done.


- 74 replies
-
- 18
-
-
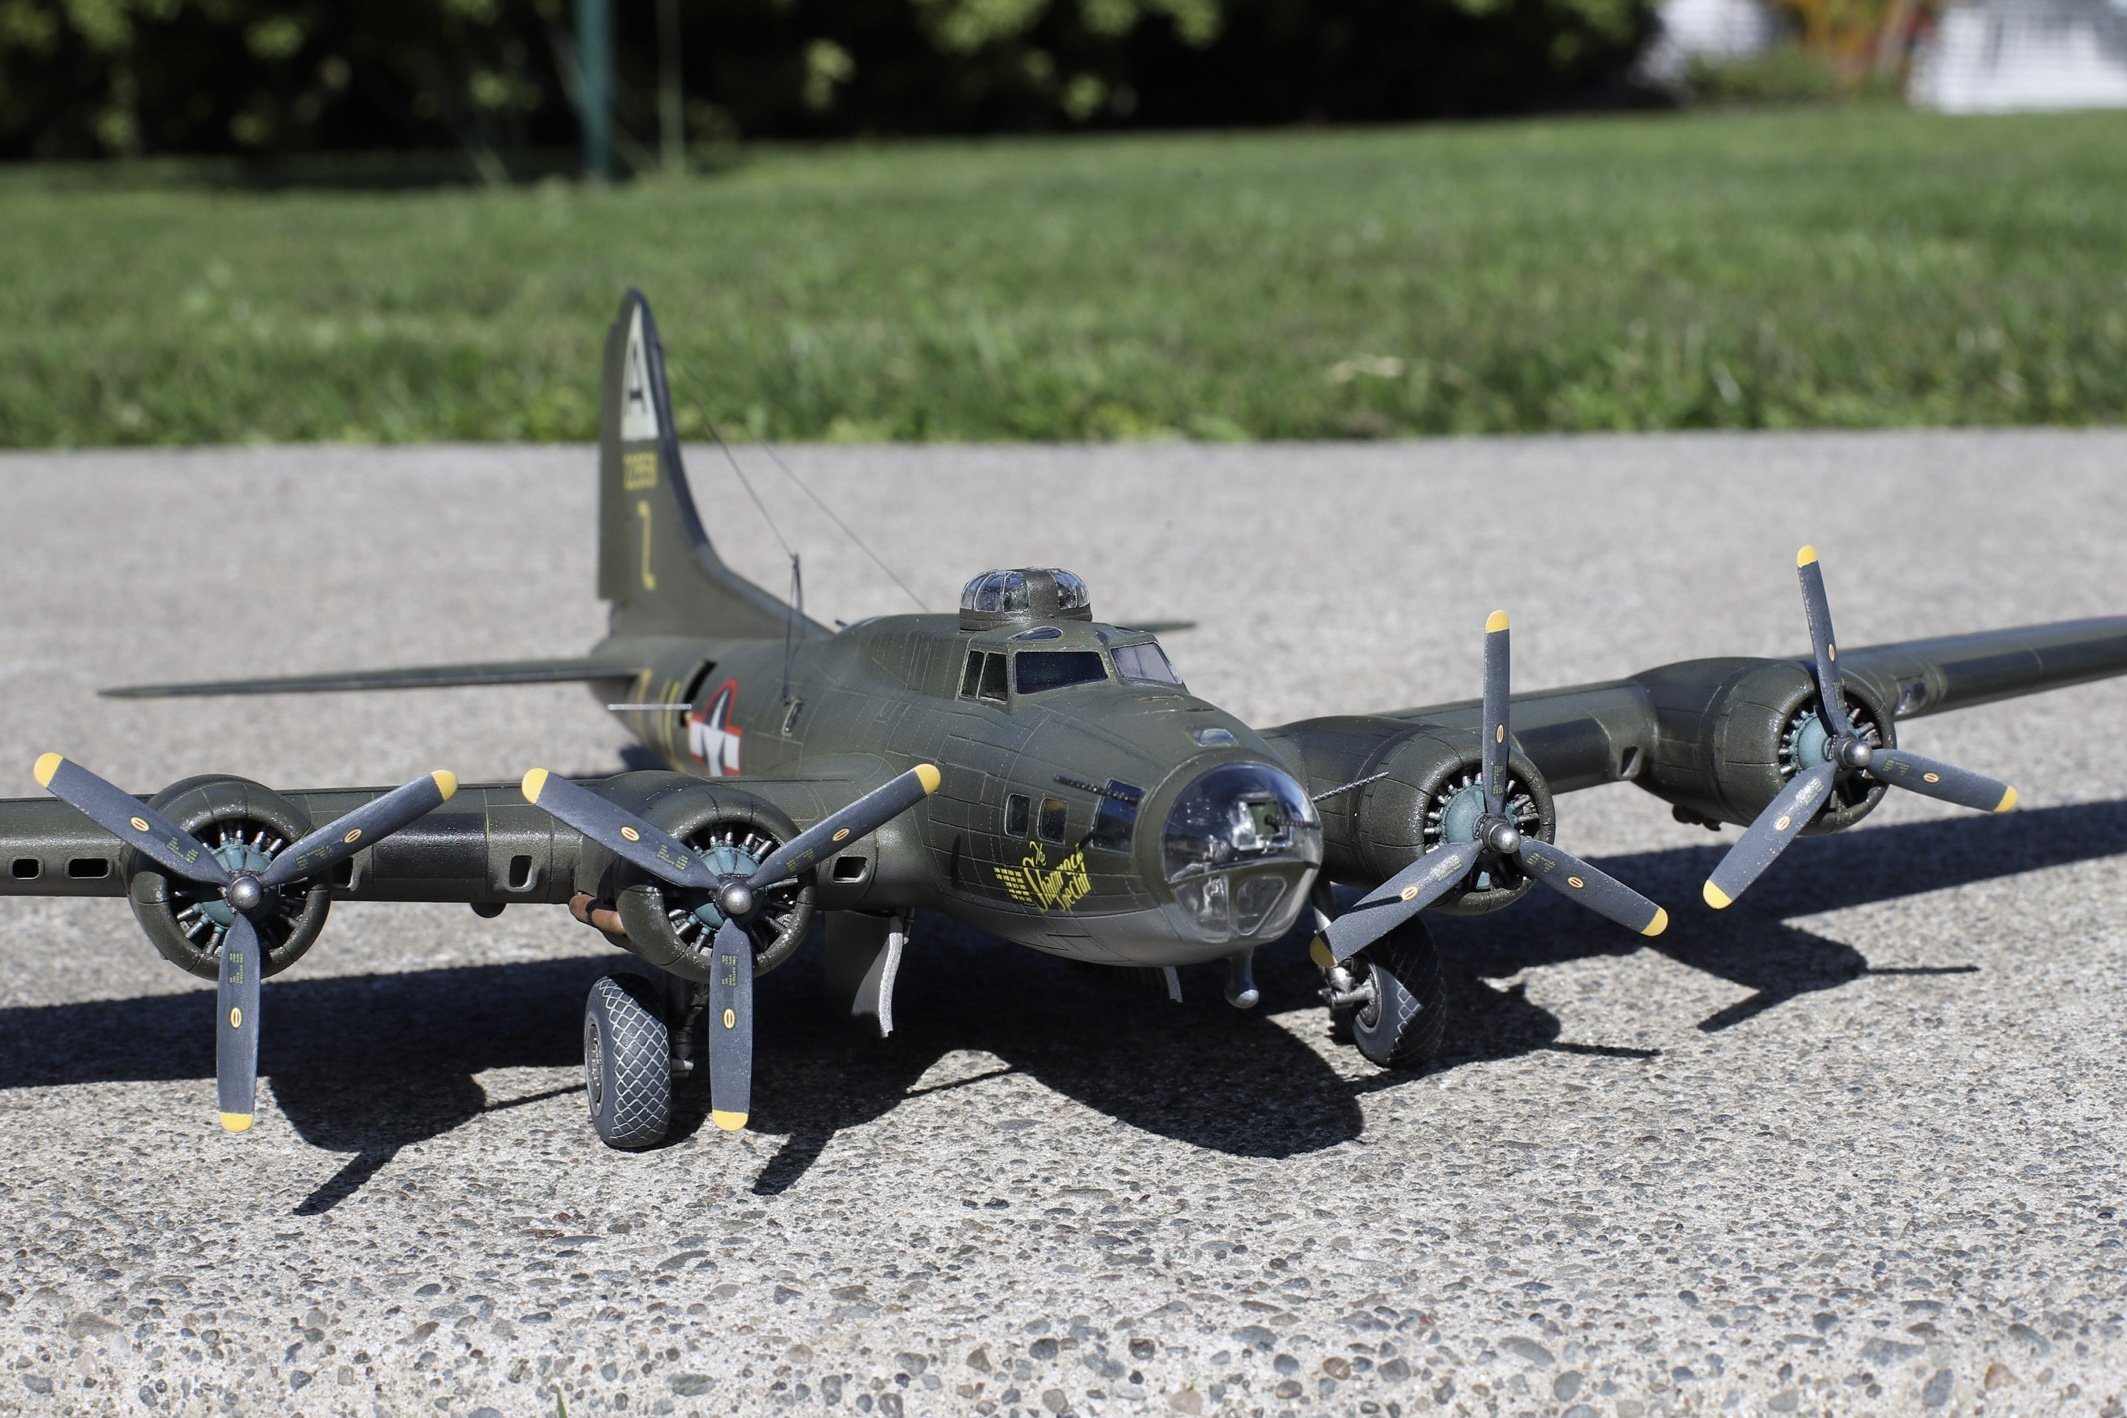
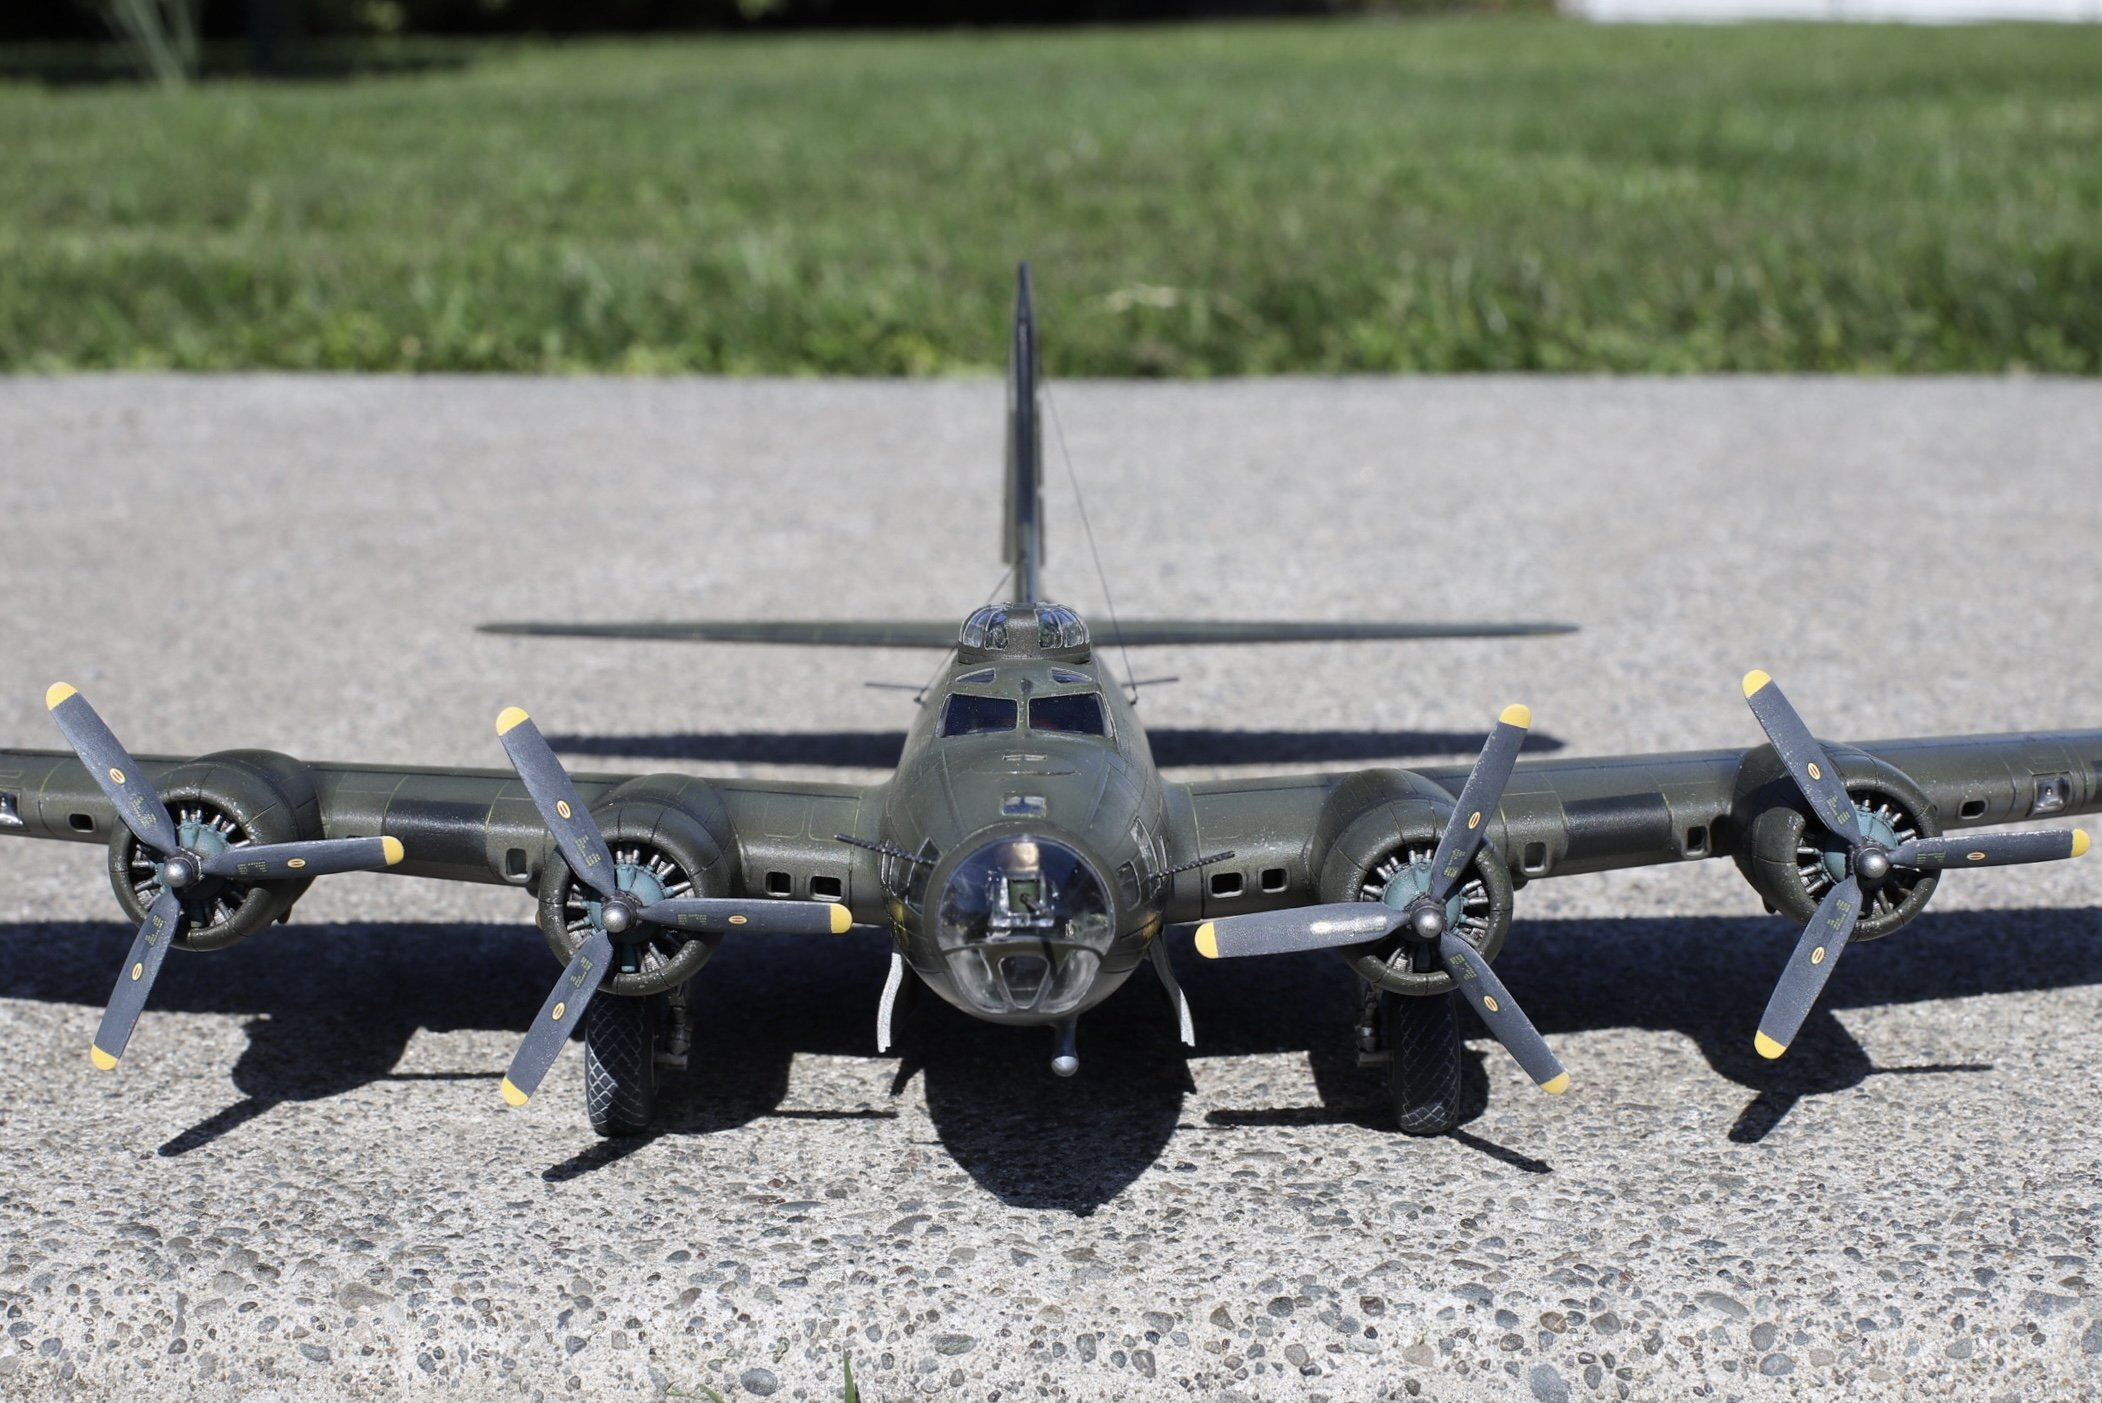
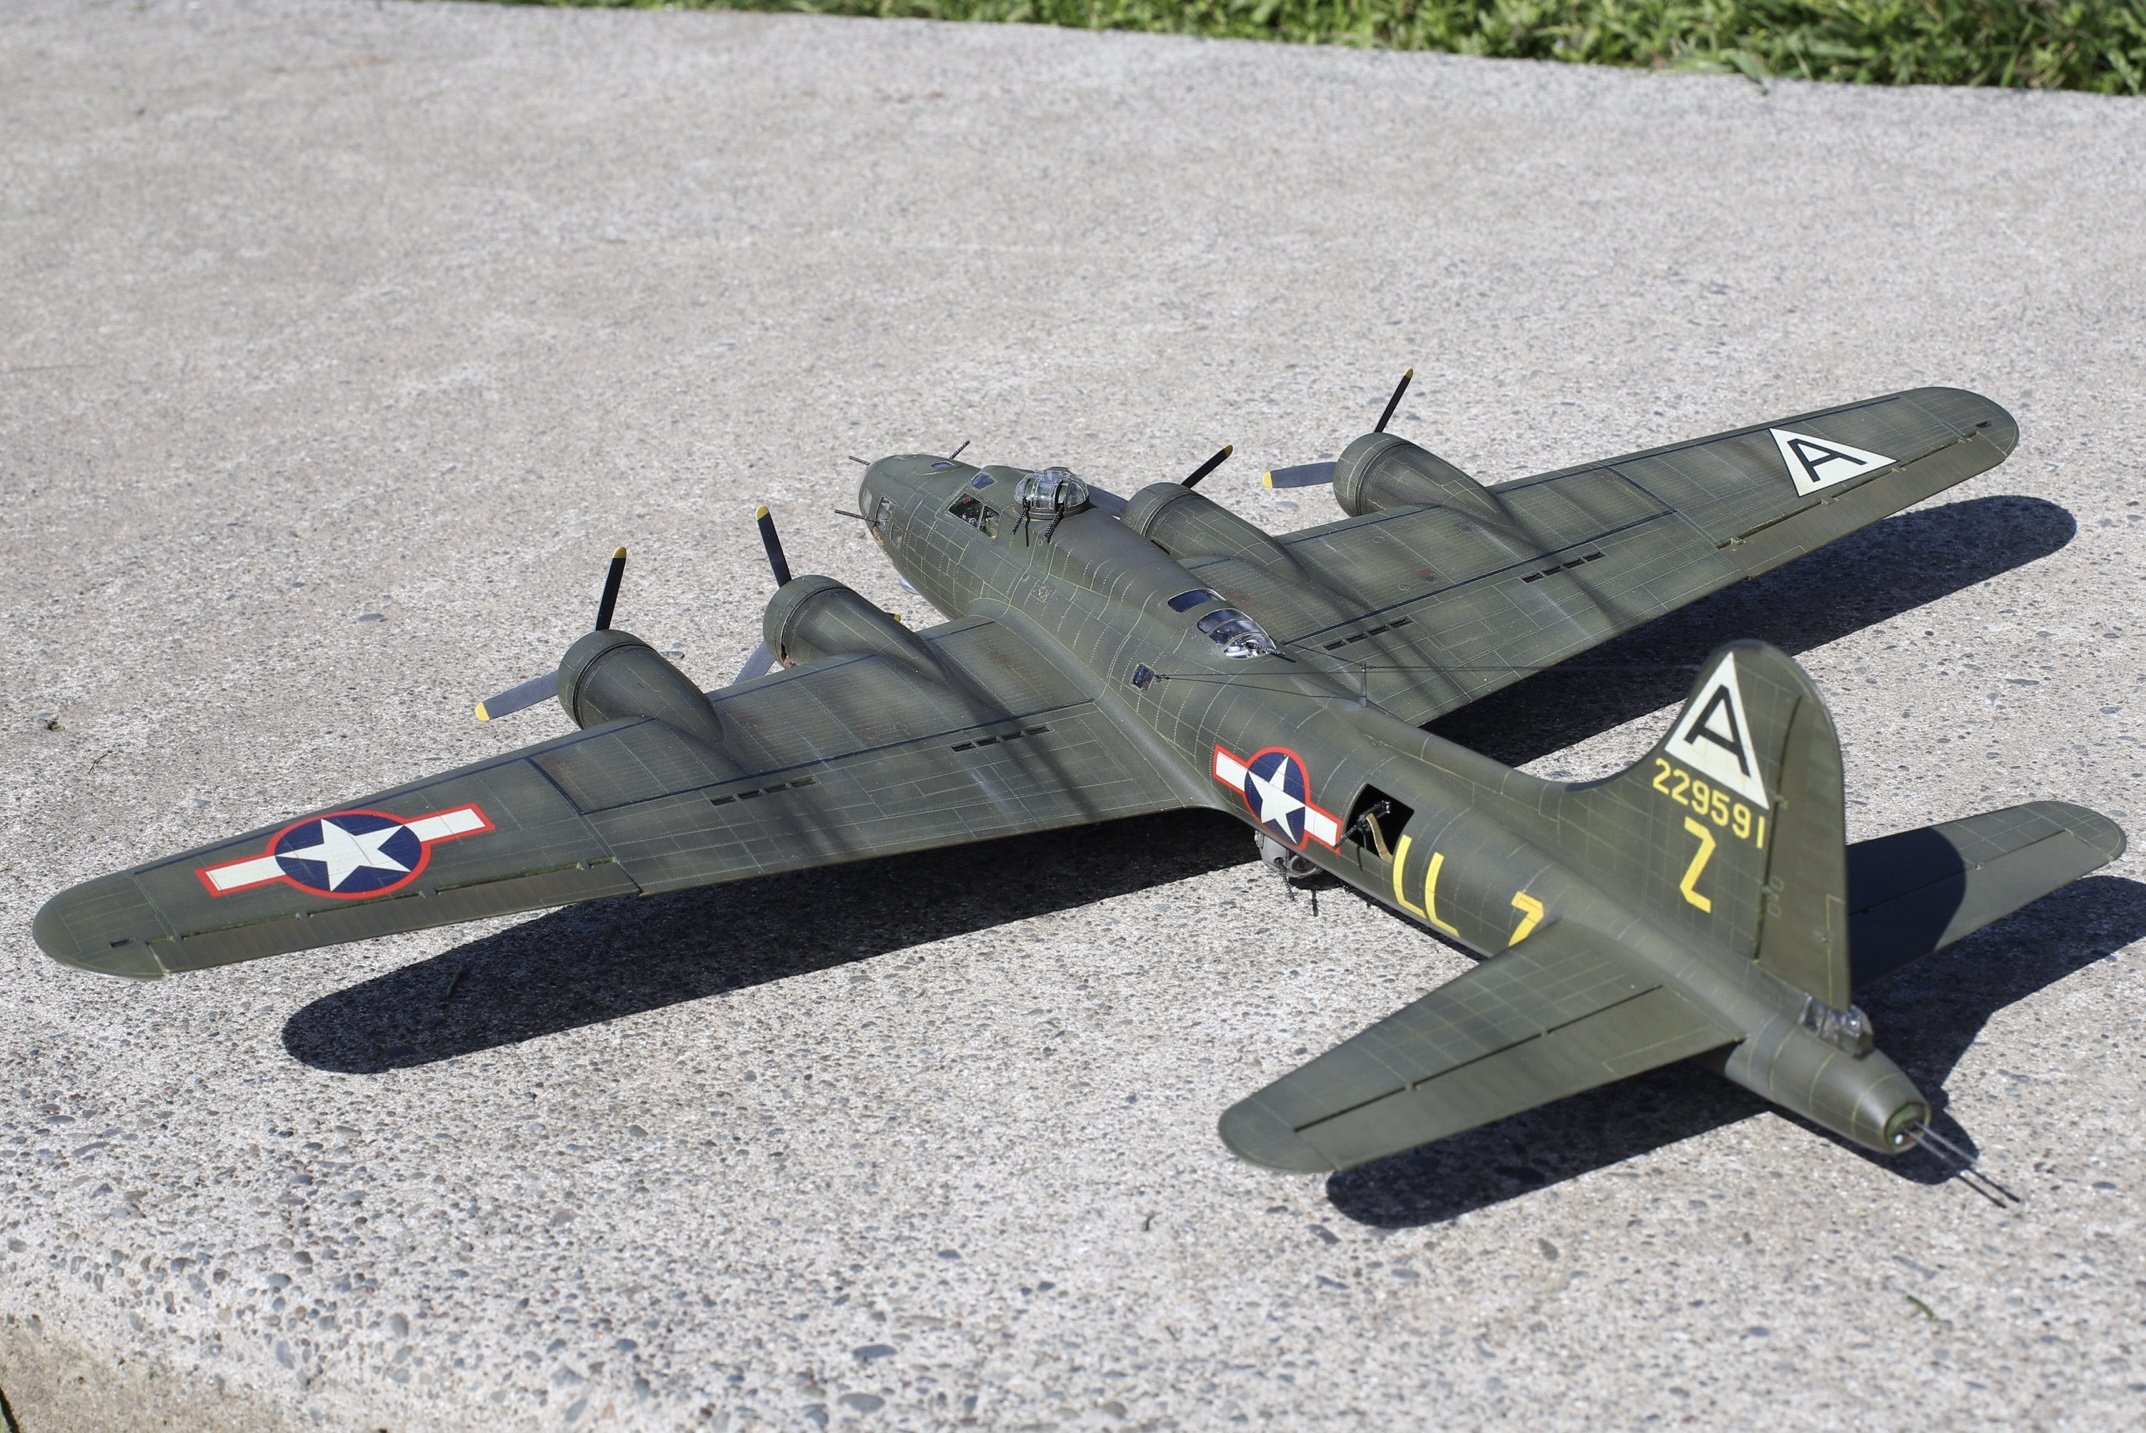
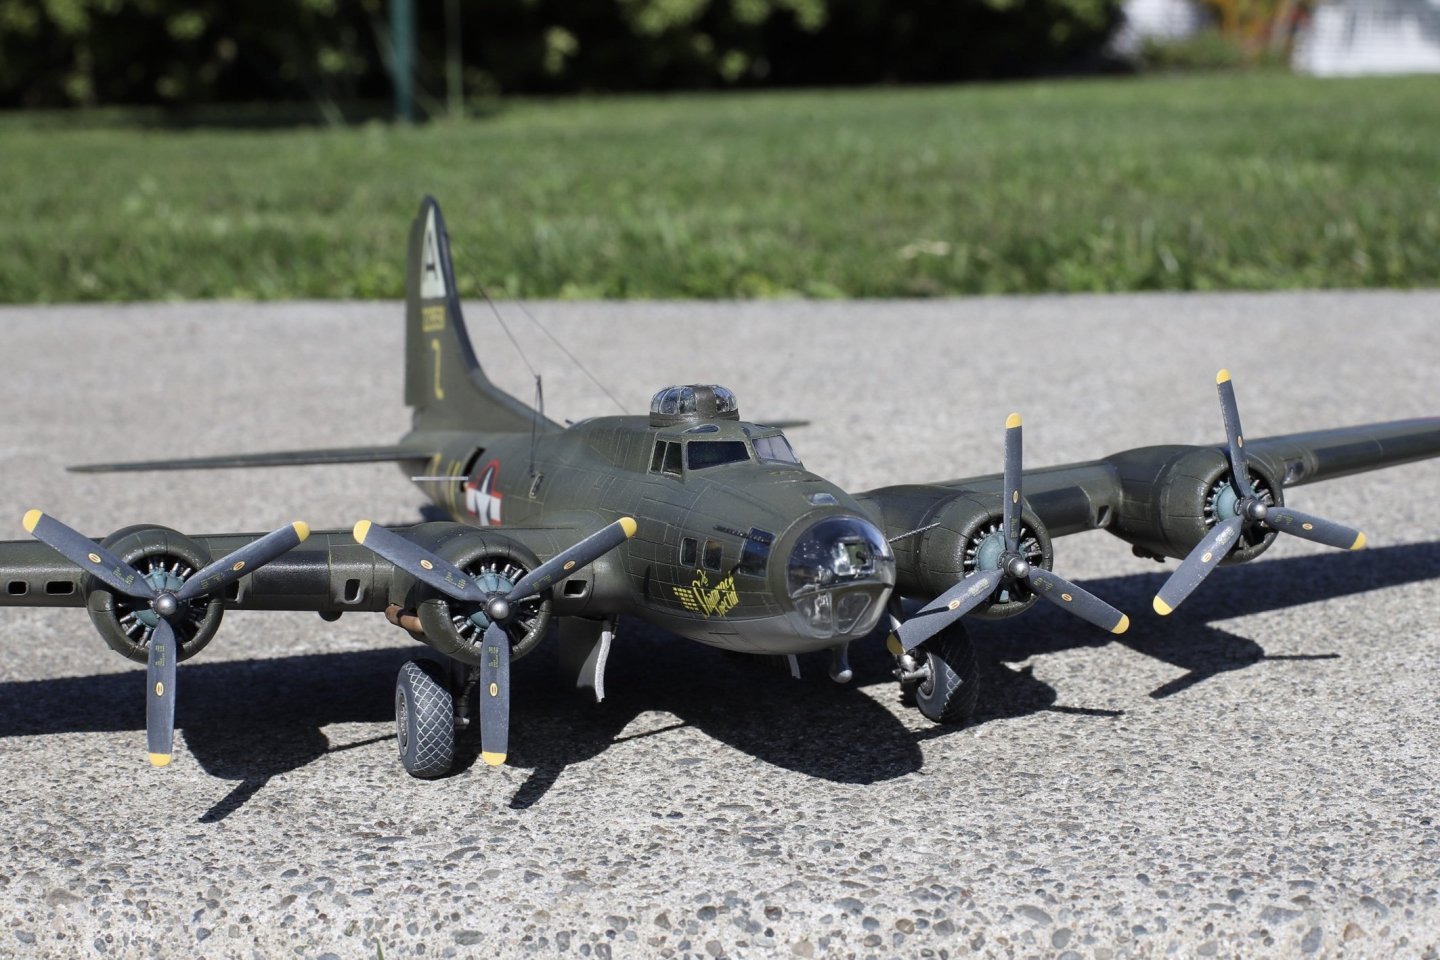
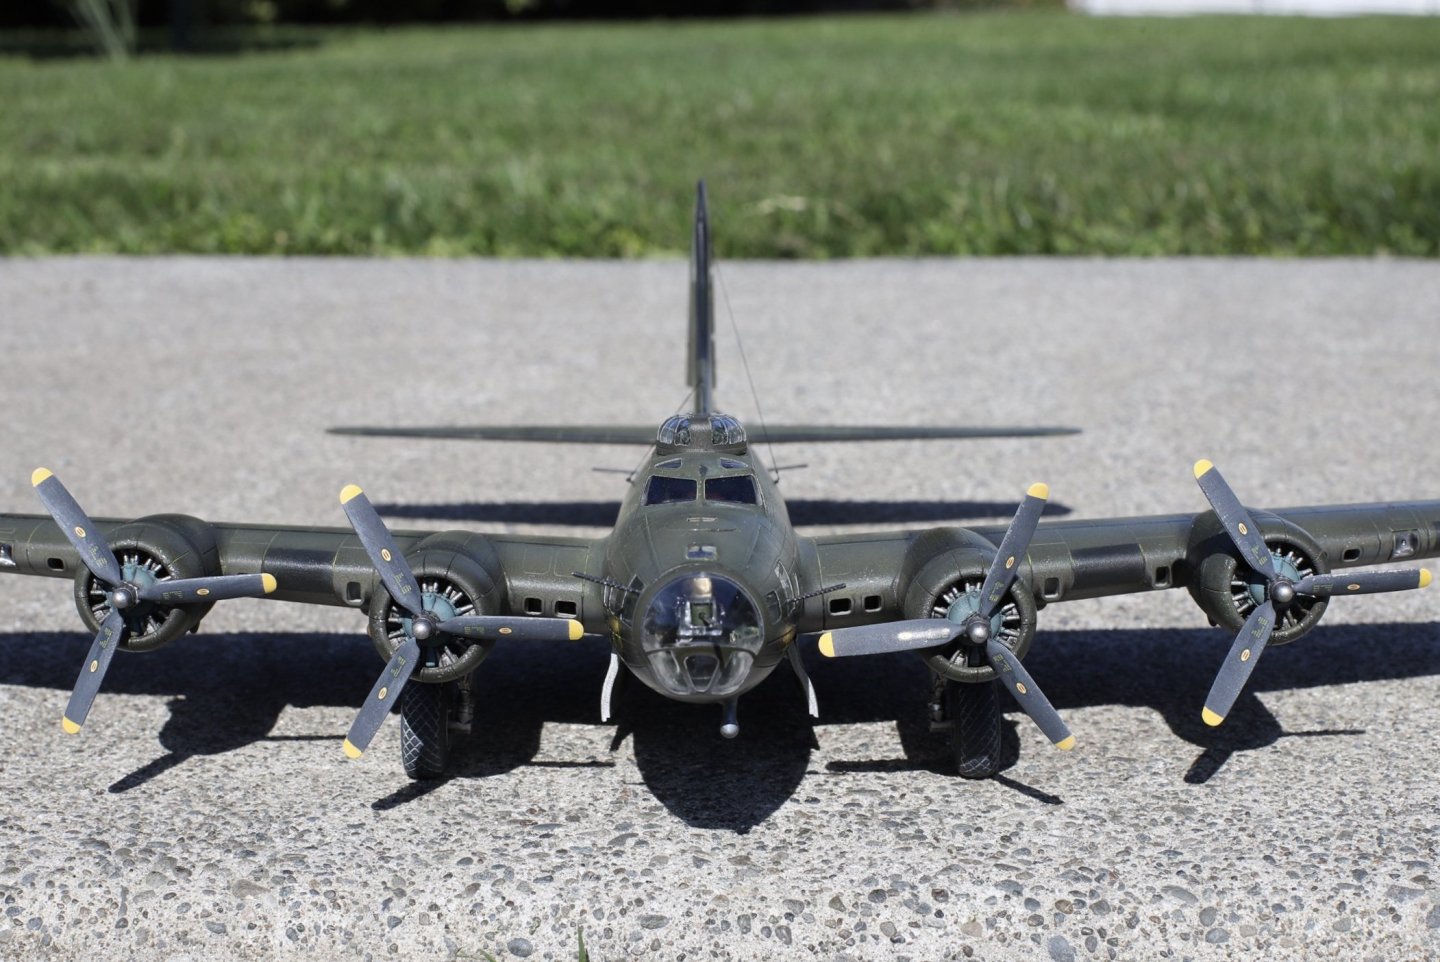
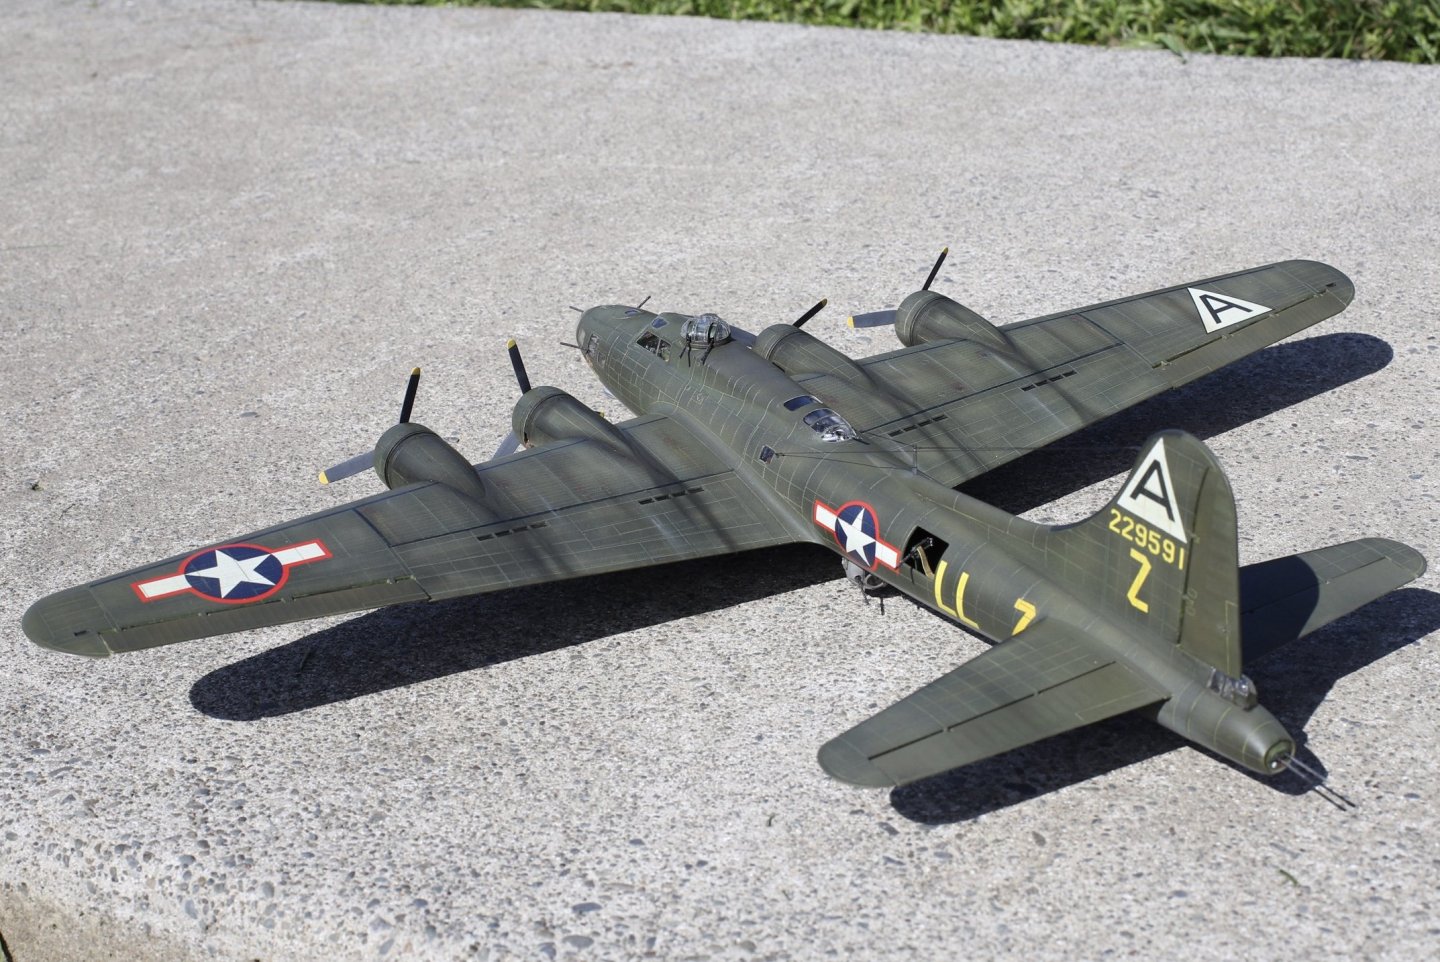
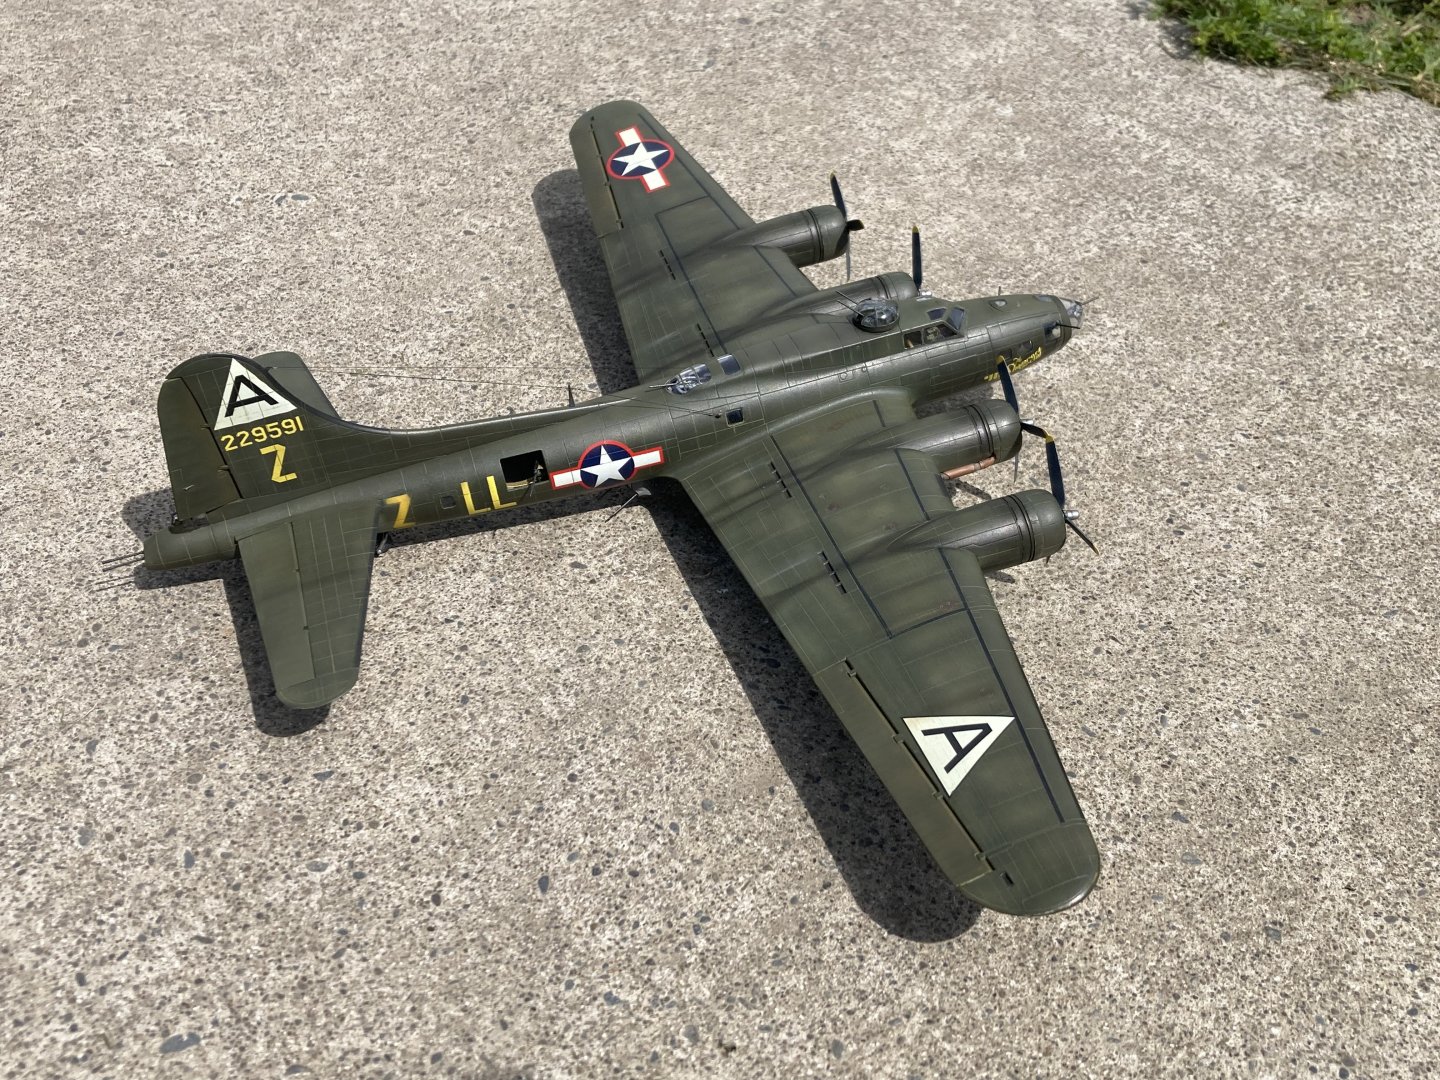
All finished. Thanks all for the company through this project. Had a good day to get some pictures. I’m pleased with how it turned out and I learnt a lot during this build. Thanks.


- 77 replies
-
- 14
-
-
-
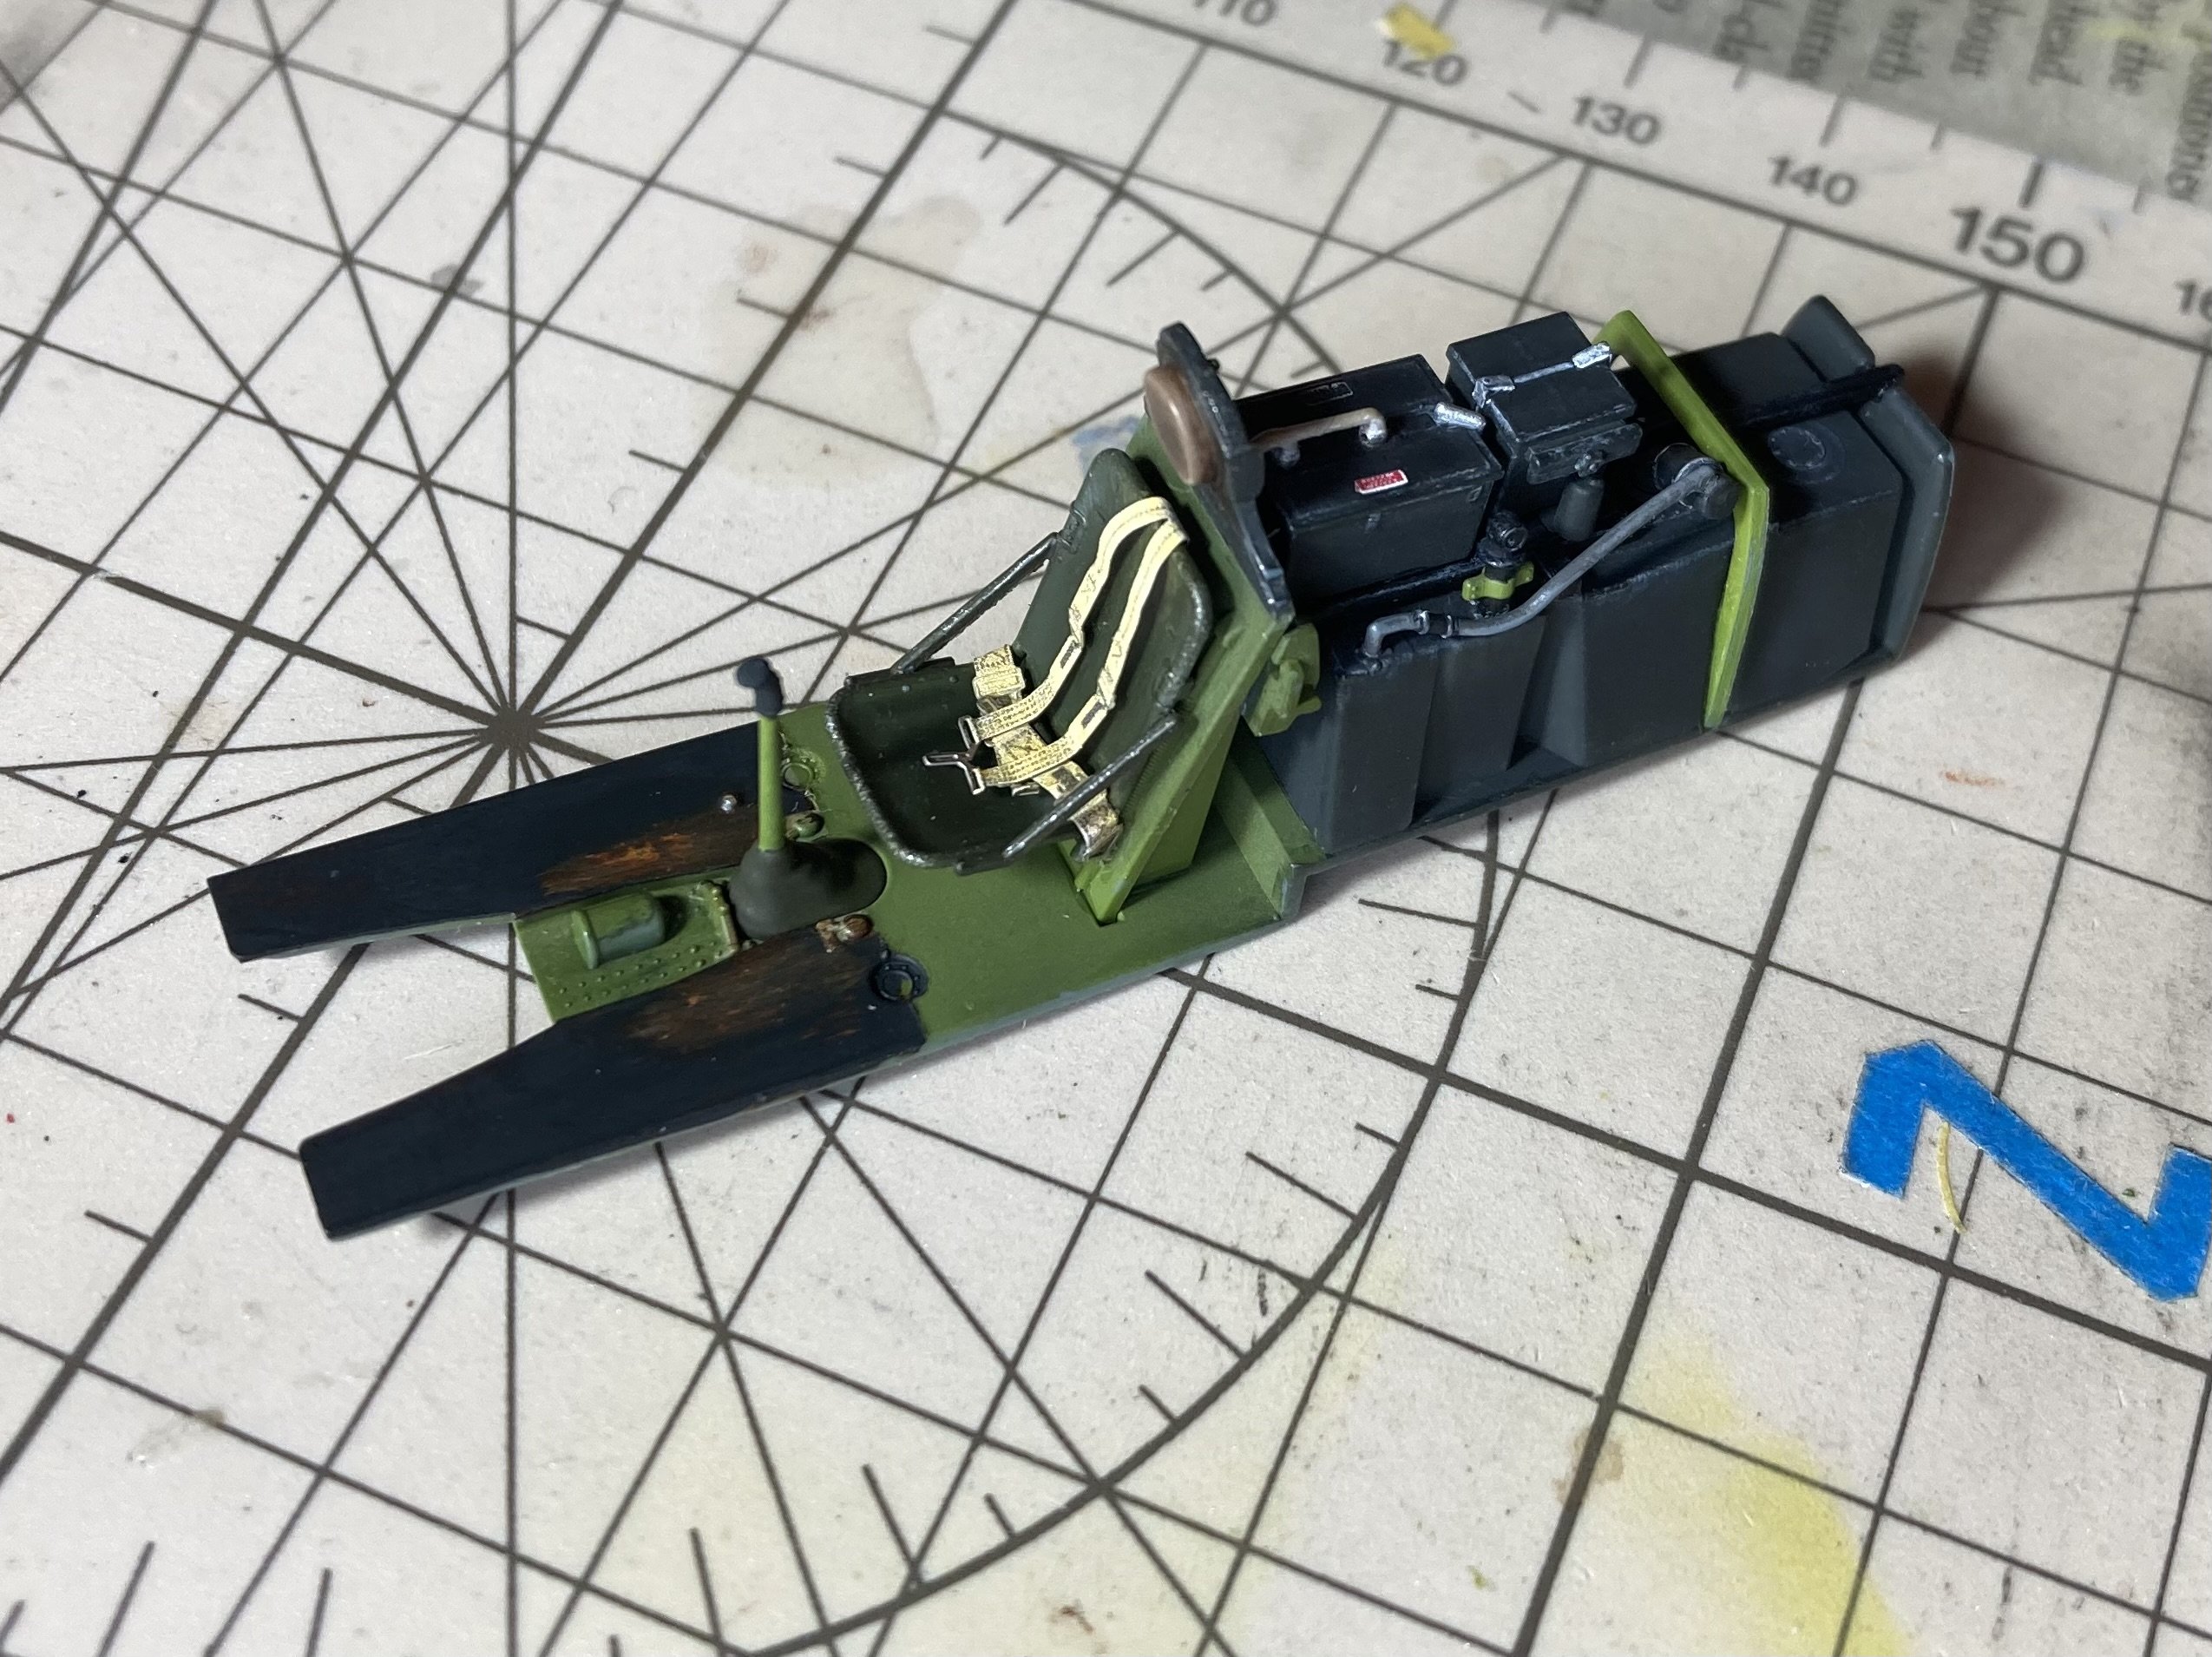
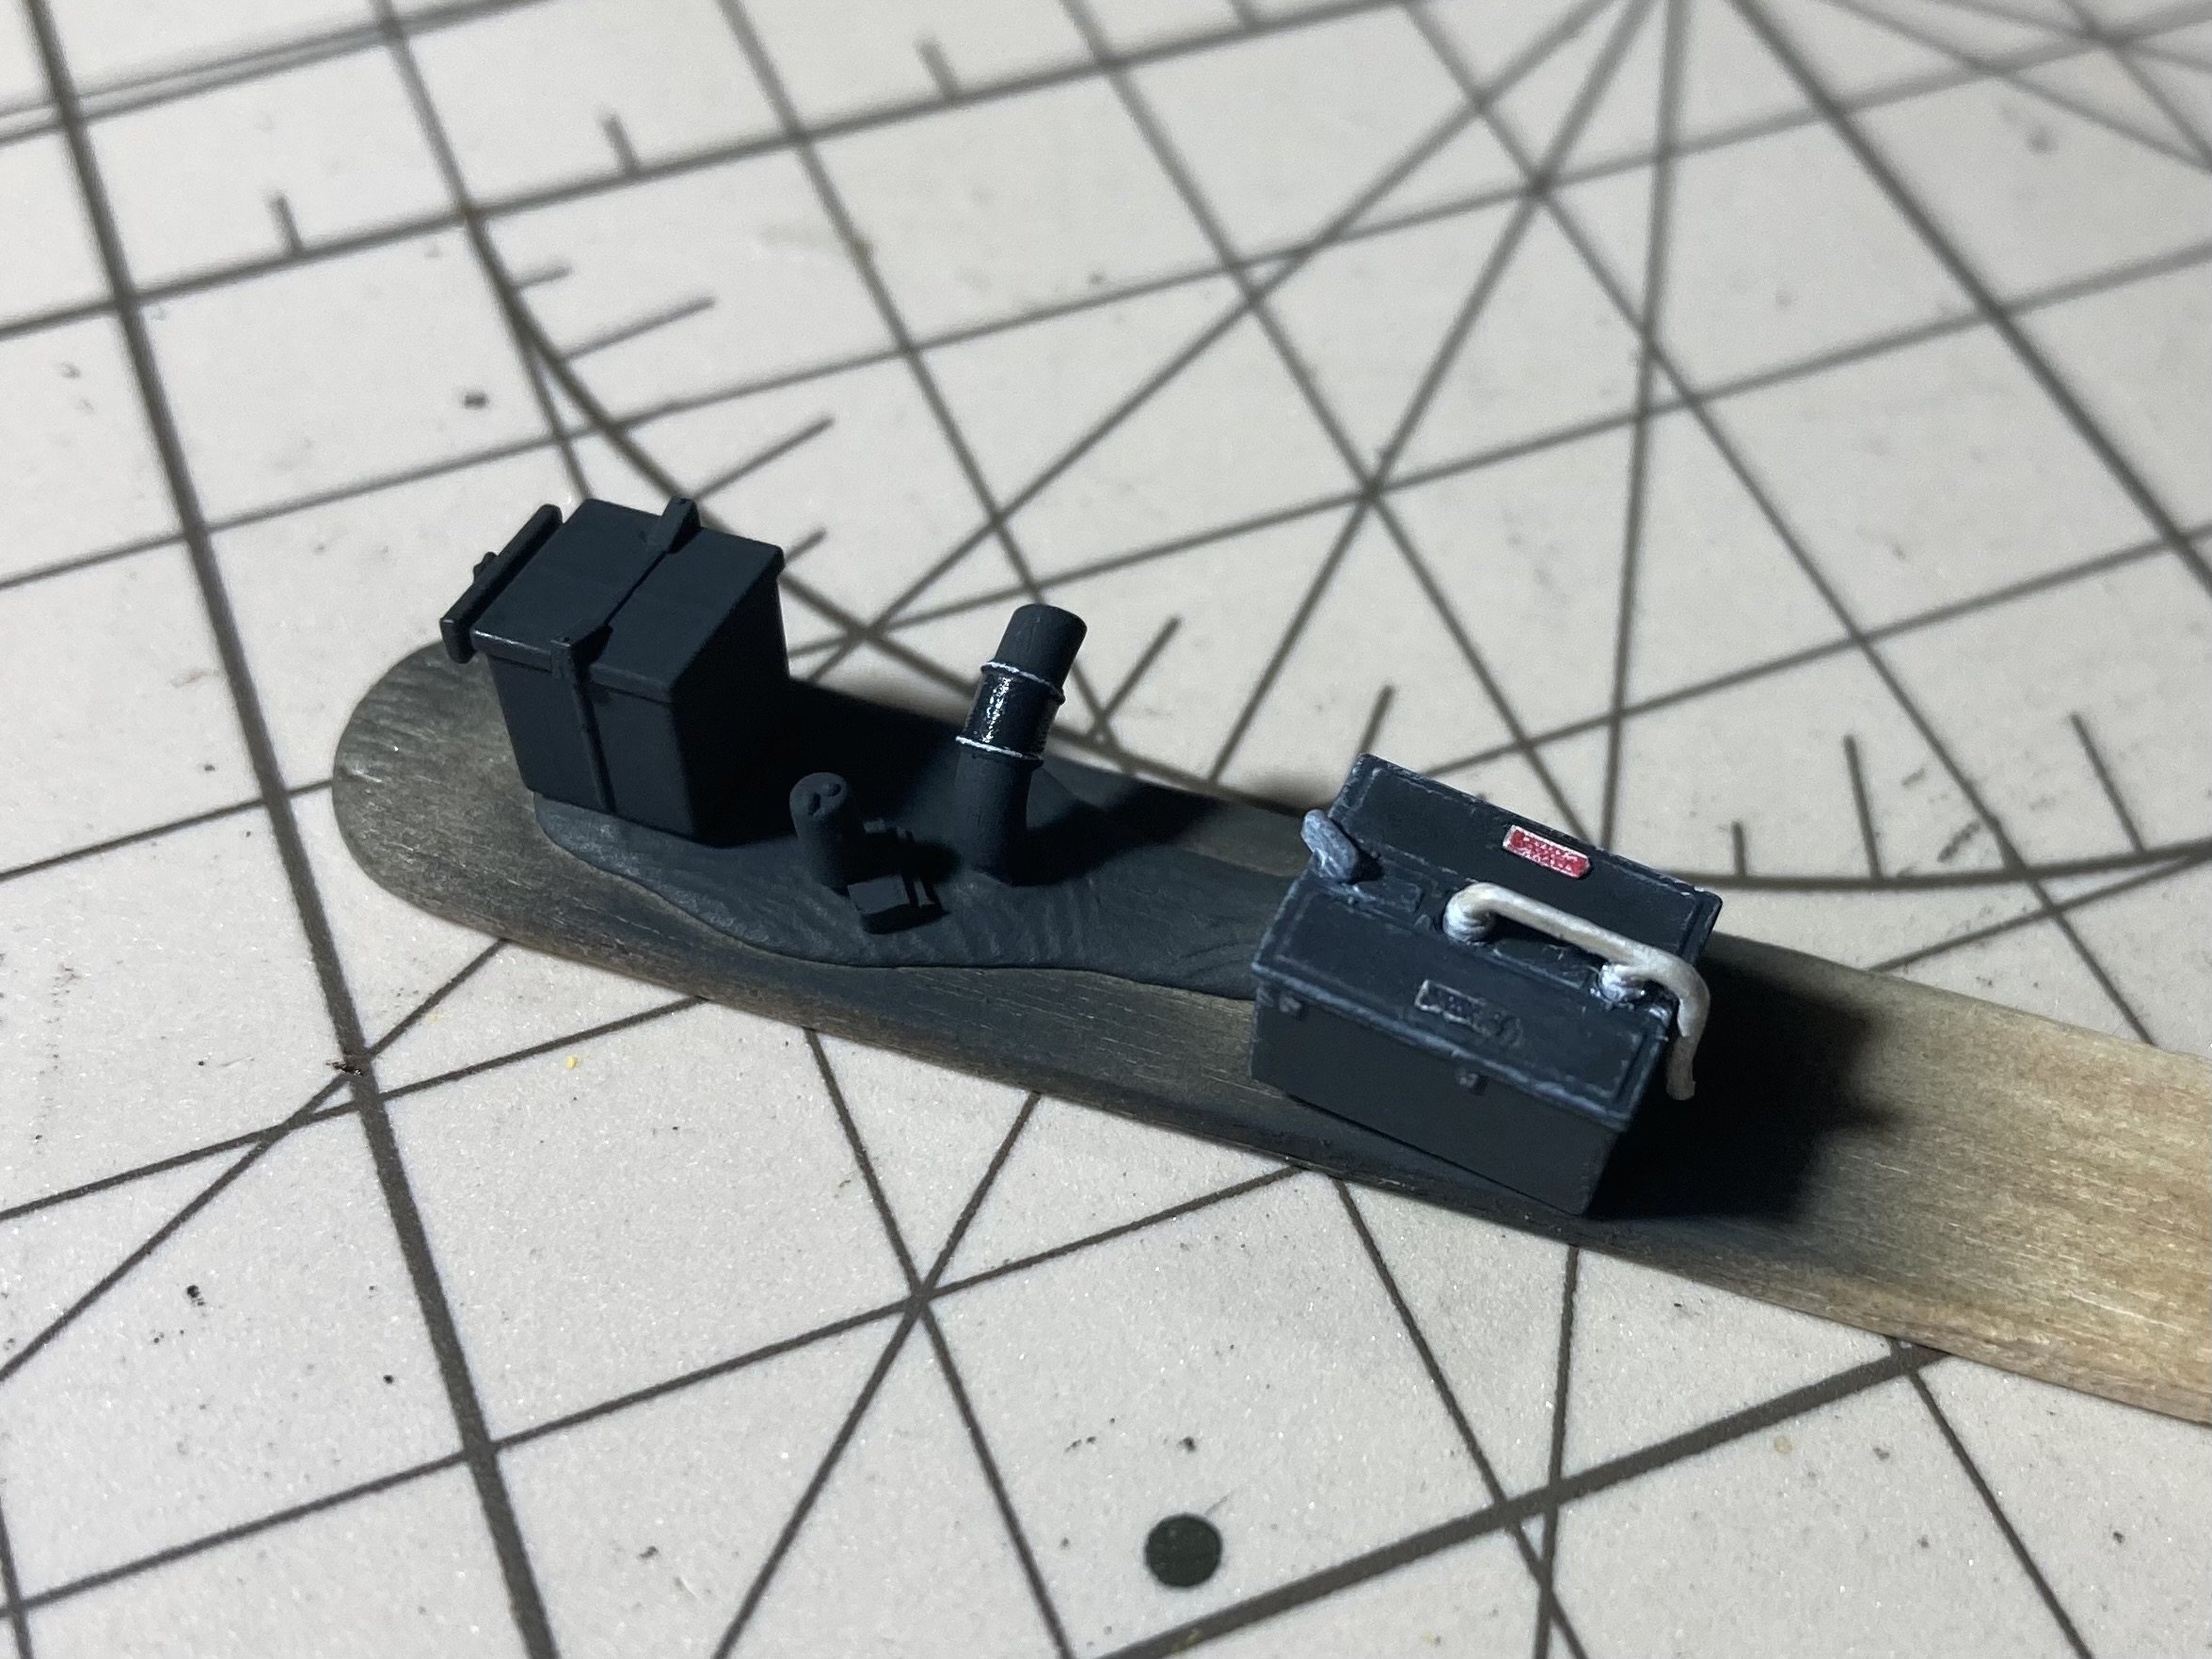
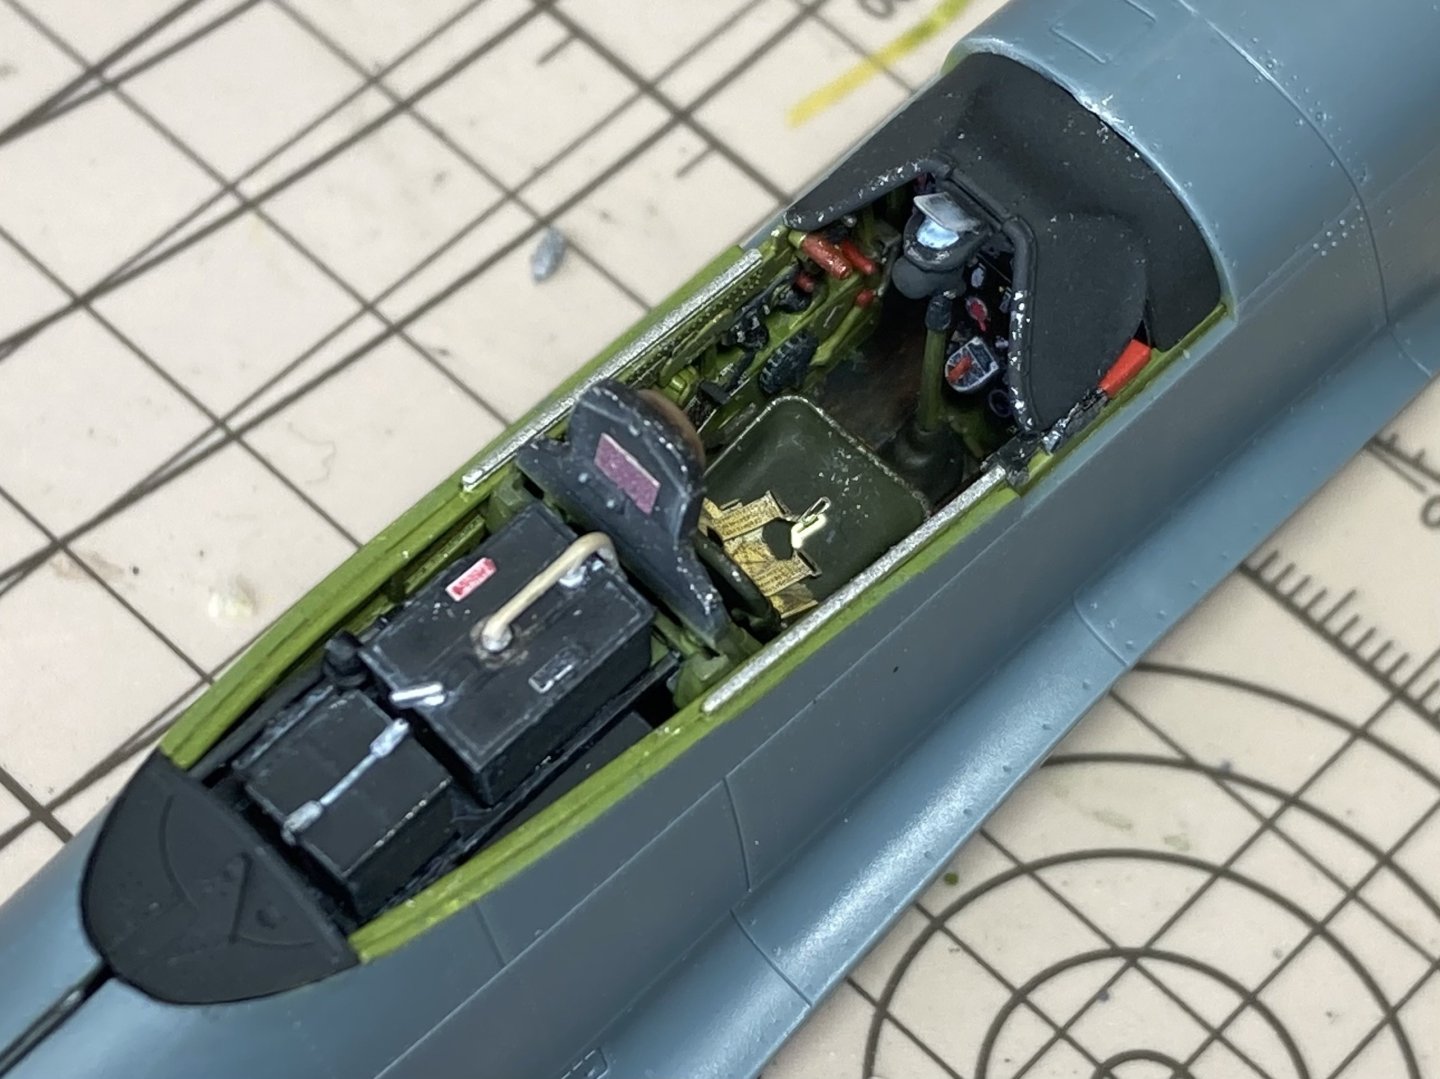
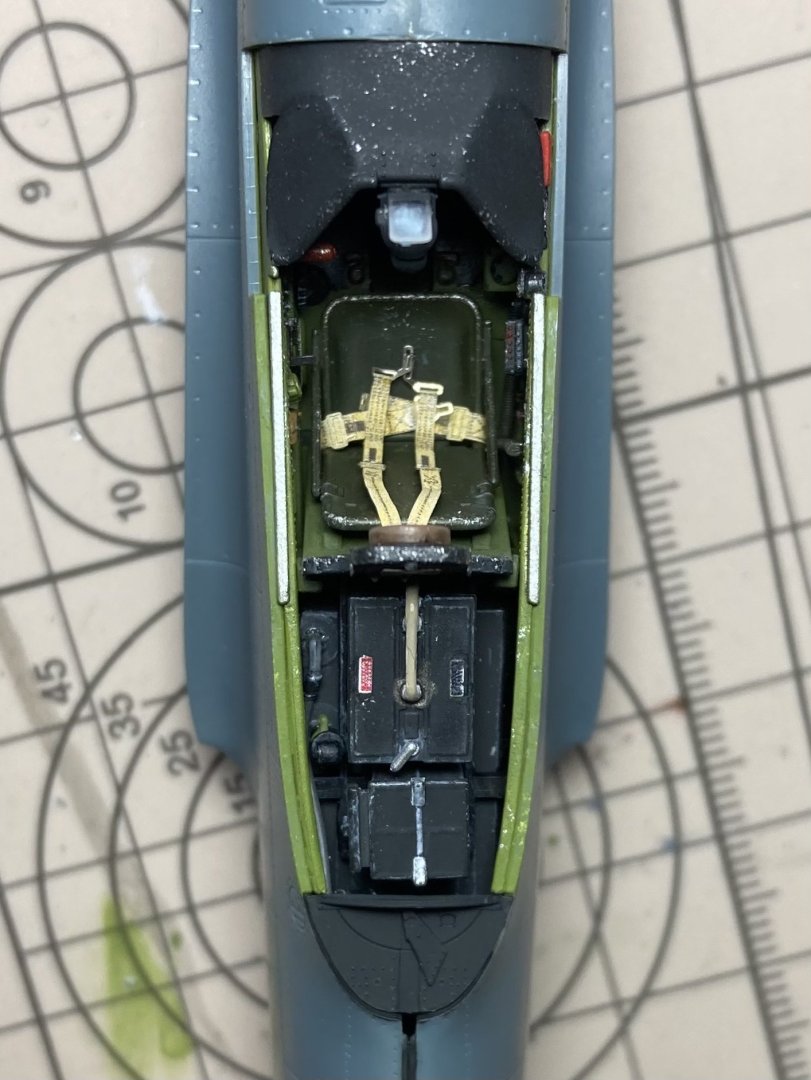
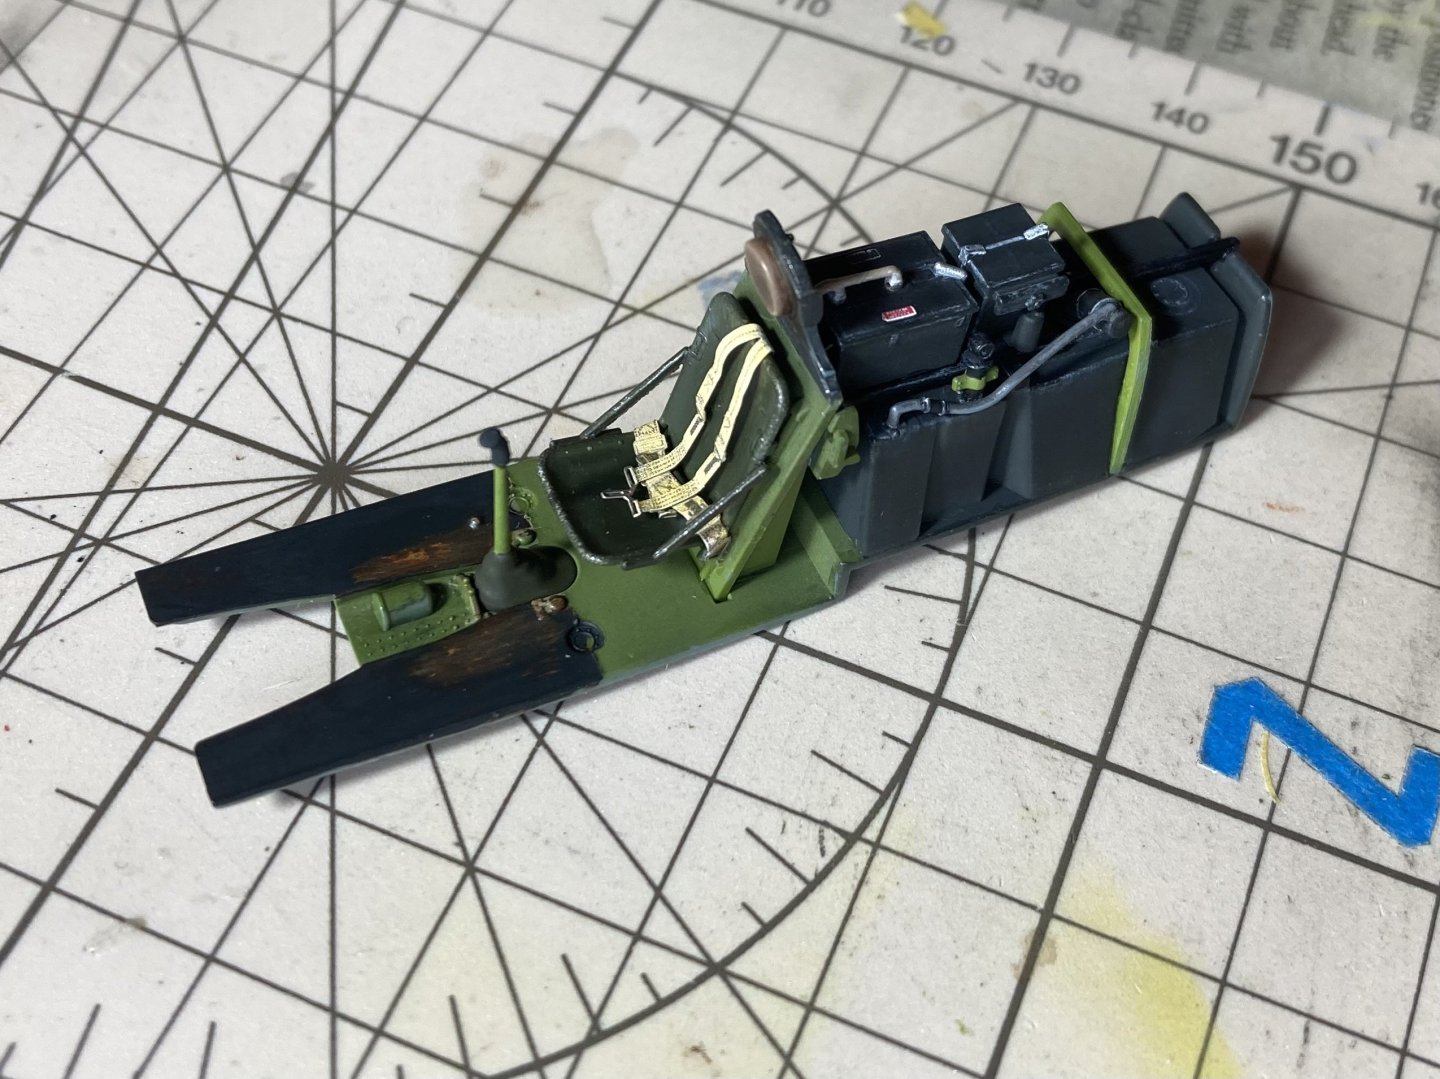
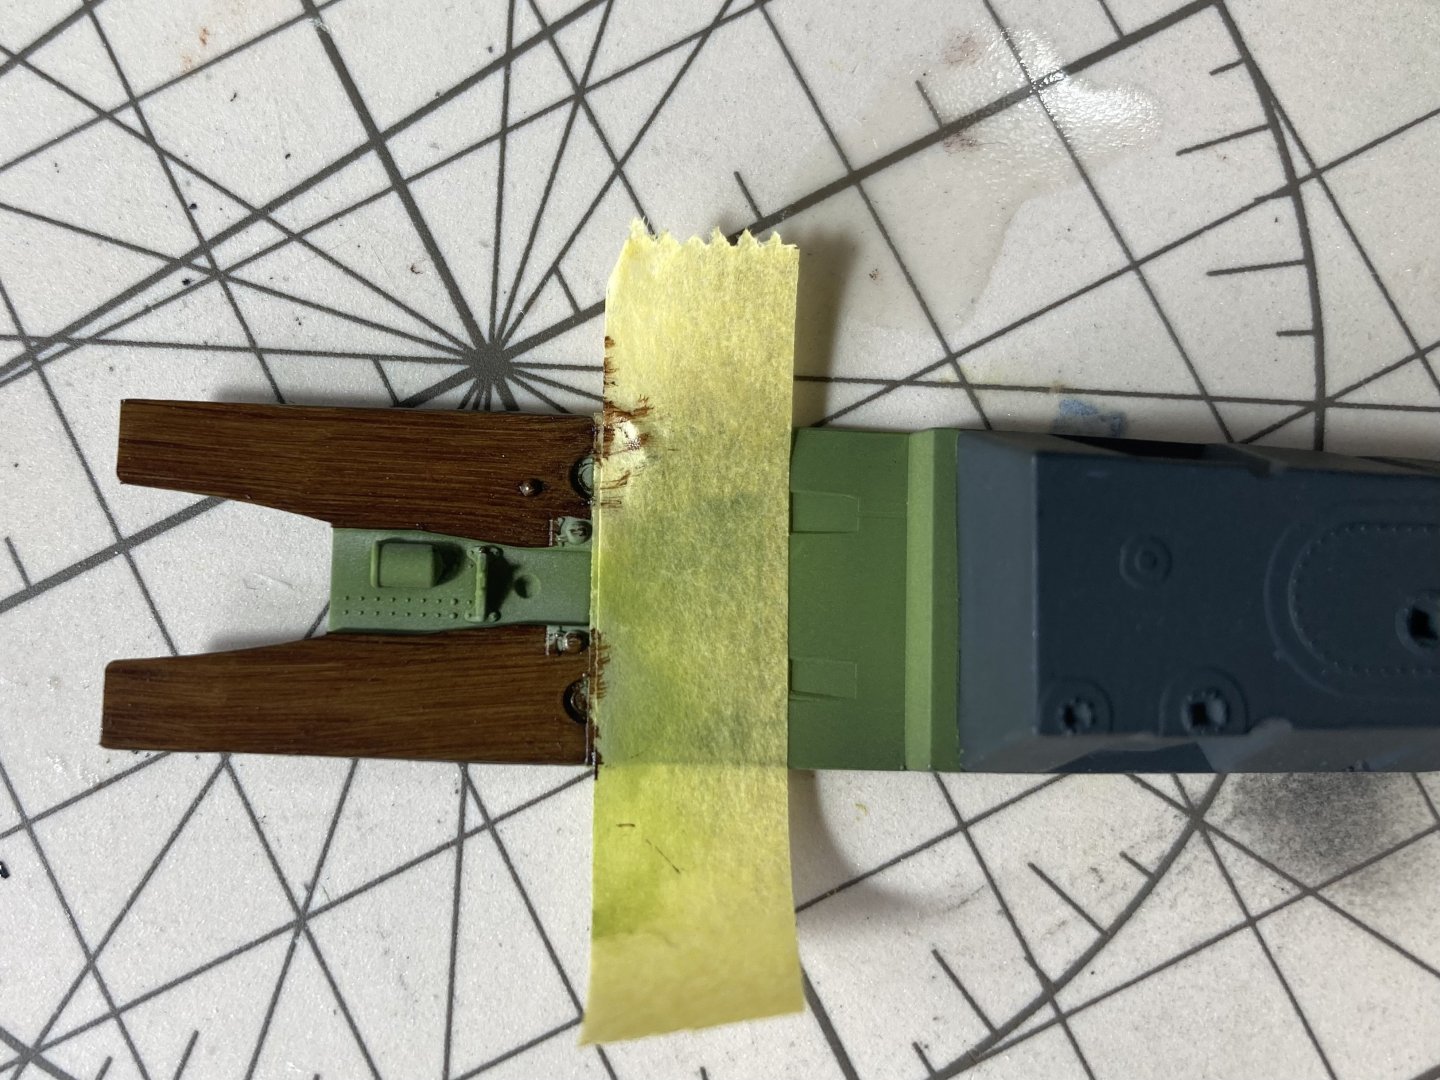
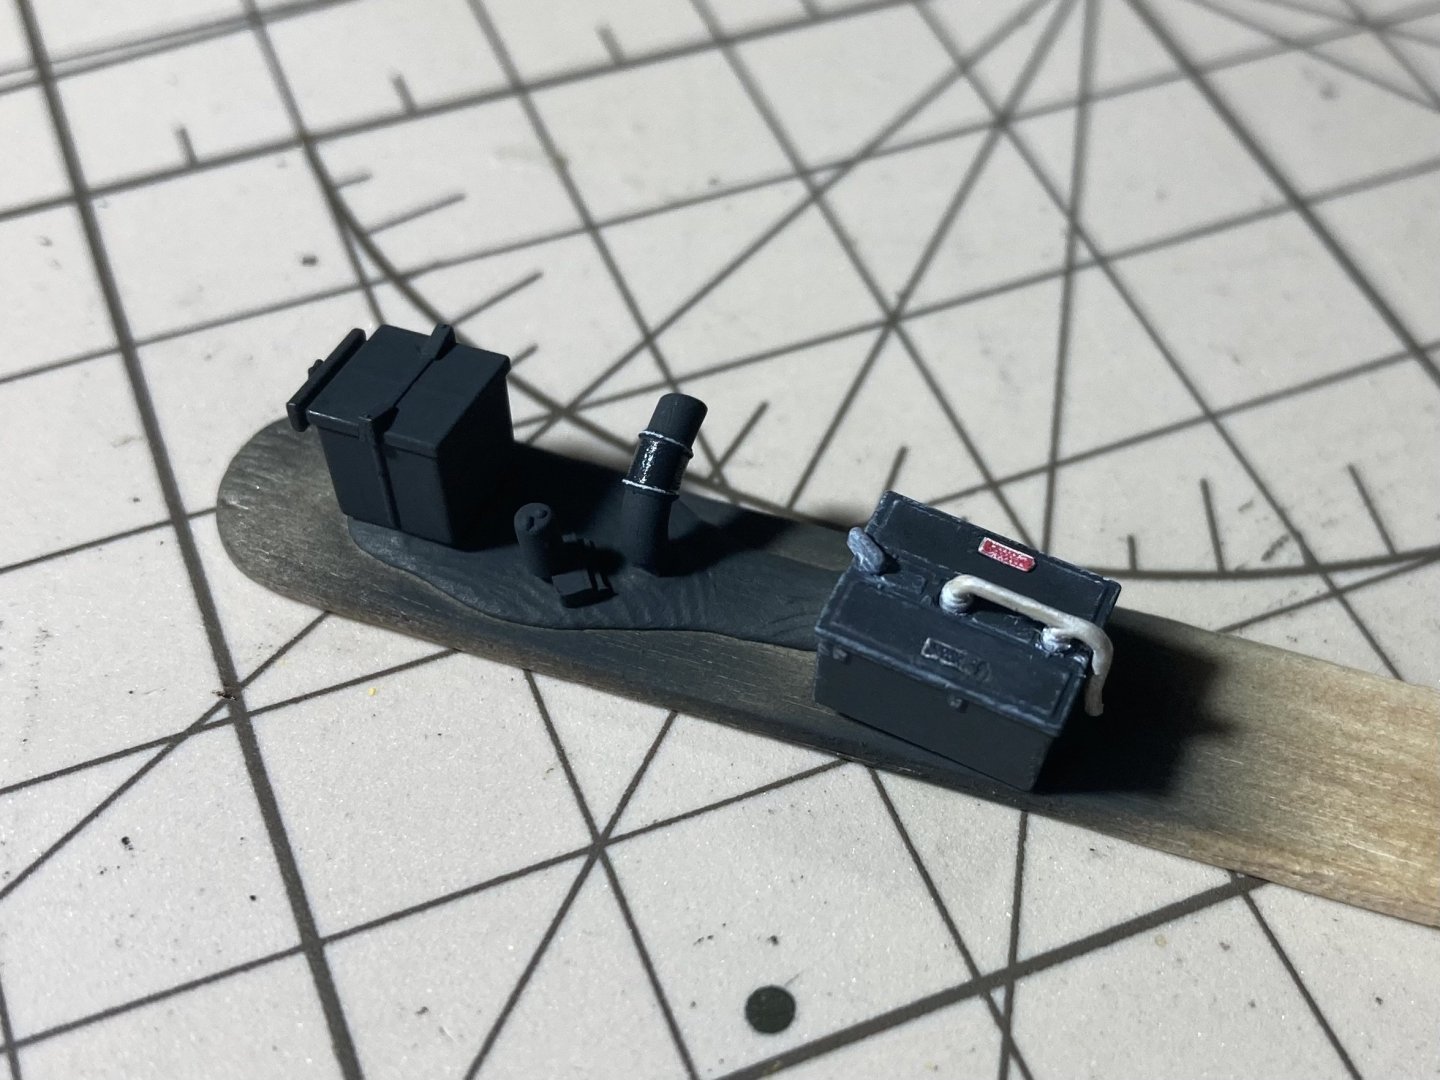
The cockpit has begun on the real model now. I’ve ordered some 3000 grit sanding sponges and will be part of my next experiment with the paint mule. Made my own mix of interior green with tamiya green and yellow mix while making the Fortress and seems to do the job well. I wanted to make the colour in a bottle so I can do touch ups and all the rest of the parts without having to mix it each time! Put down some buff colour then brown oil paint streaked on top to give a wood grain effect. Once dry I’ll seal it in with a clear coat then try out my chipping fluid and paint with rubber black and scuff up the floor alittle. Letting the oil dry might take a good few days though. So begun on the bits behind the seat. One part has to be a battery and the other maybe a radio but kinda looks like a battery also! Anyway good fun parts to detail that I don’t think will be visible once finished.


- 74 replies
-
- 13
-
-
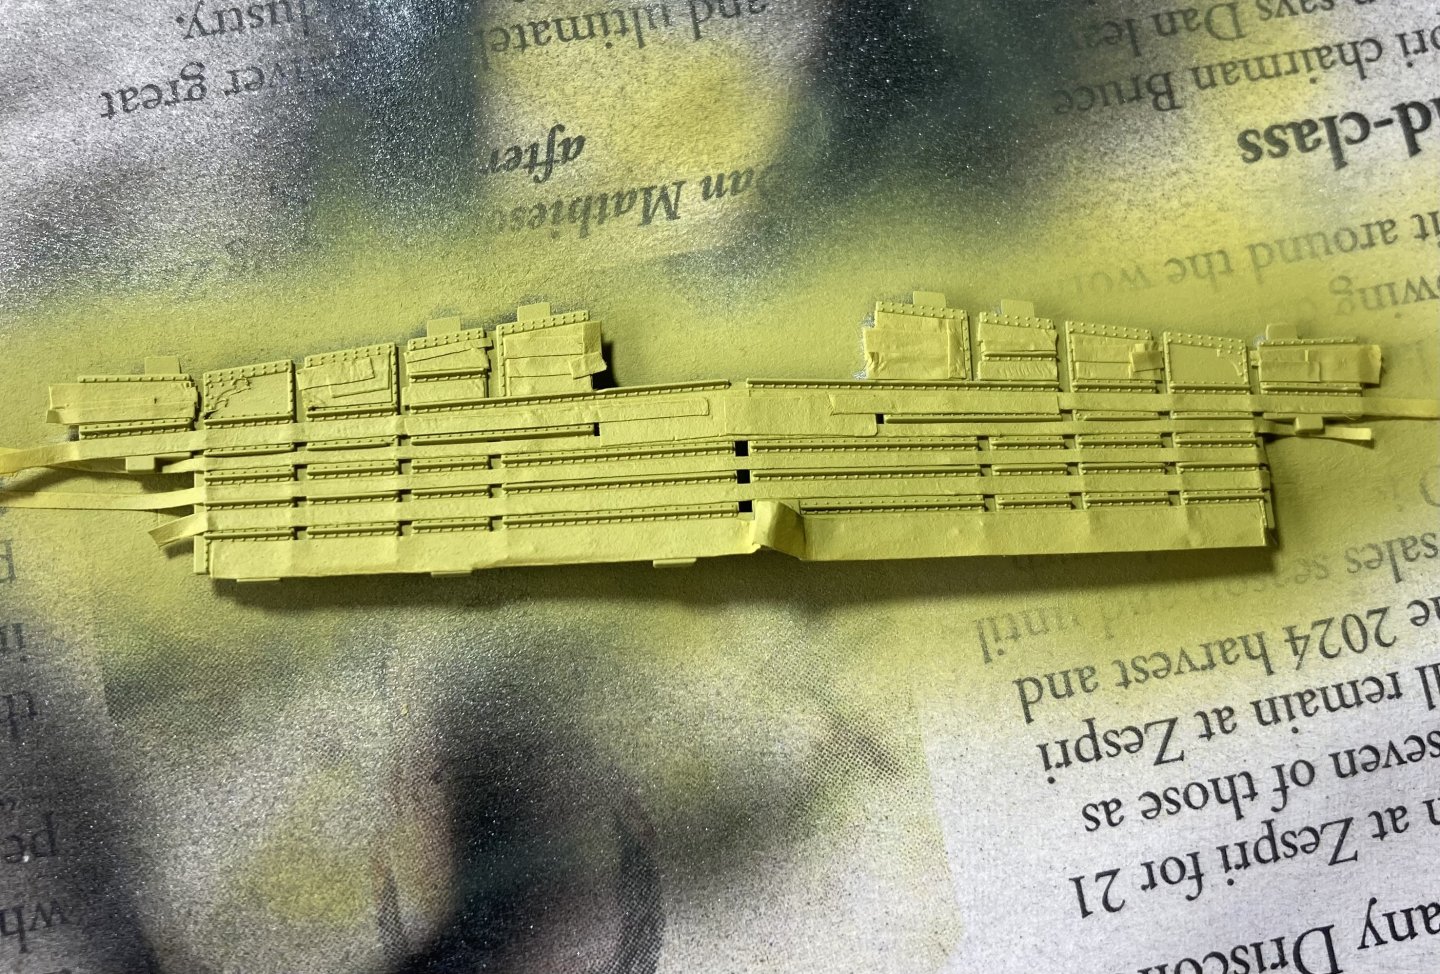
The NMF experiments have begun on my 1/72 scale test mule. This is what I’ve learned so far. Smooth smooth smooth! I think that’s all there is to it really. so I just need to find away to make the smoothest surface with the thinnest amount of paint to keep all the surface details. I also learned that the gloss base isn’t just because it shines through and makes the paint more shiny and metallic it’s that gloss has a smoother surface. Here the far left has the gloss black under it and the rest is the Matt surface primer. And the changes are just applying more coats… which makes it smoother and so a better finish. Here the wing on the right from our perspective is straight on the Matt primer. On the left I gave the primer a quick sand with 1200 grit sand paper and it’s noticeably better except you can see the scratches in it, so I’ll need to find super fine sand paper. My next lot of tests will be to sand down the primer as smooth as I can and see if that is ok. Or if I need to spray something on the primer that I can make smooth. Any ideas are more than welcome! These paints are really nice to work with though!!
-
Welcome along!
-
I’ve also been keeping an eye on your build to see how you will do yours and any tips and tricks or dos and donts! Here is to us managing to get lucky and land a result we are both happy with on our first attempt 🍻
-
As always glad to have you along! You always have good tips and tricks up your sleeve! I’d love to go for the oxidised aluminum. Well that’s the goal at least! I will try giving different grey undercoats a go! Thanks for these tips! does it need to be a gloss coat? I will try gloss and Matt undercoats and see if it’s different. And also gloss and Matt clear coats over top! About the thickness. I’m abit worried about loosing all the details if I do a primer, a few coats of thick gloss paint and polish then wet coats of my aluminum. In my tests I’m trying to get the gloss black thick enough to get the smooth surface otherwise I get the almost patterned finish. If I try sand it back smooth then I sand back to plastic and so the paint needs to be thick enough to sand! I’m secretly hoping I can paint the super metallics over the Matt primer if my prep is good enough. I’ve not sprayed any of the super metallics yet as I need to go get a respirator and set up a place in the outside garage due to the smell! I’ll not get away with spraying lacquers on the dining room table 😬
-
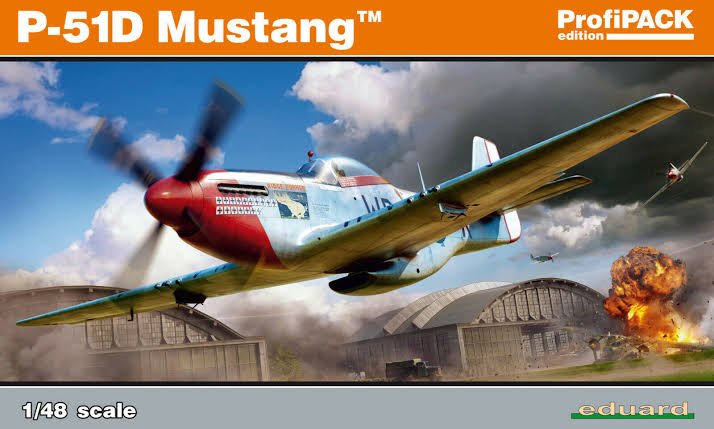
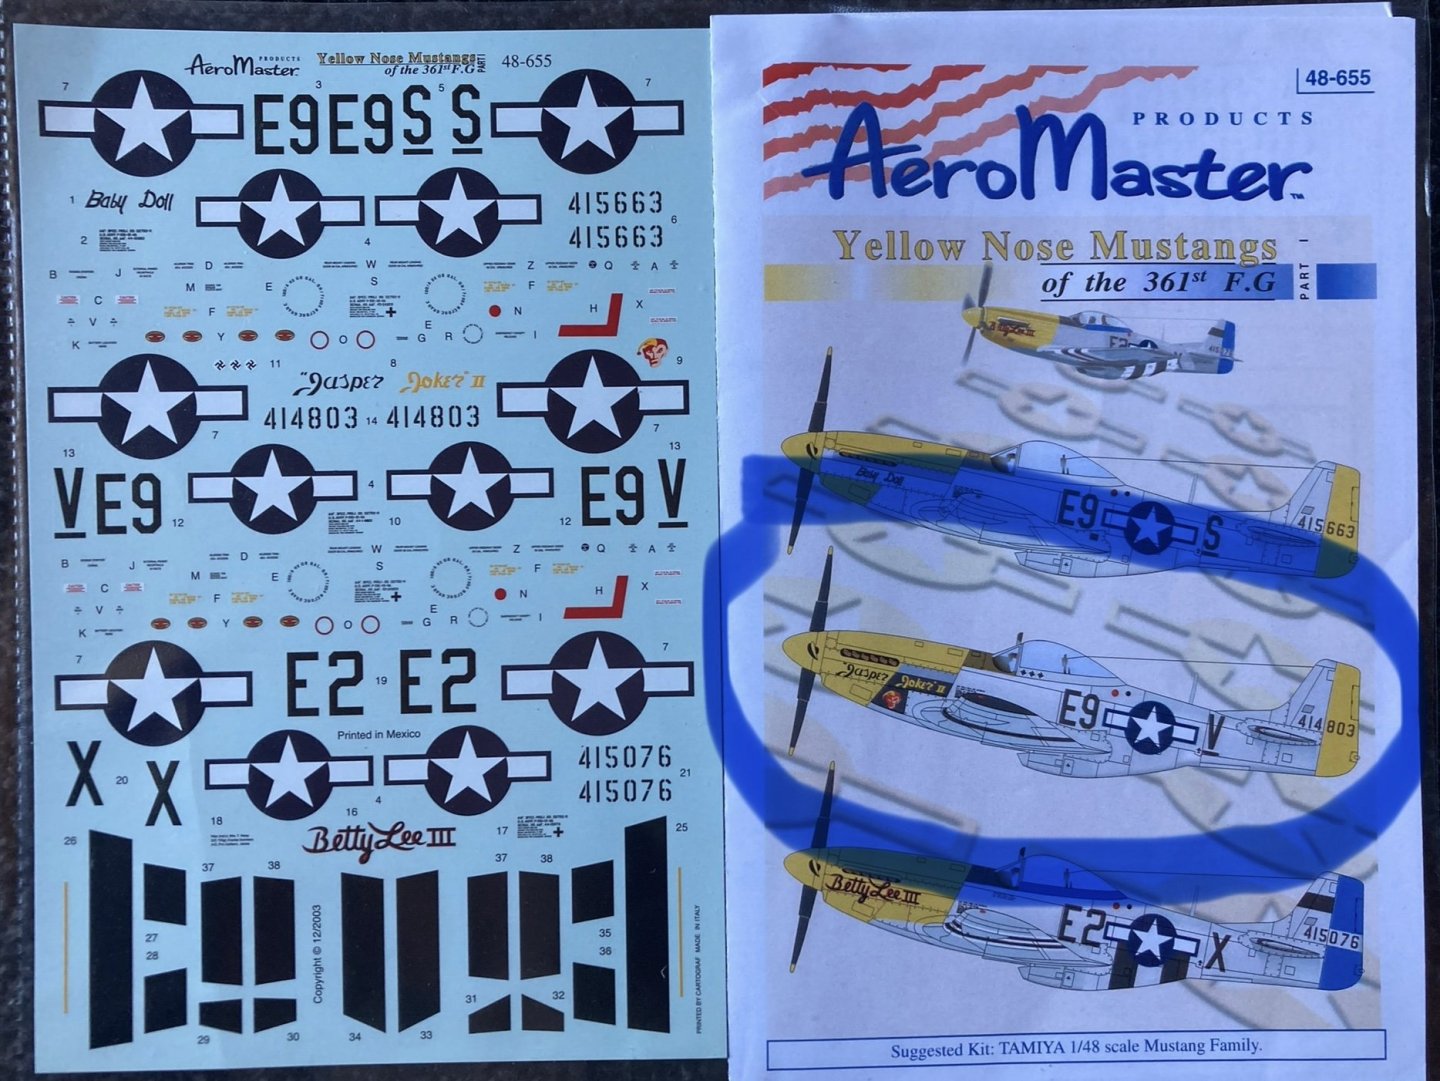
Time to begin my next project while the B-17 gets its finishing touches. This one also I’ll not be keeping myself, but unlike the fortress, this time I have an actual plane to replicate. This makes it easier mainly and perhaps occasionally more difficult. For this kit I have Eduards, Profi Pack edition, so will be an out of the box build. As it contains cockpit masks and Photo Etch I’ll not get any aftermarket parts. The subject for this build will be, Lt. Donald F. Vulgamore’s P-51D, E9-V “Jaspers Joker II” who flew as part of the 361st Fighter Group in Europe. The reason for this subject is the paint scheme! It has a yellow nose, NMF (natural metal finish) and doesn’t have the full D-Day invasion stripes. So it ticked all the boxes. To top it off I managed to find decals for this very build. If I can find spray stencils I may give them a go otherwise I’ve got the decals and I’ve heard good things about Aero Master decals printed in Italy by Cartograf. They weren’t easy to find as they aren’t made anymore and bought mine from a collector it seems! I think this will be a faster build than the B-17 and I’m looking forward to trying my first ever natural metal finish. Each build I try to do something new and push my abilities. This time the NMF will be that part! So any tips at all about how to get a weathered war weary aluminium look I’m all ears! I’ve got some Mr. Color Super Metallic 2 lacquer paints, Super Fine Silver 2, Super Duralumin and Super Iron 2 which will be new for me to try. Ive been doing a lot of research over the last month and have a 1/72 mustang prepped as my test mule. Currently the undersides of the wings are an assortment of different base colours to see how much of an effect they have, as it’s one thing to be told something and another to see for yourself. Im expecting the build to be pretty straight forward and once at the prep for painting stage I’ll be in new territory.
- 74 replies
-
- 12
-
-
I’ve always liked the look of the Tempest! looks like an interesting build
-
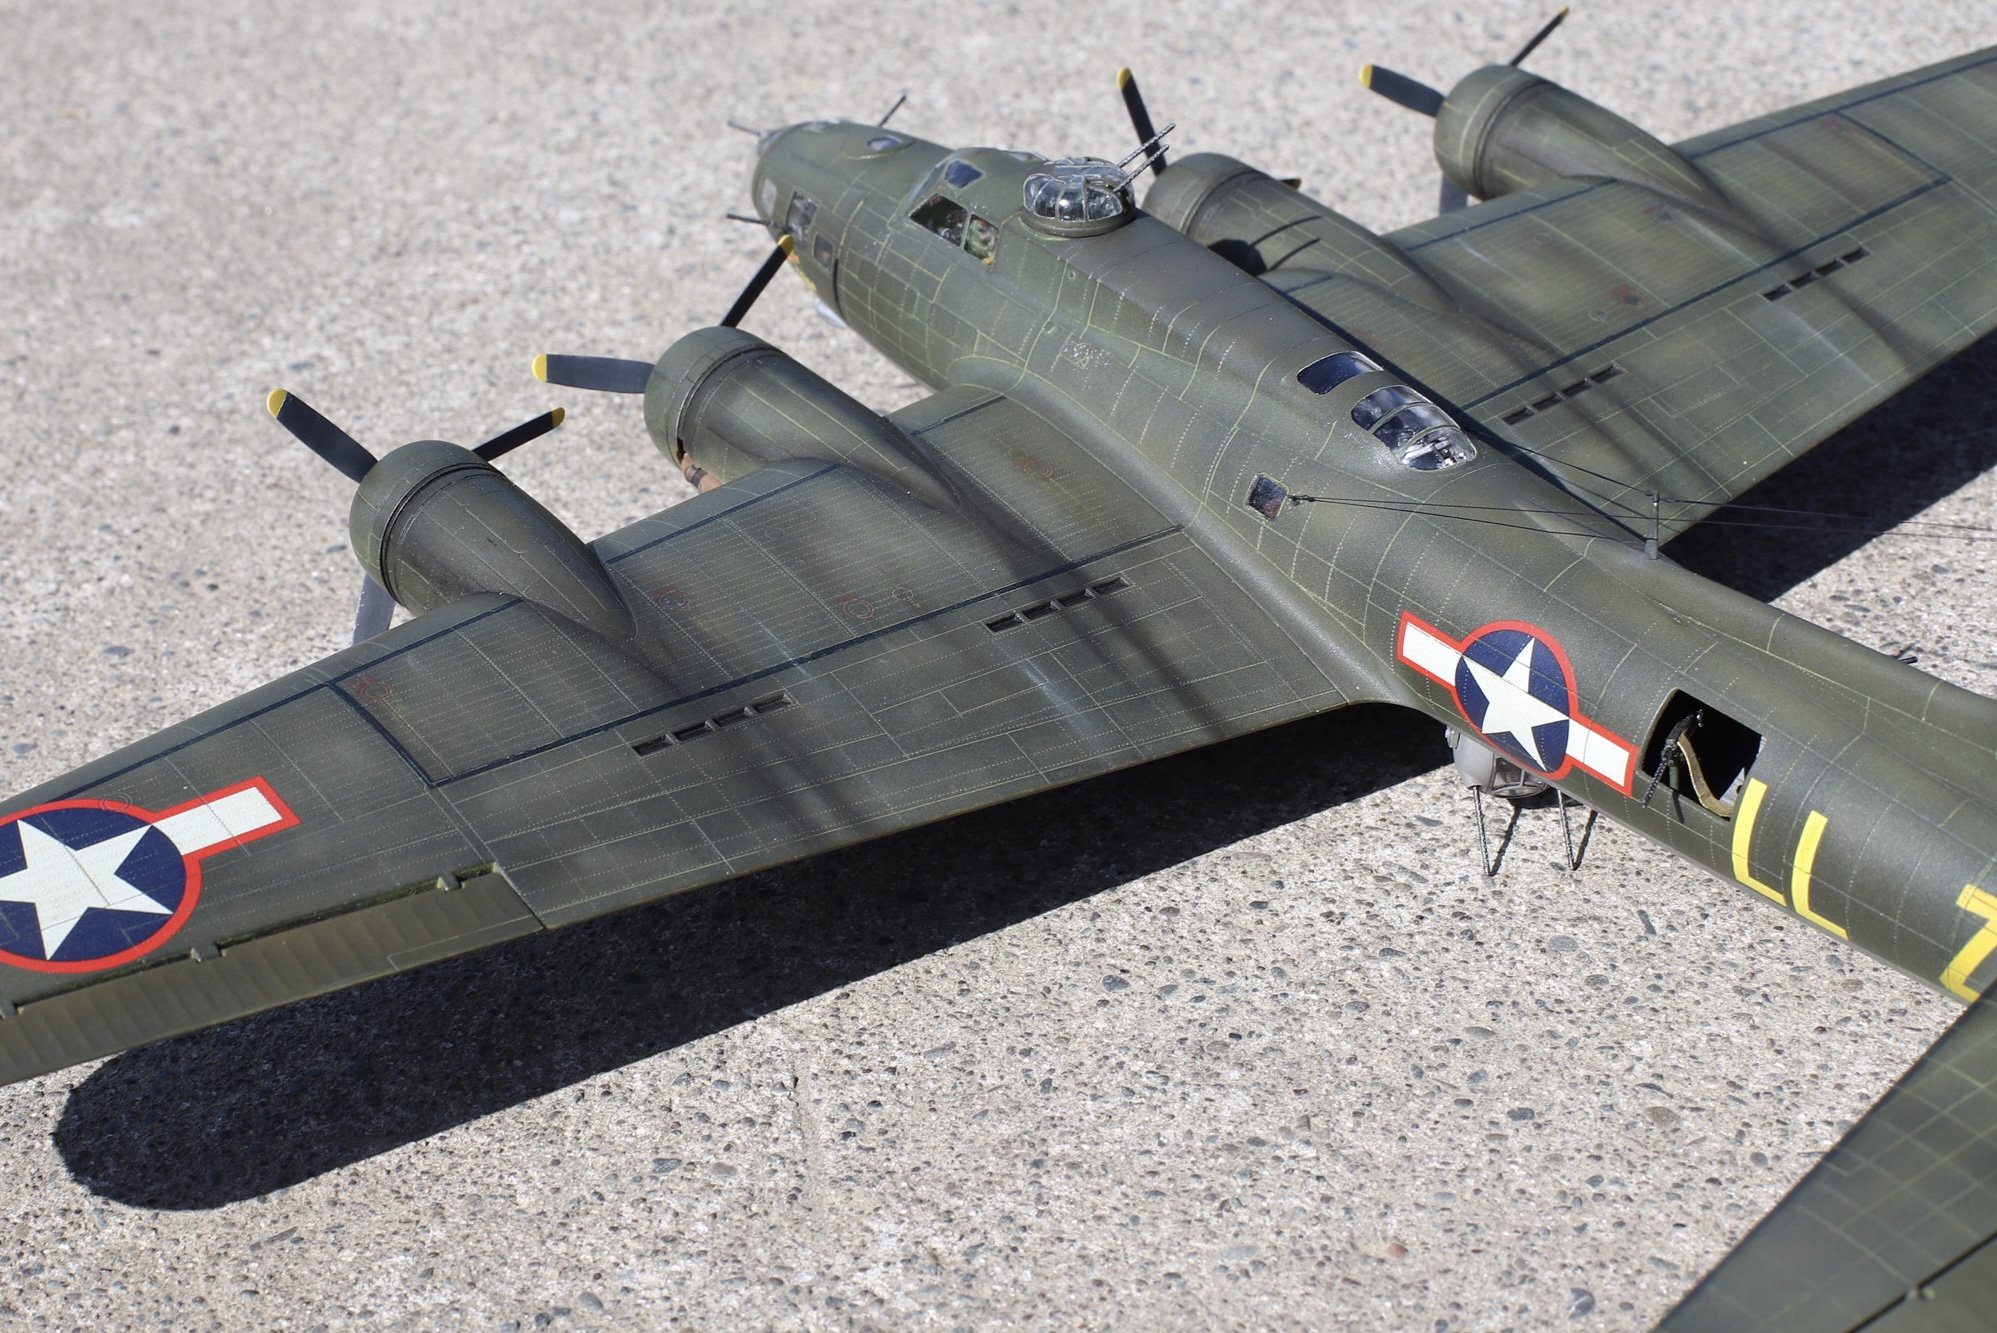
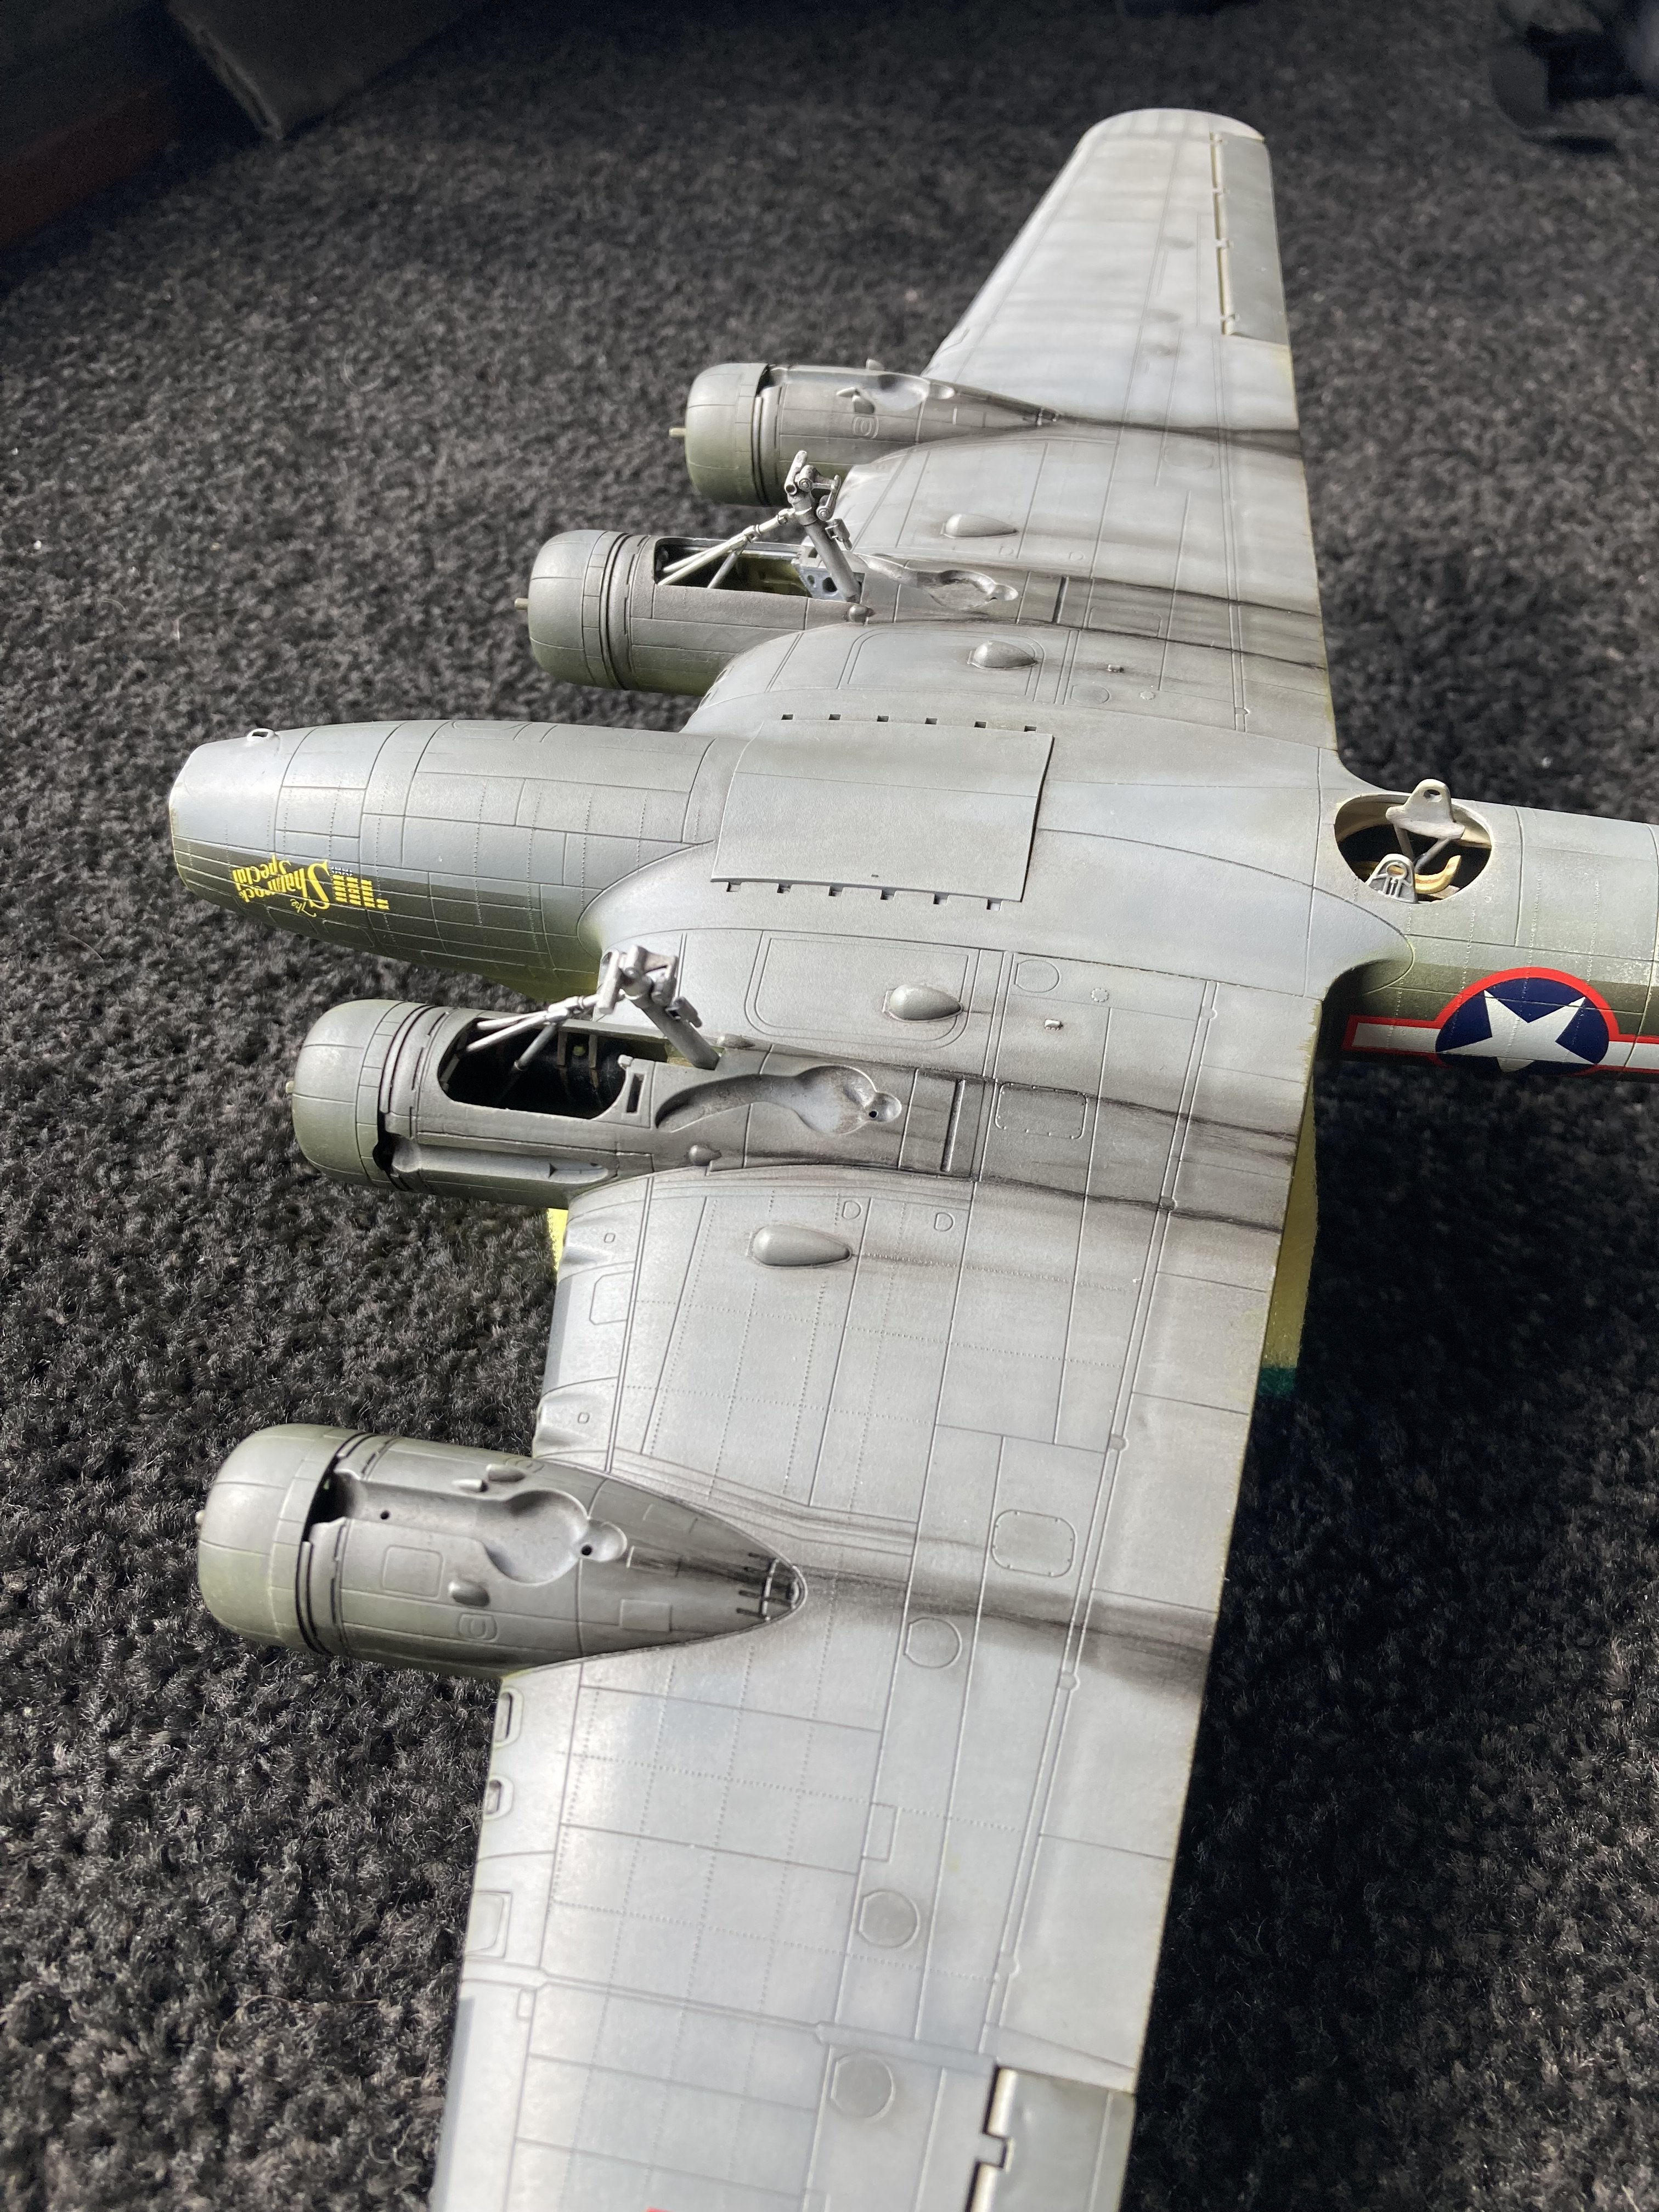
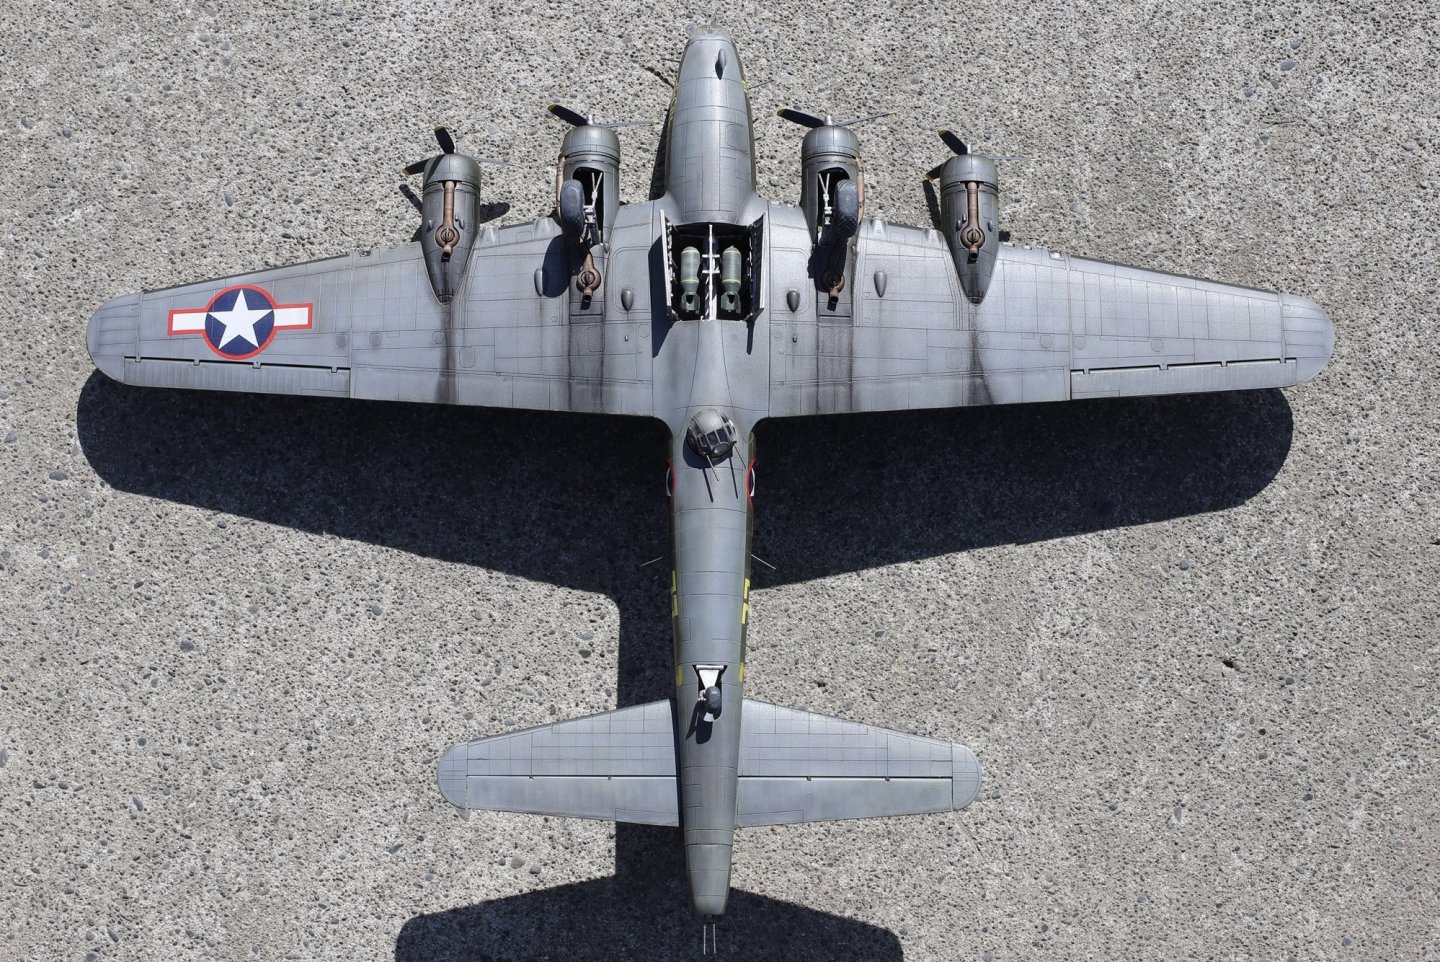
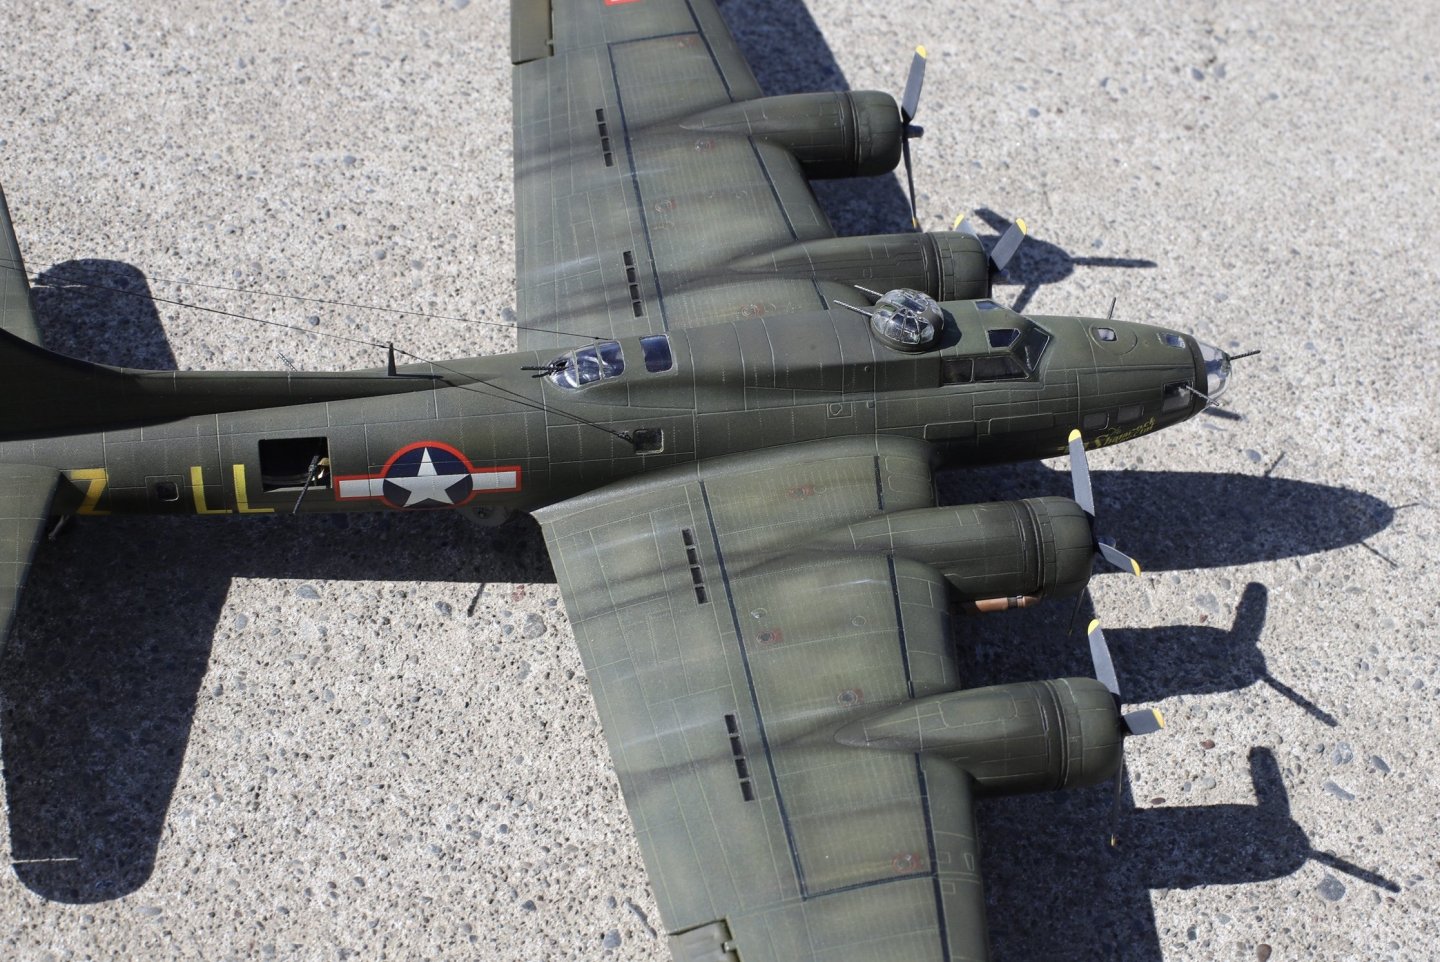
A little update, just doing the finishing touches now. Brass barrels are on, Resin wheels are fixed on, Opened the bomb bay doors, Most of the antennas are done, Propellors are on, Nose cone is on, All the masks are off the windows, A few stains and streaks added here and there, And a few touch ups from the inevitable things breaking while working one other things! Once these final touches are done I’ll take some good all round pics and it will be finished!
- 77 replies
-
- 13
-
-
-
Thanks, I’m pleased with how it’s turned out and I’ve learnt a lot from this build!
-
Looks amazing! Love how he had a giant kiwi on his Spitfire!
-
F-51D Mustang by ERS Rich - Tamiya - 1/32 - PLASTIC
Lt. Biggles replied to ERS Rich's topic in Non-ship/categorised builds
Looks great! I’m learning all the tips I can about natural metal finishes as I’ll try one for my next project. Is that metal gloss varnish made especially for NMF paint jobs to give them a weathered and out in the weather used look? -
Thanks, it was another case of not really knowing what I was doing but managed to stumble upon what I was after!
-
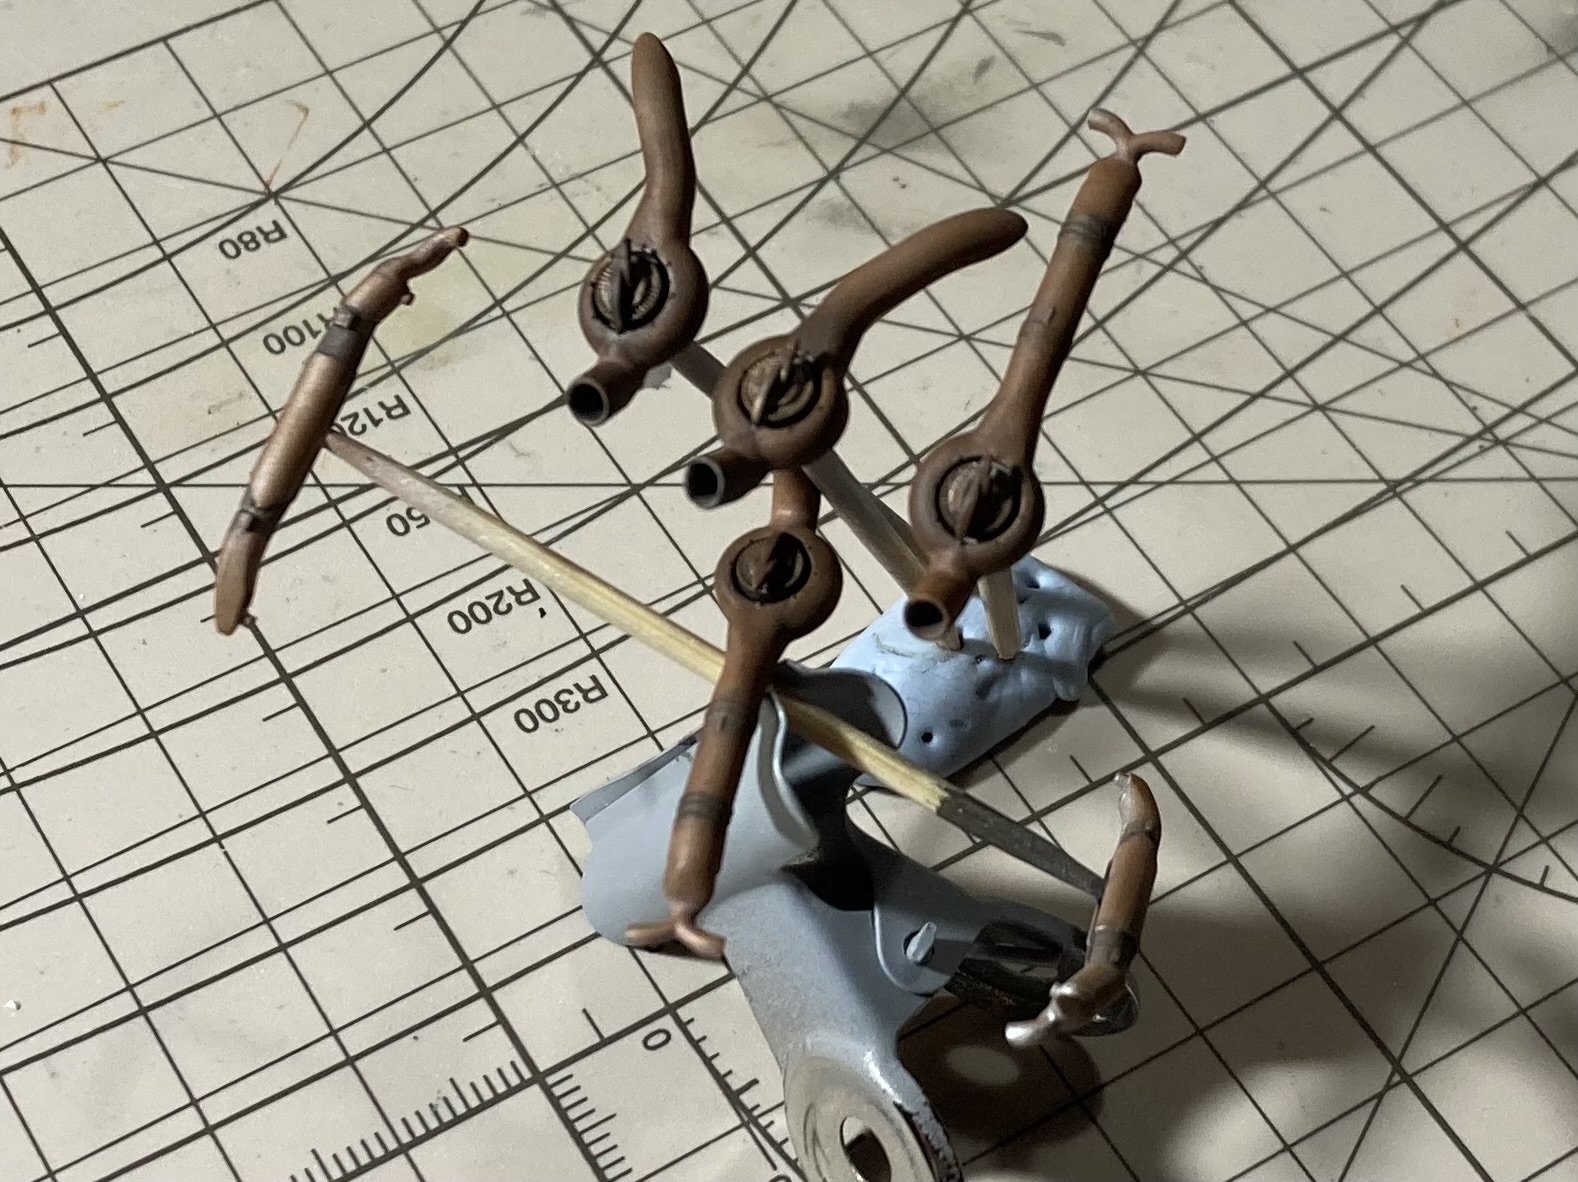
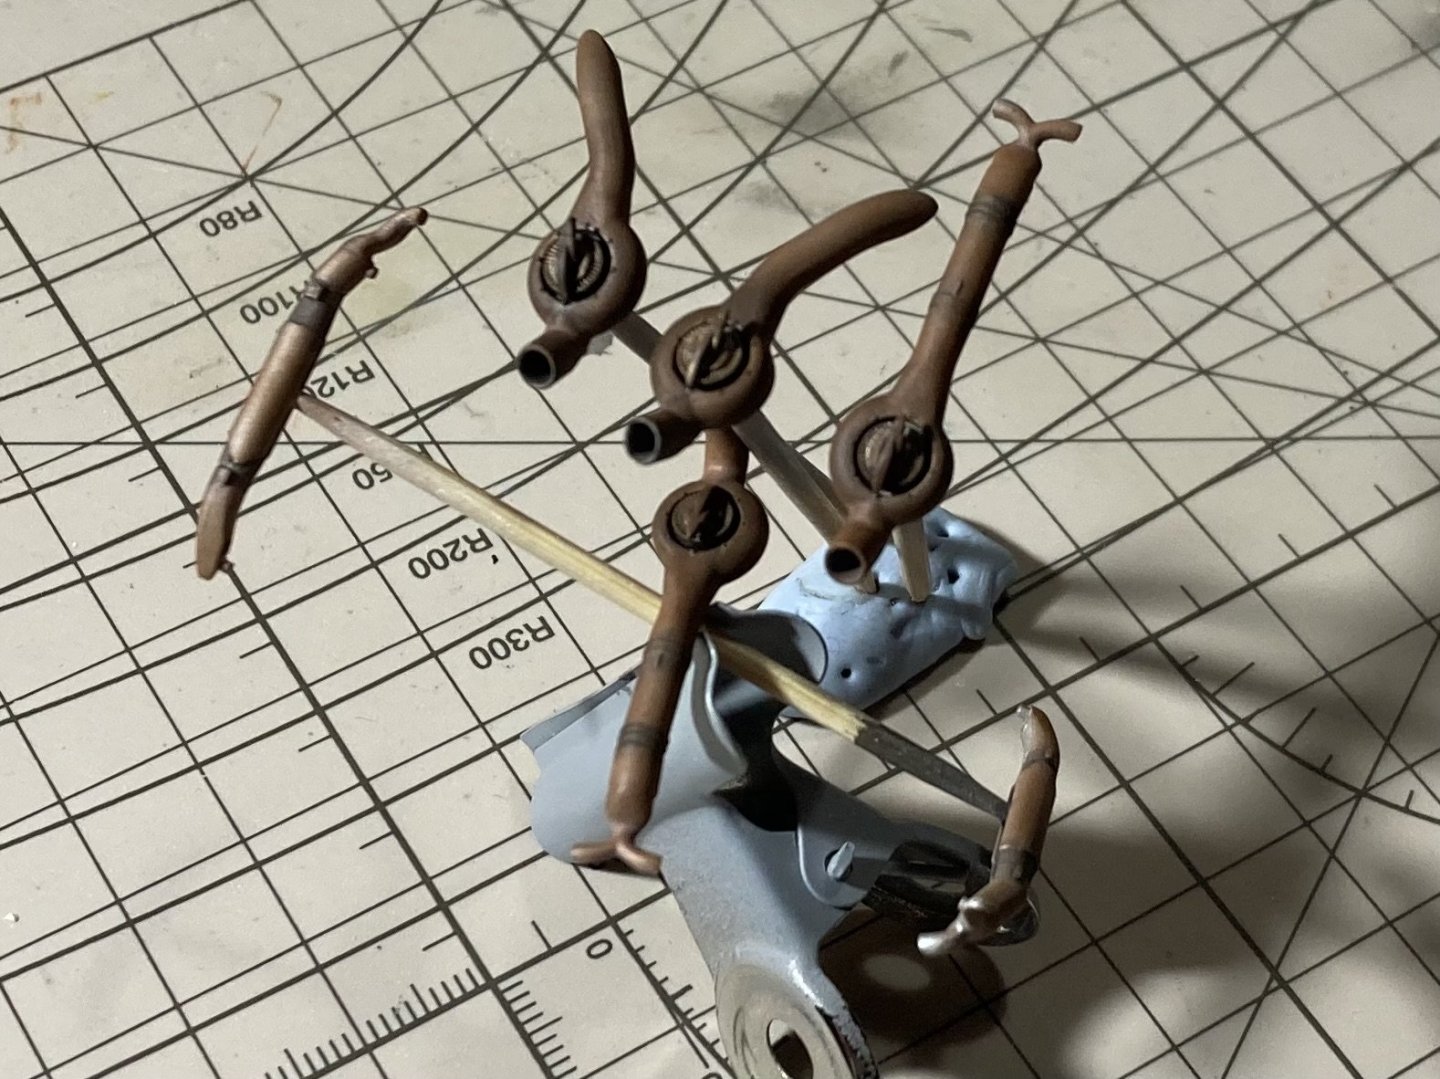
I’ve been on a few days road trip up to the north cape of NZ so this gave all the oil paint a good long time to dry in the hot water cupboard. Before I left I painted the exhausts aluminium and gave them an oil wash. These dried well while away and then I did many light misty coats of a red brown mix. Until it was enough to still have some aluminium coming through. Then I added some rust pigments and abit more highlighting with some soot pigments. Happy with these I managed to get them on the plane with only slight damage! They blended in with the whole plane which was what I was after, I didn’t want them to be super obvious and jump out in a bad way. I wanted them to look the part and just add to the over all feel. I am really happy with how they turned out!
- 77 replies
-
- 13
-
-
-
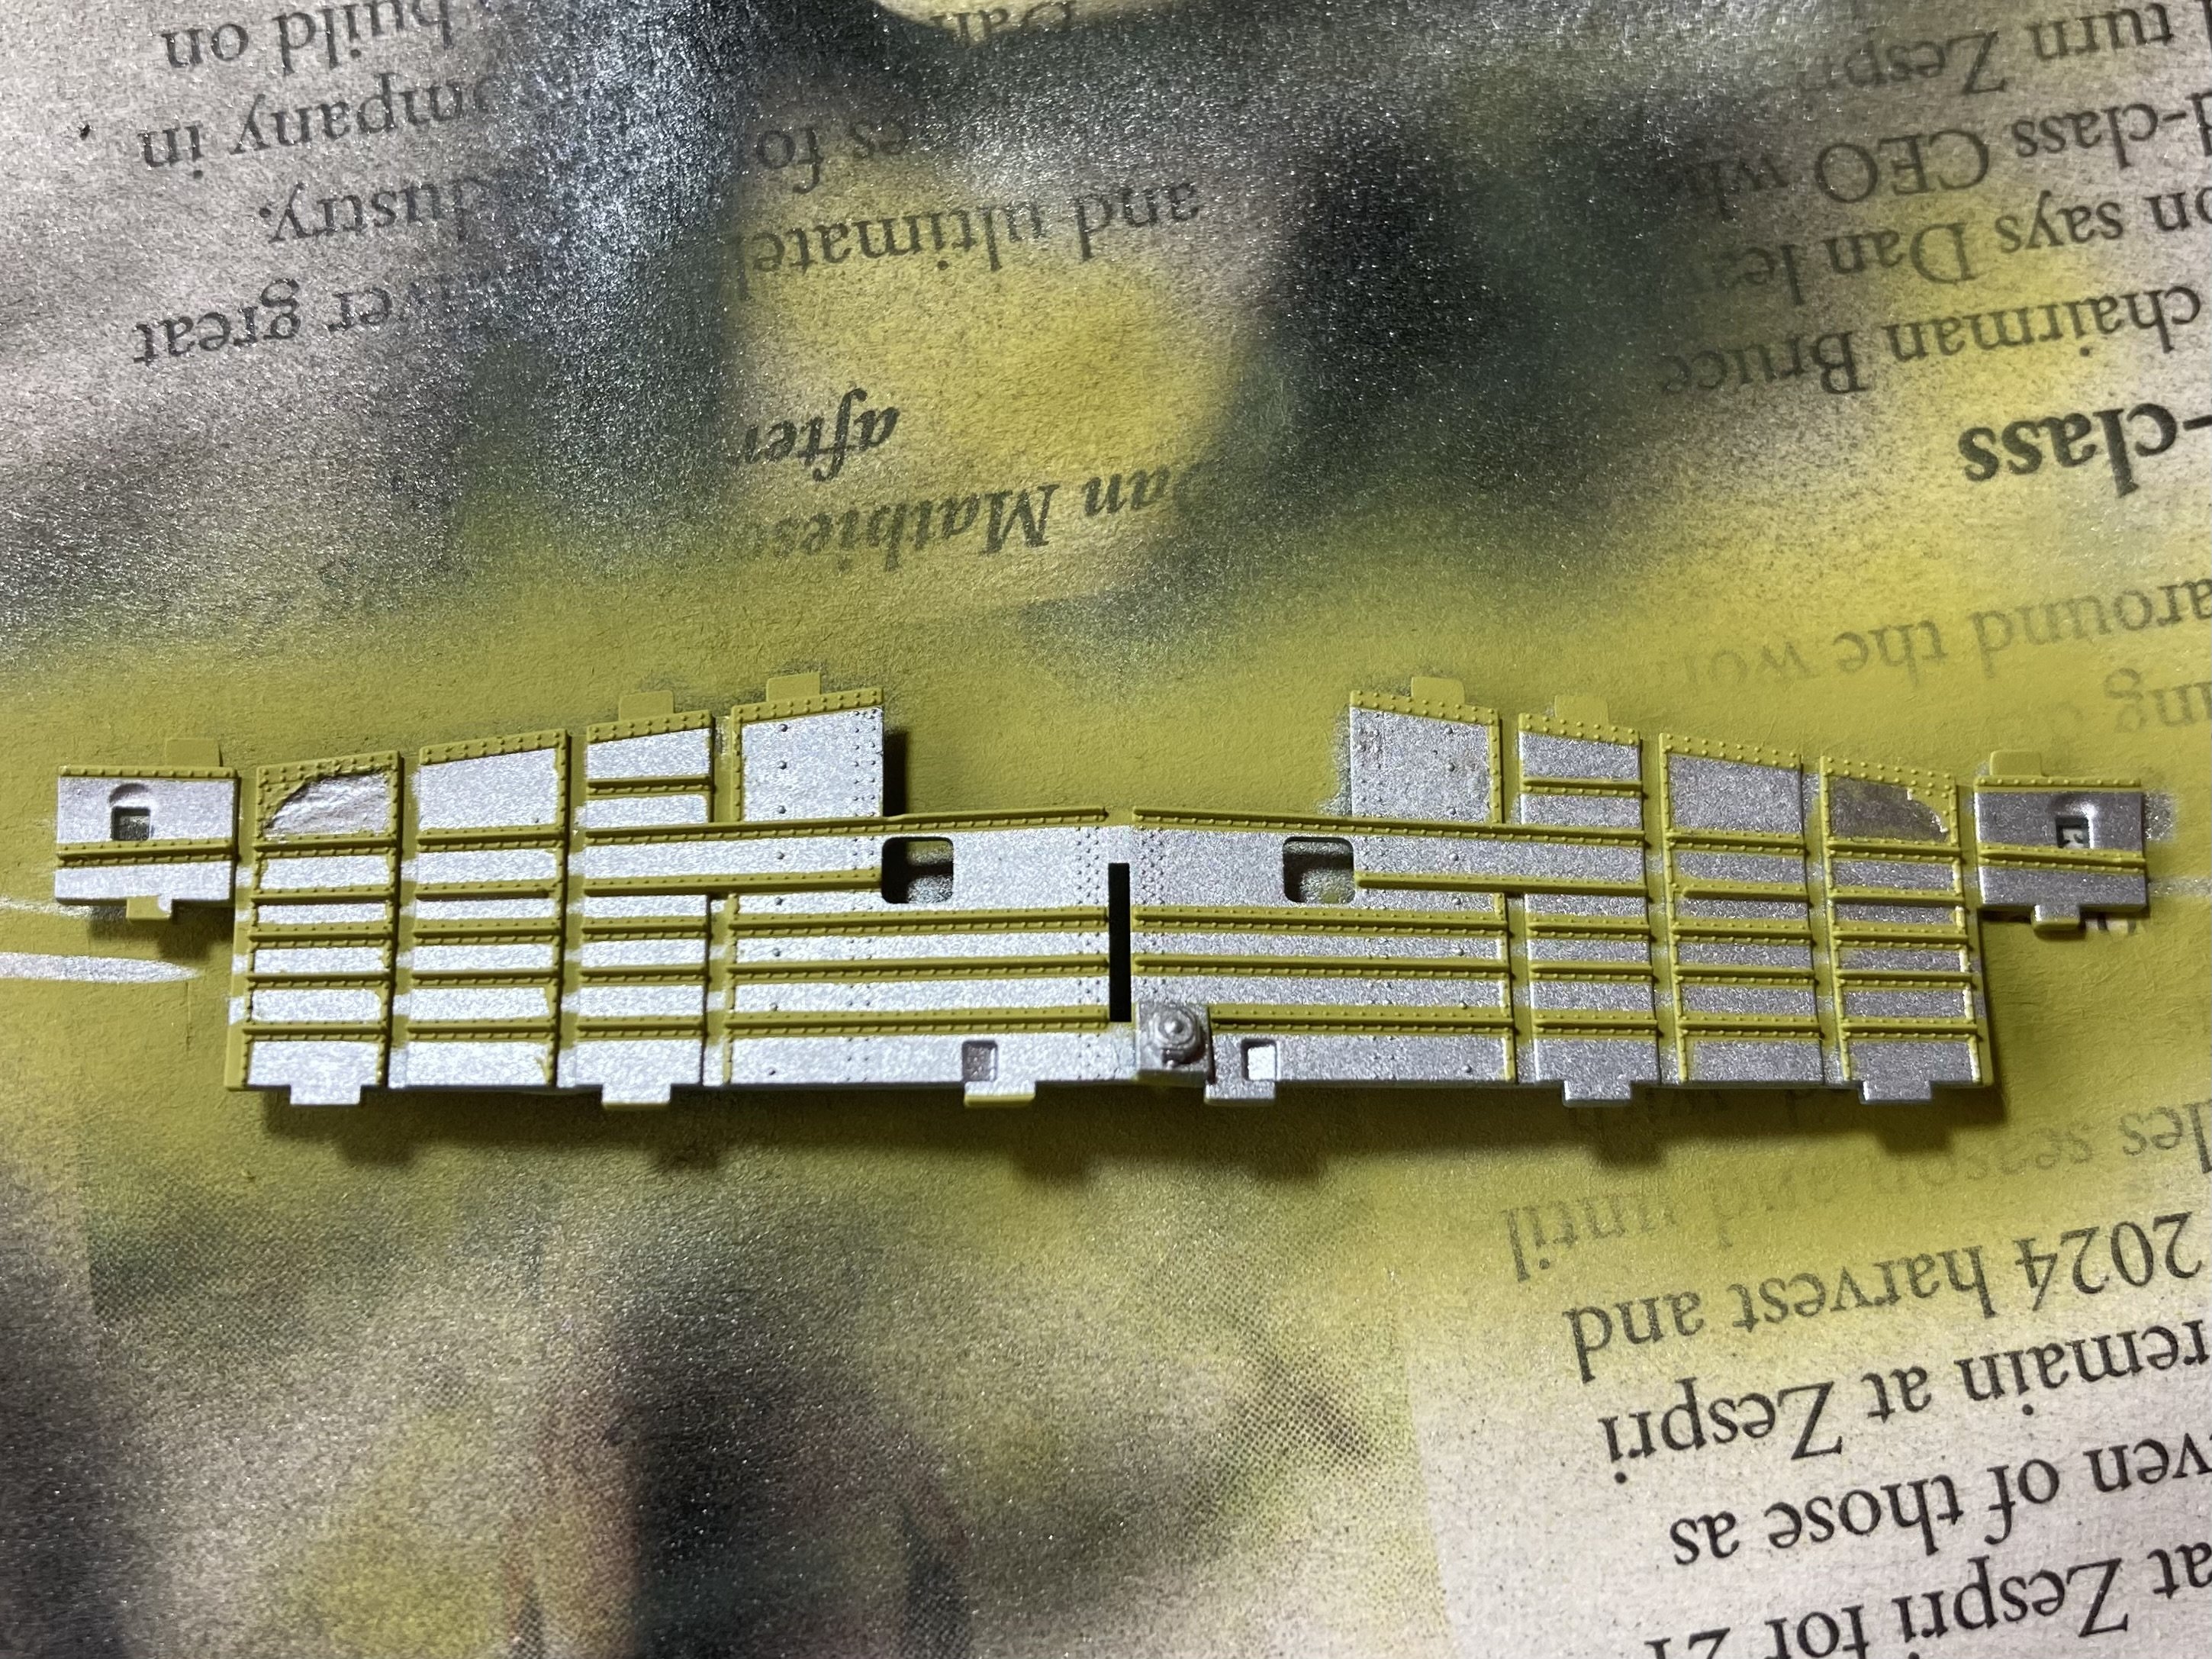
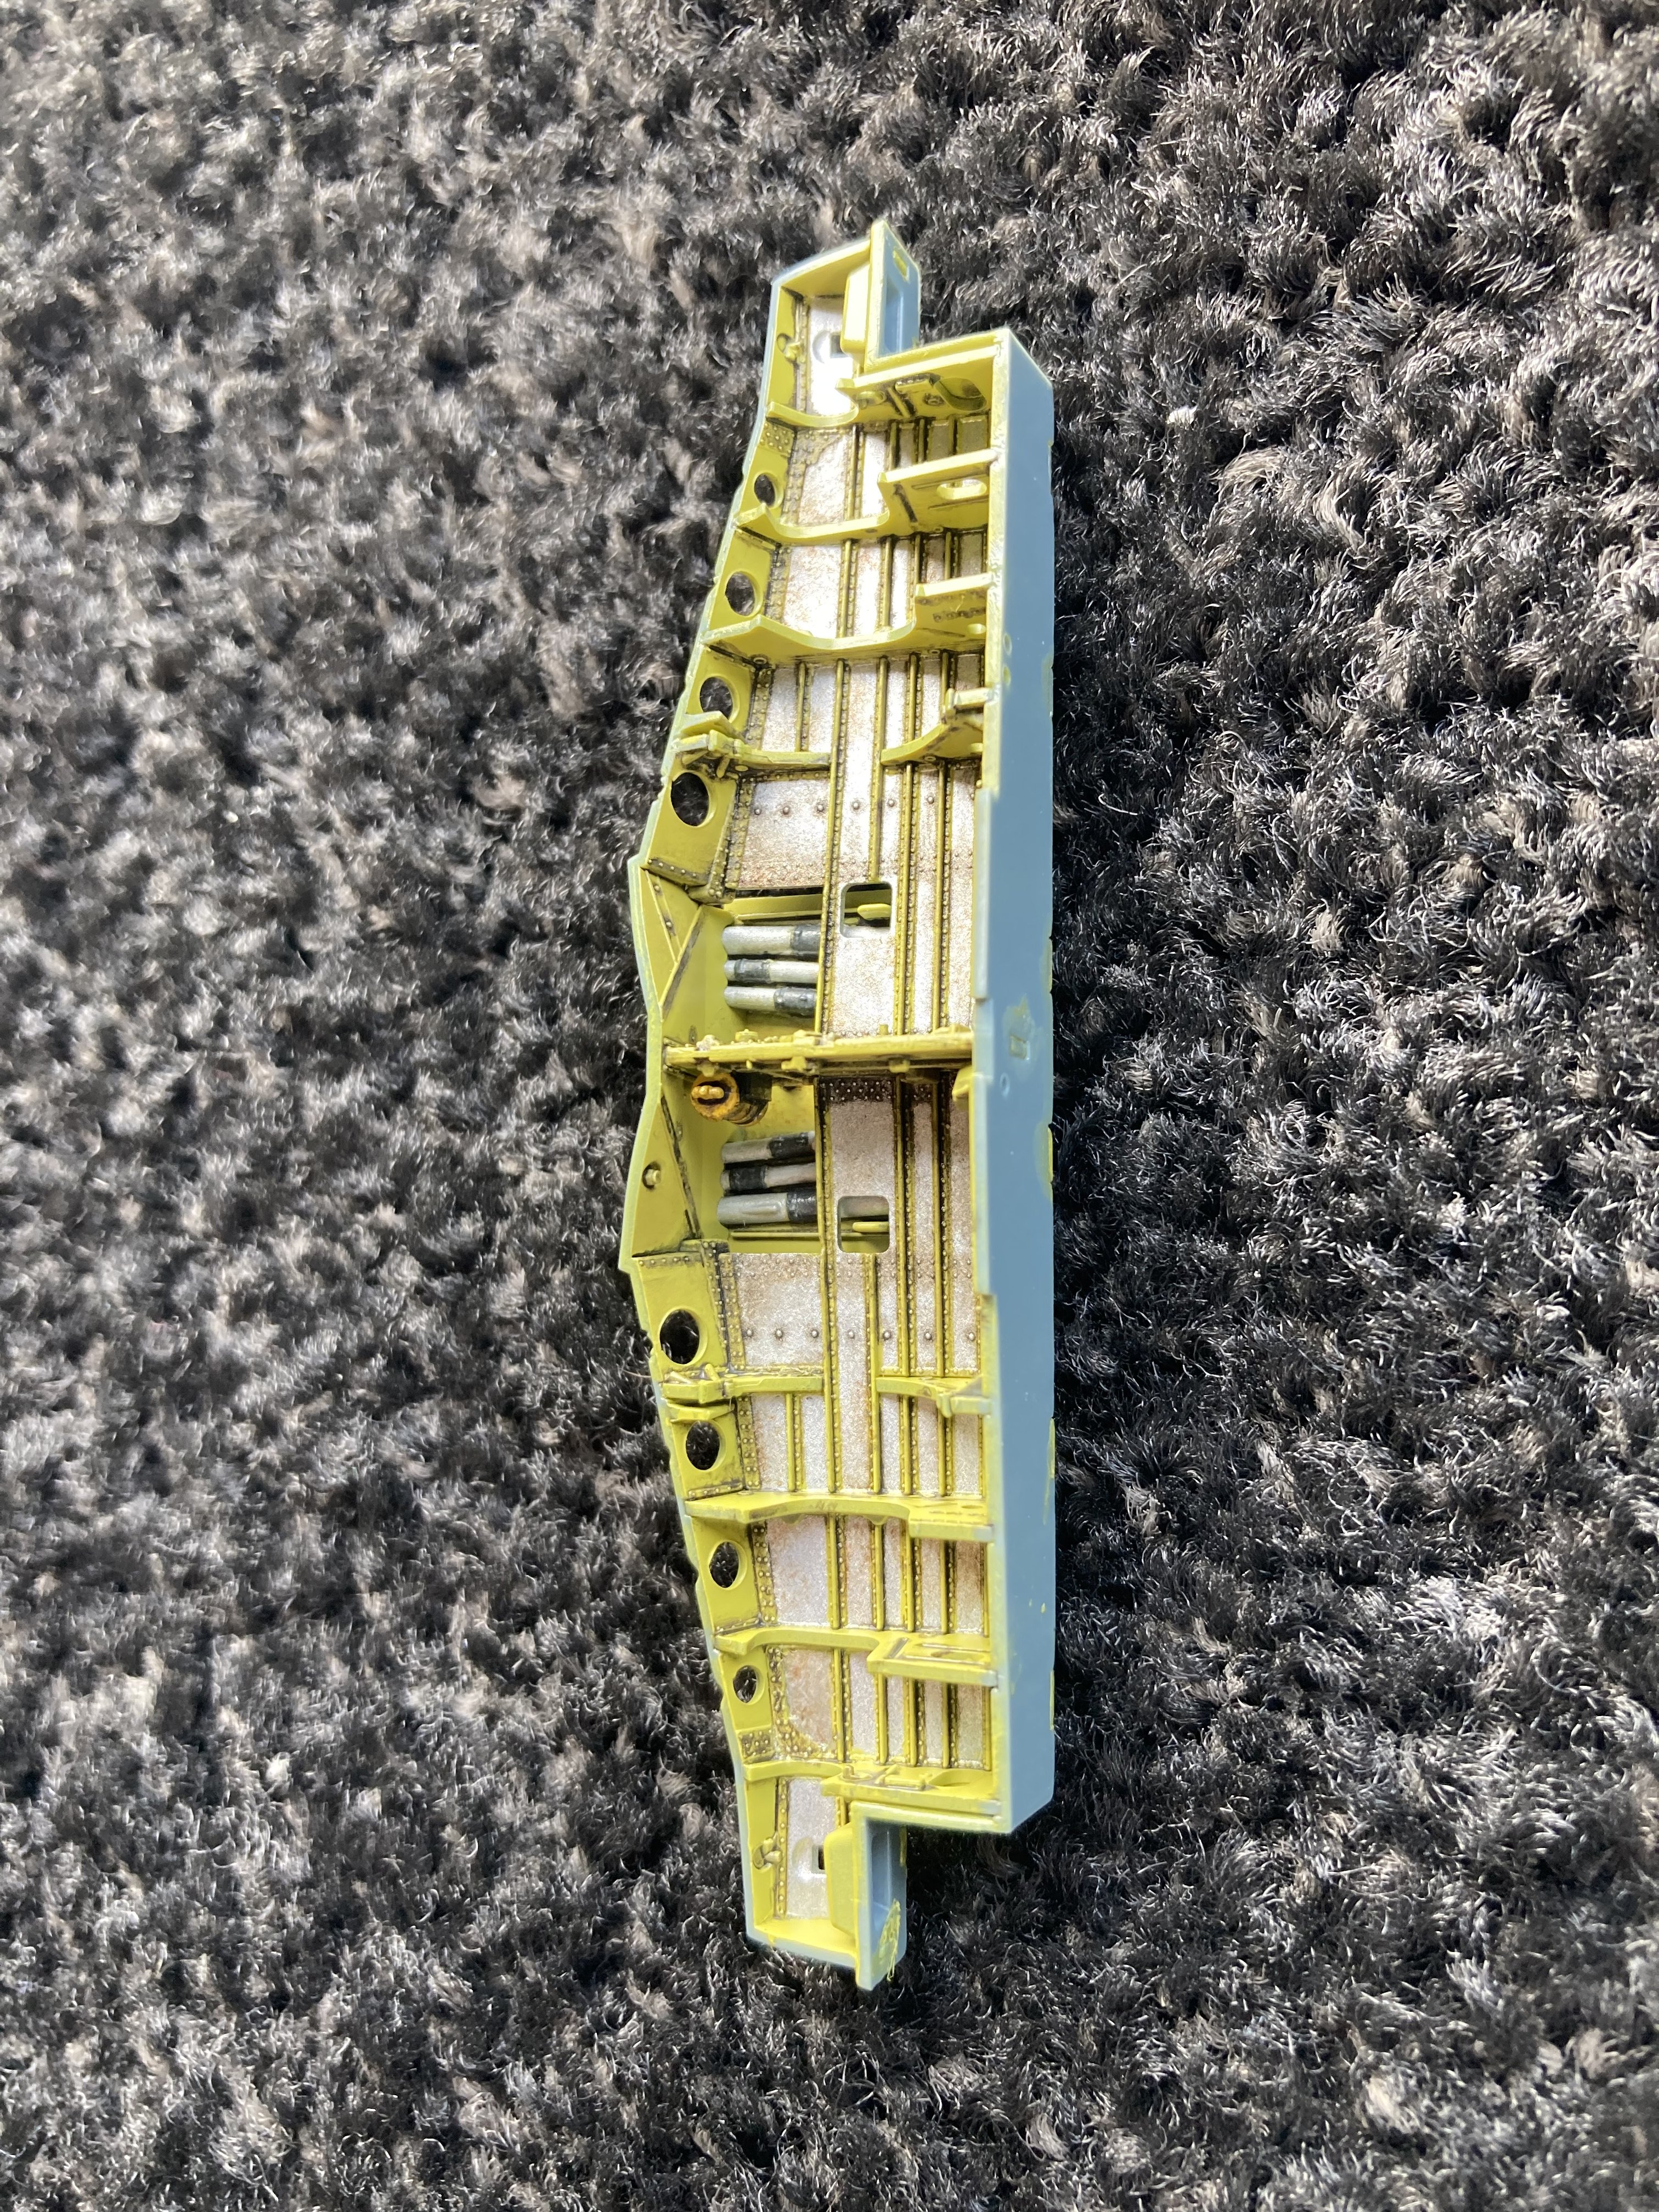
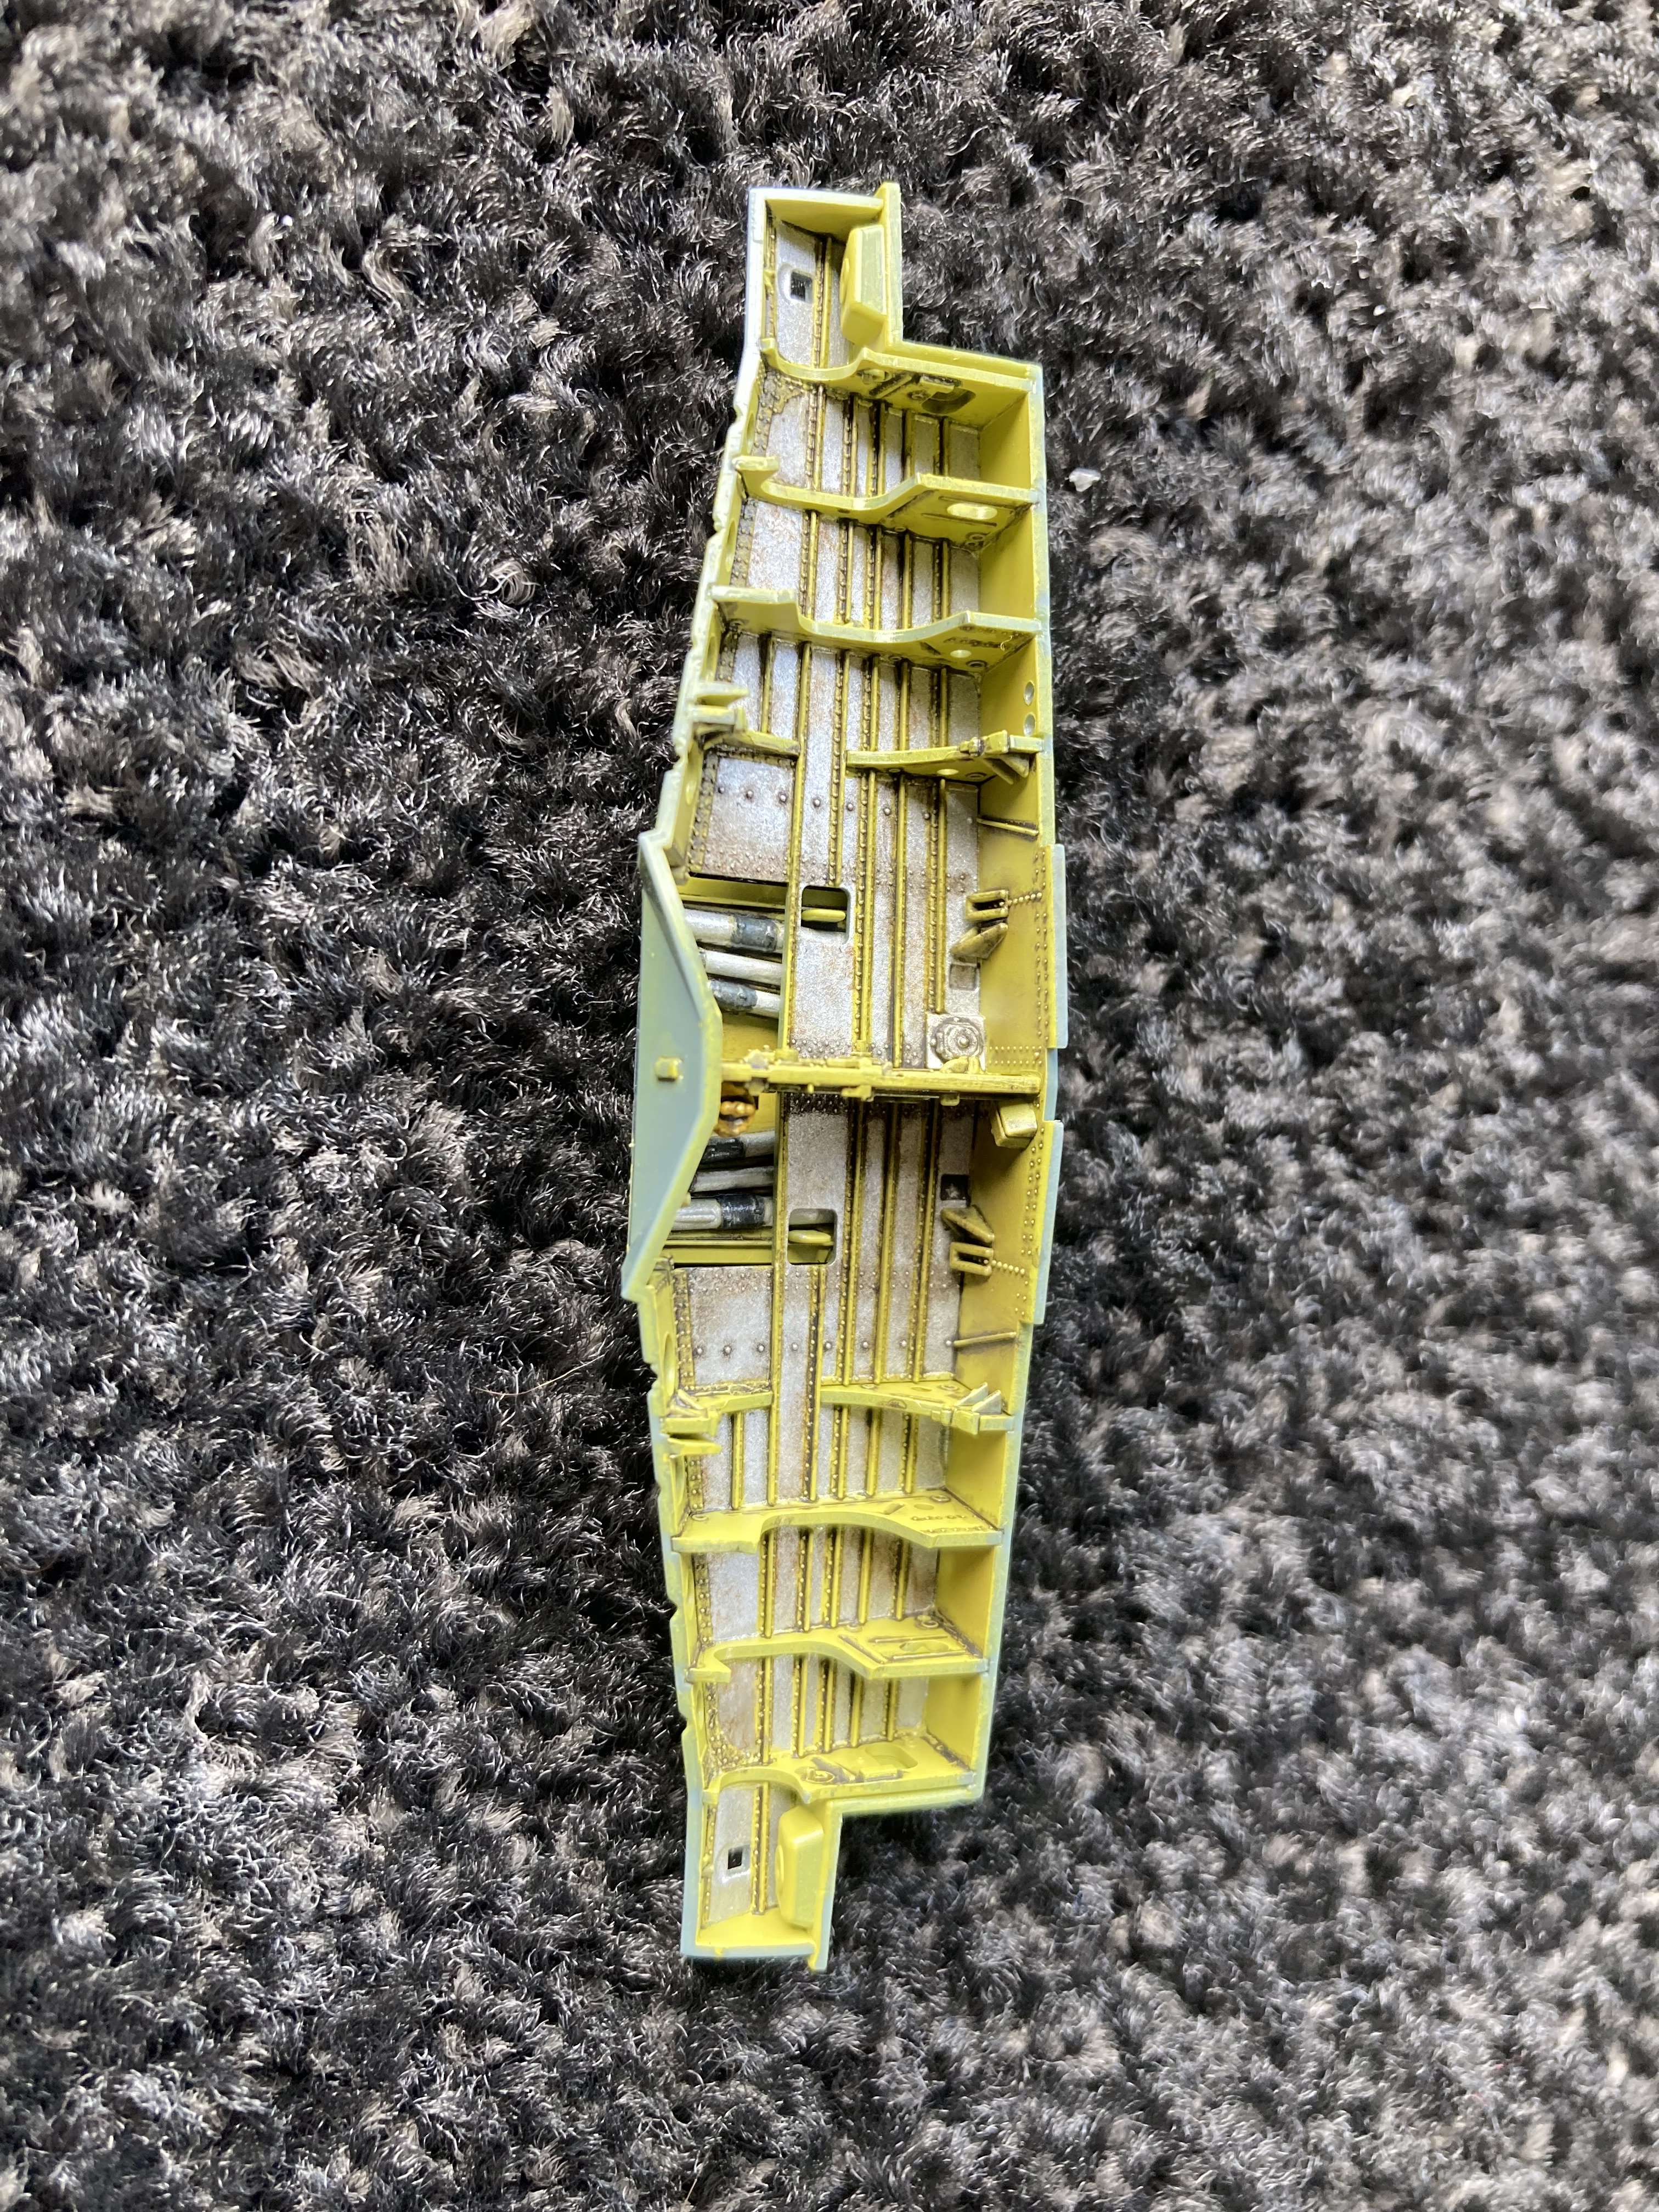
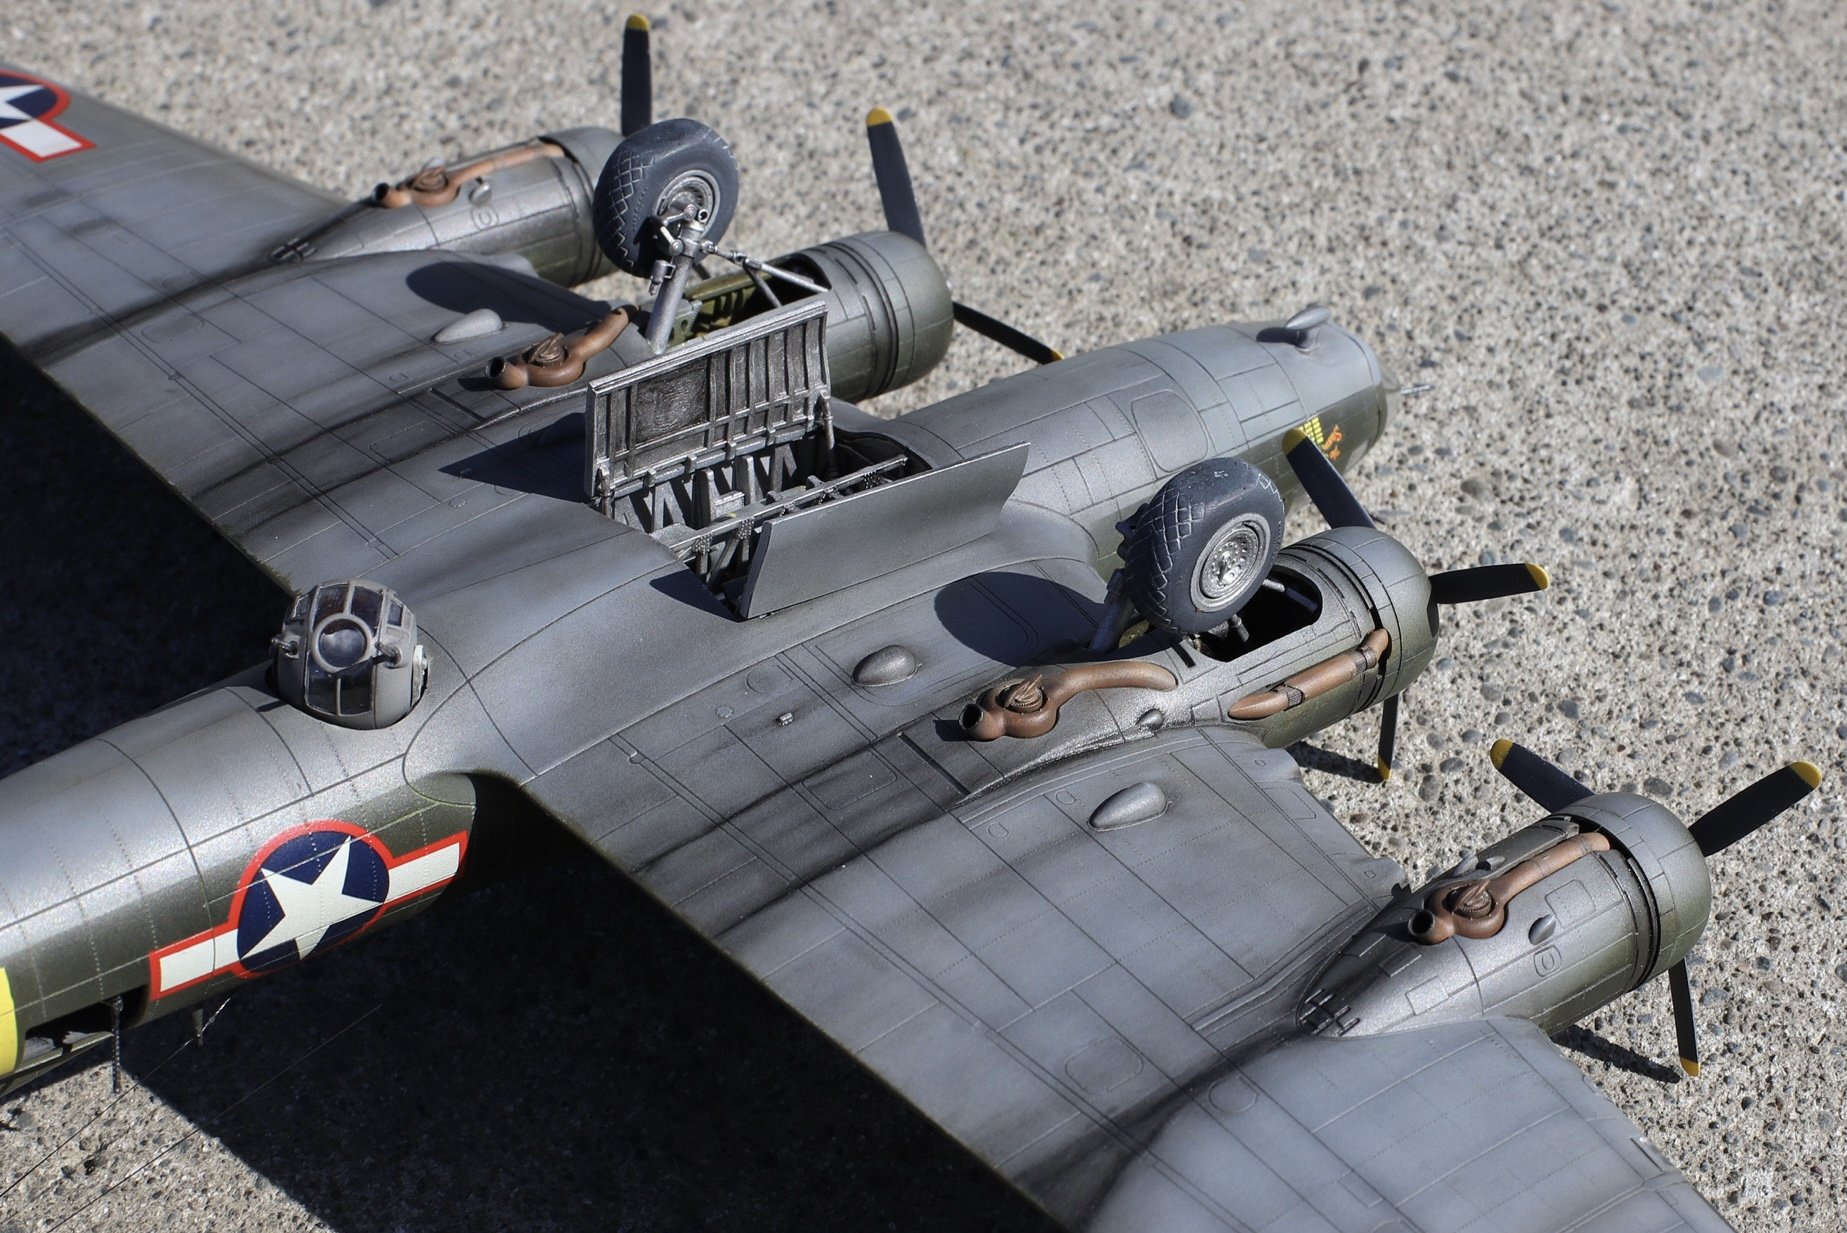
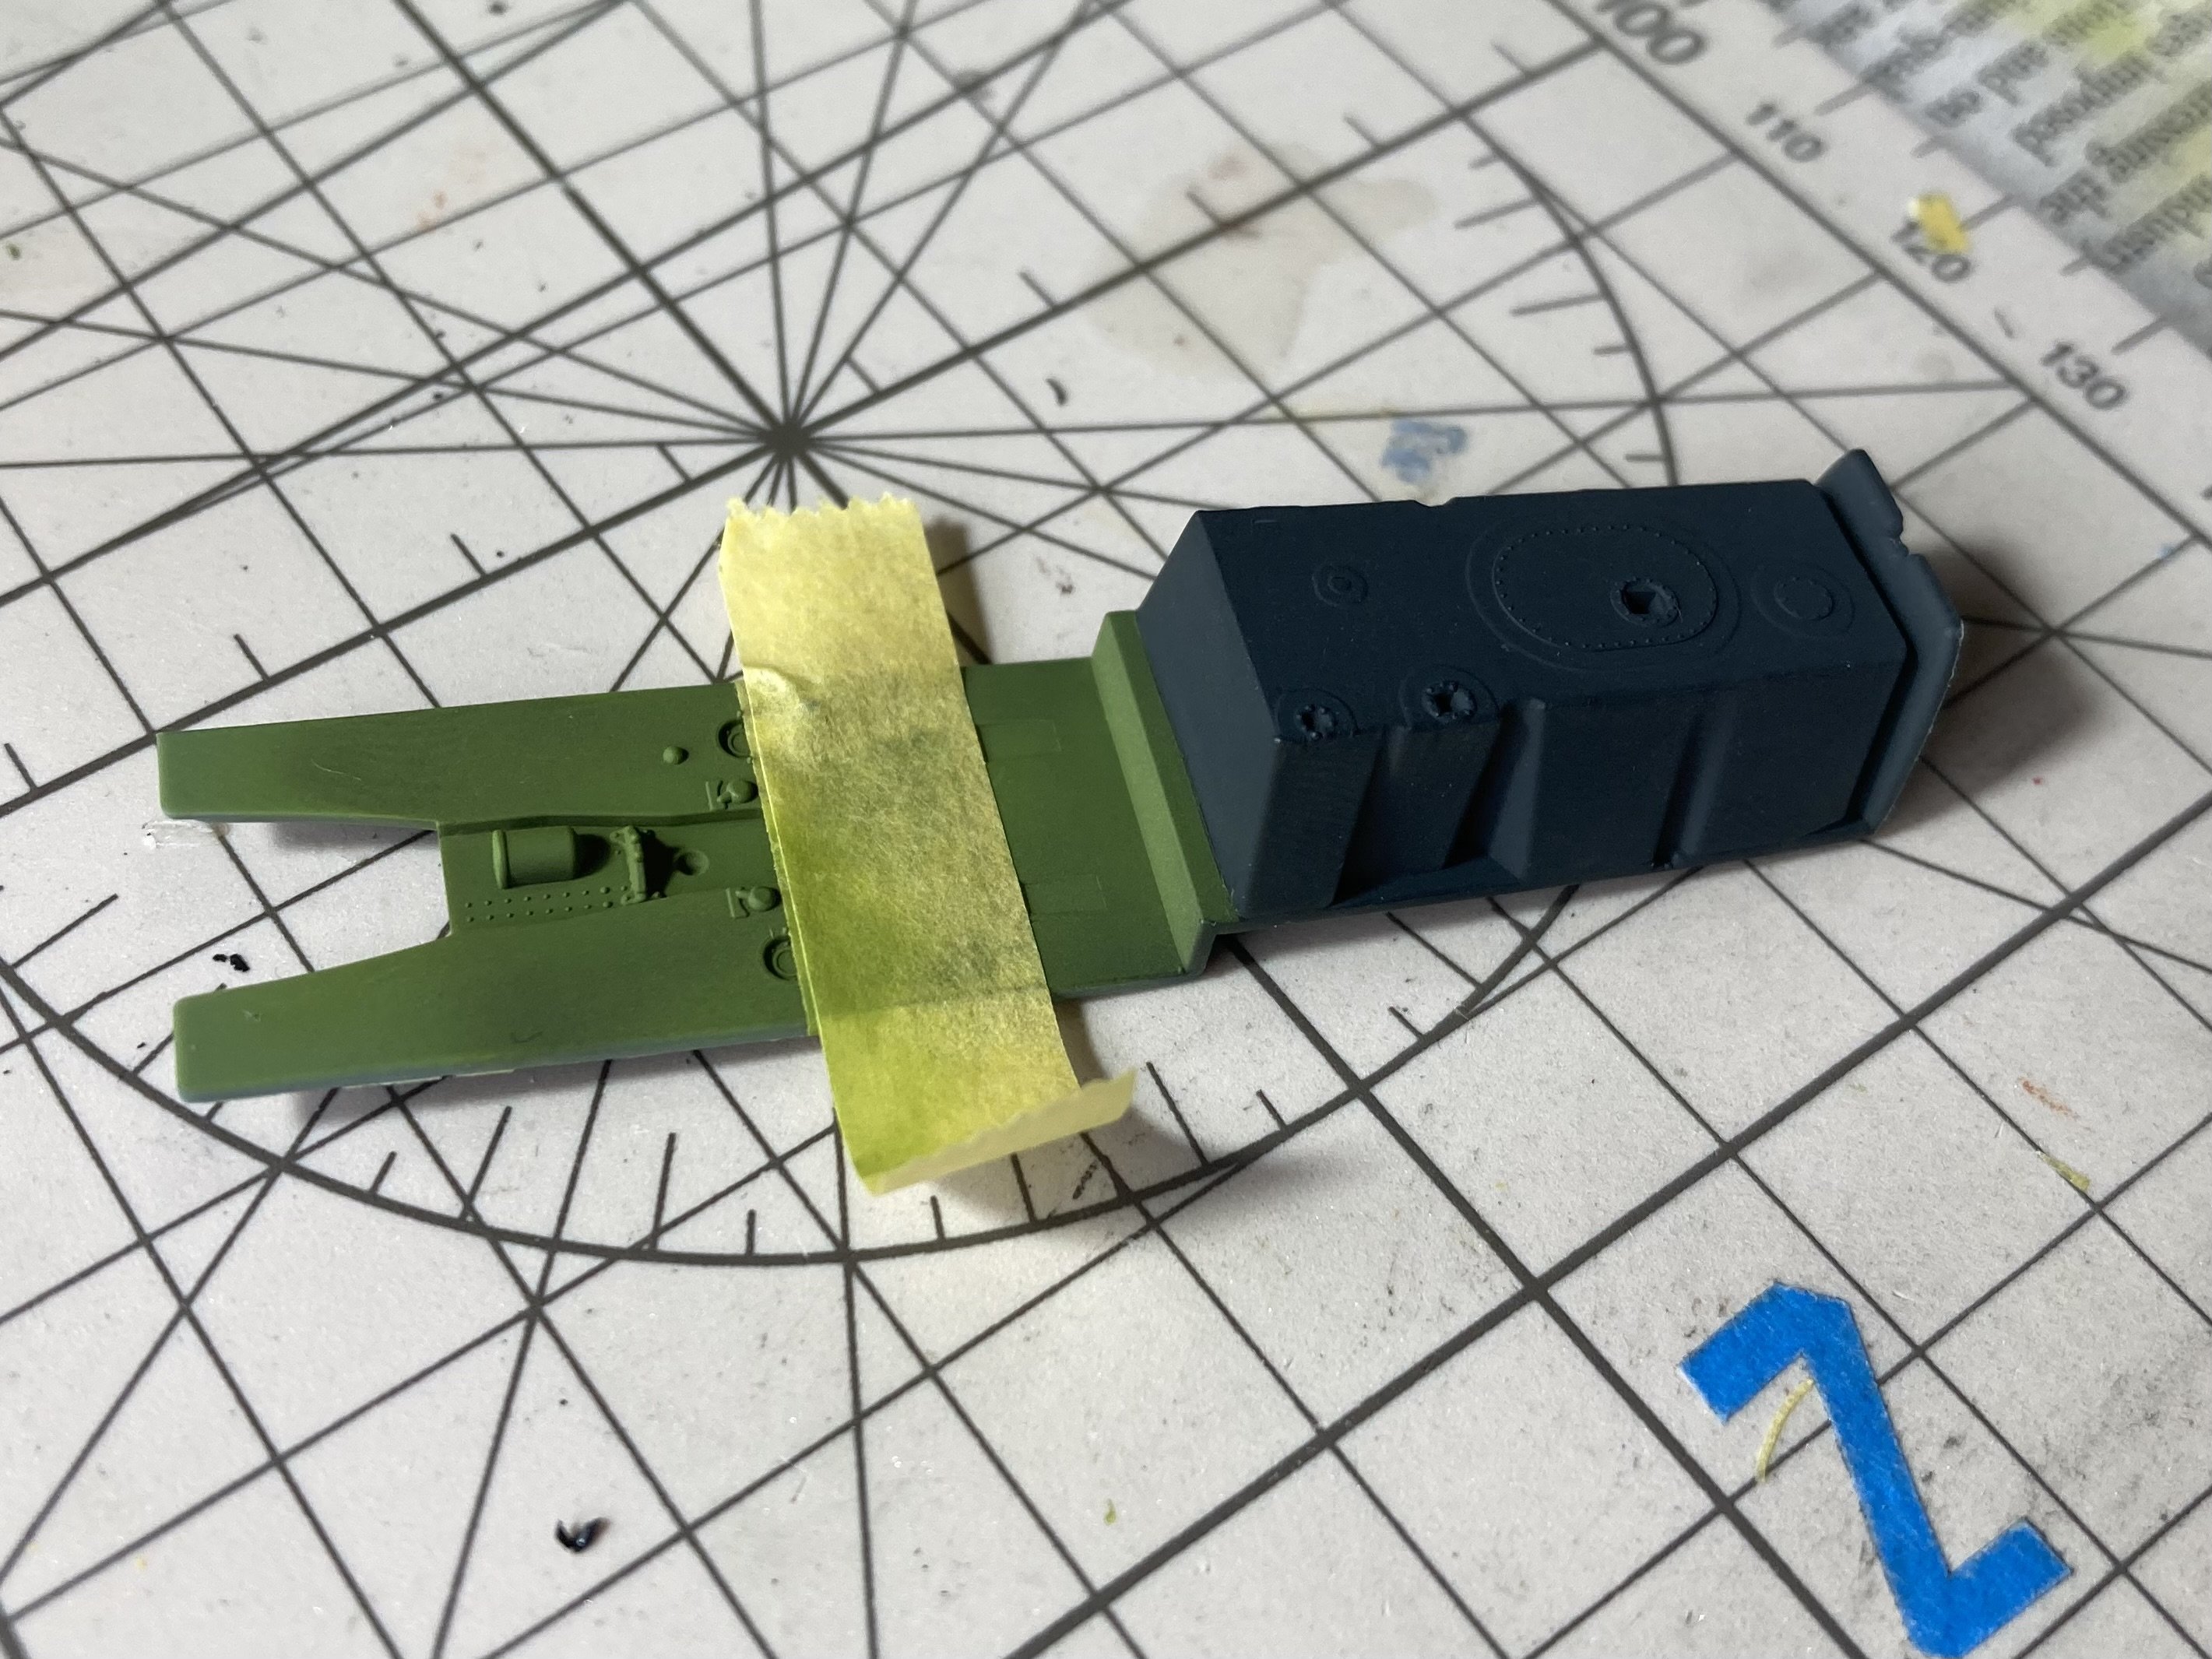
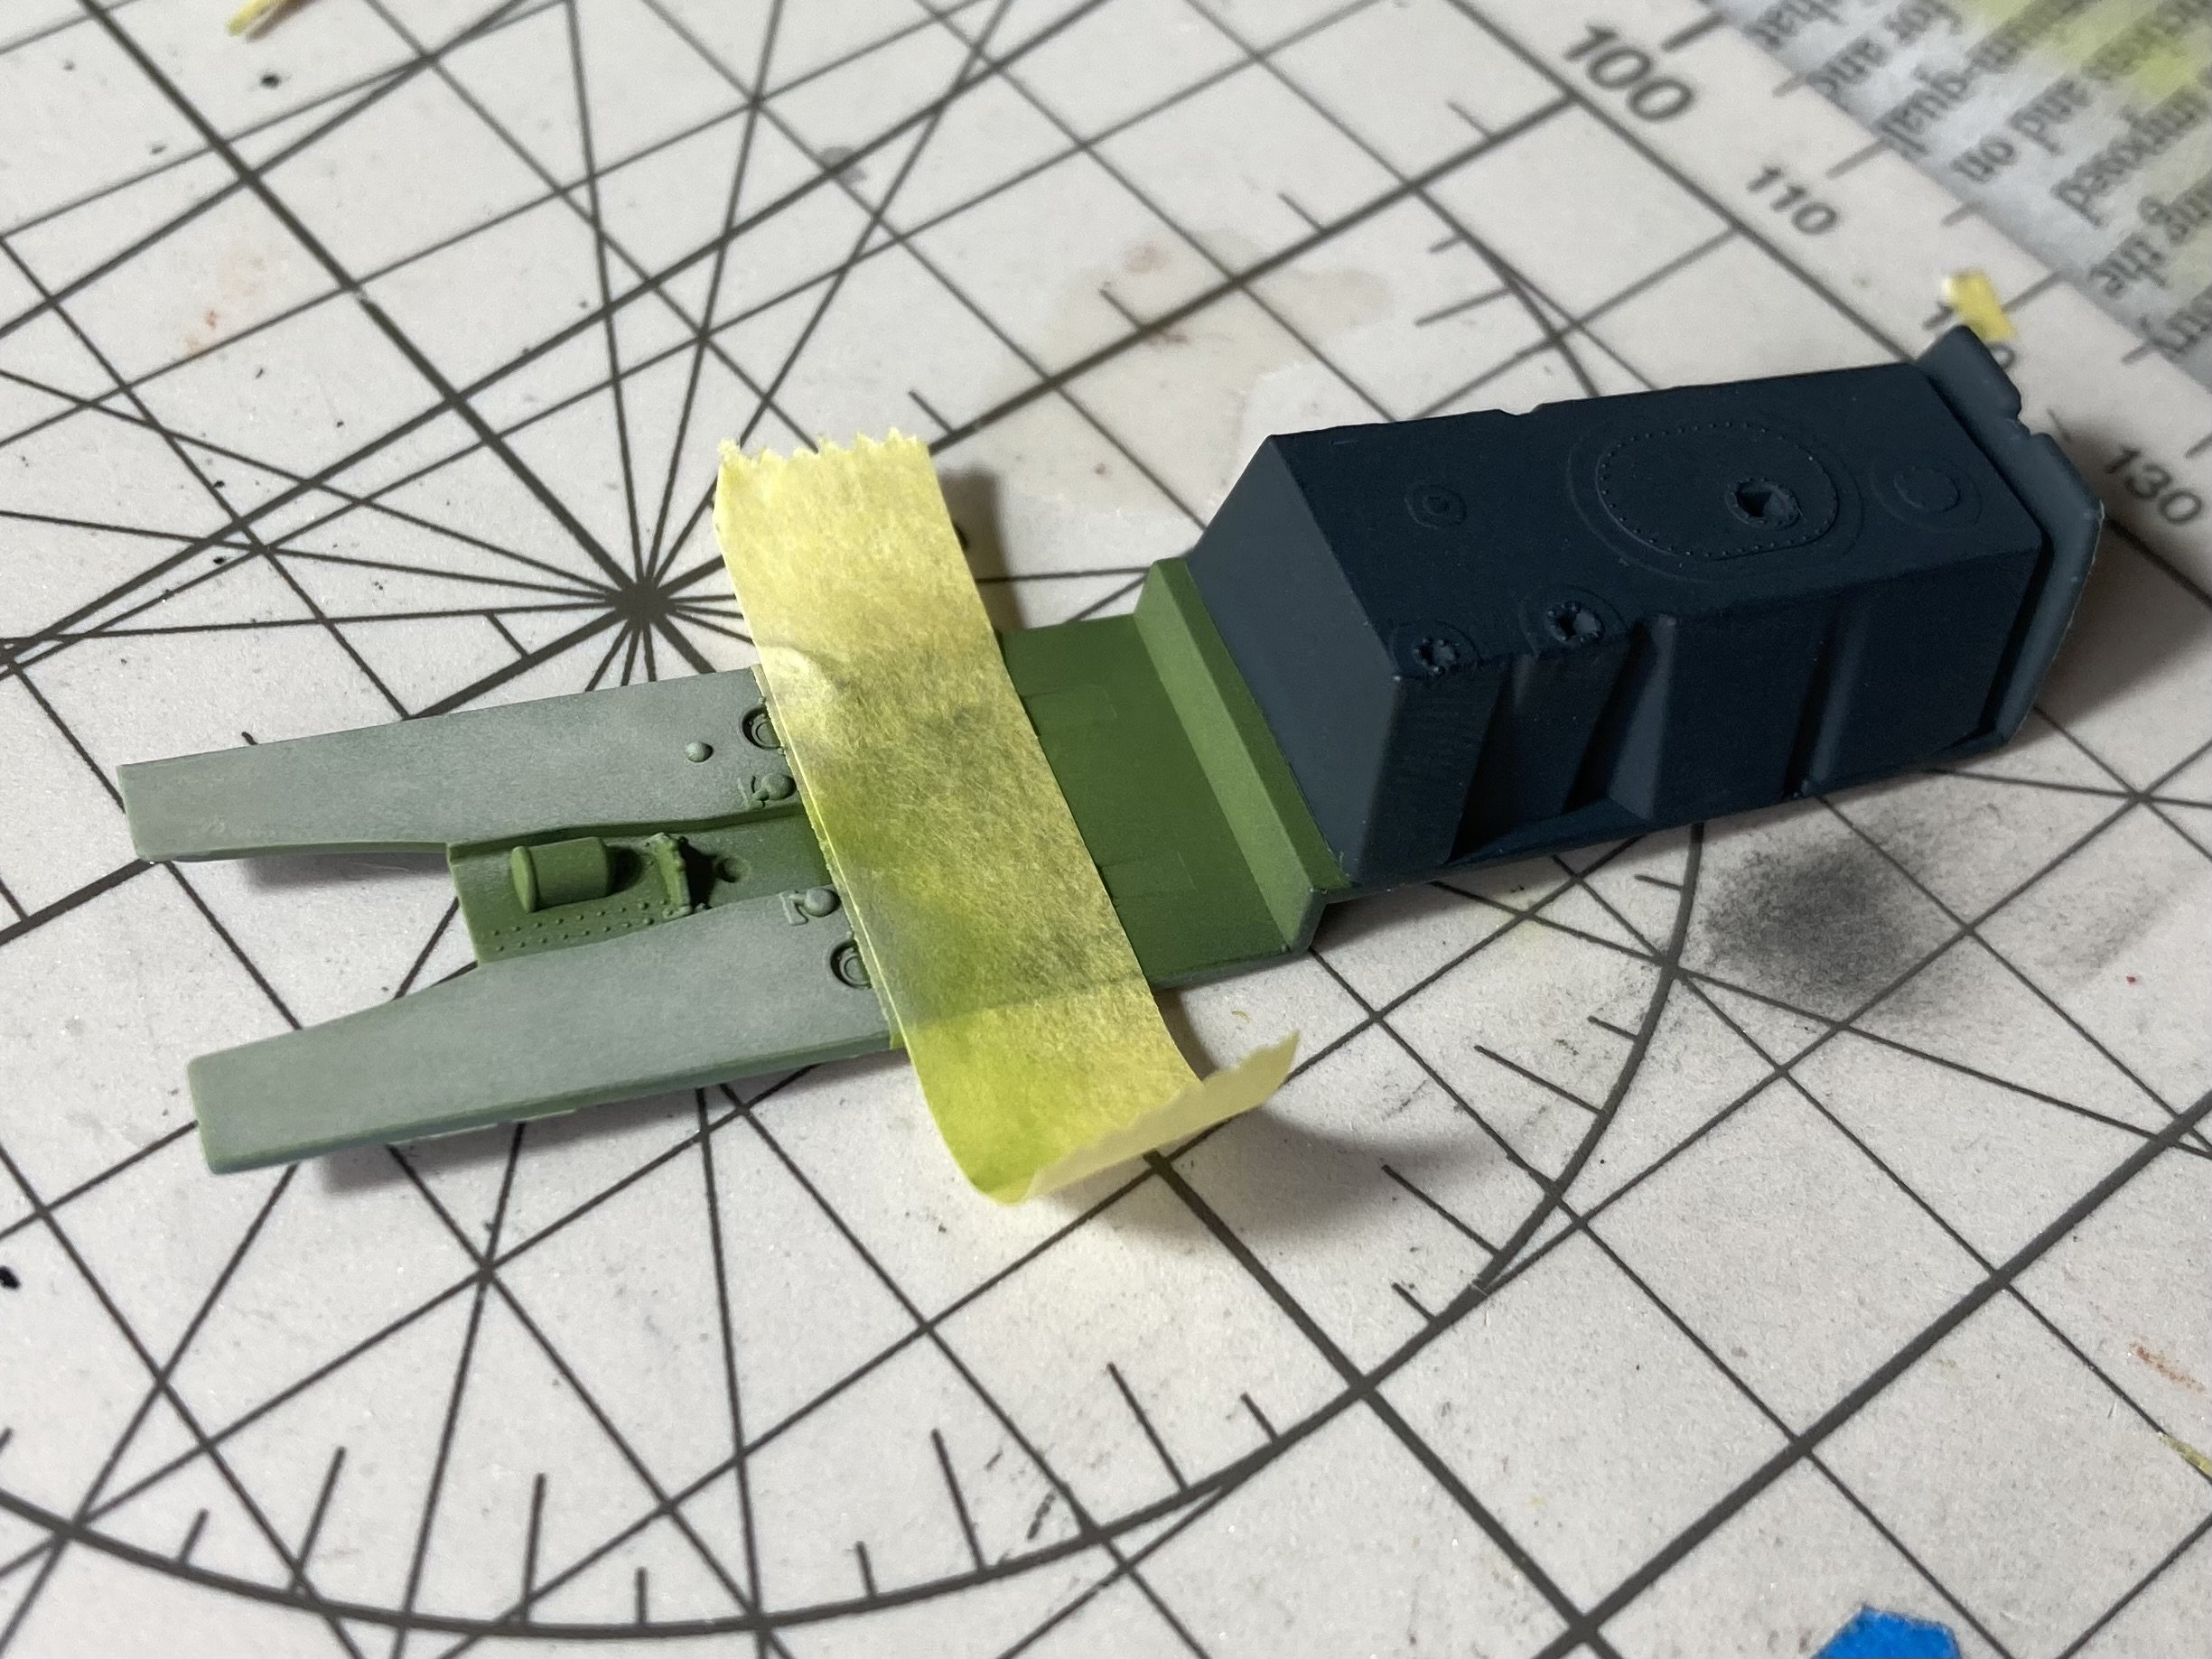
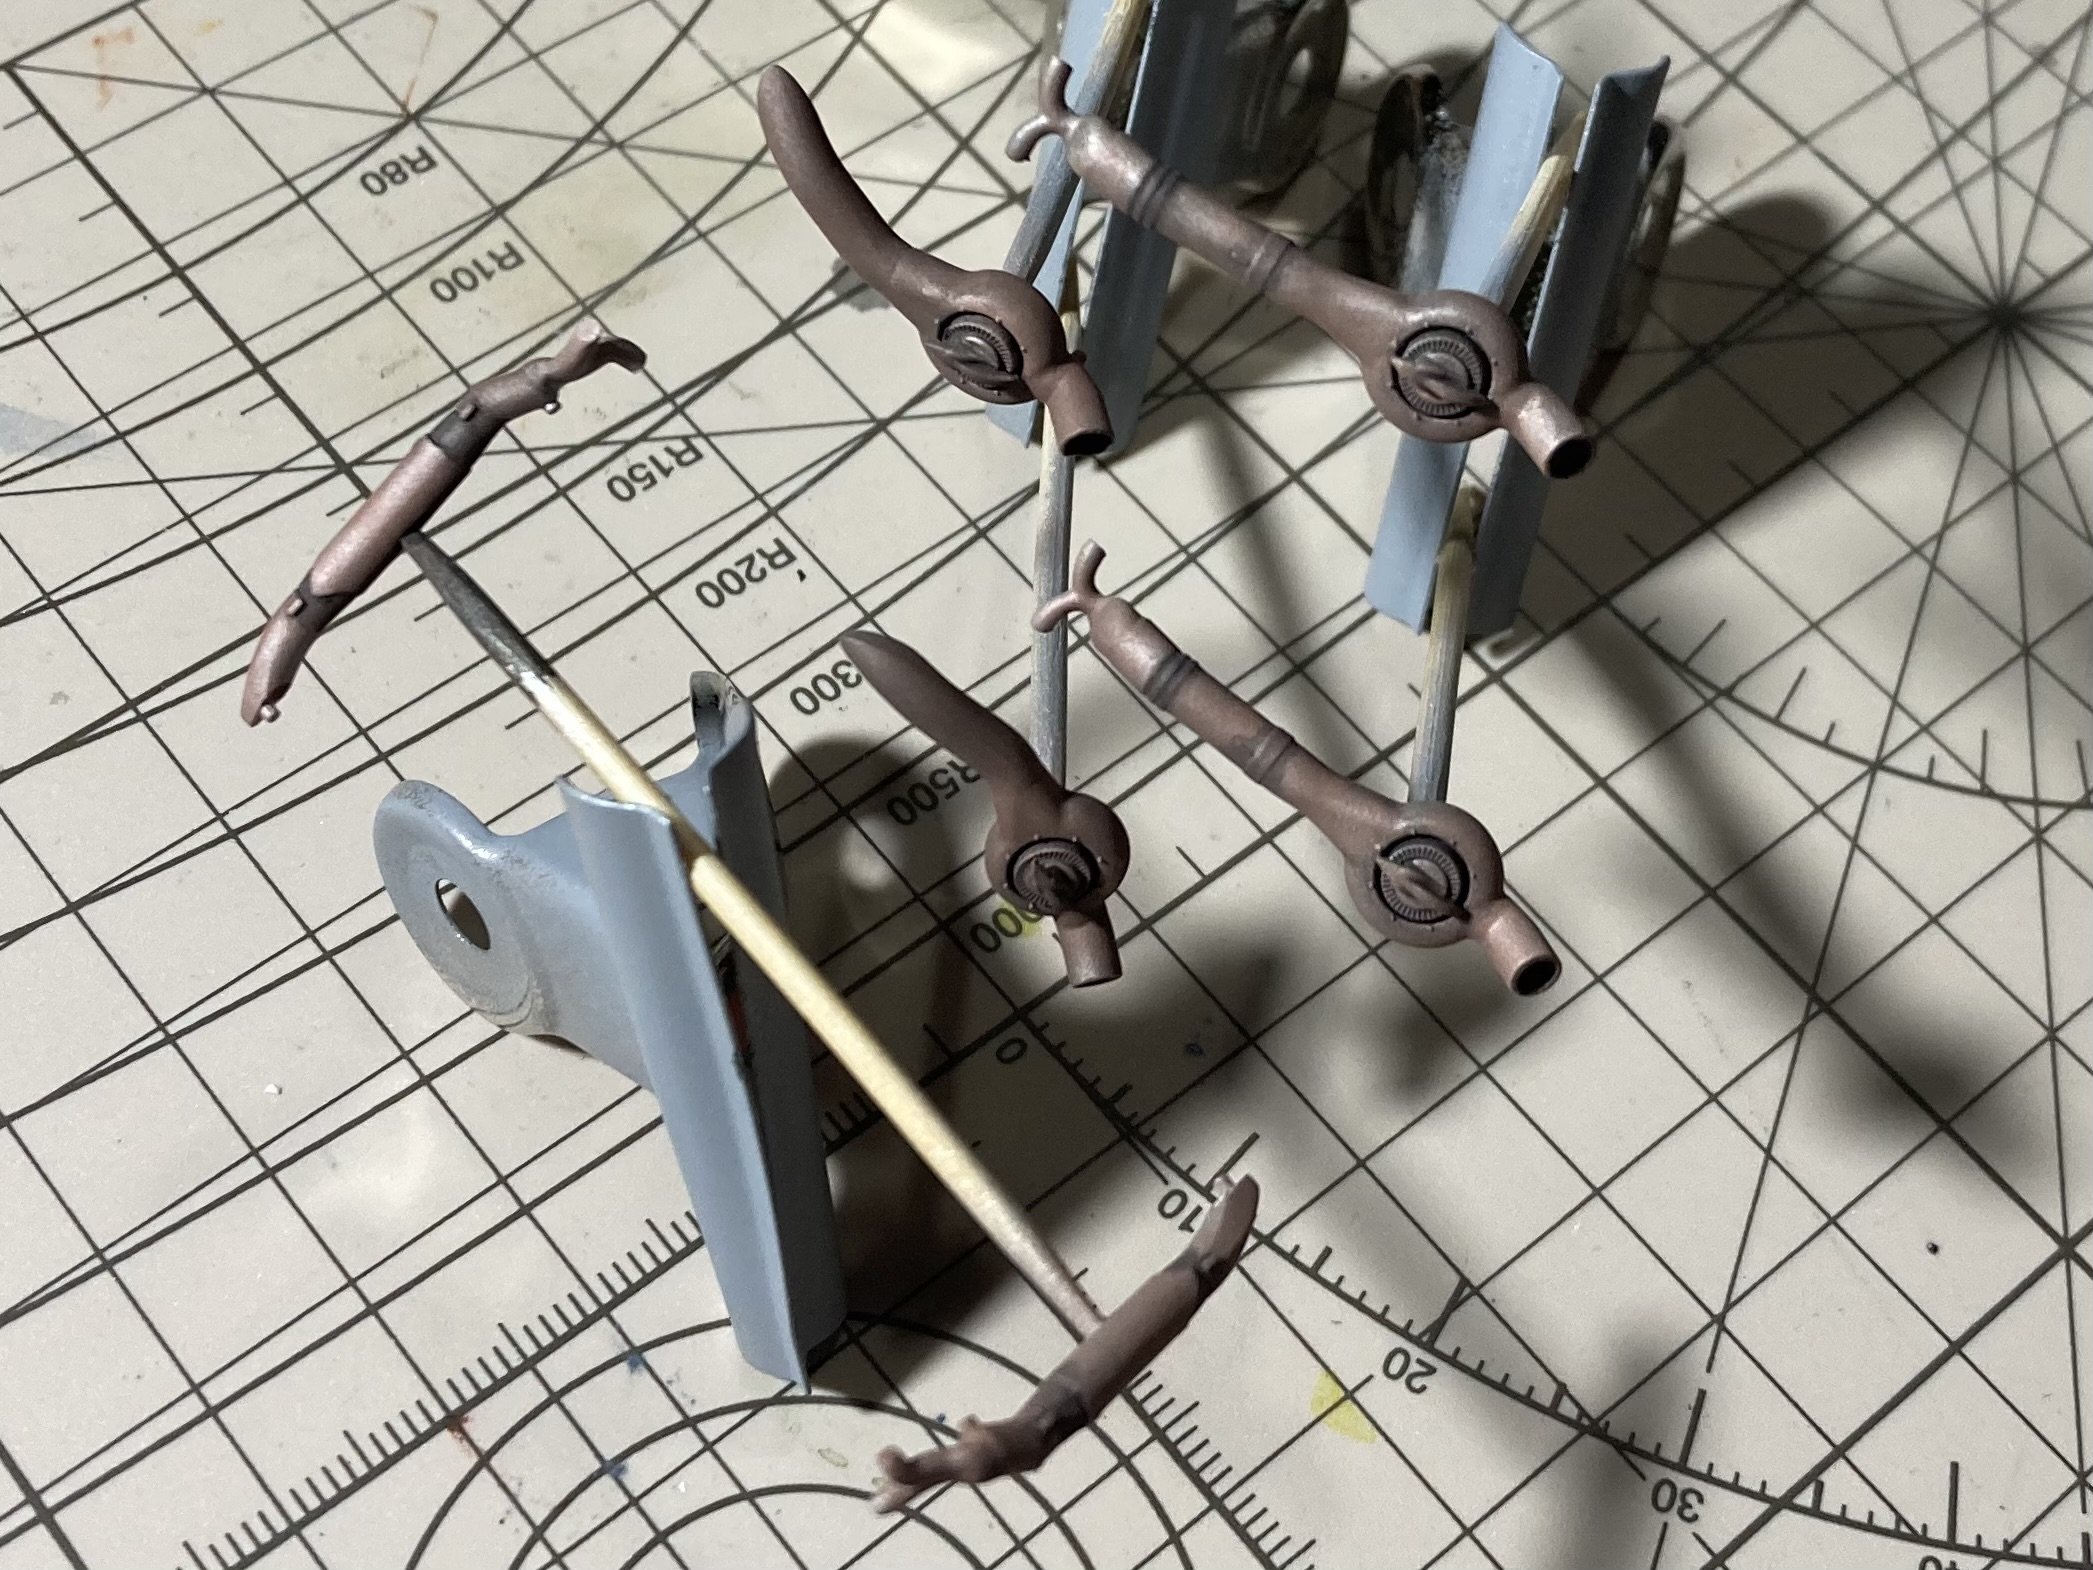
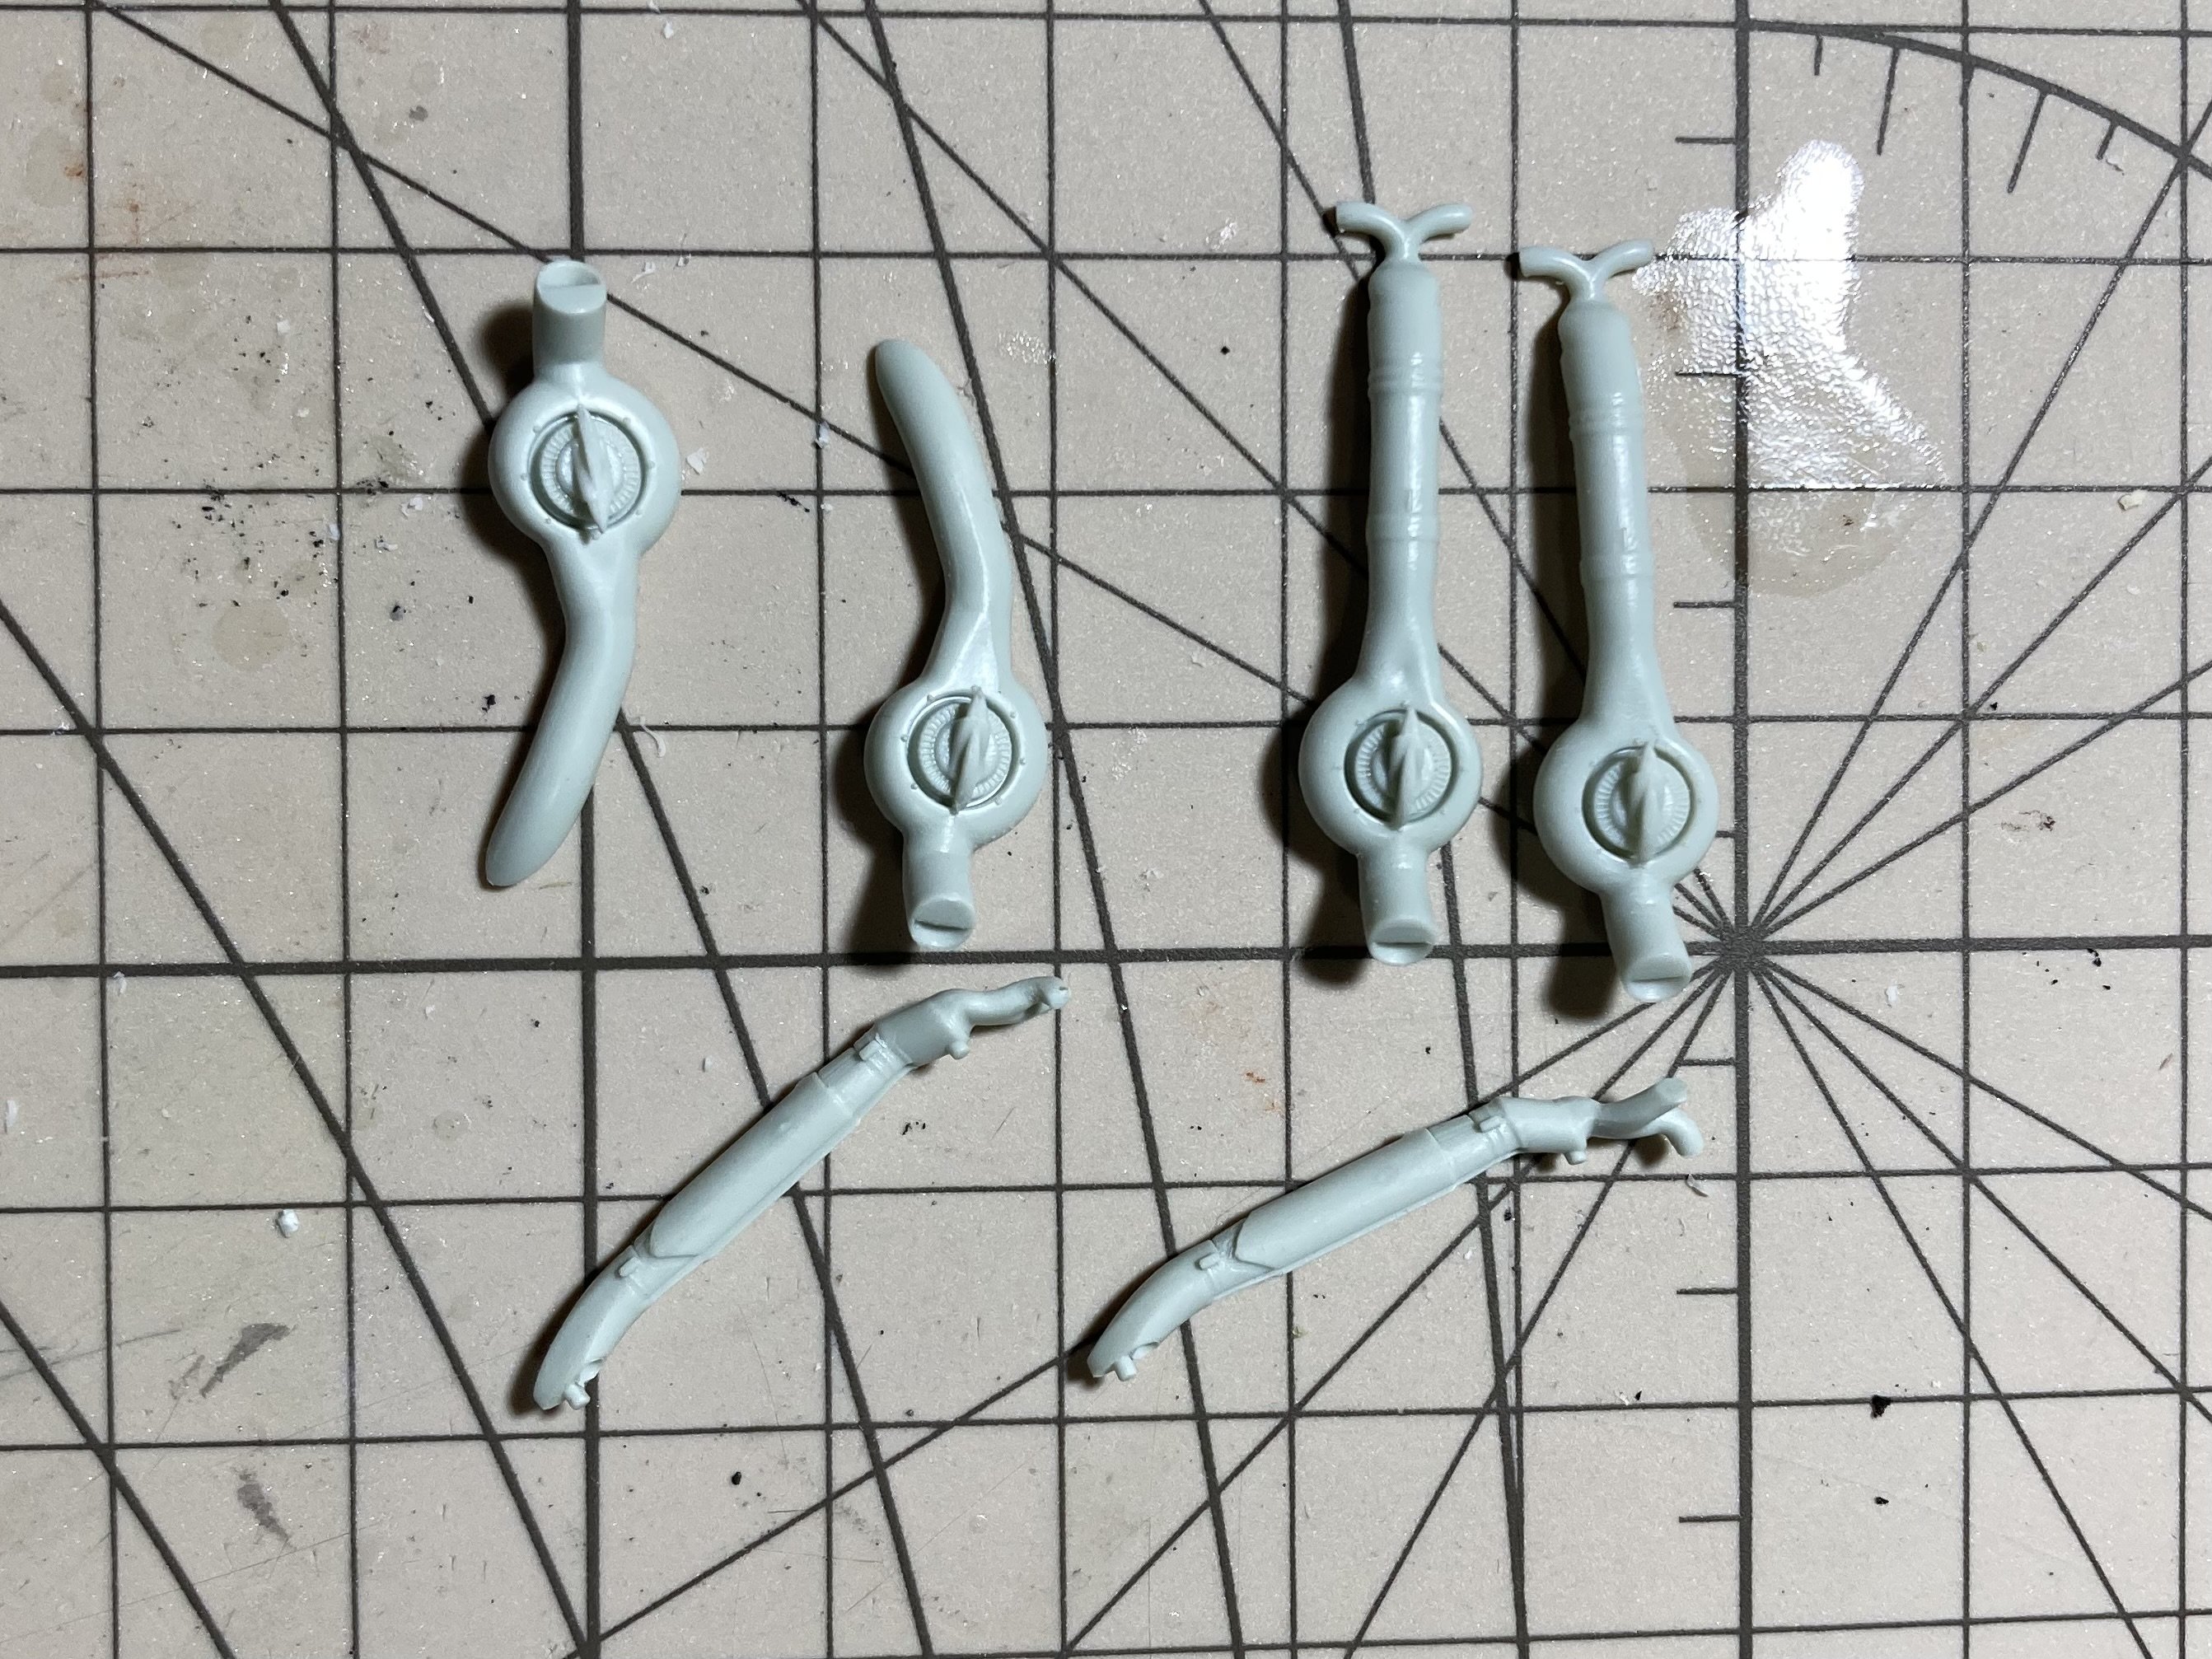
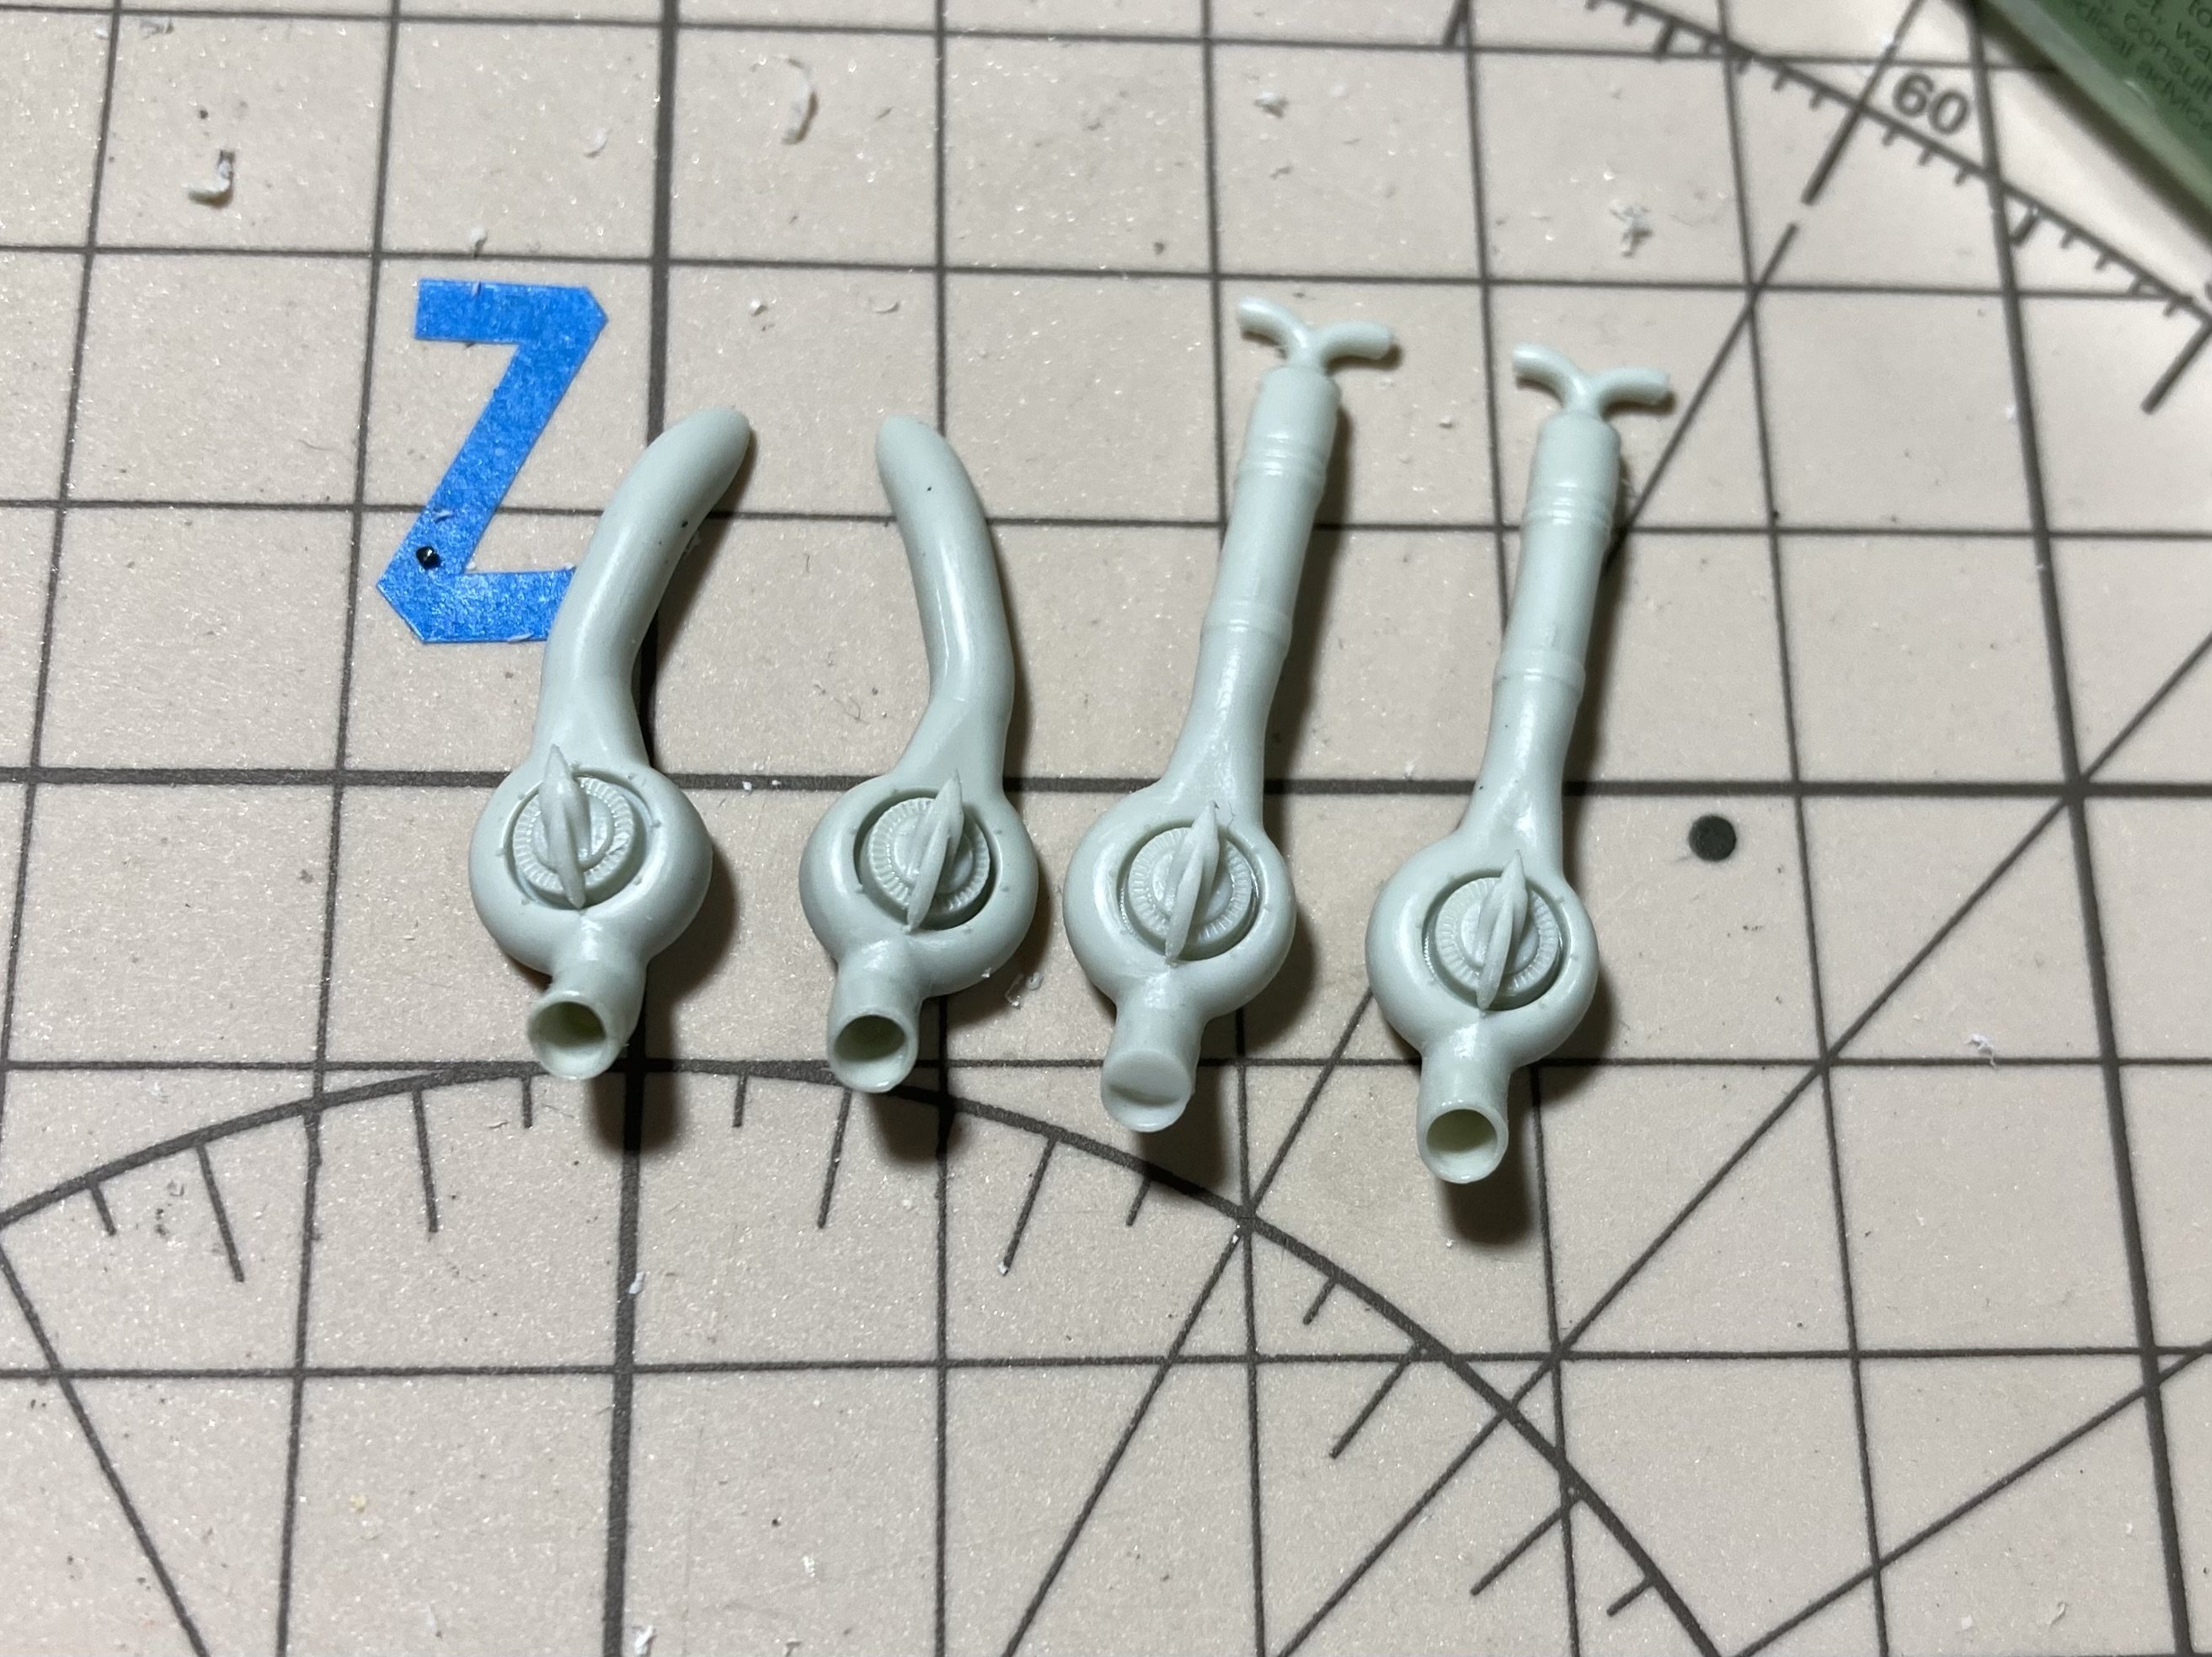
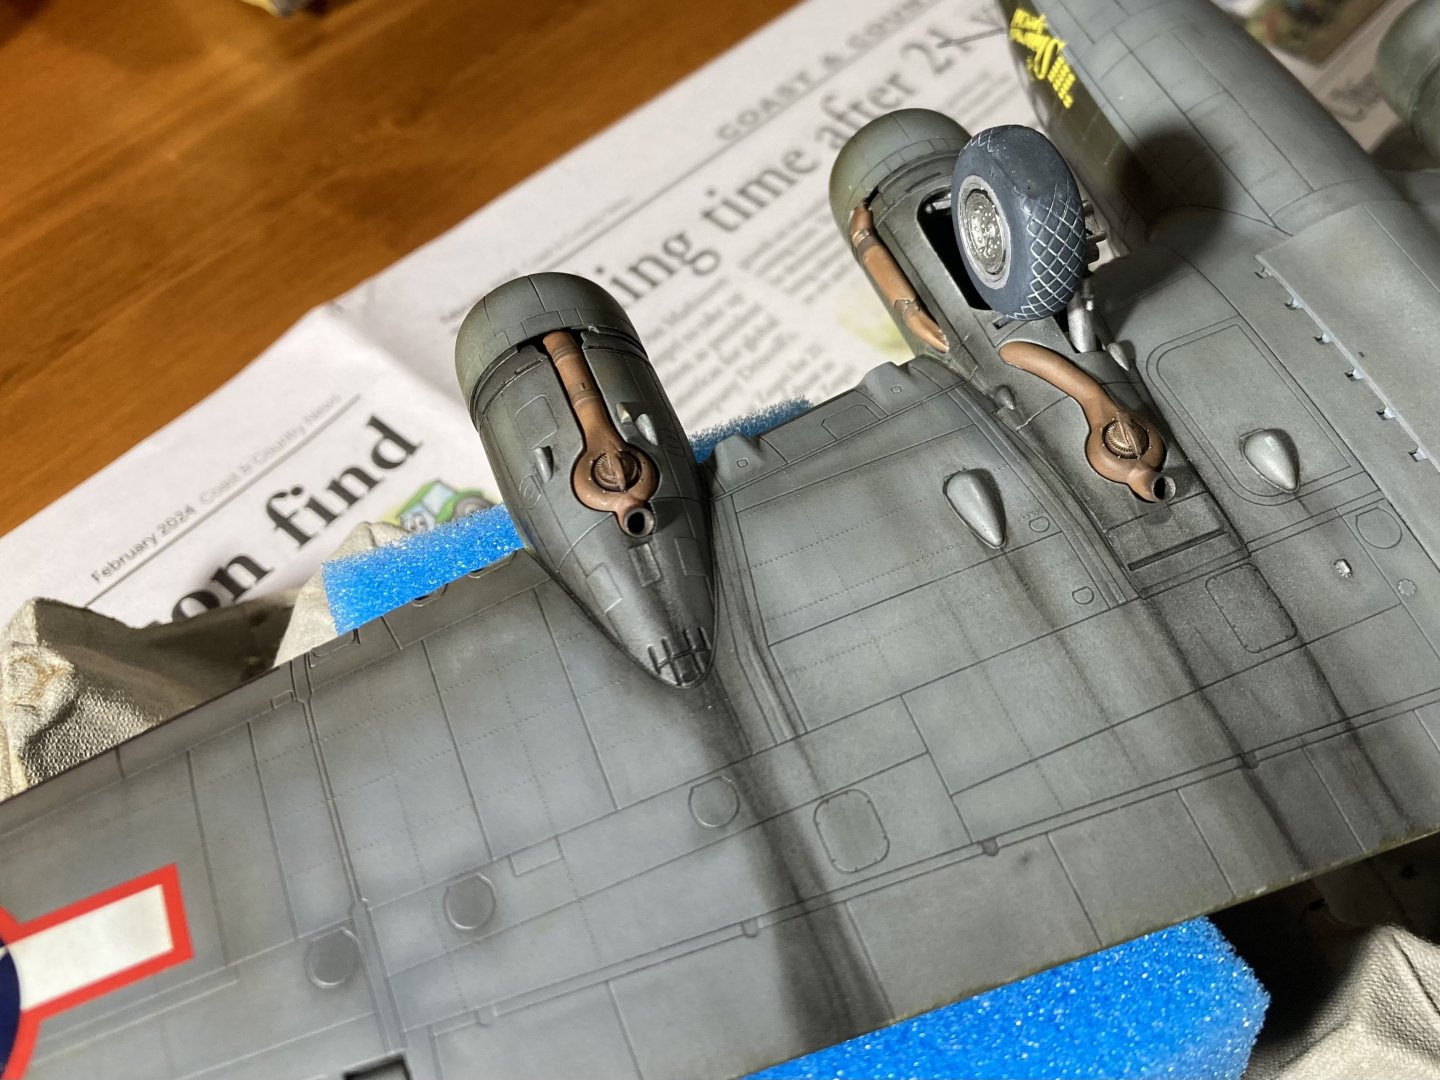
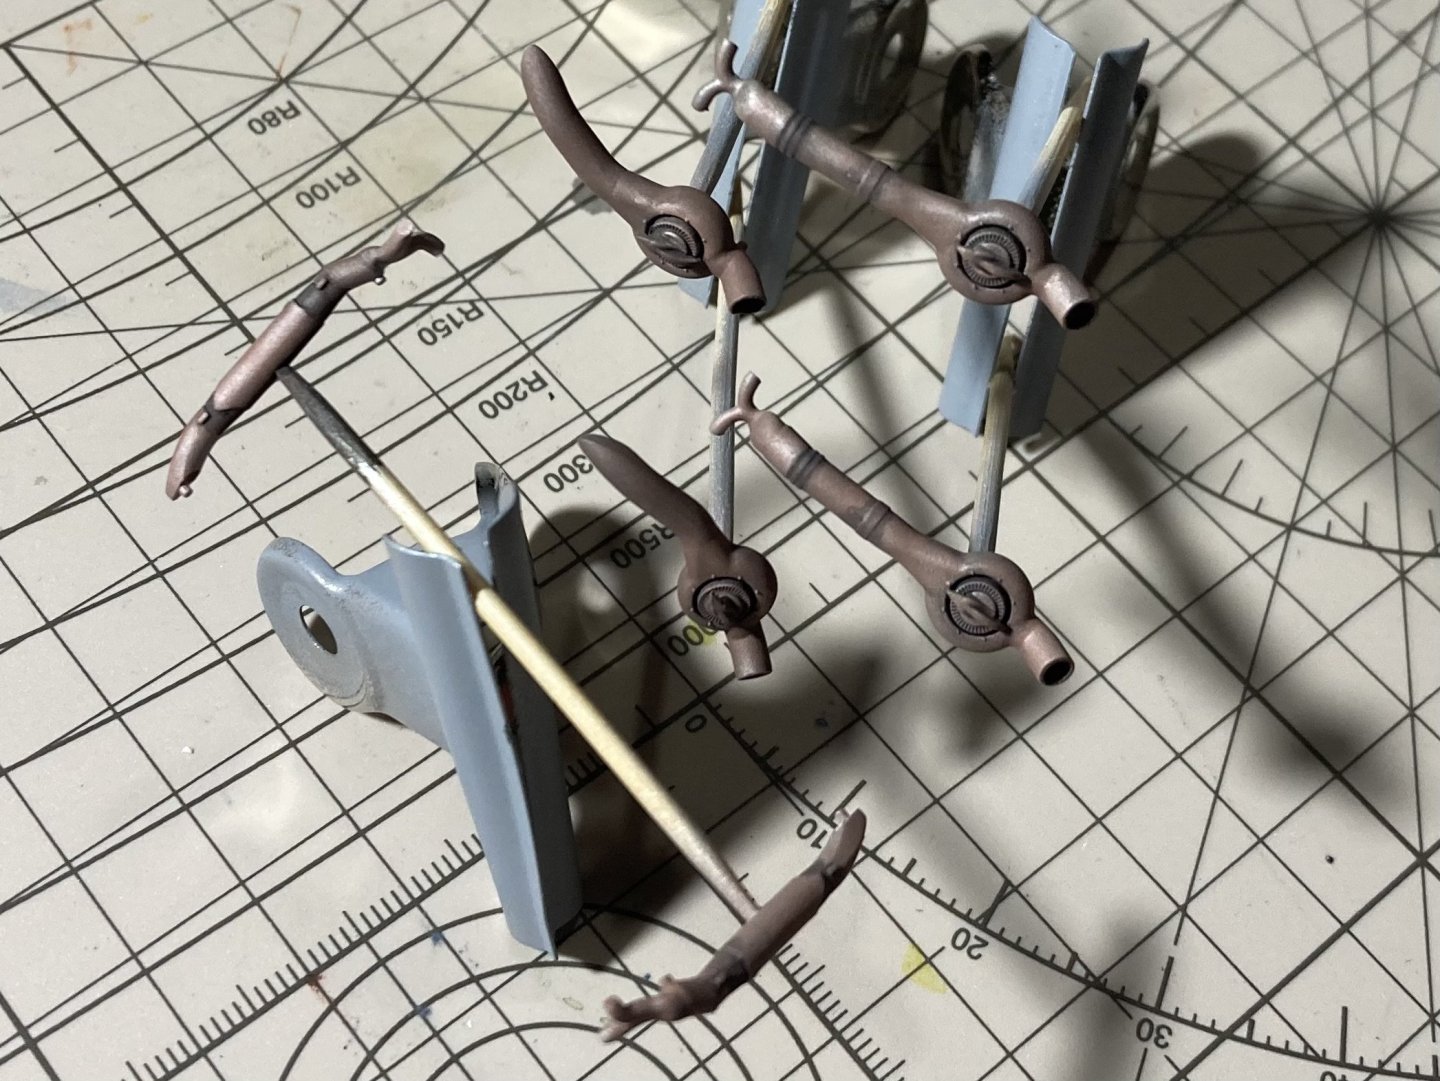
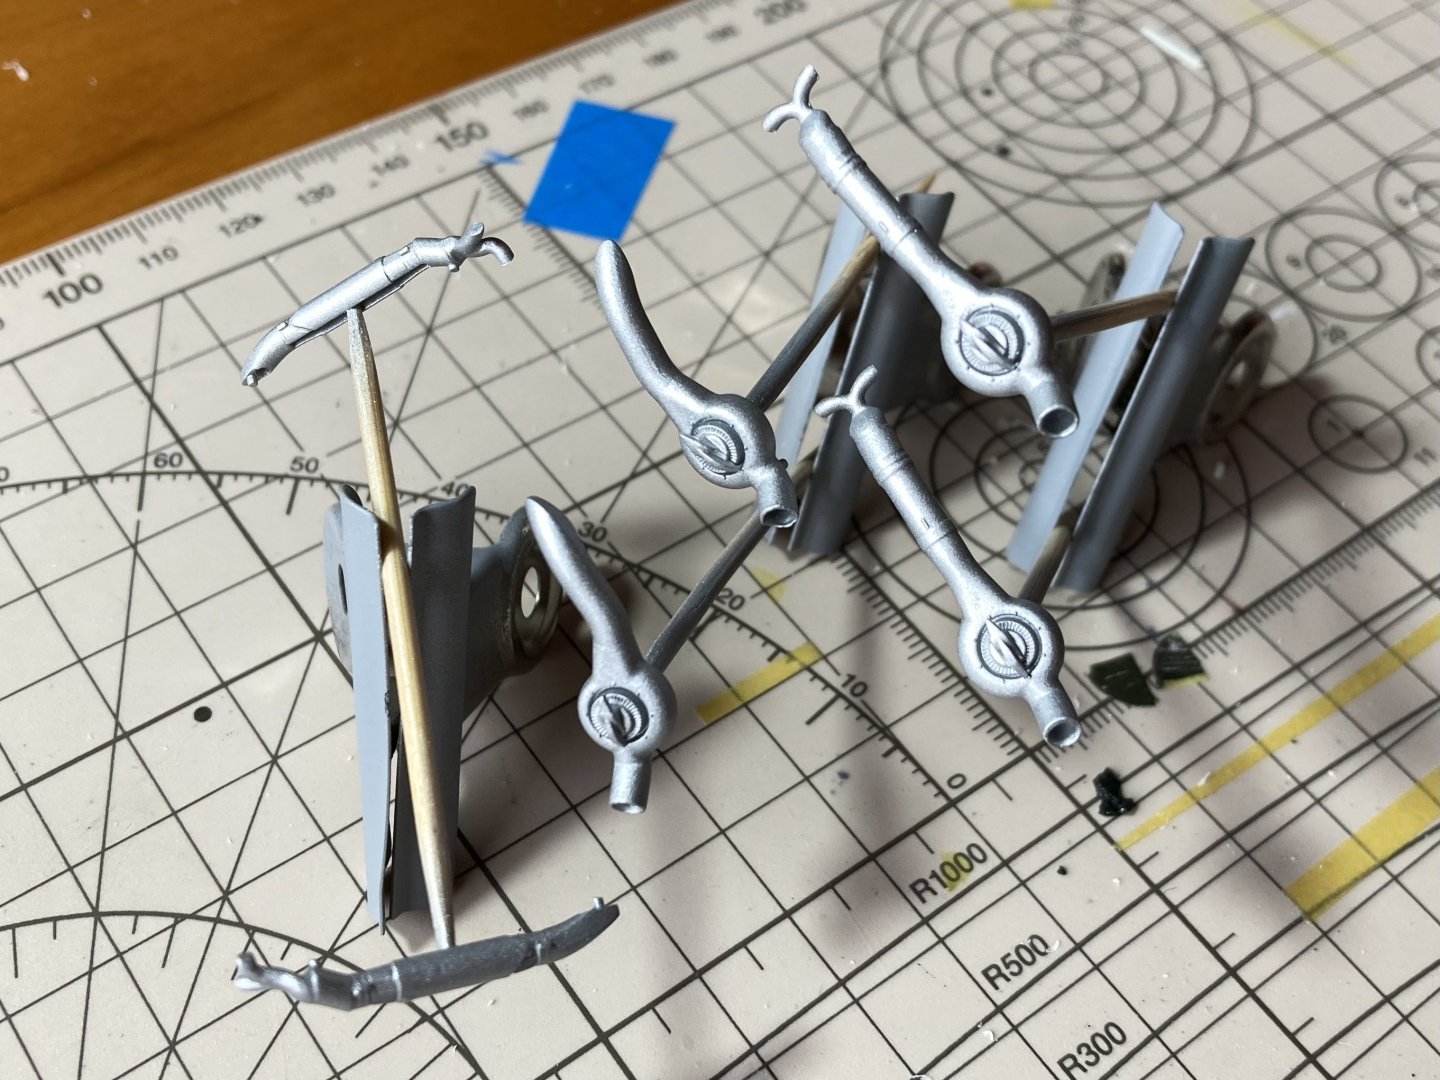
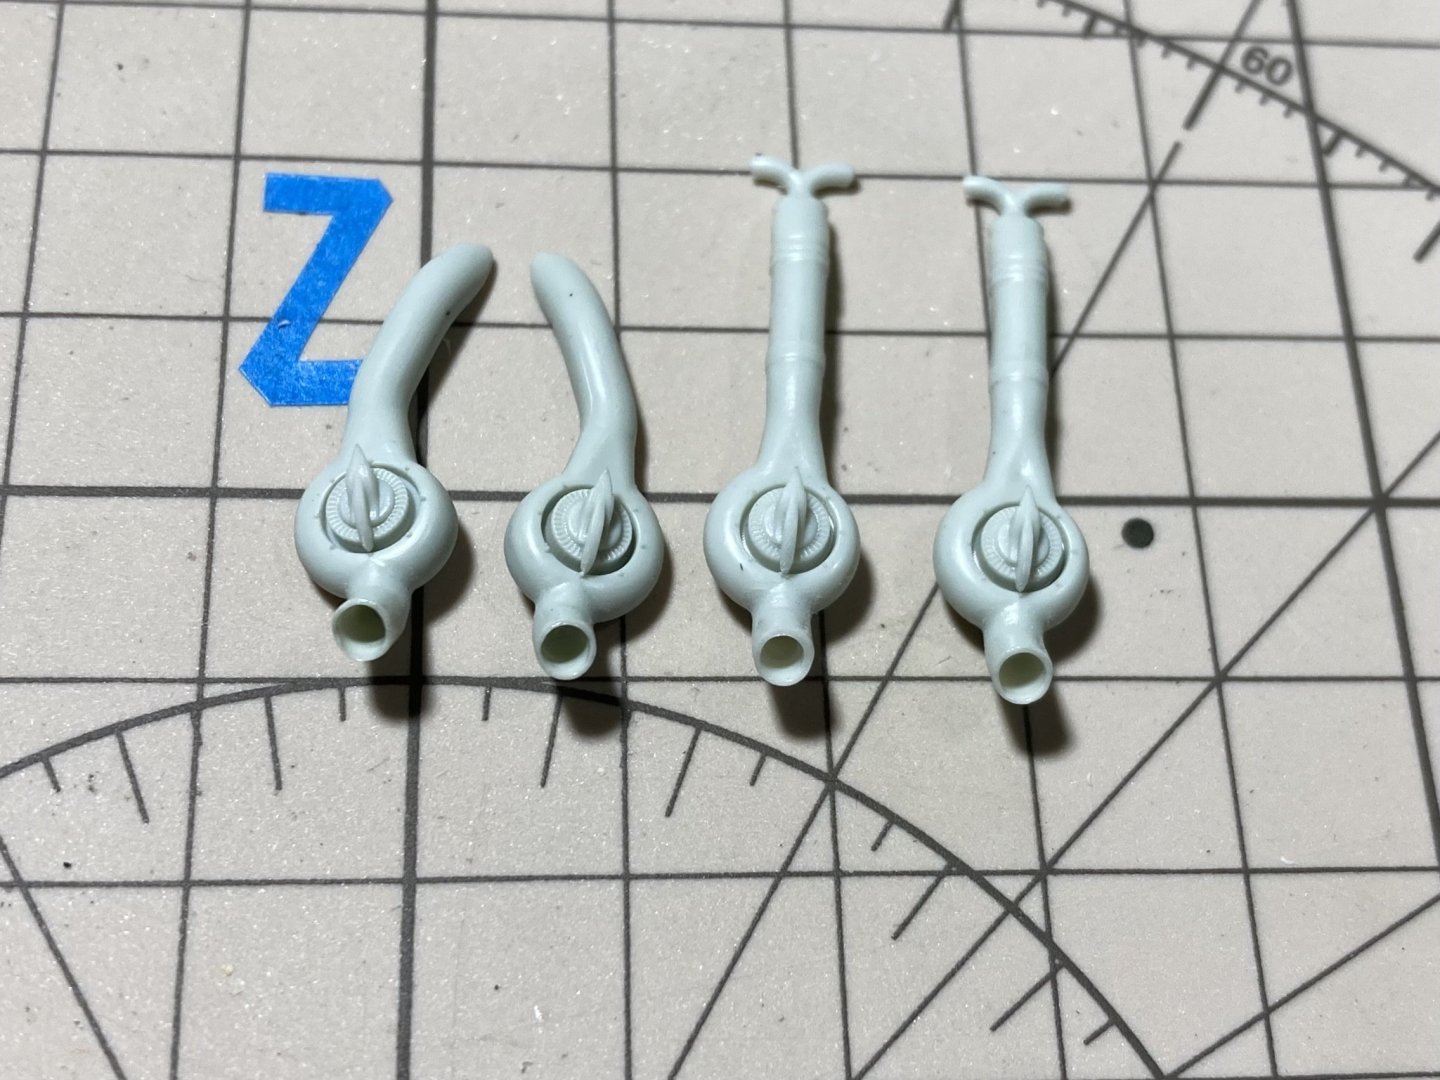
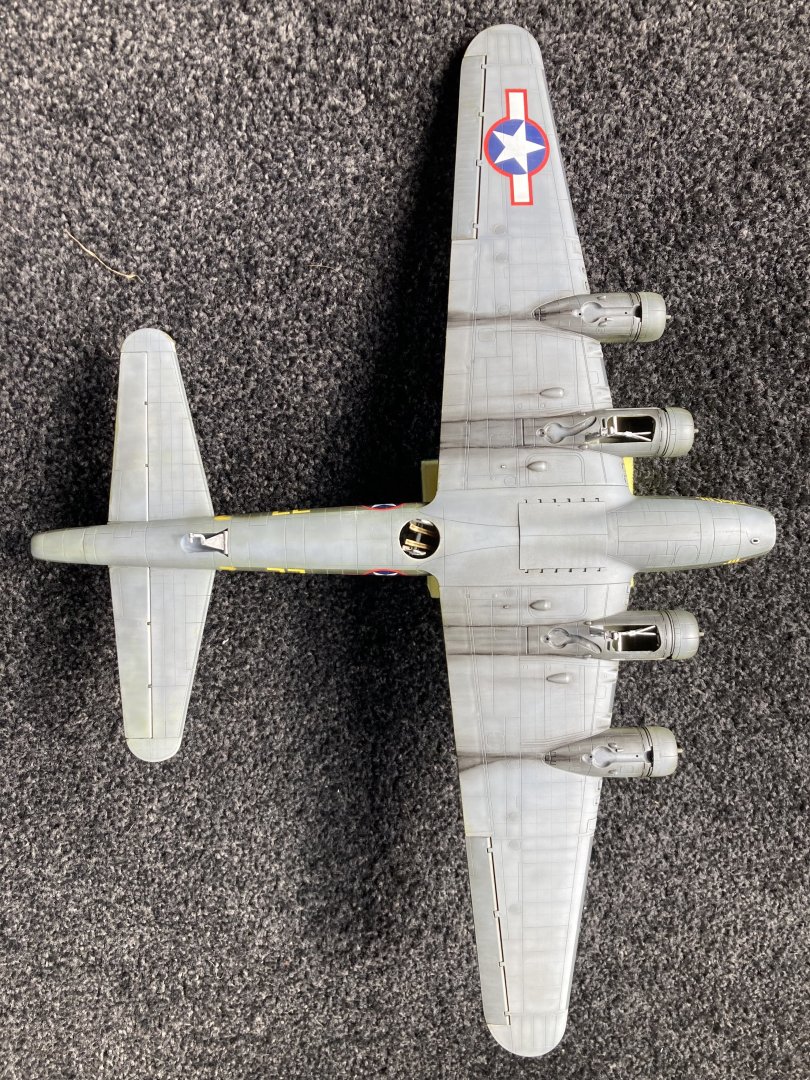
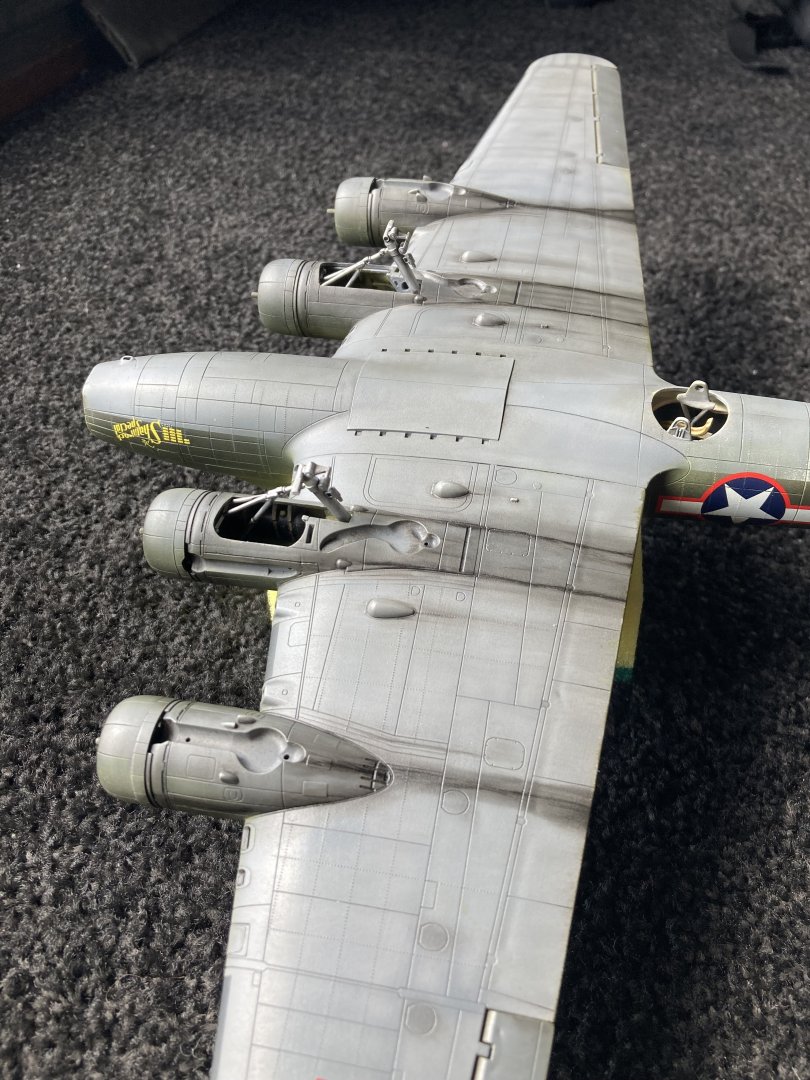
Decided to start on the superchargers, it’s the final subsection left! I did a lot of reading and looking at pics of the real ones and other modelled ones to see if there is a good and easy way to paint them so they don’t stick out but also look the part! saw a lot of people following the real ones and drilling out the pipes. So I decided to also while thinking about how to paint them. Here it shows one straight from the kit with the other 3 drilled. I think they do look quite good drilled out! They are all set for painting now! Still unsure so will leave it and think! at this stage I’m thinking the paint them aluminium, dry brush oils of black, grey and brown randomly and then do a wash with my AK rust wash. From there see how it looks and go from there! Any tips would be appreciated or links to other kits with a good technique. Otherwise I’ll just give it a go


- 77 replies
-
- 11
-
-
Thanks, I find it can be easy to weather so much that it becomes the main thing and looks nothing like any reference pics! So I try have some restraint even though it is fun, and keep the weathering to complement the paint job! I'm in the final stages now!!
-
Haha back when one shade of green would have to do for everything! I also struggle with the weathering part! I feel I more give it a go and if it works it’s more of a fluke! I’ve mainly gotten better at knowing how to remove it with as little damage as possible to try again with a different technique until I’m happy! let’s see if I can fluke some very light chipping when I get around to it!
-
Looks like an interesting build! Flying a normal plane the fuel is a big enough hazard… can’t imagine flying knowing that fuel tank was right behind me while in a combat environment!
-
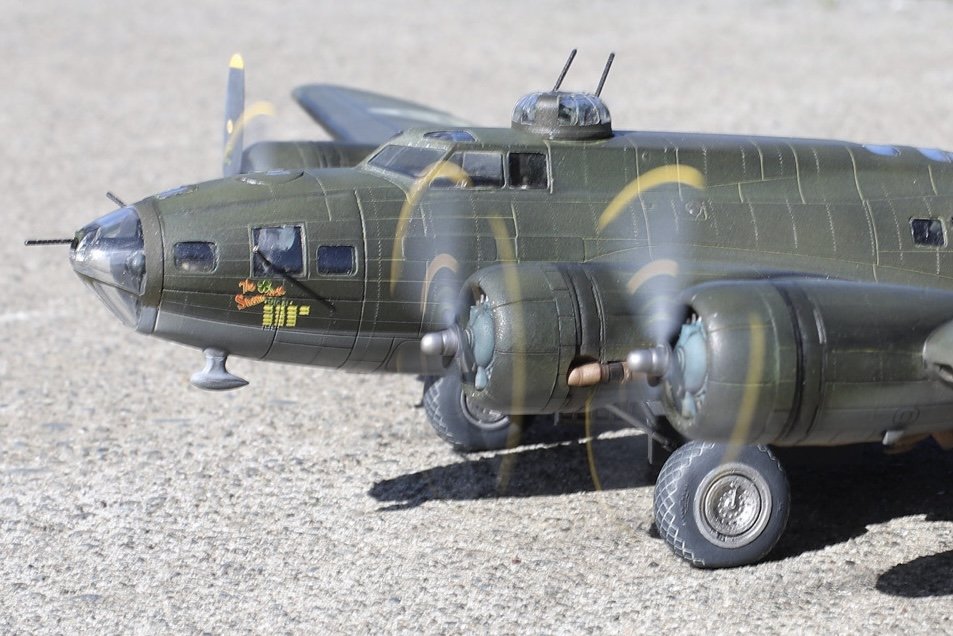
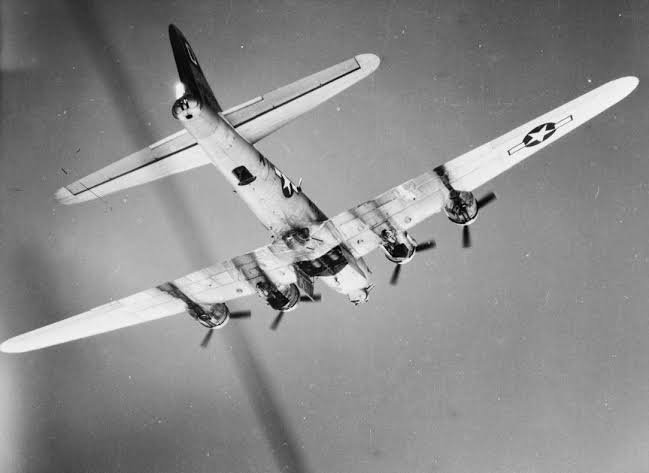
It is quite a contrasted picture. I won’t go darker but just move the oils about just to try give it a more smooth look. I like having an actual picture to work off as it means I don’t have to guess. The inboard engines have a unique pattern which I’d not have done if I’d not seen it!
-
Underside exhaust and oil effects had started. Using this pic as a reference. I don’t want to do a super heavy exhaust effect but from a lot of the pictures they are really filthy! This is more of a first coat but also roughly as heavy as I’ll go but as it dries I’ll give it little tweak and add bits to it. also while it’s been on its back I installed the undercarriage.
- 77 replies
-
- 11
-