HOLIDAY DONATION DRIVE - SUPPORT MSW - DO YOUR PART TO KEEP THIS GREAT FORUM GOING!
×
Lt. Biggles
-
Posts
344 -
Joined
-
Last visited
Content Type
Profiles
Forums
Gallery
Events
Everything posted by Lt. Biggles
-
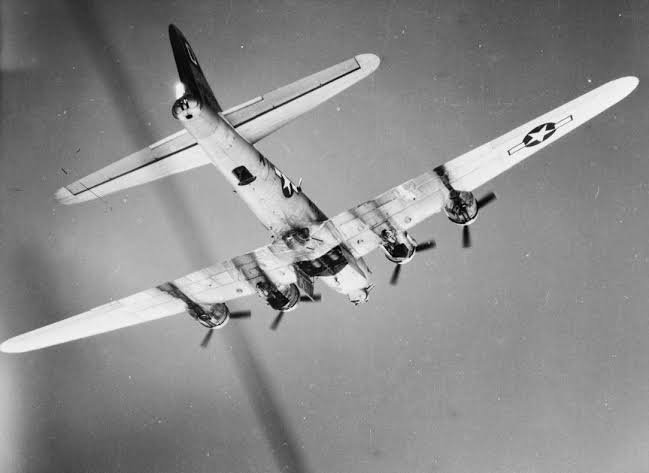
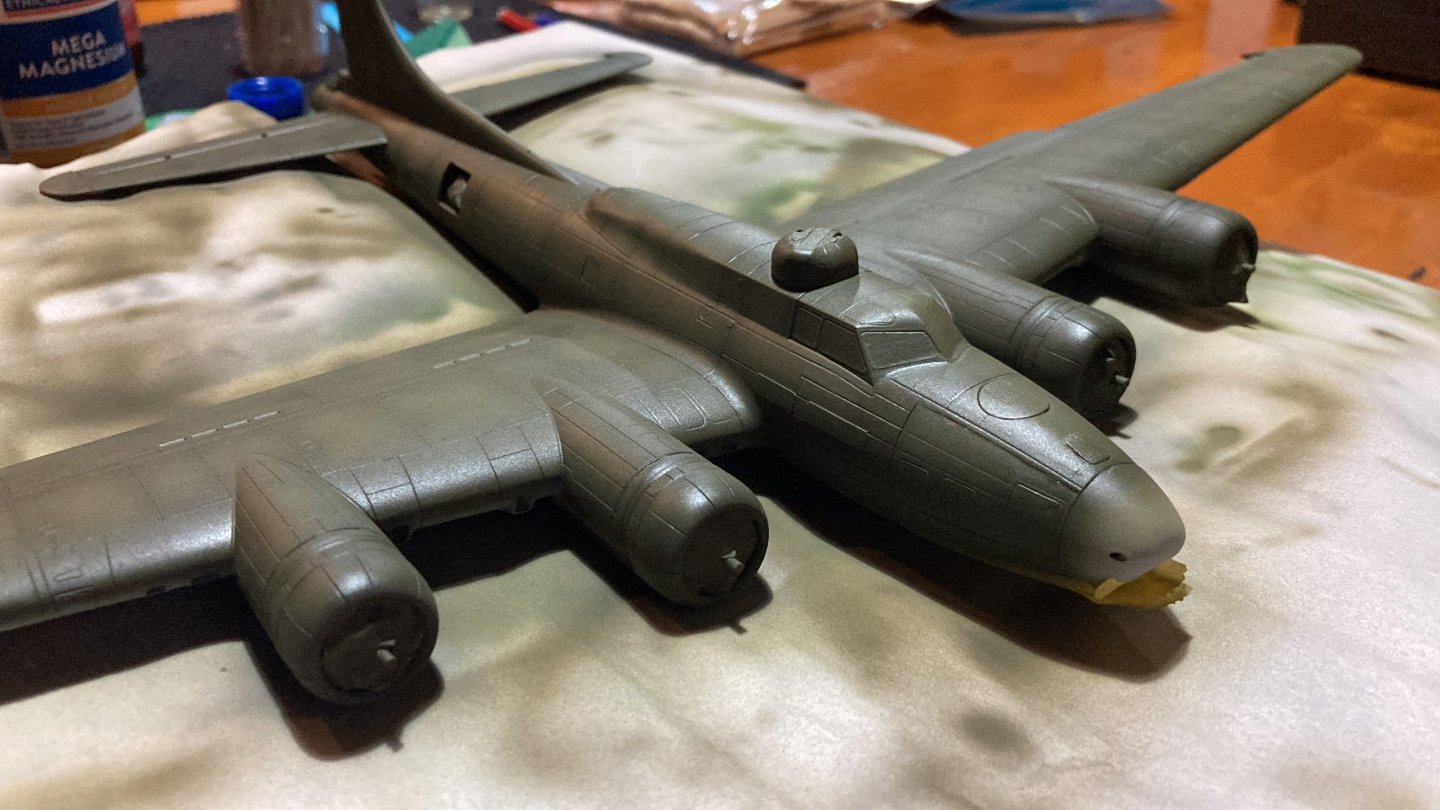
 It is quite a contrasted picture. I won’t go darker but just move the oils about just to try give it a more smooth look. I like having an actual picture to work off as it means I don’t have to guess. The inboard engines have a unique pattern which I’d not have done if I’d not seen it!
 -
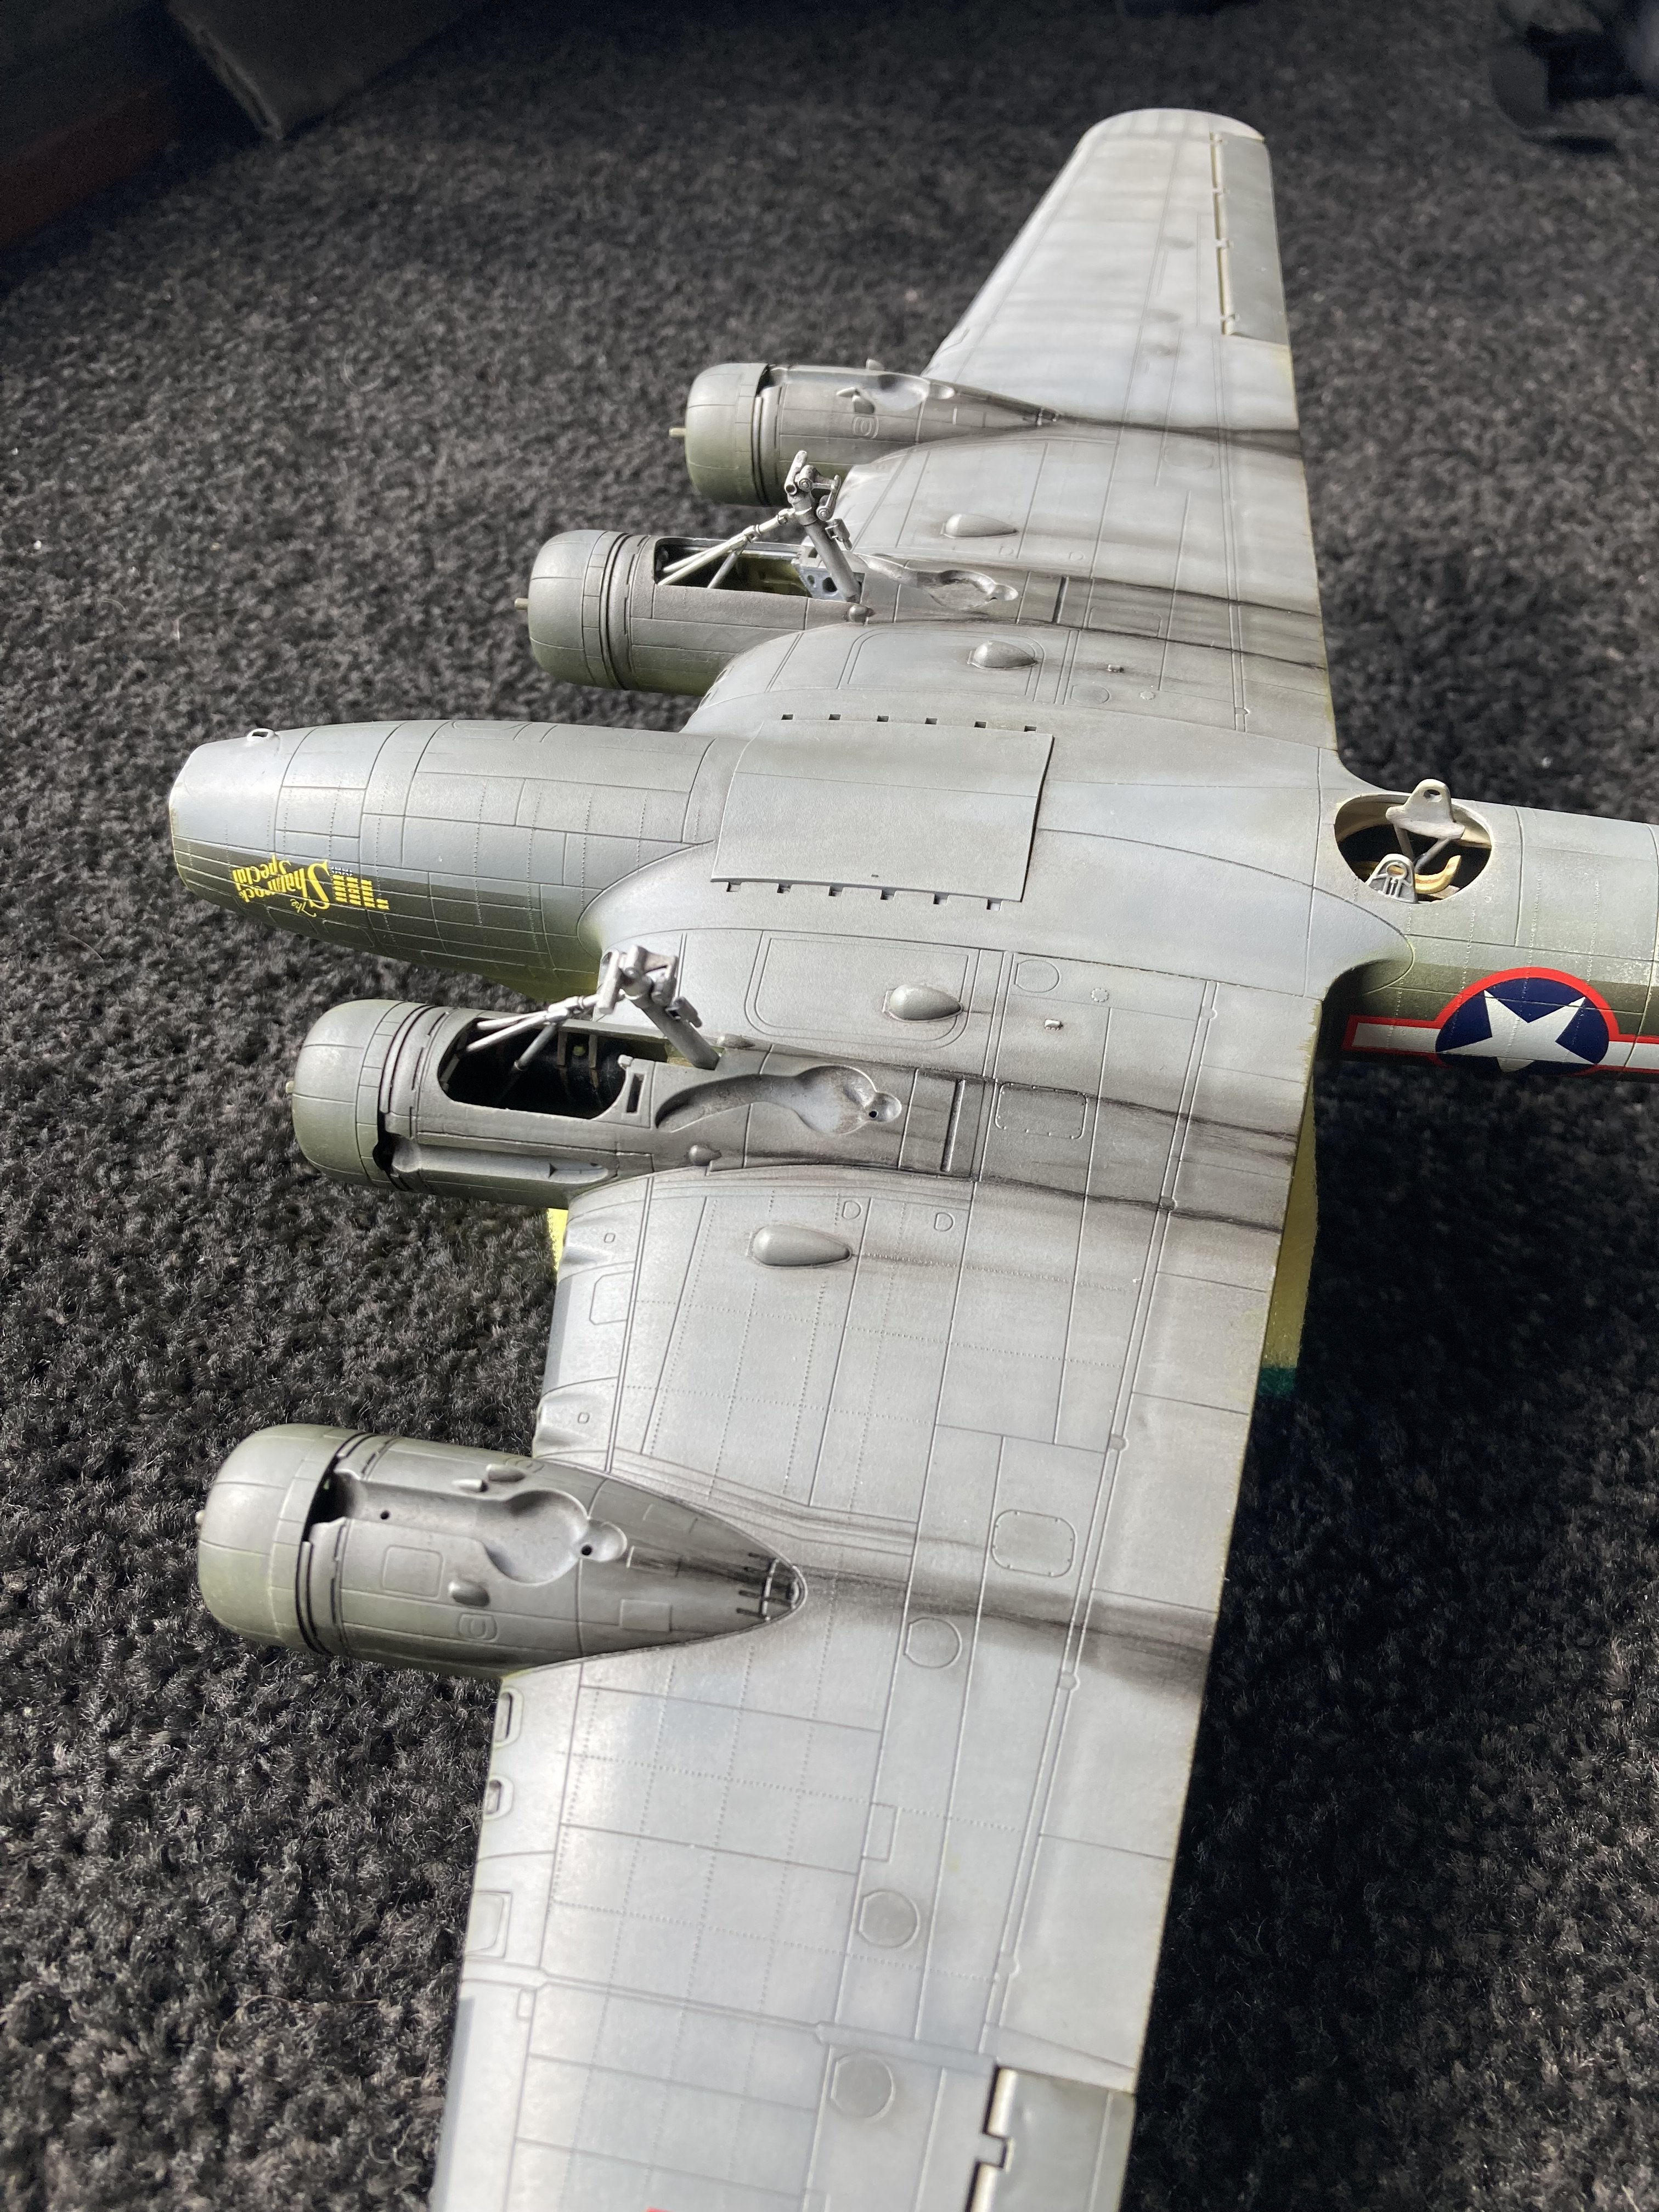
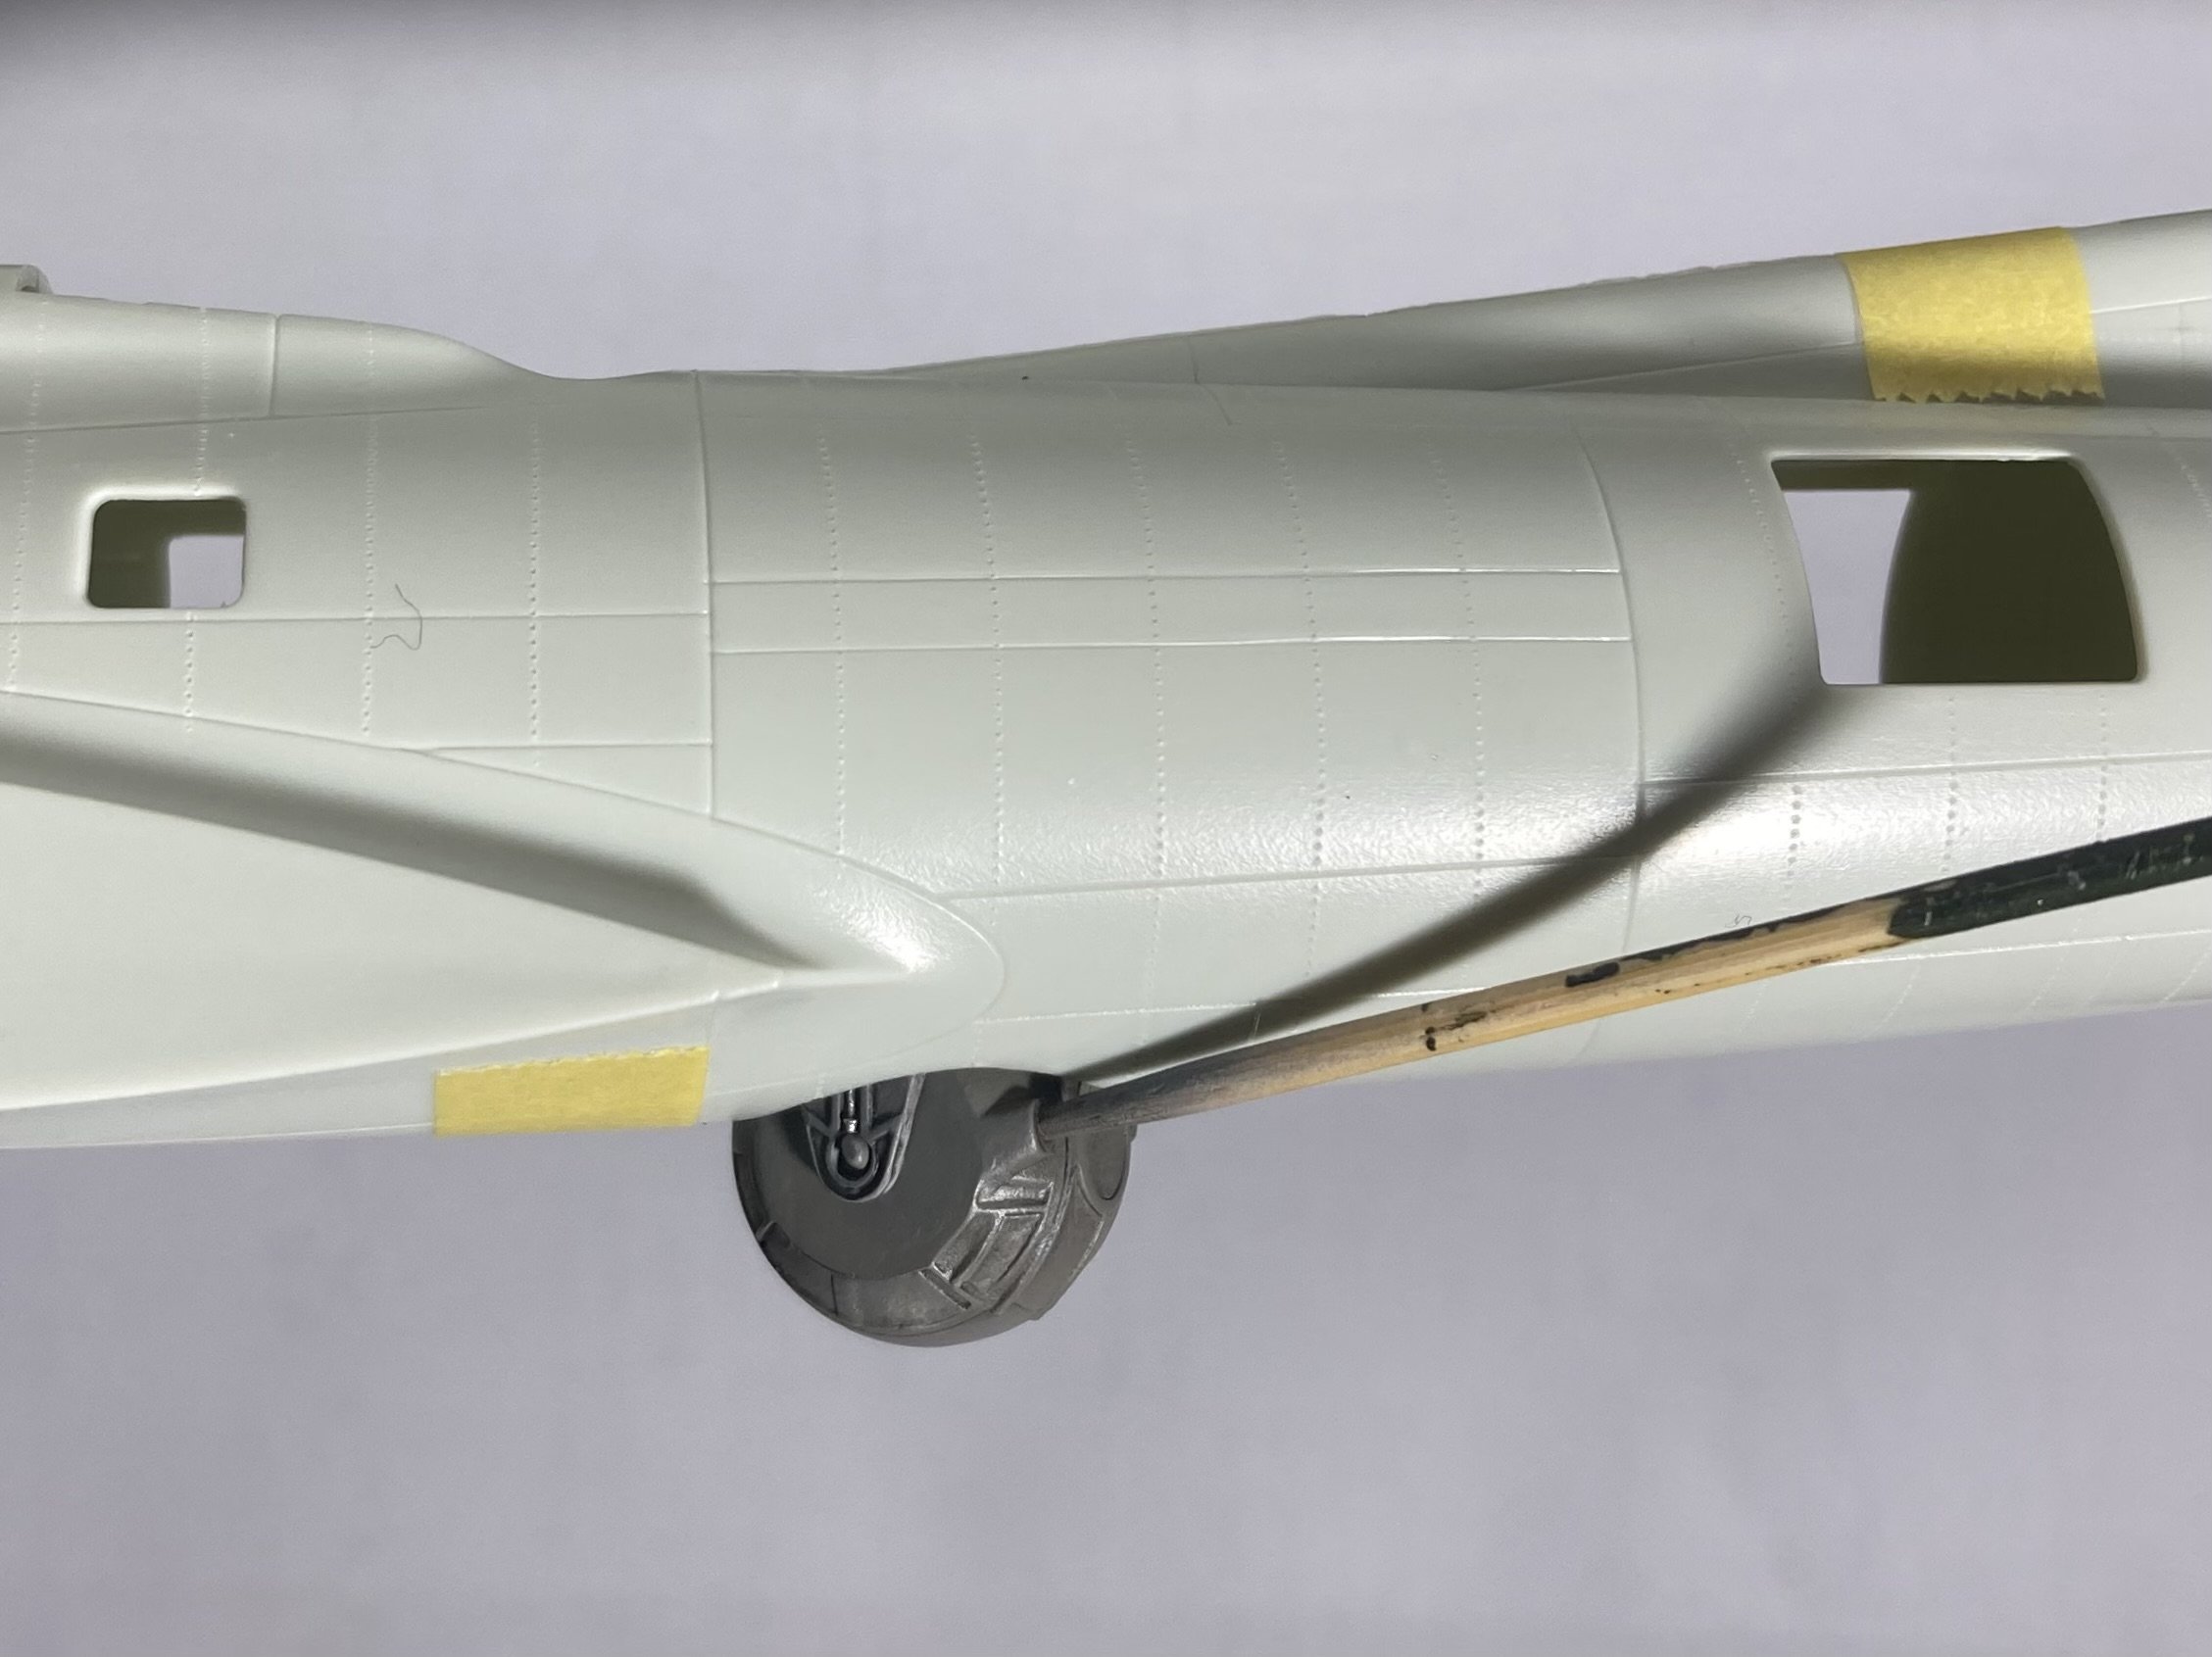
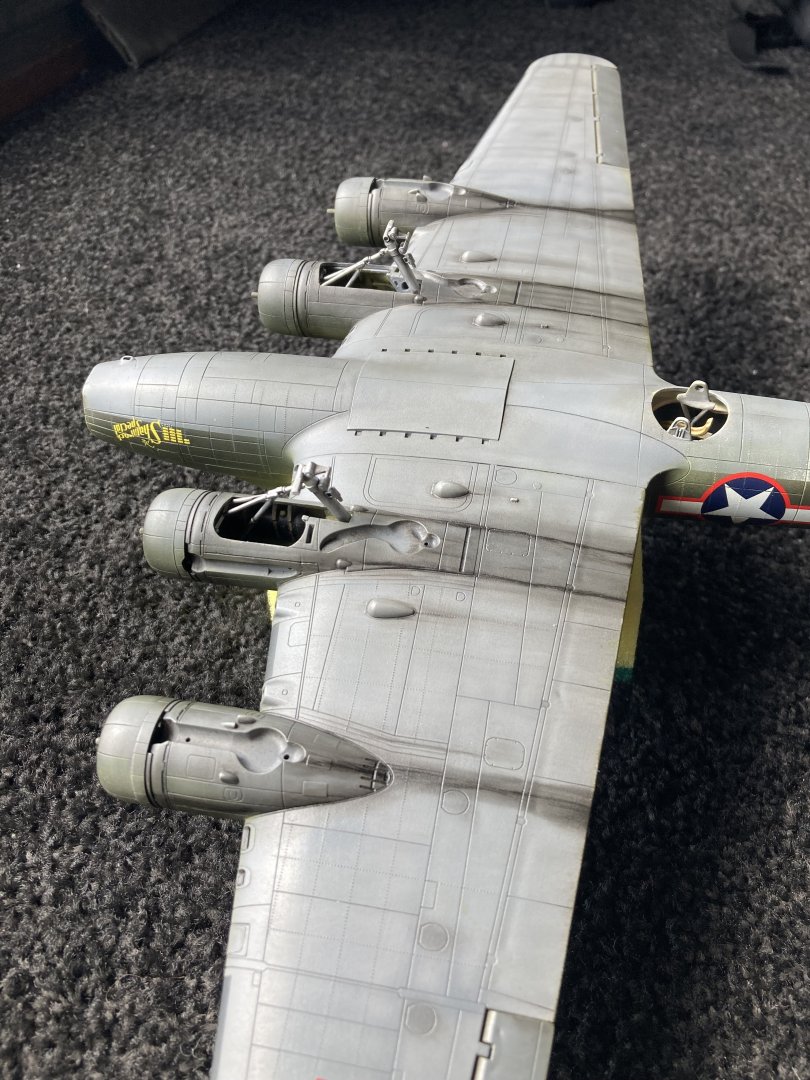
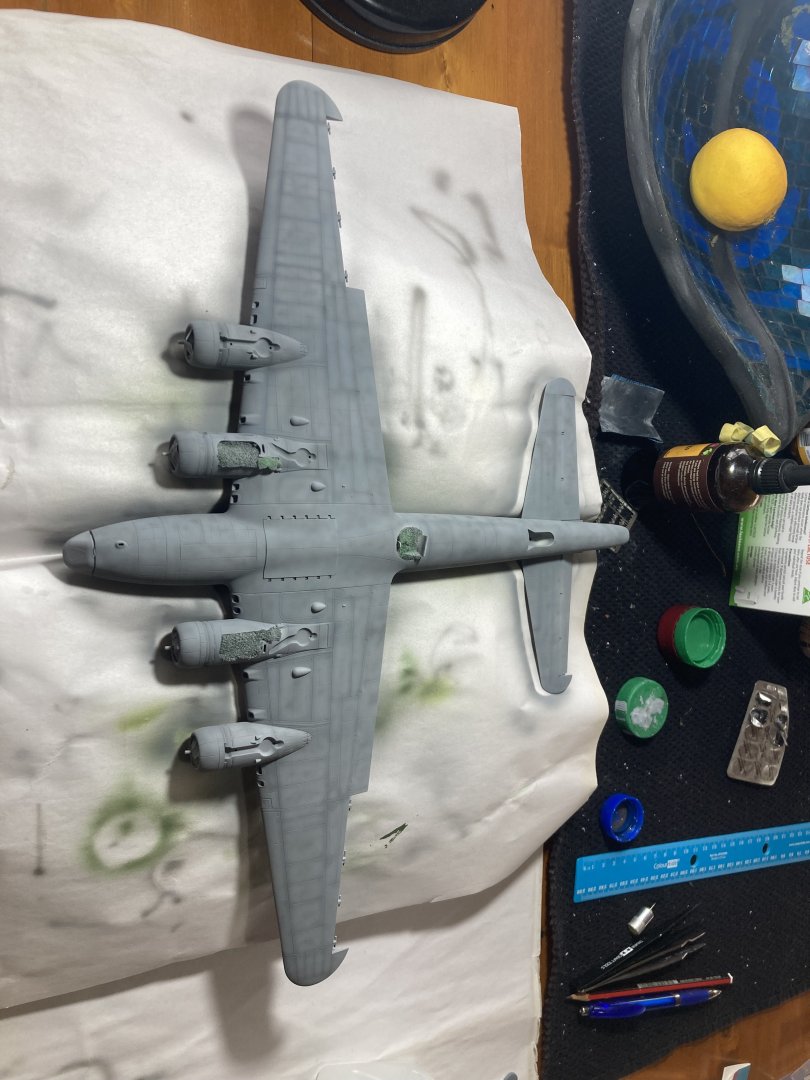
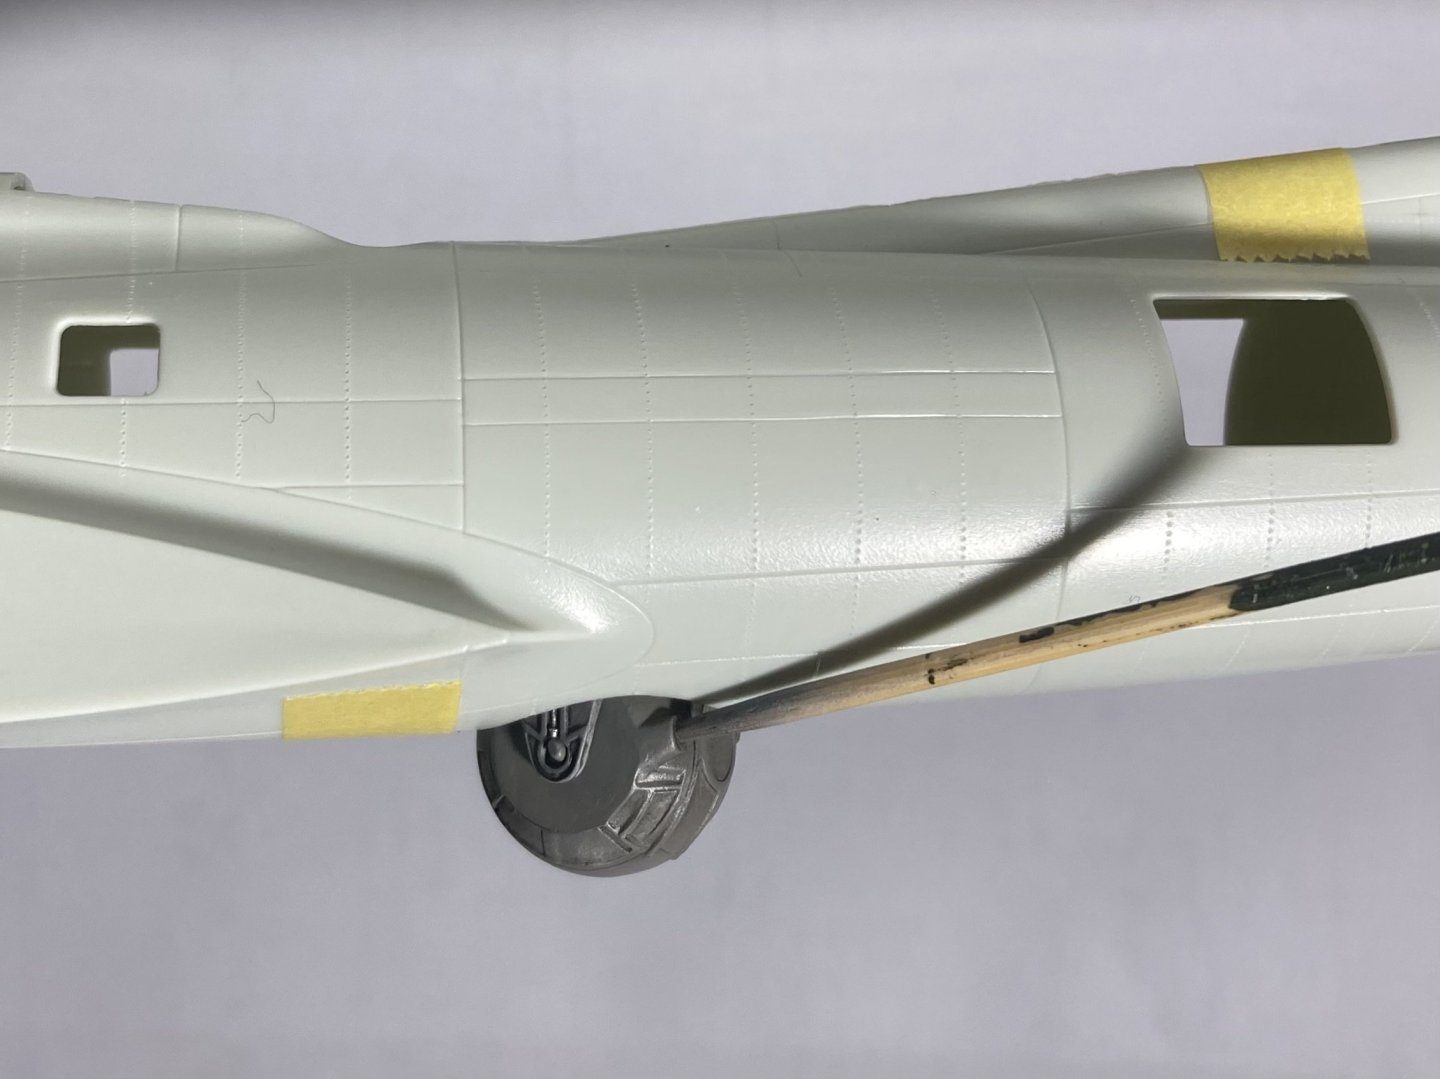
Underside exhaust and oil effects had started. Using this pic as a reference. I don’t want to do a super heavy exhaust effect but from a lot of the pictures they are really filthy! This is more of a first coat but also roughly as heavy as I’ll go but as it dries I’ll give it little tweak and add bits to it. also while it’s been on its back I installed the undercarriage.
- 77 replies
-
- 11
-

-
Thanks! I’m also following someone else’s build which I’ll be doing next. Happens to be an Eduard kit also, a P51d. Eduard do some amazingly detailed kits! And a 1/48 b17 will be a beast! This 1/72 one is still big so can only imagine! At the very least I hope I can help you learn what not to do with yours 😂
-
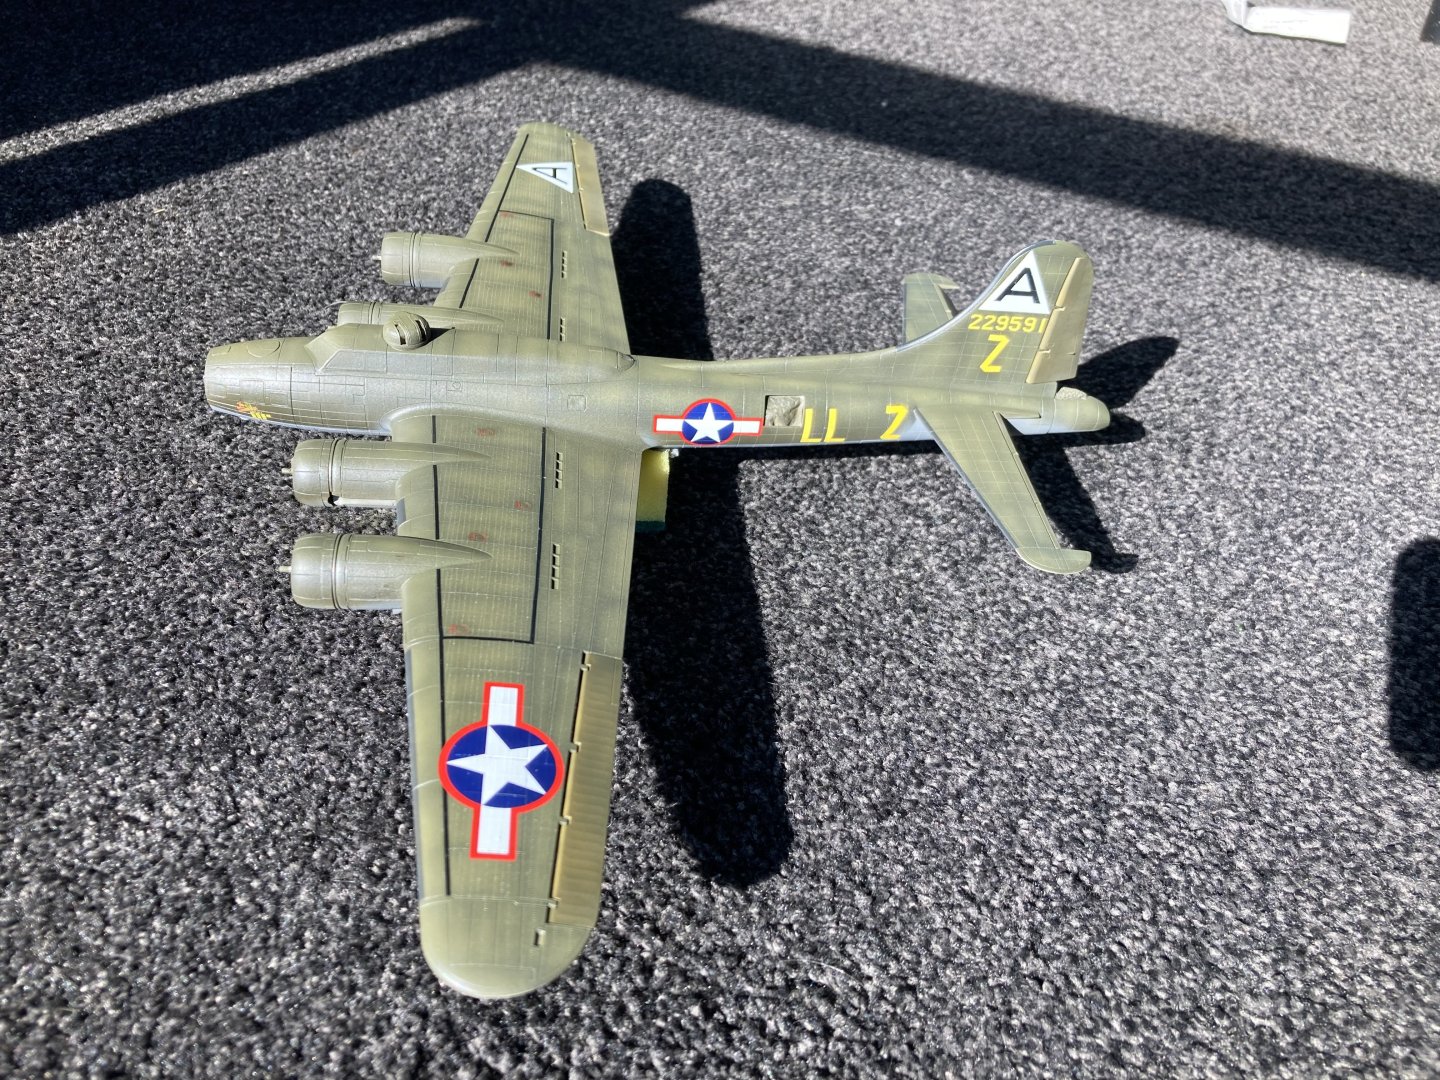
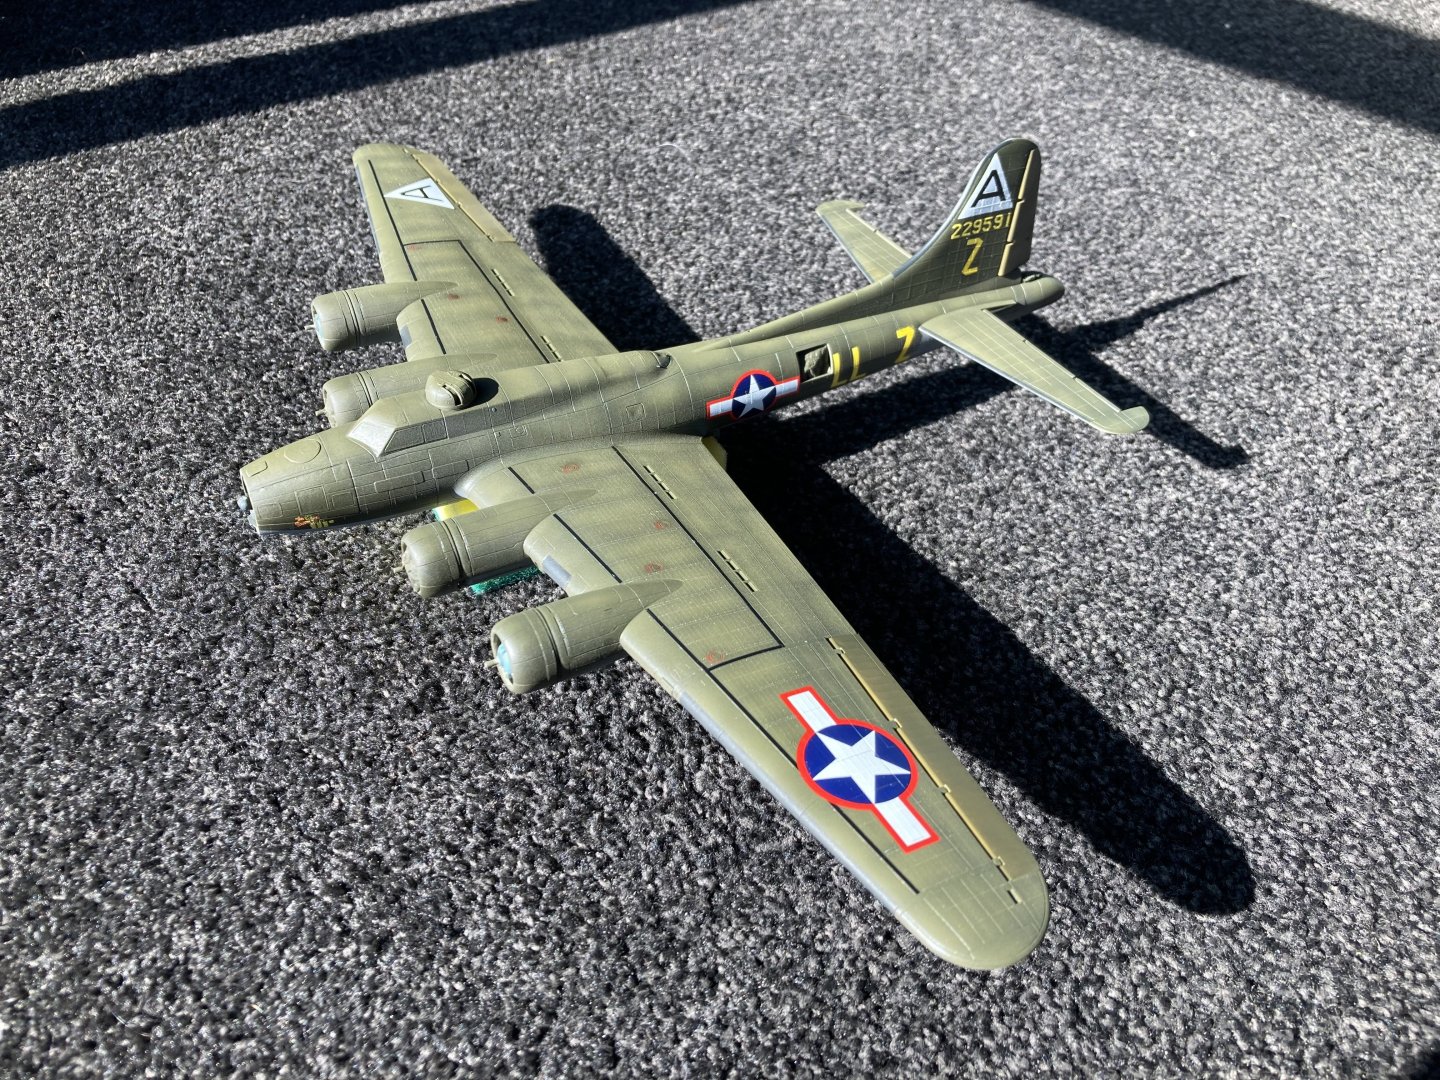
Thanks. I’ll leave it as it is. A bit of making it abit grubby from use and hopefully that gives it abit more character. I’d like to do alittle bit of chipping effect with aluminium but it makes me abit nervous as the chipping patterns to make it look natural isn’t my strong point! The olive drab does change a lot depending on the angle you view it. Some angles it’s all just one shade and another angle all the fading and colours are nicely visible.
-
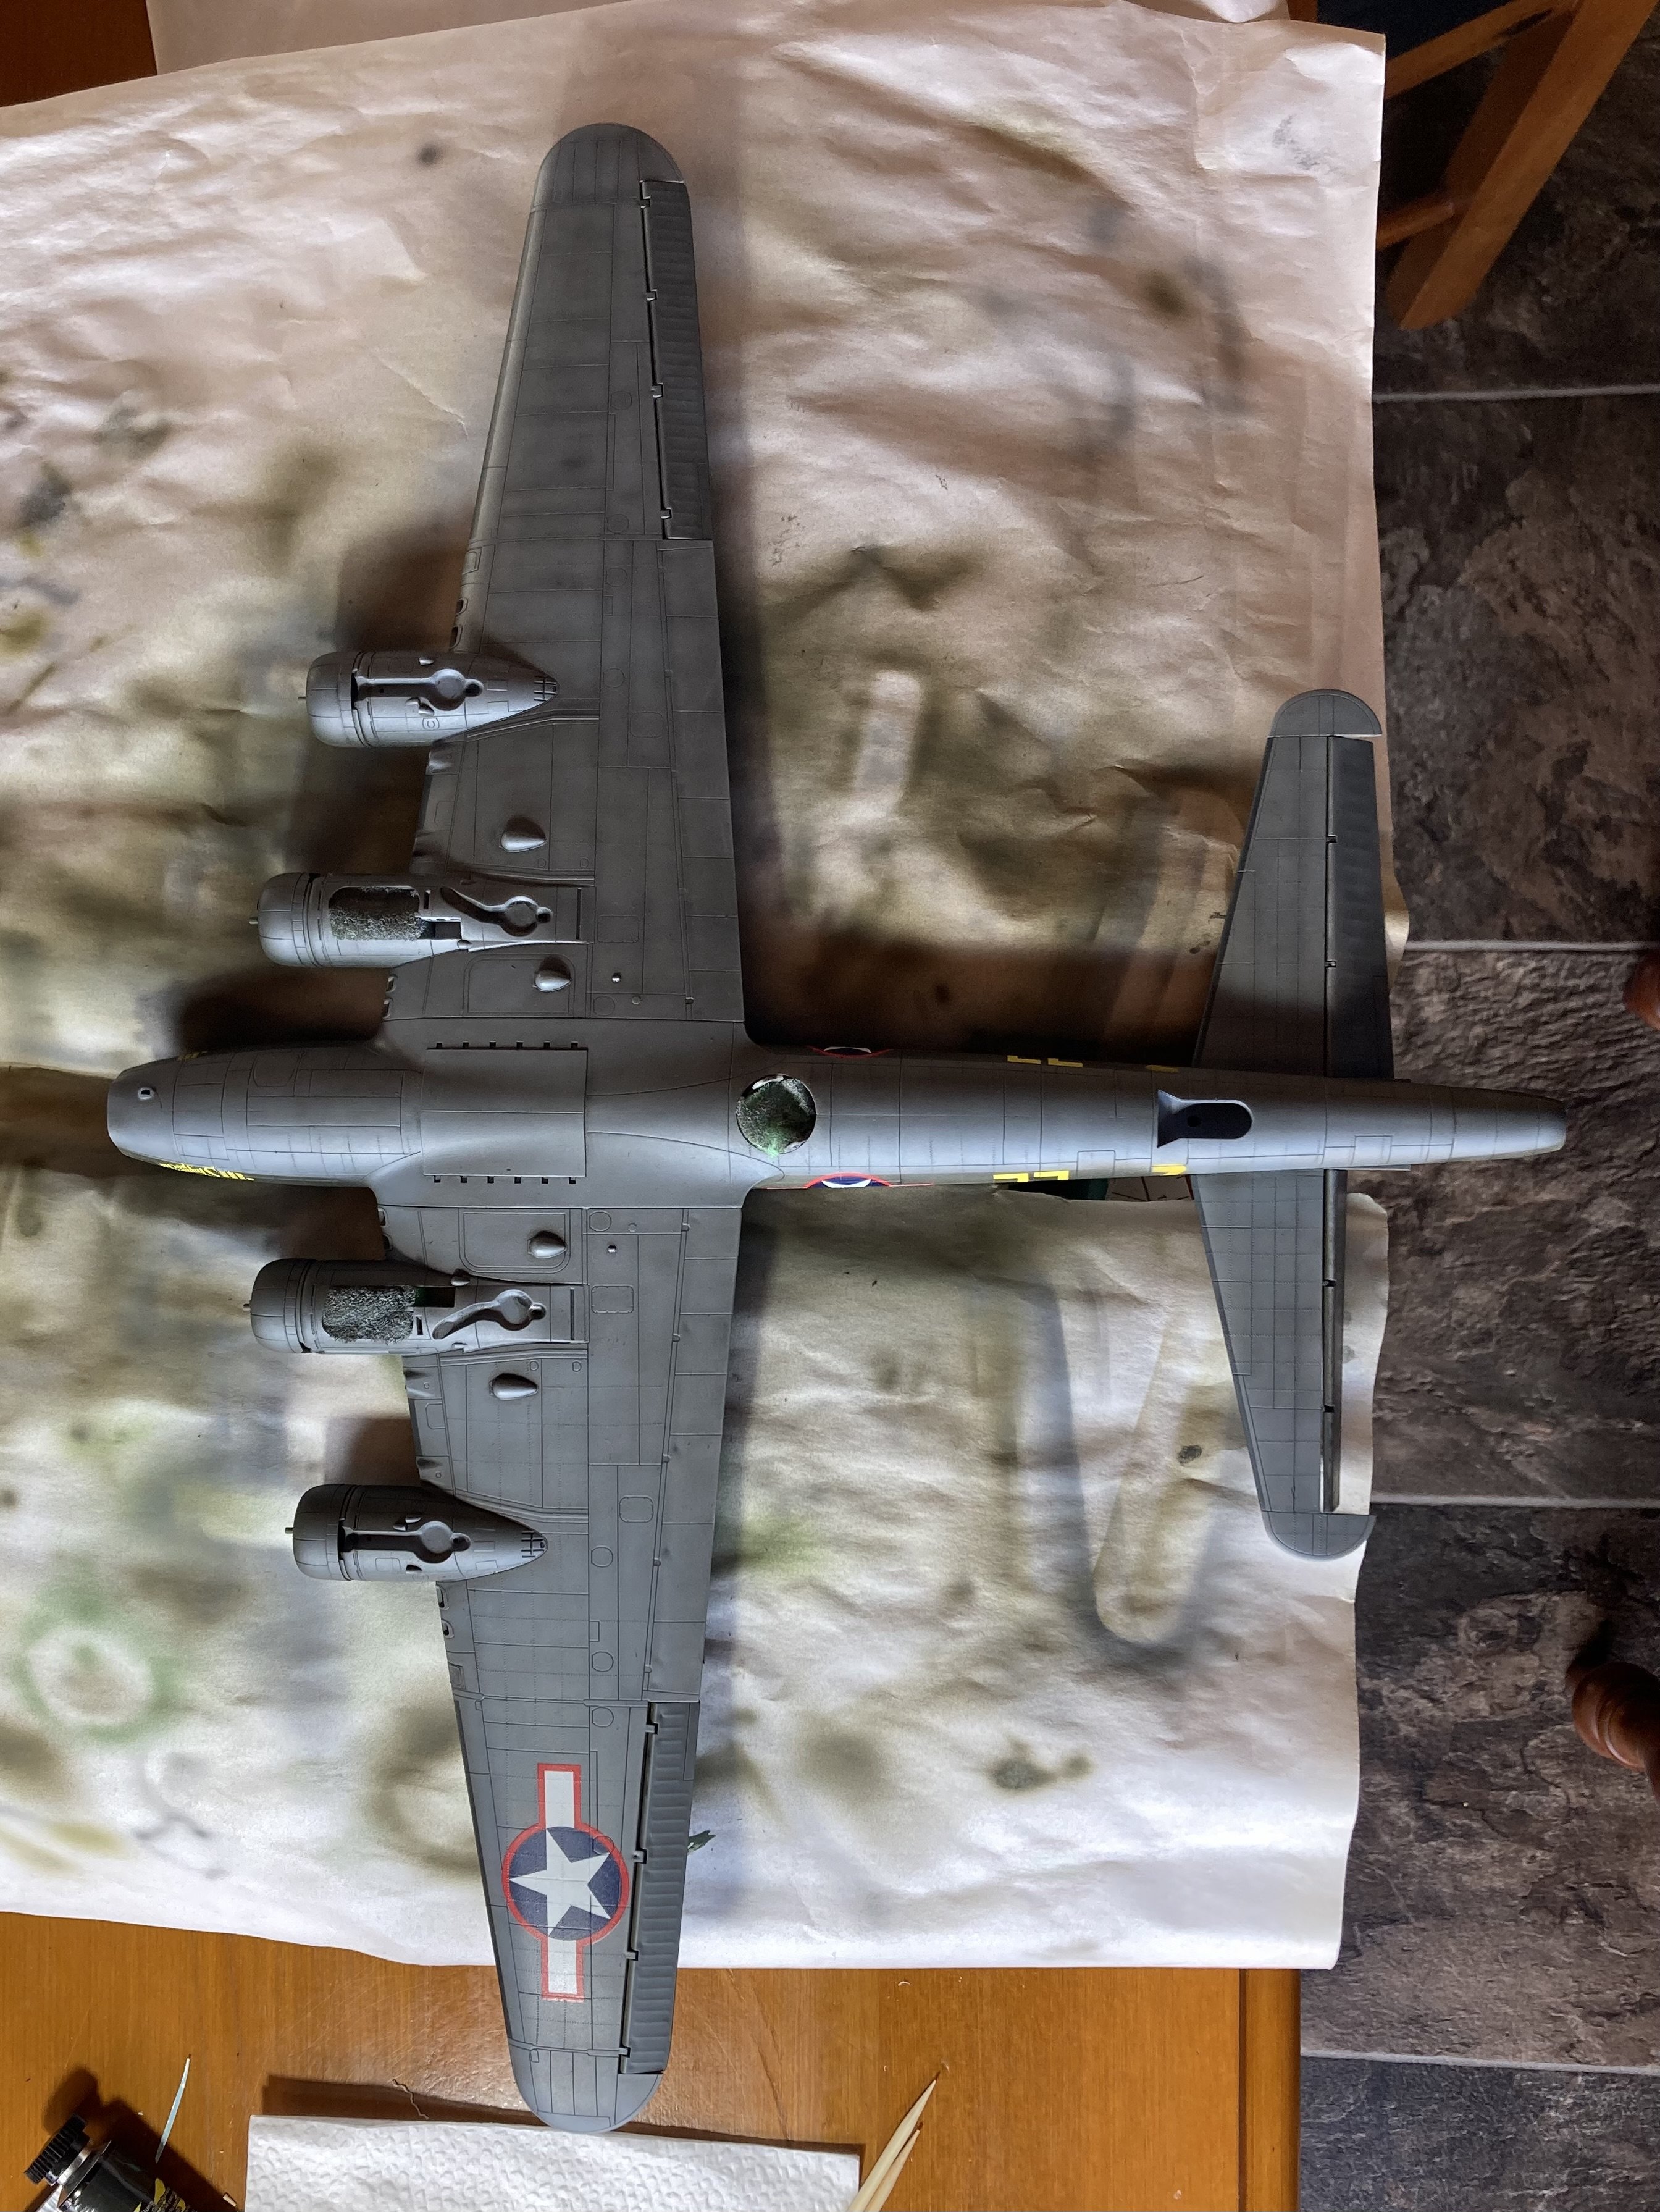
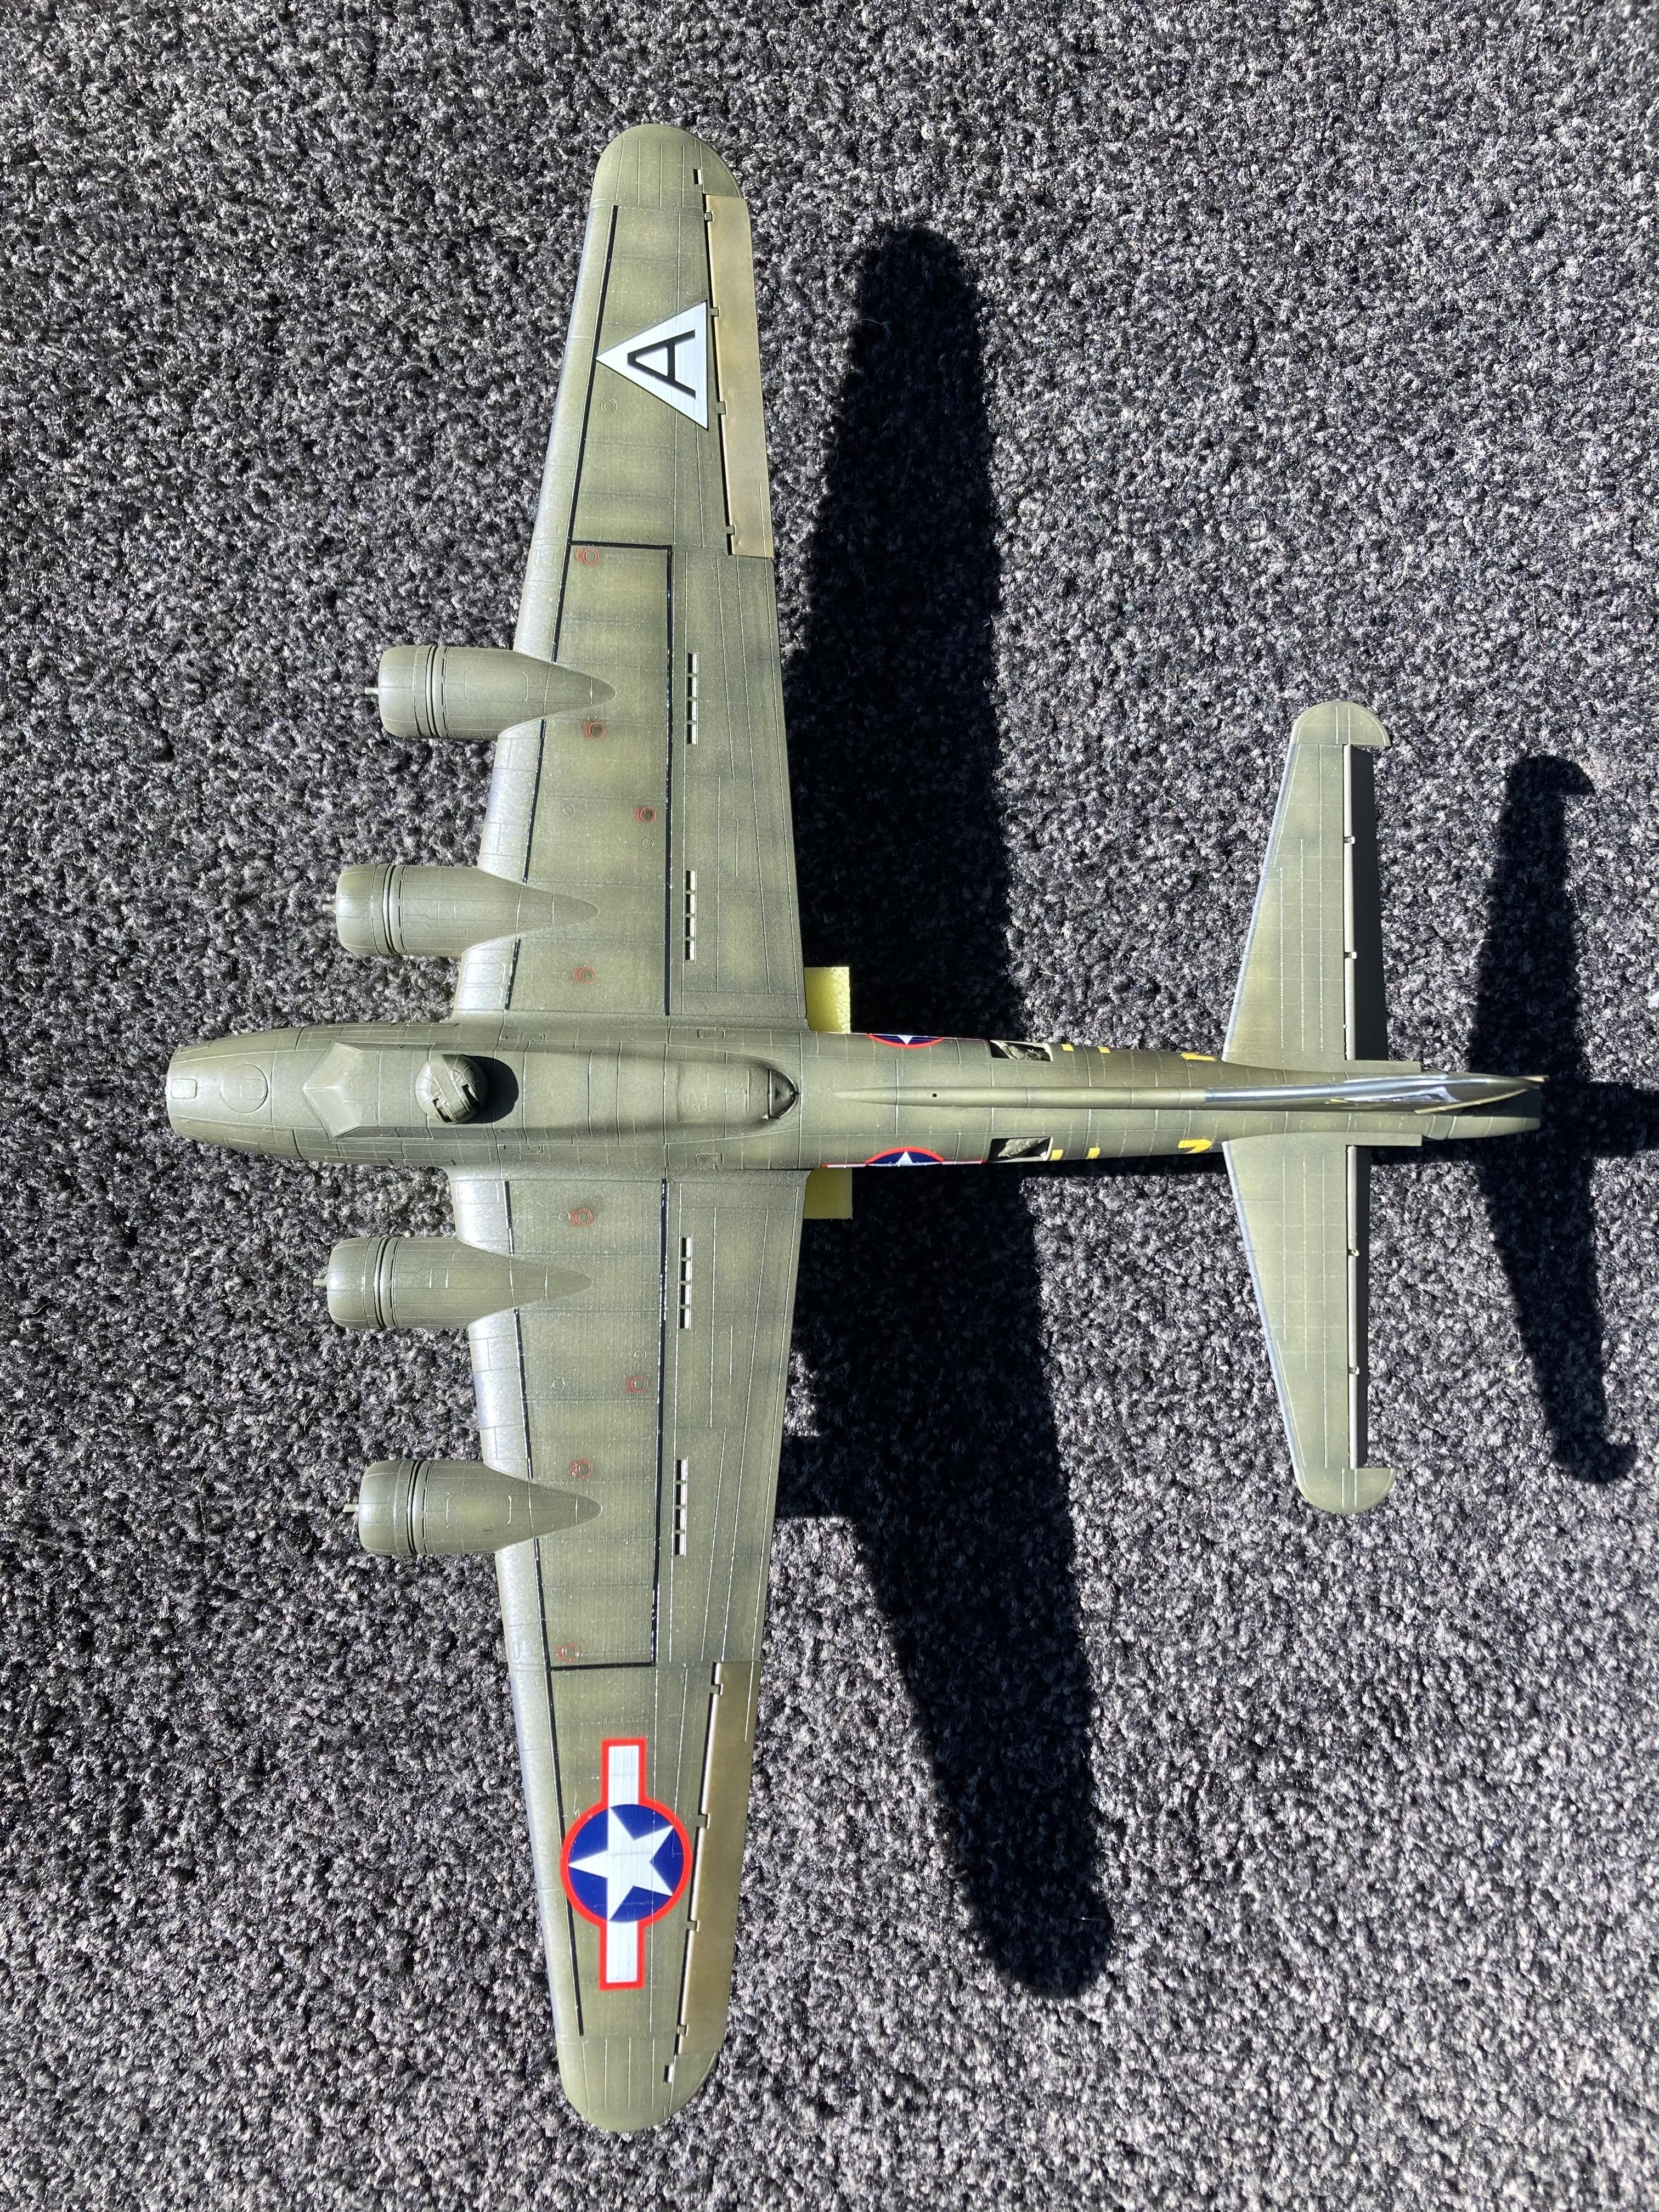
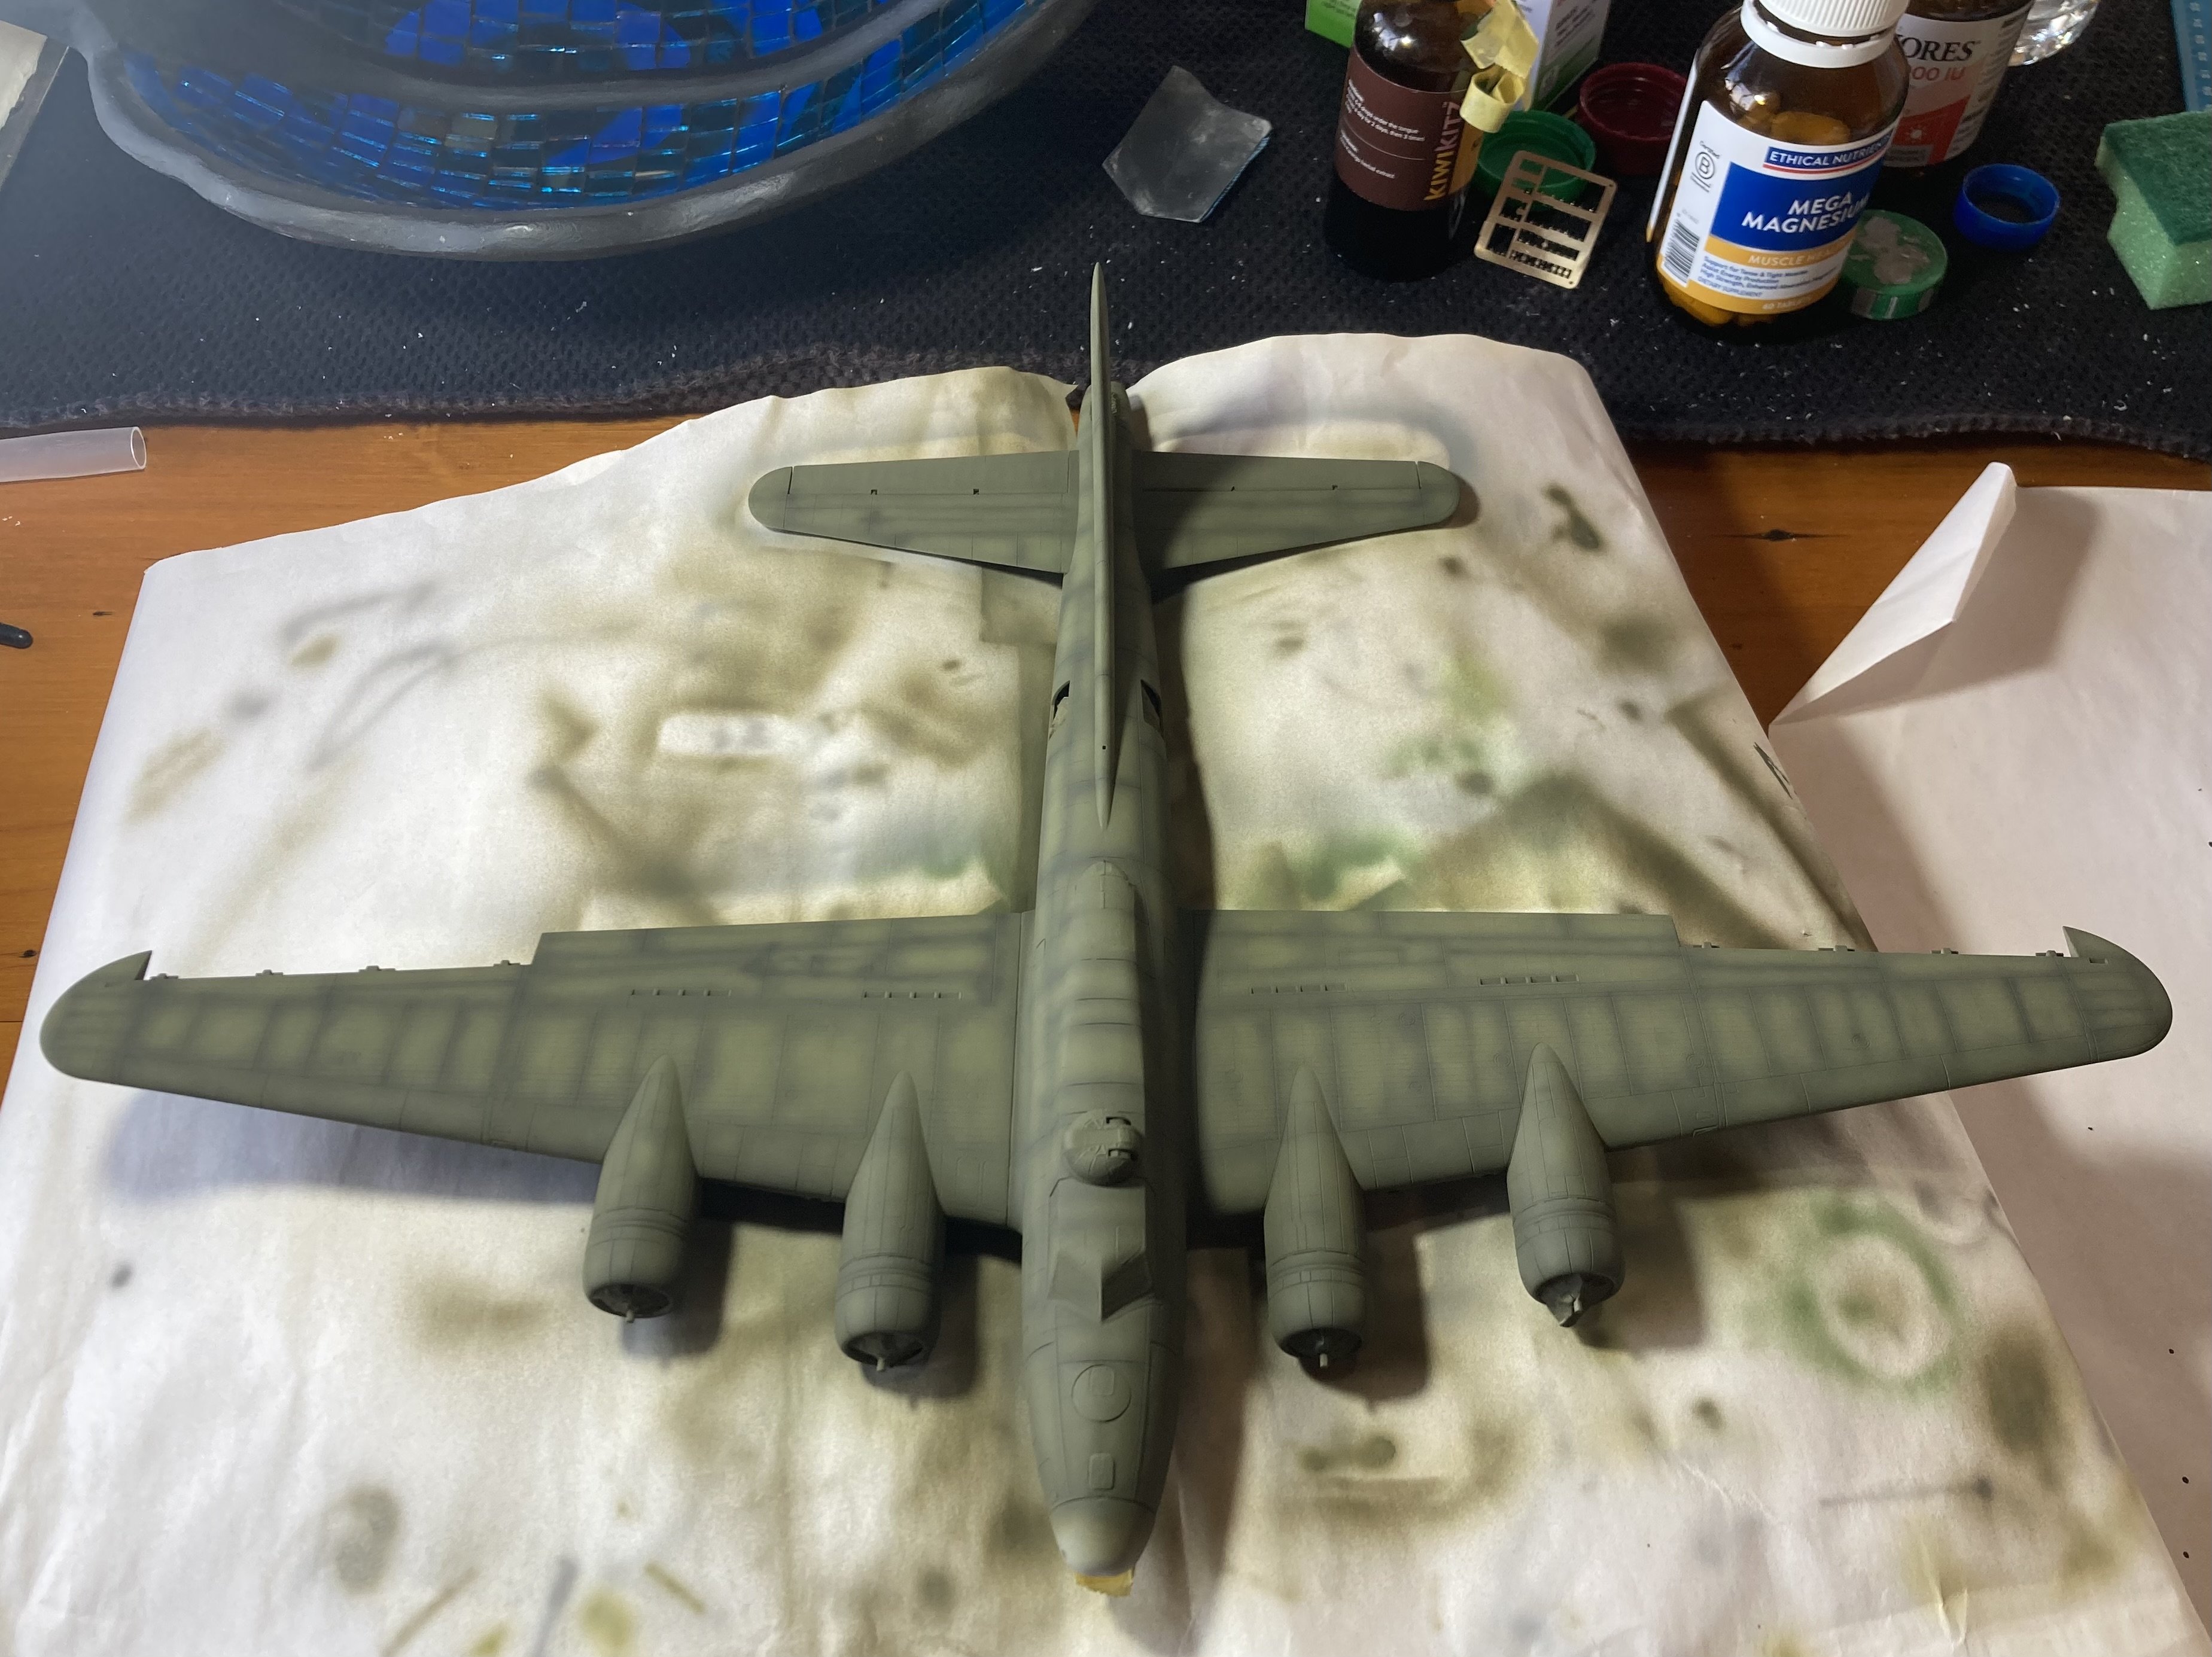
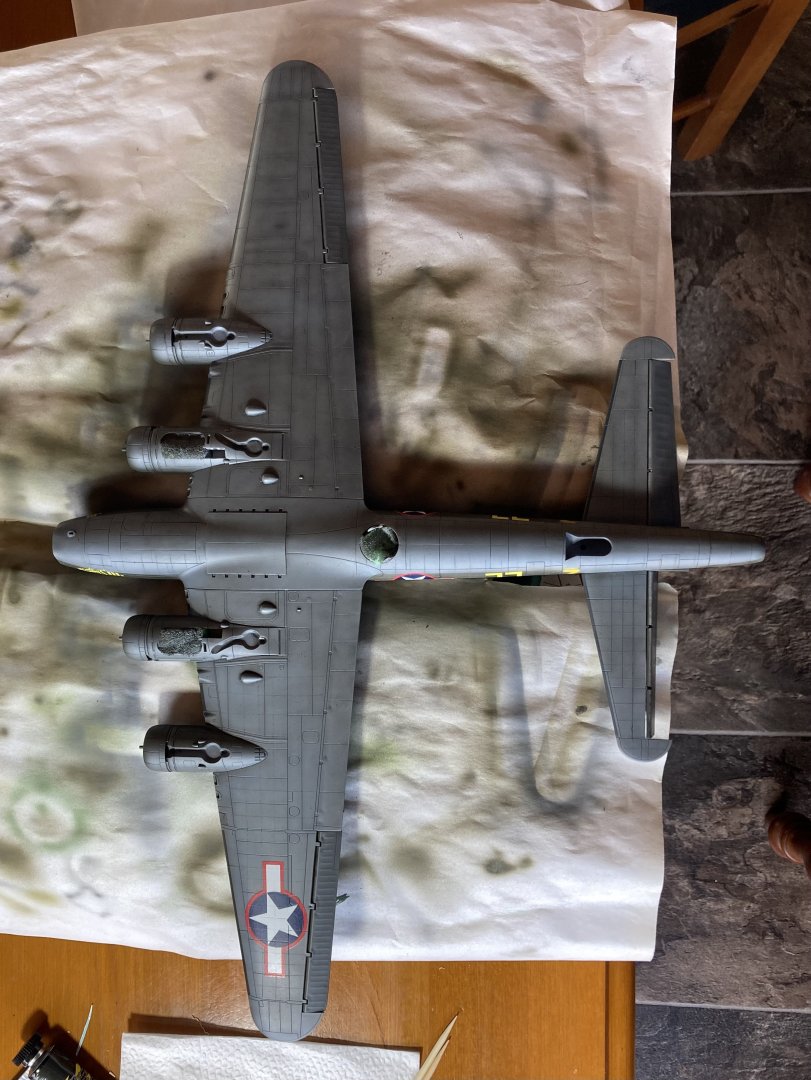
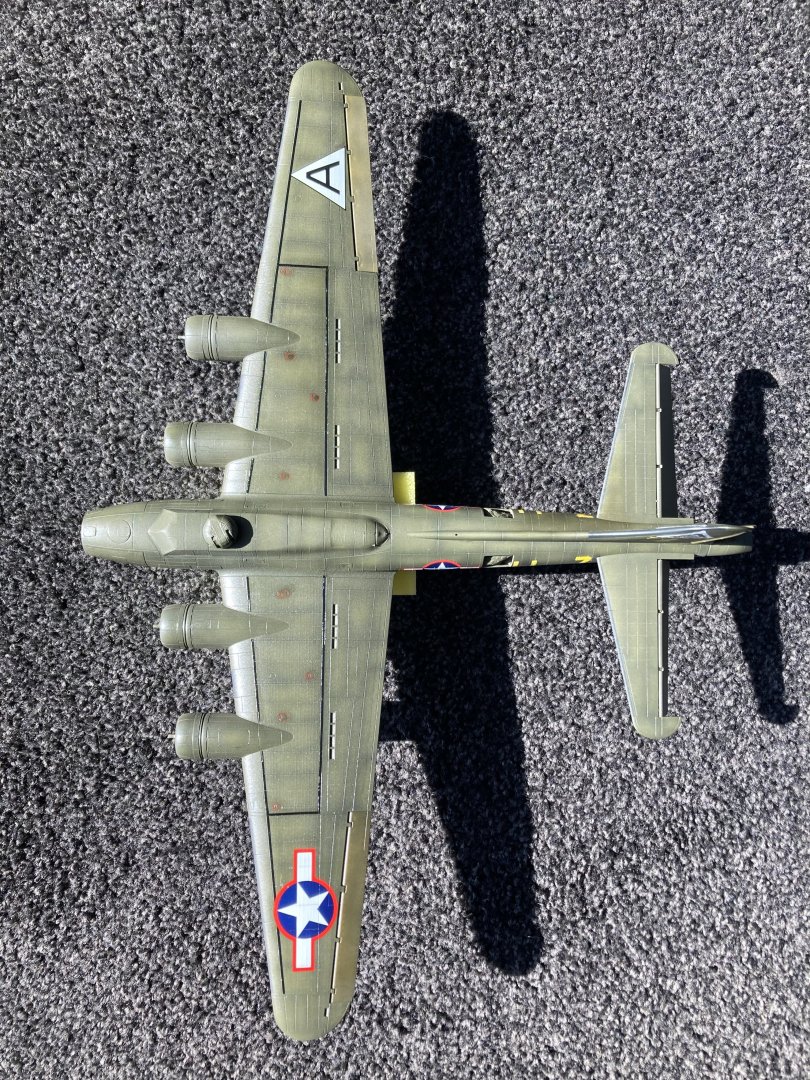
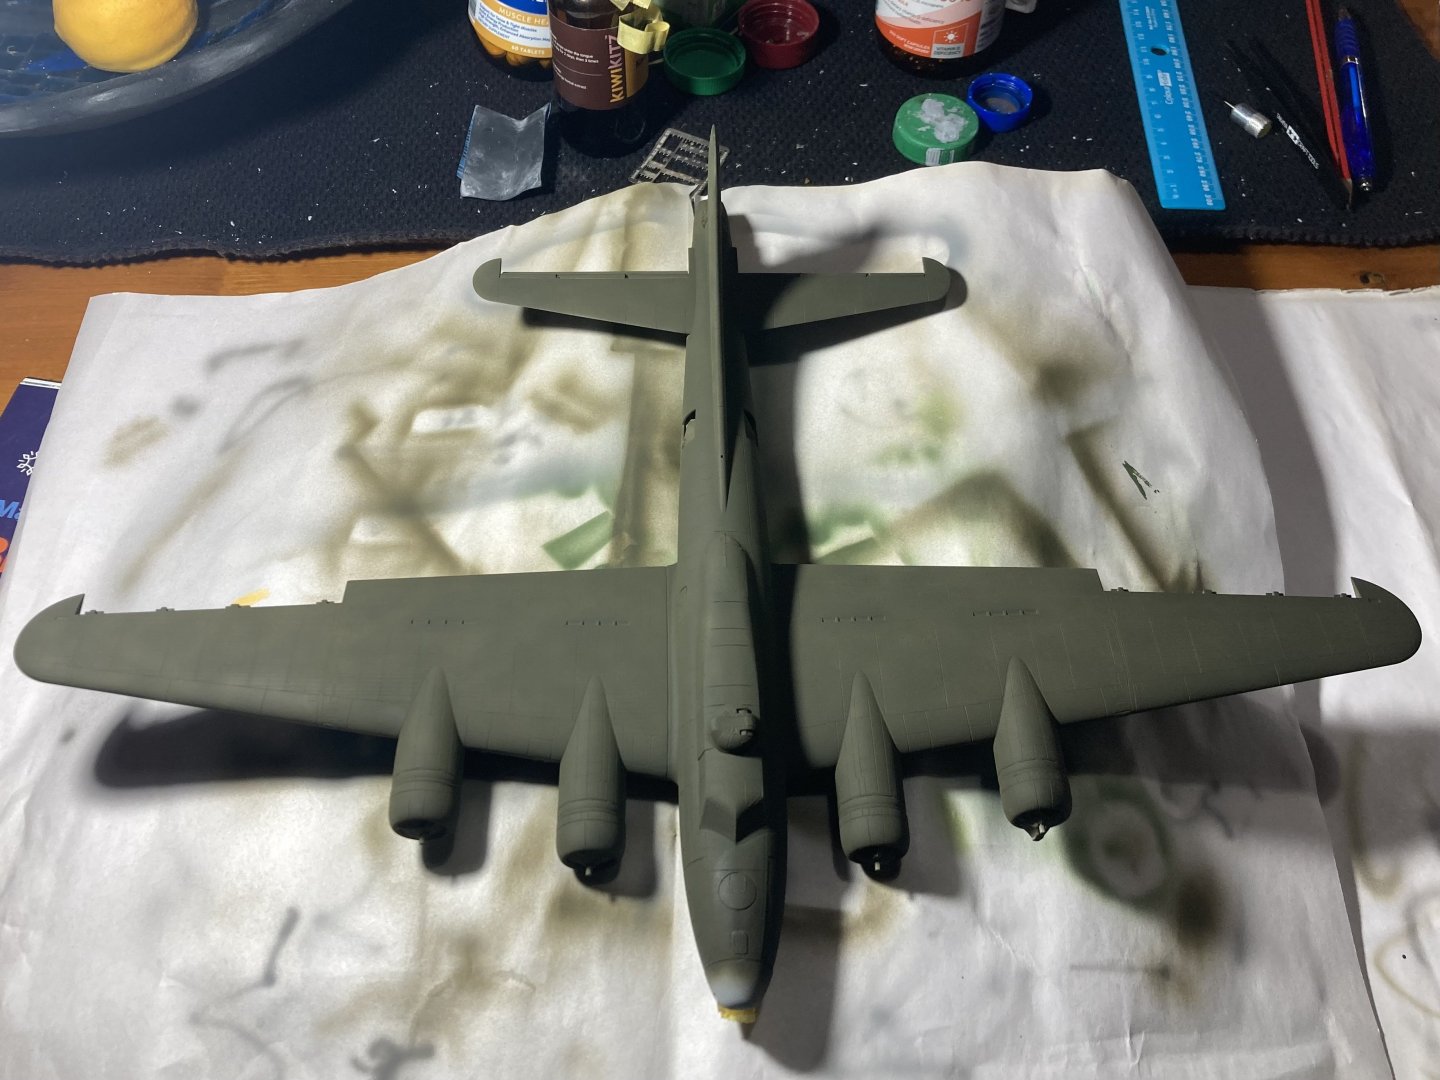
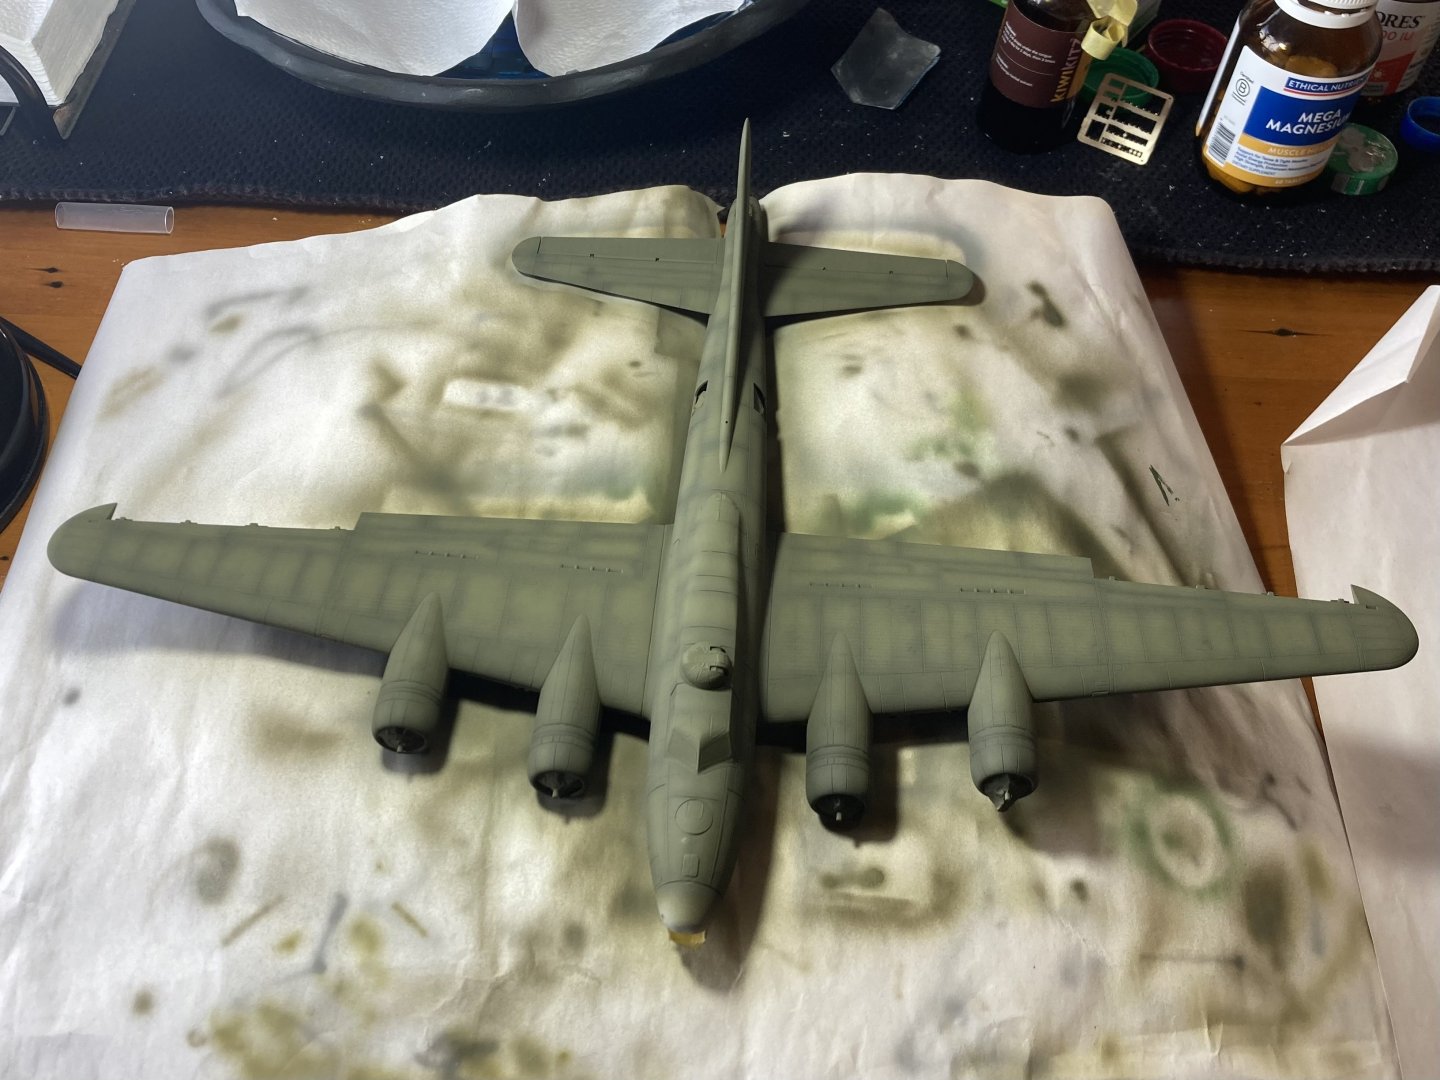
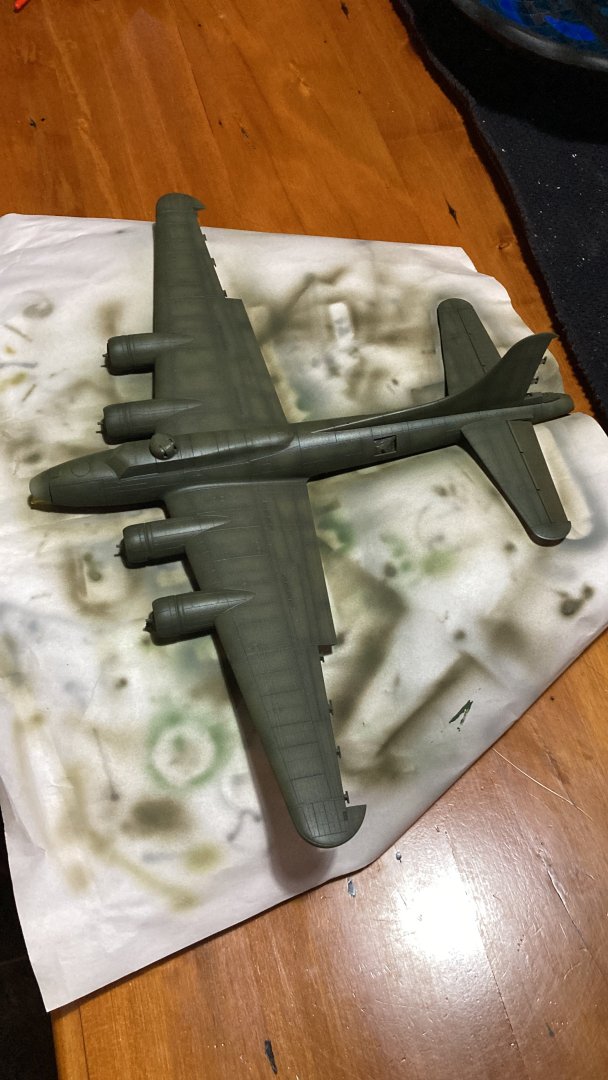
The underside was straight forward. dark grey with some brown for the wash and a bit of griming. The top however was not so easy. I wanted a dark wash to get in the panel lines but didn’t really want to darken the paint, probably should have just done a dark pin wash looking back, as I wanted to do a wash to lighten and make abit faded and blend the paint together, which would have meant lighter. So I did the same wash on the top as underneath (dark grey with brown) and surprisingly it darkened the paint haha! So after a few days I mixed up some lighter olive drab and did another wash to lighten it. So my panel lines are actually lighter. I don’t mind the effect, but the panel lines should be at least a shade darker than the paint and I hope I haven’t washed out too much of the contrasting greens. After that I did a very light misting of very light olive drab to help fade it abit more as it was abit dark. Will see how I go but might just leave it how it is. While I’m deciding I’ll do abit more of the weathering and grime. After looking at a lot of actual photos added abit of the oil stains. The difference in the two photos are mainly due to the lighting. Middle one is on an overcast day and bottom one under direct sunlight

- 77 replies
-
- 12
-
-
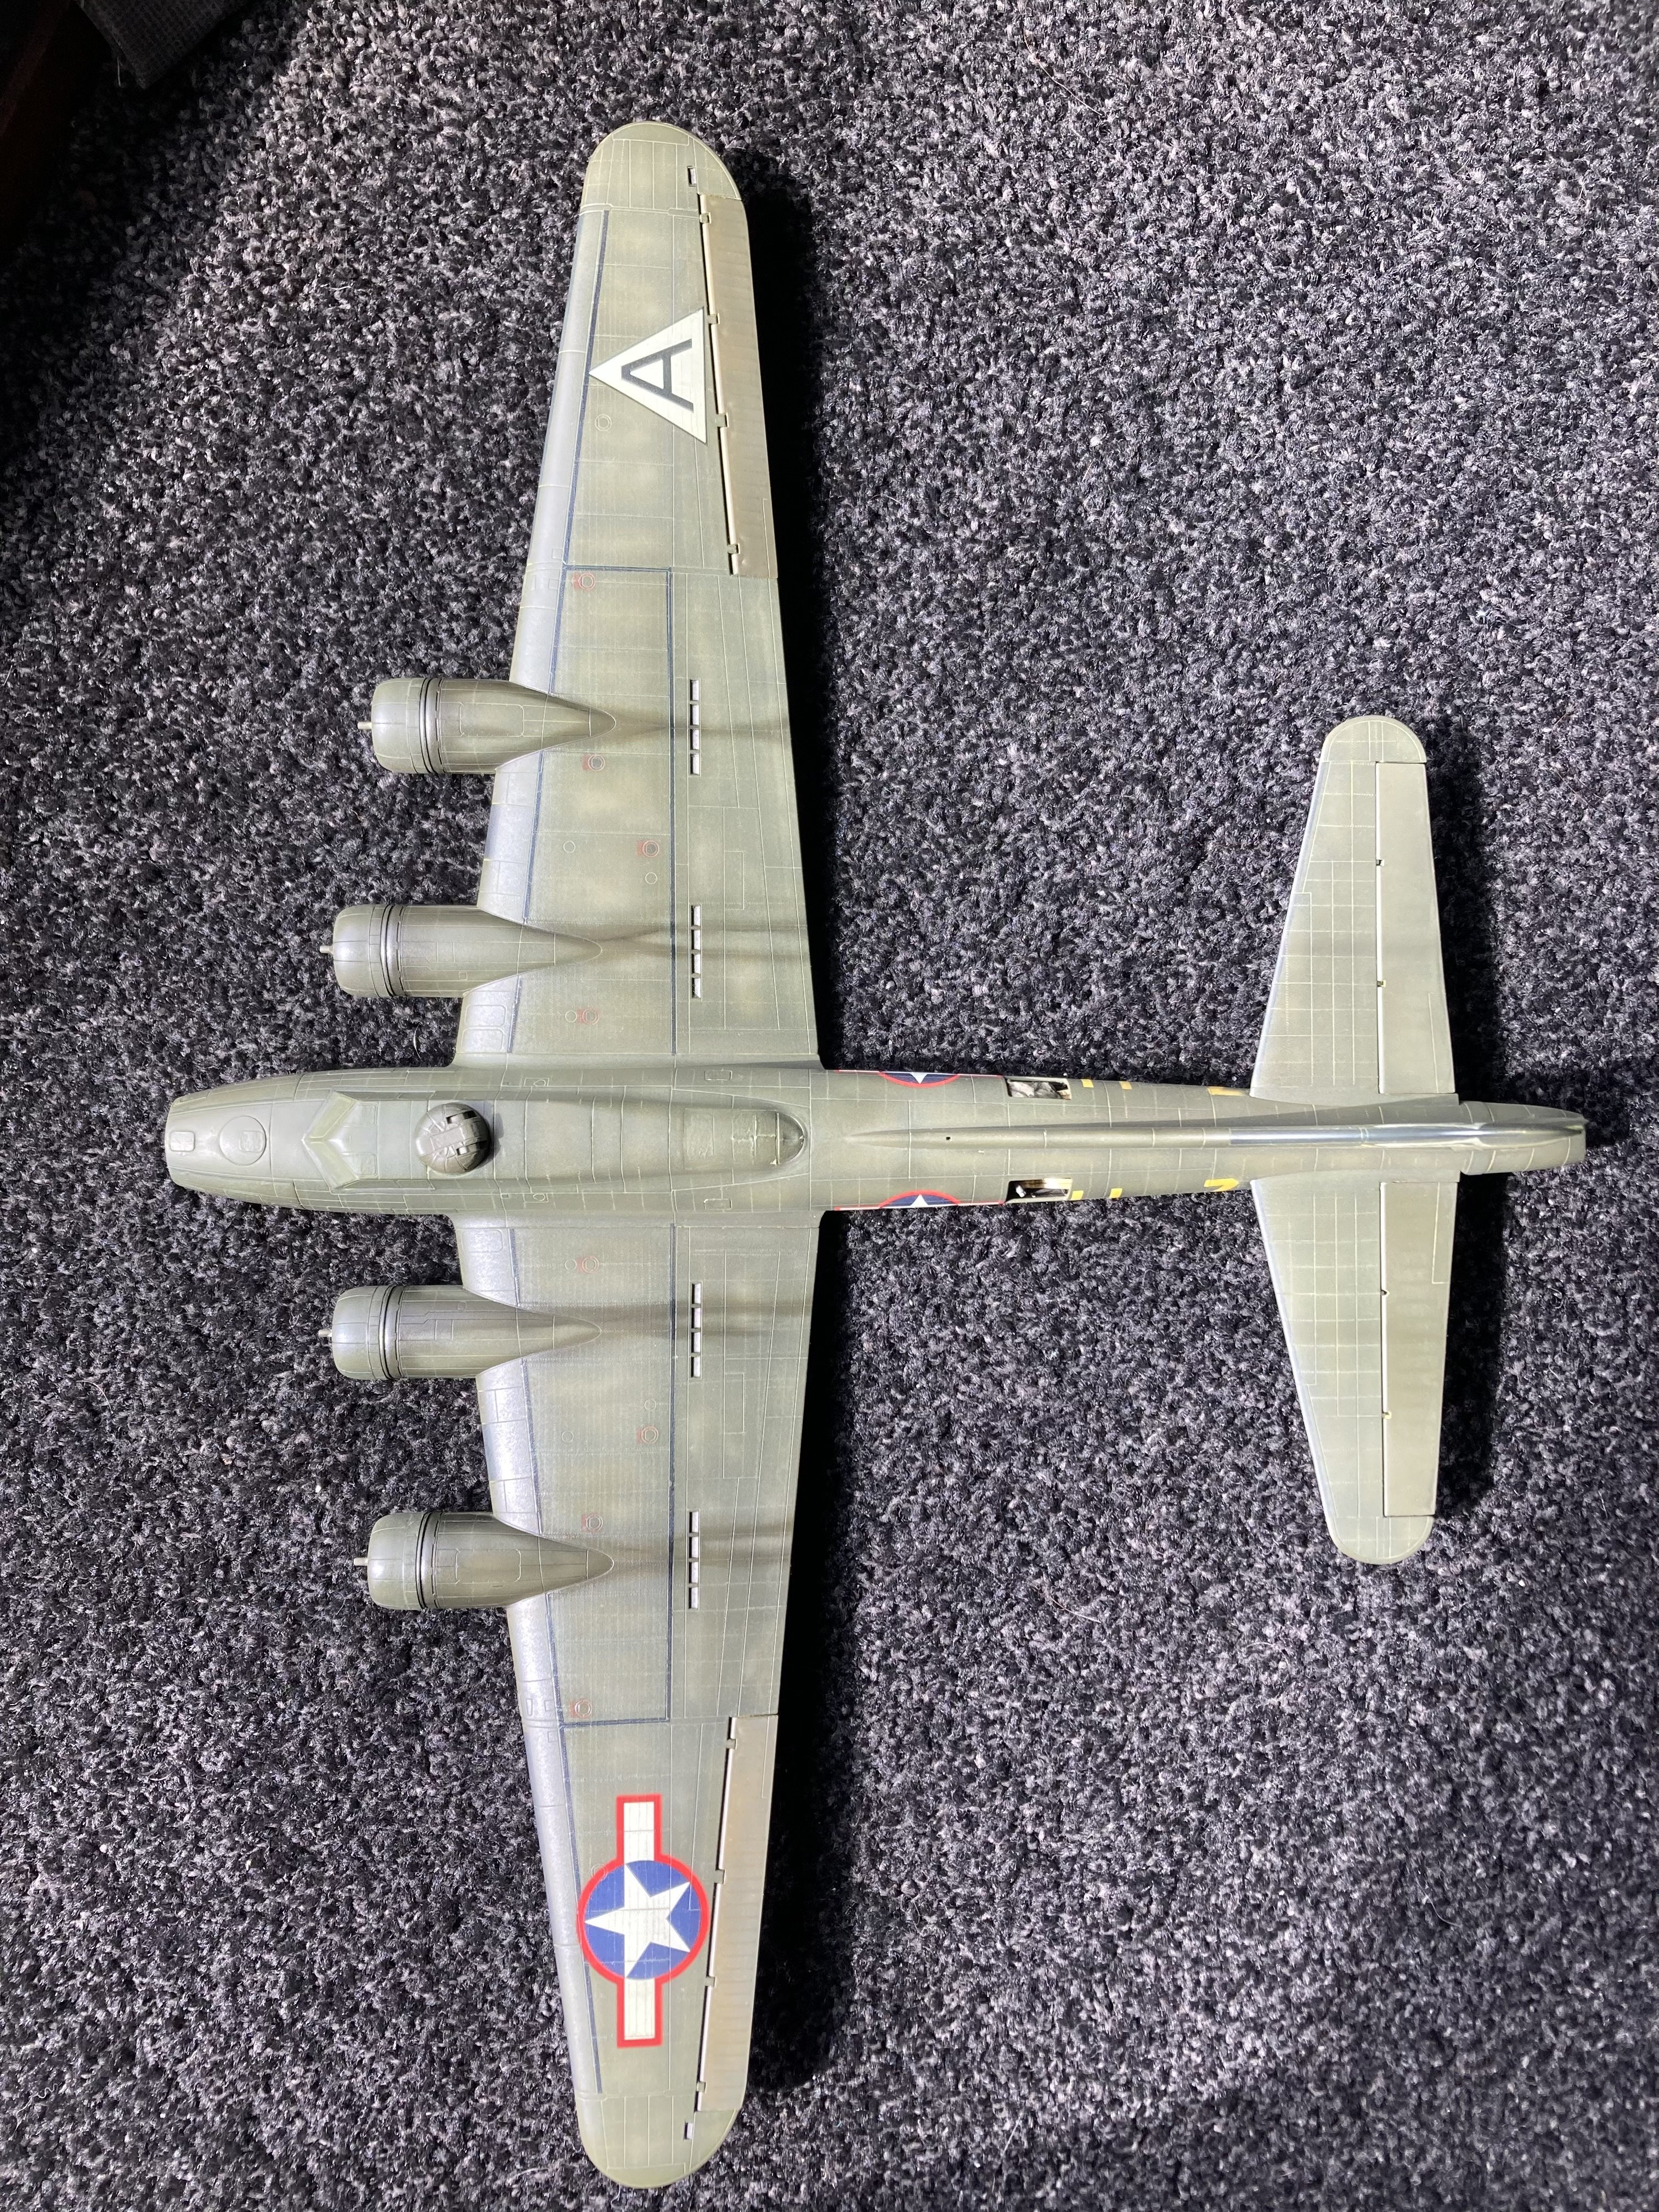
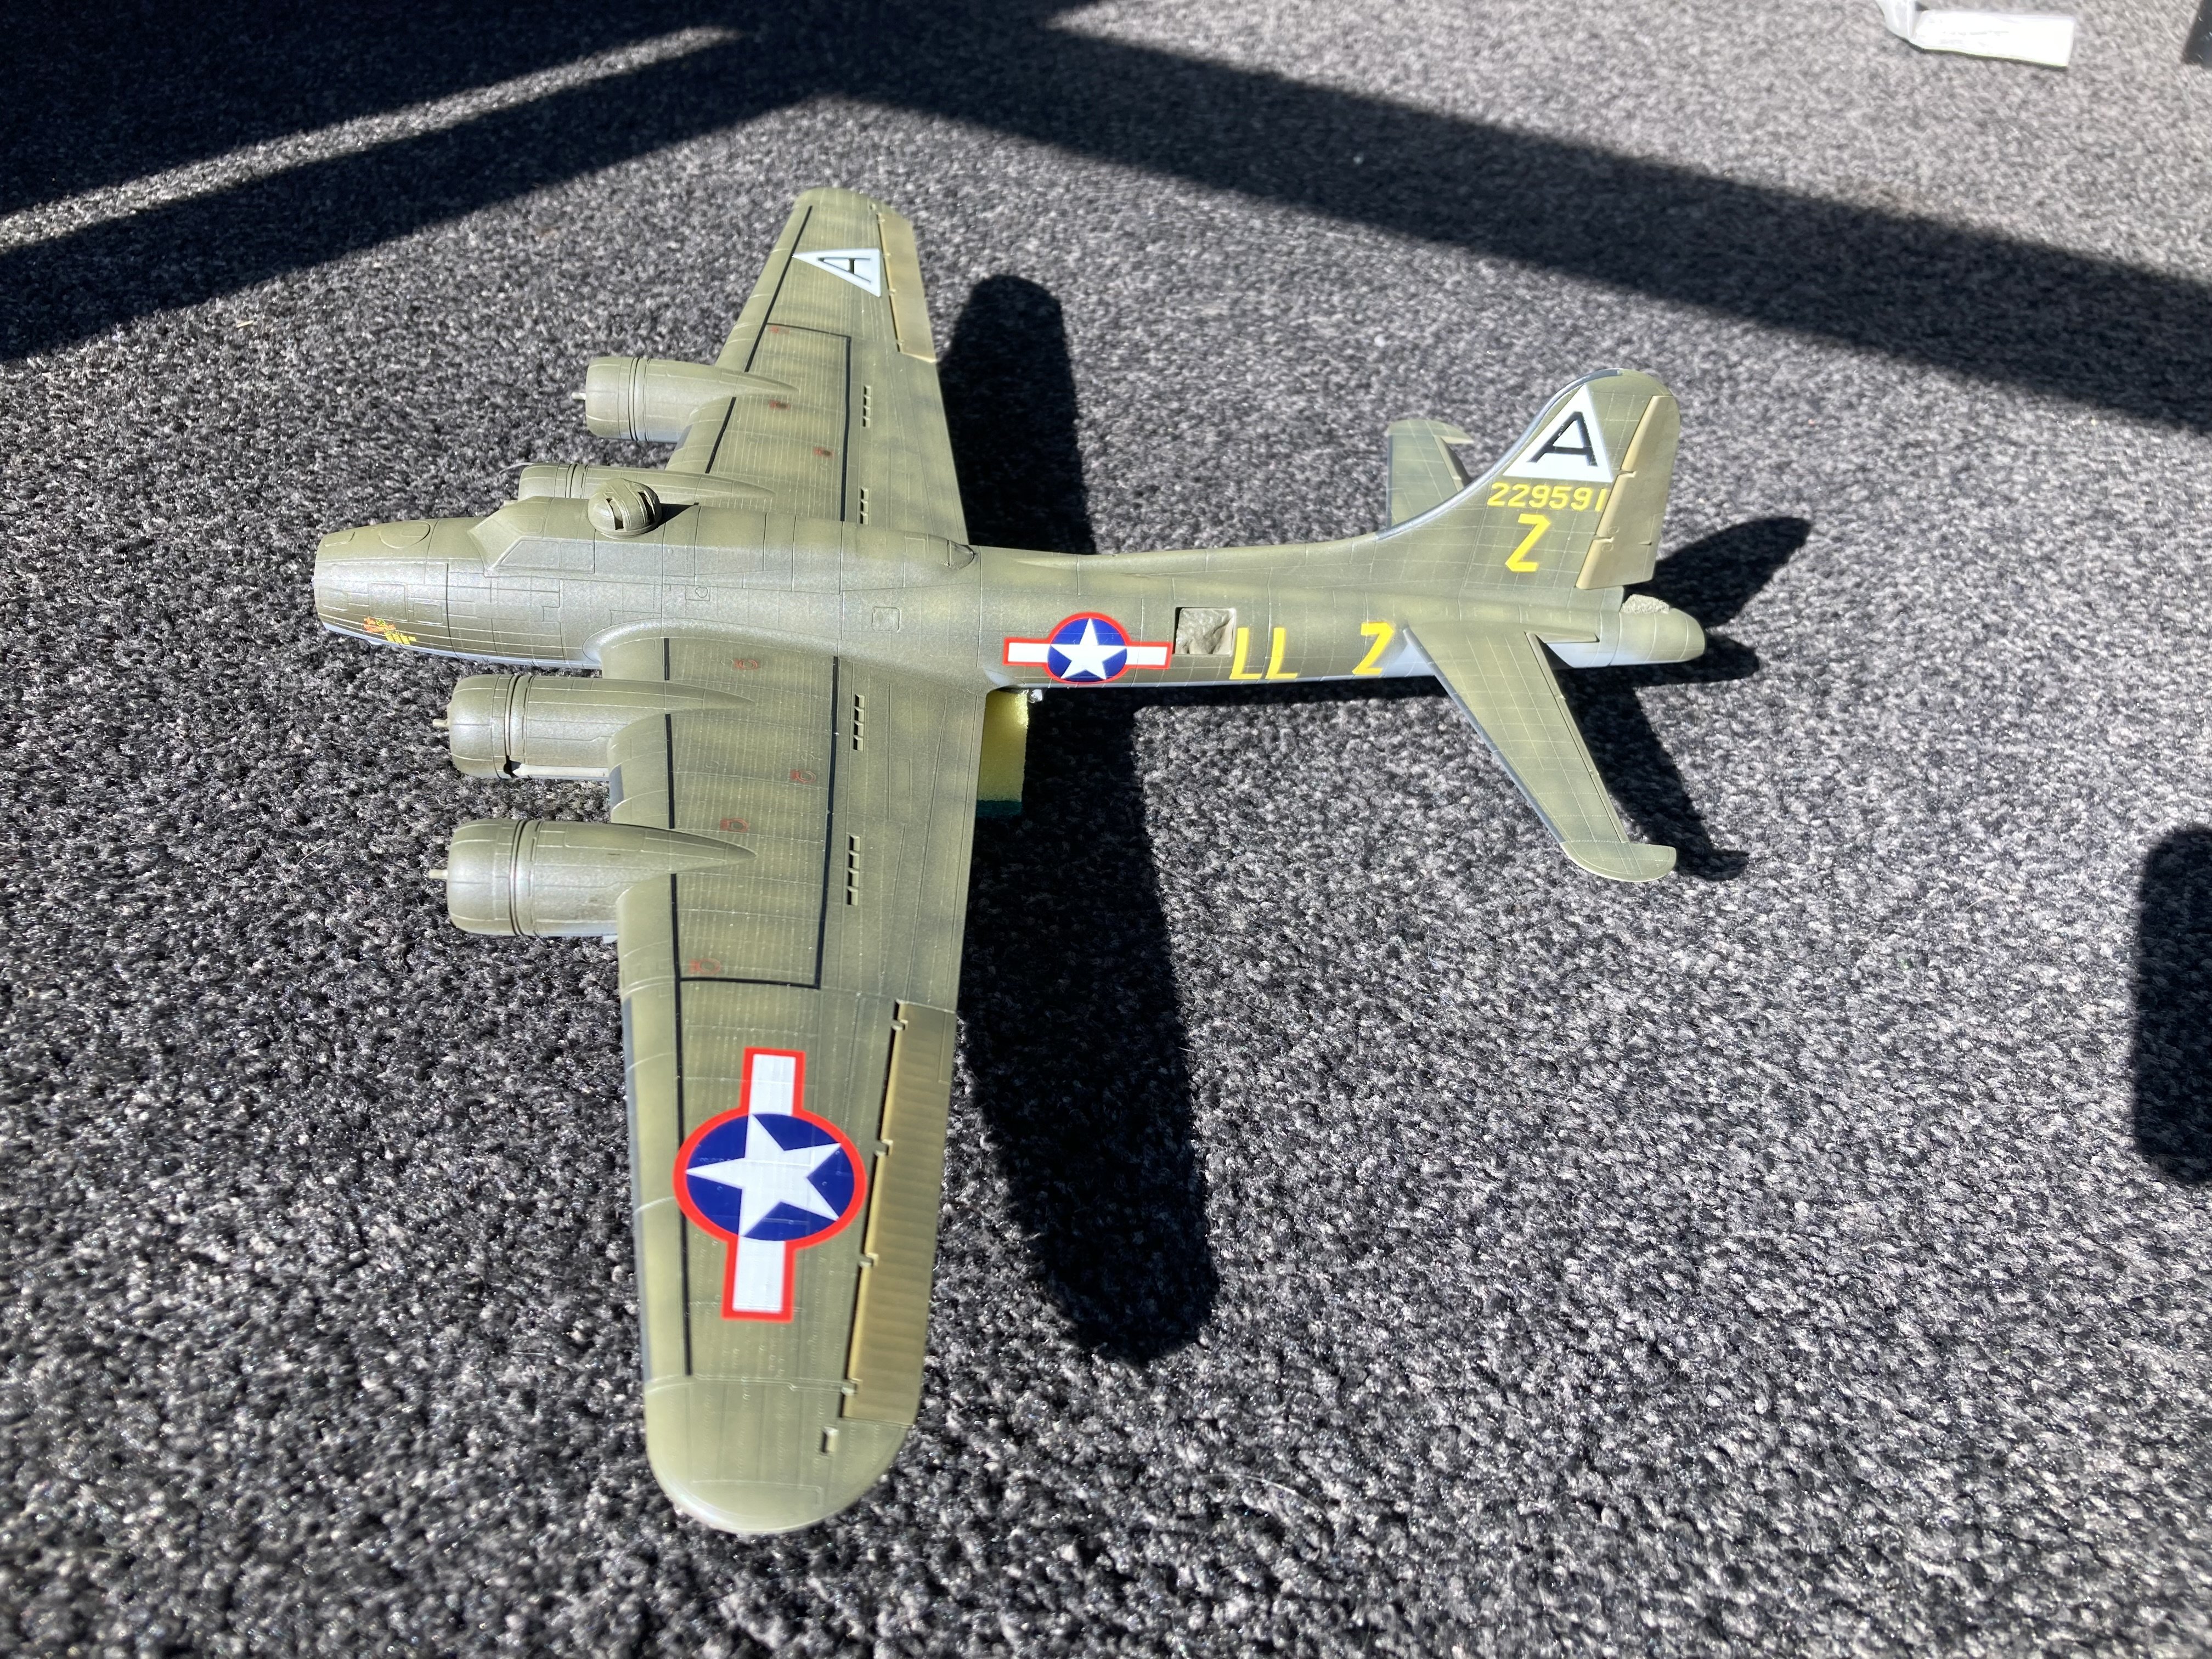
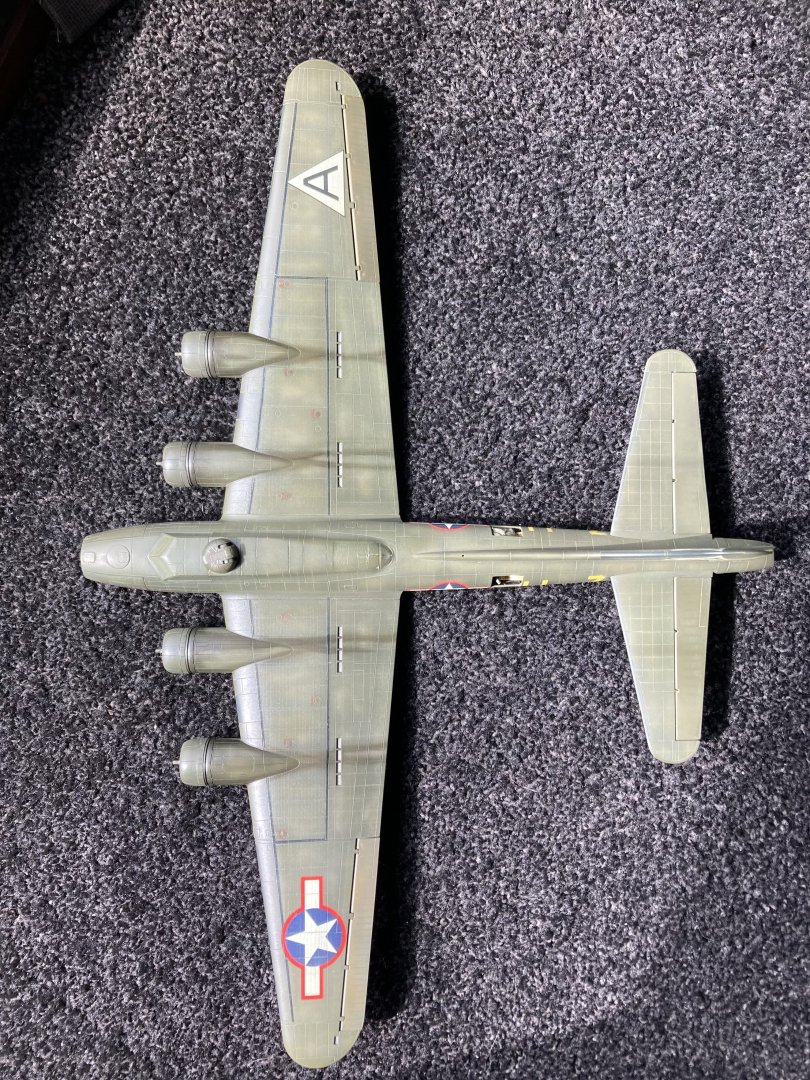
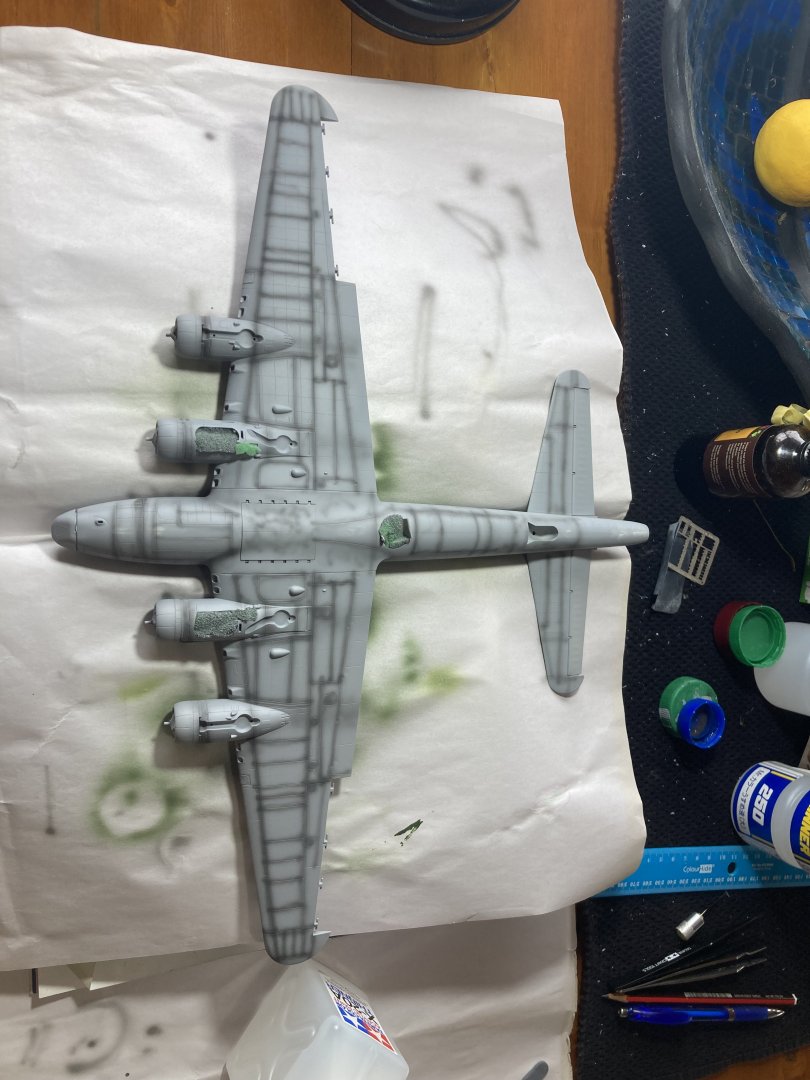
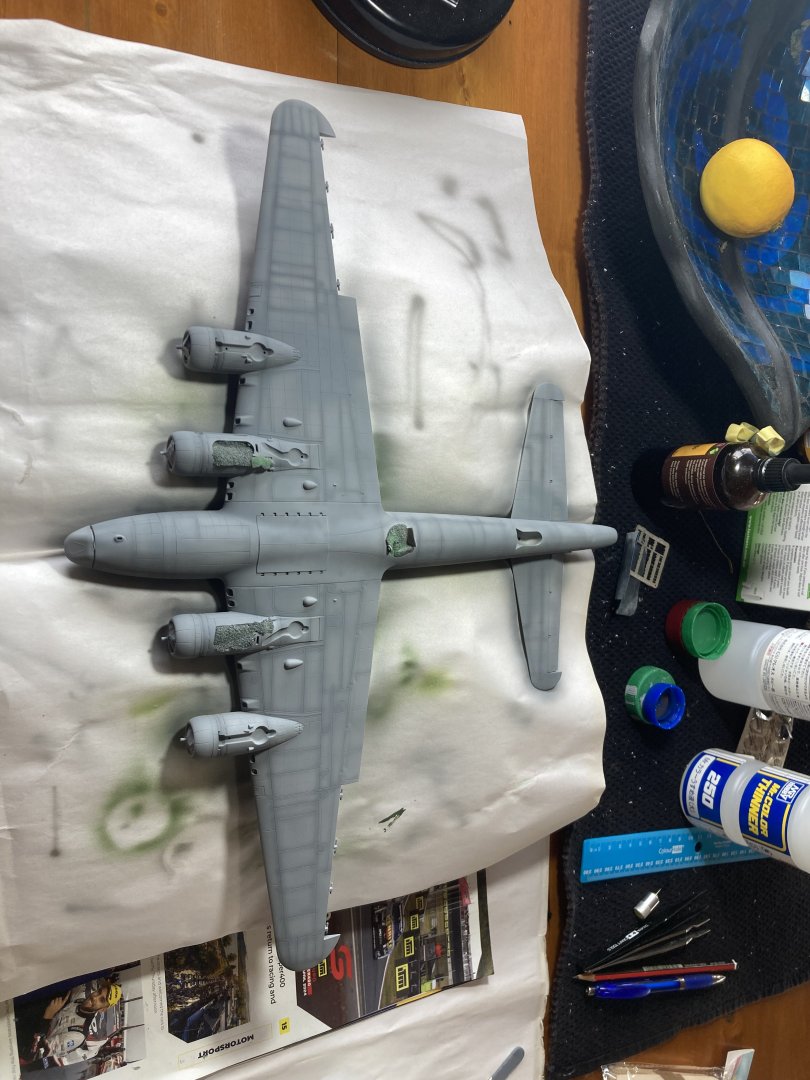
Over the last few days I’ve managed to do the decals. there were a heap of tiny ones and against the dark paint were practically invisible but we’re leaving that slightly super gloss effect from the clear part, so don’t hate me but I didn’t put them all on! These pictures were taken under direct sunlight It’s almost ready for its oil washes. I’m really not sure what colour to do the oil wash? I don’t want it too dark otherwise it might loose it’s faded out look. But also can’t really imagine doing a light wash as all the panel lines wouldn’t look right. Any suggestions as to what might work? Brown mixed with dark grey with a touch of black is my thinking, as long as it’s abit darker than the dark shade of olive drab are my thoughts.
- 77 replies
-
- 11
-
-
Thanks mate
-
Begun on the Olive Drab. It’s my first time painting with this colour and quite a large area of the same colour I think needs some modulation but looking at pictures of the real plane there really isn’t that much. If it’s well used and faded then it’s mainly just lighter but I’ll do some panel lines as just one solid colour doesn’t look right. And straight xf62 olive drab looked to dark for what I was after so used a 3 to 1 ratio of xf62 to xf4 yellow green and that seemed to give a nicer faded hint of brown that I was after. Added a few drops of NATO black to the olive drab to darken the panel lines. Then misted lightly over the top with buff mixed with a little olive drab to blend the two together and lighten it even further. Remembering the washes should blend the colours in further and under this light the contrast is maximum so didn’t want to make the colours blend into one and disappear I decided that it was enough. Let it dry and put a gloss coat over it. i think my gloss coats are too thin as I like to just make the surface look wet but pooling it like the tutorials say to get a shinny gloss I can’t bring myself to try! As pooling paint just scares me alittle 😅 So my gloss coats are more like a satin coat. A good dry time is in order now!

- 77 replies
-
- 15
-
-

-
Hey, thanks. I actually looked at your build log not that long ago as the Catalina is so unique looking! It came up well! Seems your main points about greys were that the lighter pre shading didn’t really work for contrast? They are a tricky colour
-
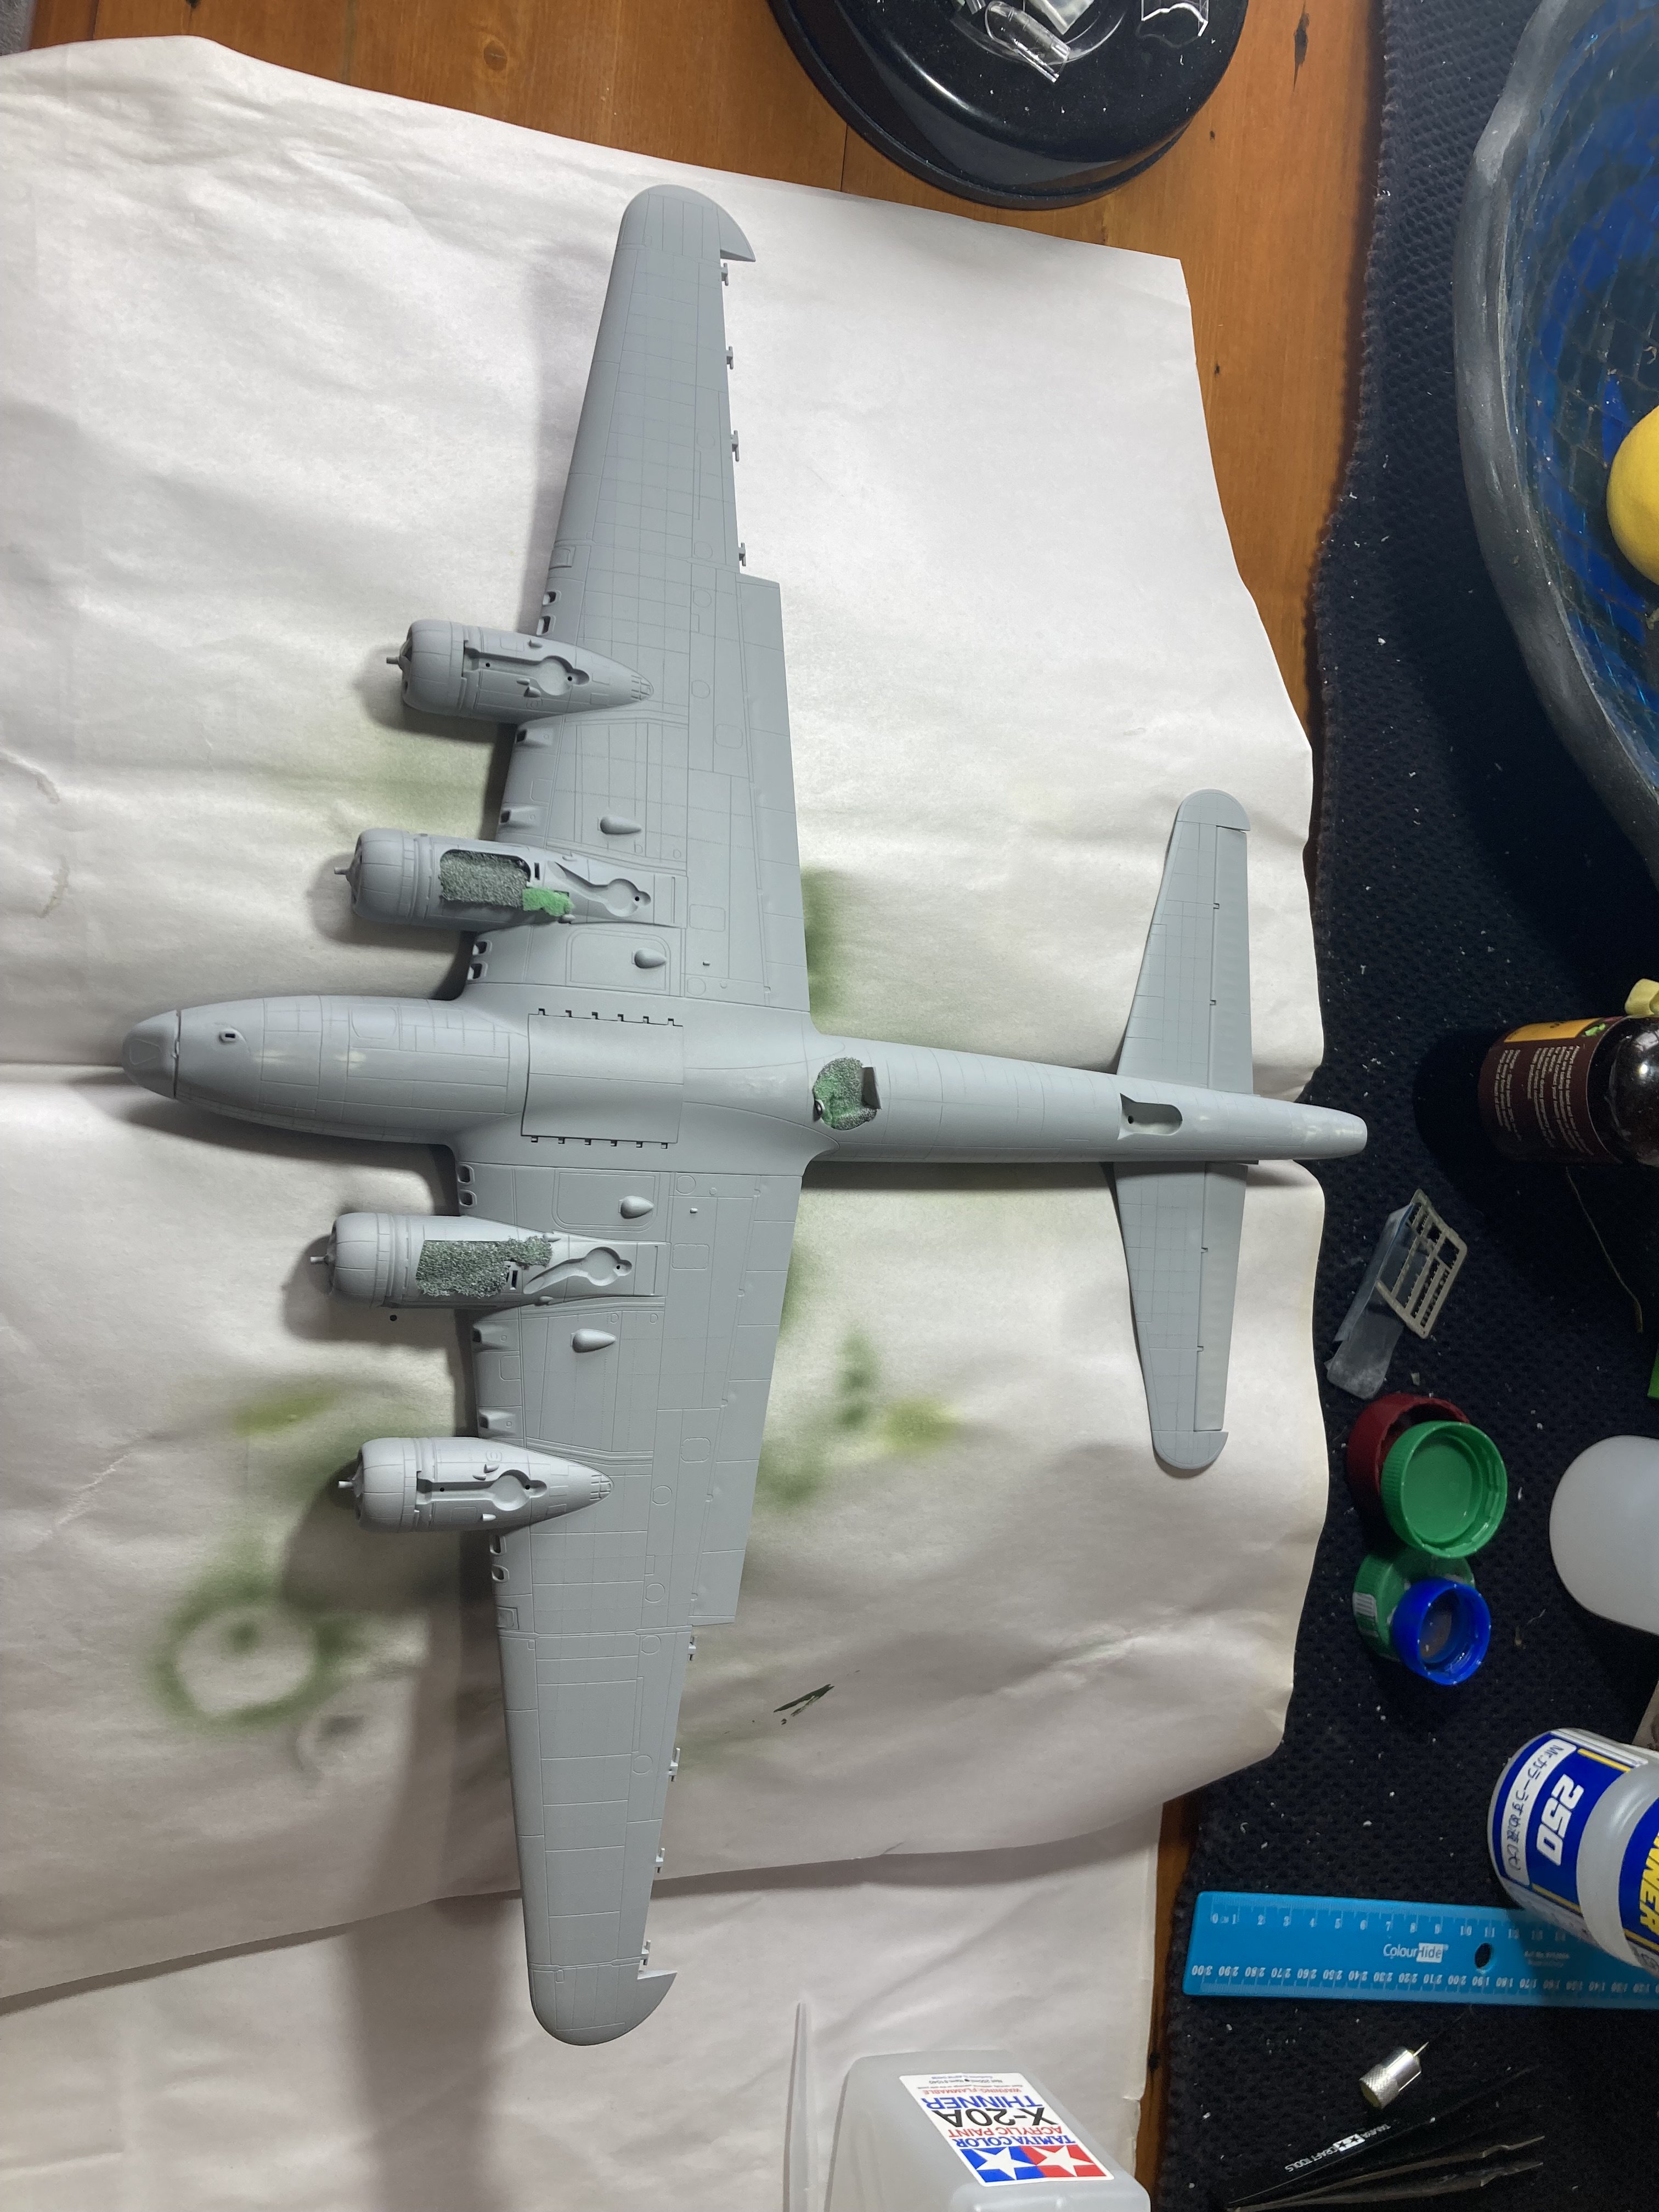
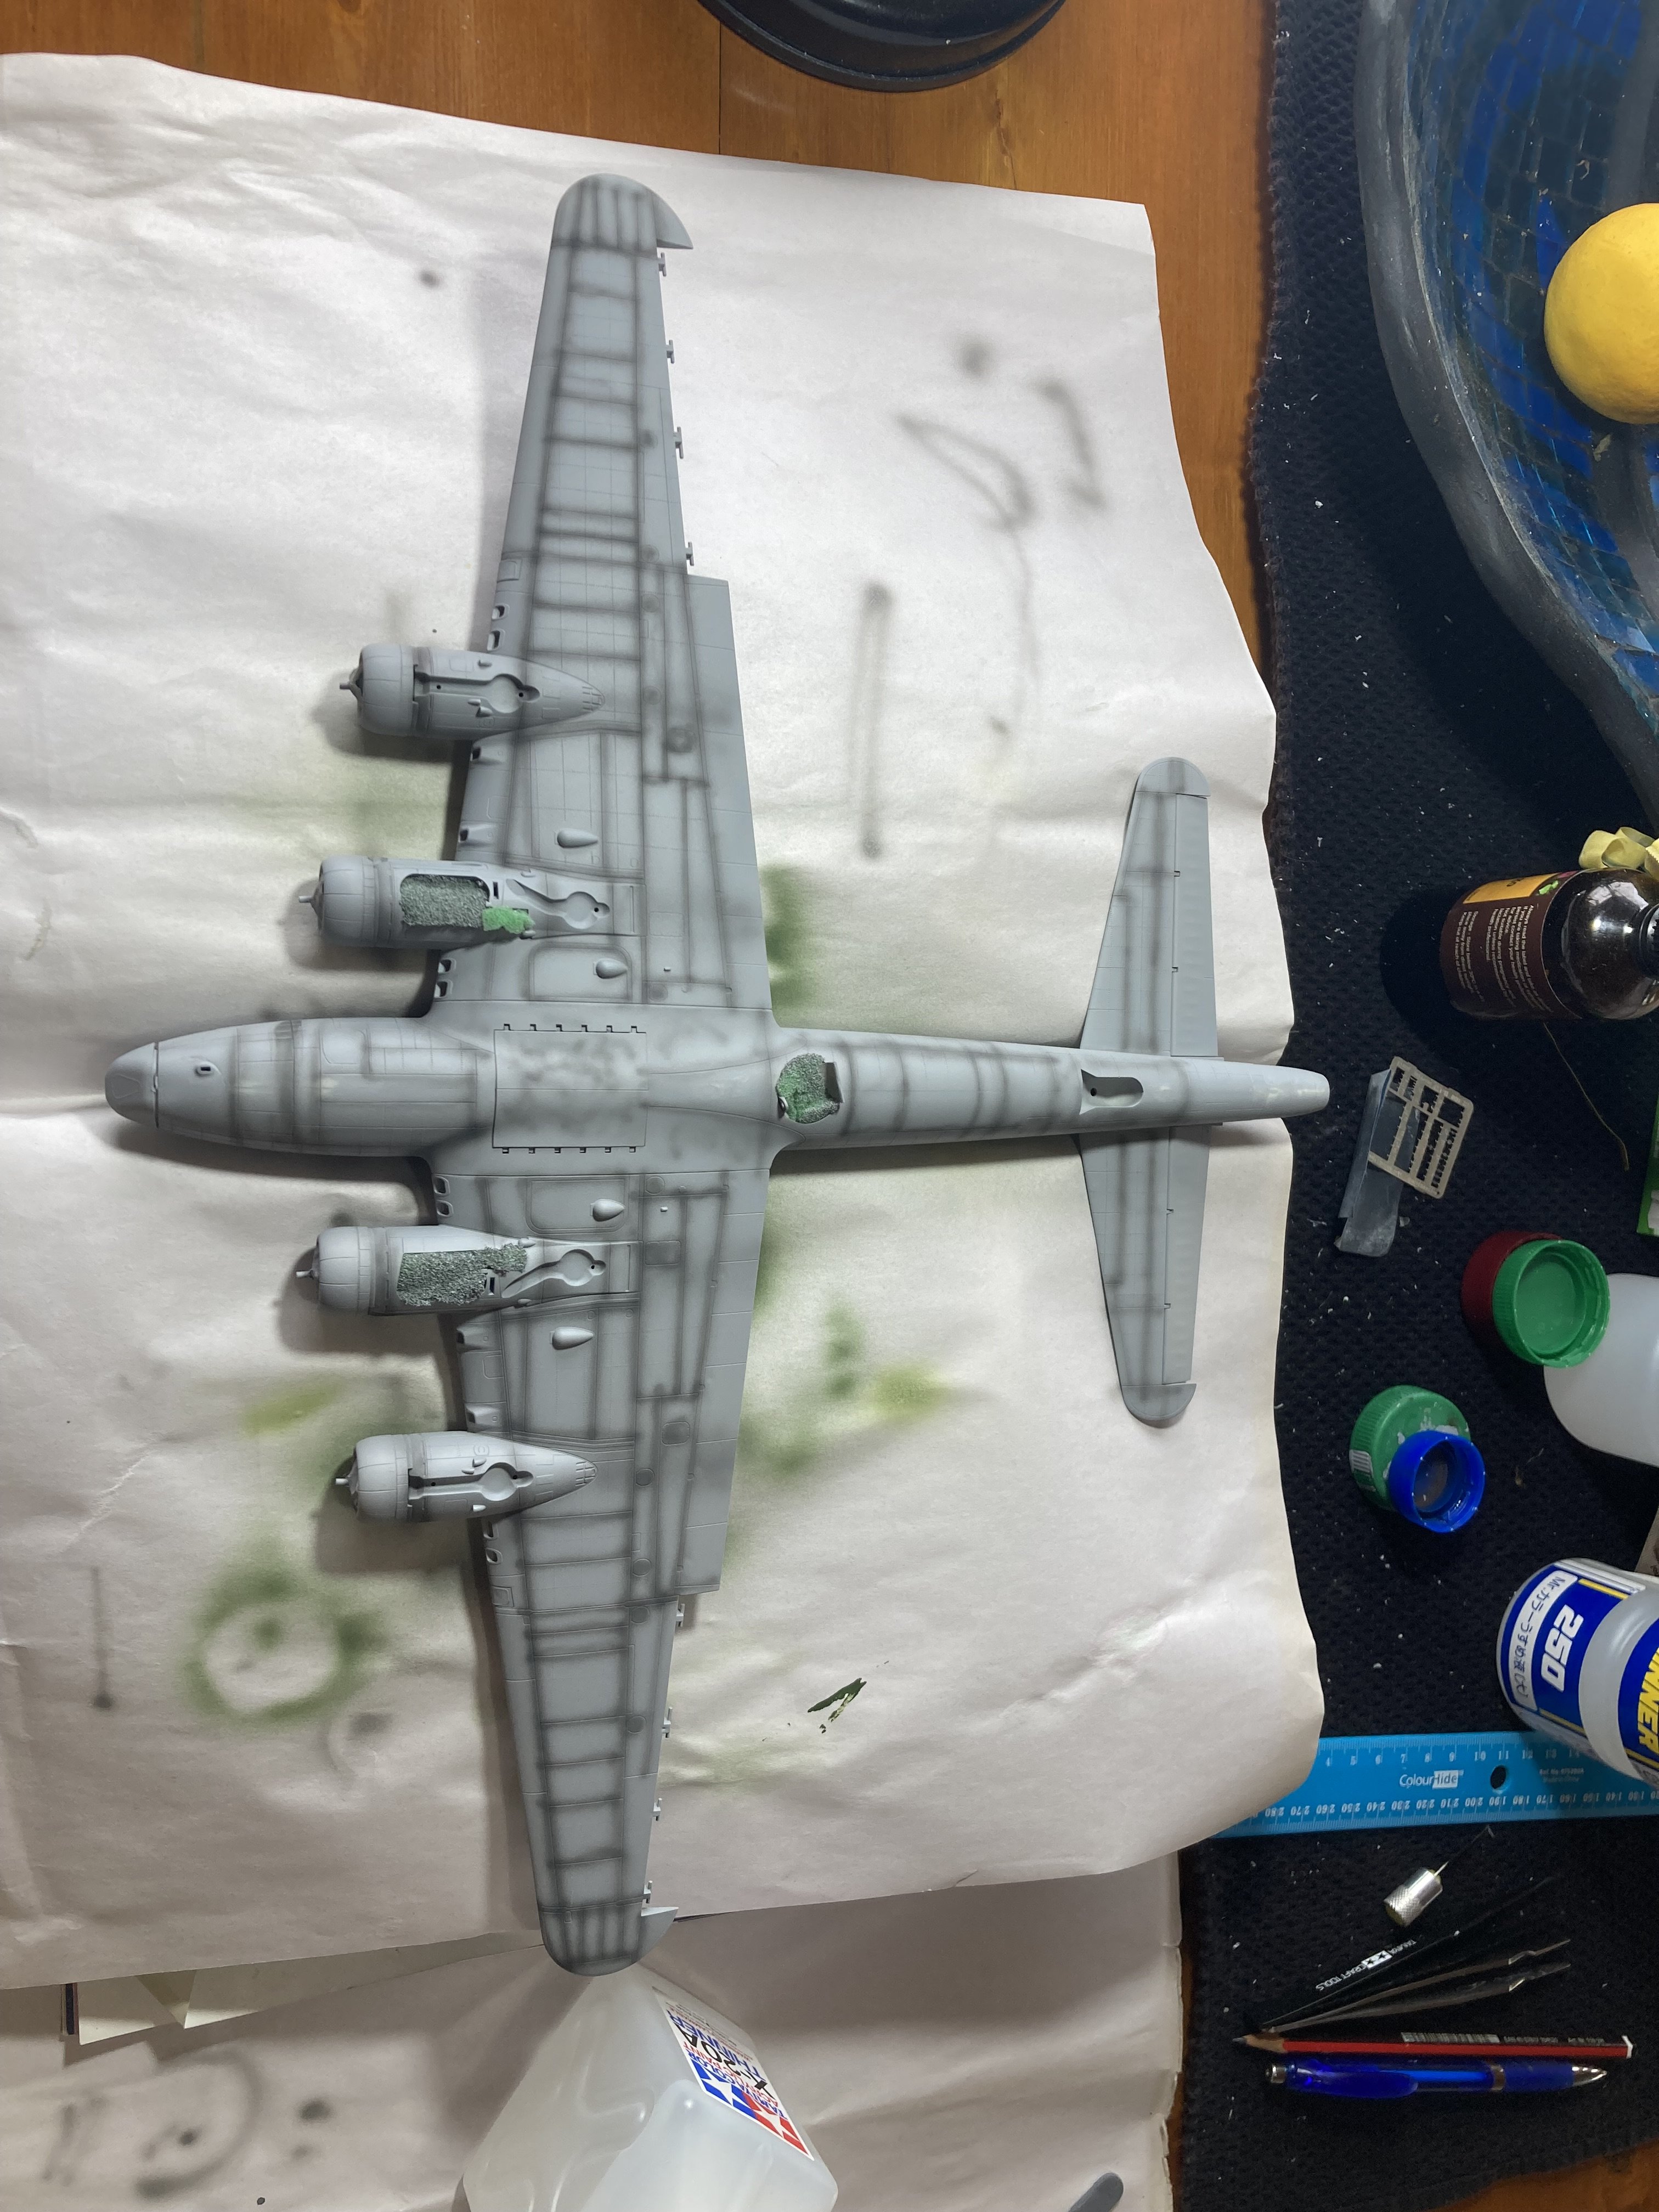
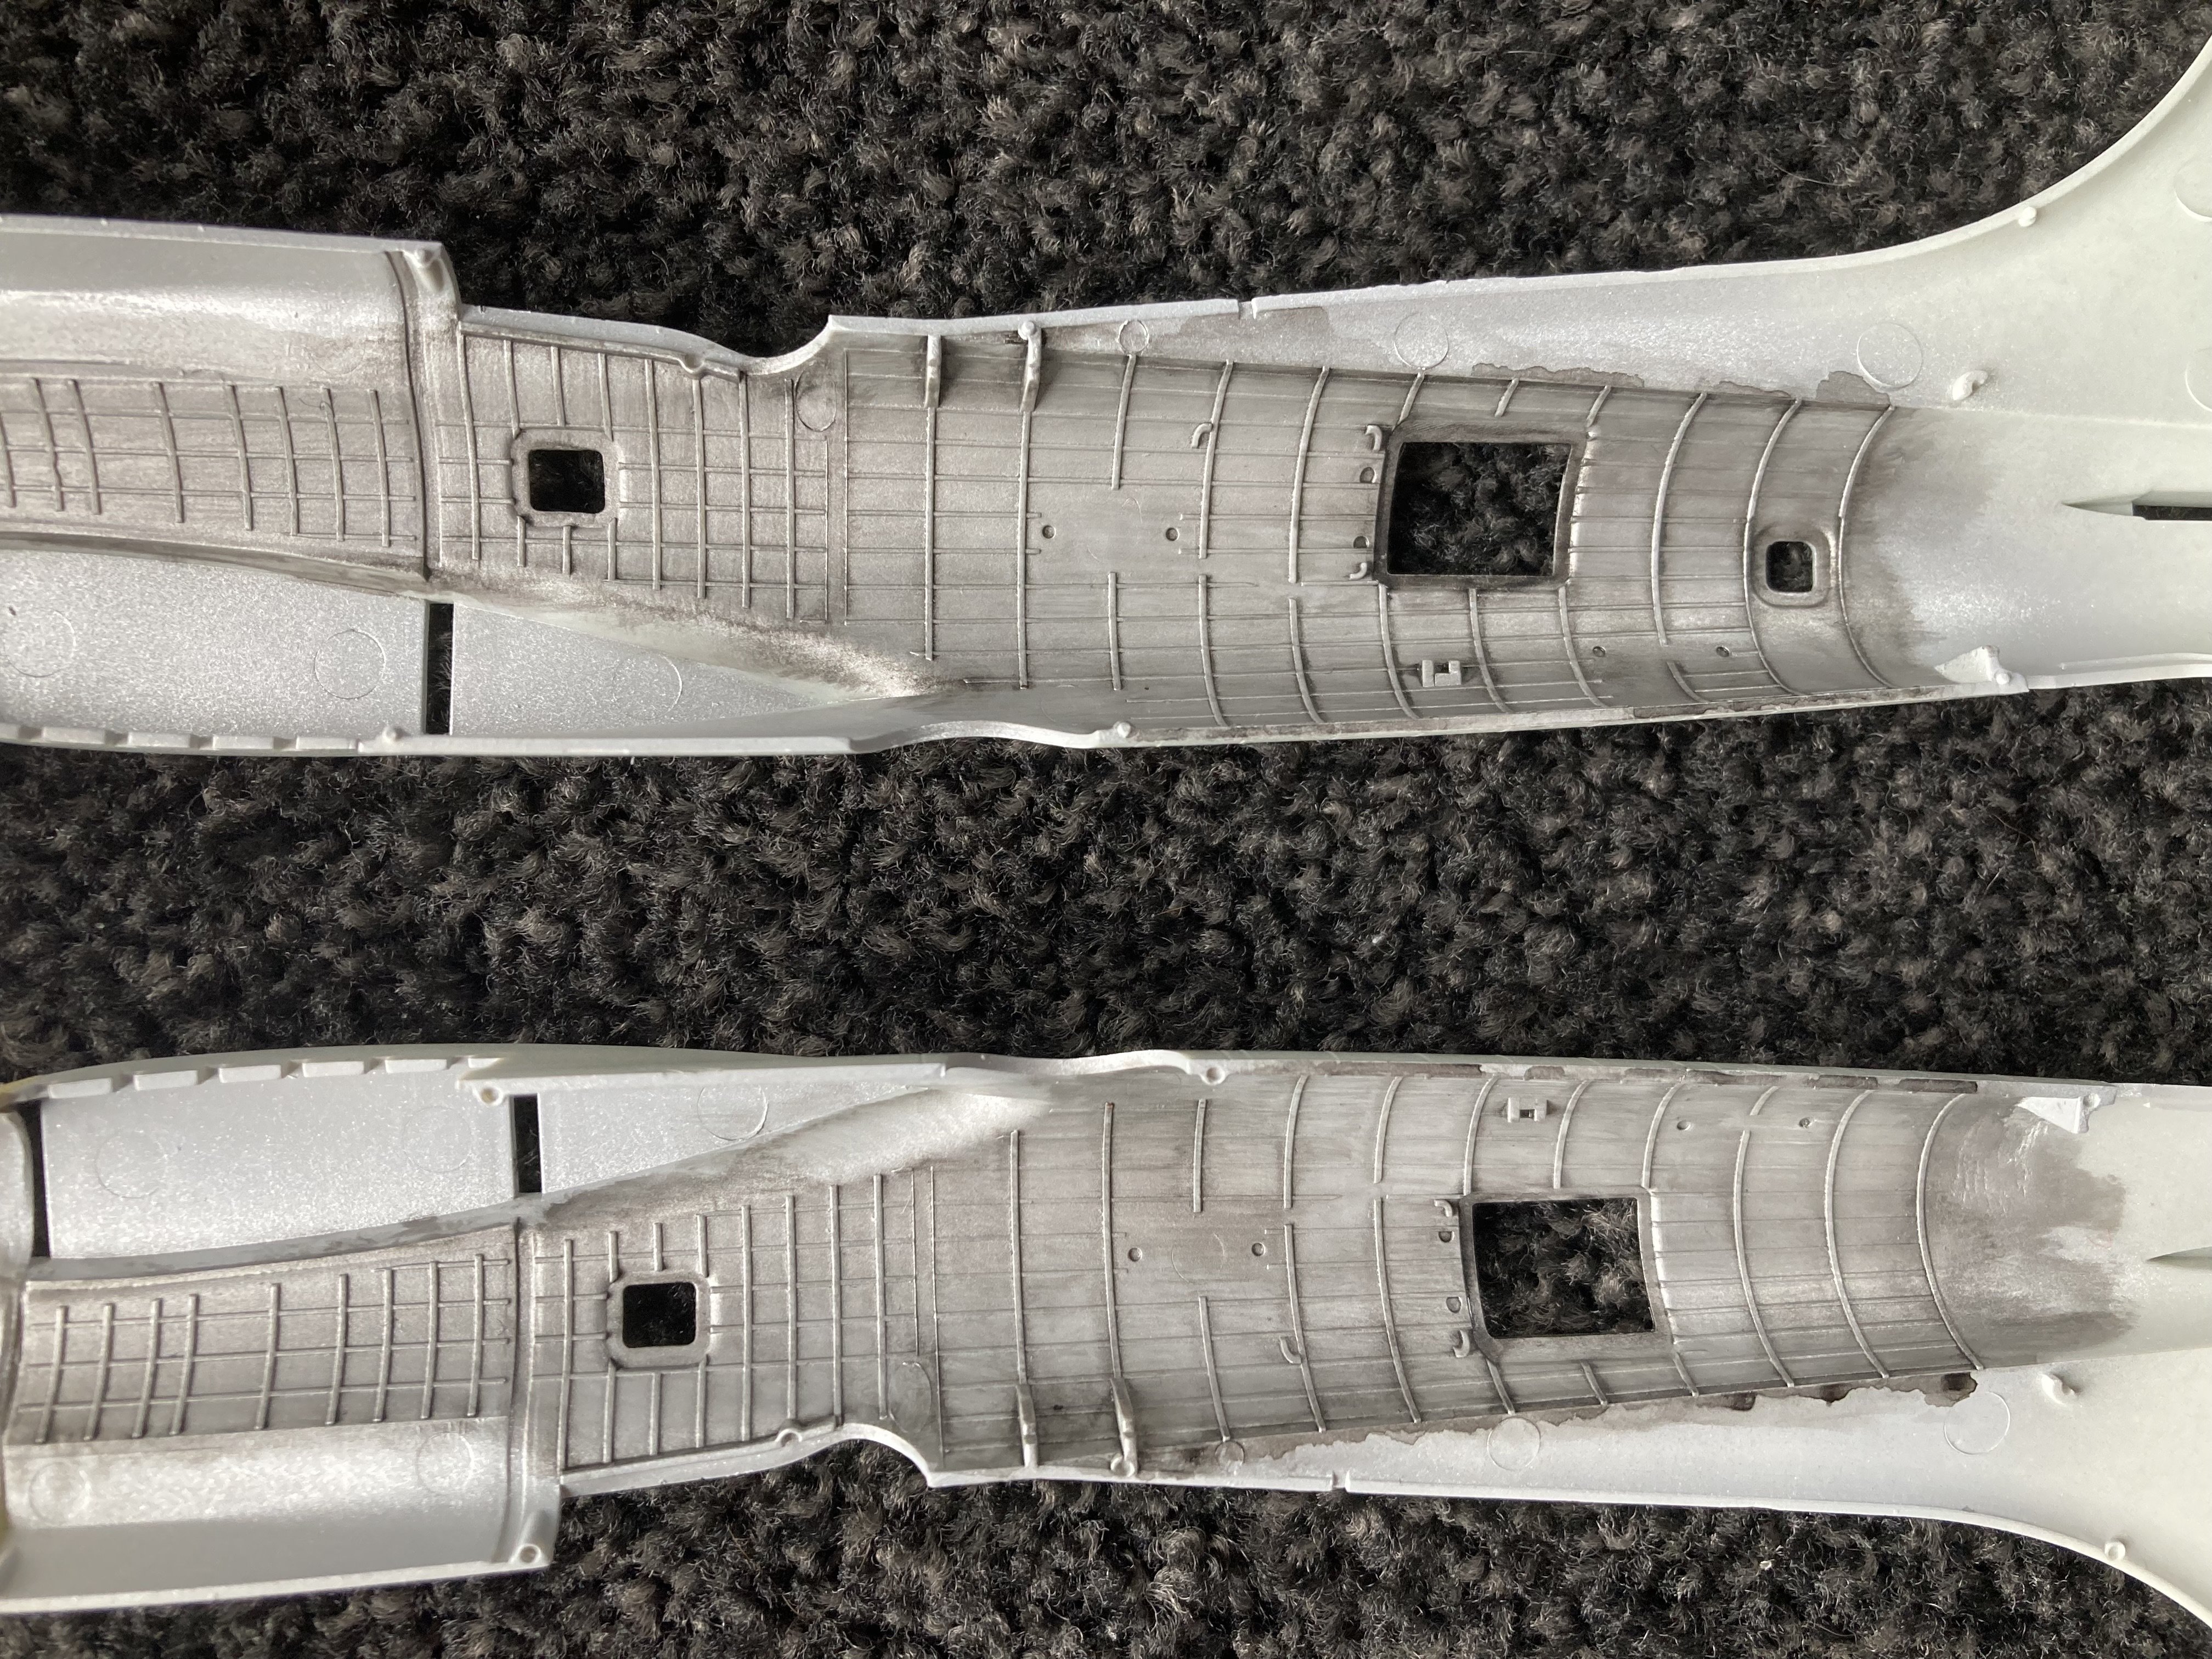
Started on the underside, Tamiya neutral grey was the base colour over the primer and preshading. used a lightened NATO black to pre shade. A light base coat. The paint splashed out of my airbrush next to No 1 engine, so had to minimise that and try fix it. I’ll do a dark grey with a bit of brown oil wash to help blend it in better. I did learn if the shades underneath aren’t defined enough and visible then the washes will show nothing. So balancing how much coverage is tricky! Hopefully I’ve got it right! The pics are taken under light that really shows the layers through, under sunlight I like how it looks and it is alot more subtle!

- 77 replies
-
- 10
-
-
Thanks! I can imagine a 1/32 scale b17 once complete would take up a fair bit of room! This scale it’s still a good size!!
-
Thanks for the kind words. I’m interested to see how the paint job goes myself! Trying to make it interesting without going too over board with effects is tricky I find
-
Thanks for the recommendation! It’s abit late now that it’s all glued together. But it’s good to know about it just in case one day!
-
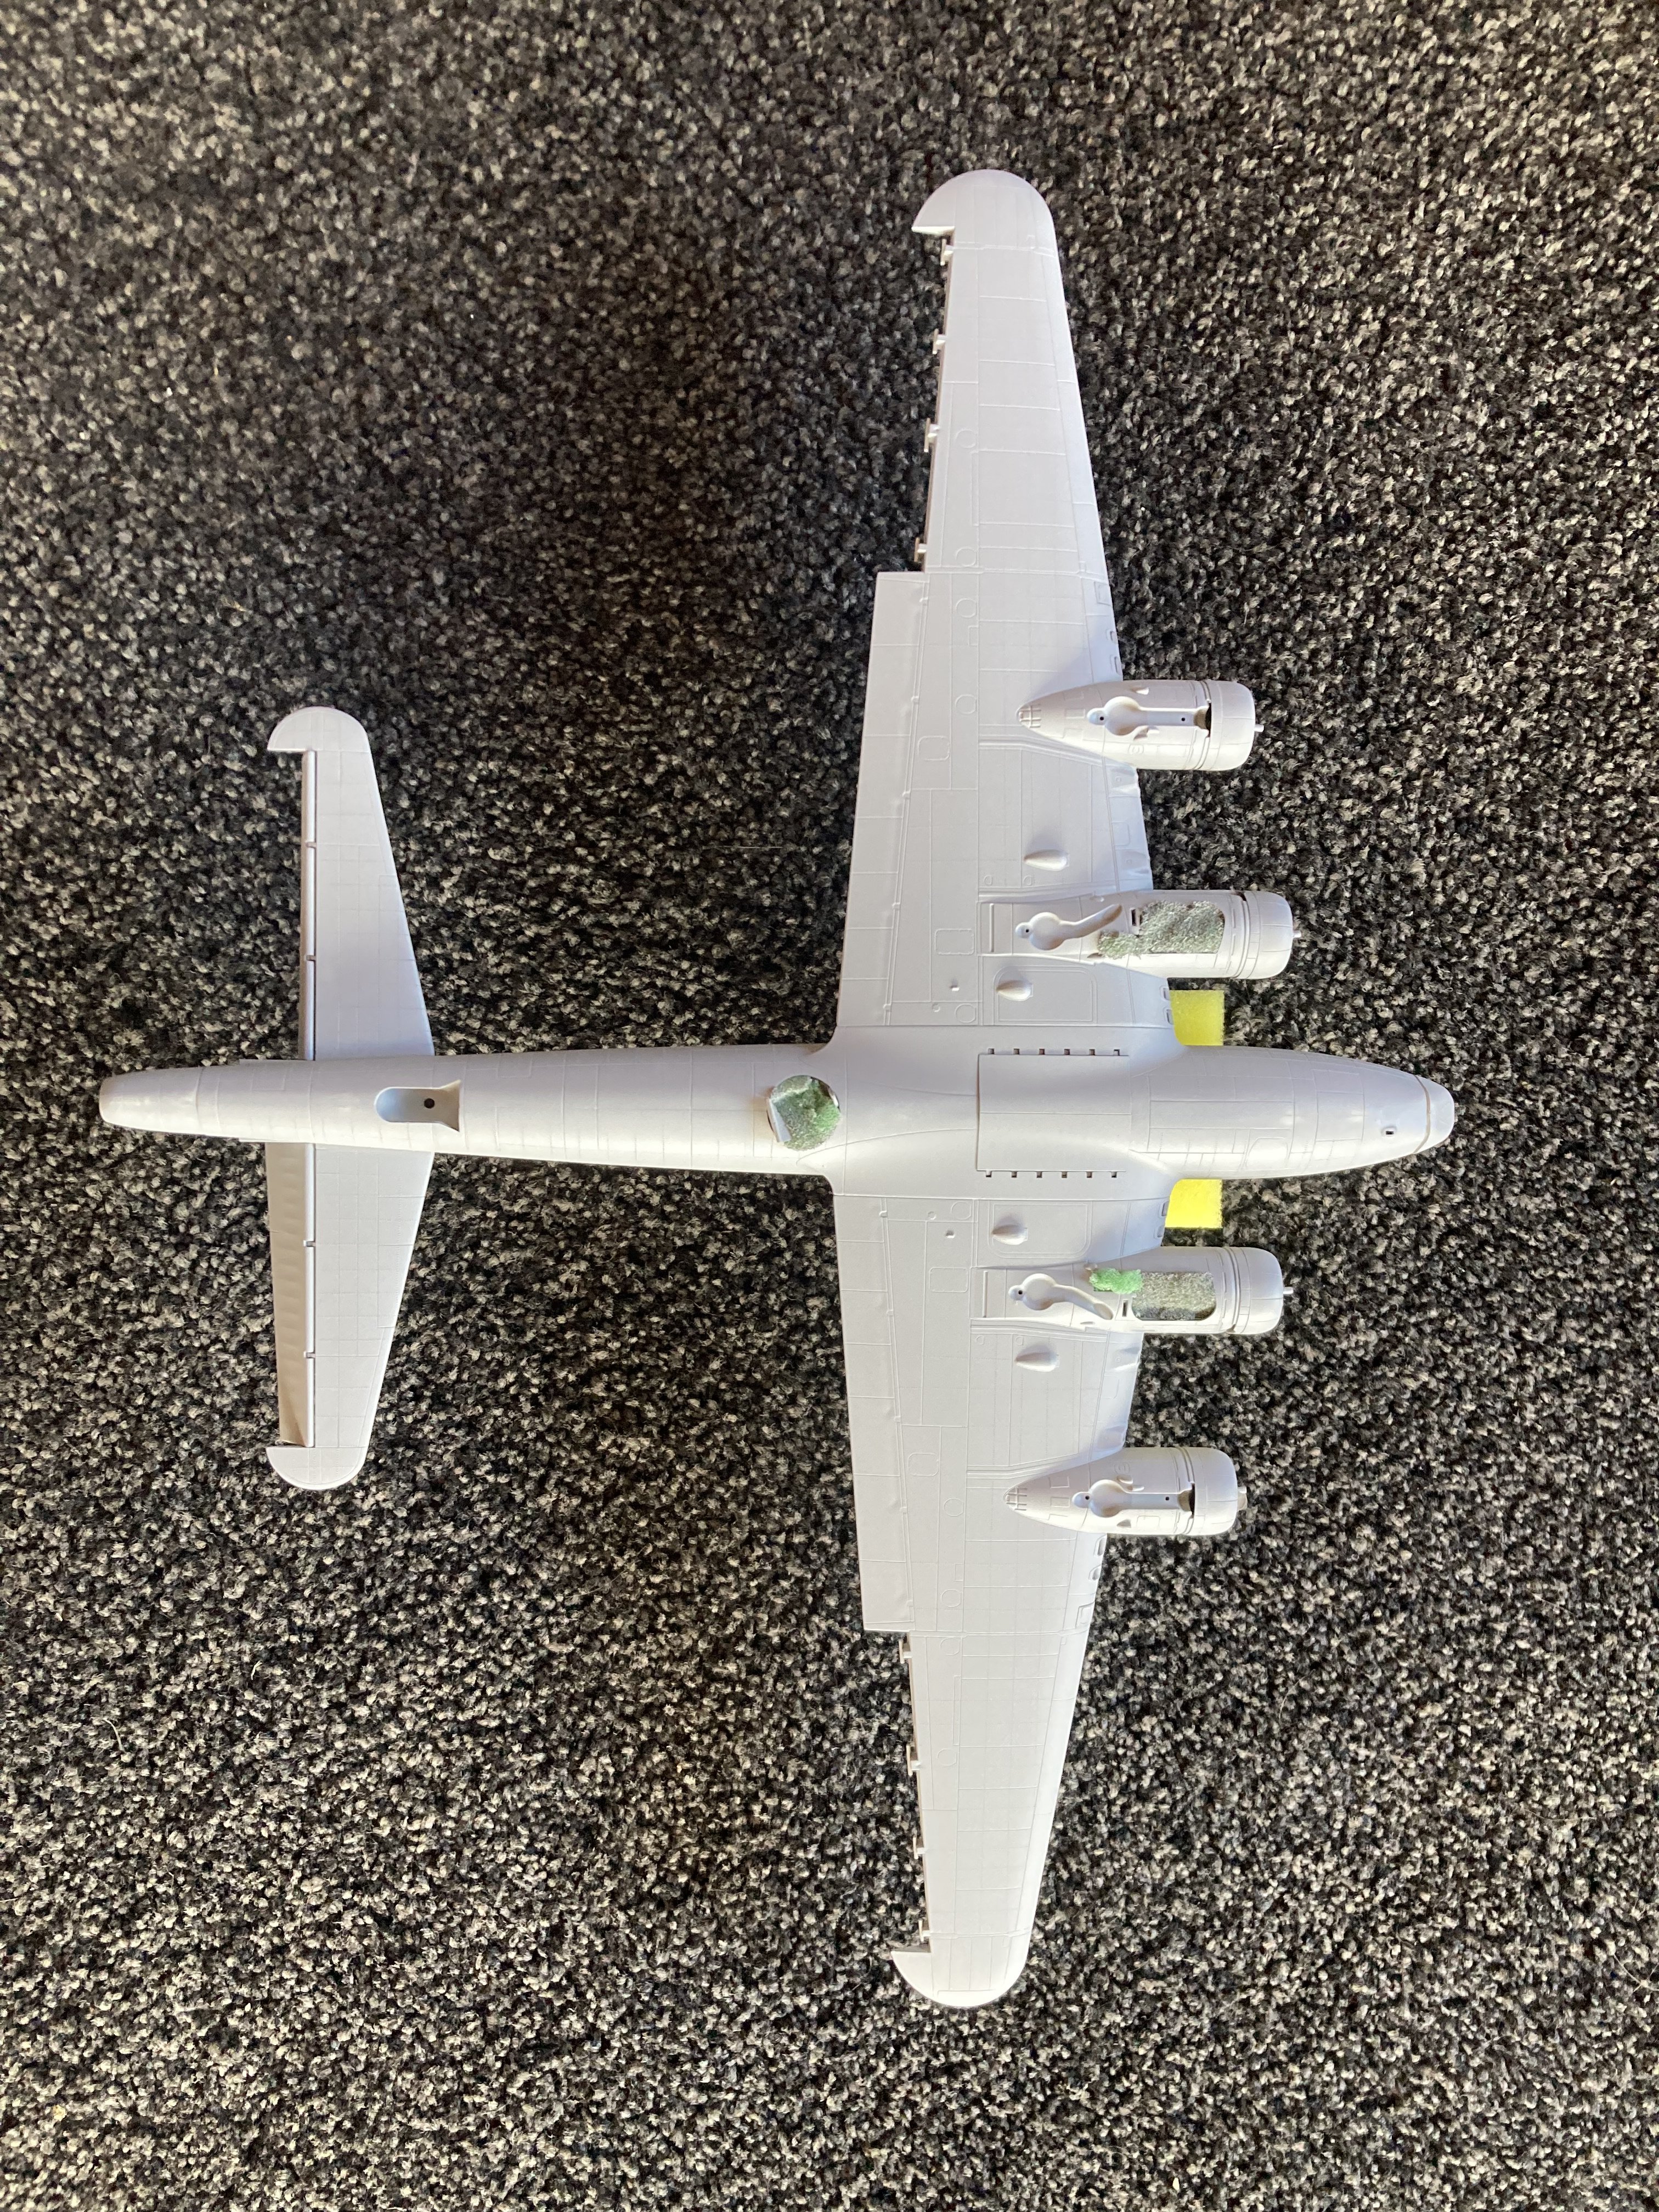
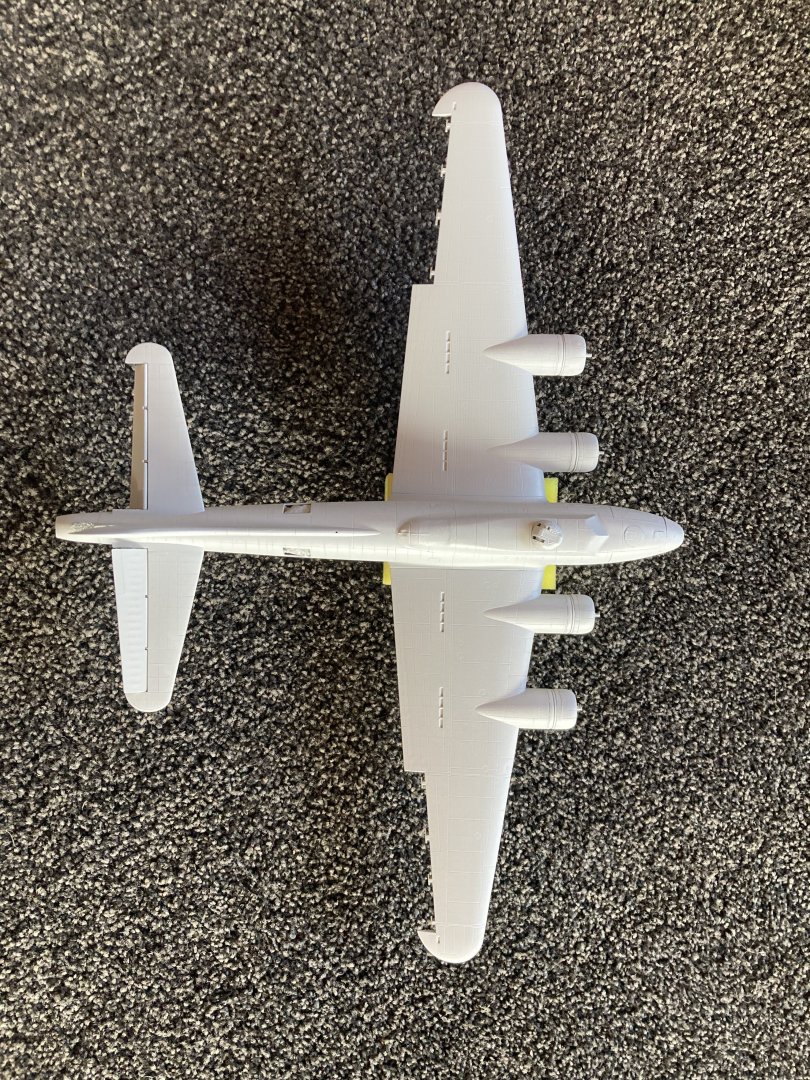
Primed with Tamiya surface primer in a can, re sanded and filled where needed and primed again. Will let it dry well for a few days.


- 77 replies
-
- 13
-
-
-
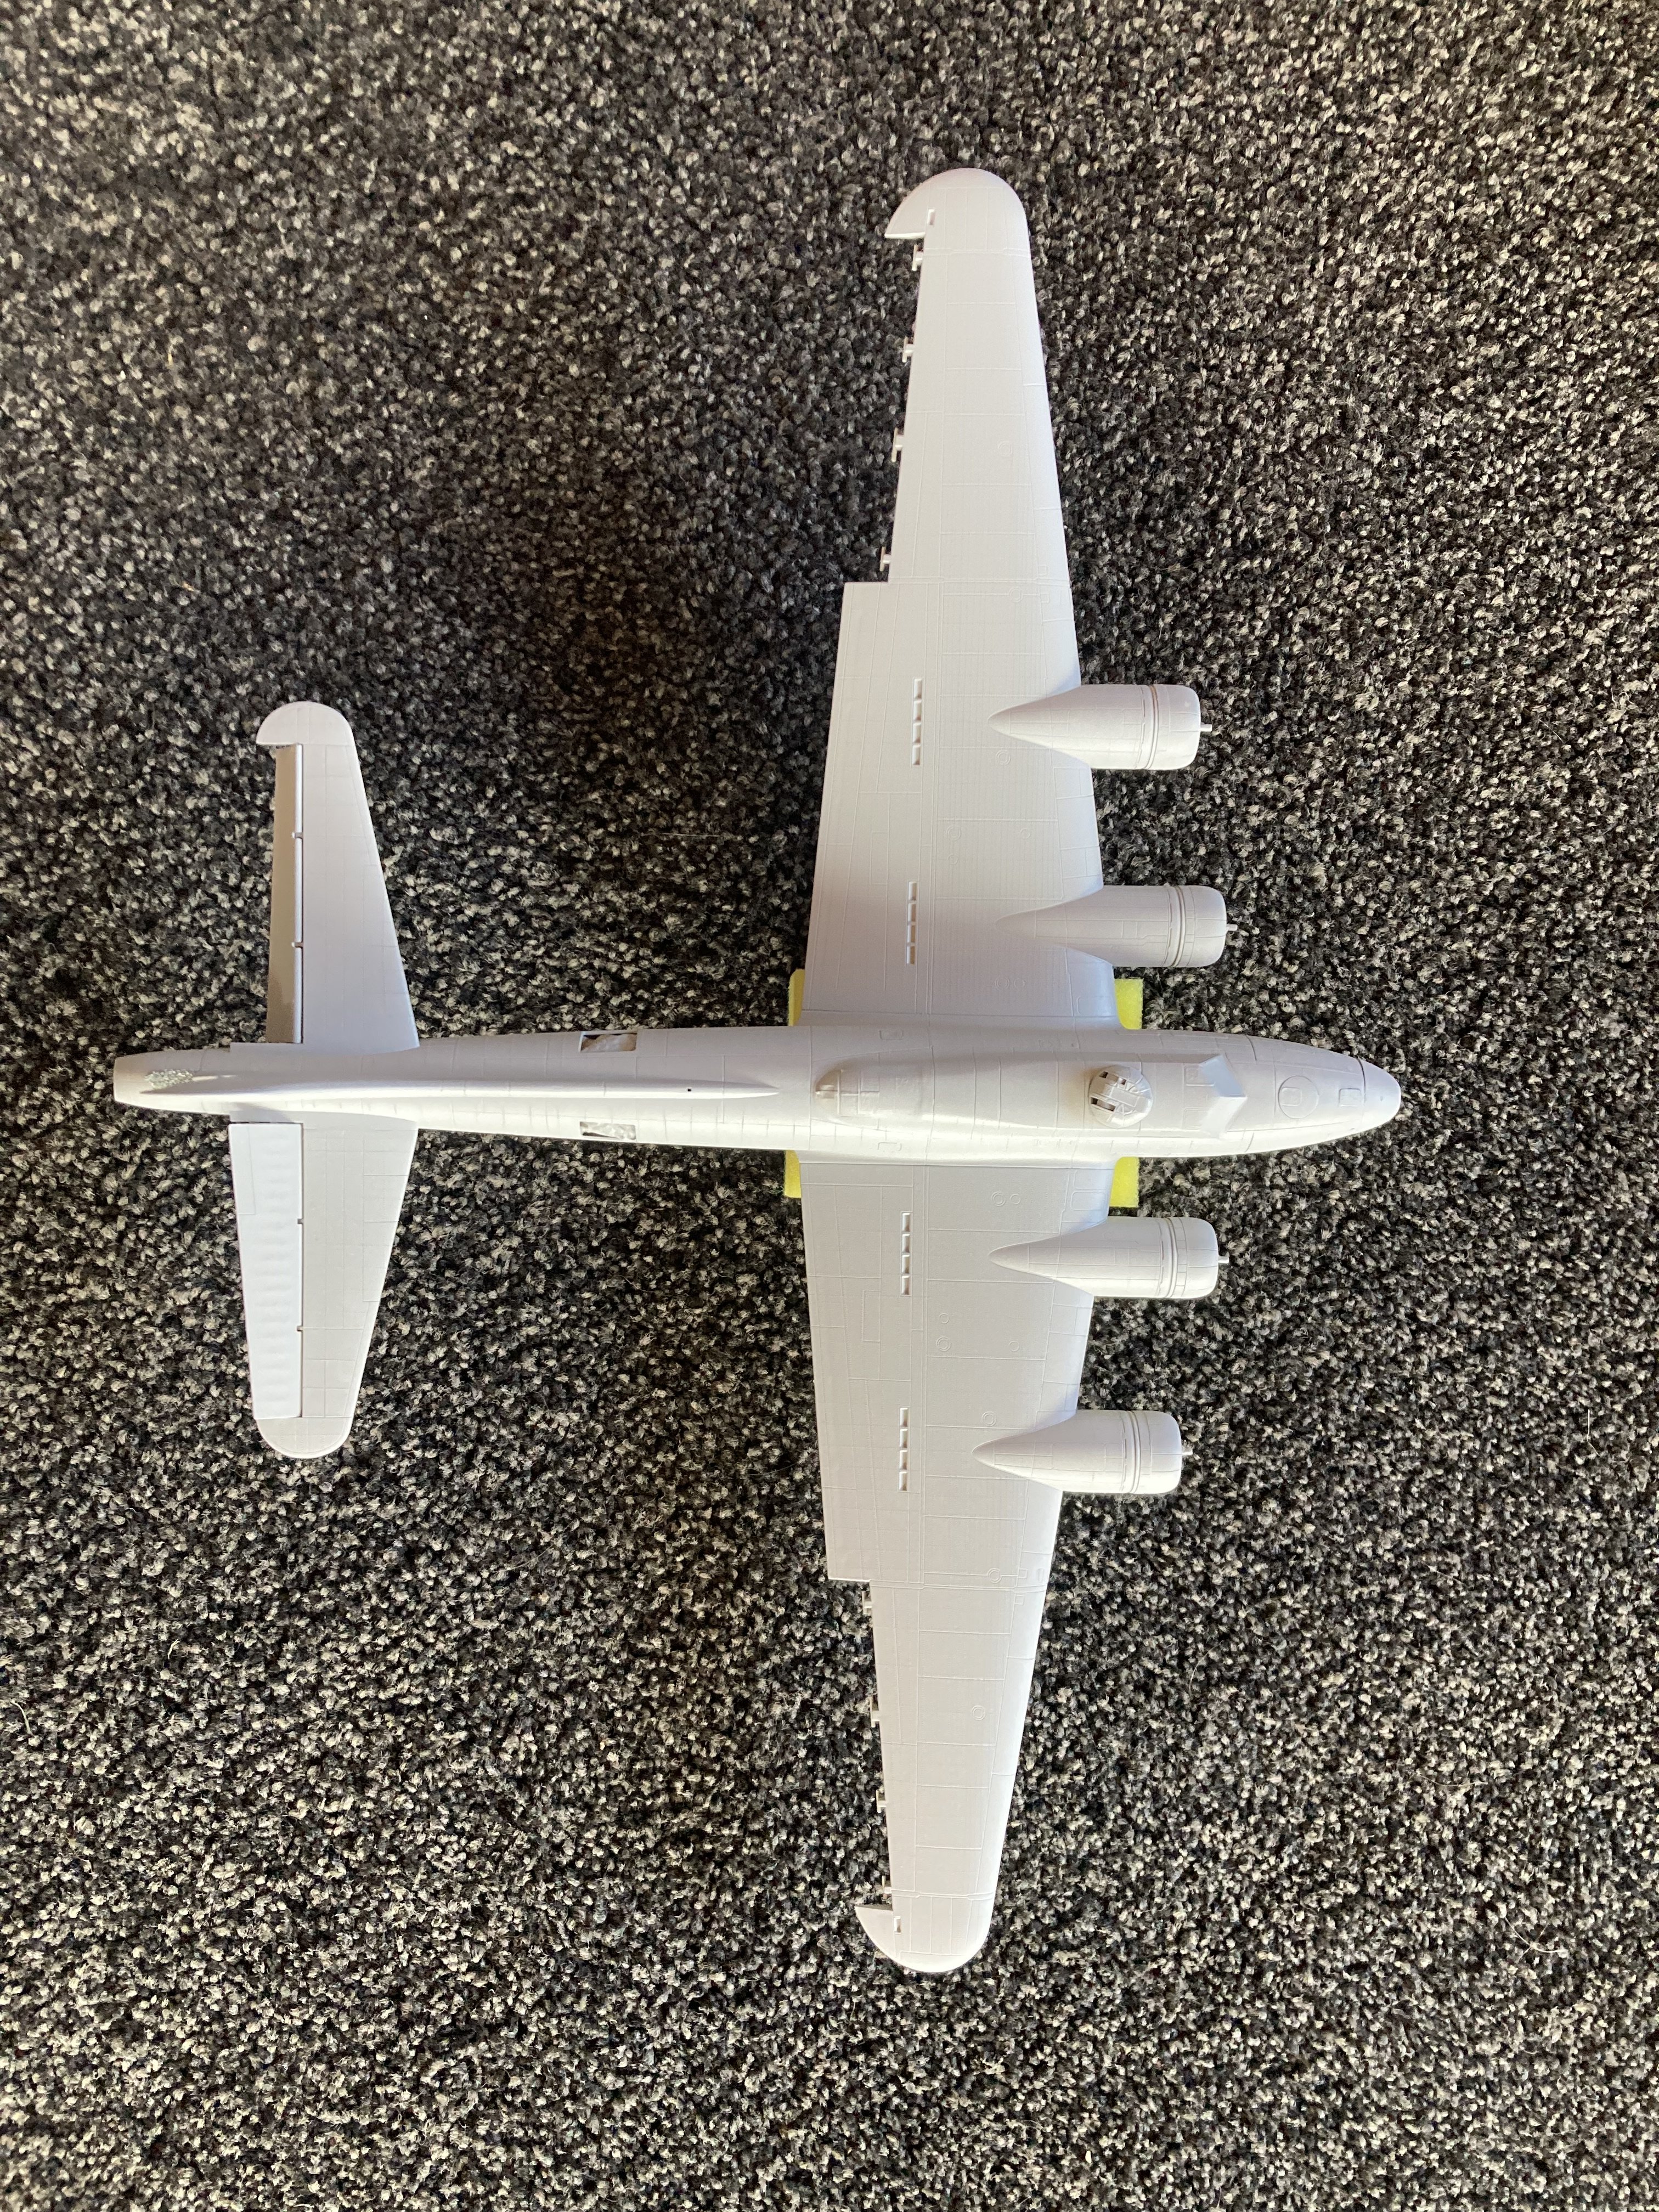
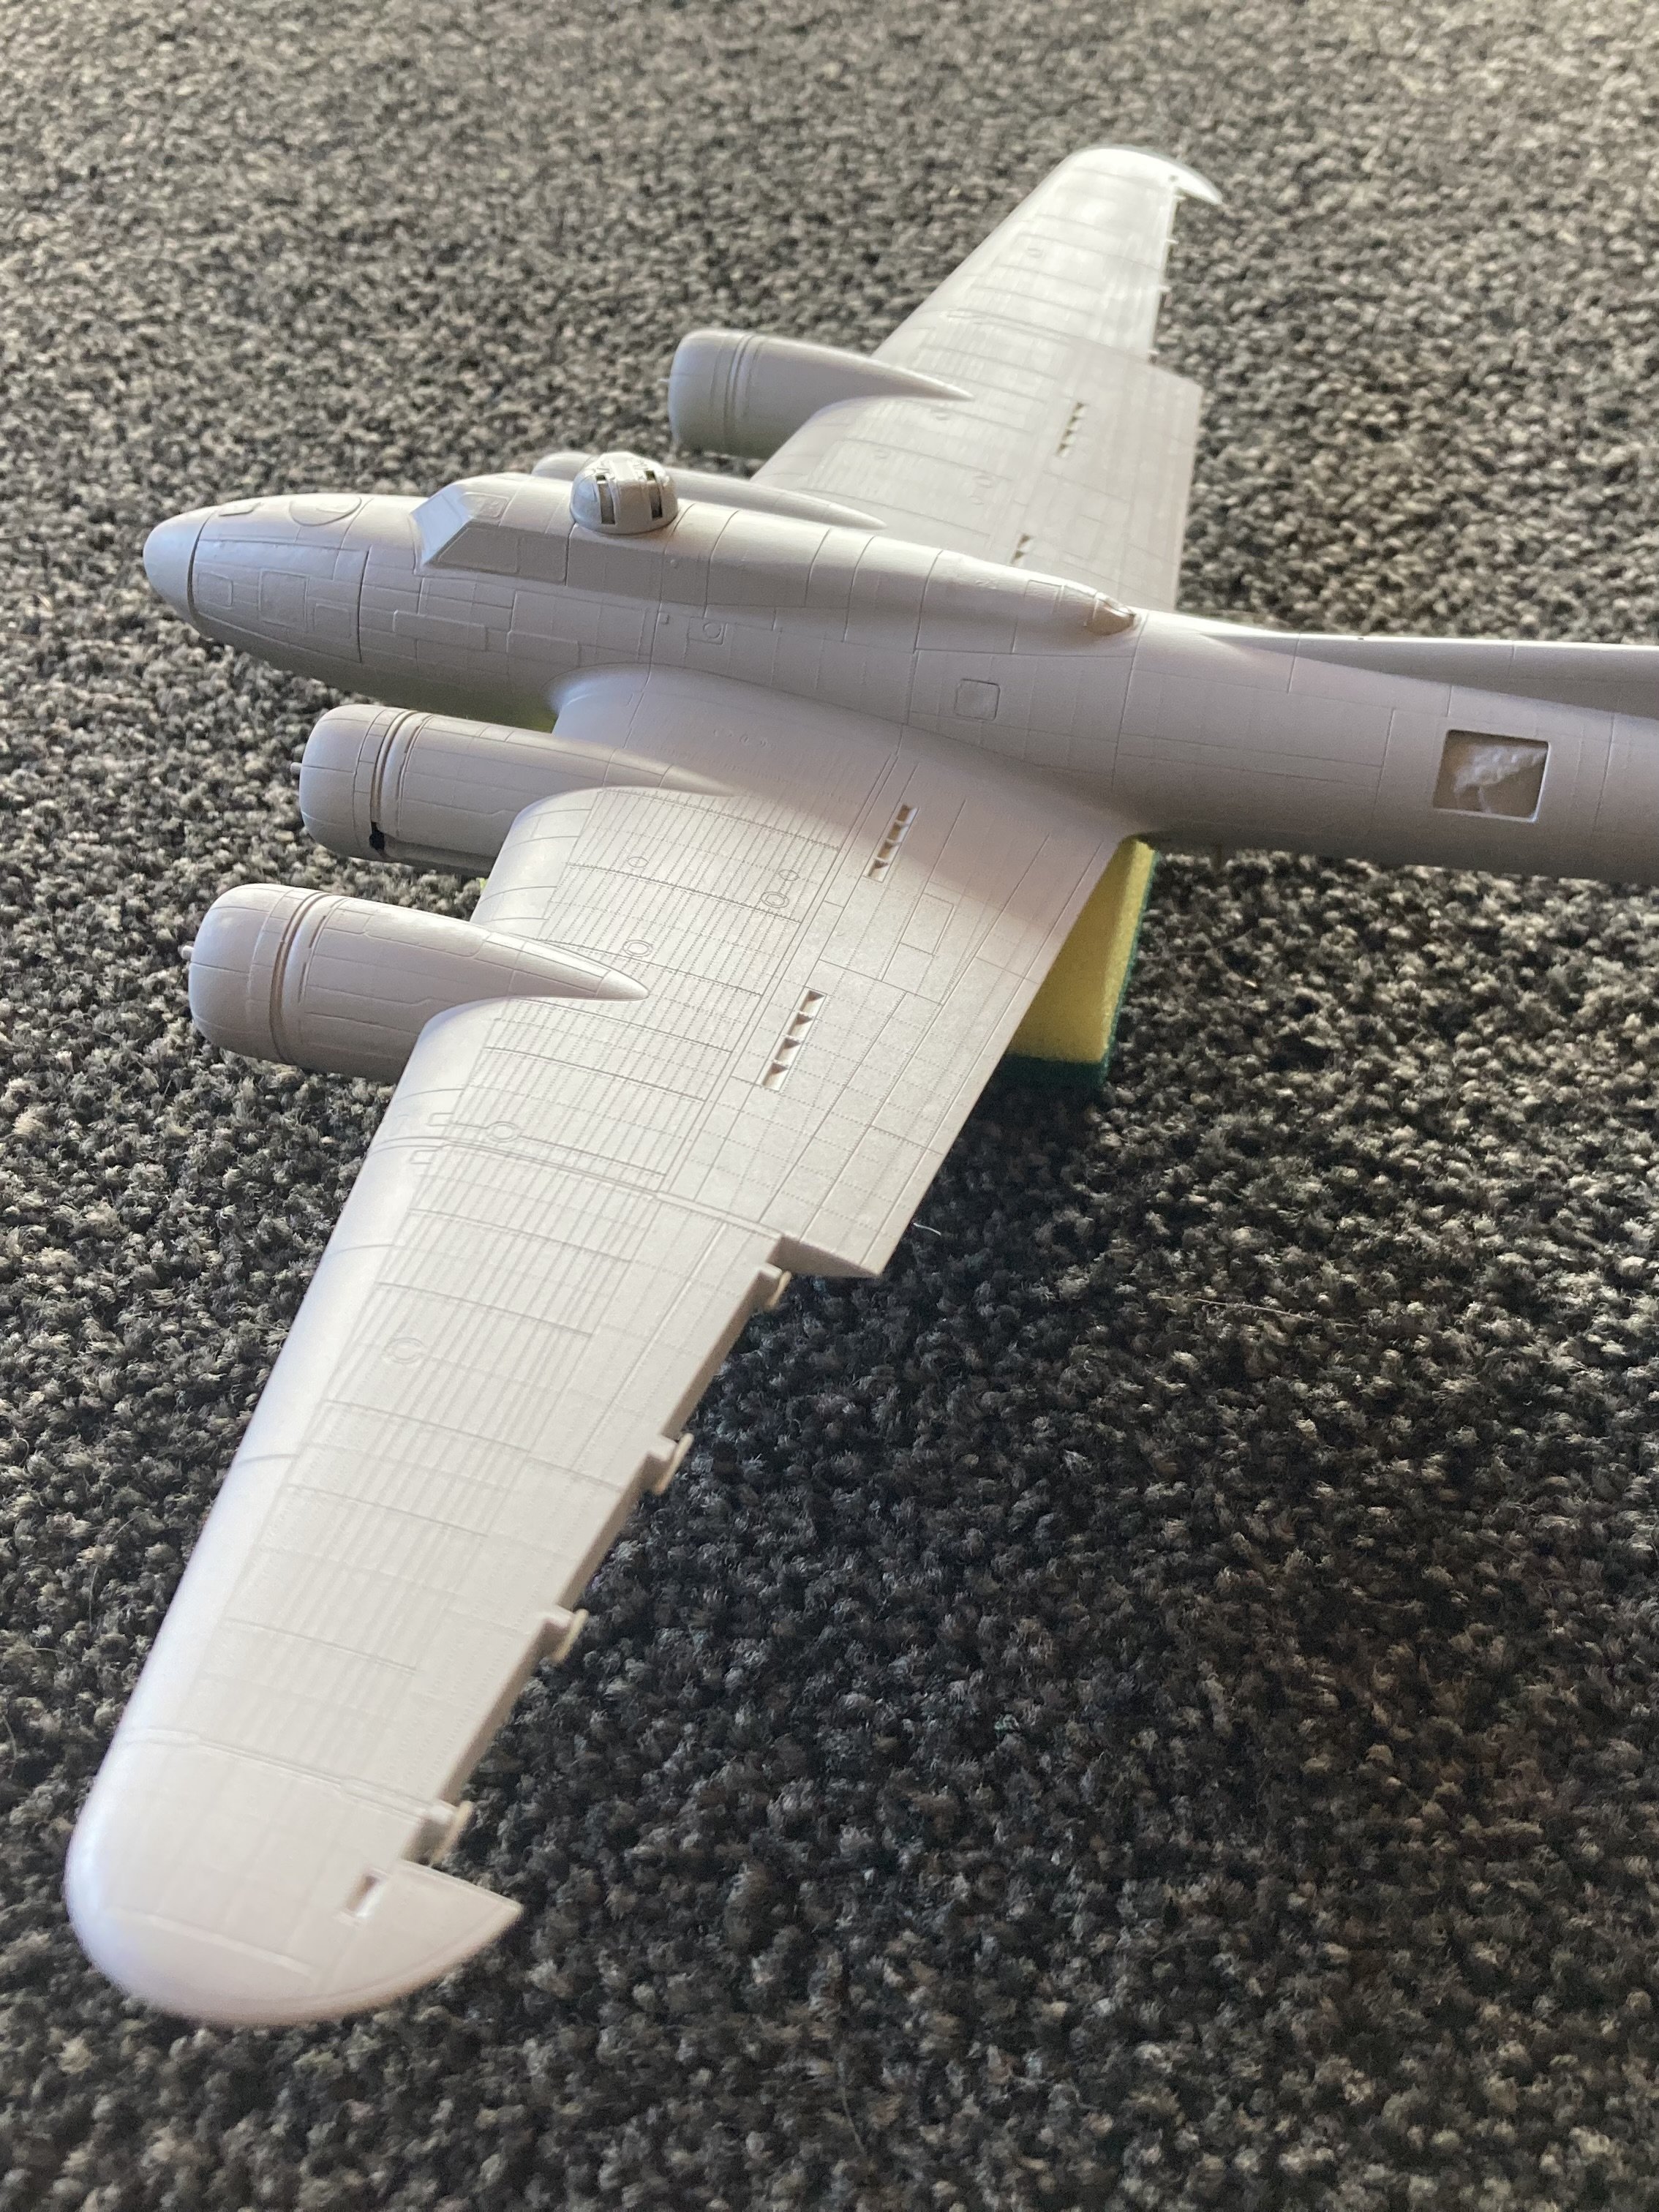
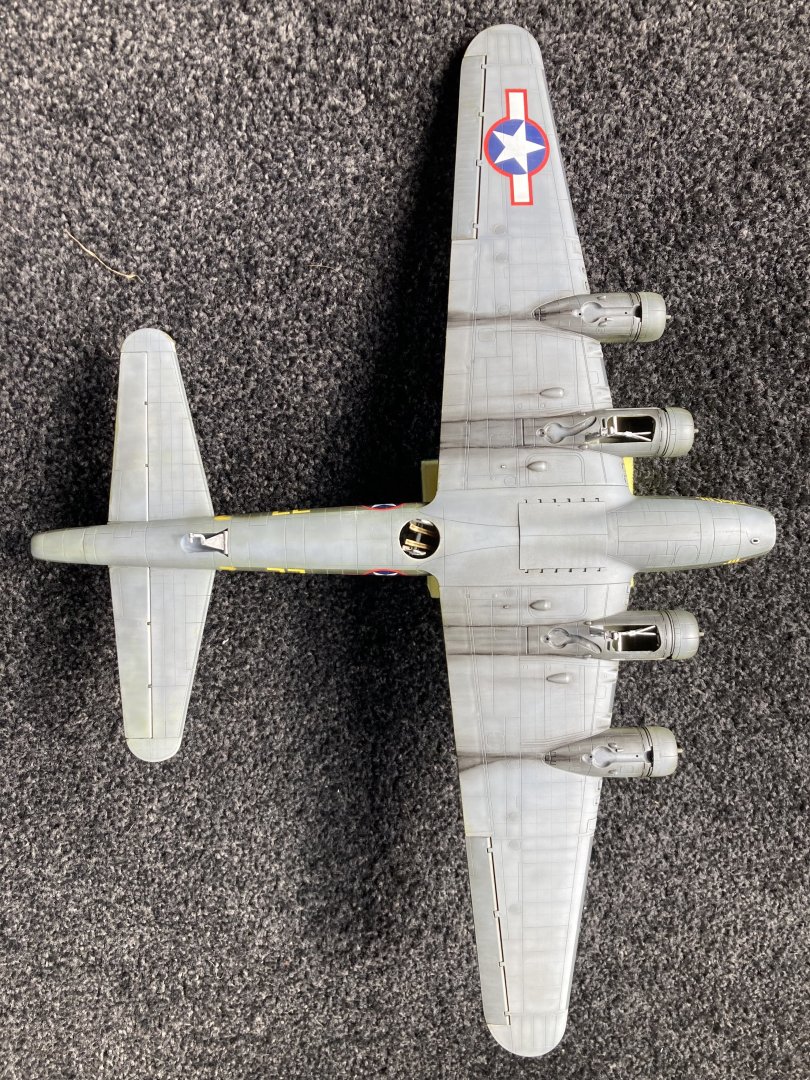
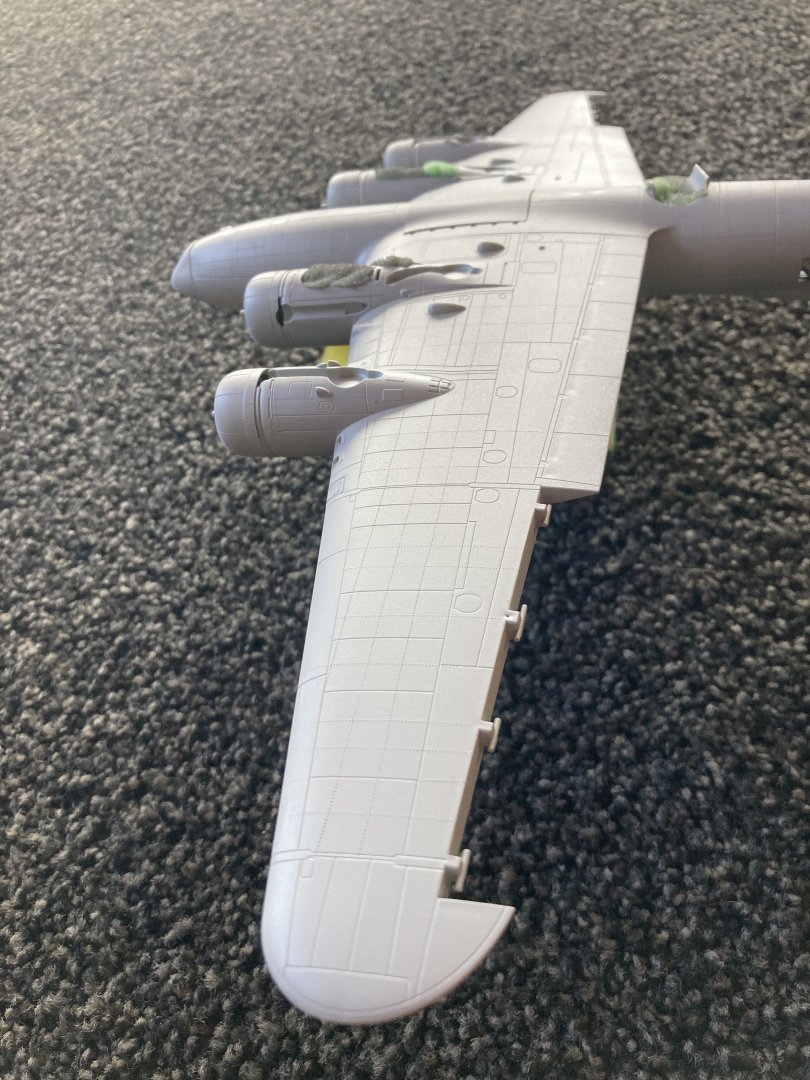
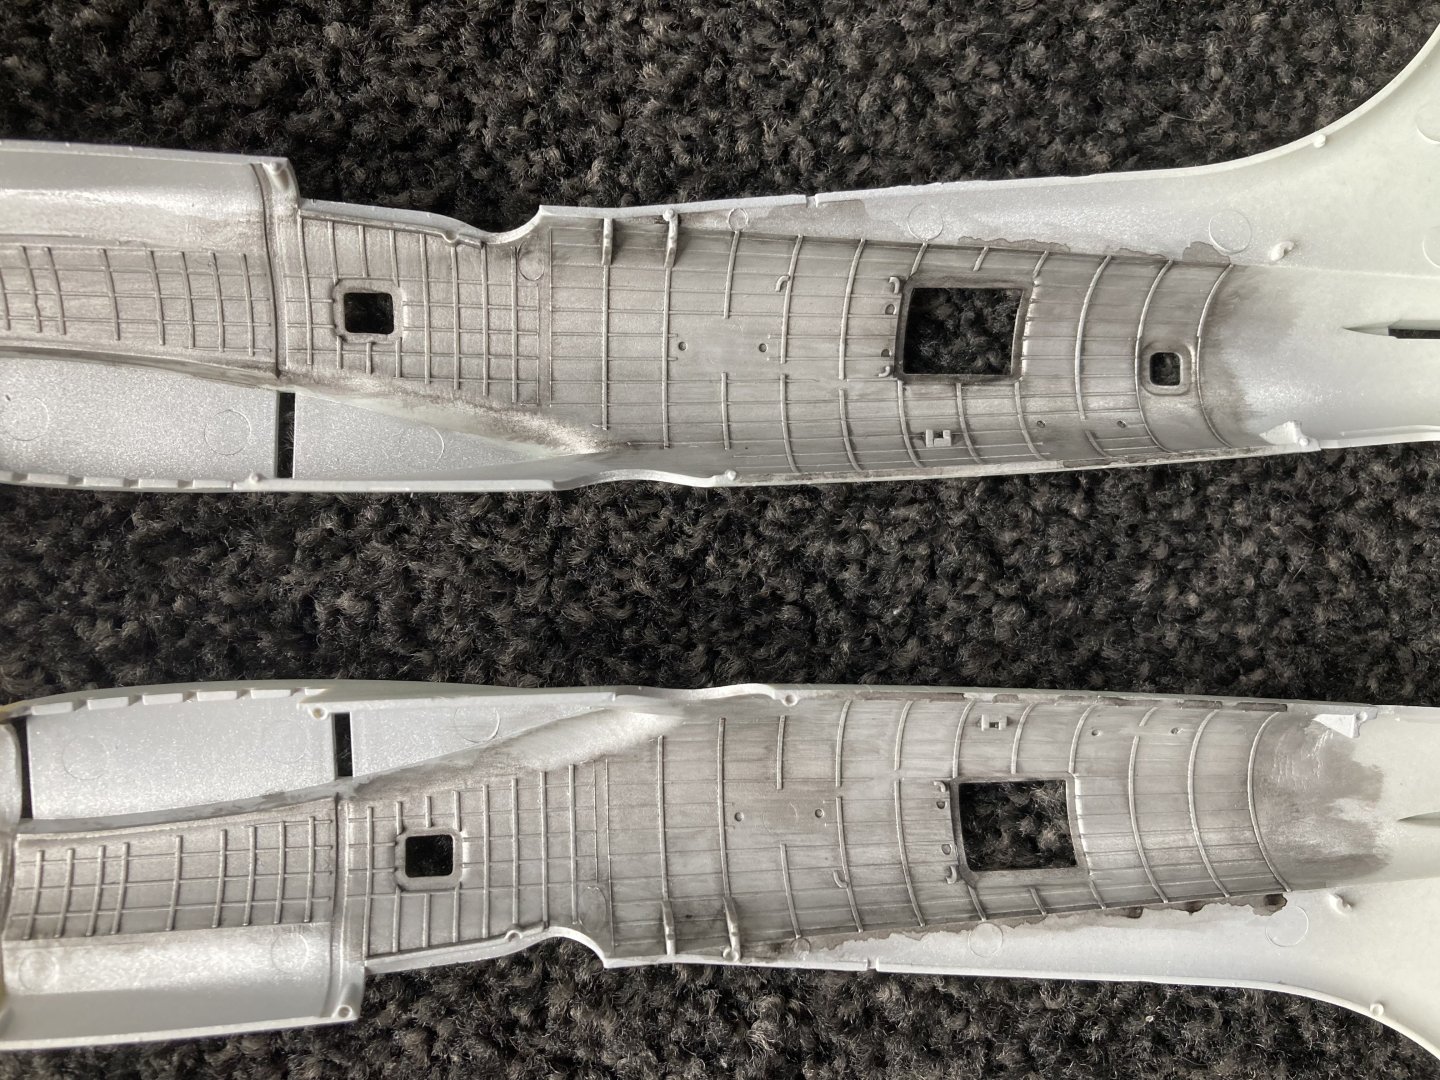
Everything is complete. Time to put it all together! Many dry fits, so was pretty smooth! It’s amazing how often everything either shrinks or grows 5% when you apply the glue! But that didn’t happen this time and it all went together quite well! The wings are all ready to go so they also went on and the seam to fill is minimal so I was happy! I did some seam work with putty and sandpaper, rescribed the panel lines, attempted to put the rivets back on but the amount of force needed with the wheel meant I was breaking the glue seal and having to glue again and re fill and sand so I will think about that later.

- 77 replies
-
- 12
-
-
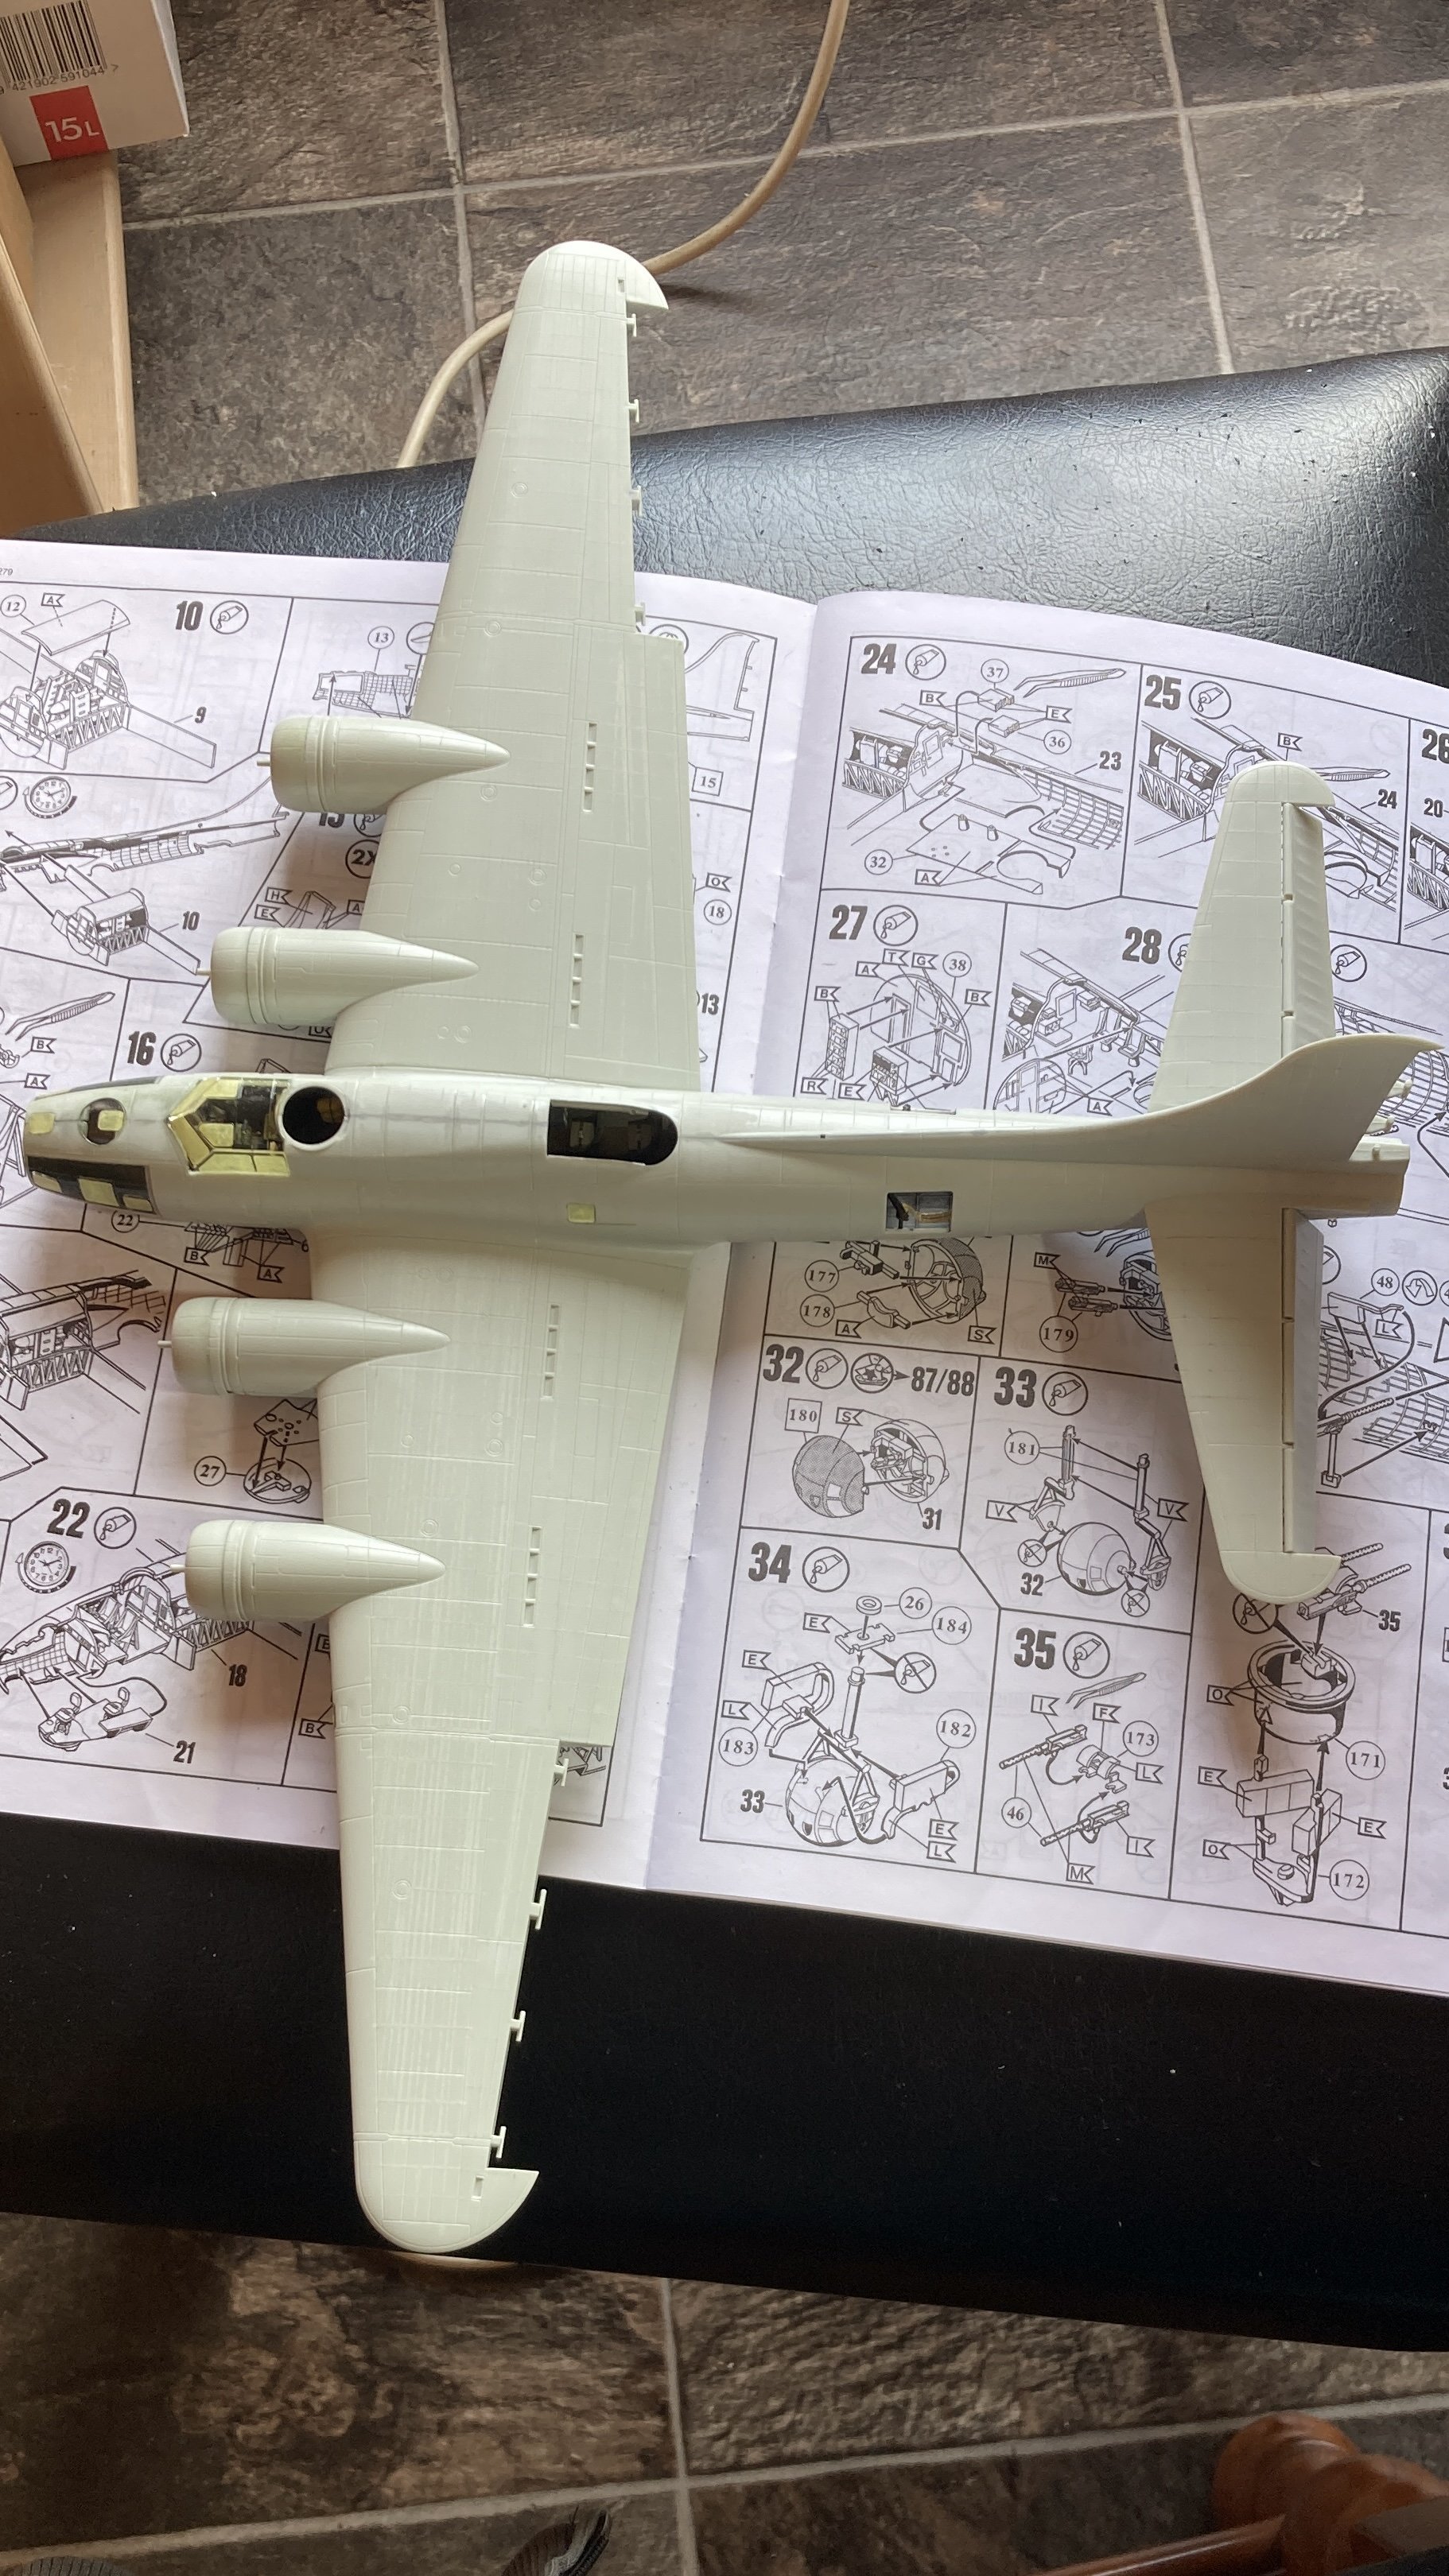
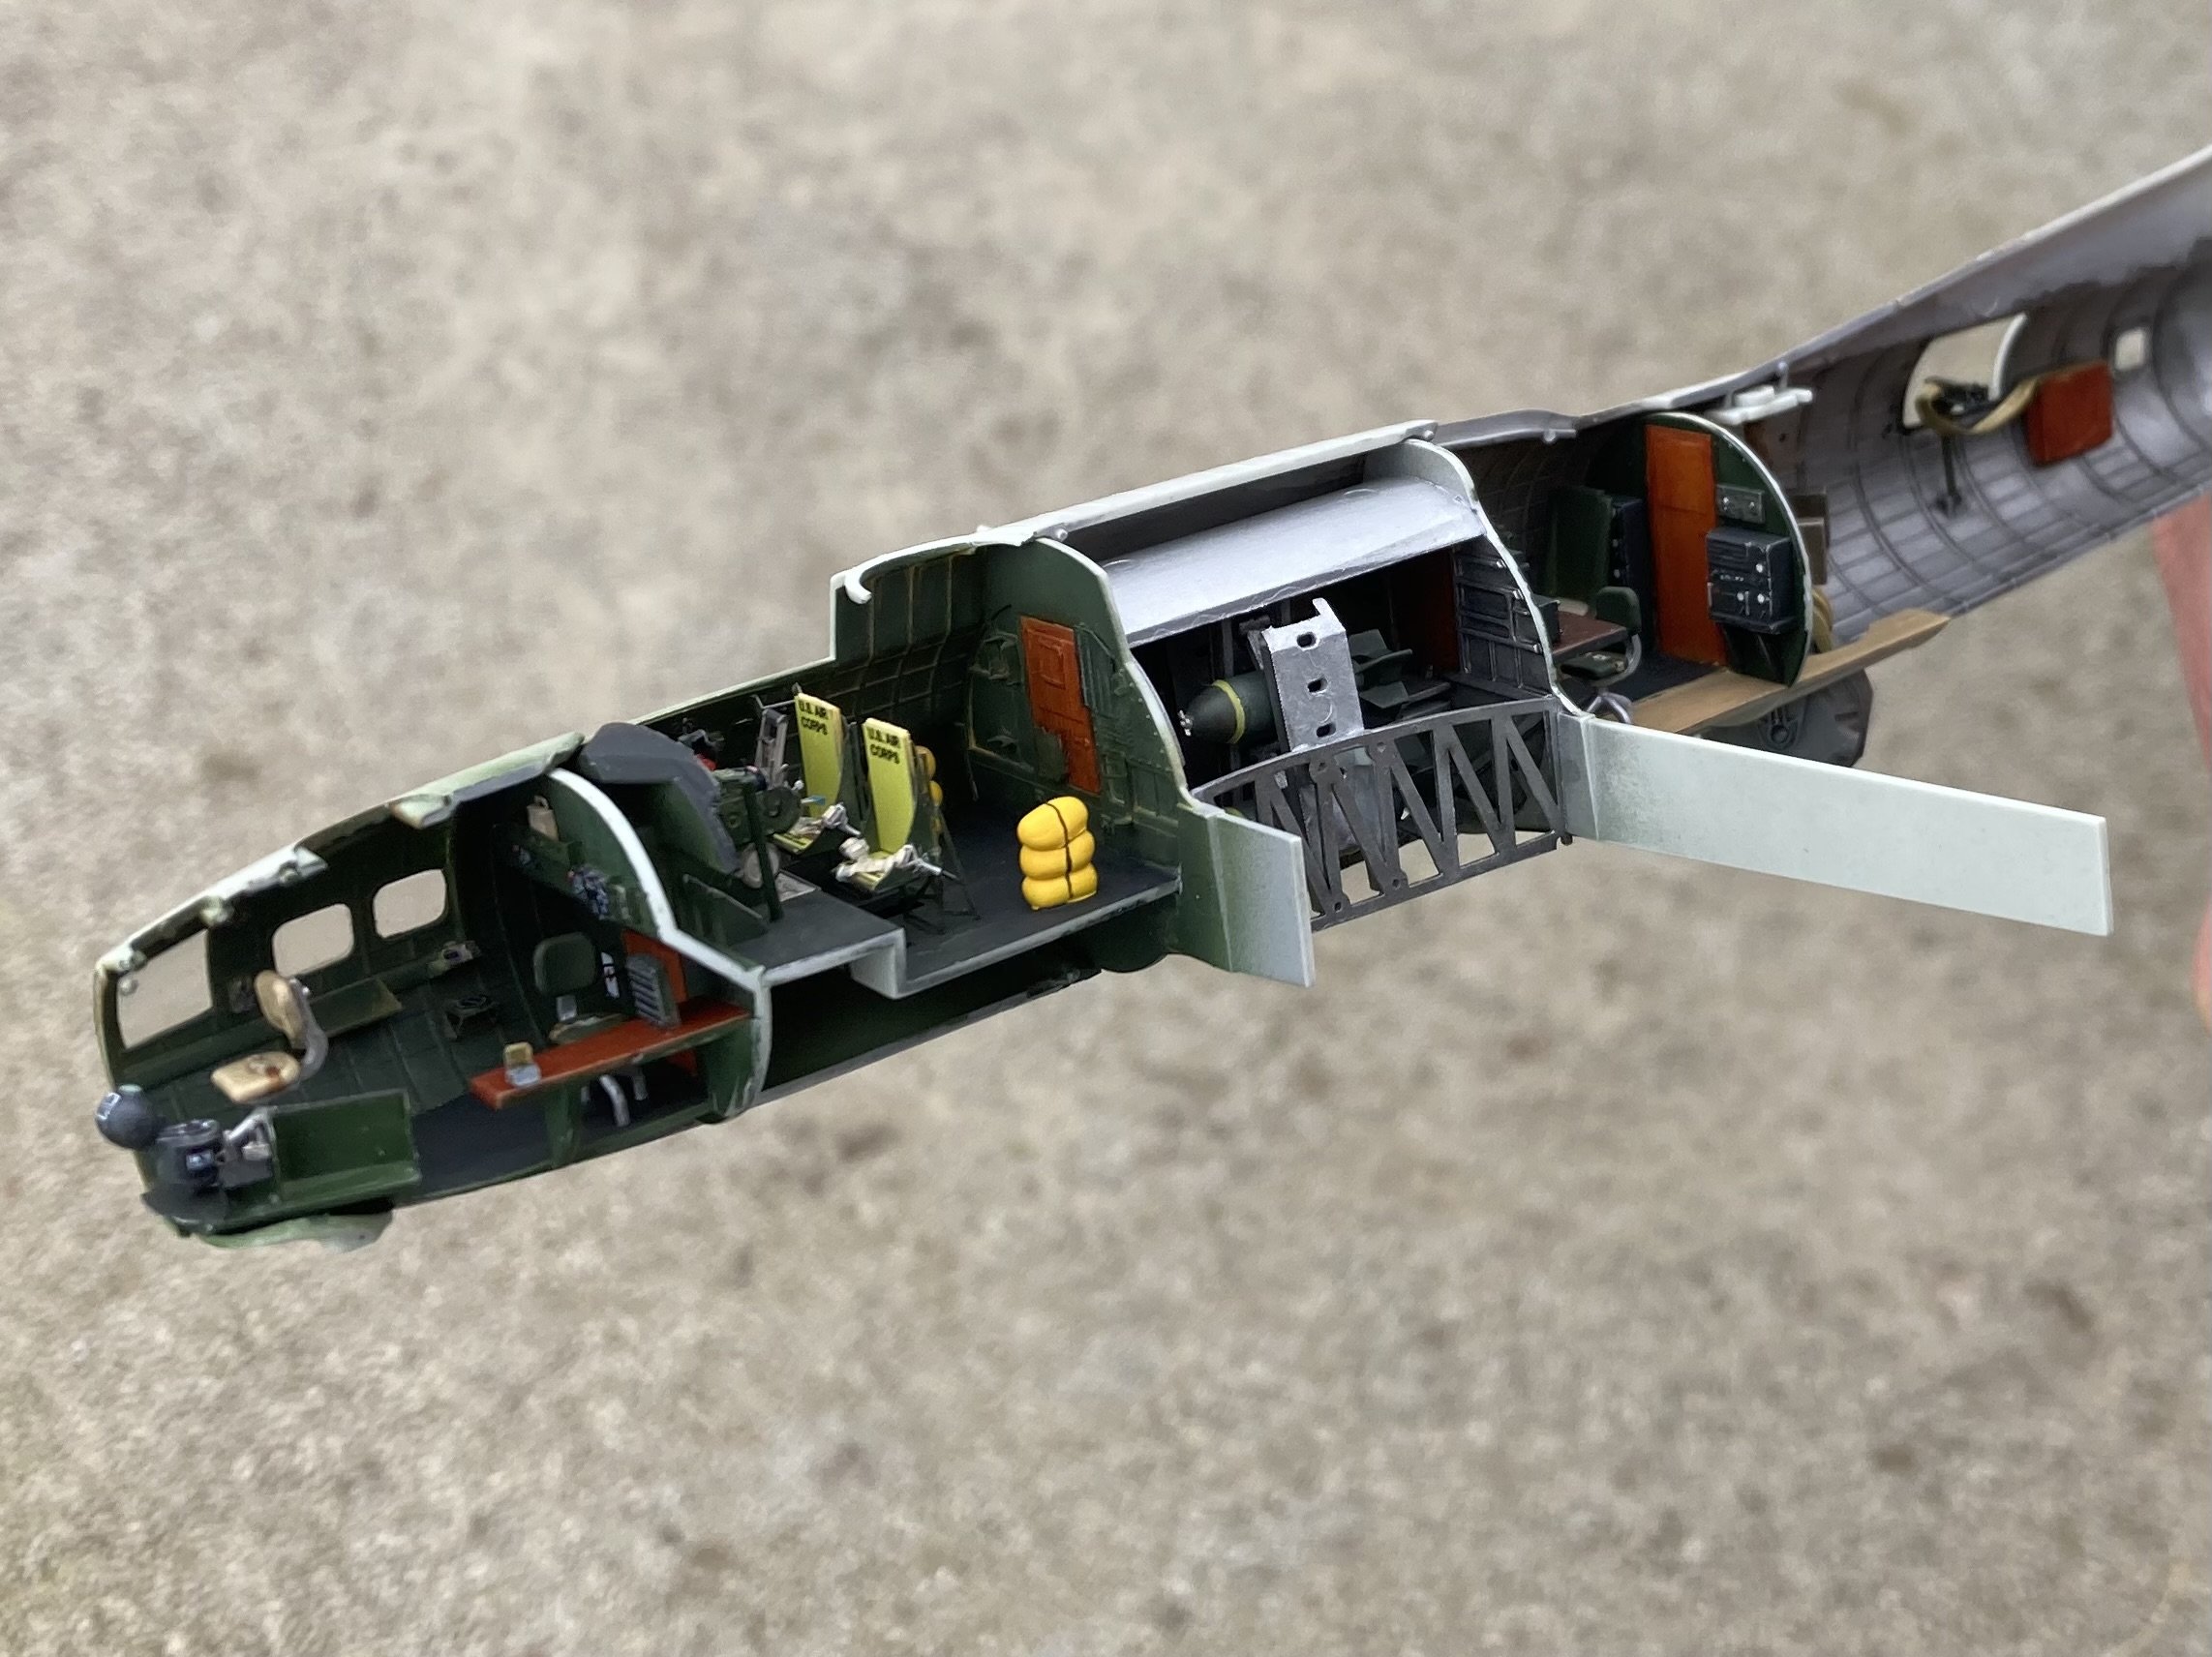
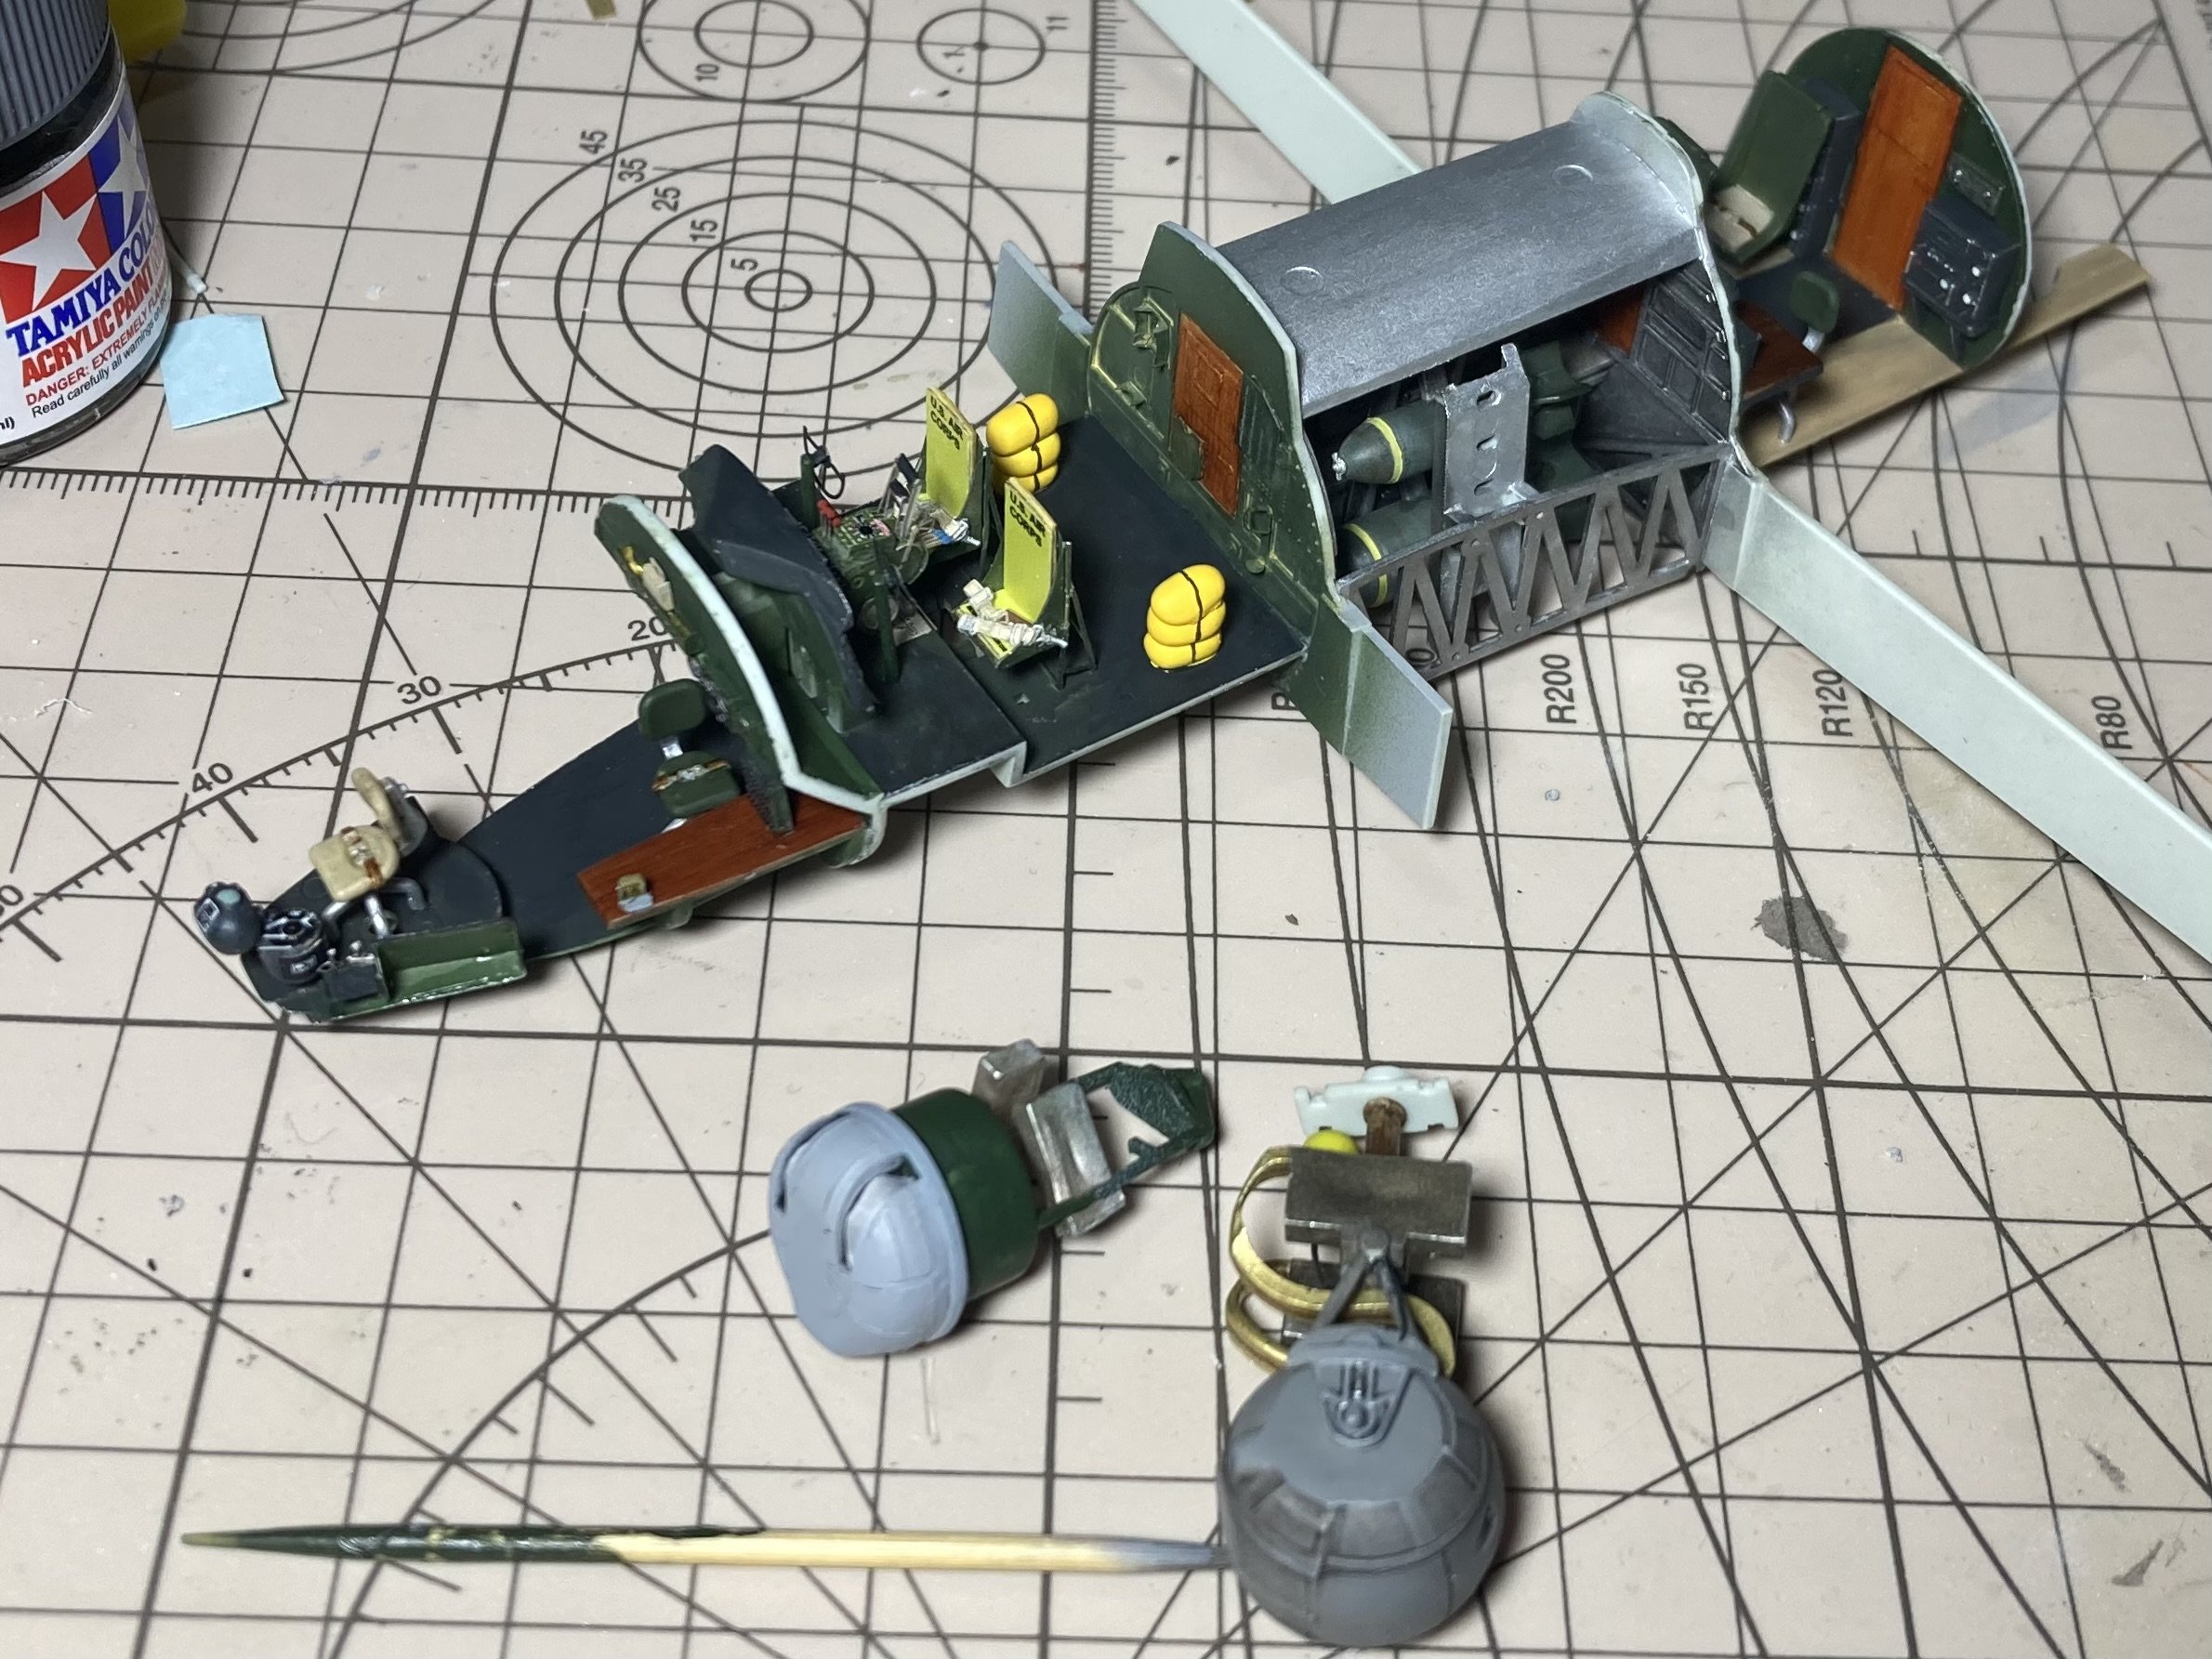
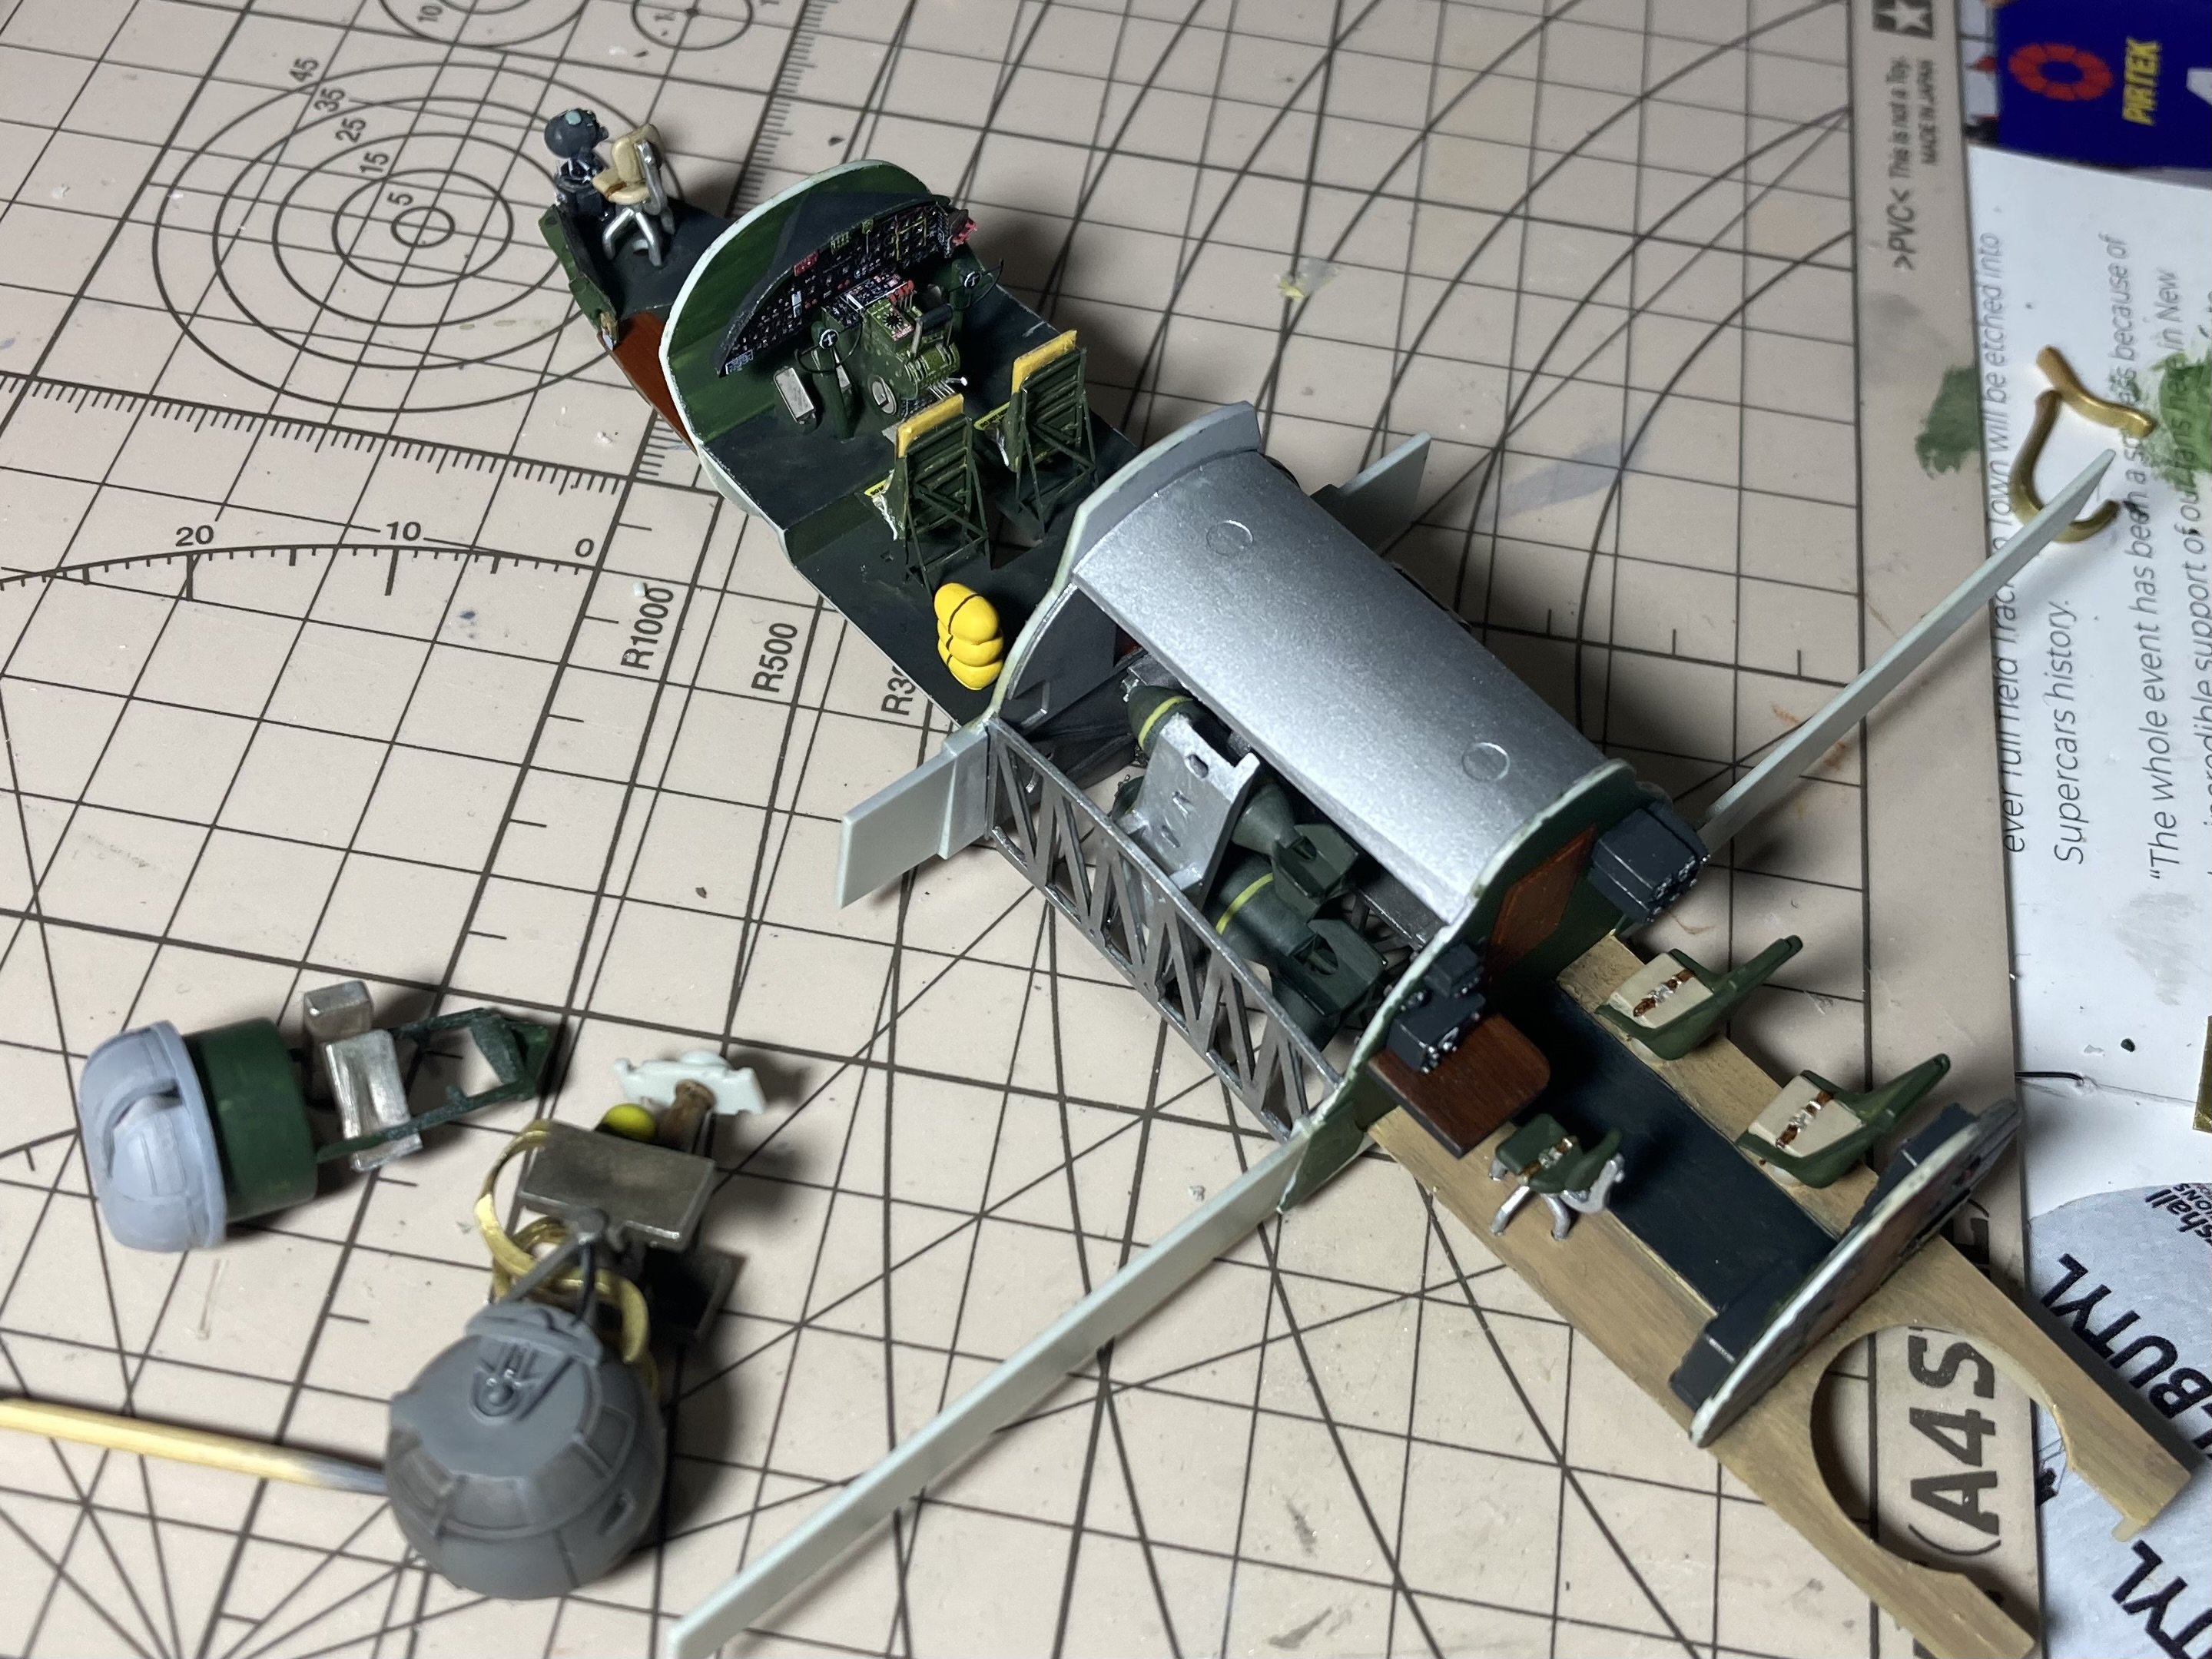
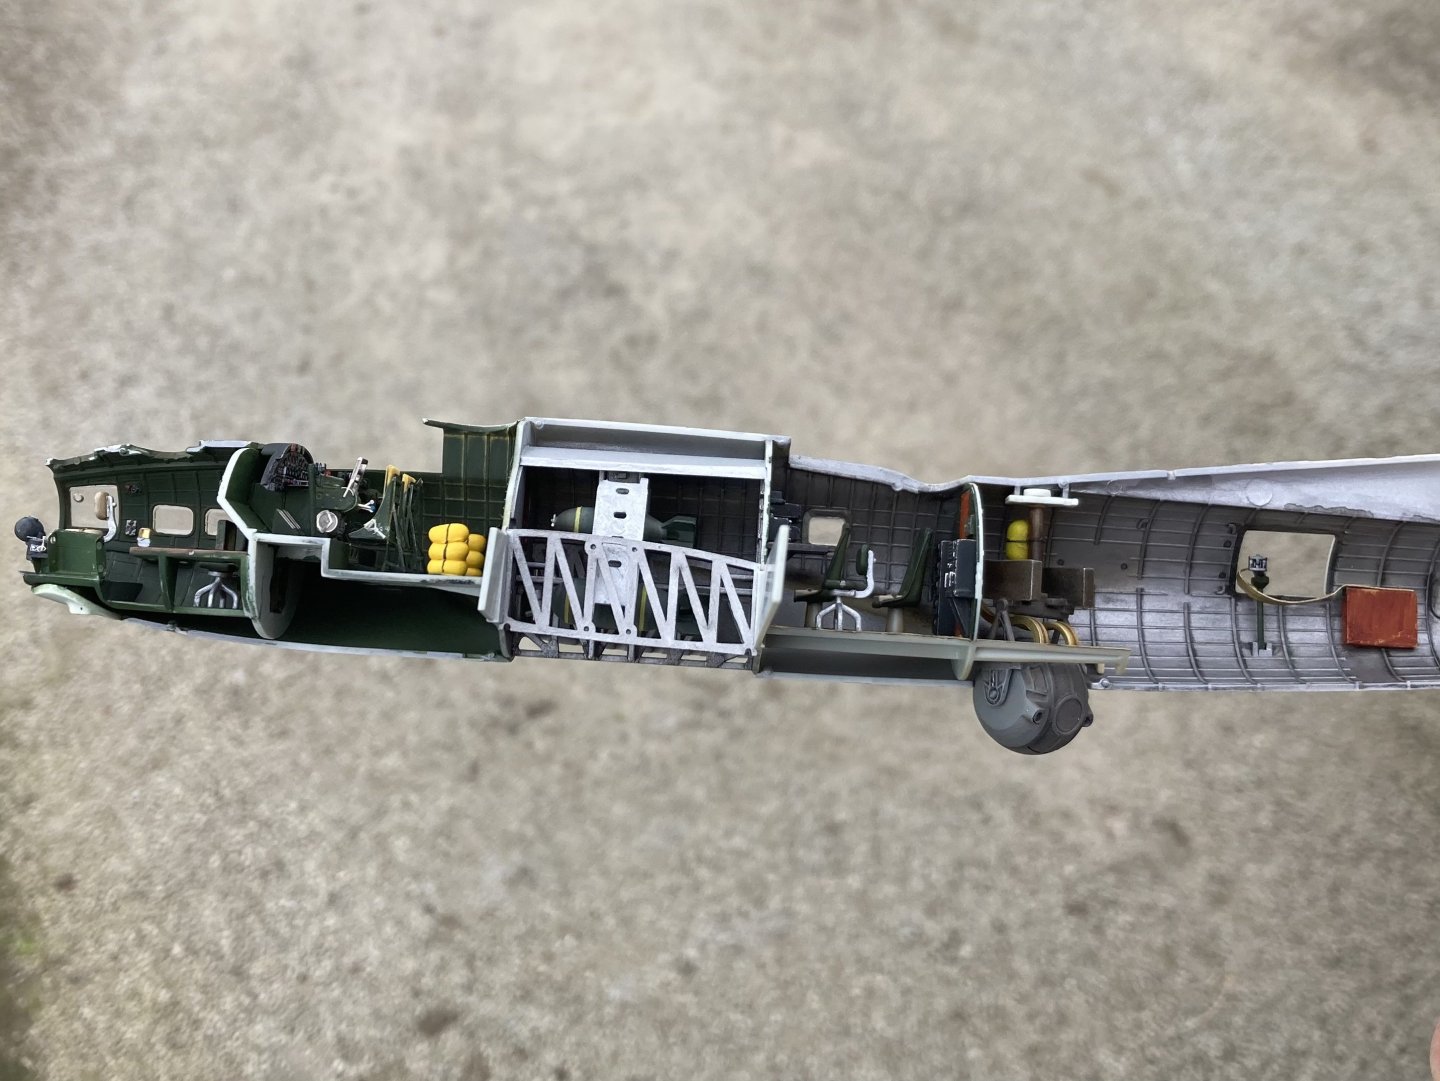
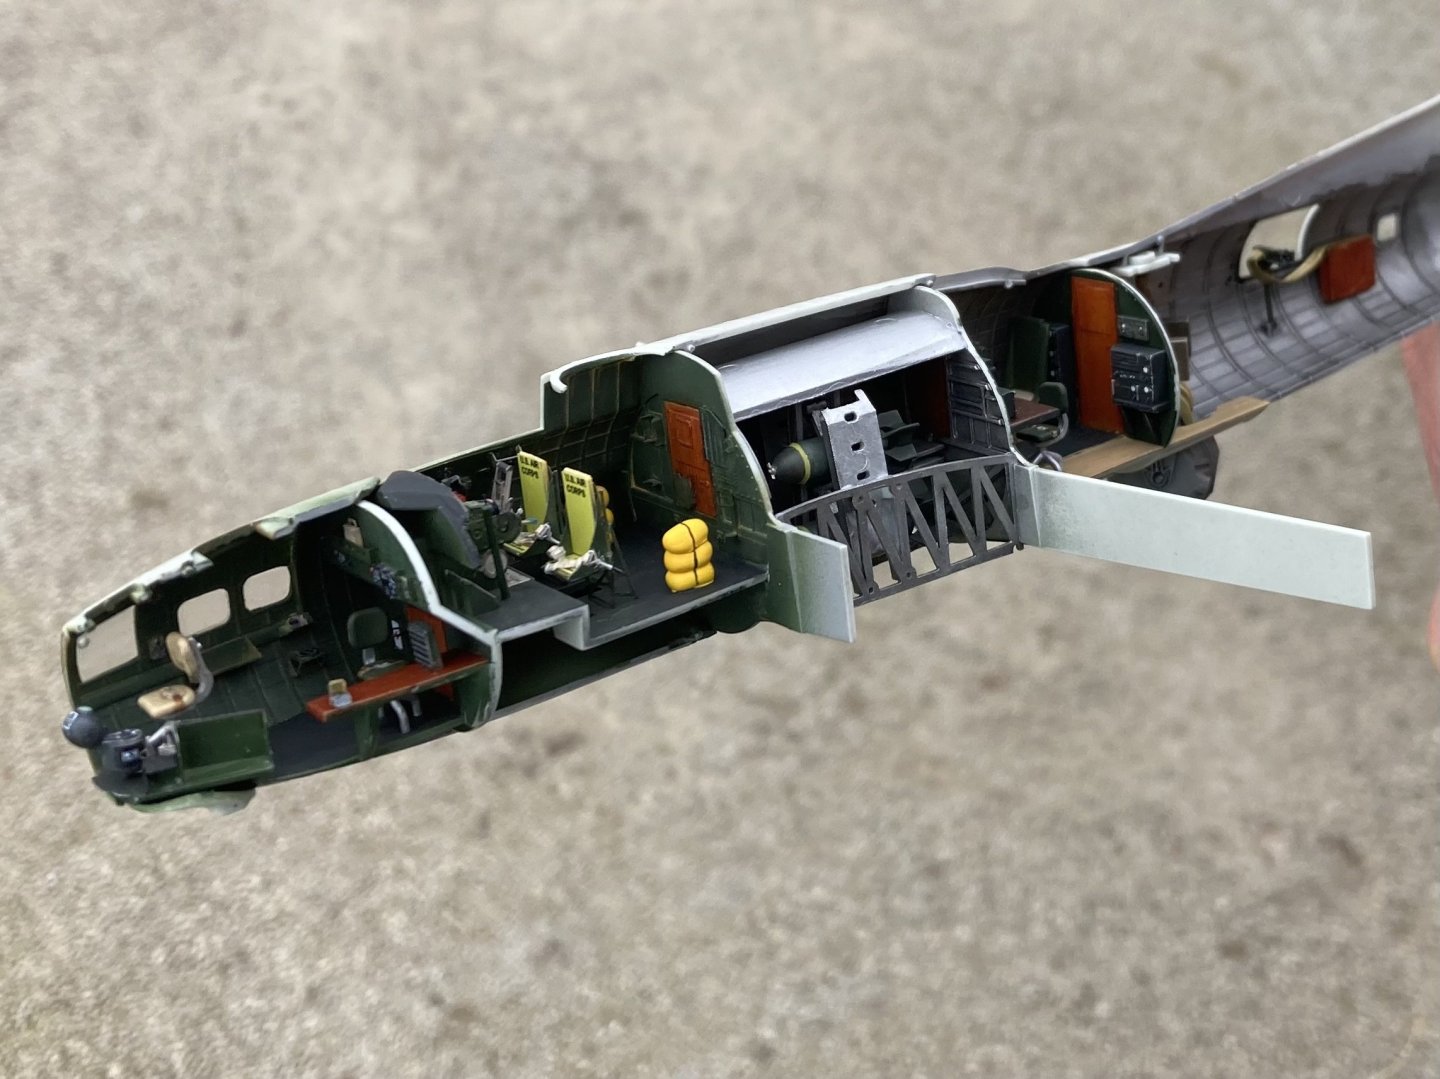
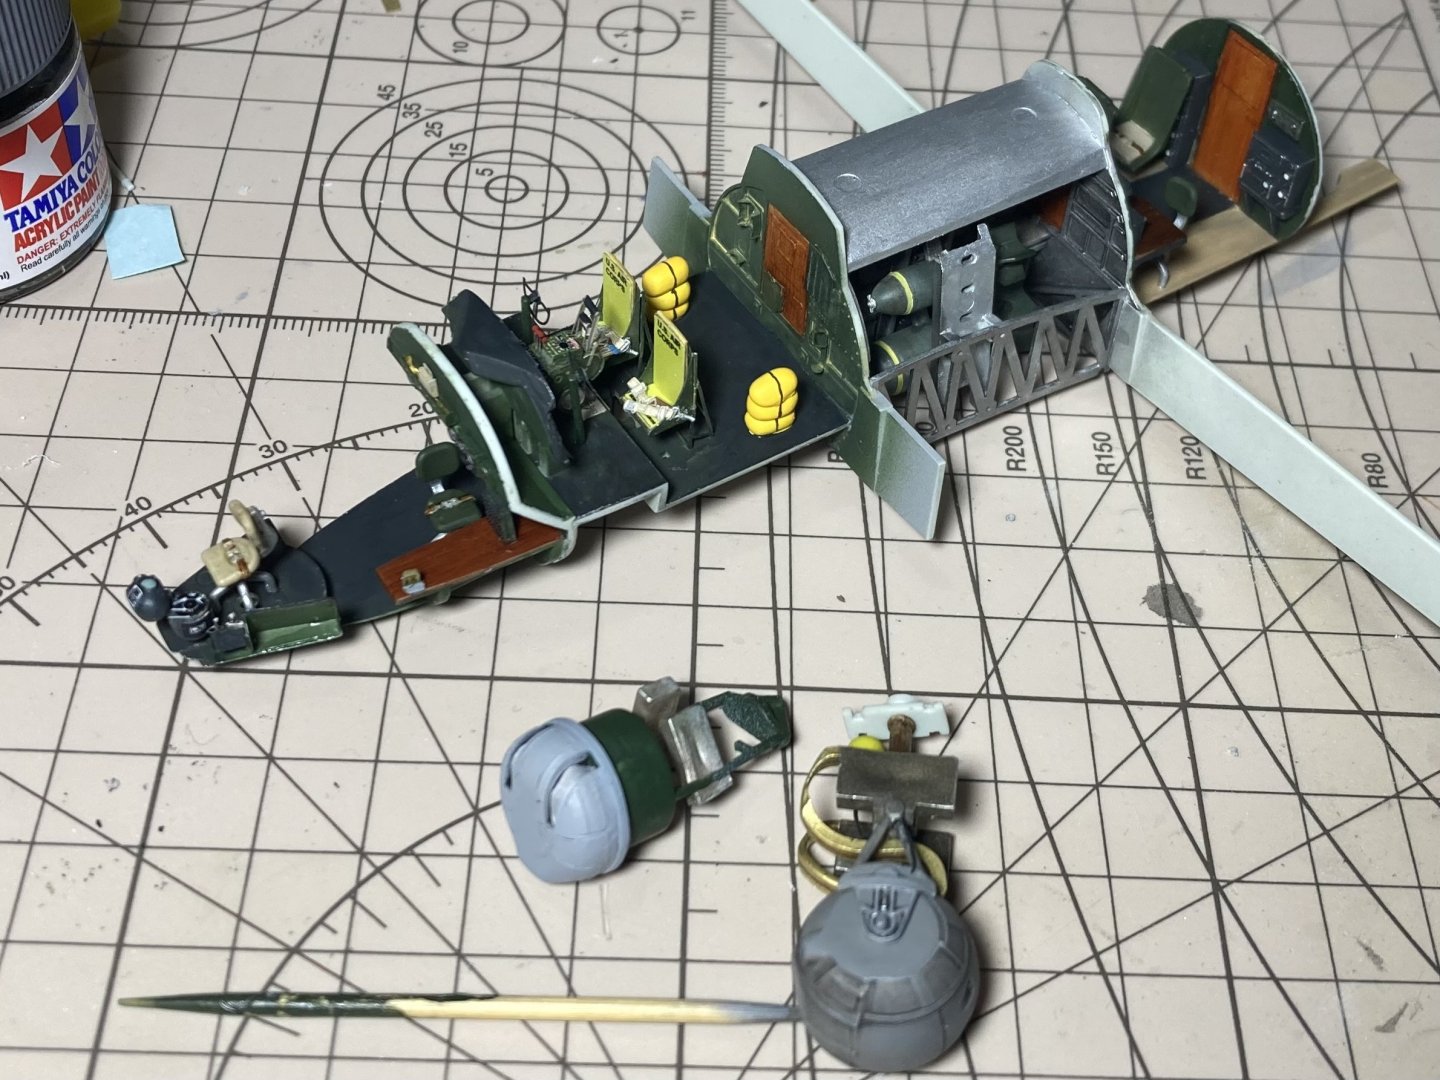
The internals are finally complete and I’ve done 2 dry fits. There turned out to be quite a lot going on inside this model! Although the parts weren’t very complex, they just needed research and slowly used a lot of time until all the little attachments and sub sections were complete. Then took time to let the oils dry, doing details and dry brushing. Repairing and repainting parts that caught a stray finger or got destroyed by something smashing into it while fitting another part! The usual During the dry fit I found out that the ball turret ammo belts were hitting the door! So filed down the ammo belt and rounded off the corner to so it turns as advertised! Most of the parts aren’t even visible so modifying them isn’t a big issue. Just glad I found them before the fuselage was nicely glued together. I’ll let all the parts sit in the hot water cupboard for one last night of drying. Tomorrow all going to plan will have it all closed up and glued.


- 77 replies
-
- 10
-
-
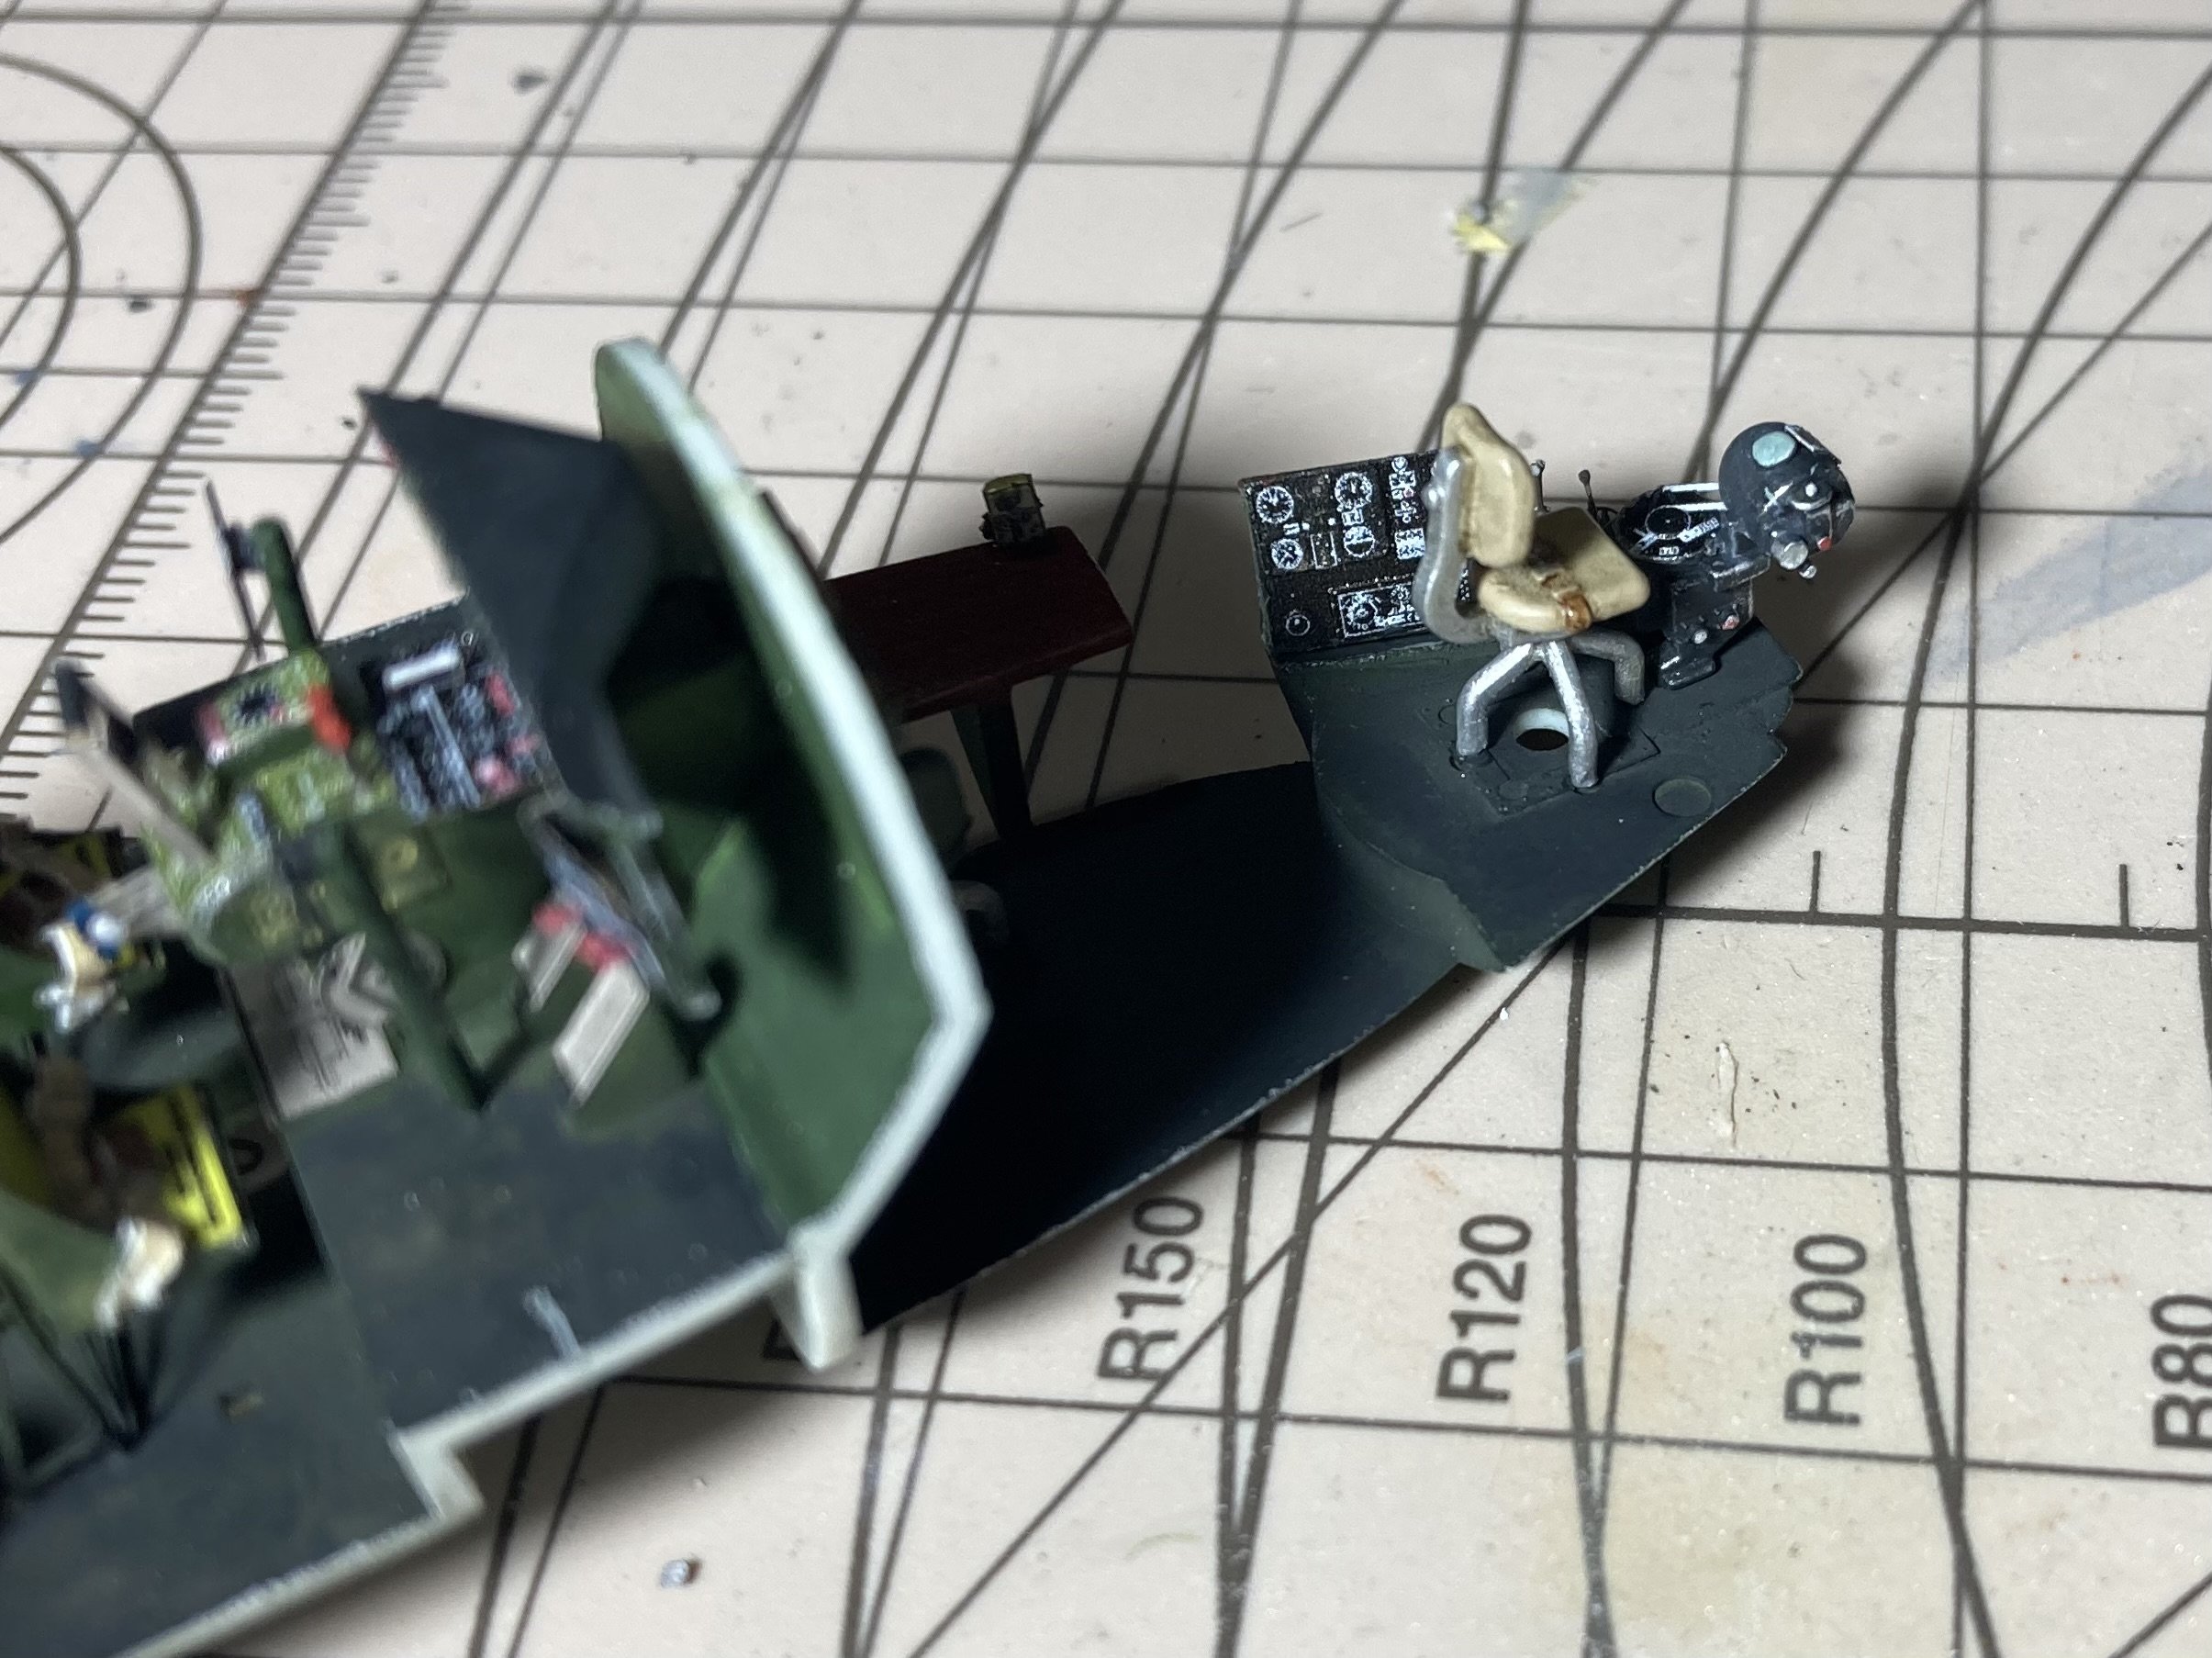
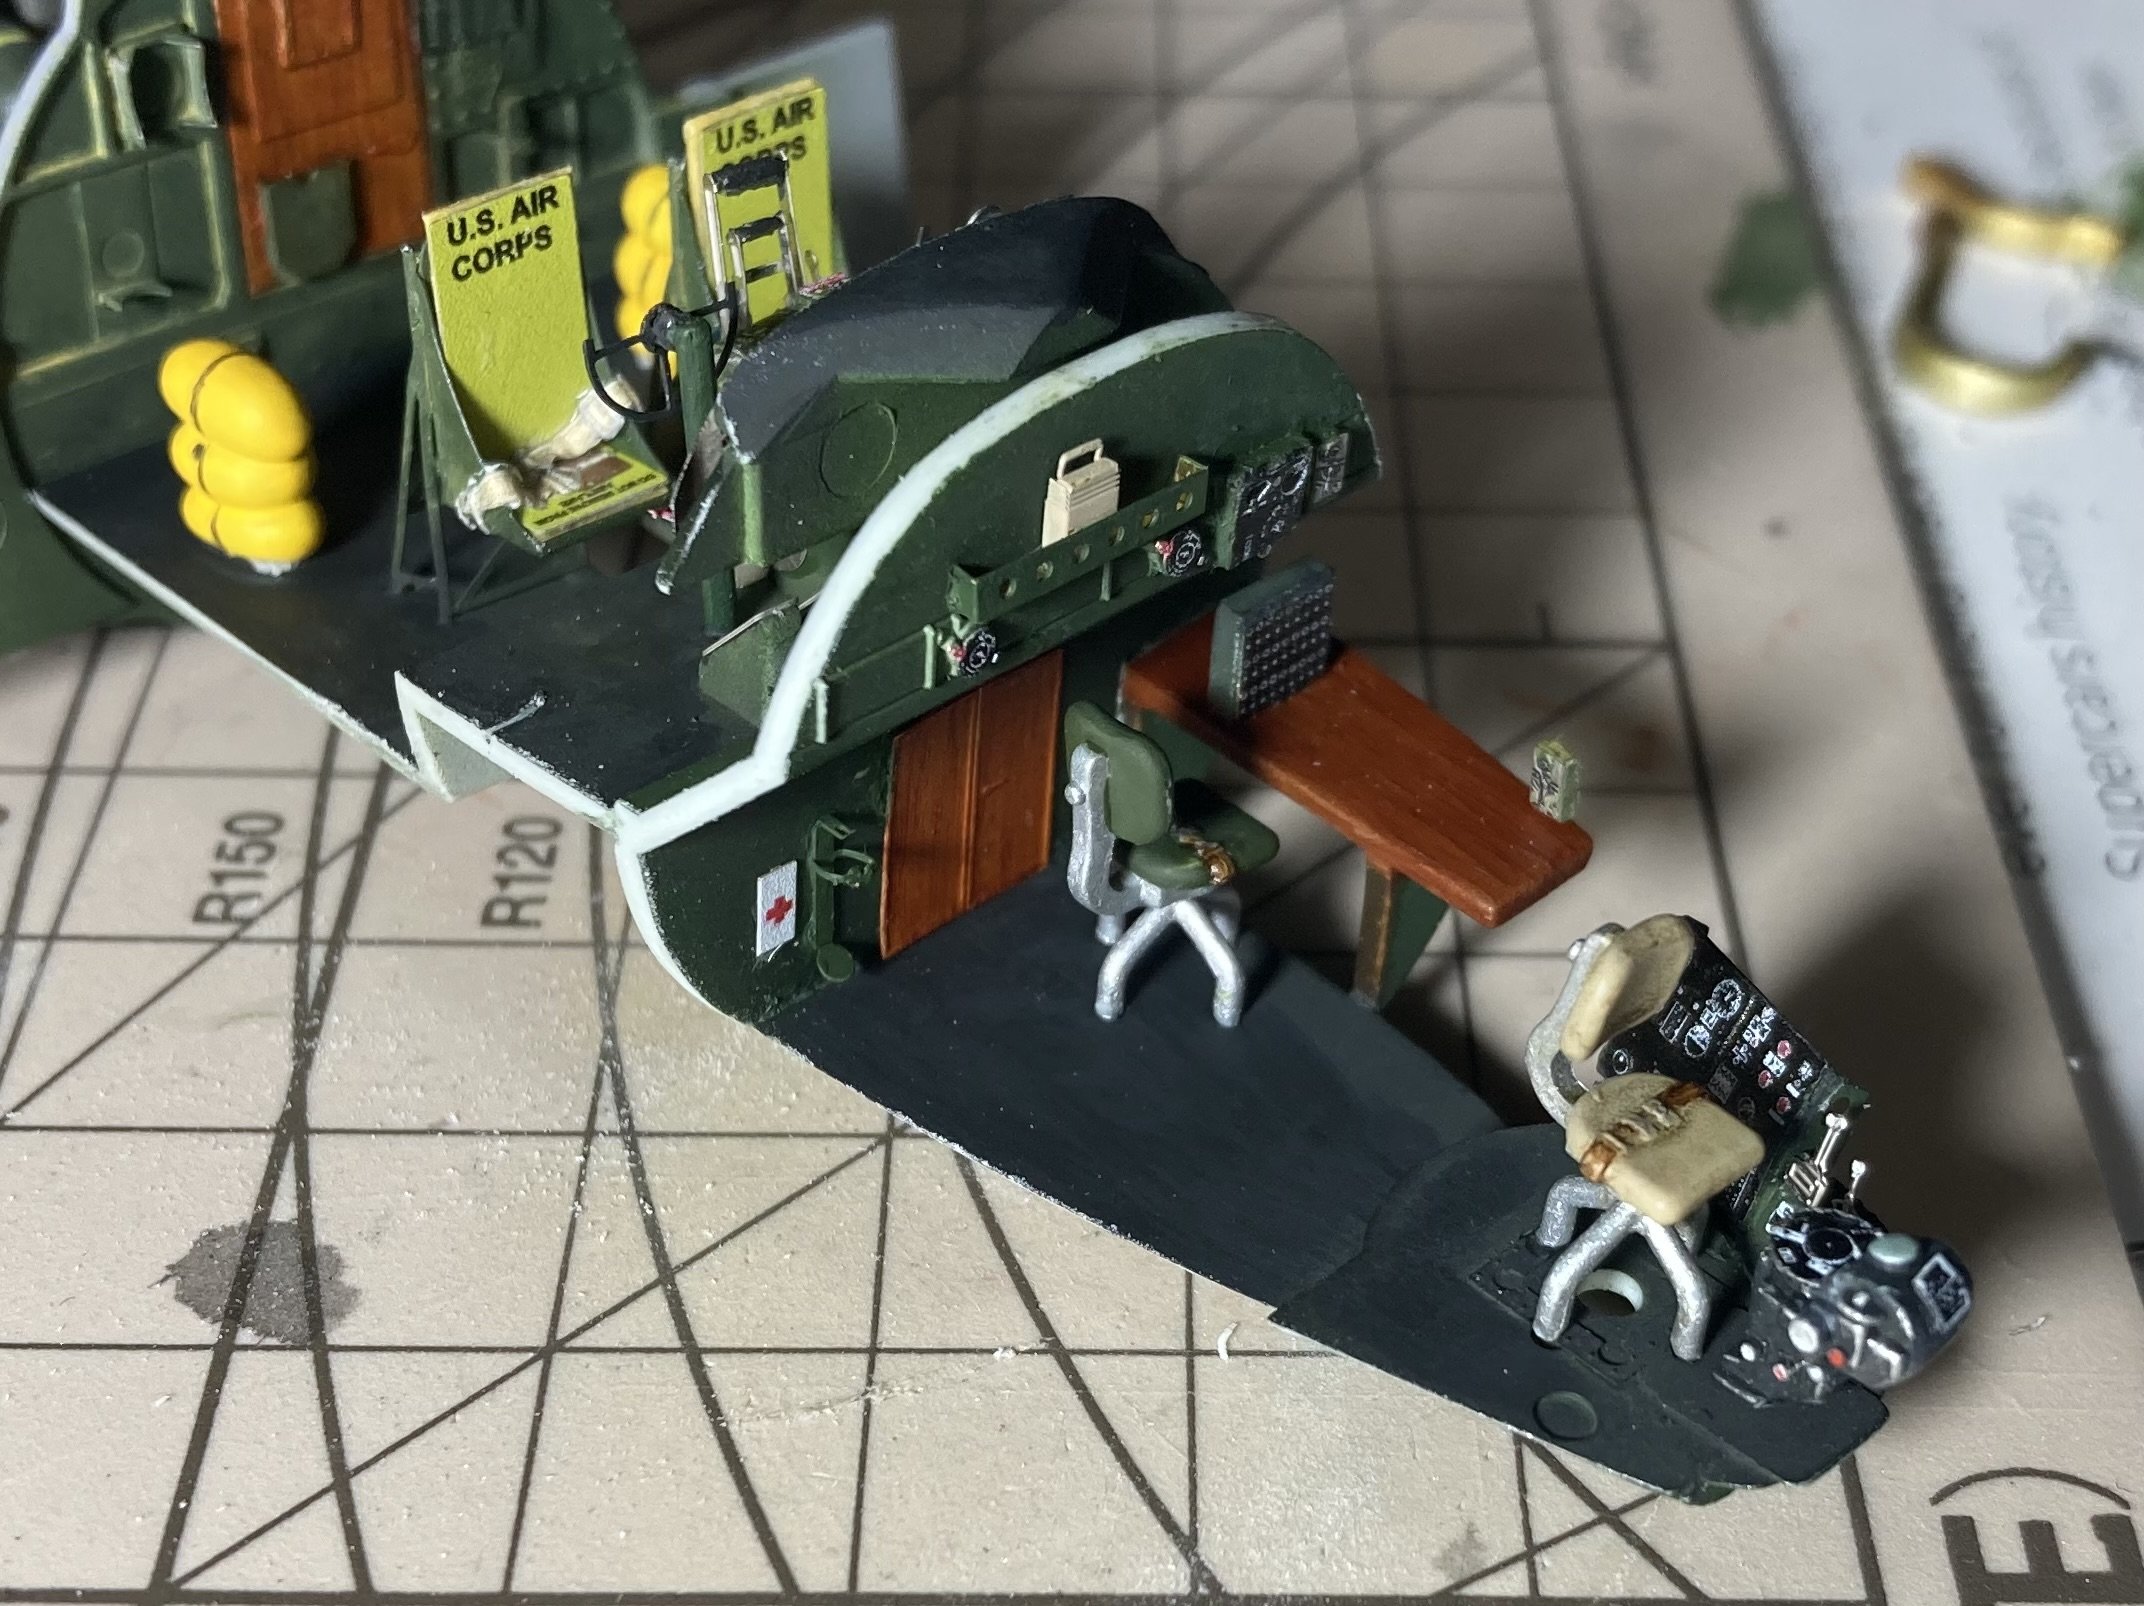
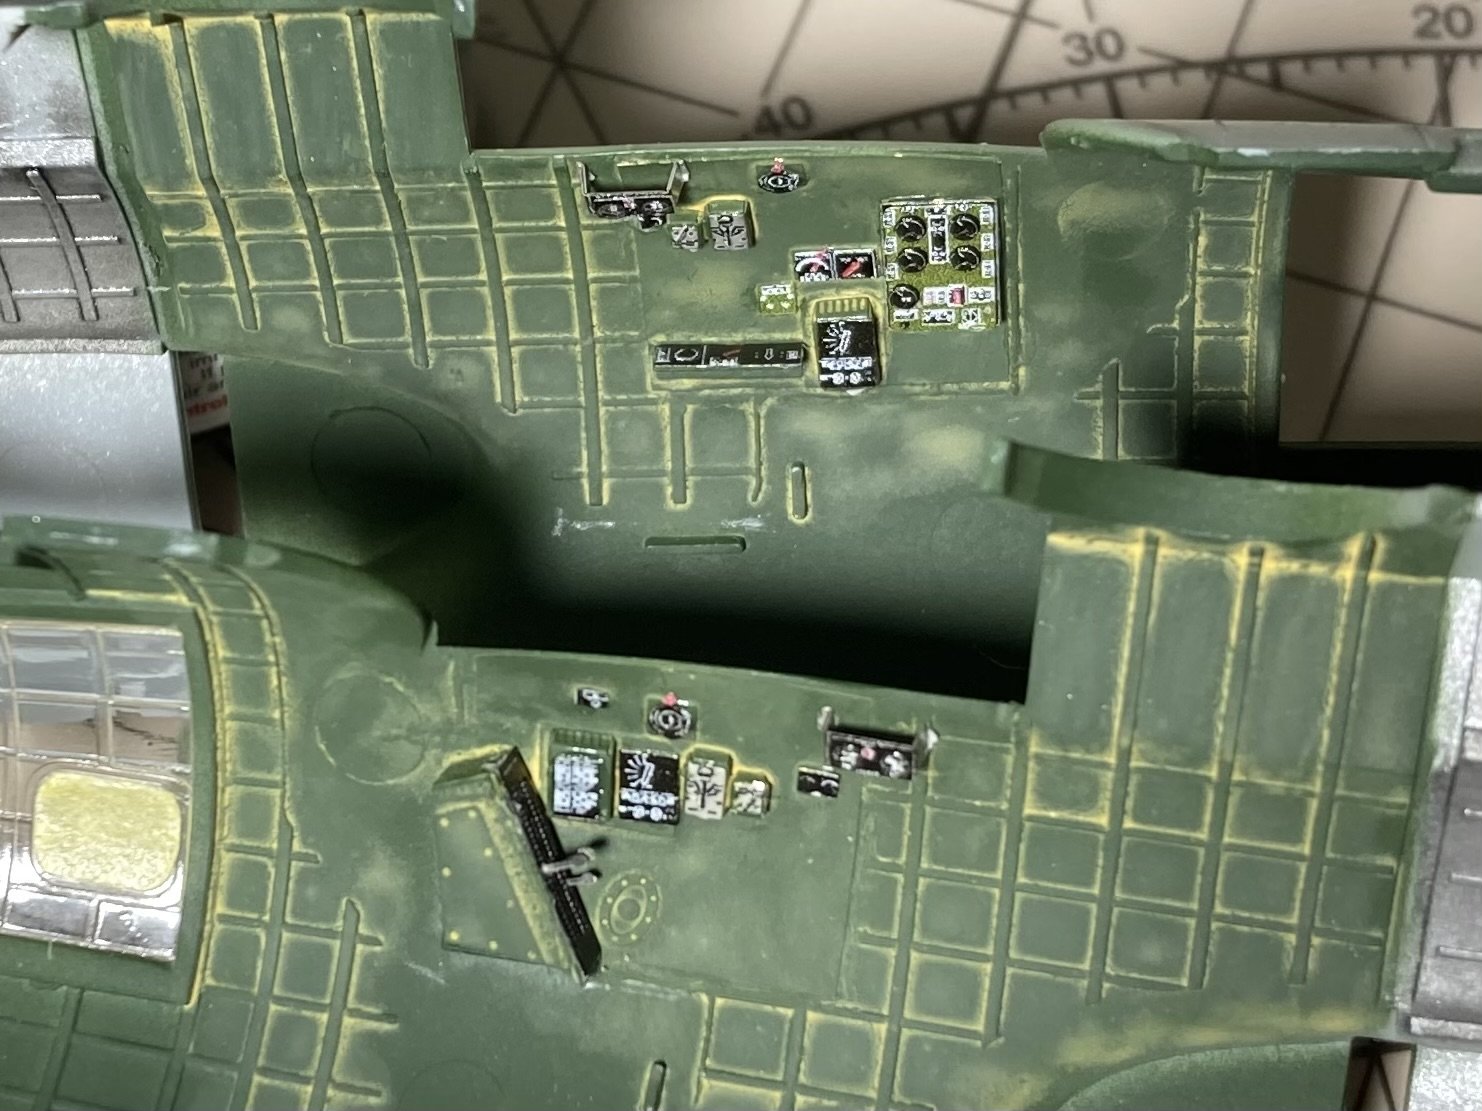
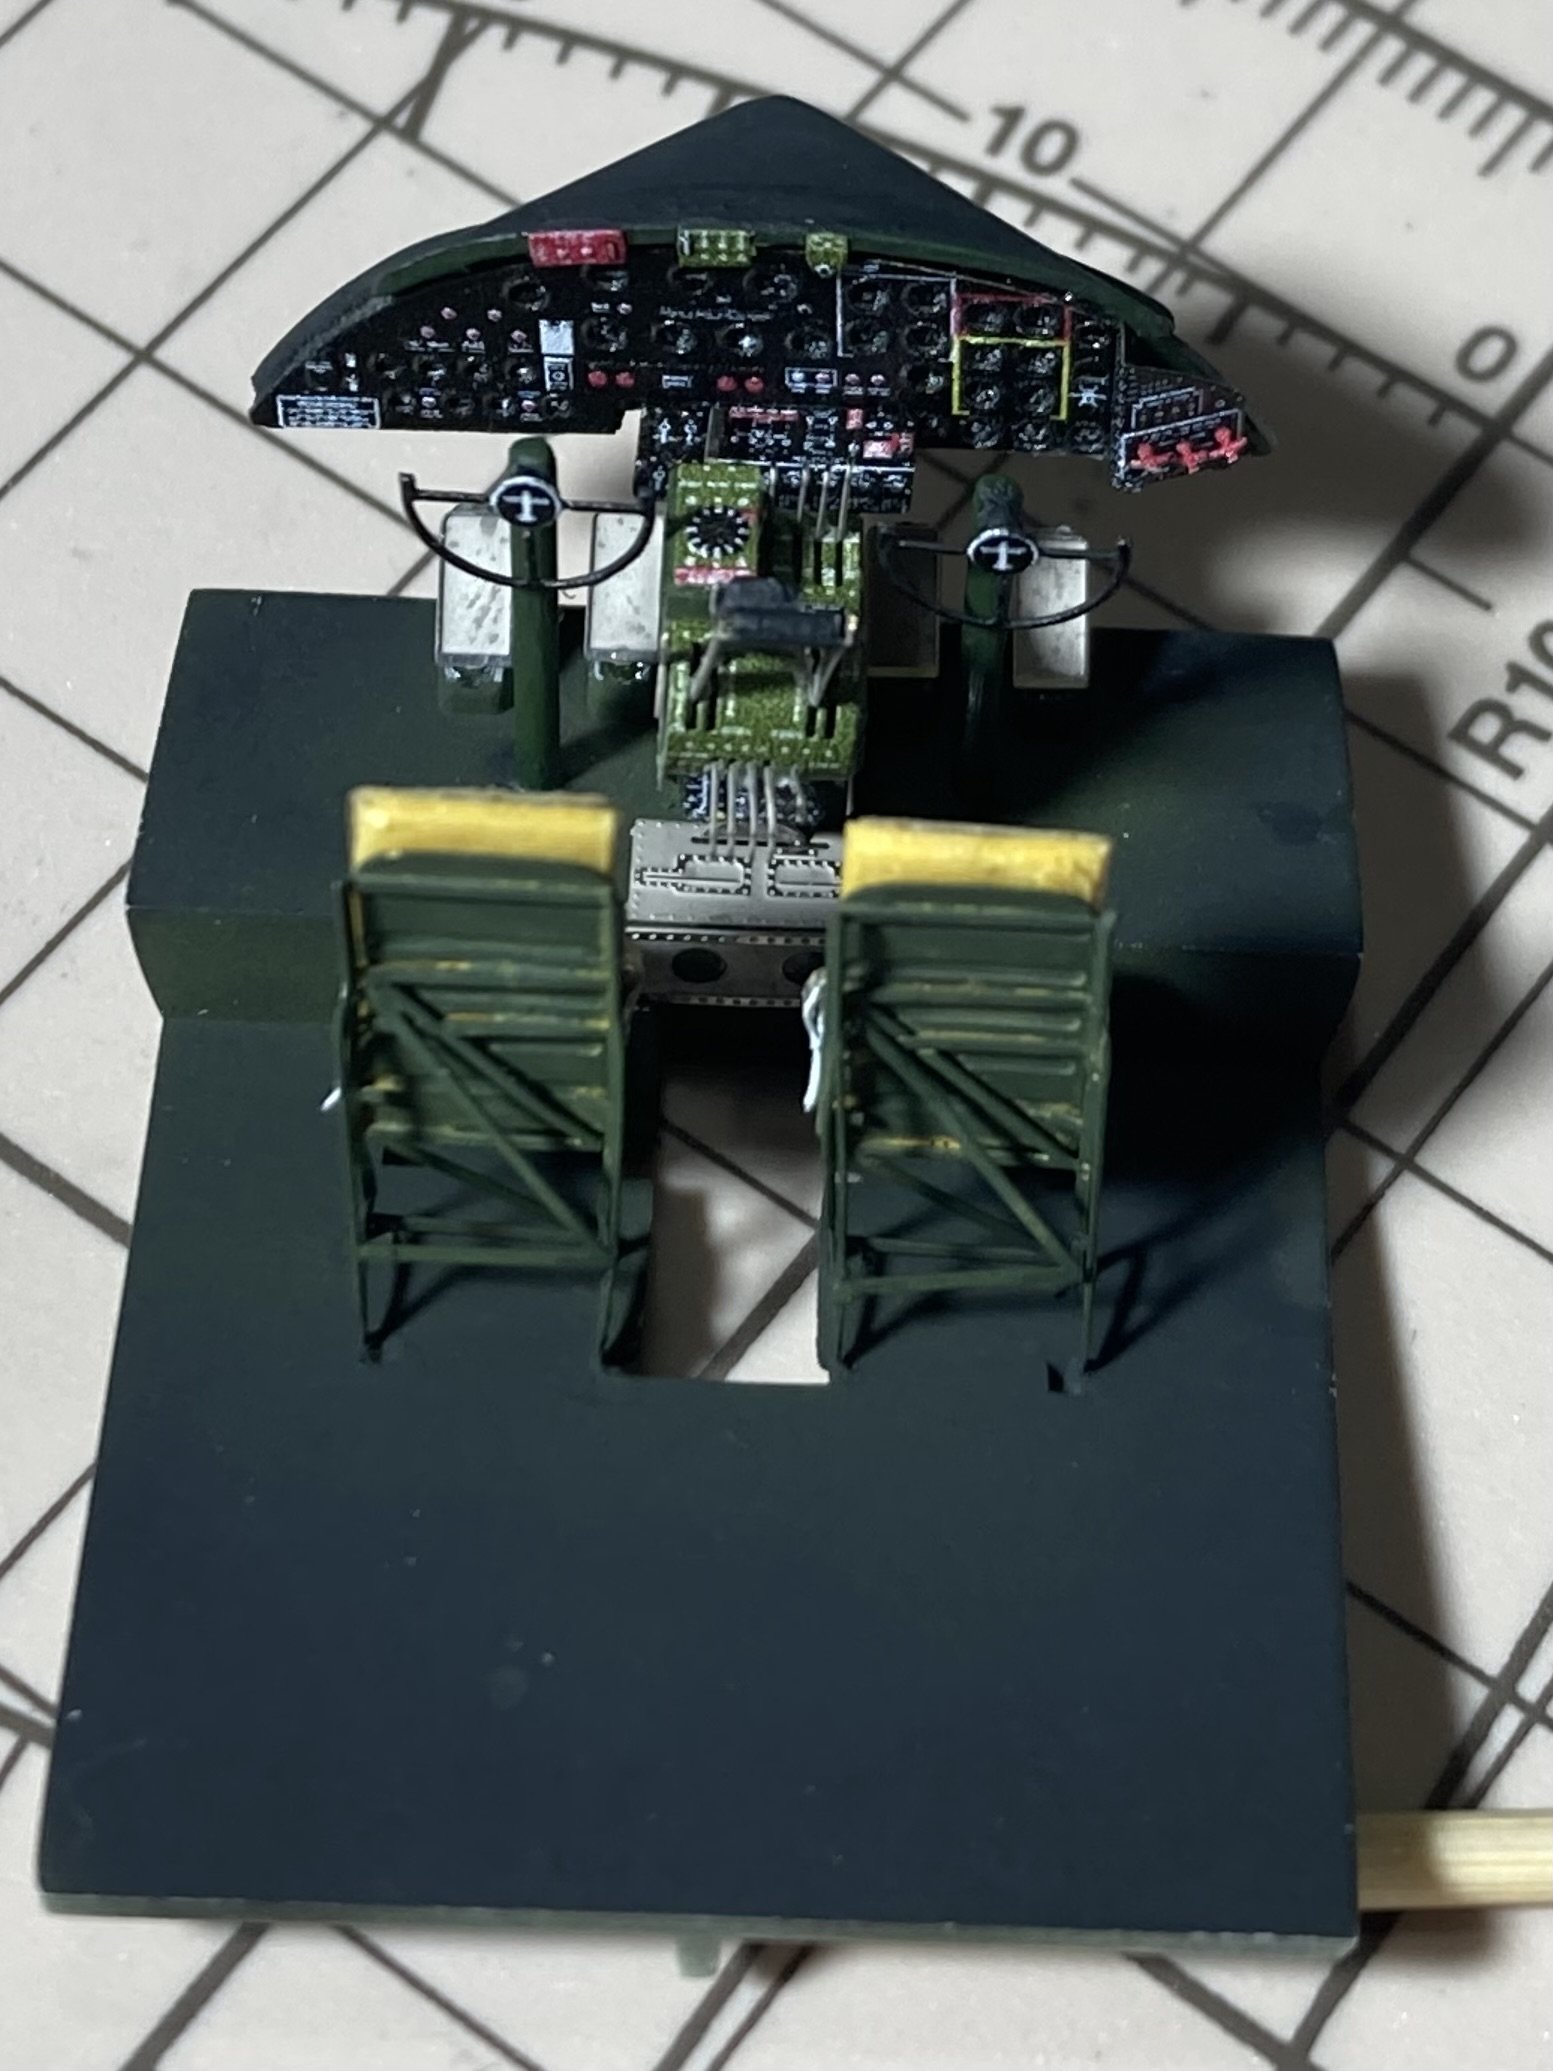
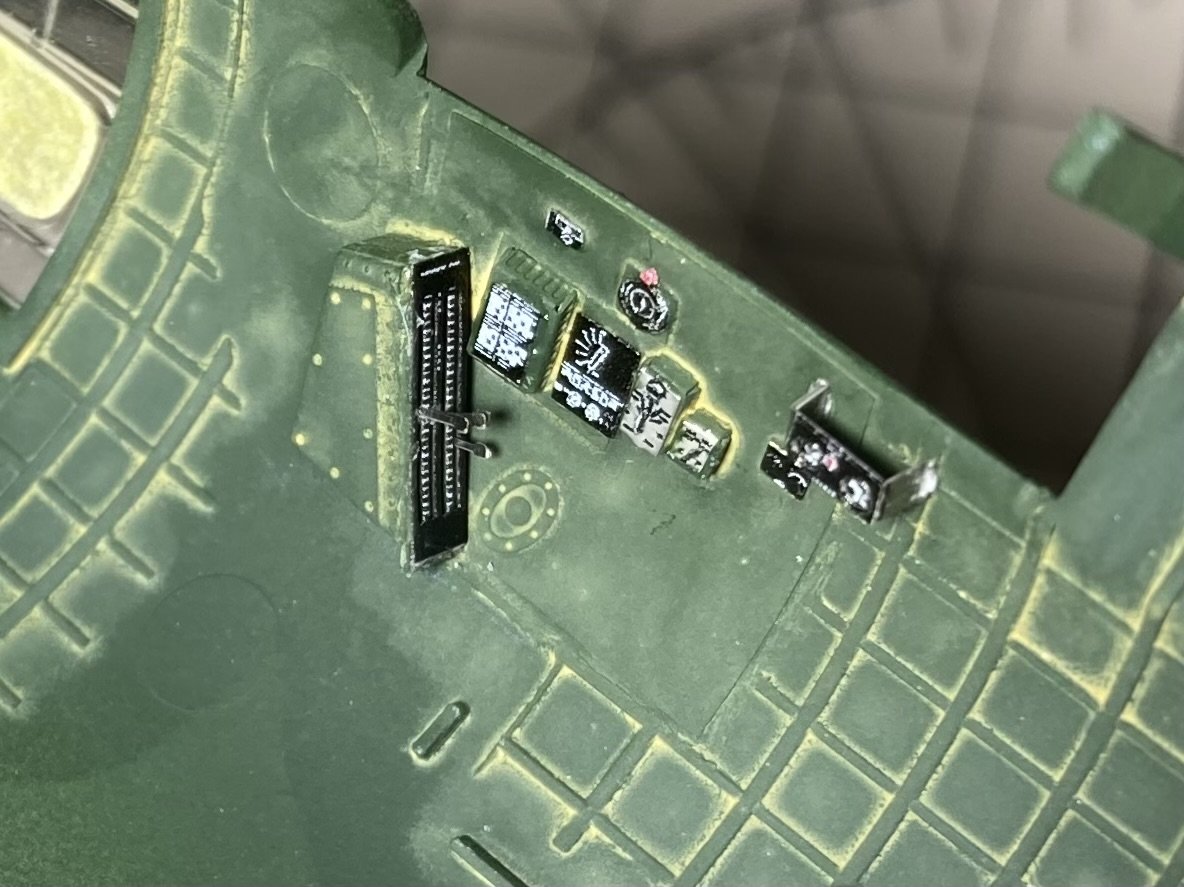
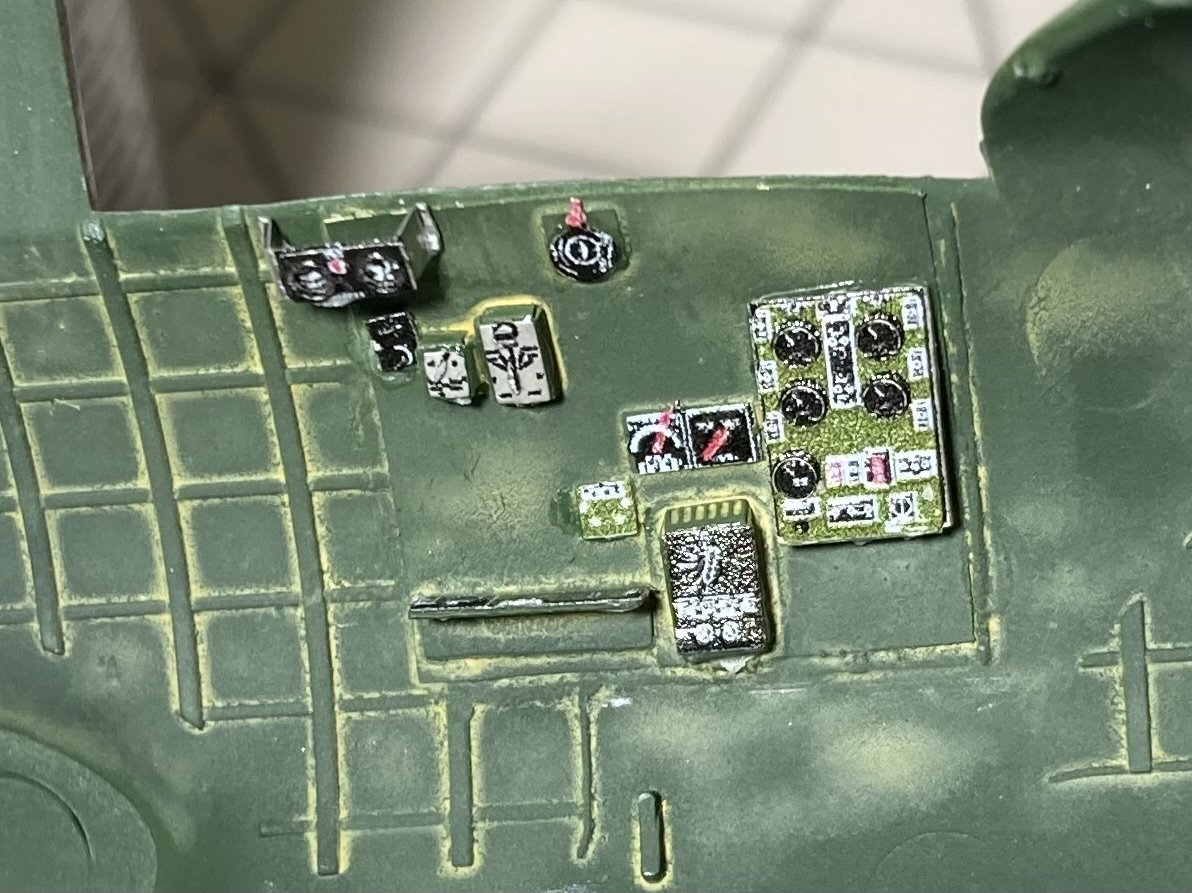
Did the cockpit walls, I probably should have continued through to the front and completed the nose interior PE set at the same time. That way I could have primed once and then painted the whole lot. Oh well we learn and it doesn’t matter too much. my first oil panel wash was a light colour so it can brighten it up inside. Once closed up it’s pretty dark. Will see on dry fitting if it needs to have a darker wash. but the set does add some nice details especially for 1/72 scale. Next I’ll add the glass sides of the nose, paint and then do the nose interior set of brass PE, paint again and do an oil wash before applying the instrument and colour printed Detail PE set. I’ve been using Tamiya gloss clear paint to put the colour parts on. It doesn’t dry as quick as CA glue so I don’t have to panic place and hope I can get it into position within 0.2 of a second! I can then add CA to the edges. Once dry I paint with Tamiya Matt clear to lock everything in place.

-
Thanks, once the entire inside is complete I’ll give it a dry brush.
-
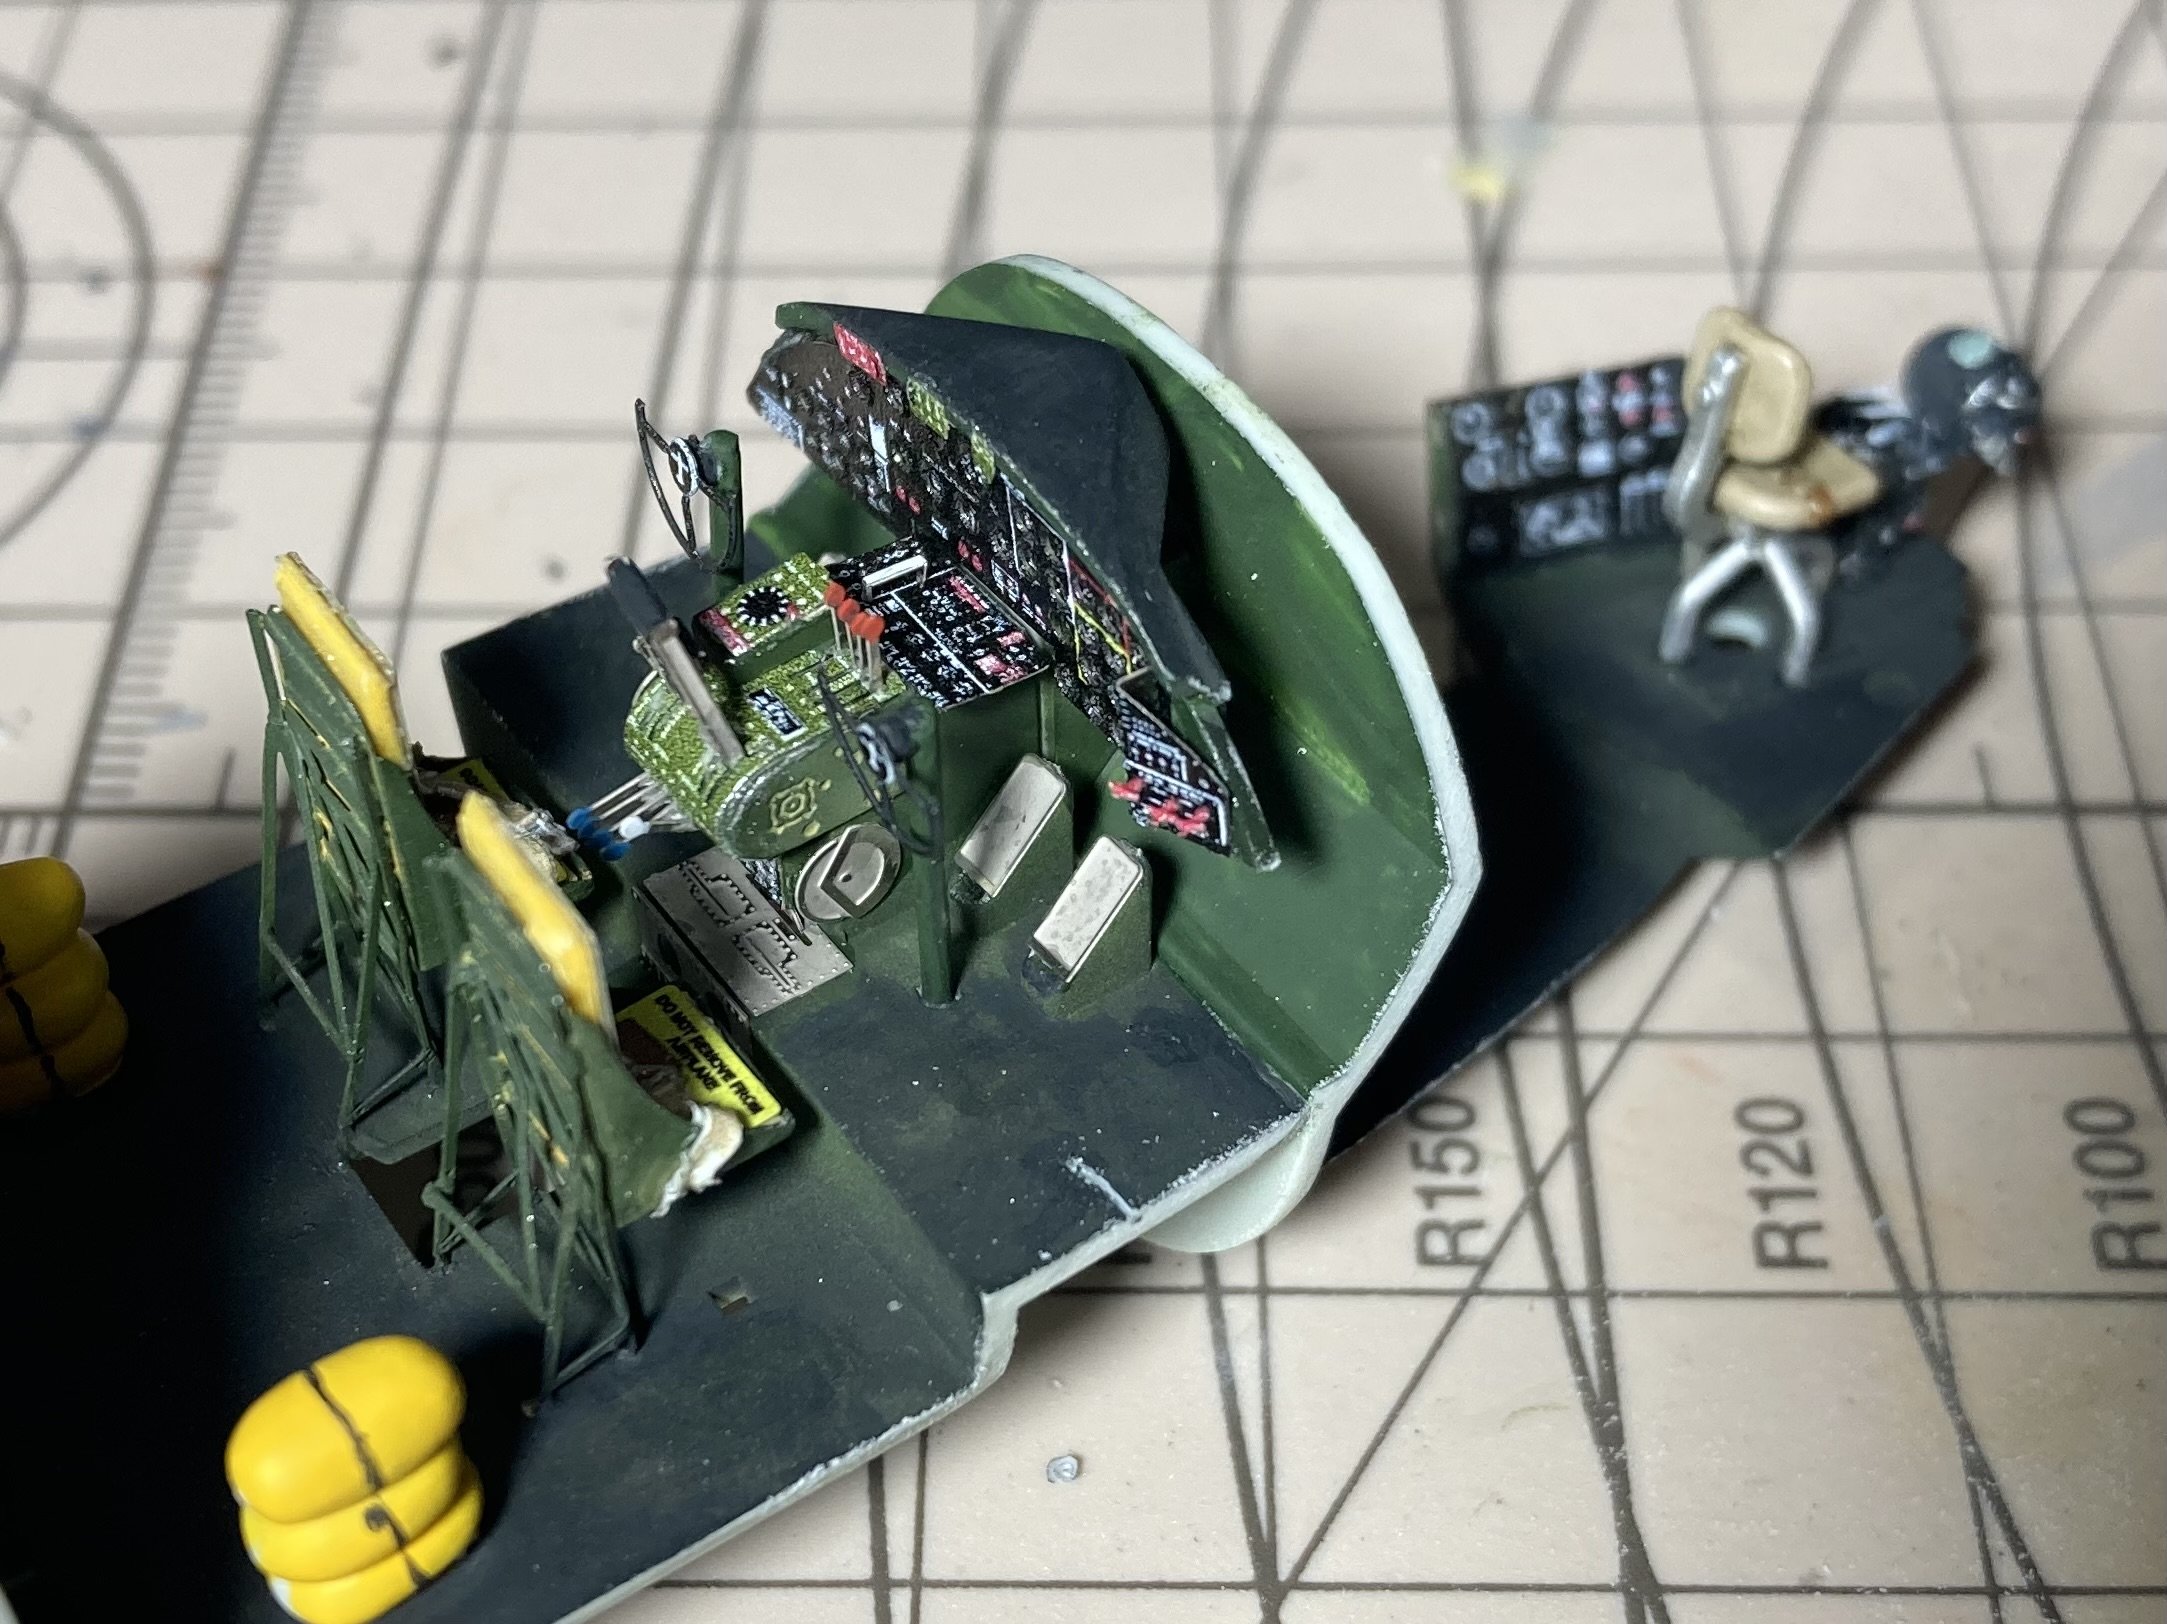
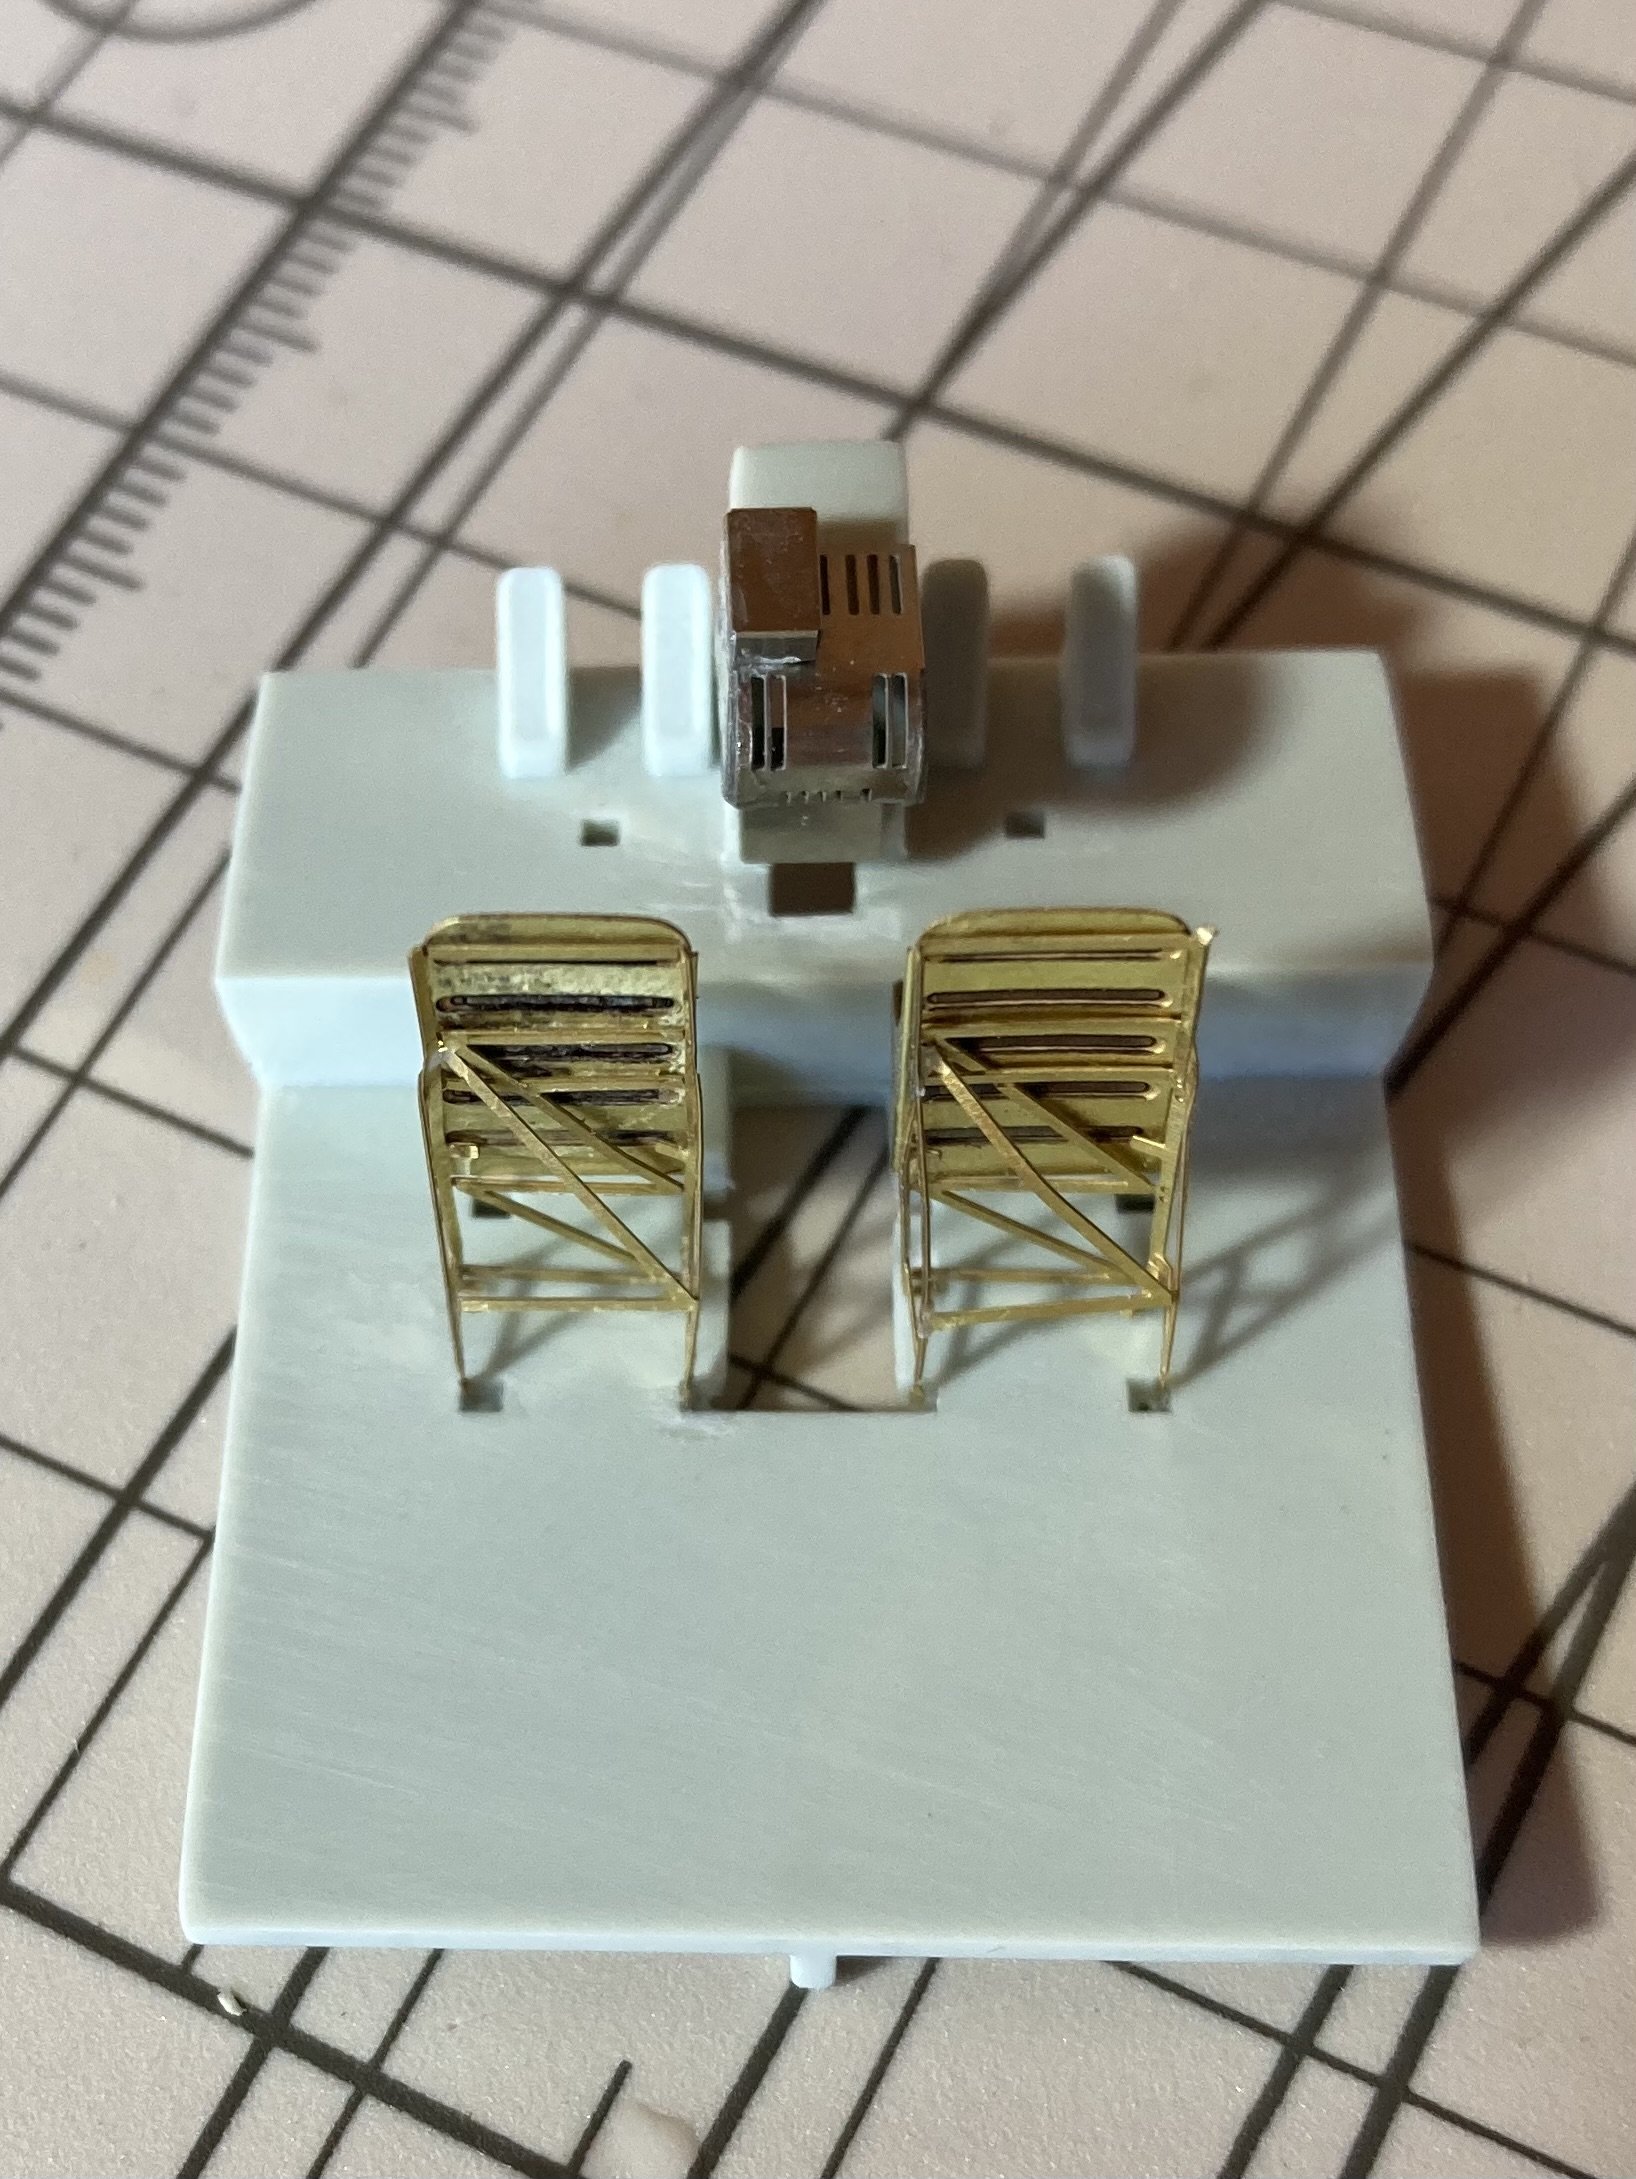
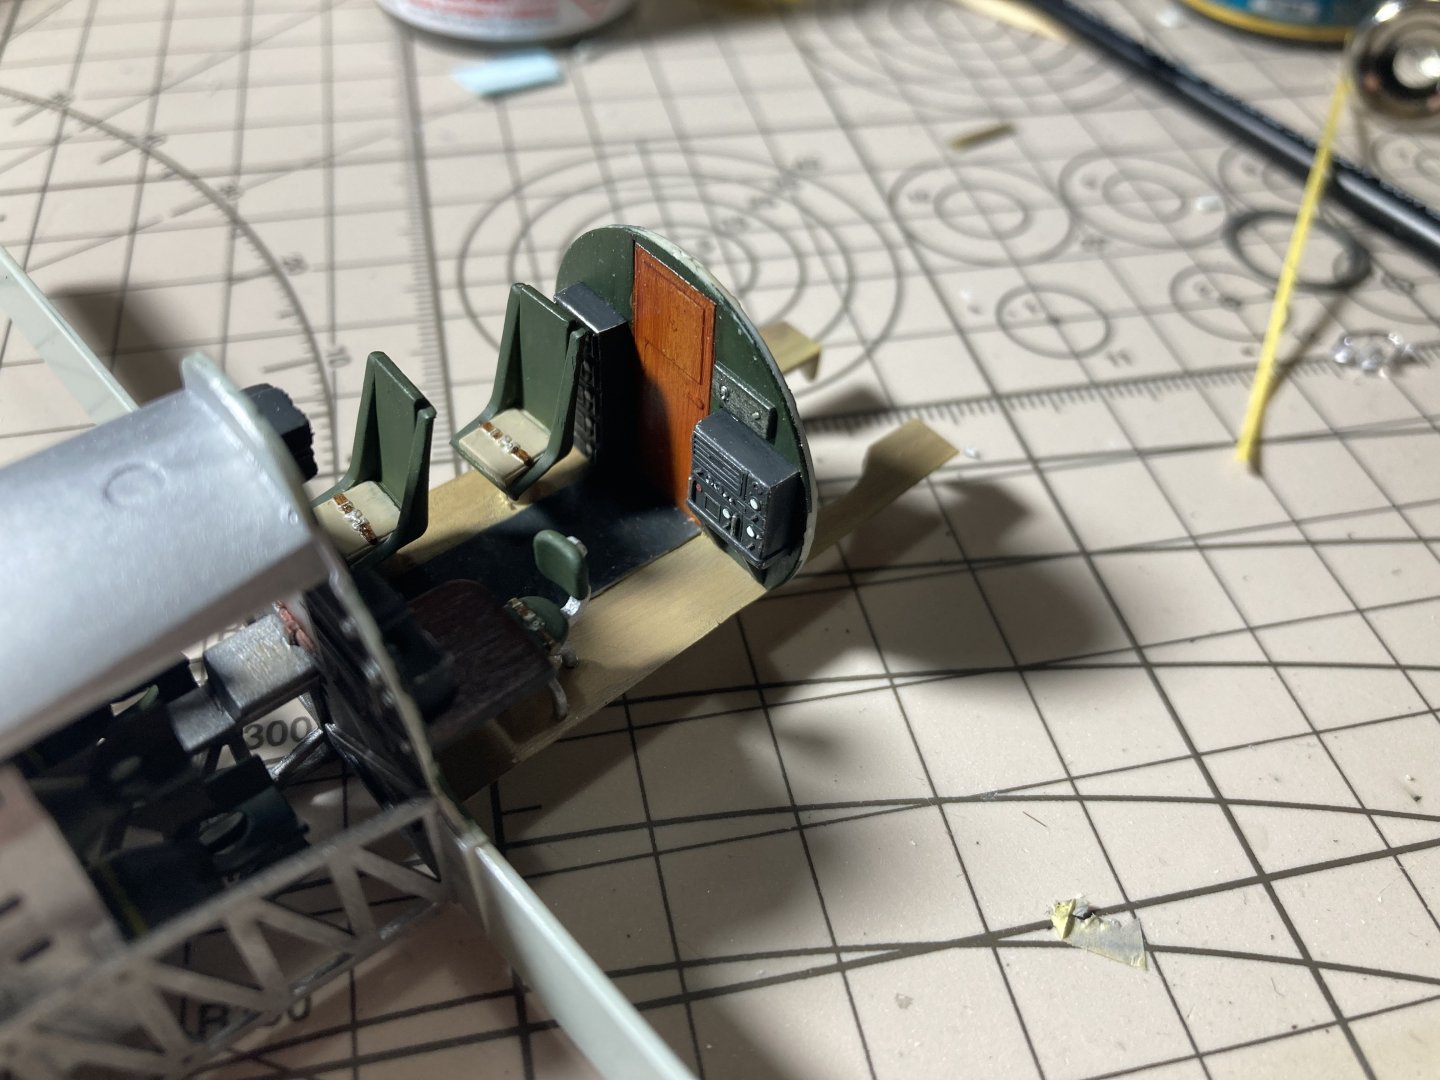
Made a start on the cockpit. And added the PE parts. I’ve done abit of PE now so it’s not so bad and part of the PE fun is the vague instructions that you have to use so it turns into a puzzle. But not too bad this time around. mixed up what I thought was a bronze green and airbrushed the main PE parts once installed but left the printed parts to put on top separately after the cockpit painting was done. Which was the best idea. Thought for how little can be seen and how dark it is that I’d do a light colour wash. Decided on a light brown. for the cushion I just layered my tamiya tape. And then used CA to glue the seat belts on. I’ll add some slight chipping tomorrow and then do the side walls and then move to competing the front interior. Once that’s done I can close up the fuselage… then it’s well on its way!


- 77 replies
-
- 10
-
-
-
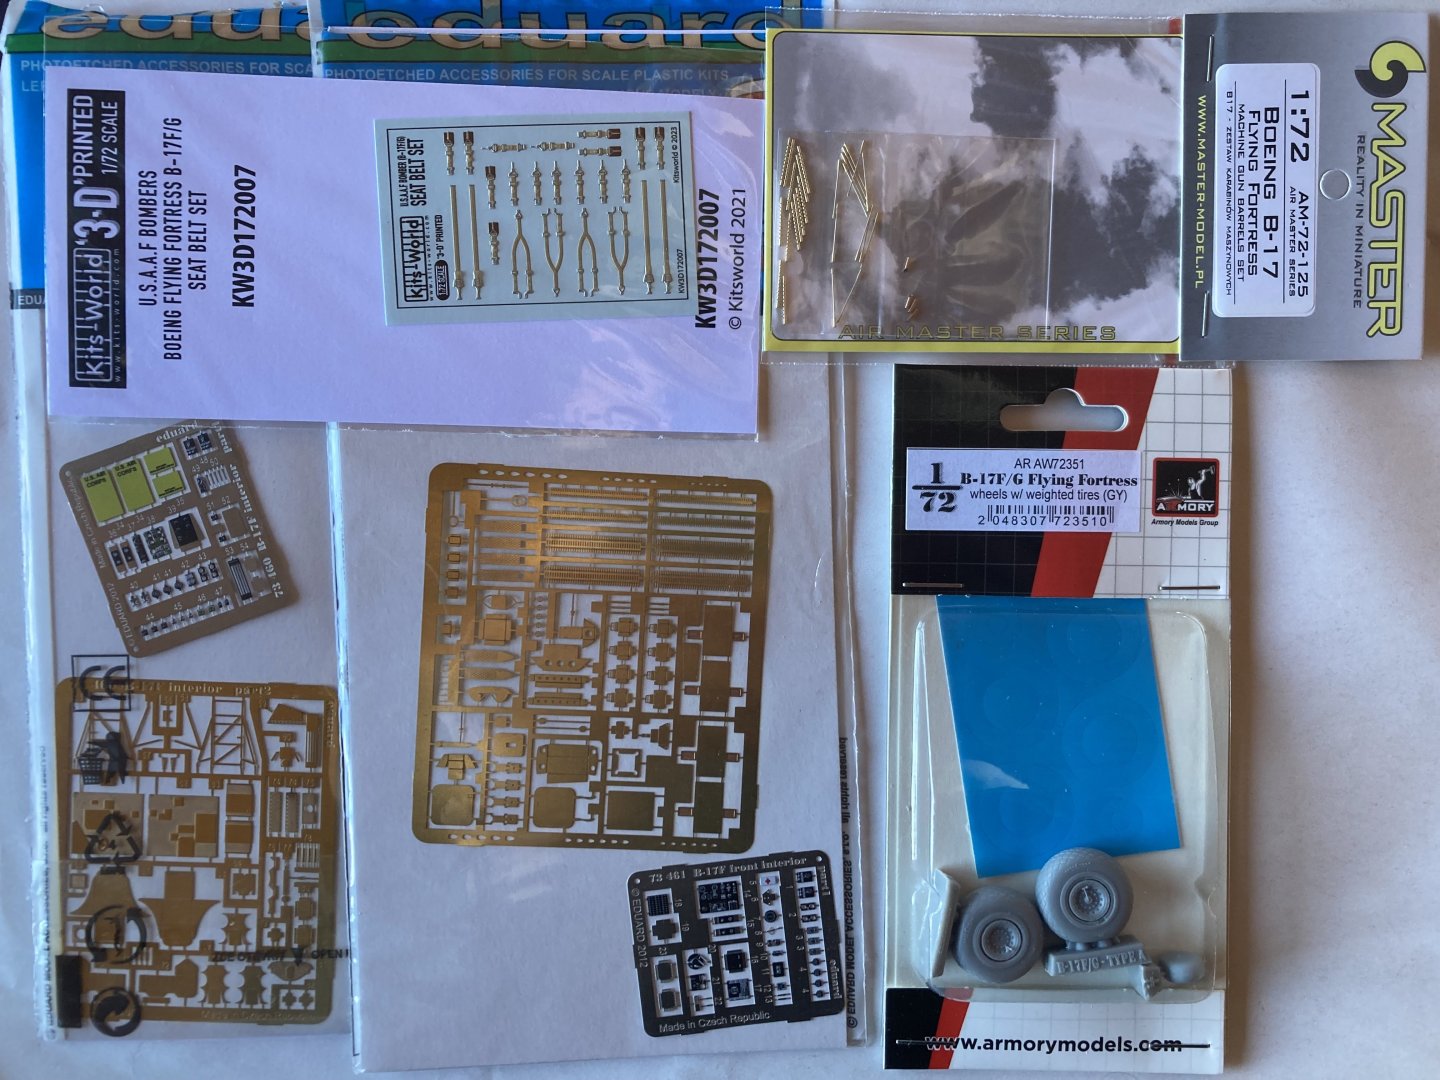
Just a quick update, been abit busy at work and then I’ve gone away for the week so haven’t been able to do too much. All the aftermarket things arrived. Eduard cockpit and front interior PE kits, brass barrels, weighted tires, seatbelts and last week the Eduard mask arrived so we are not waiting for anything now! settled on bare aluminium for all inside except cockpit which will be bronze green. So did make a start painting and then have a black wash to dull it down abit. From the bomb bay back to the tail will all be out of the box apart from barrels. So should come together pretty fast I think once I sort out what colours are meant to go where. I’ll try do a plywood colour with rubber walkways for the floor. hopefully next week I can get back into it!
-
Thanks, I’ve no real time limit so it’s quite fun just taking my time on each section
-
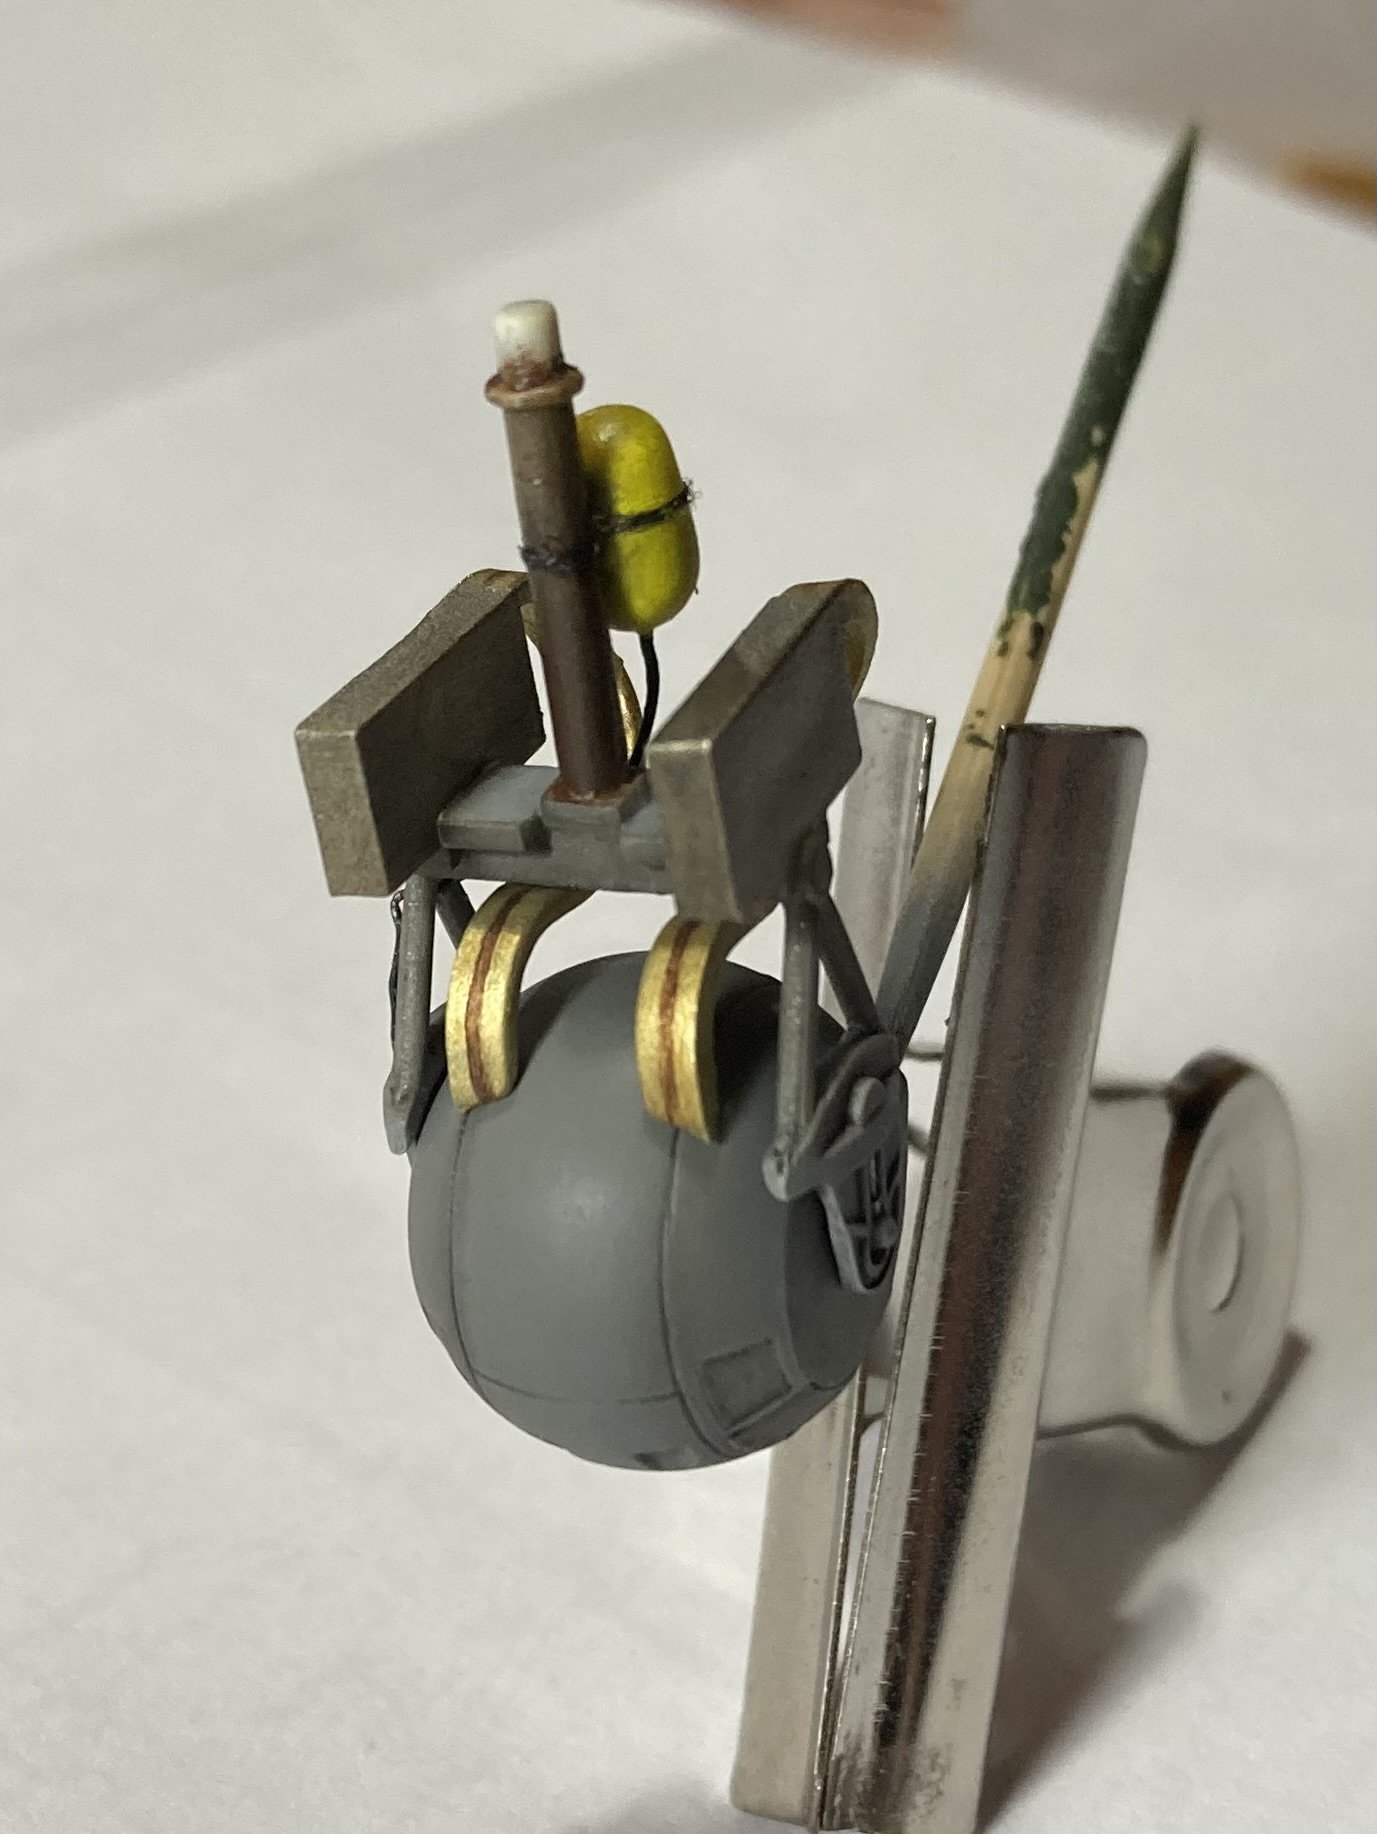
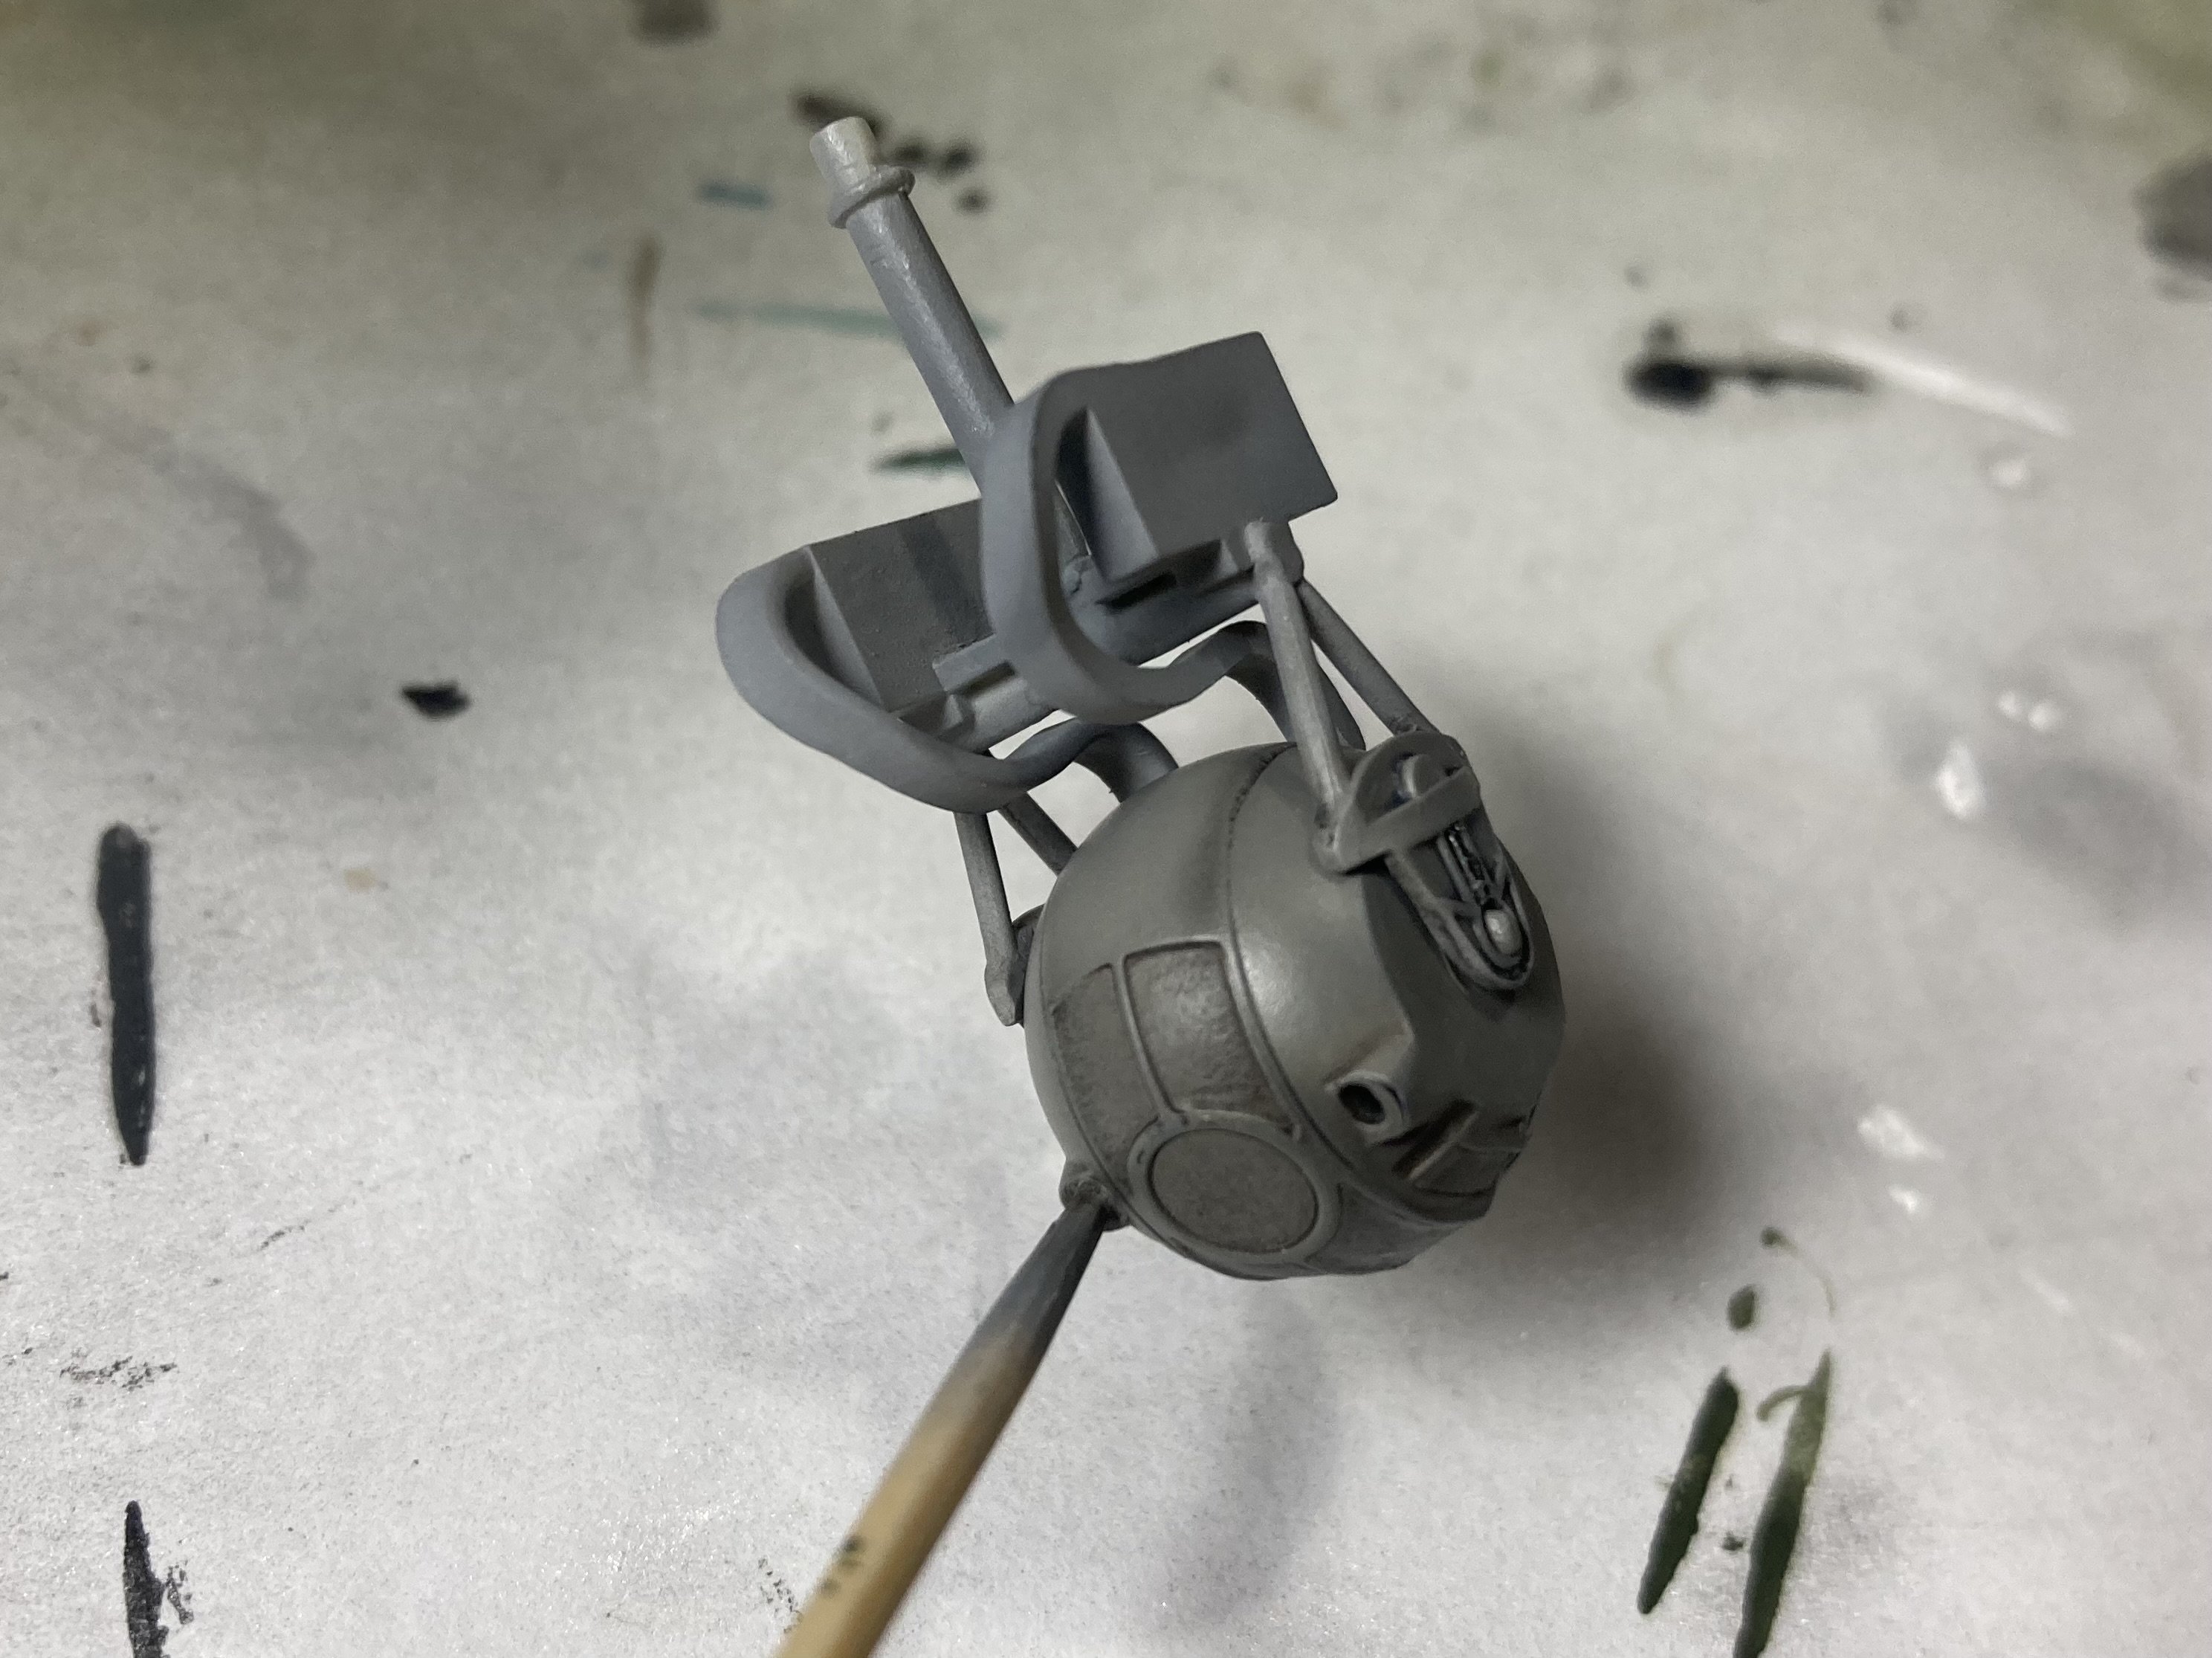
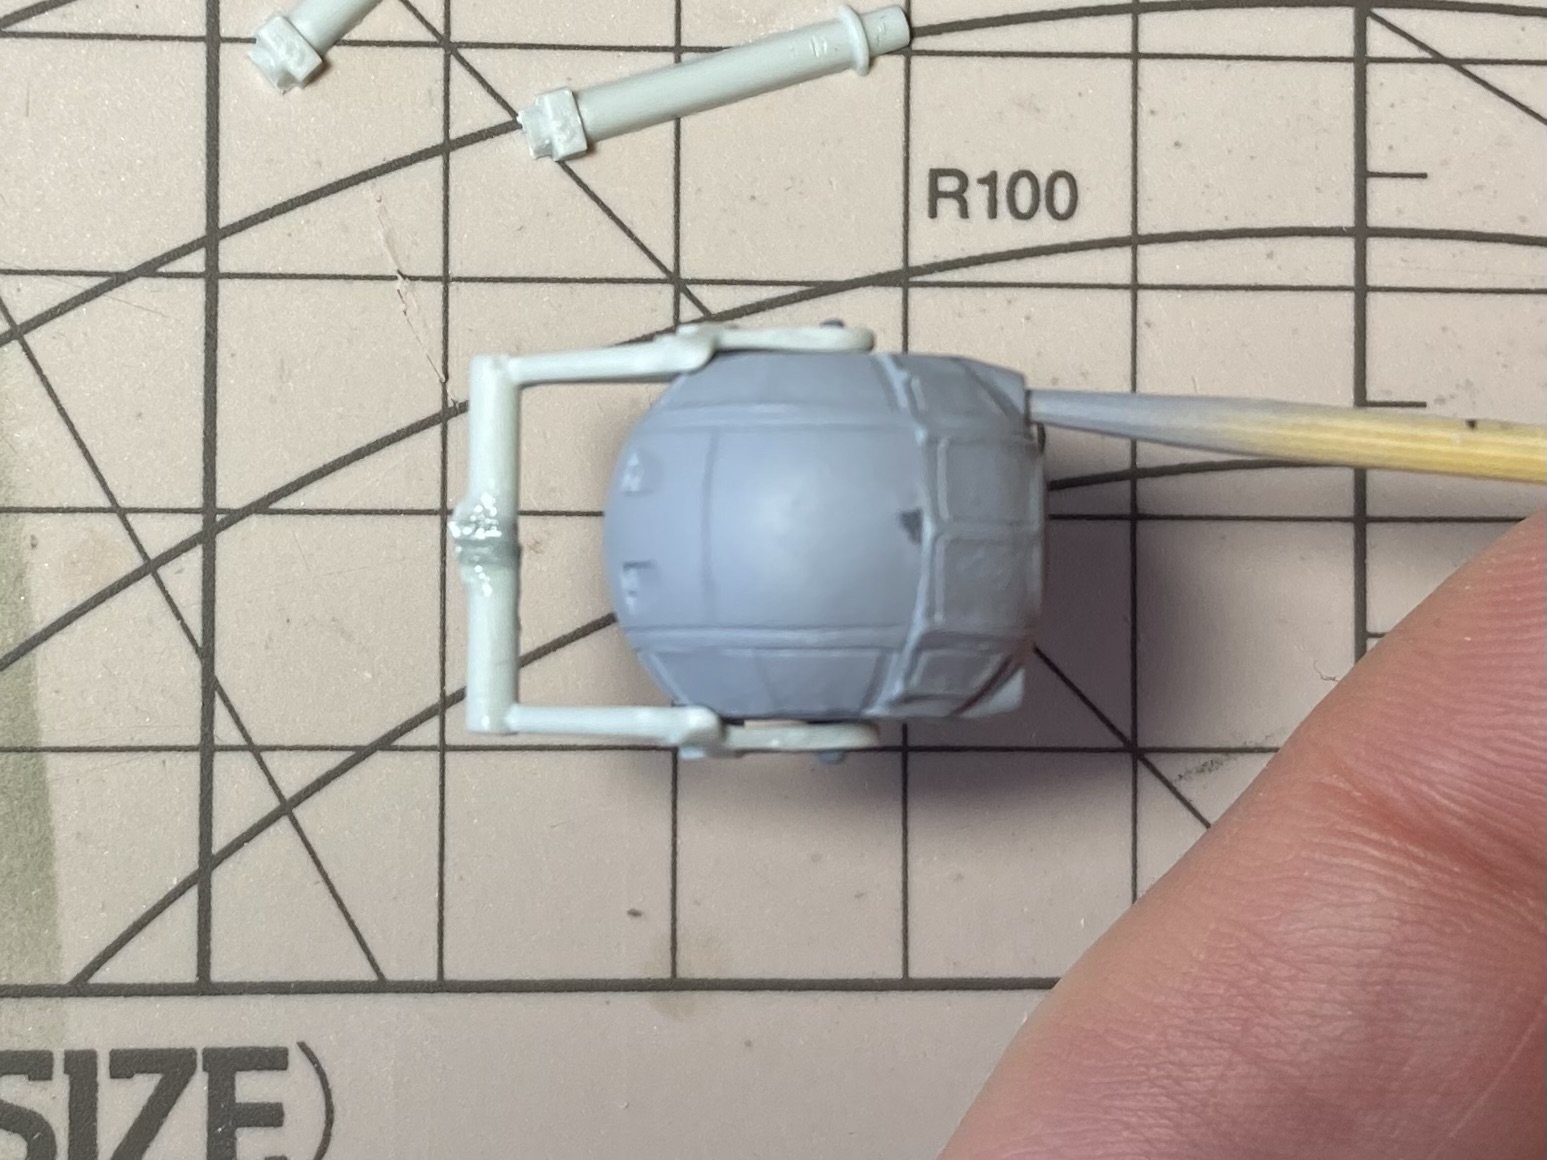
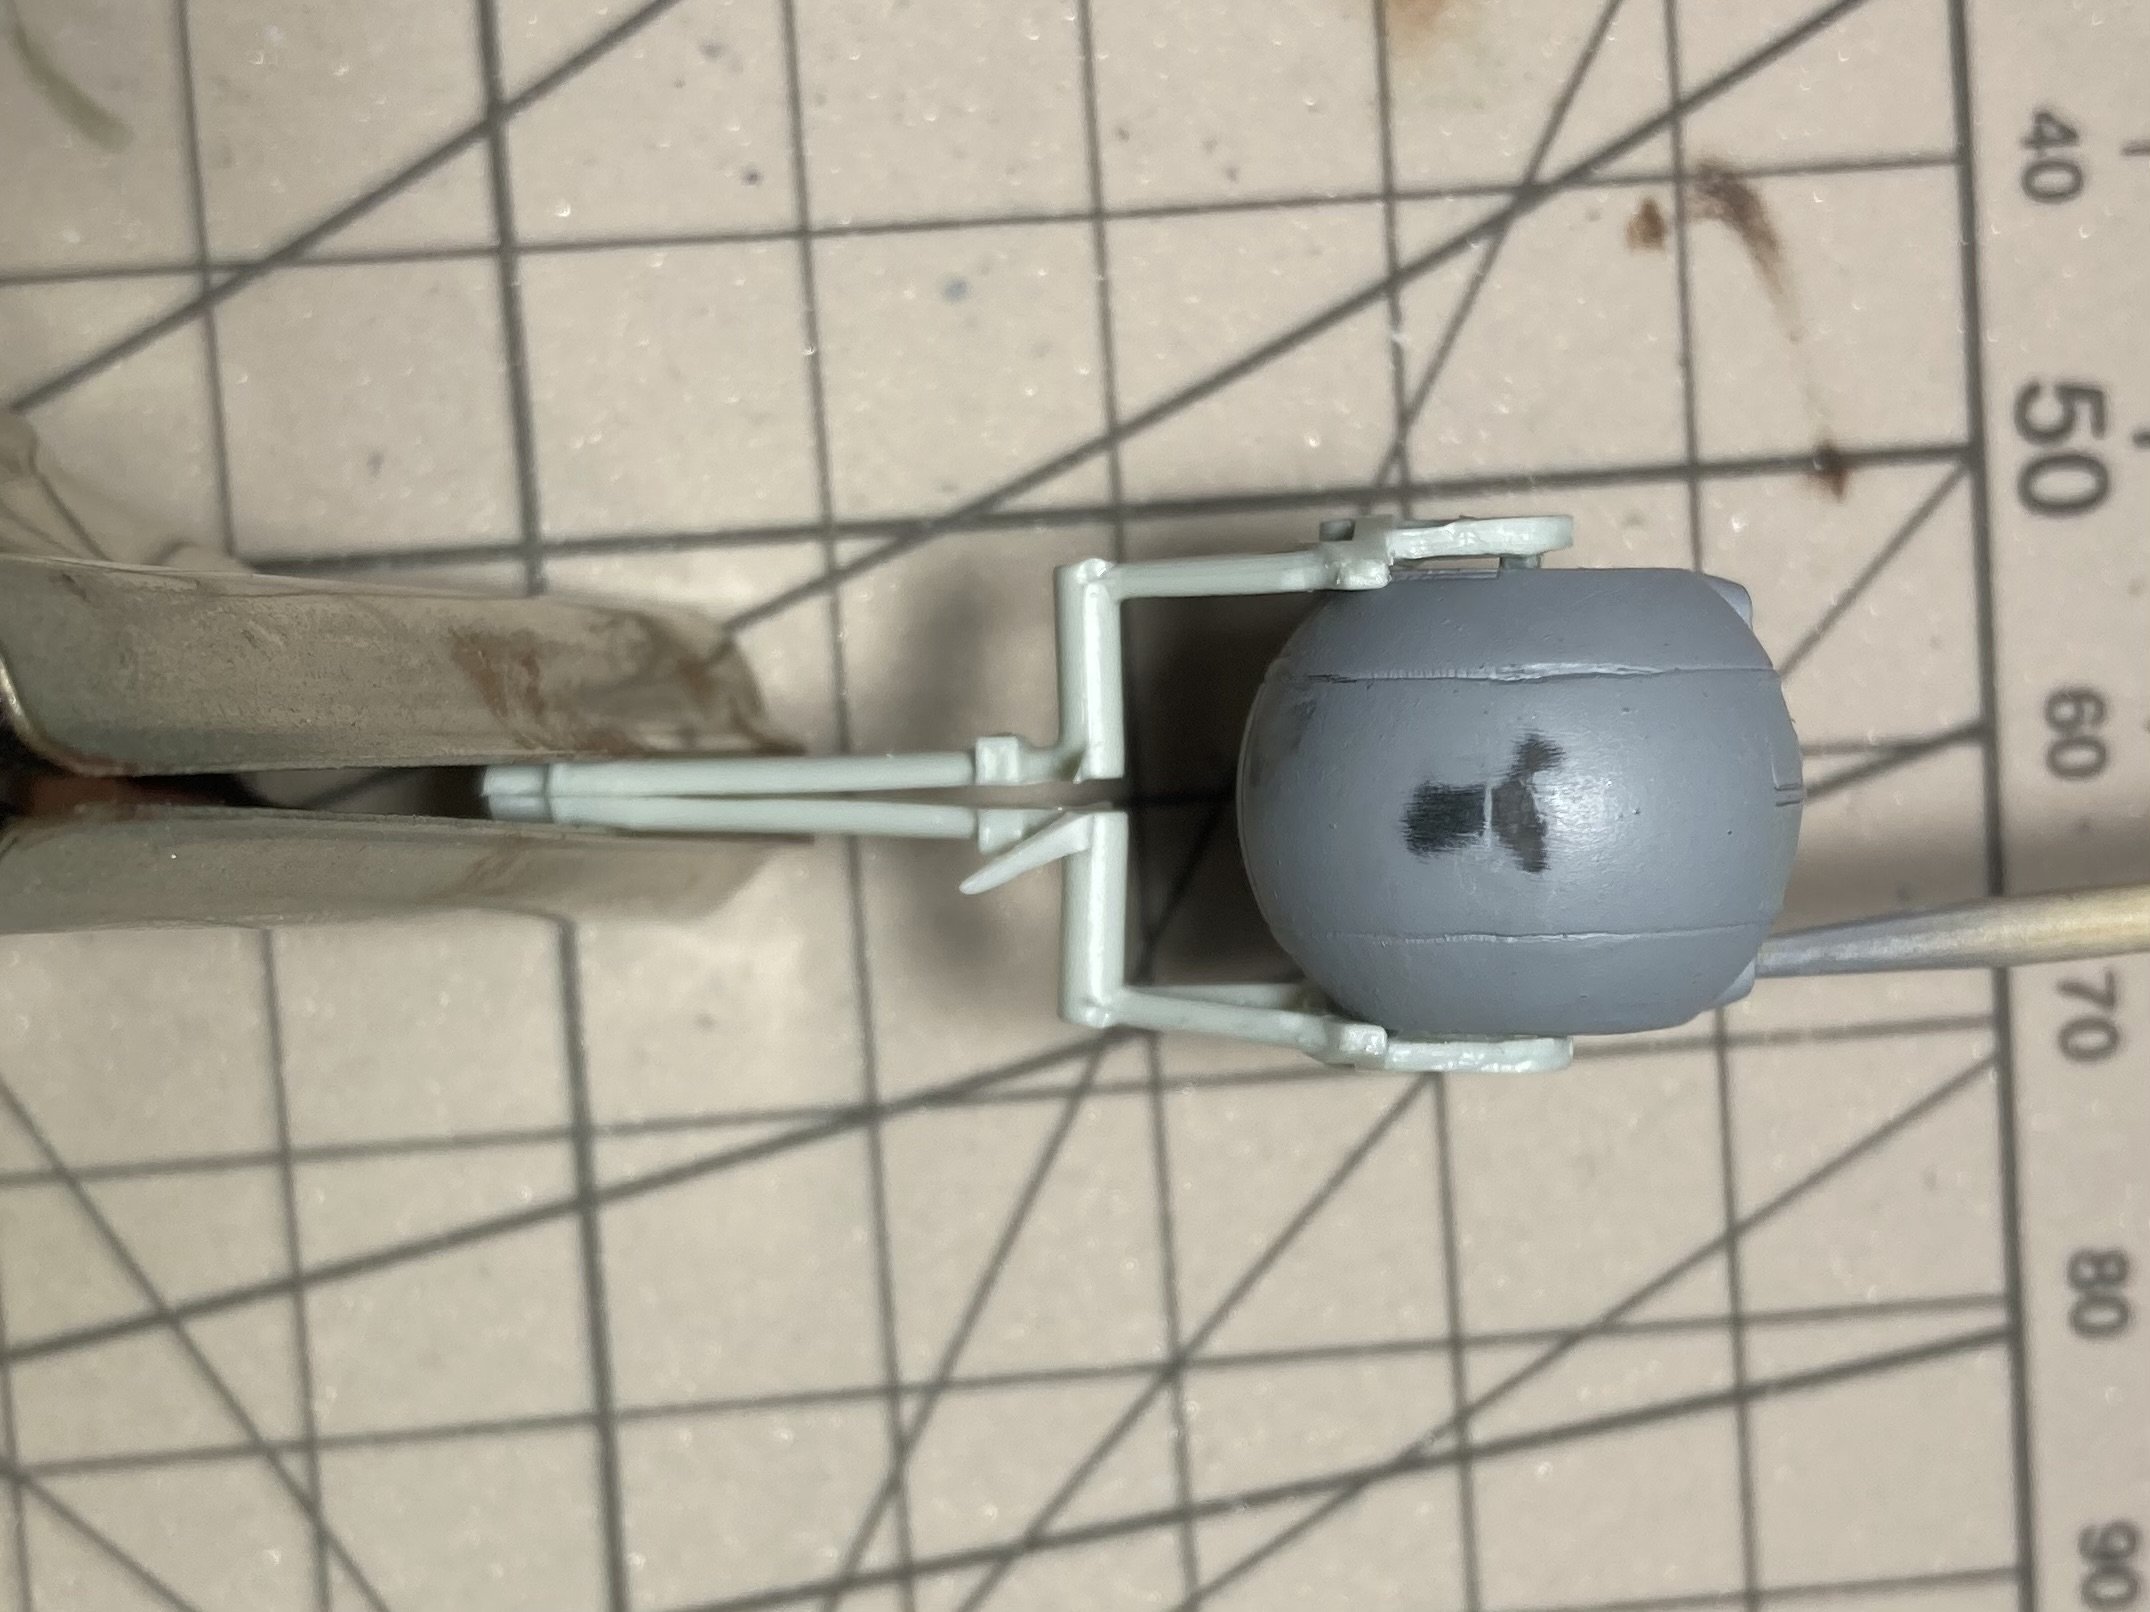
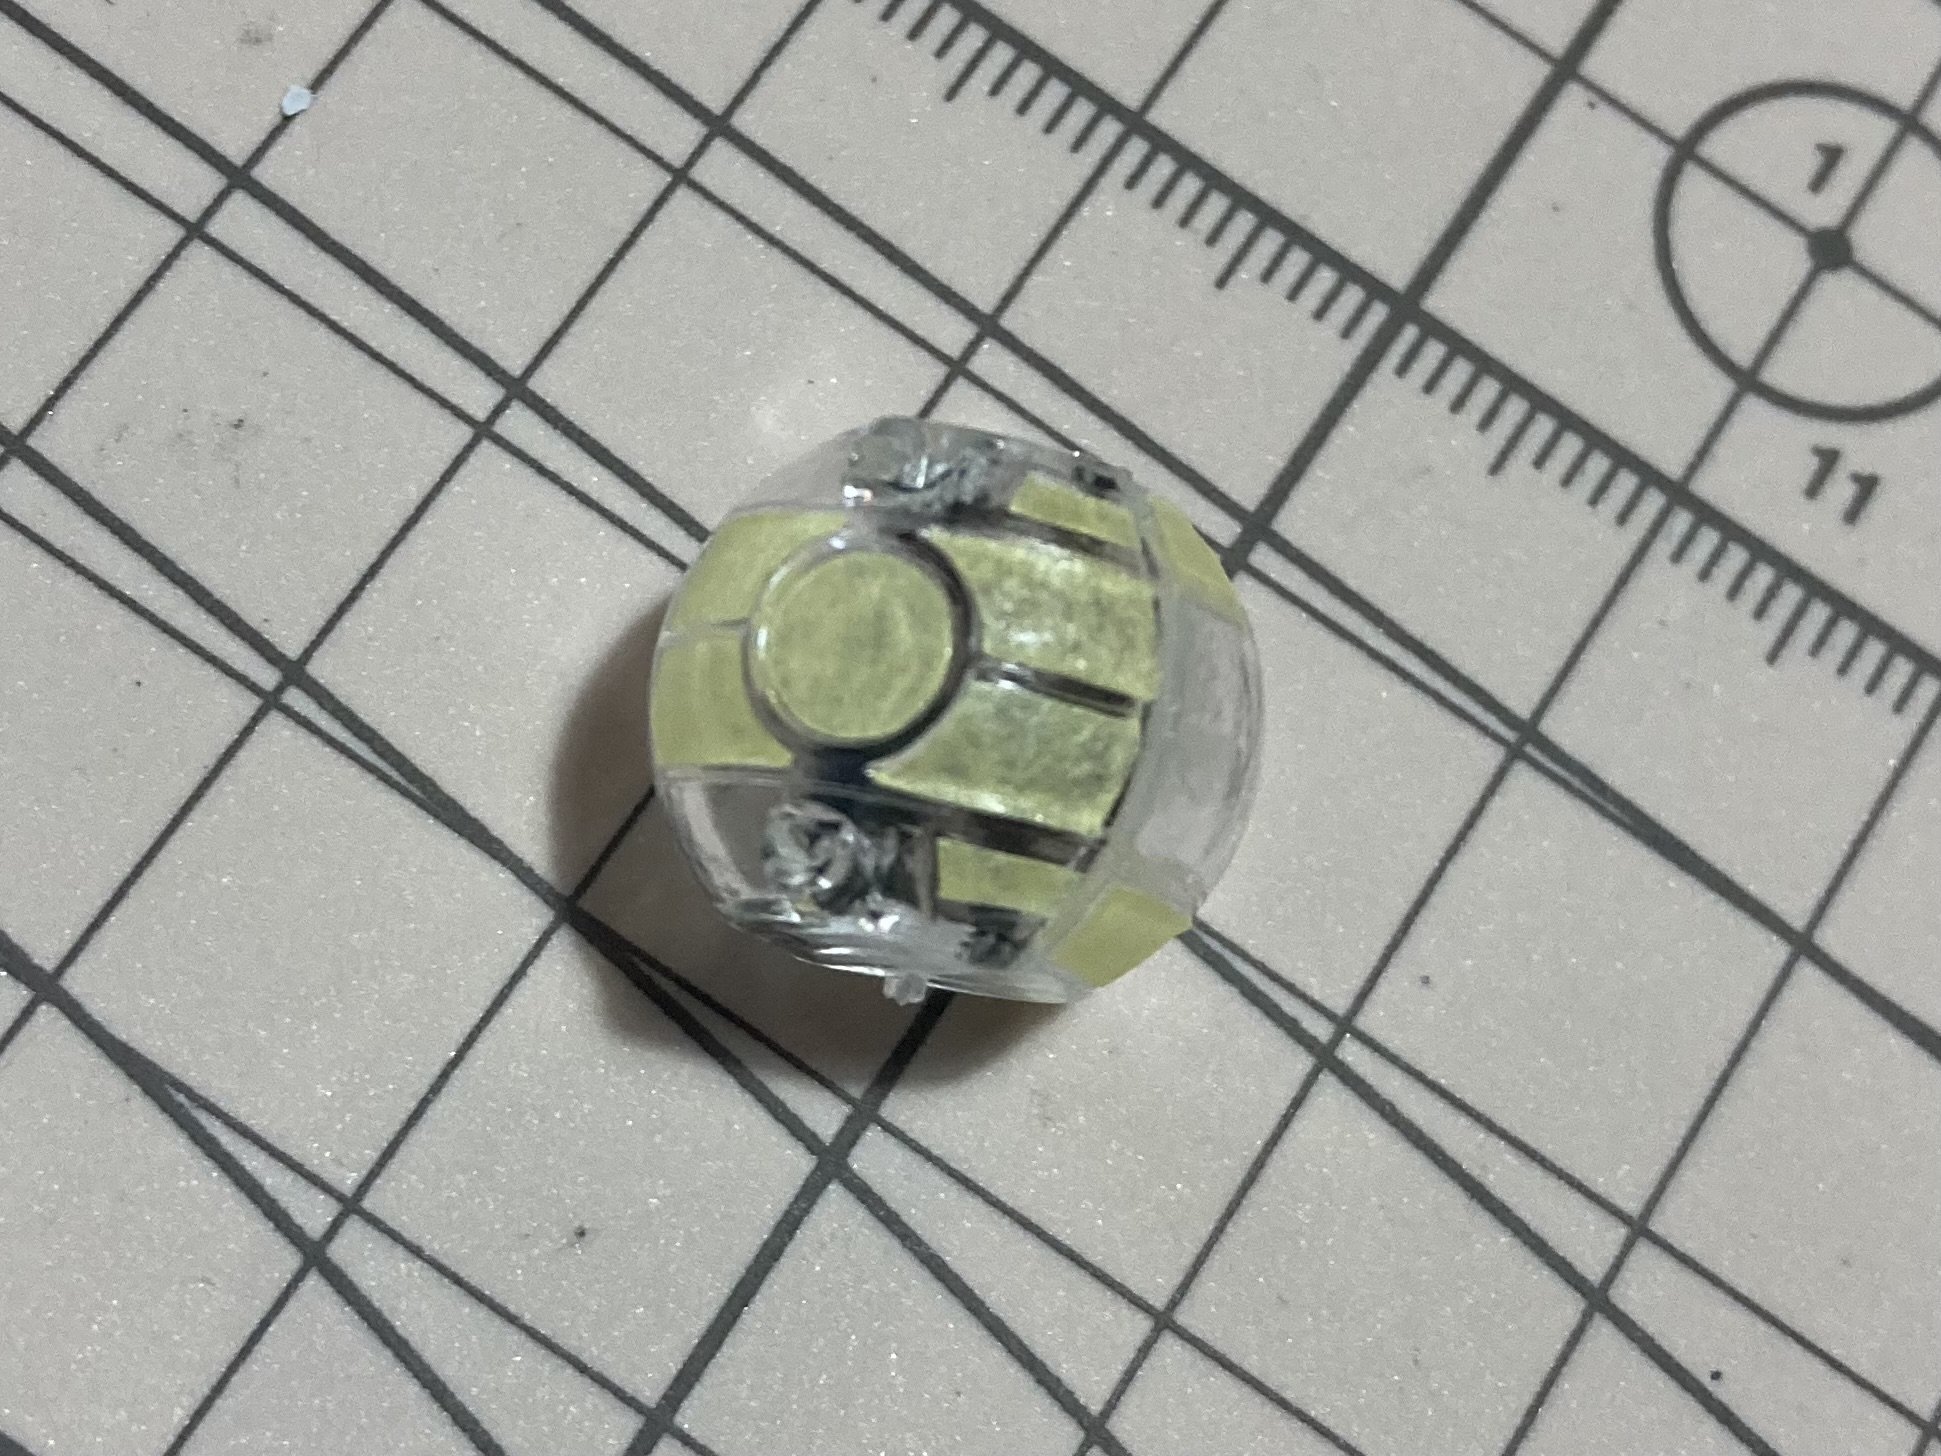
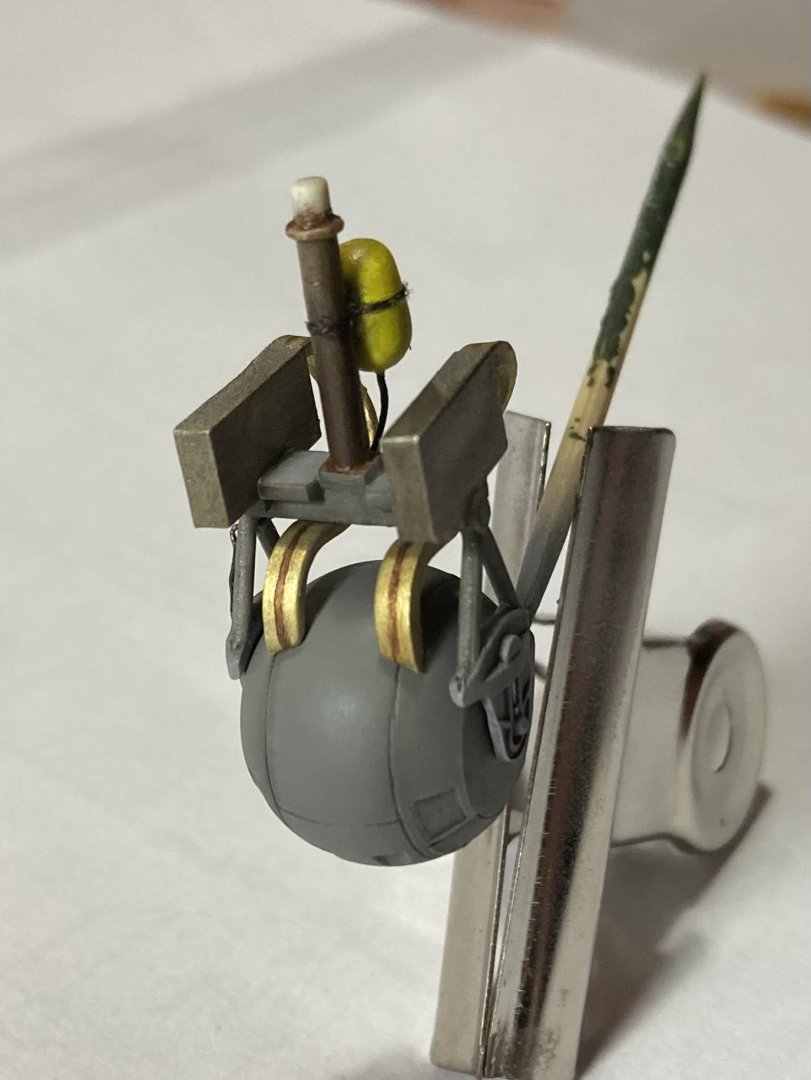
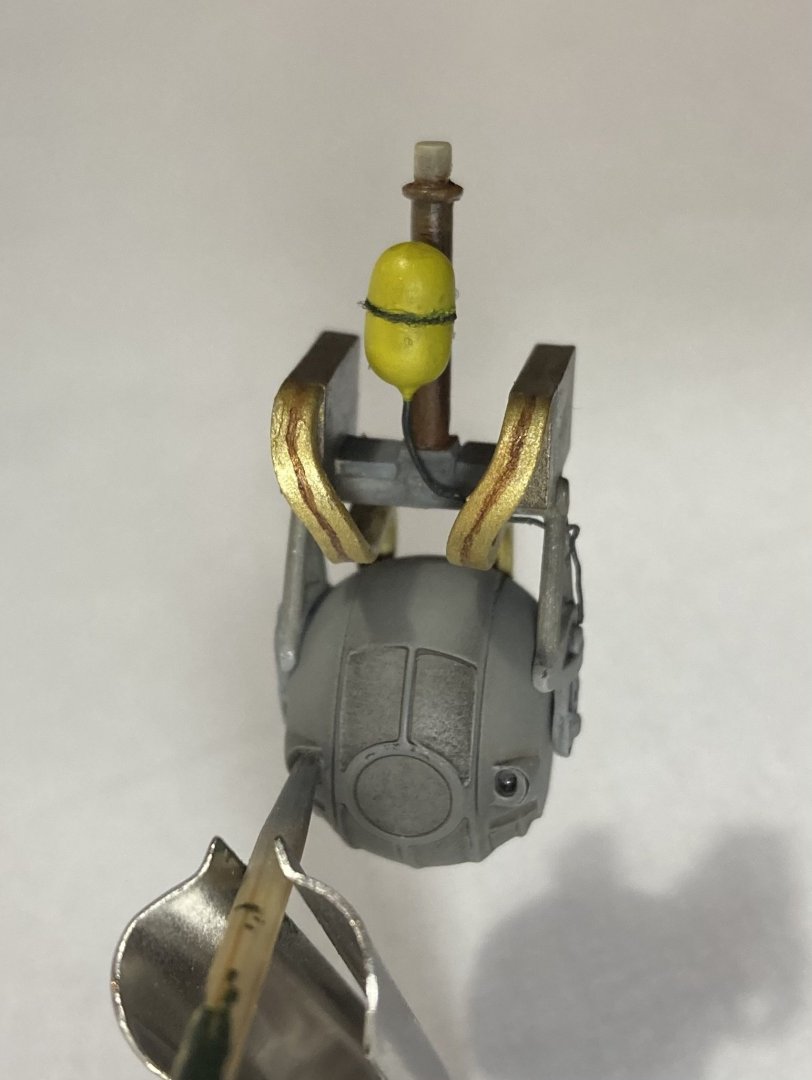
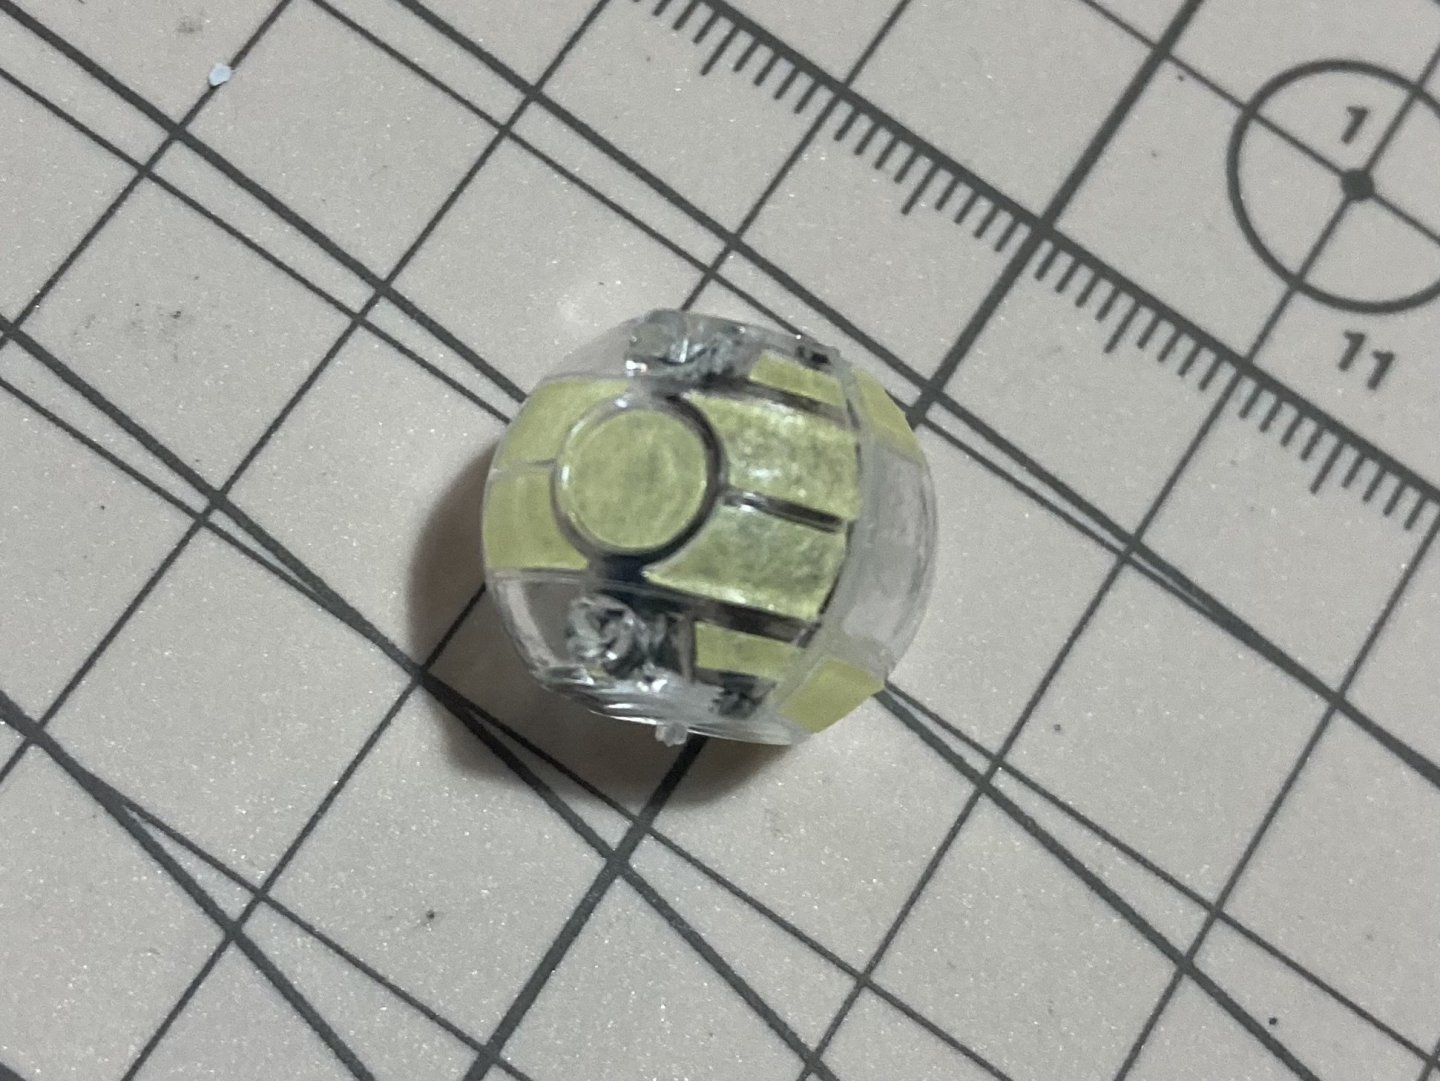
There were some great reference pics of the internals of the ball turret so decided to add some of them, even though I don’t think it will be visible once done. It was just fun. But it’s complete now and on with the next parts. At this scale it’s getting on the small side but a bigger scale you could really go all out with details I’m sure! Hence why the bullets aren’t quite correct but I don’t know how to replicate them being in the almost clear looking feed. Maybe a fussy white would have been more accurate
- 77 replies
-
- 10
-
-
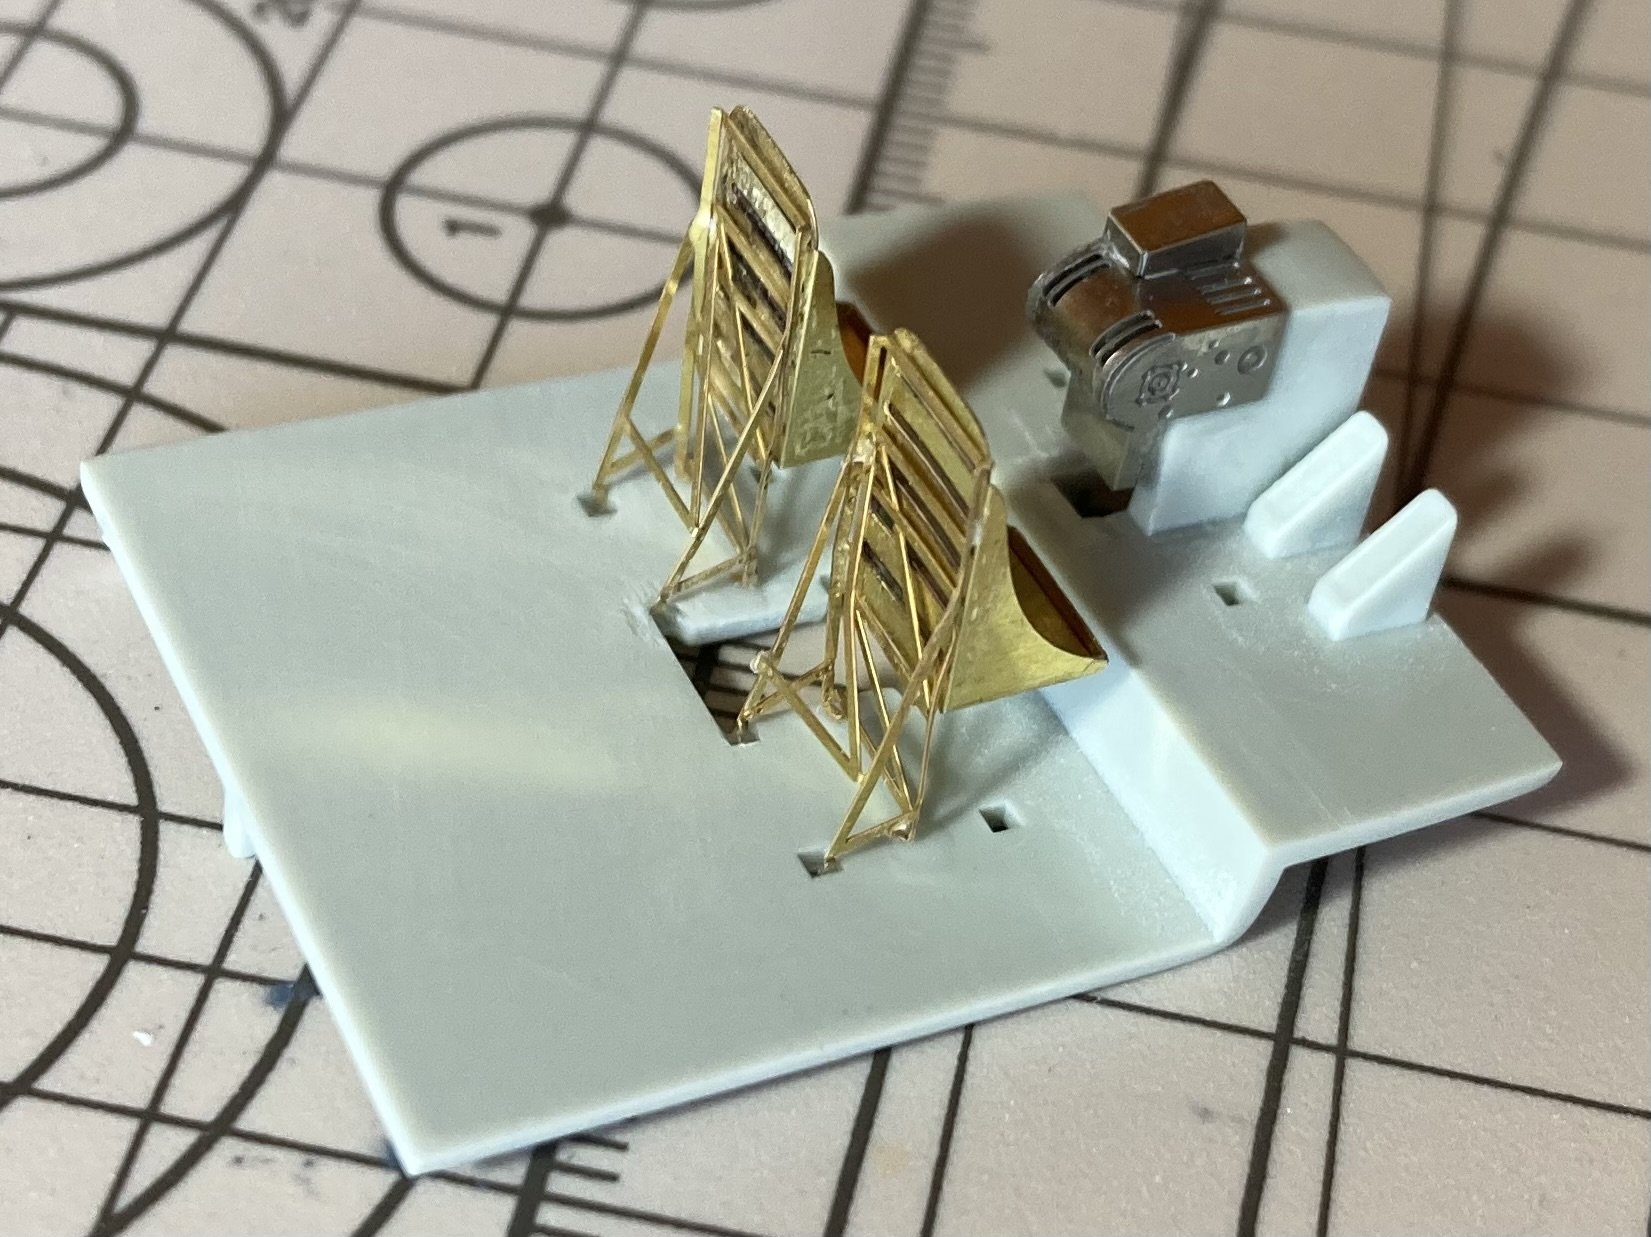
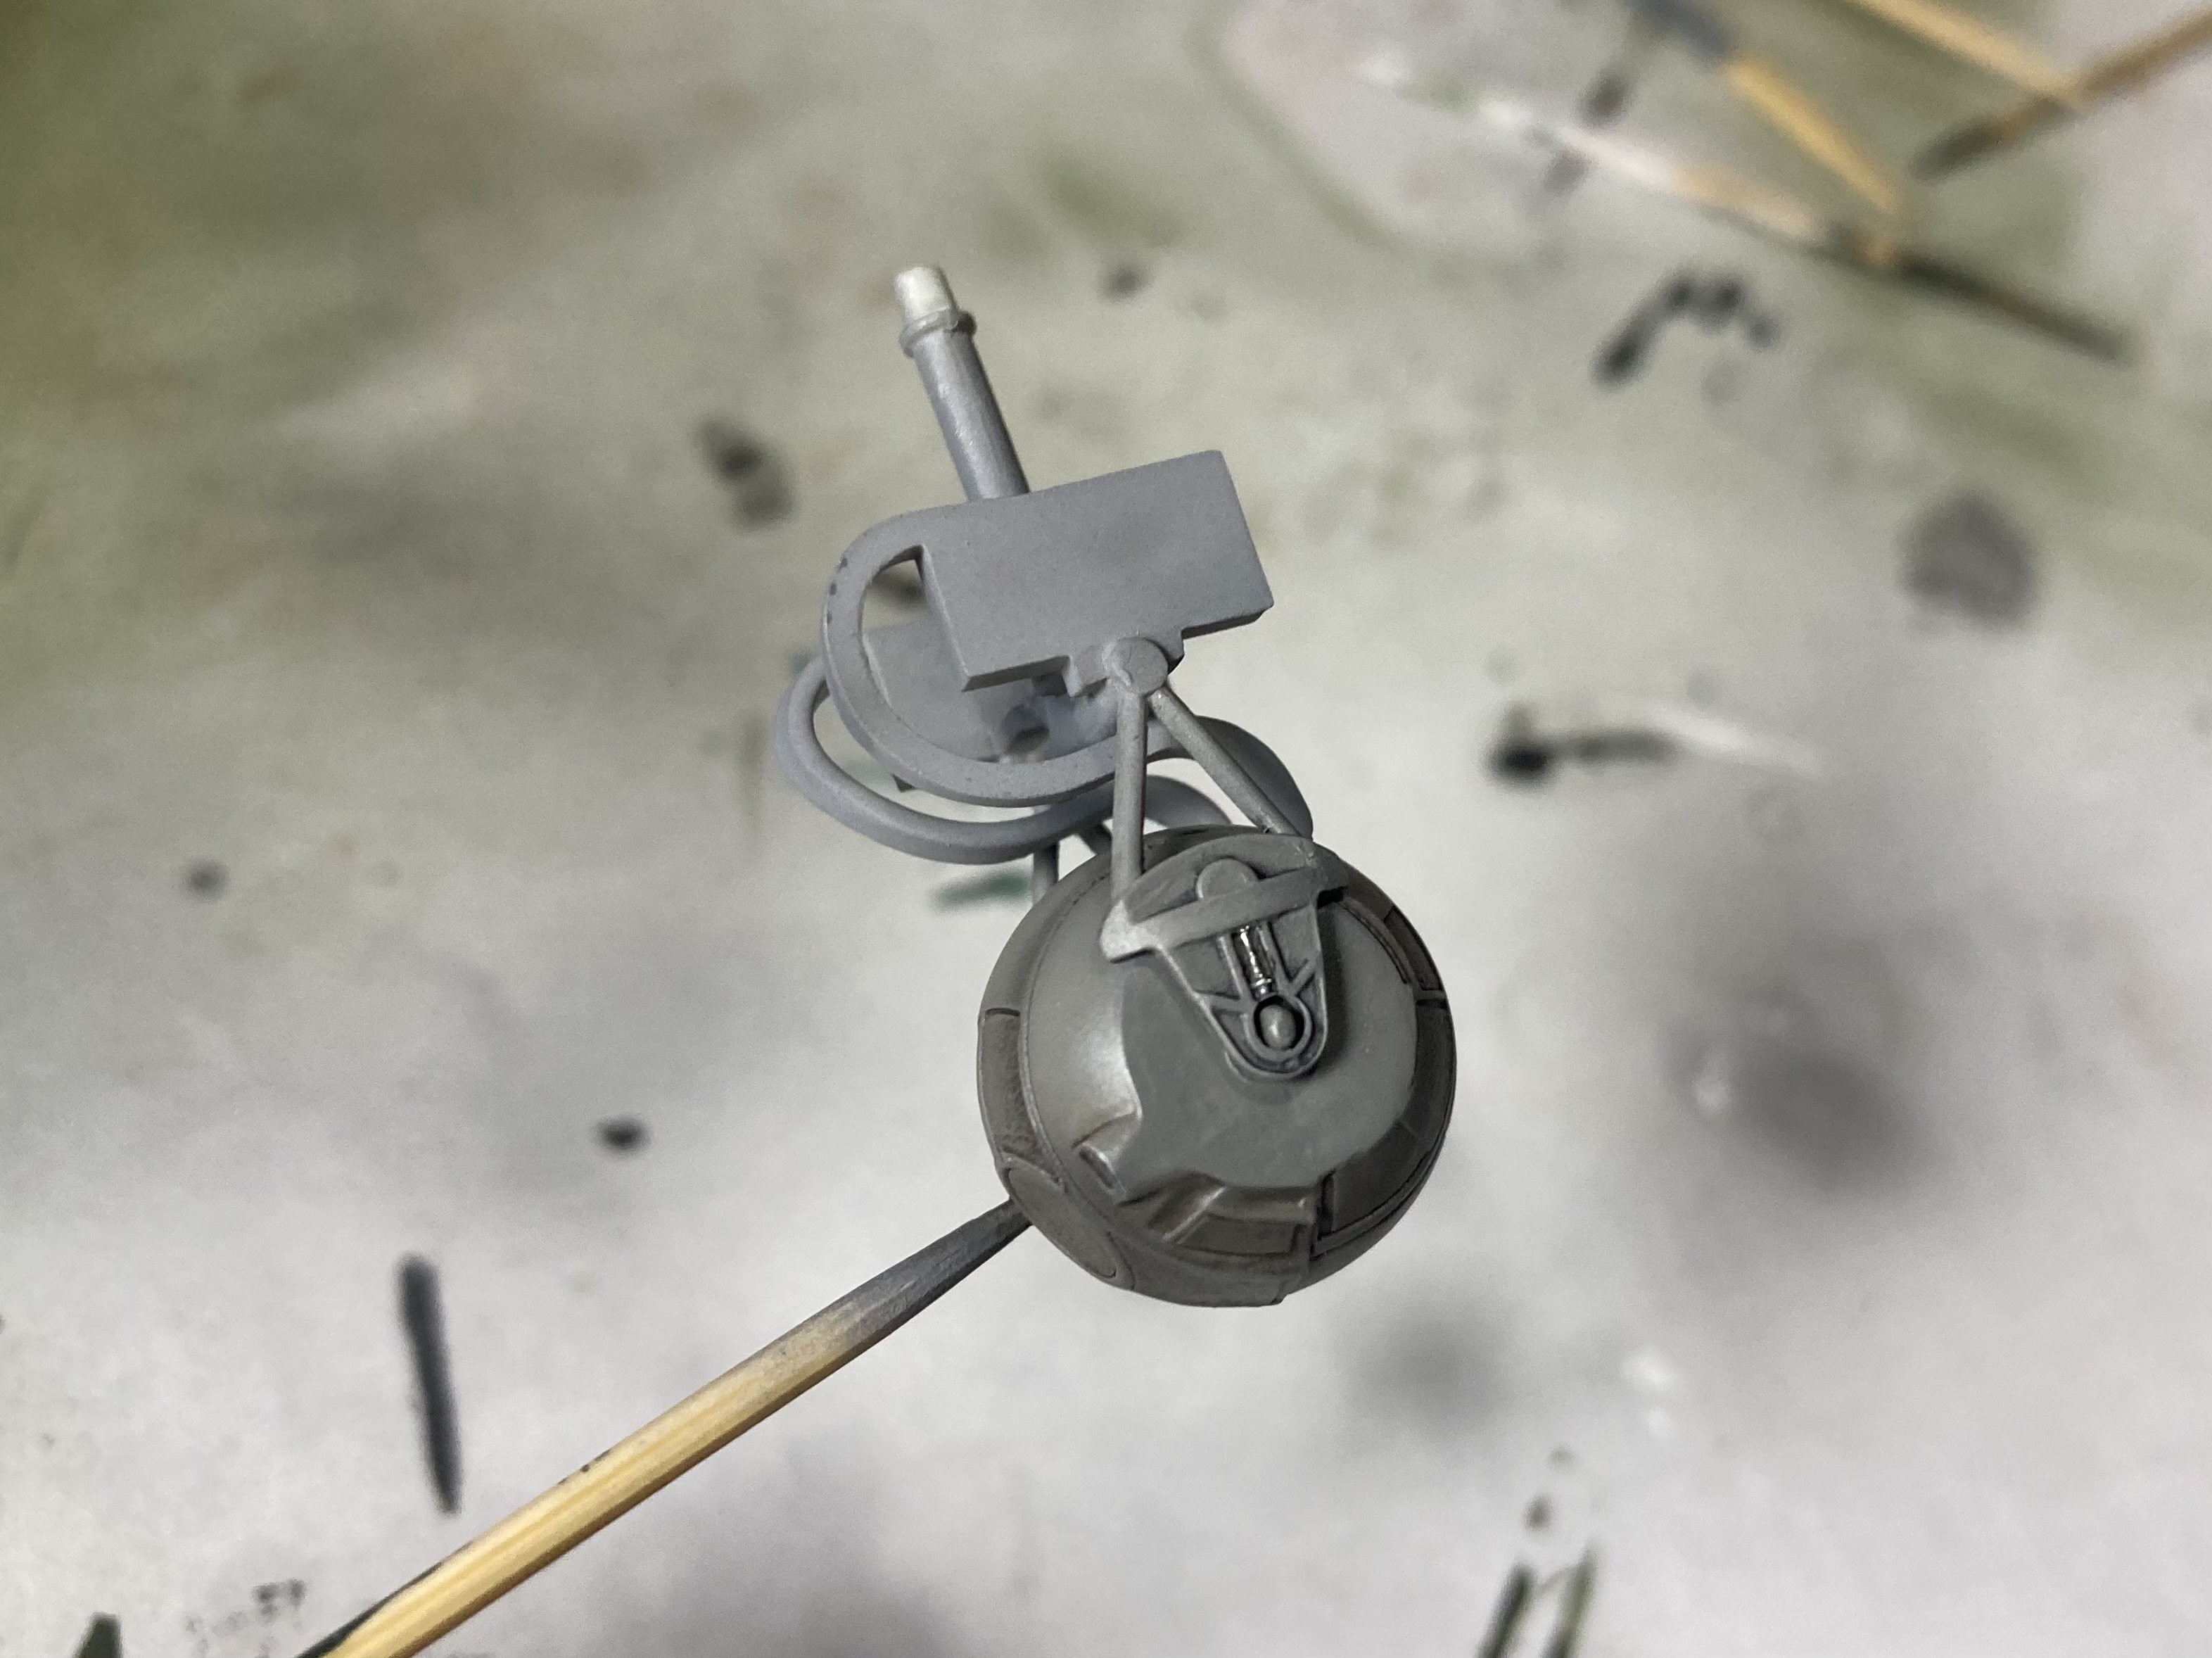
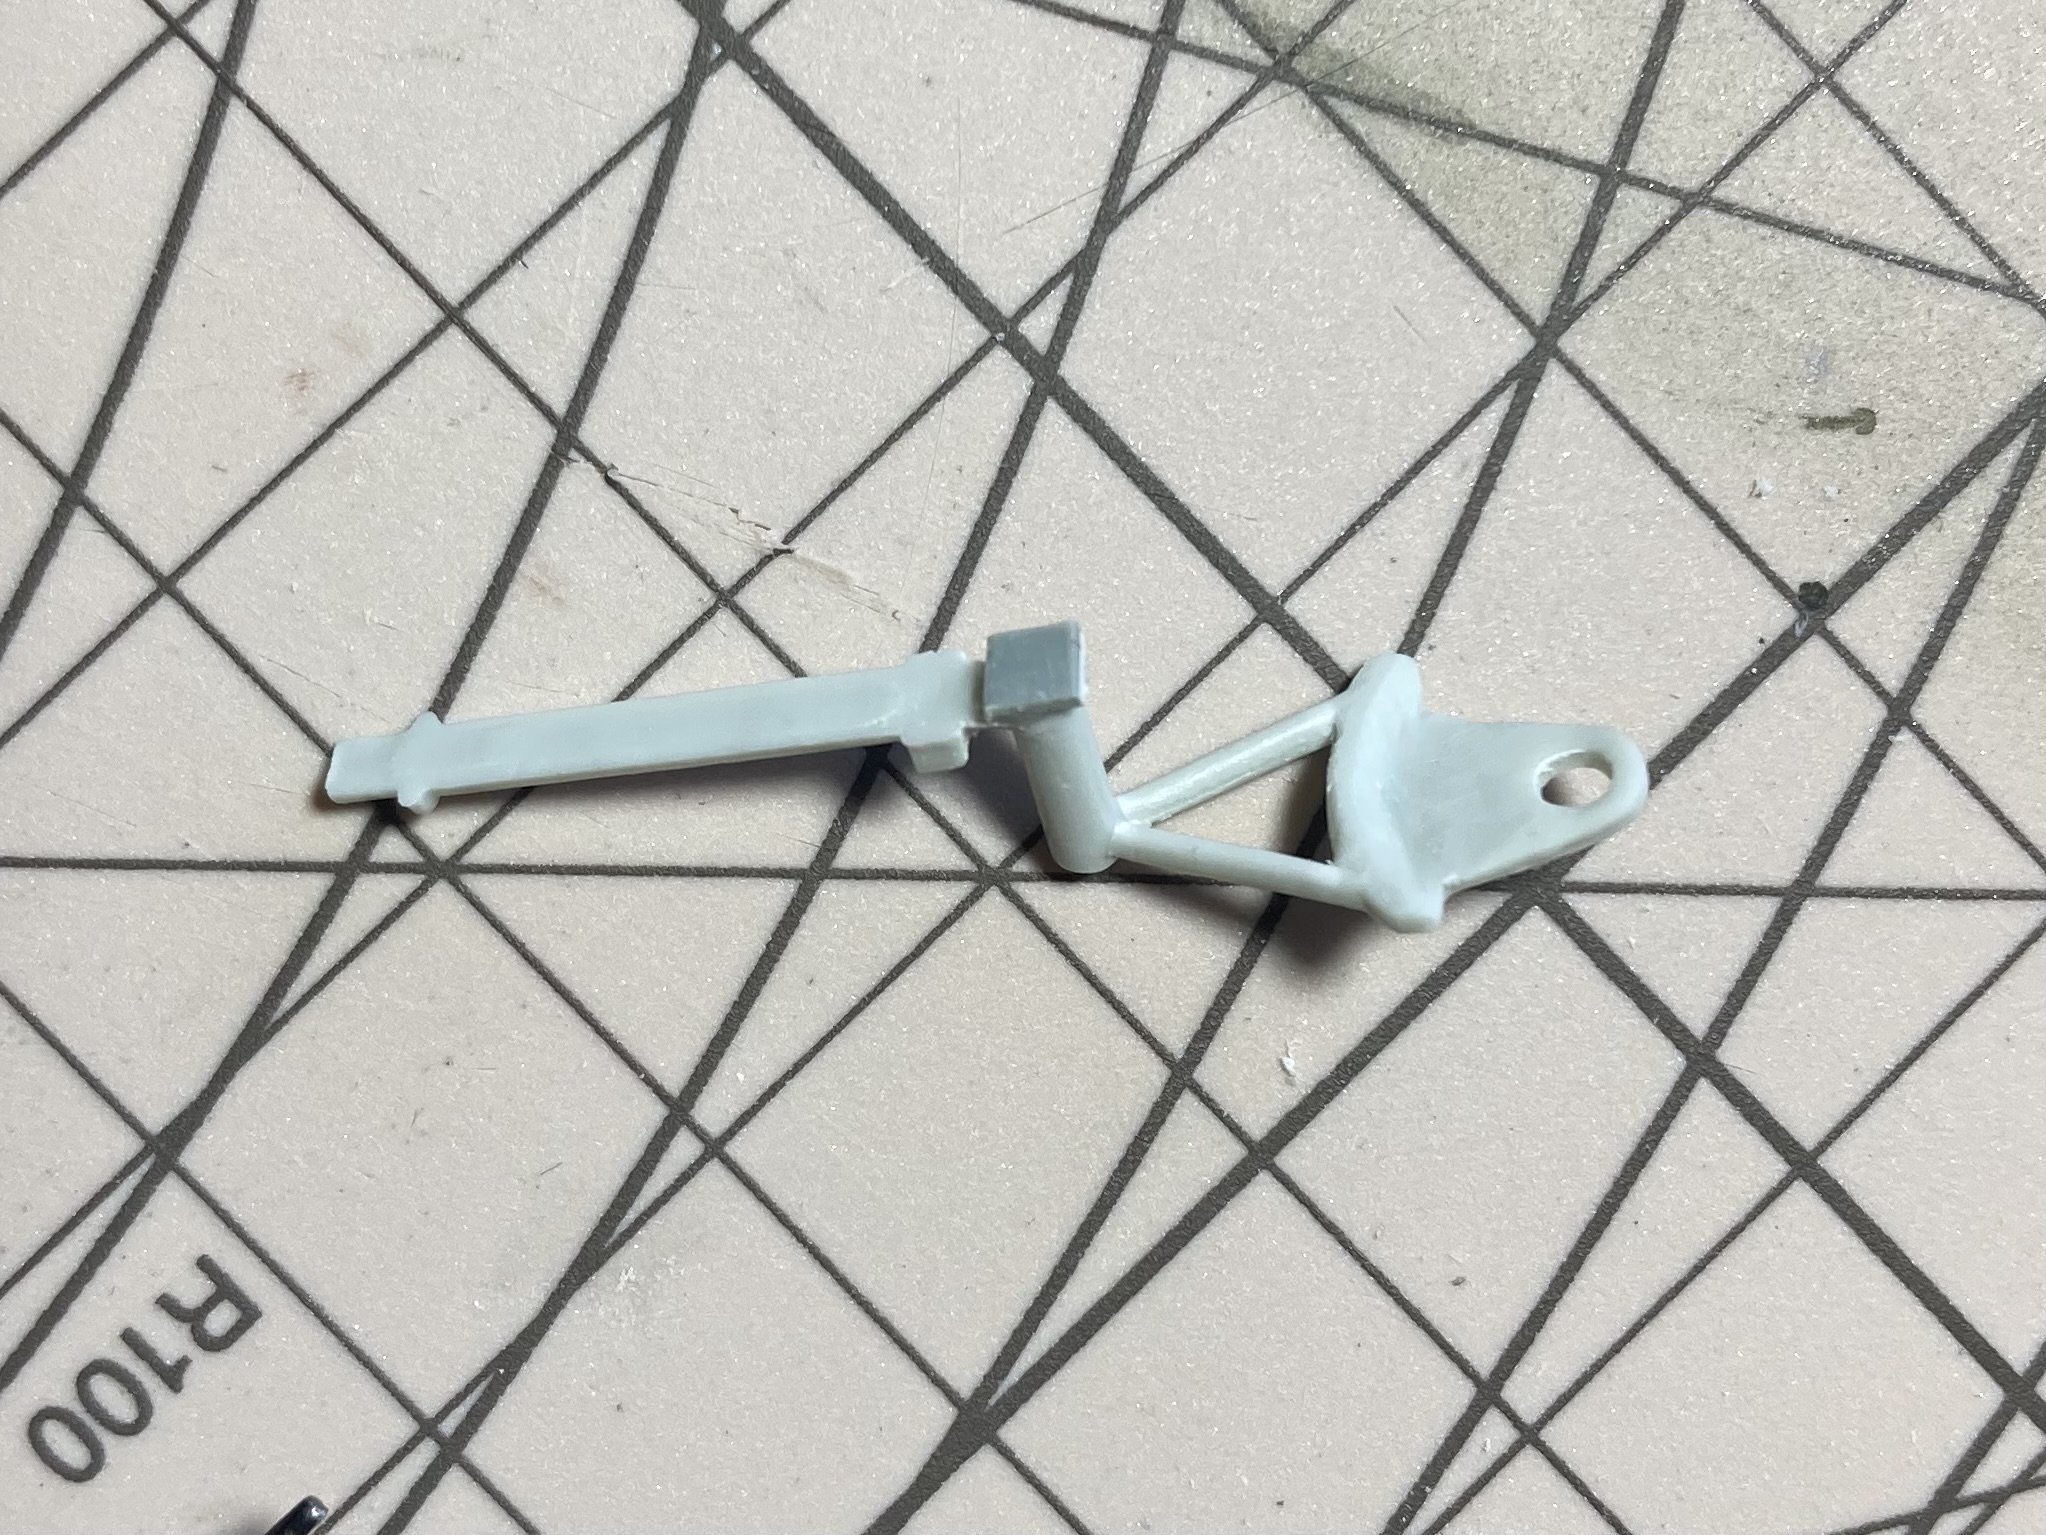
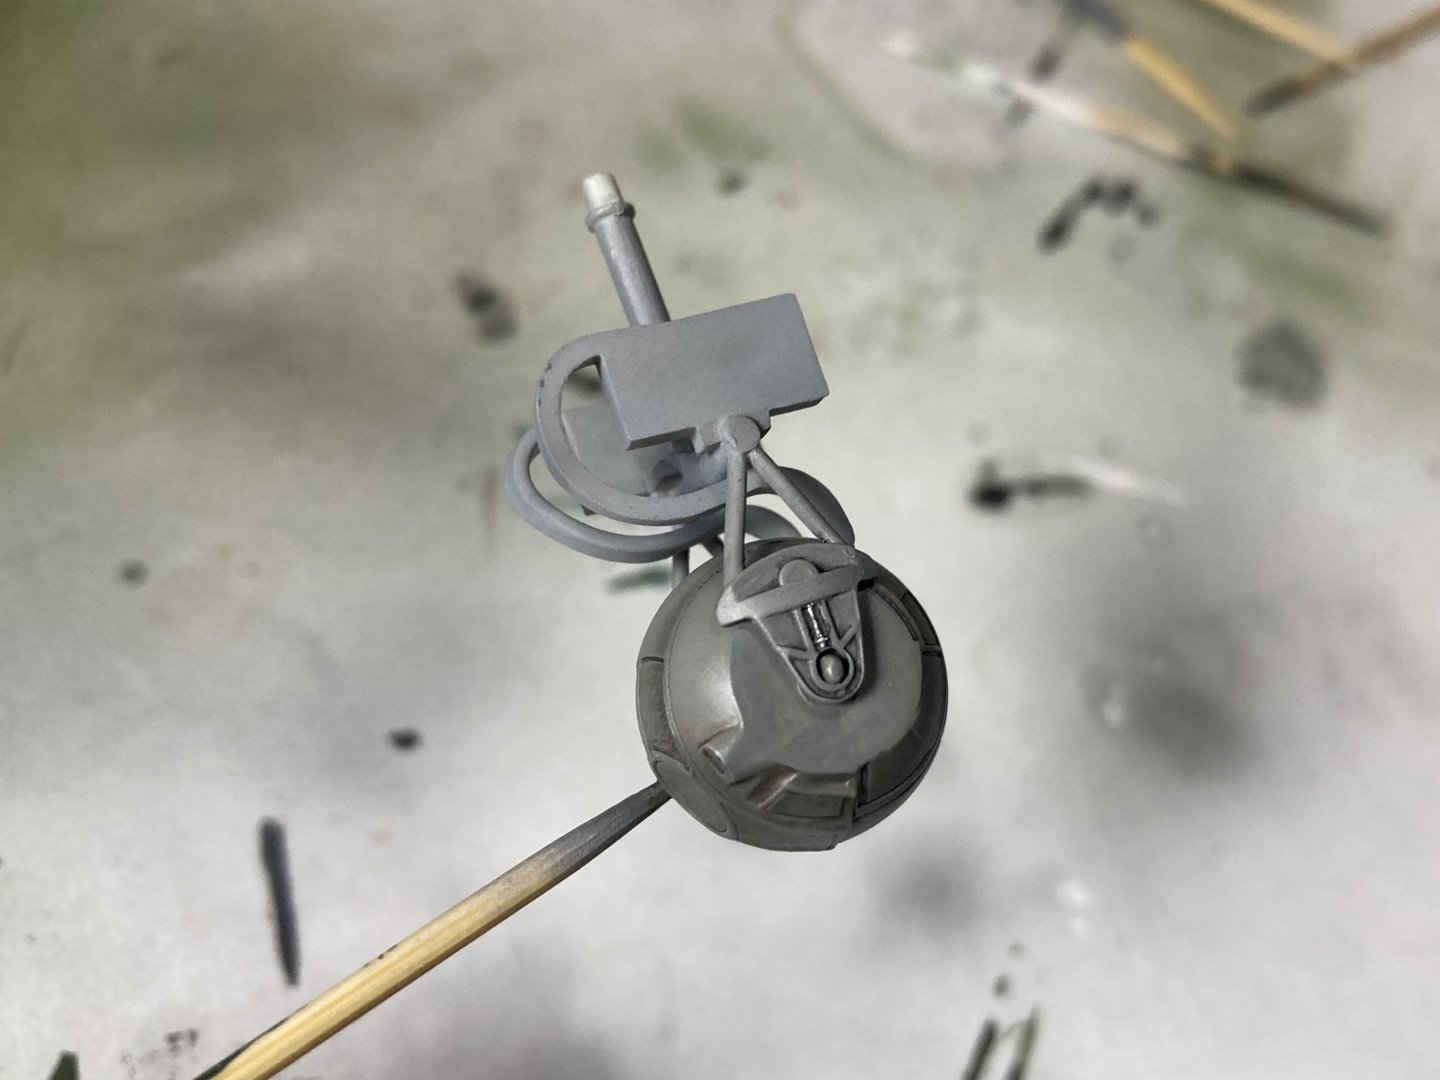
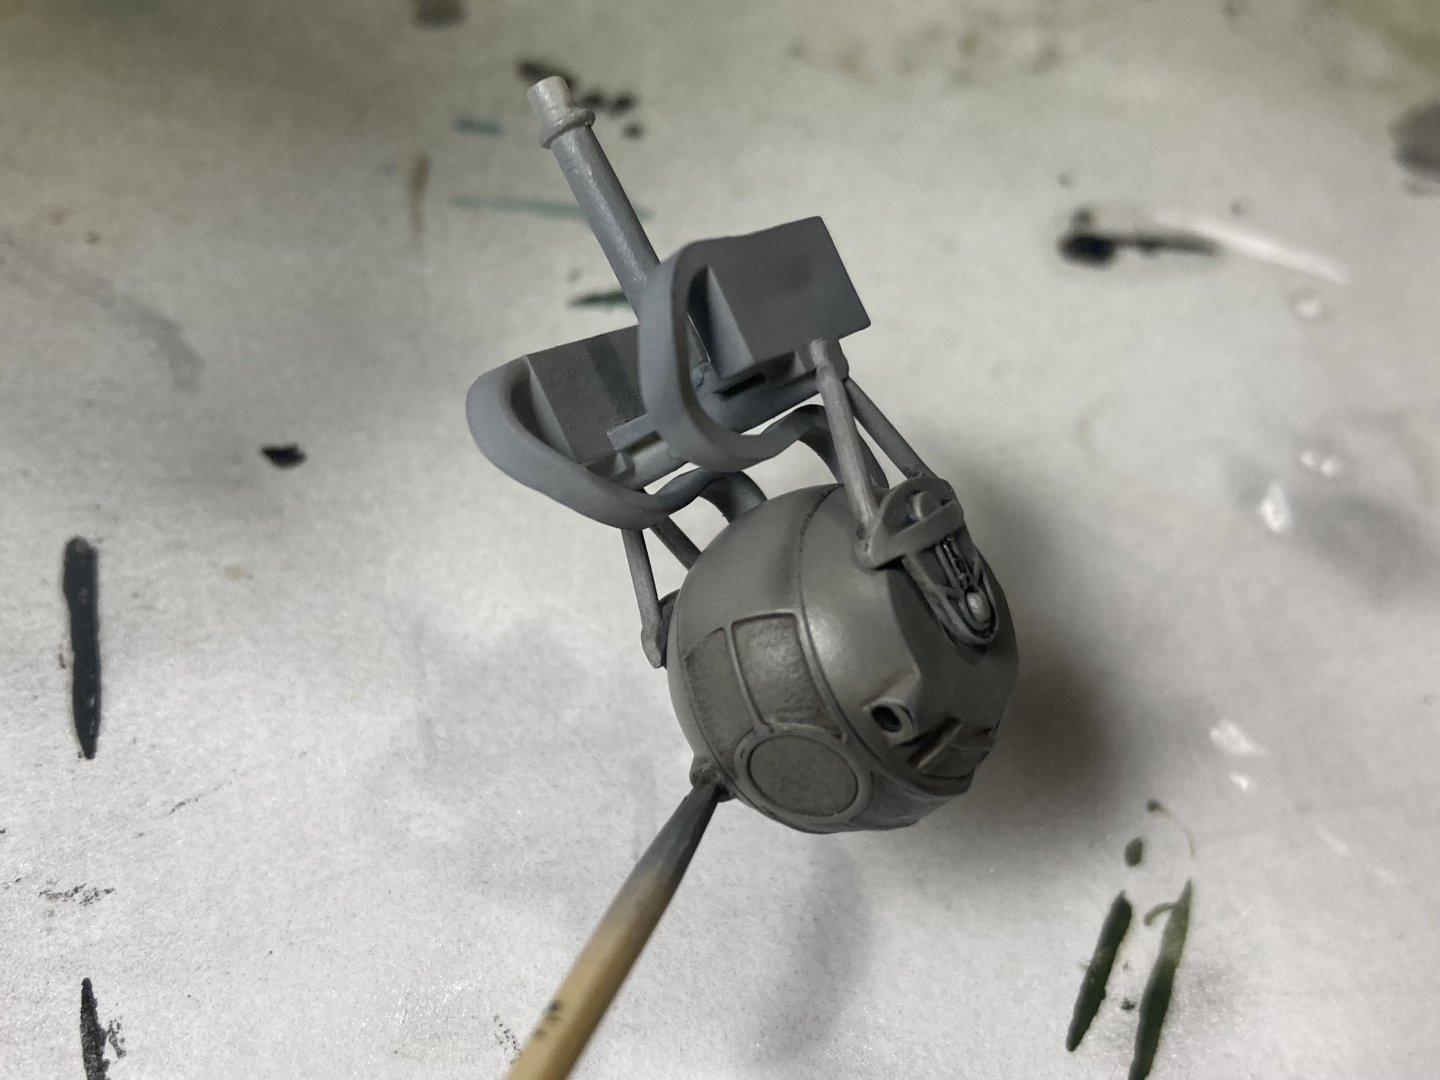
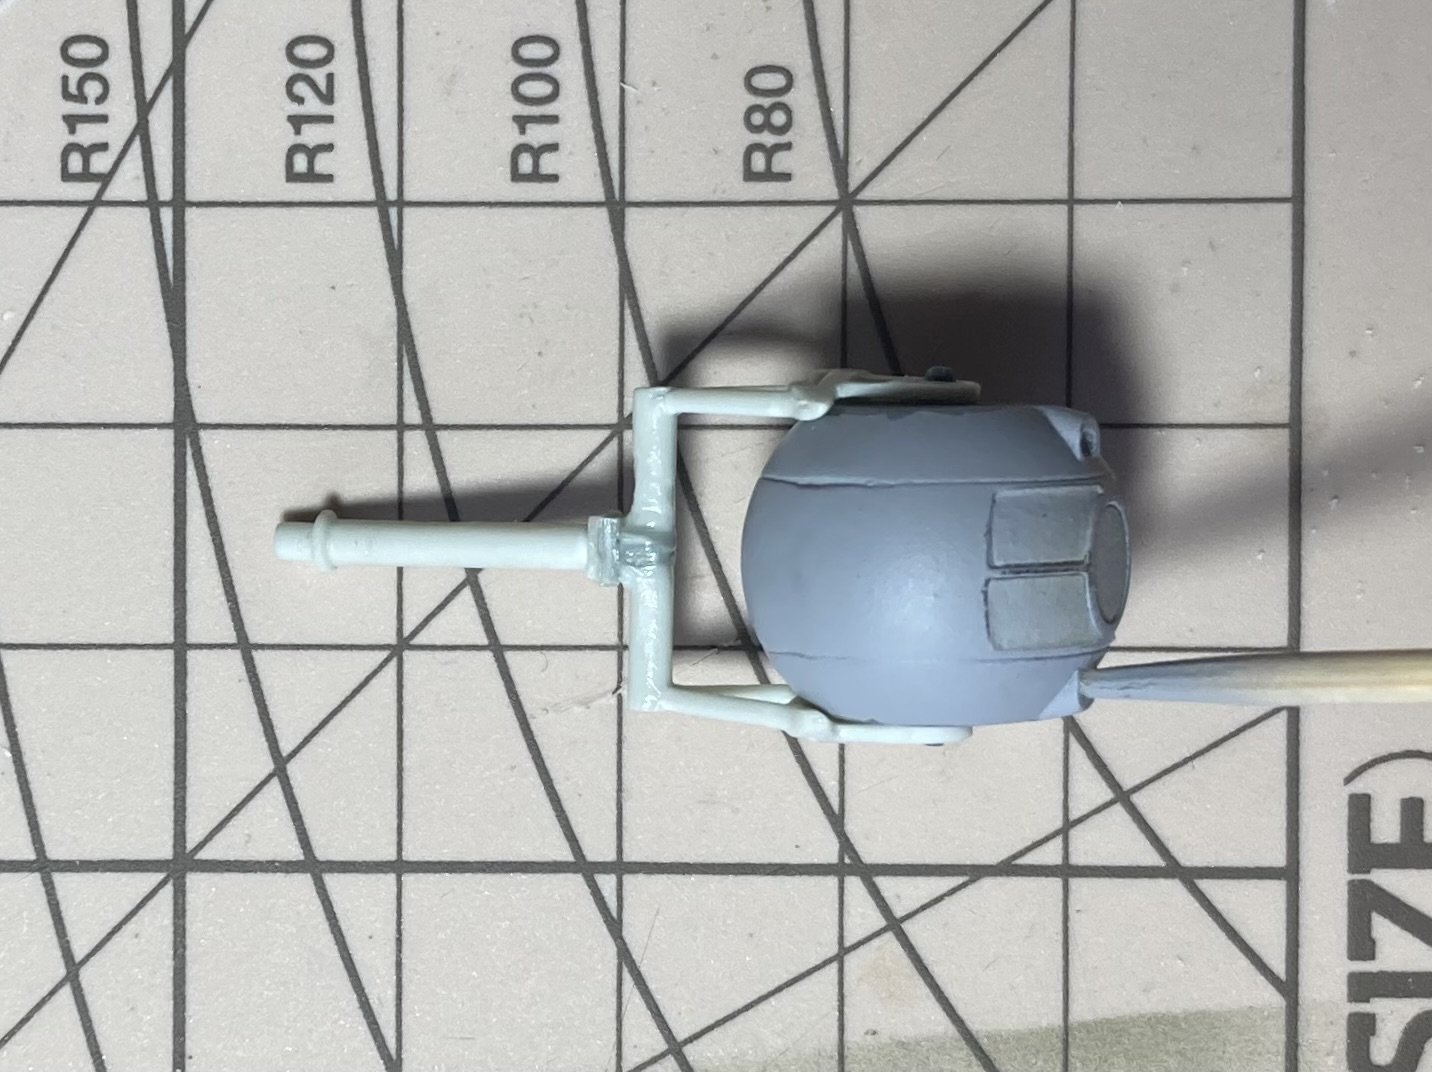
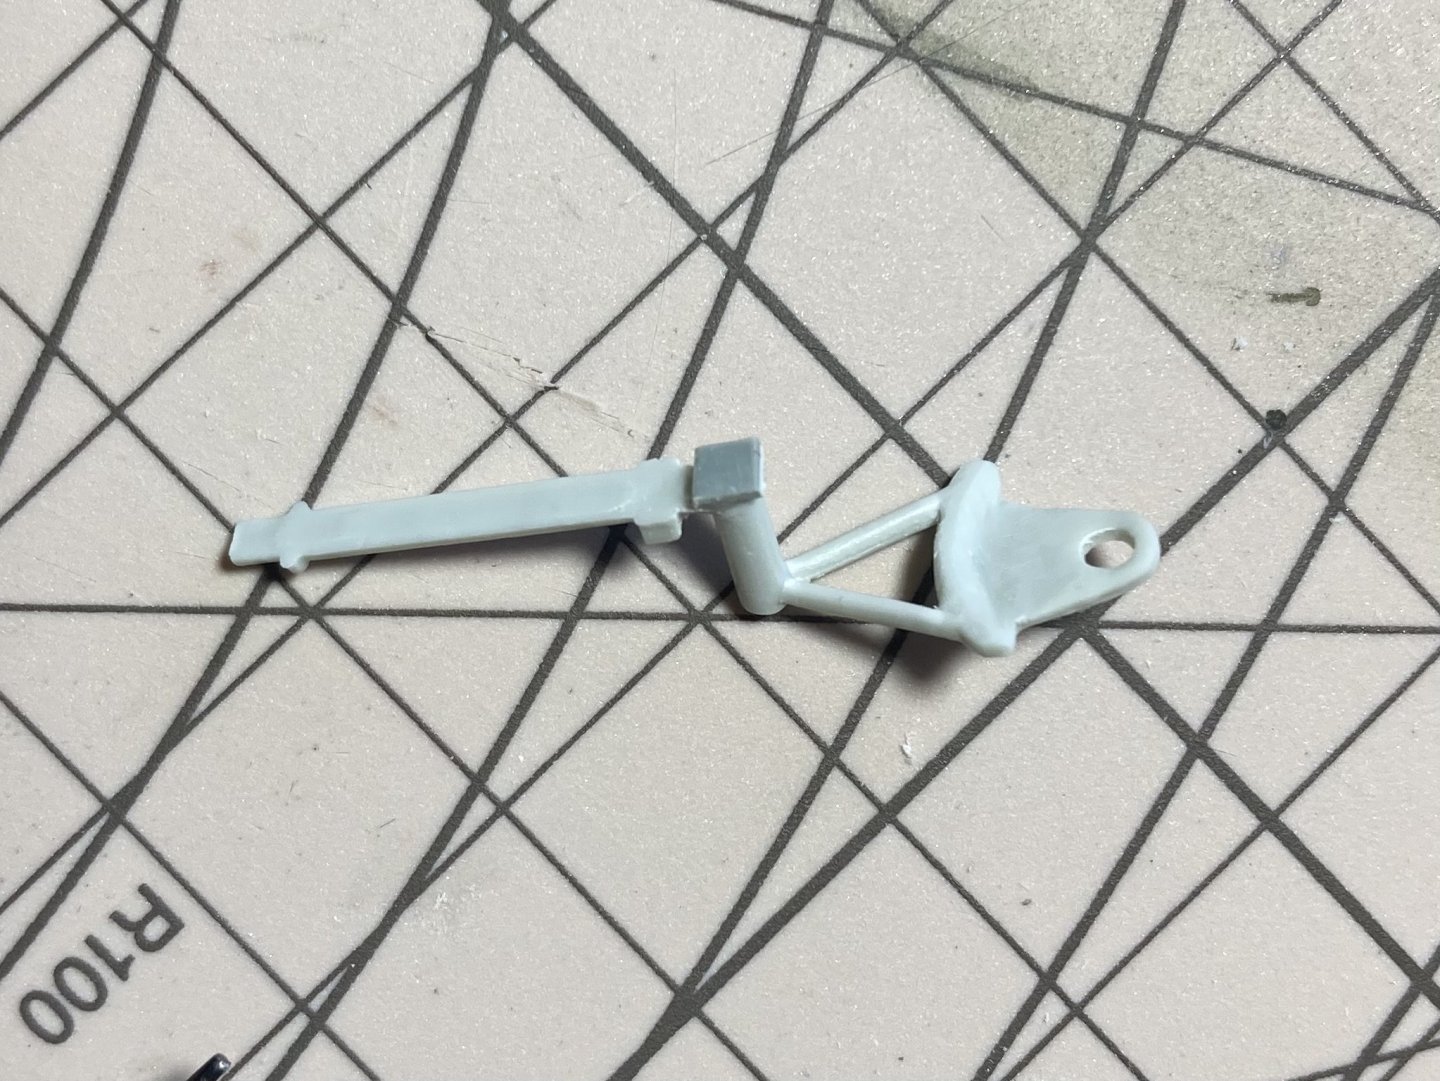
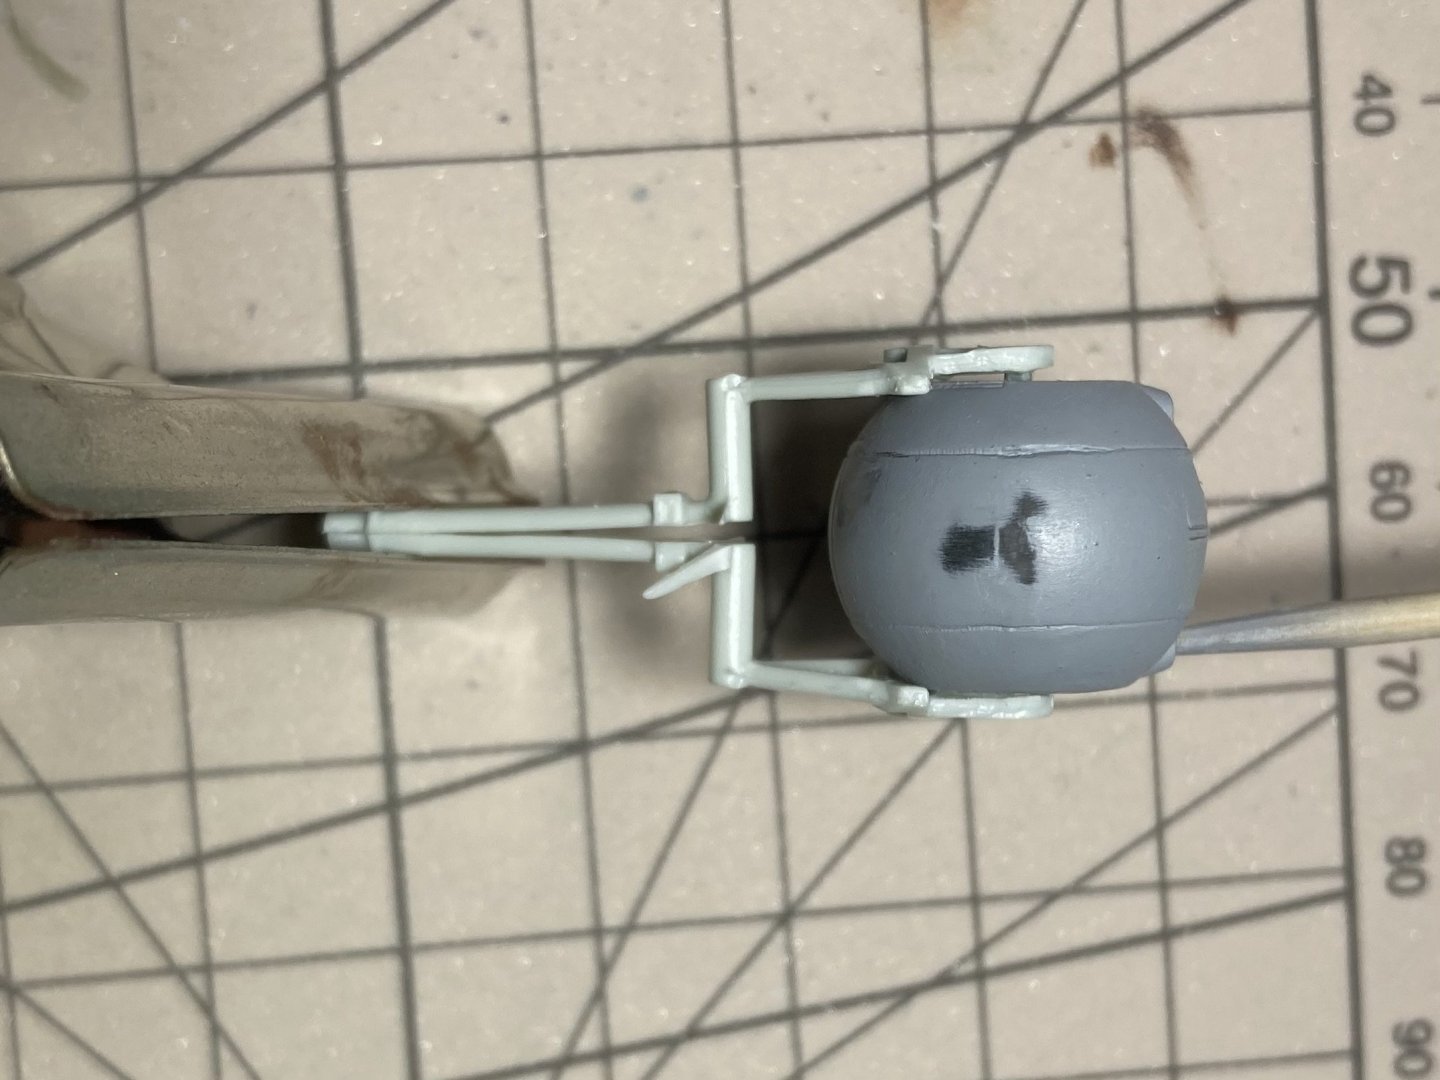
Today I started on the ball turret. just 4 pieces inside and glued the two halves together. Put on the Eduard masks and gave it a prime. I thought it would be a quick little part to do… I was wrong! At first I thought the seams were pretty good but the primer showed they needed a lot of work, so trimmed and sanded them down and after the 3rd check I was happy. Next I started on the connecting mechanism, but quickly found out it was too narrow or the ball turret was too wide and so the arms were being splayed out and barely holding it in place. I wasn’t sure if I’d done something wrong so let it sit while I thought about it and decided I’d modify it to fit better. I measured how much I wanted to widen it by and added some plastic to each part and removed the centre pole so that it fit well. Then reattached the centre pole and spent awhile working out how far out of the plane the turret should sit. At this original height it seemed to be protruding a lot more than reference photos showed so trimmed it up till it looked right. Then I let the glue harden before sanding it into shape. Added the ammo boxes and also made an oxygen bottle which I’ll add later. Then test fitted it and gave it a paint. This is how it will look once attached. I also learned during the dry fit that with the ammo boxes on I can’t install it if the two halves of the plane are together! So I’ll have to make sure to install the mechanism before closing it up. But I can remove the turret easily so that’s ok and can put the ball in its place once the undercarriage is on and the painting is complete. Also I’ve not painted the ammo boxes or any of the mechanism that is inside the plane, only the external parts.

- 77 replies
-
- 11
-
-
Looking great so far! Got to love the look of the spitfire and that instrument panel looks amazing!
-
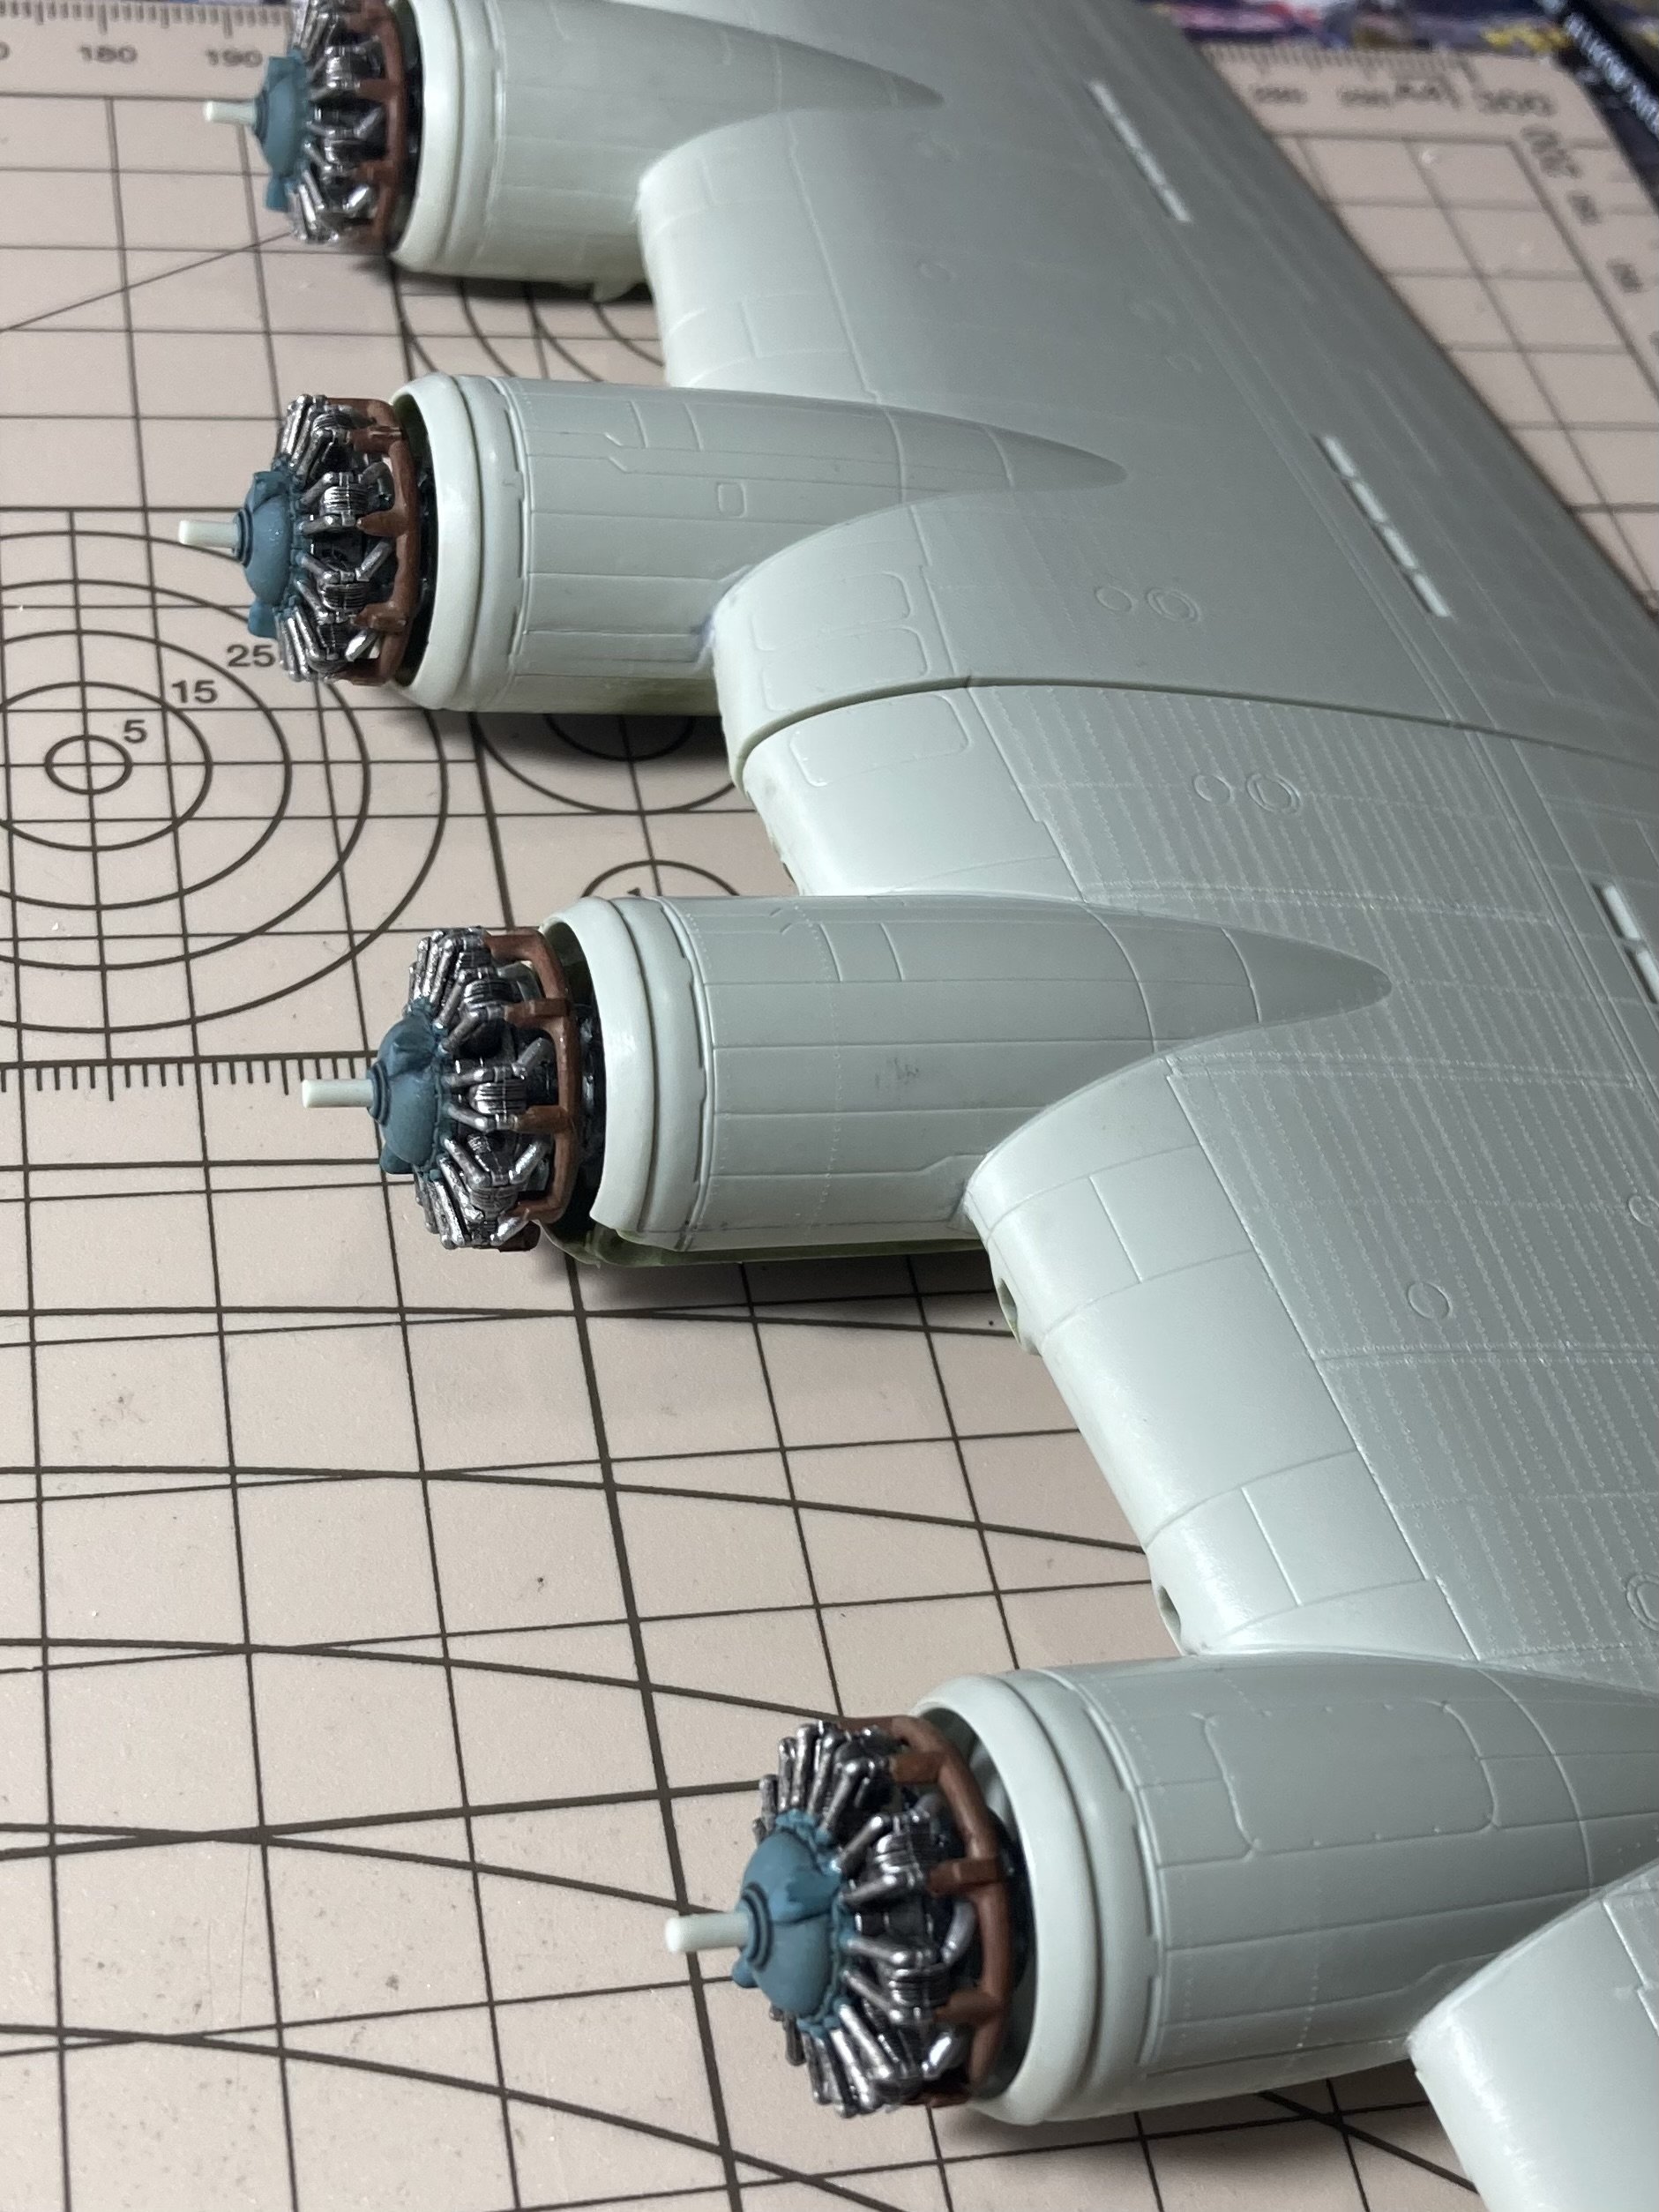
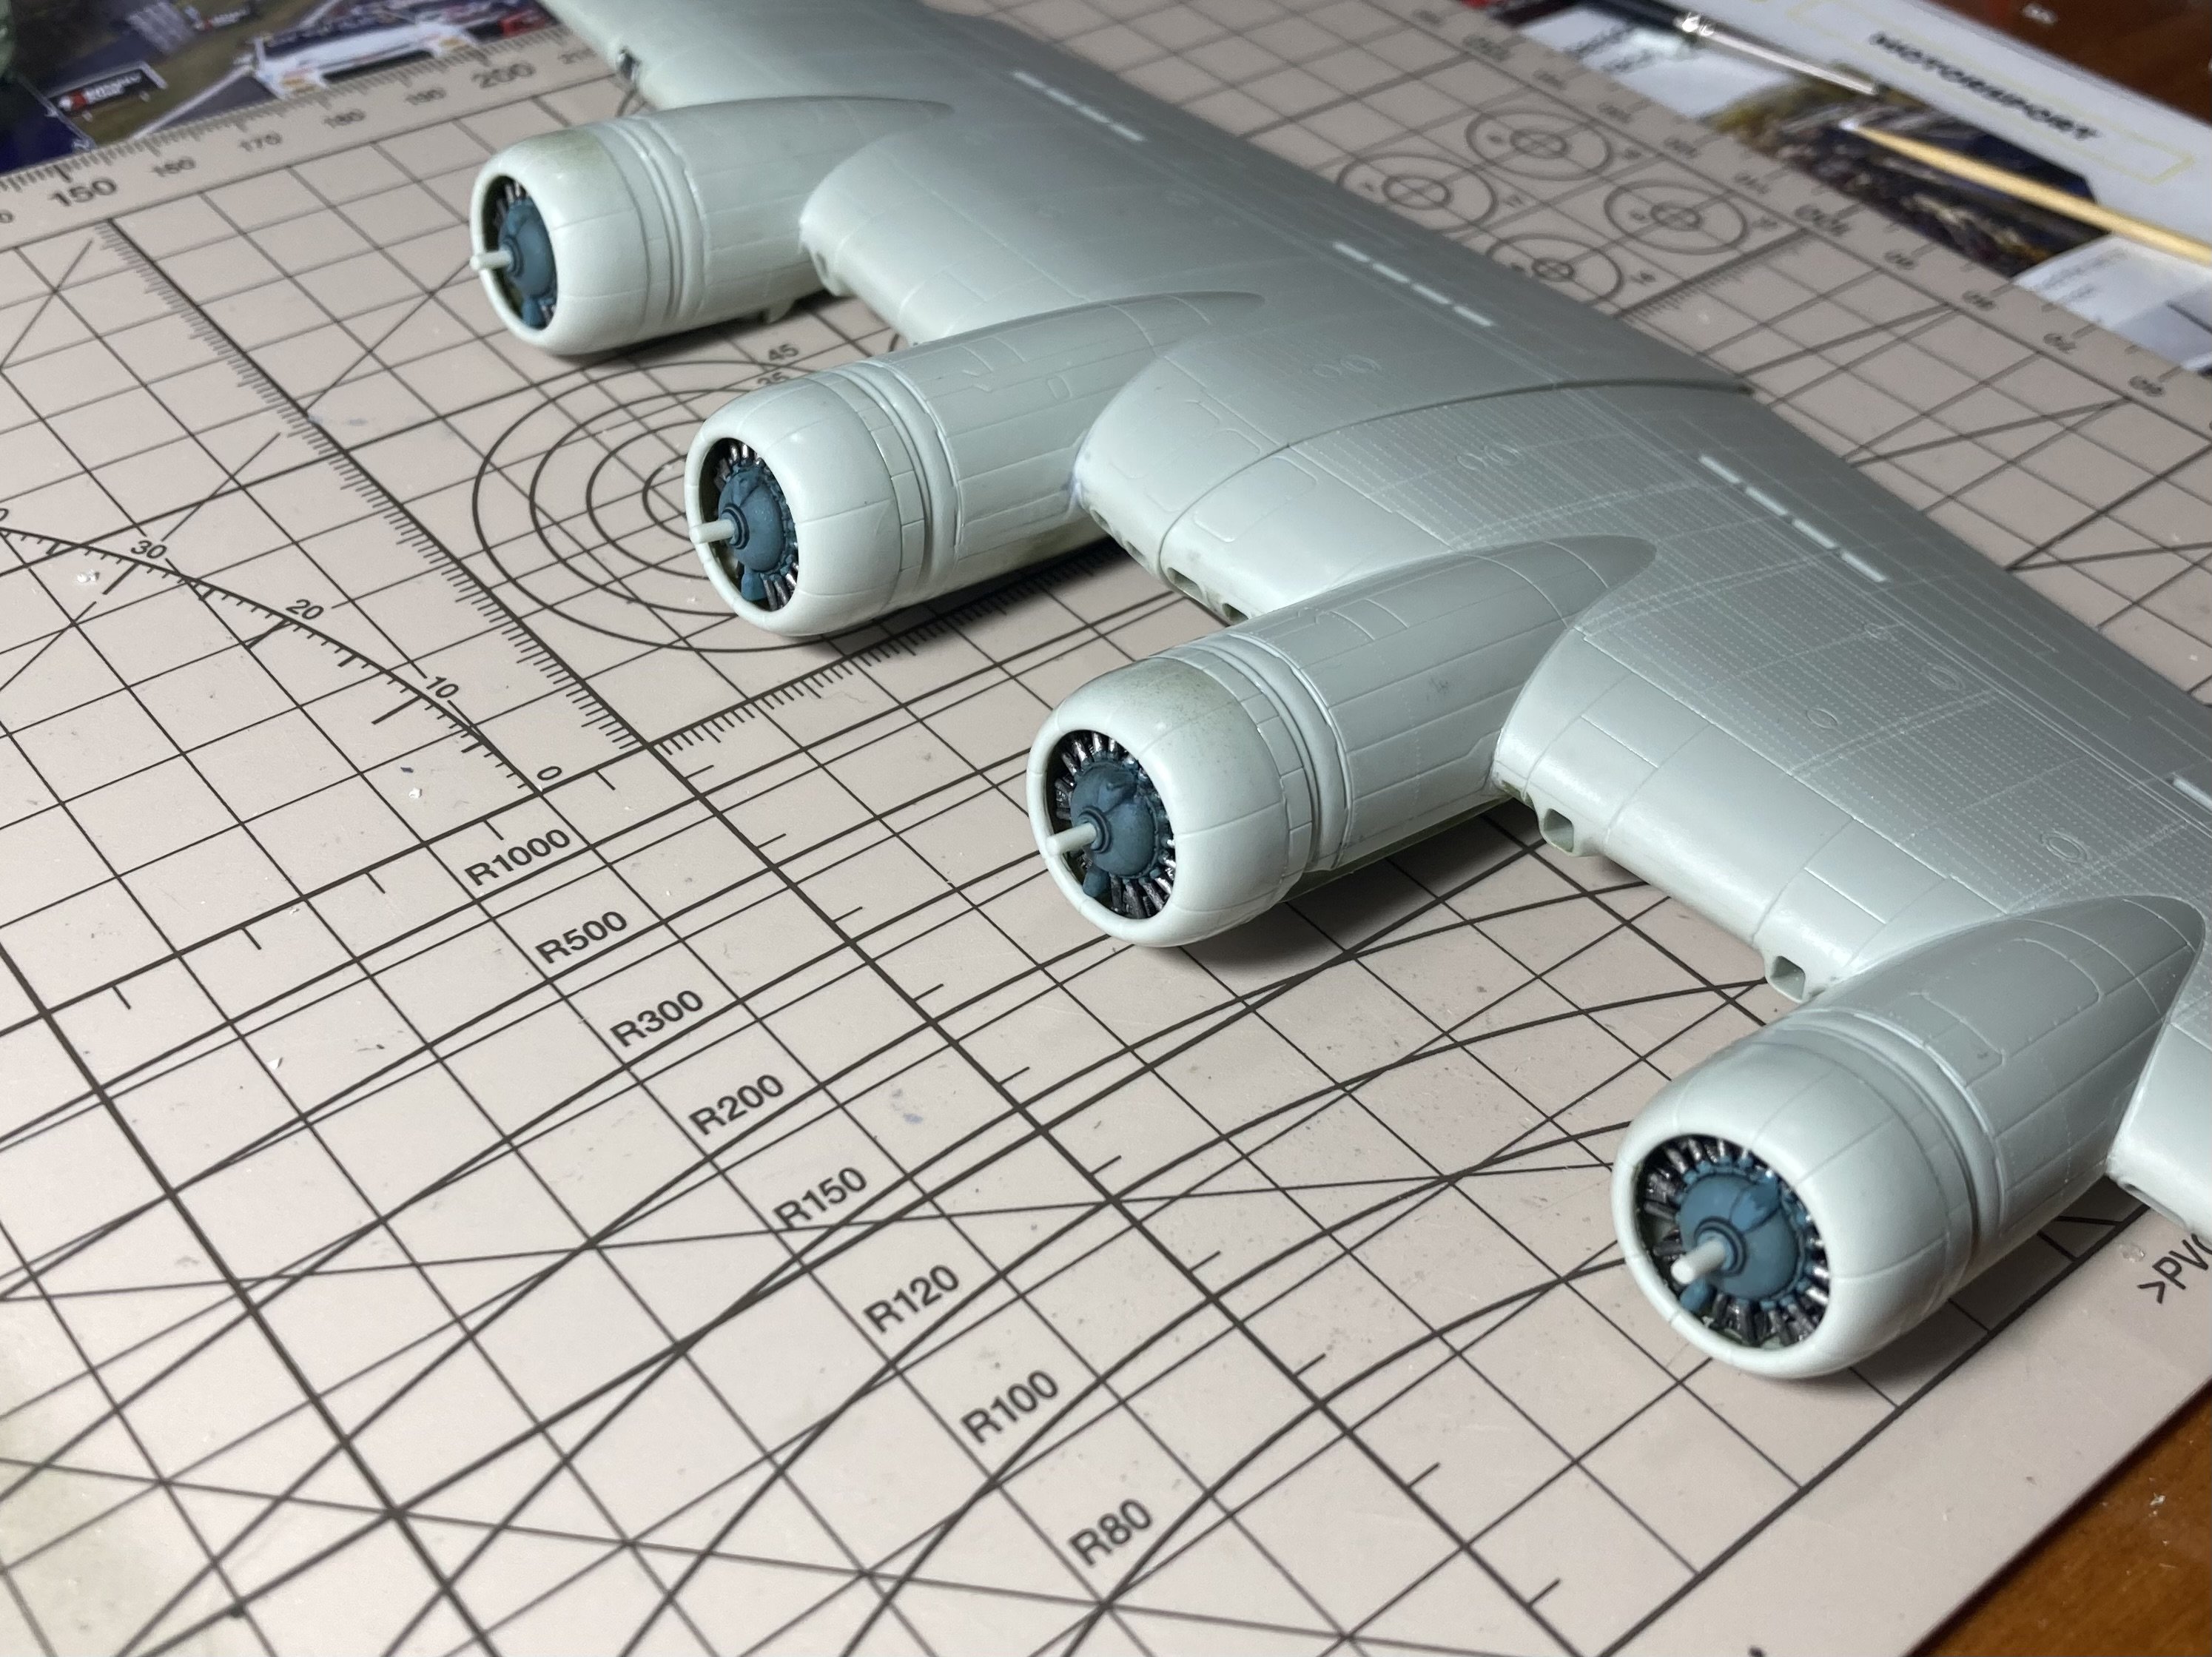
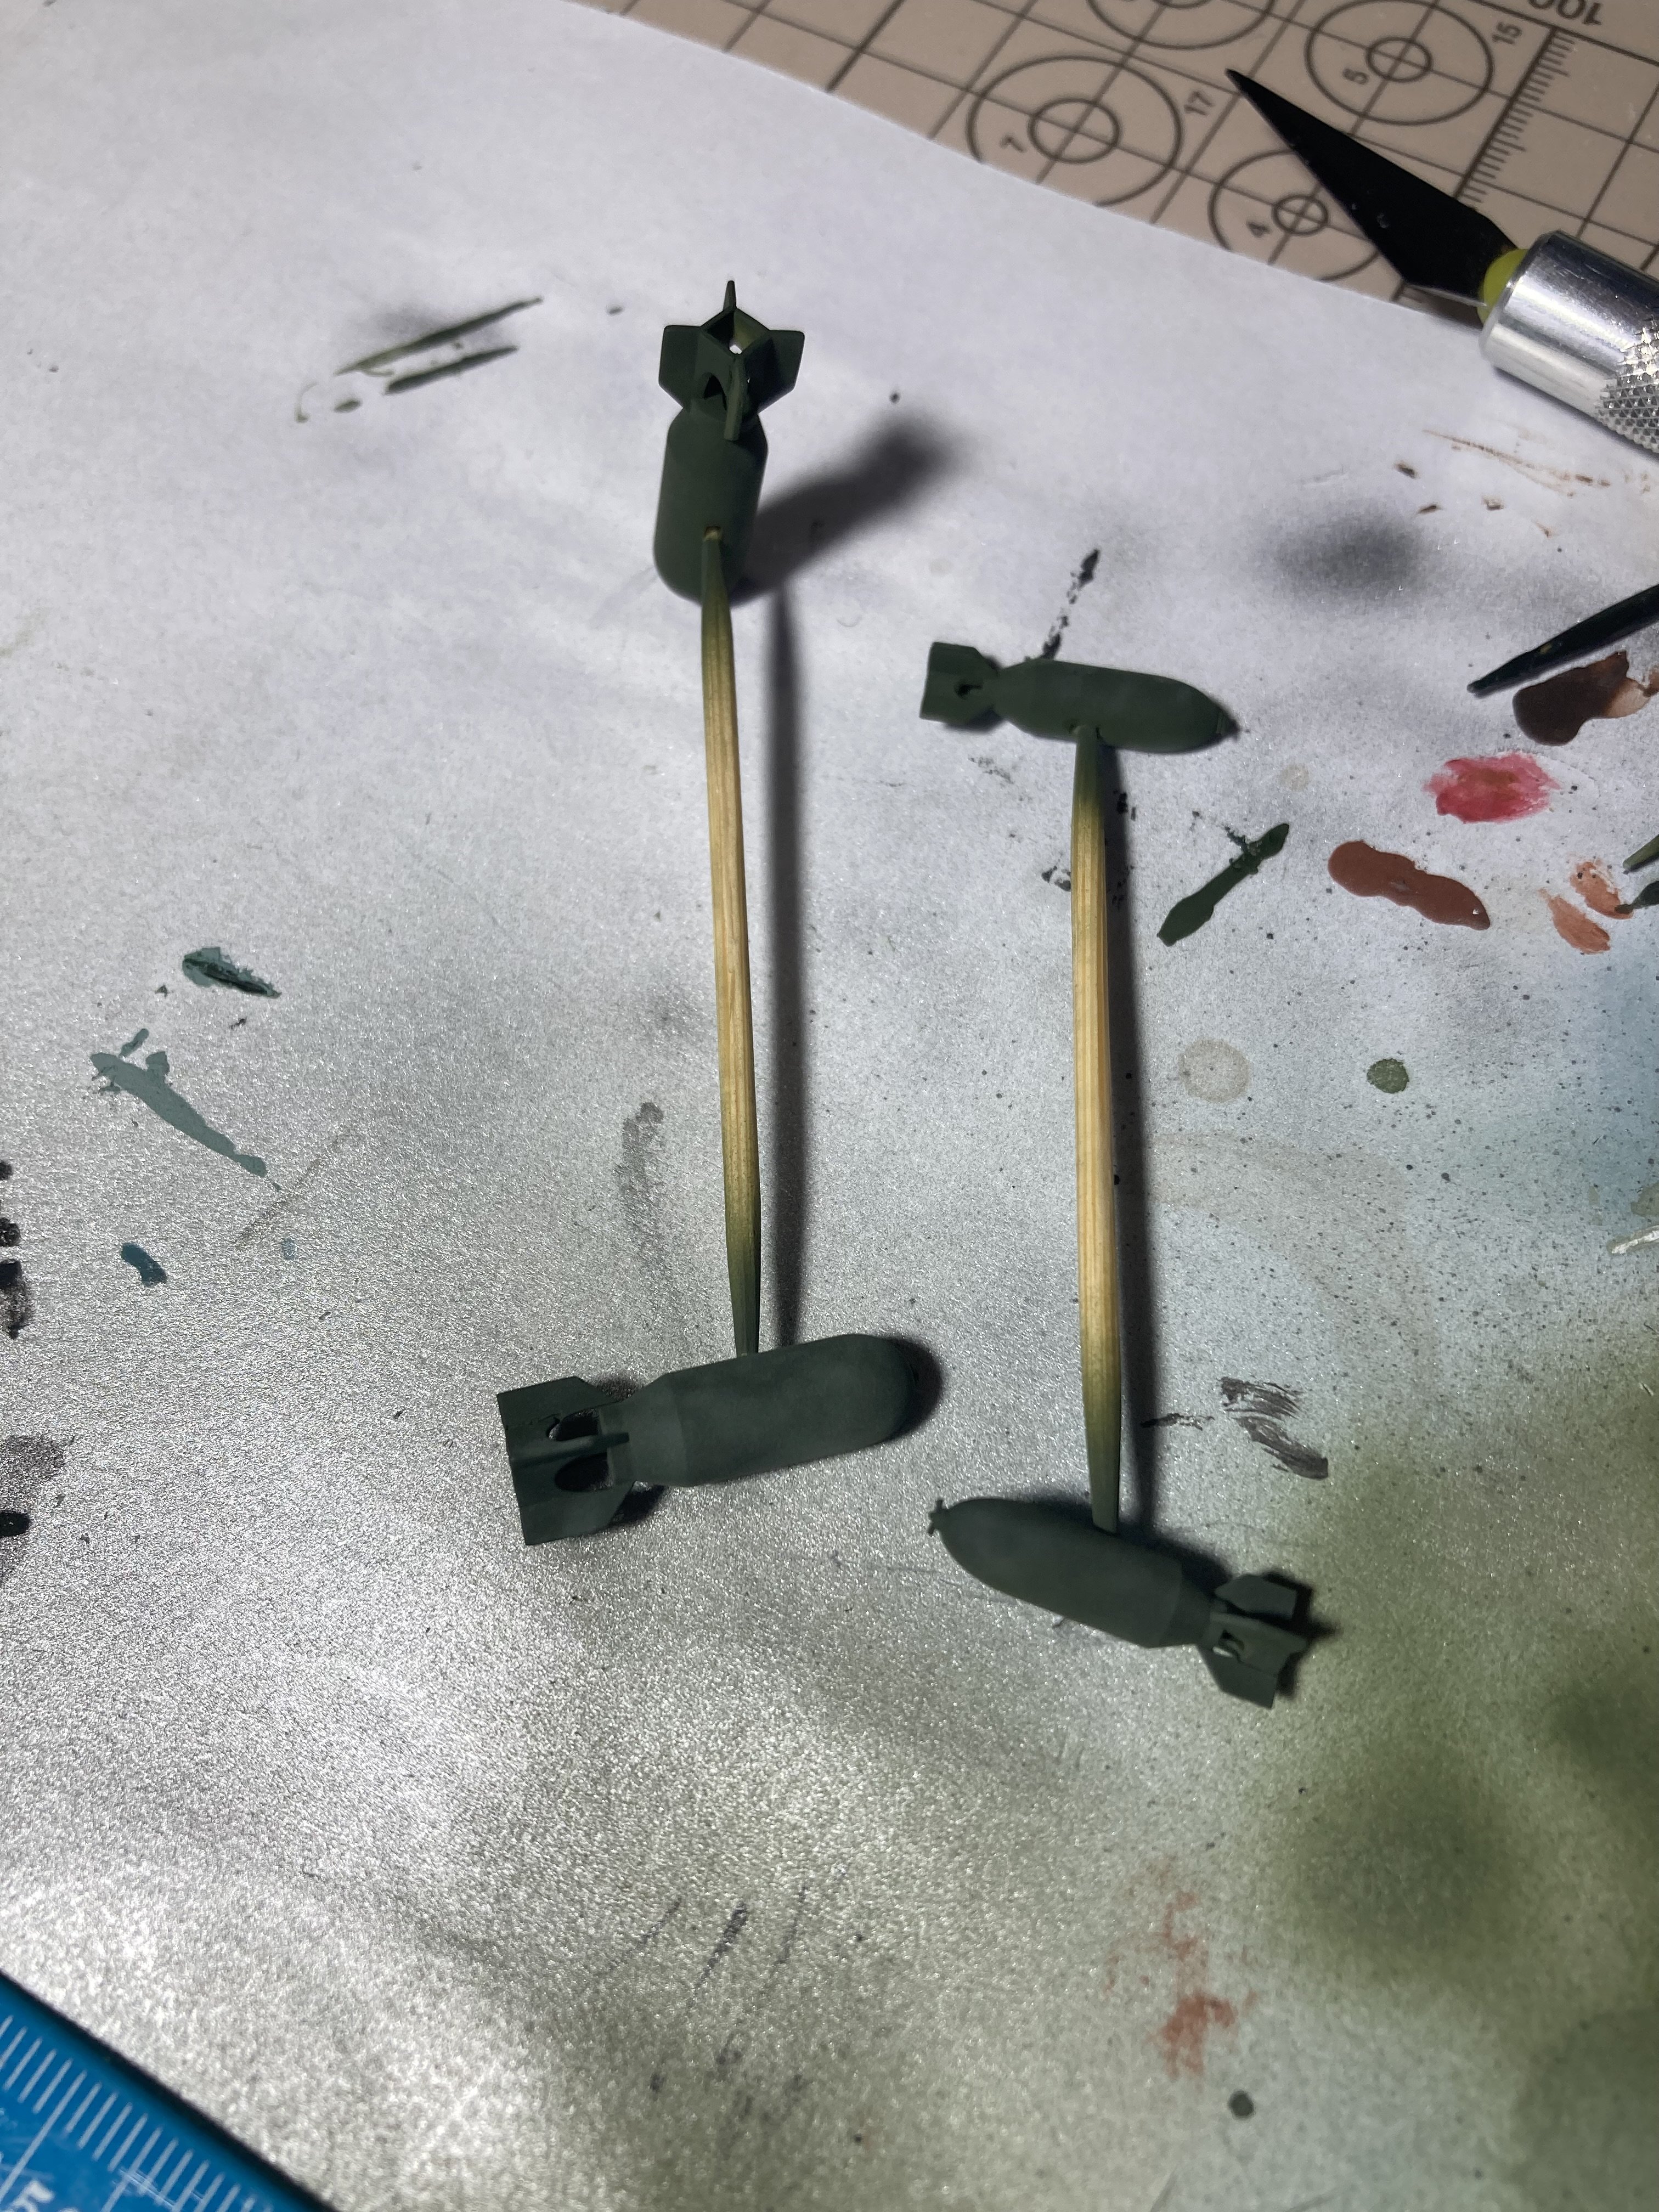
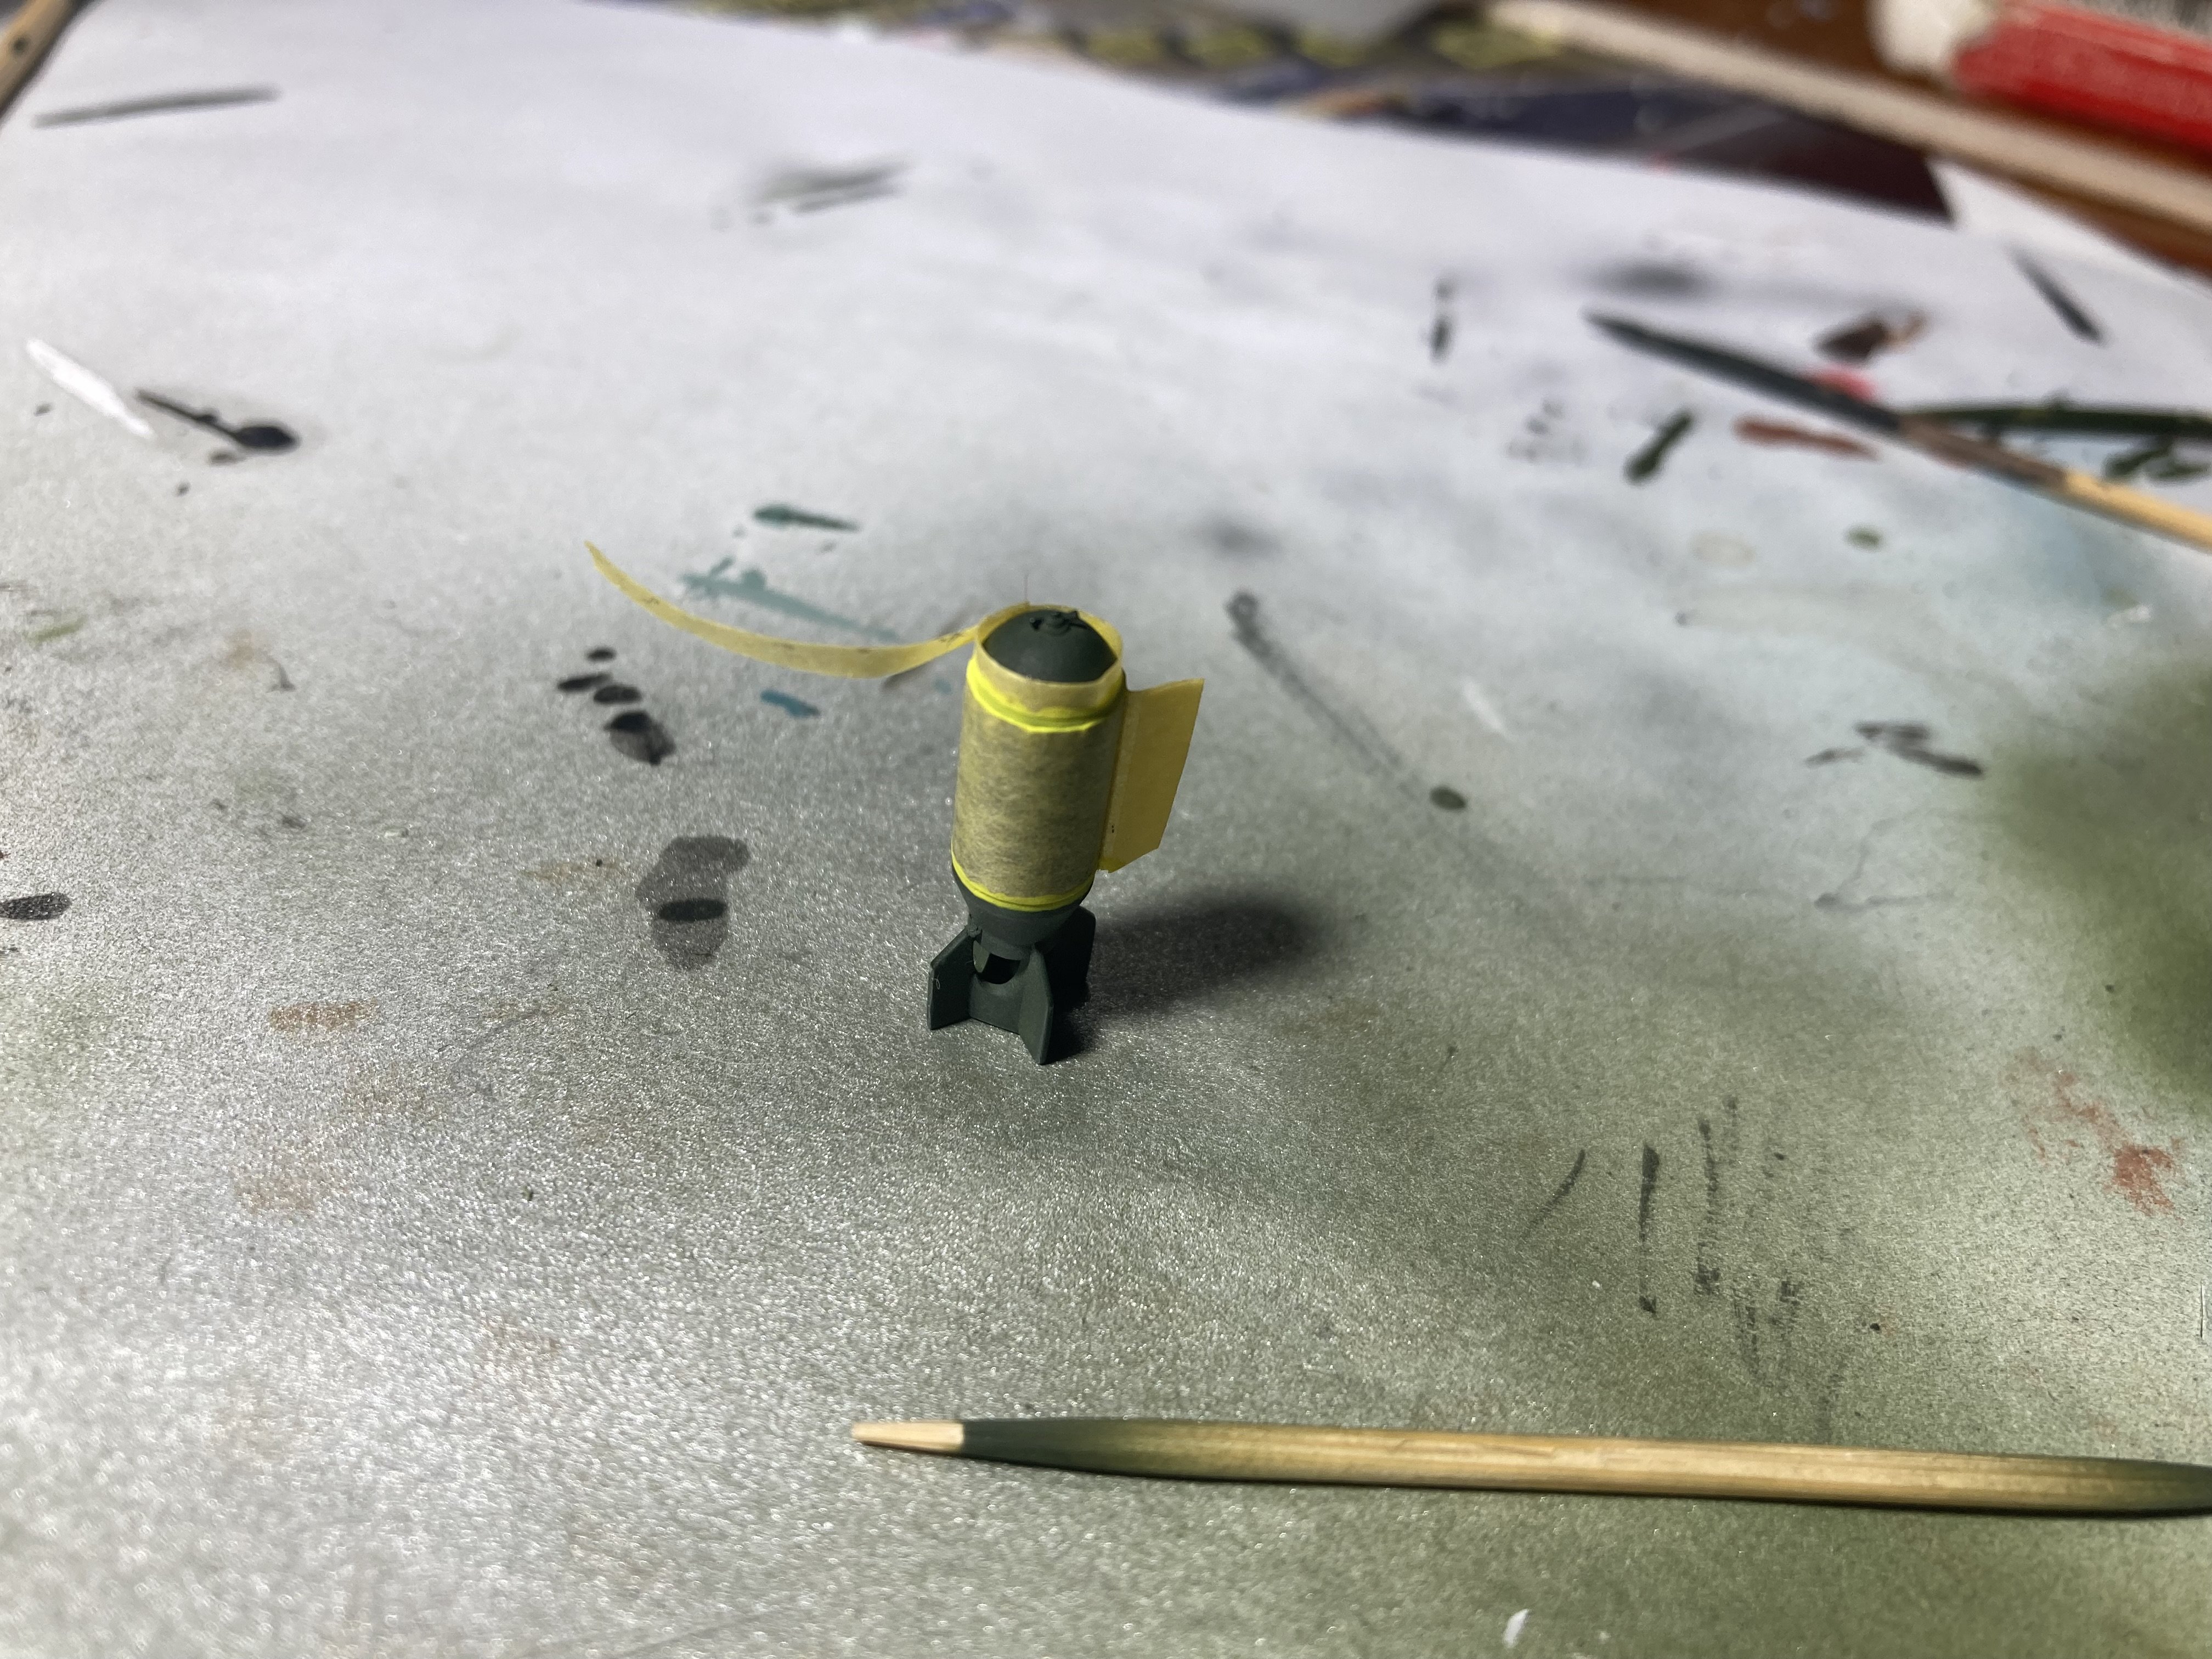
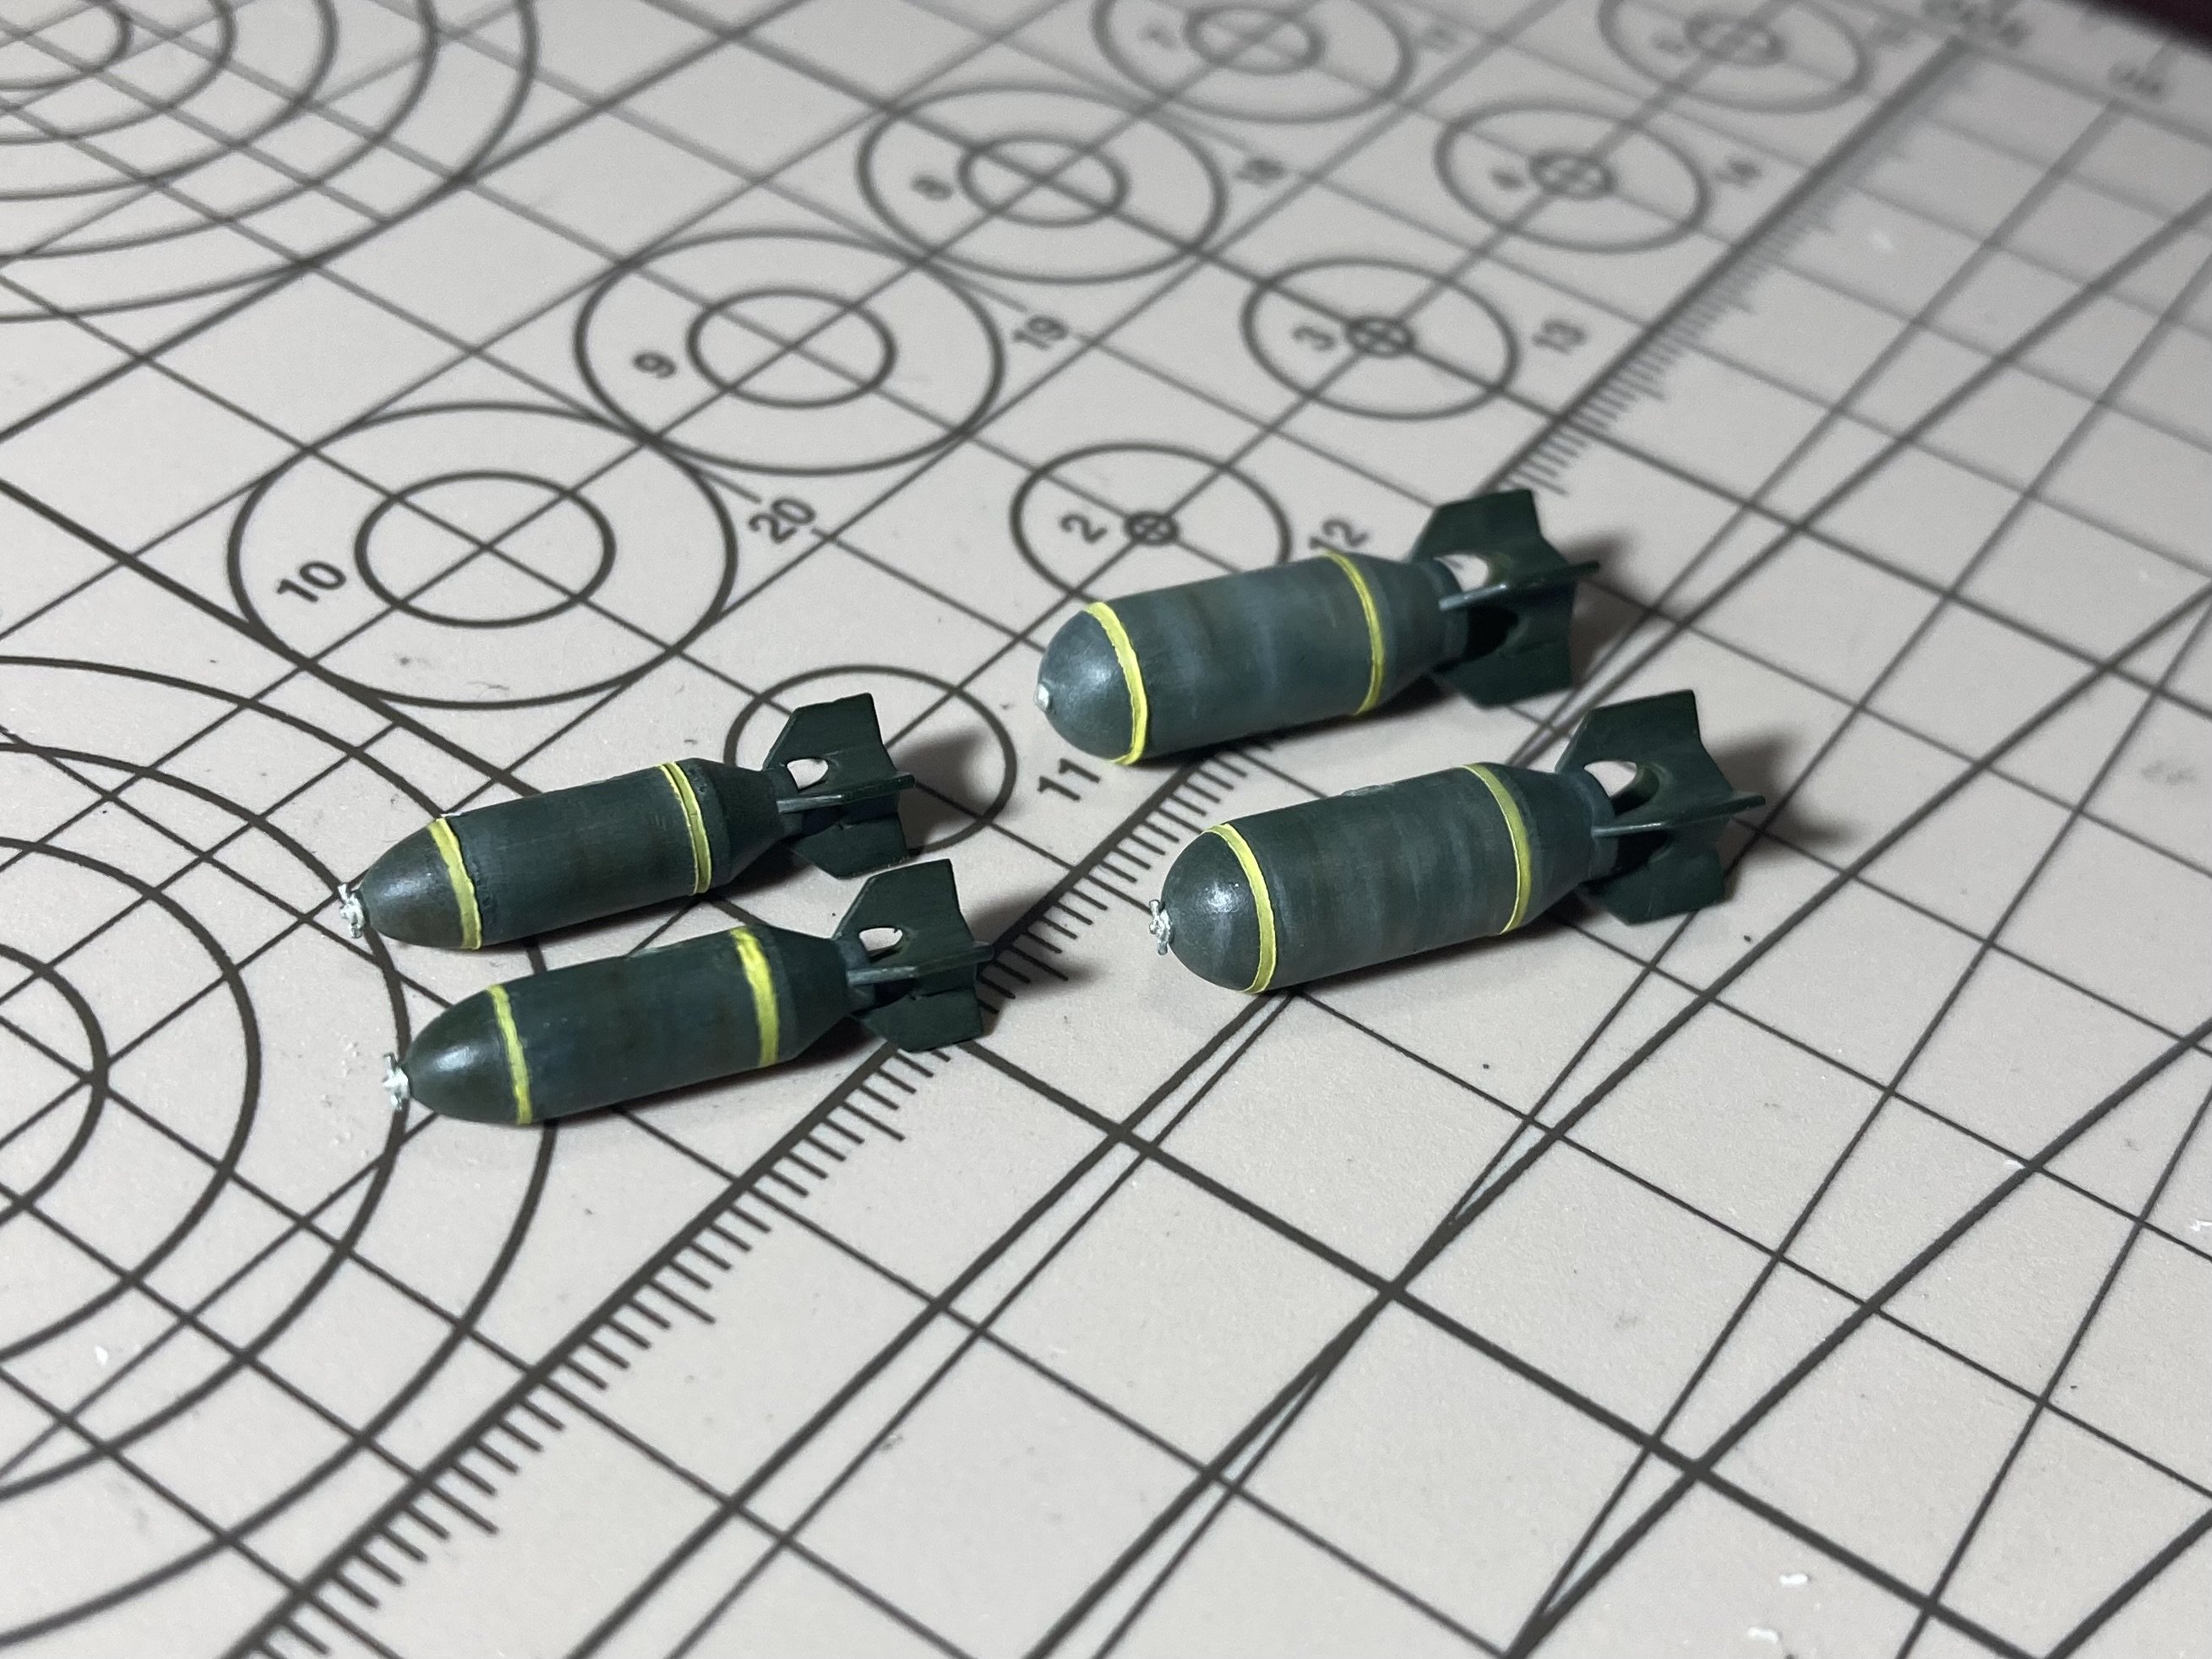
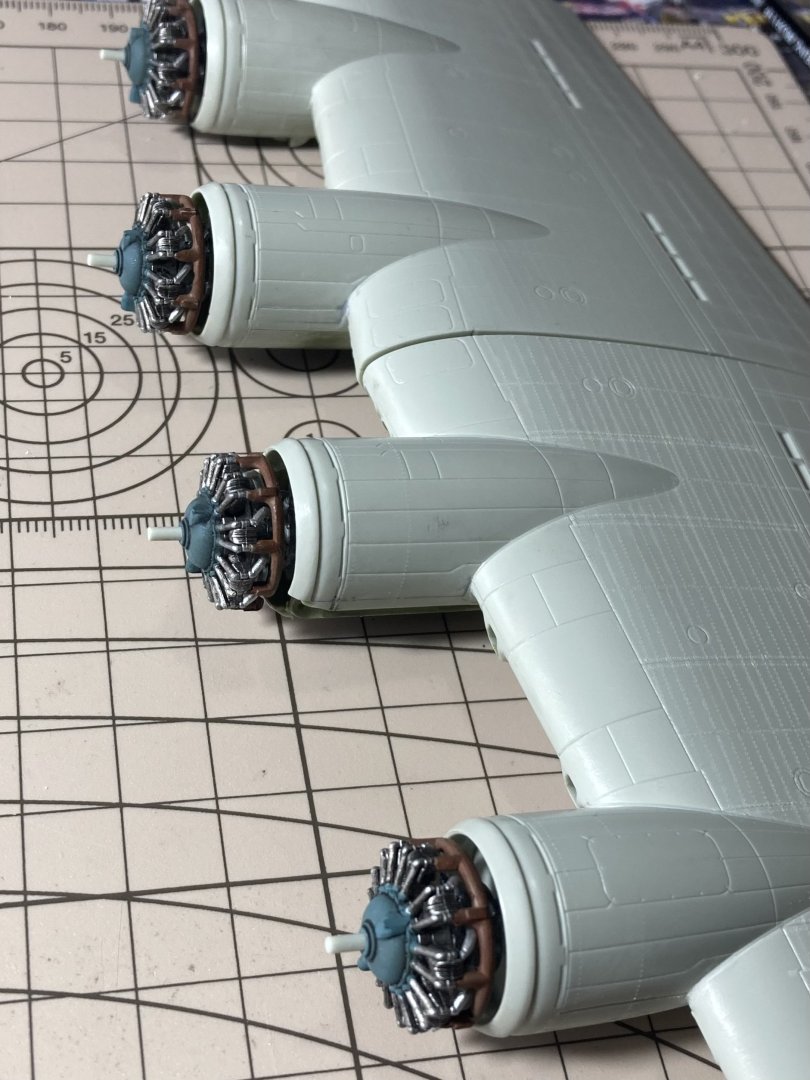
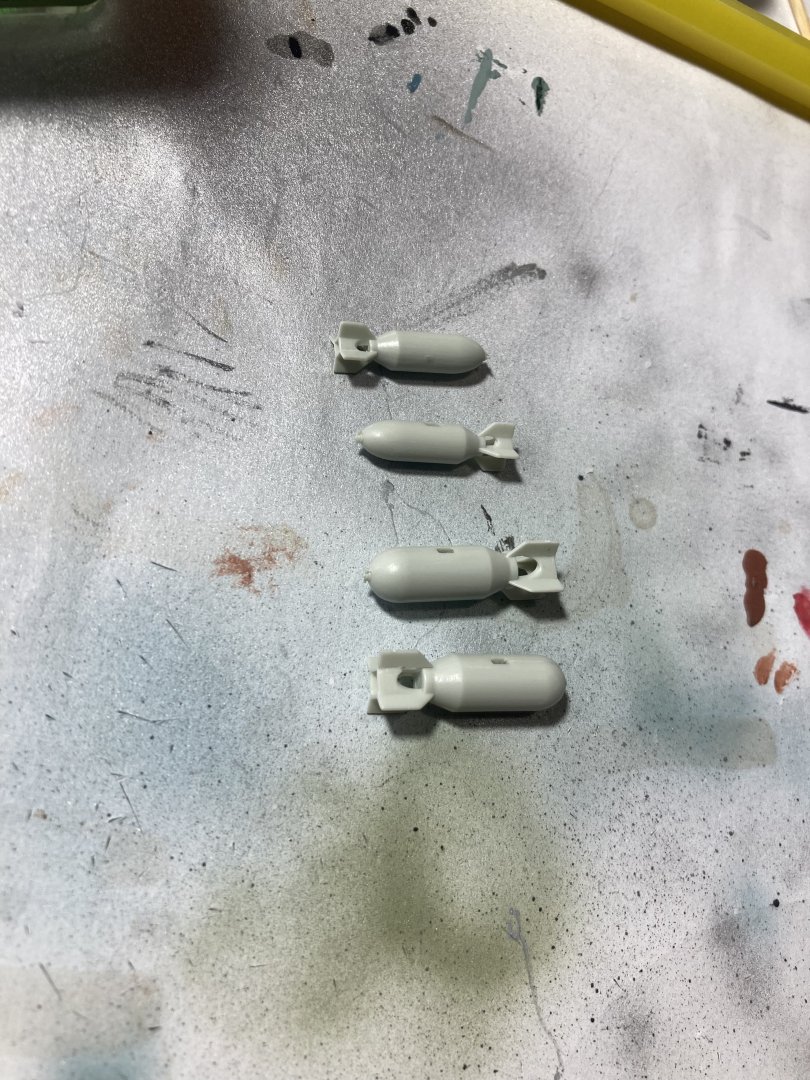
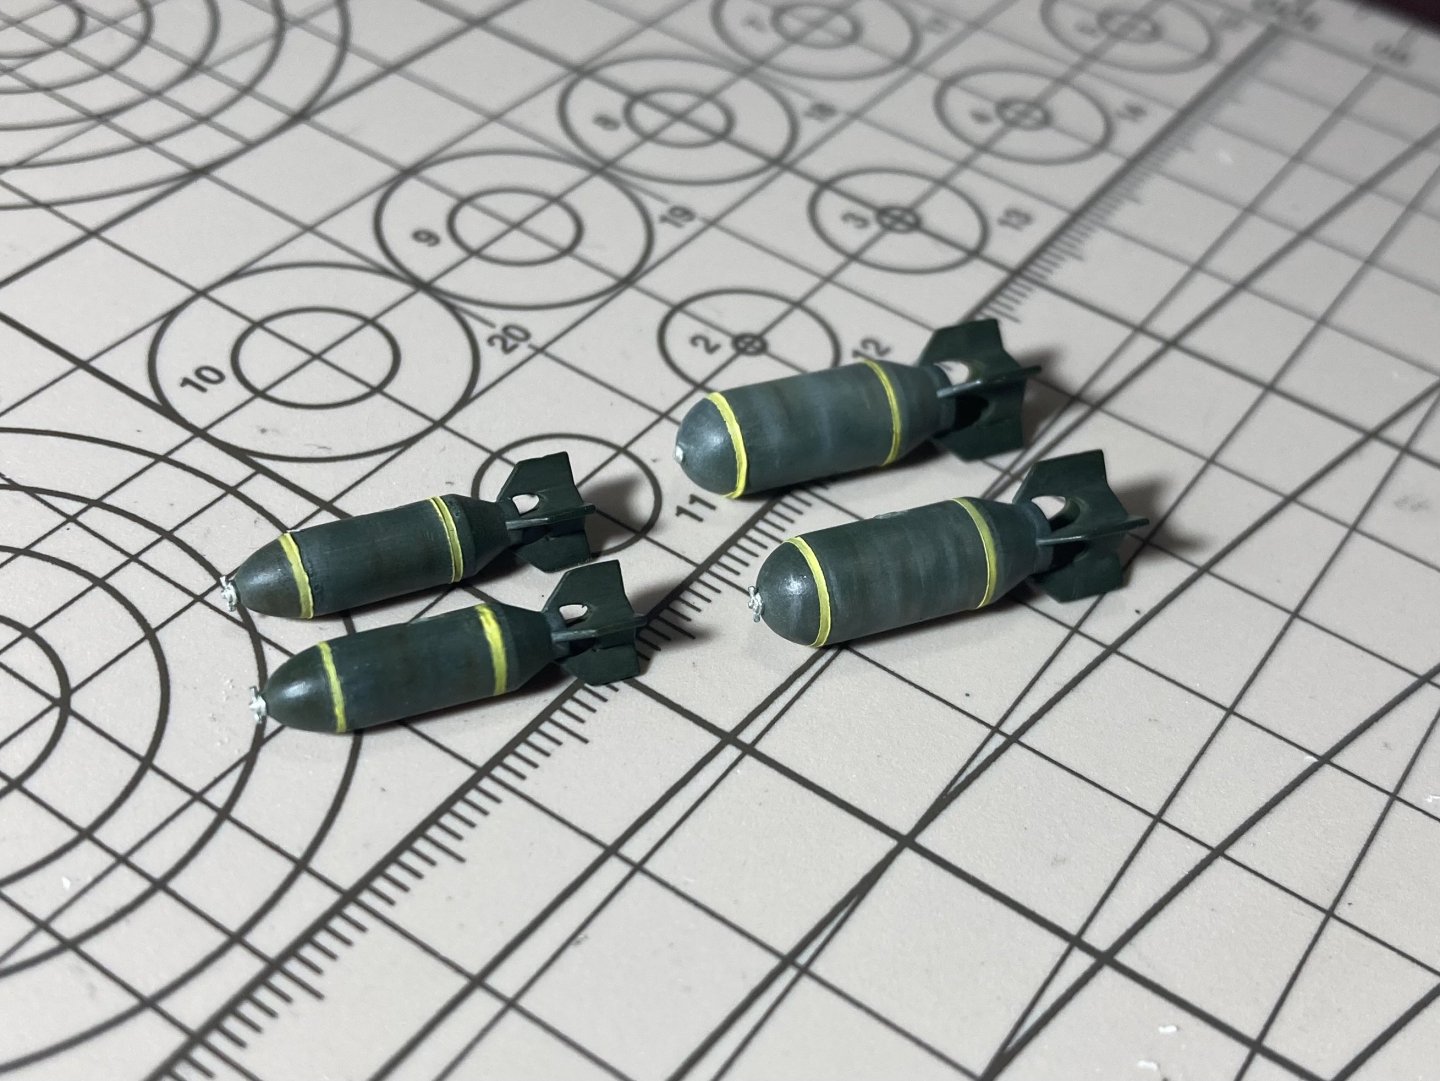
Engines are now attached and I’m liking how they look. Now the engines are covered. At first I wanted to do the cowl flaps open. But they just didn’t look right. So closed them up. Decided to start on the bombs next. luckily there are only 4 in the kit! Making 10 or 20 of these guys would really reduce the fun factor! Painted them in olive green so they are abit different than olive drab. And a few lighter shades in there too. Learnt for HE there were two 1 inch yellow lines, one at the front and one at the back. Masking on a curved surface was interesting! But decided to cut the mask to fit between the two lines at the required width then I just had to mask each end with a thin piece of mask and hope for the best! Let them dry over night and then did some weathering to liven them up abit. Left the tail fairly clean, and they will do. Now I really have no choice but to begin on the internals! Let’s hope the Eduard aftermarket PE internals arrives this coming week and on Monday I’ll go get some more paints so I can mix together some green zinc chromite


- 77 replies
-
- 10
-