DonInAZ
-
Posts
138 -
Joined
-
Last visited
Content Type
Profiles
Forums
Gallery
Events
Everything posted by DonInAZ
-
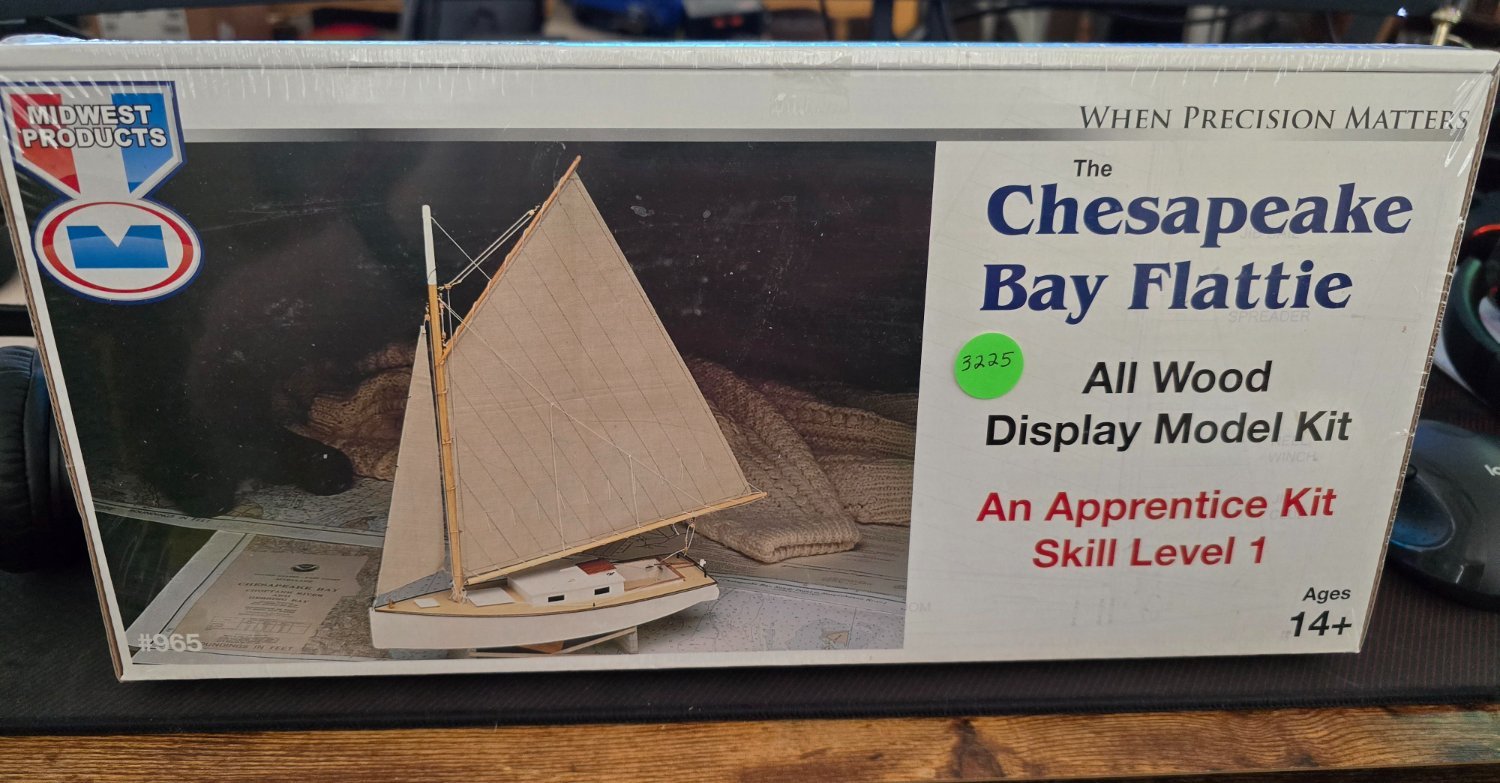
 Well I'm finally getting around to doing another wood ship (boat in this case...lol!) model. I finished my Chesapeake Bay Crabbing Skiff some time ago and as I have stated in other posts, my intention was to work through some of these small Midwest kits as a starting point to obtain the skills necessary to tackle larger modeling projects in the future. So for my second model, I've selected another Skill Level 1 kit. The Chesapeake Bay Flattie. This one will have slightly more rigging and an additional sail from the crabbing skiff. It is my sincere hope that this build will not take anywhere near the 5 years that my first build took. Hopefully with a dedicated model building room and fewer interruptions, this build will be "smooth sailing"! As always, I'm sure I will have many questions and I look forward to engaging the tremendous pool of talented builders on this forum once again. OK, first up is a parts inventory. Stay tunded for that!
-
I used to get lines to hold their shape (like when coiling the lines on the deck).
- 120 replies
-
- 1
-

-
- crabbing skiff
- Chesapeake Bay crabbing skiff
- (and 3 more)
-
Thank you. It was my intention to hide that joint inside the hole. It must have worked it's way out while I was working on the other bits. I'll get that corrected before she goes on display. I upload most of my pics straight from my phone and often times, I miss little issues like that until I see my post on an actual monitor. That dog hair that showed up on one of the pics in my rigging posts was another example of that.
- 120 replies
-
- 2
-
-
- crabbing skiff
- Chesapeake Bay crabbing skiff
- (and 3 more)
-
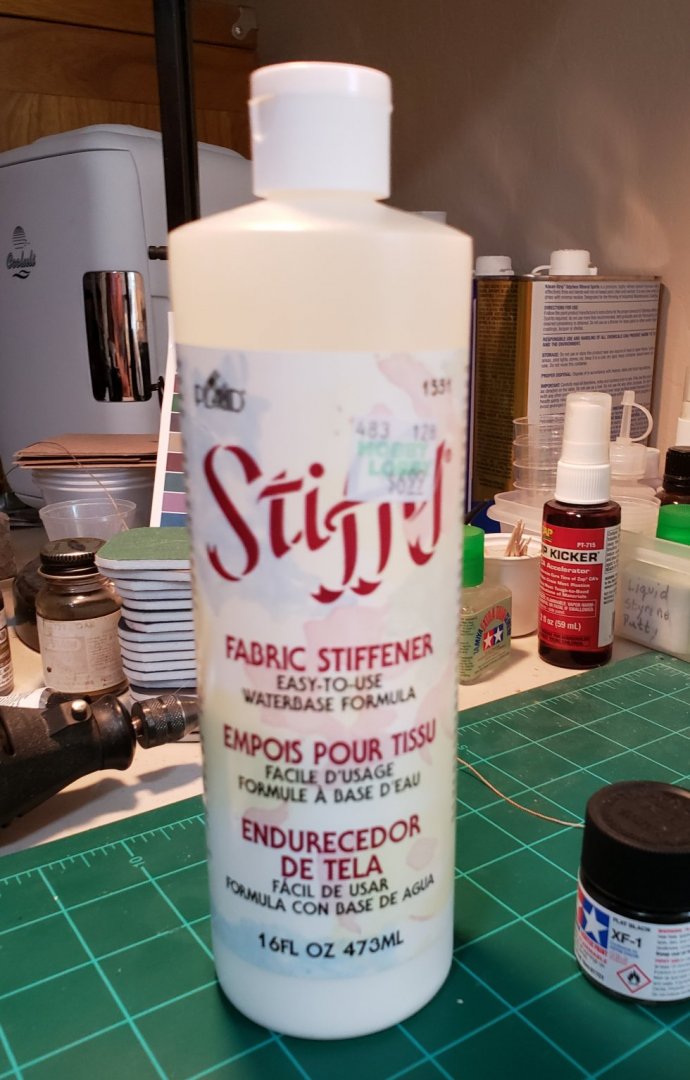
Yes indeed. I found it invaluable for applying the scenic cement and fabric stiffener (both are on the watery side) to the various lines.
- 120 replies
-
- 2
-
-
- crabbing skiff
- Chesapeake Bay crabbing skiff
- (and 3 more)
-
On March 18, 2015, I posted my first entry in this build log... Just a few days shy of 5 years later, the project that was supposed to be my basic intro into wood model ship building is finally completed !!! A lot of things happened in my life over the course of this build...some good...some not so good, but I enjoyed every minute I spent working on it. Many times it was a refuge from those life events. I have also immensely enjoyed my interactions with this community of amazing modelers and I want to thank each and every one of you for your advice and support!


- 120 replies
-
- 9
-
-
- crabbing skiff
- Chesapeake Bay crabbing skiff
- (and 3 more)
-
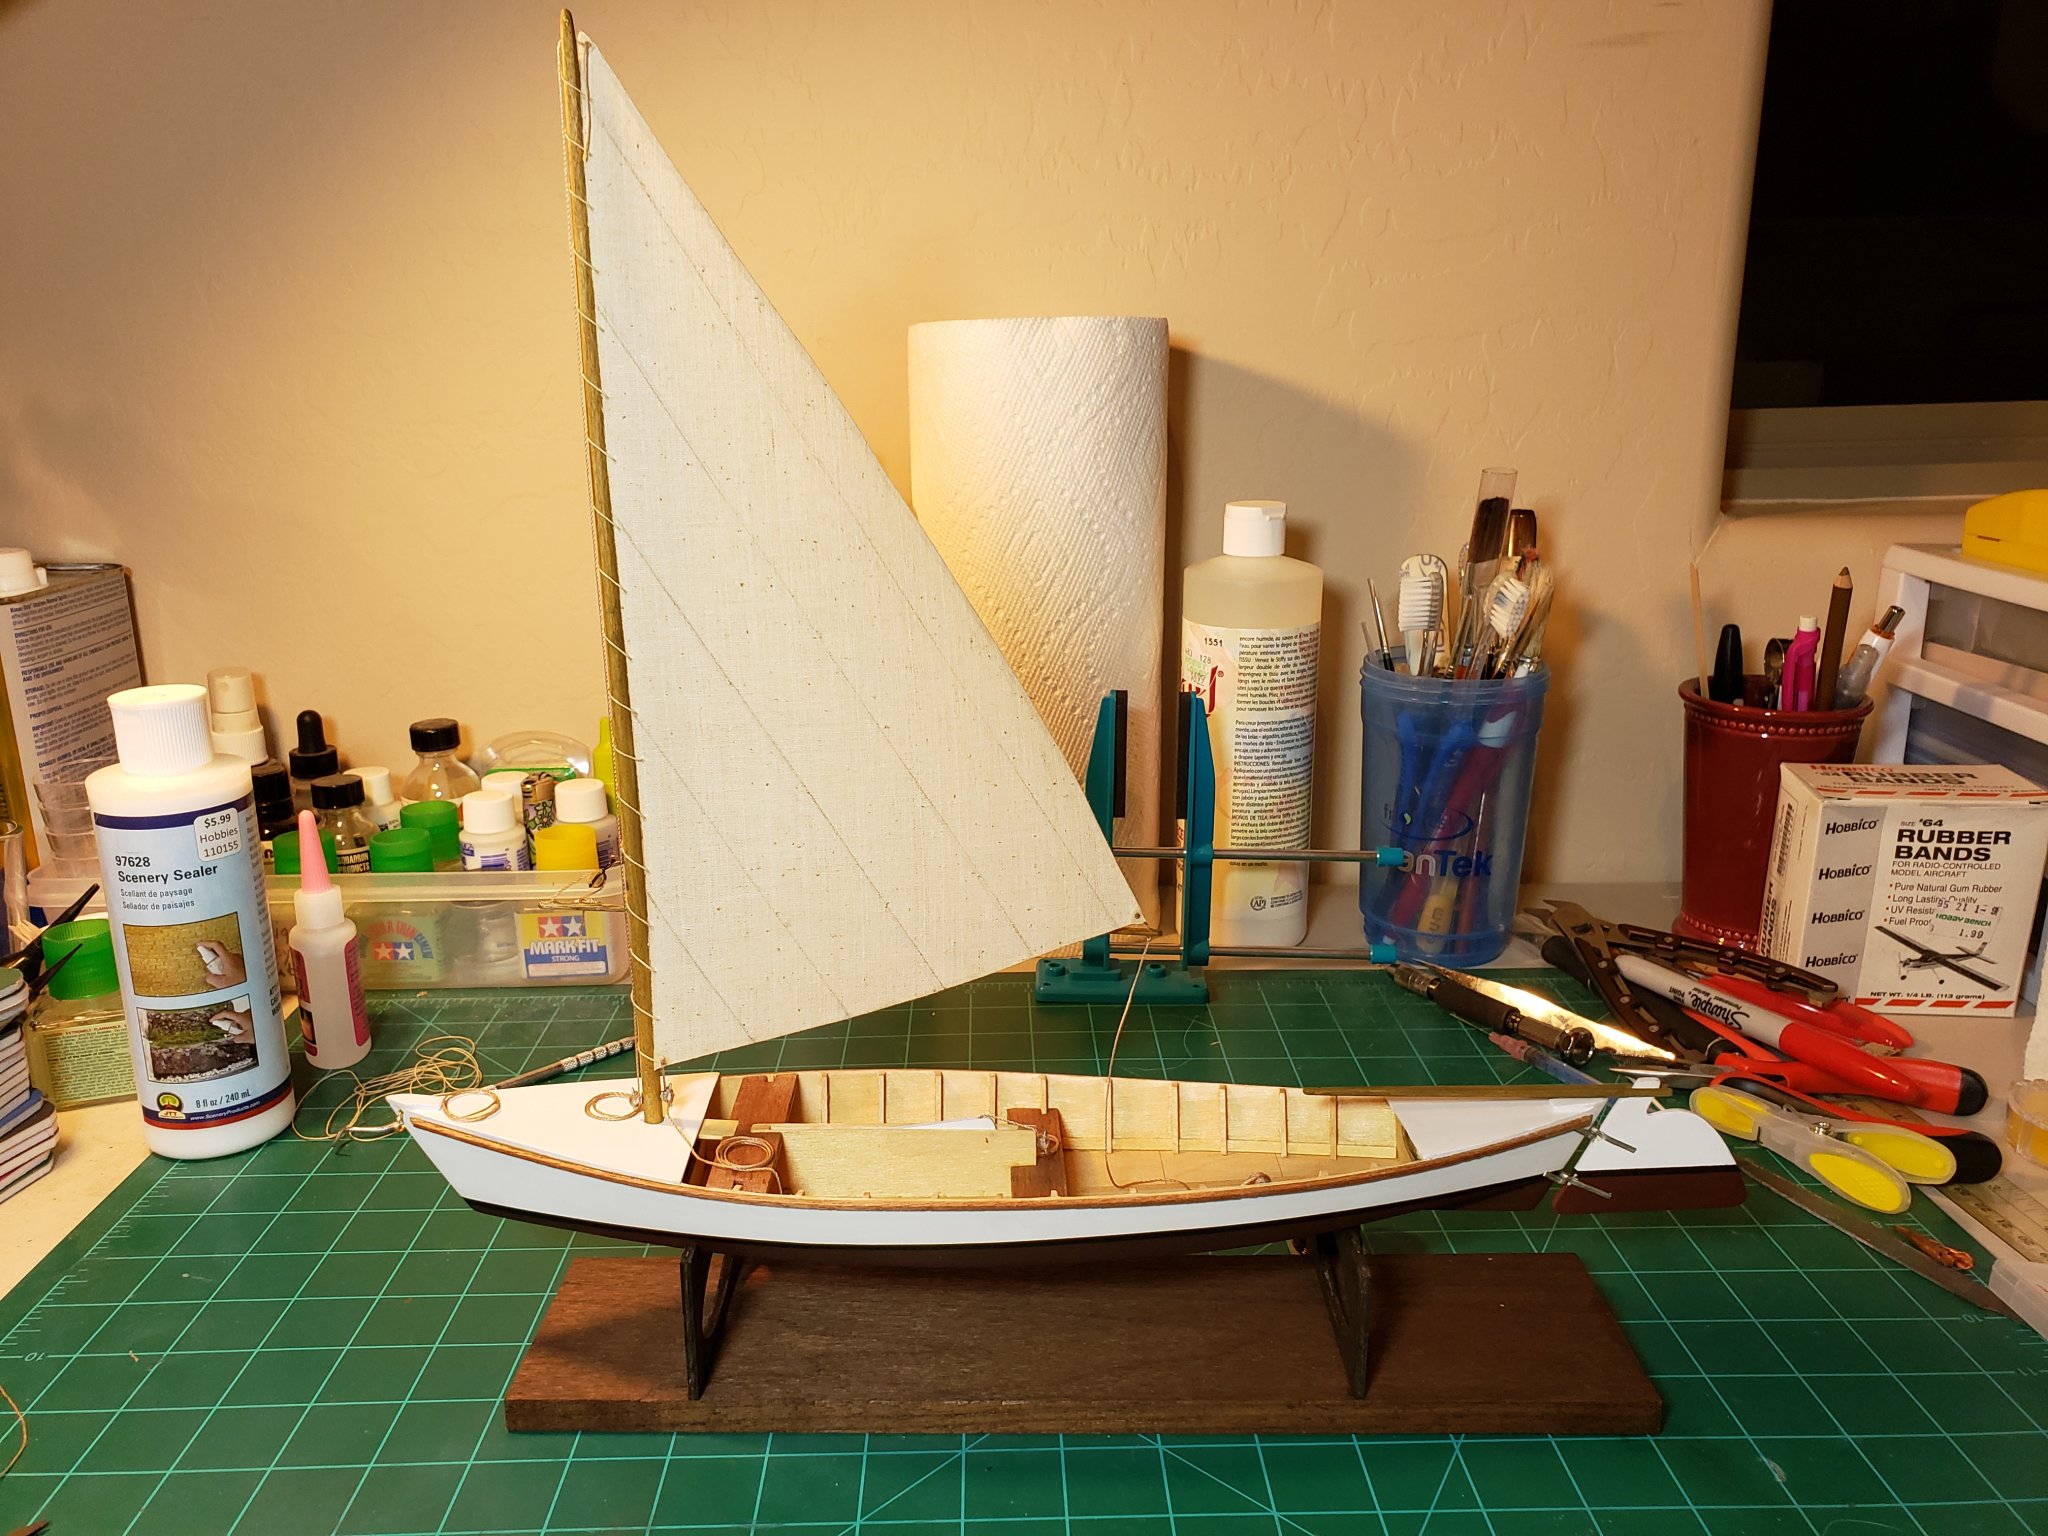
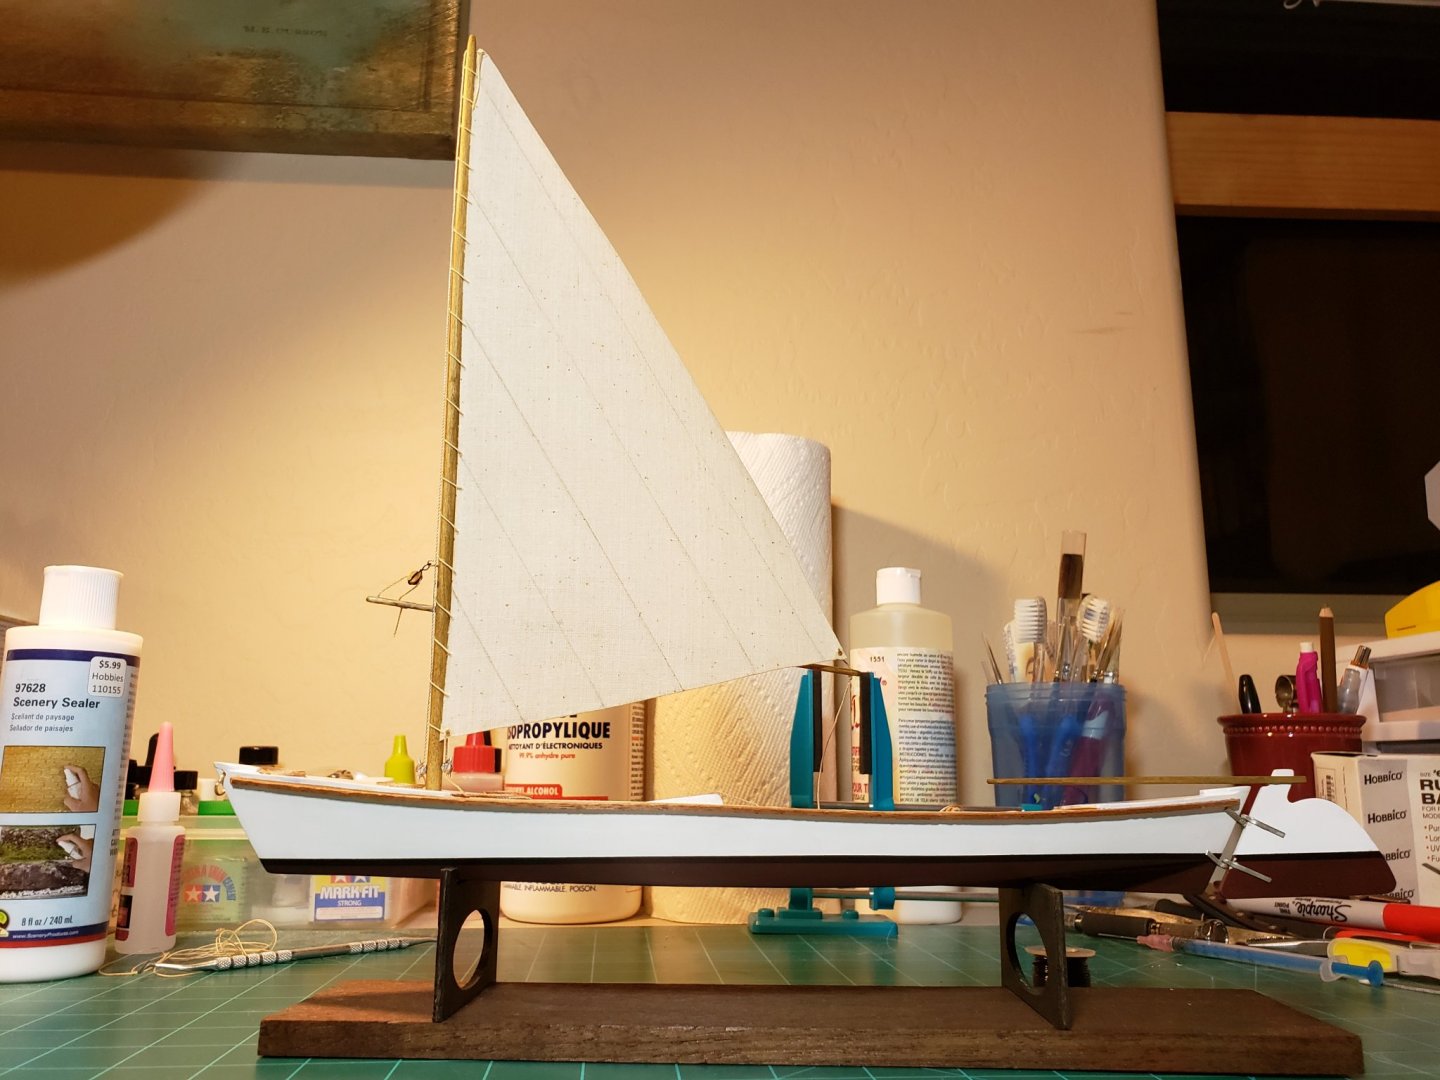
Quick update: So for the last few days I've been working on coiling up the loose lines for the mainsheet, the halyard and the downhaul. I was very surprised at how difficult a task it is to get these lines to look "right" as they are laying on the deck or hanging from a stanchion. I actually ended up removing and re-threading the mainsheet entirely after 1 failed attempt to get to lay down in a way that looked natural. I'm still not 100% satisfied with how it looks but I'm not sure I'm going to try and change it at this point. I think I might have mentioned in a previous post that I suffer from "essential tremor". This makes fine work EXTREMELY difficult and it was particularly frustrating when working with these lines as I'd get something just where I wanted and my tremor would alter or move it before I could let go. Anyway my point is not to make excuses, but wanted to share with those of you following this build why this last (seemingly minor) step is taking me so long. As it stands this morning while writing this, I have only the downhaul line left to set in place so it should not be much longer. Of course I'll post some pics when it's completed.
- 120 replies
-
- 4
-
-
- crabbing skiff
- Chesapeake Bay crabbing skiff
- (and 3 more)
-
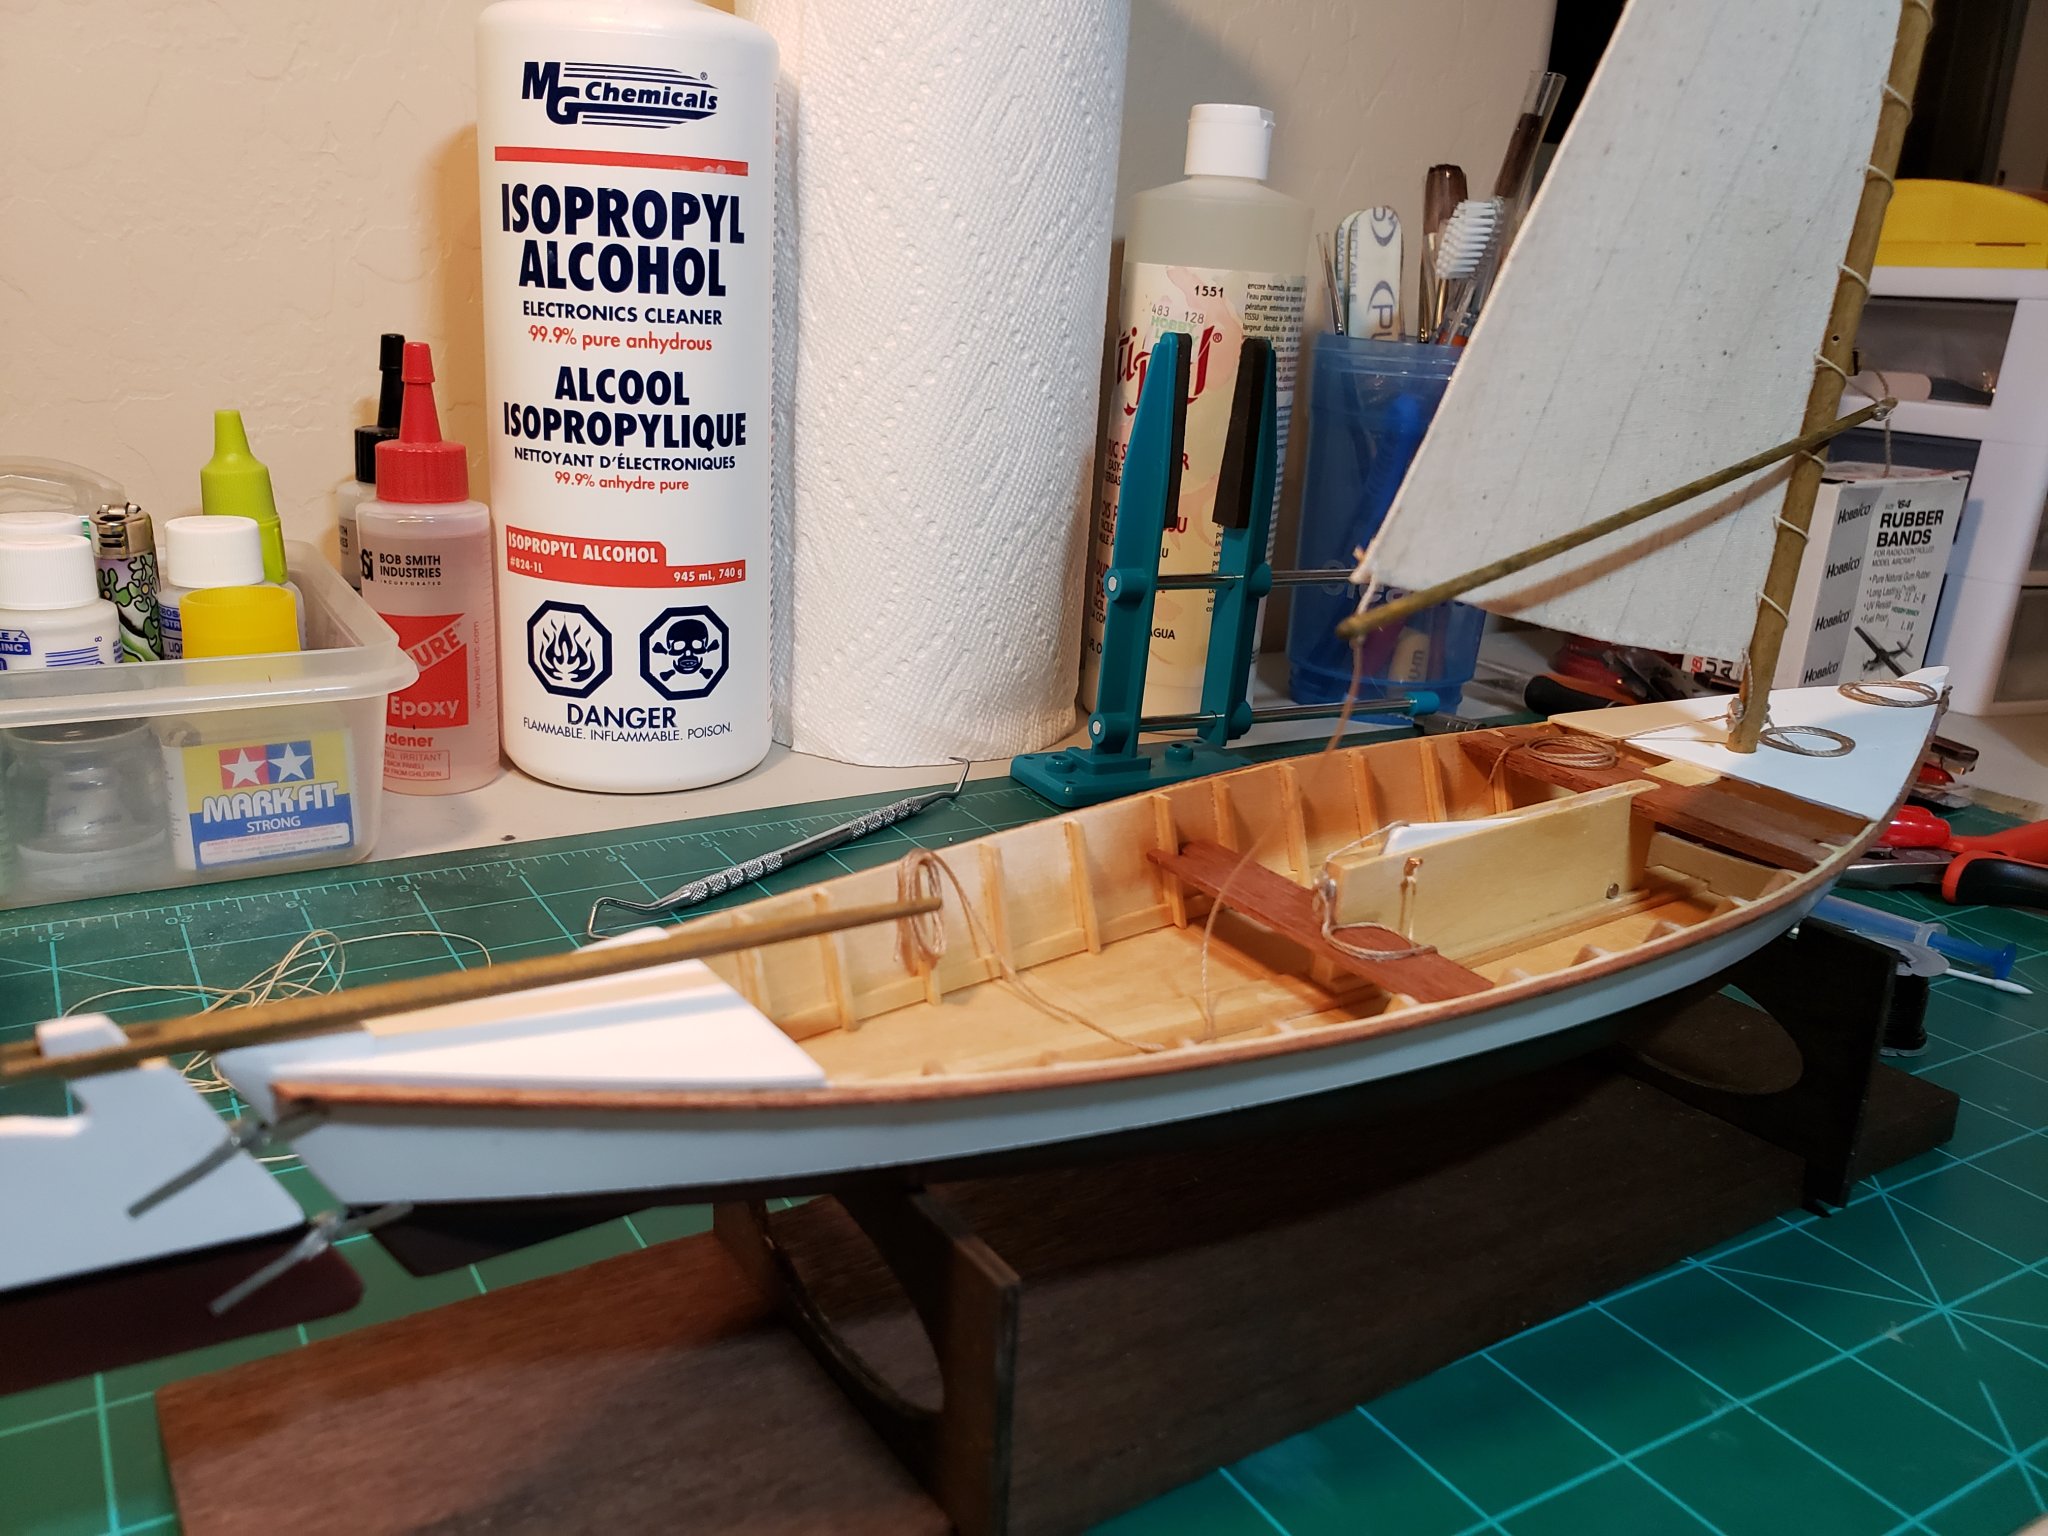
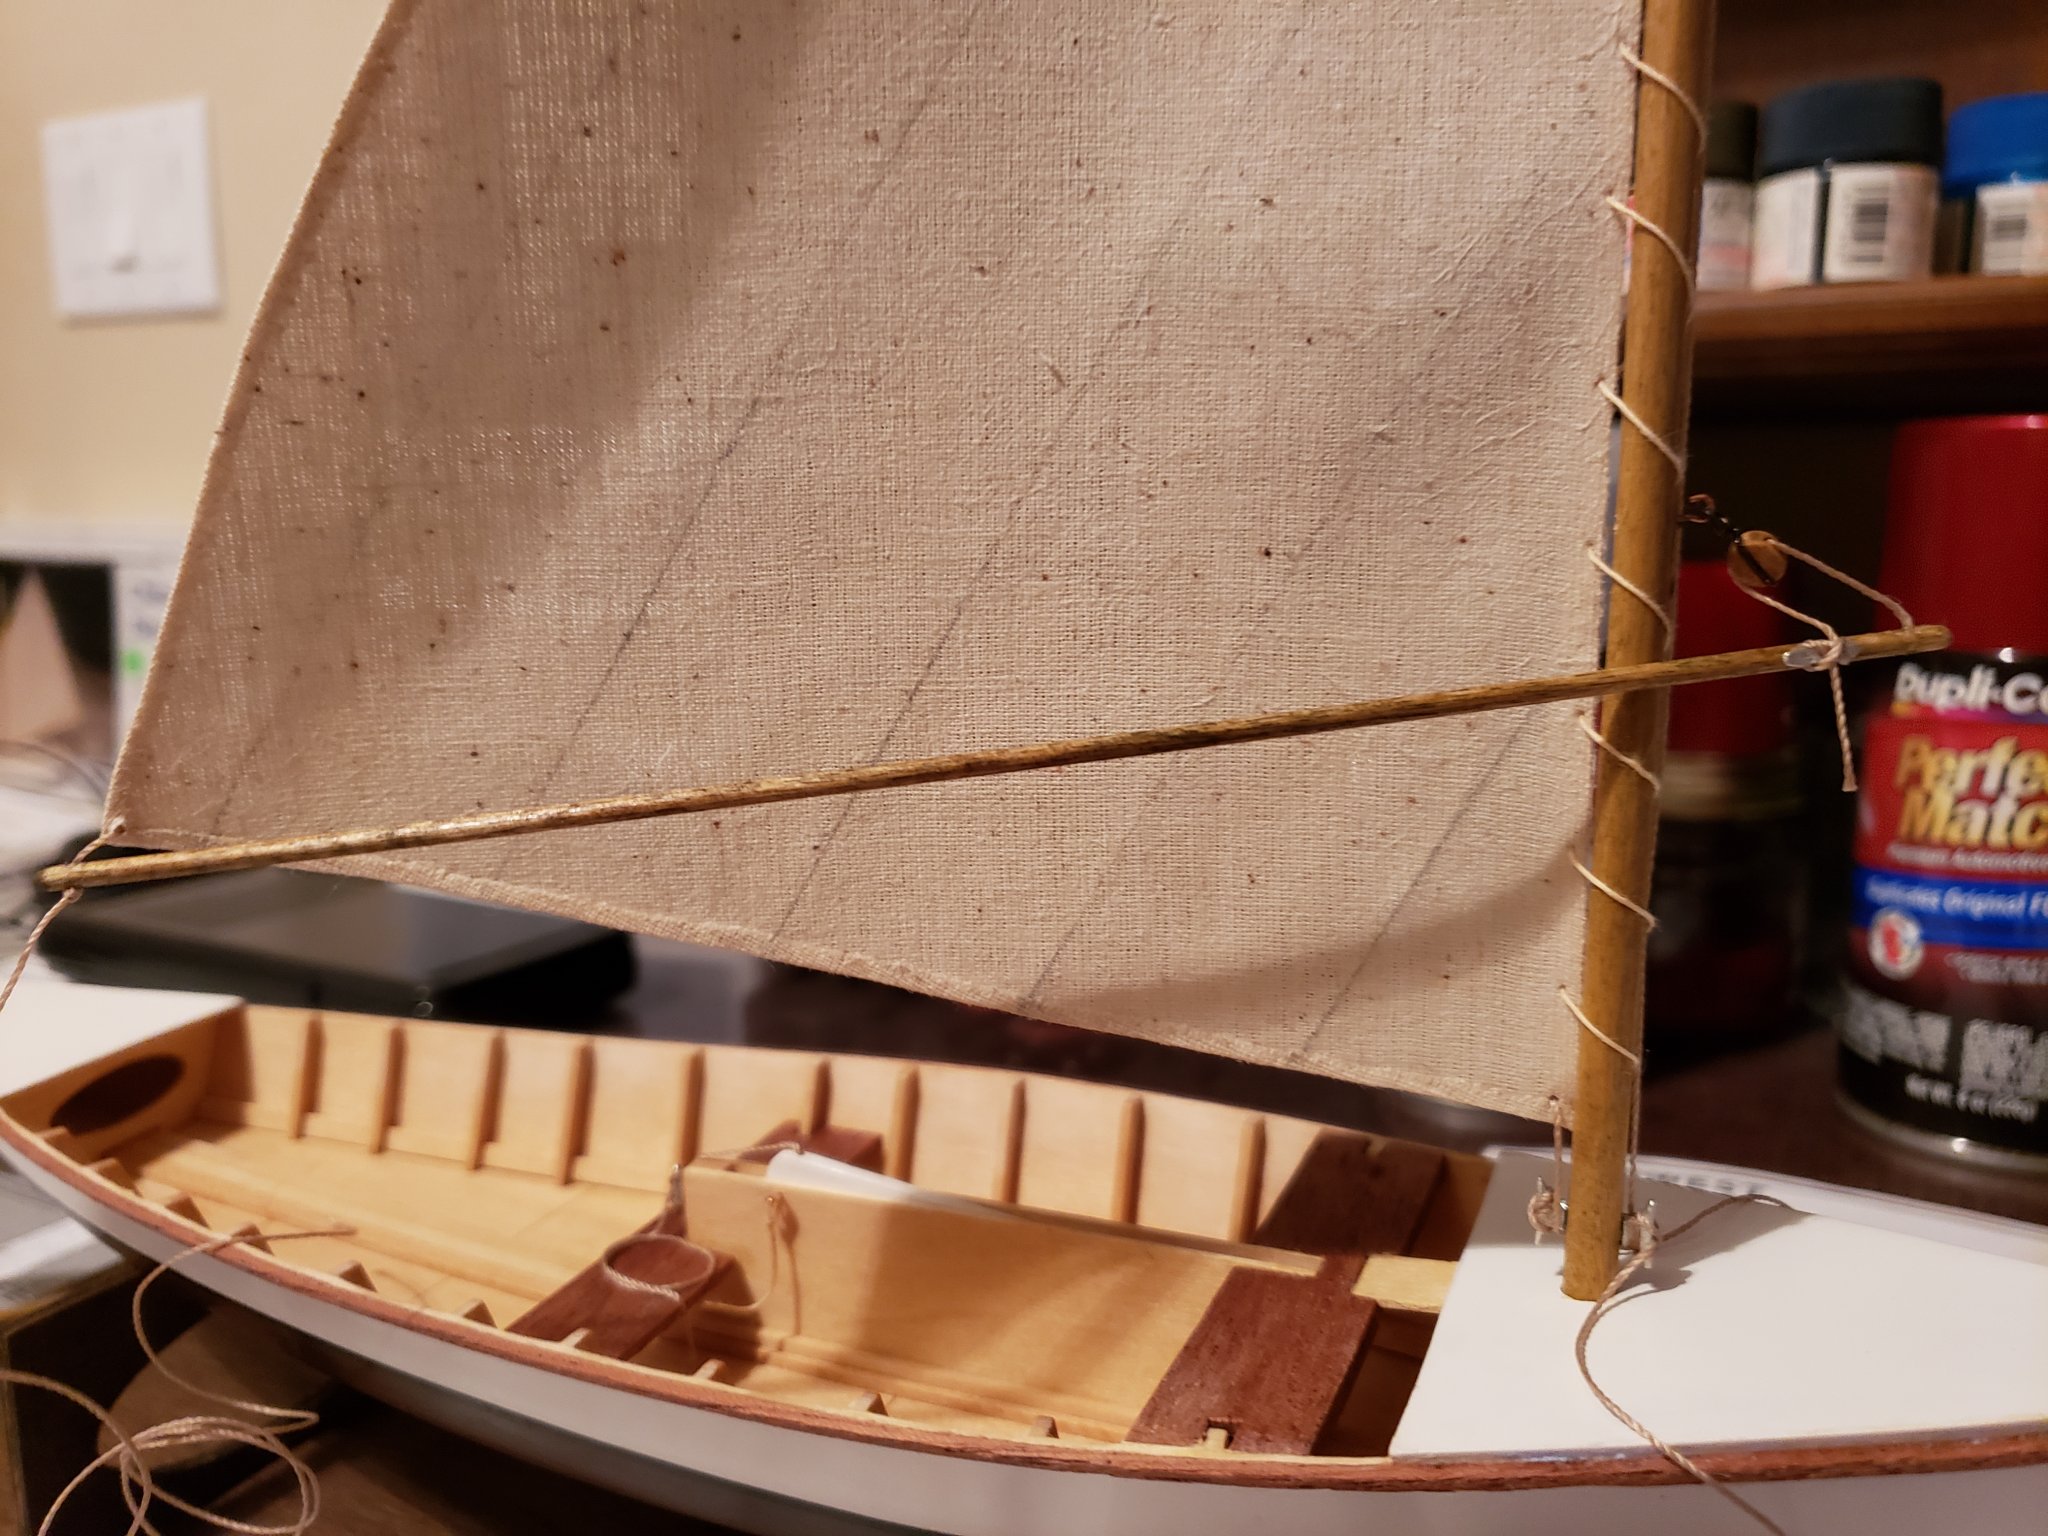
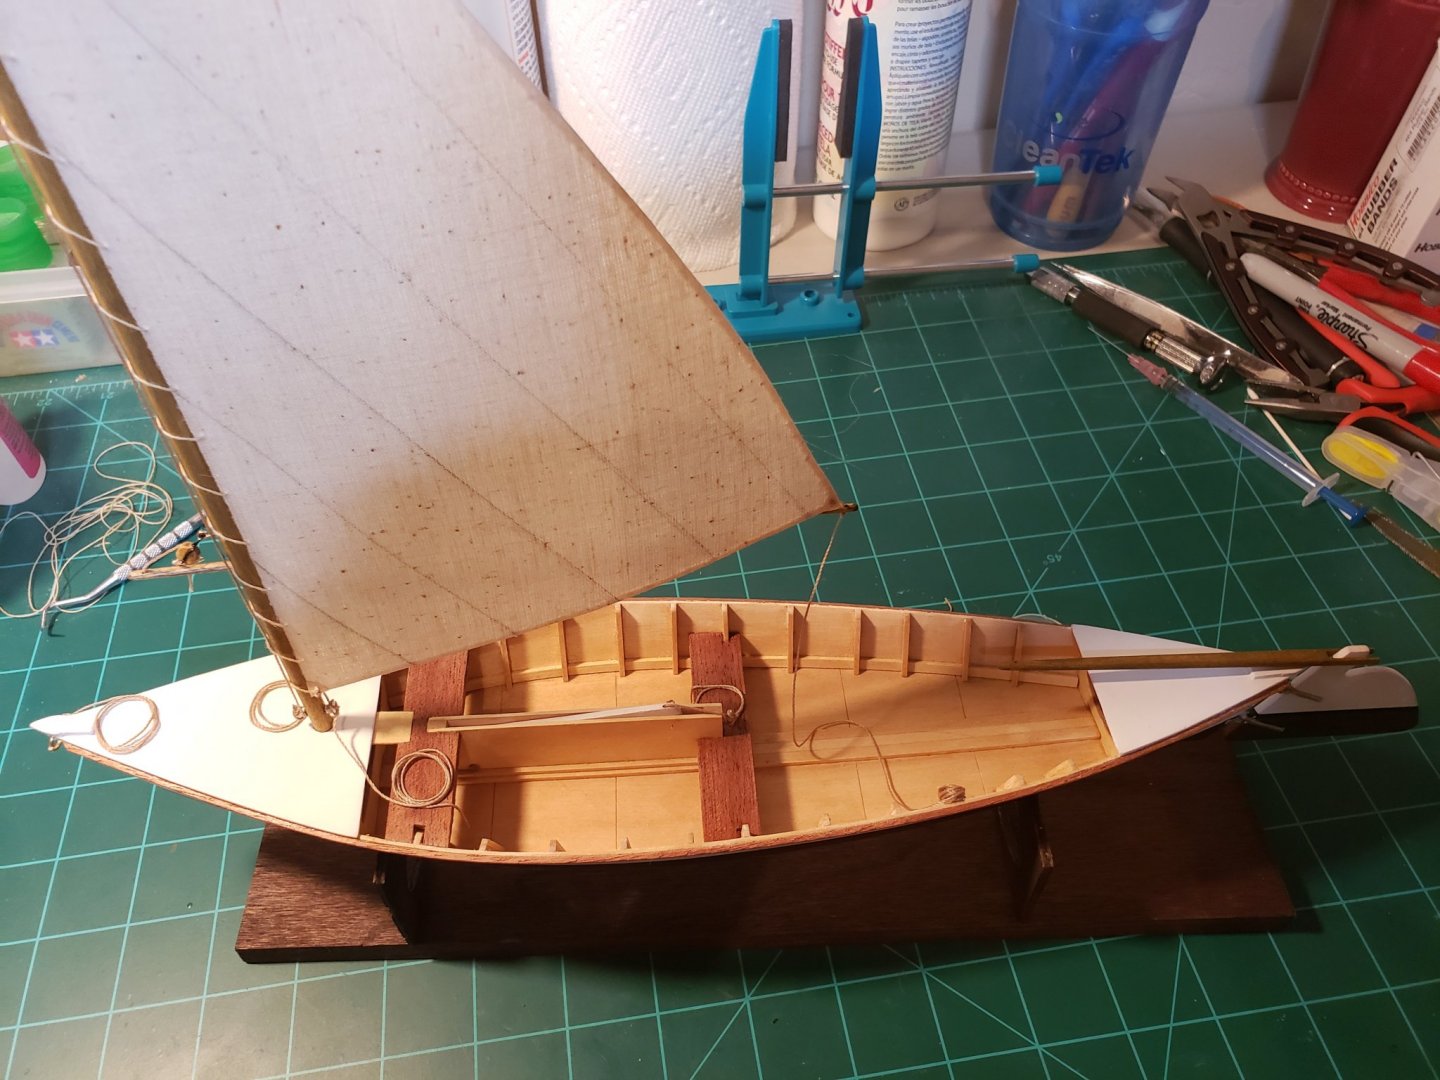
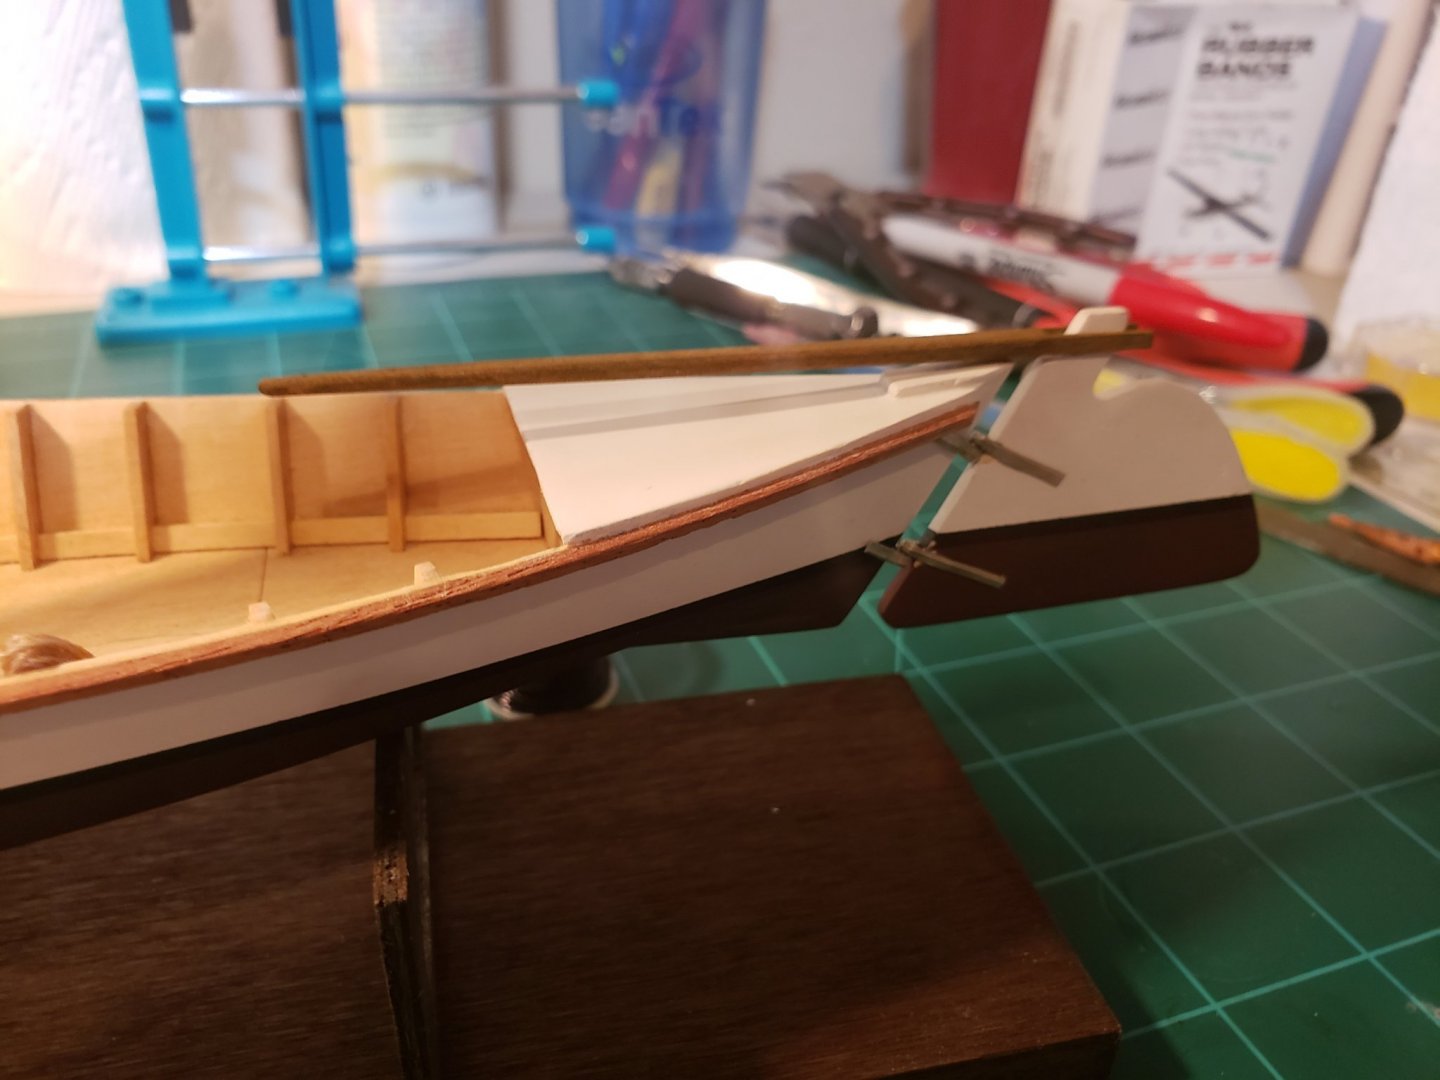
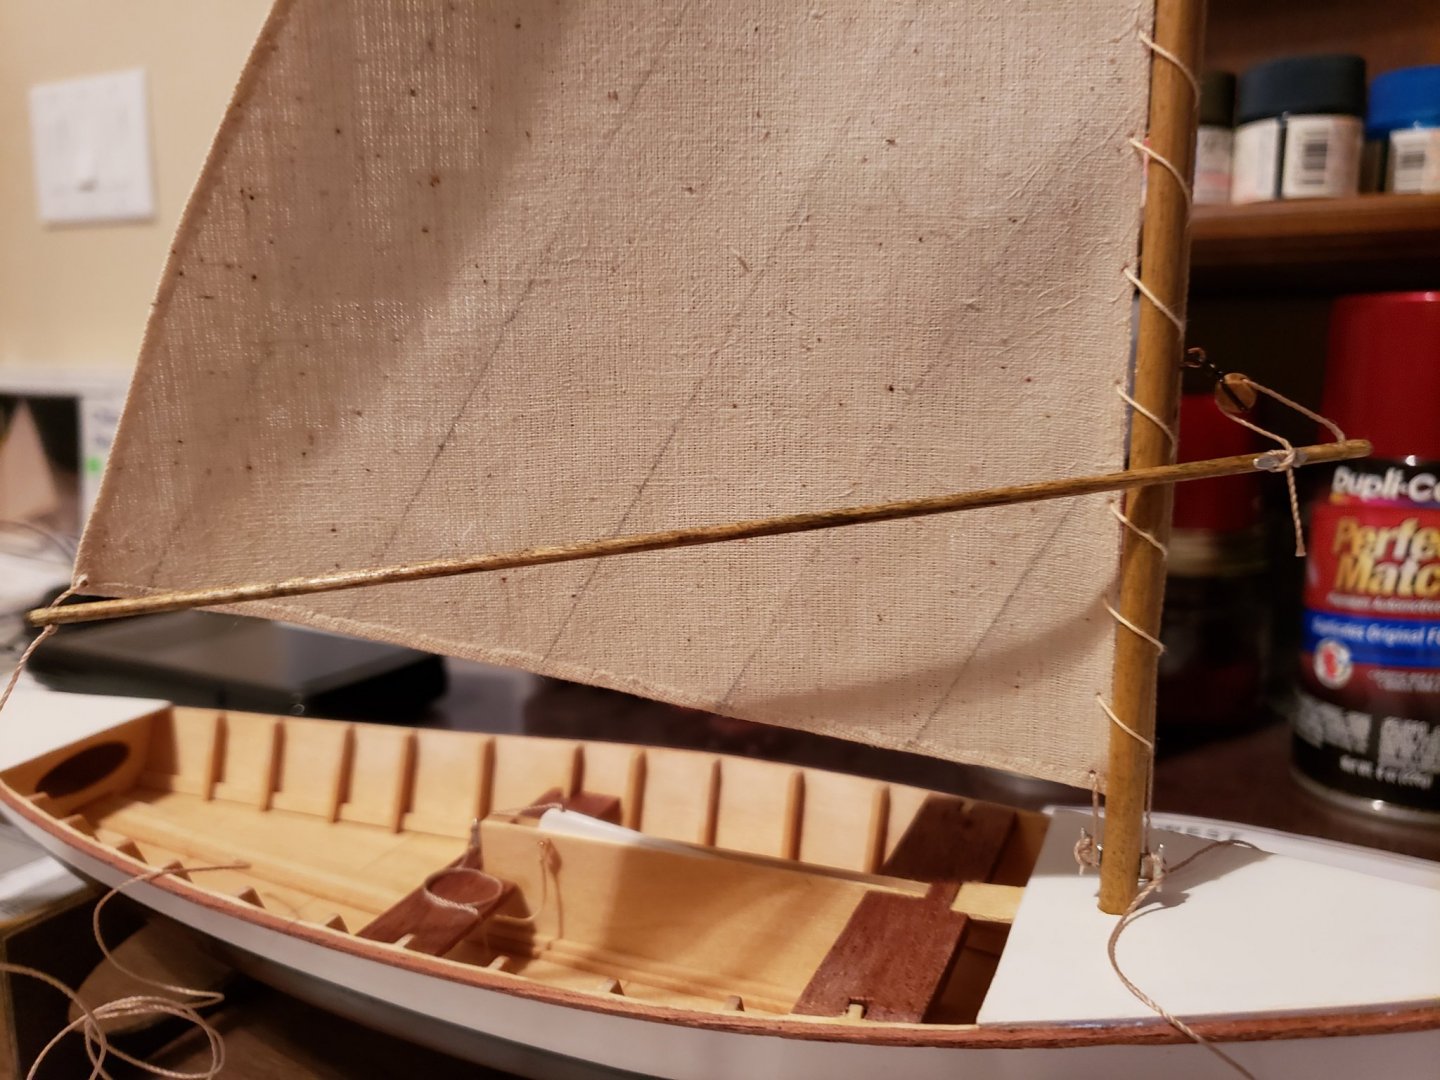
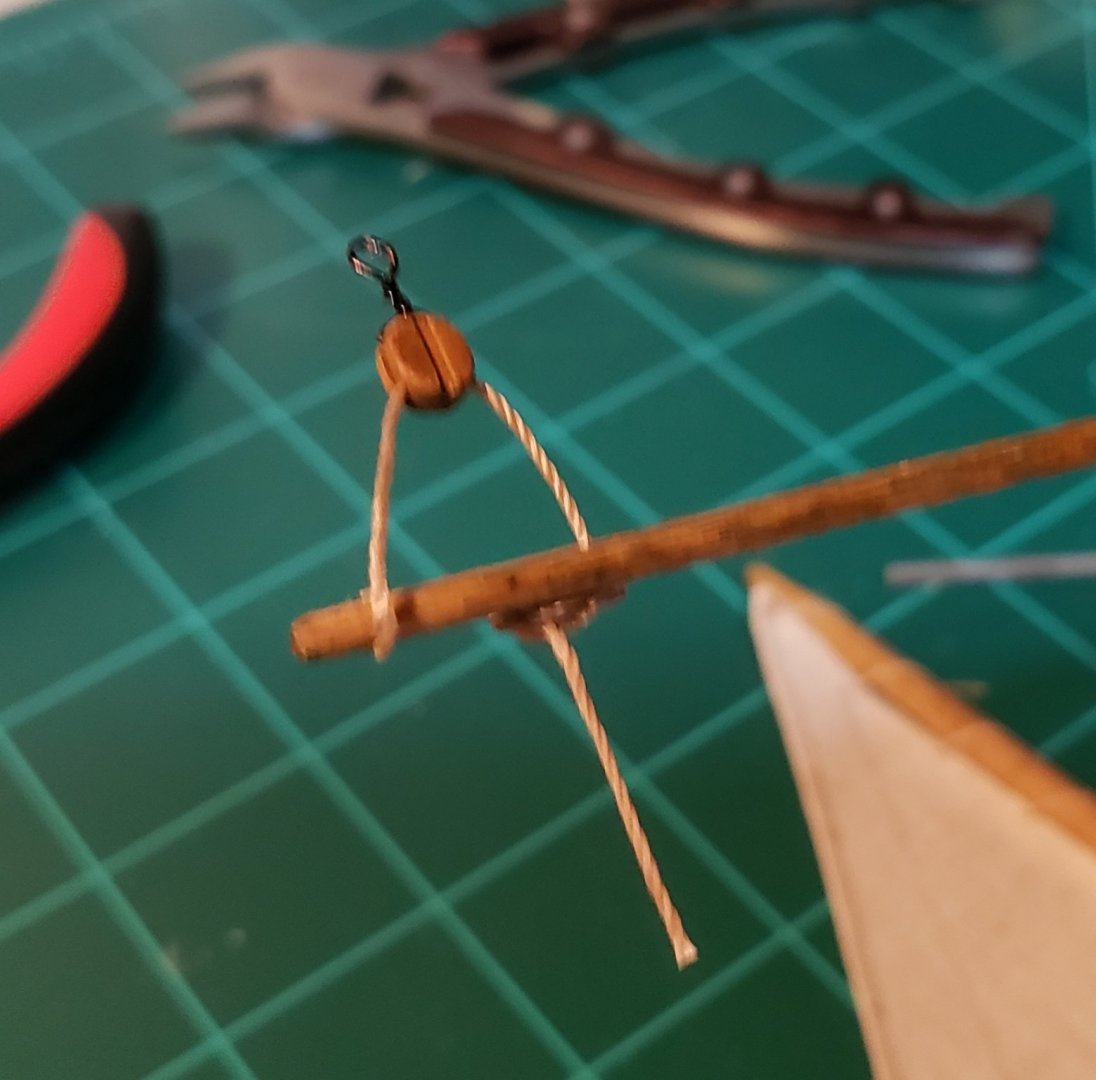
Ok, so I just did a simple block with a piece of black wire for this build. I may try to do the whole thimble thing with the brass tube at some point down the road but I need to get this one in the books...it's only been 5 yrs since I started this build log after all 😕. So in the above picture you can see the mast is glued in place and the sprit is attached. All that is left to do is coil up the lose rigging lines and glue the tiller on (it was only a friction fit thus far) I bought some small bits to try scratch building a couple of crab traps for detail. We'll see how that goes.
- 120 replies
-
- 7
-
-
- crabbing skiff
- Chesapeake Bay crabbing skiff
- (and 3 more)
-
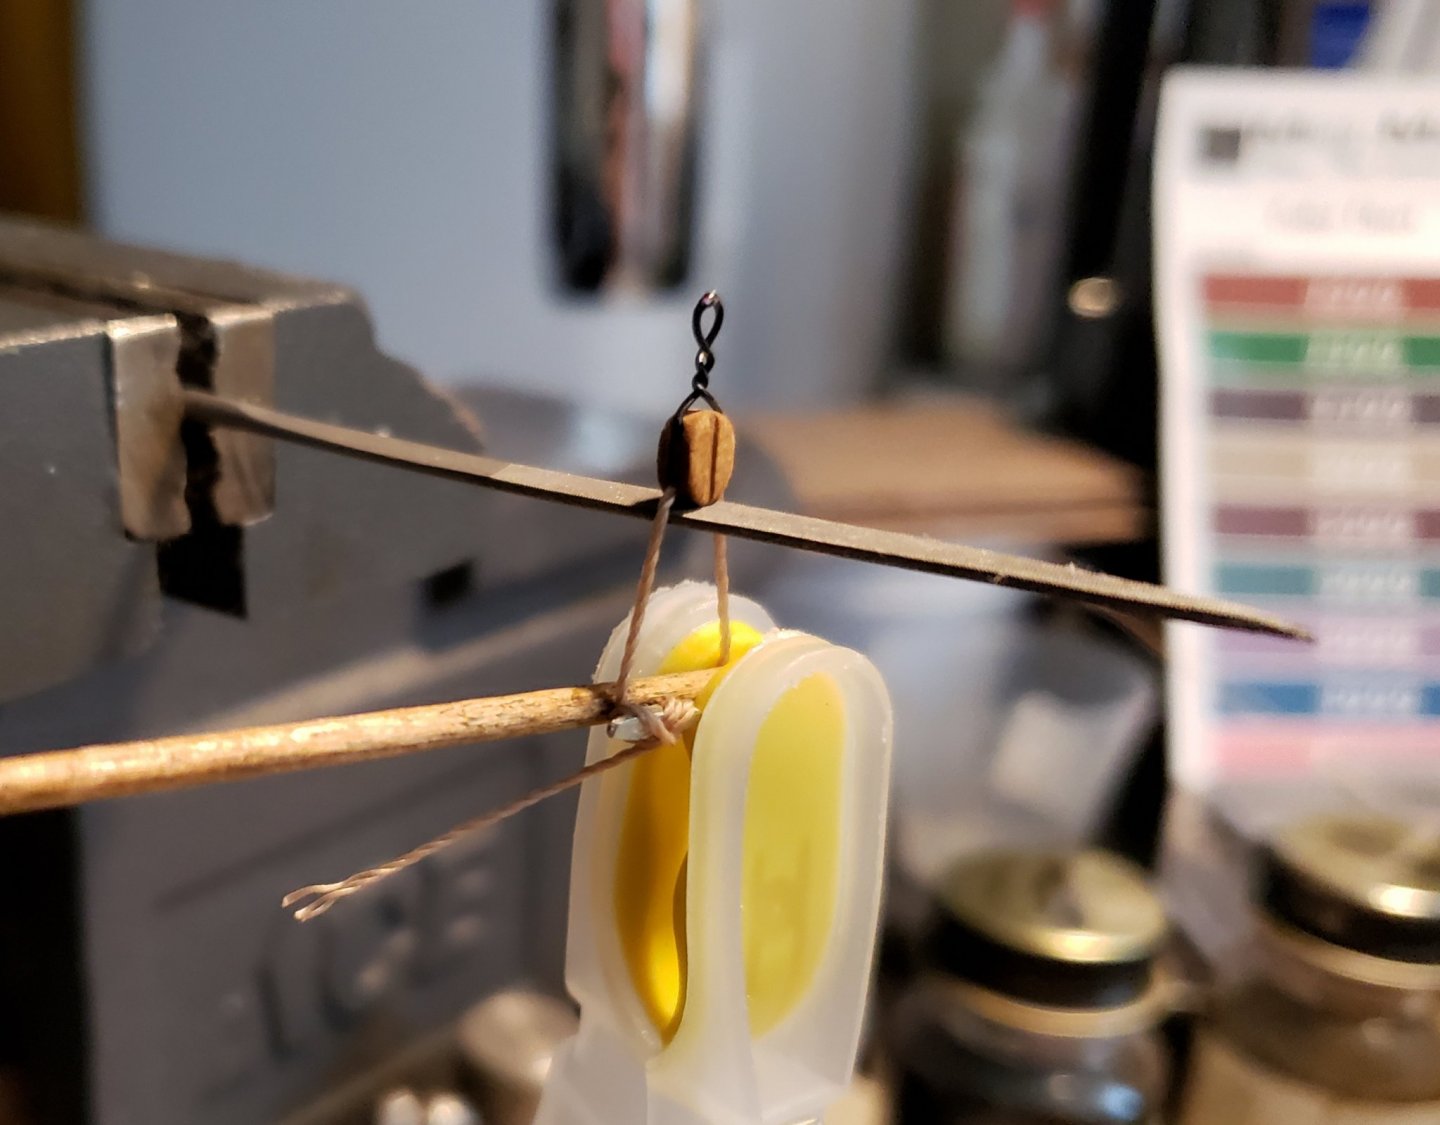
I tried last night to make a couple of thimbles... failed miserably! I was trying the hole punch method but I suspect the tube I was using has walls that are too thick. I need to get some smaller tubing and then I will try the method of filing half the tube off and bending it around as Bob showed above. When I get something worth showing, I'll post some pics...
- 120 replies
-
- 2
-
-
- crabbing skiff
- Chesapeake Bay crabbing skiff
- (and 3 more)
-
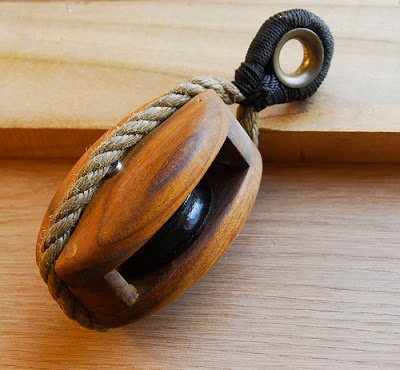
That's a really nice looking block Bob! I hope mine looks at least half that good... I went to Hobby Lobby last night and purchased some brass tube to try my hand at making some thimbles. We'll see how that goes.
- 120 replies
-
- 3
-
-
- crabbing skiff
- Chesapeake Bay crabbing skiff
- (and 3 more)
-
WHOOPS!!! How embarrassing... My block in the above pic is COMPLETELY WRONG! I will be re-working it to look more like this: Should really have checked some references first... another lesson learned. 😳 Update forthcoming...
- 120 replies
-
- 6
-
-
- crabbing skiff
- Chesapeake Bay crabbing skiff
- (and 3 more)
-
Just went through your log Dave... Wow! You did a fantastic job. What a nice little introduction to the mysterious art of planking. I am also intimidated by that and am working through a few of the Midwest small boat kits as a way to build some of the skills I will need to tackle a full on 2 or 3 masted tall ship model. Anyway, congrats on this little beauty. She is going to be a fantastic display model.
- 114 replies
-
- 2
-
-
- small
- Peterboro Canoe
- (and 2 more)
-
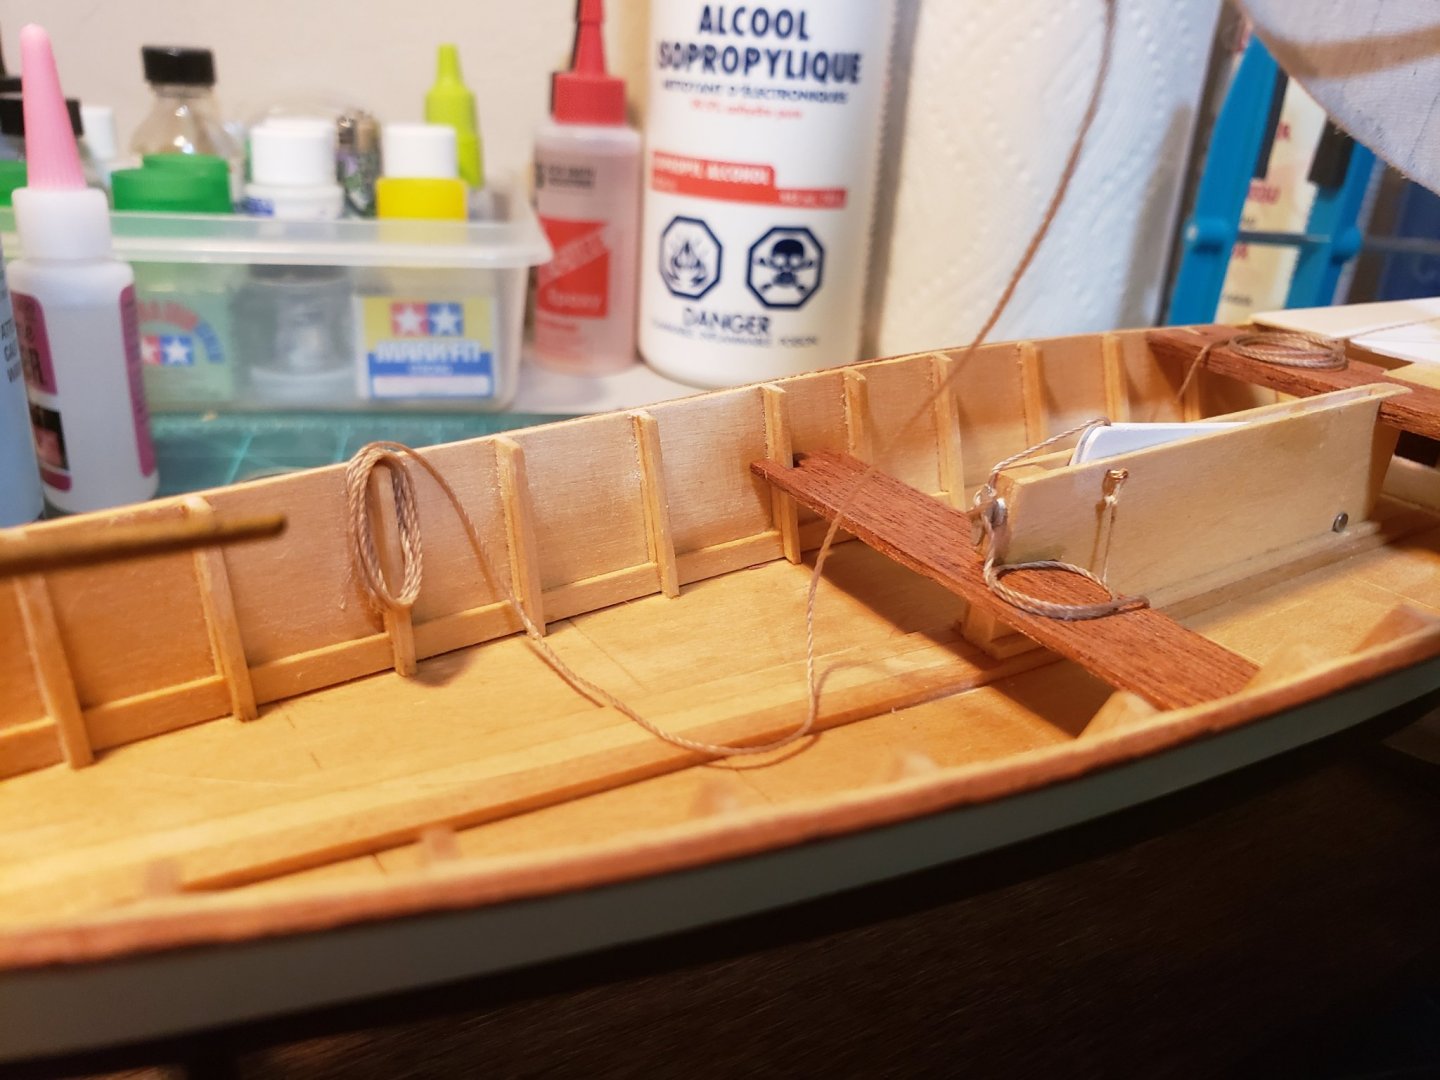
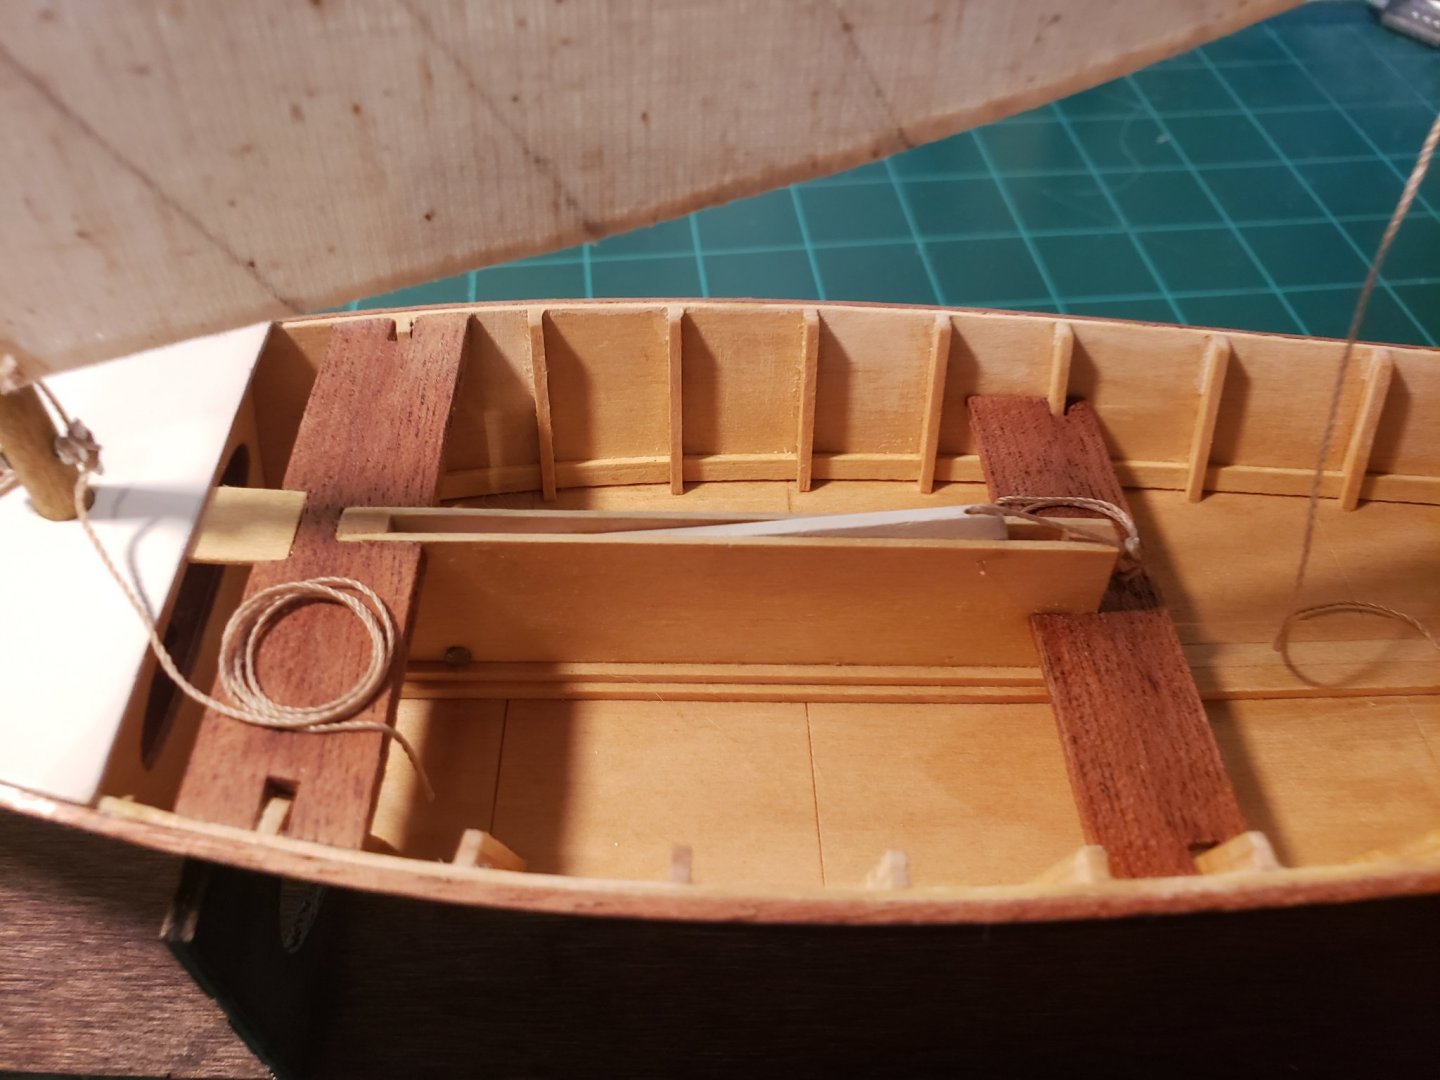
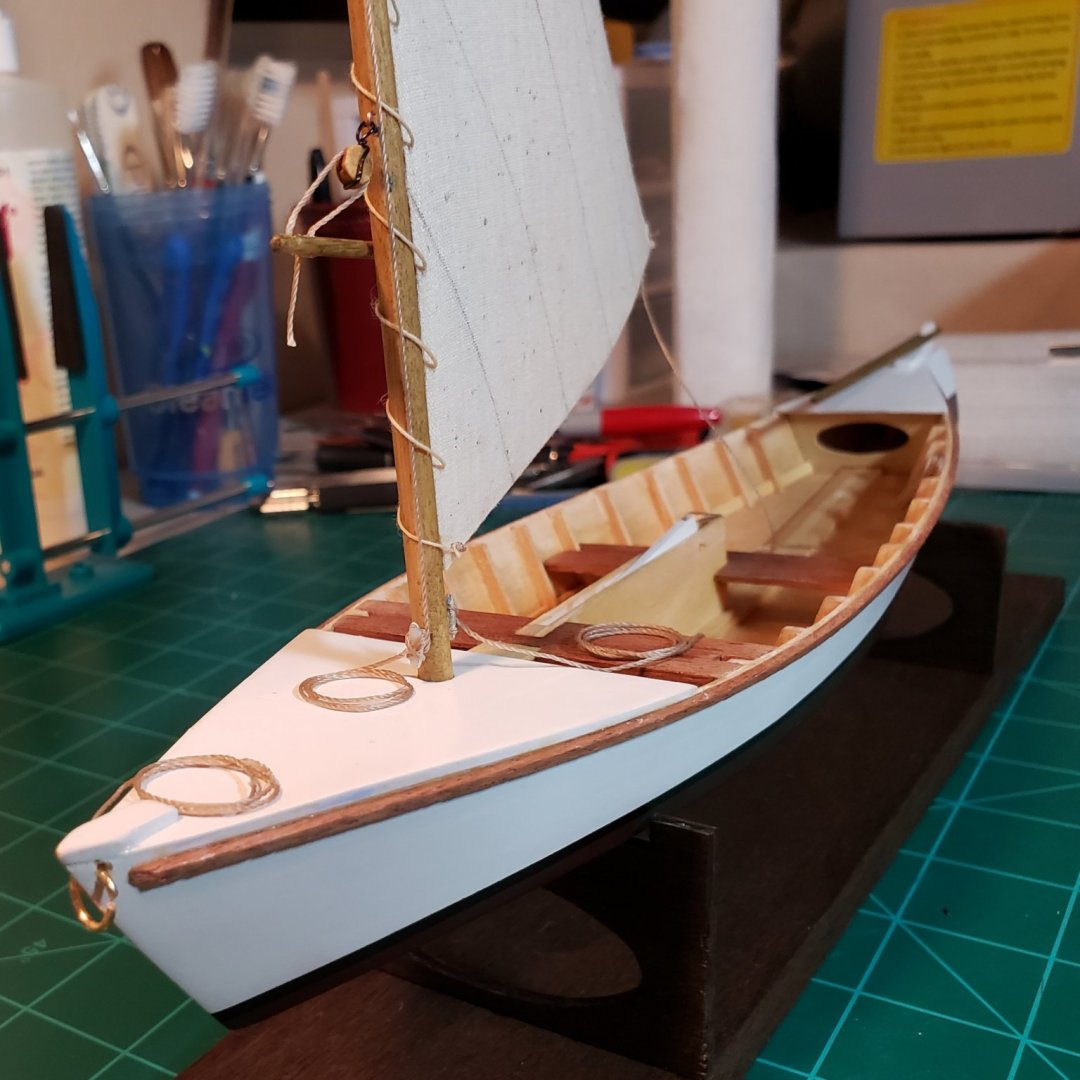
So I am quite pleased with the results from the fabric stiffener. It definitely added the rigidity I wanted to make the lines from the block to the sprit appear to be under a slight load. Also the loose end appears to hang down.
- 120 replies
-
- 7
-
-
- crabbing skiff
- Chesapeake Bay crabbing skiff
- (and 3 more)
-
Well this one is almost in the books but one of my primary goals when building my Chesapeake Bay Flattie is going to be solving the riddle of gluing rigging line. In fact there will be some experimenting on some scrap pieces happening very soon. I'll give the Liquitex a shot as part of that effort.
- 120 replies
-
- 3
-
-
- crabbing skiff
- Chesapeake Bay crabbing skiff
- (and 3 more)
-
Working on the sprit block and cleat assembly. What I've done here is to place some tension on the line to remove the slack and then I applied some fabric stiffener to it to hopefully encourage it to hold its shape.
- 120 replies
-
- 5
-
-
- crabbing skiff
- Chesapeake Bay crabbing skiff
- (and 3 more)
-
This is looking very nice. I was thinking of doing a cross section on my way to tackling a fully rigged ship. Am quite interested to see how yours turns out and your thoughts on the build and what it taught you.
- 48 replies
-
- 1
-
-
- mamoli
- constitution
- (and 2 more)
-
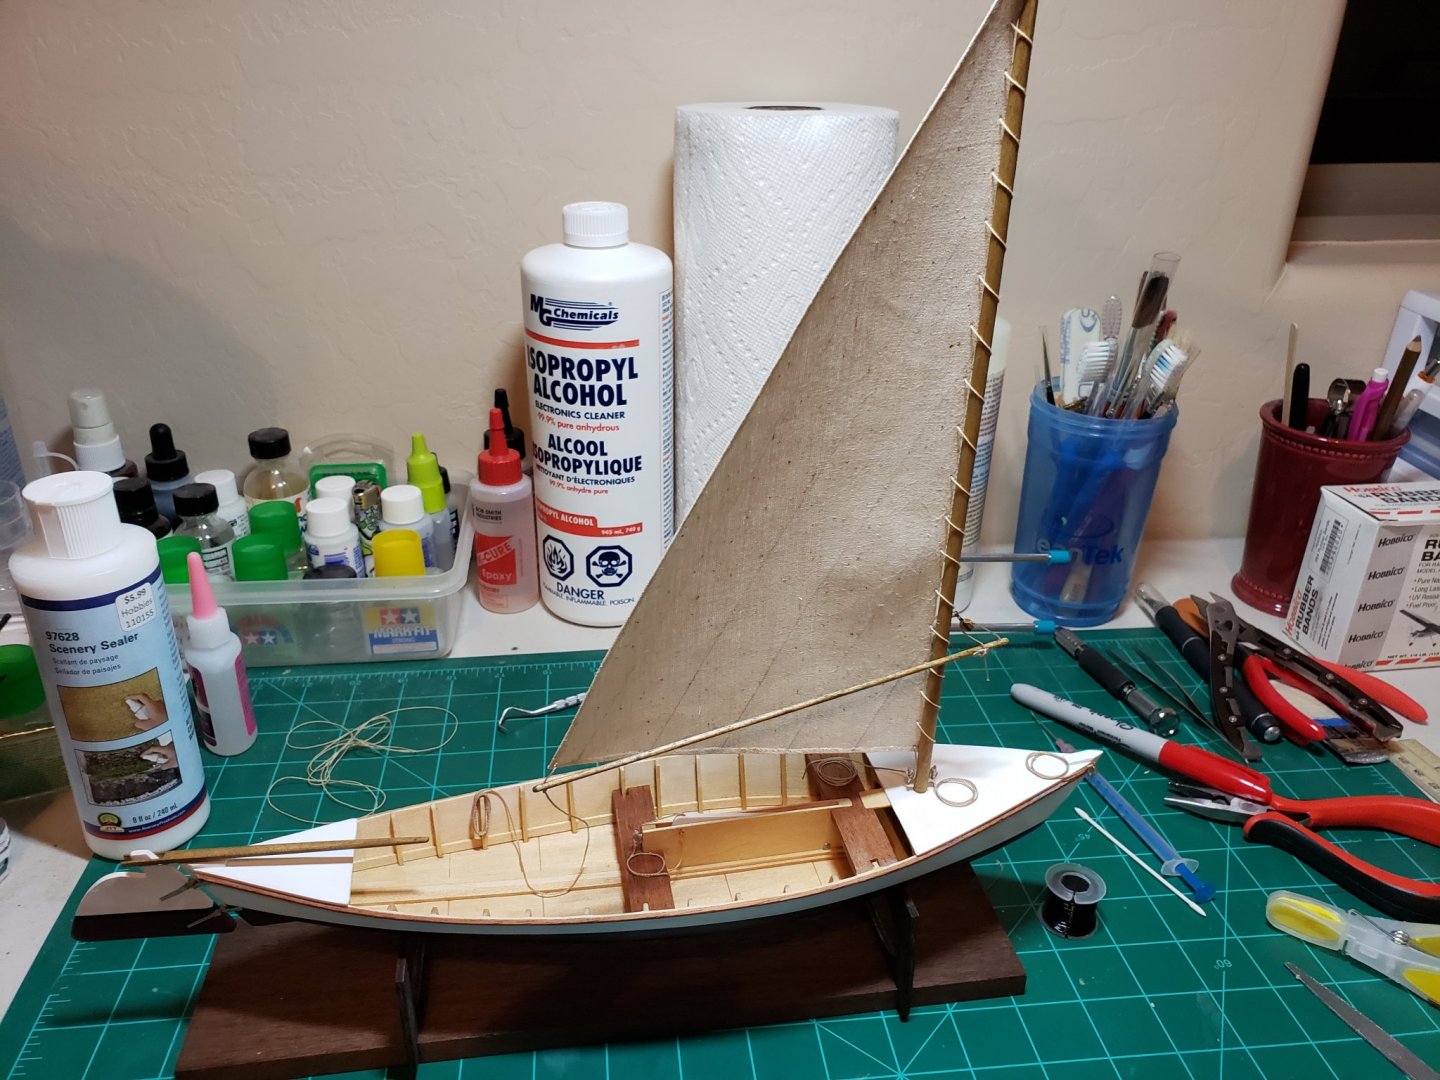
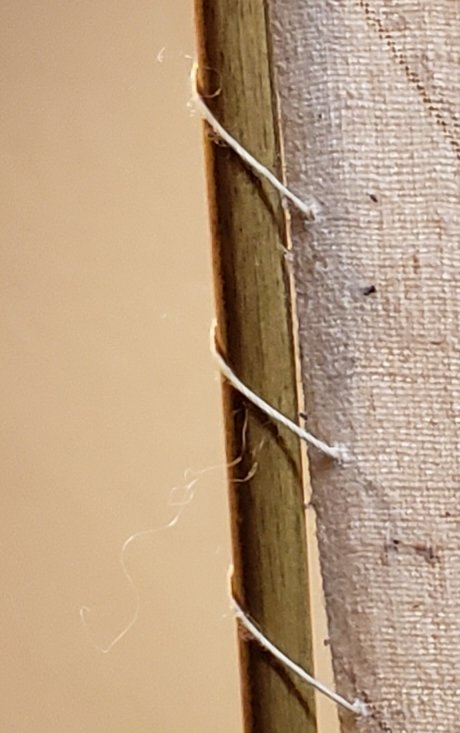
Here's a good example of the camera picking up things I couldn't see myself from 12" away. Apparently at some point the rigging line started picking up fibres and animal hair, as well as some fraying from passing through the sail cloth over and over during the lacing step. I'll definitely try to clean this up a little but only noticed it after posting the pic in the previous post.
- 120 replies
-
- 6
-
-
- crabbing skiff
- Chesapeake Bay crabbing skiff
- (and 3 more)
-
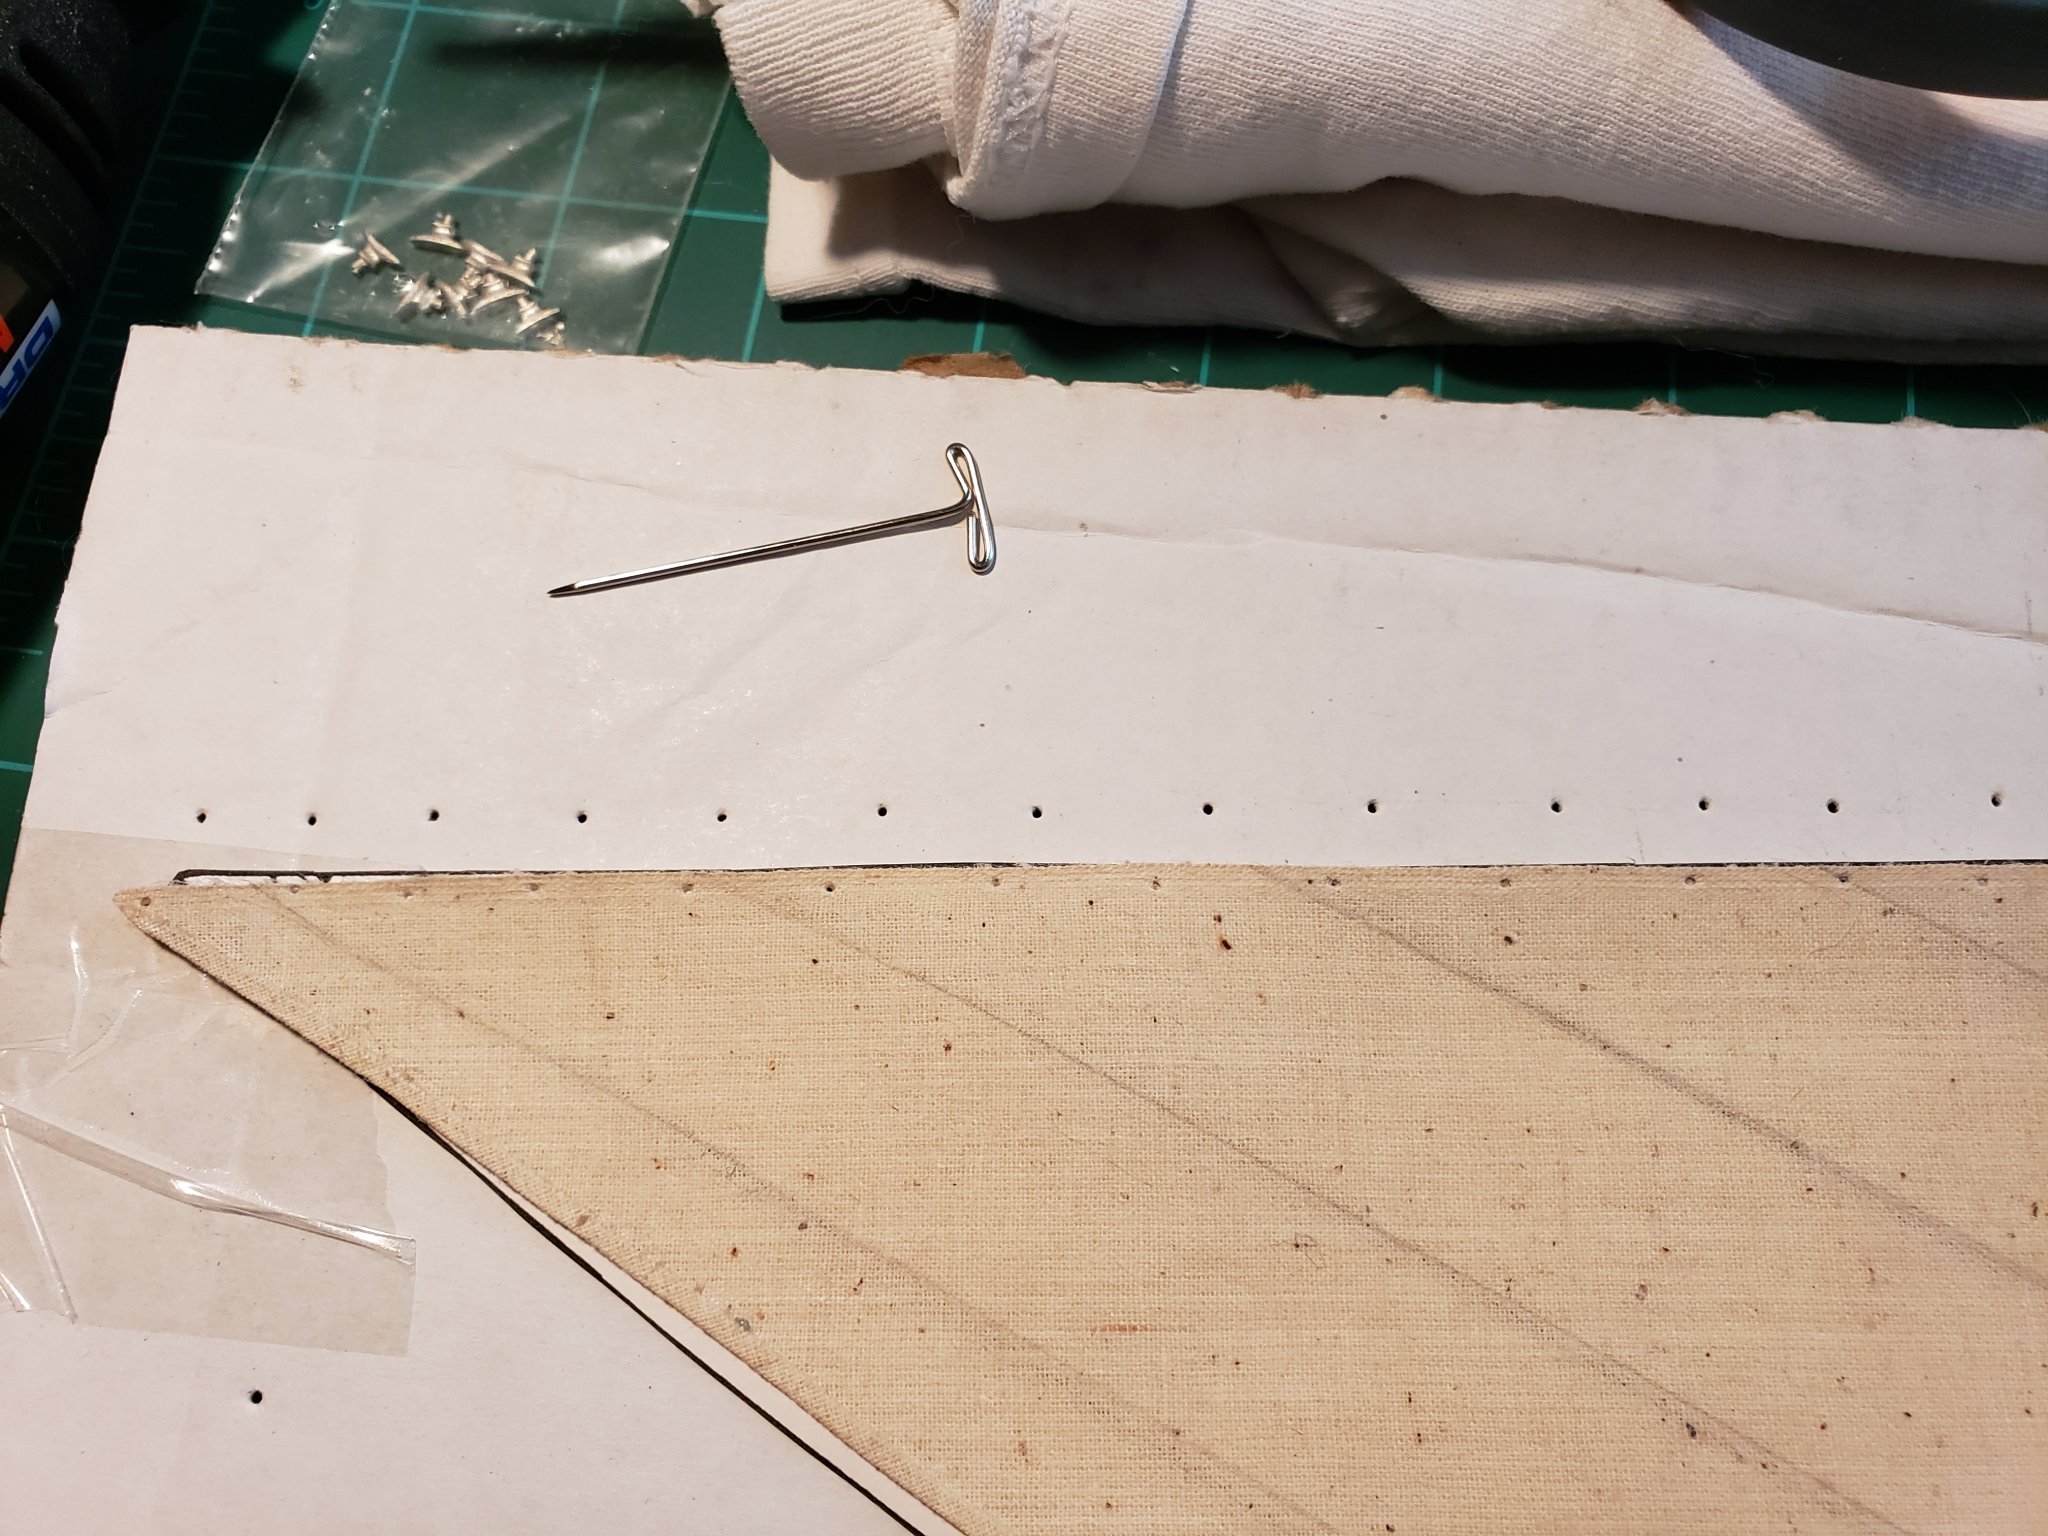
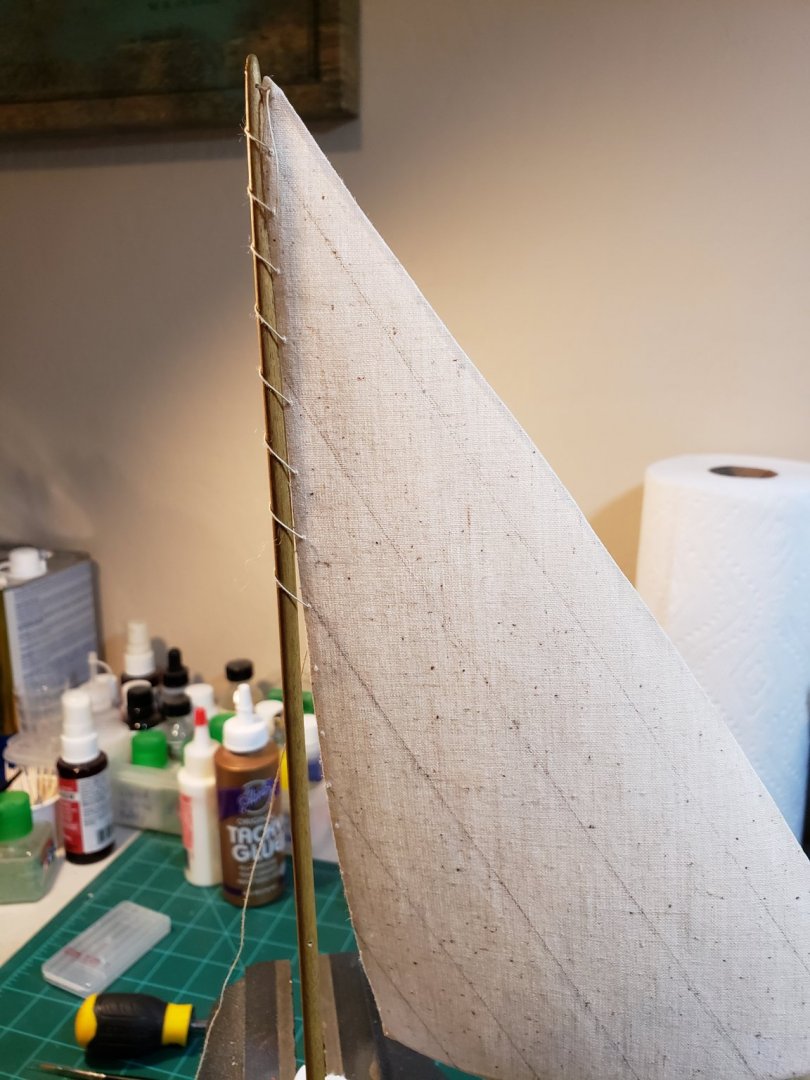
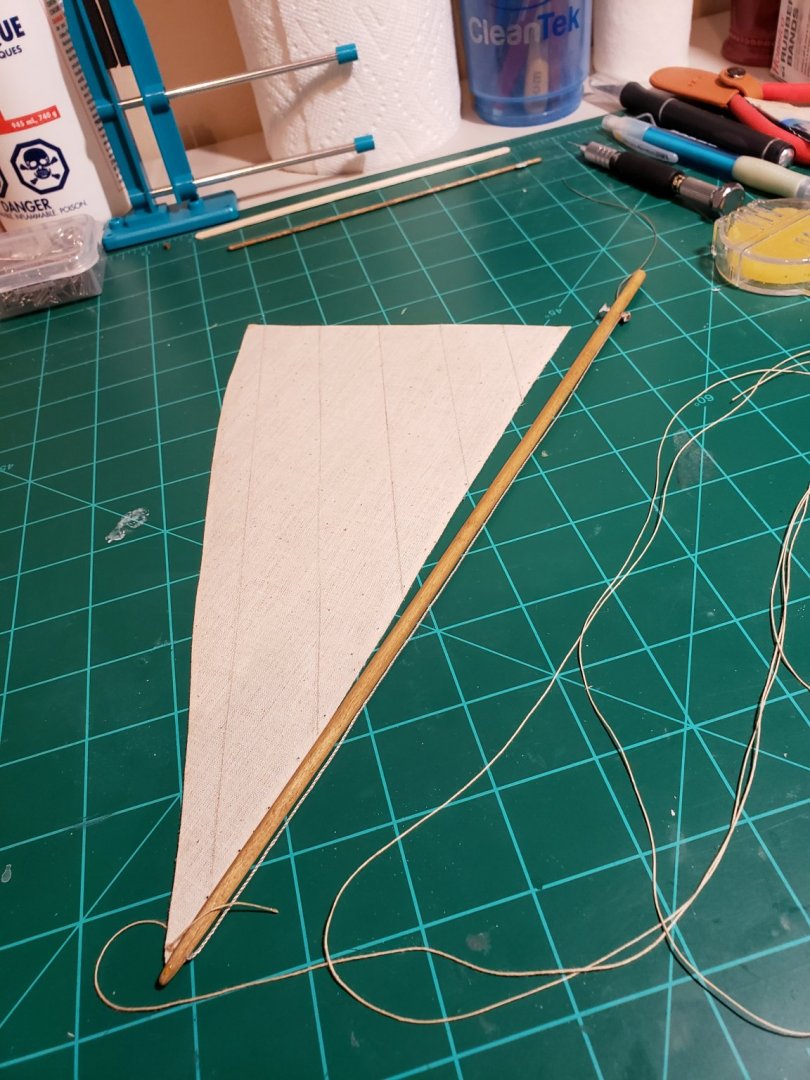
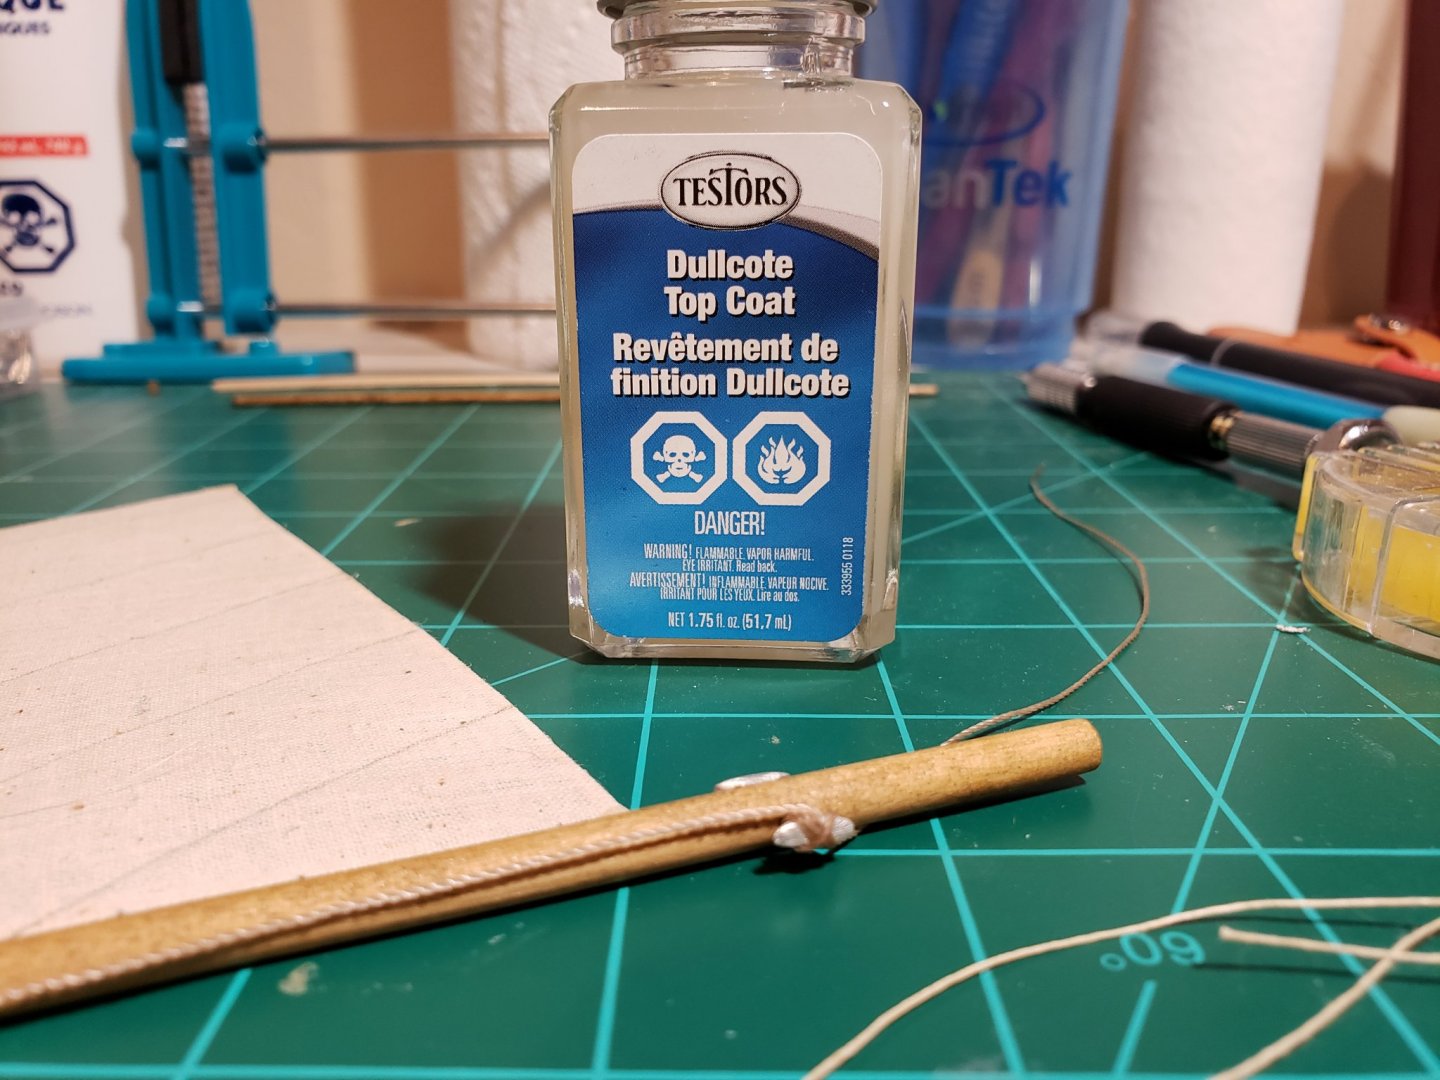
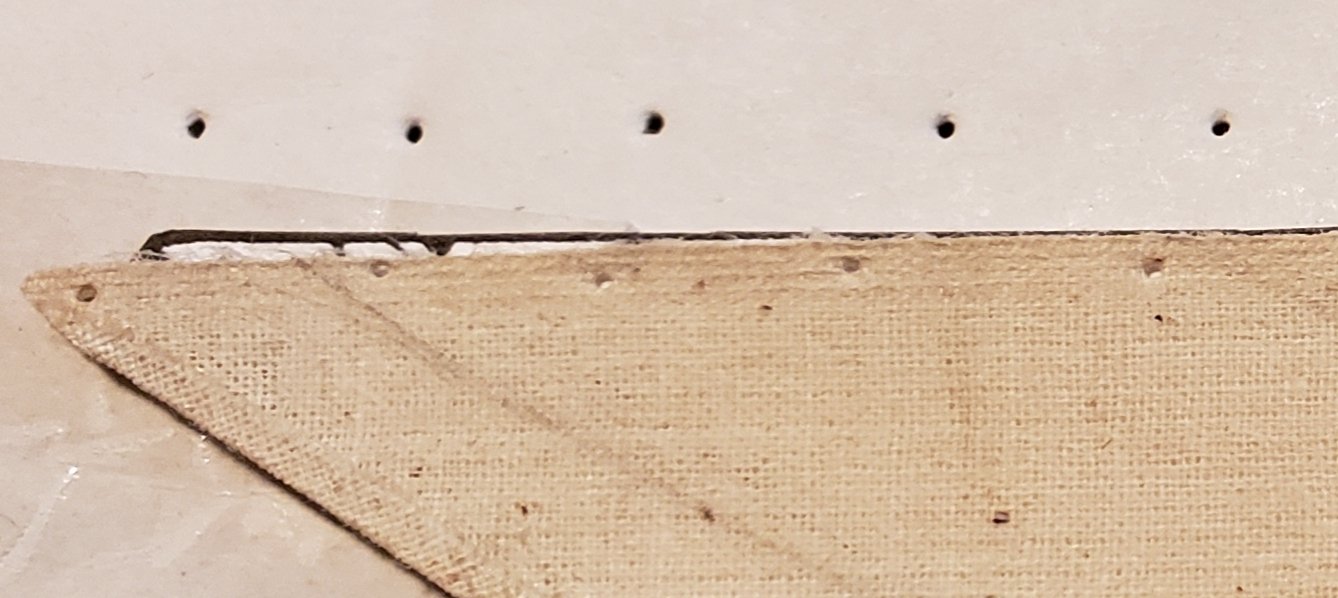
Lacing the luff edge of the sail to the mast. Pre-punching the holes for the lacing was essential for this step...especially if you've use any kind of treatment to "firm up" the sail cloth. As stated in a previous post, I'm not using the Syren rigging line for this build ( but will be using it on the next model of the Chesapeake Bay Flattie). For the lacing, I used the line that came with the kit (which is very lightweight - think heavy sewing thread). It comes white in color and so to give it more of a tan look, I soaked it in hot, thick, black coffee for a couple of hours. Then I ran it across the beeswax several times and result was something I was pretty satisfied with.
- 120 replies
-
- 5
-
-
- crabbing skiff
- Chesapeake Bay crabbing skiff
- (and 3 more)
-
Got the halyard line in place as well as the luff lacing line anchored and ready to lace. I still have not found a method of securing these tiny lines without making them look glue-soaked. I tried the scenic cement but it didn't hold. CA and dullcoat hold but don't look that great.
- 120 replies
-
- 7
-
-
- crabbing skiff
- Chesapeake Bay crabbing skiff
- (and 3 more)
-
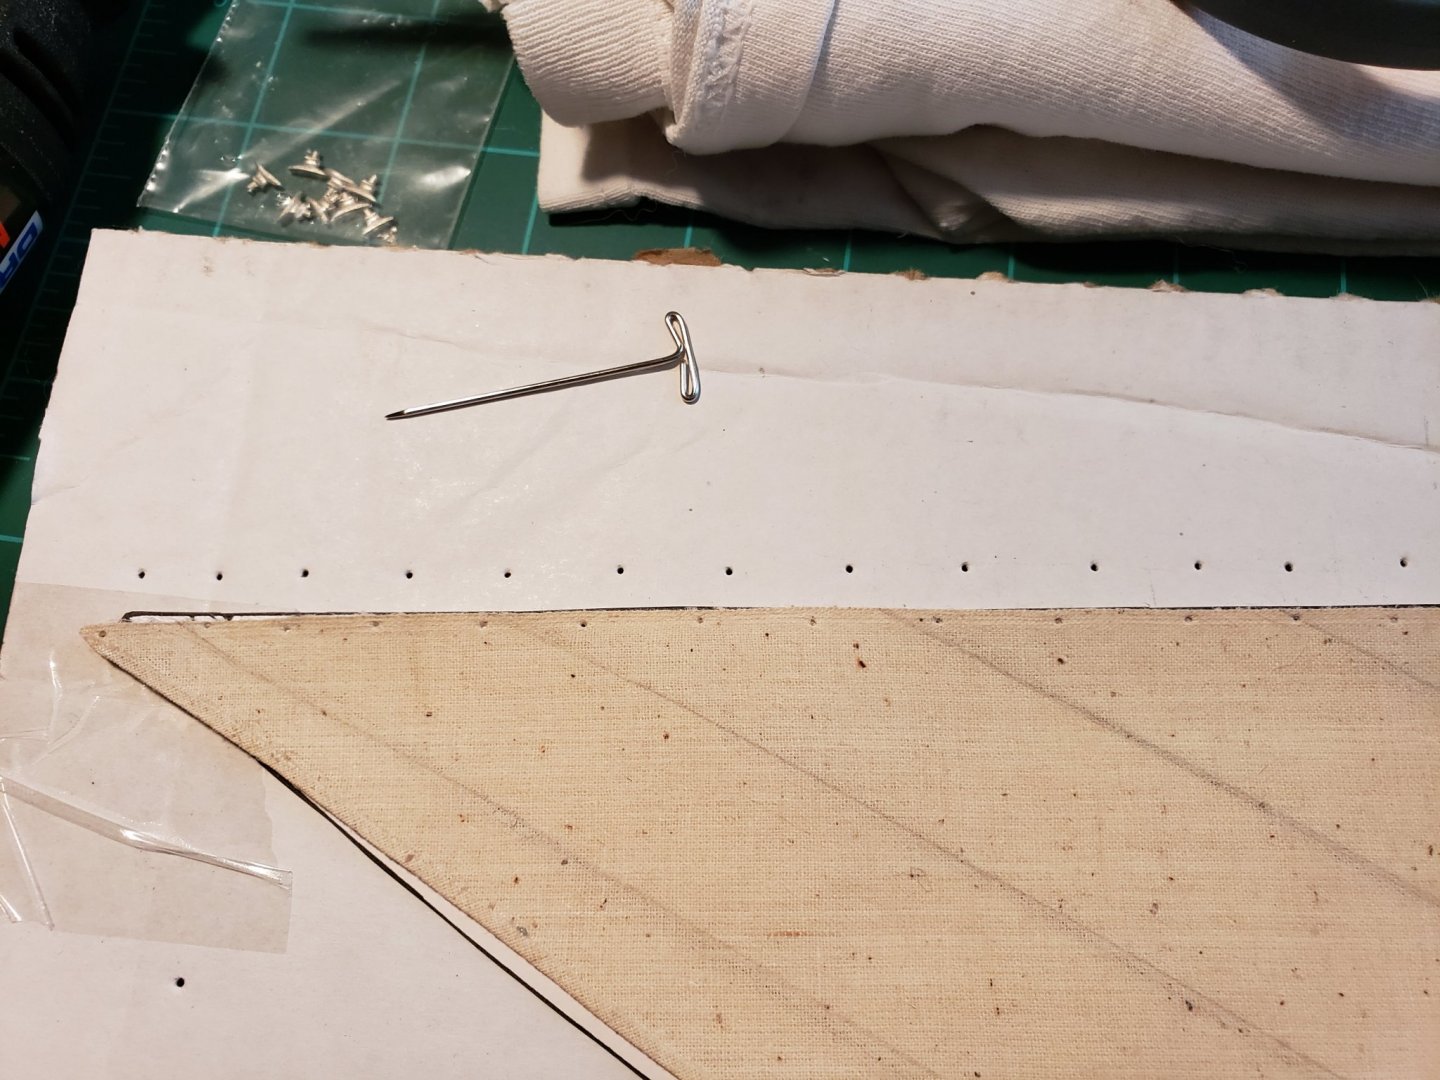
Pre-punching the holes for the luff lacing line to make threading easier.
- 120 replies
-
- 10
-
-
- crabbing skiff
- Chesapeake Bay crabbing skiff
- (and 3 more)
-
Ok so I've made the executive decision to leave what I've done on this model as is and finish it with the supplies I have on hand. I could tear out the nylon Model Shipways line and redo everything with the superior Syren line, but to be honest, I'm just not that unhappy with how it looks to risk messing it up. For my first wooden boat model, I'm actually pretty satisfied with how it's turned out so far and from a 1.5 - 2.0 ft viewing distance, the many little issues it has don't really show that badly to my untrained eye. One thing I have done in the past with other modeling projects, is to try to be too much of a perfectionist (not that my work here has been anything even close to that). All too often I will keep trying to fix or redo areas I perceive as "flawed" and end up either making things worse or ruining a project altogether. My next kit is going to be the "Chesapeake Bay Flattie" (also by Midwest) which has substantially more rigging than this little boat does and so I will make use of the Syren line and blocks on that project from the very start. I will also use the experience I gained on this model to make that one hopefully better. Anyway, I hope this decision doesn't disappoint anyone who might be following this build or reading it in the future... Now, let's get on with it! Don
- 120 replies
-
- 5
-
-
- crabbing skiff
- Chesapeake Bay crabbing skiff
- (and 3 more)
-
Noob Question: So is this kit meant to be a waterline model or were these types of boats really as flat-bottomed as the kit is? Excellent work so far BTW... It's a really interesting model.
- 39 replies
-
- 1
-
-
- philadelphia
- model shipways
- (and 1 more)
-
Looking for input: If I decide to redo the rigging that I've already done, should I go ahead and swap out the metal cleats (which I was going to use in place of the plastic ones) for wooden ones (from Syren of course)? Would they have likely been wood or metal on a typical crabbing skiff in the Chesapeake Bay region? Don
- 120 replies
-
- 2
-
-
- crabbing skiff
- Chesapeake Bay crabbing skiff
- (and 3 more)
-
Thanks Michael, I also picked up some single sheave blocks (3mm, 4mm & 5mm) from Syren. I was going to use an old AL or MS (not sure which) surplus block I had, but once again, Chuck's products just look so much better. David (Duanelaker) used a 5mm wood block to replace the plastic block in the kit and I had to admit it looked SO much better! So yes, it appears I've caught the Syren bug as I will be using their products in my future builds whenever possible.
- 120 replies
-
- 6
-
-
- crabbing skiff
- Chesapeake Bay crabbing skiff
- (and 3 more)
-
On hold for a few days (waiting on parts)... It was recommended that I switch over to use scale rigging line from Chuck over at Syren. After taking a look at their website, I thought it looked AMAZING and ended up ordering 3 different sizes in 2 colors. I will definitely be using the Syren line for the rigging of the mast and boom. I have to decide whether to replace what I've already done, which would only be the bow painter and the 2 centerboard lines. I'll think about that. I'm not really happy with the centerboard cleat tie off as it got glue-soaked and looks "fake" to me. Stay tuned, Don
- 120 replies
-
- 5
-
-
- crabbing skiff
- Chesapeake Bay crabbing skiff
- (and 3 more)
-
Question on line size for lacing for small craft
DonInAZ replied to DonInAZ's topic in Masting, rigging and sails
Thanks for the advice and the feedback Bob, I just place an order with Syren for: 20' - 0.012" Tan Rigging Line (1/4" at 1/20 scale) 20' - 0.018" Tan Rigging Line (3/8" at 1/20 scale) 20' - 0.025" Tan Rigging Line (1/2" at 1/20 scale) ...also grabbed some light brown of the same diameters: 20' - 0.018" Light Brown Rigging Line 20' - 0.012" Light Brown Rigging Line 20' - 0.025" Light Brown Rigging Line I'll think about re-doing what I've done thus far... Took me most a weekend (working in 10-15min intervals between honey-do list chores 🙄). But will definitely use it going forward. Chuck's rope looks AMAZING!