DonInAZ
-
Posts
138 -
Joined
-
Last visited
Content Type
Profiles
Forums
Gallery
Events
Everything posted by DonInAZ
-
 Forgive me, I'm still pretty inexperienced with the latter stages of shipbuilding (I always get stalled before I get to the sails)... So how exactly did you indicate the stitching (seams) on the sails? Are those actual stitched seams? I really can't tell from the close up pics.
- 72 replies
-
- 1
-

-
- Chesapeake Bay Flattie
- Midwest Products
- (and 1 more)
-
Just checking in... I still have not made any more progress on the skiff but it's still in good shape. I have to do a paint touch up as I had a can of spray paint explode in my "temporary" modeling space and the hull got a couple of minor splatters of metallic blue lacquer. I was able to remove the blue paint spots but the lacquer thinner went right through the Tamiya acrylic white on the hull and that will need a re-paint. Unfortunately, my main model room is STILL a storage room. I do have a buyer for my surplus kits but he is a small hobby store owner and can only purchase a few at a time. Space is very tight right now, which is probably the main thing hindering my progress. I tend to lose interest when things get disorganized. That's not something I'm proud of, but a weakness that I know I have. The other major obstacle I have is lack of time. I leave the house at 6:00-6:30am and don't get home until 6:30-7:00pm. By the time I eat dinner and spend some time with the family, it's time to go to bed. Weekends end up being the only time I can take care of chores and "honey-do" items. That doesn't leave much time left for hobbies. But I have not given up and I will endeavor to make some progress soon and get this little gal finished.
- 120 replies
-
- 5
-
-
- crabbing skiff
- Chesapeake Bay crabbing skiff
- (and 3 more)
-
Okay, so I've set up a temporary modeling area in my game room... The model room is still packed to the walls with unbuilt model kits of all kinds. It's time to sell a lot them I know I'll never build. Anyway, I hope to post some more progress pics soon. Need to get this build over the finish line!
- 120 replies
-
- 1
-
-
- crabbing skiff
- Chesapeake Bay crabbing skiff
- (and 3 more)
-
Behind schedule as usual... Ok so we've made it into the new house but my model room is currently a model storage room. I need to sell off some stuff I know I'll never build so I can get my work area set up.
- 120 replies
-
- 2
-
-
- crabbing skiff
- Chesapeake Bay crabbing skiff
- (and 3 more)
-
Wow Derek, Great build log so far... Your pictures are fantastic. Nice and close and very easy to relate to what your describing in the log. I have this model in my stash, but am working on some simpler builds first. She makes a beautiful model though and I'm leaning towards this as my first plank on bulkhead model. Also, I'm not sure if you found this already as part of your research, but a gentleman named Gary Brinker has a detailed 40 part YouTube build of this kit from start to finish. I know he discusses some of the pitfalls of the instructions and ambiguities of the plans during the build. In the end, his turned out VERY nice and I believe he said it was only his 2nd wood ship model as well. Anyway, thank you for sharing your hard work and I look forward to following your progress. Don
-
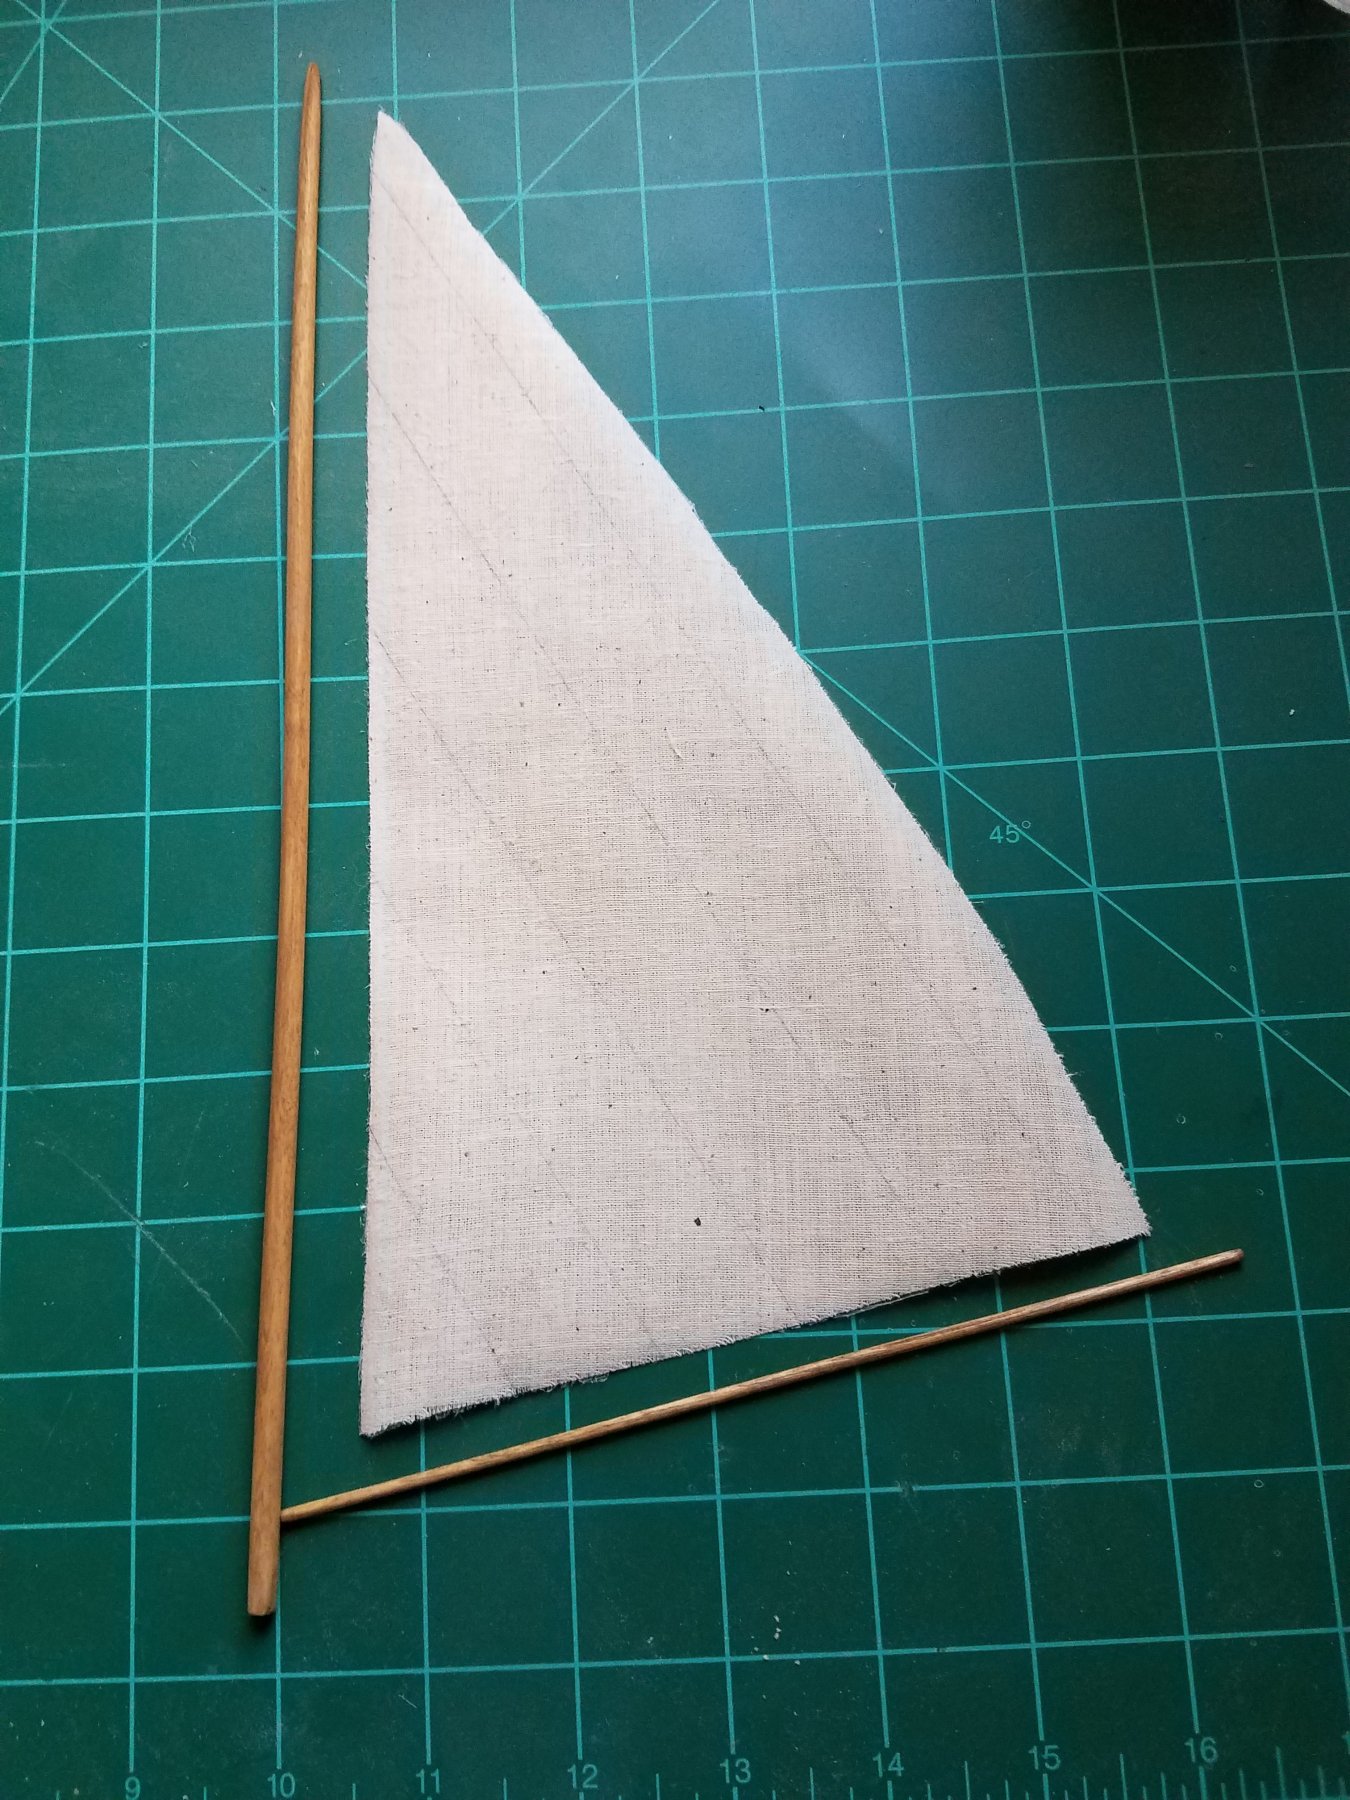
So here is the only recent progress I can report on: I've cut out the sail and shaped and stained the mast and the boom. As you can see from the picture below the boom is not taking the stain quite as well as the mast did. I will attempt a few more "coats" and if it still looks dodgy, I will likely just replace it with a higher quality material. As for the sail itself, I coated it with dope on both sides to give it a little rigidity. I'm probably going to experiment a bit more with it since I purchased aftermarket sail cloth and have a lot of extra to try different things. The one below isn't too bad but the "frays" tend to grow over time even after sealing the edges with fabric sealer. I don't really like the "hemmed" approach as it usually looks way out of scale. I have to admit that I don't know a lot about fabric or sewing so I'm a bit out of my element here. And I'm definitely open to suggestions... As far as the stitch lines on the sail go, I just used a pencil to lightly indicate them. I still am not completely satisfied with those. On my next attempt, I think I will use a brown colored pencil. As I stated in my previous post, this will likely be the only progress I make until I get settled into our new house and my new dedicated workshop. Look for something in the early summer perhaps. Don

- 120 replies
-
- 1
-
-
- crabbing skiff
- Chesapeake Bay crabbing skiff
- (and 3 more)
-
GREAT JOB! Wow Elijah, you have really done some fantastic work here. An outstanding first effort (waaaay better than mine) and the the fact that you stuck with it, didn't get discouraged and came through it all with a great looking Phantom should be an inspiration to all of us! As others have stated, your patience, attitude and work ethic shows a maturity and strength of character not often found in young people today. I'm sure whatever you chose to do in life, you will be successful at it. Thank you for being willing to share your first build experience with everyone. I look forward to following your Philidelphia build and I'm sure it will be fantastic. Don
- 701 replies
-
- 4
-
-
- phantom
- model shipways
- (and 1 more)
-
Just a quick update since it's been awhile... I got laid off in late summer of last year (I know...life happens...) and that obviously had an effect on my time and money priorities. As such, the crabbing skiff (and modeling budget) went back on hold whilst I concentrated on finding a new job. I did make a little bit of progress in the fall (as seen in the previous few posts) but not a lot. Well I'm happy to report that right after Thanksgiving, I started a new and better job. The only problem was that my commute is about 90 min to work and 120 - 150 min home in the evening (depending on traffic) which doesn't leave much time for modeling. Anyway, that's probably more than anyone wanted to know about my personal life, but I wanted everyone who might be following this build to know that I have not abandoned the model and nothing has gone wrong with it, I've just had very little spare time lately. This should all be changing soon as we are in the process of buying a new house that will be closer to the office and will allow me to have a dedicated room/workshop for modeling. What that also means is that it might be a little while longer before we finish this build as it will take some time to set up in the new house. I have made a bit of progress on the mast, boom and sail and I will try and post something on that soon (before packing up for the move). Then hopefully come summer, I'll be back in full swing with a dedicated workshop and we'll get this little gal done! Don
- 120 replies
-
- 2
-
-
- crabbing skiff
- Chesapeake Bay crabbing skiff
- (and 3 more)
-
Painted and lightly gloss coated...
- 120 replies
-
- 8
-
-
- crabbing skiff
- Chesapeake Bay crabbing skiff
- (and 3 more)
-
All masked up and ready for the paint shop! I'll be painting it the same as the box cover model. White with red below the waterline and leaving the interior natural wood.

- 120 replies
-
- 4
-
-
- crabbing skiff
- Chesapeake Bay crabbing skiff
- (and 3 more)
-
whats an easier build for a first kit
DonInAZ replied to rdestefano01's topic in Wood ship model kits
Hi Rob, I always enjoy reading threads about someone just starting out and their process for choosing a first model kit. Back in the 90s, I tried and failed to build what was considered a "beginners" kit - the Model Shipways Phantom. Because there was no internet and I didn't have anyone to answer questions, it all went horribly wrong and I got discouraged about the whole hobby. I recently decided to try again as, like most of us here, I have a passion for all things nautical. This time around I went with an even more basic kit, the Chesapeak Bay Crabbing Skiff by Midwest Products. So far, this build is going well (except for moving and losing my work area a couple of times) so it was the right approach for me. I'll probably do one more Midwest kit before tackling the Phantom again. Then I will venture into more advanced kits that require planking and lots of rigging. So did you make a final decision yet? If and when you start, I definitely recommend a build log. It's a great way to show off your work and also to present questions or problems. This group is a great resource and inspiration. Best of luck to you and most importly, relax and enjoy your first build... Don -
Hello all, I'm looking for recommendations for a first plank on bulkhead kit. Is there one out there that is particularly well suited to learn the "art" of planking on? I'm trying to methodically work my way up from relatively simple kits to building more advanced kits by building in a specific order where each successive build is slighty more challenging than the previous without taking any HUGE jumps. Here is what I have in mind (subject to change obviously): 1. I'm starting with a couple of very simple Midwest (R.I.P. btw) kits and am currently finishing up the "Chesapeak Bay Crabbing Skiff" 2. Model Shipways Phantom. I started this kit once before but it kind of got off the rails as it was in the pre-internet days and I didn't really have anyone to answer my questions. 3. THE SUBJECT OF THIS INQUIRY - An entry-level plank on bulkhead model that will give me some basic planking experience to carry forward. Preferably something with a good practicum or at least some detailed build logs. 4. Model Shipways Bluenose 5. AL HMS Surprise, MS U.S.S. Constitution & Mamoli Cutty Sark. The order gets a little "iffy" here as I'm not really sure where these more advanced kits fall in order of difficulty. I realize this is about a 15-20 year building plan (for me at least) and will probably change. I do own the Model Shipways Fair American but don't know if that would be a good candidate or not. Thank you in advance for you input! Don
-
I know it has its flaws but I love the fact that its HUGE! It will be my first attempt at a full sized tall ship and as such it will have to wait for me to get a couple of simpler models under my belt, but she is officially in the queue. I wasn't going to buy the model yet, but I saw it online at a major hobby retailer for $509 w/free shipping and figured I wouldn't probably see it much cheaper so decided to pull the trigger on it. I had considered the DiAgostini subscription approach until I found out I could get their detailed build instructions for free. $509 is still a lot of money for my modeling budget but I'm guessing it's at least a one year project. Probably more. I need to start following some build logs for her.
-
For anyone interested in building the AL 1:48 HMS Surprise: In an above post I stated that the Model-Space rep said that their detailed instructions are not available for sale seperately. OK, technically that is true... but they ARE available for FREE! Not on the US Model Space website but on the "GB" or Great Britain website. Here is the link: http://www.model-space.com/gb/build-the-hms-surprise.html Scroll down and click on the tab labled "The Build" and it will take you to a page where you can download all 28 pdf files (2 for each of the 14 monthly packets). I'm not sure if they intended to make these available publically or if this was an oversight but on the US website you can only see the first month's packet (as a sample). So for now at least you can get a detailed set of illustrated instructions for building the AL 1:48 scale HMS Surprise at no cost. I checked to see if the HMS Victory instructions were also available and only the first 5 packets were listed, so I'm guessing not but maybe they will add more later.
-
Thanks for the heads up on the San Felipe BV! I'll check it out. I have heard of the SF but I don't know a lot about her.
-
I guess my post came off like I was knocking the Model-Space line and I think that was mostly due to my disappointment that there were not upgraded materials involved for that much additional investment. But value is always subjective and if the ONLY path you have to completion is the Di Agostini approach then I would say that is better than not building at all. I also should have noted that they do GUARENTEE the product they sell and if there is missing or defective material, they replace it at no cost and with minimal hassle. I was very interested in the HMS Surprise kit and I still haven't made a final decision but I'm leaning toward buying the kit and building it myself with the help of more experienced modelers in my local club.
-
Sorry to resurect an old thread but I finally spoke at length with a Model-Space rep and resolved the following questions: 1. The kits are NOT upgraded and/or supplemented. 2. The only thing you get for DOUBLE the price in most cases are the detailed assembly instructions. 3. The instructions are NOT available for purchase on their own. So what it comes down to is a $600 practicum. Hope this helps to answer any questions people still had re Di Agostini / Model-Space.
-
I lost my modeling area for a time. I have since carved out a corner of my office that will get me back in the game and the Crabbing Skiff back on the ways soon!
- 120 replies
-
- 1
-
-
- crabbing skiff
- Chesapeake Bay crabbing skiff
- (and 3 more)
-
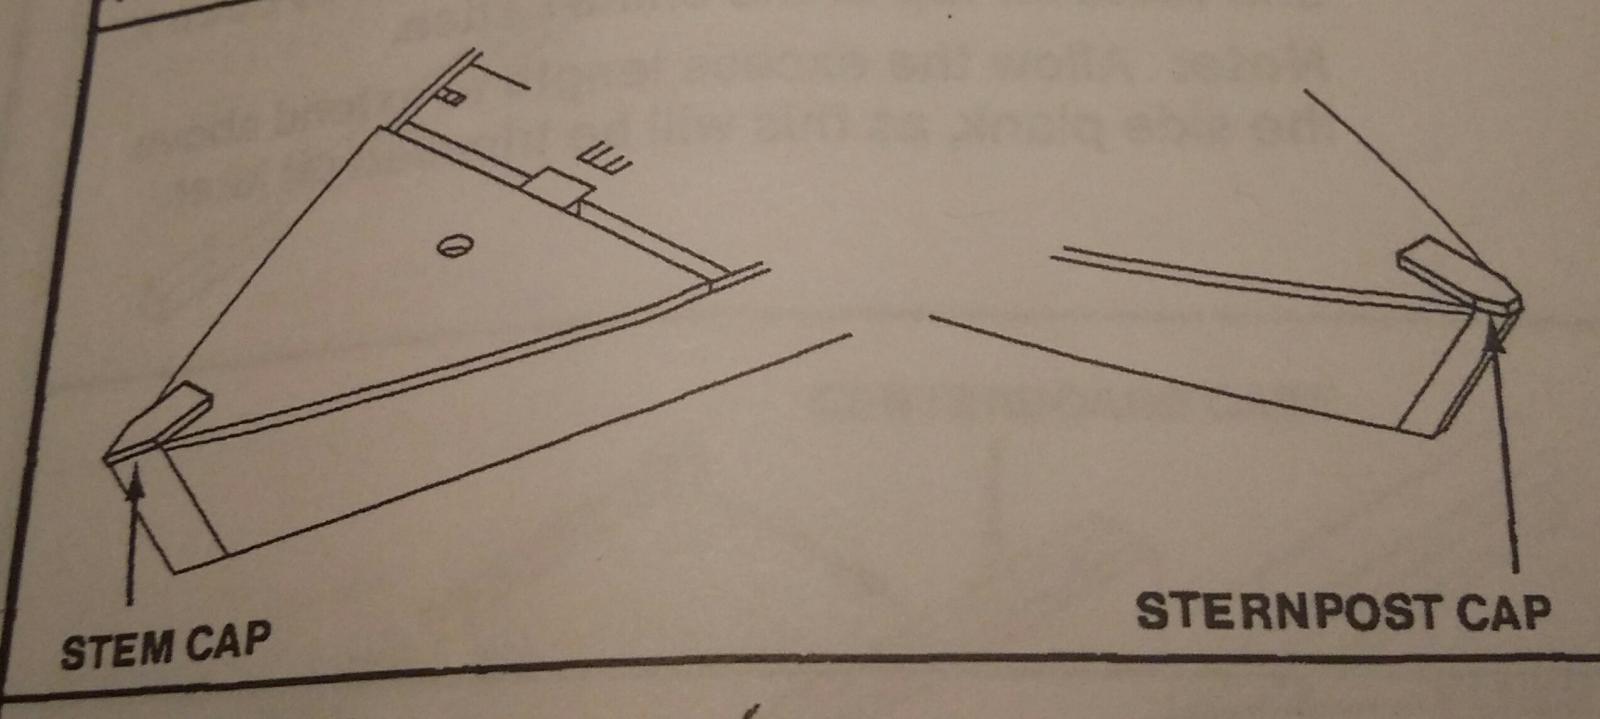
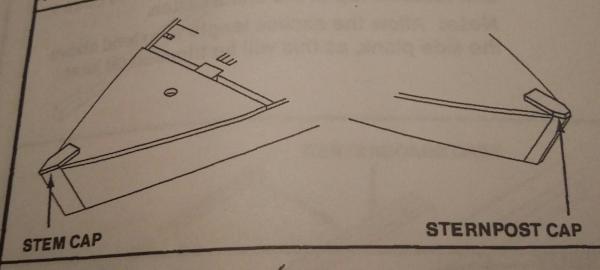
Kit Complaint #2: The kit instructions say to cut the stem cap and sternpost cap out of a scrap piece 3/16 x 1/ 16 wood. Since nothing was that size in the kit, and I don't have any laying around, I'll be making a trip to Hobby Bench on my lunch hour tomorrow. I mean really...how hard or expensive would it have been to throw in an inch and half long piece into the lumber bag.
- 120 replies
-
- 3
-
-
- crabbing skiff
- Chesapeake Bay crabbing skiff
- (and 3 more)
-
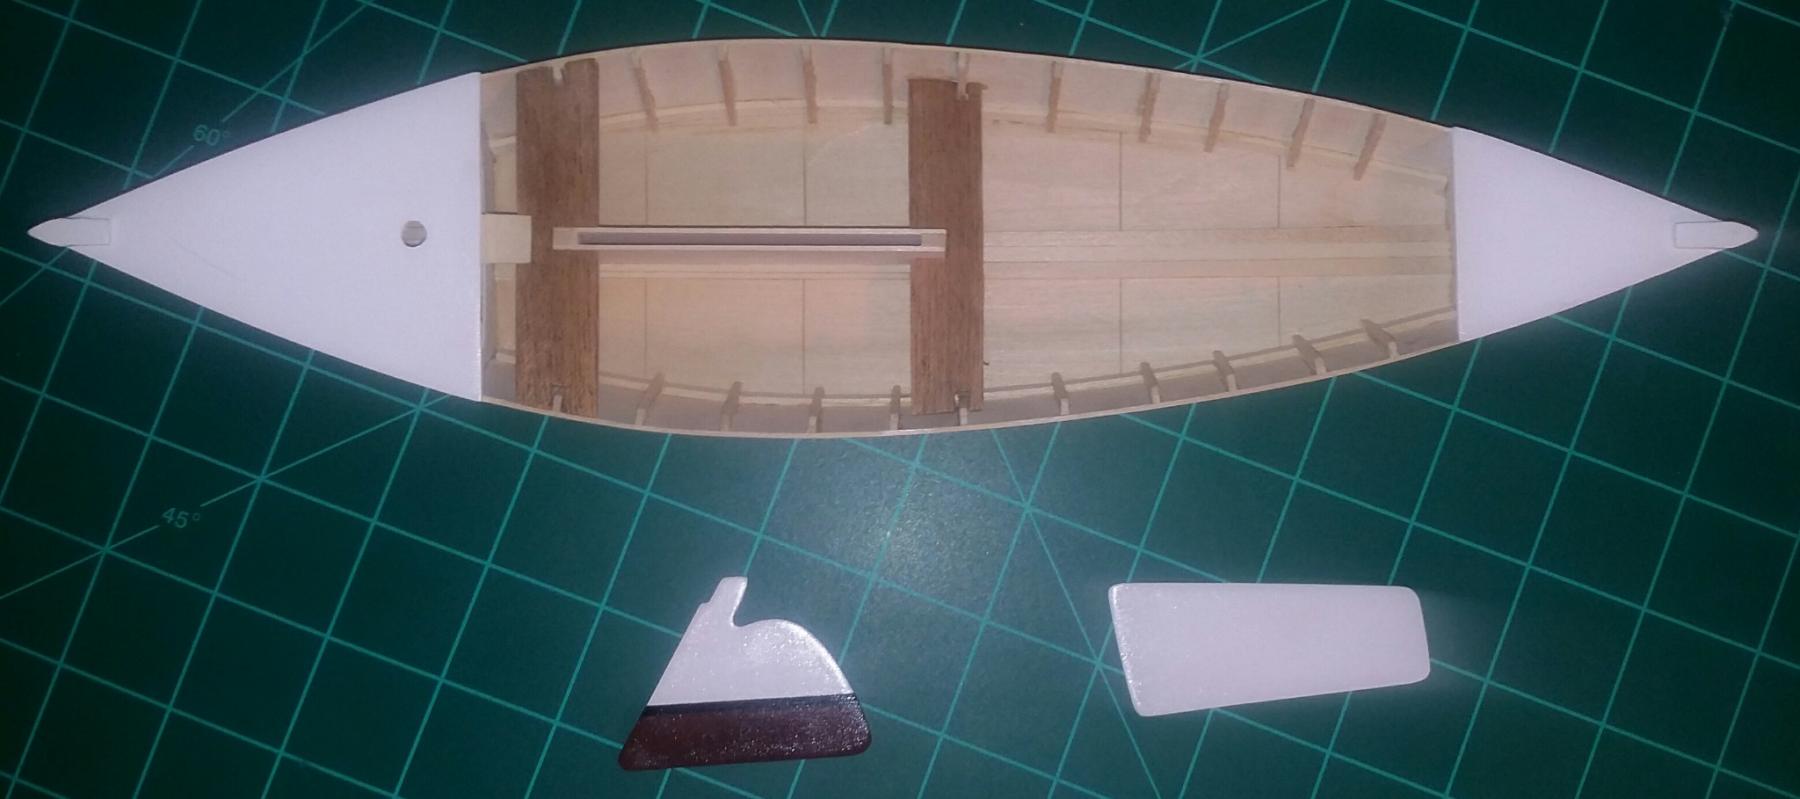
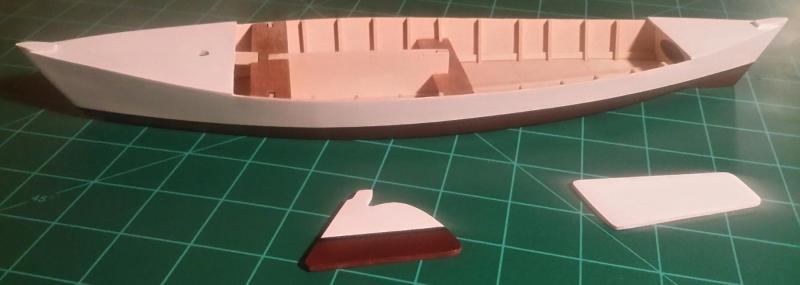
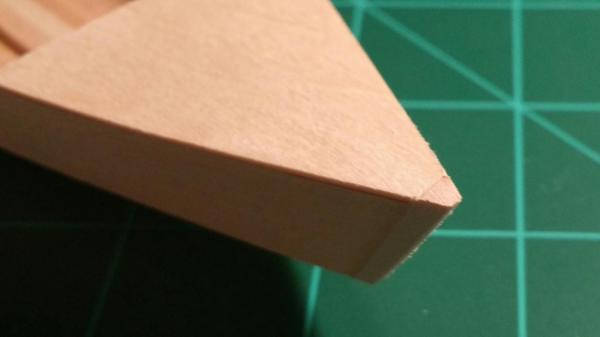
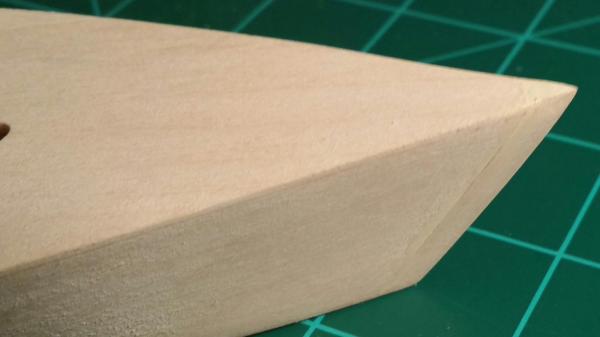
False Stempost and Sternpost... In shapping these I managed to sand the side hull planks near the bow all the way down to the stempost and ended up using a little wood filler to build it back up. No worries since this part of the hull will be painted anyway. The false sternpost is squared off to meet up with the rudder.
- 120 replies
-
- 3
-
-
- crabbing skiff
- Chesapeake Bay crabbing skiff
- (and 3 more)
-
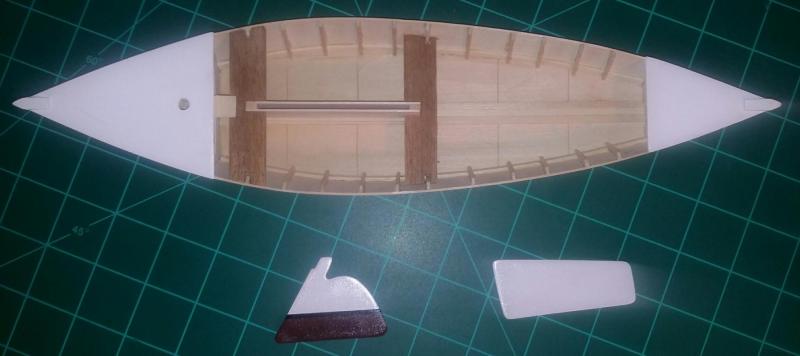
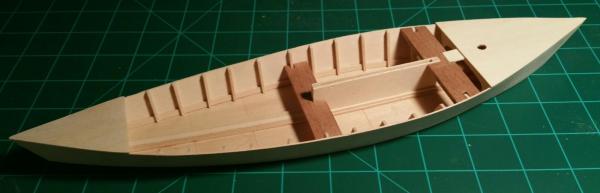
Next up was attaching the fore and aft decks and sanding them down to size. This step revealed the only kit flaw I've come across thus far. The aft deck piece is a fraction too narrow and short to place it as the instructions indicate. The fore deck was fine. Since Midwest has stopped producing model boat kits all together I guess I won't bother with an email...
- 120 replies
-
- 3
-
-
- crabbing skiff
- Chesapeake Bay crabbing skiff
- (and 3 more)
-
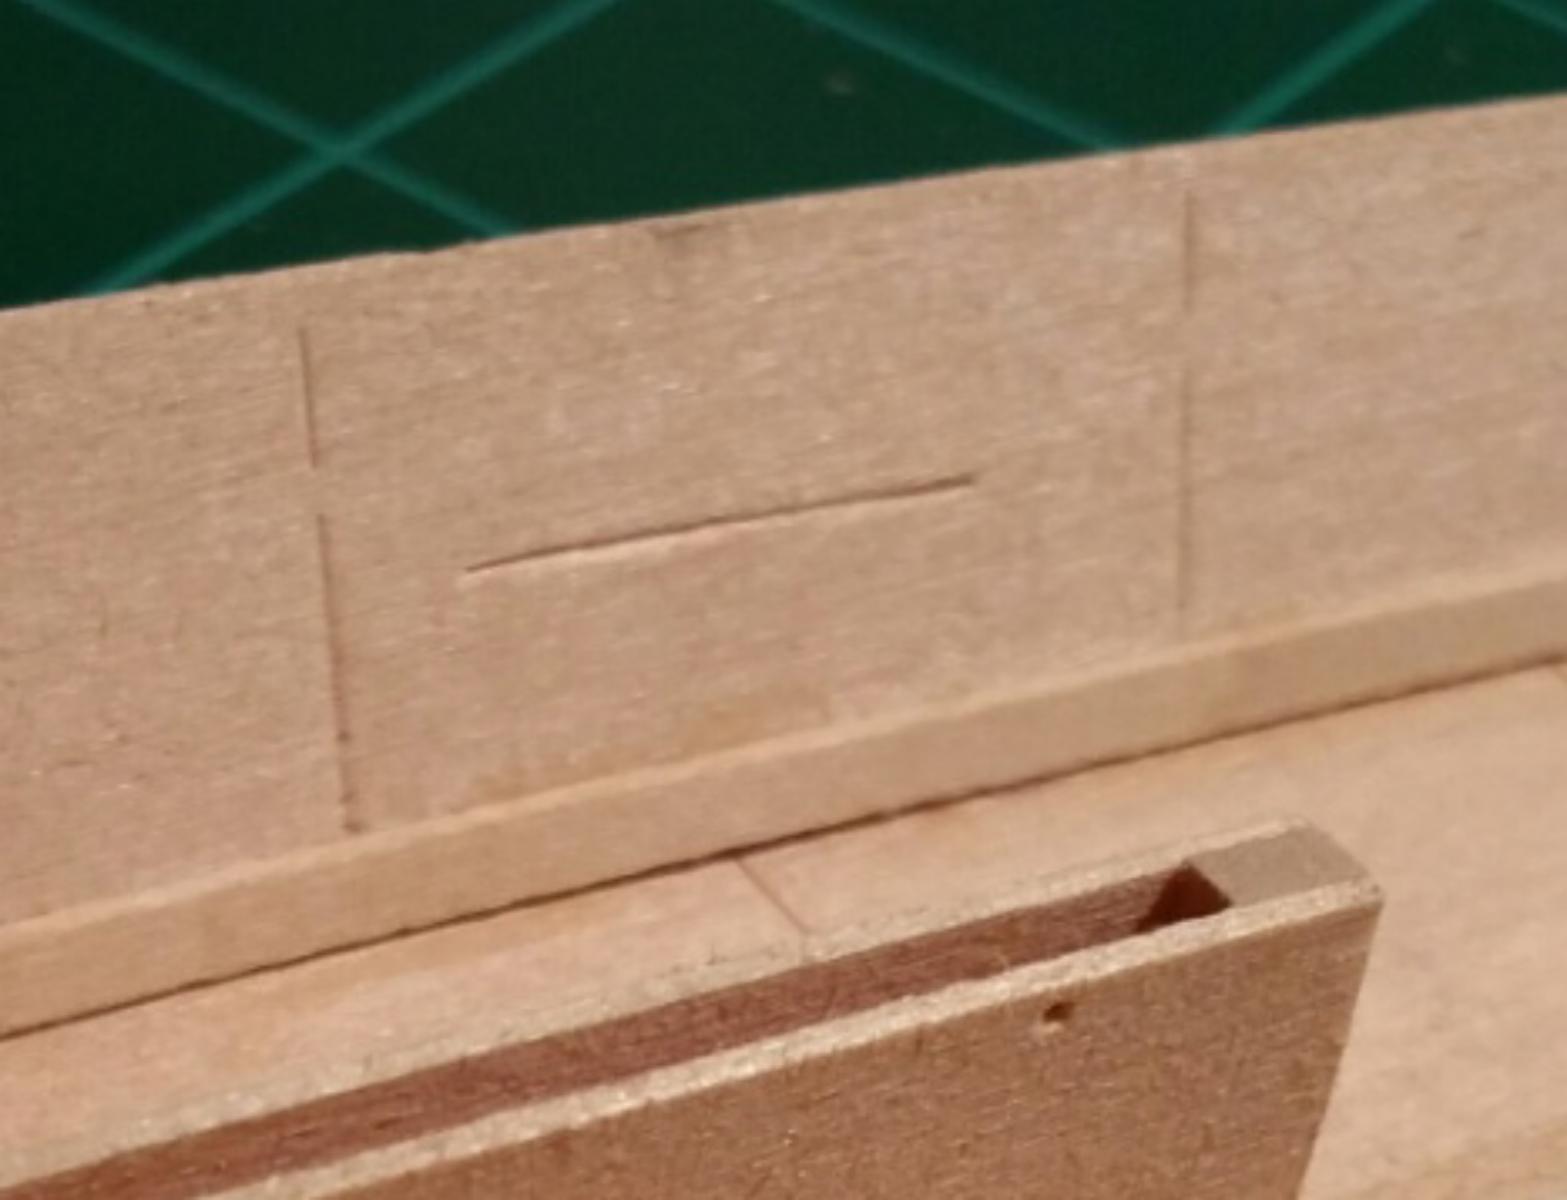
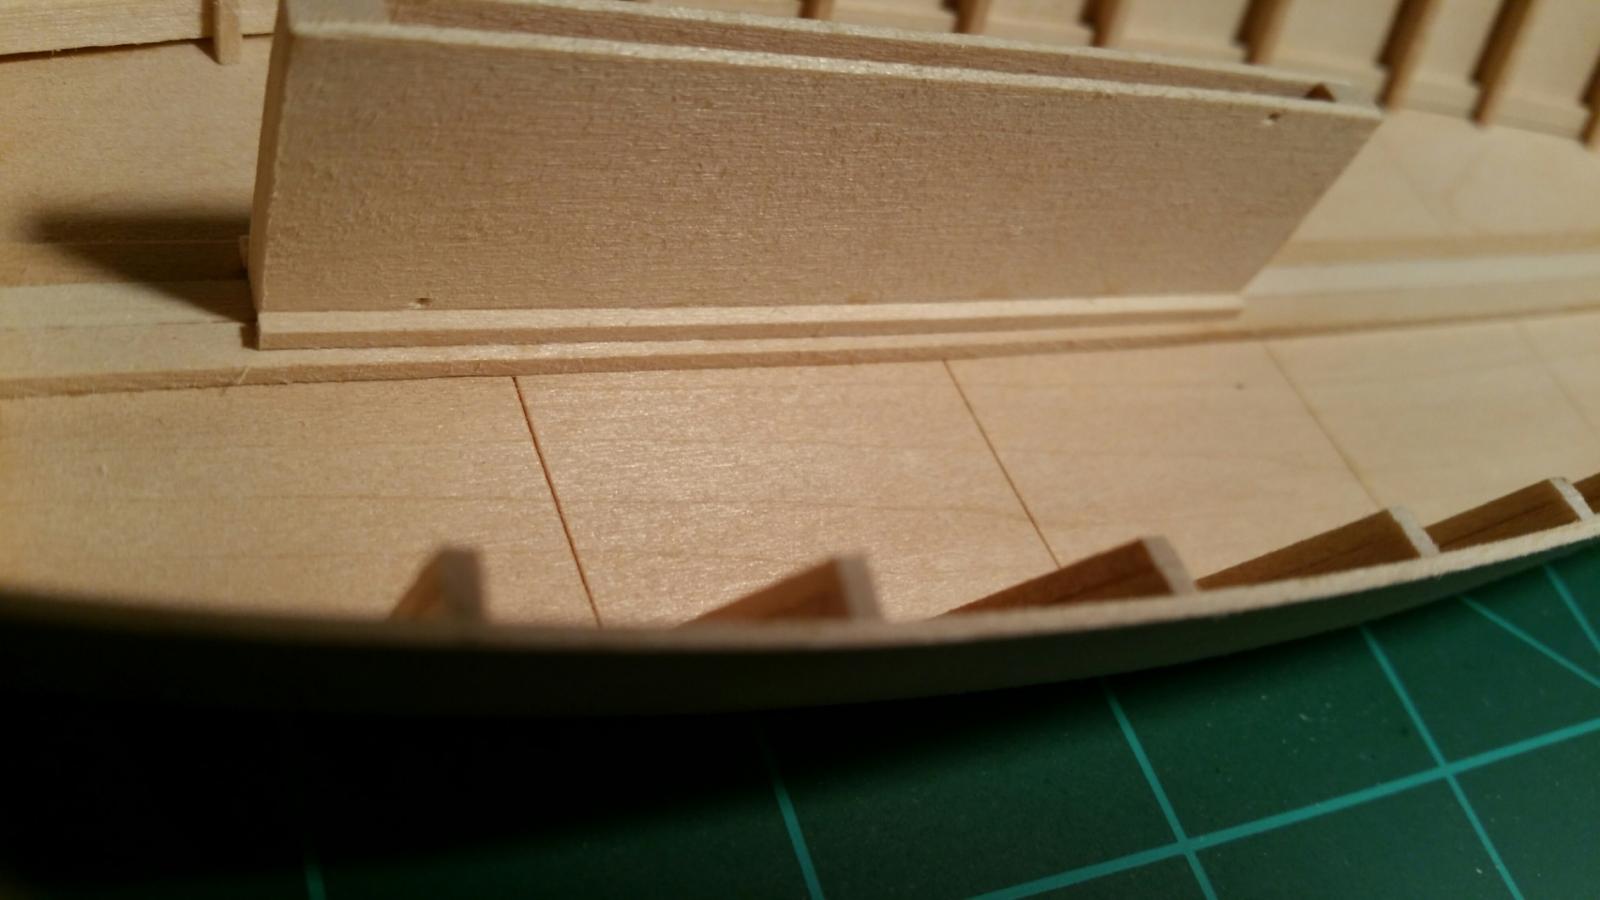
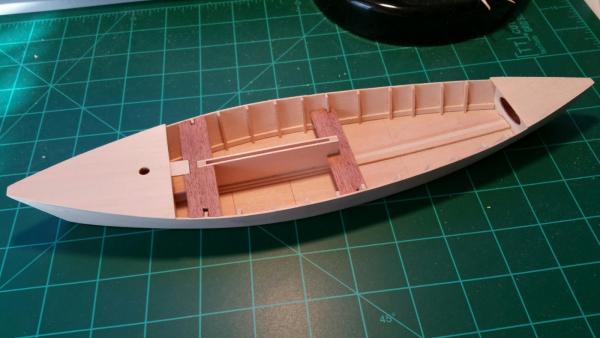
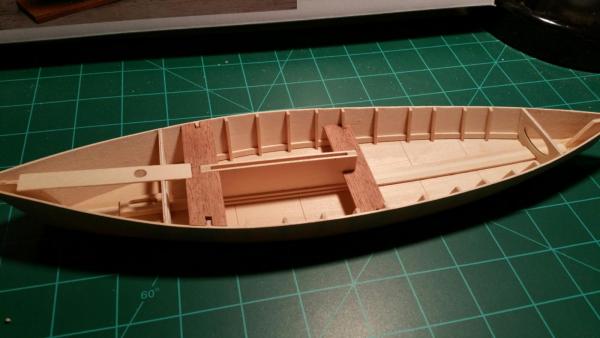
Ok so with the reference line filled, and all of the interior parts in place, it was finally time to glue the fore and aft thwarts in place as well as the king plank.
- 120 replies
-
- 2
-
-
- crabbing skiff
- Chesapeake Bay crabbing skiff
- (and 3 more)
-
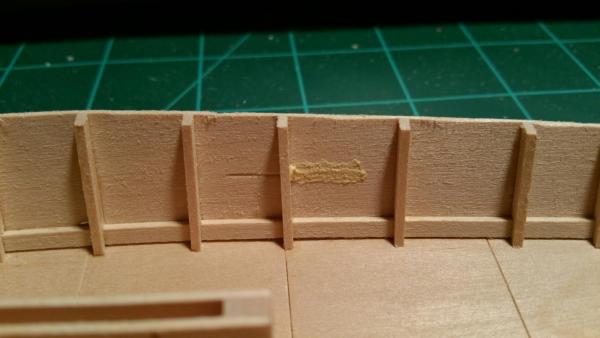
A little thinned Elmers Wood Filler applied...
- 120 replies
-
- 1
-
-
- crabbing skiff
- Chesapeake Bay crabbing skiff
- (and 3 more)
-
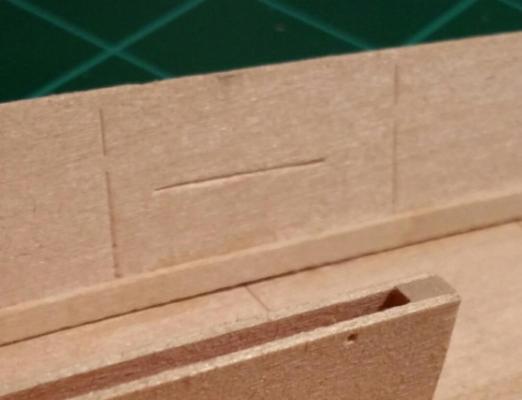
Next up... Before I can put the rear thwarts in place, I want to fill in the reference line that was scribed onto the inside of the hull. The thwart piece covers some of it but leaves about half of it visible and it needs to be cleaned up with a dab of wood putty.
-
Last bit for tonight was glueing the centerboard case baseboards into place.