Sea Hoss
-
Posts
420 -
Joined
-
Last visited
1 Follower

Recent Profile Visitors
2,527 profile views


-
 Bill Morrison reacted to a post in a topic:
Sea Witch by Moltinmark - FINISHED - Lindberg - 1/96
Bill Morrison reacted to a post in a topic:
Sea Witch by Moltinmark - FINISHED - Lindberg - 1/96
-
Bill Morrison reacted to a post in a topic:
Sea Witch by Moltinmark - FINISHED - Lindberg - 1/96
-
ccoyle reacted to a post in a topic:
US Brig Syren 1803 by Sea Hoss - FINISHED - Model Shipways -1:64
-
Obormotov reacted to a post in a topic:
MONTAÑES by Amalio
-
FillNill reacted to a post in a topic:
USN Picket Boat #1 1864 by Sea Hoss - FINISHED - Model Shipways
-
Sea Hoss reacted to a post in a topic:
US Brig Syren 1803 by Overworked724 – Model Shipways – Scale 1:64
-
Sea Hoss reacted to a post in a topic:
Emma C Berry by ahb26 - FINISHED - Model Shipways - 1/32
-
Sea Hoss reacted to a post in a topic:
HMS Winchelsea - FINISHED - 1764 - by Chuck (1/4" scale)
-
Sea Hoss reacted to a post in a topic:
USS Constitution by ERS Rich - Model Shipways - 5/32
-
 That looks very good! Makes me want to invest the time and money in trying my hand at one!
 -
Thank you all for your generous comments...I just have to stop adding stuff before I over do it!
-
Thanks for the comments, she's getting to be a popular model, lots of fun building her! Yes Will, the model RR sites are great for diorama components.
-
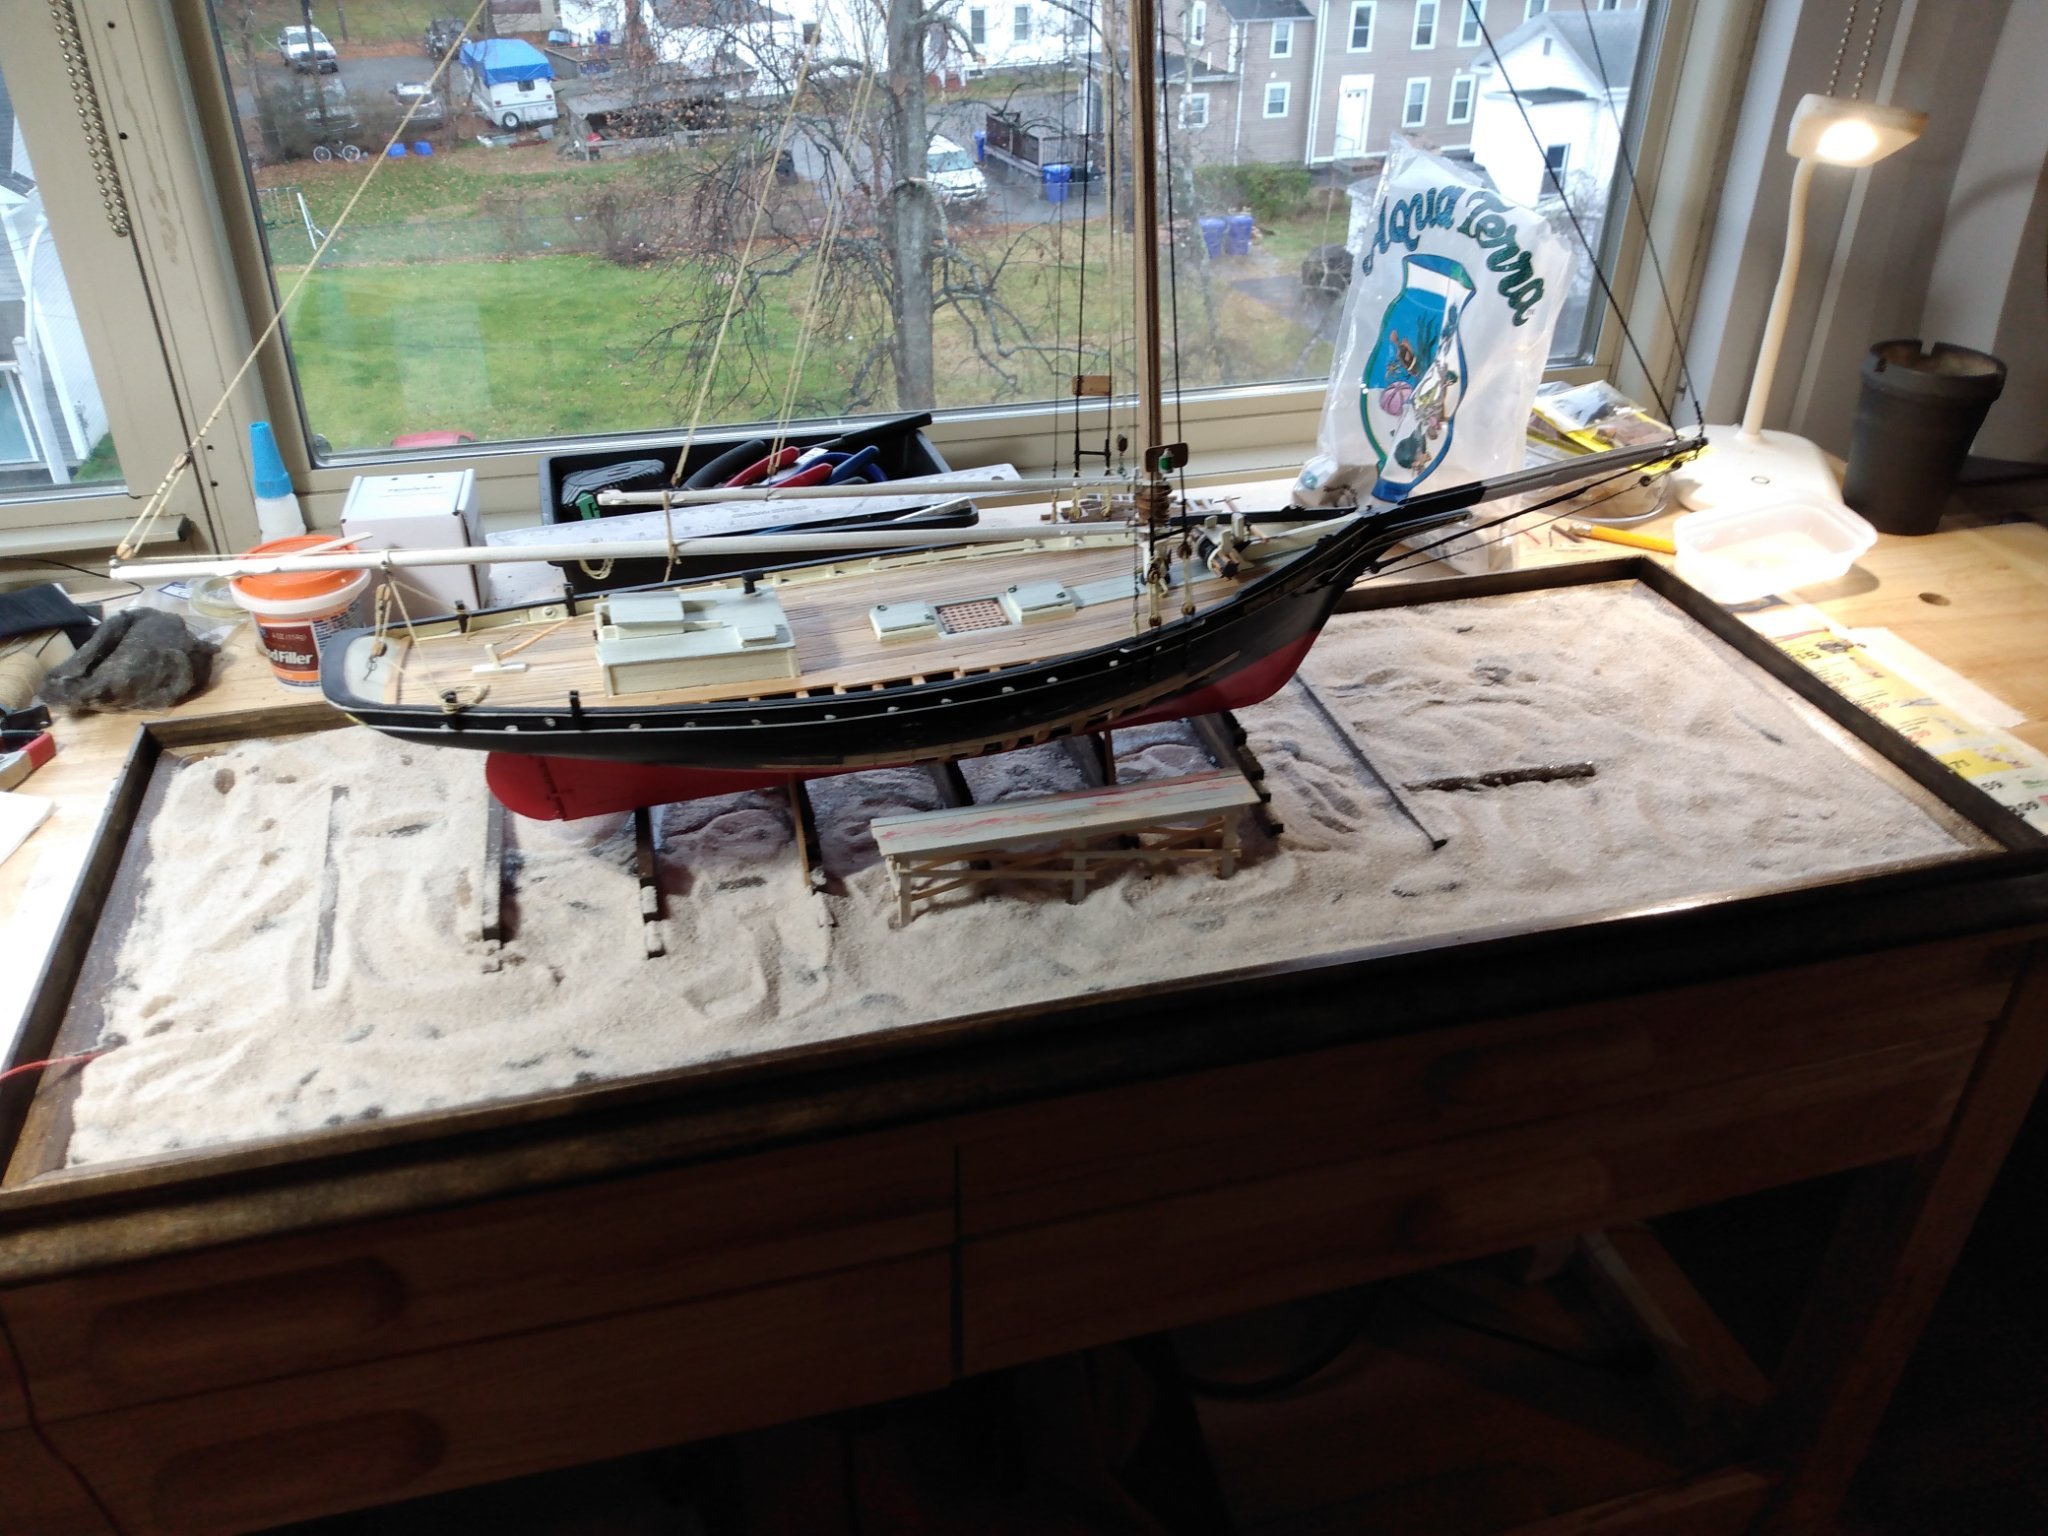
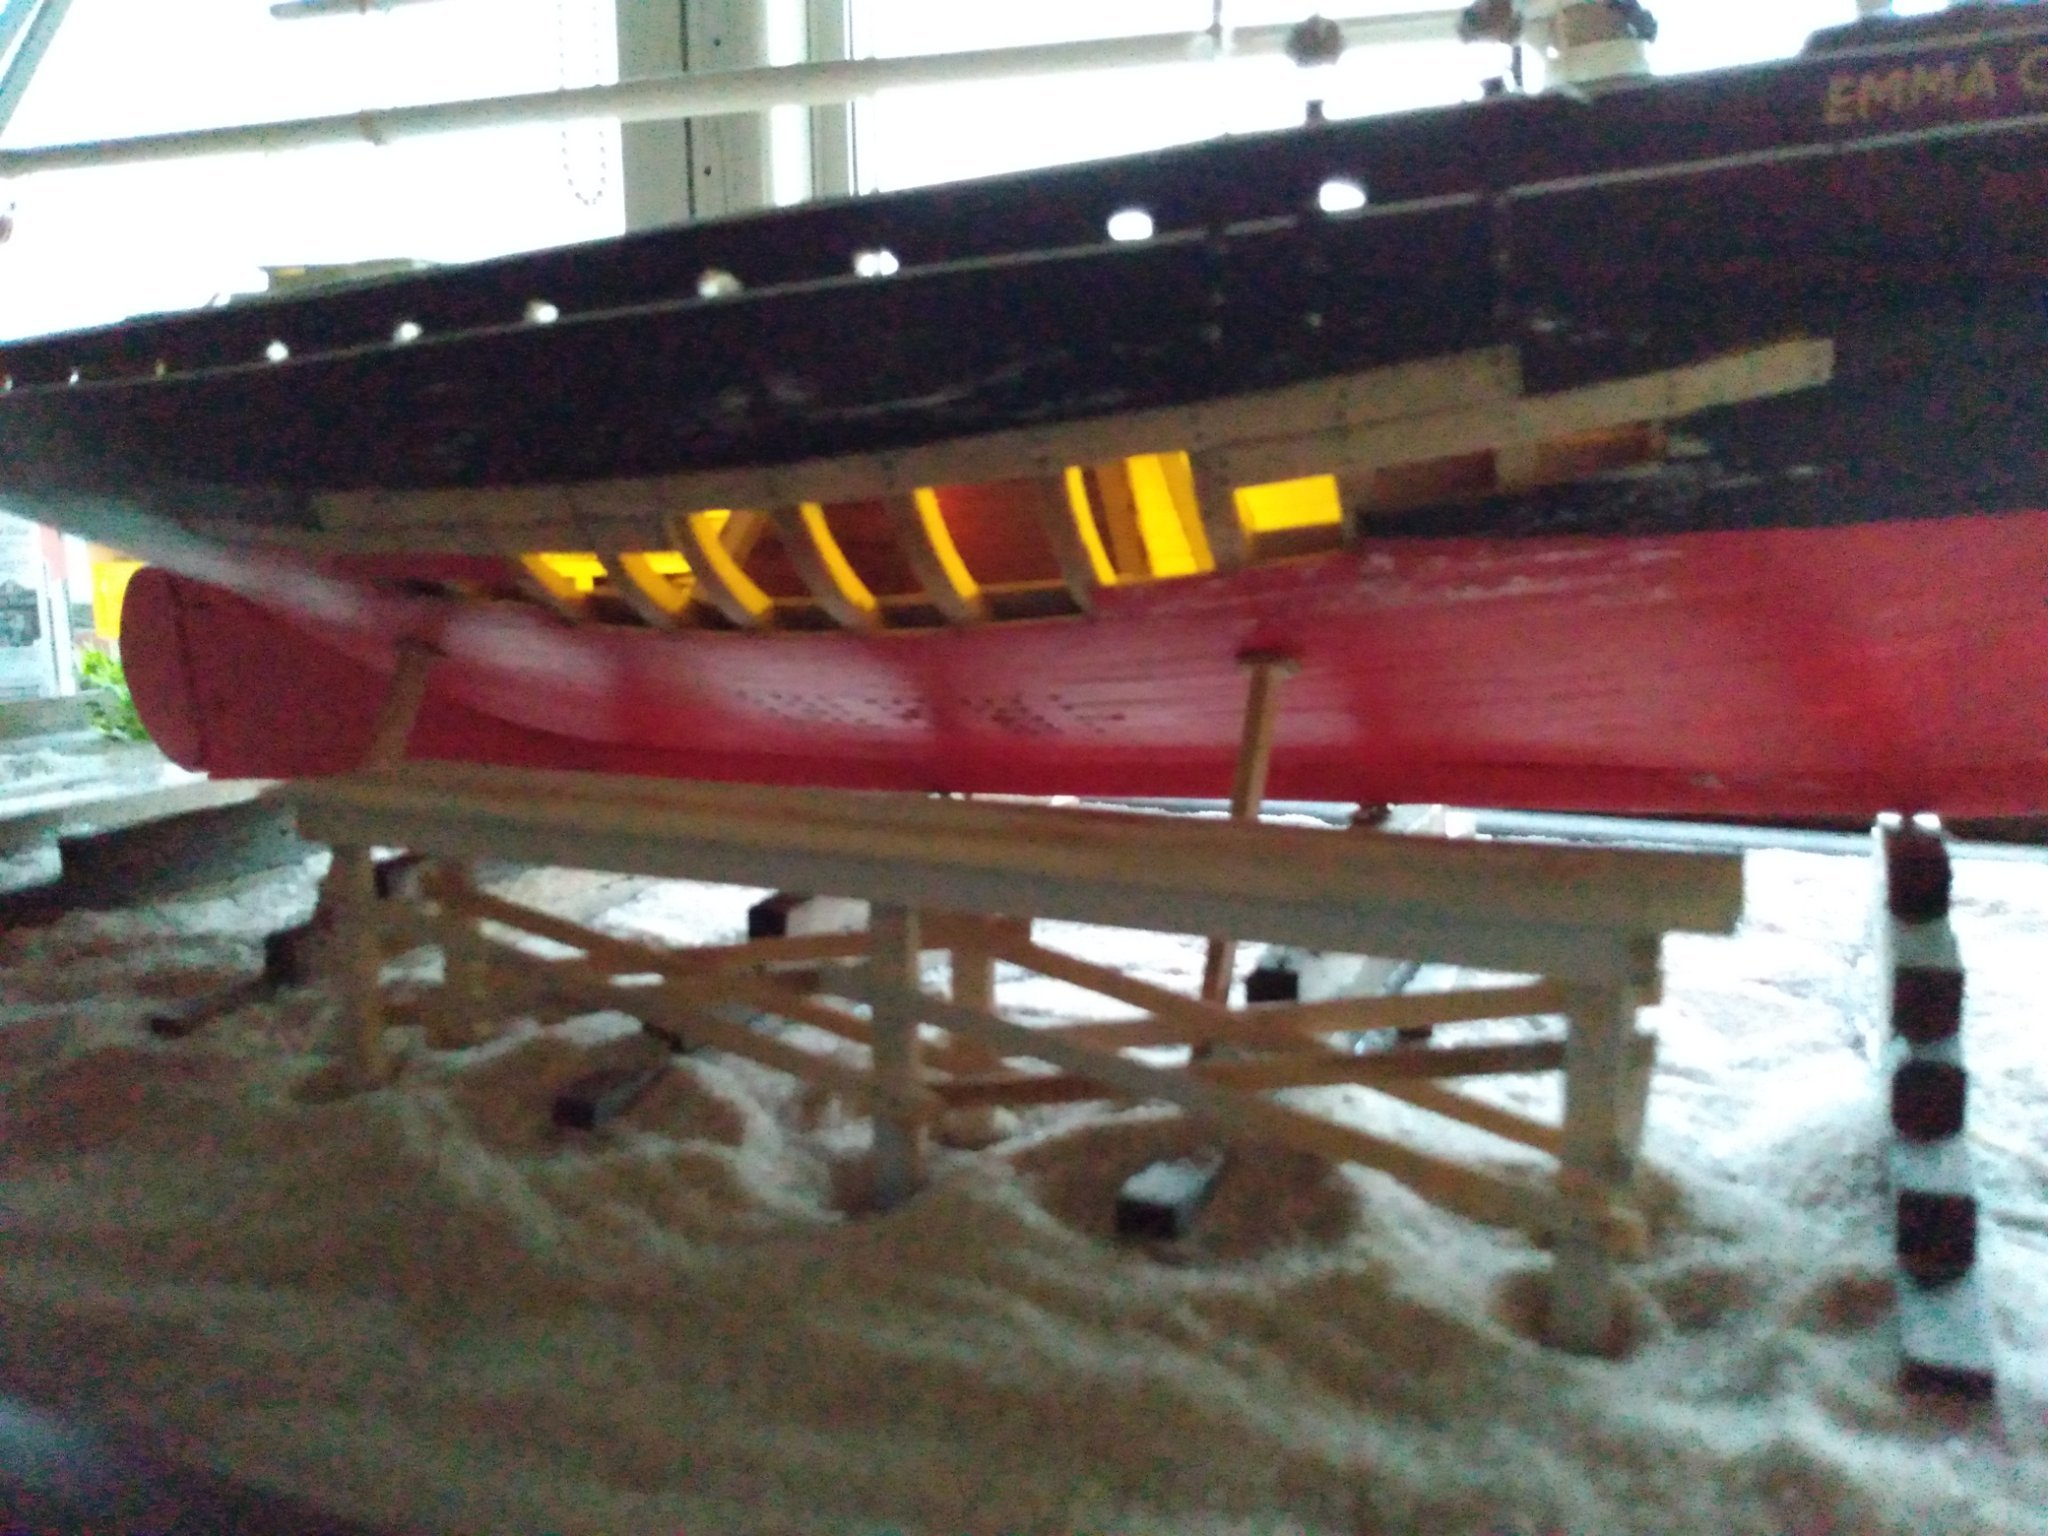
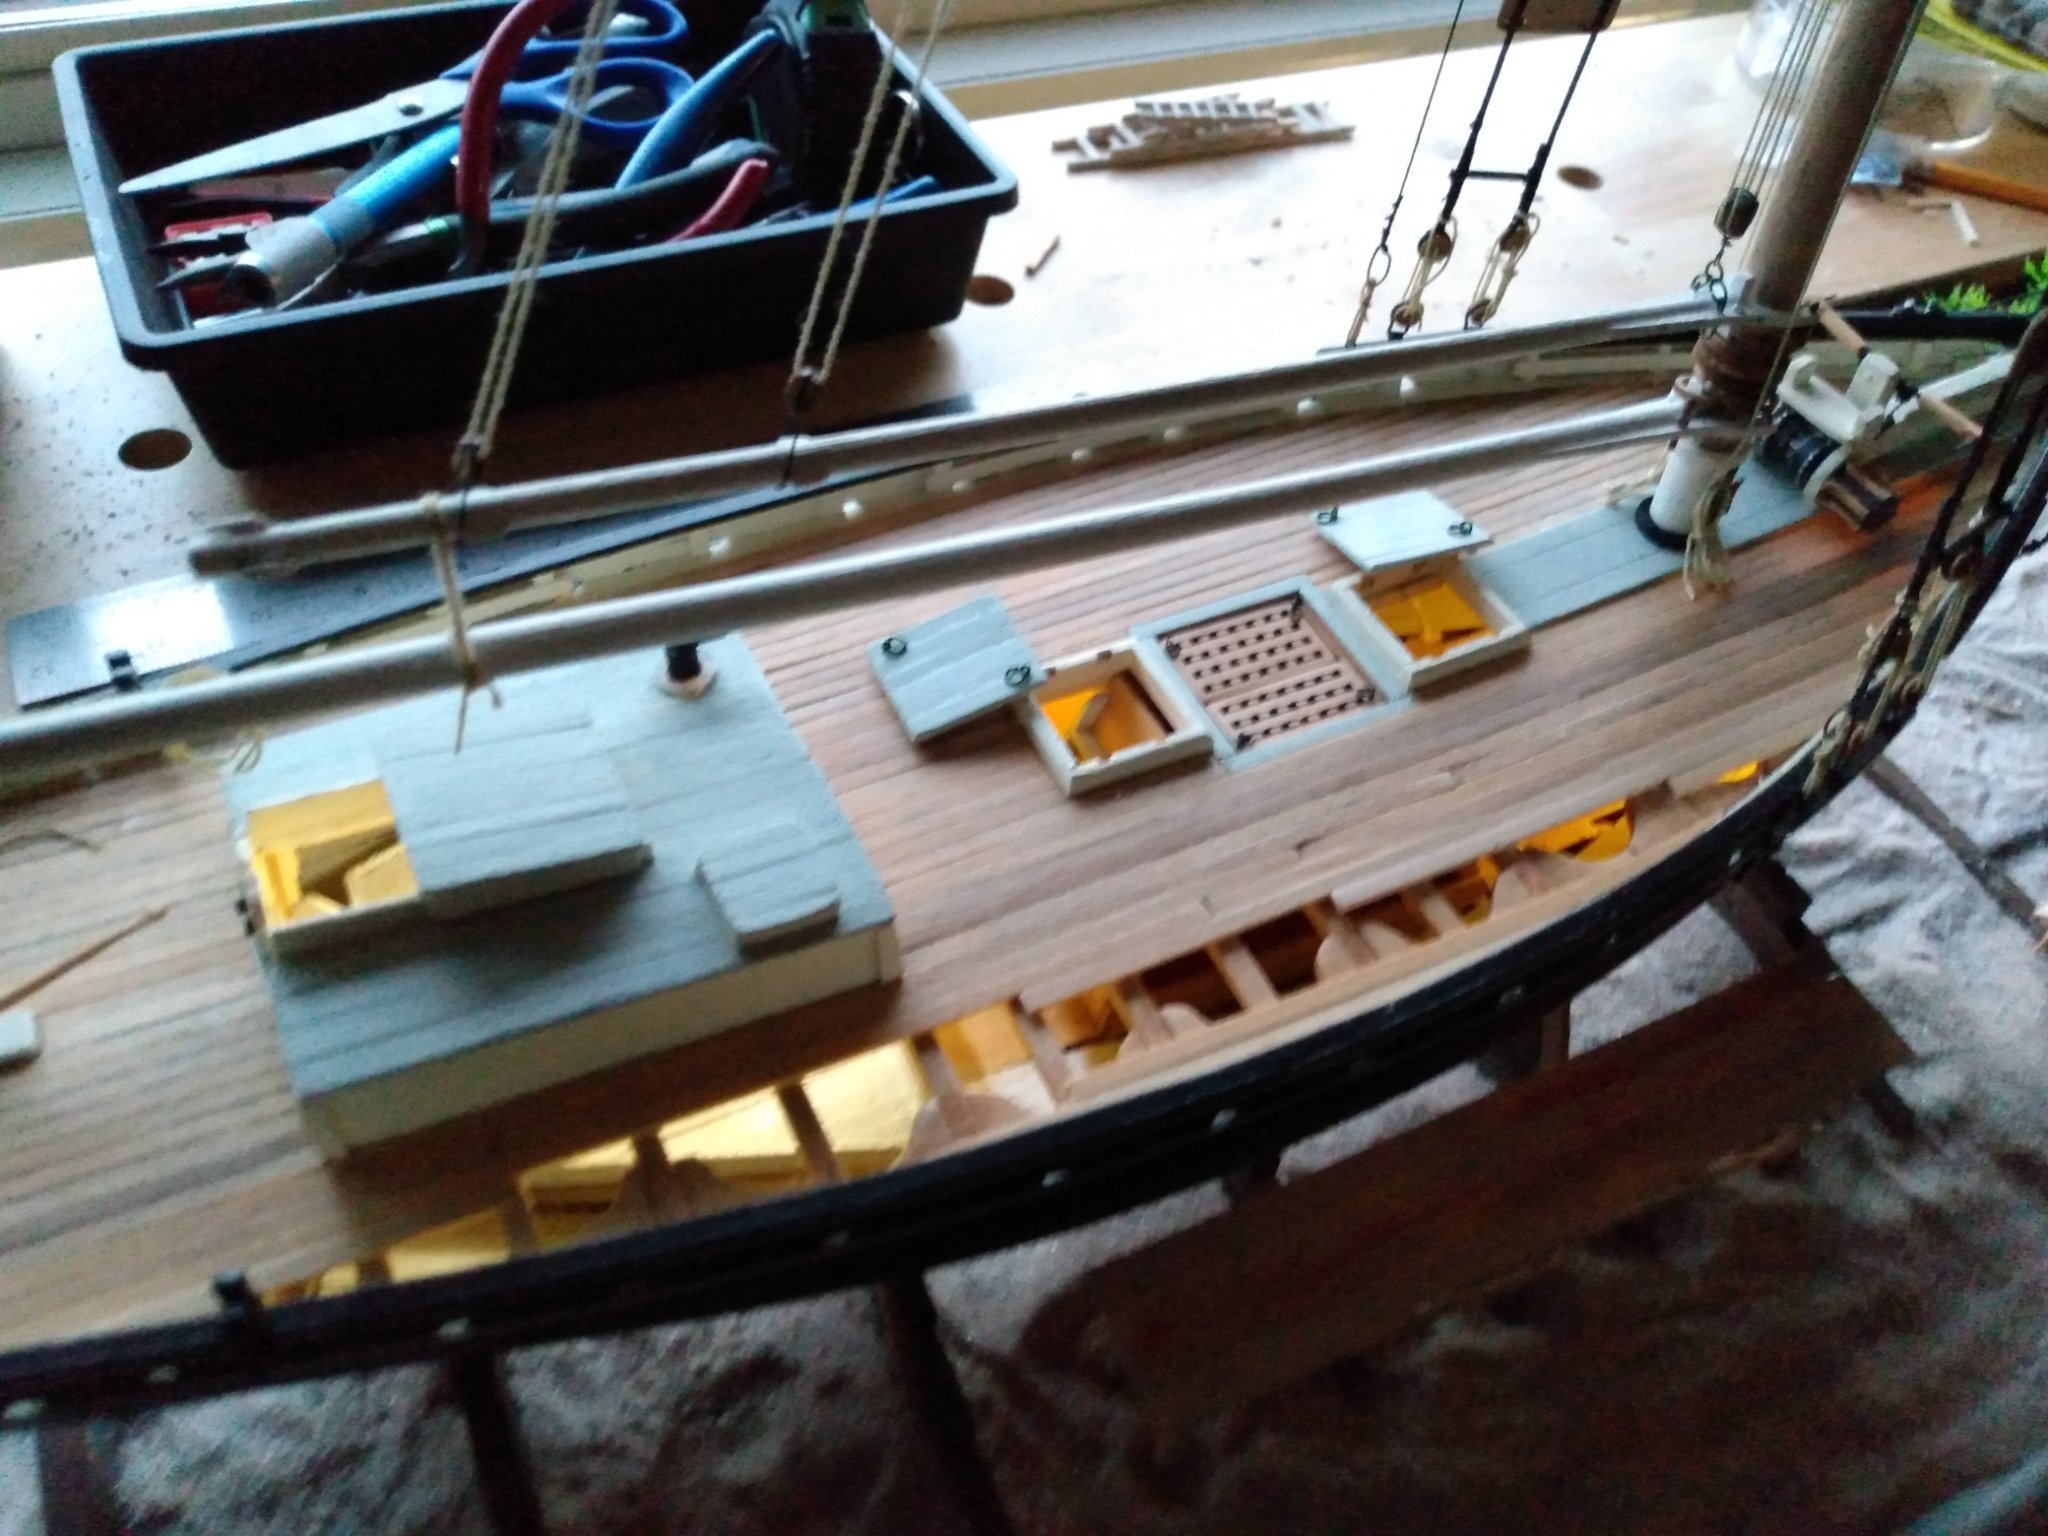
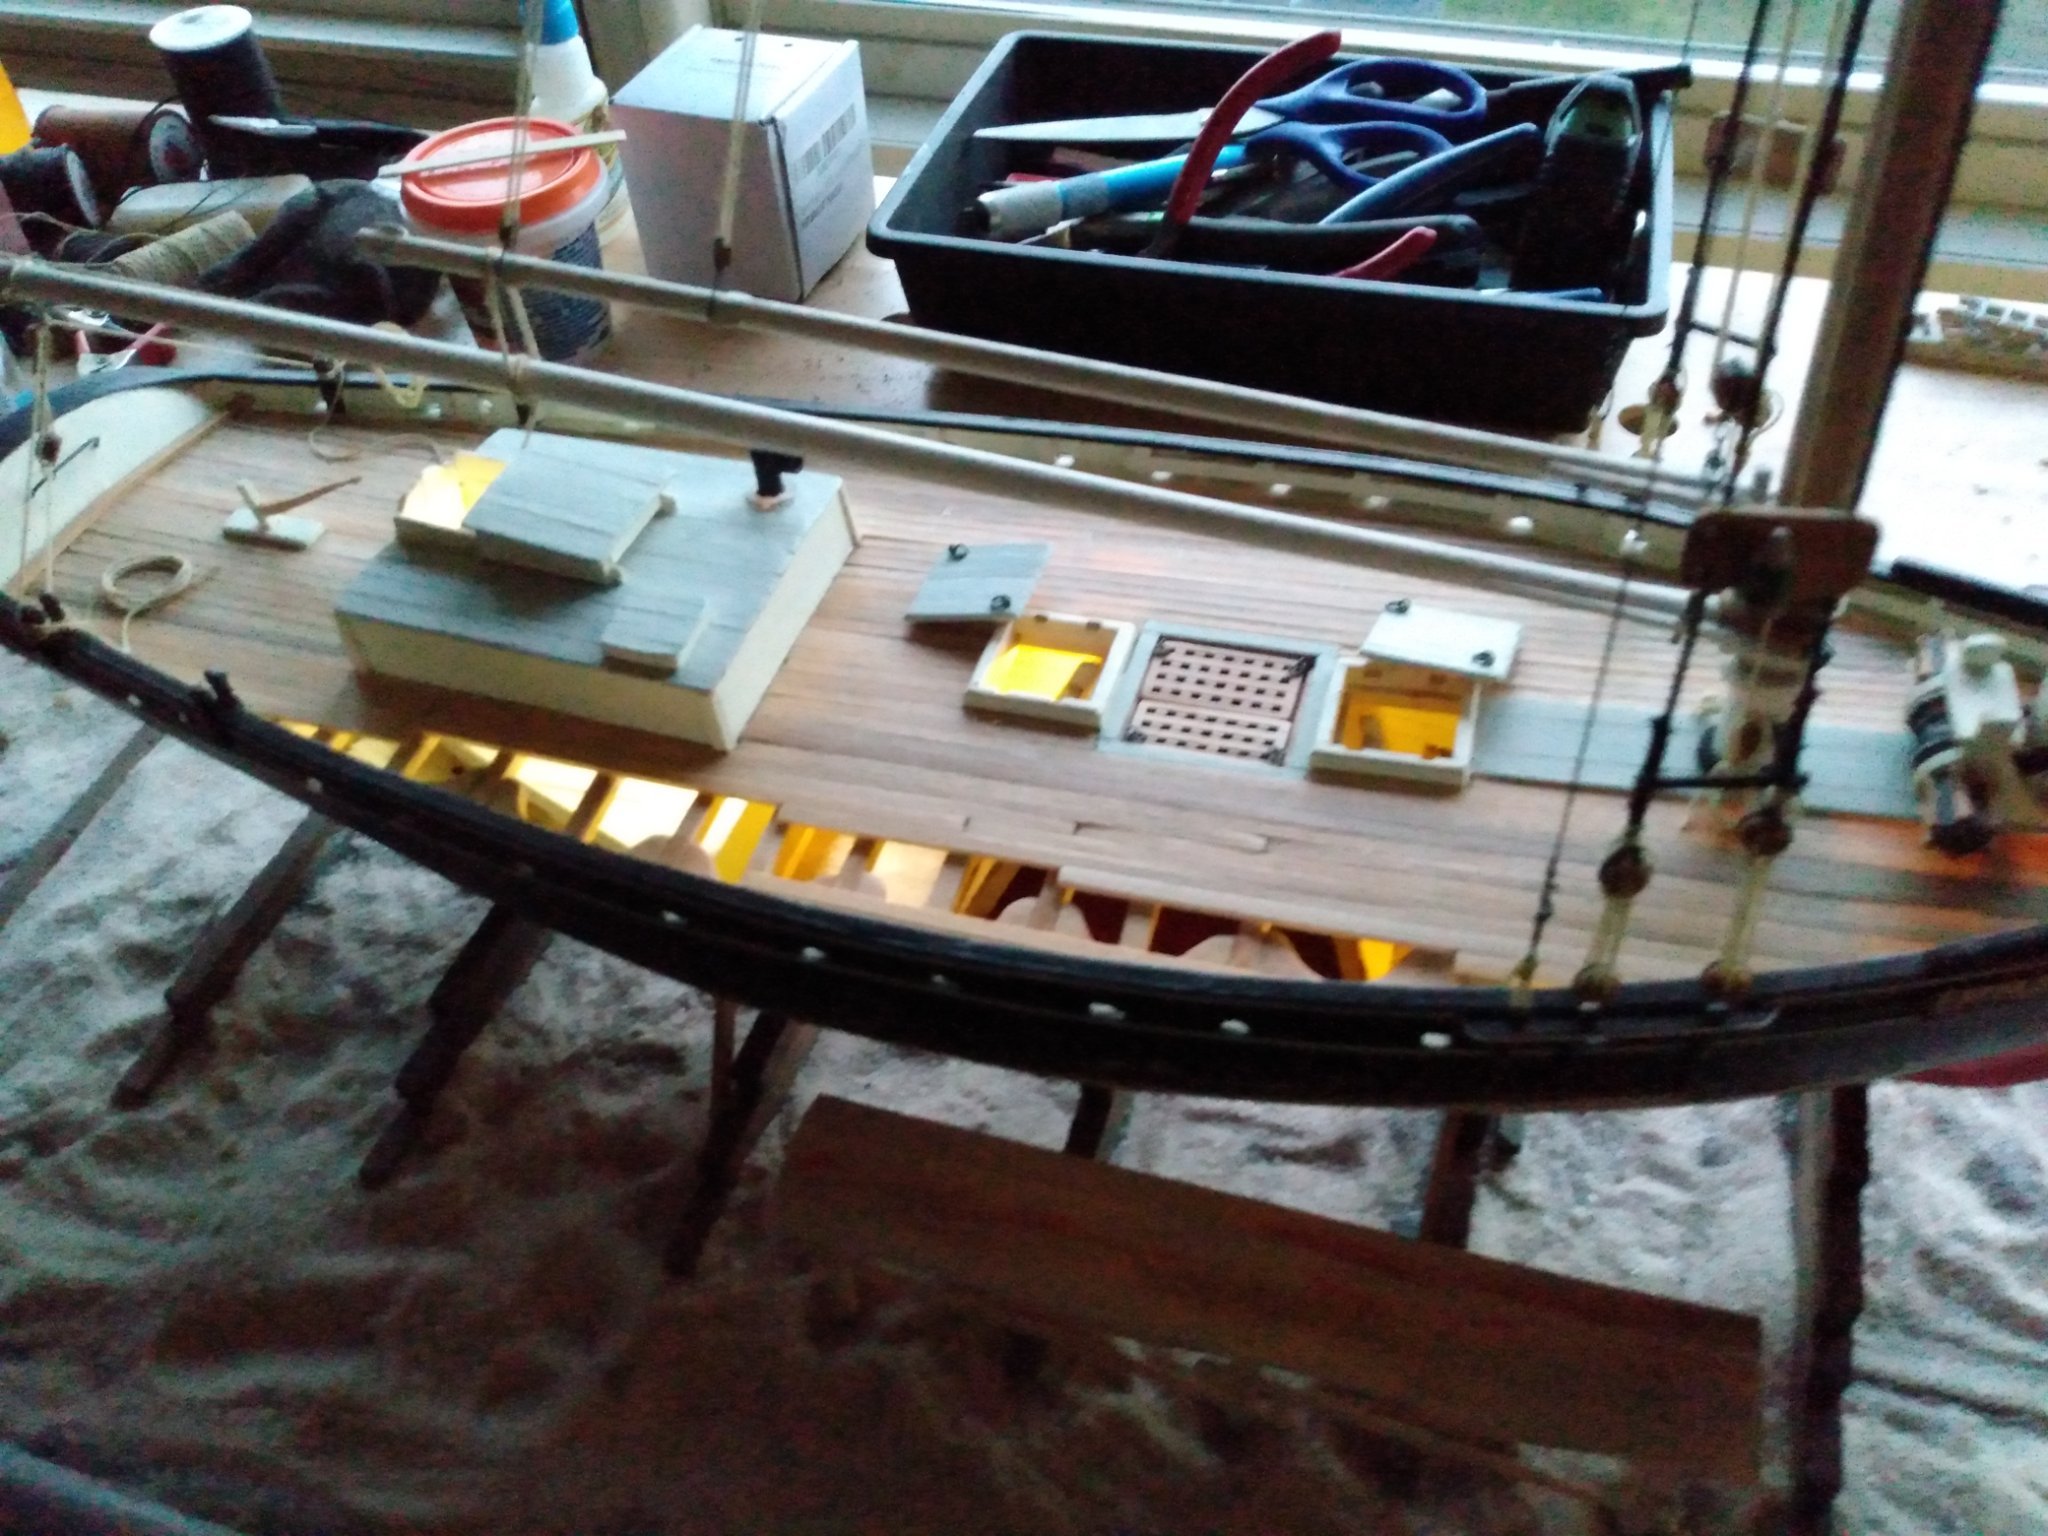
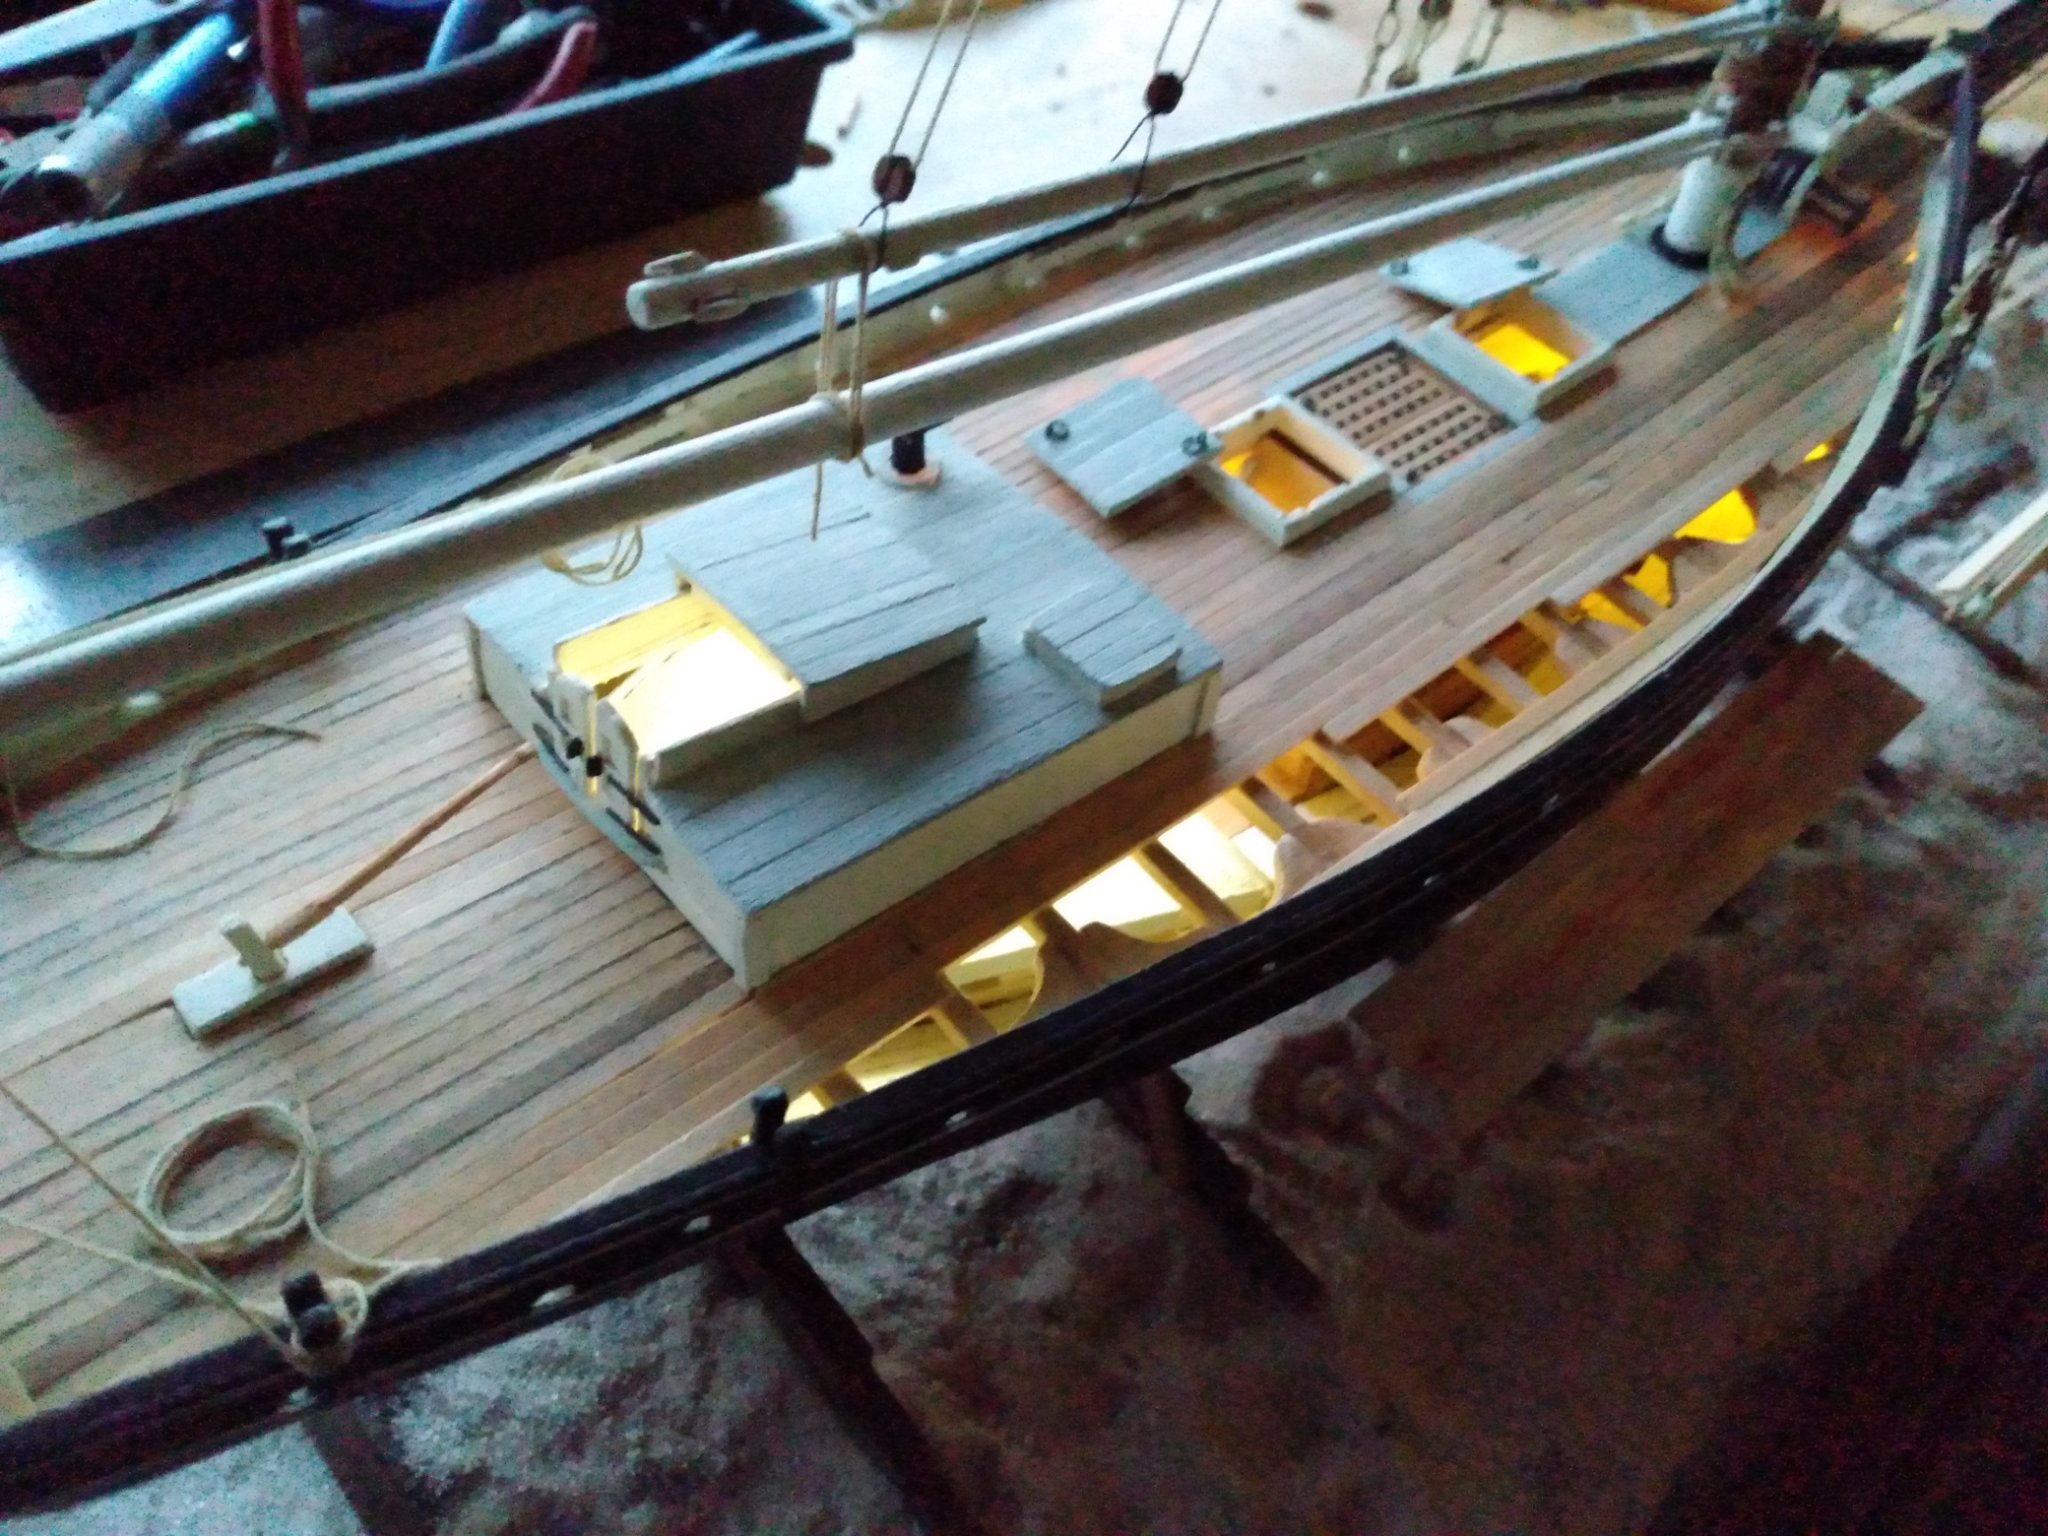
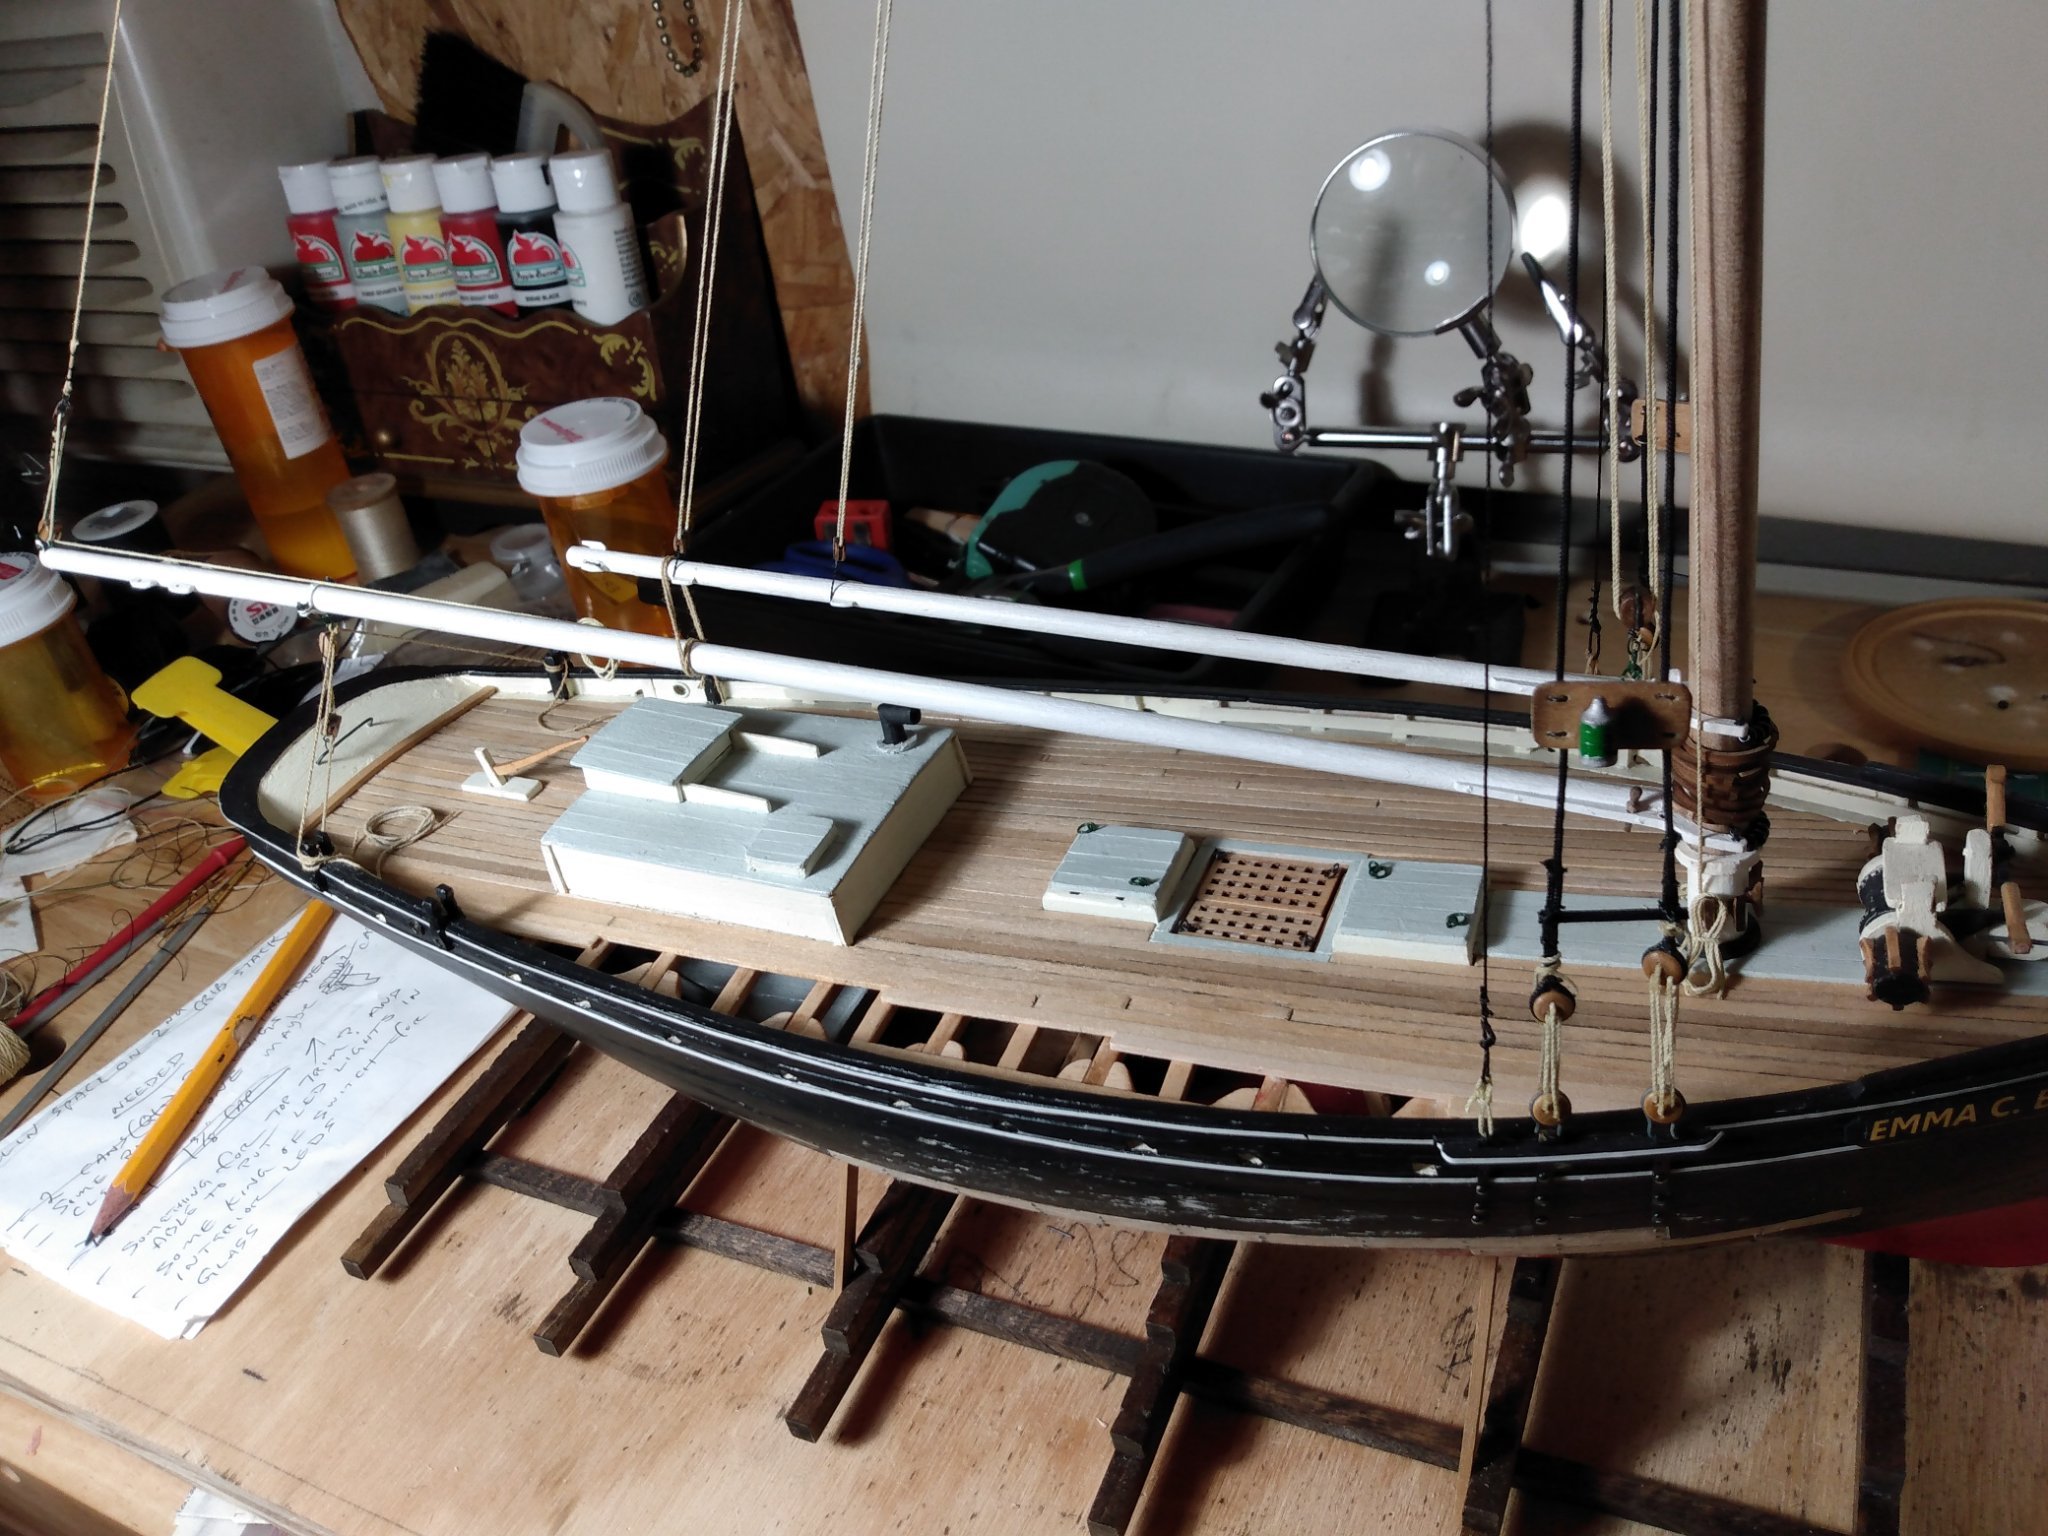
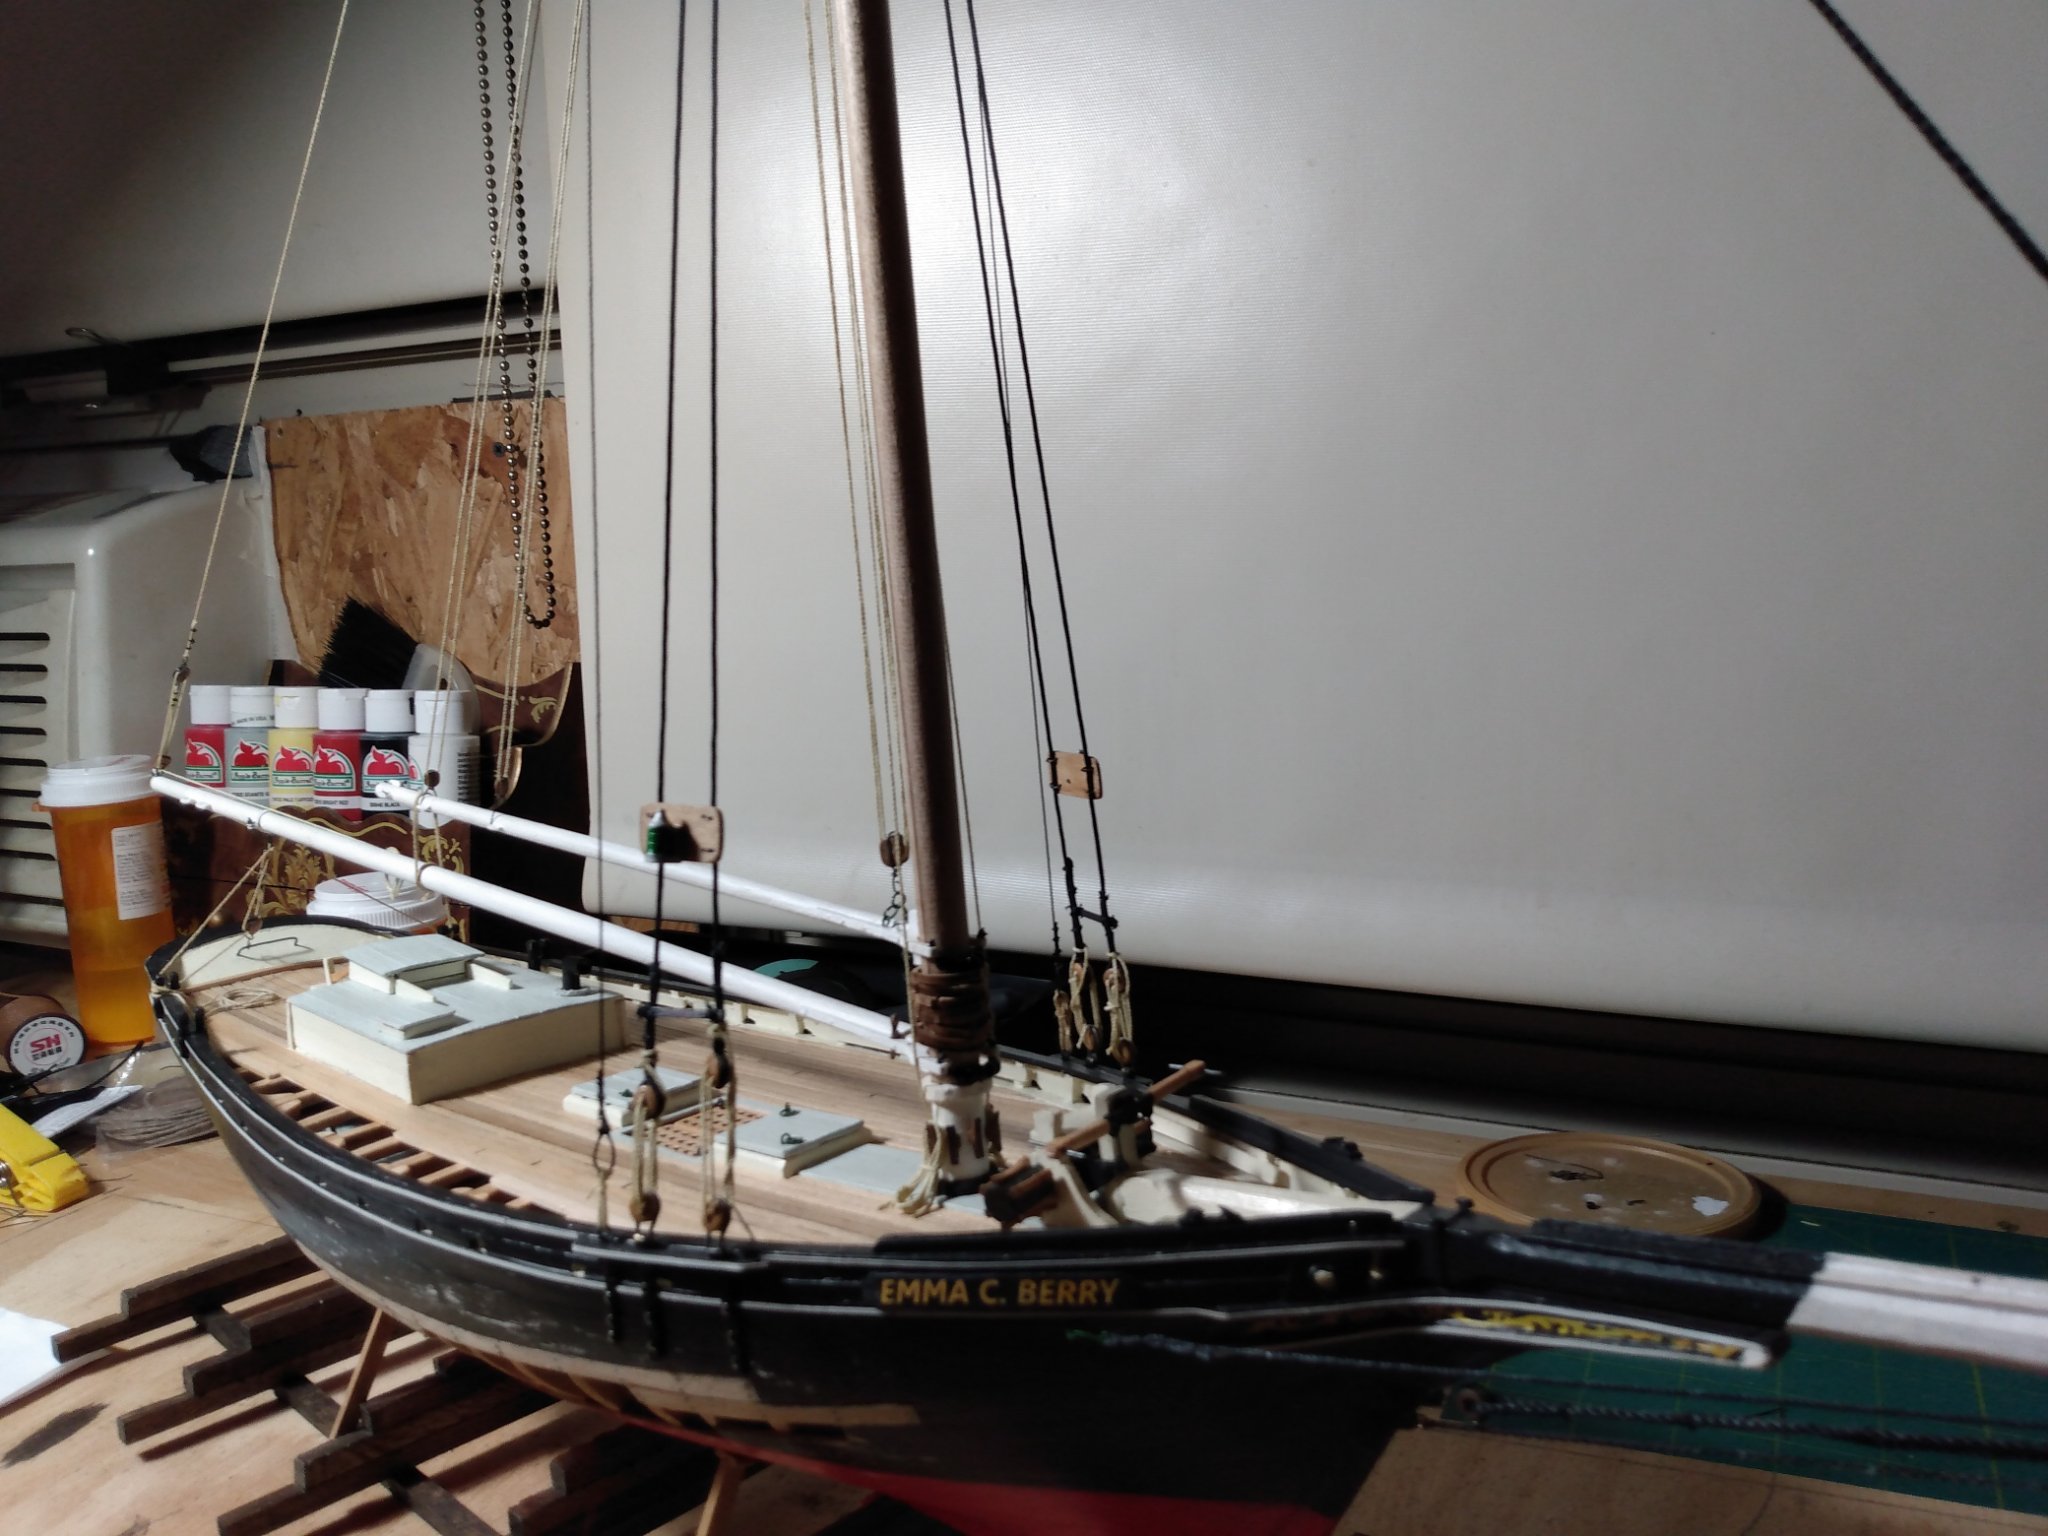
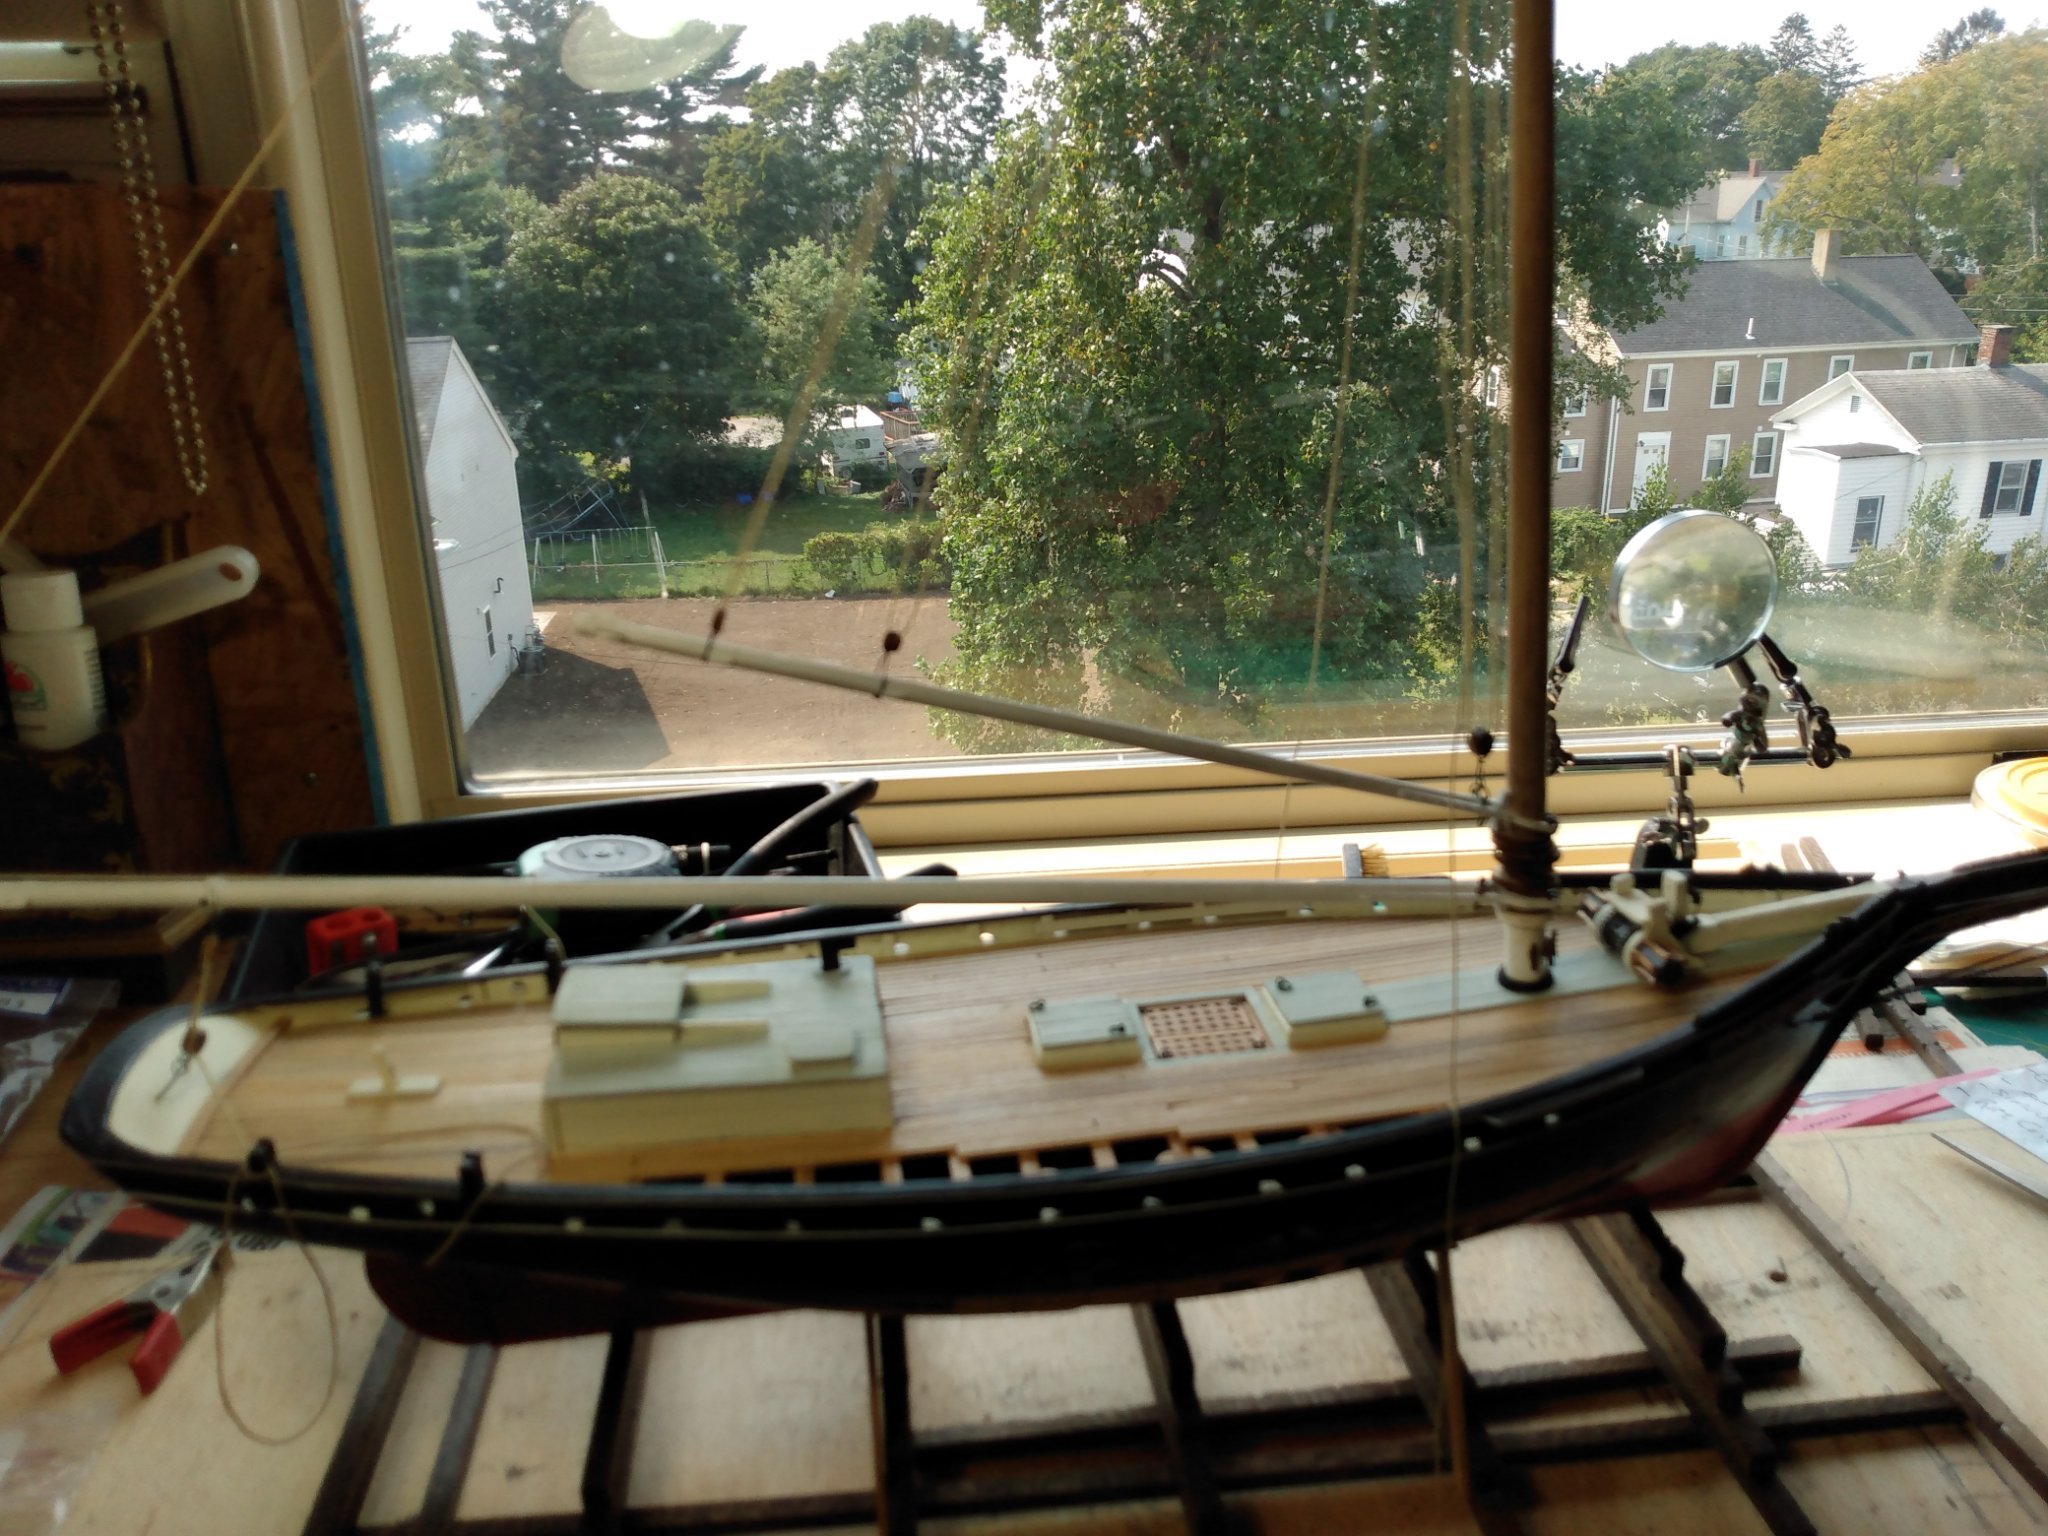
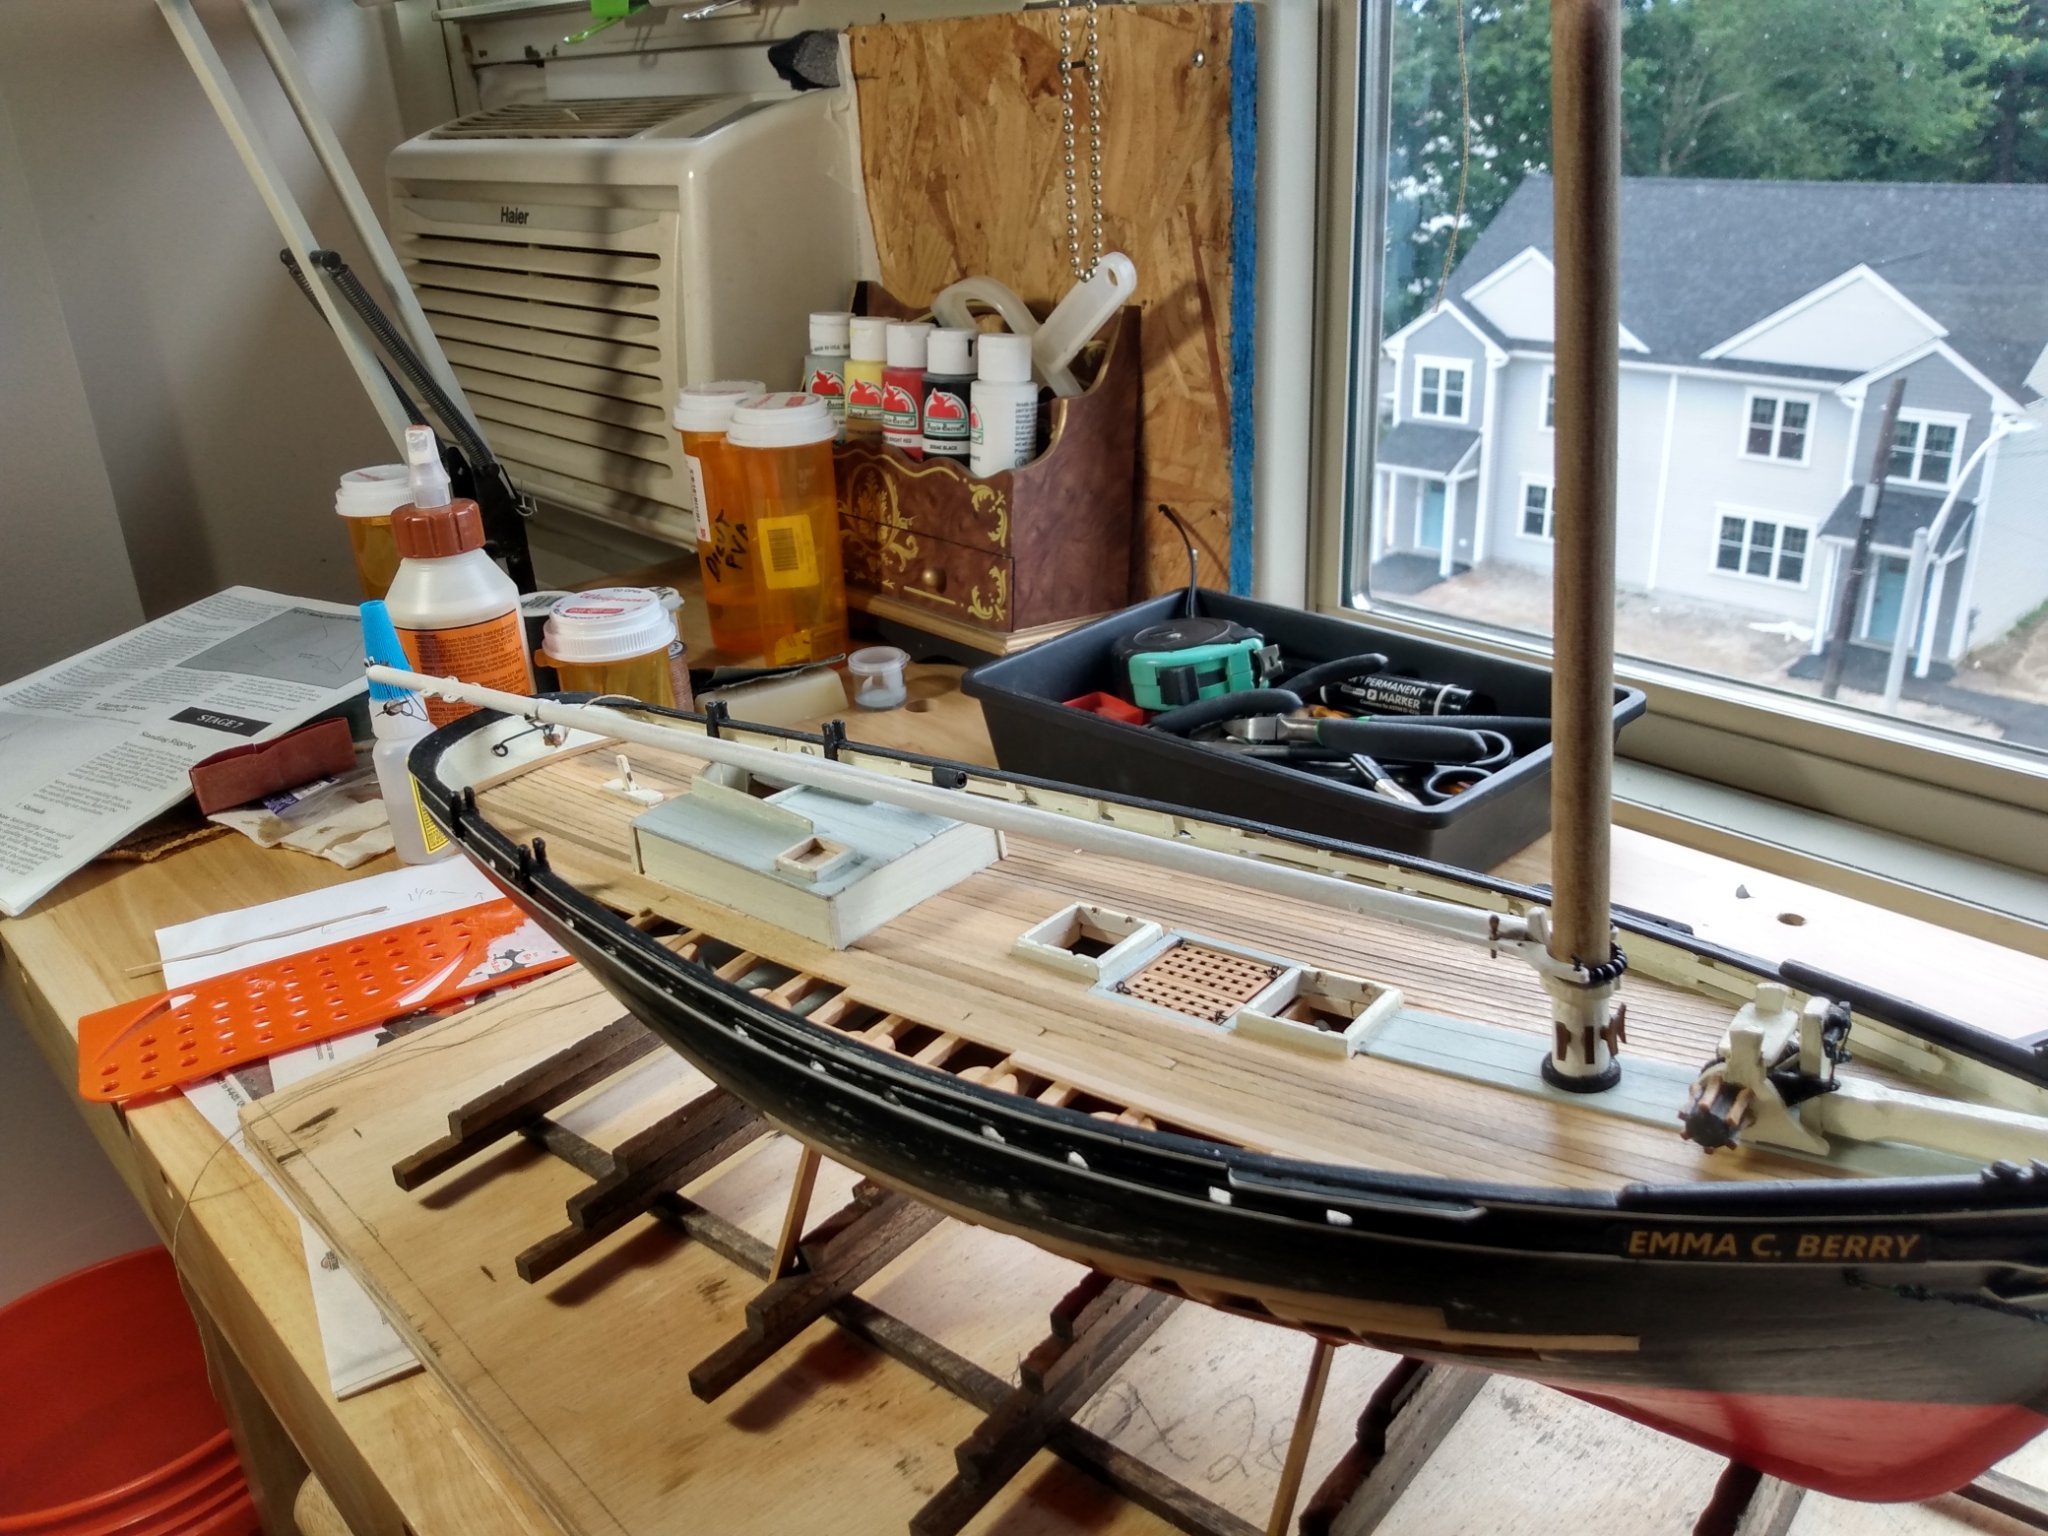
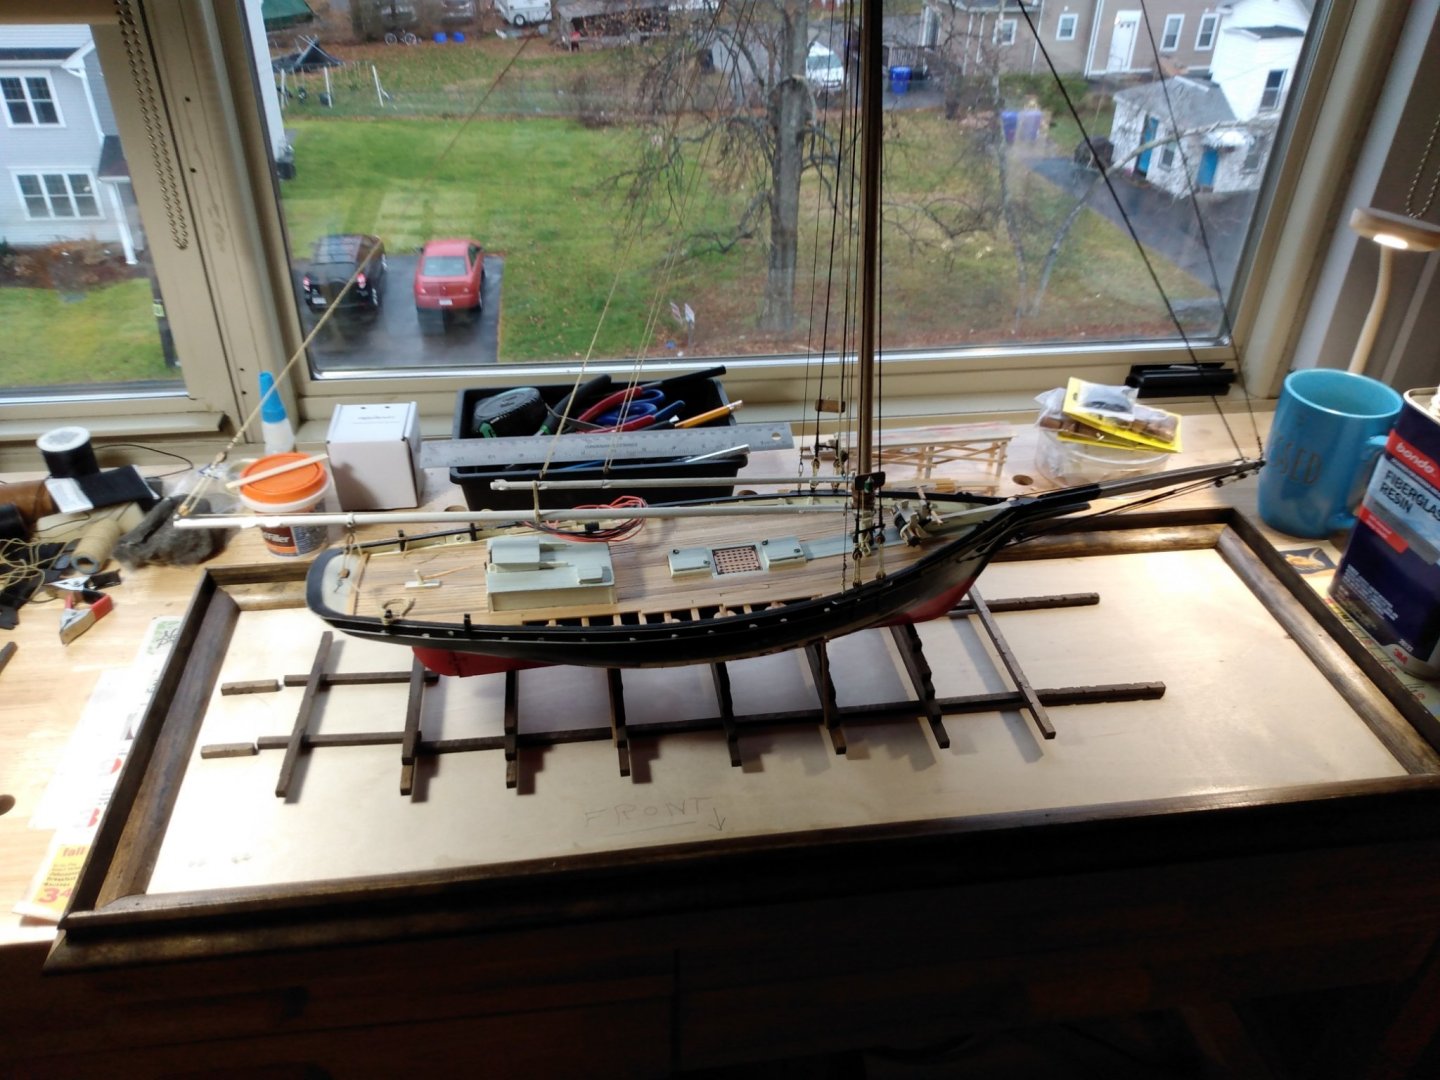
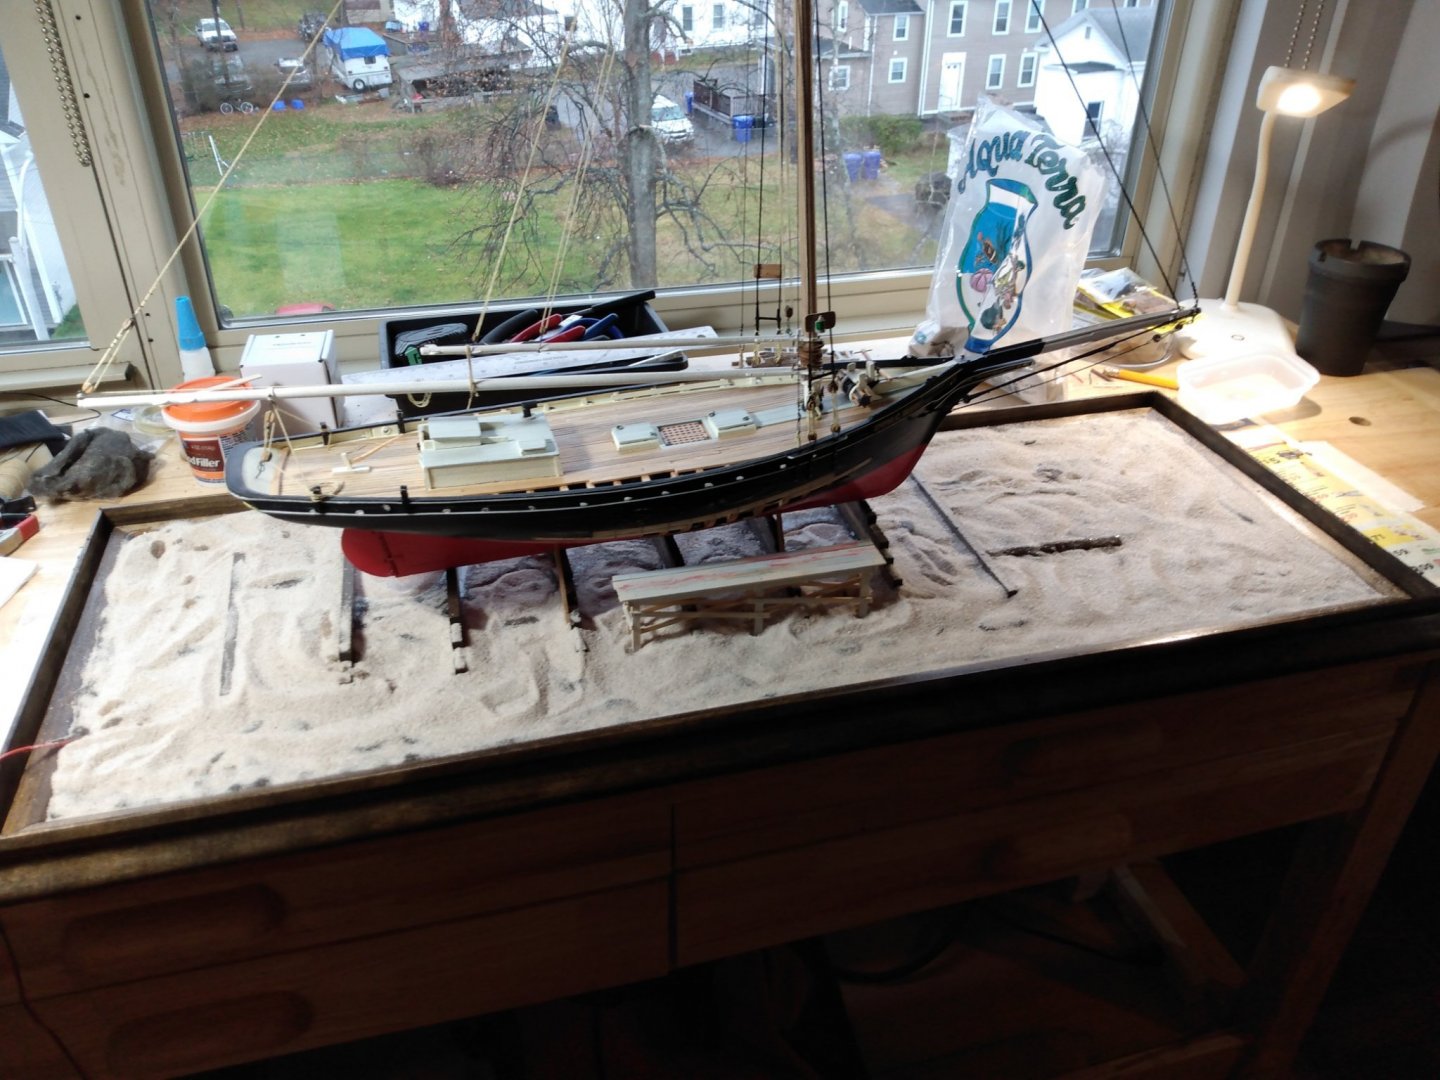
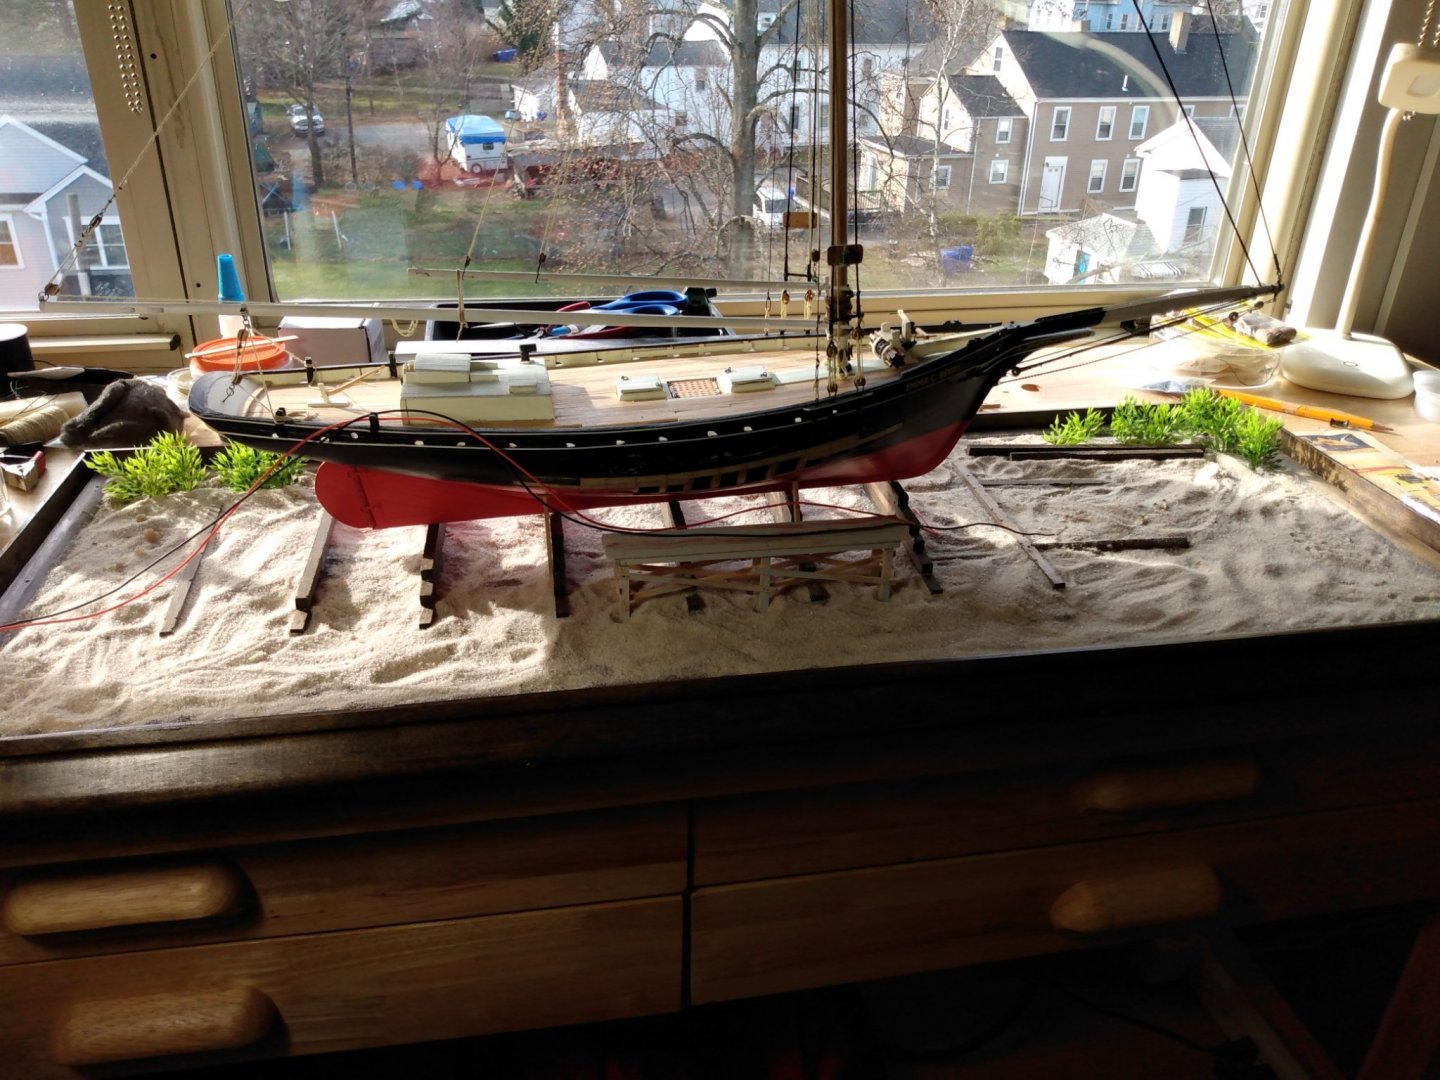
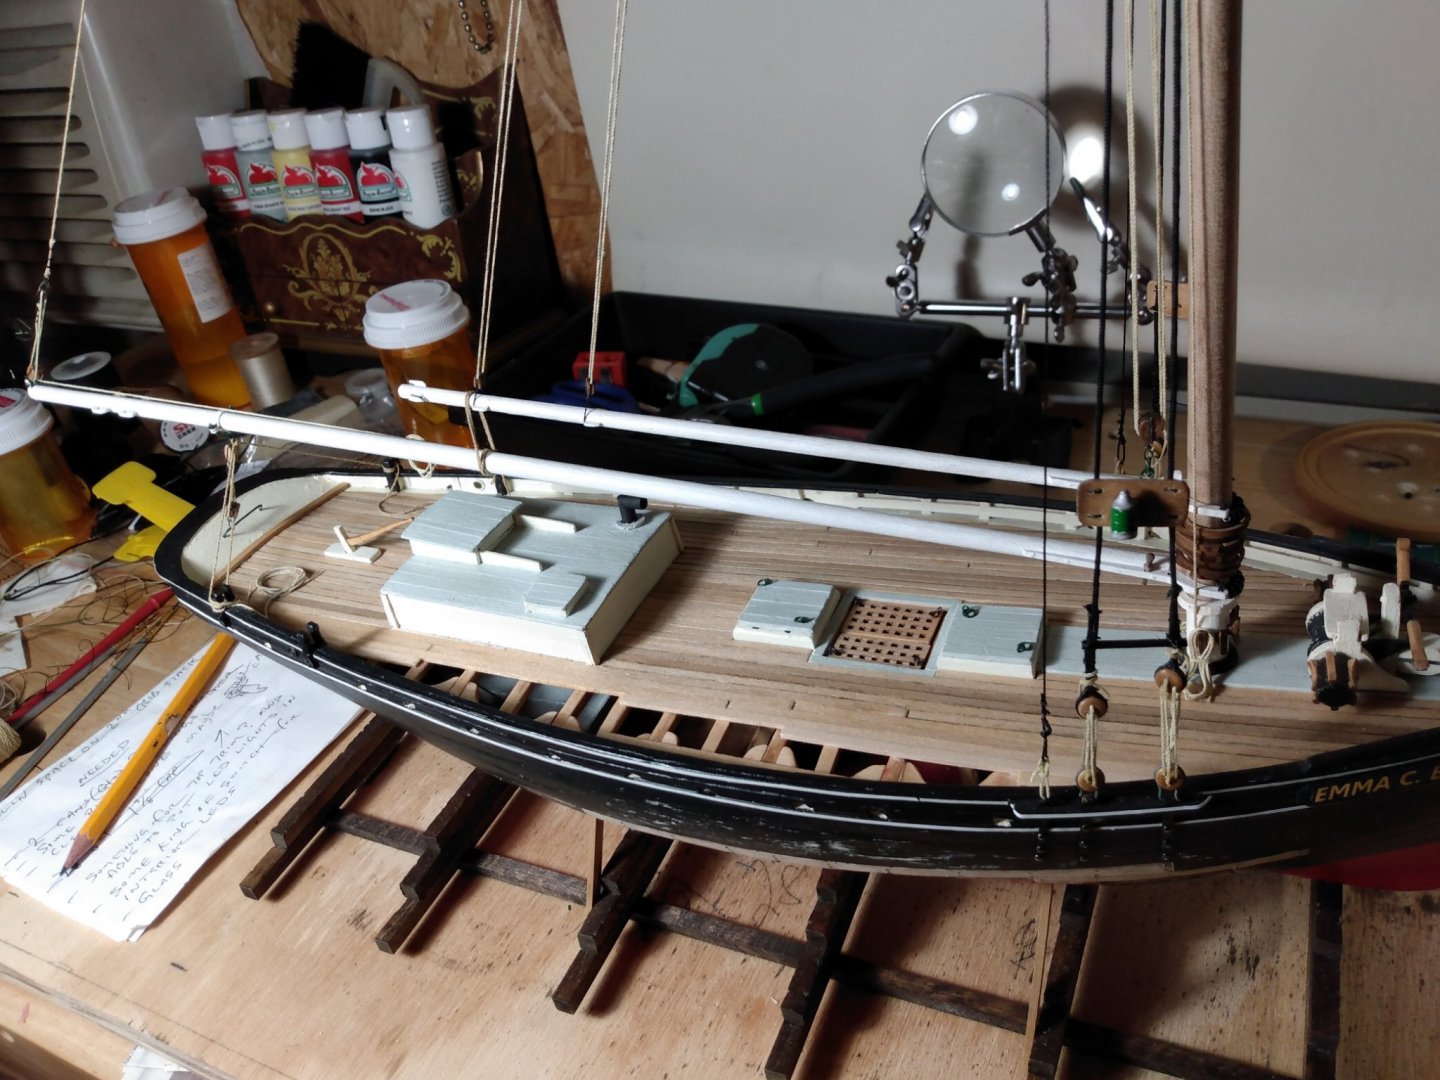
Fooled ya, got another update on my ECB... Got to work on the diorama and got the LED's on and working. Created some boatyard items to add interest. Still need to secure everything a little better and maybe add some rocks to the sand and a little construction debris. Eventually I'll get around to closing her up in glass and create a decorative top moulding. That's all for now.


- 101 replies
-
- 8
-
-

-
- emma c berry
- model shipways
- (and 1 more)
-
Very nice job on The ECB Andrew.
-
Sea Hoss reacted to a post in a topic:
USS Constitution by ERS Rich - Model Shipways - 5/32
-
Looking great Mr T.
-
Sea Hoss reacted to a post in a topic:
Emma C Berry by Turangi - Model Shipways - 1:32
-
Sea Hoss reacted to a post in a topic:
HM Brig-Sloop Flirt 1782 by glbarlow - Vanguard Models
-
Sea Hoss reacted to a post in a topic:
Emma C Berry by Turangi - Model Shipways - 1:32
-
Sea Hoss reacted to a post in a topic:
Emma C Berry by ahb26 - FINISHED - Model Shipways - 1/32
-
Thank you all for your kind words and acknowledgements. The Emma was certainly more complex of a build than I at first thought. I have and will continue to admire the other ECBs under construction!
-
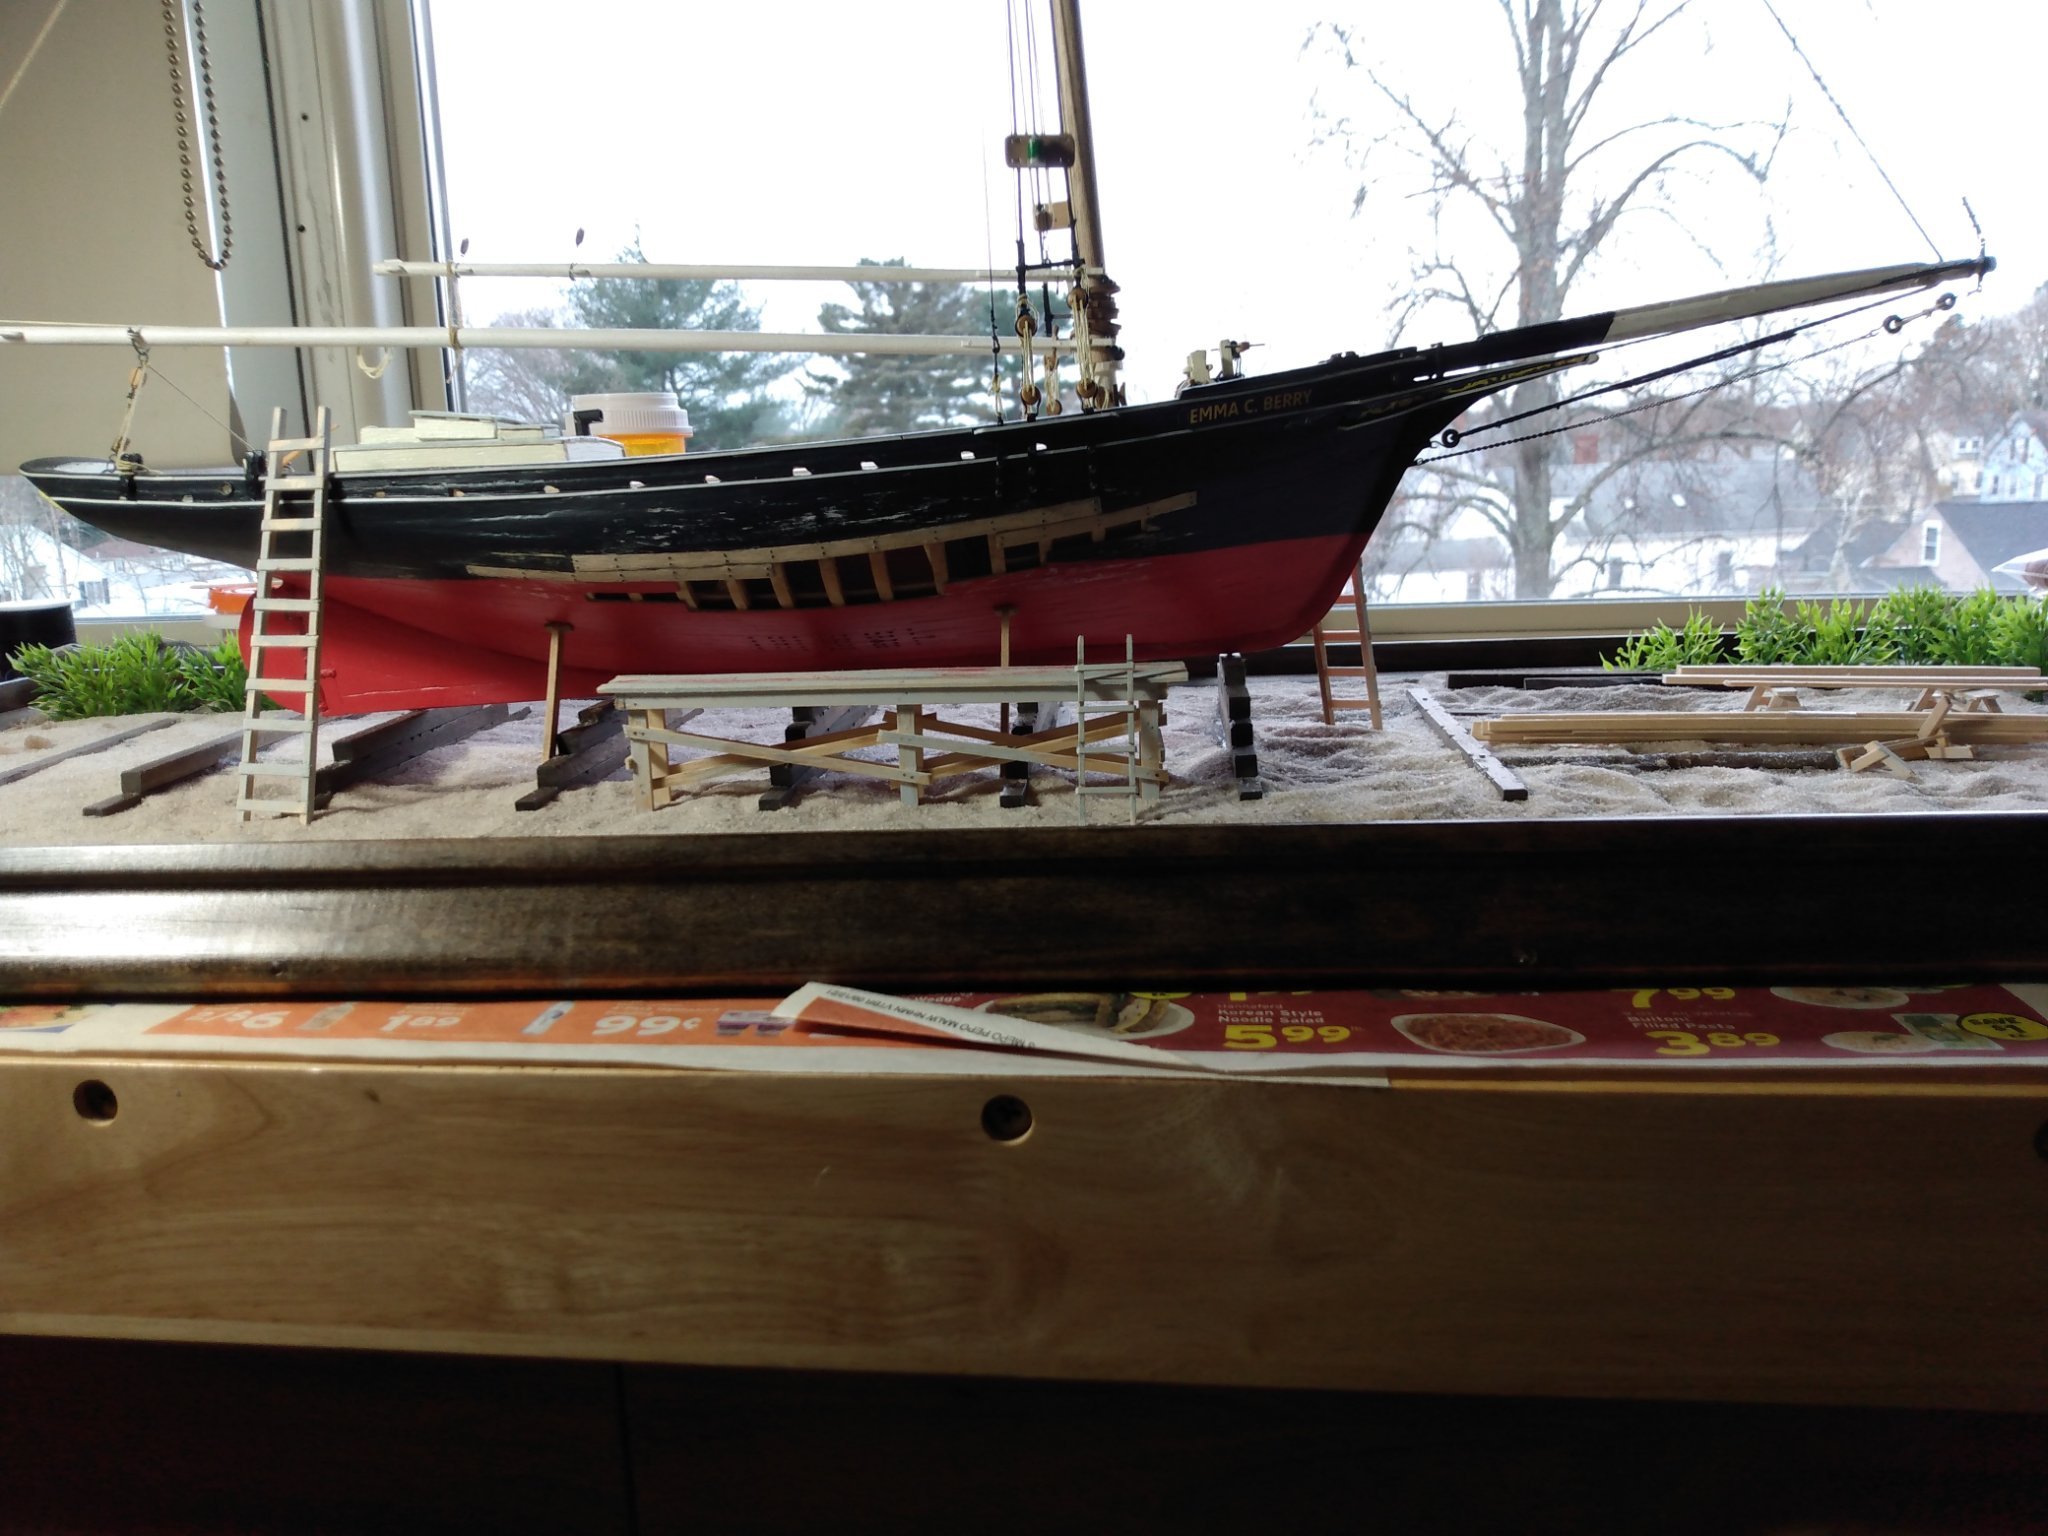
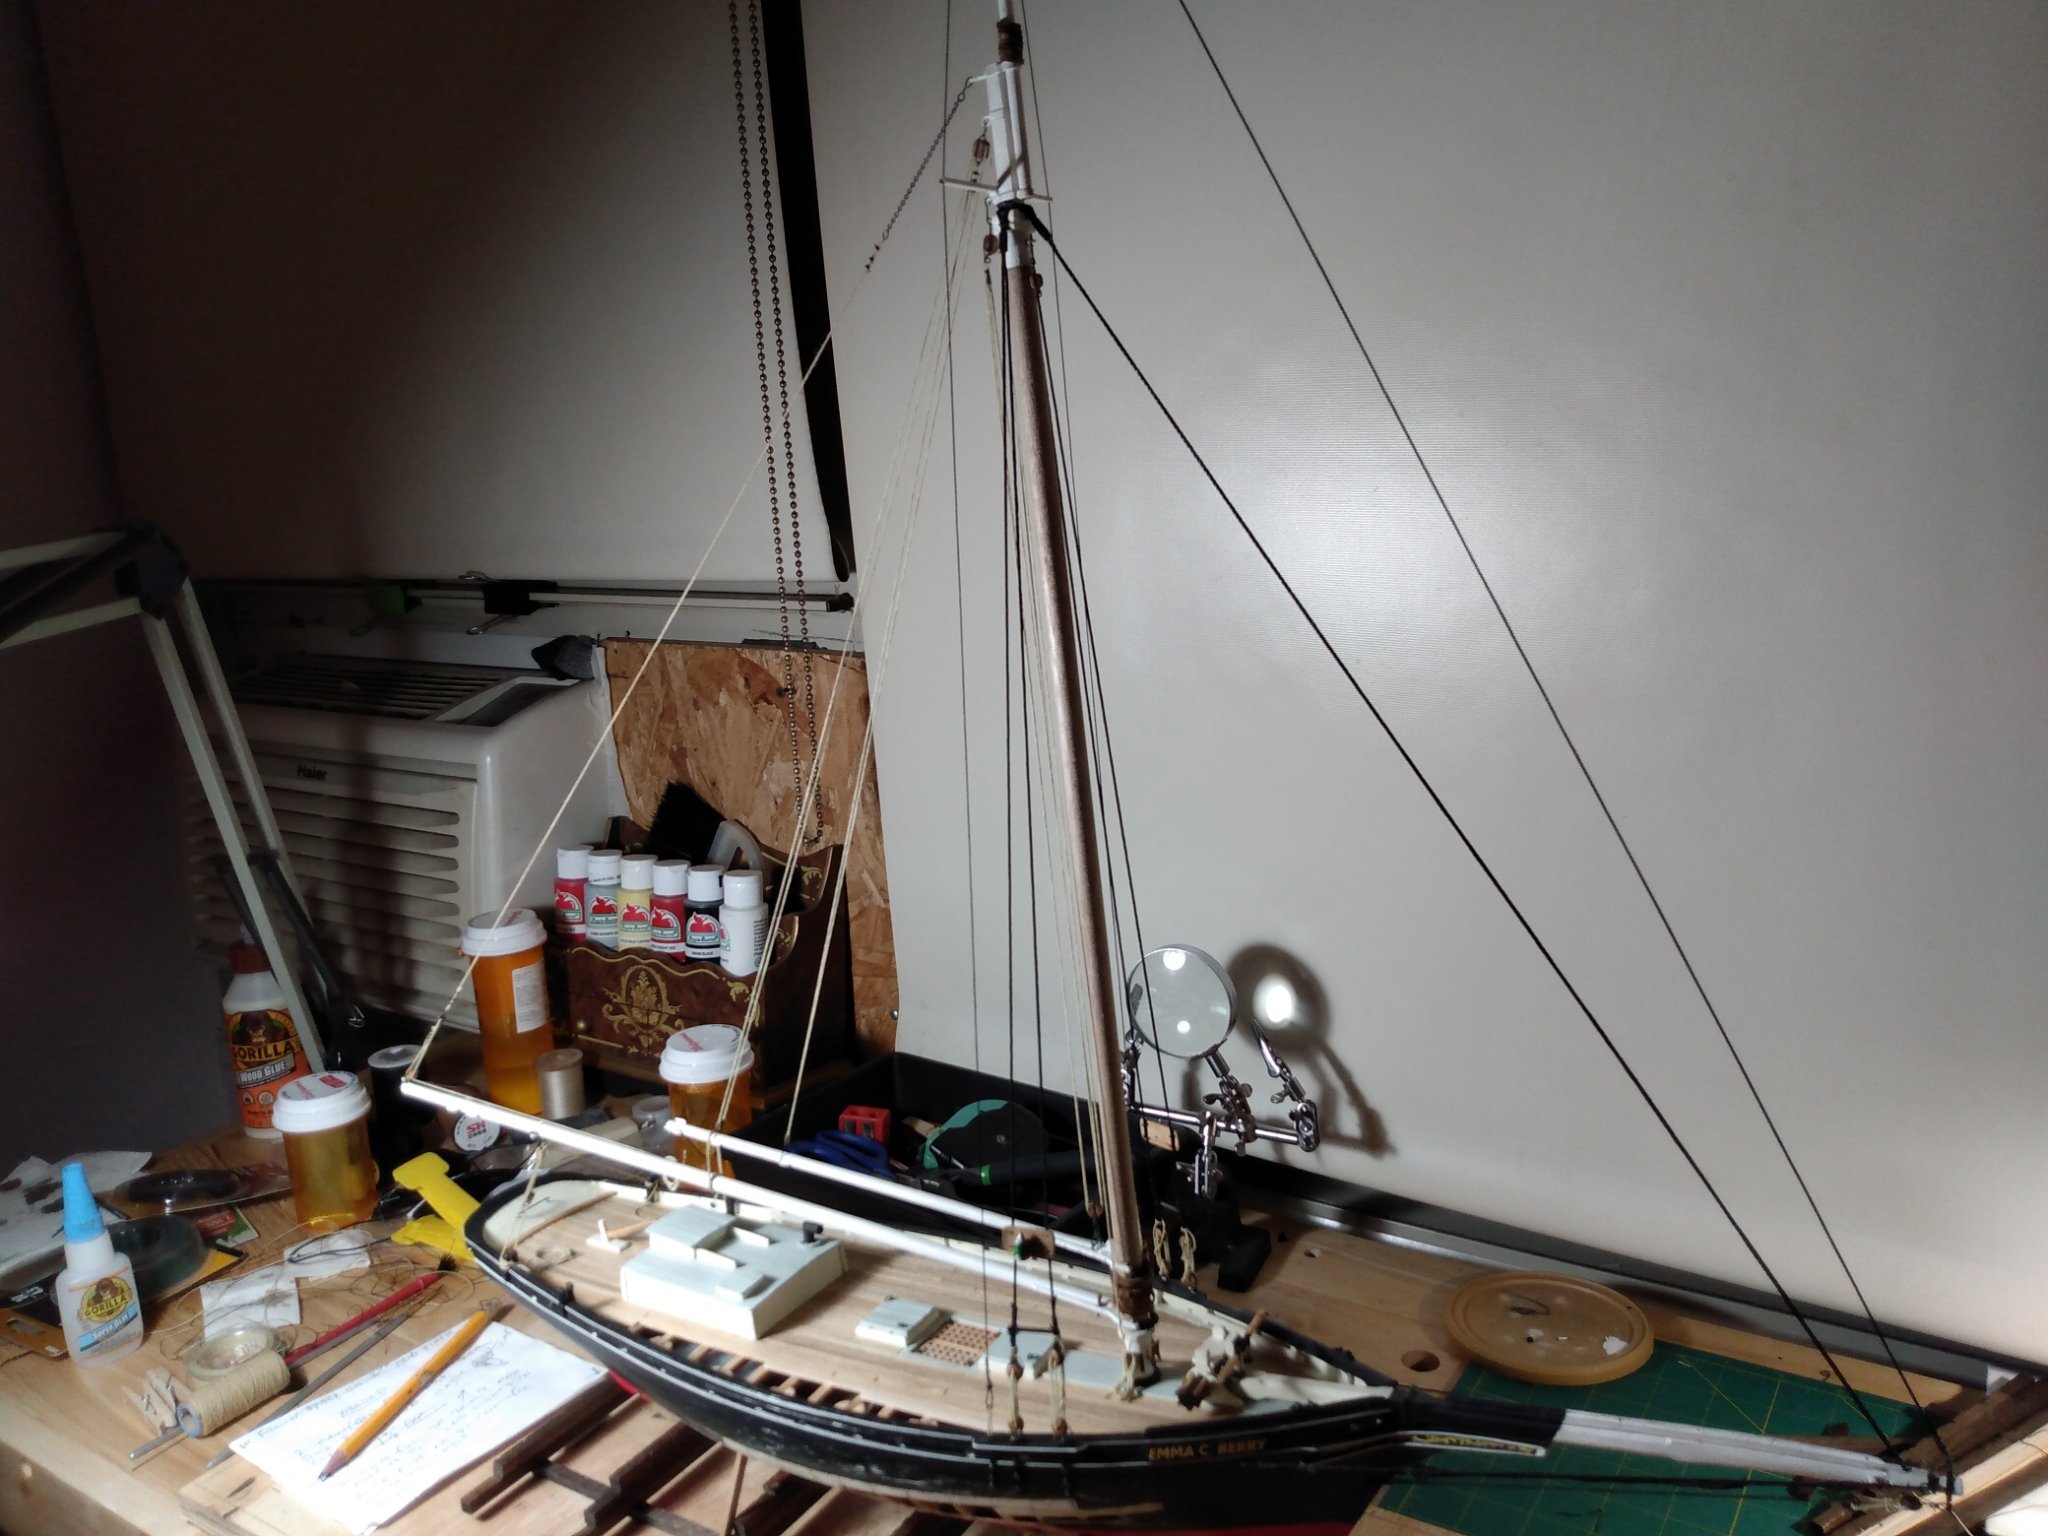
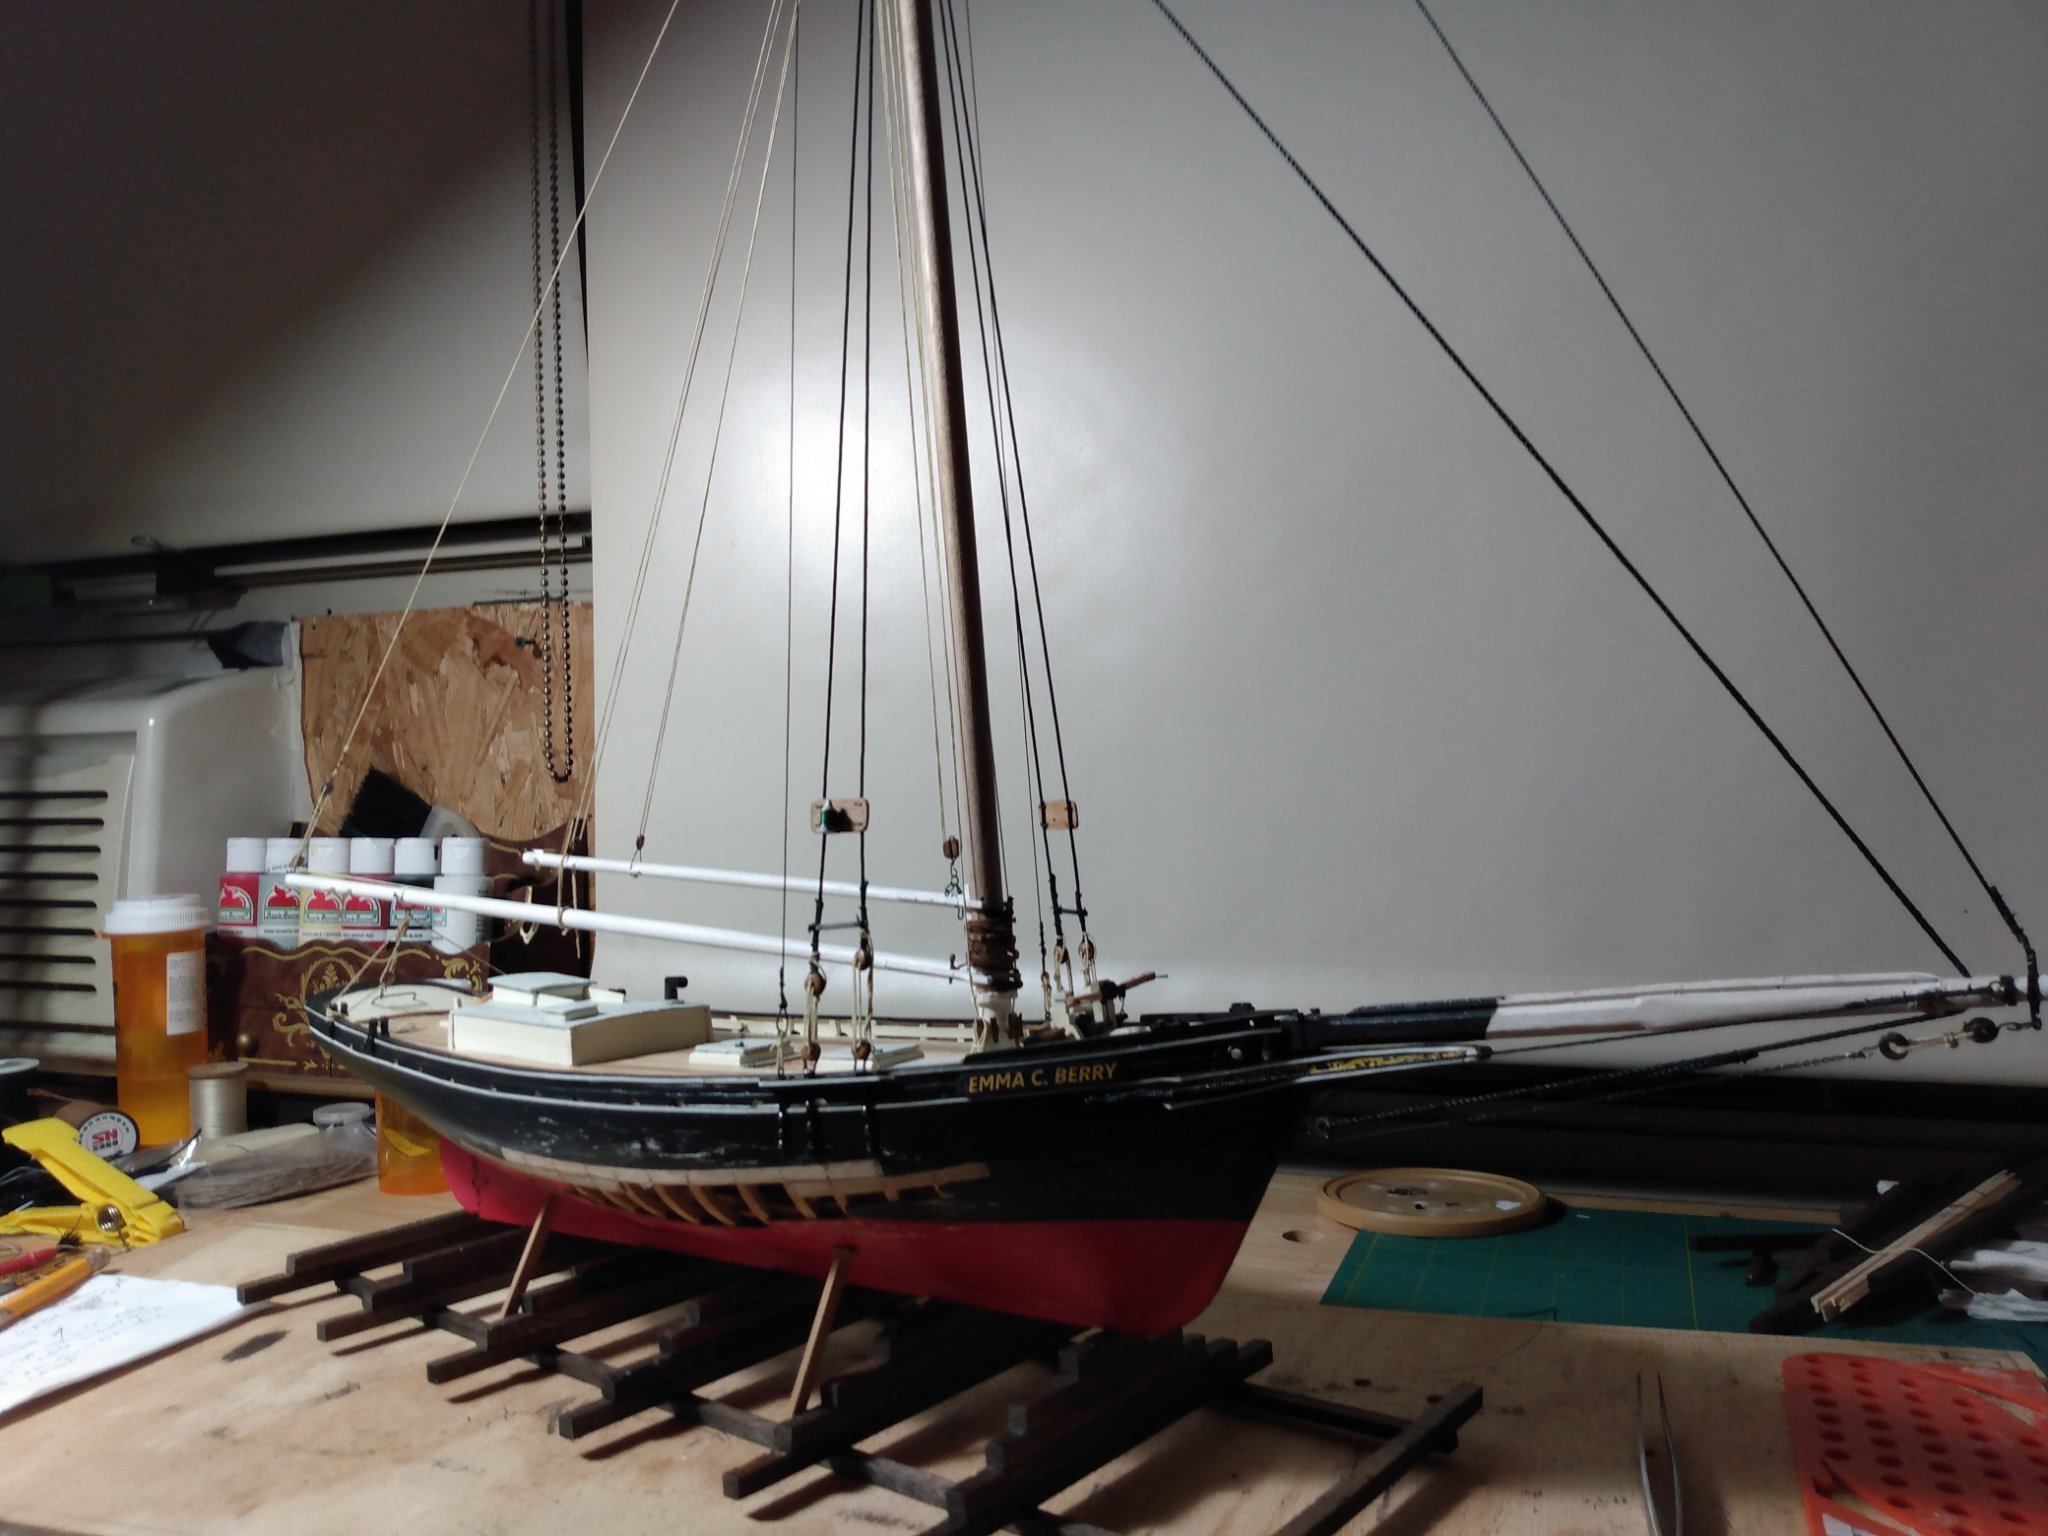
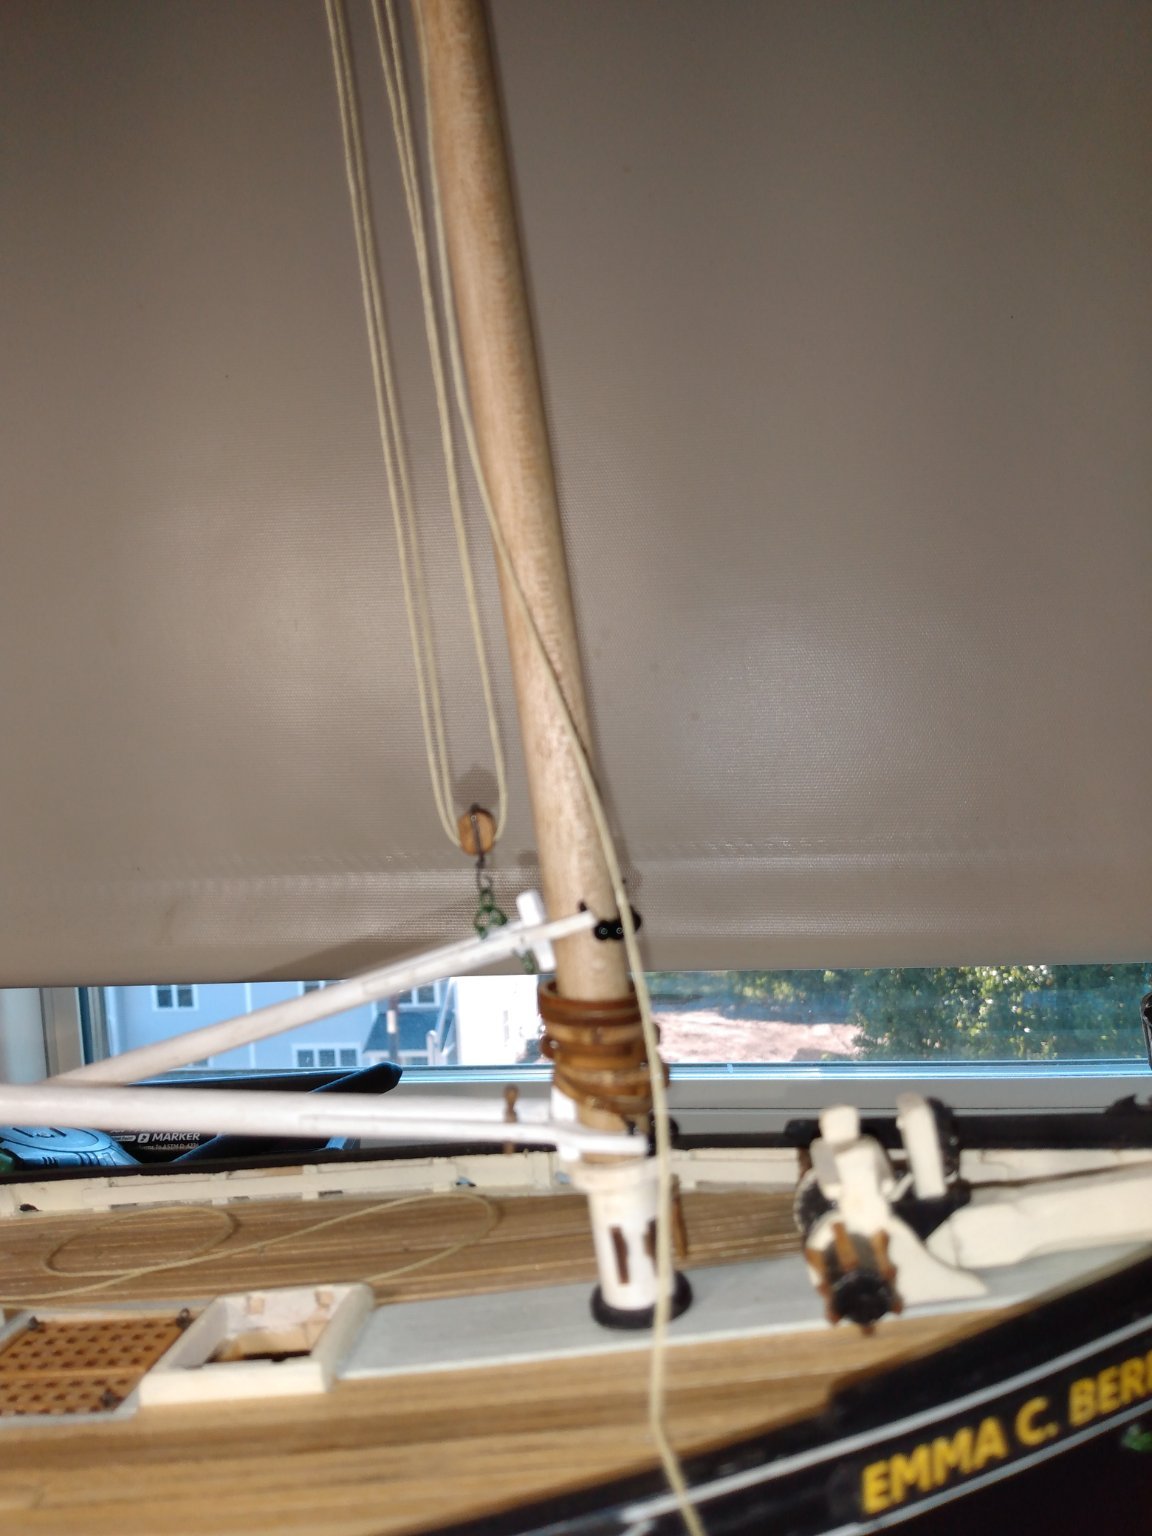
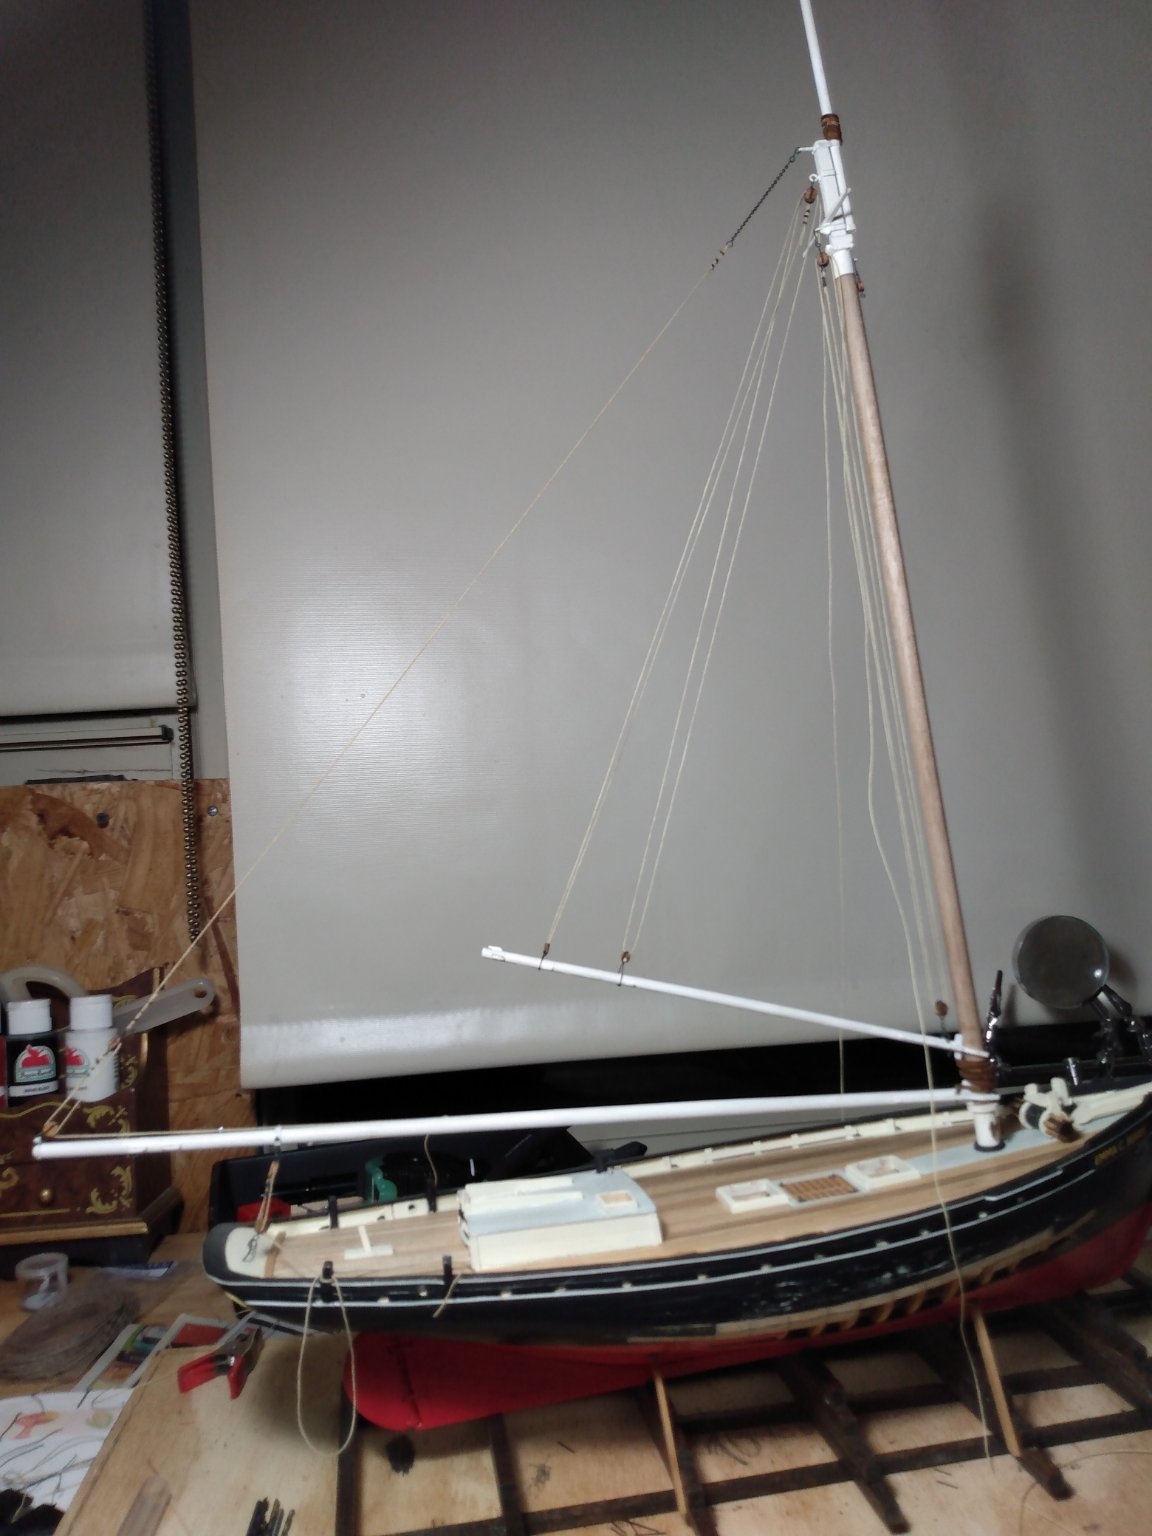
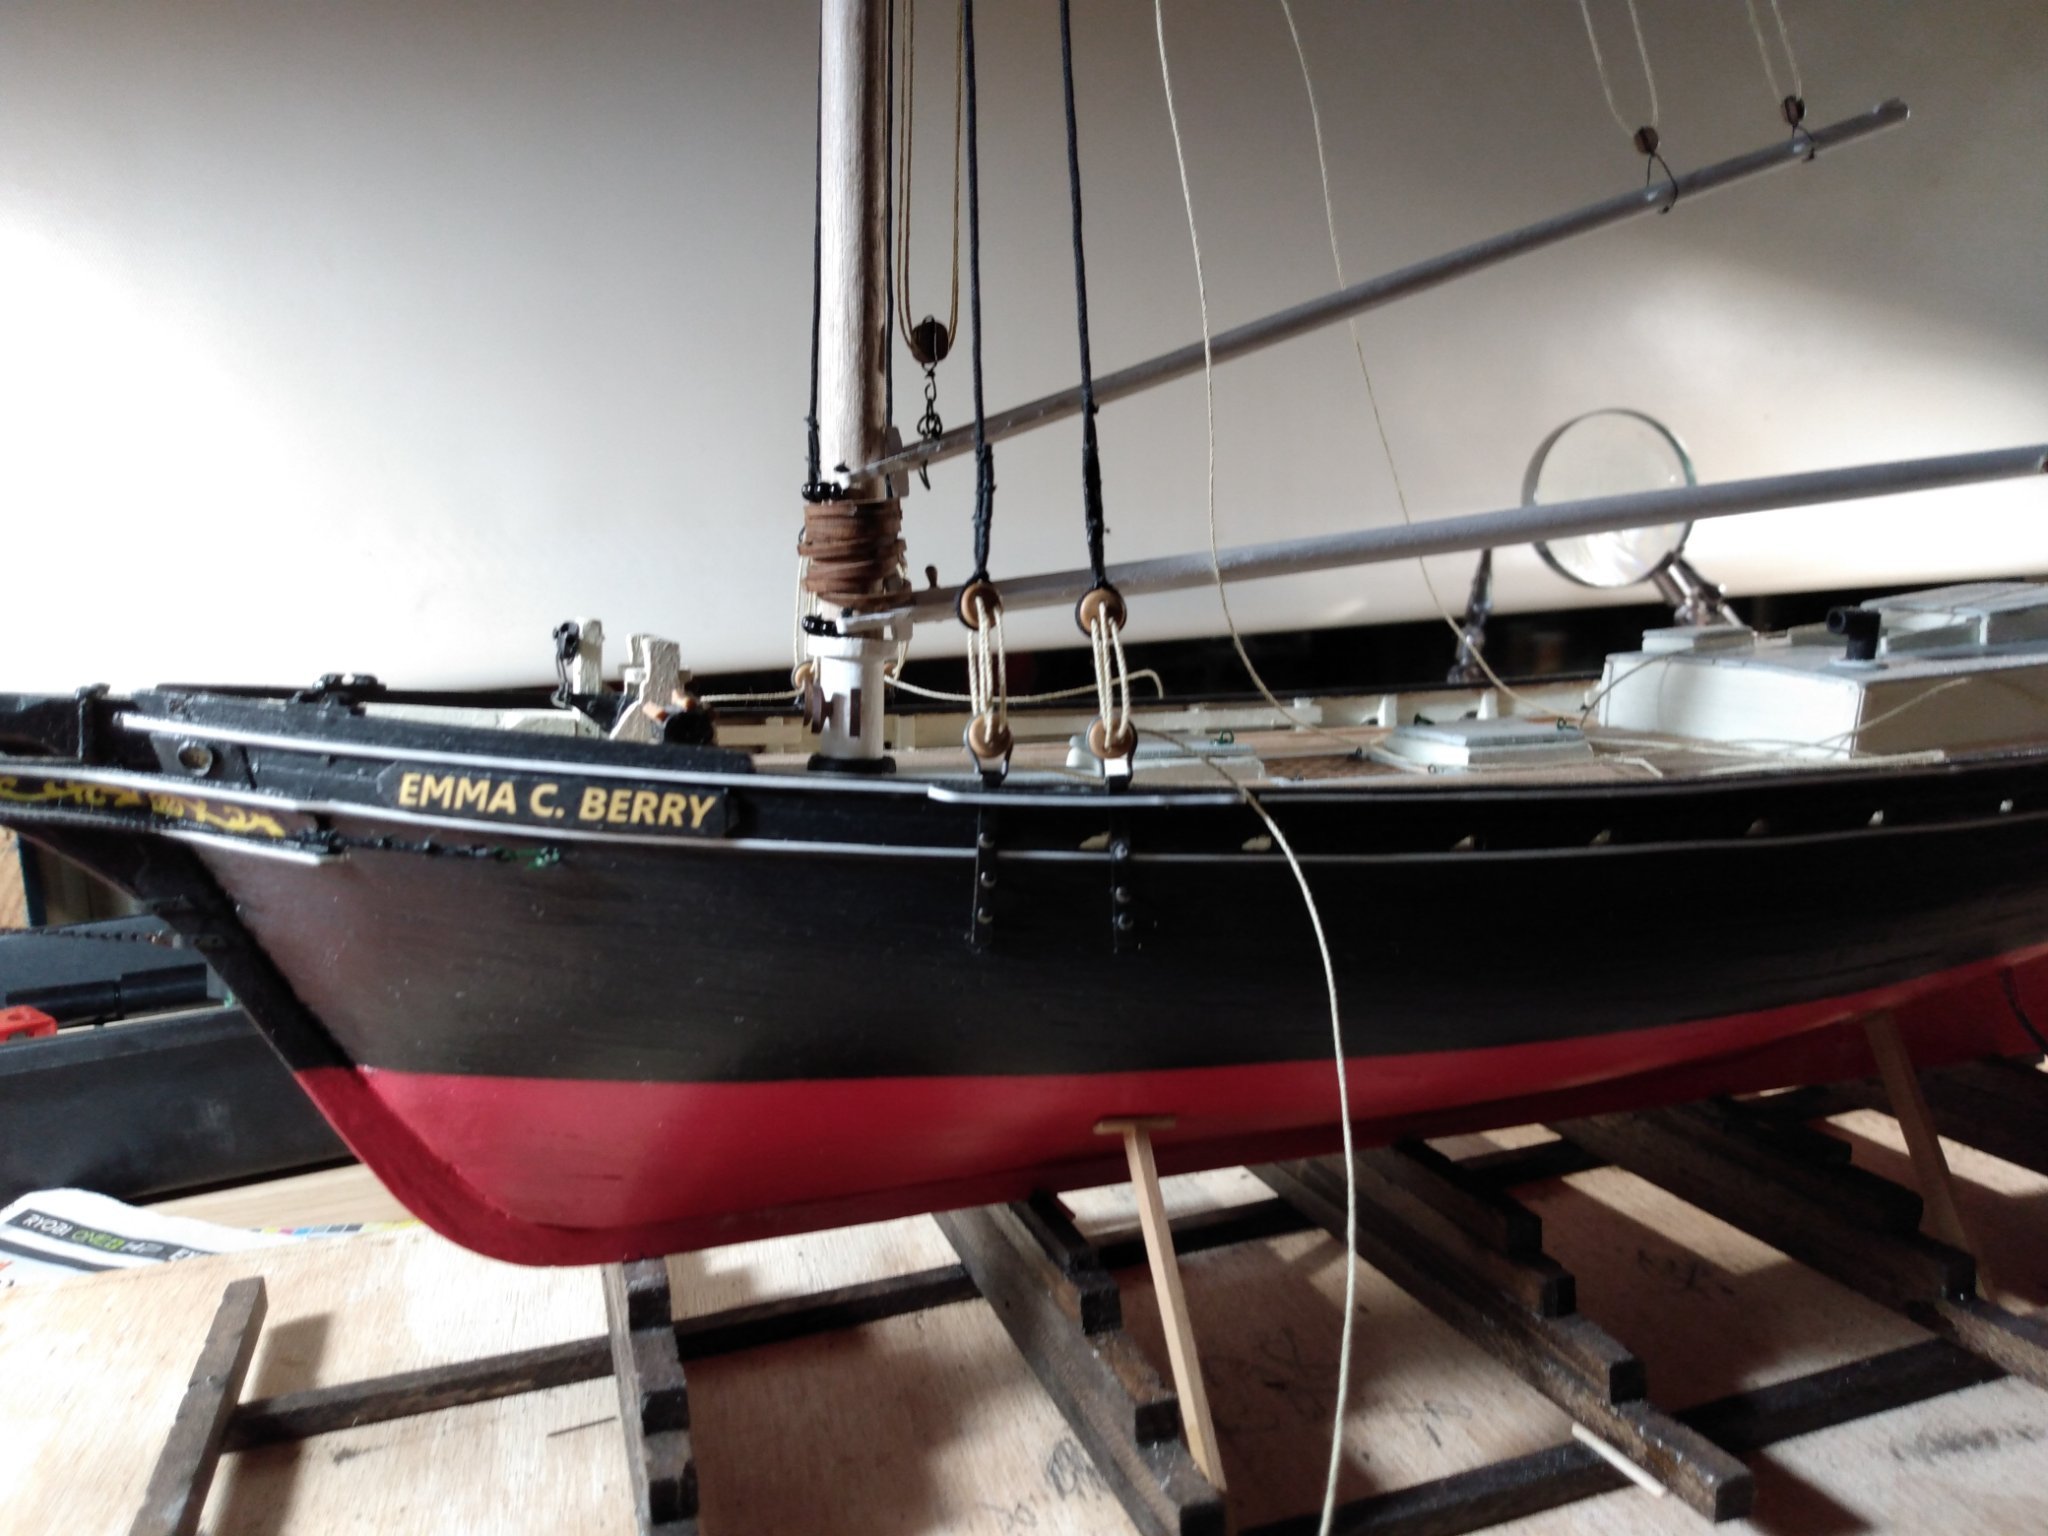
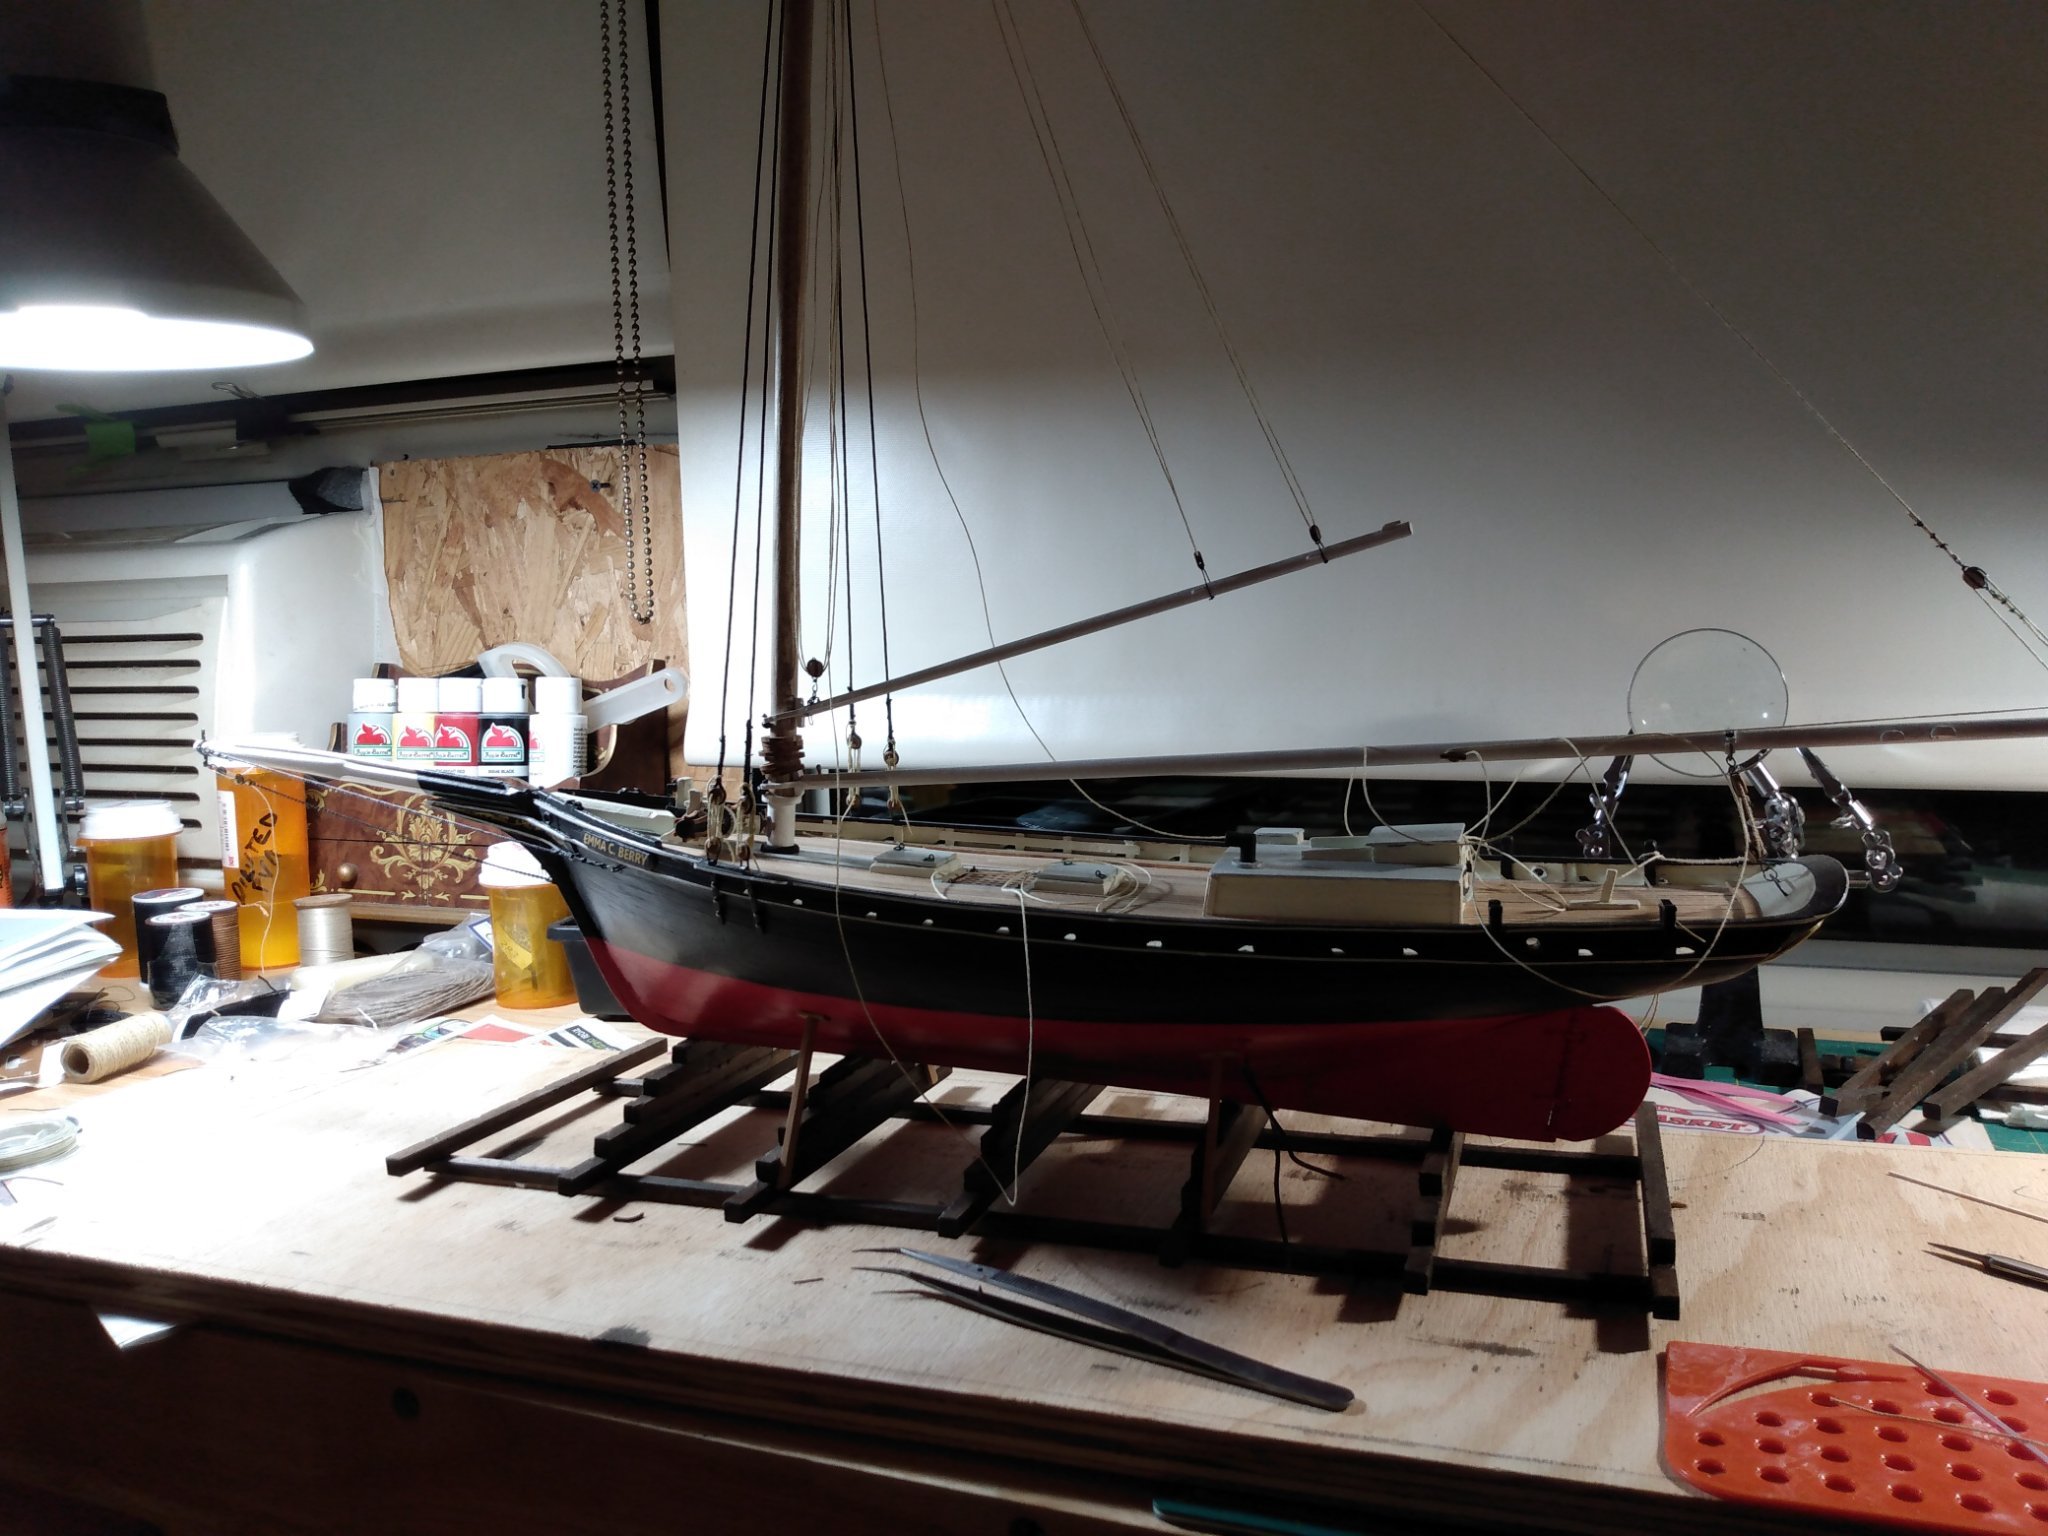
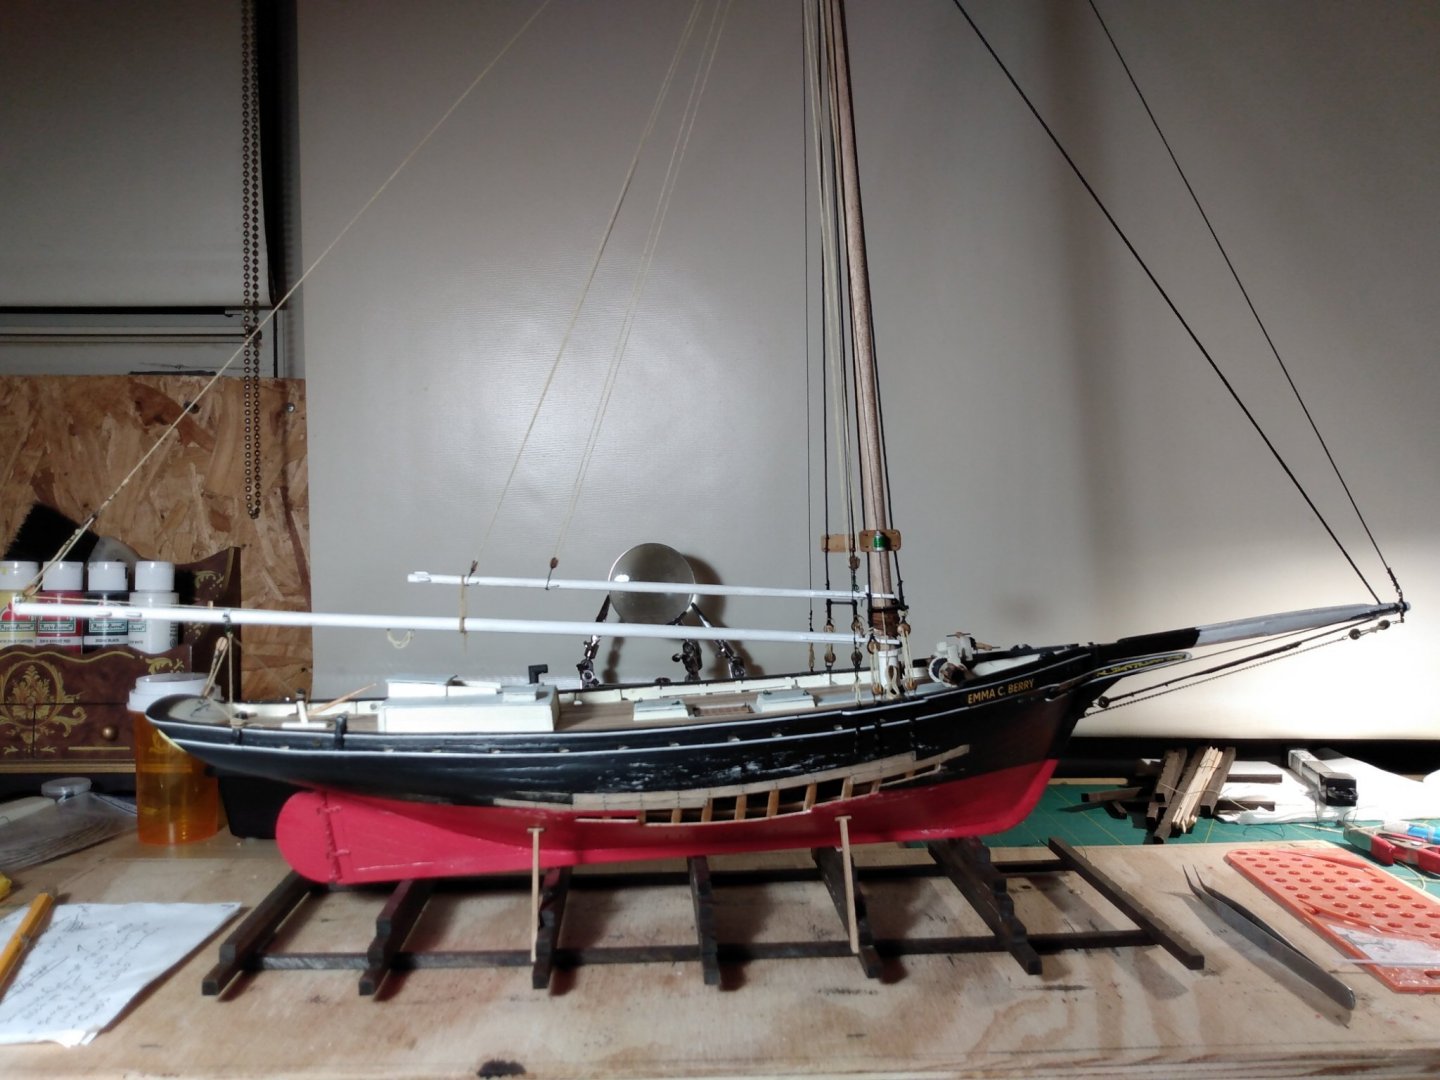
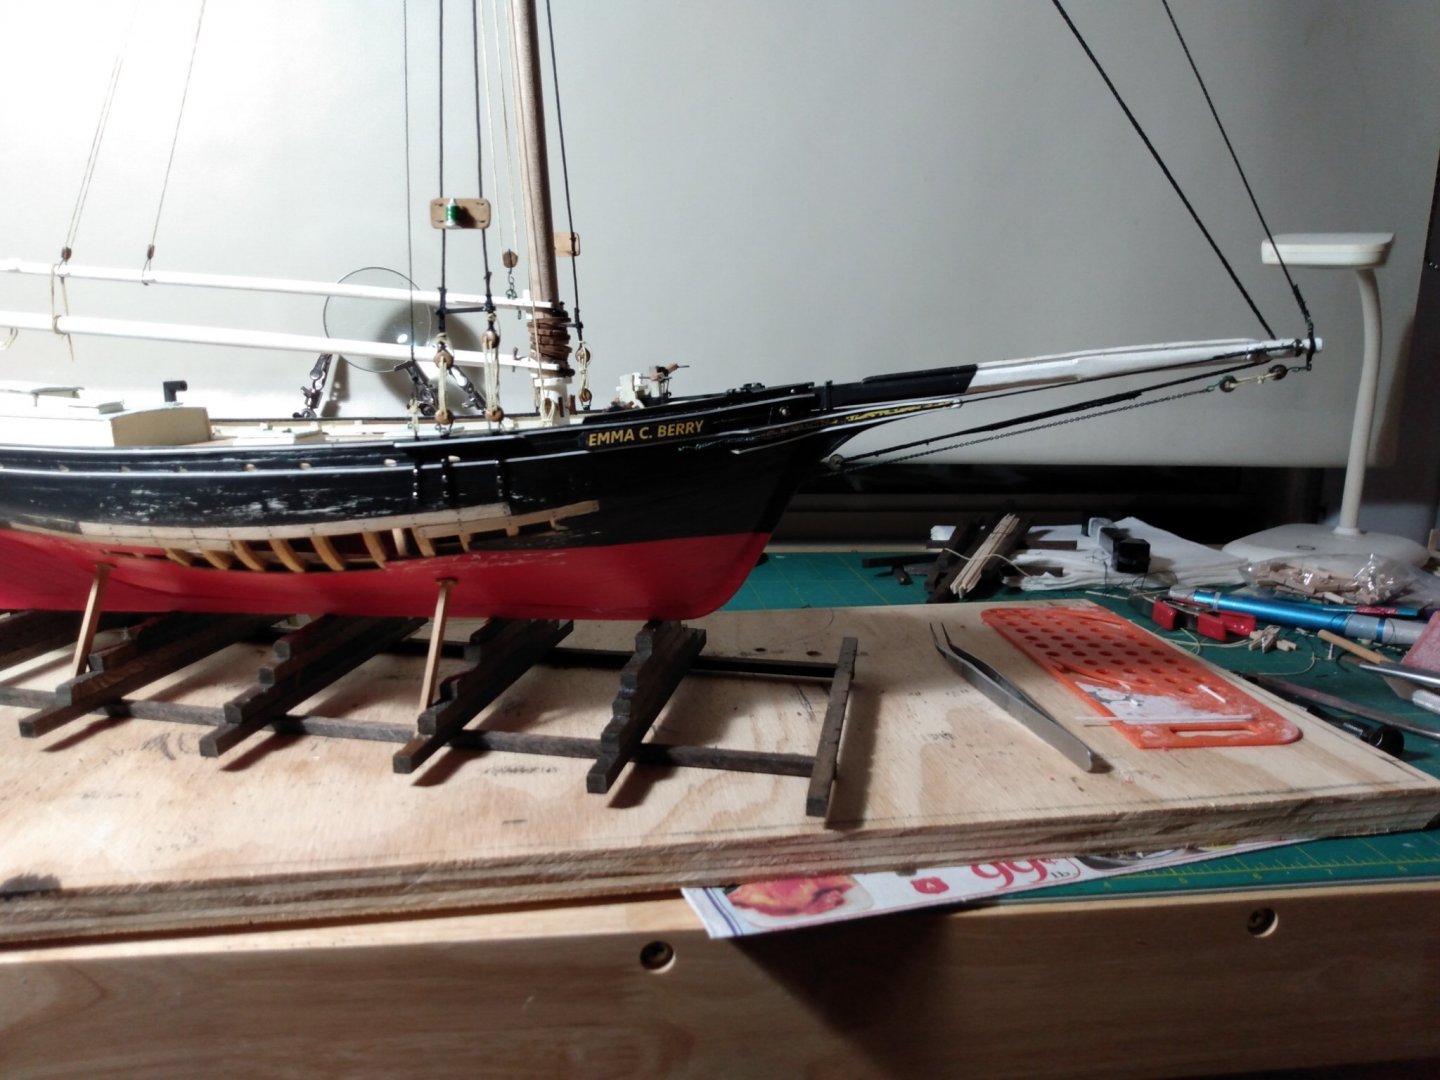
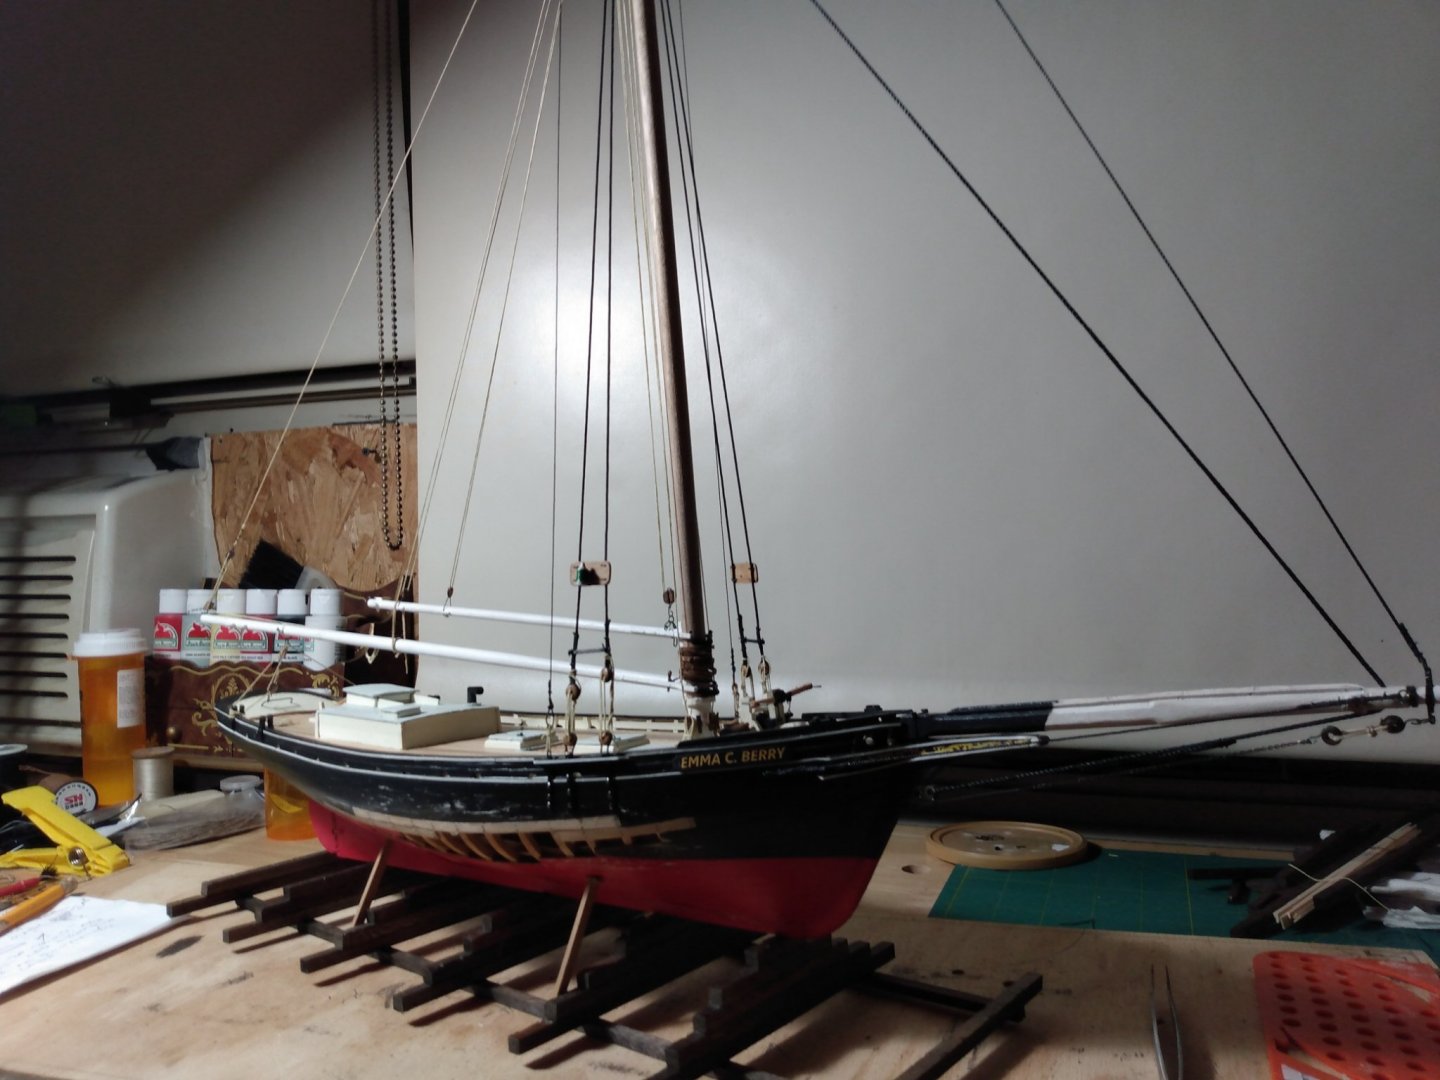
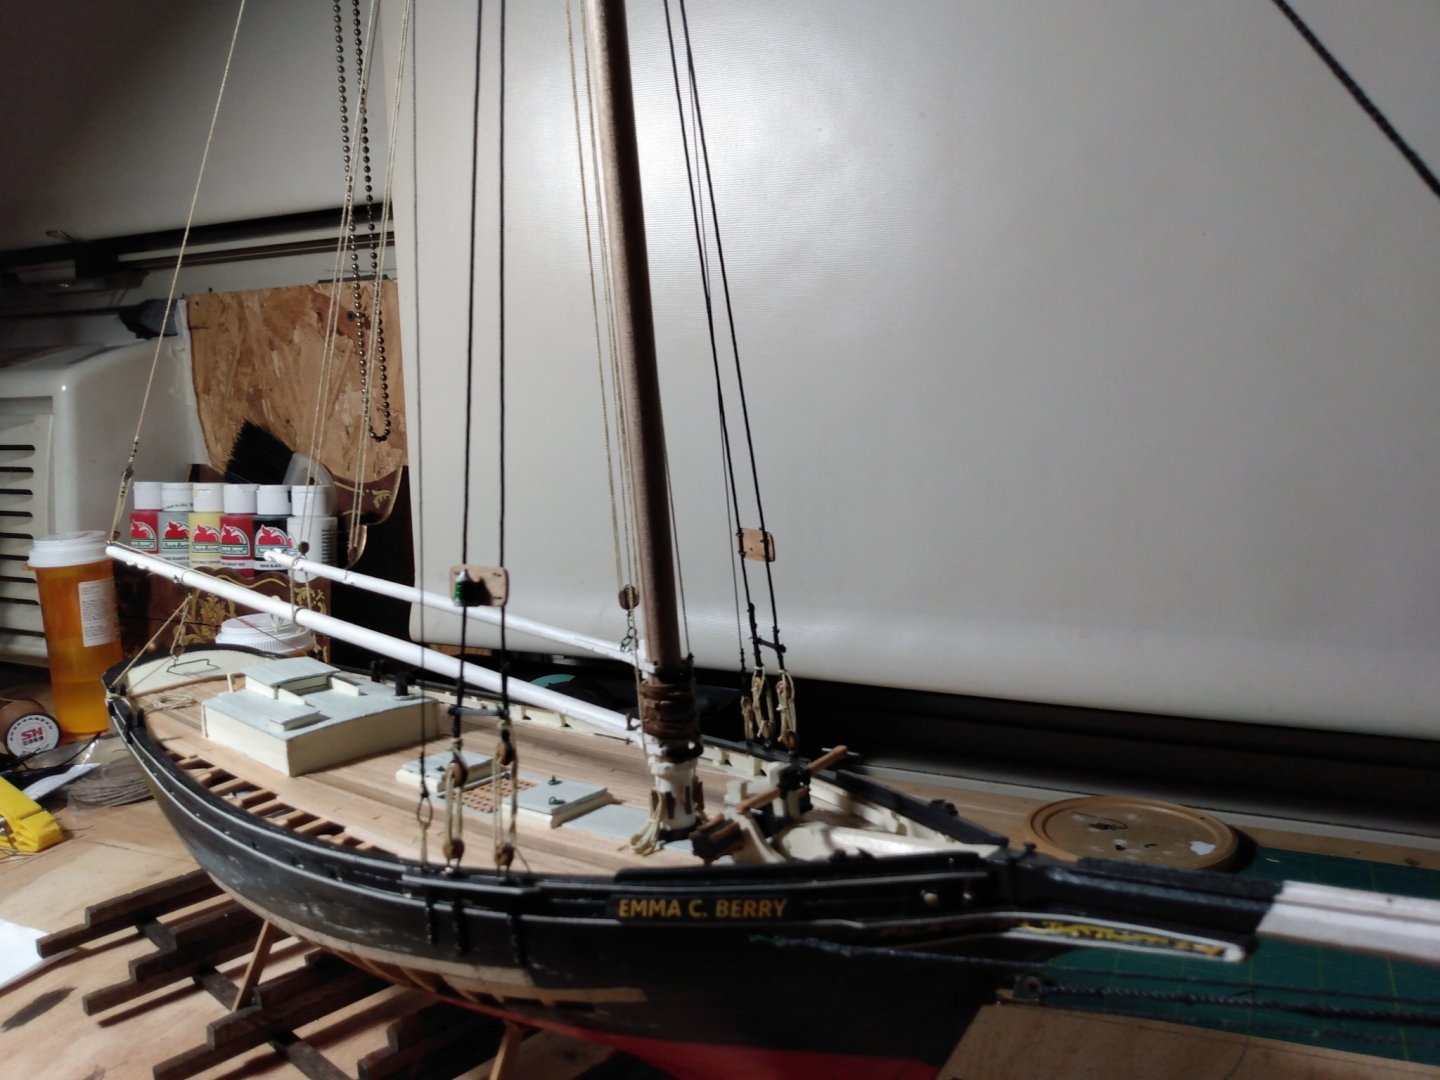
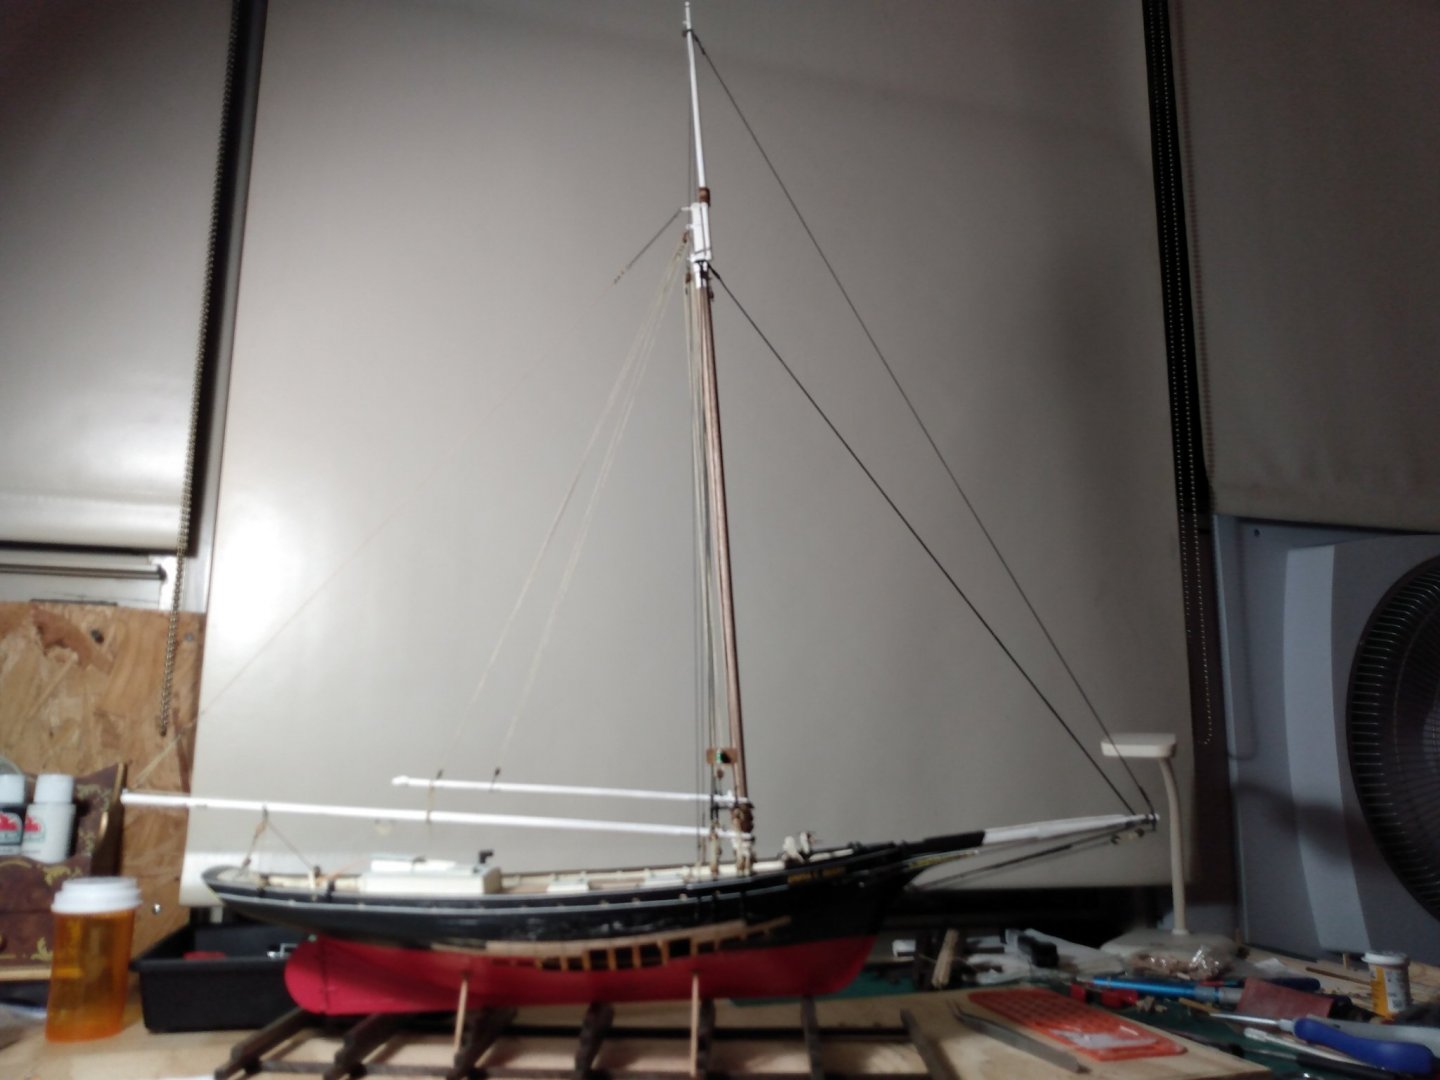
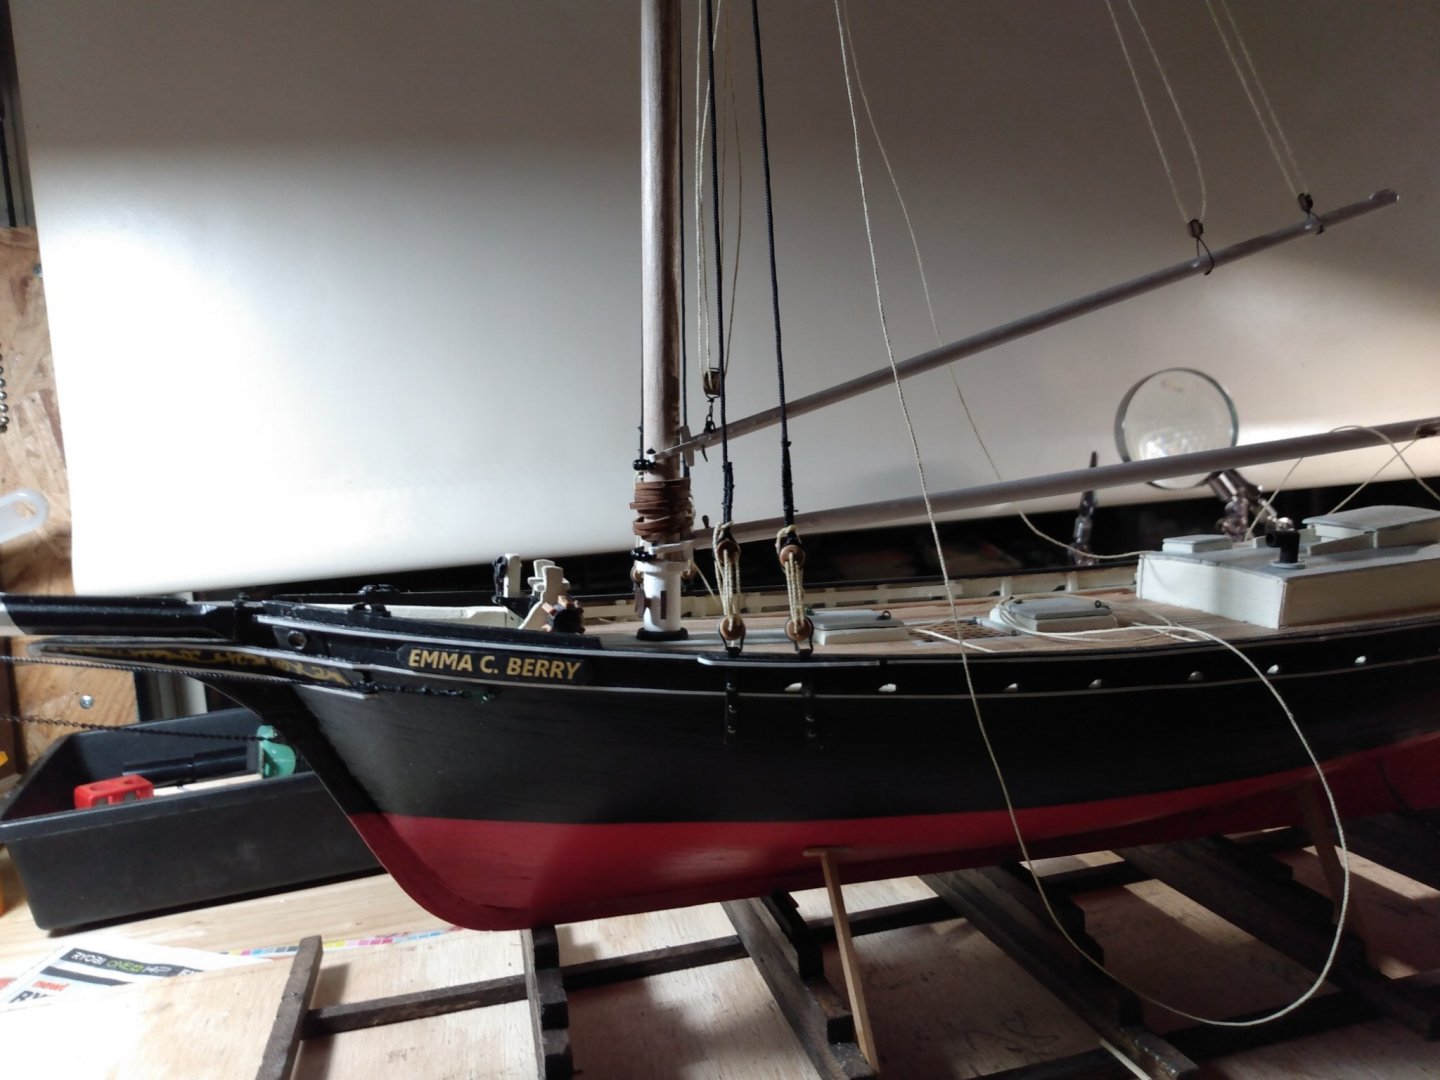
Well, I believe that I have achieved a point in this build that I can declare the model "finished". I can now focus on the base/diorama/case. I am generally satisfied with it. As with all the previous models however, I tend to zoom in on the areas that make me wonder if I could have done better! Visitors to my workshop assure me that it is "perfect" and they are amazed that such a creation by the likes of me is just short of miraculous! (this doesn't always quell my doubts however). But all in all, the overall look of the Emma is pleasing. So since the last posting, I rigged all the blocks and belayed them. Added the shrouds, jib stay, topmast stay and back stays. Attached the sheer bars and running lights to the shrouds. Then I added some rope coils here and there. I'm sure I will add a few more "do-dads" to the deck for some interest before closing up the case. I apologize in advance for the poor quality of the photos. My phone camera is sub-par to say the least.


- 101 replies
-
- 7
-
-
- emma c berry
- model shipways
- (and 1 more)
-
I could see from the start of this model that the manual was vague and that the plans were sometimes wrong. I just opted to do what seemed "right" when confronted with a dilemma.
- 161 replies
-
- 2
-
-
- Model Shipways
- Emma C Berry
- (and 1 more)
-
Sea Hoss reacted to a post in a topic:
HM Cutter Cheerful 1806 by PRS - FINISHED - Syren Ship Model Company - 1/48
-
Looking really good Andrew, the details are impressive.
-
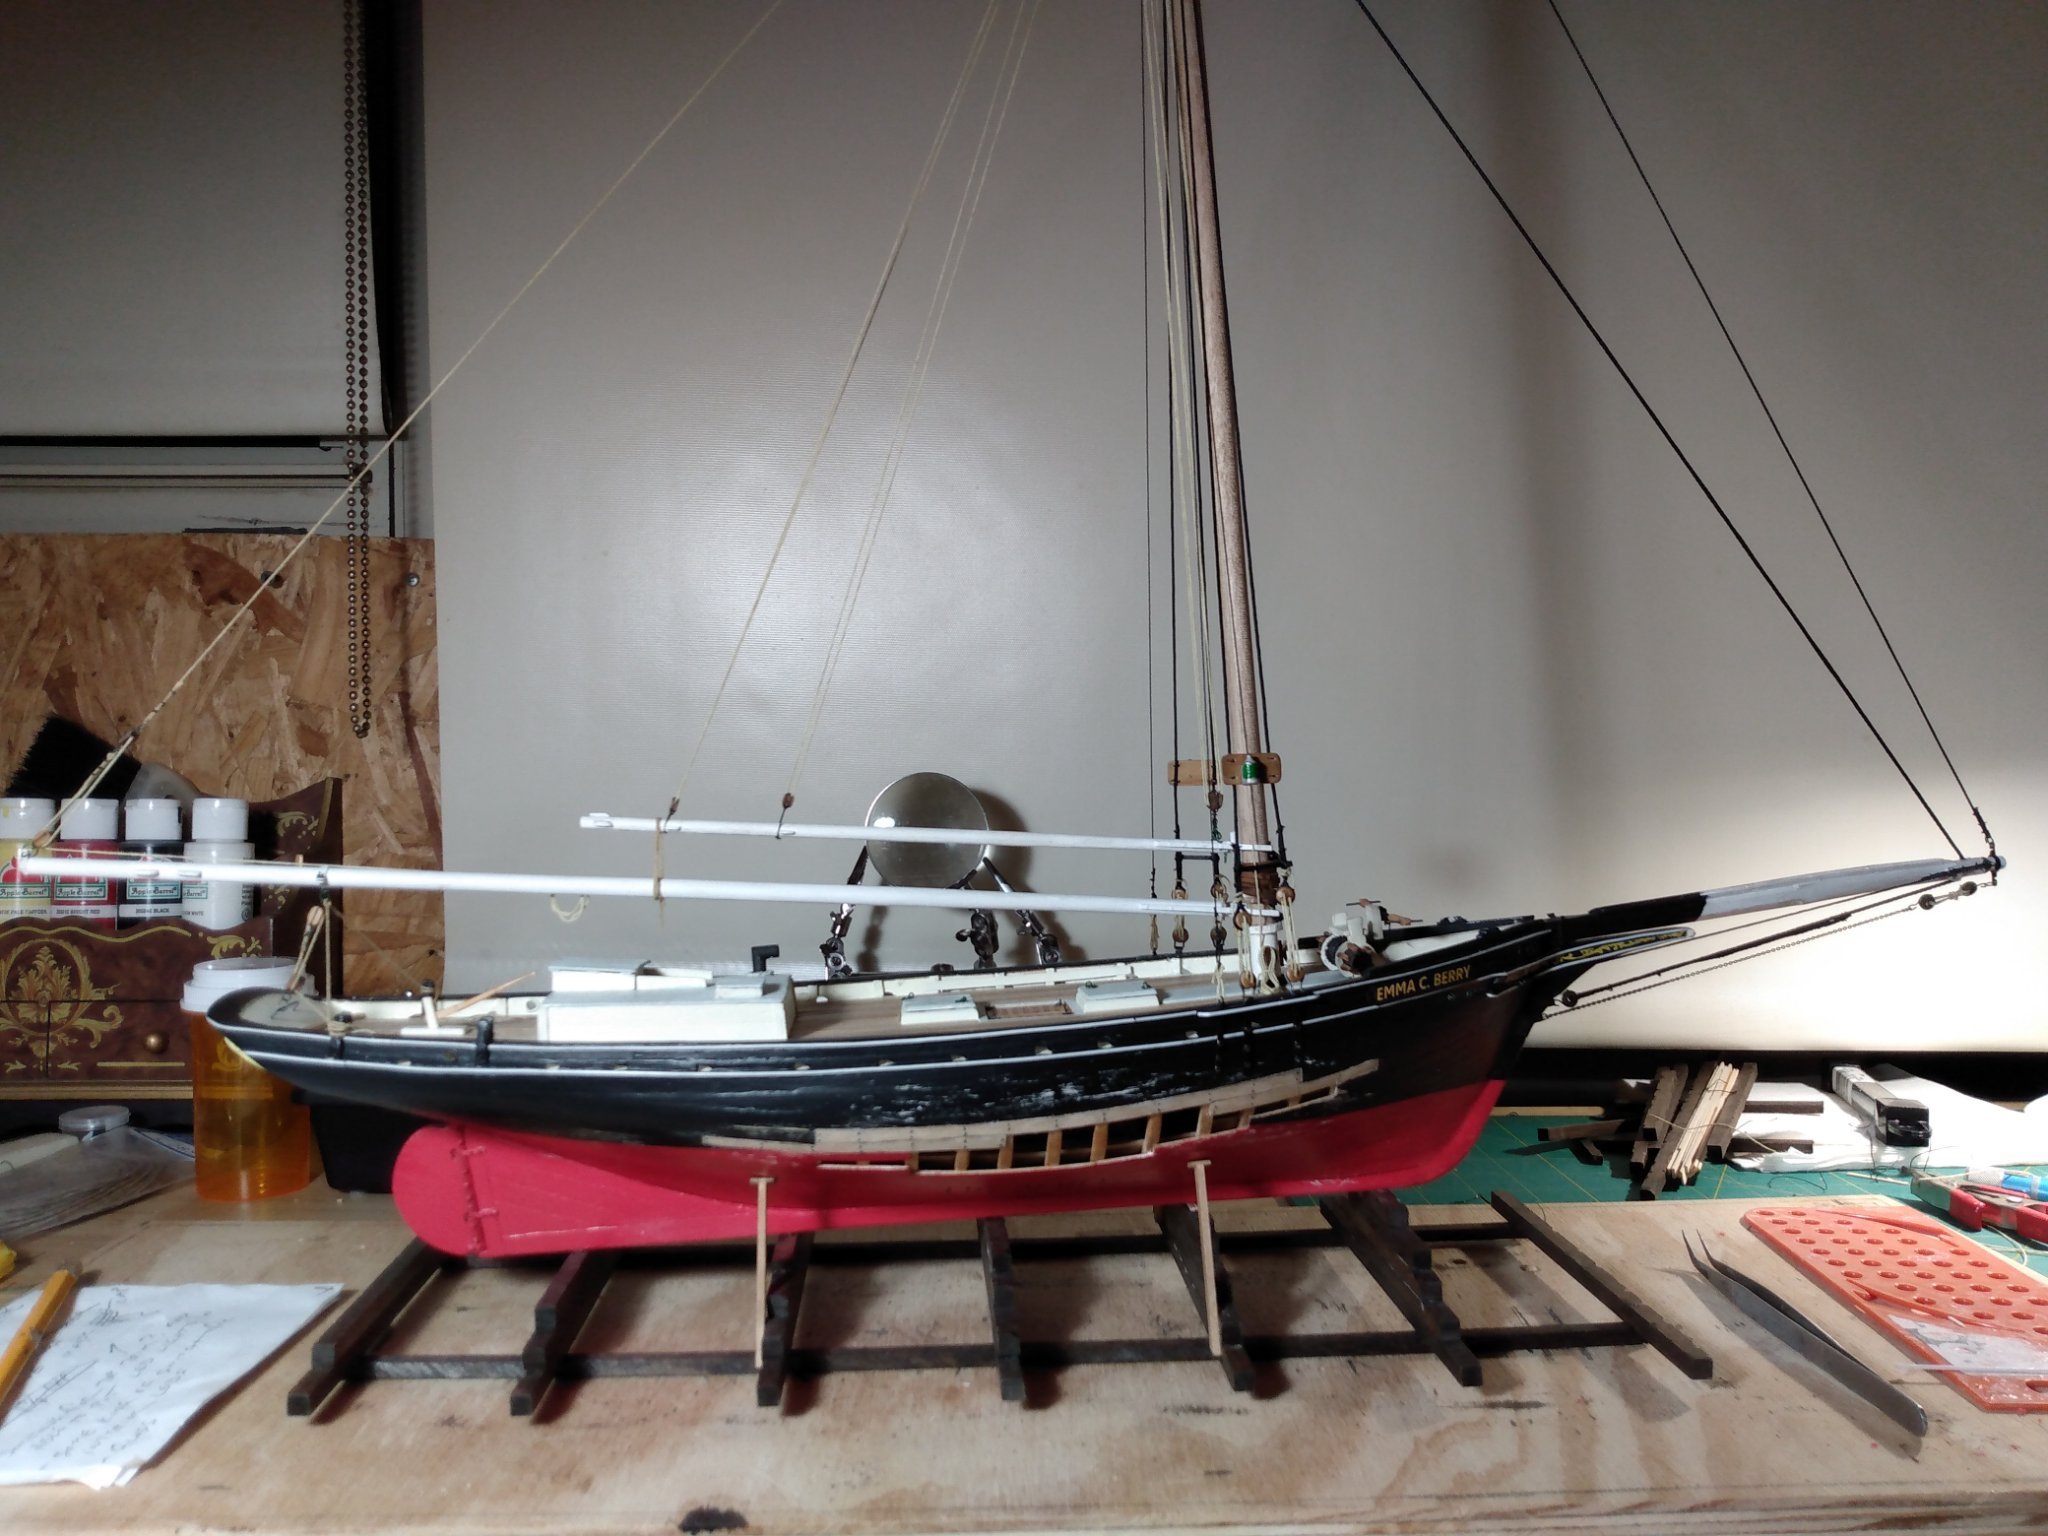
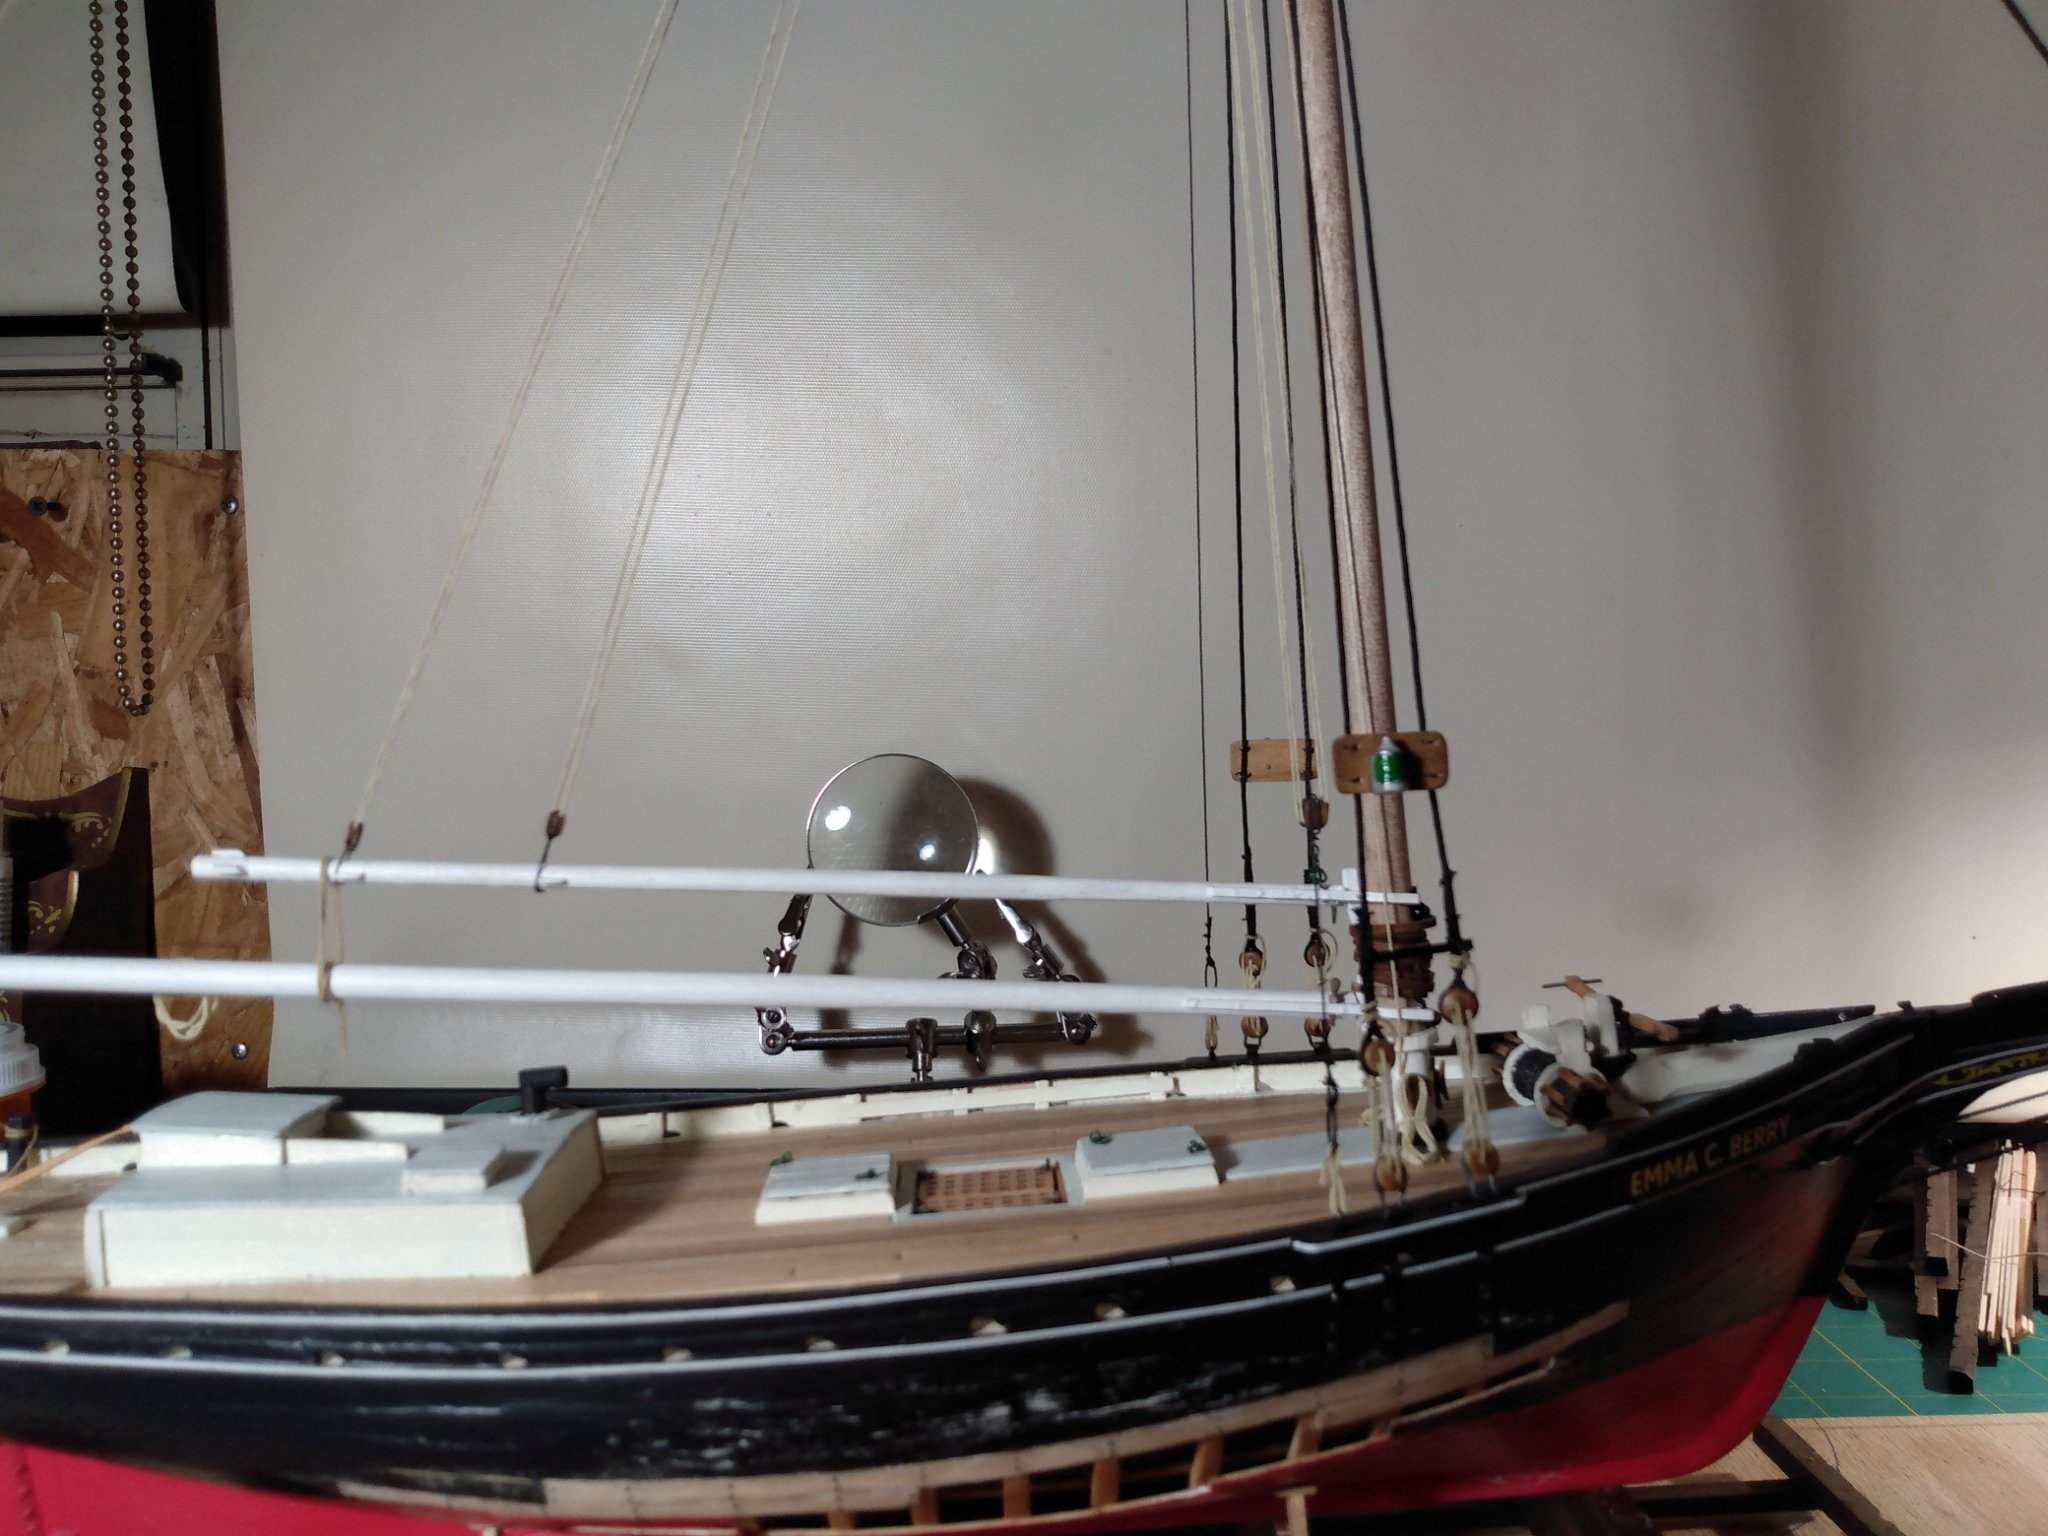
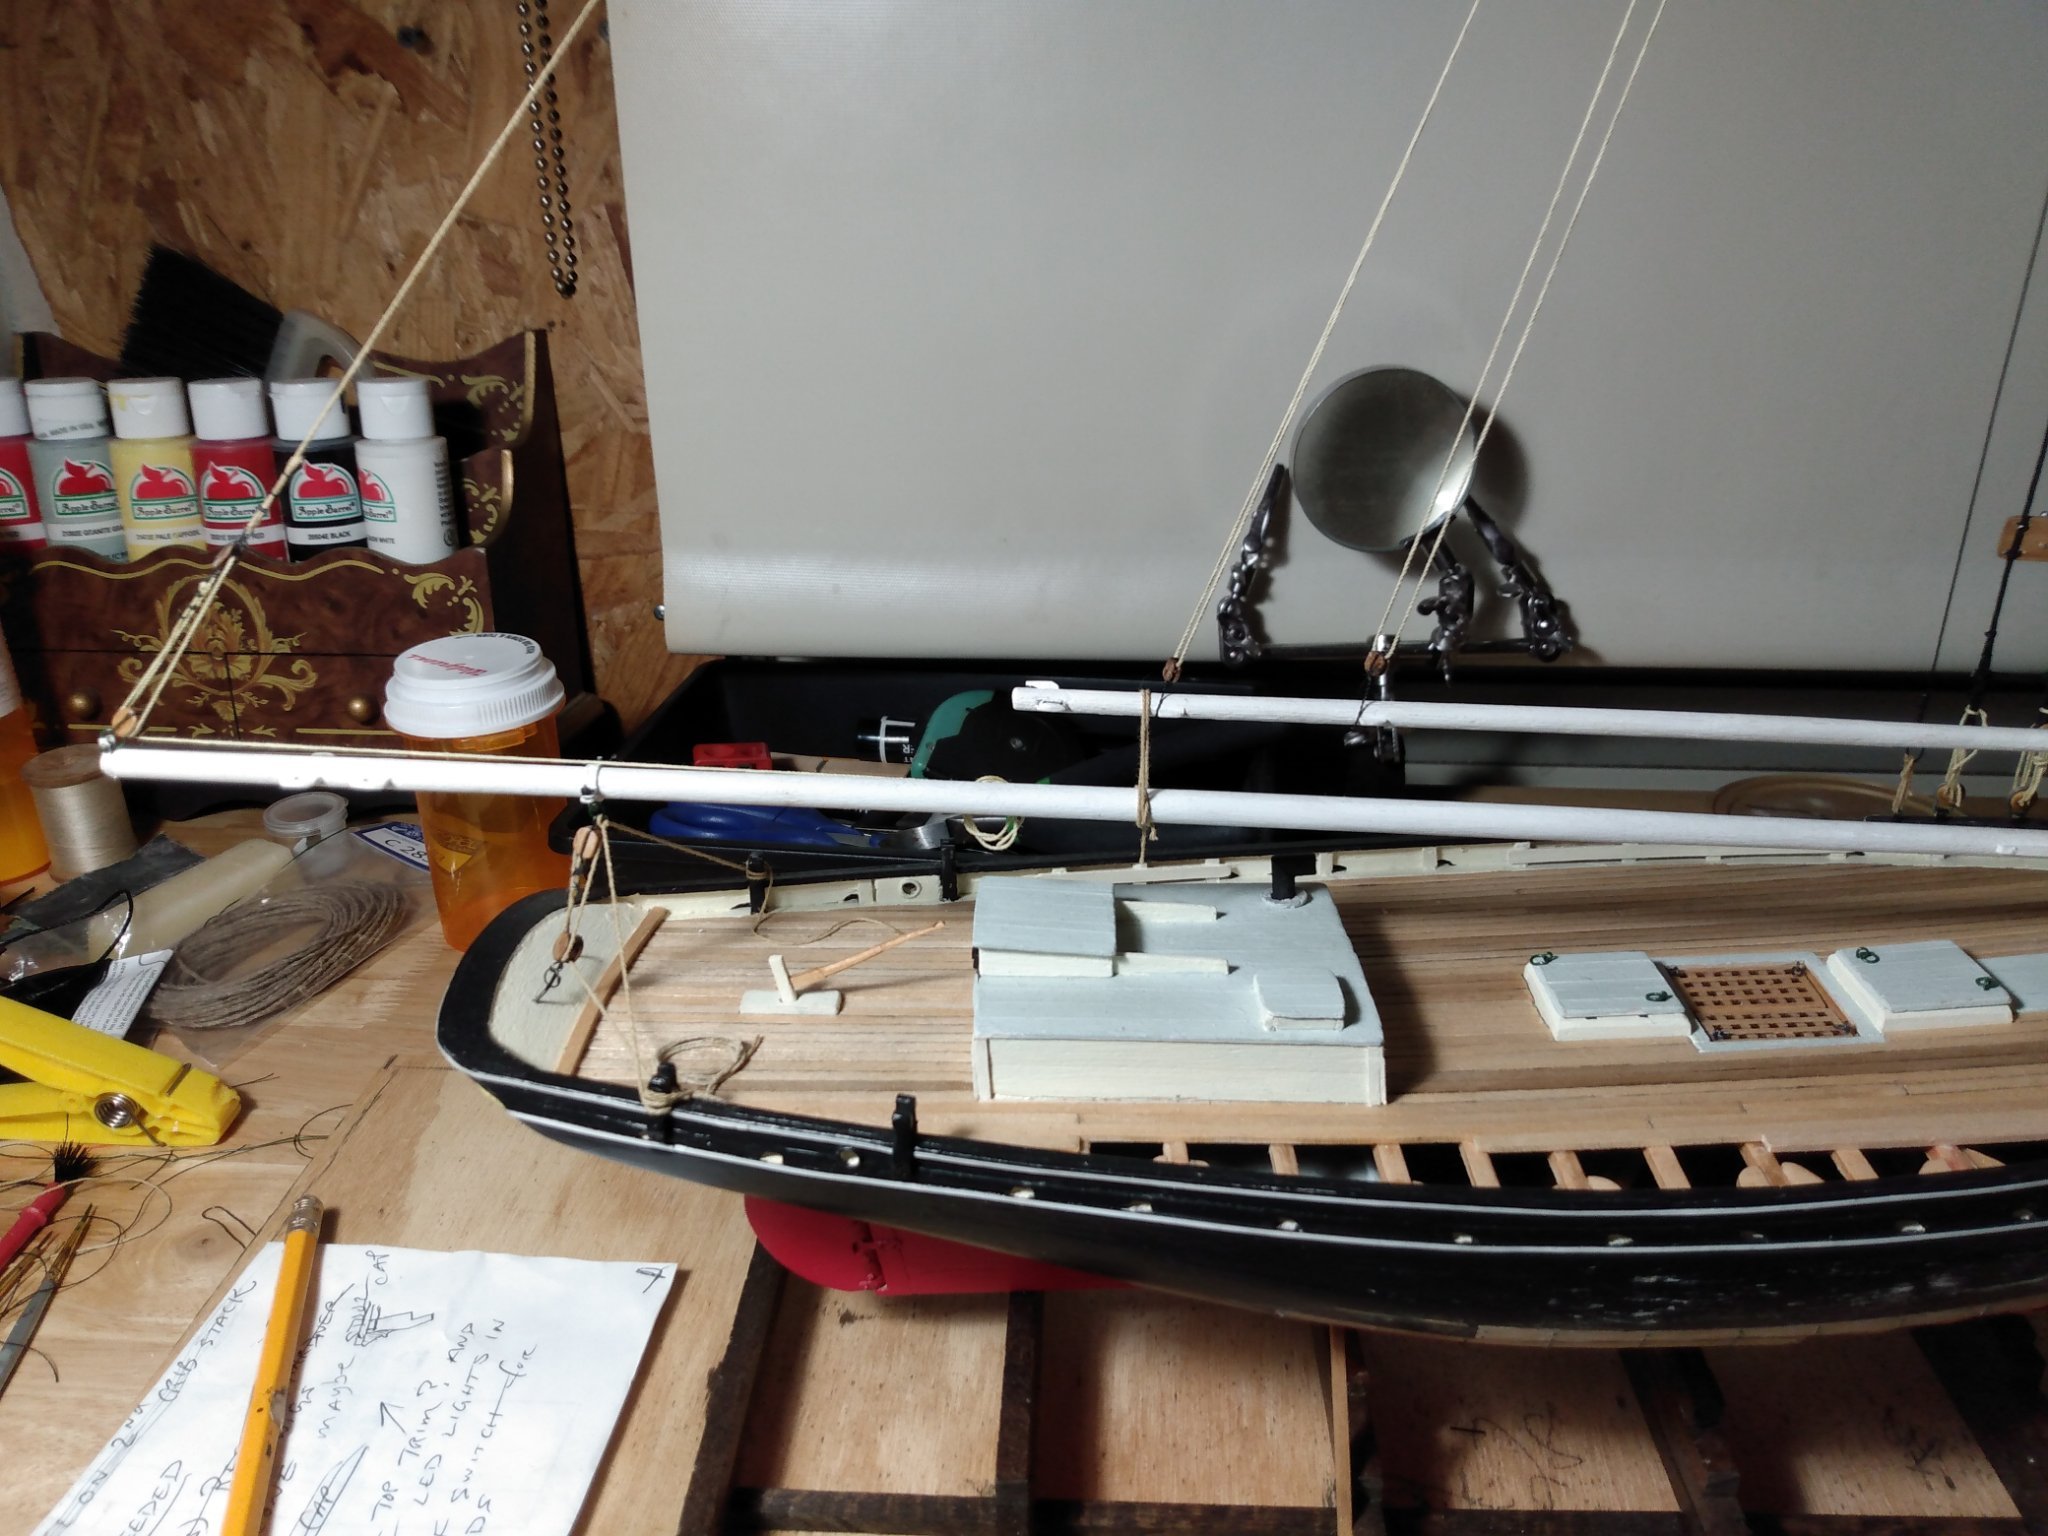
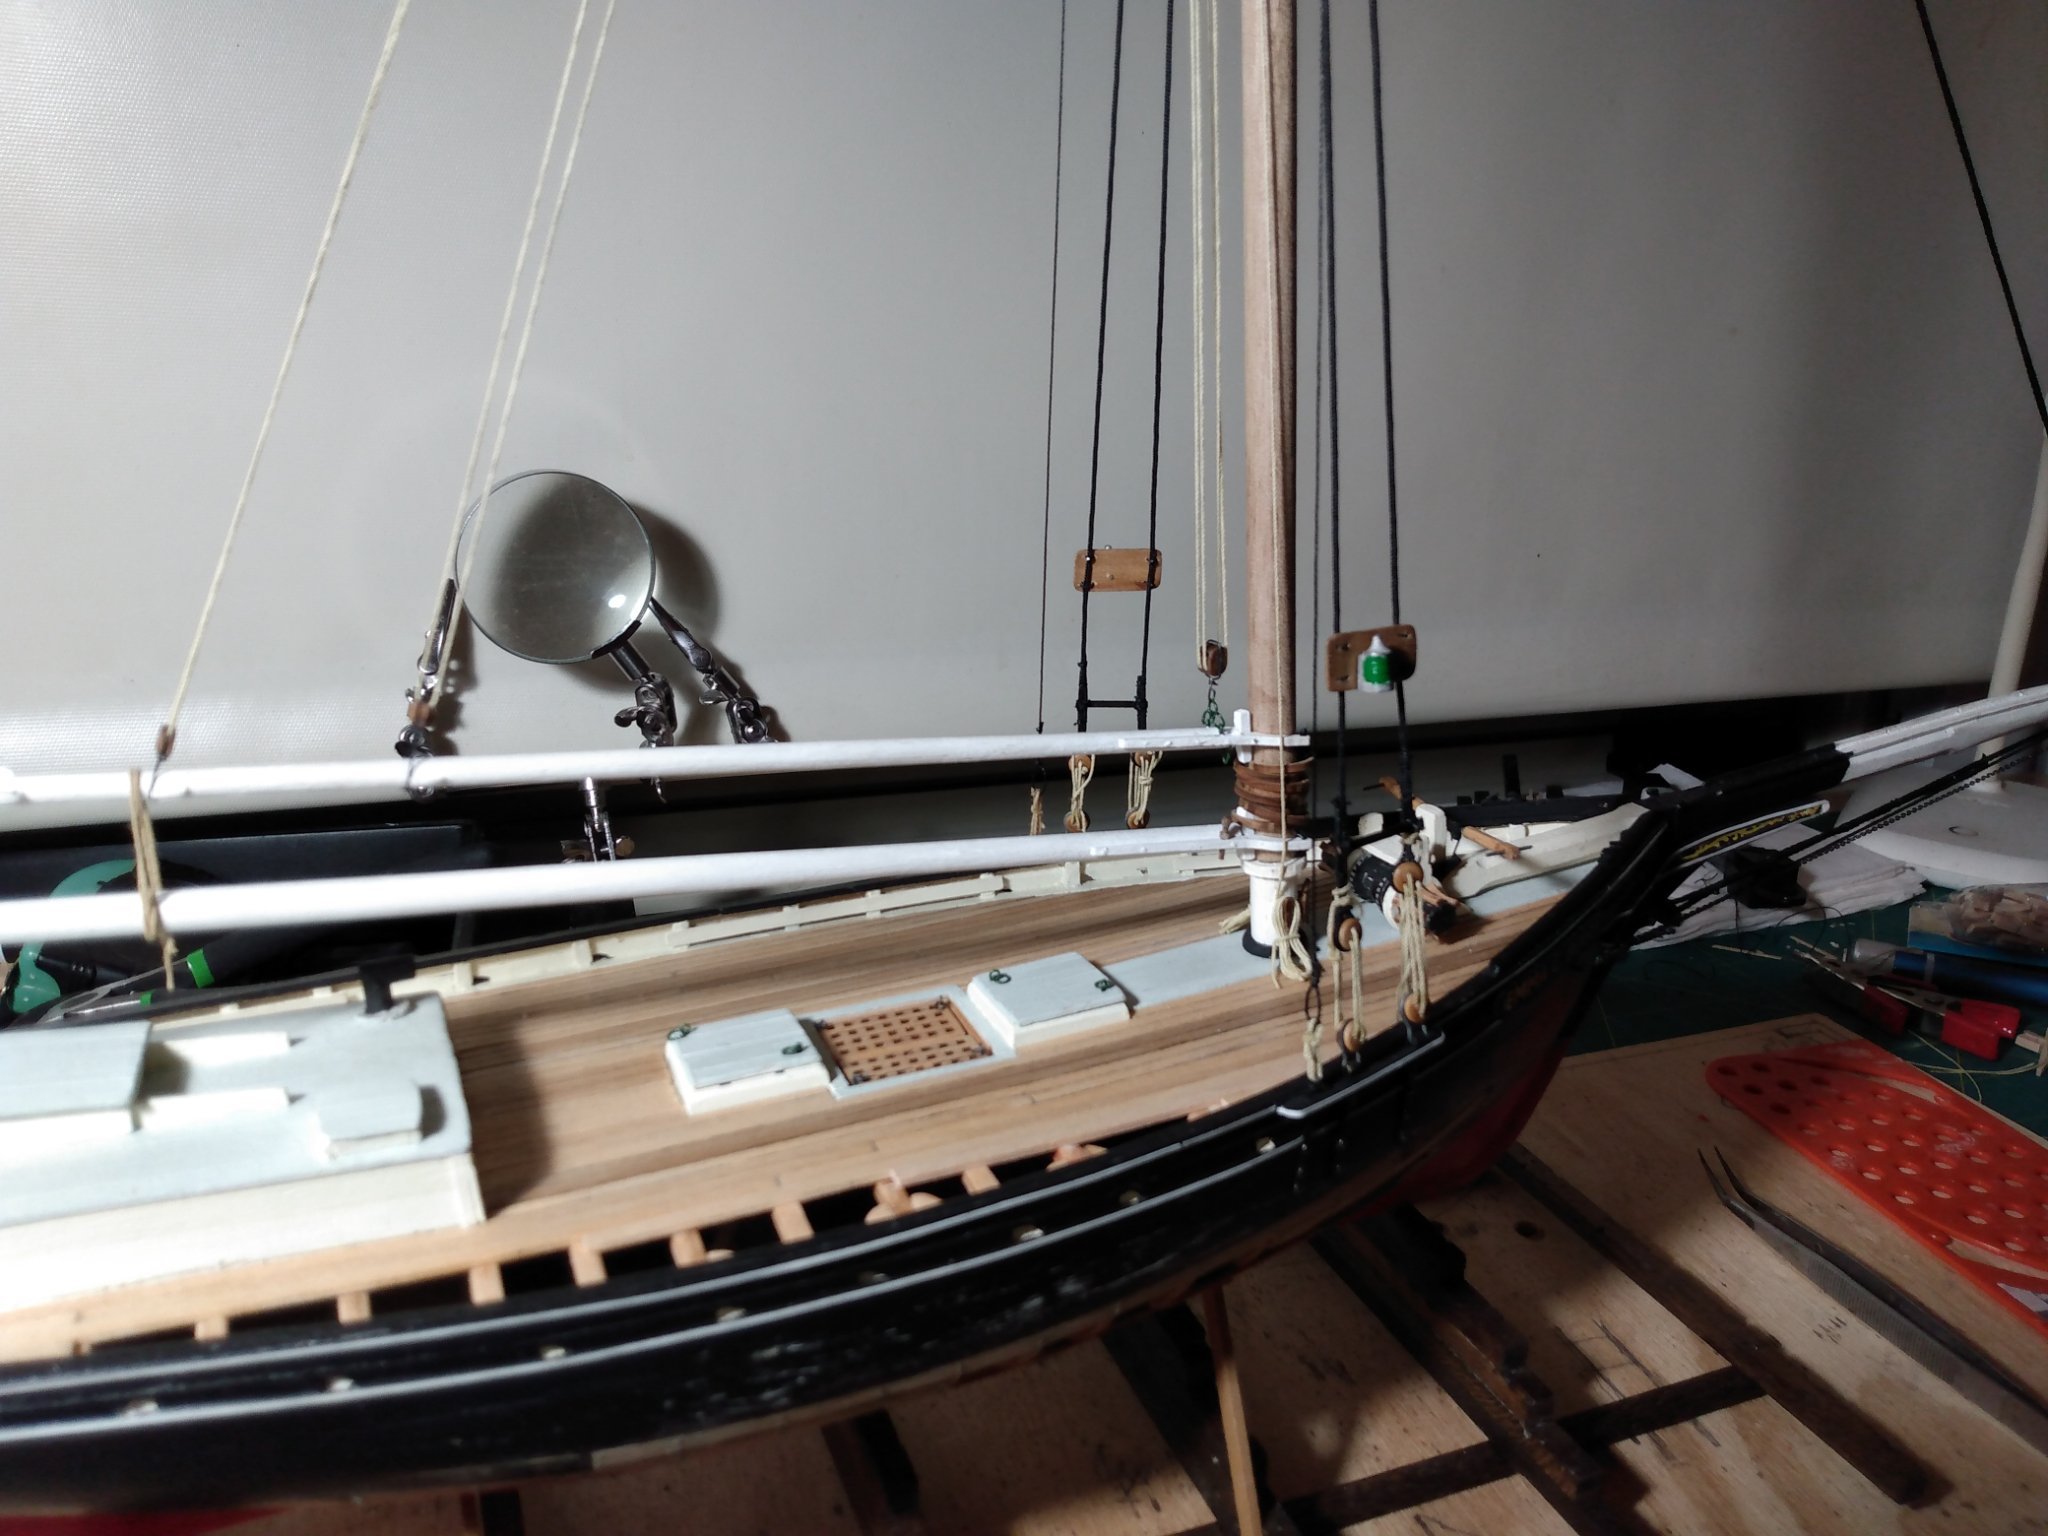
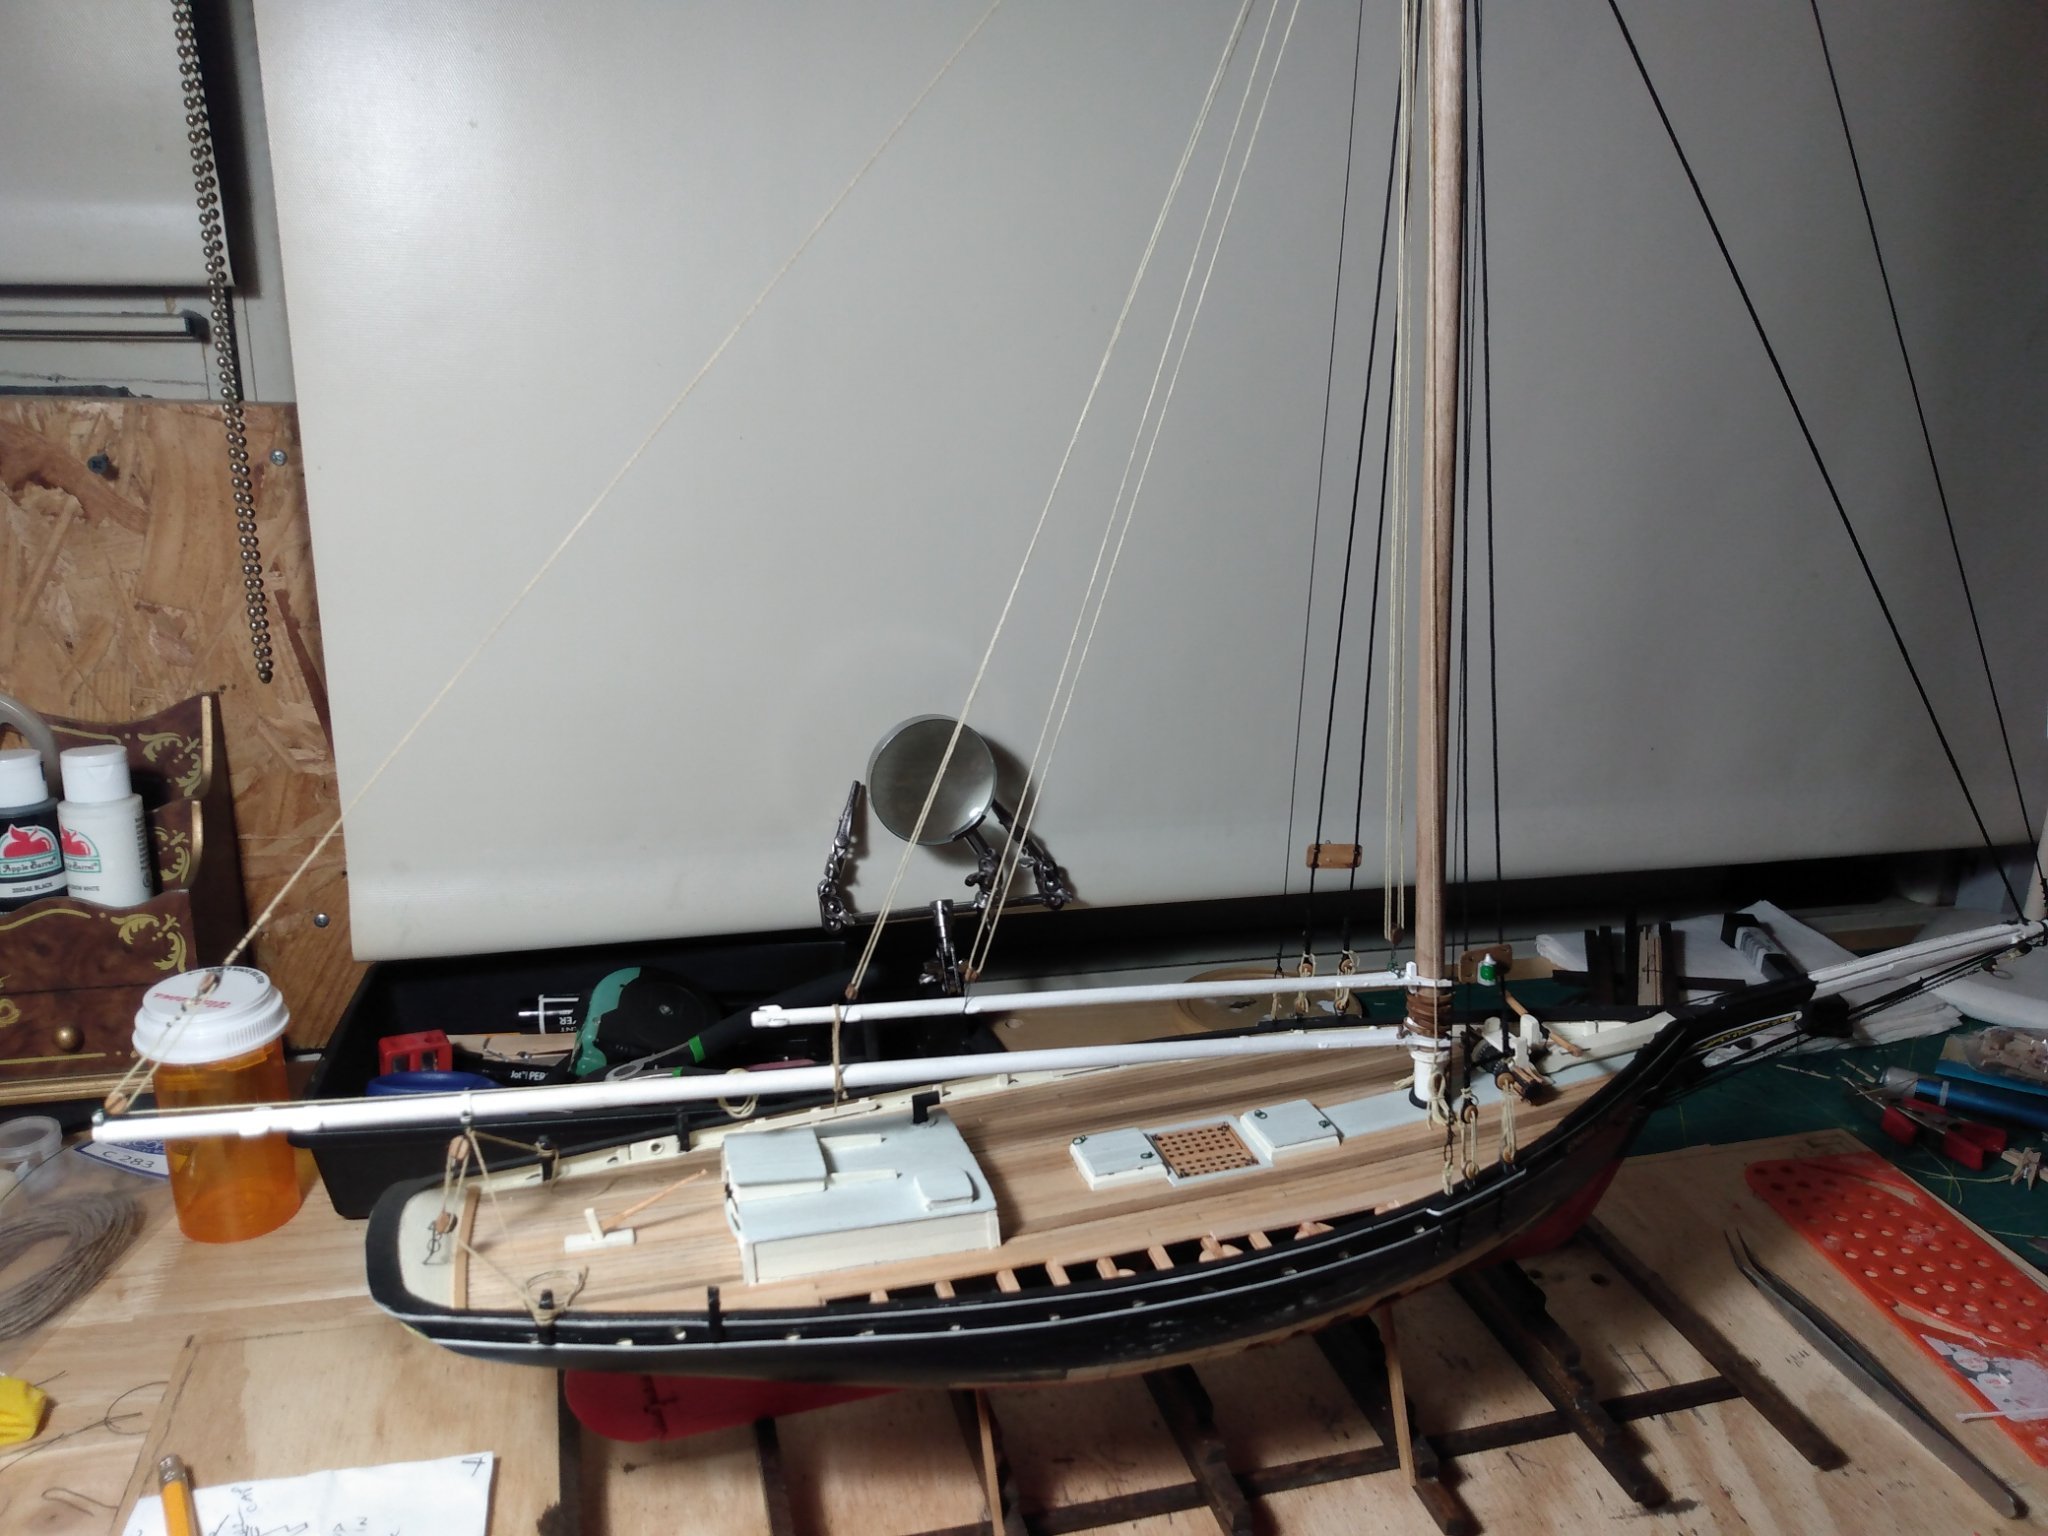
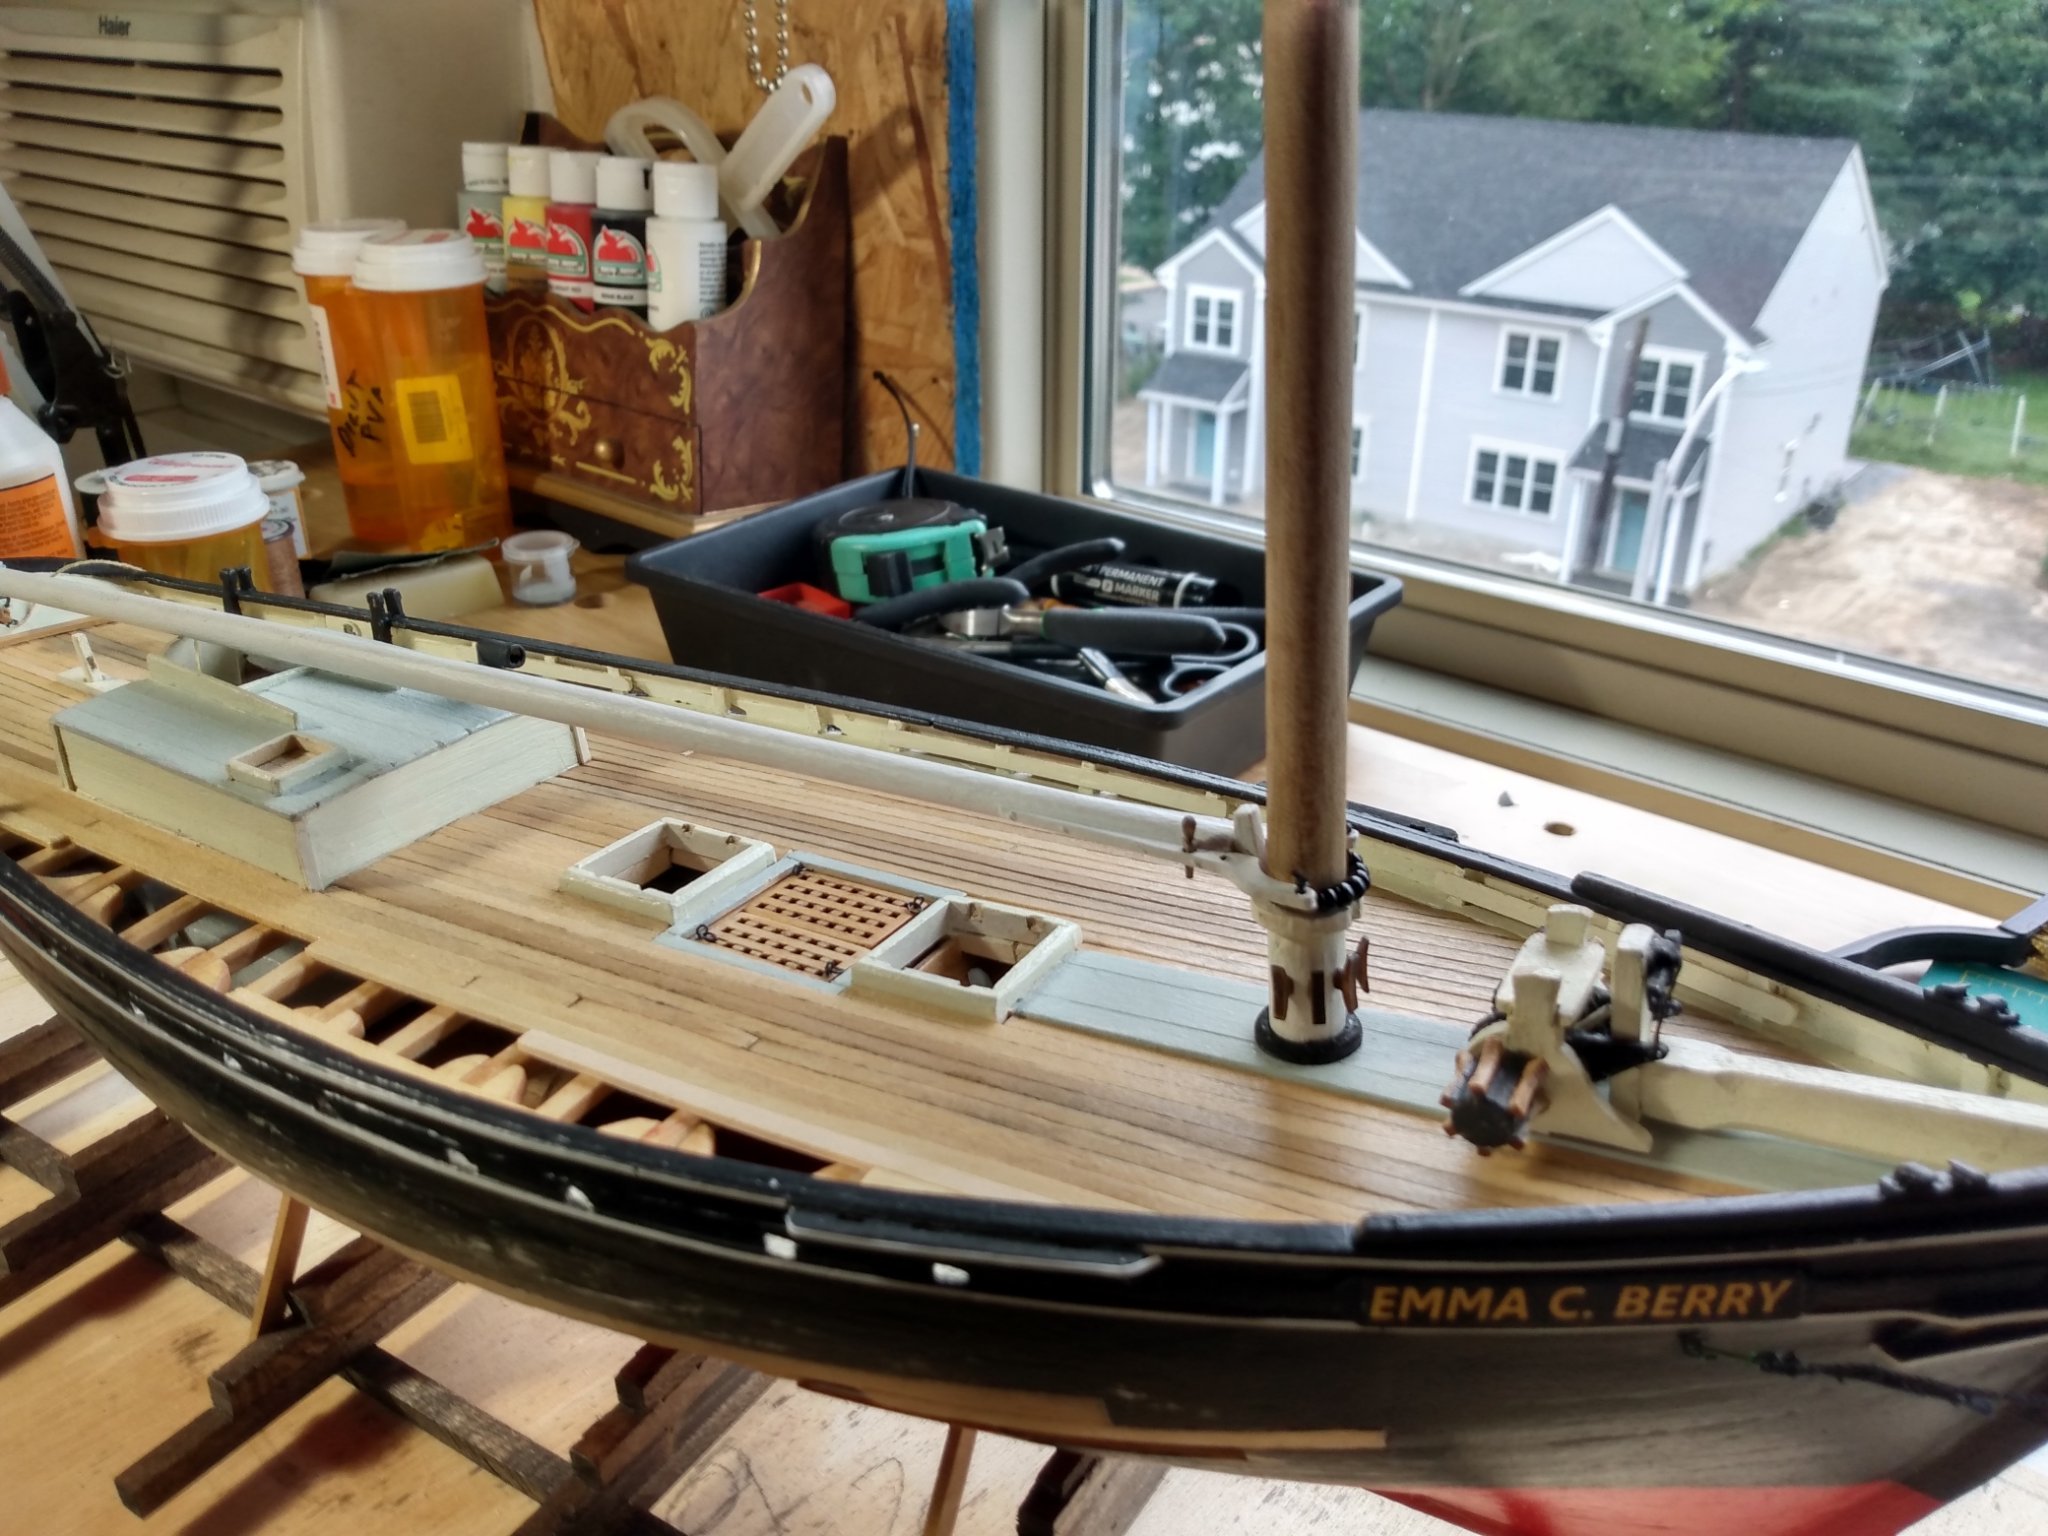
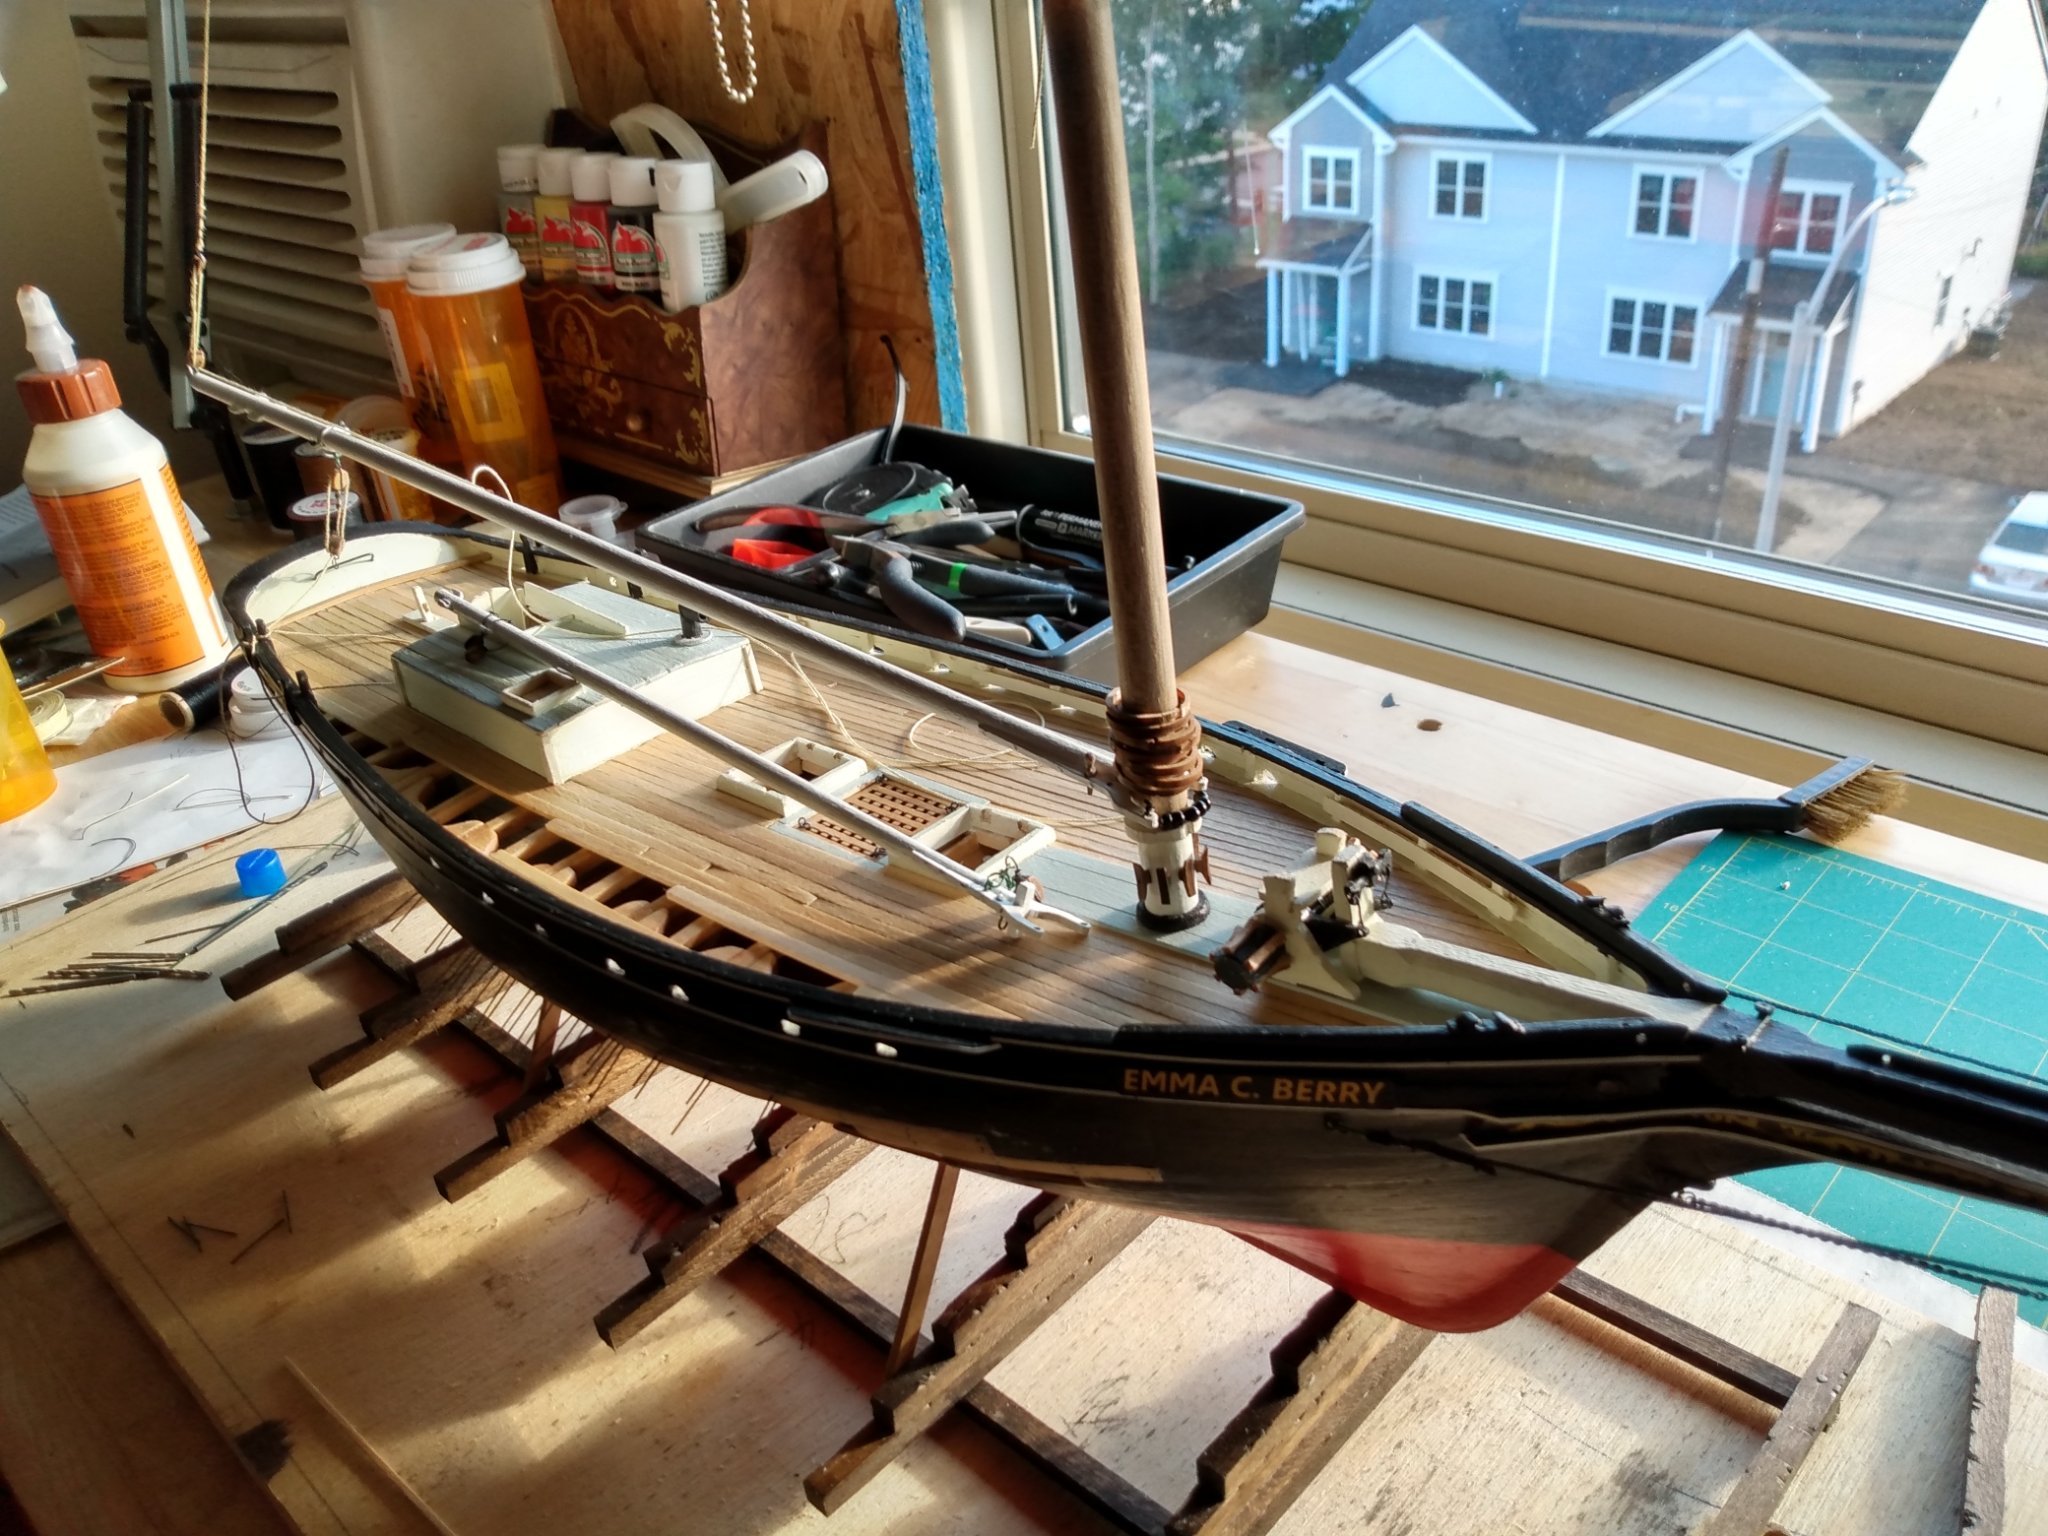
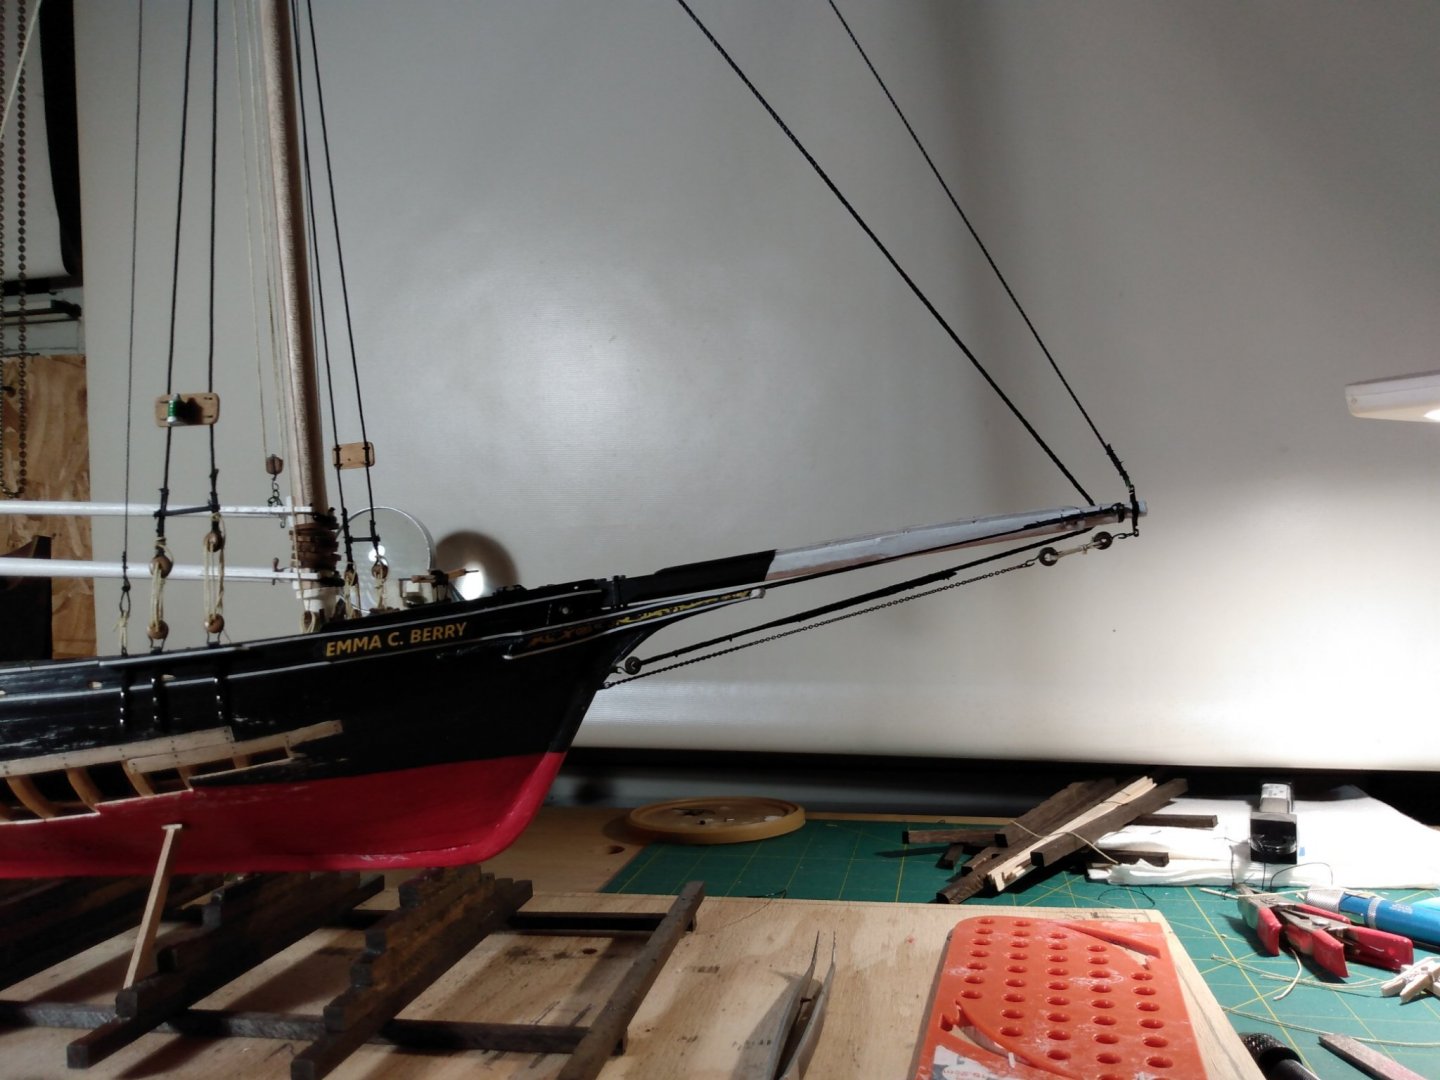
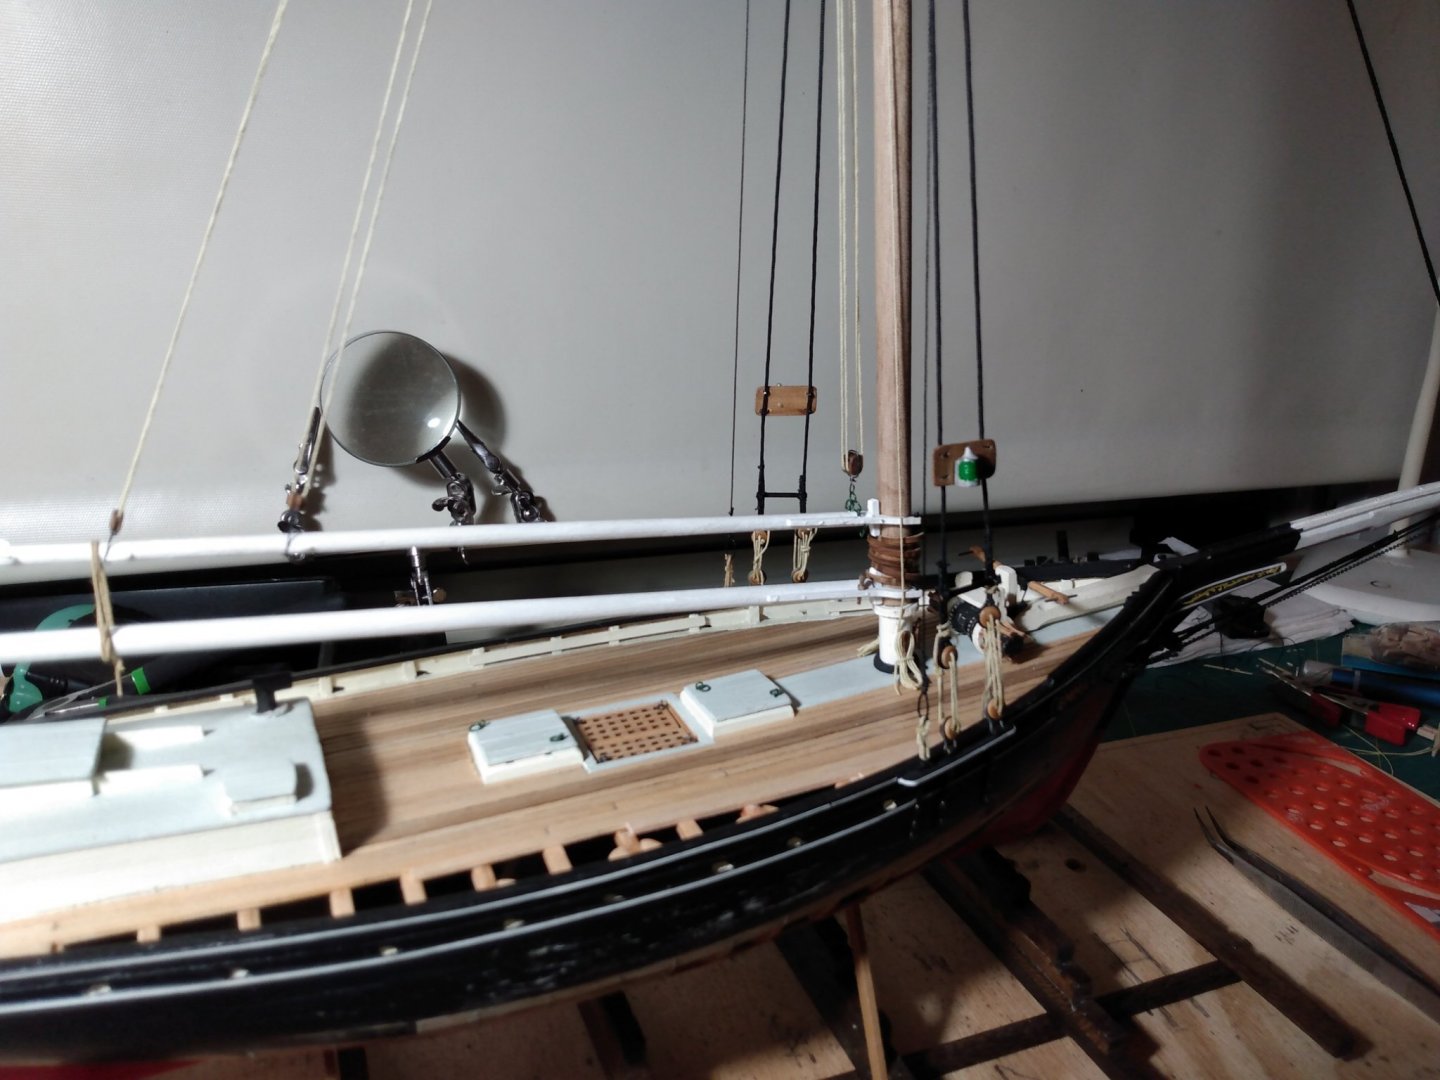
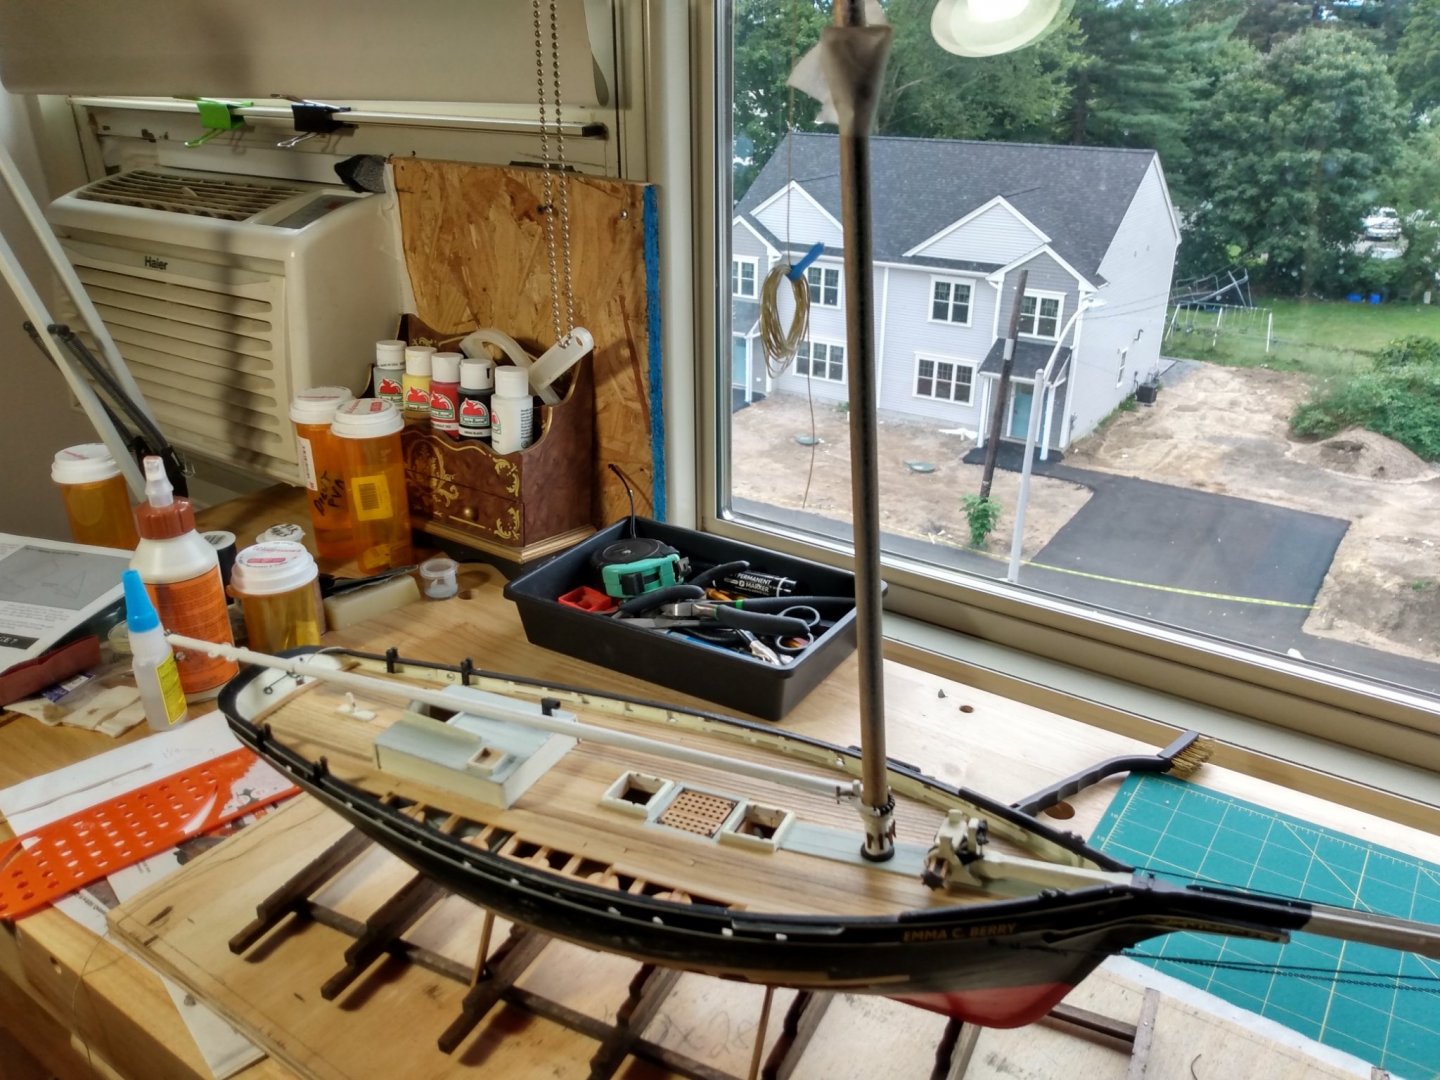
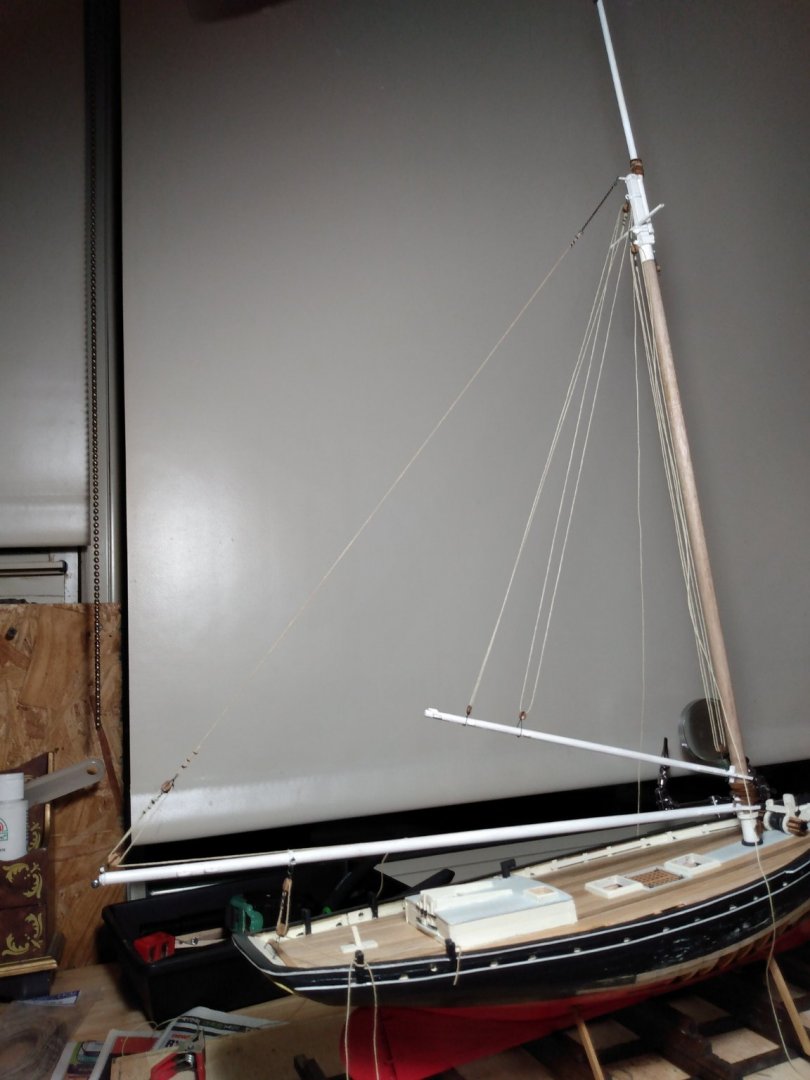
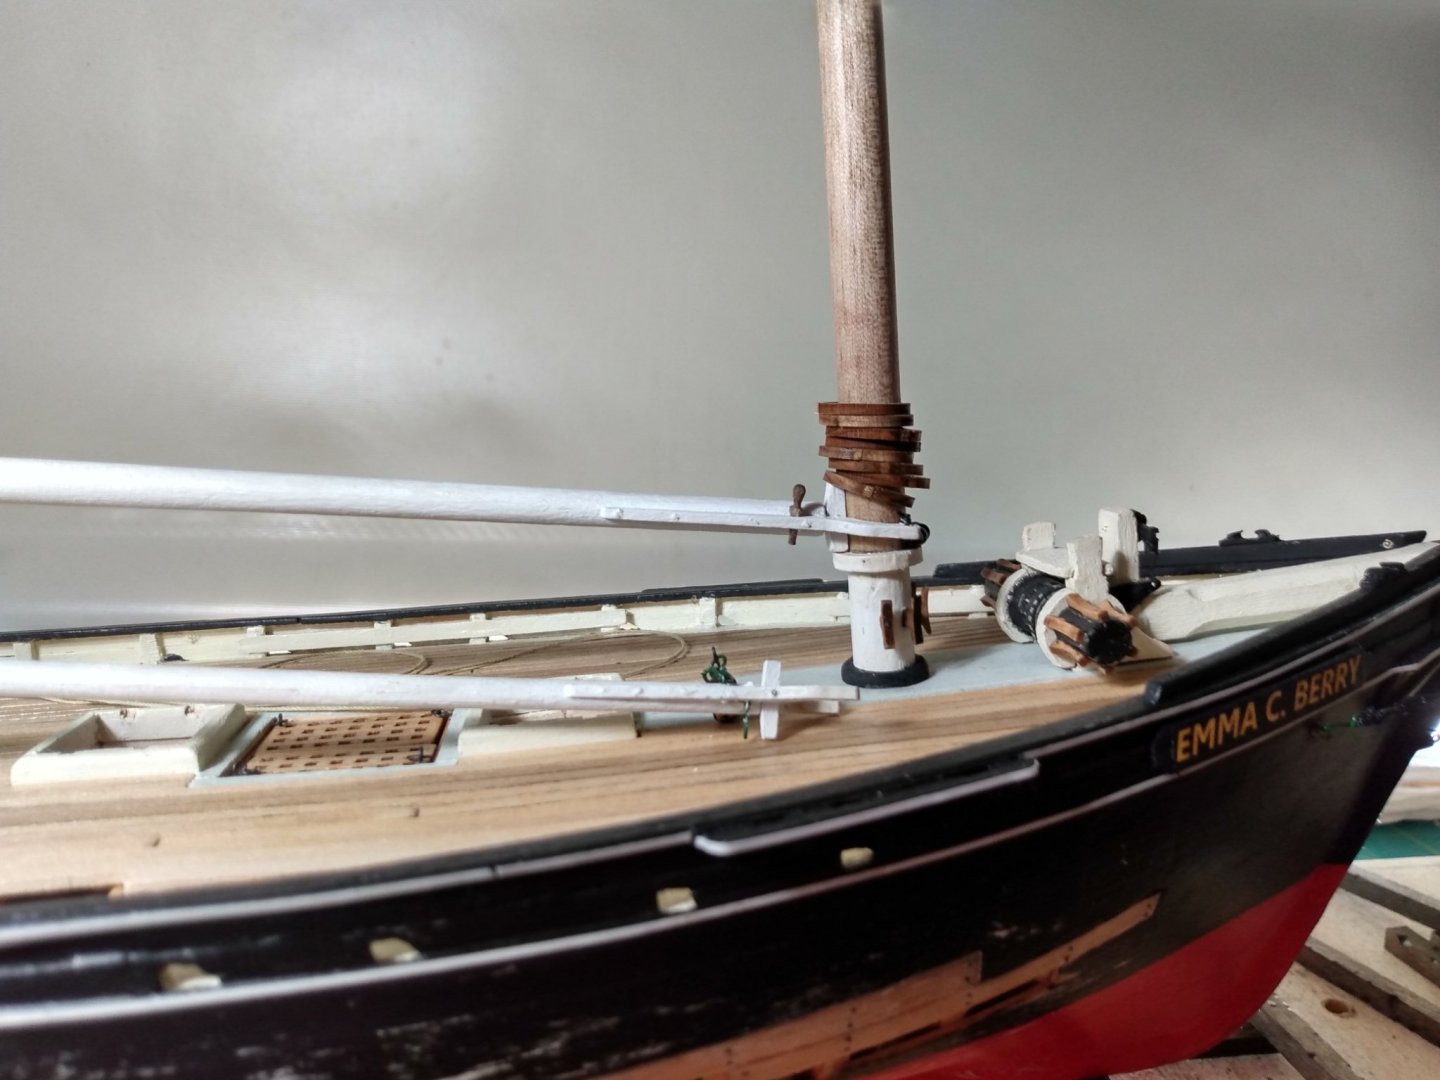
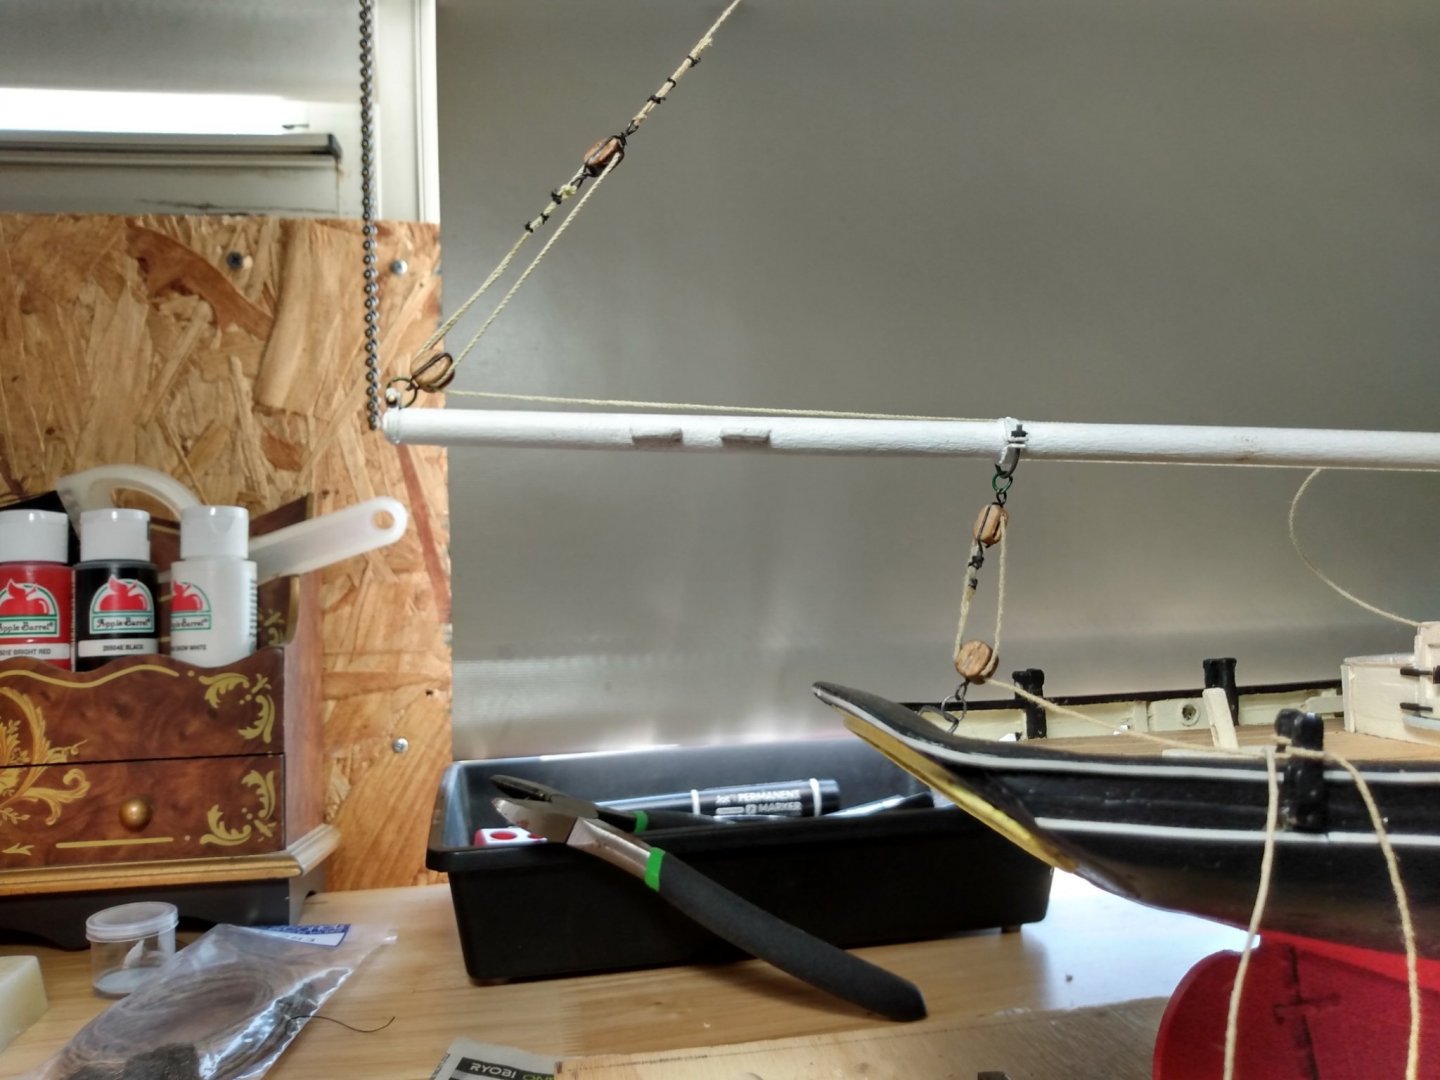
Hey there, got some more progress to share on ECB. After stepping the mast I began adding the boom and gaff. Connected the jaws to the mast with the parrels, then began rigging the blocks. Then I just let them hang there until I get further along with the standing rigging. When all that is completed, I can look everything over and finalise the the rigging and belaying all the running ends properly. Next, I focused on the shrouds. Quite straight forward. It was actually nice to work these at a larger scale than most of the ones I've previously done, (and no ratlines!). I will also neaten up the deadeye lanyards eventually. Next up is the jib stay, topmast stay and topmast back stays. Then the end will be in sight. Permanently mount her to the base and finish the diorama. Eventually, I plan on enclosing everything in glass.


- 101 replies
-
- 6
-
-
- emma c berry
- model shipways
- (and 1 more)
-
Thanks Rich. I have to give credit to a fellow modeller for the bristle idea. (I forget who it actually was). But I know lots of guys here use black mono filament also. I just noticed; you are a fellow Mass. guy, where abouts? Also your Connie is coming along beautifullly.
-
Yes, I believe you are right about the 3 planks making up "the king plank". What appears to be two in the center is actually one with the center line down the middle.
-
Thank you Yves, much appriciated. I enjoy your work also.
- 101 replies
-
- 1
-
-
- emma c berry
- model shipways
- (and 1 more)
-
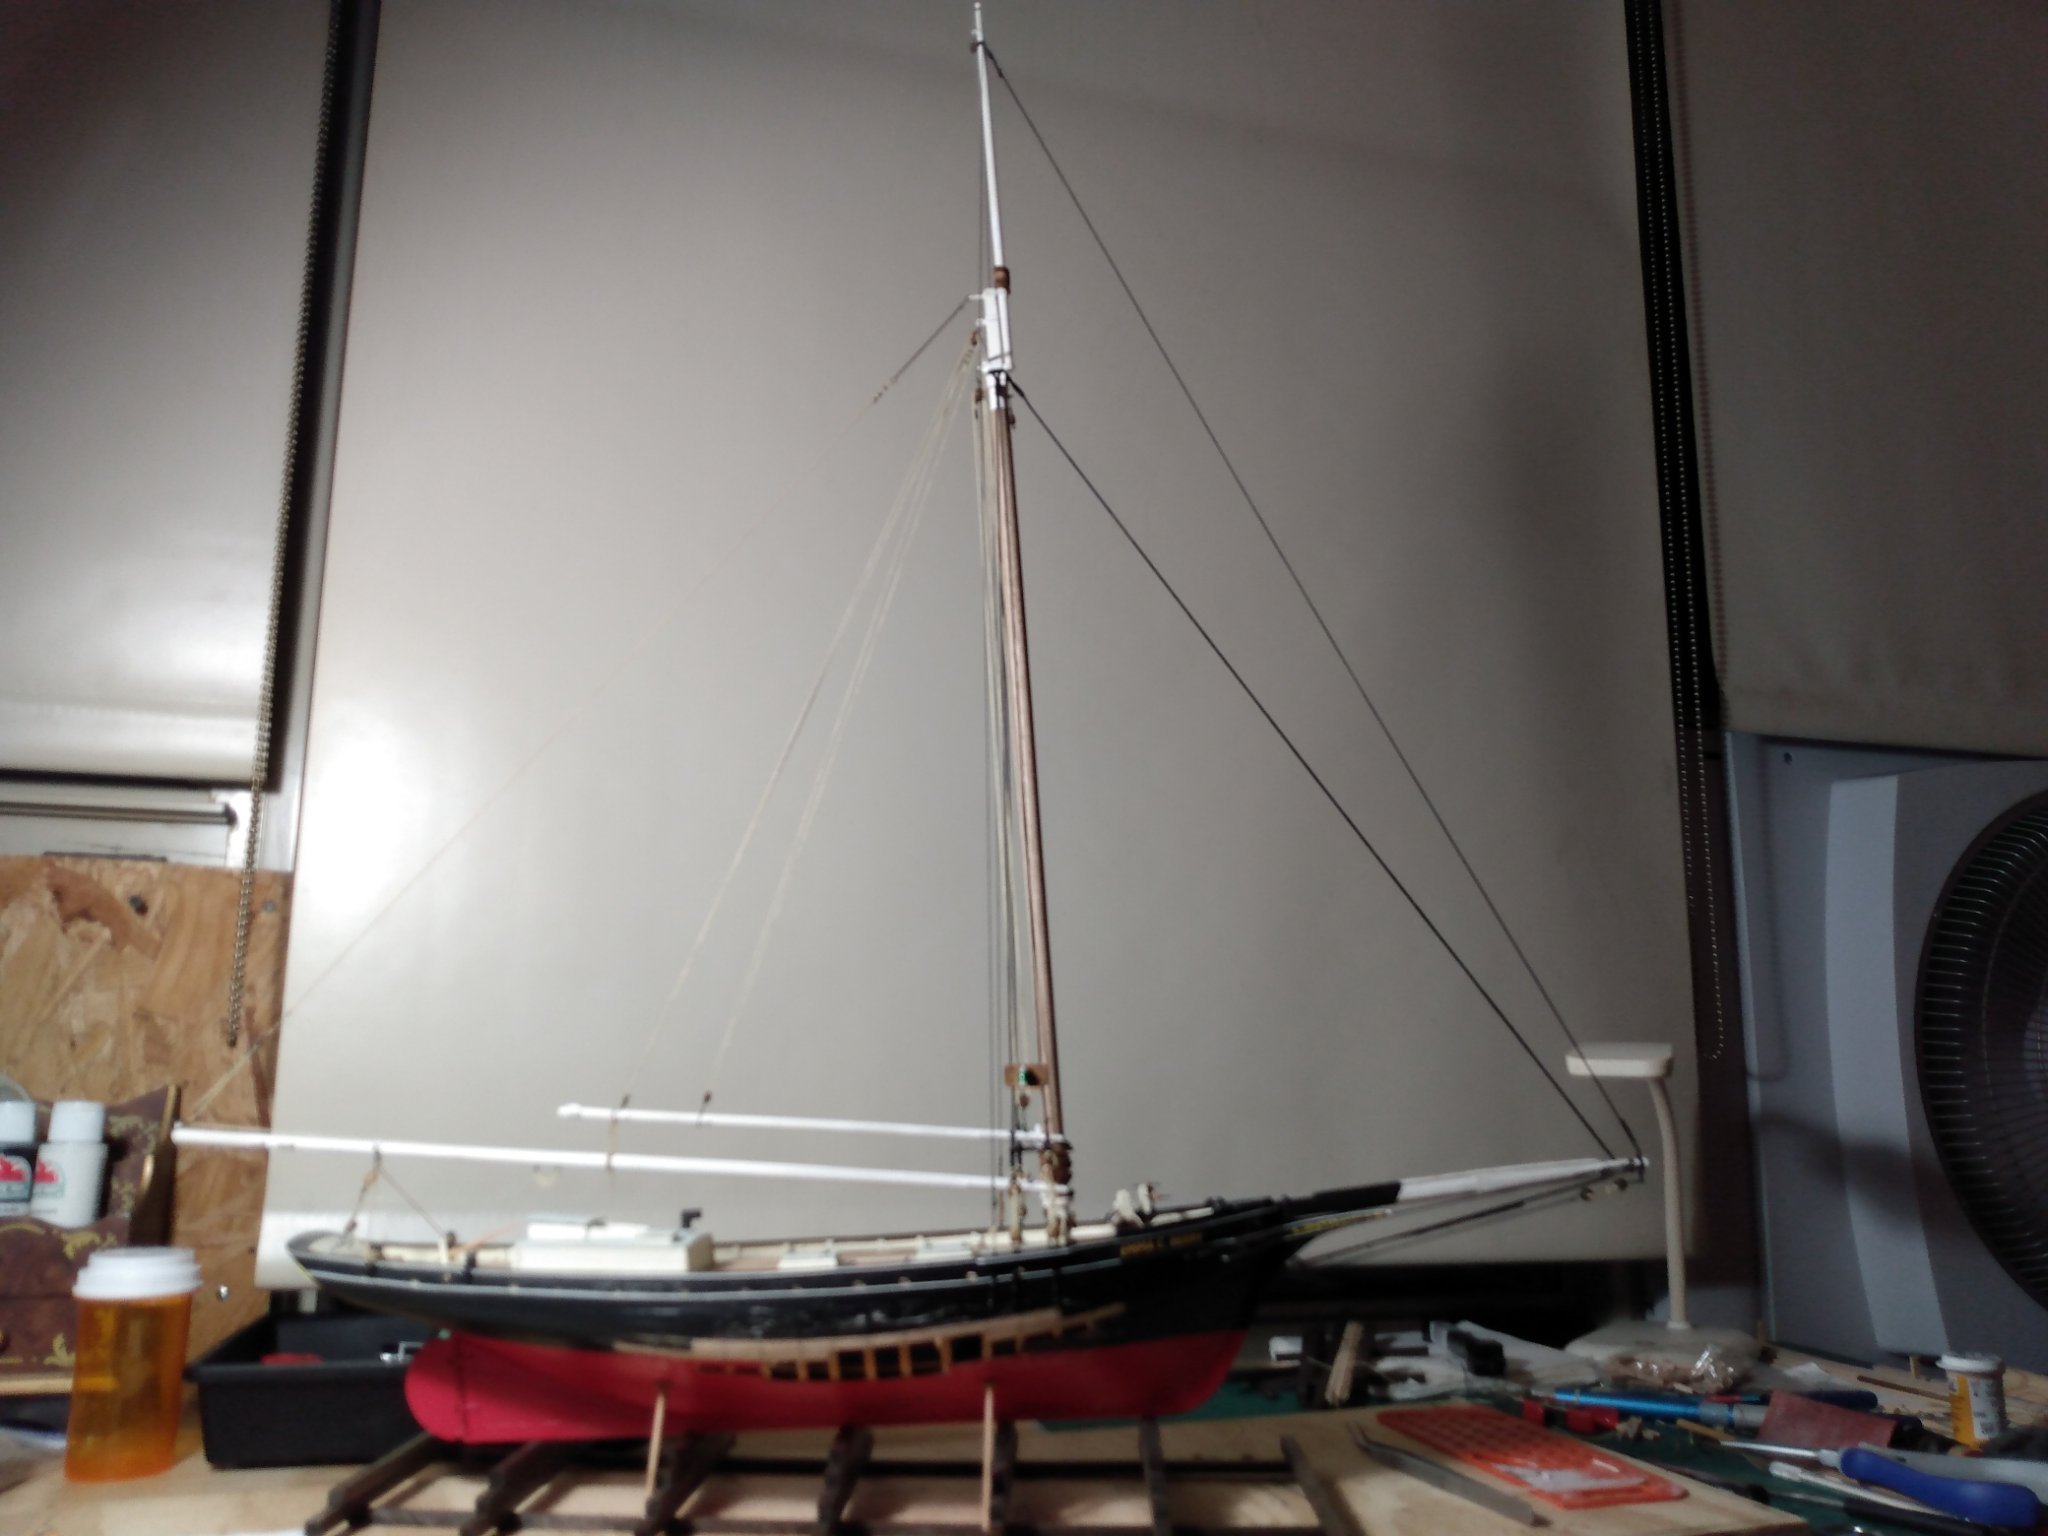
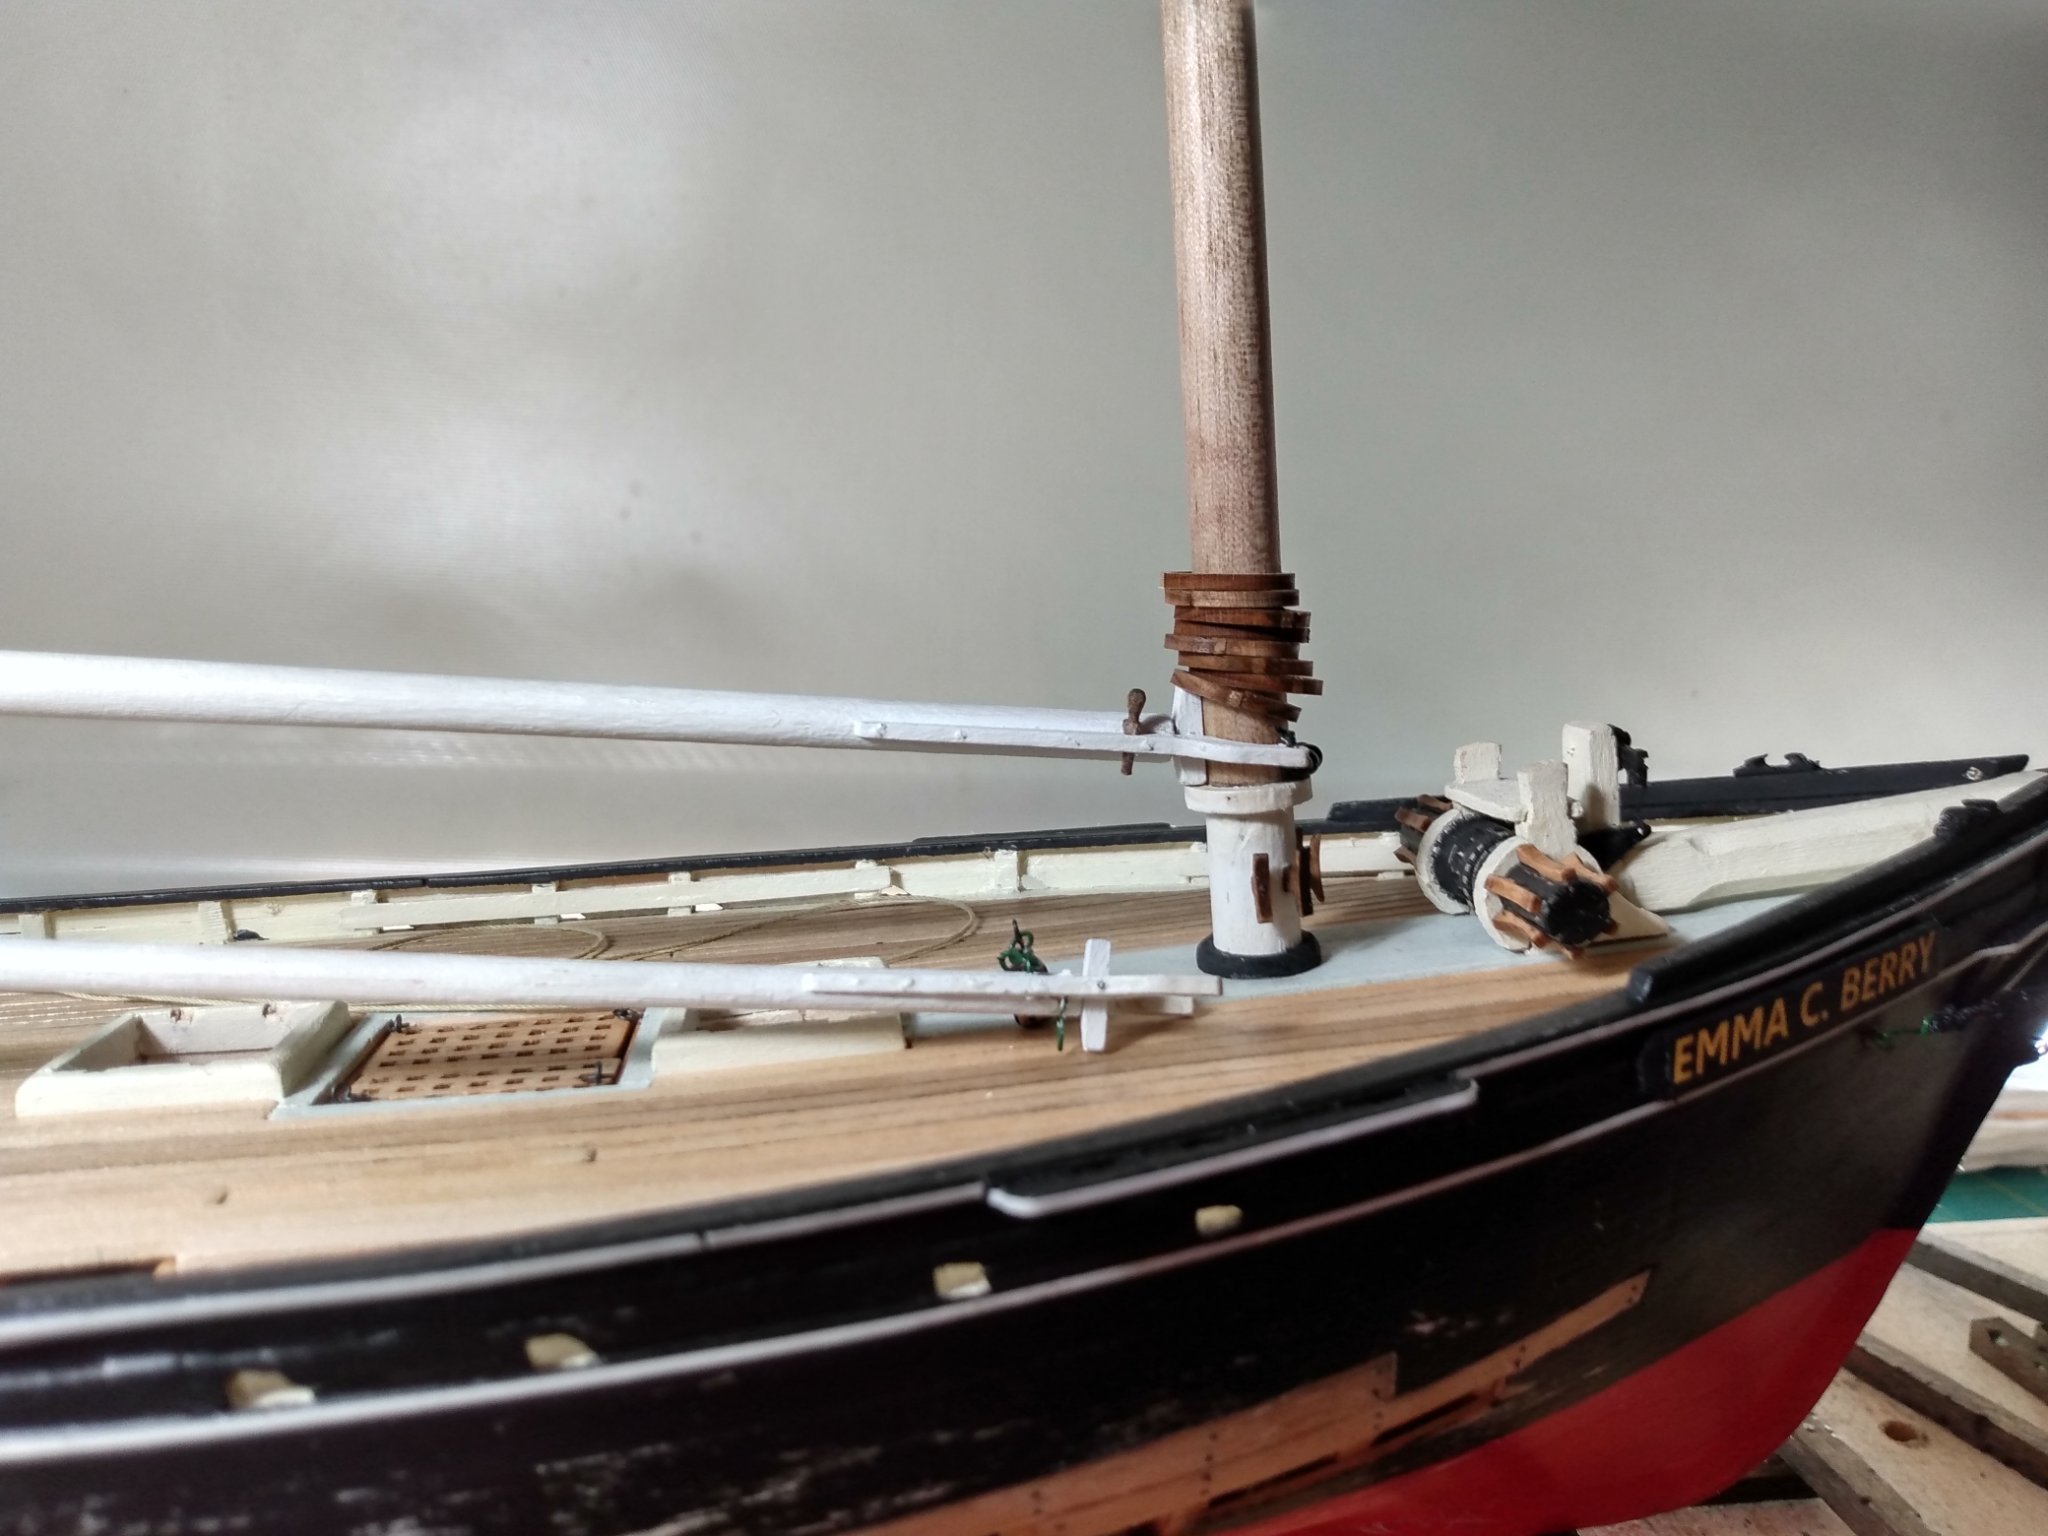
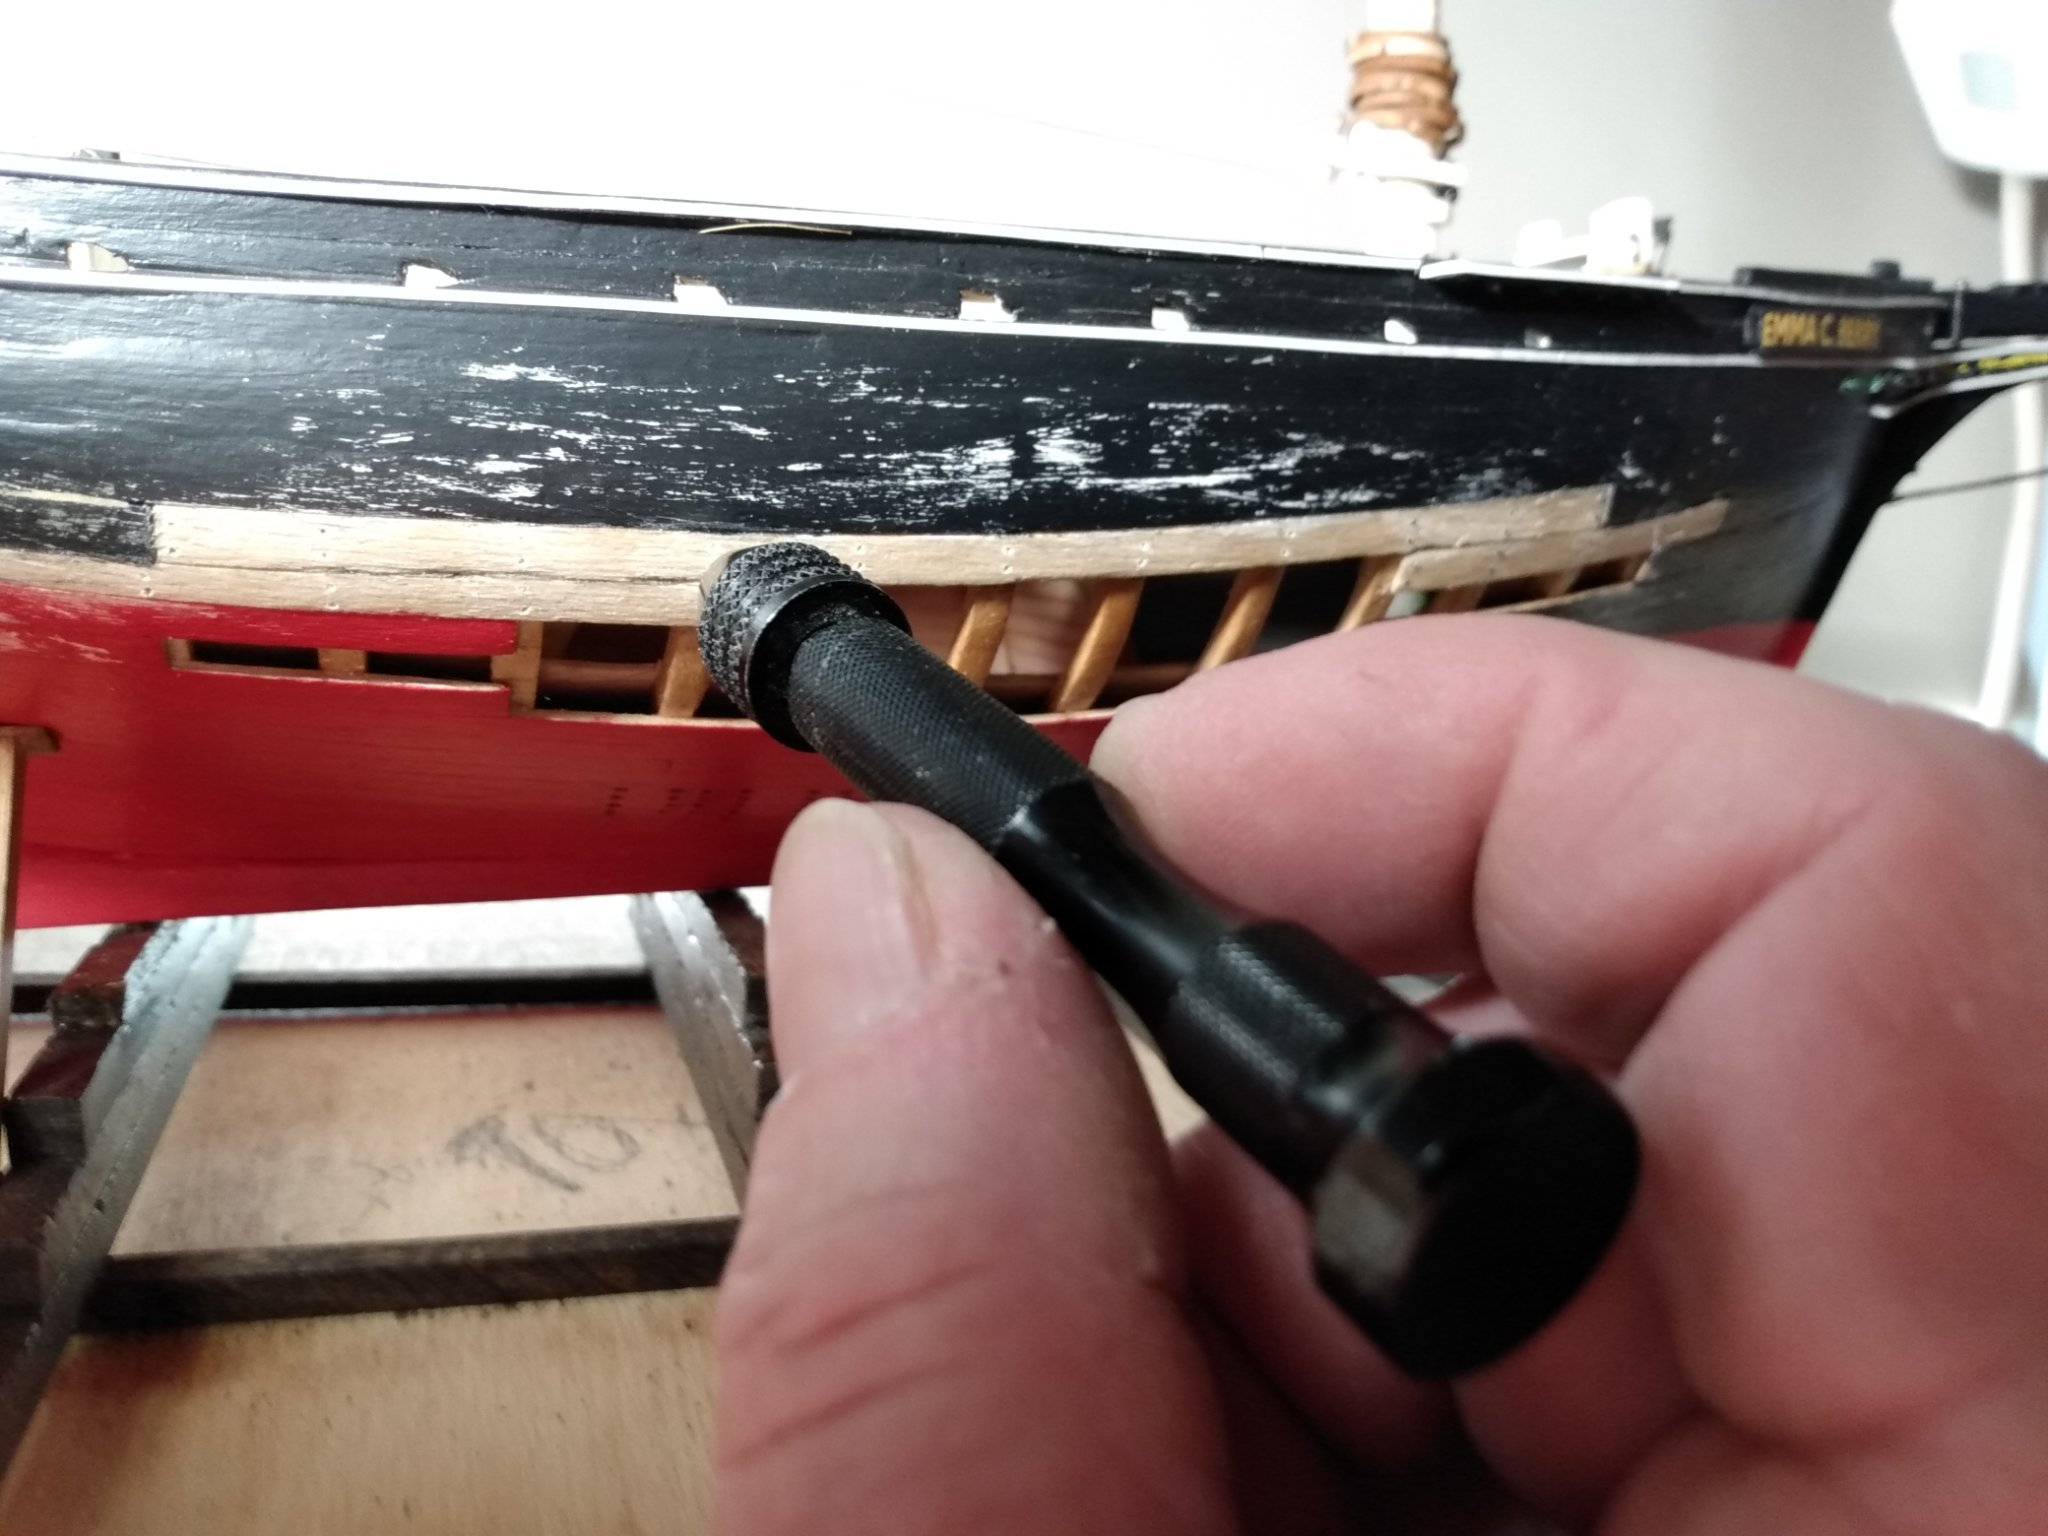
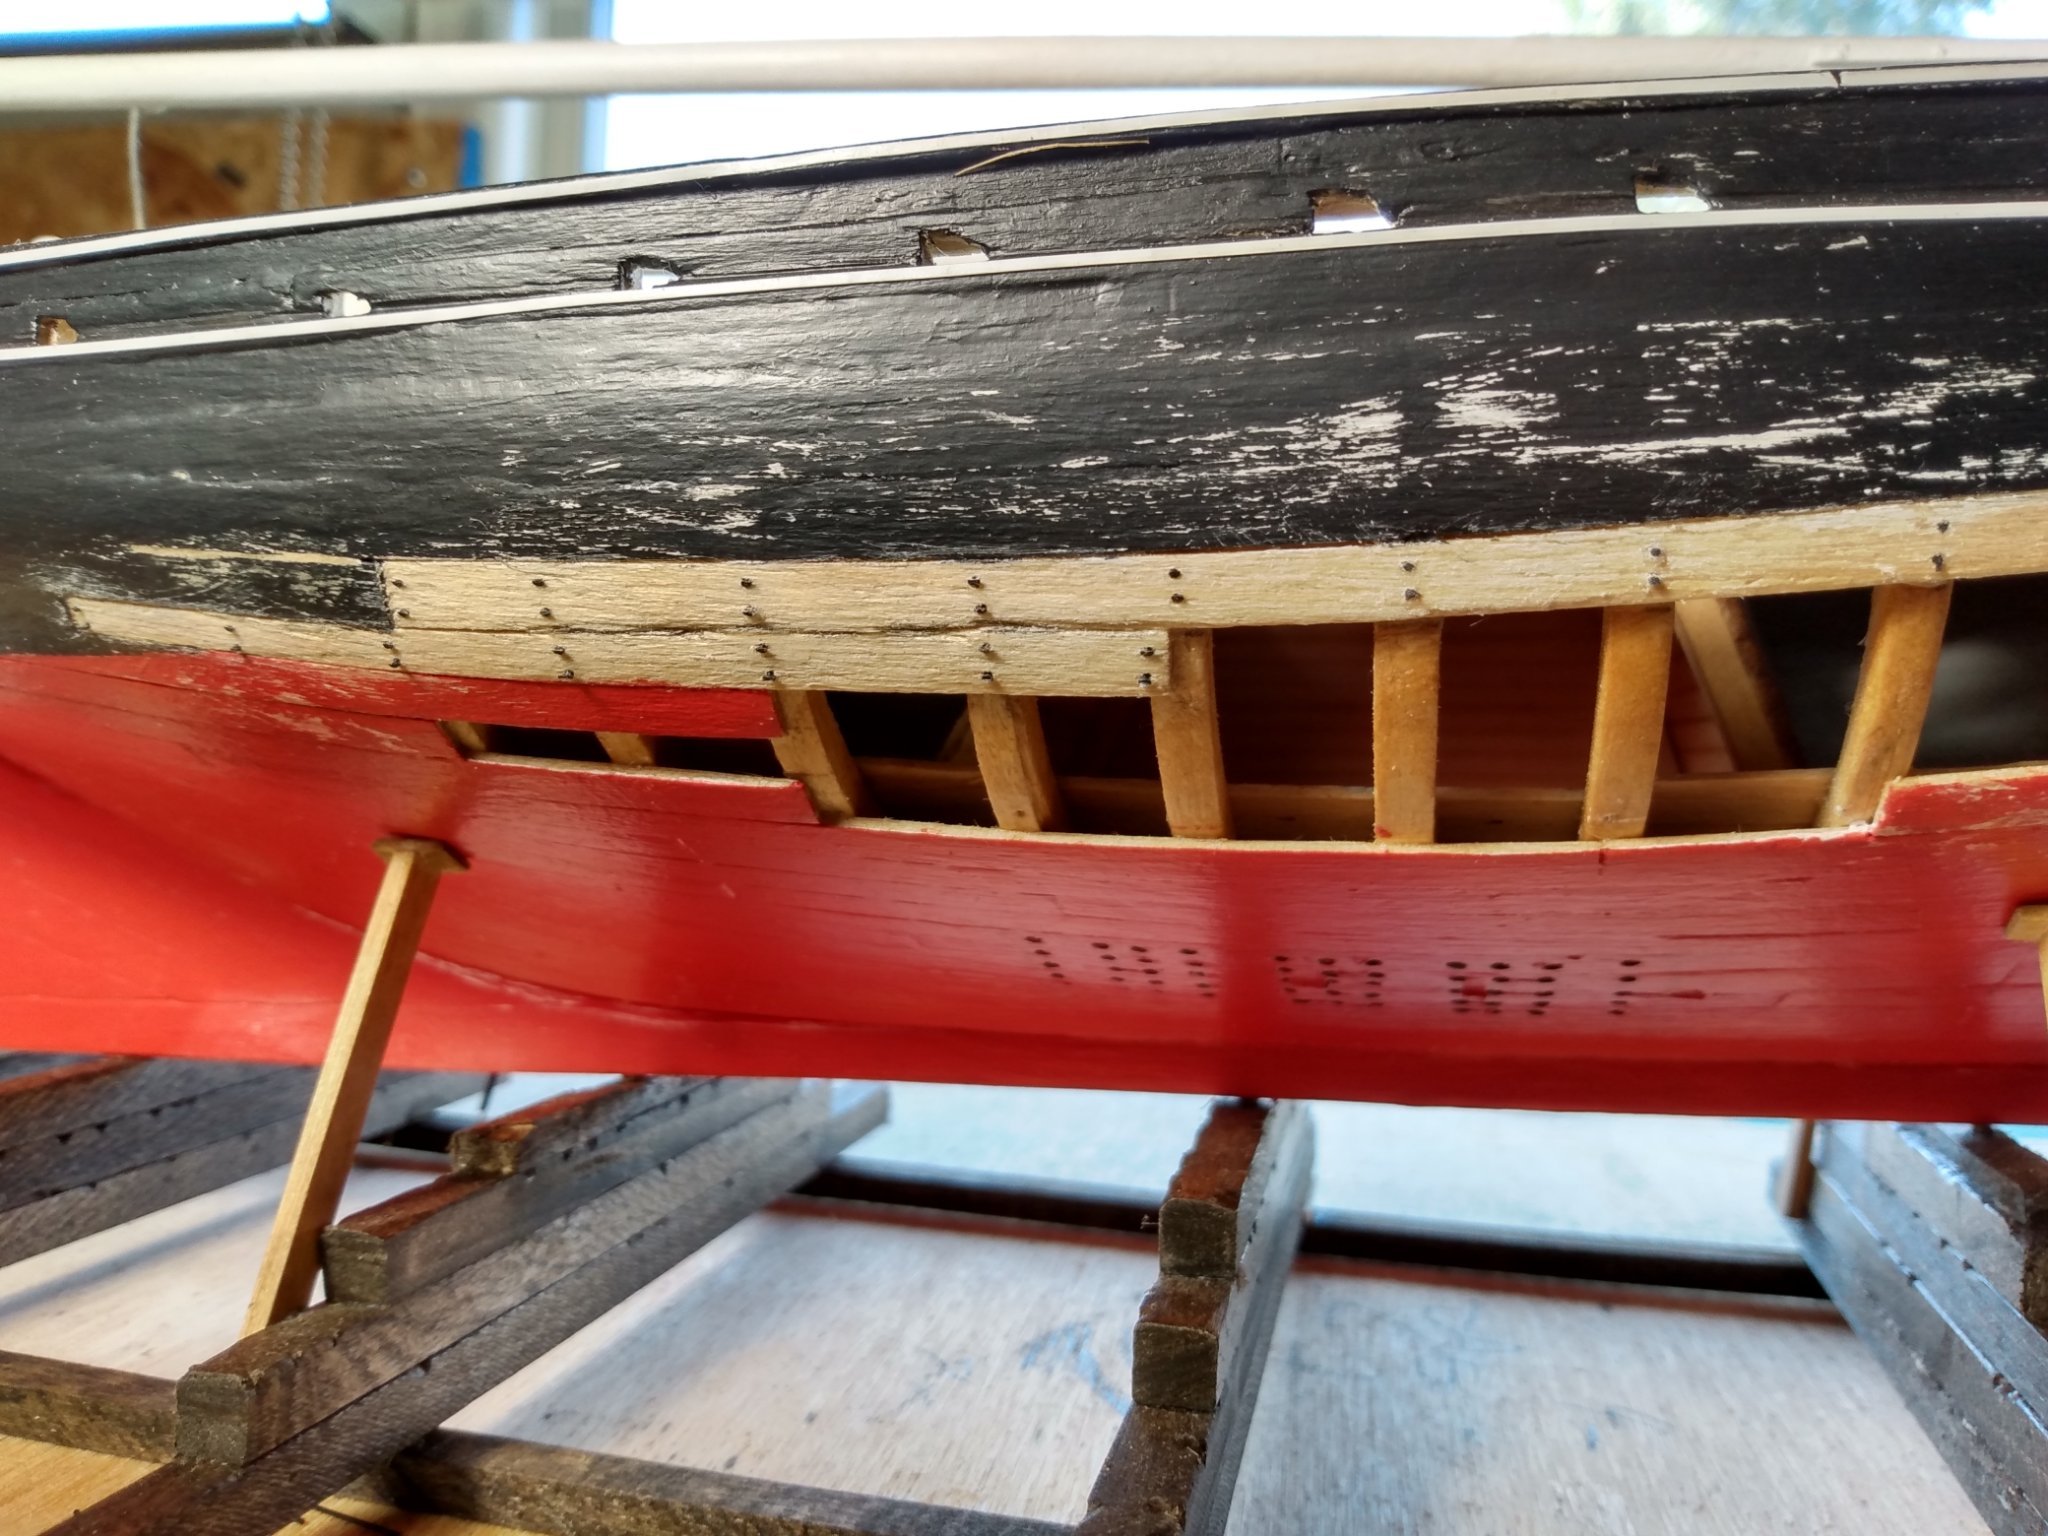
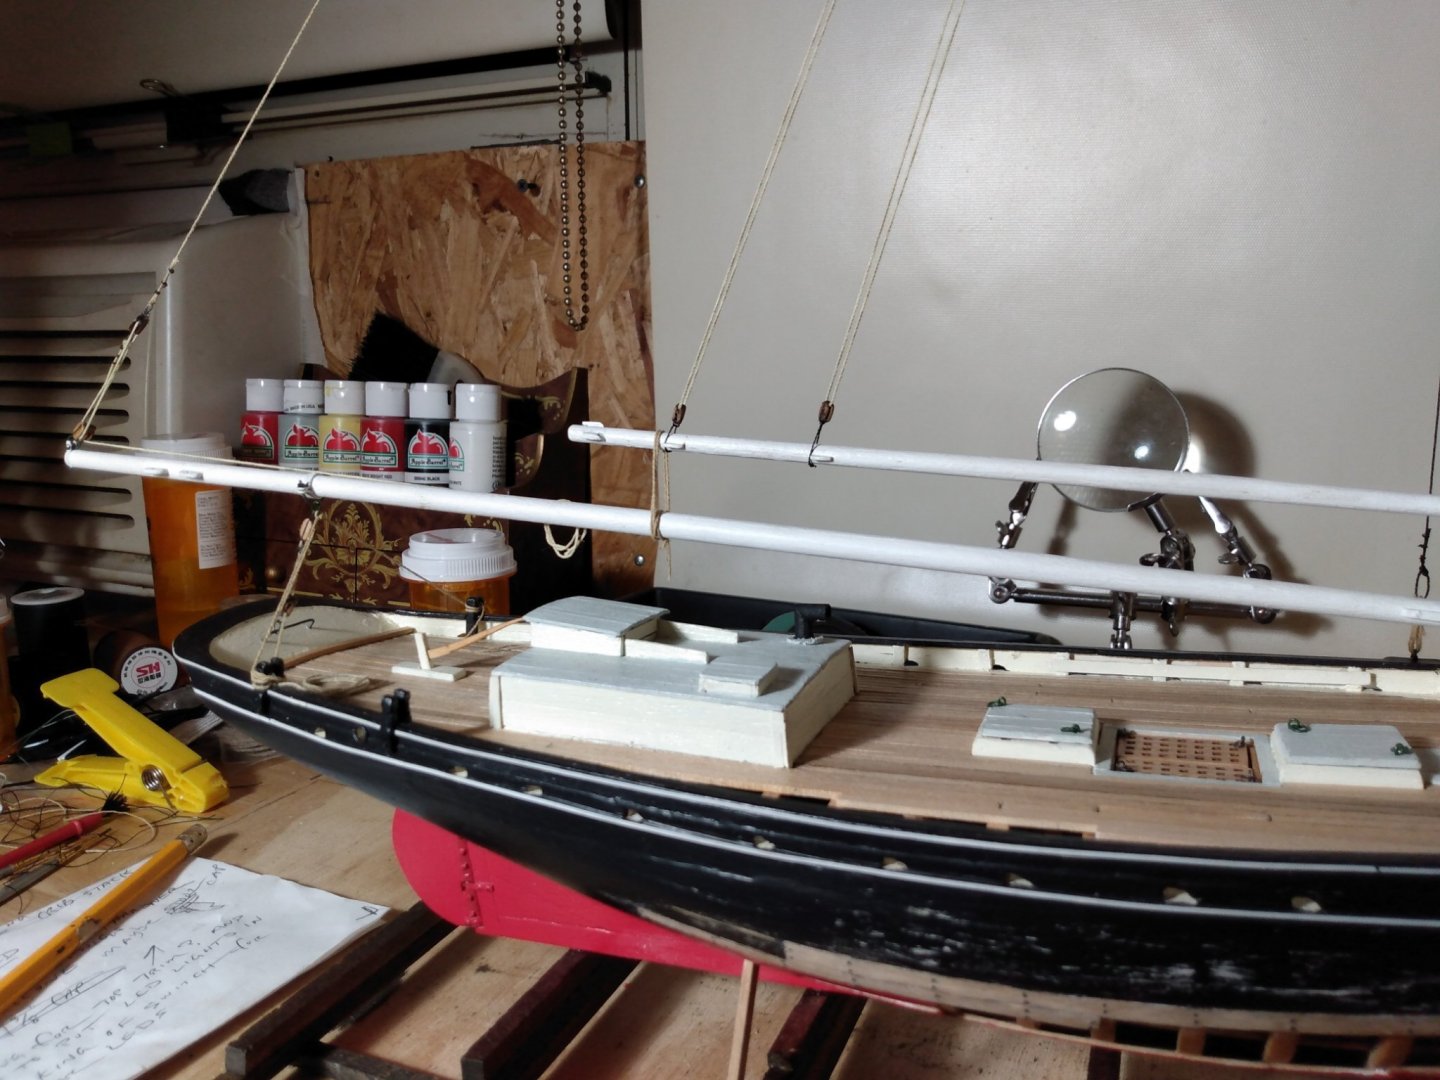
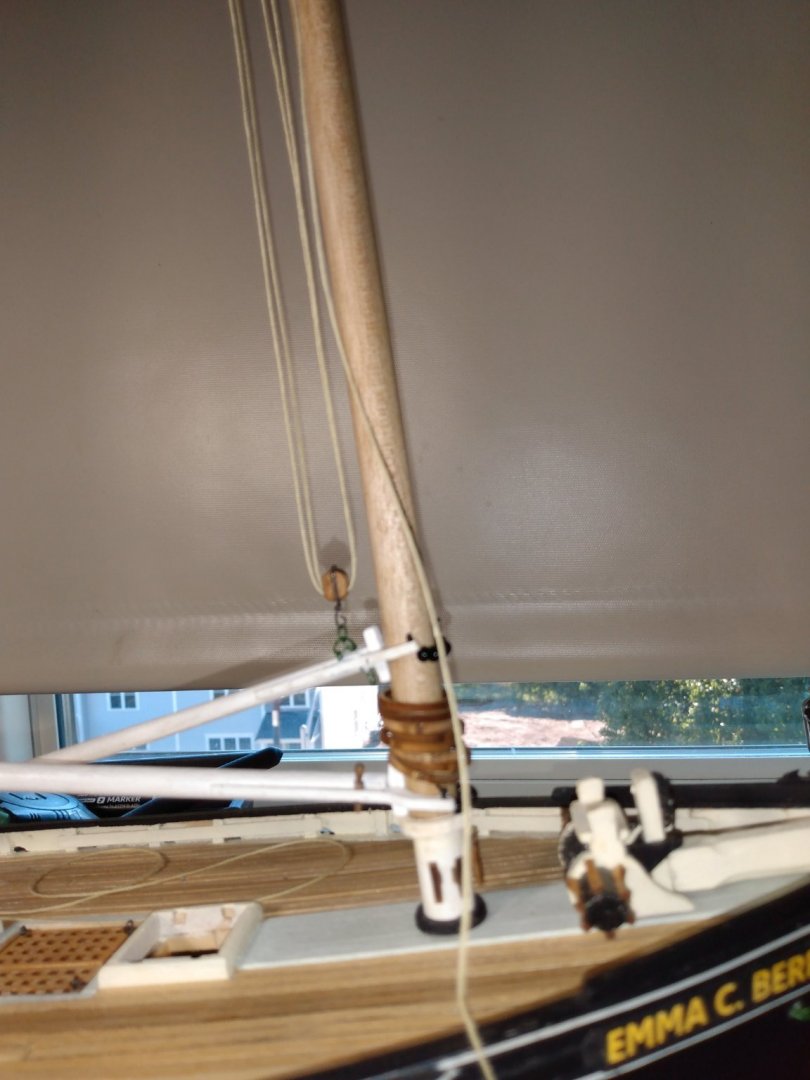
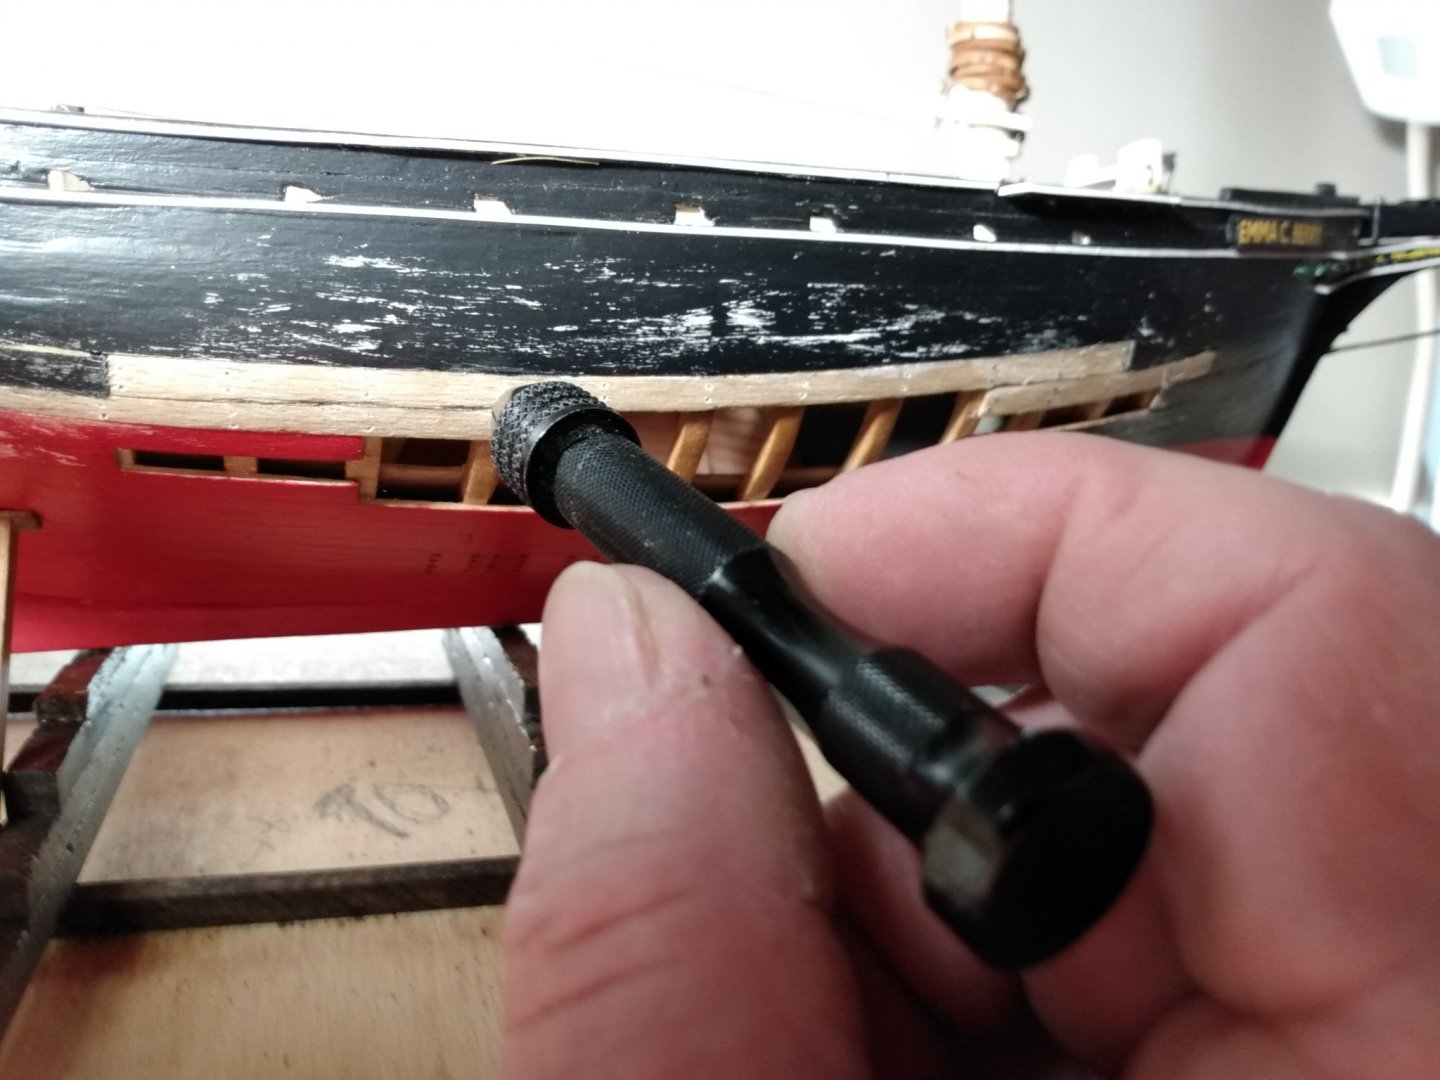
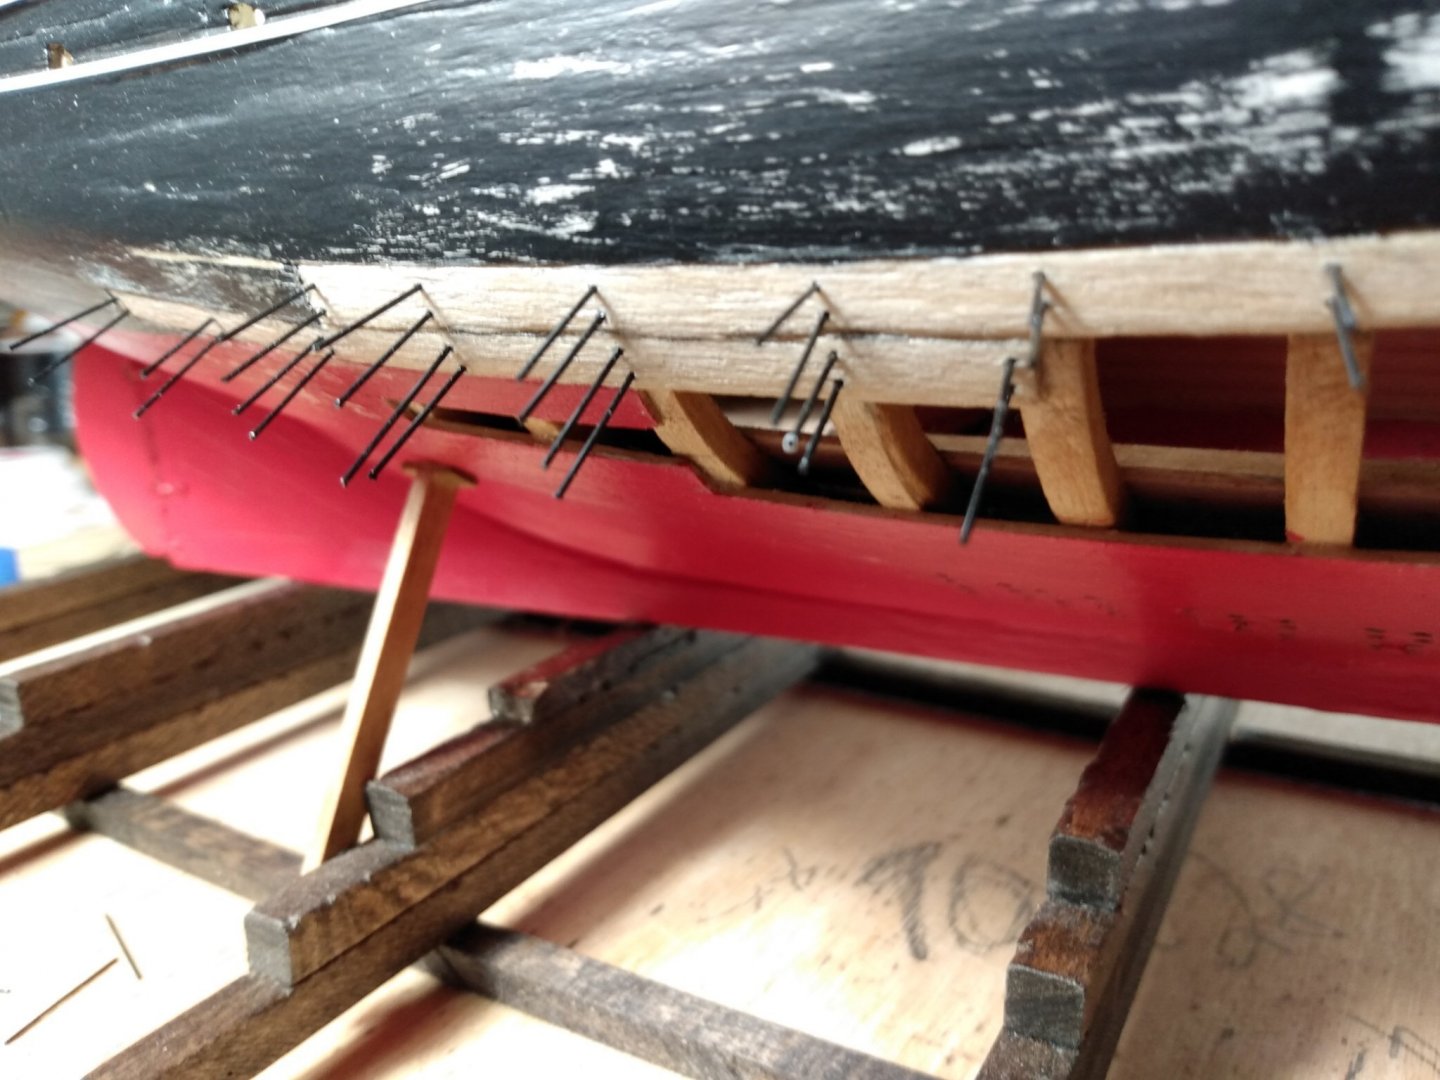
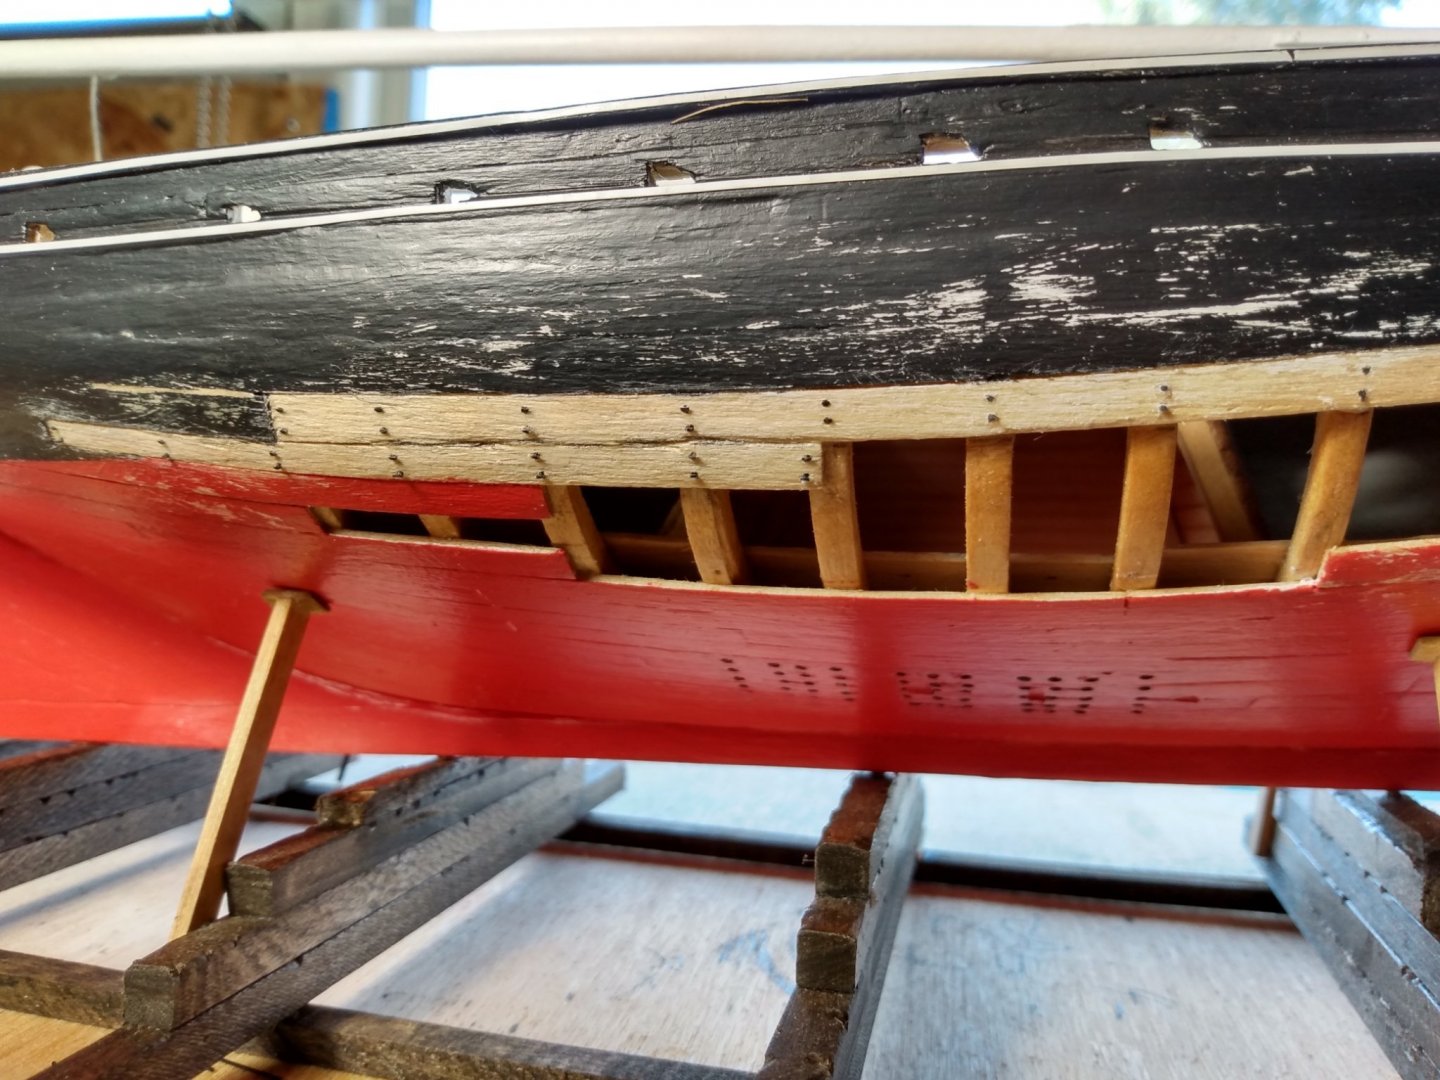
Stepped the mast and used wedges to get the proper rake and stability while I added the boom and topping lift and blocks. Also the main sheet set up and blocks were added. The boom was secured to the mast with a parrel bead rig. The parrel beads were not supplied with the kit so I purchased some 3/32 black glass beads at the local Michael's. They look just fine. I made the dicision to wait on rigging the shouds etc. until I got the boom/ gaff on as I could see it would be easier without them in my way. Before I put on the gaff a little distraction popped up. I had been meaning to add simulated treenails to the "newly" added hull planks. This I did by drilling holes in the appropriate spots, then, I harvested some black bristles from one of my hair brushes, dabbed in CA and pushed into the holes. Then after the glue cured, sliced off the excess with a sharp #11 blade. I think they look convincing. Now I can resume installing the gaff and the rest of the rigging. Also, I have been working on the base for the diorama. It will include a 3/16+ slot around the perimeter for the glass which will enclose it. Well, that's all for now... Thanks for looking and the comments and likes.


- 101 replies
-
- 8
-
-
-
- emma c berry
- model shipways
- (and 1 more)