


Drazen
-
Posts
389 -
Joined
-
Last visited
Content Type
Profiles
Forums
Gallery
Events
Everything posted by Drazen
-
 Jigs for holding fittings when working on them Drazen
.thumb.JPG.f3996ebaa0b413aca249b3ccf6e64511.JPG)
- 86 replies
-
- 7
-

-
- royal caroline
- yacht
- (and 1 more)
-
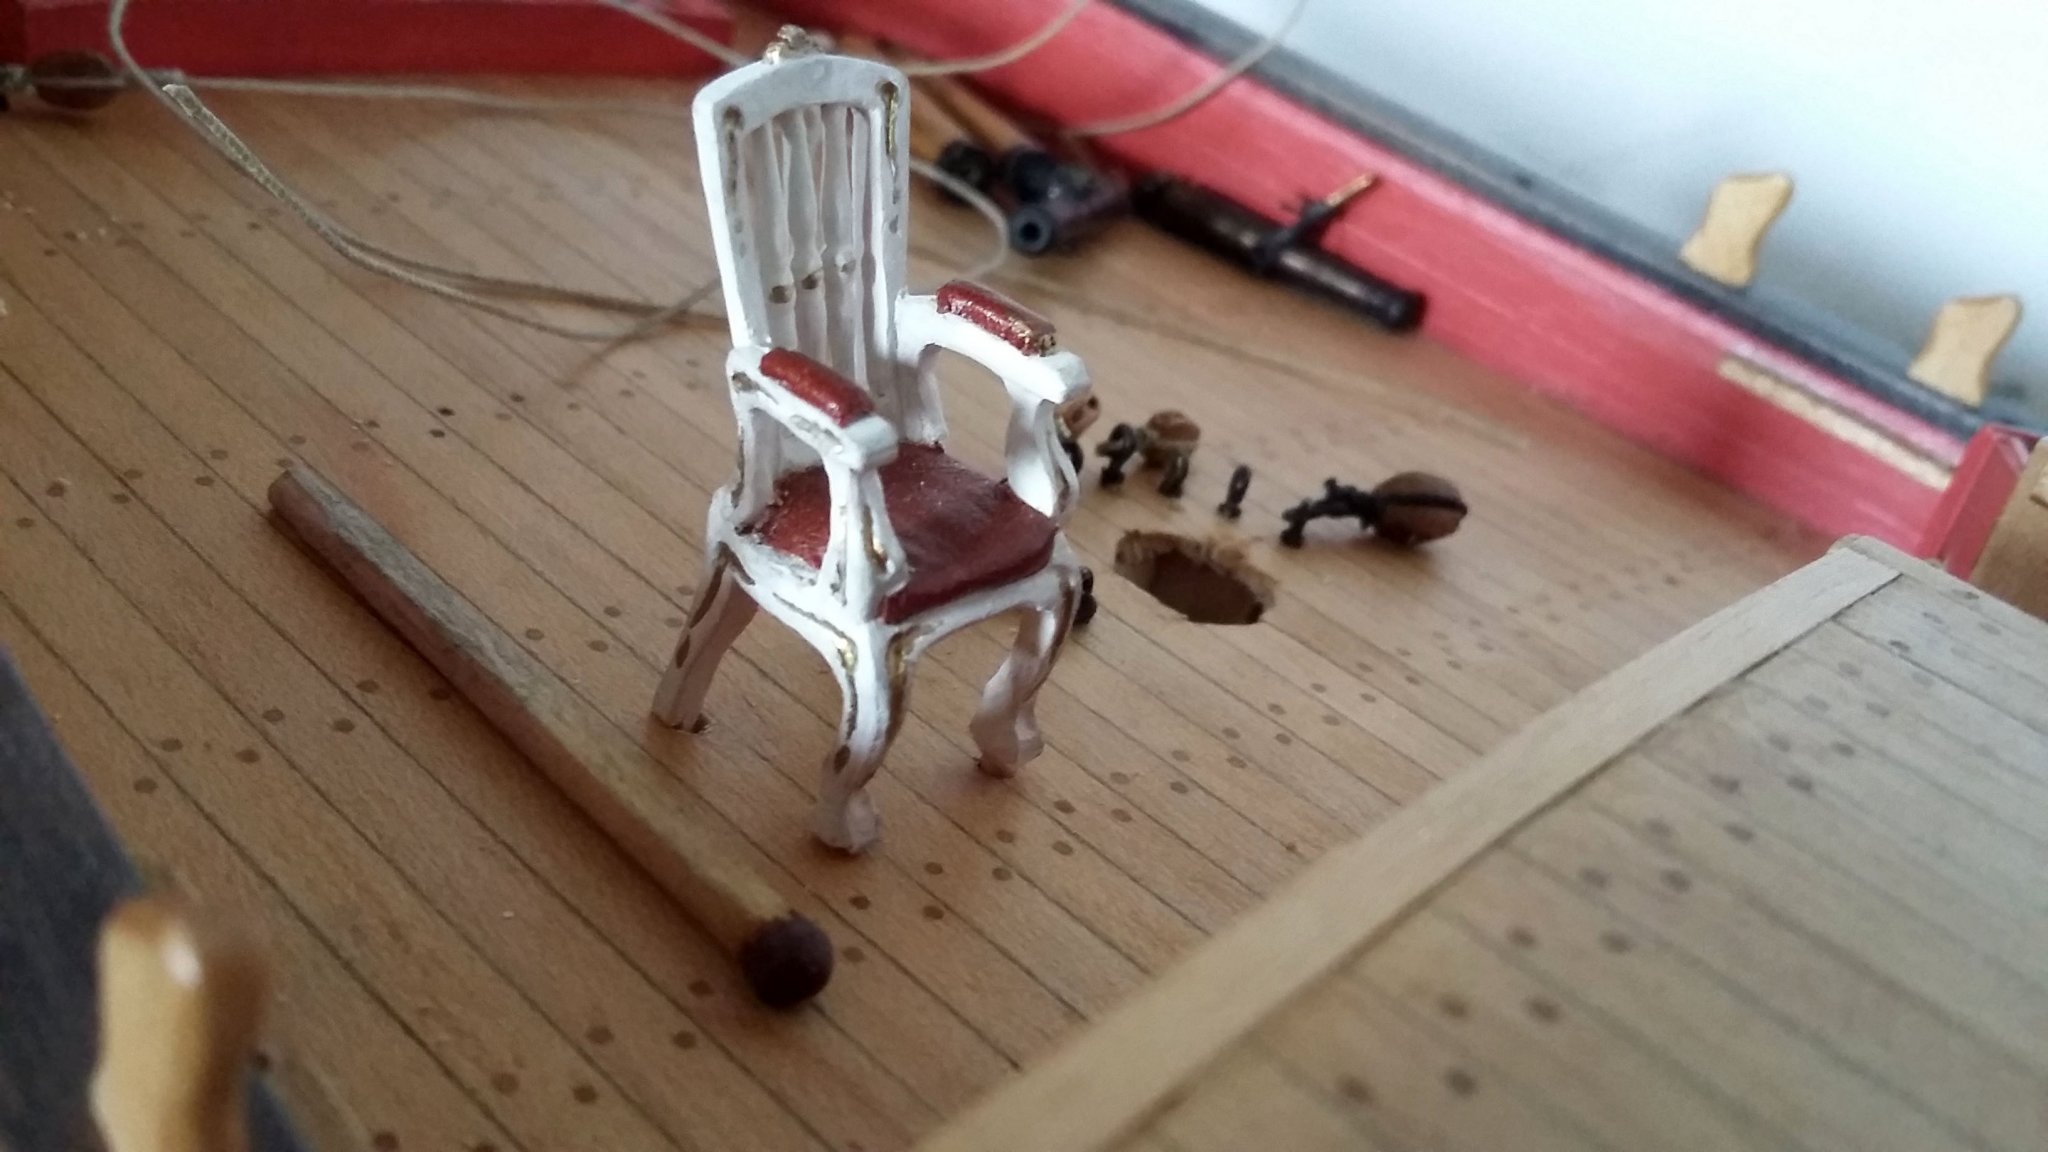
Sorry for not posting so long, but now it comes - all in one Mile's work on fittings Drazen
.thumb.JPG.63f532f876659f4c354d741e42a9c120.JPG)
.thumb.JPG.6ed9c562ccdd72351ec0988e4469caae.JPG)
.thumb.JPG.4700d08186c30dfc54a79bd69e4f9eec.JPG)
.thumb.JPG.f9148be844ab7bc77417320d2aff4ecb.JPG)
.thumb.JPG.9cea319e32ebfcd5b8f2bc023de09d17.JPG)
- 86 replies
-
- 8
-
-
- royal caroline
- yacht
- (and 1 more)
-
Unfortunately pine, yes. I had just very small amount of dry lime wood and this is used partly in the tower, but mostly pine. For the small area, it will do. Drazen
- 487 replies
-
- 4
-
-
- ship of the line
- 80 guns
- (and 1 more)
-
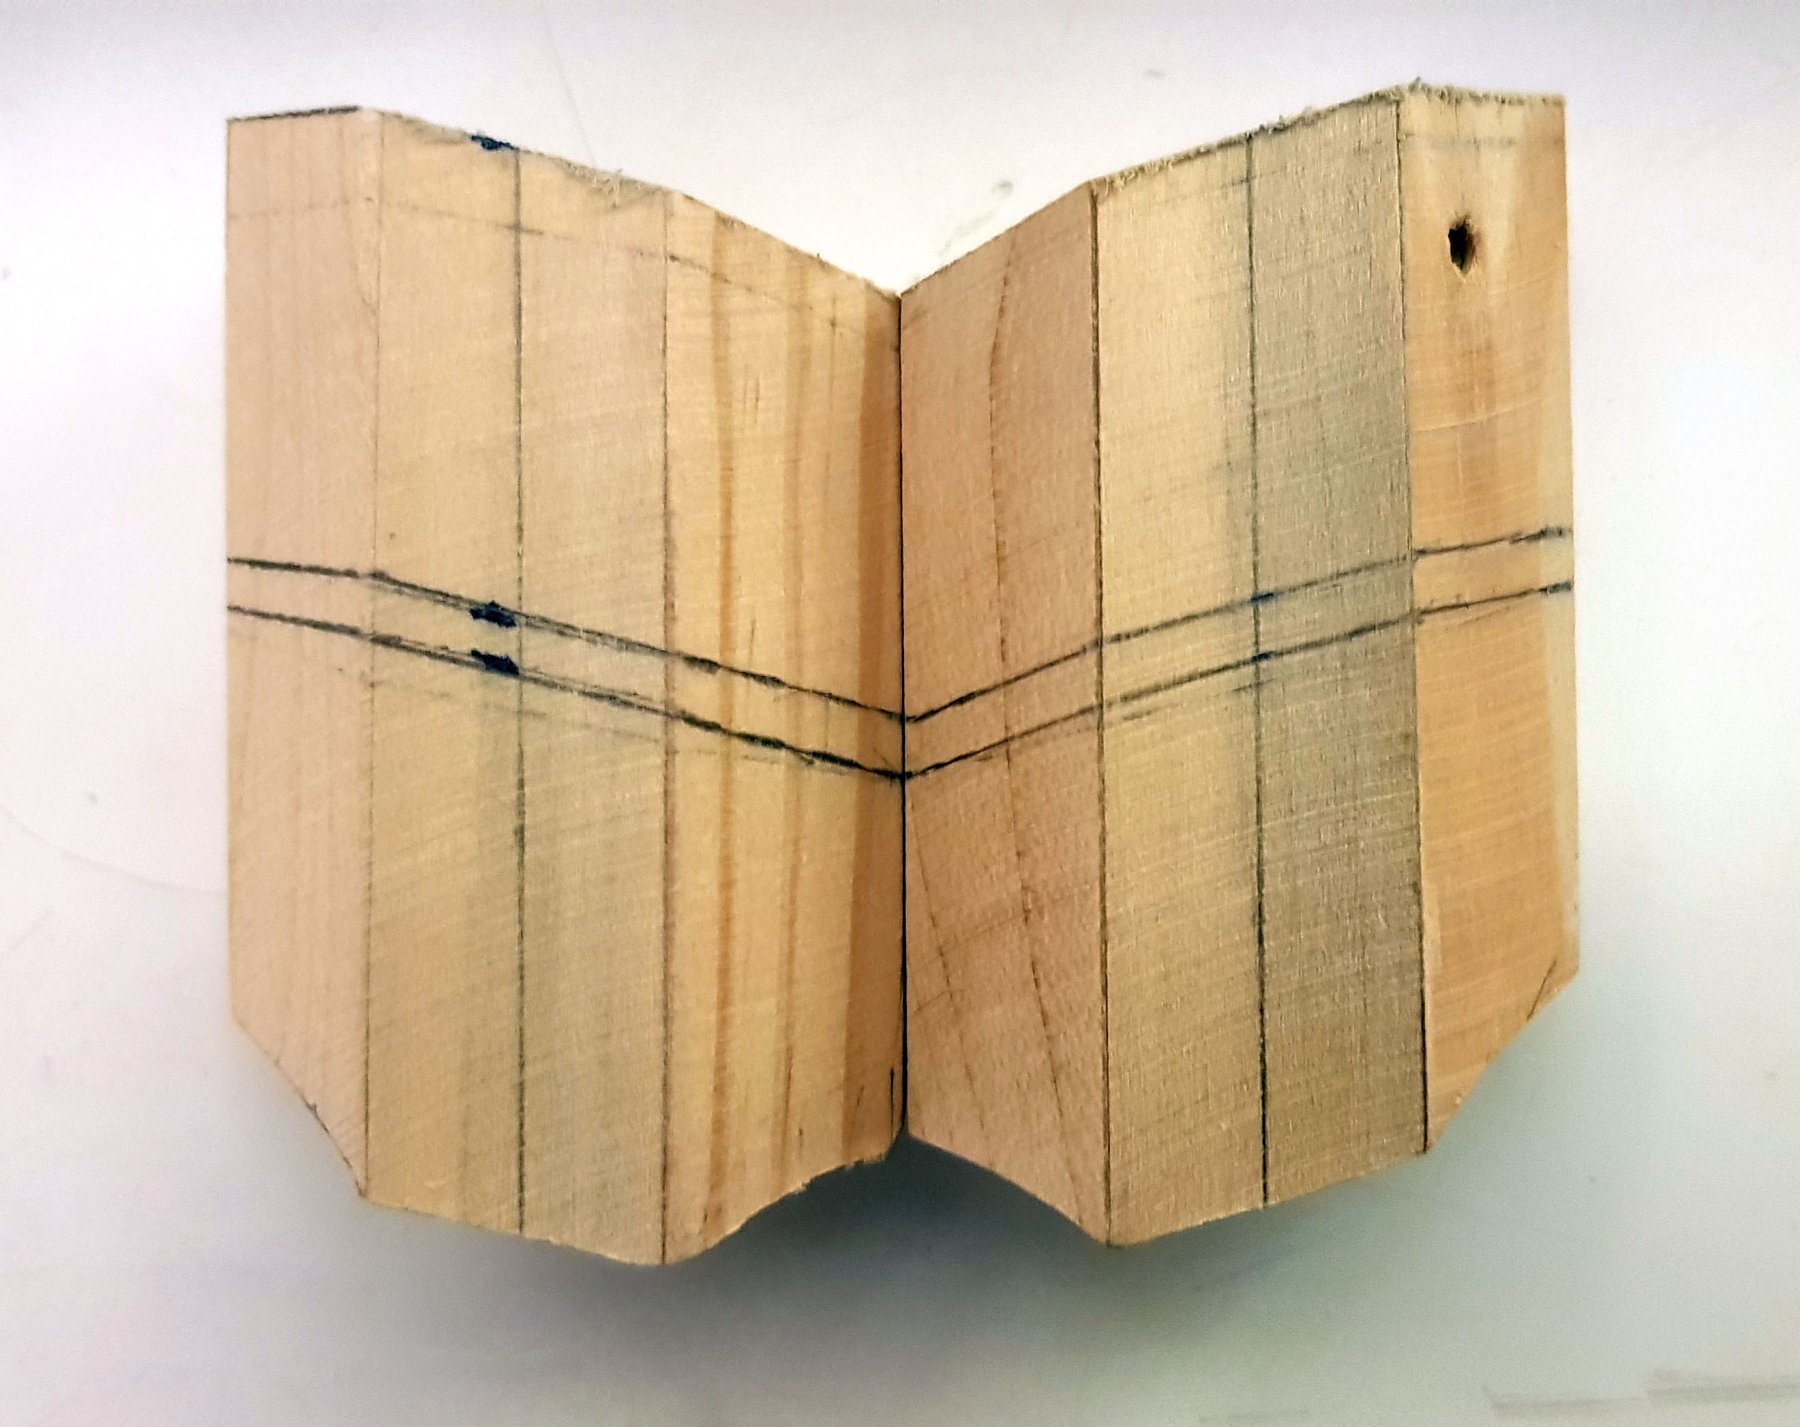
... than the curvature from front/stern view... and than the shapes in between (under 45°). One can easily control the shape by following the joint-/gluing-line of the original pieces of wood. Drazen
.thumb.jpg.6aba650277f0efbf7bdd546e4ae6a3b4.jpg)
.thumb.jpg.558a3f860f9d844dd90e390e54e863fc.jpg)
.thumb.jpg.bd893026e13c7f4667ba76501714356a.jpg)
- 487 replies
-
- 9
-
-
- ship of the line
- 80 guns
- (and 1 more)
-
Do the curvature/outer shape first from the side view... Drazen
- 487 replies
-
- 9
-
-
- ship of the line
- 80 guns
- (and 1 more)
-
... trim the top... align both to be the same (with this the mistakes are also minimised)... Drazen

- 487 replies
-
- 7
-
-
- ship of the line
- 80 guns
- (and 1 more)
-
Adjusting the shape to the side gallery where they touch - done with a Proxxon grinding tool. Drazen

- 487 replies
-
- 8
-
-
- ship of the line
- 80 guns
- (and 1 more)
-
... giving it the approx. 8° angle towards the ship hull... (The galleries are standing vertically to the earth, not parallel to the ship's sides. - most probably.) Drazen
.thumb.jpg.8449878f59eb987e769b9f7a236fcfcc.jpg)
- 487 replies
-
- 8
-
-
- ship of the line
- 80 guns
- (and 1 more)
-
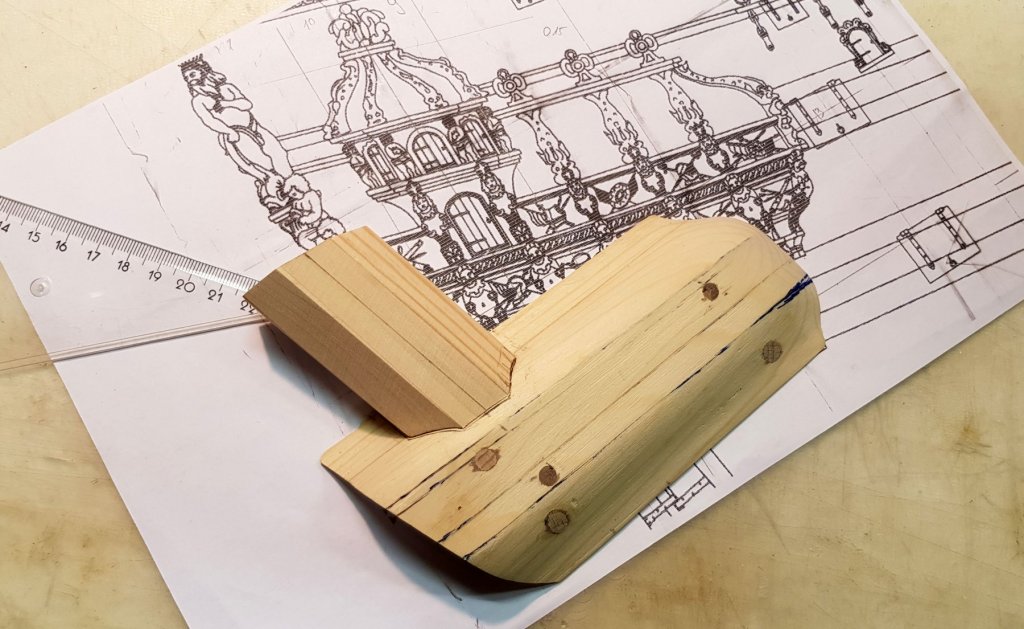
... than glue together with epoxy and grind till they fit nicely... Drazen
.thumb.jpg.0ebab5ca65d046190c33534a6592894b.jpg)
.thumb.jpg.30a2f38bbf6a48531e3fc90b70940c02.jpg)
- 487 replies
-
- 7
-
-
- ship of the line
- 80 guns
- (and 1 more)
-
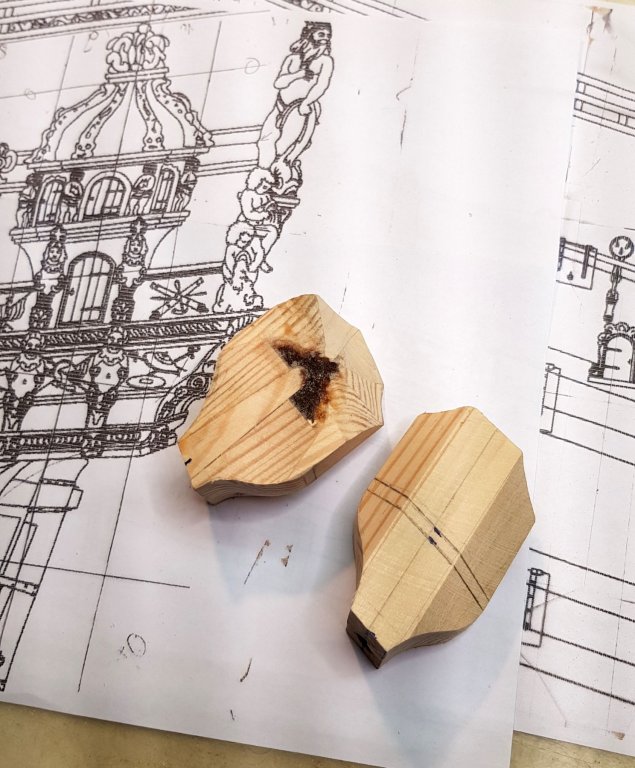
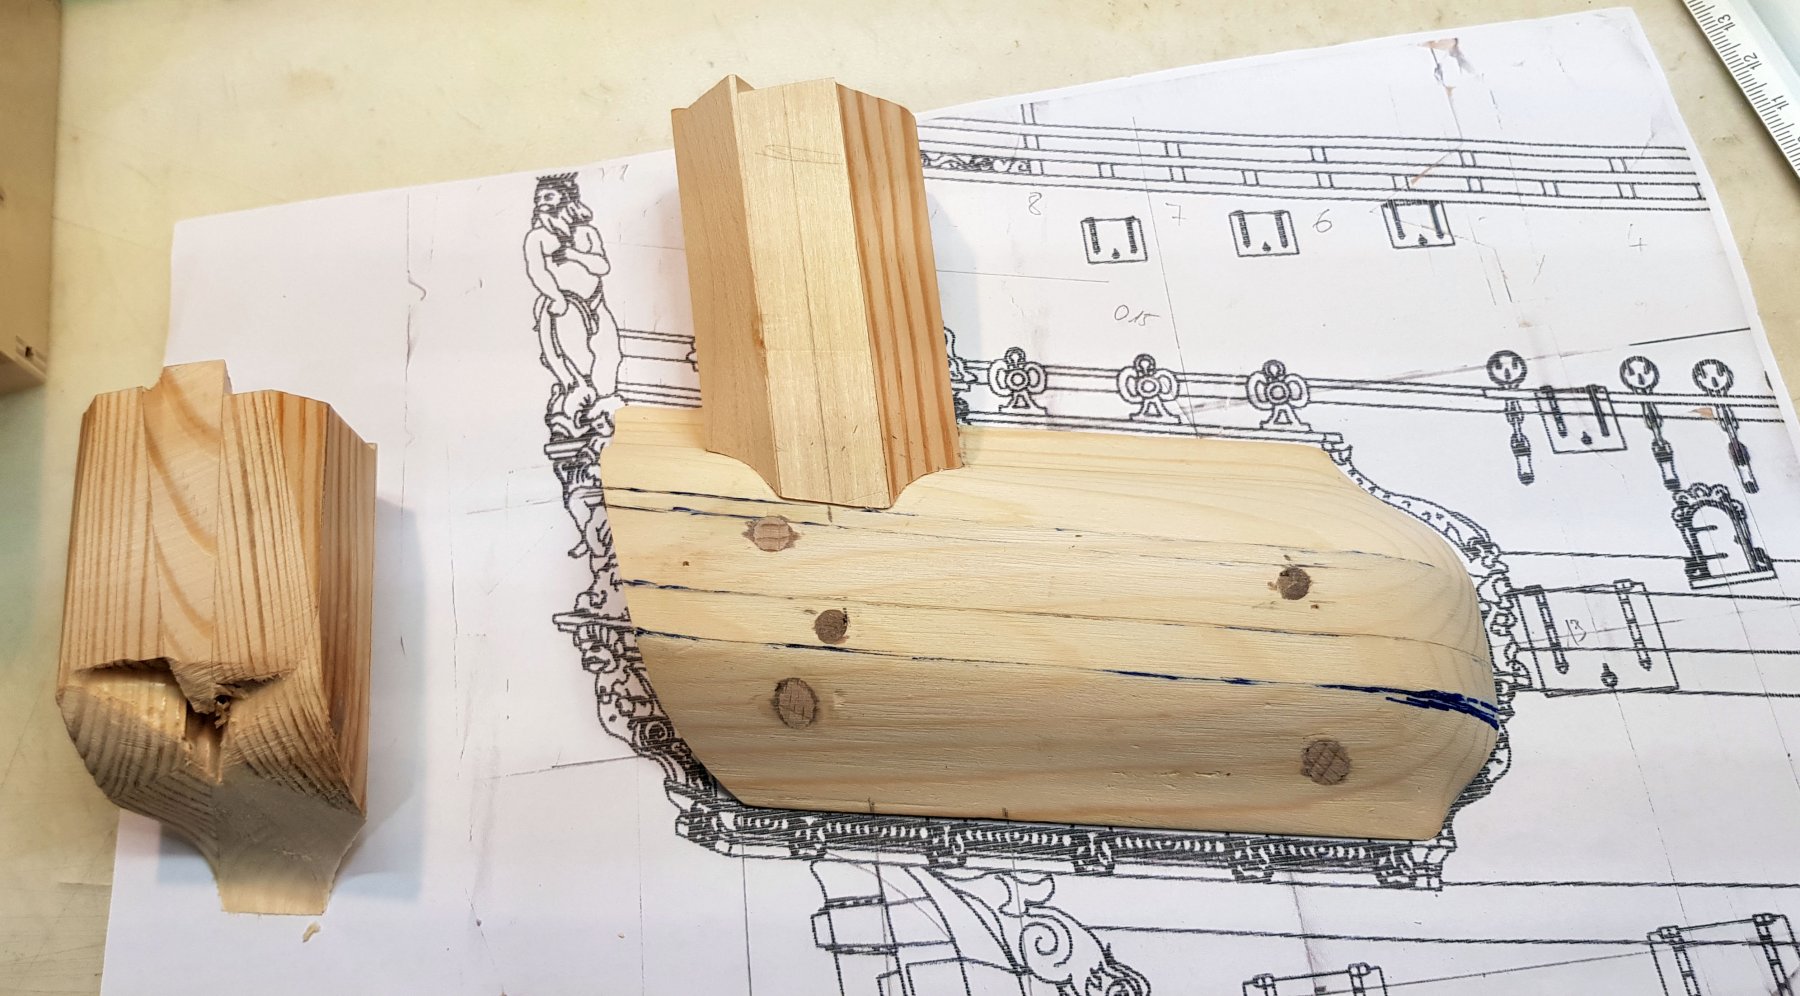
The tower... It is an octagon. I calculate 360°/8 = 45°. So, I cut the wood pieces under 45 degrees and grind them so the outer width fits to the drawing by Otte Blom. Drazen
.thumb.jpg.3b19377b715e87ac759da2bff9bfd316.jpg)
.thumb.jpg.05ddf4d90d73eddf875b5421d0434b75.jpg)
- 487 replies
-
- 9
-
-
- ship of the line
- 80 guns
- (and 1 more)
-
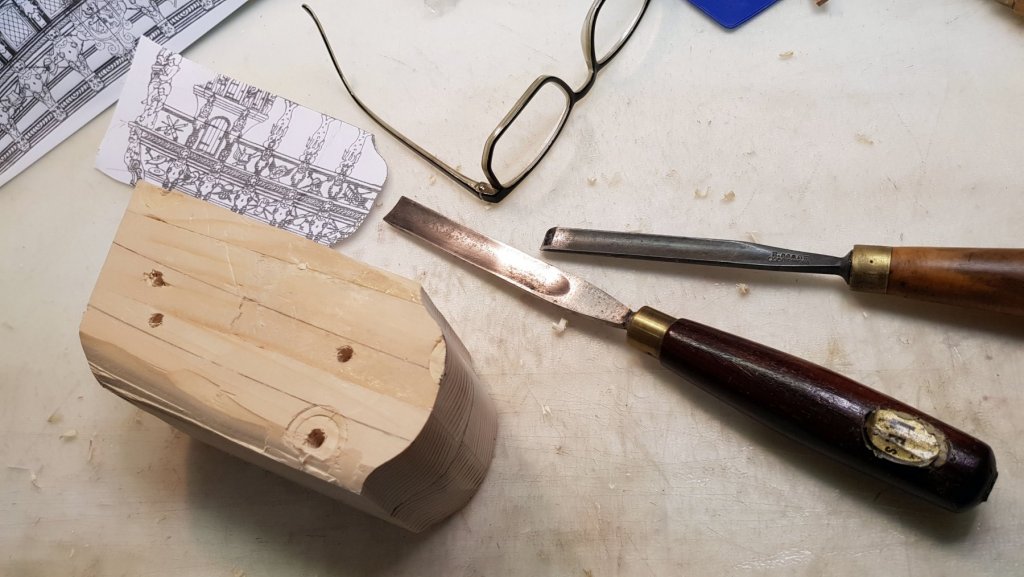
... coarse and fine removing of the material to get the right shape. I used three templates of cross sections and the side plank to check the form. Drazen

- 487 replies
-
- 10
-
-
- ship of the line
- 80 guns
- (and 1 more)
-
gluing the wood pieces together and cutting/defining the outer shape... The small bolts position the piece always on the same place on the hull - this I need for frequent checking the shape. Drazen
.thumb.jpg.9264d32804fe69ae3f33d8bb206e185a.jpg)
.thumb.jpg.2a61645e0cb745931564b5fe0a1fcca9.jpg)
- 487 replies
-
- 9
-
-
- ship of the line
- 80 guns
- (and 1 more)
-
Doing the base for the side galleries... I did a small observation mistake resulting in a 5-6mm error in the heigh of the joint at the "slingerlijst". The plan observes the side galleries from the side and parallel with the waterline. I transferred the drawing onto the base directly which was few degrees more than the 0° - due to the slightly tilted base of the side galleries (it is something like 8° on my model). This i did only on the side galleries, but the tower has ben done right. Due to my cross section from the stern, the form of the side gallery was right and I needed to compensate only the heigh of the gallery-plank which is joining the slinger plank. Now, it is OK, but in spite of all brain work, such things happen. The big problem is that the plans I use have no cross sections and no top view of the side galleries, so I needed to combine the Otte Blom's drawings (which, frankly, differ from each other) and my observation of the van de Velde paintings. Let's go... Drazen
- 487 replies
-
- 2
-
-
- ship of the line
- 80 guns
- (and 1 more)
-
Small step forward in the project - small steps on the side of the ship Drazen

.thumb.jpg.1ed4534d4511ff475240fe25cdefc2d2.jpg)
.thumb.jpg.2ce6085c1a50d67733a0e9aa88a03d52.jpg)
- 487 replies
-
- 12
-
-
- ship of the line
- 80 guns
- (and 1 more)
-
I have forgotten about this topic, but still want to leave the hint as an answer to my own question: The yellow shade goes away after leaving the model or the part behind the window on the direct sun. It takes several weeks (4-5) till the yellow disappears. Probably, the direct sun exposure (without any window glass in between) will accelerate the process even more. I am just making some tests. The yellow shade does not appear on pear wood, so, better to use pear as building material. Drazen
-
Hi Y.T., I am sorry. I'm afraid I do not understand. Please, try to go to the date February 11th 2015 and after it. There, I explain how I did the outer planking on the gunport frames. It is hand made - every single plank, not cut out of the frame/planking. Actually, the frame shall make a labyrinth-like closing with the gunport lid. Therefore, the outer planking has a slightly wider frame than the massive inner frame of the gunport. You see it also on the gunport lids when they will be ready. Inside of the ship, the gunport frame is flush with the inner planking (the deck-side). I hope, this is what you meant. But, if I am wrong, please come back to me. I did post all essential steps and technologies. It has to be here listed somewhere. Drazen
- 487 replies
-
- 7
-
-
- ship of the line
- 80 guns
- (and 1 more)
.jpg.adaf2f8450f339bb08243e1a0c999456.jpg)
.jpg.660a46c65ac262b6e6d418a15fc2160b.jpg)
.jpg.b35ace032484c1c4854b573039bab94b.jpg)
.jpg.21848f2ed0e0060a72c1a9126d00046d.jpg)
.jpg.1d87ddc73e776f0329d7557c6556c546.jpg)
.jpg.10622e9322bf1fbc6dc6ac65187be49b.jpg)
.jpg.fcba7cbf8684efe424d180e93a7668c1.jpg)
.jpg.e75ebd3b1e283d7b826831c2c3e7092d.jpg)
.jpg.bc25dd7a8b18965cd139b6ed2d3f1be6.jpg)
.jpg.a5b0b934929601e3654f77e345e7e639.jpg)
.jpg.329da2a3306ea4867ce22a0fa5b0bb7e.jpg)
.jpg.ddffeaf774afdc65e94dcd7178d33009.jpg)
.jpg.f0940a9a0d96a3c6c297ab706f9a828e.jpg)
.jpg.82d88e6b7a55f2a438644fa02e5496e6.jpg)
.jpg.e7728684b423b3f419d104b1c770ba37.jpg)
.jpg.caa6f0b0ee07bcc969b5ce362d0c16e8.jpg)
.jpg.1d50dd1ae146023ad2064a2ef938b18a.jpg)
.jpg.ad0dbfa3e8370d0fca11f0fb12496be7.jpg)
.jpg.db995e1ec225286e749a72917c42b85f.jpg)
.jpg.559df6de5b7ba6993532491eee901e43.jpg)
.jpg.597c590cce1a6fdac88794e48f4999a3.jpg)
.jpg.d18b206d043ce31f777cc1a5ac5dd638.jpg)
.jpg.7cc0bc783087589724950d6d75f9f11c.jpg)
.jpg.7f6d68029a4b8e9287582aa28d37bb81.jpg)
.jpg.ff1d84f44b73aa62dbc18ba9081090b0.jpg)
.jpg.488e749cc2b7ea4543da8ca0ac5572df.jpg)
.jpg.28a969e959f12aefeabc03f06ae296d9.jpg)
.jpg.be2f5ebd2423343f6c86f78ae658fa21.jpg)
.jpg.073815473a4702969fcc8c879f5b33c4.jpg)
.JPG.1c2ed9495beb4480280b7aa6ef79bf49.JPG)
.JPG.91a551db2798ca4a03b74175c7158e19.JPG)
.JPG.240e2eca9155c2d2dba85ec2df343b08.JPG)
.JPG.4bb42647a107409995c3cfcd5db58723.JPG)
.JPG.5898cf30eaa6e385bcbb562cab887b7e.JPG)
.JPG.d240ecb816acd642d60dc00828dc5f11.JPG)
.JPG.ba71a482d1e62fbf89199eaf800d3459.JPG)
.jpg.c47fce81a147d30df4bb56c2d3248bc4.jpg)
.jpg.189fc7f99a12a42318040e24a7f1d41f.jpg)
.jpg.5047e62872a62e08b1c164c5456bdc57.jpg)
.jpg.0415c32ae2a053330db146b06d7ba4e6.jpg)
.jpg.4bac4eeb2b3264a196c6c61a4af92884.jpg)
.jpg.201c91a8bf44beec292bab327e4a69f3.jpg)


.jpg.bacfc49709ecc92a03c31e467128bd23.jpg)
.jpg.ce8bd75c9016ad7fcd7fe4e76dc3294e.jpg)
.jpg.79f849969e22fdc3e9f214a1c171ca96.jpg)
.jpg.3f18984437cbd8a31718f6a7ce27197d.jpg)
.jpg.f4d2cb2f2d9a4e06b57f1f379d4bed09.jpg)


.jpg.2b165ea3e8eb6e031b29d1c8ad0da22c.jpg)
.jpg.677f7ca07d4b8669f972feb607892335.jpg)
.jpg.9e577a6a782433b4dc060116e03f1ea2.jpg)
.jpg.92c3e9b3492eeed476603166082daa18.jpg)