HOLIDAY DONATION DRIVE - SUPPORT MSW - DO YOUR PART TO KEEP THIS GREAT FORUM GOING! (Only 24 donations so far out of 49,000 members - C'mon guys!)
×


aydingocer
-
Posts
916 -
Joined
-
Last visited
Content Type
Profiles
Forums
Gallery
Events
Everything posted by aydingocer
-
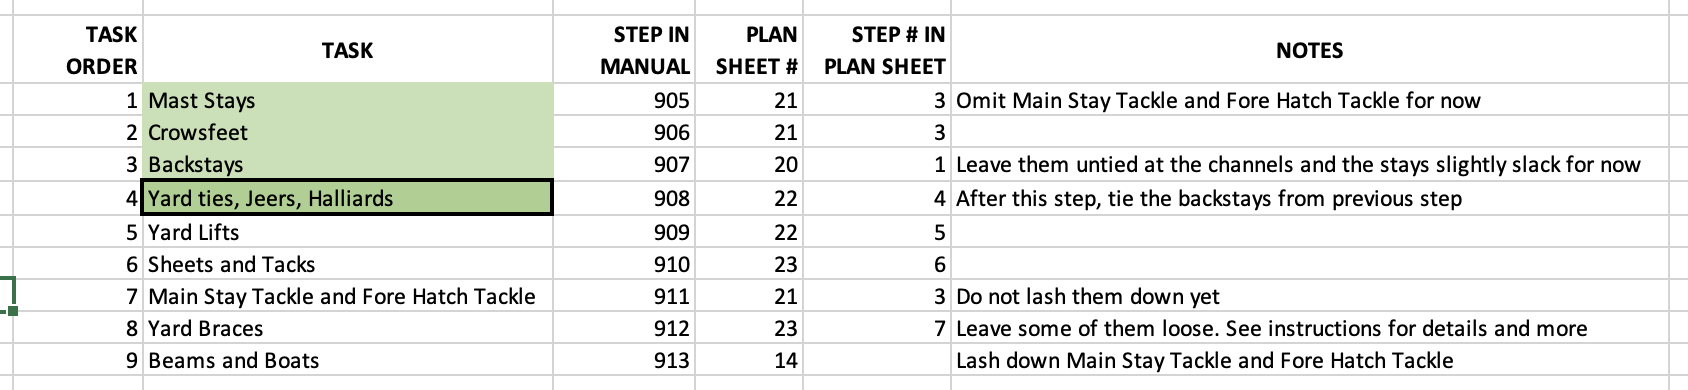
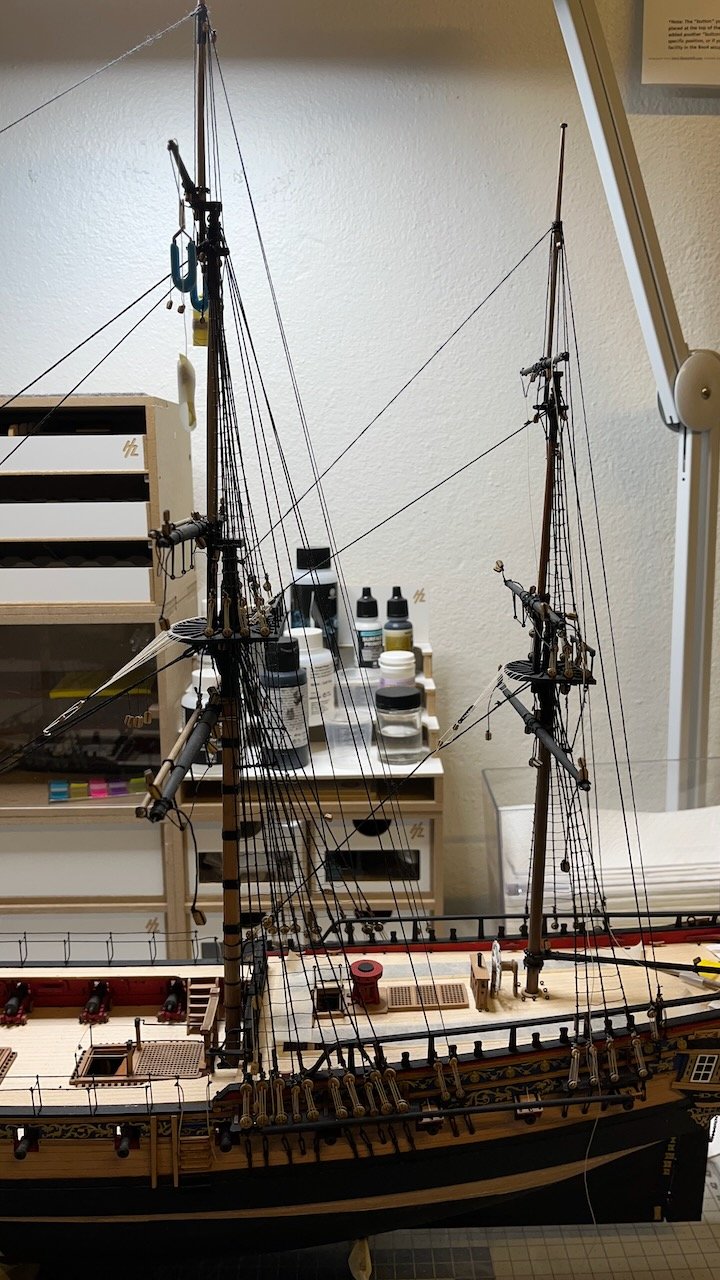
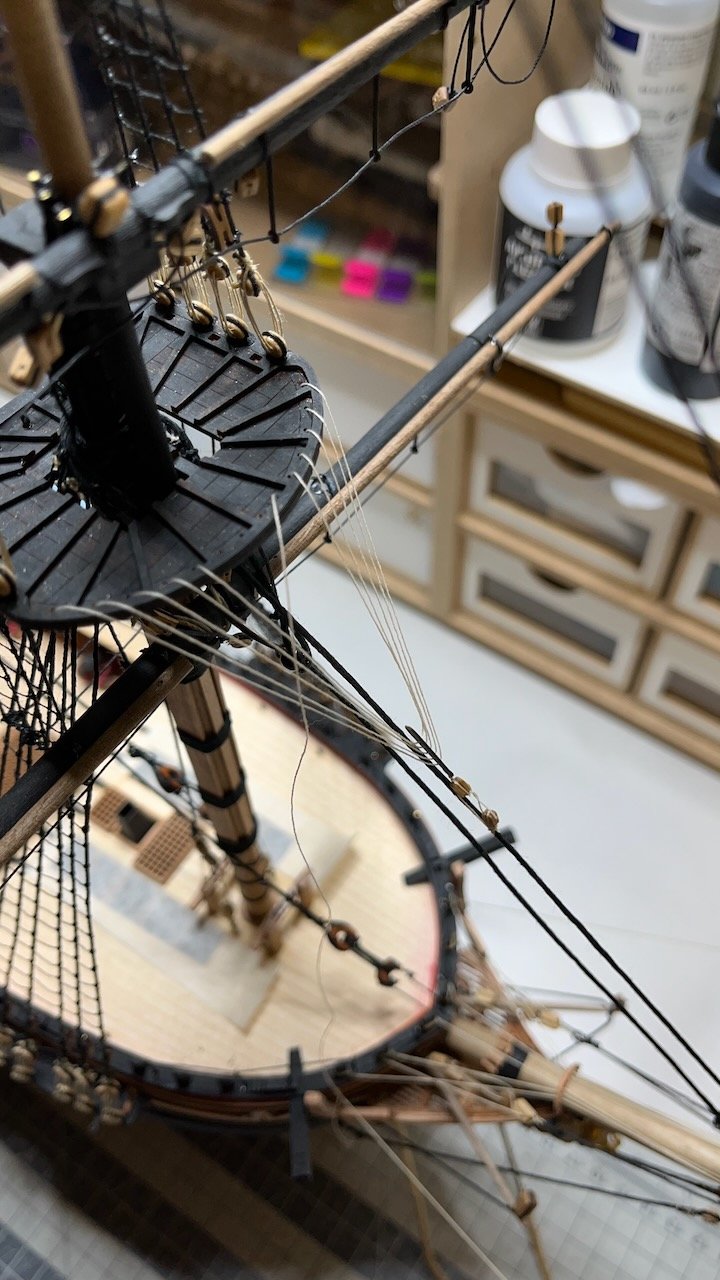
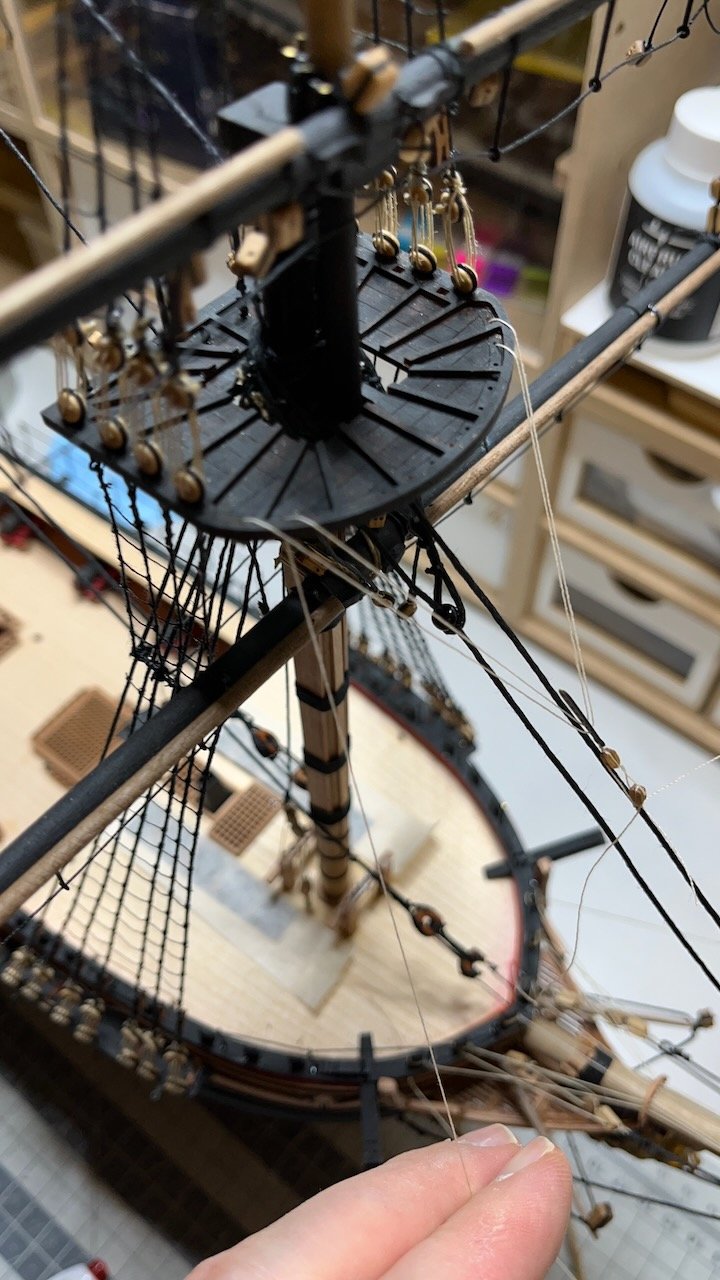
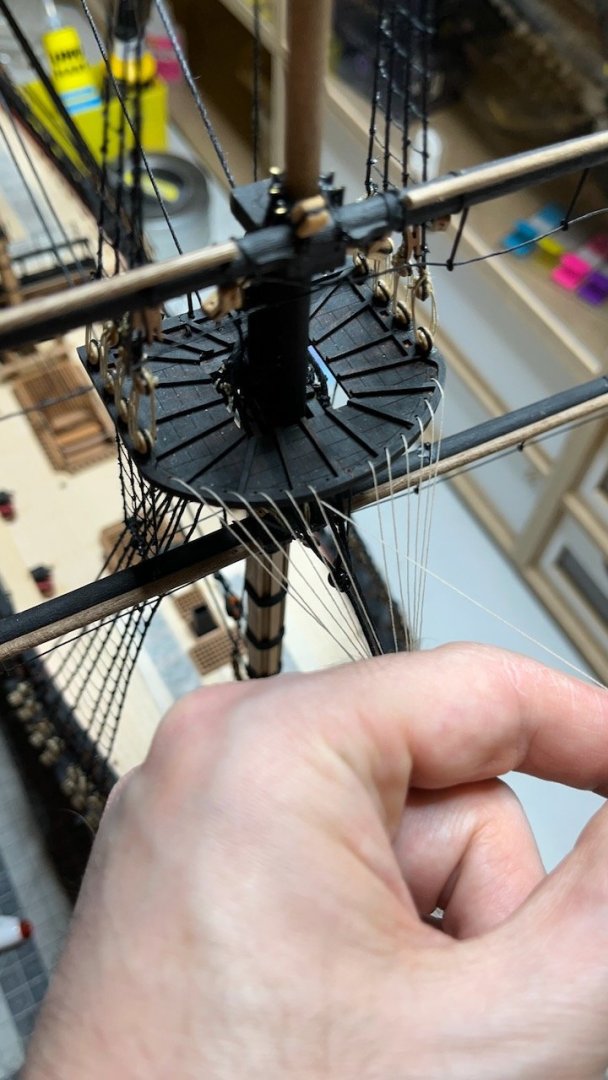
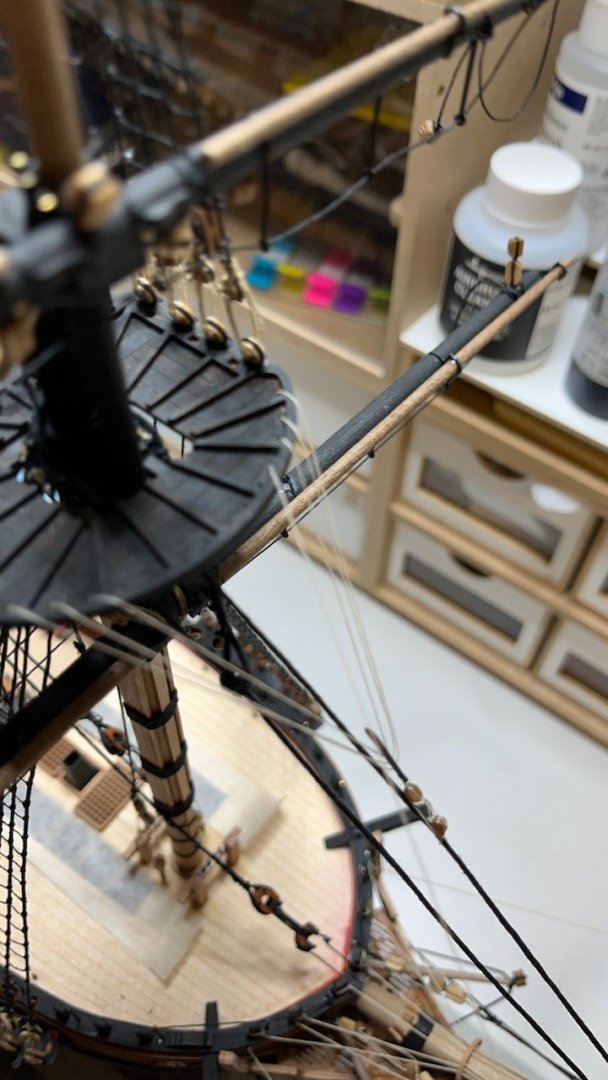
 Build day 179/2: 2 hr / Total 374 hours Yard Lifts. Started and finished Mizzen Yard Lifts as well as the Main Yard Topsail yard lift. Photo 929: Main Yard Topsail Yard Lifts.
- 426 replies
-
- 7
-

-
- Vanguard Models
- Sphinx
- (and 1 more)
-
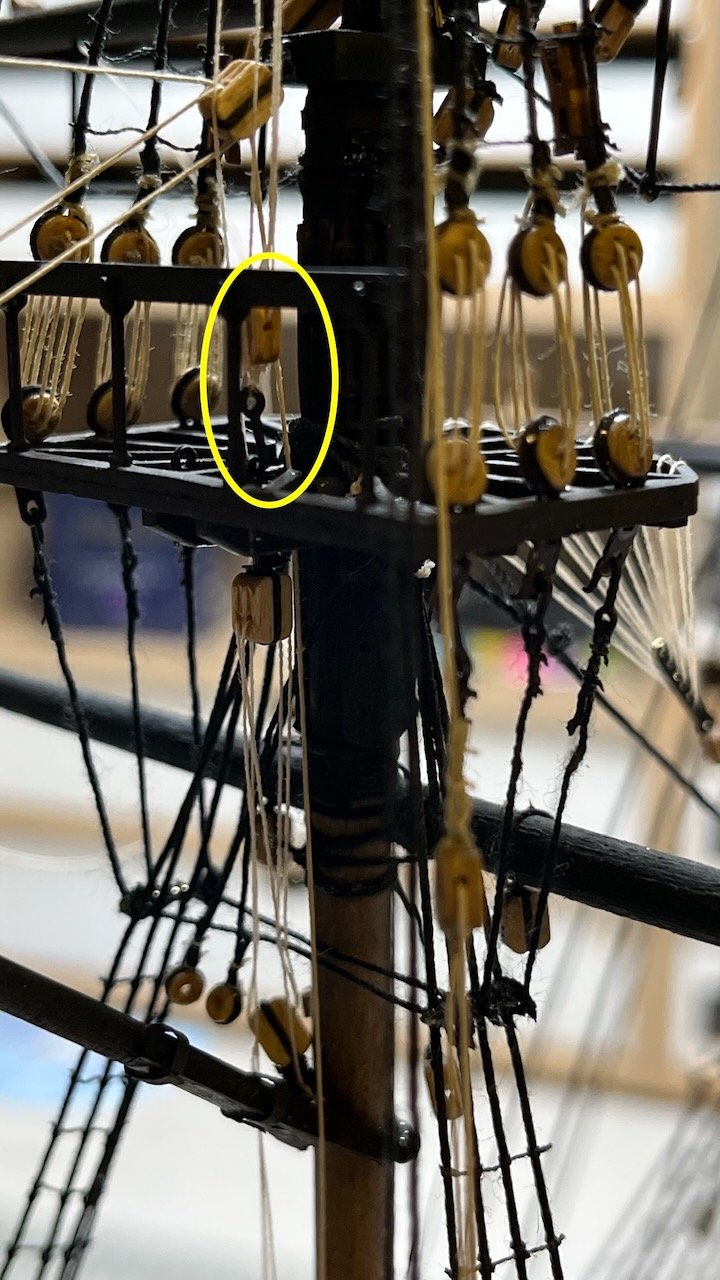
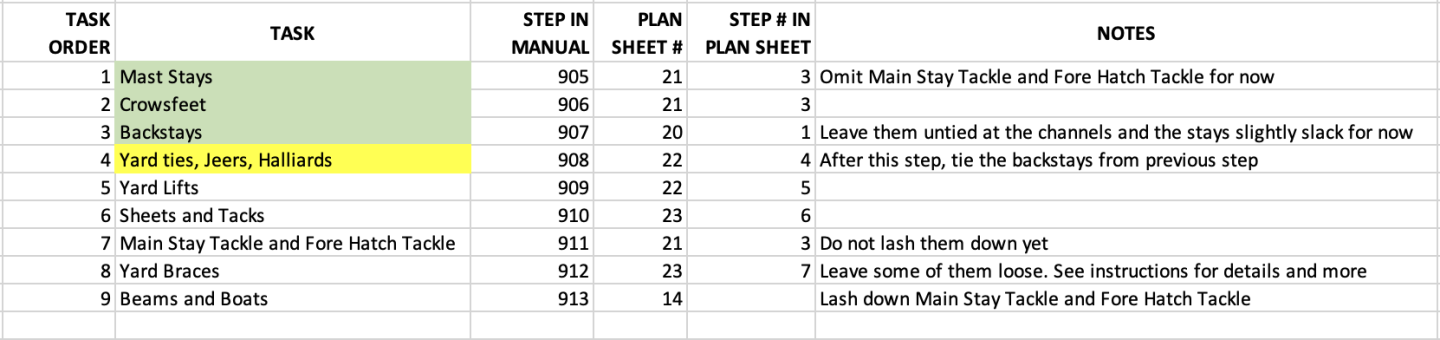
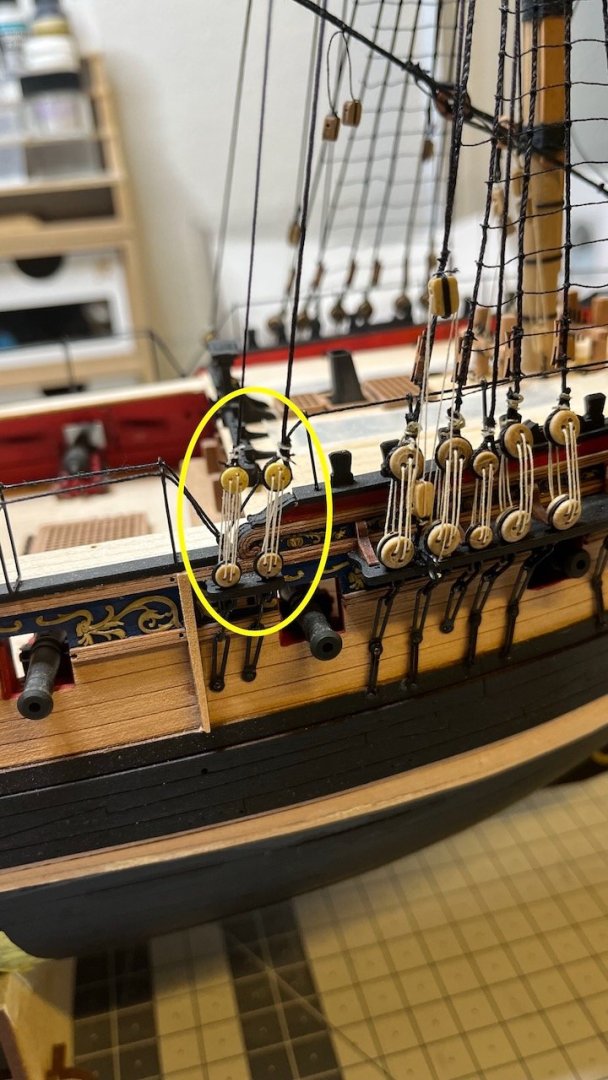
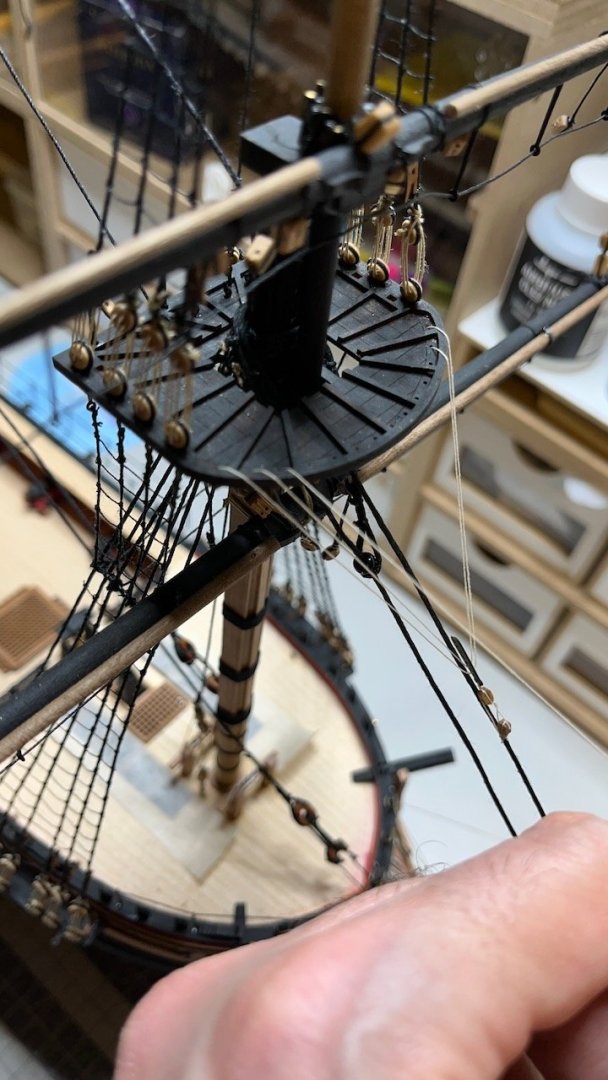
With the Fore yard ties, jeers and halliards complete, my 4th task completion status turns to green Next move will be #5, i.e Yard Lifts.

- 426 replies
-
- 5
-
-
- Vanguard Models
- Sphinx
- (and 1 more)
-
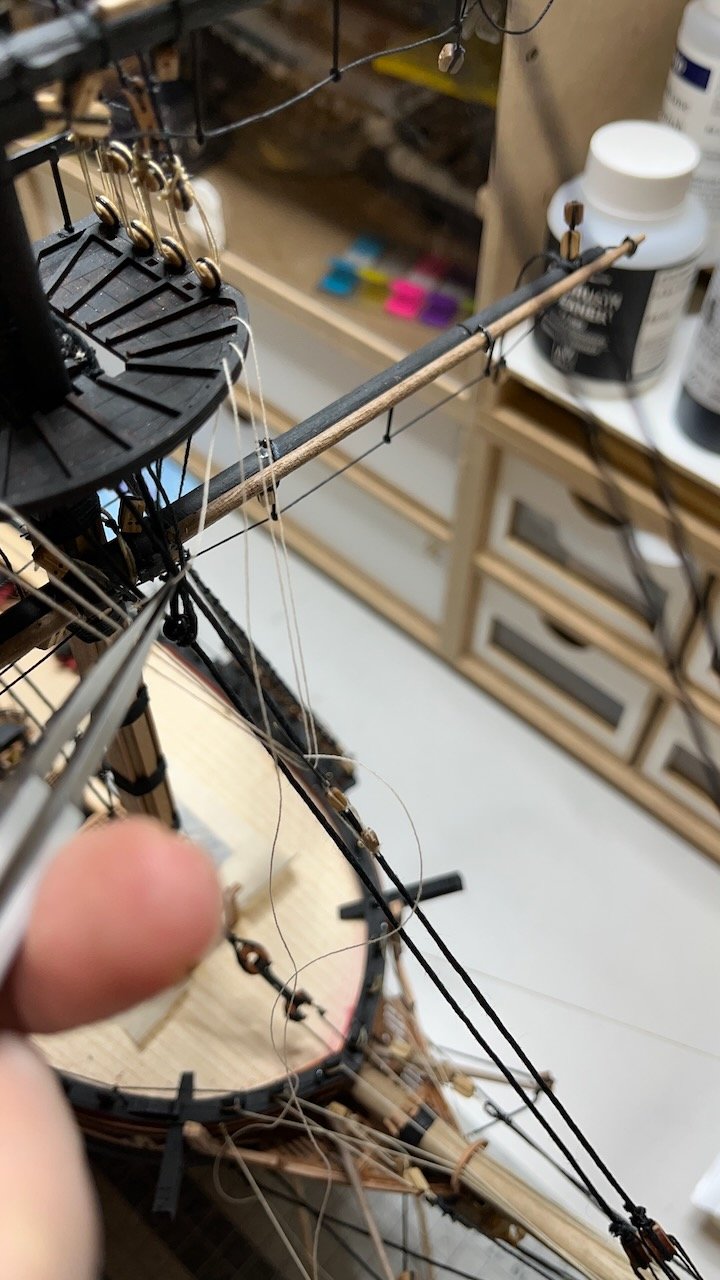
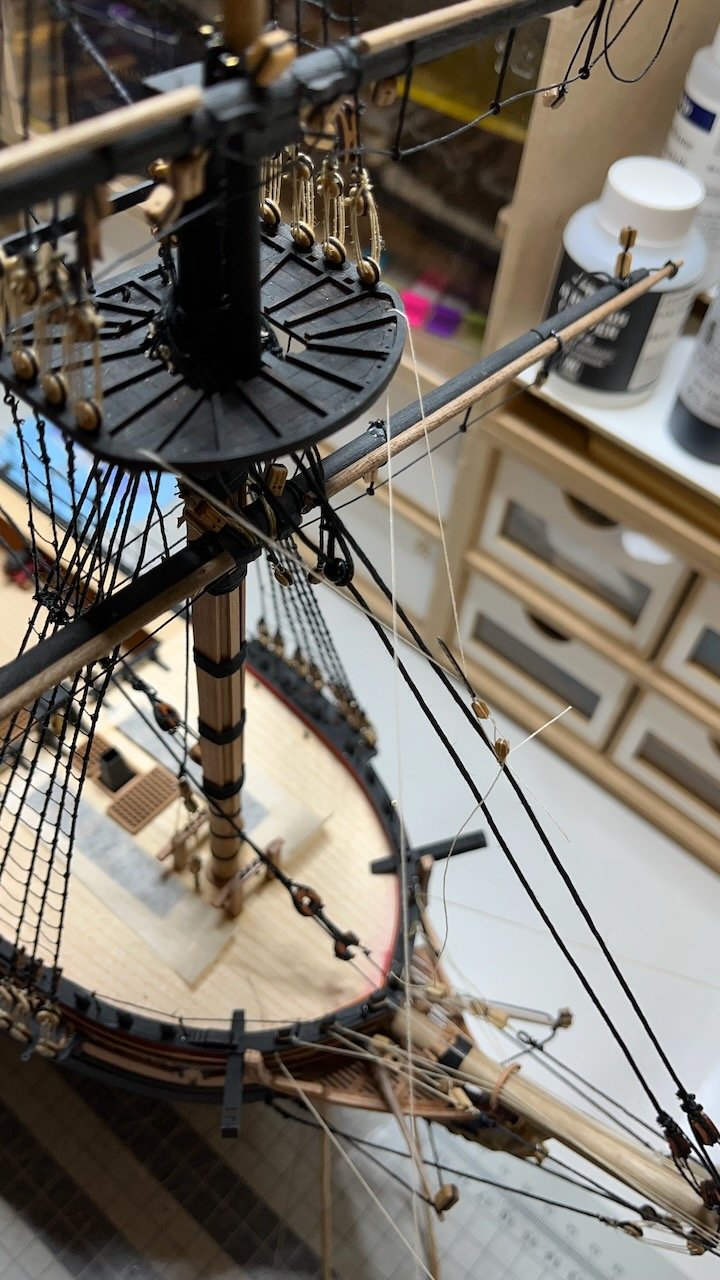
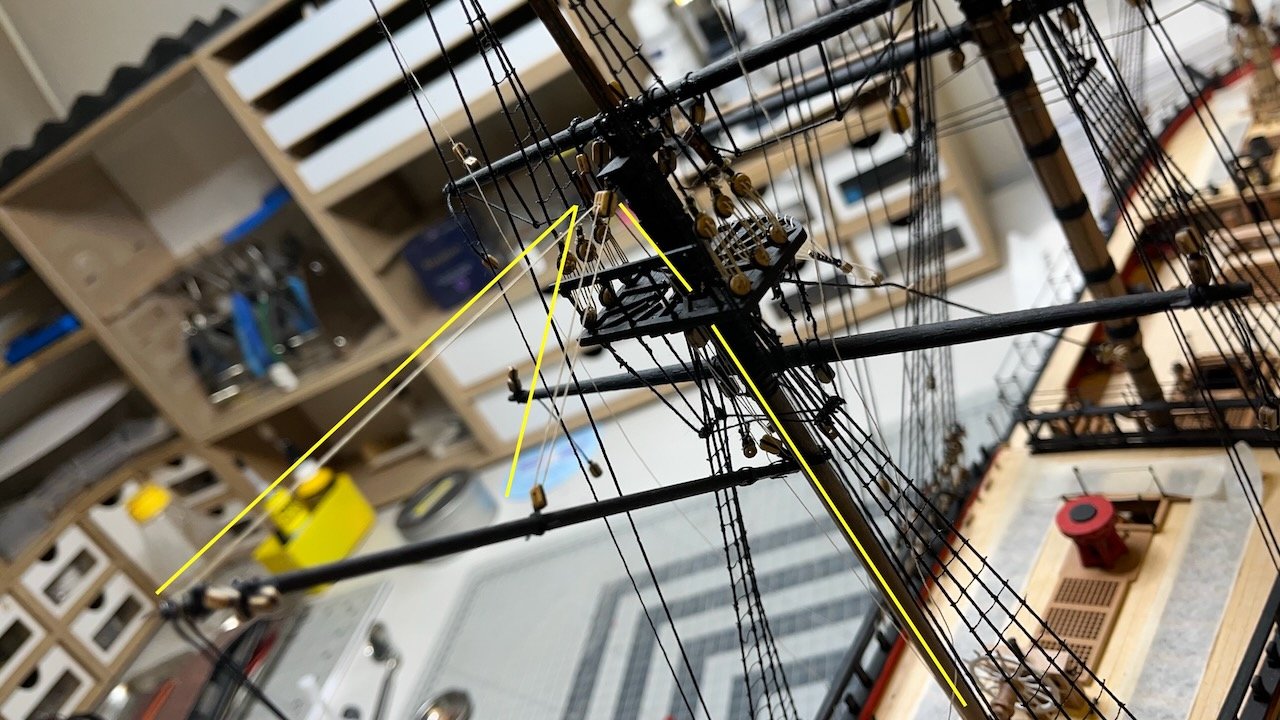
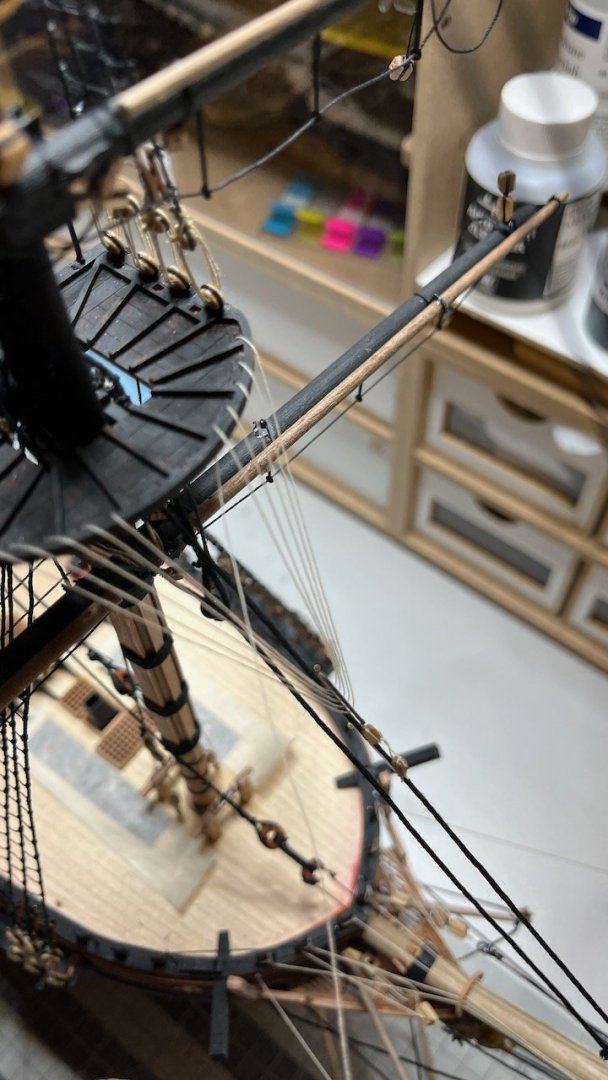
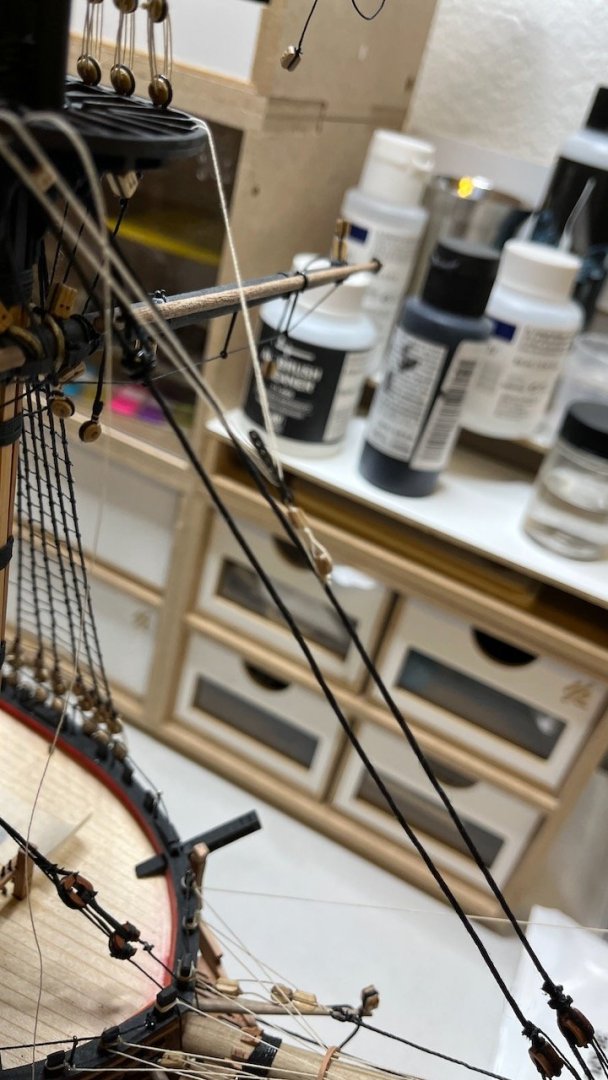
Build day 179: 1 hr / Total 372 hours Photos 926-928: Fore Topsail Yard Tye and Halliards.


- 426 replies
-
- 6
-
-
- Vanguard Models
- Sphinx
- (and 1 more)
-
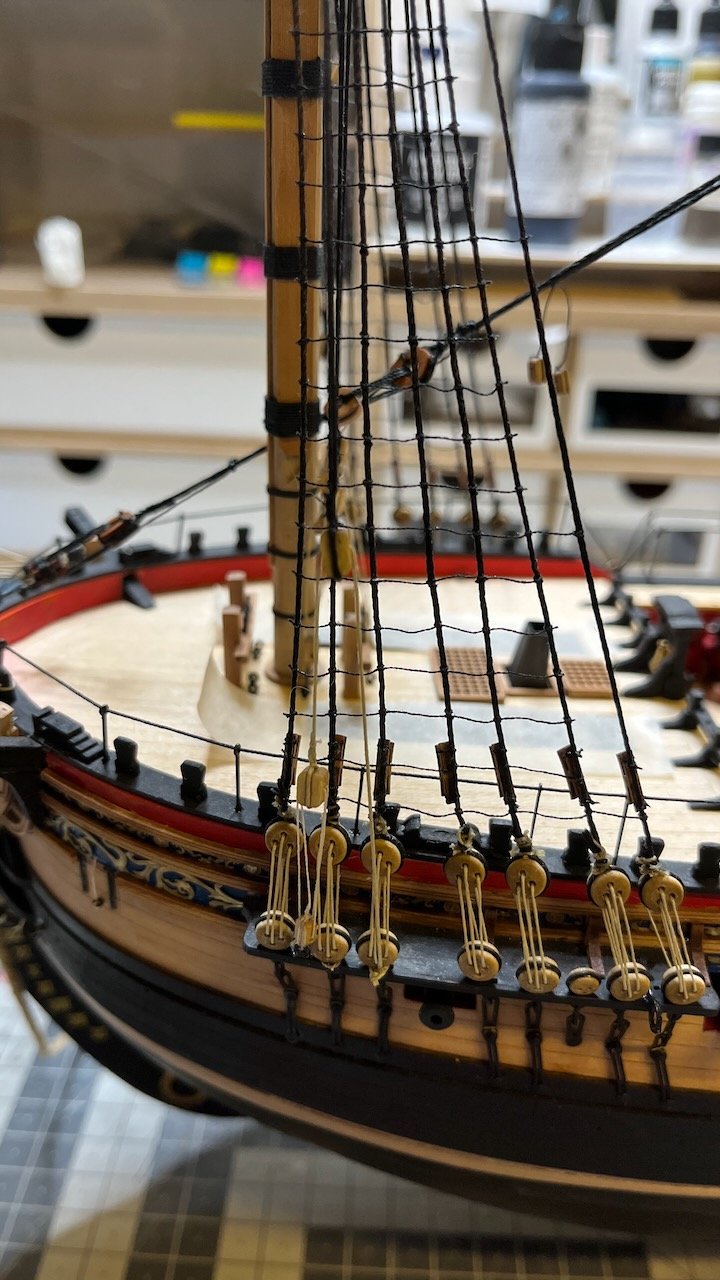
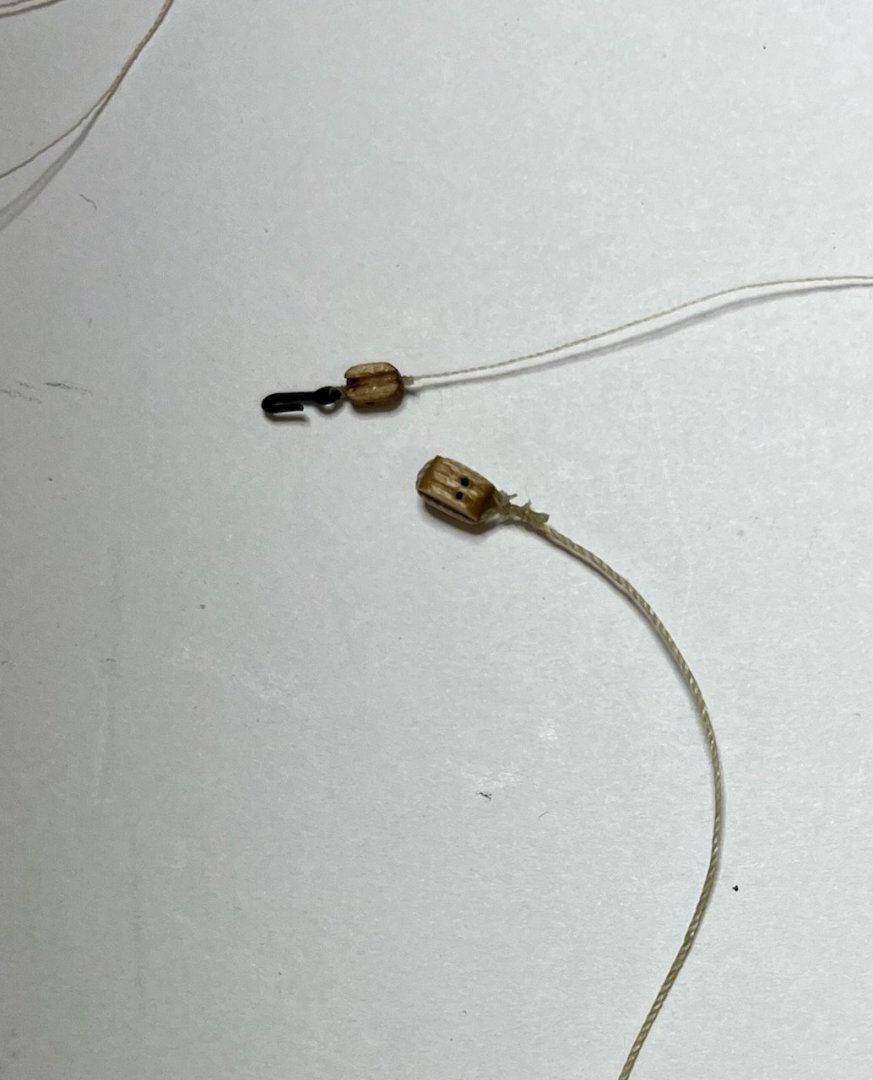
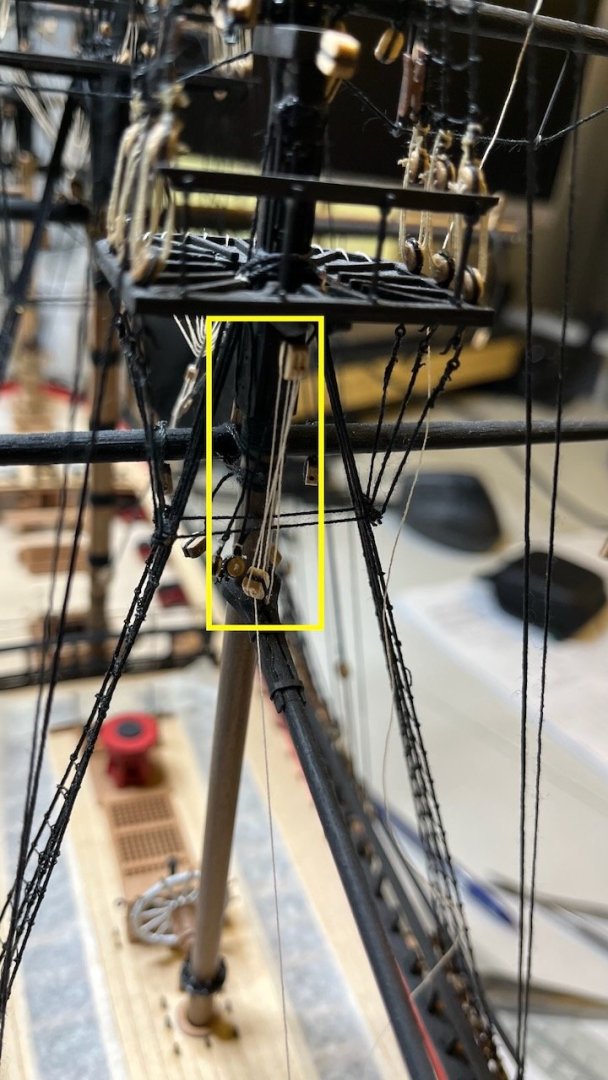
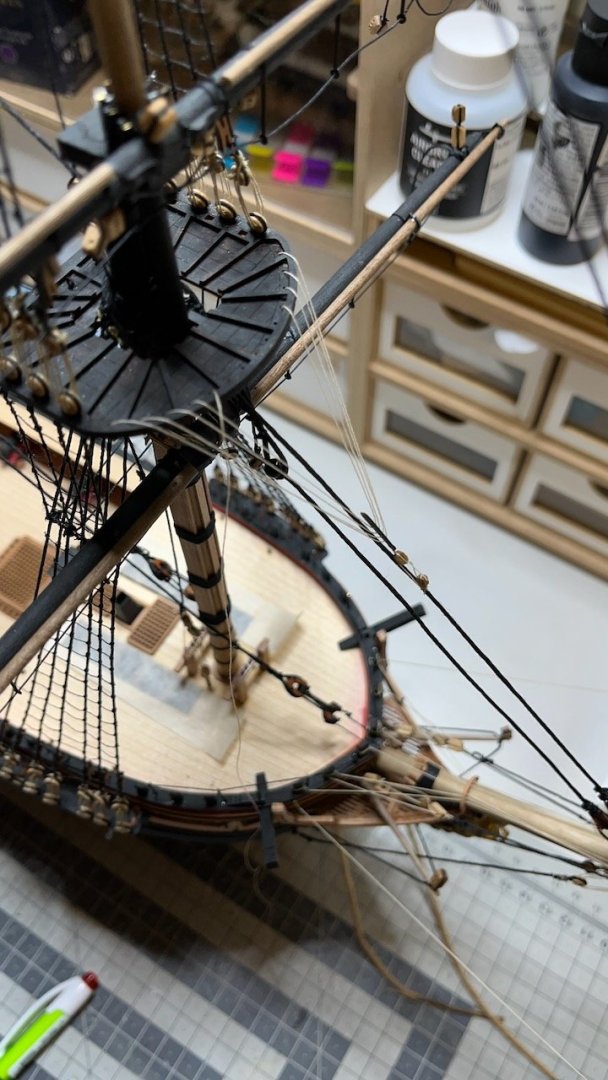
Build day 178: 1 hr / Total 371 hours Photo 925: Fore Yard Jeers. One of the most challenging blocks to insert the threads so far. After several tries I managed to install them.
- 426 replies
-
- 2
-
-
- Vanguard Models
- Sphinx
- (and 1 more)
-
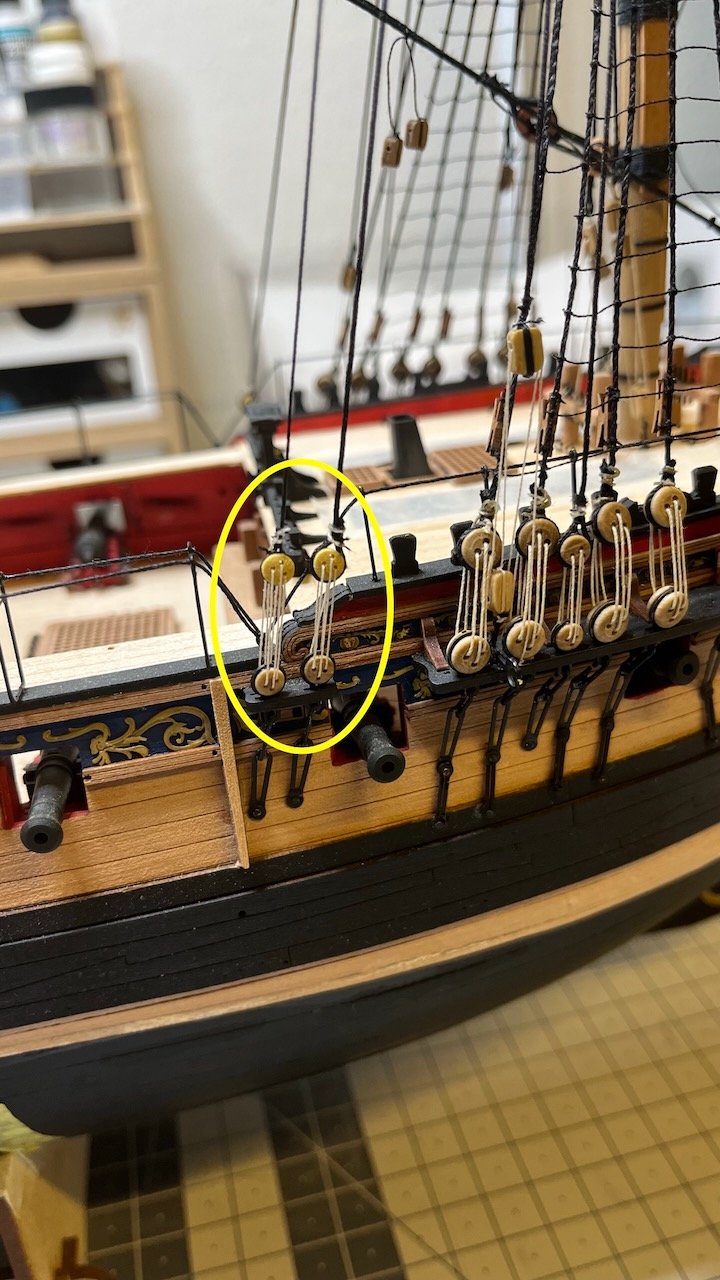
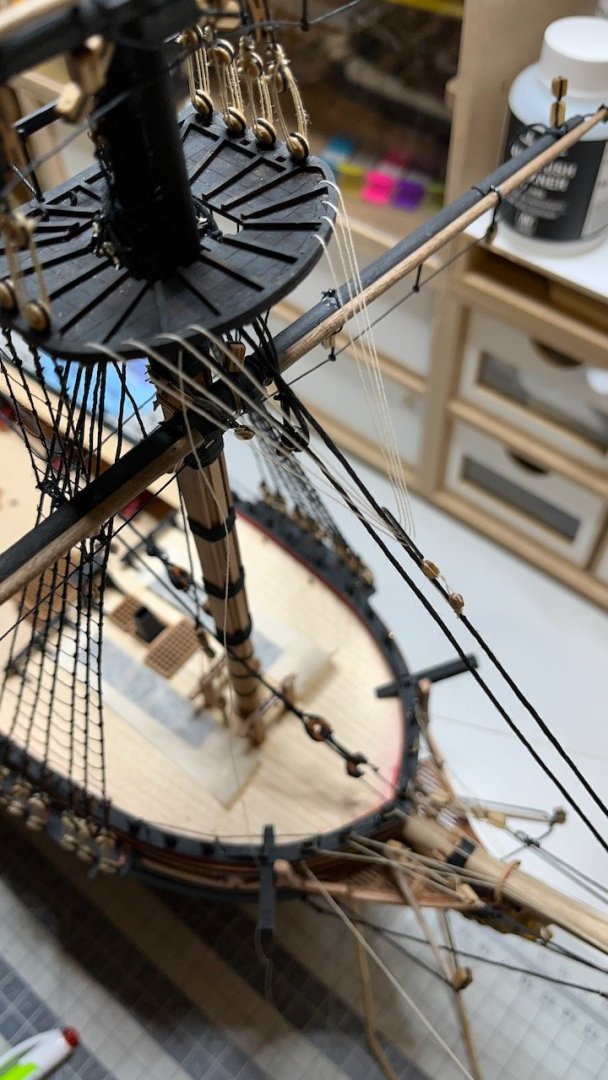
Photo 924: Main Yard Jeers Finished with the Main Mast, moving forward to Fore Mast: Photo 925: Fore Topgallant Yard Halliard. Constructed similar to that of the Main Mast.

- 426 replies
-
- 5
-
-
- Vanguard Models
- Sphinx
- (and 1 more)
-
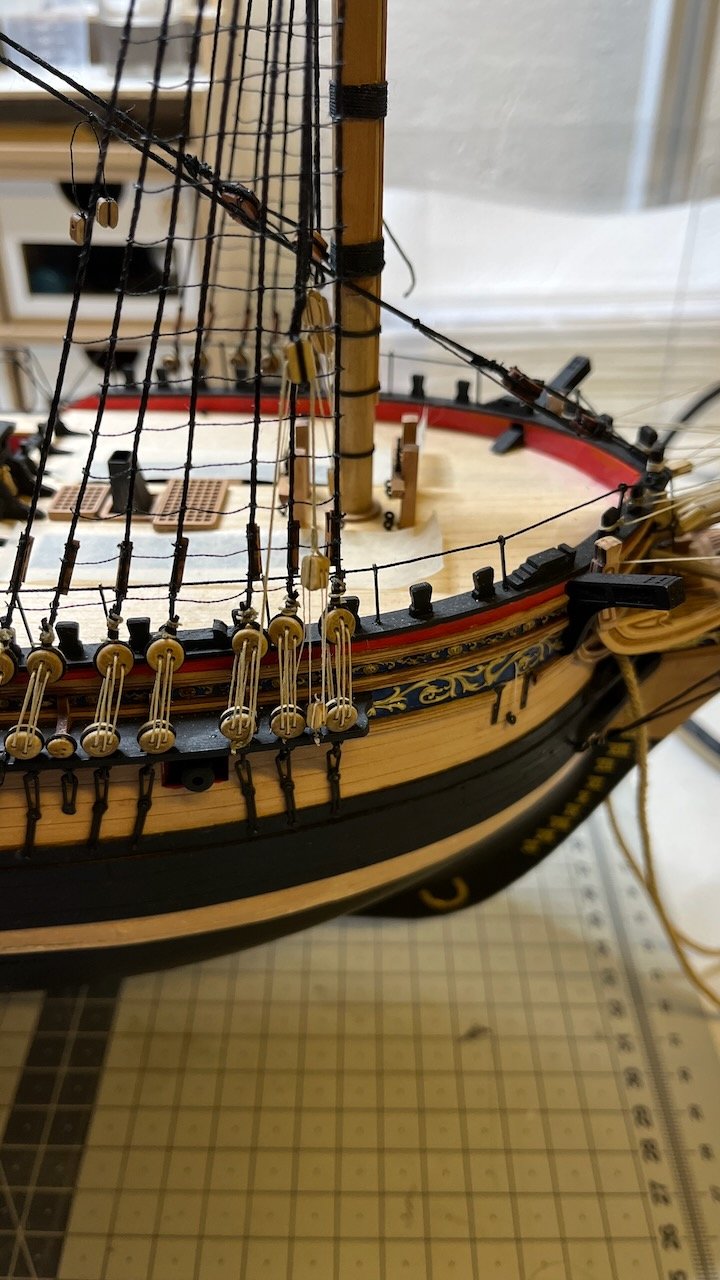
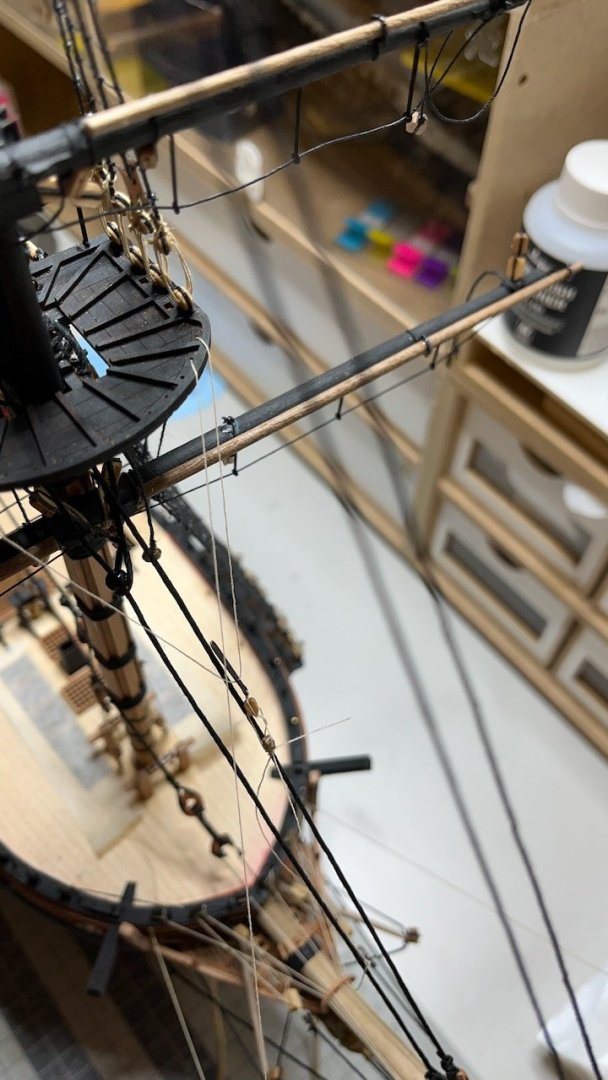
Build day 177: 2 hr / Total 370 hours Photos 920-923: Main Topsail Yard Tye and Halliards.

- 426 replies
-
- 3
-
-
- Vanguard Models
- Sphinx
- (and 1 more)
-
Build day 176: 0,5 hr / Total 368 hours Photos 917-919: Main Topgallant Yard Halliard. Decided to follow @brunnels advice above, tied the end to the bitt in front of the main mast.
- 426 replies
-
- 6
-
-
- Vanguard Models
- Sphinx
- (and 1 more)
-
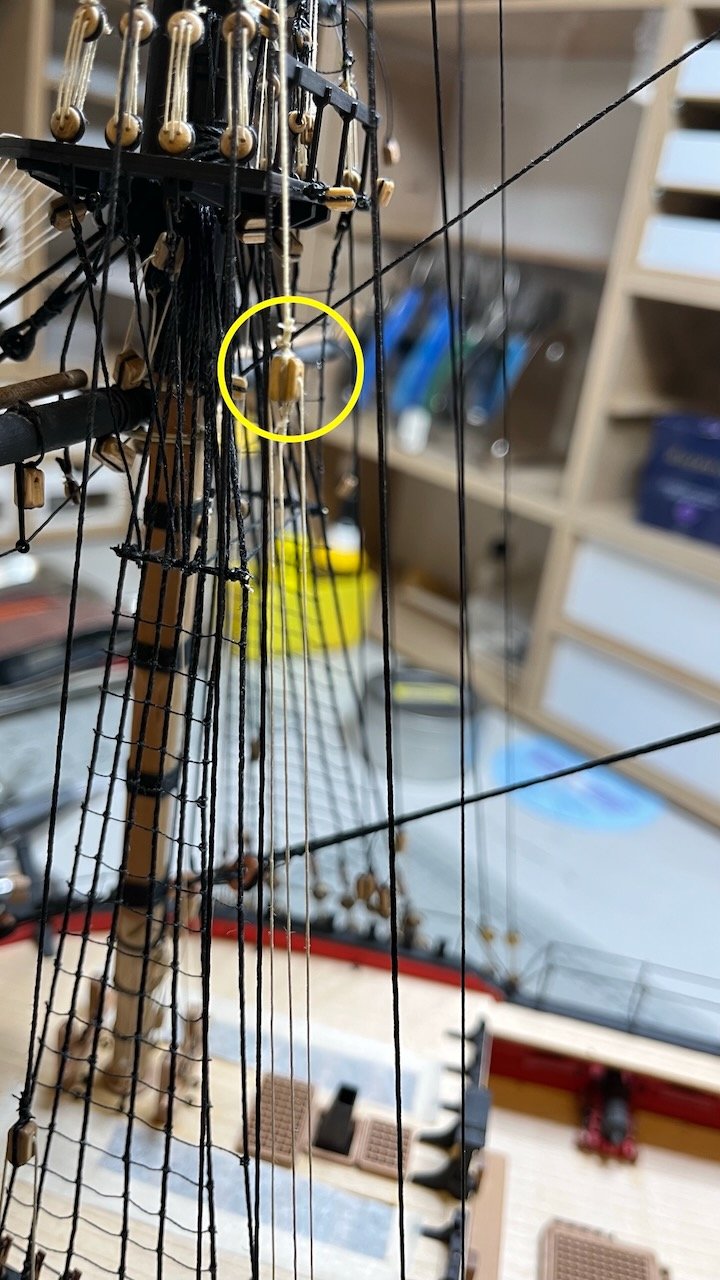
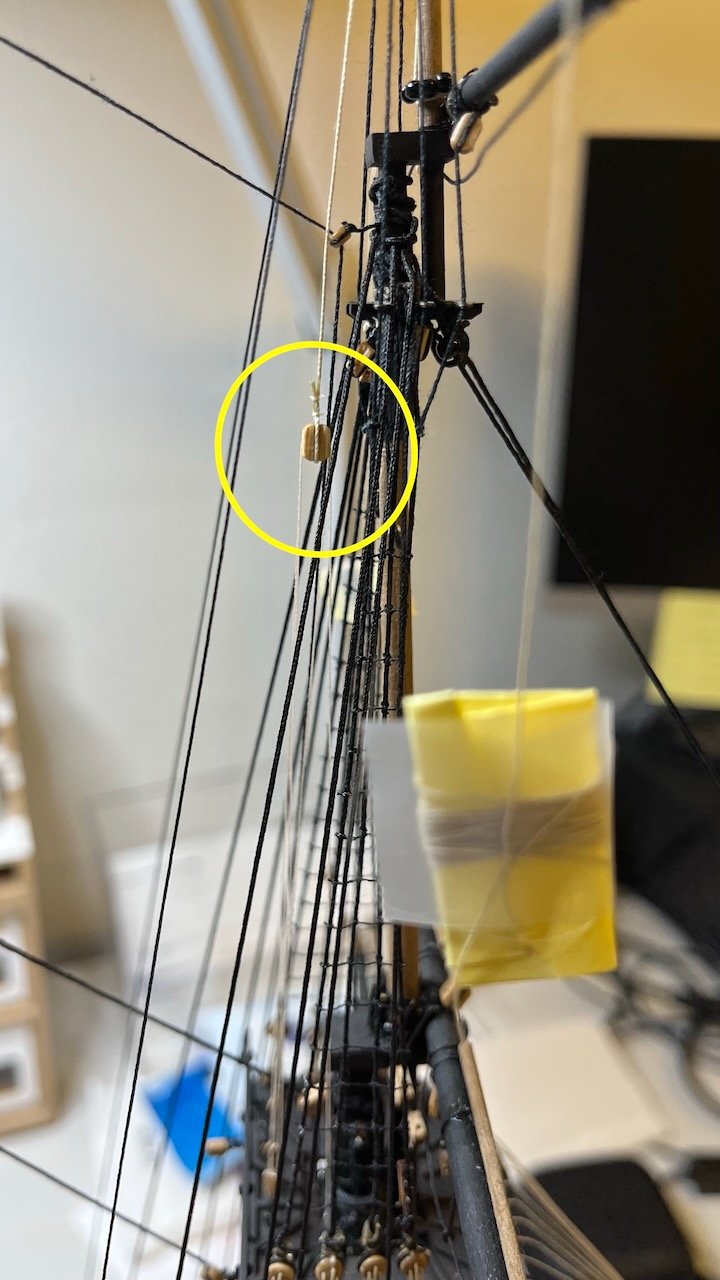
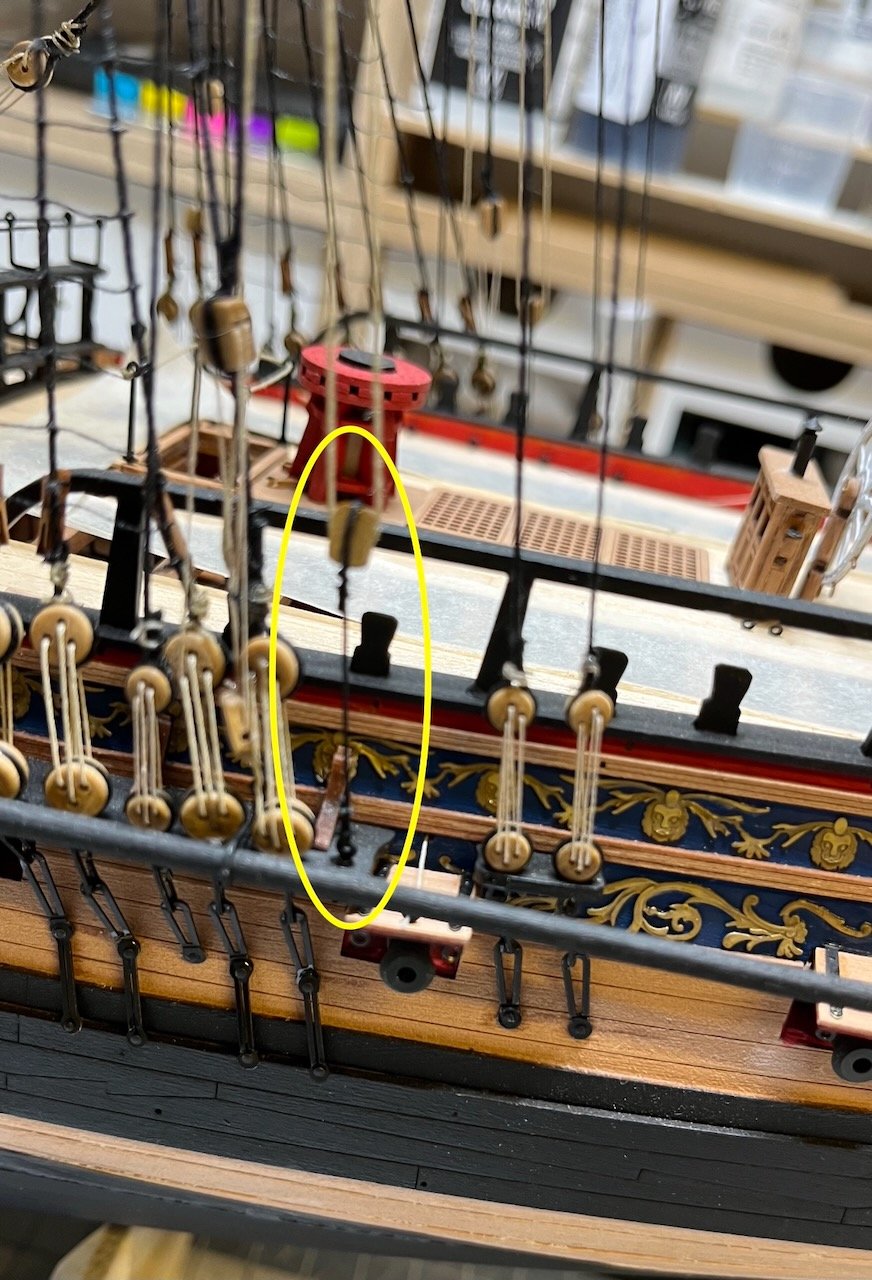
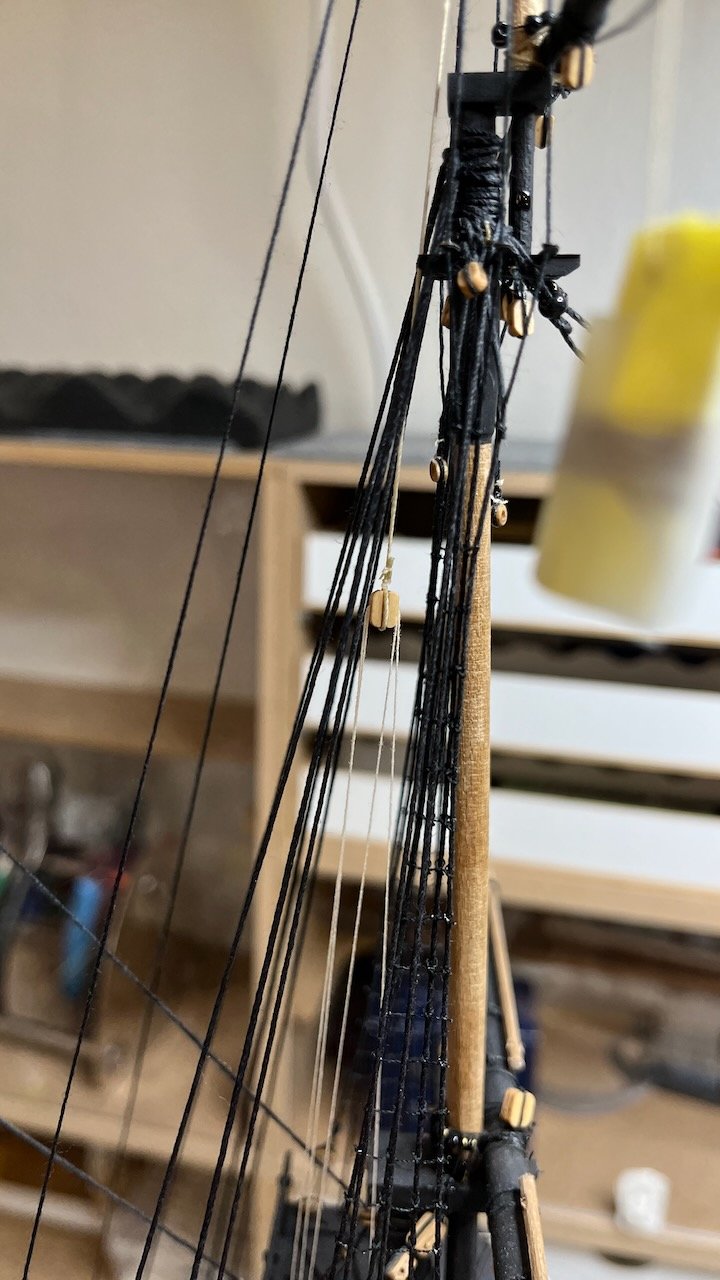
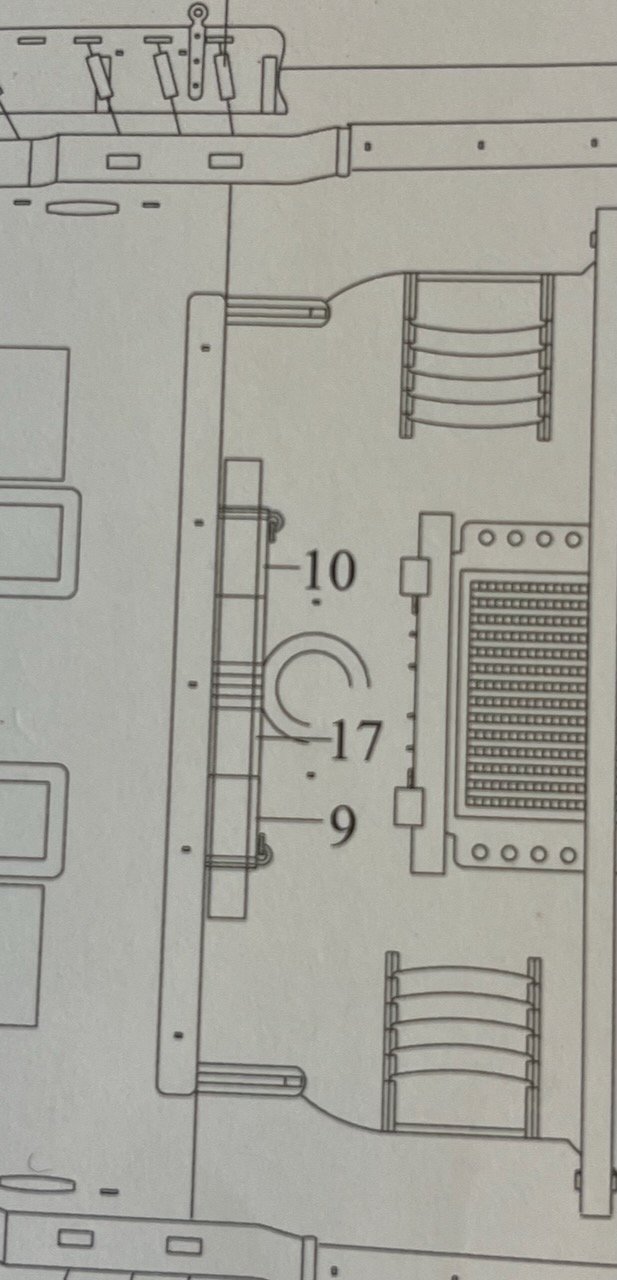
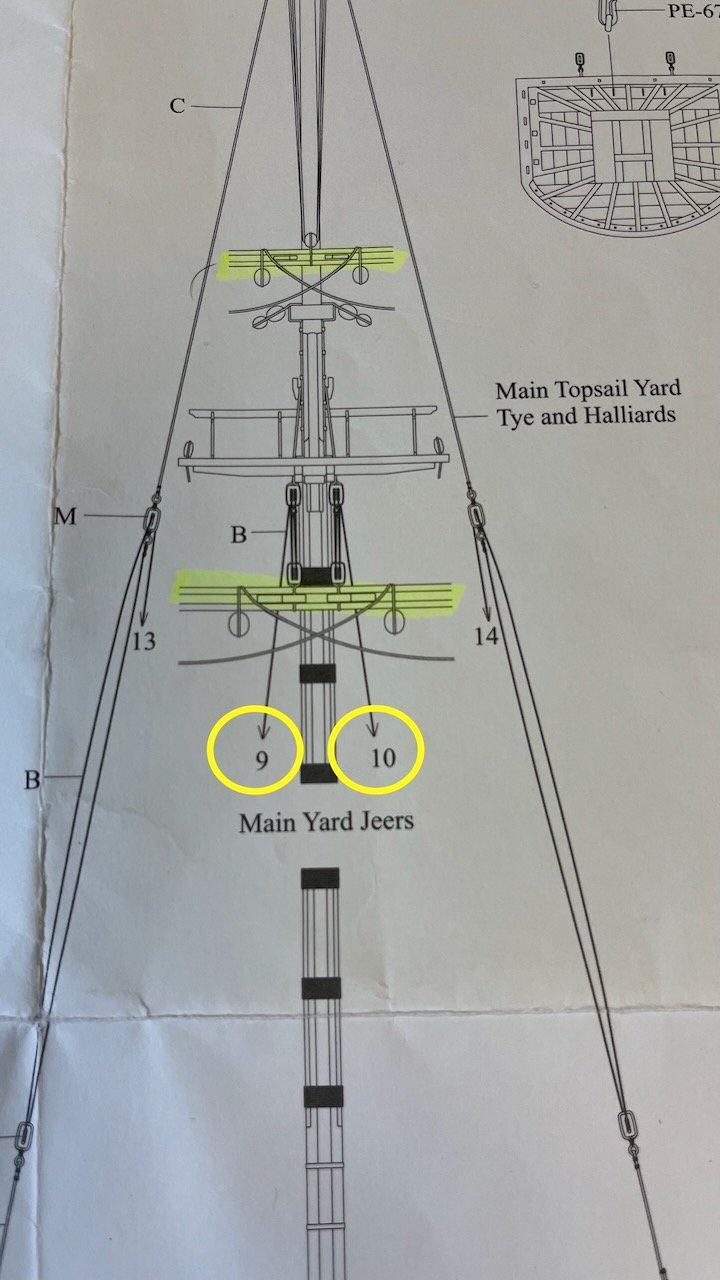
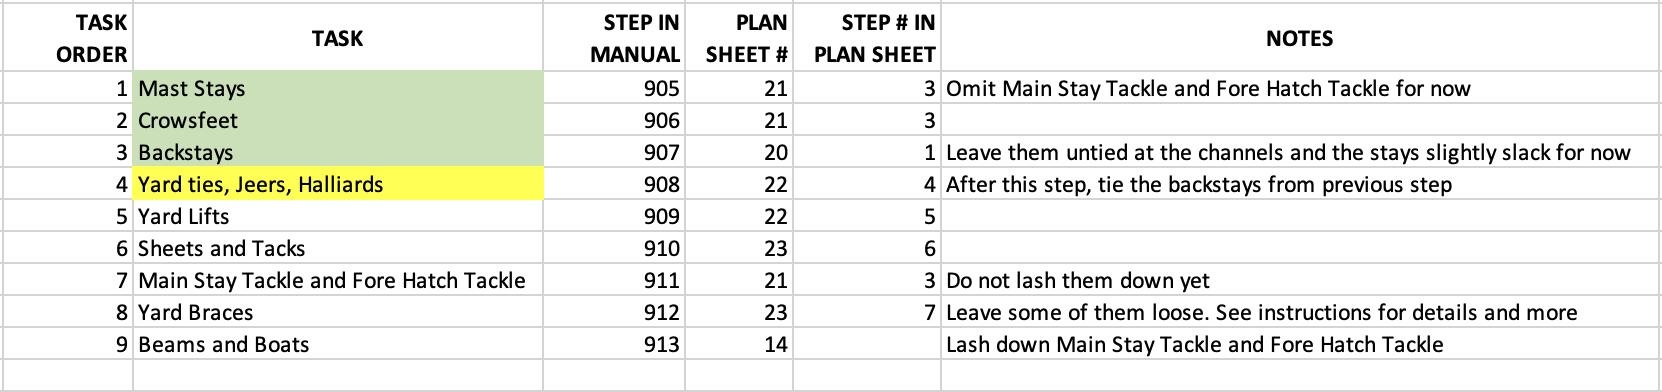
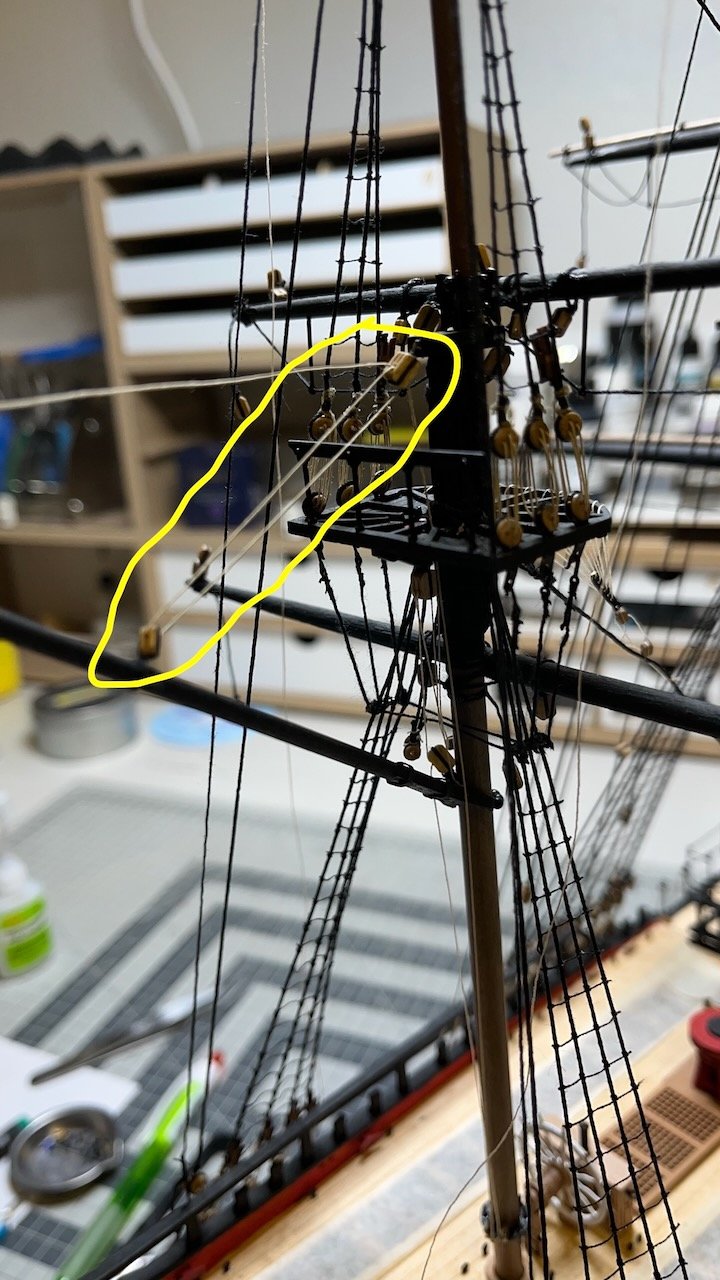
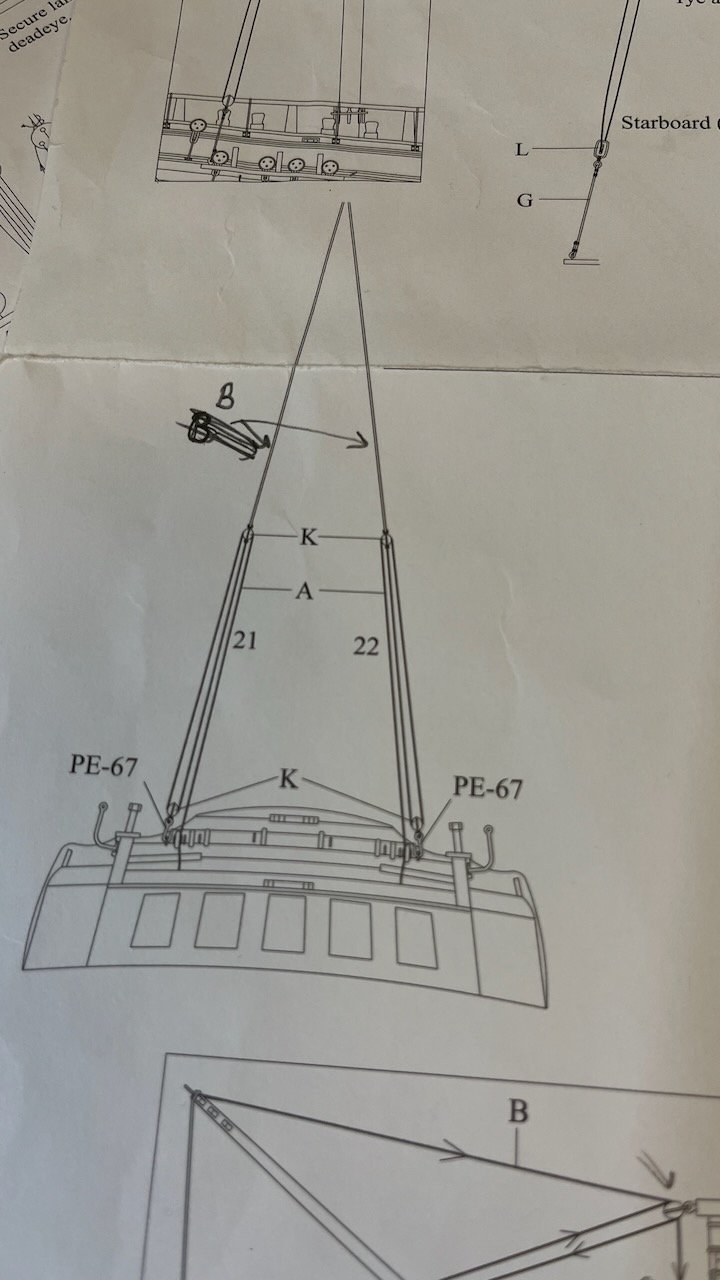
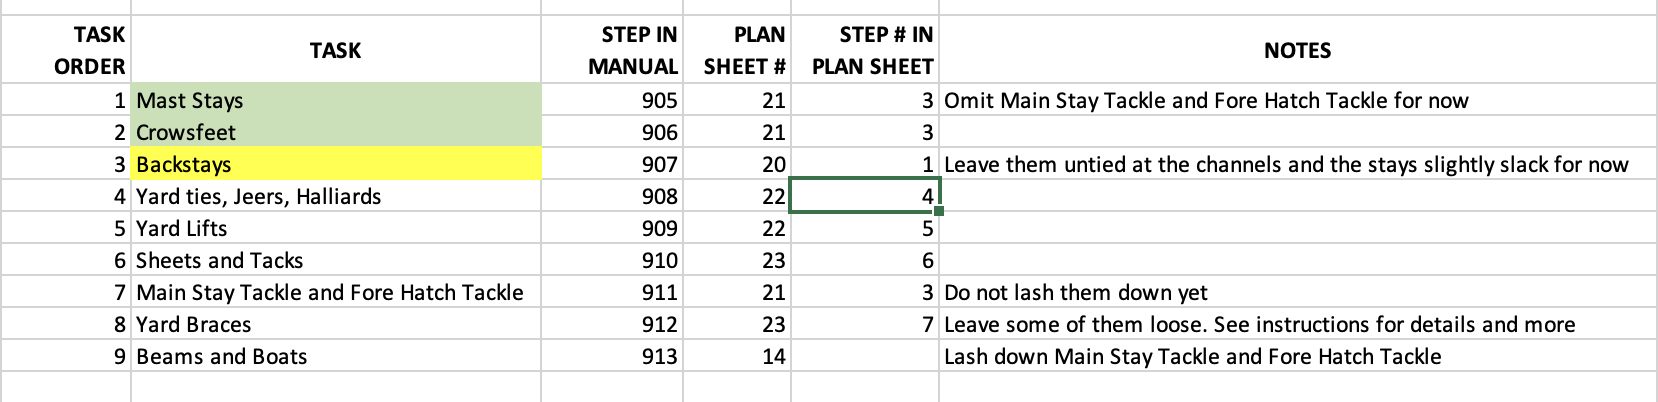
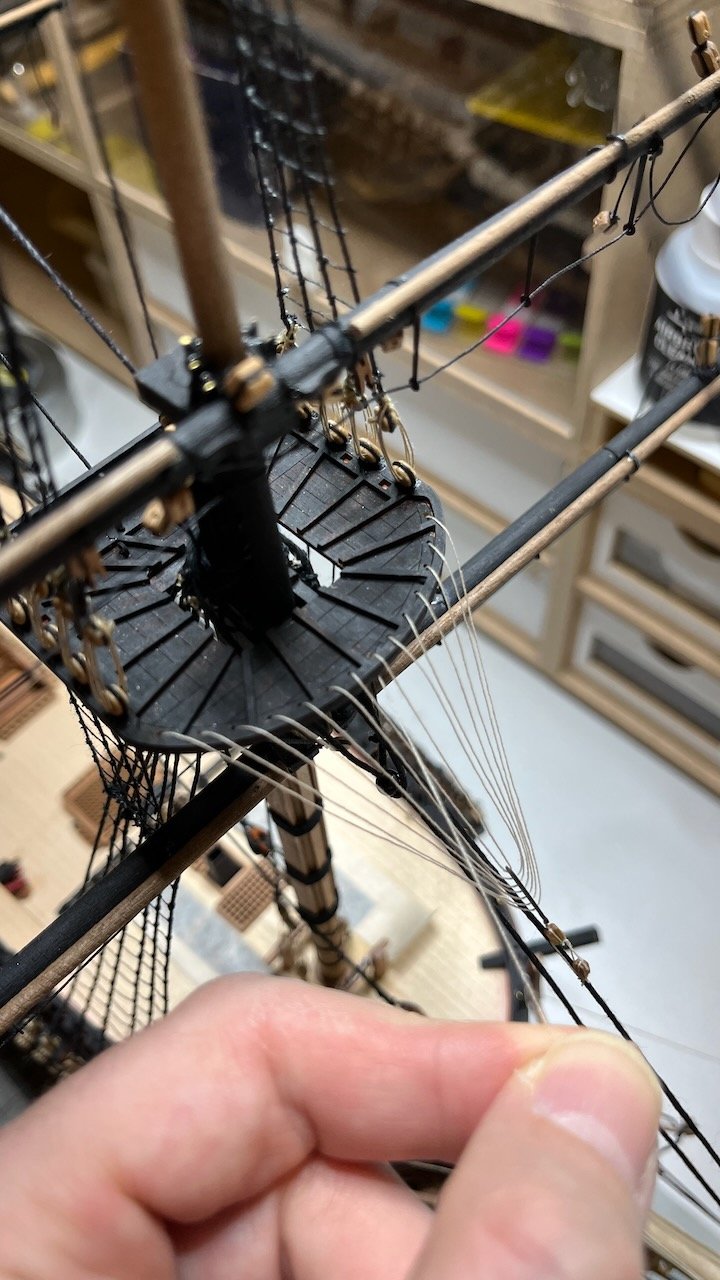
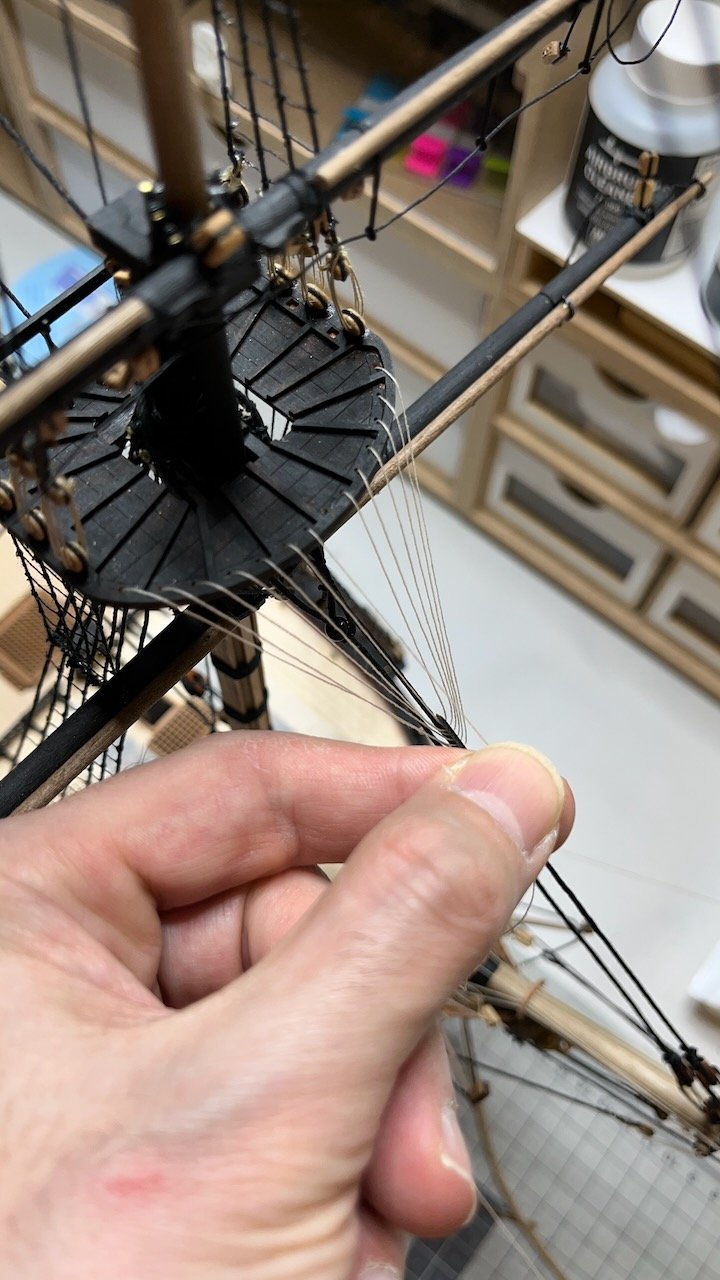
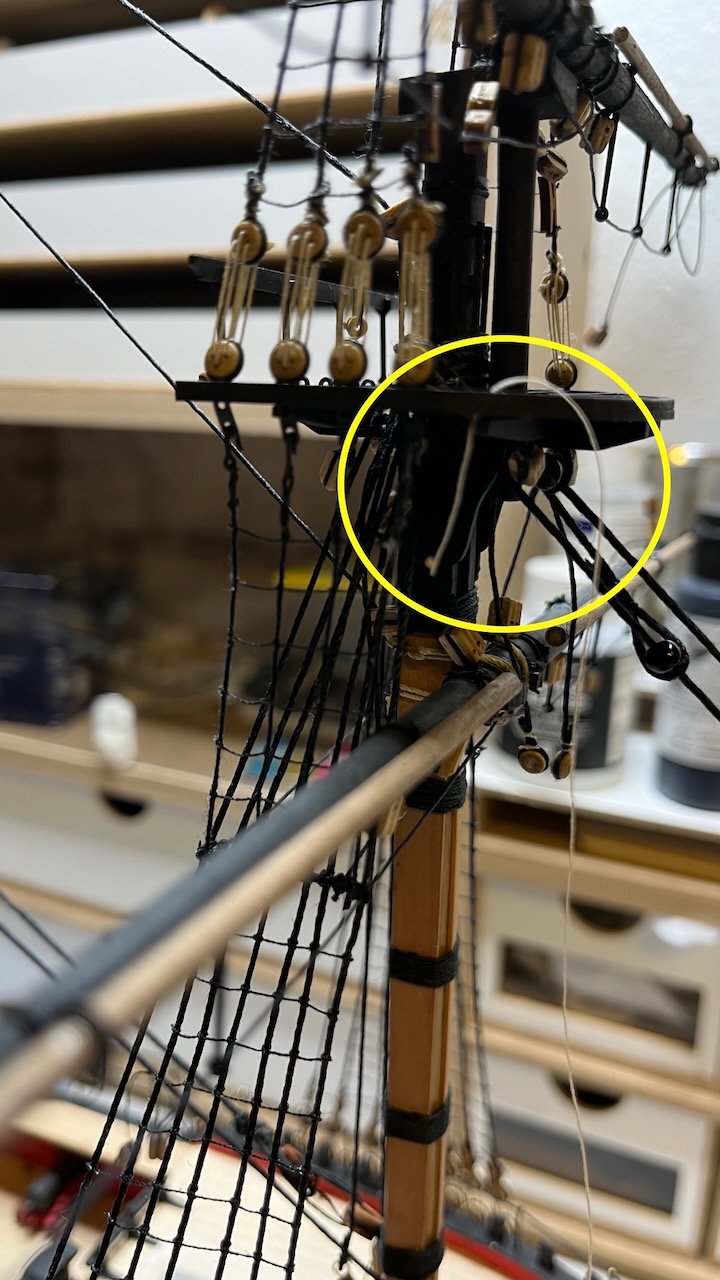
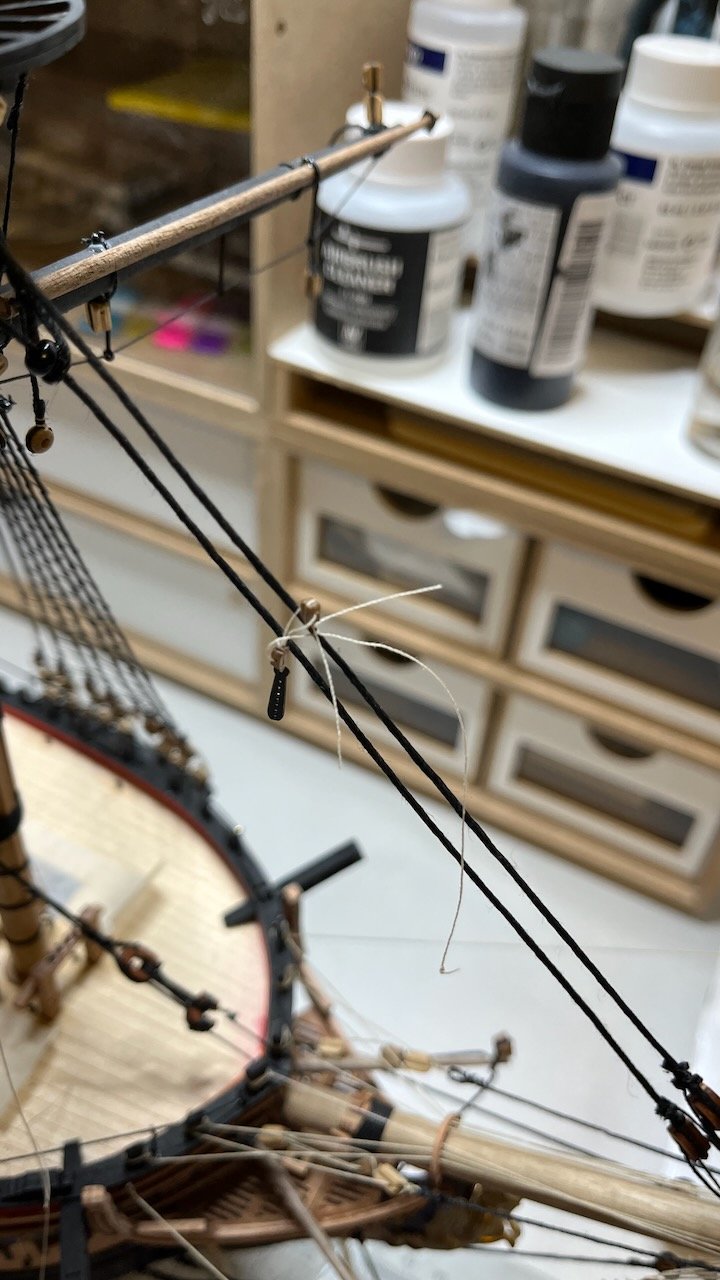
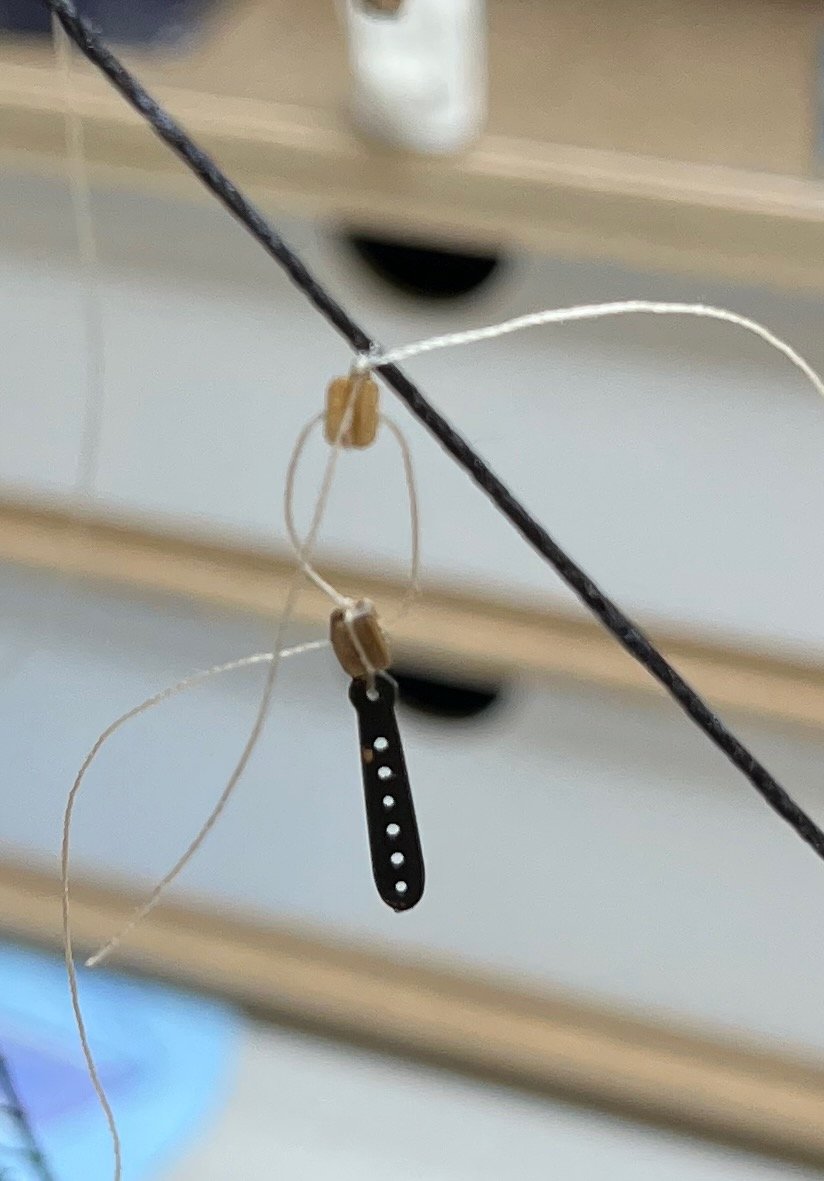
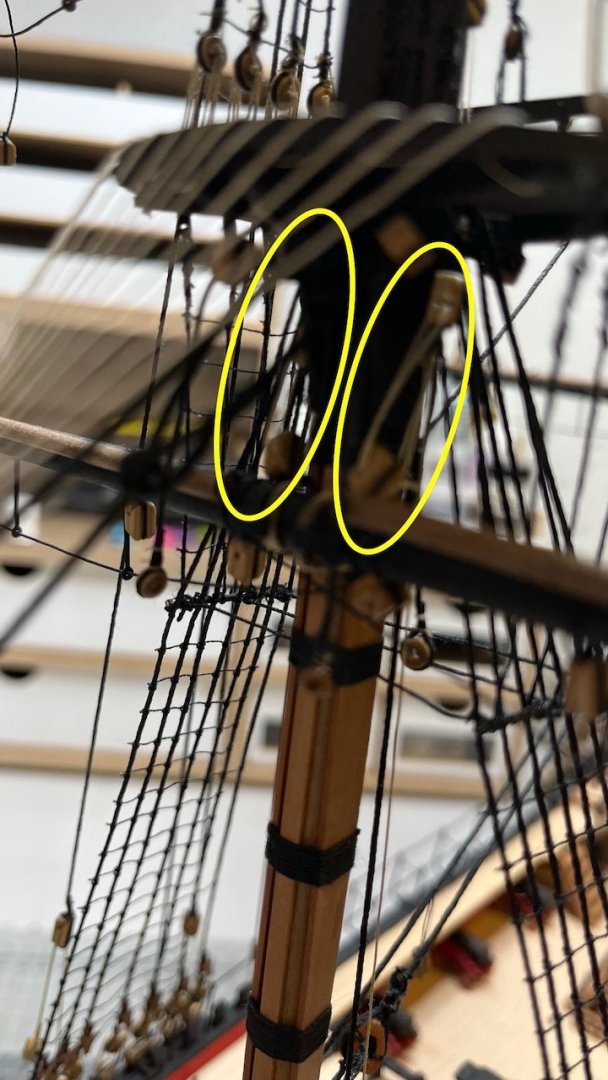
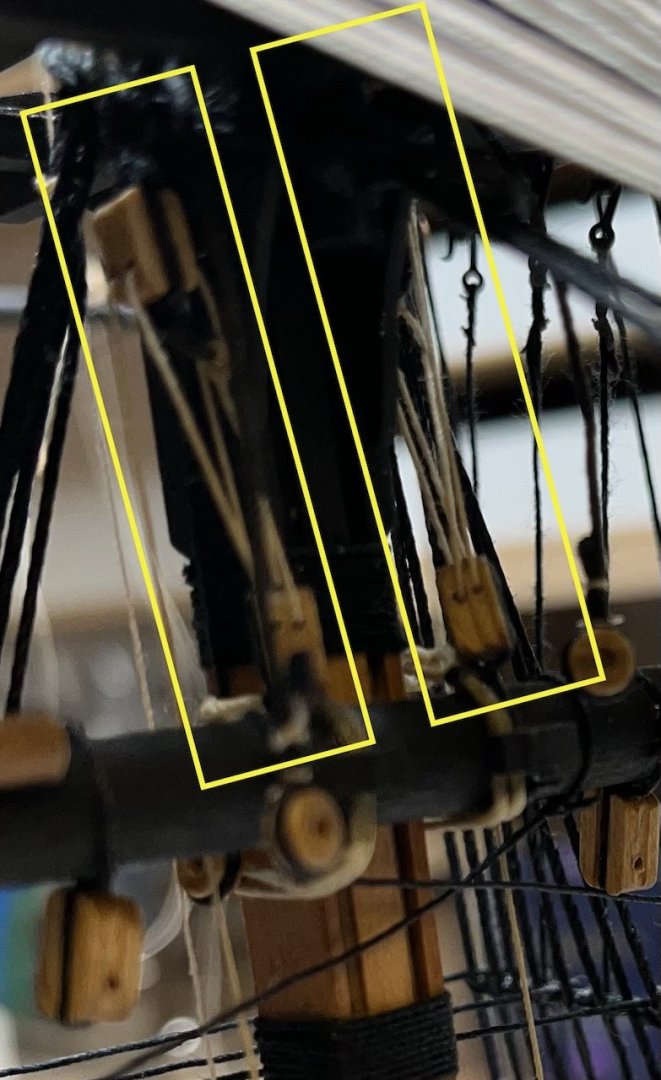
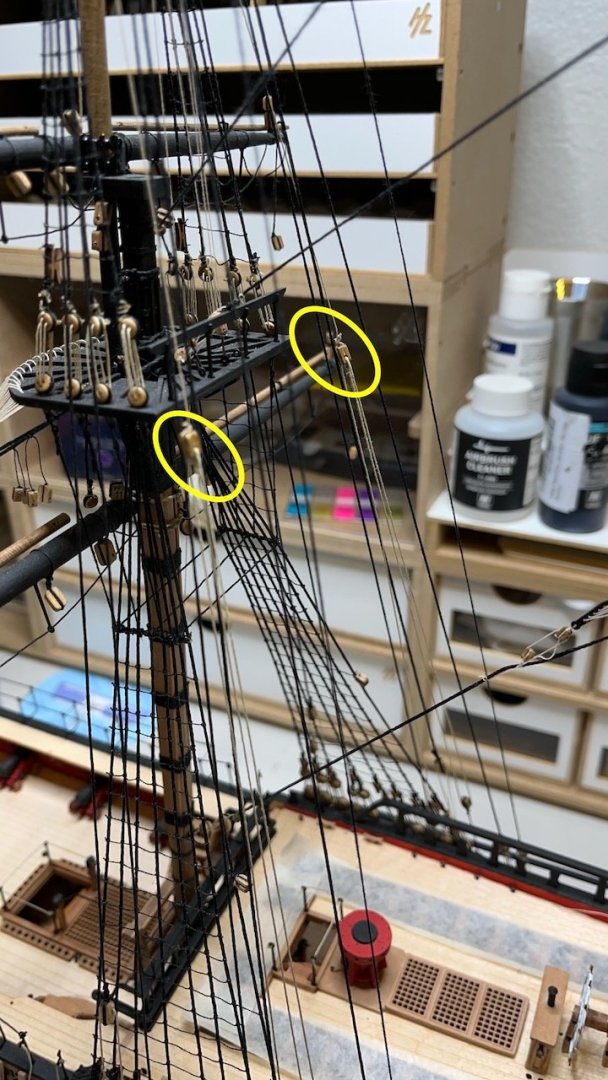
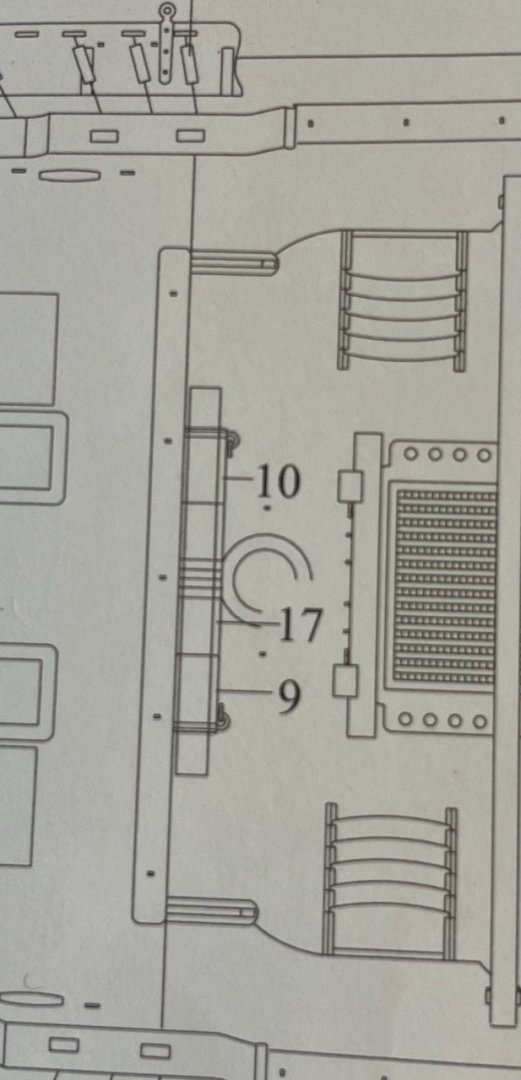
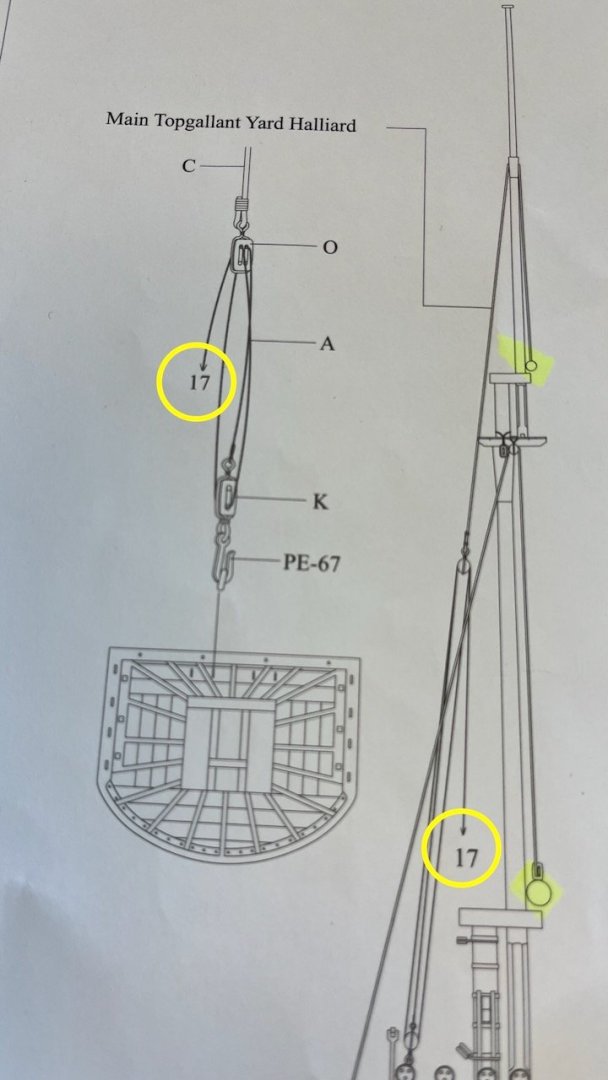
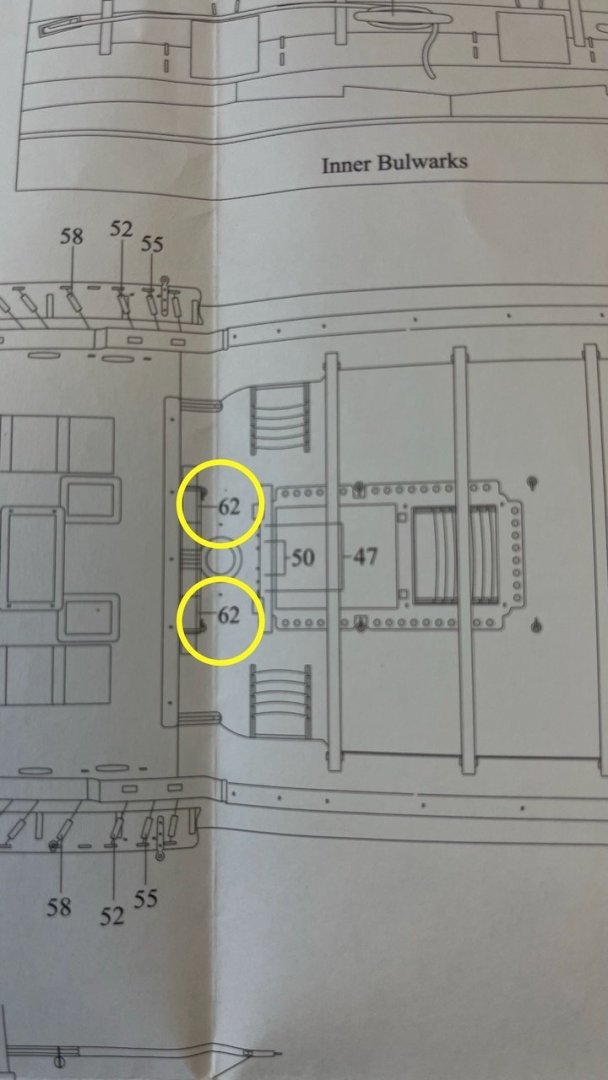
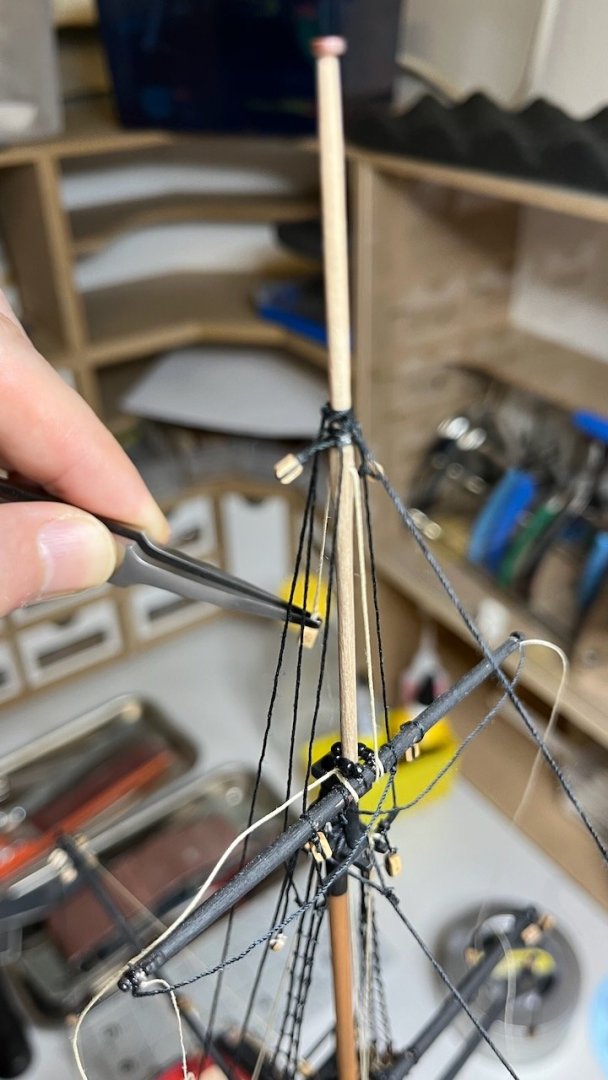
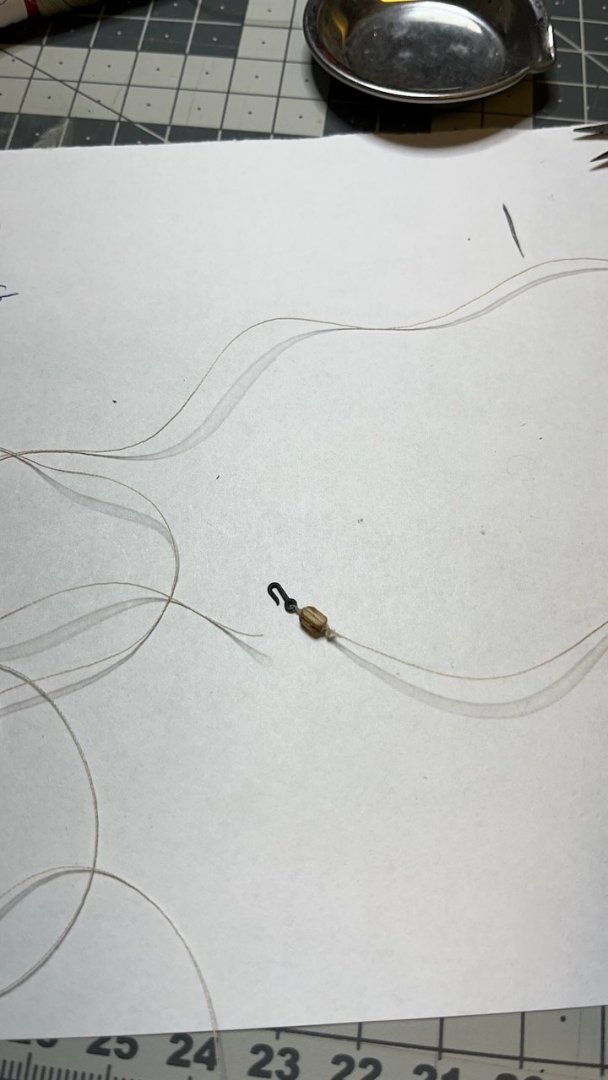
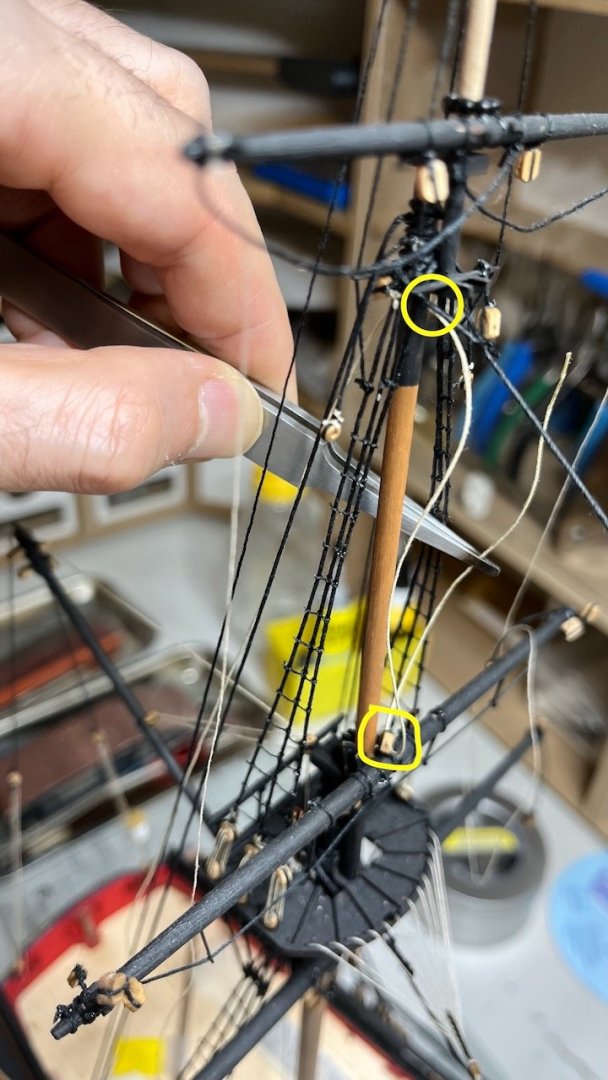
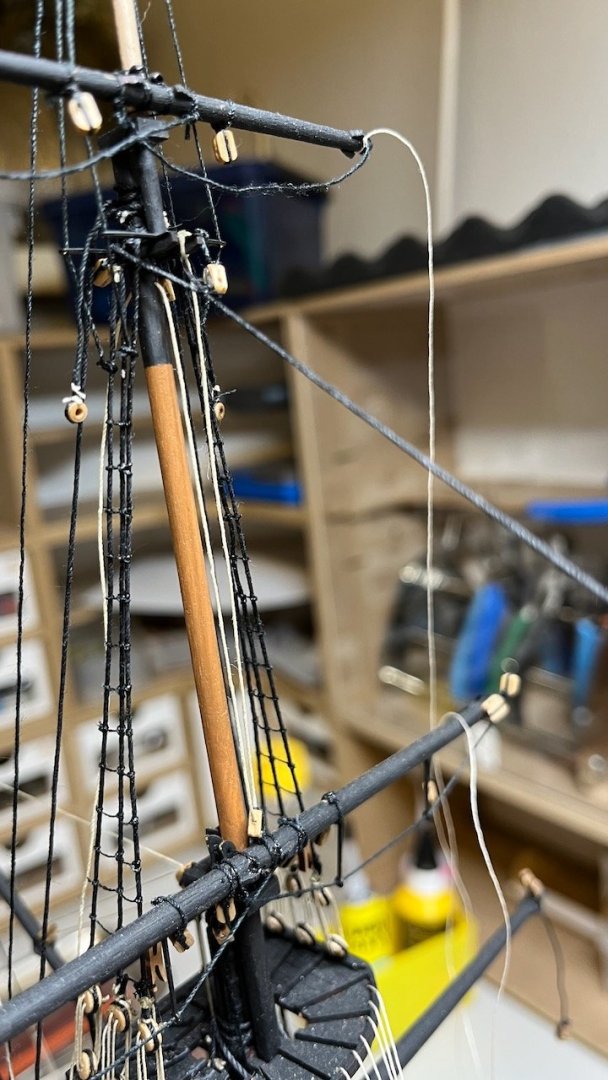
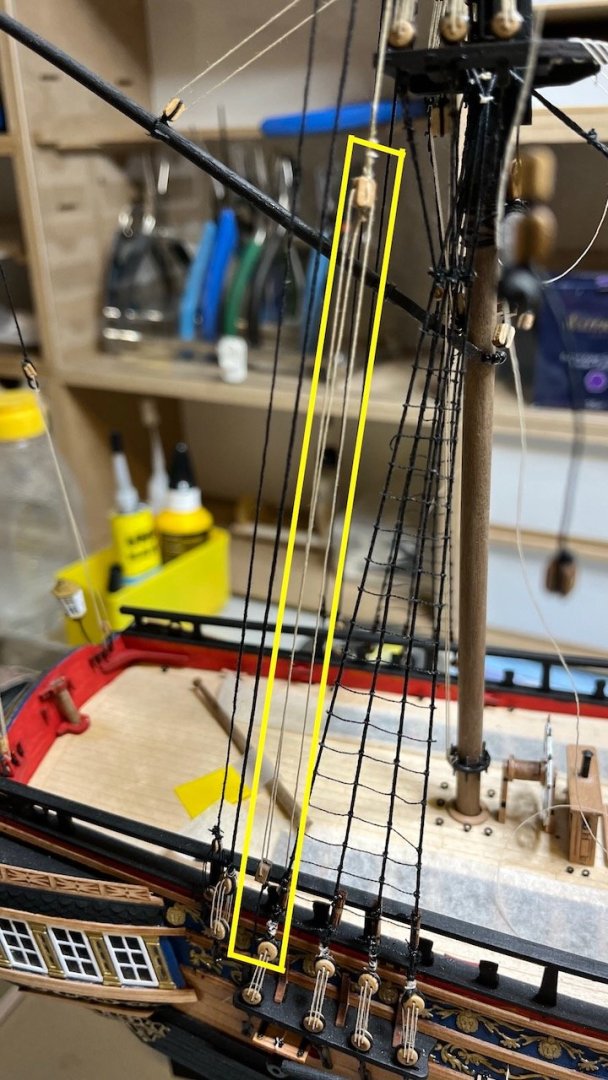
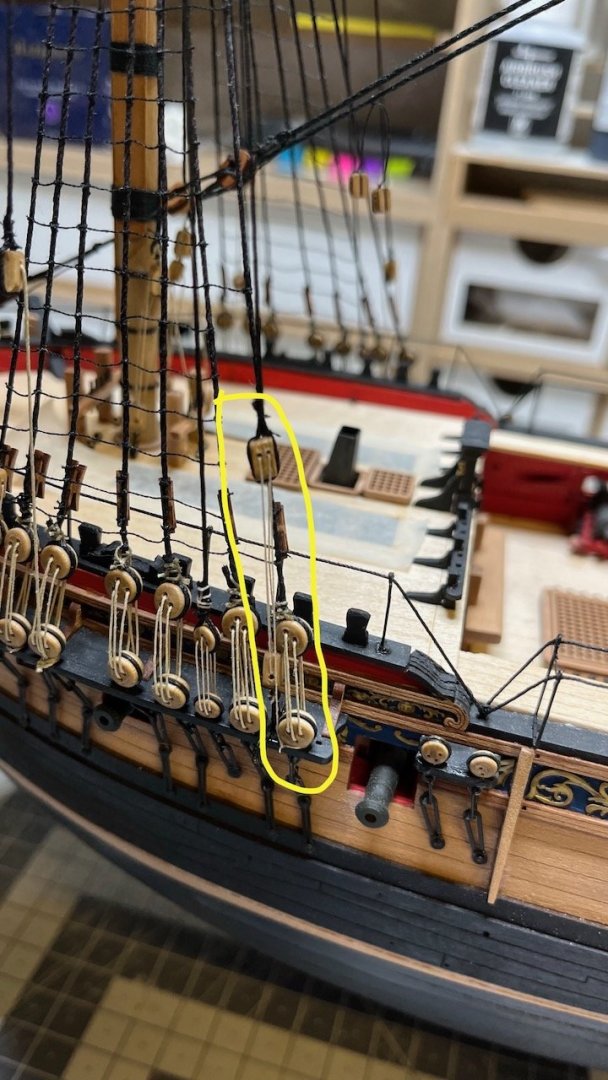
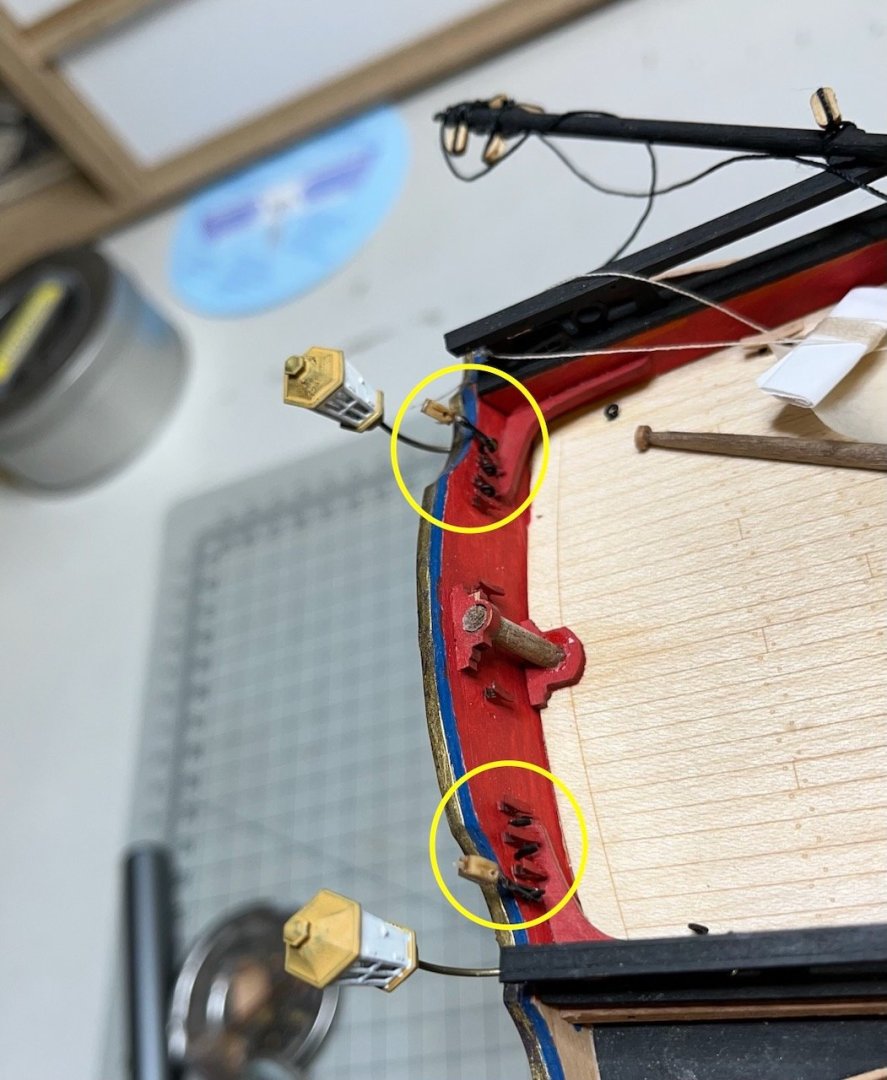
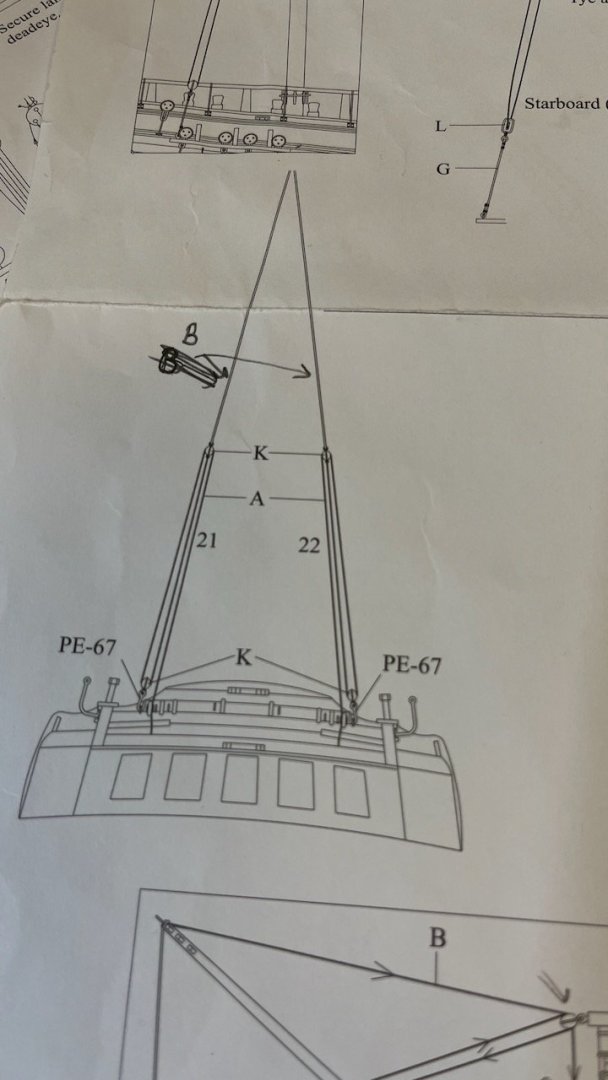
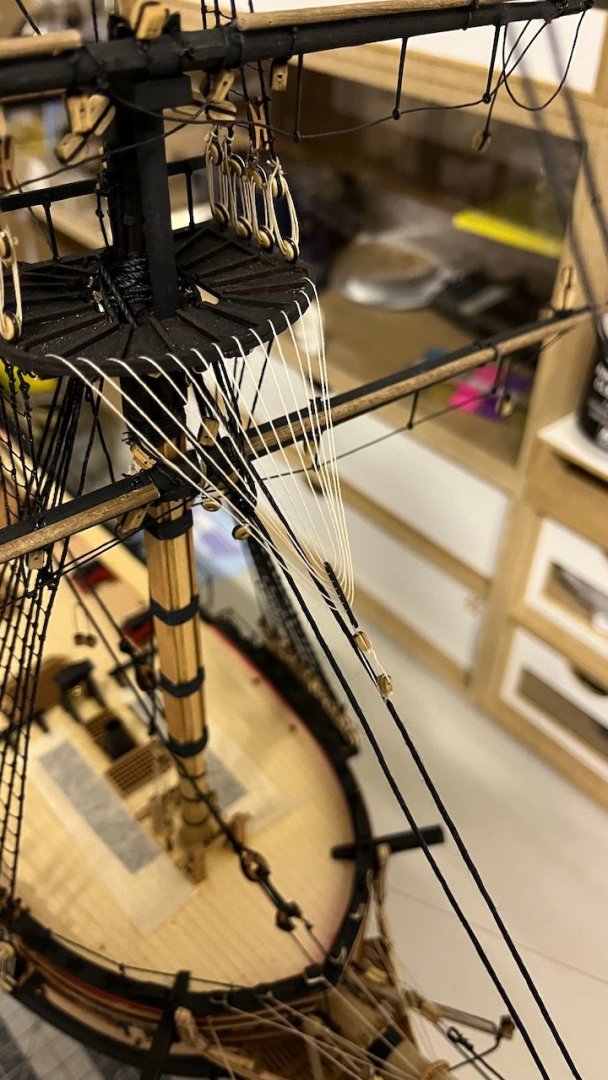
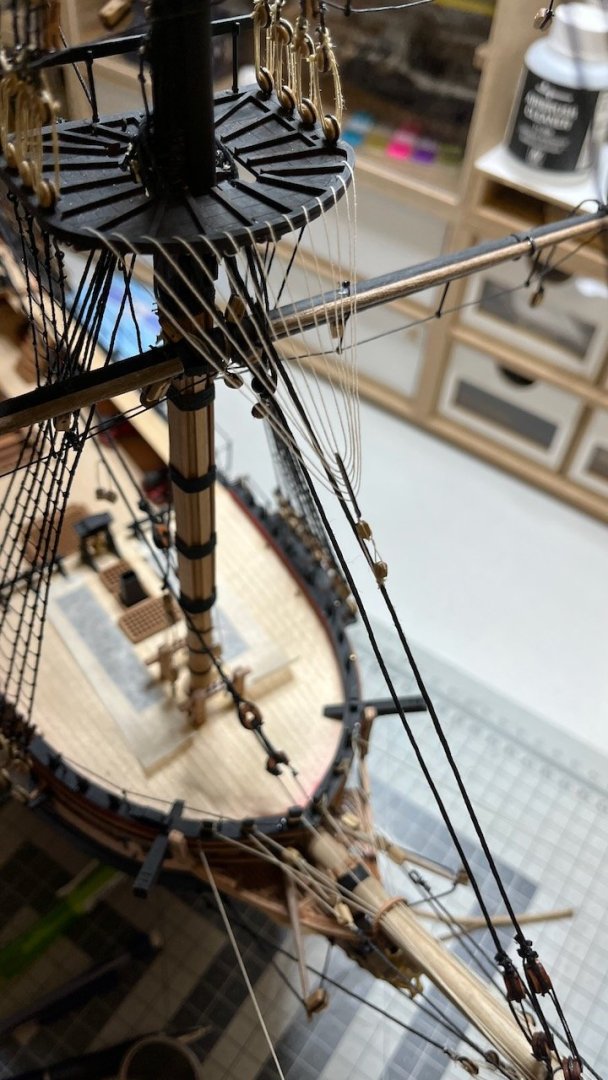
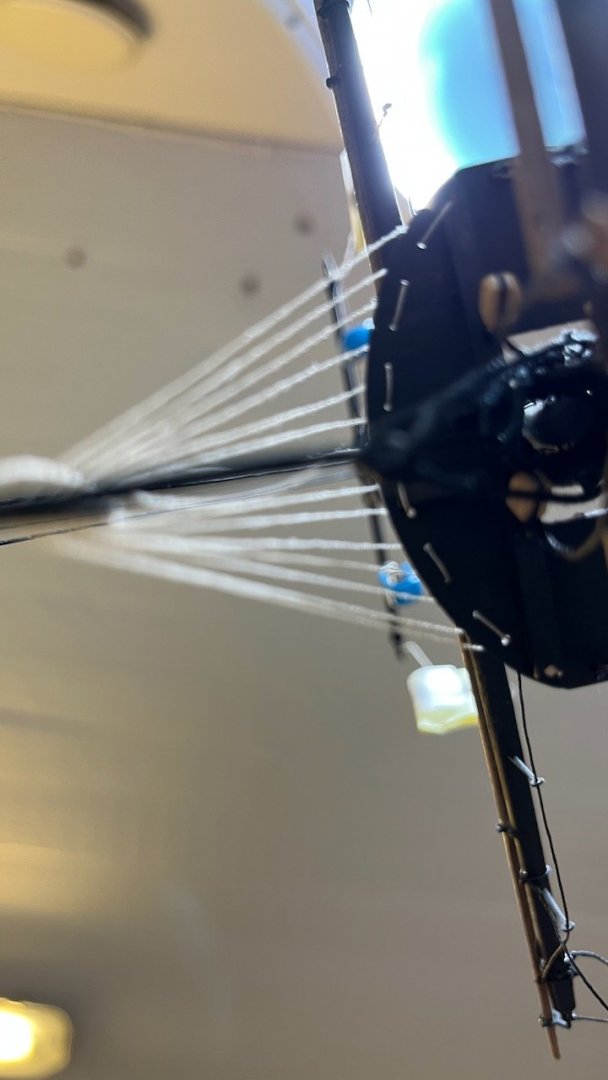
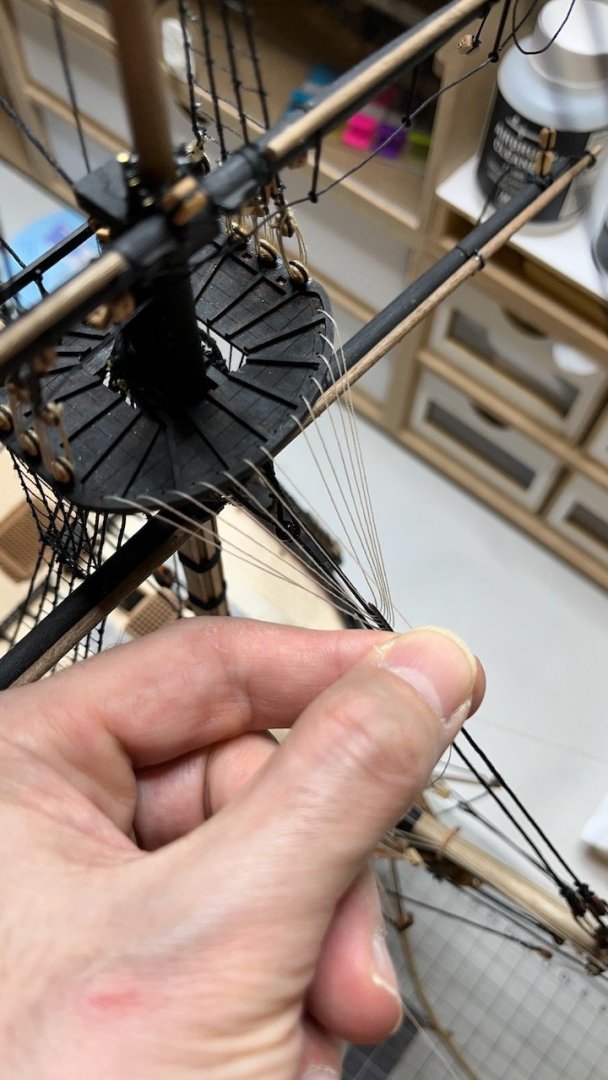
I need some support. (in Plan Sheet 22) Main Topgallant Yard Halliard: I am supposed to tie the end of the thread to spot #17. But where is it? I can't locate it. The marking on the plan corresponds to somewhere top of those wooden "gears". Same goes for spots #9 and #10, for Main Yard Jeers. Also there are 2 times #62 spots at the same place, so altogether 5 ropes will end up there. Can anyone point at where exactly they are? The photo of the finished model below from the instructions does not show any ropes going there. The photo below is my model:


- 426 replies
-
- 1
-
-
- Vanguard Models
- Sphinx
- (and 1 more)
-
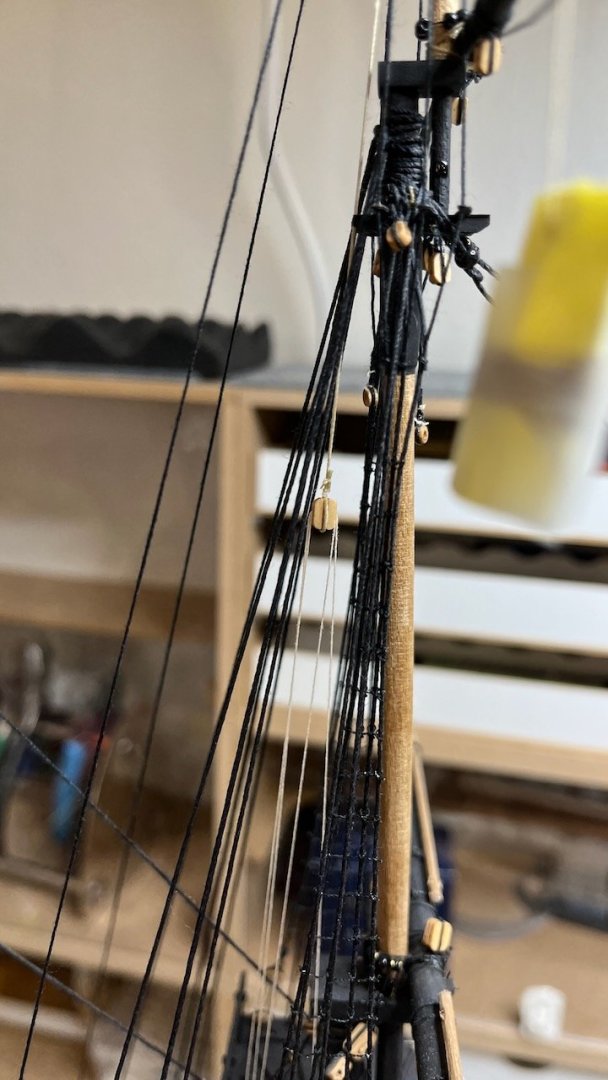
Build day 175/2: 1 hr / Total 367,5 hours Mizzen Topgallant Yard Halliard. Photos 913-916 showing some of the progress and a few final views.


- 426 replies
-
- 5
-
-
- Vanguard Models
- Sphinx
- (and 1 more)
-
Build day 175: 1 hr / Total 366,5 hours Mizzen Topsail Yard Tye and Halliard. This is an asymmetrical structure existing only on the Starboard side. Photos 909-912 showing some of the progress and a few final views.

- 426 replies
-
- 4
-
-
- Vanguard Models
- Sphinx
- (and 1 more)
-
Build day 174: 2,5 hrs / Total 365,5 hours With today's work of the remaining Fore backstays, the backstays are complete. In my list of remaining steps, now I can paint step 3 to green as complete and step 4 to yellow as the current step: Photos 906-908: A photo showing the initial steps and two photos showing the final views.
- 426 replies
-
- 6
-
-
- Vanguard Models
- Sphinx
- (and 1 more)
-
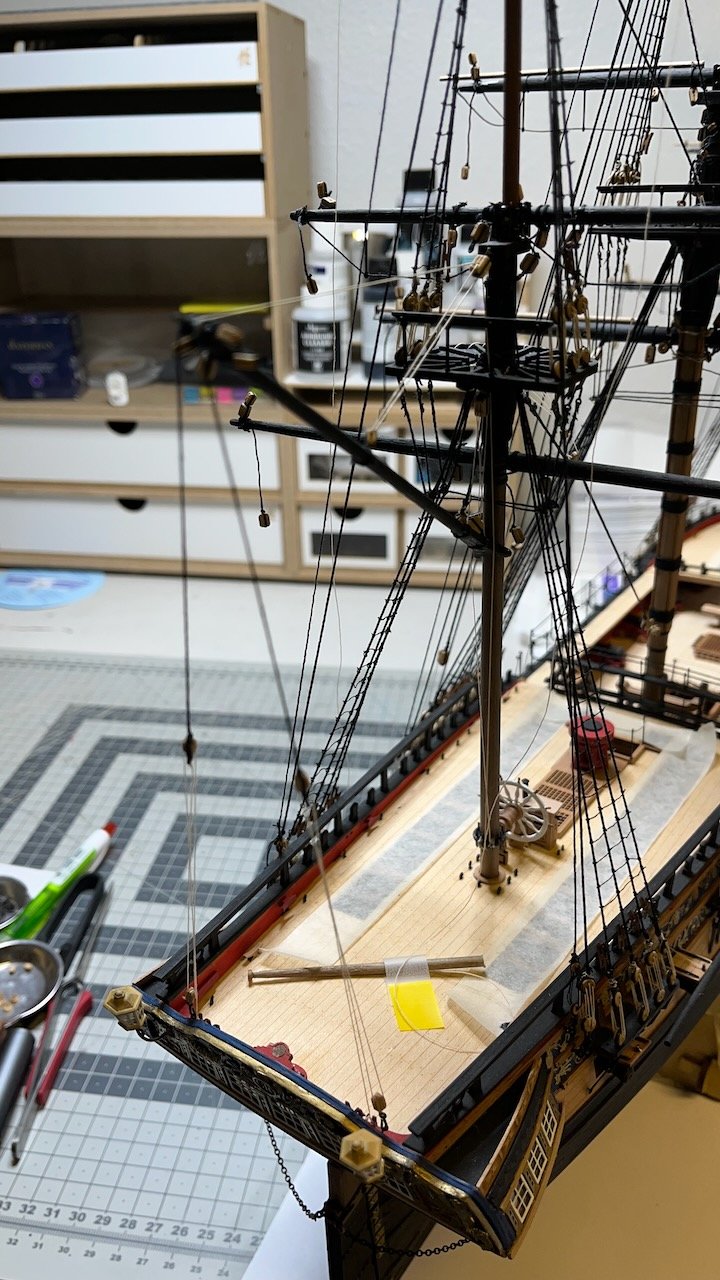
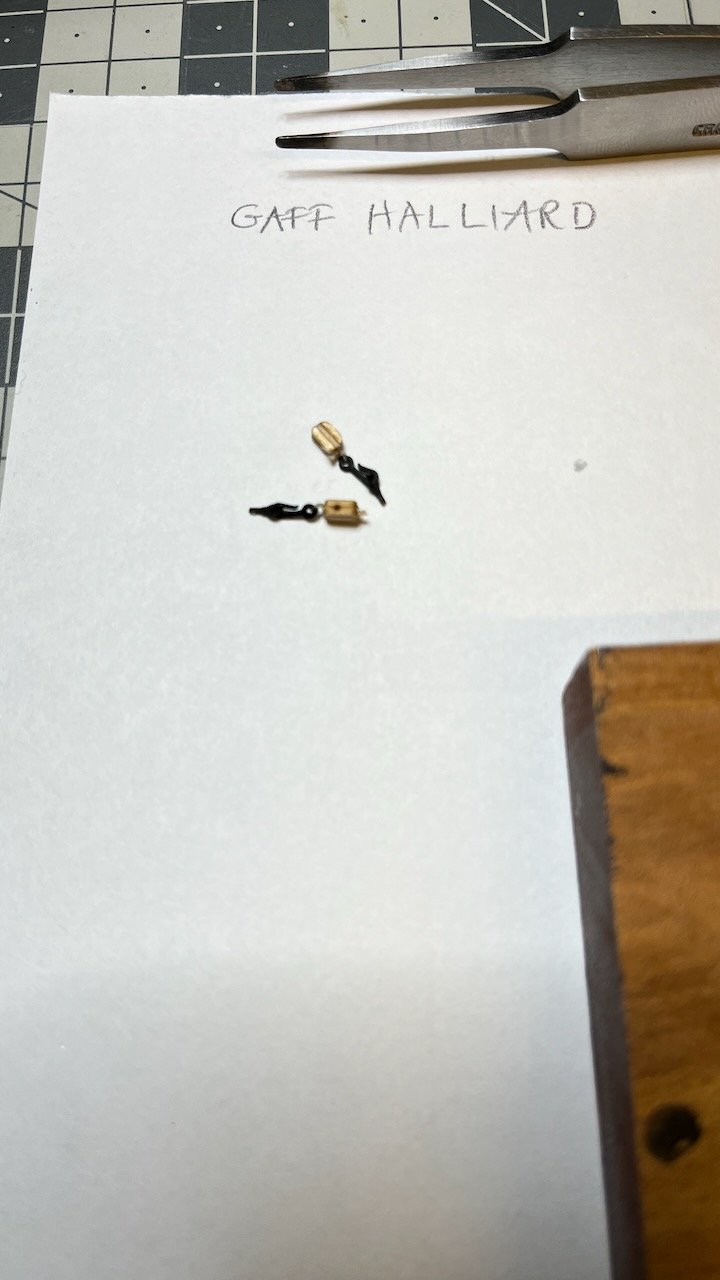
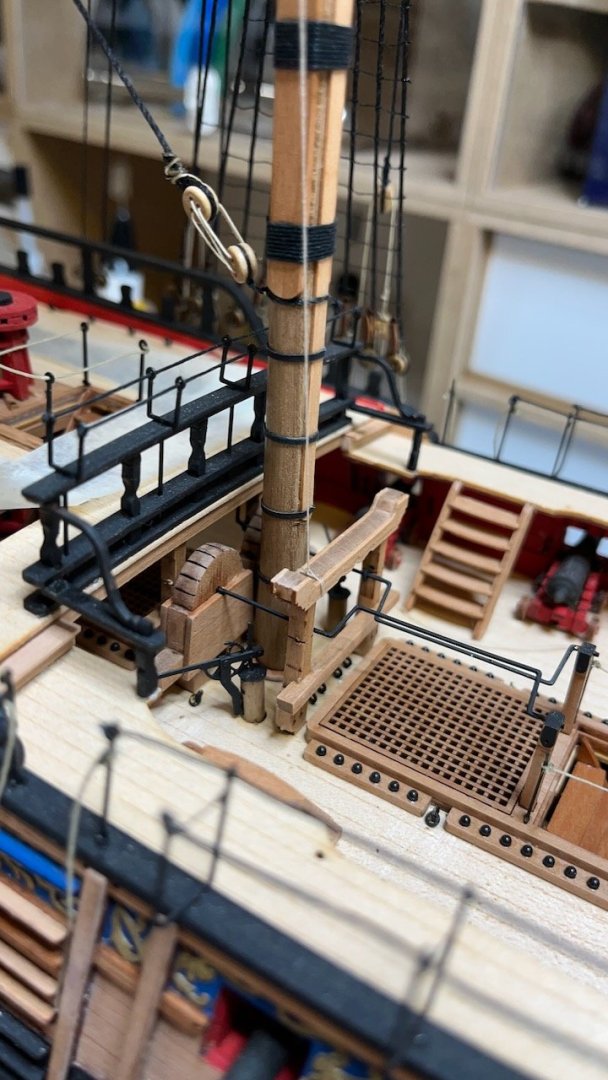
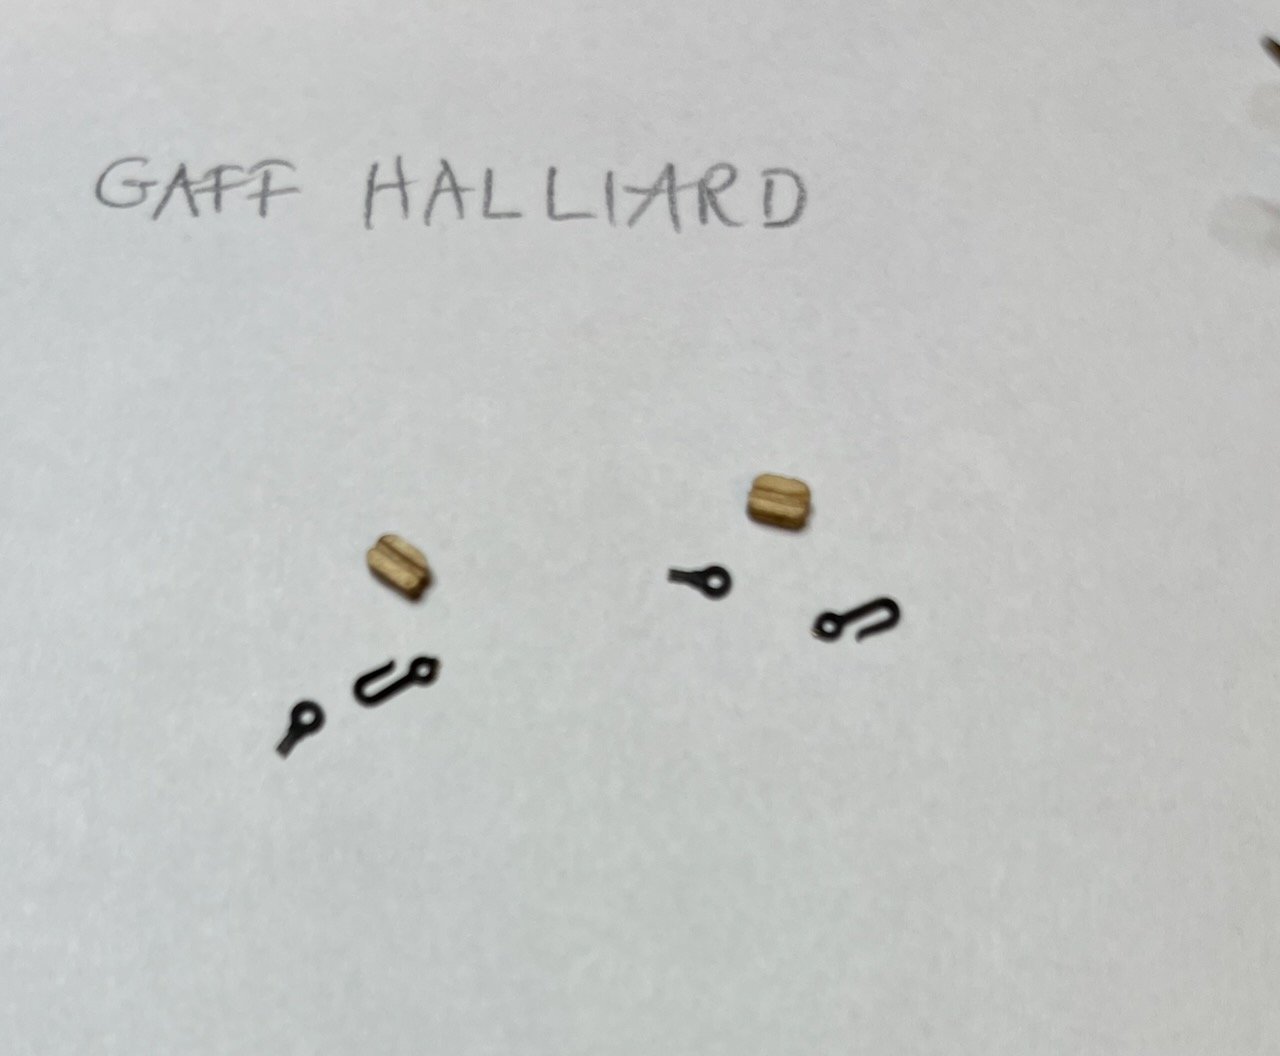
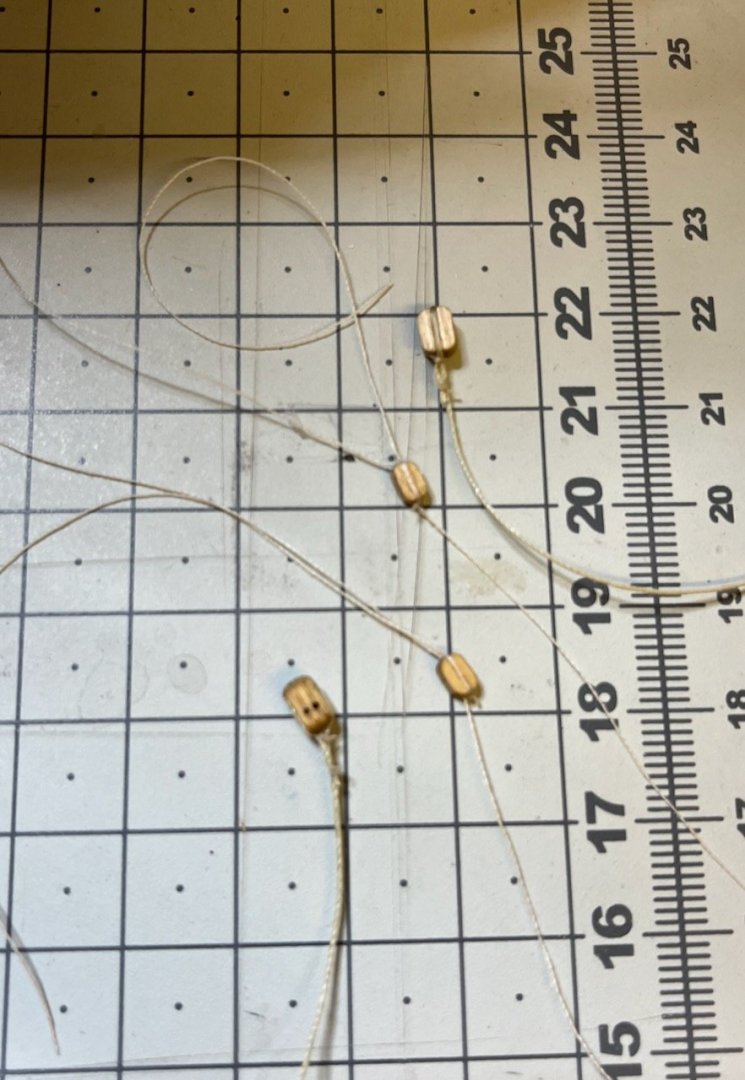
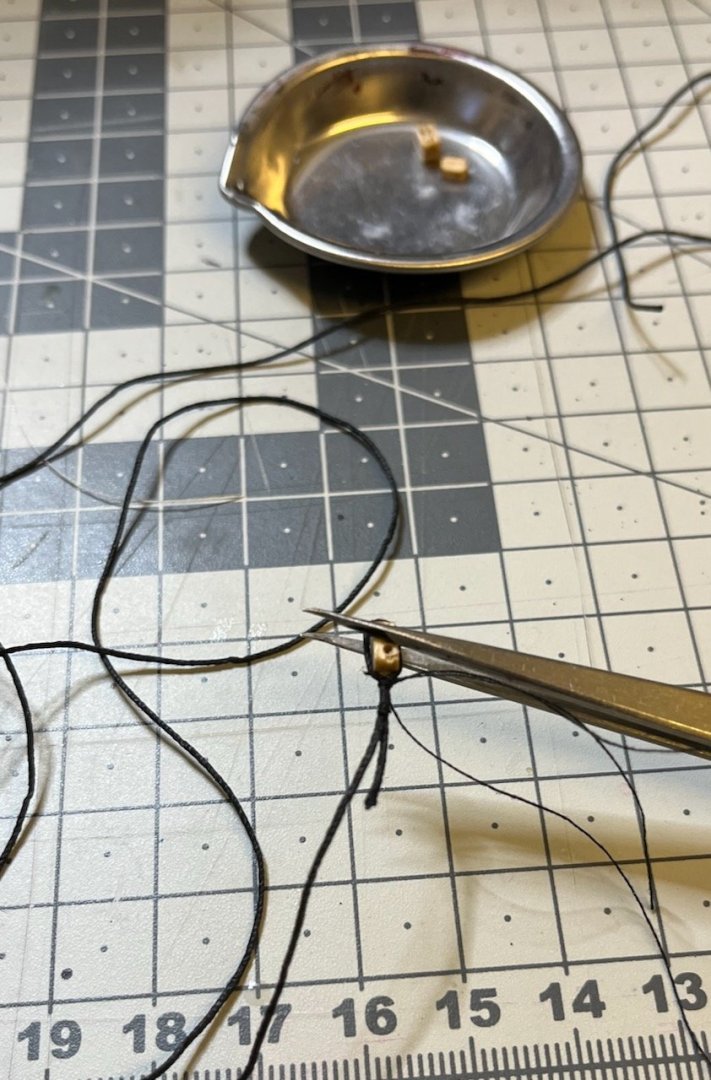
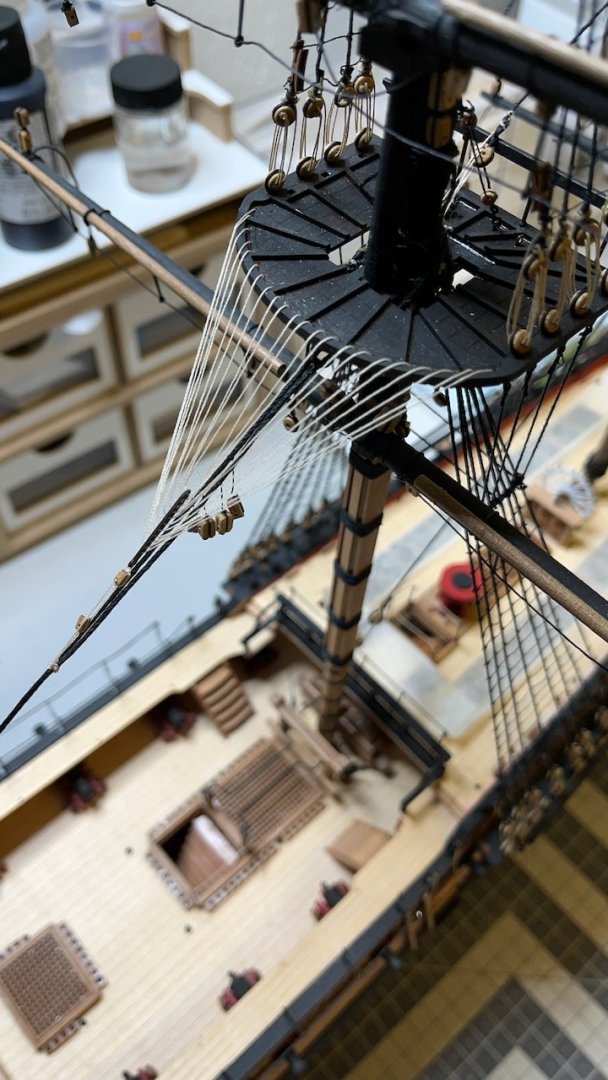
Build day 173: 2 hrs / Total 363 hours Gaff Haillard Today I wanted to give a break with the backstays (only a few Fore backstays left anyway) and proceed with the Gaff Haillard. Finished the work in 2 hours. One will notice the broken ensign post at the back 😁. I broke it by hitting it accidentally during construction. Will fix it after I am done with everything so that I won't break it again 😆. I chose to use black thread, instead of natural, in the part that ties the tip of the gaff to the blocks half way to the stern, just to create a bit of a visibility. Rest is all natural color thread, as instructed. Photos 898-905: Photos showing part of the process and a few final status.


- 426 replies
-
- 8
-
-
- Vanguard Models
- Sphinx
- (and 1 more)
-
Build days 172/2: 2 hrs / Total 361 hours Photos 895-897: Got my deadeyes and continued to work. Fore Breast Backstays ready.


- 426 replies
-
- 6
-
-
- Vanguard Models
- Sphinx
- (and 1 more)
-
You certainly did put, but just add 4 more, so I'll be safe for my next Vanguard Model kit 😁
- 426 replies
-
- 1
-
-
- Vanguard Models
- Sphinx
- (and 1 more)
-
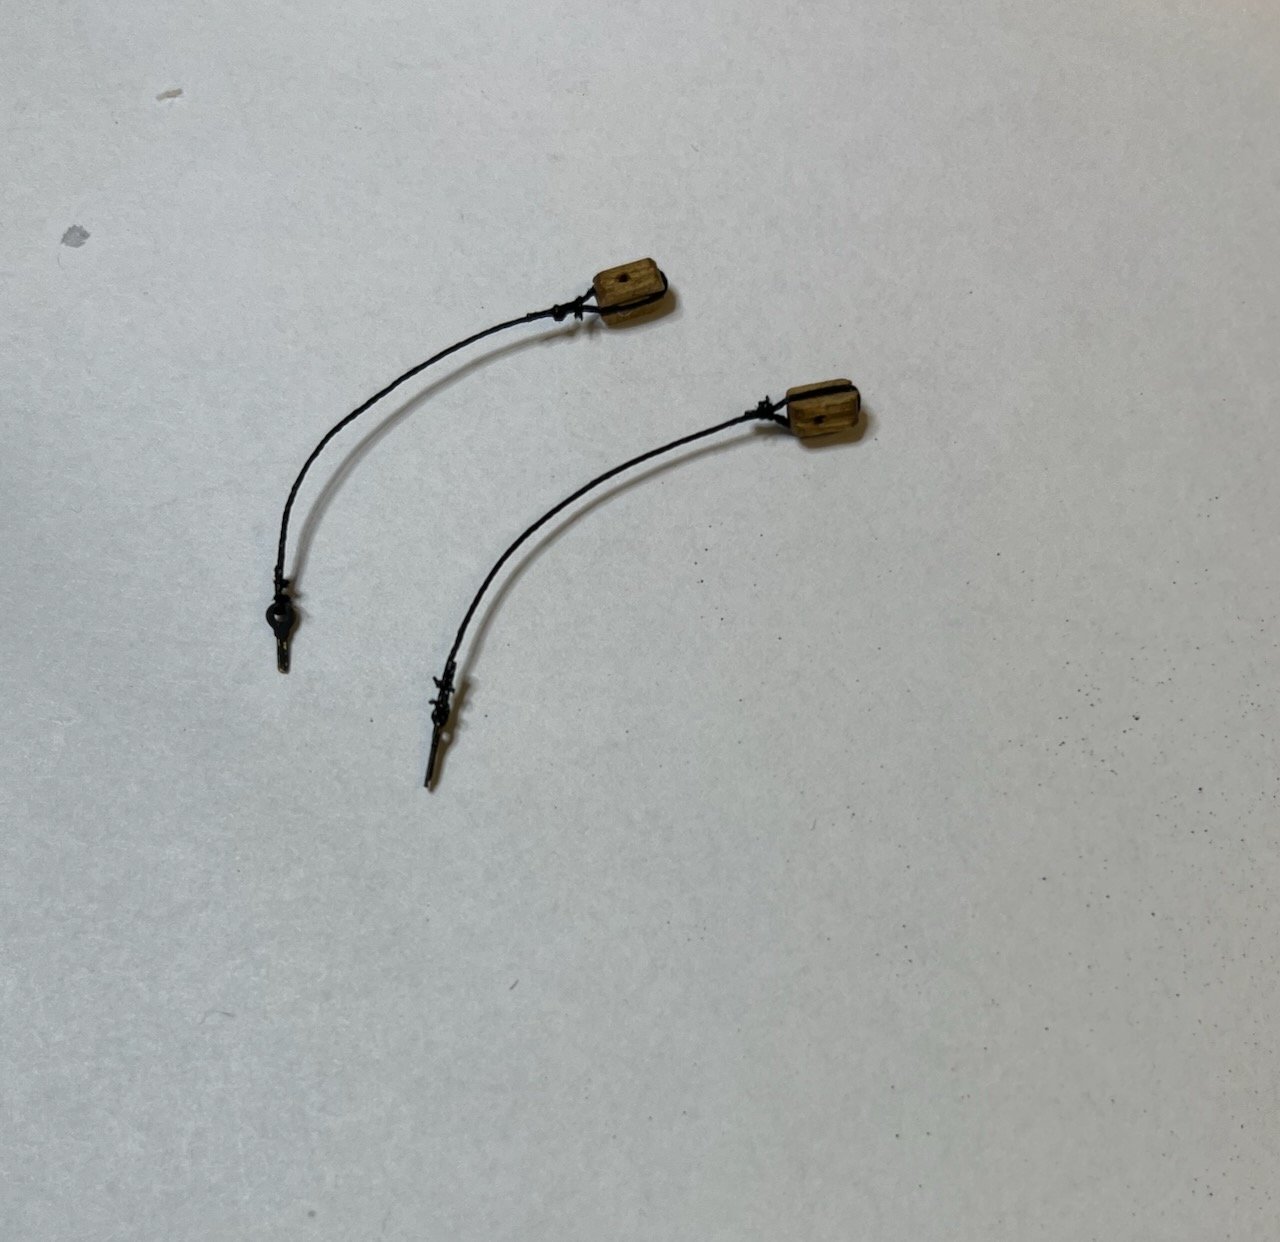
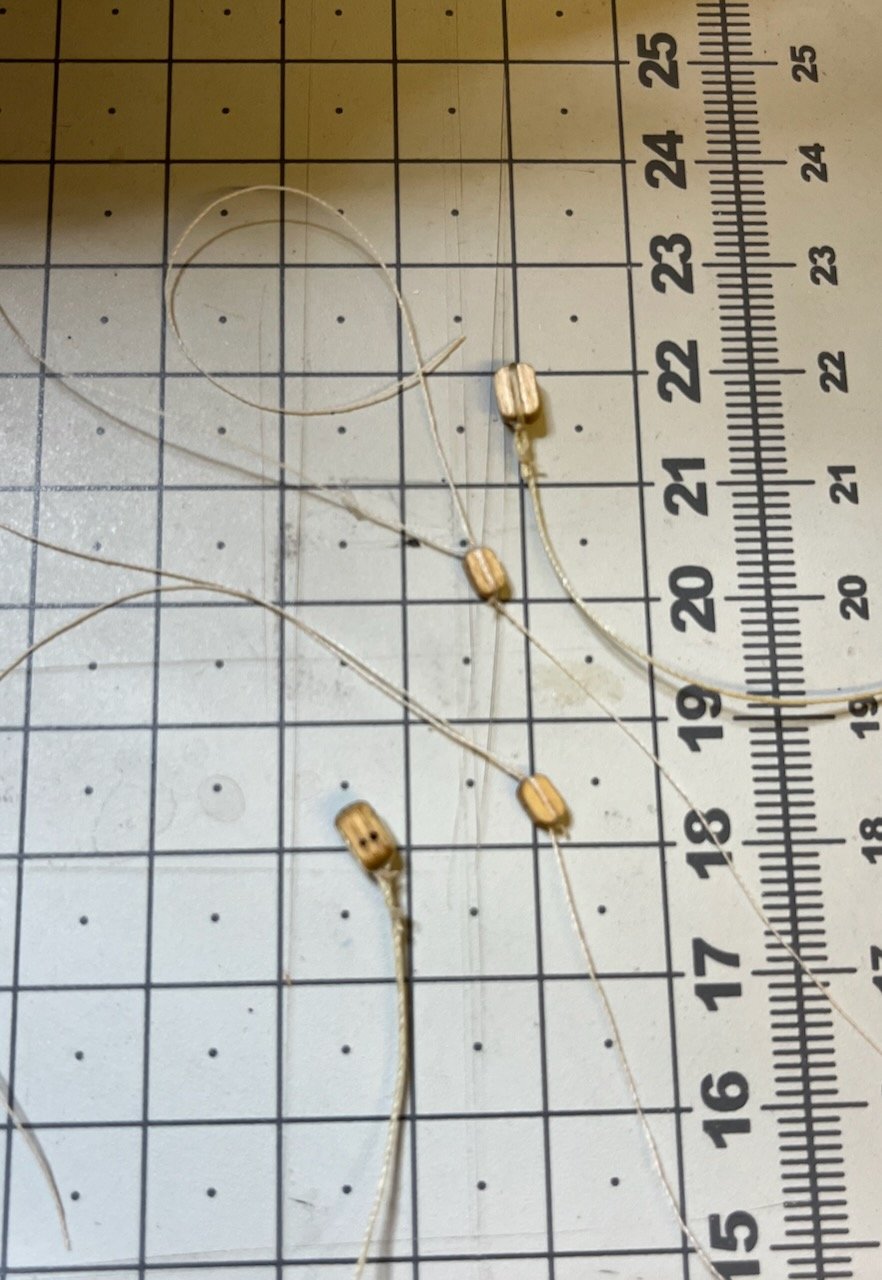
Build days 171-172: 4 hrs / Total 359 hours As of today, Mizzen and Main backstays are complete. I have run out of 3mm deadeyes just 4 pieces to go as well as 0.75mm black thread. I don't remember wasting so many 3mm deadeyes, but apparently the kit did barely contain any surplus. Now I'll need to head to the local hobby store to buy a small box of them, in order to continue with the Fore backstays . Photo 894: Not much detail one can see from a distance however I still add here a photo for evidence.

- 426 replies
-
- 10
-
-
- Vanguard Models
- Sphinx
- (and 1 more)
-
I guess it's probably they haven't updated the Euro pricelist for a while. Turkish Lira devaluated significantly against the foreign currency in the recent years. For those considering them from outside Turkey, I'd recommend ordering them from known online hobby shops or global vendors such as Amazon etc.
-
They have a webpage at: https://www.tersanemodel.com.tr I had met the owner, Mr. Kudret Altinkeser, many years back. A professional dedicated his life to ship model design and manufacturing. My build log of its Bosphorus Sandal kit is here:
-
Build day 170: 2 hrs / Total 355 hours Main breast backstays. Photo 893: I realized I had forgotten to insert the pins while installing the deadeyes. It was a bit tricky to do now (I was even using hand drill to widen the holes), but I managed. Photo 894: Preparing the blocks. Photo 895: Main breast backstays in place. Photo showing starboard side.


- 426 replies
-
- 6
-
-
- Vanguard Models
- Sphinx
- (and 1 more)
-
Build day 169: 2 hrs / Total 353 hours Once again, a long break. Today I made the Mizzen Back Stays. No photos to share.
- 426 replies
-
- 3
-
-
- Vanguard Models
- Sphinx
- (and 1 more)
-
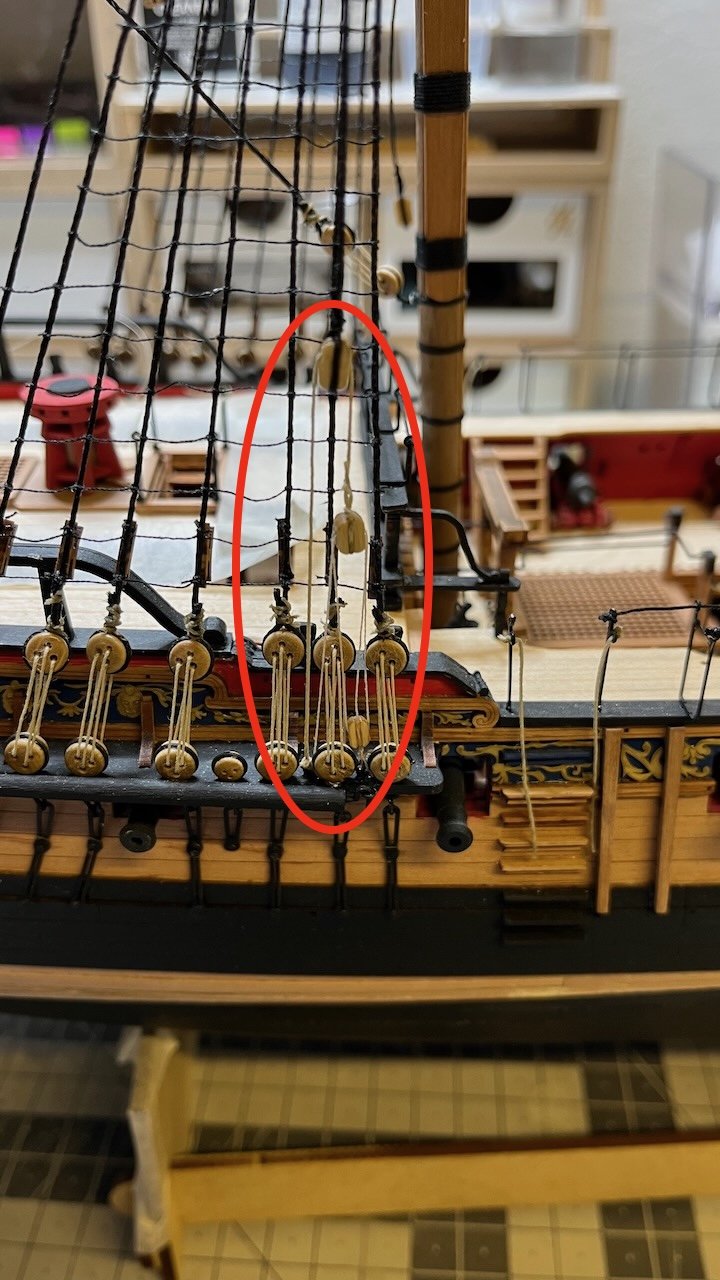
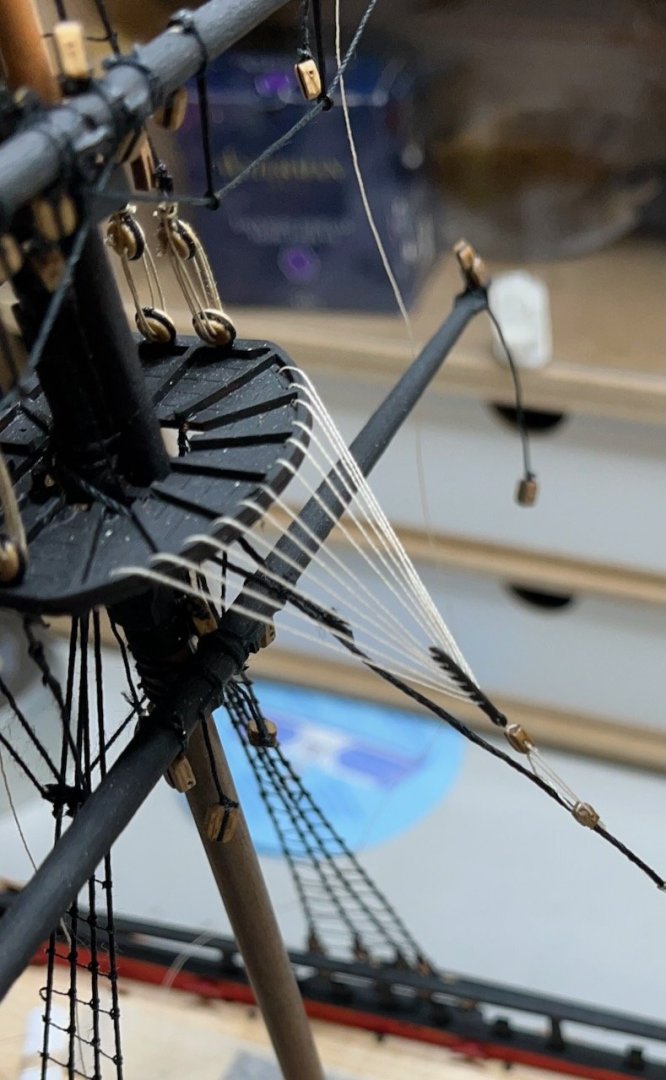
Build day 168: 1,5 hrs / Total 351 hours Photo 892: Main mast crowsfeet is complete (more conveniently than the earlier ones thanks to Glenn's note above). Moving to next step, the backstays. This brings us the 907th step in the construction manual. This is the progress on my rigging. Green=complete, Yellow=current:

- 426 replies
-
- 7
-
-
- Vanguard Models
- Sphinx
- (and 1 more)
-
Starting from outer end felt more convenient at first glance and that's how I did, never thought of the other way :). But now when I think of it, starting from inside and moving outwards will make easier to do the finishing knot. I will try your way with the Main Mast crowsfeet
- 426 replies
-
- 2
-
-
- Vanguard Models
- Sphinx
- (and 1 more)
-
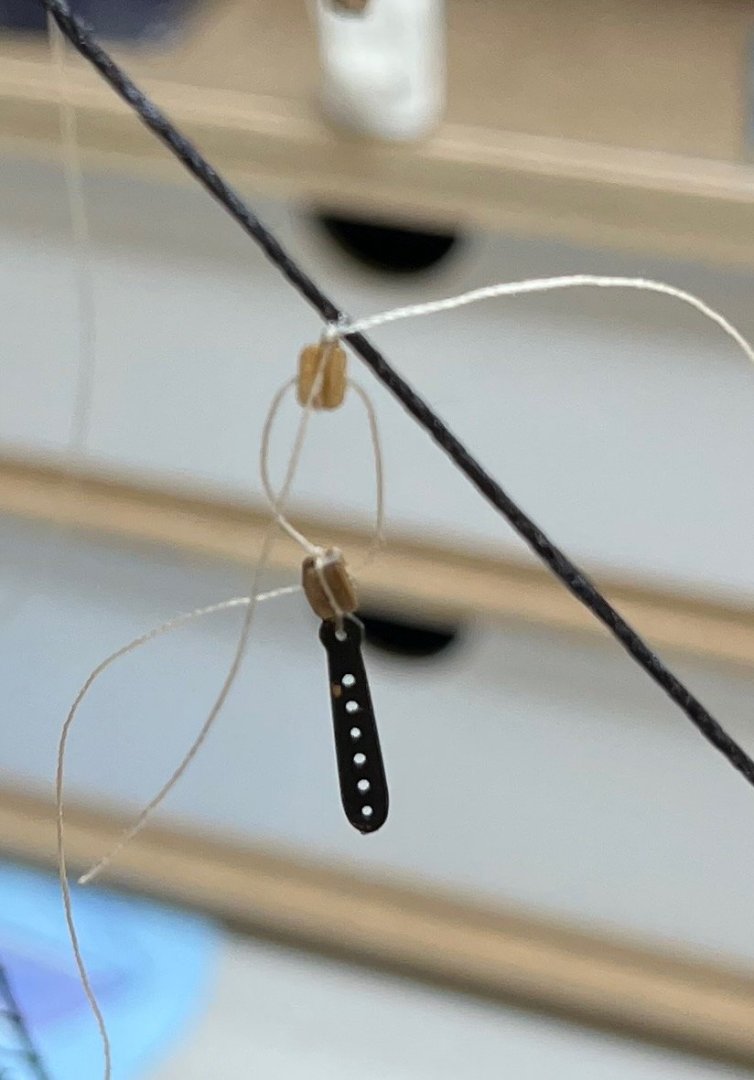
Build day 167: 1 hr / Total 349,5 hours Today I continued with the Foremast Crowsfeet. This time I wanted to take the photos of each step and share the entire process. I will be happy if it serves as a guide to those who build similar. Except for the block structure on the stay, the structure uses a single thread. I used a mirror stick to see the hole better when inserting the thread from under. It helped a lot. Here are the photos: Photos 872-891: View from under:


- 426 replies
-
- 10
-
-
- Vanguard Models
- Sphinx
- (and 1 more)
-
Thannks Julian, and all the best luck with your surgery!
-
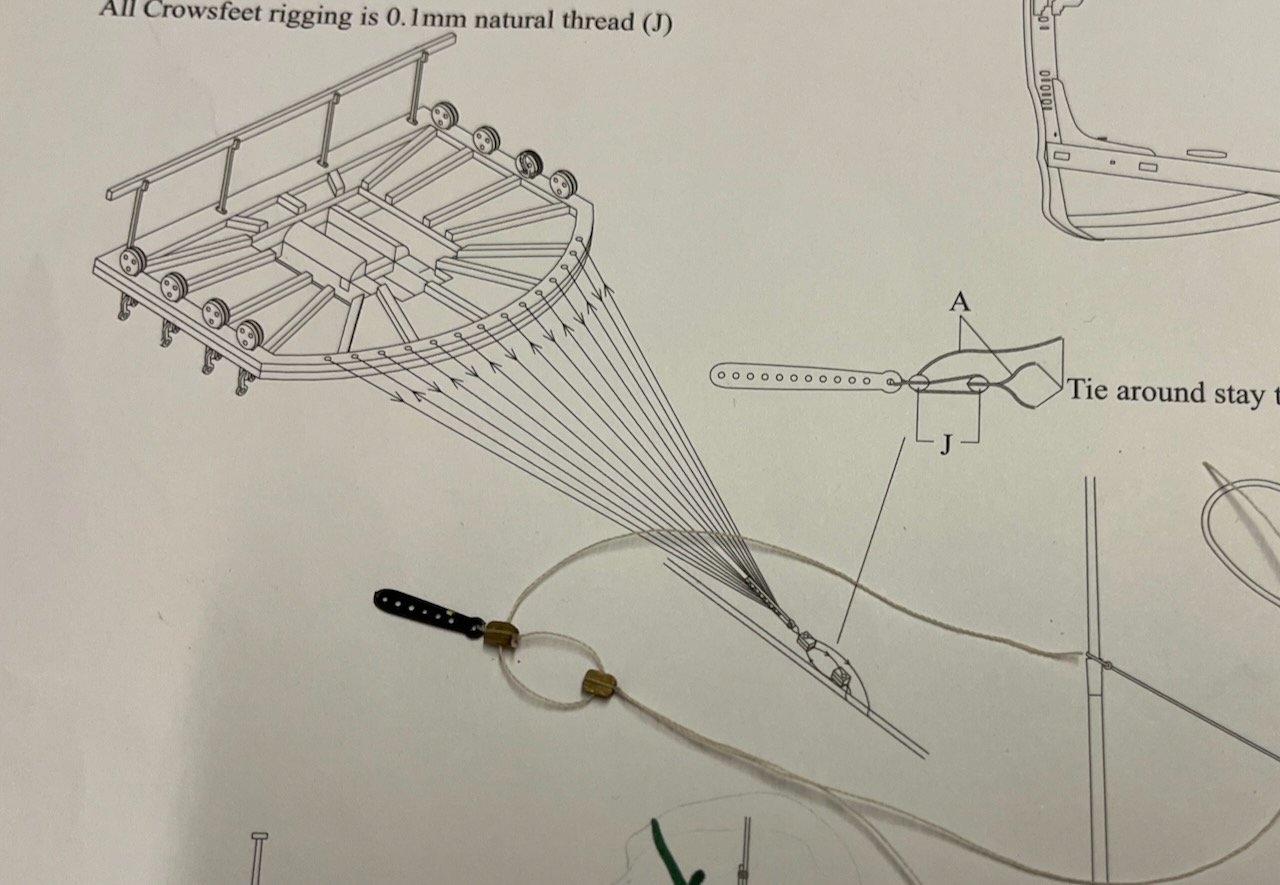
Build day 166: 1,5 hrs / Total 339,5 hours Crowsfeet. I have never rigged a crowsfeet until now. It took me some time to gather my courage. I start with the one on the Mizzen mast. The photos show the progress. Overall I am happy with the result. Photos 870-872:
- 426 replies
-
- 10
-
-
- Vanguard Models
- Sphinx
- (and 1 more)
-
Having recovered my hand surgery (nothing too serious), now it is time to resume my project. It has been a while and I have realised I had really missed it.
- 426 replies
-
- 1
-
-
- Vanguard Models
- Sphinx
- (and 1 more)