HOLIDAY DONATION DRIVE - SUPPORT MSW - DO YOUR PART TO KEEP THIS GREAT FORUM GOING! (Only 24 donations so far out of 49,000 members - C'mon guys!)
×


aydingocer
-
Posts
916 -
Joined
-
Last visited
Content Type
Profiles
Forums
Gallery
Events
Everything posted by aydingocer
-
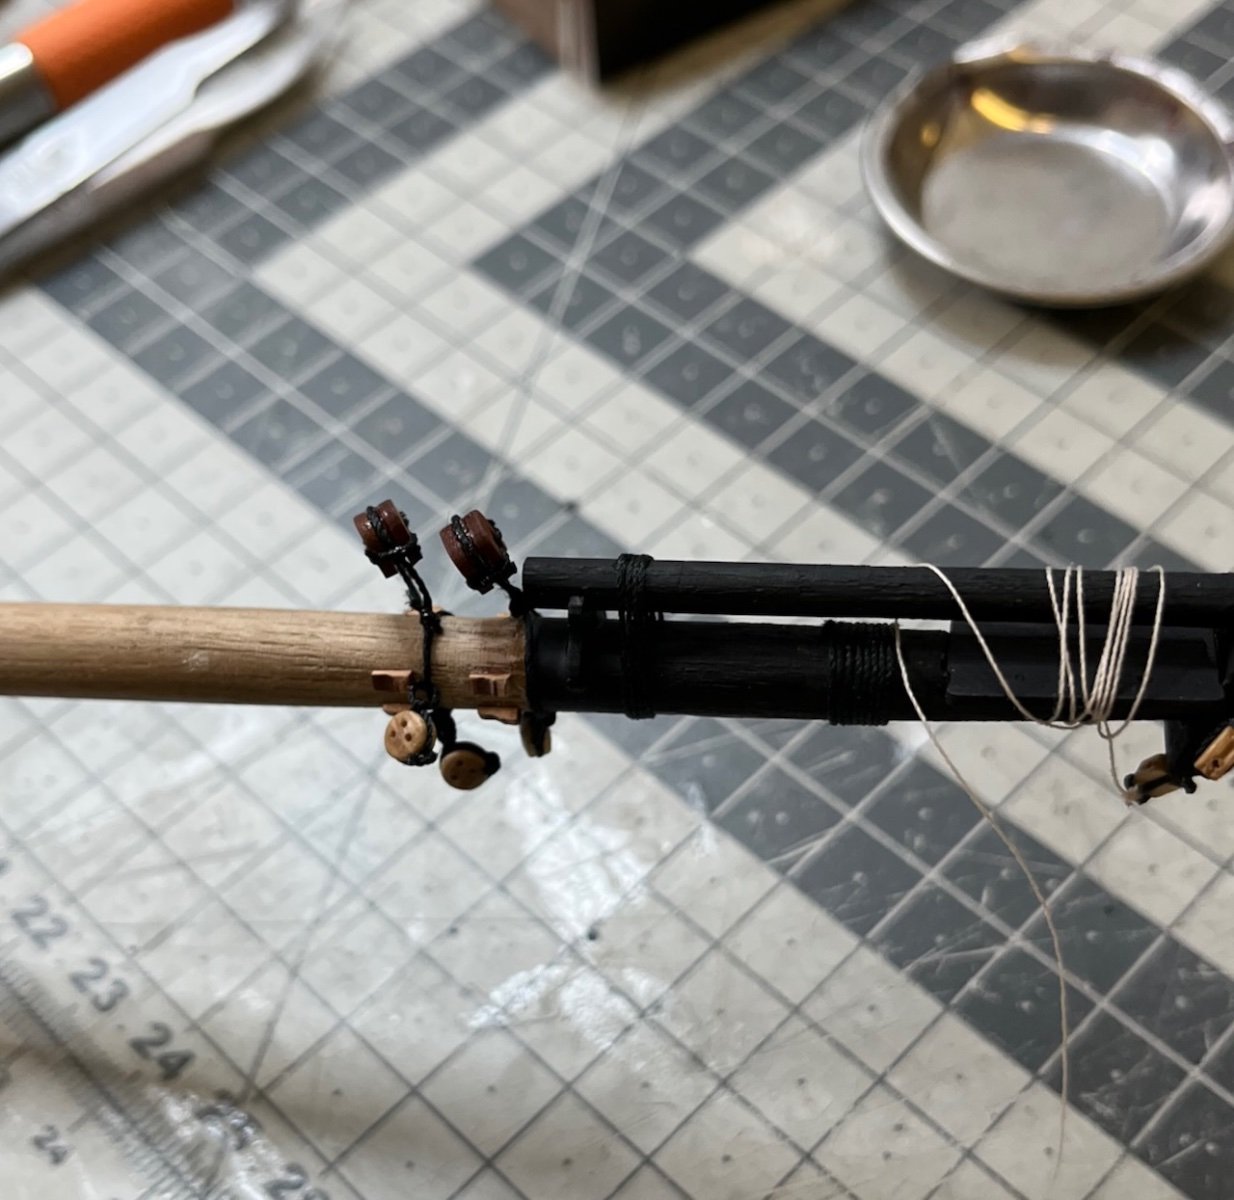
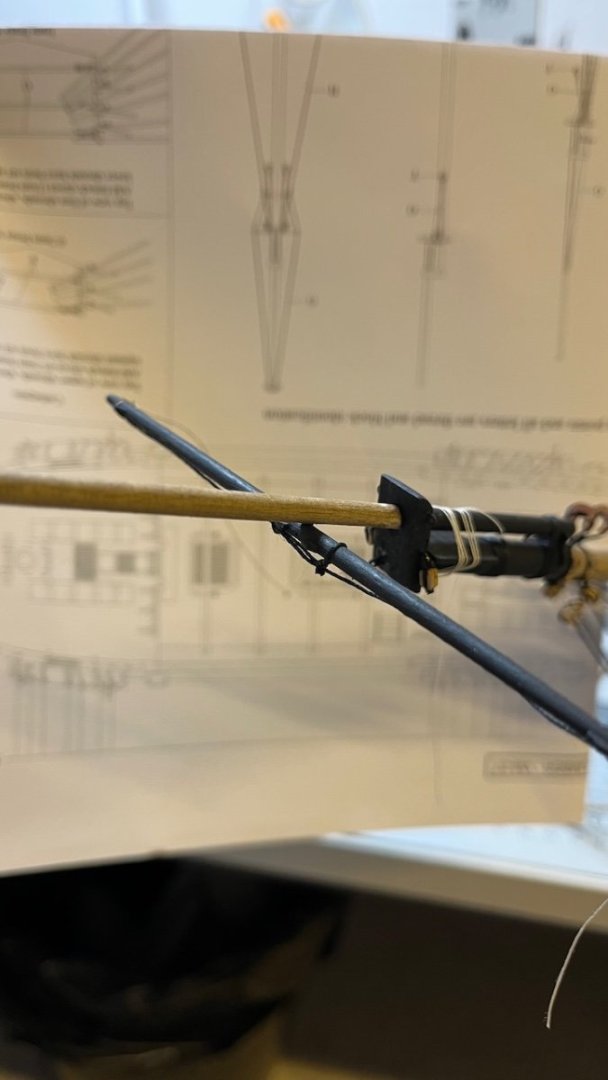
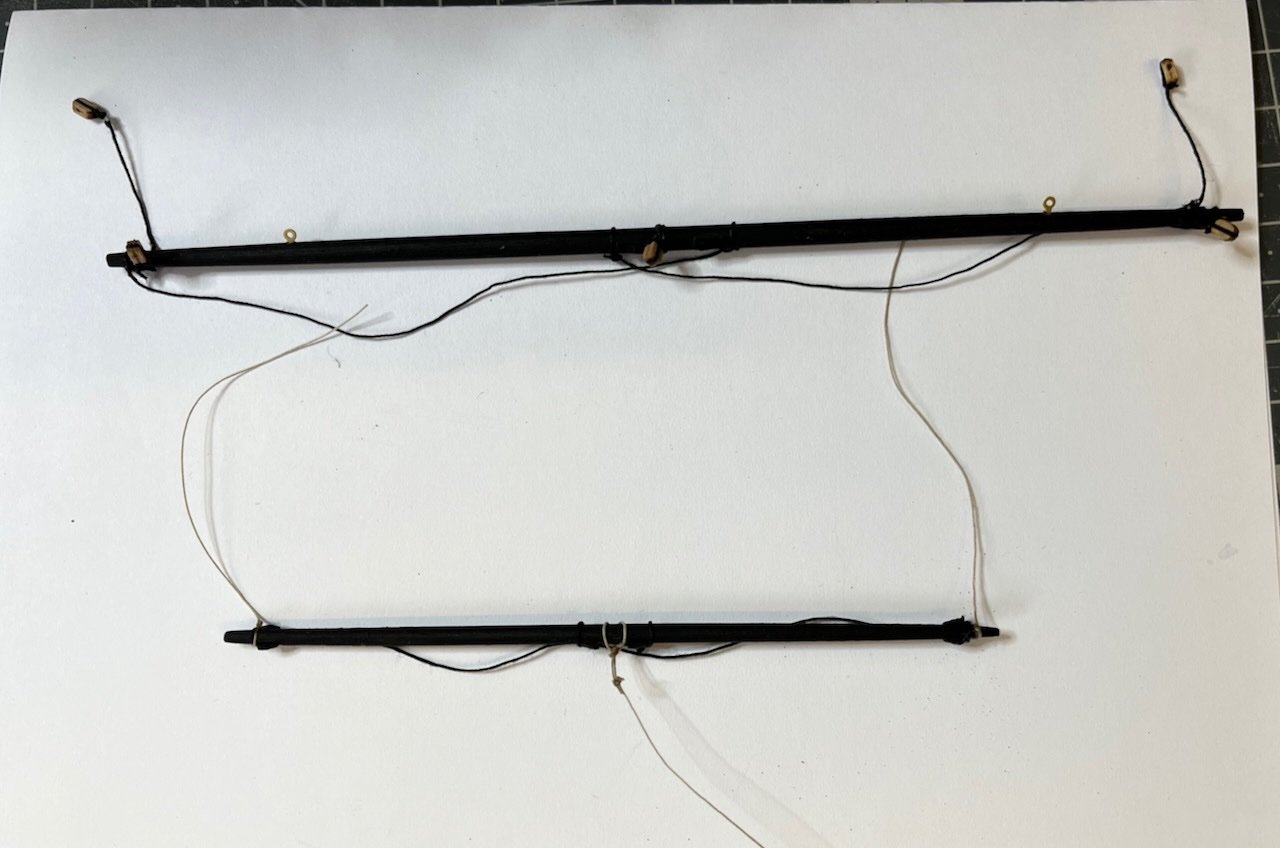
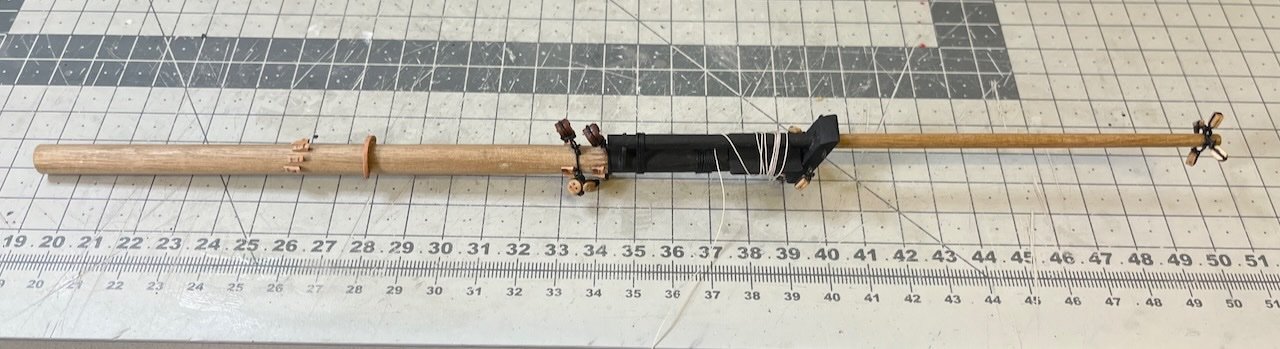
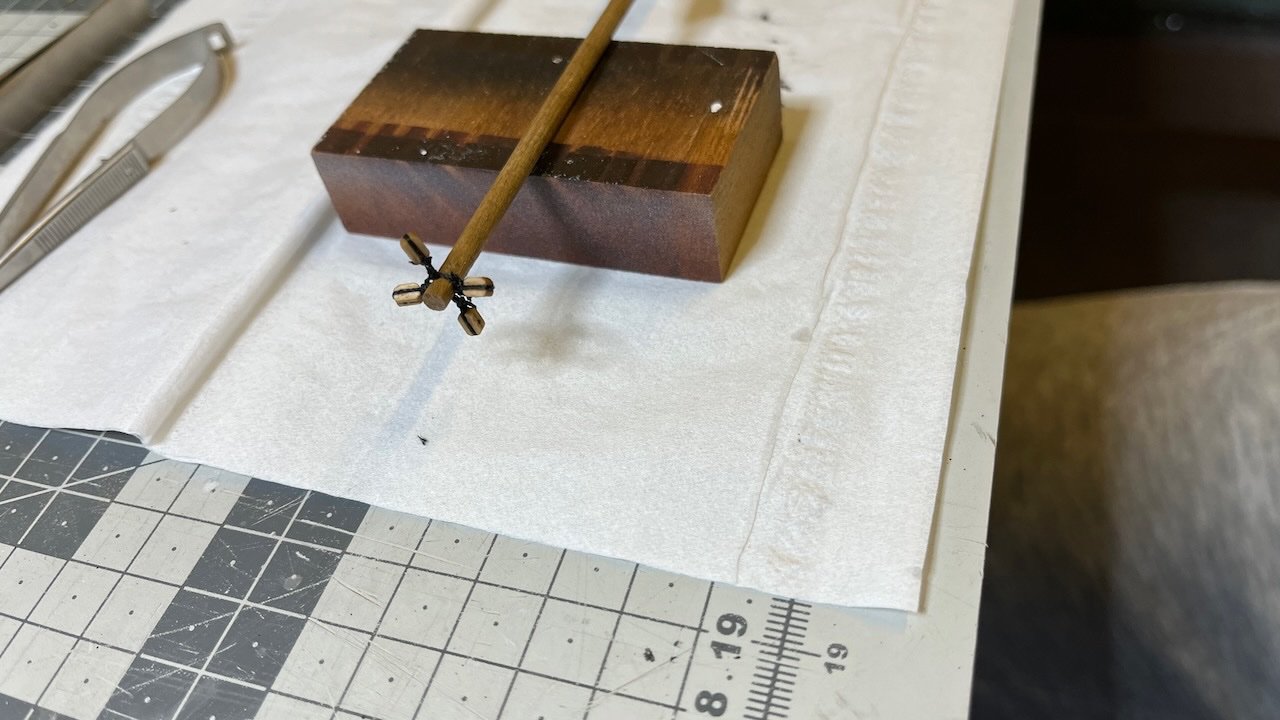
 Build days 111-114: 7,5 hrs / Total 247,5 hours Summer travels, spending time outside followed by a thorough workdesk rearrangement slowed down the build log a bit. But nevertheless there is some progress to share. Photos 753-755: Spritsail yards construction and installation on the Bowsprit. These are the first two of the many yards that will come. I used nails (clipped their heads and inserted to 0.5mm holes I drilled on both parts) to mount the yards to the Bowsprit, strengthened by the threads.
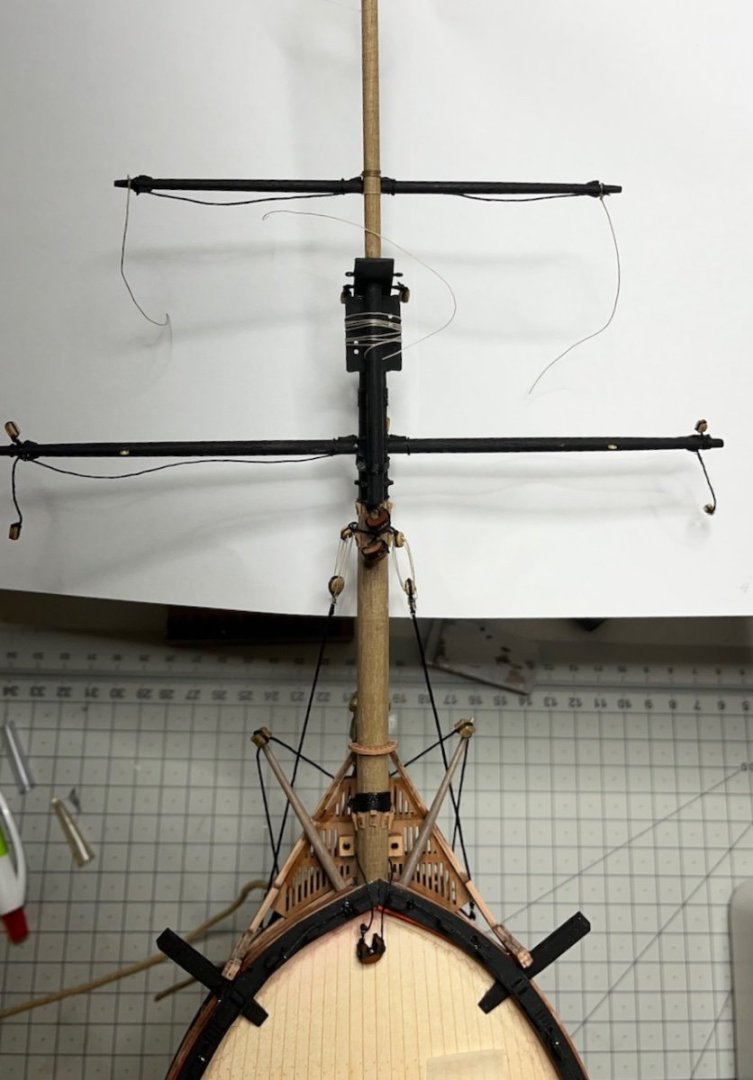
- 426 replies
-
- 4
-

-
- Vanguard Models
- Sphinx
- (and 1 more)
-
Hi Allan, Thanks for the appraisal. I applied a slight octagon shape on this one yes, mostly to try and see if it is worth the effort. This is the spritsail yard. The octagon is barely noticeable and it will be even less visible once I have mounted it on the bowsprit and among the riggings. So I'll decide one by one as I go along. As James also mentioned above they are in the plans and one can skip them at will. Otherwise I am not too knowledgeable about the period accuracy of these ships. /Aydin
- 426 replies
-
- 2
-
-
- Vanguard Models
- Sphinx
- (and 1 more)
-
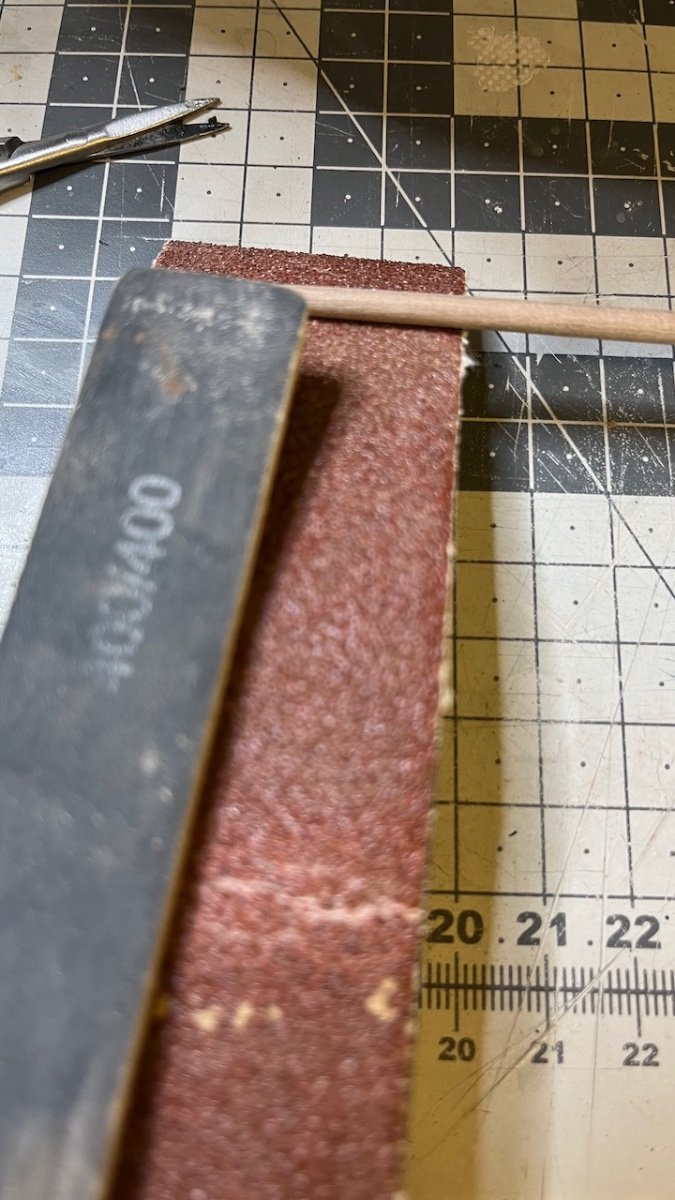
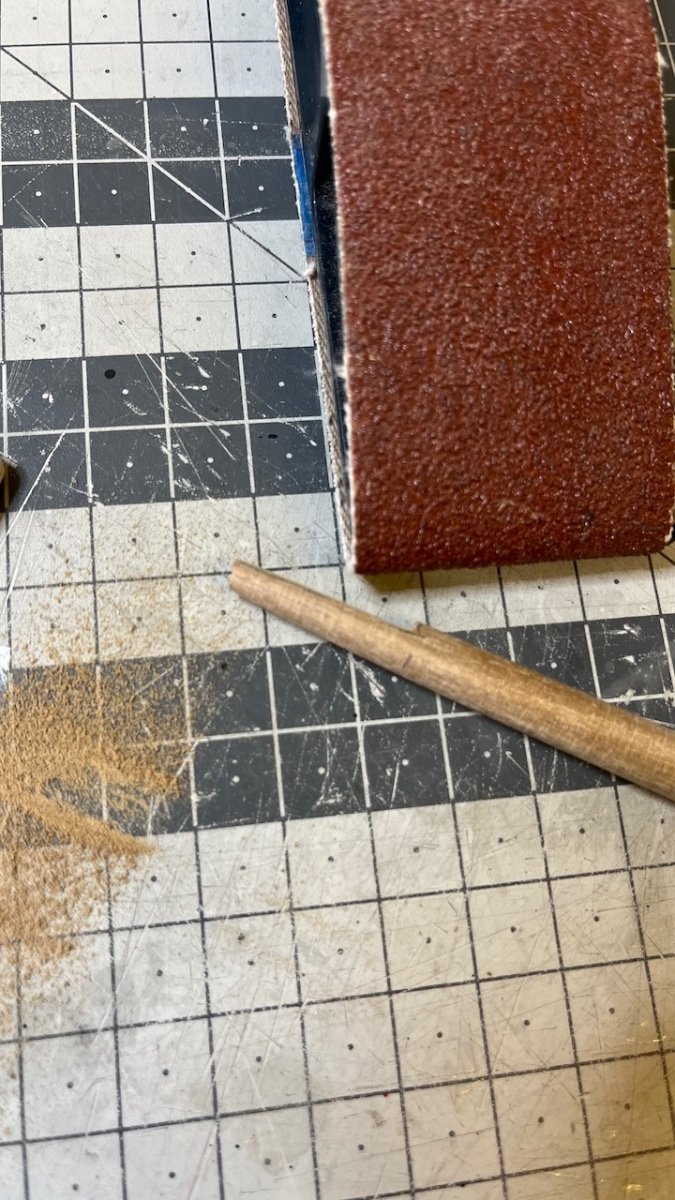
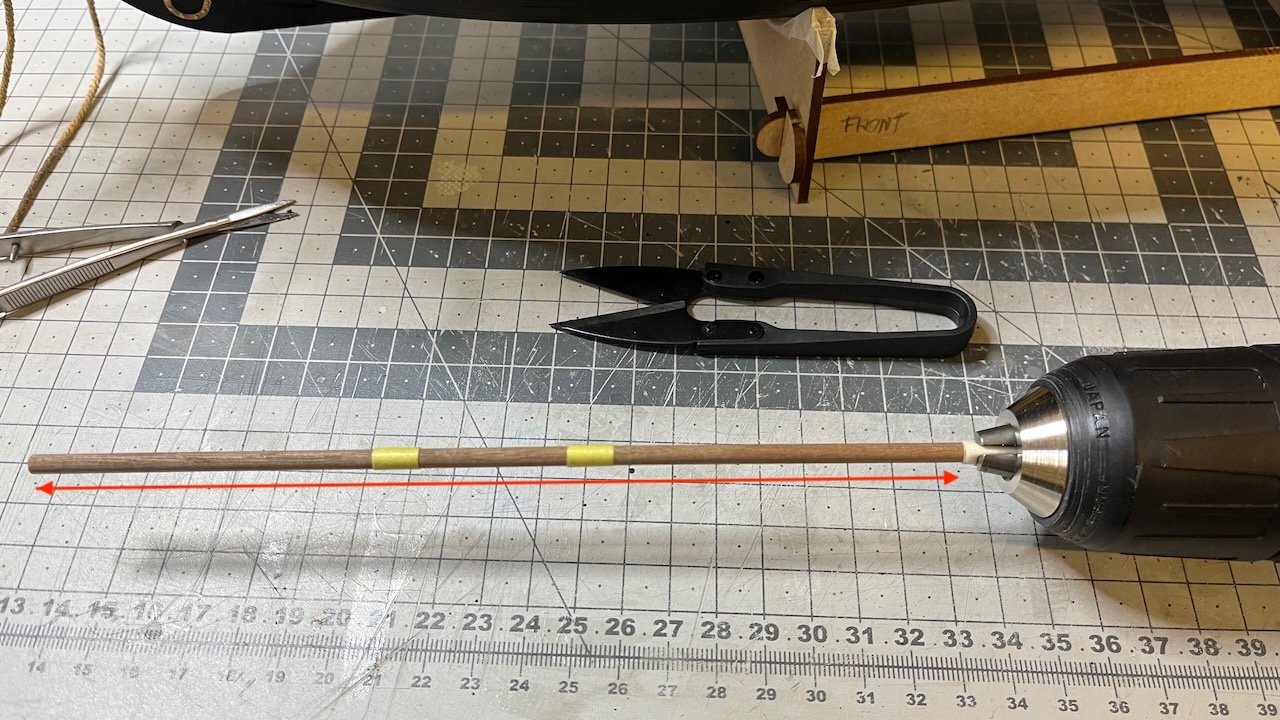
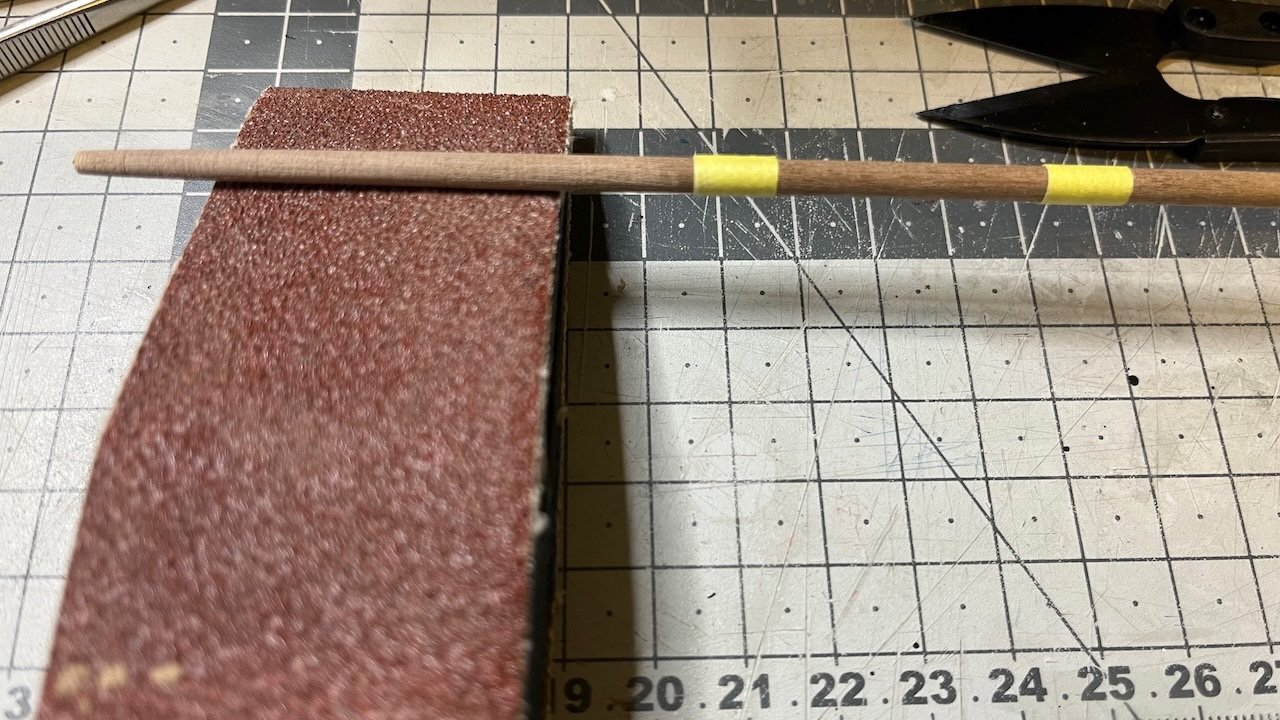
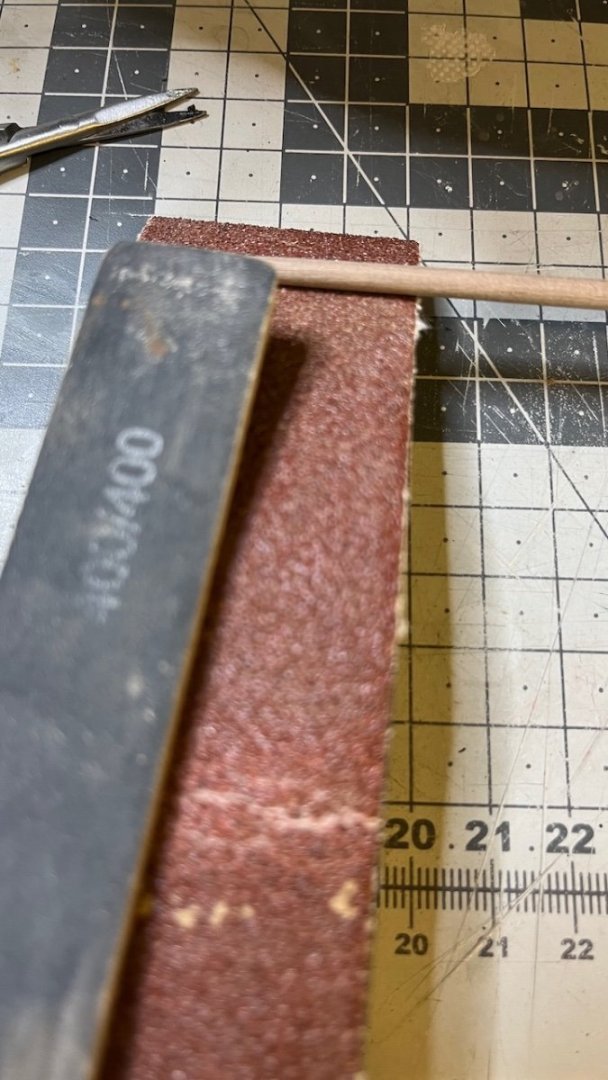
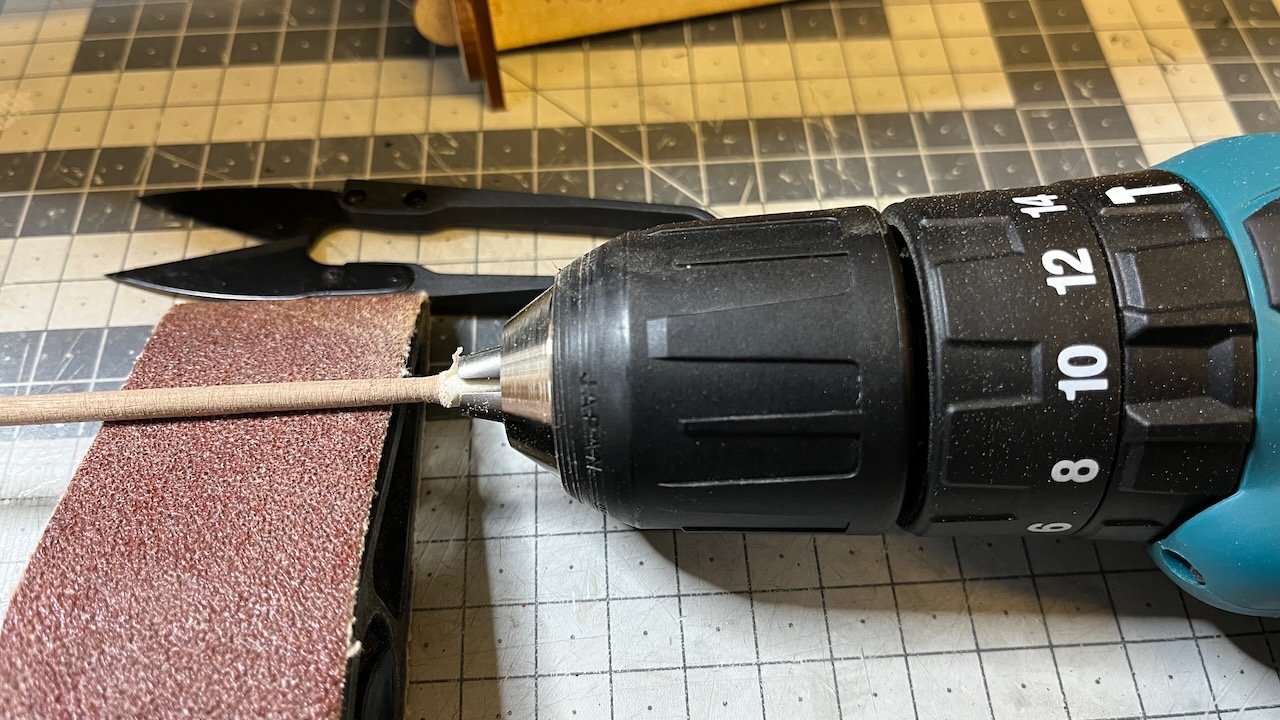
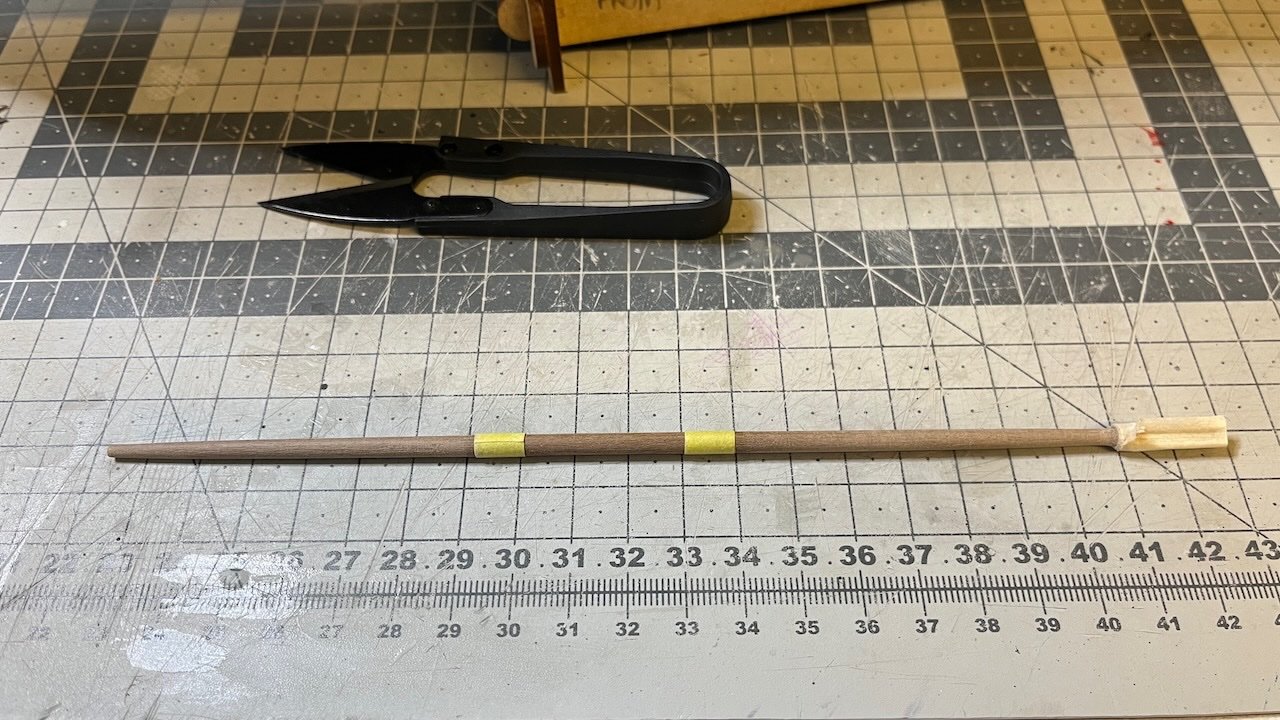
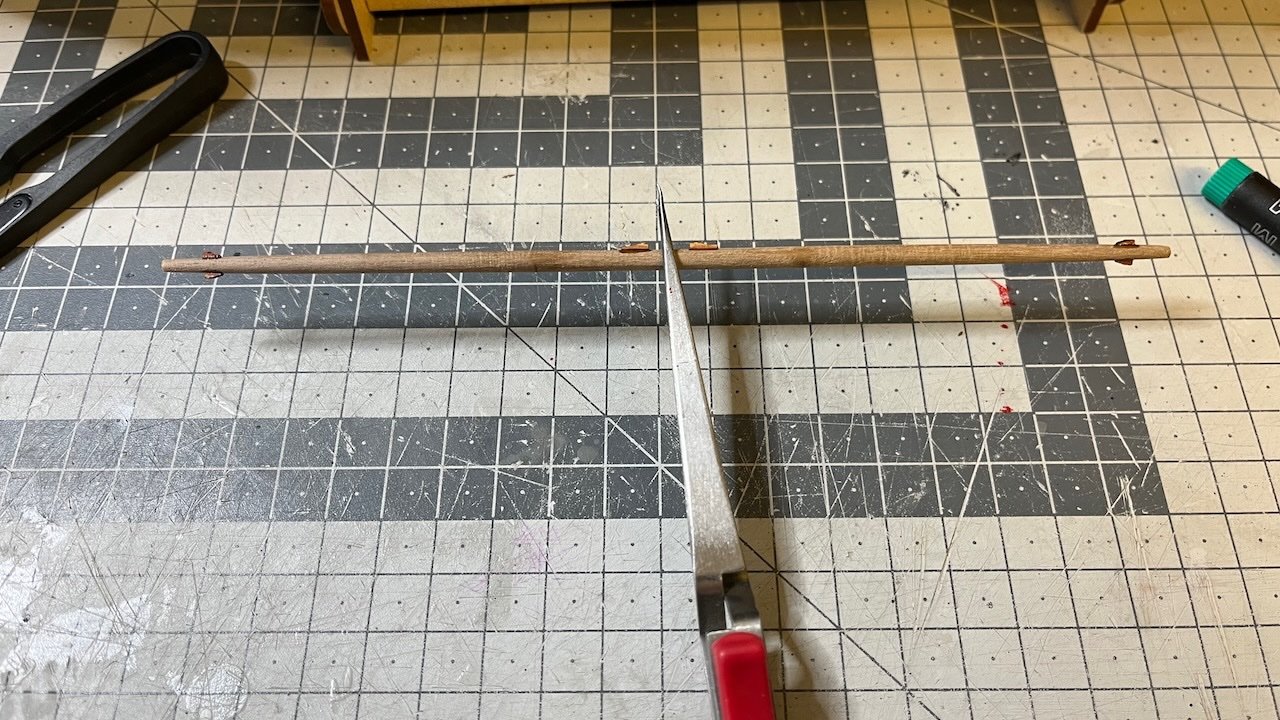
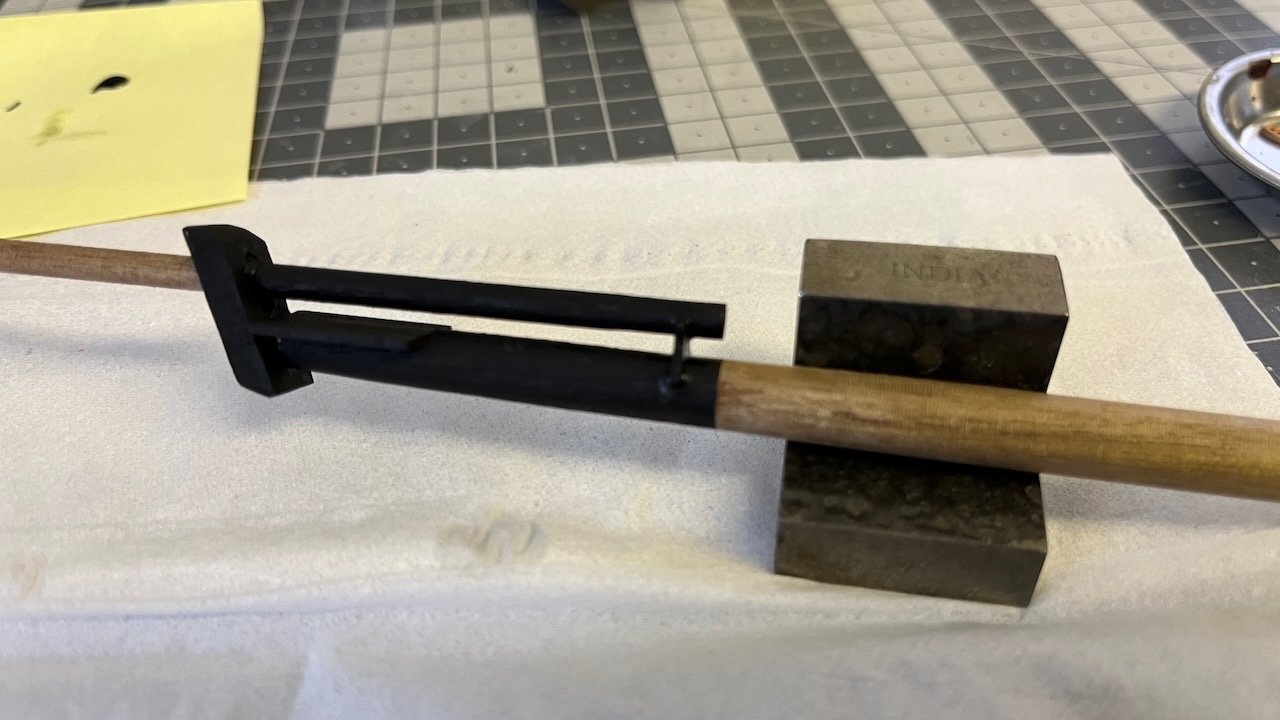
Yards' construction. Photos 747-752: As the yards need tapering from both ends, here is how I do it. I cut the dowel around 2cm longer than the yard. The excess amount is for inserting into the screwdriver. The red arrow shows the full yard length. Yellow tapes mark the sections (exclusive) that will be tapered. Then I turn on the drilling machine and use the rough sandpaper on a sand block, starting from the far end of the dowel. It helps to press slightly on the dowel with a finger to put the necessary pressure, without burning your finger with the heat from the friction. Once I have achieved the final shape, I use a 400 grit sanding stick for smoothening the surface. Next the other end (i.e. close to the drilling machine). Handling this part after the far end reduces the risk of breaking the dowel, as otherwise it could get too thin to stand the vibration while tapering the other end. Tapering done. It is time to chop off the drilling machine insert. Ready
- 426 replies
-
- 11
-
-
- Vanguard Models
- Sphinx
- (and 1 more)
-
Looking at the photos from Blue Ensign's build log, indeed they would obstruct the shrouds. Hence I'll skip them. Looked fine on his model since he skipped rigging.
- 426 replies
-
- 2
-
-
- Vanguard Models
- Sphinx
- (and 1 more)
-
Question: In step 689 of the manual, just before construction of the boats, we are advised to leave the Quarterdeck Hammock Cranes for now, as this could impede the fitting of the shrouds. When is the good time to install them? I can't see them in the final completed model photos either. Thanks in advance.
- 426 replies
-
- 2
-
-
- Vanguard Models
- Sphinx
- (and 1 more)
-
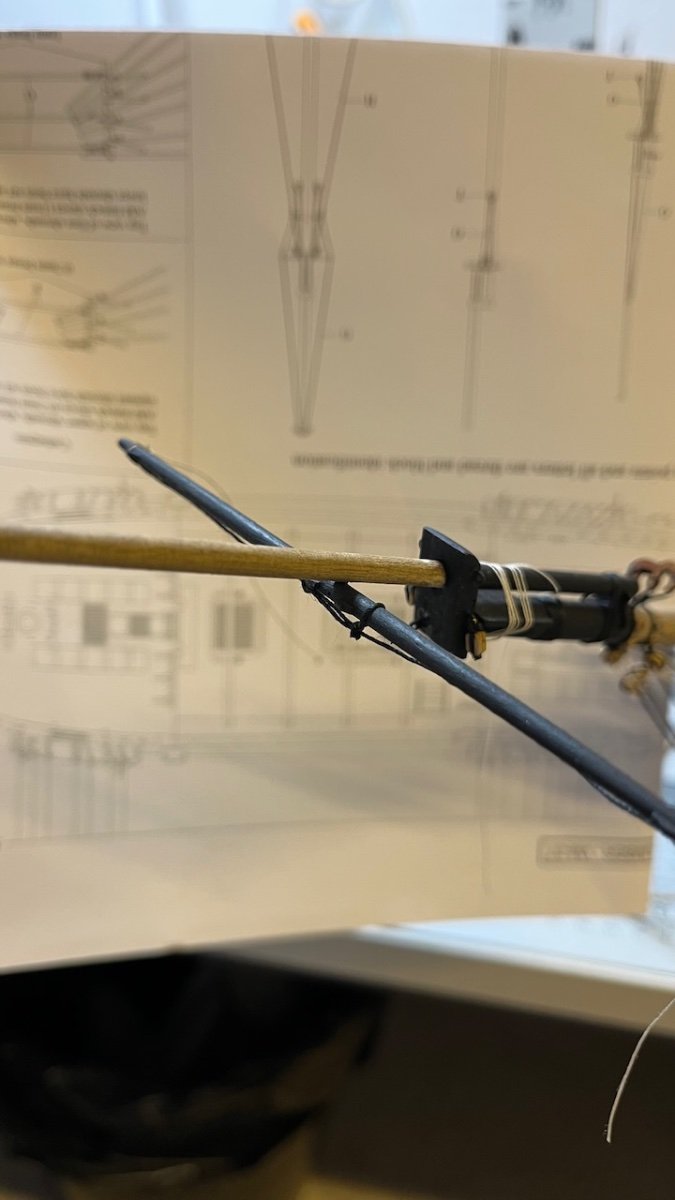
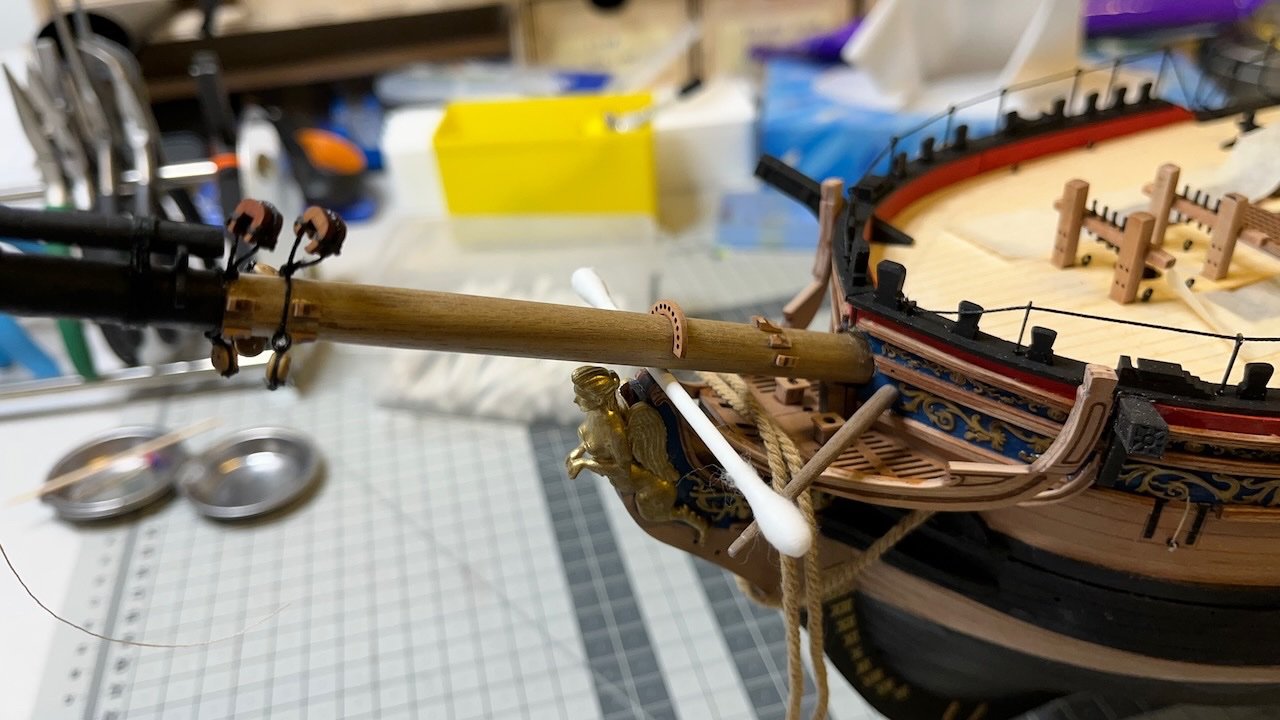
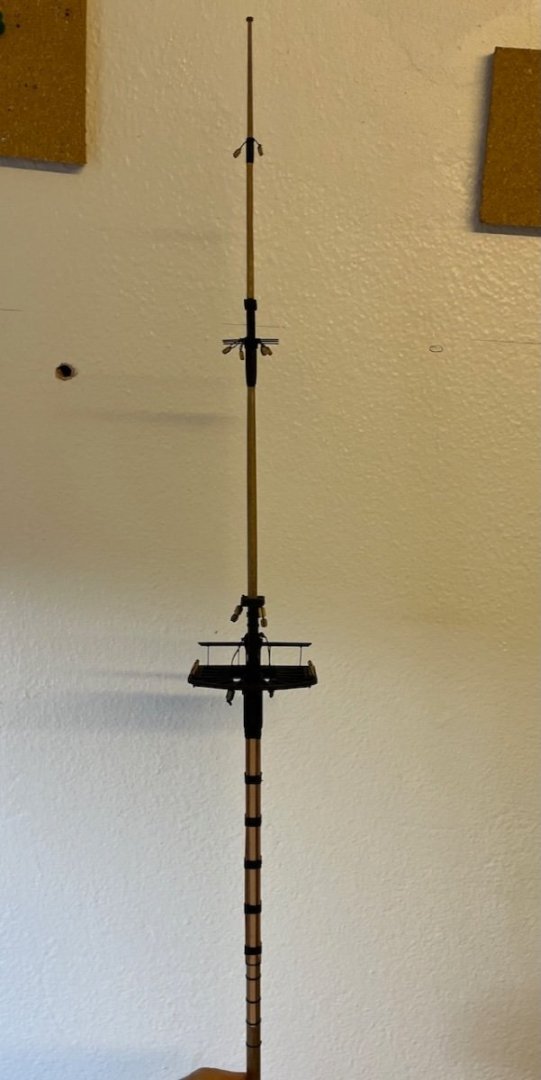
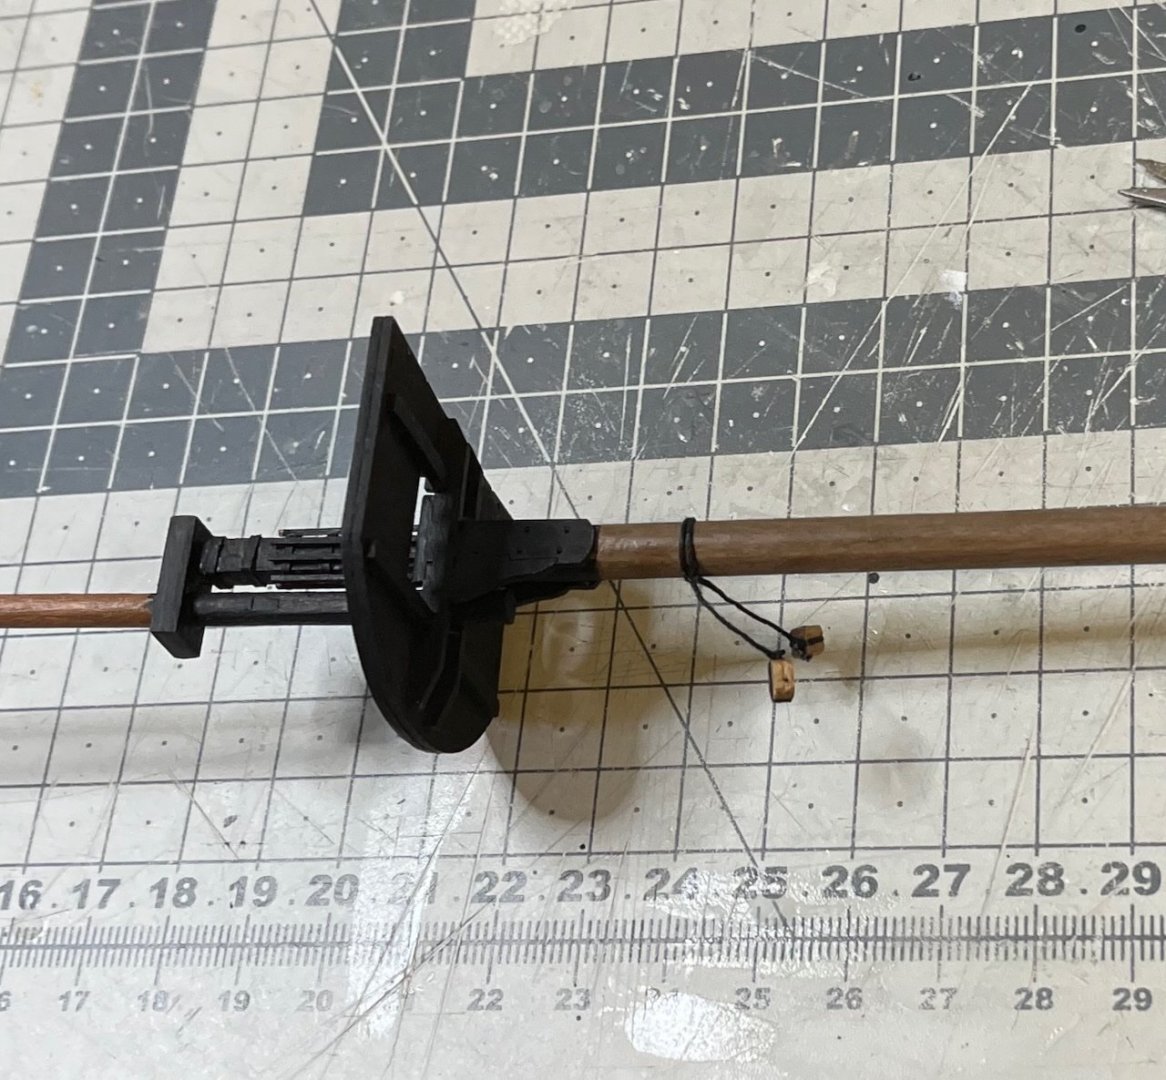
Photo 746: Short update after retuning from a one week trip. The hull is back on the table after the masts and the bowsprit constructions. Glued the bowsprit carefully into place. I dry fit first to make sure (following with the plans) to insert the bowsprit correct amount. It was a relief that when the bottom of the bowsprit finally touched the stopper inside the hull, it was exactly the right length. Here a cotton swab stick is holding the bowsprit in correct height until the glue has dried, preventing it otherwise from resting on top of the lady's head. Next I will continue with bowsprit gammoning and rigging the bowsprit shrouds and stays once I have gathered my courage 😅.
- 426 replies
-
- 4
-
-
- Vanguard Models
- Sphinx
- (and 1 more)
-
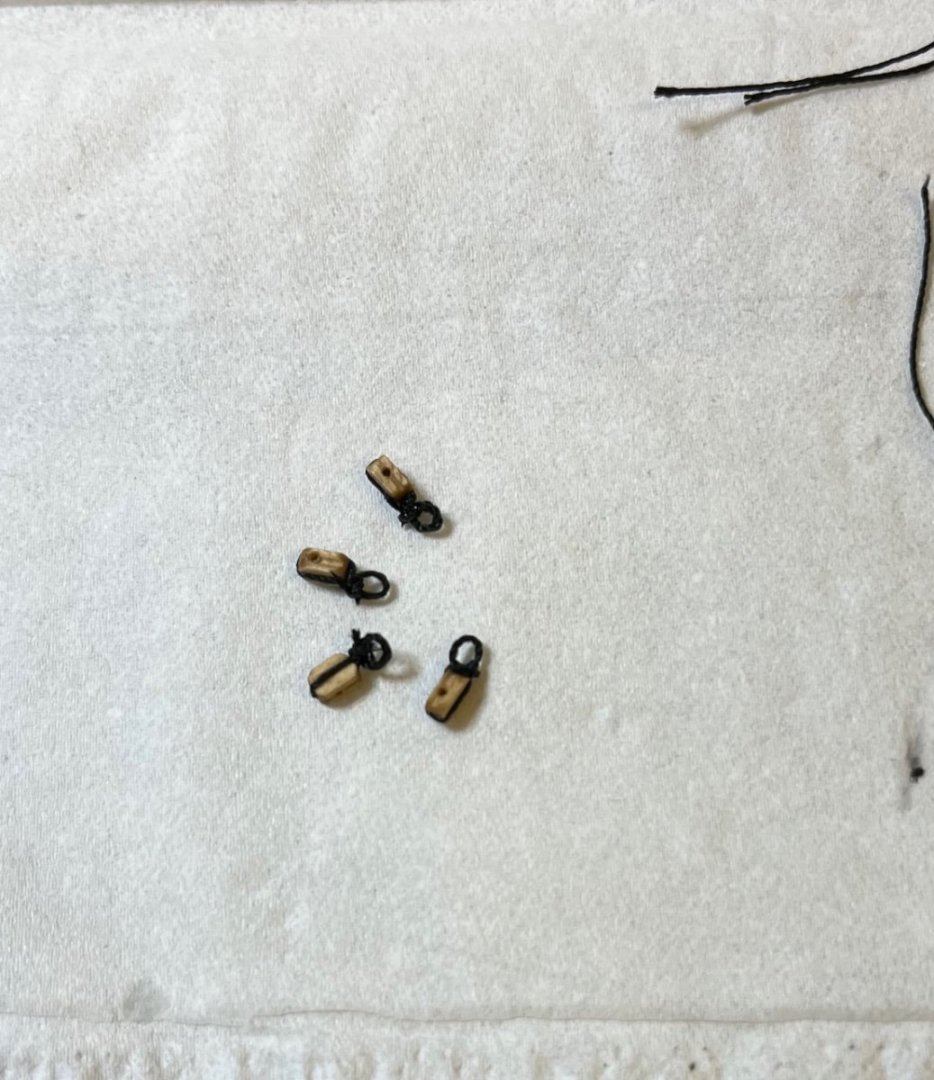
Photos 743-745: Installation of the heart shaped blocks followed by a photo of the finished bowsprit.


- 426 replies
-
- 4
-
-
- Vanguard Models
- Sphinx
- (and 1 more)
-
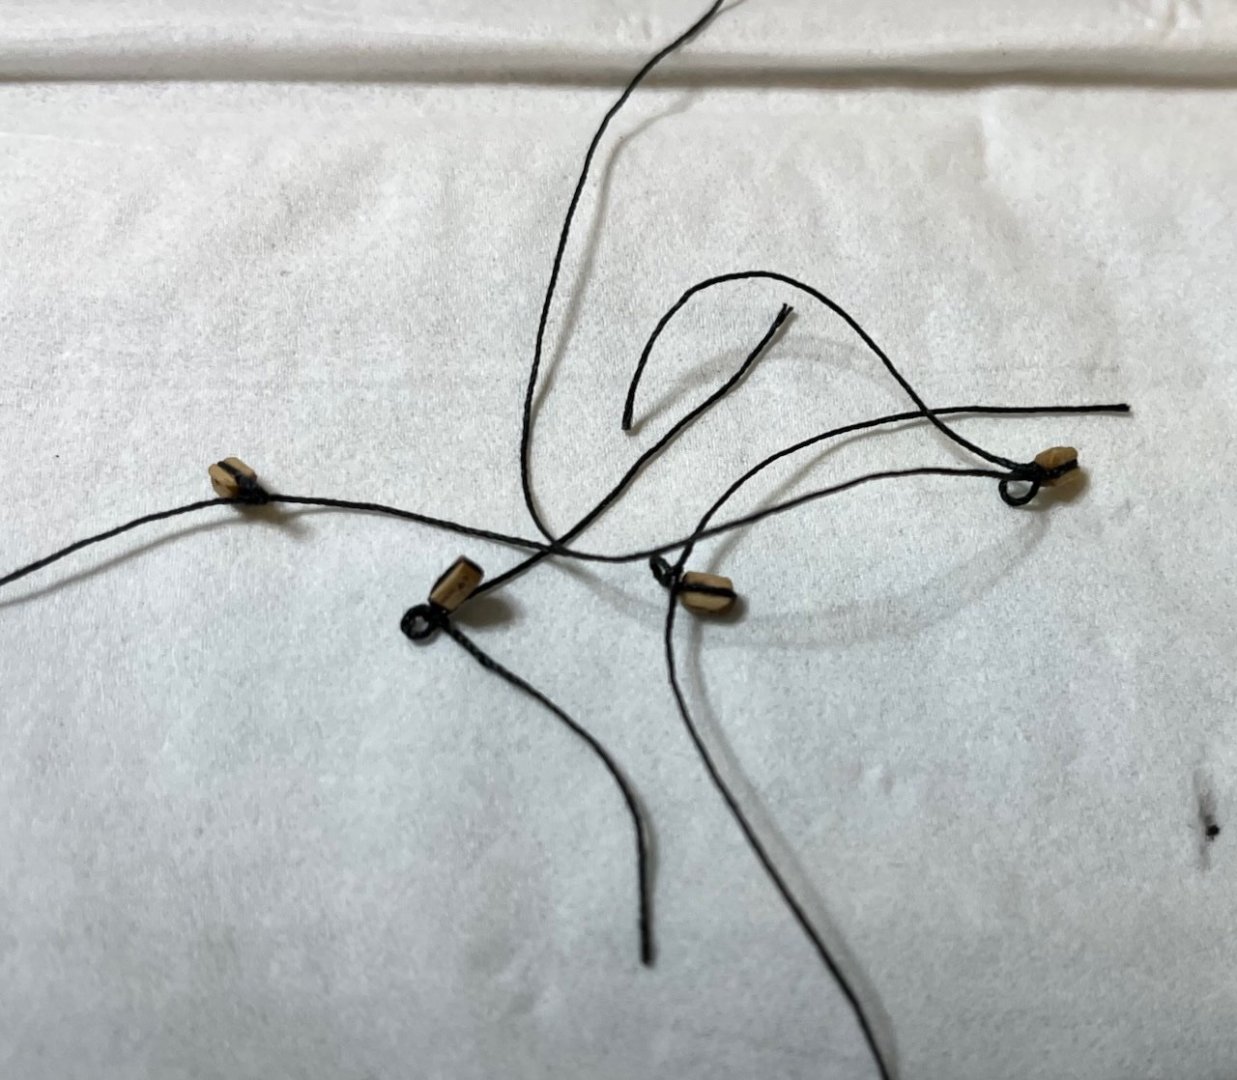
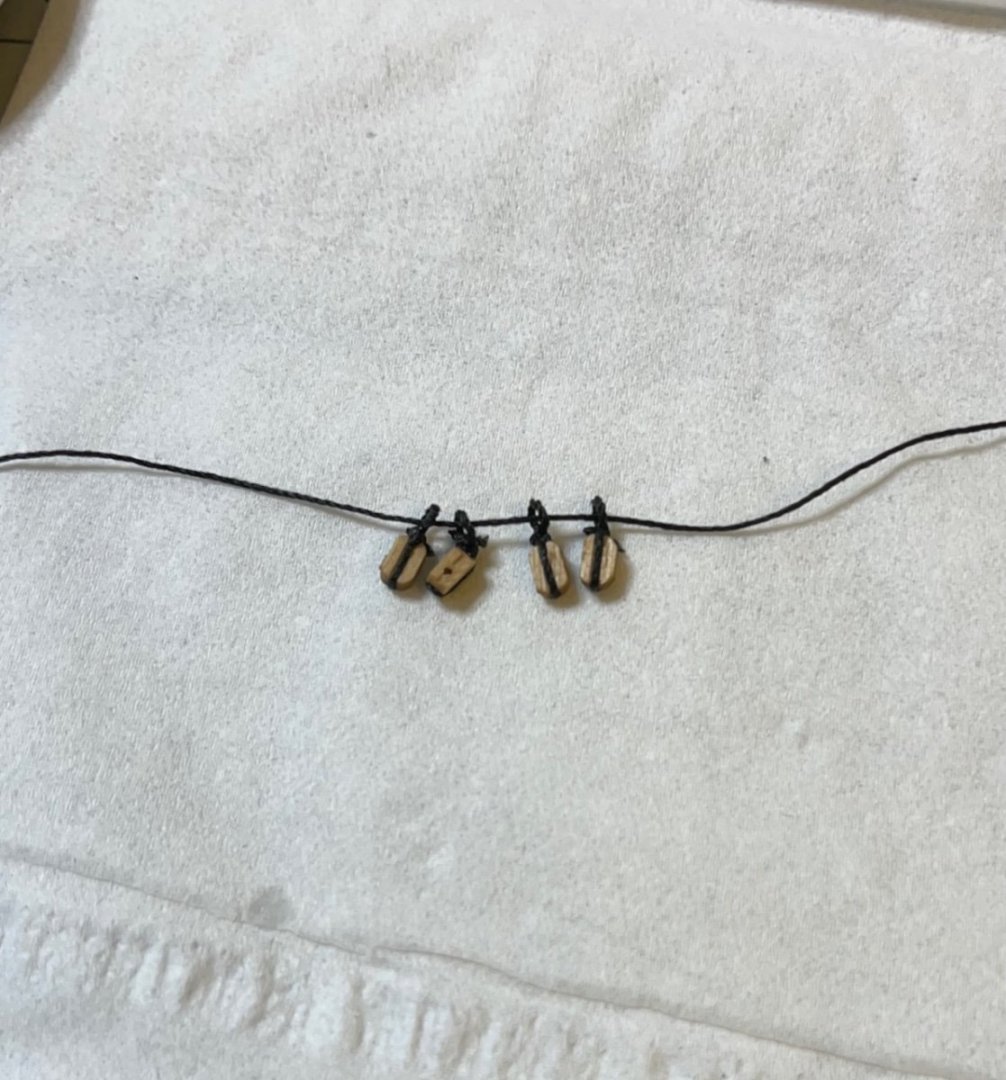
Photos 738-742: This is the way I attached the four blocks to the tip of the bowsprit. Gives a chance to adjust their positions accurately before fixing them on their final locations.
- 426 replies
-
- 1
-
-
- Vanguard Models
- Sphinx
- (and 1 more)
-
Build day 109-110: 3,5 hrs / Total 240 hours Bowsprit construction finished. Photo 737: Painted the section to black after sanding the filler.
- 426 replies
-
- 1
-
-
- Vanguard Models
- Sphinx
- (and 1 more)
-
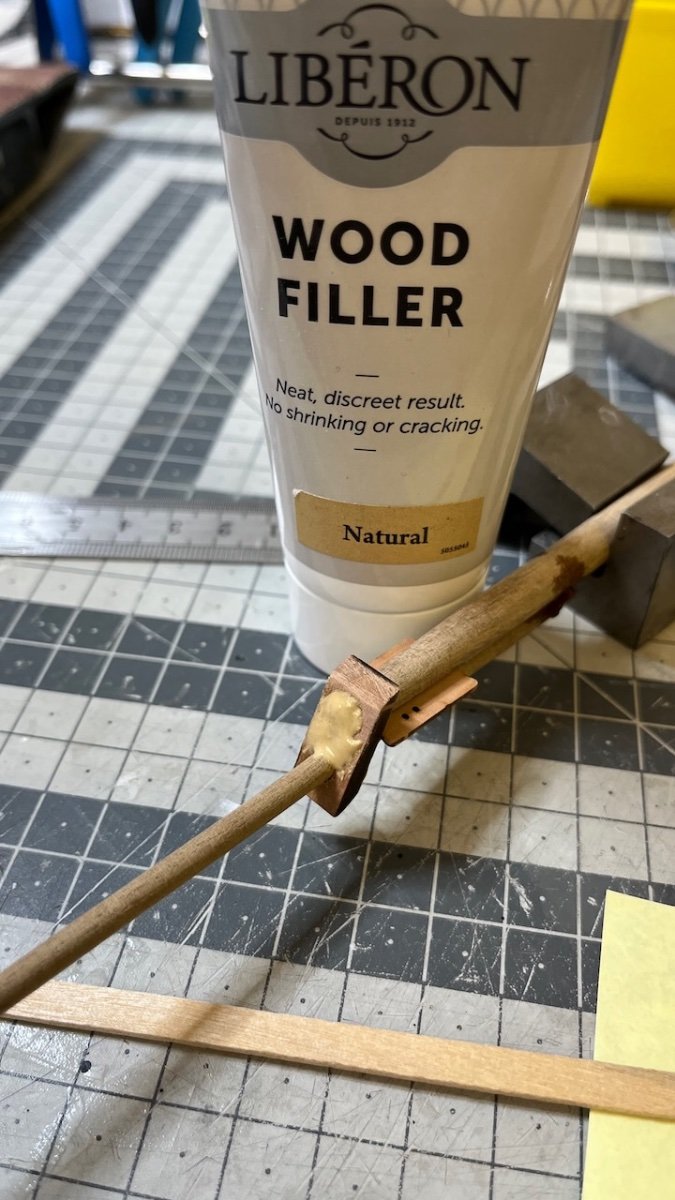
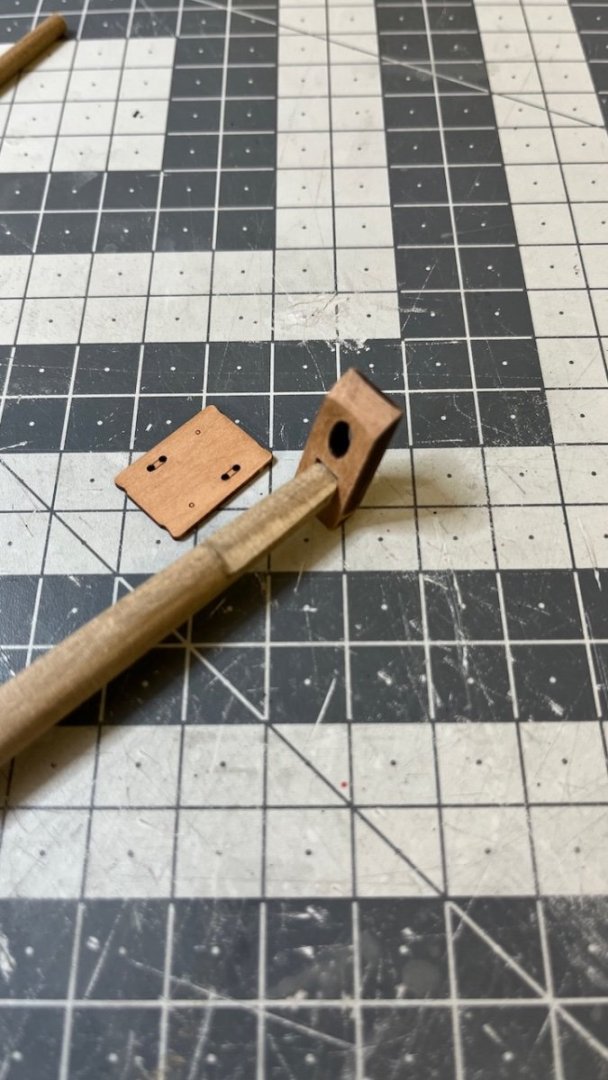
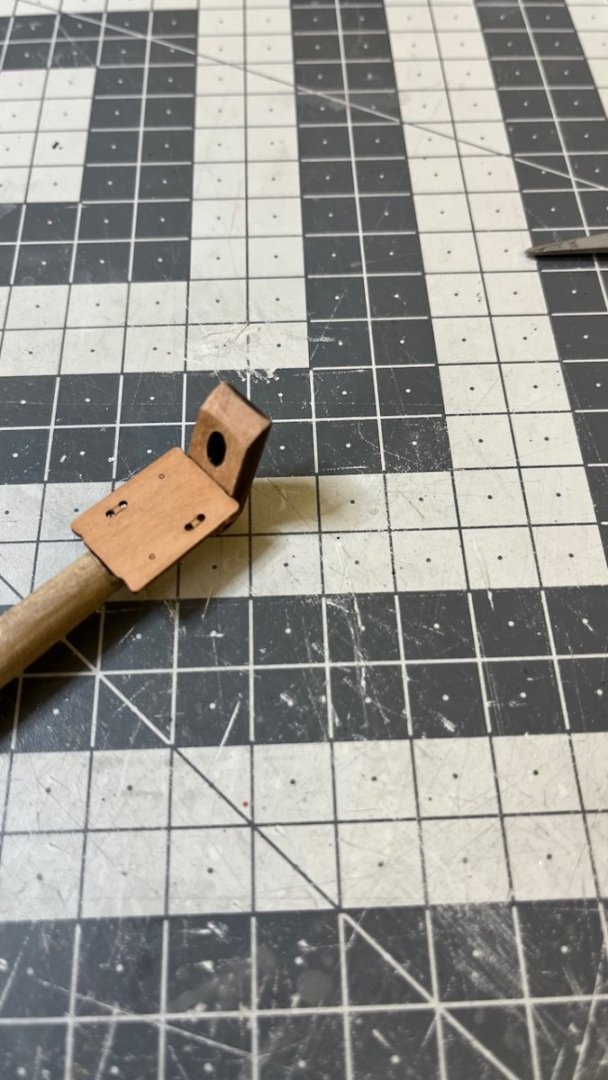
Build day 108: 2 hrs / Total 236,5 hours Bowsprit construction starts. Photo 733: I use this rough sand paper for flattening one end of the dowel. It works like a rasp, but with a better control. Photo 734: Dry fitting with the cap during sanding. Here the cap has been already trimmed to the shape and holes treated to fit the dowels with an angle. Photo 735: Bee and the cap glued in place. Photo 736: Filling the gaps with the wood filler. Work pauses here for now, waiting for the filler to dry. That's all for now. Thanks for watching!


- 426 replies
-
- 2
-
-
- Vanguard Models
- Sphinx
- (and 1 more)
-
Looks quite nice this way, too. I may try this. Haven't started the yards yet, though. I am currently building the bowsprit.
- 426 replies
-
- 1
-
-
- Vanguard Models
- Sphinx
- (and 1 more)
-
Is it me seeing only small part of your photo? (most of the photo shows black)
- 426 replies
-
- 1
-
-
- Vanguard Models
- Sphinx
- (and 1 more)
-
Question about yards construction: On the plan (Sheet 19) it is instructed to paint all yards and booms in black, while in the photos the booms are left natural. Is it a question of preference?
- 426 replies
-
- 1
-
-
- Vanguard Models
- Sphinx
- (and 1 more)
-
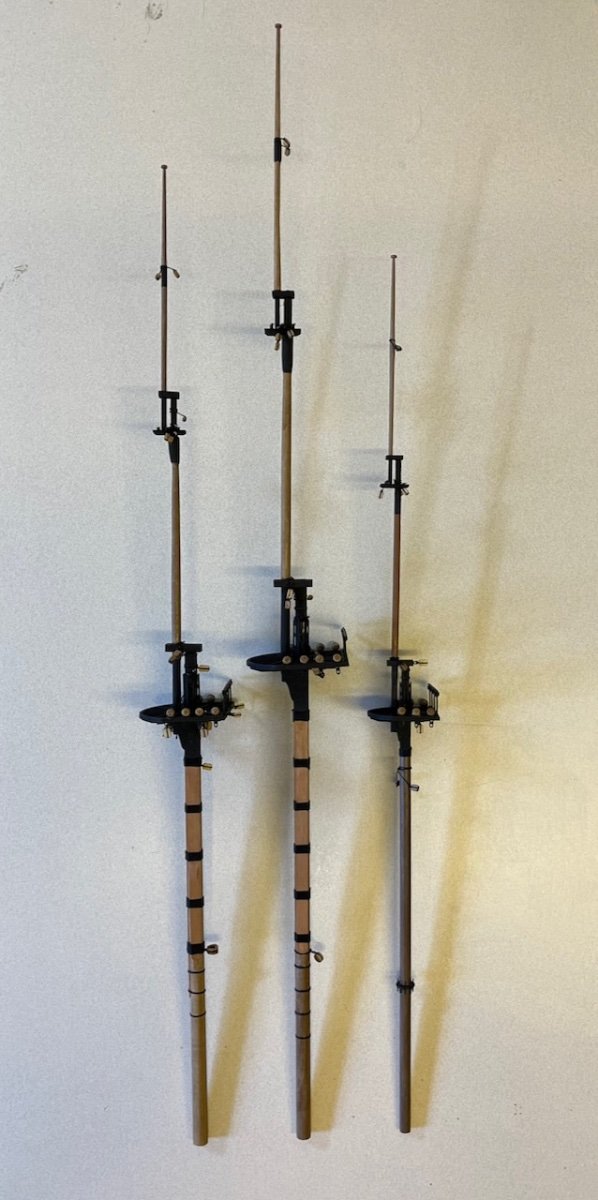
Build day 105-107: 5 hrs / Total 234,5 hours Main mast Part 2. Photos 730-732: Finally with the main mast details ready, the masts' construction is complete, to be followed by the bowsprit.
- 426 replies
-
- 5
-
-
- Vanguard Models
- Sphinx
- (and 1 more)
-
Photo 730: After a similar work as the Mizzen mast, now Foremast is ready (except for lower top rail stanchions in this photo) That's all for now. Thanks for watching!

- 426 replies
-
- 4
-
-
- Vanguard Models
- Sphinx
- (and 1 more)
-
Photo 727-729: Heart shaped blocks. There are a few different size of them but construction is the same. I need one of the closed hearts for the Foremast. I brushed diluted glue and waited long enough for it to dry.

- 426 replies
-
- 3
-
-
- Vanguard Models
- Sphinx
- (and 1 more)
-
Build day 103-104: 6,5 hrs / Total 229,5 hours Foremast Part 2. Photos 726: This is how I keep track of the accessories to ensure I "leave no man behind". It will be a nightmare if you realize during rigging that you have missed installing a block. Red dots are "to do", green checks are "done".
- 426 replies
-
- 6
-
-
- Vanguard Models
- Sphinx
- (and 1 more)
-
Deal . Anyway, inaccuracy in instructions is common even in the most major manufacturers' kits and often they occur more than in this one. As opposed to with other brands, what we builders have here with Vanguard Model kits is the privilege to get instant first hand response to our questions from Chris and you and it is a big deal.
- 426 replies
-
- 4
-
-
- Vanguard Models
- Sphinx
- (and 1 more)
-
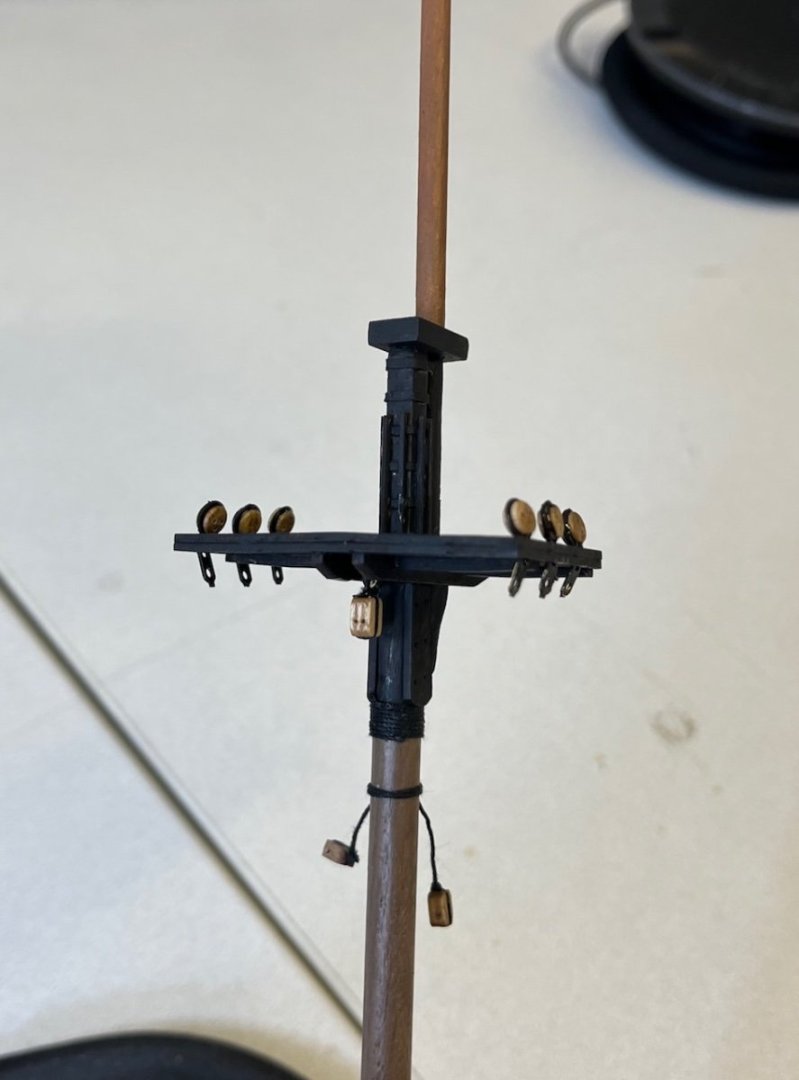
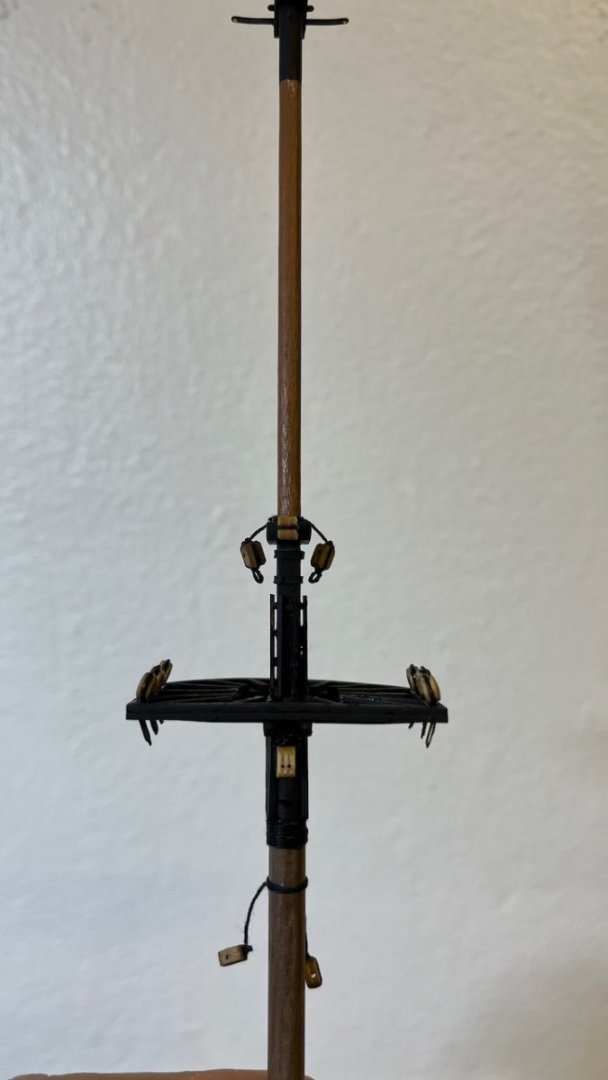
Alright. I'll do the Main Mast and Fore Mast like that. I have already done the Mizzen Mast like in the photo, but I guess I can wrap a dummy thread around the mast cap just to make it look like in the plan. Thanks Chris and James for clarification.
- 426 replies
-
- 2
-
-
- Vanguard Models
- Sphinx
- (and 1 more)
-
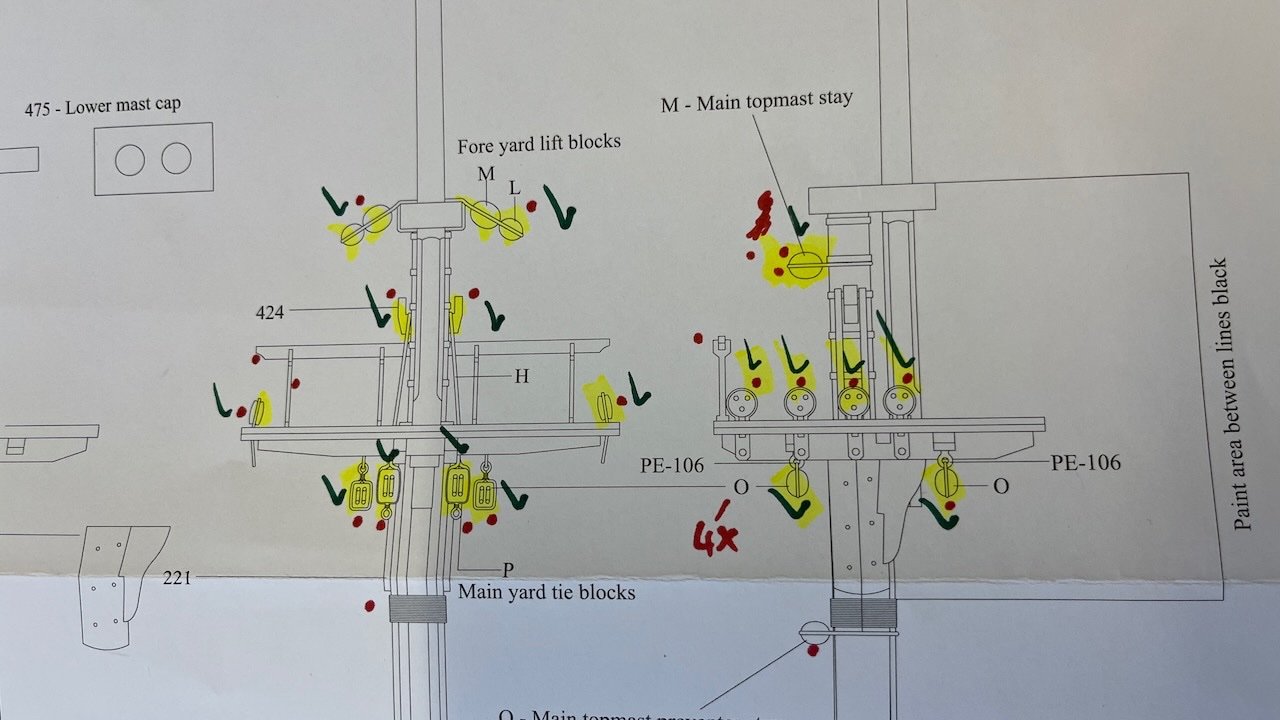
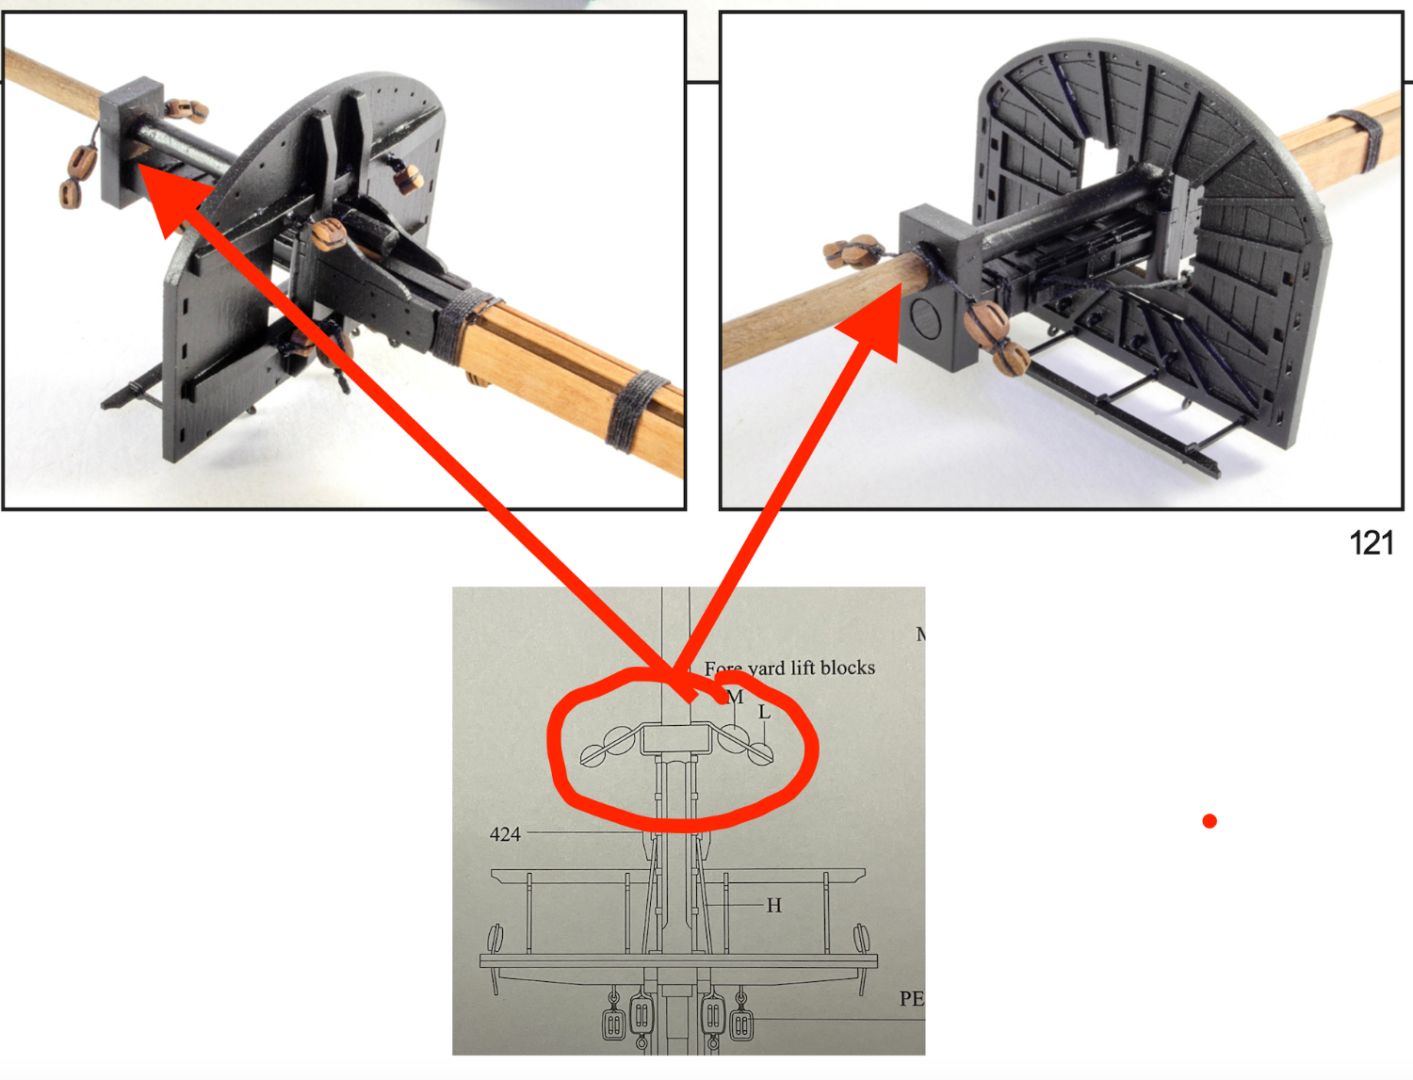
OK what gets me confused is that if I see correct, in the instruction photos (page 121) the blocks are wrapped around the mast, not around the mast cap. Is this a change from the prototype?
- 426 replies
-
- 1
-
-
- Vanguard Models
- Sphinx
- (and 1 more)
-
Photo 724: I am left with one confusion. What are the "[" and "]" shaped drawings around the mast caps? See the photo from the plan where I marked them (Ignore the question mark pointing at the loop at the block). At first I thought if they are the threads used for the crossjack lift blocks but it is not the way the blocks are tied. There is no such thing in the photos either. This is the case in the plan for all three masts. Any clarification is appreciated. That's all for now. Thanks for watching!

- 426 replies
-
- 3
-
-
- Vanguard Models
- Sphinx
- (and 1 more)
-
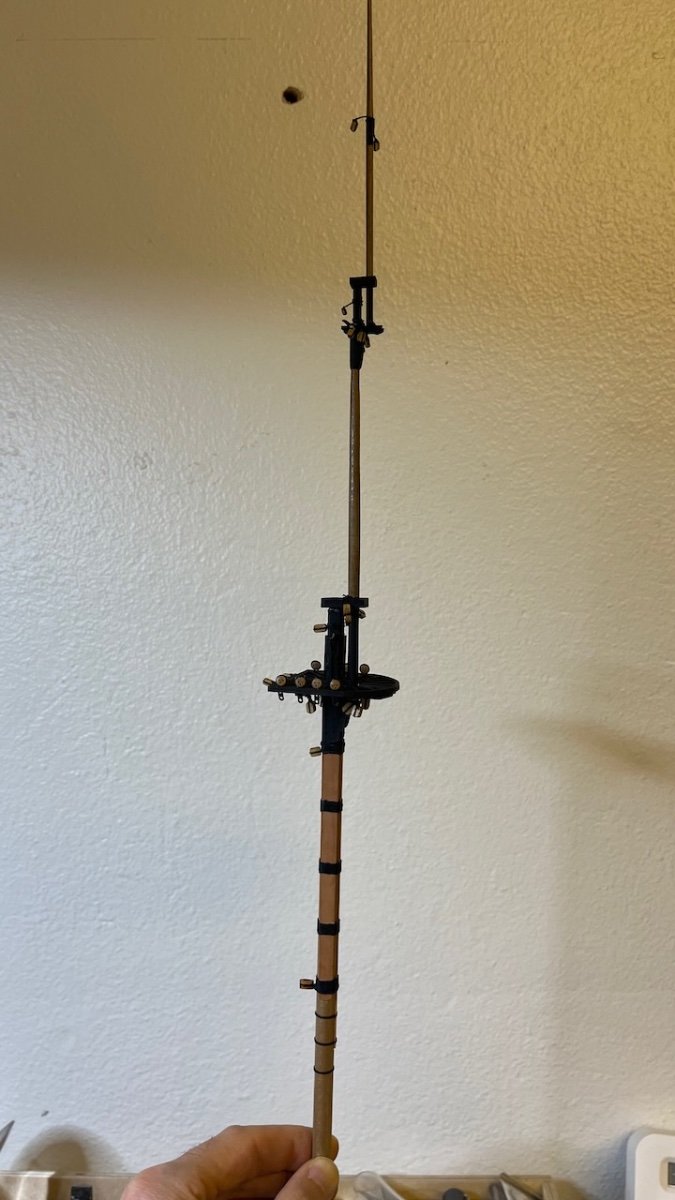
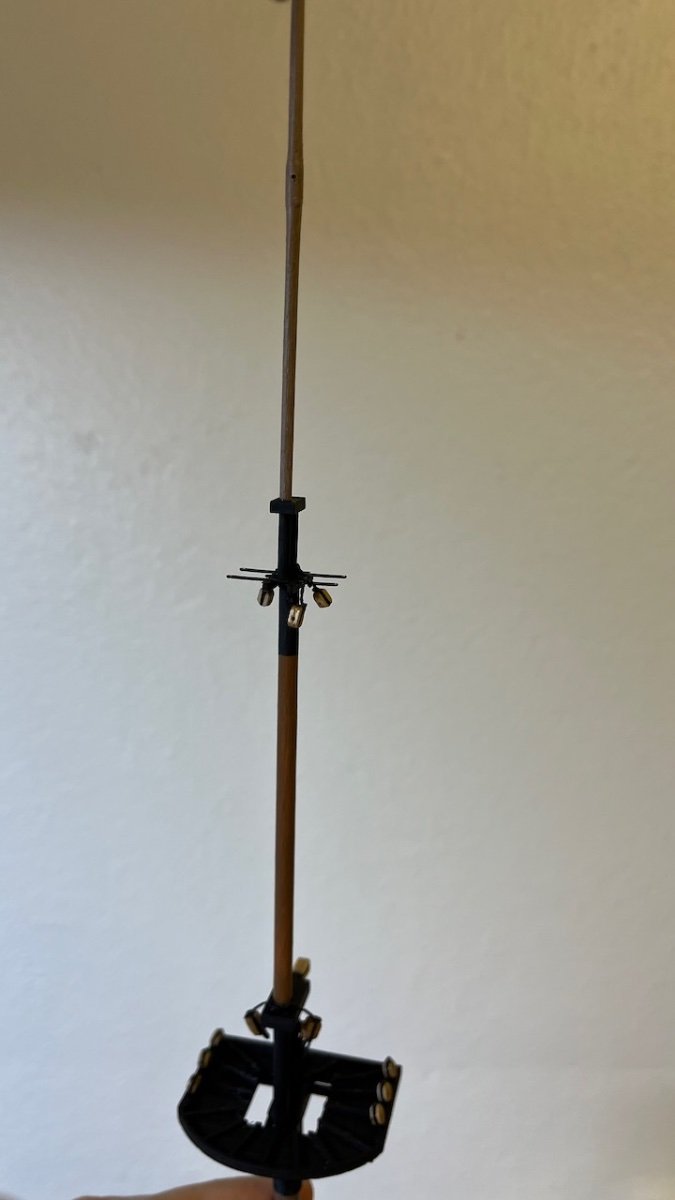
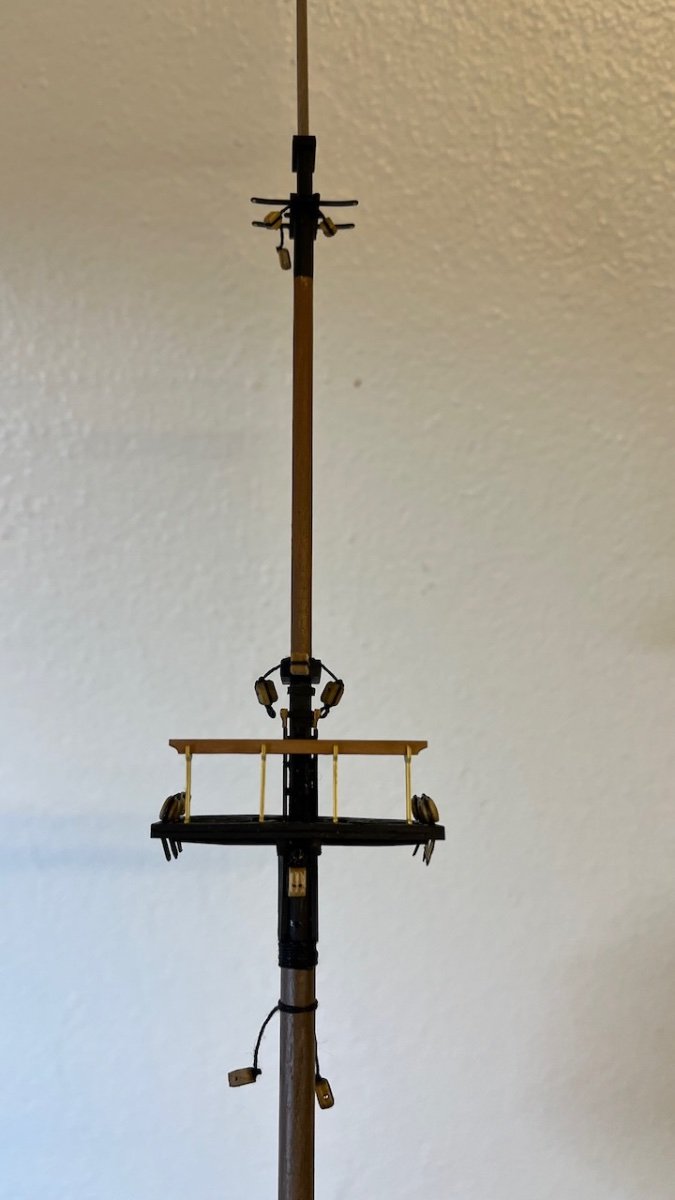
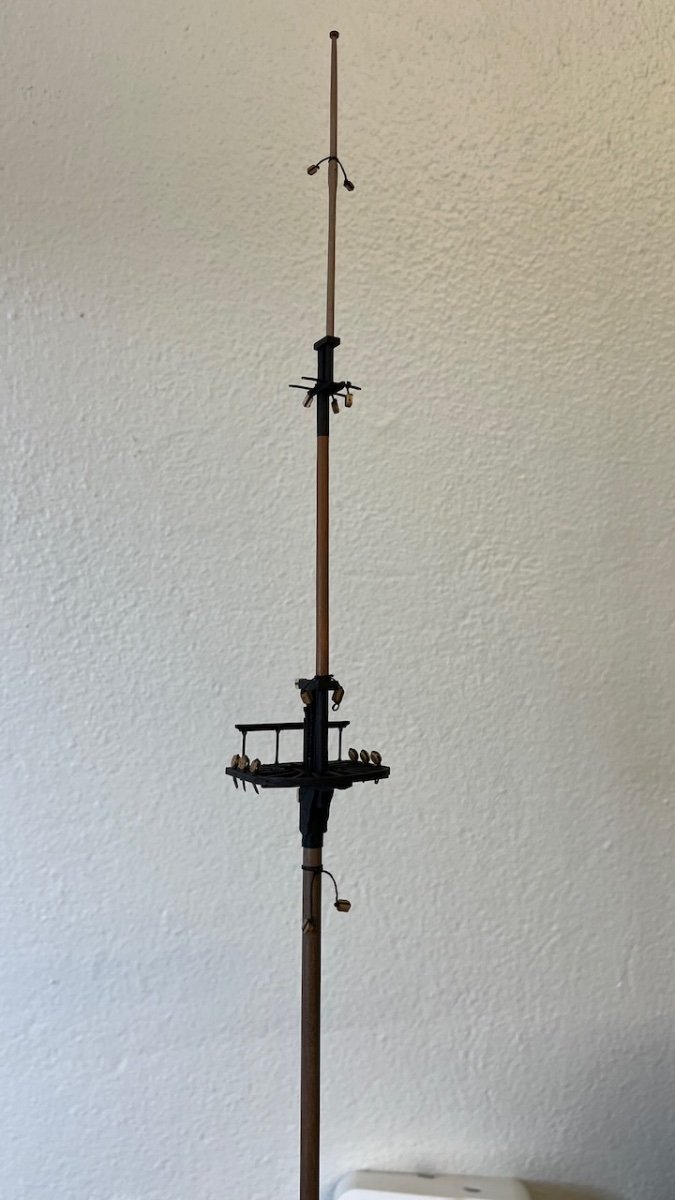
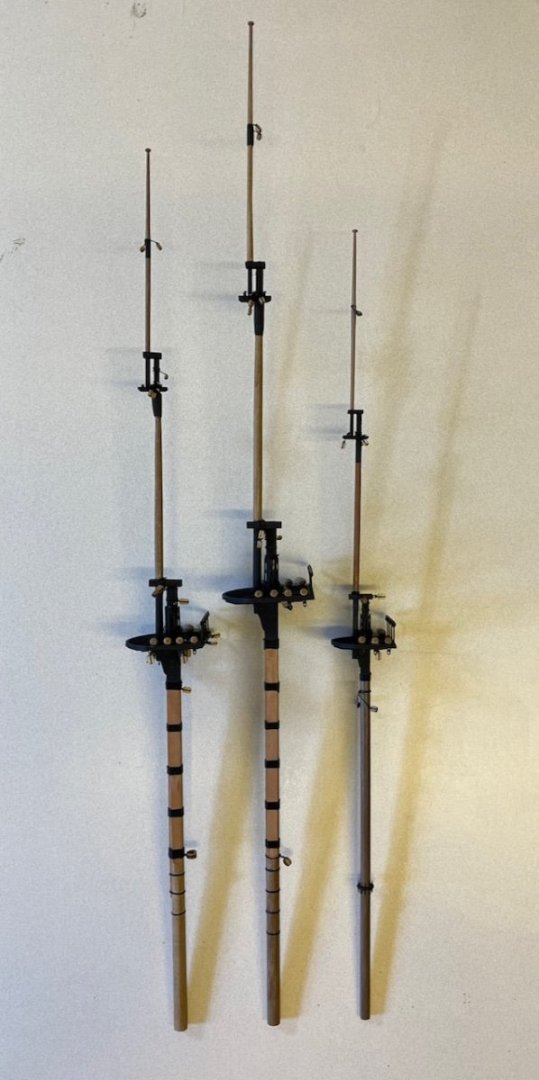
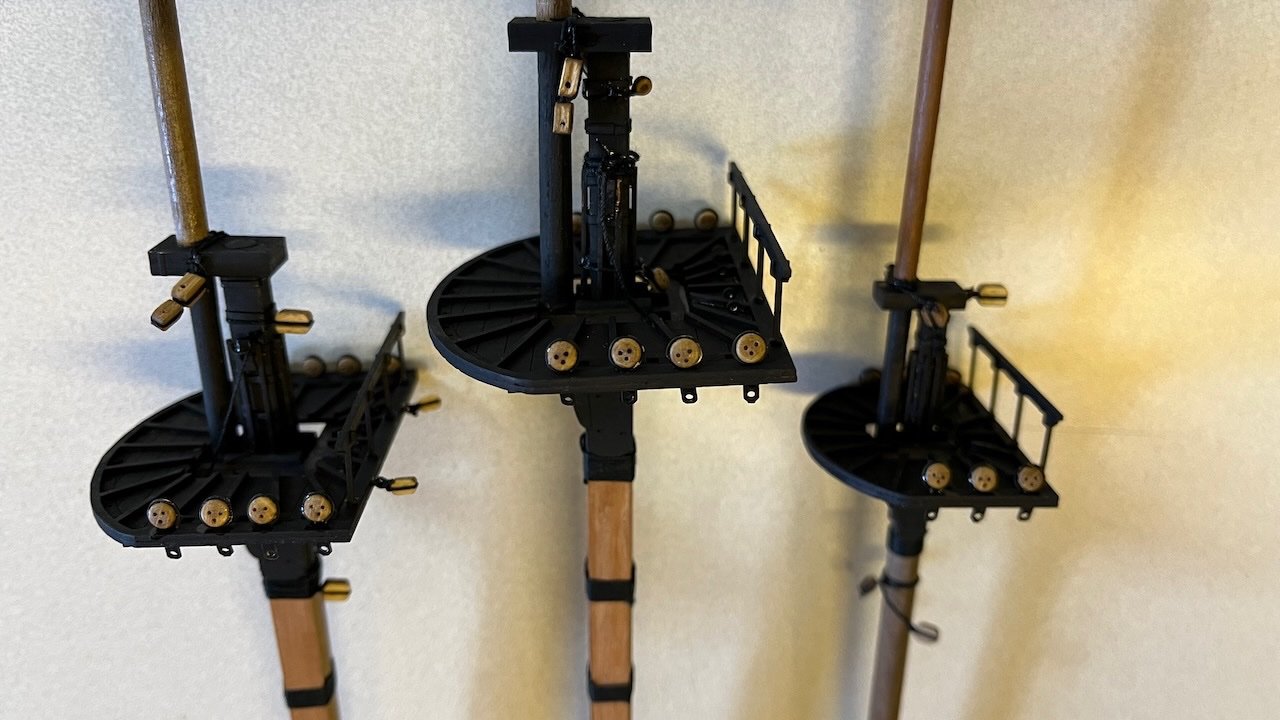
Photos 718-723: Some photos showing the progress and the completed mast.


- 426 replies
-
- 2
-
-
- Vanguard Models
- Sphinx
- (and 1 more)
-
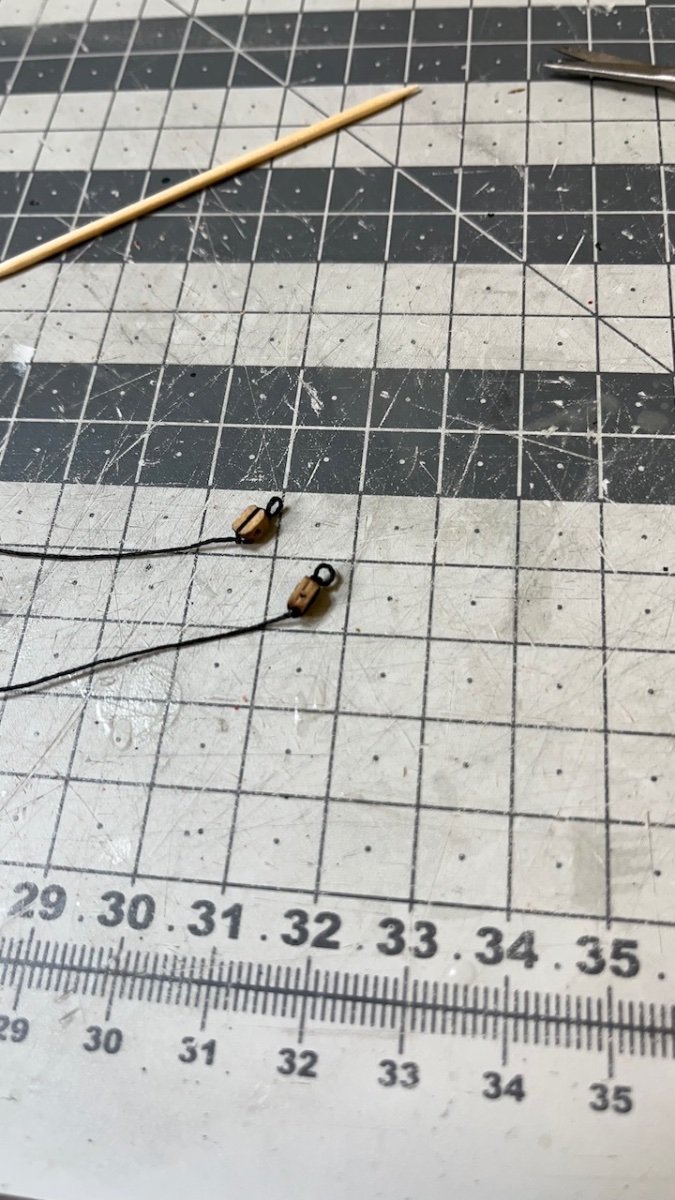
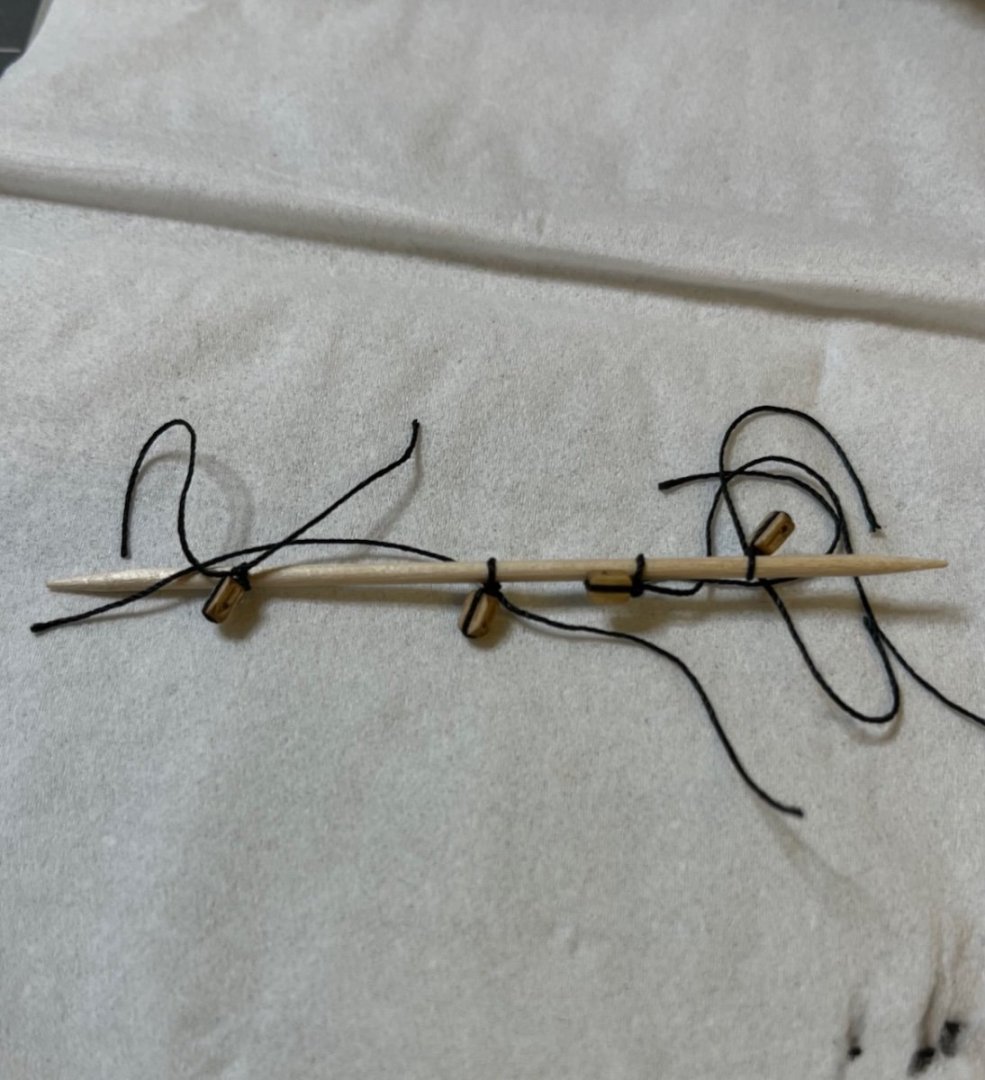
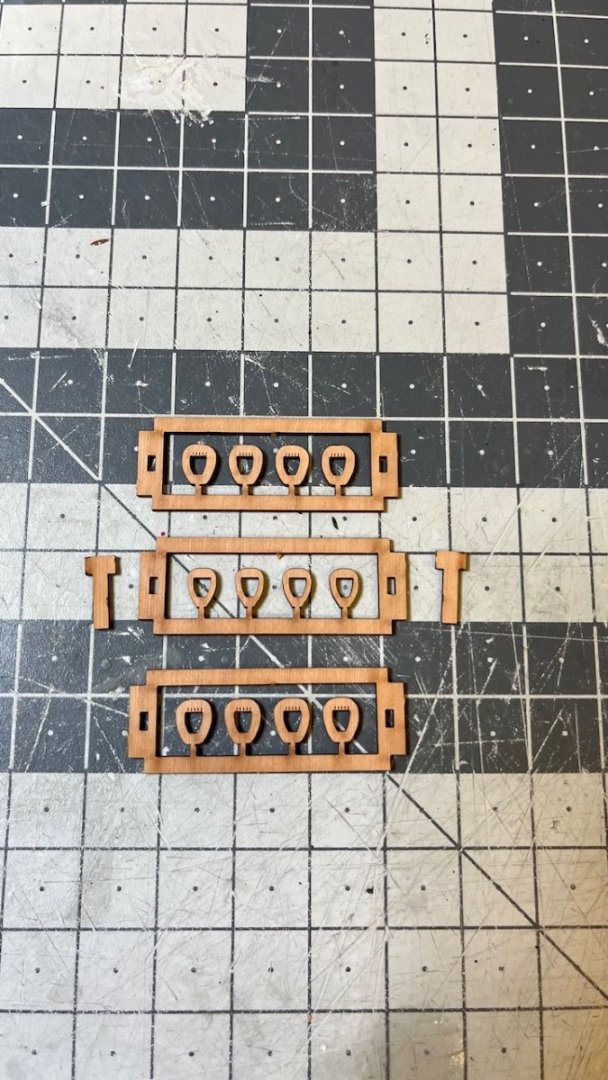
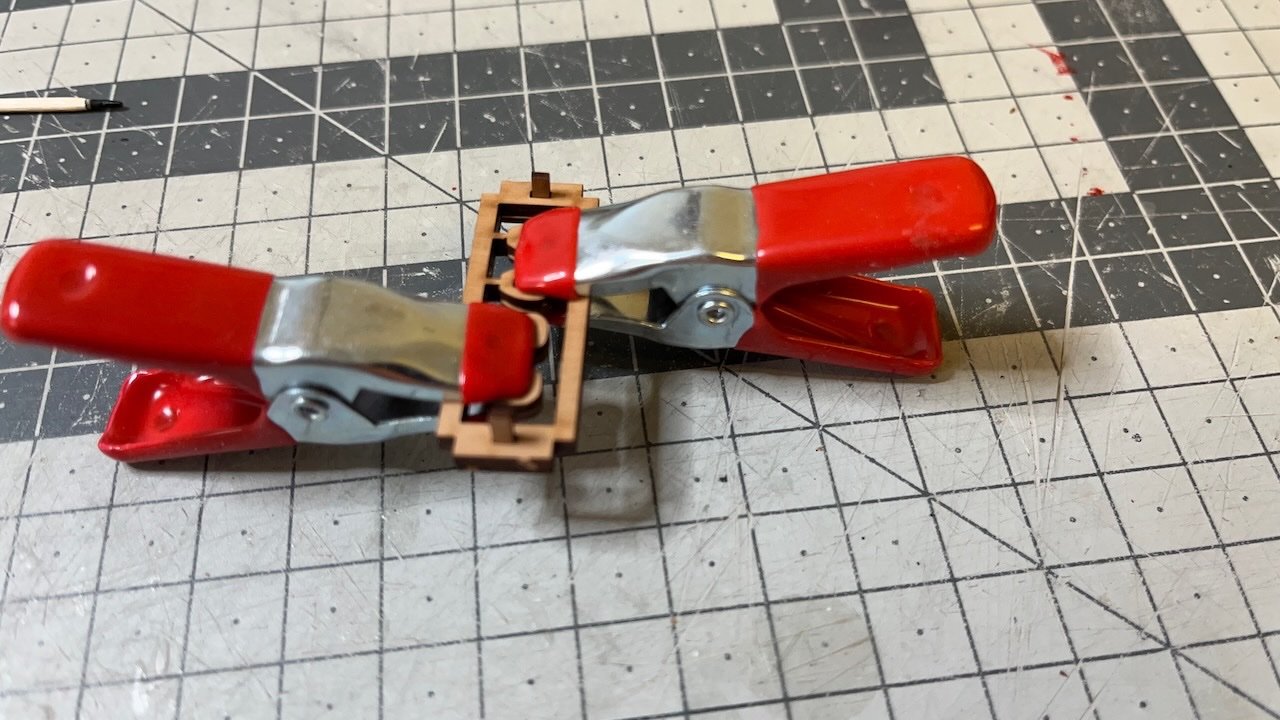
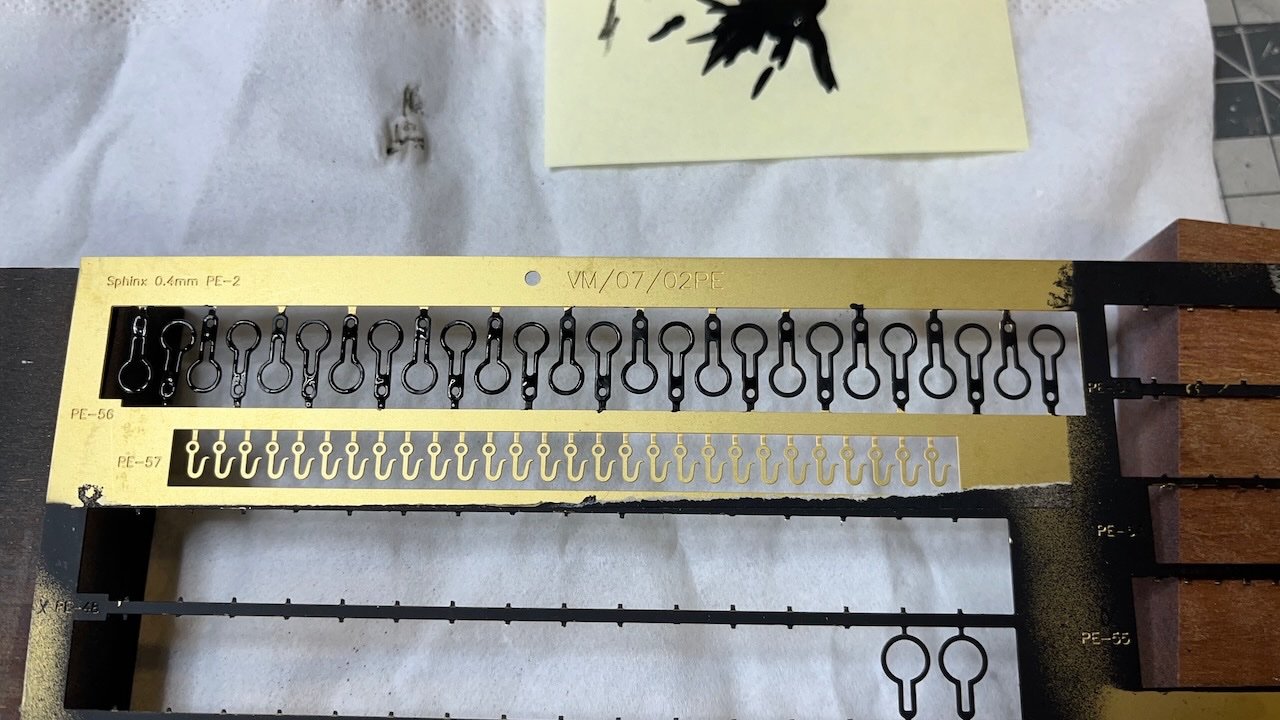
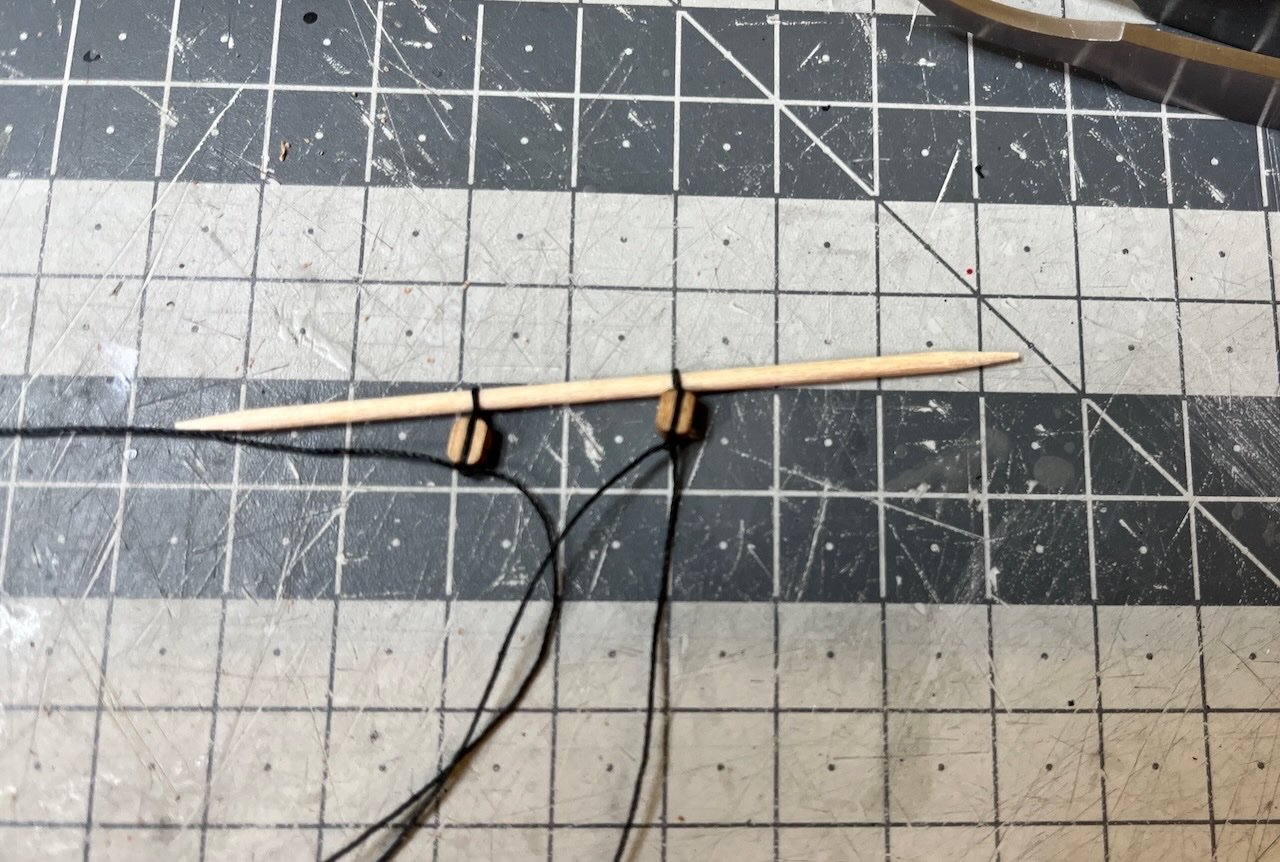
Build day 102: 3,5 hrs / Total 223 hours Today I spent around 3,5 hours to complete Mizzen Mast Part 2 (i.e. the details) Photos 715-716: Some blocks have a loop at their end. In my previous models they have always been made of wire, but in Sphinx you'll make them from thread. I made them with the help of a toothpick as below: Photo 717: PE parts painted, waiting to dry. Those in the photo are for deadeyes.

- 426 replies
-
- 3
-
-
- Vanguard Models
- Sphinx
- (and 1 more)
-
Photo 714: First installation on masts. In the photo it is the Mizzen mast. I did the black paintings first. This was a bit like a test to see how I am adjusting the hand and fingers to start working with different parts such as blocks and thread
- 426 replies
-
- 6
-
-
- Vanguard Models
- Sphinx
- (and 1 more)
-
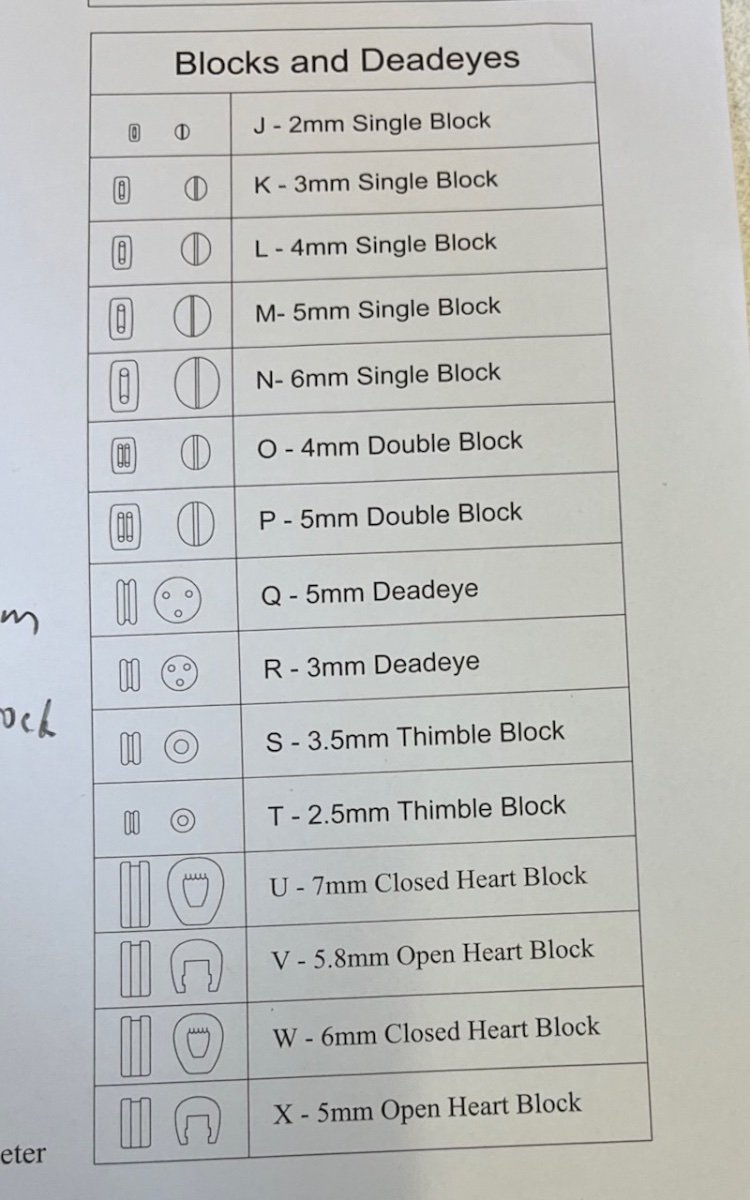
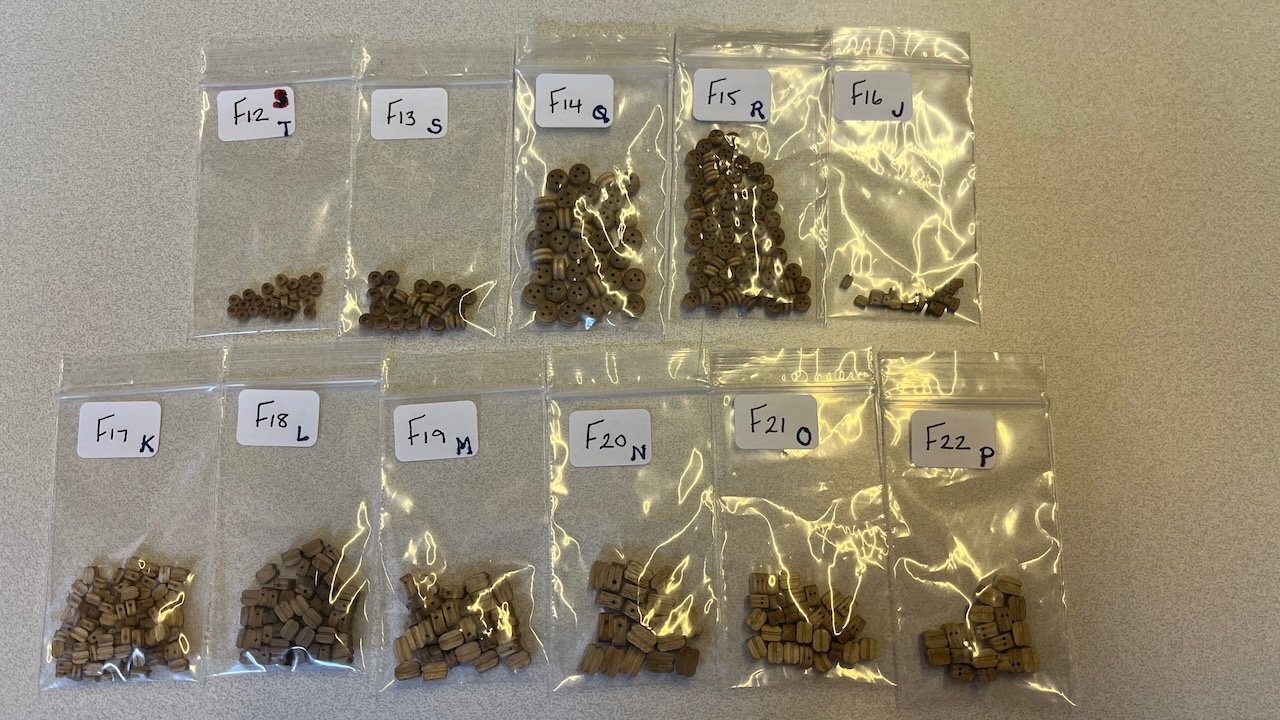
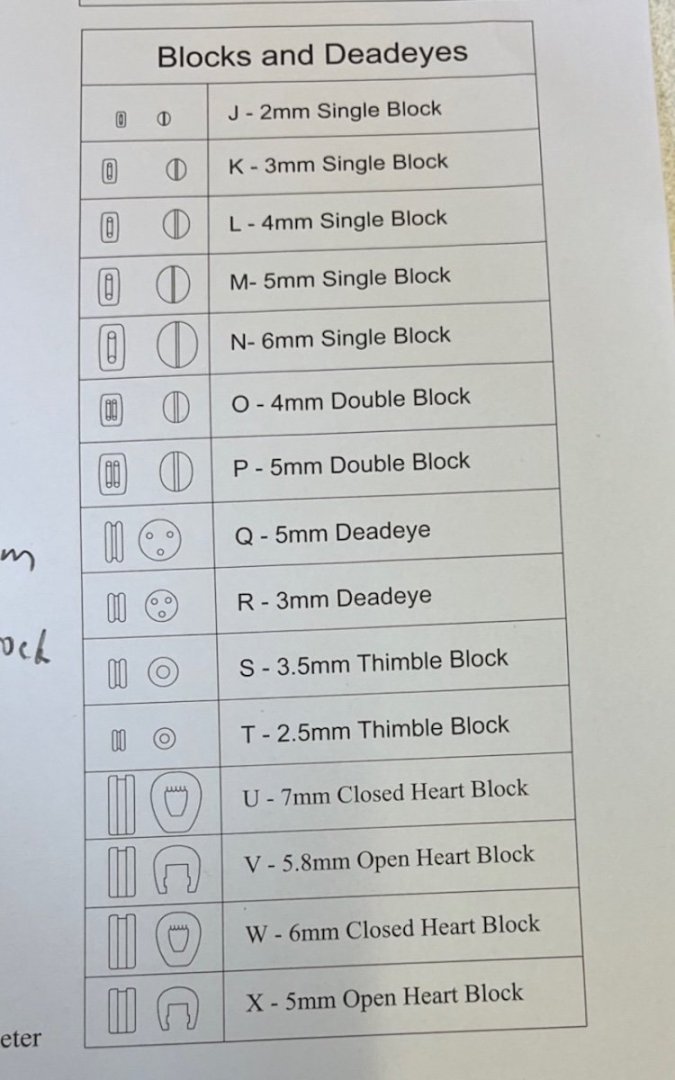
Photos 712-713: Next job is the so called my "Part 2" work on the masts: finishing work such as painting, blocks, deadeyes etc. It will help to label them with the same letter codes as on the plan.
- 426 replies
-
- 3
-
-
- Vanguard Models
- Sphinx
- (and 1 more)