HOLIDAY DONATION DRIVE - SUPPORT MSW - DO YOUR PART TO KEEP THIS GREAT FORUM GOING! (Only 24 donations so far out of 49,000 members - C'mon guys!)
×


aydingocer
-
Posts
916 -
Joined
-
Last visited
Content Type
Profiles
Forums
Gallery
Events
Everything posted by aydingocer
-
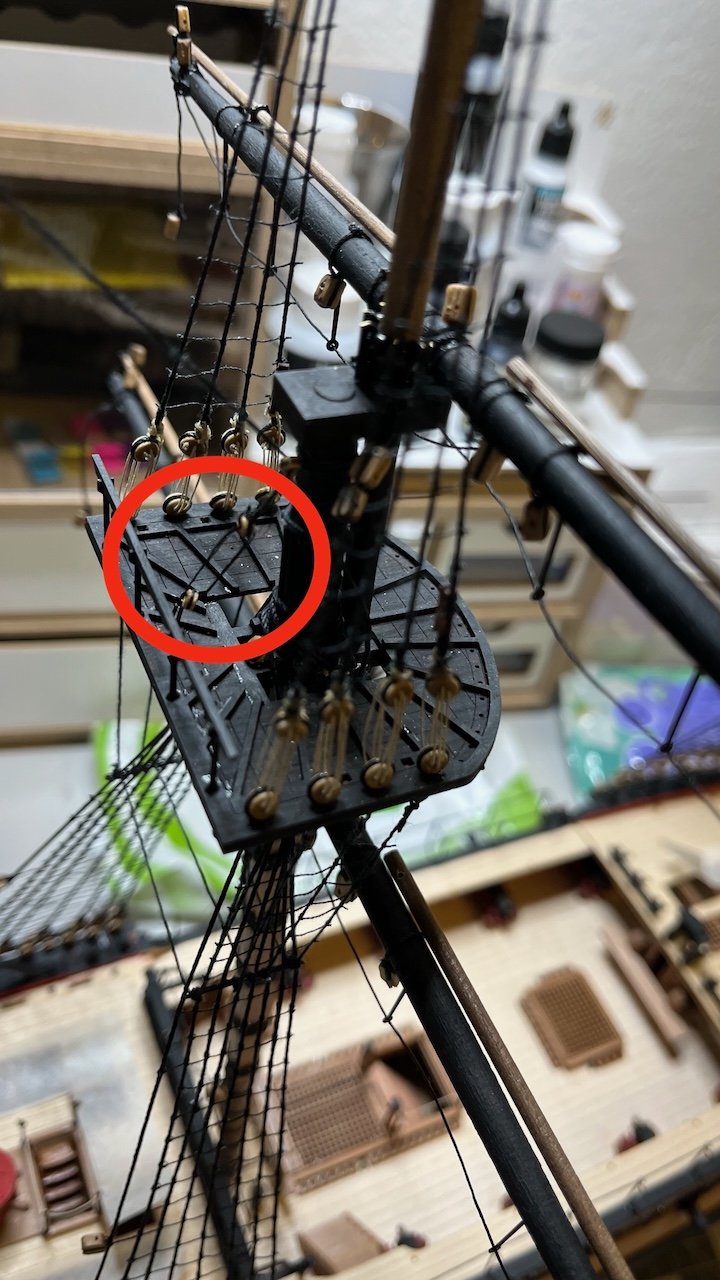
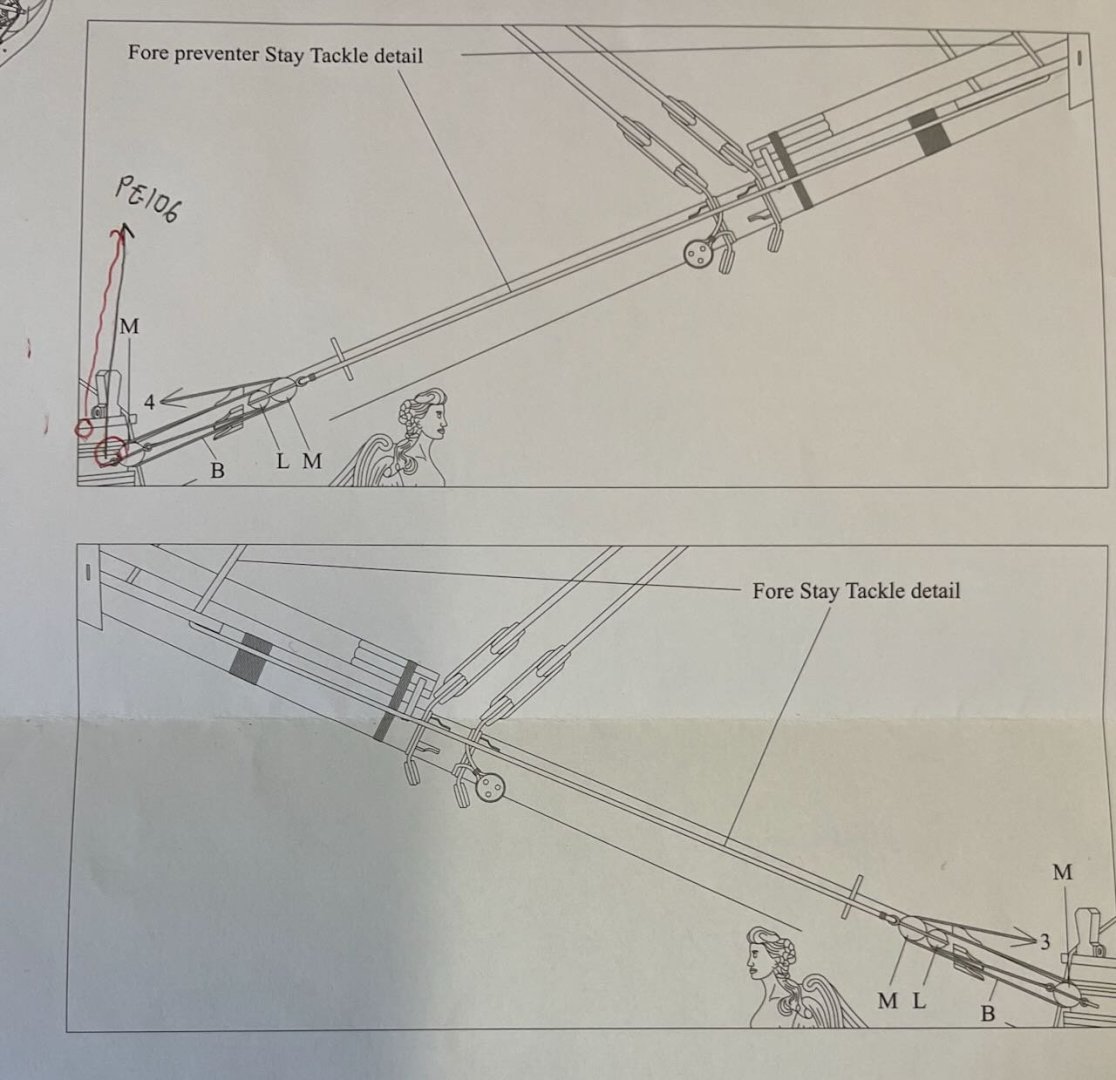
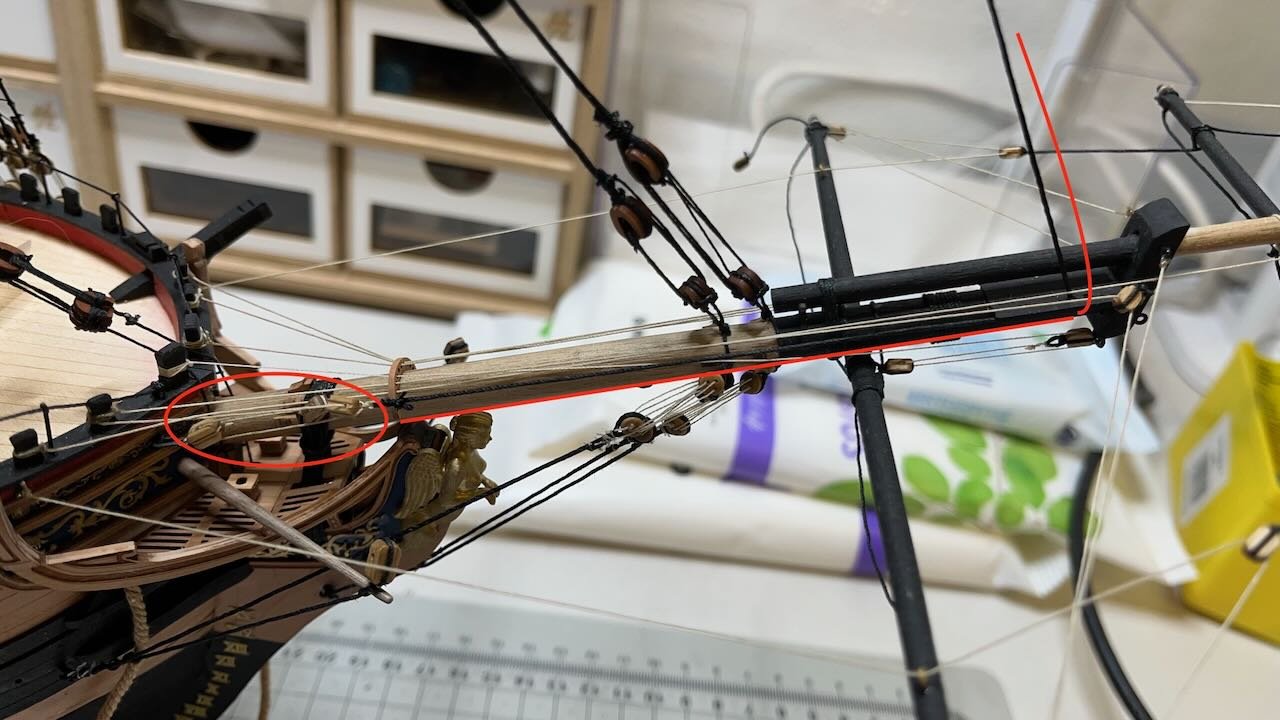
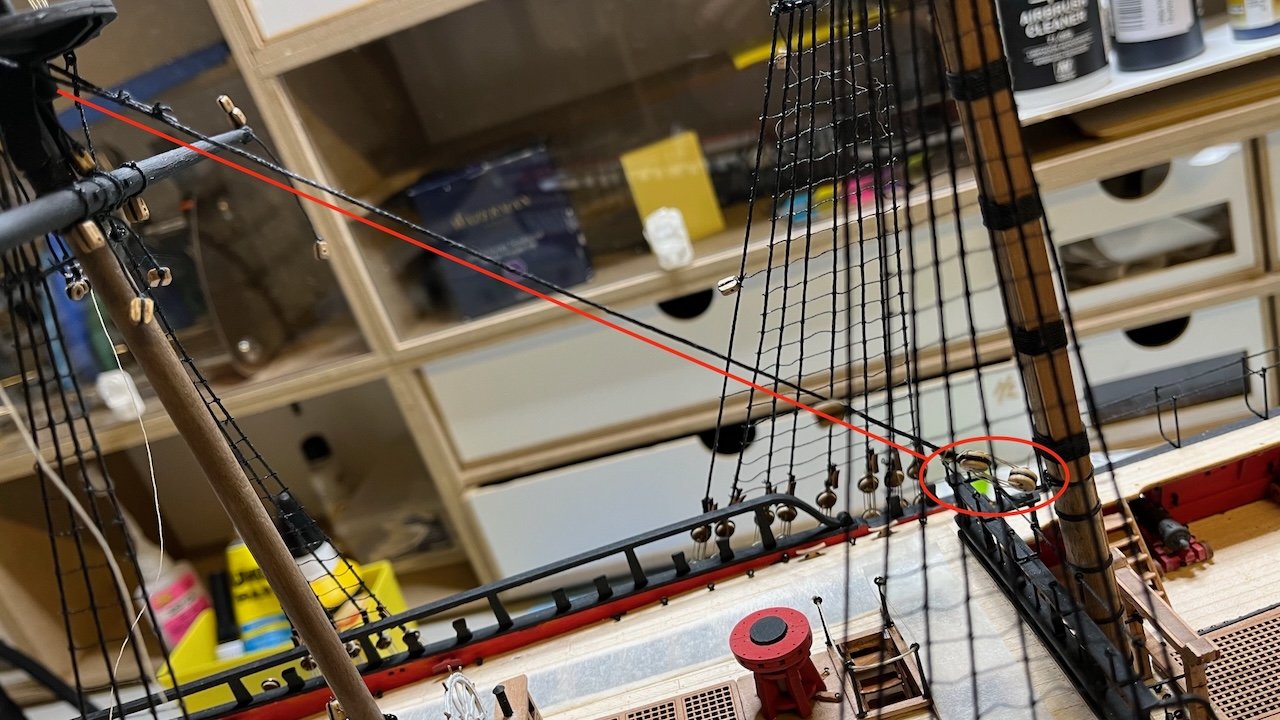
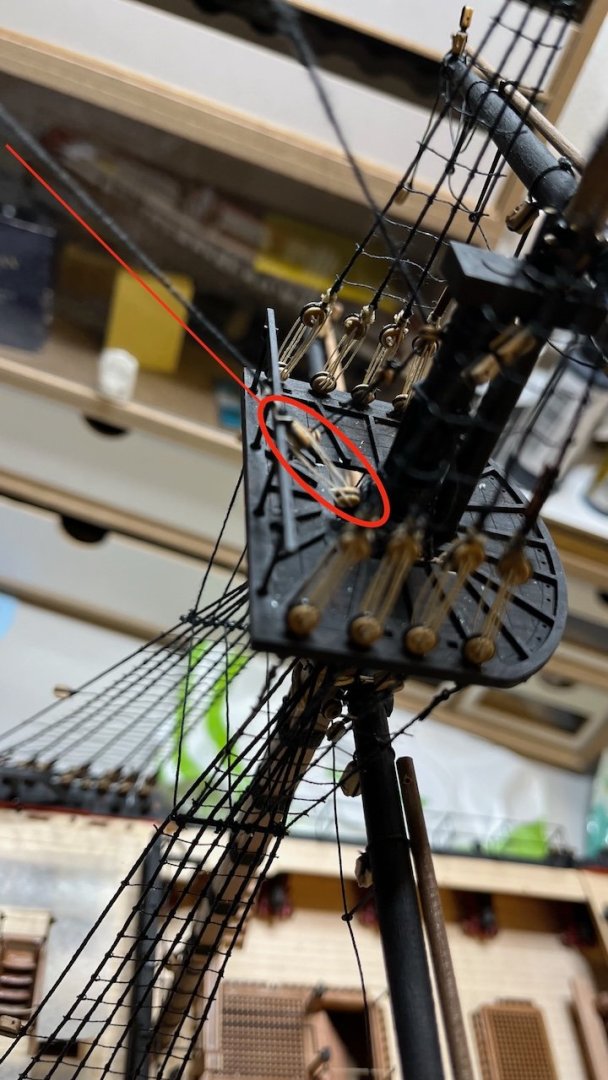
 Photo 869: Similarly, Fore Stay Tackle is in place.
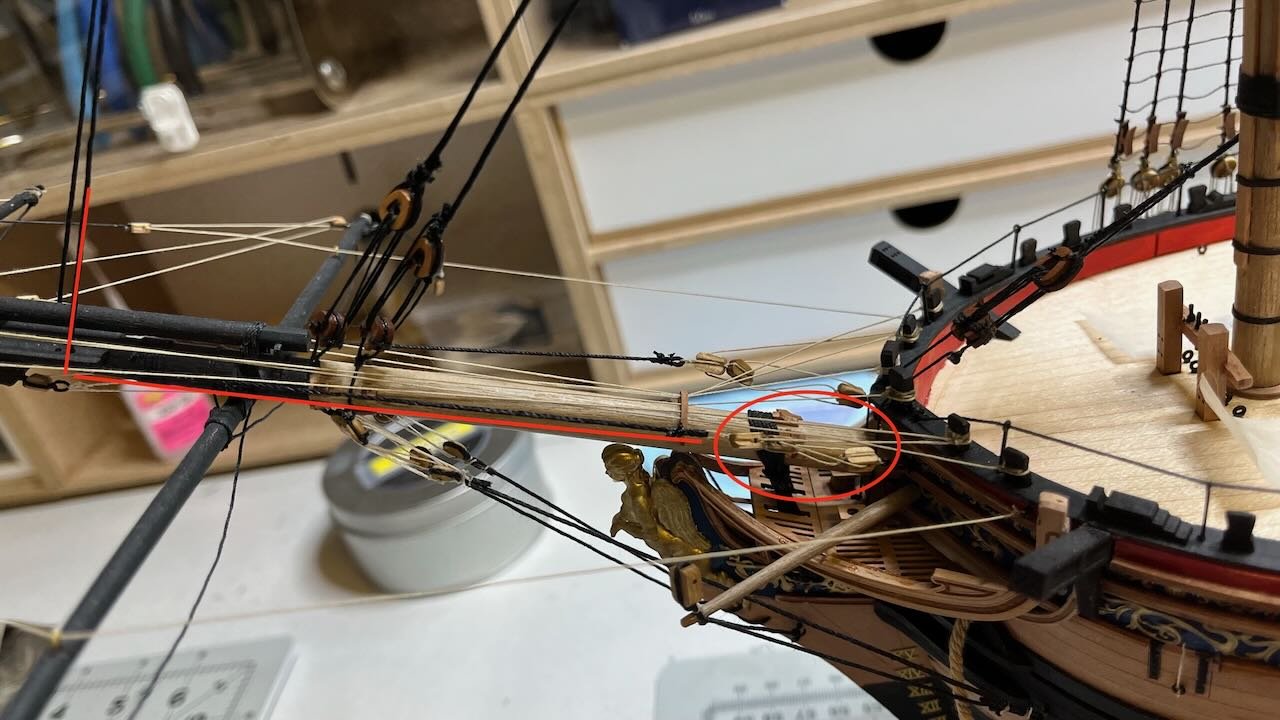
- 426 replies
-
- 9
-

-
- Vanguard Models
- Sphinx
- (and 1 more)
-
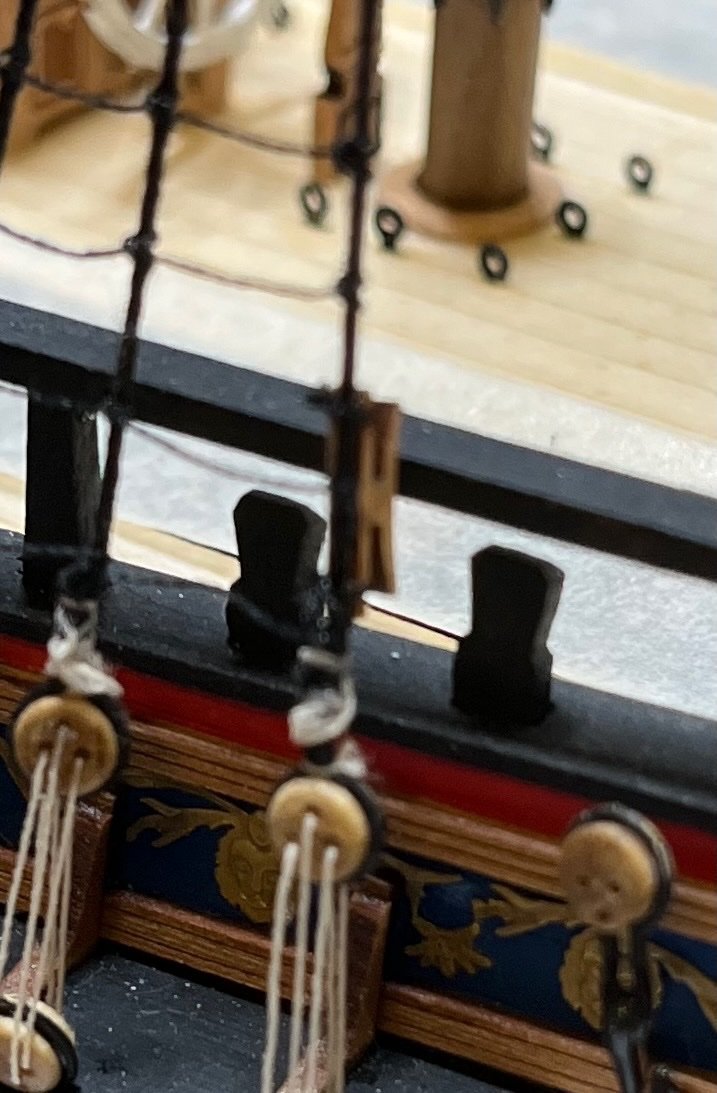
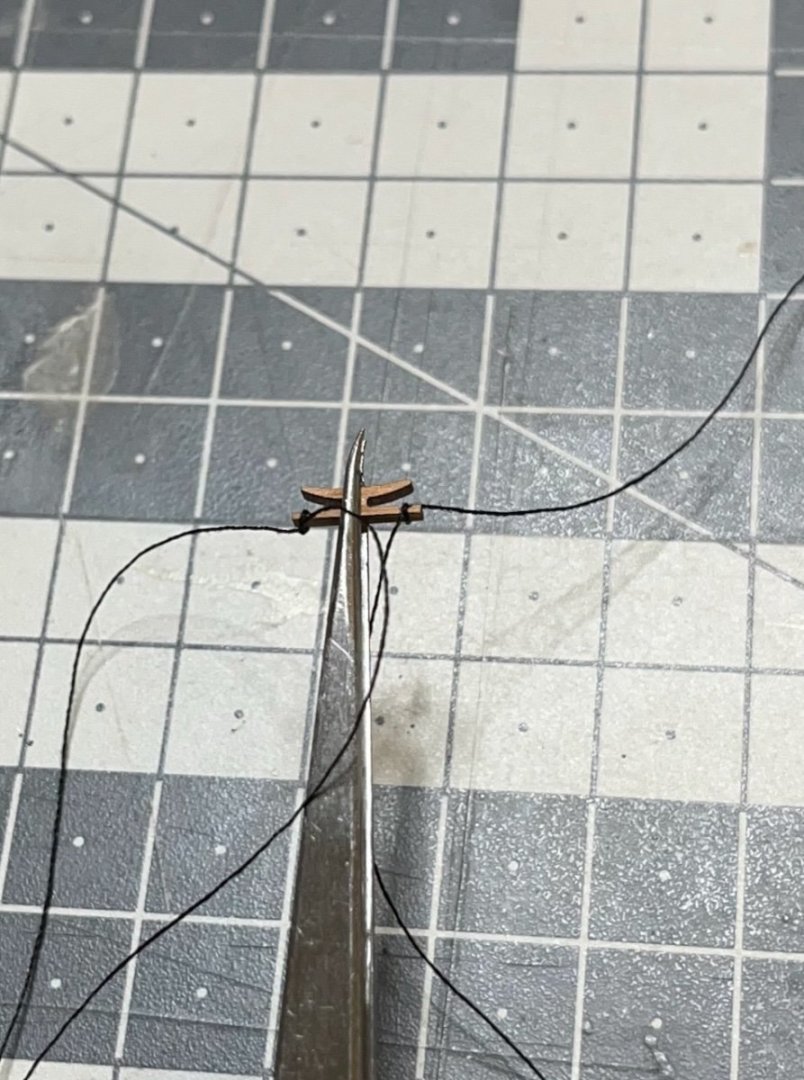
Photos 864 - 868: Fore Preventer Stay Tackle (the one on the starboard) construction.
- 426 replies
-
- 10
-
-
- Vanguard Models
- Sphinx
- (and 1 more)
-
Build day 165: 2,5 hrs / Total 338 hours Photos 863: Forestays

- 426 replies
-
- 5
-
-
- Vanguard Models
- Sphinx
- (and 1 more)
-
Build day 164: 2,5 hrs / Total 335,5 hours Photos 859-862: Continued with 2 main stay elements, including the blocks hanging on one of them. Took 2,5 hours.

- 426 replies
-
- 6
-
-
- Vanguard Models
- Sphinx
- (and 1 more)
-
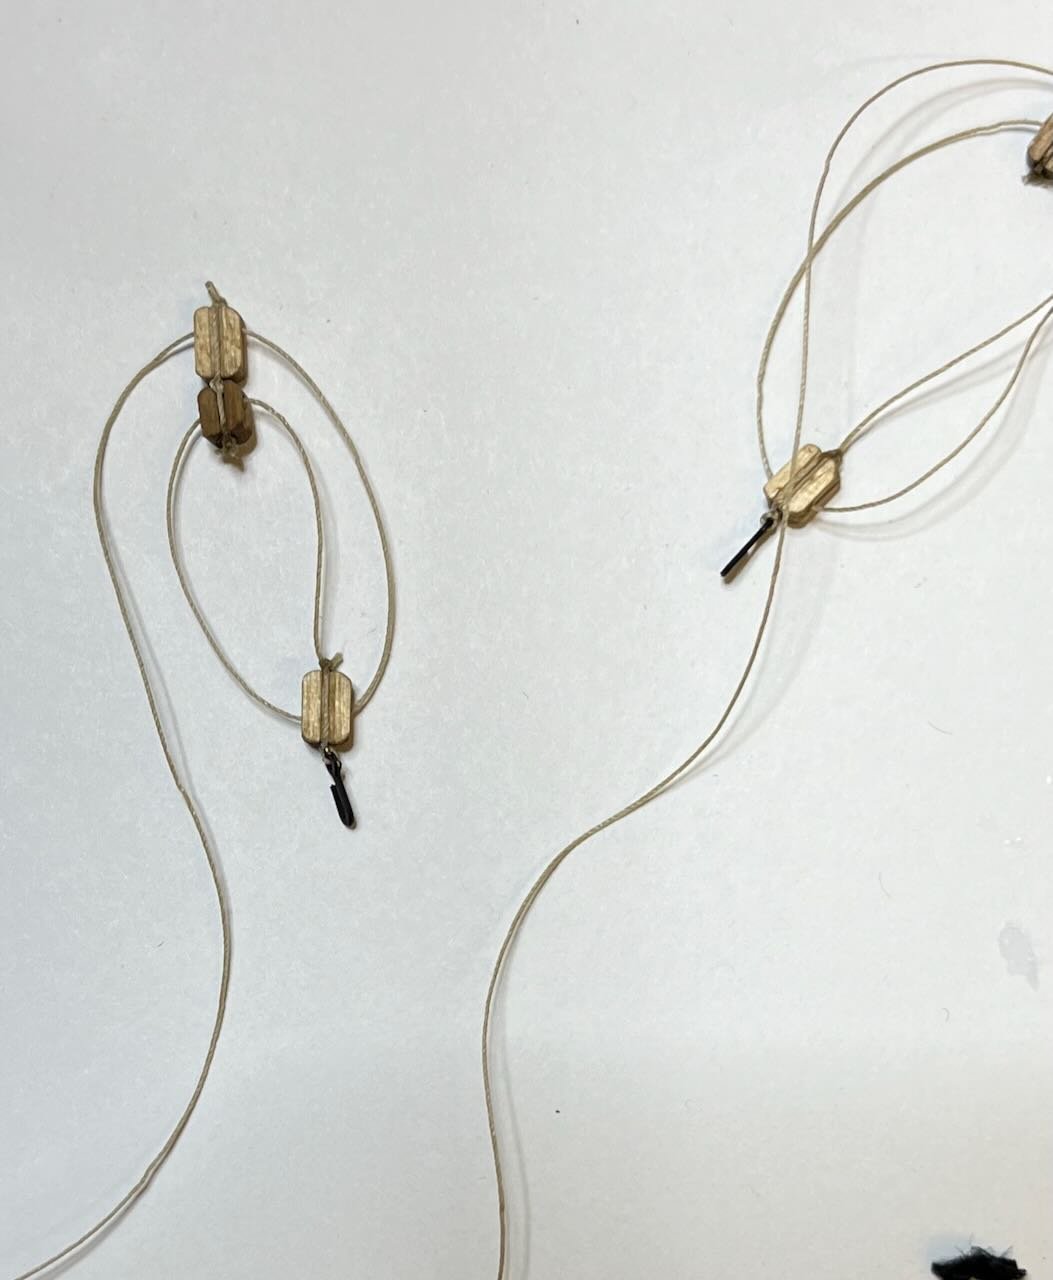
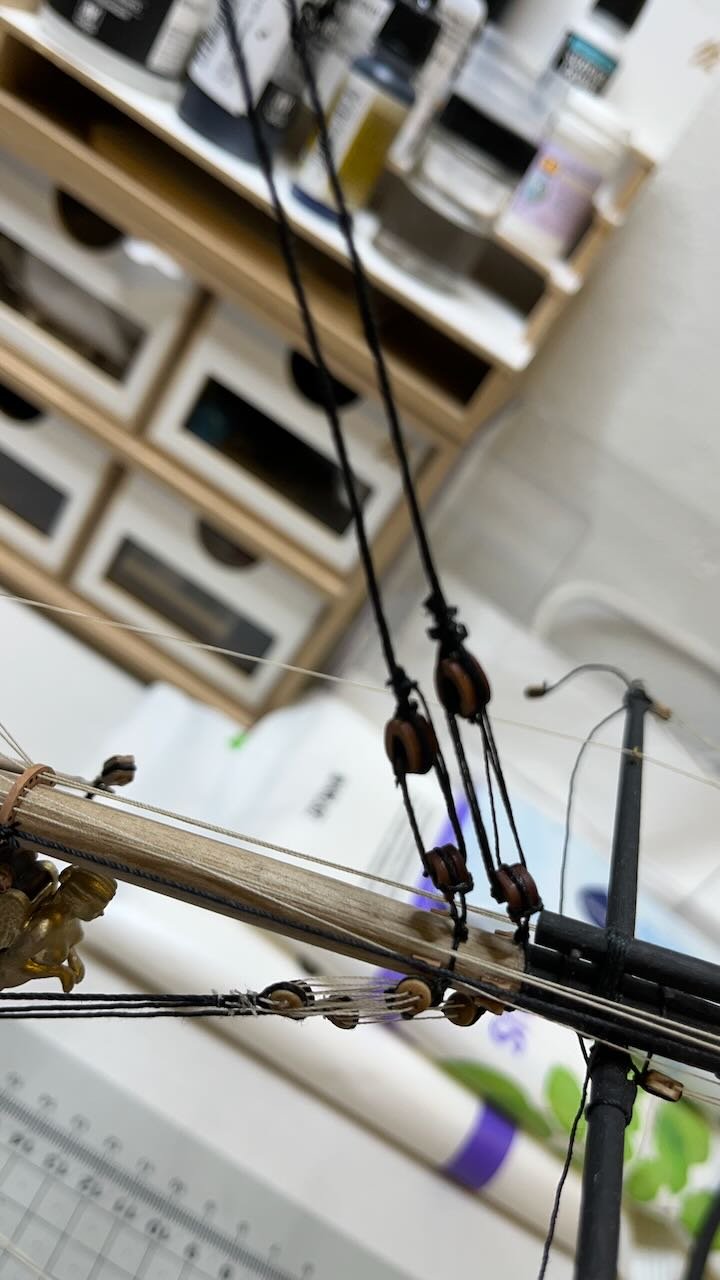
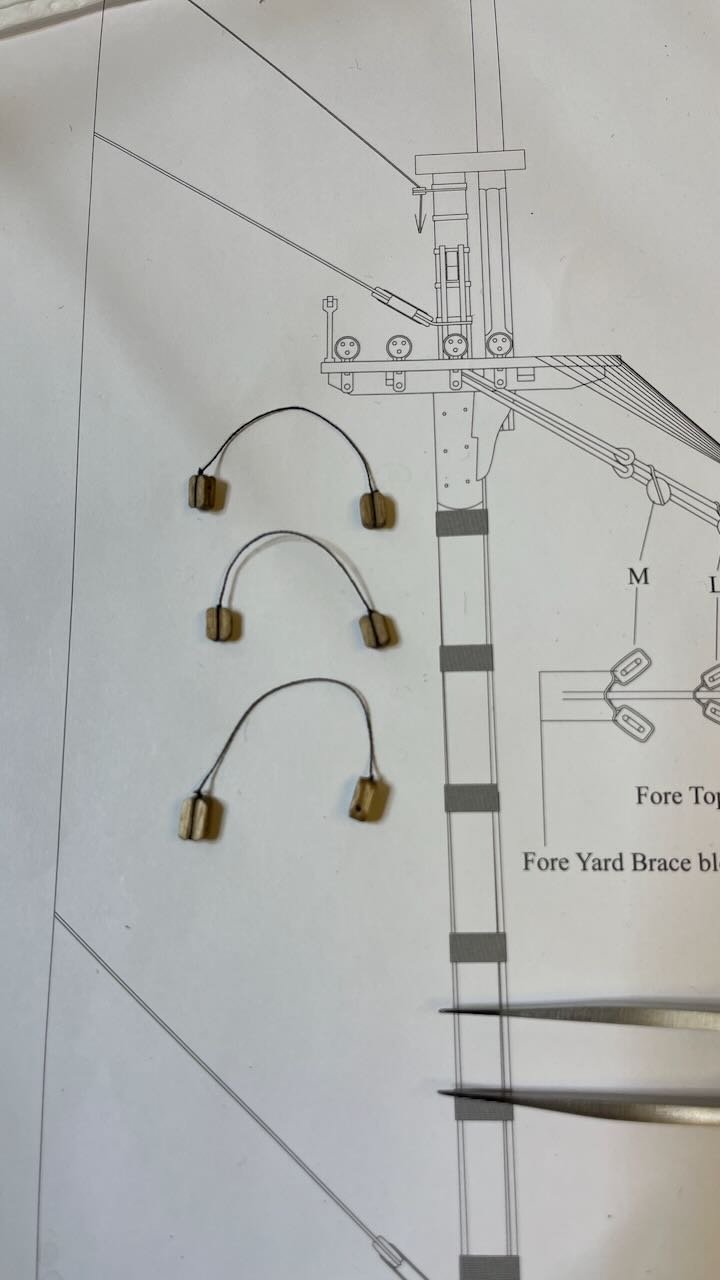
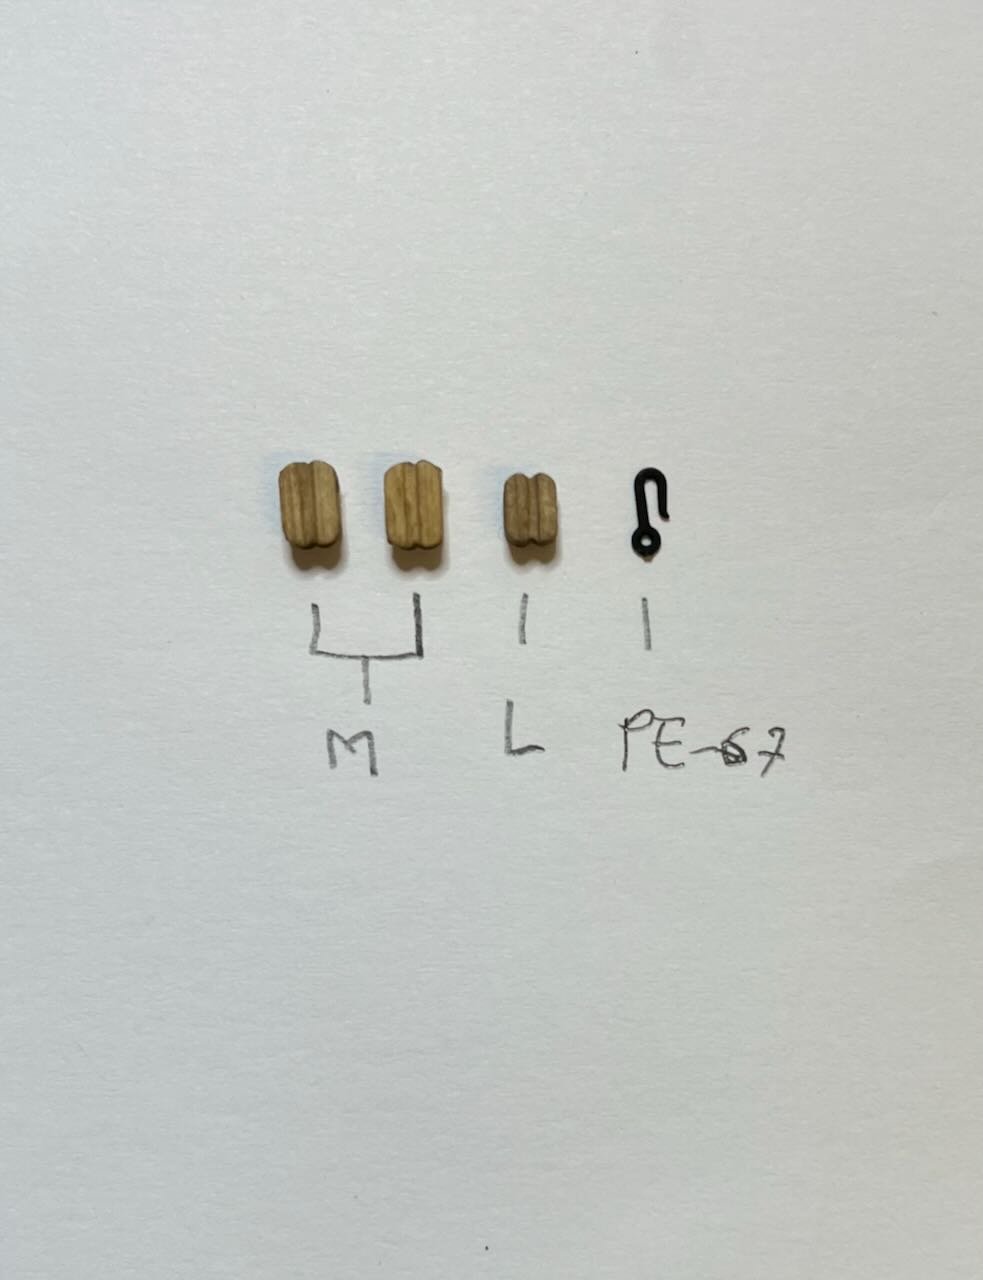
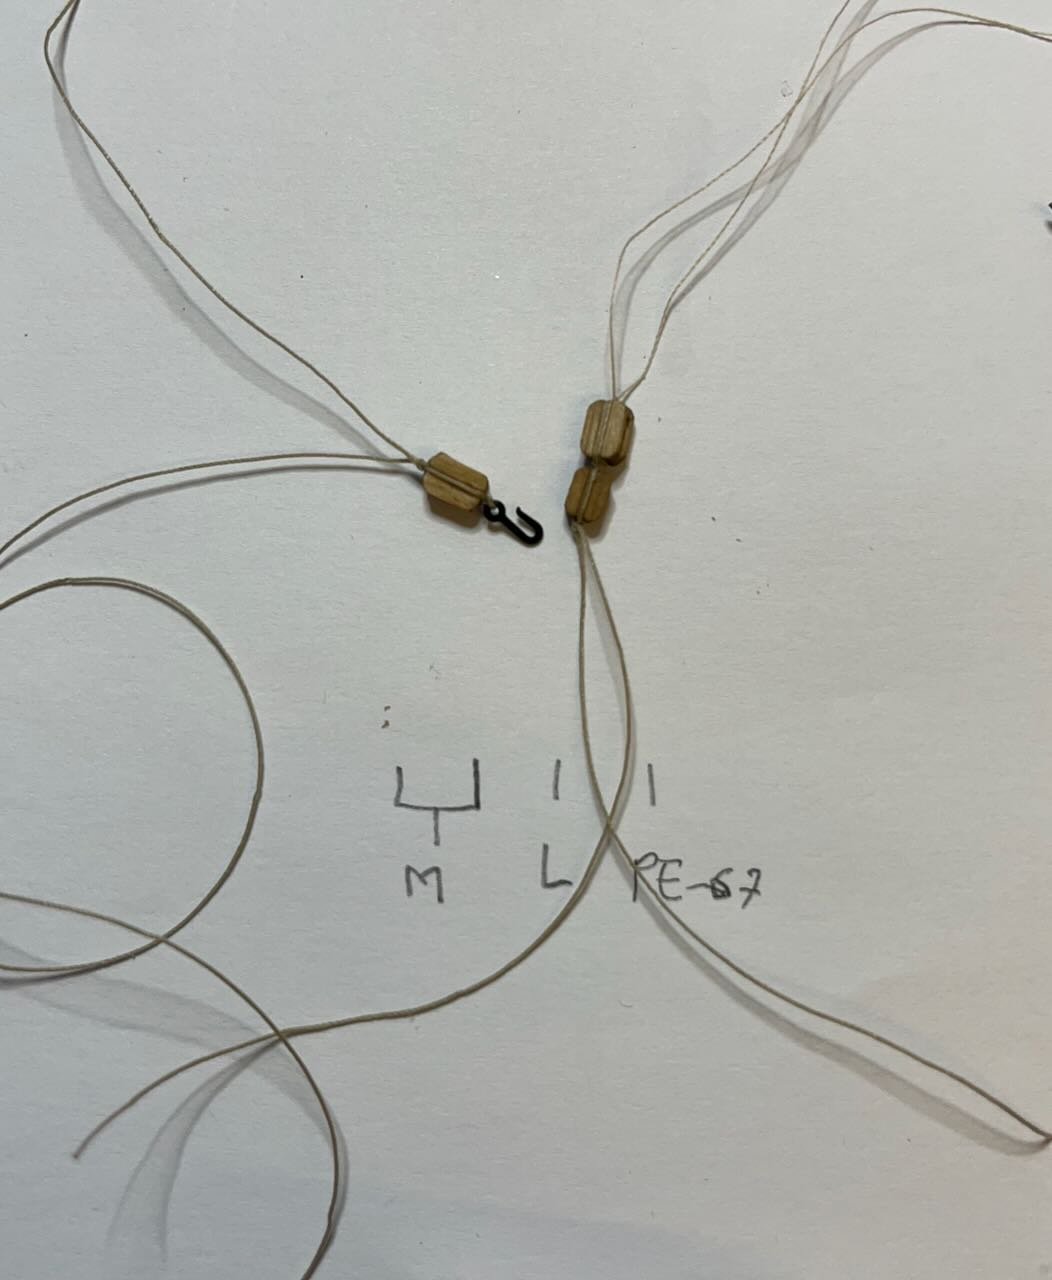
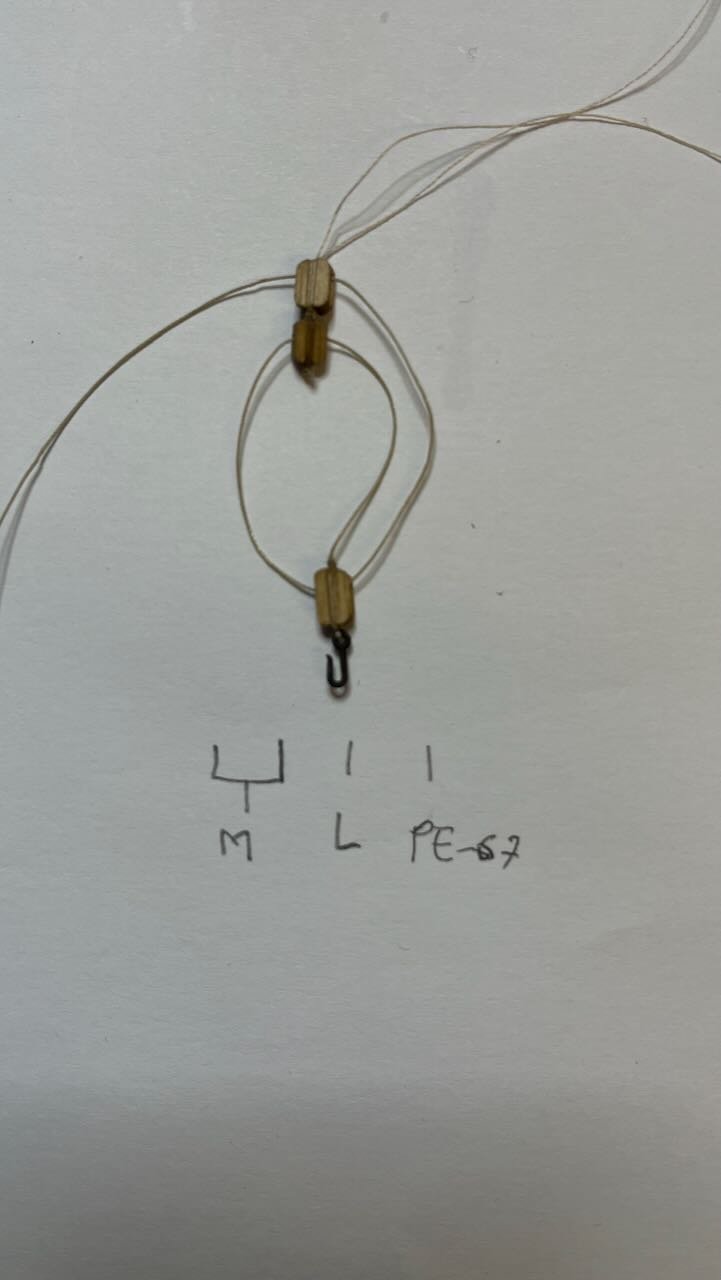
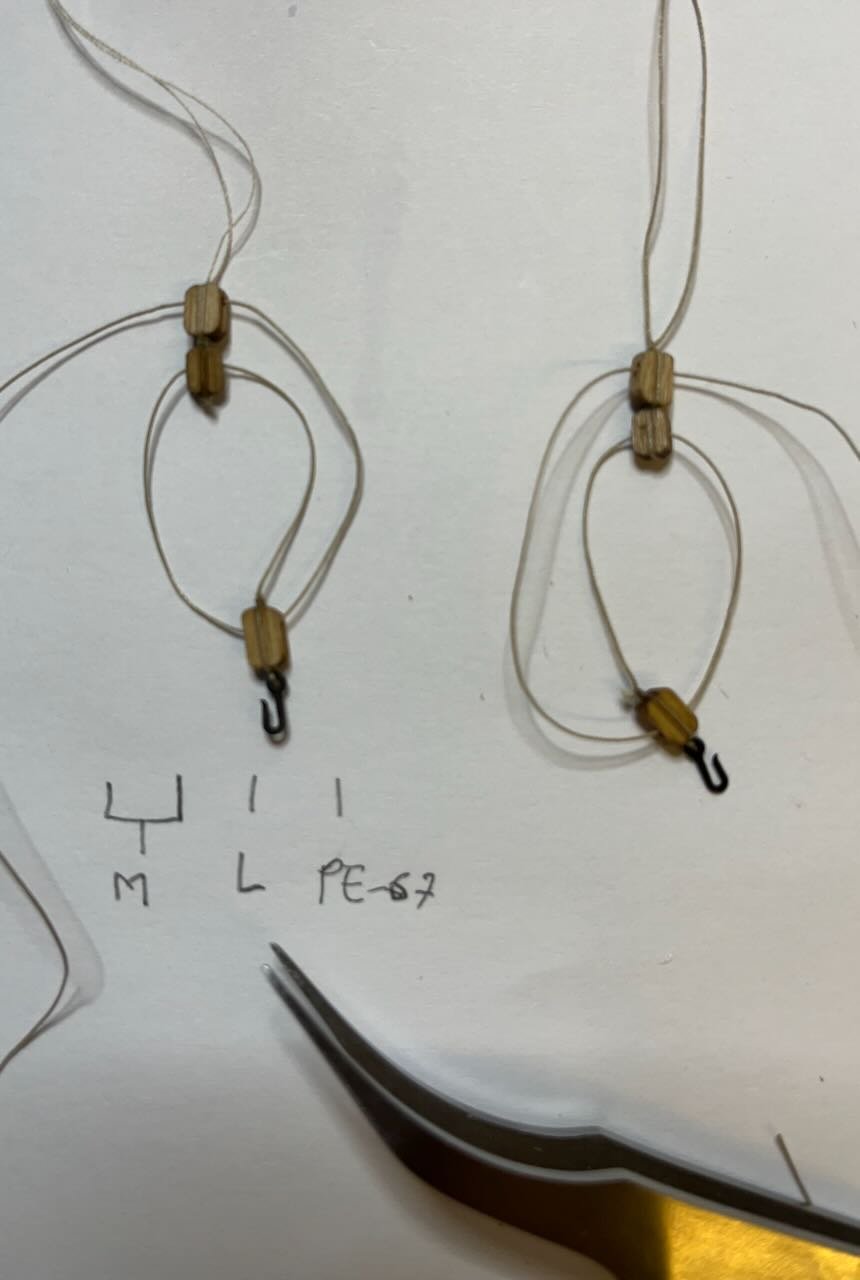
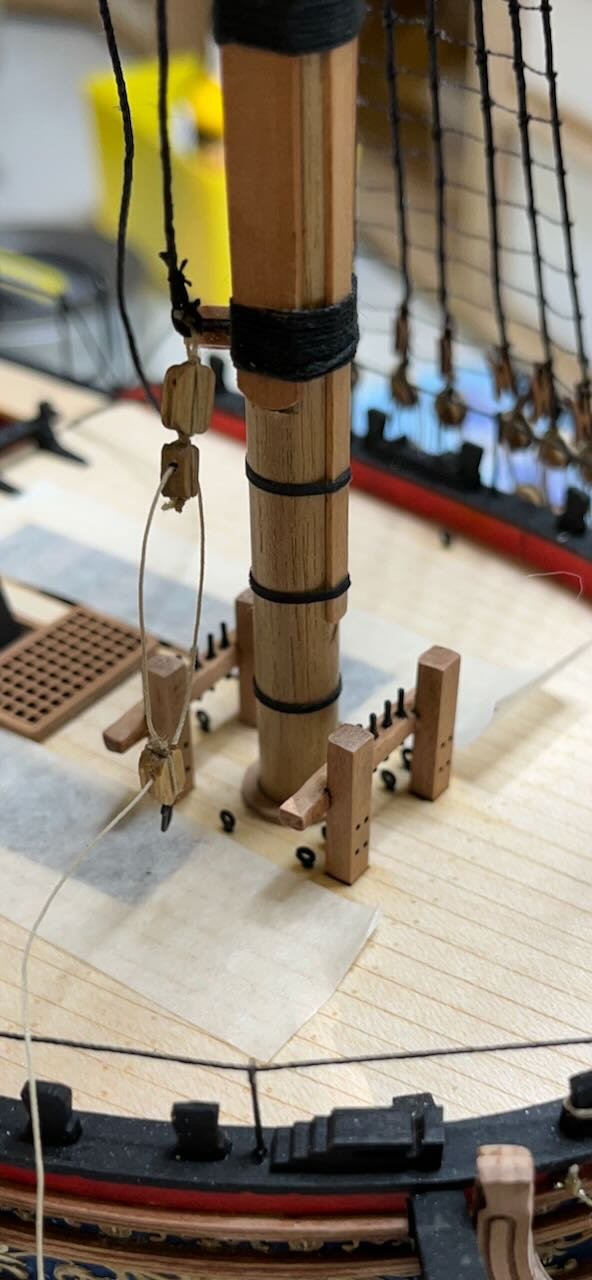
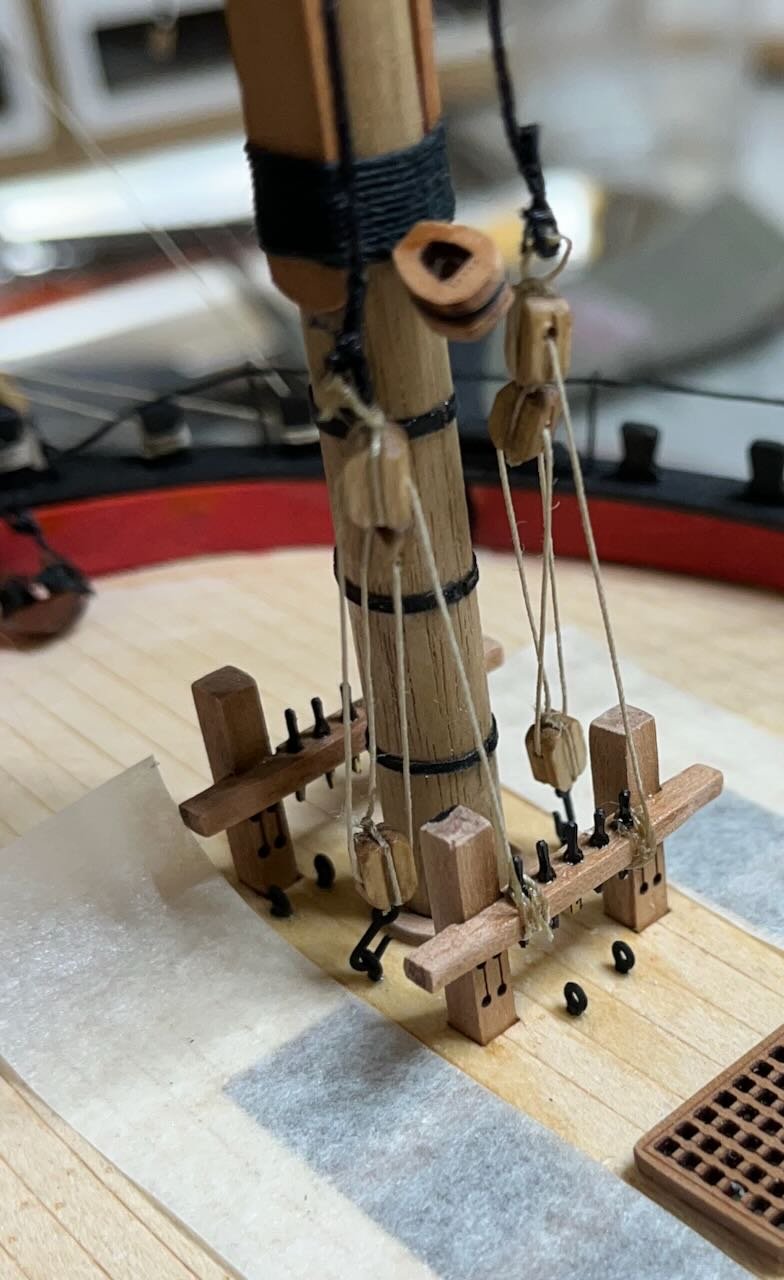
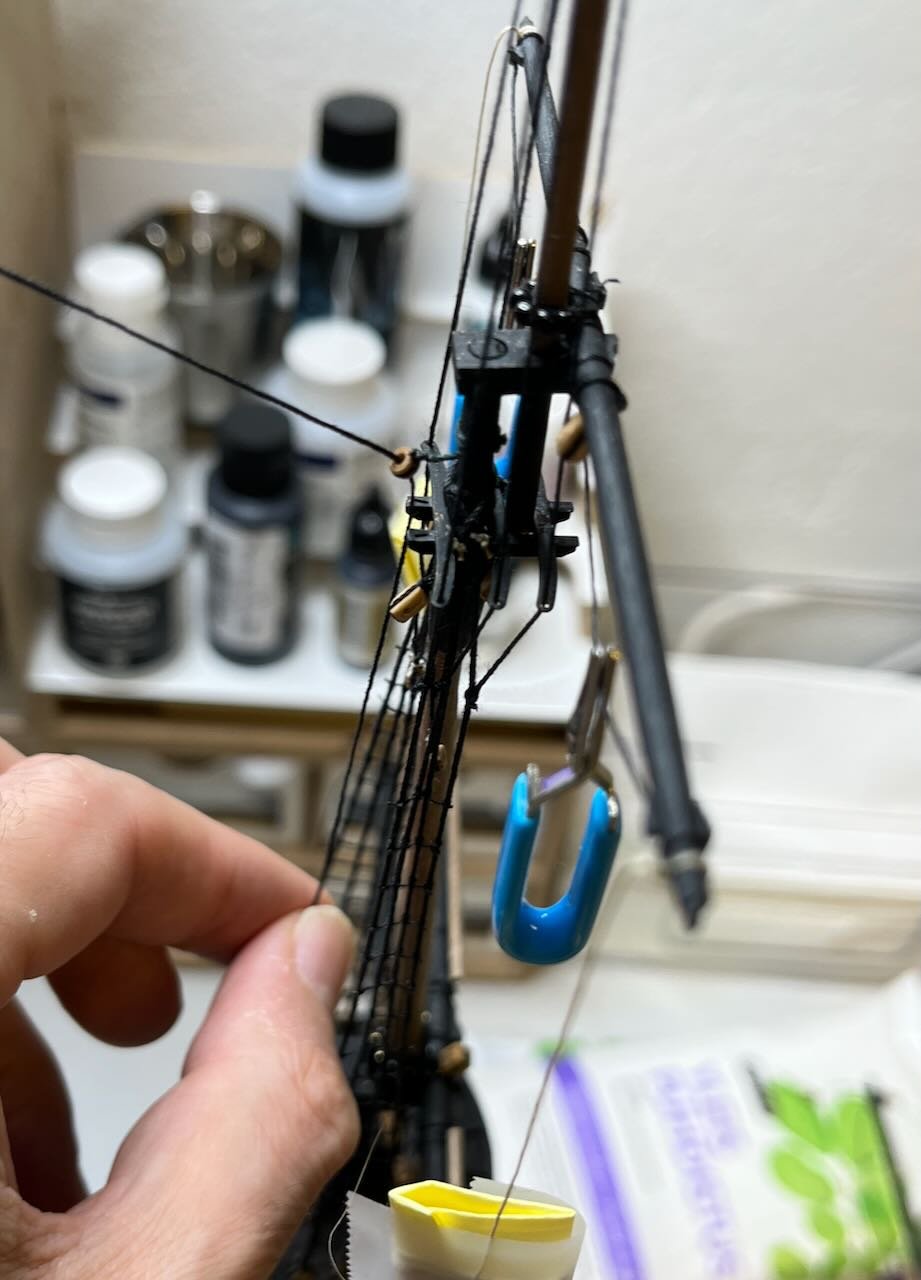
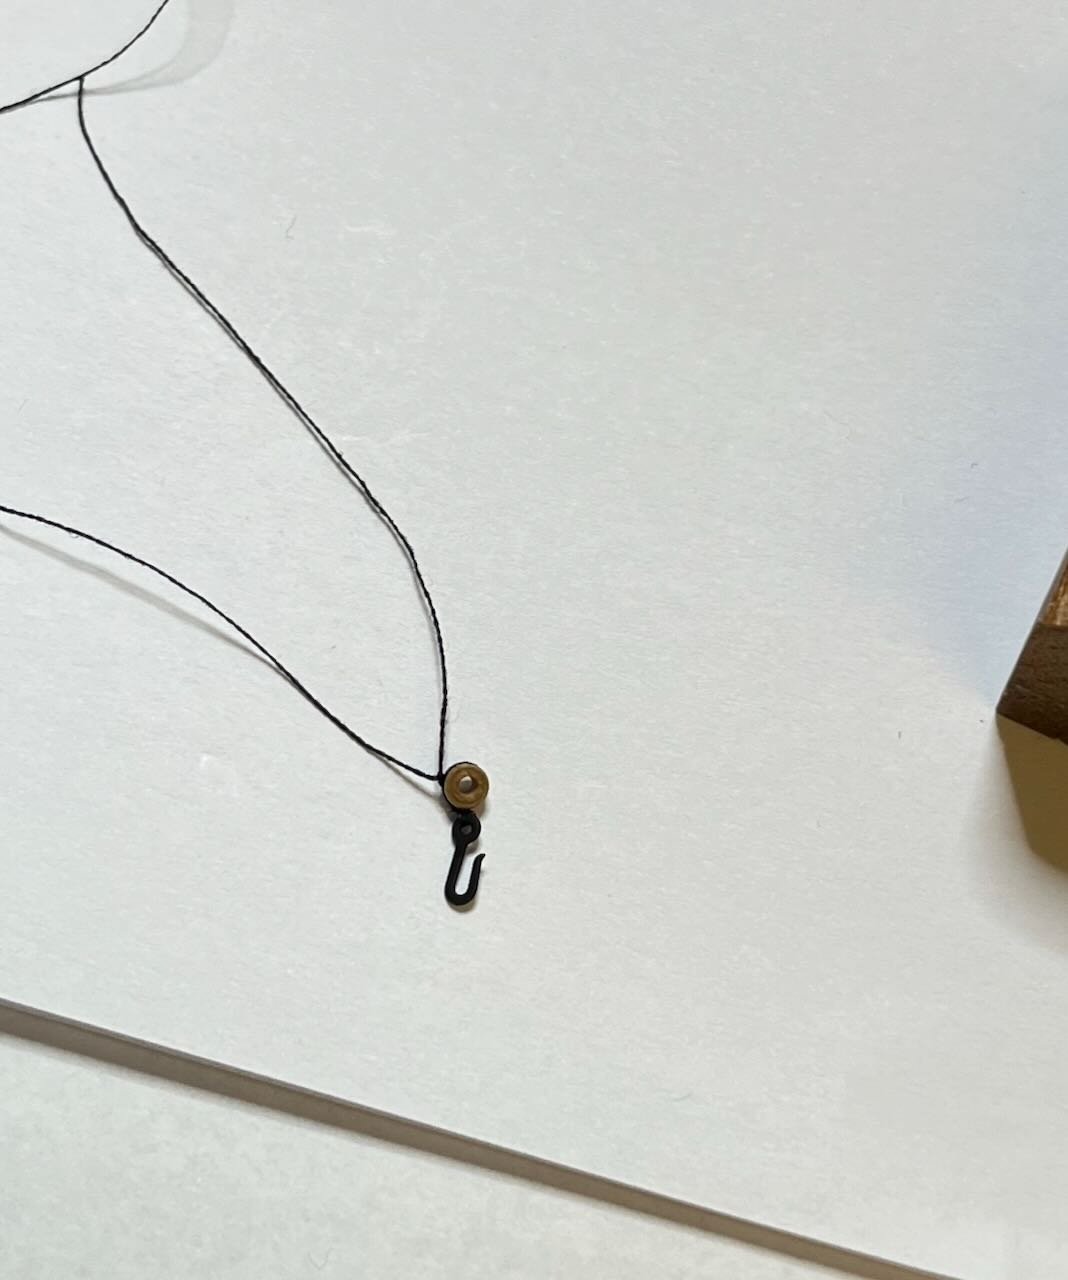
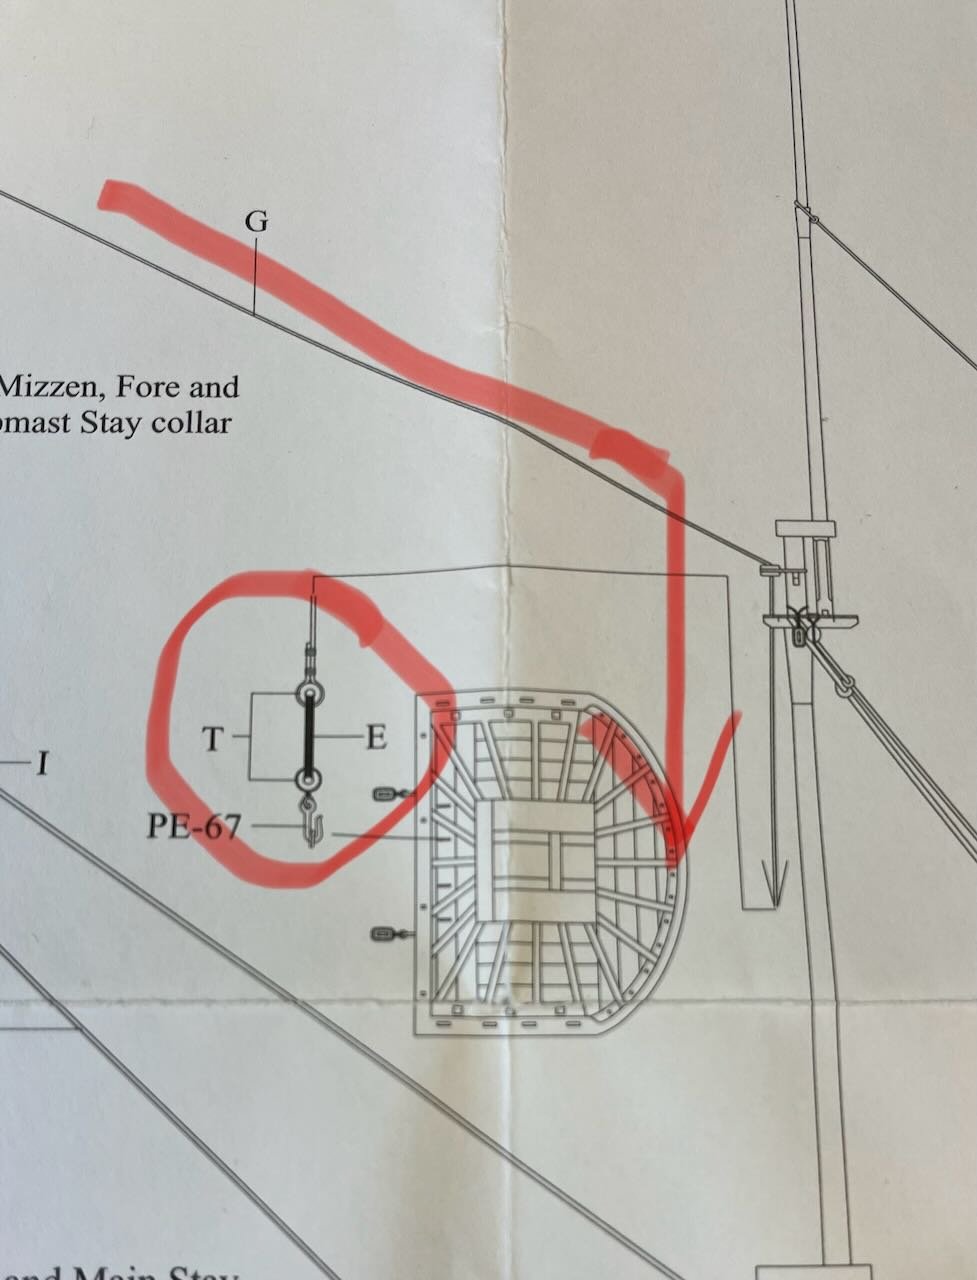
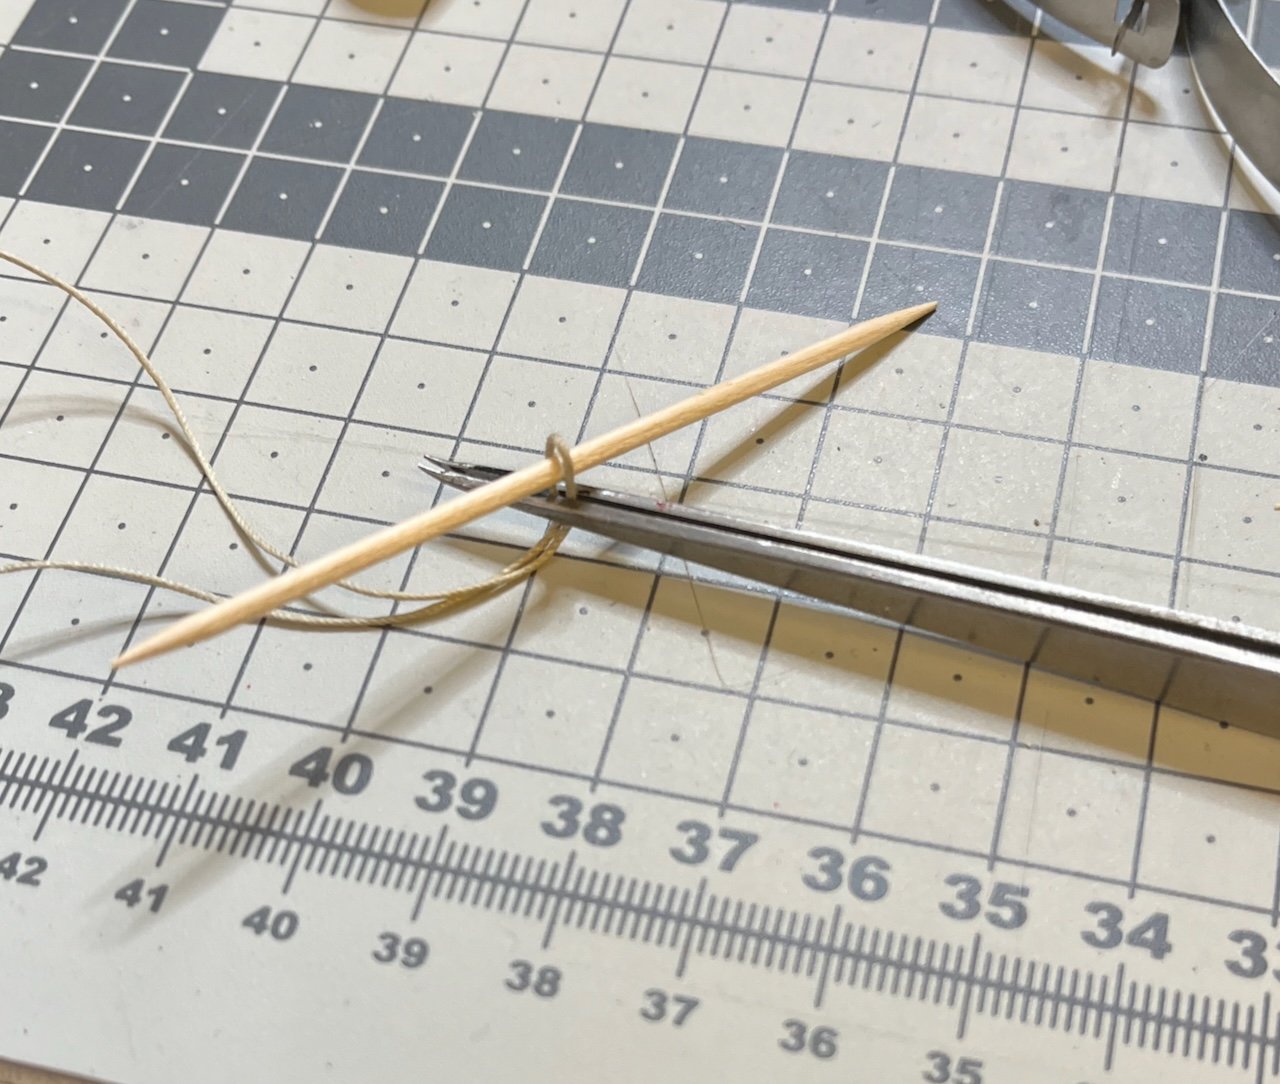
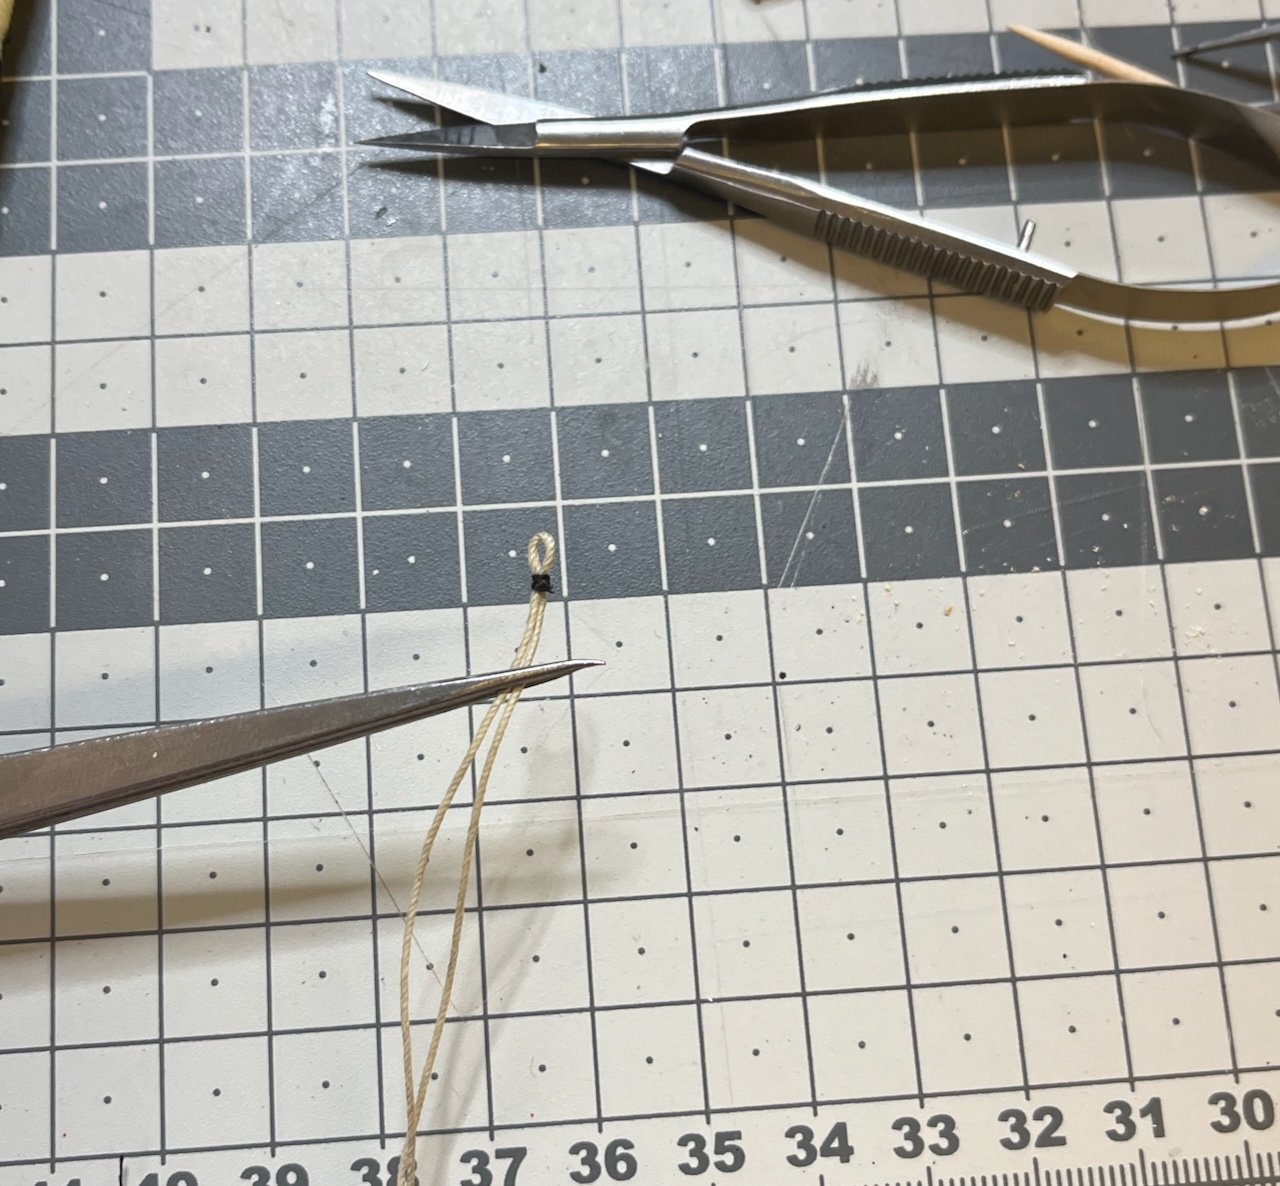
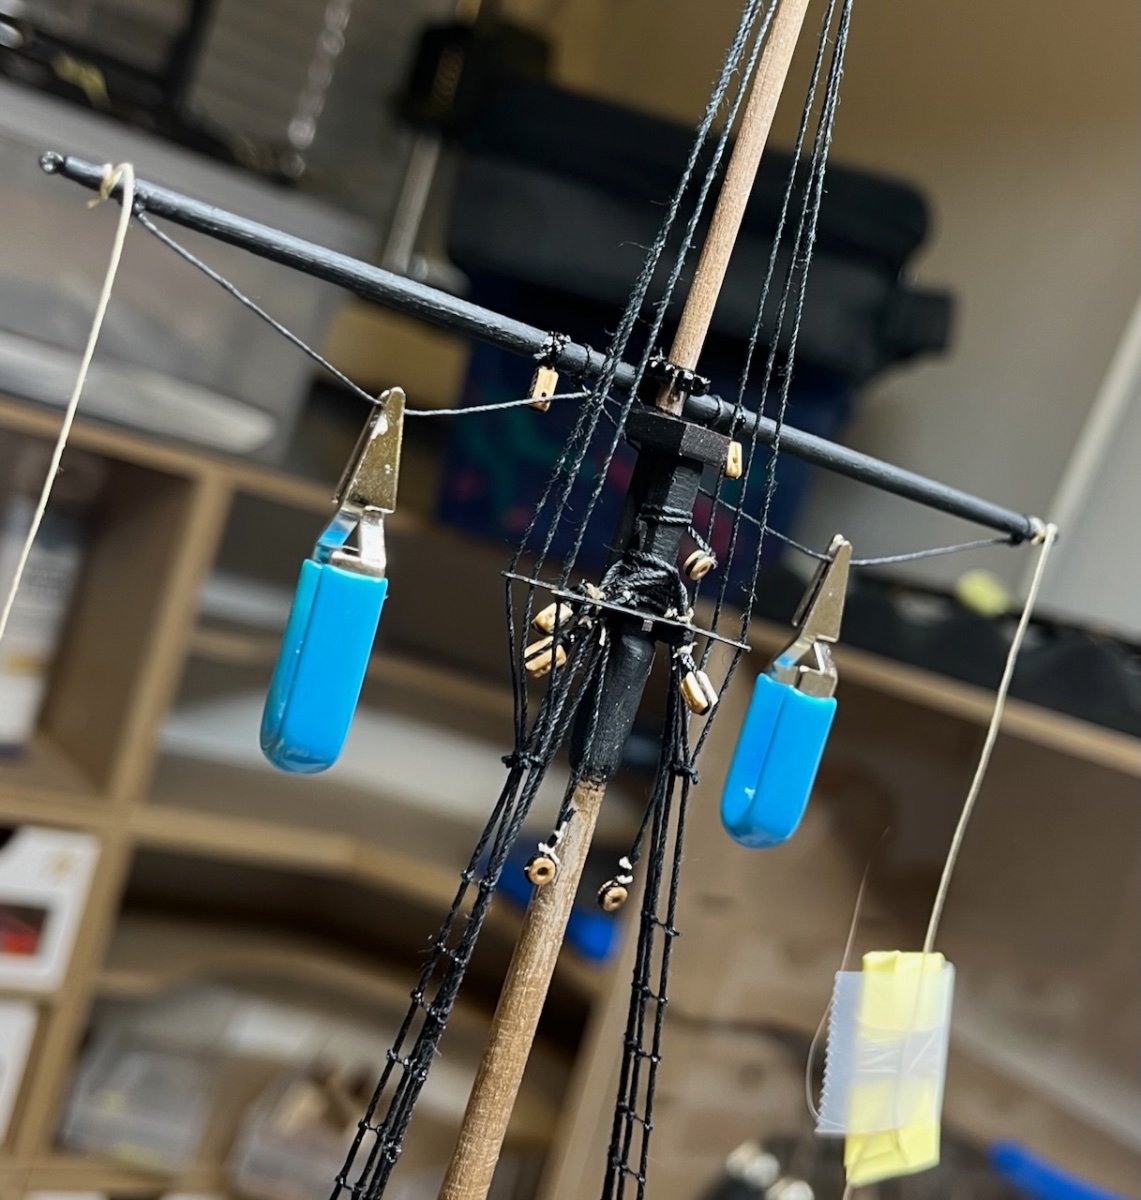
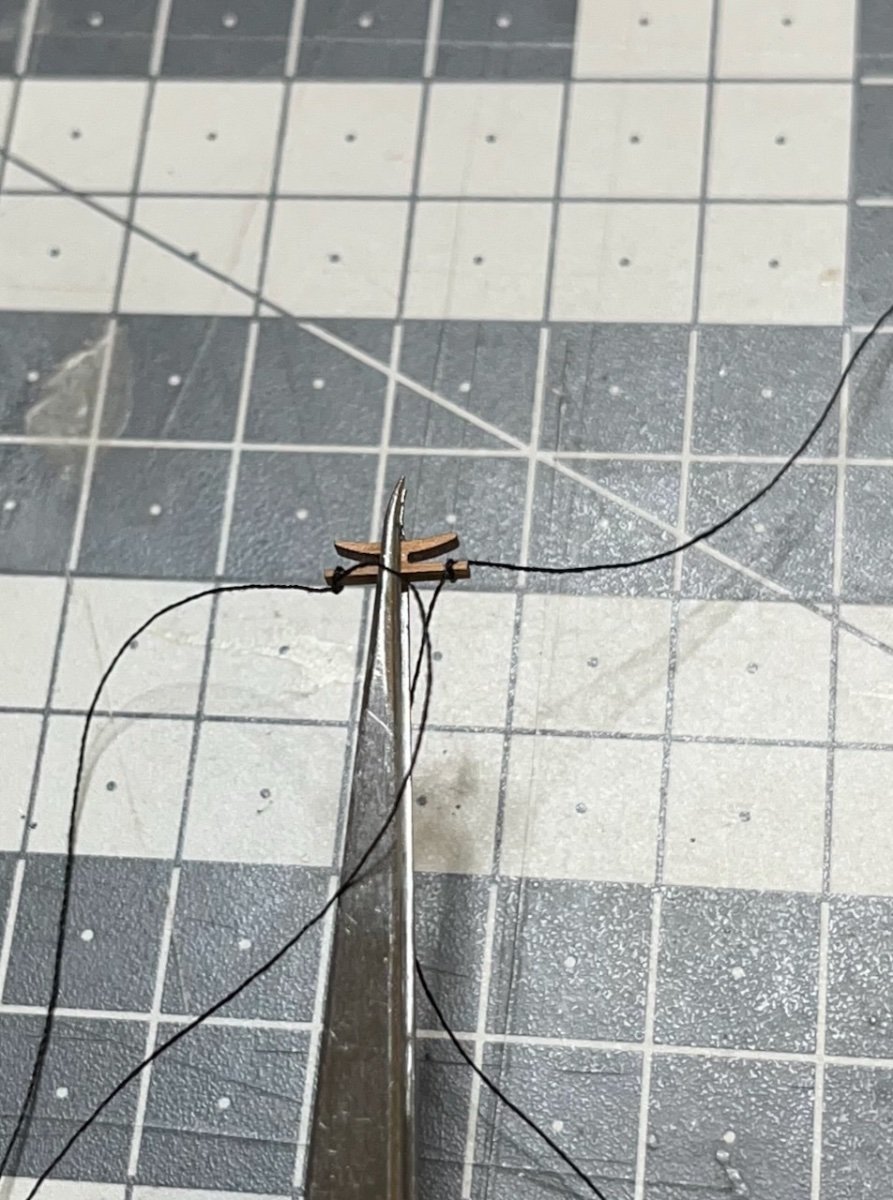
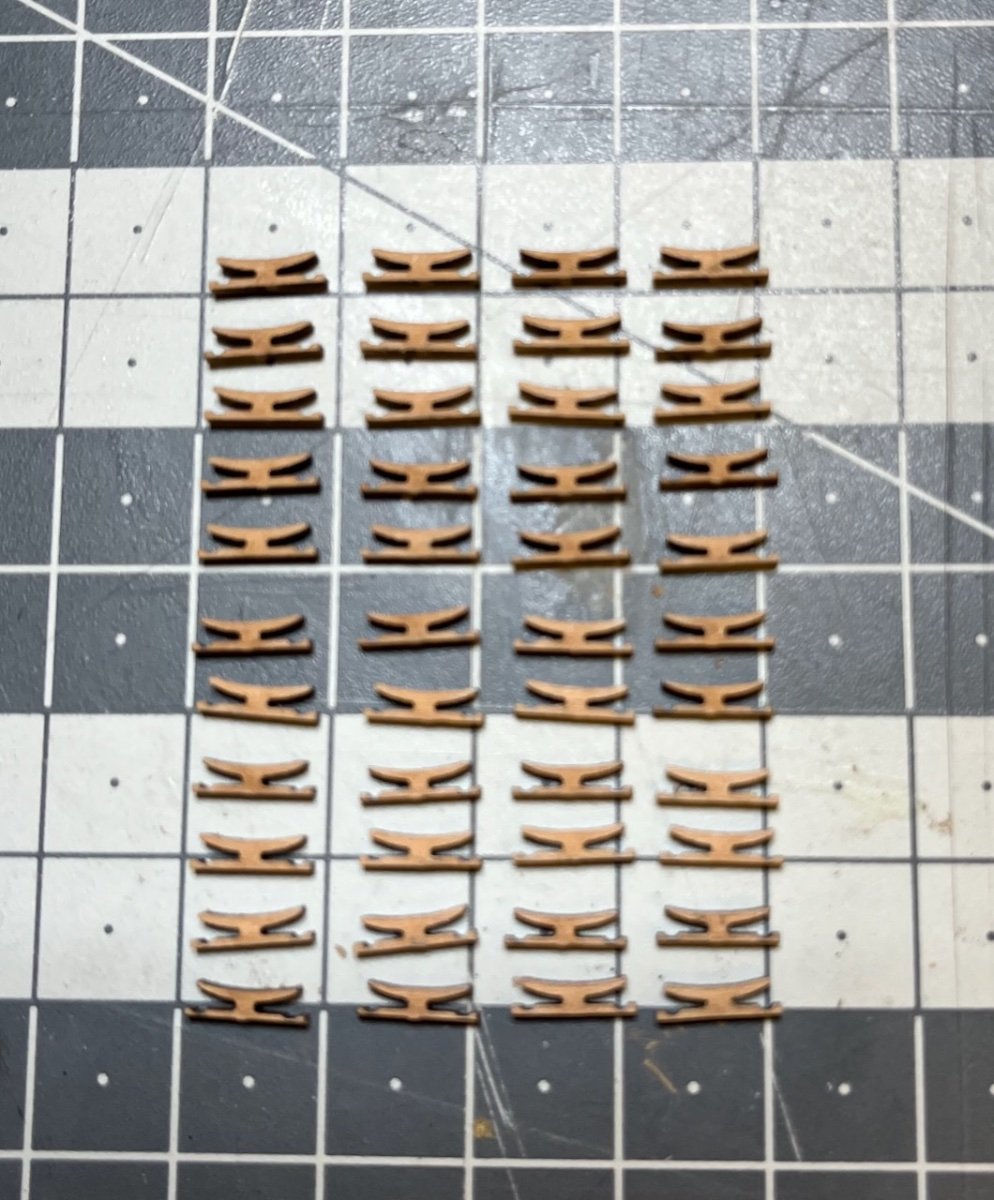
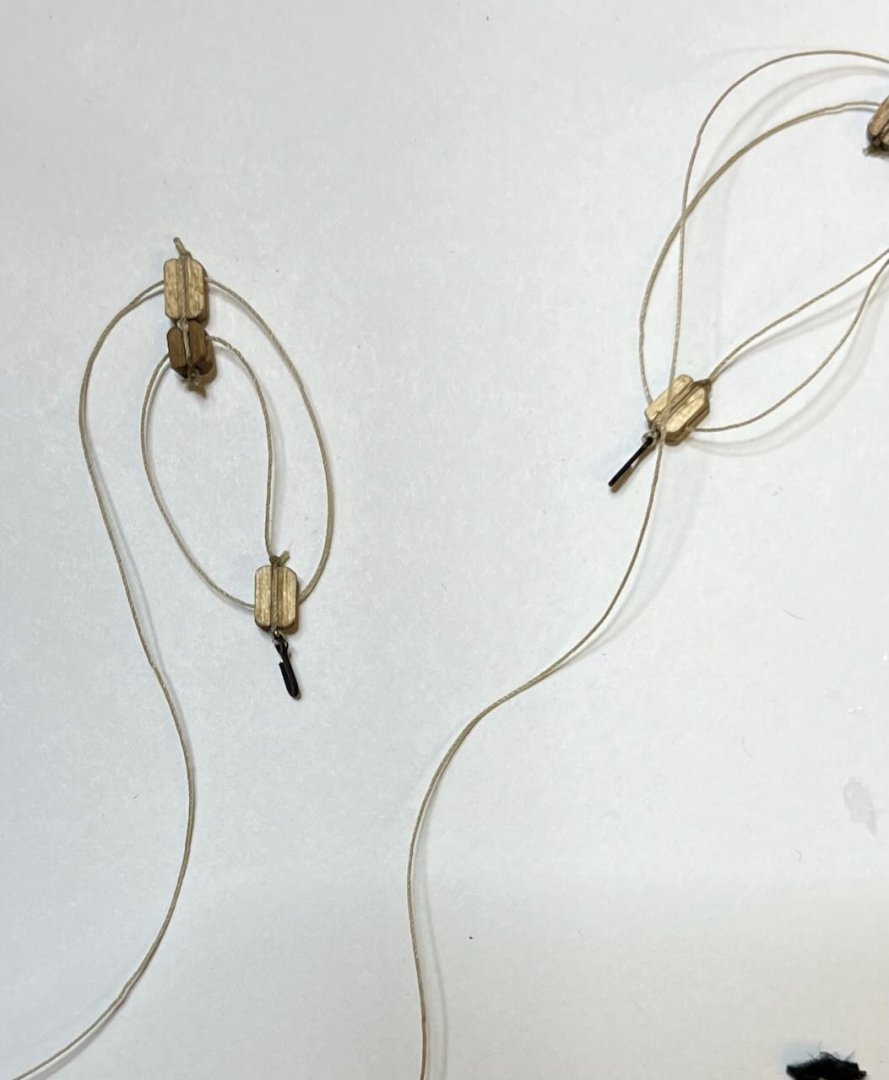
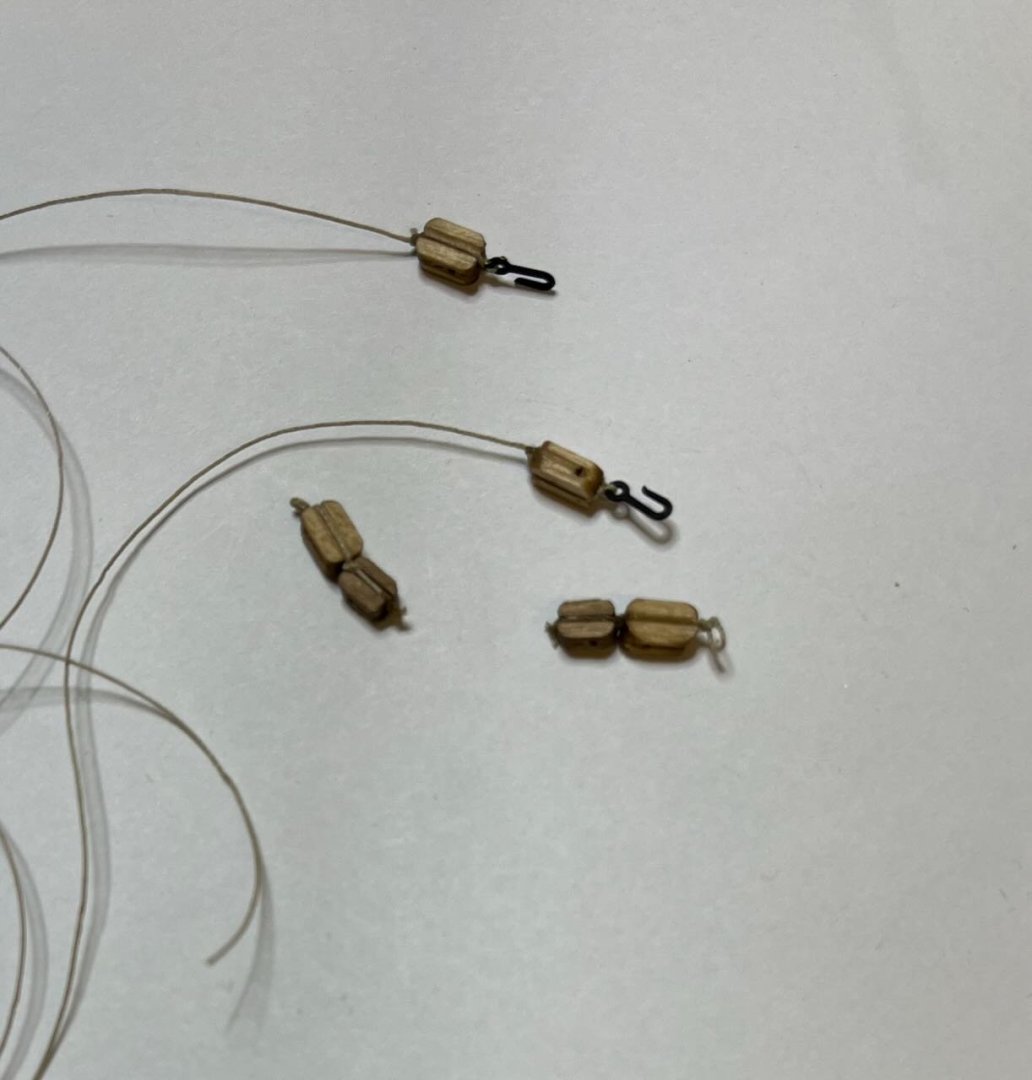
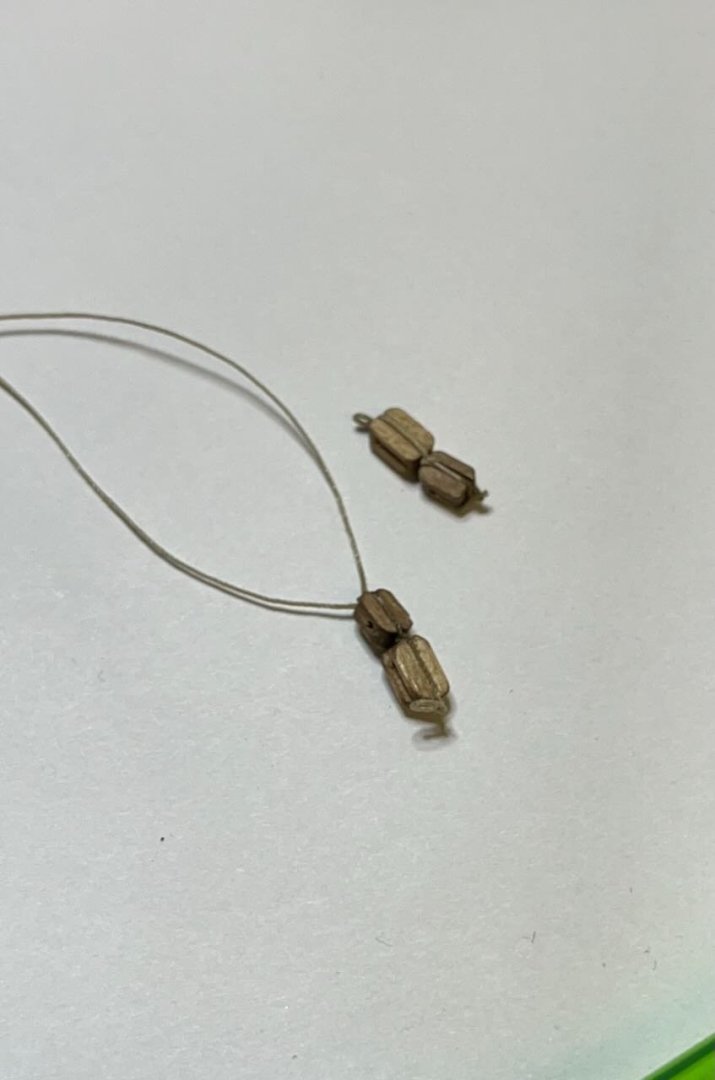
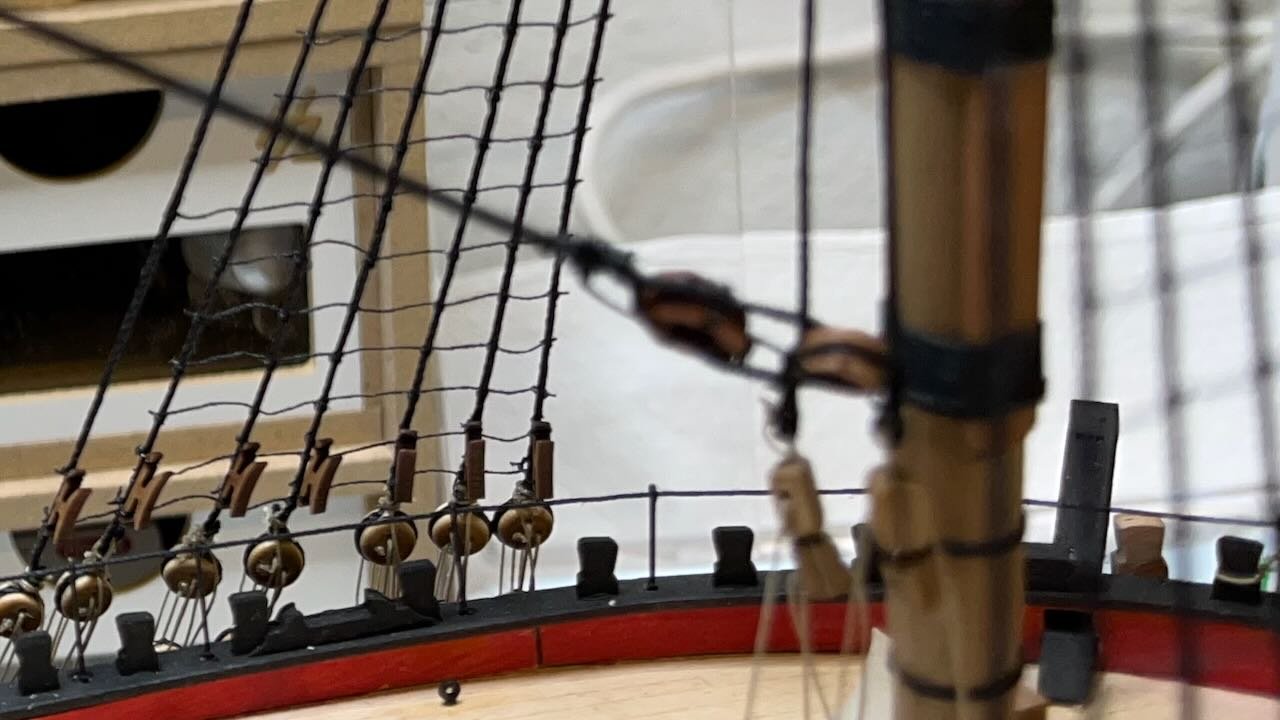
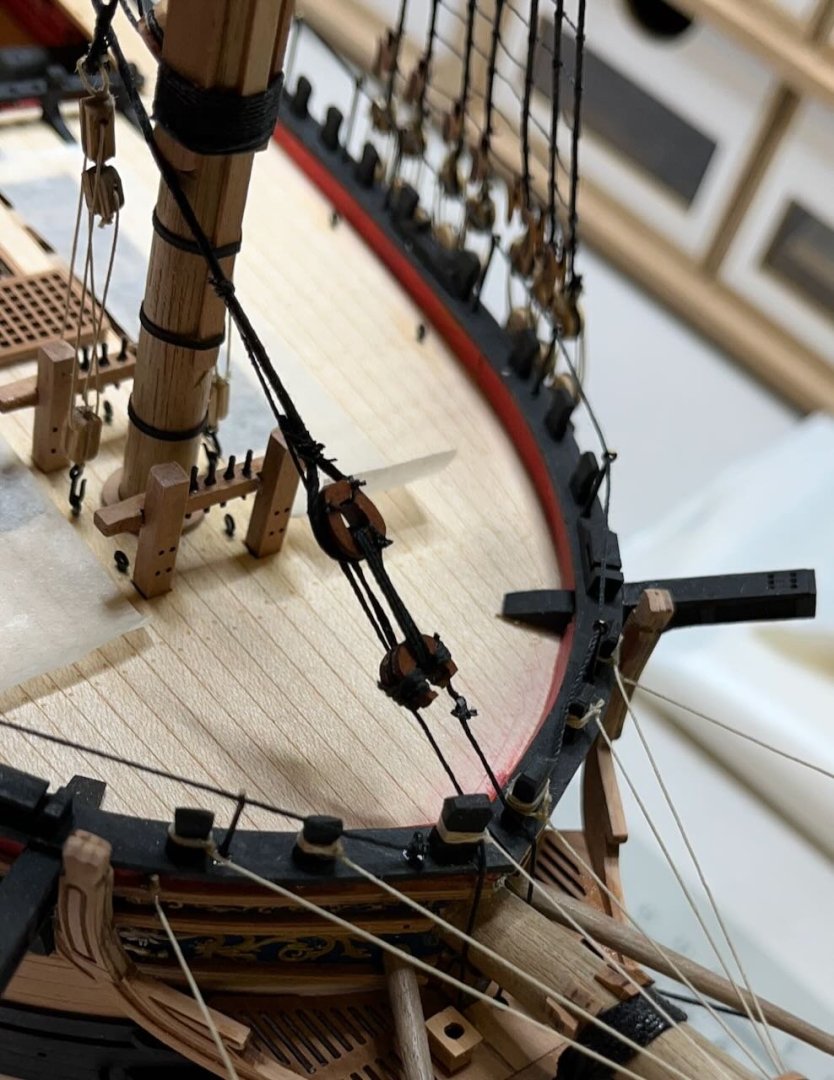
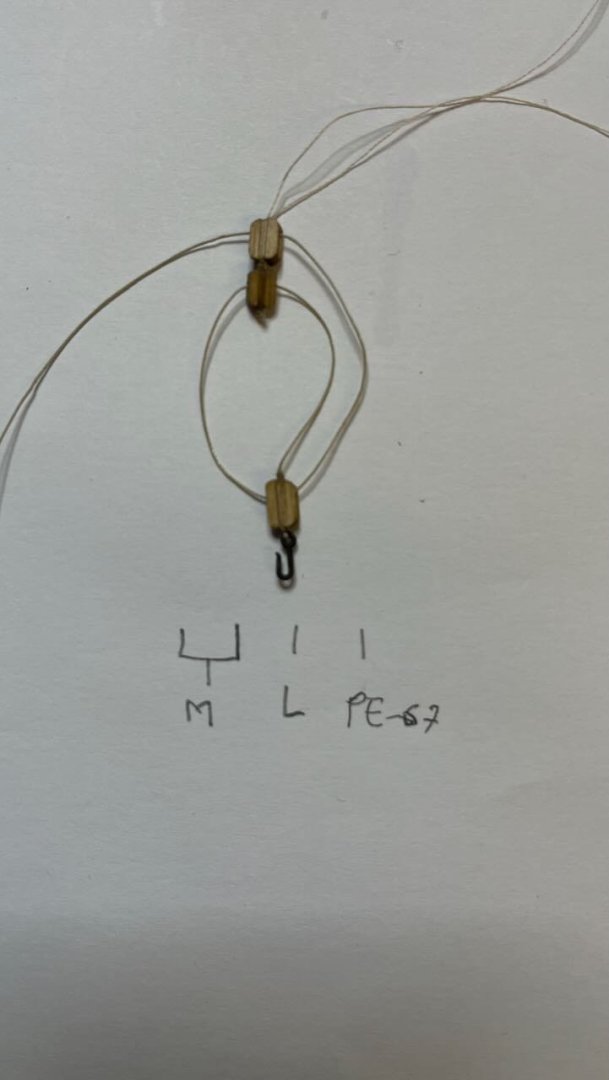
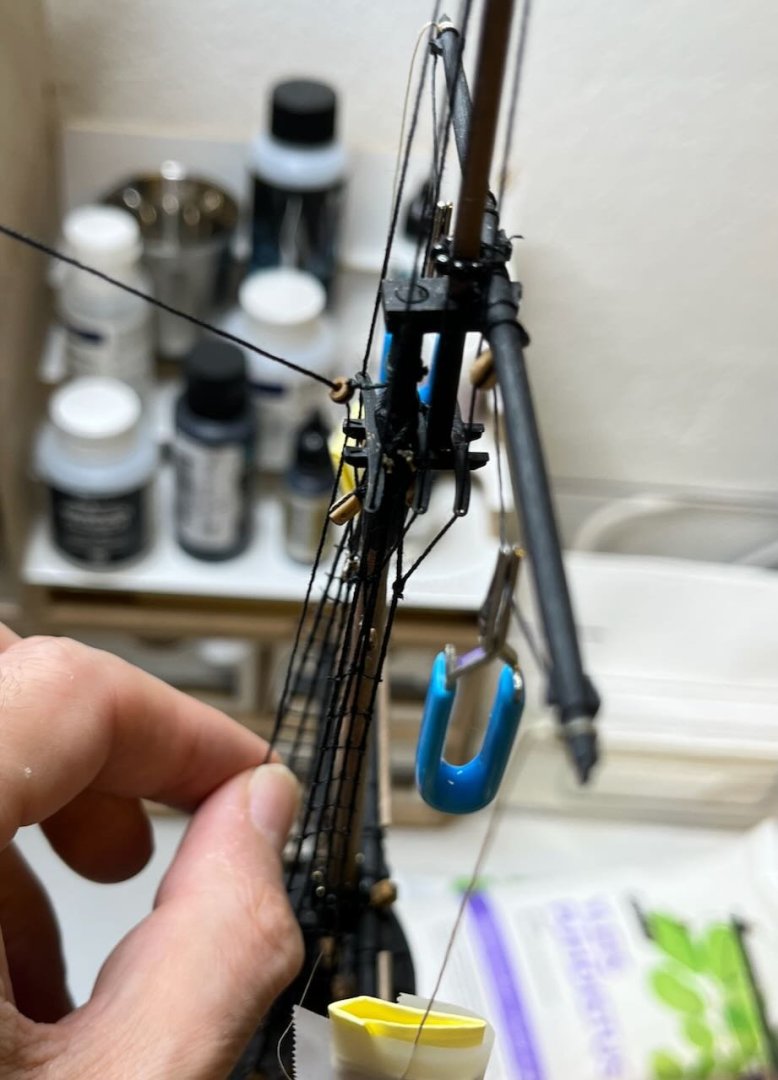
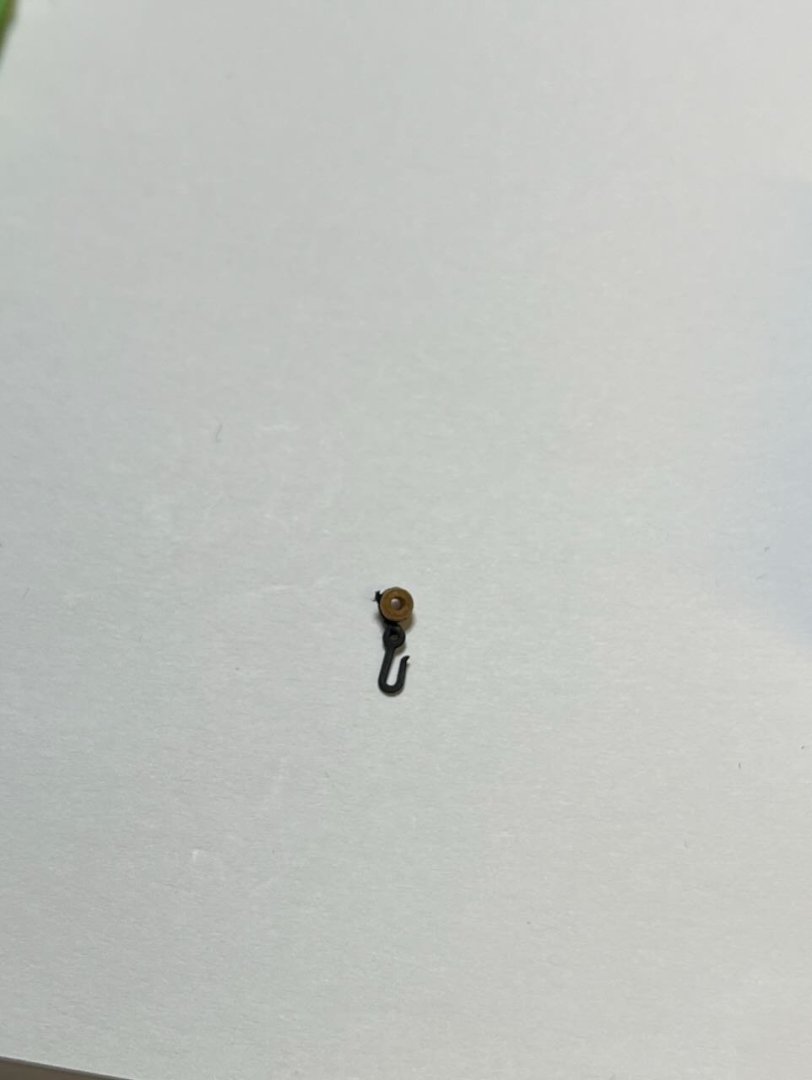
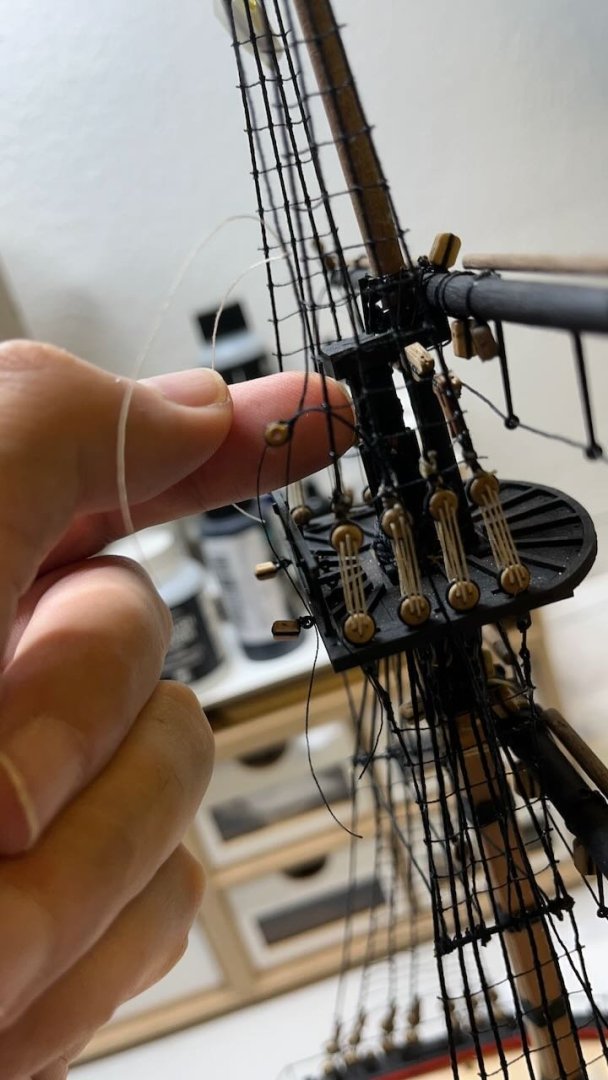
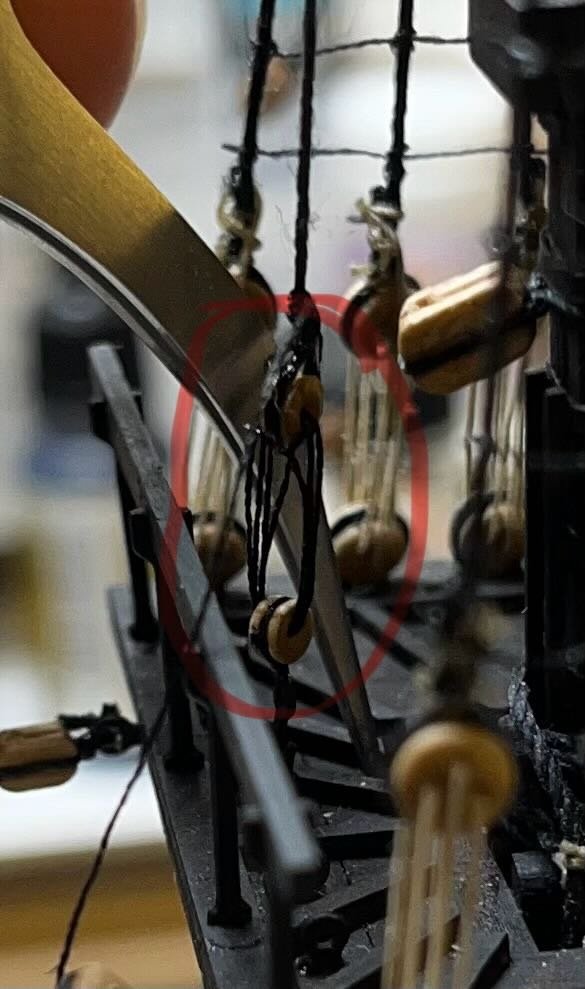
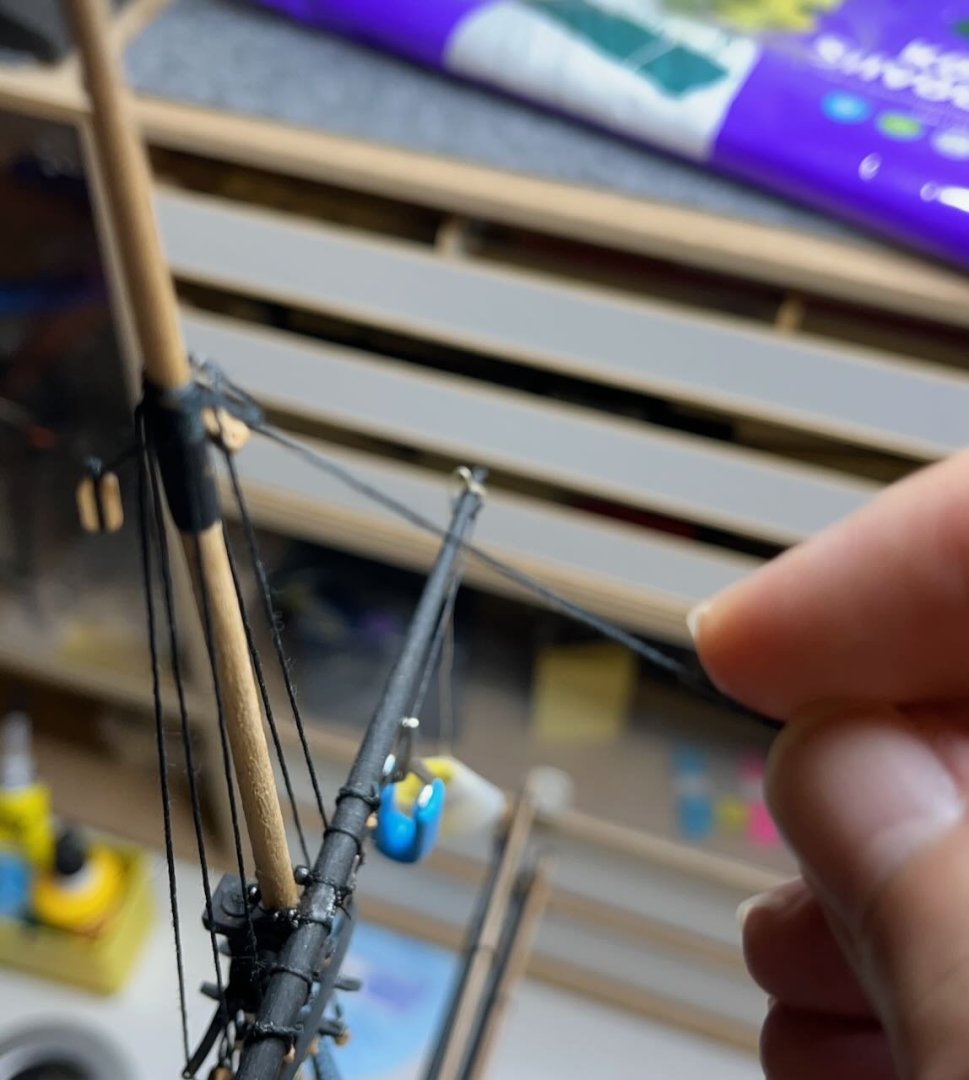
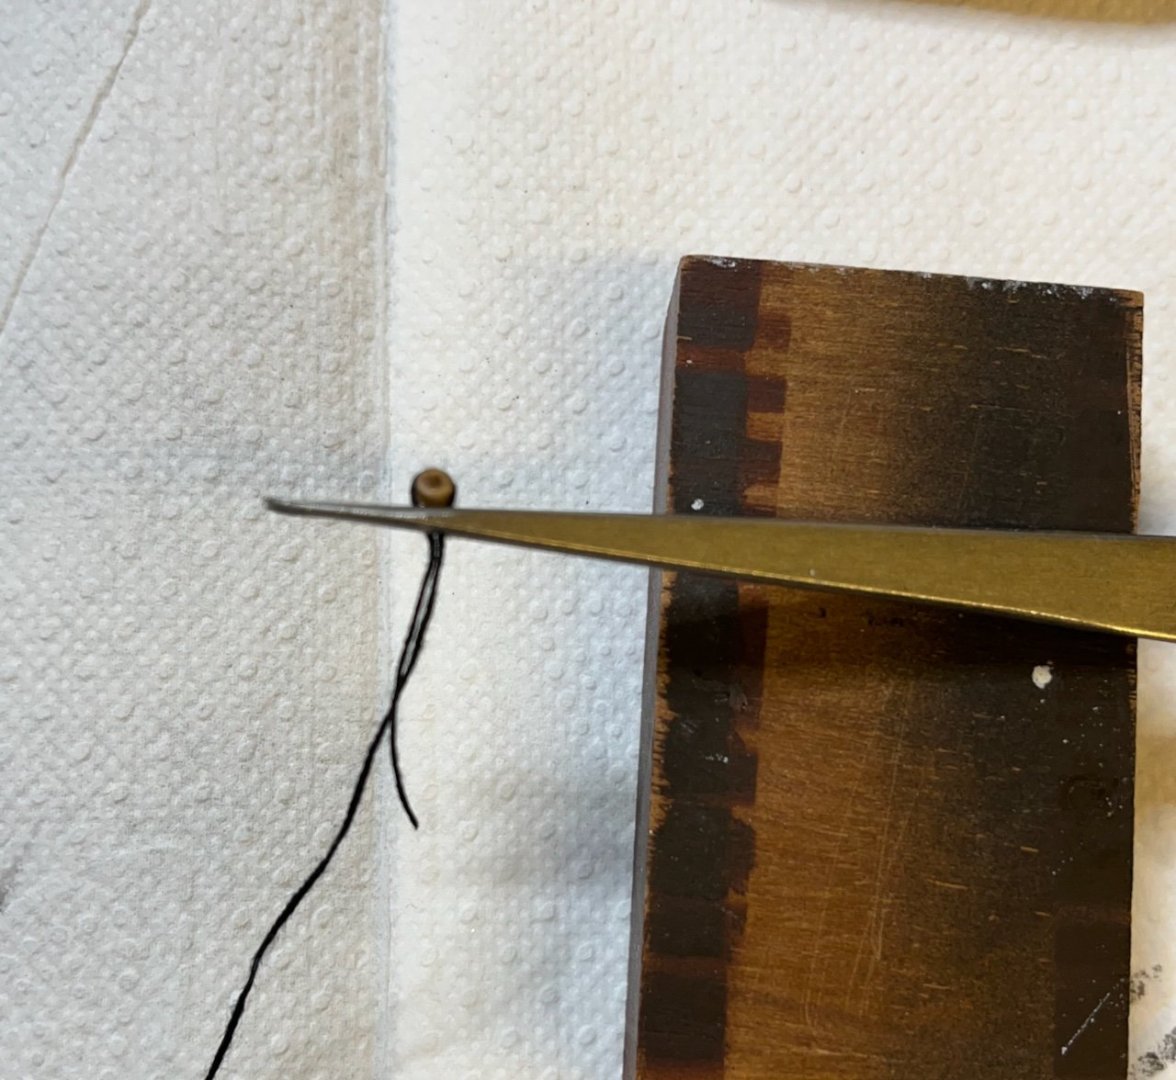
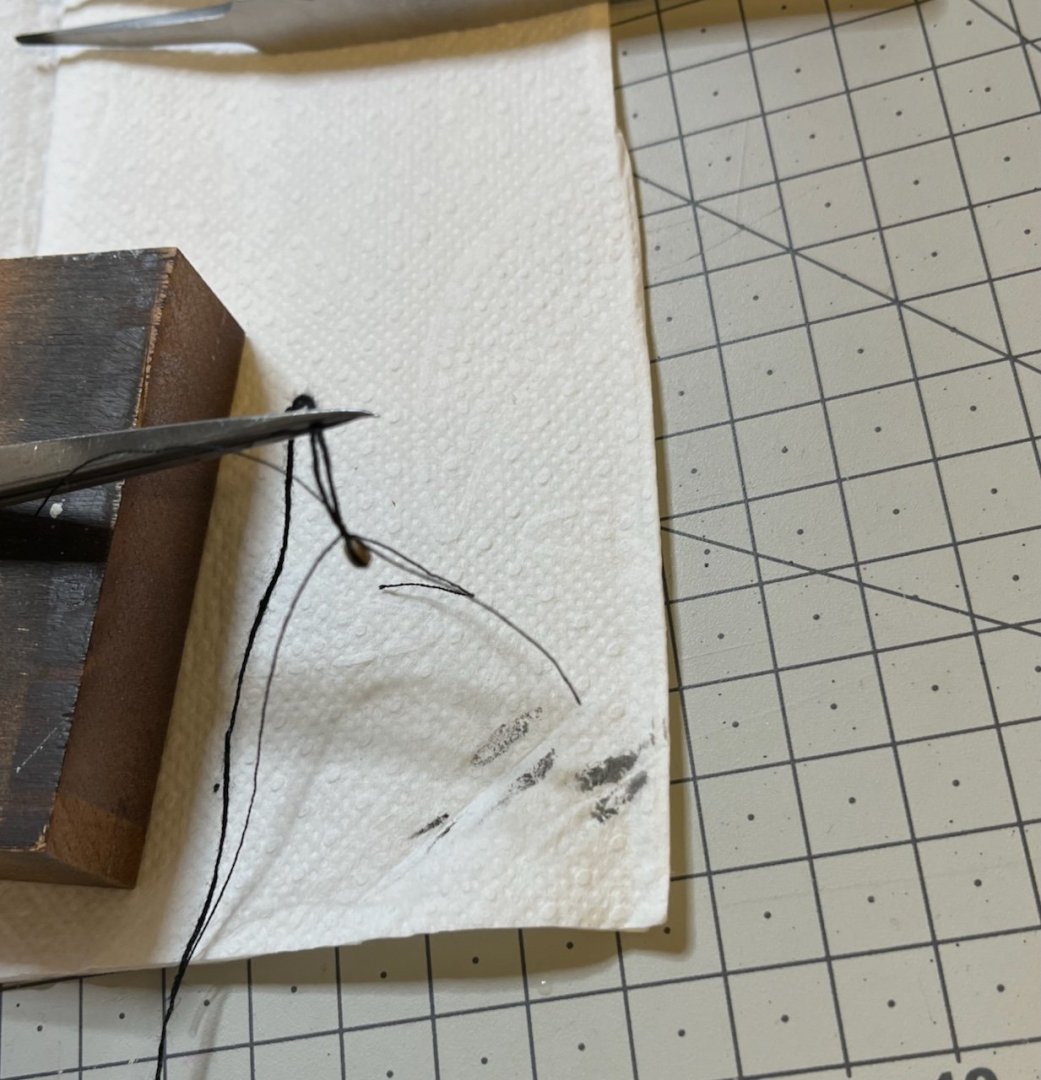
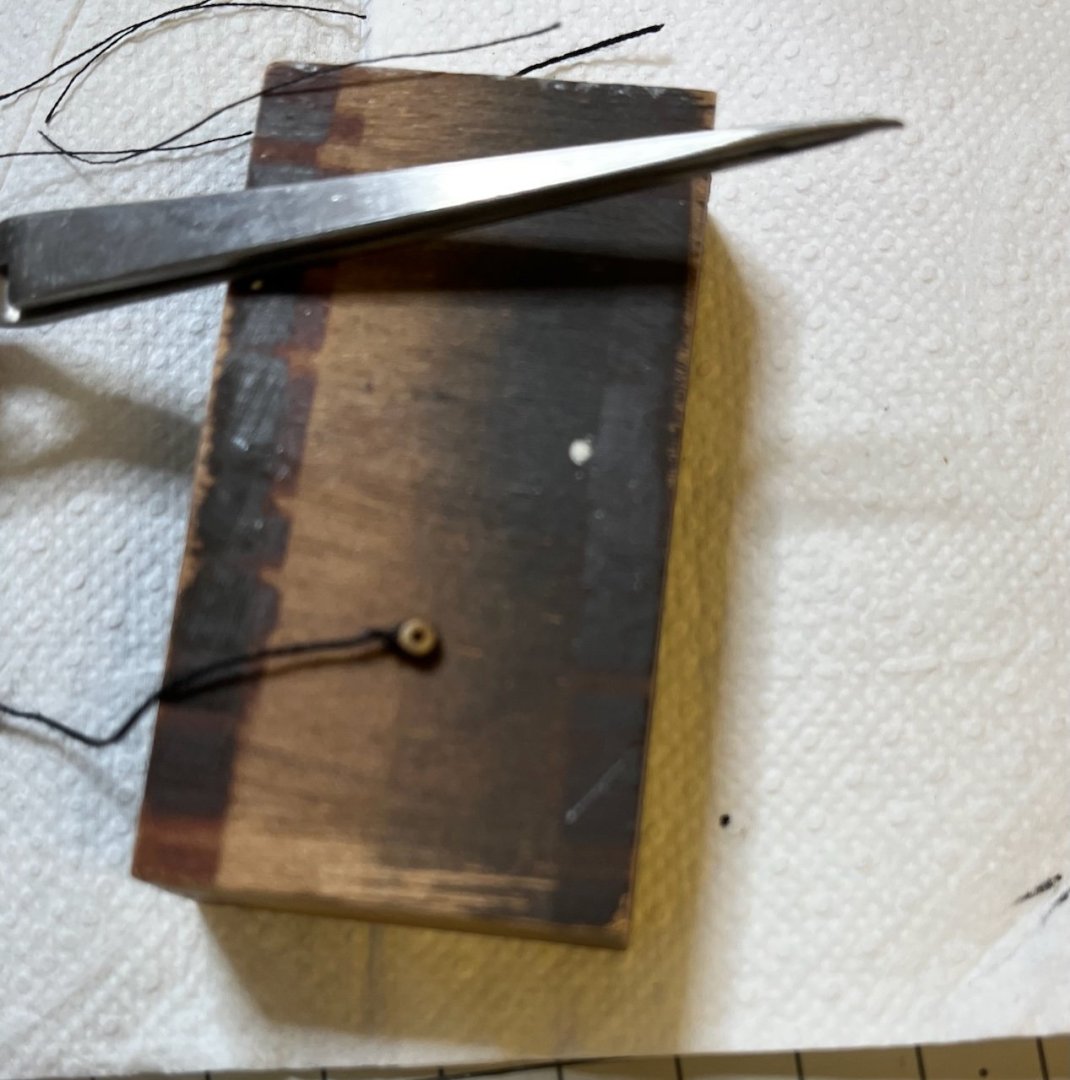
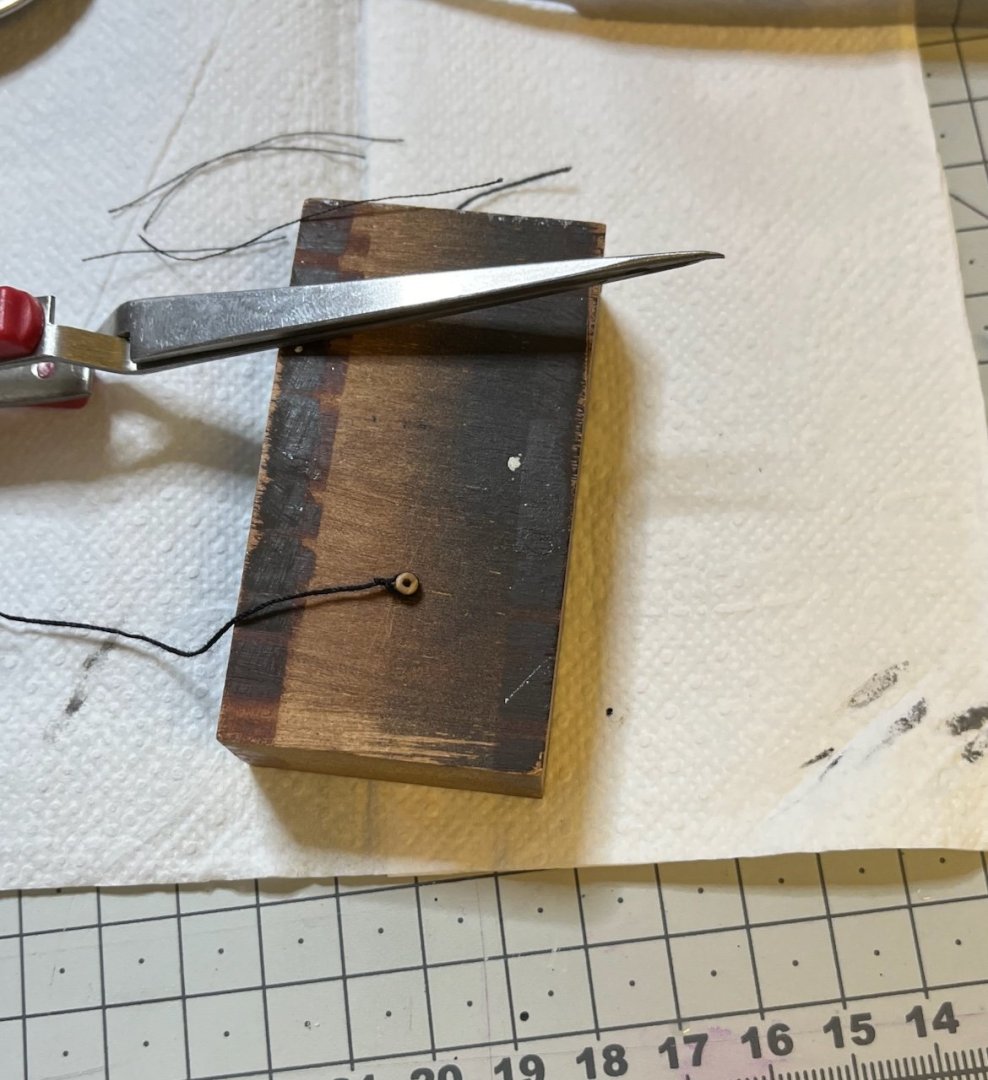
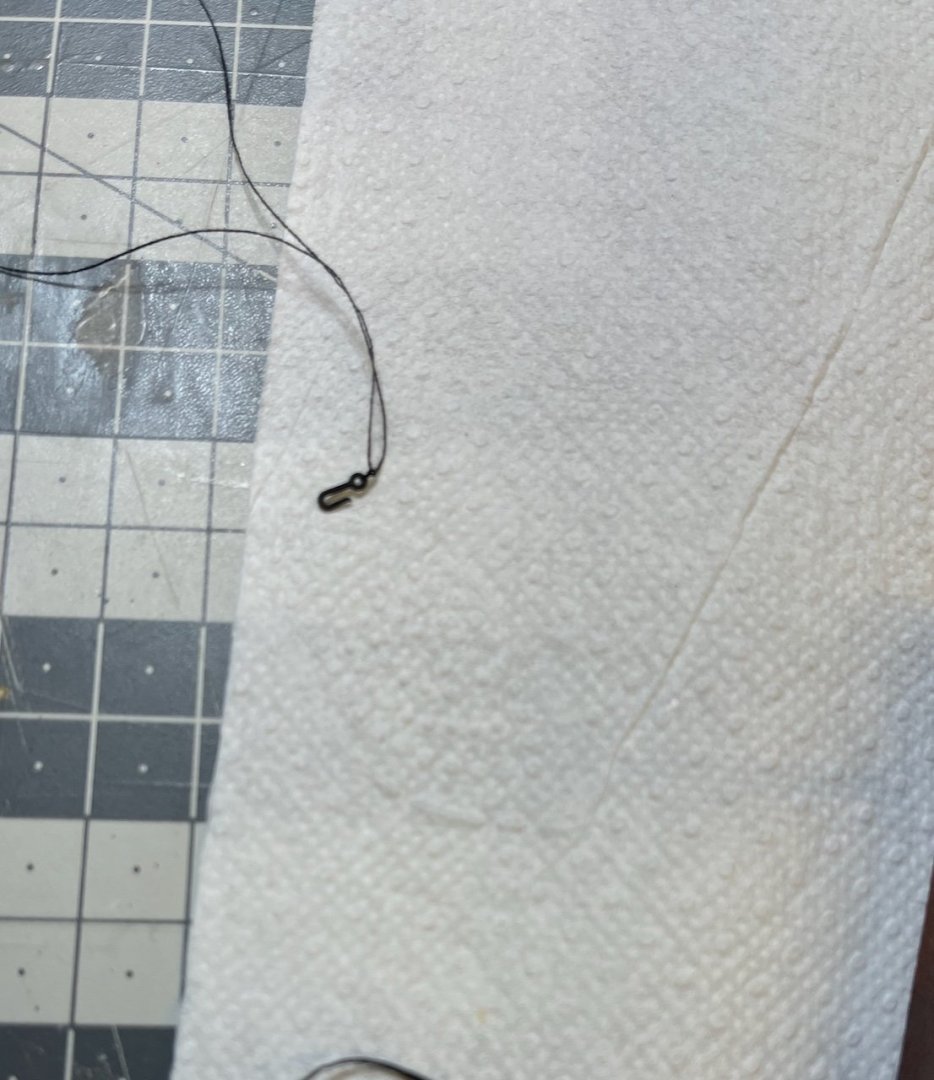
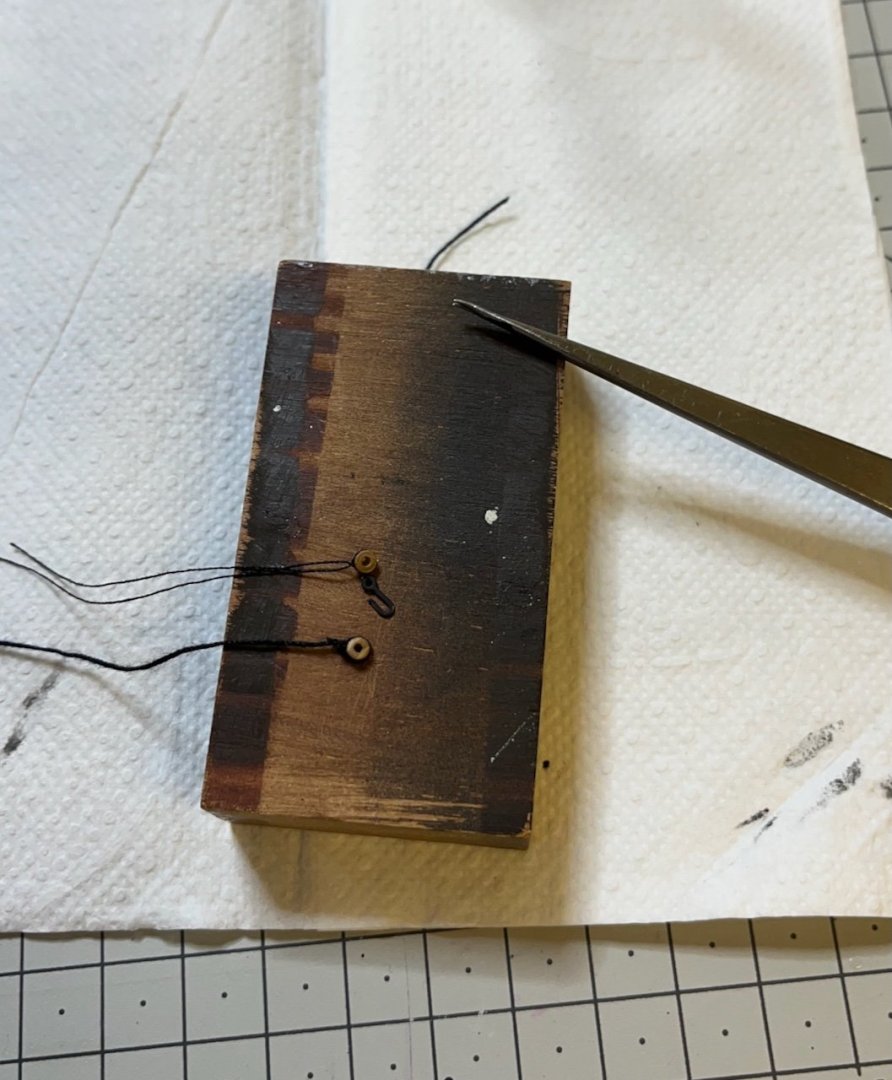
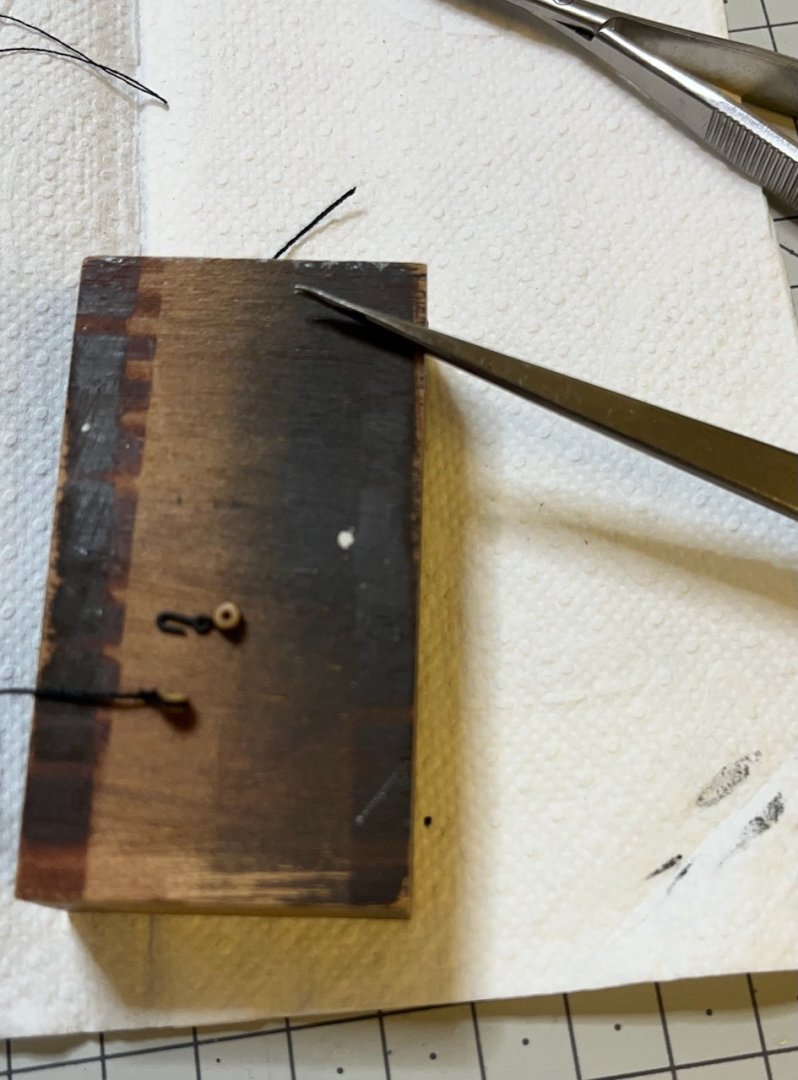
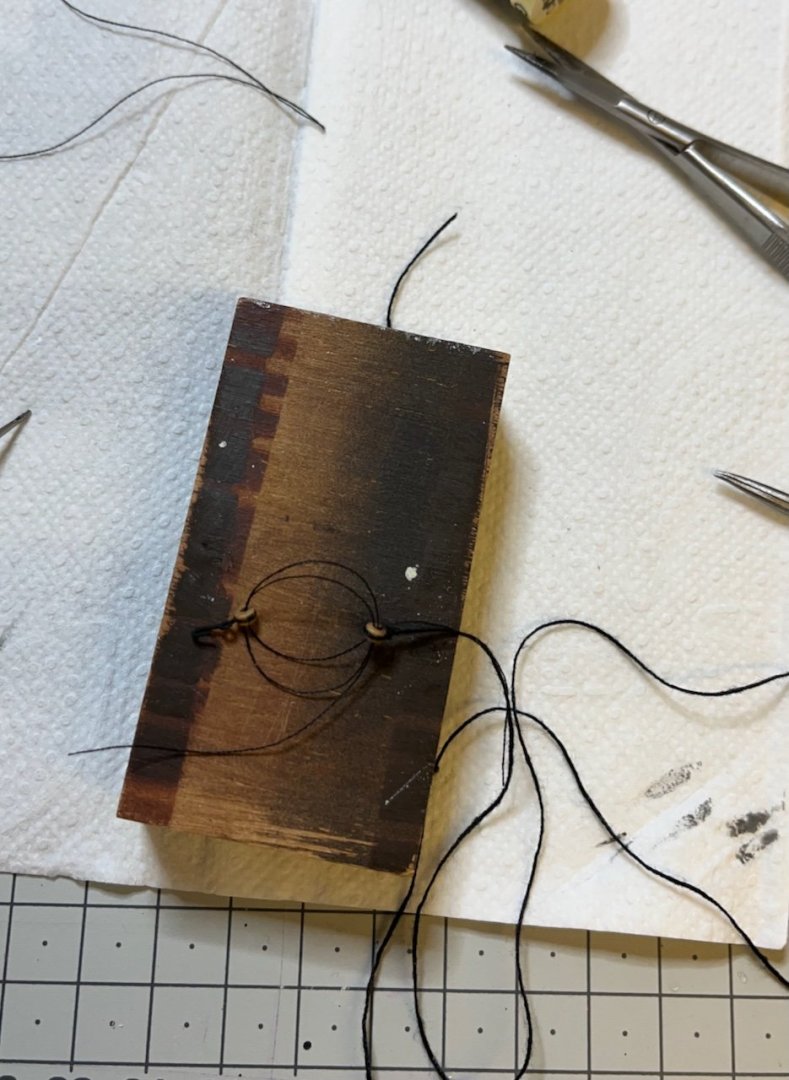
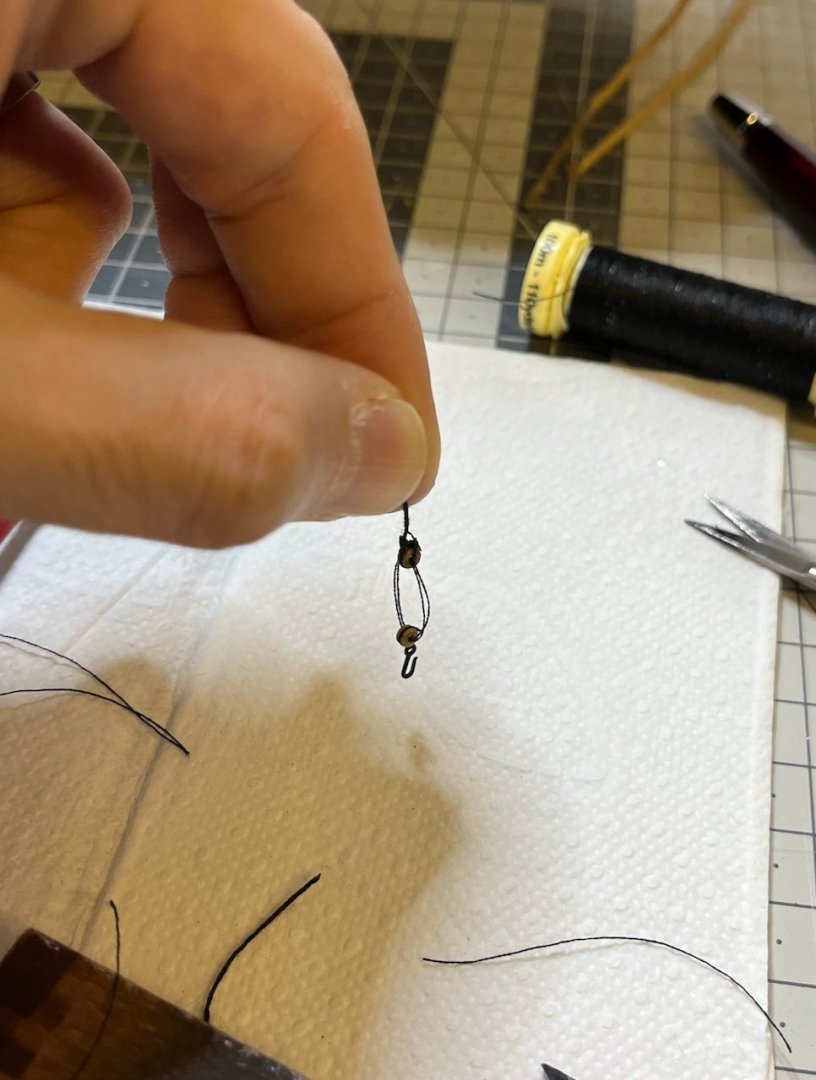
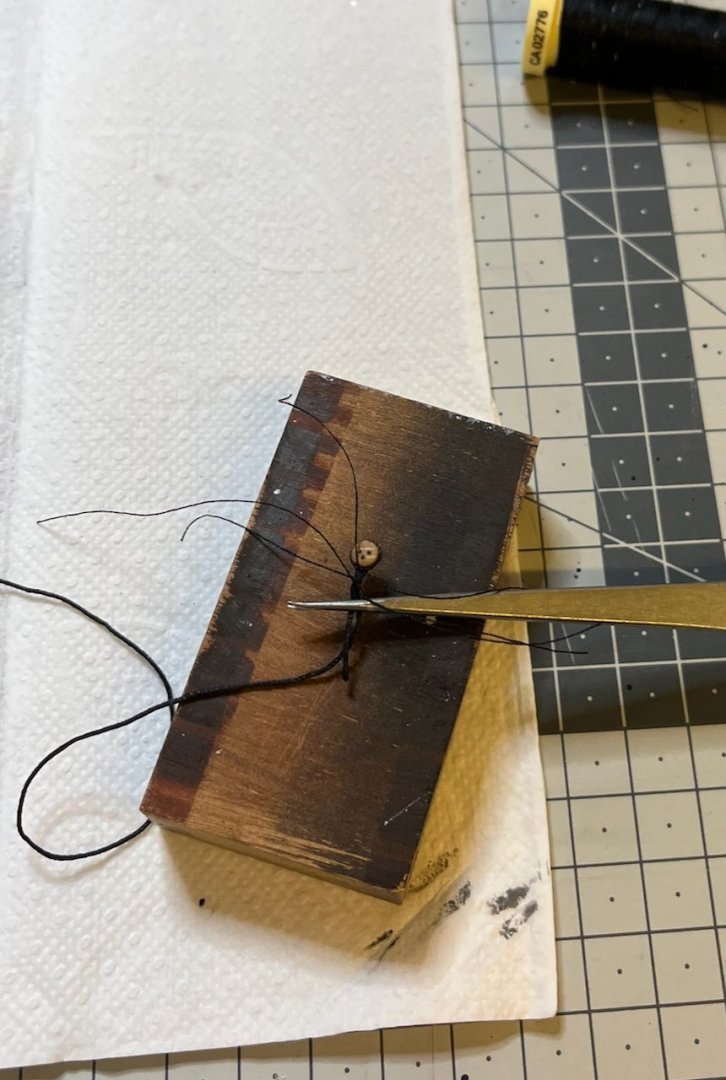
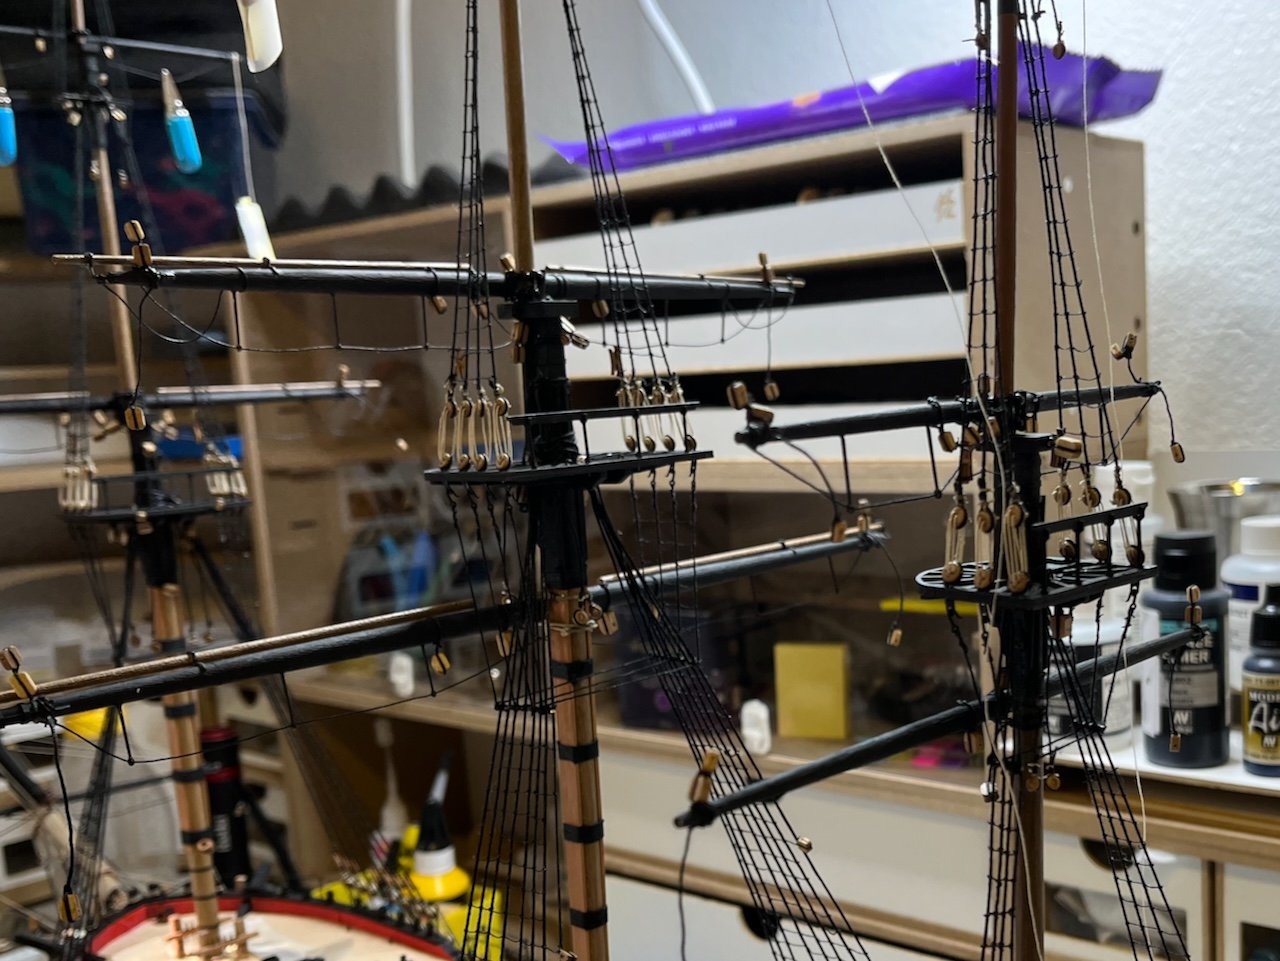
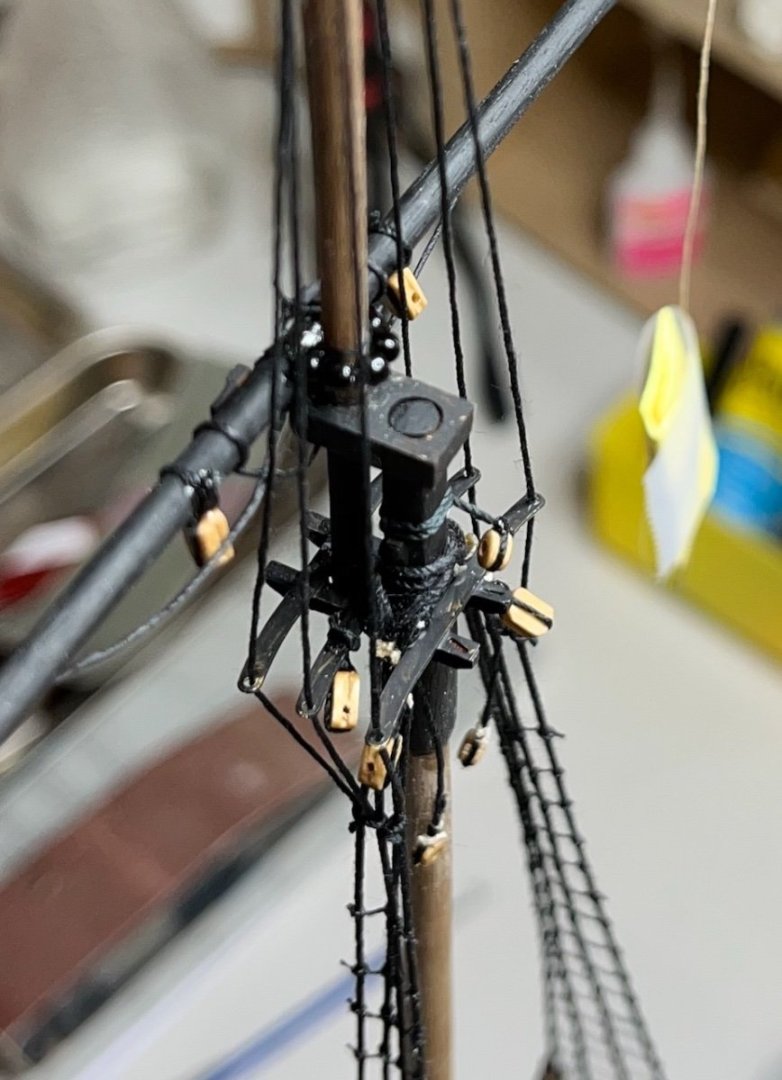
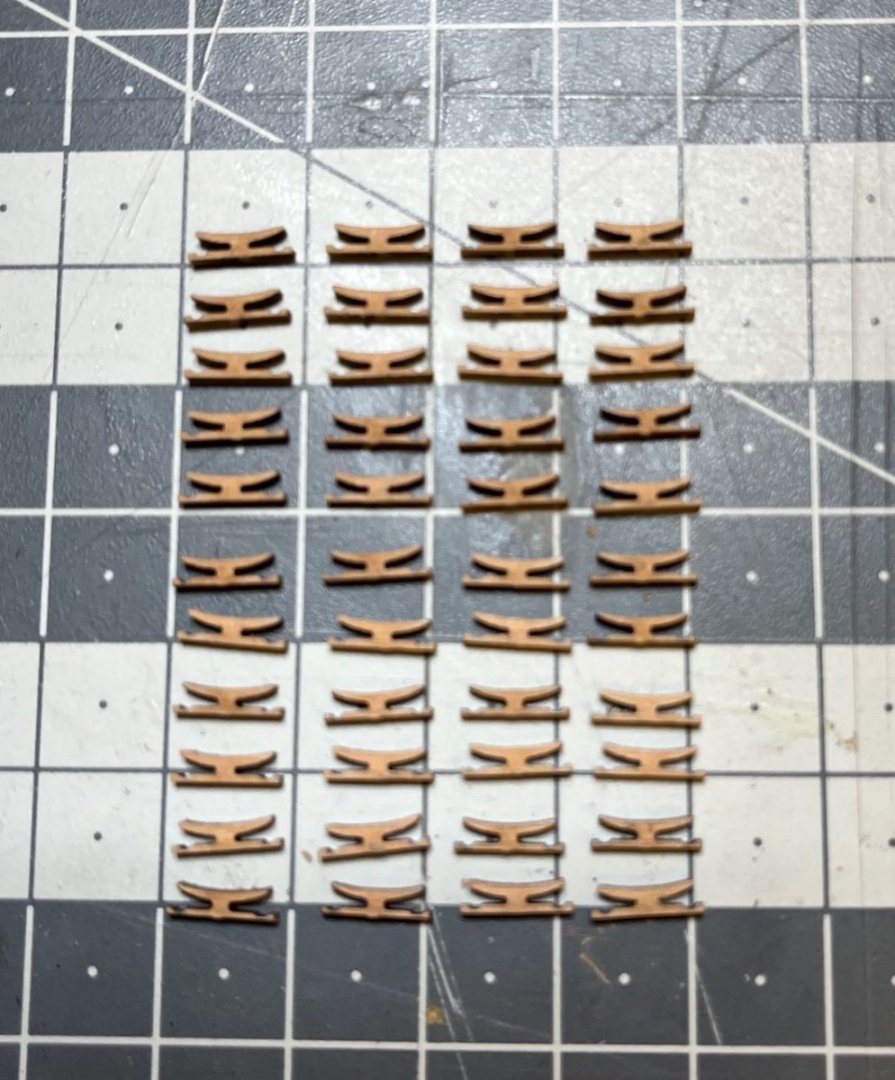
Build days 161-163: 3 hrs / Total 333 hours Photos 852-858: Main and Main Preventer Stay Tackles. They have similar construction to Main Stay and Fore Hatch Tackles, (the latter are scheduled for later). They use 2xM, 1xL and 1xPE-67 and B thread (0,25mm natural). The two systems are otherwise identical. Photos show the construction process and finally installed in place.


- 426 replies
-
- 10
-
-
- Vanguard Models
- Sphinx
- (and 1 more)
-
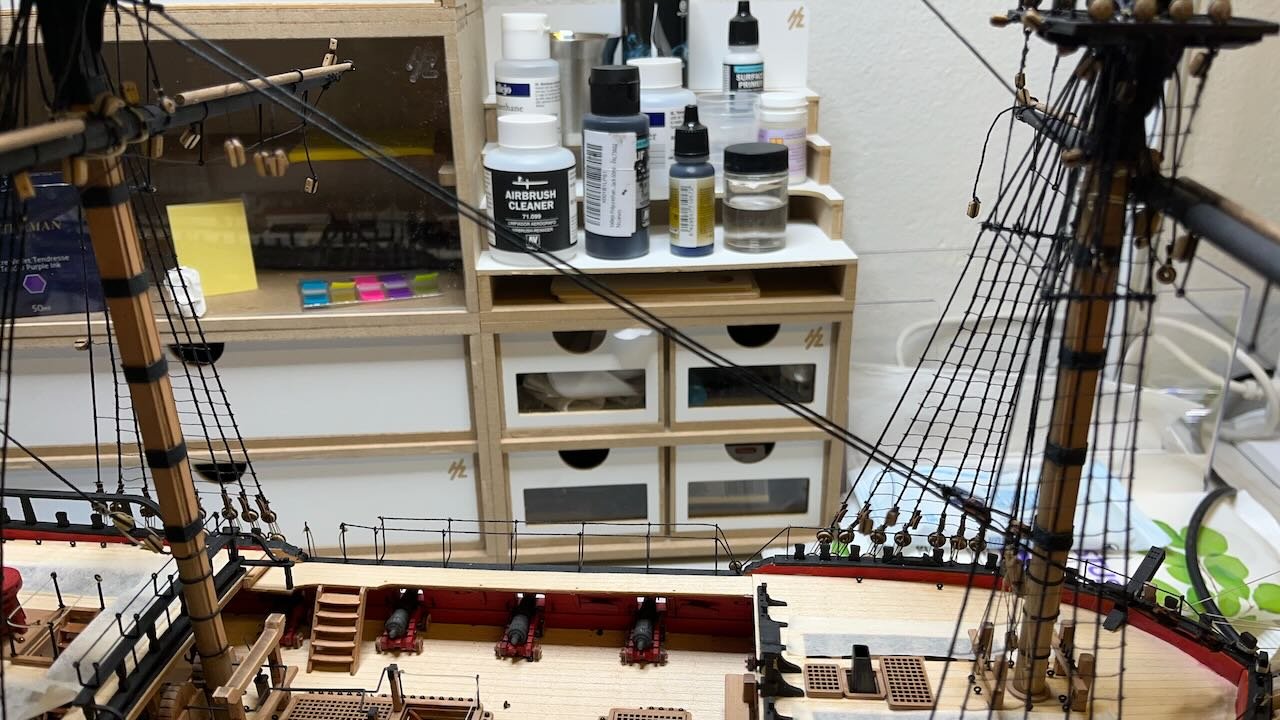
Photos 846-851: Rest of the rigging, with a snapshot of the plan to give you an idea what I am doing:


- 426 replies
-
- 8
-
-
- Vanguard Models
- Sphinx
- (and 1 more)
-
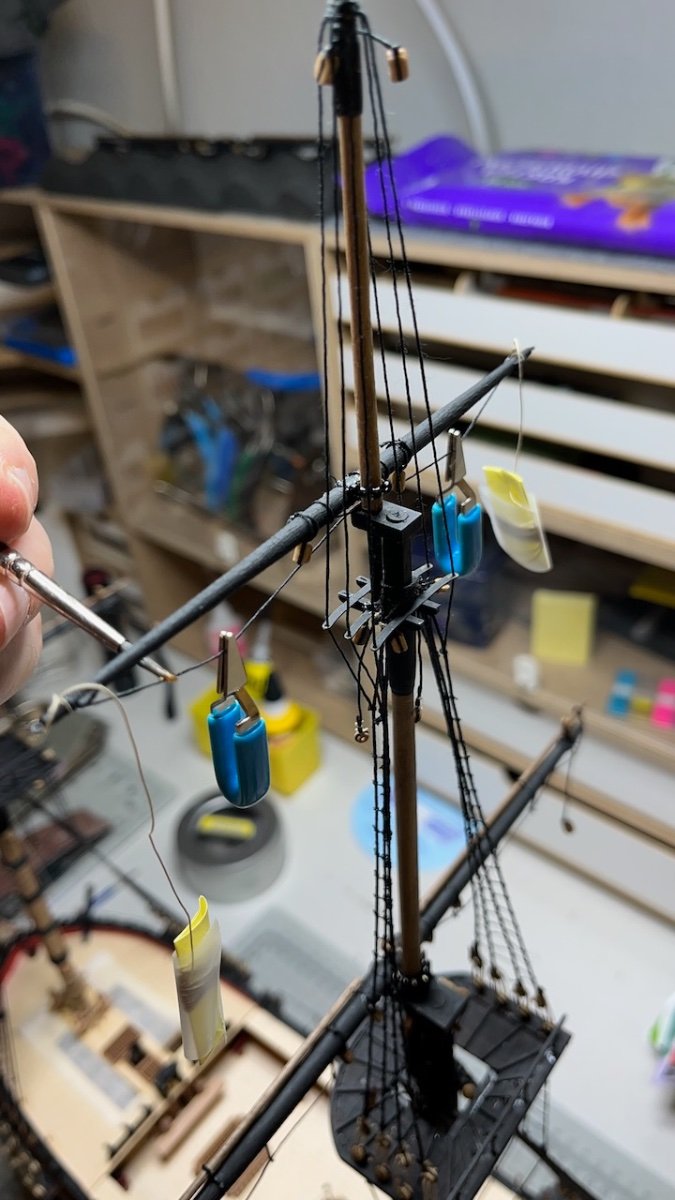
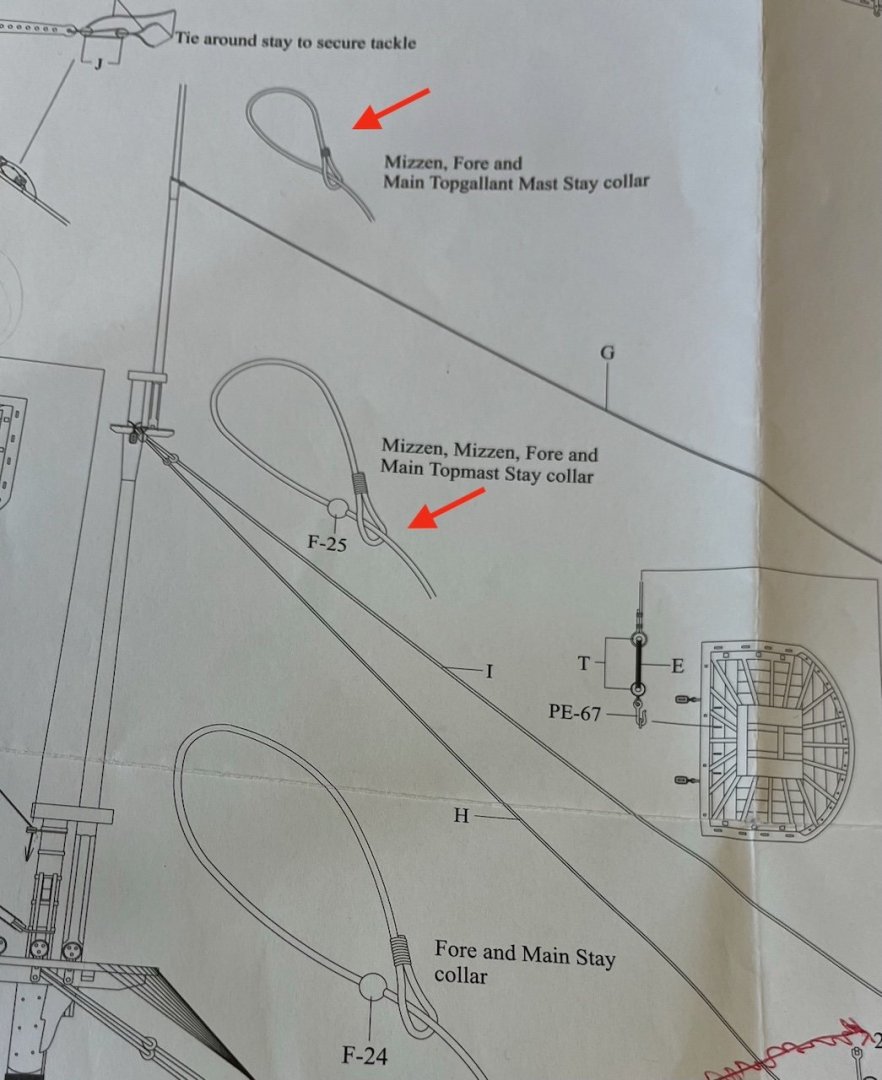
Build day 160: 1 hr / Total 330 hours Hand is better, now resuming my build little by little. Moving on to Main Mast Stays after having completed the Mizzen Mast Stays. Moving top to bottom, next it is the Main Topgallant Mast Stay: Photos 843-845: Rigging the collar around the mast
- 426 replies
-
- 4
-
-
- Vanguard Models
- Sphinx
- (and 1 more)
-
I know I haven't been around for a while. I injured a finger beginning of the summer and it is still recovering. Can't wait to resume!
- 426 replies
-
- 3
-
-
- Vanguard Models
- Sphinx
- (and 1 more)
-
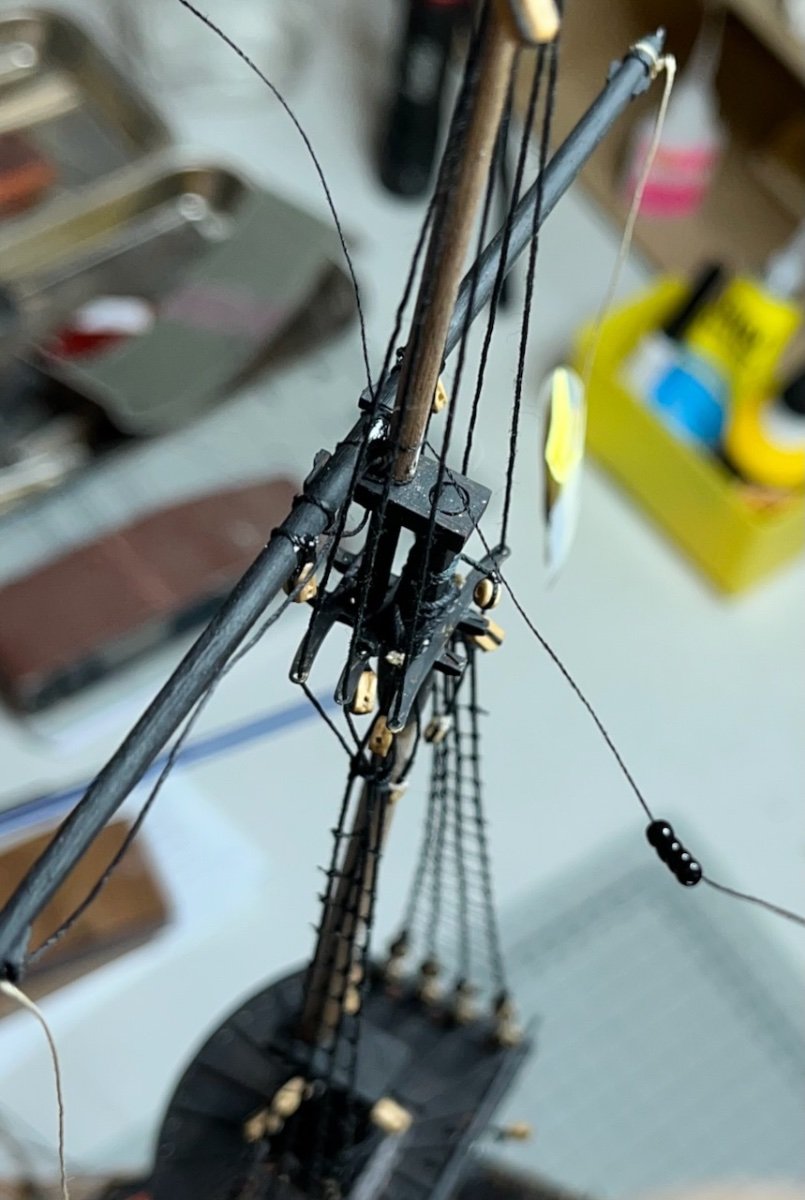
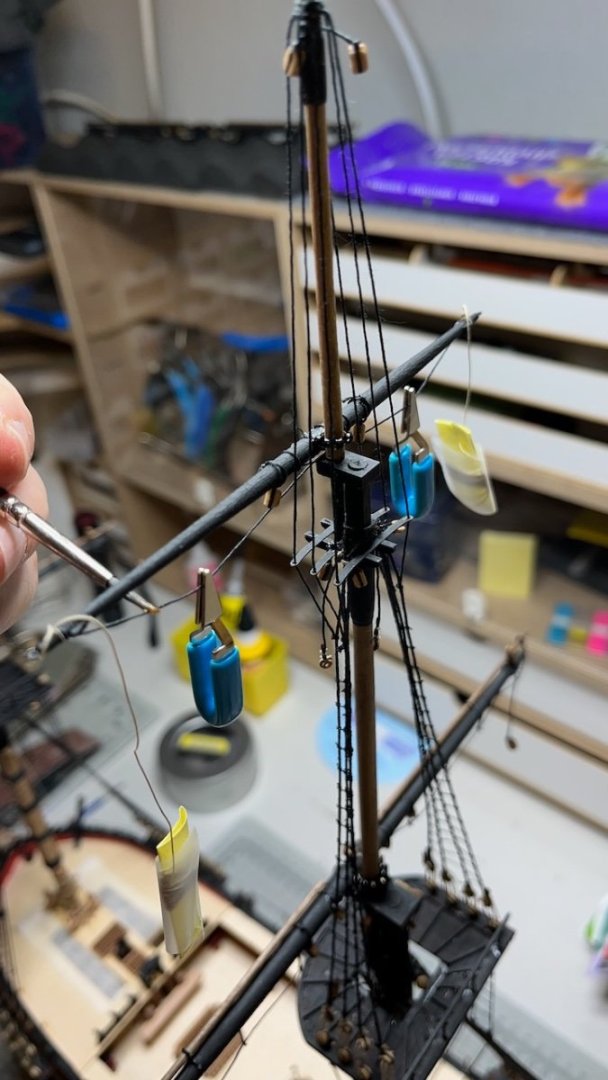
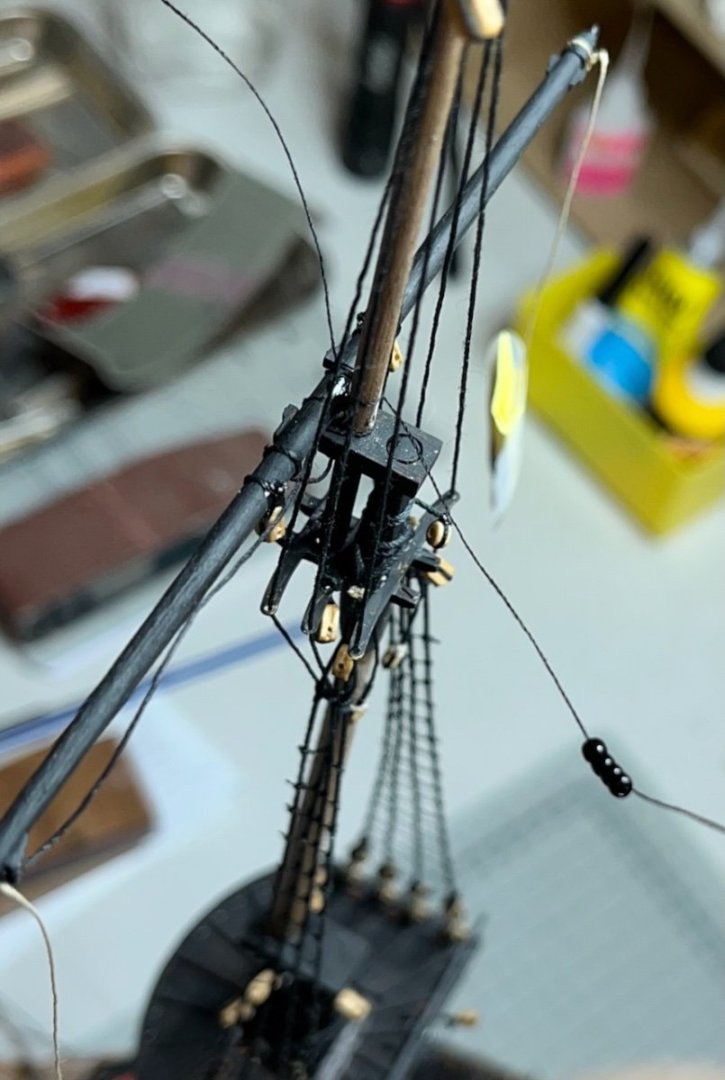
Build day 159: 1 hr / Total 329 hours Photo 841: With the below, Mizzen stays are complete (except the Crowsfeet which come later). Photo 842: I noticed the instructions for how to loop the thread around the masts too late for Mizzen stays. I had made them my own way (check the photo above), though not looking too bad. I hope to follow the instructions for the Fore and Main stay collars.
- 426 replies
-
- 6
-
-
- Vanguard Models
- Sphinx
- (and 1 more)
-
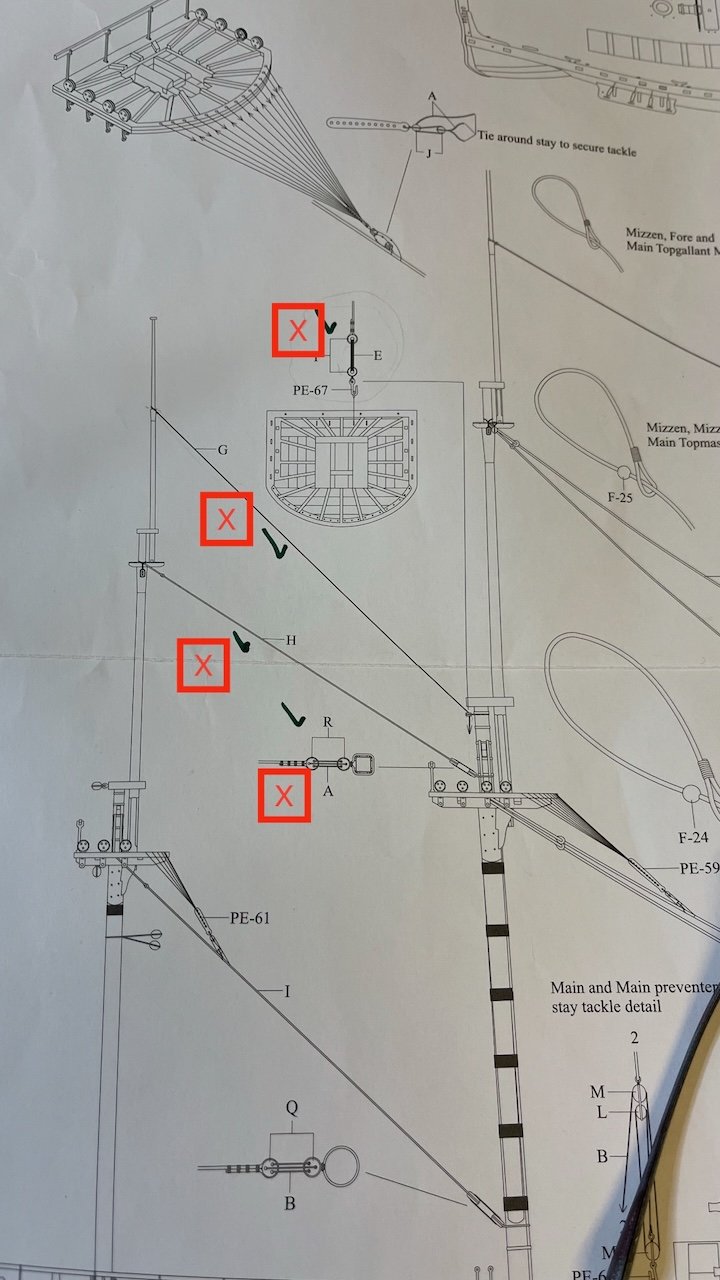
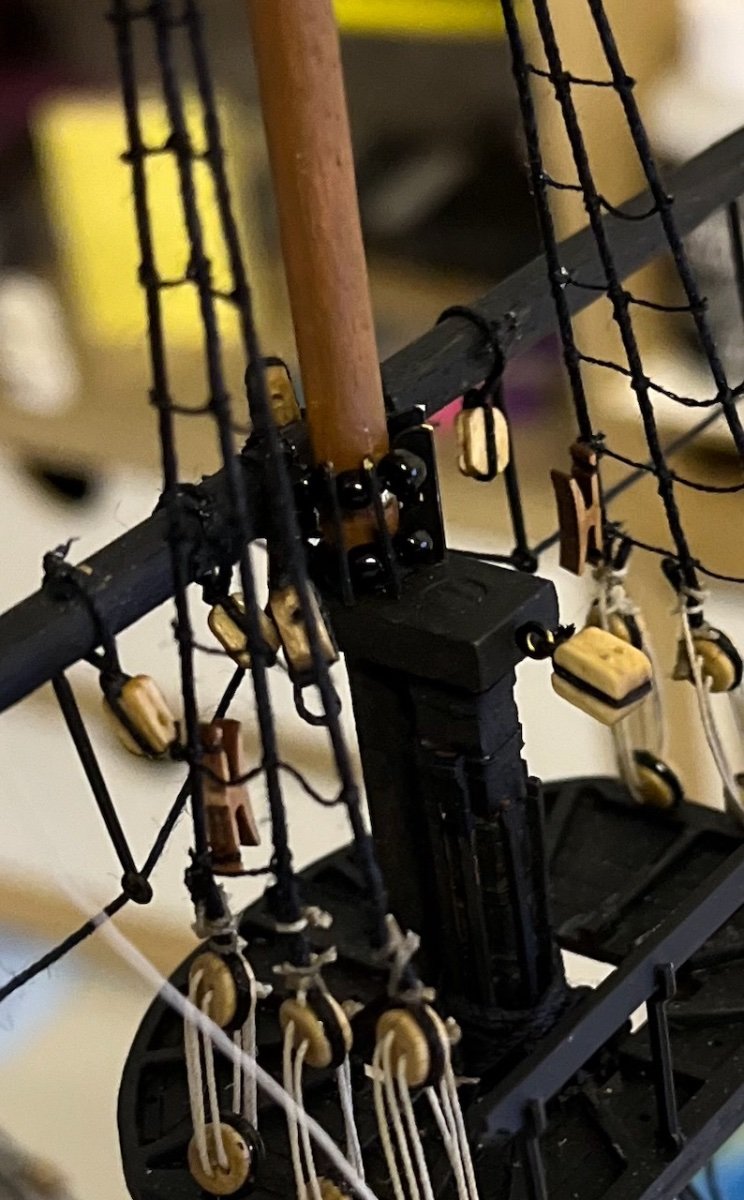
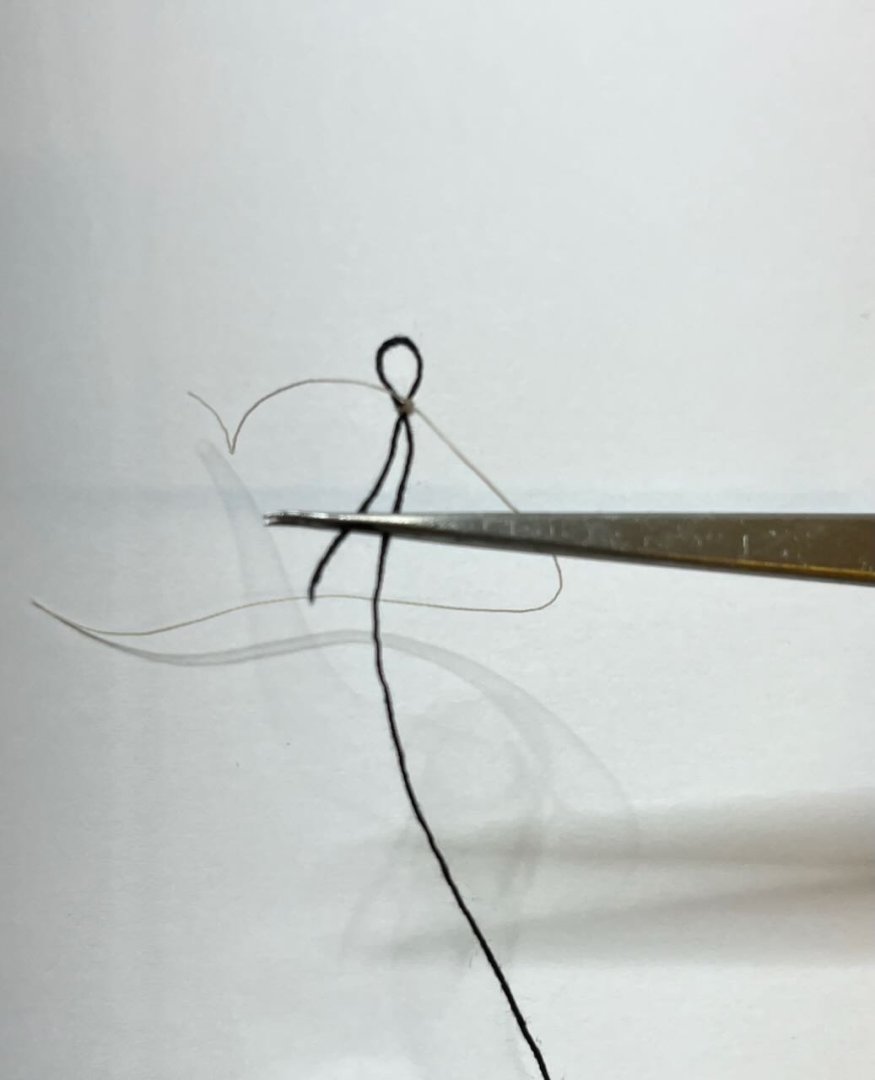
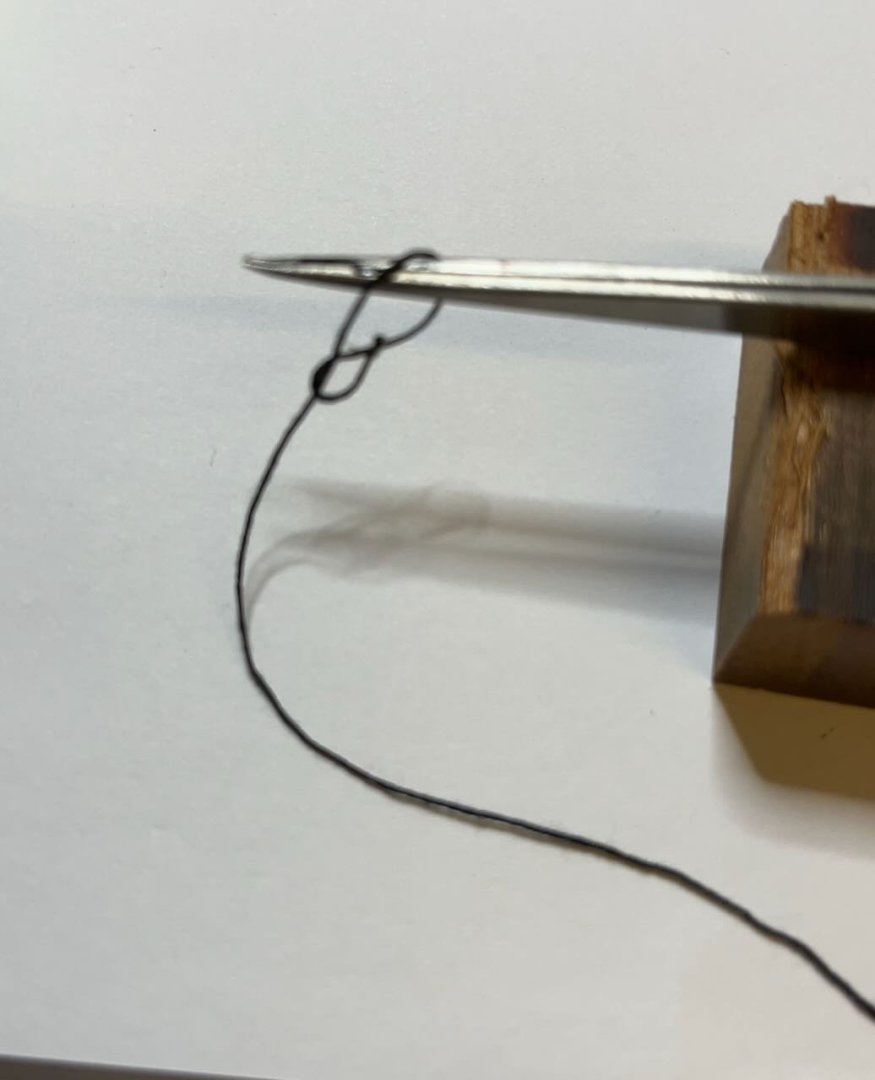
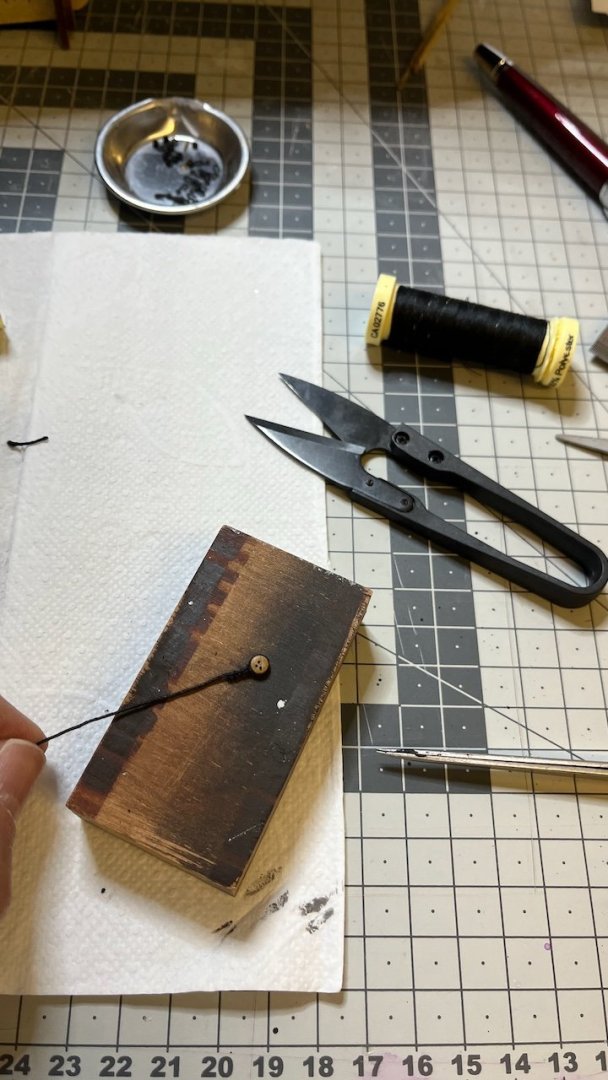
Build day 158: 1,5 hrs / Total 328 hours Today I started to work on the stays, completed the parts I marked with a red X. I have added several photos showing the steps in detail. Photo 825: Photos 826-837: The "upper" stay (indicated with "G" type thread in the plan screenshot) Photos 838-840: The "lower" stay the (indicated with "H" type thread in the plan sceenshot)


- 426 replies
-
- 5
-
-
- Vanguard Models
- Sphinx
- (and 1 more)
-
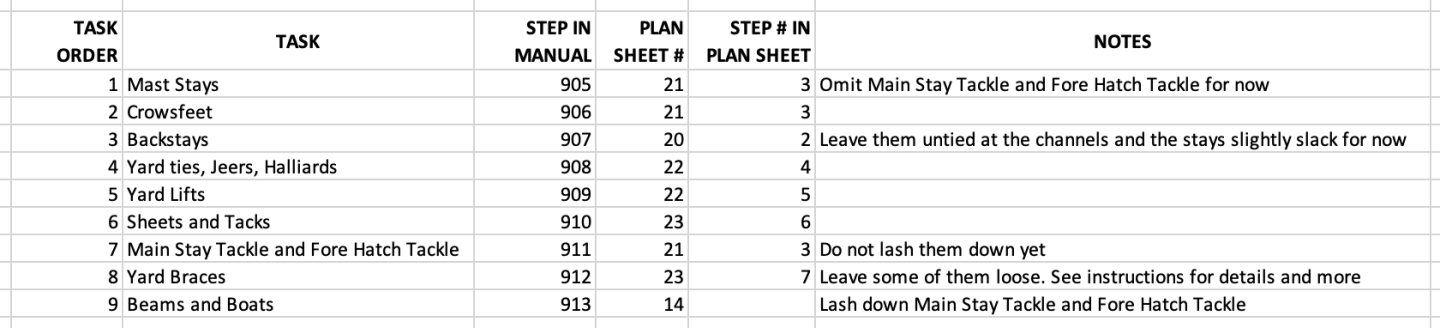
The order of steps recommended in the instruction manual slightly differ from the numbering in the Plan Sheets. I have now studied the plans and instructions once again in detail before moving forward and came up with my updated reference task list. I don't want to make irreversible mistakes at this moment. Hence I will go with this order:
- 426 replies
-
- 2
-
-
- Vanguard Models
- Sphinx
- (and 1 more)
-
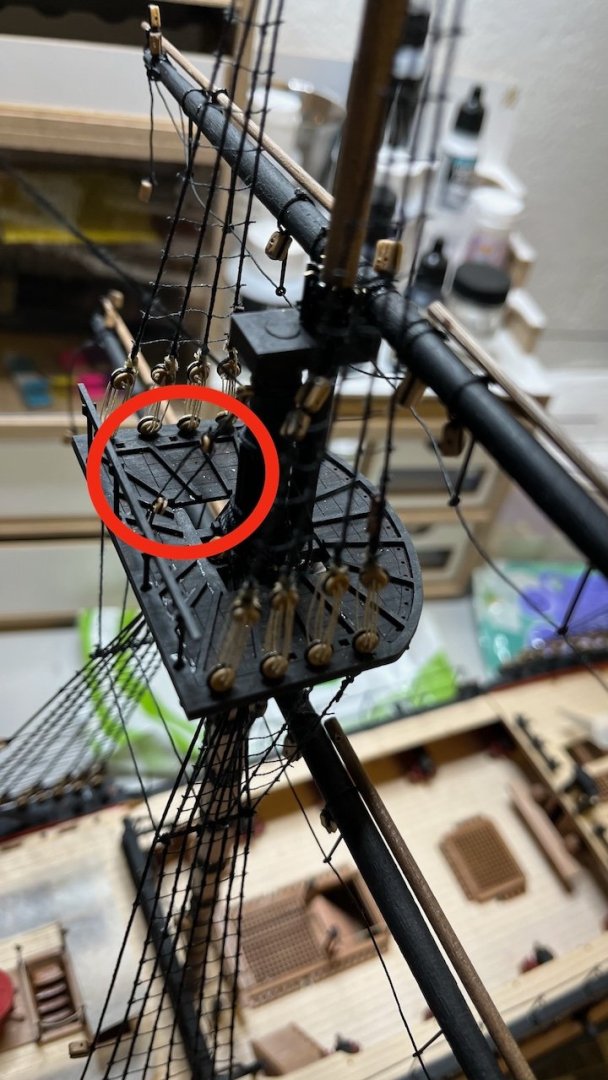
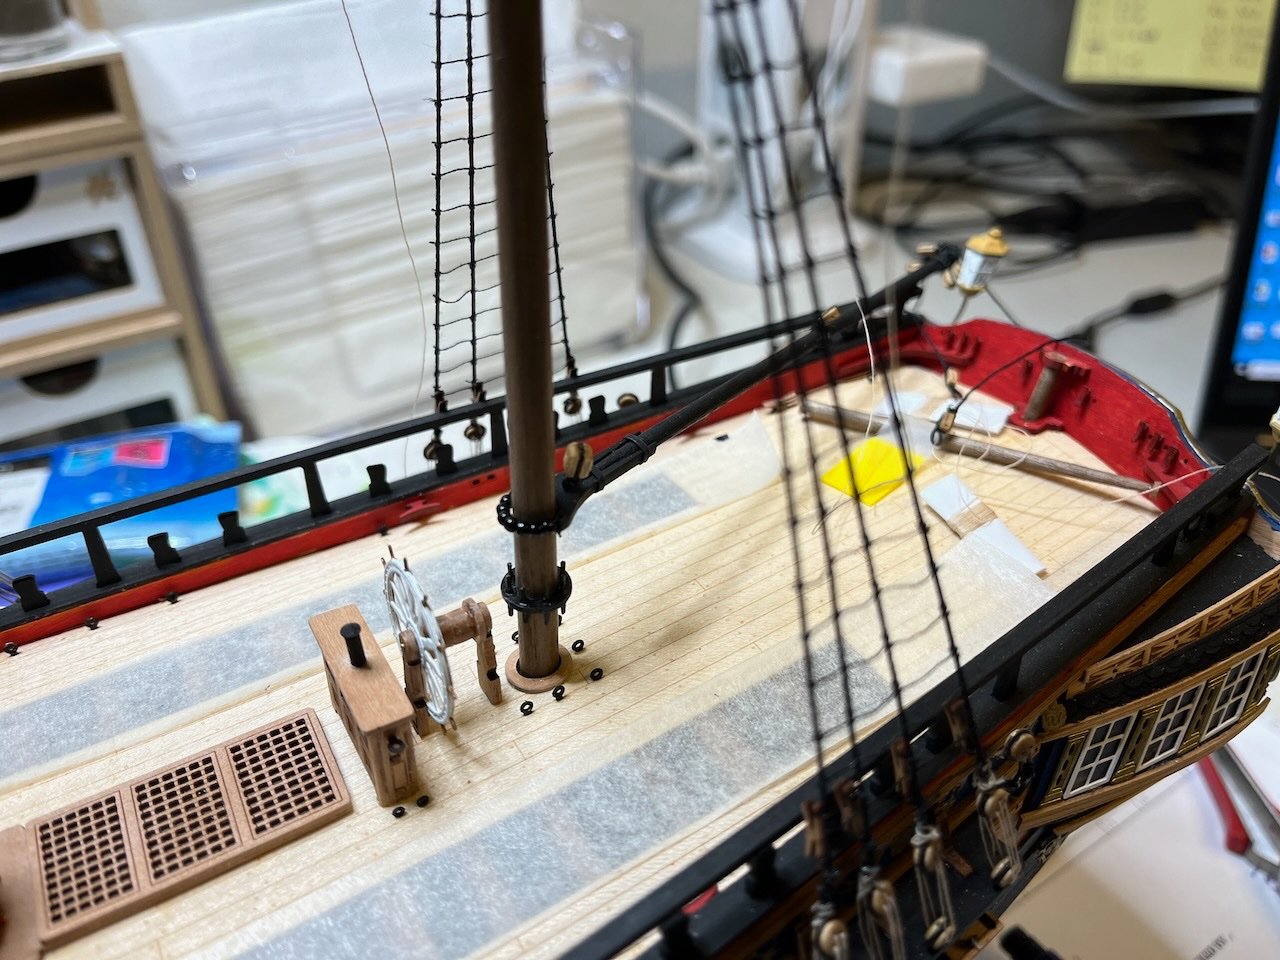
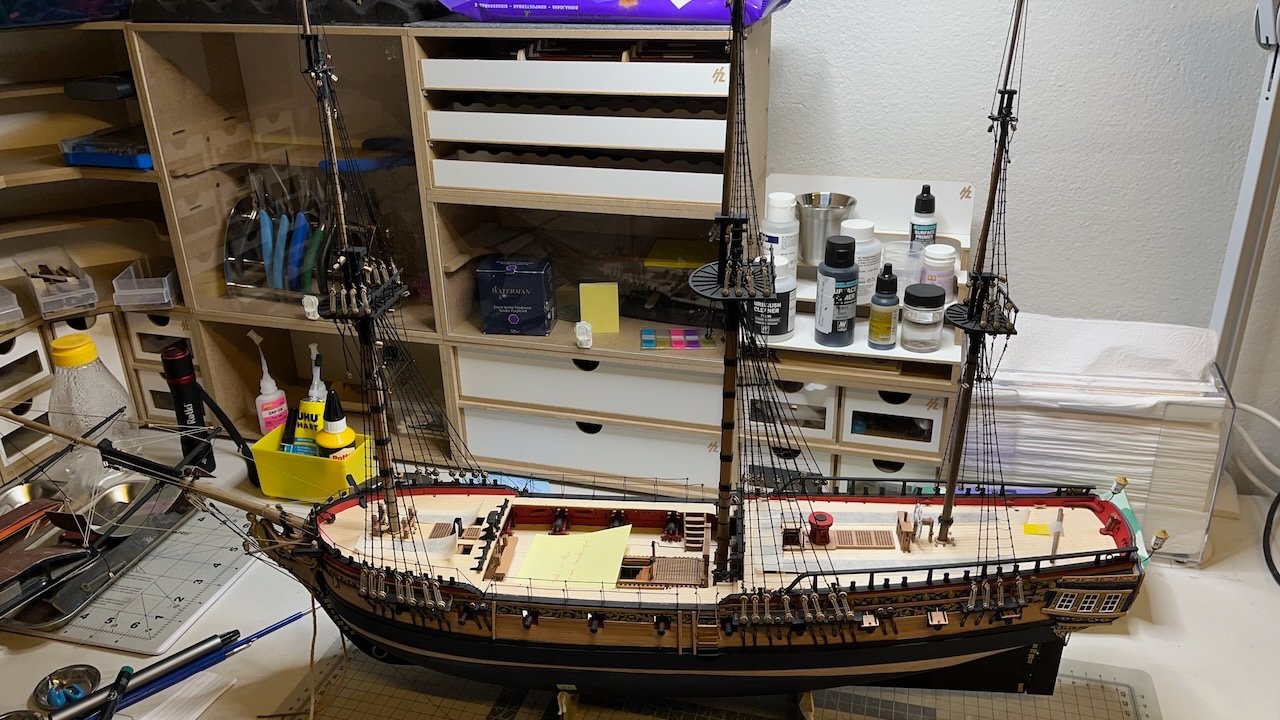
Build day 156-157: 1,5 hrs / Total 326,5 hours 1,5 hours of more work and fitting of the yards are complete. Now I can tick the 4th item in my checklist: Edit: I have Crossjack Sling also in position. So, 5th item is also ready. ✅ Fit masts ✅ Rig lower shrouds ✅ Rig upper Shrouds ✅ Fit the yards (do not rig them yet) ✅ Fit the crossjack sling to the crossjack yard (at this point for accesibility) Rig the mast stays (Omit Main Stay Tackle and Fore Hatch Tackle at this stage) Add the Crowsfeet to the mast tops Rig the back stays Rig the yards Fit Sheets and Tacks Fit the Main Stay Tackle (but do not lash them yet) Rig the Yard Braces Fit the ship's boats Lash down the Main Stay Tackle and Fore Hatch Tackle A photo for the record: Photo: 824

- 426 replies
-
- 9
-
-

-
- Vanguard Models
- Sphinx
- (and 1 more)
-
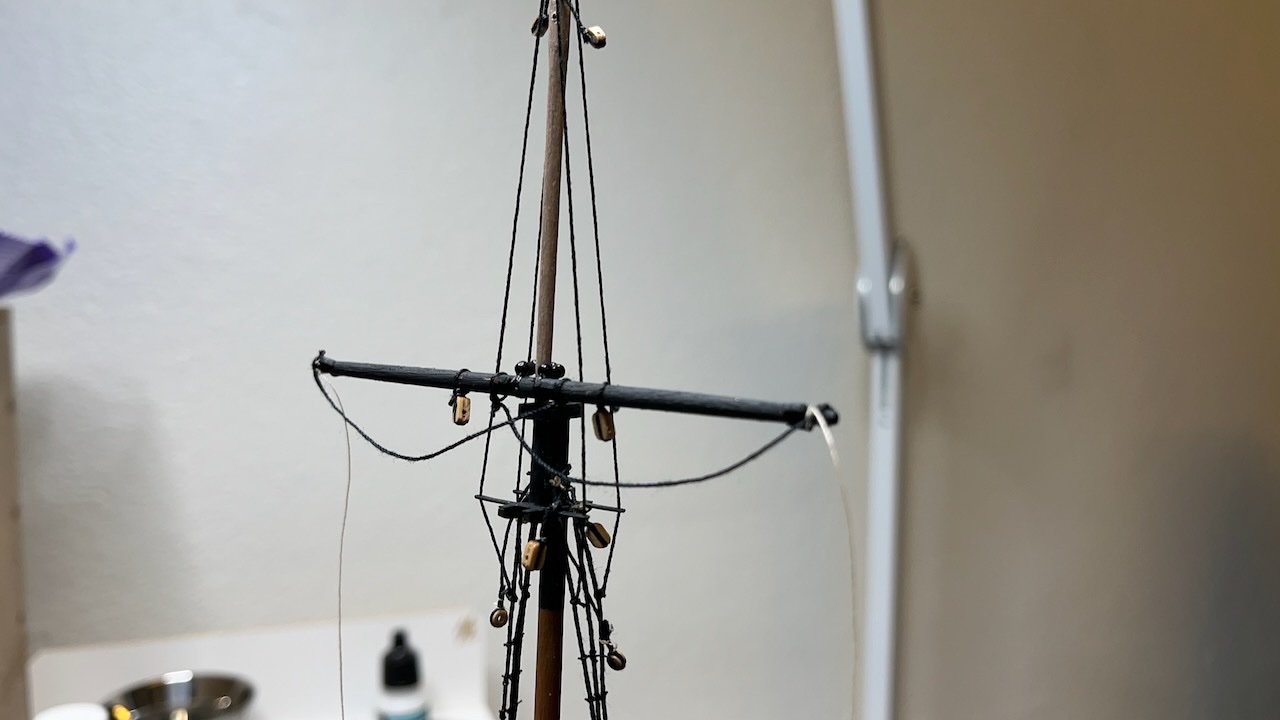
Build day 155: 5 hrs / Total 325 hours Installing Crossjack Yard and Main Yard. Below I share the process of rigging the thread structure for mounting the Main Yard, as good as I understood from the plans. Last two photos show the yards in place with their thread fittings. I used nails here, too, to mount them strongly in place. Photos 818-823


- 426 replies
-
- 7
-
-
- Vanguard Models
- Sphinx
- (and 1 more)
-
Here is my rigging progress. Not quite done, but getting there! ✅ Fit masts ✅ Rig lower shrouds ✅ Rig upper Shrouds (IN PROGRESS) Fit the yards (not rigging them yet) Fit the crossjack sling to the crossjack yard (at this point for accesibility) Rig the mast stays (Omit Main Stay Tackle and Fore Hatch Tackle at this stage) Add the Crowsfeet to the mast tops Rig the back stays Rig the yards Fit Sheets and Tacks Fit the Main Stay Tackle (but do not lash them yet) Rig the Yard Braces Fit the ship's boats Lash down the Main Stay Tackle and Fore Hatch Tackle
-
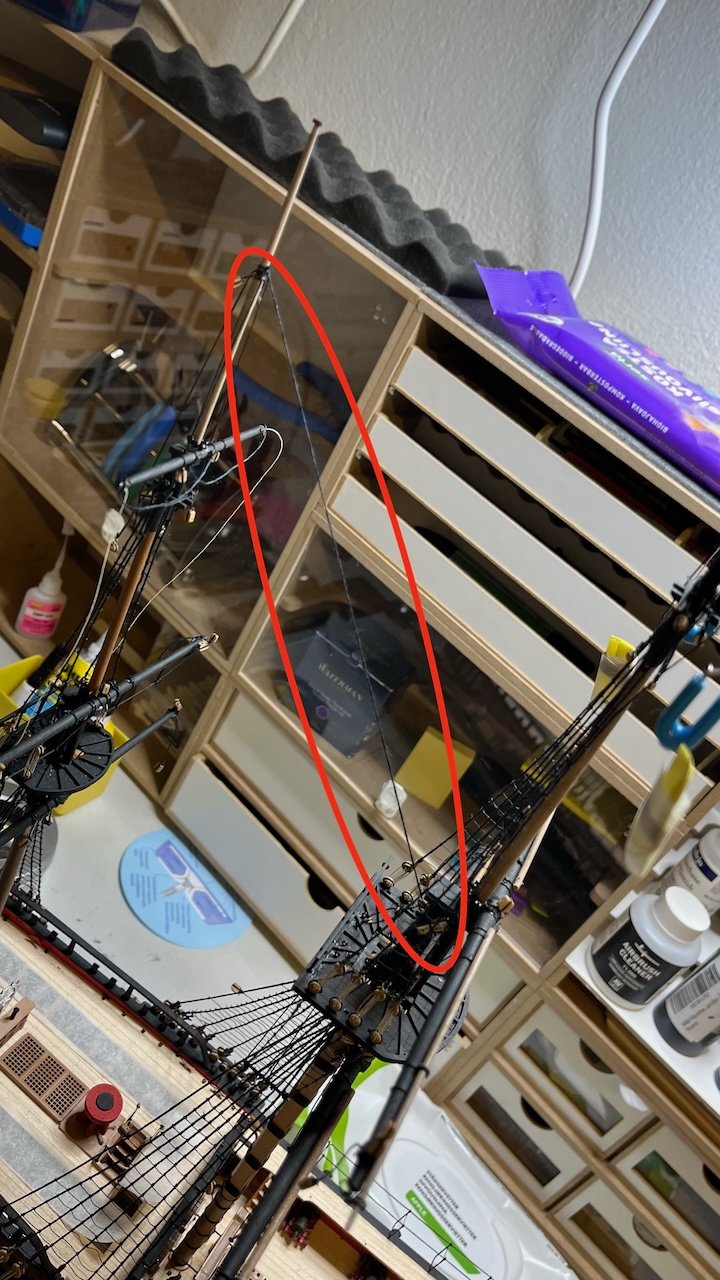
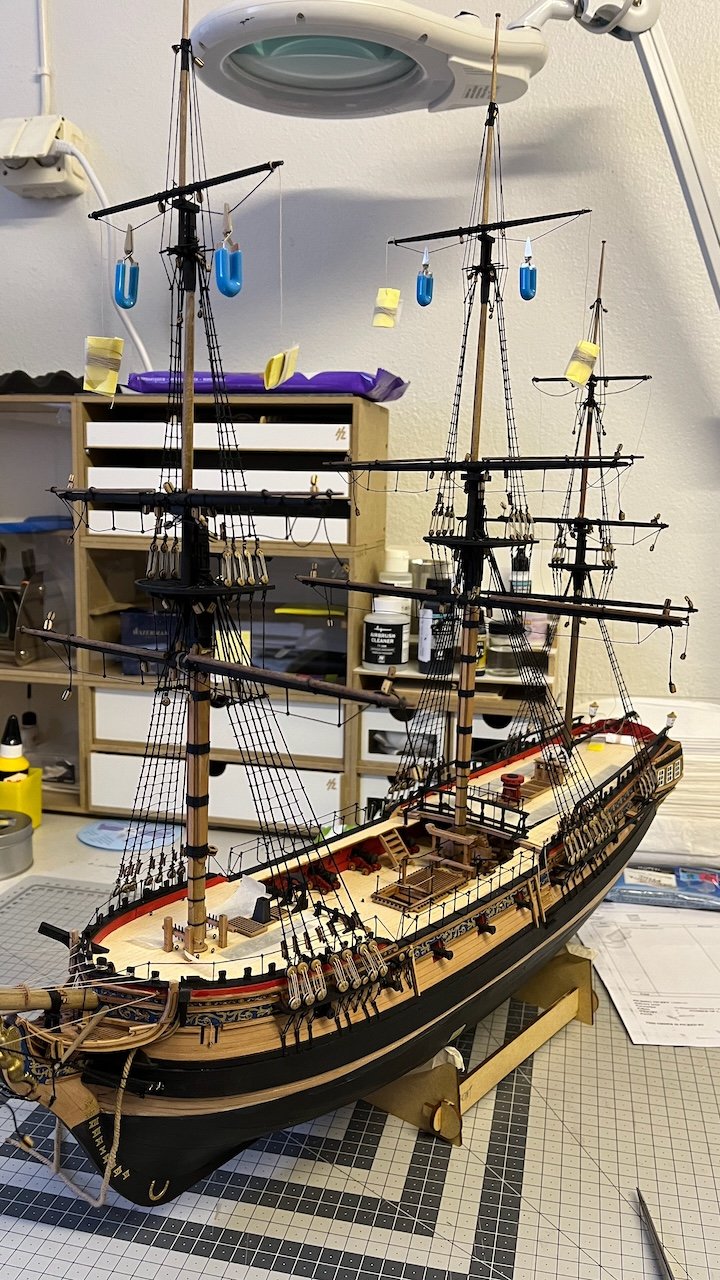
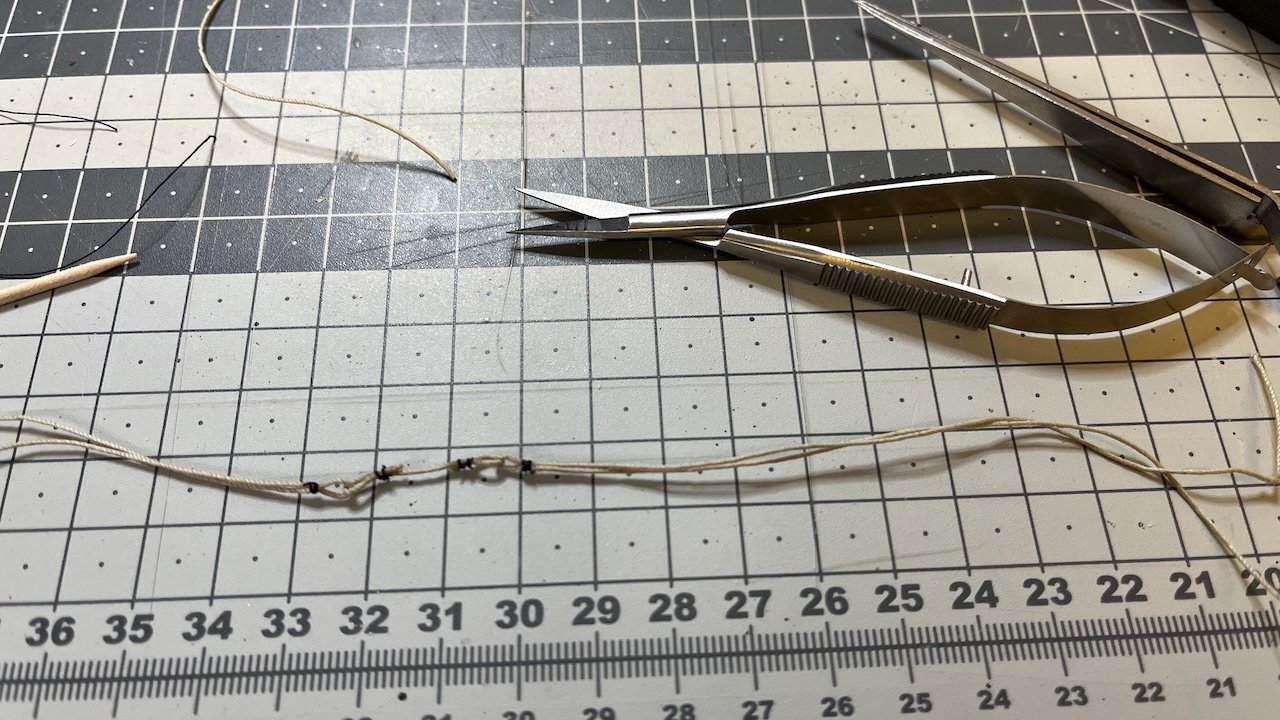
Photos 816-817: I wanted to try hanging weights in the center of these threads to give them a more realistic curved shape. I soaked them with water using a brush to help somewhat maintain their shape once they have dried (the 2nd photo). They will stay there as long as they can. I hope it helps. That's all for today! Thanks for watching!

- 426 replies
-
- 2
-
-
- Vanguard Models
- Sphinx
- (and 1 more)
-
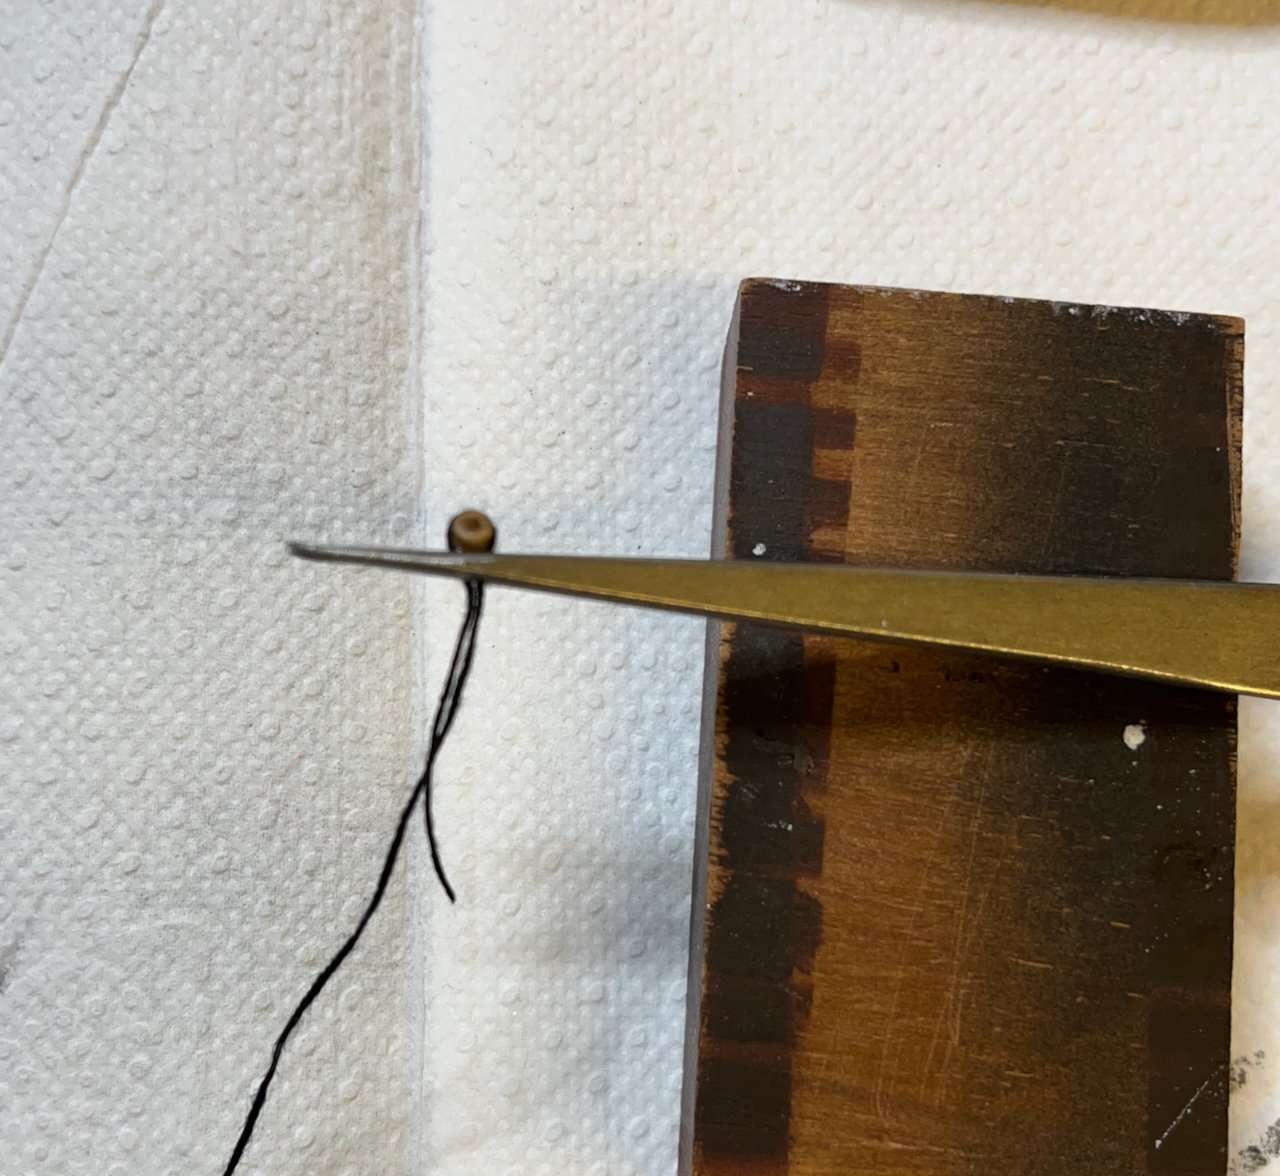
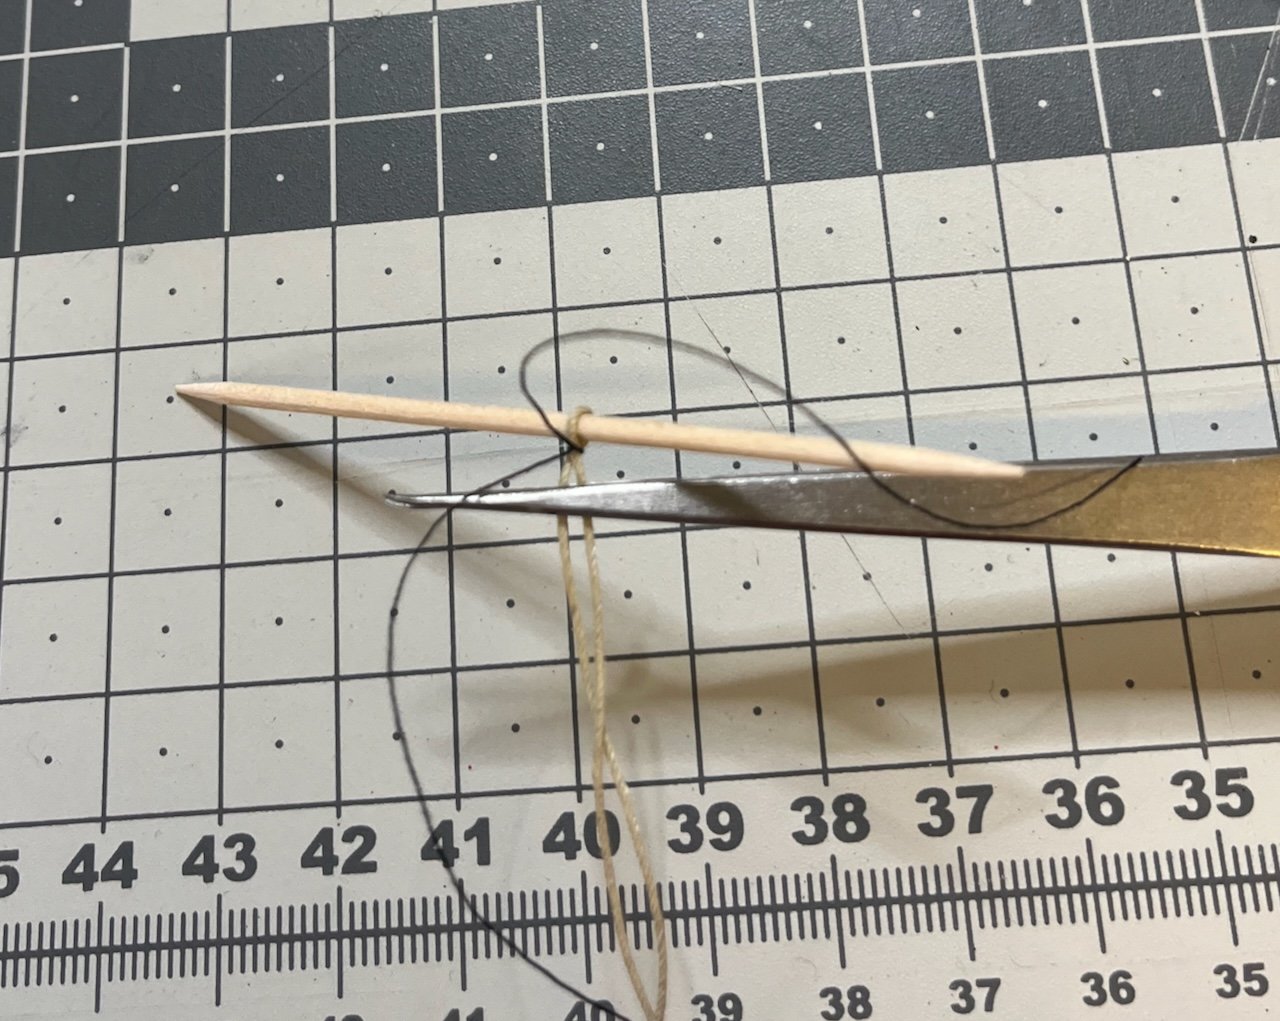
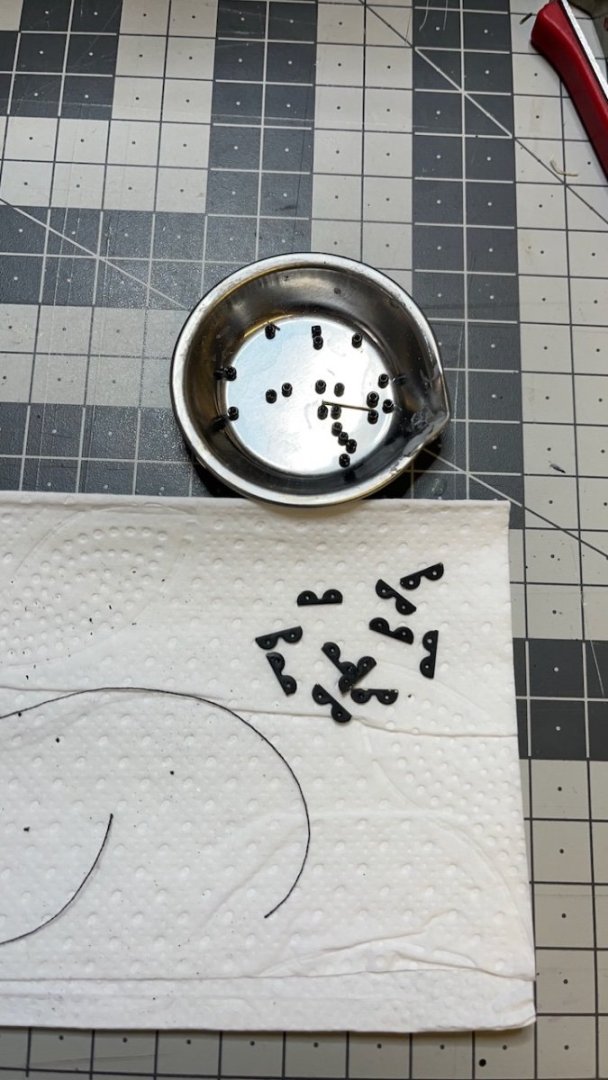
Photos 814-815: Here is how I worked with threads, which use only parrel beads: Fix the thread on the yard in one end and add as many beads as you need from the other end. It was much easier to work this way than installing an already prepared thread with beads, in which case the beads kept dropping while trying to get the thread ends back and forth through intricate spaces.
-
Photo 813: Mizzen gaff with parrel beads around the mast. (Behind you see the stern ensign post, which I accidentally hit with my hand and broke, waiting to be repaired - what a disgrace 😆)
- 426 replies
-
- 3
-
-
- Vanguard Models
- Sphinx
- (and 1 more)
-
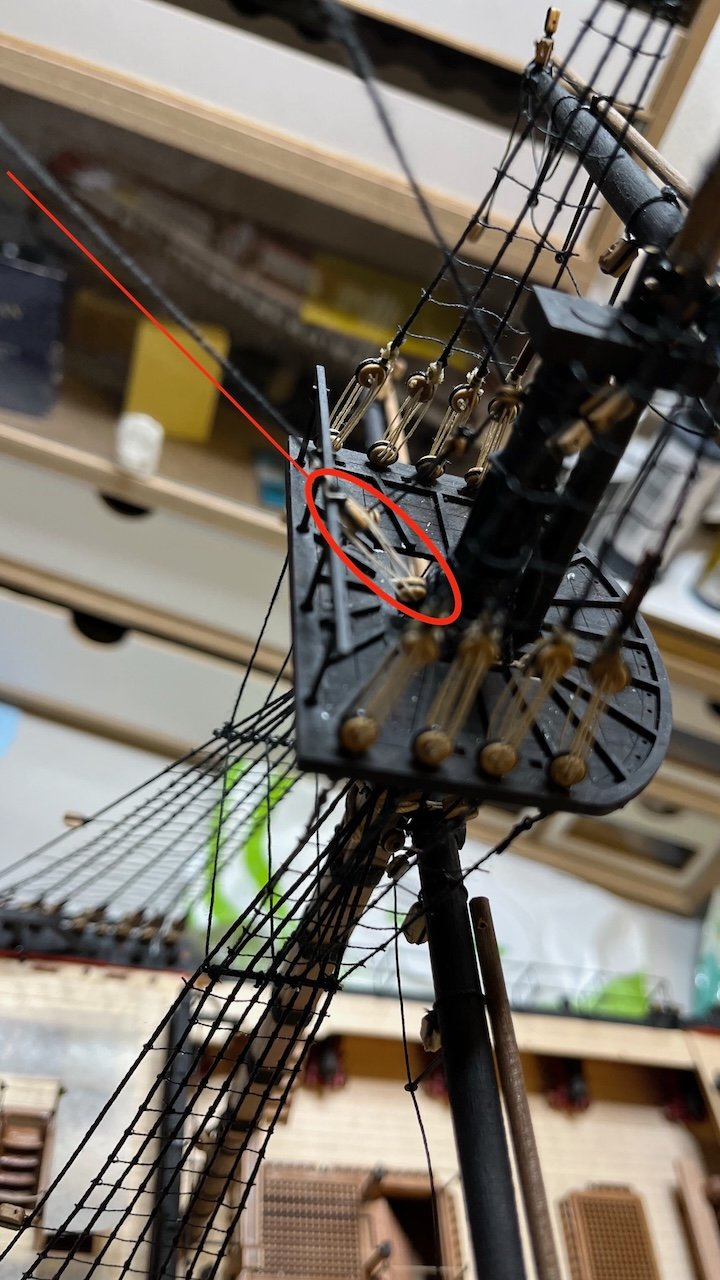
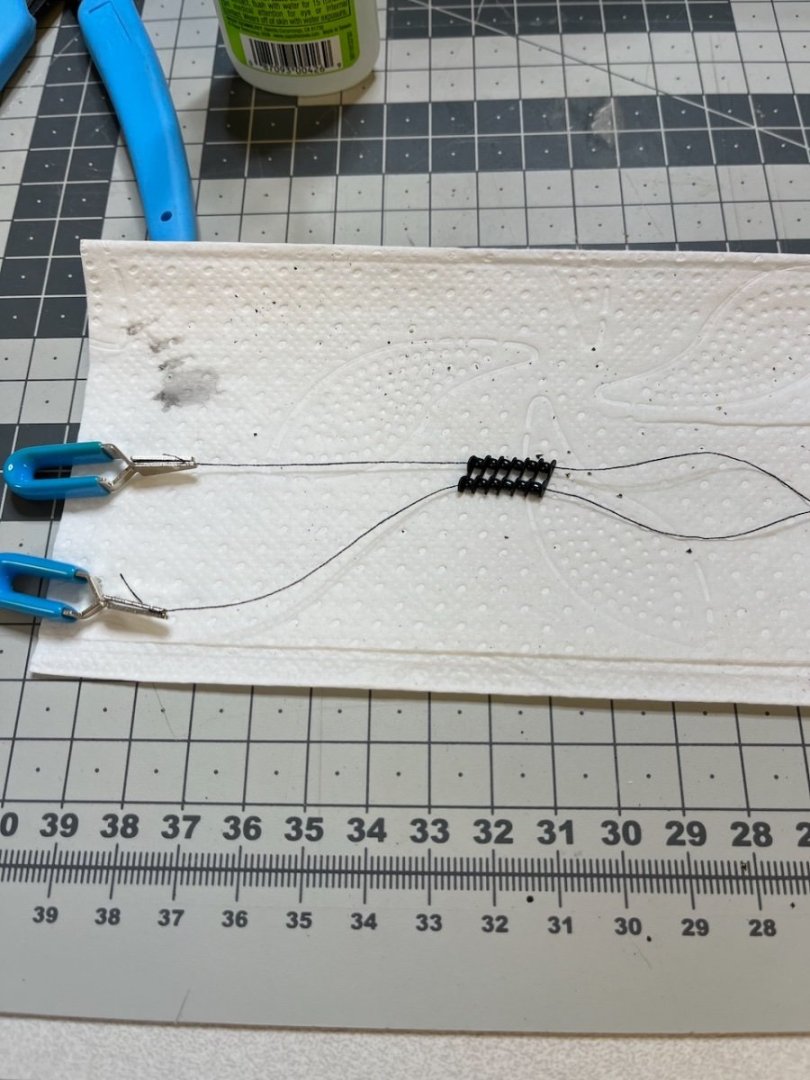
Build day 154: 4 hrs / Total 324 hours Yard installation continues. Some use just threads, some use parrel beads on thread, and some use parrel beads with parrel ribs on thread in order to tie them to the masts. They are instructed in the plans. Photos 810-812: The next 3 photos show some details how I installed parrels with parrel ribs and then their place. I have already used nail and glue to mount the yards and reinforced them with a black thread. This makes rigging the thread with parrels to their place much easier as you don't worry about actually holding the yard with them.

- 426 replies
-
- 1
-
-
- Vanguard Models
- Sphinx
- (and 1 more)
-
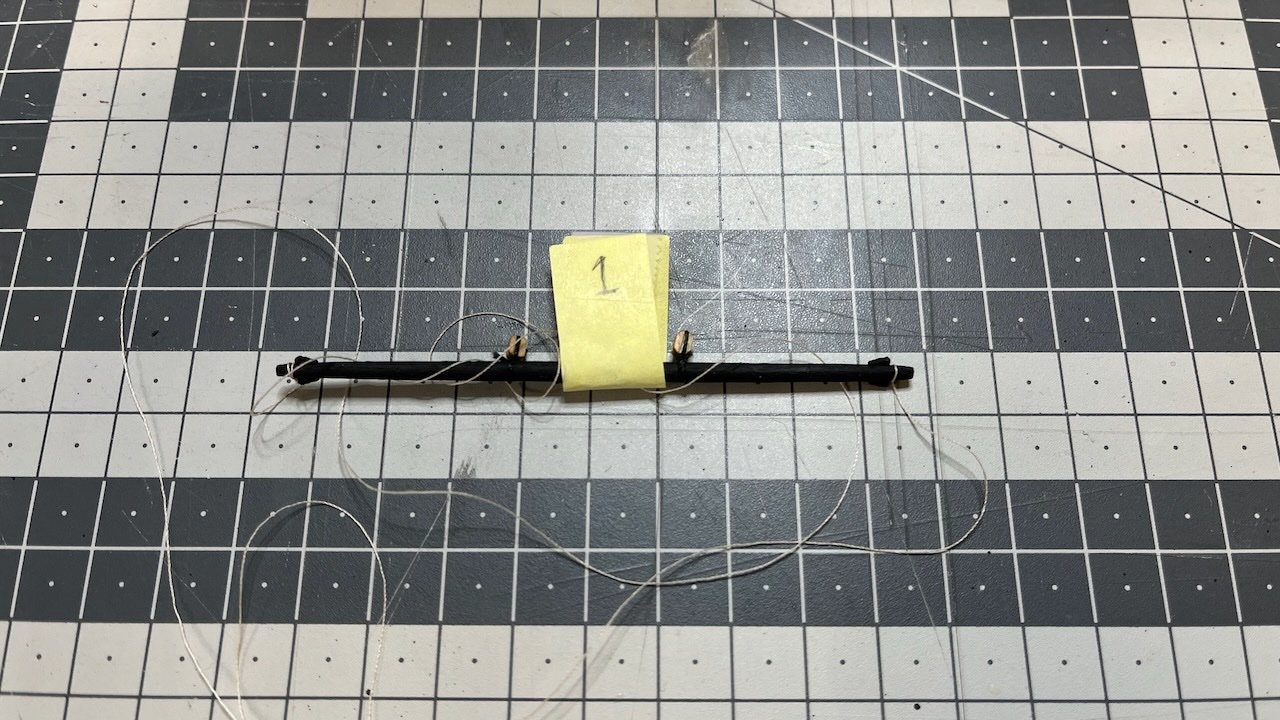
Build day 153: 0.5 hr / Total 320 hours Yard installation starts. I am installing them in the order I had numbered. The first one happens to be the Mizzen Topgallant Yard. I fix the yards to the masts using a nail, then rig it to the place. Photos 808-809:
- 426 replies
-
- 6
-
-
- Vanguard Models
- Sphinx
- (and 1 more)
-
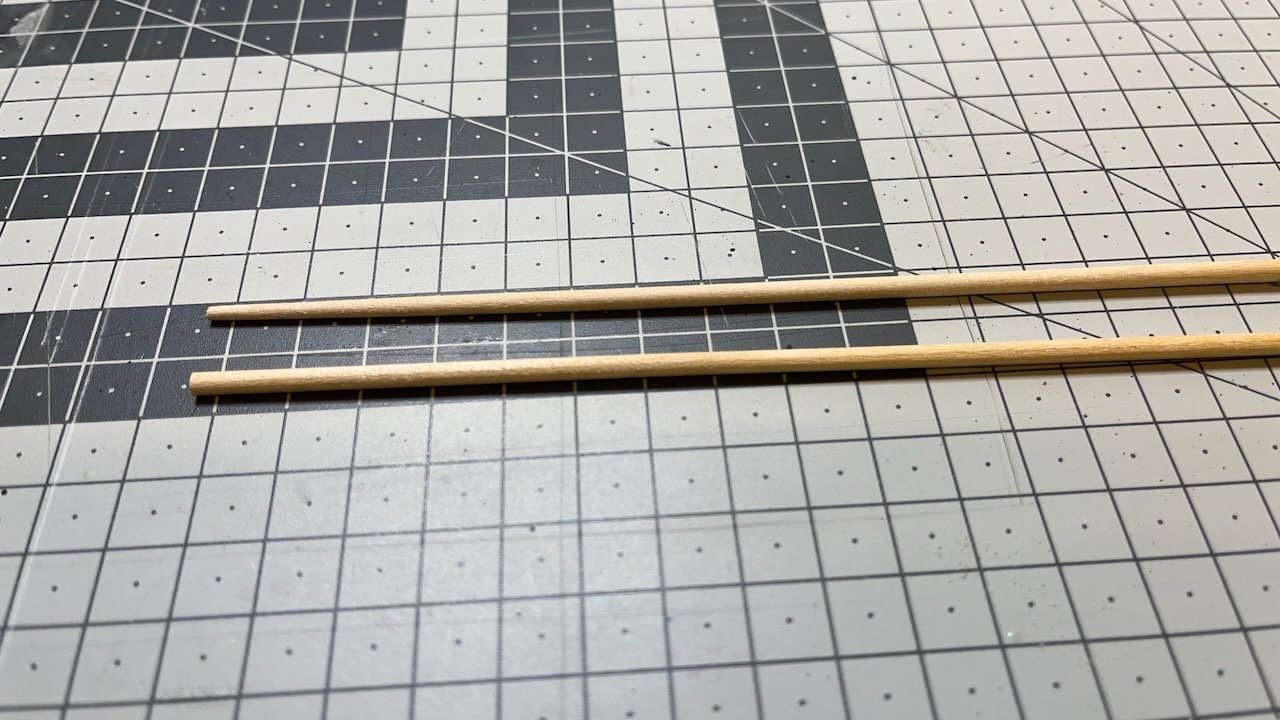
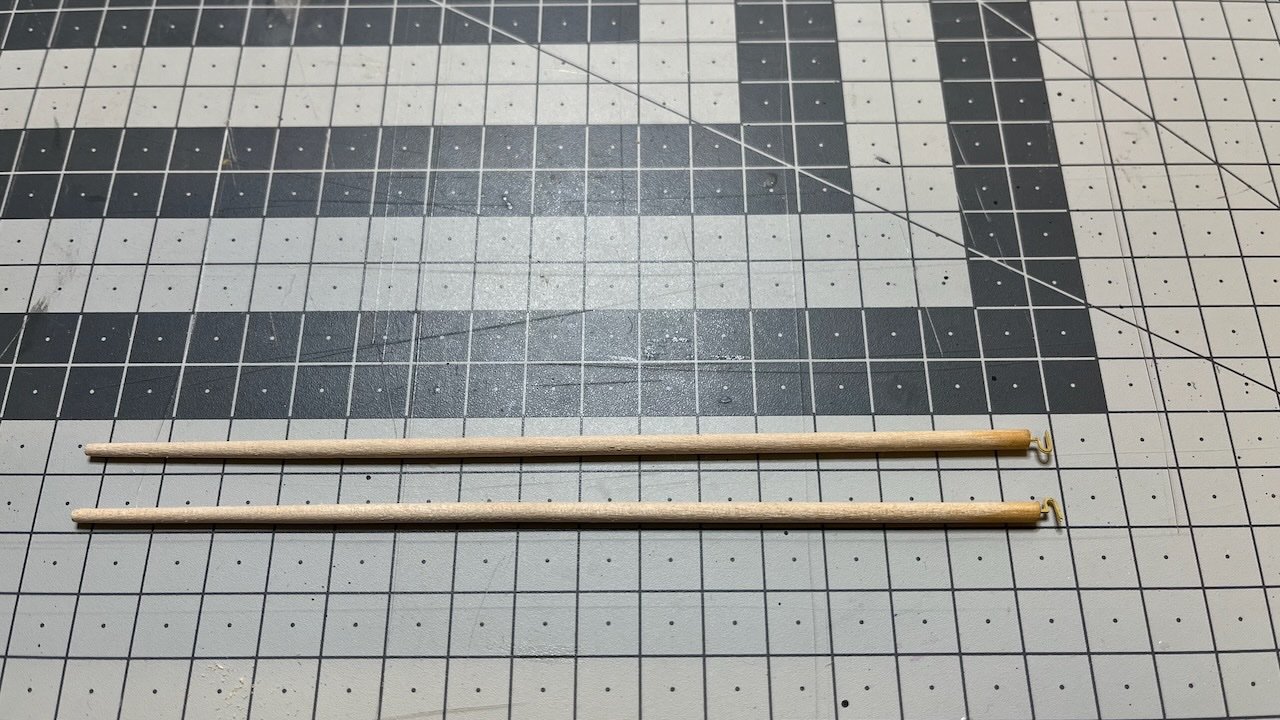
Build day 152: 1 hr / Total 319,5 hours Photos 803-807: Lower main stunsail booms had been pending for a while. Before moving to yards' installation, I decided to get them out of the way. I tapered them using my hand drill usual way until they dry fit nicely in their places. Dry fit:


- 426 replies
-
- 5
-
-
- Vanguard Models
- Sphinx
- (and 1 more)
-
Build day 151: 3 hrs / Total 318,5 hours Today I did about 3 more hours to finish all the shroud cleats. So it tool altogether 4,5 hours
- 426 replies
-
- 1
-
-
- Vanguard Models
- Sphinx
- (and 1 more)
-
Build day 150: 1,5hr / Total 315,5 hours Photos 800-802: Started tying the shroud cleats to the shrouds, using 0.1mm thread. 12 of them done in approximately 1,5 hours.


- 426 replies
-
- 8
-
-
- Vanguard Models
- Sphinx
- (and 1 more)
-
Build day 149: 0,5hr / Total 314 hours Photo 799: Preparing the shroud cleats for installing on the lower shrouds and some of the top shrouds.
- 426 replies
-
- 4
-
-
- Vanguard Models
- Sphinx
- (and 1 more)
-
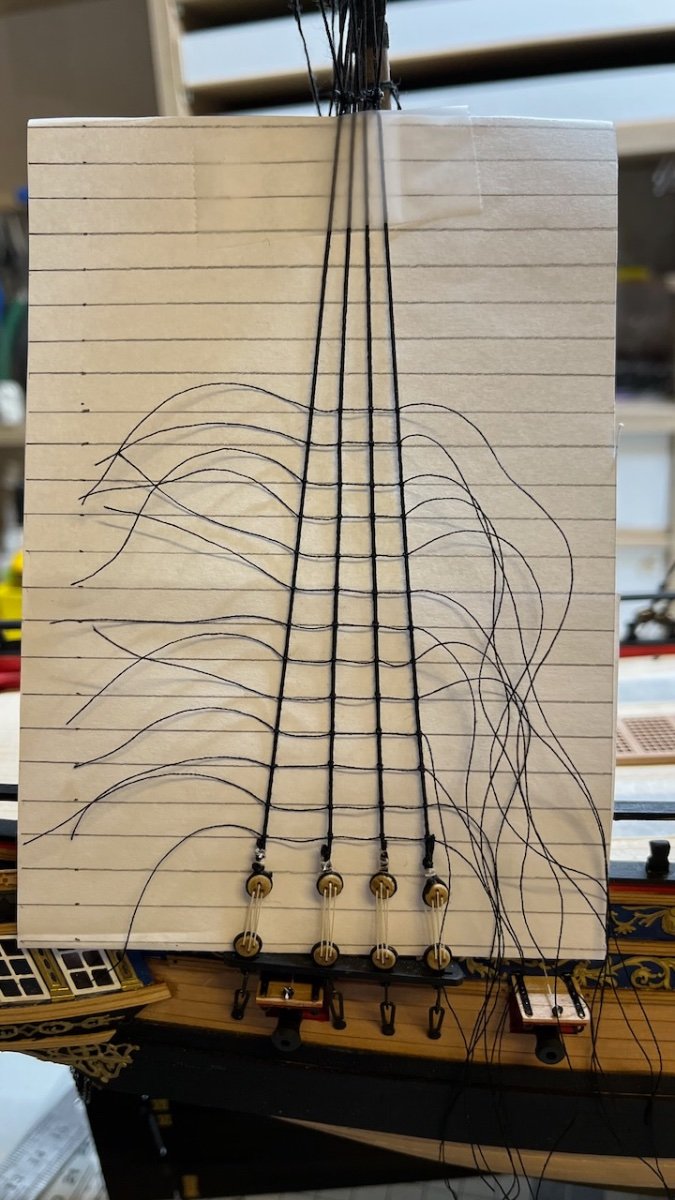
Build days 142-148: 13,5hrs / Total 313,5 hours Working time to time from Jan 17th to Feb 25th, after 13,5 hours spread in to 7 build days, the ratlines are finally ready. Next step is to add the details (shroud cleats etc) Photos 798: For documentation, one photo showing the status:
- 426 replies
-
- 8
-
-
- Vanguard Models
- Sphinx
- (and 1 more)
-
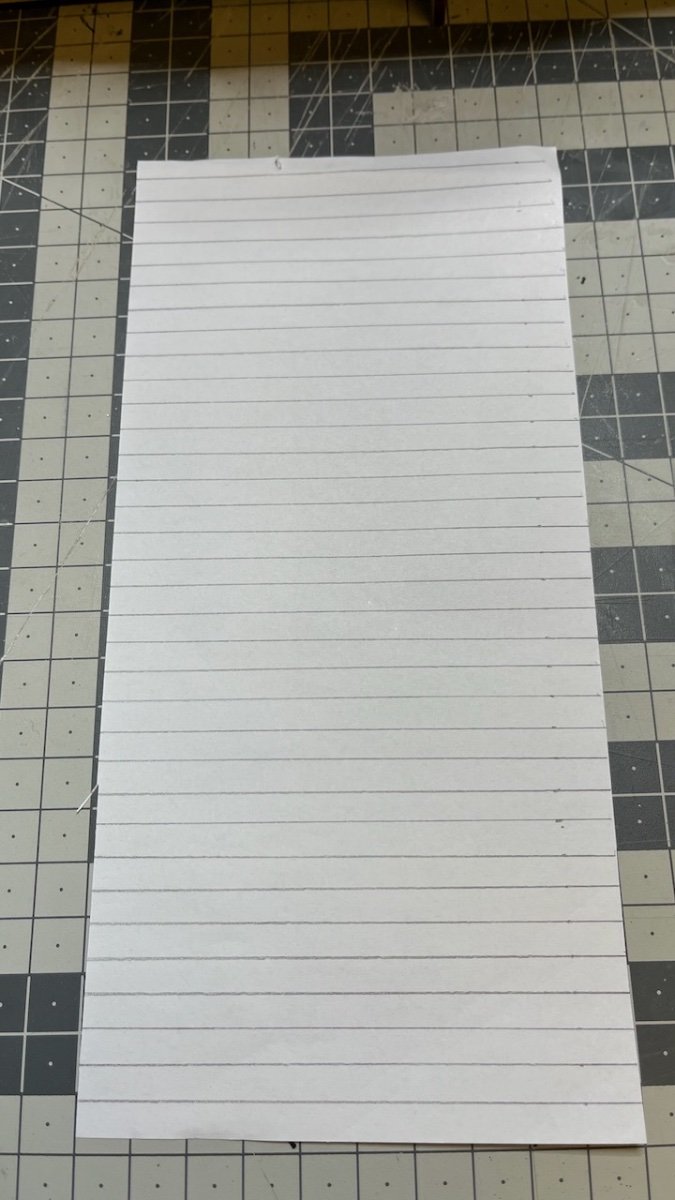
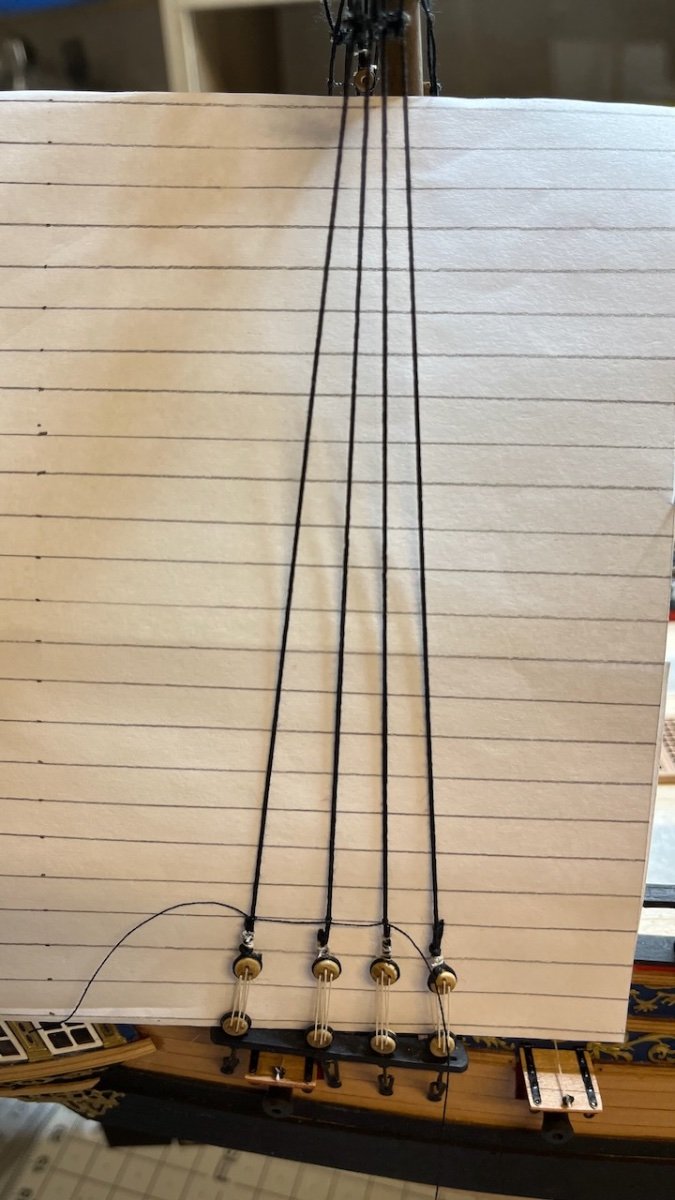
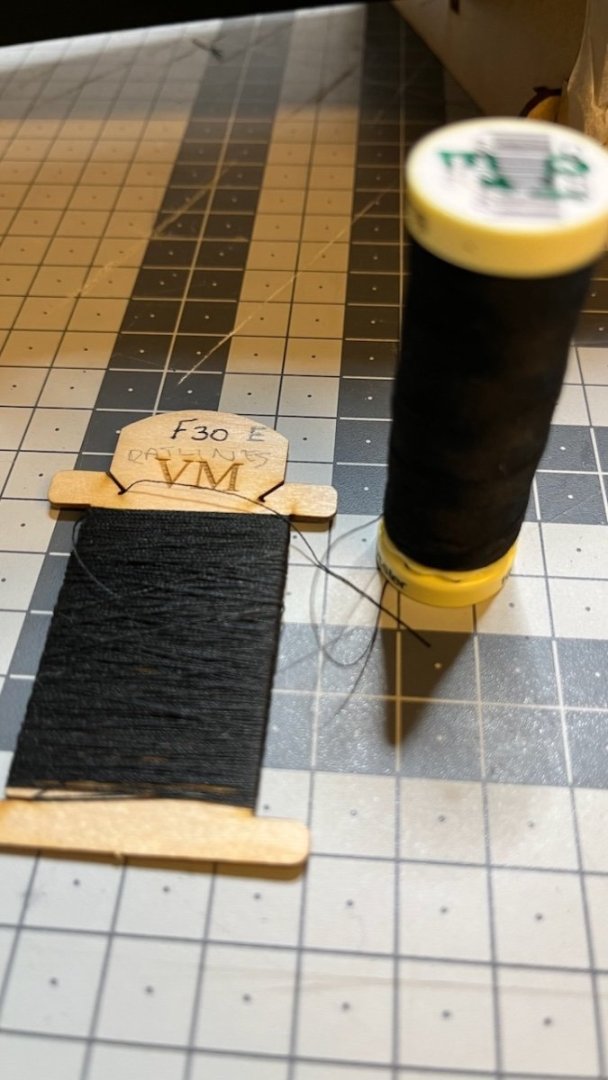
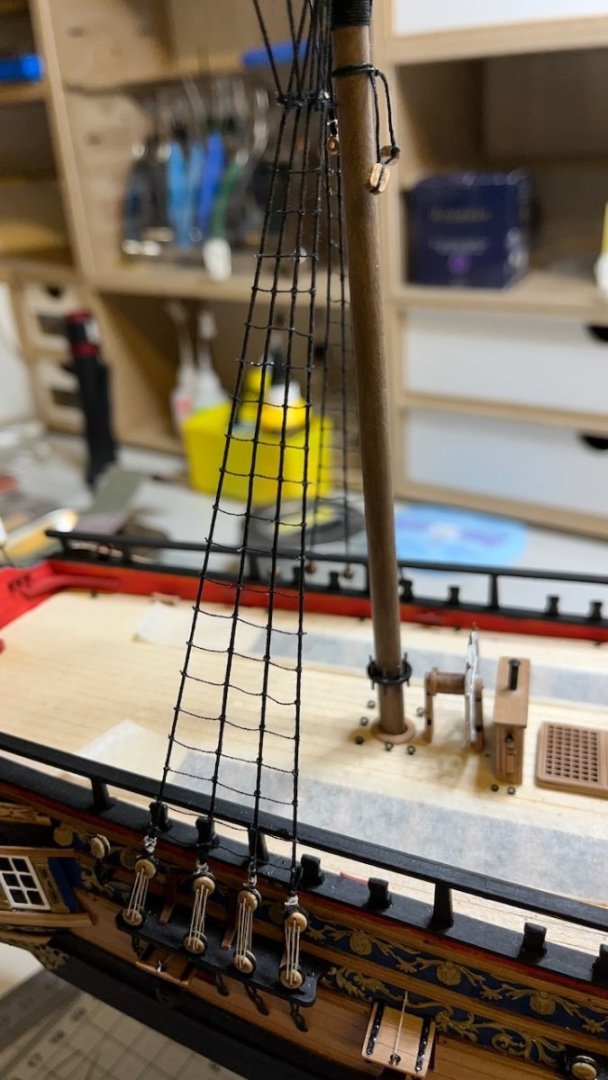
Build day 139-141: 3,5hrs / Total 300 hours With the first build days of 2024 I am setting the milestone of 300 hours 🙂. I know I have not been very active with this build lately but winter time comes with its own busy days - work and holidays. Photos 793 - 797: Next job is to rig the ratlines. I made the guidelines on a piece of paper as suggested in the instruction manual, to help with aligning the ratlines at a spacing of 6mm. Then I secured the paper to the shrouds from the top with a tape. I know I am not an efficient user of threads, I need a lot of slack to work comfortably. I am sure the amount supplied (on the left) will not be enough for me so I bought myself a roll of the same size from the shop. Some photos of progress. I started from lower mizzen mast. Then I will continue with the lower ratlines of mainmast and foremasts, before moving on to upper ratlines. I made the knots as described in the plan and once all the ratlines are done, I secured the knots by applying a diluted PVA glue with the tip of a tiny paint brush. Thanks for watching!


- 426 replies
-
- 12
-
-
-
- Vanguard Models
- Sphinx
- (and 1 more)