aydingocer
-
Posts
916 -
Joined
-
Last visited
Content Type
Profiles
Forums
Gallery
Events
Everything posted by aydingocer
-
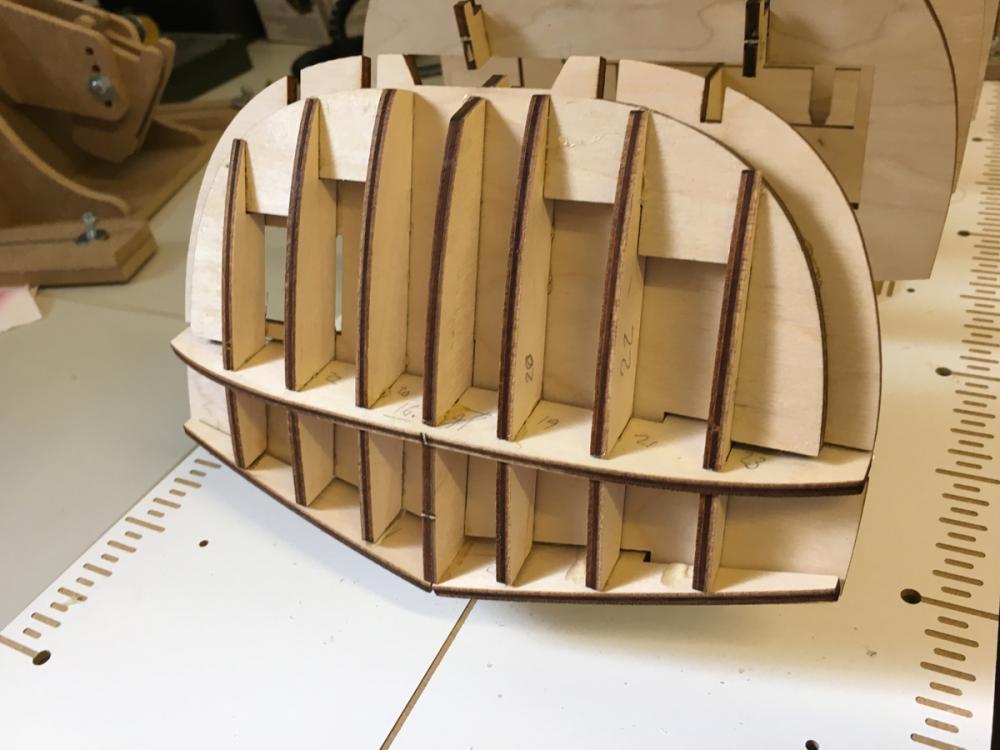
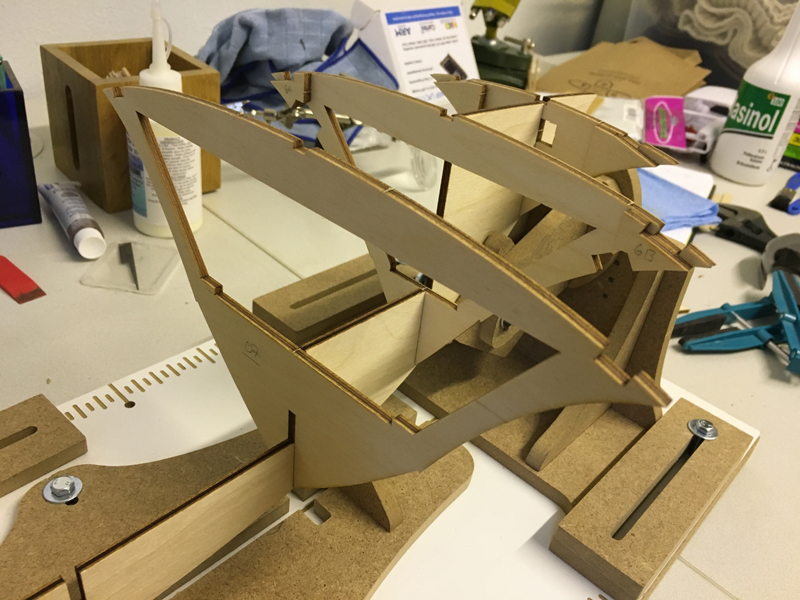
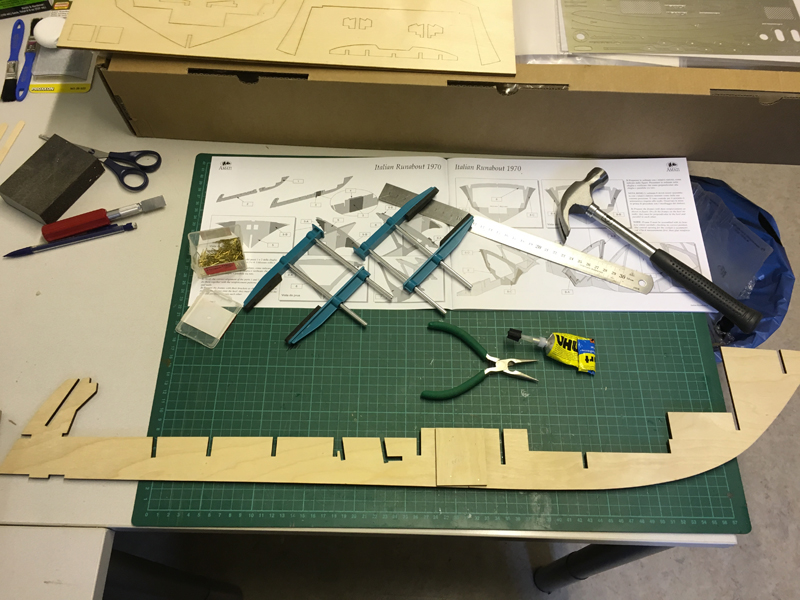
 Current status of the hull (most of the stuff is still dry-fitted):
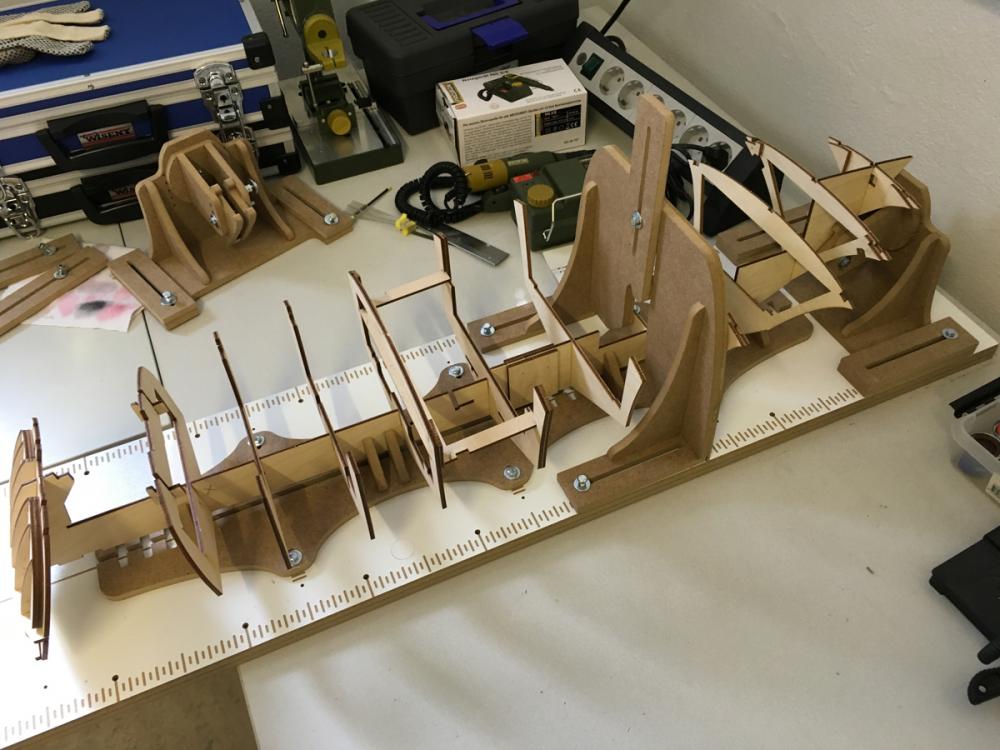
- 414 replies
-
- 6
-

-
- riva aquarama
- amati
- (and 2 more)
-
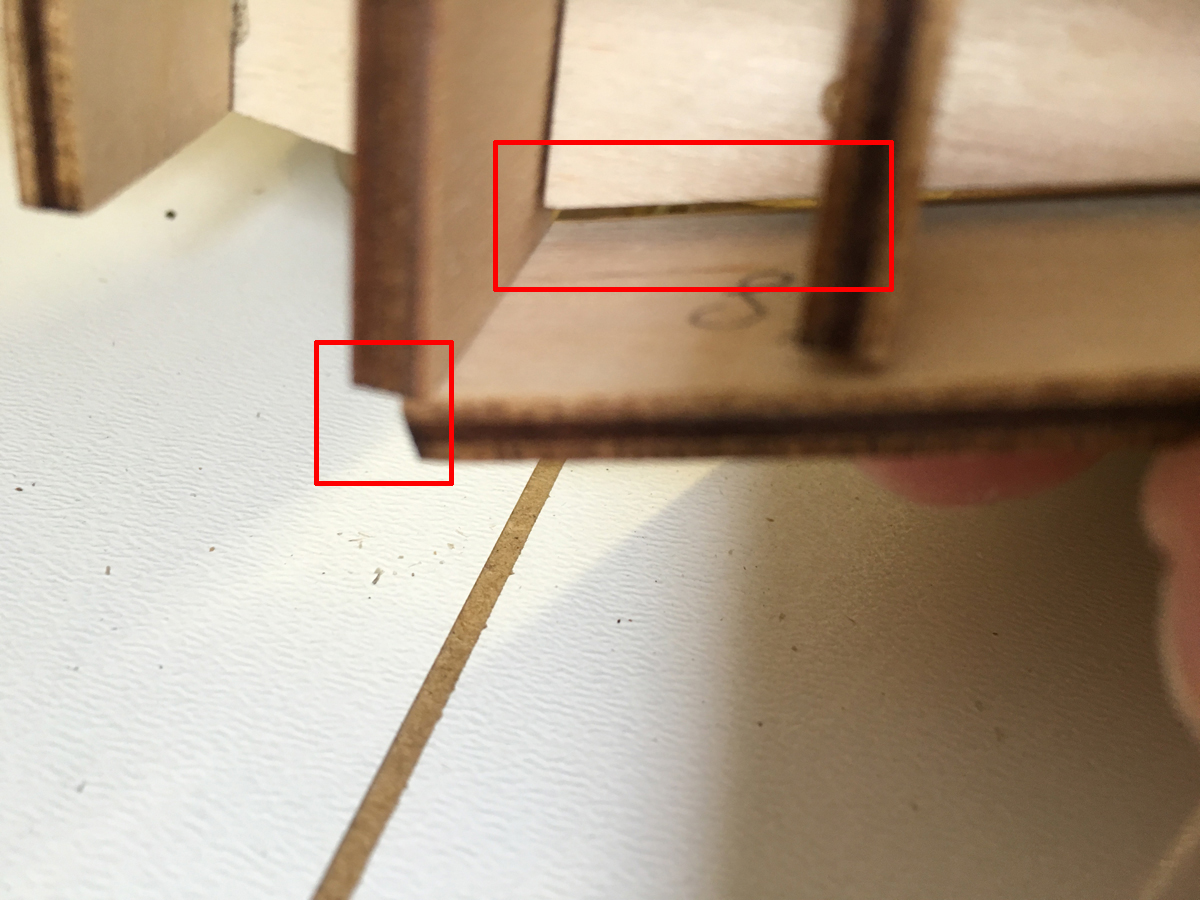
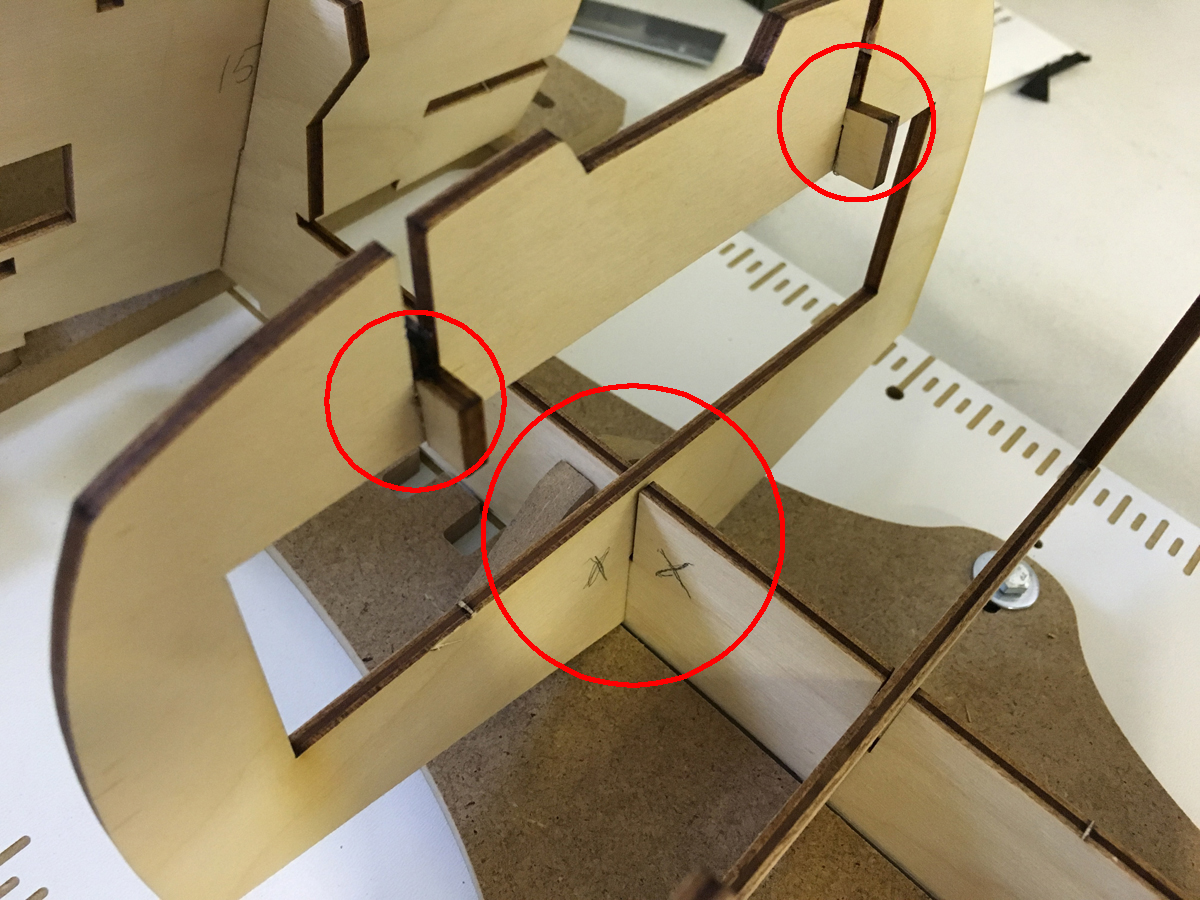
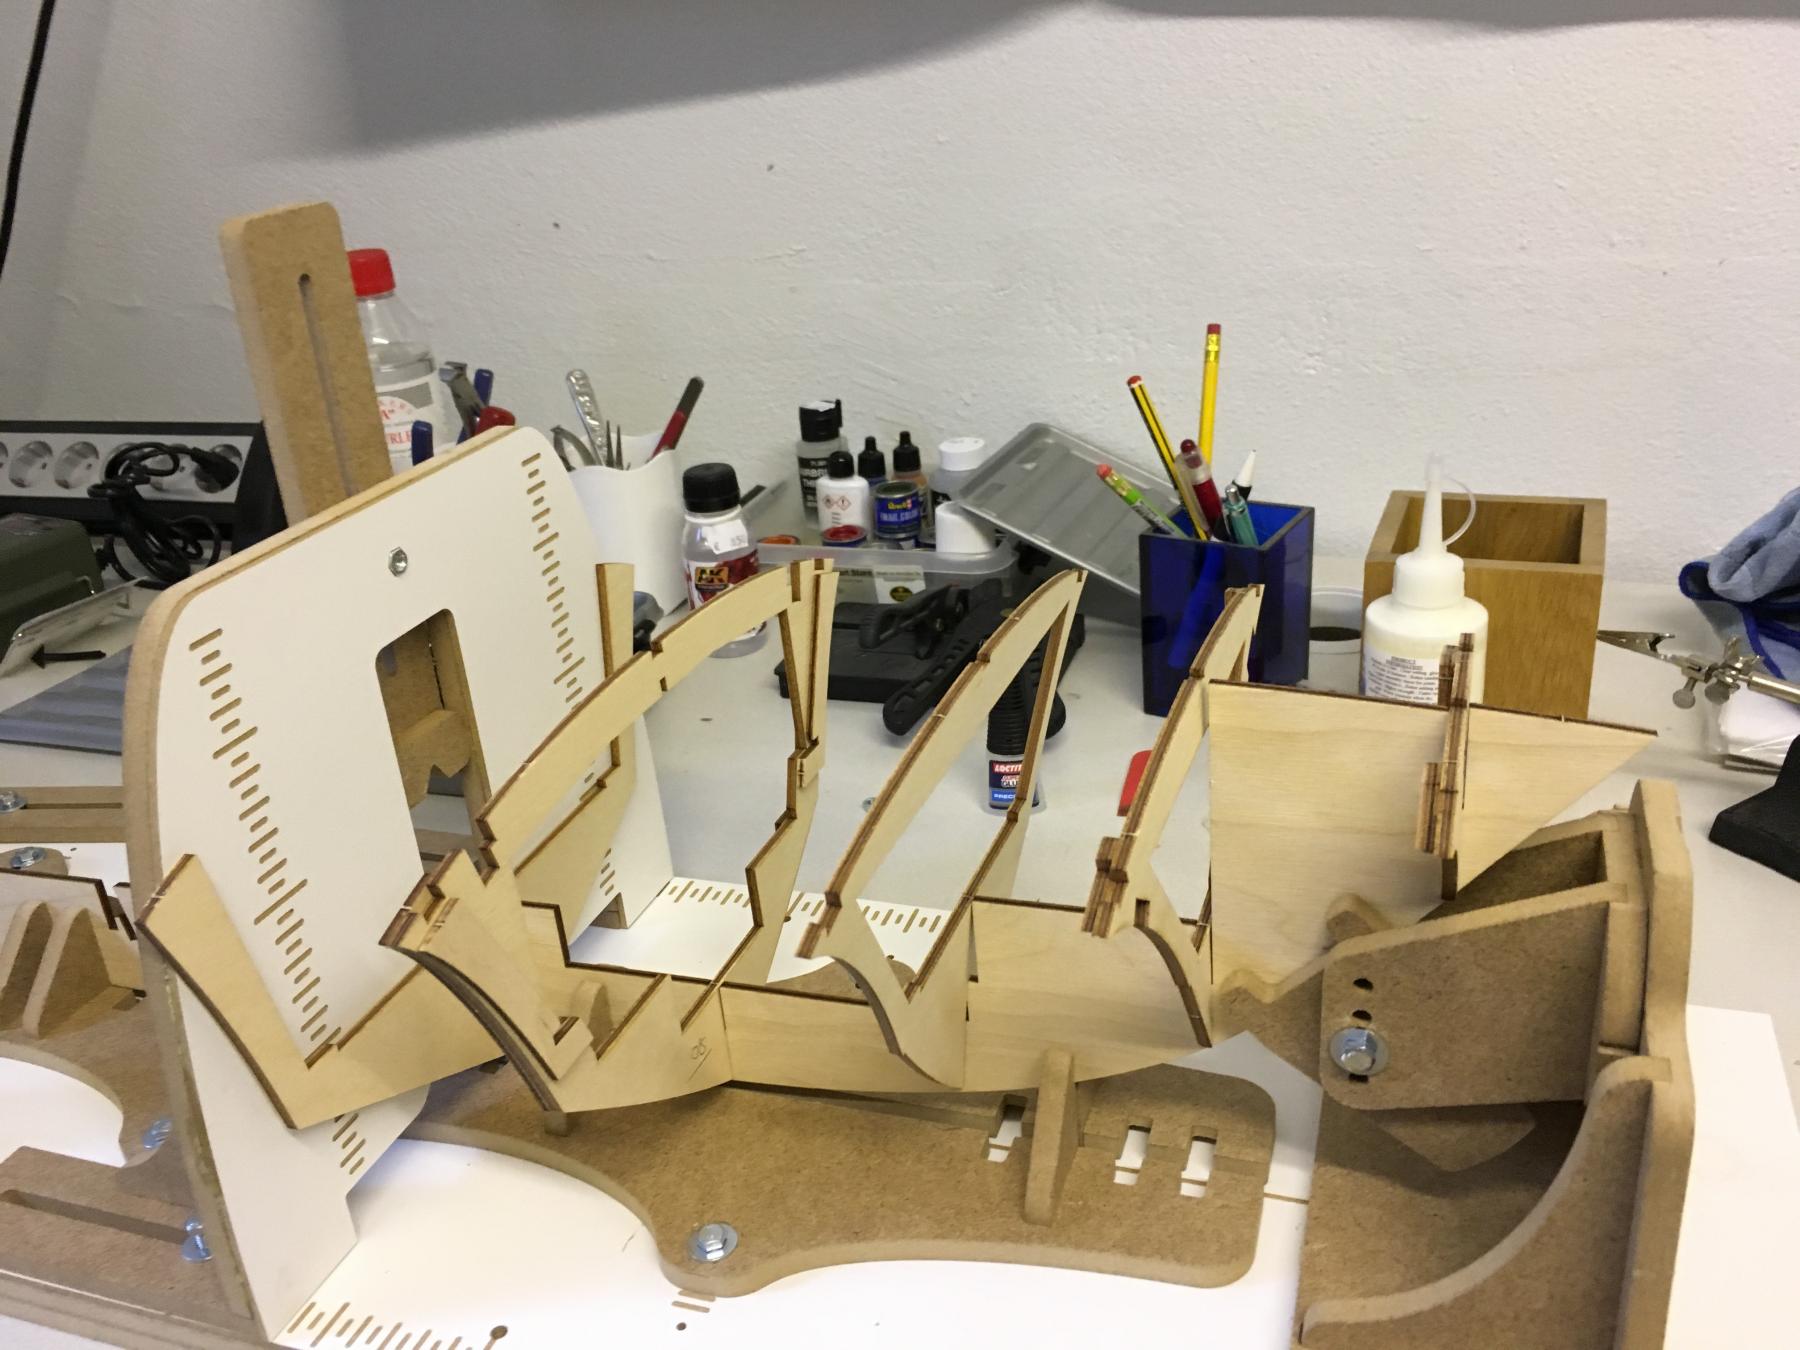
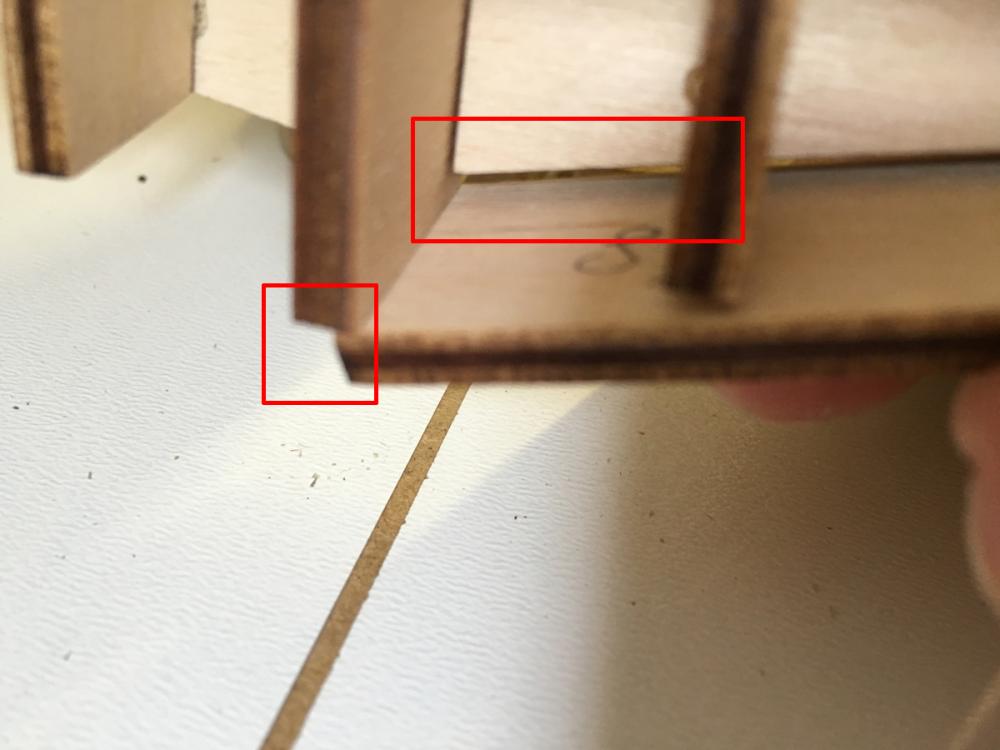
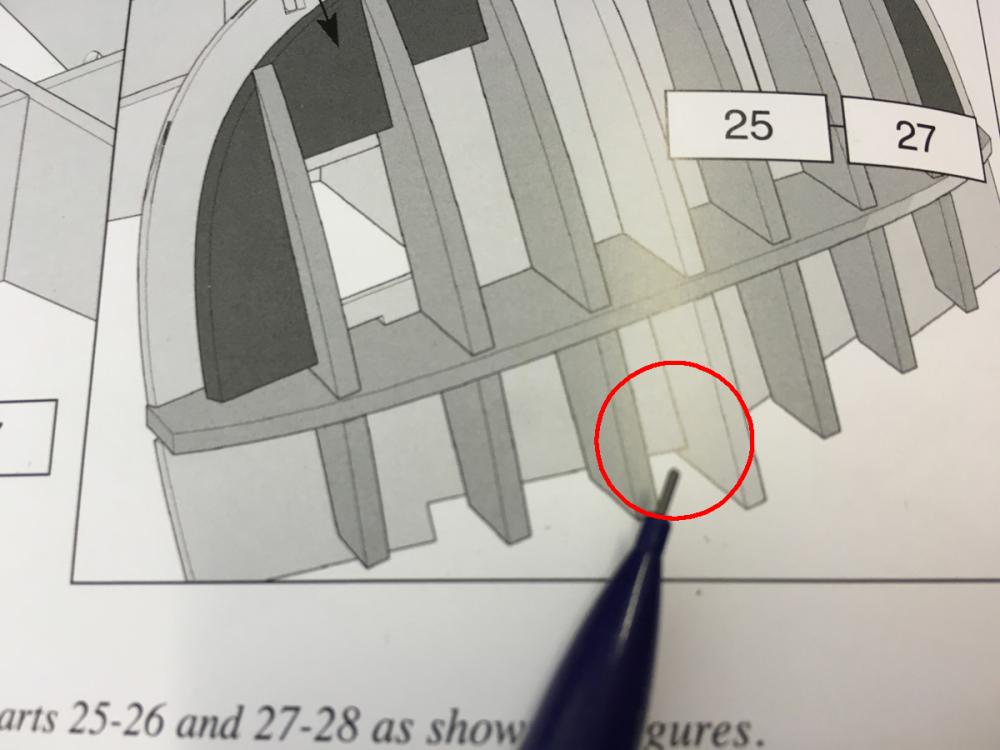
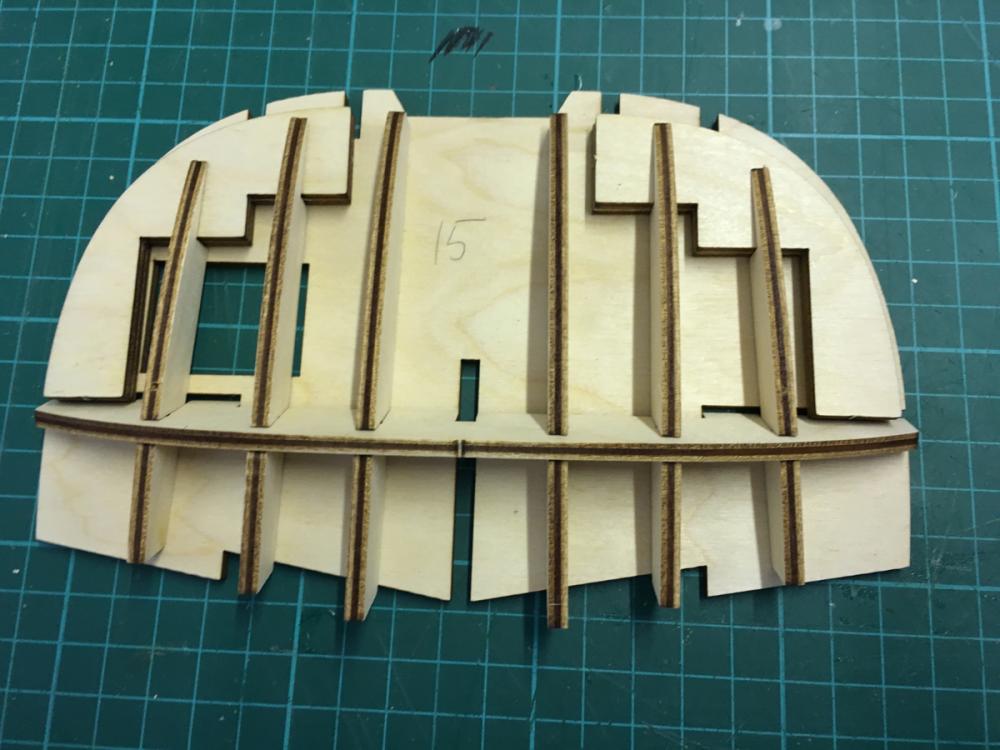
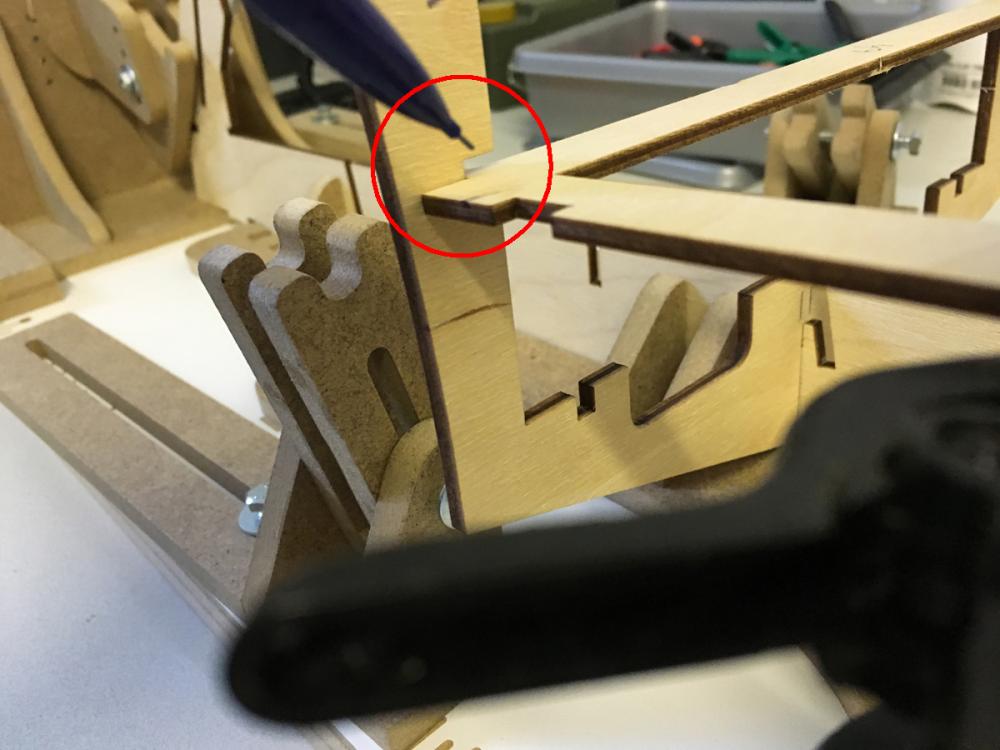
Bottom pieces of the Stern board and a few details about the orientation of the pieces. The gaps and mis-alignements (which I have indicated in red brackets) are actually how they are supposed to be. I also circled them below on the instruction manual: Finally the horizontal support piece has been glued and the Stern board is installed. Here my build slip did not help much because of the angled orientation of the board.

- 414 replies
-
- 4
-
-
- riva aquarama
- amati
- (and 2 more)
-
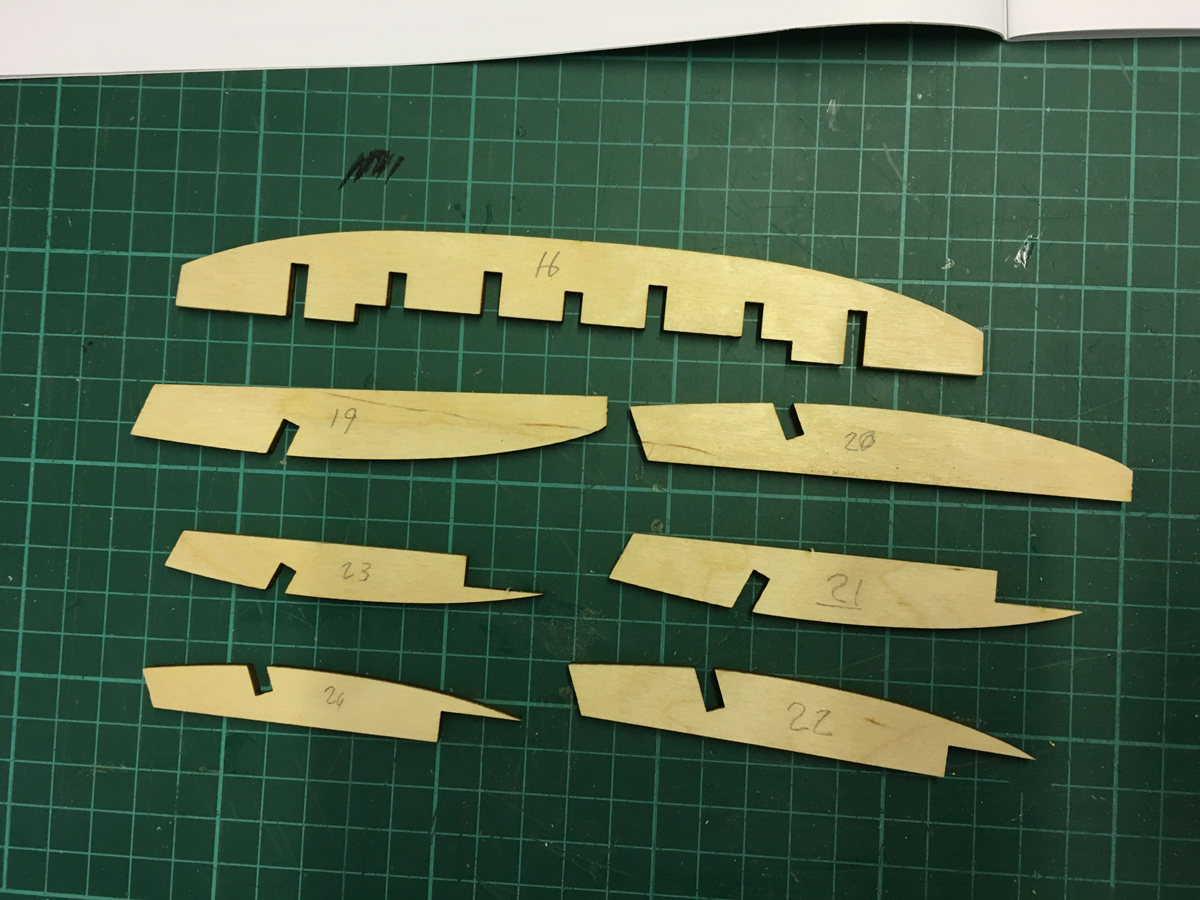
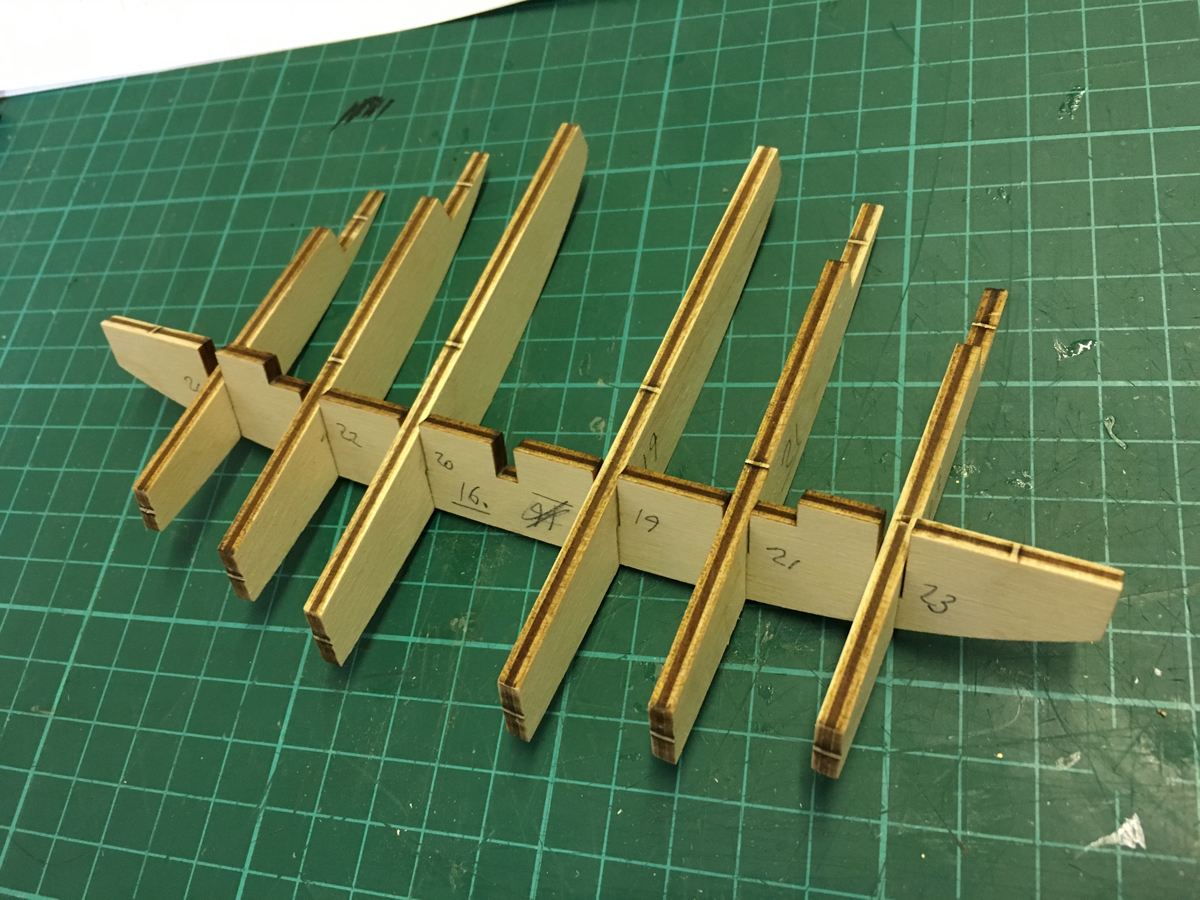
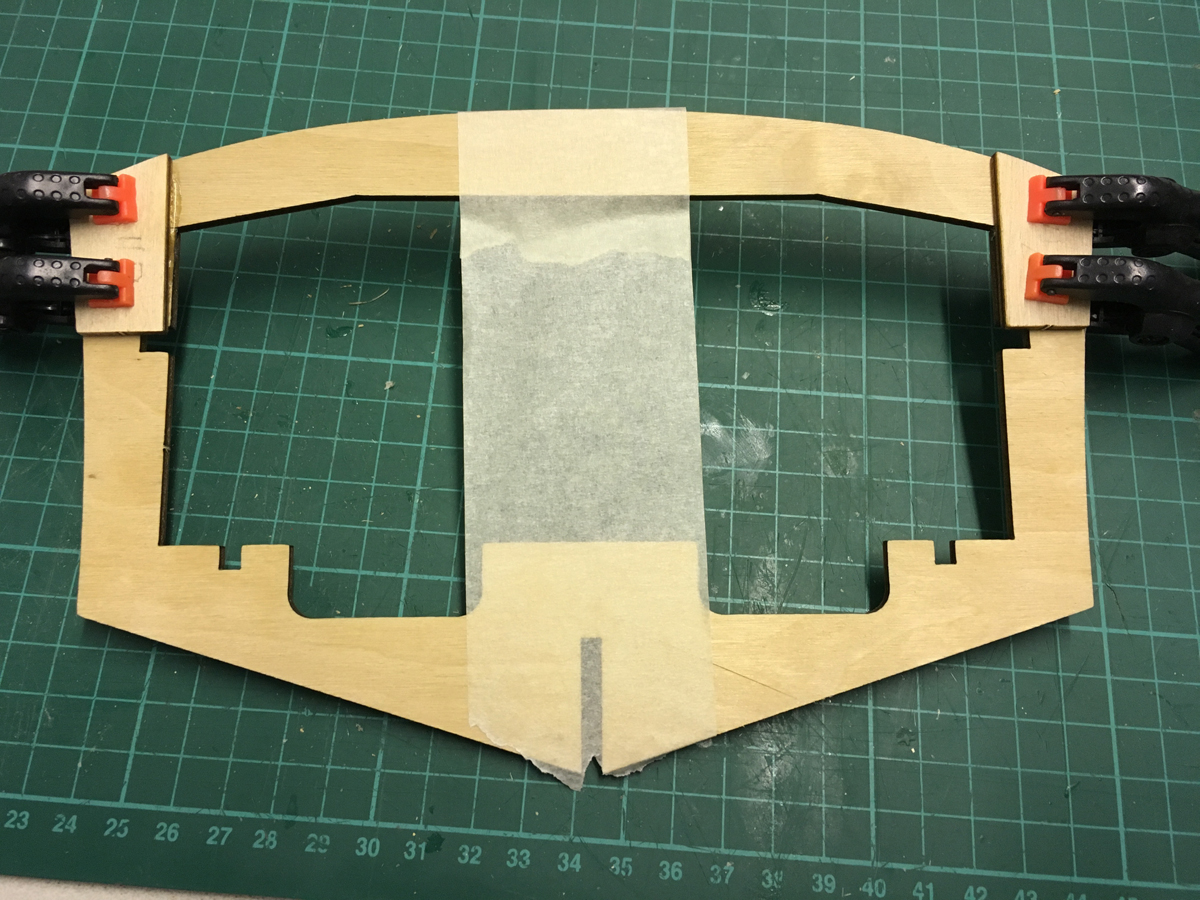
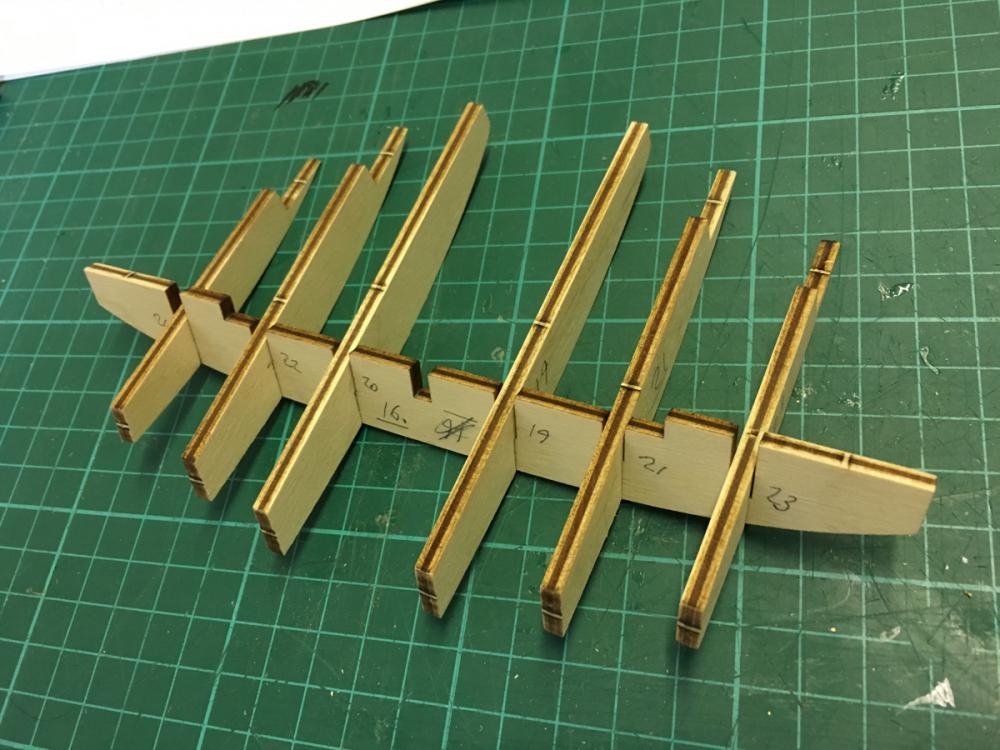
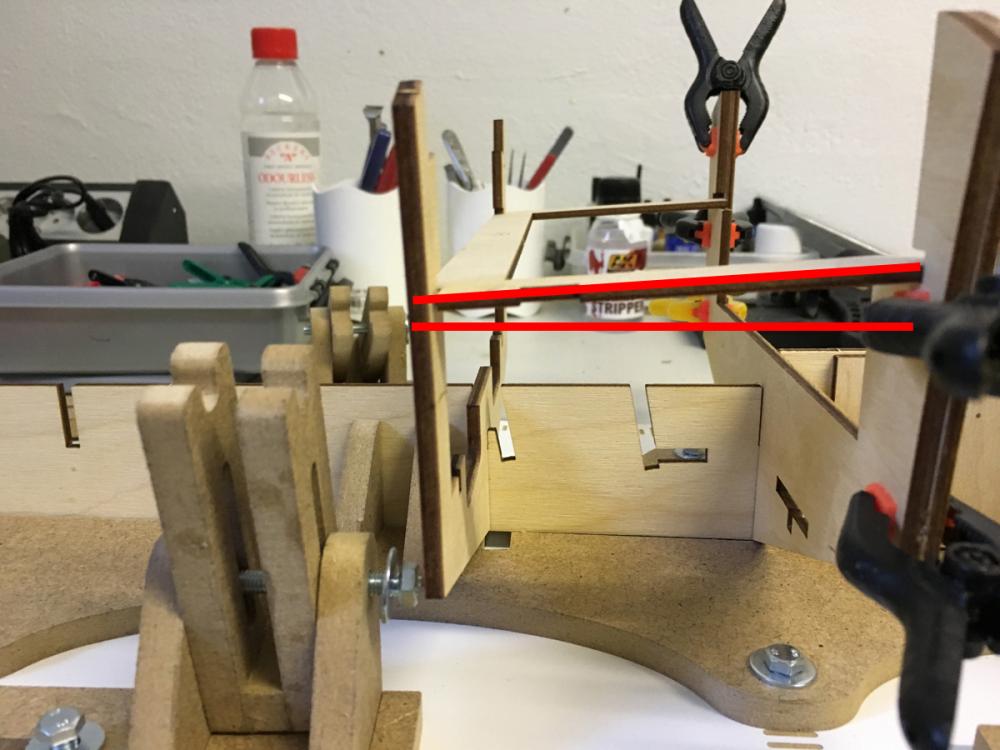
Stern board: The challenge here is that you must keep everything dry-fit until you install it on the keel, mainly because the horizontal support (No 16) can be placed only after the board has been inserted on the keel. The parts kept falling all the time which was very irritating. Then I applied a "small" amount of glue on them until I have inserted it on the keel. Finally glued everything once they are in place. The bottom pieces 17 and 18 are to be glued the last. I will have a separate post below about it. Now some photos of the Stern board:


- 414 replies
-
- 5
-
-
- riva aquarama
- amati
- (and 2 more)
-
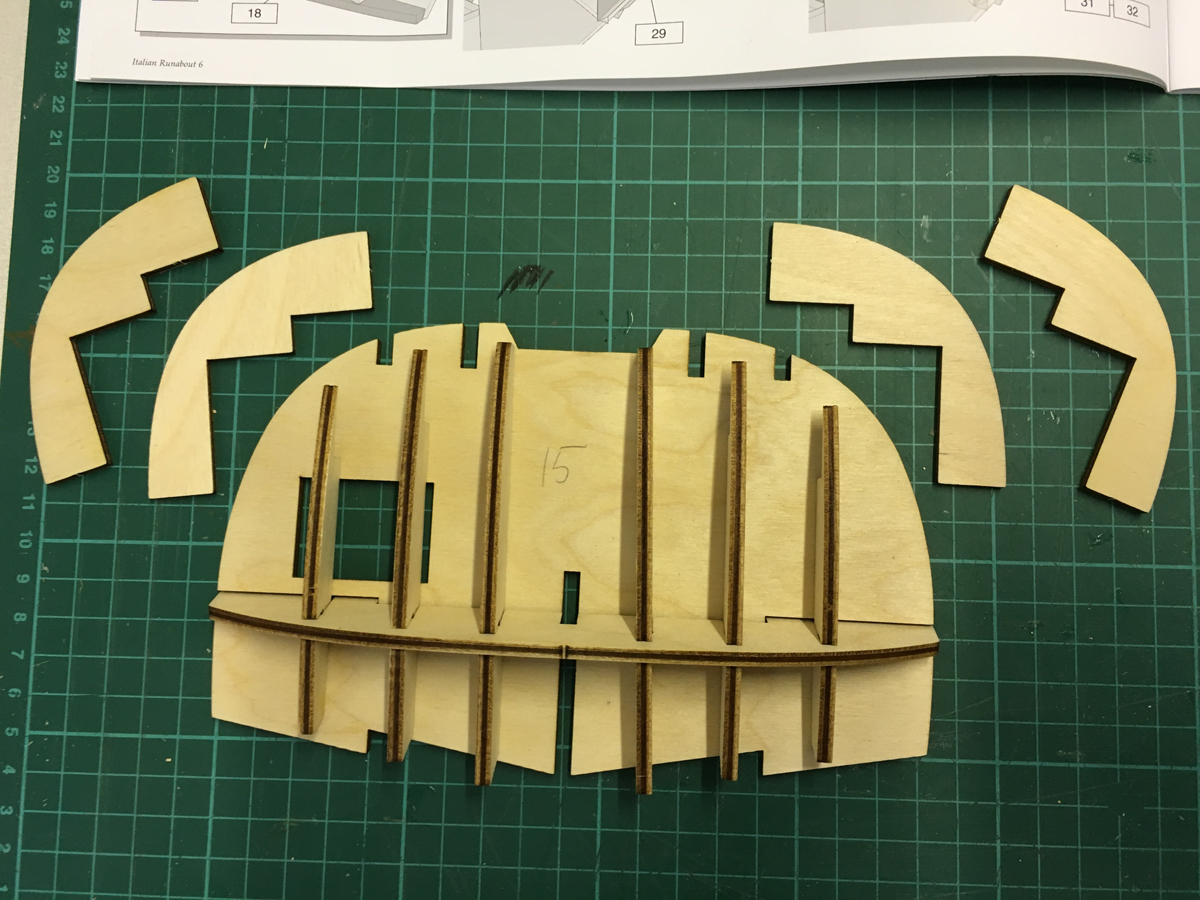
Frame 14 has two sub pieces which makes it important to install in correct orientation. I used (x) marks to help prevent make a mistake when the moment o truth (i.e. gluing) comes.

- 414 replies
-
- 3
-
-
- riva aquarama
- amati
- (and 2 more)
-
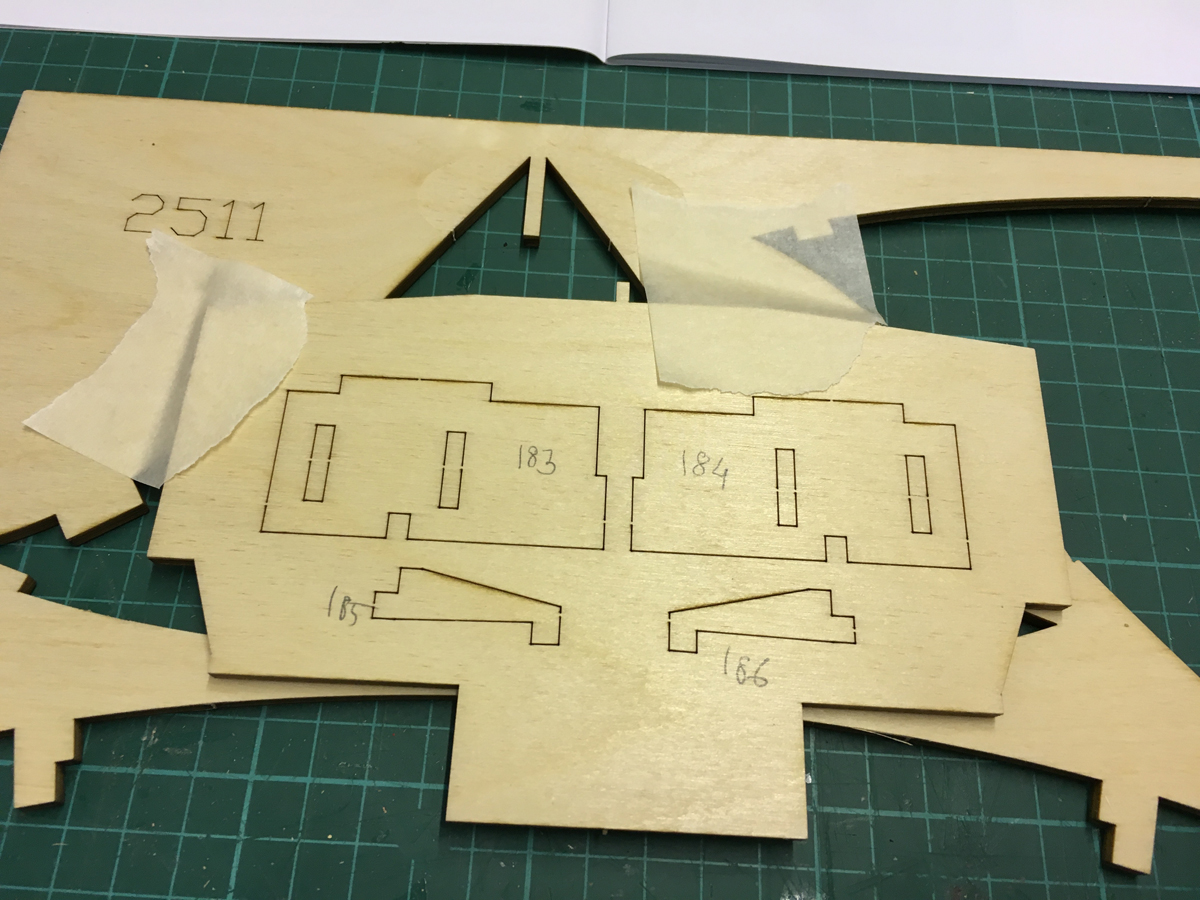
This is just a way of locating the cut-outs which still contain unused pieces using the parts list: I tape them on their sheet so that I can find them easier when it's their turn

- 414 replies
-
- 2
-
-
- riva aquarama
- amati
- (and 2 more)
-
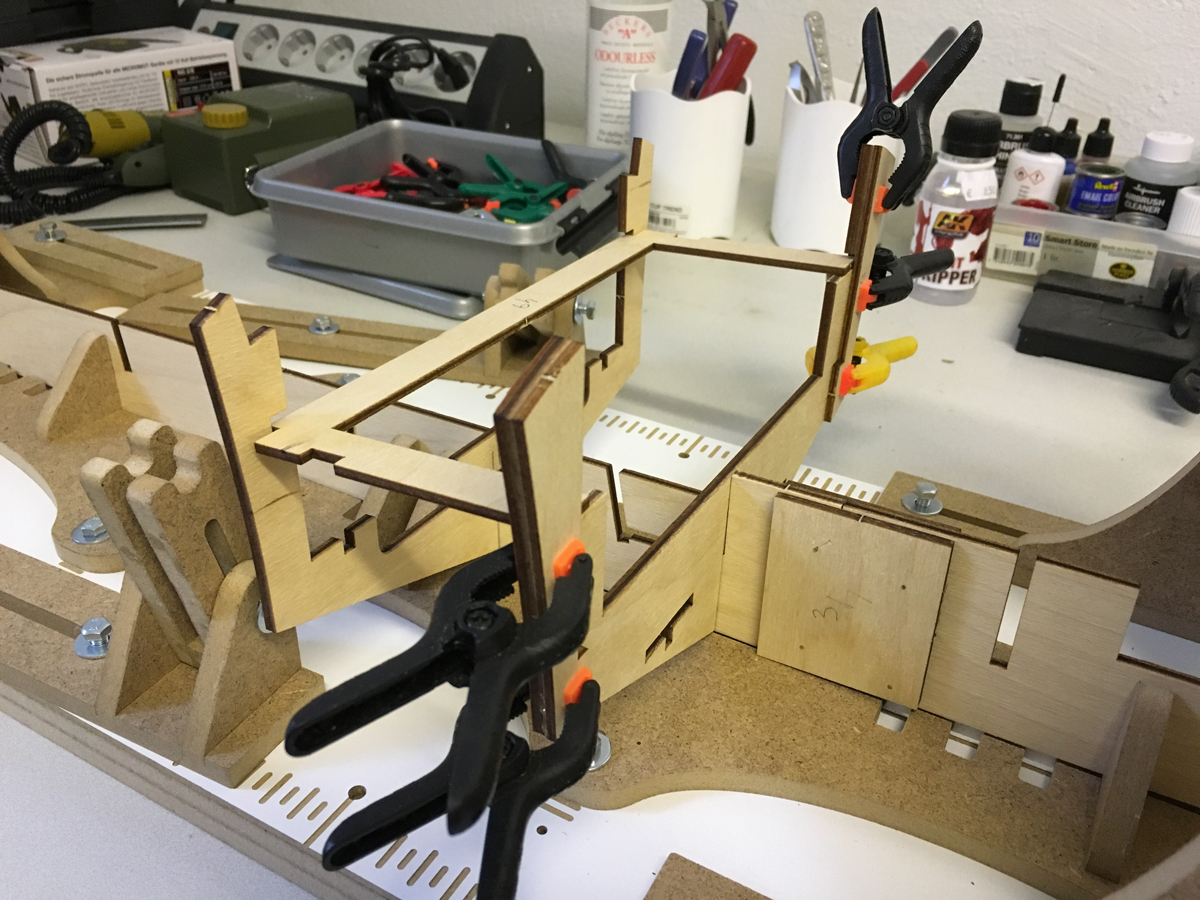
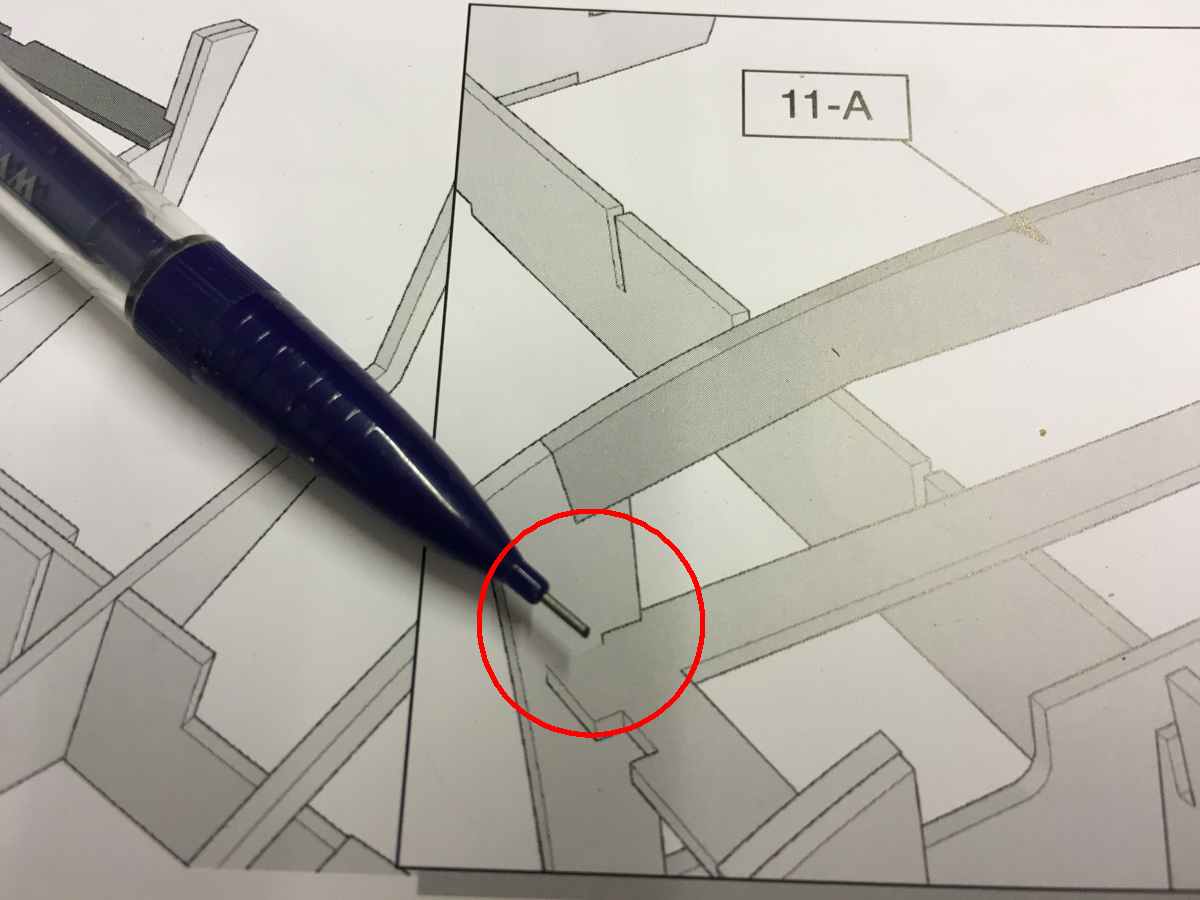
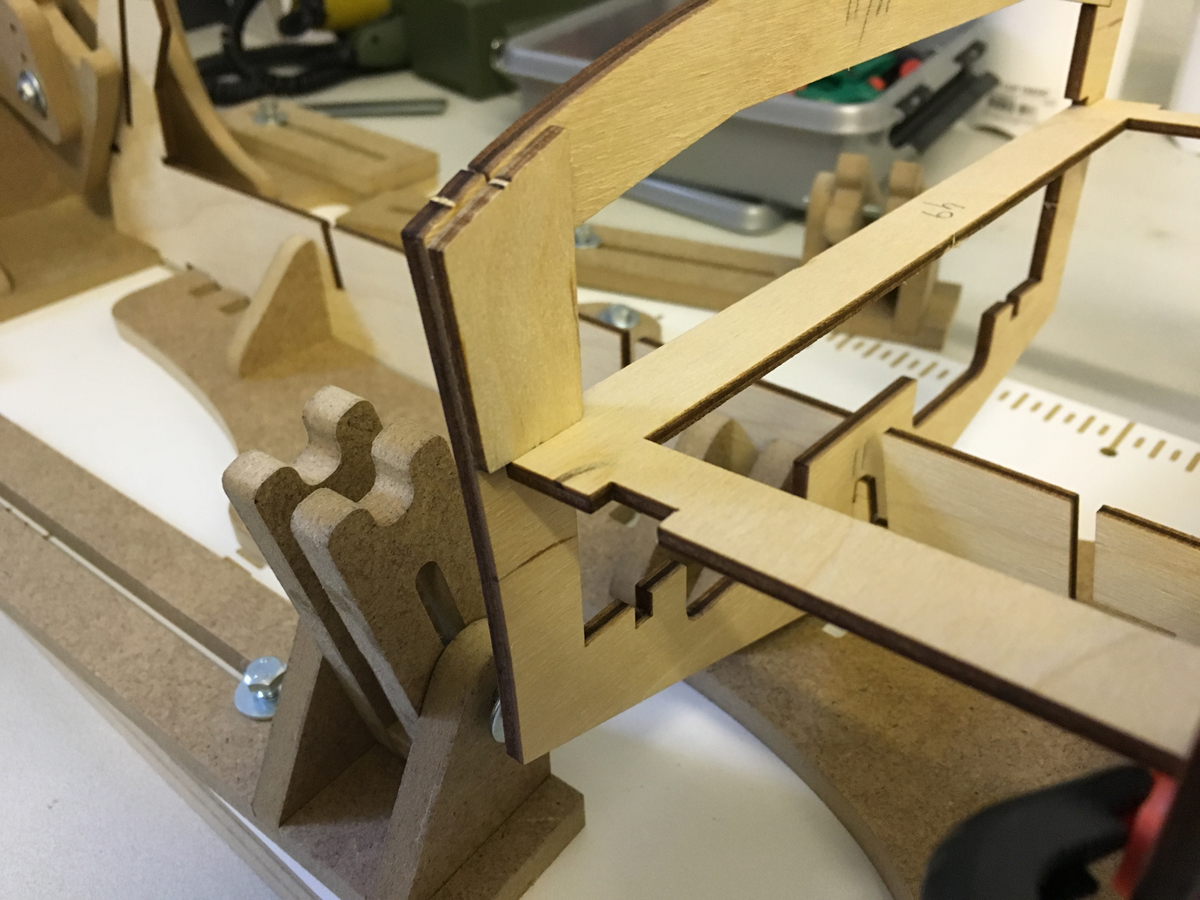
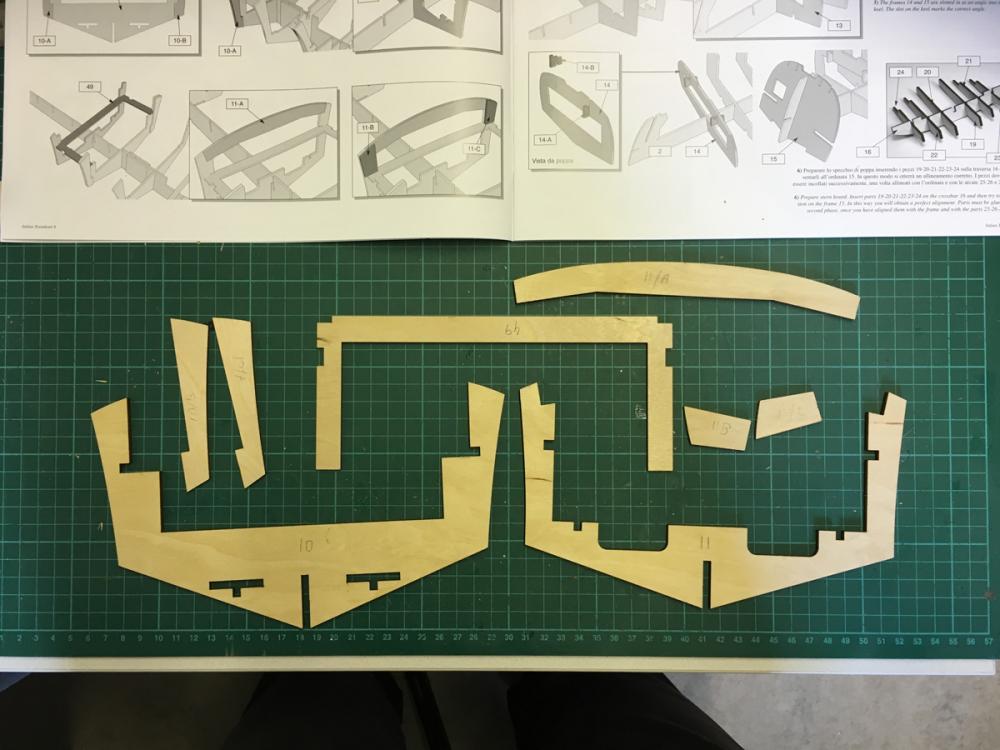
Frames 10 and 11. This pair is a bit different than the others so far because they are connected with a horizontal reinforcement frame. In the manual the suggested order goes as follows: install frame 10 install frame 11 install horizontal reinforcement frame 49 close top of frame 11 (with 11A) install reinforcements for frame 11 I changed the order a bit, instead first I built the frame 11 totally with its reinforcements and top piece because I thought it would be hard to do them properly once the frames are in place. Maybe the reason the instructions go that way is that it would be difficult to install the horizontal piece once the frame 11 is closed from the top with 11A. Anyway, I did it my way and faced no problems. At this stage, everything is dry-fit (except the frame 11 components). Note from the photos that the gap where the horizontal piece (49) is insterted to frame 11 is thicker than thickess of piece 49. How to actually install this piece takes a careful checking of the instructions. Installing the reinforcements 11B and 11C determines the final position of this insert. Note that the horizontal piece is NOT parallel to the surface, instead it follows and angle.


- 414 replies
-
- 3
-
-
- riva aquarama
- amati
- (and 2 more)
-
Thank you everyone once again for the motivating words. It adds a lot to the pleasure of building. Today I spent about 6-7 hours on the kit. Below I will add some logs.
- 414 replies
-
- 1
-
-
- riva aquarama
- amati
- (and 2 more)
-
Hi Cog, thanks. Here is the build log of the building slip which I use: http://modelshipworld.com/index.php/topic/13422-hobbyzone-building-slip-for-wooden-ship-models/
- 414 replies
-
- 2
-
-
- riva aquarama
- amati
- (and 2 more)
-
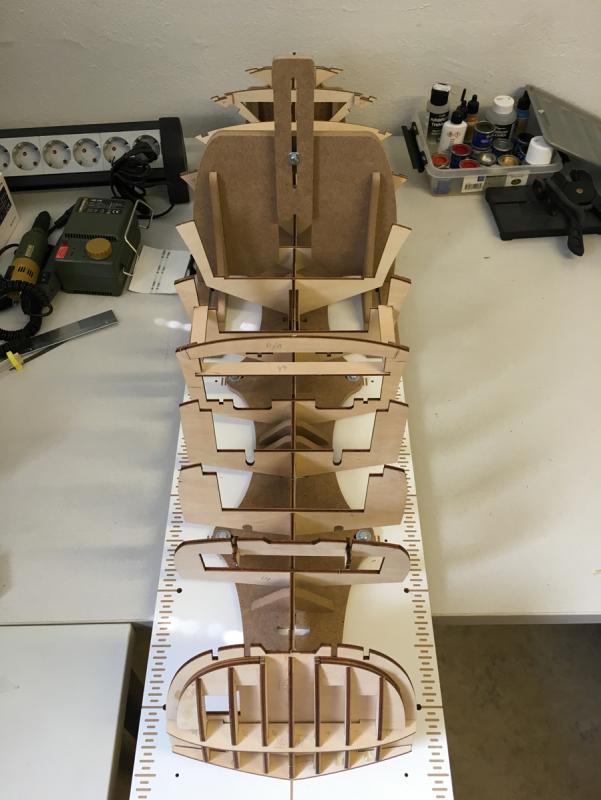
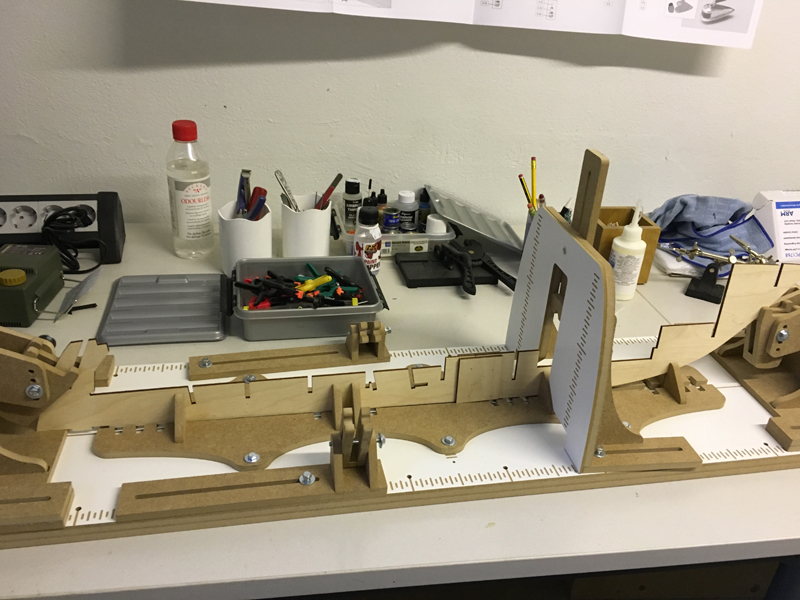
All parts so far ripped from the sheets are dry-fitted on the keel. That's all for today. Thanks for watching.

- 414 replies
-
- 6
-
-
- riva aquarama
- amati
- (and 2 more)
-
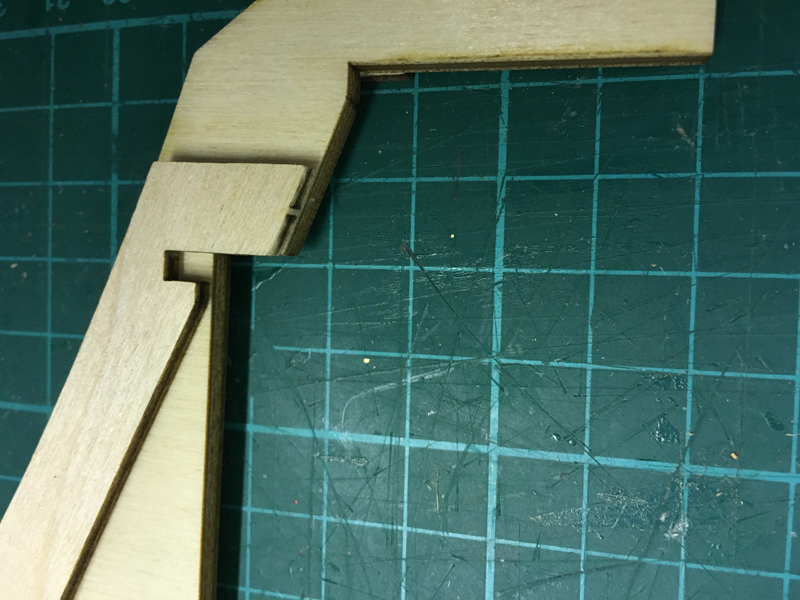
Here is the example of non-flush reinforcements I promised to show earlier. The pieces (1 each side) sit flush only with the inner part of the frame on the bottom section, leaving a gap towards the top.
- 414 replies
-
- 4
-
-
- riva aquarama
- amati
- (and 2 more)
-
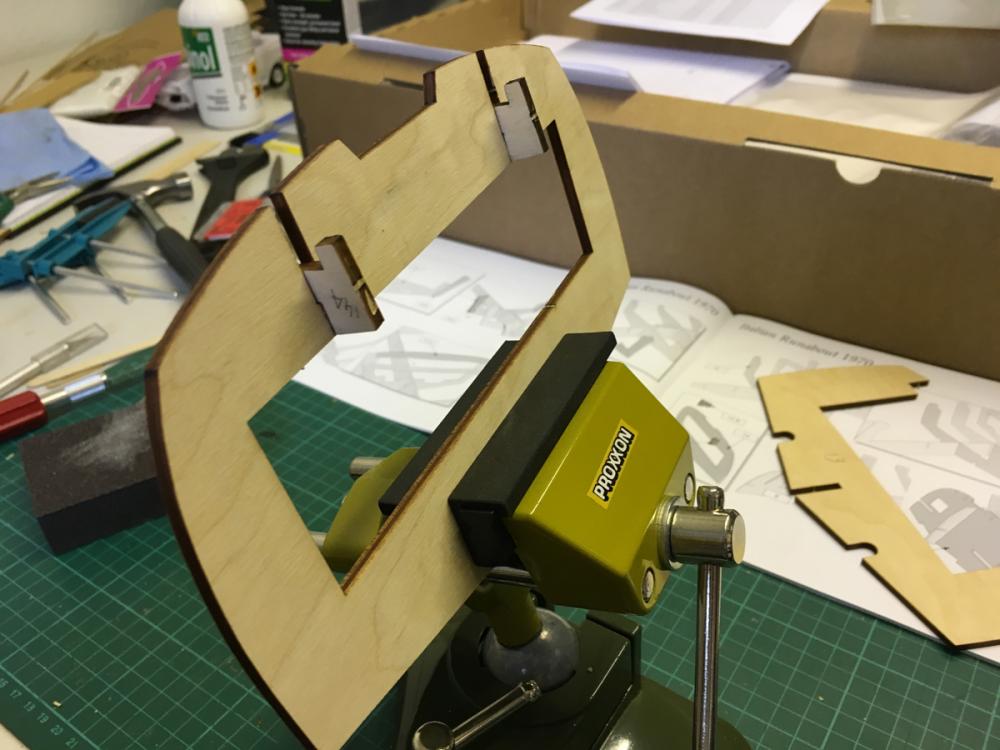
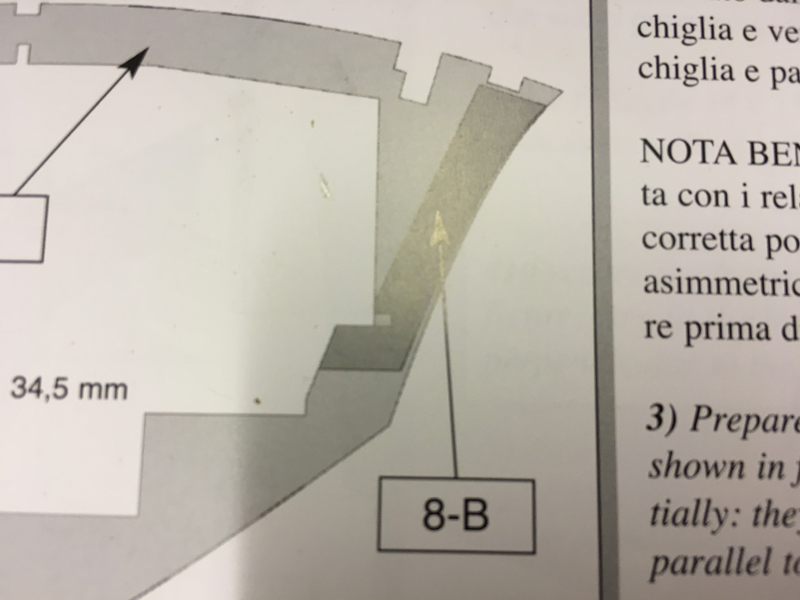
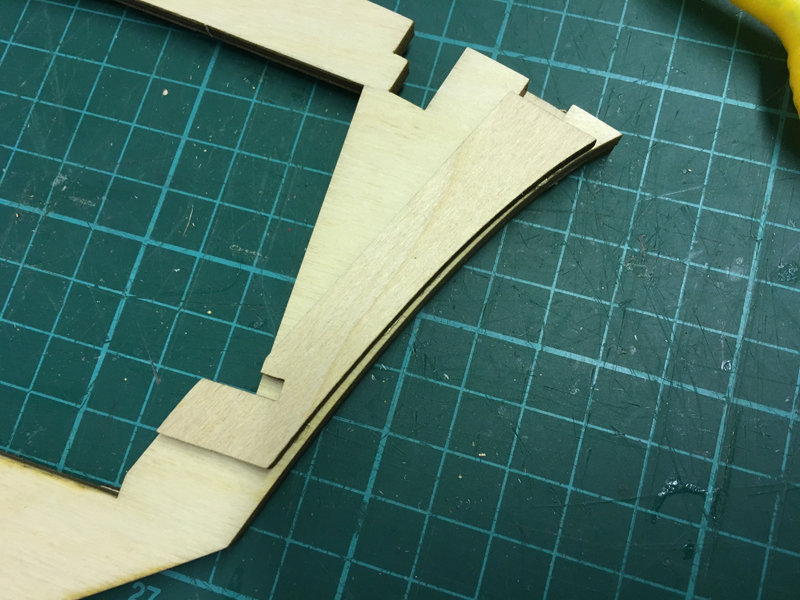
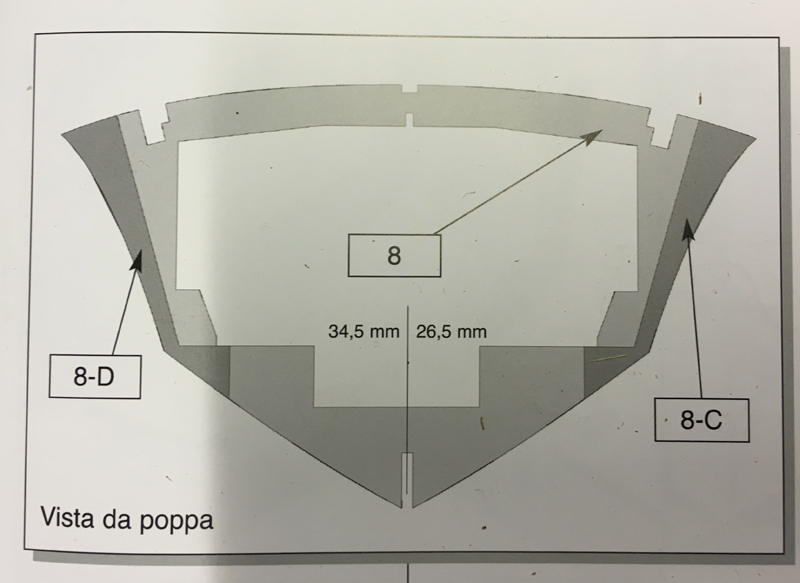
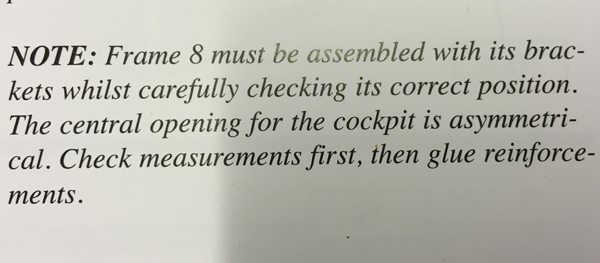
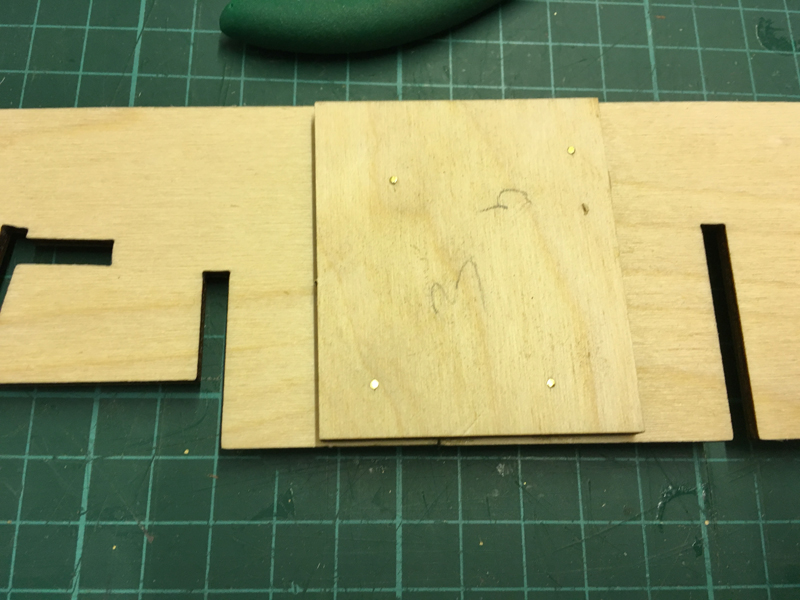
An interesting note. This piece is NOT symmetrical and is a good example of benefits of following the instructions closely. I added also shots from the manual. Check the grids on the cutting mat to notice the asymmetry.
- 414 replies
-
- 3
-
-
- riva aquarama
- amati
- (and 2 more)
-
Thanks for the interest Keith. And who knows, with a few more encouragements like yours, I may go the full measure and face all the challenges you've mentioned .
- 414 replies
-
- 1
-
-
- riva aquarama
- amati
- (and 2 more)
-
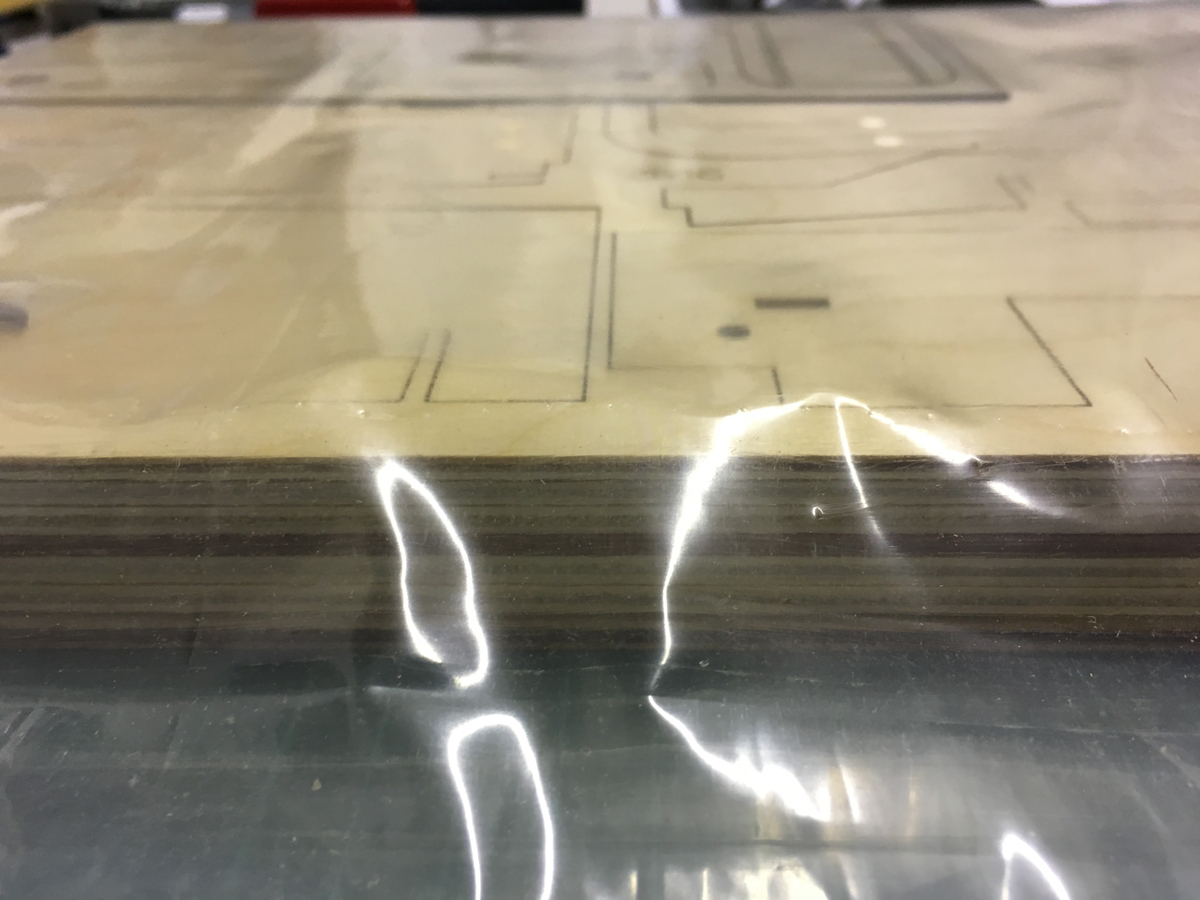
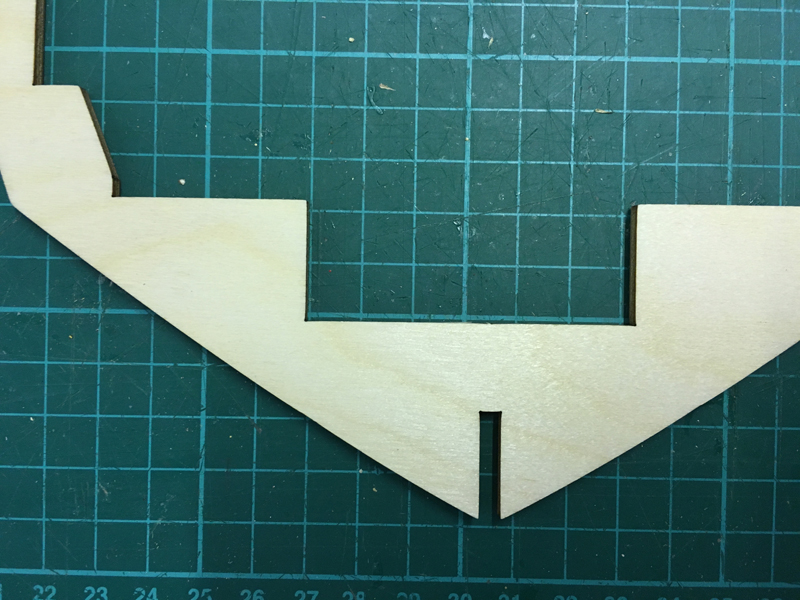
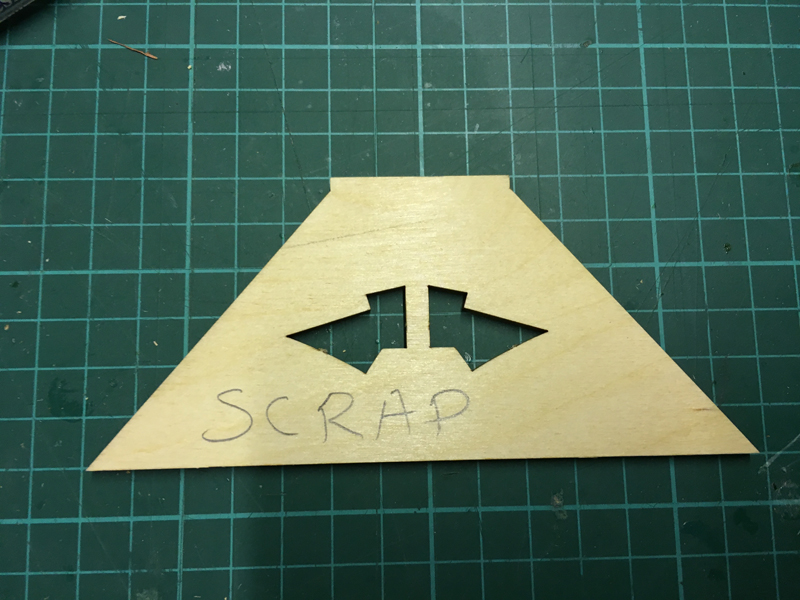
I cannot pass by not pointing out how precise the laser cuts are. This photo actually belongs to a "scrap" piece. The cuts are so clean that they look like a real piece. That's why I wanted to mark them "scrap" so that I won't wonder where the heck it belongs to. . The reason I keep some of them instead of throwing away is to use as a support or test material when needed.
- 414 replies
-
- 4
-
-
- riva aquarama
- amati
- (and 2 more)
-
One more example of un-even reinforcements. Second photo: Part dry-fitted to the building slip.
- 414 replies
-
- 8
-
-
- riva aquarama
- amati
- (and 2 more)
-
Keel in place, with reinforcements. I opted to "reinforce" the reinforcements using a few nails in addition to the glue, even though I use UHU HART the "pinnacle of German chemical engineering" , adding a few nails won't hurt the German pride, I suppose . The reinforcements, as seen in the photo, as well as the others so far I have experienced, do not always sit flush with all the edges. This is sometimes important point to watch carefully while gluing them. I have one example to this issue further ahead. In the last photo, the keel is now placed and tightened on my building slip.
- 414 replies
-
- 7
-
-
- riva aquarama
- amati
- (and 2 more)
-
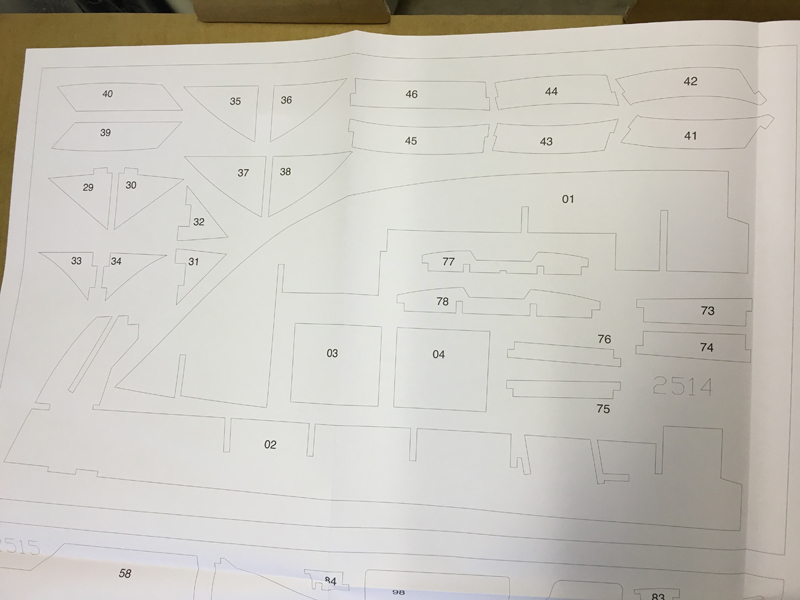
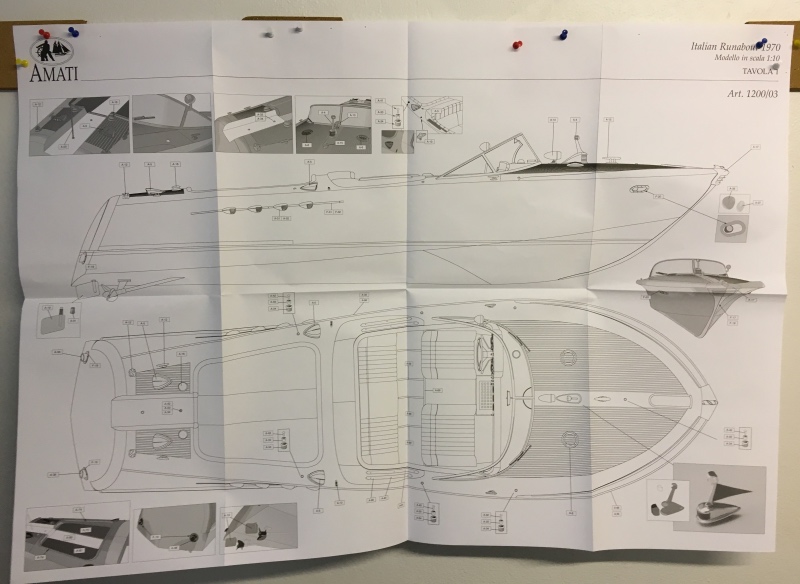
Apparently most of the rest of the plan sheets actually 1:1 scale prints to serve as a guide for numbering. You look at the parts list, find which sheet has the part you look for, then check the plan sheet to mark that piece.
- 414 replies
-
- 5
-
-
- riva aquarama
- amati
- (and 2 more)
-
Alright, now I didn't plan to start today, but thanks to the Finnish summer, the weather forecast promised rain the whole day so I can peacefully sit home and start building this beautiful model! The first plan sheet is now nailed on the wall. It won't be in immediate need, but gives a construction yard feeling and motivation (doesn't it)? And an idea to you what the plans look like.
- 414 replies
-
- 4
-
-
- riva aquarama
- amati
- (and 2 more)
-
Thanks for the good comments, Antony. I like it here, too.
- 414 replies
-
- 1
-
-
- riva aquarama
- amati
- (and 2 more)
-
add the product(s) to your shopping cart go to Check Out Select country and you will see the shipment options with prices. You do not have to register nor enter any details about you. Cost me around 65 Polish Zloty (around 15 euros) to ship to Finland.
-
Hi Anthony, Sure. I am from Turkey, moved to Finland about 15 years ago. BR.
- 414 replies
-
- 4
-
-
- riva aquarama
- amati
- (and 2 more)
-
That's all for now. Next step will be commencing the build. Regretfully won't happen today due to other plans. Thanks for watching and meet you soon! Aydin
- 414 replies
-
- 3
-
-
- riva aquarama
- amati
- (and 2 more)
-
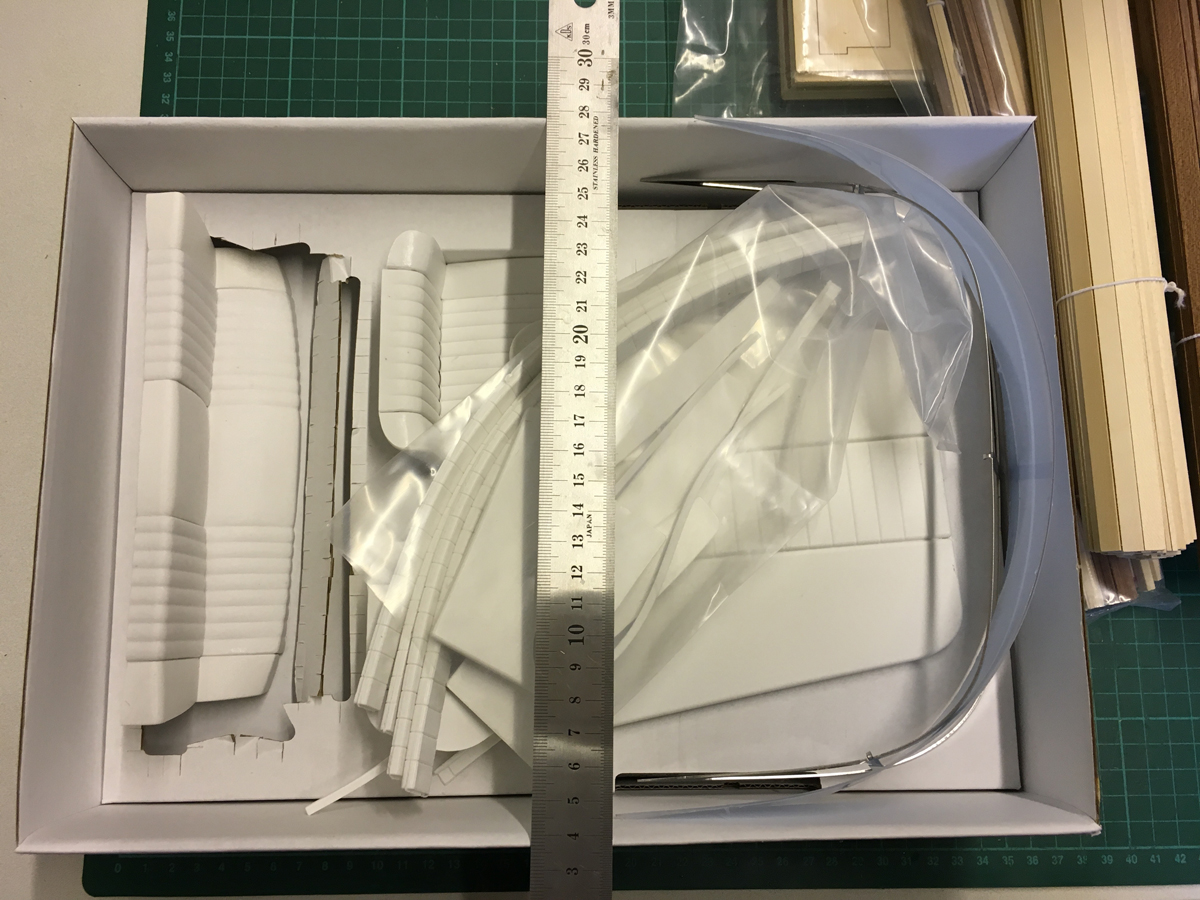
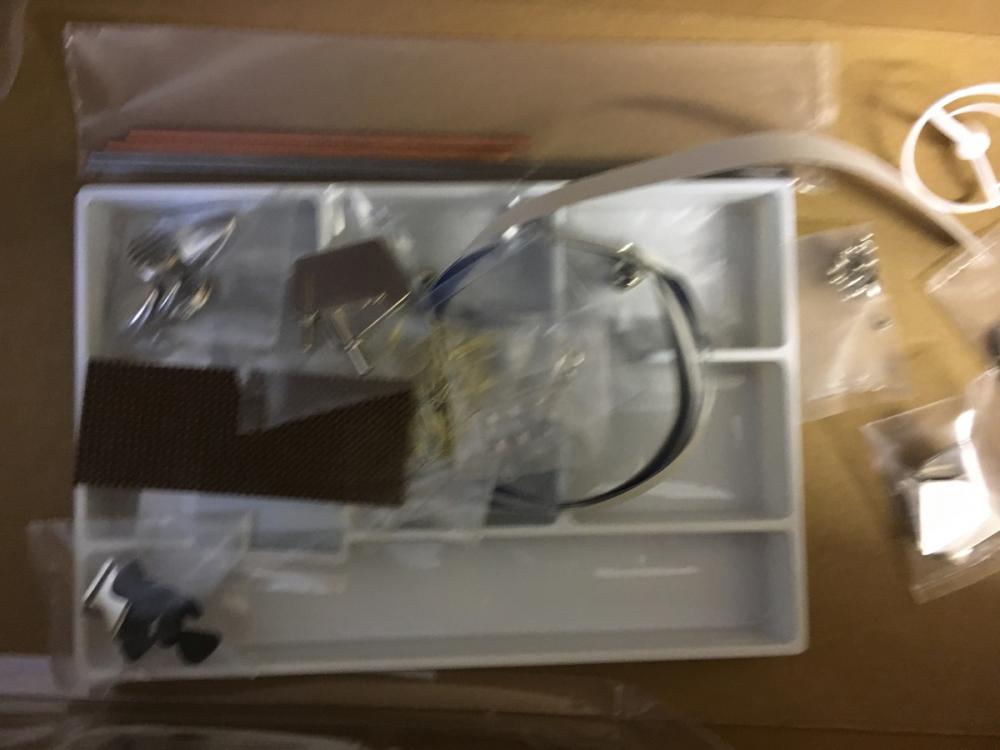
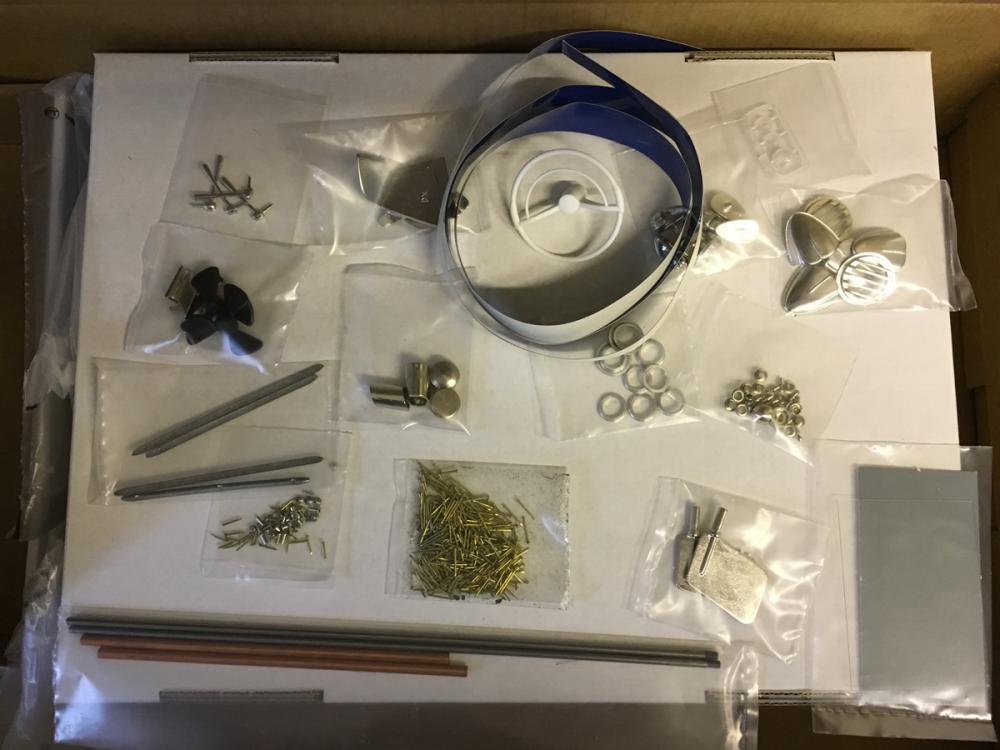
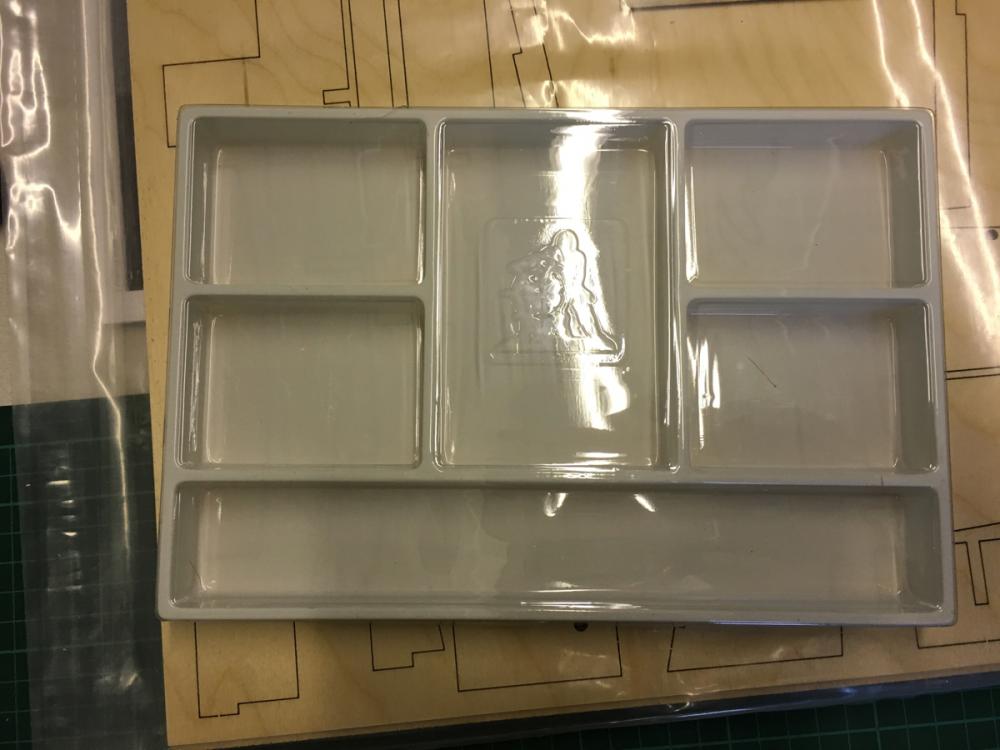
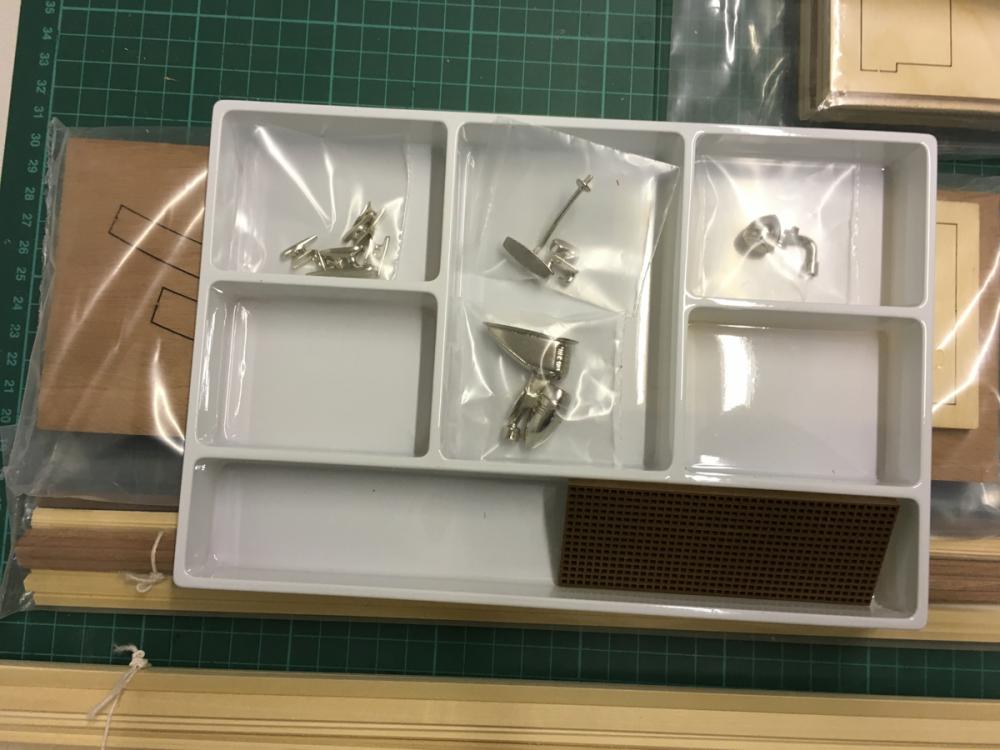
And last but not the least, the accessories and ornaments. The box had obviously been shaken quite a bit during transport, the pieces were scattered all around the box, but luckily they were contined in their own box so that they did not get any damage. They should've otherwise been sitting calmly in their white plastic containers . Also it seemed to help that they are further protected in small plastic bags.
- 414 replies
-
- 6
-
-
- riva aquarama
- amati
- (and 2 more)
-
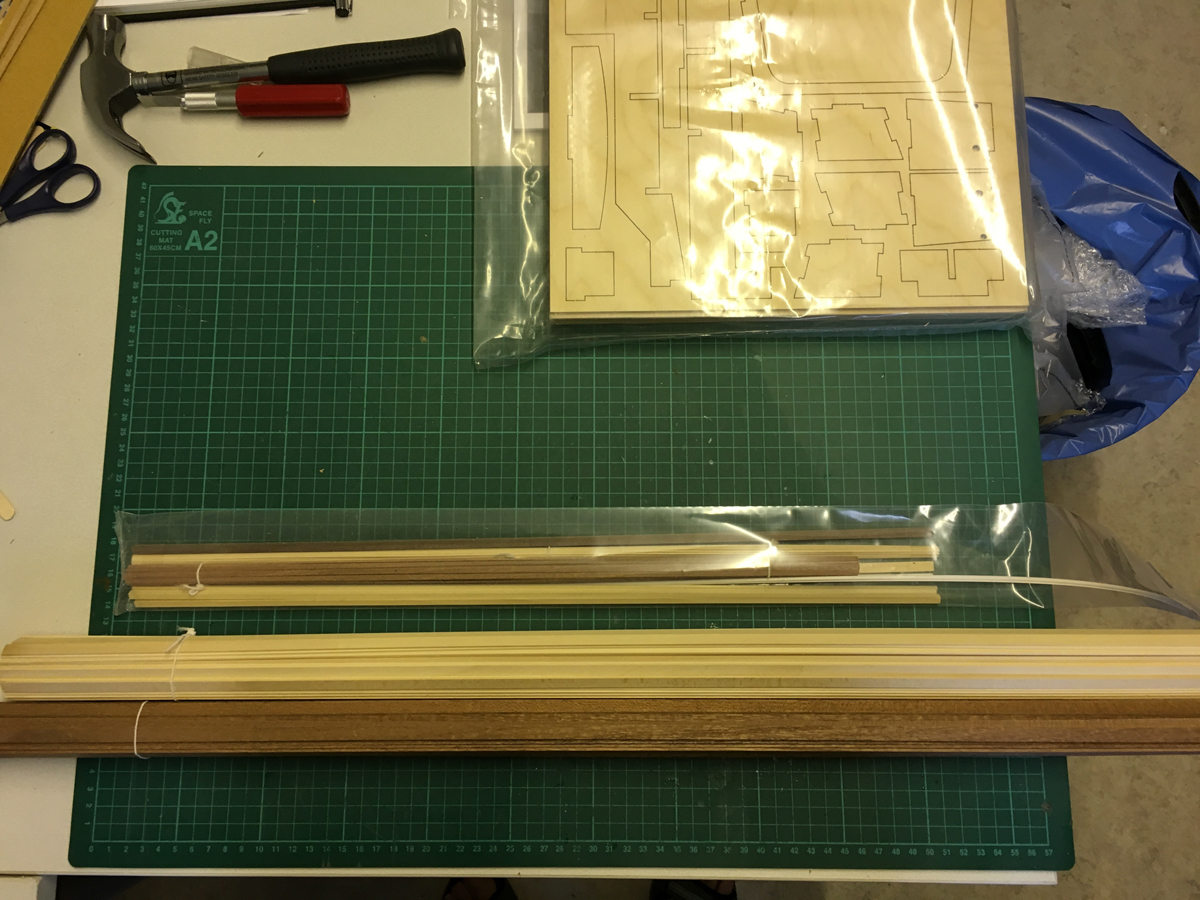
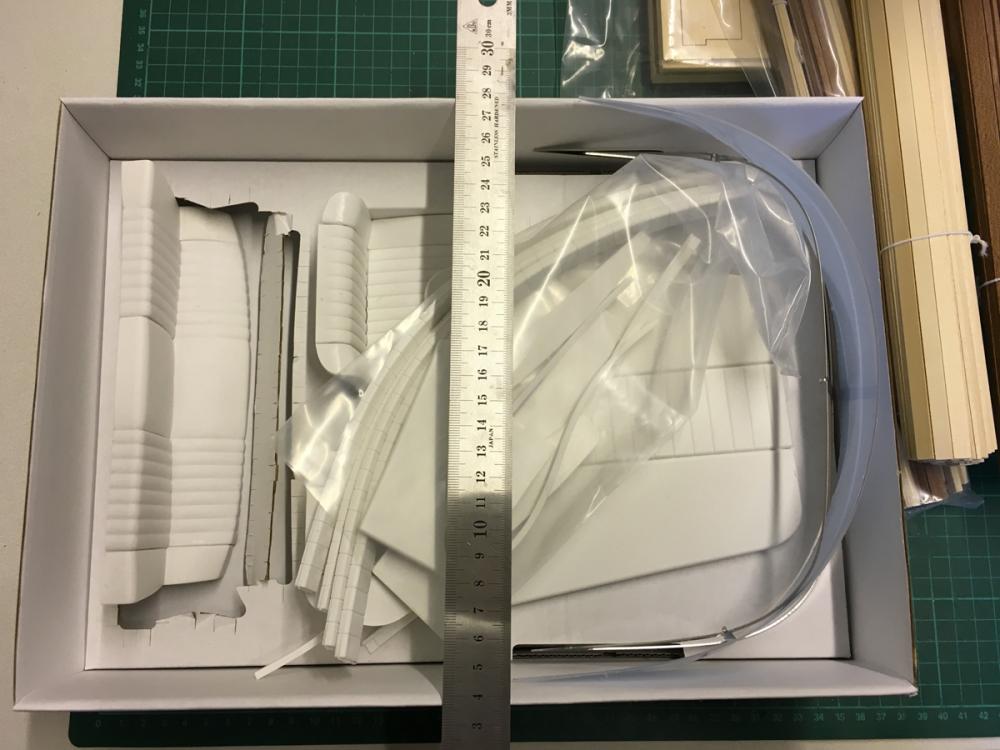
Strips. Allow me to mention once again that they are really top quality.


- 414 replies
-
- 6
-
-
- riva aquarama
- amati
- (and 2 more)
-
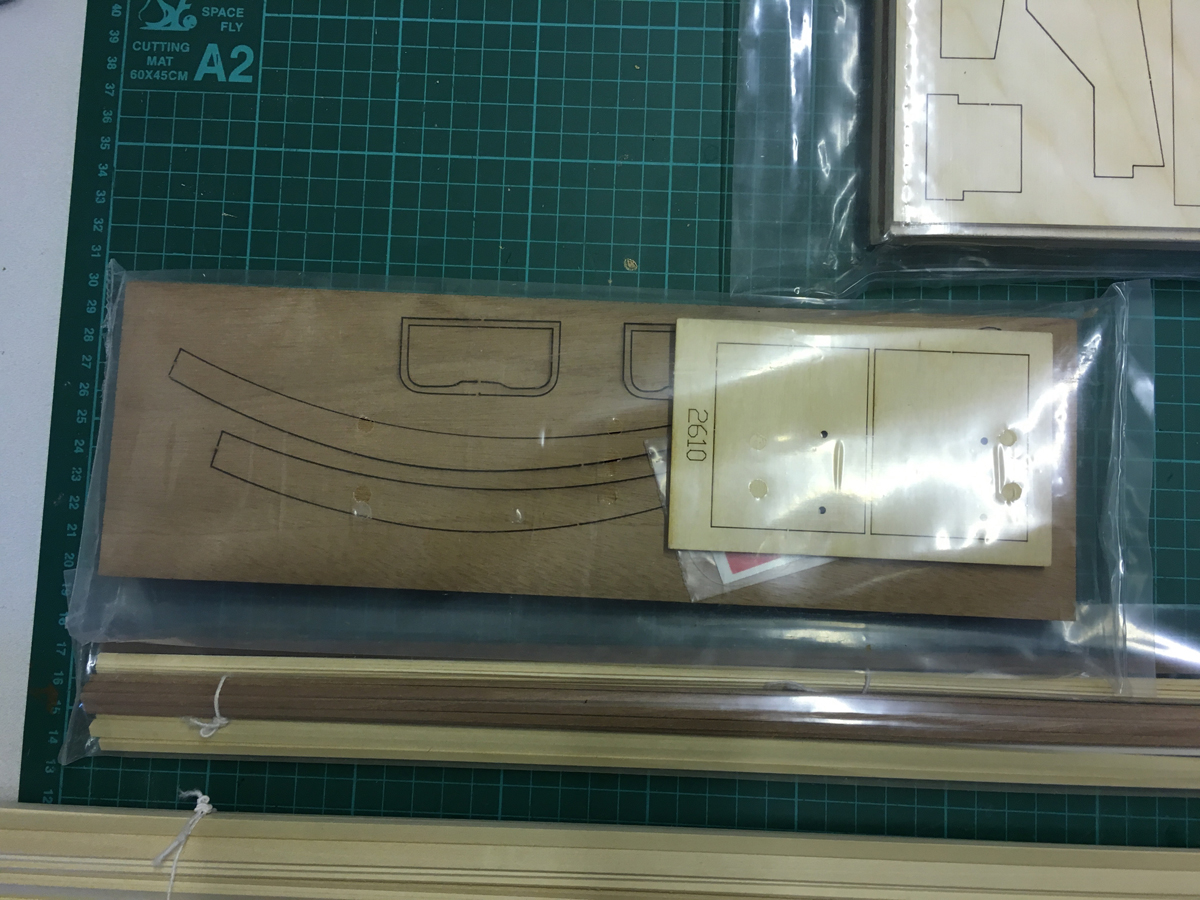
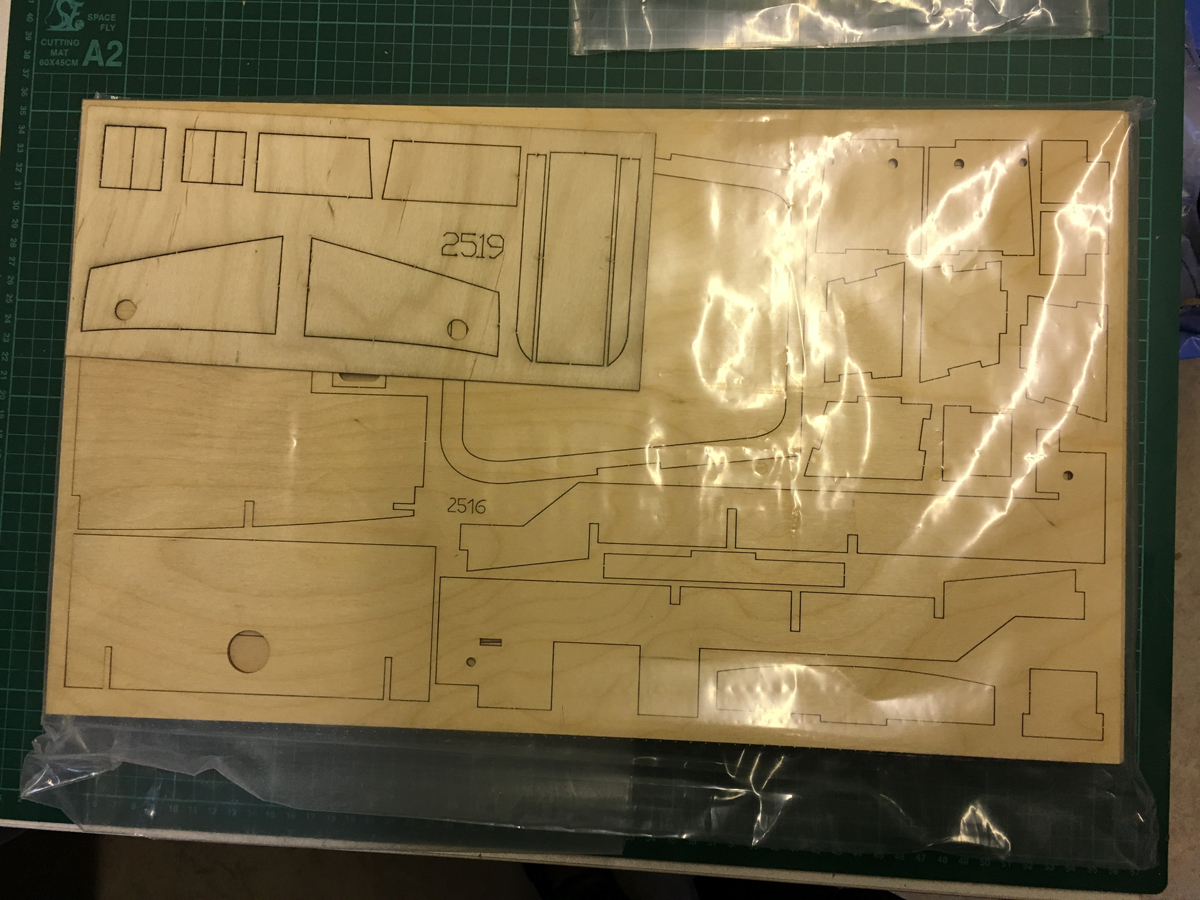
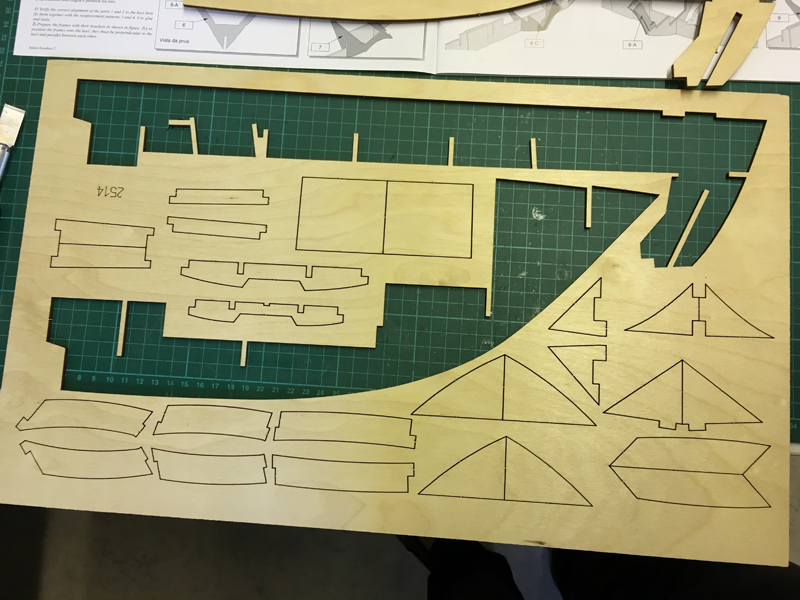
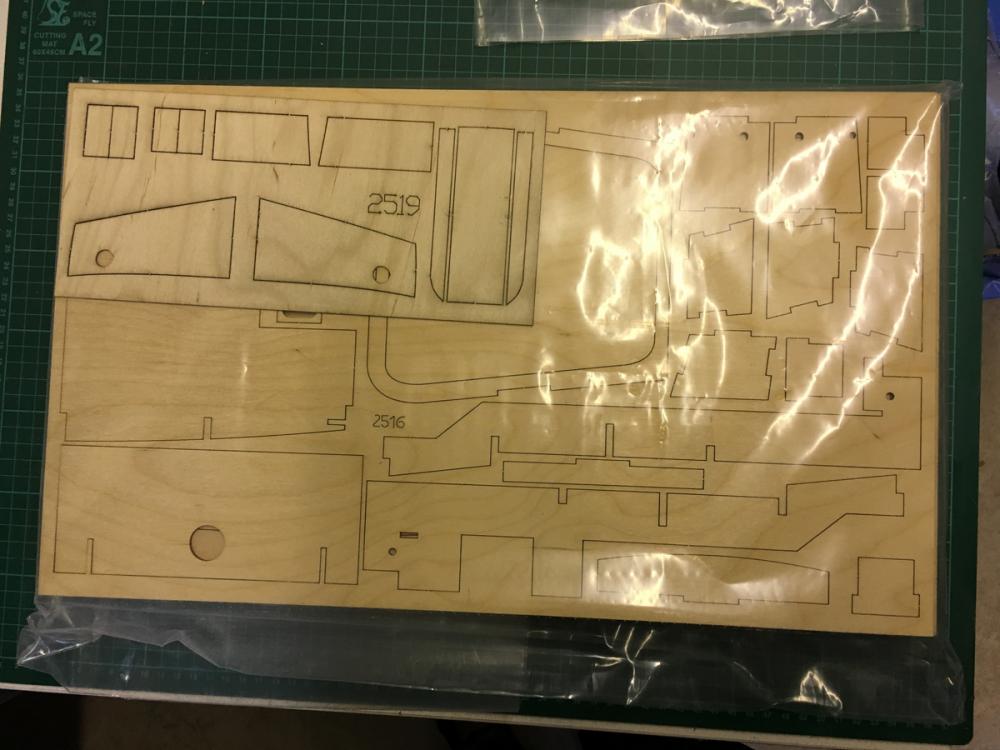
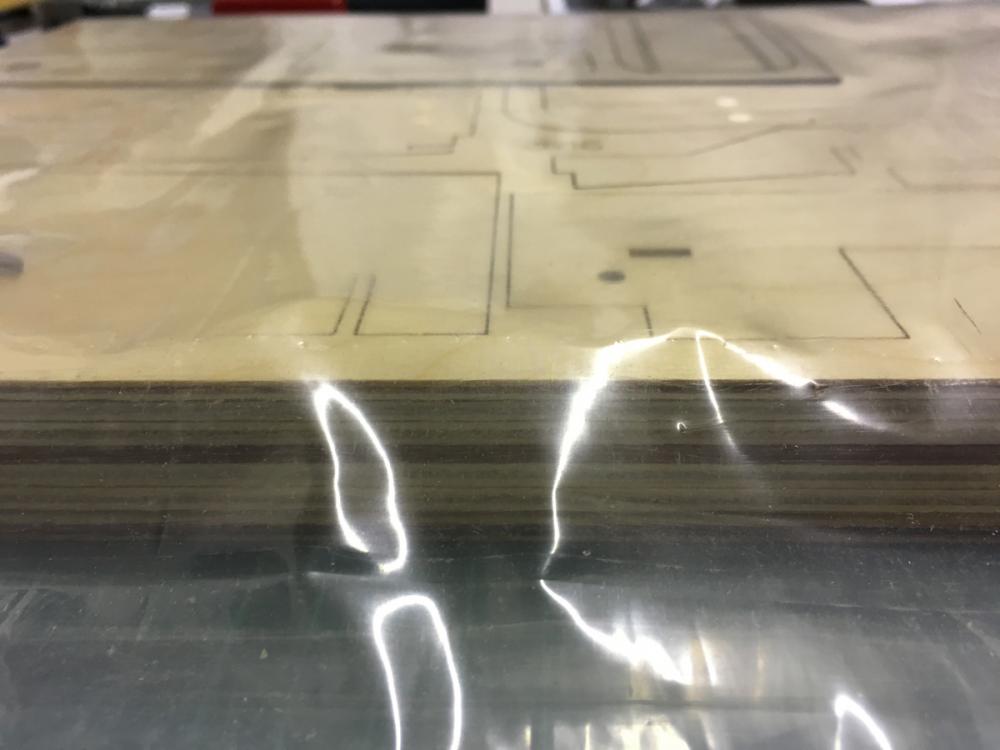
Wooden sheets of plywood. Quite many. I don't put all of the photos here but see the second photo to have an idea of their amount.
- 414 replies
-
- 7
-
-
- riva aquarama
- amati
- (and 2 more)