aydingocer
-
Posts
916 -
Joined
-
Last visited
Content Type
Profiles
Forums
Gallery
Events
Everything posted by aydingocer
-
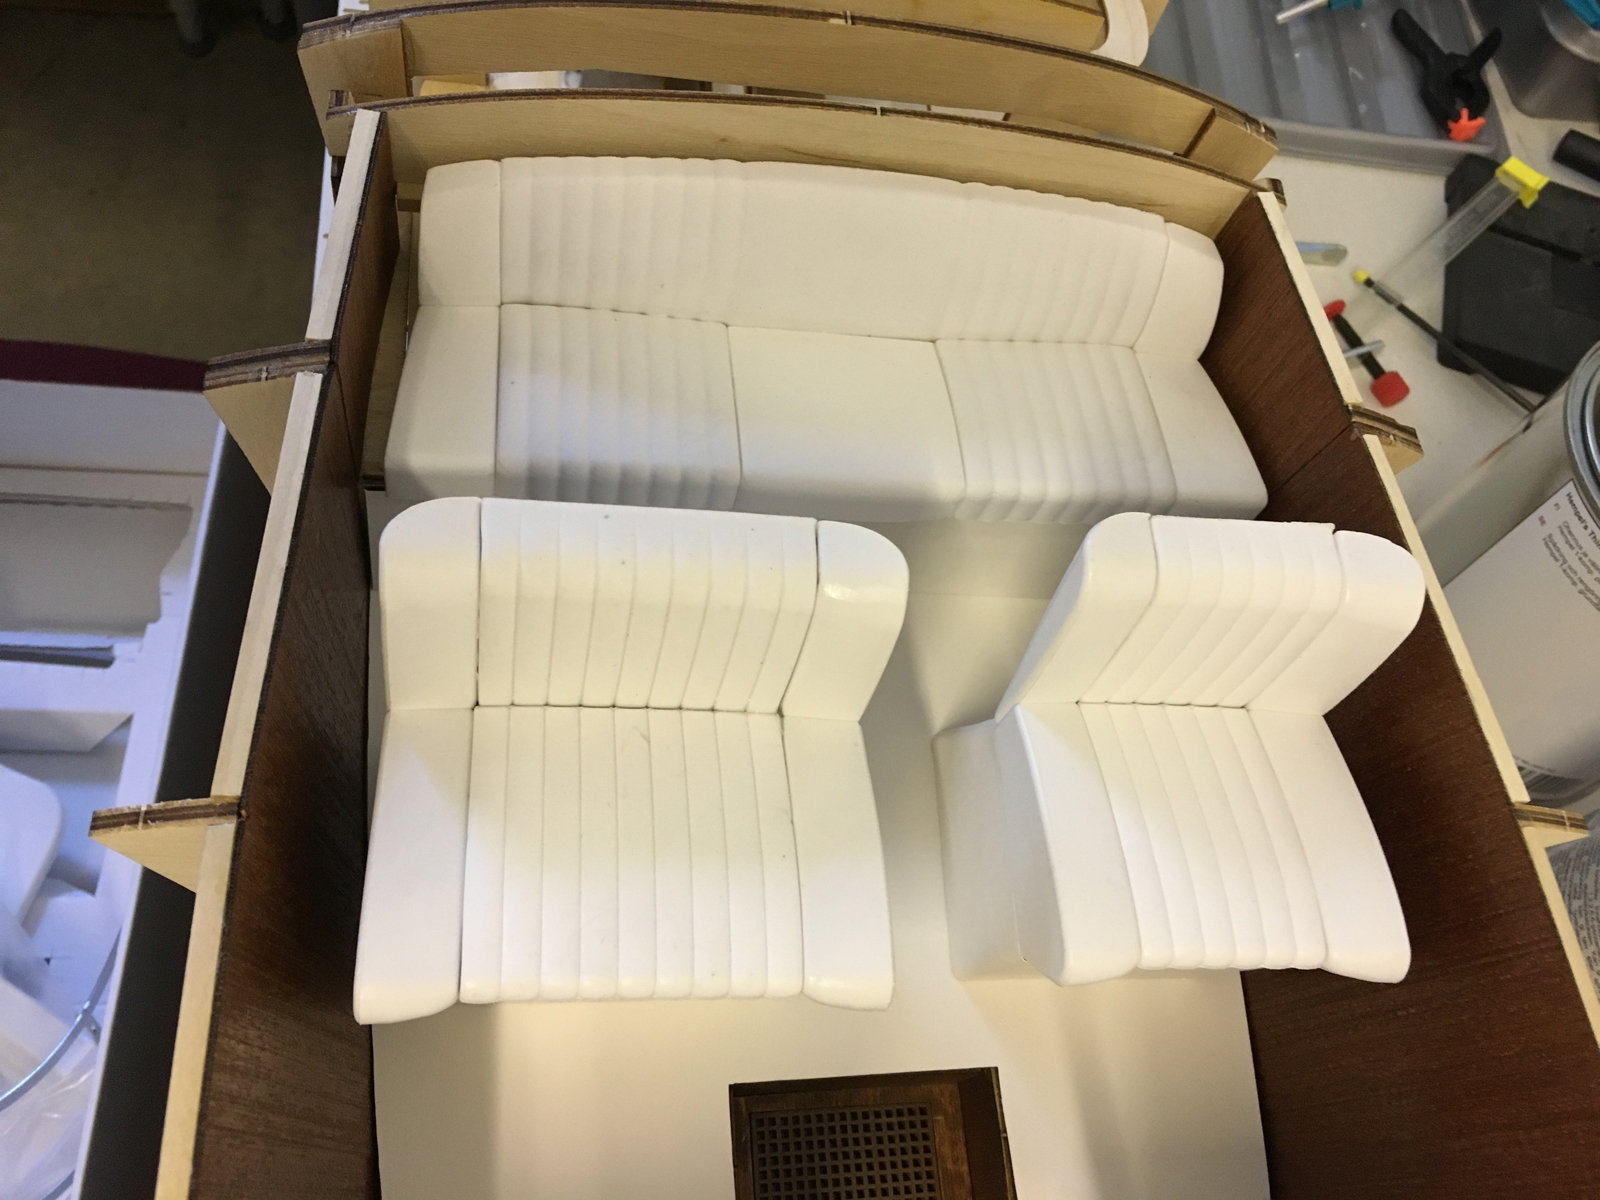
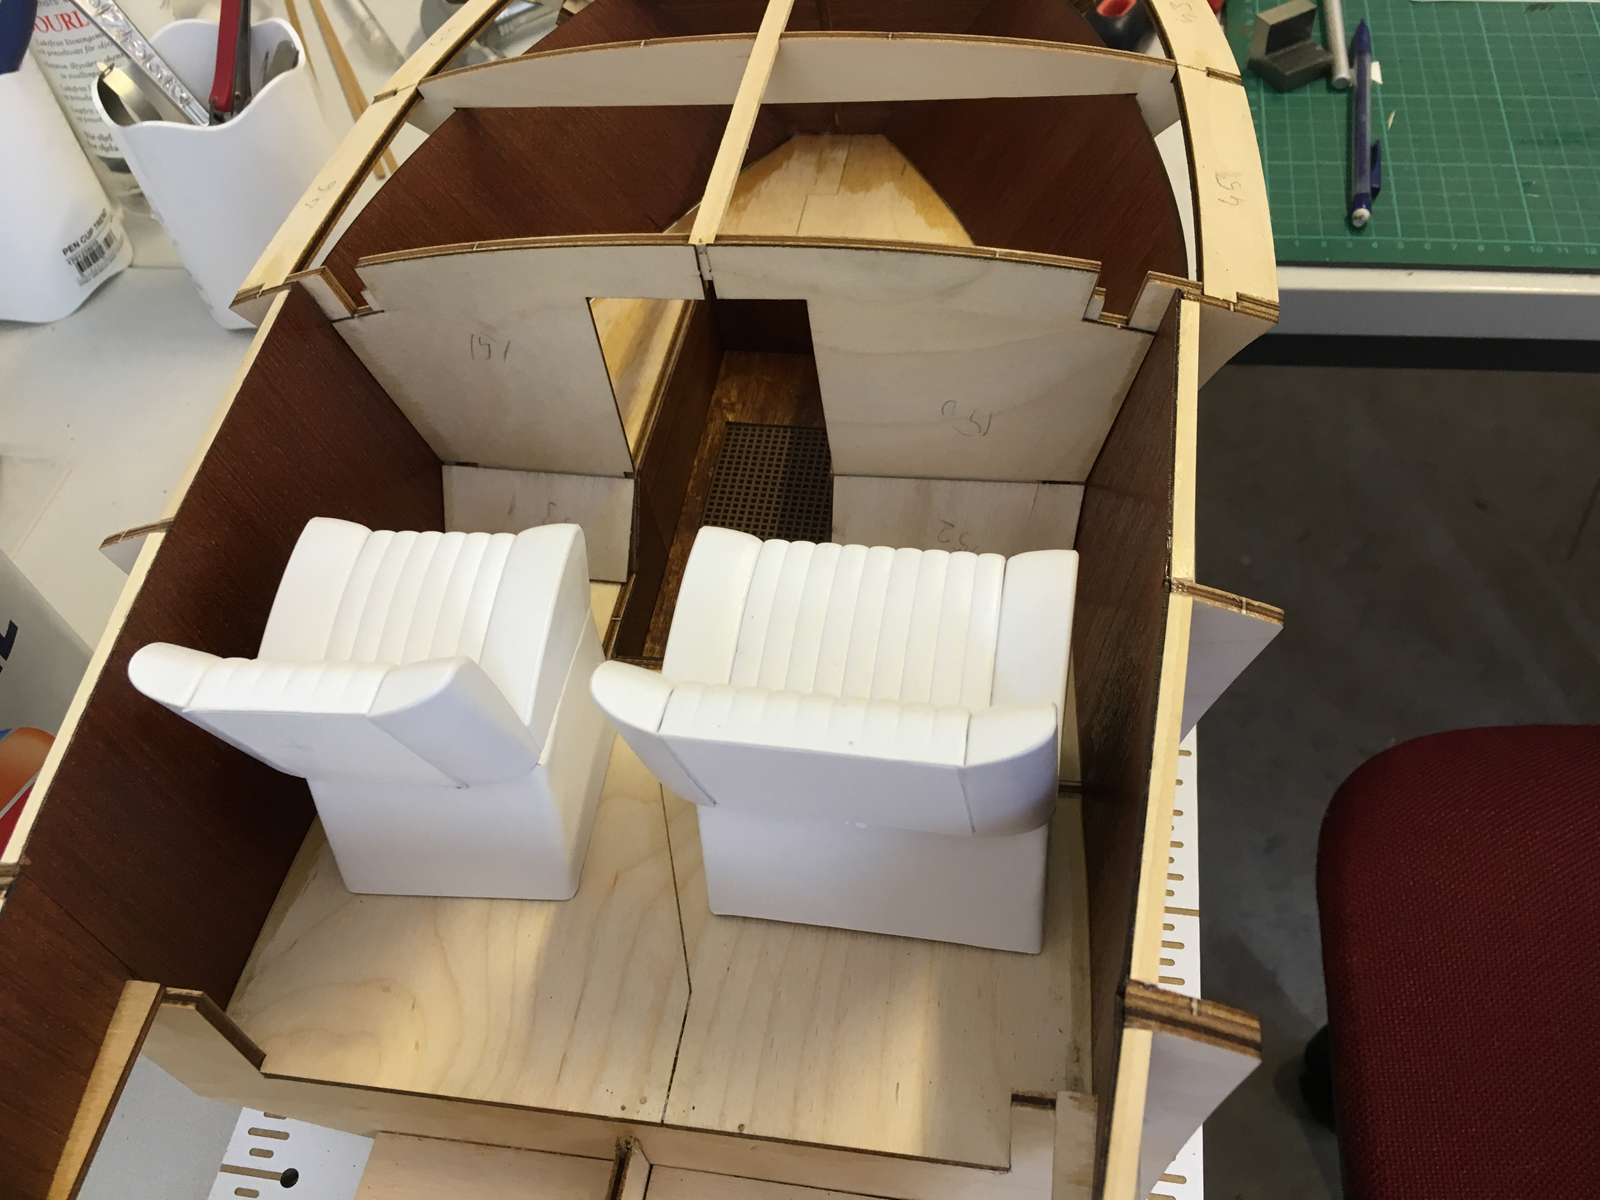
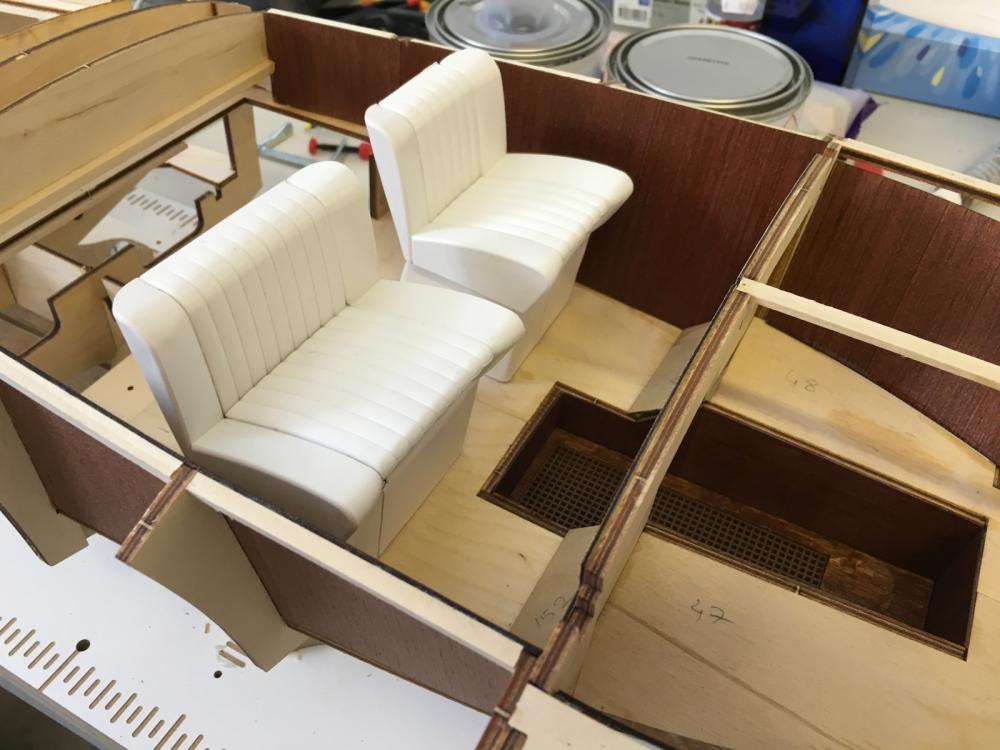
 I wanted to see the looks with seats. I was just curious. This is the view at the moment:
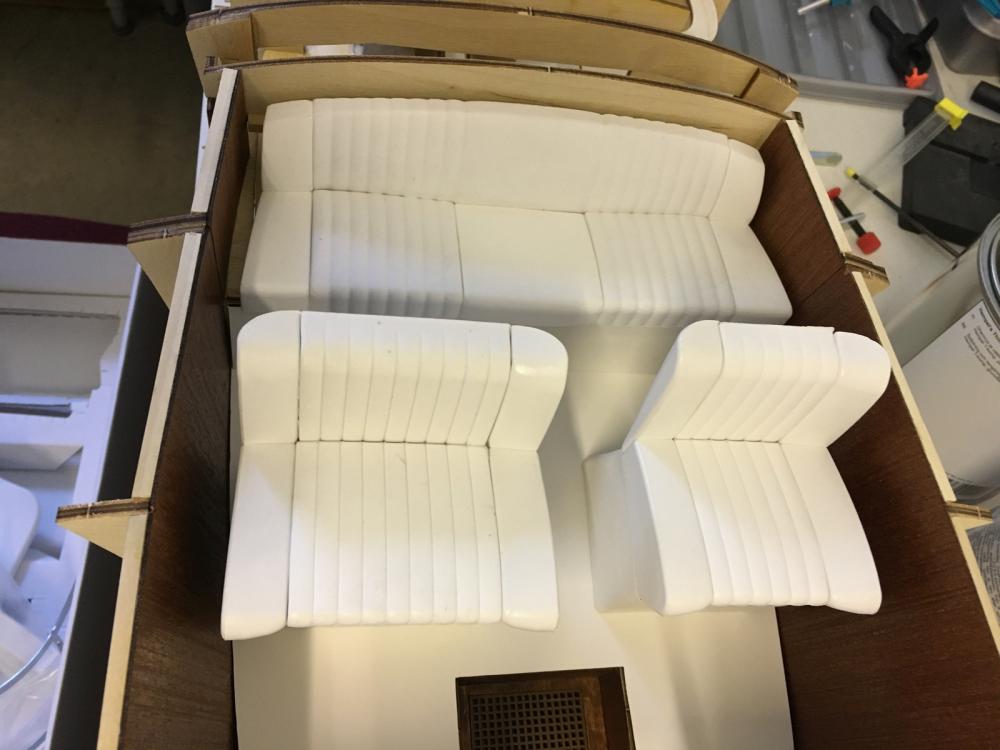
- 414 replies
-
- 9
-

-
- riva aquarama
- amati
- (and 2 more)
-
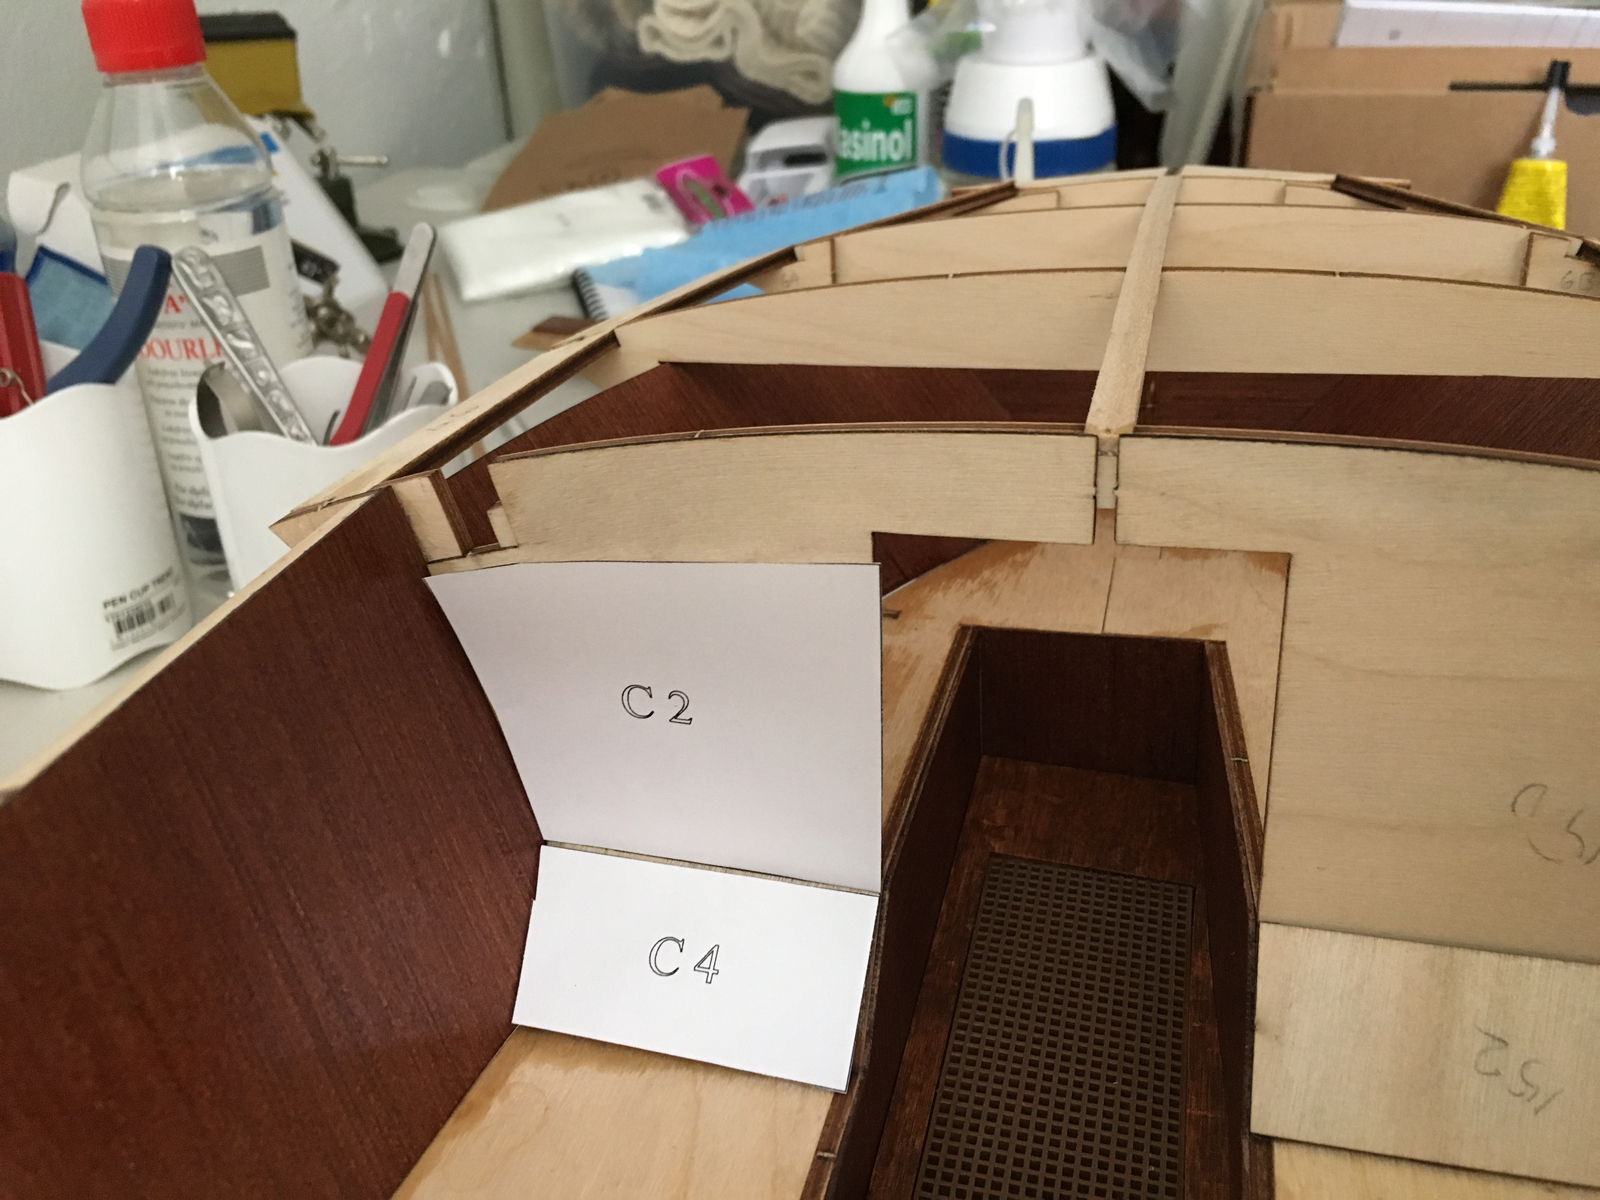
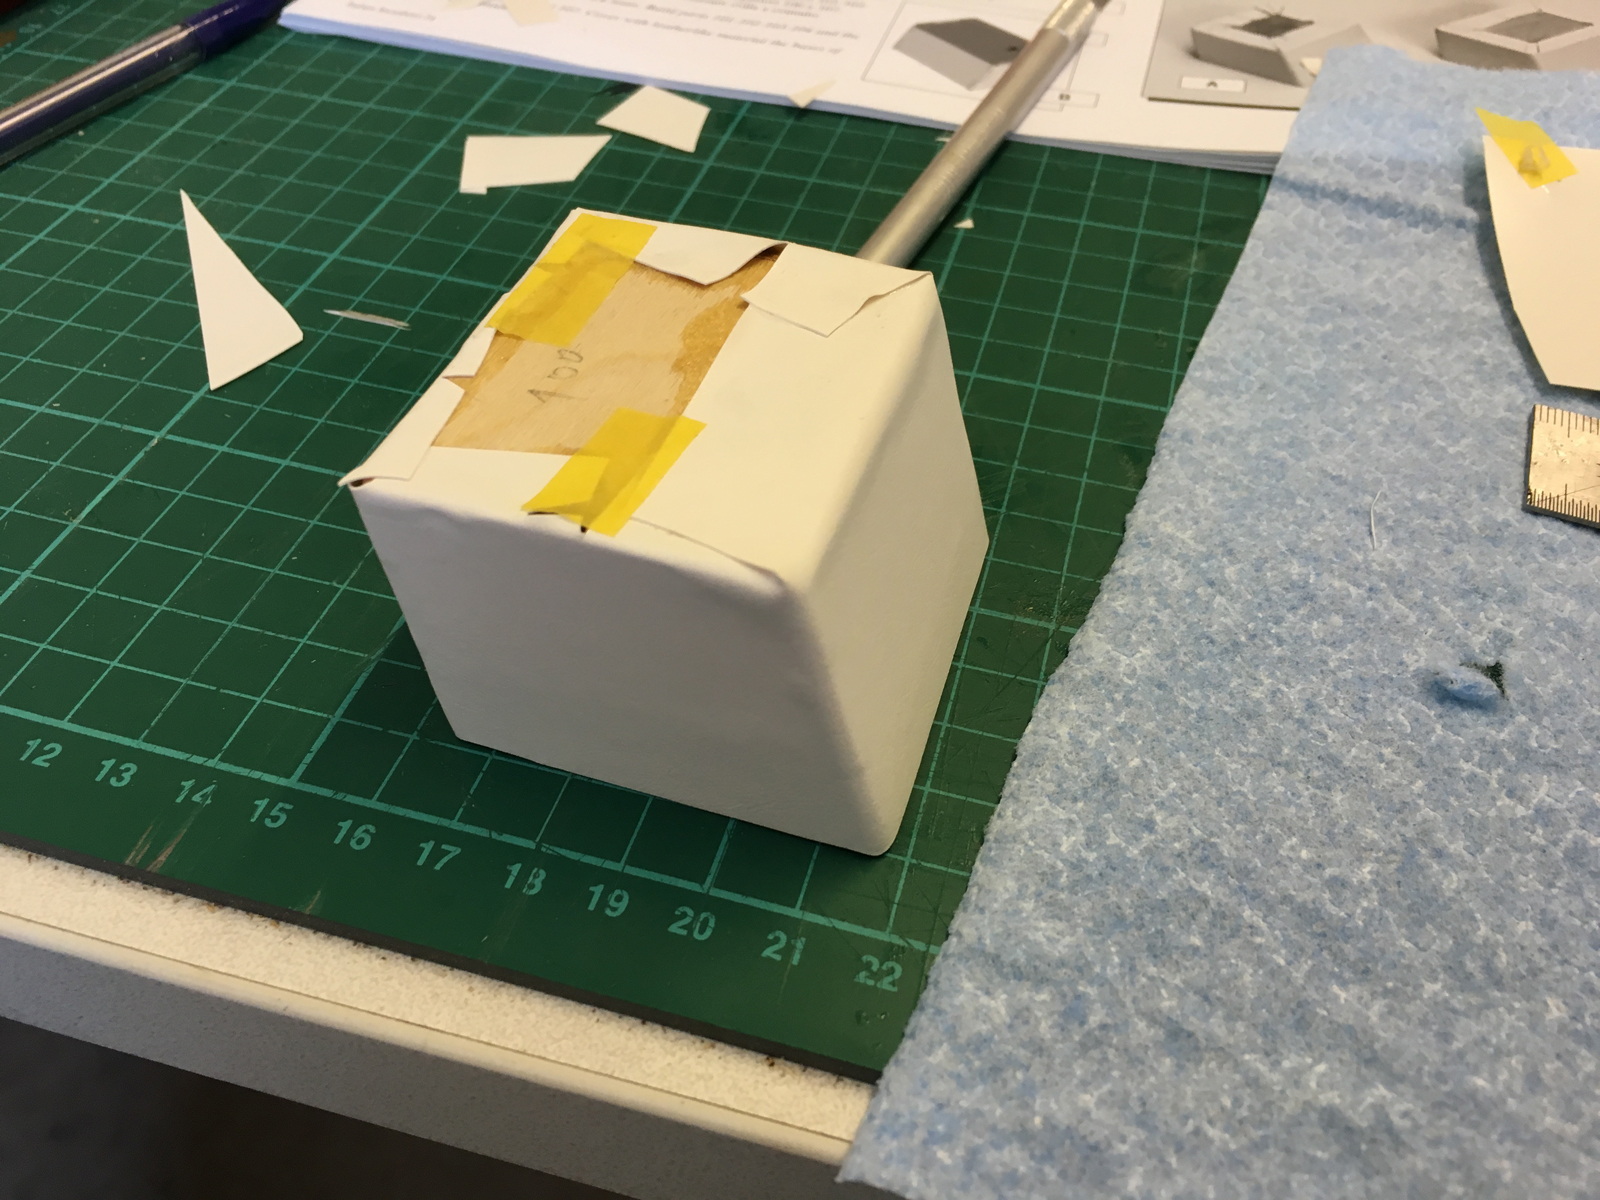
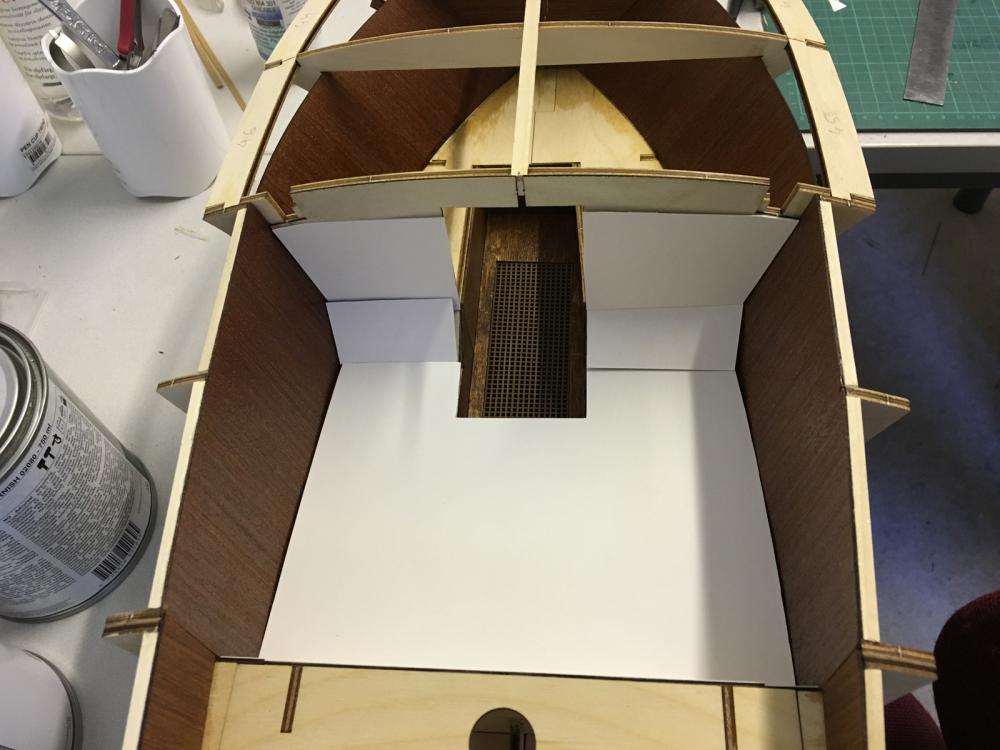
Dashboard, floor and bottom of the back seat base are covered and dry fitted.
- 414 replies
-
- 5
-
-
- riva aquarama
- amati
- (and 2 more)
-
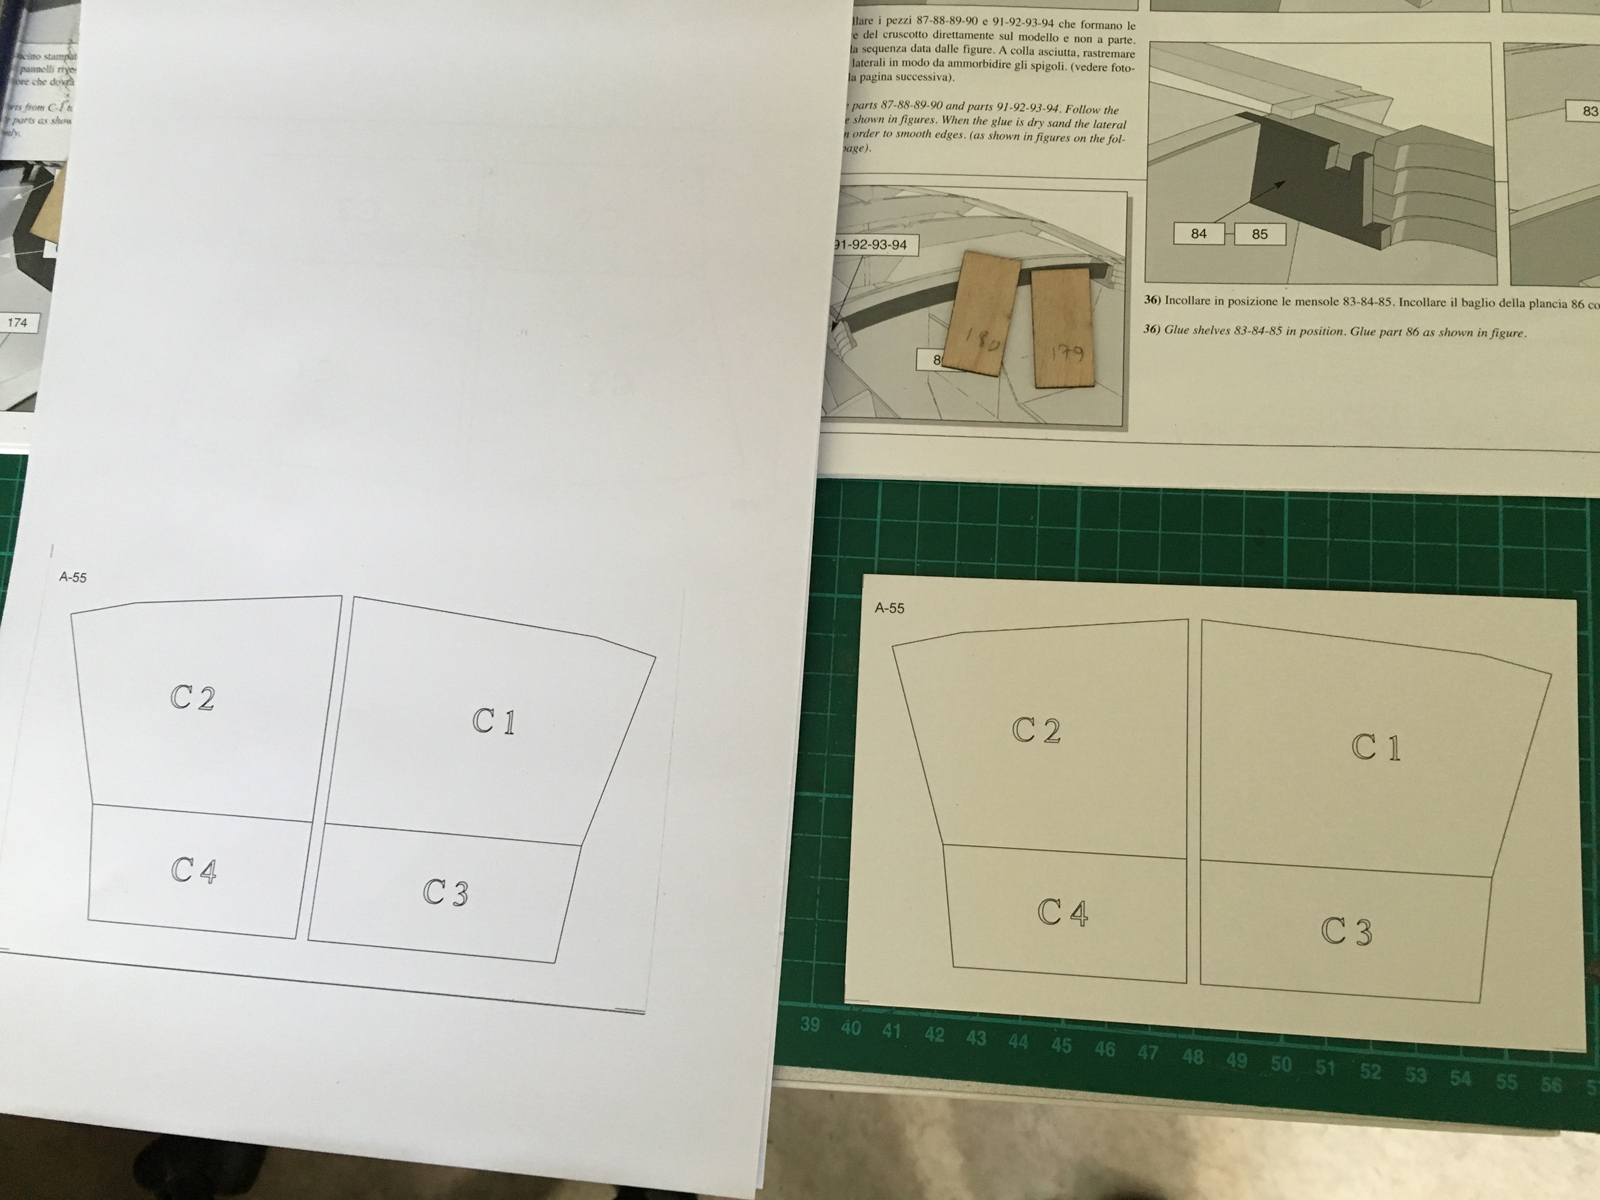
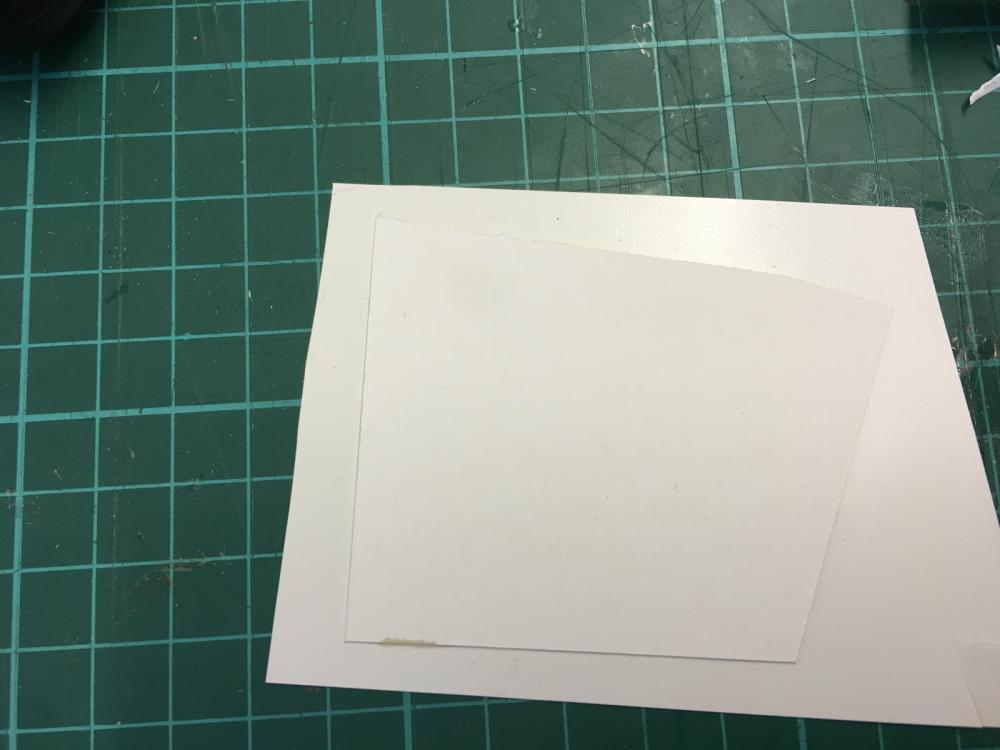
Dashboard and foot room coatings. These are to be applied on thick paper instead of veneer. I took a few copies of the paper just in case. It is always good to take backups.


- 414 replies
-
- 2
-
-
- riva aquarama
- amati
- (and 2 more)
-
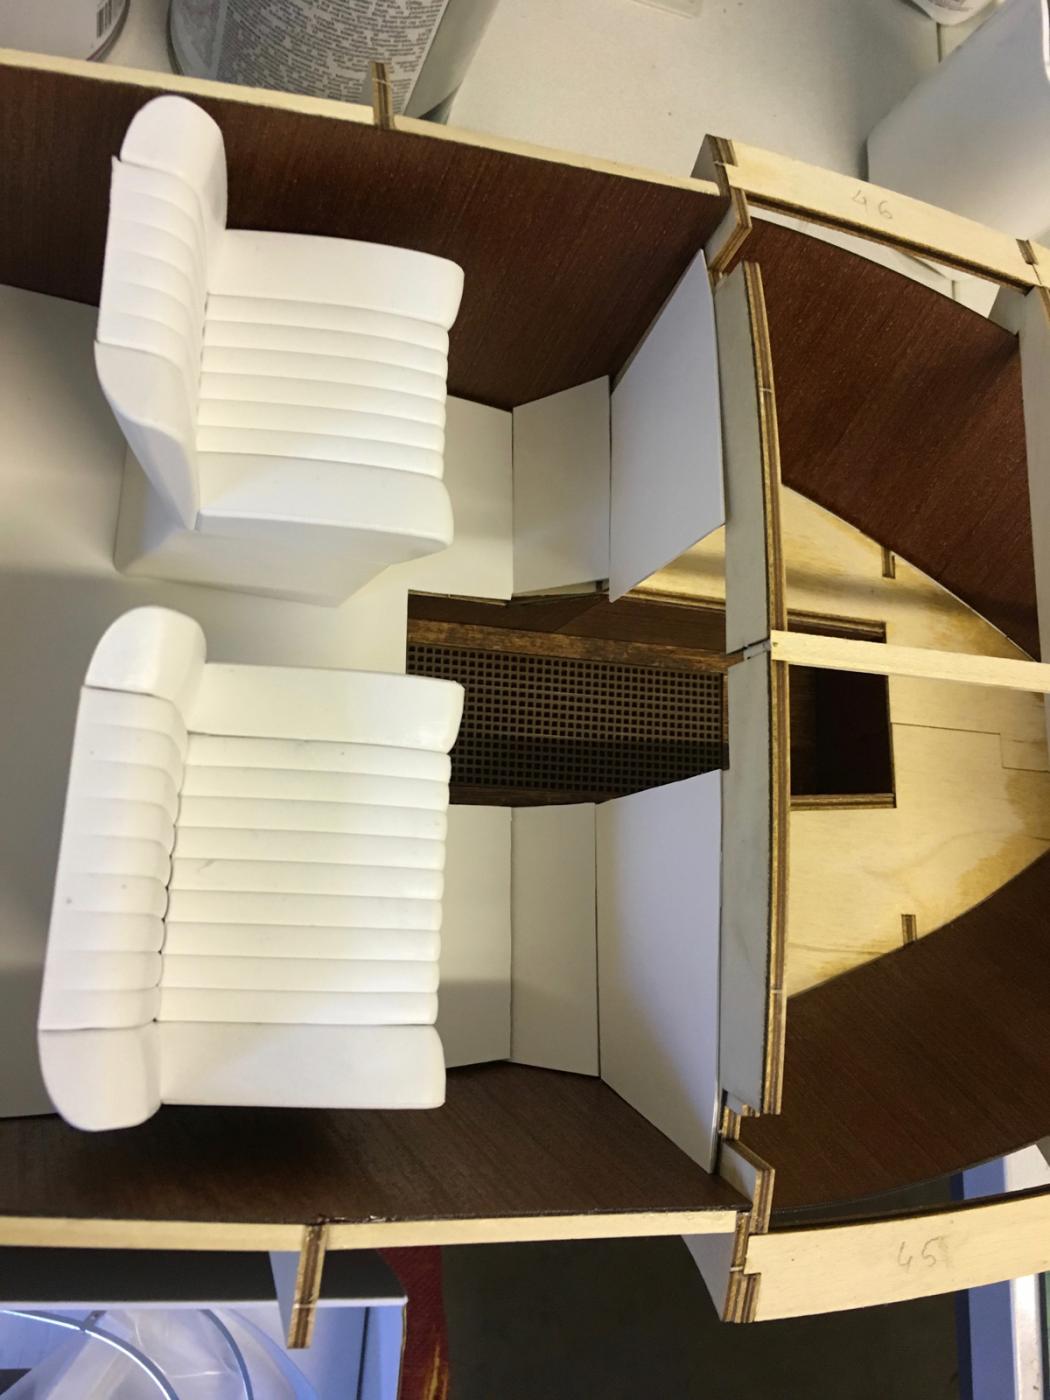
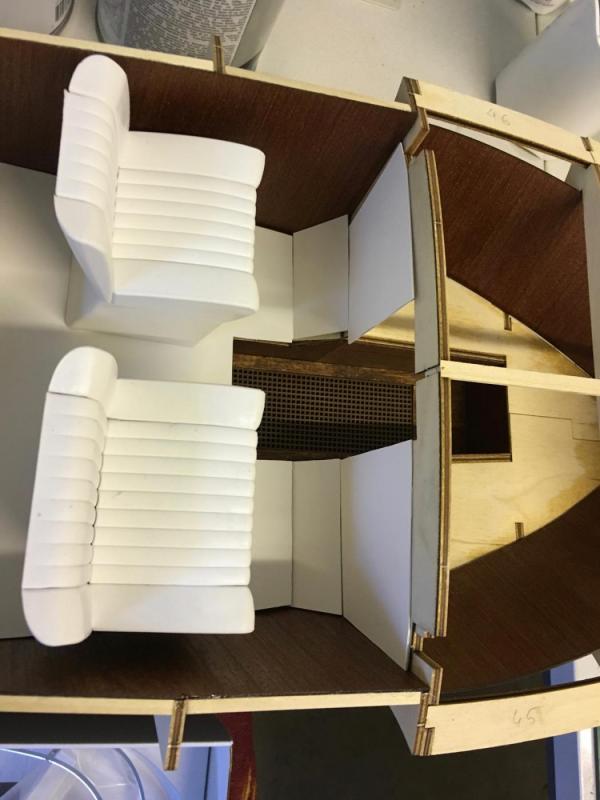
Checking with the seats (dry fit). The minor impurities, which I couldn't avoid during covering seem to be well hidden under the seats and in the small cabin space.

- 414 replies
-
- 9
-
-
- riva aquarama
- amati
- (and 2 more)
-
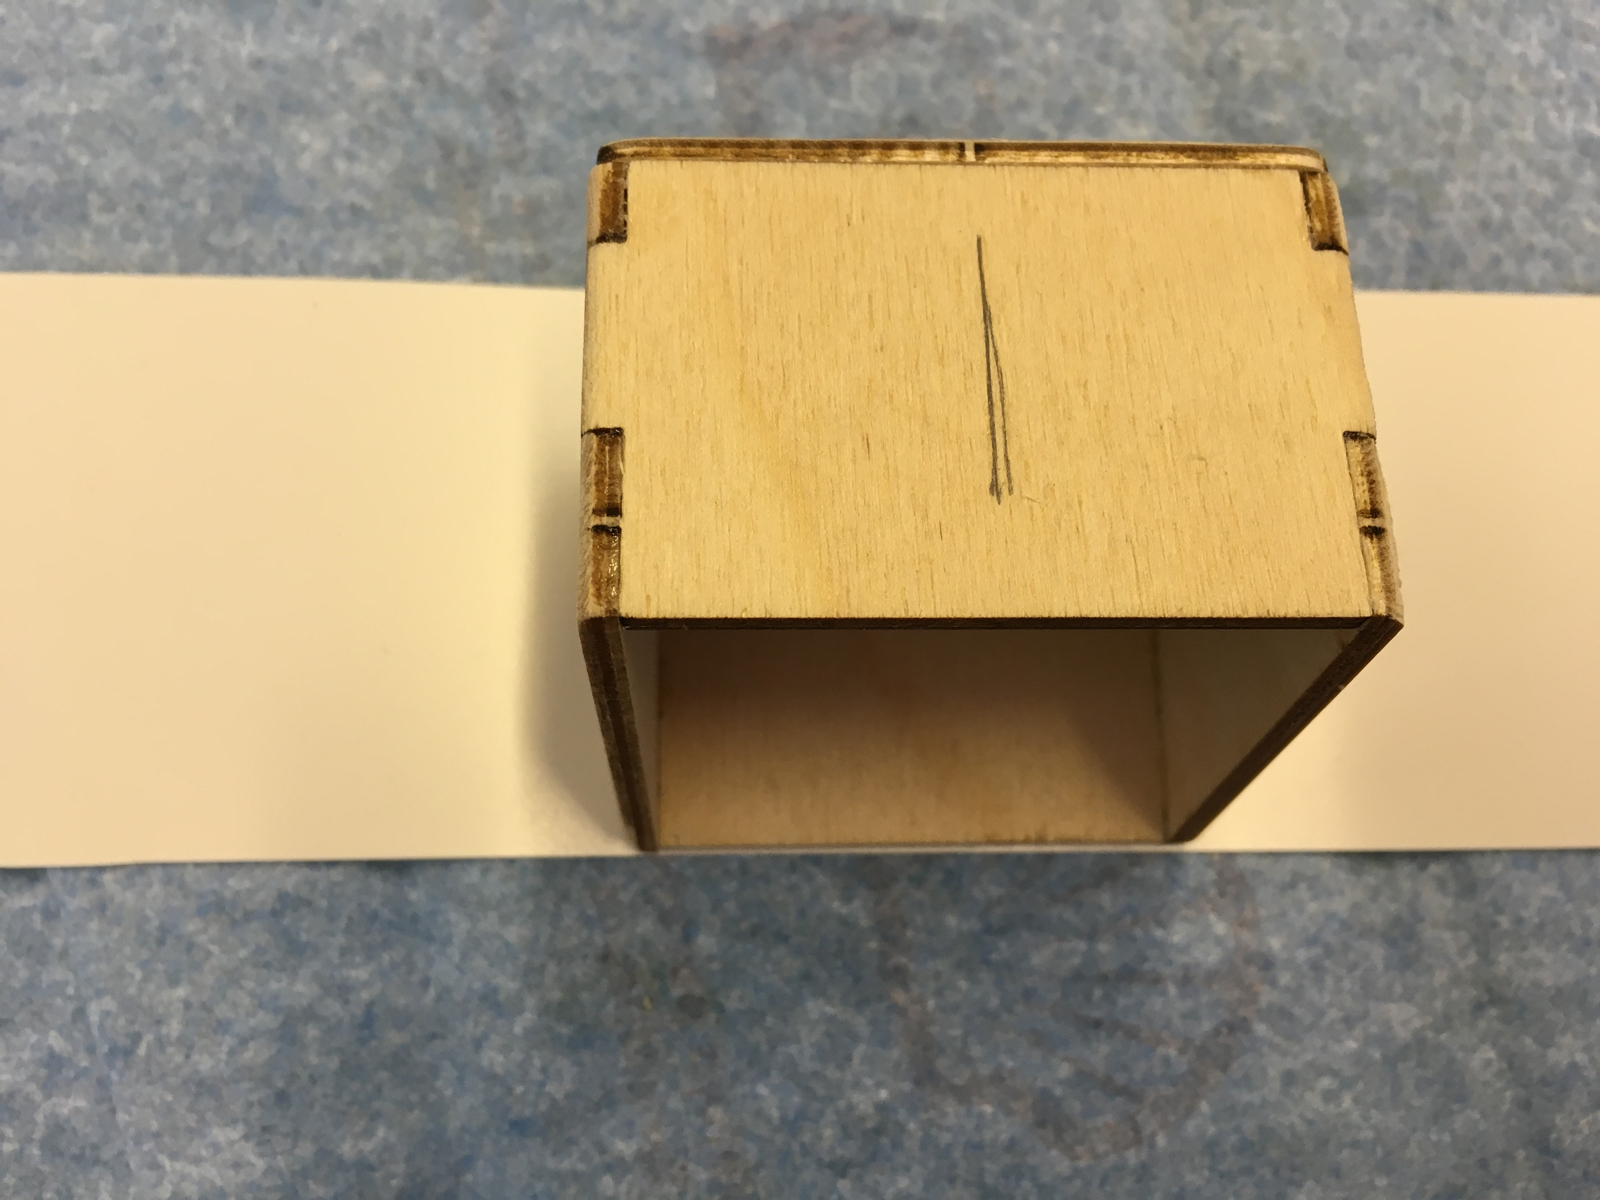
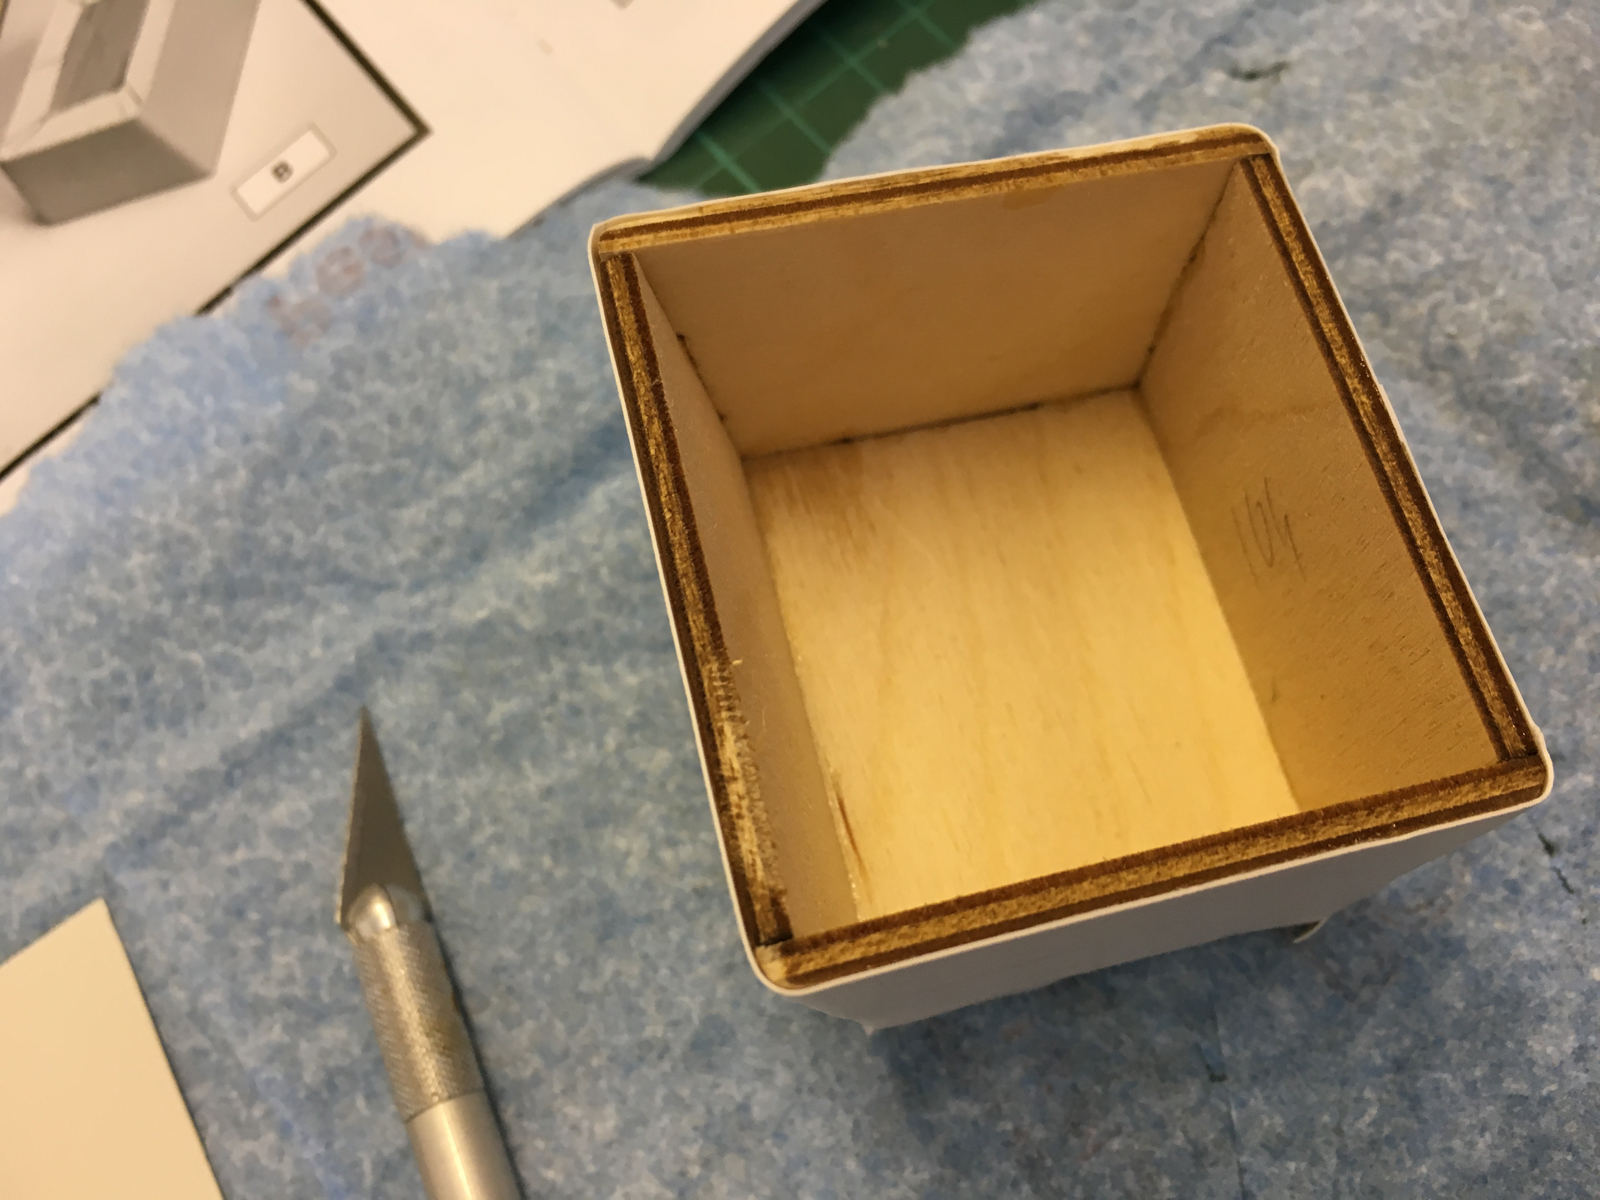
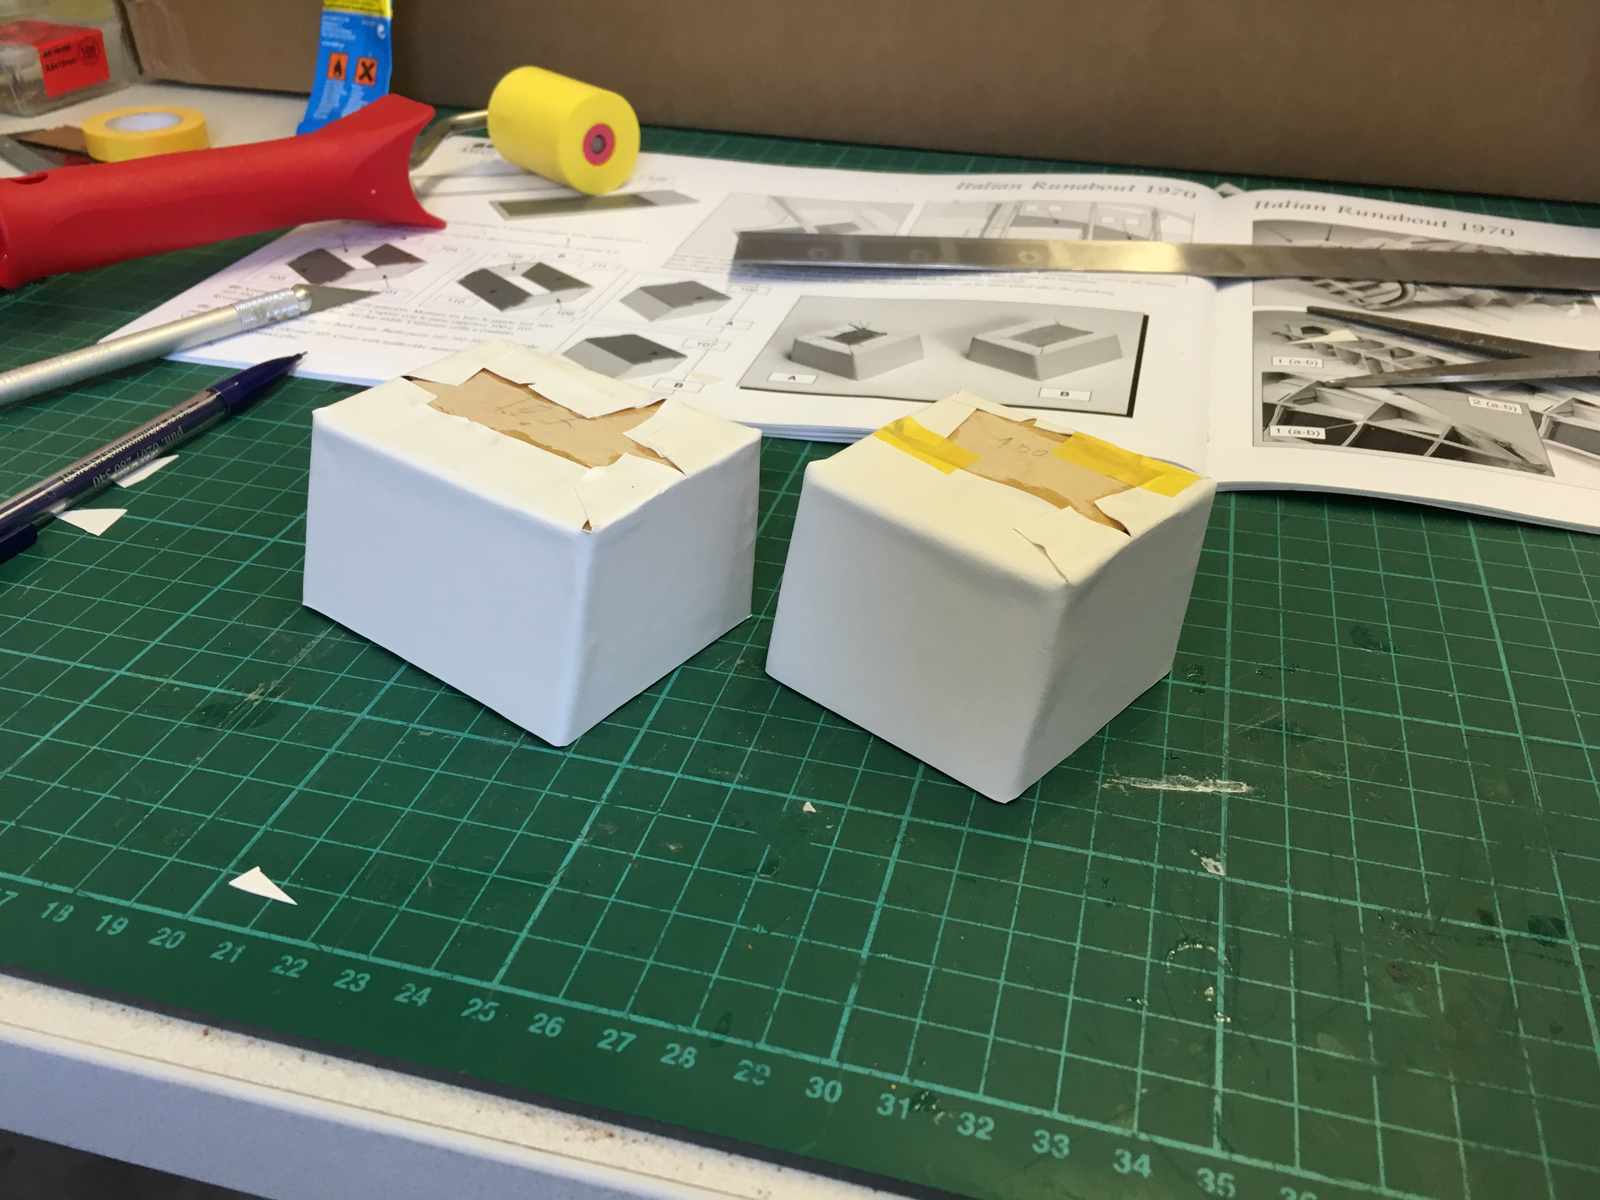
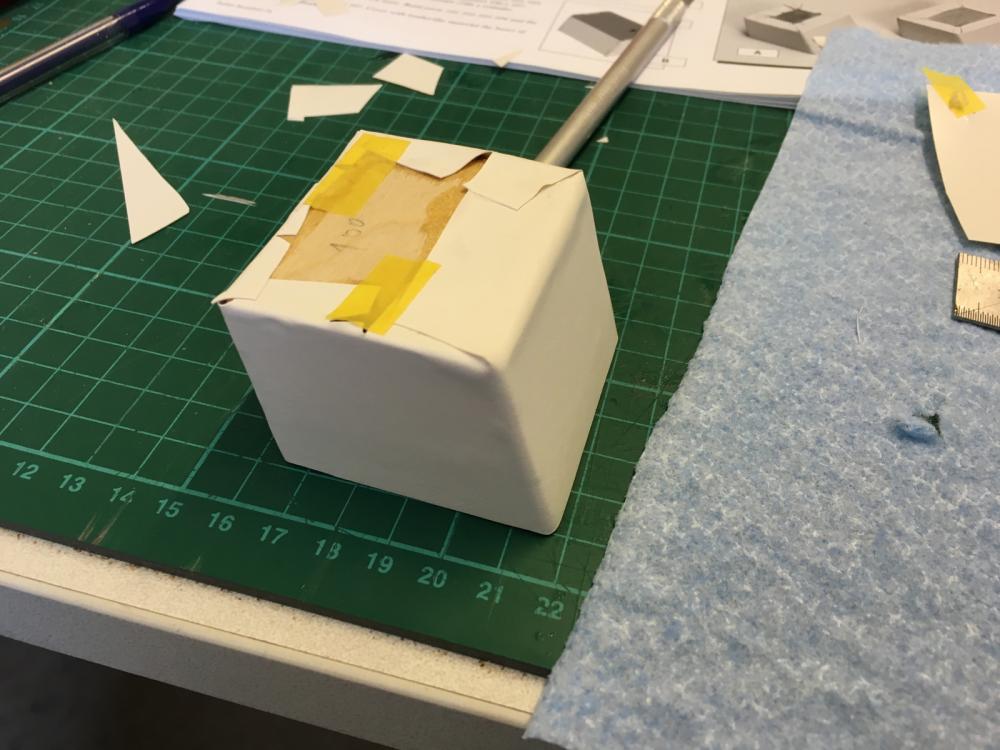
Similar treatment to the seat bases. The non-rectangular shape of the bases give some challenges. I marked with a pencil where the two ends of the fabric will overlap. This is in accordance with the photos in the instruction manual and are on the least visible spots once the bases and the seats are installed:


- 414 replies
-
- 8
-
-
- riva aquarama
- amati
- (and 2 more)
-
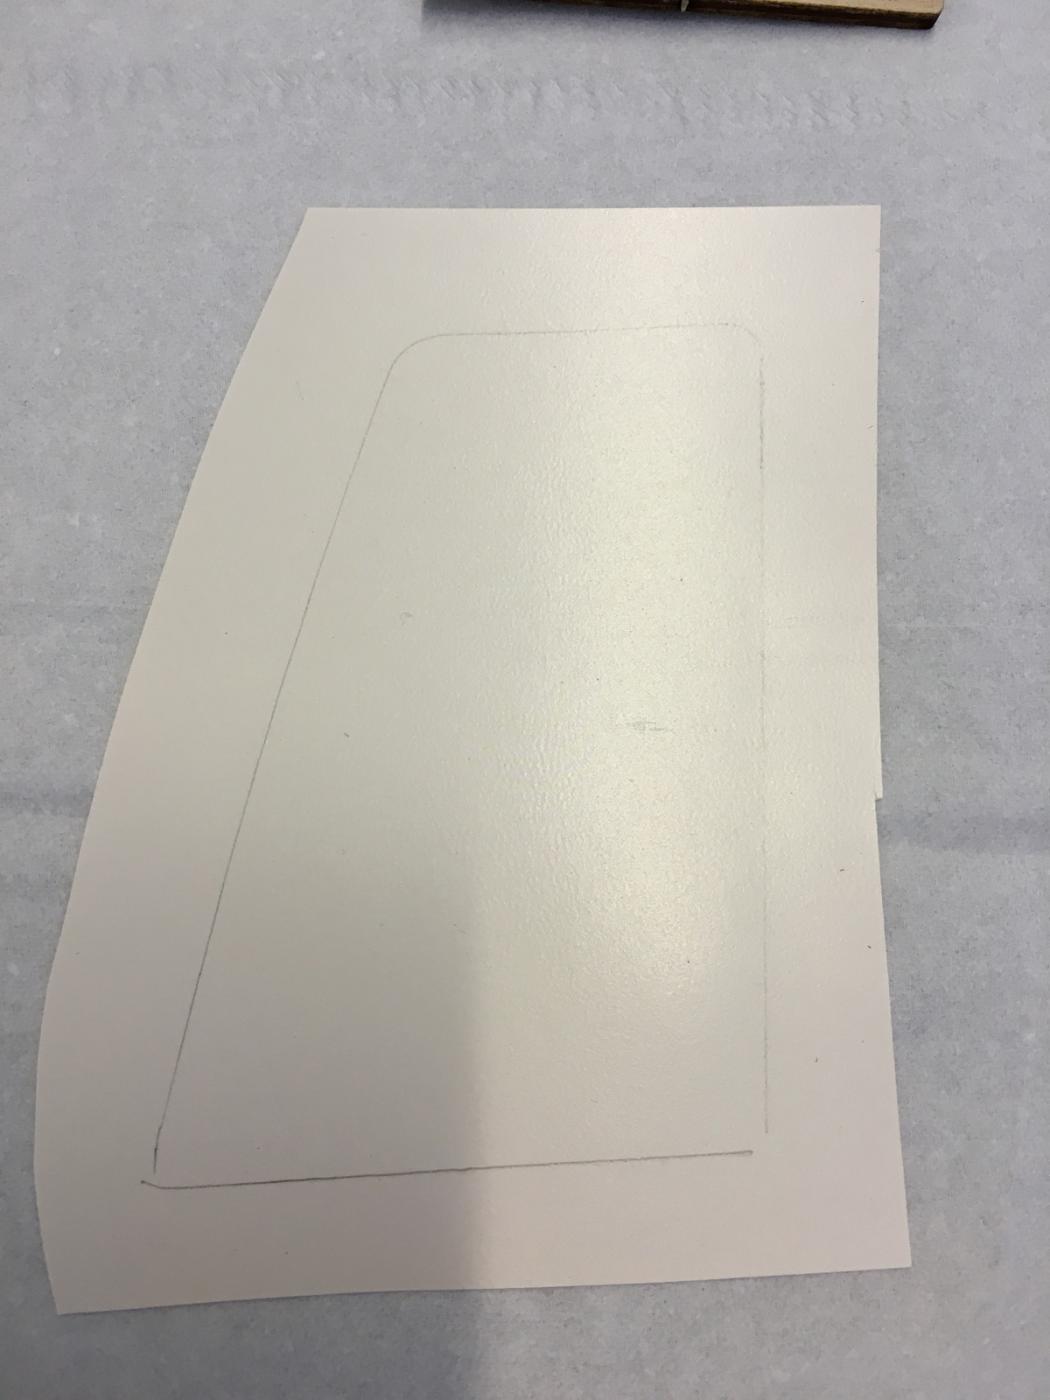
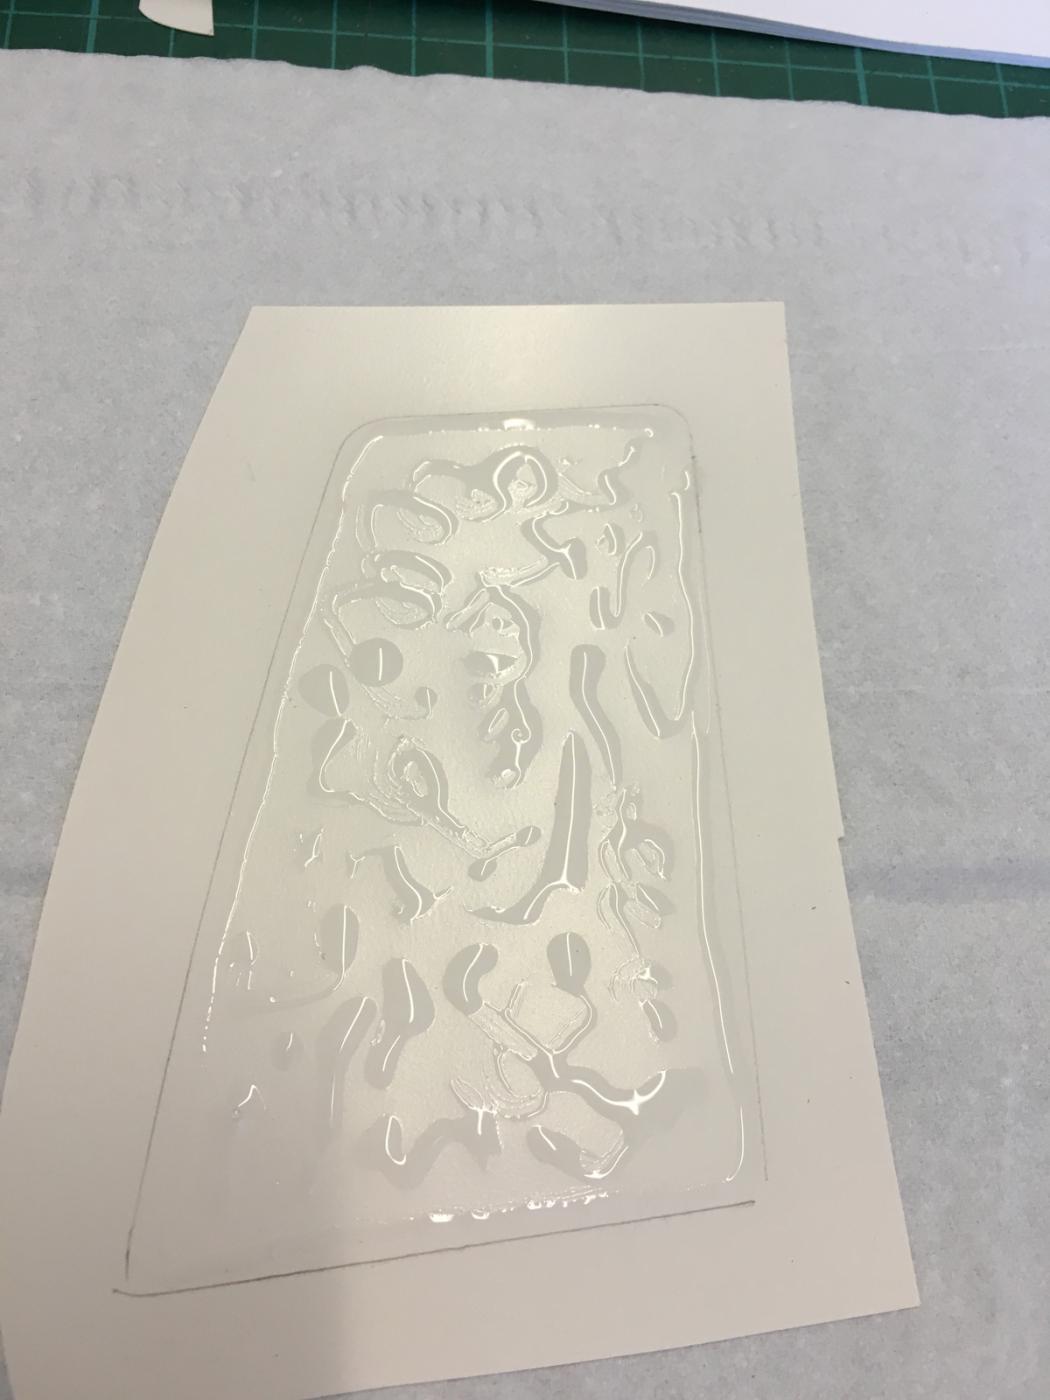
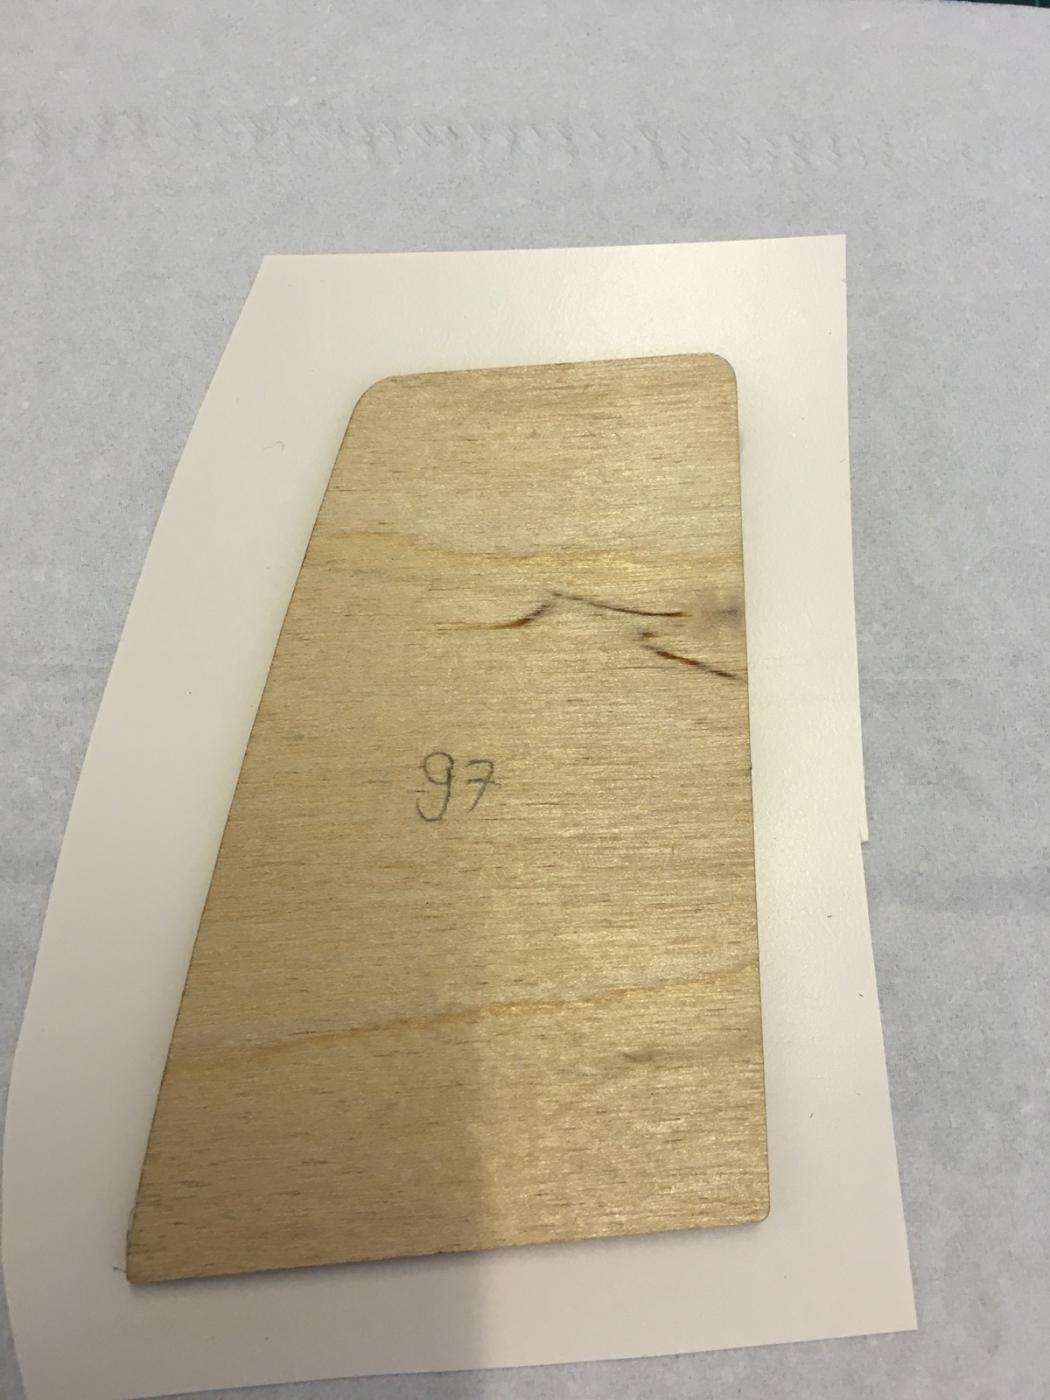
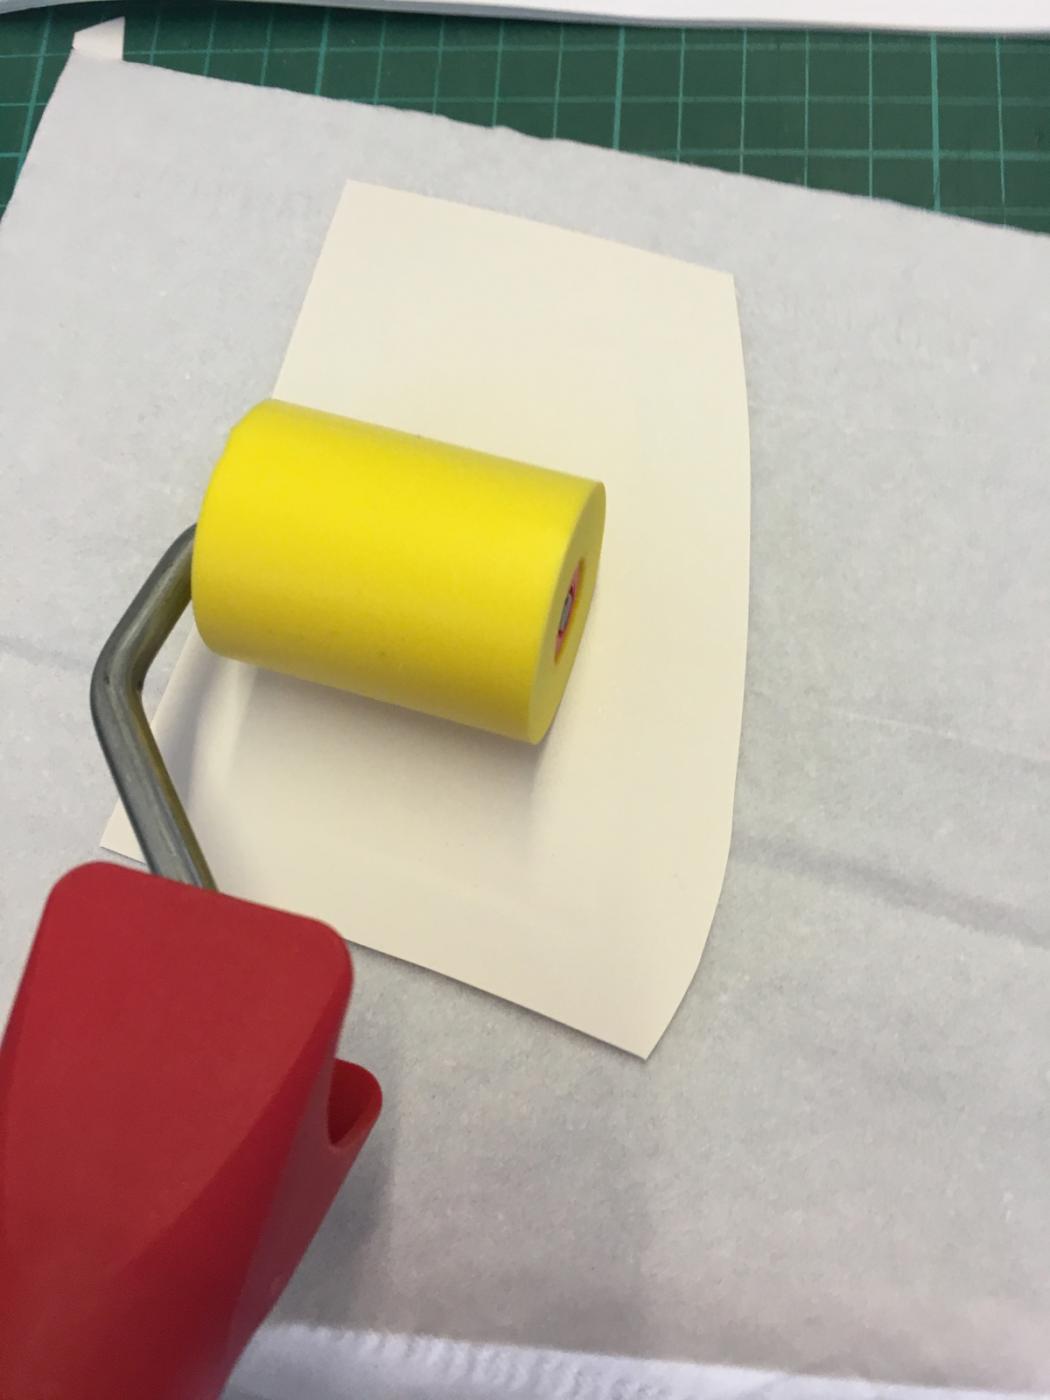
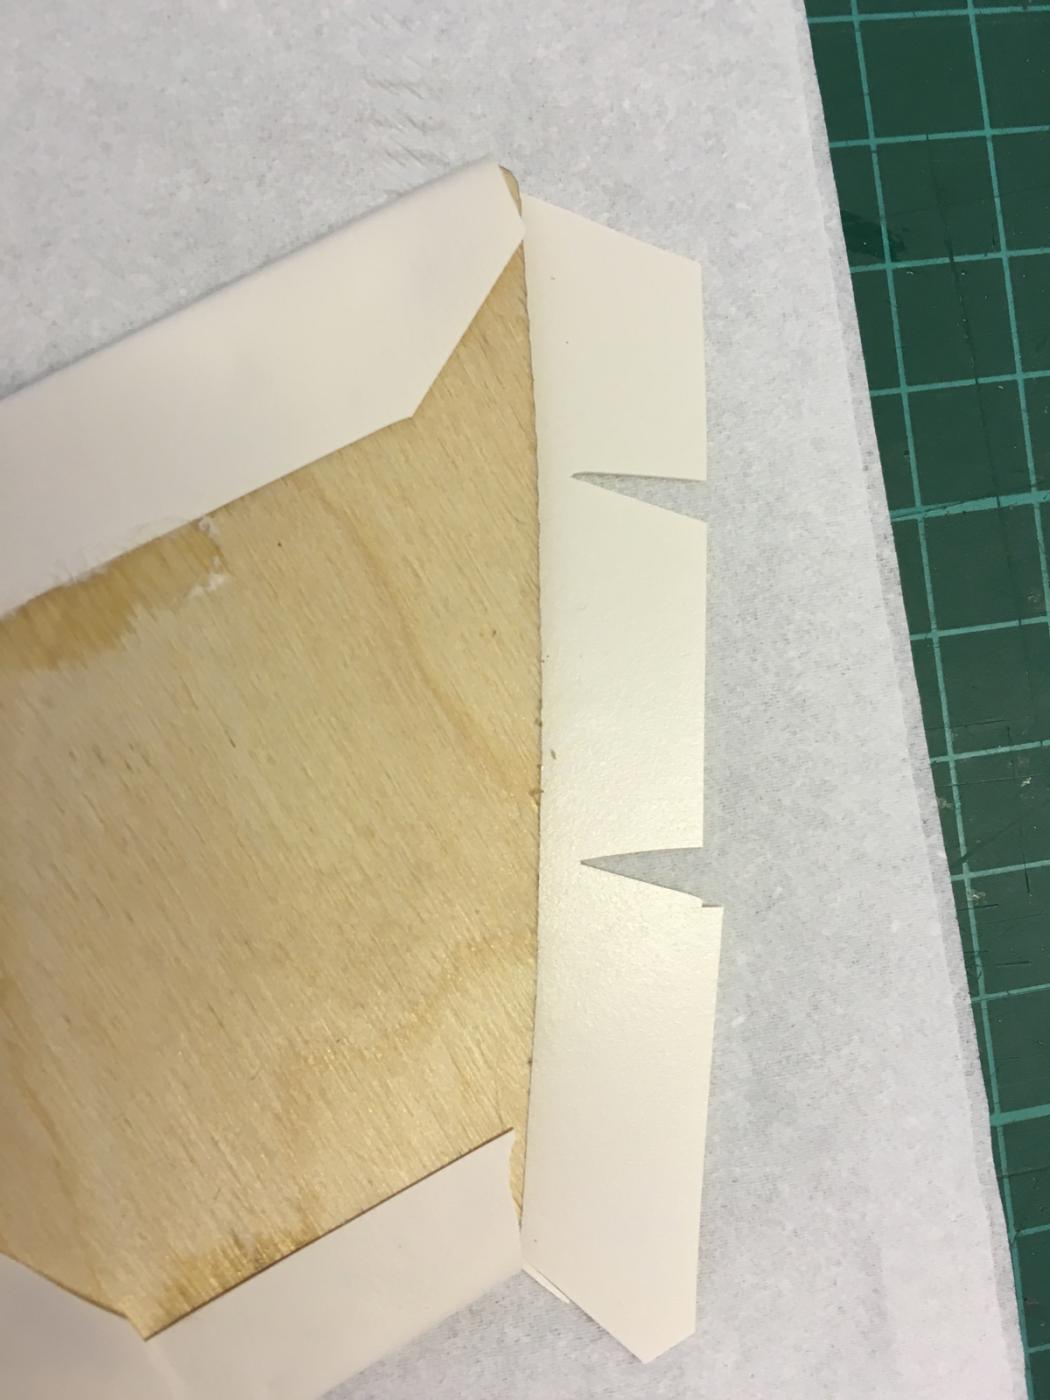
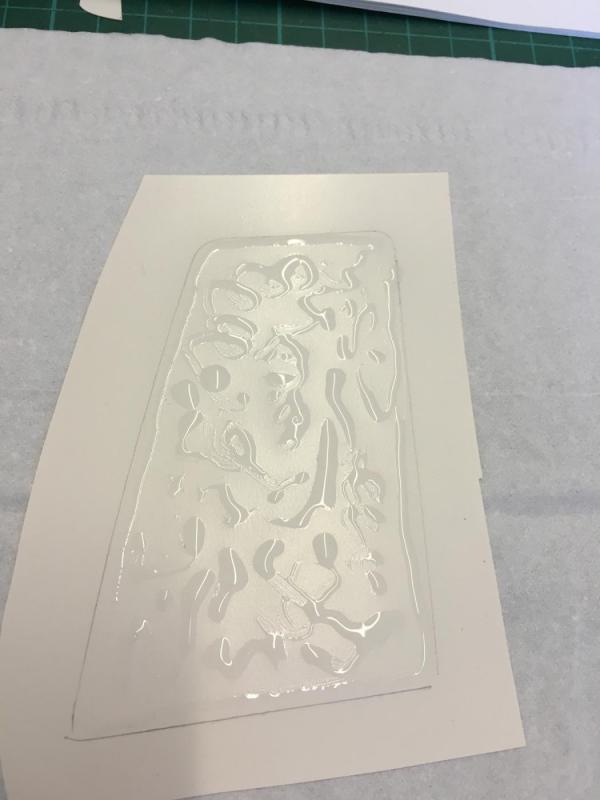
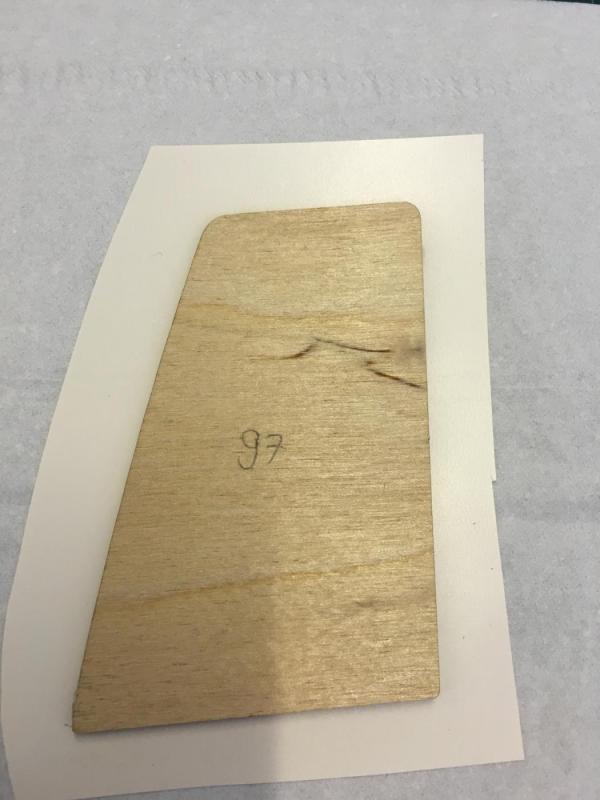
Bedroom matresses, using “leather like” material: Draw the outline with a pencil: Apply CA glue: Press the part: Roll on from the fabric side in order to eliminate any bubbles: Fold back and fix with CA glue: The result (there are altogether 3 of them. All of them are dry-fitted at the moment, just to see how they will look):


- 414 replies
-
- 6
-
-
- riva aquarama
- amati
- (and 2 more)
-
In the mean time, I thought it is good time to start finally varnishing the interior. The varnish has an overcoat interval of 4h-48h, therefore if I do 2 overcoats a day (one before going to work and one after coming home), with 10 layers planned, it will take about 5 days to get it ready. Here is the 1st coat using 20% thinner + 80% varnish, after slight primary sanding with 120 grit wet sanding paper: Already looks promising (of course the varnish is just wet):


- 414 replies
-
- 7
-
-
- riva aquarama
- amati
- (and 2 more)
-
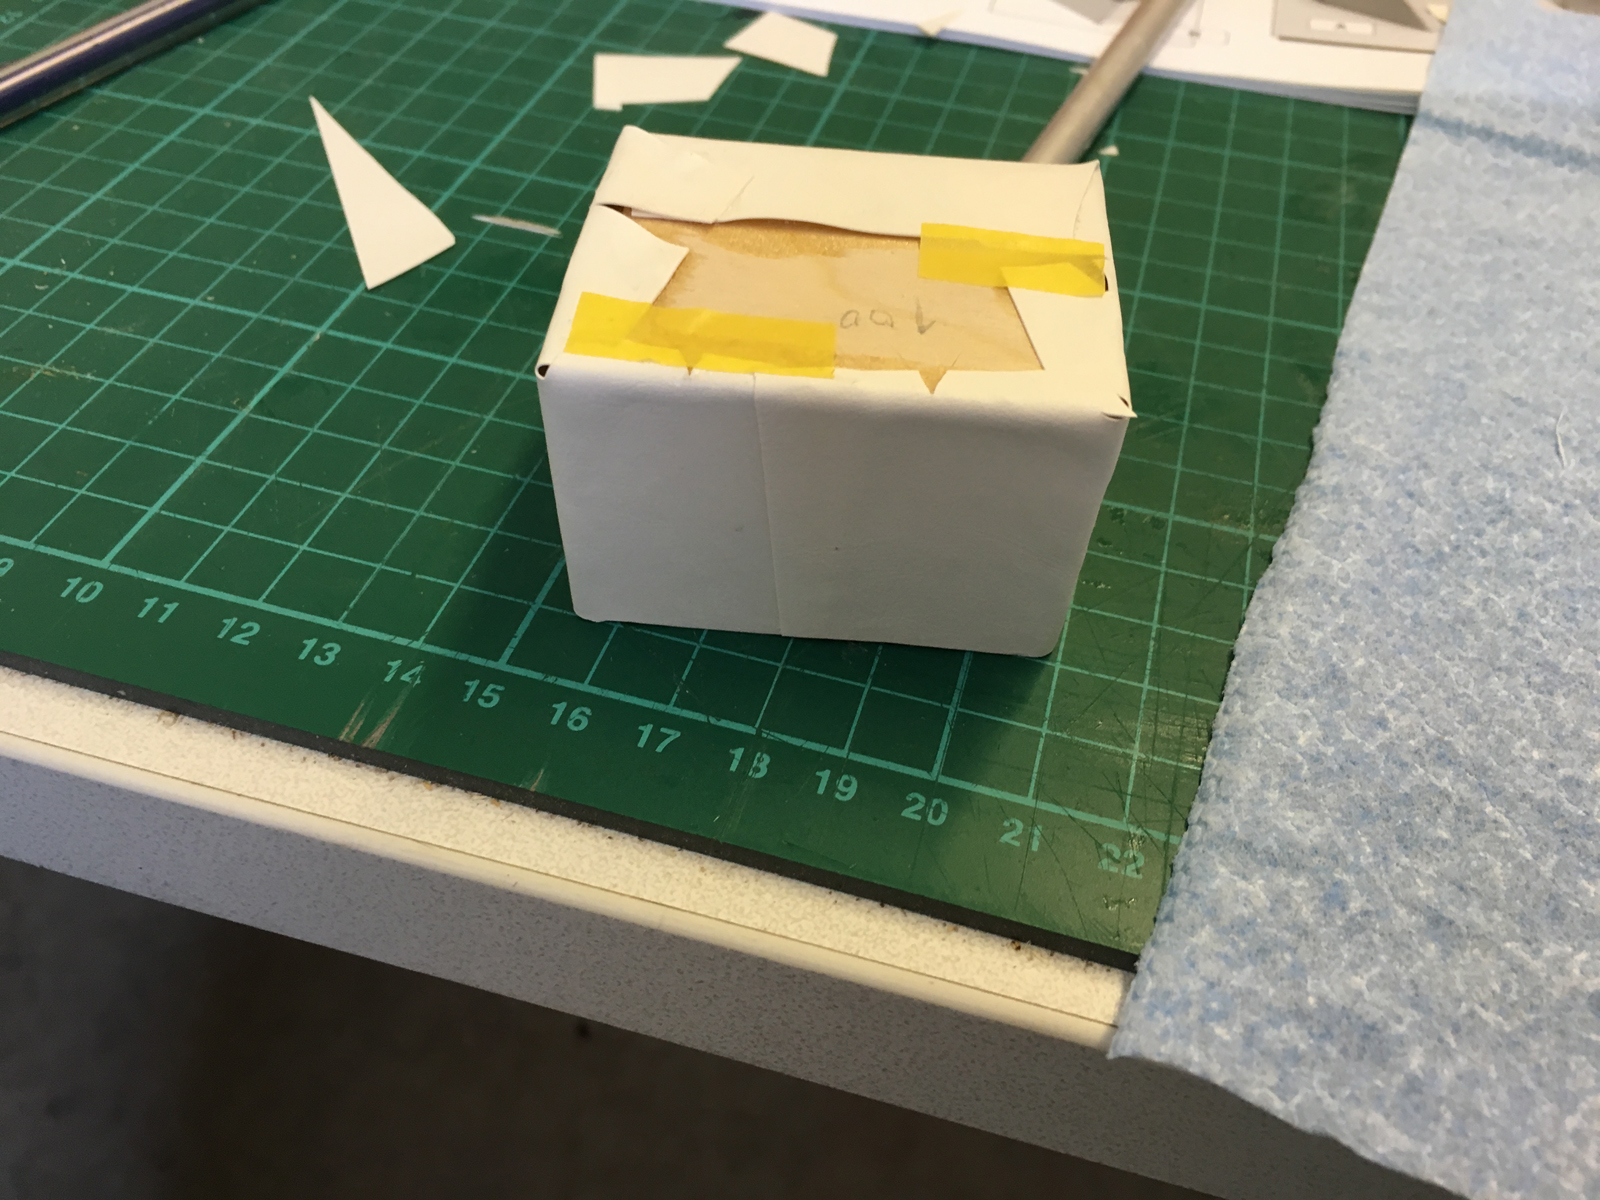
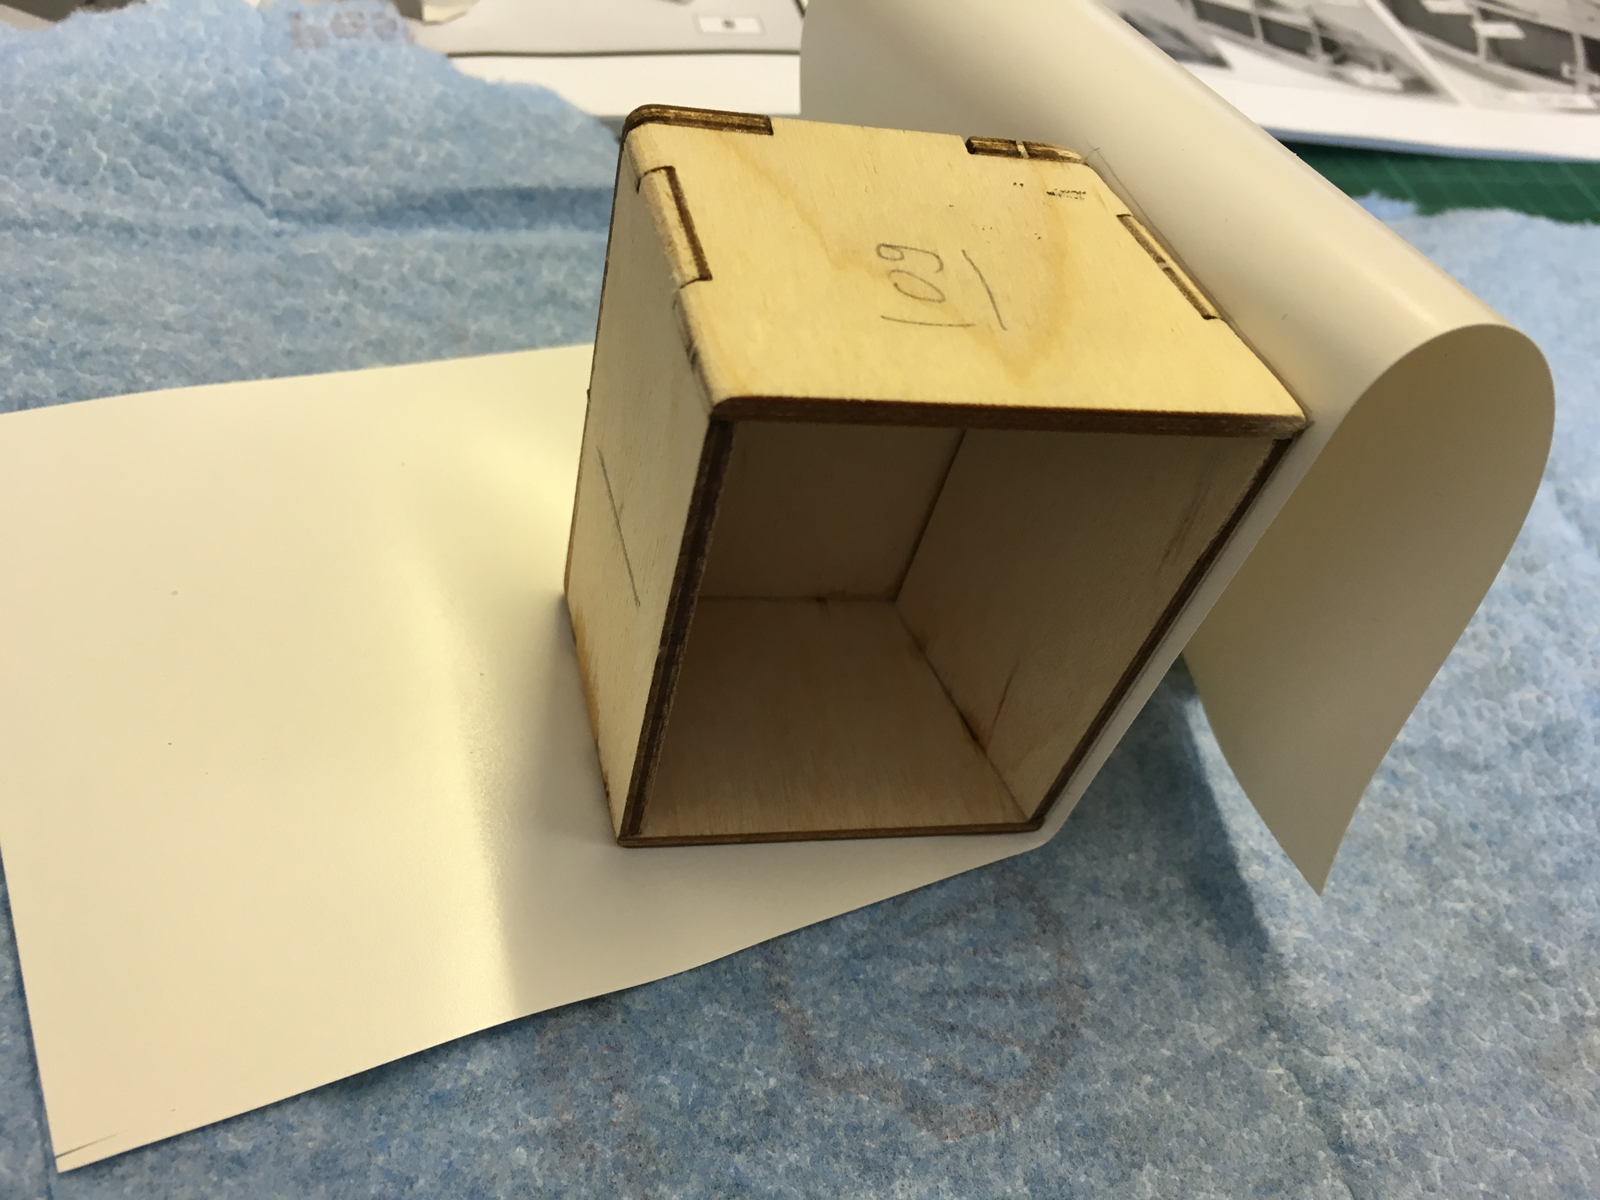
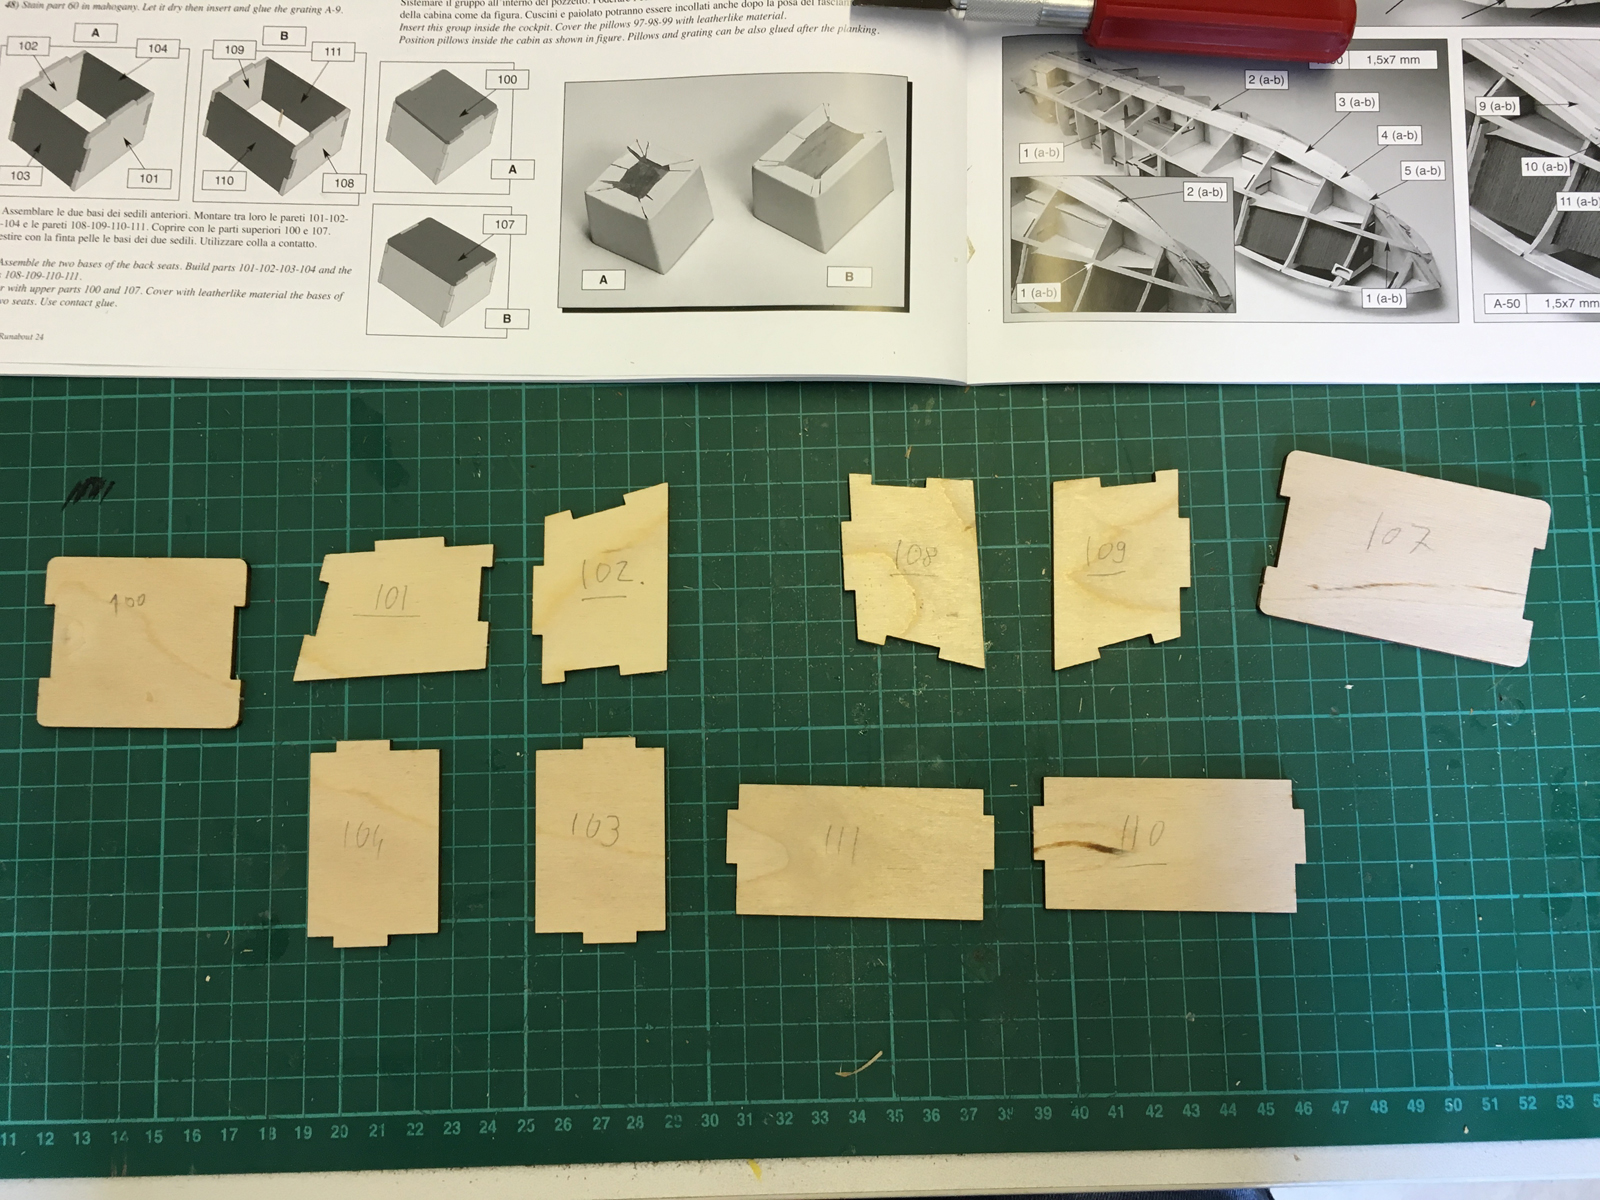
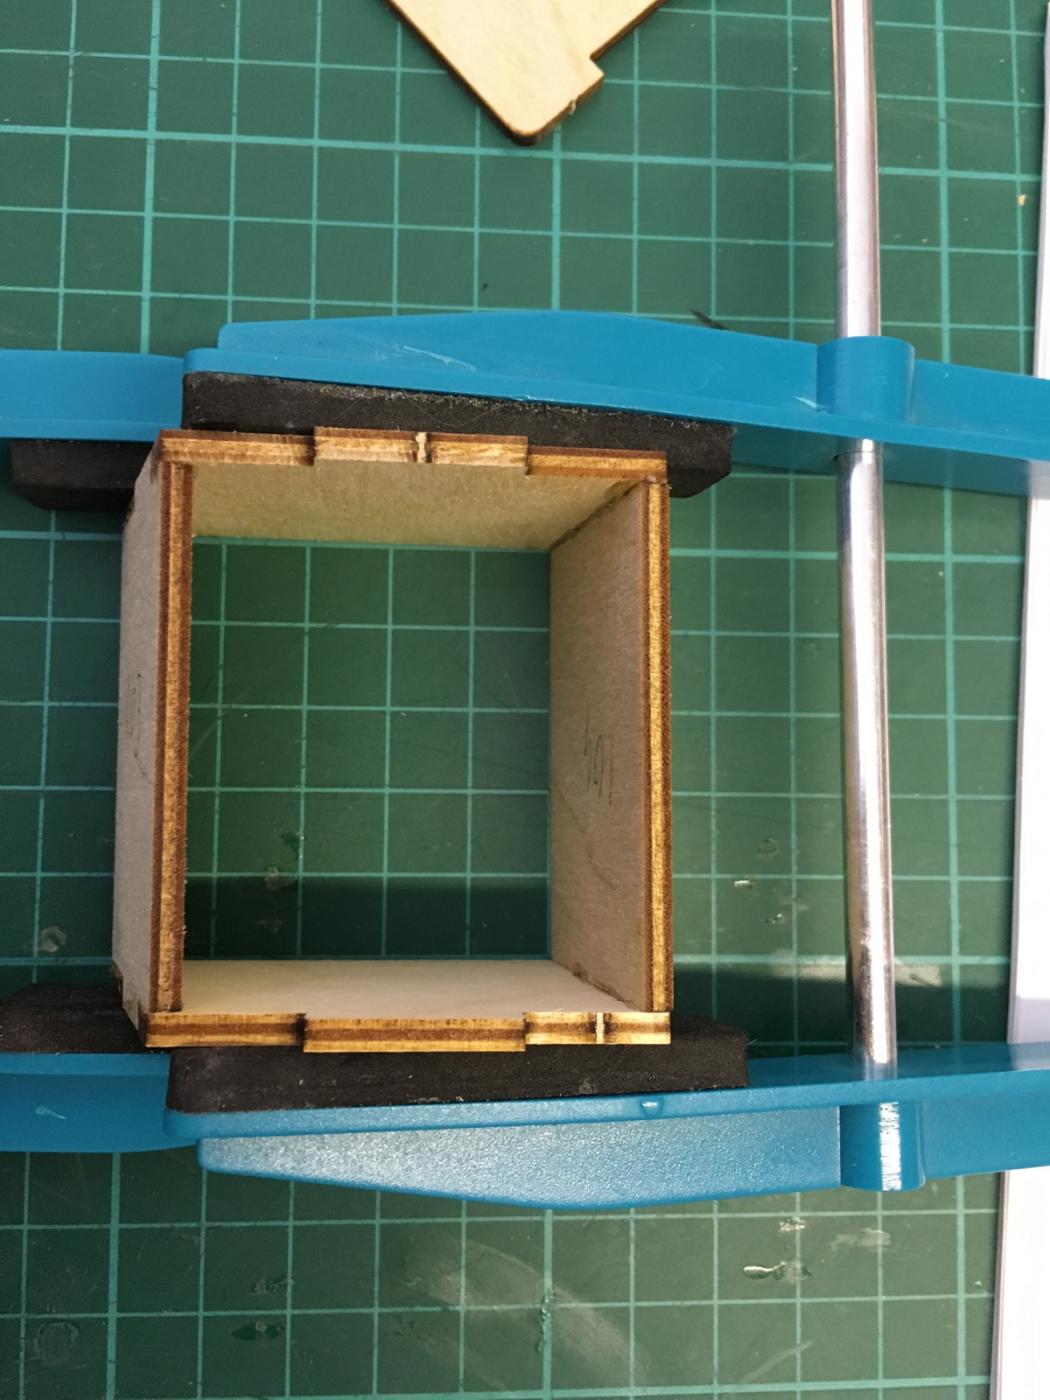
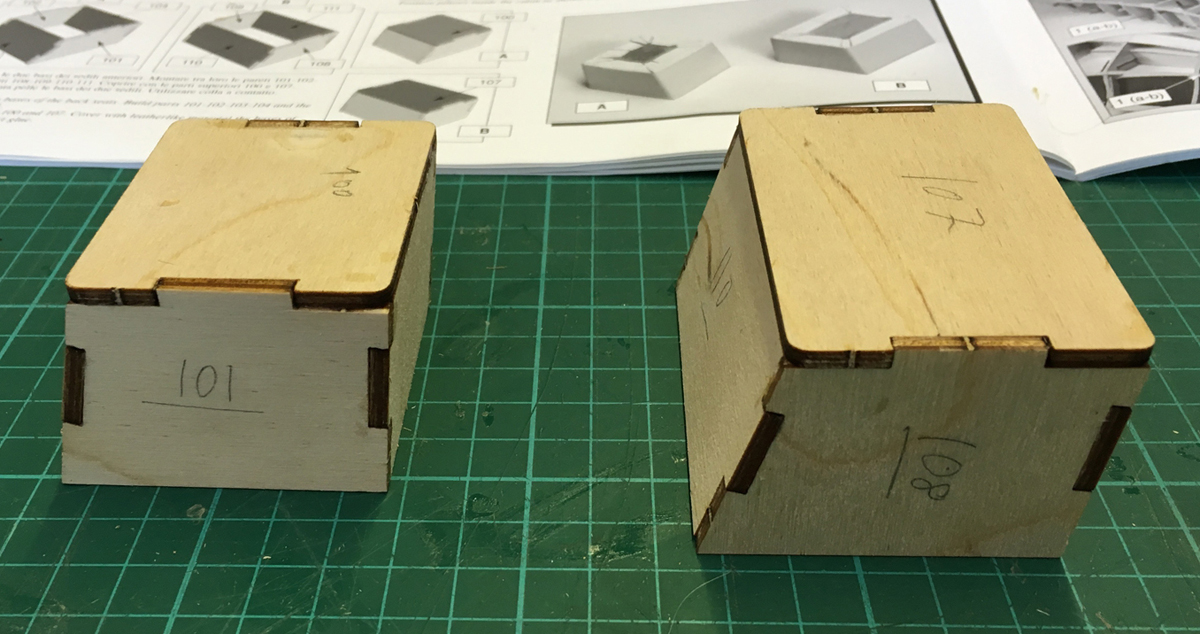
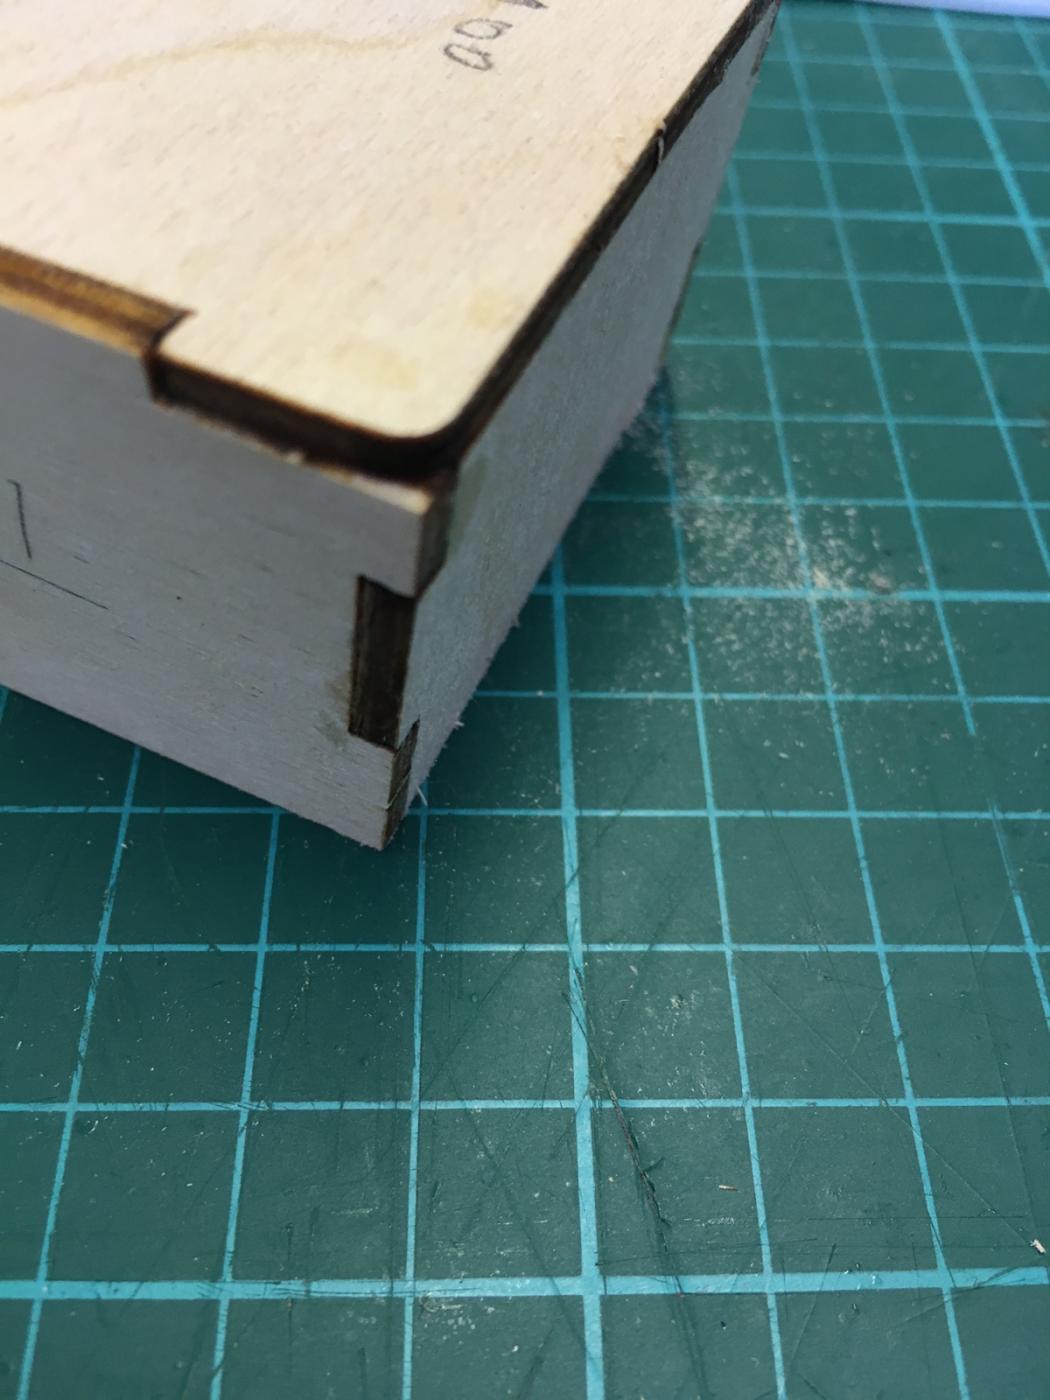
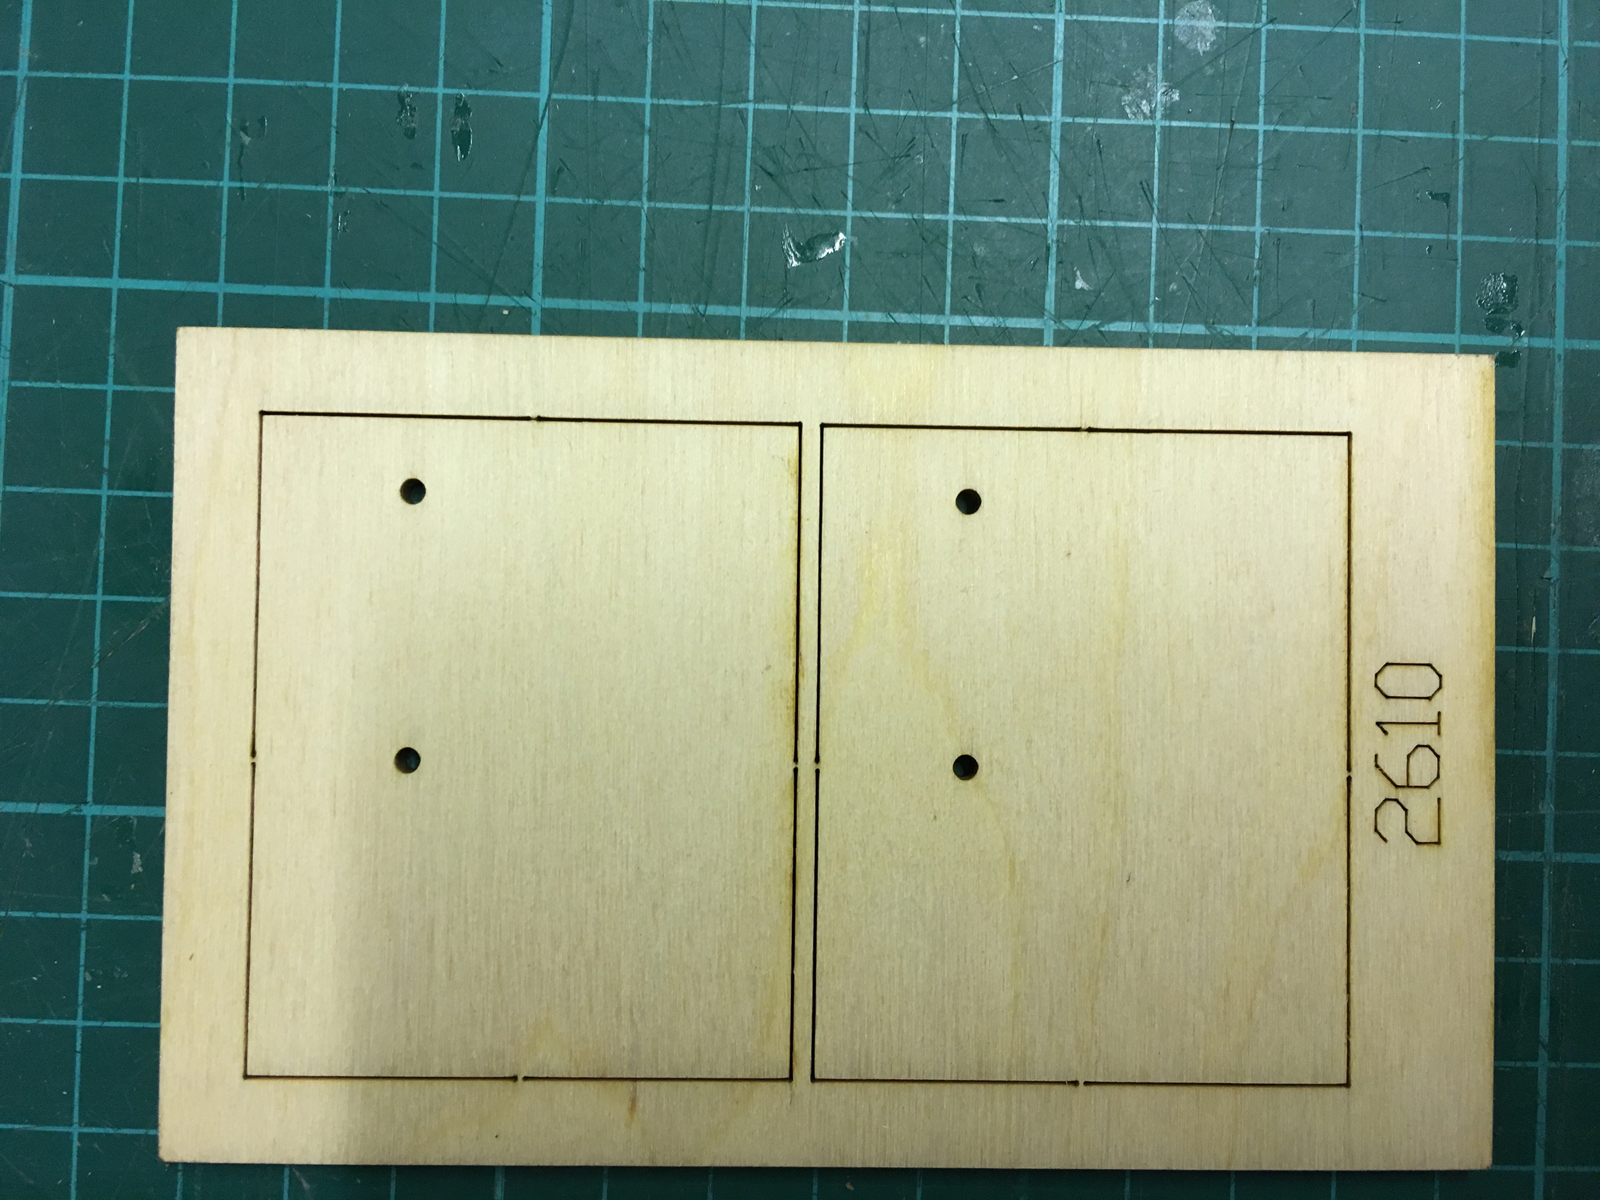
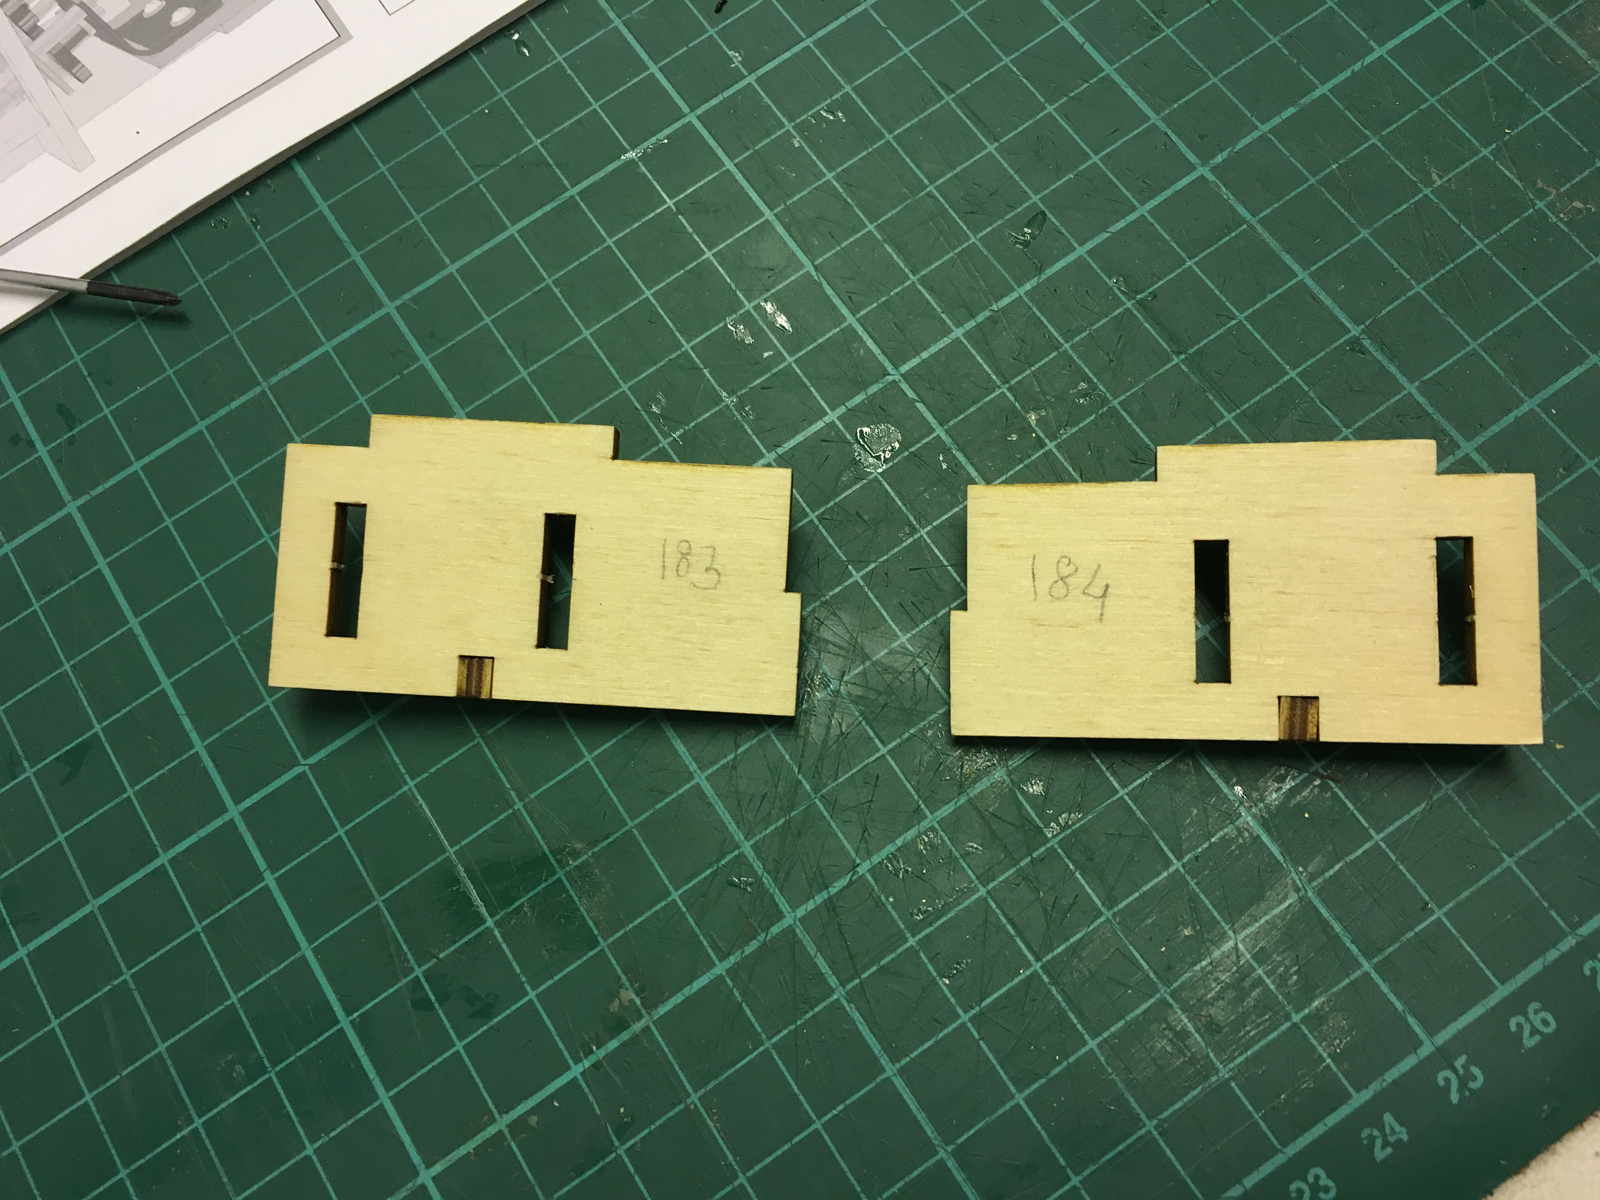
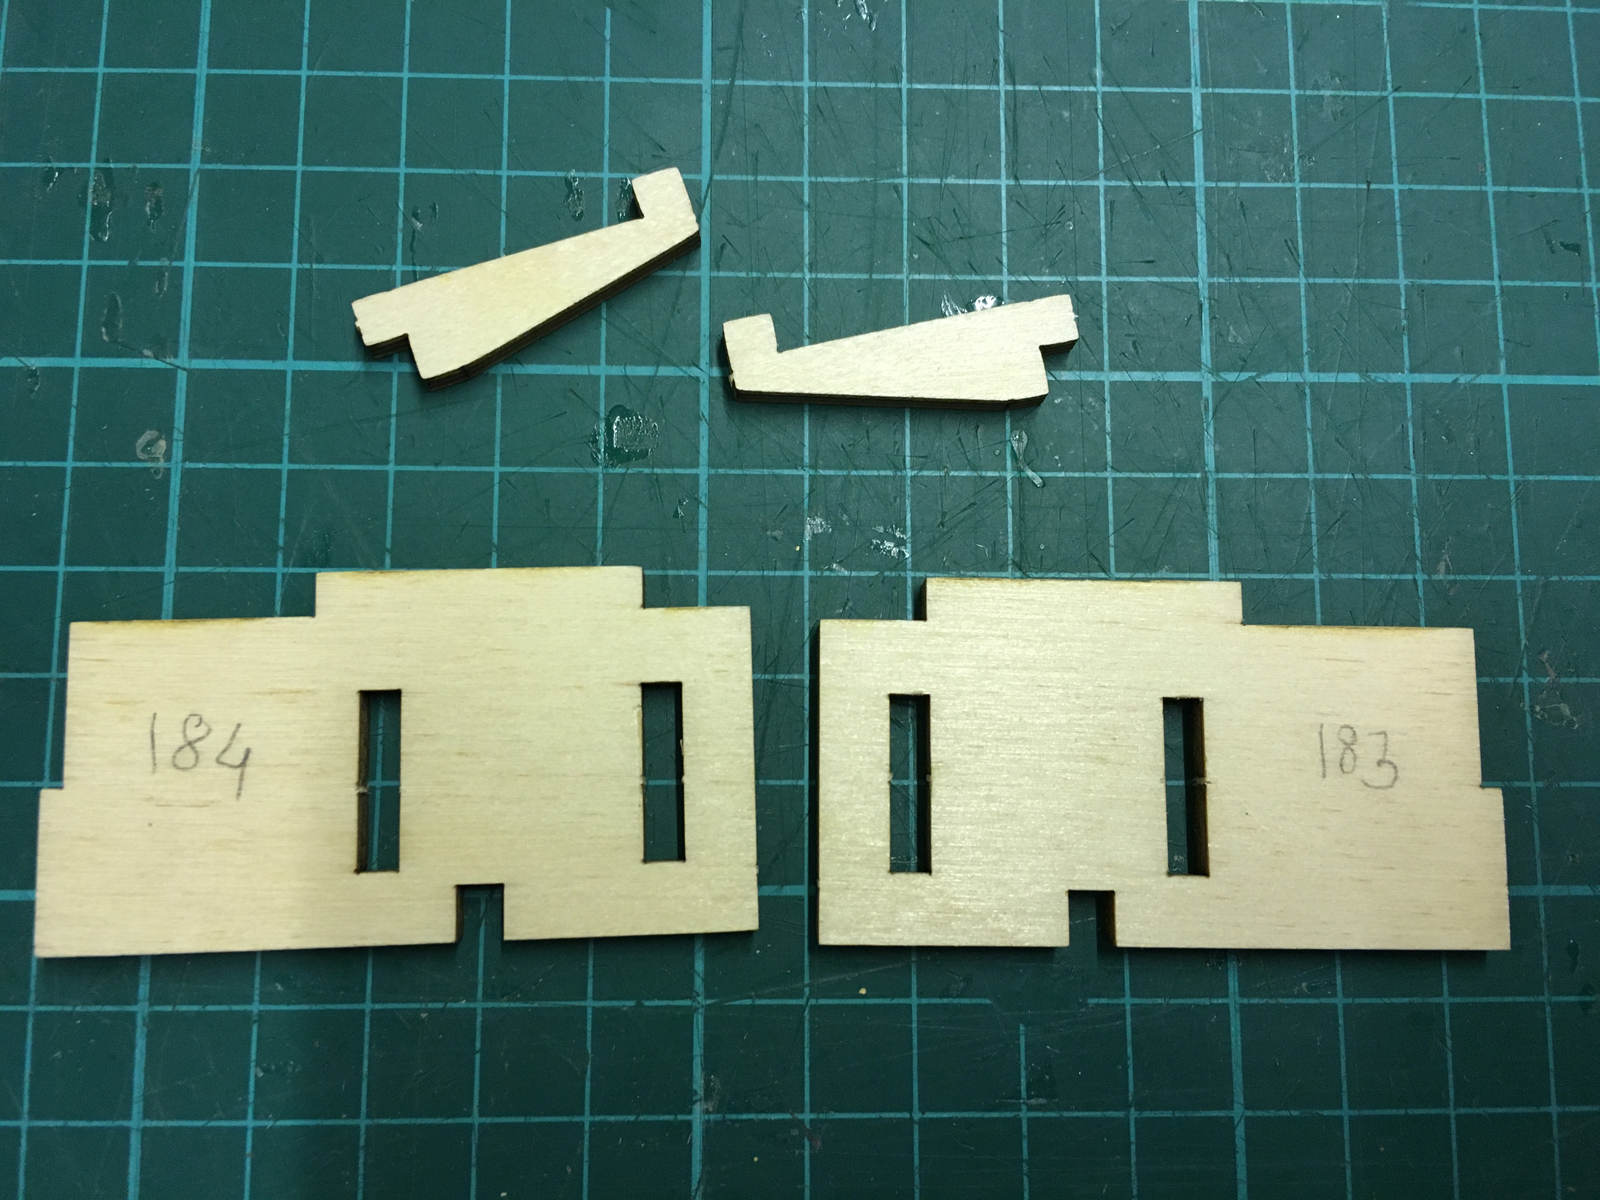
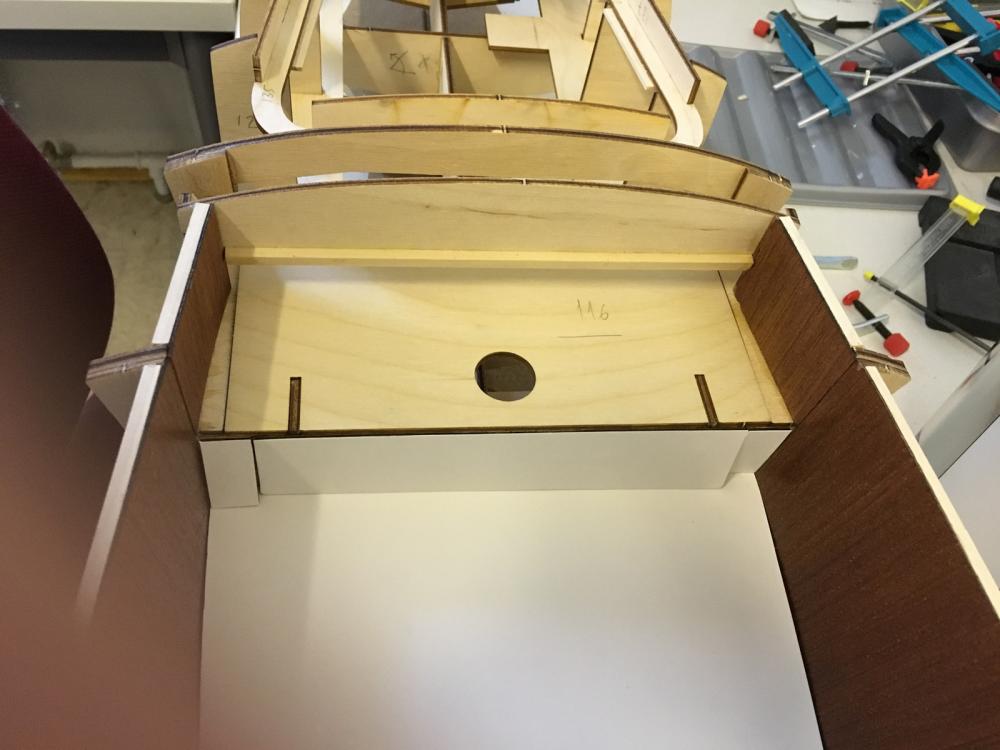
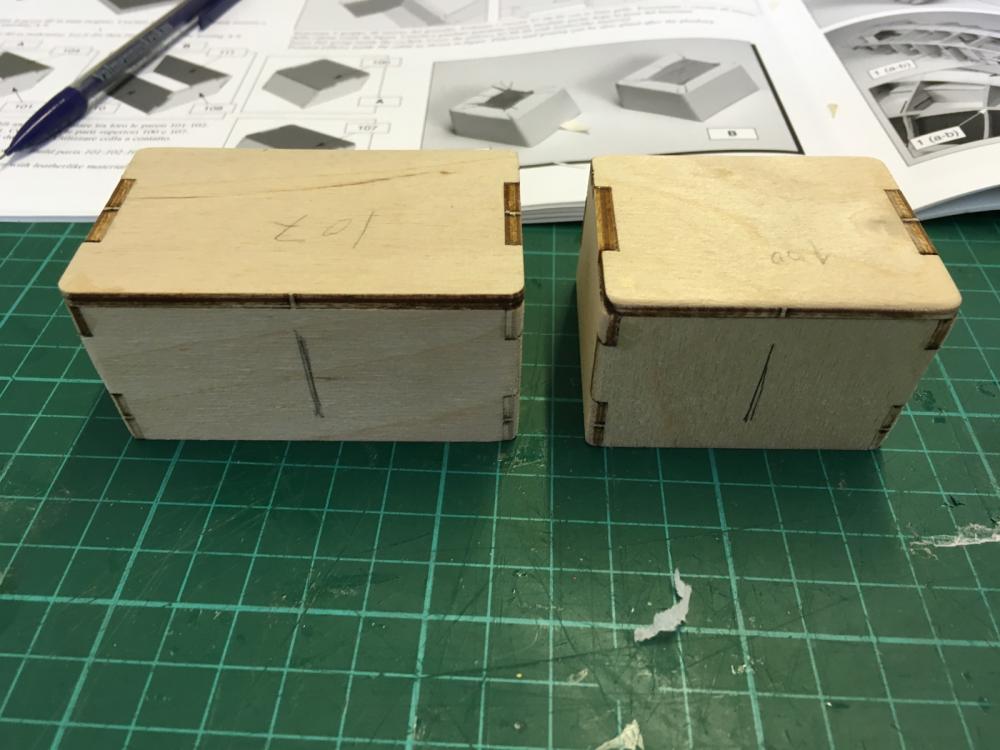
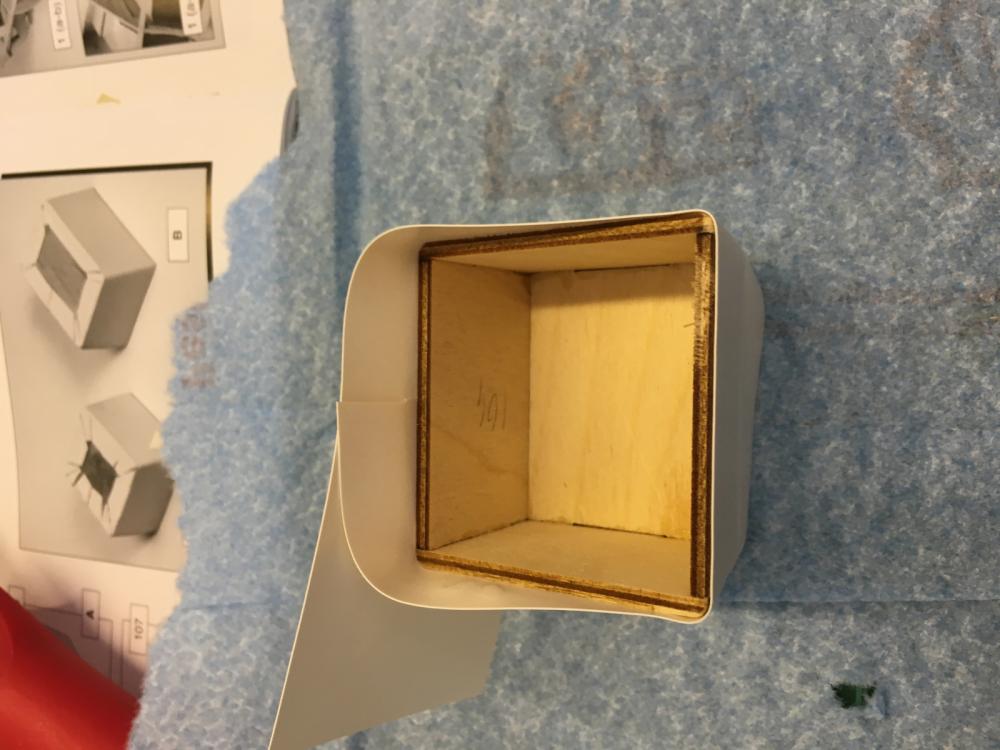
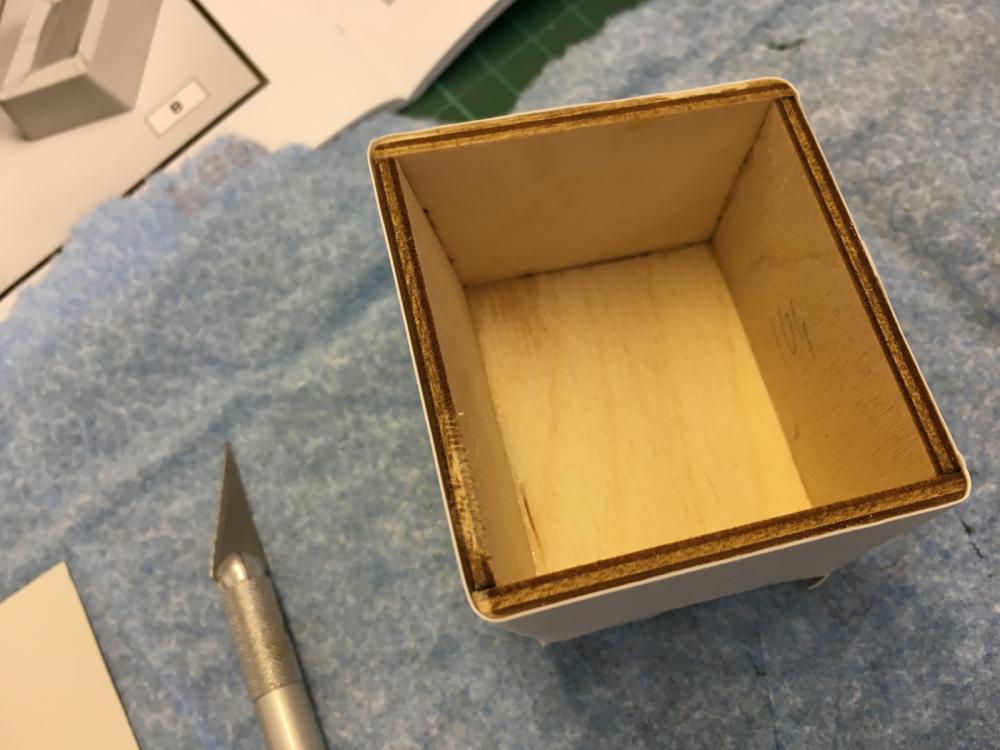
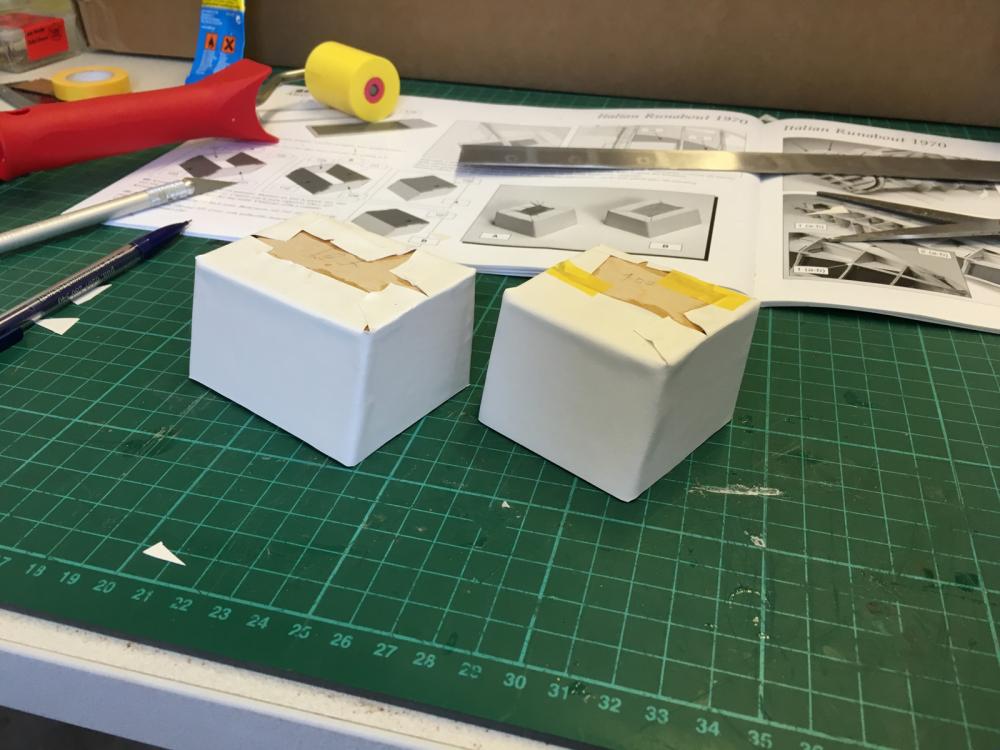
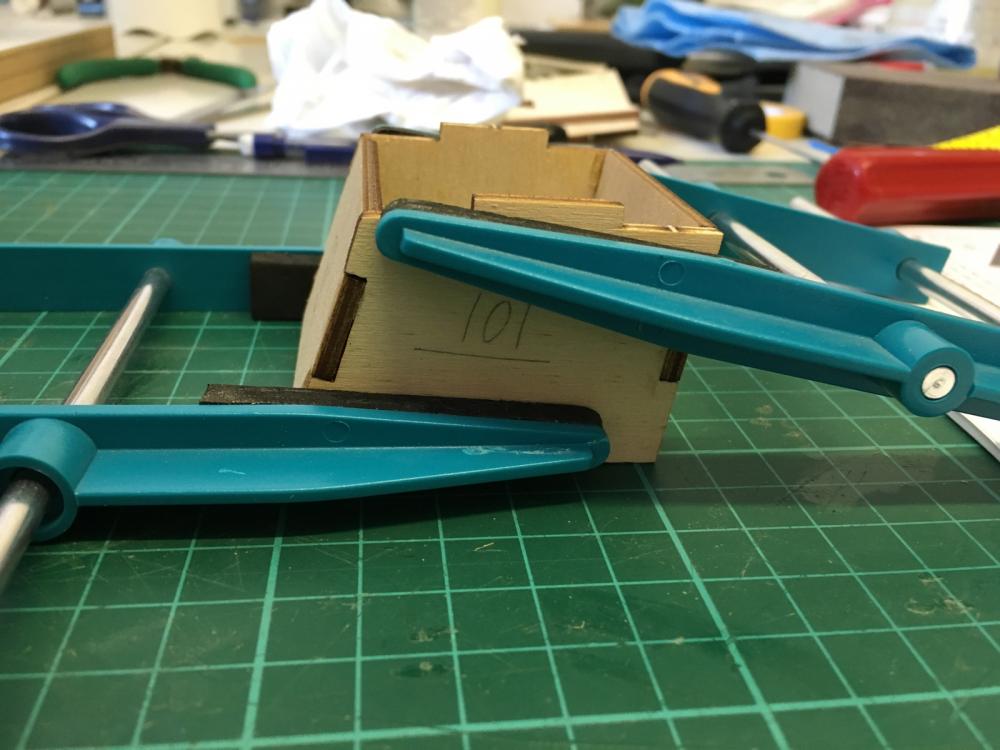
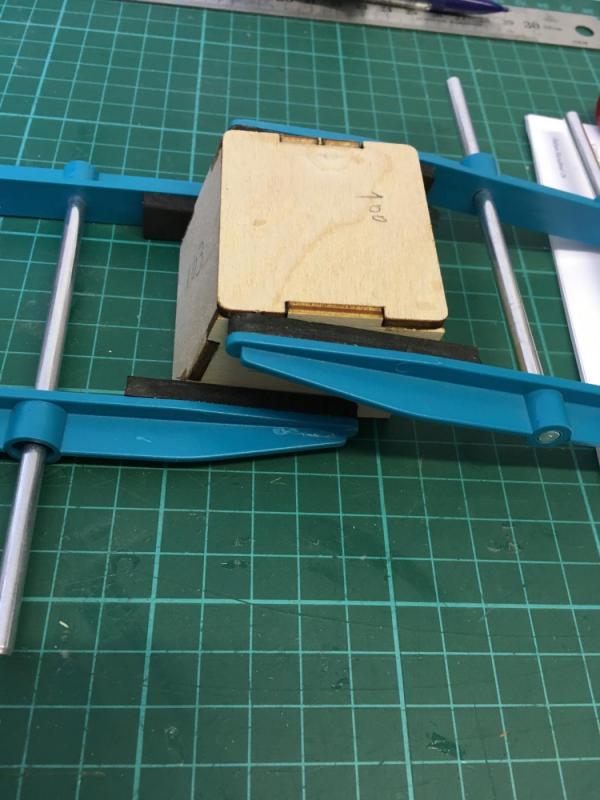
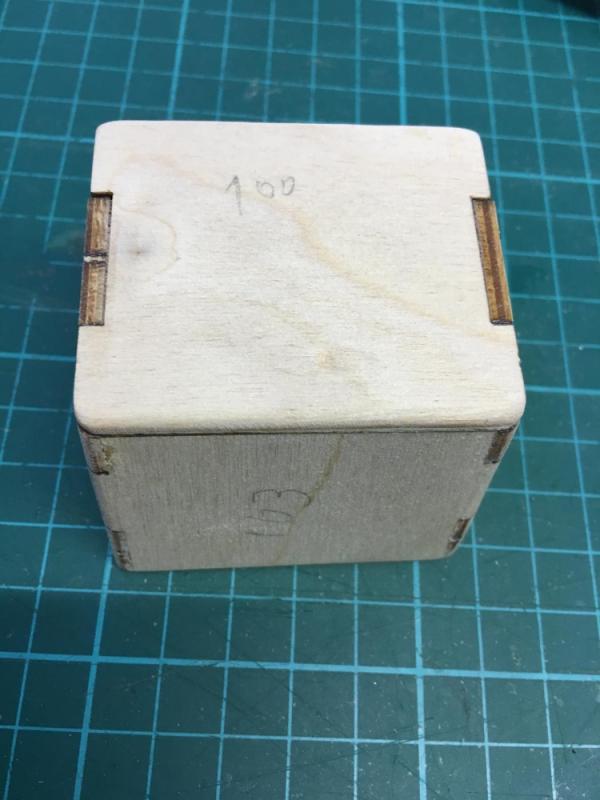
Parts for the two seat bases: I used the grids on the cutting mat to ensure that the shape keeps correct while the glue is curing: See the structure is not totally rectangular: The sharp corners need to be filed round to match the rounded corners of the lid: Done (showing one of the bases):


- 414 replies
-
- 6
-
-
- riva aquarama
- amati
- (and 2 more)
-
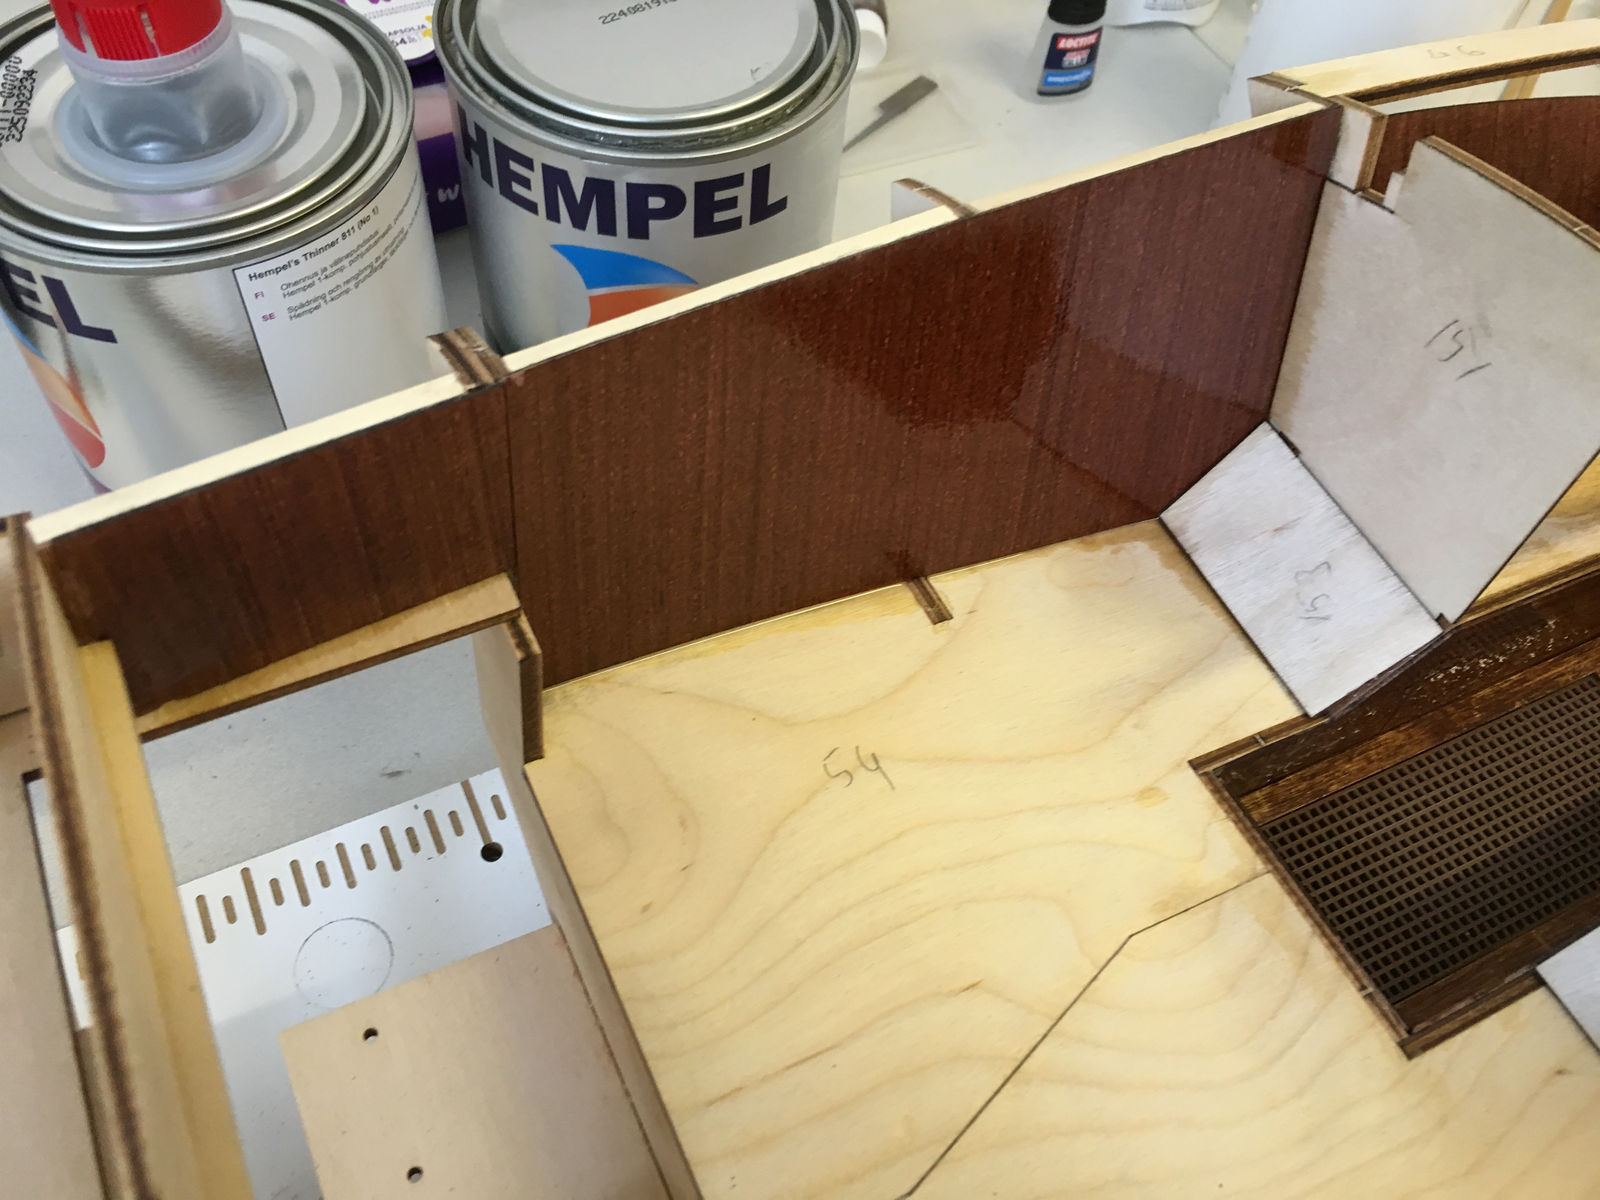
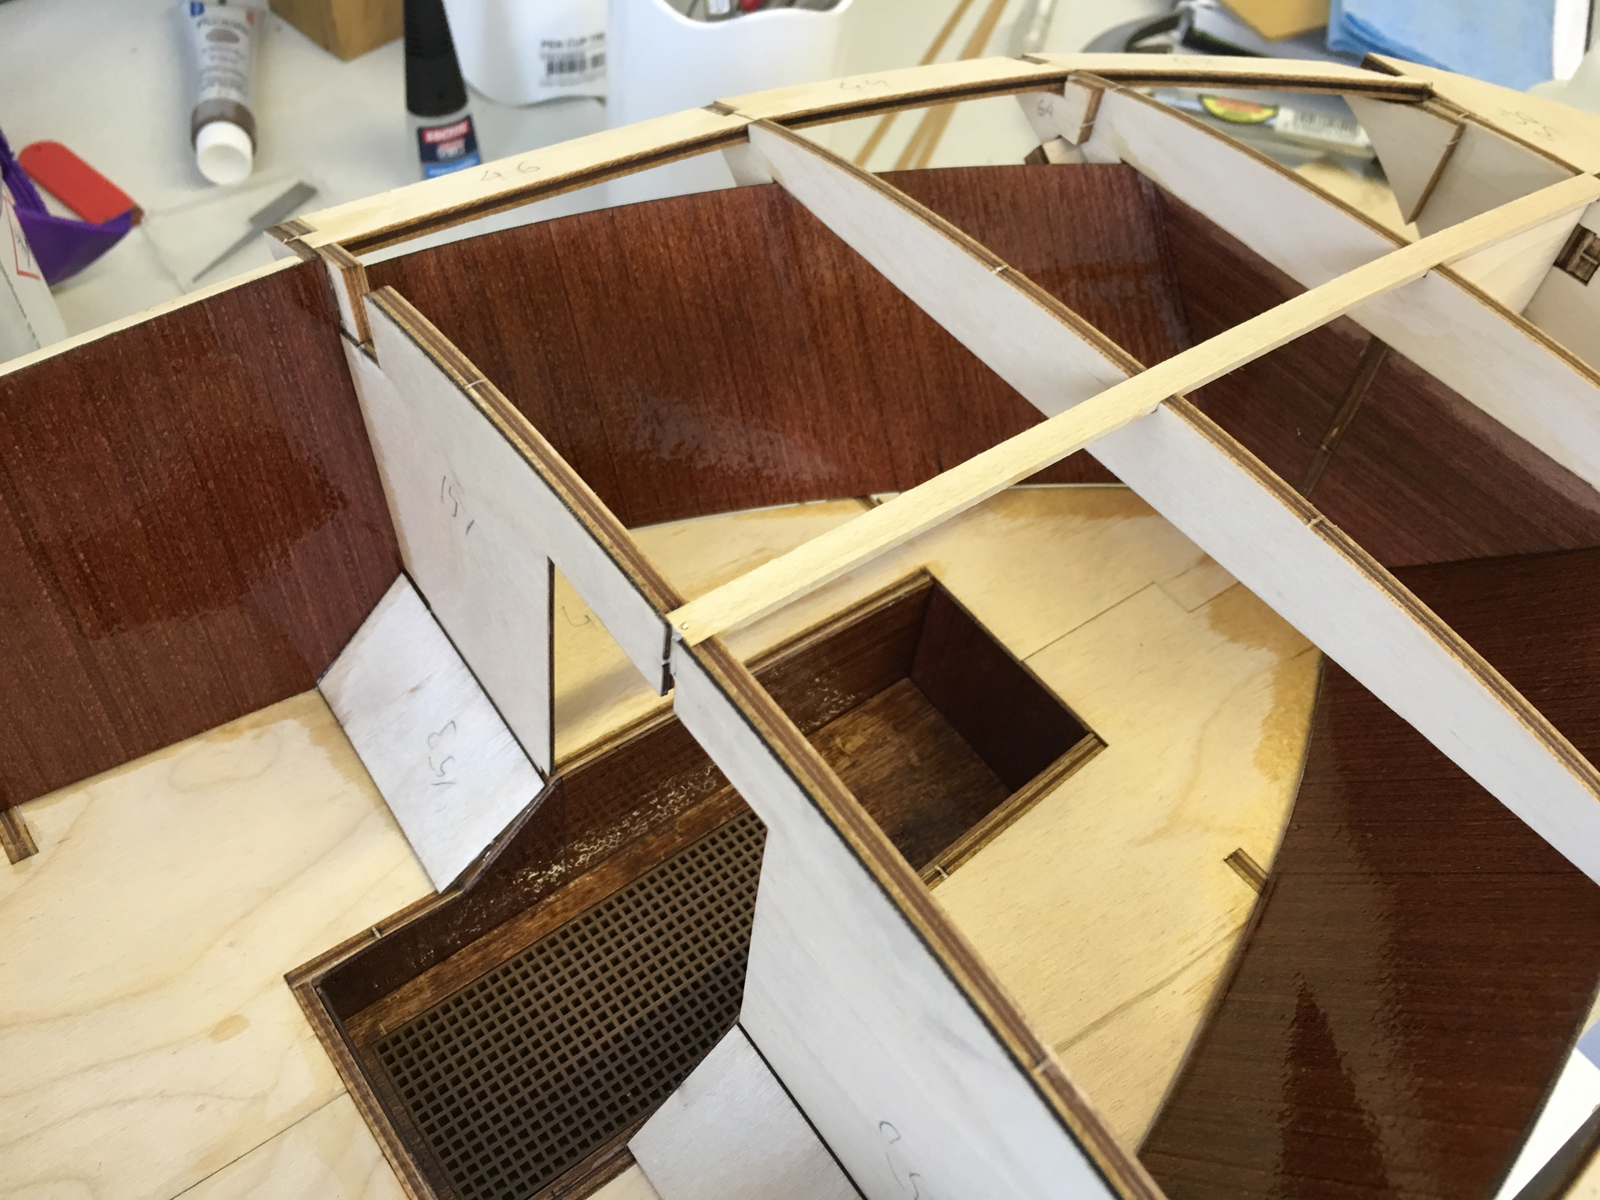
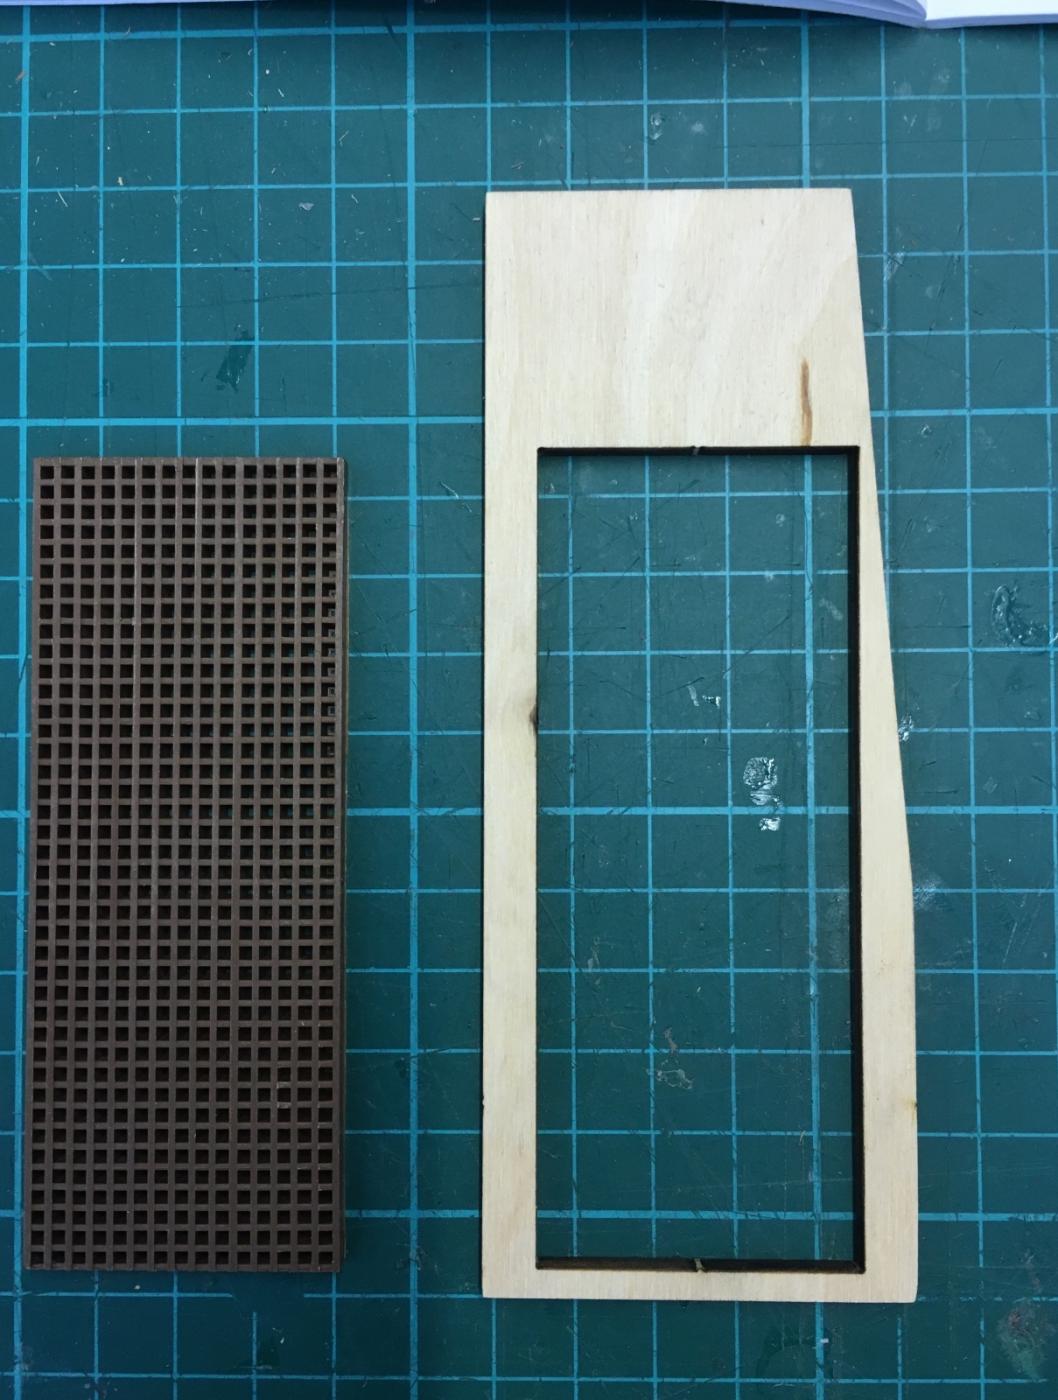
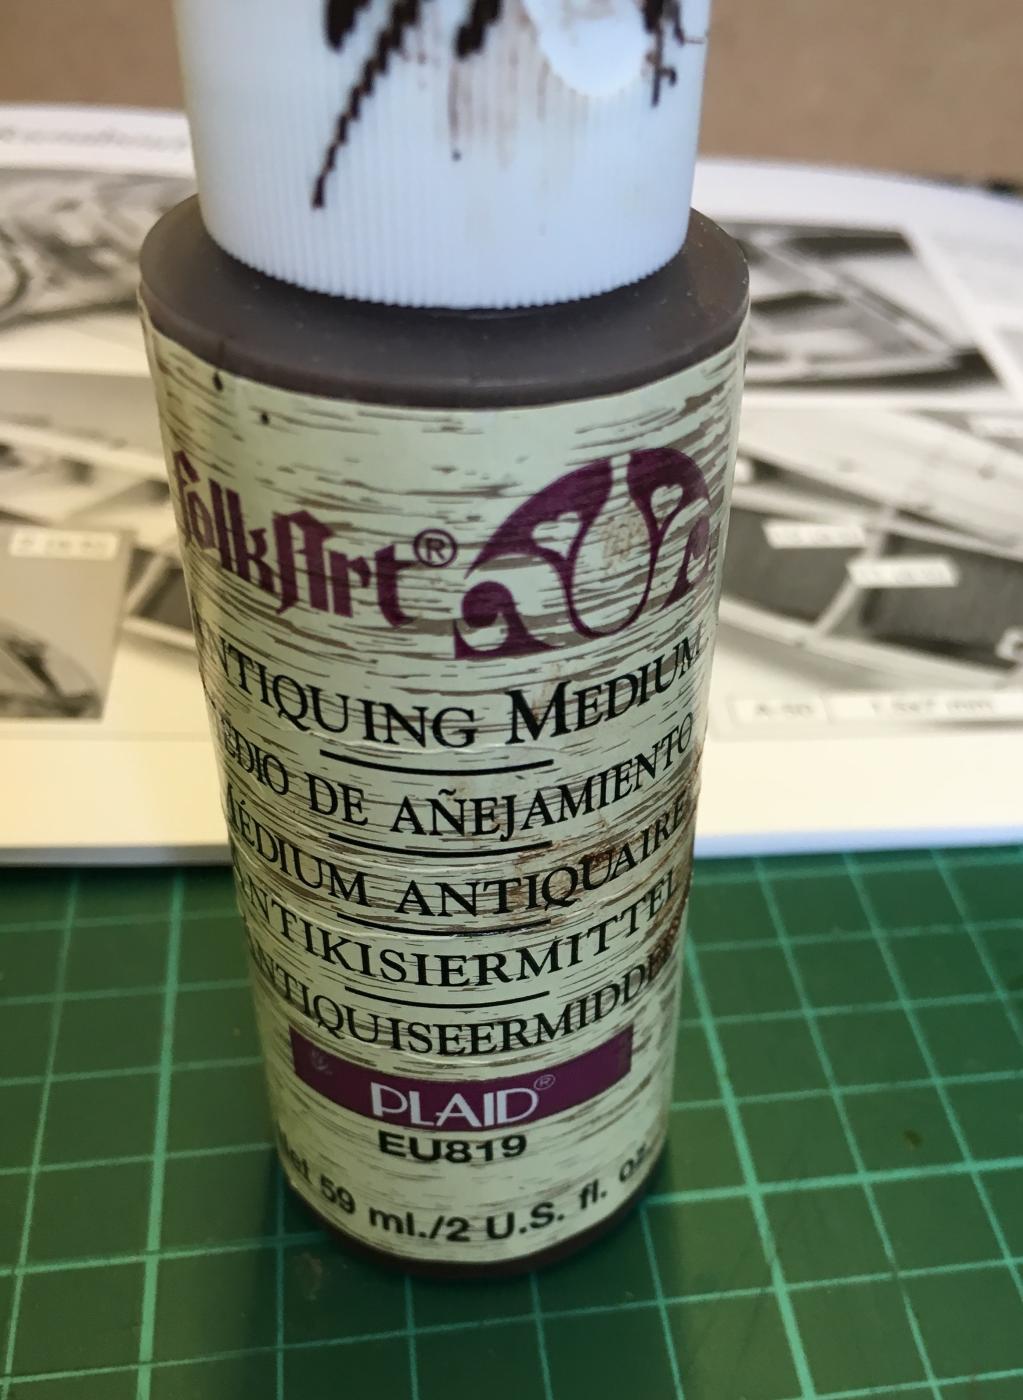
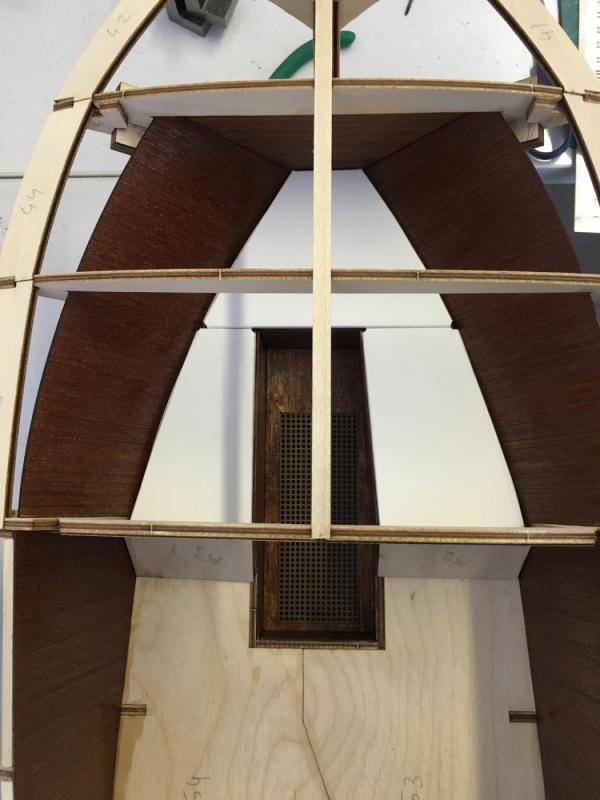
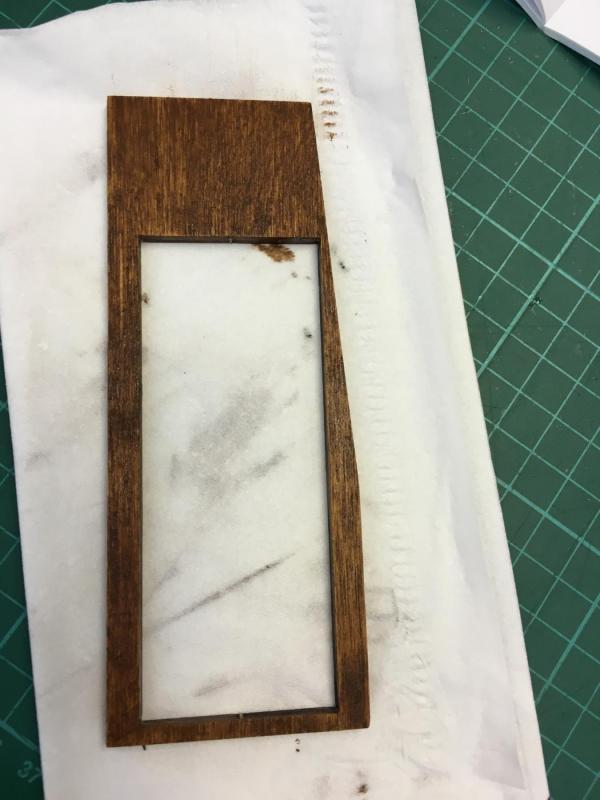
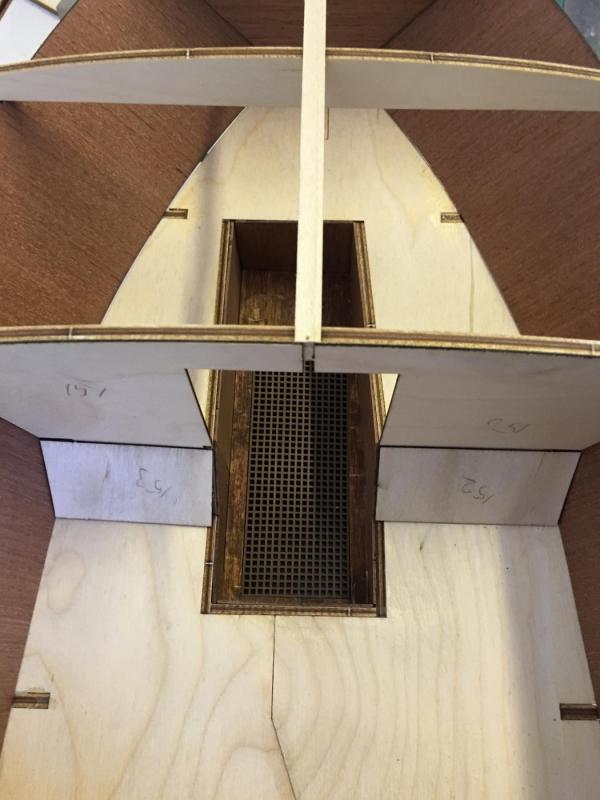
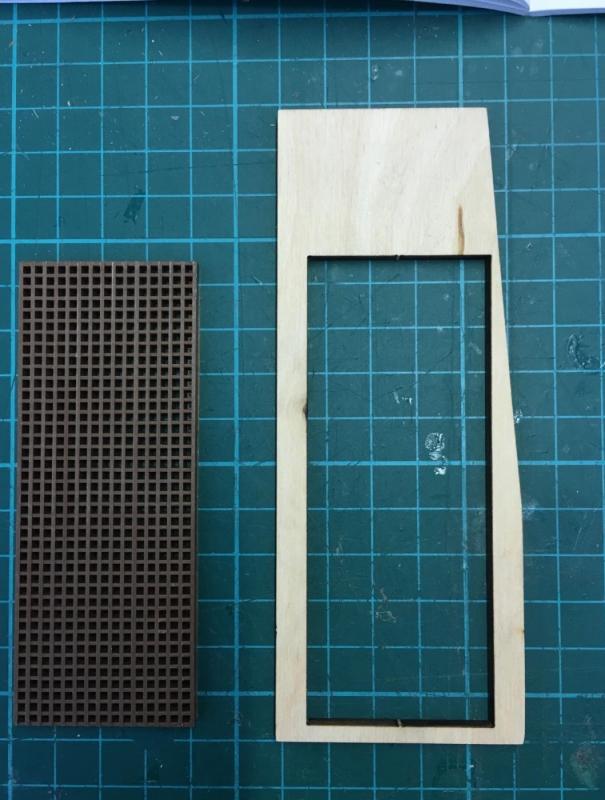
The grill in the compartment on the front with its frame. The frame is supposed to be stained with mahogany effect (why stain? Why not with a matching mahogany veneer just like everywhere else in the kit? I don’t know. Maybe the manufacturer thinks that because the compartment is hidden under the hood all the time it won't be at all visible normally). Luckily I had this “antique” stain left over from an earlier project (I had stained Bluenose masts with it, if I remember correct). Applied 2 layers with a paper napkin and it looks acceptable enough: Frame in place (using CA glue): And the component in place in the compartment (took some filing before it fit nicely):


- 414 replies
-
- 3
-
-
- riva aquarama
- amati
- (and 2 more)
-
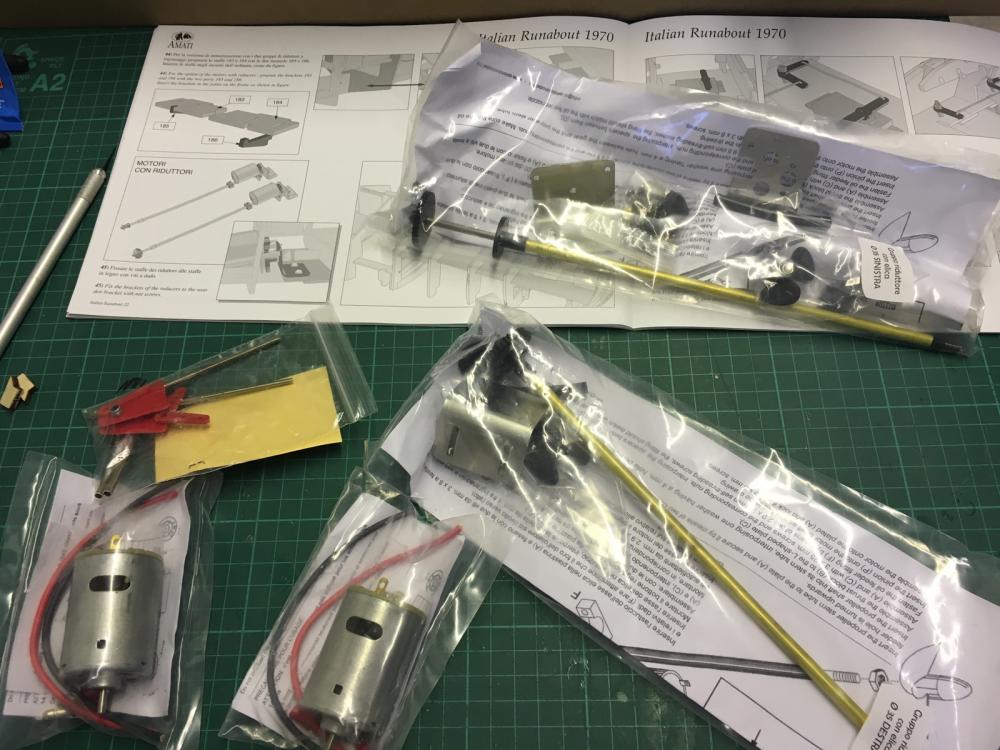
BUILD DAY 7. INTERIOR DECORATION, DRY-FIT Enough experimenting with the radio control gear for now, having duly noted the following: I will need to order a suitable servo, receiver, transmitter and a battery The propellers that come with this 390€ + 150€ kit are crap. They are plastic. I will order a pair of decent propellers (3 bladed, 35mm diameter, M4 screw fit, 1 left hand and 1 right hand drive), most probably brass. I will be using reduction gear Engines are working (tested with a 9v battery) I will move on to task of building the interiors, which I had stopped before. I have decided to use the “leather-like” material for the floor, seat base, and dash. I realized that a faux leather sheet would look fine, but with a significant fact: it will have the patterns of a 1:1 scale. At 1:10 scale the leather patterns should look much smaller, hence use the “leather-like” sheet, which came with the kit, looking like a better option in terms of scale. I am not sure about how to decorate the seats just yet. I am still looking around for the older version of those seats, which use real fabric and look more realistic than the plastic ones in the new version. Anyway, here we go today:
- 414 replies
-
- 2
-
-
- riva aquarama
- amati
- (and 2 more)
-
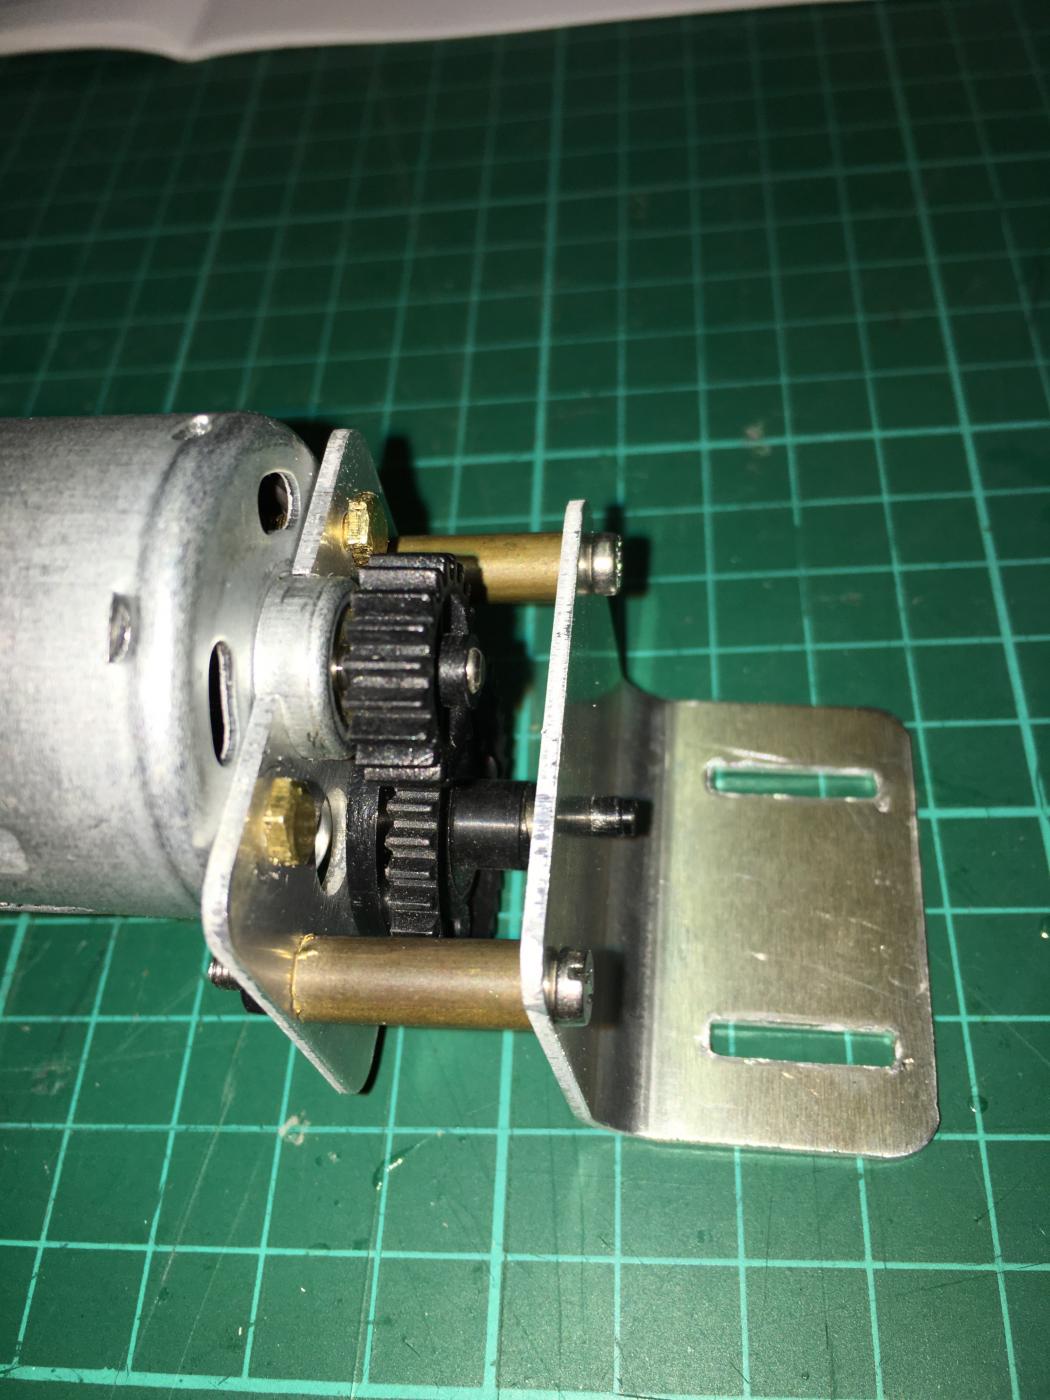
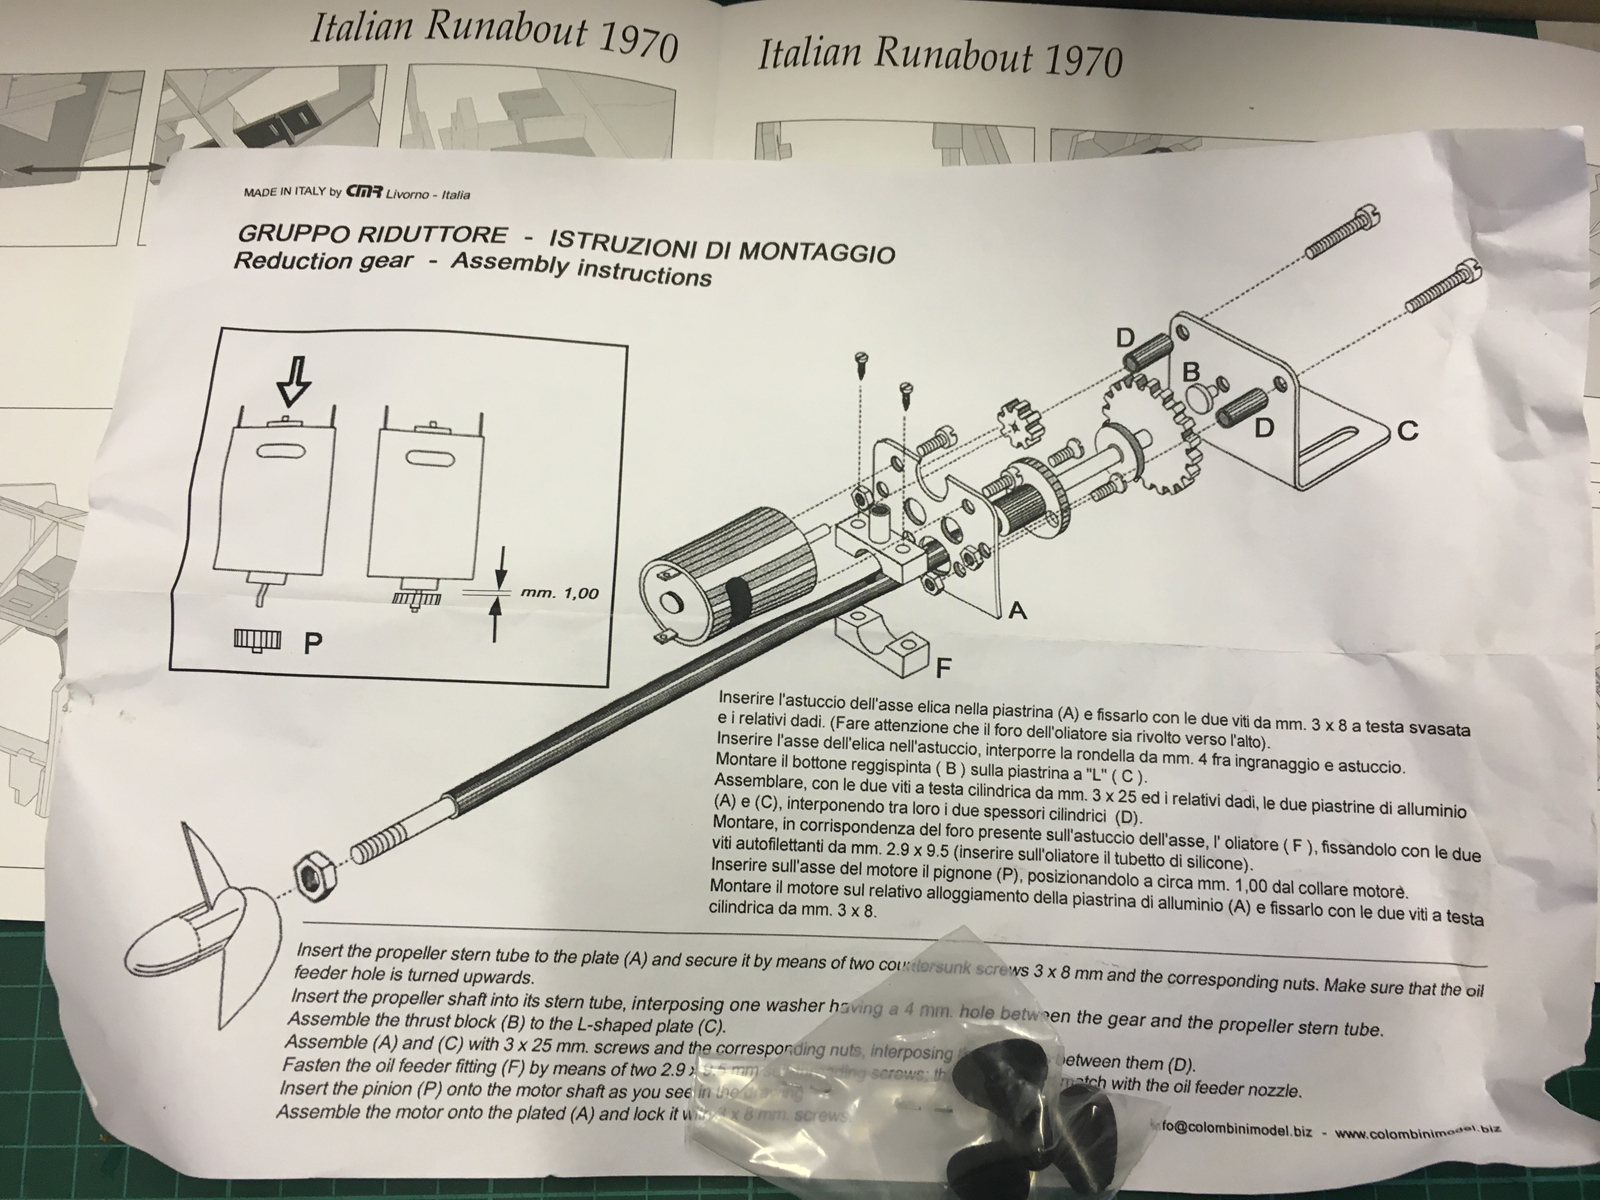
Hi Keith, I was curious also after your question and I counted the pitches. The gear ratio is 20/38, in other words roughly reducing by 1/2.
- 414 replies
-
- 3
-
-
- riva aquarama
- amati
- (and 2 more)
-
Nice going Grant, watching your build log gives me motivation to continue every time when I feel troubled with mine. I'll keep following all the way! /Aydin
- 339 replies
-
- 4
-
-
- dumas
- Chris-Craft
- (and 3 more)
-
Yes, wive's bribe is often omitted in the total cost calculation of such hobbies, good that you've already realized it . Though I assure you you'd save some if she'd seen a few photos of the finished model, as this is a definitely SAF-10 stuff (Spousal Acceptance Factor of 10, I mean) .
- 414 replies
-
- 6
-
-
- riva aquarama
- amati
- (and 2 more)
-
END OF BUILD DAY 6. 3:30 hours today. 20.5 hours into build in total. This is the end of DAY6 .Thanks for watching.
- 414 replies
-
- 1
-
-
- riva aquarama
- amati
- (and 2 more)
-
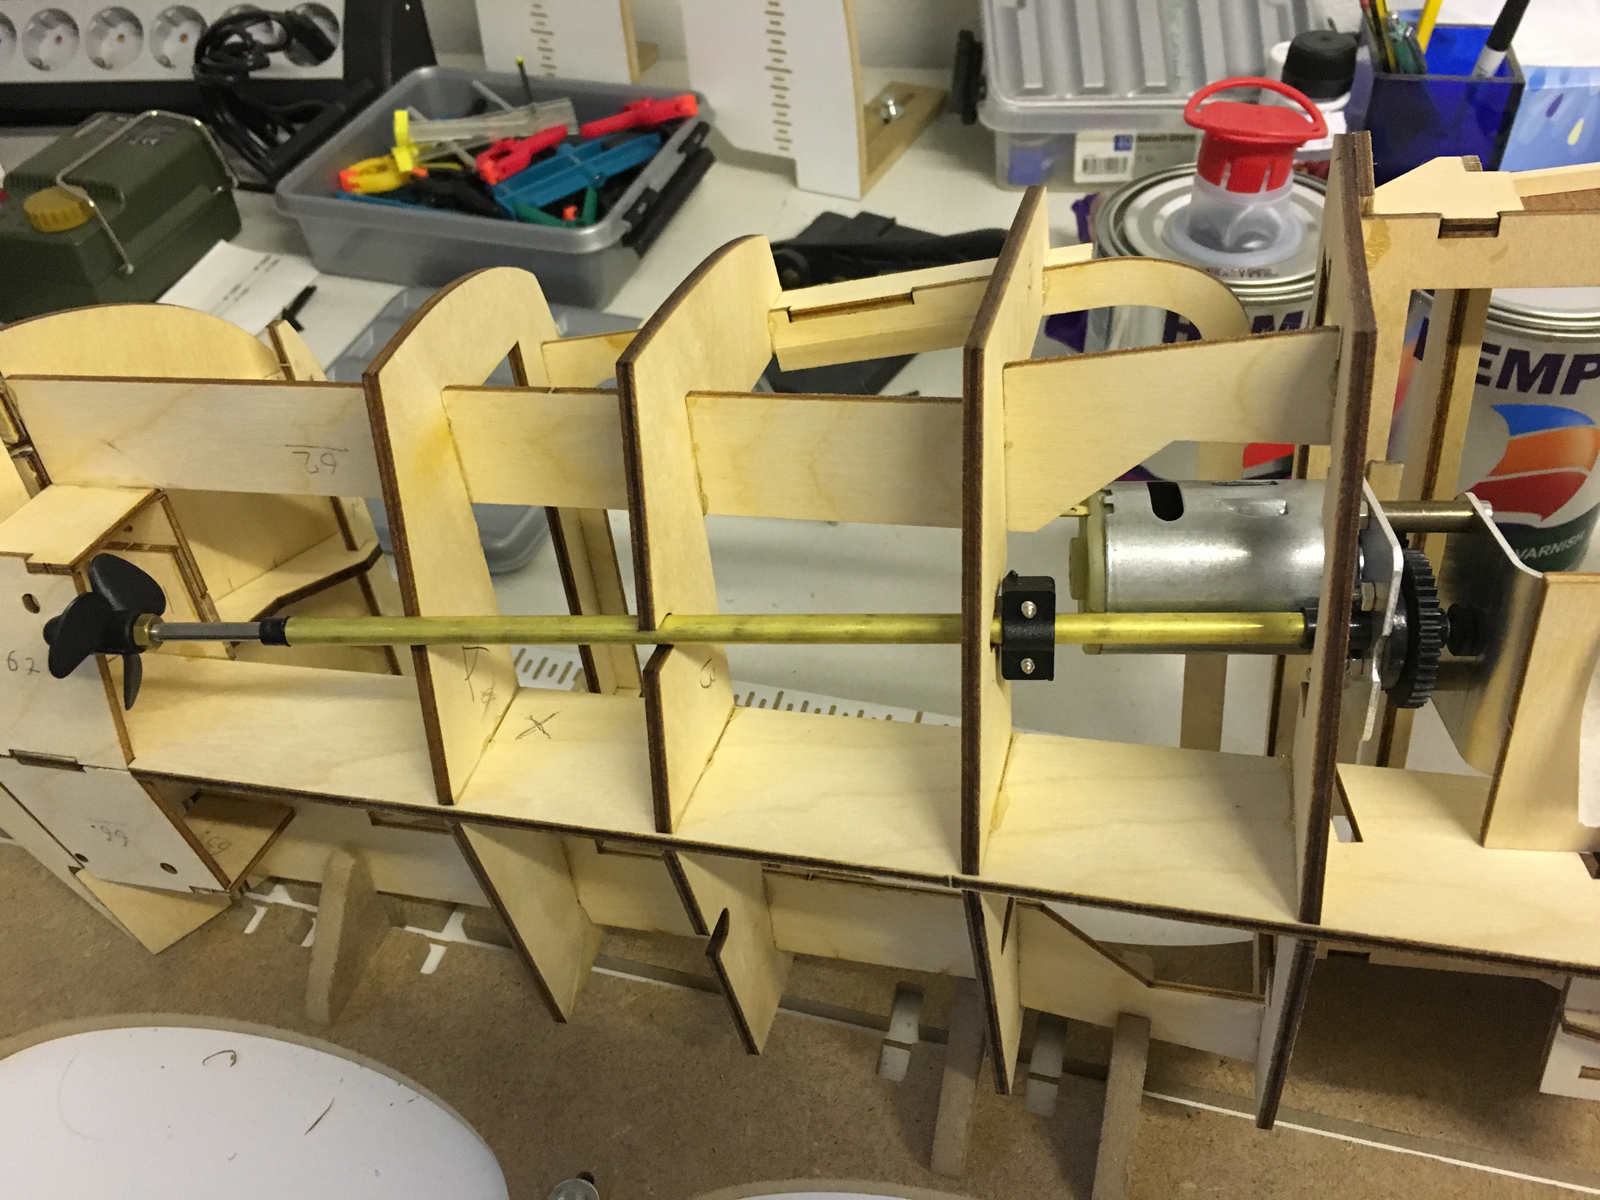
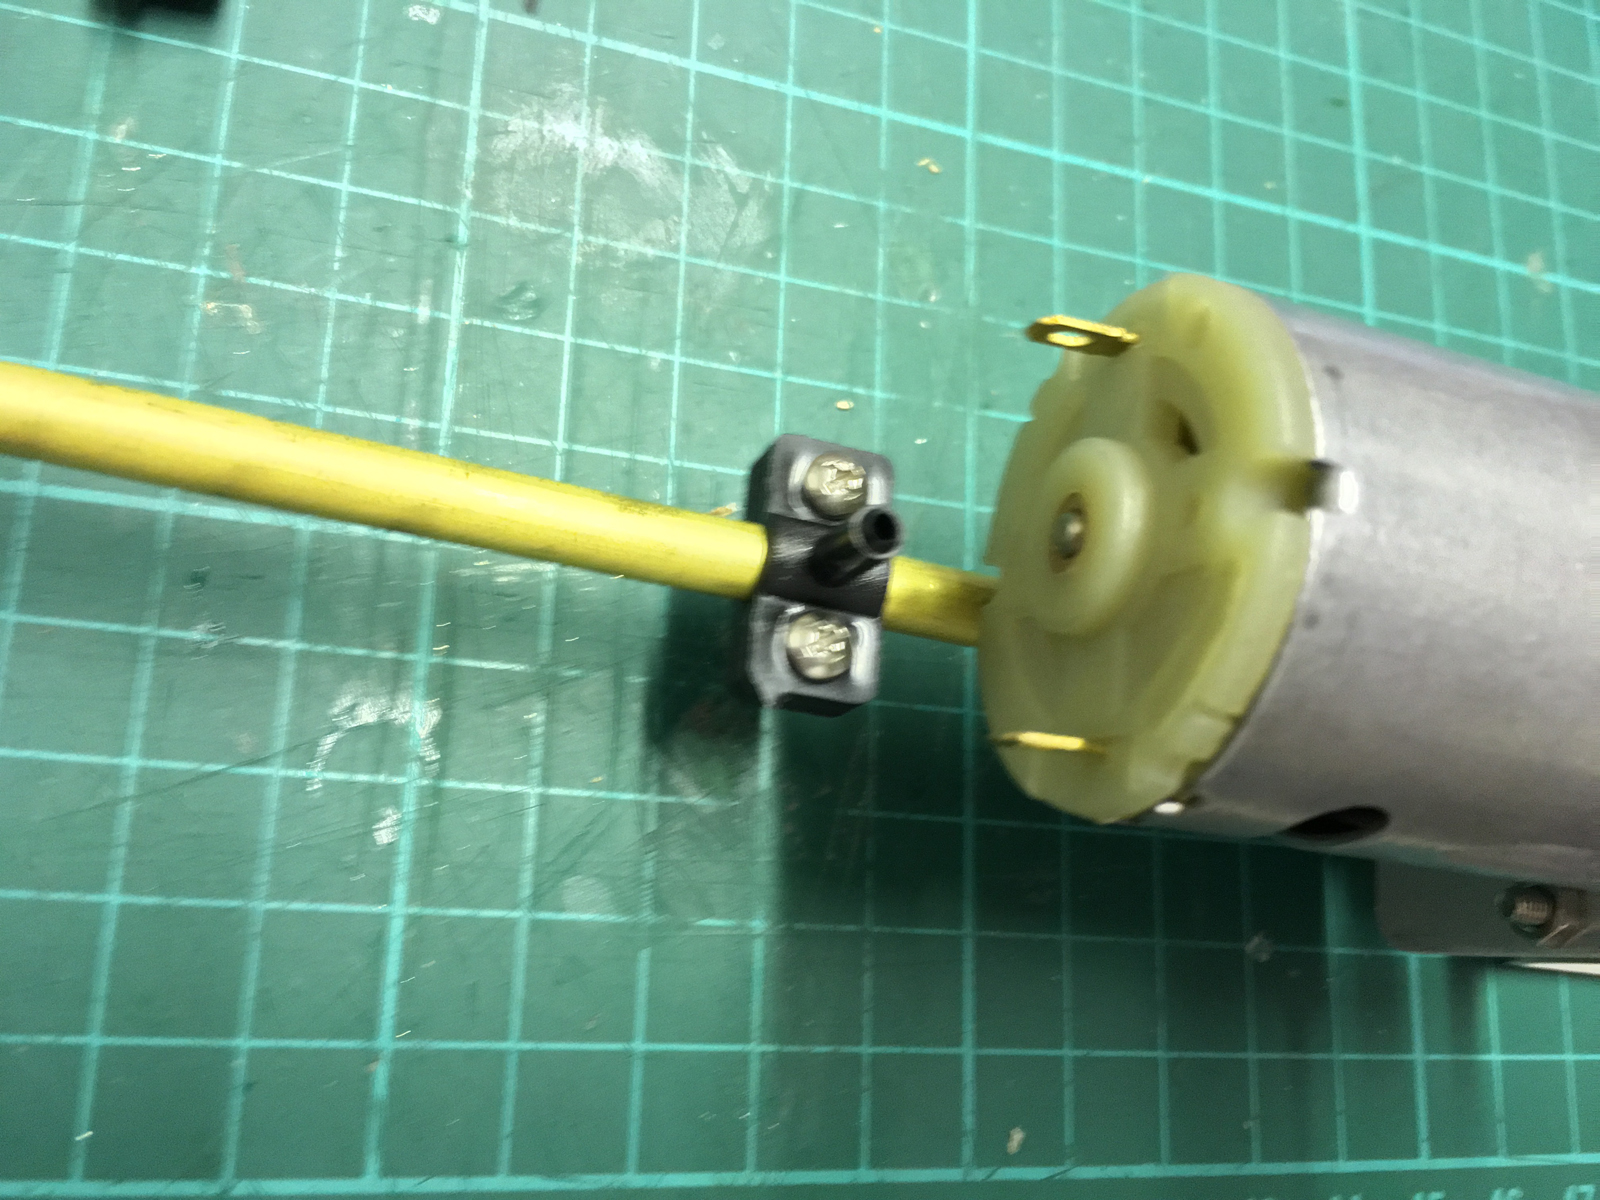
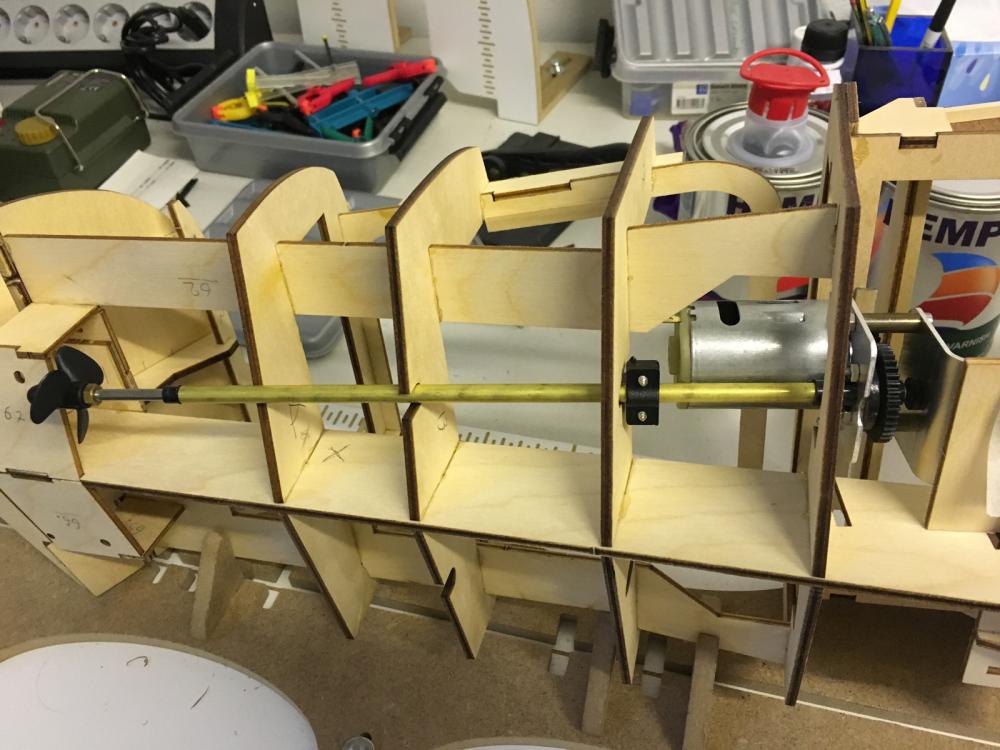
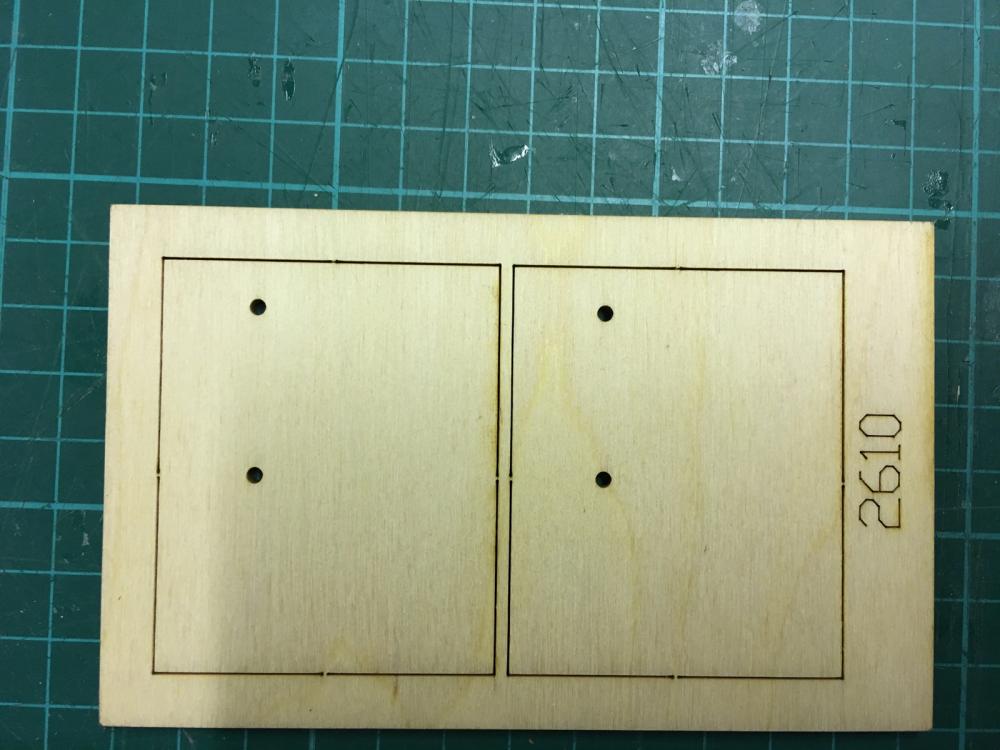
This is the construction to go for reduction gear option: Base for the brackets (the holes are for screwing the brackets to the base) .. in place One of the motors dry-fitted:


- 414 replies
-
- 6
-
-
- riva aquarama
- amati
- (and 2 more)
-
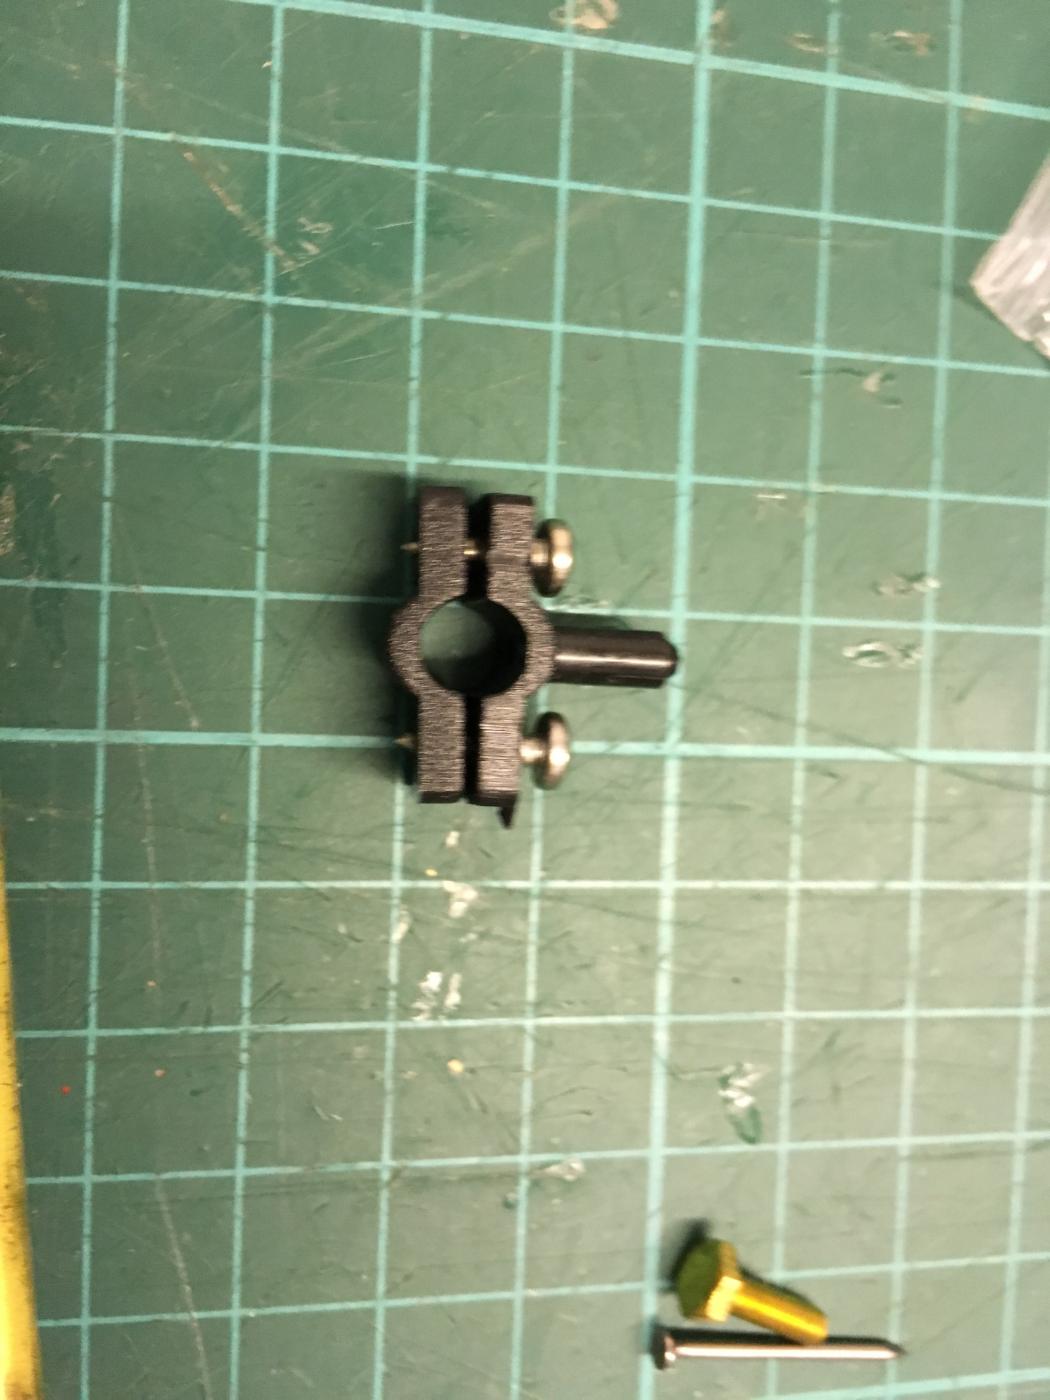
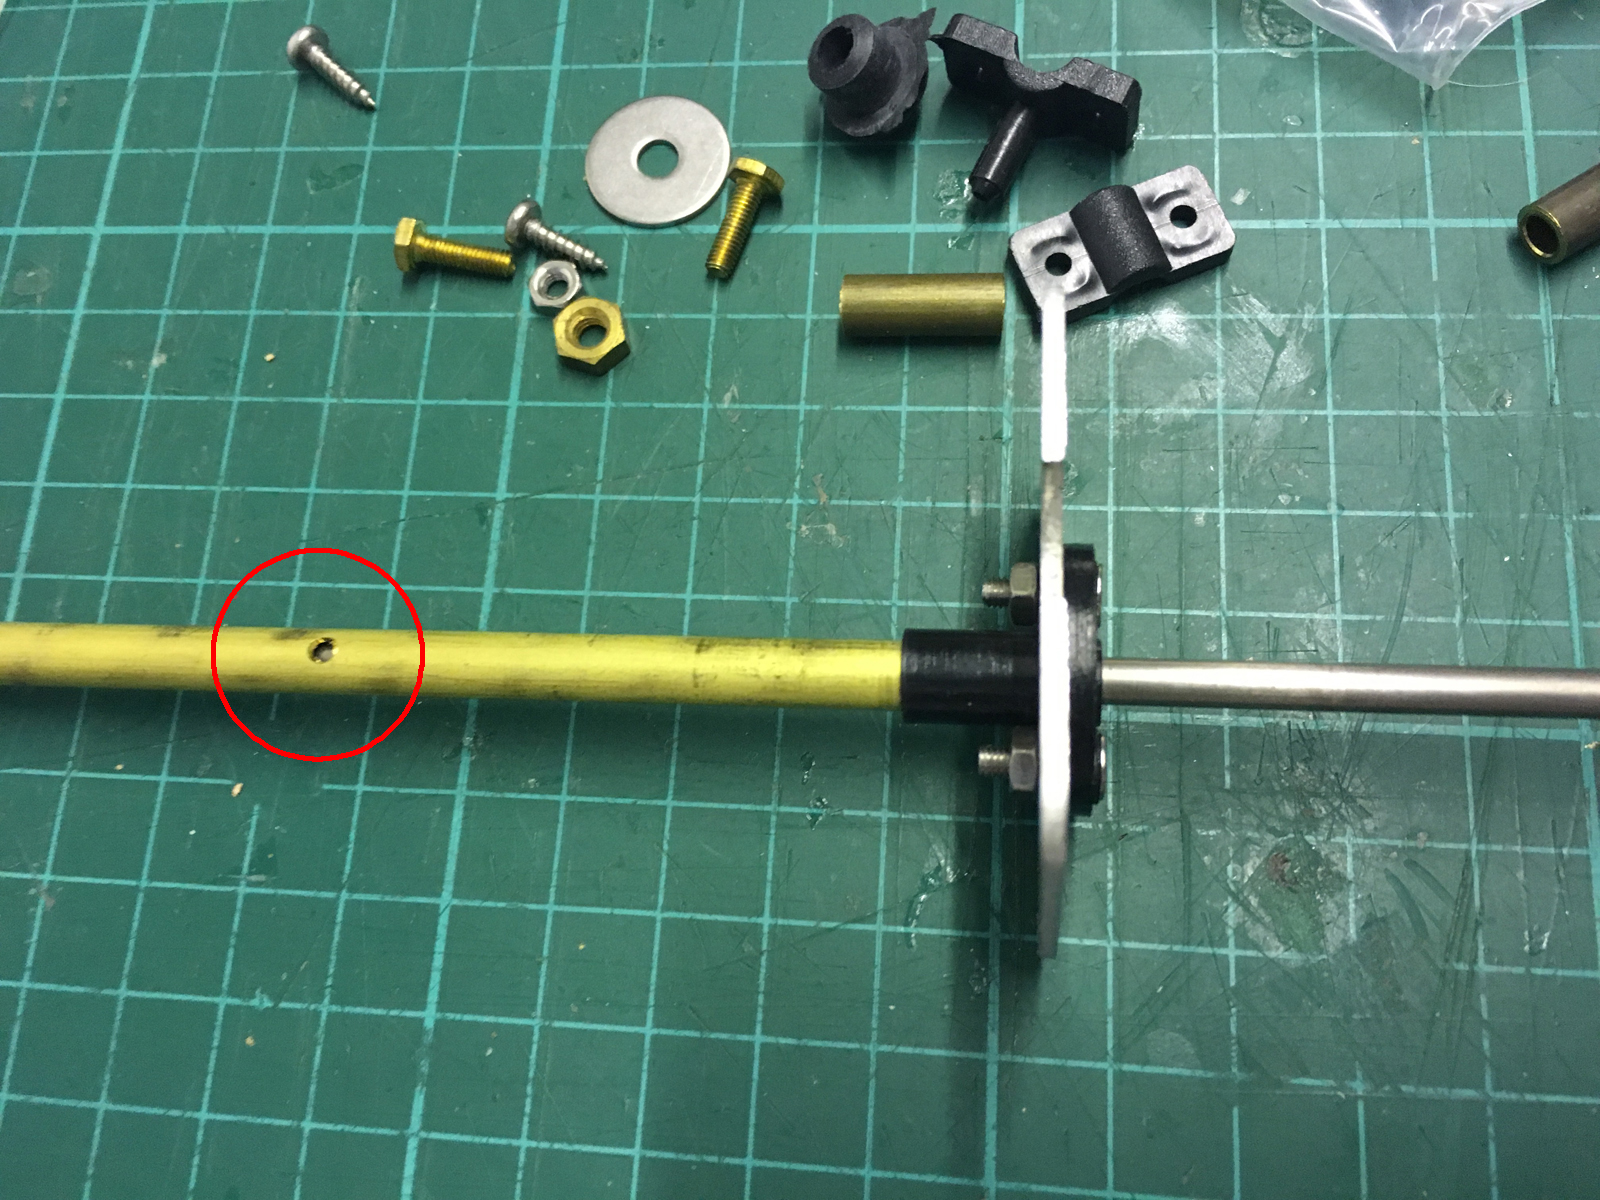
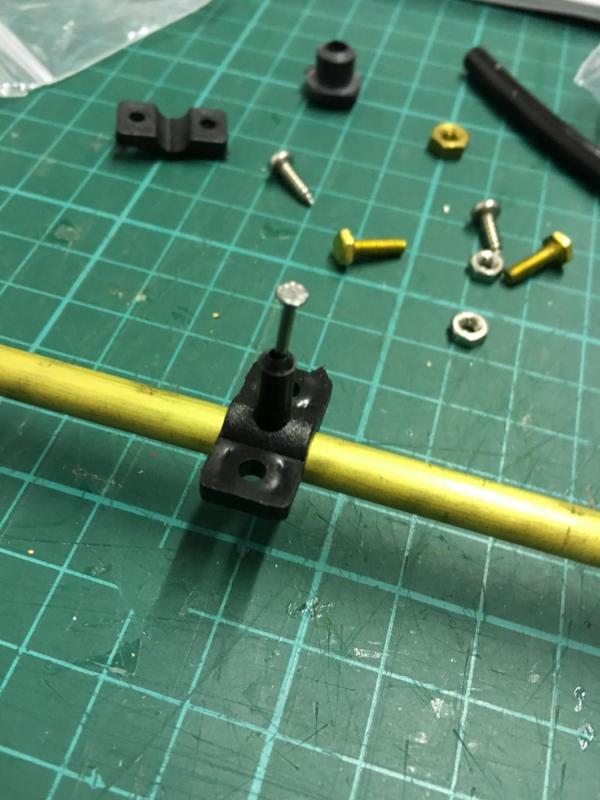
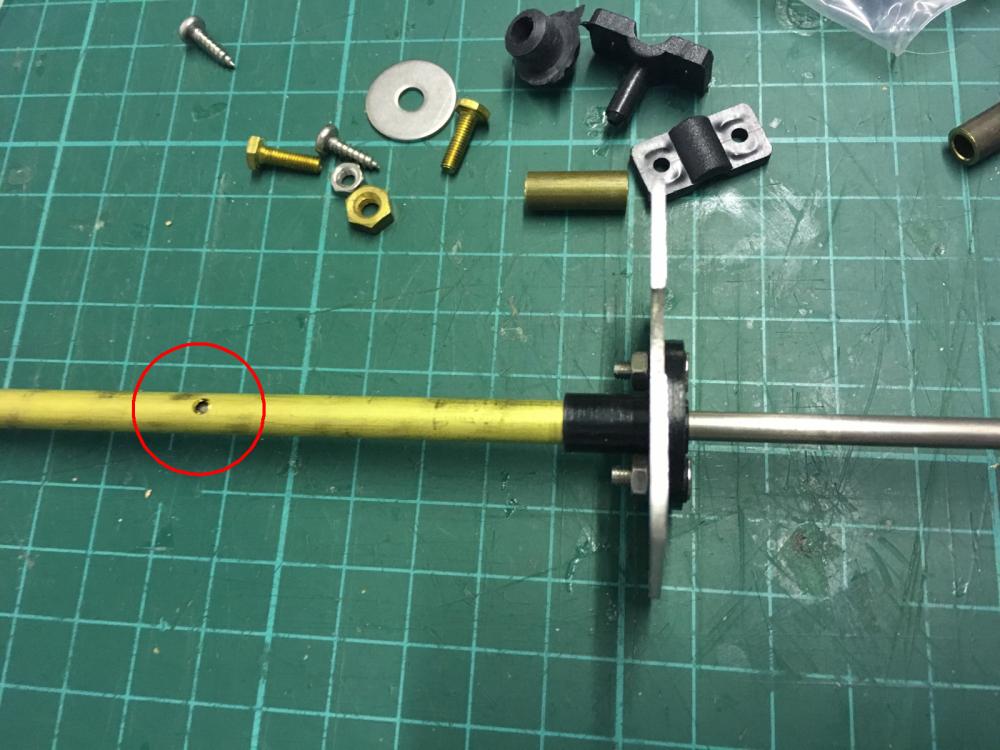
Fixing the oil feeder fitting with the help of a nail to help align the hole. POST NOTE: The fitting will move back and forth lots of times during installation no matter how tight you fix it, therefore do not worry too much about the precision. You can always use a nail (or something similar) to fine-tune it after installation. It will however make your task easier if you fix it as close as possible at first.


- 414 replies
-
- 3
-
-
- riva aquarama
- amati
- (and 2 more)
-
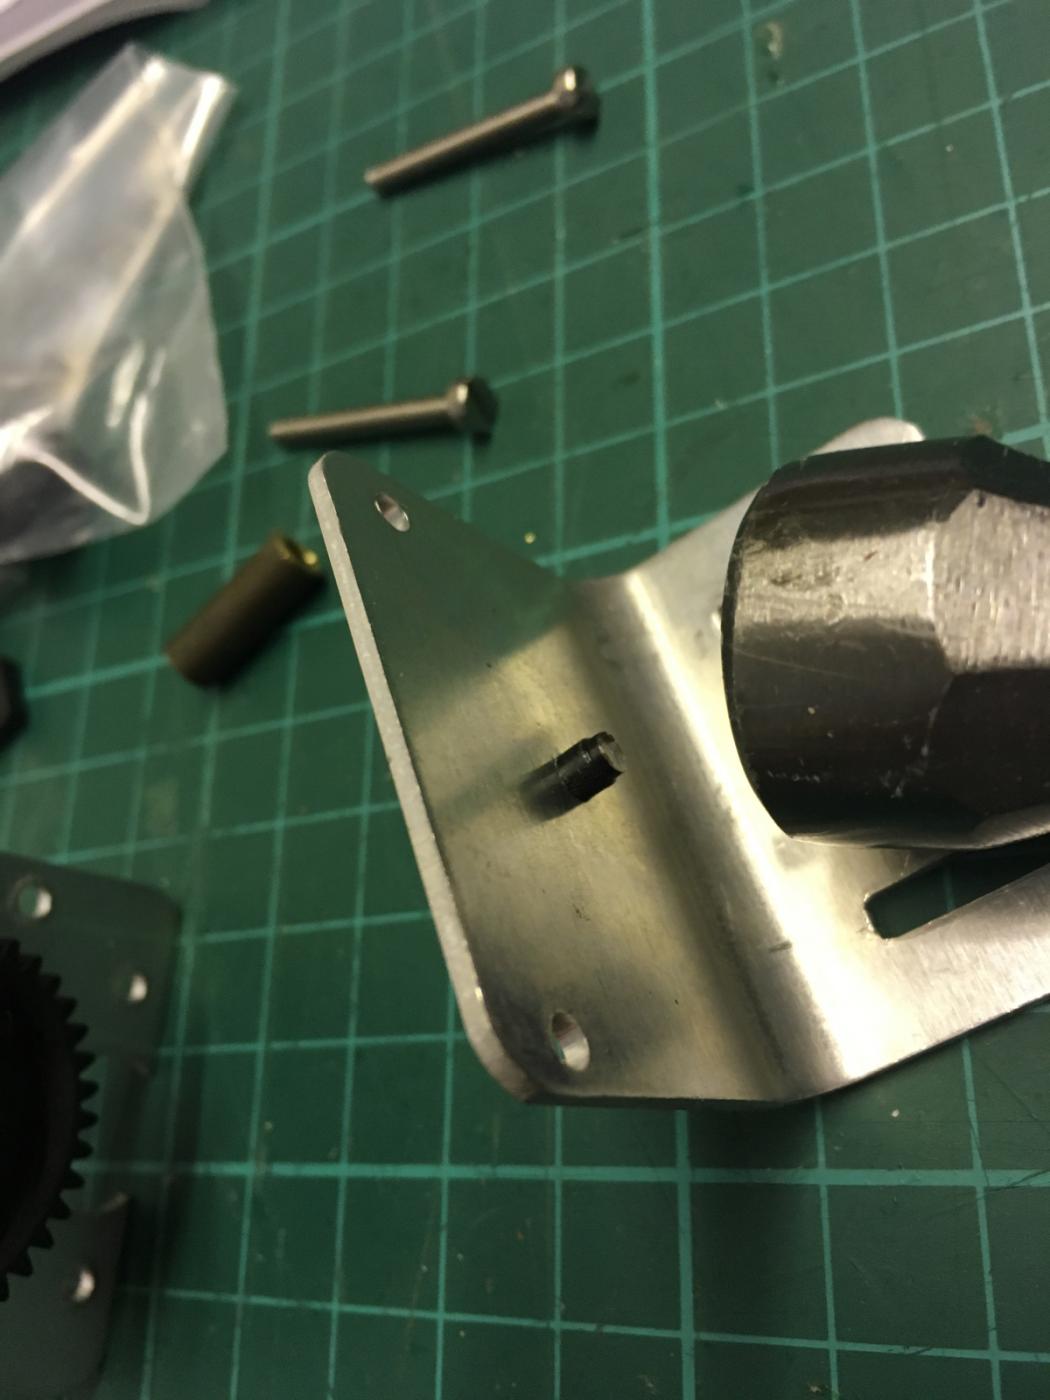
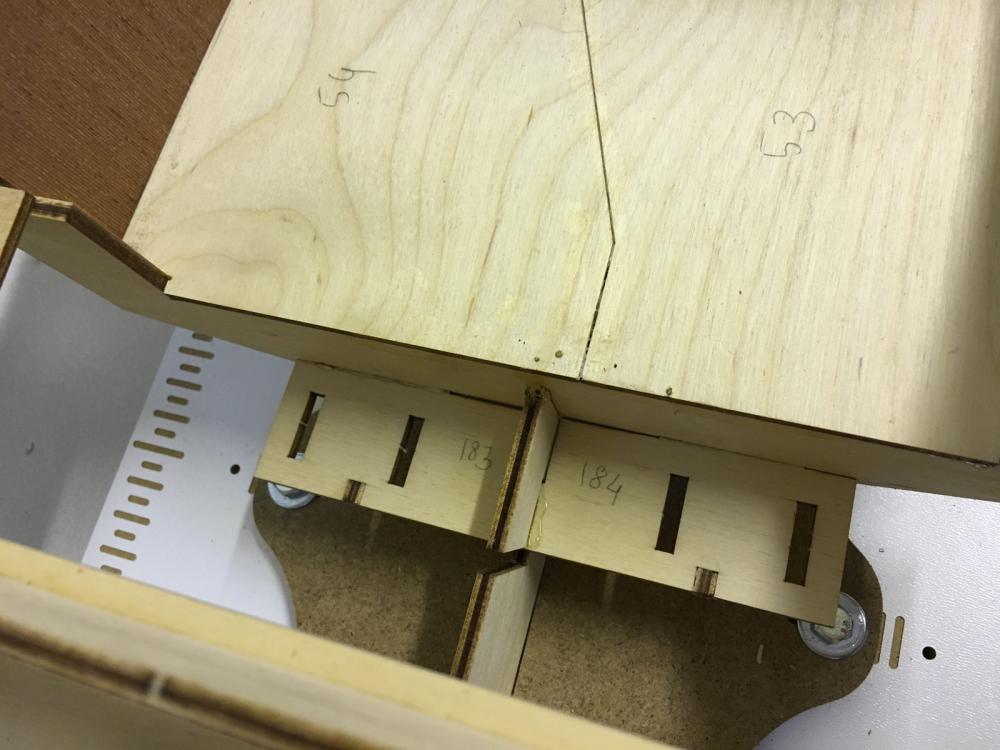
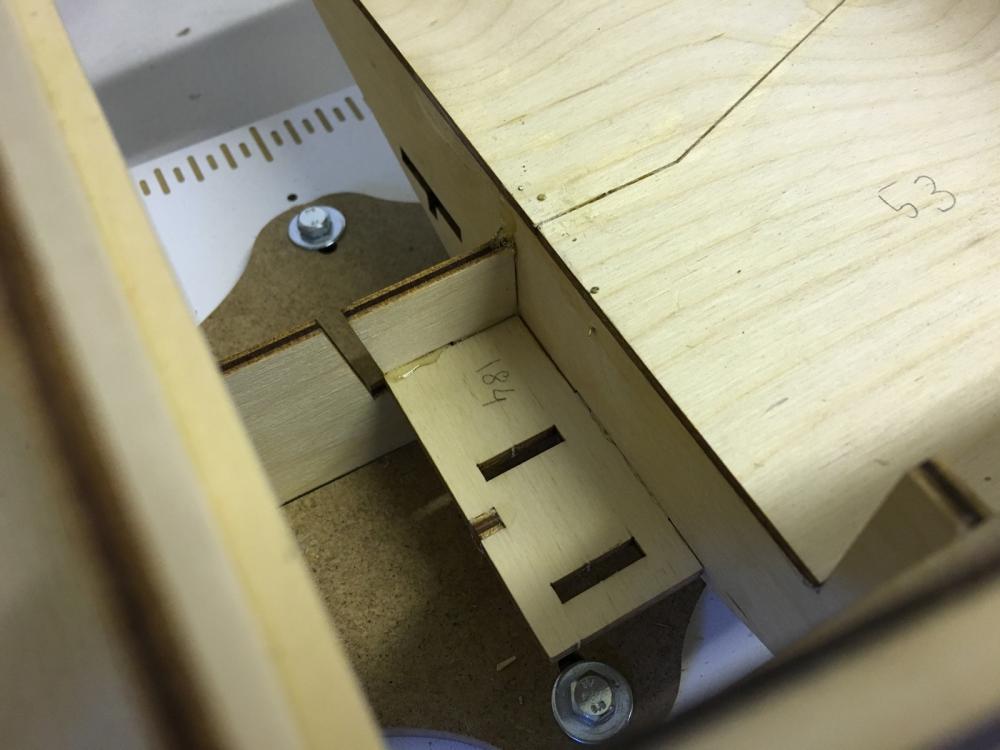
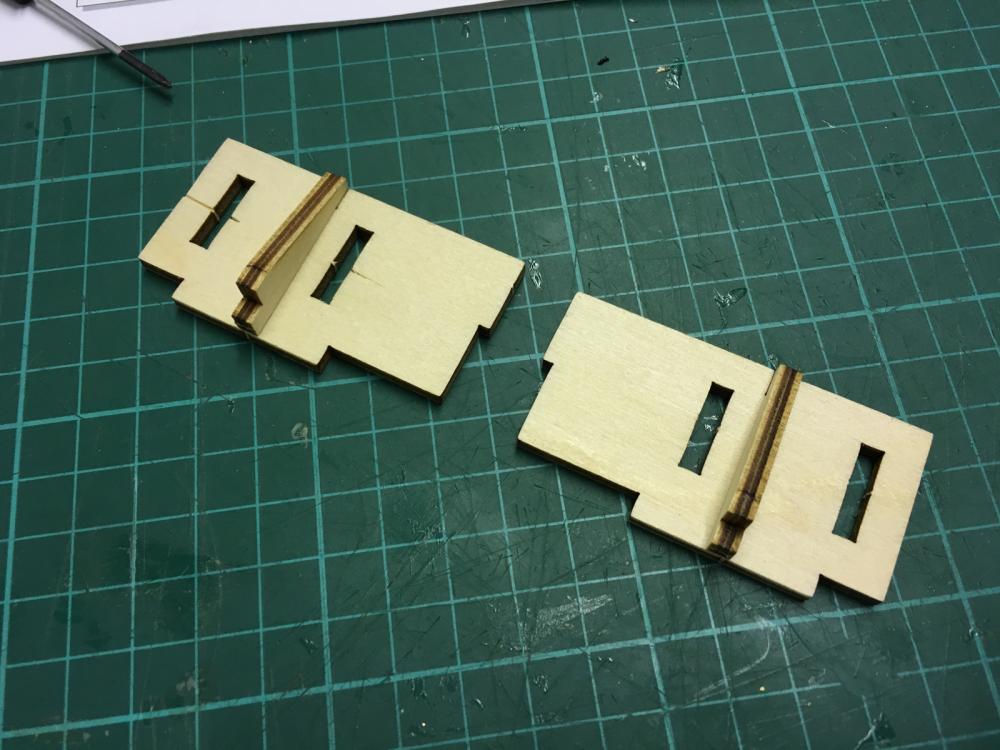
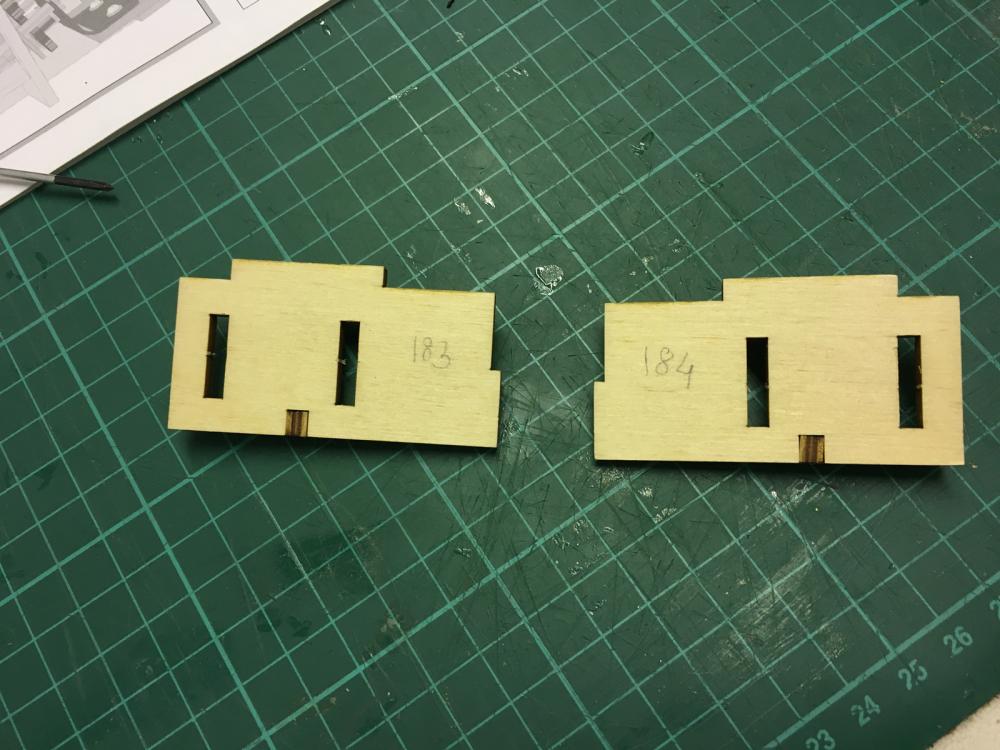
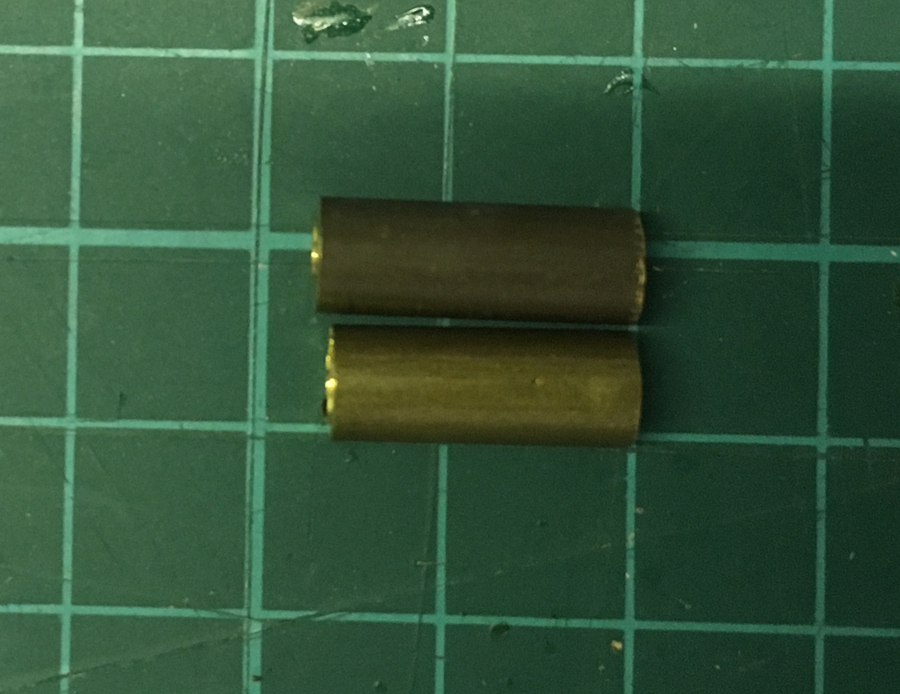
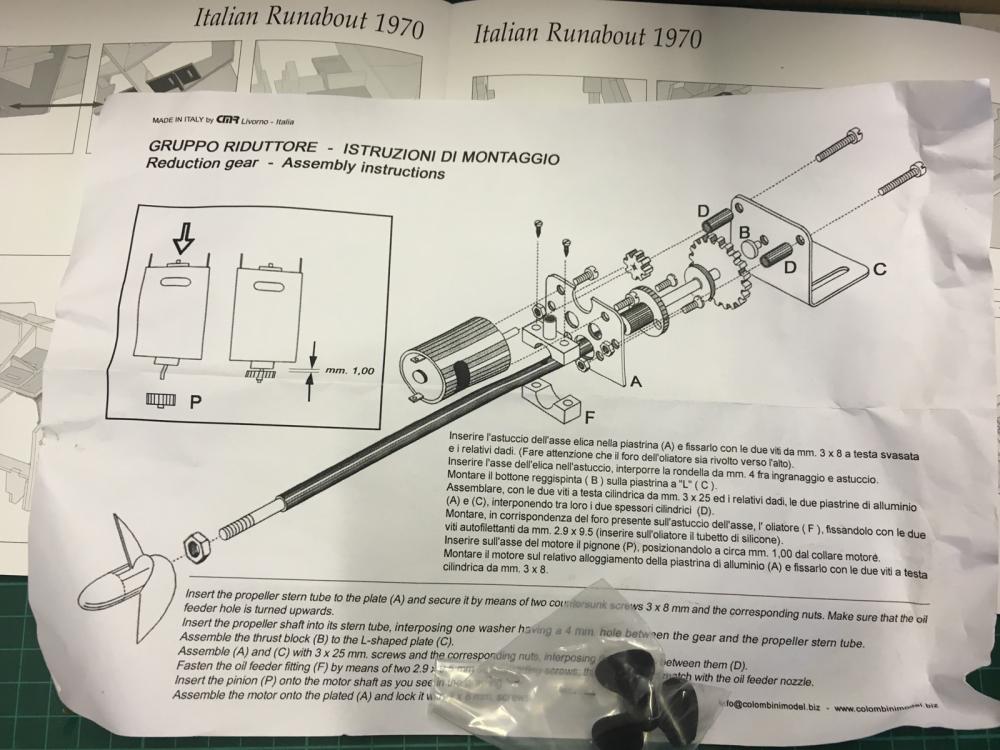
Spacers for some reason are not identical even though there is no indication of that. This motor kit was apparently not specifically designed for this kit. It is from another italian manufacturer called colombinimodel.biz according to the foot note on the instruction sheets. Looking at their website, you see the kit is used in their boats. I hope this "non-identical" size will not cause a problem. The whole structure looks a bit not straight, but maybe that's the way. If it causes problems, I will just have to unassemble and cut one of them shorter in order to make them identical.
- 414 replies
-
- 3
-
-
- riva aquarama
- amati
- (and 2 more)
-
Jep, I am going for the reduction option! EDIT: Actually I was first worried about the possible criticisms like "What! You choose reduction gear for a speedy boat like this!" so it was nice to hear that it is more realistic. Thanks for clearing my concerns
- 414 replies
-
- 2
-
-
- riva aquarama
- amati
- (and 2 more)
-
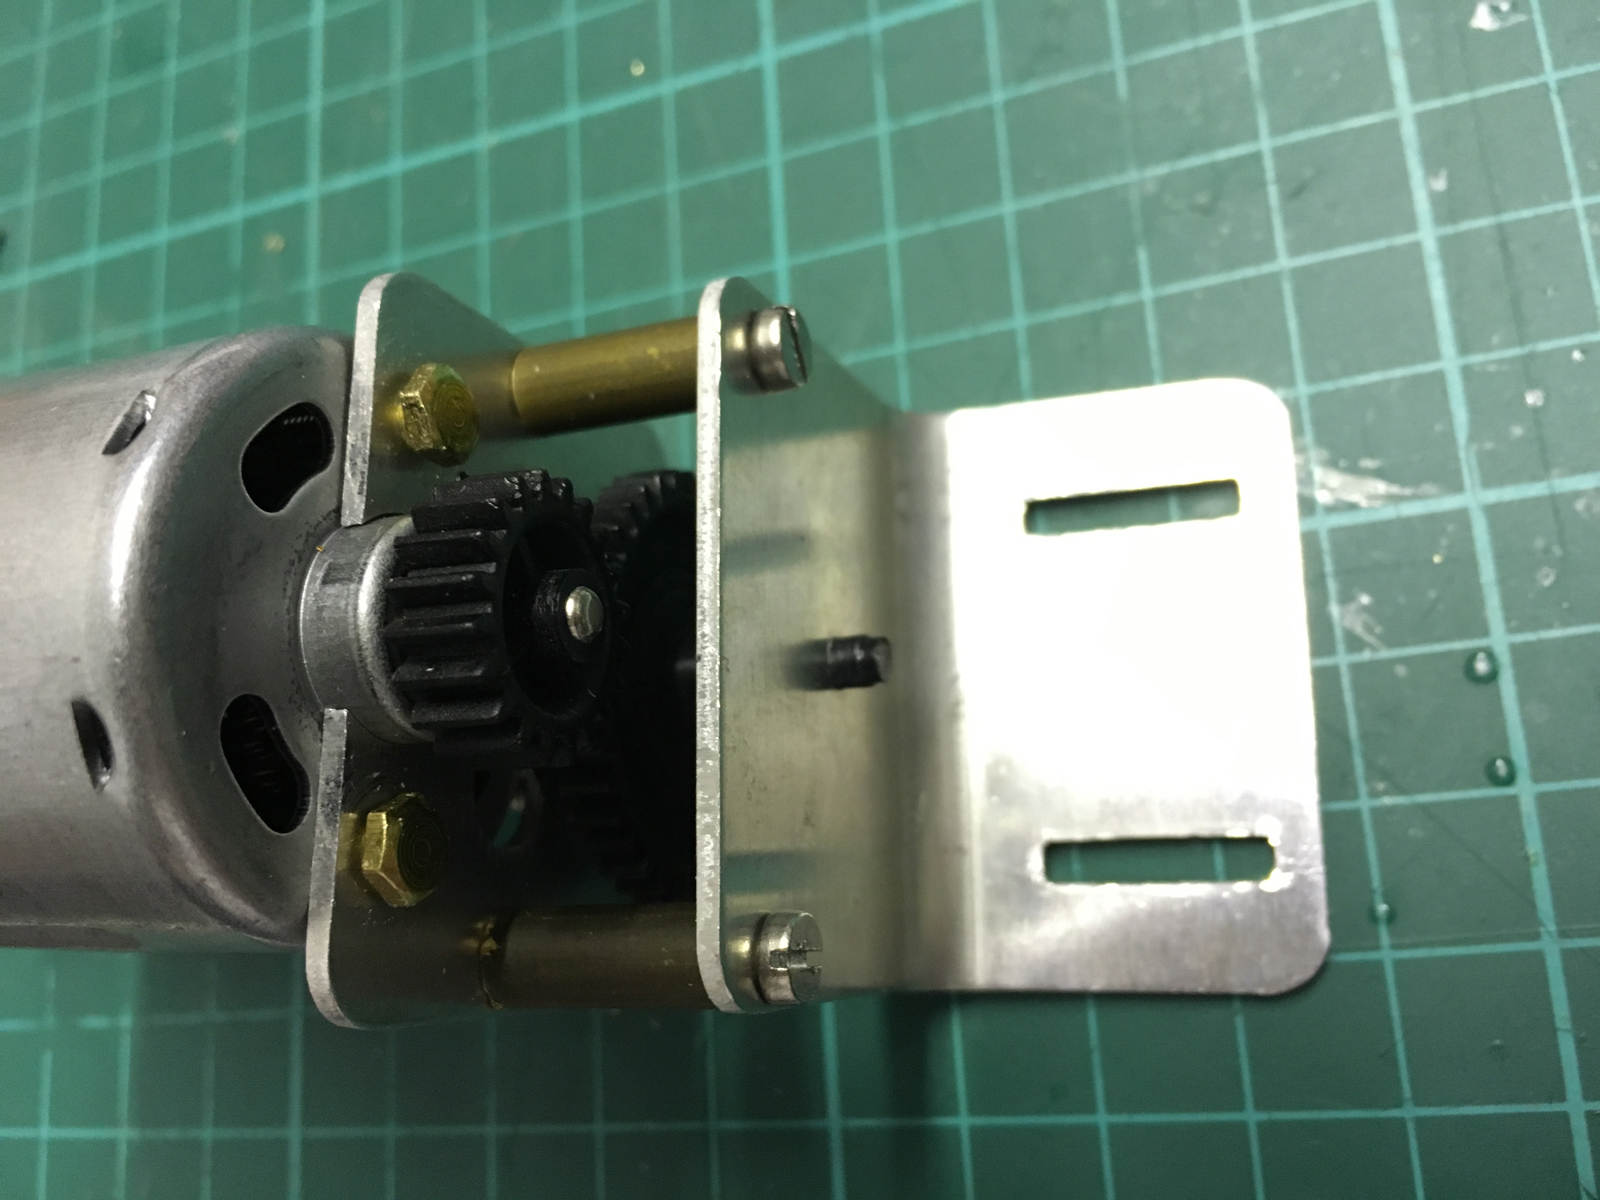
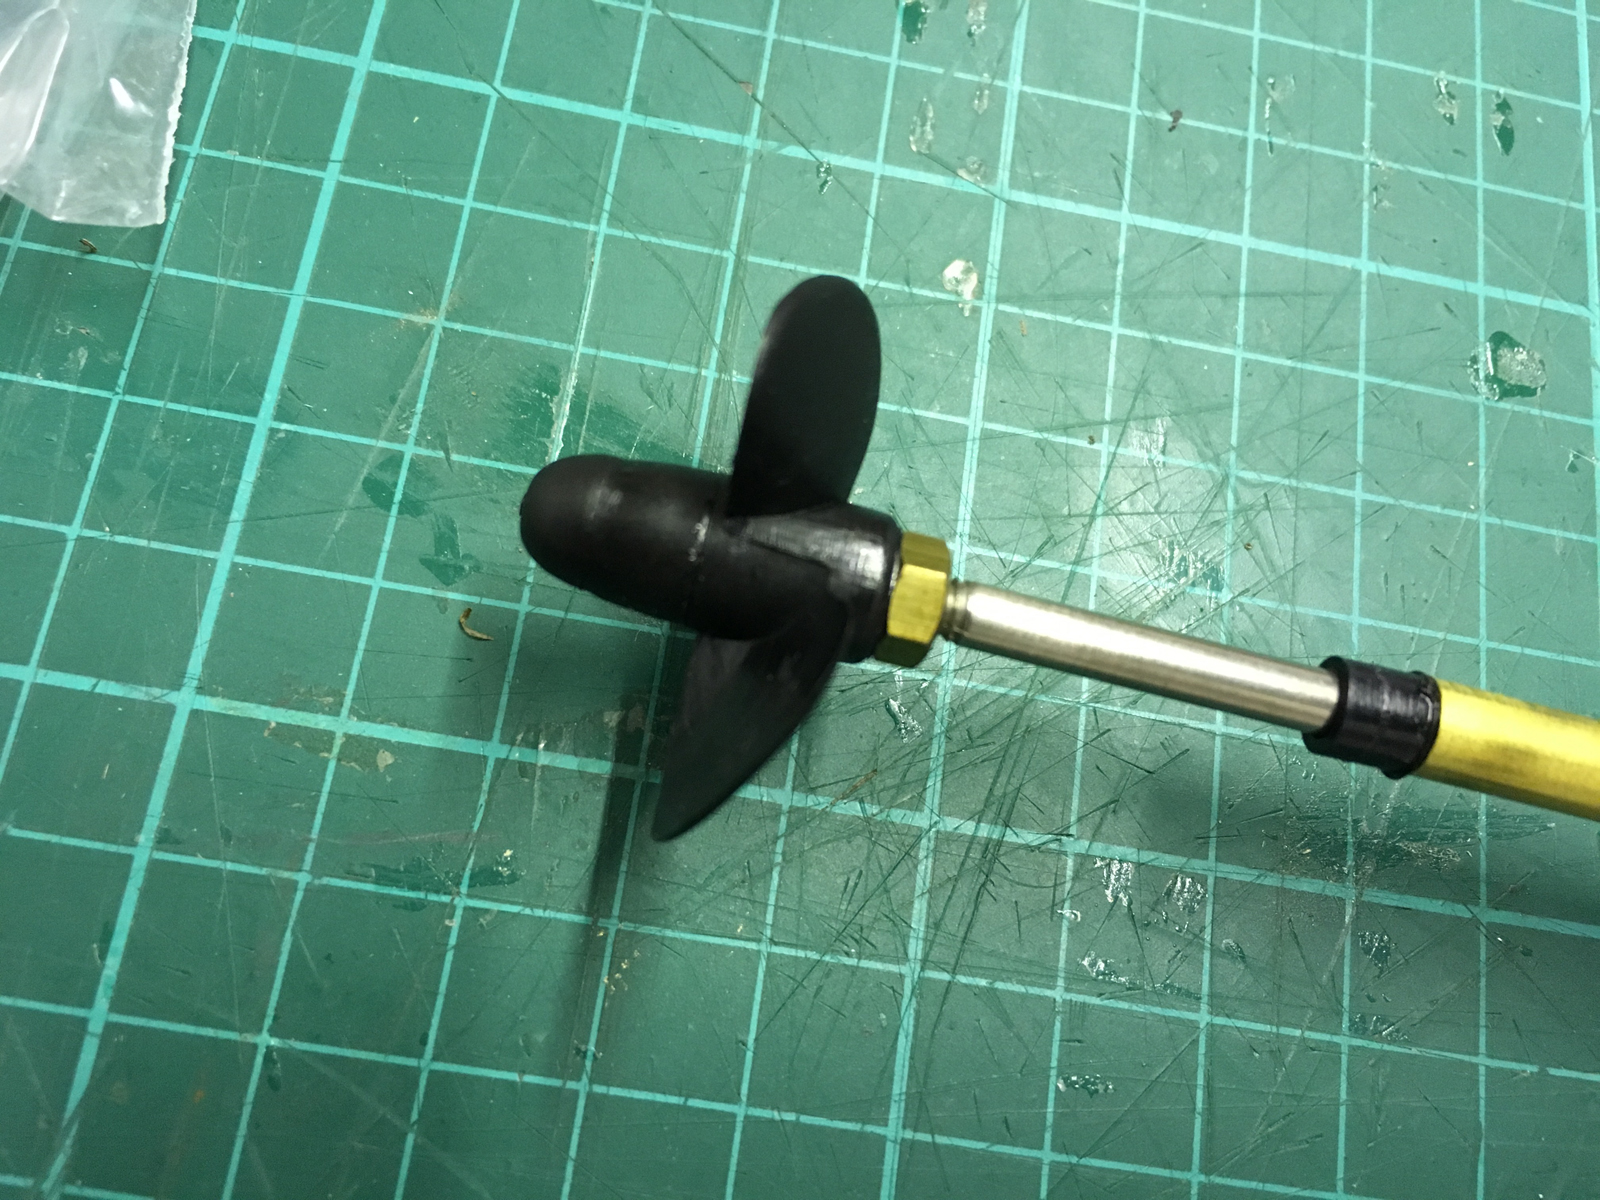
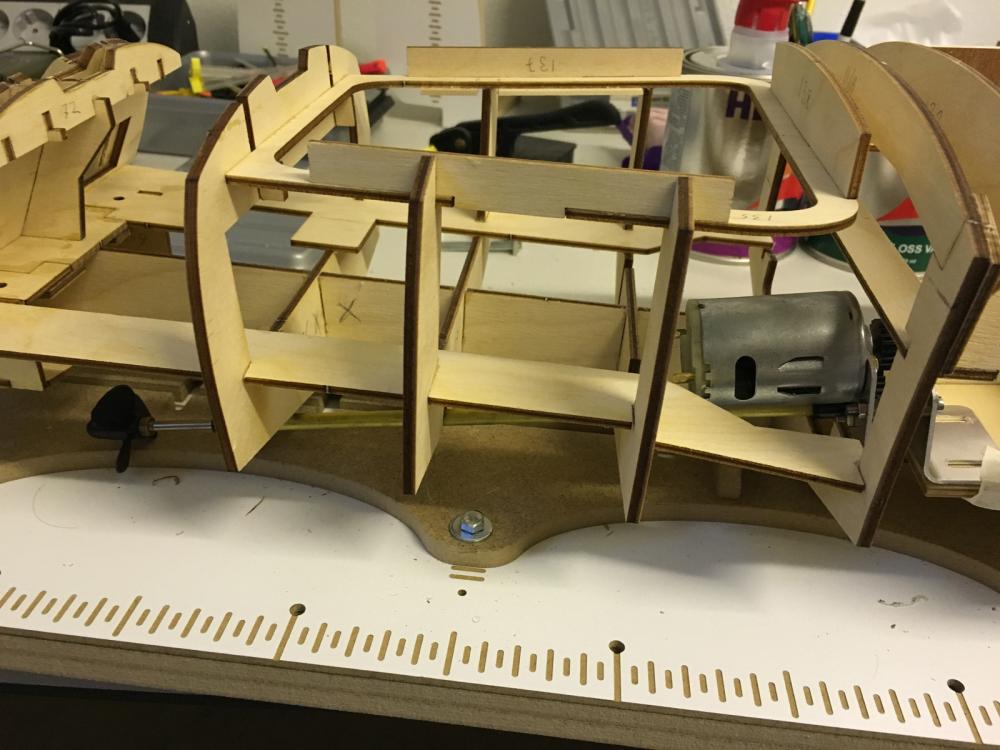
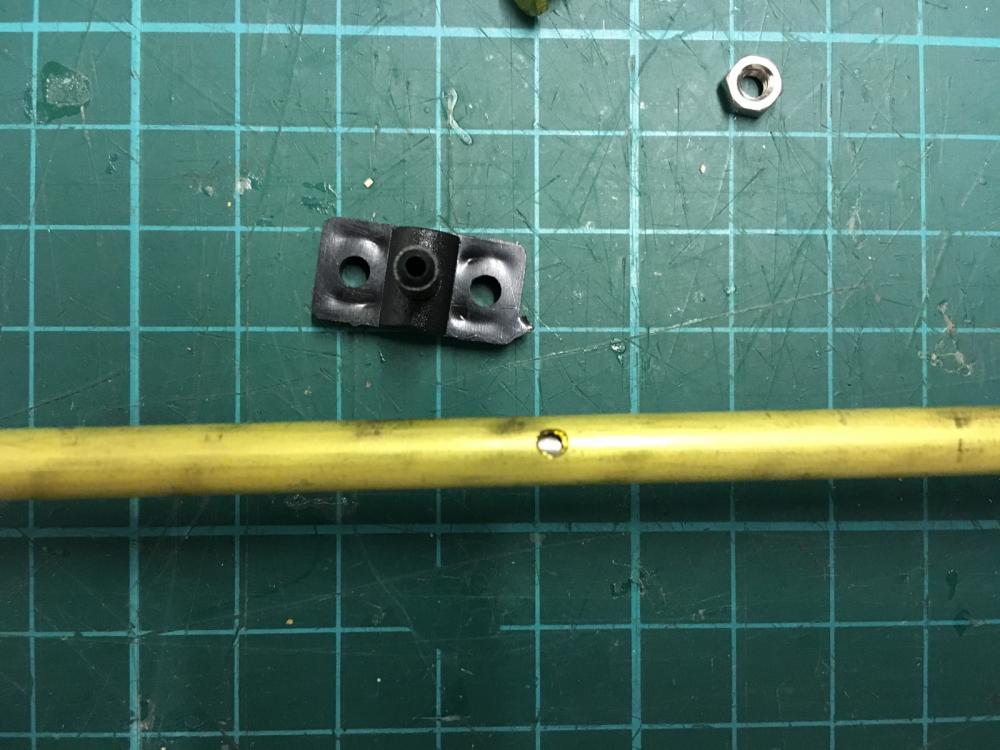
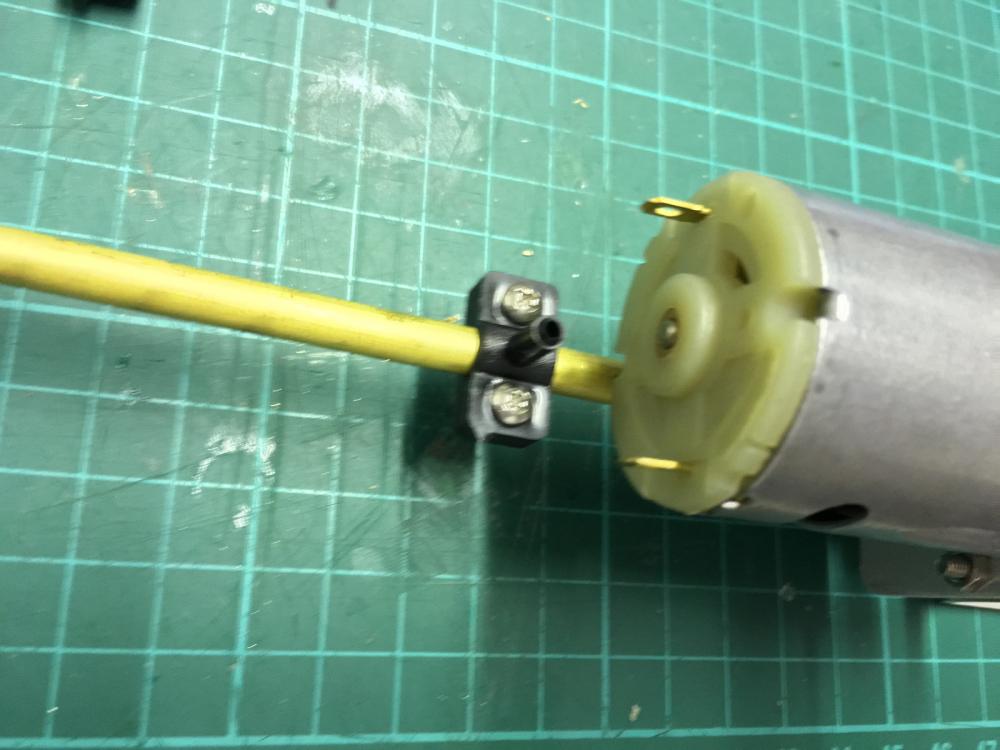
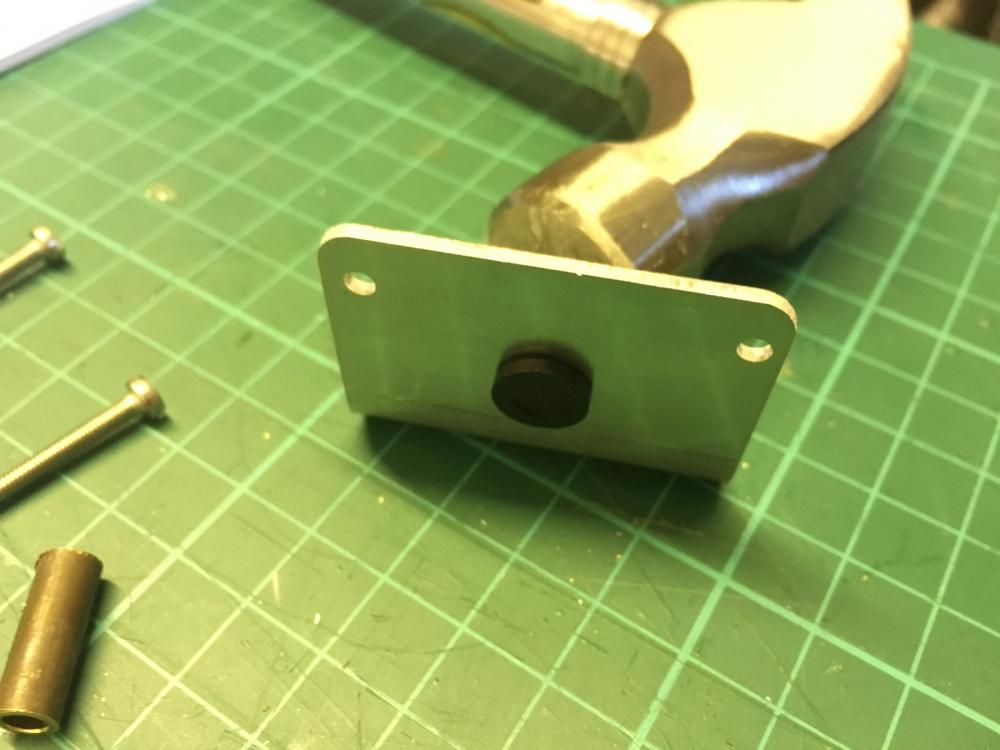
Some closeups for the motor installation: Oil supply hole. The rod should be screwed to the metal frame so that the oil supply hole faces upwards. Thrust blocker Thrust blocker (opposite angle):

- 414 replies
-
- 5
-
-
- riva aquarama
- amati
- (and 2 more)
-
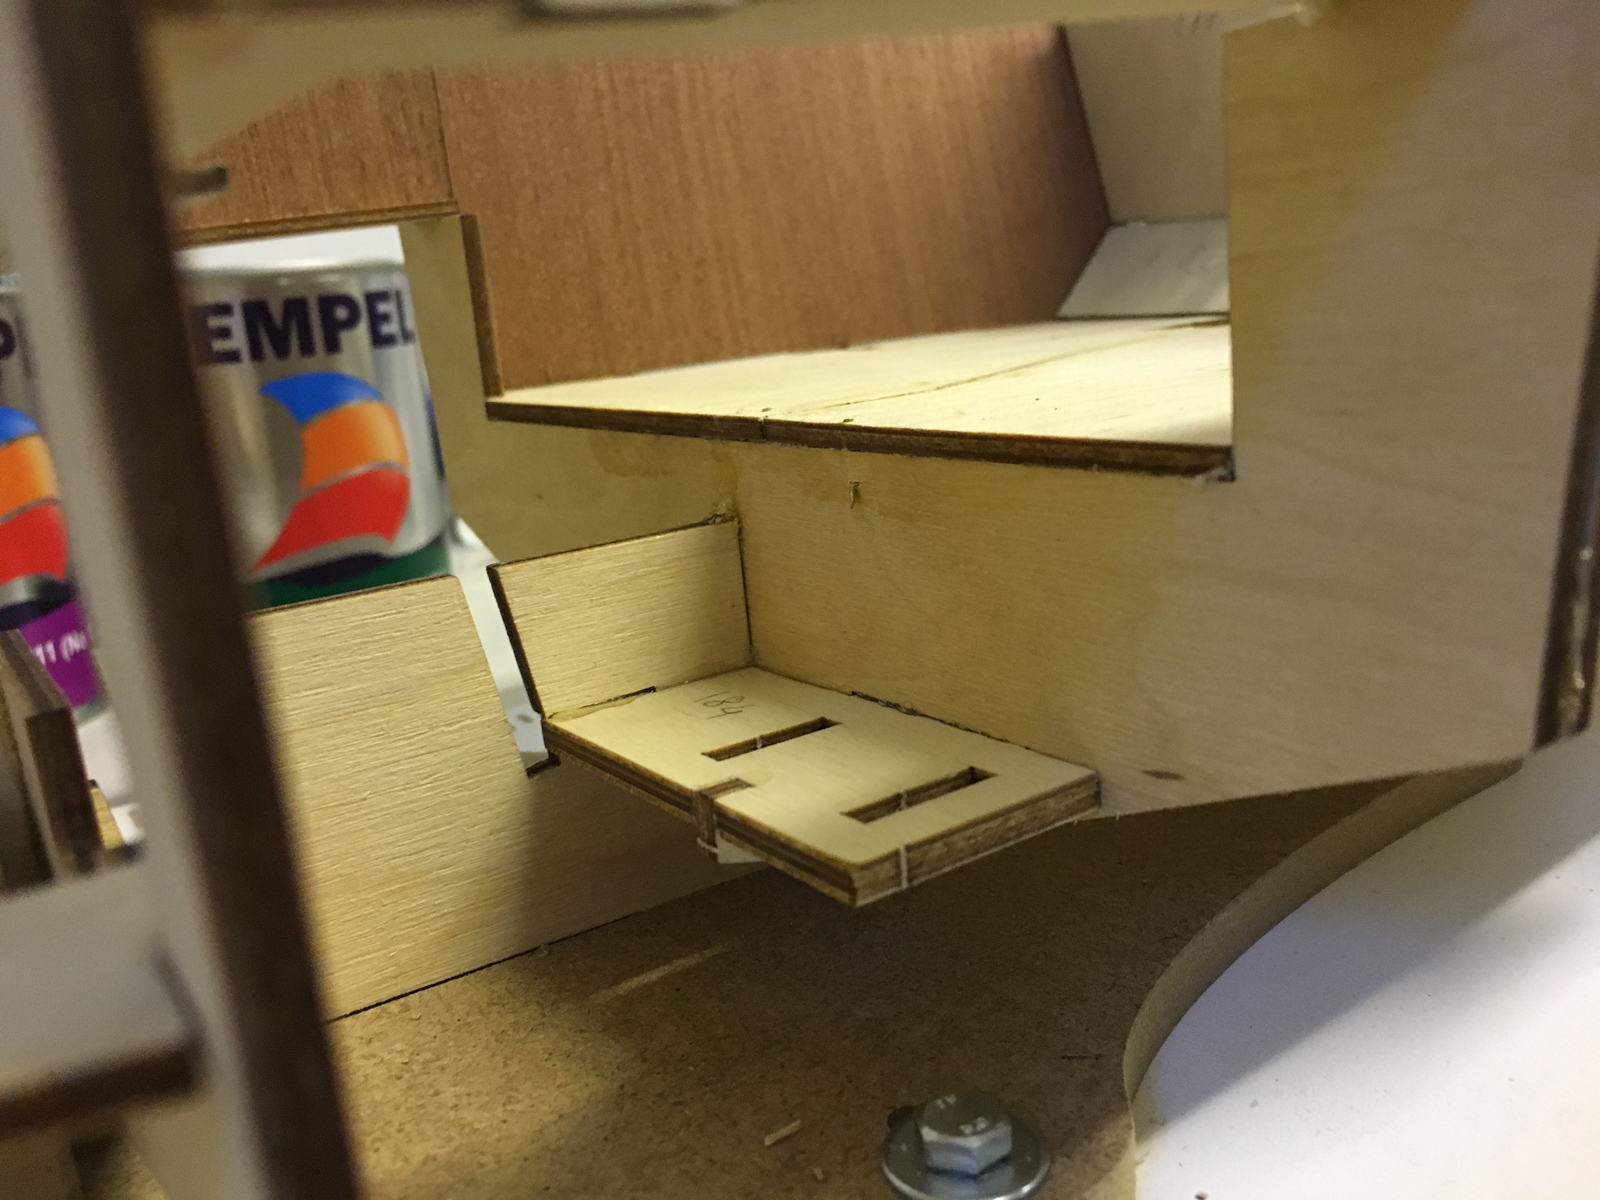
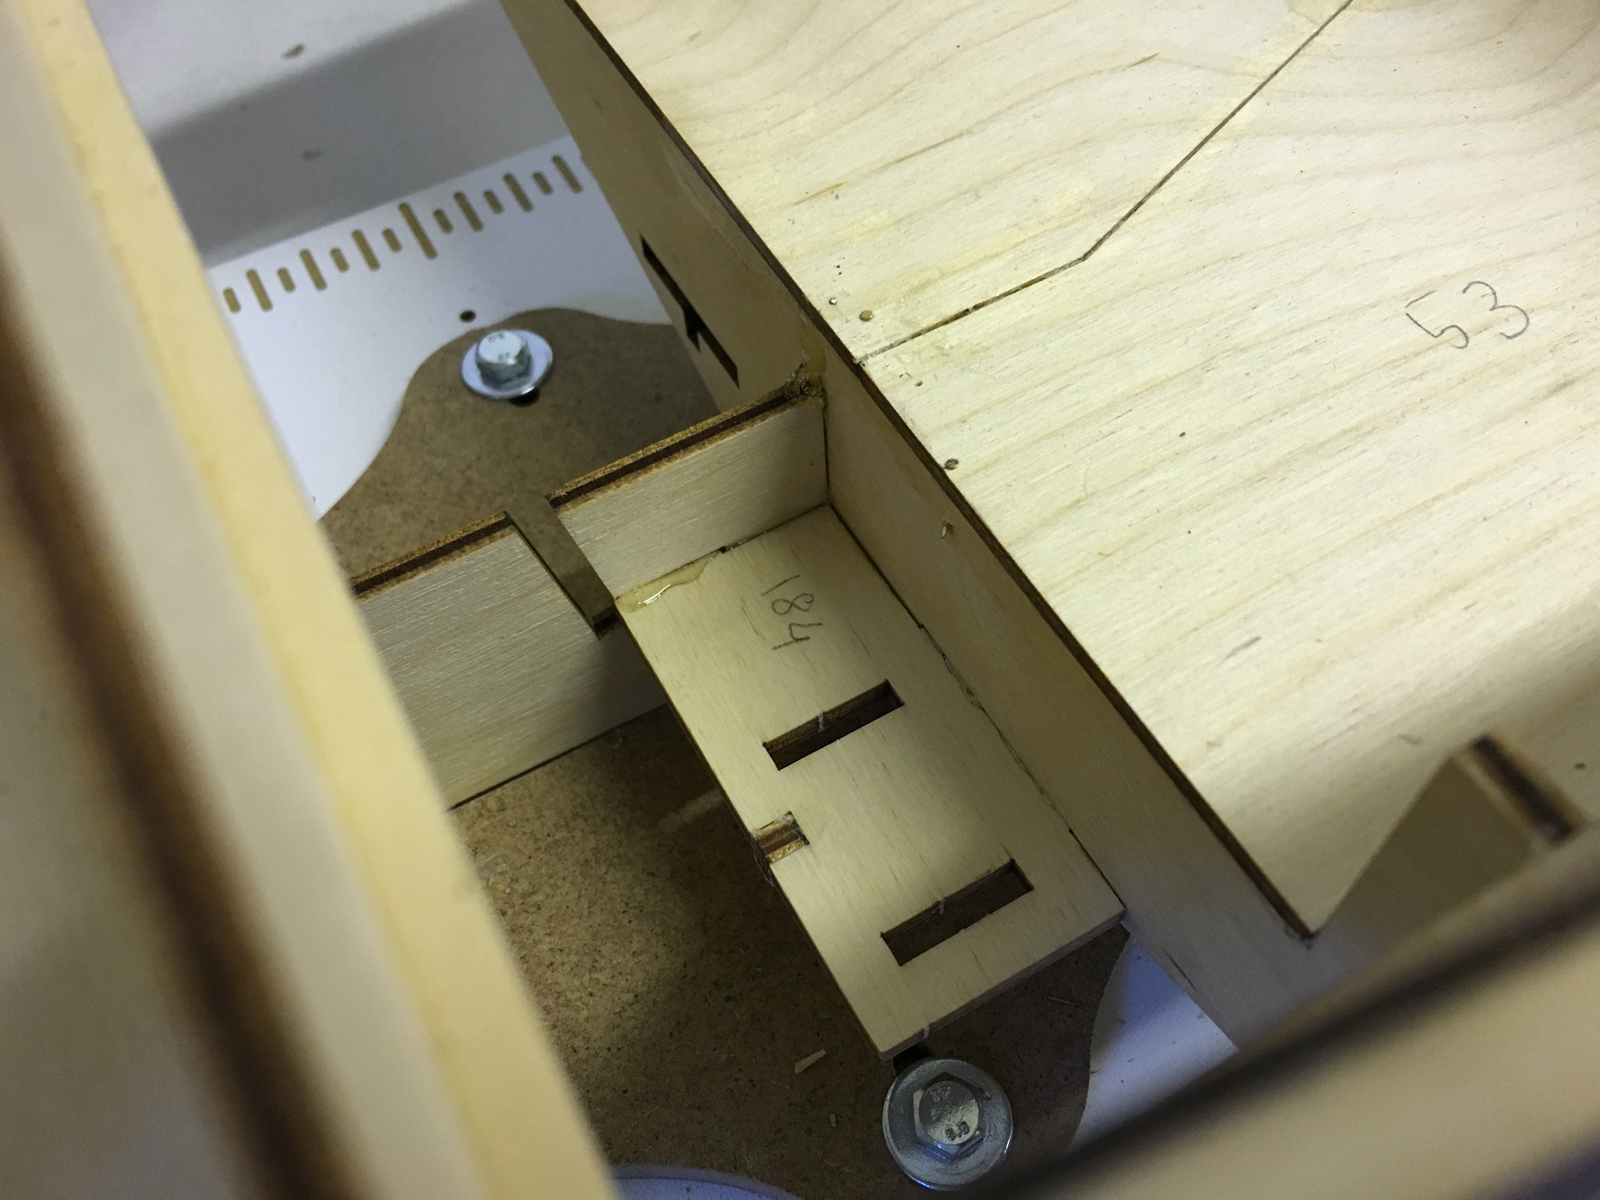
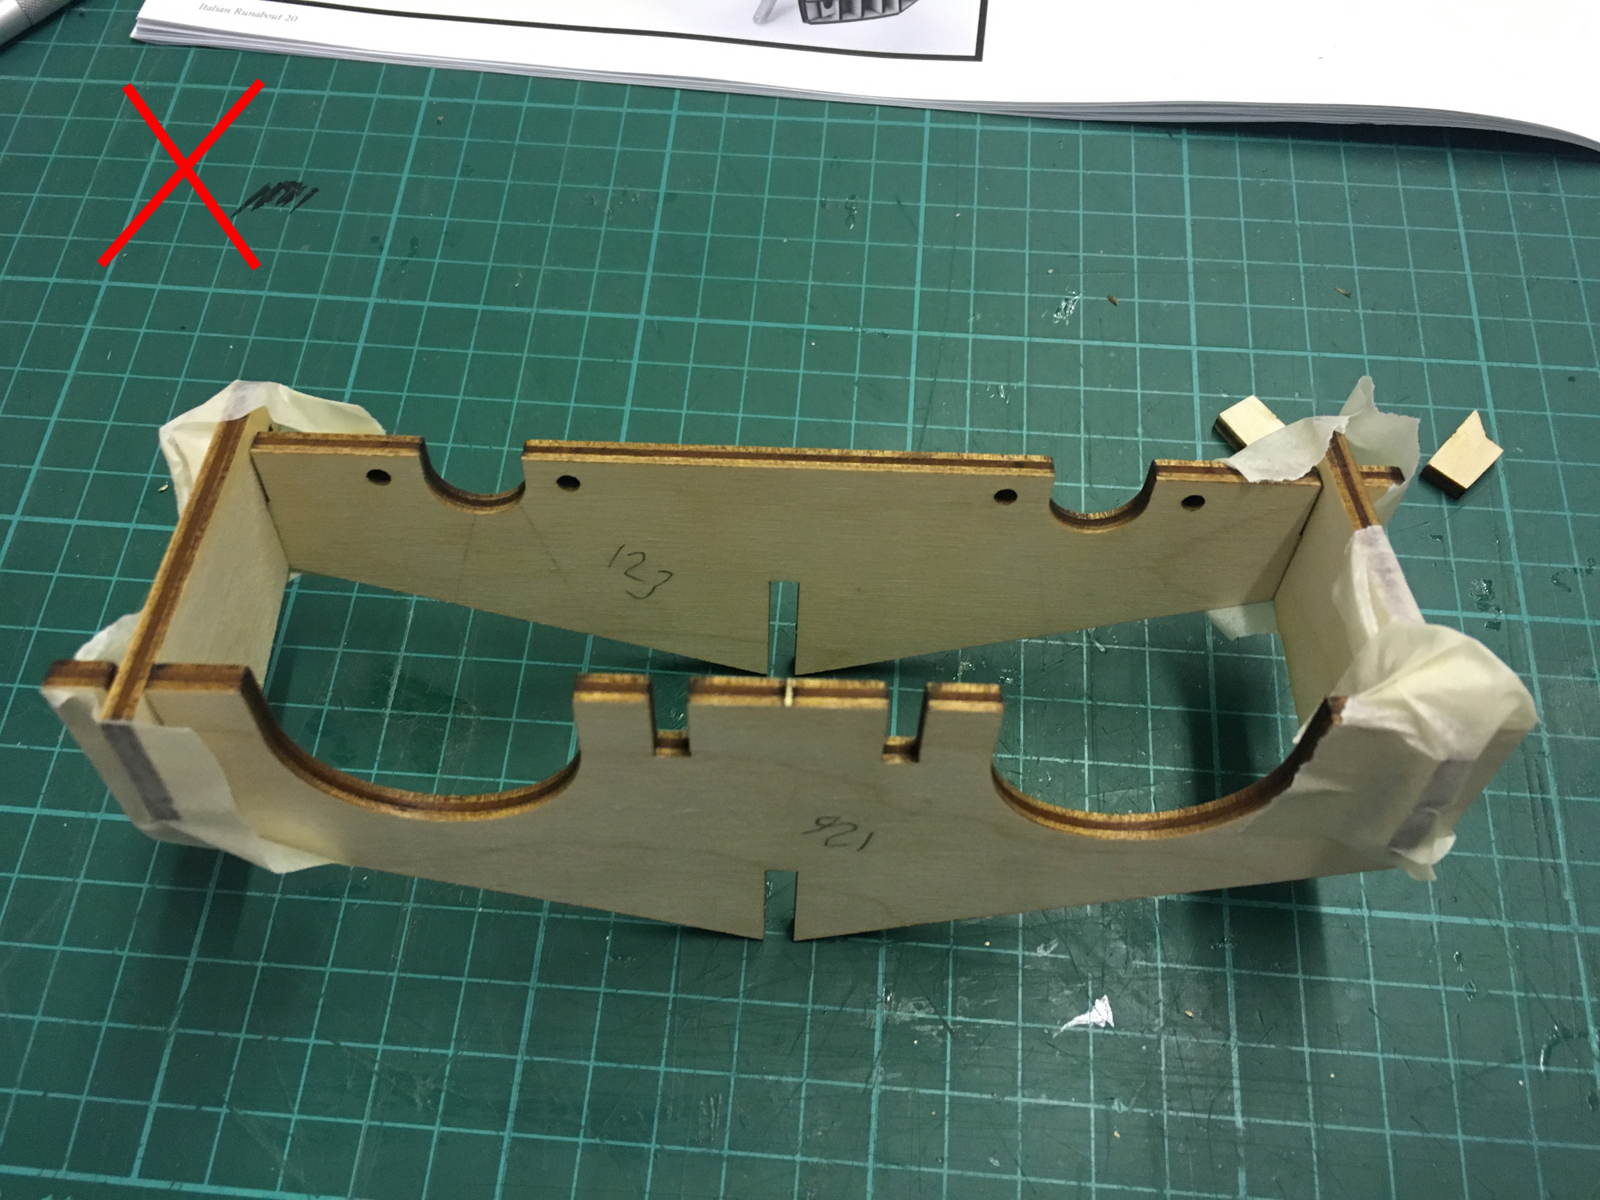
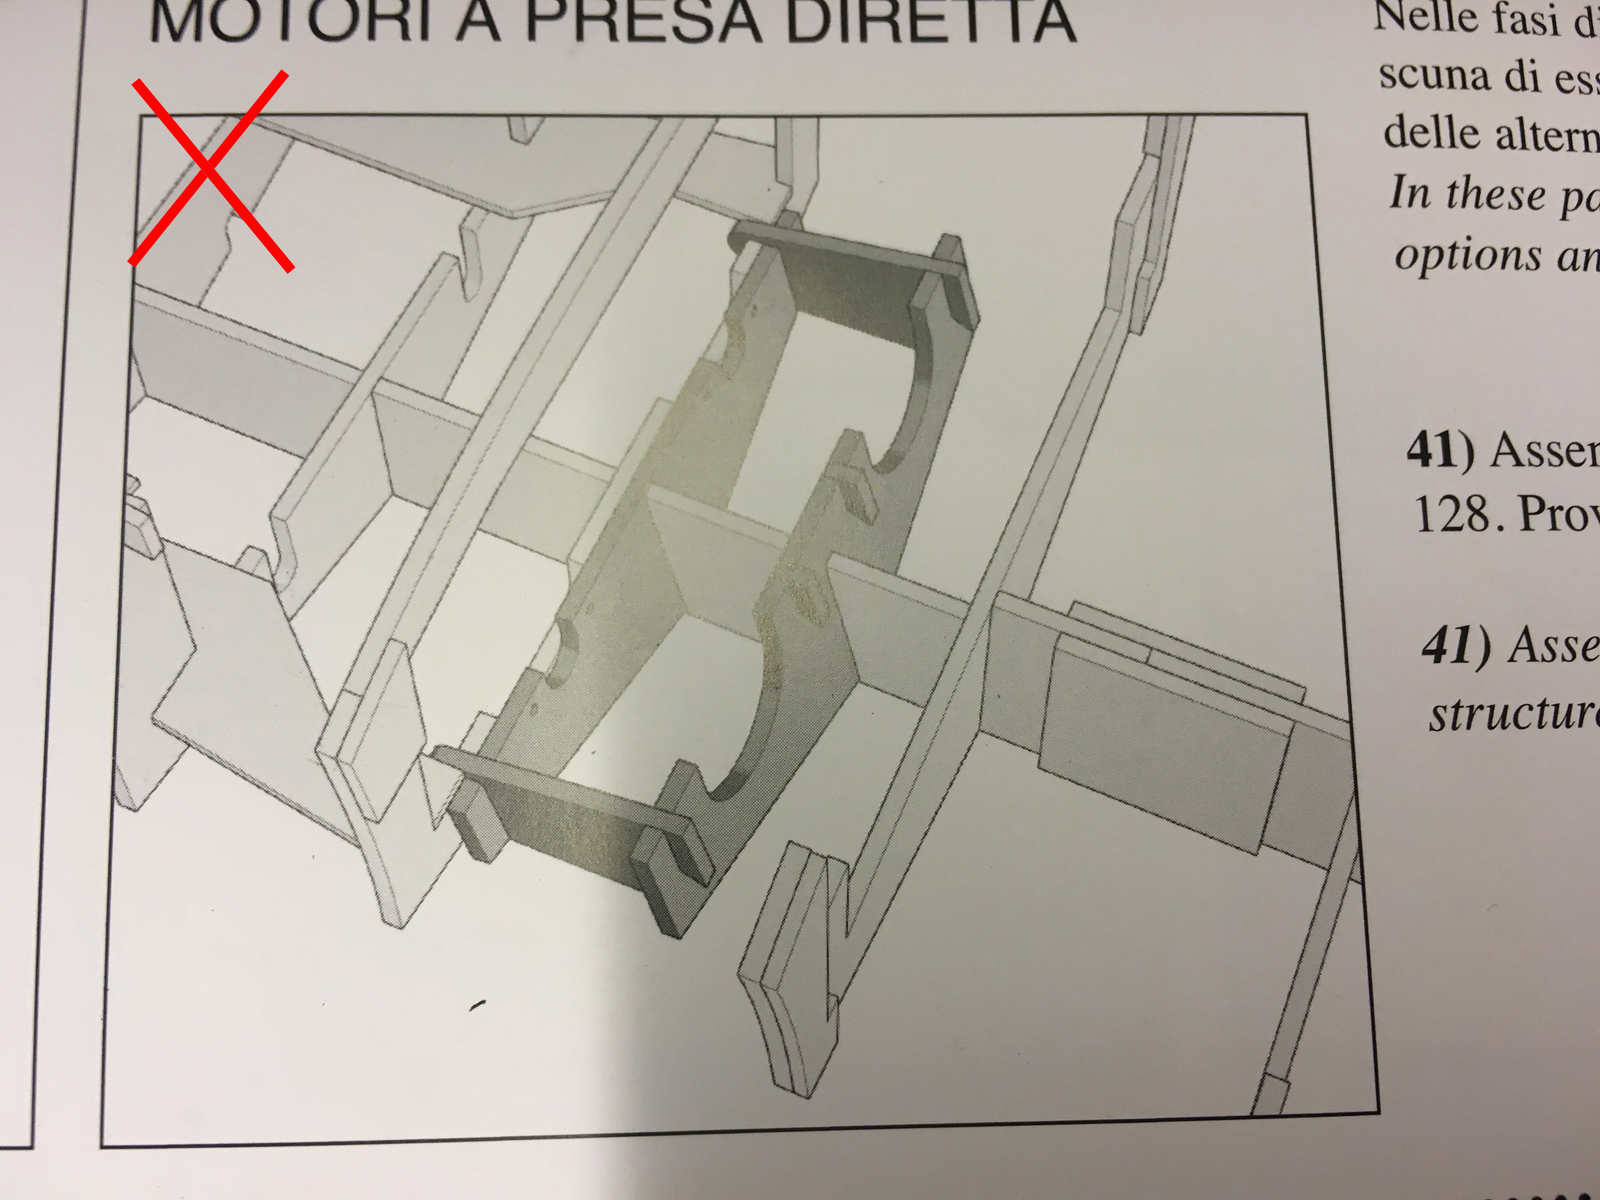
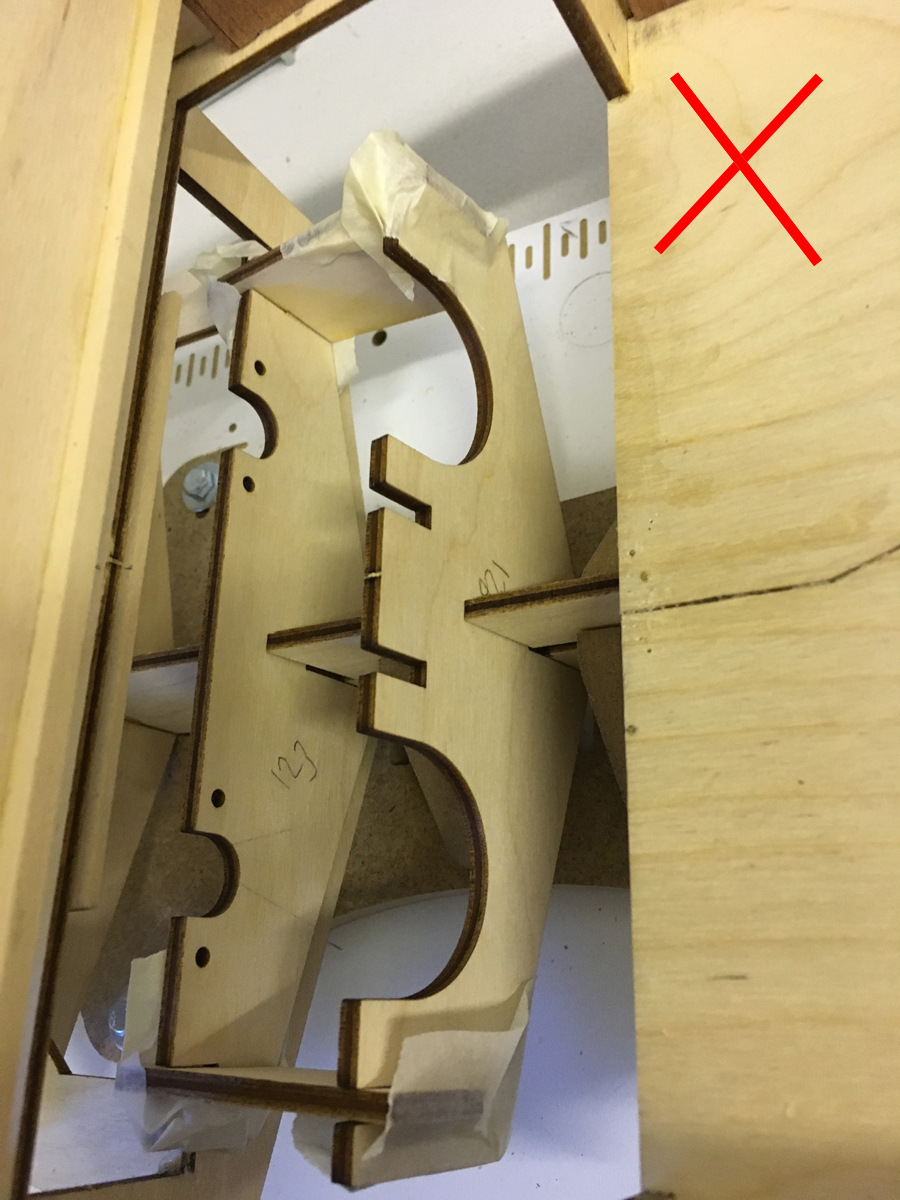
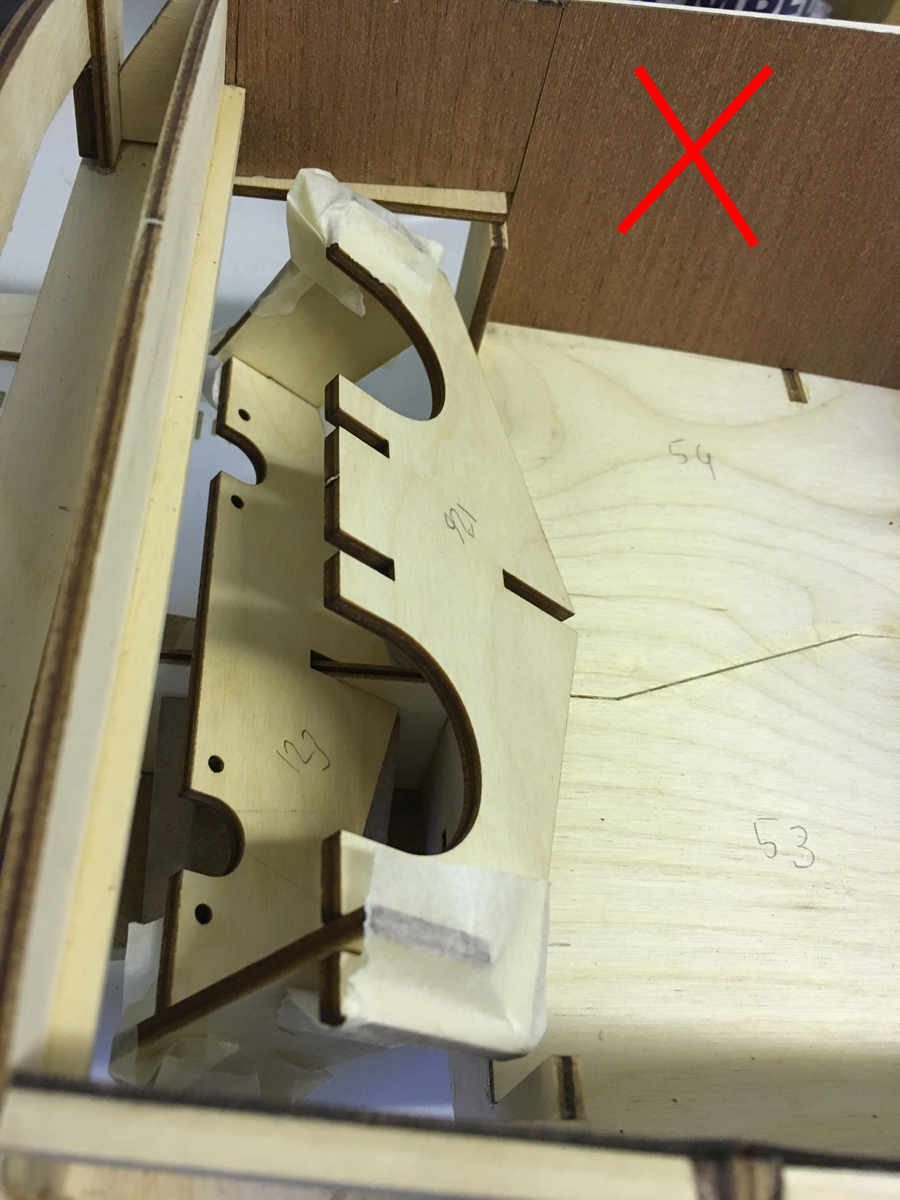
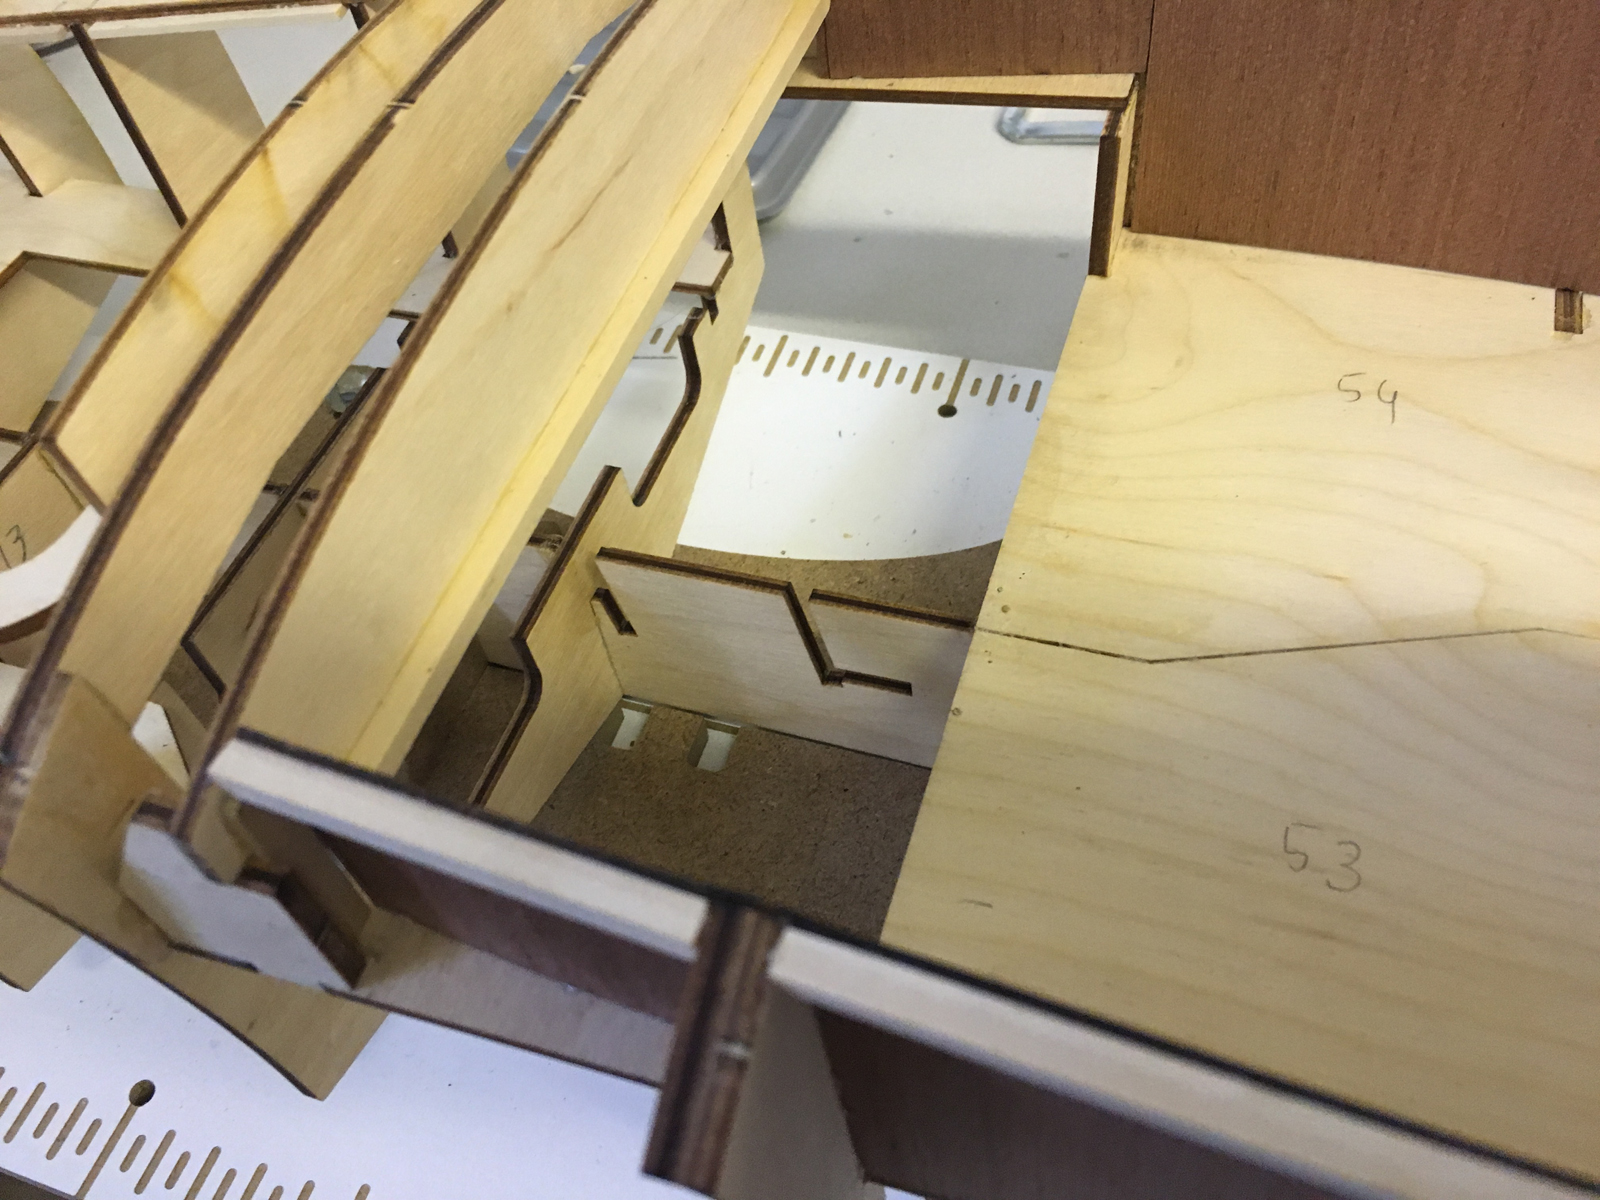
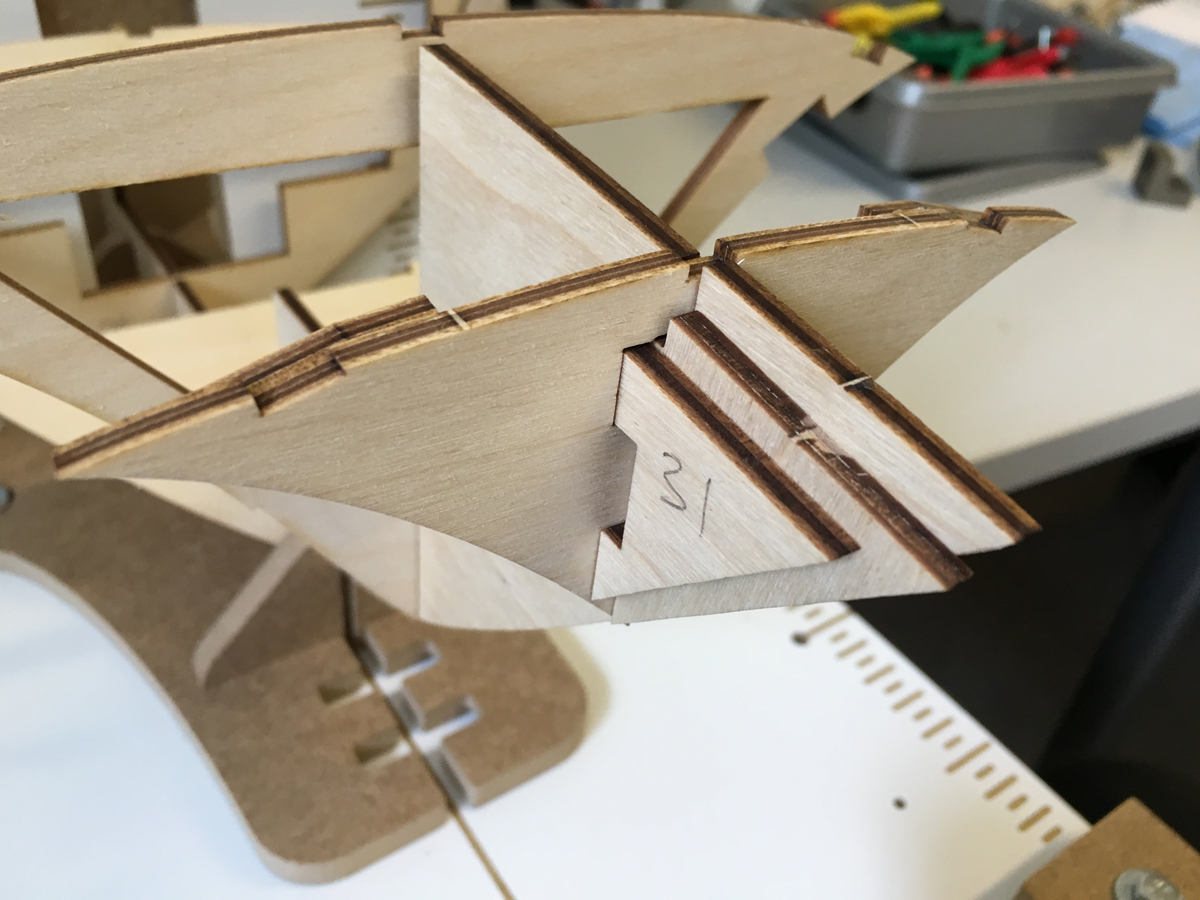
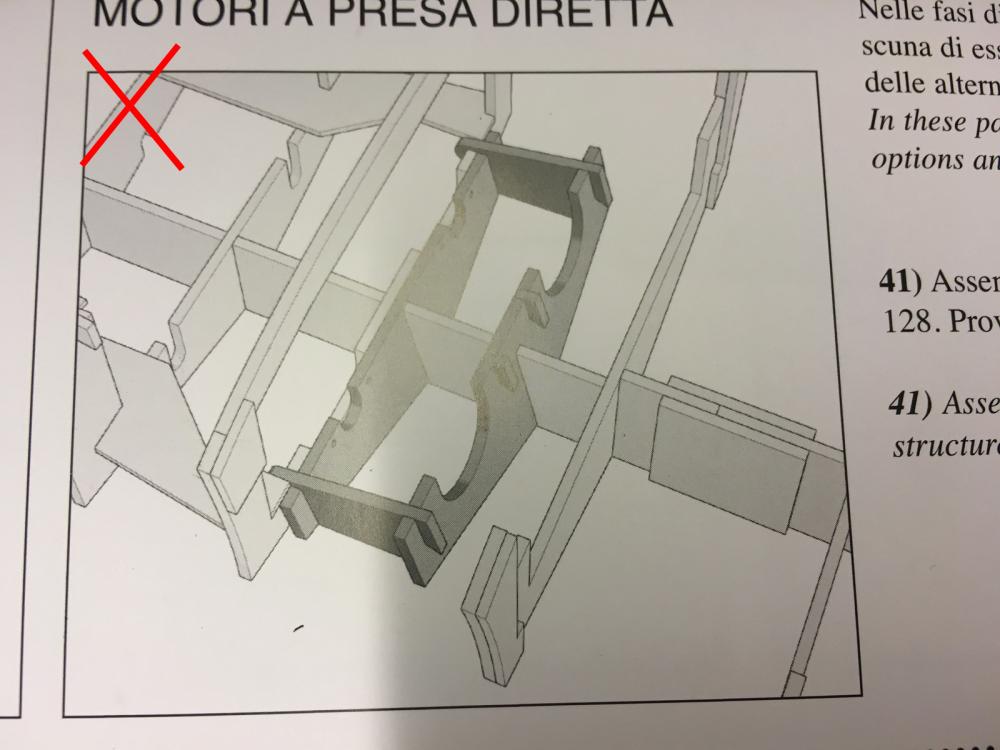
If you would go for direct drive option, you'd be constructing this "nest": Below is sequence of moves for how to carefully insert it to place: Insert the keel to part 123... .. then slide it so that keel is inserted into part 126... ... finally slide to place and push down.


- 414 replies
-
- 3
-
-
- riva aquarama
- amati
- (and 2 more)
-
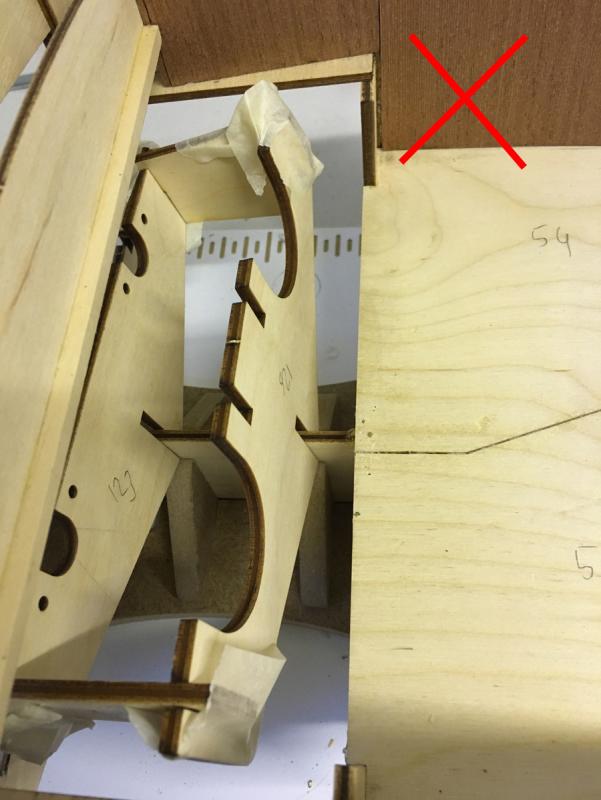
Apparently there are 2 options here, depending on if you use the "direct drive" option or the setup with "reduction gear". The kit that came with the kit happens to use the later (i.e. the reduction gear option), but I will also share here what you'd do if you'd go for the direct drive option. The photos which are meant for direct drive option are marked with a red (X). This is where the motors will sit. The engine compartment:

- 414 replies
-
- 2
-
-
- riva aquarama
- amati
- (and 2 more)
-
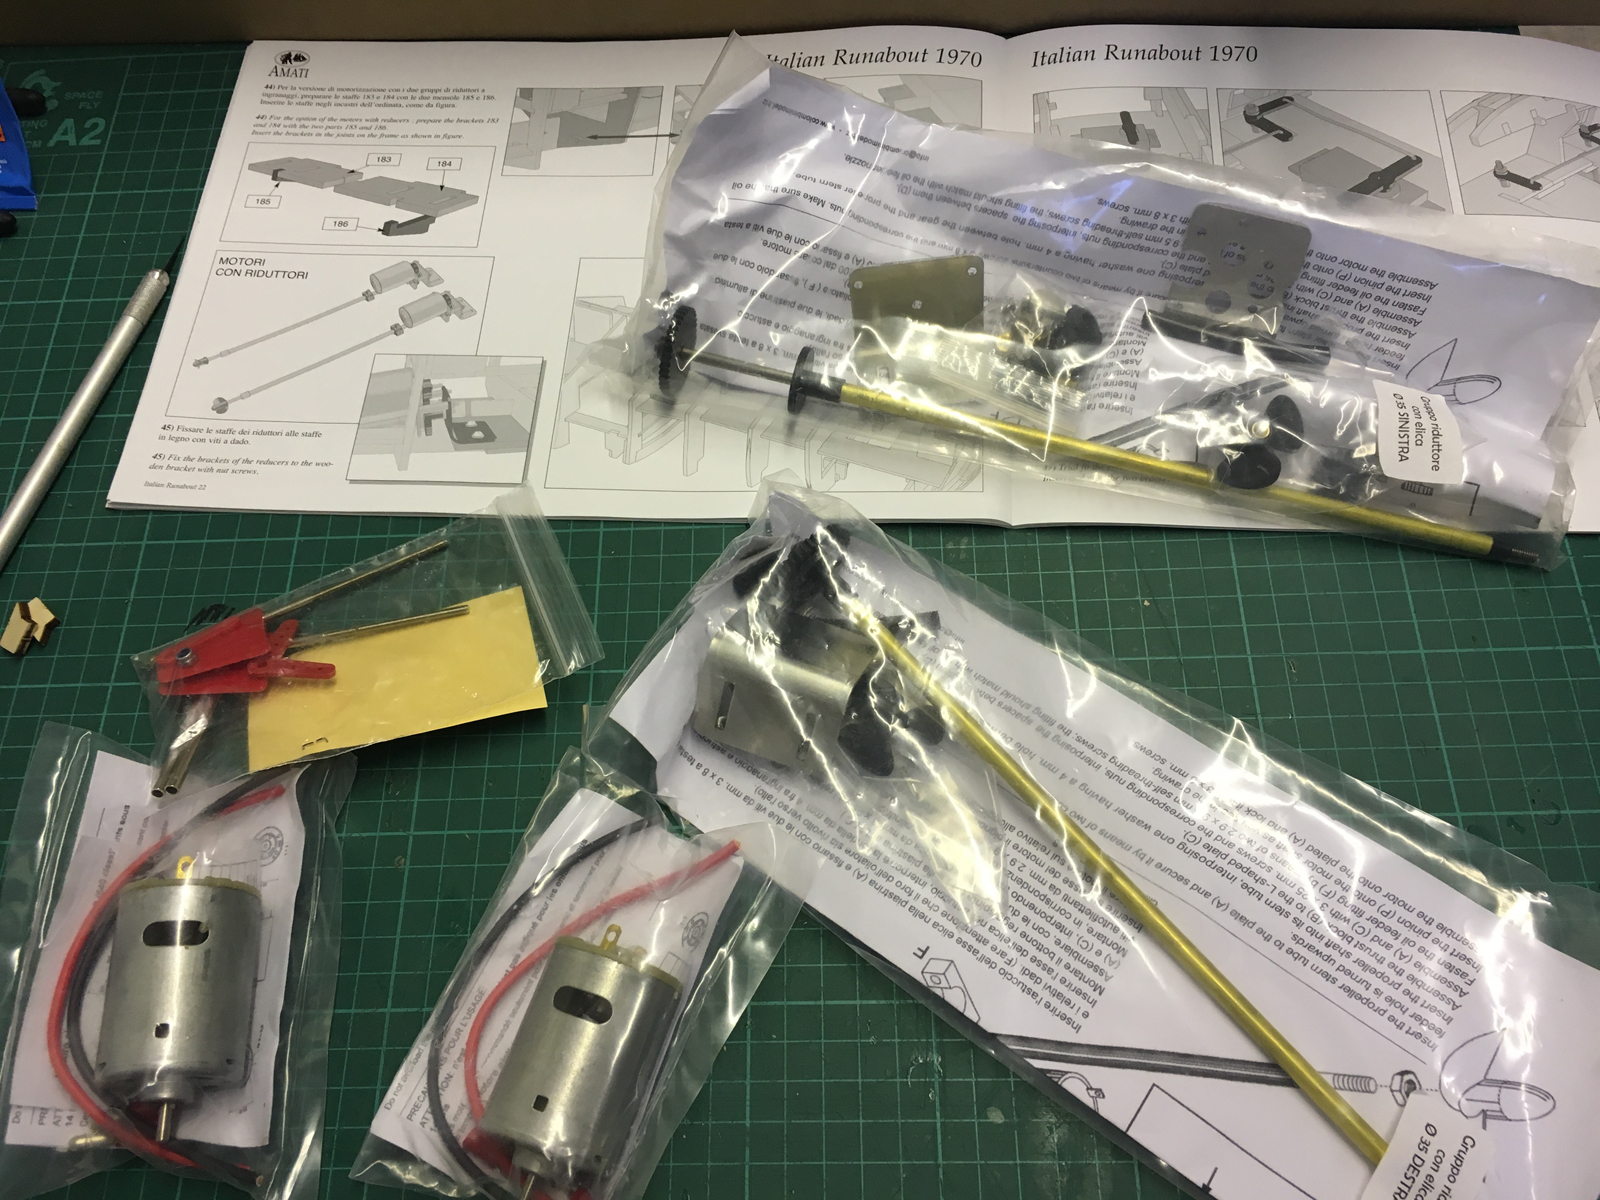
BUILD DAY 6. MOVING KIT DRY-FIT While waiting for the faux leather which I ordered to arrive for the upholstery, I thought it is good time to check what the motor construction will look like. I want to make sure for myself that: - The motor kit is assembled correctly - All the needed parts are present - It fits correctly to the hull - The moving parts work fine in-vitro, before assembling to the hull. This means: I have all the motor kit, batteries etc installed on a test bench and I can use a radio transmitter to control propellers and rudders, so that I don't face surprises afterwards. Opening the box and checking carefully, two things annoyed me a bit: - Some papers are ONLY in Italian (though the "this is not a toy" kind of warnings were tip top complete in many languages ) ) - Receiver and servo are not included in the kit. Maybe this is the way but I just thought that when you pay 150 euros for an R/C extension kit you won't have to look around for more electronic components to get it working. These are the components which will be installed in the hull so the shape and size somehow matter. I'll have to figure out what brand/model servo and receivers are compatible with Riva Aquarama. Alright, enough whining and no hard feelings. This is still a great kit and so far is worth every penny. Following posts will include some photos of the motor kit construction and try-outs...
-
Merhaba Yambo! I saw in another forum a guy covering all the hull, AT THIS STAGE, facing out with boat sealer (namely Hempel Sealer 999) so maybe I'll comply with his approach. Anyway I will figure out something. Other than that, yes, I am planning to cover it with fibreglass sheet + epoxy.
-
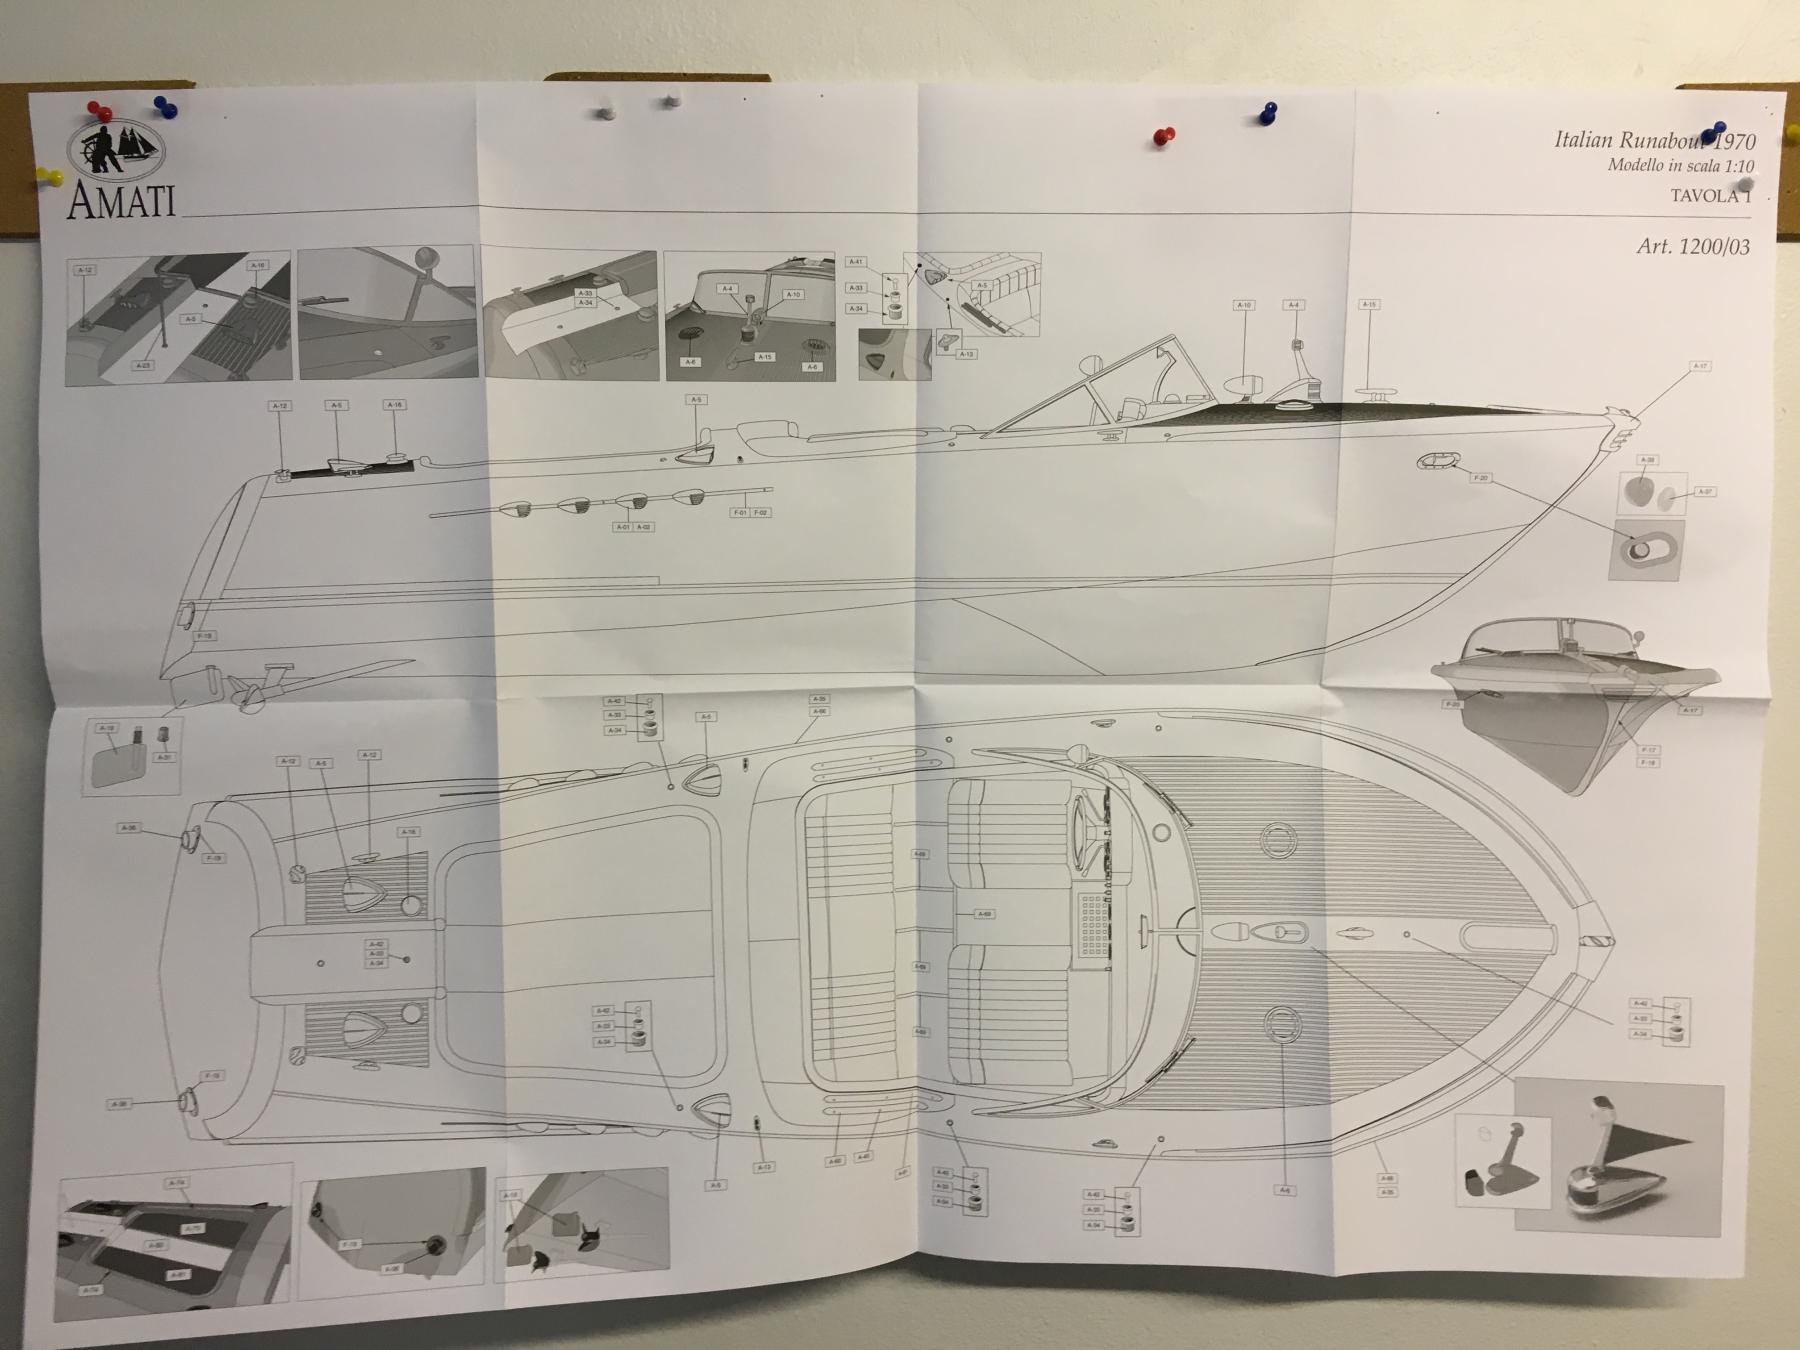
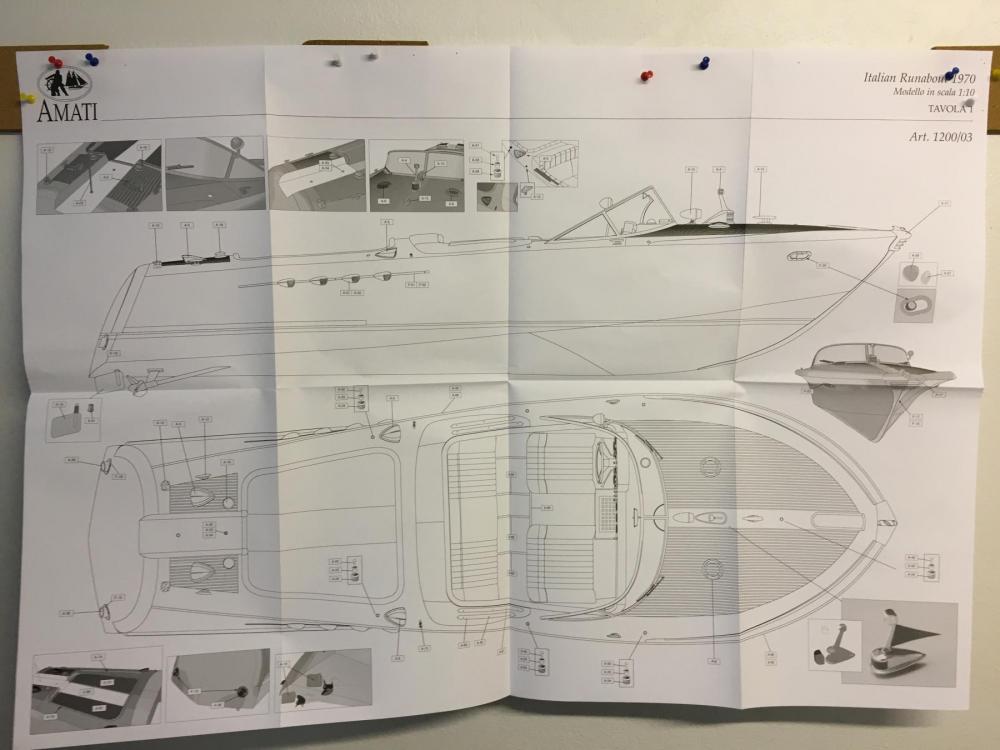
Hi Per, I didn't check yet for the inserts but according to the plan sheet below, it comes with some sort of ornaments: The long edge of the light frames are parallel to the deck. Actually if you check the image below, their slot is quite precise. It is the frame at the back, the slot on the right side. I have left the workshop for today but I will try to find answers for you tomorrow.

- 414 replies
-
- 7
-
-
- riva aquarama
- amati
- (and 2 more)