HOLIDAY DONATION DRIVE - SUPPORT MSW - DO YOUR PART TO KEEP THIS GREAT FORUM GOING!
×

Winlich
-
Posts
66 -
Joined
-
Last visited
Content Type
Profiles
Forums
Gallery
Events
Everything posted by Winlich
-
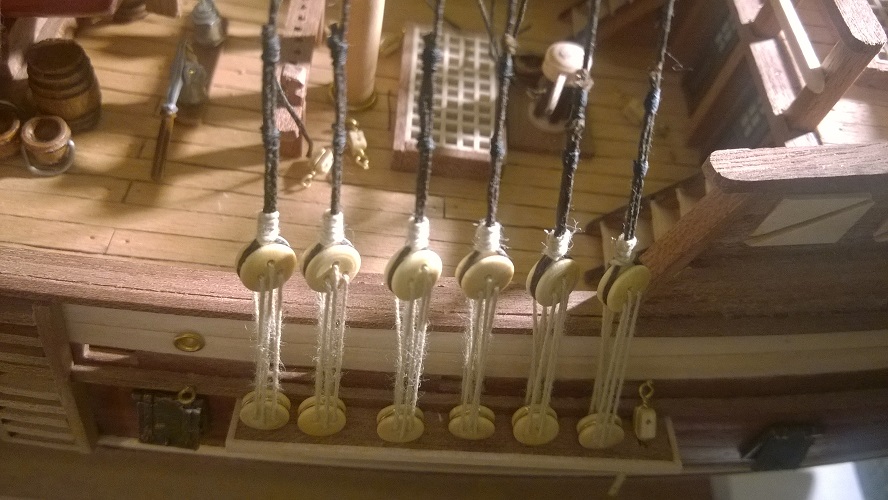
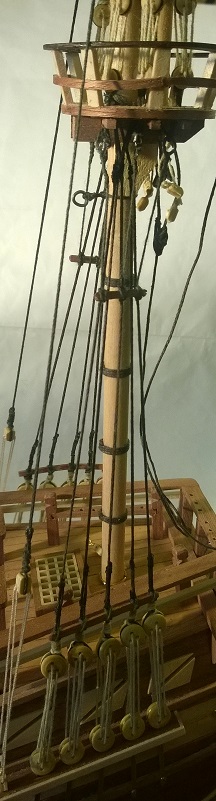
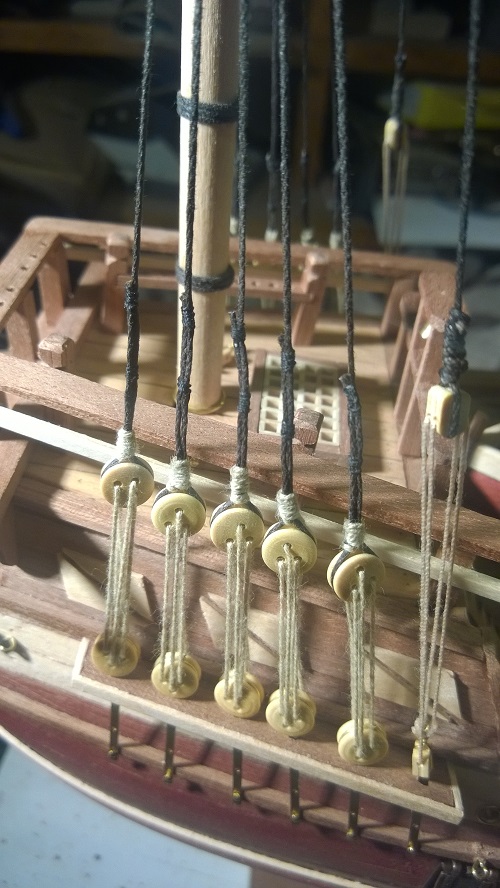
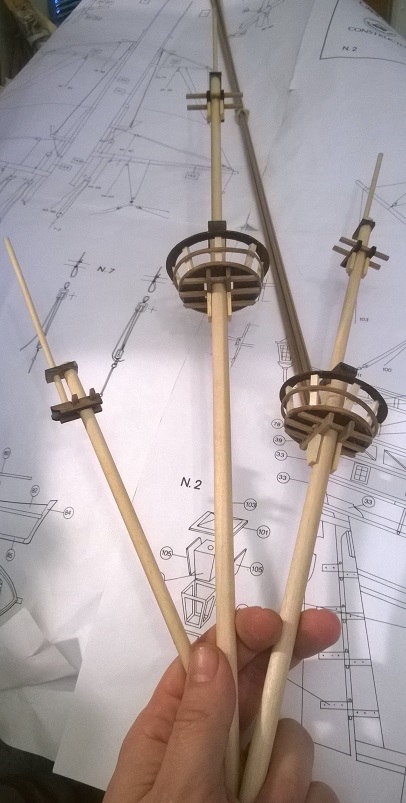
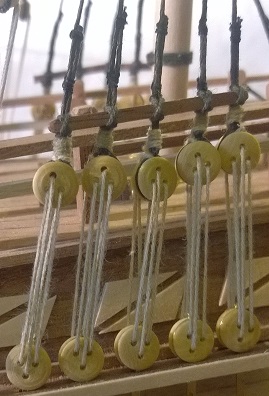
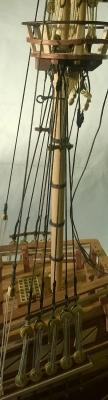
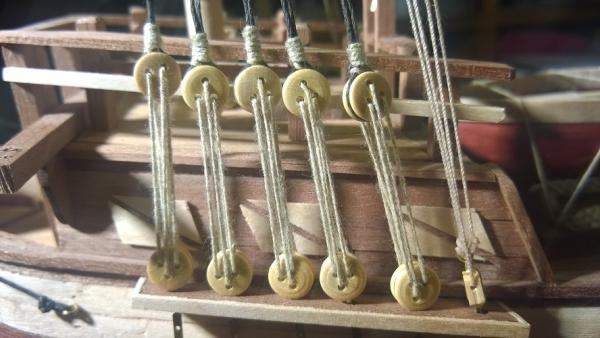
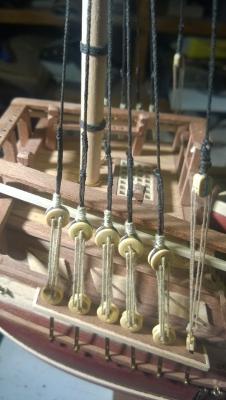
 10.6.2015 Main mast shrouds and deadeye lanyards completed.
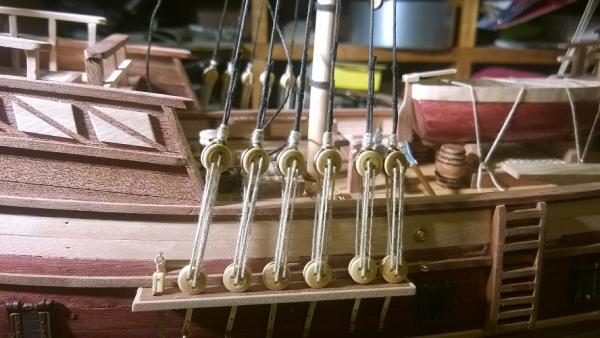
- 80 replies
-
- 1
-

-
- mayflower
- constructo
- (and 2 more)
-
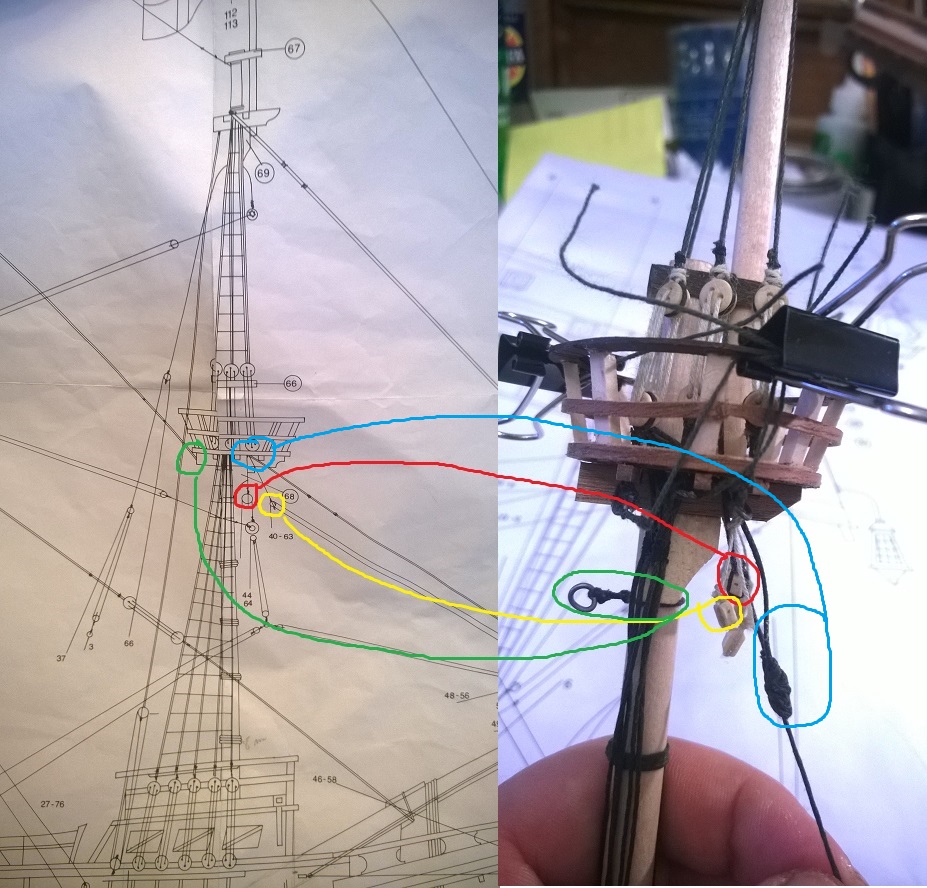
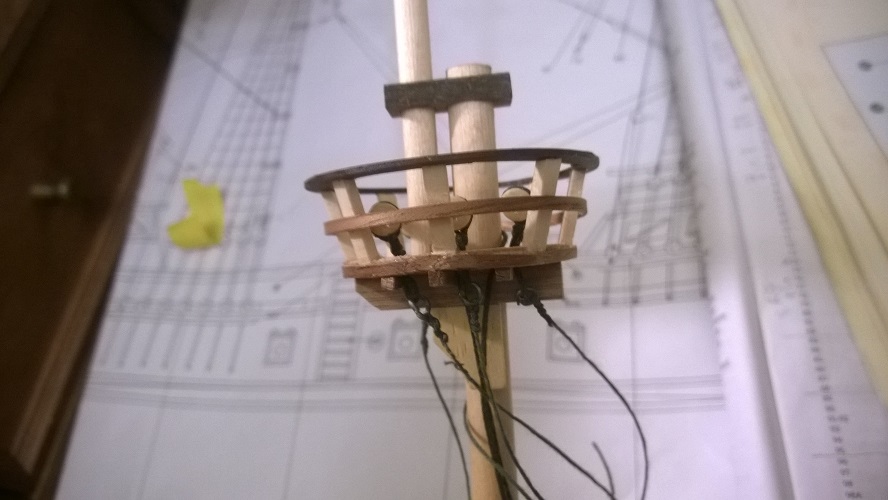
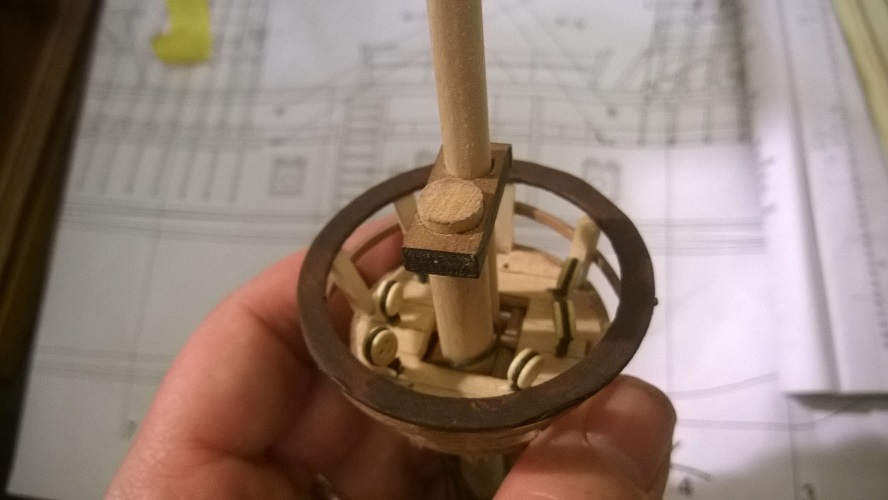
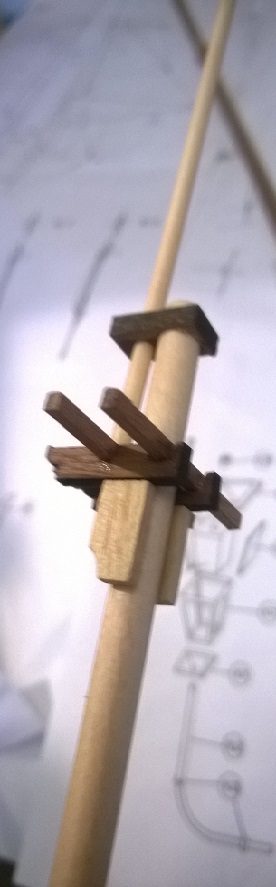
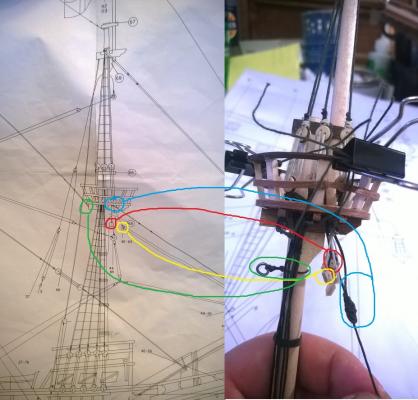
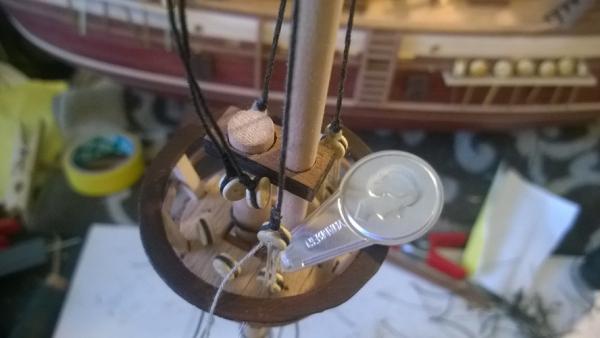
8.6.2015 Main mast shrouds and deadeyes. Today I continued with main mast shrouds and deadeyes and managed to finish port side. Nothing special, except when fixing Chain plates (didn't do that before the shrouds were ready so that I could get the into right angle), I managed to break the other of the pump levers. Should be easy to fix with CA. I didn't fix any of the yards yet before ratlines are done. It was hard to get same tension to the shrouds and it feels the sheer pole is balancing a bit (at least it feels so in the fore mast). Should be pretty equal except maybe 1-2 that are a bit less tight but I don't know yet if it will create some problems in the future, lets see.

- 80 replies
-
- 1
-
-
- mayflower
- constructo
- (and 2 more)
-
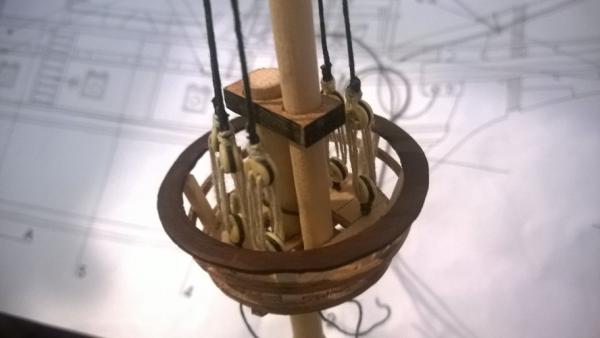
7.6.2015 Fore mast sheer poles and main top mast shrouds. Building top mast shrouds before attaching masts to the hull would have given a lot more comfortable working position as I thought . I wonder if I should have also build the ratlines to top masts before gluing masts in place... I think I also made a small mistake by attaching the fore mast yards already in place. I will definitely leave them off from main mast and mizzen until I have done the ratlines, because at least now it seems that they will be a bit in a way. Maybe finish ratlines and then move to yards.
- 80 replies
-
- 1
-
-
- mayflower
- constructo
- (and 2 more)
-
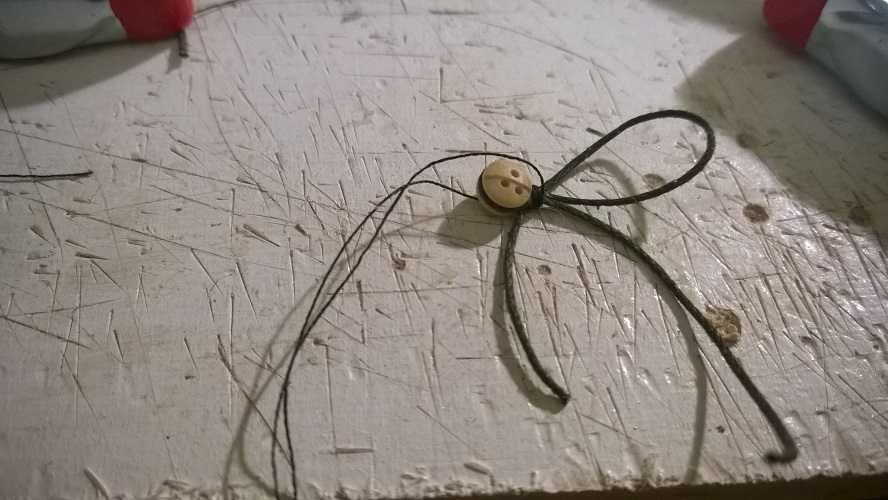
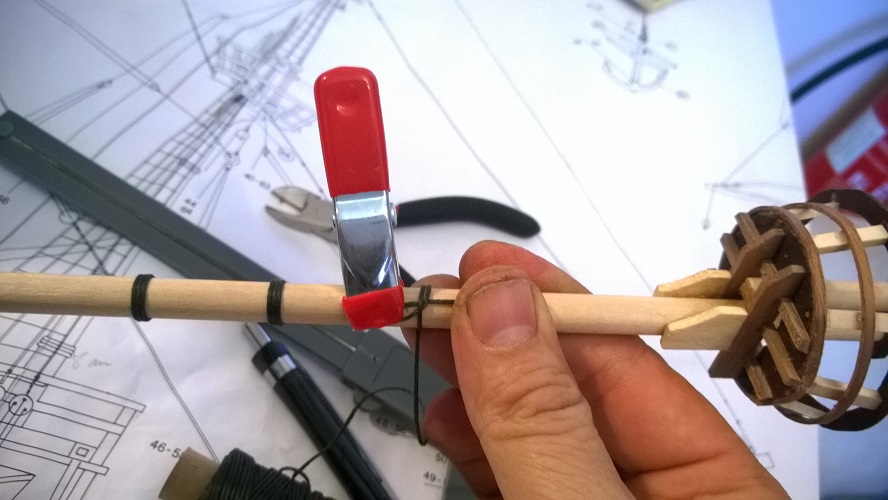
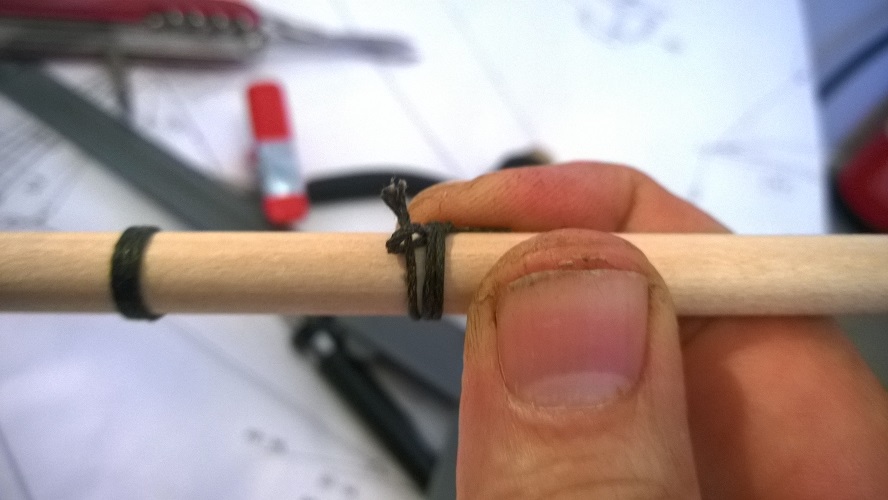
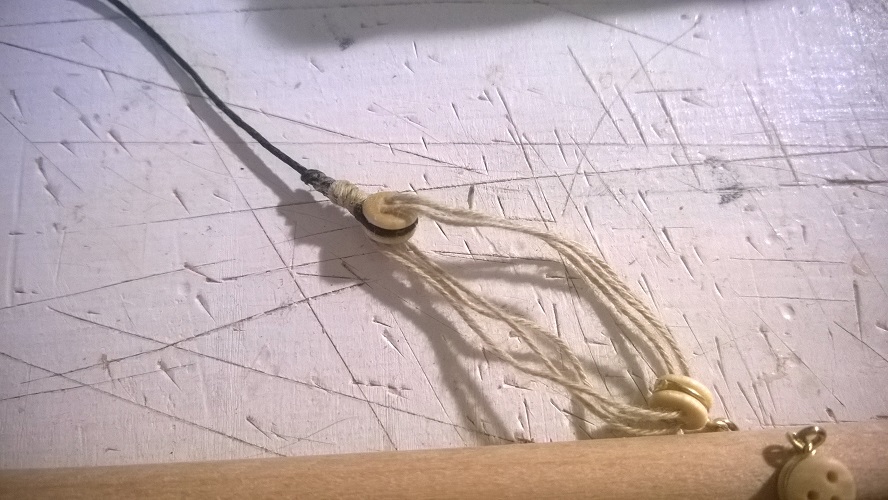
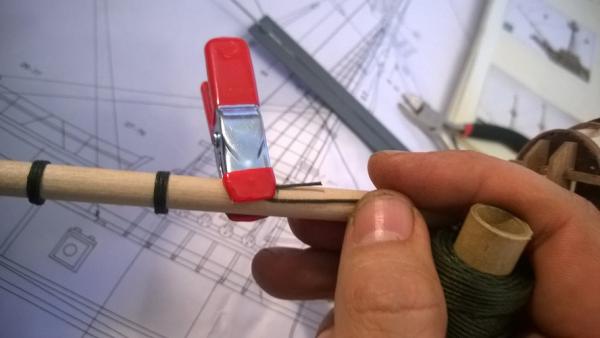
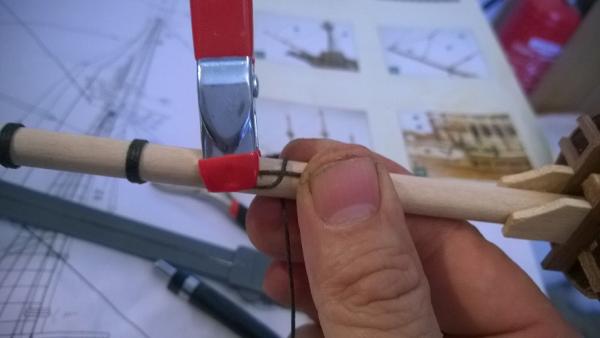
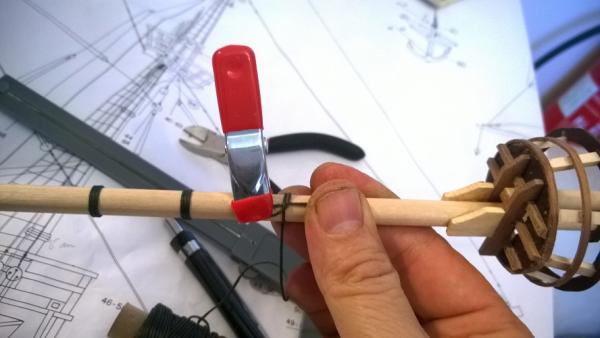
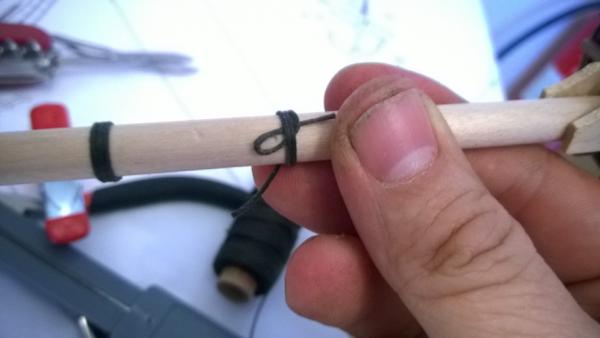
5.6. and 6.6.2015 Rigging fore mast with deadeye lanyards. Trying to be as patient as possible and make quality work. I'm following this model (https://www.youtube.com/watch?v=PrImPdbLRAw) when rigging lanyards. I'm putting only 2 visible seizings (1 right where the deadeye meets the shroud) and I'm finishing lanyard without taking it all the way up "behind" the shroud like in the video.
-
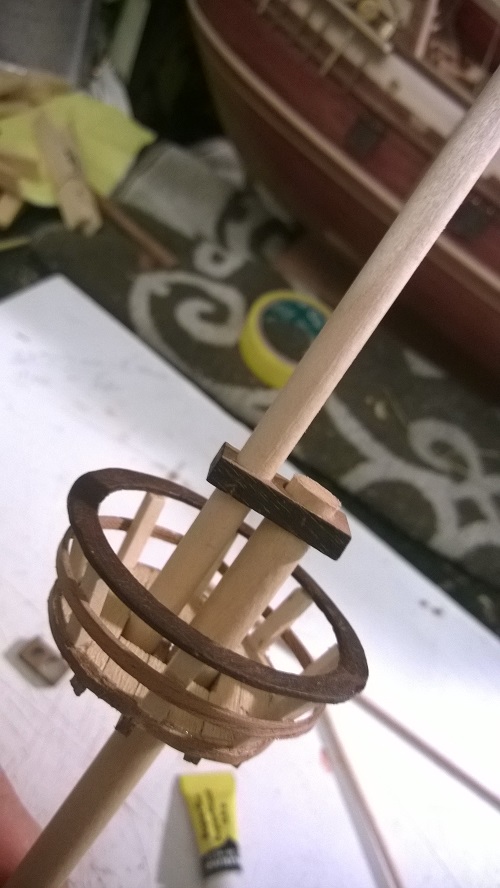
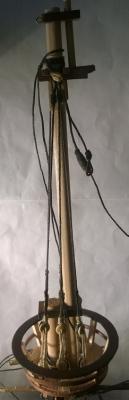
4.6.2015 Mizzen mast shrouds+blocks and attaching masts to the hull. Today Finished mizzen mast and attached masts to the hull Learning: It's hard to drill right in the beginning straight into right angle all the masts but do it carefully then in the beginning and you save a lots of trouble at this stage. I almost got everything straight but needed some rework on the main mast bottom to fit it in right angle. Let's see when the glue is dry and the base riggings are in place. Oh, and just noticed that I forgot to do the main top mast lanyards before gluing masts in place. Oh well, a bit more uncomfortable position to do them tomorrow...

- 80 replies
-
- 2
-
-
- mayflower
- constructo
- (and 2 more)
-
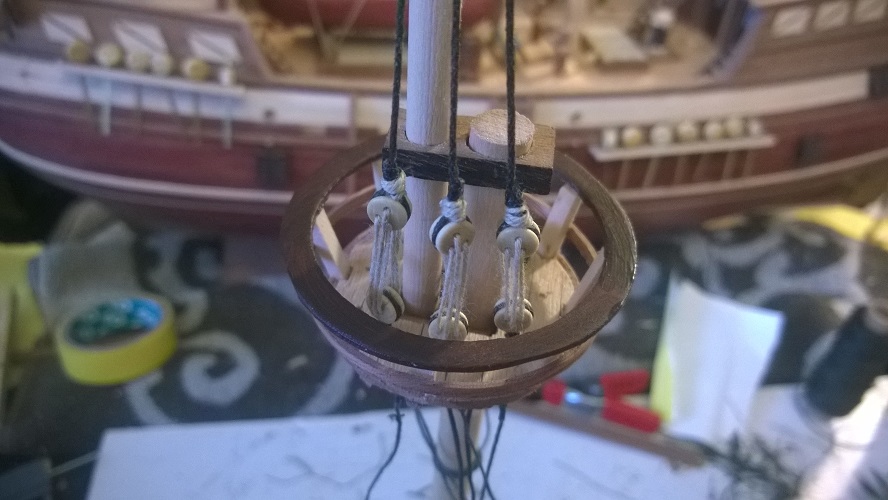
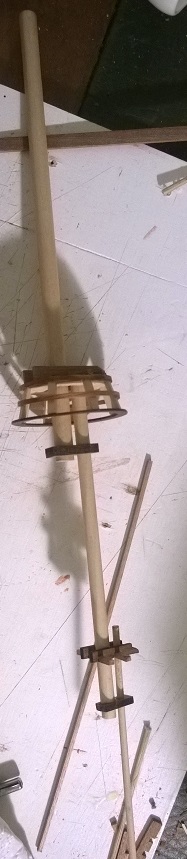
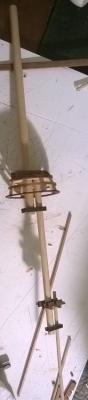
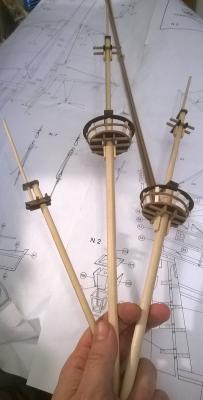
2.6.2015 Preparing main mast. Main mast hoops, base and top mast shrouds, all the needed block, parts and rig connections ready. I hope I understood correctly the instructions earlier because I basically followed exactly how I did my fore mast. Few enhancements to my knots and I also used a bit thicker rope to seizings to give a bit cleaner result. I'll take a more detailed photos after I have connected the shrouds to lanyards cause at the moment my masts looks like rope hell .

-
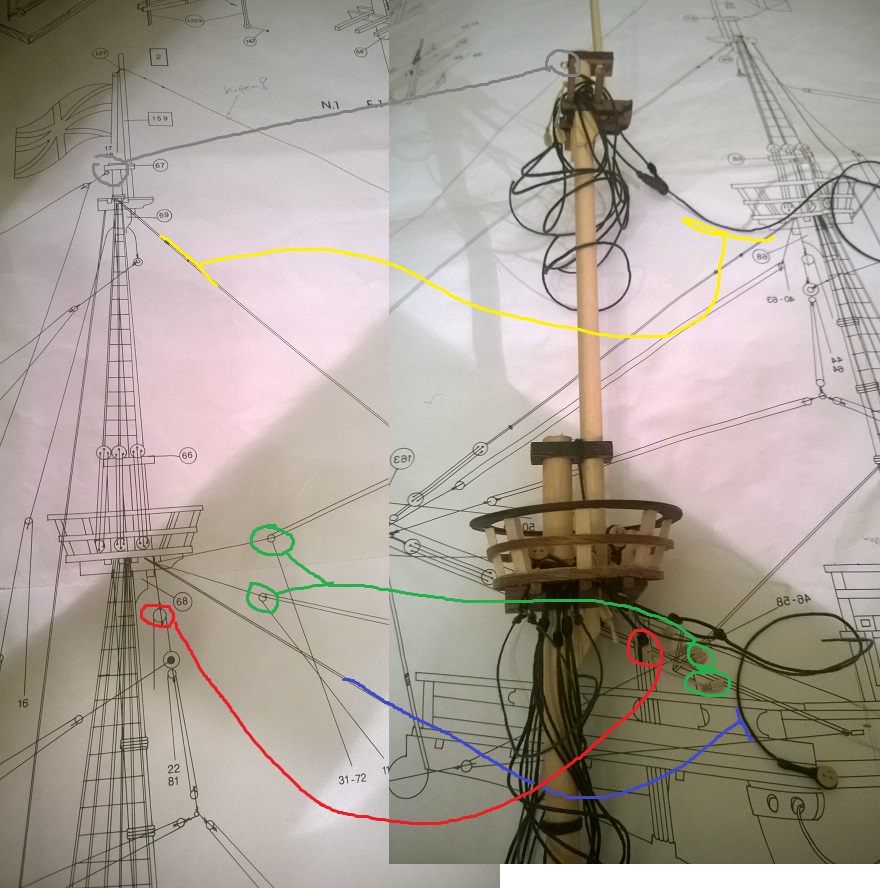
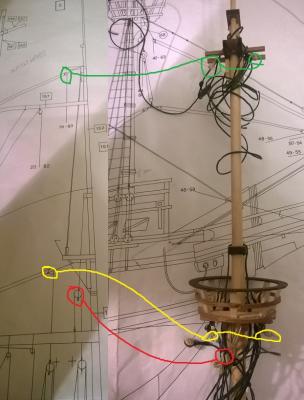
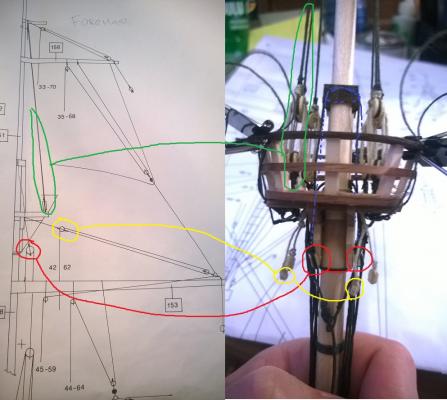
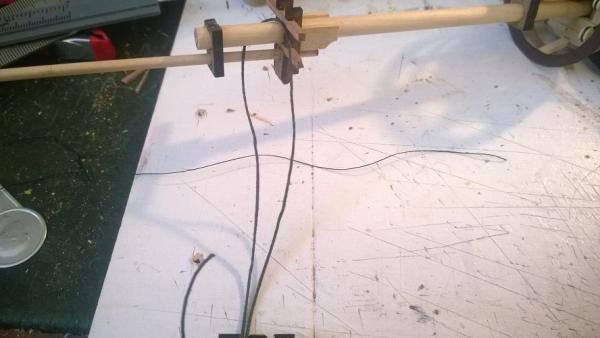
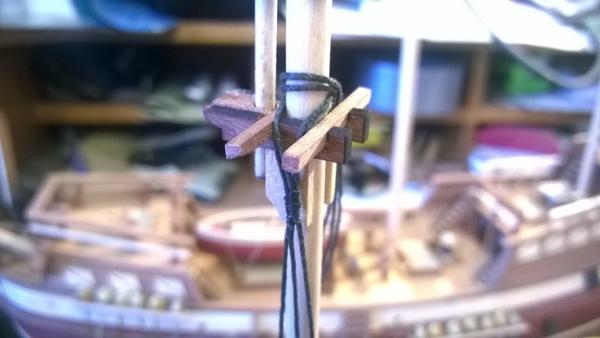
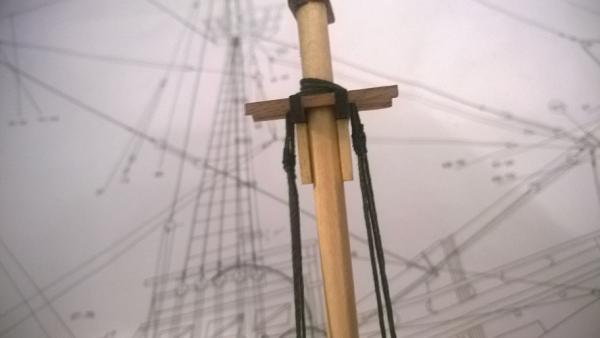
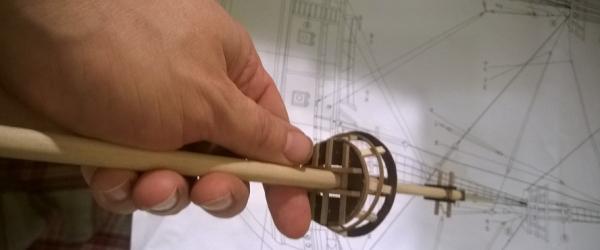
1.6.2015 Preparing foremast. I figured that before moving to ratlining, gluing the mast in place and moving to main mast, I should try to finish all the small blocks that are going to get attached to foremast at this stage. a) after ratlines and fixing the mast, it's harder to seize those small parts that are close to the mast. At least now after work it seems to be a good idea, but lets see later when I actually going to use those blocks . In addition I modified a bit the Fore Stay (which in original would have been just few knots) by building a Mouse there. I also seized the base mast shrouds ready for deadeye connections. Almost all my time went on research what does those Contructo drawing actually mean and for what purpose those lines will be set up. I hope I got it right and please comment if you see something wrong in my approach. Going to still finish the top mast (only few connections and should be much easier).
- 80 replies
-
- 1
-
-
- mayflower
- constructo
- (and 2 more)
-
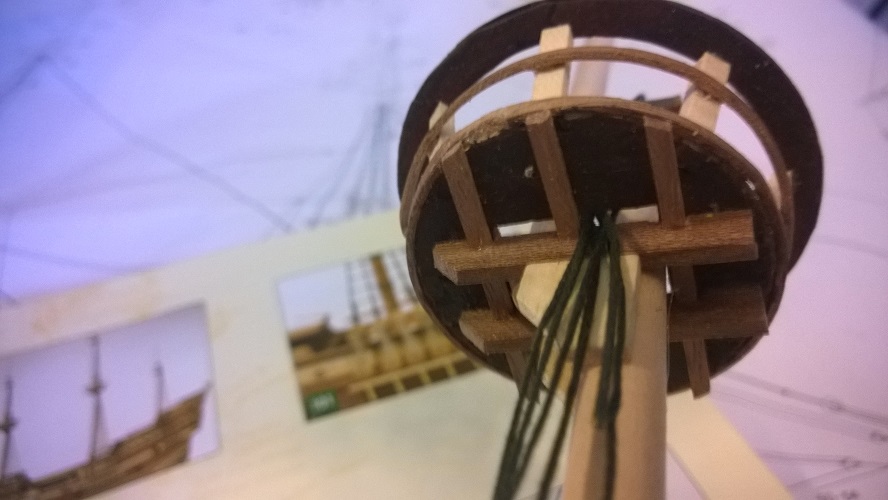
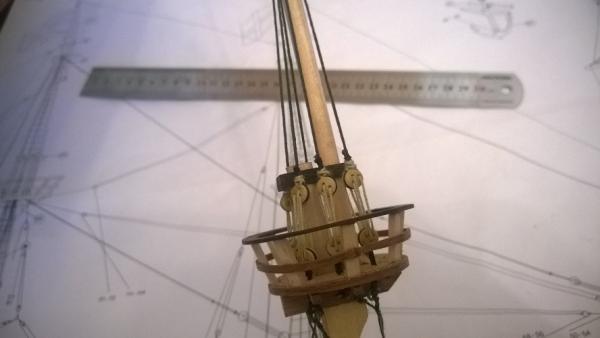
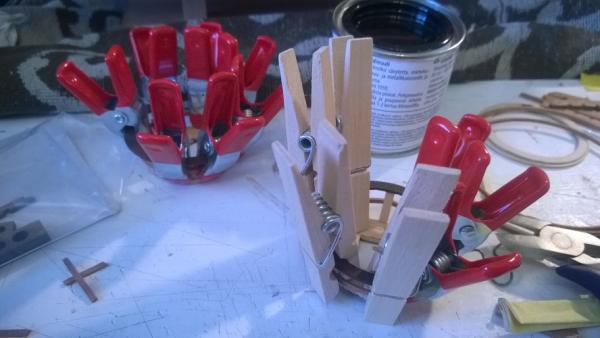
31.5.2015 Top foremast shrouds and lanyards. Today I found my new best friend: NEEDLE THREADERS! Handy tool, the inventor should be awarded nobel prize

-
Looking very good! Keep it up, nice work!
-
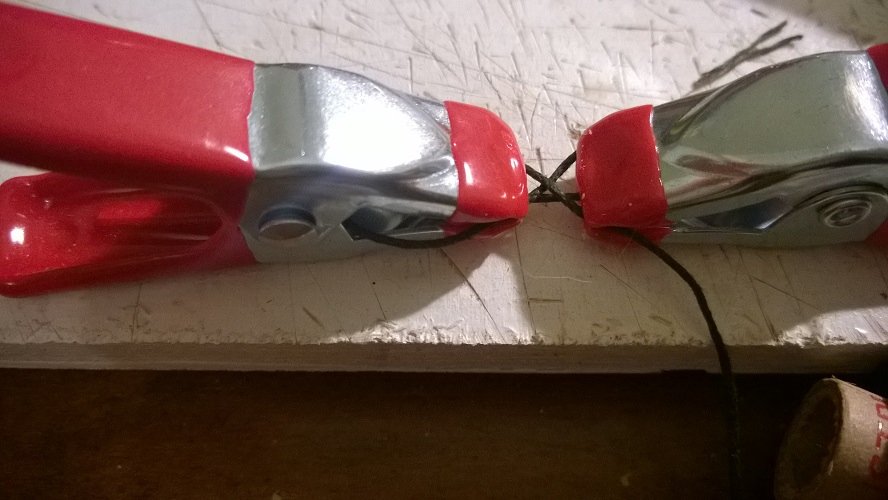
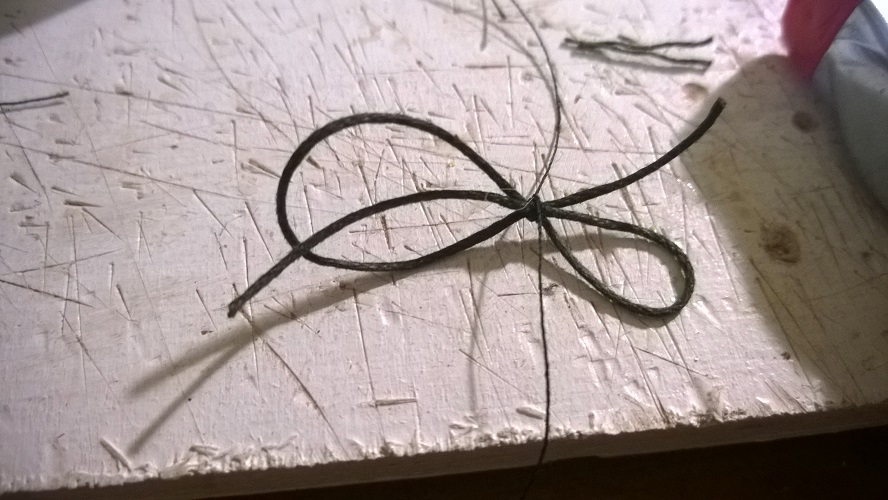
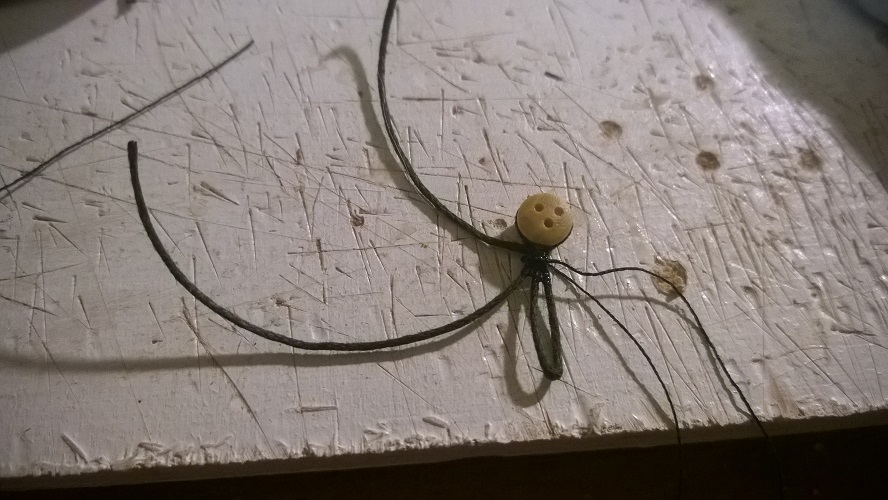
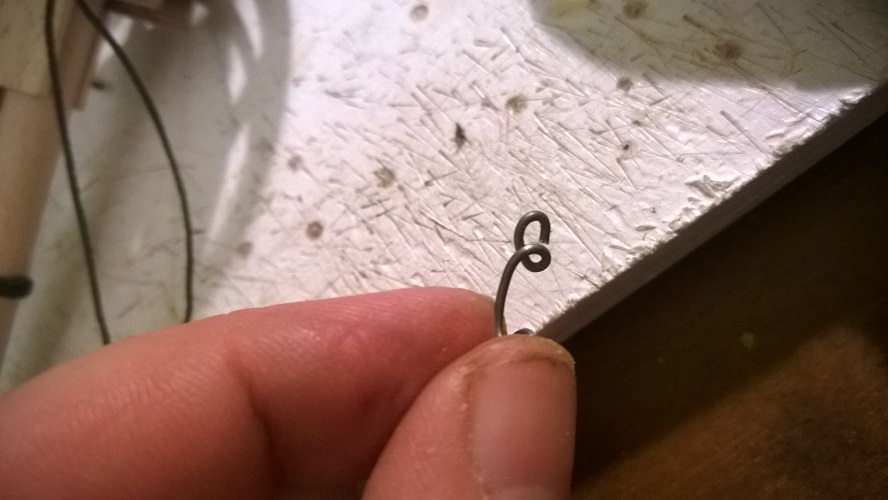
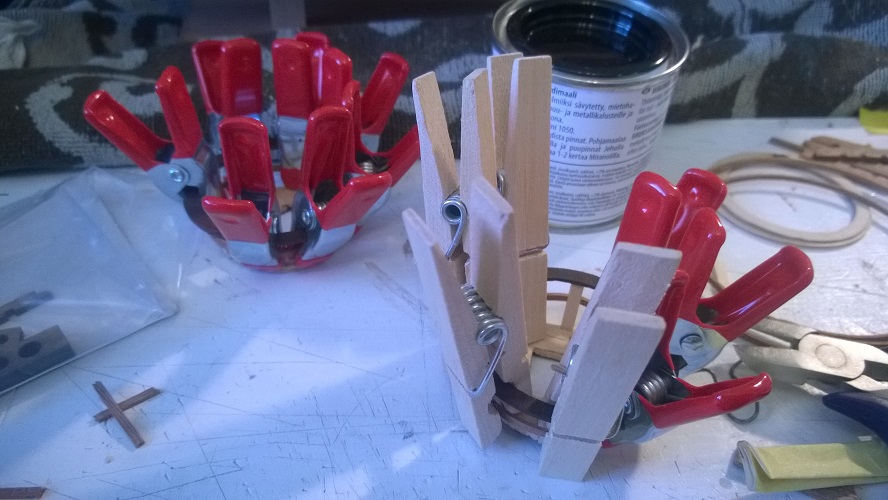
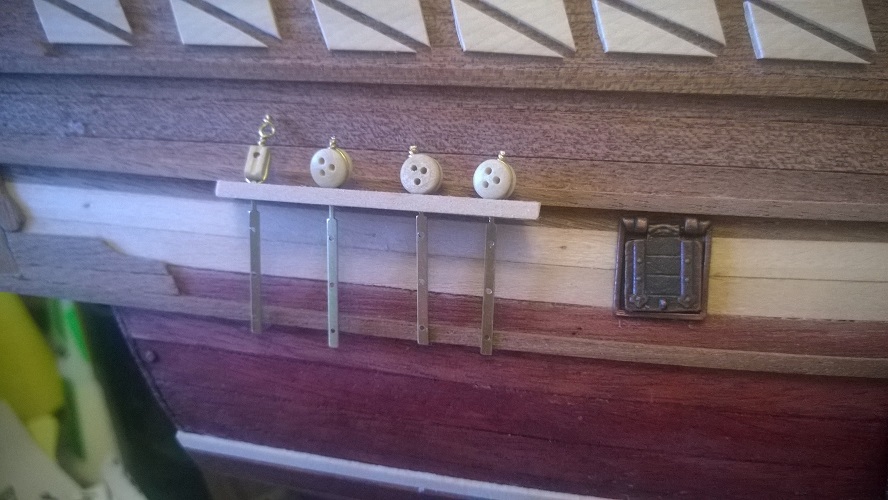
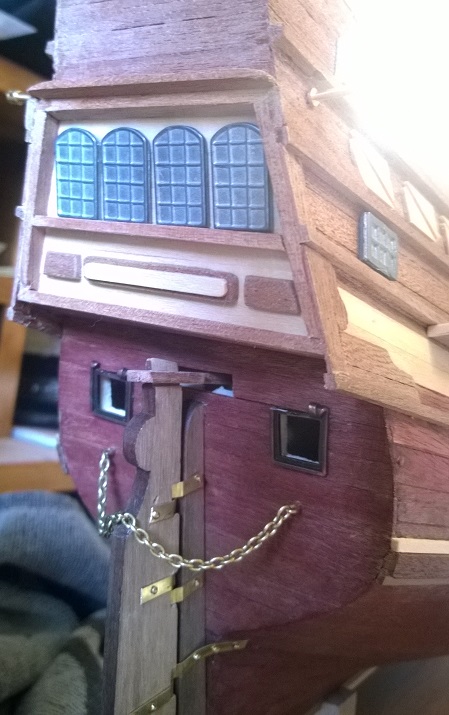
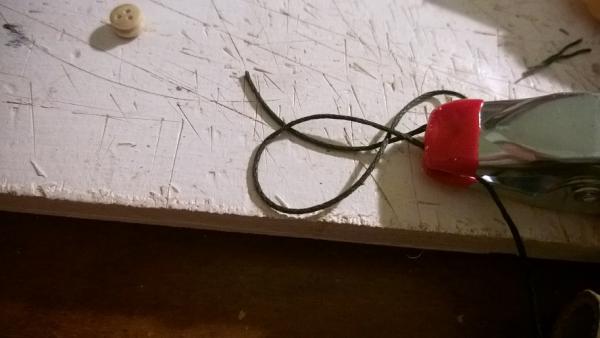
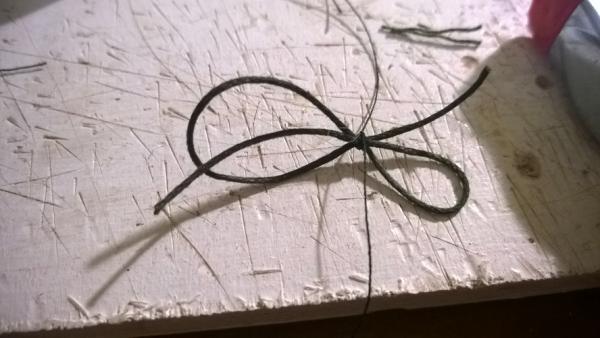
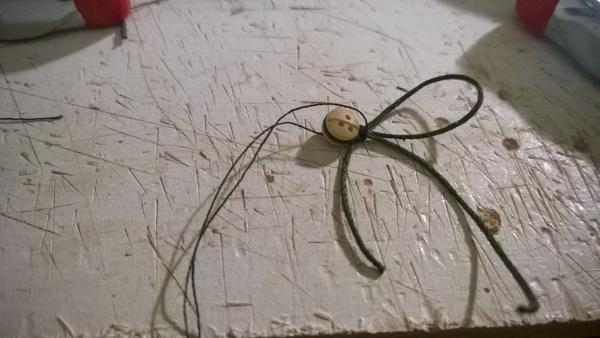
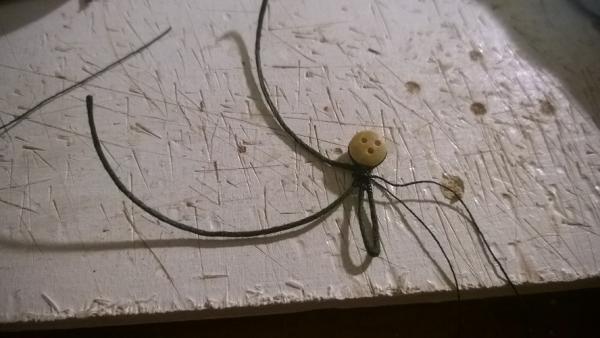
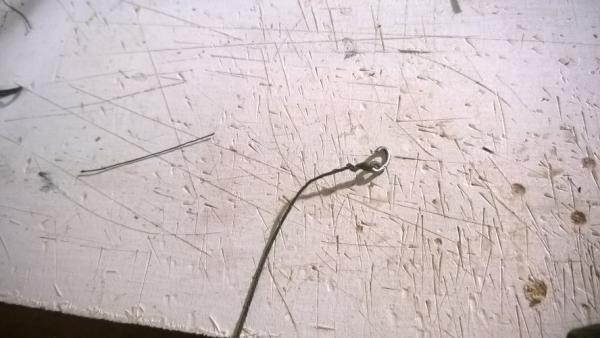
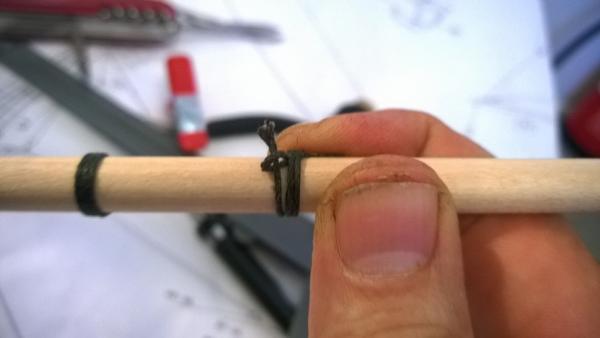
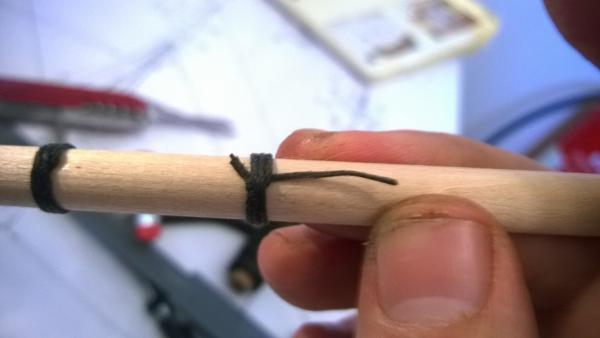
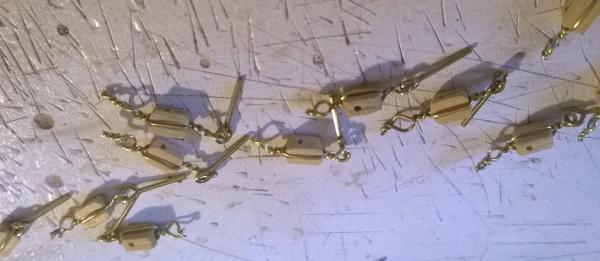
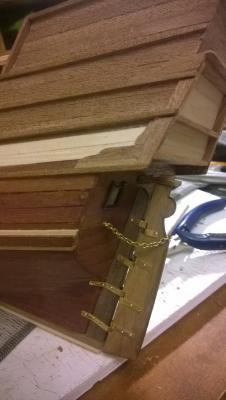
Instead of fixed chain plate, I used rope (same as in shrouds). The lower part is fixed only when I get to the base foremast shrouds. I tried the hook technique but my hooks looked awful (picture below) so I decided to make a fixed ring to connect the deadeye hook and the "rope" plate. I left 10 cm rope hanging for room to fix that later to the base shroud ratlines.


- 80 replies
-
- 1
-
-
- mayflower
- constructo
- (and 2 more)
-
30.5. continued. Since constructo instructions didn't say anything about the top mast deadeyes, I decided to follow this model, with a slight twitch.

-
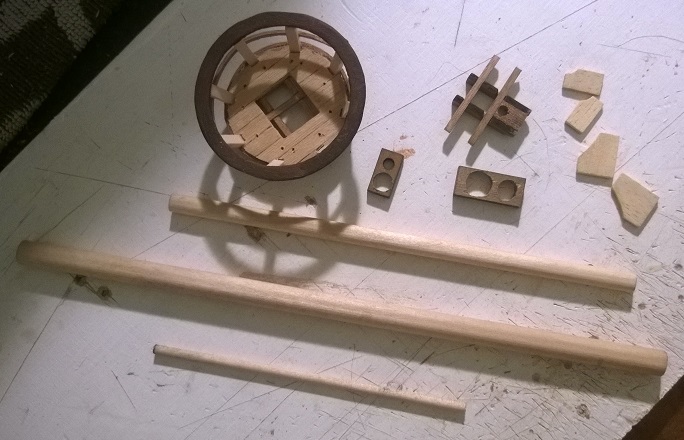
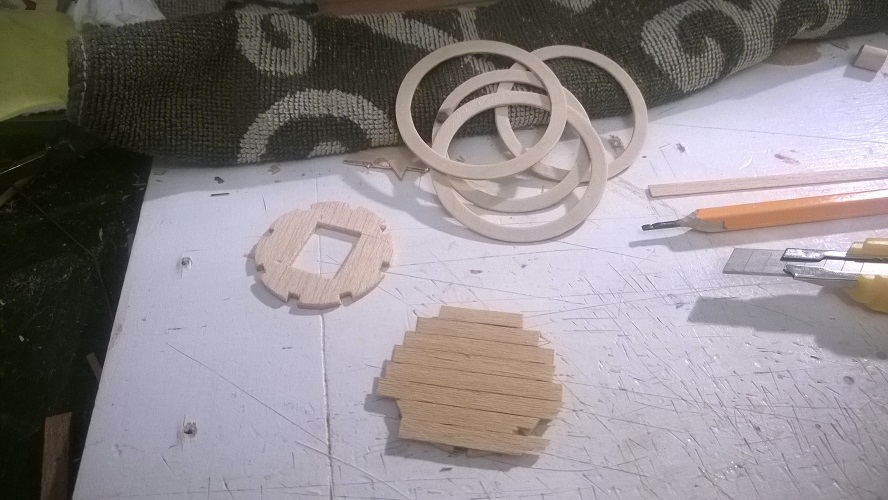
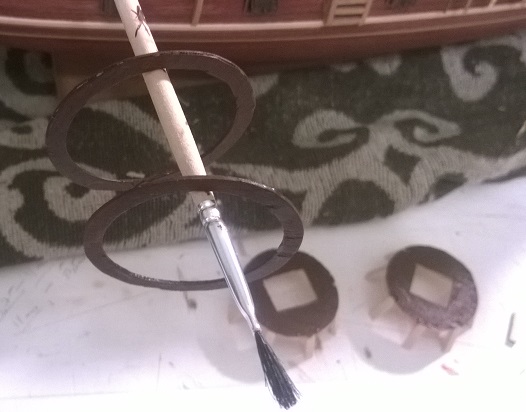
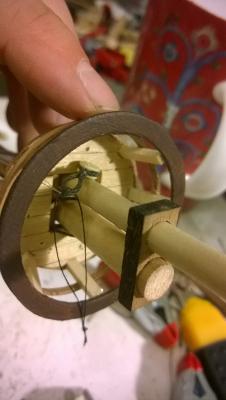
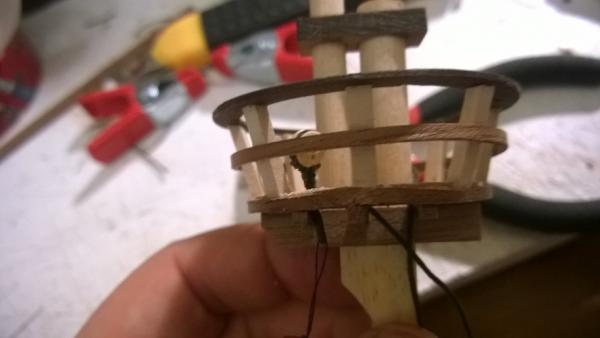
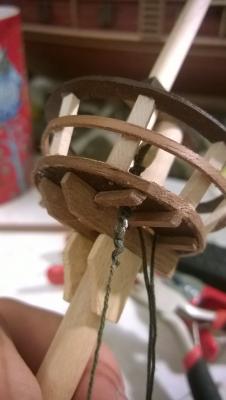
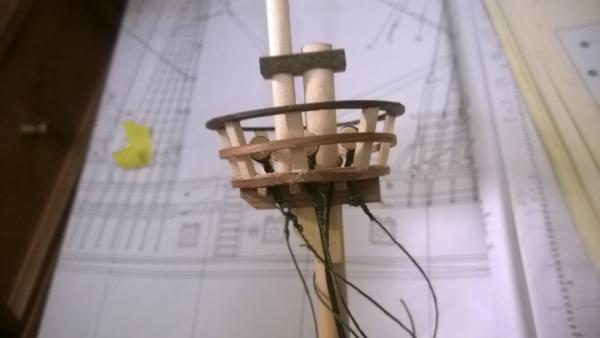
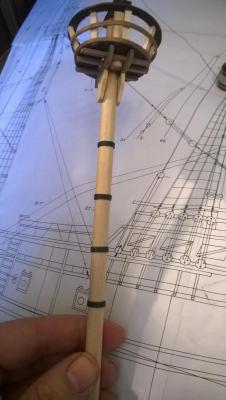
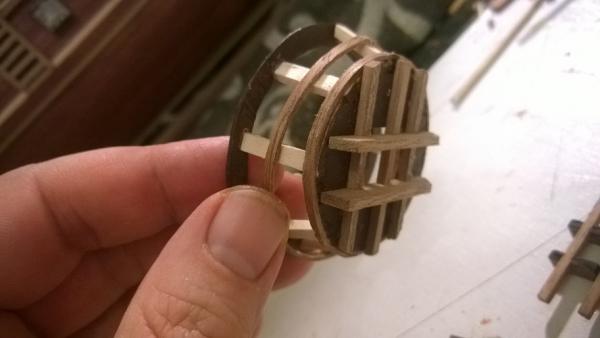
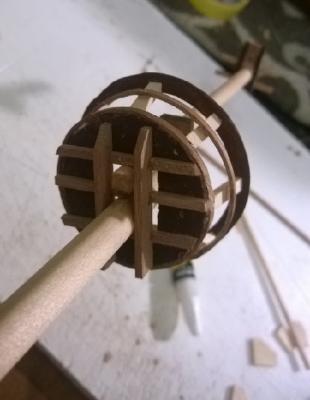
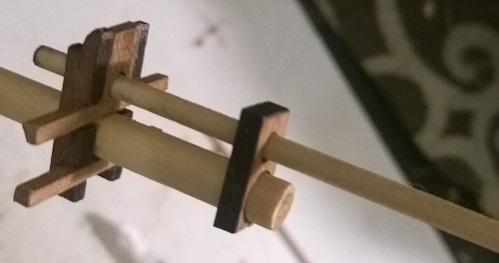
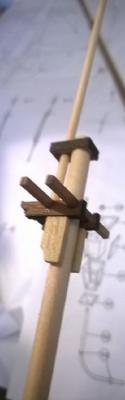
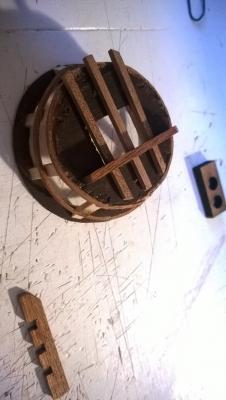
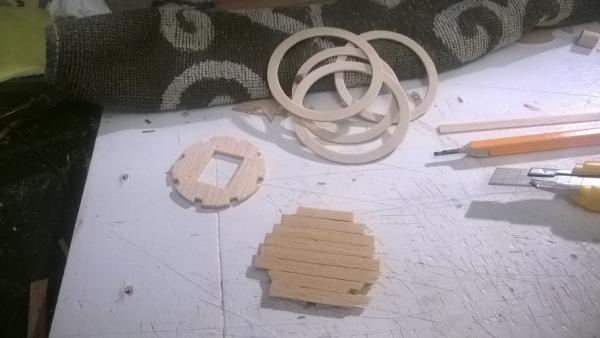
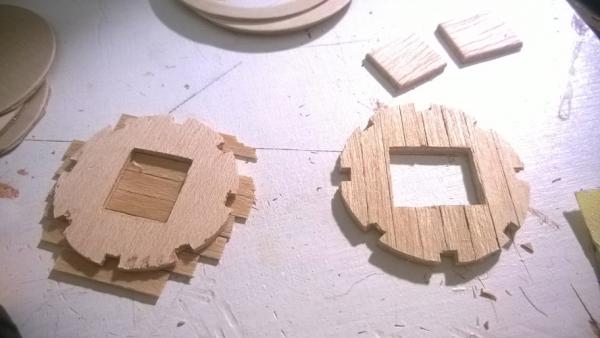
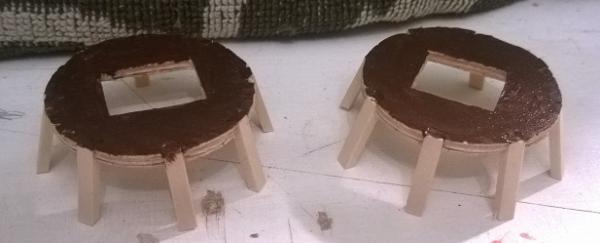
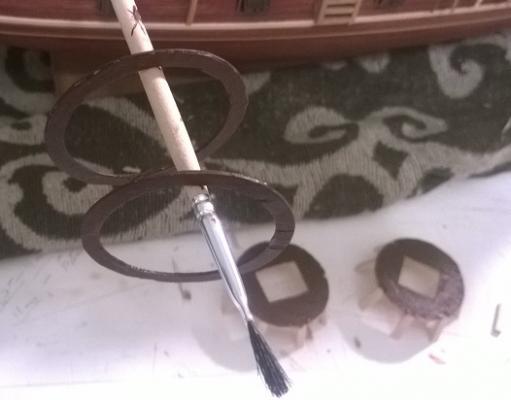
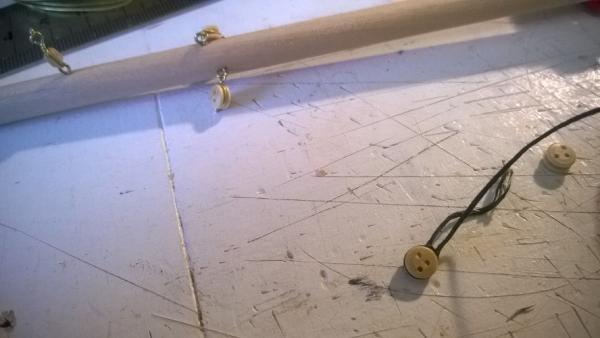
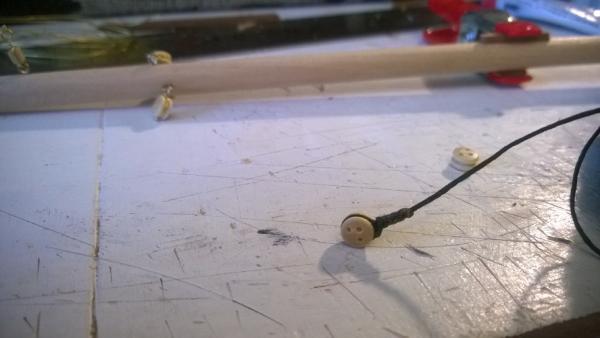
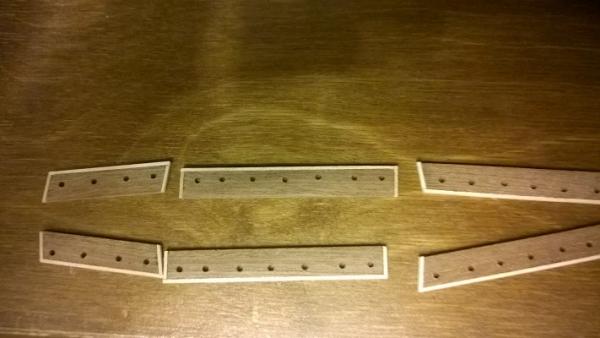
30.5.2015 Preparing mast hoops and digging Internet for rigging information. Today I mostly searched Internet how to do mast hoops, shroud riggings, shroud and deadeye connections, ideas to ratlines, order of rigging and trying to figure out do I need to do some block connections to mast before I continue or just start doing shrouds and ratlines. I put some pics how I decided to do the mast hoops to the foremast.
-
Thanks Rschissler! I tested with 6 shrouds and they went through smooth even from 1 hole (I hope I understood correctly what holes you mean). It's hard to measure the gap but they are around 2mm:ish in my case. Added few pics to illustrate. ps. When putting the very top mast piece on, I made a small measurement mistake and when everything else is straight, my tops tilt a liiiitle bit backwards... I did the mistake with the foremast and.. have to admit, I repeated the same mistake in the main mast so had to tilt backward also the last mast so that it seems a "calculated mistake"

-
29.5.2015 Masts Today it was turn to put the pieces together to masts. Managed to make at least the base ready before putting "middle ropes" and starting the rigging. If I understood correctly, some does the deadeye rigging into the top masts first before gluing the masts into the hull, and then after gluing move to chainwail deadeyes rigging. Maybe I try that also first...

- 80 replies
-
- 2
-
-
- mayflower
- constructo
- (and 2 more)
-
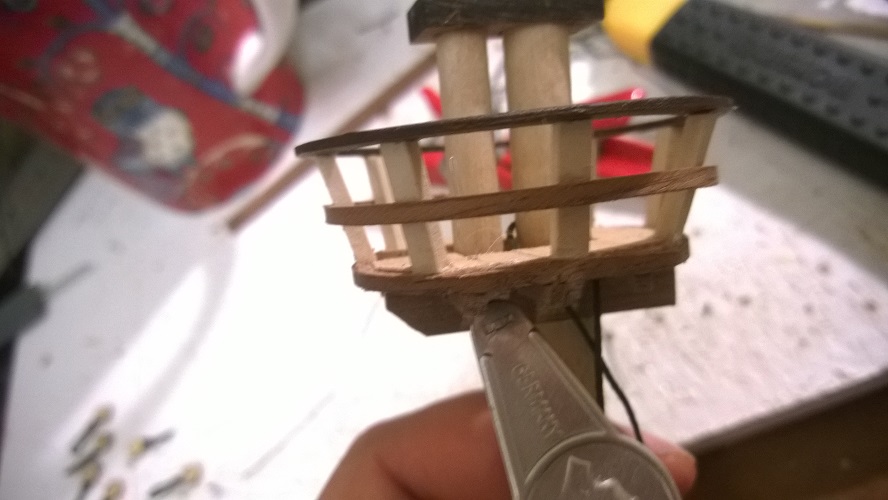
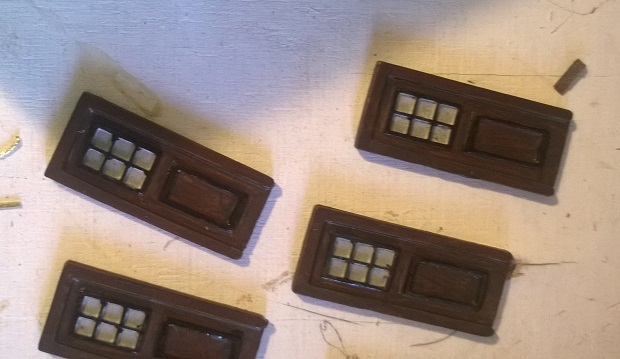
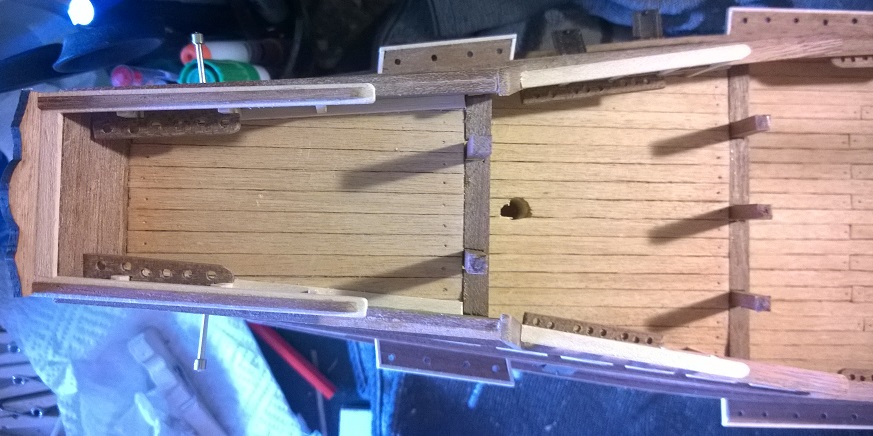
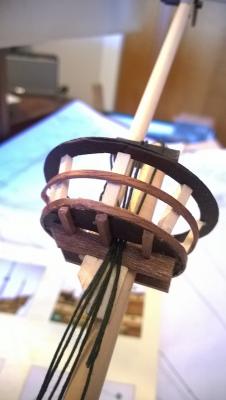
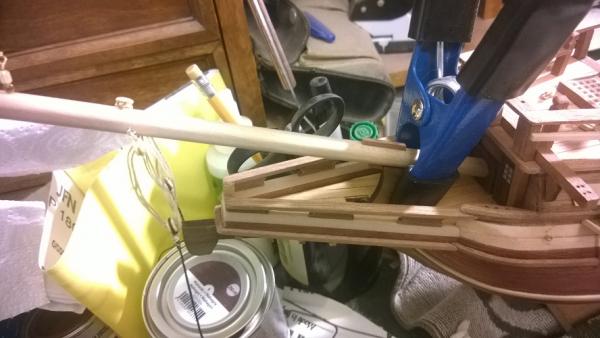
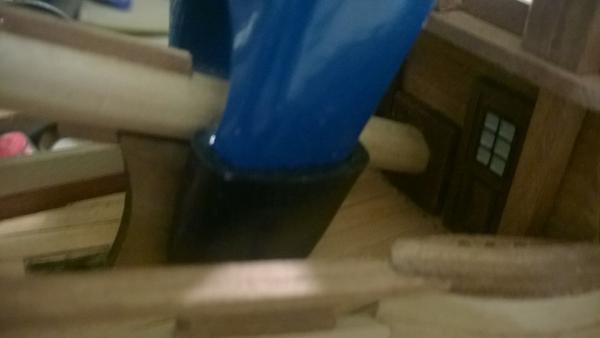
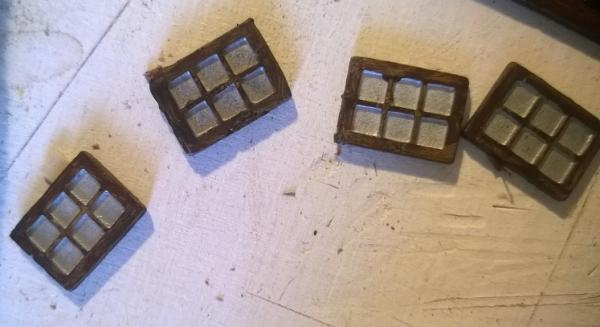
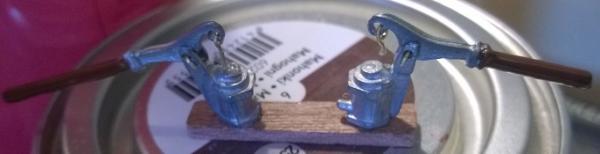
28.5. Attaching bowprit and battling with tower guard posts. Only negative comment so far about this Constructo kit has been the really poor instructions. One large 1:1 architecture pictures and 1 picture illustrated no words guide. The more you advance, the poorer and less detailed the illustrated guide becomes. There are also differences between the guide with the pictures versus the architecture picture. Also second time some of the "ready made parts" didn't fit (first one was with the metal doors). First I did grid parts under thetower guard post with the ready cut parts -> wrong, since they are identical and actually the base foremast diameter is more than foremast top, so basically those didn't fit through the grid and I had to made the parts that fits. Second error was the picture in the guide and in the architecture paper. In the pictured guide you can't actually see how the guard post is set up and to what direction it should point. On the architecture picture there is a clear arrow pointing bow, BUT its wrong. Since the square hole in the guard post is not square but rectangle, you cannot fit the foremast and the foremast top if the rectangle is faced wrong. Basically this doesn't matter, UNLESS you had drilled the deadeye holes that was instructed in the pictured guide -> had to drill second pair of 6 holes correspondingly. Learnings: From now on, I will not follow the illustrated guide, and before I start to operate on any part, I will double check the part and the architecture picture that it's right sized/facing/cut/drilled.

- 80 replies
-
- 2
-
-
- mayflower
- constructo
- (and 2 more)
-
27.5. Preparing Masts, building mast towers and bowprit side deadeye riggings While I was building mast towerposts, I used same method as I used in deck planking (5% oil color sienna blending) to give the masts a bit darker color (I should've used 10%-15% since I would have liked a bit more darker color). I painted the towerpost bottom to brown, as well as the fence circling around the mast tower. I also started my first deadeye rigging exercise in the bowprit side. As I was finished I tried looking for best practices in the rigging and found out this Youtube: https://www.youtube.com/watch?v=PrImPdbLRAw. Maybe I follow that when I get to the chainwale riggings... Well still few things to do like masts before I get there .


- 80 replies
-
- 1
-
-
- mayflower
- constructo
- (and 2 more)
-
Hi Splicer and thanks for comments! I agree with you, that is exactly what I was looking from this forum in the beginning. I try to take more detailed pictures in the future (I decided to have this build log only after I had already done my initial hull planking) and especially pictures from build phazes, not just from ready parts
-
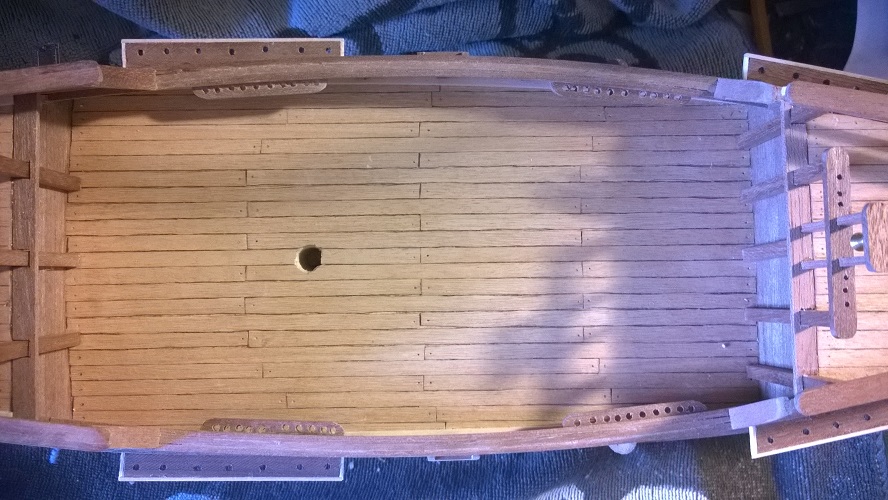
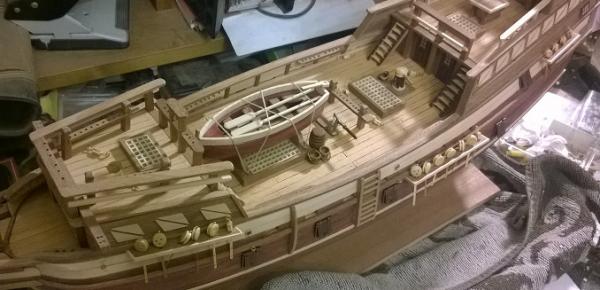
26.5. Glueing deck accessories in place and starting to sort out mast and bowprit.

- 80 replies
-
- 2
-
-
- mayflower
- constructo
- (and 2 more)
-
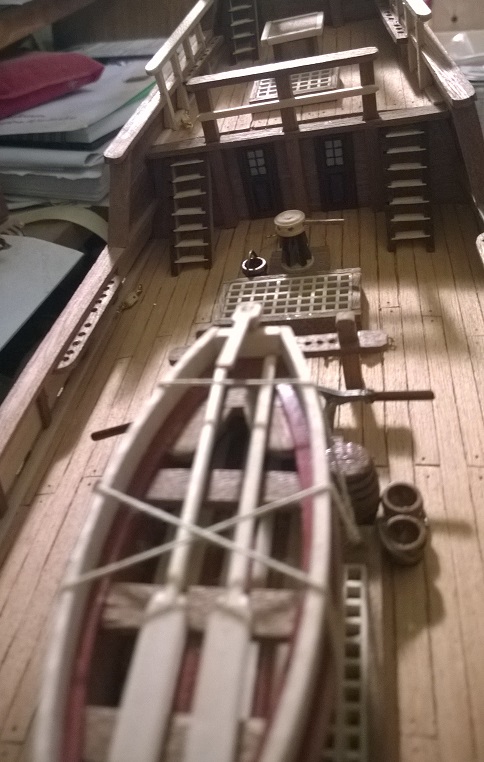
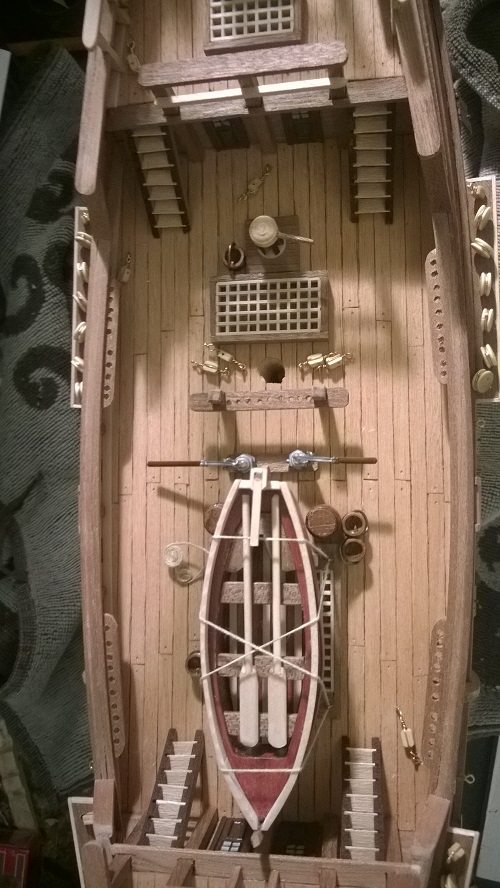
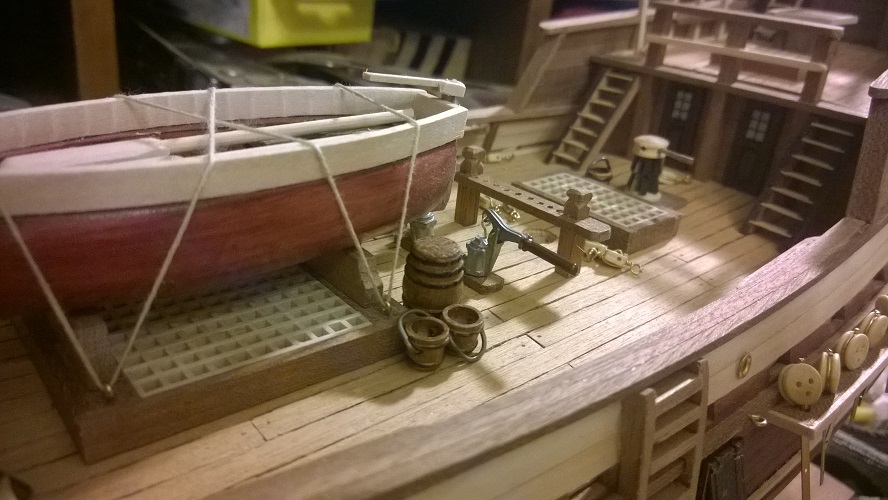
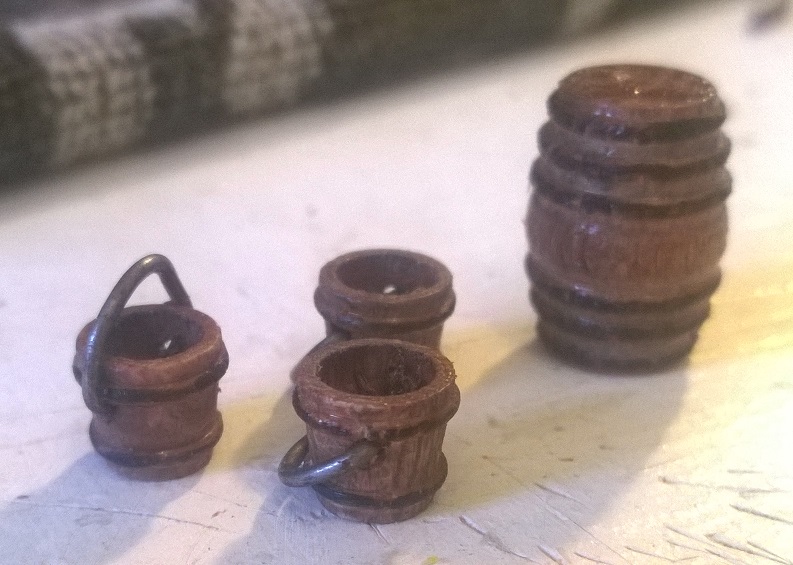
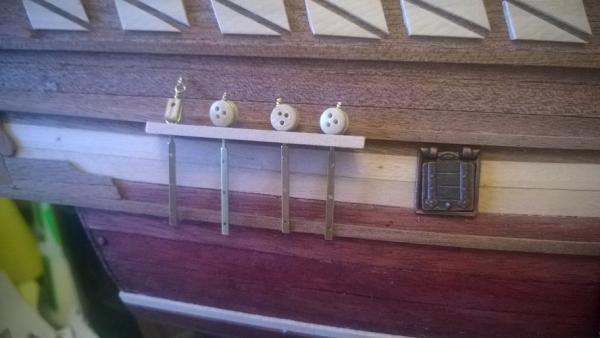
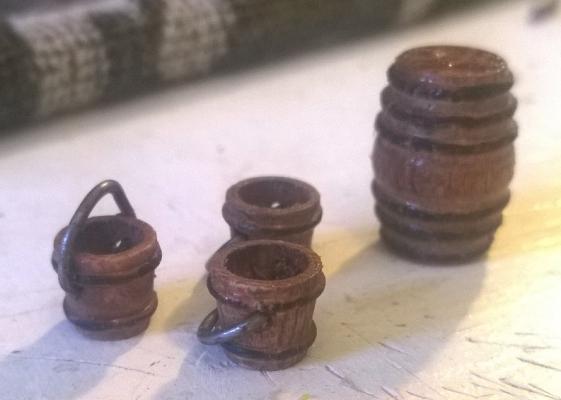
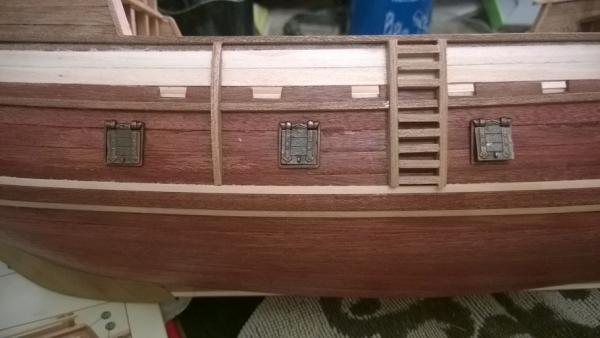
25.5. Finishing deck accessories and chainwales. Also tried my first rope "circle" to the ropes on the row boat . Learnings: Never use alkyd-colors. Tried painting doors with that first and the surface was slick smooth with bright reflection (nothing that wood would look like). Well, second layer then with normal acrylic paint and the result was much better. In addition I put some color to the baskets, barrels and build handles.

-
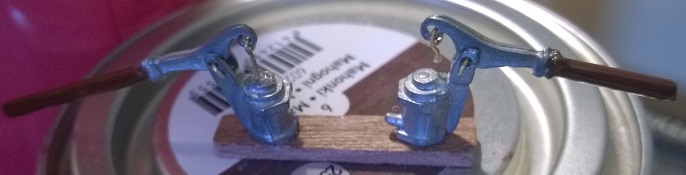
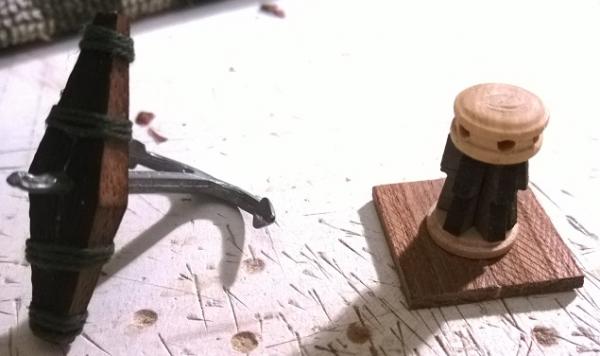
24.5.2015 Loops, deck accessories and pumps Continuing with deck accessories (pumps, lamp and painting anchors to black). Learning the builds of loops and deadeyes.

-
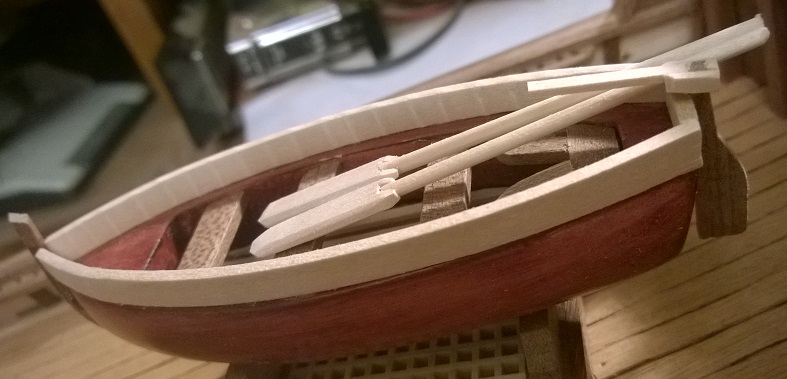
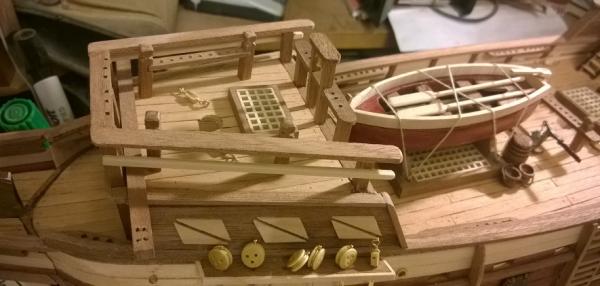
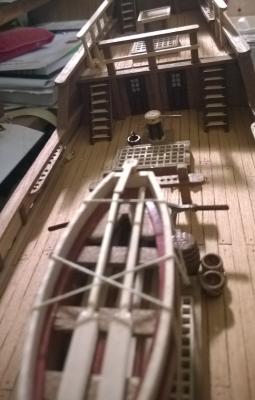
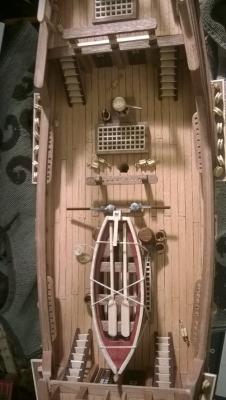
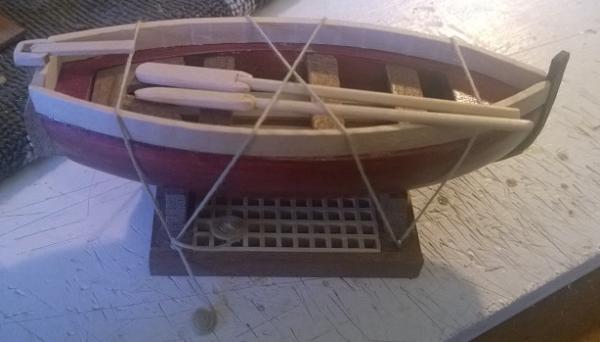
23.5. Anchor, wheelhouse, capstan, ladders and finishing row boat. Pretty relaxing day putting together deck accessories and looking for information how to make proper mast setup and rigs.

-
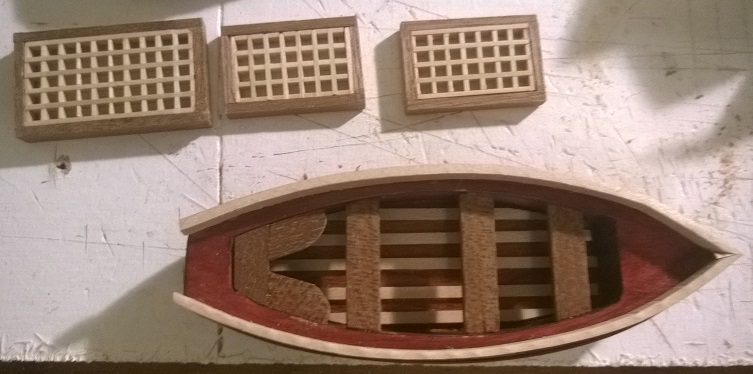
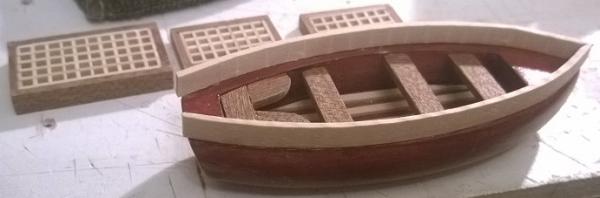
22.5.2015 Continuing gratings and starting boat Continuing to build deck accessories. Fixed the oil color mistake in the boat by cleaning the oil color and putting colored coat of varnish on top of that. Lets see if should still put planks into it.

-
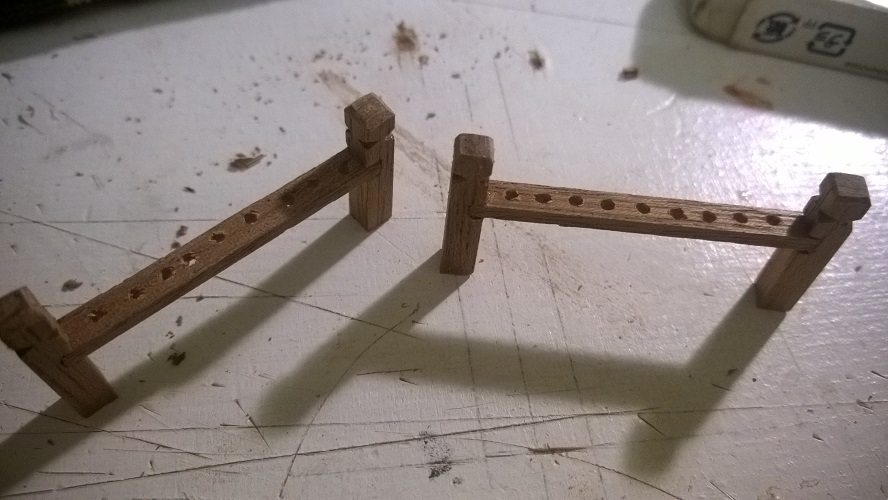
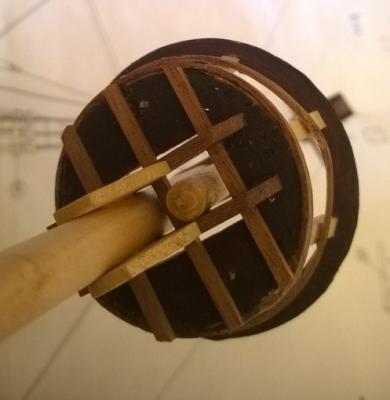
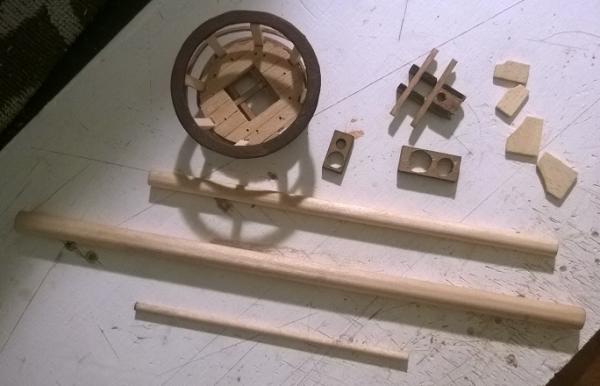
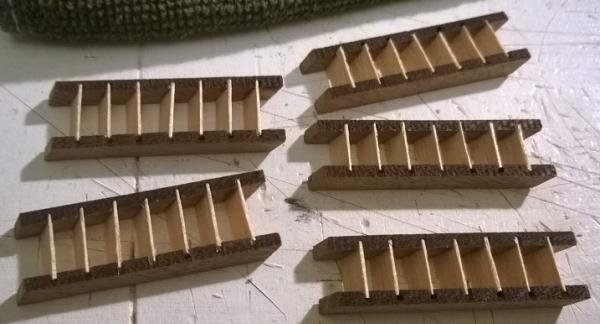
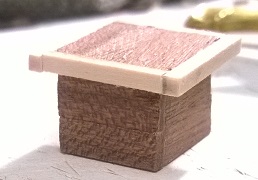
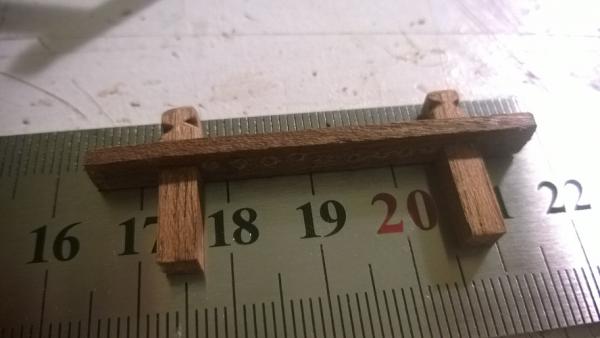
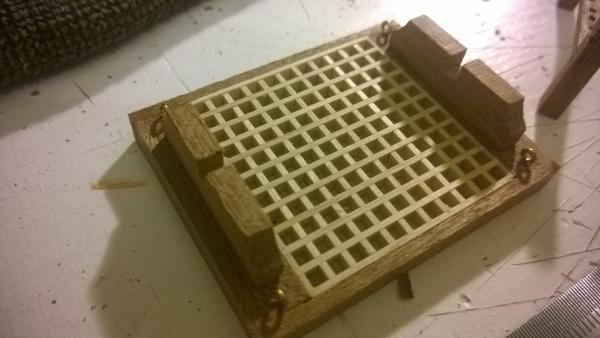
21.5.2015 Gratings and mast pinrails. I started from the boat which was white colored. I thought of planking it but before that, I would have liked to color it deep brown... I put some oil color into it (van Gogh) and waited for 24h... It was still as wet as I have just put it! I searched the net and saw that oil color might take "1 week to dust dry, 2-4 weeks to touch dry", what? I think I need to try wipe it off tomorrow and use some other type. Well, managed to build 1 grating and few mast pinrails. Learnings: Never use oil color (meant for picture painting) to paint wood, at least without thinning it.

- 80 replies
-
- 1
-
-
- mayflower
- constructo
- (and 2 more)
-
20.5. Gun ports, soffits, chainwales and stern. Fingers sore from yesterday's rudder battle, today was a bit easier job gluing ready pieces and drilling few holes. Tomorrow I'll start building the deck equipment: Boat, gratings, mast pinrails, wheelhouse, achors, etc.


- 80 replies
-
- 2
-
-
- mayflower
- constructo
- (and 2 more)
-
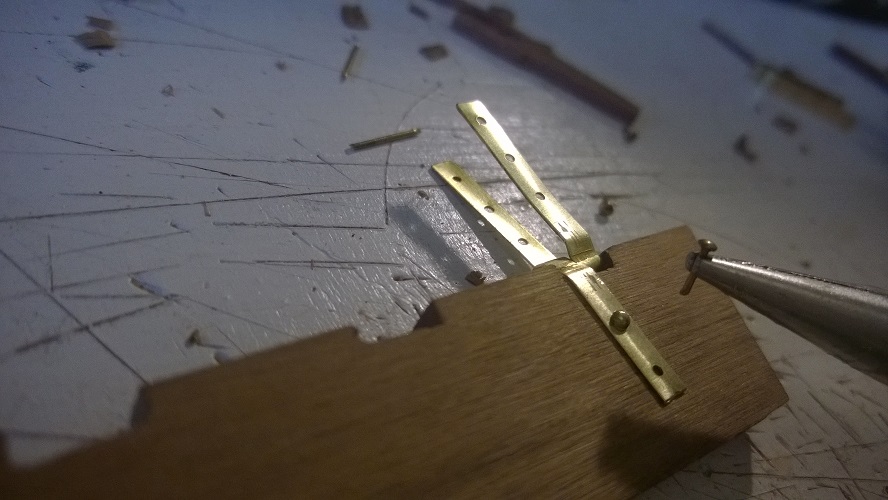
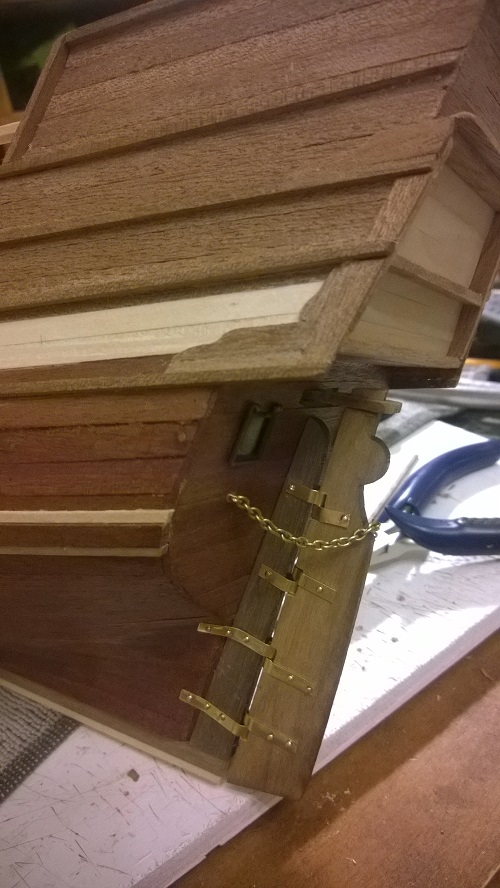
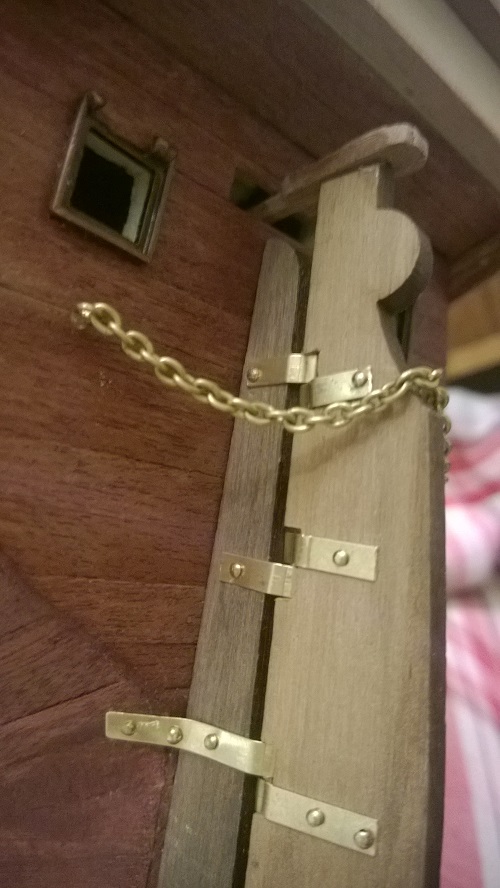
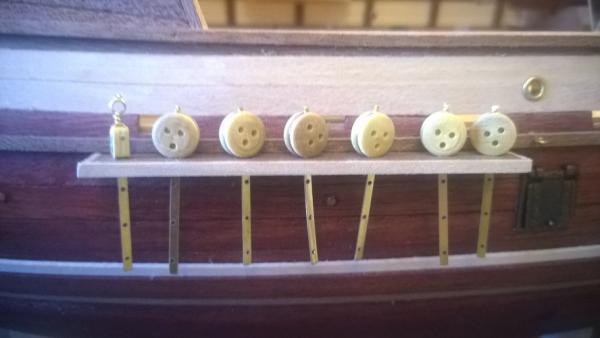
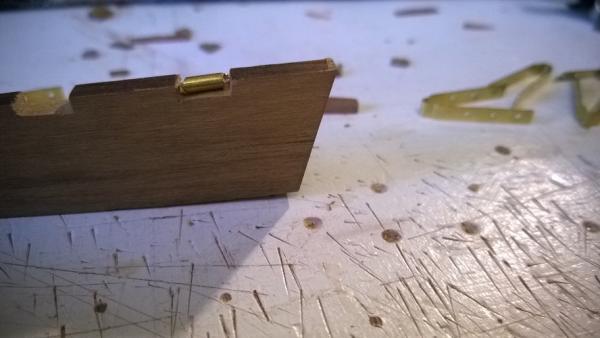
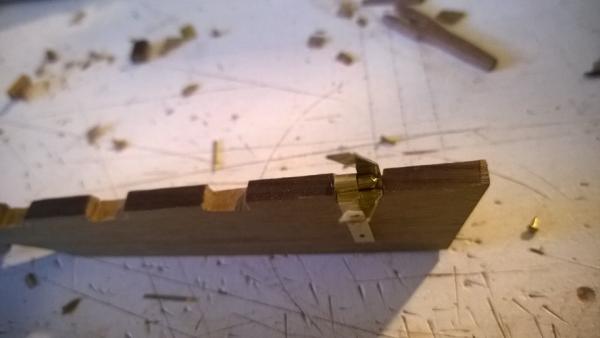
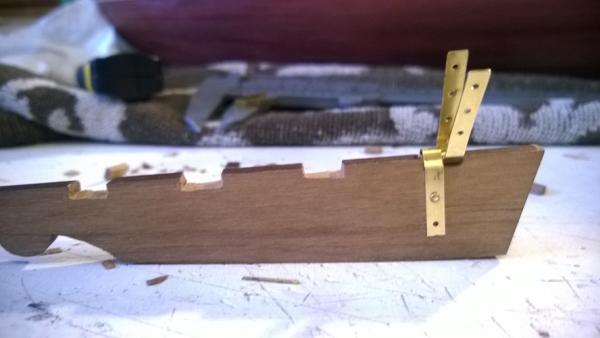
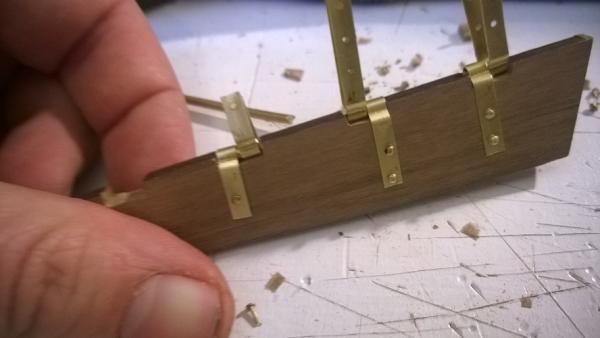
19.5. Rudder, gun ports and chainwales(?) Rudder was pure pain. I don't know how I've should have done it, maybe my technique was poor. If I needed (hope I will not) to do it again, maybe I would first glue the hinges to the frame and rudder and only after that I would put very small decoration nails to it. Now I didn't use glue and tried to use nails to fix the joint hinge in place. I took some photos of the process I did the joint and hinge. My fingers are just too large for that and my tools too big. Maybe I should have fixed the rudder already in earlier phazes, now there so many overhangs (for example bow ram, anchor holder, gun port covers etc), so using brute force with the nails would have probably broken something... Also using glue at this point would have been difficult since the angles and position in the rear and it was hard to use any clamps. Too tired to continue, but made the chainwales(are they called that?) ready for tomorrow.


- 80 replies
-
- 3
-
-
- mayflower
- constructo
- (and 2 more)