


qwerty2008
-
Posts
552 -
Joined
-
Last visited
Content Type
Profiles
Forums
Gallery
Events
Posts posted by qwerty2008
-
-
-
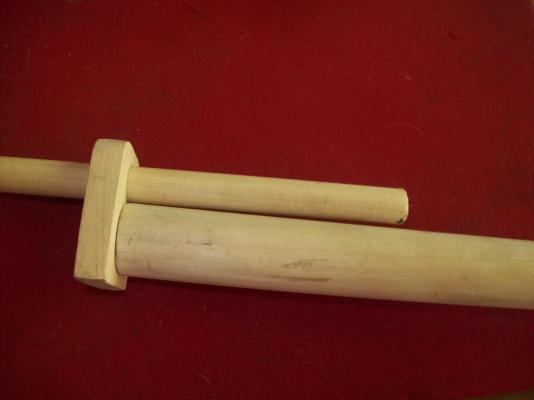
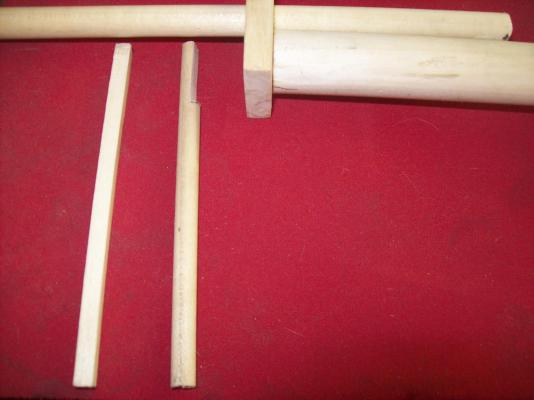
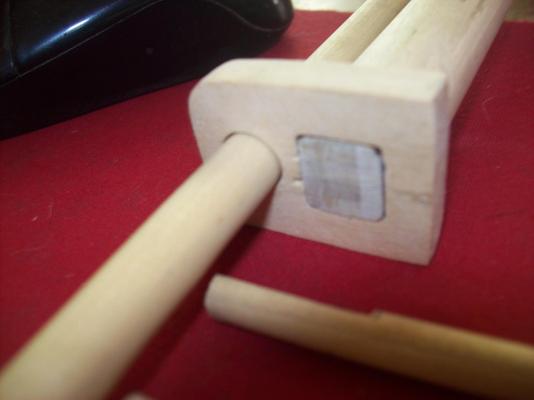
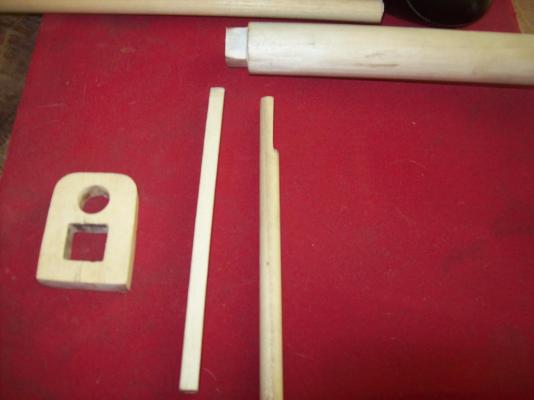
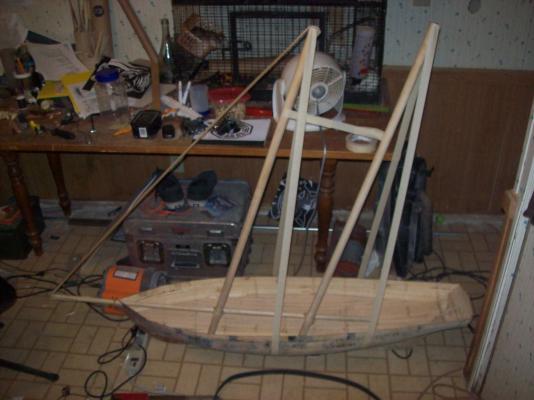
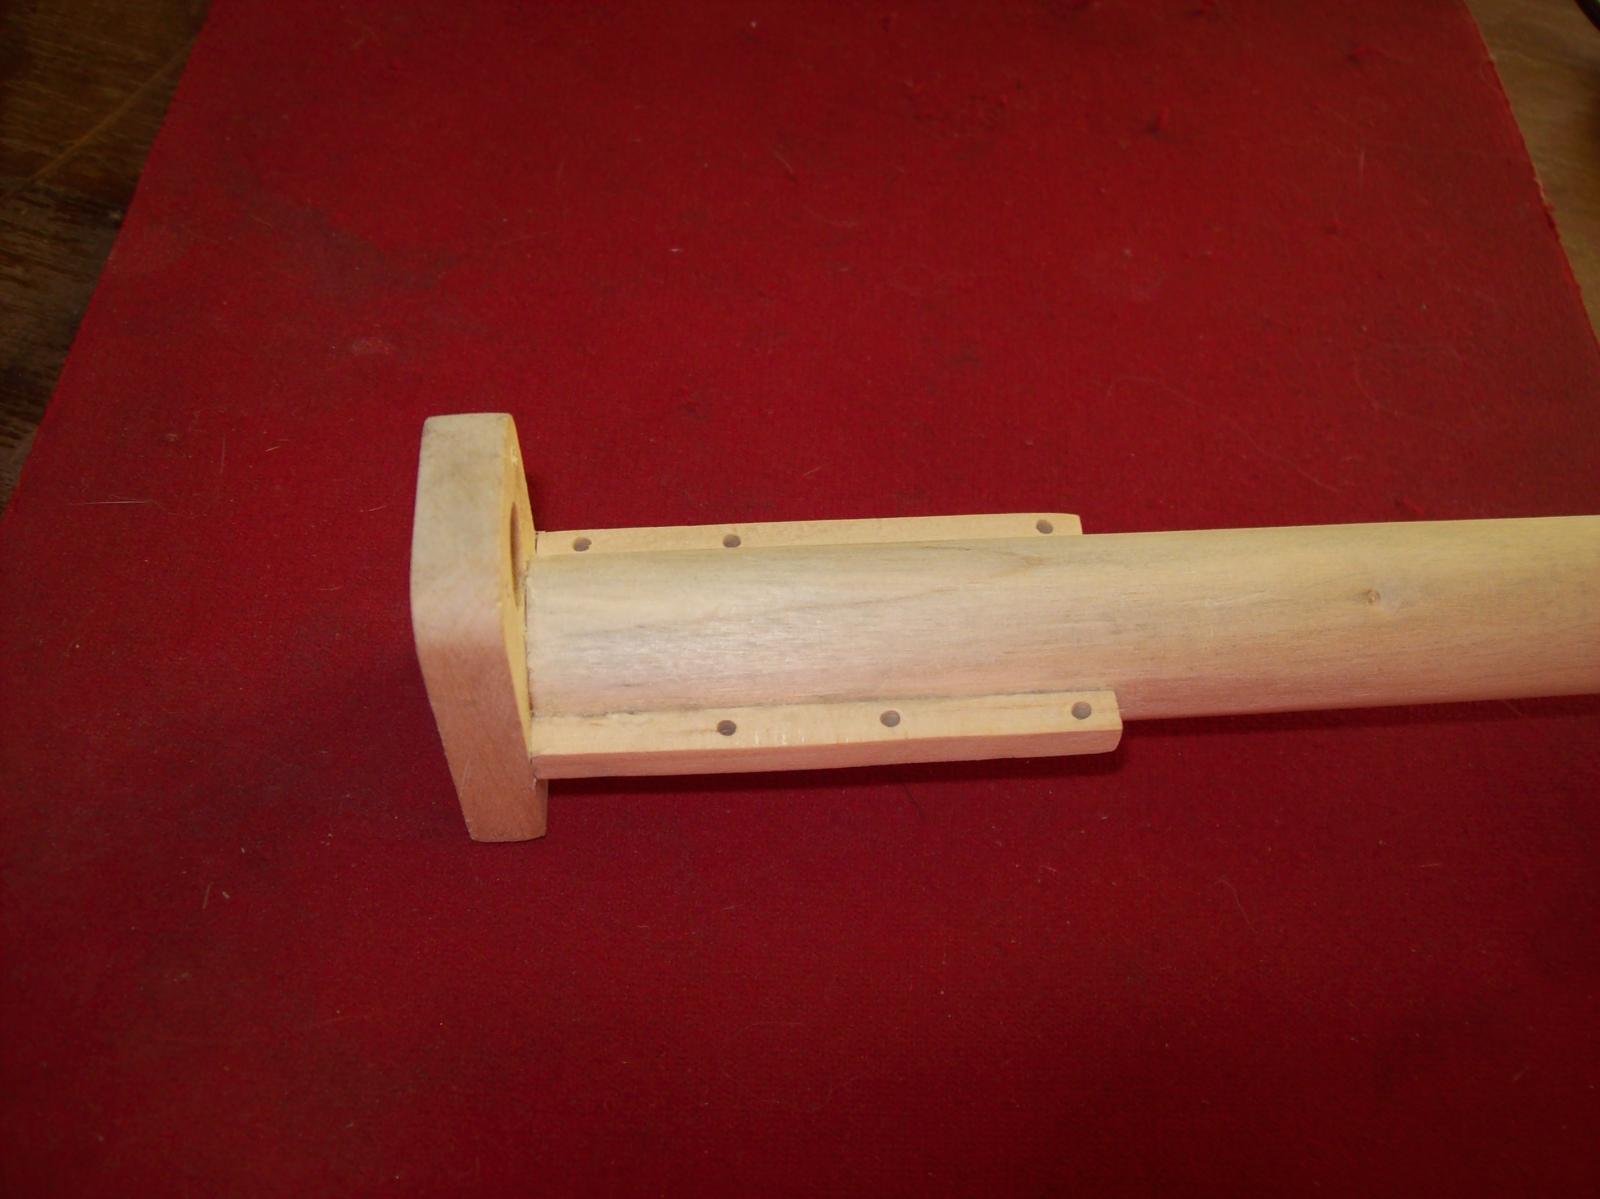
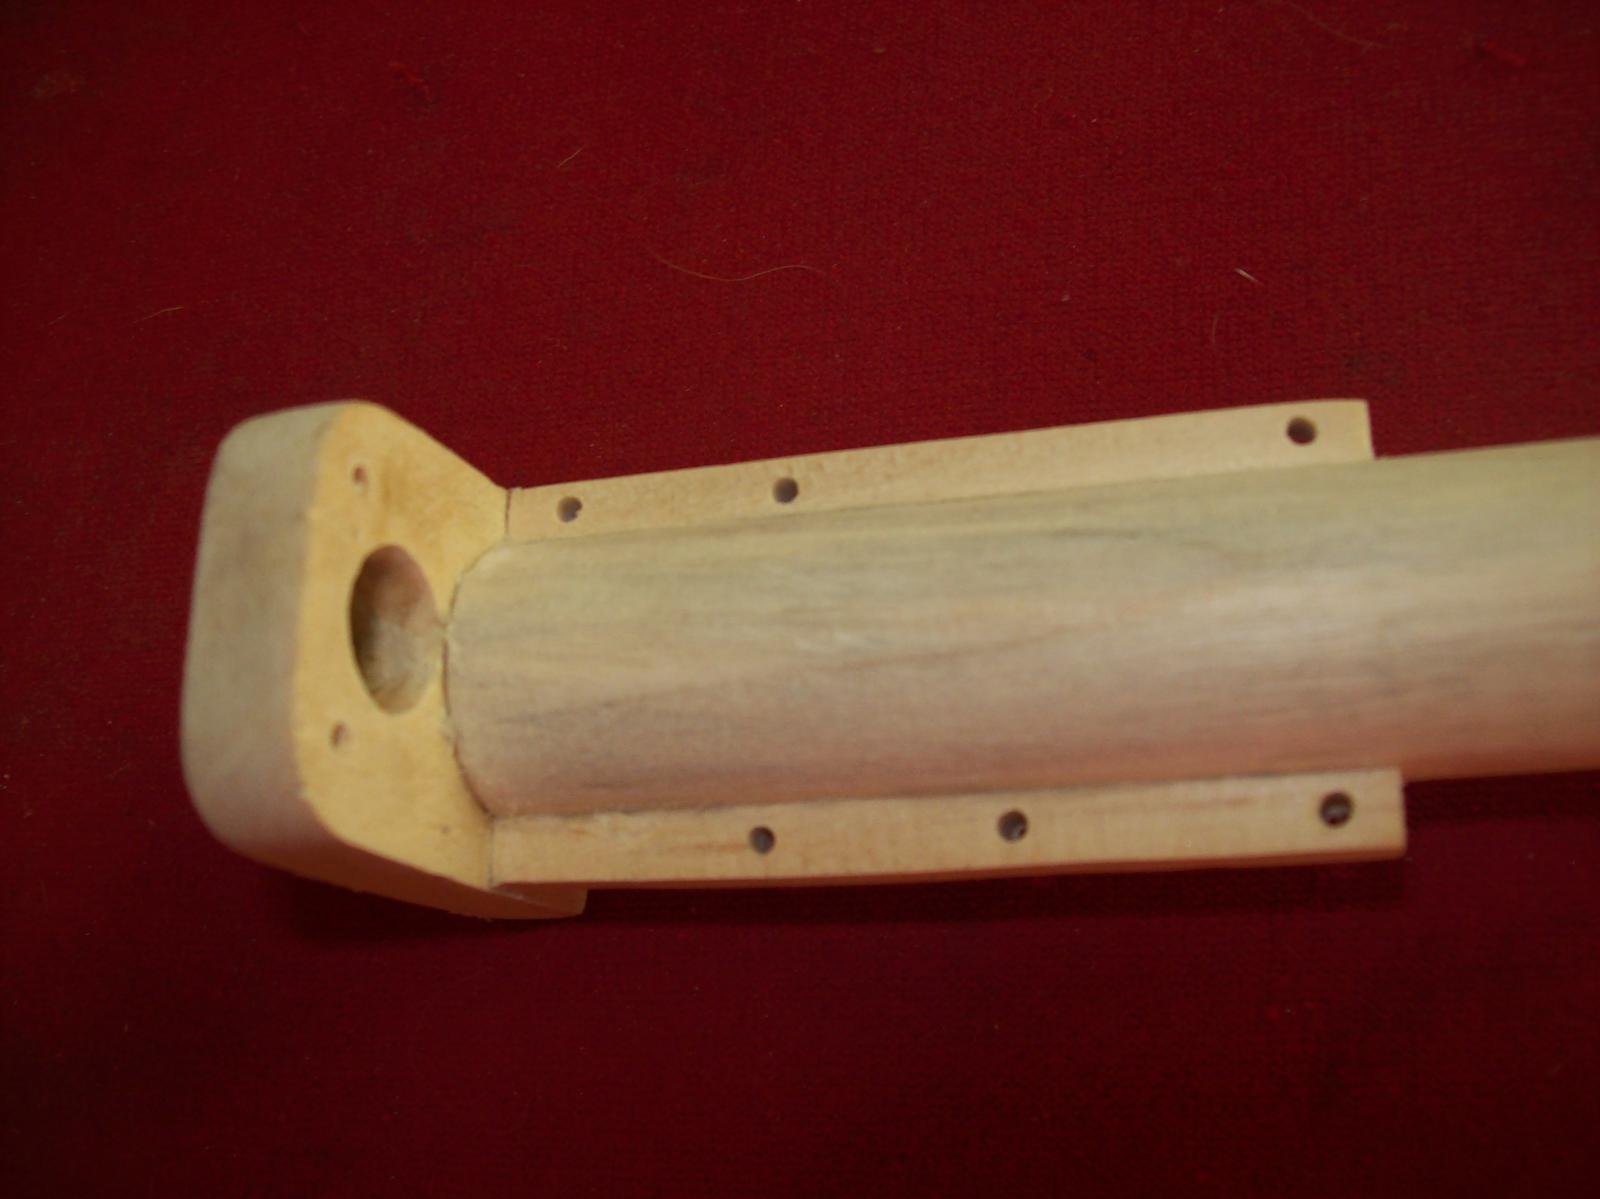
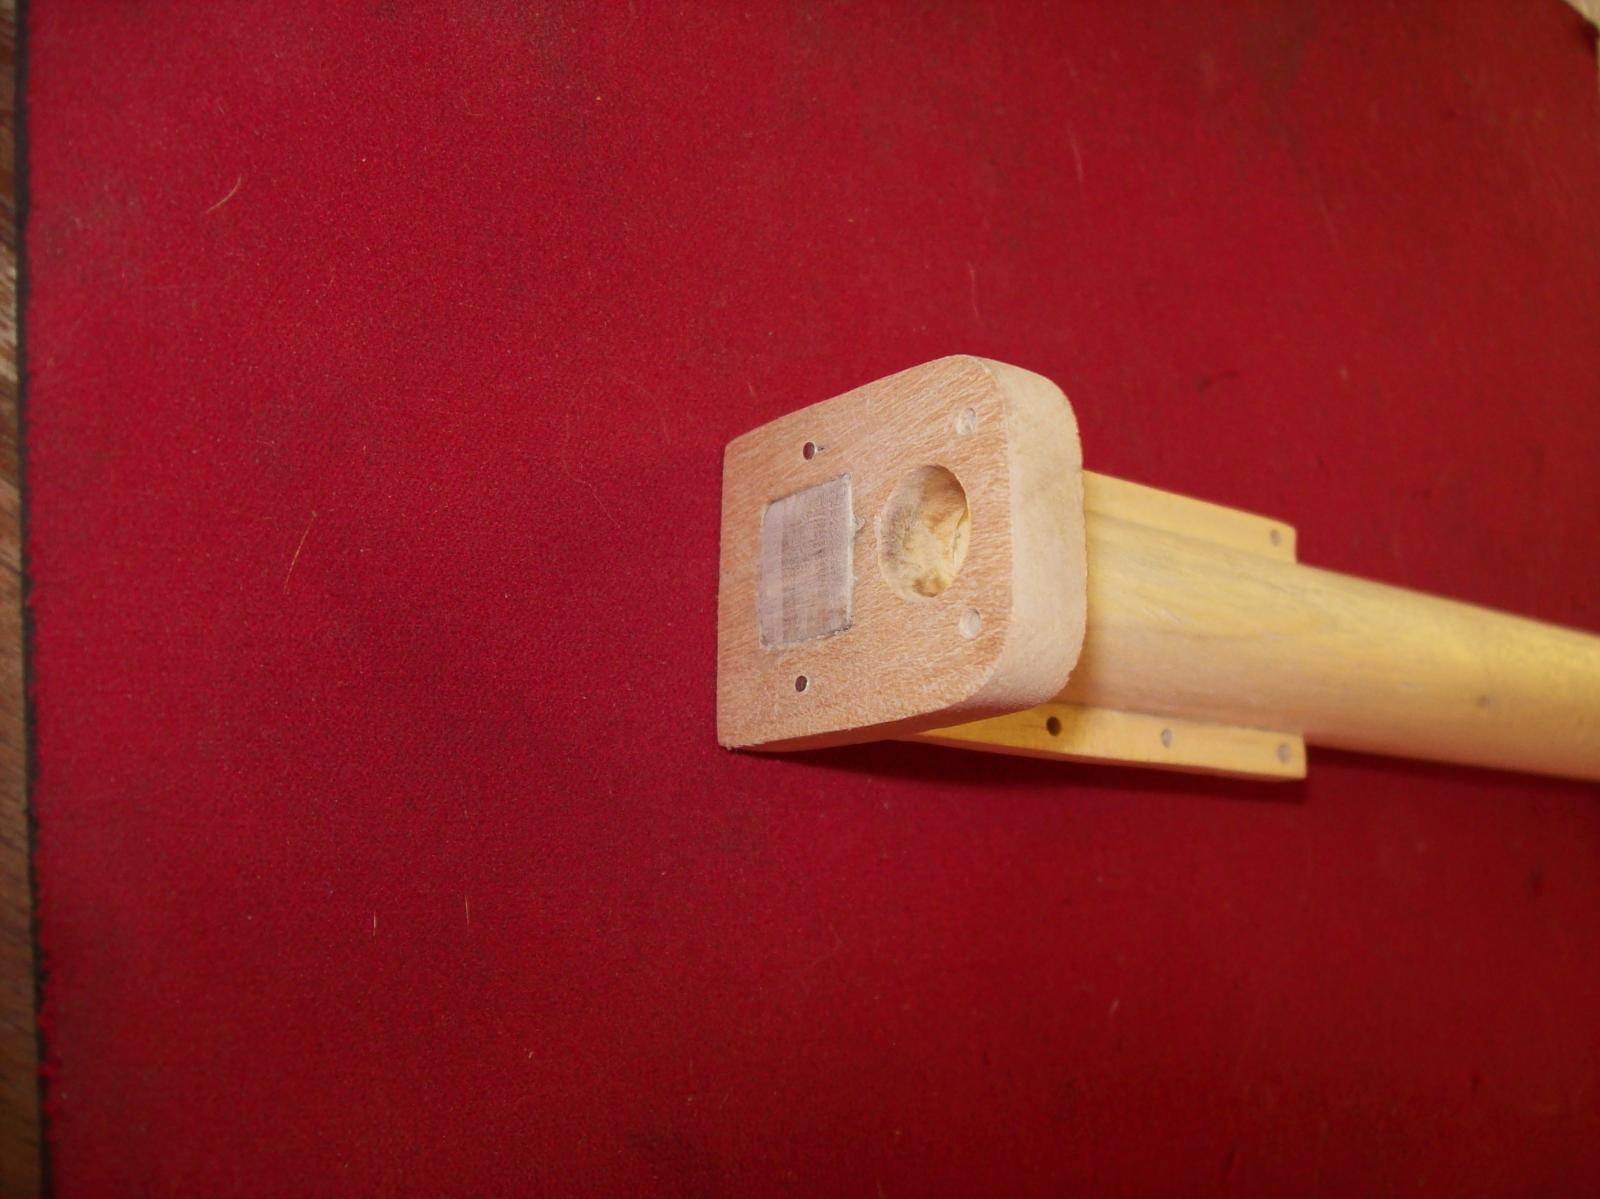
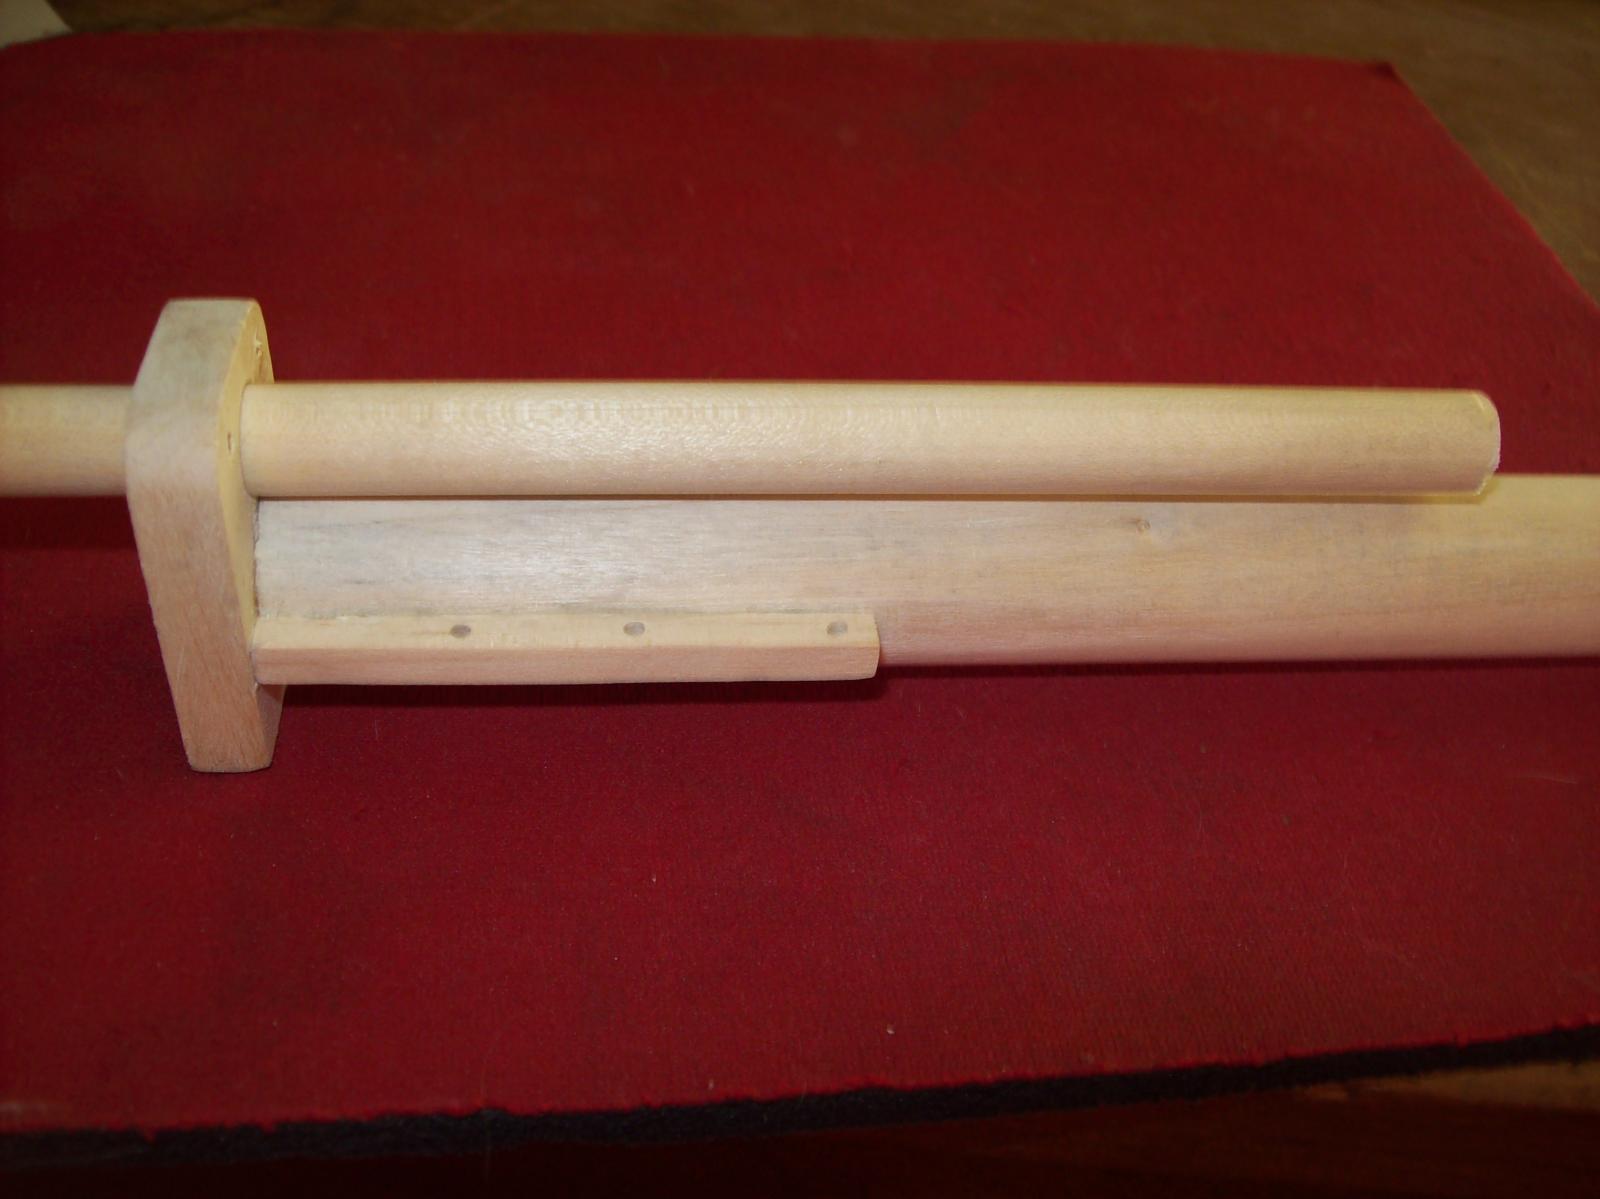
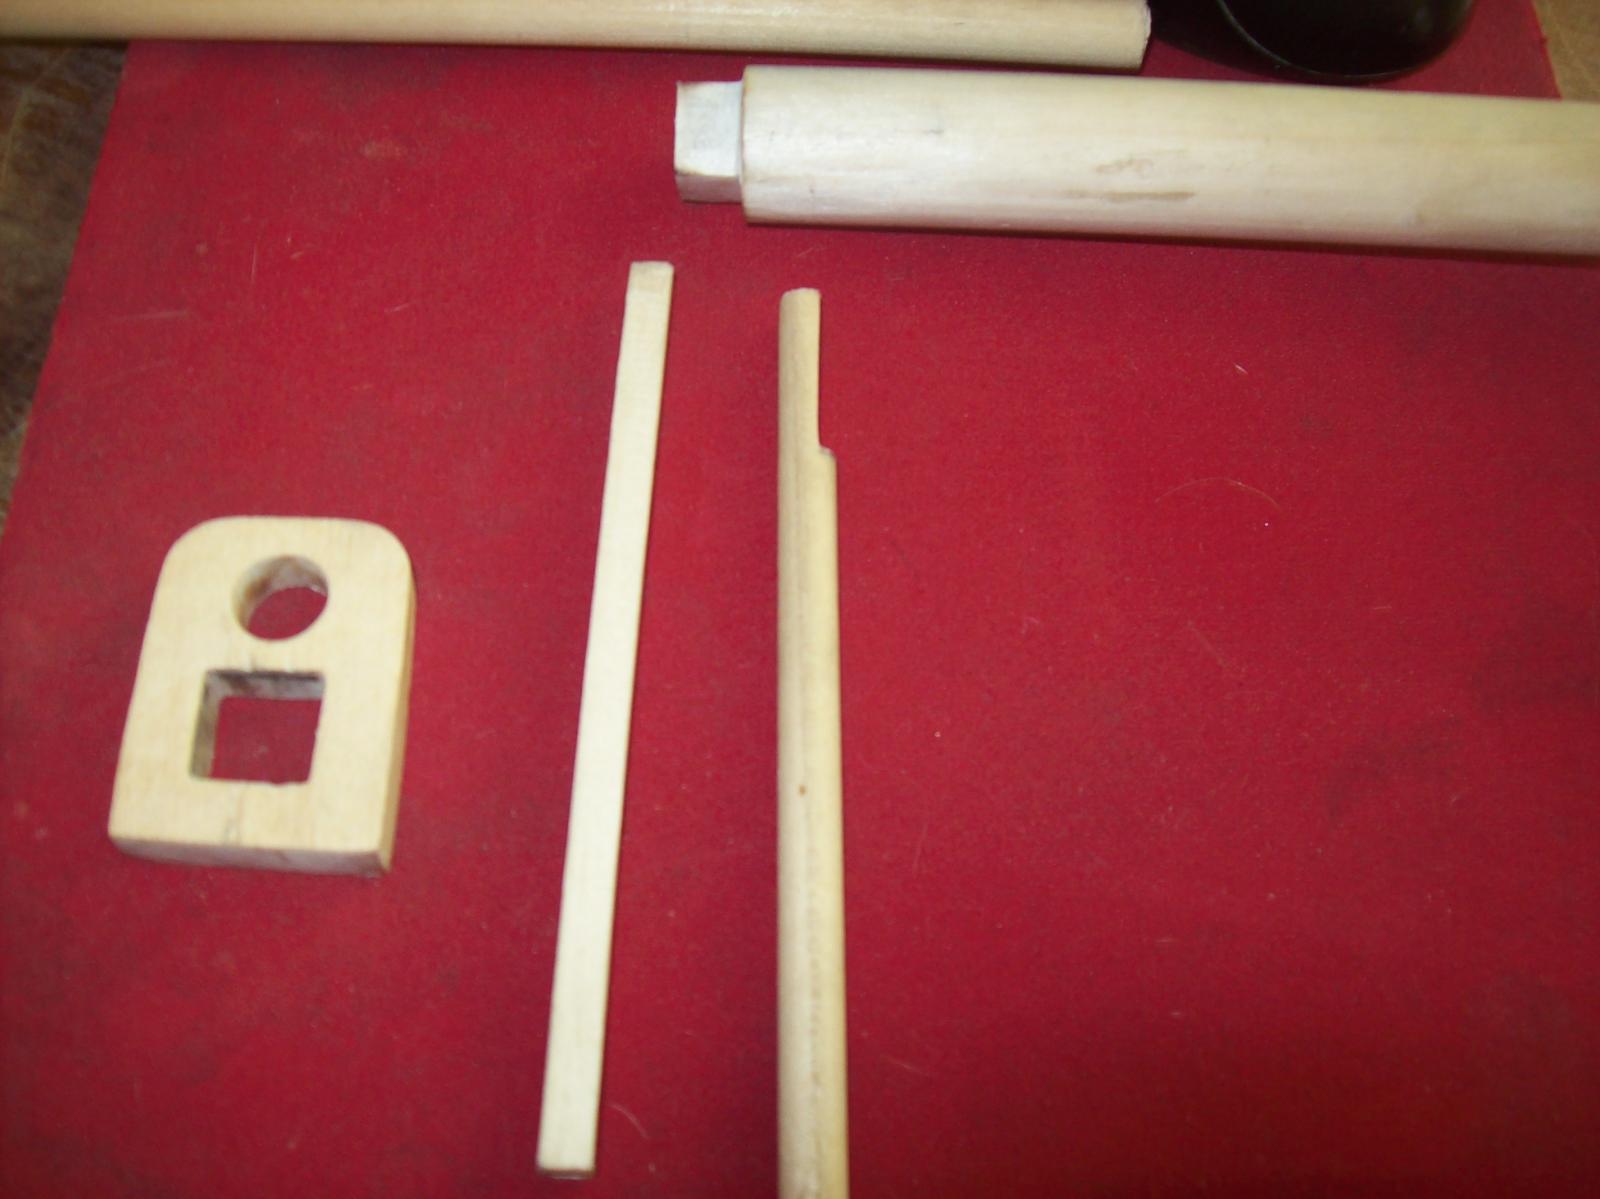
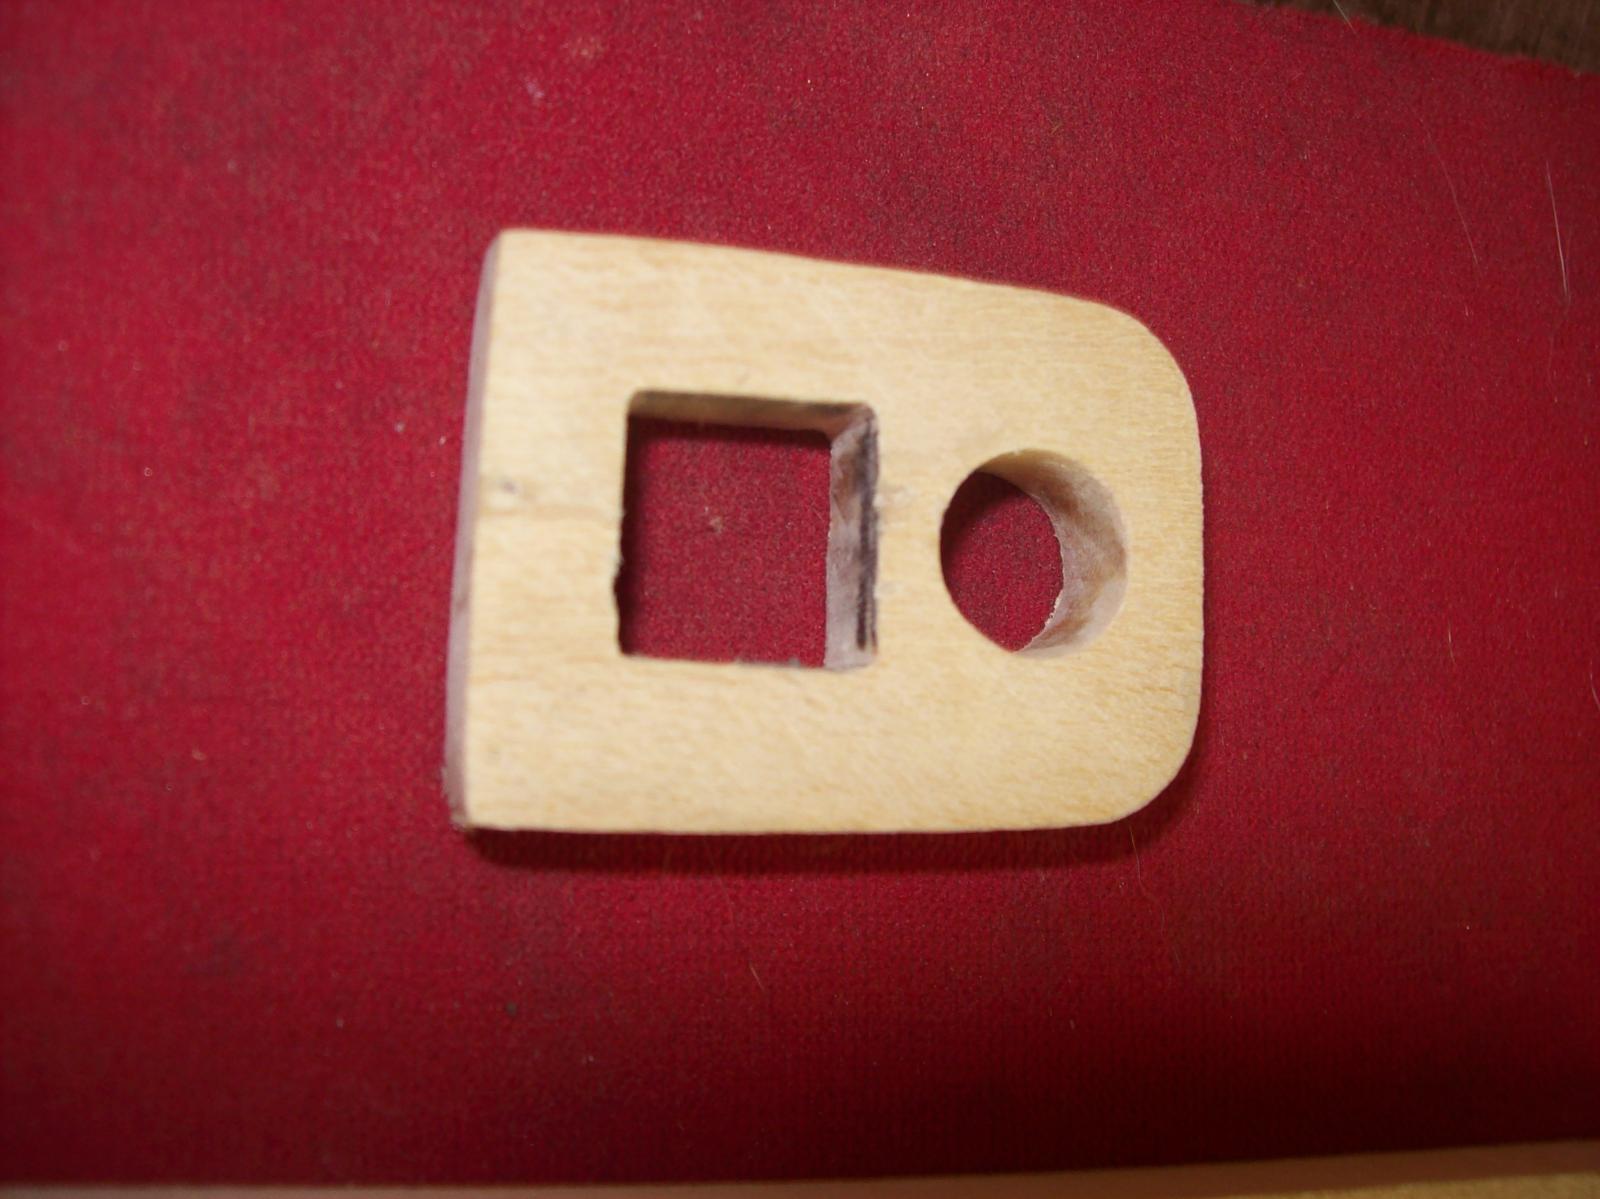
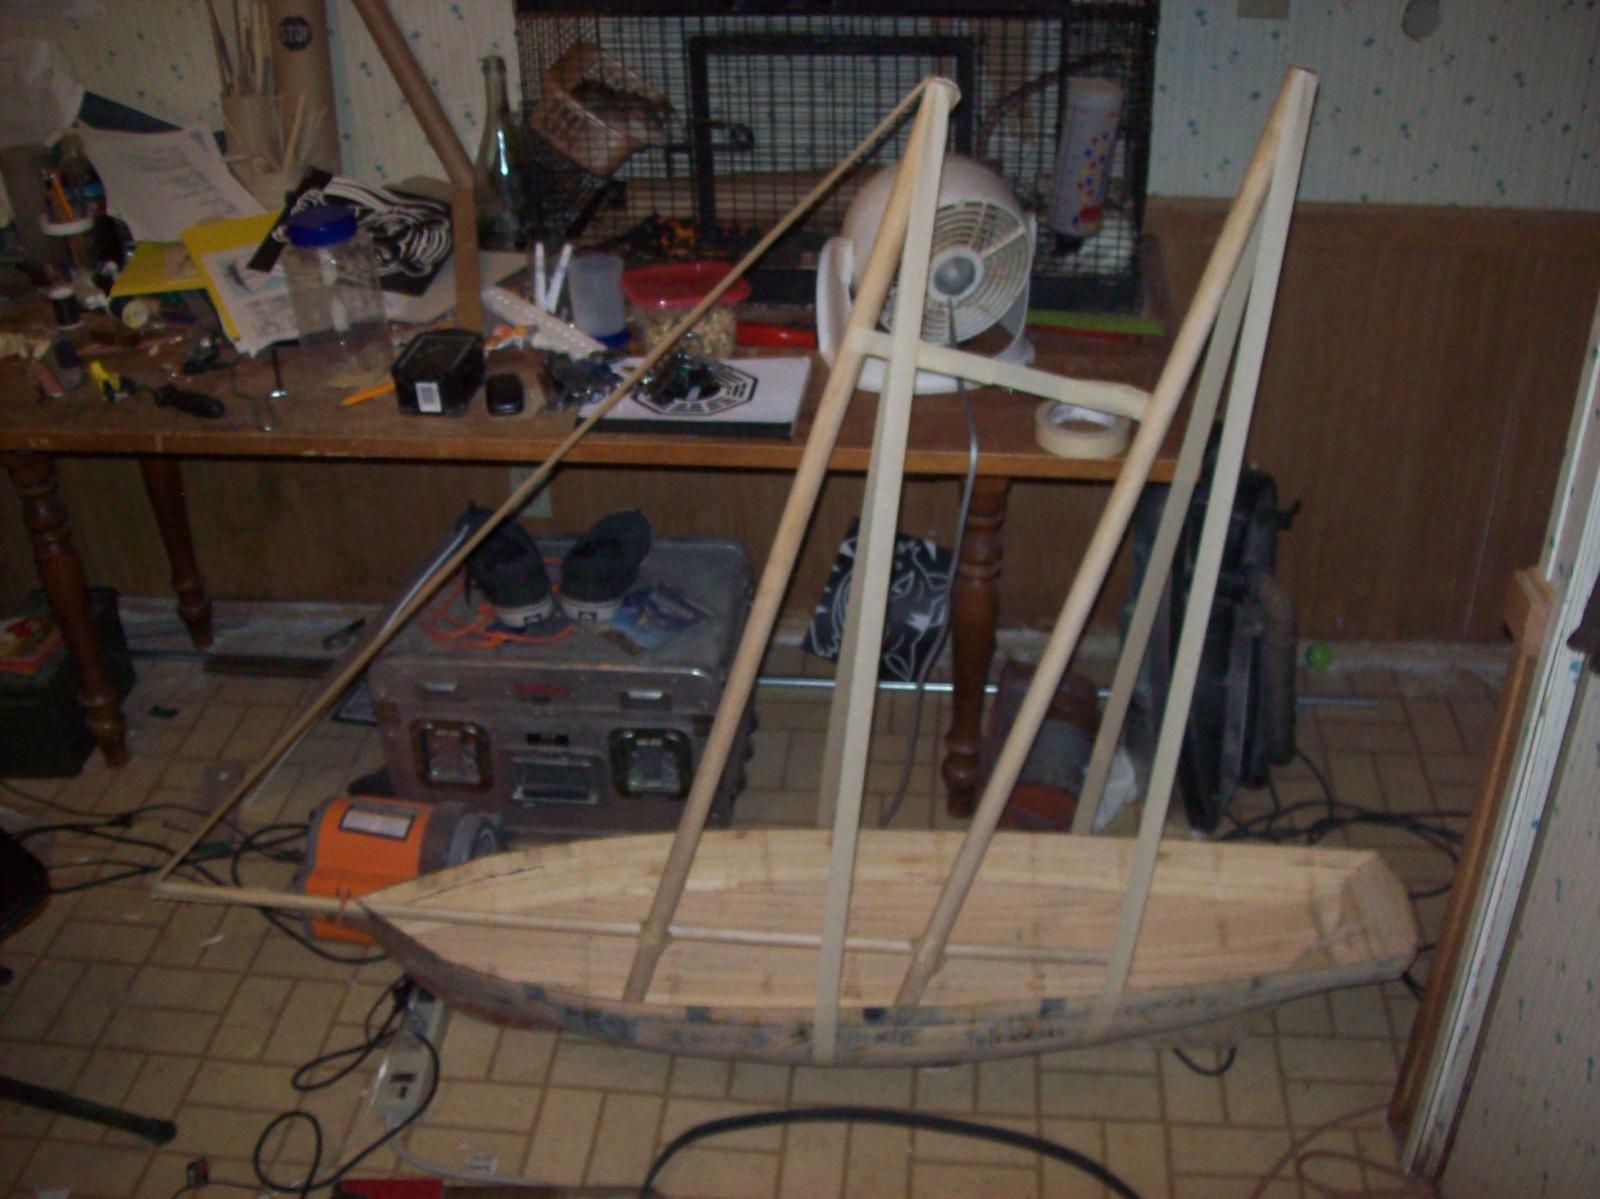
I know that its too early to start on the rigging but I cant work on the hull right now so I gave in and made the bowsprit and bowsprit cap. I also set aside two pieces for the dolphin striker until I decide on square or round.

-
Jerry the main hatch grating will be approximately the size of your access hatch.
I still haven't figured out every thing about how it will look when its done I might add more smaller gun ports between the regular ones to make it look like somebody cut more gun ports after the ship was made. I am planning on adding some swivel guns too. Or I might add a lot swivel guns instead of the extra cannons. I still haven't fully decided on a color scheme or insignia yet.
I tapped the dowels inplace to get an idea of how big it will be when it is fully rigged.
-
Michael Thank you for reminding me to seal the inside of the hull first before I attach the deck. Things could have got very difficult when I try to seal it, if you did not remind me about this now. I will wait on the deck until I get more fiberglass for the inside of the hull.
I bought the dowels to make the lower mast sections today and will hopefully get started on the mast and associated fittings(mast steps, cross trees.....) soon. The dowels are surprisingly lighter than I thought they would be.
-
Qwerty
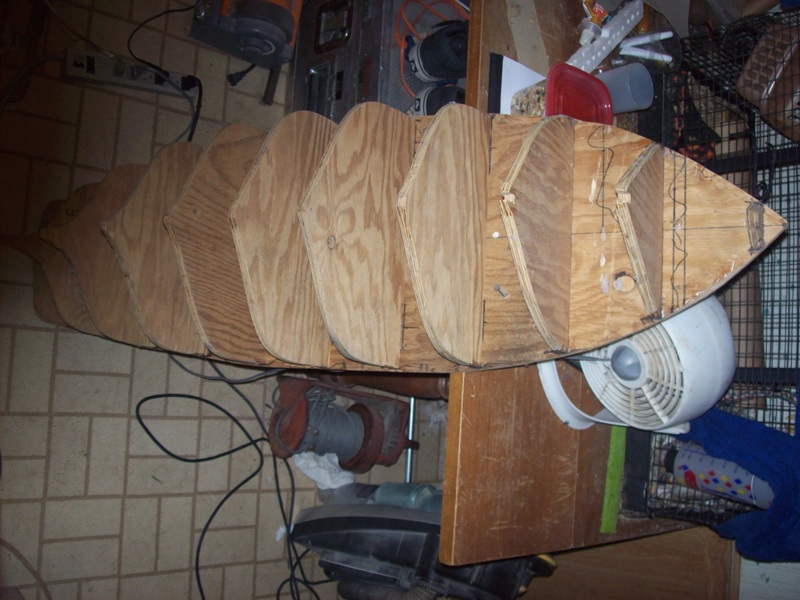
1 Perhaps a couple of pictures showing the formers and how you are presently using them.
2 Are you intending to have the whole deck lift off?
3 If you are not going to lift off the whole deck will you be creating an opening that will lift off to access the controls?
1. I have attached some pictures below.
2. No, the deck will be permanently attached to the model.
3. Yes, the main hatch grating (see Mini Byzantium) will lift off so I can access the electronics.
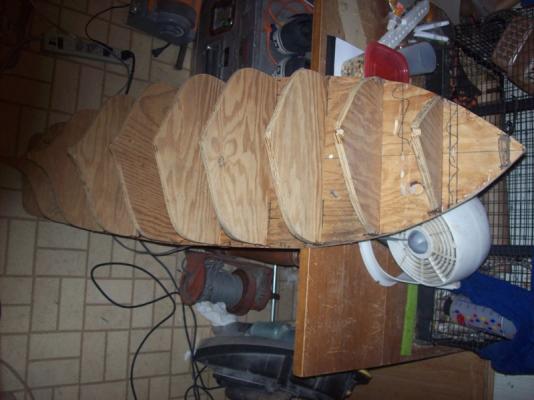
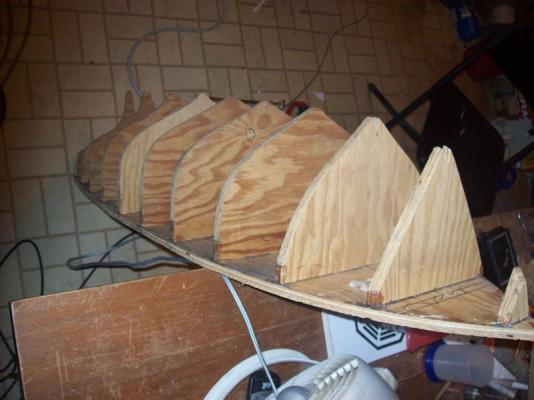
The model just sits on top of the formers.
The formers are screwed on from the bottom of the build board

-
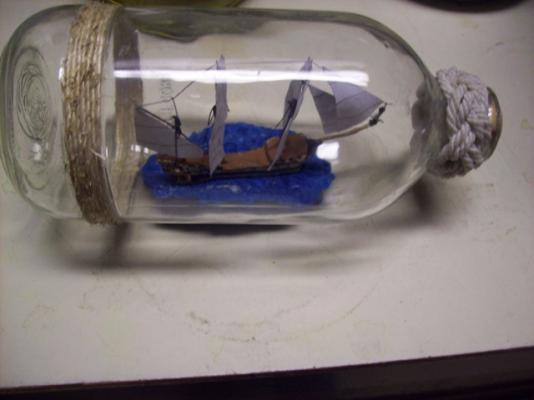
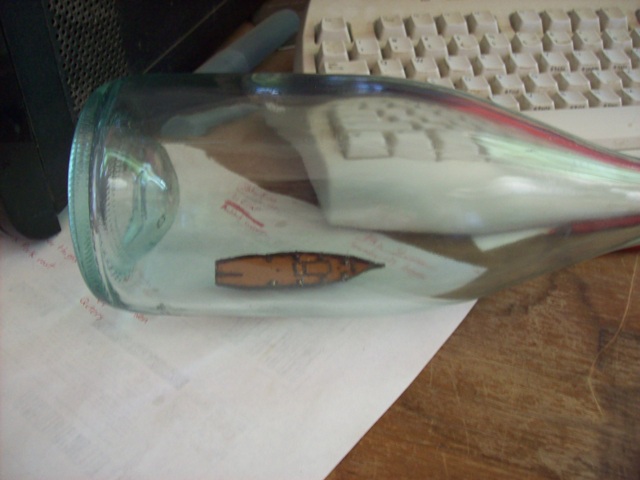
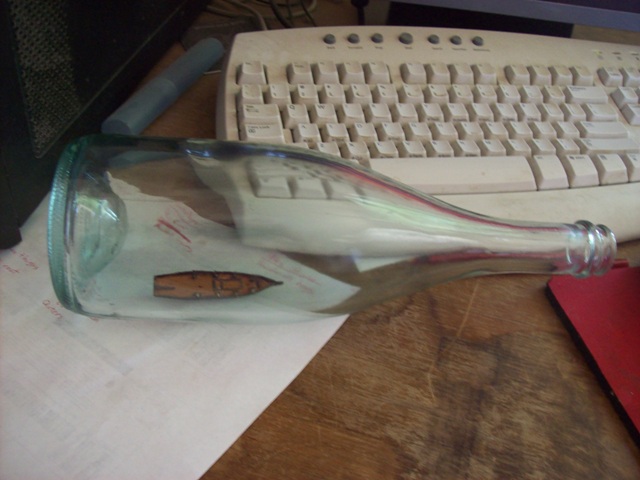
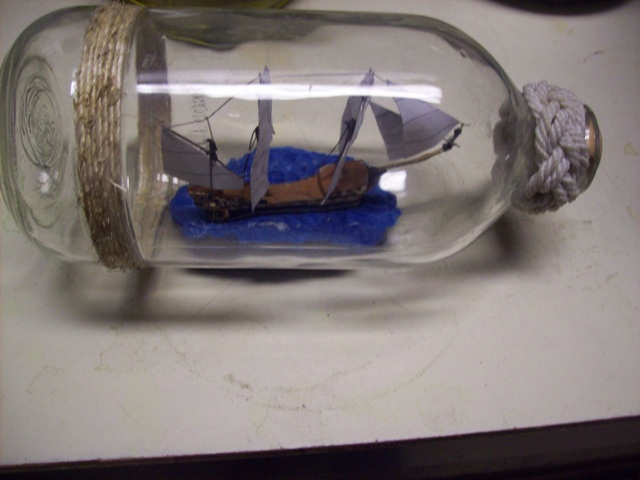
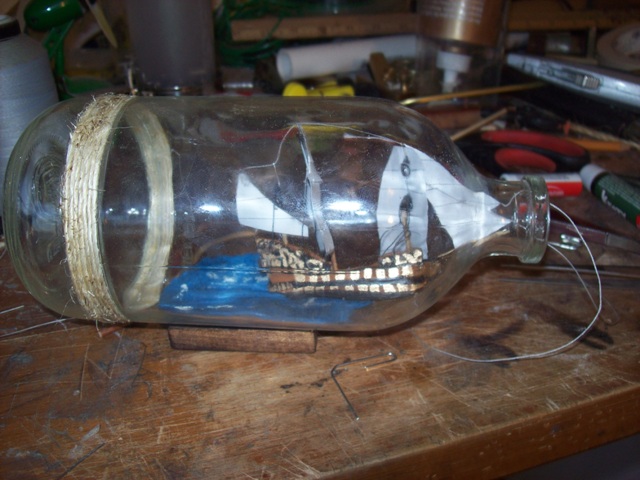
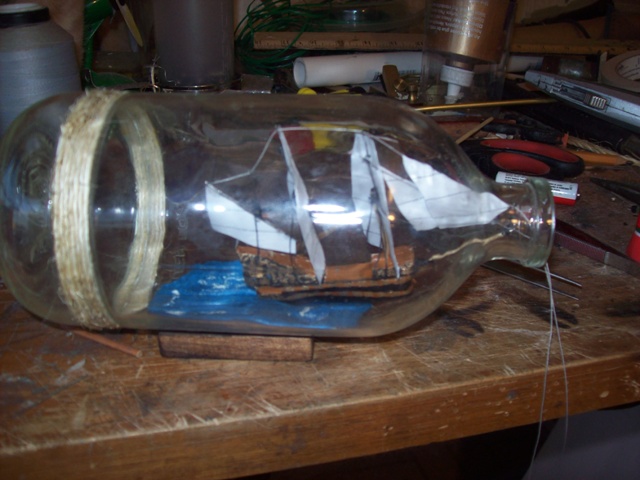
I have decided to bottle it after all
 now that its painted it looks a lot better in the bottle.

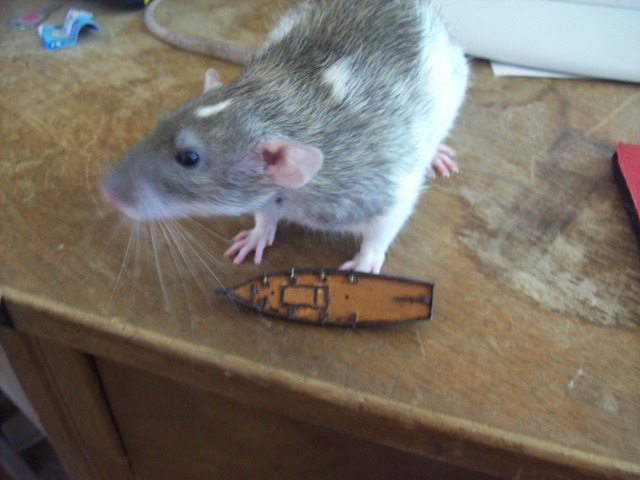
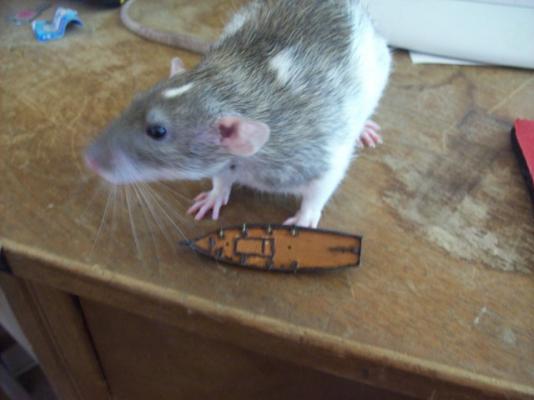 I tried to make it more authentic by putting a rat in the hold..... the rat was too big
- mtaylor, DSiemens, GrandpaPhil and 2 others
-
 5
5
-
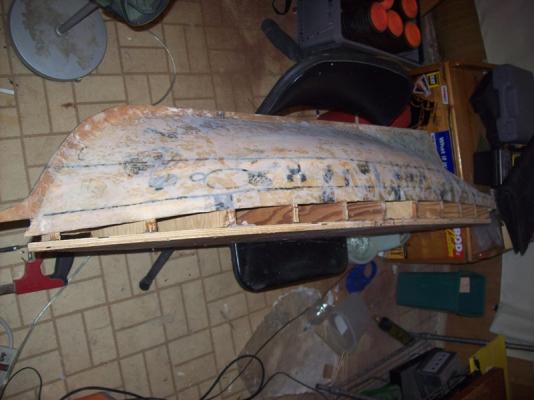
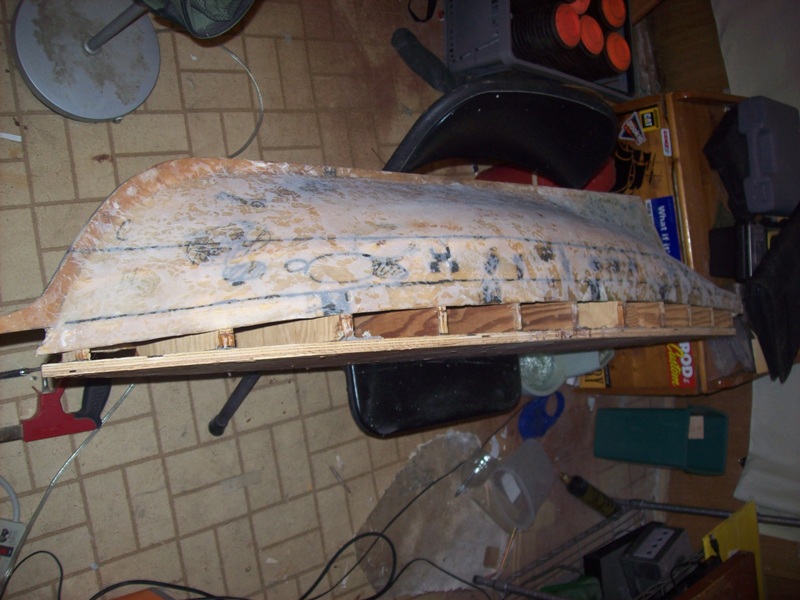
Qwerty I am a little confused, the last two pictures show the decking and a hull that has no Bondo on it are they the same hull? Am I in a time warp?
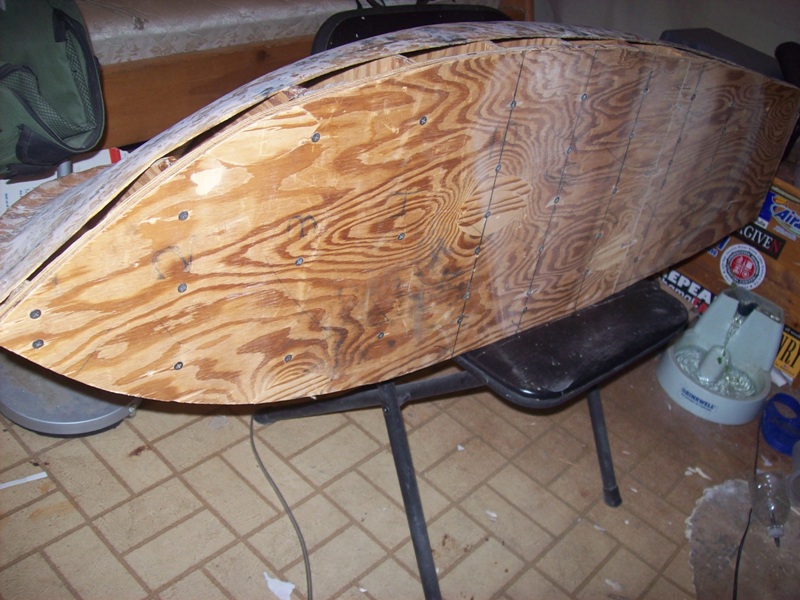
The hull is only fiberglass-ed on the outside, the deck and the inside of the hull are bare wood.
Time to bombard you with questions.
1. Any suggestions on how to frame the deck?
2. Should I re-cut the formers and put them back in the hull?
3. Or should I build a frame for the deck from scratch?
4. If I use the formers what should I use to support the hull when sanding? (I currently use the formers)
-
I just got off the phone with my dad he left the old house and is on his way up here, he forgot my can of Bondo
 . Now I will have to wait two to three weeks until the escrow is over on the old house and he comes up for good.
 -
Qwerty, glad I was able to inspire you. Now that hatch cover looks like a finicky bit of work, how did you make it?
I used the tip of a needle file to make rows of perforations on a match book cover then I cut a piece out to fit in the hatch opening. I should have marked straight lines on the match book cover first before I made the perforations so they would look better, too late now.
-
I will try to start on the rigging soon but today's payday and the parents are coming up from the old house (which is finally sold) today so I have to get this place clean.
-
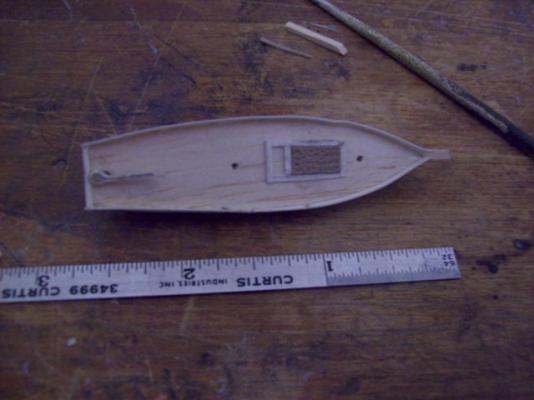
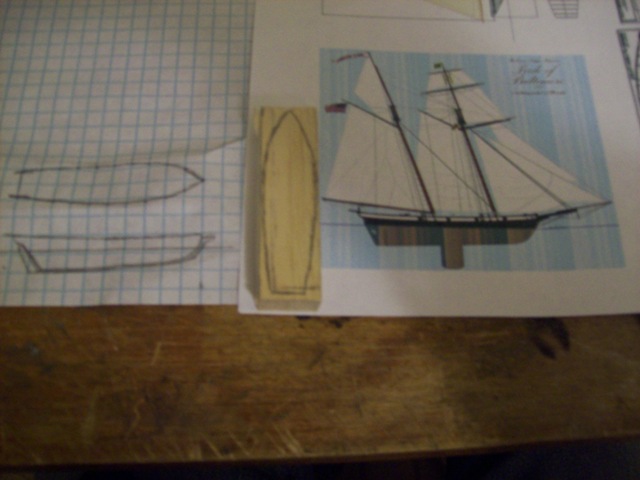
I saw that Michael Mott had built a mini version of his Bristol Pilot Cutter and thought that I would follow his lead and try to build a mini version of my Byzantium. The model was originally supposed to be a ship in a bottle but I didn't like the way it fit in the bottle so I decided to make it be a equivalently 1:20 scale model on display on its larger counterpart.
 Starting out.
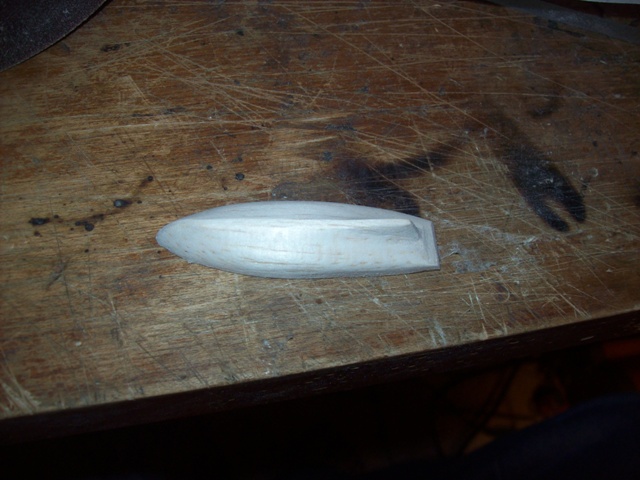
 The shaped hull.
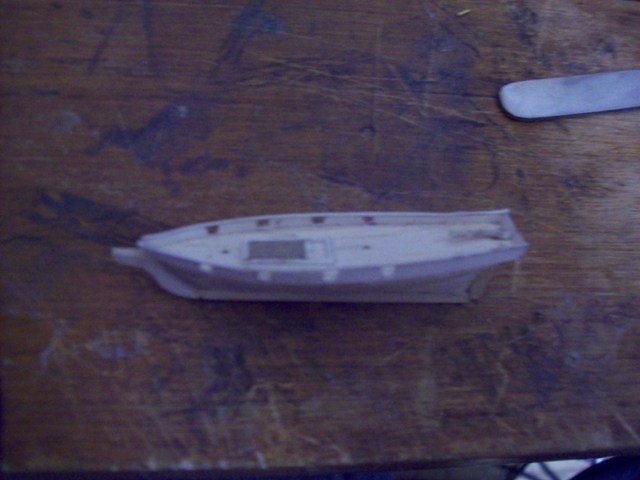
 With the bulwarks and the main hatch installed.
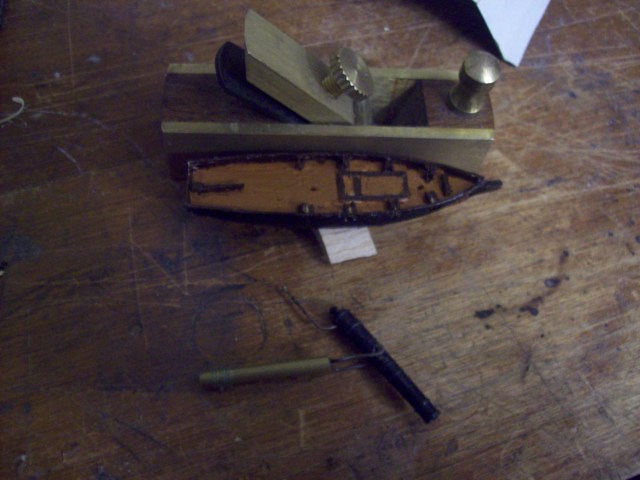
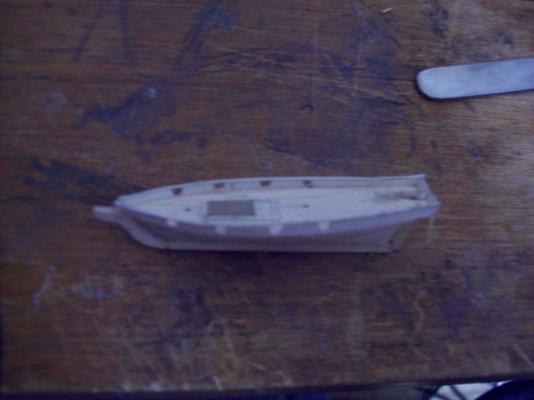 With the gunports cut and the rail installed.
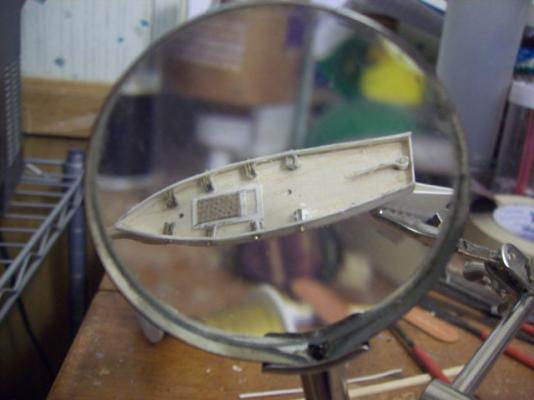
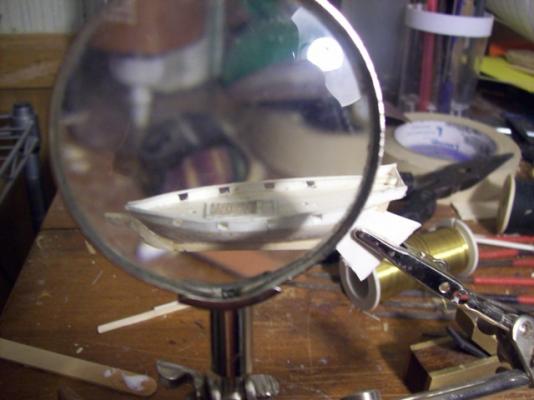 Magnified view.
 Cannons installed.
 Painted.
-
True about drilling metal when I was making my latest Knife I started with a new drillbit and after drilling three holes I had sharpened the drillbit so many times that it was almost down to the shank.
-
My dad found this ship cad software that he thought was cool so he paid them 10 dollars to get it for me and when it arrived it turned out to be an outdated version of Delftship FREE! and I already had the newer version. Anyways I hatted Delftship, it was fun to play around with but when I tried to make a specific ship, the minnow from Gilligan's island I had a very hard time getting anything done. After I finished the model I never used the program anymore, since then I have restored my computer and I never took the time backup the model or to put Delftship back on my computer after the restore.
-
Here is what I did with the rope.

-
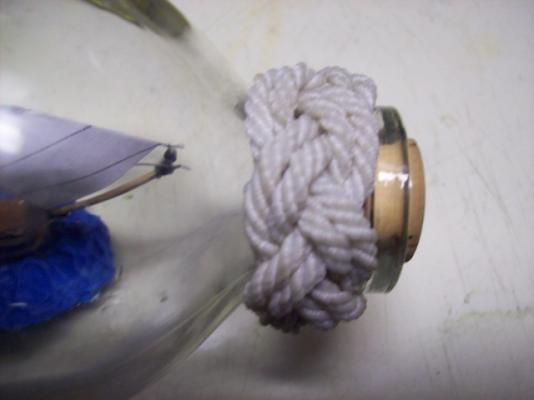
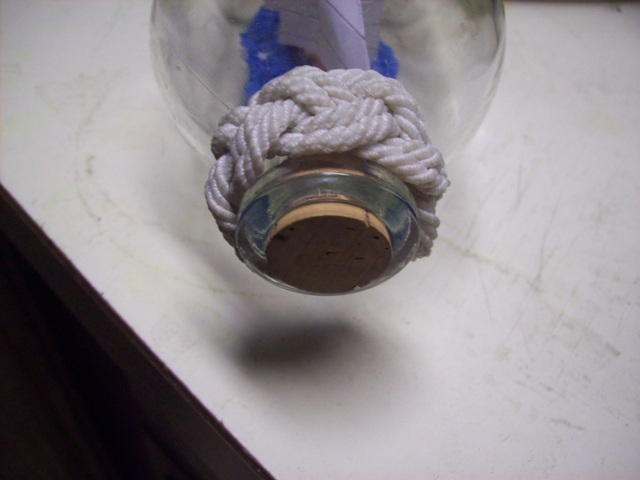
I decided to make a Turks head for the neck of the bottle from a rope I made earlier today wile testing my ropewalk
its the second one down on the page in the link
http://modelshipworld.com/index.php?/topic/1516-yet-another-ropewalk-knex-anyone/


-
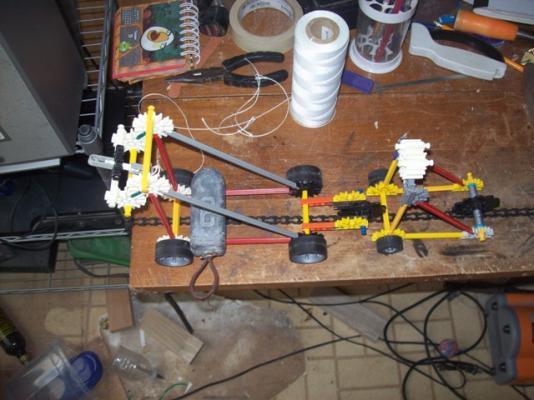
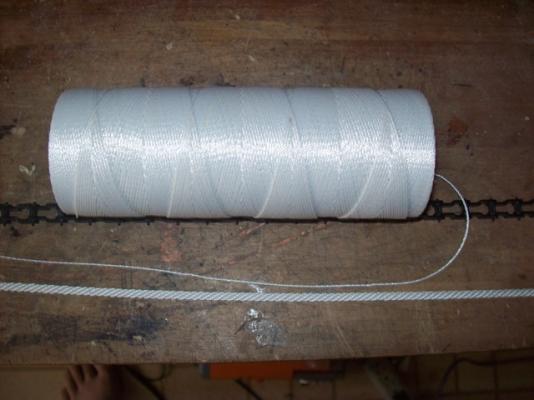
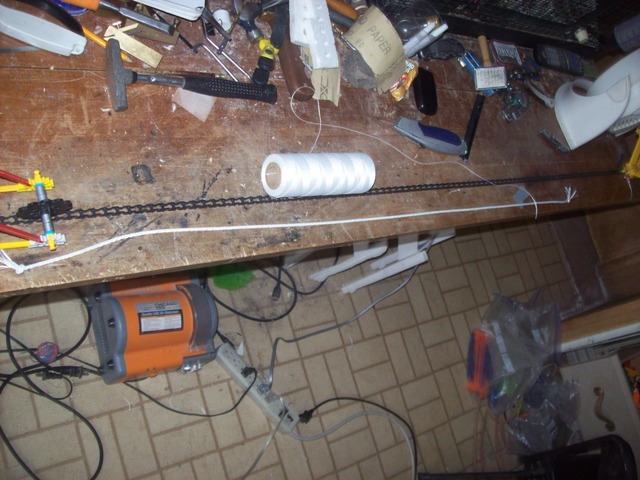
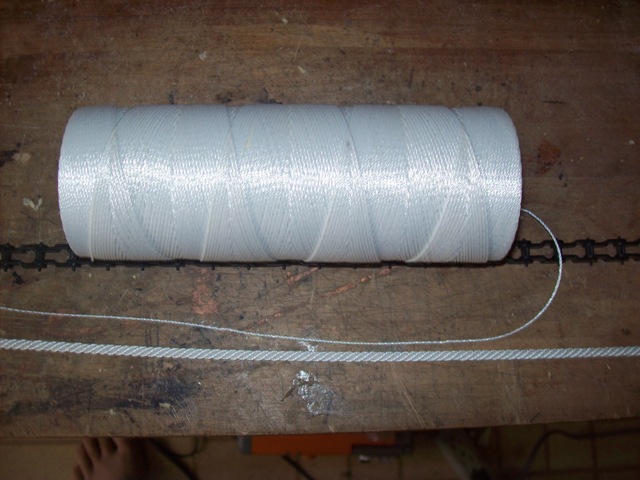
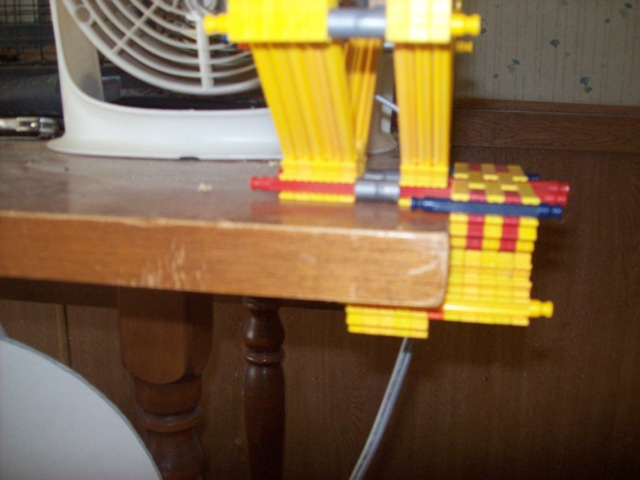
After the previous post I decided to make a rope with the ropewalk. First I made a crank because all my K'nex motors were dead and I didn't have any batteries then I made the tailstock and track. The finished rope is 12 strands (72 feet in total) of contractors twine and about 3 feet long.


- sonicmcdude and cristikc
-
2
-
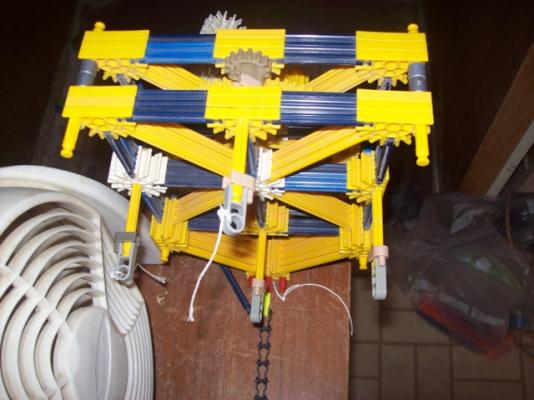
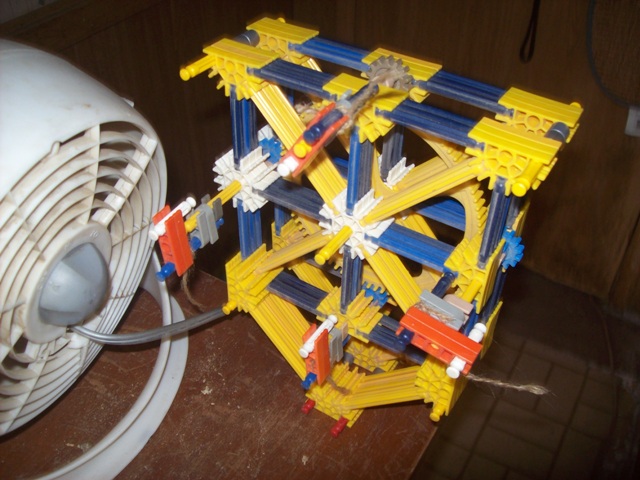
K'nex are my favorite medium for building mechanical devices because they are so simple. I made this rope walk several years ago and liked it so much that I never disassembled it. although I never made a official tail stock yet I just trow something together when I use it.


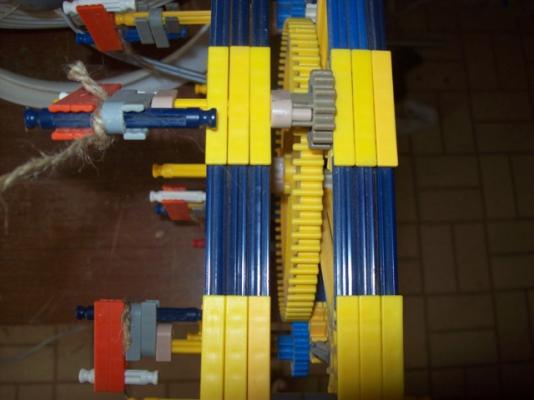
 The yellow rod in the center is for attaching a K'nex motor to power it.
 -
Daniel it was your builds that got me wanting to make this ship in a bottle. This one didn't turn out so well but if I make more I will get better and put more time into them. although I can never hope to get as good as you because I make so many different things RC boats, scale RC ships, model wagons, hobby rockets, model guns, knifes, Sketchup models, I've even made bird aviaries. The phrase "jack of all trades master of none" fits me well especially the "master of none" part. I seem to do better on the the spur of the moment models such as the concept model for my next RC build after the Byzantium is finished, the two star trek themed rockets that I built and a model or a darlek from doctor Who made from a micro torch and some foamboard.
-
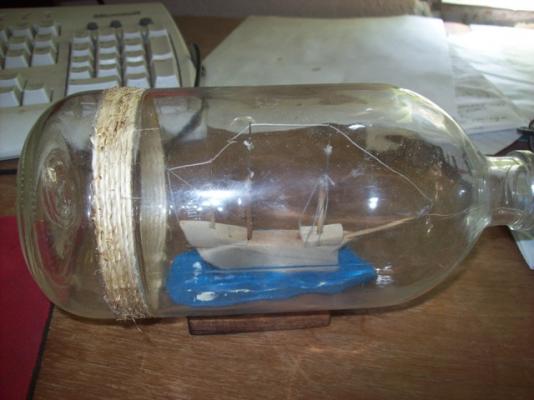
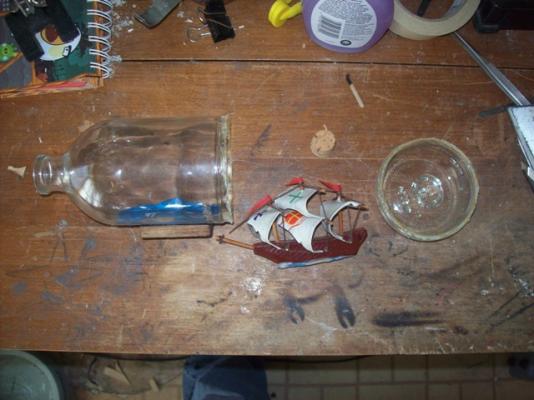
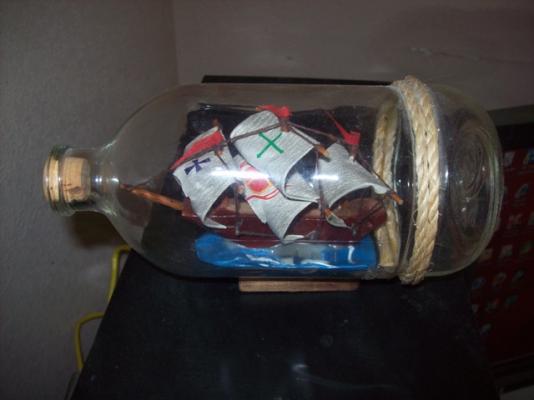
I have finished the model it came out terrible but it is ok considering that I built it in less than one day. Also I managed to get it in without opening the bottom of the bottle. I noticed two things wrong after I got it in the bottle 1 There was no way to attach it to the clay 2 I forgot to make anchors.
How did I get it in the bottle? The hull was to tall to fit in the hull so I made the aft structure removable to where once you get it in the bottle I simply snap the two pieces together. then using tweezers I fit all three of the mast into position. then tighten the rigging and add a drop of glue to secure the lines.
Maby latter on down the road I will revisit this project and make a new ship.
 After I got it in the bottle and got the first two mast in place.
 After I got all three mast in place.
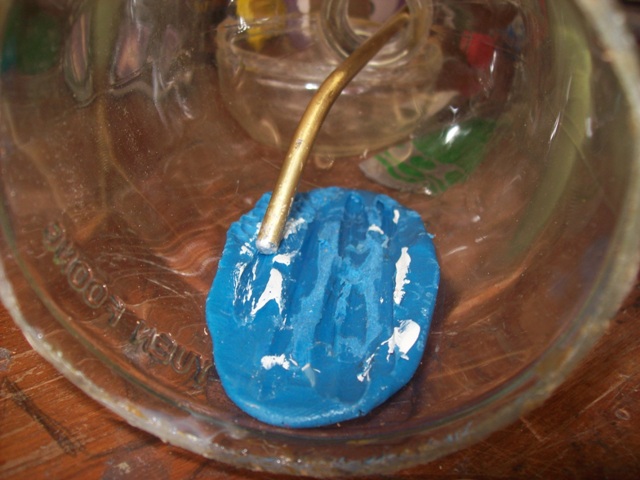
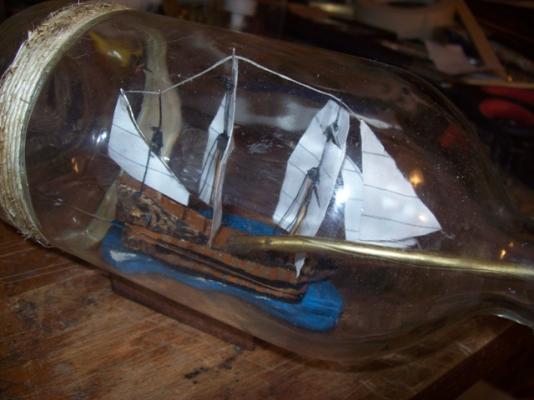 Trying to push the model into the clay.
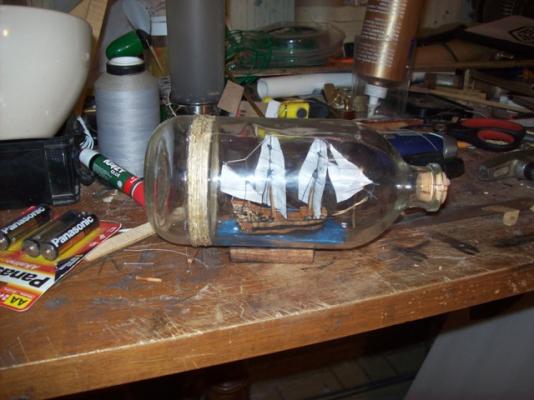 Almost there.
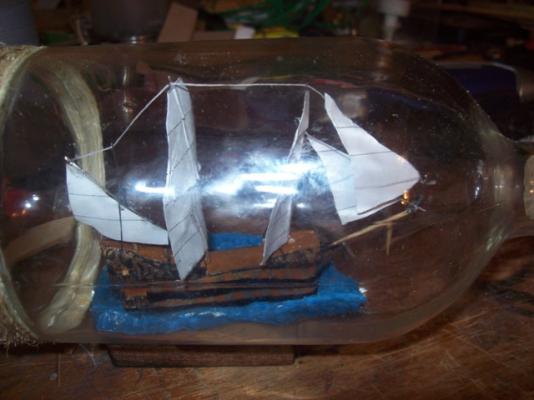 Done.
Done.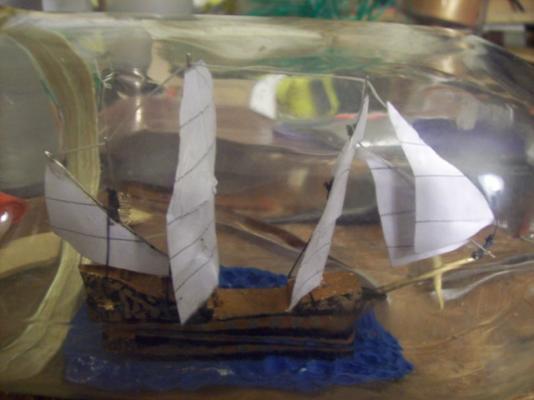
-
I have glued the bottom back to the bottle and started on the model which is a generic early ship of the line. so far I have made the hull and the mast and some (just enough to be able to assemble in the bottle) of the rigging. I still need to make the yards, the sails, the trim, paint the hull and finish the rigging.
 Test fit. Yep it fits
 -
I still have not decided on a model yet and am open for suggestions.
-
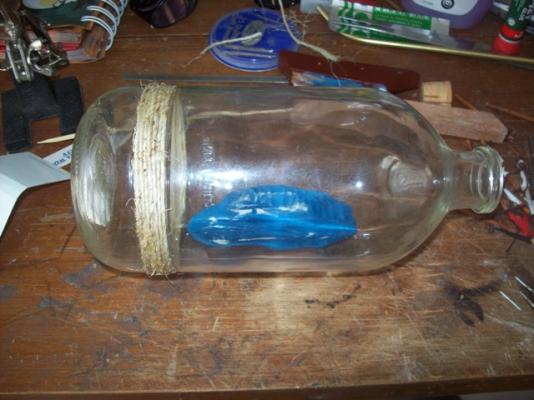
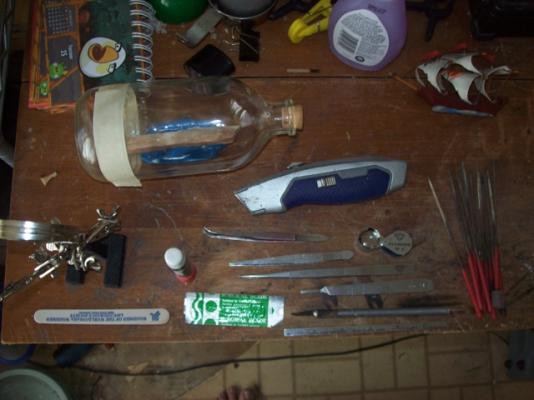
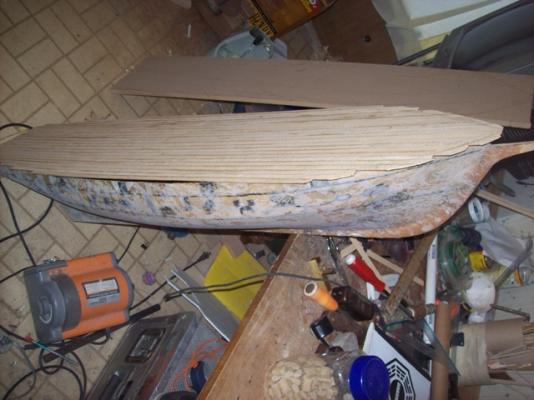
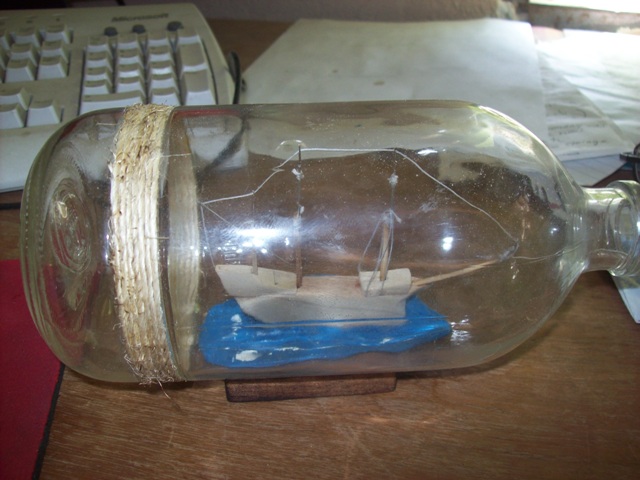
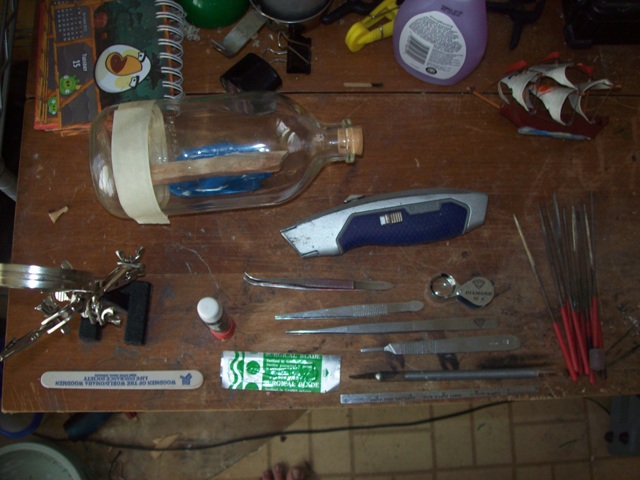
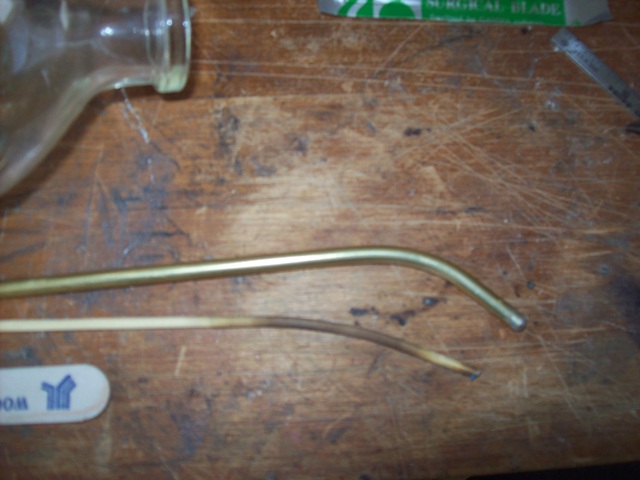
I got the bottle open and removed the old ship then I got some tools together including several pairs of tweezers, several razor knifes, several magnifiers, several needle files, two curved rods for manipulating the model inside the bottle and a wood blank for the hull. Next I will glue the bottle back together then start on the model.


-
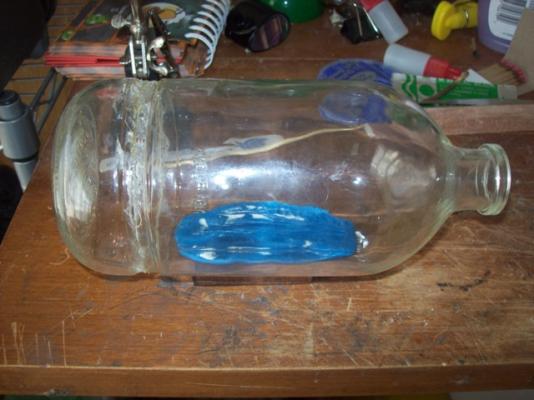
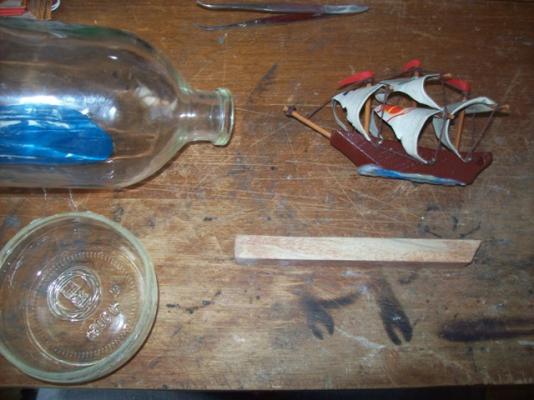
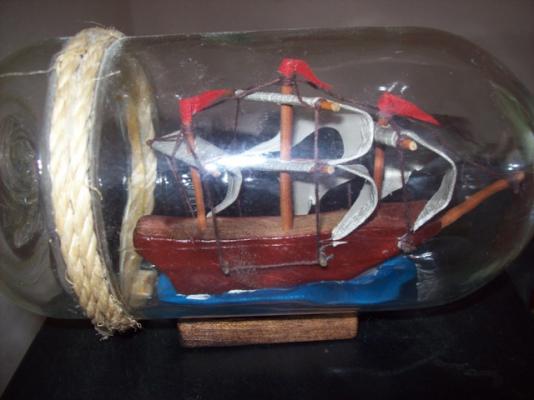
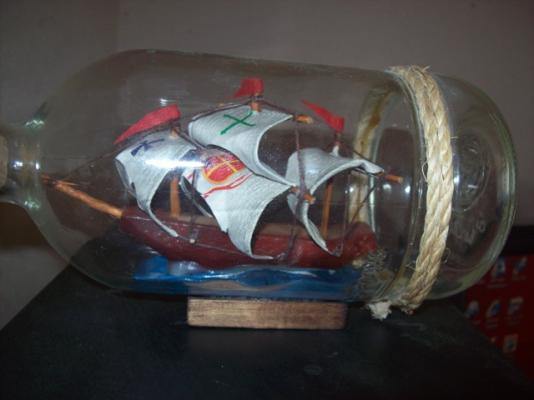
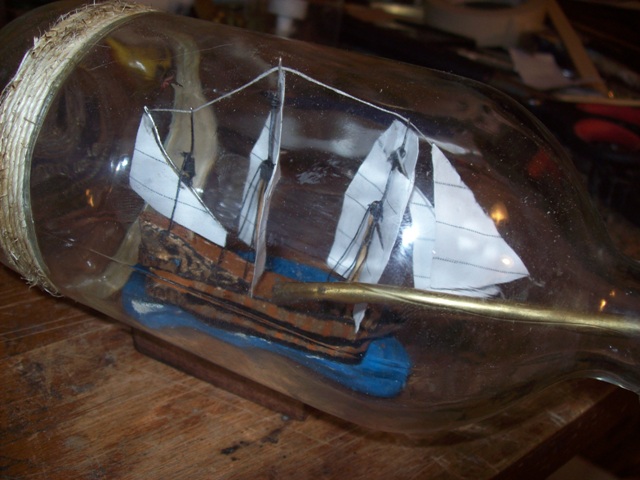
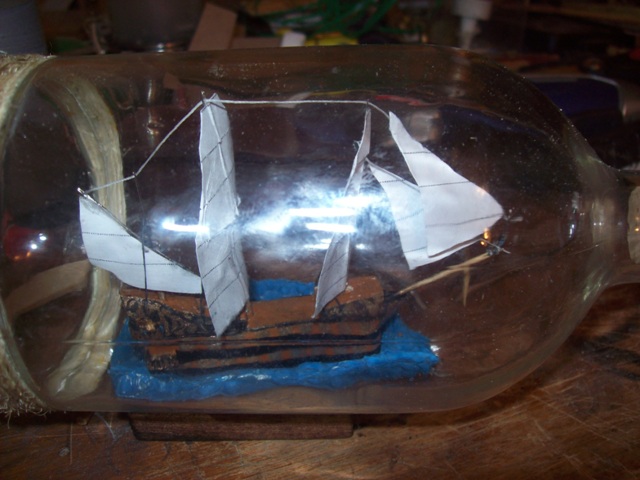
I will re-title when I find out which ship I am going to build. I found this cheapo ship in a bottle and am planning on making a new ship for the bottle. after I took these pictures I noticed a cut in the base of the bottle where the original builder cut the bottle open then placed the whole model inside, what should I do to hide this when I an done with the model?
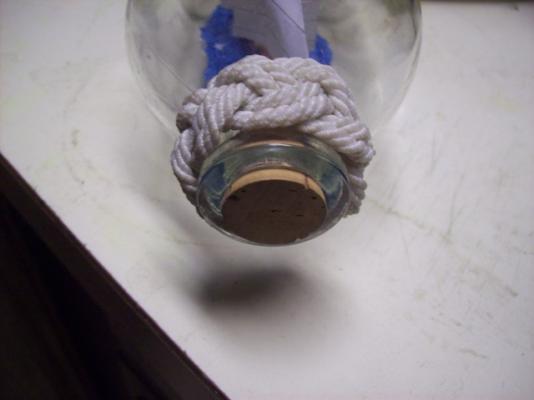
 Note the rope covering the cut.
-
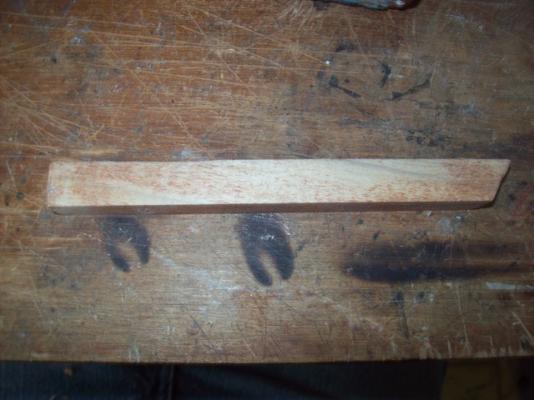
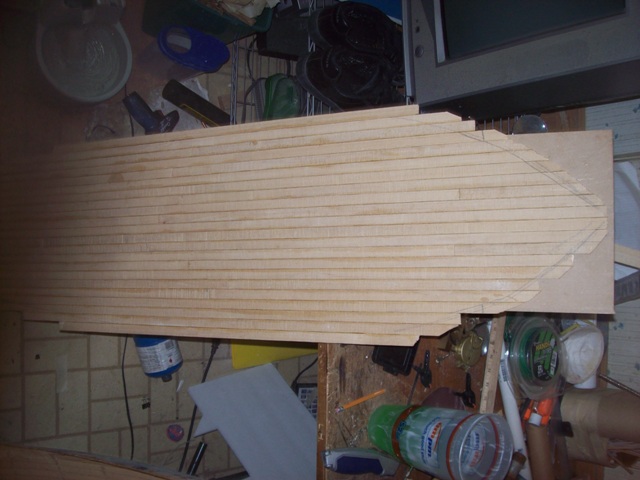
Today I made the deck planking from the leftover wood that I ripped to plank the hull with. I will try to make the frame for the deck as soon as possible.


HMS Sophie by JerseyCity Frankie – FINISHED - brig from Patrick O’Brian’s Master and Commander - Shadow Box
in - Build logs for subjects built 1751 - 1800
Posted
I have a informational book by Patrick O’Brian called Men of War and it is my favorite (read it cover to cover over twenty times and I still read it very often) book, great author.