HOLIDAY DONATION DRIVE - SUPPORT MSW - DO YOUR PART TO KEEP THIS GREAT FORUM GOING! (Only 51 donations so far out of 49,000 members - C'mon guys!)
×

dsmith65
-
Posts
36 -
Joined
-
Last visited
Content Type
Profiles
Forums
Gallery
Events
Everything posted by dsmith65
-
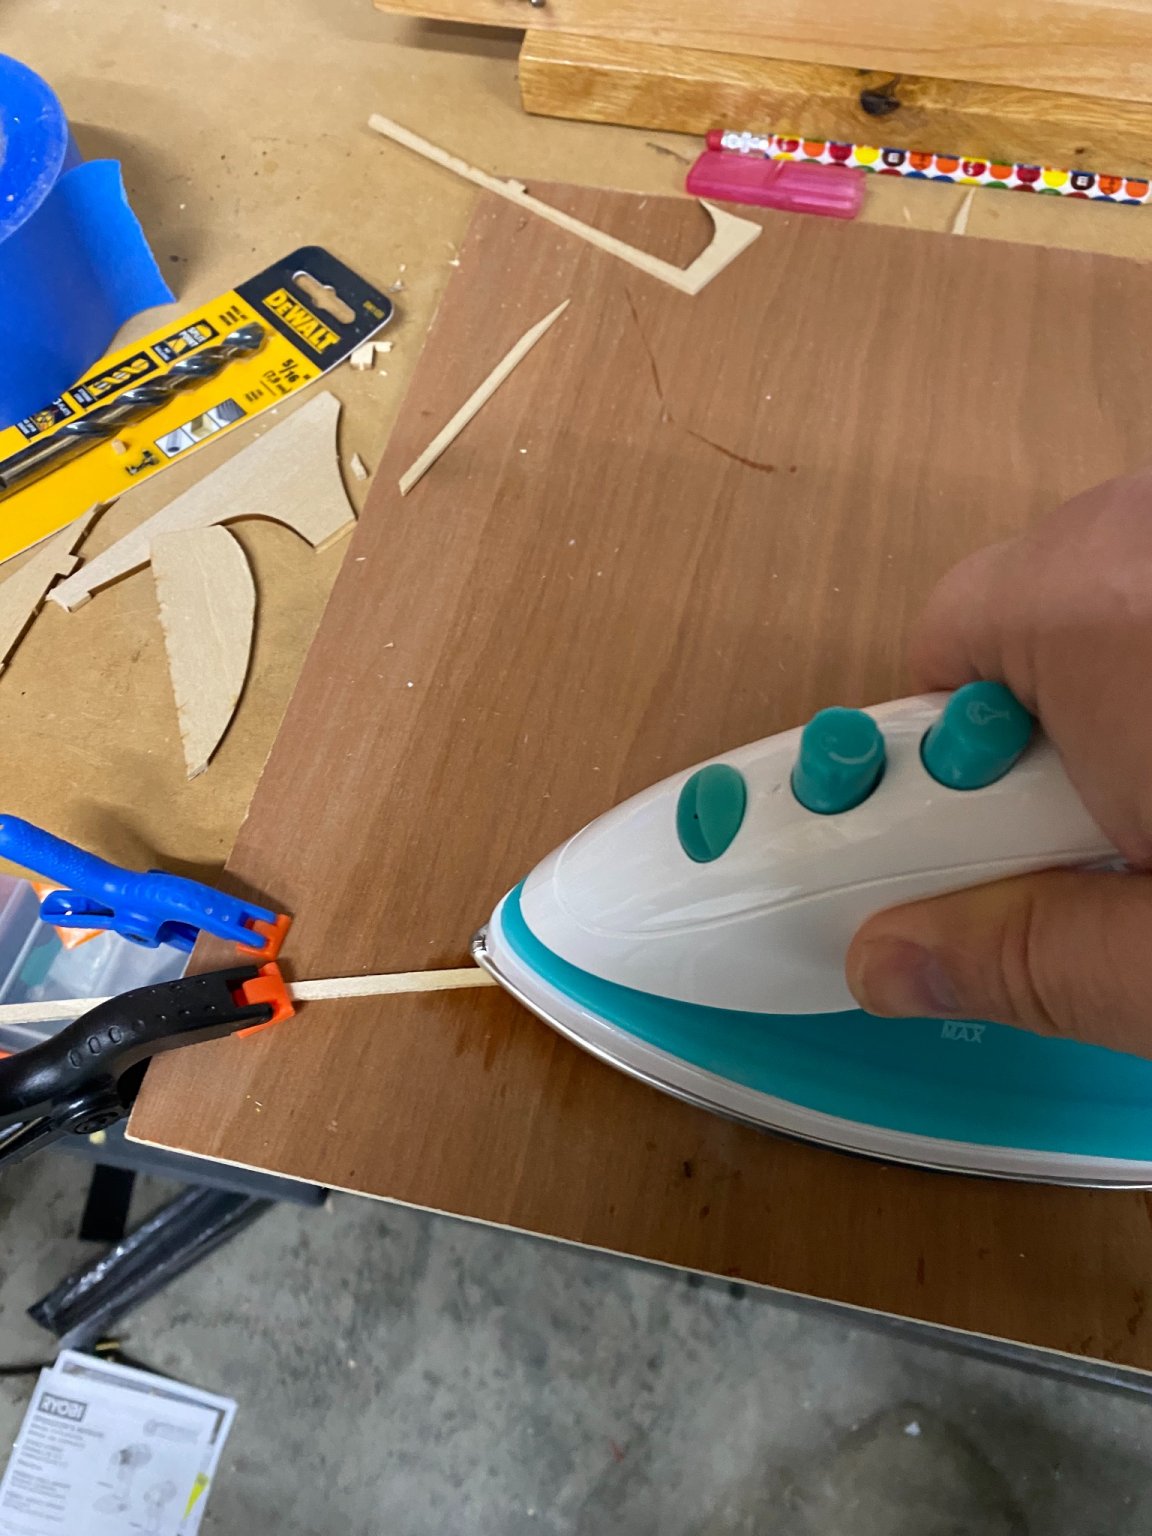
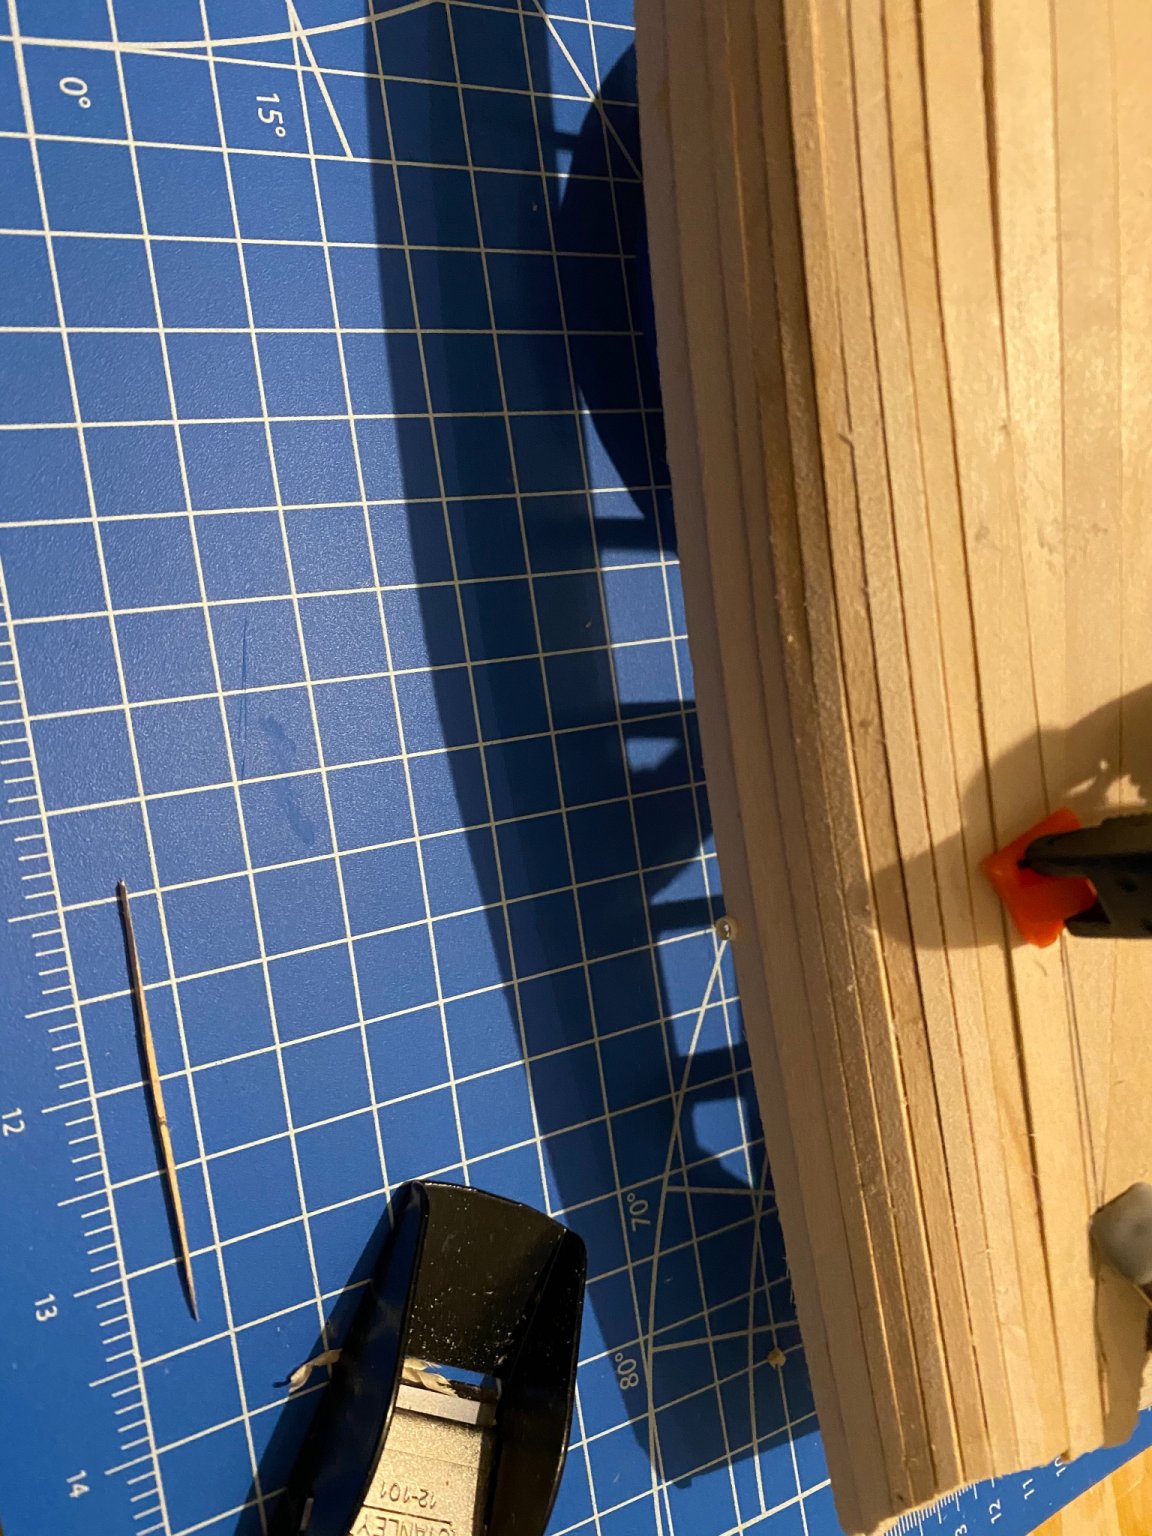
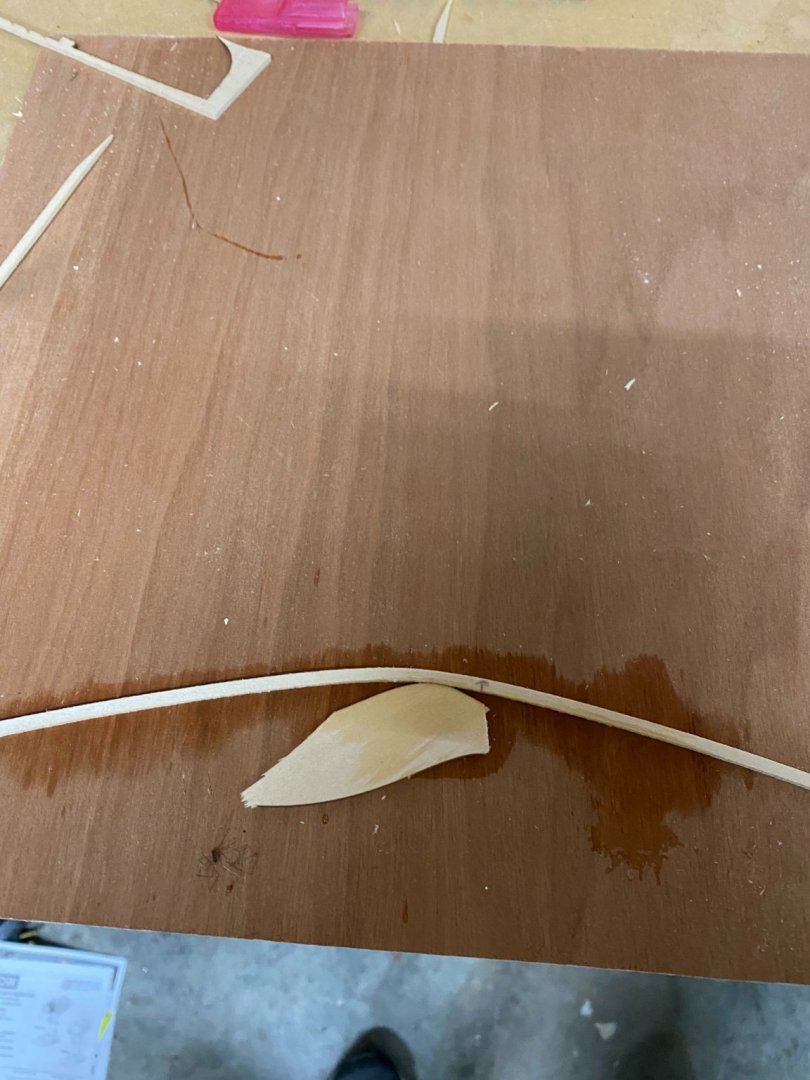
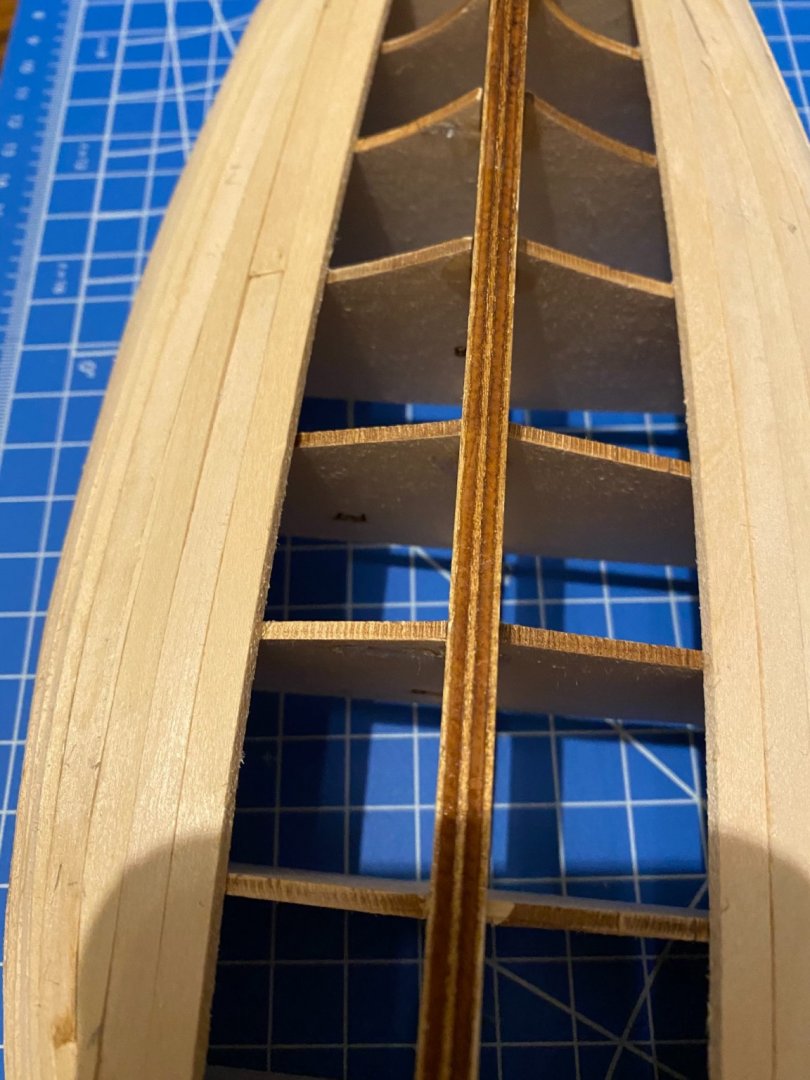
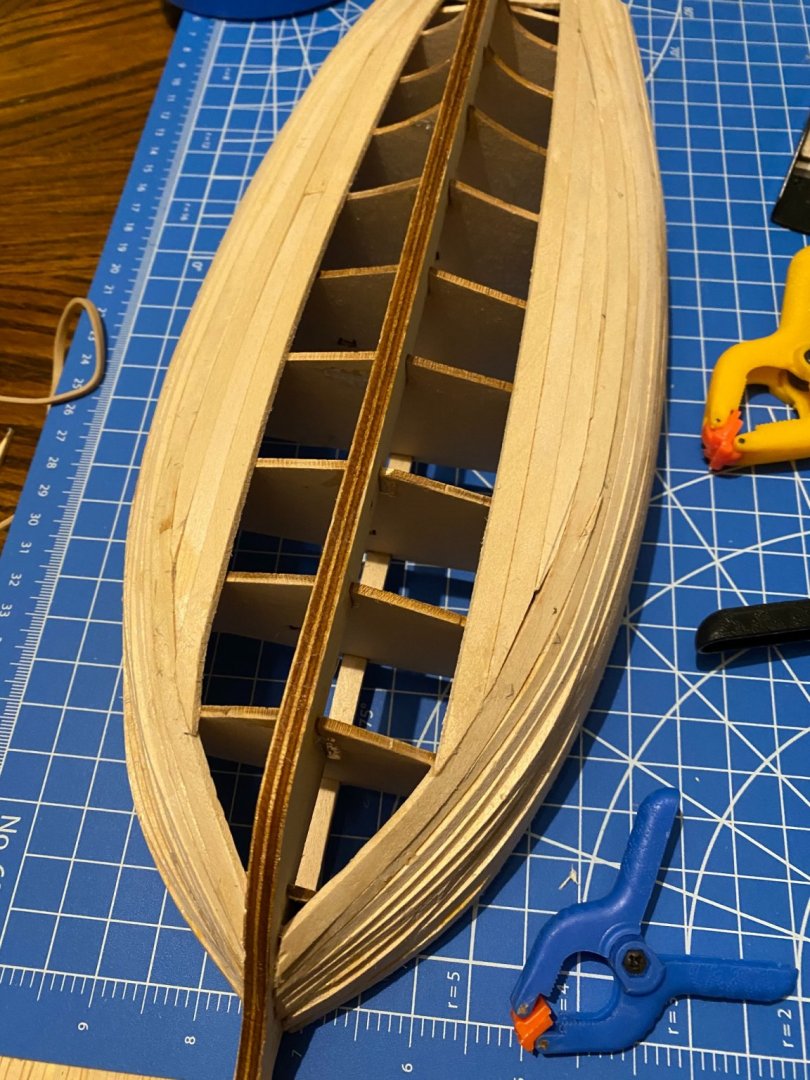
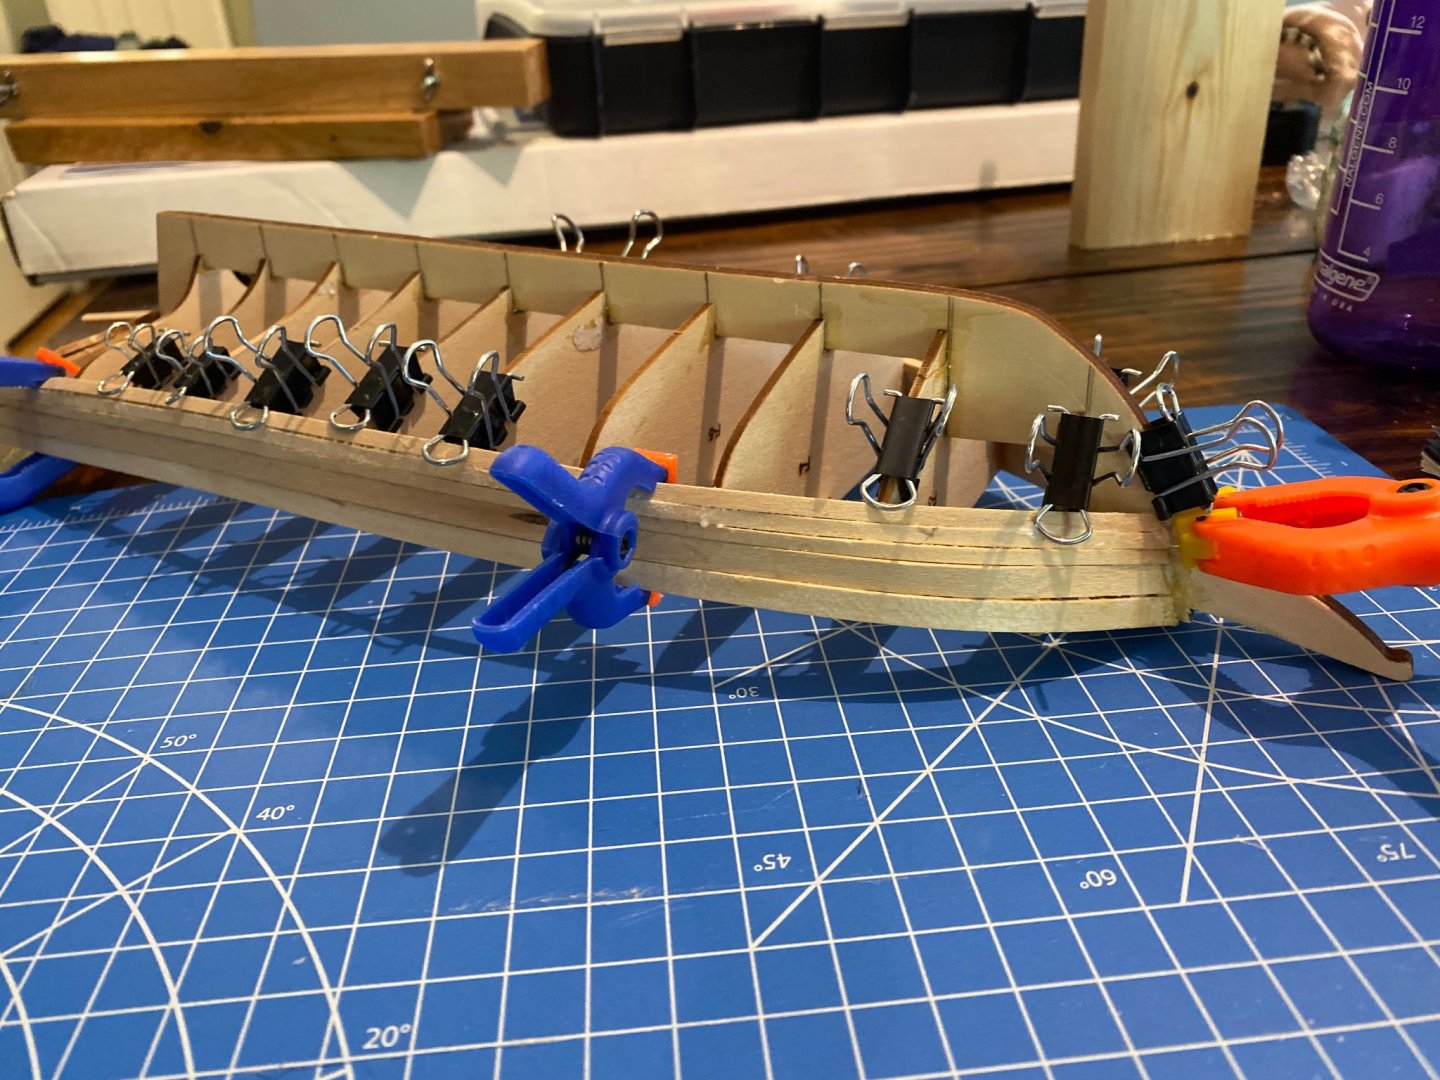
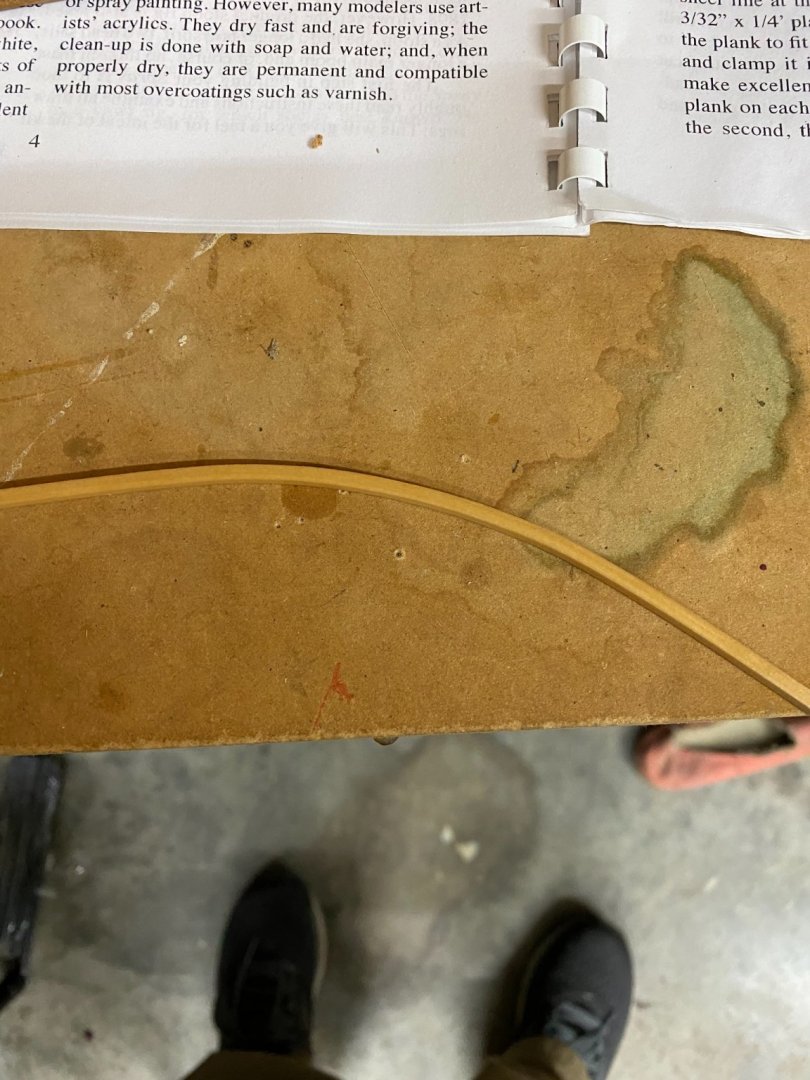
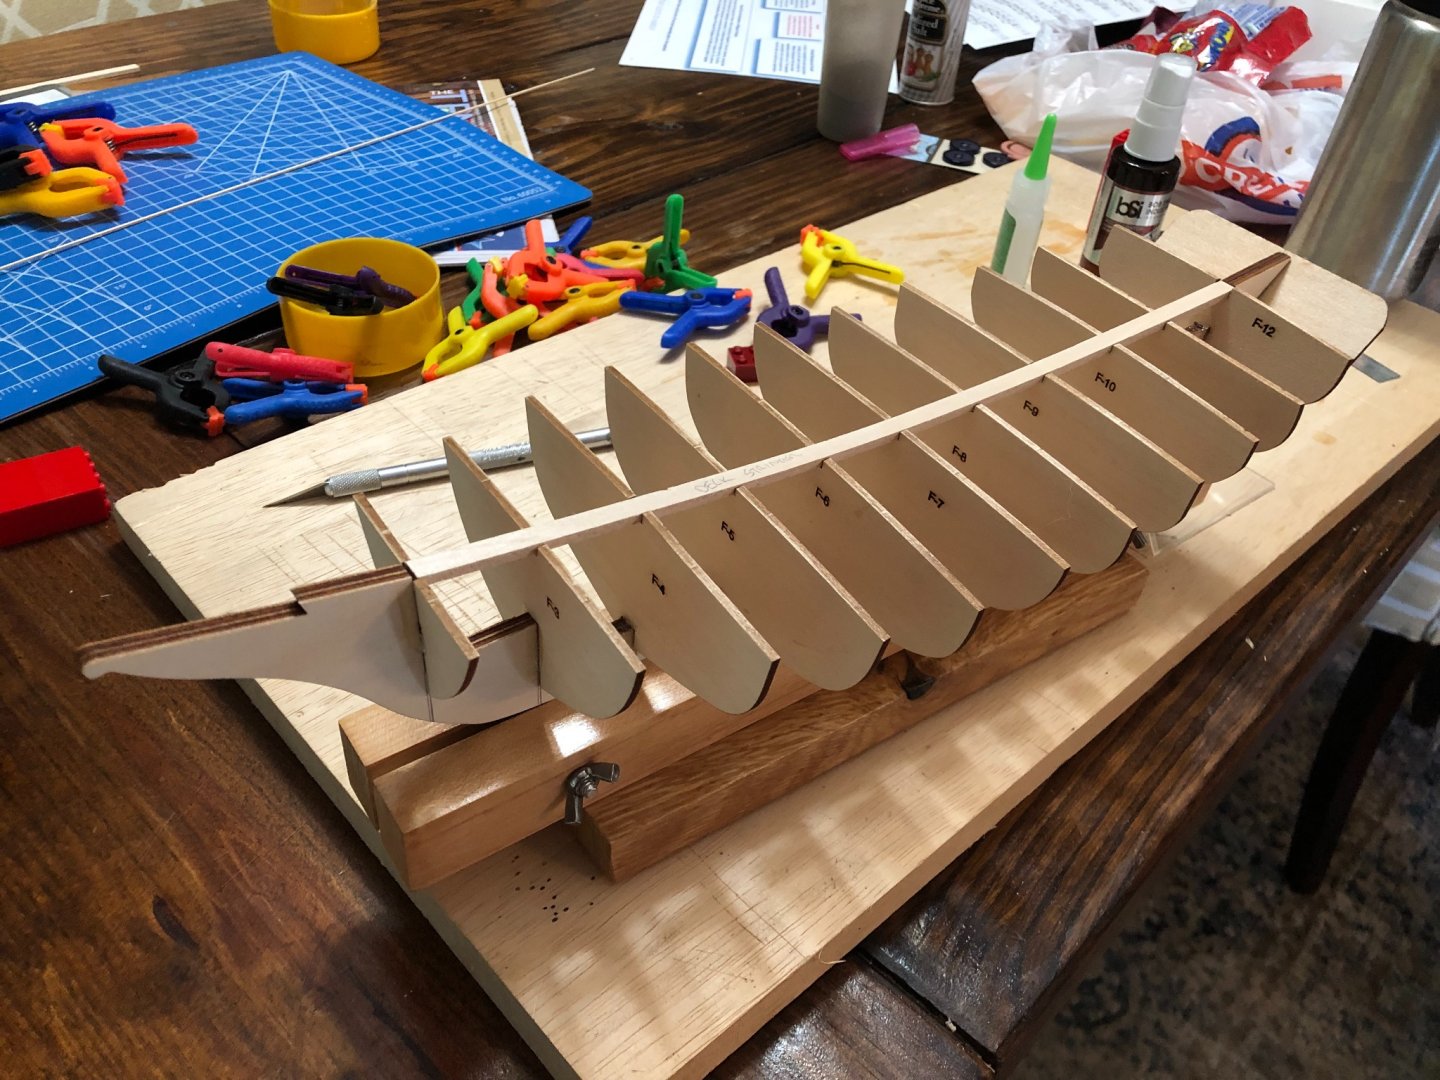
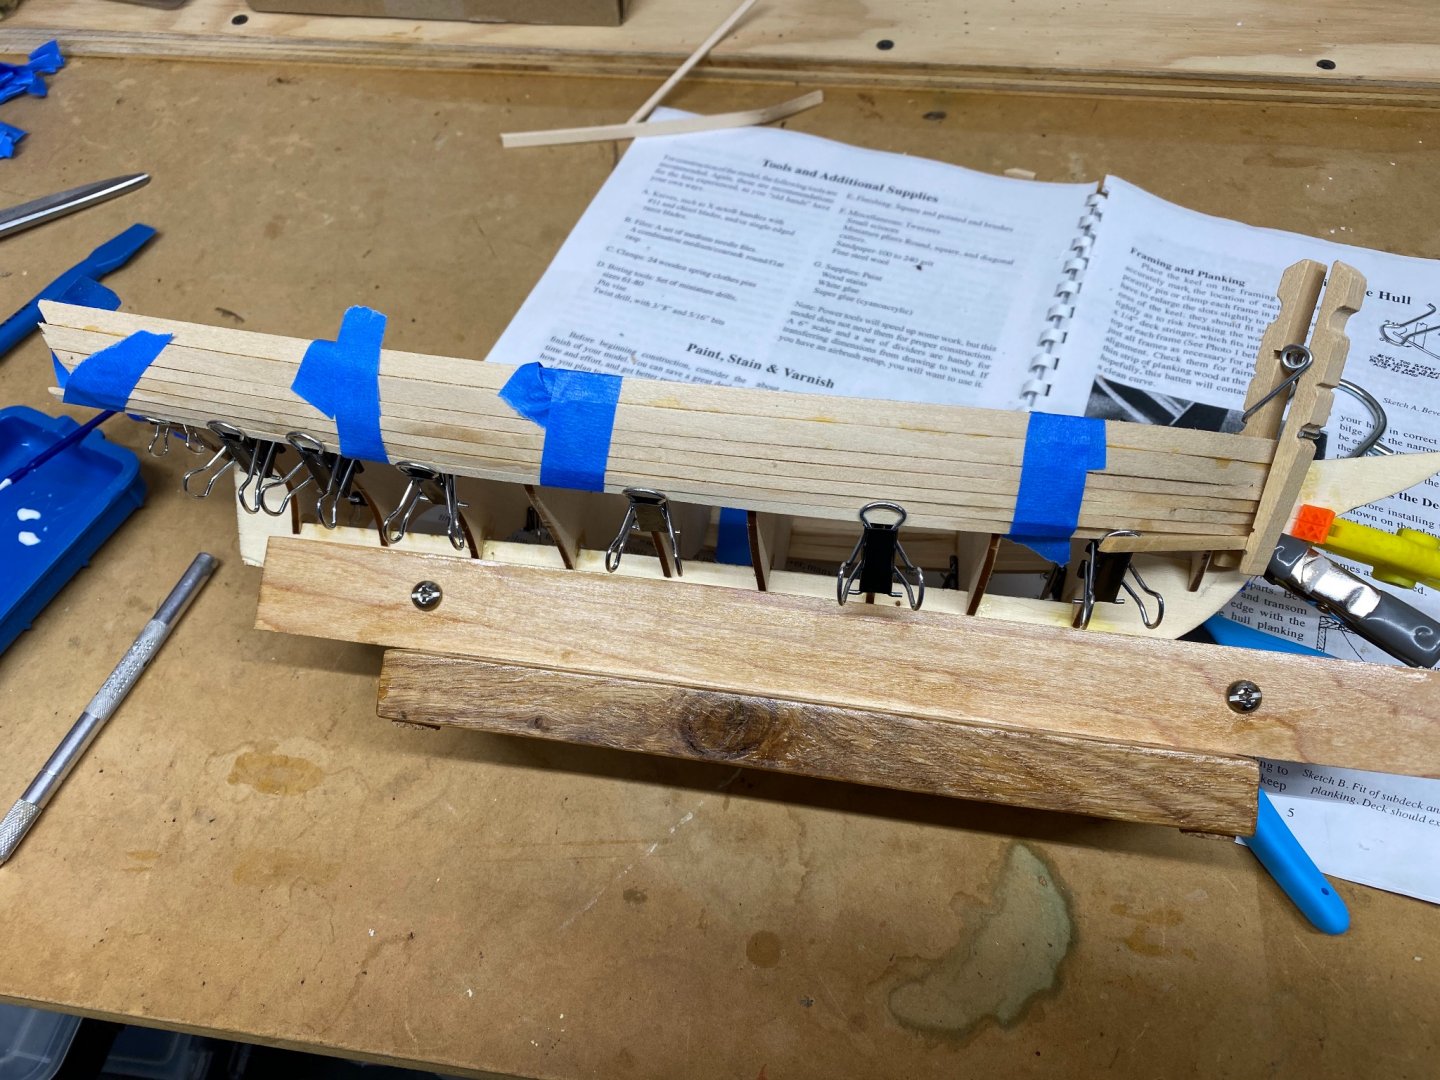
I didn't get as far as I had hoped I would this week, and this blog is latter than I planned. However I did make some progress which is more than I can say for most weeks, and I also explored new techniques. This model is stretching my skills and teaching me new things. It is advertised as one for modelers with some experience, and reminds me a bit of the technical challenge on the Great British Bake Off where the instructions are simply, bake a Choux - plank the hull is one such instance. There is some guidance given on what size planks to use and I've only ever done continuous long planks. So after watching this video from Chuck Passaro , I decided to try his technique for bending and beveling planks so they lay flat, and butt up to the adjacent plank snugly. I hopped on Amazon and got a cheap travel iron, and had some moderate success. But my jig (made from the parts of the kit that the frames were cut from) wasn't long enough to get smooth long bends, I had to do multiple short ones. After doing this for a couple planks, I decided to just cut planks to join at frames, and be laid parallel to the keel, with a couple plank width space between what I'd laid and this plank. I then made stealer planks to fit in the space, shaping and beveling them with a small plane and getting them nice and snug, which makes easy to glue in place. I was originally going to leave the gap and fill it in with wood putty, but decided to make a stealer instead, and I'm glad I did. This has been a fun new skill to learn, and increased my confidence in my building skills, that I'm not going to completely mess up this boat. Granted there is still a good way to go. So here is where we currently sit, I hope to finish the hull this week. One of my bigger challenges has been with glue. I'm having a dickens of a time with my CA glue not bonding. It is medium thickness and I can leave if for 30 minutes and it not bond, does that mean it is old? I've been using Elmers because it dries clear, as opposed to Titebond that has a yellowish color when it dries.


- 23 replies
-
- 2
-

-
- Spray
- BlueJacket Shipcrafters
- (and 1 more)
-
Building this same one myself. Great write up, I'm still at the planking stage. Following your build.
- 70 replies
-
- 1
-
-
- Spray
- bluejacket shipcrafters
- (and 1 more)
-
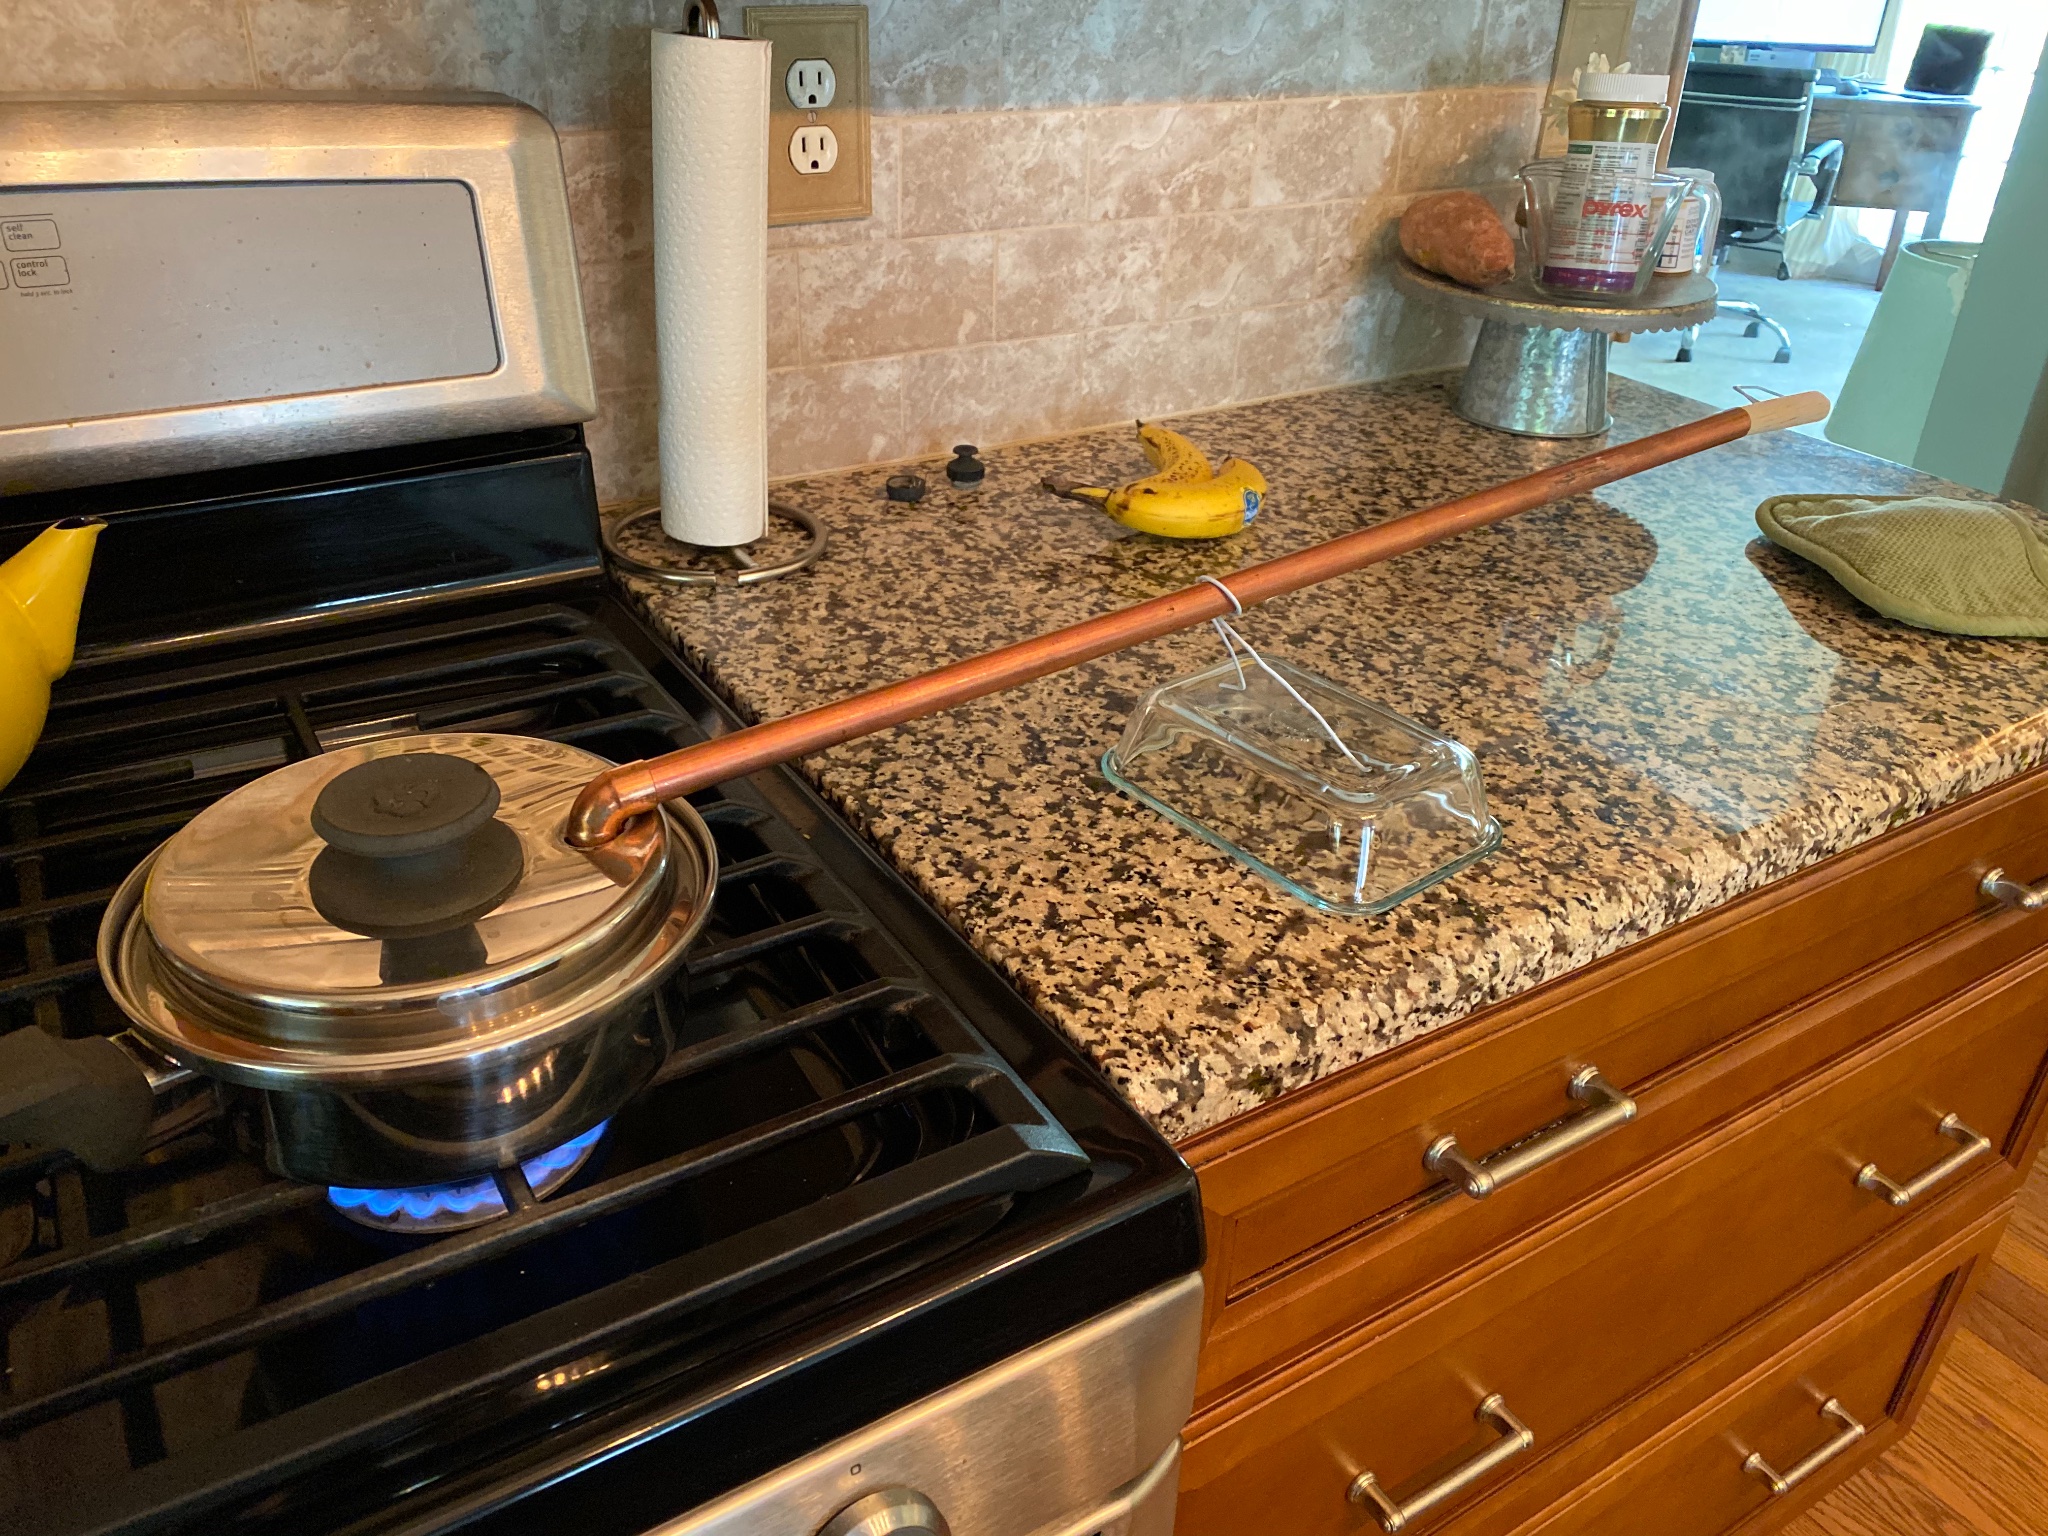
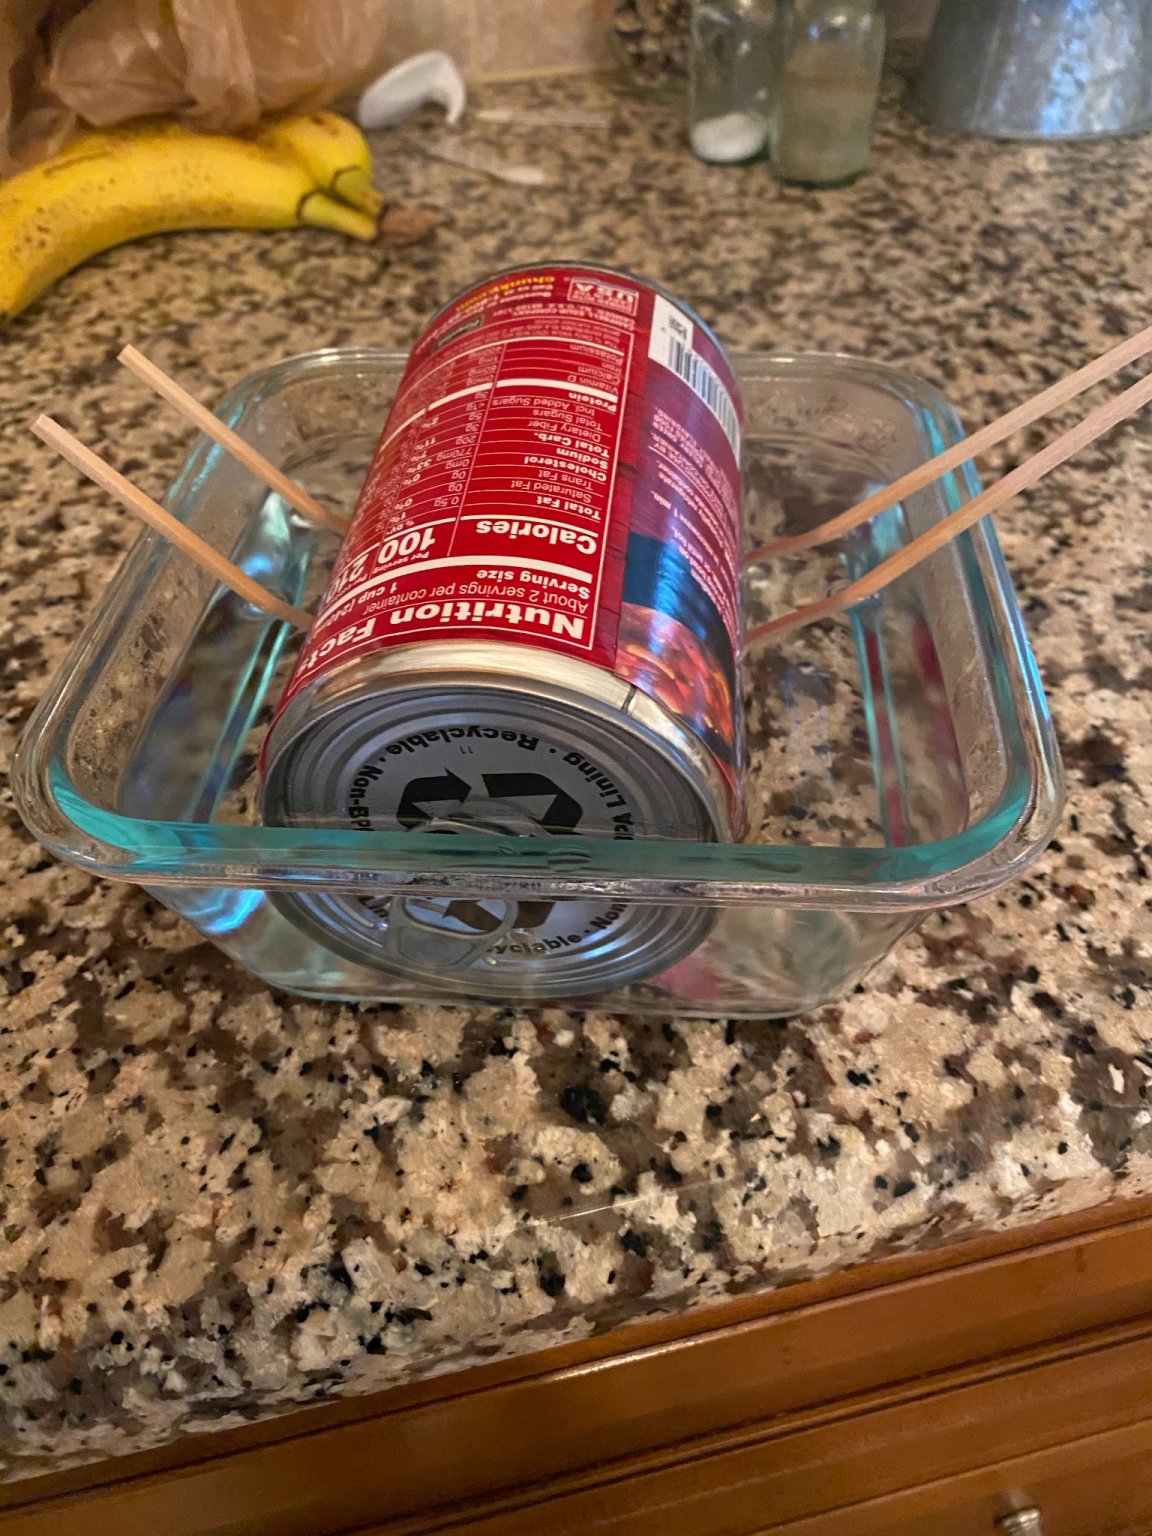
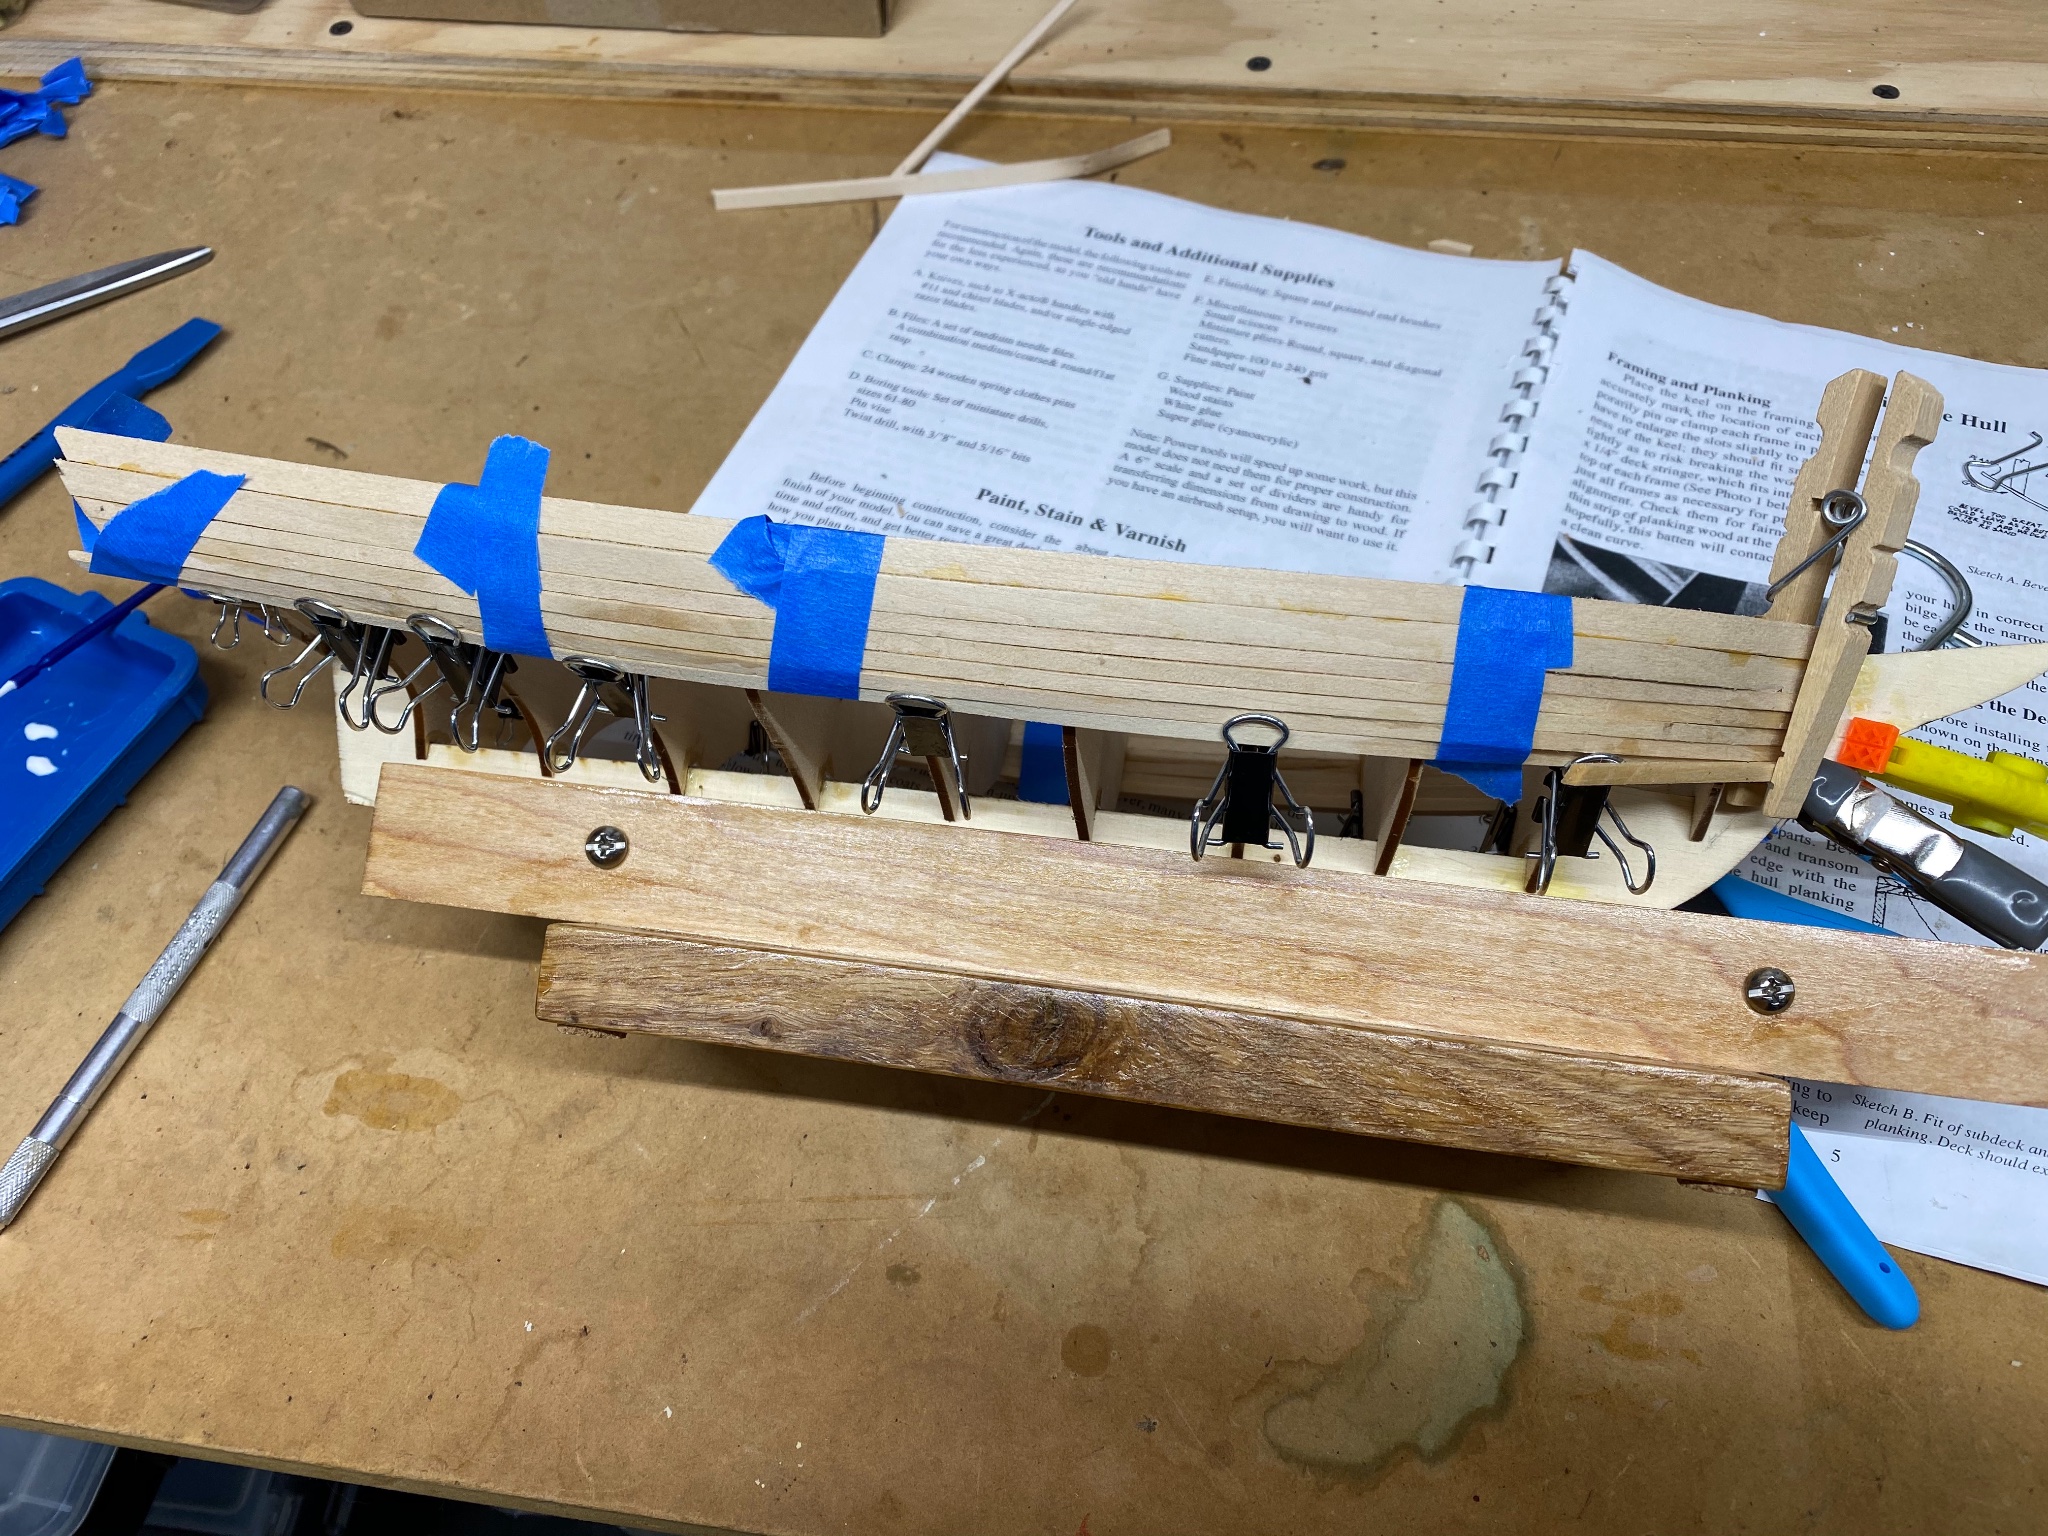
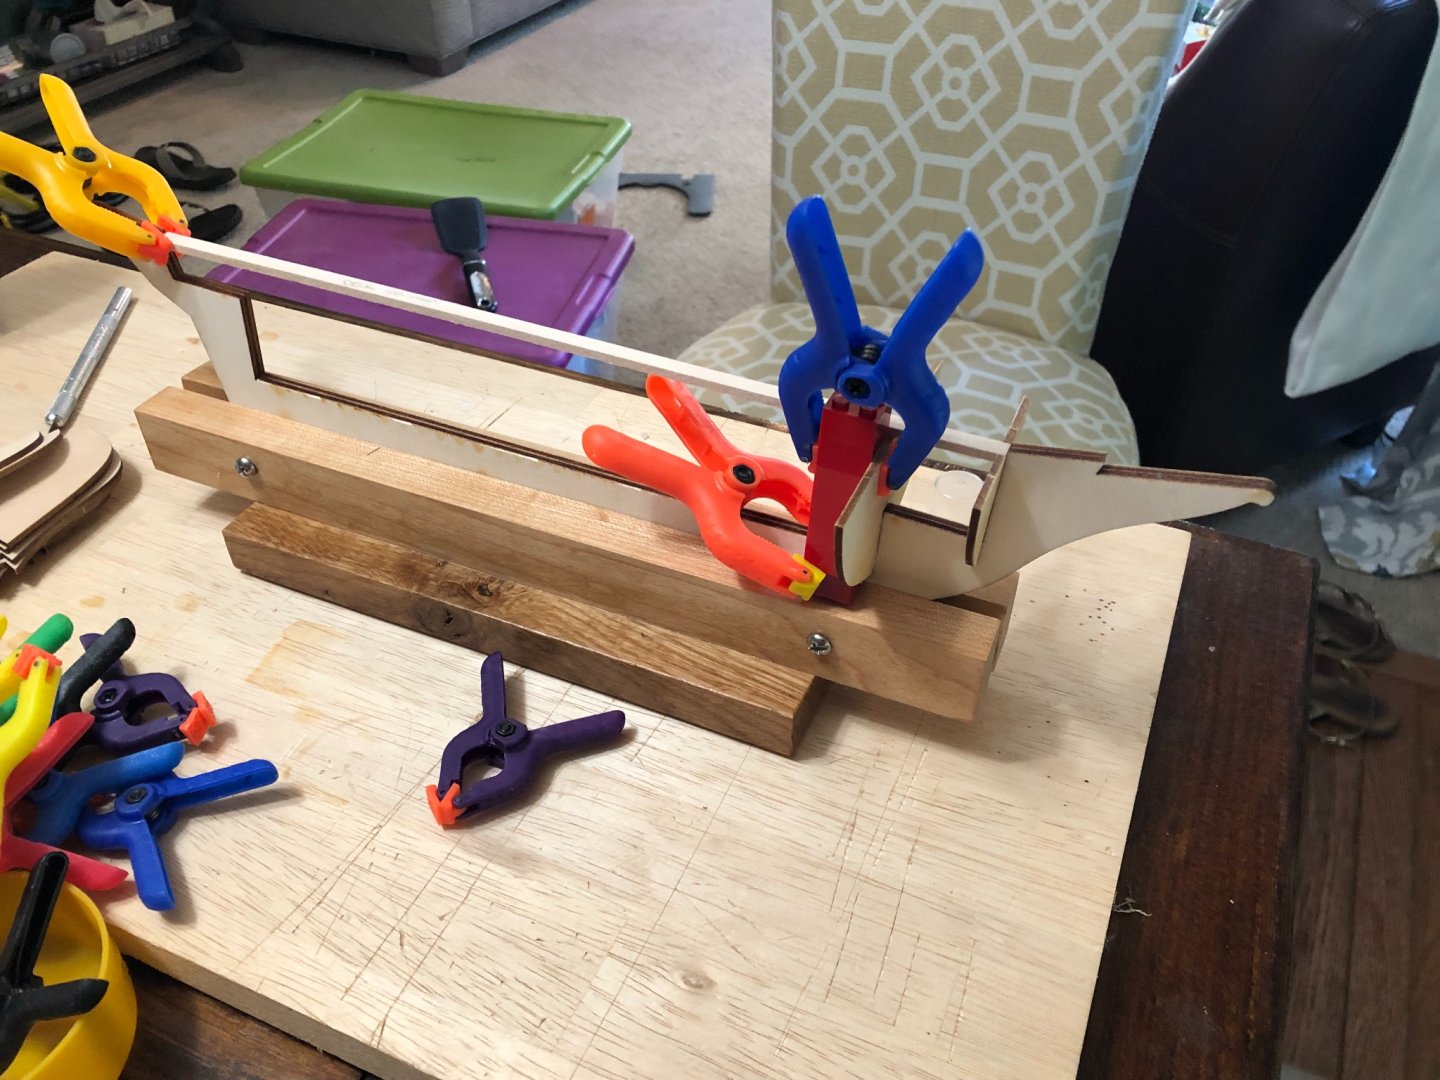
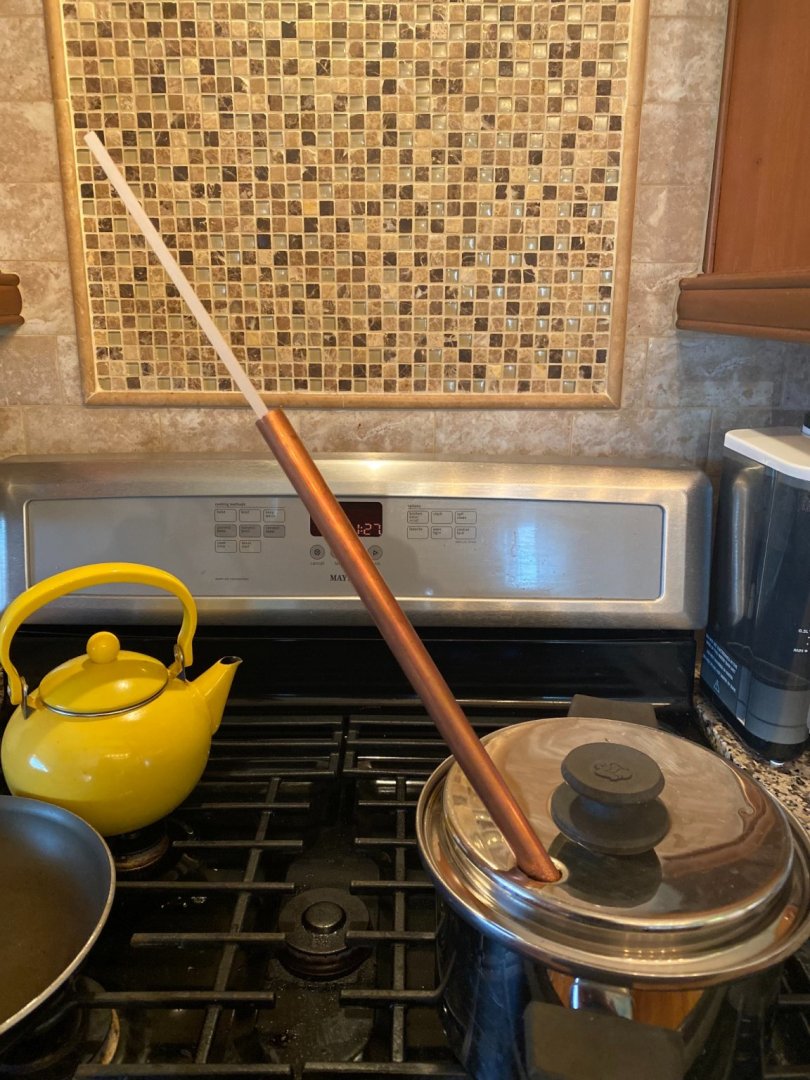
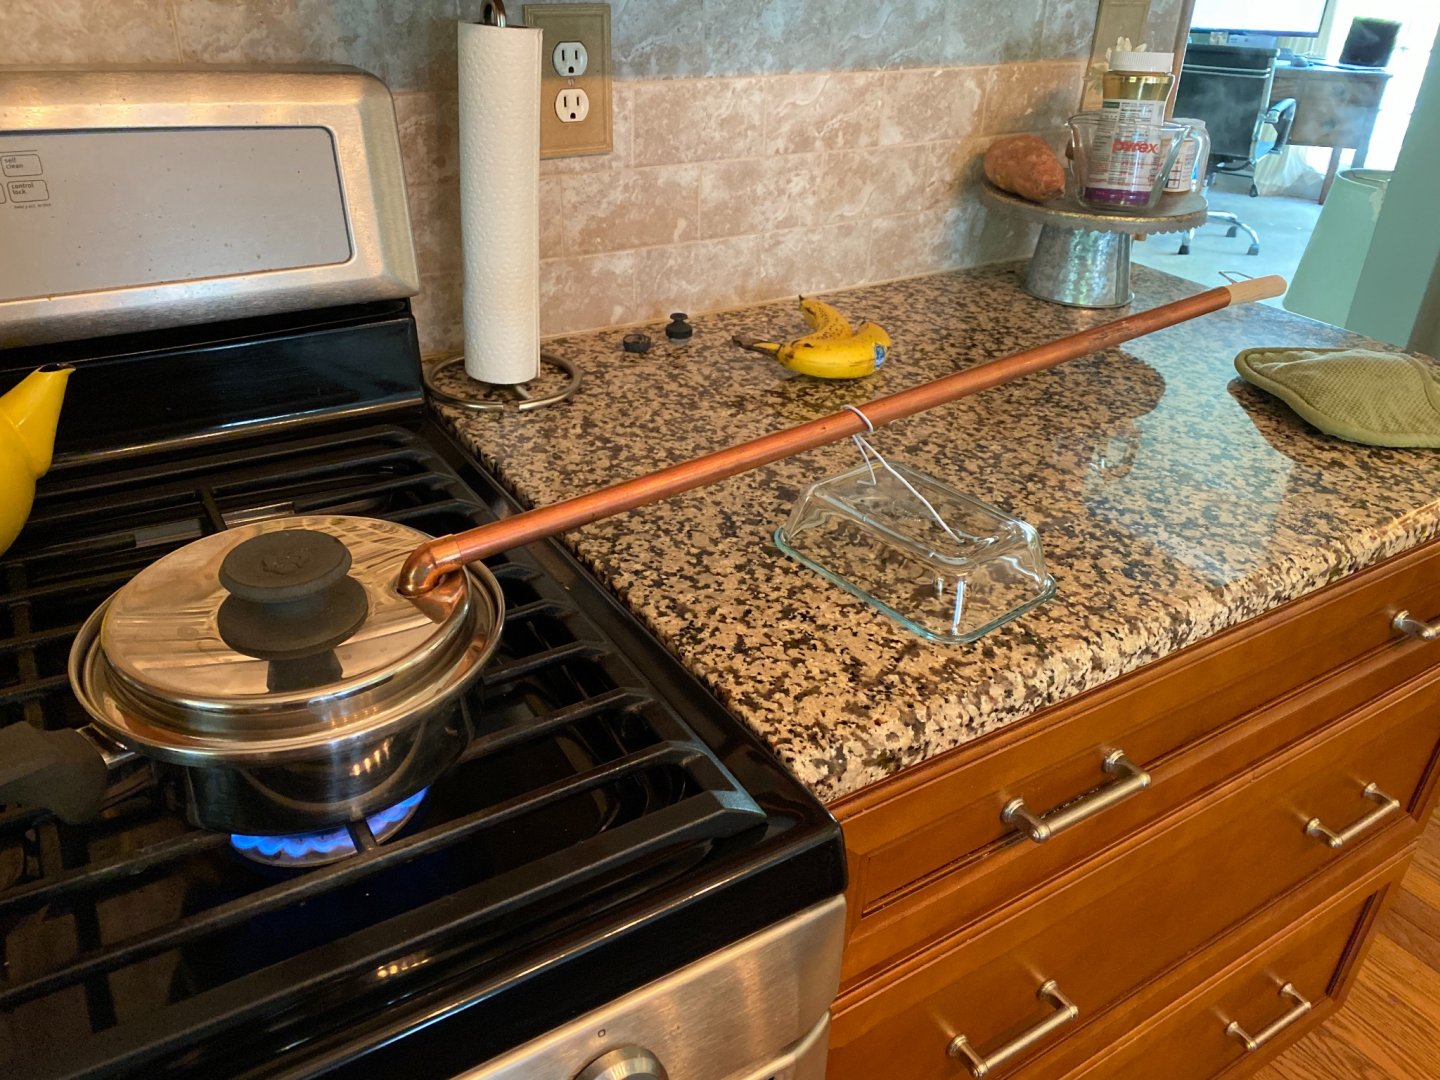
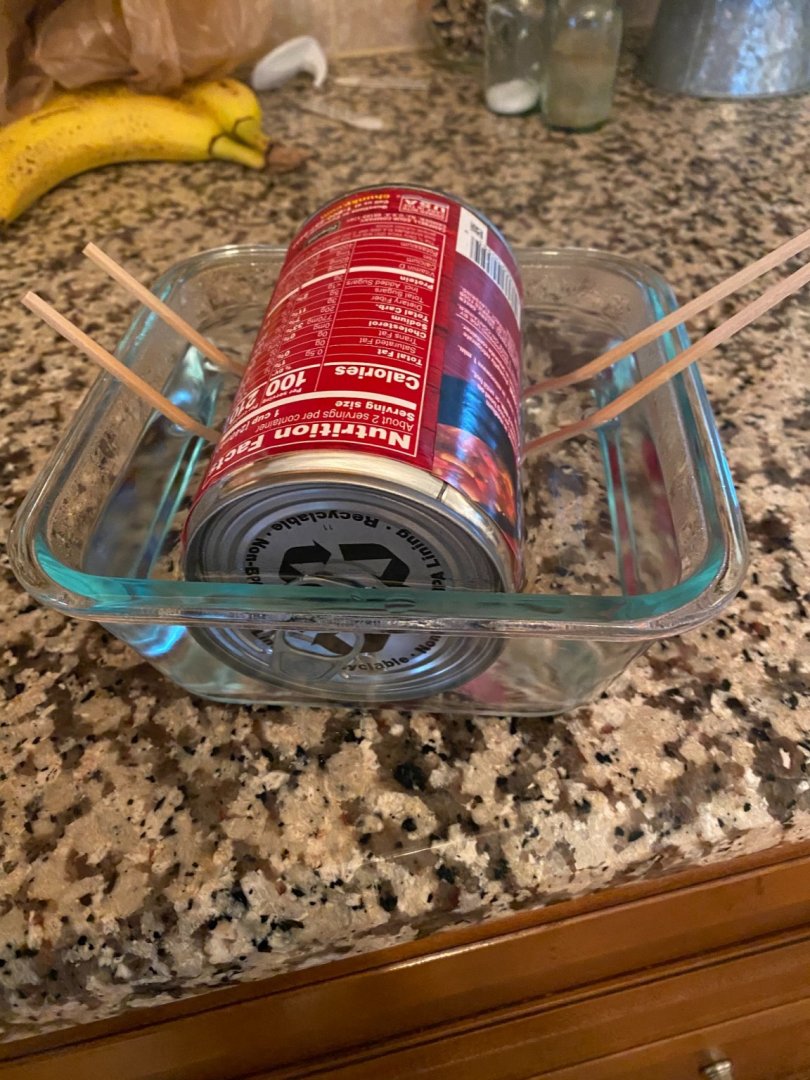
This is the first time I have ever blogged about a build. I've kept notes on builds but not done anything like this. The reason this time, is I am hoping to learn from comments made on my posts, and also my intention is to do weekly updates until the boat is built. My hope is having this "commitment" will help me to make progress on my build, rather than long lulls between activity. This is my fourth build, the first was a Lightning by Dumas, it is incomplete after I messed up the mast, and got holes in the foredeck. It took me years to get to that point. I've subsequently repurchased the messed up parts, and directions/plans with the hope of finishing it after I finish the SPRAY. Every summer for the past 9 years we have spent time in Acadia National Park, and driving up RT 1 would see Blue Jacket. I've always loved wooden sail boats since I was a kid, and so we stopped in one year to look at the models and I was hooked. I purchased a Friendship Sloop in 2015 and finished it in 2018. I told you I'm slow. Before I started on it I built a small Model Shipways kit on sale at Hobby Lobby to practice with. Every summer we stop in at Blue Jacket and chat with Nic or his wife, they keep notes on their customers and ask about our kids and vacation, it makes me feel at home. Two years ago I bought the SPRAY, and a year ago I finaly started the build. This year we couldn't get to Maine, and I missed not being able to swing into the store. Here are some pictures of the build so far, I use LEGOS to try and keep things square. Oops top half of transom is upside down That's better Next a couple pictures at my attempt to steam the planks. First planks are always the easiest Today I tried using boiling water and a soup can to bend around and hold them in place seemed to work the best. I'm also experimenting here with not cutting the shape of the front of the plank where it meets the bow until after the bend is in the plank. It bent OK, but I think on the next model I need to use a jig, bend several at a time and let them fully dry before fitting them to the boat, rather than letting them dry on the boat. I have issues with the wood shrinking as it dries, and then not fitting quite snug in the bow. I push it forward, but all the bends are just a little off at that point. Any tips would be appreciated. And here is where we currently are. I've seen the masking tape clamping method be used on strip built kayaks, and thought I'd give it a shot. It works pretty well in pulling planks together and minimizes the chance of the wood getting dents in it from the clamps. My goal is to get the next 2 narrow planks on each side by next week. I get it way to wet, and it takes to long to dry before I can glue up, so that I can only add a row a day. But I don't think the next several will require that much bending, so they shouldn't need steaming or heating to get into shape. I spend too much time watching TV, it's not as if I don't have the time to do this. And to be honest, part of me is scared about messing it up. Cheers Don
- 23 replies
-
- 7
-
-
- Spray
- BlueJacket Shipcrafters
- (and 1 more)
-
Following, Awesome job so far, I'm at the planking stage myself.
-
I just started building this same kit. I've got the bulkheads in and was just about to start planking. I think I'm going to add the stanchions and sub deck now before I plank. I was trying to figure out how to do that down the road.
-
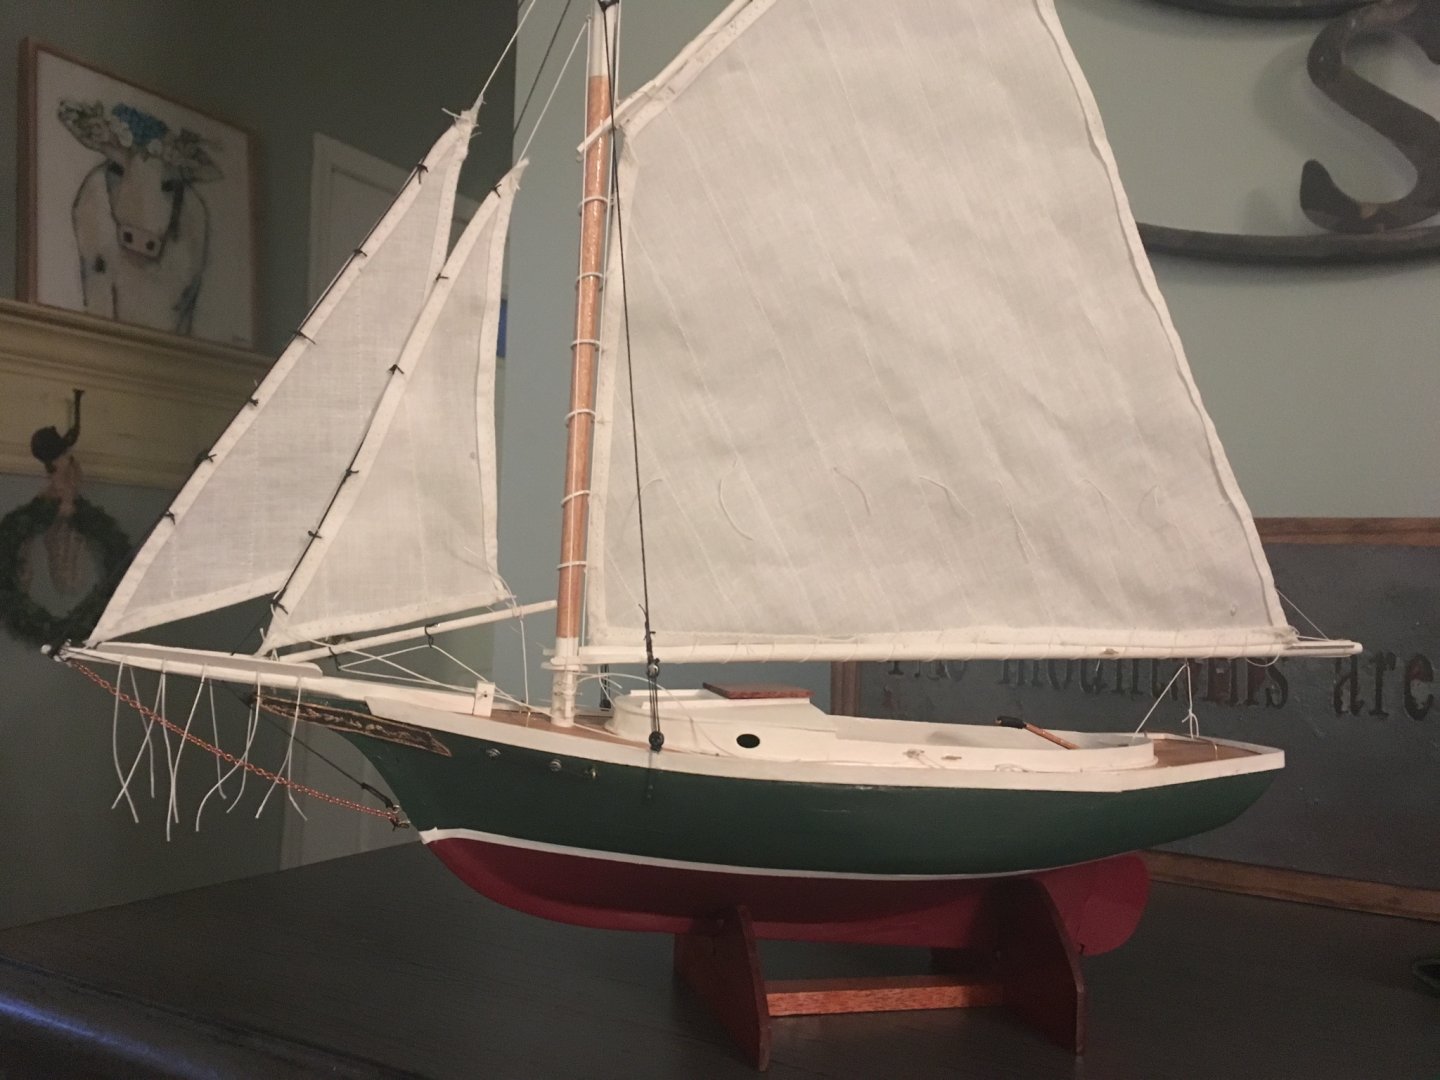
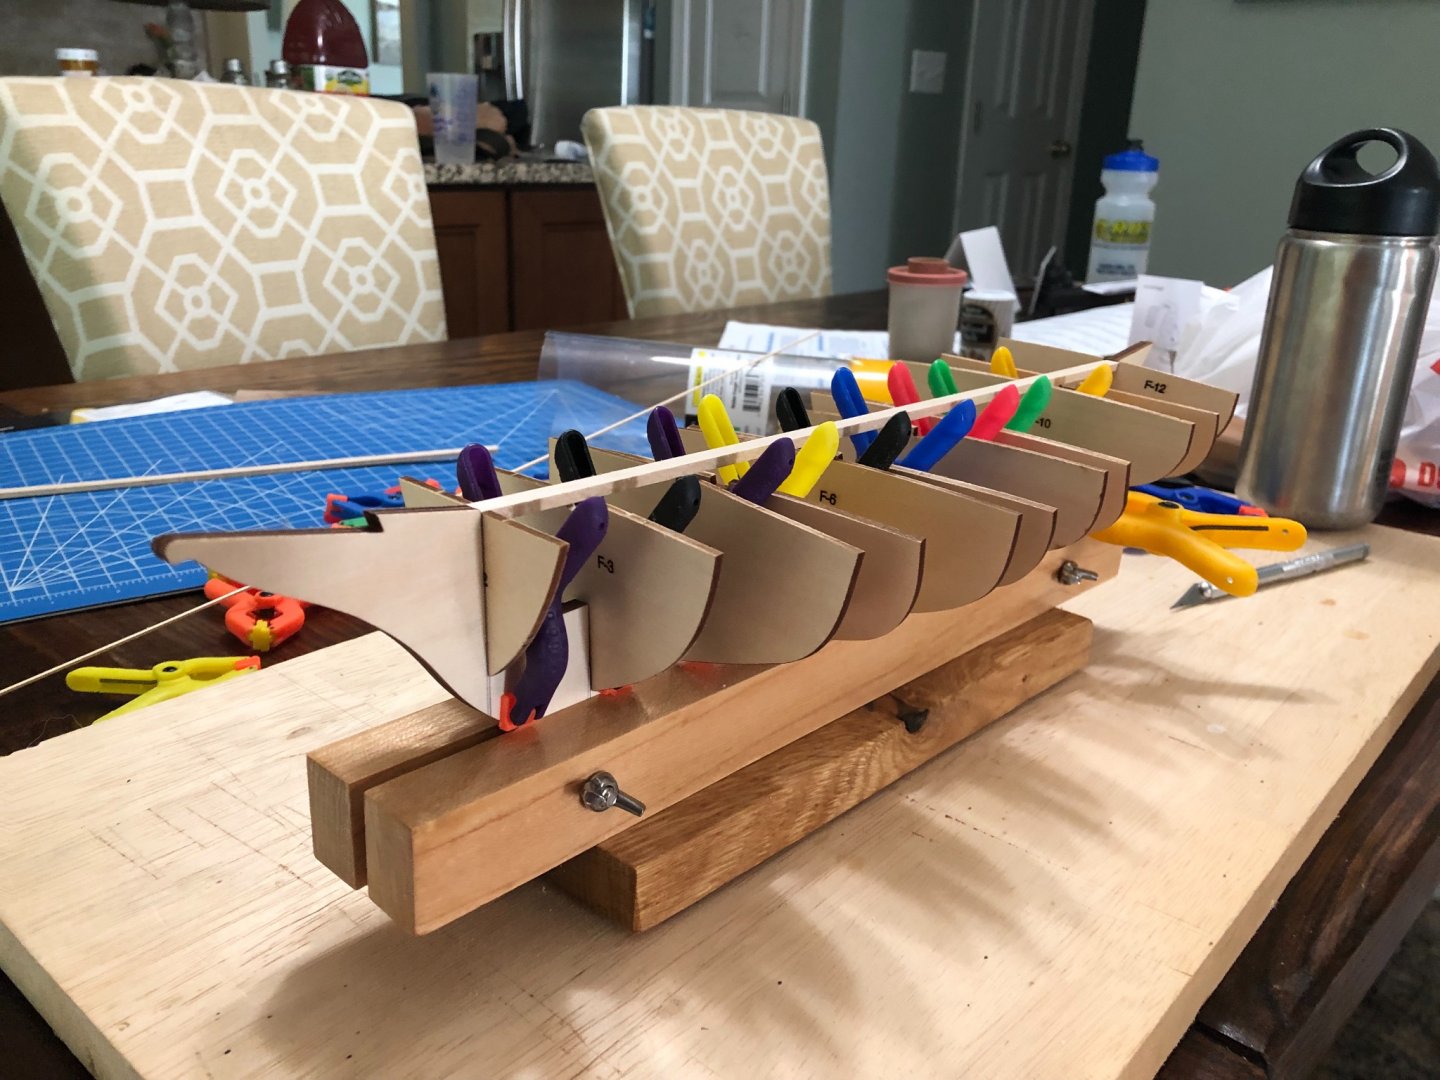
I'm enjoying this build, this boat is number 3 on my building list. Only at my rate of progress I probably won't be starting for another 5 years. Curious about your keel vise, it looks home made about how long is it? Don
-
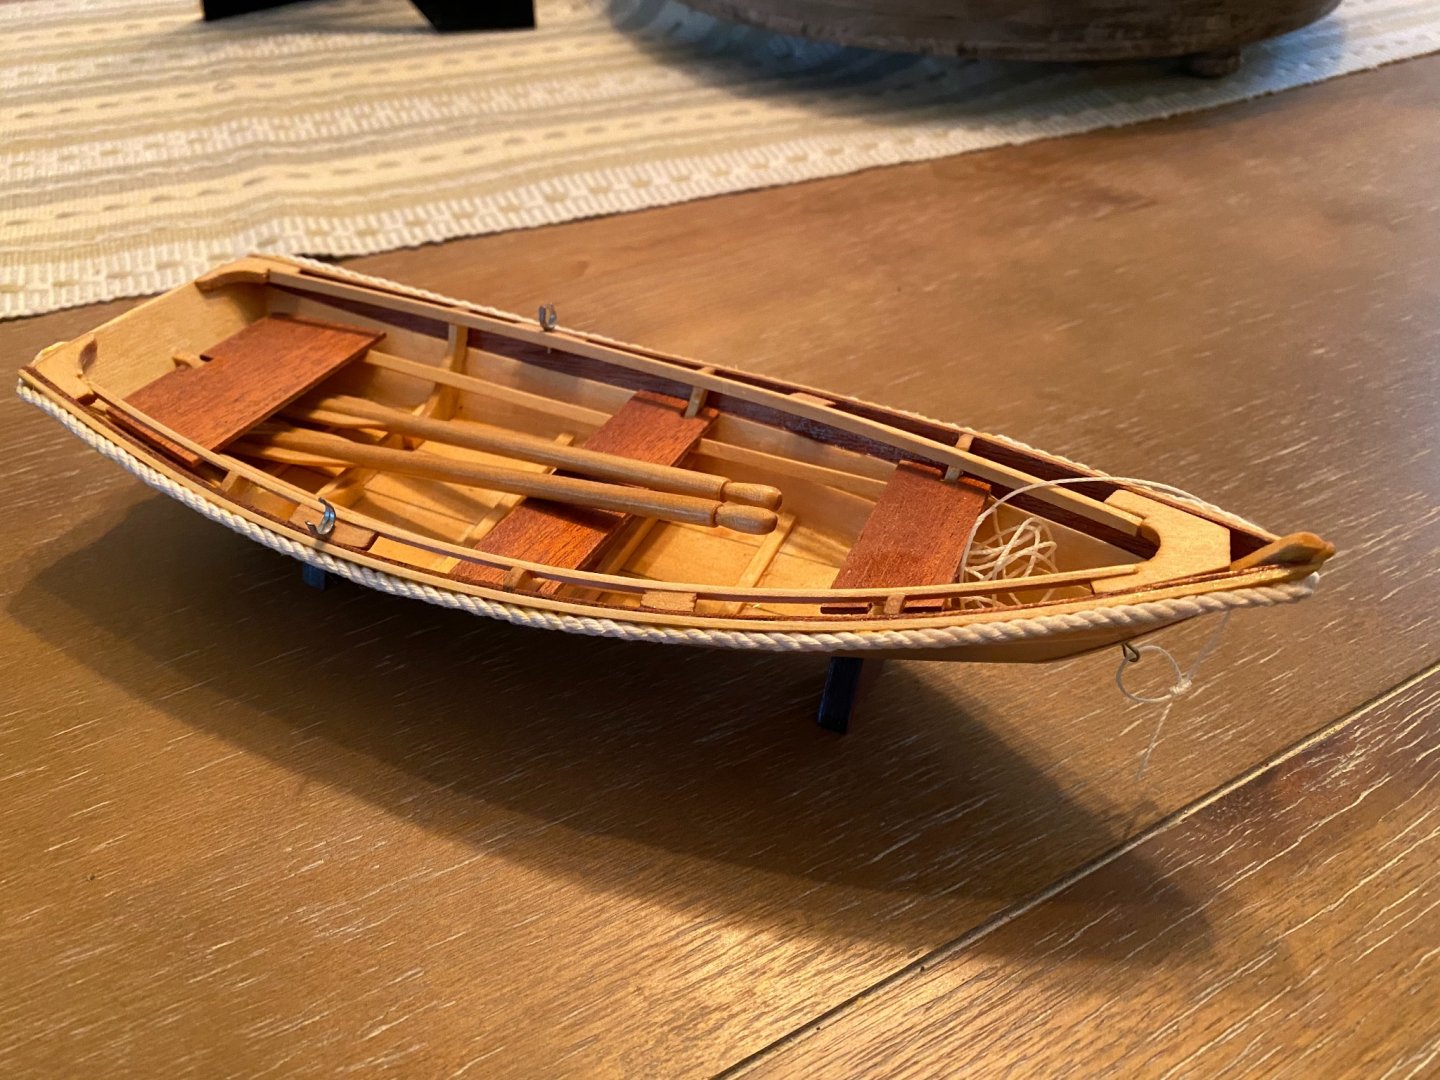
Thanks everyone for the responses, just now having the time to work on my boats again. The grime is caused by oils in my skin, so I think going forward I am going to wear gloves when building sections where the wood will show. The alcohol wipes worked a little, but they were great in showing spots that needed further sanding. Don
-
Unfortunate no matter how careful I was, my model has some grime on it from being handled while I was building it. I've sanded it, and there is still some residual discoloration from me handling it. Does anyone have any suggestions on how I might clean it some more before I stain it? Thanks Don