dicas
-
Posts
22 -
Joined
-
Last visited
Content Type
Profiles
Forums
Gallery
Events
Everything posted by dicas
-
HMS ROYAL KATHERINE 1664 by Doris - 1/55 - CARD
dicas replied to DORIS's topic in - Build logs for subjects built 1501 - 1750
The more I look at your work, the more I like it. Congratulations (again). JL- 1,035 replies
-
- 2
-

-
- royal katherine
- ship of the line
- (and 1 more)
-
Very good work, Mark, congrats Given the poor quality of the sails supplied by occre, your work is outstanding. JL
- 331 replies
-
- 2
-
-
- nuestra senora del pilar
- occre
- (and 1 more)
-
Hi, Mike, well done. Not so bad, after all. As for the rudder/hull, I hope thie helps. Regards JL
-
Looking fine. Not so bad, the kit, after all. JL
-
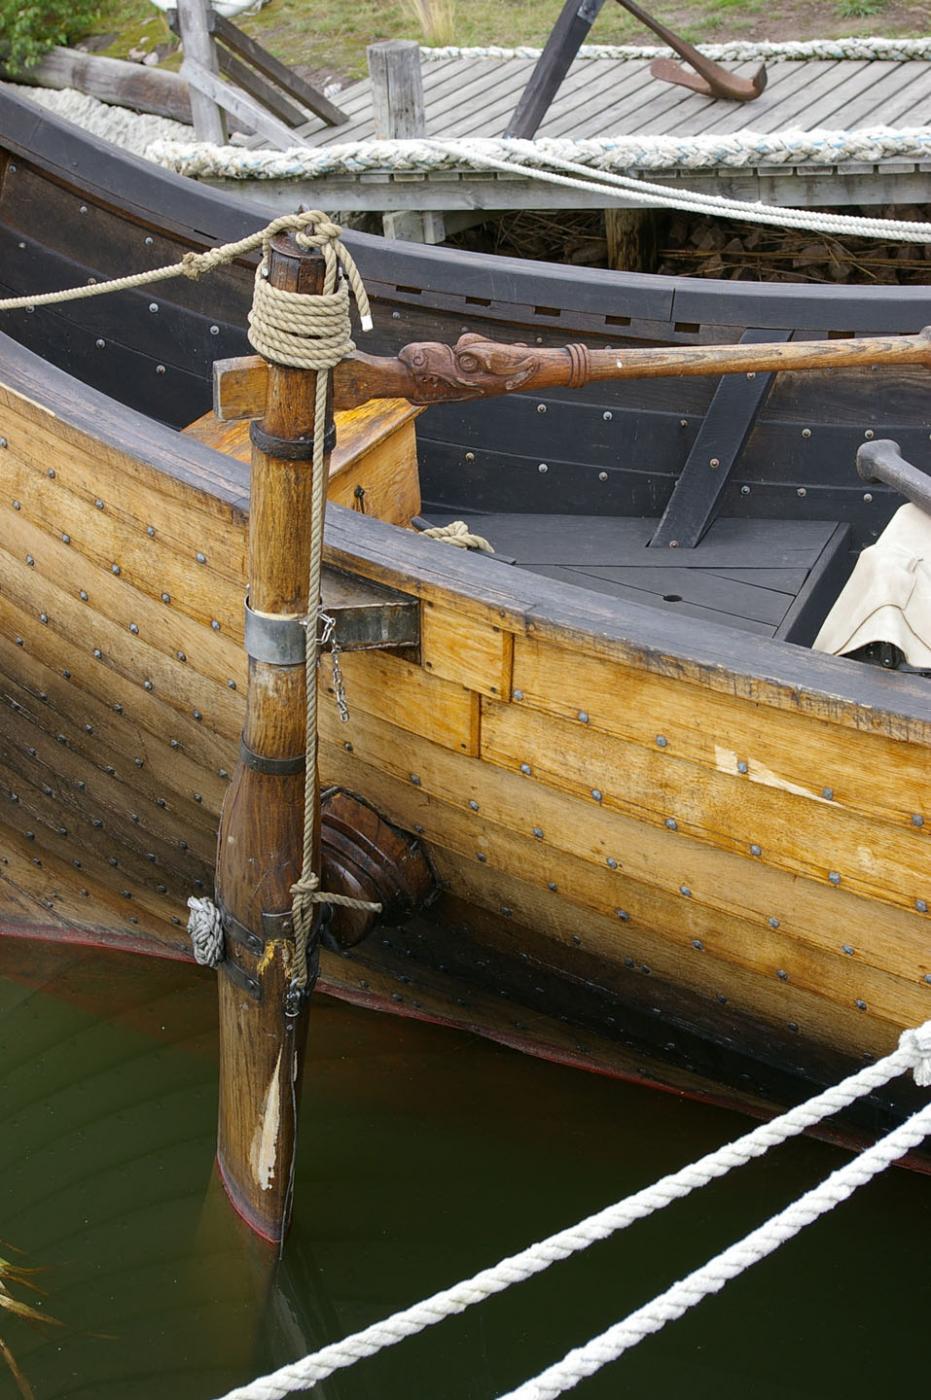
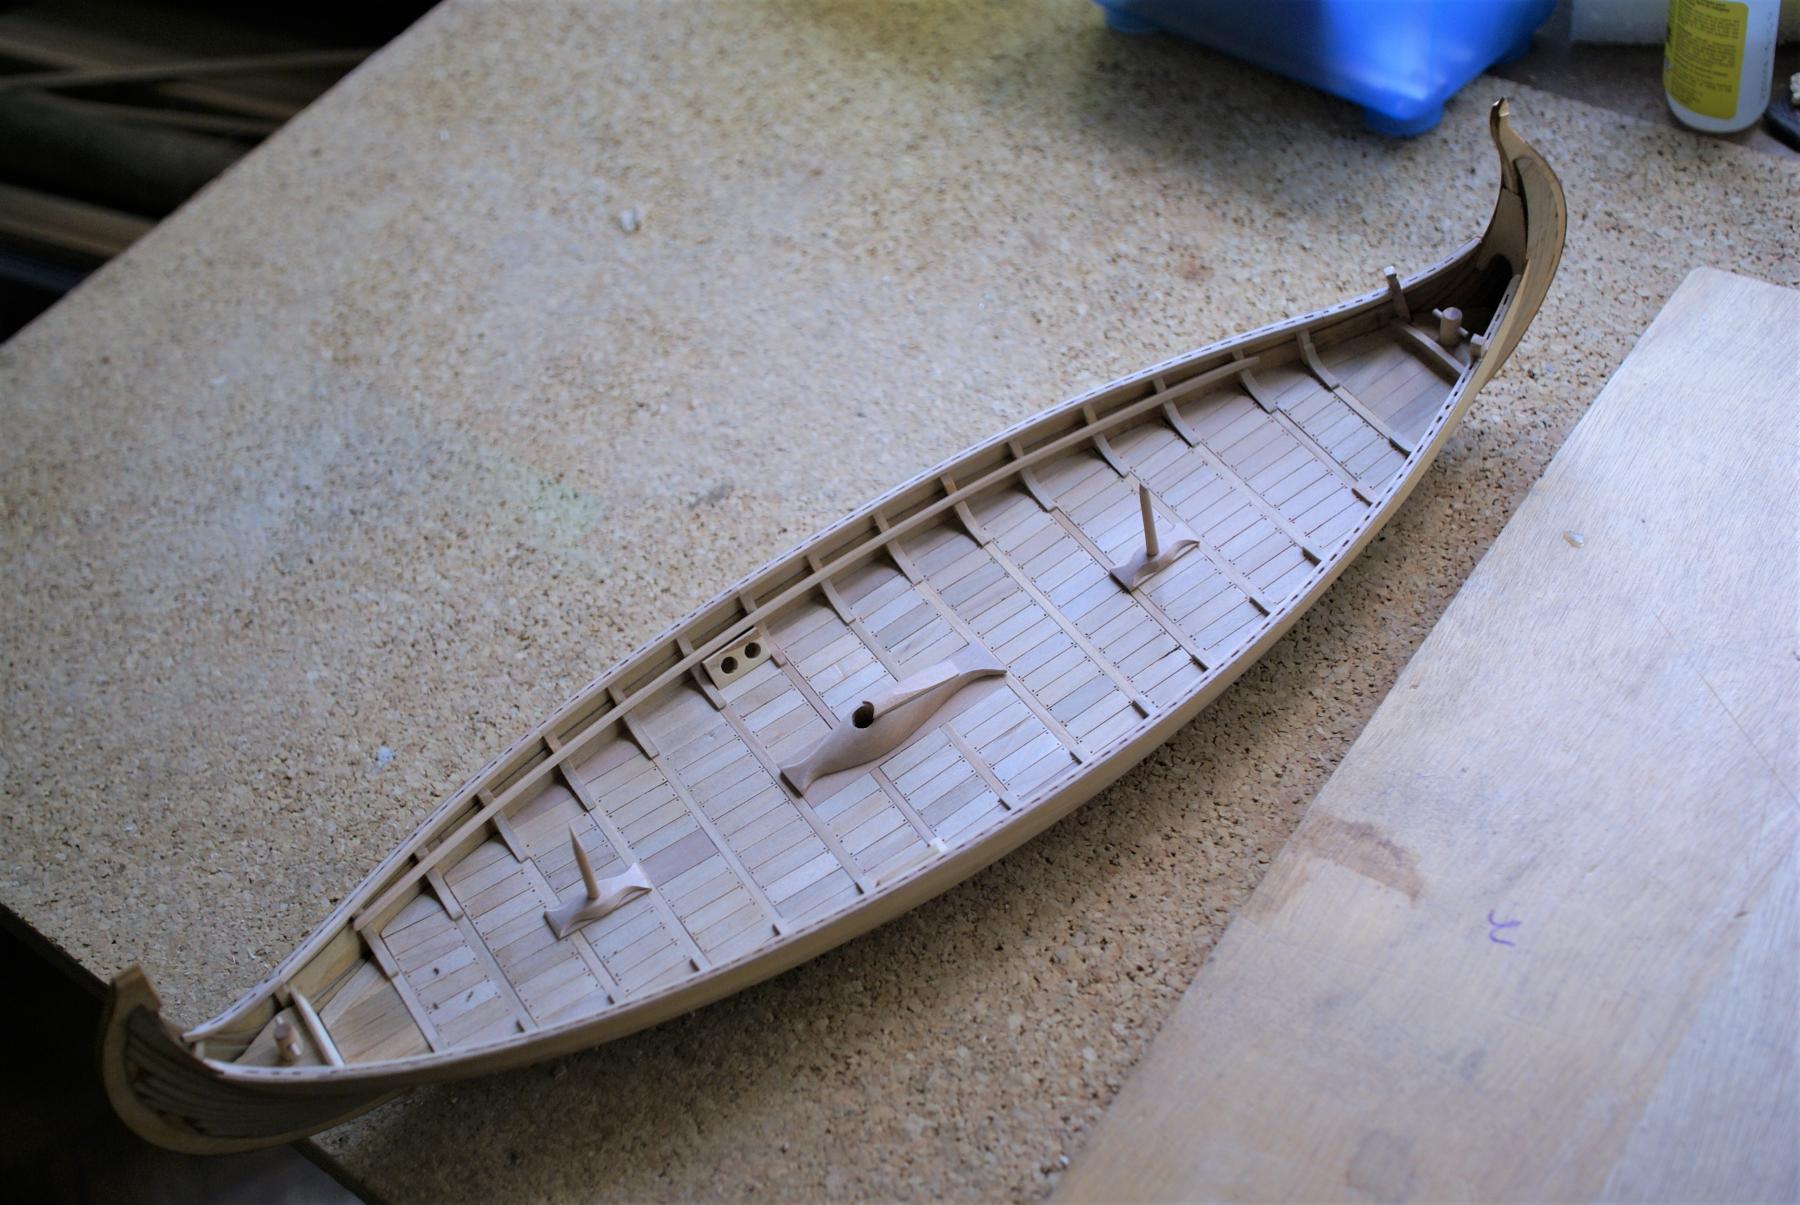
They sat on the chests where they carried their belongs. There are samples of those chests on the net: http://www.hexapolis.com/2014/07/30/onboard-one-to-one-storage-system-where-vikings-succeeded-but-we-failed/ The oars passed through the holes on the hull (of course! ) and these holes served as levers. JL
-
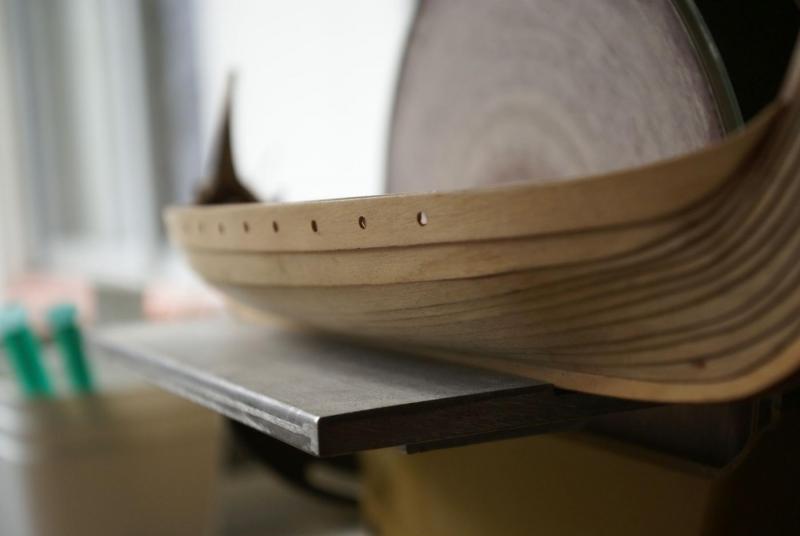
Thanks. I'm going to stain the hull, stain some pieces on the deck and leave the deck and the inside of the hull as it is now. Vikings painted their ships, blue yellow and red were the most used colours besides black. As for the two dragon tails, well, Oseberg ship has two tails, the Glokstad has none it is a matter of choice. The bulkheads are very few, very thick and very ugly even painted. I removed them, replaced by more scale bulkheads and added a number more. Besides the visual and scale improvement, I had to do that because of the extra strake. Amanzingly the hull, in spite of having its support removed is very strong now, stronger than with the original bukheads. You can see that in my first picture in your post. I think it is much better now. JL
-
Well, I like it. What did you use for staining? And why did you stain the inside? It isn't going to be seen, anyway. Just testing? And are you keeping the original plywood frames at sight or are you going to replace them? Regards JL
-
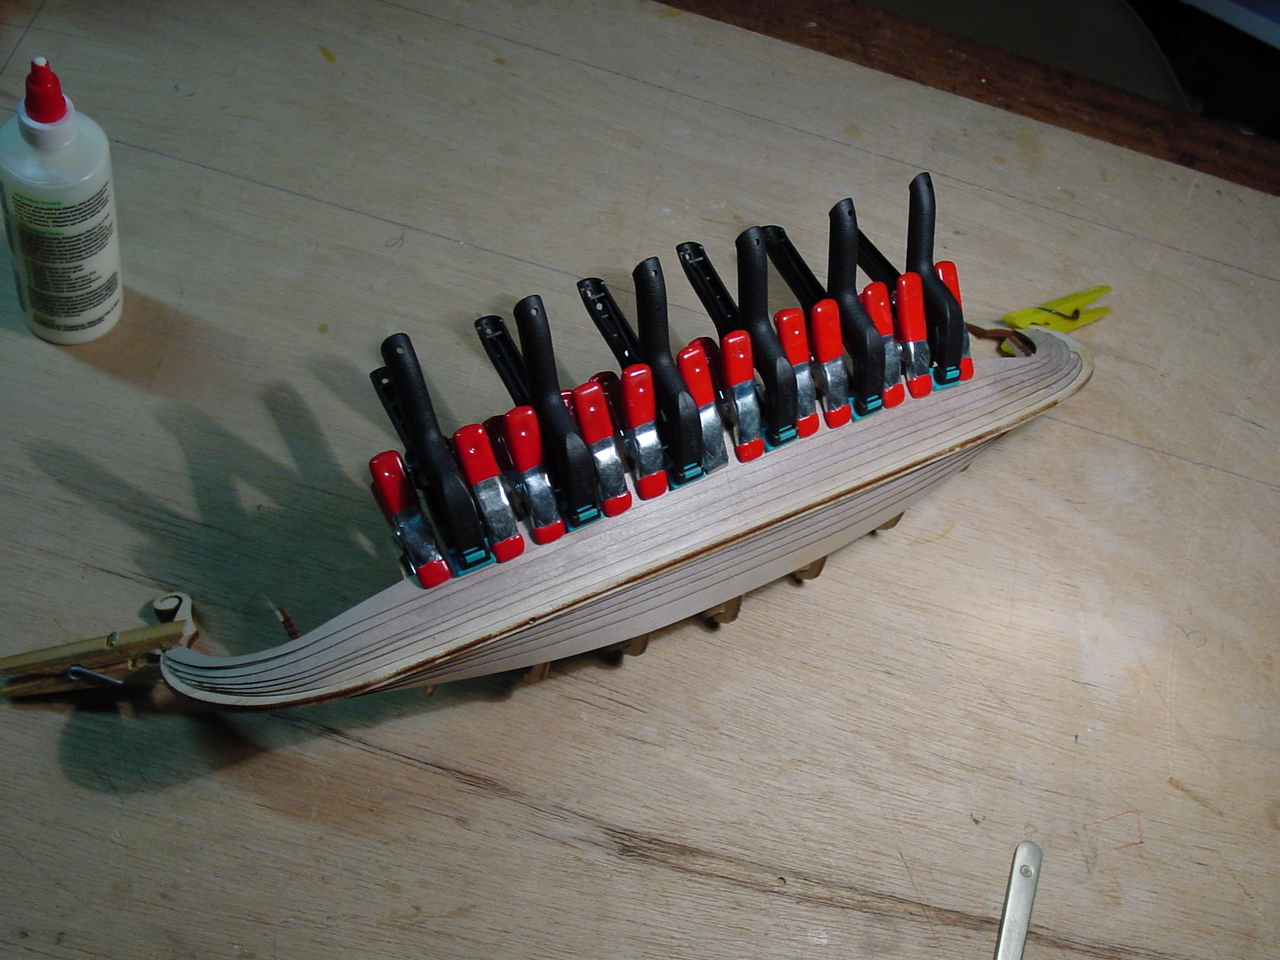
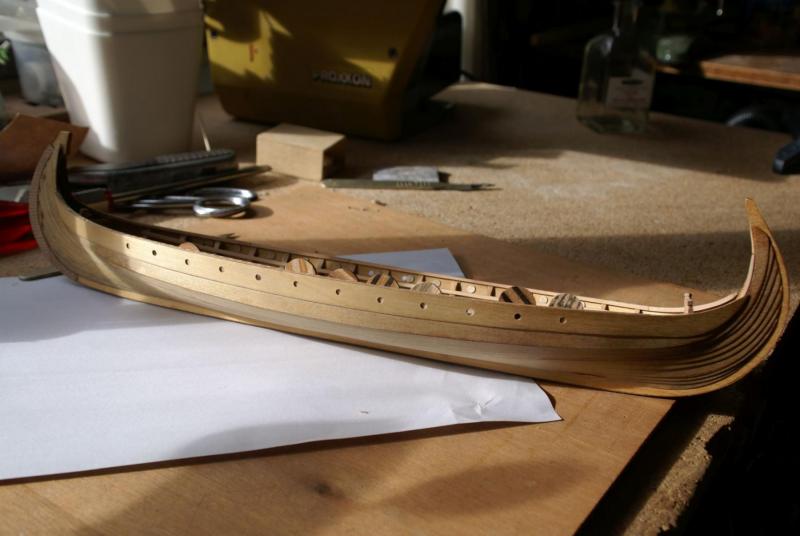
So the hull is finished. The hardest part is done, now it is only fun till the end. As for the roars, I think that Amati is using some artistic license and freeing their imagination. As for me, all the oars are born equal :) . In the old viking ships, oars were stored amidships in two containers, one each side and I can't imagine those fellows choosing carefully wich oar for his post. Made them equal and you are for sure more accurate than Amati. I didn't stained the hull yet because there is some more work to do on the hull, namely the rudder supports. By the way, at the stage that you are I made two holes vertically on the keel to support the boat with two steel wires once completed. And I covered the visible keel ply with a lamination to disguise it. Go on with the good work JL
-
Judjing by your stage coaches I think that you can manage a lot better than just a vague representation of a Drakkar. I'll be following your effort and I am sure that something good is to come out of it. I agree with you that the kit is rubish. You had a problem with the top strake that I didn't quite understand. Have you solved it yet? Regards JL
-
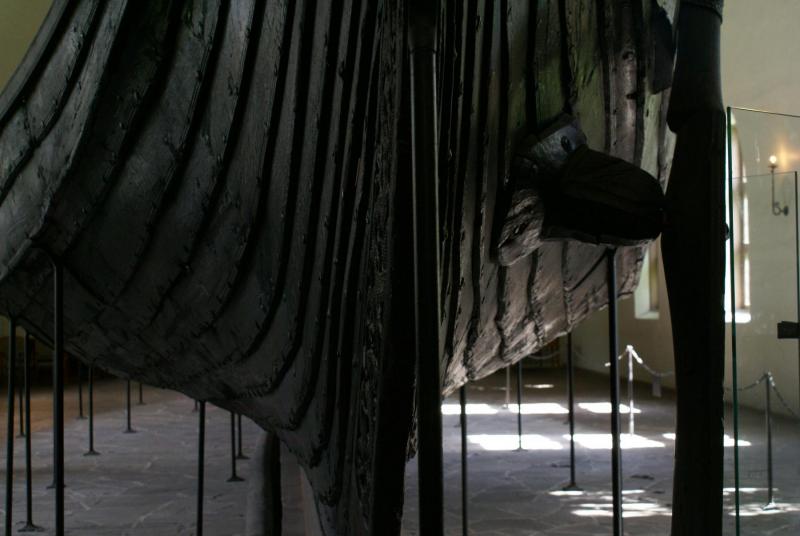
OK, here it goes, I suppose it answers your question. Fell free to ask any questions, no problem. I hope you are OK with metric, I tend to forget that you use imperial. I am not trying to model the Oseberg. Neither did Amati, buy the way. Oseberg was a funeral ship. probably never sailed and it is black. Besides, the kit as only a vague ressemblance with the ship. They called it Oseberg as they might have called it anything else. I am trying to reproduce a typical Viking ship, whatever that was. Vikings did not build their ships by plans, there were no two identical ships and if you look at the sailing examples nowadays, they are all different and with different layouts and dispositions. I began building the Amati by fun but then I went to Oslo and Bergen and had the opportunity to visit the museums I decided to turn the kit in a more decent thing. Only the hull is from the kit, all the rest is scratch built. I changed a lot of things and I have no intention of using any of the supplied parts. So I am making the oars, the shields, the chests and all the parts of the model. And if I was to begin it again I'd not use the hull either. Regards JL

-
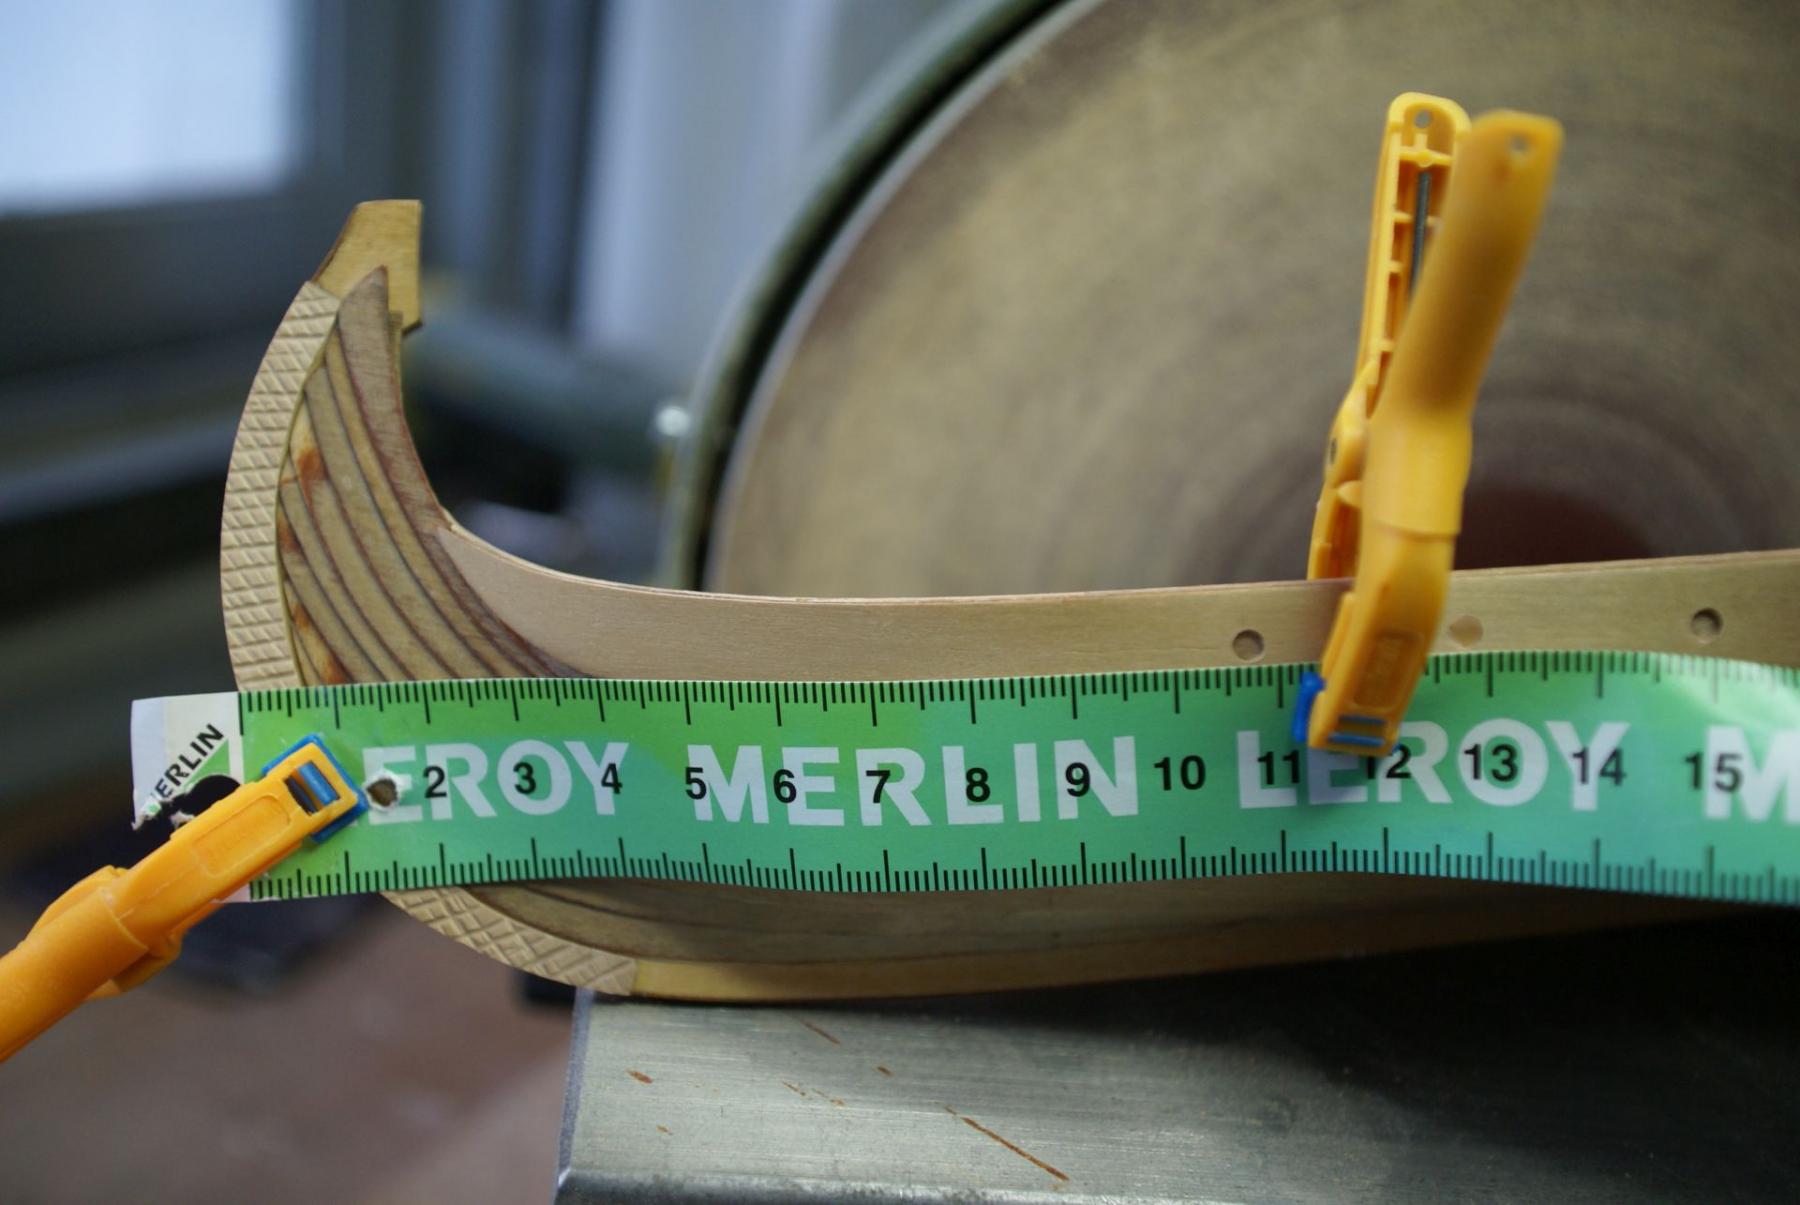
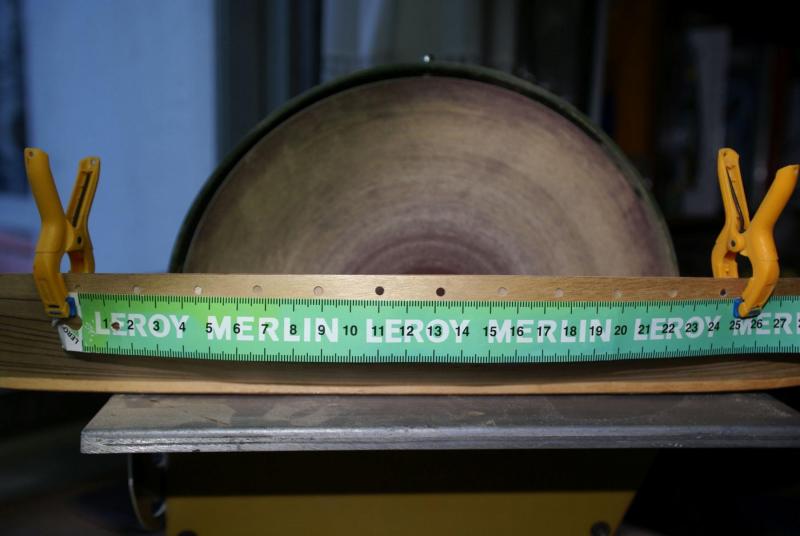
No need to measure. The plan shows 14 holes each side, I used the inner 12. I discarded the extremes because it should be a very ridiculous position for someone to row. Like that I only had to make 24 oars, 24 shields and 24 trunks for the crew to sit... Almost done JL
-
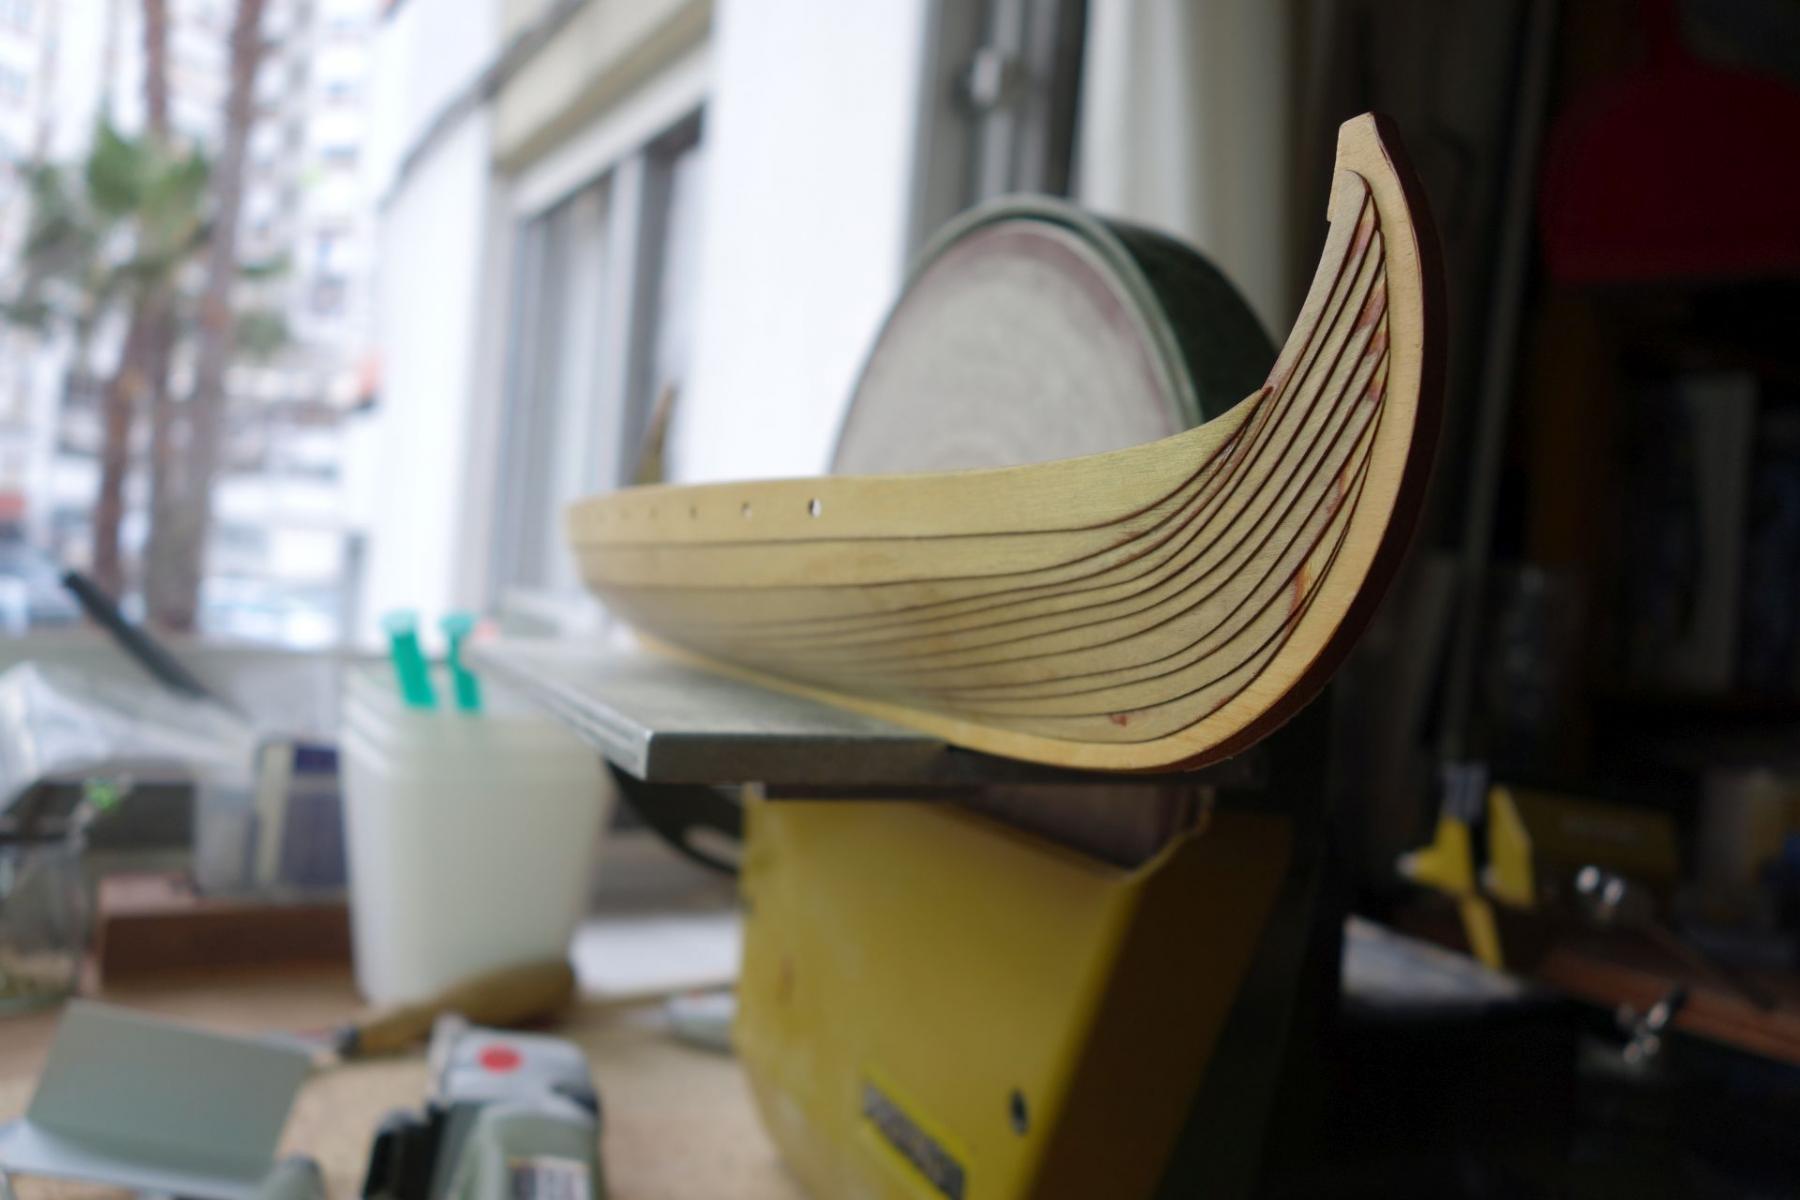
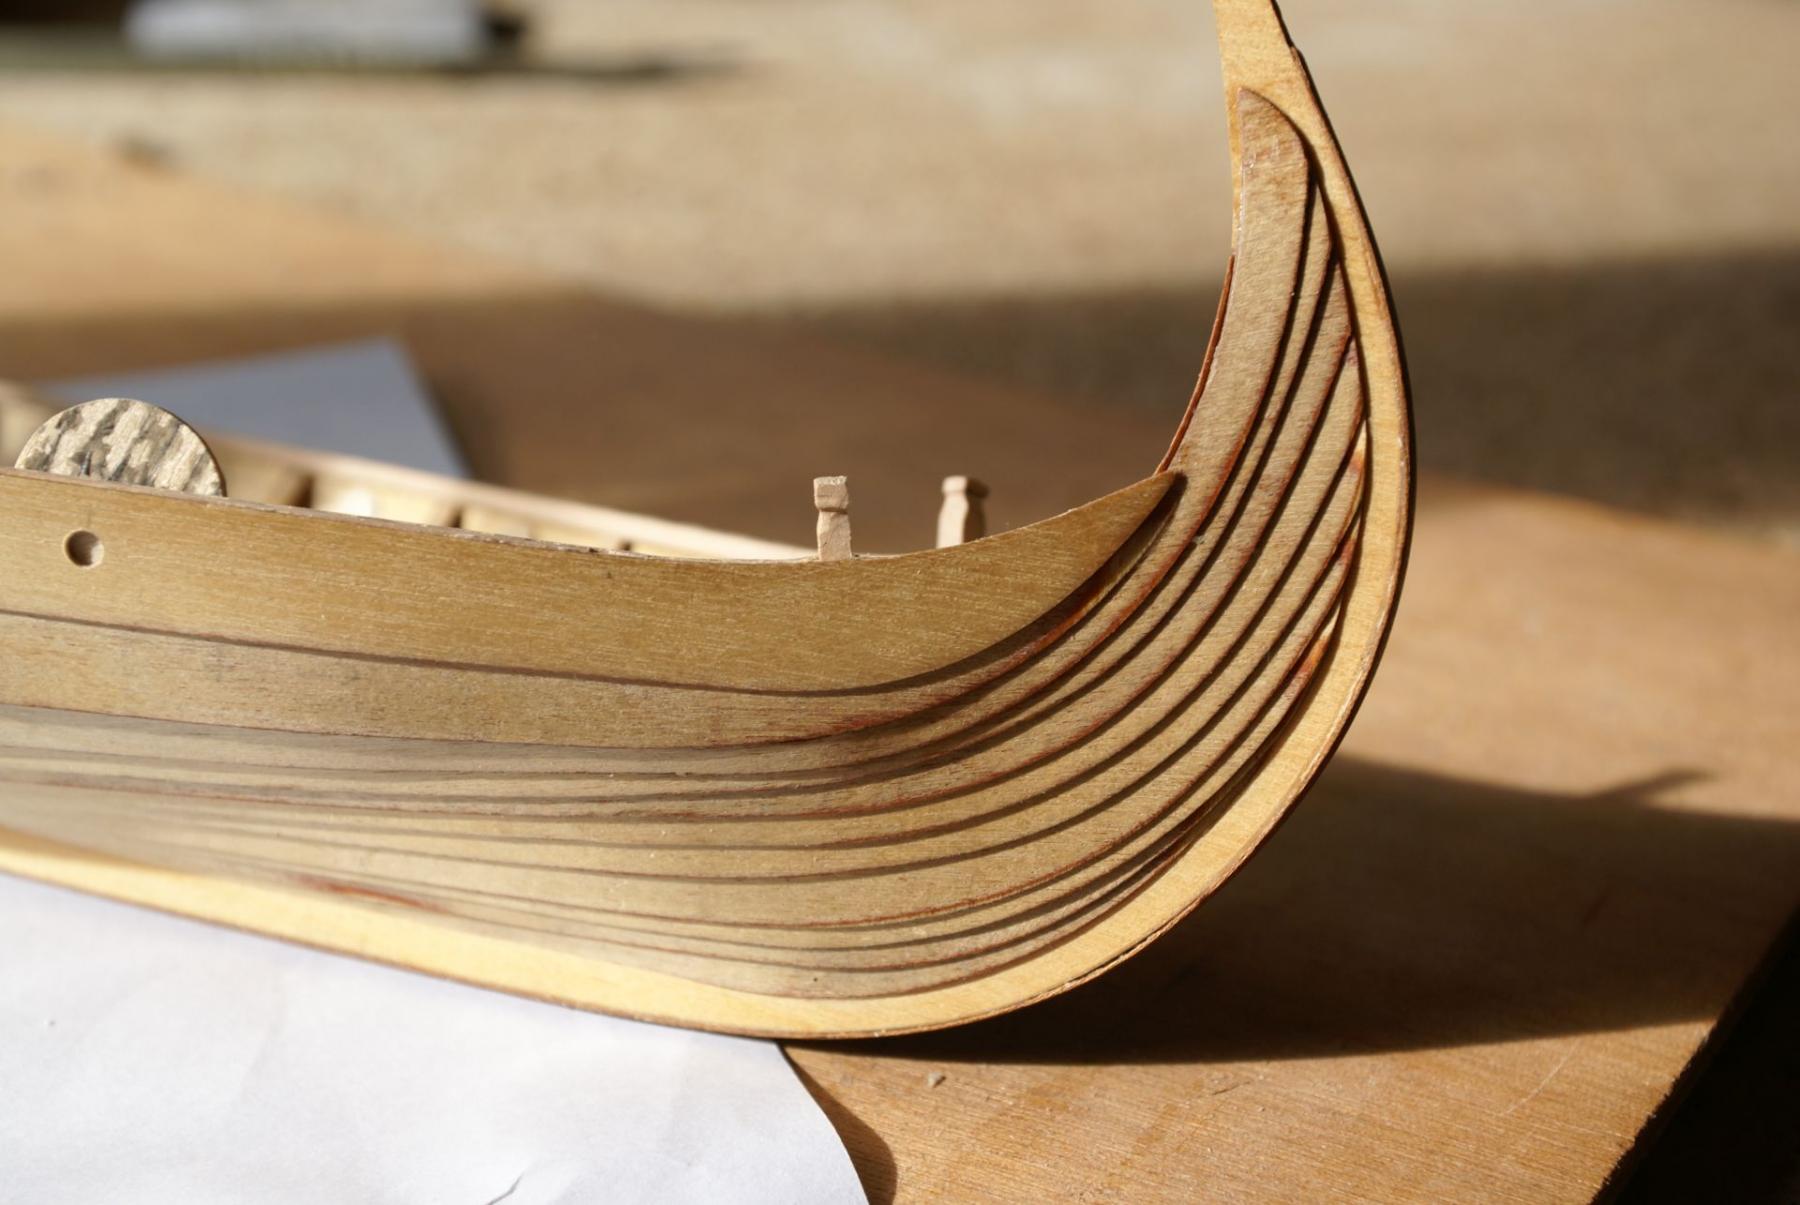
OK, here it goes, I hope it shows what I did. Extra strake fairing at the bow At the stern From the inside ( there is no hole between the two last strakes, they are perfectly joined) A general view. Hope it helps JL


-
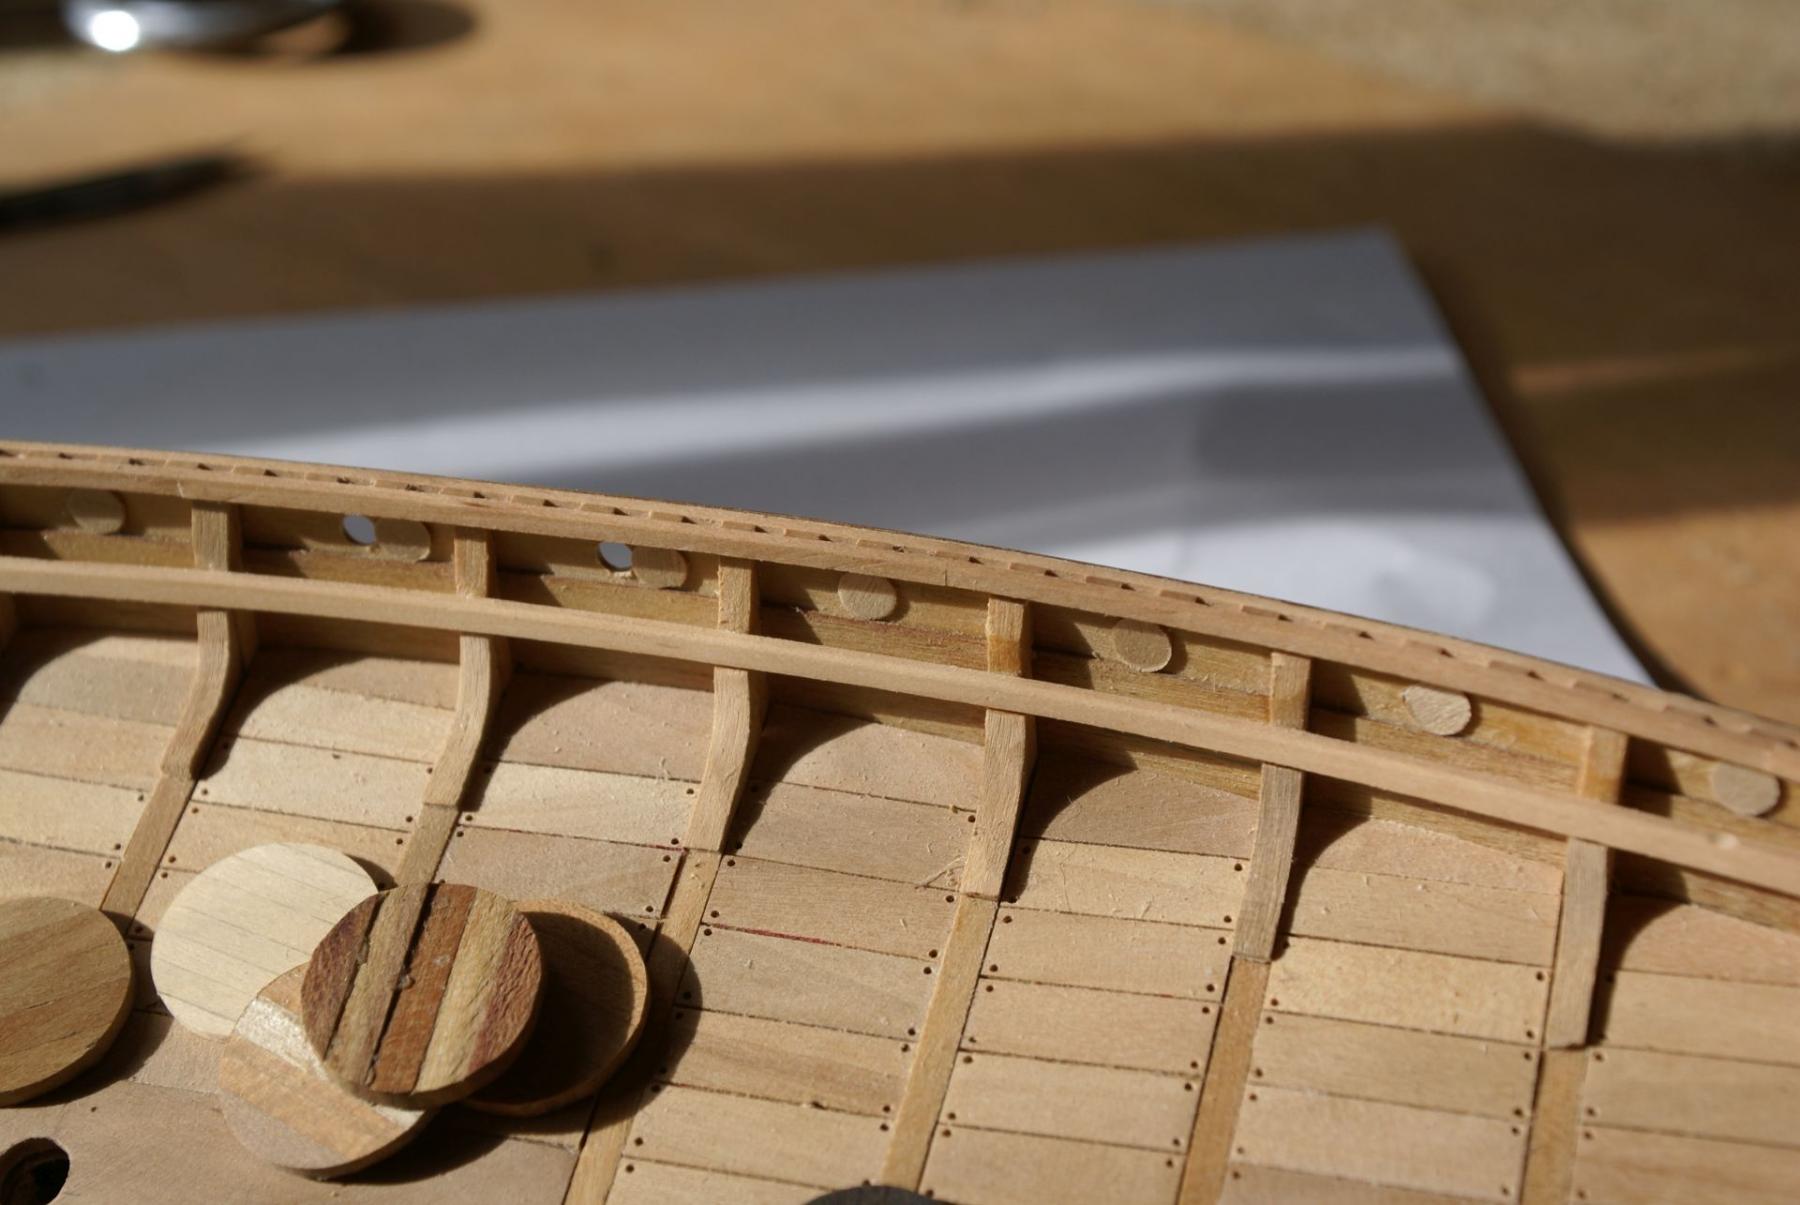
If you look at my second photo, the strake with the holes for the oars is not in the kit. I added it after looking at viking ships replicas (and the Bergen museum examples). It does not reach the front or the rear, it lies against the bottom strake. Is is not unreal As I have seen it done in replicas In the photo you can see where it ends. The bottom strake was sanded to receive that extra strake and it worked quite well without any holes. It is .8mm ply as the rest of the hull. Since the angle is very high you can have a reasonale area of contact between the strakes. If this explanation is unclear, just let me know and I'll post some more photos. Regards JL
-
Just another idea. The ships at Oslo Museum, the Oseberg and the Gokstad are black and so is the half size replica at Bergen. What a better way to conceal hull mistakes? I've been considering it myself and I hesitate between a walnut and a black hull. My hull must be stained, anyway, because there are some blemishes that I must take care of. The contrast between a black hull and the pear (in my case) deck must be an interesting one. JL
-
Well, I thought of that too. Or, since the plans are actual size, just redo everything. But Somehow I managed to make a more or less decent job of the hull. Before you enter into something drastic I assure you that this is the kind of model where the hull as almost no importance, since you hardly look at it at hull level if you see what I mean. I manage dto correct the front and rear strakes using a needle file with one side without teeth, putting that side against the hull and filing the strakes. It worked perfectly and I managed to get the strales back to the drawn line. I think that in spite of your dispair, we are making a good job so far. Just go on and concentrate on the deck and bits. On this model, these are important and make the model. JL
-
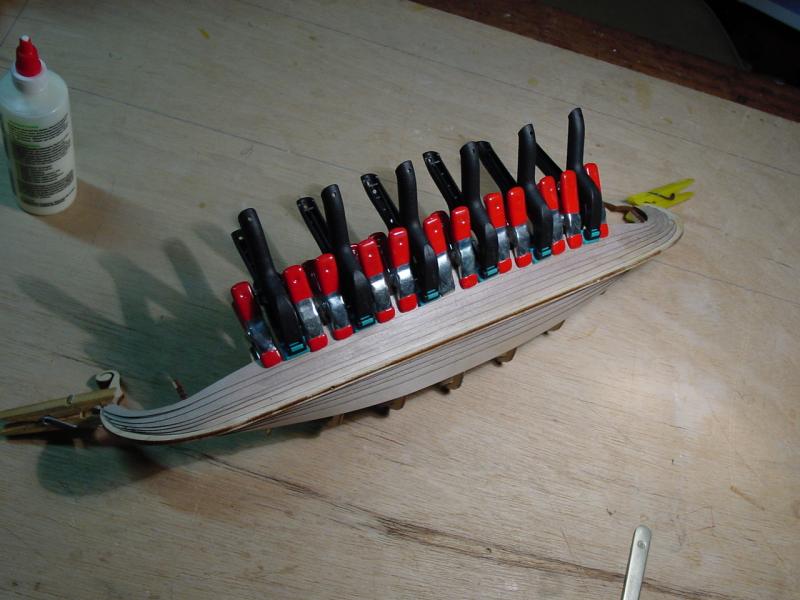
It happens... As for your question well, I am not sure if I understood it (I am sorry, but I am Portuguese and by no means a good English speaker or writer). But here goes what I learned with those strakes: Each one was sanded so that the upper one coud make the more contact possible. Each was glued (white glue, what else) to the lower one. There was no noticeable problem with the strakes, except that at the bow and stern the steps on the frames are of no use at all. It was impossible (for me, at least) to lay the strakes against the frames. I ended by fairing the the frames and erasing the steps. The strakes are 0.8mm (1/32), but you must thin them to half, at least in the extremities or you will end with a very thick planking (just look at the juxtaposition of ply at the bow and stern. Be prepared to do this. I added an extra strake, because a board of 50cm would be very usefull to get water into the boat and the crew out of it... I think it looks far better, and more like the Oslo Museum ships (or the Bergen ones) that I visited.
-
Hi Mike. There no special problem with the strakes, they are strong enough to take their position on the frame without breaking. I followed the instructions loosely, or didn't follow at all. I felt no need to cut along the strakes, as suggested in step 12 of the instructions. But if I remember well, I faired the frames as I was putting each strake, and it workwd well. I am thinking that maybe I should open a post with my building, maybe if helped future builders. Regards JL
-
Helo. Not the best of kits by Amati, and you need to change a lot to get a decent model, I am presently building one, I started it some years ago, then put it aside because it was not what I wanted it to be. Anyway I picked it again and now I am in the process of getting it better. As a matter of fact I am only using the hull, all the rest is new. You can see how it is now, maybe it helps. Regards JL

- 102 replies
-
- 10
-