CDW
-
Posts
7,755 -
Joined
-
Last visited
Content Type
Profiles
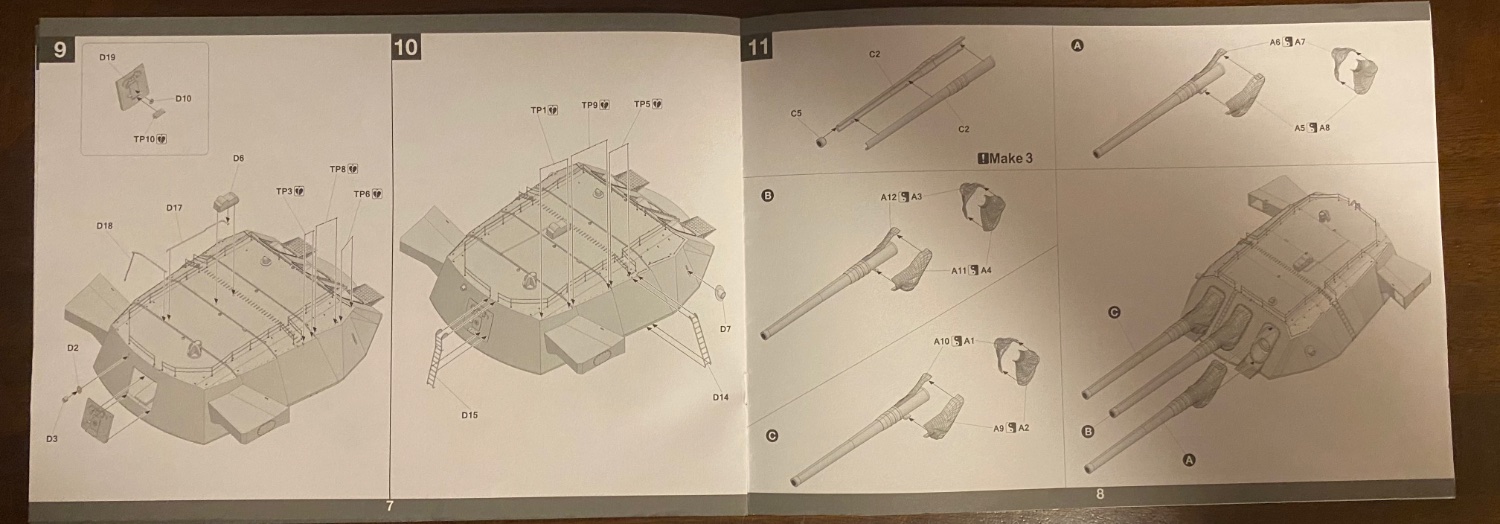
Forums
Gallery
Events
Everything posted by CDW
-
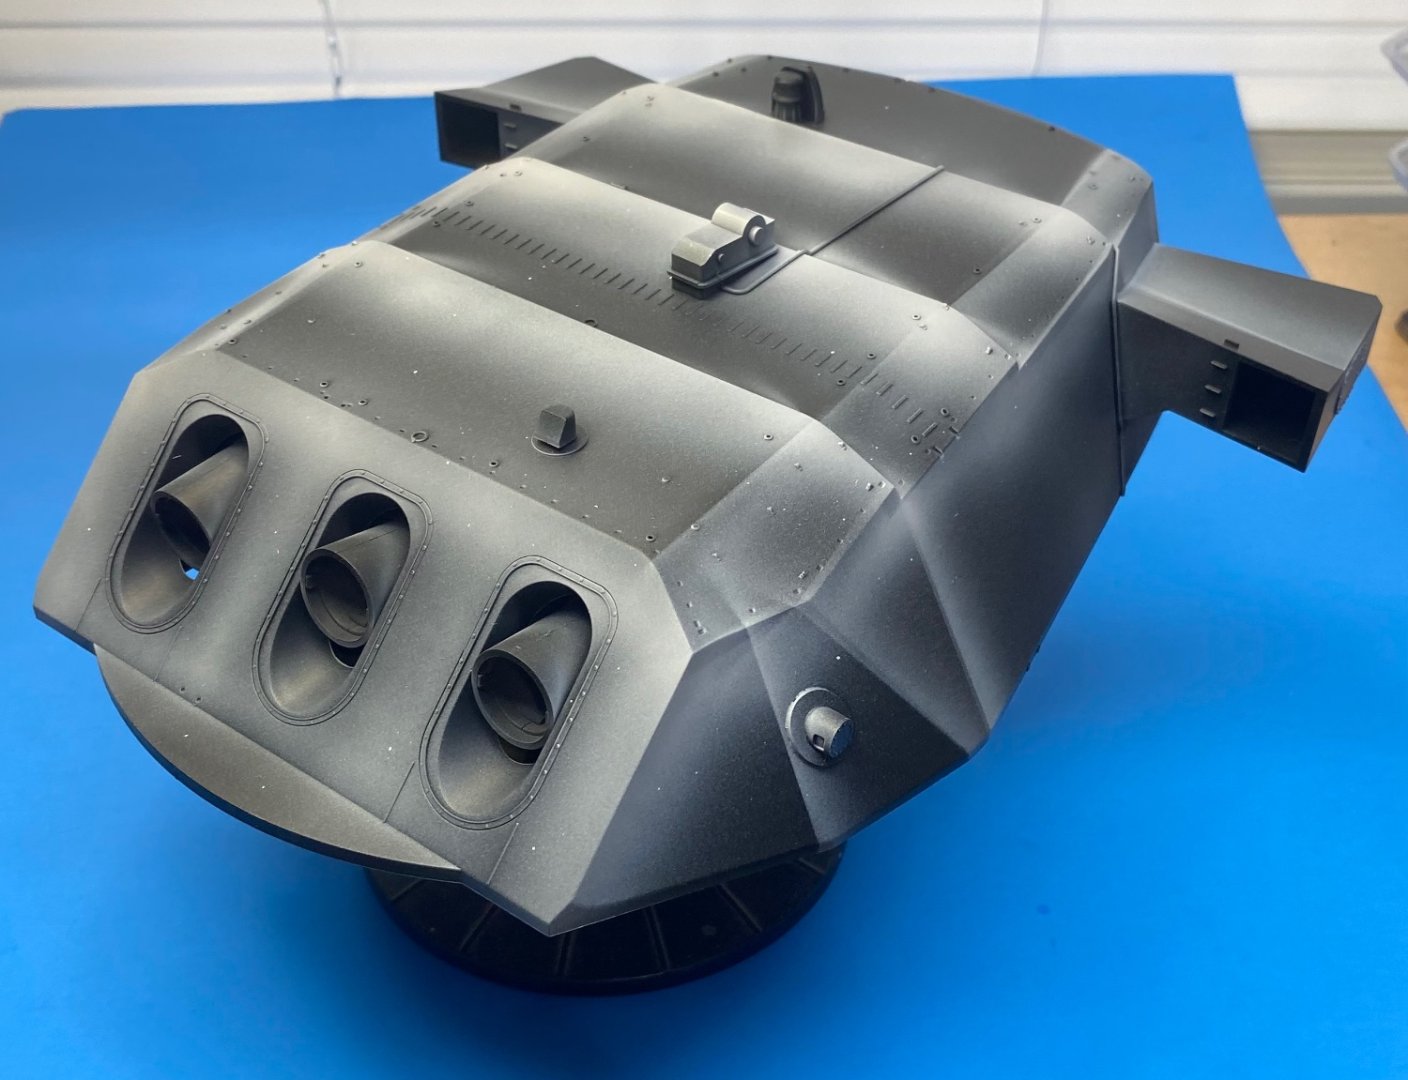
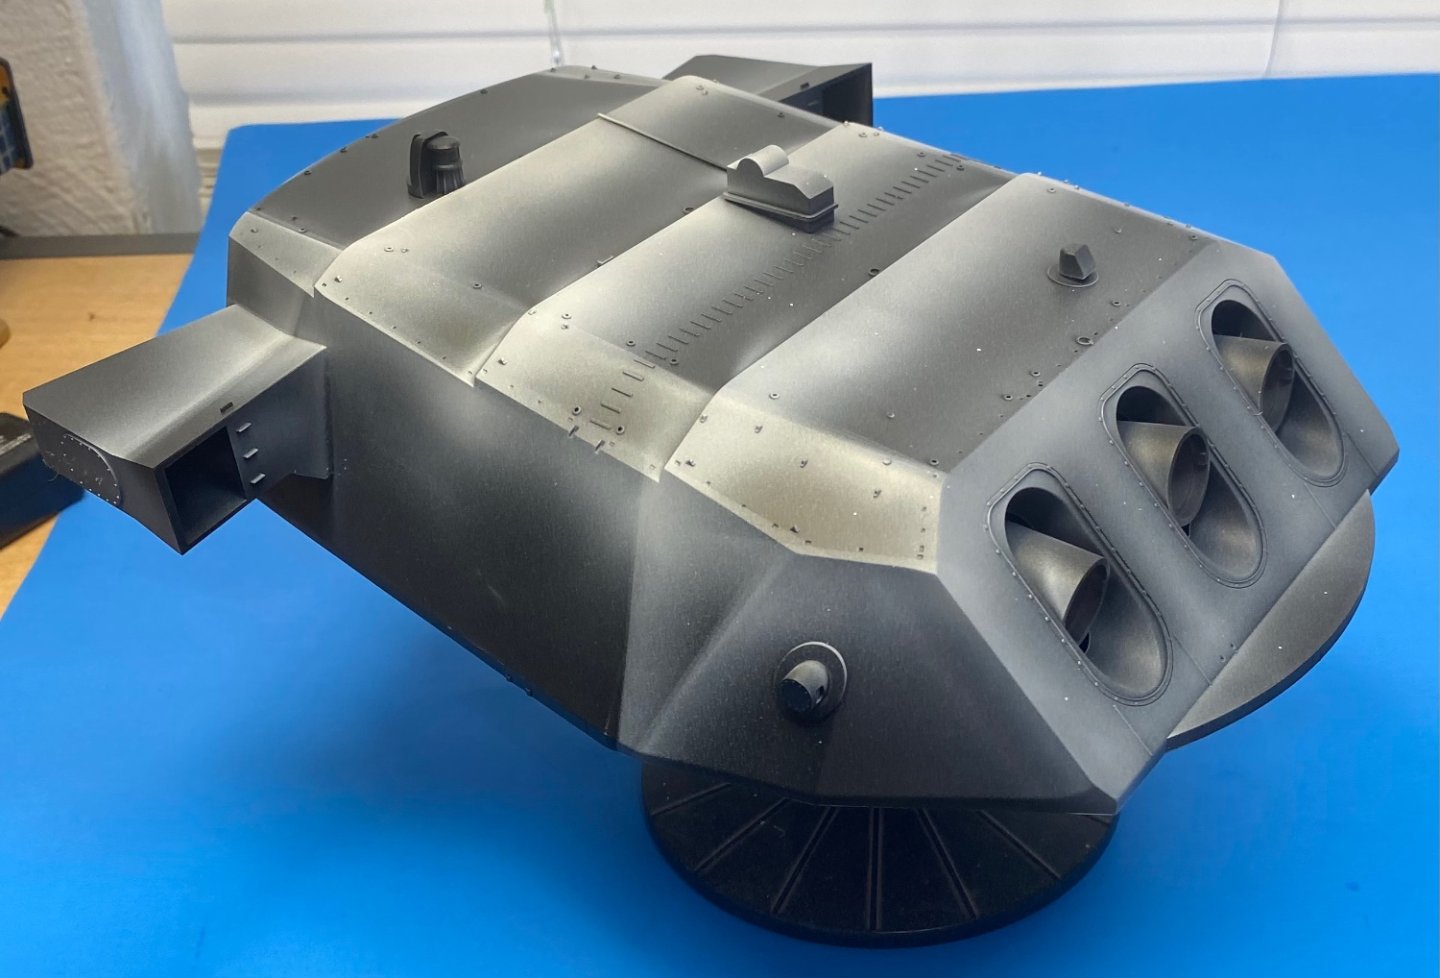
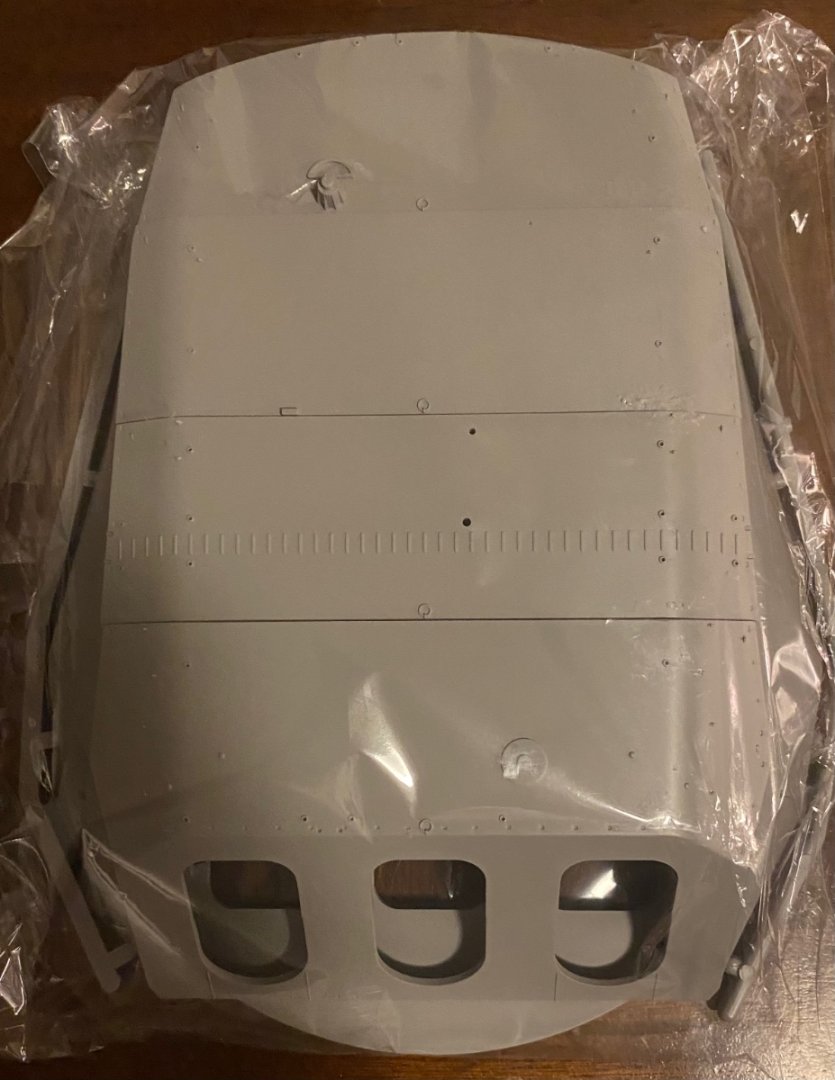
 With the photo etch and other small details installed, the model is ready for IJN gray paint. The stanchions and railings will be installed after a couple of paint and paint filter stages to help prevent breakage from handling.
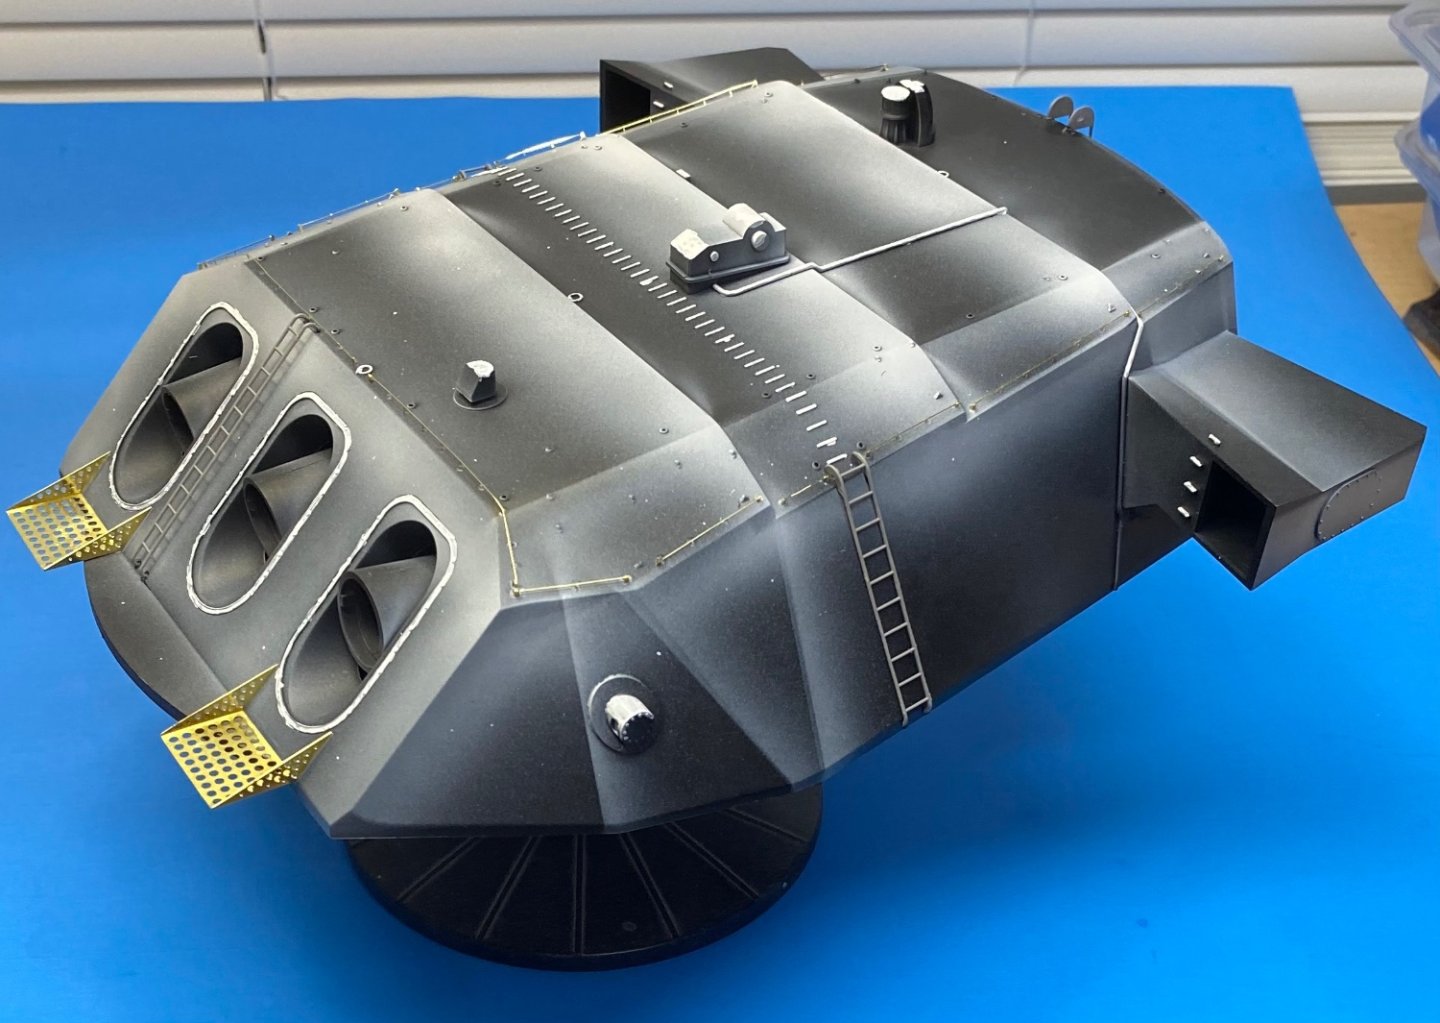


-
Your cockpit and bomb bay look super!
-
White pre shading should help an otherwise dull IJN gray paint color. Will detail the small raised details with a paint brush in white before applying the gray.

- 69 replies
-
- 11
-

-
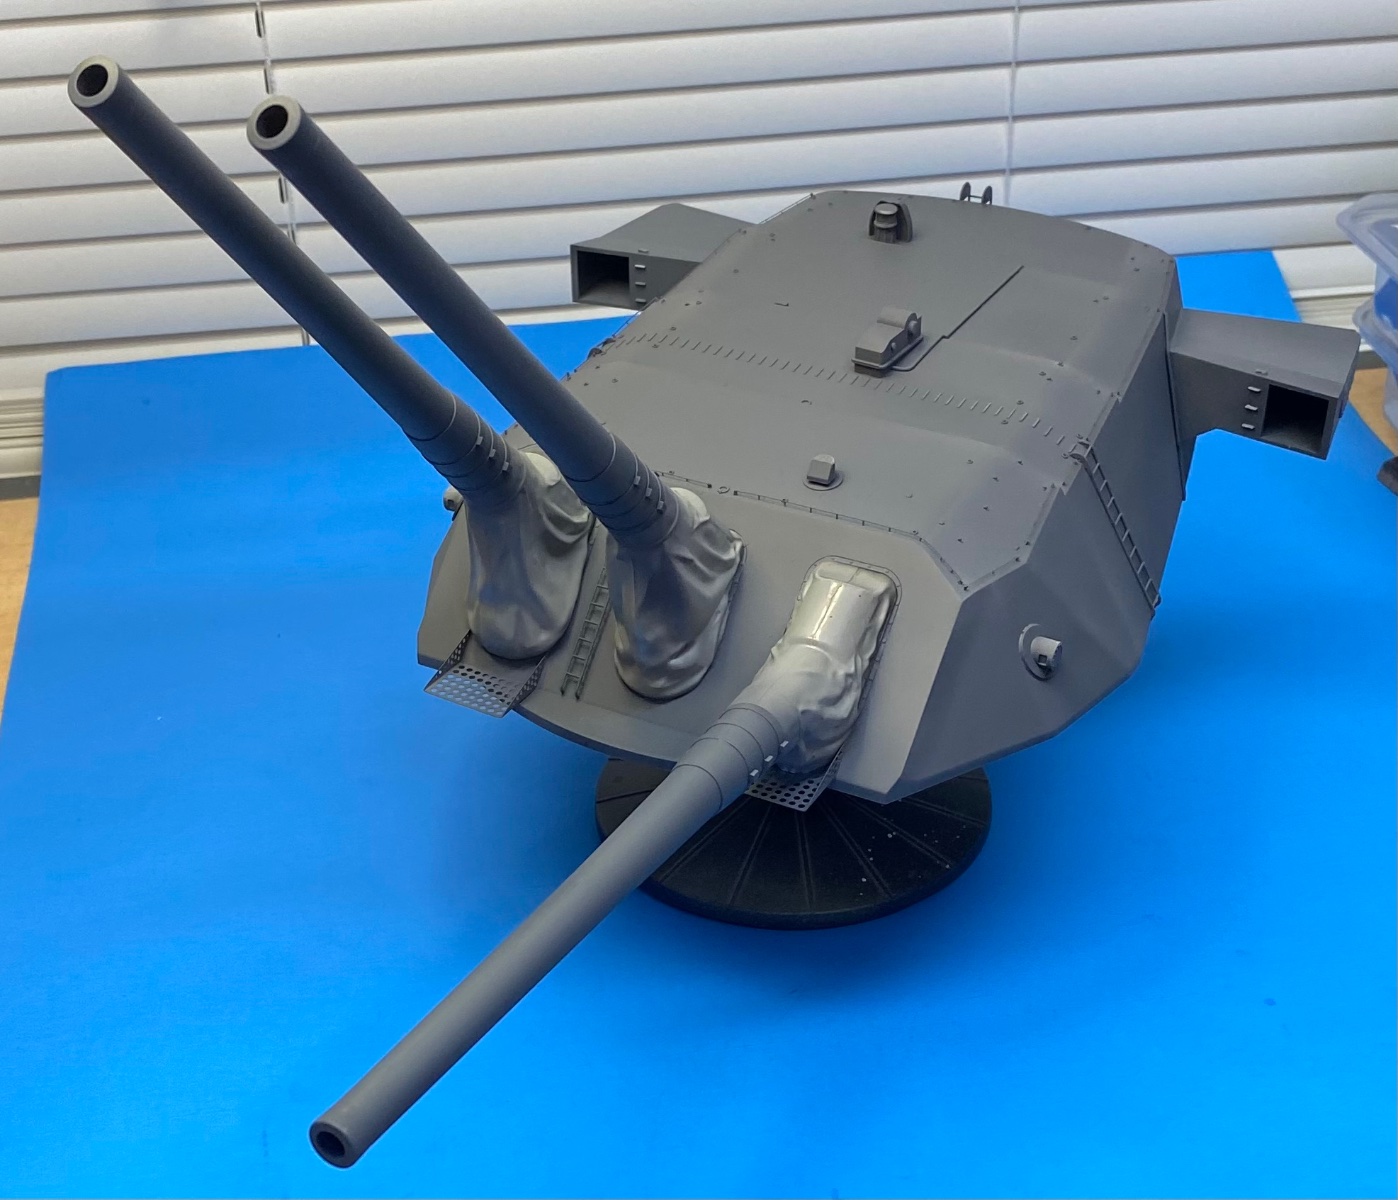
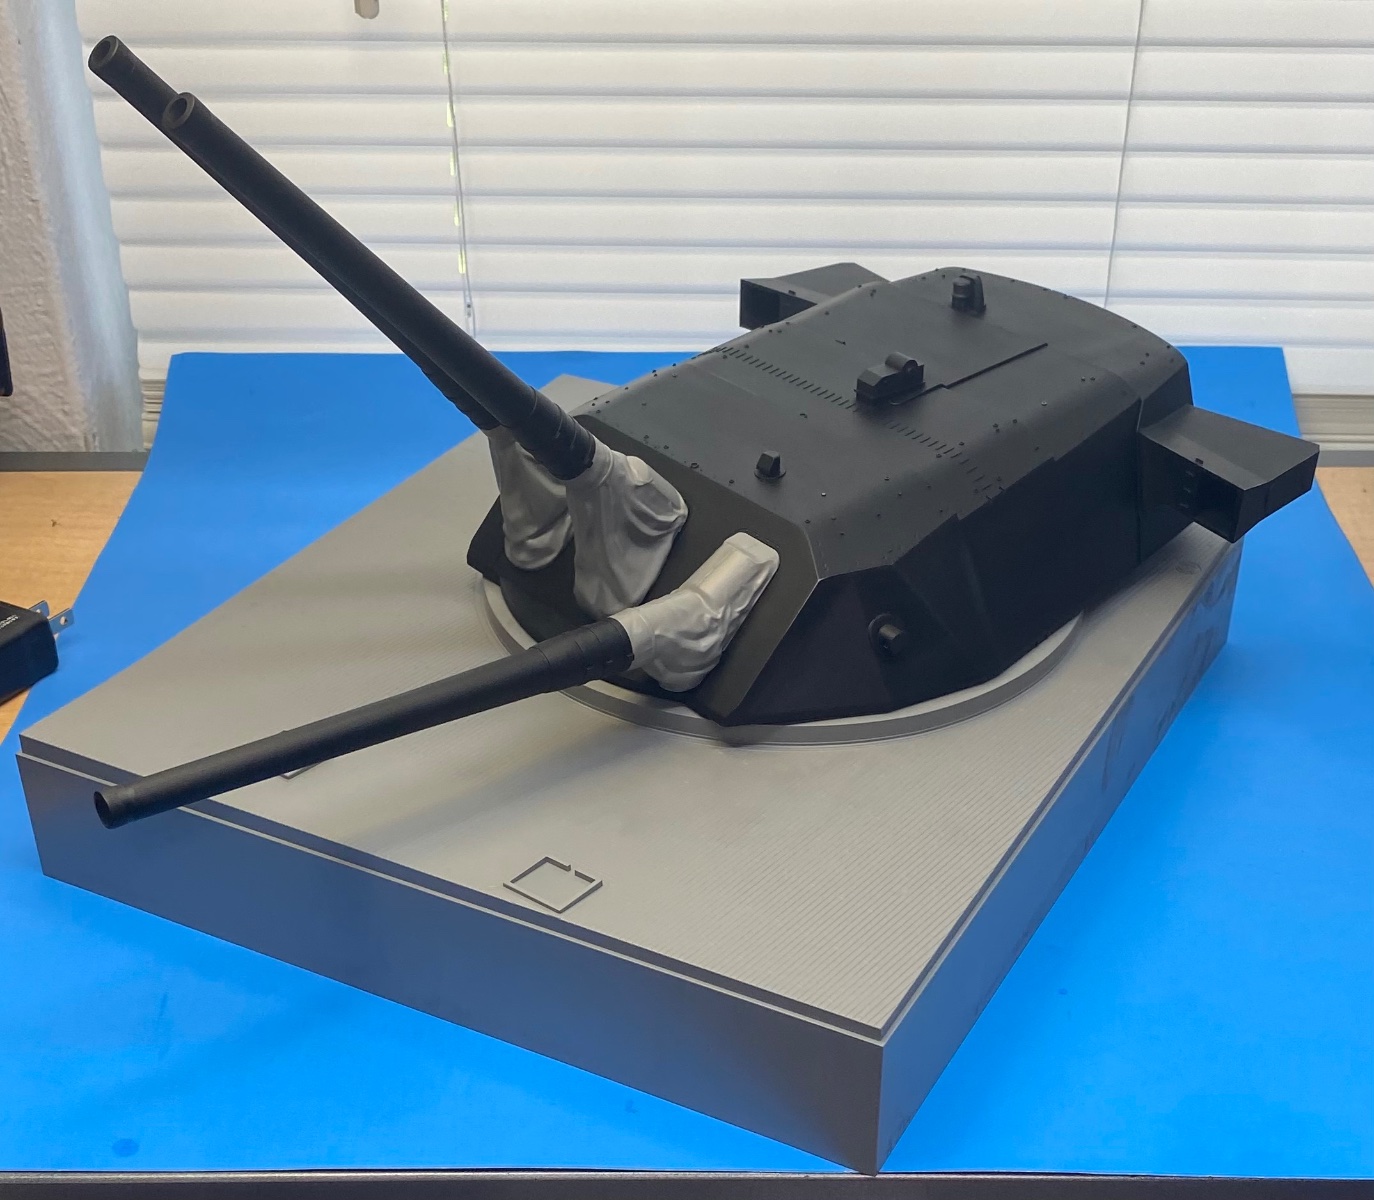
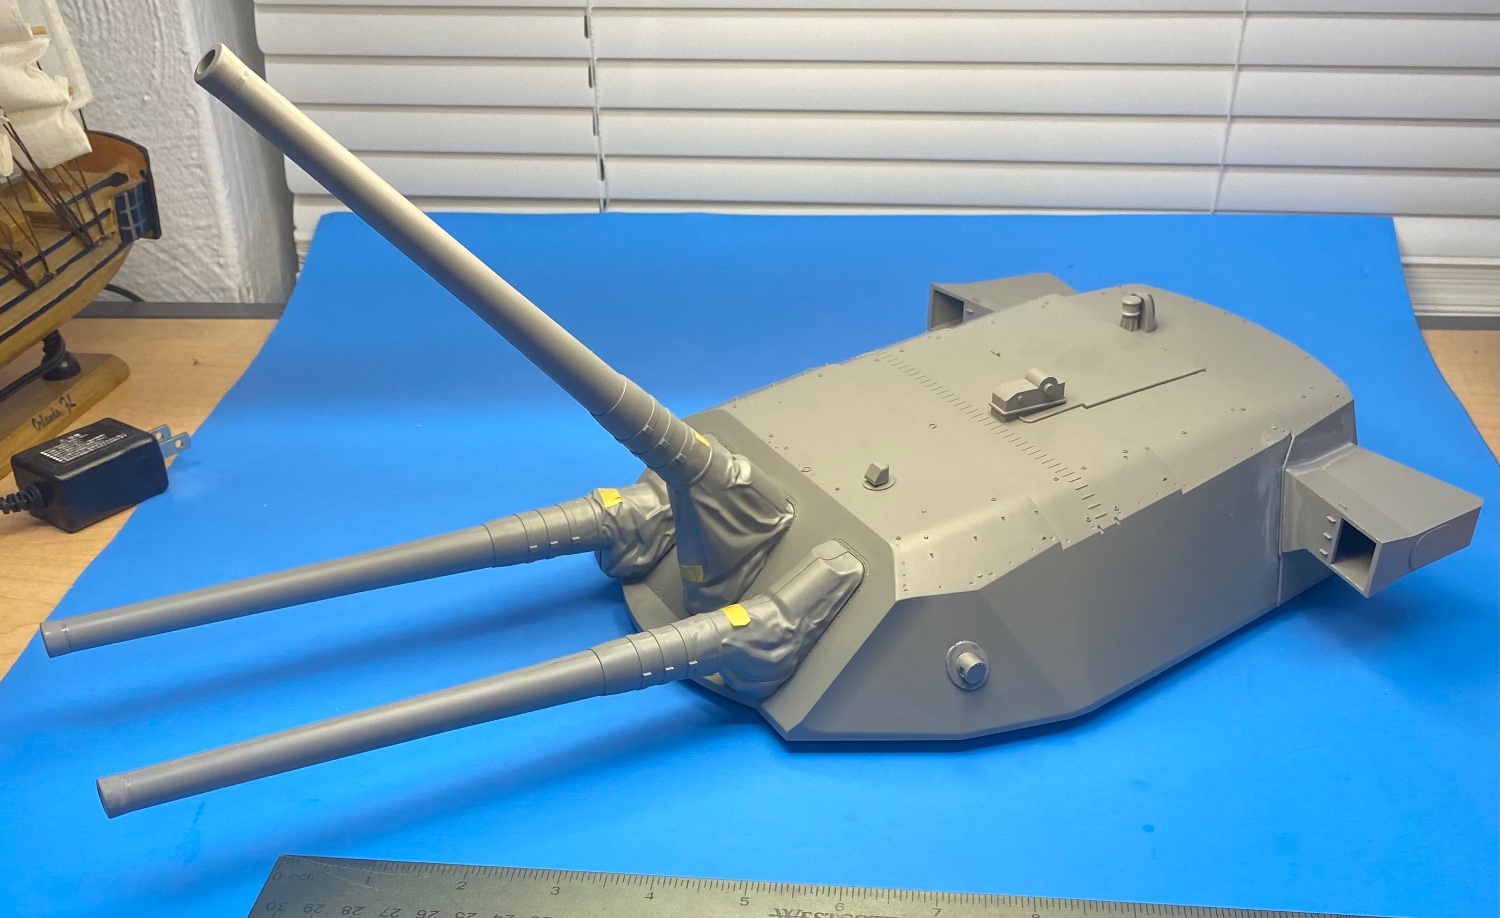
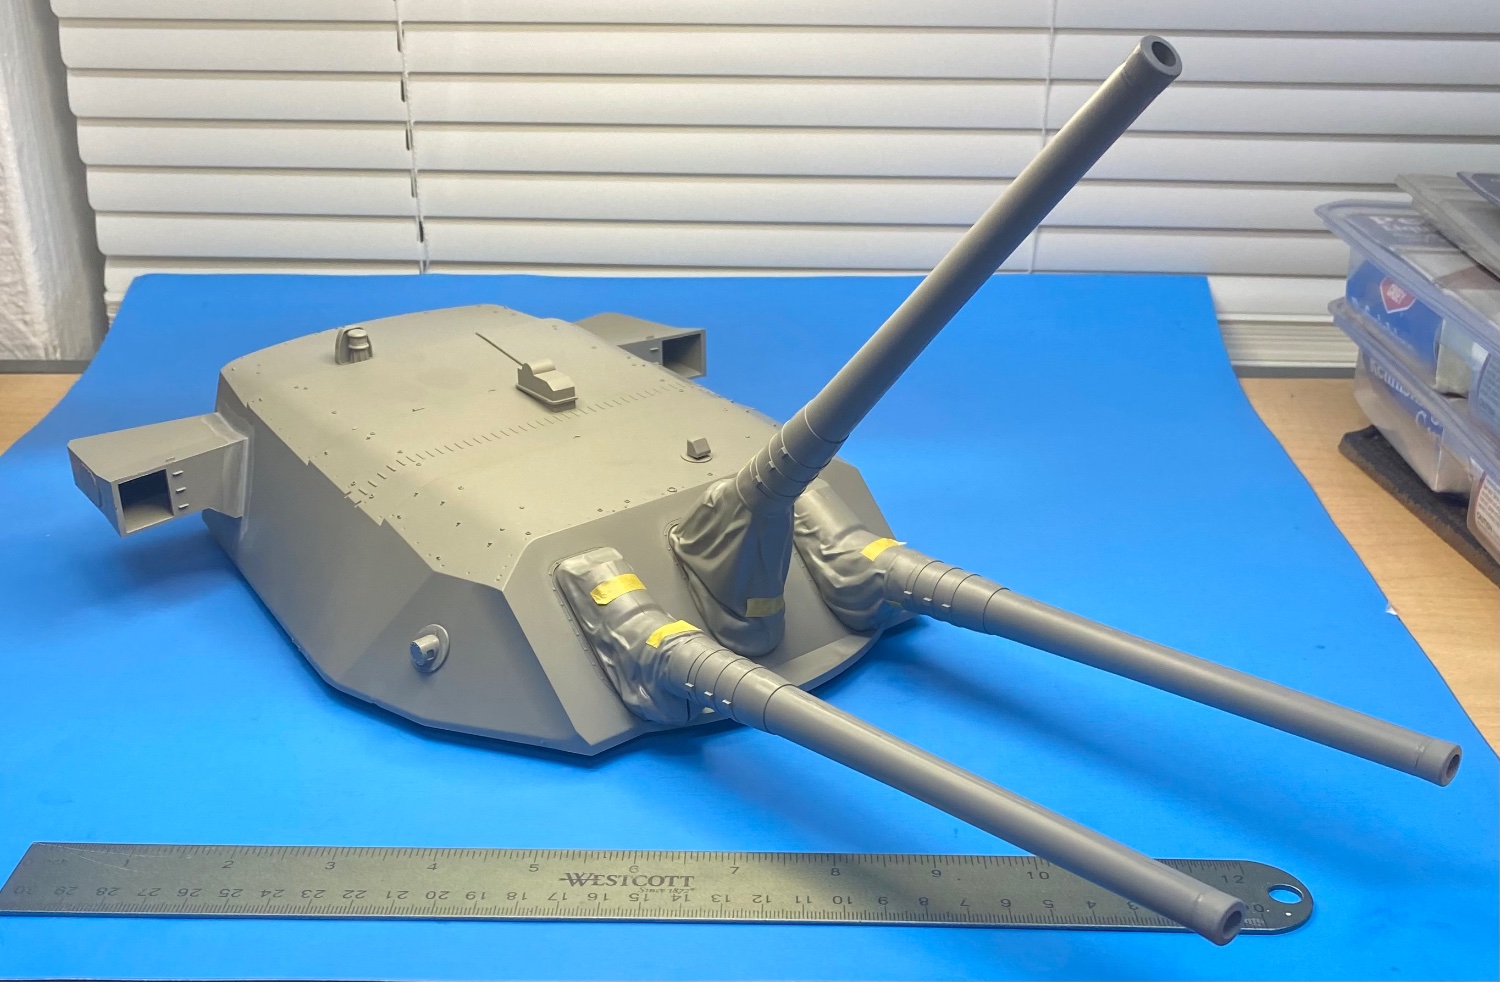
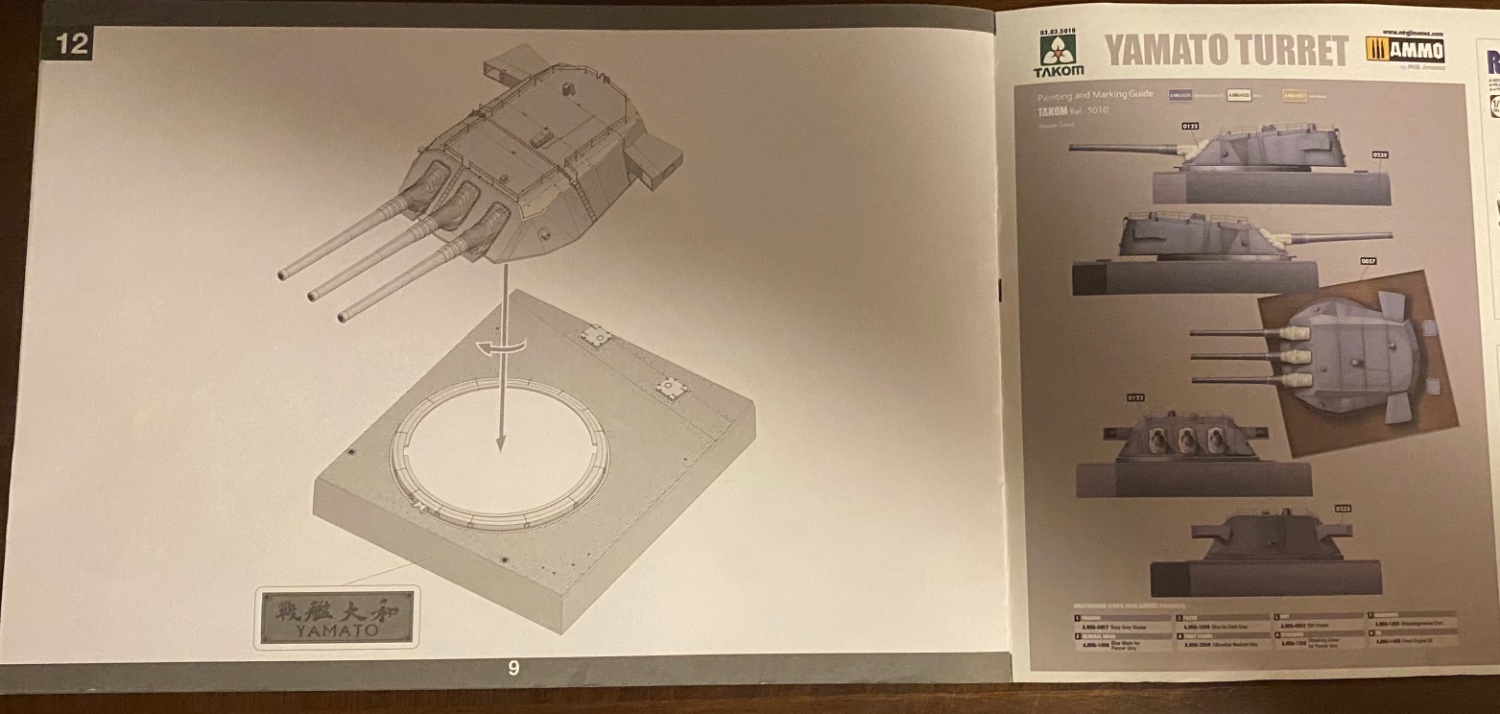
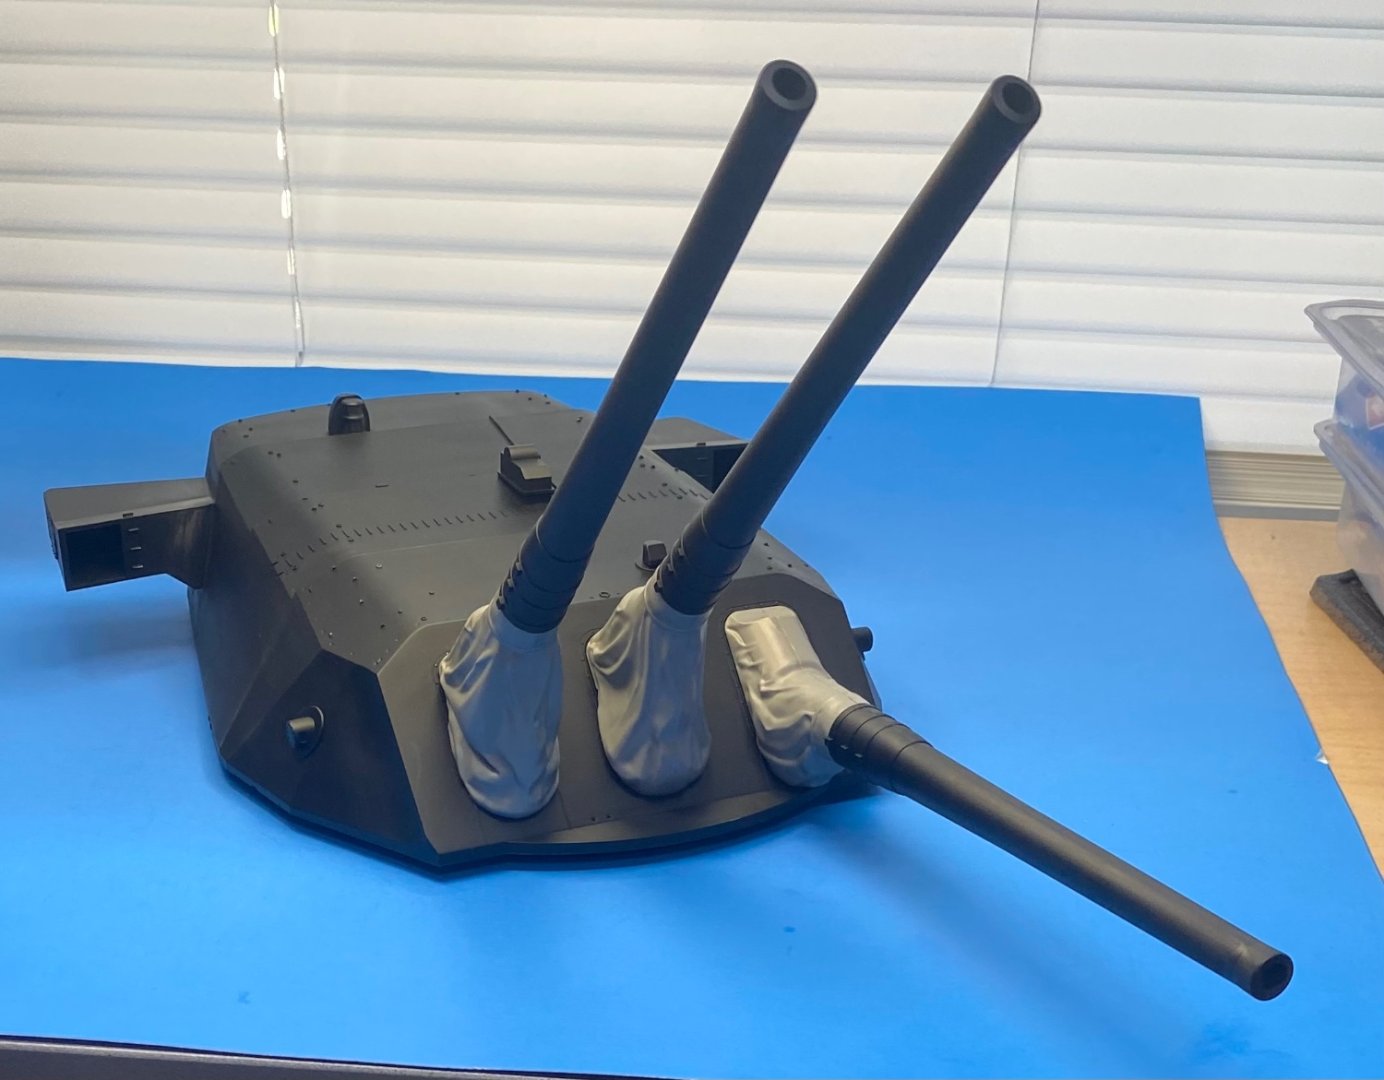
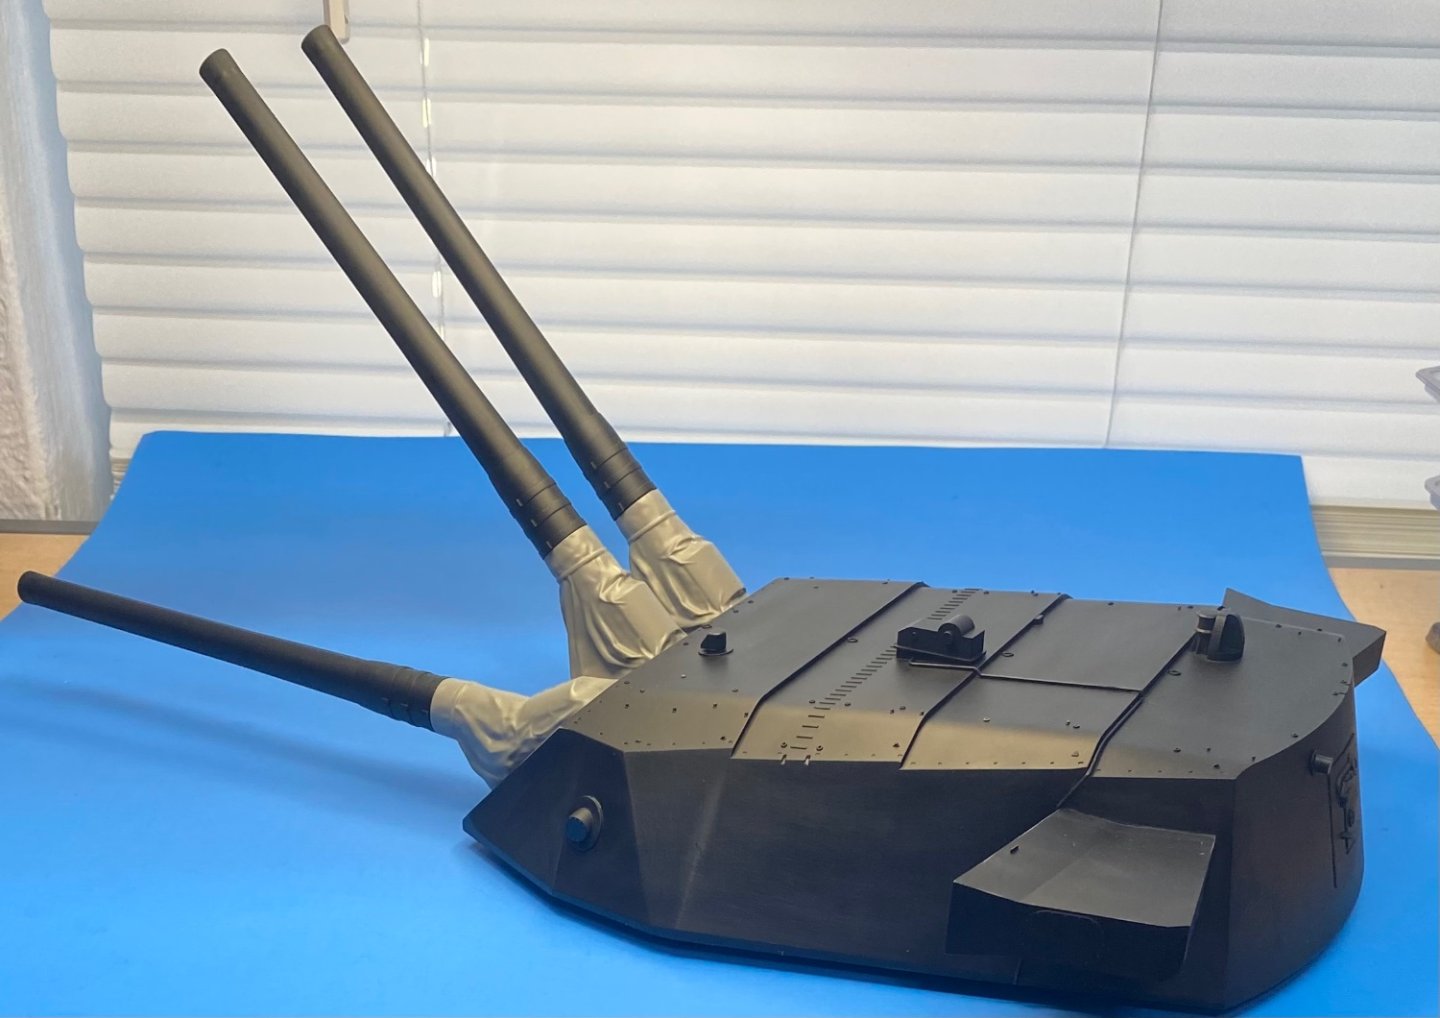
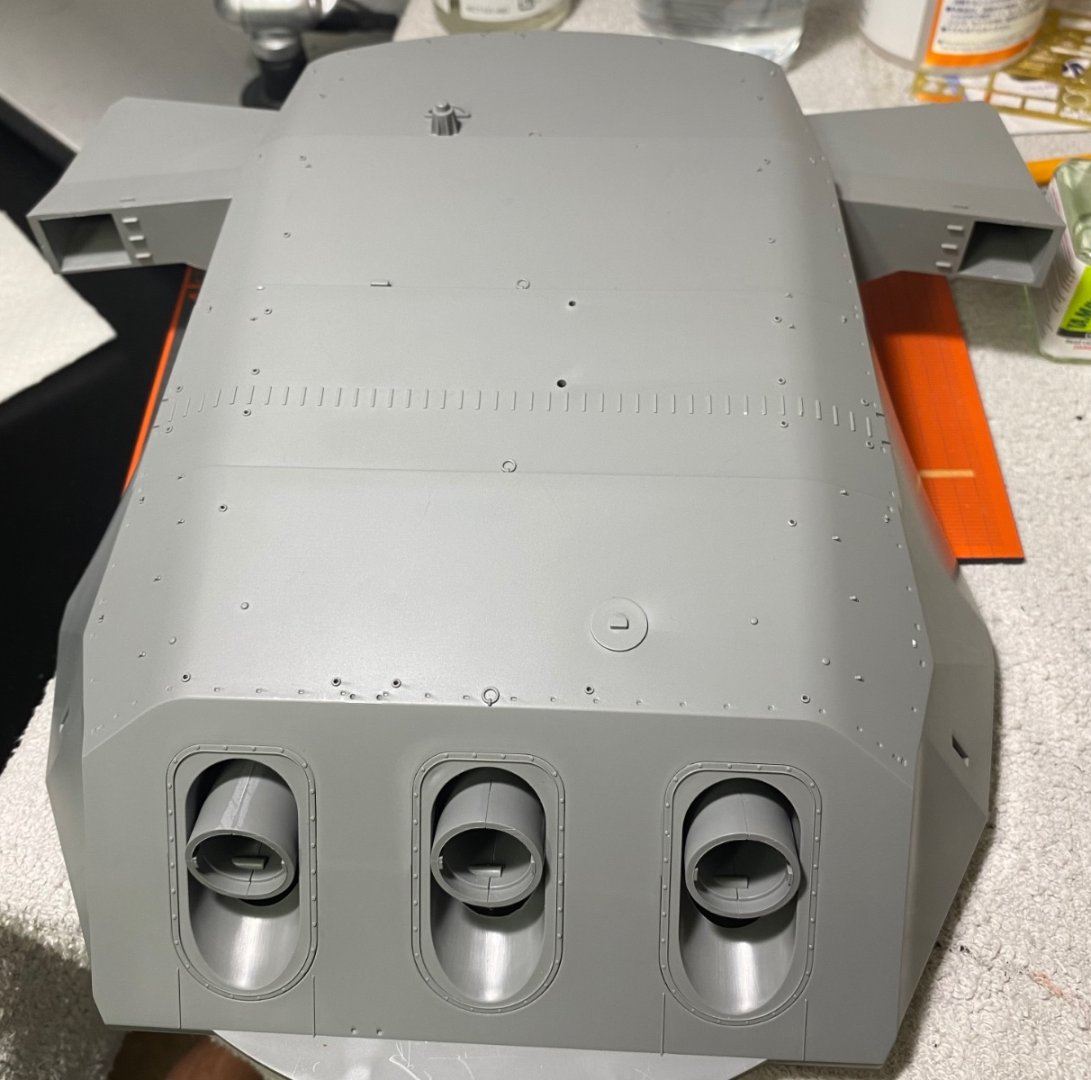
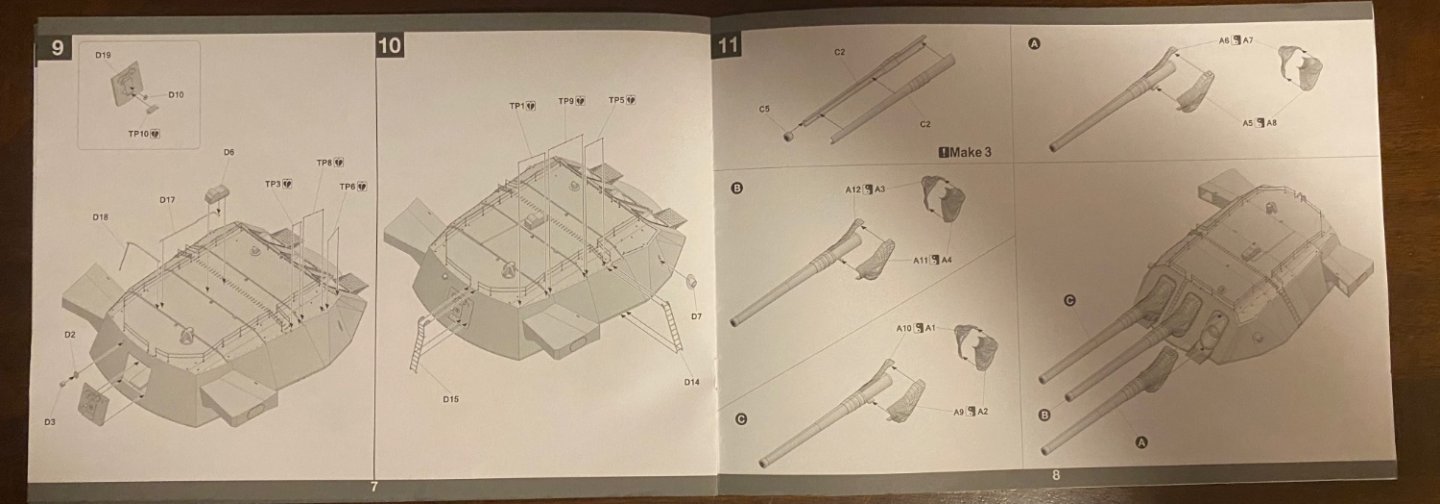
I think I will go with this pose for the guns and blast bags. Thw kit comes with a deck section as a sort of display base.

-
welcome aboard, Mike!
-
Make sure you're not standing on the main deck when those big guns go off. I've heard it could be hazardous. 🙂
-
Thanks for that excellent reference, Yves. The addition of the Japanese sailors immediately caught my eye. Will begin searching for some of those figures for my model.
-
What an awesome project Edward. It’s an inspiration for me to try one of these card models one day. Nice work!
-
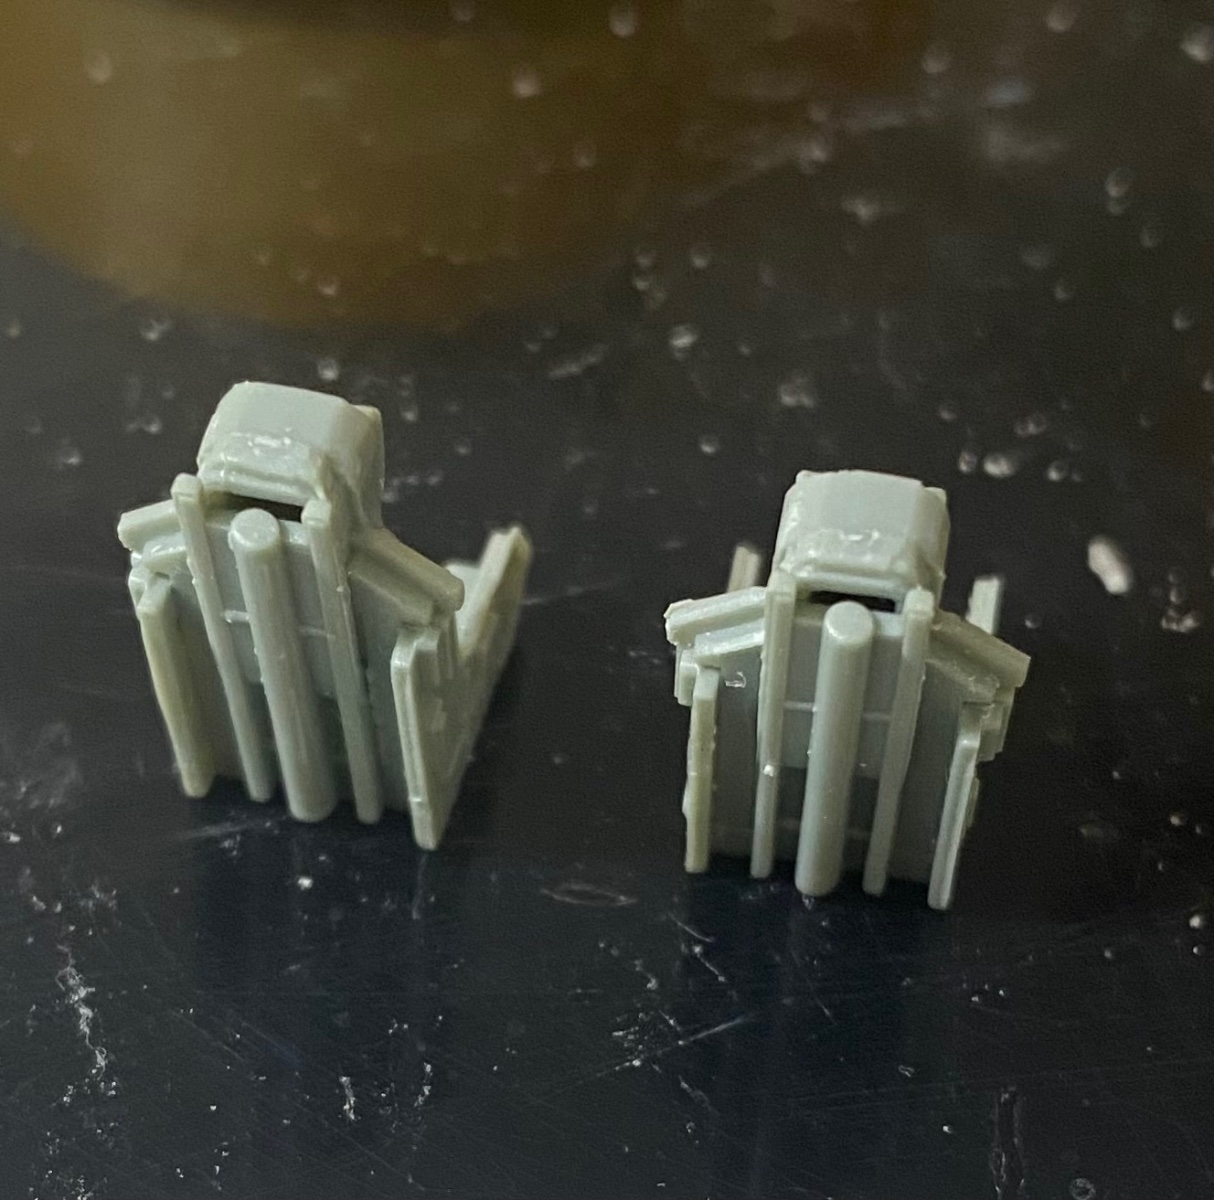
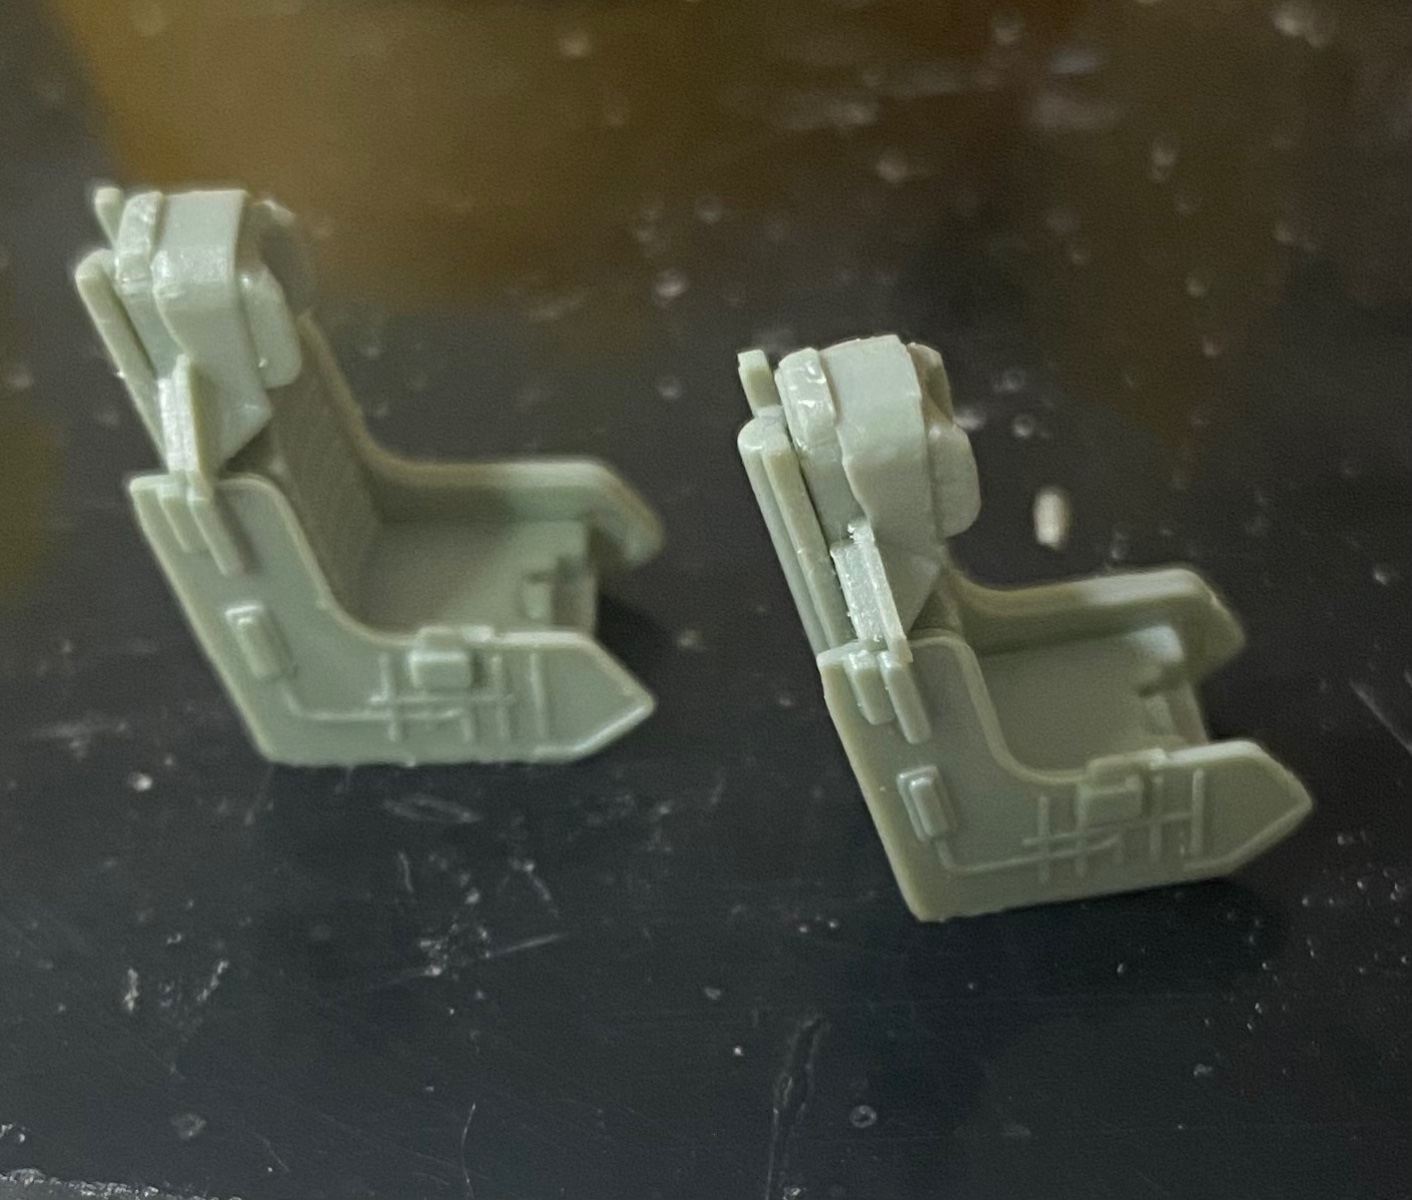
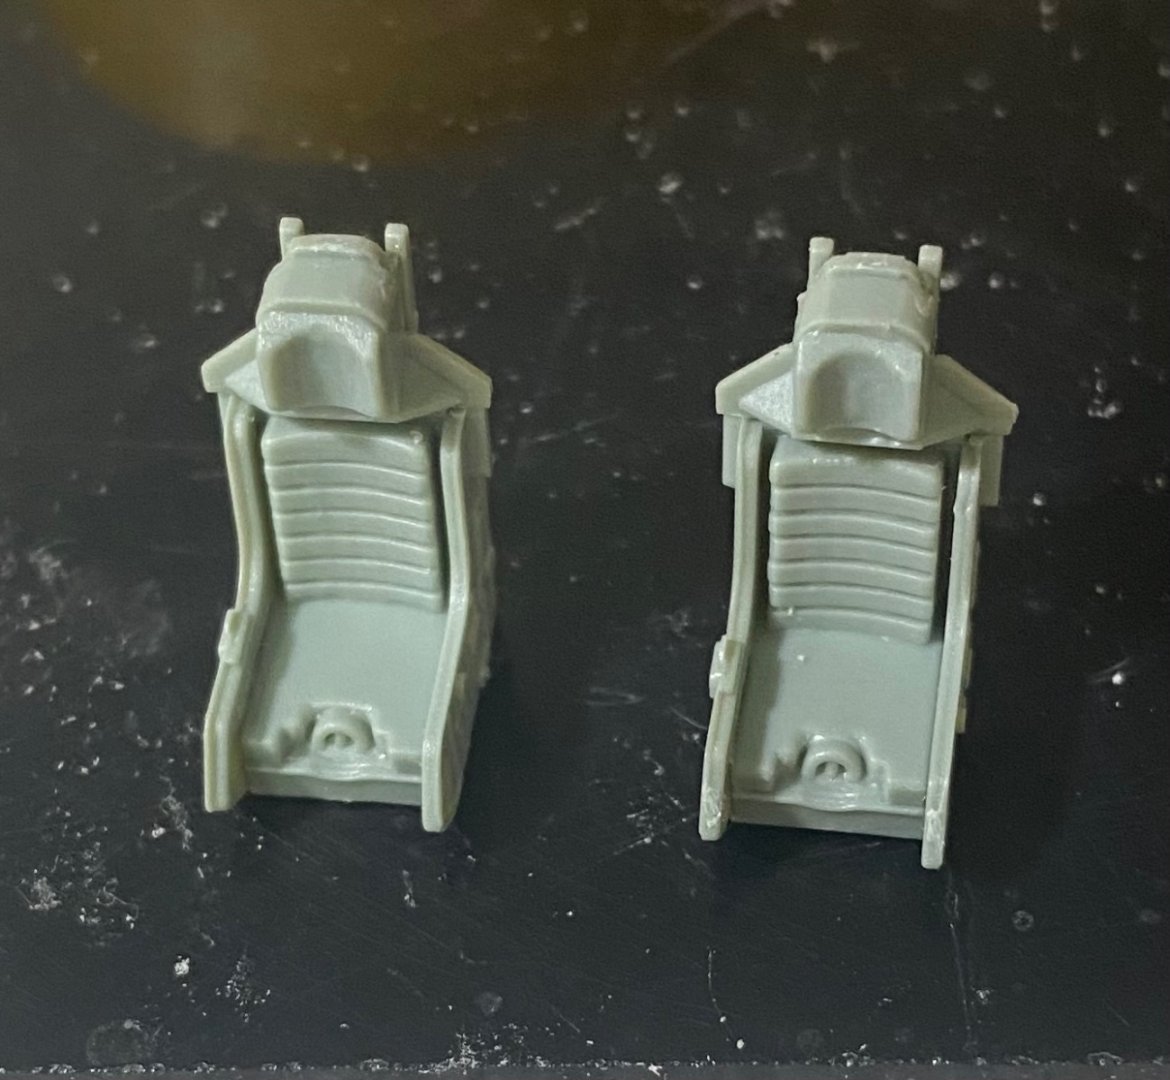
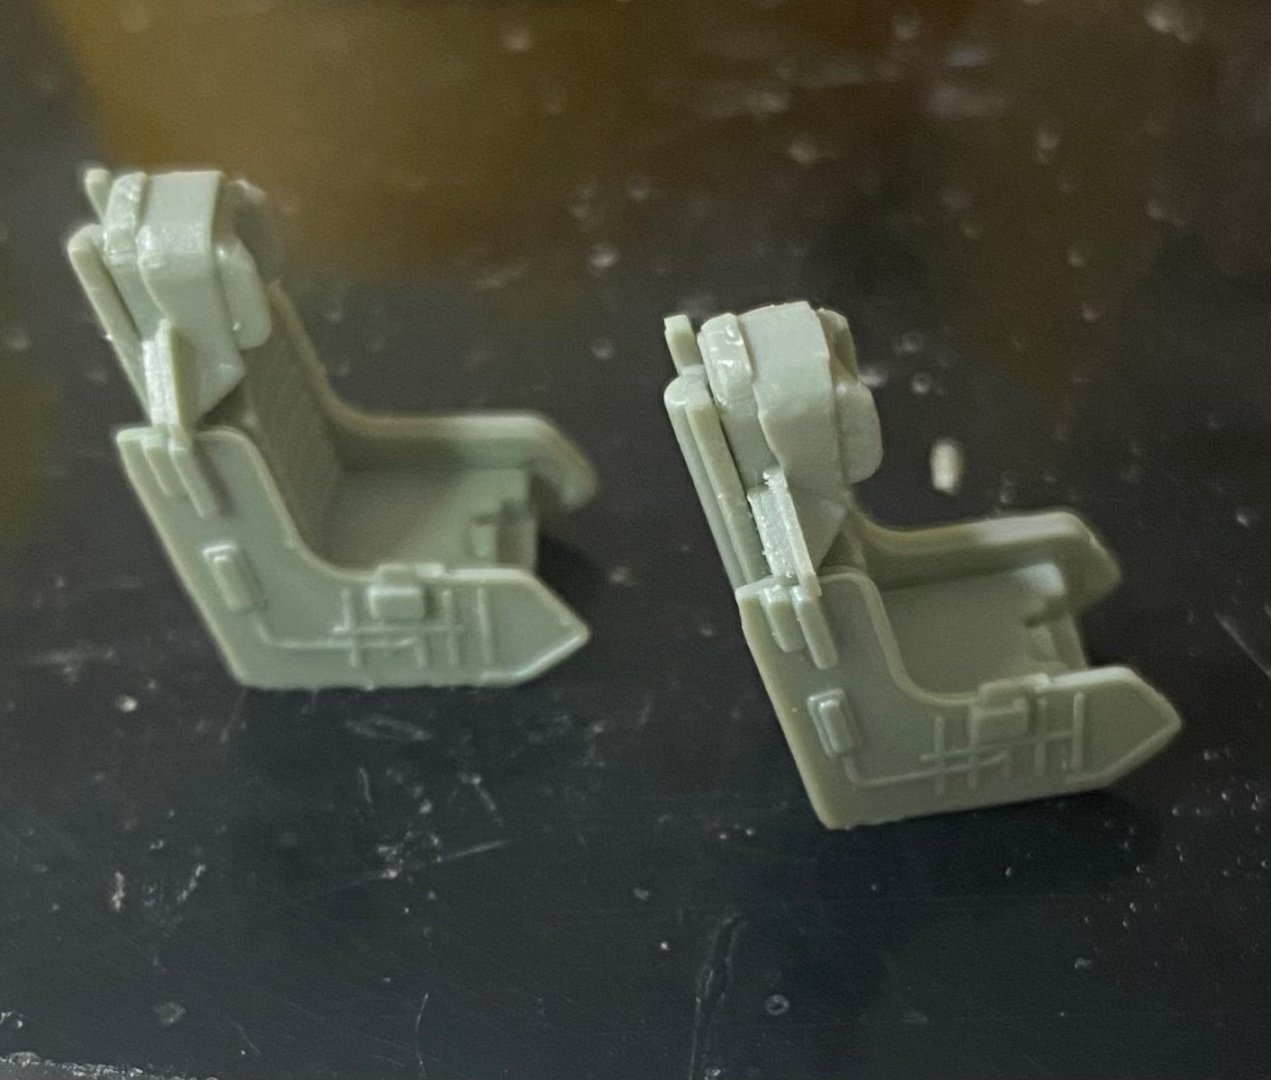
As is almost always the case with aircraft models, construction begins with the cockpit. Wolfpack did a nice job with the ejection seats in 1:72 scale, giving them a ton more detail than I had with the last project, the Japanese Fuji jet trainer kits. The seats consisted of four parts each and should pop after painting and detailing. The cockpit tub has raised details z as is the kit supplies decals for the consoles and side panels. They even provide decals for the seats, Decals are by Cartograf. Good quality.


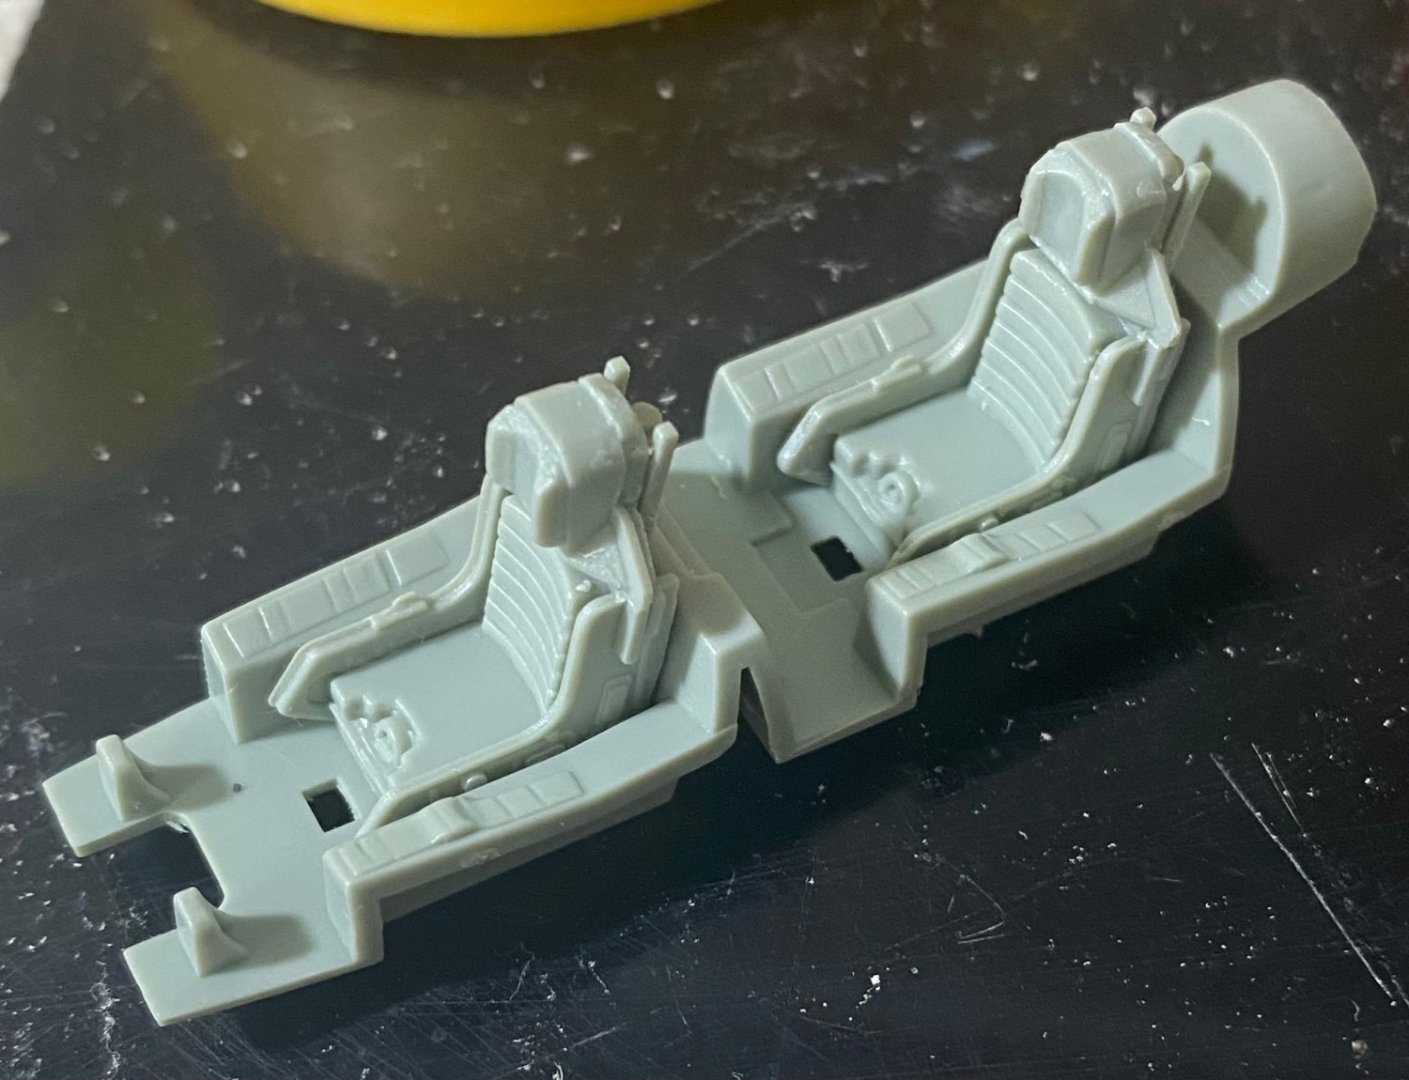
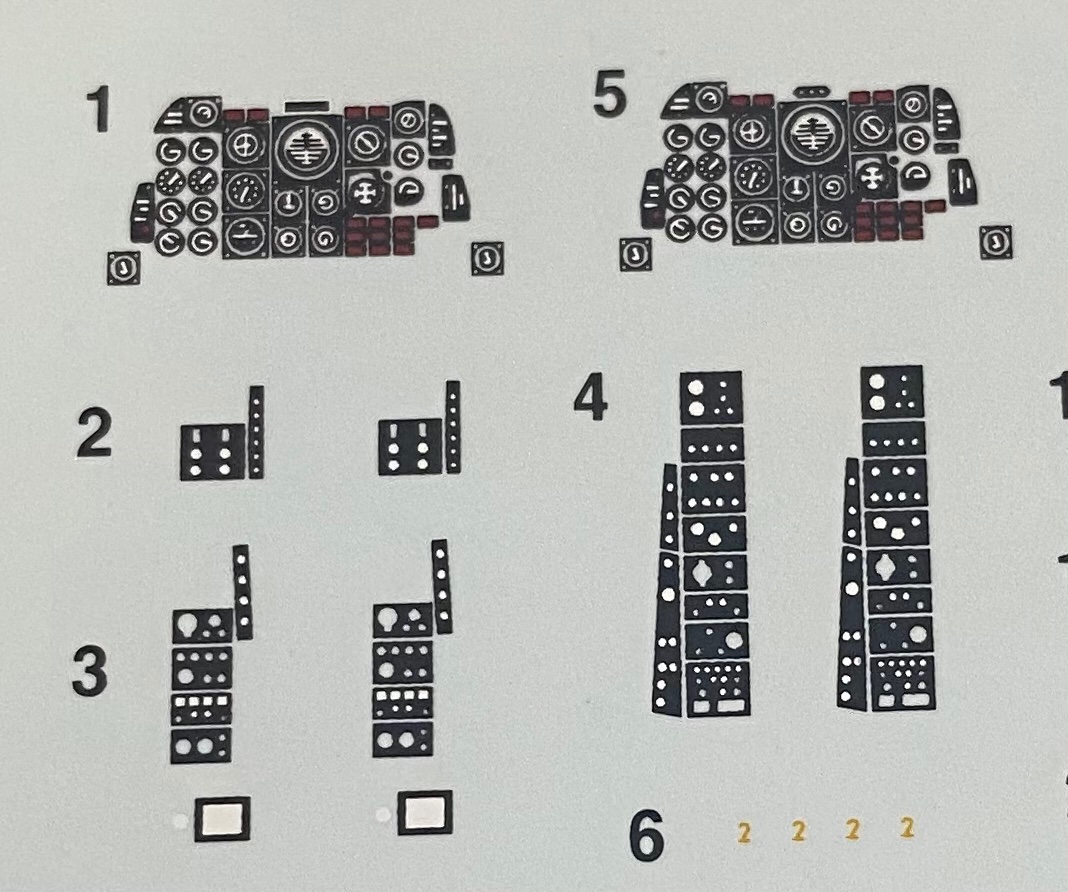
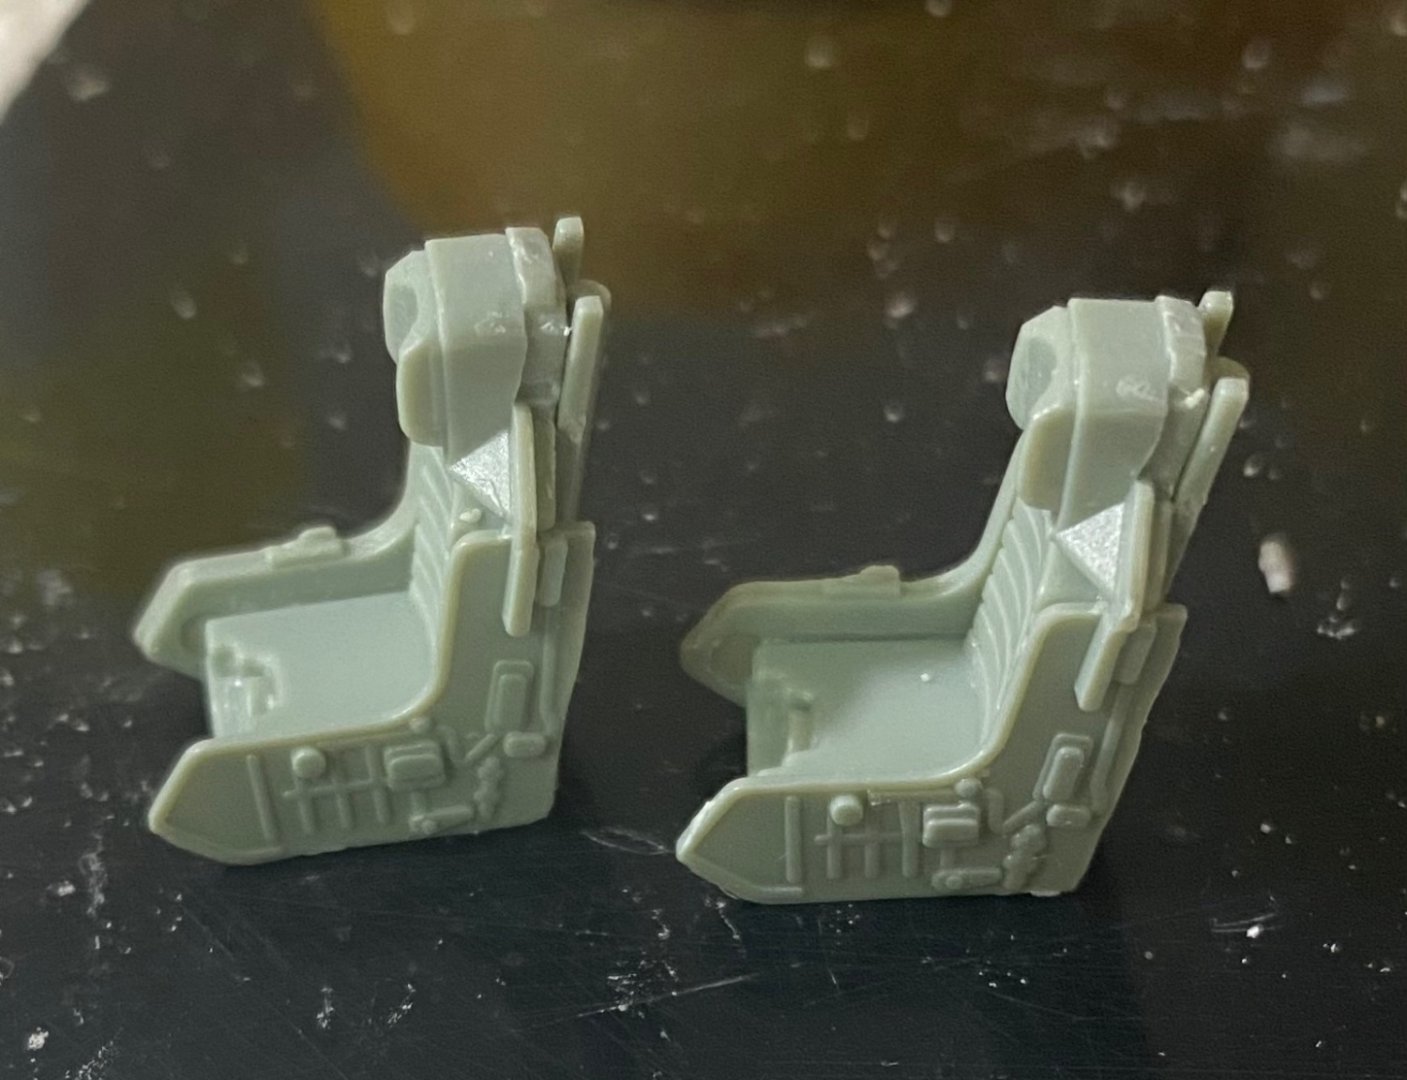
- 25 replies
-
- 11
-
-
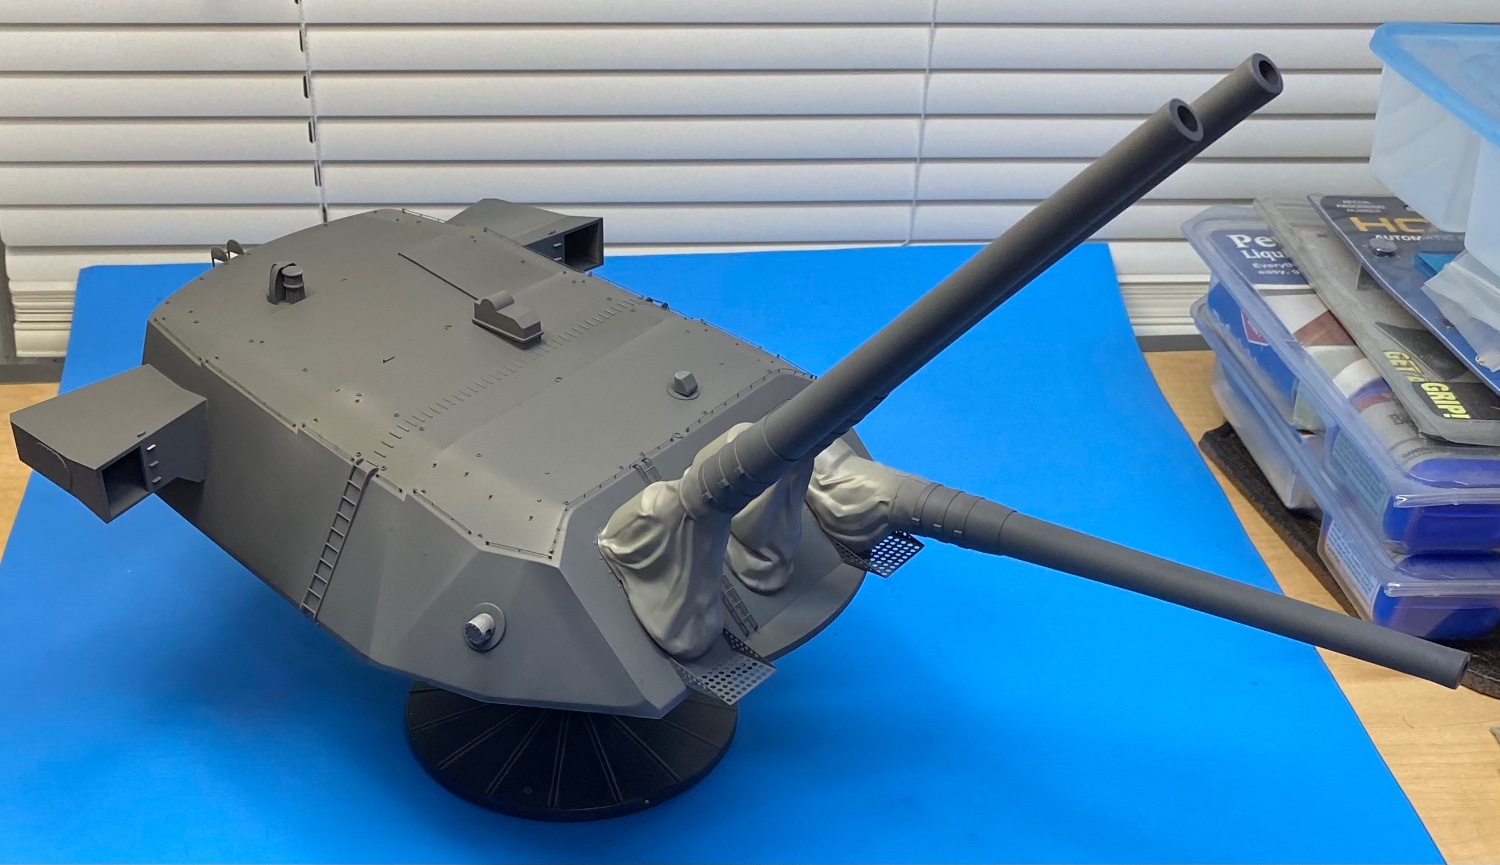
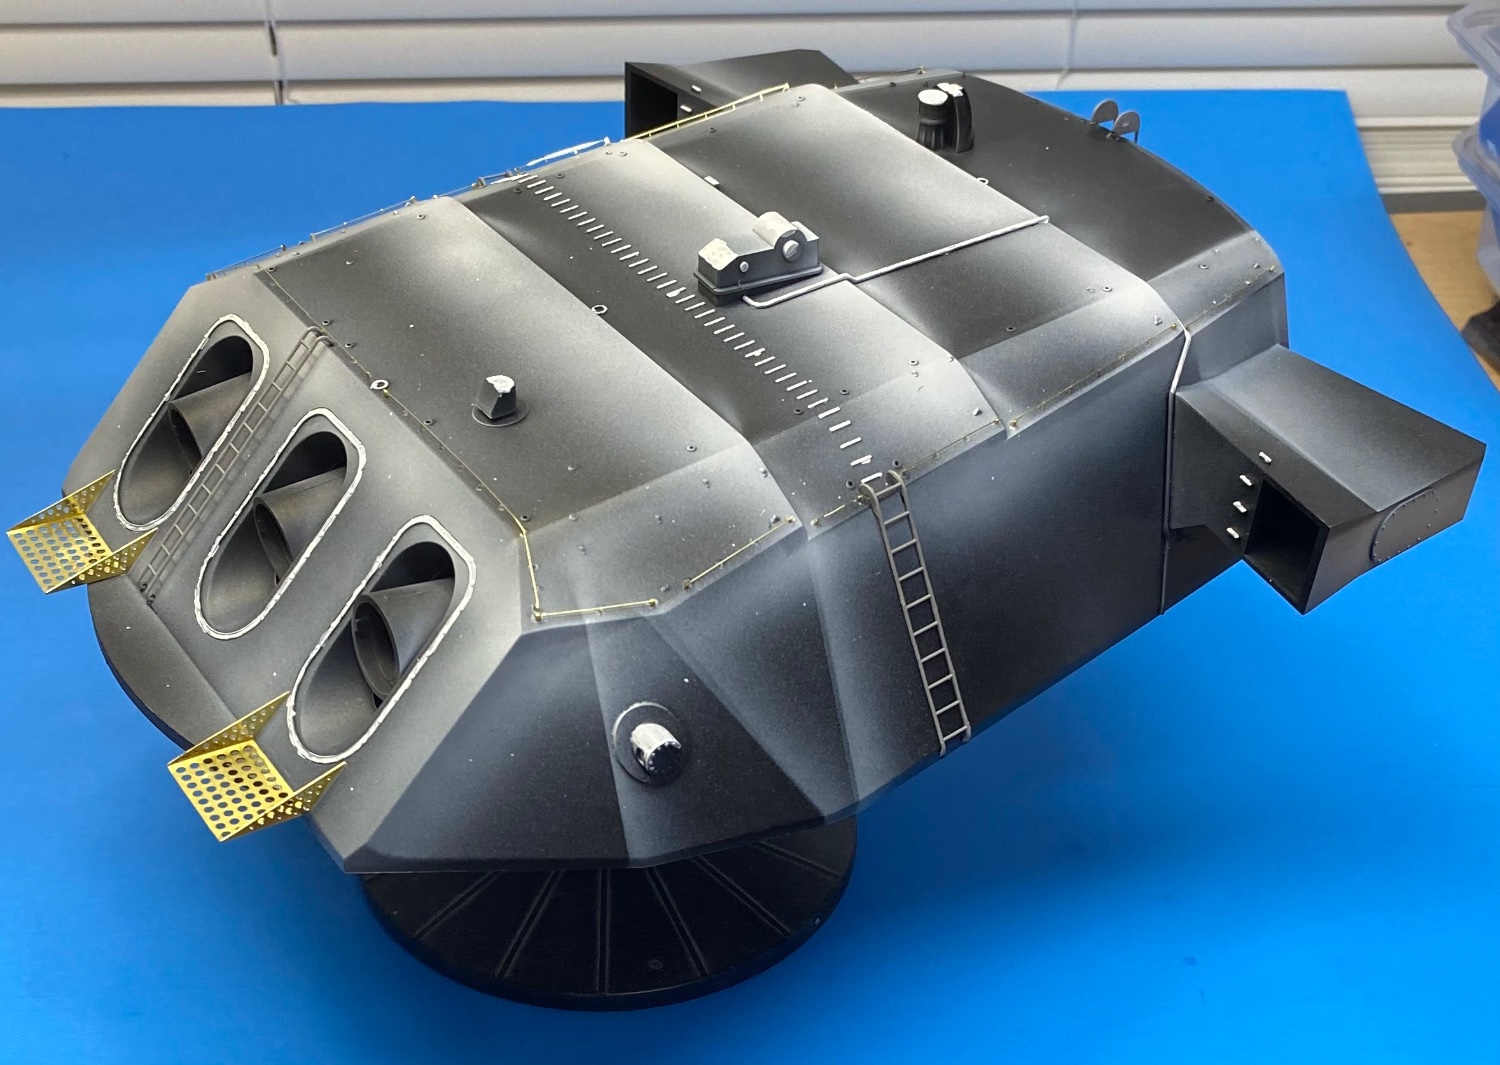
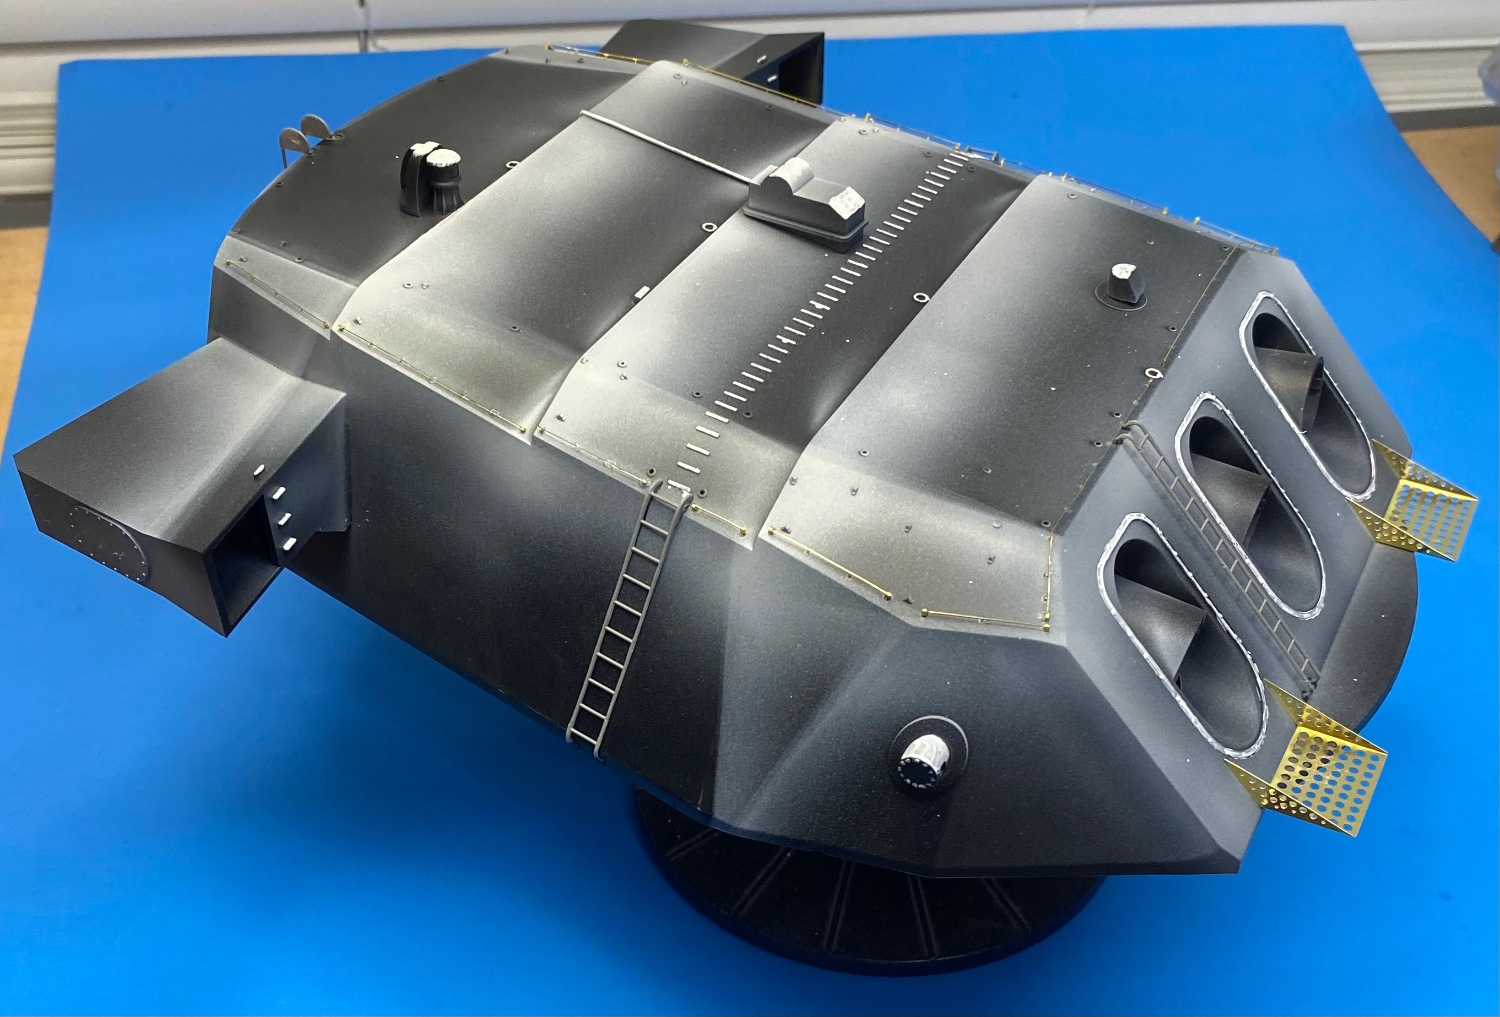
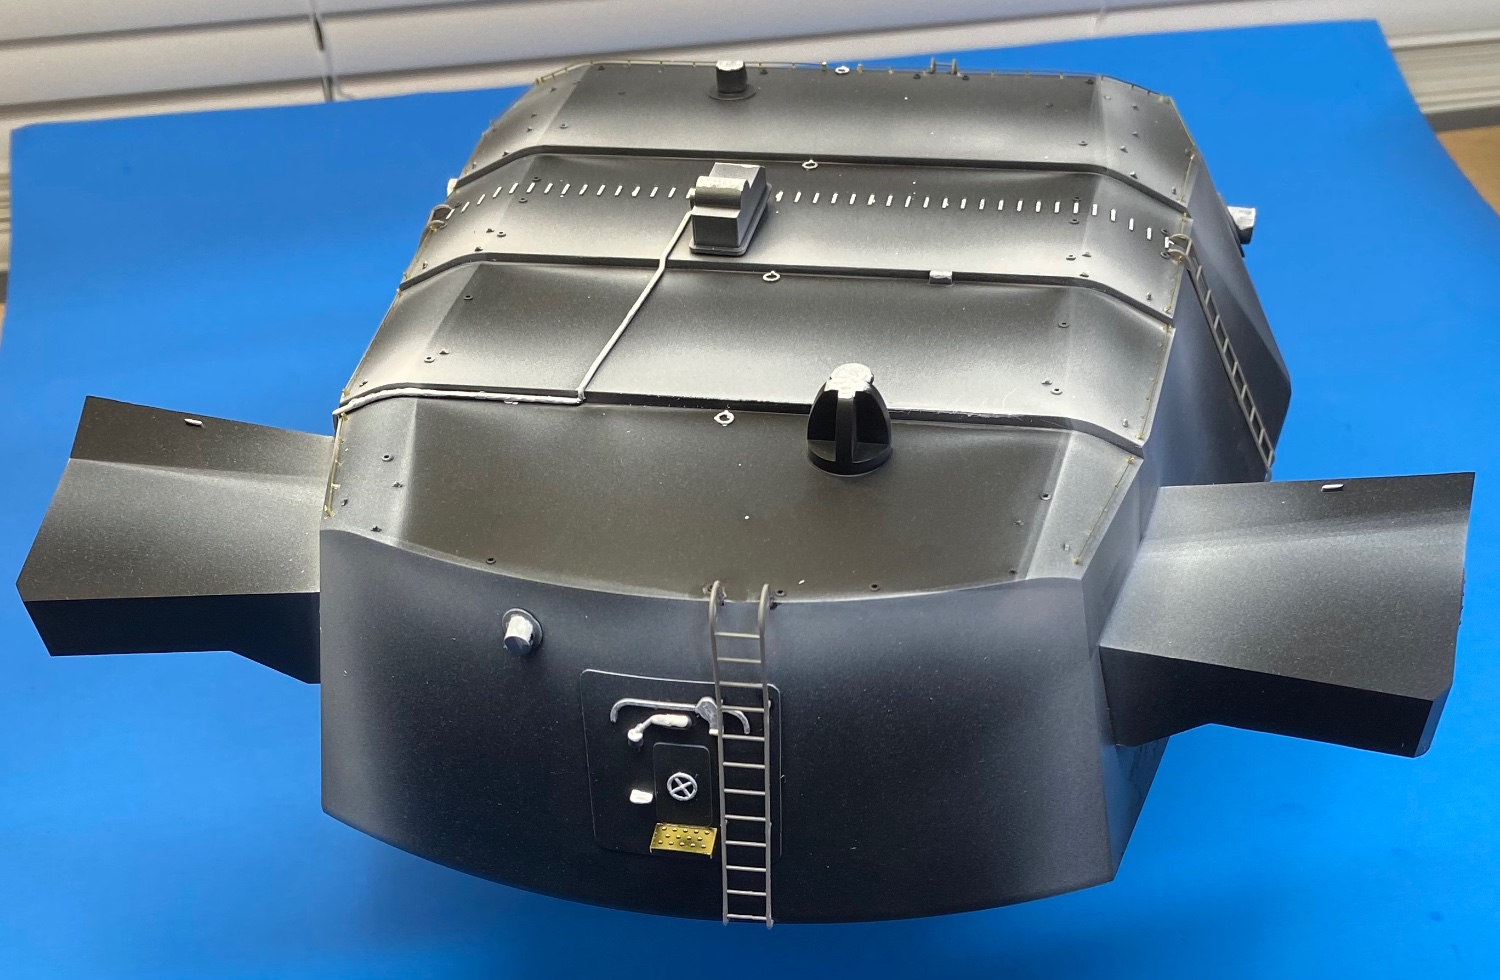
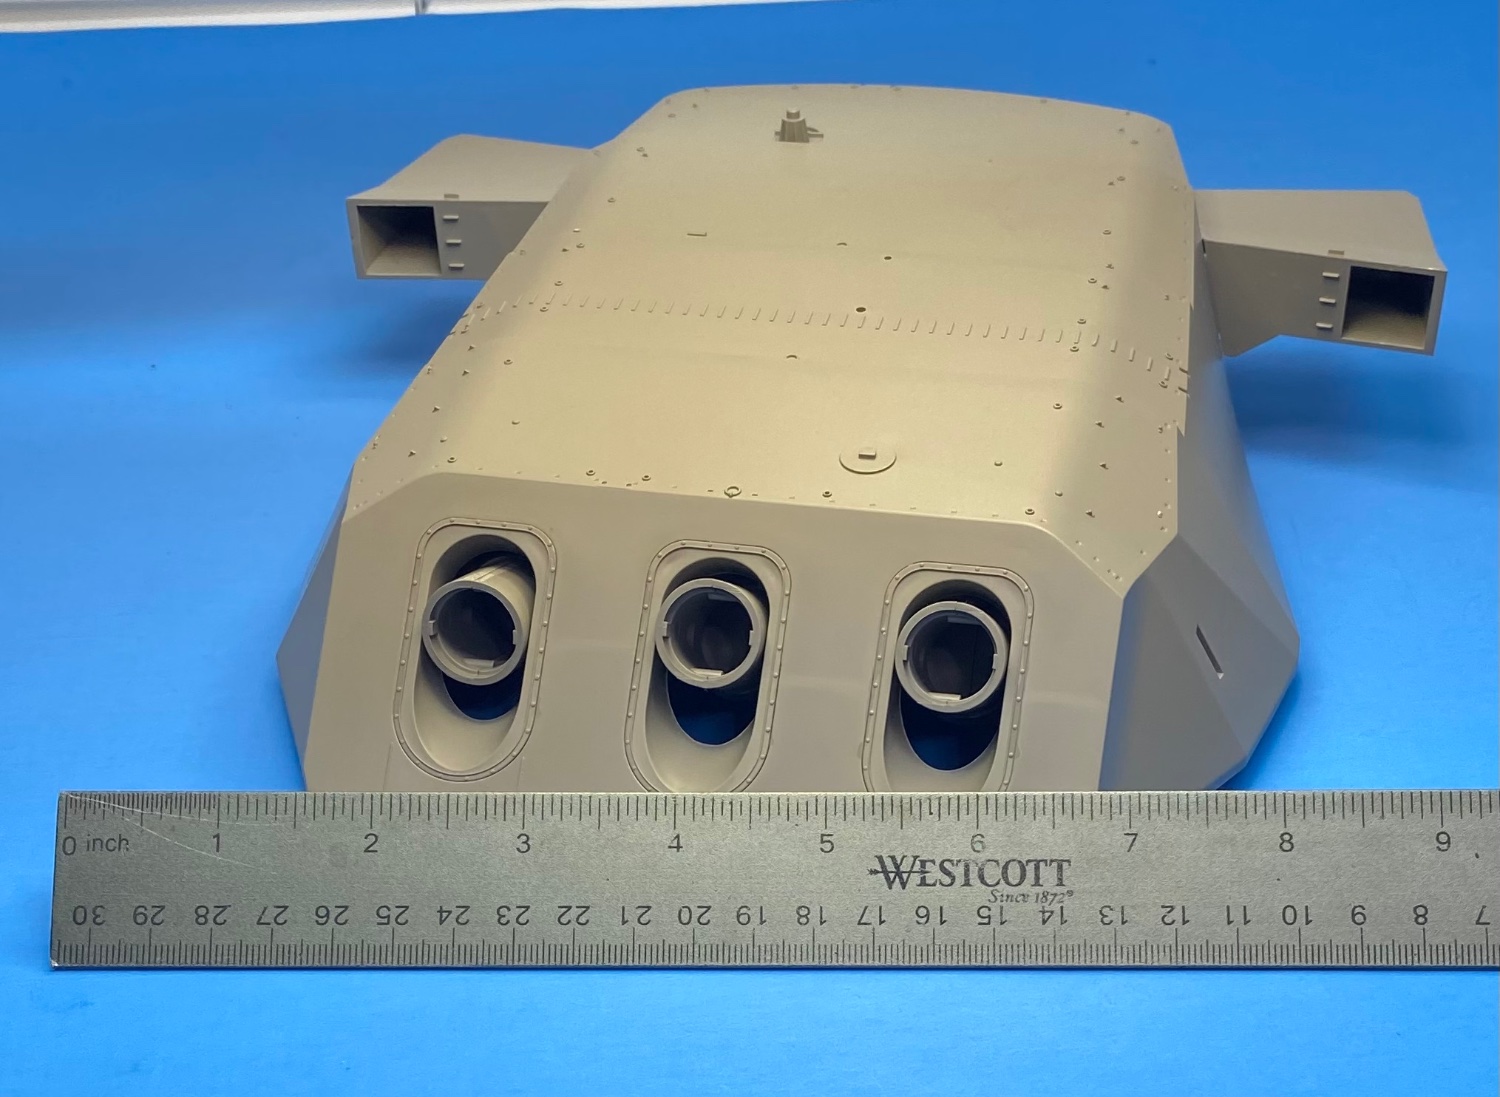
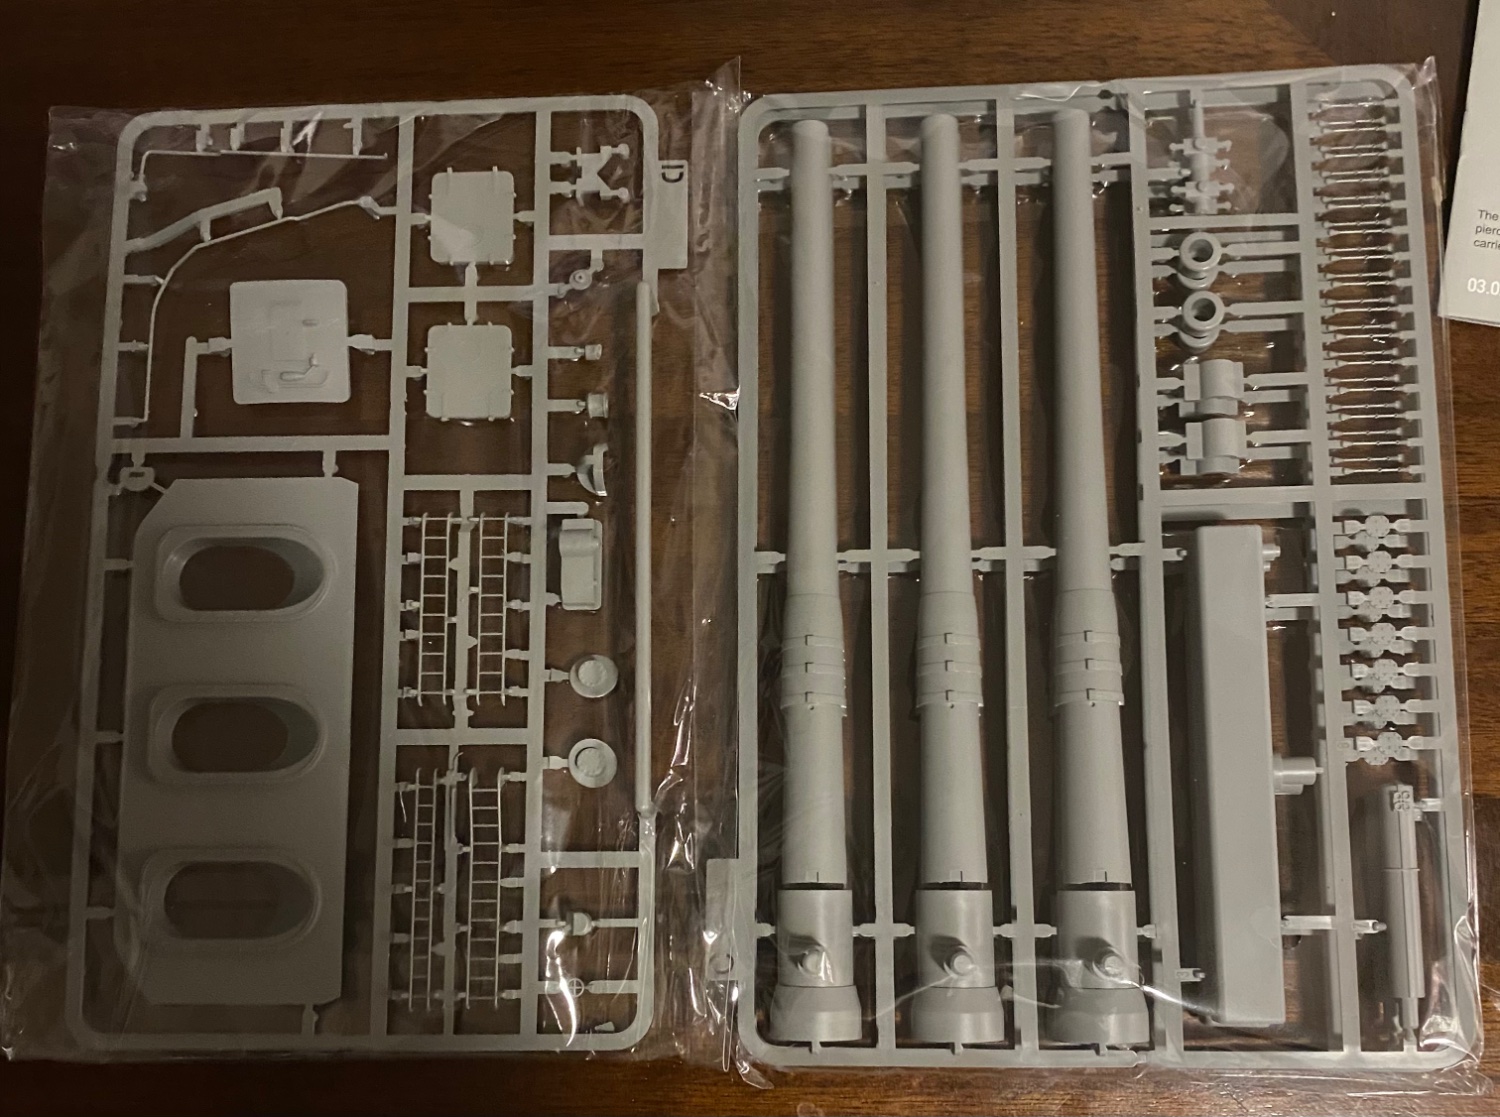
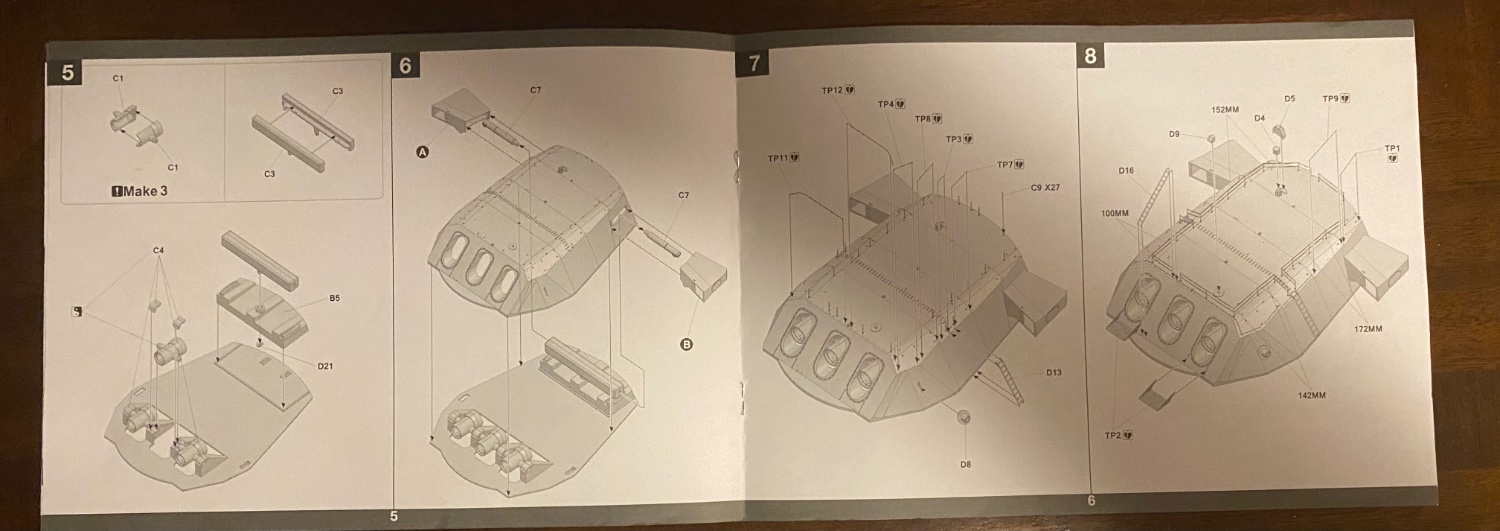
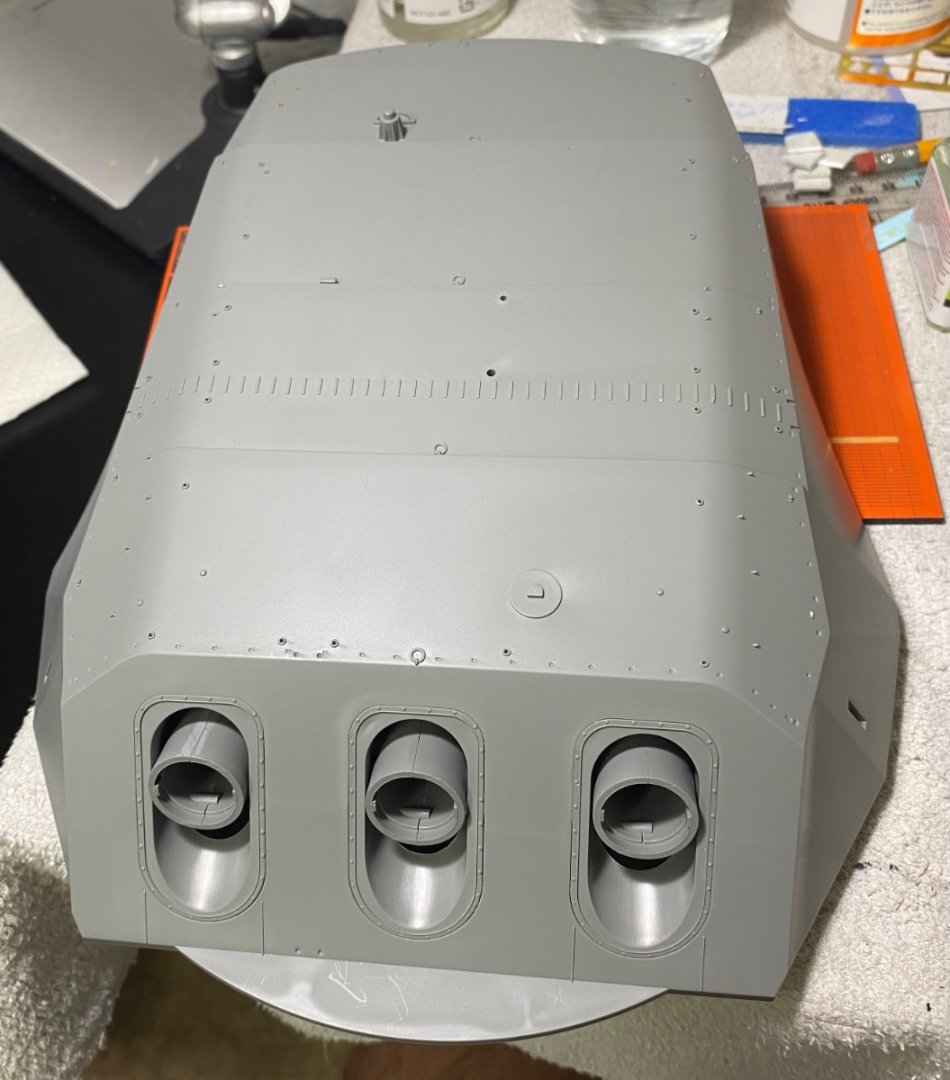
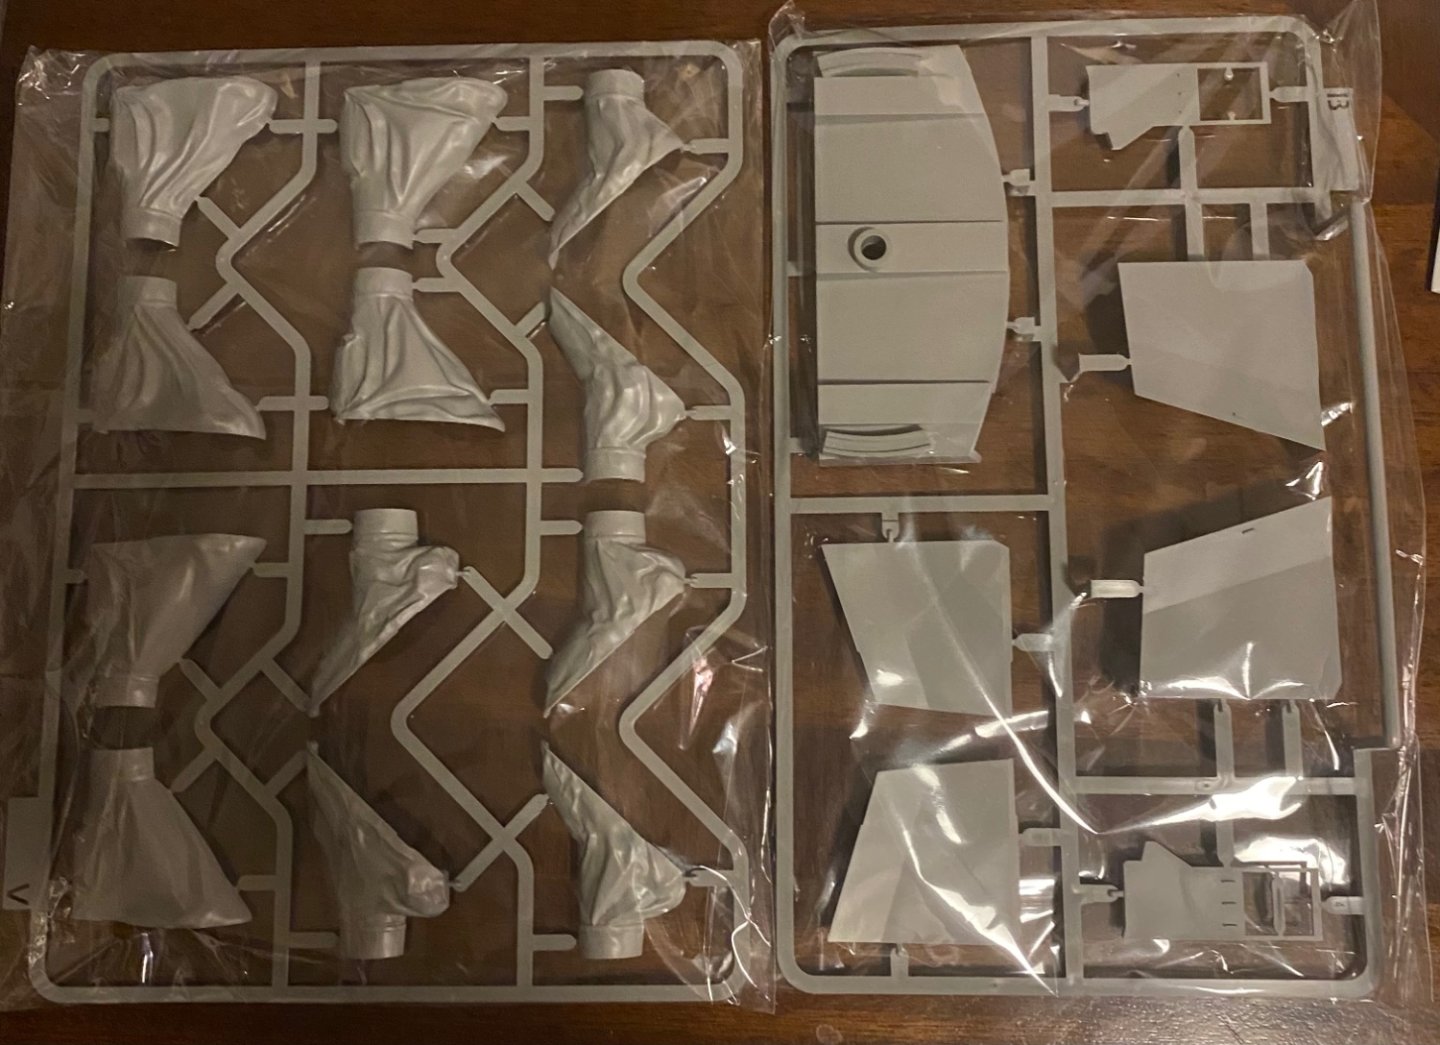
With the basic turret assembled and gun barrel halves joined, will give the entire model a black primer surfacer before doing some preshading. Will install the more delicate pieces after priming and preshading. Will also fill and sand the barrel join lines before priming. The kit provides two sets of blast bags, giving the modeler the option of displaying the barrels in a raised or lowered position.


- 69 replies
-
- 10
-
-
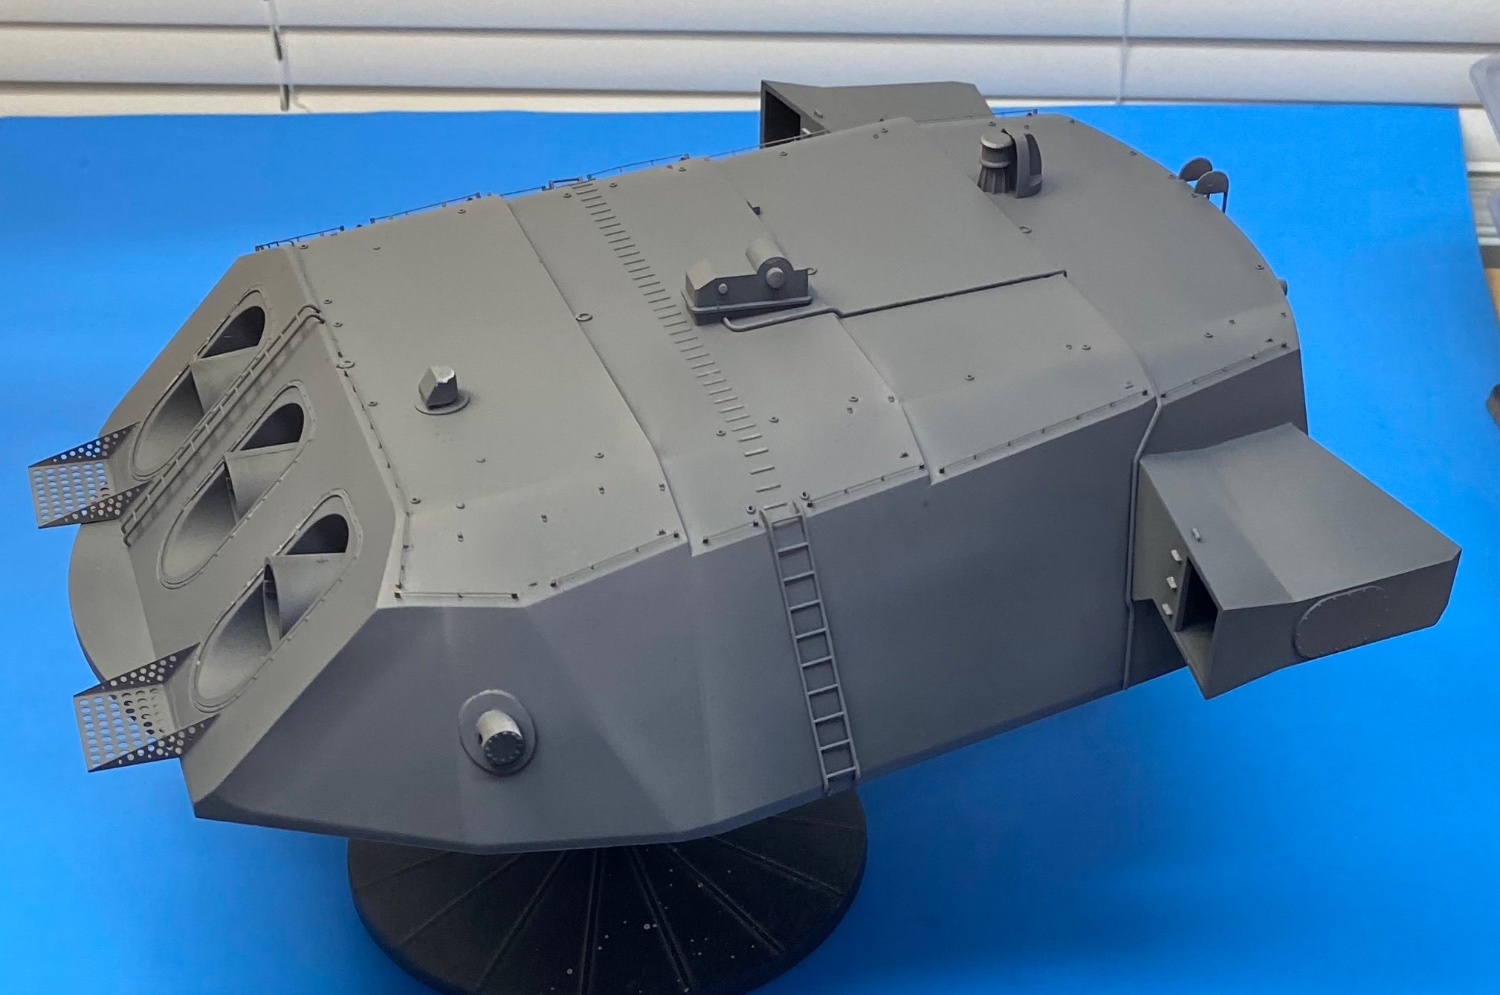
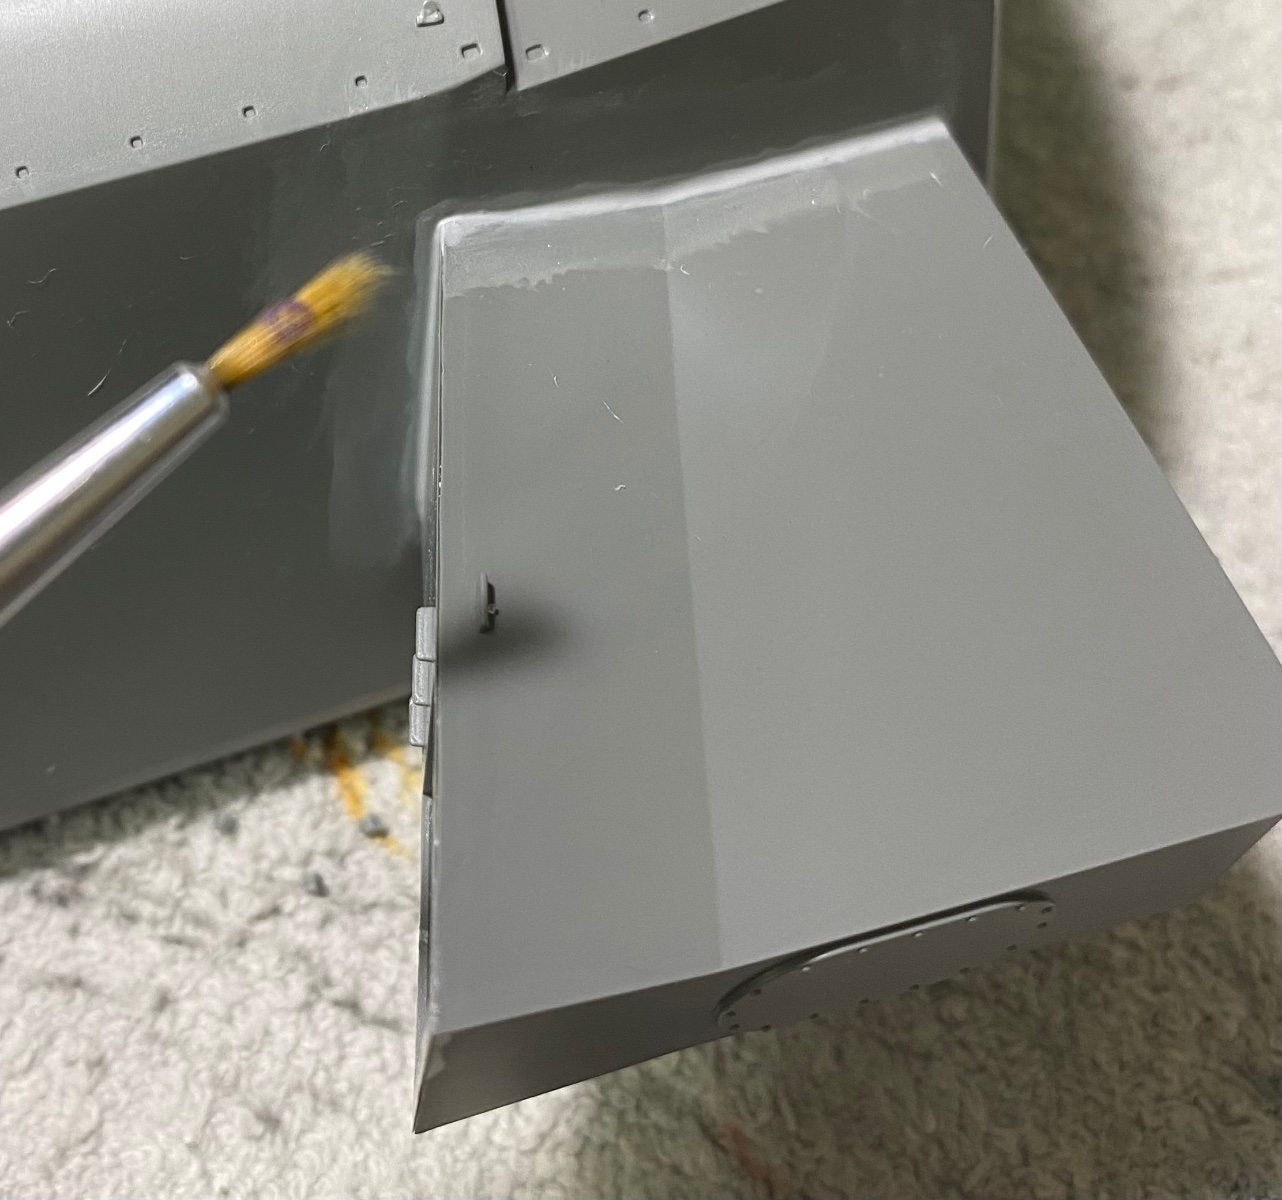
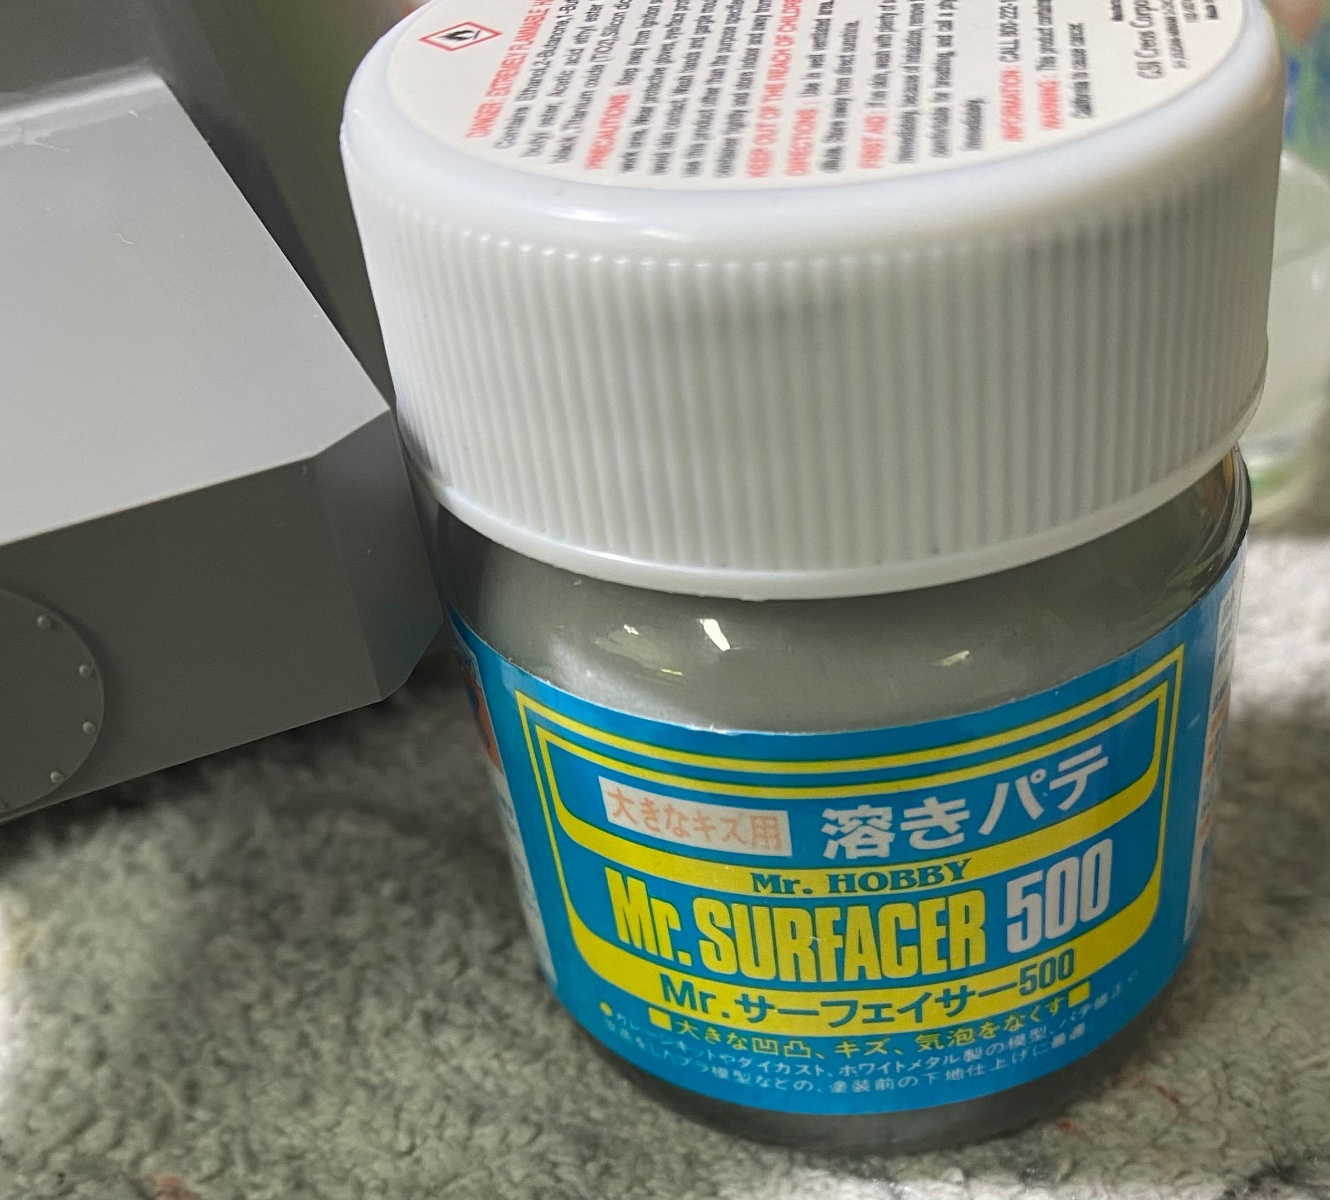
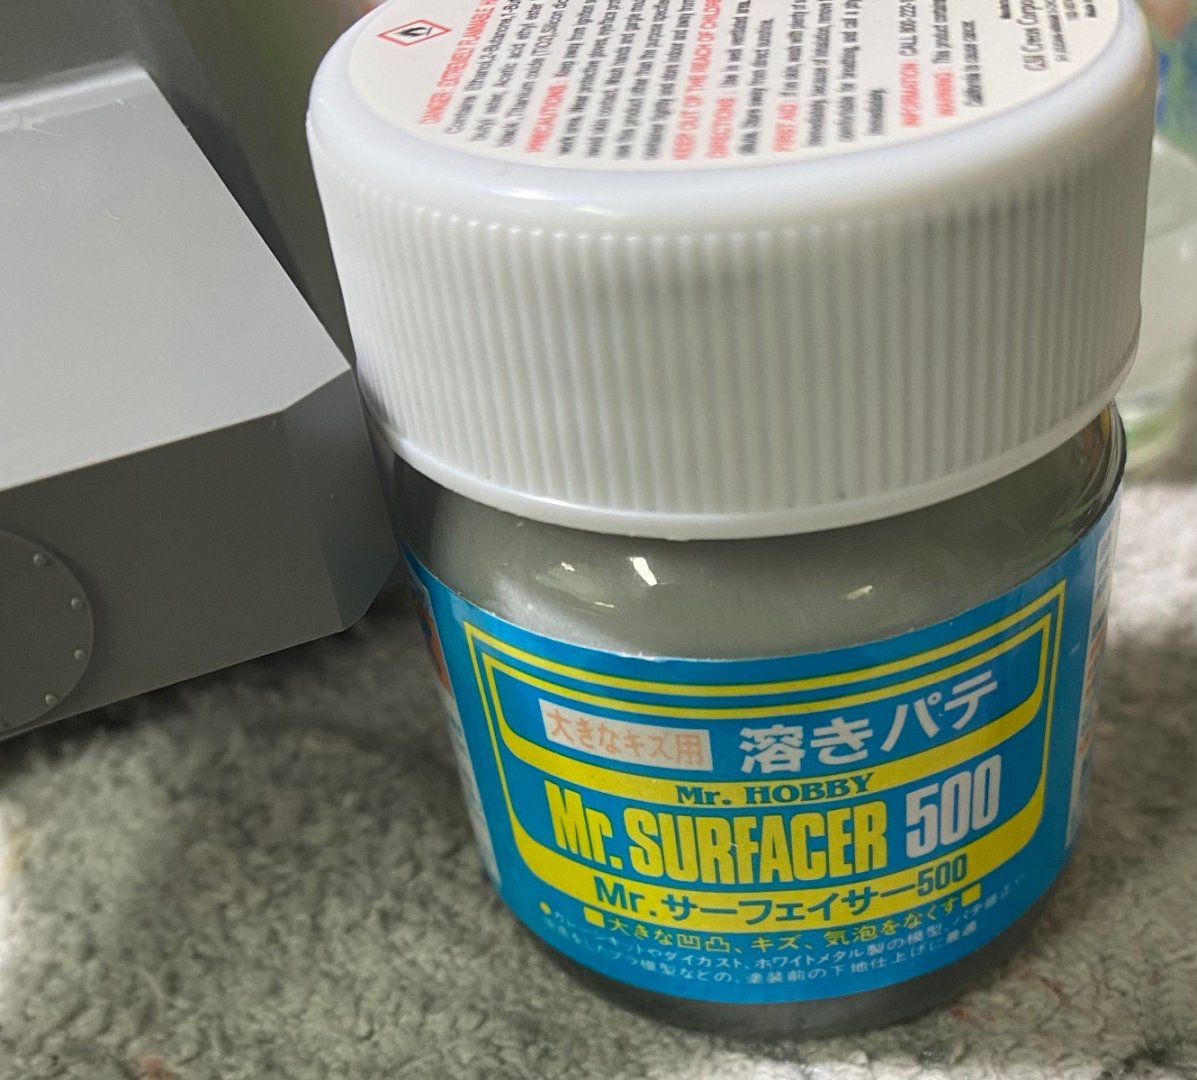
I use Mr Surfacer 500 as a filler around the range finder to turret join. Applied with a tooth pick, I smooth it out with a paint brush wetted with lacquer thinner before it sets up.

- 69 replies
-
- 10
-
-
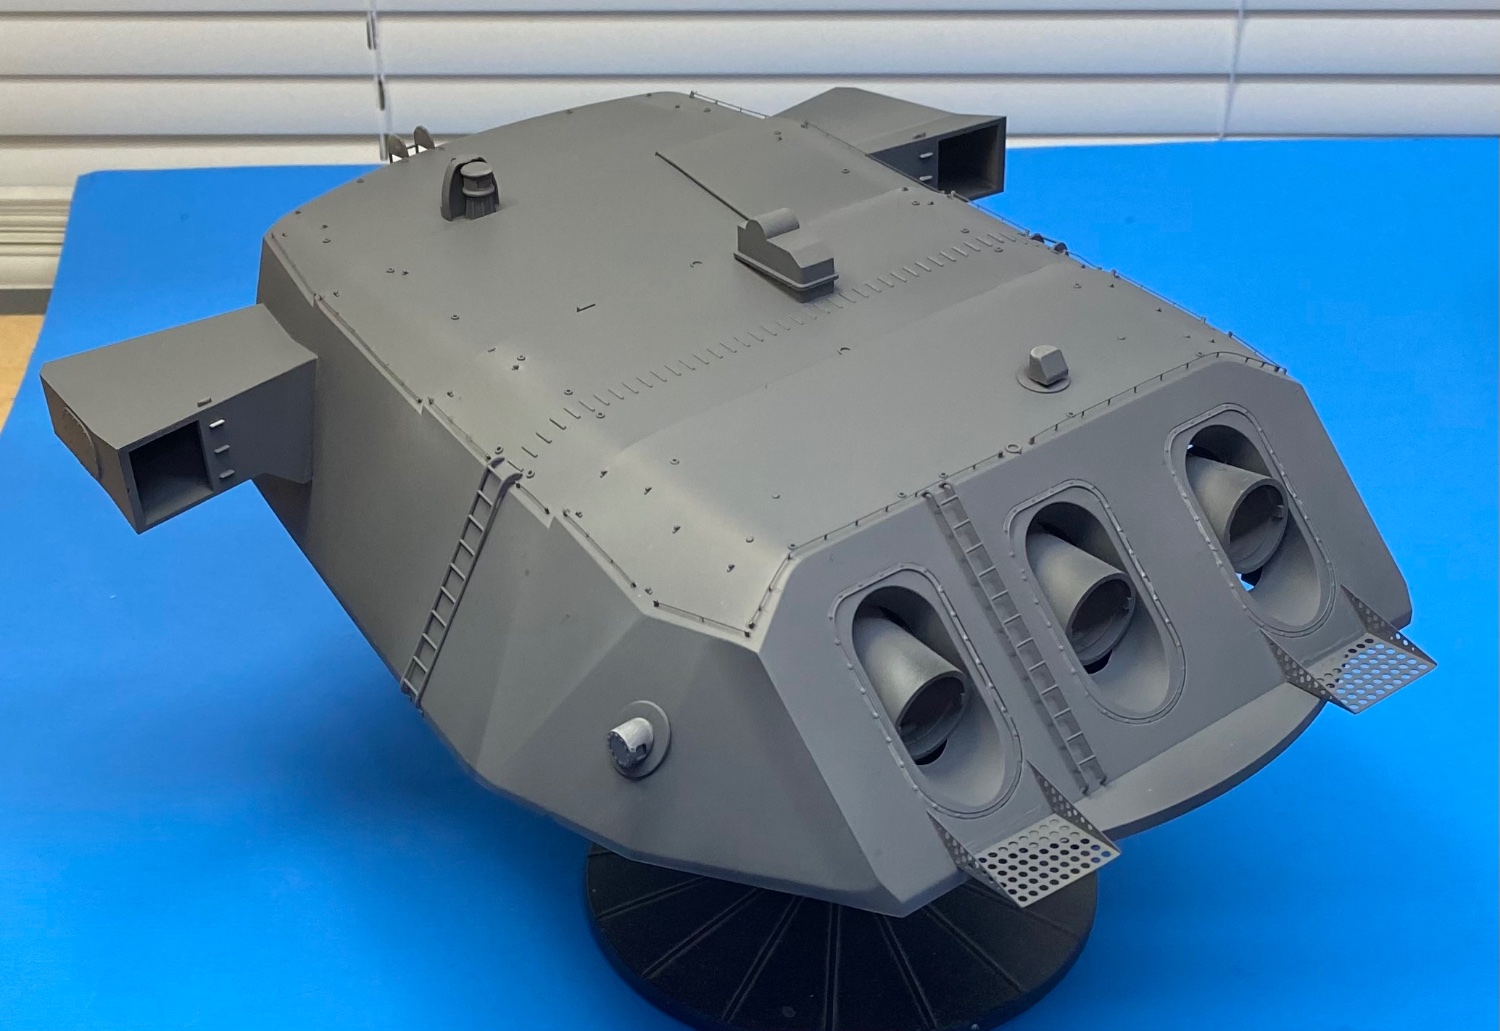
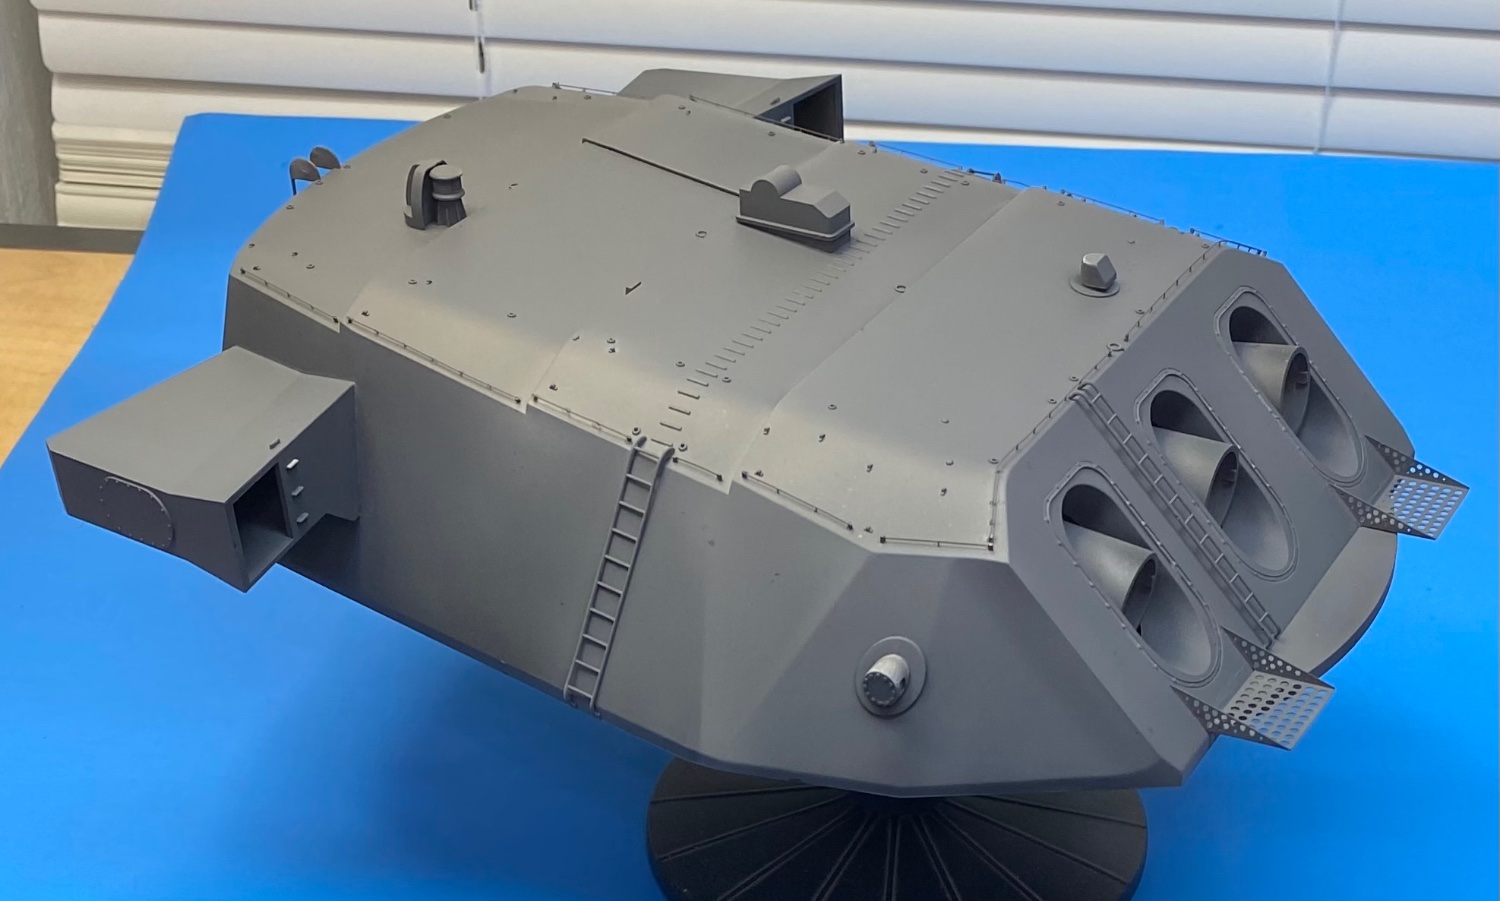
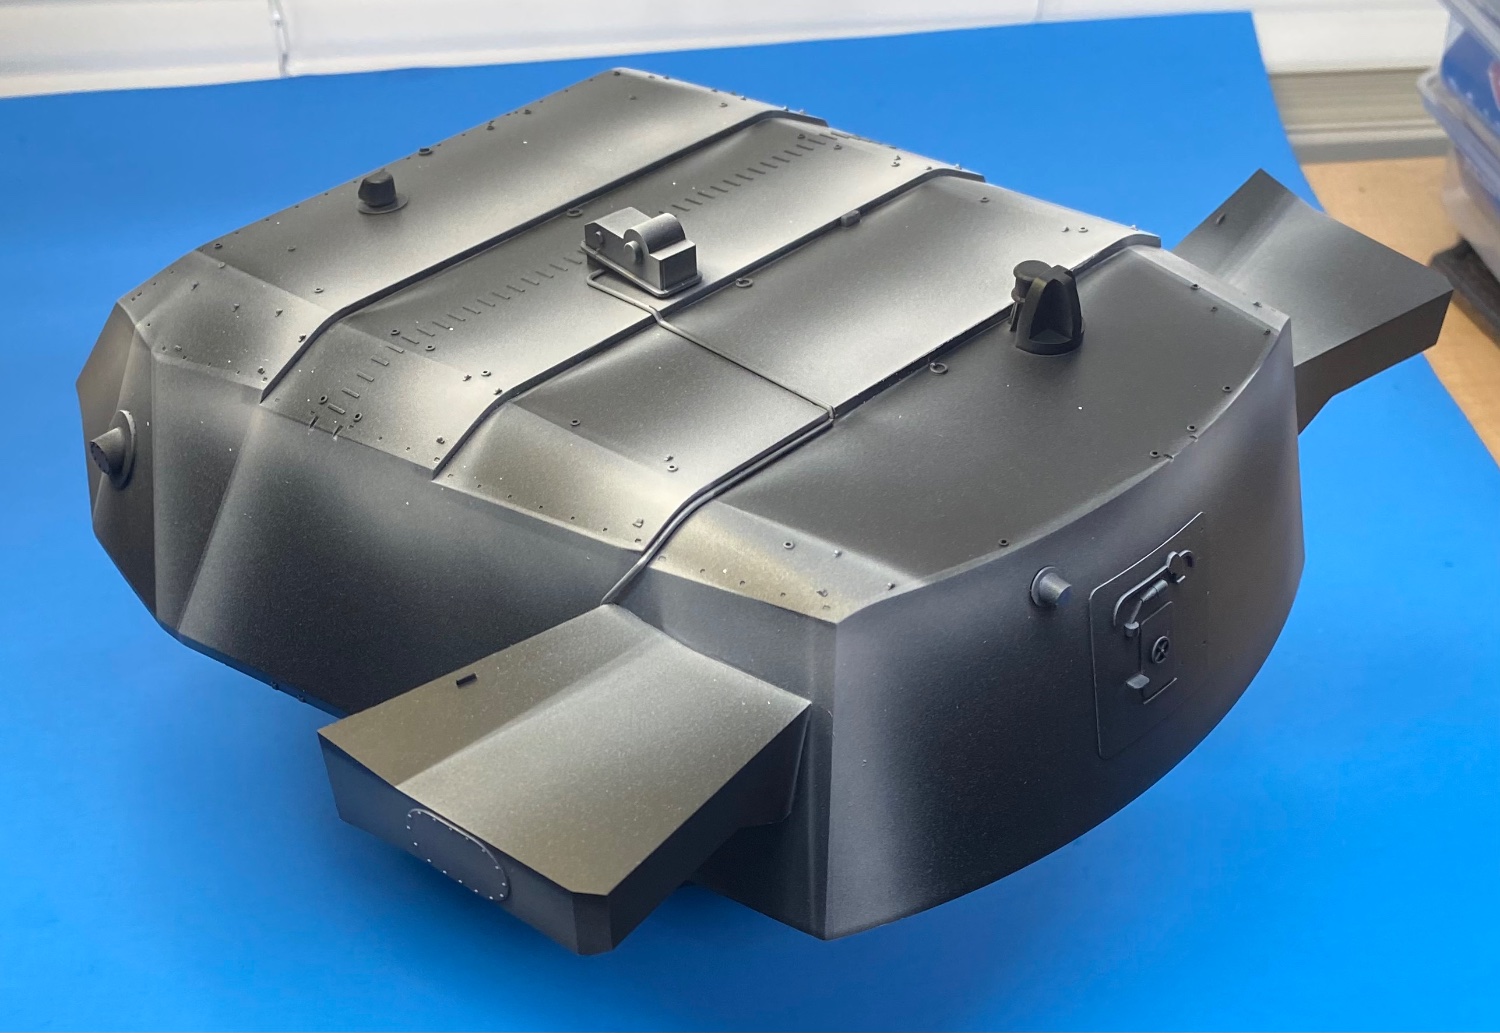
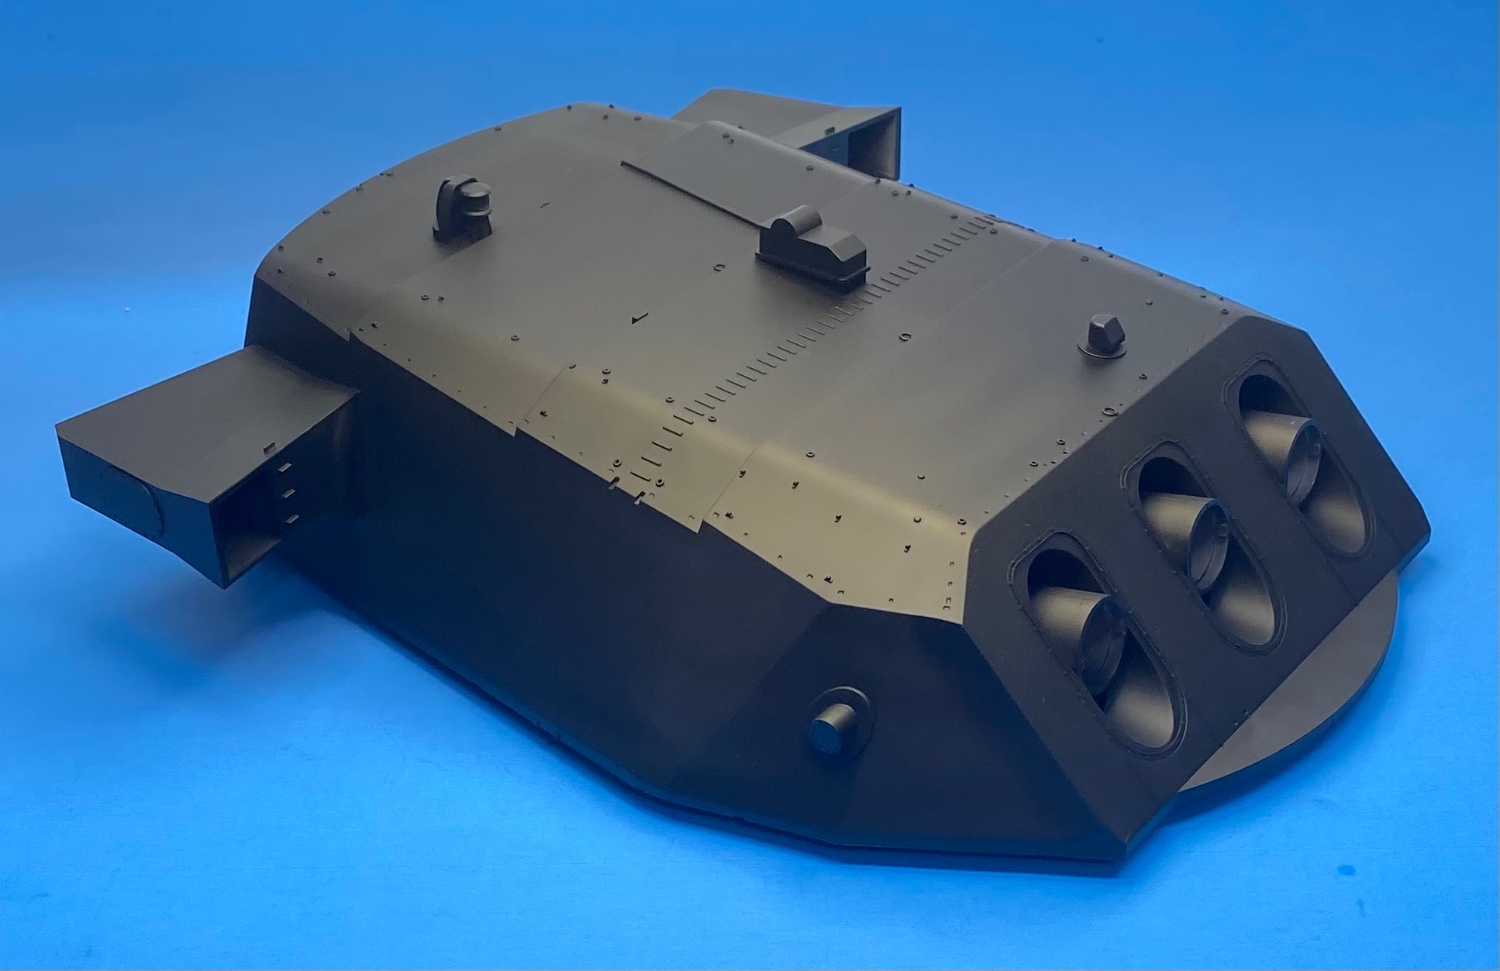
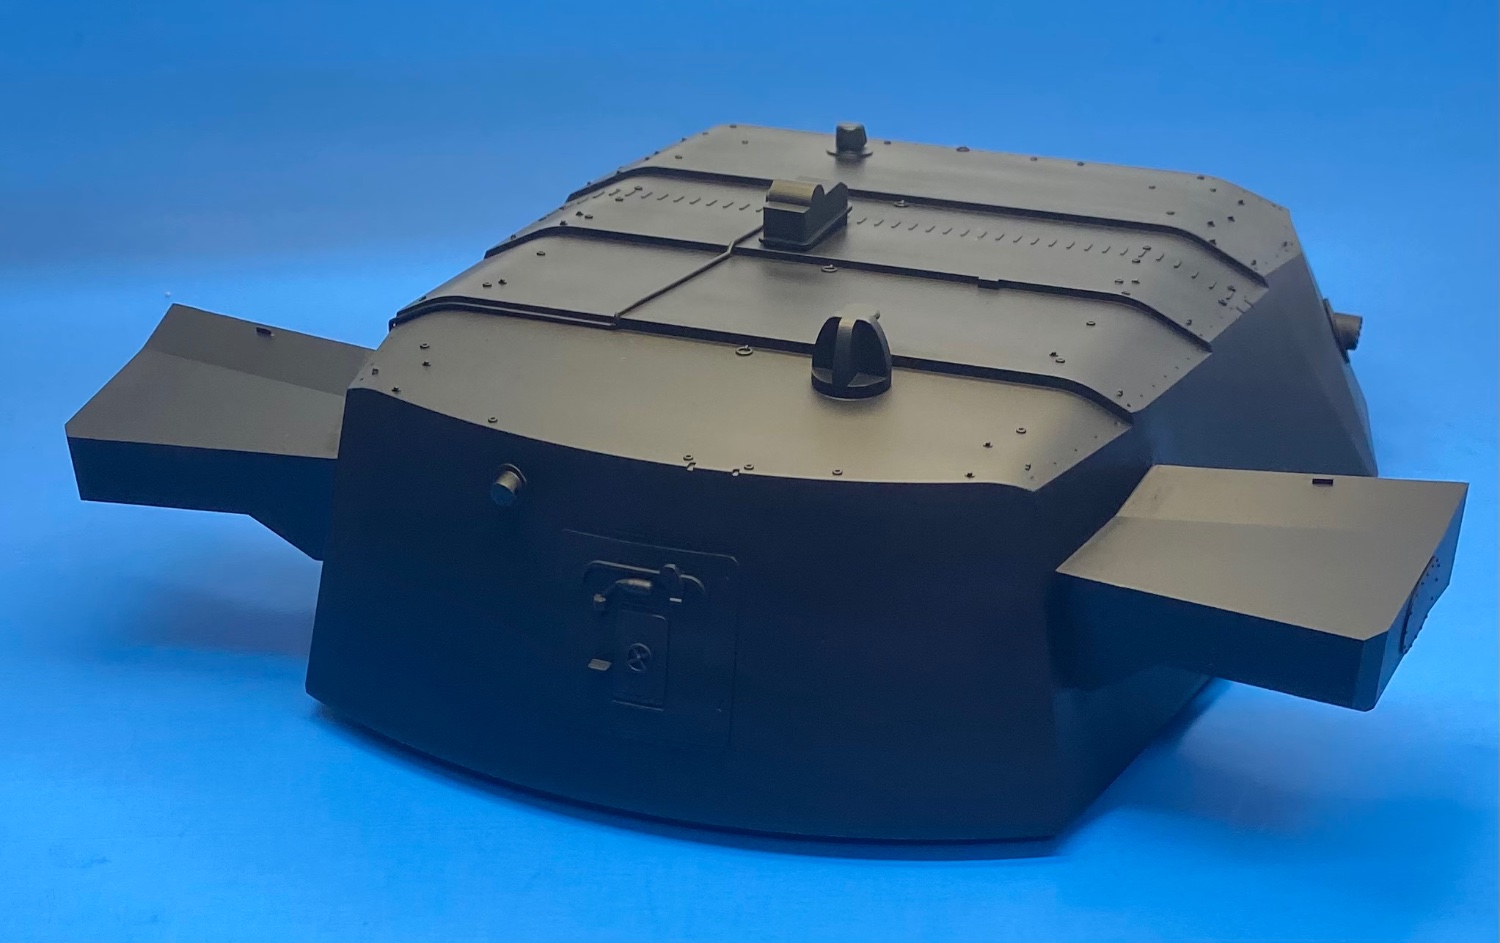
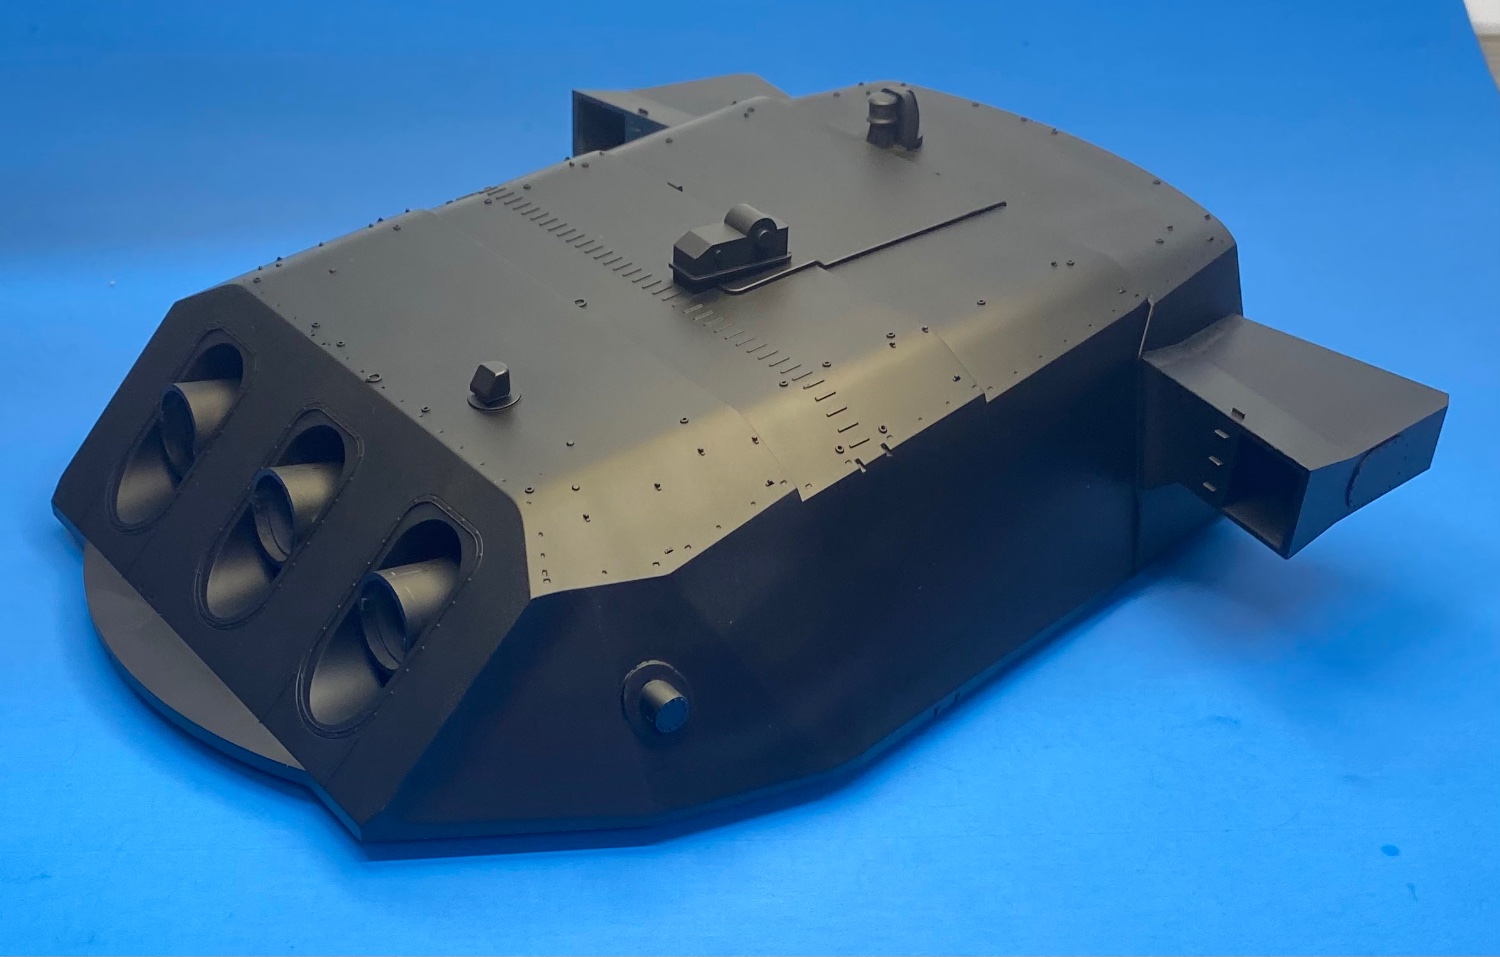
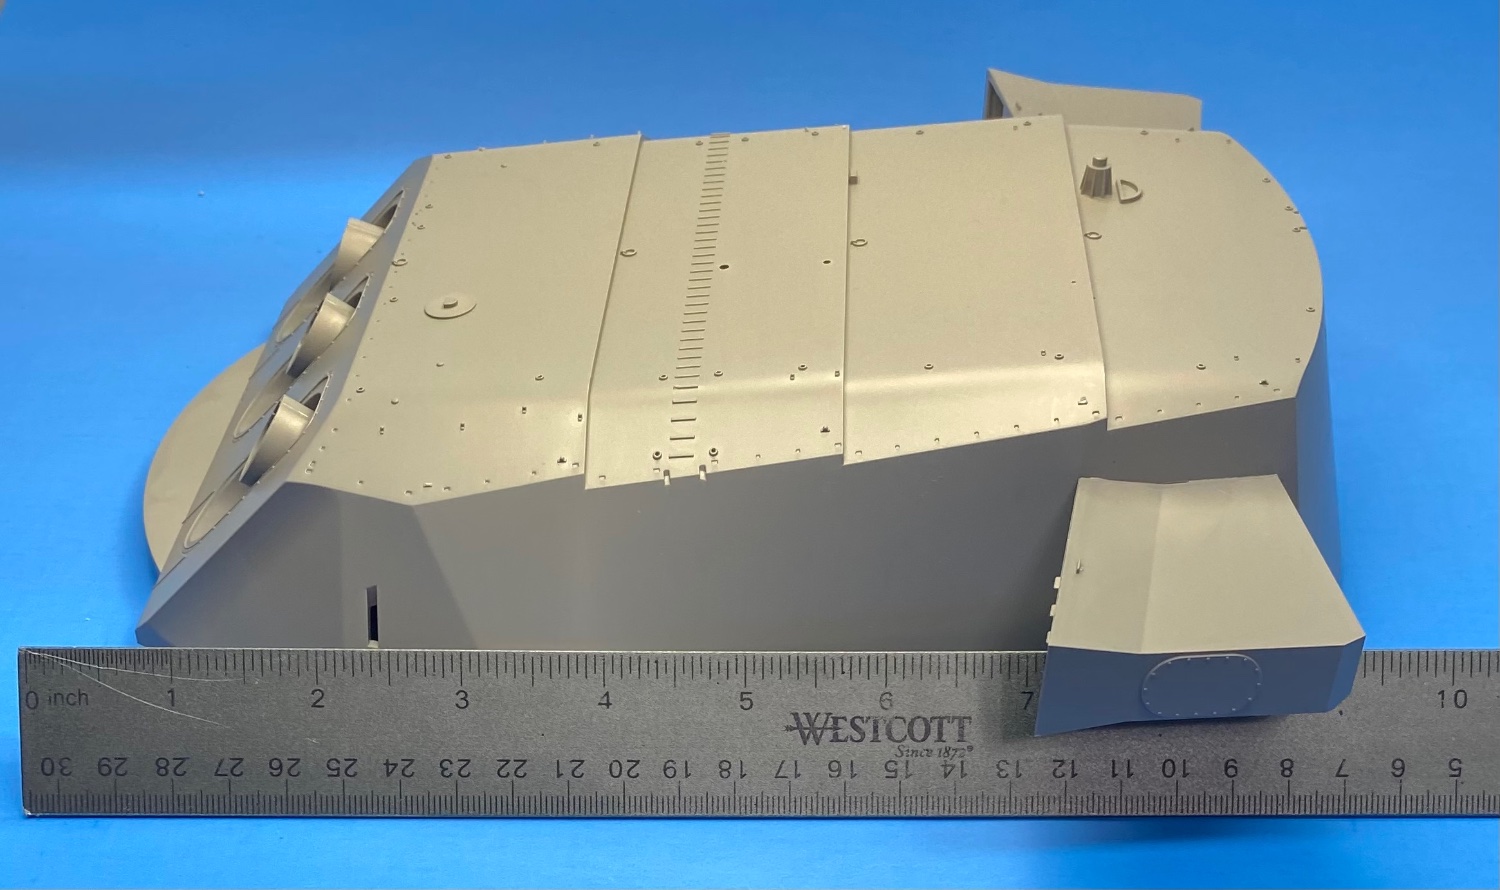
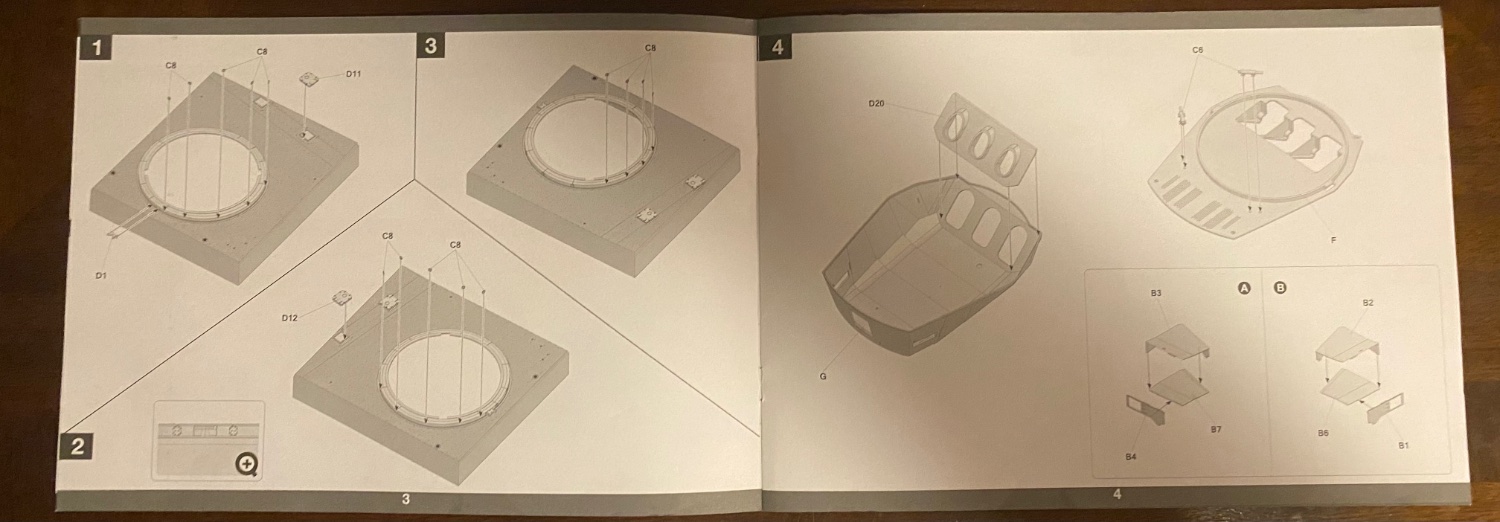
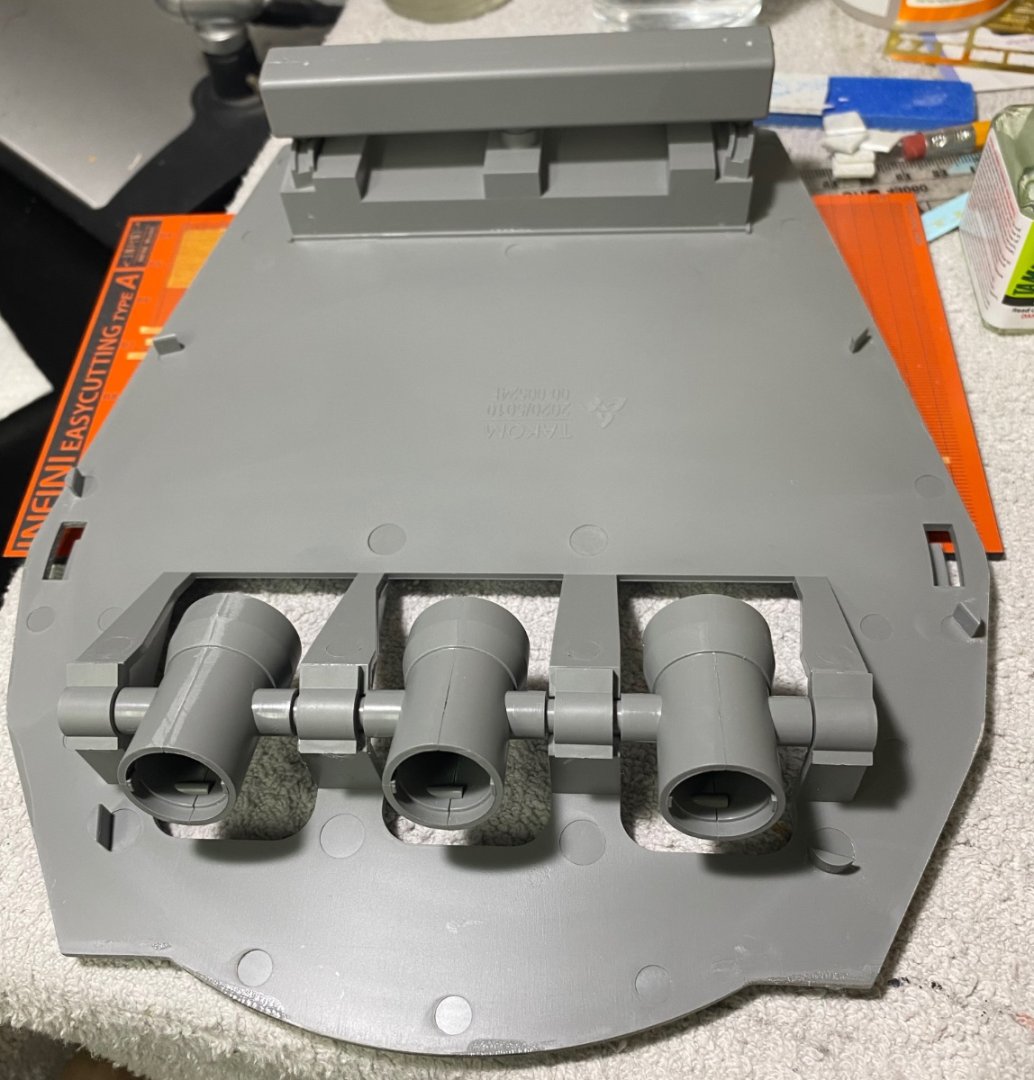
Turret assembly goes together quickly. Will build entire turret and leave off the smallest pieces such as the rail stanchions as they may get knocked off during the turret painting/detailing/weathering phases.


-
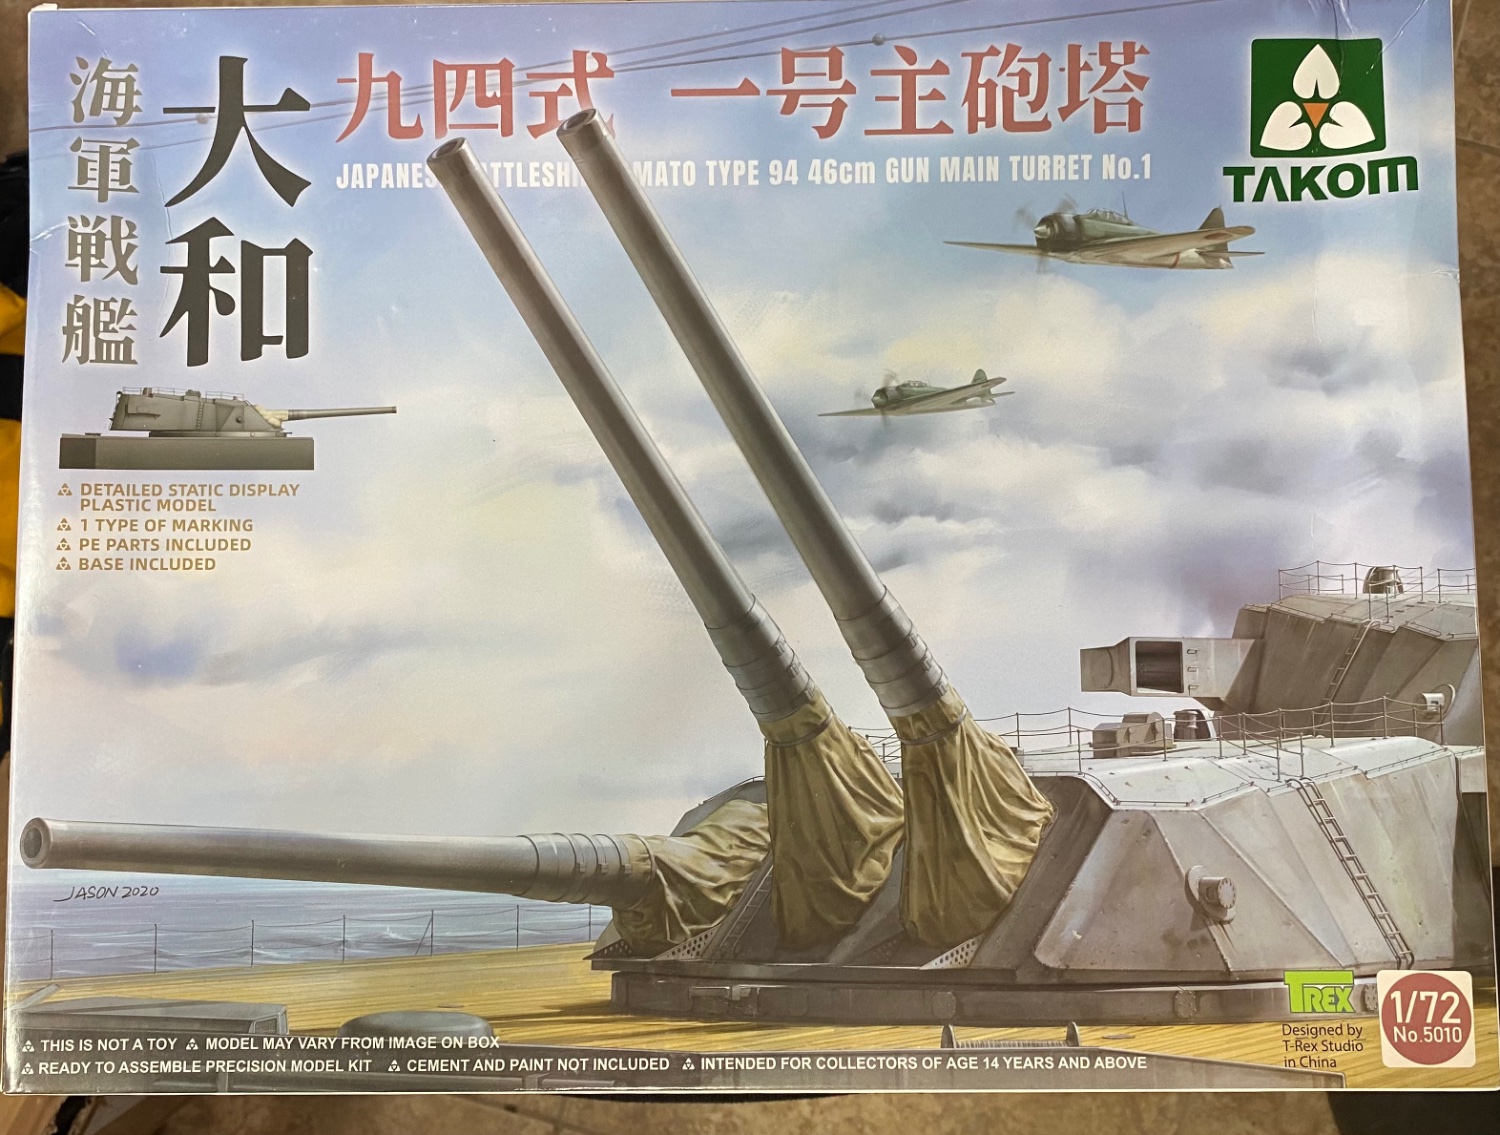
With a low parts count and simple construction, this will mostly be an exercise in painting and detailing. A short term project, but in 1:72 scale, one that’s large enough to make a nice display piece when it’s all done.


- 69 replies
-
- 10
-
-
Thanks EG! White is a hit or miss paint job. Very unforgiving.
-
Thanks OC. It was a quick, fun little diversion from more complex models.