CDW
-
Posts
7,756 -
Joined
-
Last visited
Content Type
Profiles
Forums
Gallery
Events
Everything posted by CDW
-

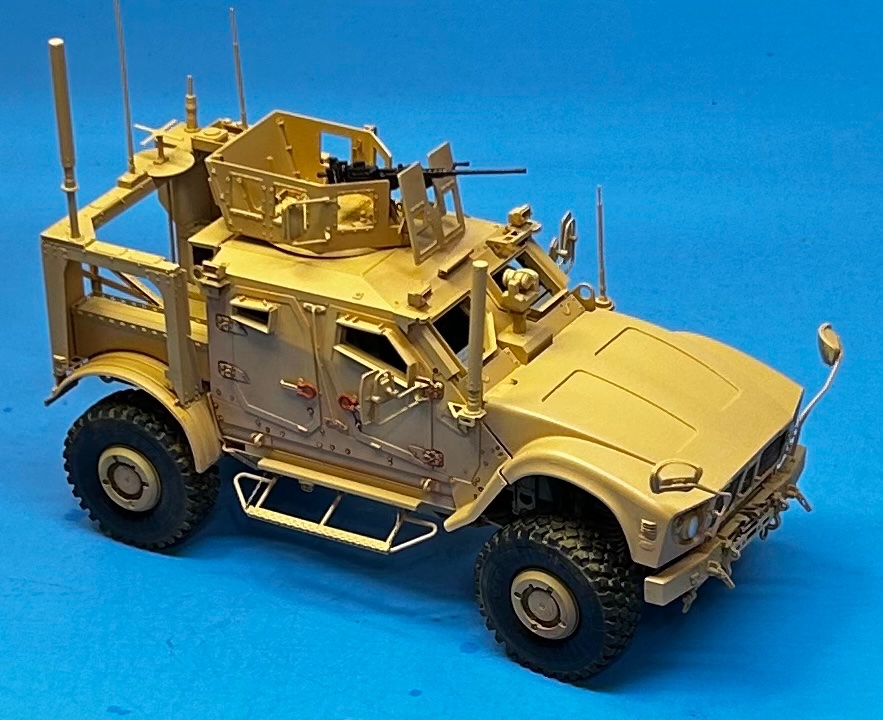
MRAP ATV by CDW - FINISHED - Rye Field - 1:35 Scale
CDW replied to CDW's topic in Non-ship/categorised builds
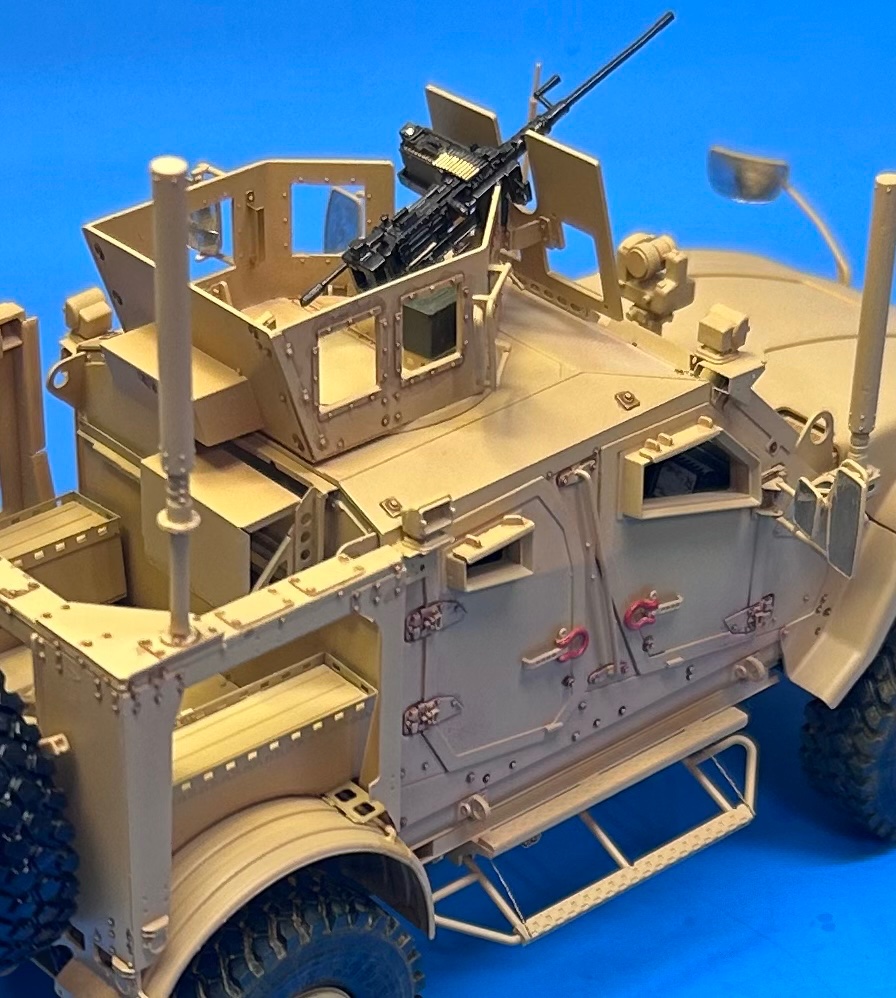
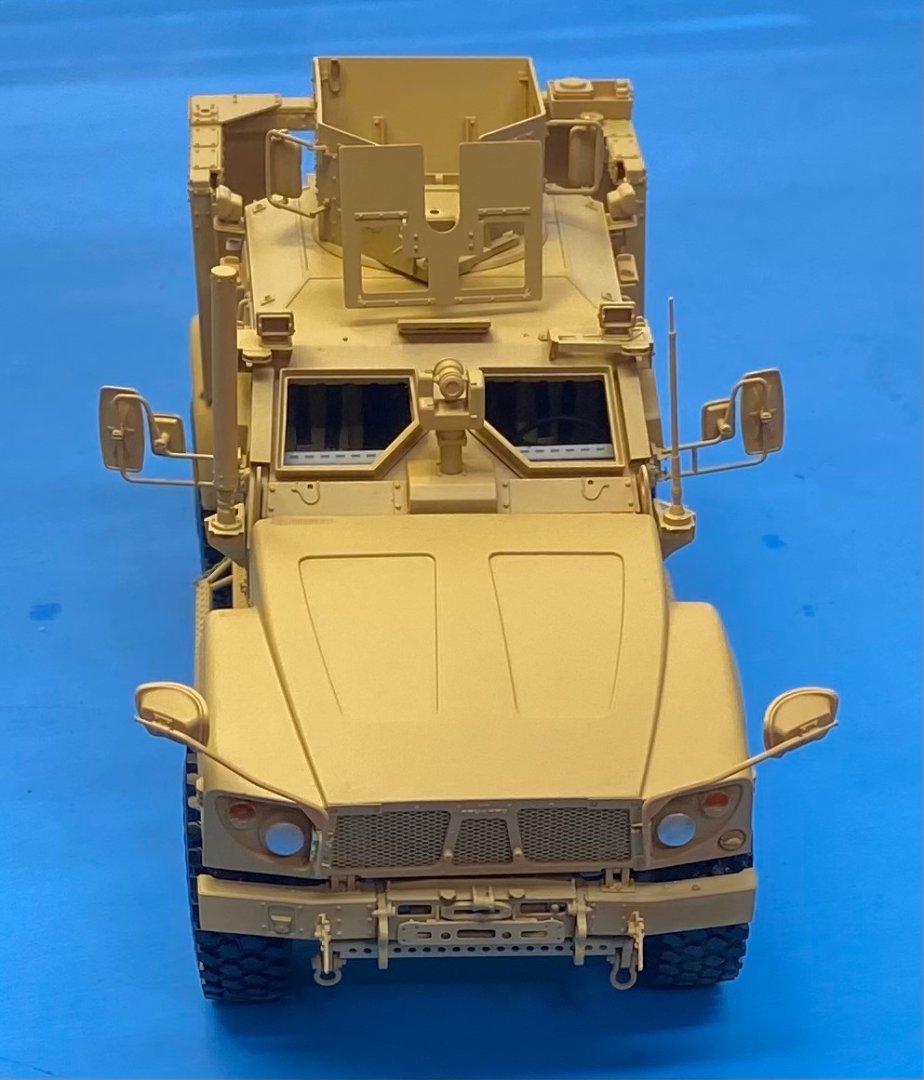
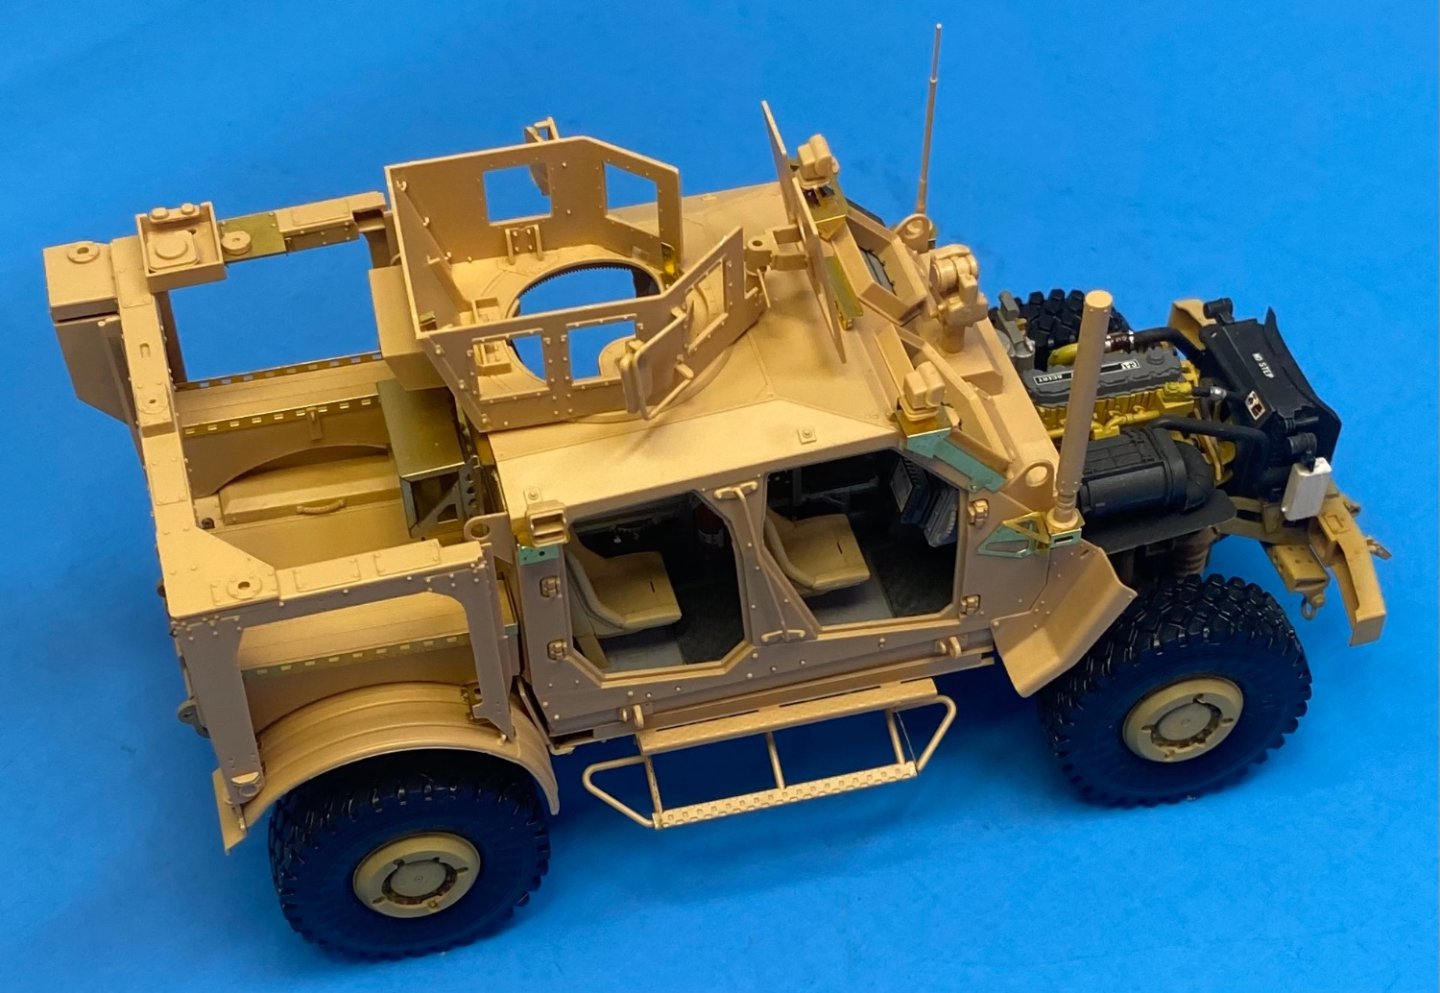
I have to install all the glass, mud flaps, exhaust and muffler, a tow bar, some decals, and I am done after everything gets a dull coat.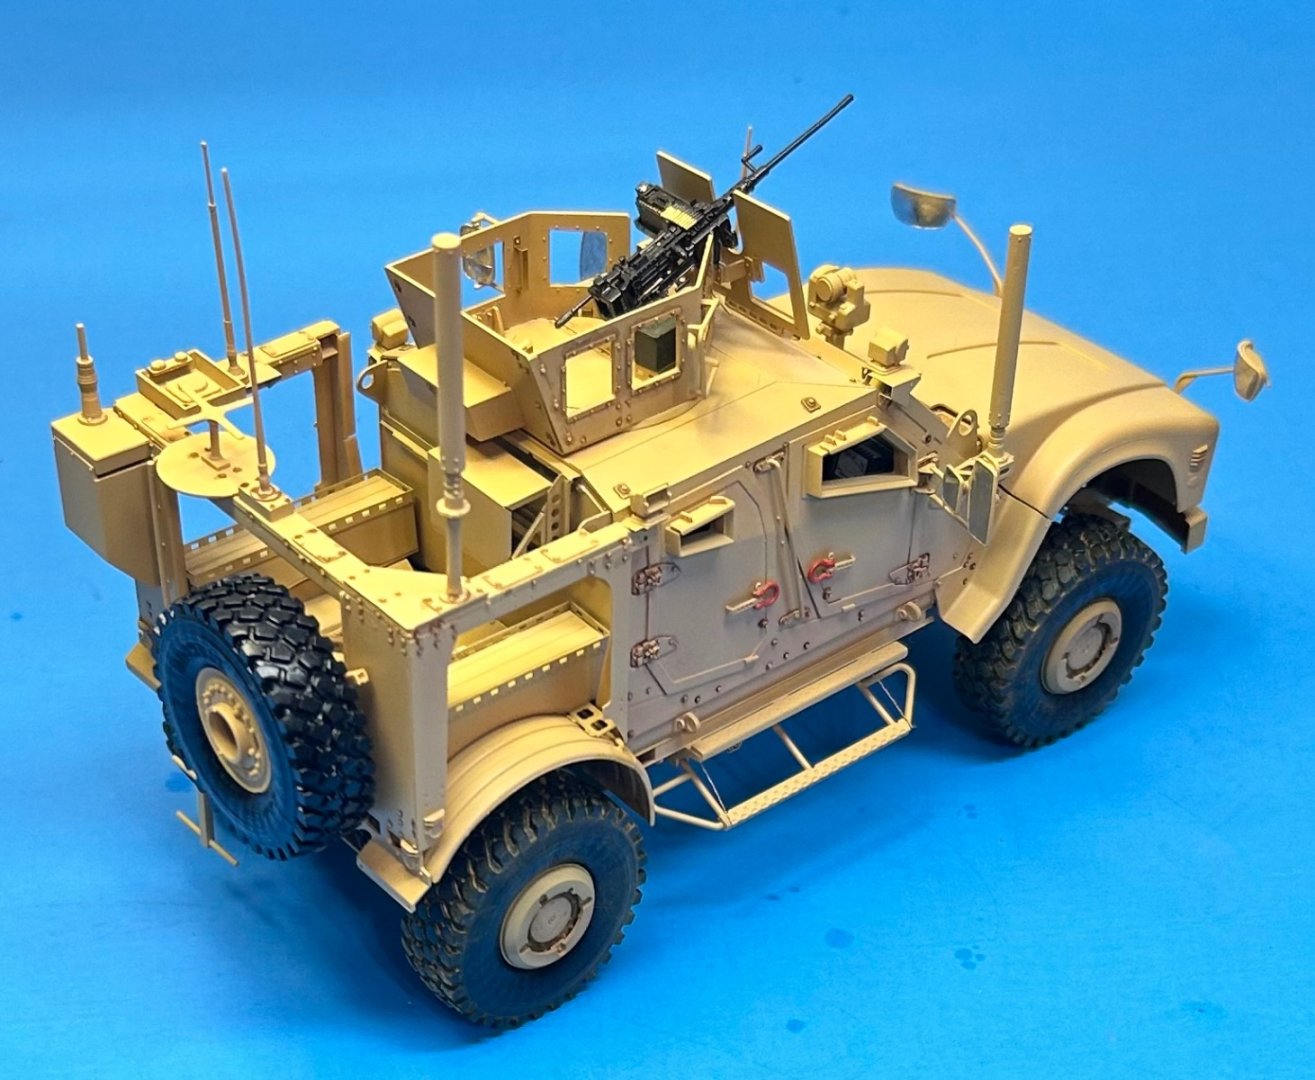
- 217 replies
-
- 10
-

-
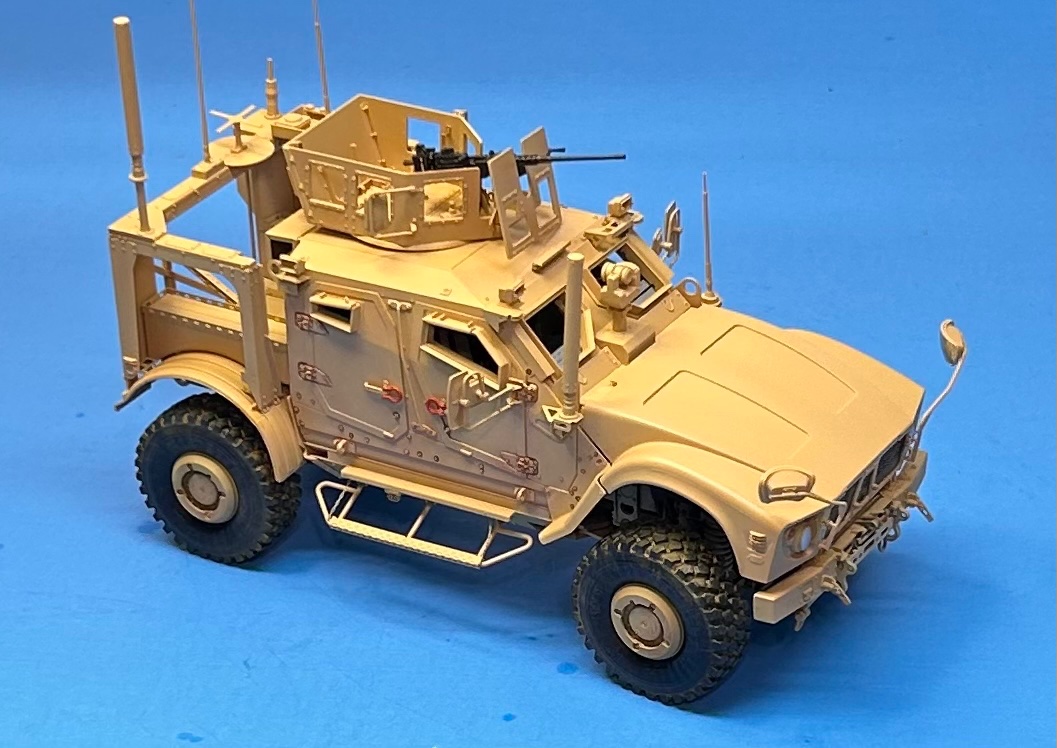
MRAP ATV by CDW - FINISHED - Rye Field - 1:35 Scale
CDW replied to CDW's topic in Non-ship/categorised builds
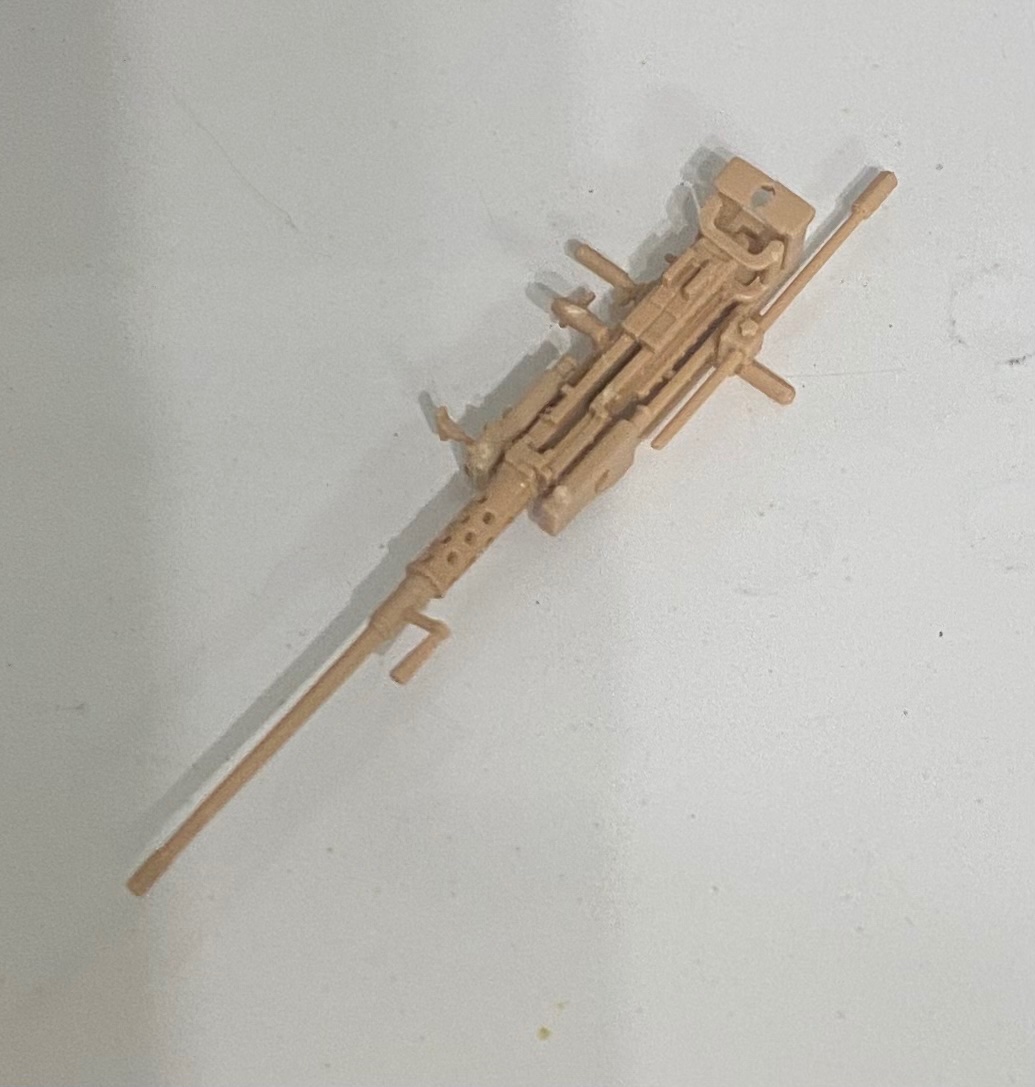
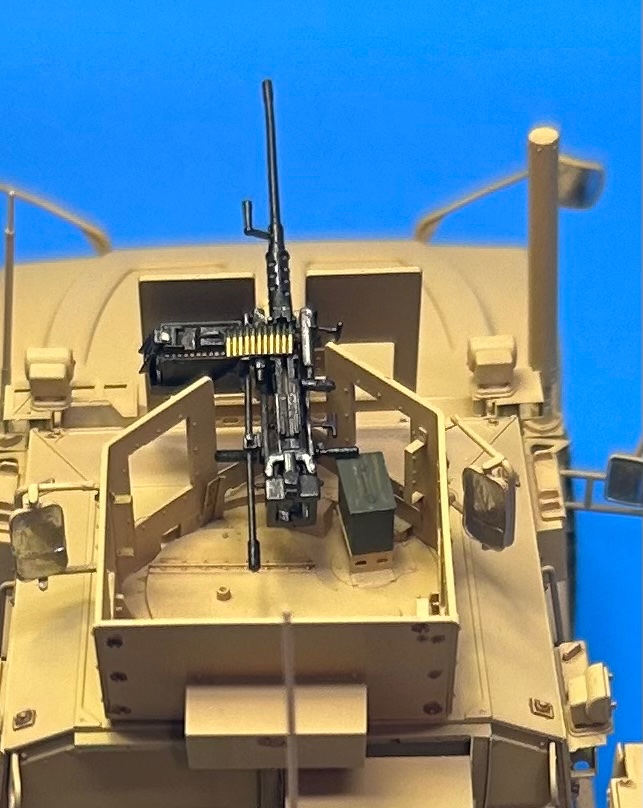
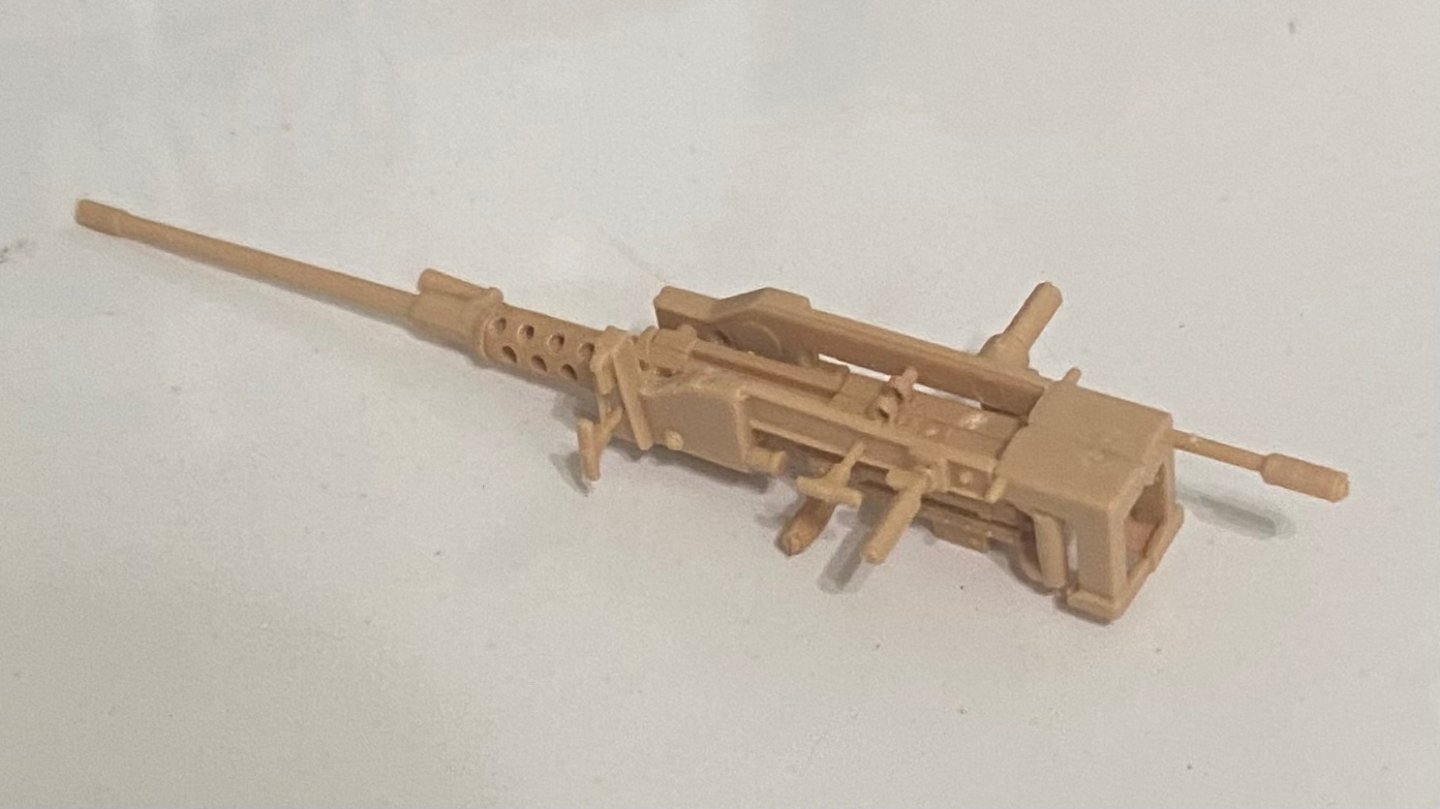
I cannot recall another 1:35 scale kit I’ve built with as detailed a .50 cal machine gun as this kit has straight out of the box. Ryefield knocked it right out of the park IMO.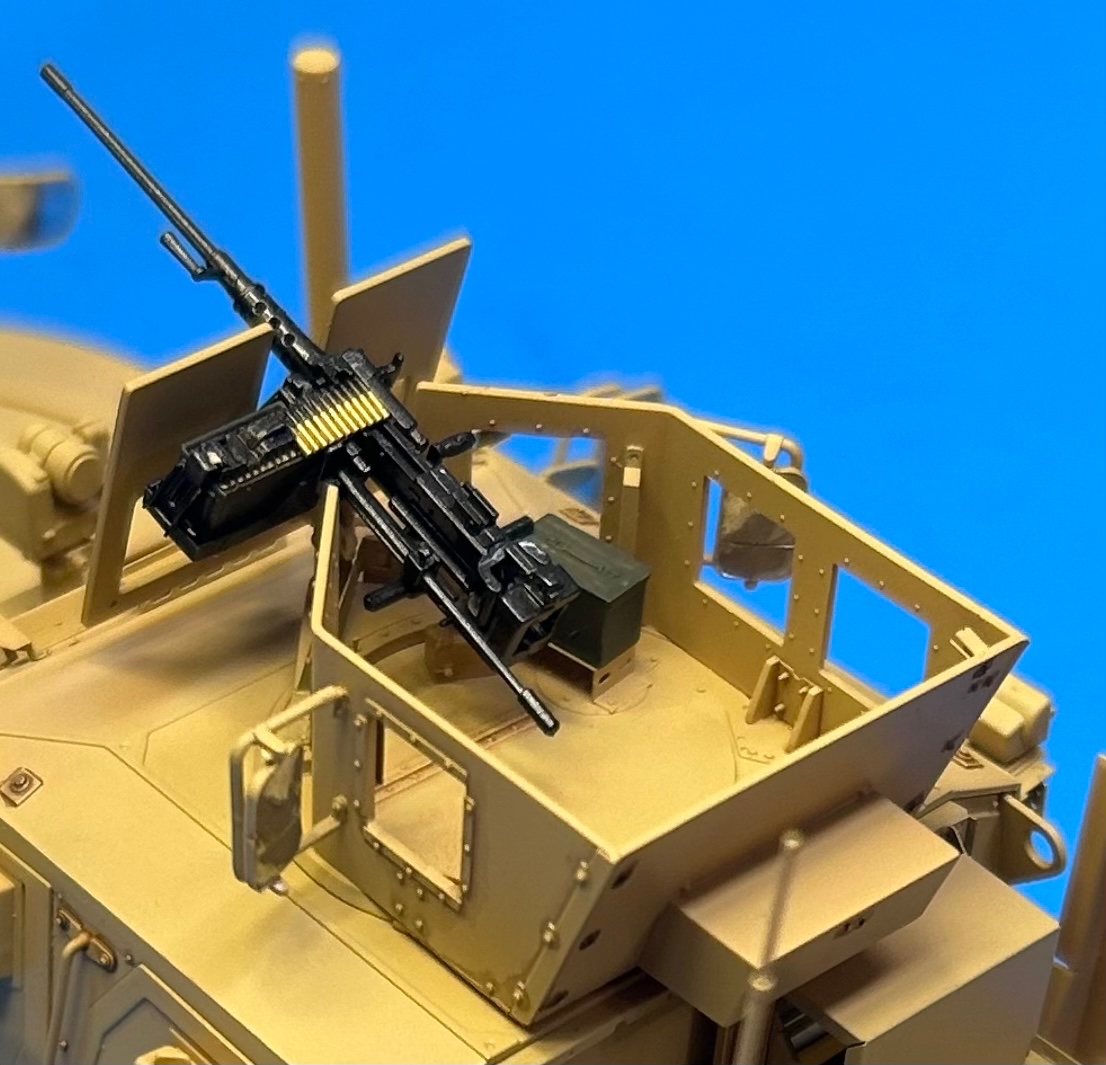

-
Wow, that canopy looks great from where I'm watching. Nice work, Chris. By the way, I received that Japanese Nieuport we discussed. Two pages of parts and one half sheet for frames.
-
MRAP ATV by CDW - FINISHED - Rye Field - 1:35 Scale
CDW replied to CDW's topic in Non-ship/categorised builds
Amen. I heard that the death toll from the area where the storm made landfall is significant, not to mention the extraordinary property damage. -
MRAP ATV by CDW - FINISHED - Rye Field - 1:35 Scale
CDW replied to CDW's topic in Non-ship/categorised builds
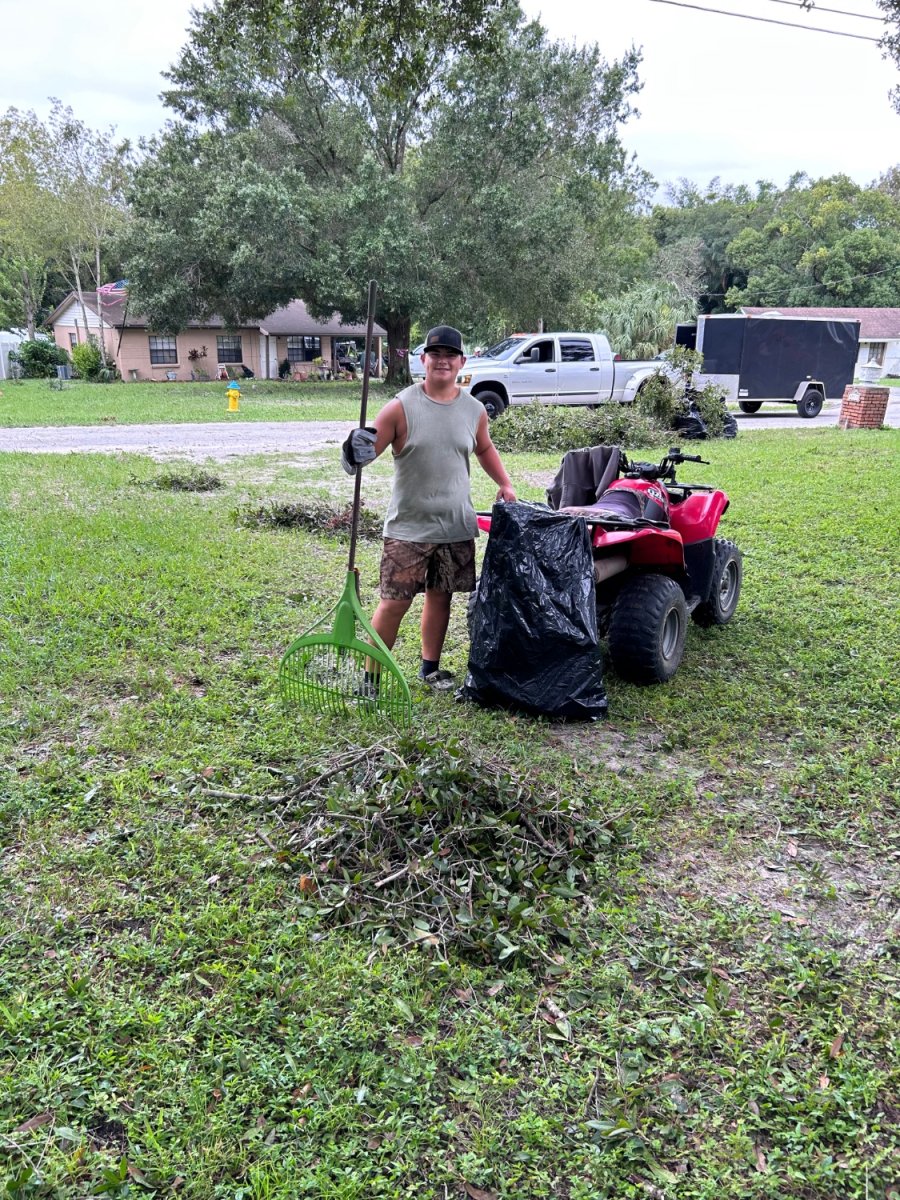
My pile of tree debris from front yard. More in the back yard. Grandson helping me out.

- 217 replies
-
- 10
-
-
MRAP ATV by CDW - FINISHED - Rye Field - 1:35 Scale
CDW replied to CDW's topic in Non-ship/categorised builds
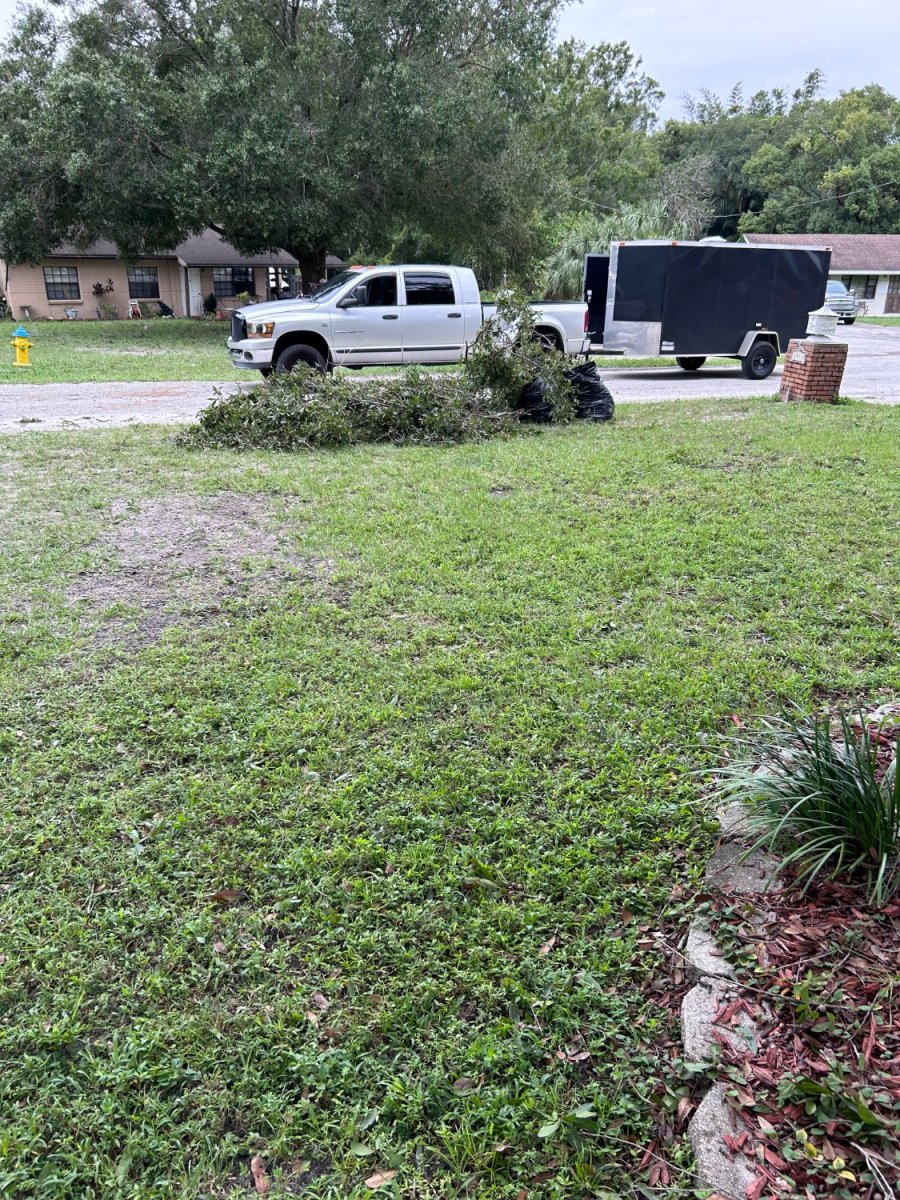
We made it through the storm just fine. Lots of limbs and tree debris scattered about the yard. I be picked up a lot of it at daylight and began piling it at the roadside. Debris removal contractors will pick it up in the coming days. For us, no flooding, no structural damage to the home. Minor damage here and there, Gazebo canvas top torn to tatters. It can easily be replaced. All those south of us did not fare as well. They will need time and help to get their lives back together. -
MRAP ATV by CDW - FINISHED - Rye Field - 1:35 Scale
CDW replied to CDW's topic in Non-ship/categorised builds
Standard preset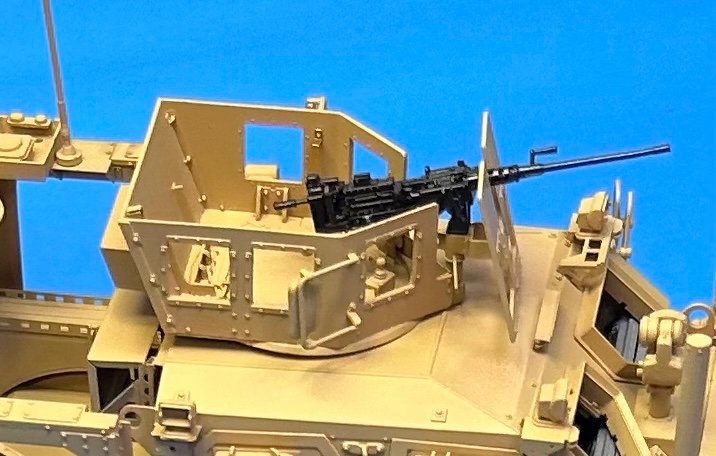
-
MRAP ATV by CDW - FINISHED - Rye Field - 1:35 Scale
CDW replied to CDW's topic in Non-ship/categorised builds
At this time it looks like Ian will come ashore well south of Tampa, on a path that’s similar to hurricane Charley back in 2004. We in Tampa are getting rain and minor gusts this morning with more rain and tropical winds later today and tonight. All hunkered down and playing around with my model and a new phone. On the new phone topic, this one came with 5 different presets for taking photos. I took a photo of the model from the same distance using each of the five presets to see which one takes the best model photo. What’s your opinion. Which of the five presets appear the best?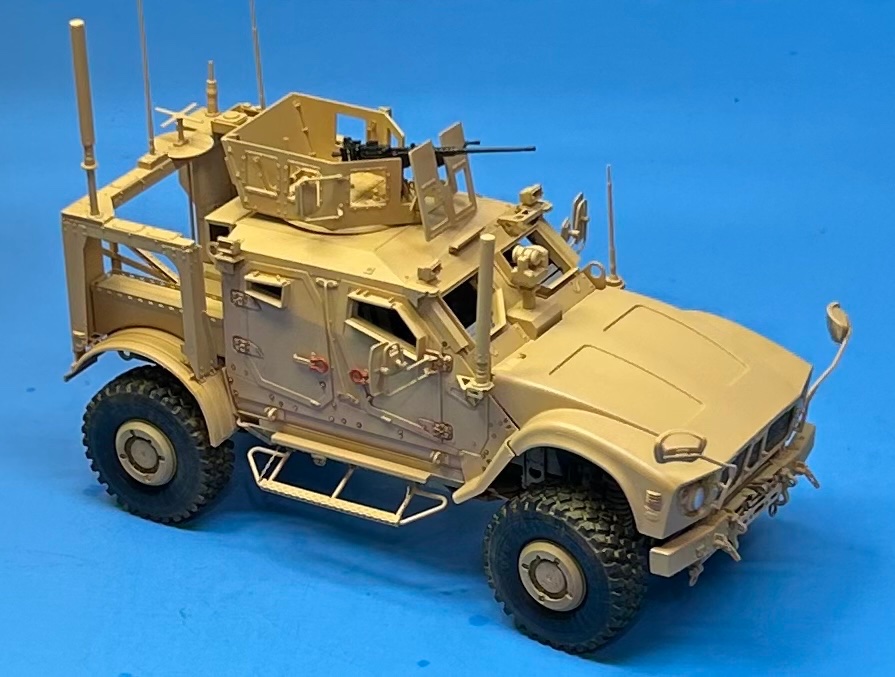

-
MRAP ATV by CDW - FINISHED - Rye Field - 1:35 Scale
CDW replied to CDW's topic in Non-ship/categorised builds
With the tremendous growth that’s happened on the coast in the past decades, it’s ripe for a storm surge. Some of our most exclusive housing is all on the coast. I’ll be saying my prayers for all in the storms path and for you in particular. Lash down the hatches matey. Let us know how you made out when you can. -
MRAP ATV by CDW - FINISHED - Rye Field - 1:35 Scale
CDW replied to CDW's topic in Non-ship/categorised builds
Thanks Phil. We grandpa's have to stick together. -
MRAP ATV by CDW - FINISHED - Rye Field - 1:35 Scale
CDW replied to CDW's topic in Non-ship/categorised builds
Thanks Ken. As is often the case, this storm has taken a slightly different track, one that puts its eye making landfall south of Tampa by 30 or more miles from where it was originally forecast. I feel certain its course will adjust again before making landfall, so we remain on ready as its uncertain at this time where it will go. I feel bad for the people south of us. -
MRAP ATV by CDW - FINISHED - Rye Field - 1:35 Scale
CDW replied to CDW's topic in Non-ship/categorised builds
Thanks for the well wishes. We will do our best. Prayers for those who will be in the greatest need wherever that may be. -
MRAP ATV by CDW - FINISHED - Rye Field - 1:35 Scale
CDW replied to CDW's topic in Non-ship/categorised builds
The 50 cal M2 before paint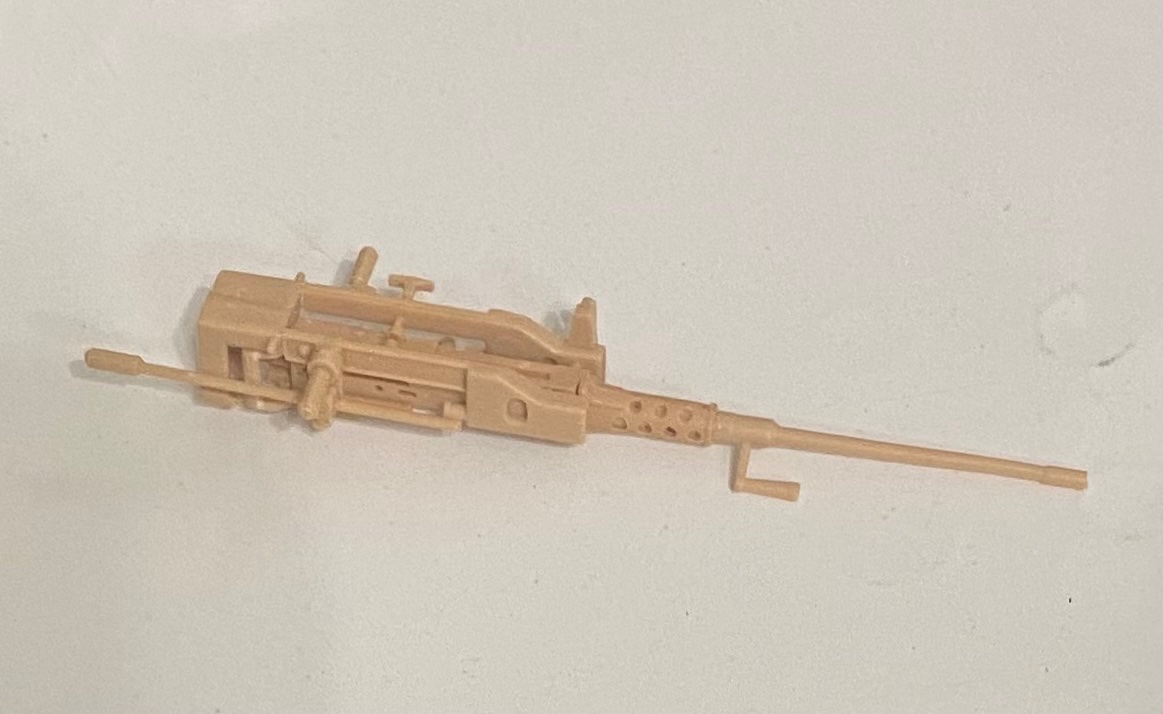

- 217 replies
-
- 10
-
-
MRAP ATV by CDW - FINISHED - Rye Field - 1:35 Scale
CDW replied to CDW's topic in Non-ship/categorised builds
Thanks Alan Hurricane warning flags flying -
MRAP ATV by CDW - FINISHED - Rye Field - 1:35 Scale
CDW replied to CDW's topic in Non-ship/categorised builds
A dark yellow pigment followed by a dark yellow wash can give the tire treads a more natural “used” look.

- 217 replies
-
- 11
-
-
Love your Eagle Dan. Beautiful bird.
-
MRAP ATV by CDW - FINISHED - Rye Field - 1:35 Scale
CDW replied to CDW's topic in Non-ship/categorised builds
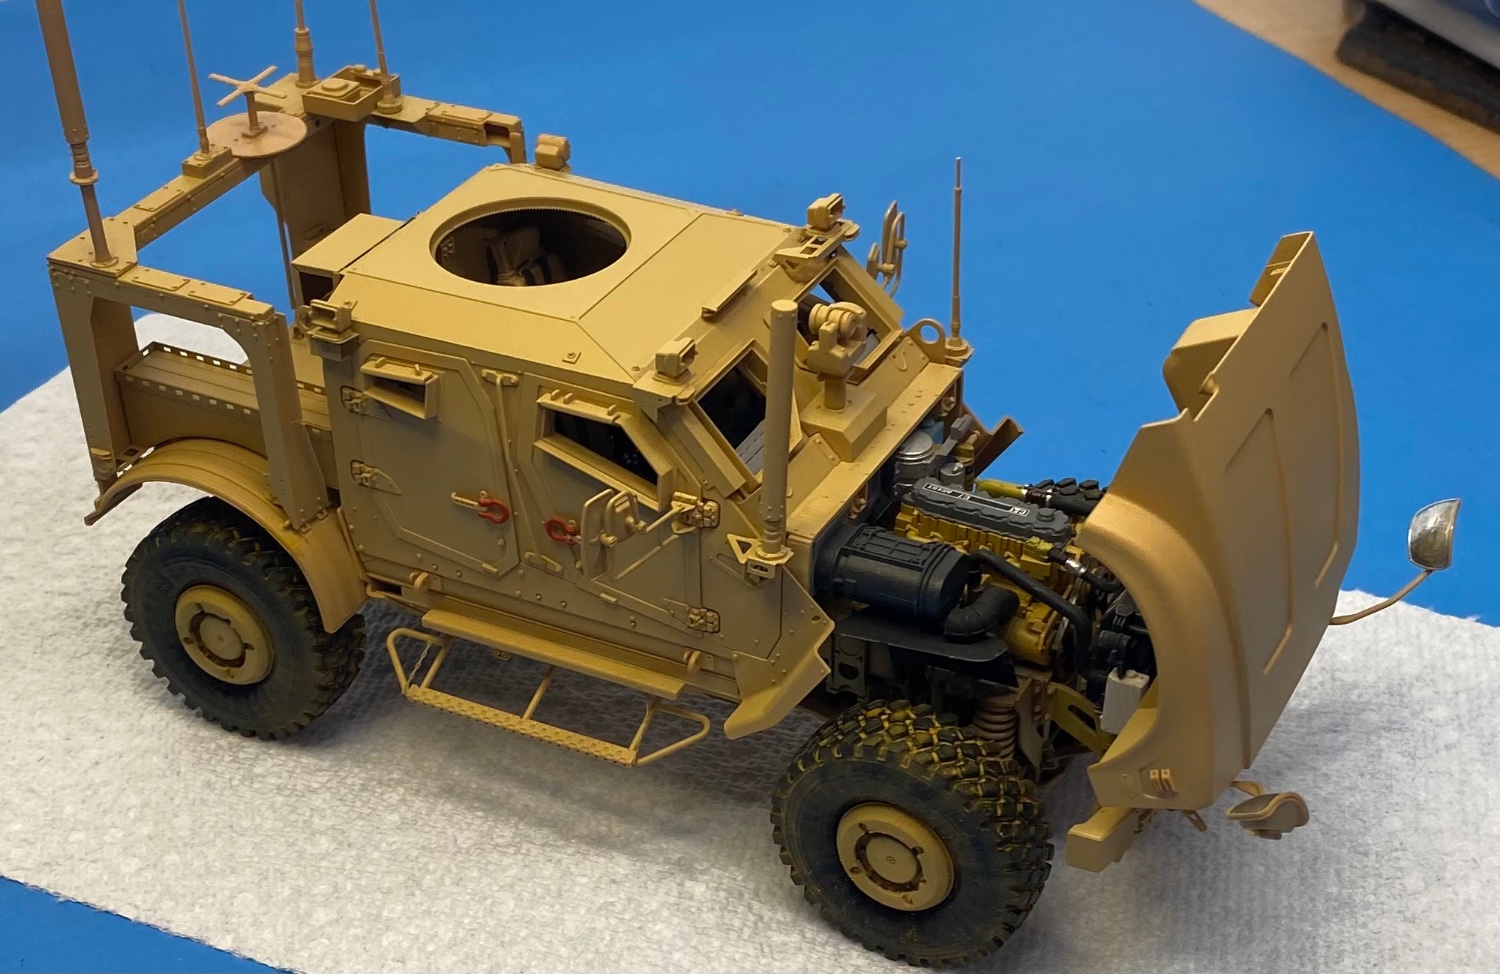
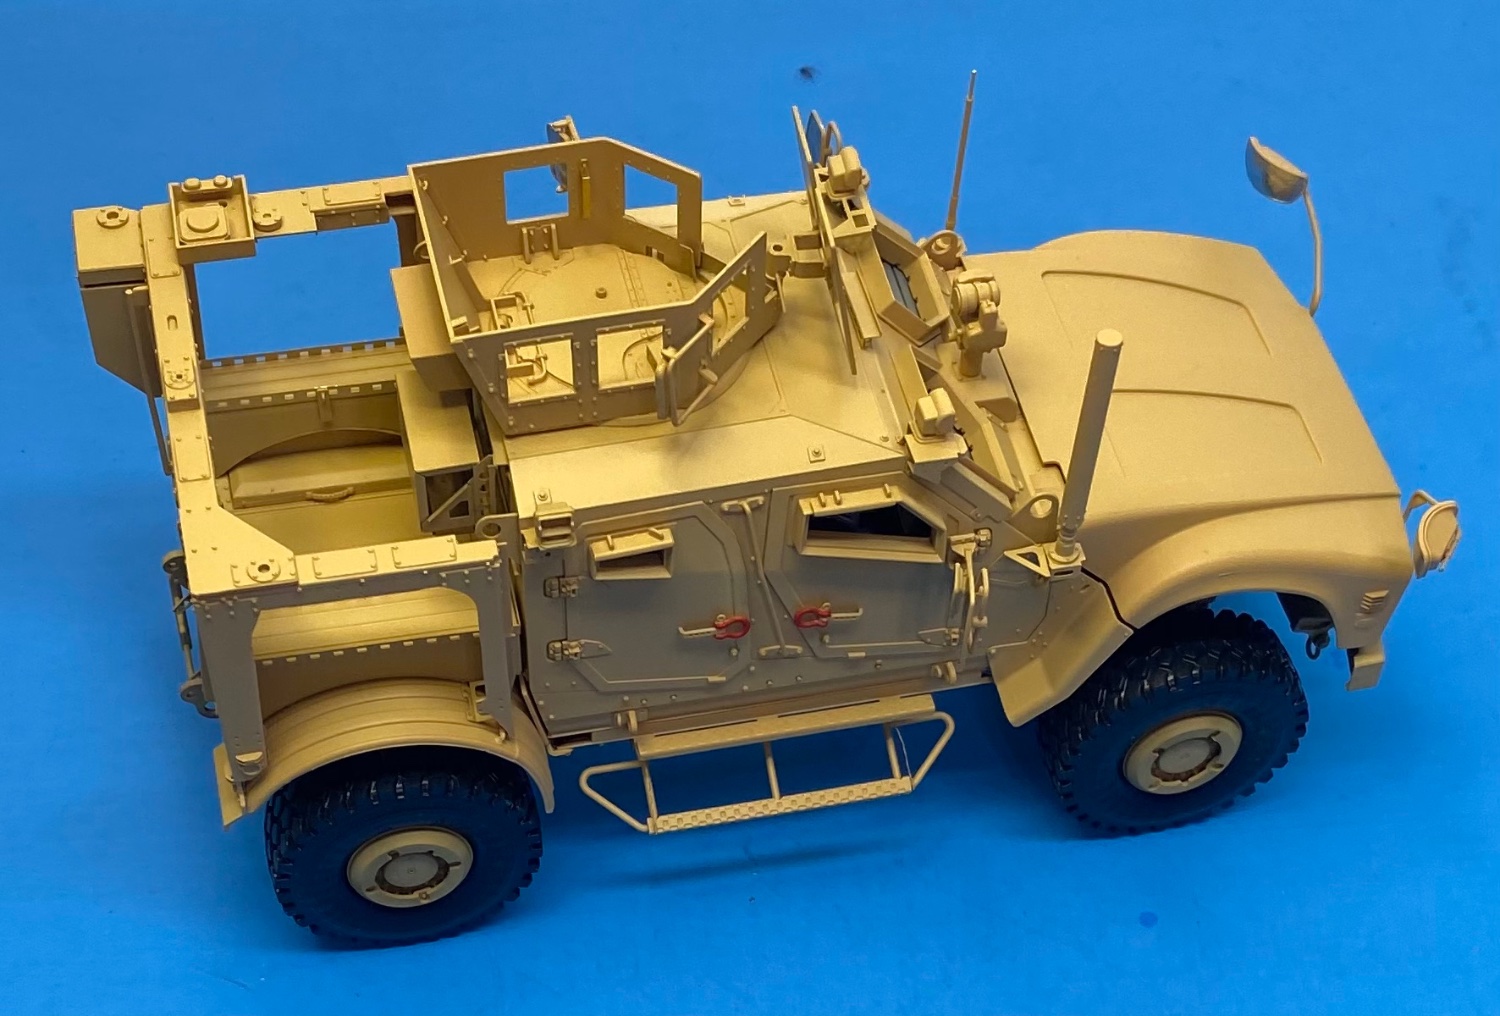
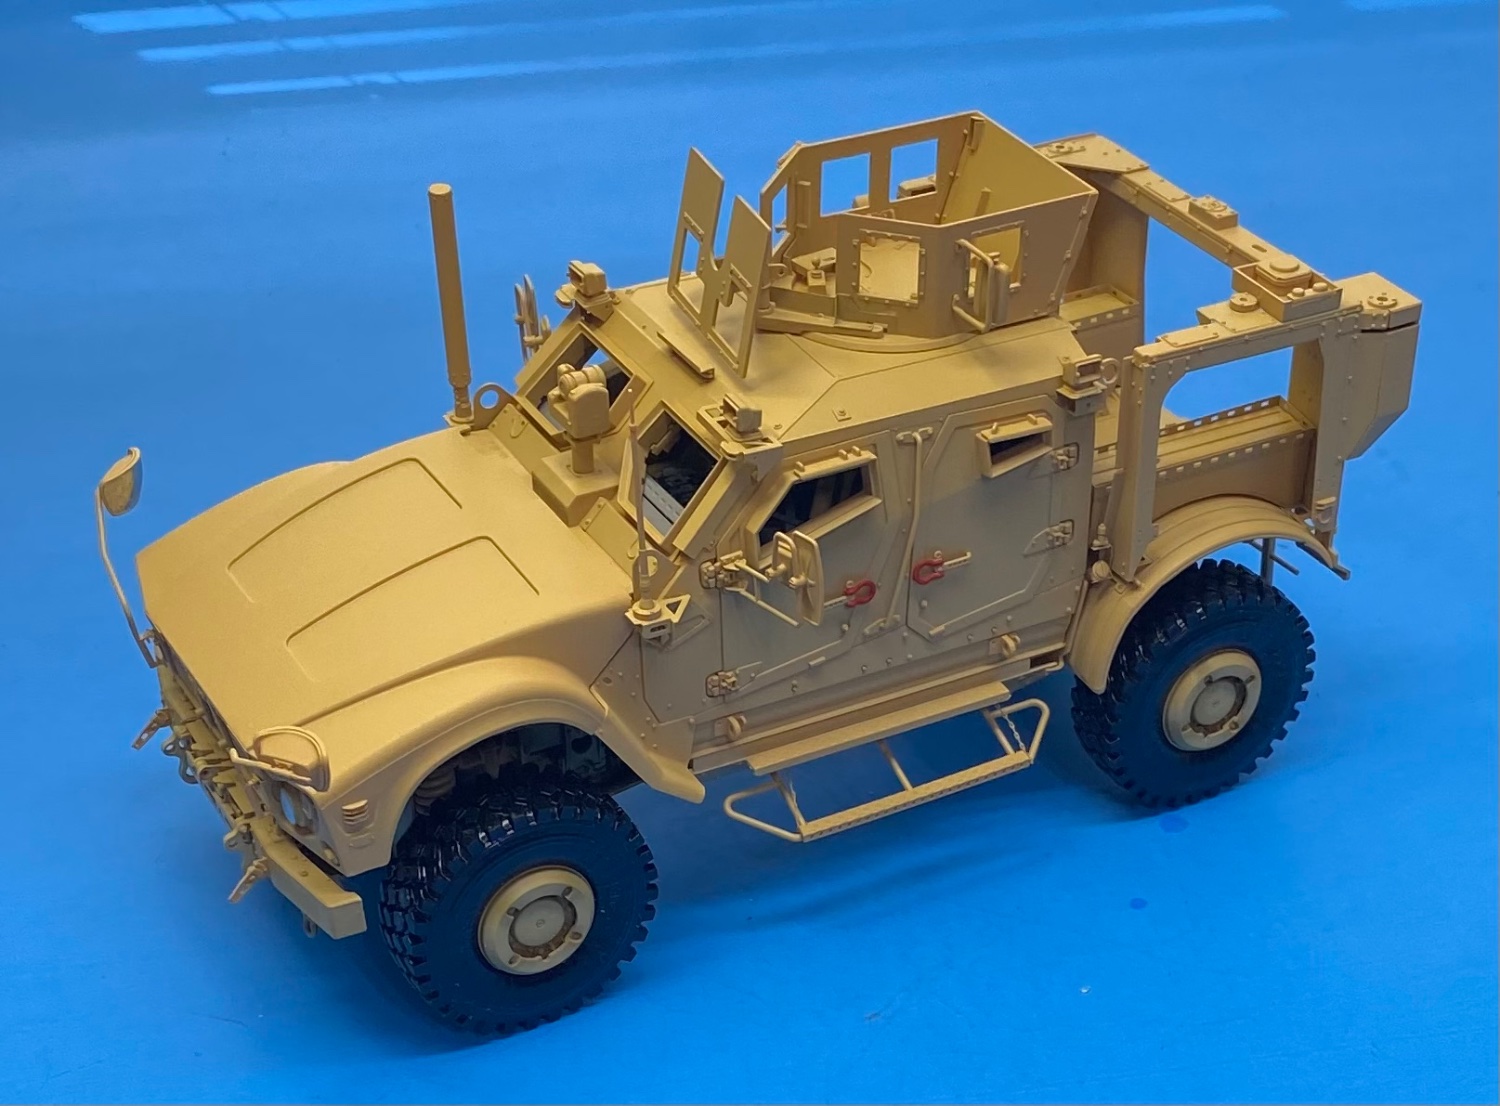
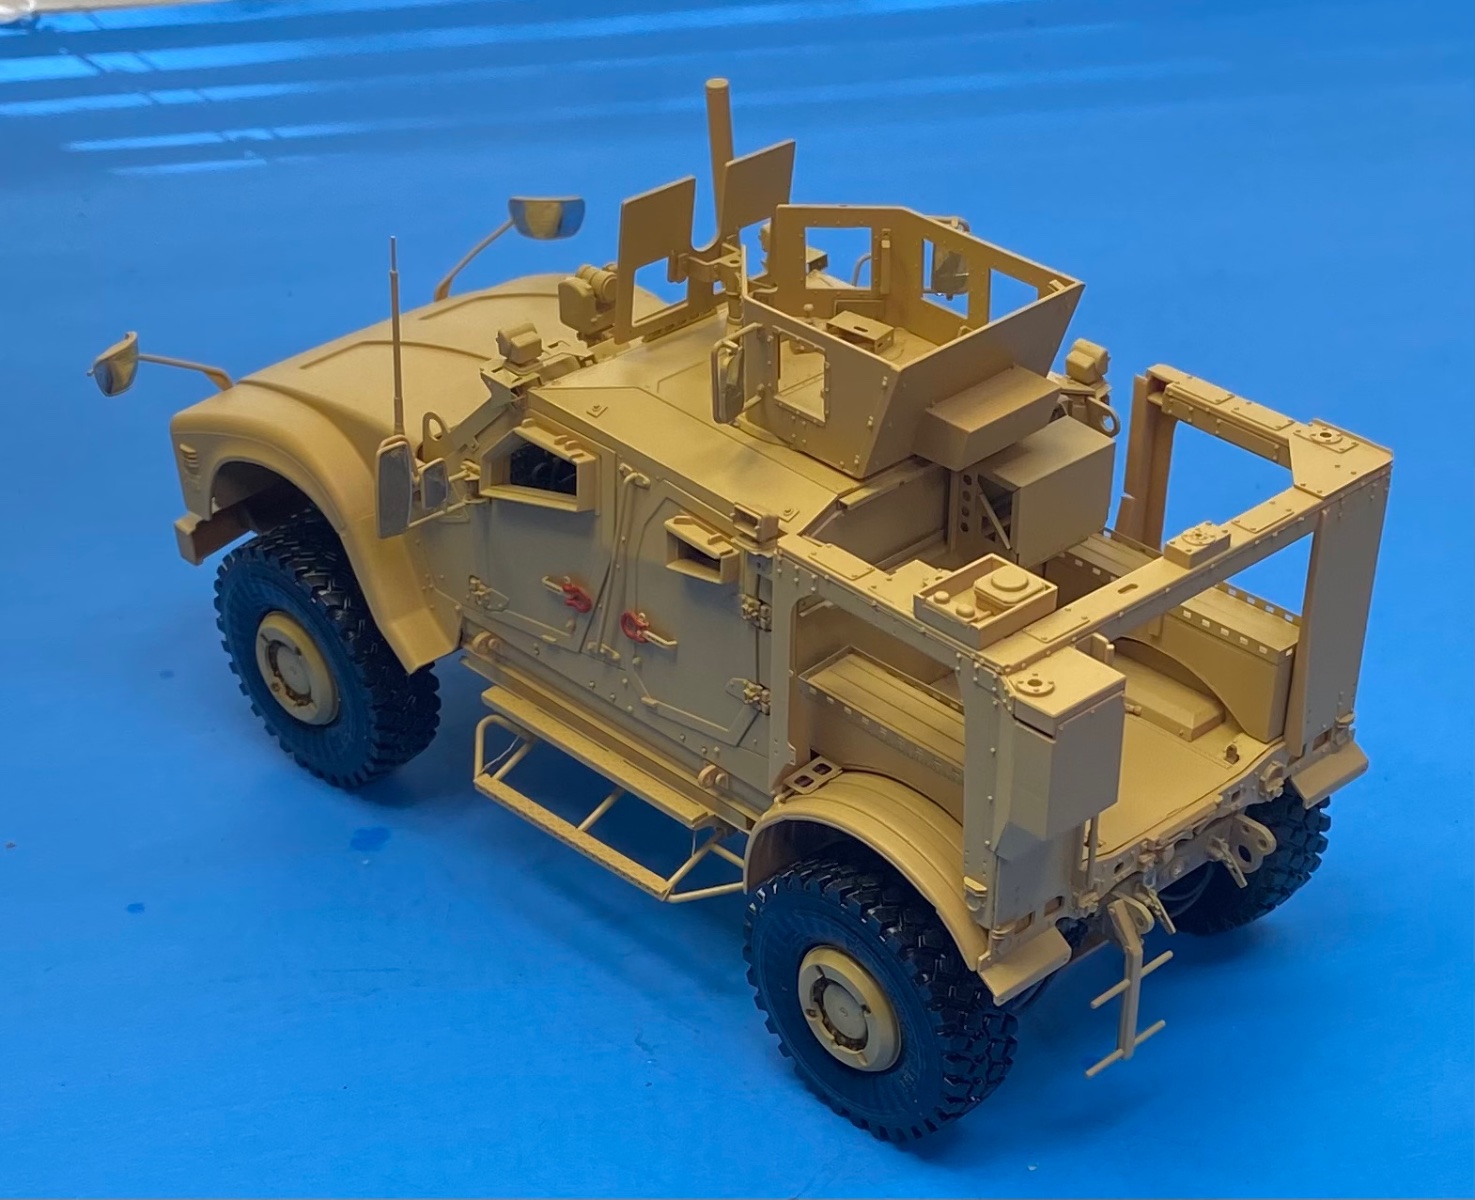
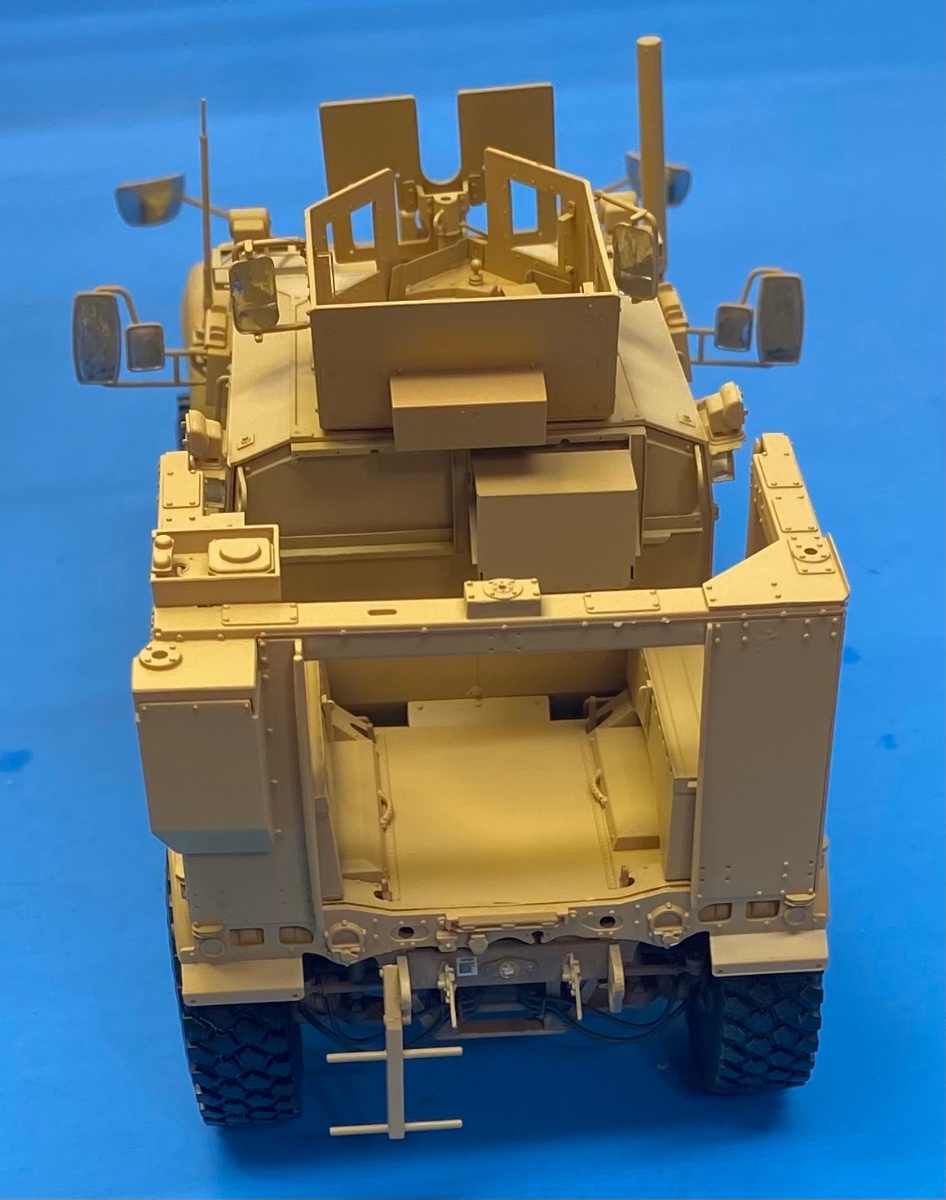
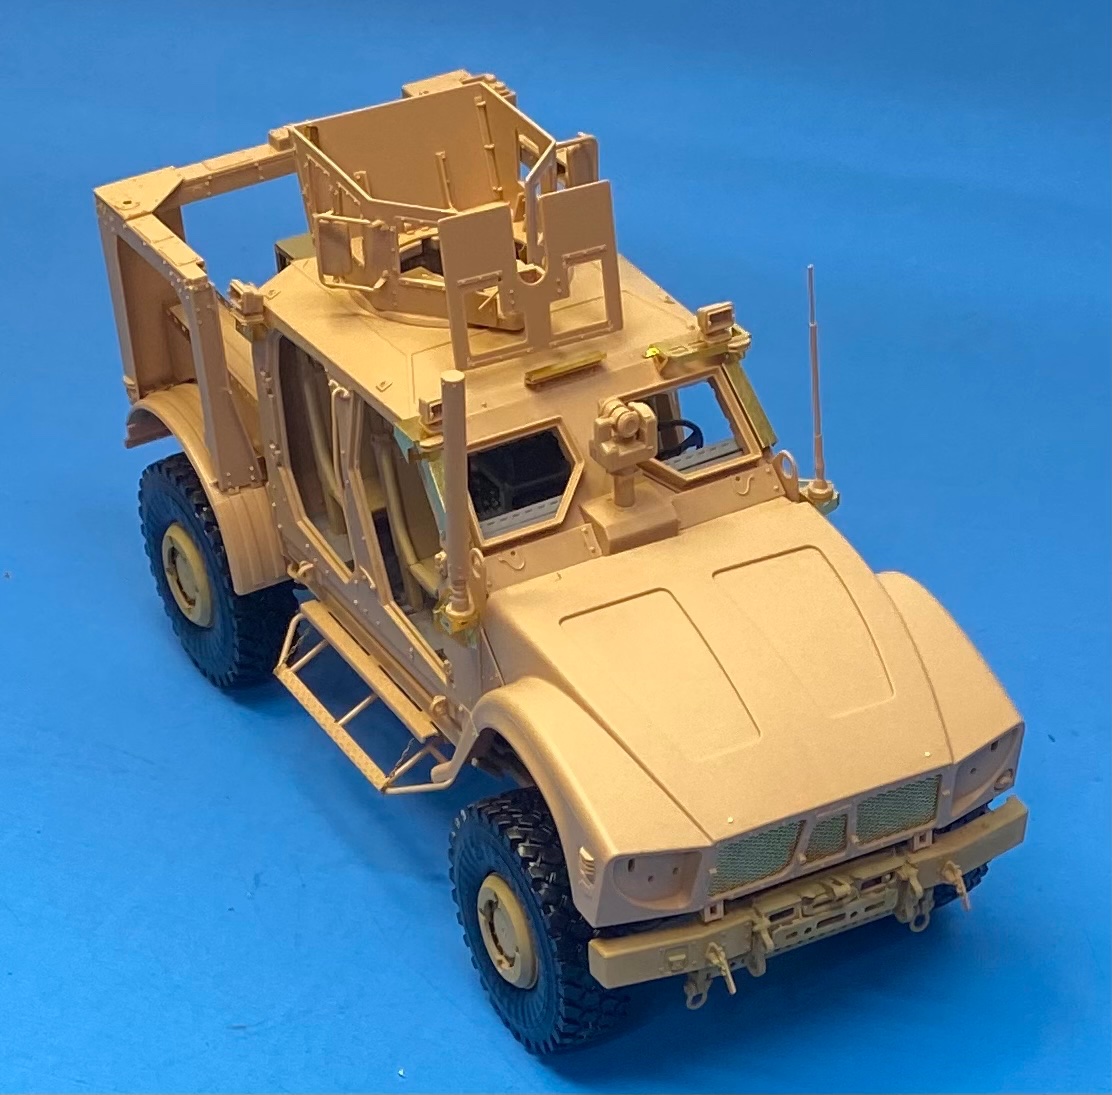
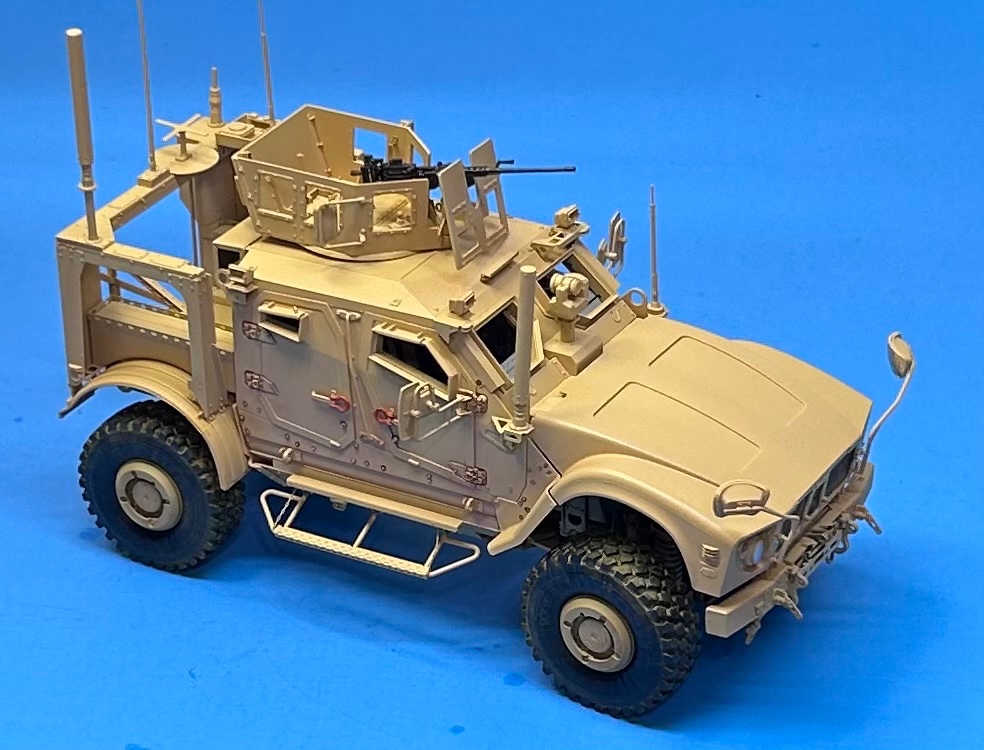
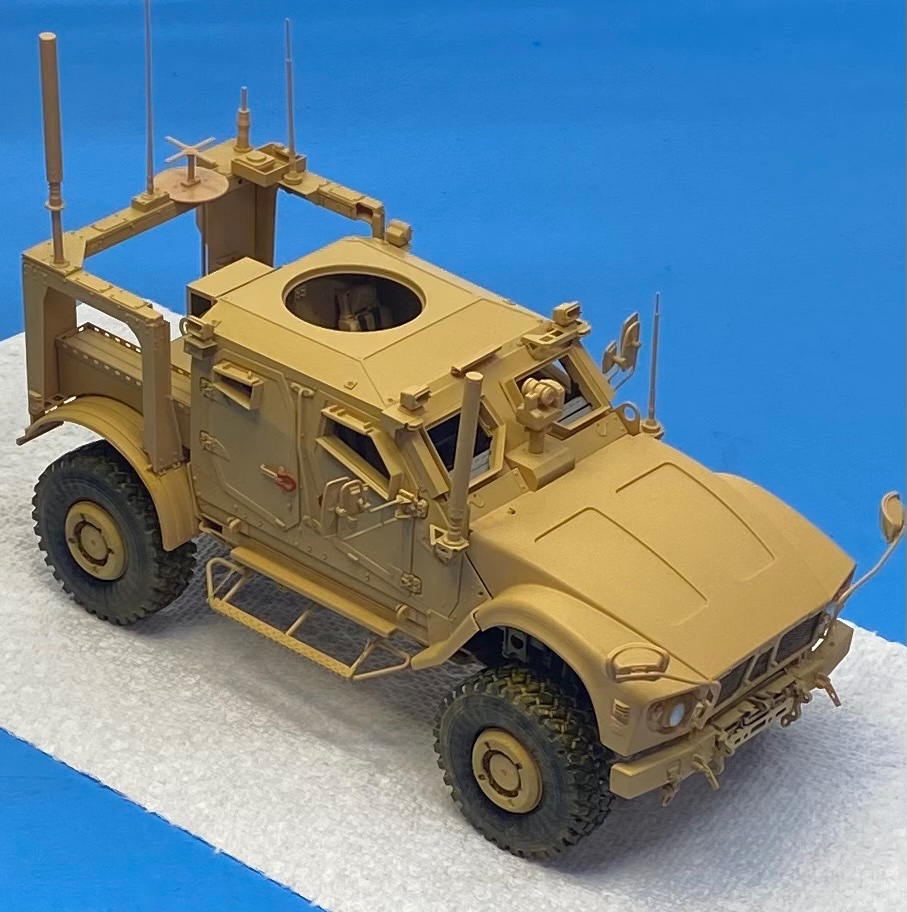
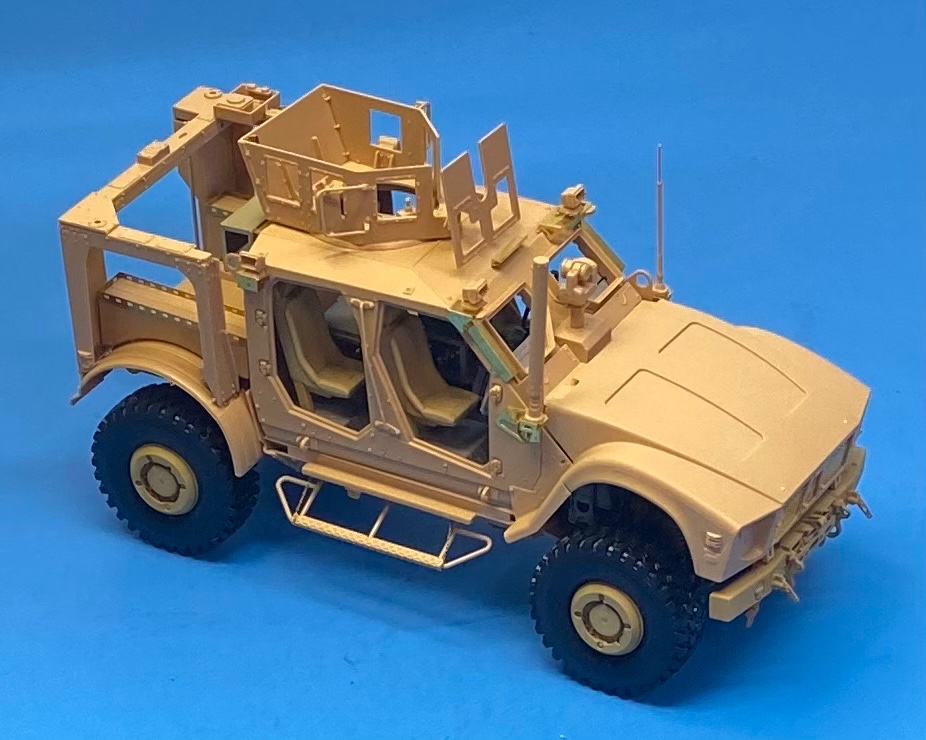
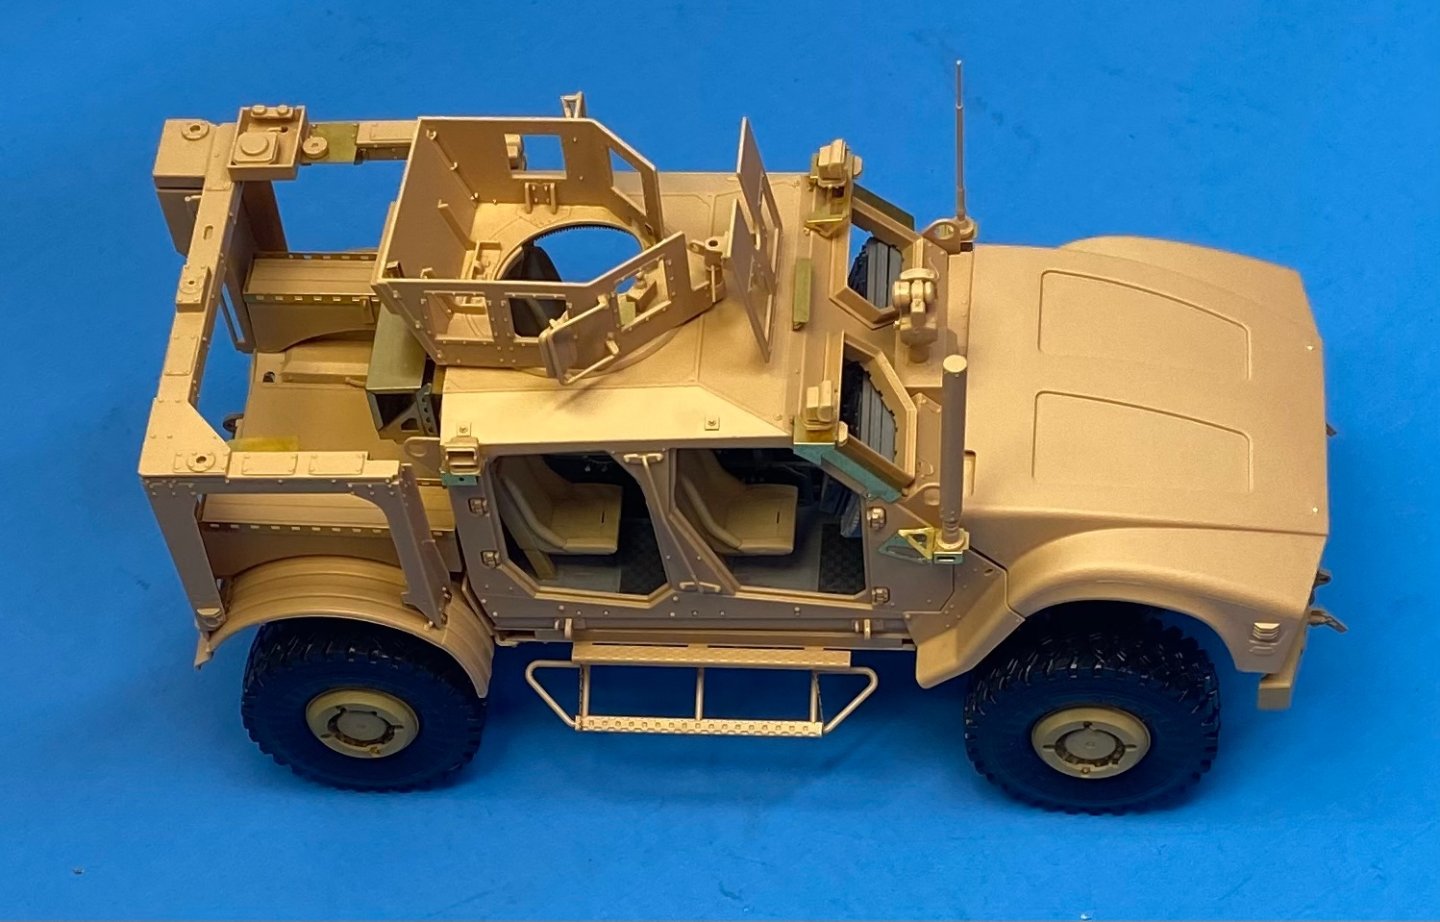
Not too much building left to do but a lot of detail here and there along with some weathering and other paint effects.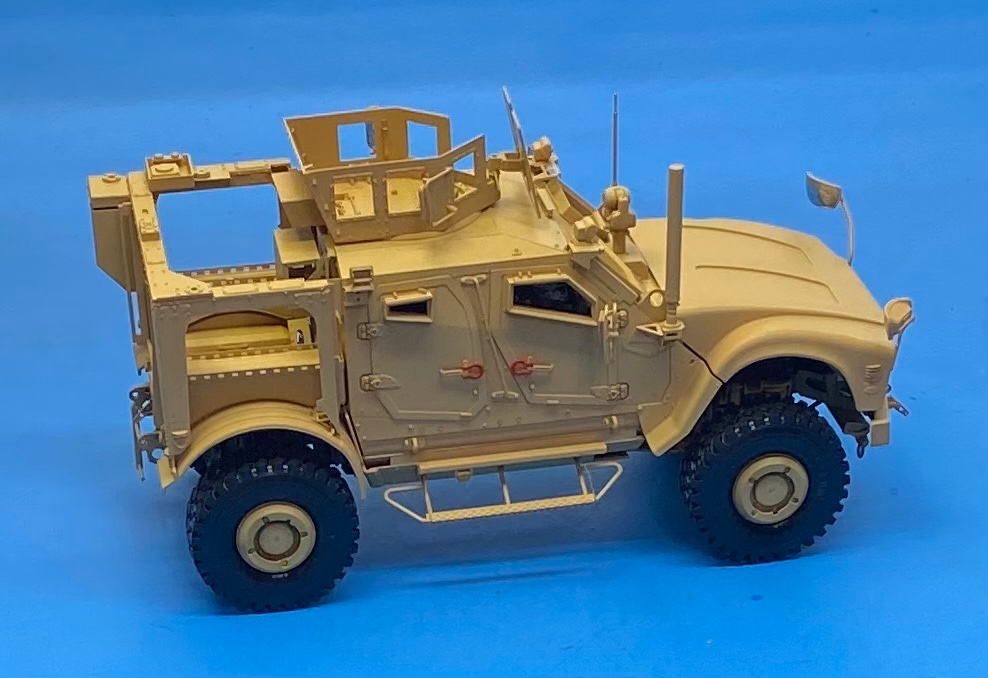


-
MRAP ATV by CDW - FINISHED - Rye Field - 1:35 Scale
CDW replied to CDW's topic in Non-ship/categorised builds
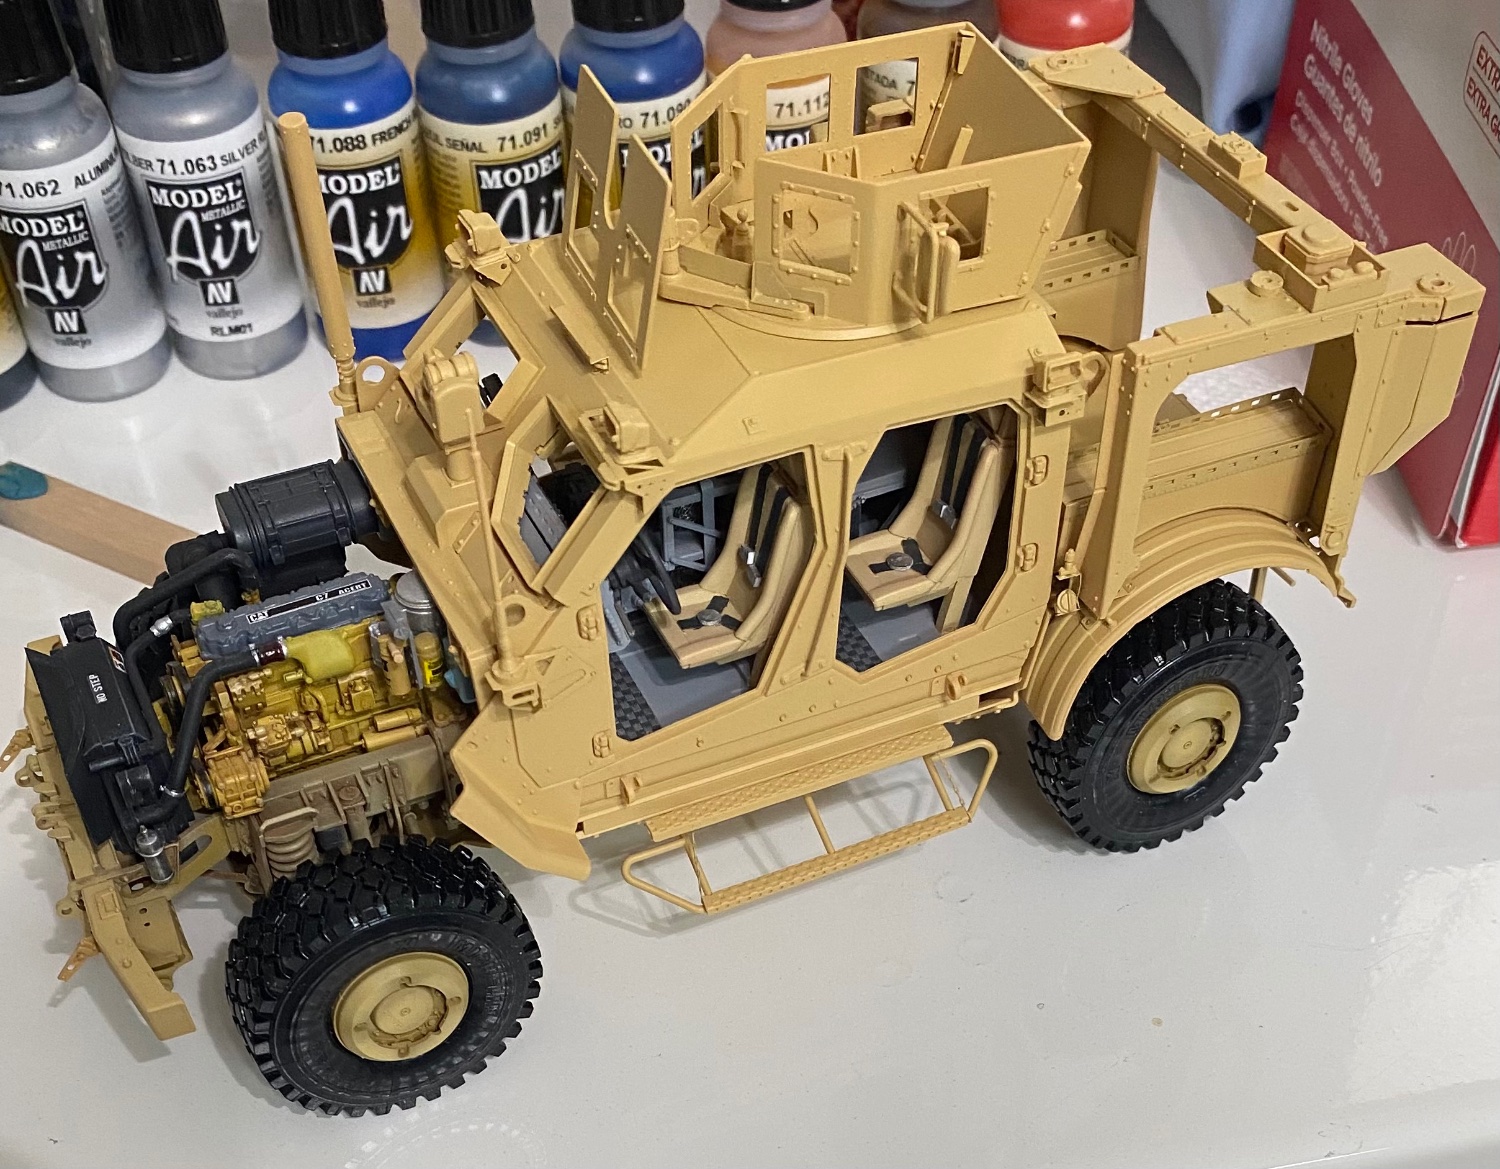
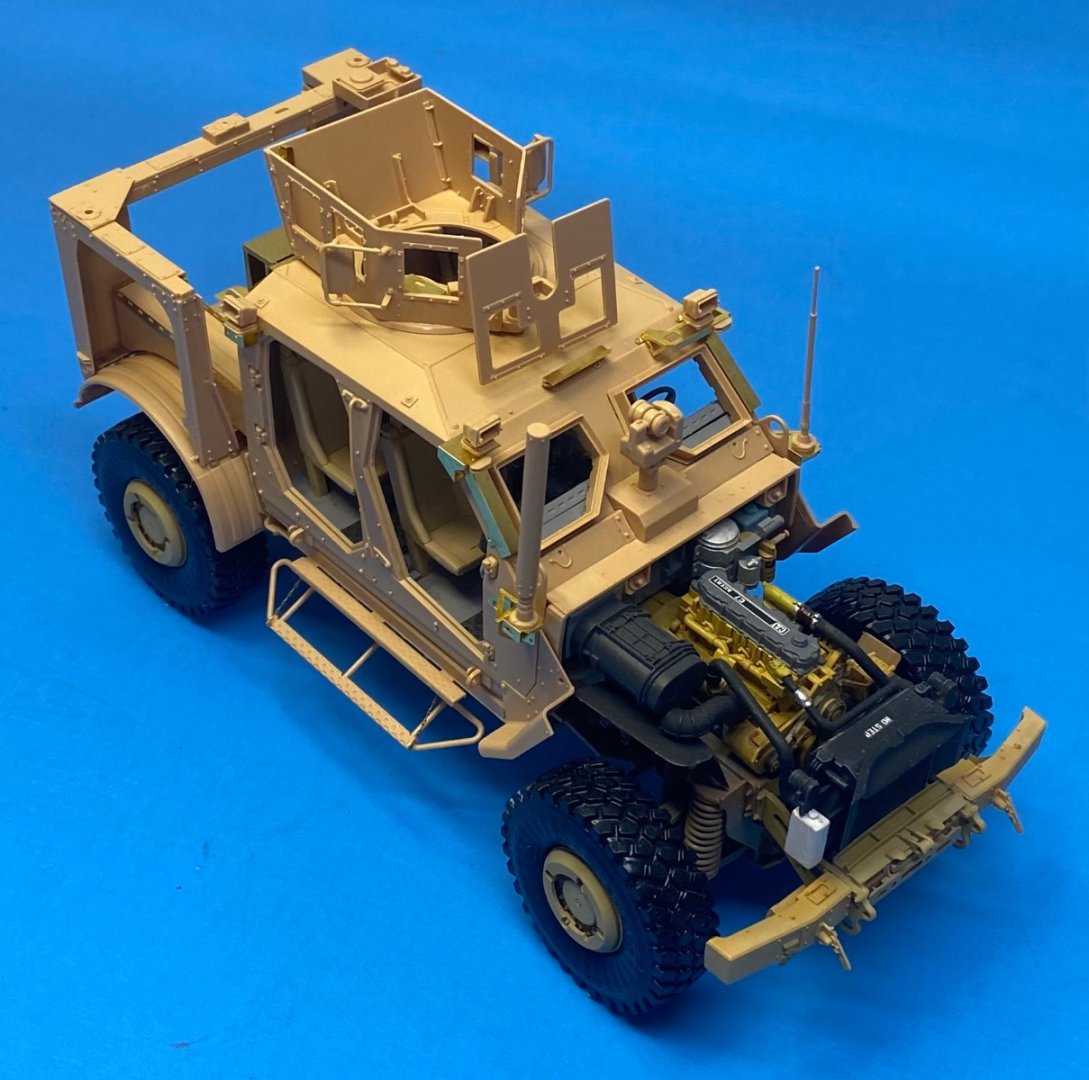
Thanks OC I am not going to pose the doors in an open position with this one. Maybe I will on the next one, but for now took a quick swipe at a set of belts and harnesses for the seats. Won’t be able to see much with the doors closed anyhow. Also, the body parts all have paint on them now and am in the process of painting the small details like mirrors, marker lights, etc. I can see this one being finished in another day or so.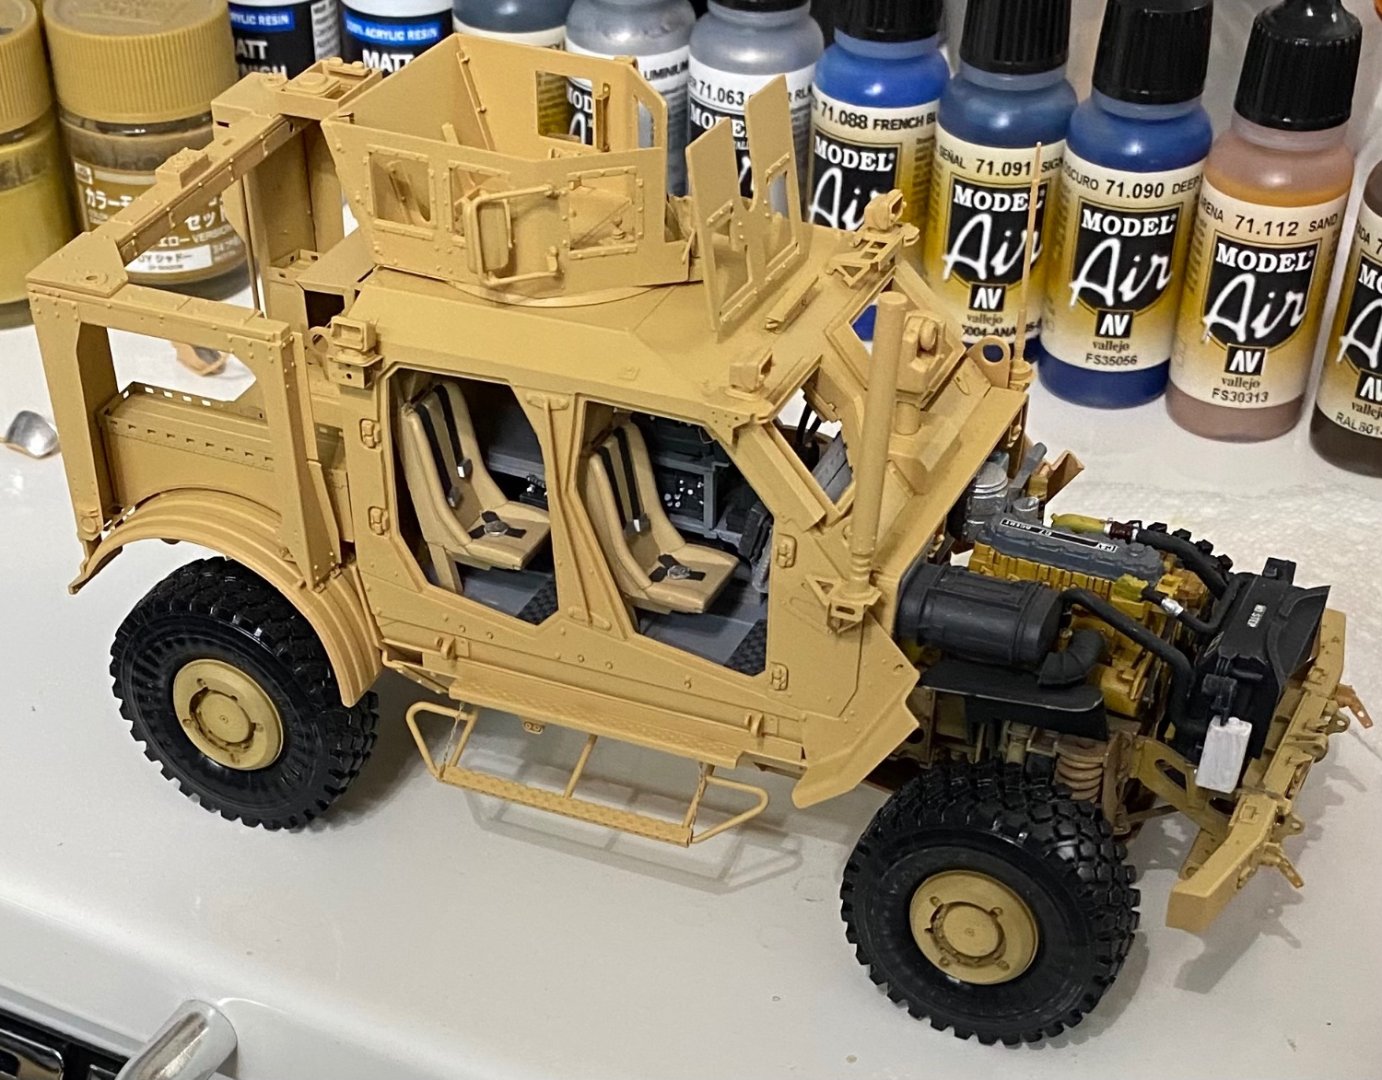

-
Inflation came from the wholesale printing of fiat currency. Oil/energy cost is mostly self-imposed by a small group of elites who are playing on the emotions of a "color" movement. In the big picture, we are all plebs and pawns in this game.
-
MRAP ATV by CDW - FINISHED - Rye Field - 1:35 Scale
CDW replied to CDW's topic in Non-ship/categorised builds

-
MRAP ATV by CDW - FINISHED - Rye Field - 1:35 Scale
CDW replied to CDW's topic in Non-ship/categorised builds
The last major component assembly before paint is the hood. Soon it will be paint, install remaining small details, some decal placards here and there then this one will be finished. There is a beautiful 50 cal assembly to mount on top before it’s all said and done.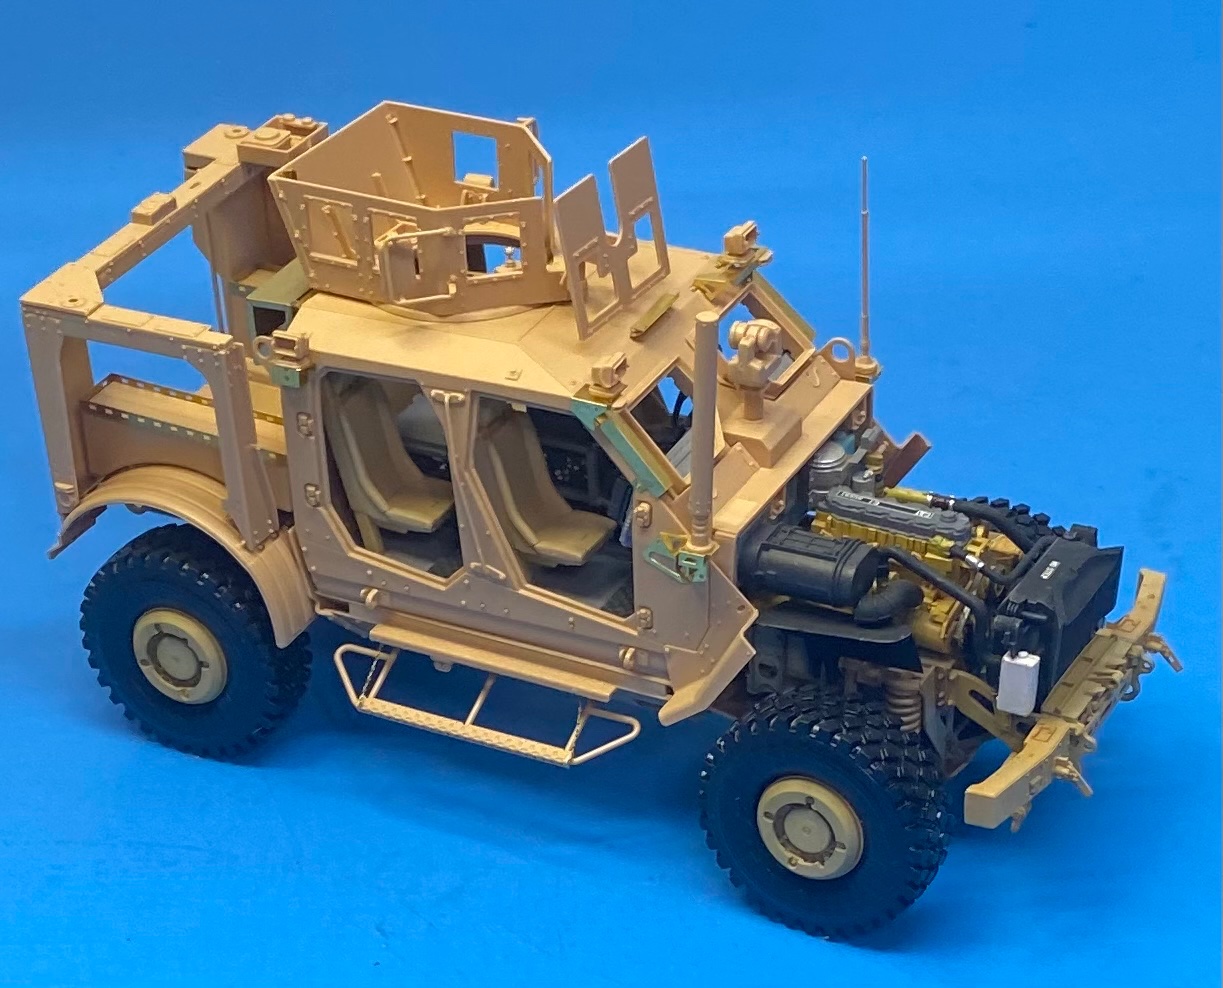
- 217 replies
-
- 10
-
-

-
MRAP ATV by CDW - FINISHED - Rye Field - 1:35 Scale
CDW replied to CDW's topic in Non-ship/categorised builds
Here is that video link for the MRAP walk around. -
MRAP ATV by CDW - FINISHED - Rye Field - 1:35 Scale
CDW replied to CDW's topic in Non-ship/categorised builds
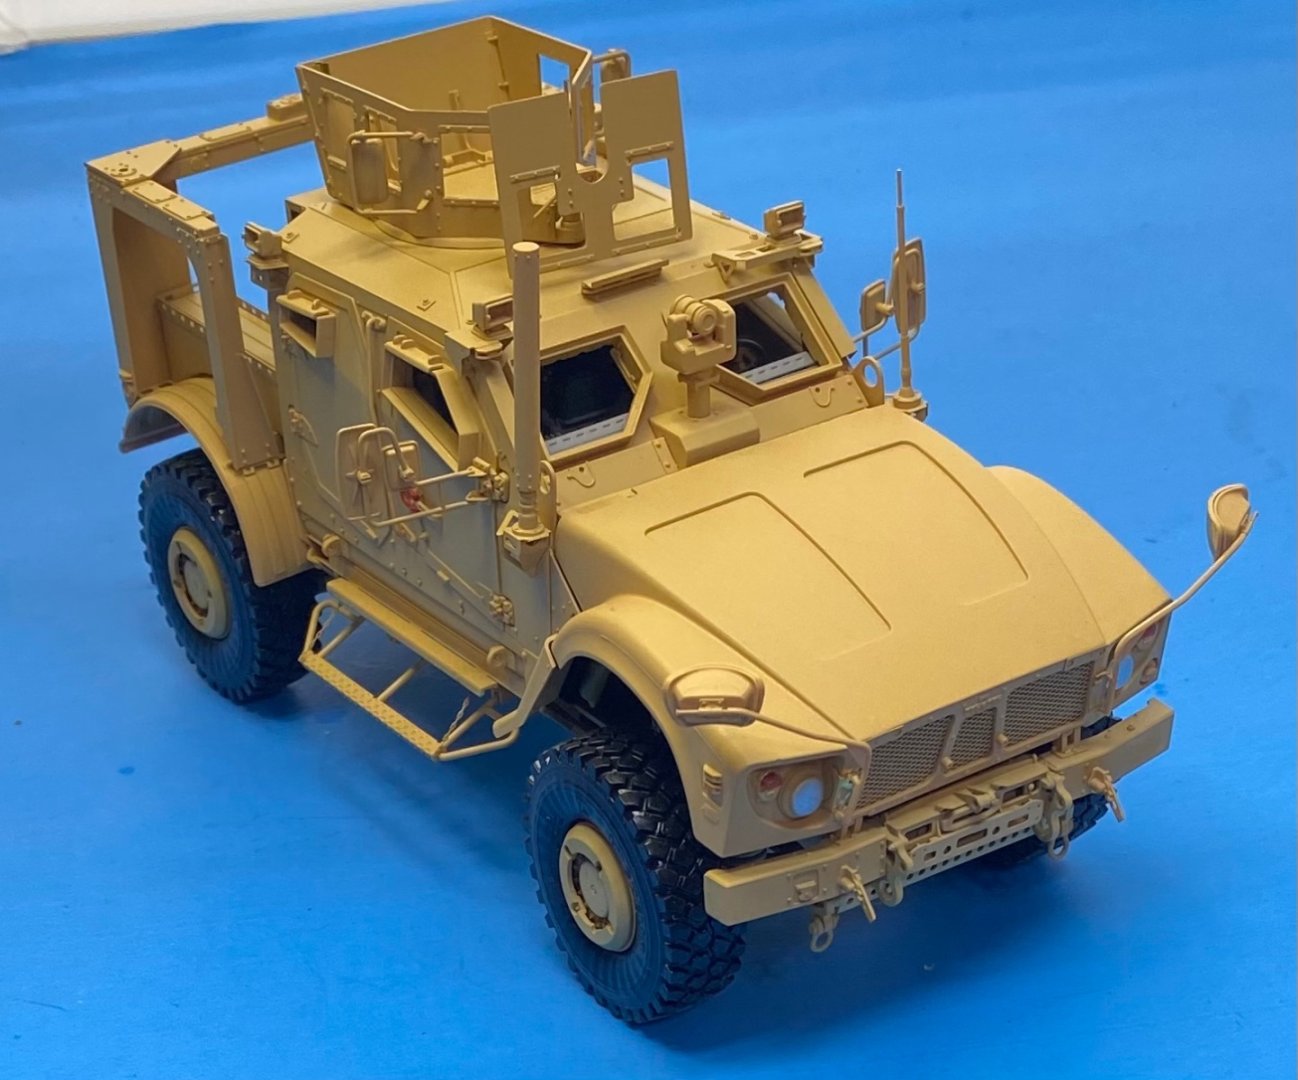
That’s an amazing story EG. Thanks for sharing it. Looking for video references, I found a video on YouTube where a man bought one of these for his own personal use. Said he paid $100k for it. I presume he got it from a surplus auction because the price he paid is nowhere near what I read the military pays for these, between $500k and $1M. Anyway I was happy to see the model I’d practically identical to the vehicle in the video. I’ll find the video and post a link to it.