Stubby
-
Posts
40 -
Joined
-
Last visited
Content Type
Profiles
Forums
Gallery
Events
Everything posted by Stubby
-
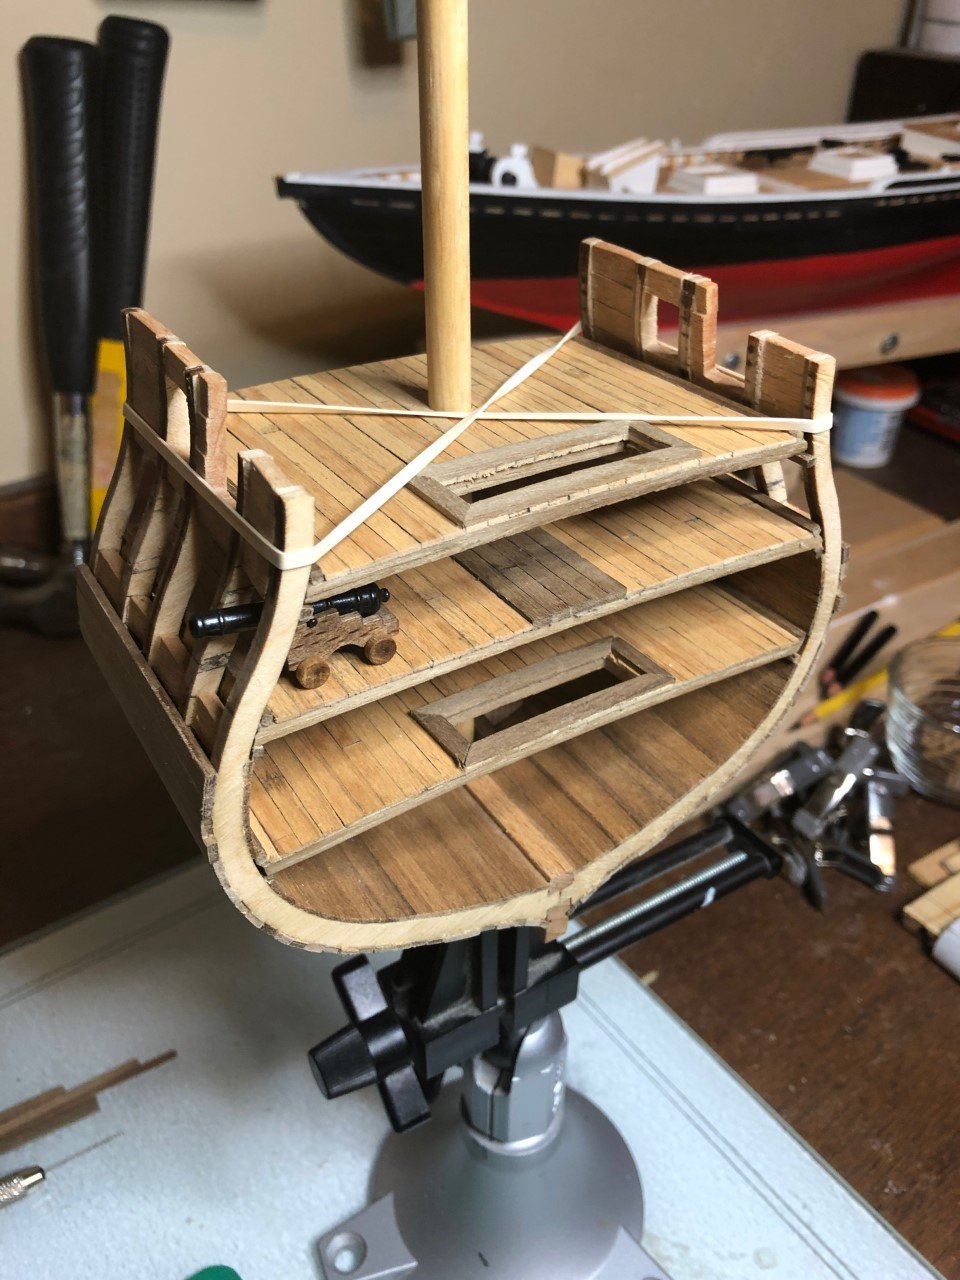
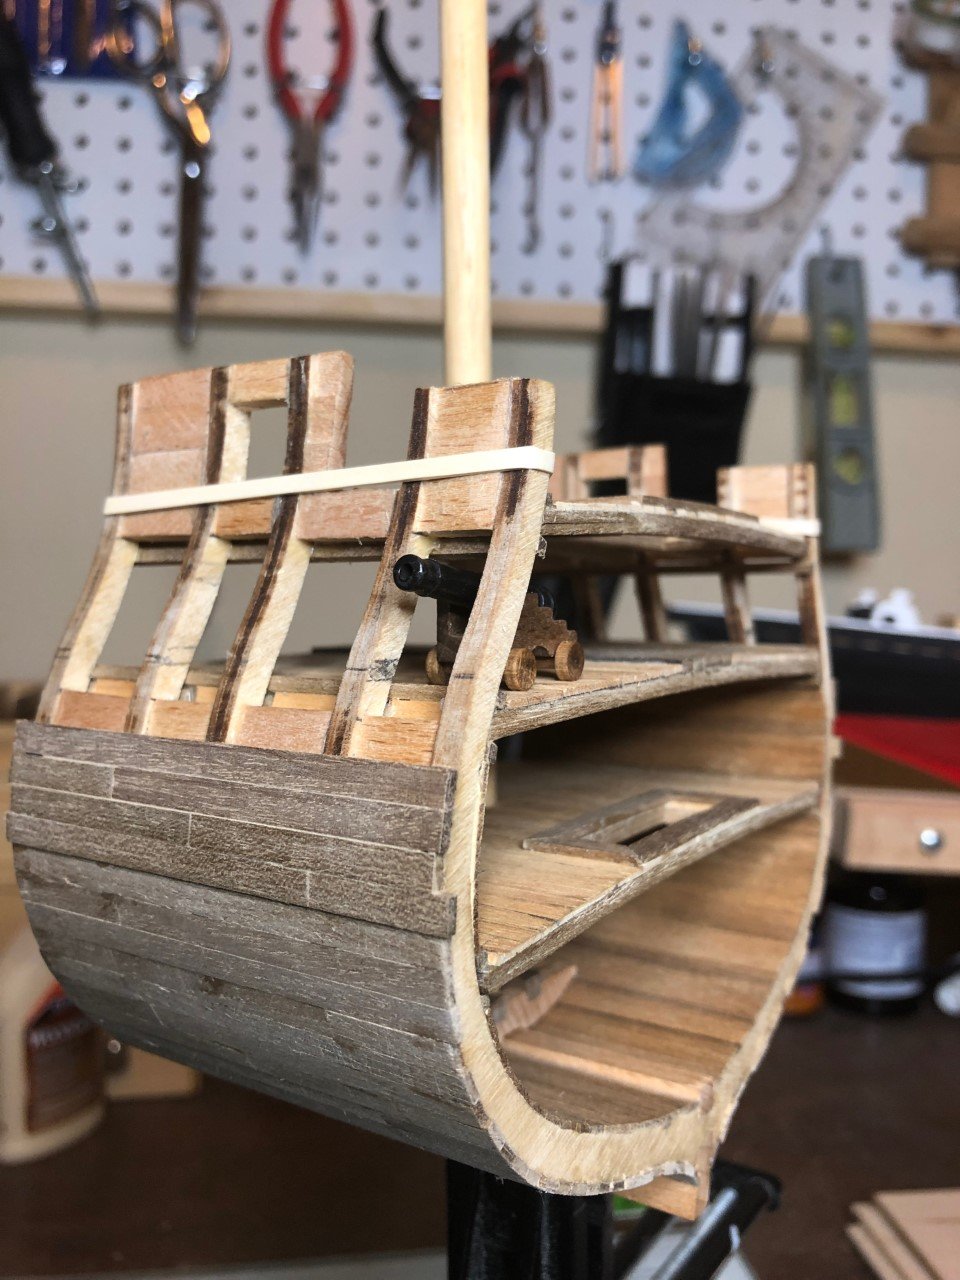
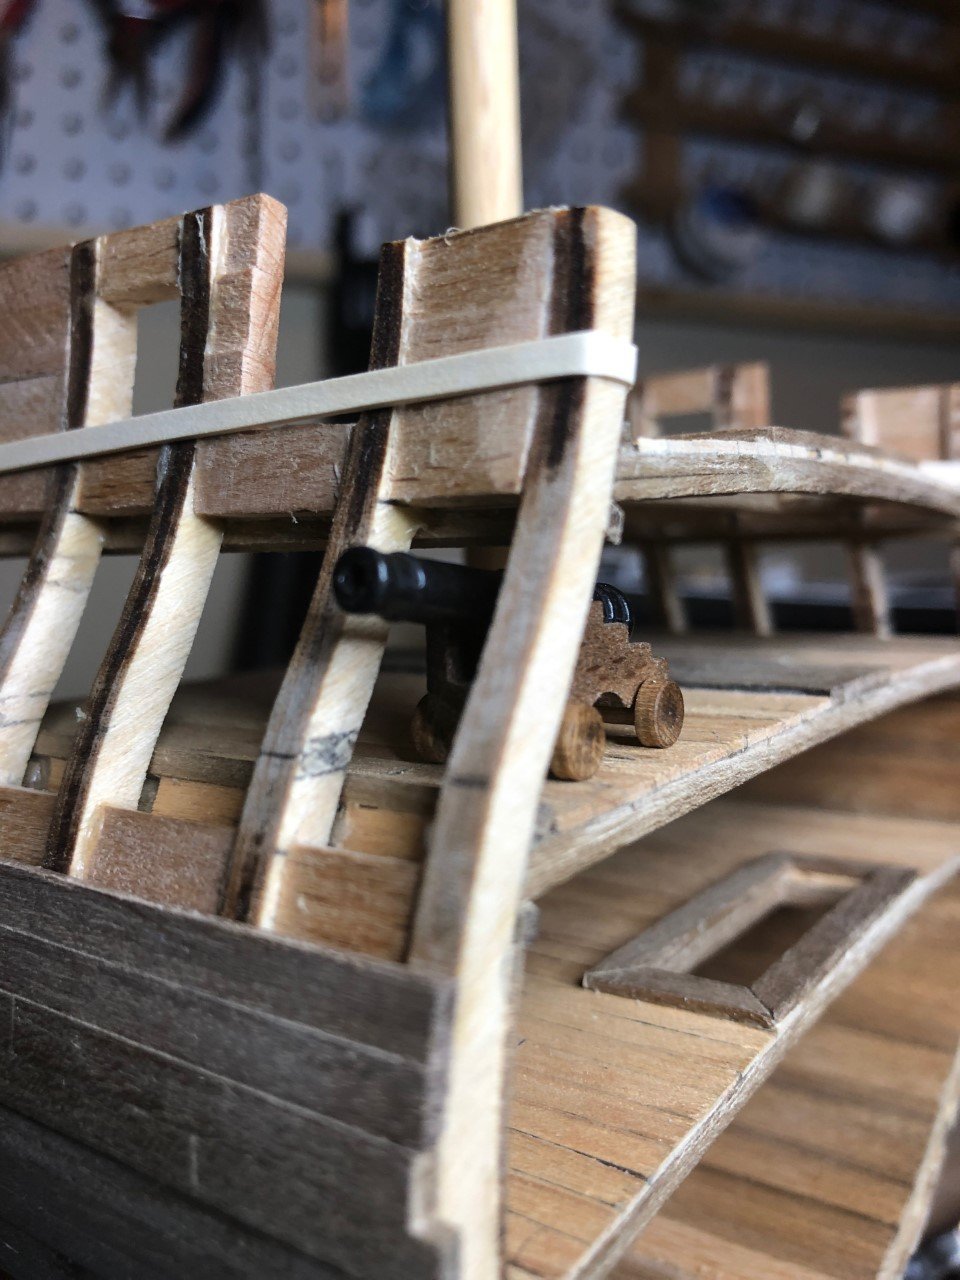
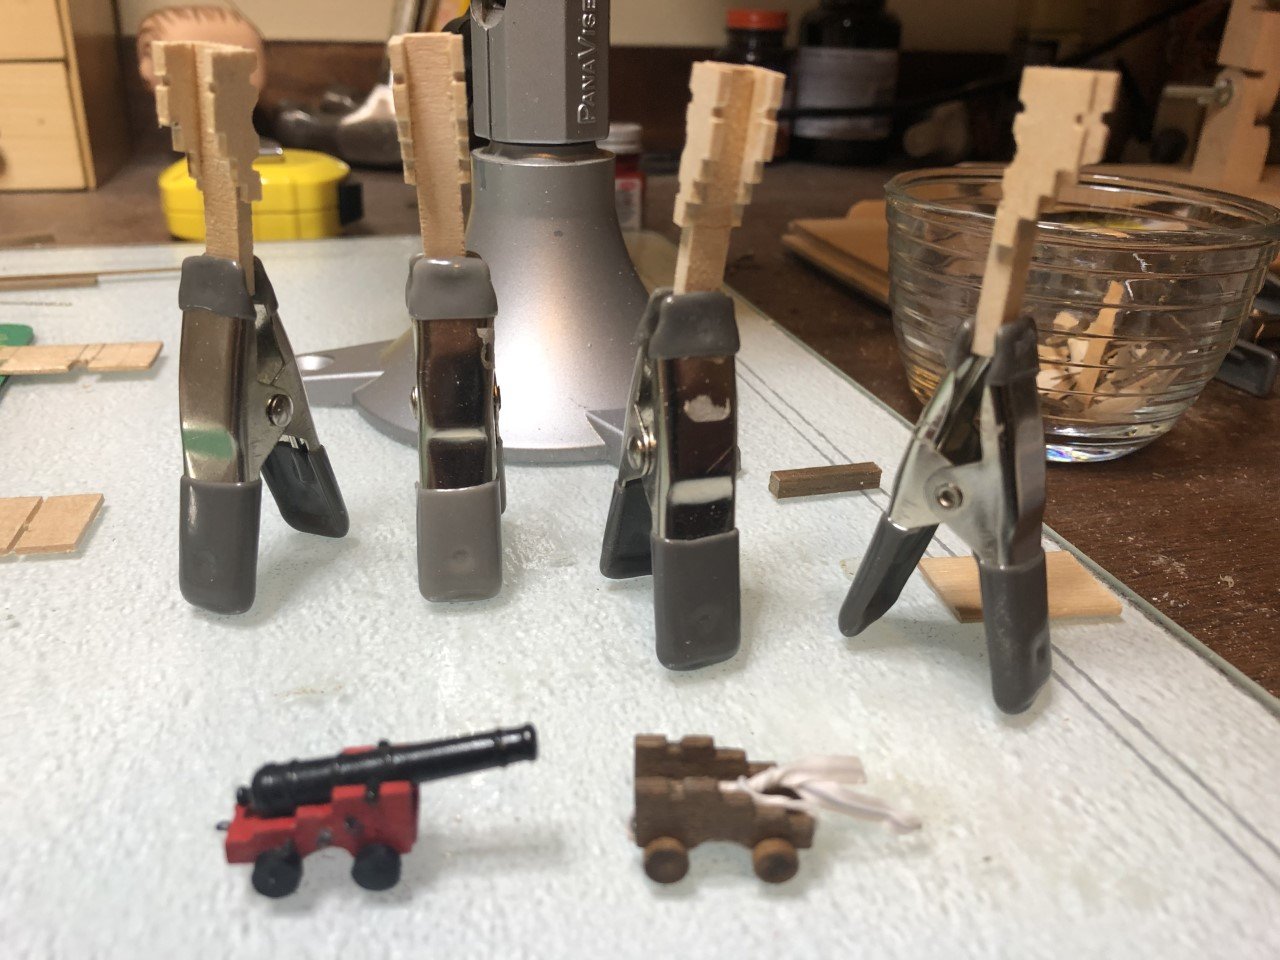
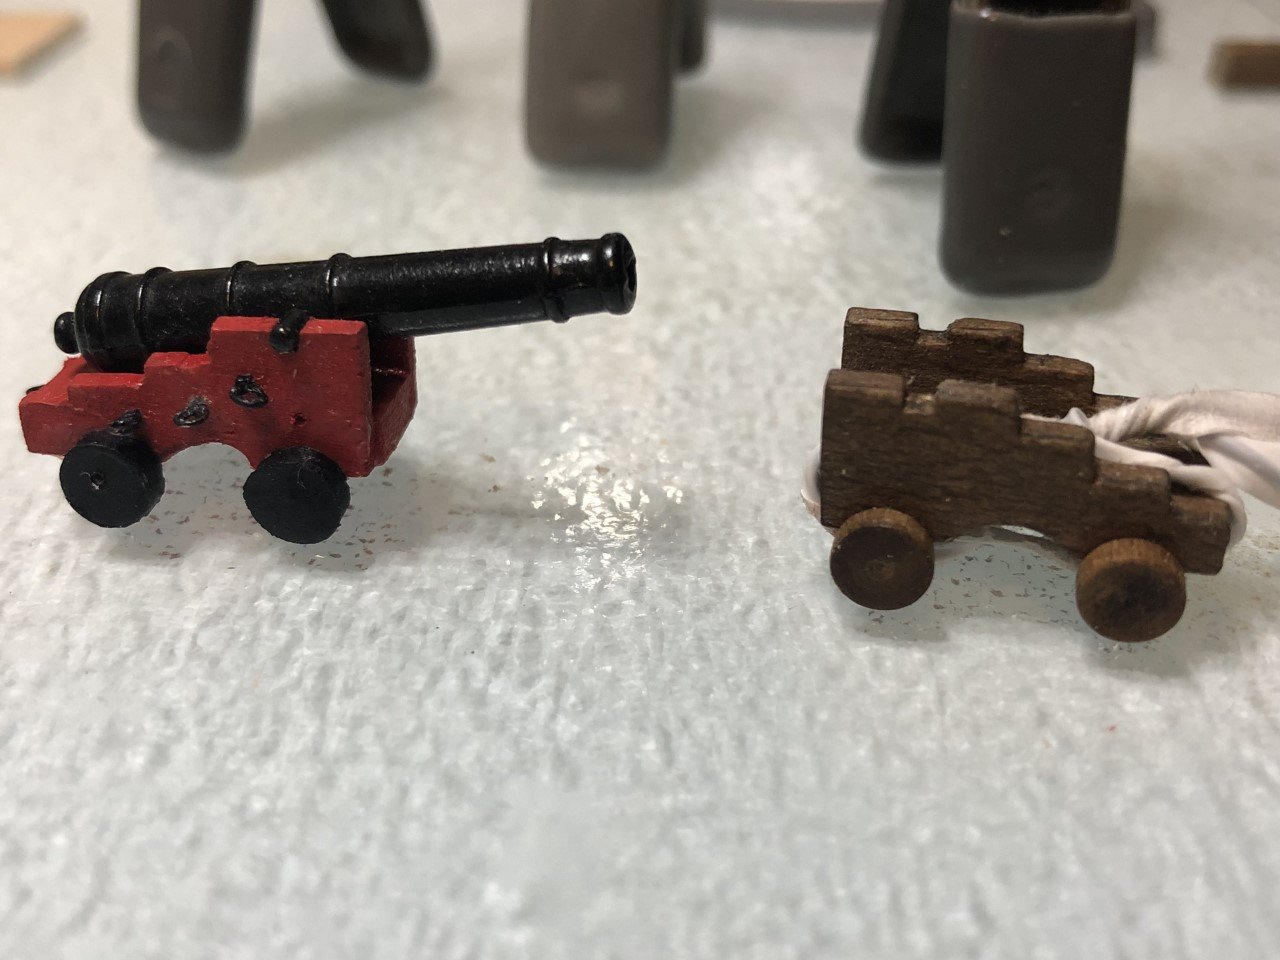
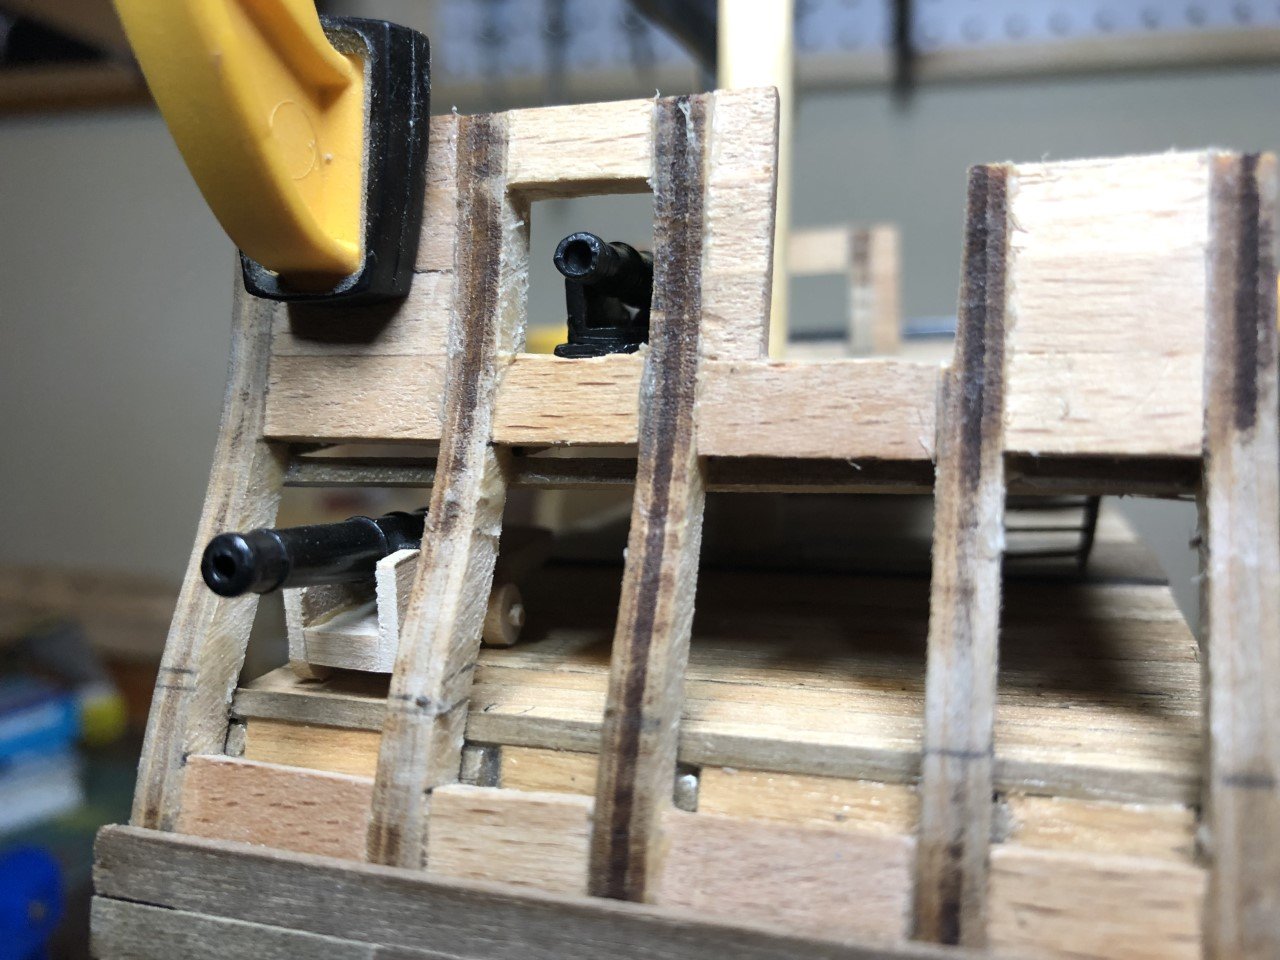
 I was out of town last week, so I didn't have much time to work on the model. Before I left though, I ordered some copper tape to copper the hull. Apparently I misread the description, because instead of getting the stick-on copper tape that I was expecting, I got a strip of copper. I considered using it anyway, but cutting, shaping, and filing the copper would probably be beyond my capability at present. I ordered a replacement this morning - hoping I got it right this time. I'm sure I'll find a use for the copper strips at some point in the future. The picture below shows what I thought I was ordering (left over from a previous build), what I actually got, and what came in the kit... I built a platform to receive as ladder down to the hold/bilge. I think I like it, but maybe it takes up too much room. Still getting used to it. I also toyed with making new ladders; it wasn't easy with the very fragile wood included in the kit, and I'm a little worried that I am using too much of it up experimenting. I did finally find a method that worked okay. One thing that has bothered me for a while it the placement of the ports on the gun deck; the cannon seem to sit high. I made some gun carriages (out of scrap) to play with the placing. I'm toying with the idea of just lowering all three decks. At this point none are glued in, but it would take some effort and creative fabrication to widen the top two decks. Alternatively, I could just make the cannon carriages shorter - but I was hoping to rig them, and making the carriages smaller leaves less room for block and tackle fittings. Still mulling it all over... The dark brown carriage is the one that came in the kit.
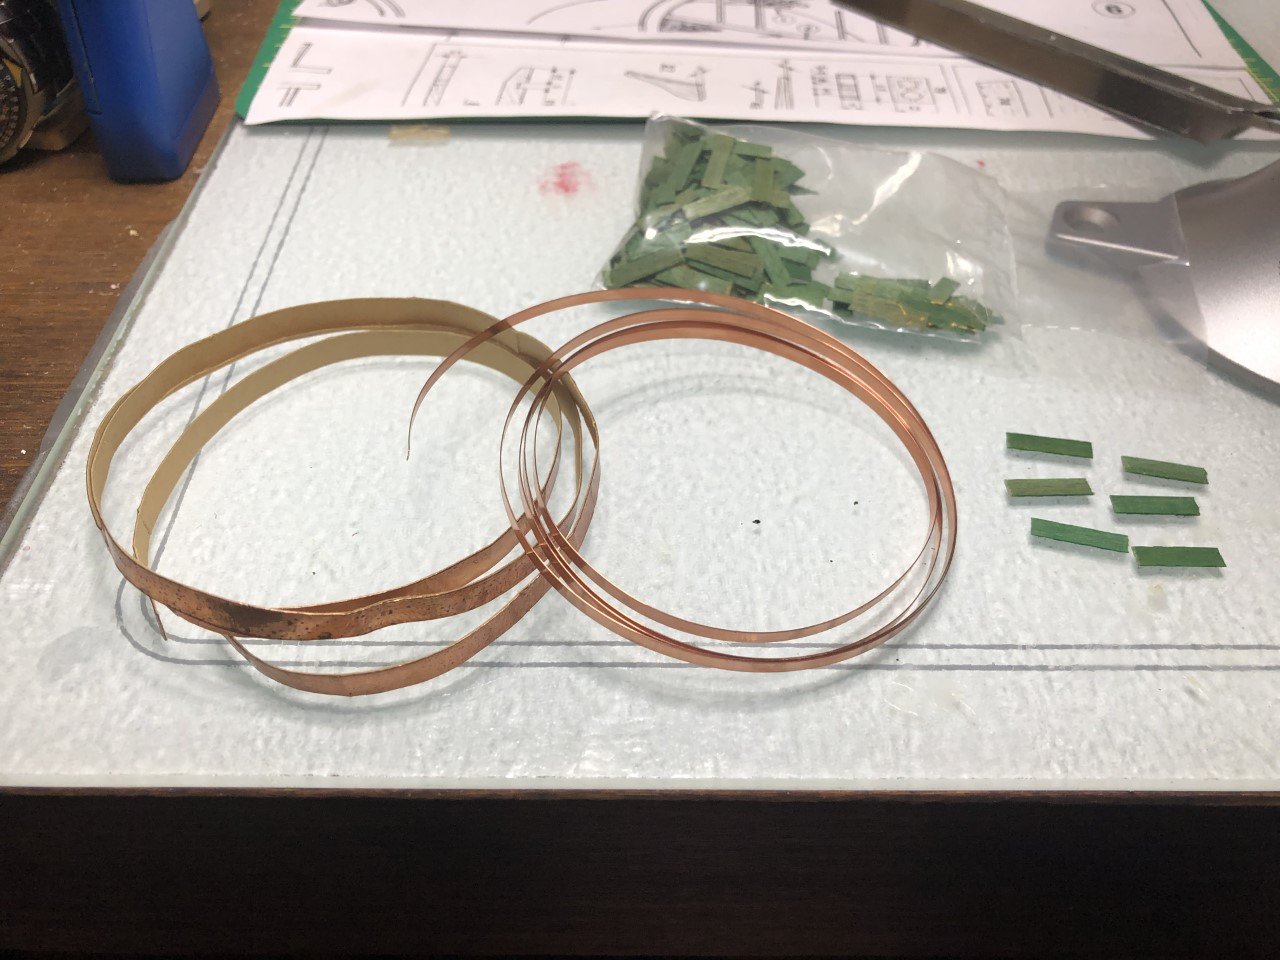


- 11 replies
-
- 2
-

-
- constitution
- mamoli
- (and 1 more)
-
md1400cs - I do plan to copper the lower hull, but the older kit that I have doesn't come equipped with it; I'll have to order some. I'm debating whether to get the adhesive copper tape/strips or pre-formed copper plating. Do you have experience with either/both? I'm also considering putting portholes on the third deck. There are three on each side in the model plans, but there is no fitting in the kit. Looking at others who have completed the model, I don't see any with the portholes. If I go that route, I'll have to purchase/fabricate some sort of fitting.
- 11 replies
-
- 2
-
-
- constitution
- mamoli
- (and 1 more)
-
JesseLee, I've been inactive for quite a while, but I have been occasionally checking in on your work here - it is exquisite. Beautiful work and a fantastic build log!
- 1,306 replies
-
- 5
-
-
- syren
- model shipways
- (and 1 more)
-
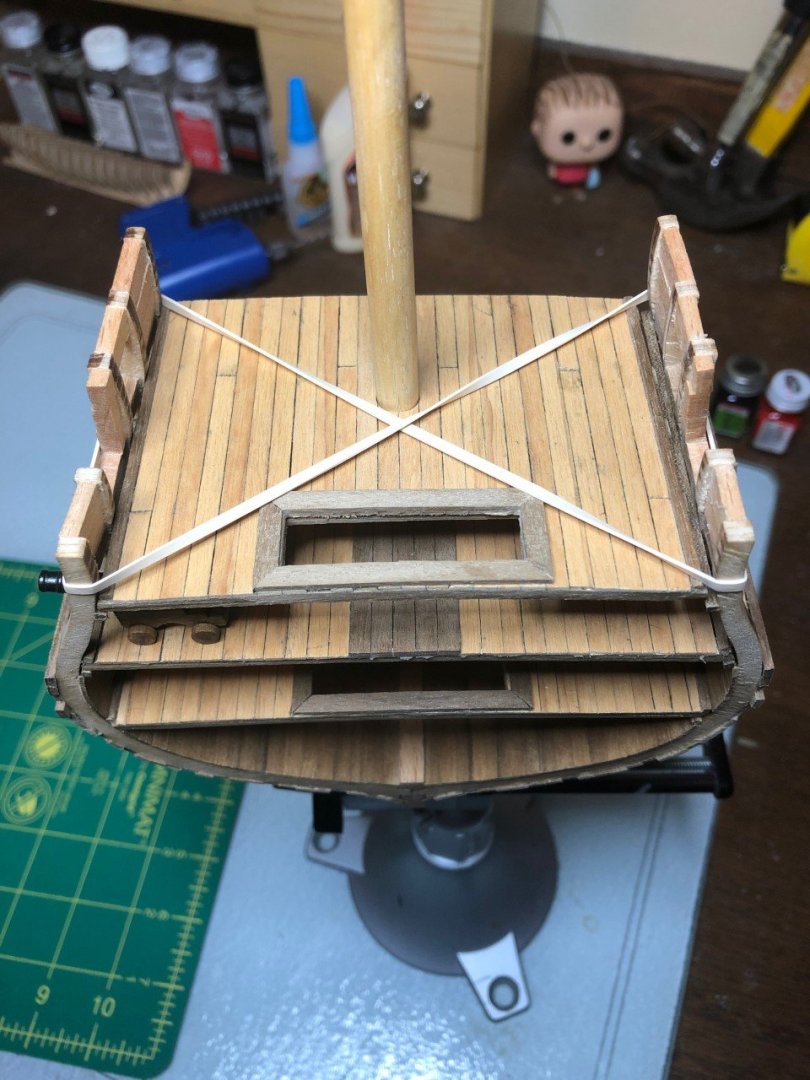
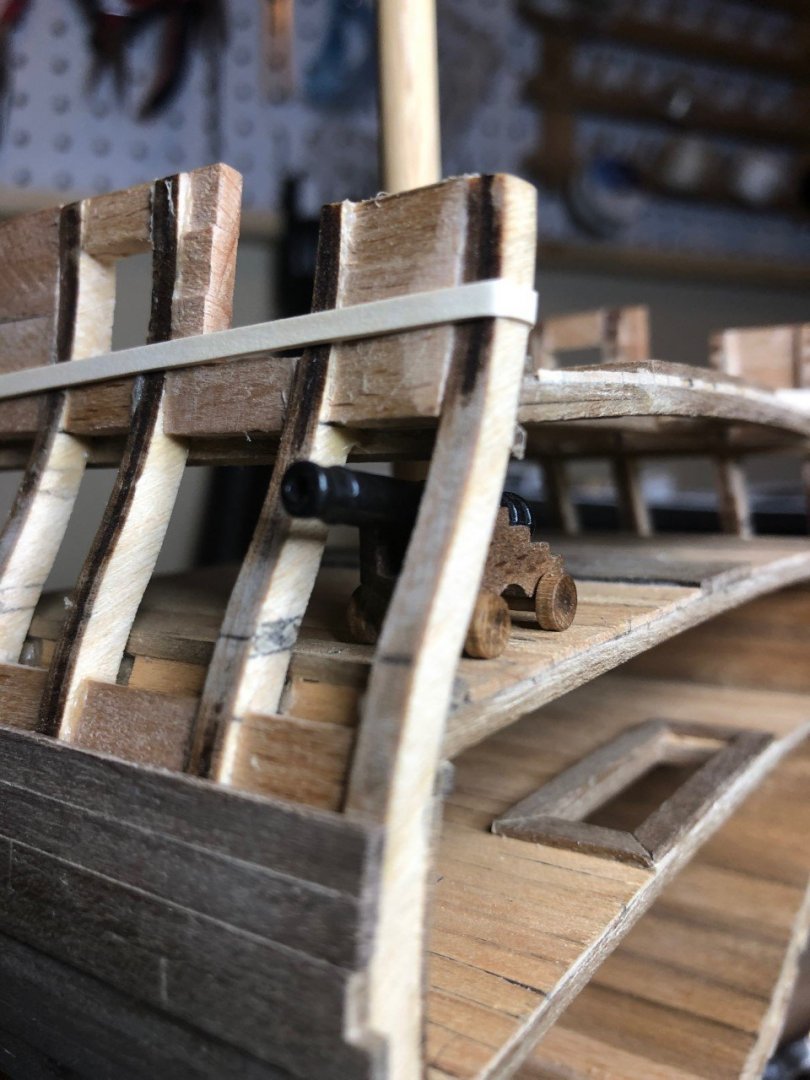
So, three and a half years is a pretty lengthy hiatus from working on my models. Glad to be back though after going back to school and finishing a degree. I have done a little work - mostly recently, and thought I would post a progress report. I finished building all three decks, drilled the hole for the mast and built the mast foot. I also cut the hatches. The hatch to the hold is closed in the model plans, but I thought I would like it better open. I created a new problem for myself however, because it's quite a distance from the third deck to the bilge. I'm thinking about building a platform to receive the angled ladder (like the one between the first two decks) and then making a vertical ladder or two to climb down to the bilge. I had originally marked out the gun ports in accordance to the model plans, but read that some other people had noted that the measurements were off. Placing a cannon of the gundeck to assess the gunport placement, I can see what they are talking about. The original port placement was certainly low. The required one seems high. but I guess it will have to do. I was happy to see that later versions of this model are supplied with copper adhesive for the bottom rather than the crazy green strips that came with the model. That doesn't help me, though; I'll have to order some adhesive myself. Here's hoping that I can be a little more focused and consistent in completing this model.


- 11 replies
-
- 3
-
-
- constitution
- mamoli
- (and 1 more)
-
I haven't been very active on the board since I went back to school, but I check in from time to time and I am never less than very impressed by your work Jesse. I have an untouched Syren kit that I am certainly going to build in the near future. You can bet that I'll be referring to your build as I attempt to emulate you (right after I finish my Benjamin Latham and my Constitution cut away). Great work!
- 1,306 replies
-
- 6
-
-
- syren
- model shipways
- (and 1 more)
-
Ken, I got your book as a Christmas present! What a great read, and I look forward to trying out some of your techniques! Merry Christmas, Stubby
-
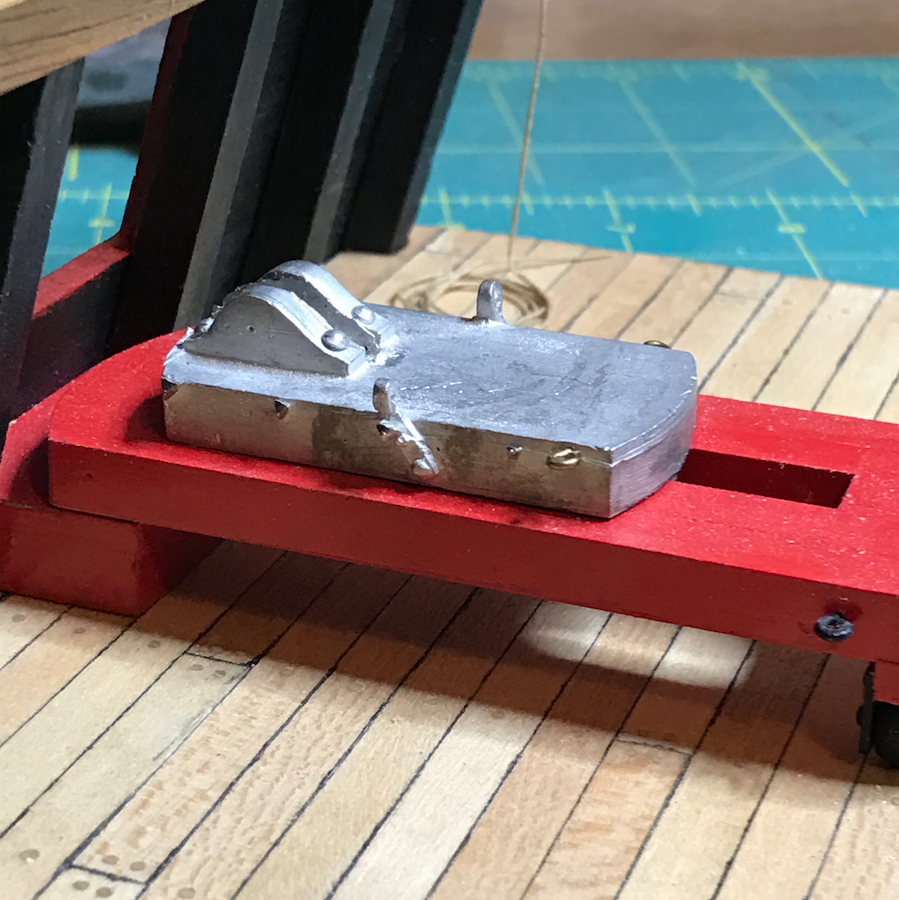
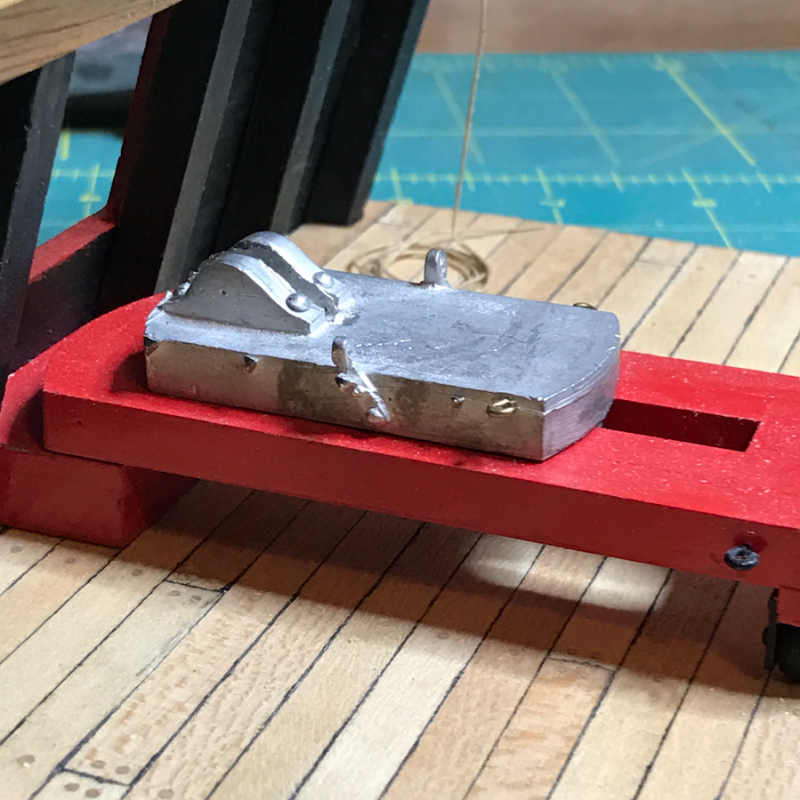
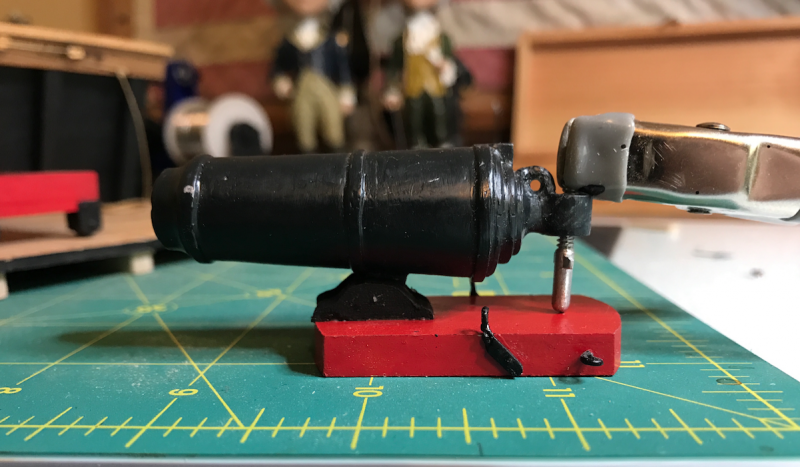
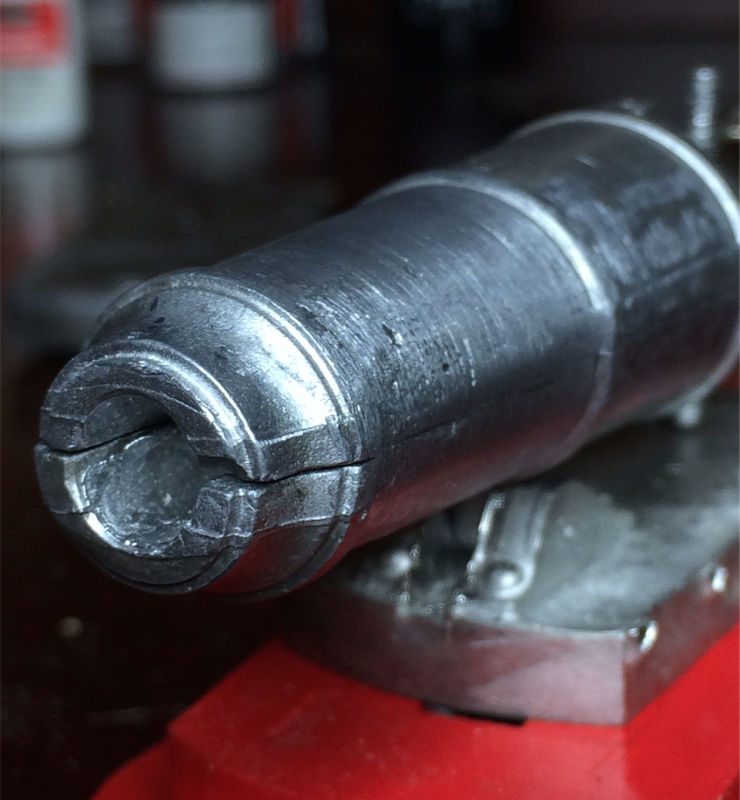
I did do a little work on the model too. I had to manufacture the block and tackle brackets for the sled and the cradle to mount the carronade itself. I tried shaping solder to make the brackets, but while i could get the right shape, it was really to soft. I then tried regular wire, which I soldered to make it a solid piece. The wire I used was not very conducive to solder - I'll have to get something that will work better for the future. Still - I deemed it "good enough." I then shaped the cradle pieces from wood, painted and attached all. The photo shows the carronade installed - the center of gravity is off because the barrel is not hollow. I'm counterbalancing with a clamp in the picture, but I'm hoping that glueing everything will overcome this problem. There! SOMETHING was done. I'm hoping to do some block and tackle this weekend.... we'll see how it goes.
-
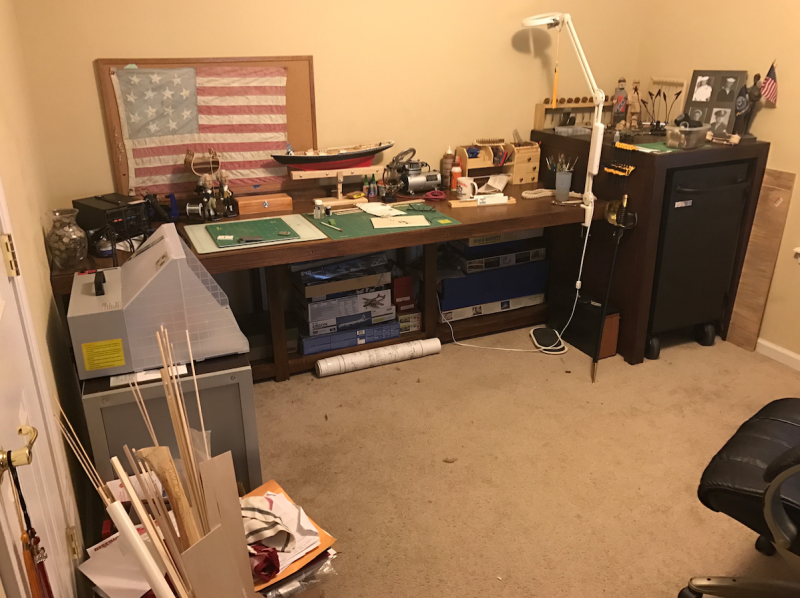
Wow, five months since I posted on this project! It's been a crazy summer. Among other things, I built a new workbench over the summer. I'm going to build overhead cabinets too, but I'm going to wait a bit before taking on that project. The room is a bit messy, but here is the workspace as it is....
-
JesseLee, I know just how you feel. I'll be driving my daughter to her new home 1,100 miles away tomorrow to start graduate school. She already went off to college, but that was only a couple hours away..... twenty hours is going to hit a lot harder! Hang in there buddy! Stubby
- 1,306 replies
-
- 6
-
-
- syren
- model shipways
- (and 1 more)
-
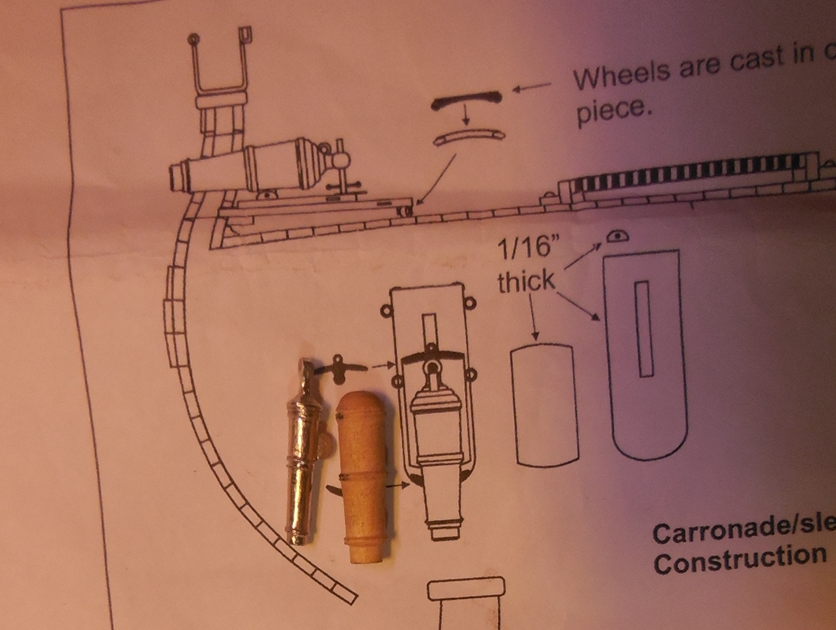
Jesse, Looking back at some of your previous entries I found this pic - I thought it was weird that the plans called for a larger cannonade than the kit provided, but when the proper size was installed the positioning was off. I read that you experimented with the thickness of the sled; it's hard to tell scale in a photograph... are your sleds really 1/16th of an inch thick as described in the plans in the photo? That seems really thin... I think it may be an academic discussion.... I agree with everyone else's comments. It all looks great as is! Stubby
- 1,306 replies
-
- 9
-
-
- syren
- model shipways
- (and 1 more)
-
You're right about where I am on the same build.... of course, I started the build eighteen years ago.... so your month doesn't sound so bad!
- 37 replies
-
- 1
-
-
- benjamin w latham
- model shipways
- (and 1 more)
-
I have bamboo all over my yard.... I'll have to experiment with it. Stubby
-
I'm not sure if I'm inspired or intimidated Jesse! You do some awesome work! I can't wait to get to this project myself.
- 1,306 replies
-
- 6
-
-
- syren
- model shipways
- (and 1 more)
-
Matt, Wow! You're moving right along. I'll be interested to see how the double planking works; I didn't do that on my build. I also like the idea of hacking off the stanchions. They were a pain to shape and match to the rest of the non-bulkhead stanchions when they were added. Stubby
-
I bought a Benjamin W. Latham kit almost 20 years ago and never finished it. It was the second kit I purchased - the first being the Phantom. In the course of moving from Virginia, to Iceland, to Hawaii, and then to Florida, I'm not sure i even have all of the pieces anymore. I made a lot of mistakes in construction, as resources like this were less available back then, but I've learned a lot looking though these build logs, and i plan on picking it up again and finishing as much as can be done before moving on to the other kits I have in waiting. I'll be very interested in following your progress! Stubby
-
Jud - That may be beyond the level of effort and experience that I currently have, but I will certainly keep that in mind for future projects. I found a link describing the molding process with silicone, but I think I will start with the Bondo Spot putty for this one! https://www.smooth-on.com/tutorials/moldmaking-tutorial-resin-metal-cold-casting/
-
Thanks guys. It's very soft metal and sands nicely - but it doesn't shape - I'll look into some bond spot putty tomorrow.
-
I'm working to smooth out the carronade and I'm finding some pretty bad seems. Does anyone have some advice on how to fill the gaps before painting?
-
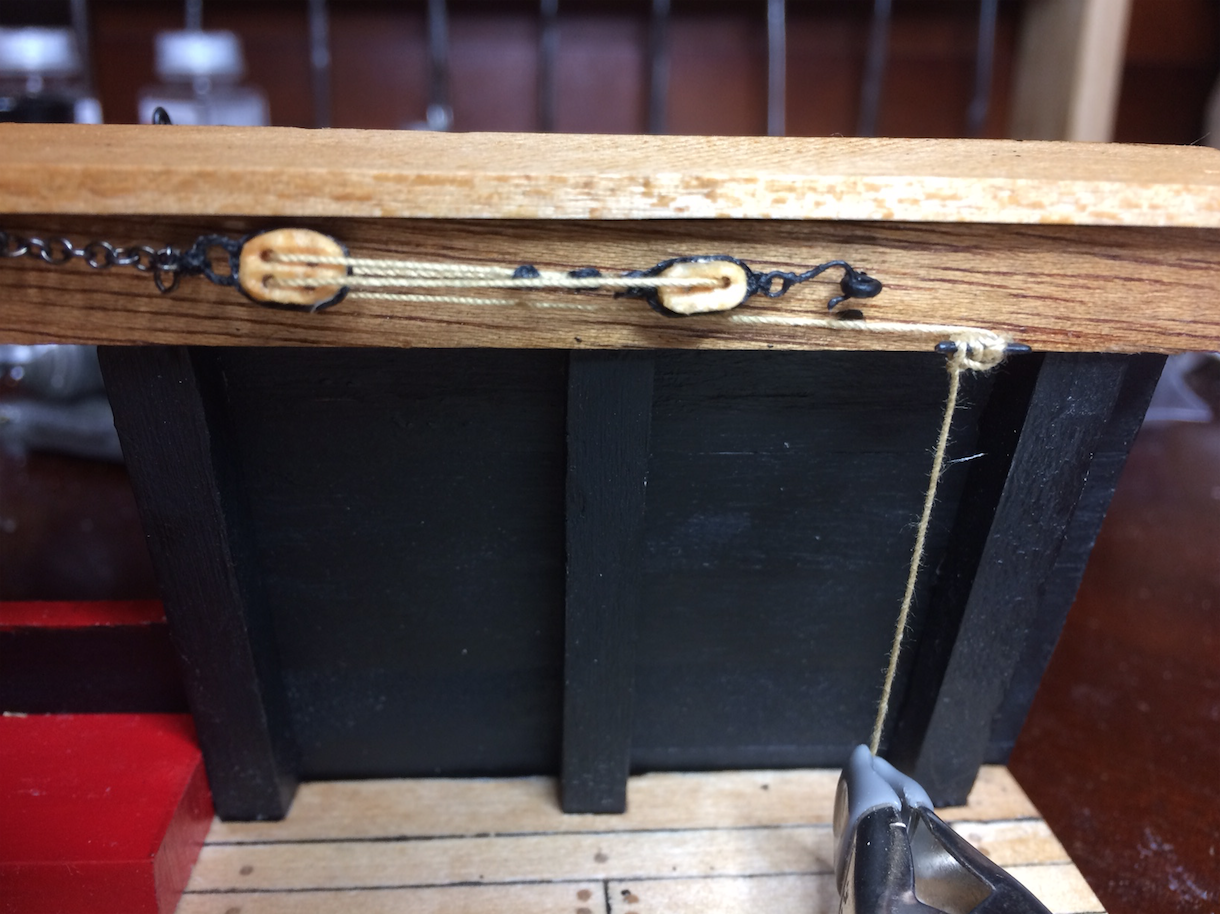
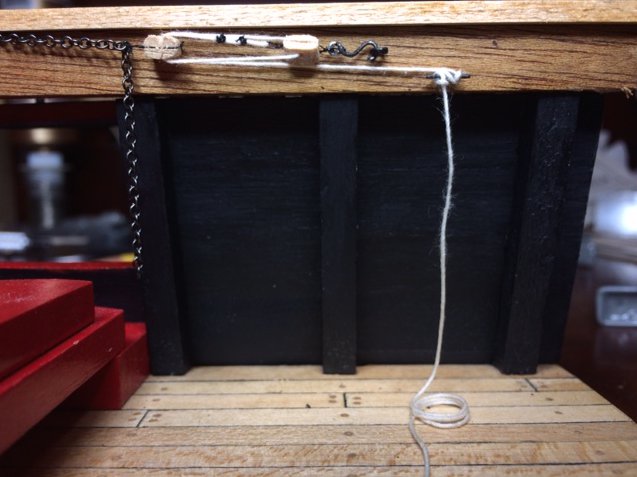
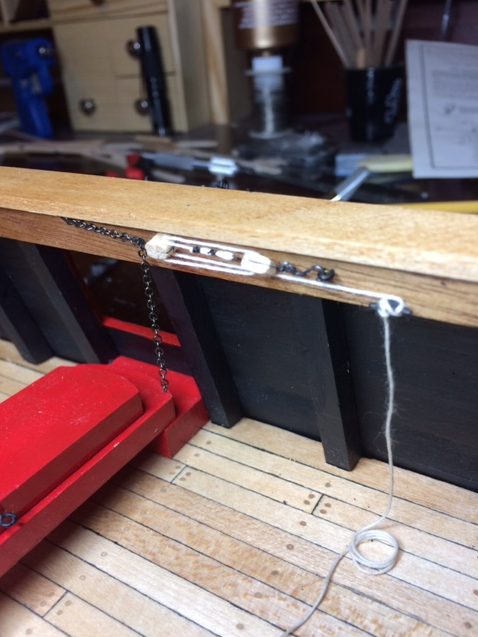
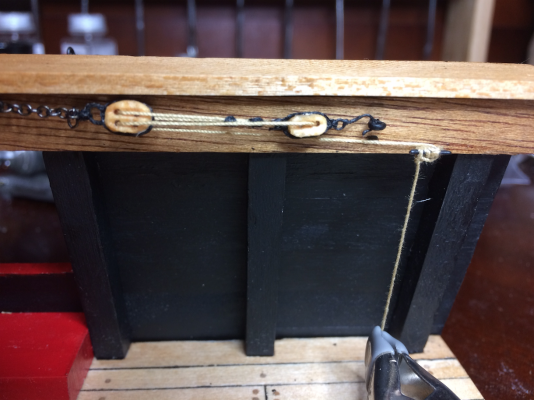
All right; I looked through some logs on this site and found some great ideas for block and tackle. I'm not quite up to the quality of some, but I think it is a marked improvement. I also moved the eye and the cleat over a bit because I had them too close to the port. I wasn't too happy about that because it left holes in the clamp beam where they were previously, but the one hole is covered by the single block, and the other by the rope so it's not too noticeable. You can see the former hole for the cleat in the larger picture right beneath the eye.
-
I have a Syren in the box for a future build - I'm definitely learning a lot from your log and enjoying your mods and ingenuity! - Stubby
- 1,306 replies
-
- 7
-
-
- syren
- model shipways
- (and 1 more)
-
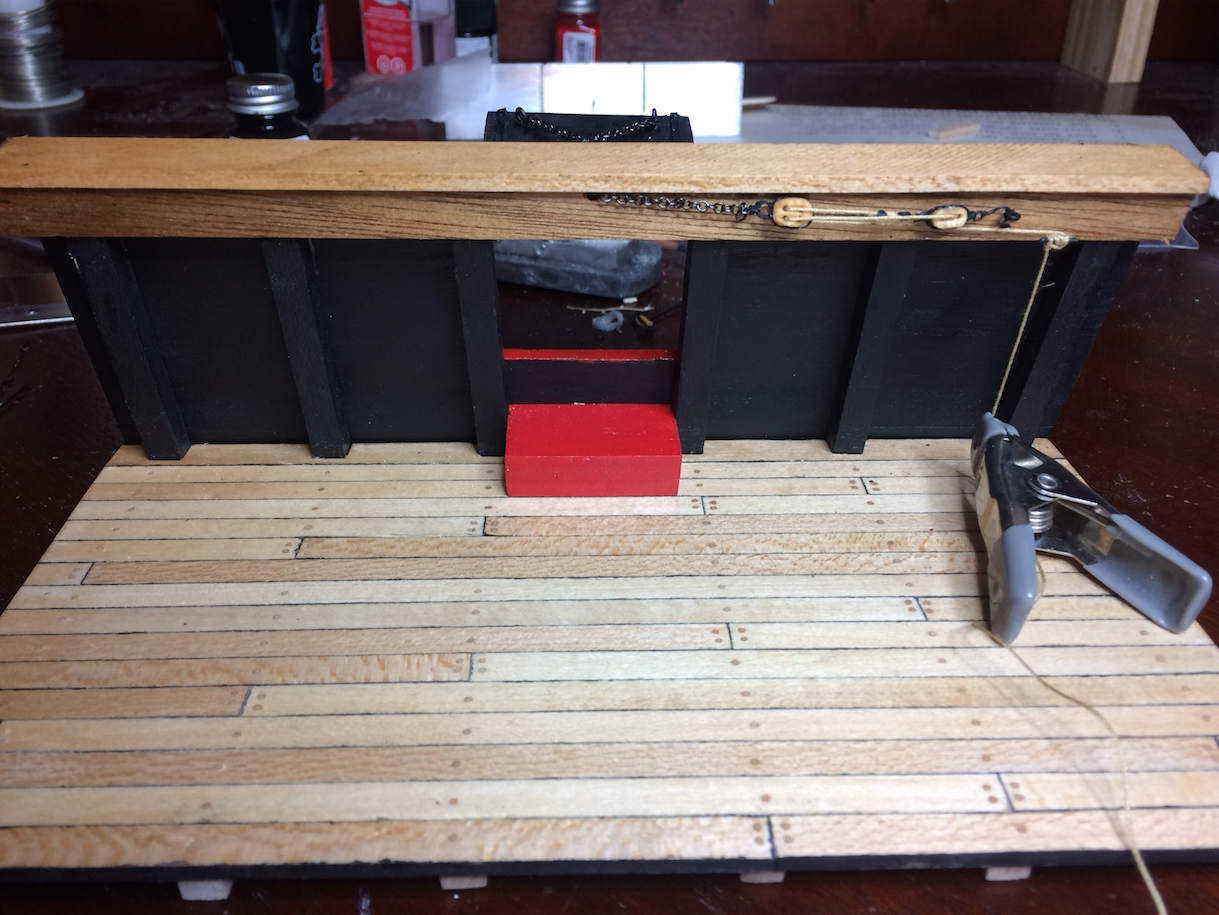
Attached the gunport tackle today. The blocks that came with the kit were too brittle, so I made new ones. I'm not completely happy with the hook - which I fashioned out of wire, and the eyes - which I made out of black thread which was really too thin for the task. I haven't cut the chain yet just in case I want to redo it. I doesn't look bad; I think I'll sleep on it.


-
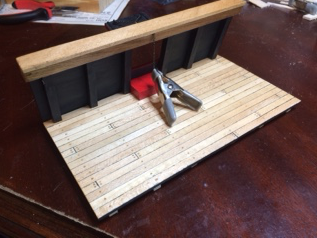
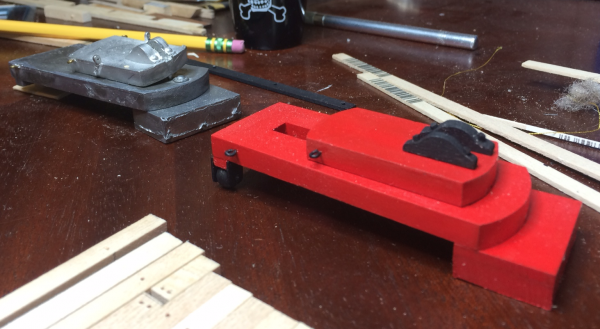
So, I haven't been very chatty about my progress, but have been progressing none the less. I installed the hull planking, cap piece and rail cap, and am pretty happy with it. I decided not to use tunnels on the hull planking - mostly because I was being lazy, but also because I wasn't sure if they would show up under the black paint. Looking at it now, I think they probably would - but I can live with it. I also put together and attached the gunport lid. I made a few minor mistakes as I went through, but I don't think they are too noticeable. The next step is to install the block system that raises the gunport lid. I also need to start prepping the actual carronade. I've been putting that off because it came so rough. The last picture shows the carronade base. Not yet installed - just sitting there so I can pretend I'm farther along....

-
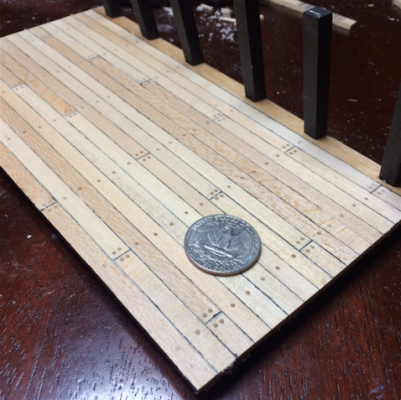
Tree nailing complete. What a pain.... but I think I like the result.
-
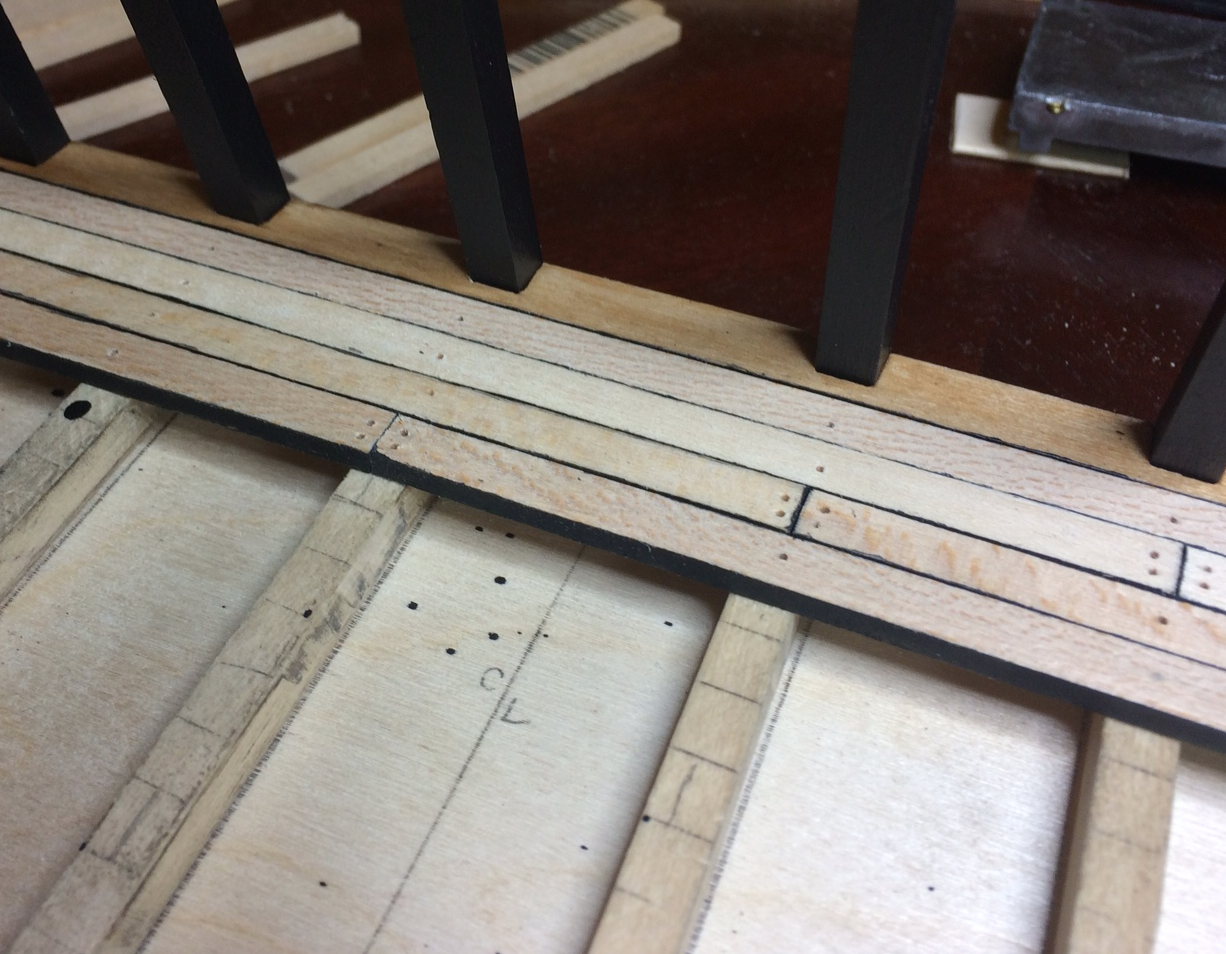
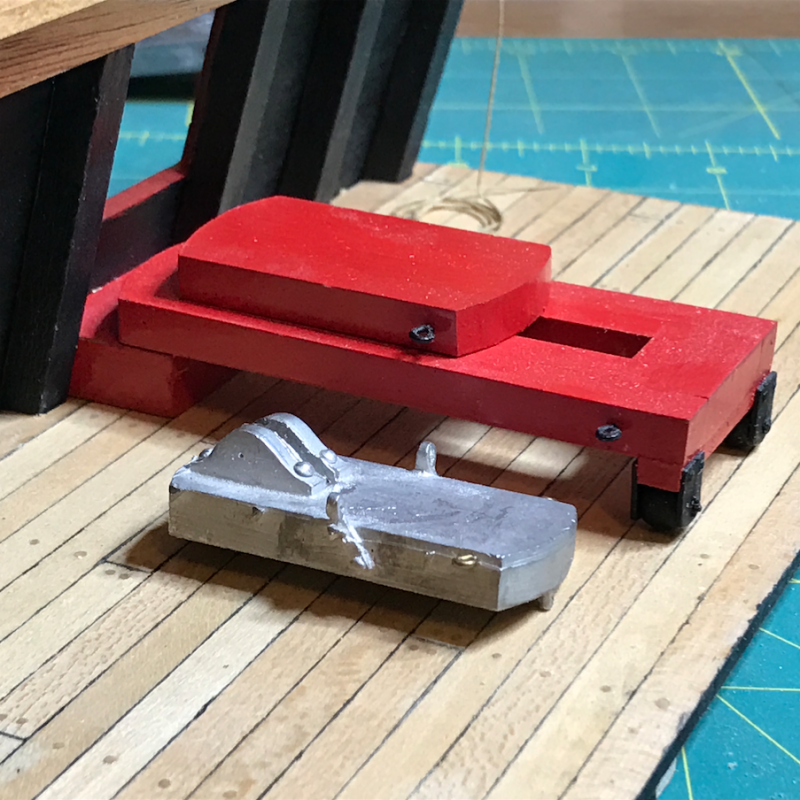
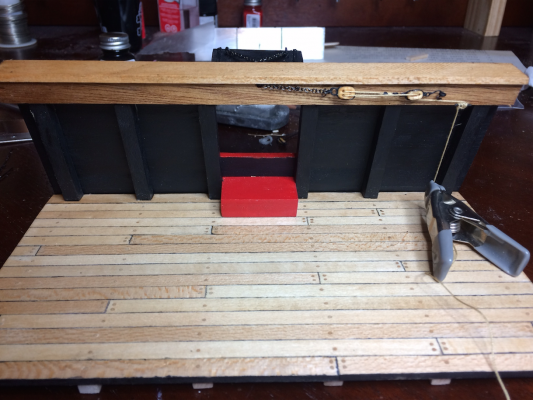
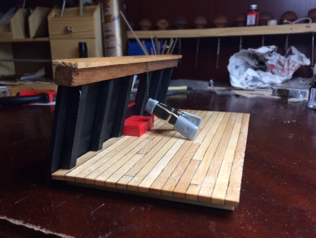
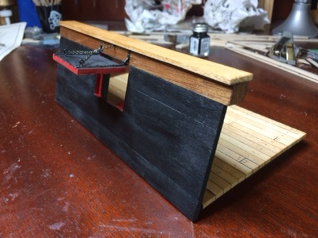
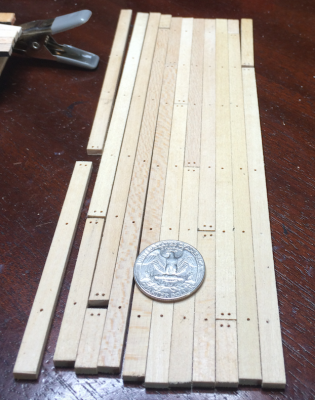
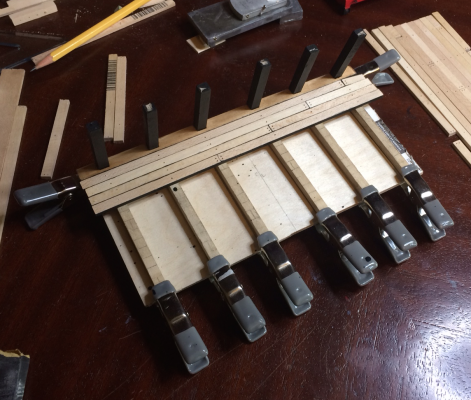
So it's been quite a while since I last posted an update - been a crazy busy couple of months. I have however, don a little work on this model. I measured out the deck planks and drilled the holes for the tree nails. I am painting the edges of the planks to simulate caulking. I tried the pencil trick with my other model, and while a generally liked the result, it was kind of messy. So... giving the paint approach a try.... The photos show the progress. None of the planks are glued in place yet. I plan to paint the caulking on all of the planks and then glue them in place. Then I will make and install all of the tree nails and sand and stain the entire deck. I'd welcome any constructive advice along this lines, as I have never attempted it before. I also recreated the carronade platform out of wood, because I thought it would look better. Not done yet, and not perfect, but I am generally happy with the results.

-
jbshan - Thank you, it is good to see another completed model. I agree about the tunnels; I've never used them before, which is why I started with scraps. I'll try to work them a bit smaller before incorporating them into the actual display. - Stubby