DONATION DRIVE - SUPPORT MSW - DO YOUR PART TO KEEP THIS GREAT FORUM GOING! (91 donations so far out of 49,000 members - C'mon guys!)
×


mikiek
-
Posts
2,276 -
Joined
-
Last visited
Content Type
Profiles
Forums
Gallery
Events
Everything posted by mikiek
-
 To this point in my career I have never made filler blocks to fit between frames. OK - well maybe back at the transom but as far as side or bow blocks, never. The builds have come out OK so far. I don't think fillers would have made any difference. After some hiatus, I am building Cazador mostly just to get my skills back again. I thought I would have a go at making filler blocks at some of the hull positions and see how that works, if there is really any benefit. The Cazador frames have a fairly large space between them - but typical to most kits I have built so far. The kit offers nothing in the way of filler material. I see a lot of basswood blocks of various sizes for sale online. From 1x1x3 to 2x2x6 to 3x3x10 pieces or some combination. I'm just wondering what makes the most sense. I imagine the smaller pieces would not be useful. But I am stuck between buying some big hunk and cutting pieces to size (probably with a lot of waste) or the medium size pieces. I'm just hoping to be as efficient as possible. There's probably a simple answer to this. Any help would be appreciated...
 -
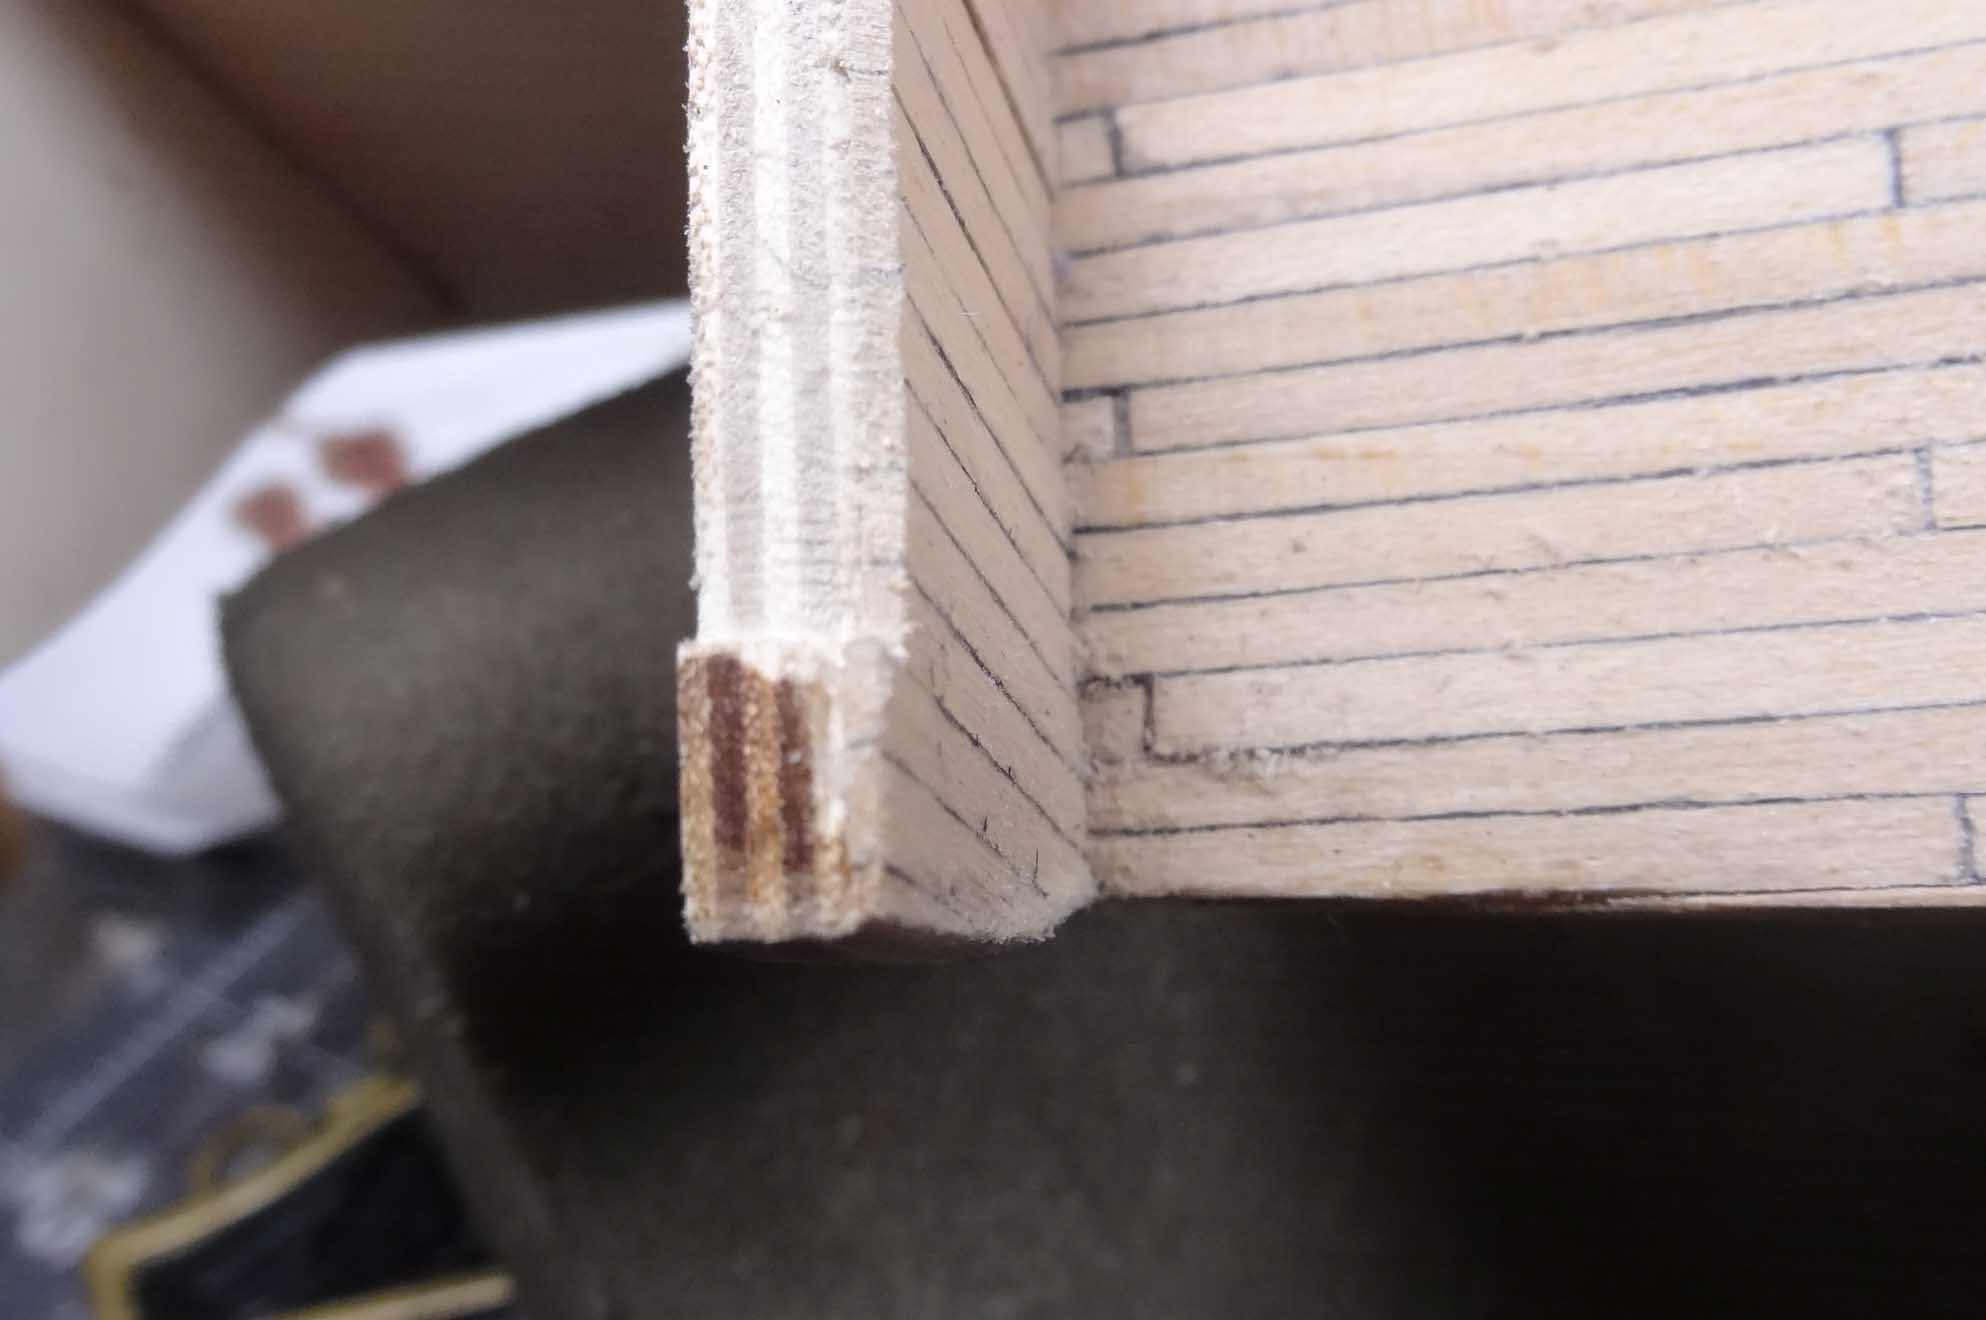
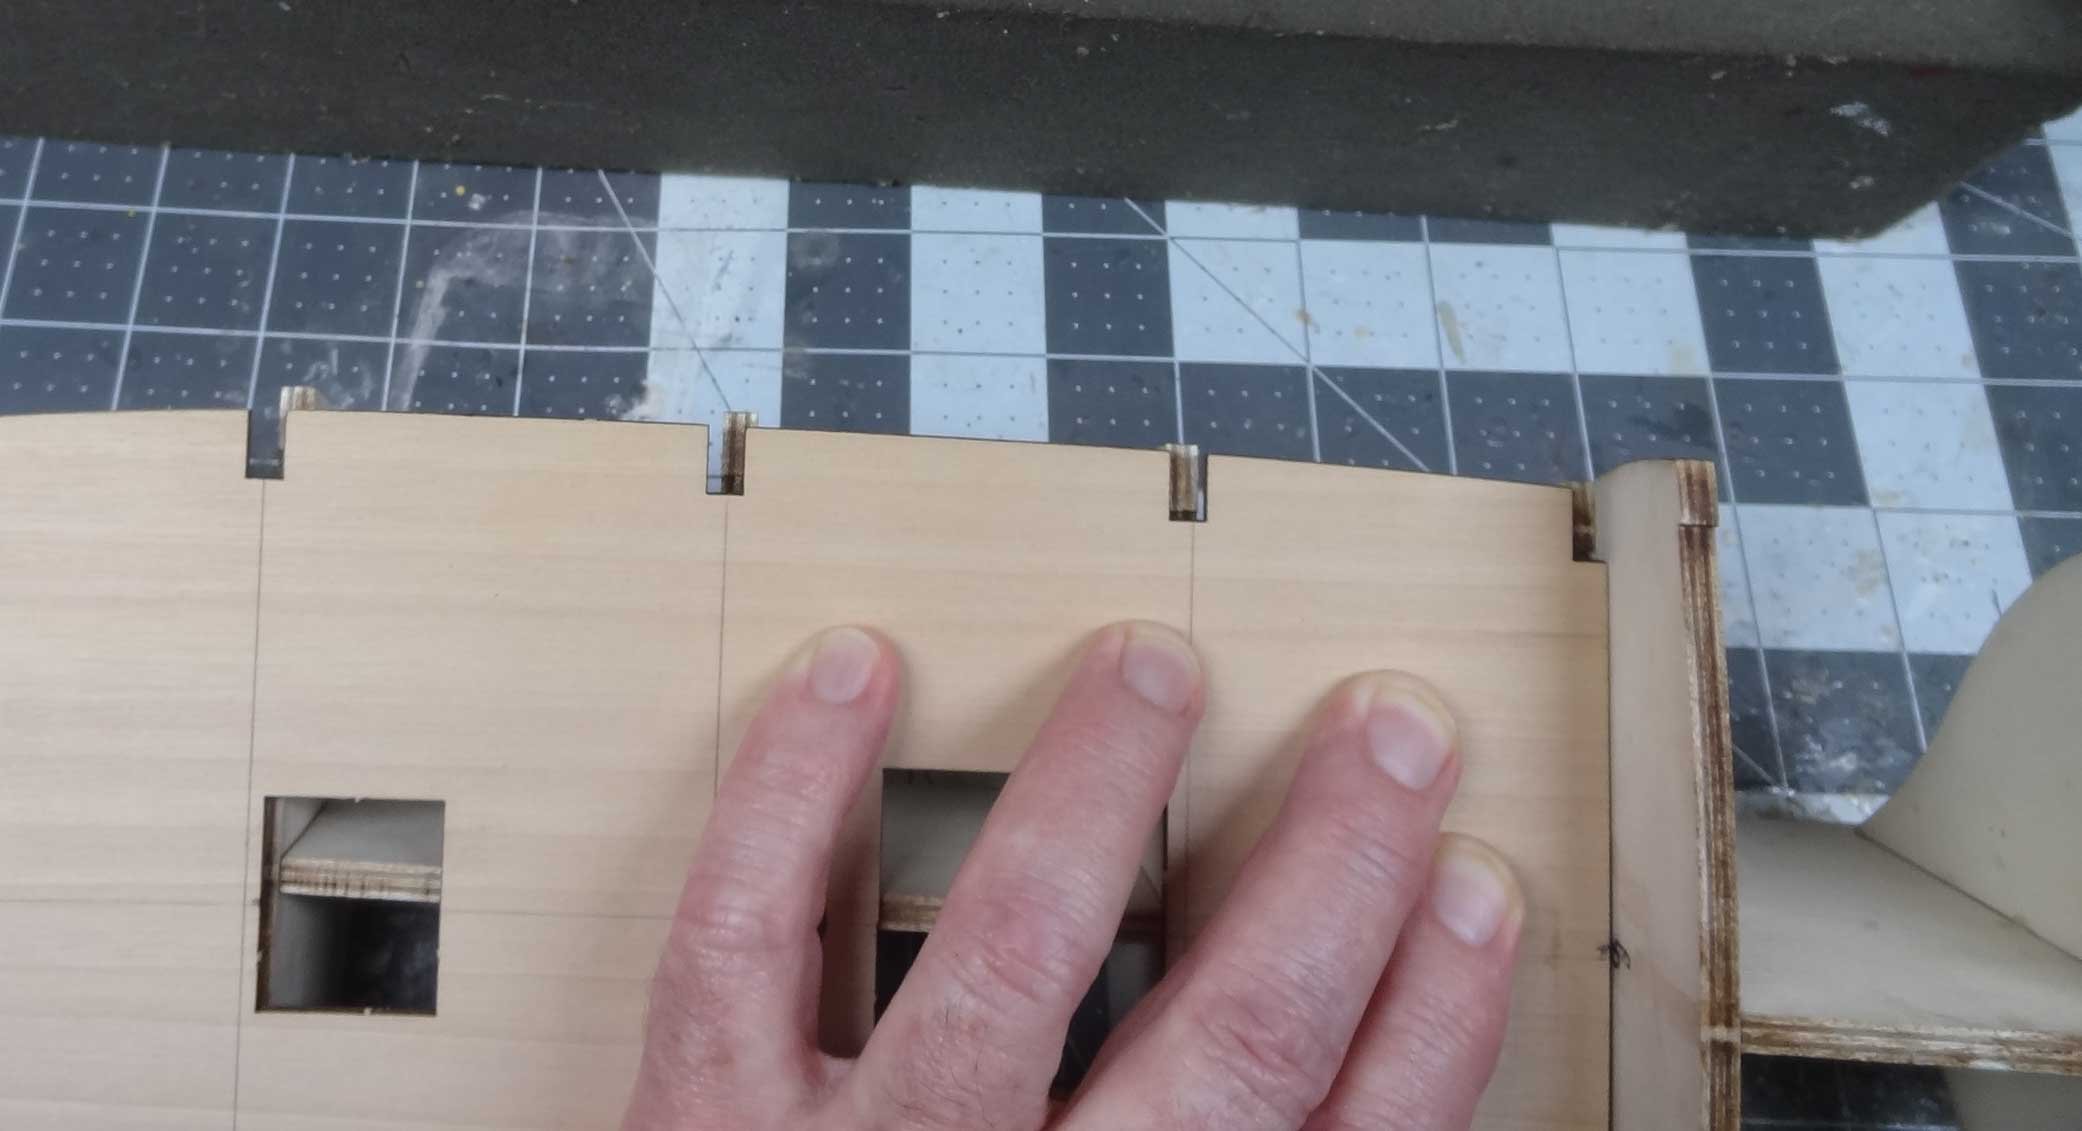
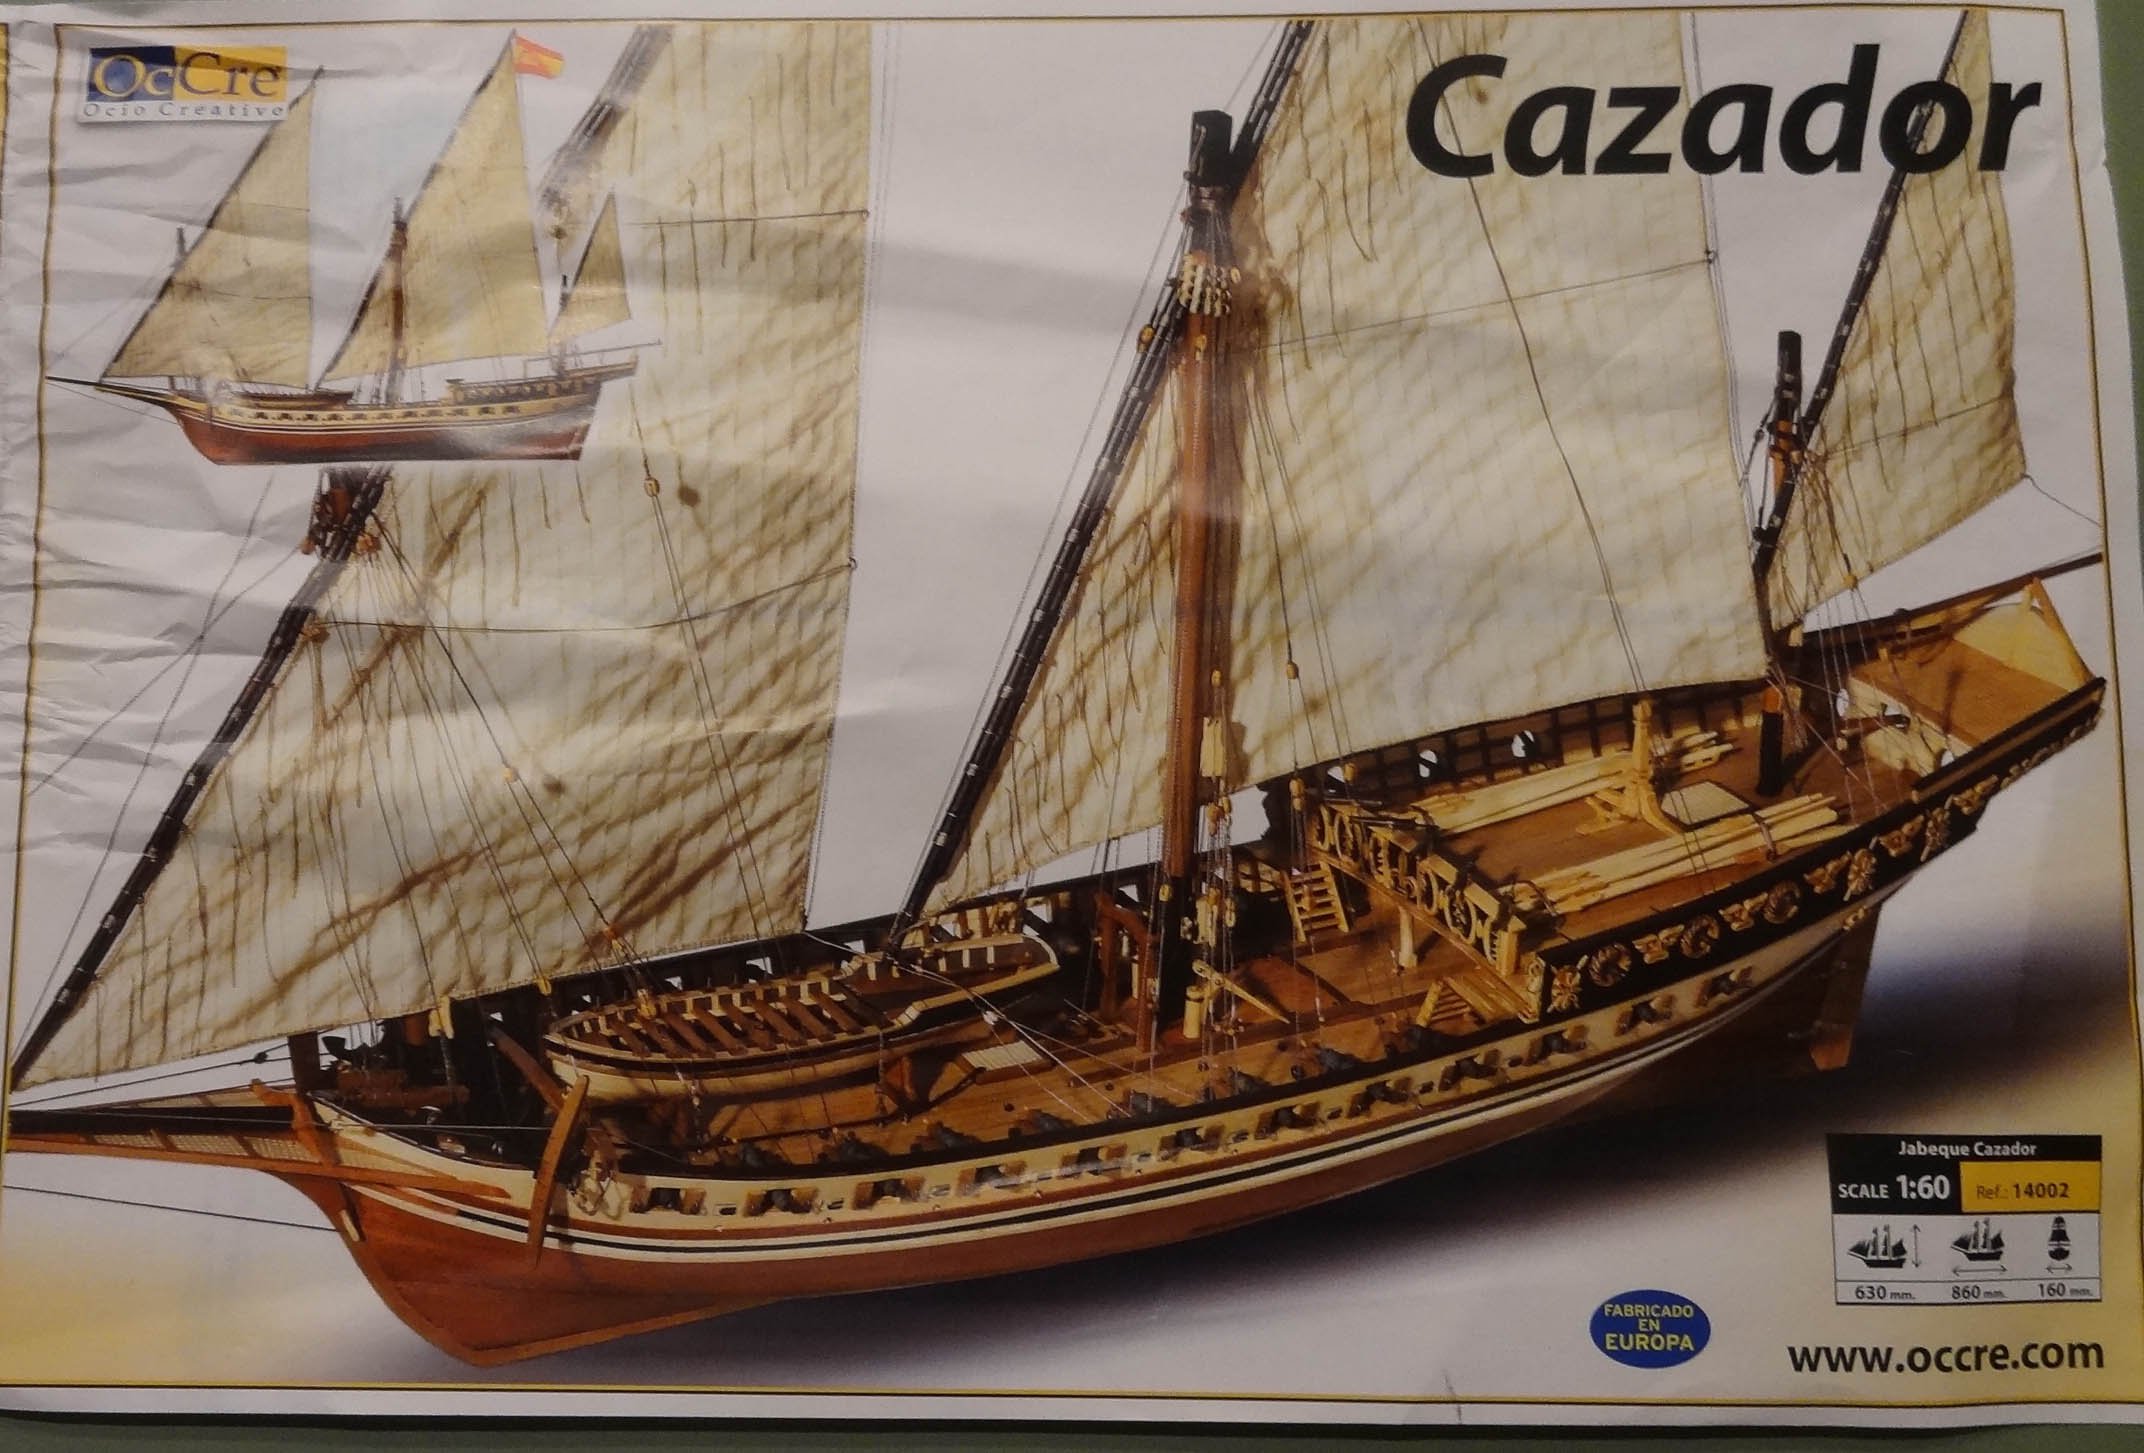
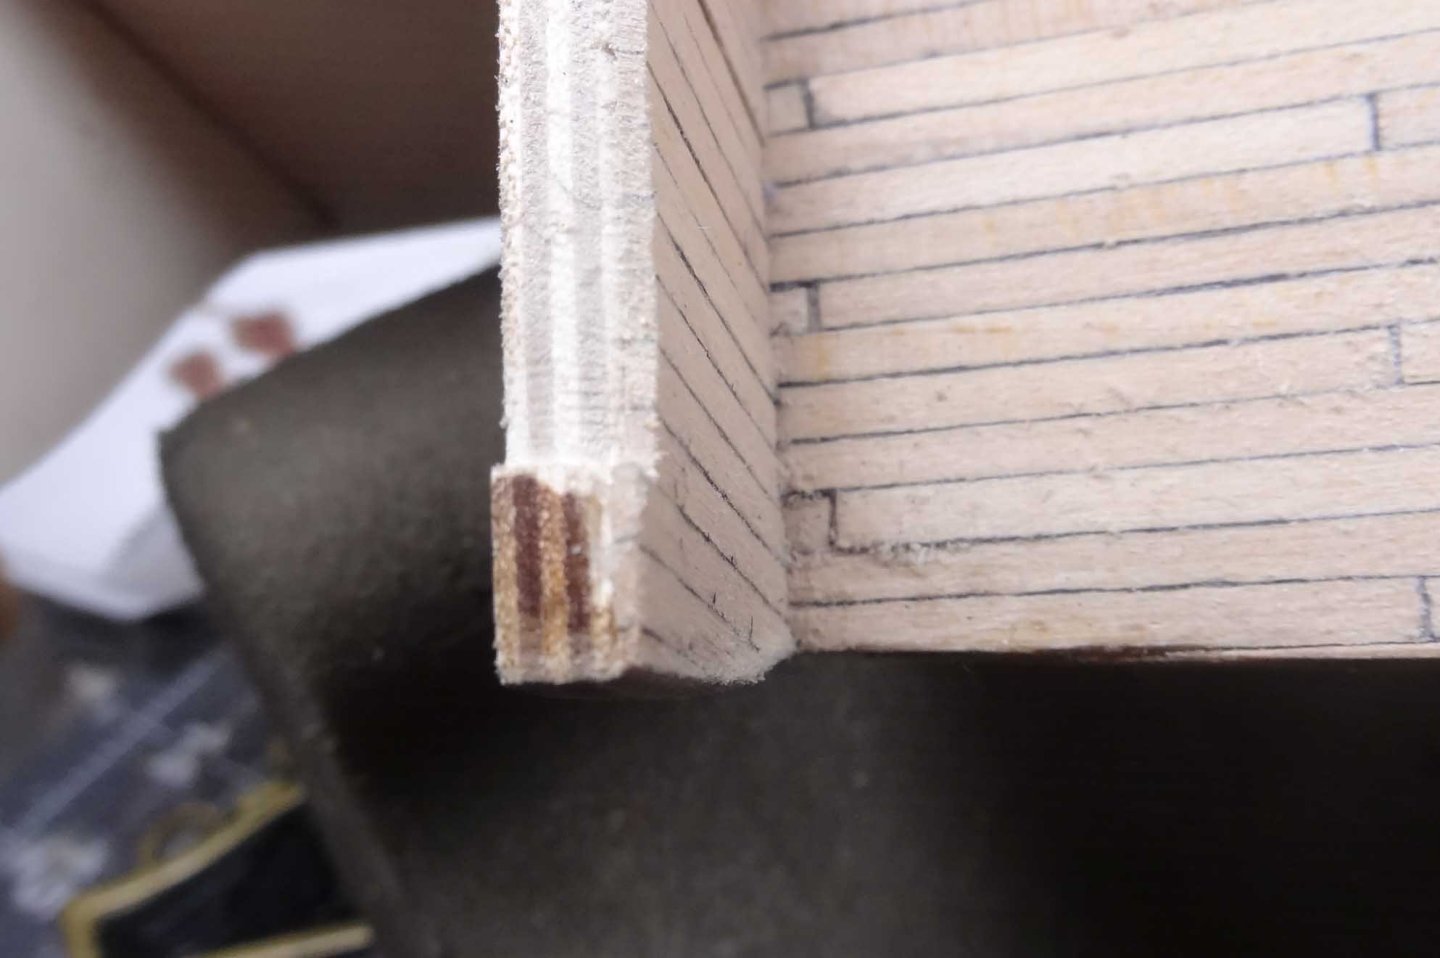
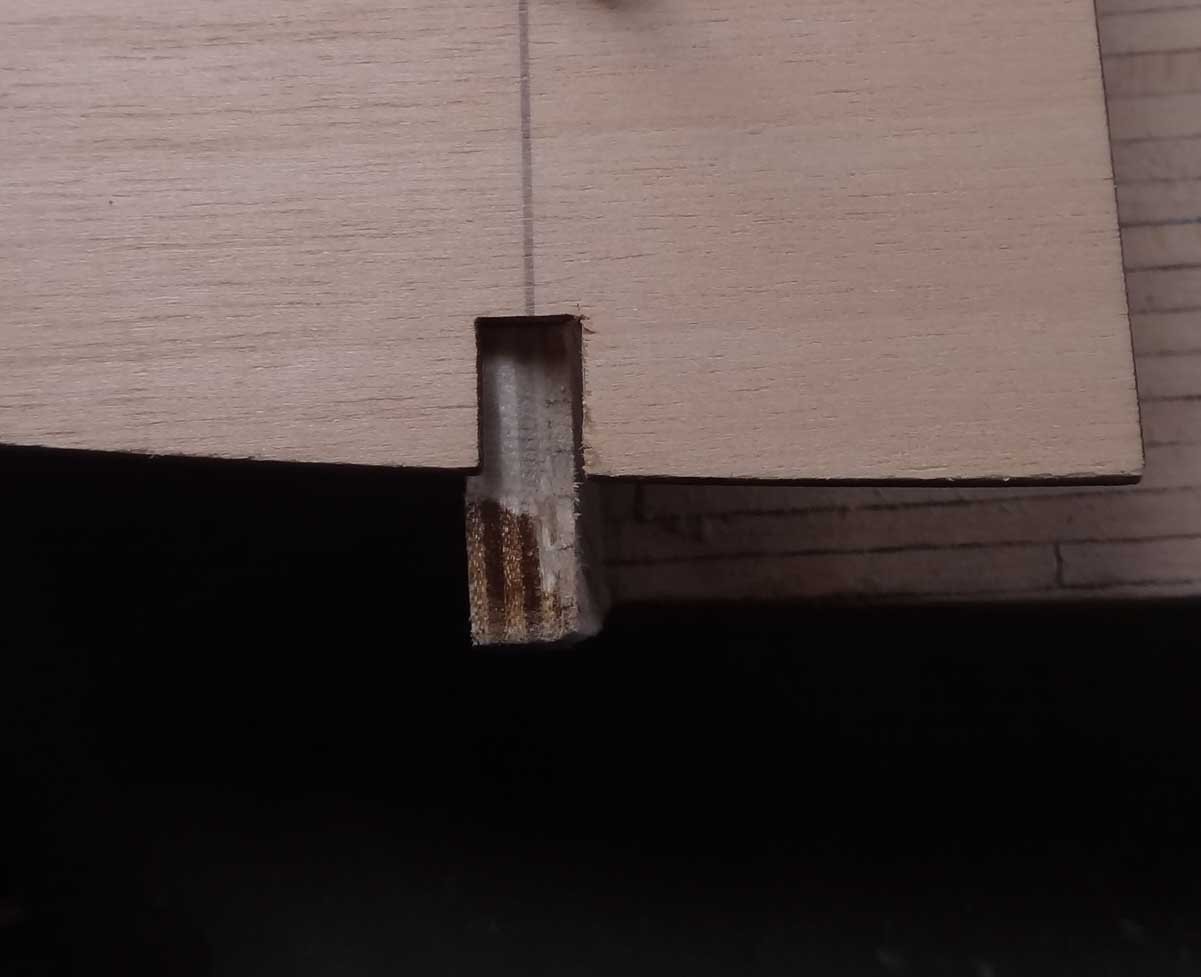
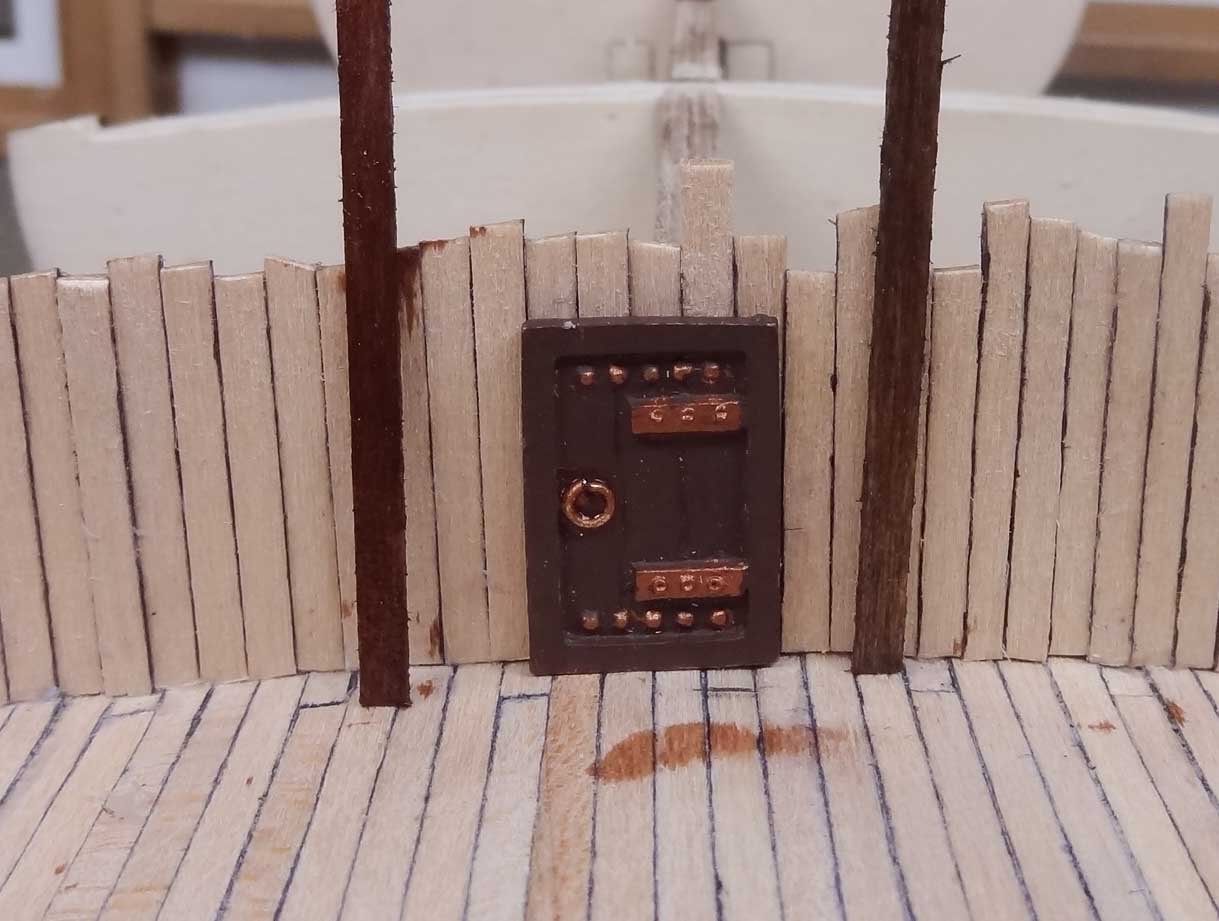
Hey everyone. First off regarding the stain mentioned in my previous post - I decided not to go with a dark stain on the facing. After looking at the finished images on the kit box cover, there is some serious overhang of the quarterdeck. You can barely see the facing, so no reason to go overboard trying to make it look great. If I did use a dark stain on the facing the Britannia door would have to be painted some contrasting color or you would never see it. Finishing up the facing, I trimmed the edges to get the even with the frame. The instructions make a good note about being sure there is still a notch in the frame for the quarter subdeck to drop into, so I sanded a little extra at the edge of the notch to get some good sharp angles. There is also a gotcha that the instructions don't mention. The frames are 5mm ply. The frame where the facing is glued to has now become 6mm. The notches cut out in the subdeck are 5mm wide. No big deal to scratch an extra mm into the deck notch, but just be aware. I'm also seeing that the last 3 frames are not equally level. The middle frame somehow got off kilter from the other two. I noticed this after attempting a dry fitting of the subdeck. Hard to see I know. I'm trying to figure out how that could happen. The groove in the frame and the groove in the keel were a snug fit, so it's not like there was some slop in that fitting. And rechecking shows the frame is perpendicular to the keel.🤔 A poorly cut frame? Dang, I was bragging on the precuts earlier. The dry fitting also shows it's going to be another fight to get that deck laid over the camber of the frames. At least it's only 3 frames this time. Talk to ya soon....

-
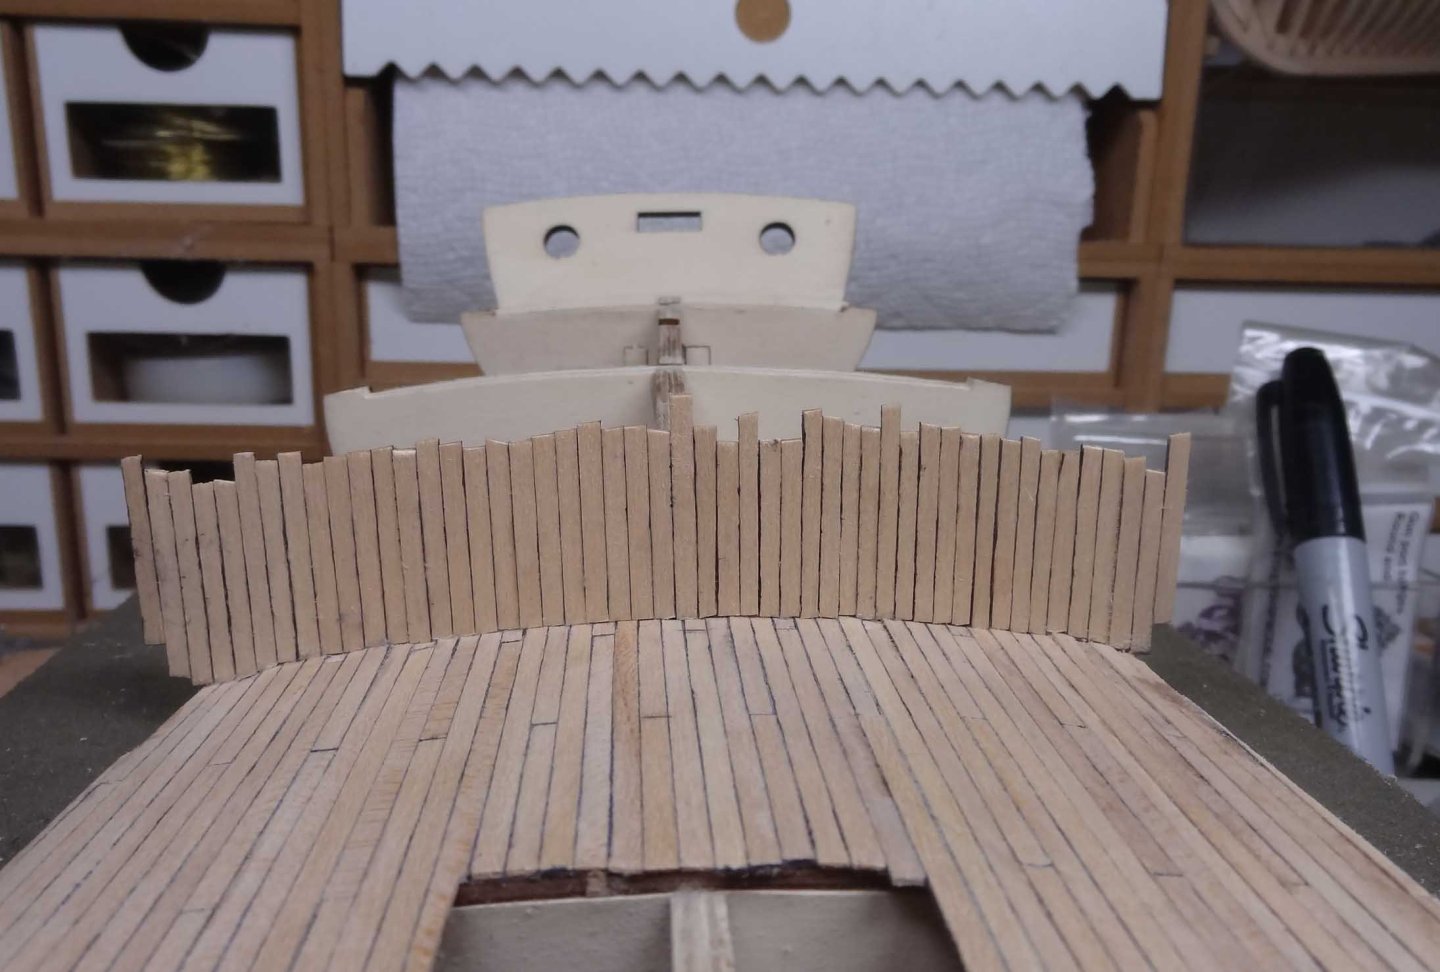
Following the instructions, I continued on with planking of the quarterdeck face. That's my term - what I see in the instructions and inventory list is many of these surfaces are generically called "linings". For instance, I just finished the foredeck lining. Then the quarterdeck face is called the frame lining (very misleading). I should have done a better job of shaping the bottom of the face planks to match the camber of the deck. I may run a stick across the deck butted up to the facing to clean that up. While the glue is drying on the facing I took a few moments to think ahead about the coloring of my work so far. With almost any wood (white or colored) I almost always go to a natural stain for decking. The go to product is MinWax "Natural". It doesn't have any pigments in but it gives any wood a nice "wet" look. The quarterdeck facing was done with the same Ramen sticks as the deck. I think there needs to be some differentiating tones between the two. I have a Red Chestnut and a Walnut stain on hand so here's what they look like - Red Chestnut on the left. I show the Britannia door painted in flat brown with the two stain samples. No real reason why the door needs to be flat brown. And of course, I couldn't possibly get this far without making a mess on the deck 😕 I think Natural on the deck for sure and Red Chestnut on the facing. Suggestions?
-
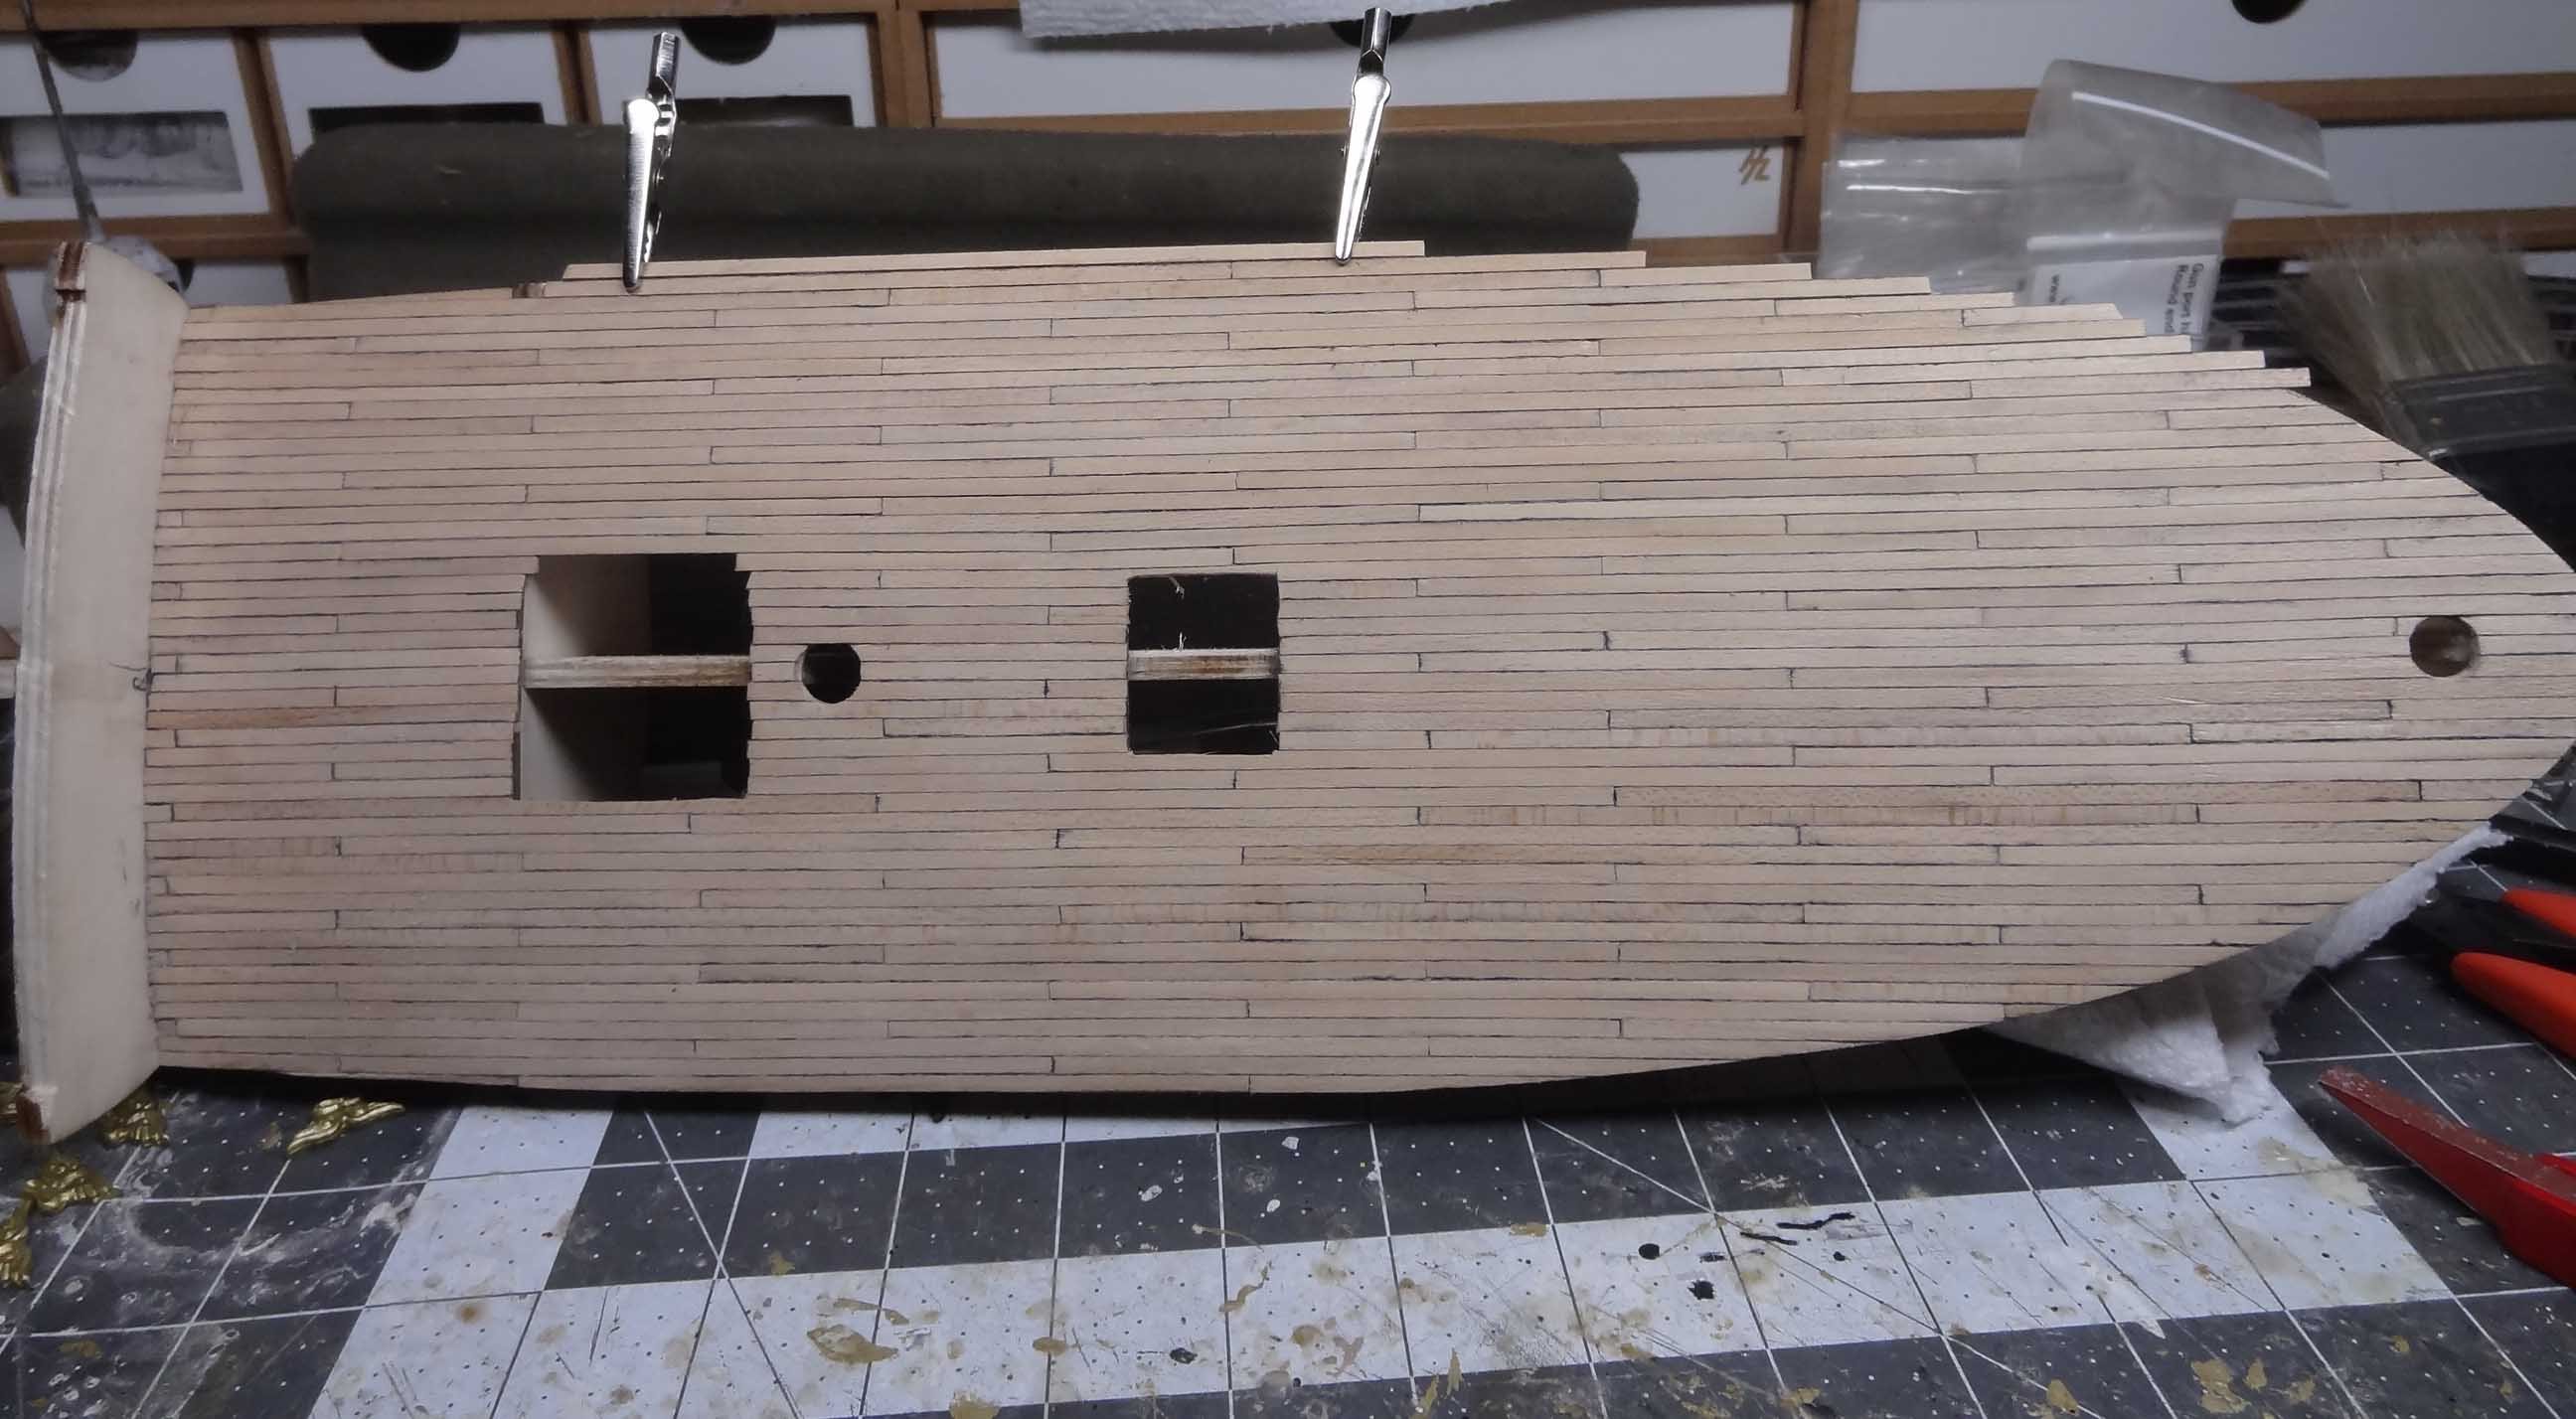
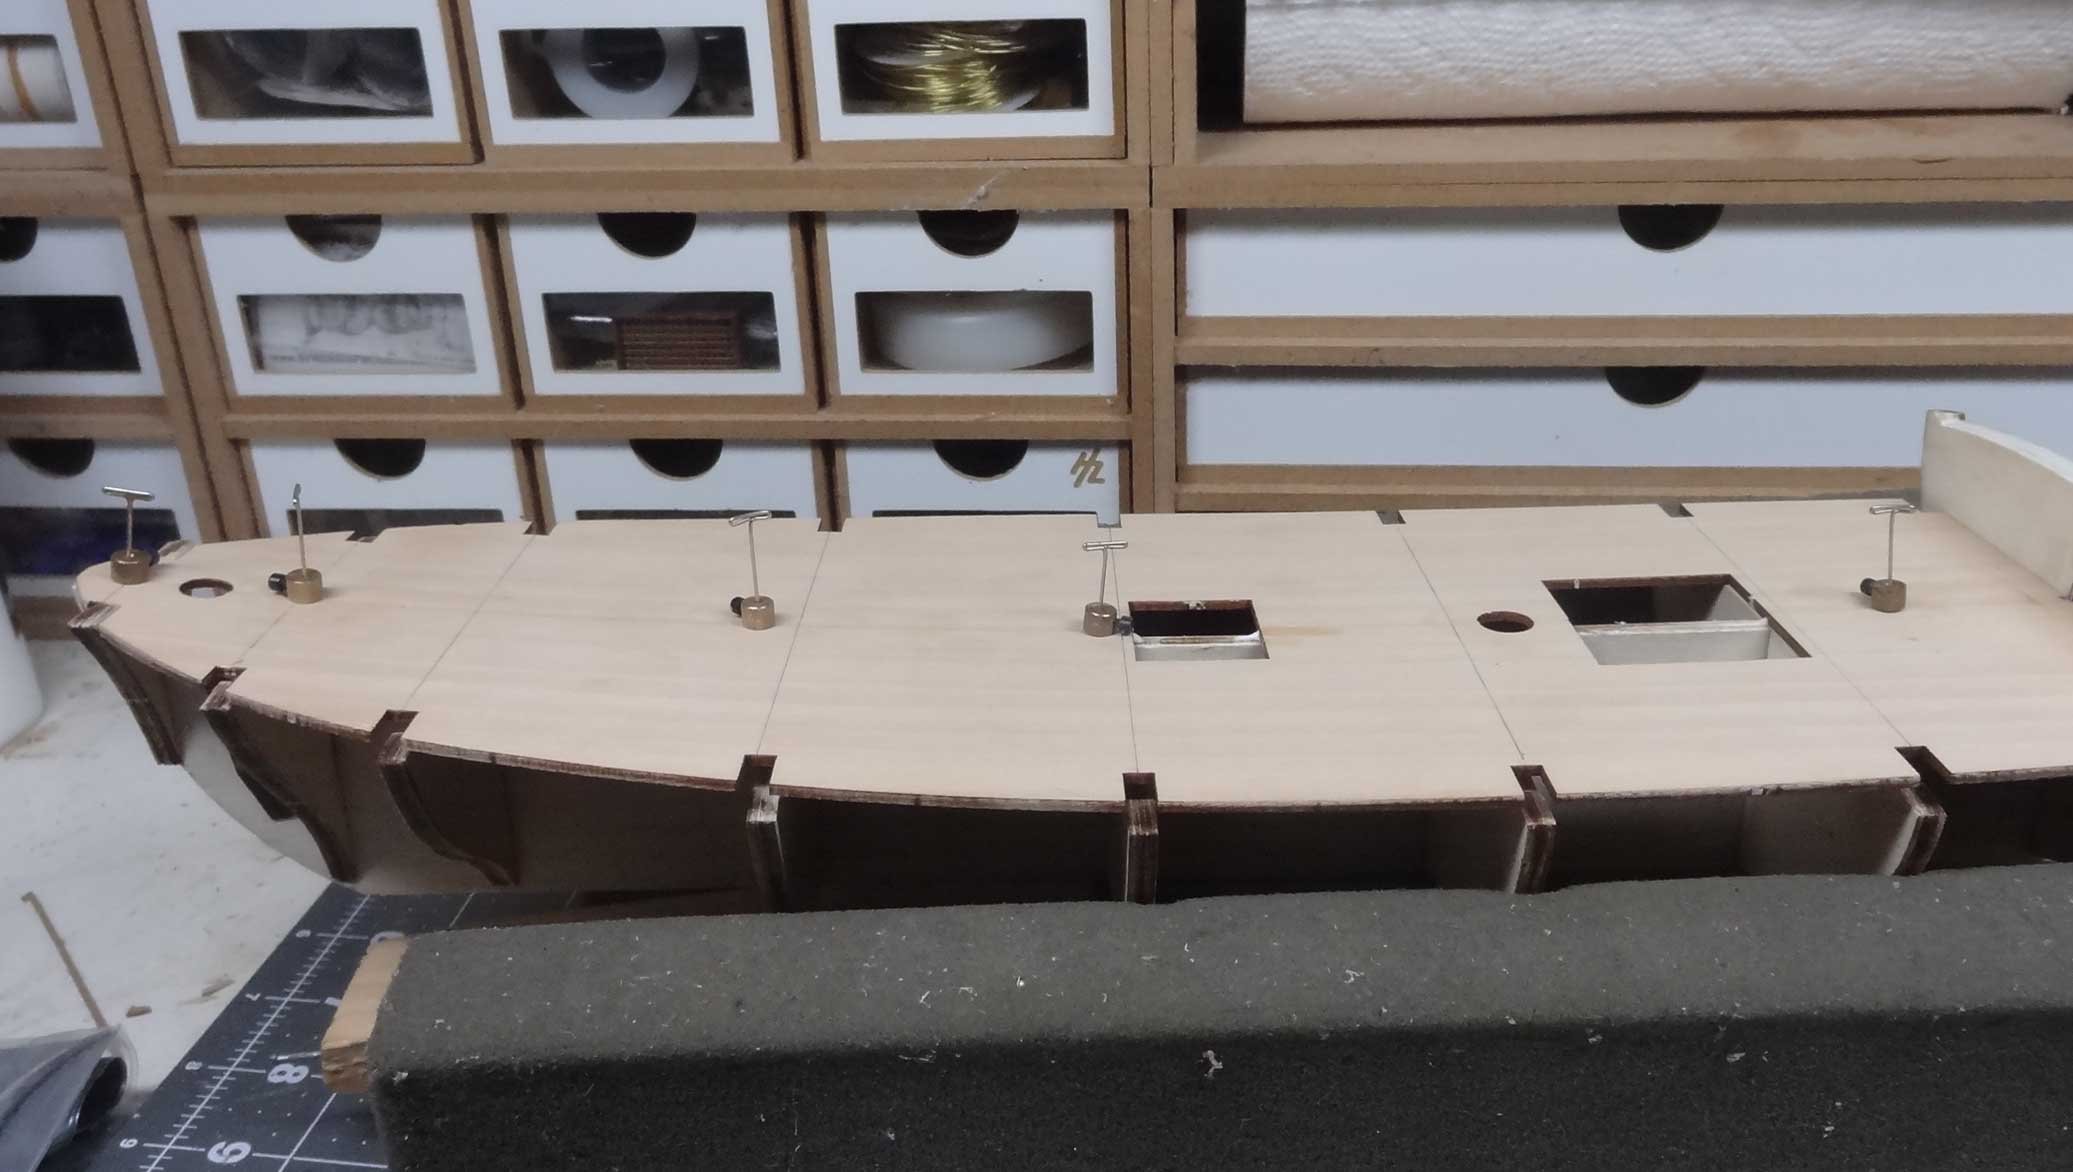
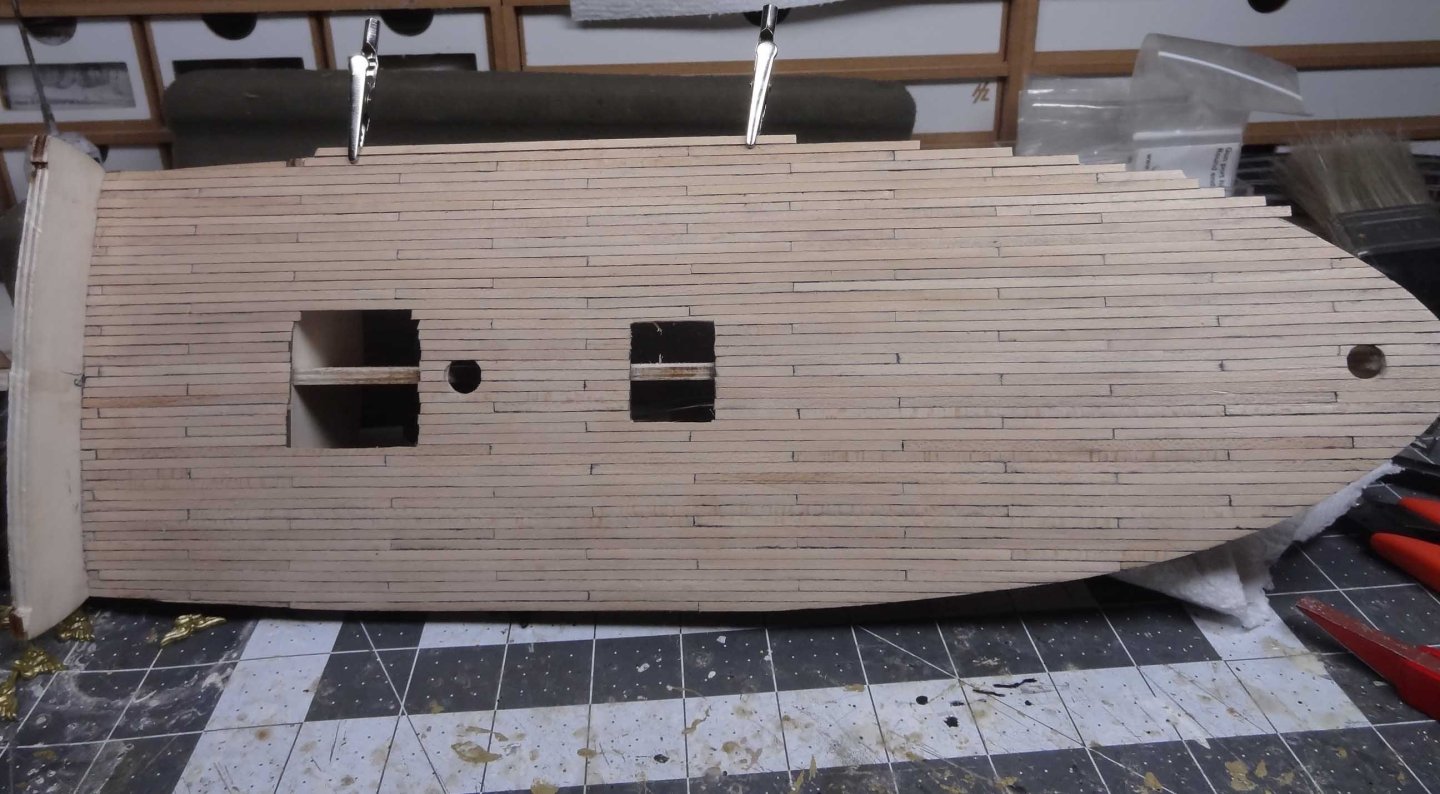
Ye-haw - the deck is planked! I really appreciate everyones suggestions. As I mentioned before, using a Sharpie for "caulking" just doesn't work for me now (at least how I was using it). I used to outline each plank on all four sides. This really doubled the amount of blackning between each plank. I still want to get away from the Sharpie but at least for this build I think I came up with a decent solution. Nothing I thought up but I think I have seen this in other posts. Instead of darkening all four sides of a plank, I just did two sides, a long side and a short side (leaving two sides unmarked). Gluing an unmarked side to a marked side gives a more reasonable rendition of caulking. If you check the port side you will see what I am talking about. Big difference. The other big difference, the port side (done after starboard) has the planking much more aligned, strake after strake. Rather than going with specific measurements (like I did on the starboard side) I ended up just eyeballing the lines on the port side. Guess I can trust my eyeballs.. OK - it ain't gonna' be beautiful, but I will get my mojo back before this build is finished🙂
-
Decking is getting close to done but I am noticing something. Used to be I liked showing a heavy caulk line between planks. I guess I just liked showing the amount of work that went into laying everyone of those planks. I always used a Sharpie to get a good dark line. Seems like these days I'm not liking that so much. The Sharpie is a bit of overkill. Add to that it can bleed into the planks especially at the ends. Looks kinda sloppy. Sanding doesn't get it all out. It's too late to change for this build but I'm going to be looking for something different going forward. Painting ornaments continues but it seems like a never ending battle. Paint with gold one day and get some gold on the black areas. Paint with black the next day and get some black on the gold.🤨 I hate looking at paint work in images. It always looks so bad. I did get the deck reglued to frame #4 but that has created a problem. I had to really clamp down the deck to make contact with the frame. So much so that the deck has a bow in it at that spot. Not sure what happened. The frame was glued in snug and at a good angle to the keel. Hope this doesn't give me problems down the line. I should finish the deck this evening. Talk to ya soon...


-
I did finish the starboard deck planking and started to move out from center to portside. I completely missed the fact that the deck at the #4 frame on the port side was totally askew from the frame. This is strange because I noticed this a few posts back and thought I had fixed it. Whatever! Sorry, I should have made some pix to show my response. I have several lab squirt bottles and one is filled with 90% alcohol. This was useful in getting alcohol right where it was needed to soften up the glue between the underside of the subdeck and the frame surface. It took a lot of squirting, scraping, cleaning to get all the previous glue out of the way so I can try to reglue. After several dry runs, I did glue and clamp the deck again. From what I can see, it looks like I was successful. I need to look ahead to see what other items I can be working on while the usual hull processes move forward. The ornament painting is fun but my eyes can only handle 10-15 minutes (under magnification) before they just go nuts. I may consider working on the ship's boat to kill idle time. Thanks to everyone that is looking in. I expect things to get more exciting after the basic stuff (deck, hull) is done. Hang in there!
-
Peter - I have definitely read your log. Your talent is amazing. Gary - That was one thing I forgot to post. I did find the instruction booklet in the recycle bin. I can only guess they got picked up with some other trash and dumped. It's pretty strange, I don't usually do stuff like that. Planking and painting continues. I should have the starboard side of the deck finished tonite. I can only paint the details on the ornaments for about 10 minutes. I start getting bug eyed after that.🤪
-
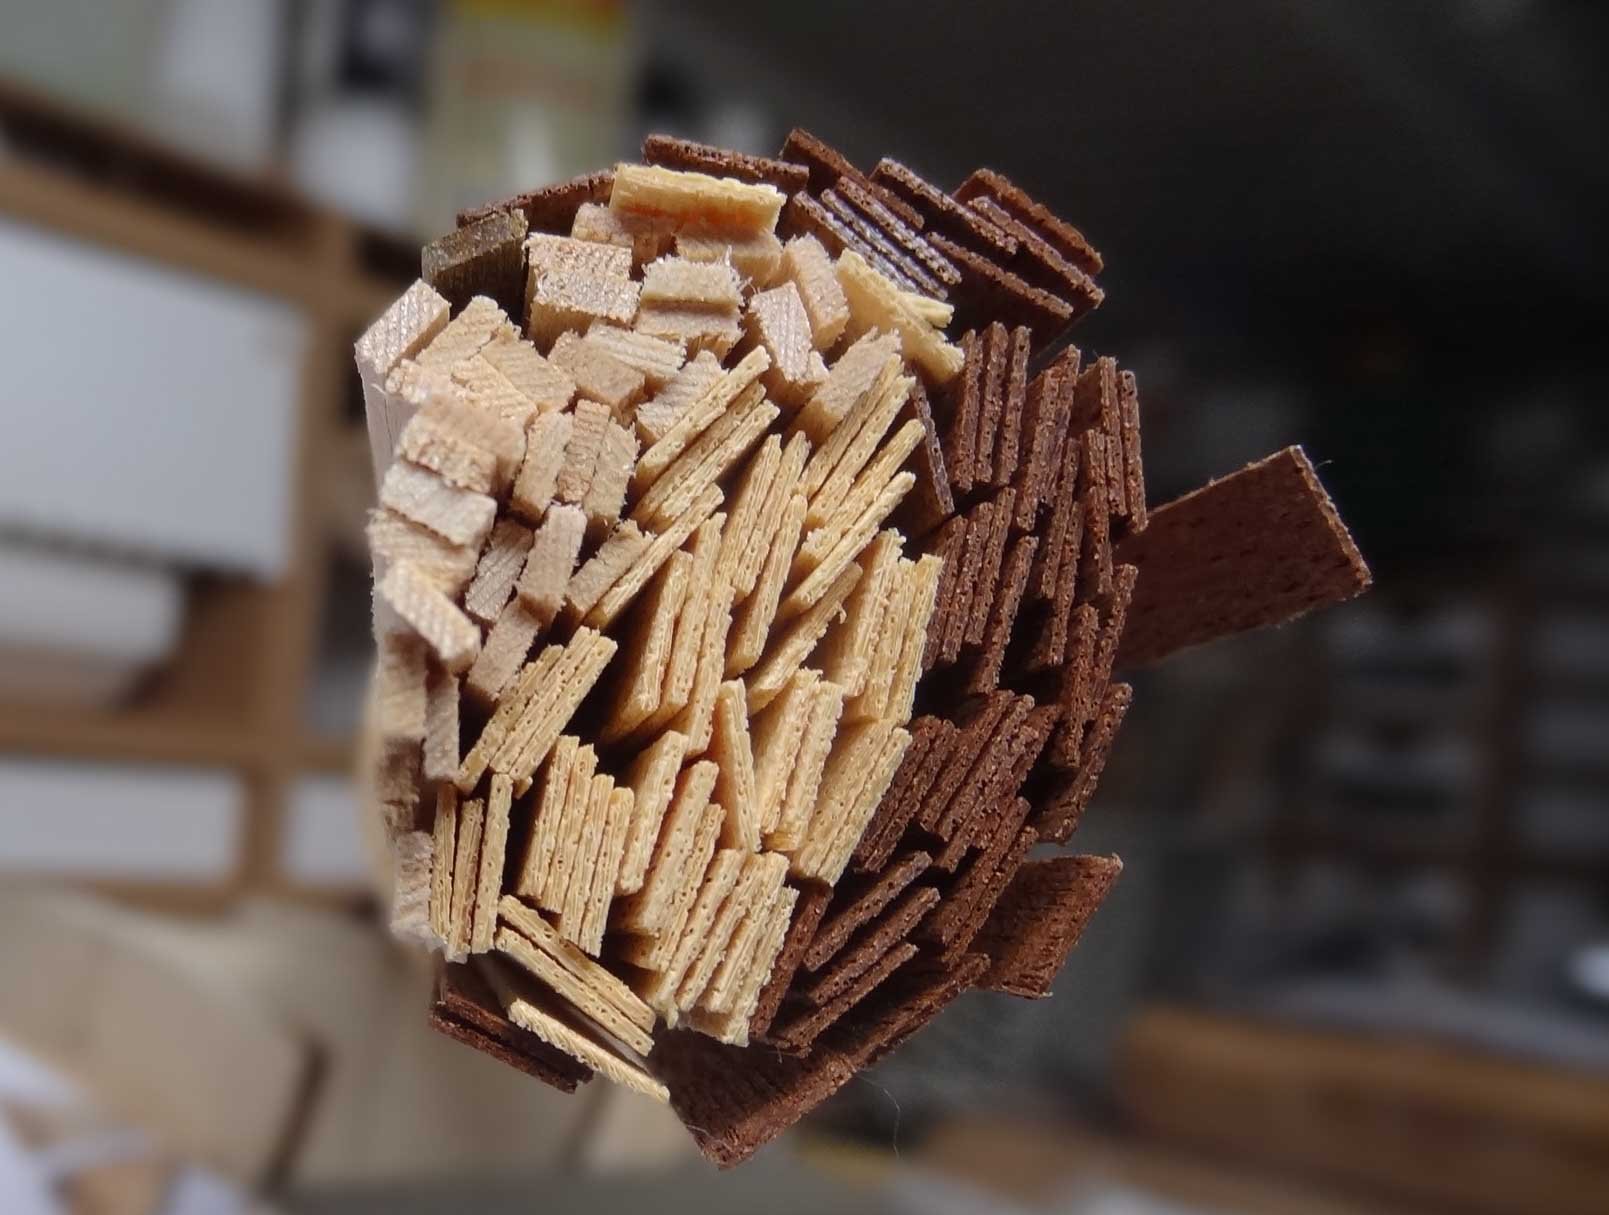
Have begun deck planking. Nothing really unusual except that the dimension of the sticks is all over the place - as mentioned in the previous post. I'm weeding out the sticks with borderline measurements. Should be 1mm x 3mm but I'm seeing a lot of .65mm x 2.85mm and also quite a few 1.15mm x 3.25mm. I hope it's just crappy milling. I have got to say, it is joy to get back to basic operations. Decking is always a chore but given the last kit I was working on, this is a dream. I'm really having a good time even though I have hosed up a few planks on the deck. Will have a few pix soon.
-
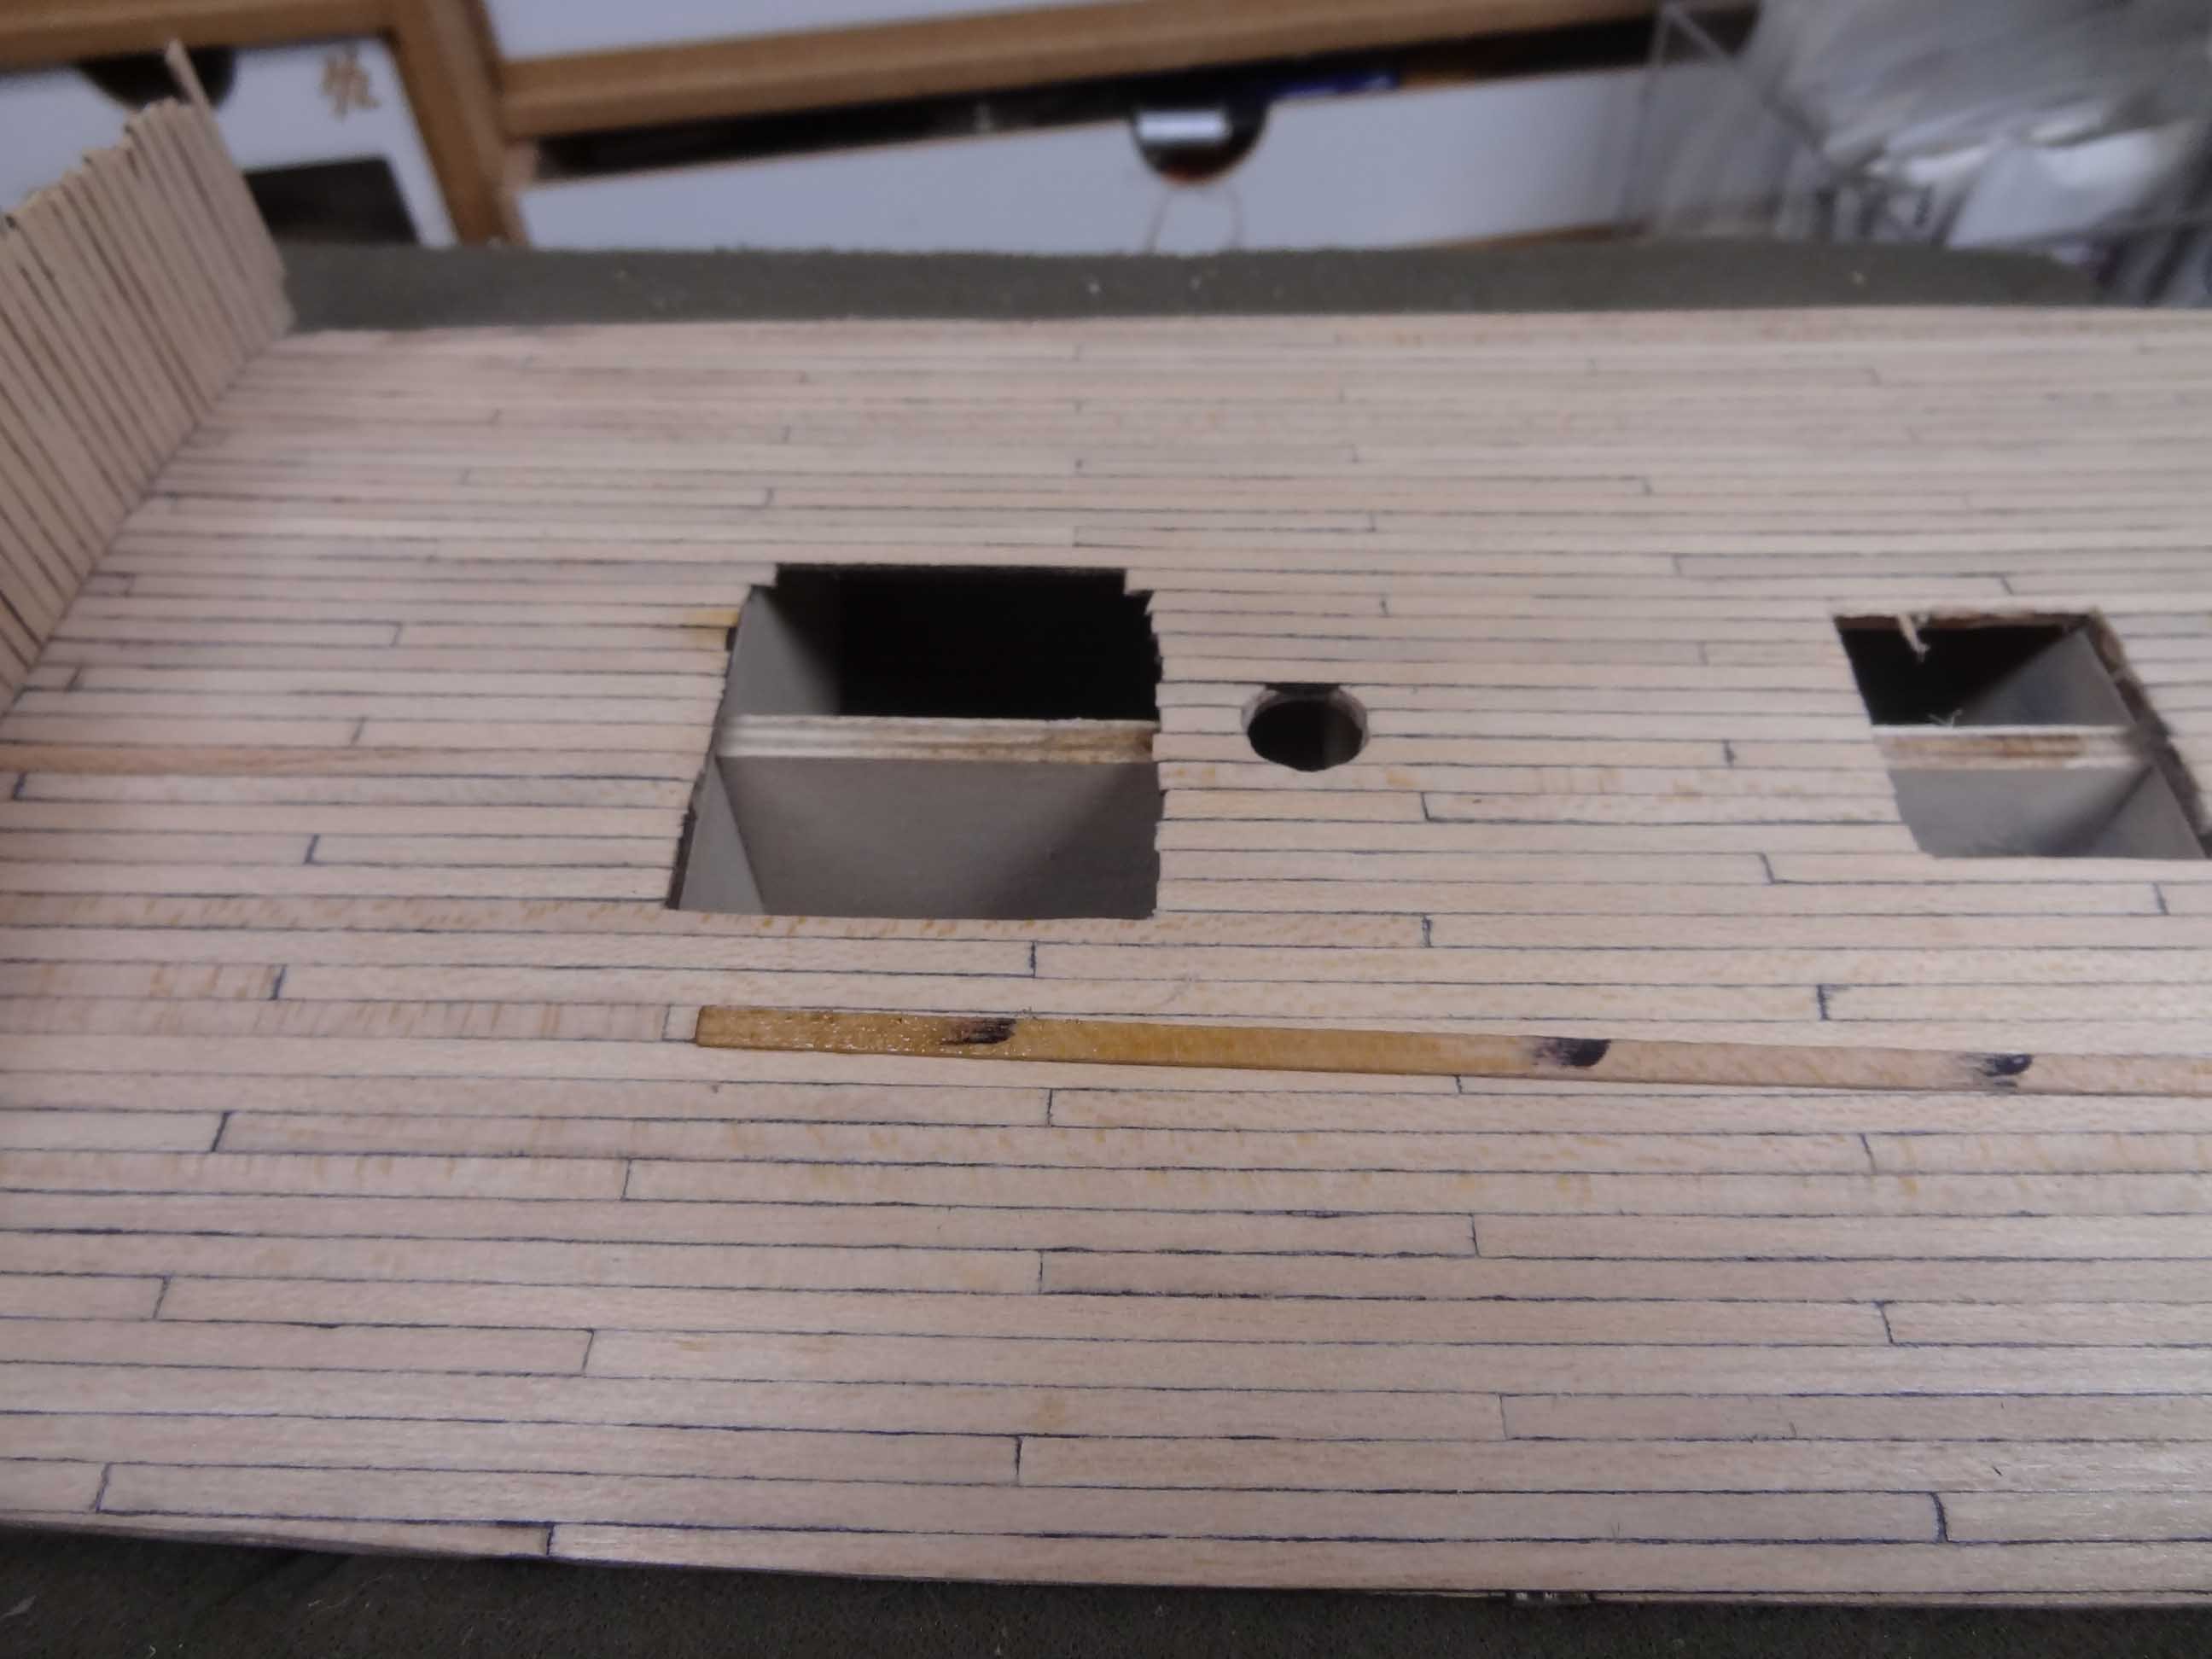
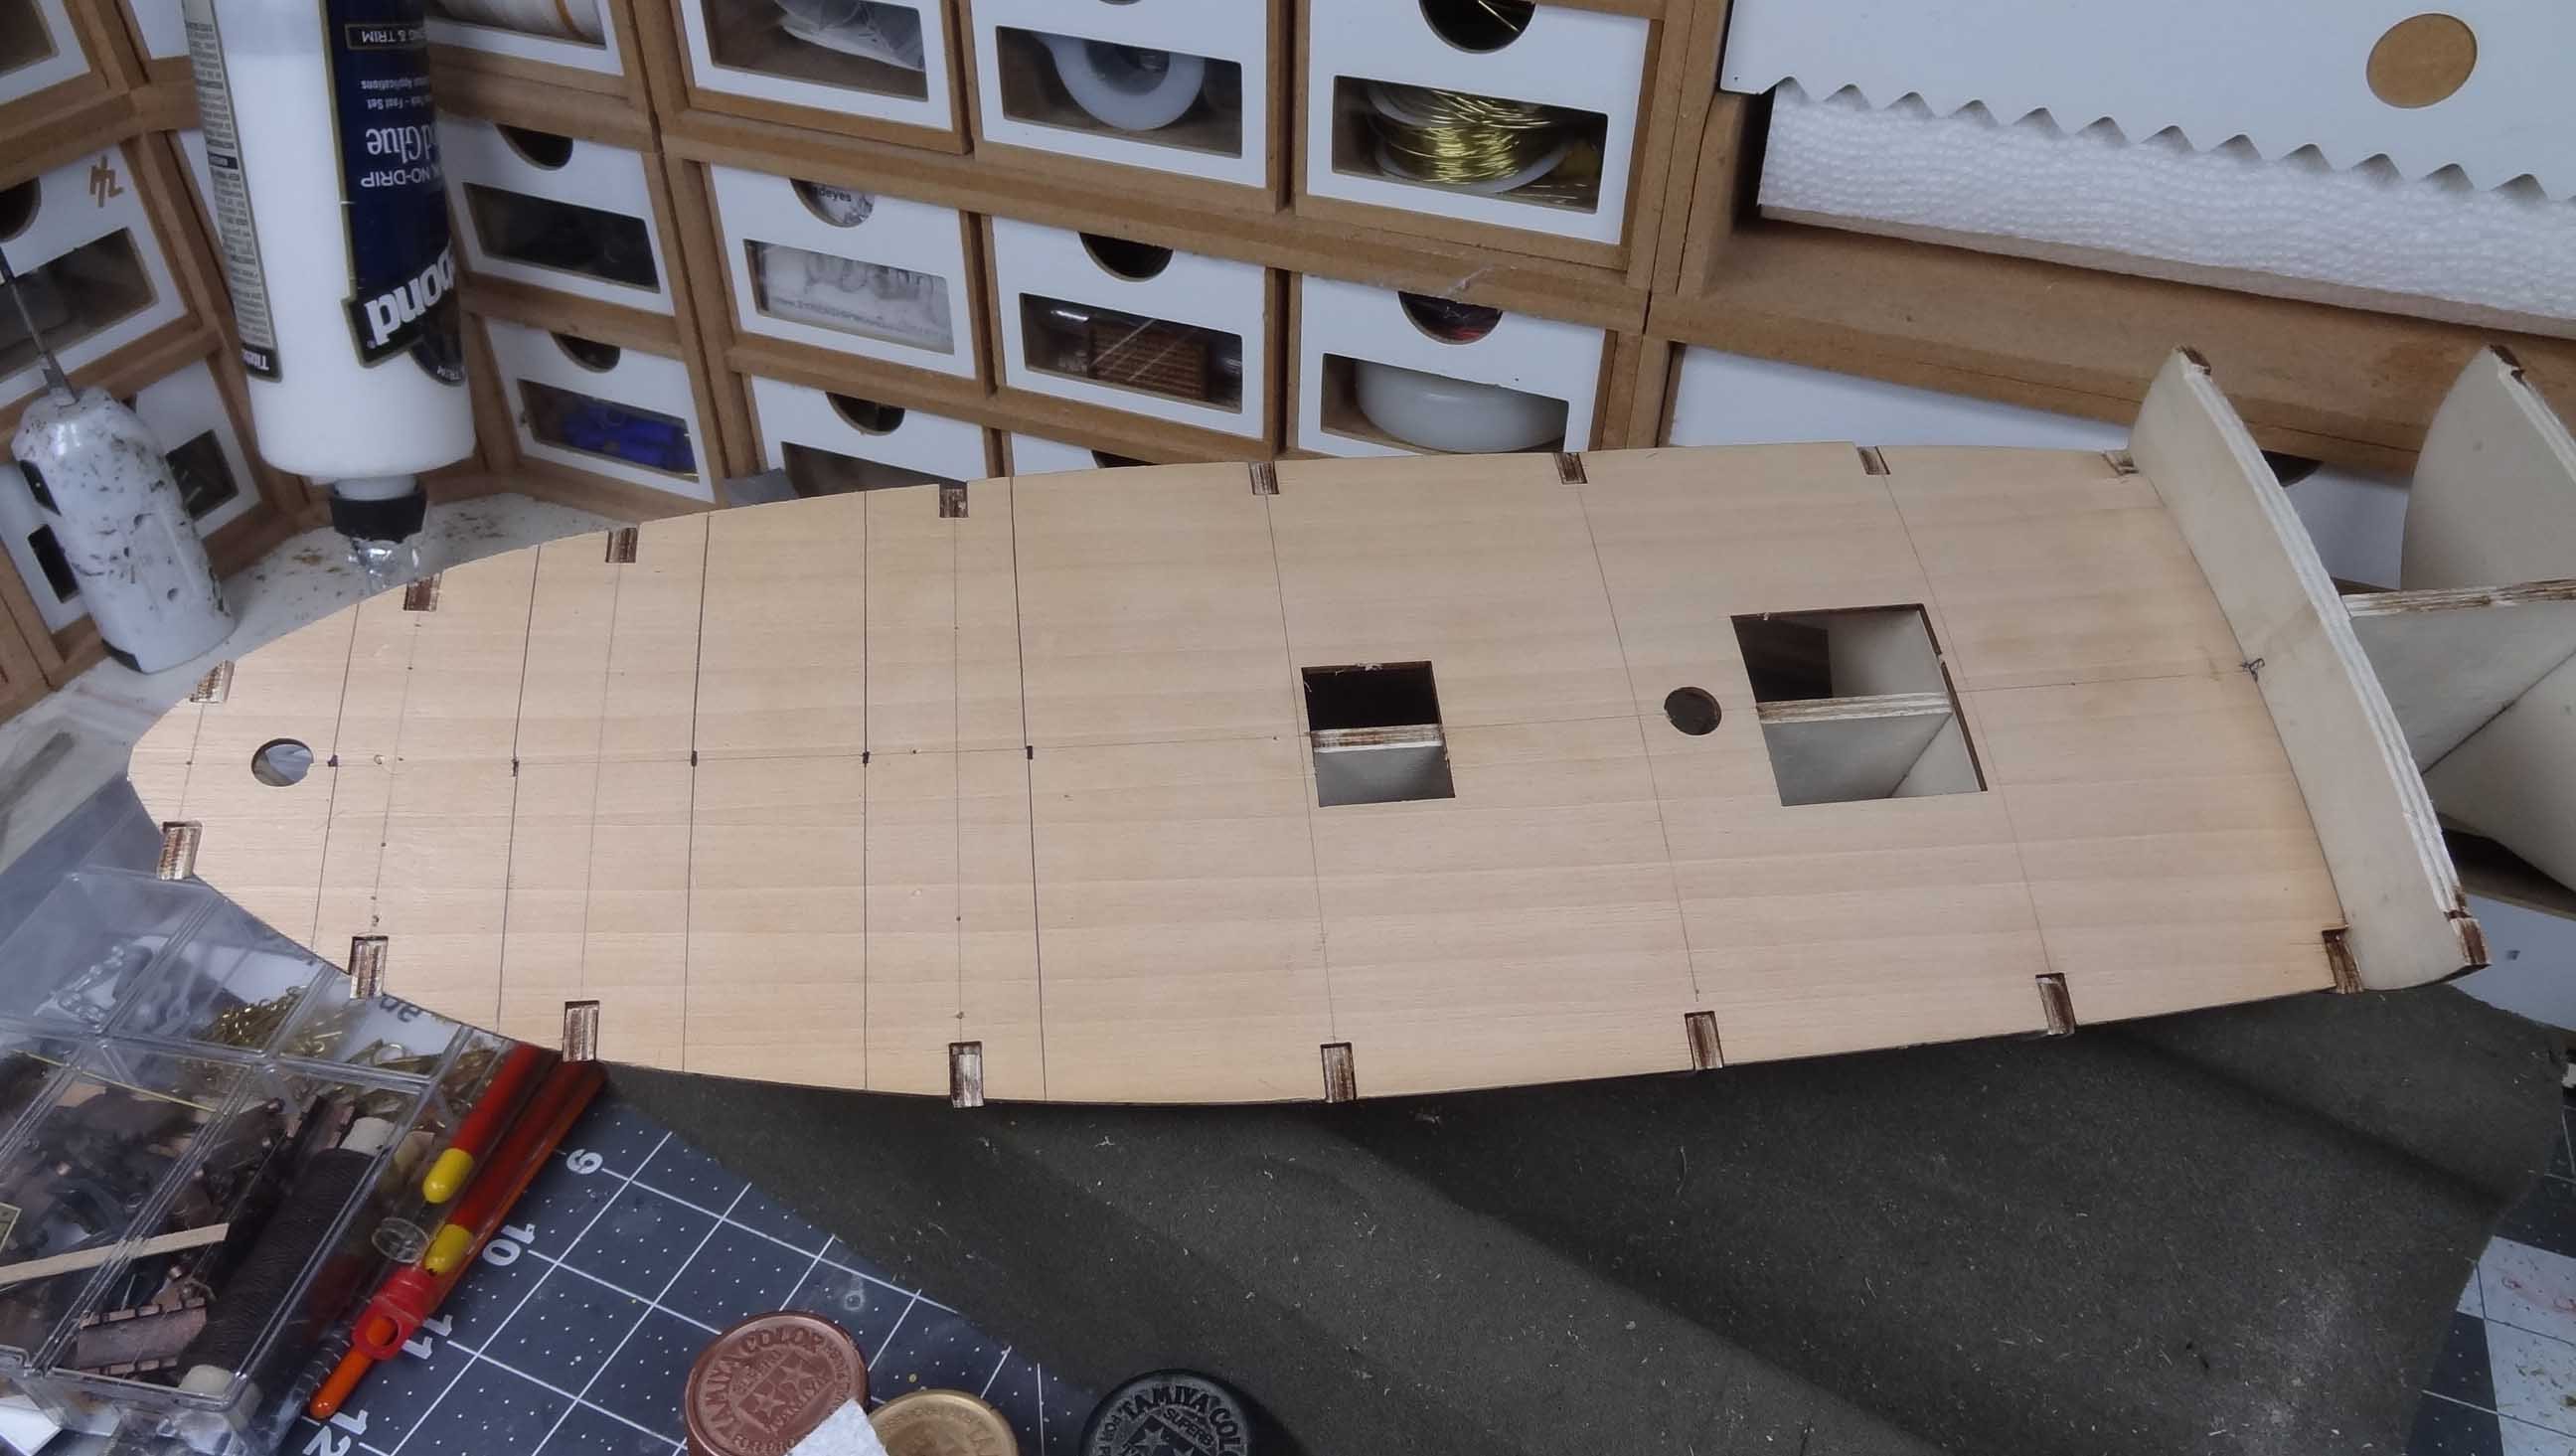
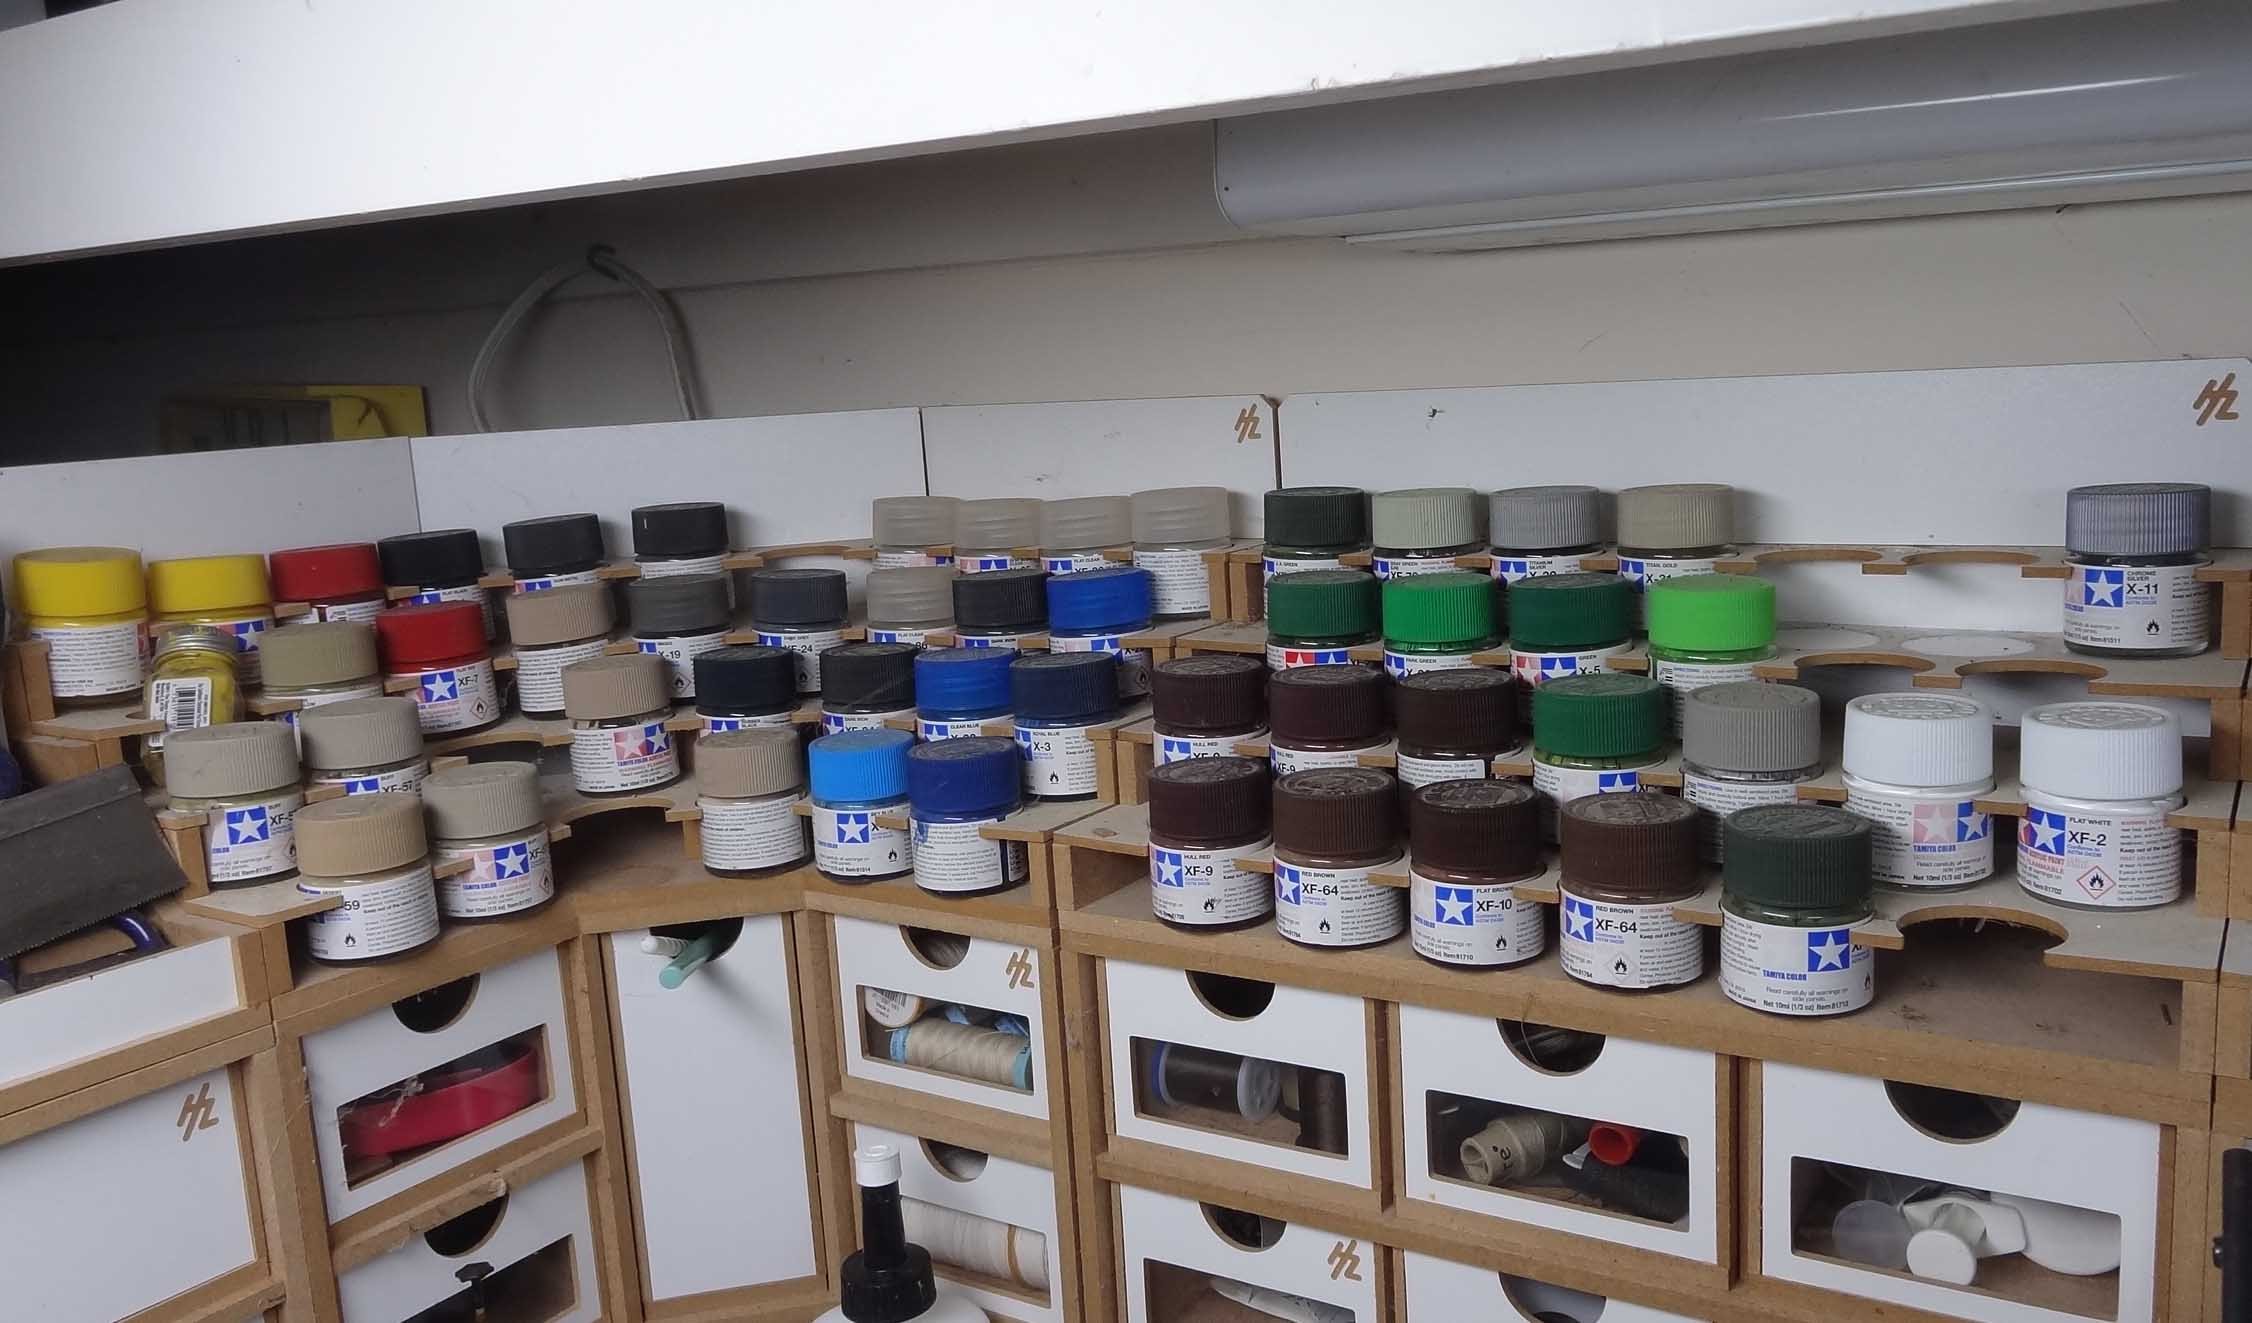
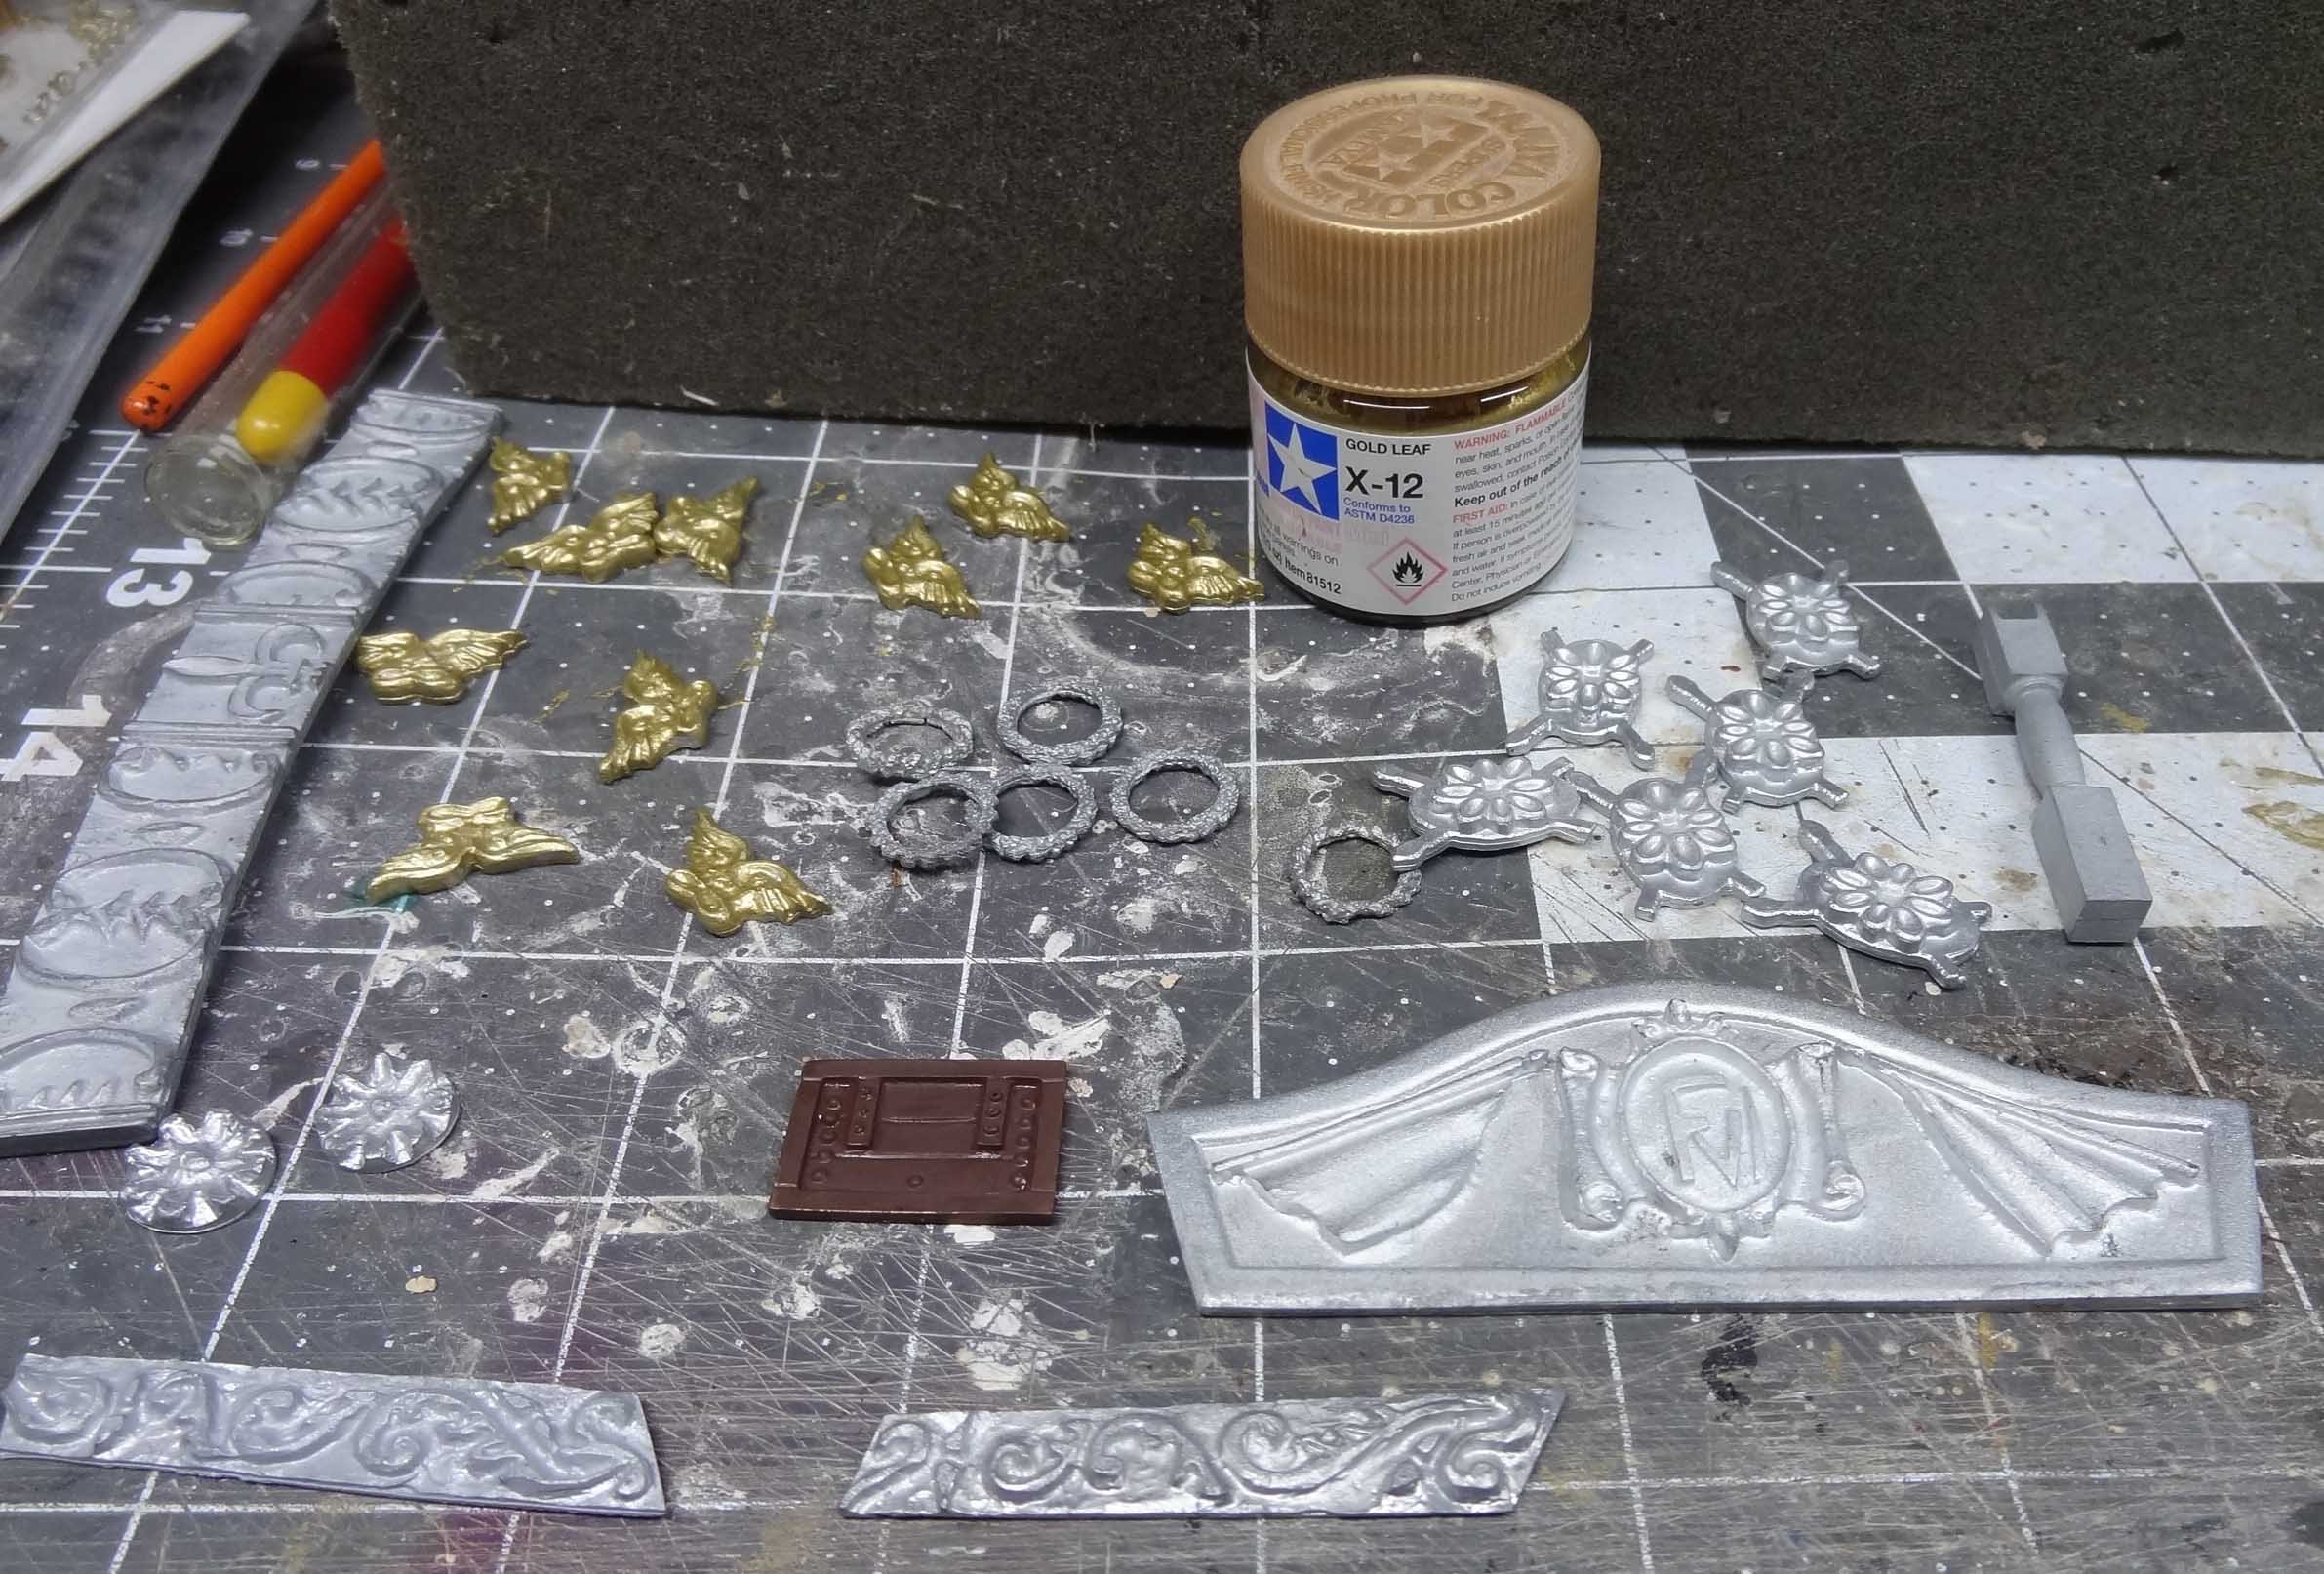
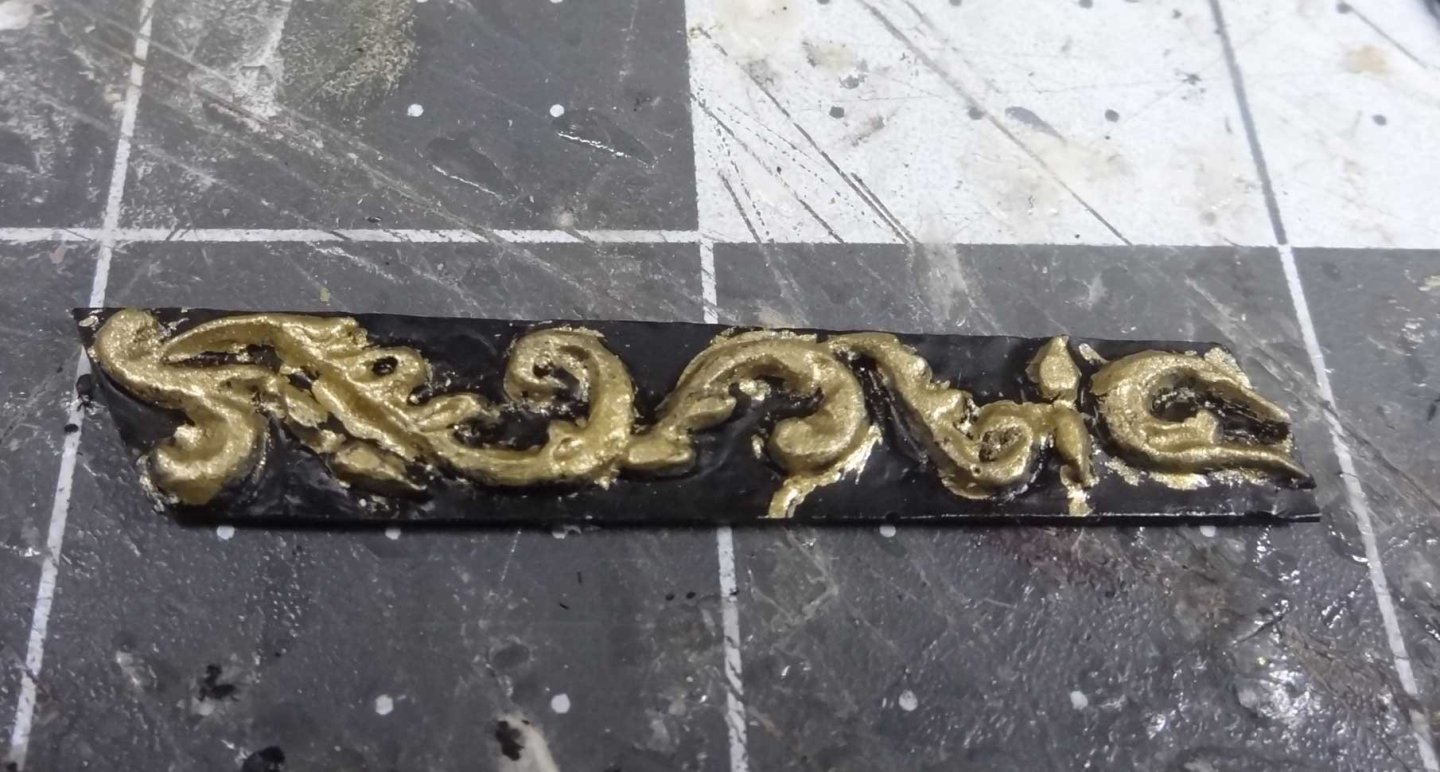
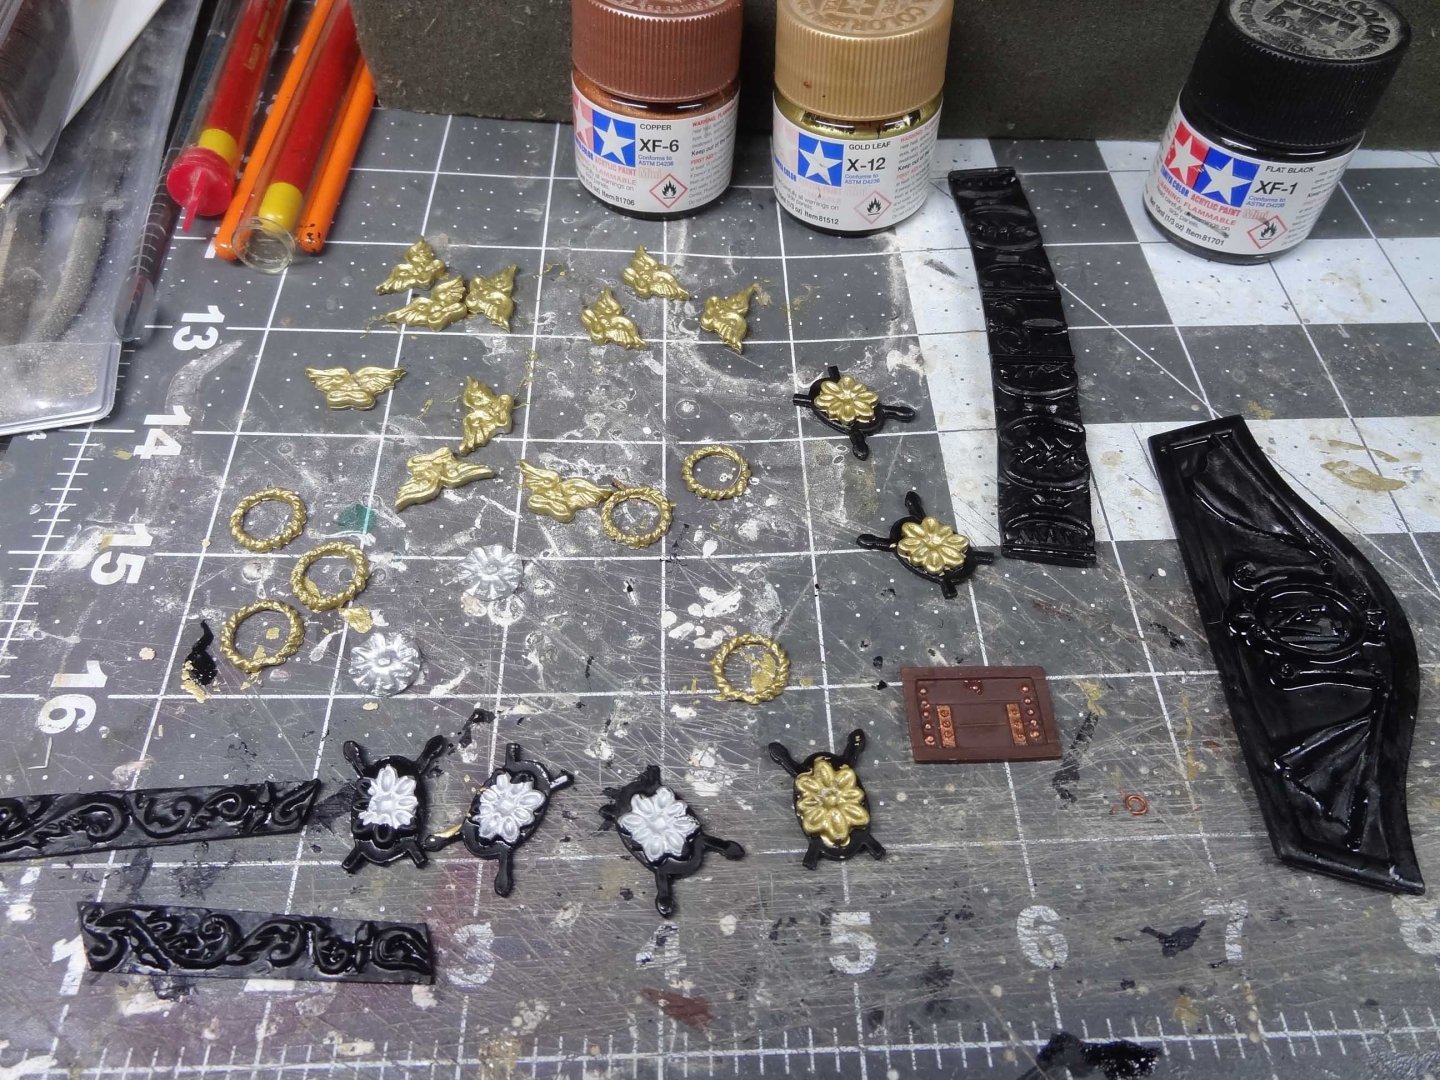
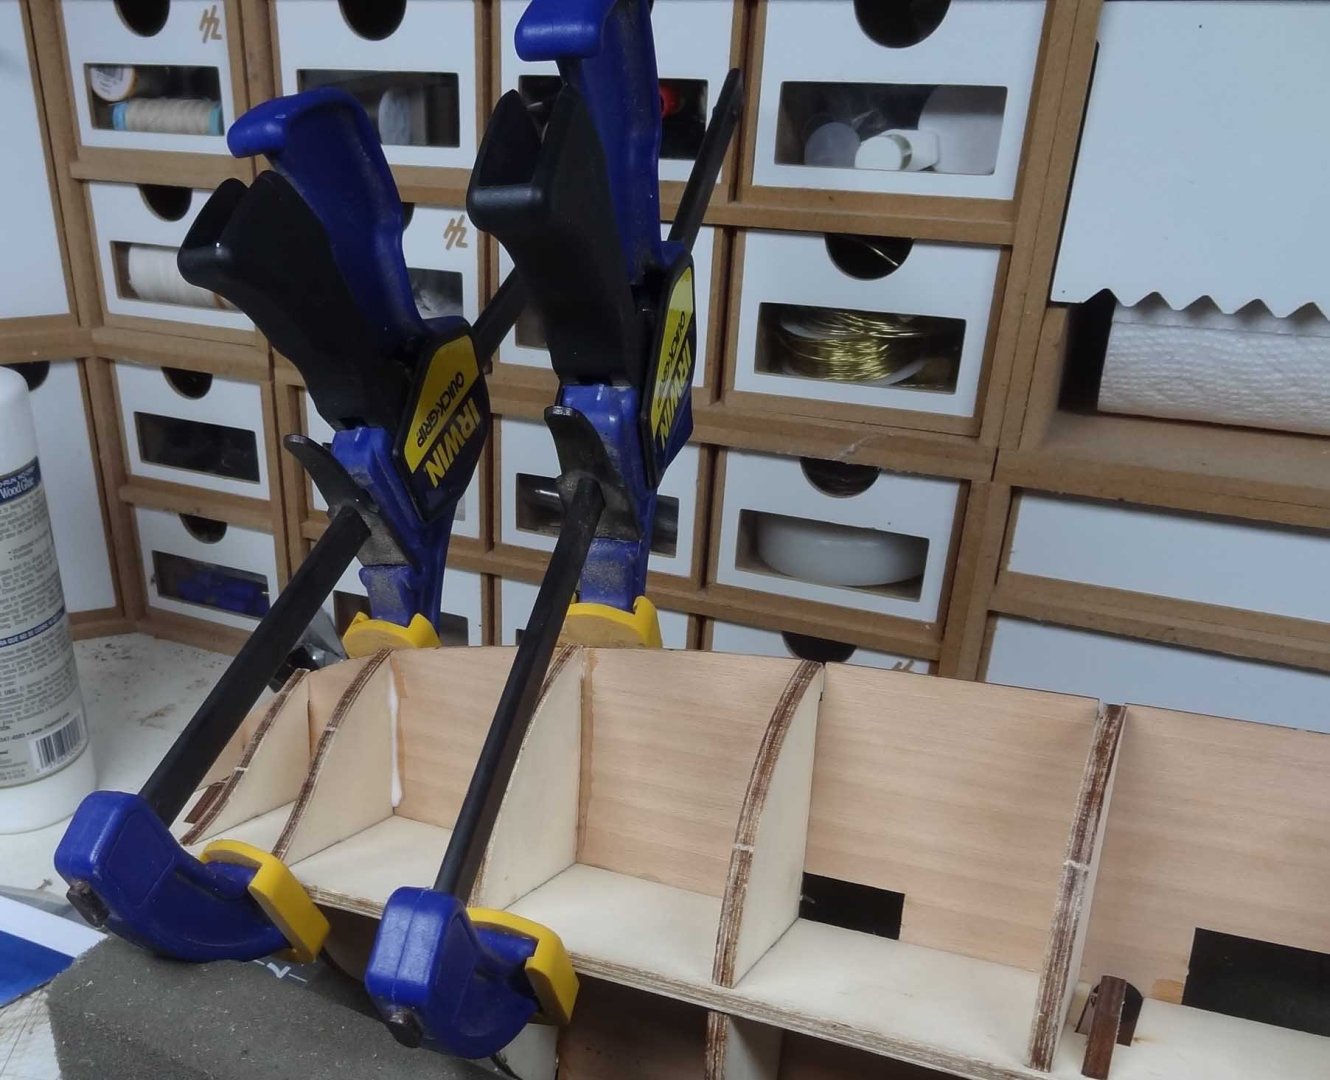
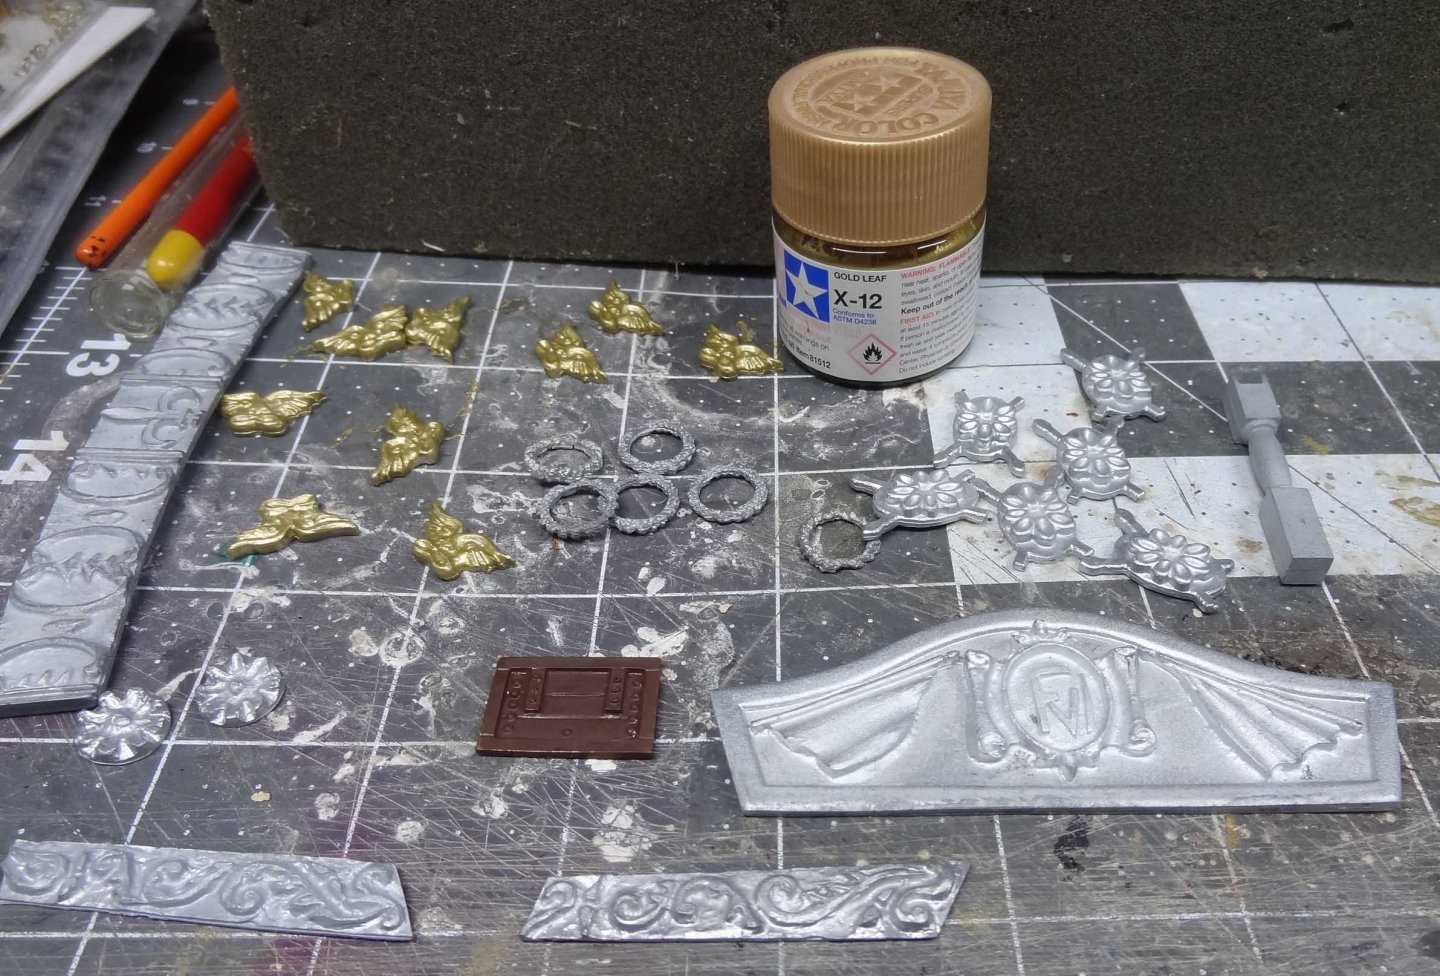
Wooh hooh - forward sub deck is attached. I offer one photo for proof, but I won't bore you with 10 more 🙂 Gonna redo one side of frame #4 as the deck did not get flush with the frame protrusion. Had to soften up the glue with some alcohol and have reglued and reclamped that. For deck planking I am going to go with 120mm planks with 4 plank pattern. The deck has been marked off accordingly. Looks a little crooked here but I think that is just the angle this shot was taken. Looking ahead, I'm reviewing the deck planking instructions. Hmmm, there aren't any. Photo #8 in the instructions shows the subdeck, photo #9 shows the deck planked - as if by magic. On a related note, here is the bunch of sticks that the decking is supposed to come from. Be very careful because as of the inventory list, there are 4 different dimensions of white wood in this bunch. Some obvious, some not. Once I started measuring the sticks I quickly found that the deck sticks which were stated as 1mm x 3mm varied in the range of .65mm x 3.25mm and all ranges in between. Typical but annoying. I'm going to get on a soapbox for a minute. When I was beginning to build I used to take deck sticks or hull sticks and cut them to my preferred length and just drop in a big pile. The idea was when I needed another I just grab one from the pile. Many articles here at MSW claim that's the way to go. BIG problem with that logic. Let's say I lay down one piece (plank) for decking. Now I need another plank to continue the strake, so I grab one from the pile. Given the fact that kit sticks never match up in width, the plank I just grabbed likely doesn't match the width of the plank I just laid. Things can get out of whack in a hurry. These days I tend to work with one stick for as long as I can. Then move to another. So besides the subdeck I am painting the Britannia ornaments. In most cases the pieces have a background and a relief. So I started most pieces by painting the background color (black) on all pieces. Then I am taking my detail brushes and hitting the raised (relief) parts of the piece with gold leaf. Obviously I had to break out my paints, most of which have been sitting on a shelf of my bench for 6-7 years without opening. As you might observe I use Tamiya paints exclusively (no affiliation), mainly because I always liked their jars/tops. Rather than the usual circular cardboard insert in the cap, the Tamiya tops have a shaped plastic insert that IMO does an incredible job of sealing the jars. So far every jar I have opened is unchanged from the first day I opened it 6+ years ago. I'm impressed. Here's a shot of some of the Brit pieces in progress. Will start planking the deck tomorrow. C'ya....


-
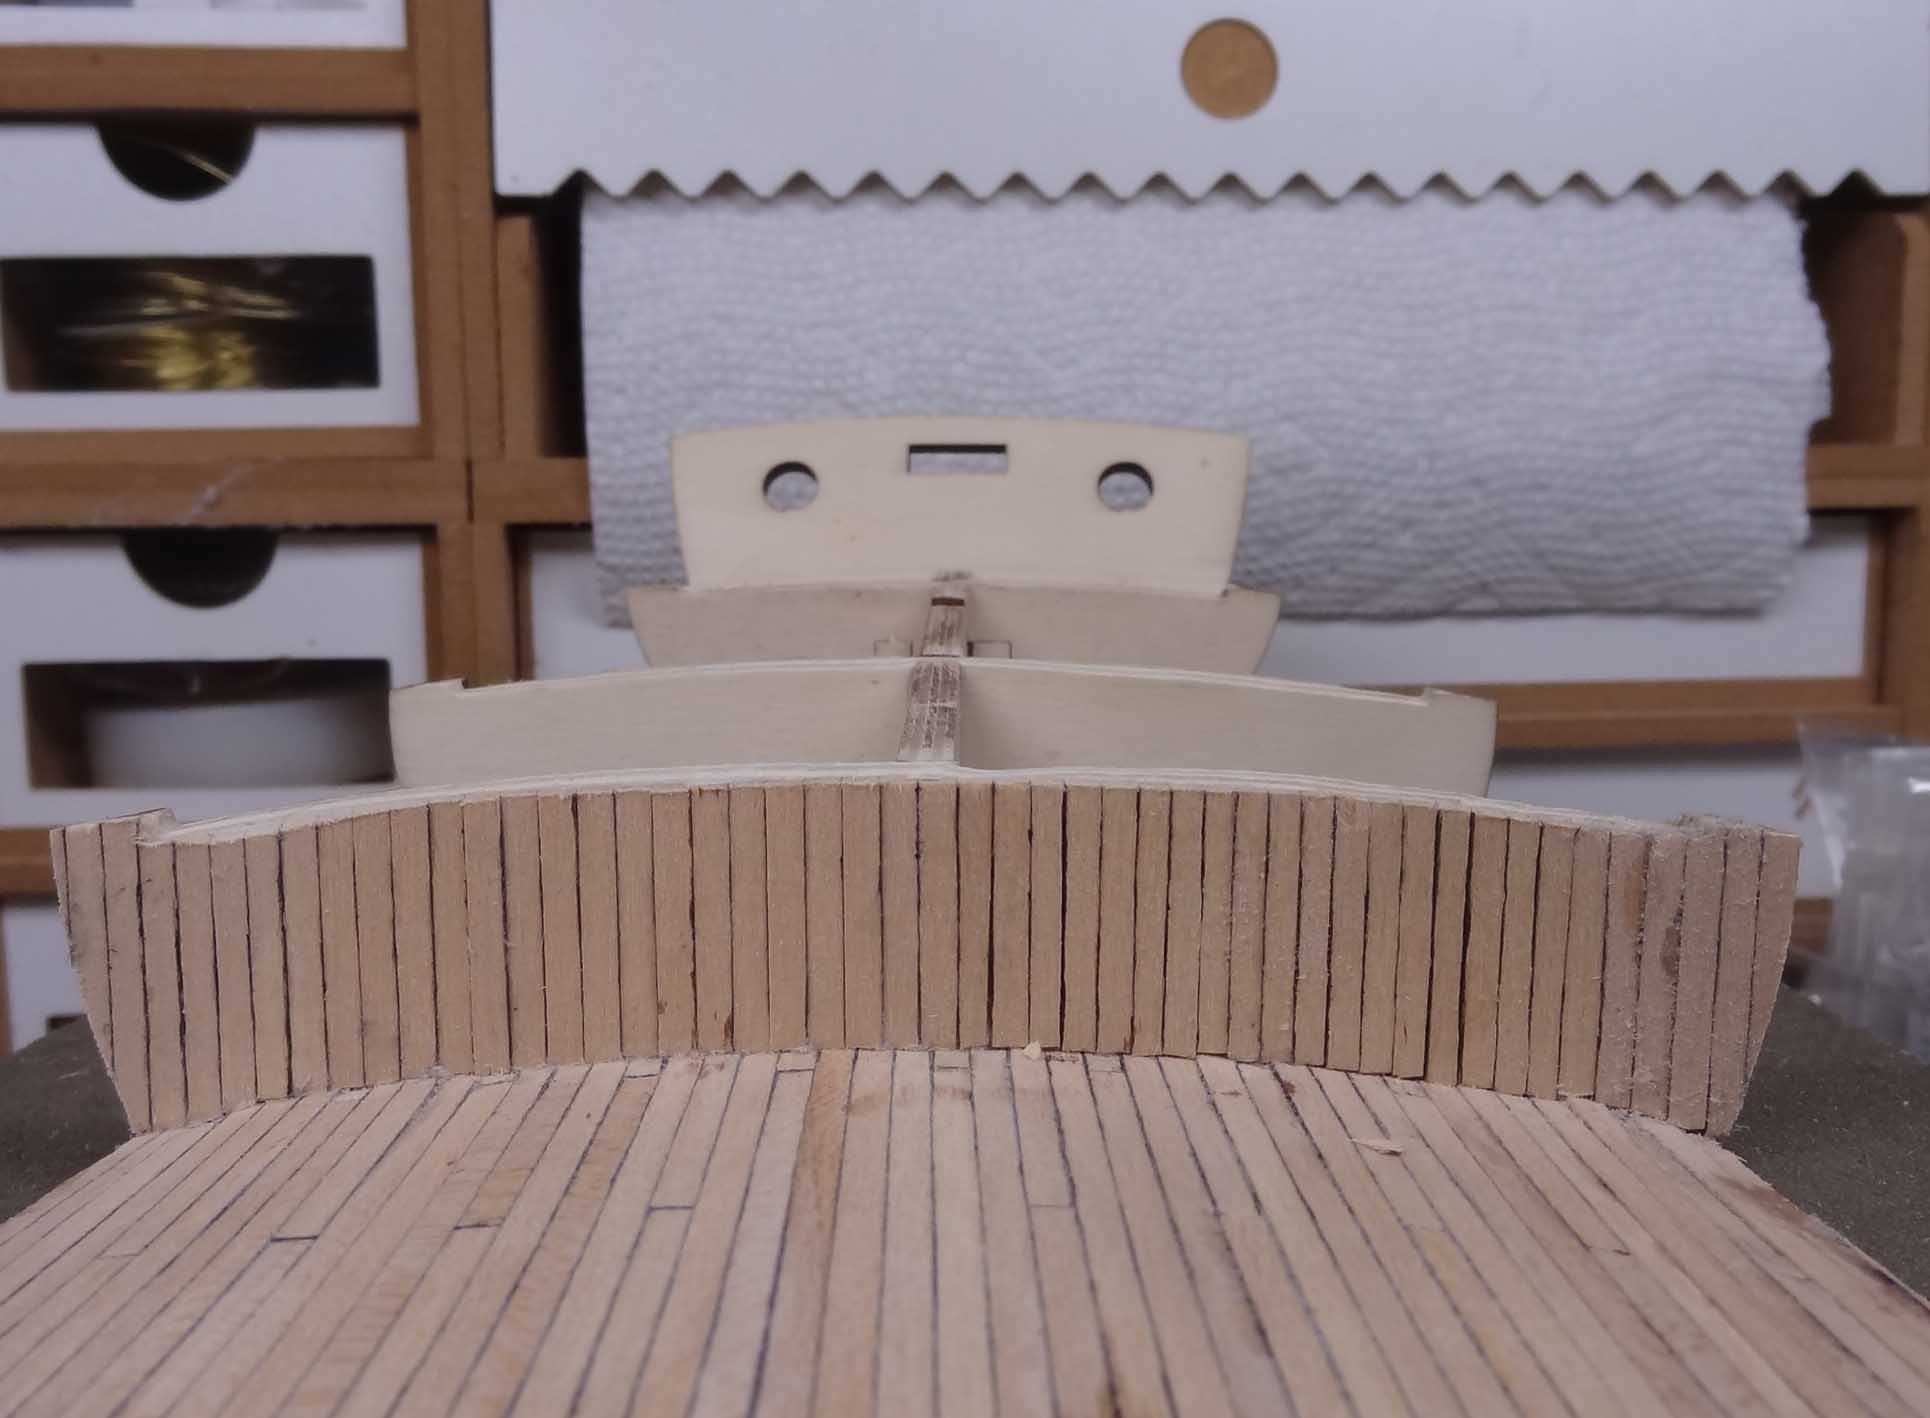
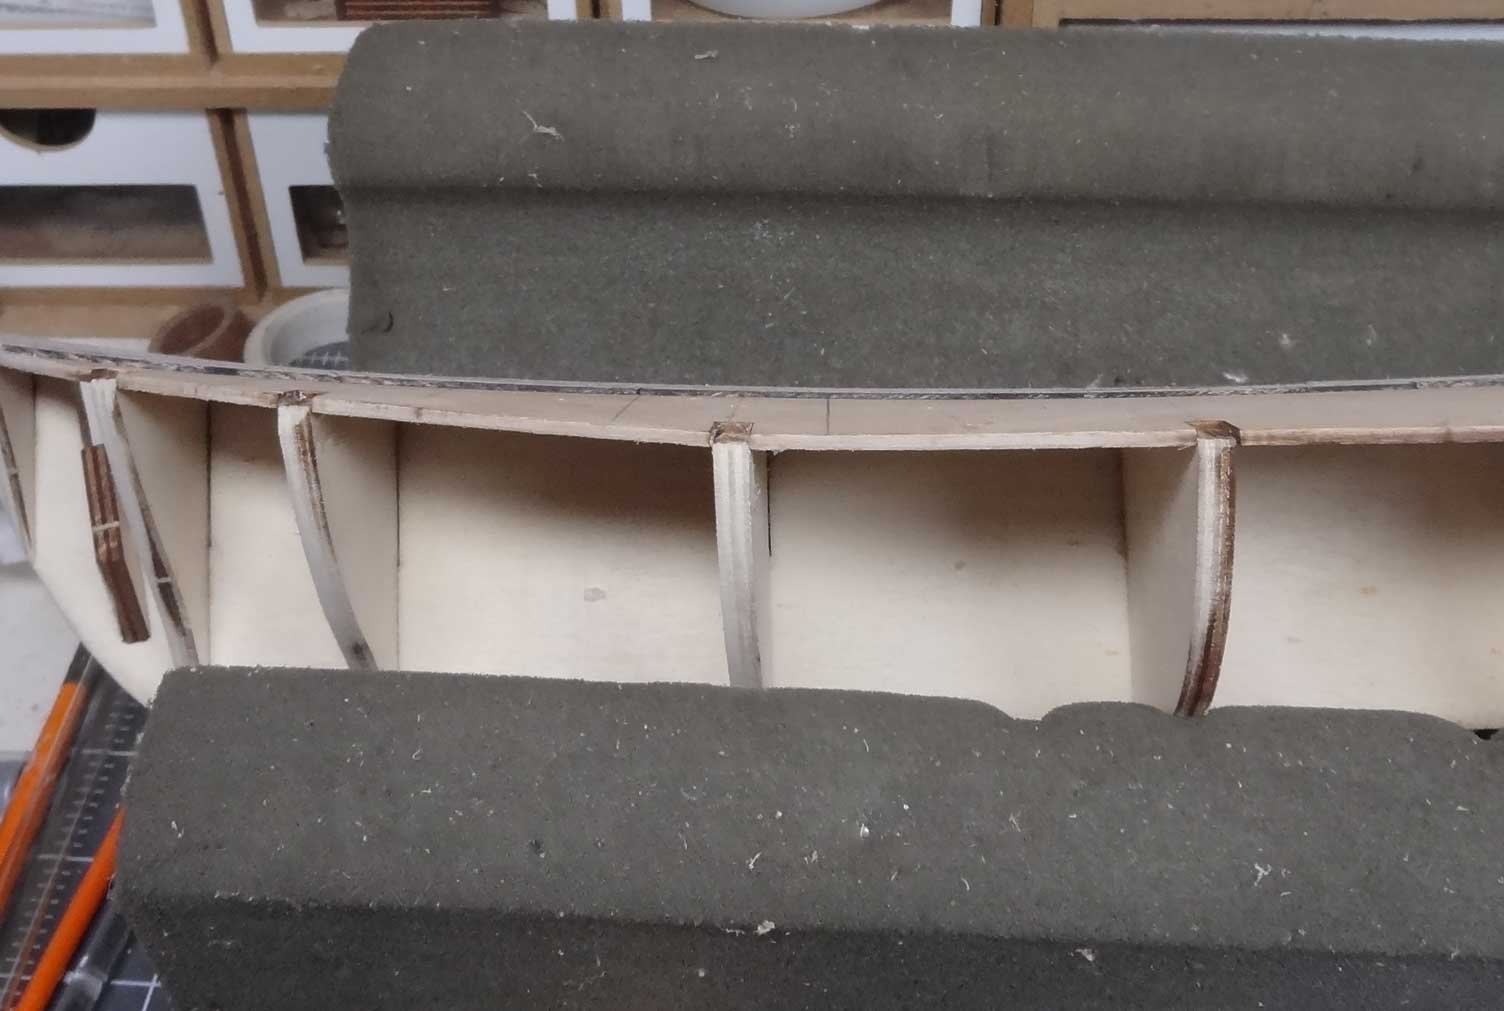
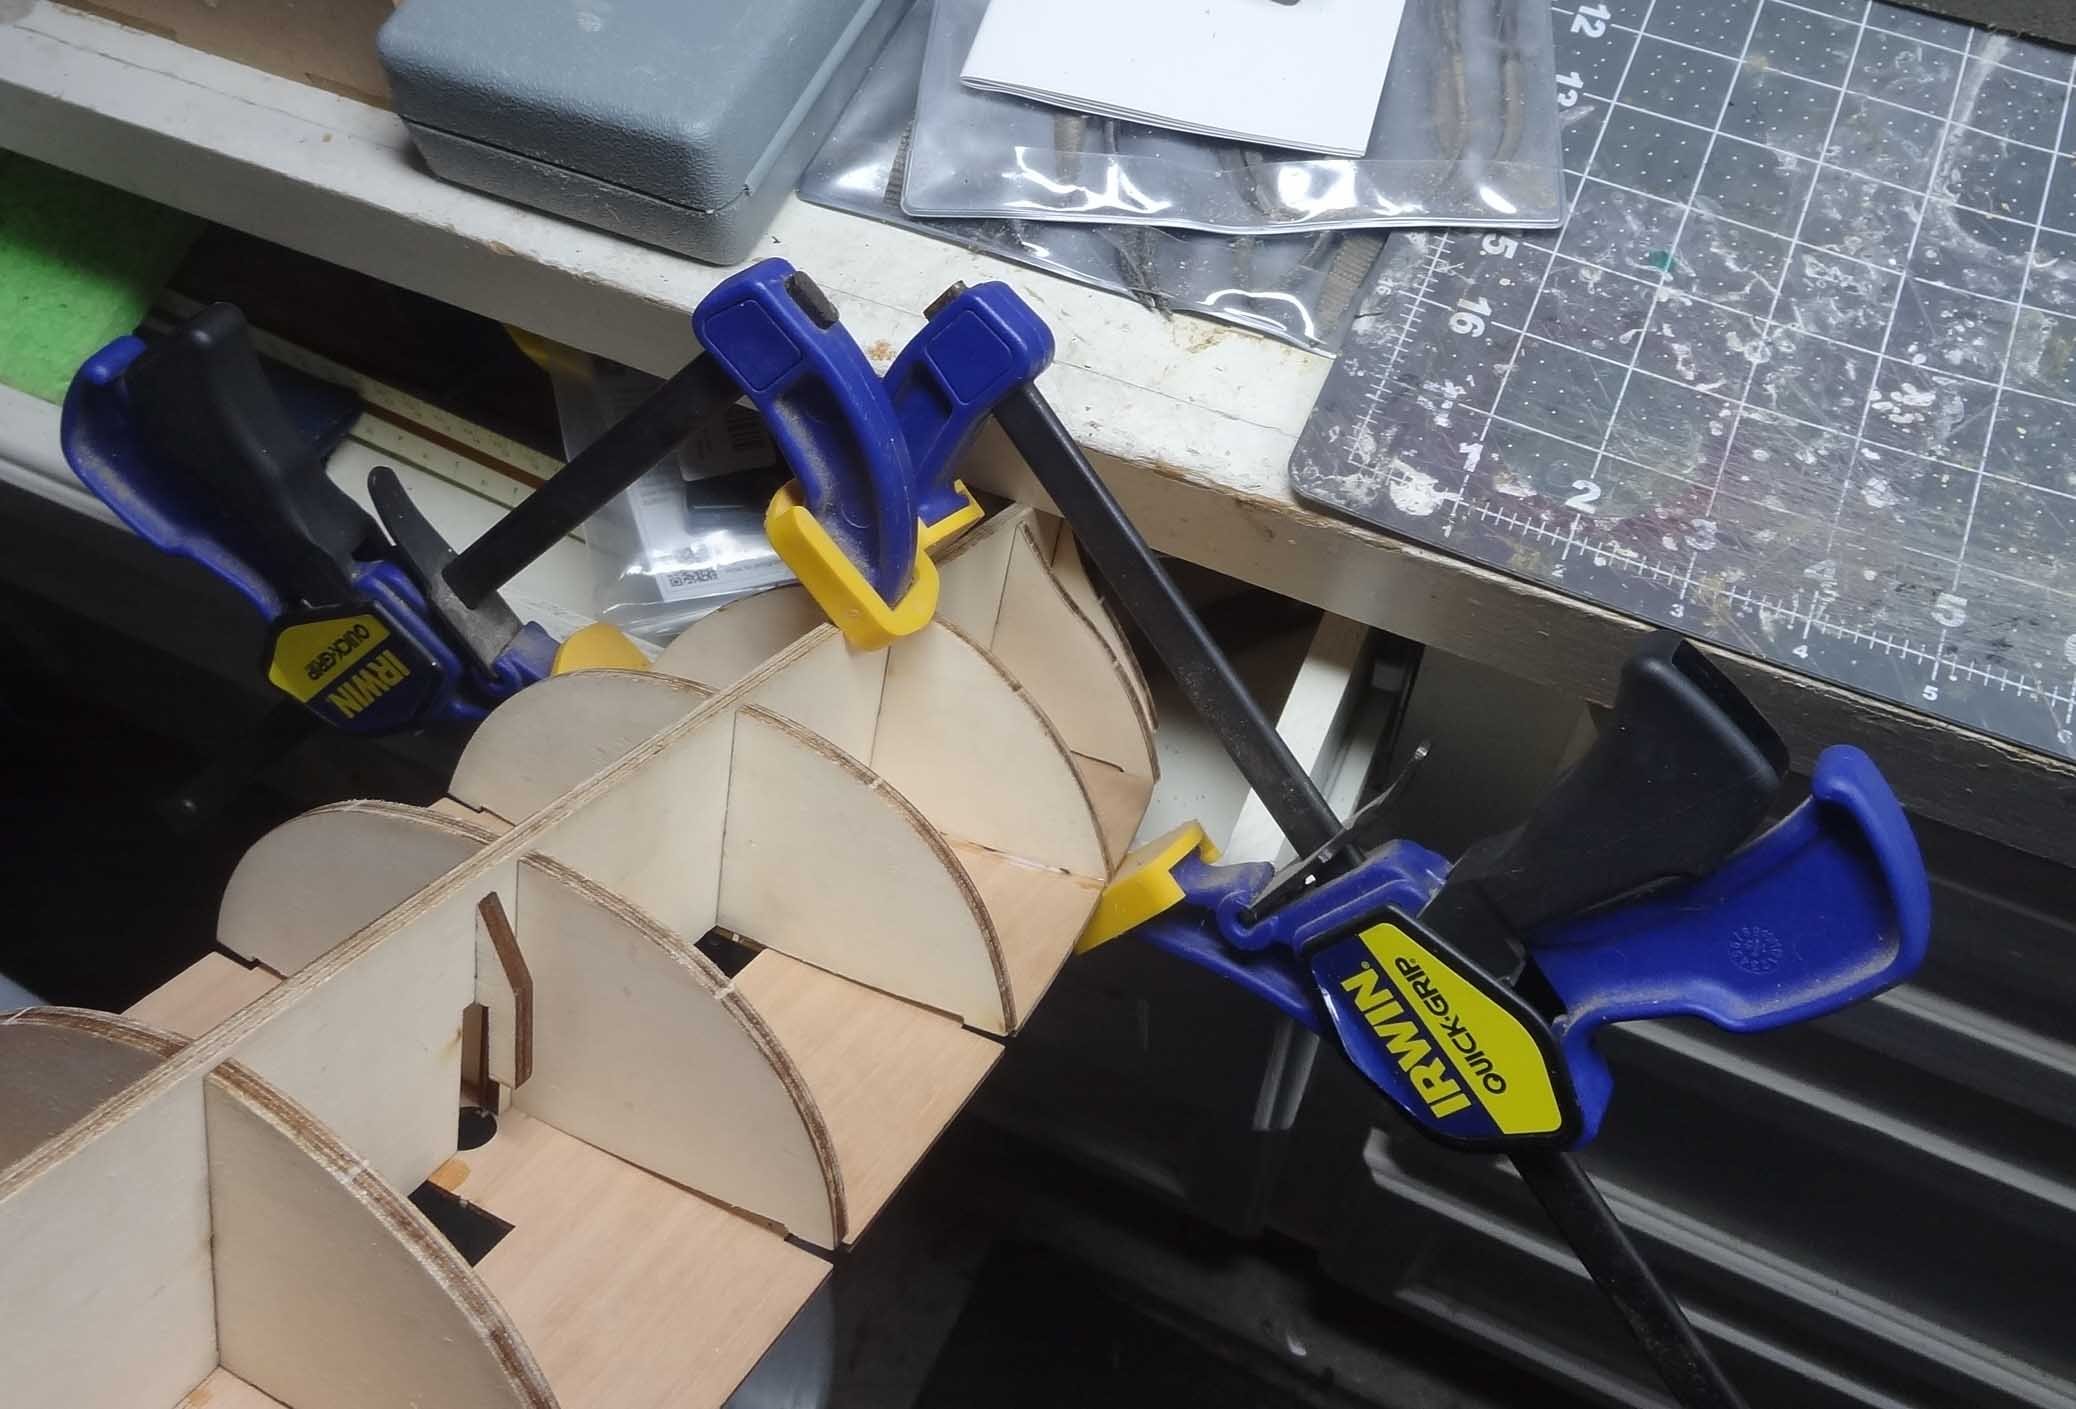
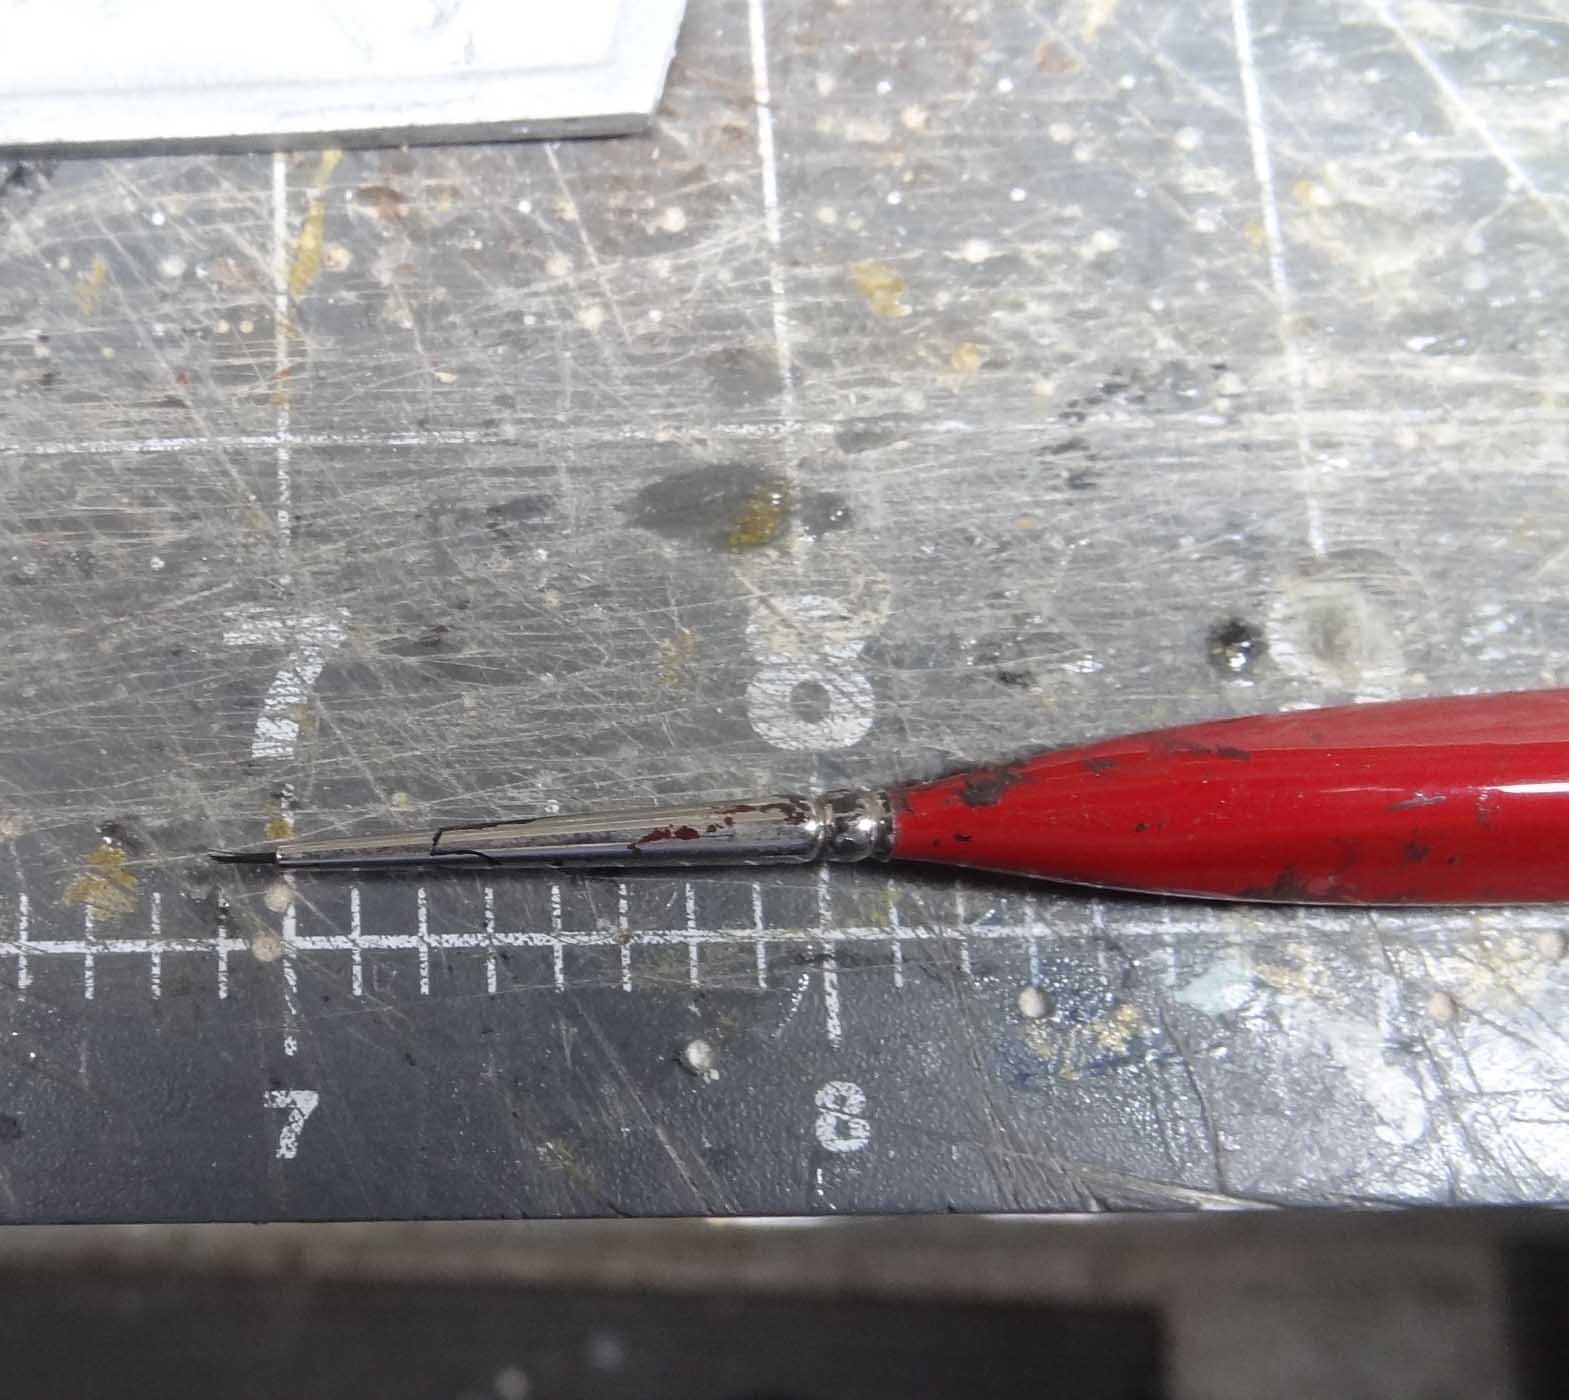
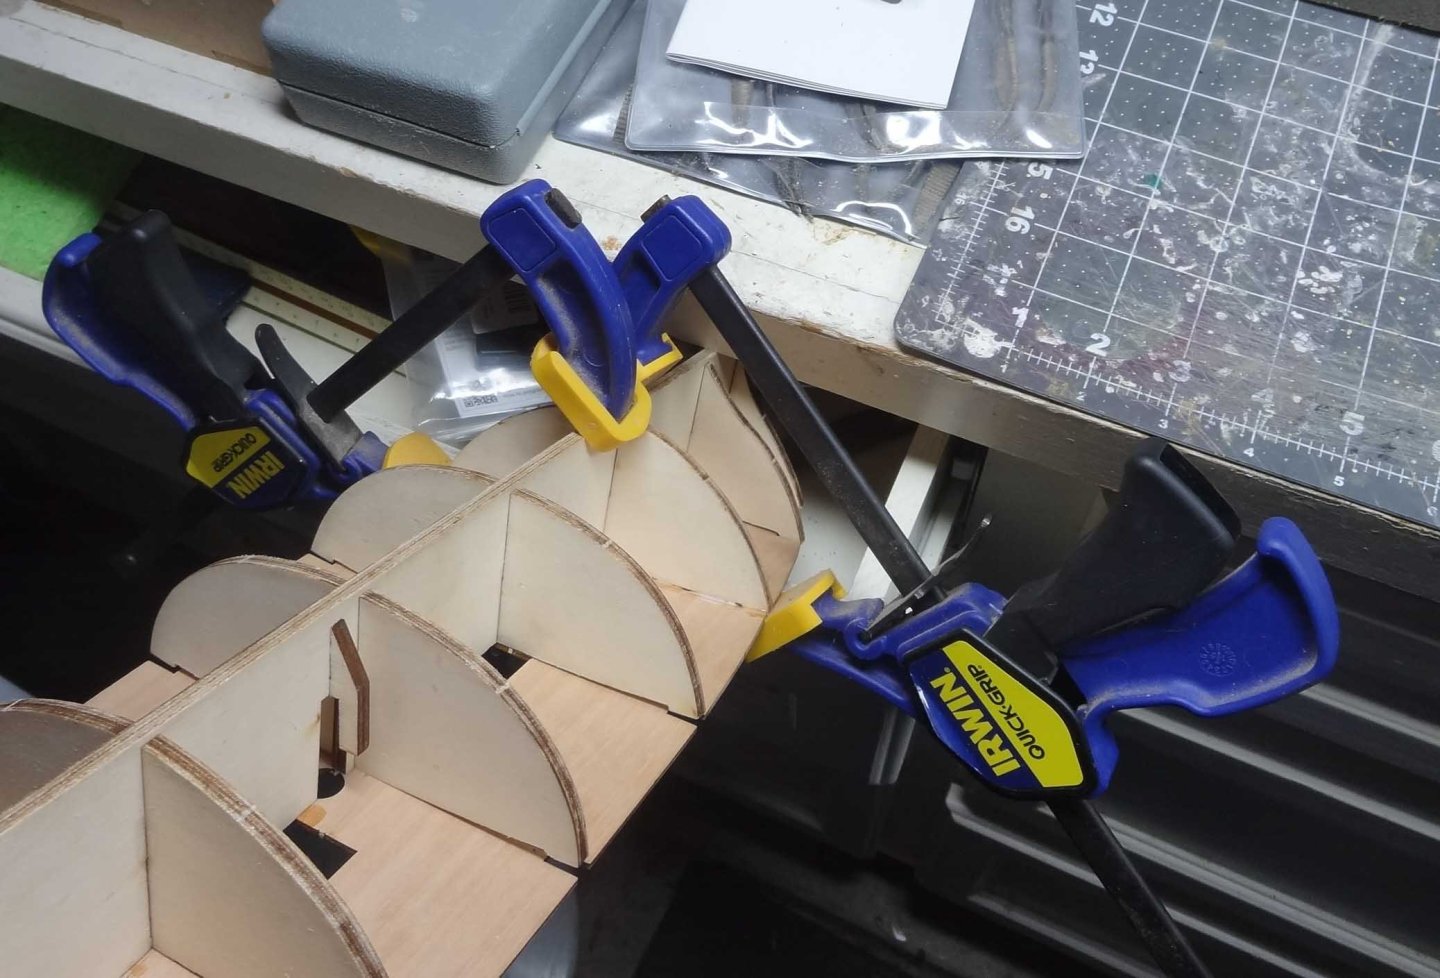
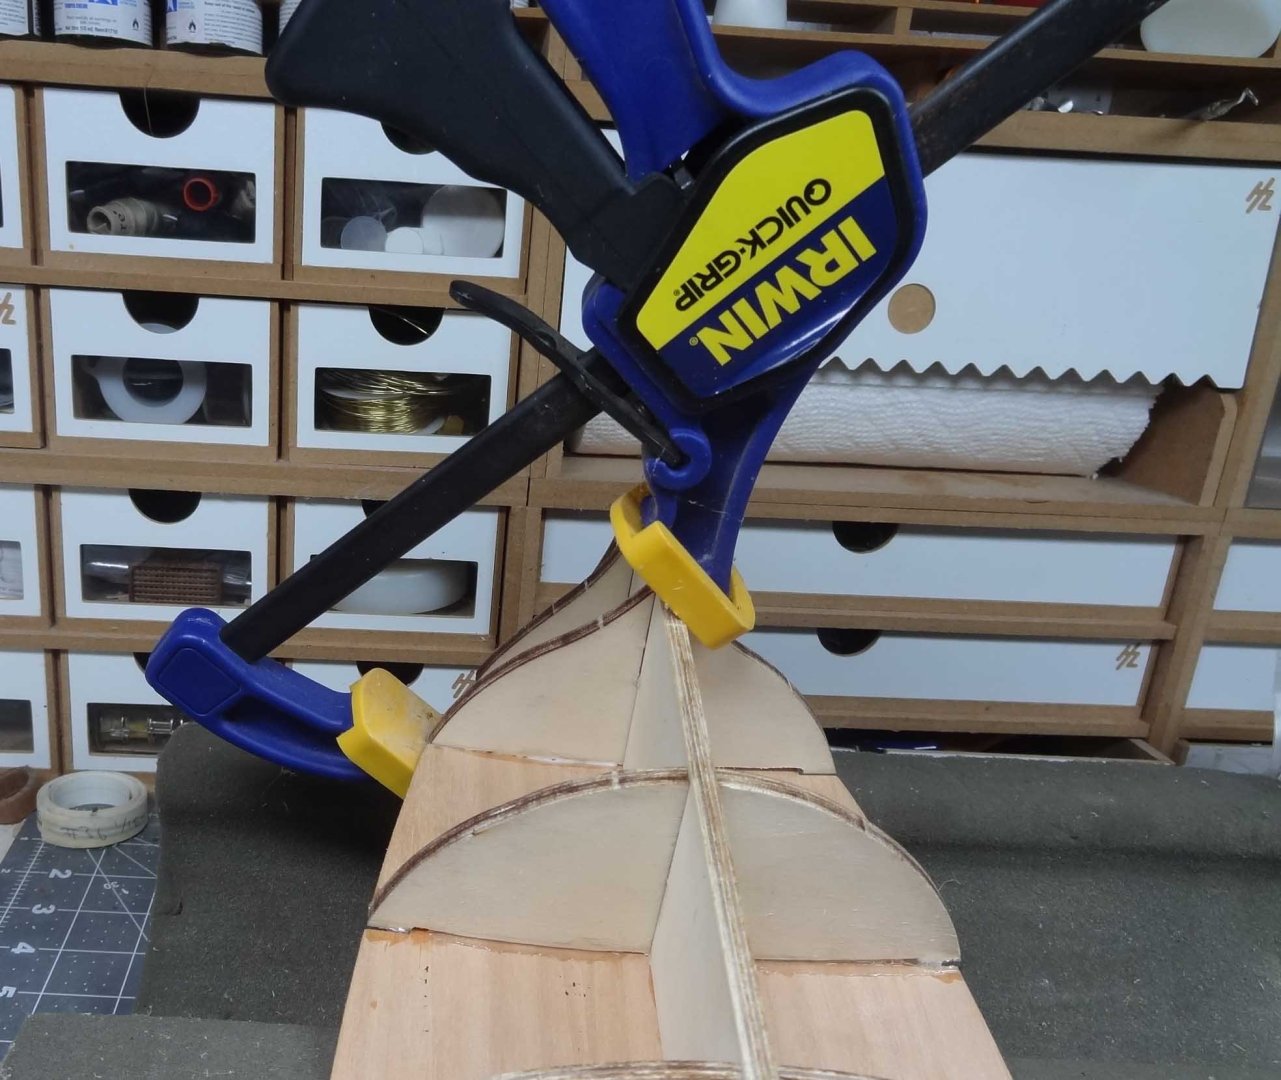
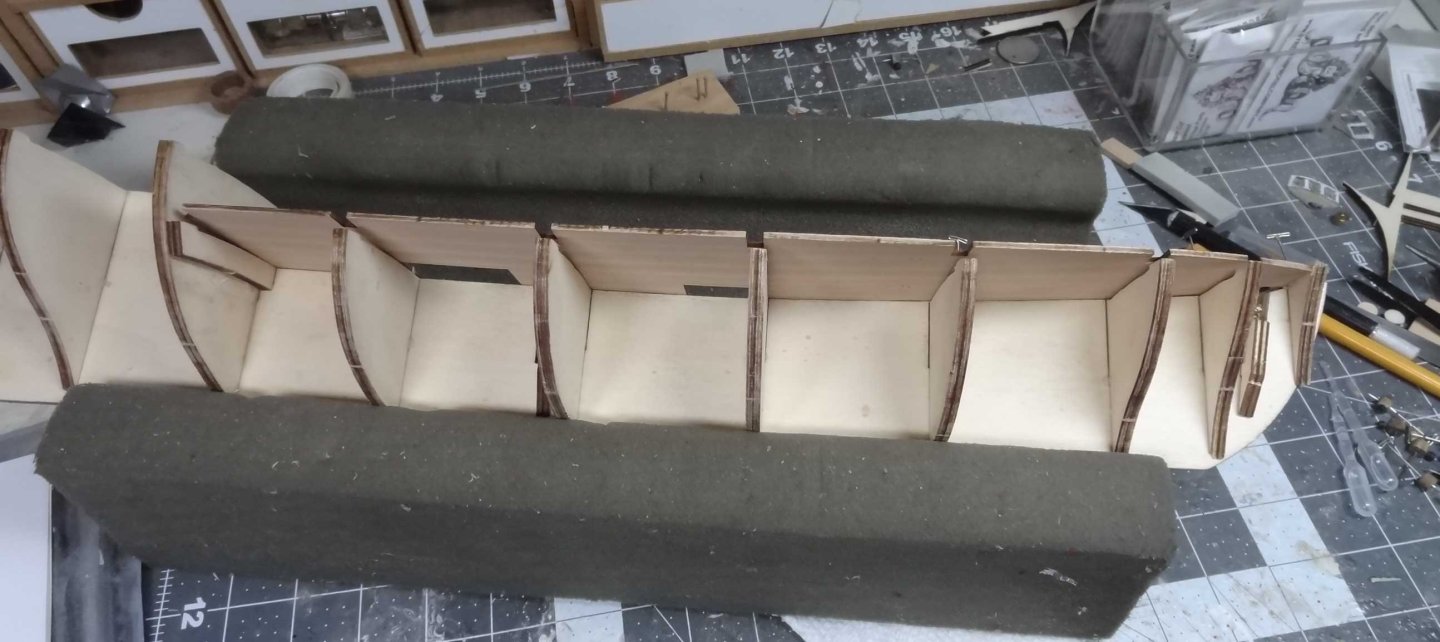
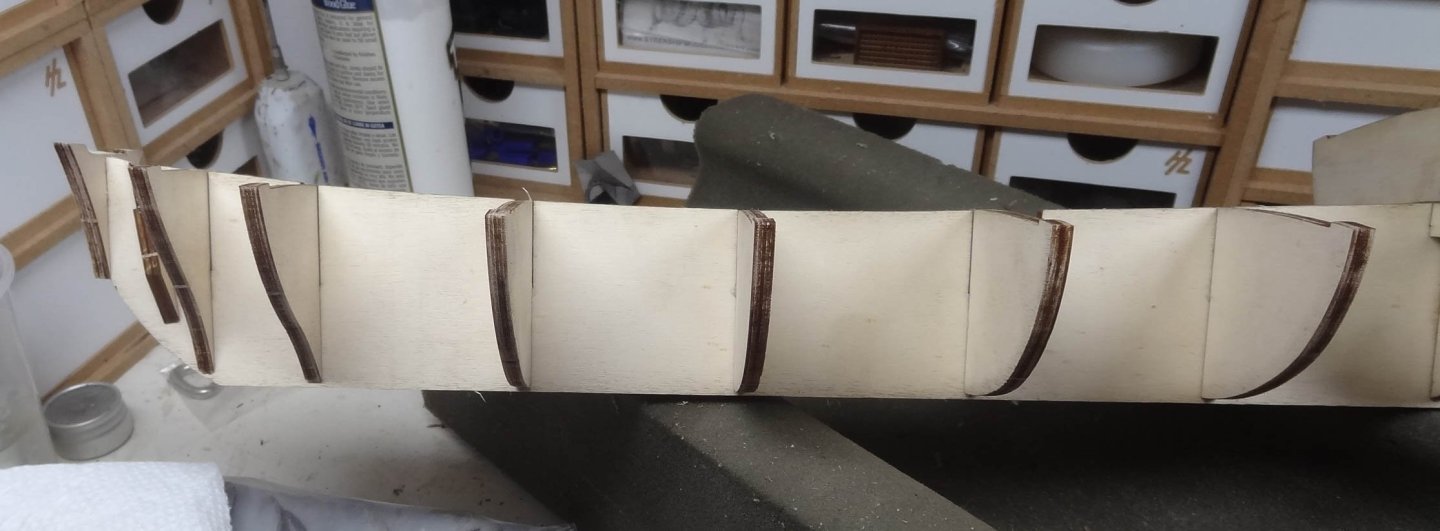
Evenin' - I'm still working on gluing the subdeck which is proving to be time consuming so far. I started at the bow because I knew that was going to be the most trouble. I glued frame #1 when I glued the deck to the false keel so I started with #2. Bending the deck outwards to the edge of the frame was not easy. In fact it might be called a struggle. A little unexpected since the deck is not all that thick, but there is some serious camber in the frames. Gluing and pinning did not hold. With that in mind I would ignore the instructions telling you to nail the deck. Fortunately some clamps were big enough to reach so that's what I used. On frame #2 I tried to glue both sides of the deck at the same time as seen in the first image. This really didn't work very well but I was too far into it to do anything else. On frame #3 I focused on one side. Problem here is given the stress the deck was under, I wanted to wait until the glue thoroughly dried (minimum 8-10 hours). At that rate it might be a week to get everything glued. So my impatience lead me to glue one side of frame #4 as well shown in image below. I suspect after #4 the going should get easier and faster. So there is some time to kill between frames so I started looking for other things to do in the meantime. I pulled out all the Britannia ornaments and decide to paint those. As I said before "mediocre" might be a stretch, but I have no intention of bashing any of it. Bashing is not a goal for this build. I did see that the background of most pieces is painted black and the relief parts are painted gold. There are some pretty fine nooks and crannies. So my challenge for the ornaments will be to do a good job hand painting them. Definitely going to need to pull out some reading glasses for that.🙄 I checked my paint brushes and came across a few that had tiny hairs - didn't even know I had them. They should help with painting the details. It rained here today so I was not able to dump the trash & recycle to look for the missing plans. Hope all this isn't in vain. I can plank & deck with no plans but not sure how much beyond that I could go without them. Talk to ya soon...

-
Hey everyone. The sub deck is secure on the false keel so I have started to glue the deck to the outer edge of the frames. I will post a report on this tomorrow. Mean time - a quite bizarre thing seems to have happened. The instructions have disappeared.😕 Both the booklet with the images and the booklet with the written instructions. Not in the house, not in the garage (my shop). Maybe the strangest thing that has happened to me in over 20 years in this house. Tomorrow I will dump out the trash and recycle bins to see if there is anything there. Unbelievable!
-
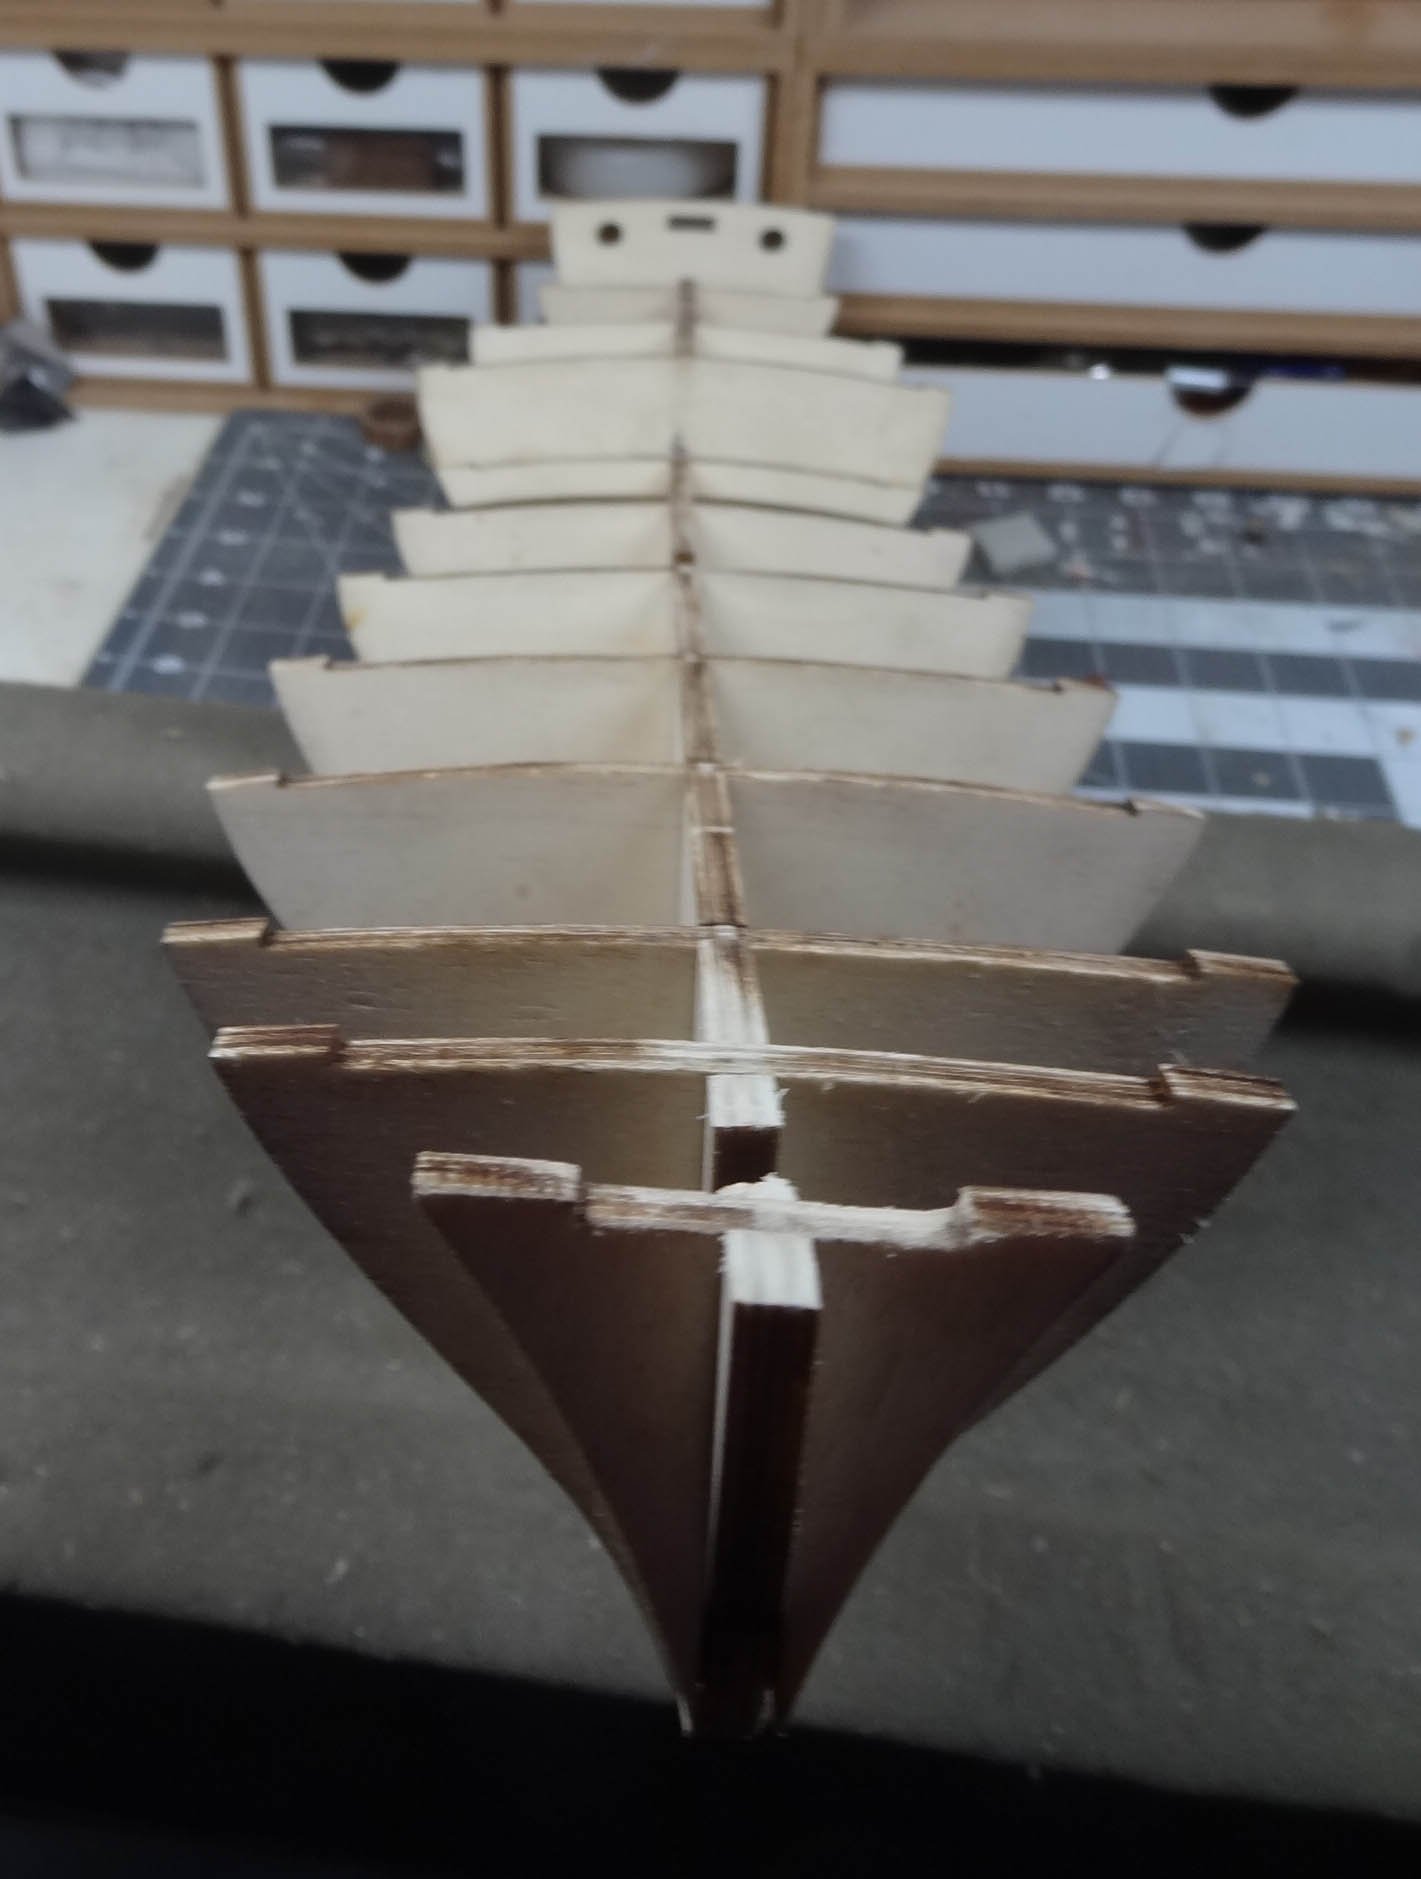
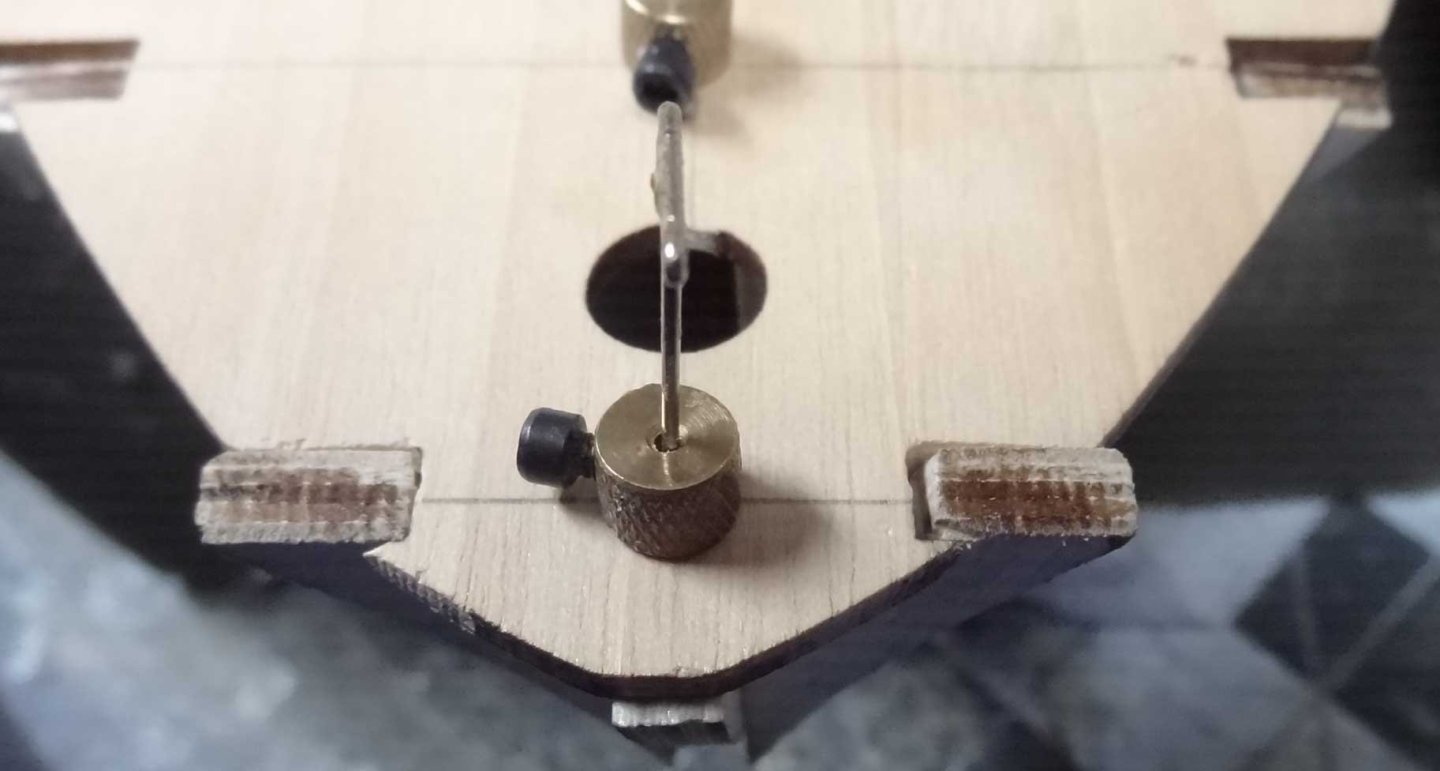
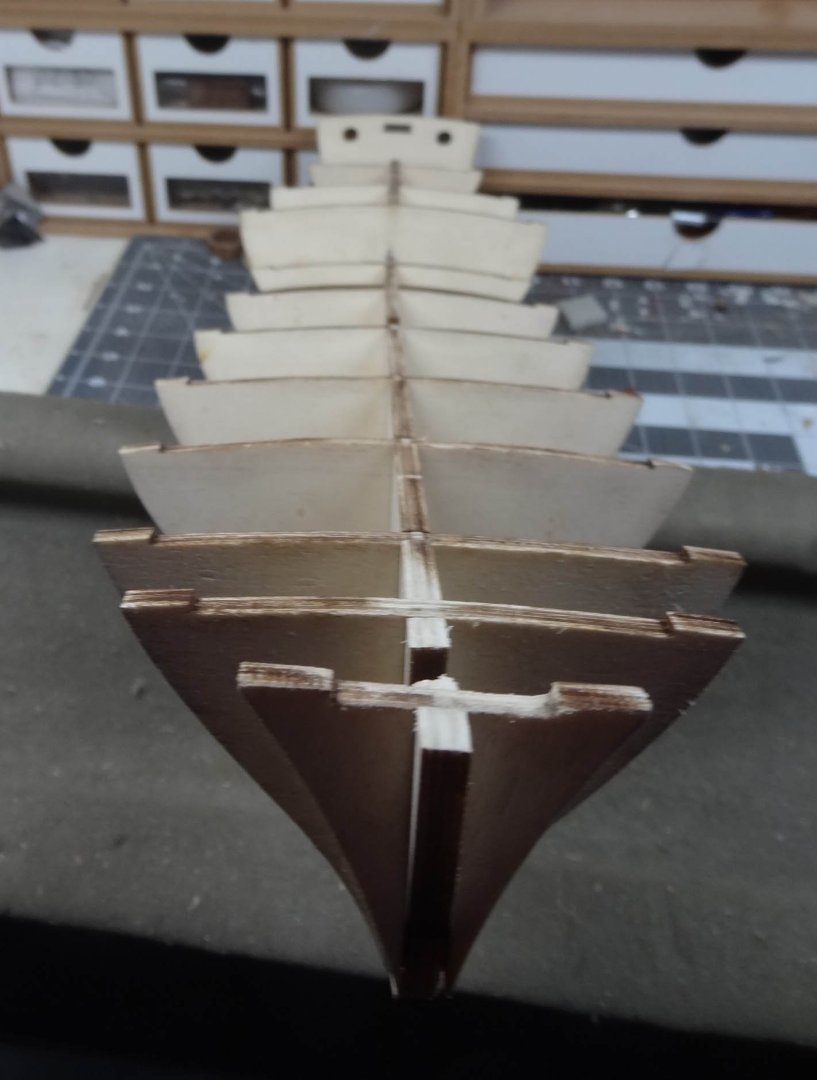
Get on and do it! I did the first step on attaching the sub deck to the frame. I applied glue down the top edge of the false keel - shown here In between the white glue I added a few drops of CA - to hold the deck until the white glue dries. Then I laid the sub deck. As you can see instead of the stupid nails I just used a few pin vises to hold it down. The trick is you need to get the deck situated in the first frame before anything else. After getting that I just ran my finger down the keel and it all kinda slipped into place. The deck won't just fall into place, but forcing the back end into place puts a natural slope into it an the rear 2/3's of the deck just ended up fitting like a glove. In all this exercise, it's the forward 3 frames that may cause problems. Mainly because they are in the middle of the most outrageous sheer (Thanks Phil). Ensuring that those frames are squared and their top surfaces are fared (a little poetry?) is really crucial. Rather than nails I just used a few pin vises to hold the whole deck down. I imagine the pin vises can be used in the upcoming step of fastening the deck to the outer portions of the frames. So for me the biggest takeaway is to seriously fare the top edge of the frame to match the sheer of the false keel. You will not get good contact with the sub deck otherwise. I might have made too big of a deal from all of this but it is planning and dry runs that makes this step work. If you don't get the deck laid right, you will have multiple problems down the line. I REALLY wanted to start gluing the deck to the frames tonite, but I will give the glue a chance to dry every last drop before proceeding. C'ya

-
"The curvature lengthwise is called sheer. It is lower midships than at the bow and stern. The transverse curvature (crosswise from port to starboard) is called camber. It is higher on the center line and lower at the hull sides. The resulting shape of the deck is a hyperboloid. " Thanks Phil. I hate it when I don't remember stuff like that. Makes me feel old😒 A lot of times when nails are called for I apply spaced dots of CA with a run of white glue in between. The CA can behave like nails and hold until the white glue dries.
-
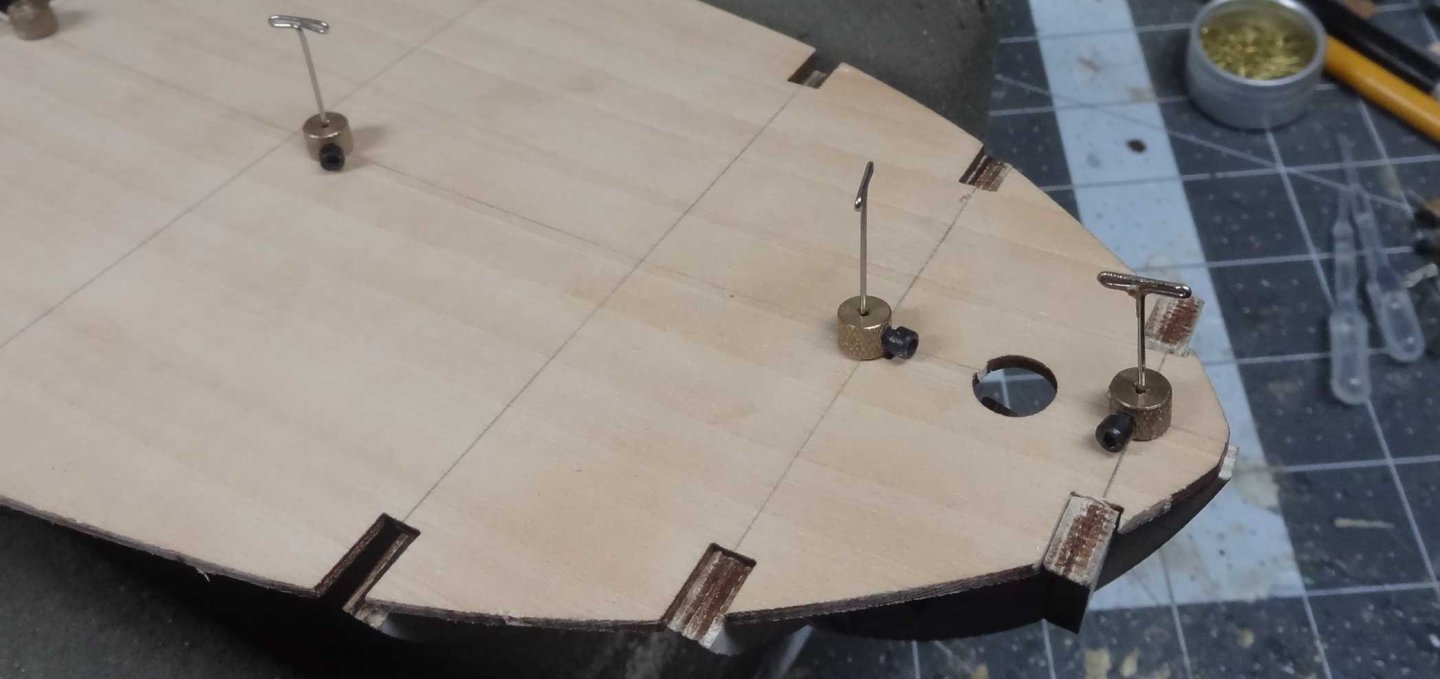
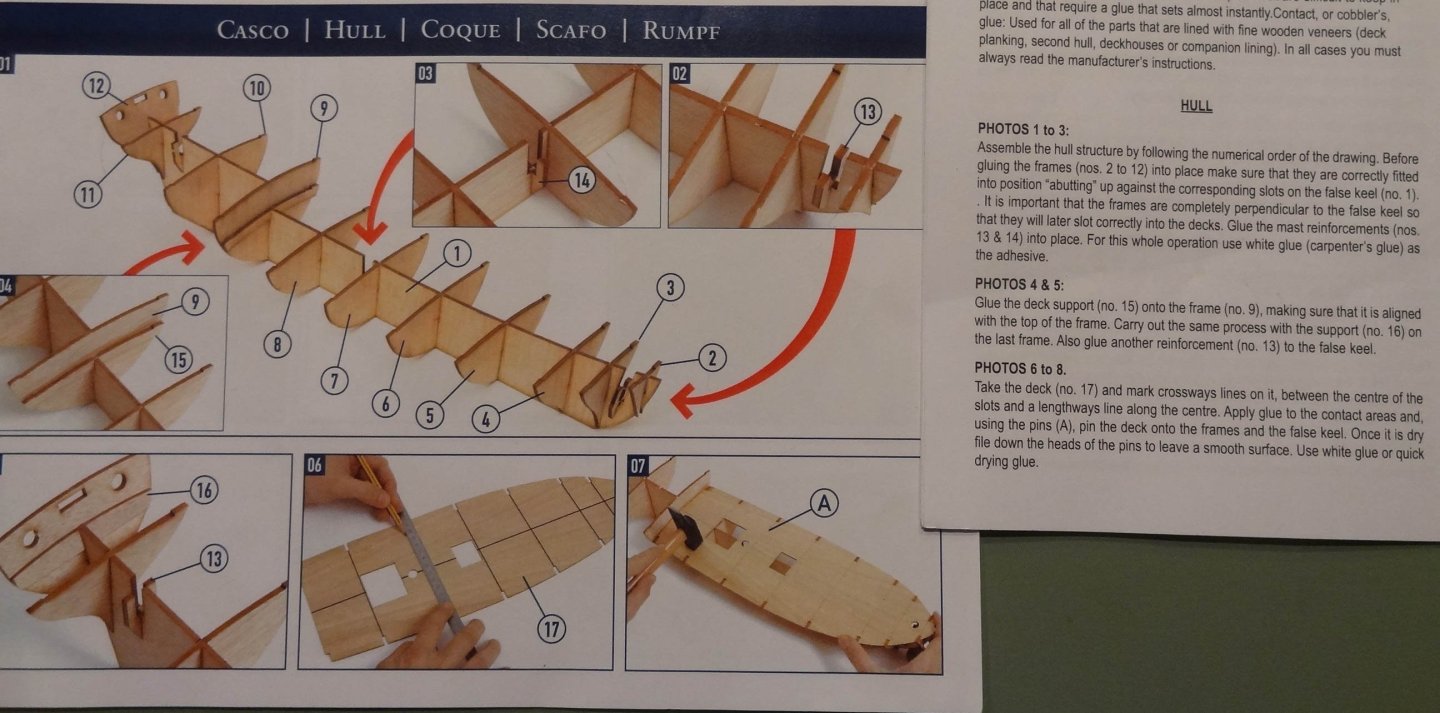
Yves - thanks for looking in. Those penciled lines are to give you a guide on where to apply glue. What the instructions didn't say was you need to pencil those lines on both sides on the sub deck. The lines on the other side can be used as a guide on where to drive nails. Gary - welcome. I bought the kit about 10 years ago. I agree with you that working out from the spine is the way to go. Then I can go one frame at a time front to back to finish the process. Using a syringe with a needle, it shouldn't be to hard to get some glue on the frame surface and then drive a few nails. Welcome to both of you!
-
I am obviously struggling with the application of the false deck. The keel and the frames produce 2 opposing angles for laying the false deck - both a horizontal and vertical bend. The flat piece used for the deck doesn't want to bend in both directions. Am I making too big a deal out of this? Something simpler? I have made multiple dry fittings - putting a few nails thru the deck into the keel. I then try to bend the deck down to the outer edges of the frames. If the nails don't pop out they at least come loose from the keel. I'm considering soaking the deck for a day and then putting a permanent crease in it from bow to midship down the centerline. That might relieve some of the stress and wouldn't require manhandling the deck quite as much. I must say, I am disappointed in the related logs regarding this situation - both at MSW and elsewhere. All suggest "just glue the deck down and start planking". Well IMO it isn't that easy. I'll try to provide some pix showing what I am experiencing. C'ya
-
Final planking.
mikiek replied to serpe's topic in Building, Framing, Planking and plating a ships hull and deck
If I understand your description and question - plank from the garboard up. Not down to the garboard. Typically, the laying of the garboard will have a direct effect on how all the upper strakes will lay. There are a few MSW posts on how to lay the garboard. The success of that will have an impact on the rest of any hull planking. -
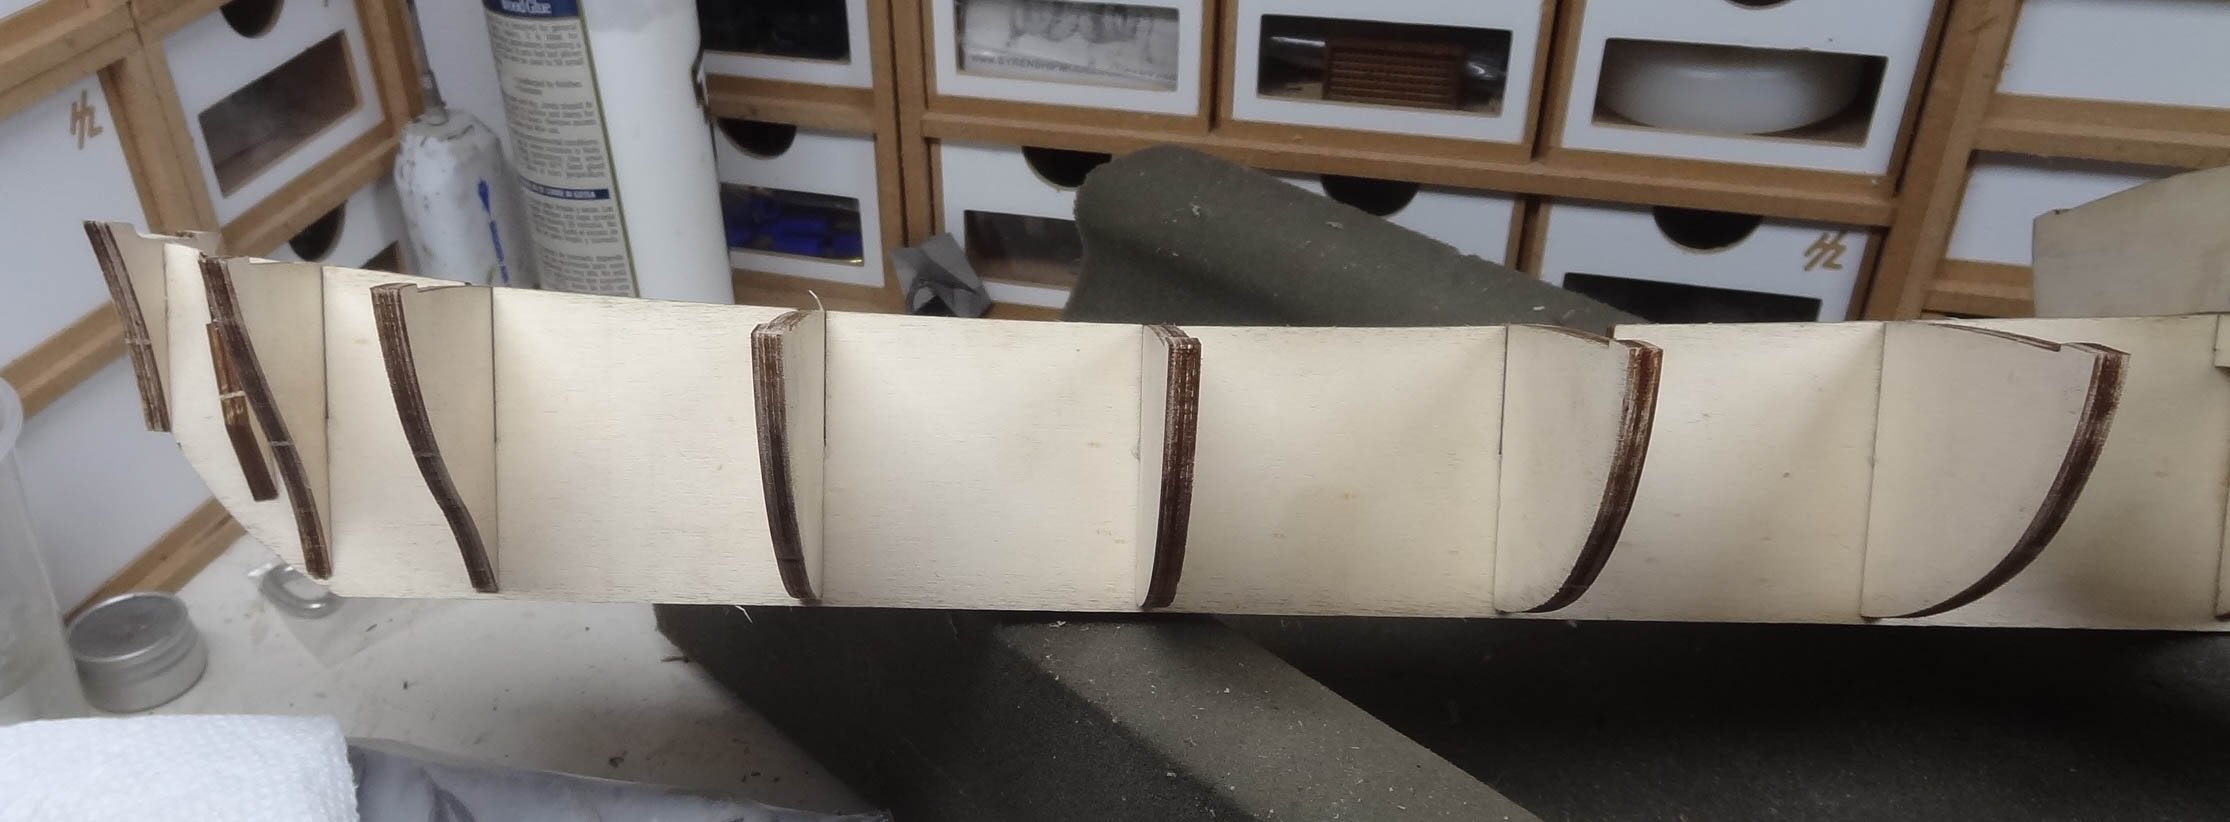
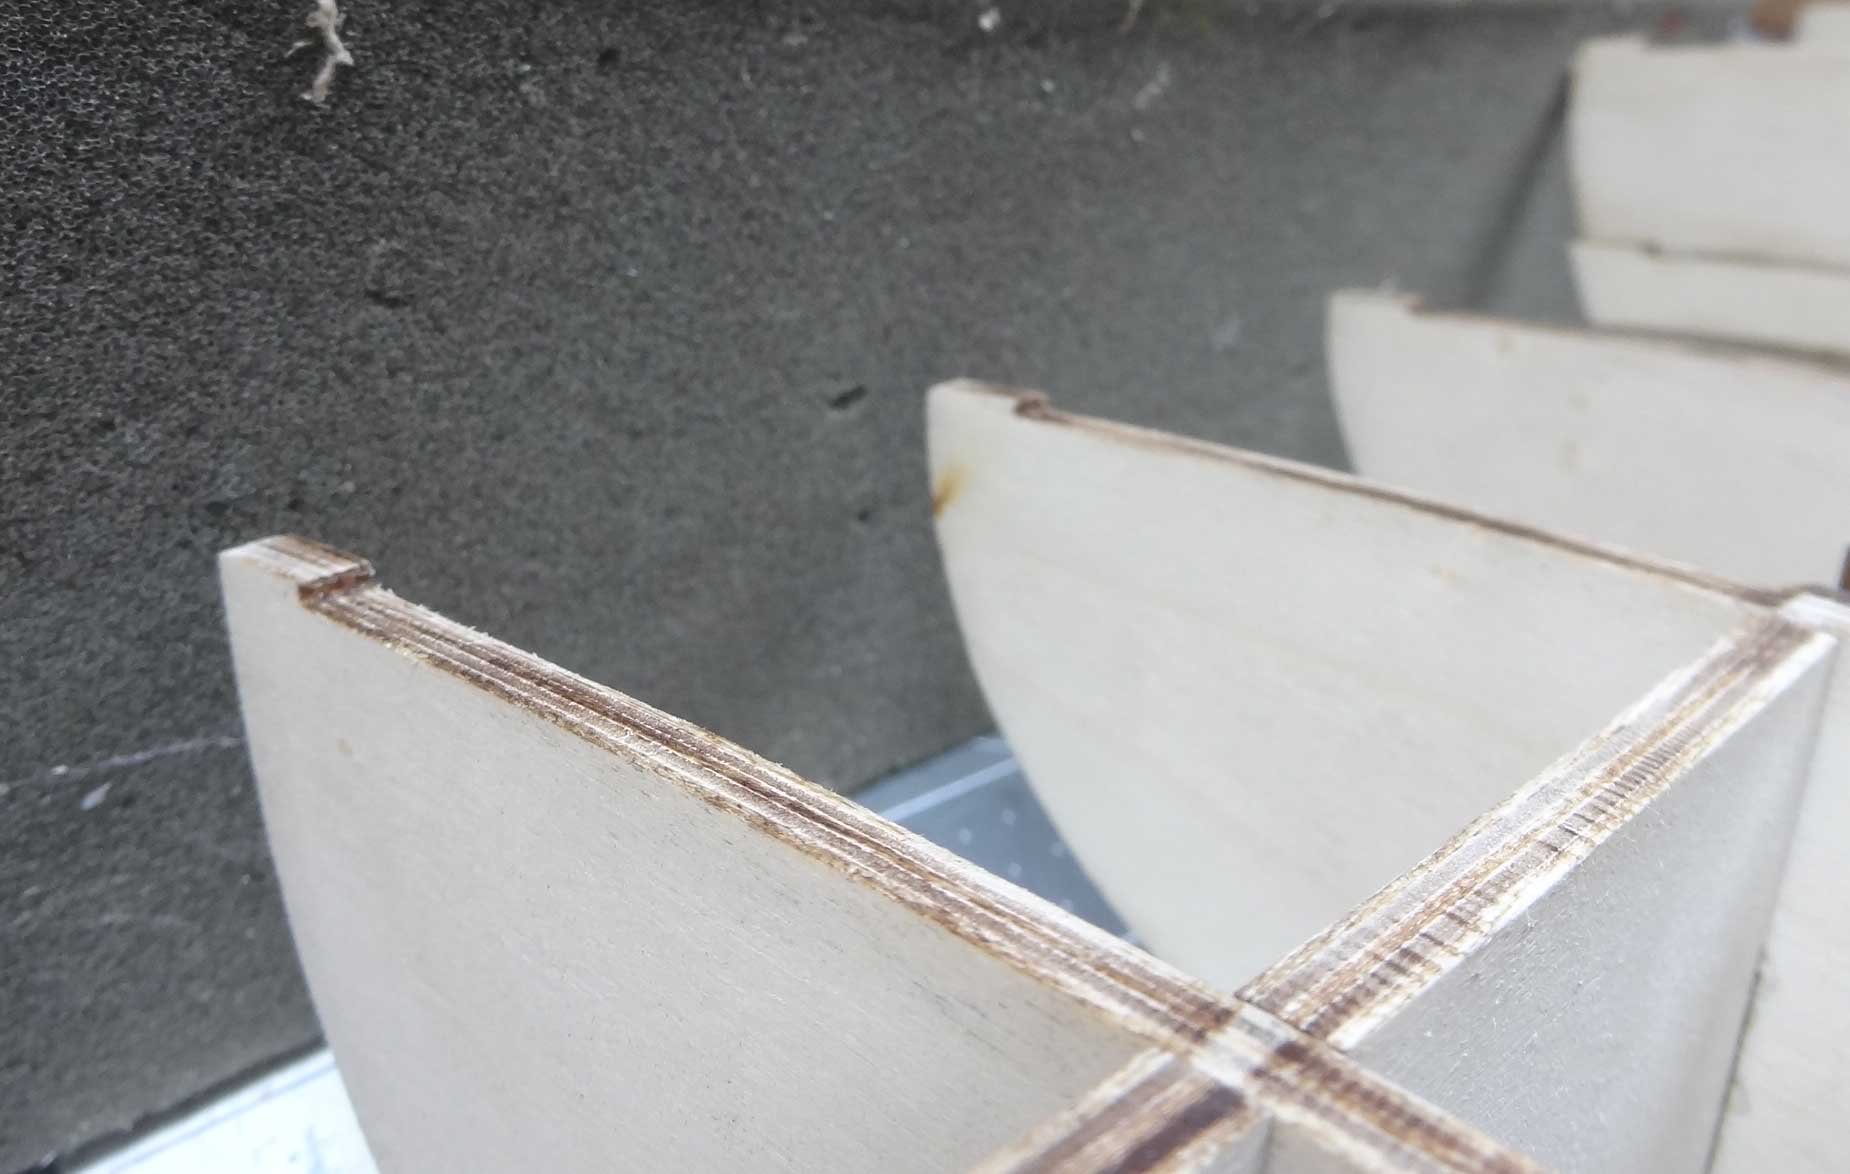
One more observation - after manually fitting the false deck to the forward frames, it appears that there will be a need to "fare" the gap in those frames to match the slope of the false keel so the deck will sit firmly on top. Hope that made sense.
-
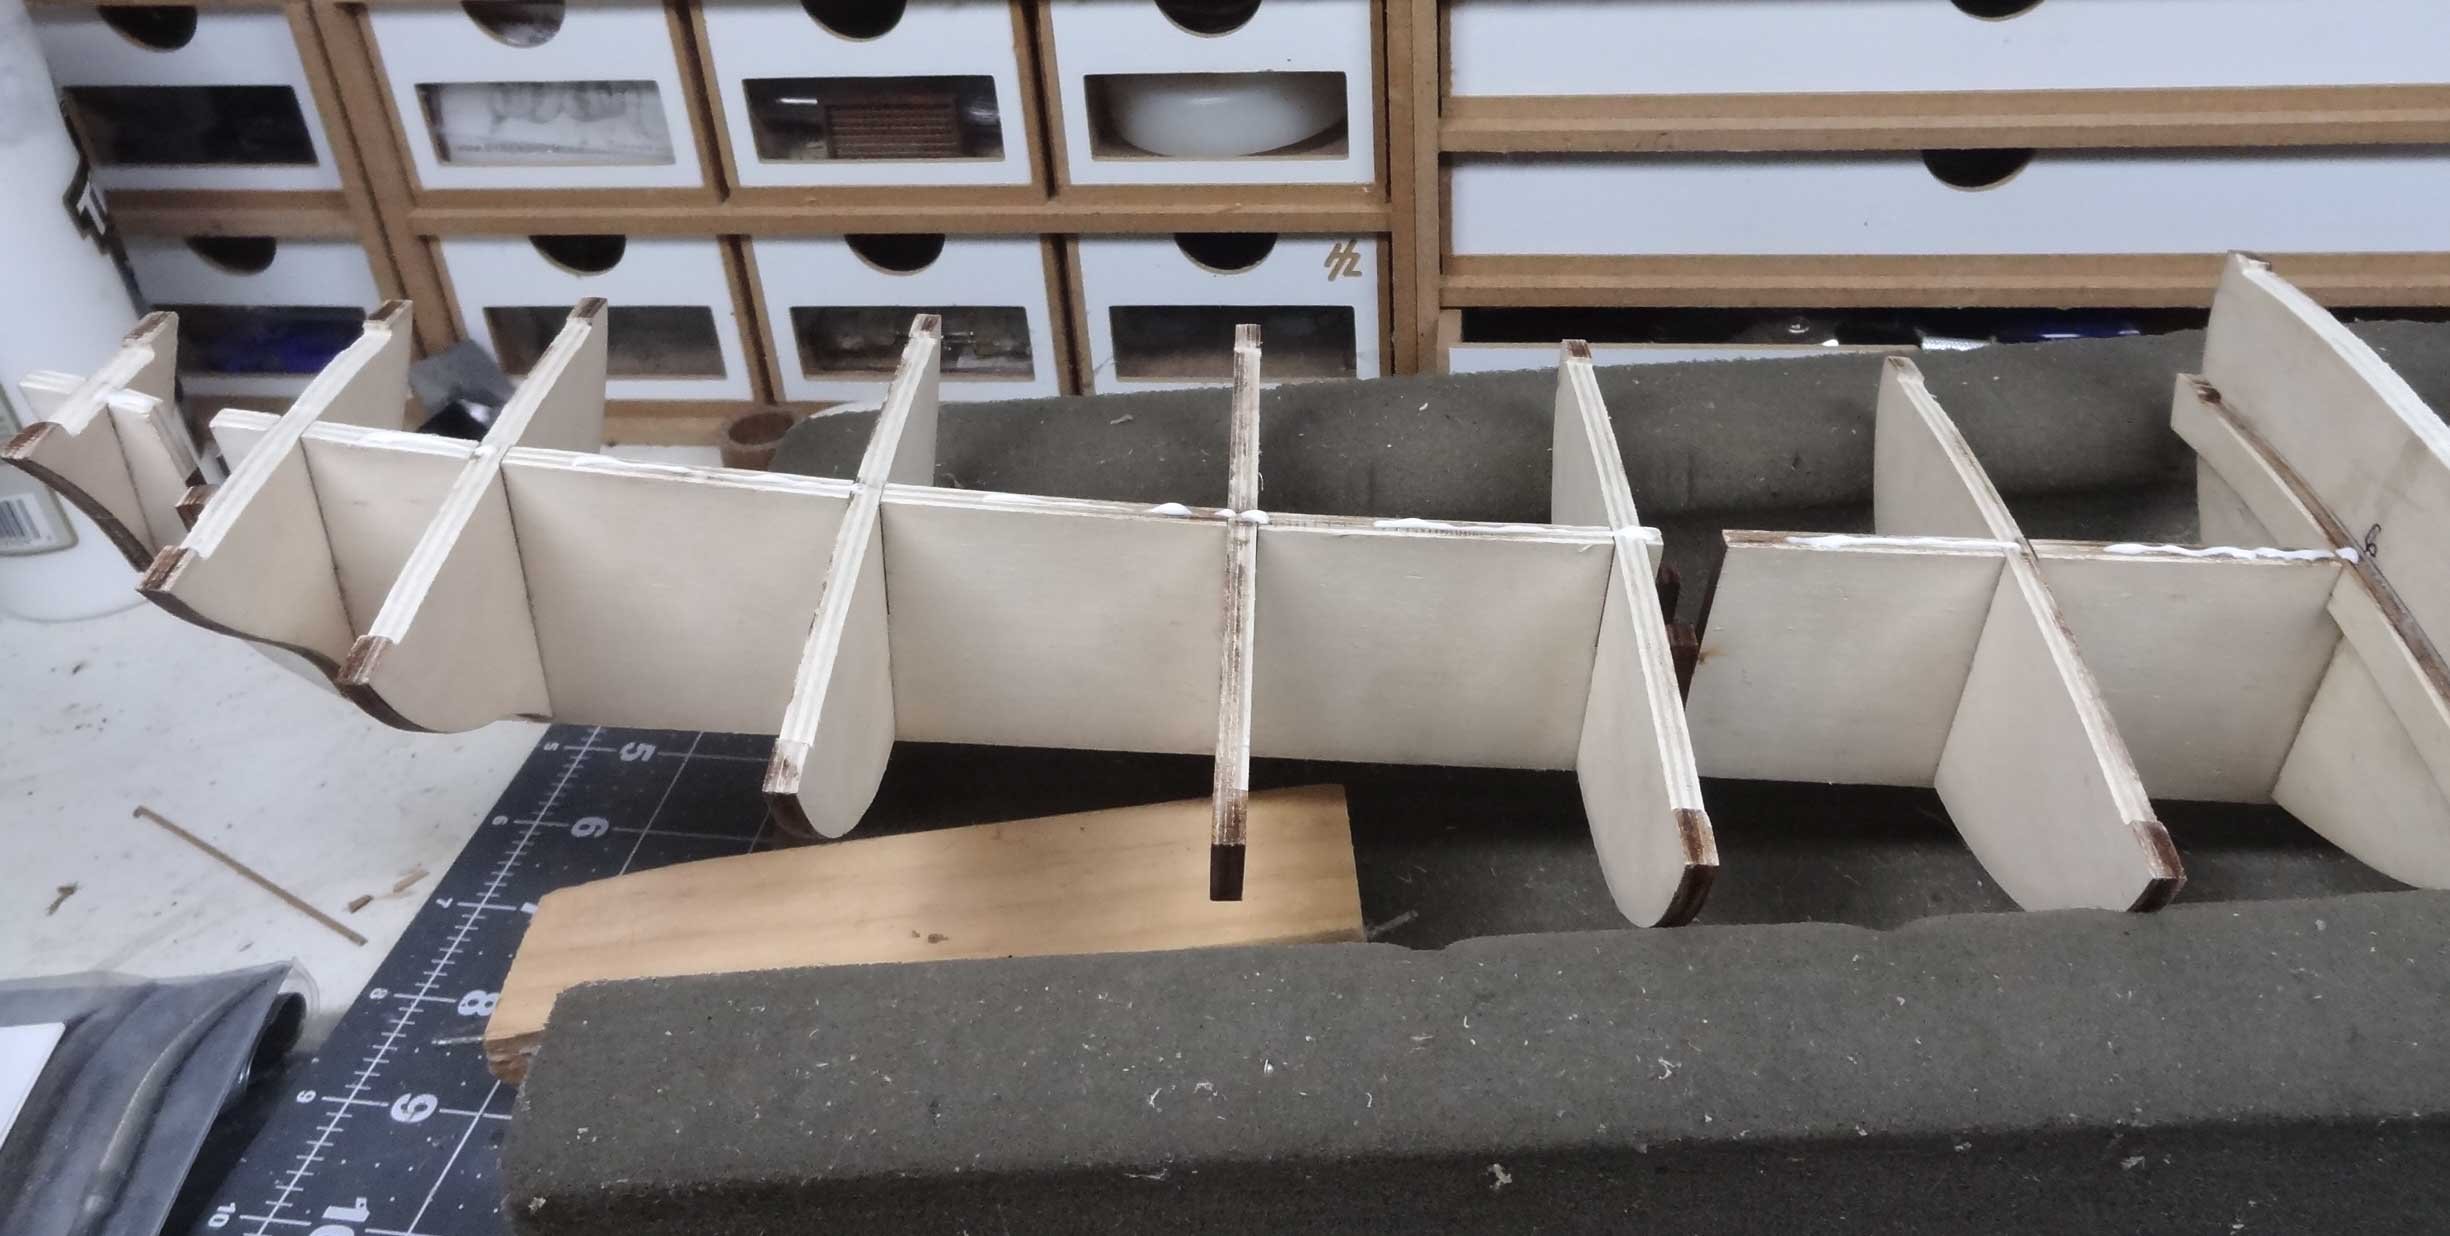
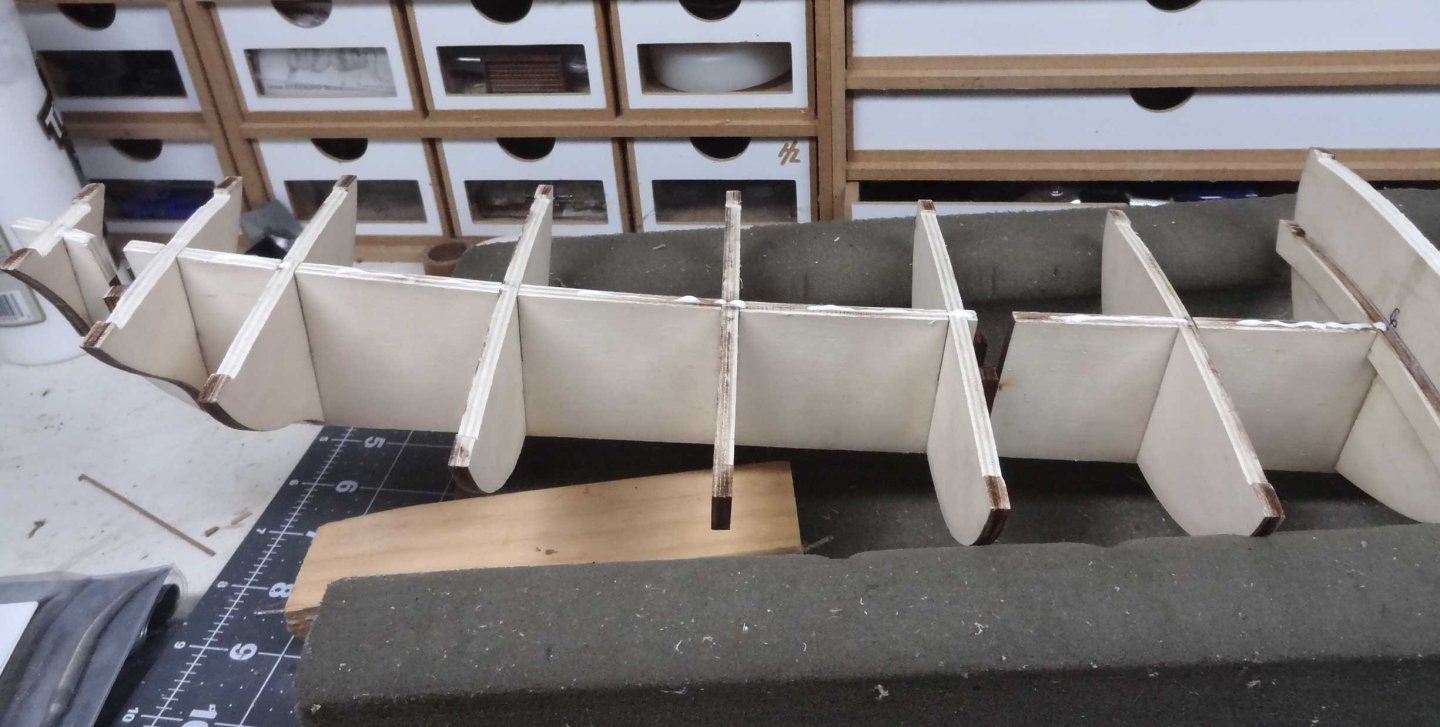
Getting started with the hull. It's the typical false keel with a bunch of frame pieces. Nothing really of note there. I won't bore you with hull pix you've seen many times before. That assembly was uneventful. The next step is going to be fixing a false deck to the top of the frames/keel. It gets kinda interesting now. A side view of the keel shows it slopes upwards from midship to the bow. A view from the bow shows a downward slope (I don't remember the term for this) from the keel outwards to what will be the bulwarks. So the false deck is going to have to bend upwards to the bow and also laterally from the keel center to the outer edge. Hmmm.🤨 I had a similar situation with my Enterprise build. In that case the false deck was even thicker than this kit. It was evil. There was no way to clamp the parts so I ended up literally holding the deck to the frames until the glue dried - about 40 minutes. Even then many frames popped from the deck and had to be re-glued. The instructions say lay some glue on the upper frames and keel, lay the deck down and start nailing the deck to the under supports. First off, the nails are the usual brass pin nails, maybe 1/2" in length, and I seriously doubt they are going to hold anything unless I bang in a few hundred. Not happnin'. Kit nails are useless. Even worse there are notches in the false deck that have to sync up to protrusions in the frame pieces. If I start gluing and nailing and then discover that one of the notches doesn't sync with the frame, what then? It seems like I need a couple of extra hands. It gets worse towards the bow as none of those notches are going to sync until the deck is firmly fitted on the keel. Again, how would adjustments be made when half the deck is already glued down midship? I may be entirely missing something, wouldn't be the first time. My first inclination is to take the false deck and slice it up into smaller sections that could be secured easier. The deck is going to have planks on top of it so none of that would show in the final build. Would appreciate any ideas.


-
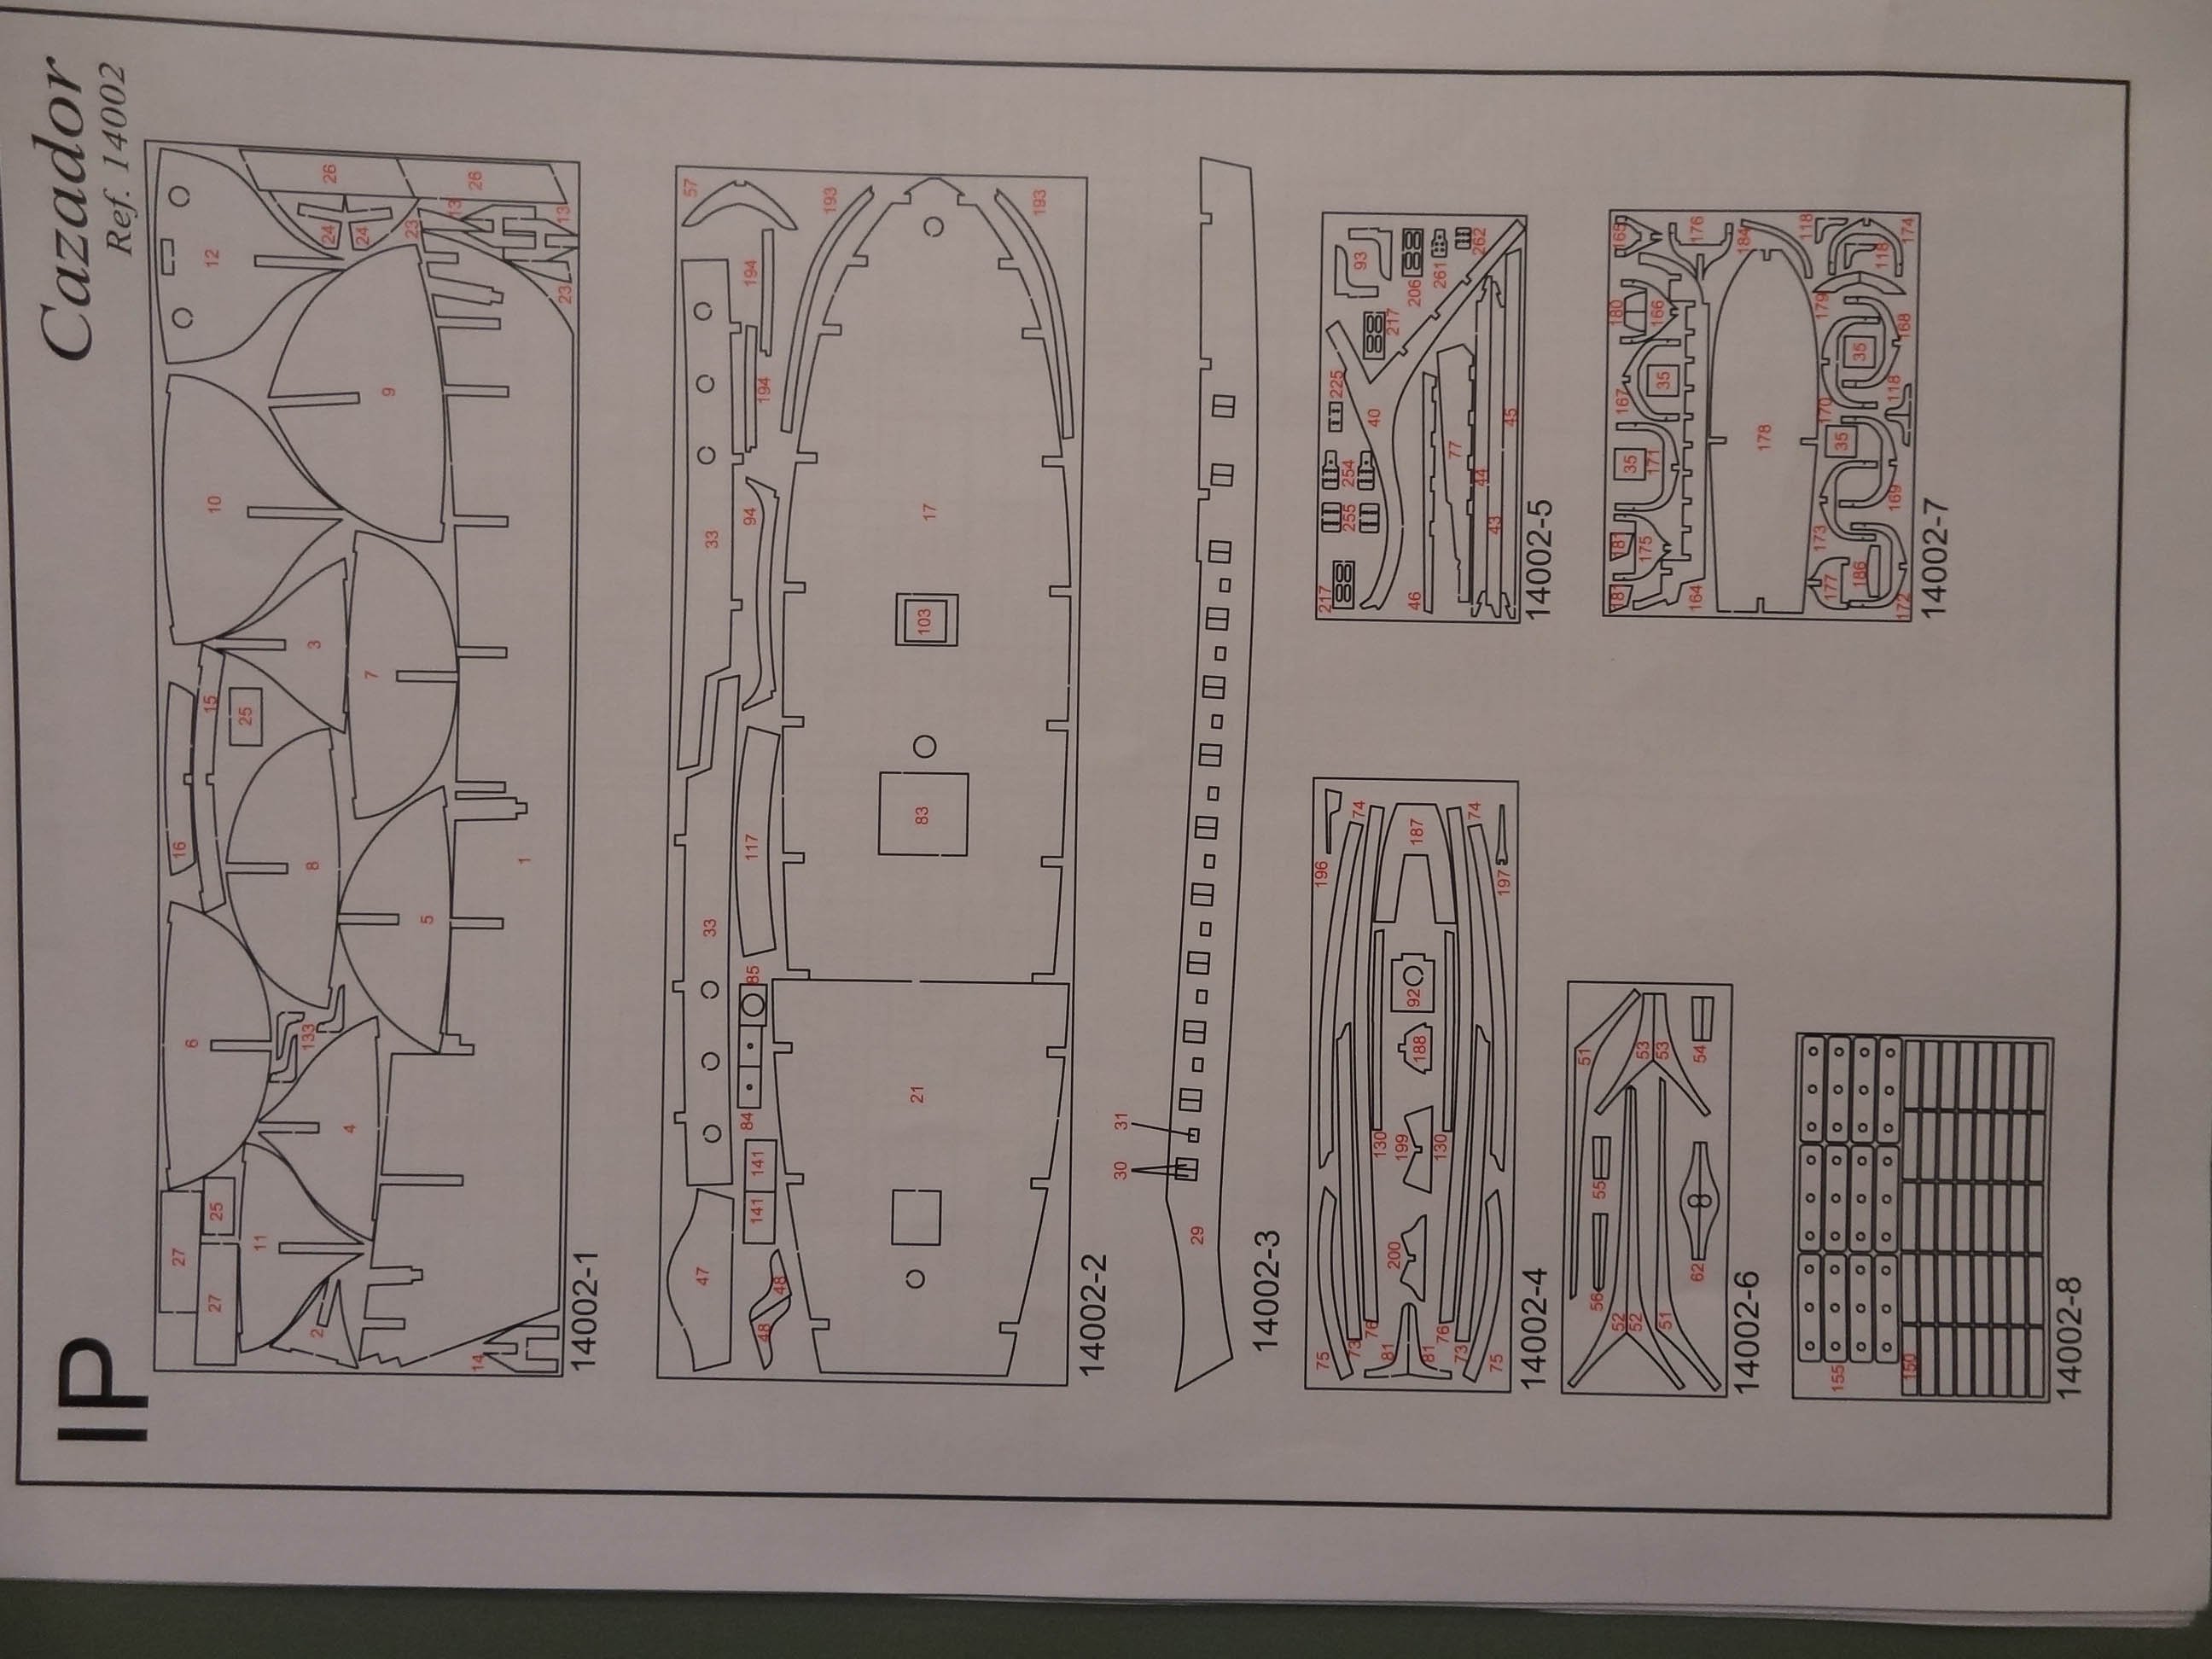
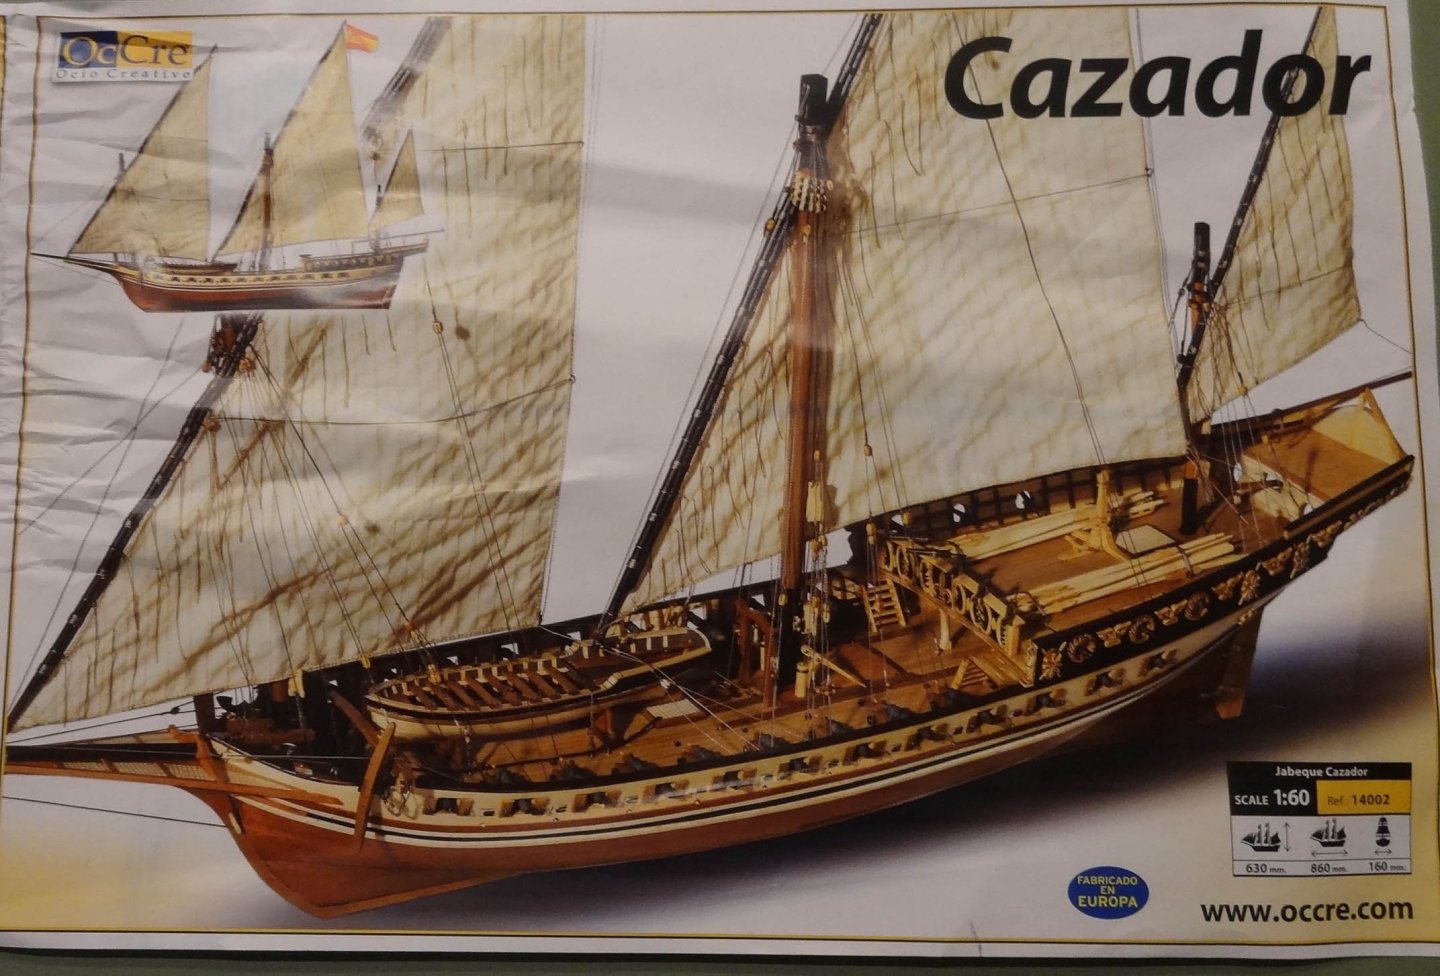
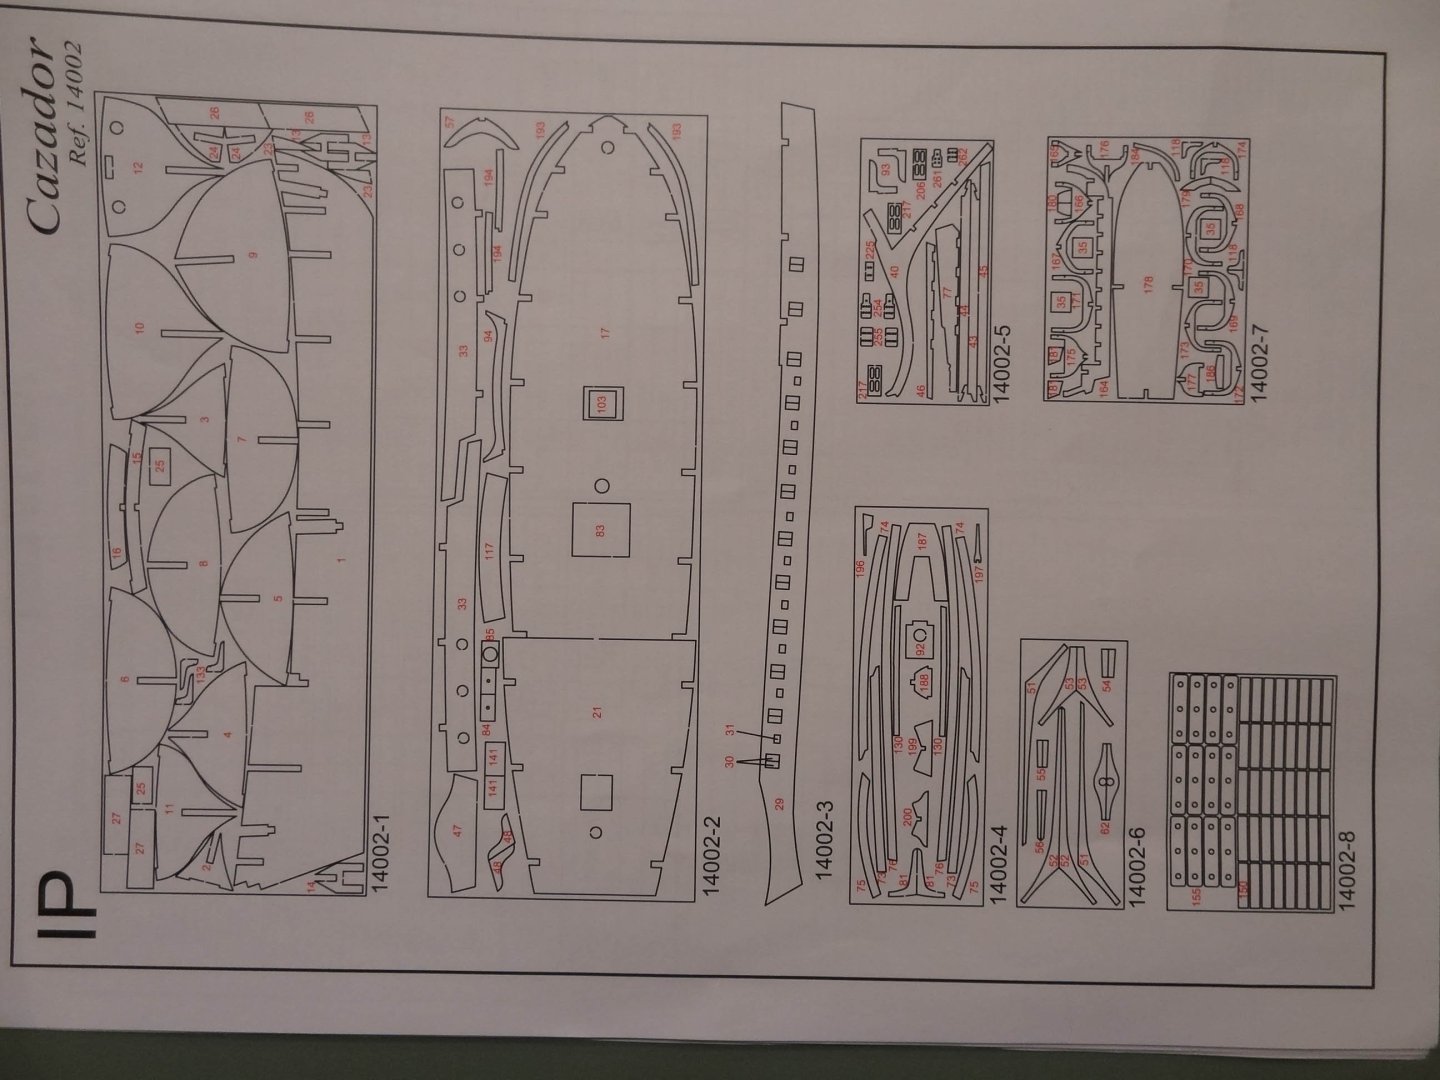
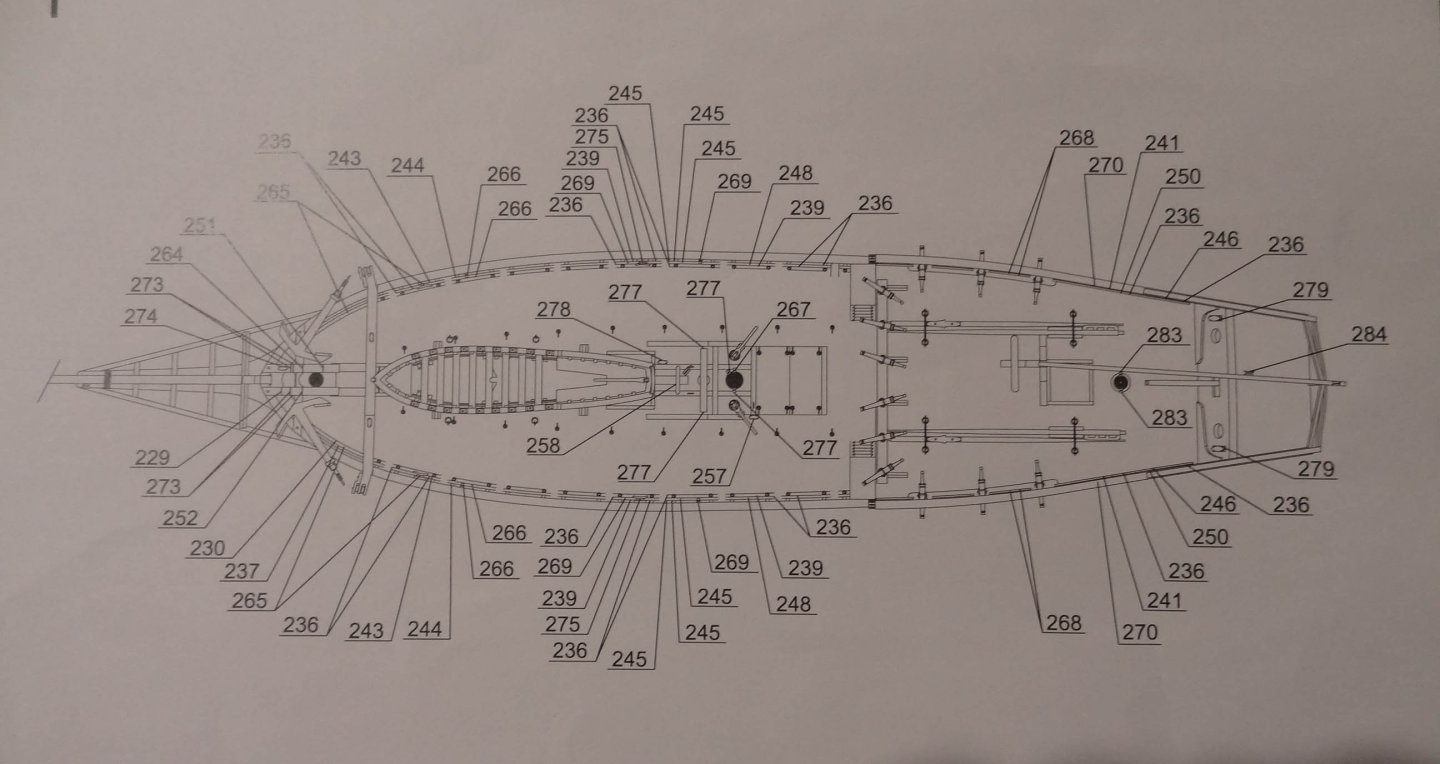
Hello MSW! - I'm starting a new adventure building Cazador. The images show this to be an interesting and attractive build. We shall see. I've always liked lateen sails so this fits nicely. The kit also has some ornaments (although only Britannia) and I have never done any of that. Just to be honest, other than maybe some wood swaps, I have no intention of bashing this build too much - reasons explained below. I originally thought this might be a fictitious ship, just built similar to the Xebec of those times, but it looks like it was a real ship. Designed by Spain to combat the Moorish pirates in the Mediterranean. I have moved to this build after giving up on my previous build. That literally dragged out for years and I had barely got past the hull. This was due mainly to the horrendous instructions/plans (or lack off). I just got so frustrated that I didn't even want to work on it anymore. A lot of lost idle time. I feel like I have lost my edge when it comes to modeling so it is time to move on. I need to get my Mojo back 😏. After perusing thru my kits I decided on this one mainly because the plans appear very well put together. I needed a kit that I could concentrate on planking, decking, rigging etc. without having to muddle thru 5th world instructions. Just get back to basics. After reviewing the plans, I think they are prepared in a format that makes sense to me. There is a booklet that has actual photographs in numbered sections. The instructions are in another booklet - well written in good English. There is a matching instruction section for each image in the other booklet. Very easy to follow. Also included was an inventory of all parts & pieces. Another page showed all the precut plywood sheets and each piece is numbered. No confusion. Pretty hard to mix things up! As far as the parts and materials go, I'm not going to bore you with pix of all that. The sticks and strips are of typical kit quality. I may replace some - maybe. I will say the laser cutting for the precut pieces is excellent!👍 Not a single missed or partial cut in any of the plywood sheets. It has been easy to cut all the parts out of the plywood. Maybe the best I have seen. The Britannia ornaments are nothing to write home about - pretty bland. But since my goal for this build is pretty basic, I will probably go with them. So as I stated, my goal is to get my build skills and confidence back again. Just work with the materials the kit provides. I am amazed how that previous build just totally drained me. Three years wasted. But I am ready to get back in the game again. So hop on board if you are interested. There aren't too many logs of this build to see. C'ya soon
-
Just be careful. Shellac and Varnish can be mentioned in posts but can also be very generic terms. Many types of shellac, many types of varnish. Whatever you think you want to use, always try it on some scraps of the material you ultimately want to cover. Your decision at that point should be easy.
-
Help with tapering
mikiek replied to N1ckel's topic in Building, Framing, Planking and plating a ships hull and deck
Good idea doing your garboard first. It's critical to get that one mounted correctly. If you you have too much curve in it every strake above it will also take on that curve. Also to make life easier and your entire bow more symetrical, when you shape a strake for one side be sure to make a duplicate right then and there for the other side. That way you only have to figure out shape one time. -
Hey Richard - kind of a down the road question, but did you paint your build or leave most of the wood colors? I'm asking after I stumbled across a section of the plan that showed "bumpers" on the side of the hull. The suggested wood was different than the hull wood. I am finding that the contrast between the two is not particularly appealing. If you did paint most of the build, where did you get your ideas from?
-
Yeah Richard - I kinda had that idea a little later. No one but you and me will know the difference.
- 62 replies
-
- 2
-

-
- lancia armata
- panart
- (and 1 more)
-
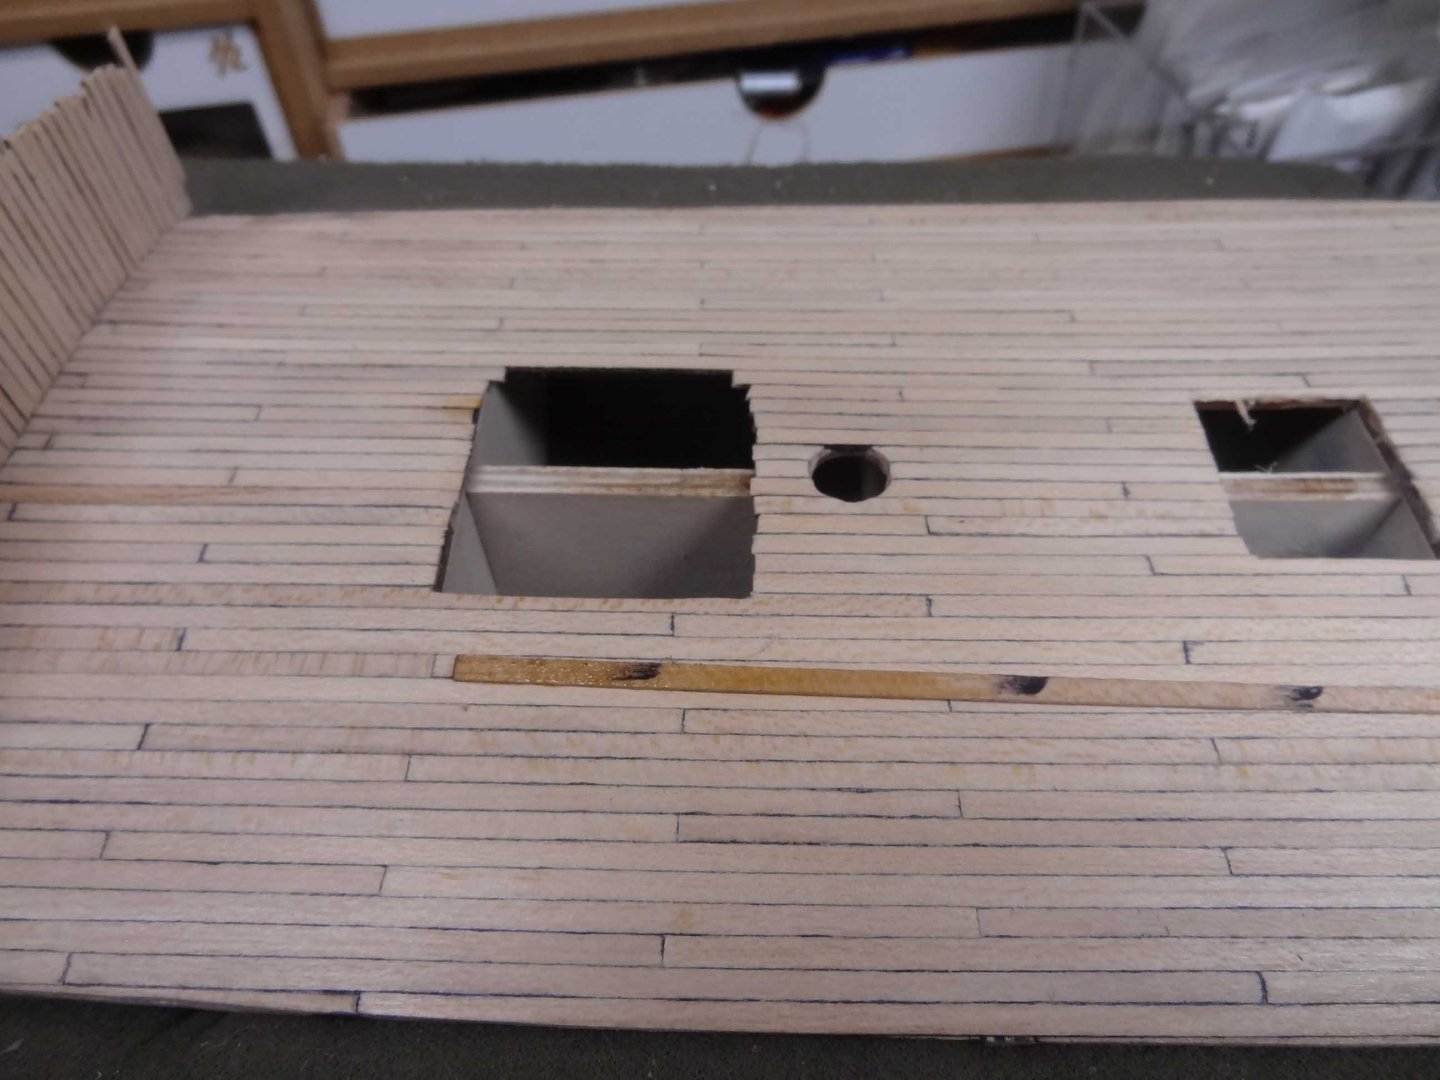
Rats Jonas - I didn't realize there was a hatch in the stern deck. That'll be fun trying to cut out now.
-
Looking good Stuart! Keep on rocking. I did want to make a comment on what was said a few posts back. You are going to find that in almost every build, the kit supplied ropes and blocks pretty much suck. Next for full disclosure, I have no connection with Syren. That said, their ropes and blocks will take your final build up at least a couple of levels. What I have learned, is that in addition to the cost of the kit, I need to be prepared for at least an extra $200 in kit bashing parts & pieces. Maybe even more if I replace some or all of the wood. One of those gotchas no one made you aware of when you dived in 😉. We all have found out the hard way. But IMO, it was money well spent.