DONATION DRIVE - SUPPORT MSW - DO YOUR PART TO KEEP THIS GREAT FORUM GOING! (91 donations so far out of 49,000 members - C'mon guys!)
×


mikiek
-
Posts
2,276 -
Joined
-
Last visited
Content Type
Profiles
Forums
Gallery
Events
Everything posted by mikiek
-

Forming a garboard
mikiek replied to rudybob's topic in Building, Framing, Planking and plating a ships hull and deck
You didn't mention if you have cut a rabbet in the keel for the garboard. Even if the plans don't call for it I highly recommend it. It will give the gb something to bite into when you go to glue it. Yes, gb's may bend and twist all over the place. At the stern it may lay vertical, amidship it will likely be horizontal and somewhere in between at the bow. Try to pin yours in place first. Then take a second stick and lay it on the gb upper edge. Look for large gaps between them and also see if the gb is adding any curvature to the 2nd stick. This is what you are trying to avoid. If you see either then the gb needs more shaping. In a perfect world the upper edge of the gb would be totally flat. You can sometimes see this by looking down the upper edge from bow to stern or stern to bow. Don't look at it from the side as it will never look straight from that angle. -
Hey Richard - thanks for the support. This things has had it's moments so far 🤔
-
Scott, Bob - As I have mentioned on every multiple layer build I have done - I HATE IT!!! 😬 Just do it right the first time! I have always wondered about reducing layers designed into a kit. While I have never tried it, I have had knowledgeable sources remind me that a lot of the placement of other parts down the road, on say a 3 layer planking, is dependent on those measurements. If I went from 3 layers to 2 (or 1) caprails would be too wide. Who knows what else. This one even gets more bizarre because you can't glue the upper 2/3's of the planks to the frames because the frames are going to be torn out. It leaves IMO a very sloppy first planking because try as you might, you will not get a snug fit of the unglued planks around the frames. As I finish the last few planks of the first layer I have a very ugly fit around the frames. I can only hope with that the 2nd layer (which is limewood instead of walnut) things will start to firm up somewhat. And if you think about it, the limewood layer is not even going to show up anywhere. I believe because of the small actual size of the boat and the relatively big scale, they had to add more beef to the planking to make it look right. Trying to cut back to 2 layers would have meant 2 layers of extremely thick walnut sticks. They were hard enough to work with as they are right now. Ehh - just a challenge I wasn't expecting 😒
- 62 replies
-
- 1
-

-
- lancia armata
- panart
- (and 1 more)
-
You might want to lose fit your masts with the dead-eye shrouds included. I remember it was an extremely close fit between the shrouds running up and the stanchions. Make sure they are not going to run into each other.
-
The material for hammocks (if you're going to show them) should be a course linen. Something that would look like canvas. Dyed a dingy tan. I would have to go back and see what I used. Are you planning on displaying them all in the open or draping some sort of covering over them? If displaying them, you will need upwards of 150 of the little buggers. FYI - If I recall, a regulation hammock was 7' long. They were typically rolled longways, lashed and folded in half when hung out on the stanchions. So whatever you do they should be 3 1/2' scaled down to 1:64. If you go that route check my log as I documented rolling and lashing them. That task was almost as rough as rigging 20 guns with all the tackles.
-
Holy crap Elijah - pardon the French but you have amazed me in so may ways. I remember when you first signed in - working with your build and what seemed like some school on the side. Now graduating (congratulations), getting a job and still finding some time for "leisure work" . You are truly an amazing young man! And the build just keeps getting better and better. You are a model for kids your age to aspire to be.
- 228 replies
-
- 4
-
-
- gunboat
- model shipways
- (and 1 more)
-
John - this is how Chuck says to do them https://modelshipworld.com/topic/11840-us-brig-niagara-by-mikiek-finished-model-shipways-scale-164-first-wooden-ship-build/page/5/ post #144
-
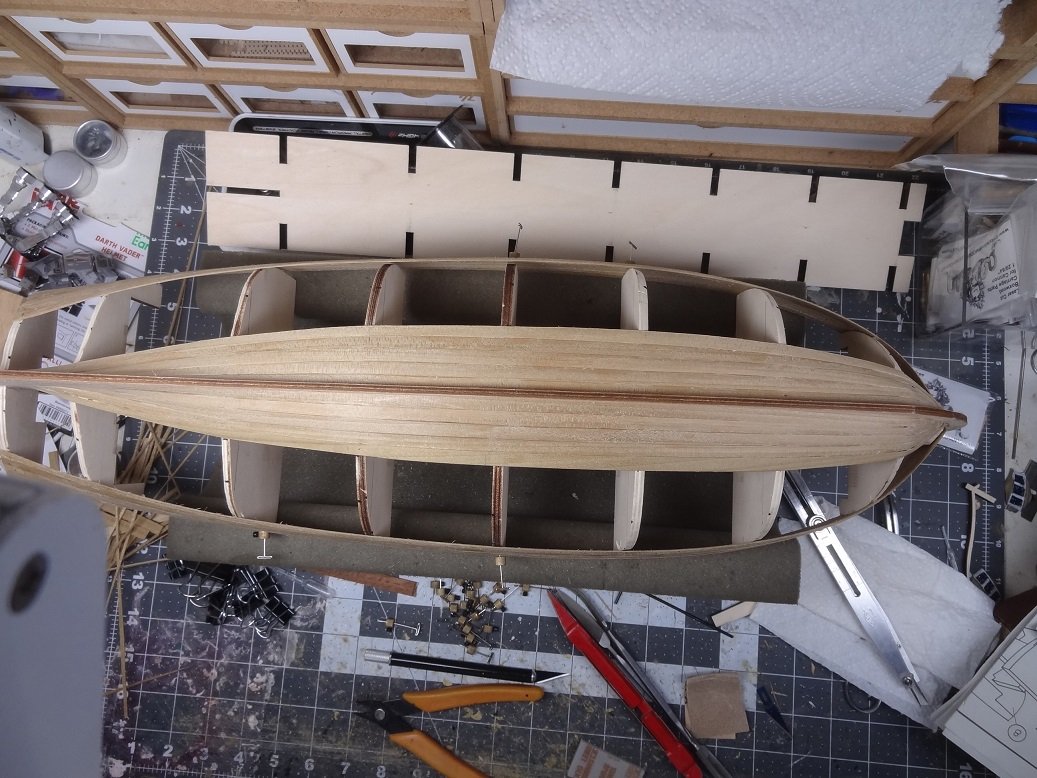
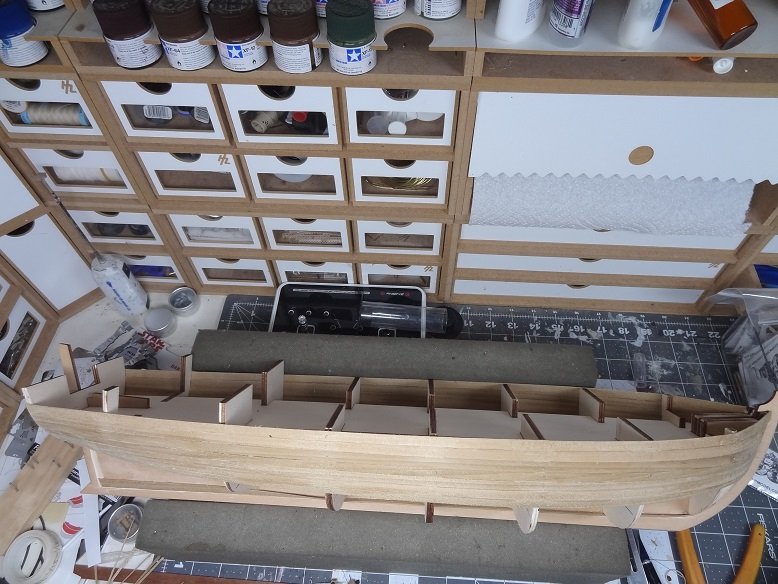
Well it took most of the evening but the lower plank band above the garboard is complete. Everything just kinda fell into place. The deadwood is covering up and it doesn't look like I am going to need a single stealer for the entire layer. I should have 2 sticks left over for use on interior parts. This time I gave myself a little extra width when measuring the strakes so I could still get after the beveling. Looks like that worked well also as the last strake on each side landed right at the band mark. I guess this will go faster when I do the 2nd and 3rd layers as there will be a base to glue to. Man I hate these multi layer plank jobs 😖 After finishing I went back with some detail files and opened up the rabbets a little. I filed down the edges of the planks in the rabbets to provide a little more room. Widened the rabbets and filed down the wood in them to make a little more room. I still don't think it will hold 2 more plank layers. G'nite.


- 62 replies
-
- 4
-
-
- lancia armata
- panart
- (and 1 more)
-
Richard - I am really glad to see your Lancia build log. I'm not sure how I missed it when I was searching. I know it will come in handy when I get further along. You taught me one thing already. I had never heard of a flexible rule, but I can see where it would be useful. I ordered one from Amazon. I'm glad your on board!
- 62 replies
-
- 1
-
-
- lancia armata
- panart
- (and 1 more)
-
Hello Richard - It's nice to see someone around. I used to do these logs so maybe I could help others with problems I run into. These days I do them so that I can remember what I did 6 months ago. What do you think of Pegasus? I have that one on the shelf. I almost broke it out, but decided on something smaller for this build.
-
Still working on the bottom band. One more stick on each side. I forgot how difficult this one can be, as the sticks really need a LOT of shaping at the end that fits into the stem. Interestingly, I may not need any stealers to complete this band. I always seem to have luck planning out the bands. There's always a potentially troublesome spot if your strake has to lay halfway on deadwood and halfway on a frame. Amazingly, the strakes are falling where the edge meets the bottom edge of the frame. This gives a nice tight fit. From what I can see I may not need any stealers at all. Go figure 😏 Thinking ahead, if the bands are marked A,B,C,D with A being the uppermost (completed) and D being the band above the garboard (in progress), I'll probably do B next. I have found in previous builds it can be helpful to recalculate the bands when there's 2 left. I have sometimes just combined the 2 into 1. We'll see. Will have pix when I finish band D. Hopefully tomorrow. As I stated early on, this kit does not seem to draw a lot of interest. Maybe because there are several similar builds. Anyways, I feel like I have been talking to myself up to this point. And I guess I have been 🙃
- 62 replies
-
- 1
-
-
- lancia armata
- panart
- (and 1 more)
-
74-Gun Ship Gun Deck by Jeronimo - FINISHED
mikiek replied to Jeronimo's topic in - Build logs for subjects built 1801 - 1850
Absolutely gorgeous! This is a scratch build in your face like not many others. You did a great job on your build log. I happened to build a kit gundeck cutaway so I have a weakness for these. The triple deck just adds to the whole thing. It's really fun building at that scale. Thank you for sharing and congratulations on your completion. -
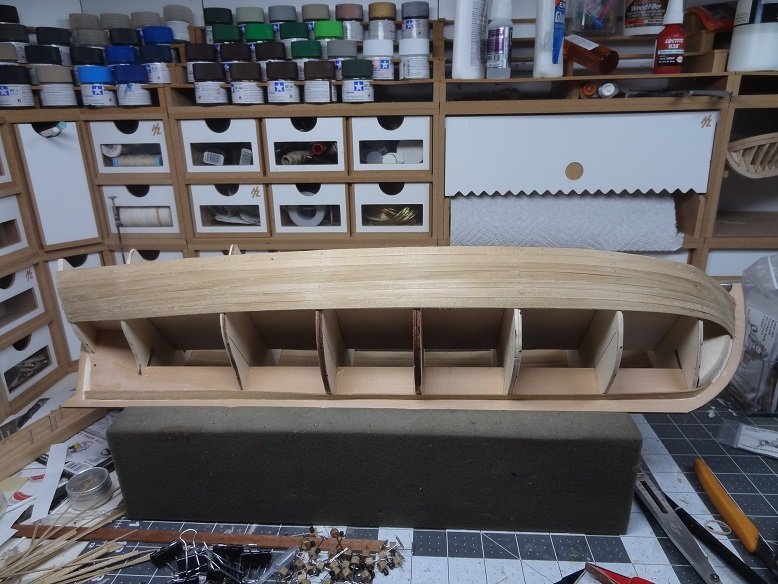
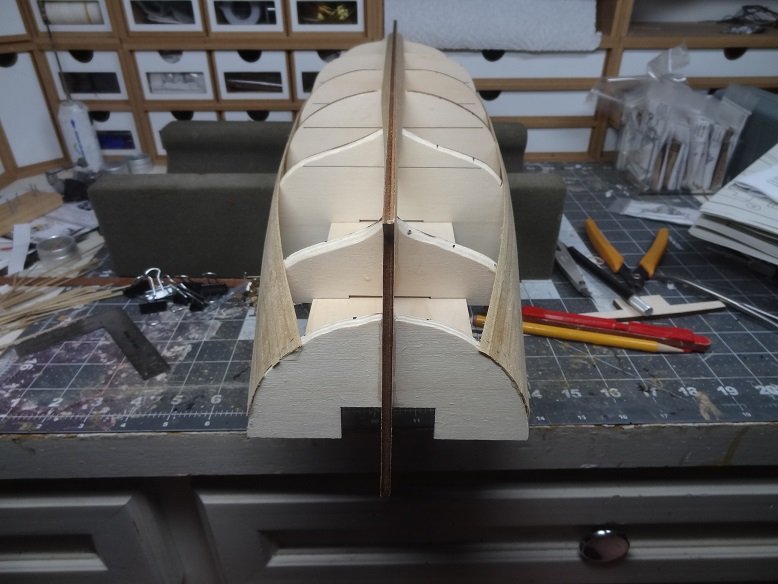
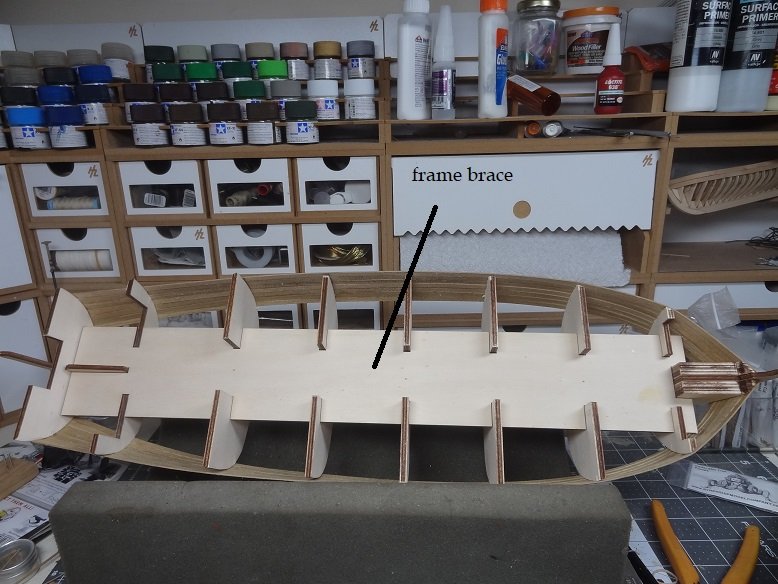
First band of strakes in place. They didn't come out too bad. I was a little short of some the band marks but I'm writing this off to the aggressive bevel I was sanding in each edge. I got the stick sized properly but then sanded the bevel which reduced the width a bit. I do like doing the beveling - plank edges fit together real snug that way. Next I think I will do the bottom band. I know this is going to require some stealers to cover the deadwood. I've been saving every scrap of stick that I cut, hoping it will be enough for this purpose. Here's a few pix - nothing too exciting. One thing the kit has that I hadn't seen before. It's a brace piece that sets down on the frames from the top. It seems to help keep the frames square. It will be removed at the same time I break off the frames.
- 62 replies
-
- 2
-
-
- lancia armata
- panart
- (and 1 more)
-
This slow going. I can really only add one strake at a time and then wait an hour or so for the glue to dry. Painful. On the bright side the sticks are going on nicely, the dividers are doing their thing and it is going together OK. I'll post some pix when the first band is finished. I did realize that with the band directly above the garboard and part of the next one I will be able to glue to all the frames. That part of the frame will remain in place when I break off the upper part. At least that's what they say. So as usual, starting from the top down, I am doing to hardest part first 😒 I'm still concerned about the inventory of sticks. There are just enough for the first layer and I see that there are a lot interior parts that are covered by a strip veneer. However, for some very odd reason I have 2 of these kits, so I suppose I can scavange from the other one. Or find some other nice looking wood to replace the walnut.
-
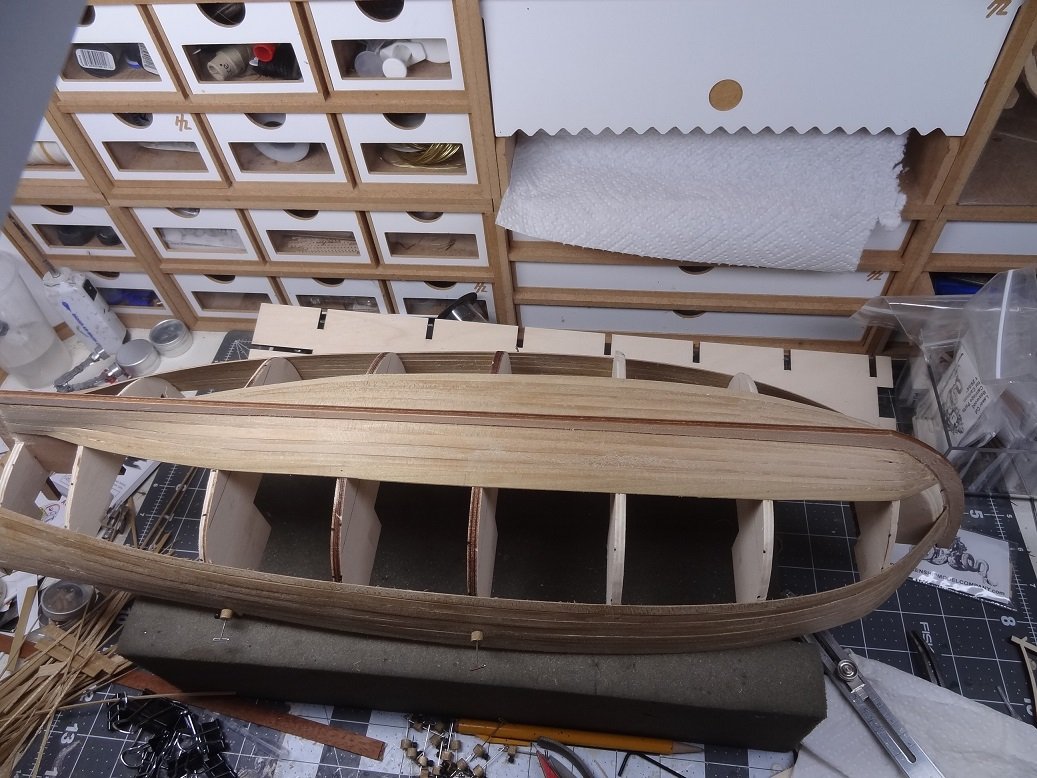
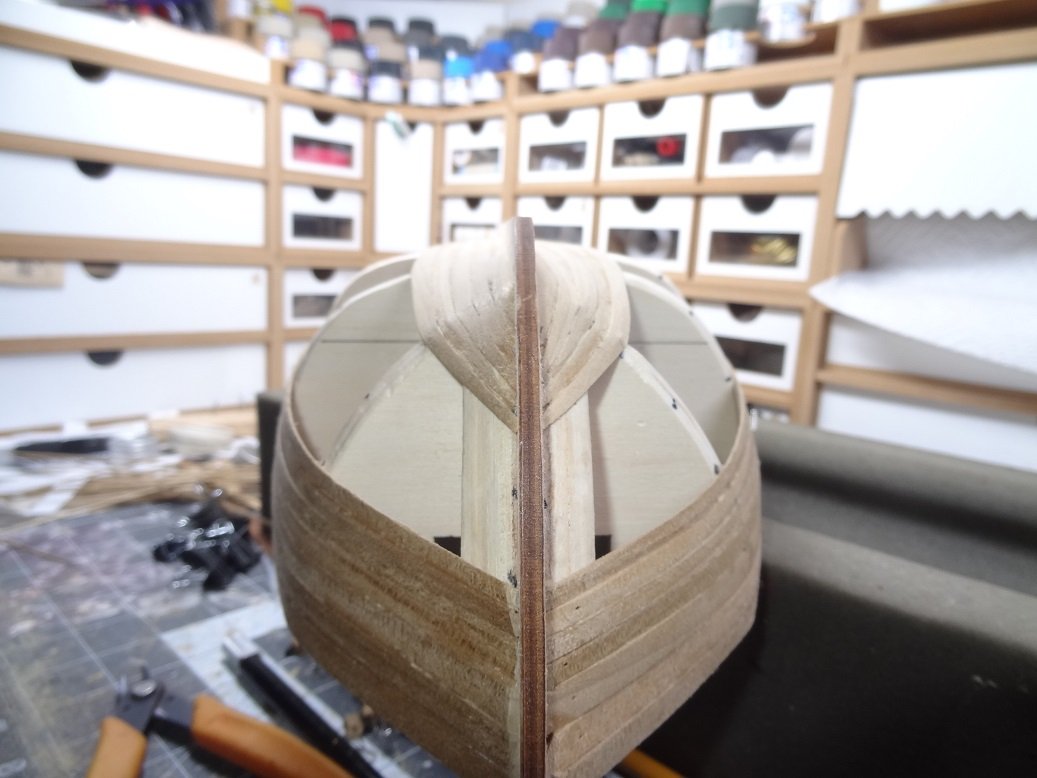
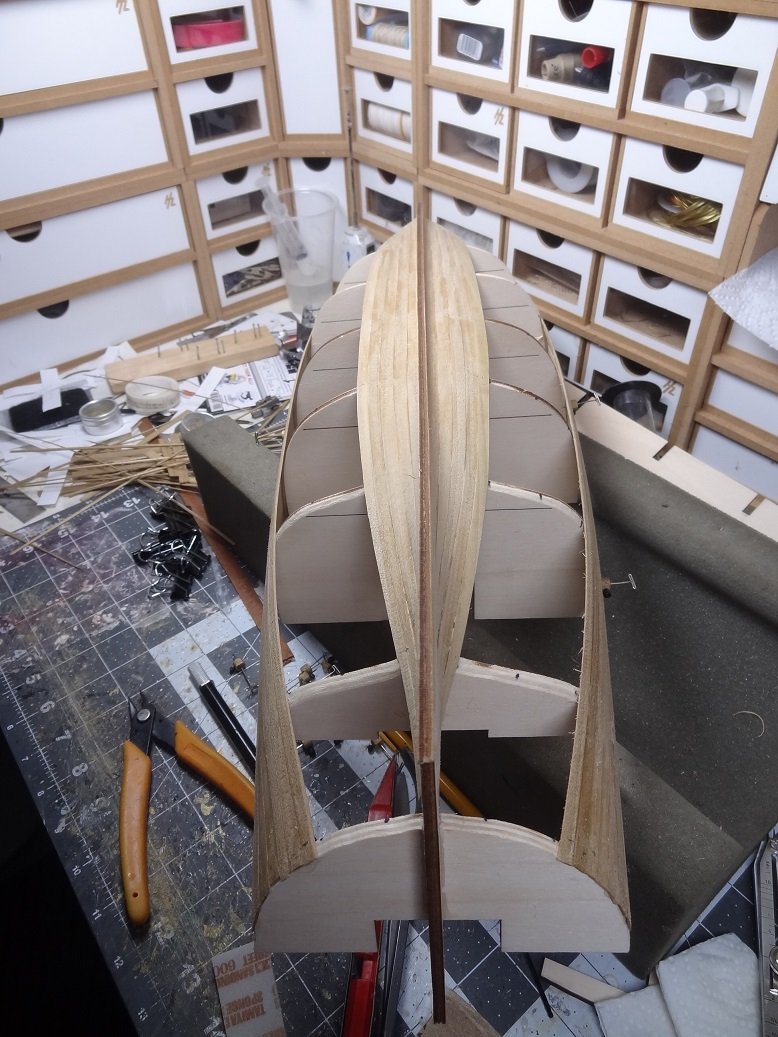
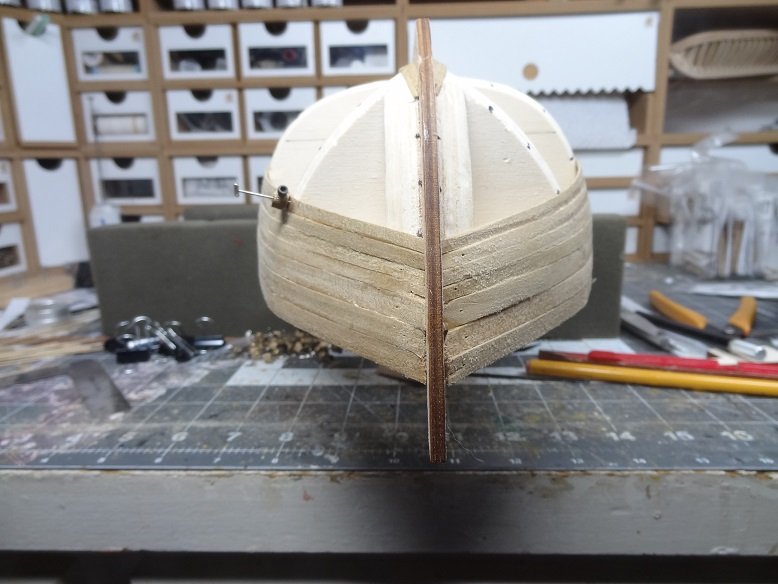
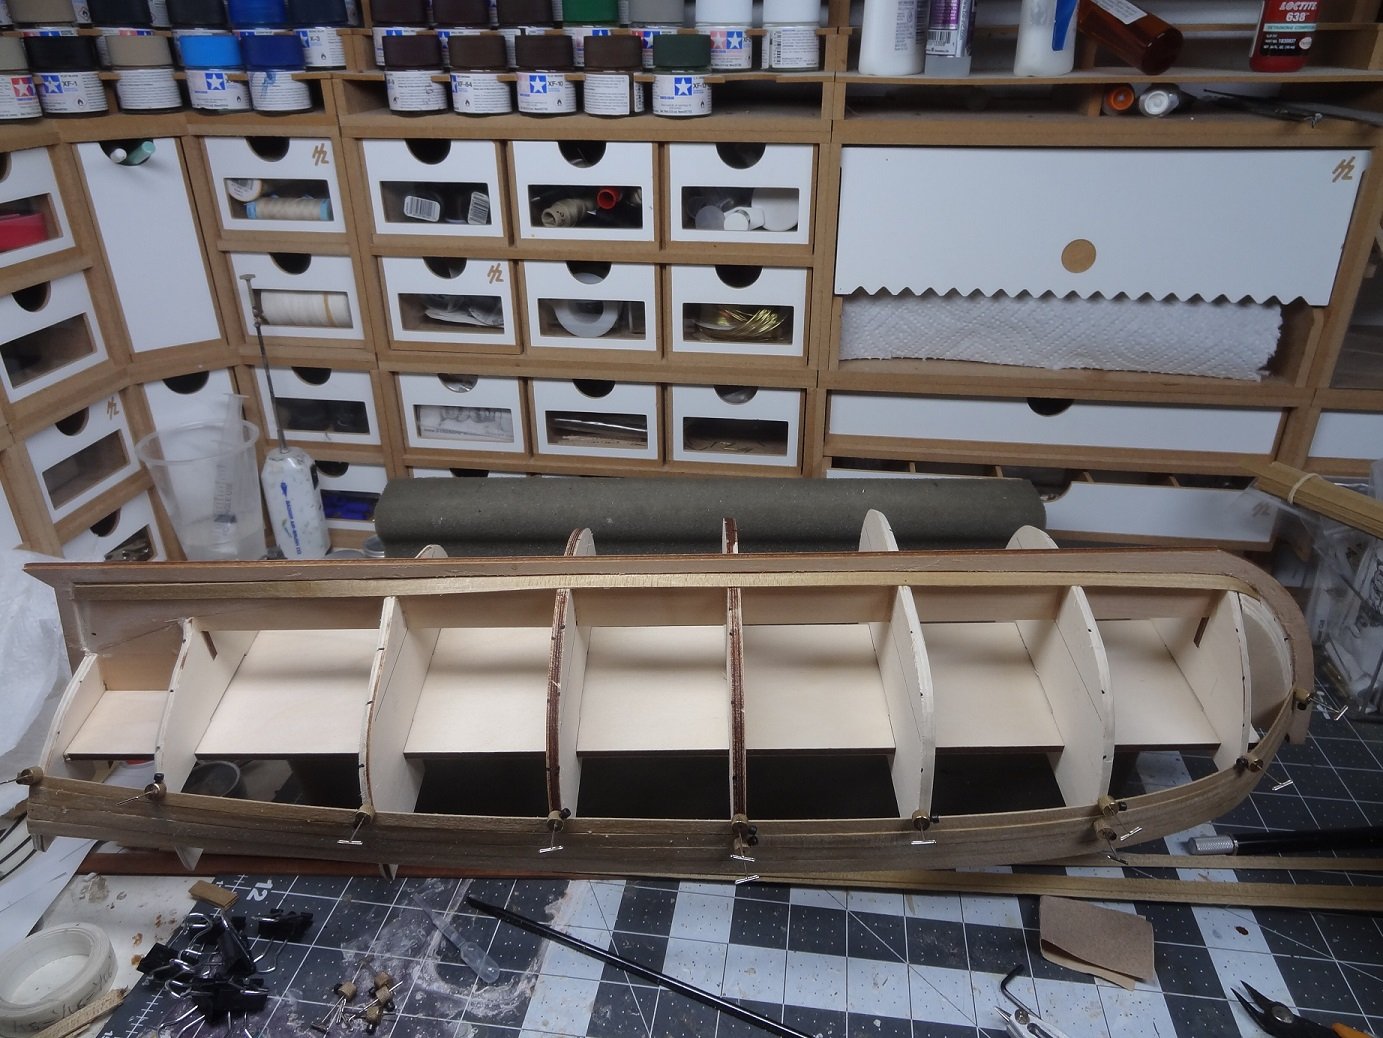
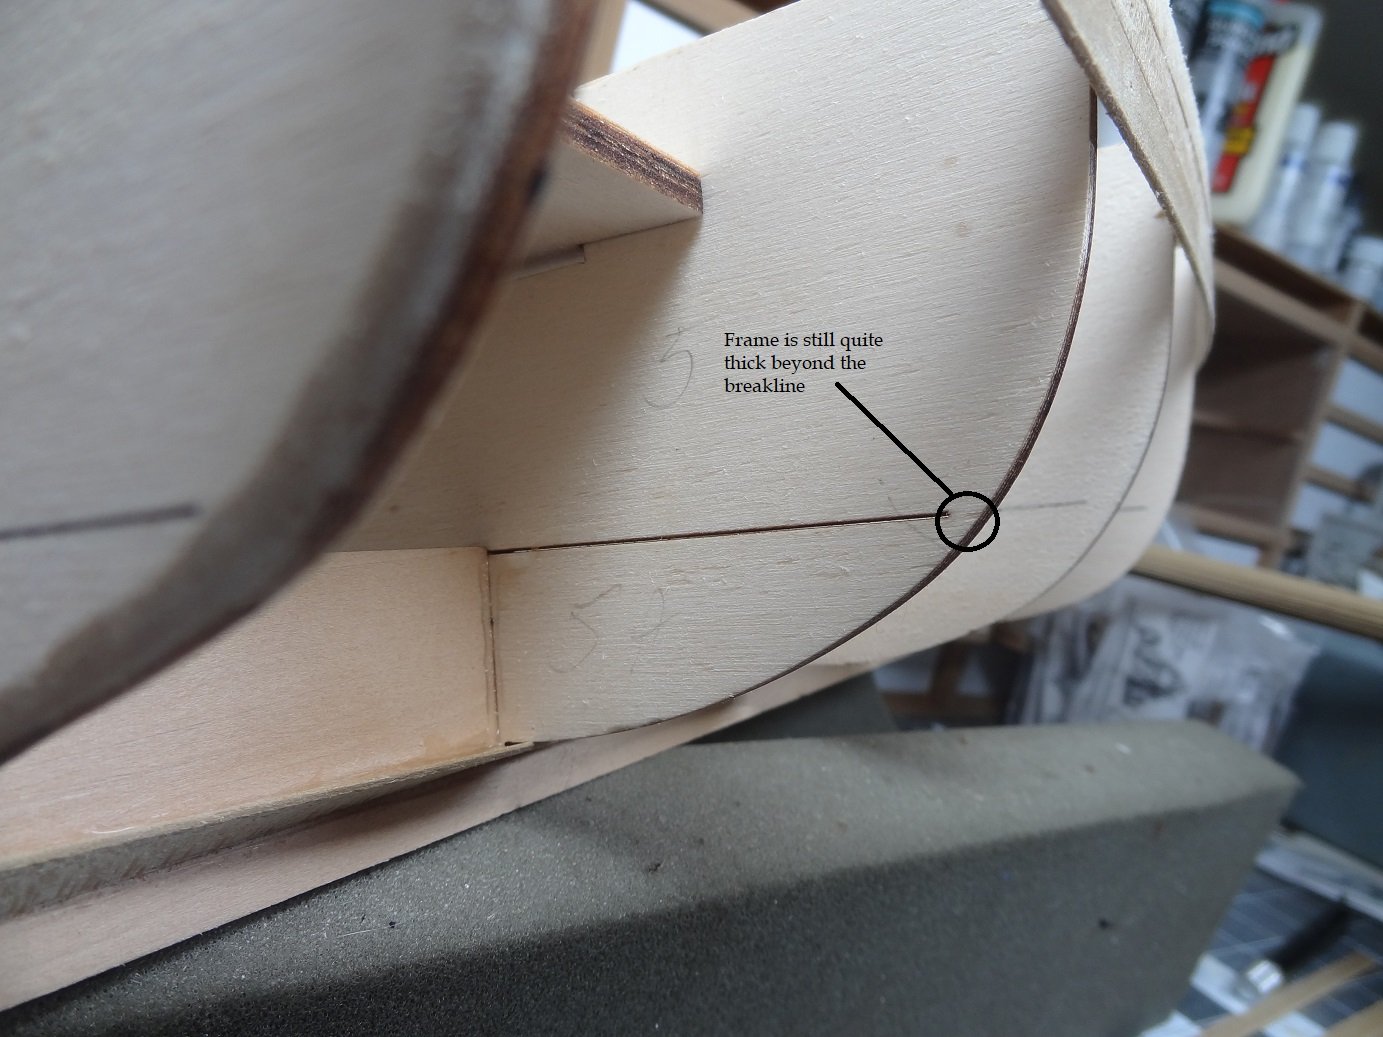
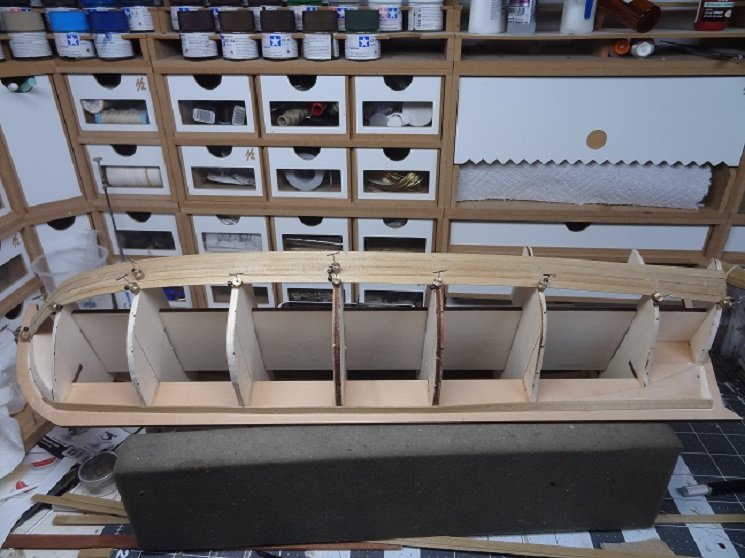
Hey everyone. I have settled down now and going about my business. As far as planking goes, I'm saying the plans can take a hike. I am building this just like any other build. I think that was the tonic for me. I cut a rabbet, since it has to hold 3 layers of planks I went as deep into the keel as I could, wide too. Somehow I don't think they are gonna fit without some help. I'm thinking I will thin down the edge of each garboard where they fit into the rabbet. That's not gonna solve the whole problem but it should help. The first layer garboards are laid, I have my bands marked on the frames and am putting down planks. I can glue sticks to the stem and the first frame behind that. Also the transom frame and the one in front of that. Can't glue to any of the others, so I'm basically edge gluing the rest of each stick. I'm finding pin clamps to be a tremendous help here. I pin a strake to the frame (where I would normally glue it) and then start edge gluing the stick underneath it. I did that for the first 3 strakes, no shaping, just get the edges glued together. After the first 3 strakes and the garboards were in I divided up the remaing area into 4 bands and am going thru my planking by dividers routine. I've done that tutorial in several previous builds so I'm not planning on repeating it here. I will say it all looks pretty cut & dry at this point. The only potential problem is each of the 4 bands needs 4 sticks. Thats 4 x 4 x 2 = 32 sticks and that is exactly what I have left at this point. The sticks are just a little longer than the hull so there's not a lot of leftovers. I suspect I'm gonna need some extra to make fillers back in the deadwood area. So we'll see. I'm also concerned whether the frames are going to break out like they are supposed to. See pix below. Garboard laid. You can see the band marks on the frames and that top most plank is the first one to be shaped. Pin clamps in action. These are the breaklines for the frames. You cant see it but they are cut all the way thru. They left a lot of meat at the end of the breaklines. I hope the frames break as designed as there is another part that will glue to whats left of the frame. The going is slow as I can only fasten 1 strake the wait until the glue dries. So it has been in and out of the shop every hour or so. That's about all for now.

- 62 replies
-
- 1
-
-
- lancia armata
- panart
- (and 1 more)
-
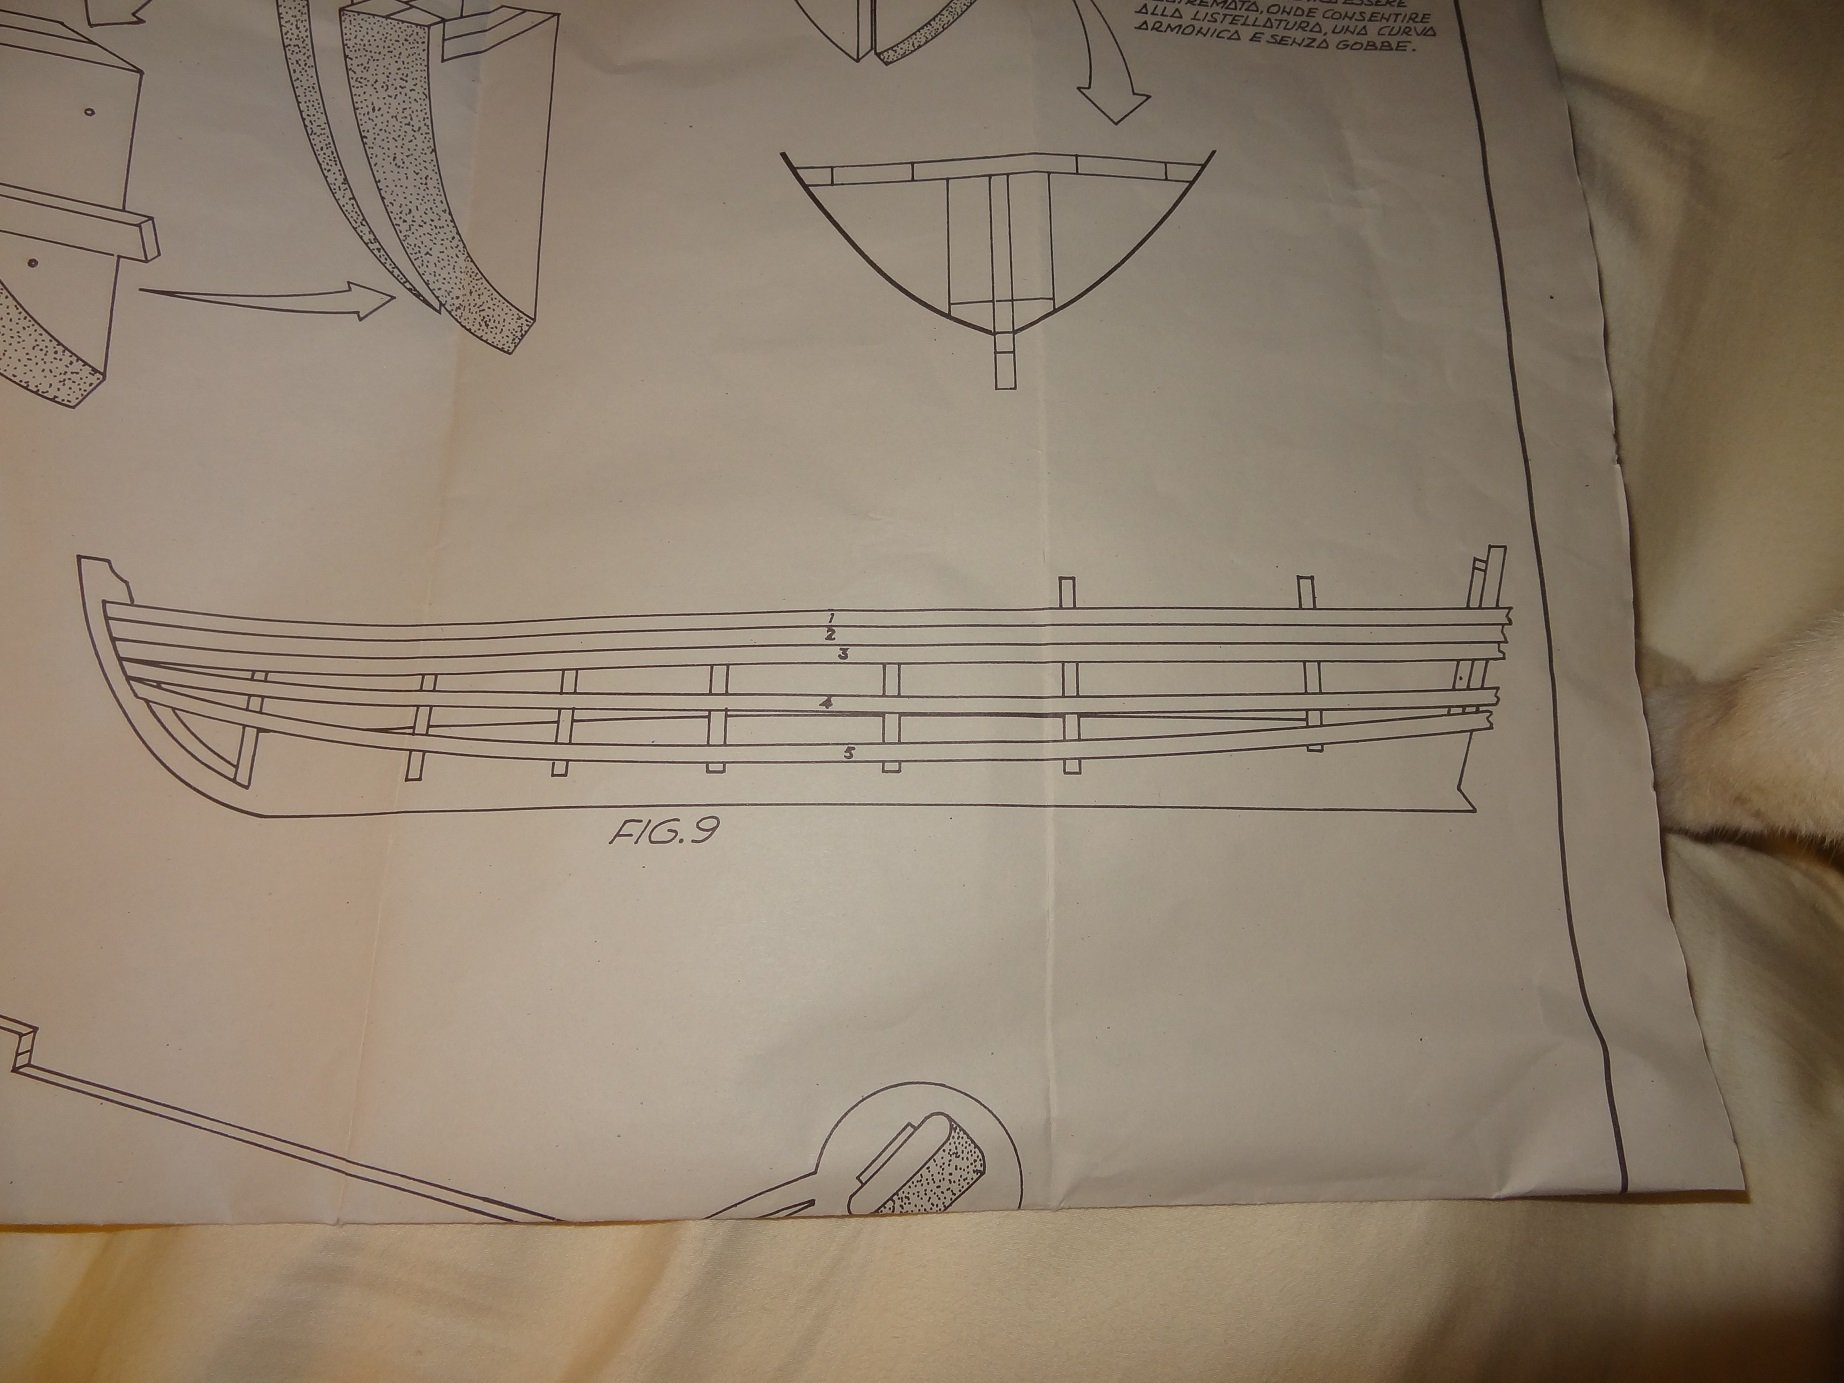
Hey all, I have to admit honestly I have cheated and already begun this build. Truth be told, I wasn't even going to post a build log. However, early on I began running into problems and questions based from the plans (if you can call them that) and I thought I should at least let you guys know what my thought process was in resolving them. I have built another Panart kit (gundeck cutaway) and overall the experience was OK. There were many occasions where the instructions totally contradicted the drawings and the drawings totally contradicted what few pix there were. Fortunately, there were more than a few MSW members that helped me along with that build. It turned out quite nice and I have to say working with the large scale was a lot of fun. Sadly, this kit does not have the same appealas the gundeck. I have found a few old build logs, but honestly have gained little insight to the problems that I see. Lancia Armata is not much more than an armed ships boat, but at 1:16 scale even a small boat has lots of detail. This is one those builds where you plank the frames then knock out the frames and there are some issues around that. The biggest one is the lower part of the frame is supposed to remain fixed so basically you are breaking off the top 2/3 of the frame. There is a horizontal slice at the breakpoint but I doubt it extends far enough to give a clean break. I am definitely considering extending that slice before I cover the frames with planks. Then my biggest nitemare, the planking diagram (insulting to even give it that much credit) shows some bizarre pattern for planking. Keep in mind this build is supposed to have 3 plank layers. Yup, you heard me right. Here's the only drawing they show: Looks like what a 5 year old might turn out as their first planking attempt. I mean honestly, this is pathetic. And it is the only drawing that shows any planking at all. Is this how all 3 plank layers are supposed to be laid? Is there supposed to be a garboard? How about a rabbet? Are they truly suggesting that I lay these 5 planks and then carve fillers for all the gaps? This lack of detail is inexcusable. I apologize, I am still on a rampage due to the lack of details. Fortunately, I have enough builds under my belt to realize the deficiencies in the drawings/instructions. Someone that took this kit as their first build would be totally hosed. I will try to be more positive in the future. I am already making my own adjustments to get me thru this BS. I have decided to plank this just like every other build I have done. If you are familiar with any of my other builds you know that means marking off bands and breaking out the proportional dividers. I will have some pix and an explanation forthcoming. Sorry for starting out so negative, but it will get better.....

- 62 replies
-
- 2
-
-
- lancia armata
- panart
- (and 1 more)
-
I suspect I should do a build log - just to explain the roadbumps I hit and my ideas for overcoming them. Geez, I'm just on the first few frames of the plans. Given the limited detail from the plans, all the missing steps should at least be identified. Readers can make their own decisions.
-
Well from the other logs it looks like everyone went their own way. Not even a mention of how screwy the plan looks or the fact that there is not a rabbet. Other than the drawing I posted above, the other kit drawings don't even show planks on the hull. I was just wondering if there was some real reason why they would be done that way. As in that's how they built this type of boat back in the day. I'm beginning to think this is not the case. More & more I'm thinking to just go with what I know. Draw off some bands and break out the proportional dividers and plank this thing just like I would any other build. I am a little concerned how high 3 layers of planks will lay above the keel. I went ahead and carved a rabbet but trying to bury the edges of 3 plank layers in it doesn't sound like fun.
-
This diagram looks like my first attempt at planking years ago. Why on earth would you force yourself to have to make fillers for those gaps? No measurements so I guess they expect you to eyeball it. This is all the planking help this kit gives you (Panart-Lancia Armata). I'm assuming there should be a garboard at the keel although strake #5 doesn't leave much room for that? FYI - this build has 3 (yup 3) layers of planking. When you're done you knock the frames out and then add some faux frame strips. Any guesses? Or should I just plank this like I would any other ship

-
Jaager - the more I think about it, it sounds like you are right. The wax (whatever type) is applied to keep ANY glue from sticking to the frames. A reread of the minimal instructions shows (I think) that the planks are actually glued to what will be the stern & stem. As you noted, the other frames are just forming a mold to shape the planks. I'll go with the usual Tightbond glue on the plank edges, and forgo the "nailing" to the frame with CA. Thank you - that helps!
-
I just started Lancia Armata. The hull frames are installed but they are the type that will be taken out after planking. The instructions briefly mention rubbing the edges of the frames with a candle. I believe this is done so the plank glue doesn't stick so tight to the frames, making it easier to remove the frames without damaging the planks. This build is more of a ships boat than a large ship and it is supposed to have 3 layers of planking. I guess what will end up as the inner planking is what will be glued to the frames and they will be visible so I don't want to see a build up of glue where they came in contact with the frames. I think I have have heard of this before, but I'm hoping that someone with a little more knowledge can fill me in with more details. Mainly what types of glue can I use? In previous builds I would usually "nail" a plank to a frame with a dot of CA then use white glue along the plank edge. Thanks in advance.
-
Chris, Ian - thanks to you both. I appreciate your looking in. I'm still trying to decide if I have a display case built for this one.
- 136 replies
-
- 1
-
-
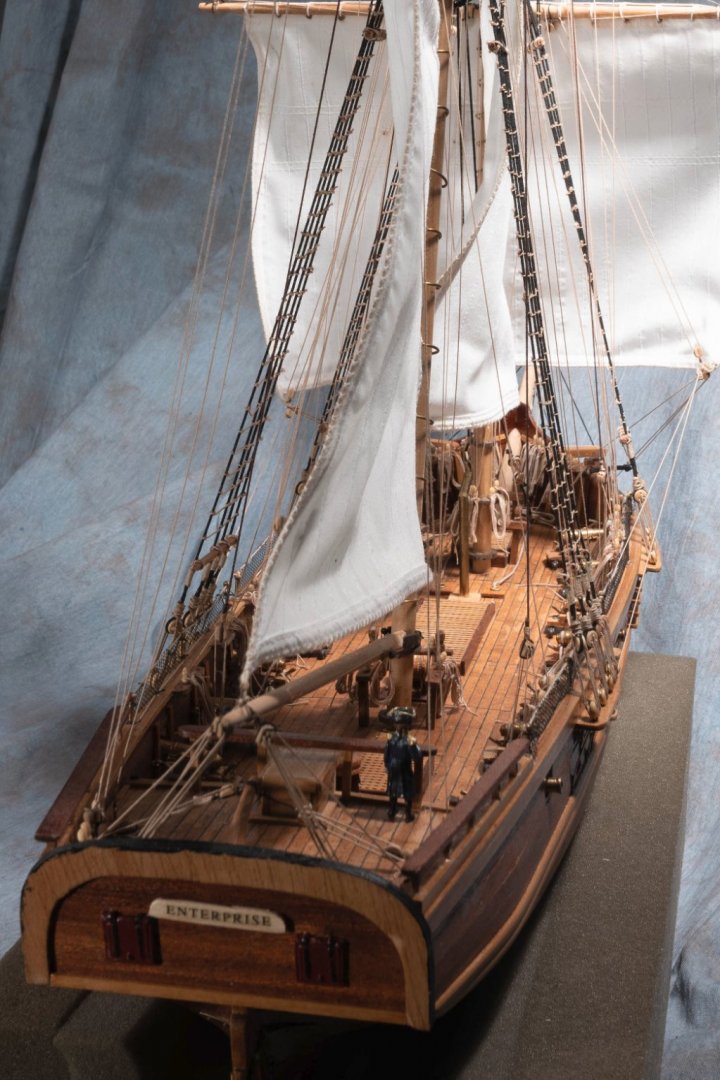
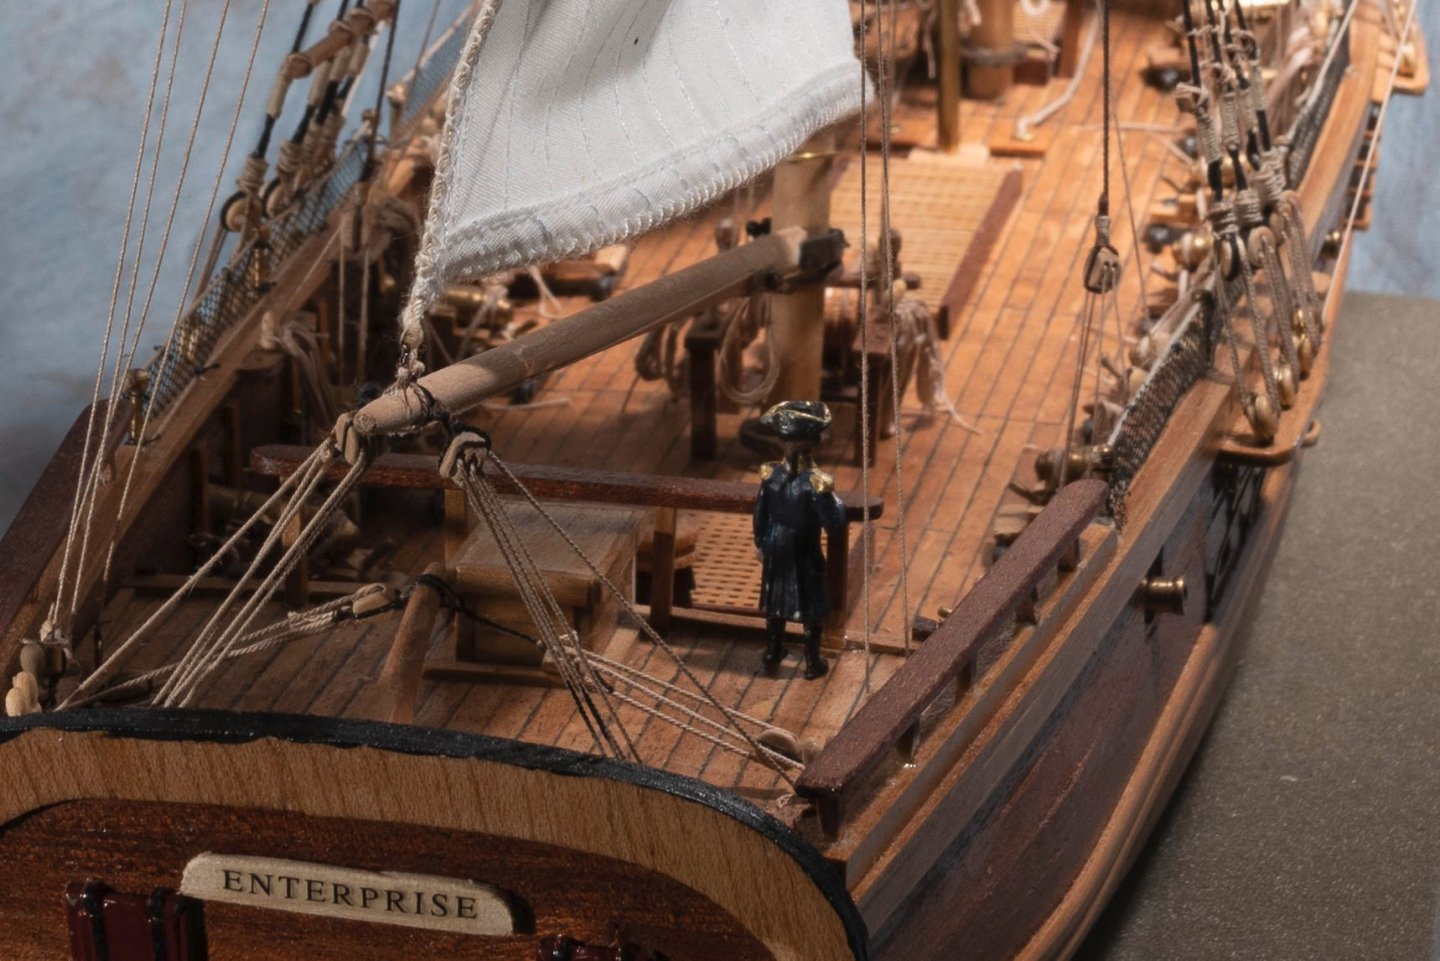
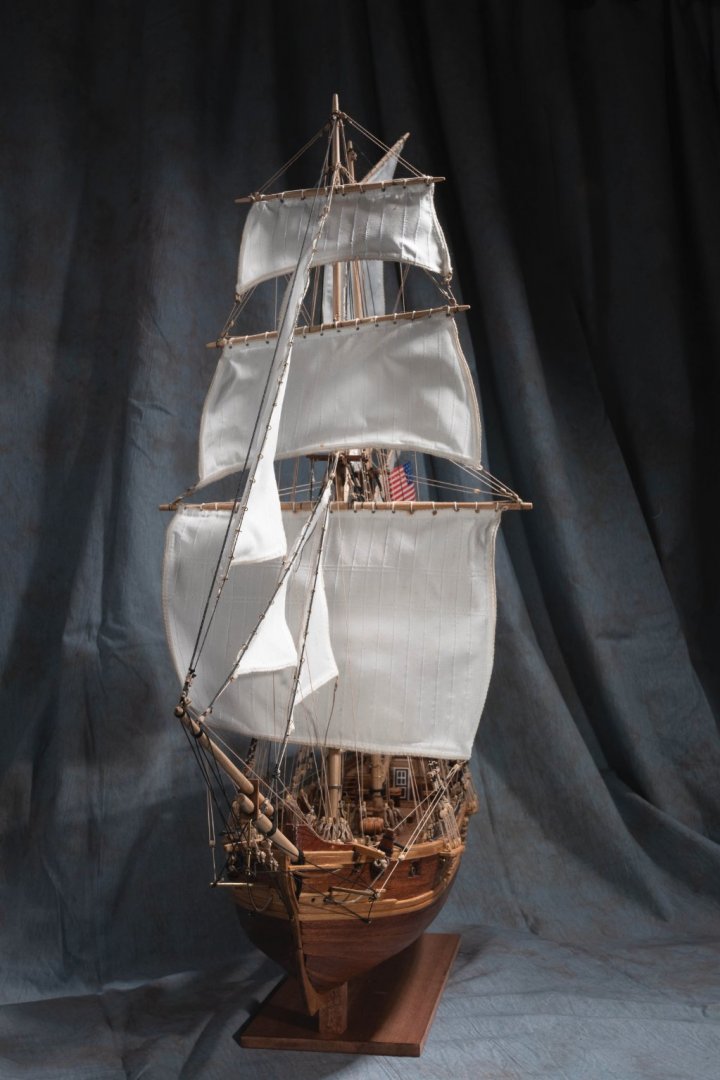
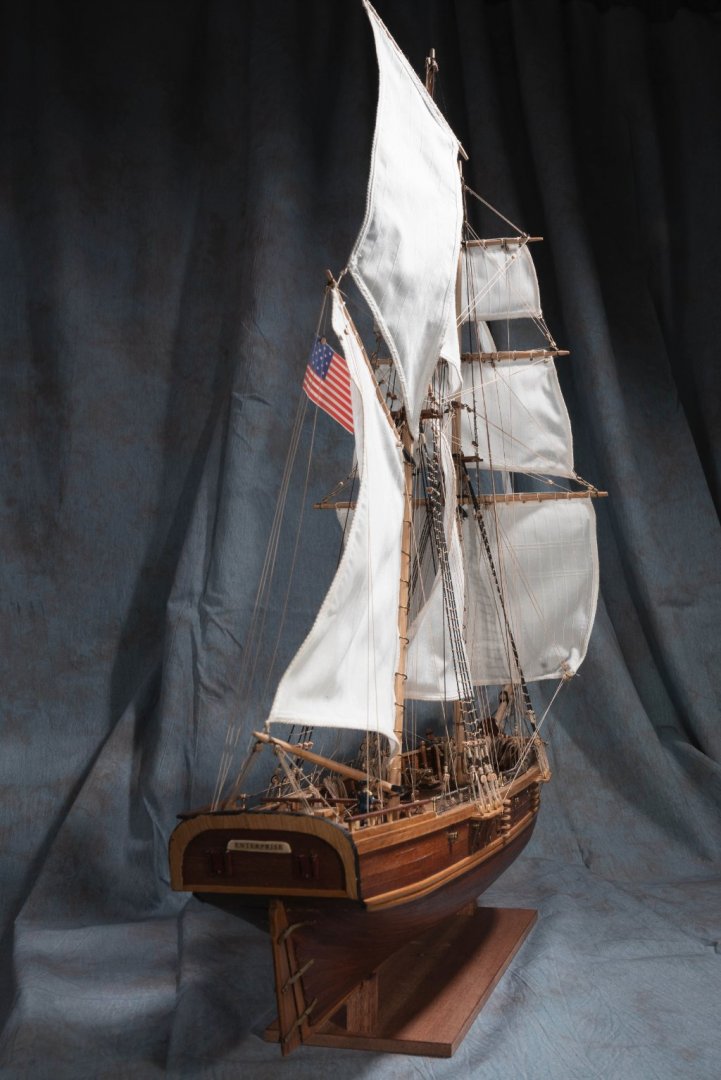
- enterprise
- constructo
- (and 1 more)
-
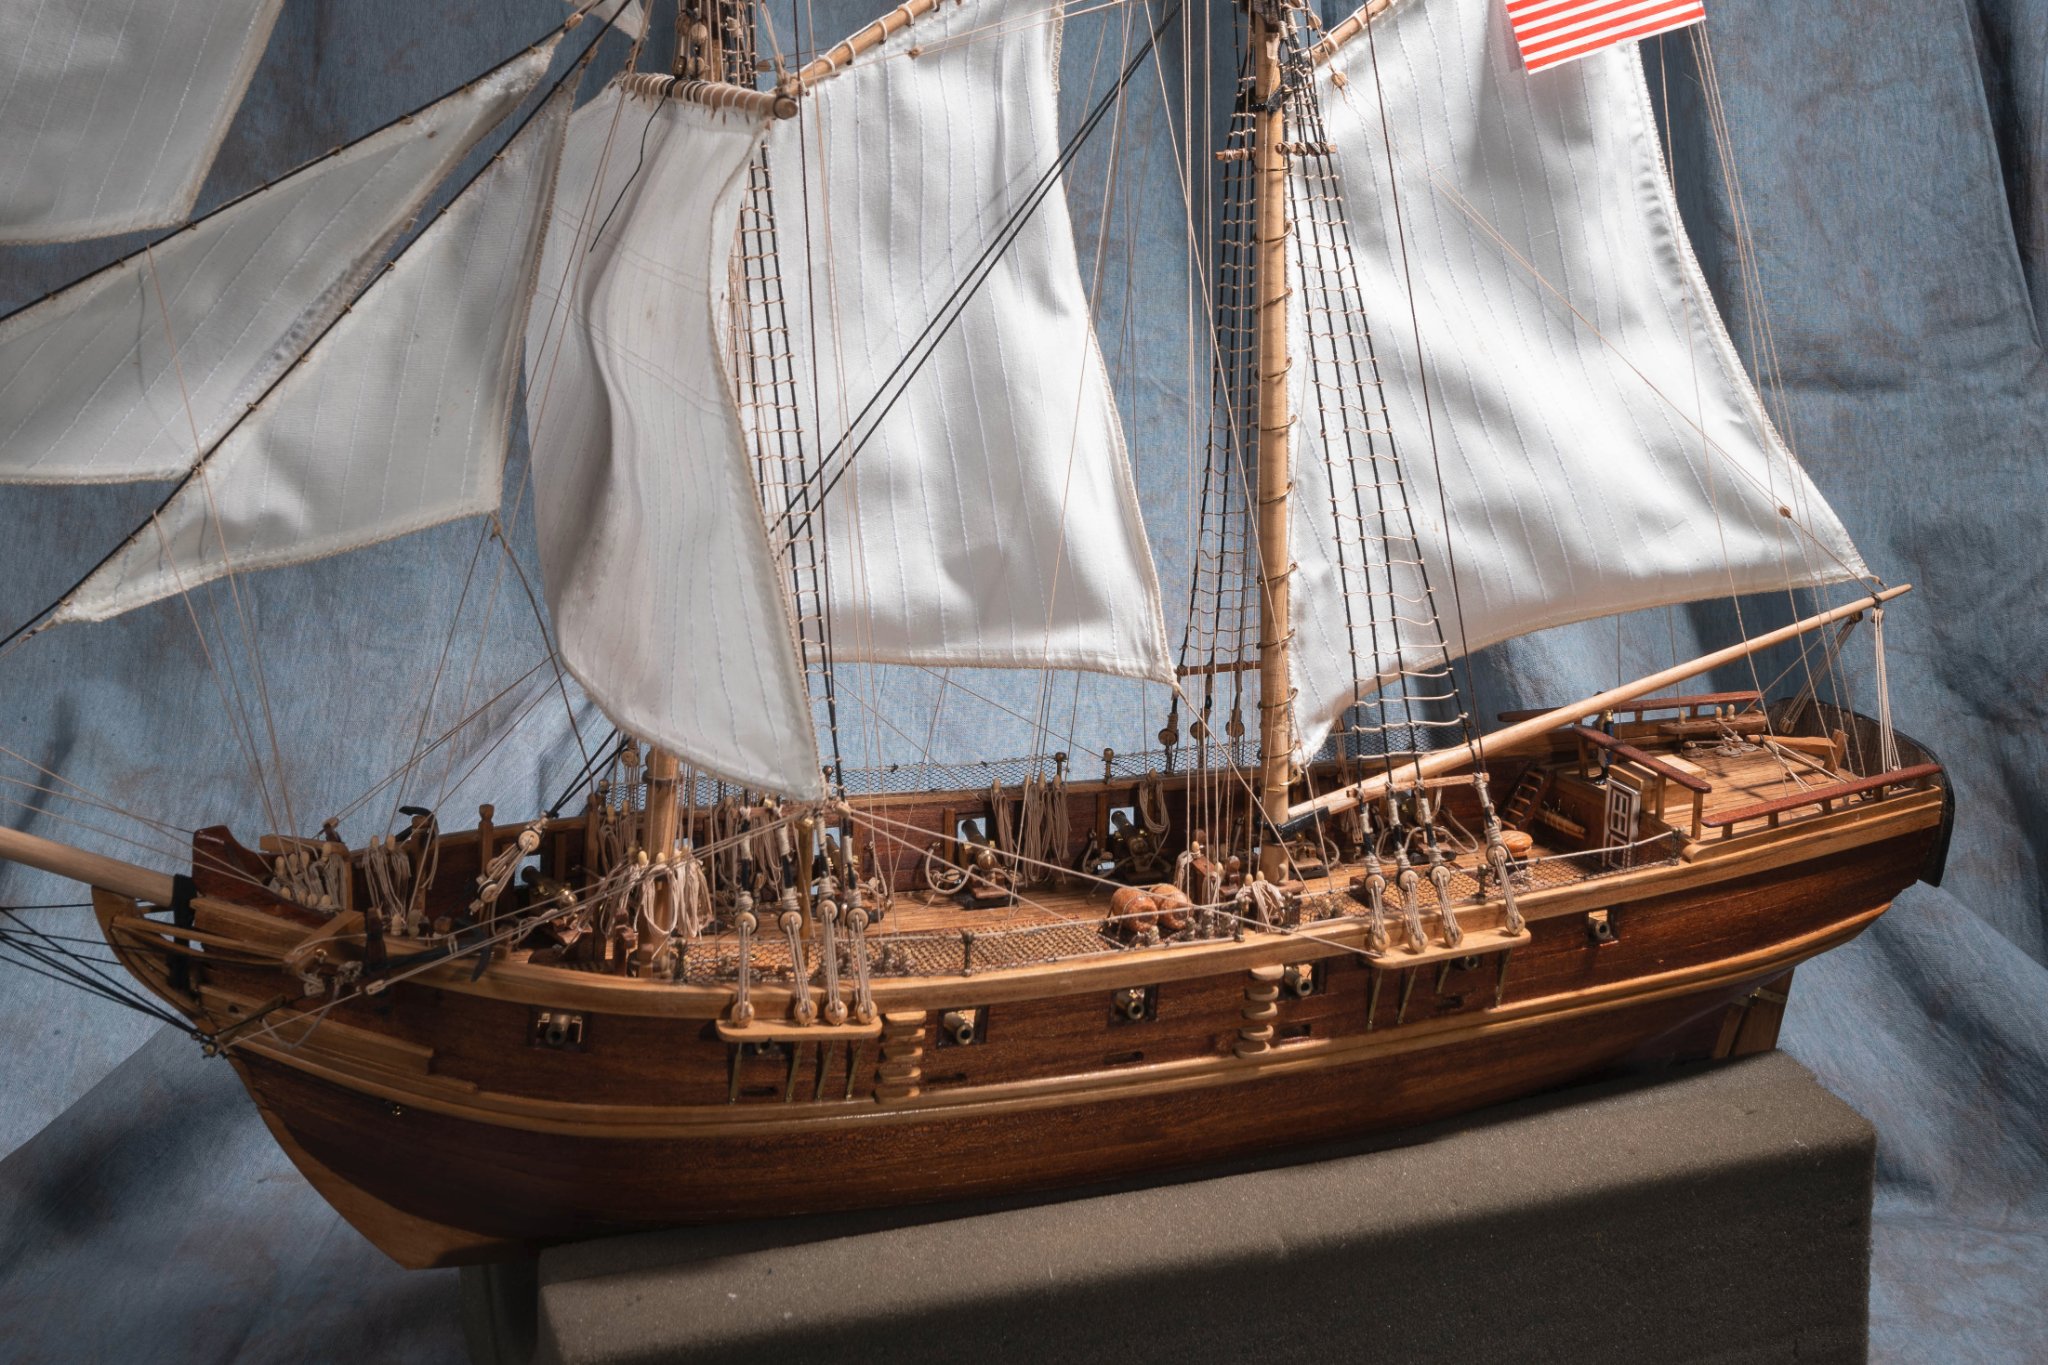
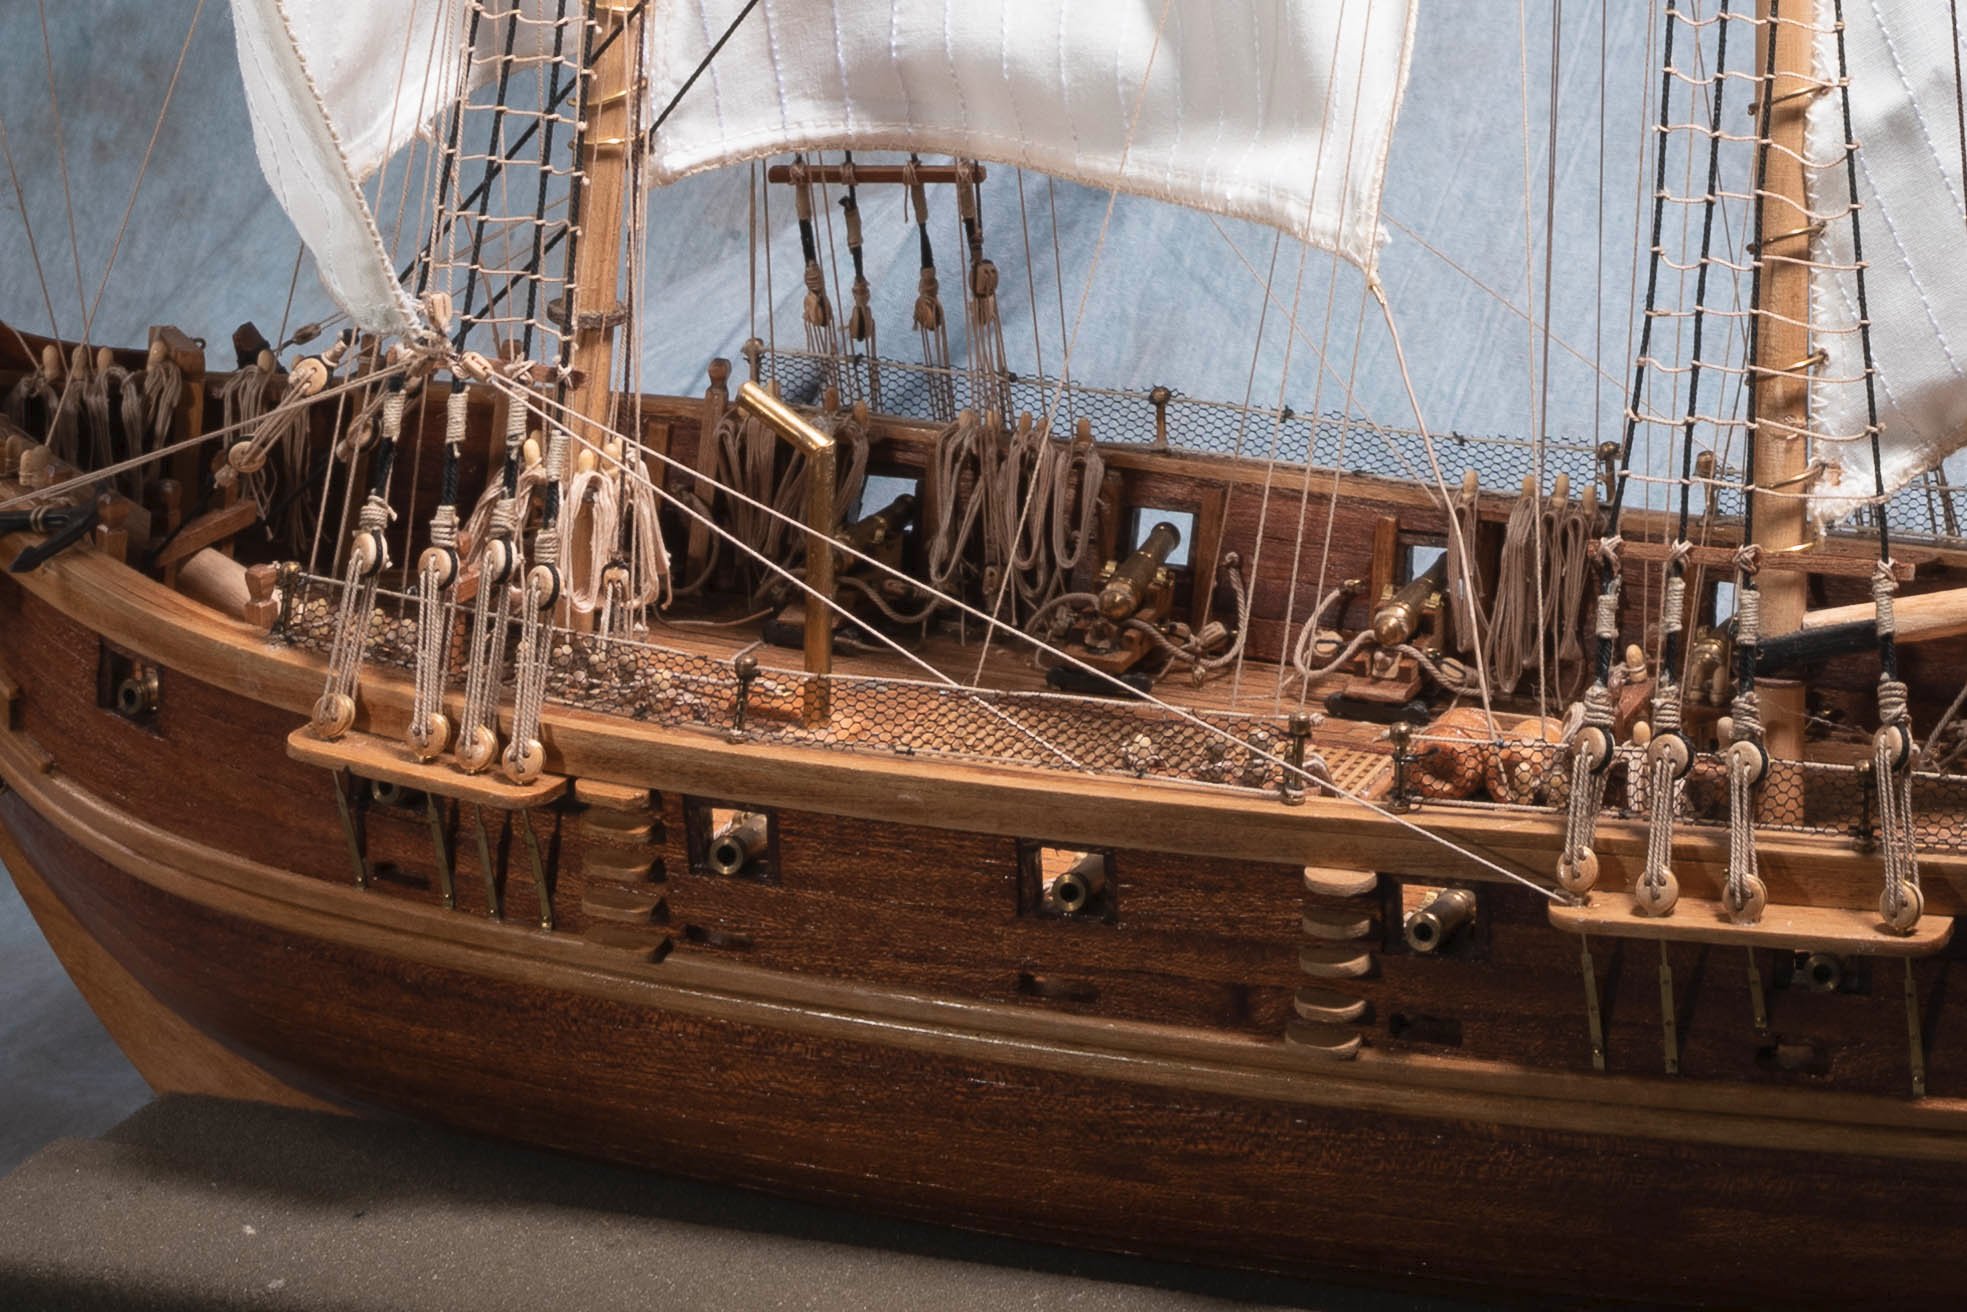
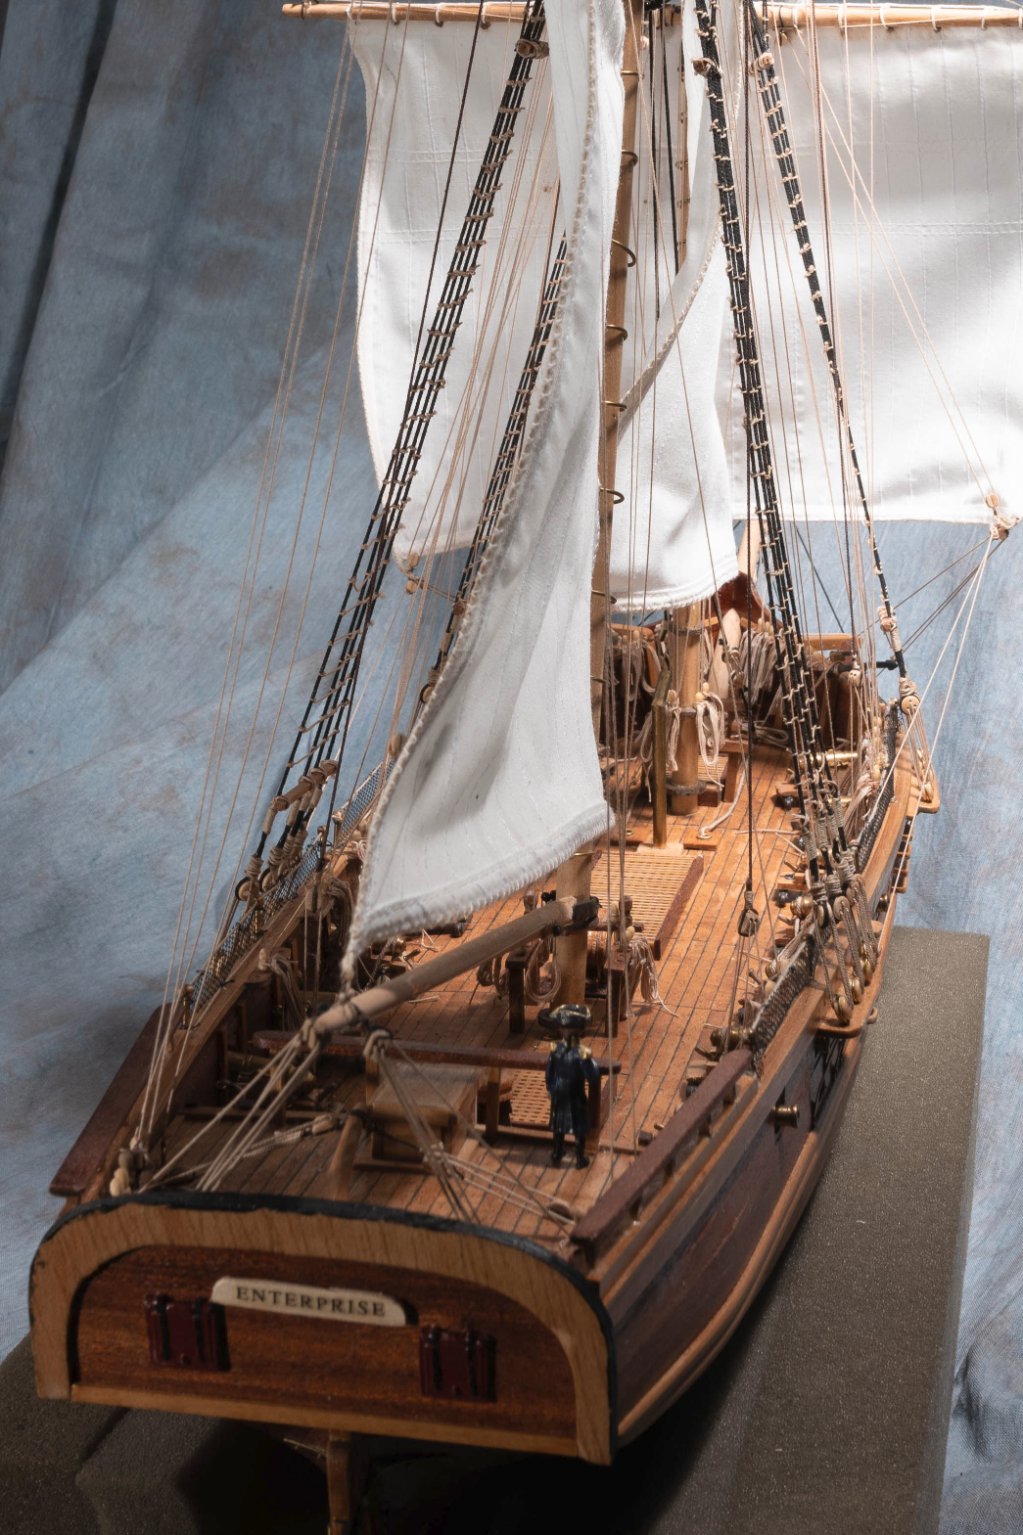
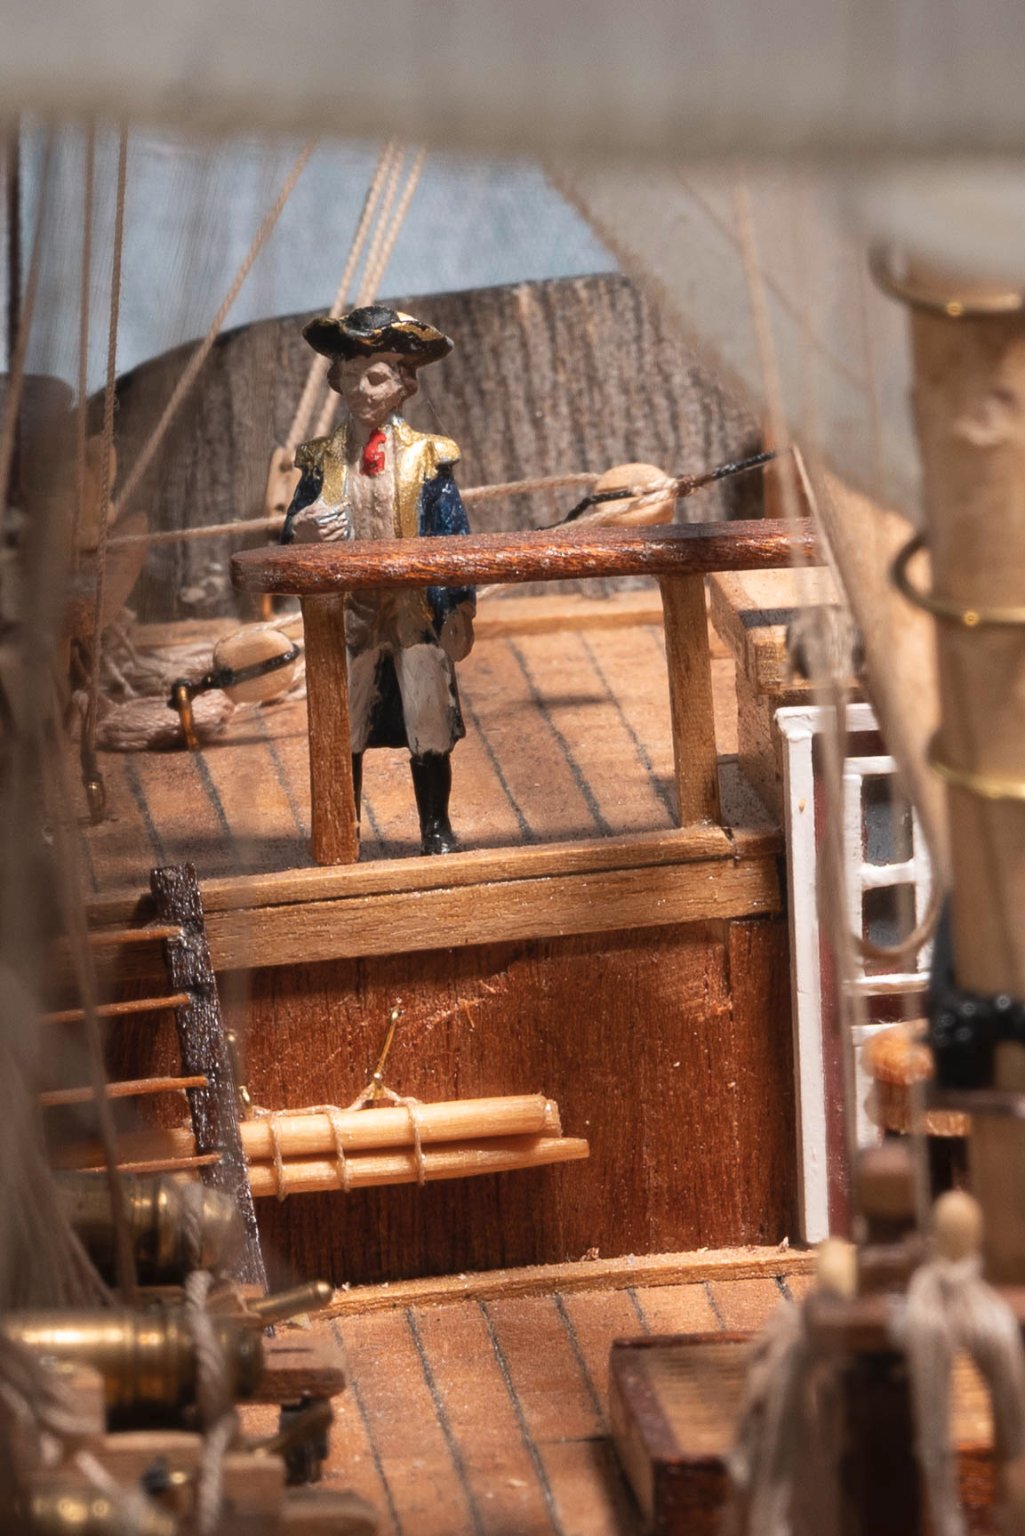
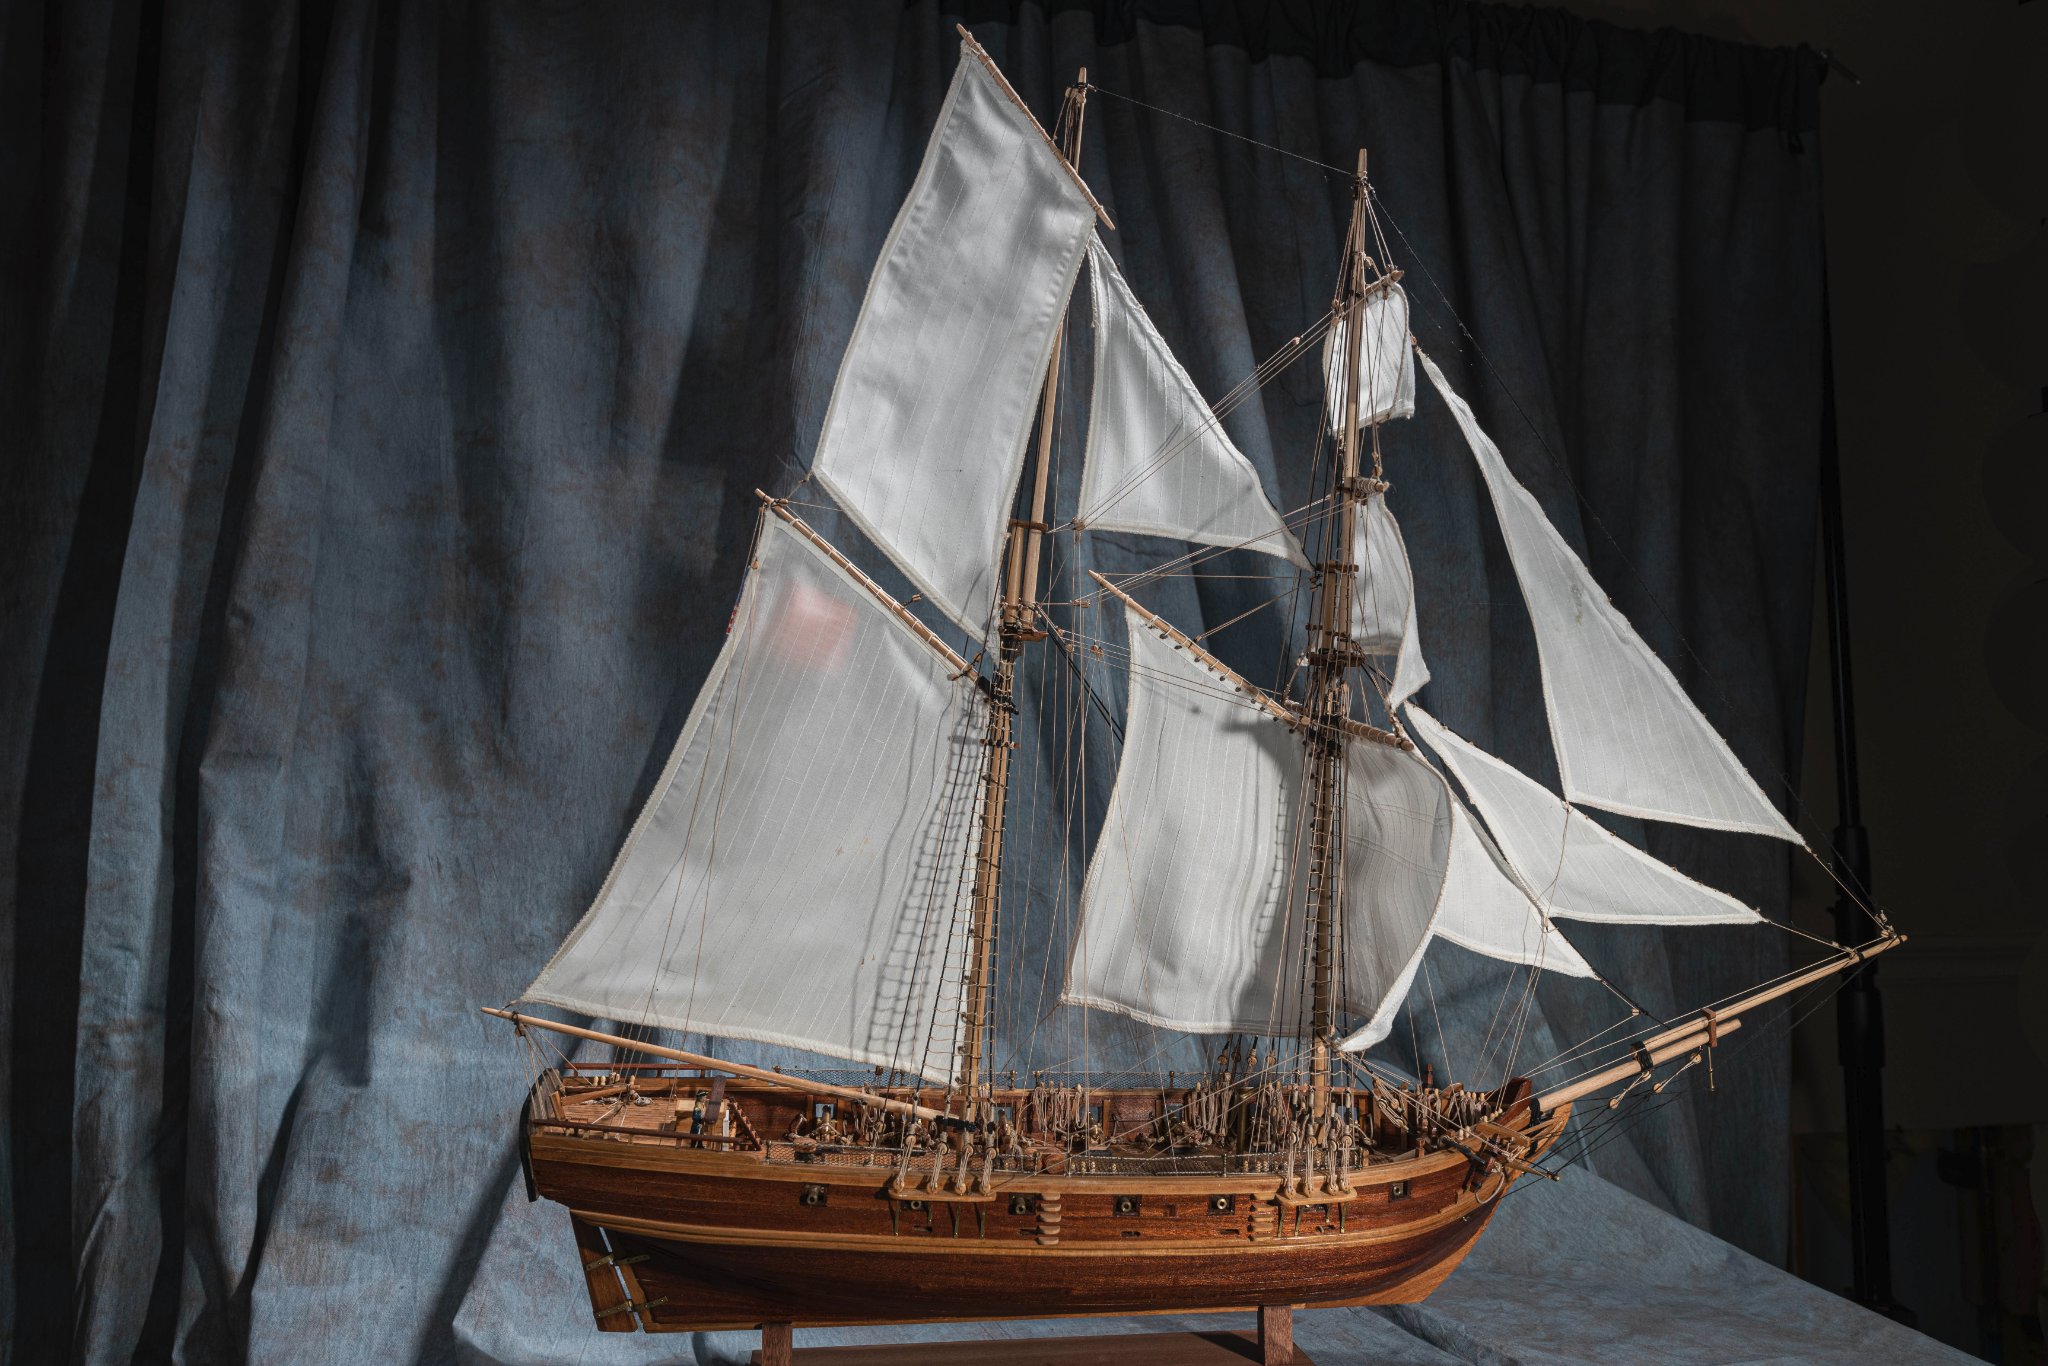
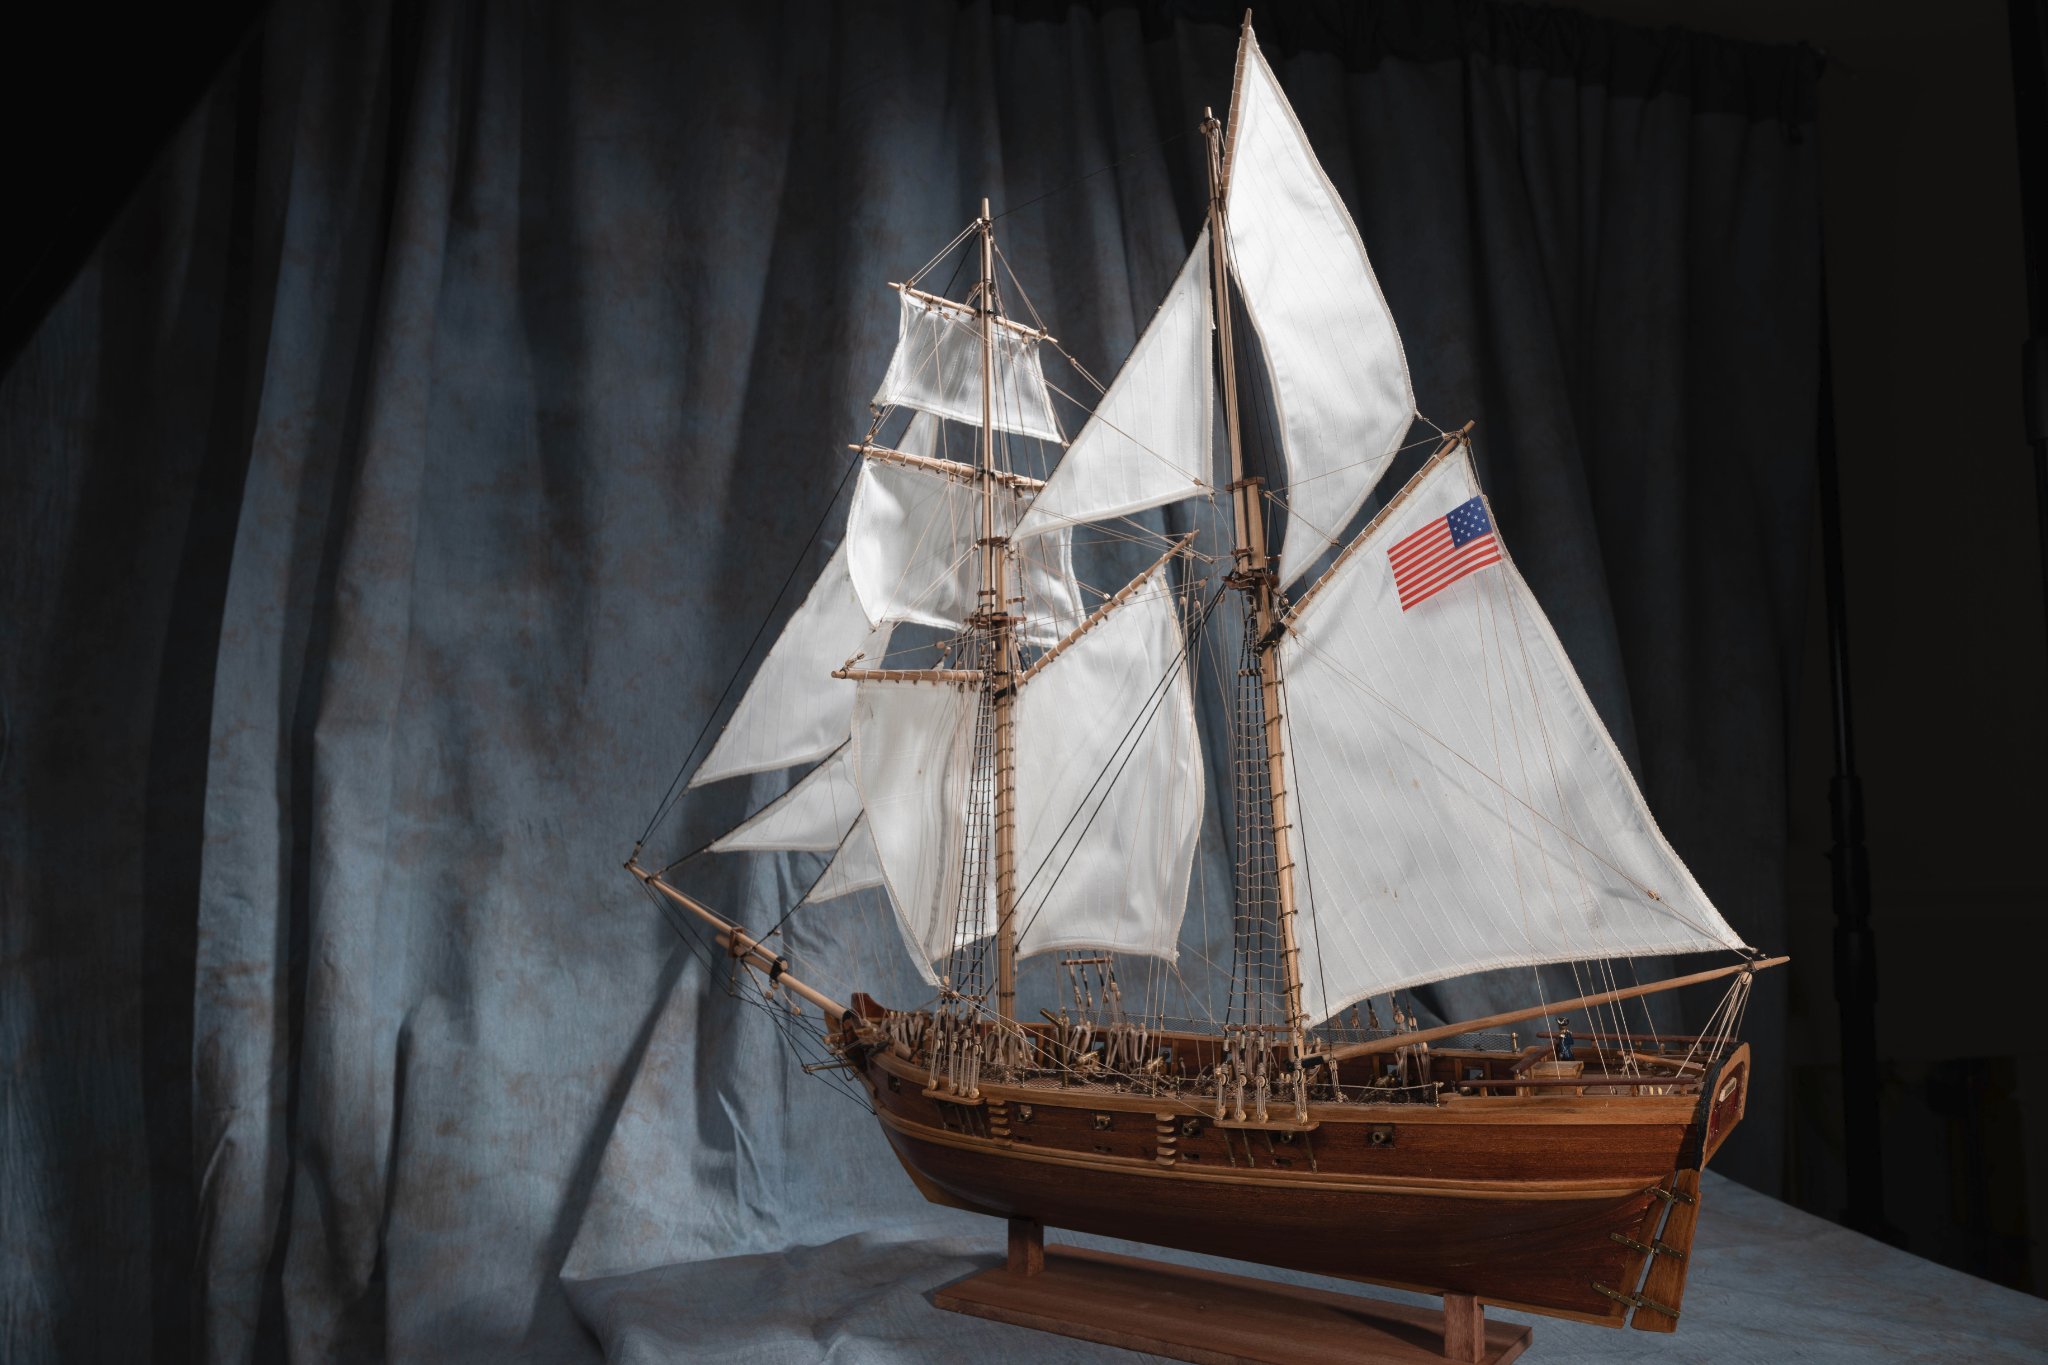
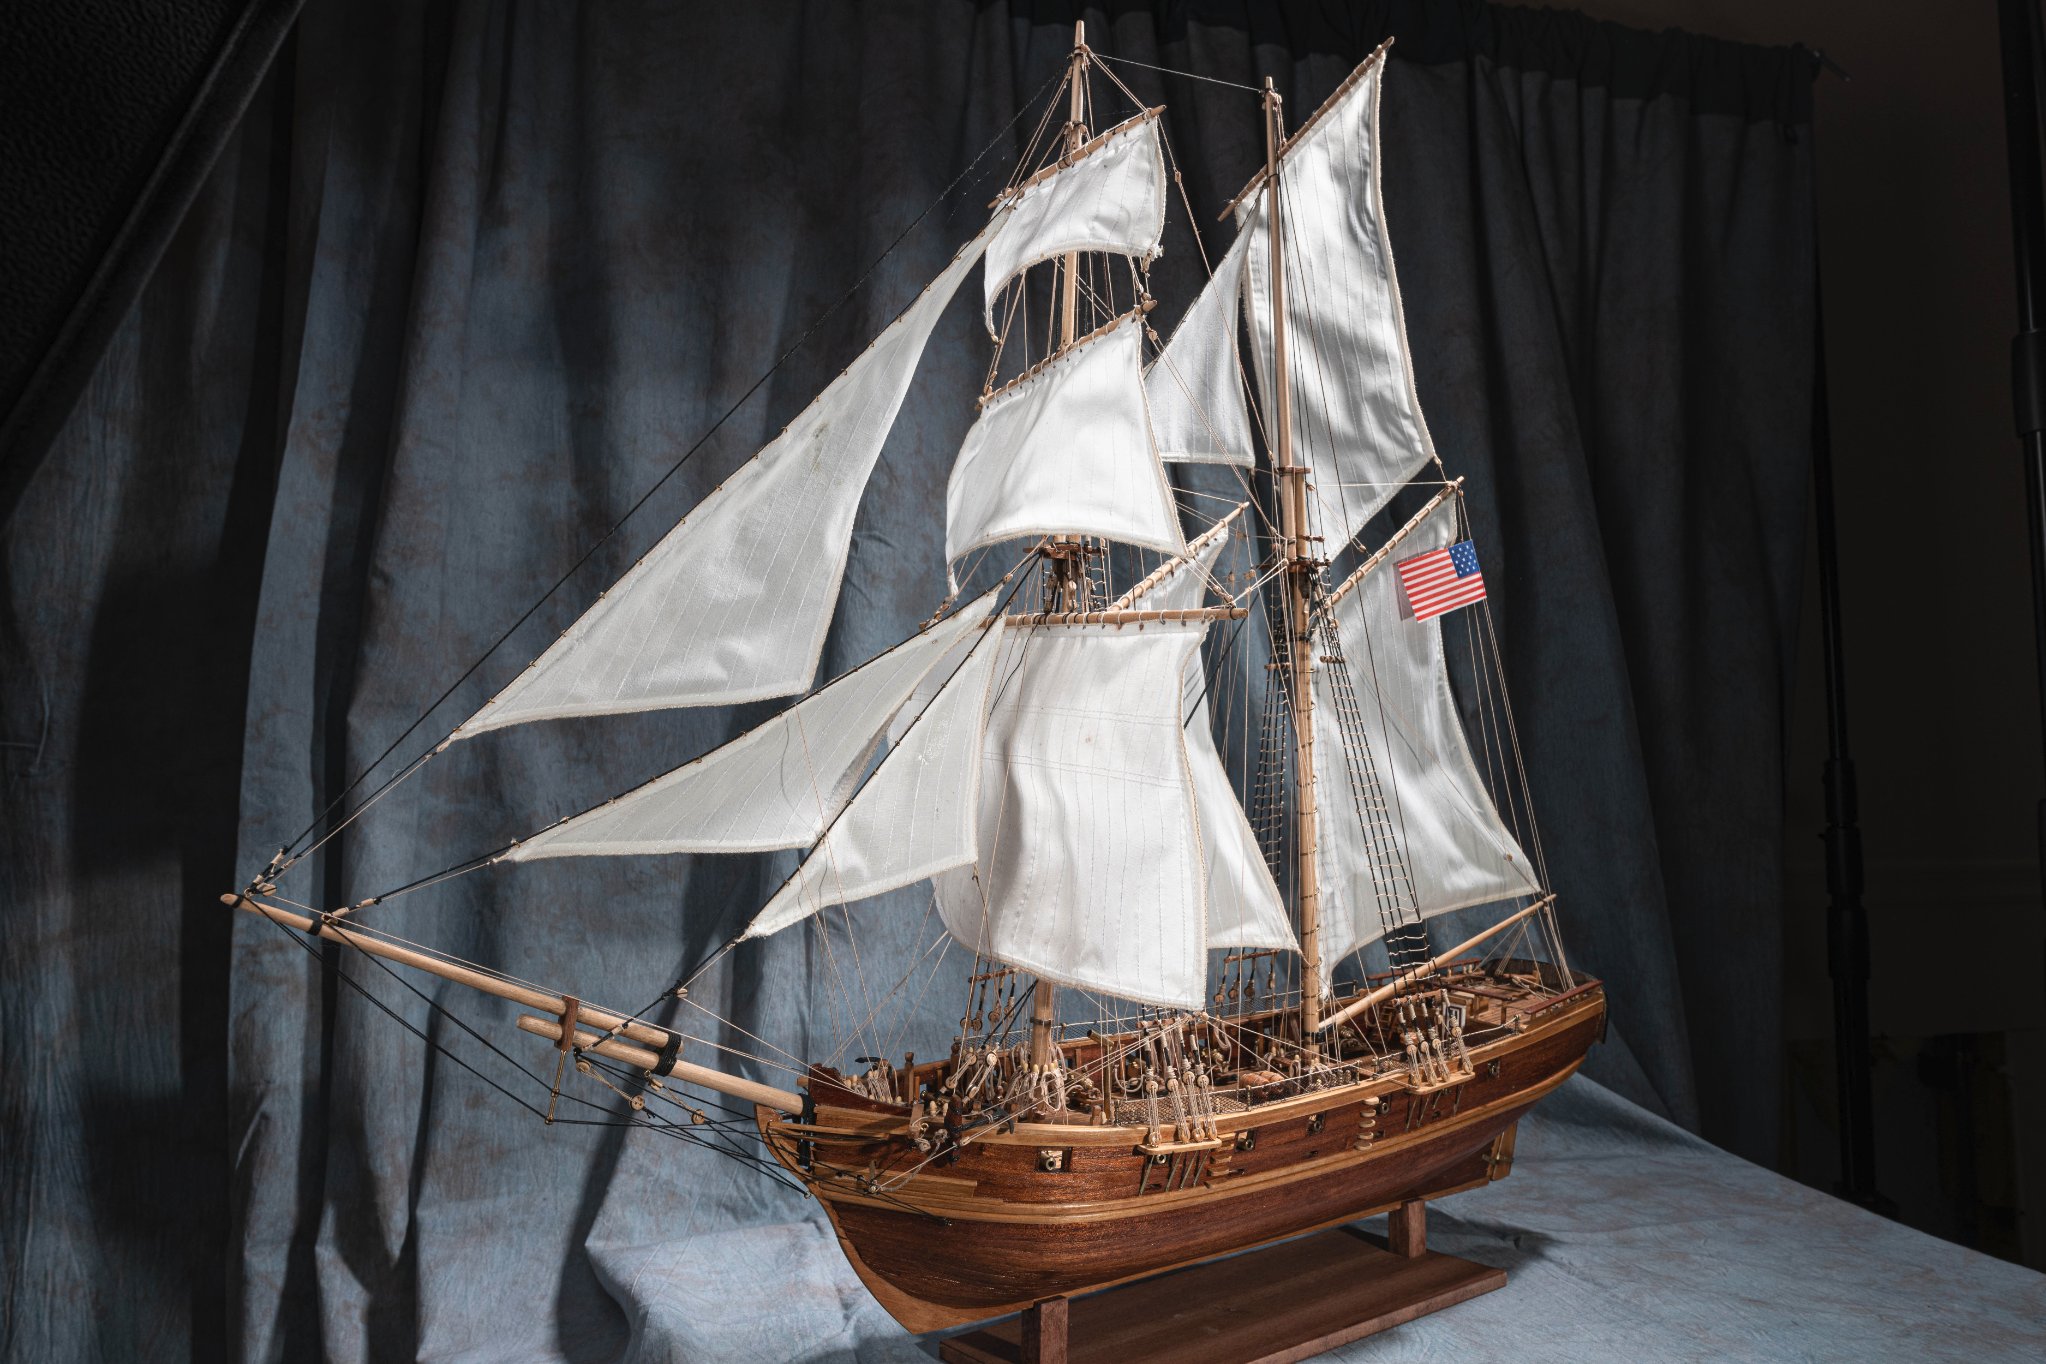
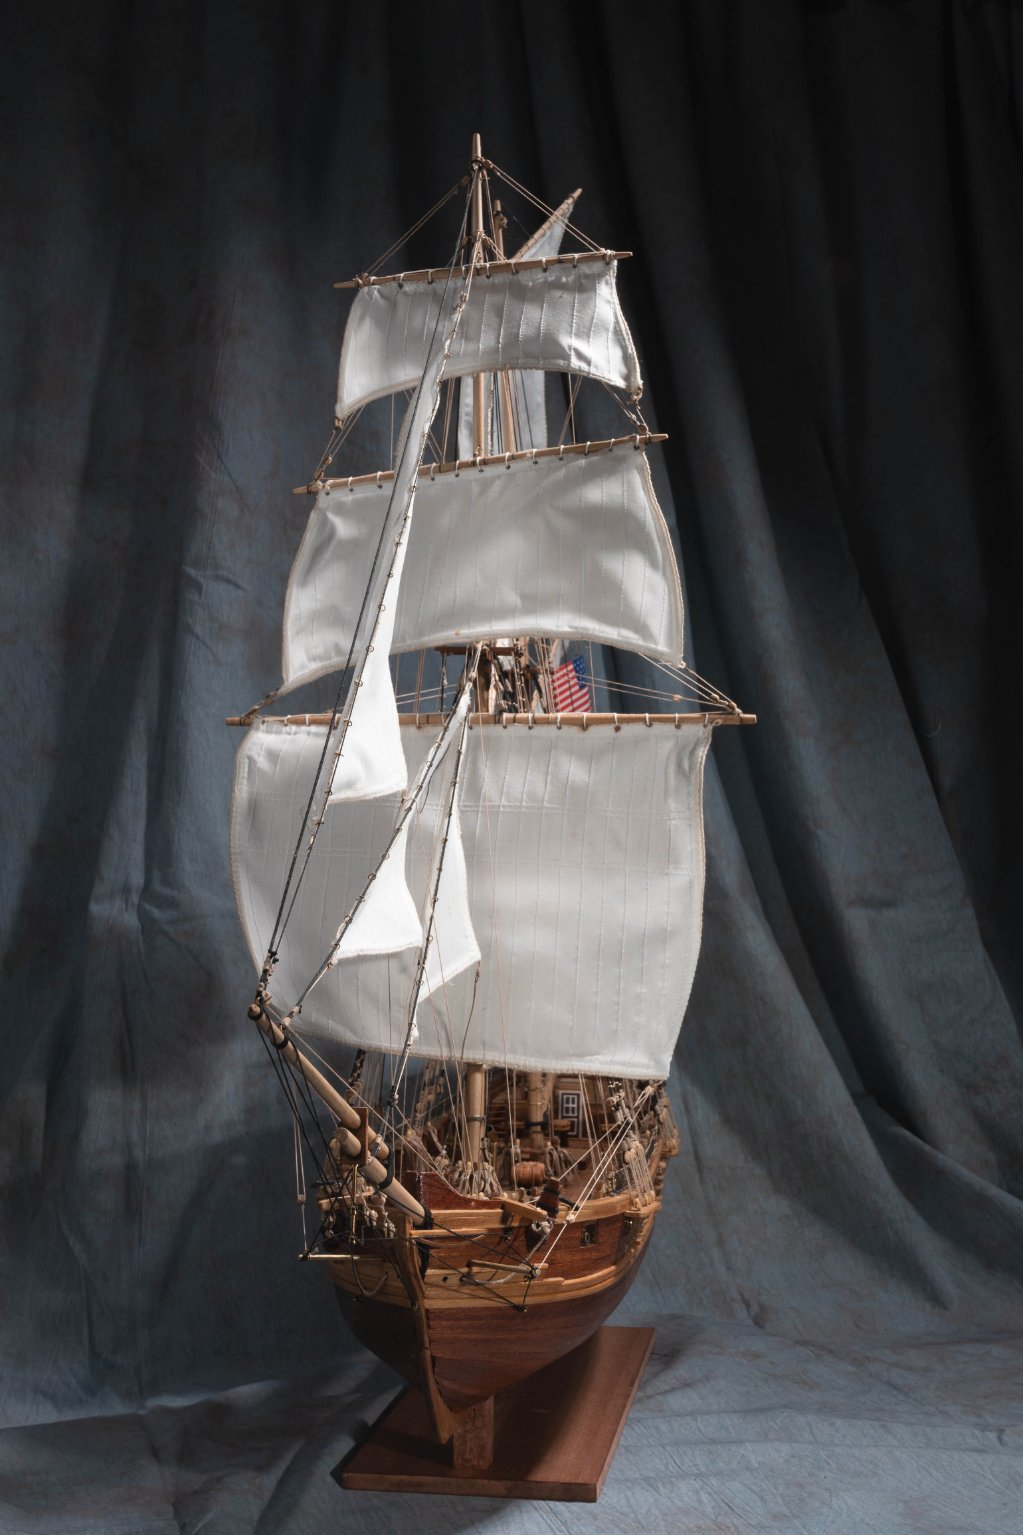
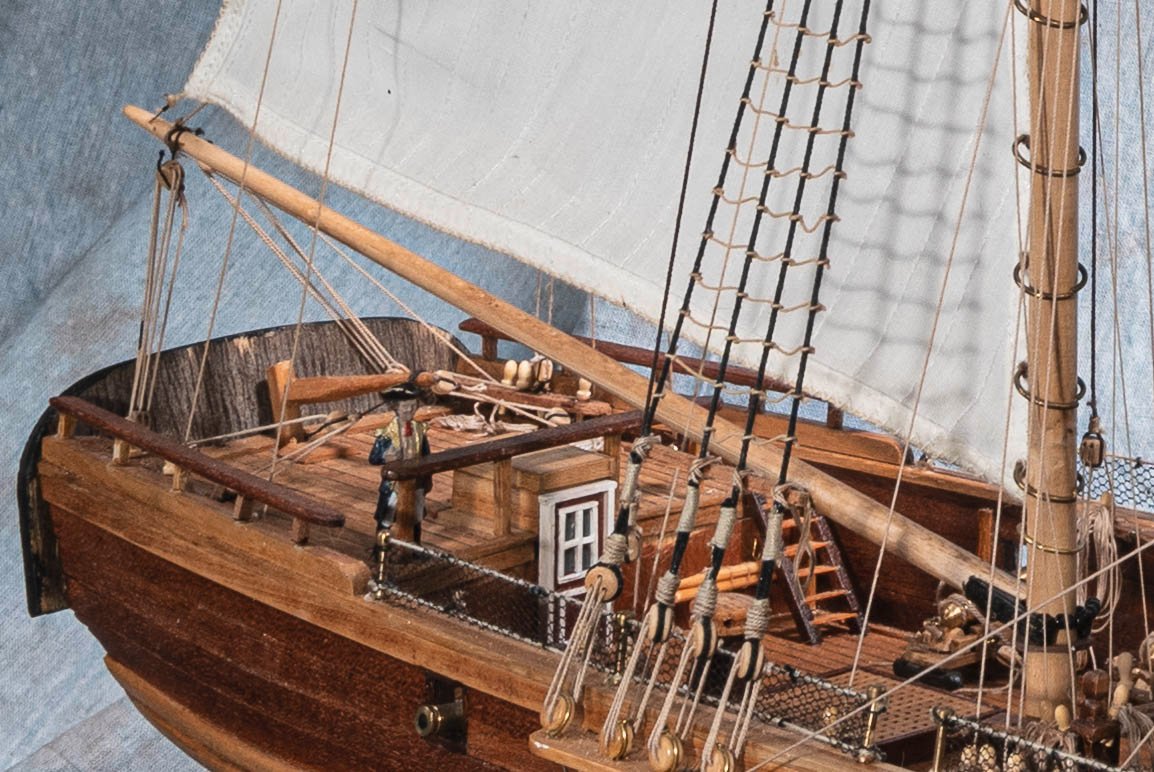
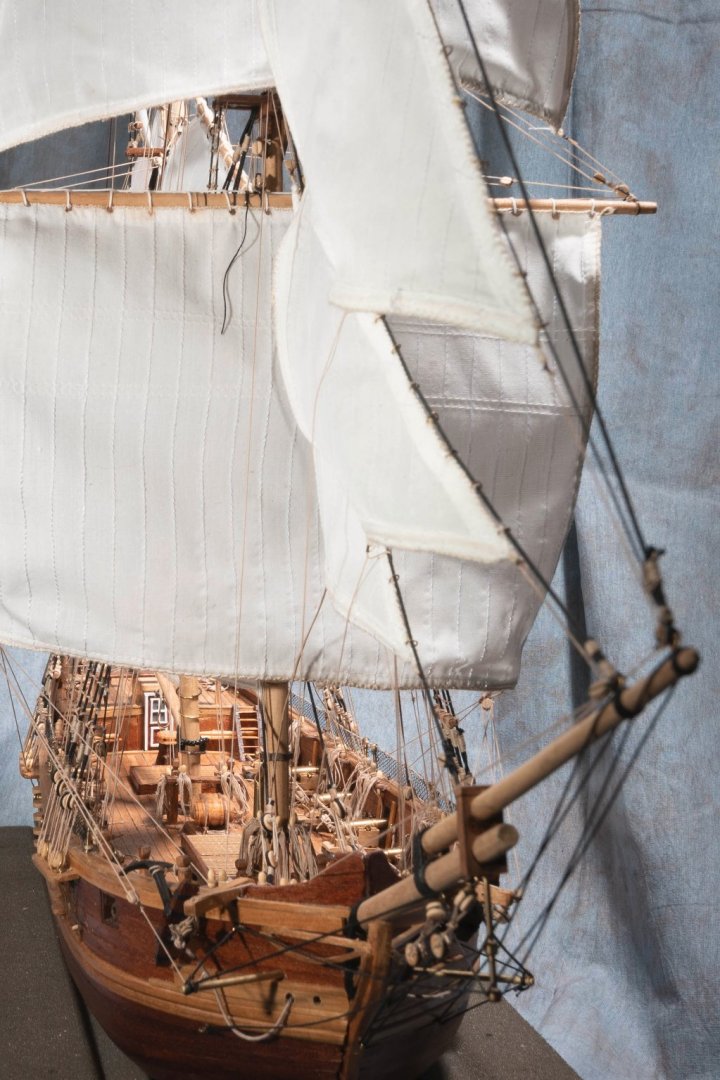
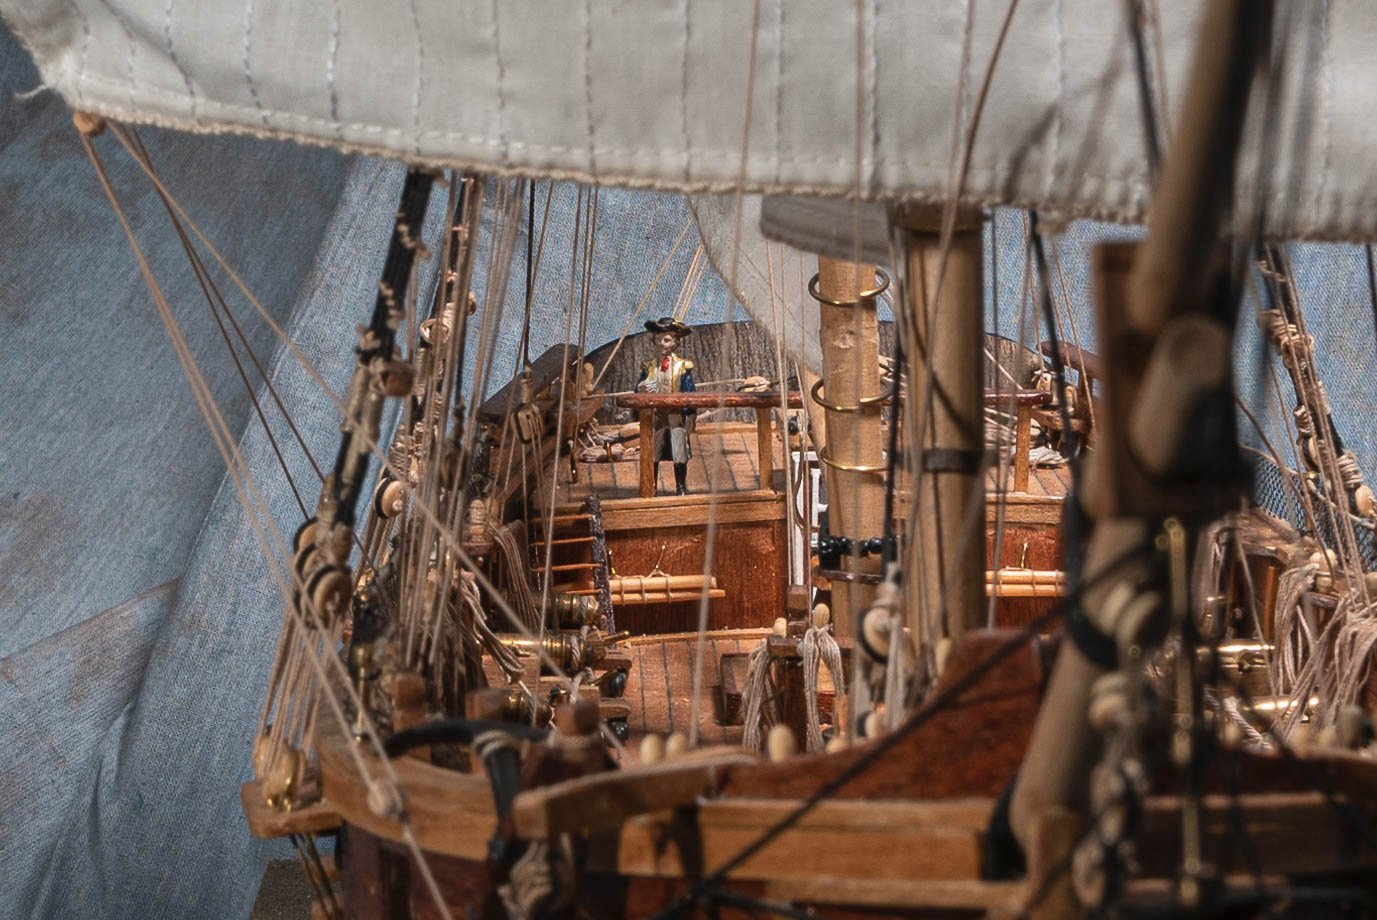
Well I guess this is it. A few retrospective comments. Overall, the build went without too many hitches. I think the worst task was getting the false deck glued to the frame pieces due to the curvature of the frame tops. That actually turned me off enough to shelf this model for about 8 months. Besides that, this was my first double planking kit and I still say - what a waste. Sure it helps with the outer planking - if you need it - but it is double the work. I much prefer to just get it right the first time and be done with it. This was also my first build with full square rigged sails. Or at least sort of since there were some fore/aft sails as well. I guess I must have ordered a sail upgrade kit - there were several comments from viewers claiming their sails did not match mine. I had several threads with rowboat as he was building the same model but evidently an older or newer kit than mine. Same manufacturer, but his plans were different. Particularly the rigging/sail drawings. So beware if you decide to use any of this to influence your build. The guns were kind of funky. They looked sort of like carronades but the carriages didn't quite match. You might consider a bash here, but I didn't. Also I went with minimal coloring. While probably not terribly realistic, I think the supplied wood looked quite nice with just some lacquer, so that's the direction I took. Even the guns I left as brass rather than painting or blackening them. The build has been compete for about 5 weeks but I have struggled with producing decent final images. I am working my way into photography so selfies just don't cut it. I have worked with several lighting setups - some working better than others. But I need to get this project to closure, so here's what I have ended up with: One more post to tag this as finished. Thanks to all who followed along. I commend your persistence, given the huge gaps in reporting my progress. BTW - I will be giving this model to my father who has been waiting patiently for almost 2 years for me to complete. Considering Corel Eagle as my next build.


- 136 replies
-
- 10
-
-

-
- enterprise
- constructo
- (and 1 more)
-
With Chuck discontinuing Syren rope it might really be worth going for one of his rope walks like you said. Although I can say, it ain't easy to turn out nice looking rope even with his machine. I used to have a bunch of bookmarks for articles on how they used to make real rope. There is some actual science behind it. Which way the strands twist and then which way those strands twist if you are making bigger rope. The problem I had was with the twist of the first strands (usually sewing thread). I can't remember if the first strands are supposed to twist left or right but I do remember that most thread purchased in the US is the wrong twist. I ended up buying some European thread that had the correct twist. Now that I'm down from building for a bit it might be a good time to work on that. Stay with it....