TMAN
-
Posts
22 -
Joined
-
Last visited


-
 bridgman reacted to a post in a topic:
Hairy/fuzzy rigging thread
bridgman reacted to a post in a topic:
Hairy/fuzzy rigging thread
-
The Gimps Chimp reacted to a post in a topic:
Hairy/fuzzy rigging thread
-
mtaylor reacted to a post in a topic:
Hairy/fuzzy rigging thread
-
That's real nice line....
-
JJolley reacted to a post in a topic:
Hairy/fuzzy rigging thread
-
JJolley reacted to a post in a topic:
Hairy/fuzzy rigging thread
-
Hi Johnny, Thanks for your post....I don't use a specific ratio, glue to water. I put an amount of water (about 3/4" deep) in a plastic container with a screw on top and add about 3 - 4 drops of Titebond to the water and stir, or shake, it up to a thin milky consistency (like skim milk). As I stated earlier, I soak the line for about 10-15 minutes to let the solution saturate the line. The line does not come out overly stiff or sticky as I run the line through my fingers as I remove the line from the container. That doesn't allow the line to stiffen up to a "wood like" piece; in fact, the line is very workable and can be rove in short order. I hang the line with alligator clips, from a hook in the ceiling for straightening. I usually wait a few hours or overnite before rigging the line. That's why I soak longer lengths (4'); I then cut the line to the lengths I need. This is really a "go with the flow" system that works for me. No more fuzzies!
-
As and addendum to my prior post, I have to disclose that learned this process from watching a YouTube video by Tom Lauria where he described this a the process he used to as opposed to beeswax. I think this works really nice...........
-
Hey guys, Here's how I solved my problems with fuzzy line: 1. I no longer use beeswax on rope line, especially on black shroud lines; it seems to leave a "whitish" film on black line, for one, and doesn't really seem to solve the "fuzzies." 2. I make a solution of white glue (although Titebond works) and water in a container with a screw on cap. 3. I then cut about a 4' length of line (depending on how much I need) and place it in the solution. I shake the bottle so that the line gets saturated. 4. I let the line sit in the solution for about 10 - 15 minutes. 5. I then carefully remove the line (which gets somewhat tangled up from the shaking) and run it between my forefinger and thumb to wipe of the excess solution back into the bottle. 6. I then hang the line using an alligator type clip to dry. You can also dry the line with a hair dryer which makes the process quicker. I've found that this step accomplishes several things: it takes out all the kinks in the line, it reduces the fuzz more than beeswax (without discoloring the line), it makes running rigging lines hang more naturally and although the lines seem a little stiffer, after steps 1-5, I believe it makes rigging go smoother.
-
Good morning,
Not sure if you are still active on this site. I am presently building model of Gertrude L. Thebaud and would like to share info on build.
Regards,
ODDS
.thumb.JPG.2803d94fca923e0ac20e6ed57e07dd8e.JPG)
-
Sure I'd be happy to. I completed my model a while back. It's nice to see someone else building this classic old model. I got mine sometime in the (mid to late) 1990's, but didn't work on it for some time after March 2000. I know I finished it prior to March 2017. Unfortunately I did not maintain a build log. Reach out any time...
Tman
-

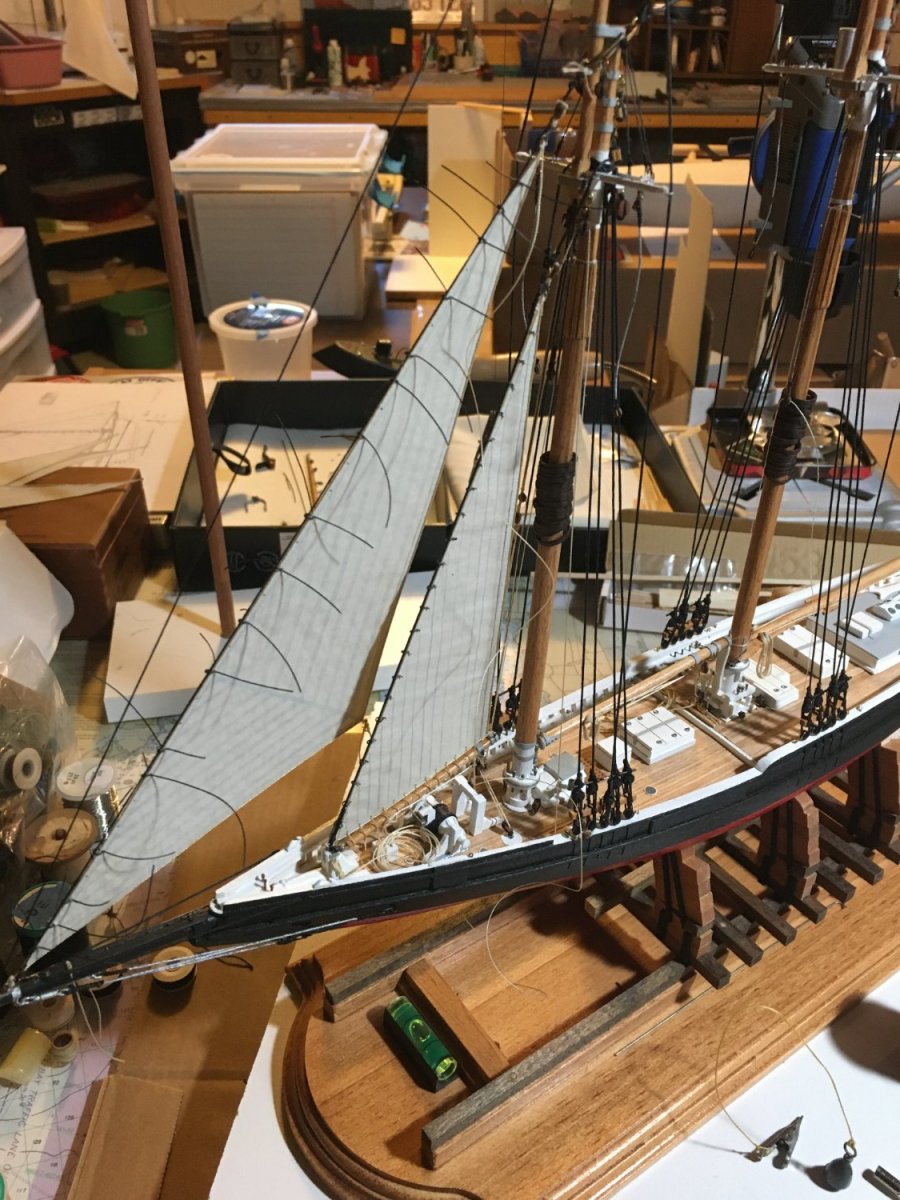
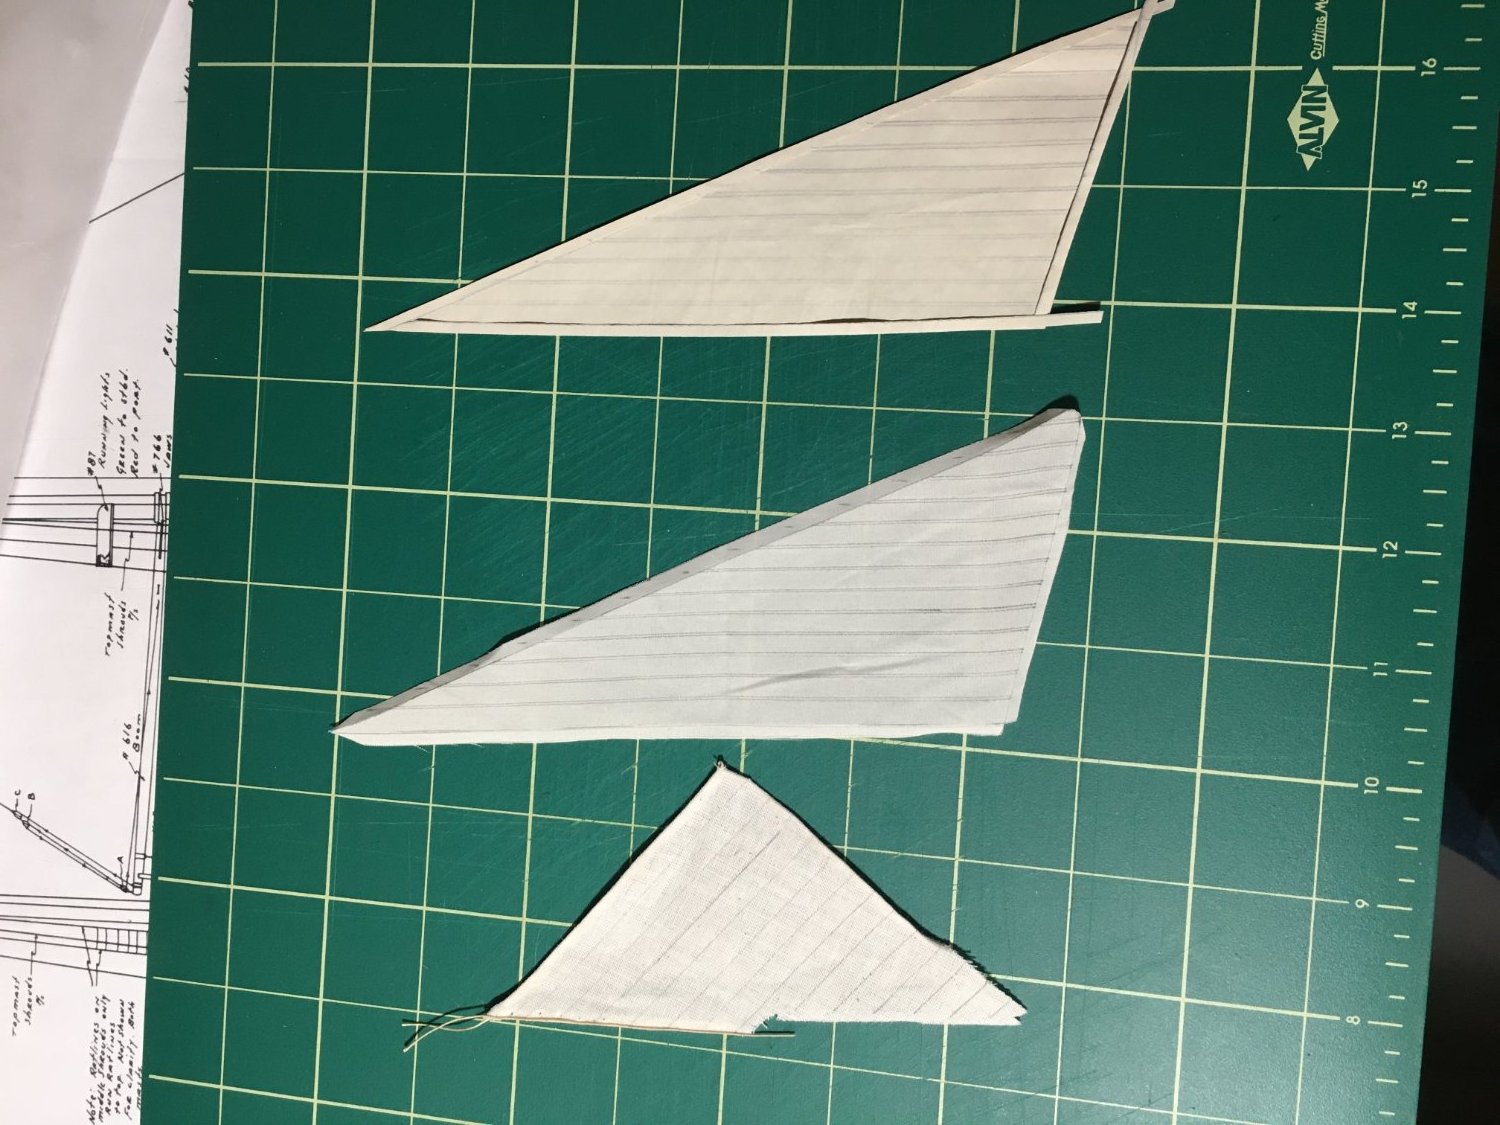
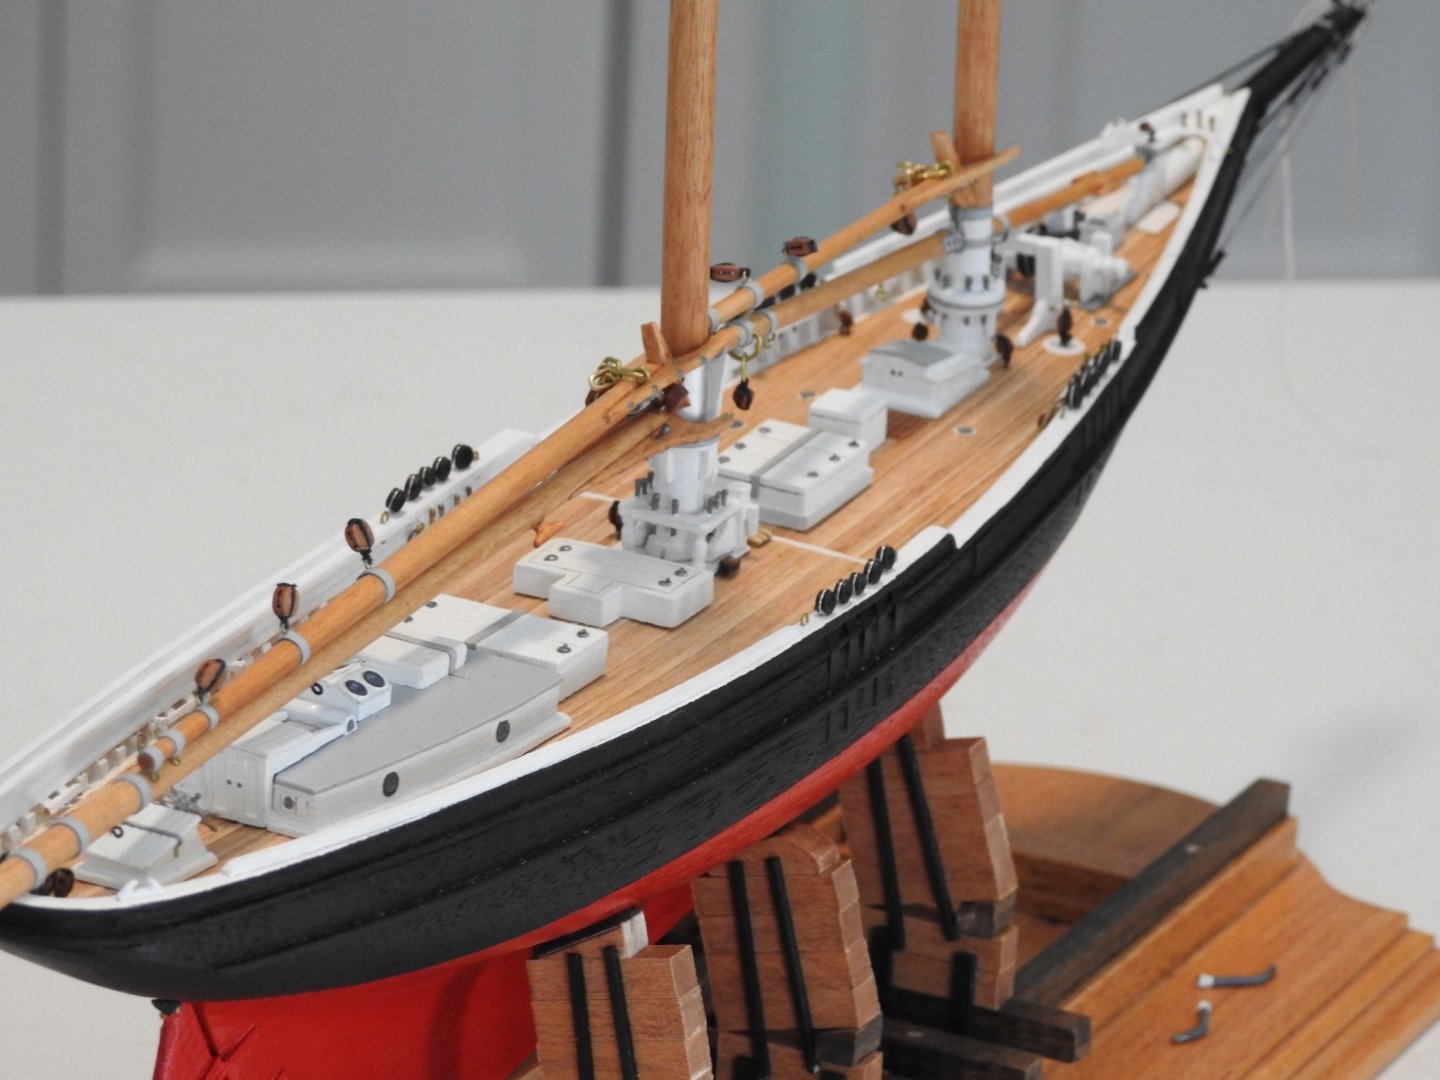
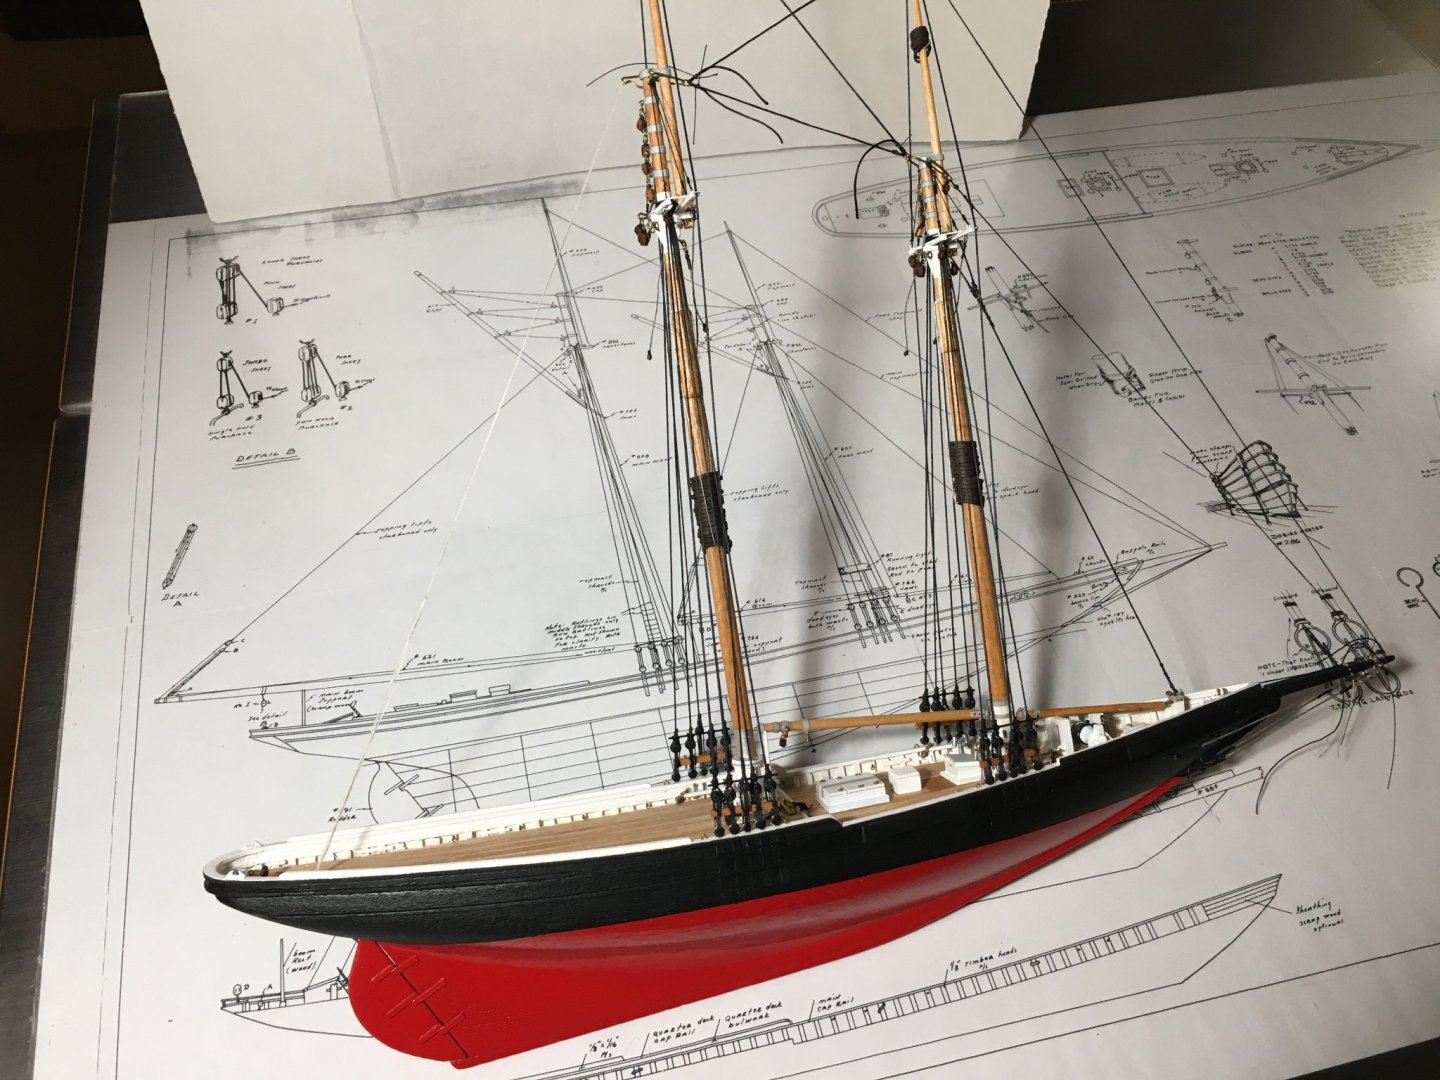
Glad to see you are still checking this site. I was just hoping to see someone else's work for inspiration on this build. I've made progress, slow at times, and am now working on the running rigging. I finally chose to use paper / silkspan for the sails after making a set of Jumbo, Jib and Balloon Jib out of cloth. I've set the Jumbo and Jib, now starting on the Balloon Jib. These are just some photos of the work in progress...any tips or photos that you'd like to share?


-
HI ODDS,
I'd love to put pics of my completed THEBAUD on the Forum, but I don't know how. I'll get my nephew to help me. You're doing an incredible job on yours. It looks like the same vintage model as mine but mine came with actual "blue" print plans.
I didn't do sails...I never have so I can't remark on them. Guys in my Long Island Ship Model Society made them and I don't remember what materials they used and they always looked great. A lot of guys color sails in an off- white. I believe that Tom Lauria addresses using dyes on sails. You can check him out on YouTube under "Model Ship Building" topics.
Again, as soon as I can, I'll try to post some pics.
TMAN
-
-
Loved it..... merci! All the best, TMAN Current build: Model Shipways Topsail Schooner, "Eagle," 1847 Prior Builds: NY Pilot Boat, "Phantom;" " Gertrude Thebaud;" 1929 & Henry Hudson's "Half Moon" 1609.
-
Do a search here for "Berlin by Corel" and you'll find the build log for the "Berlin" by Maggsl_01 in 2016 (I think) and scroll until you see how he made his head rails. Study the photos closely and compare them to your plans. I'm currently following Pete Jaquith's build log for the 1847 Topsail Schooner Eagle for my current build. Those logs and photos are an incredible source and visual aid that are an amazing way to help you realize that it's not as hard as you think! TMAN P.S......Thank you Mr. Jaquith..........!!!
-
Didn't the Cars sing, "Let The Good Times Roll...?"
-
thank you...that's super helpful! TMAN
-
Thanks Dr PR, I'll check out Floating Drydock and check out Zu Mondfeld's page 240. But what I am trying to determine is in "model size" how many links to the foot of chain I should use for a 3/16" scale model. I'm using an 18th century Continental Type anchor. Thanks, TMAN
-
Ahoy Mates, I'm building an old Model Shipways' (solid hull) 3/16' Topsail Schooner Eagle. I need to determine what size chain I need for the anchors and bowsprit chains. I have no idea how to size the chains to scale. I also don't know where to get the chain; Micro Mark or Model Expo. Any advice is appreciated, thanks. TMAN
-
i think this is probably one of the best exchanges of ideas i have read on this site. Each modeler has expressed their personal views & experiences in this craft that are truly enlightening and inspiring. I've been modeling since the early 1960's as a teen (model cars, some of which I still have and display) but in the middle seventies, on a trip to the Smithsonian, in Washington D.C., I saw a huge display of model wooden ships for the first time. I was mesmerized; I'd never seen anything like it. Right then & there I knew that some day, I had to build one. Then in the mid 1980's, I took my girlfriend (now my wife) to the NY South Street Seaport Museum. Again, model wooden Ships. I told her that one day I wanted to build a model ship. For my 35th birthday, she gave me Model Shipways PHANTOM. I didn't build it until 1995, why... I was overwhelmed! It looked so complicated. Then, one night, I took the hull & plans out of the box and studied everything. I looked at it as a challenge and figured, if I could plastic model cars and make my own parts, why couldn't I build the PHANTOM? I visited the hobby shop, found and later subscribed to SHIPS IN SCALE Magazine & learned about books, the NRG and discovered the LONG ISLAND SHIP MODEL SOCIETY. I joint the cub and learned from all sorts of fellow modelers about tools and this "trade." I realized then, with their help , criticism, advice & encouragement, that I could realized my dream...that I could build model ships like those in the Smithsonian. It became a passion; one of the most rewarding accomplishments so many folks walk away from out of frustration. This craft, in my view, takes, research, encouragement, practice, loads of time but most of all, perseverance; so to you newcomers...NEVER GIVE UP...YOU CAN DO IT. TMAN Current Build: Model Shipways, EAGLE Completed Models: Model Shipways PHANTOM Boucher Models, Henry Hudson's HALF MOON GERTRUDE L. THEBAUD Note: All solid hull models
-
Old Floquil paints?
TMAN replied to MEDDO's topic in Painting, finishing and weathering products and techniques
Thanks, great advice...I'll wait at least a week. TMAN -
Old Floquil paints?
TMAN replied to MEDDO's topic in Painting, finishing and weathering products and techniques
Hey all, I'm currently using an old jar of Floquil Buwarks White on my current build of Model Shipways, Topsail Schooner "Eagle." I need to apply multiple coats to any parts that require painting, particularly the metal windlass. I cleaned all the "tarnish & age" off the windless with a fine brass brush & 0000 steel wool; came out real nice. Soaked it in isopropyl alcohol for a quick minute, sprayed the next day with Krylon grey metal primer. Came out real sweet! But...the floquil white isn't adequately covering the windless knees, cheeks & bits. Do I have to re-prime the part or can i paint over the areas with an acrylic paint? Thanks, TMAN -
Wood used for decks
TMAN replied to hooite's topic in Discussion for a Ship's Deck Furniture, Guns, boats and other Fittings
Ahoy Vossy, I'm currently building a 1/8 scale of GERTRUDE THEBAUD (1929). I've already prepared about 20 barrels of different sizes for placement on the deck when the rigging is complete. Reviewing several publications about 1920's fishing schooners, photos of real boats showed numerous bucket & barrels to be filled with the "catch" on the decks; so many, in fact, that it seemed as if the crew had no place to move around freely. these details, in my opinion make the model "real!" TMAN


.JPG.b57fea59ecccf14a12639b50b664e9e1.JPG)