Etcher
-
Posts
114 -
Joined
-
Last visited
Content Type
Profiles
Forums
Gallery
Events
Everything posted by Etcher
-
 Thanks! If I ordered the Fifie are you likely to have the sails available in the near future?
 -
Which of the Erycina, Nisha, Lady Eleanor and Lady Isabella kits would you say is the best introduction to planking? I have planked a hull before but that was around 15 years ago! Thanks
-
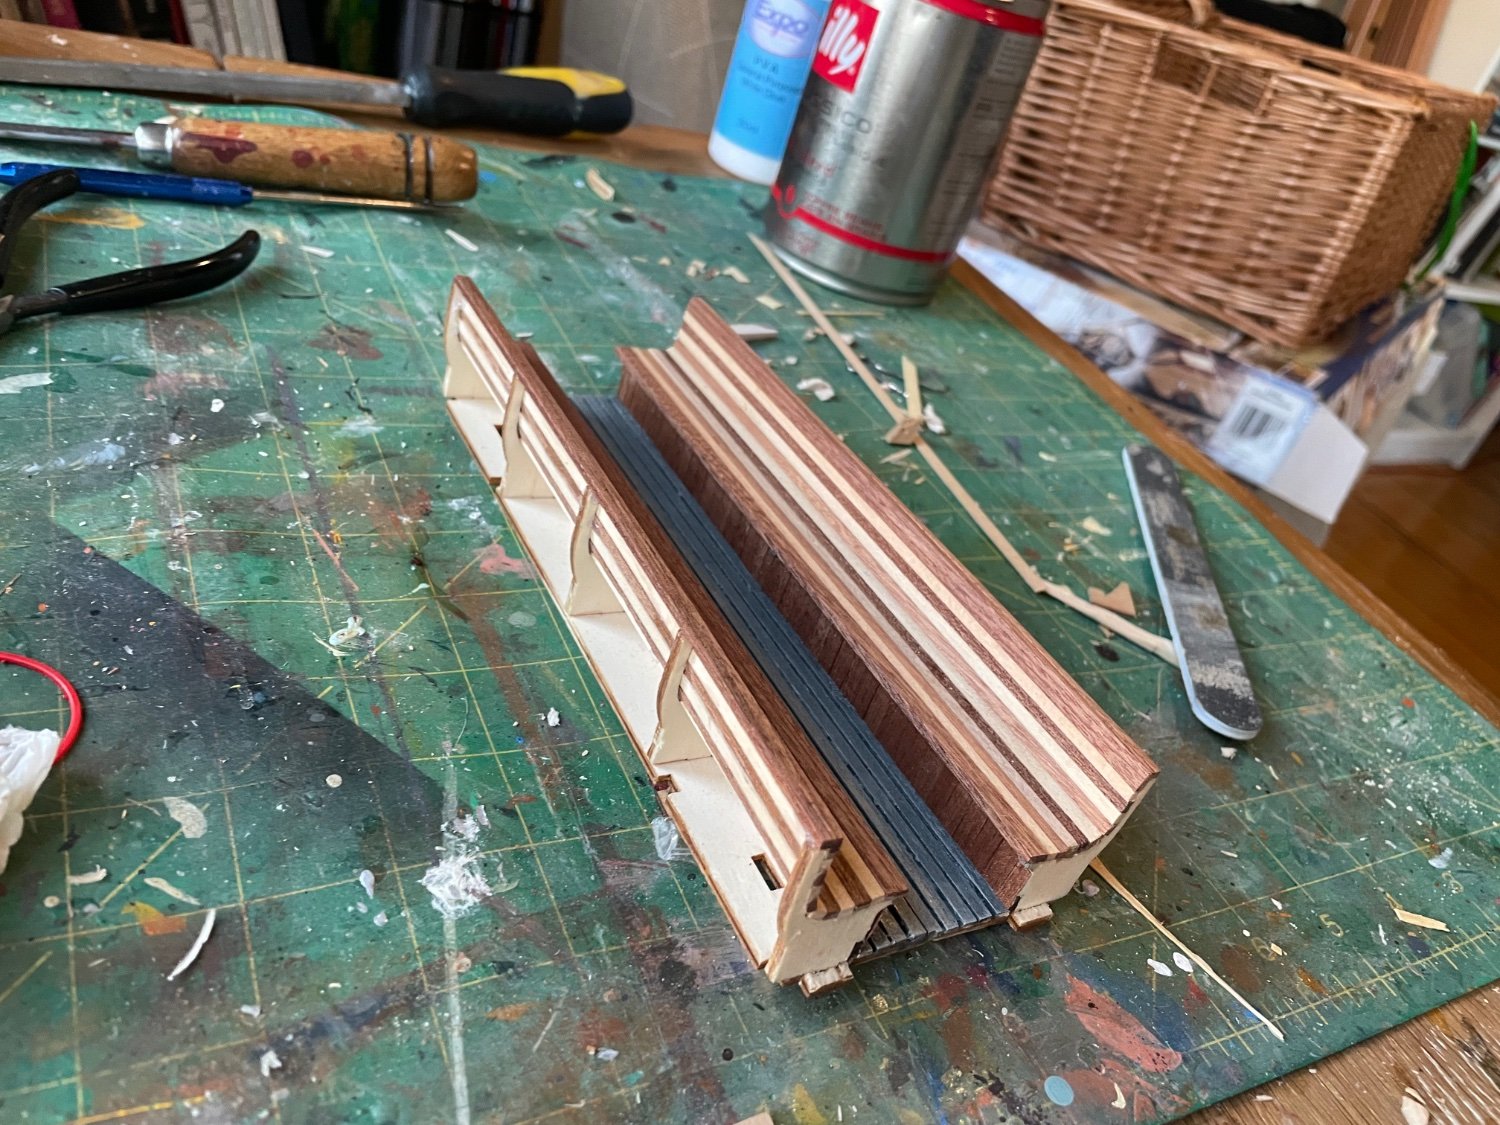
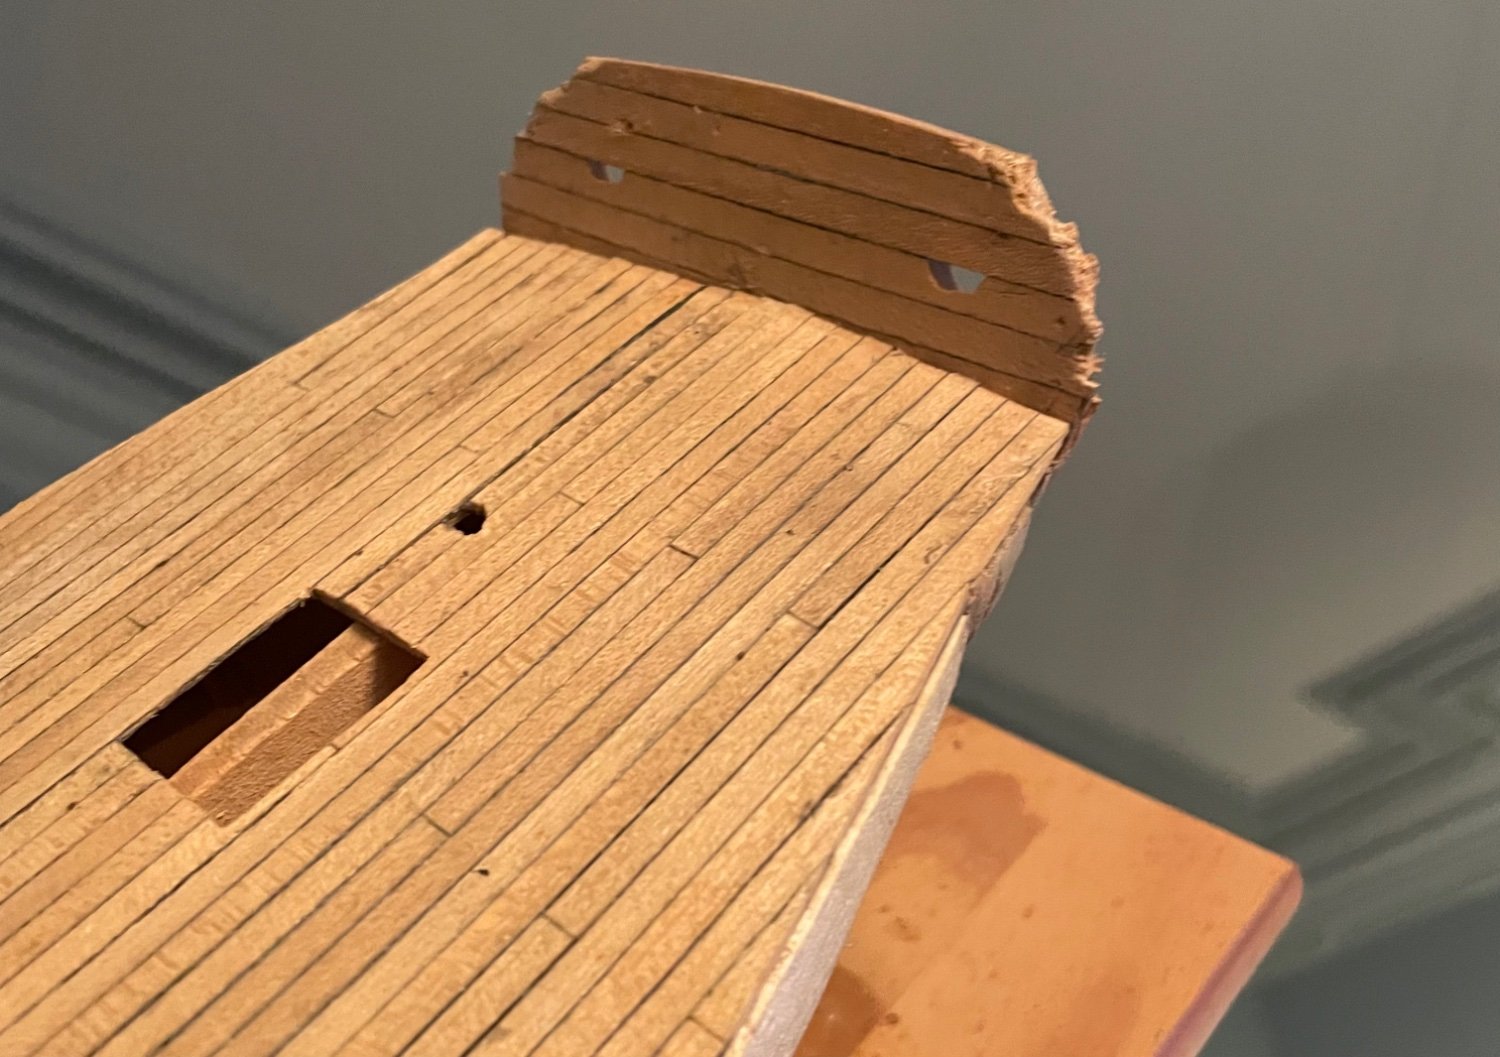
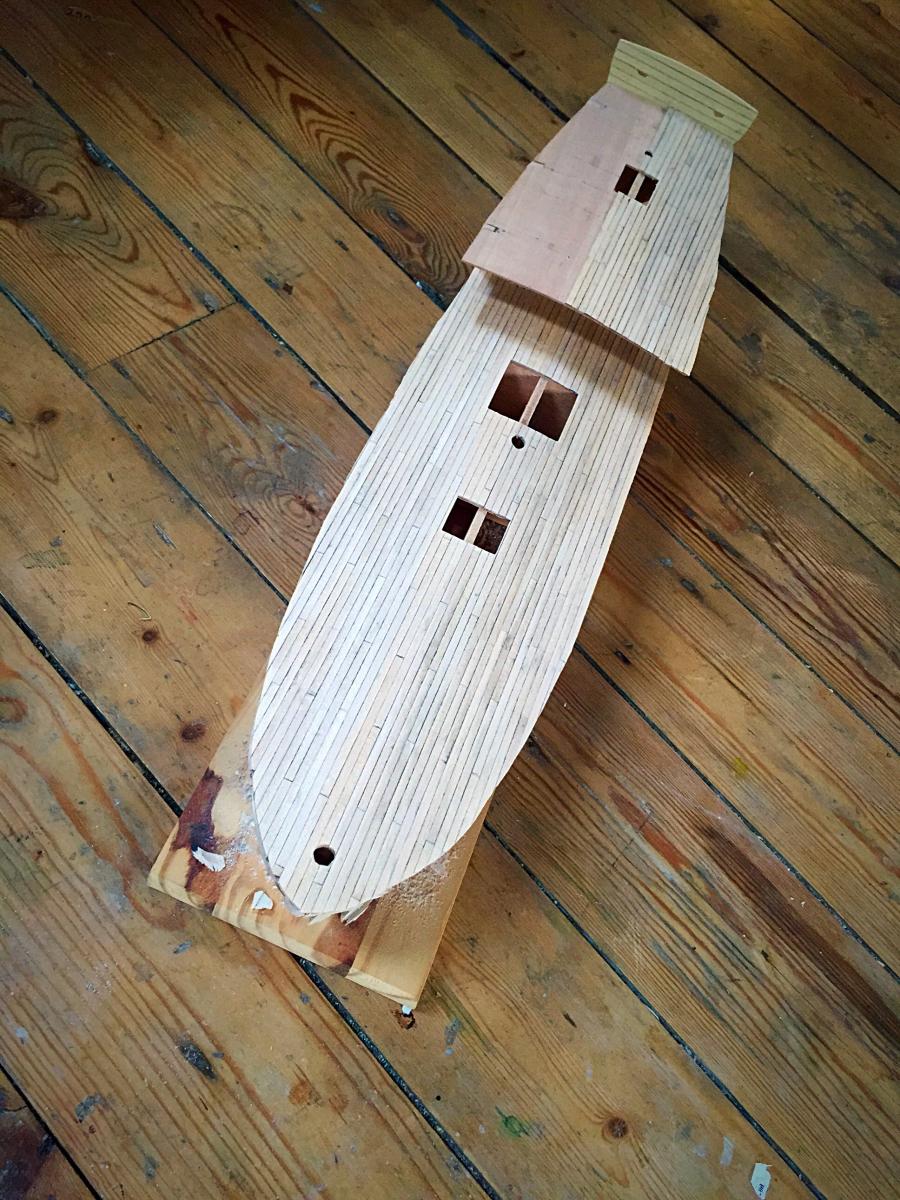
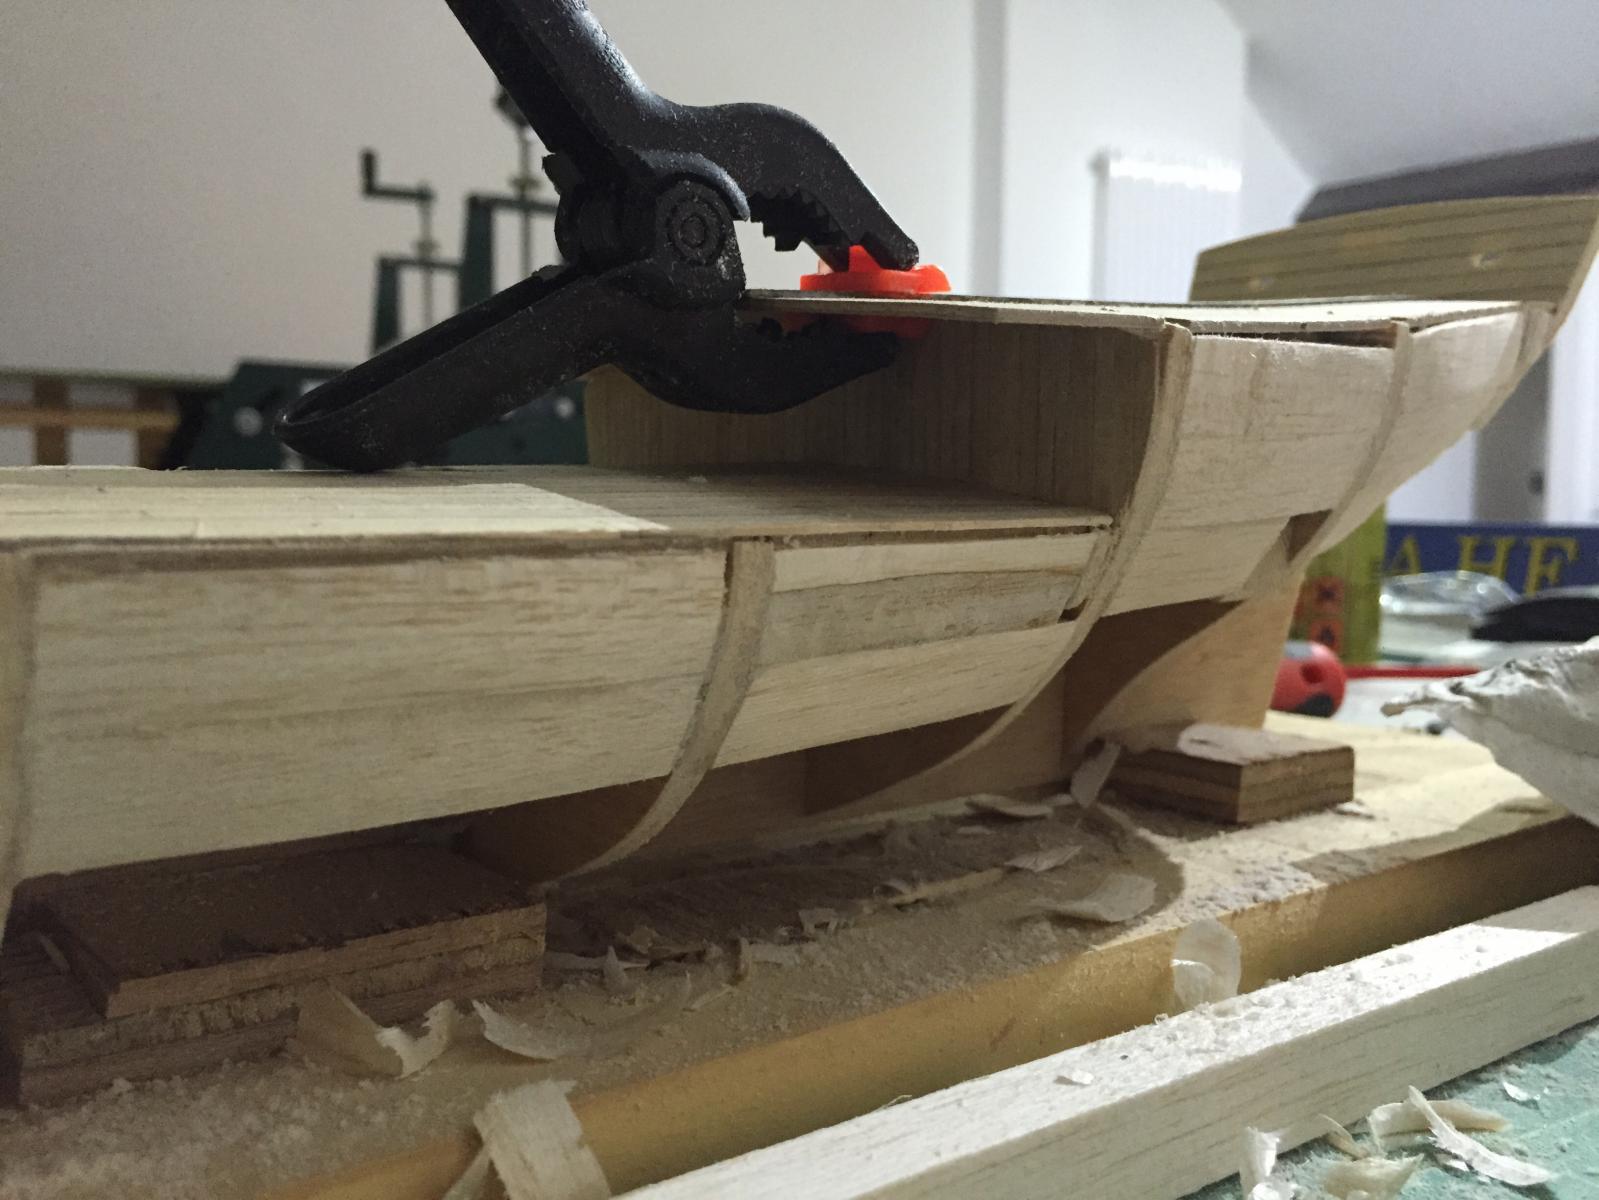
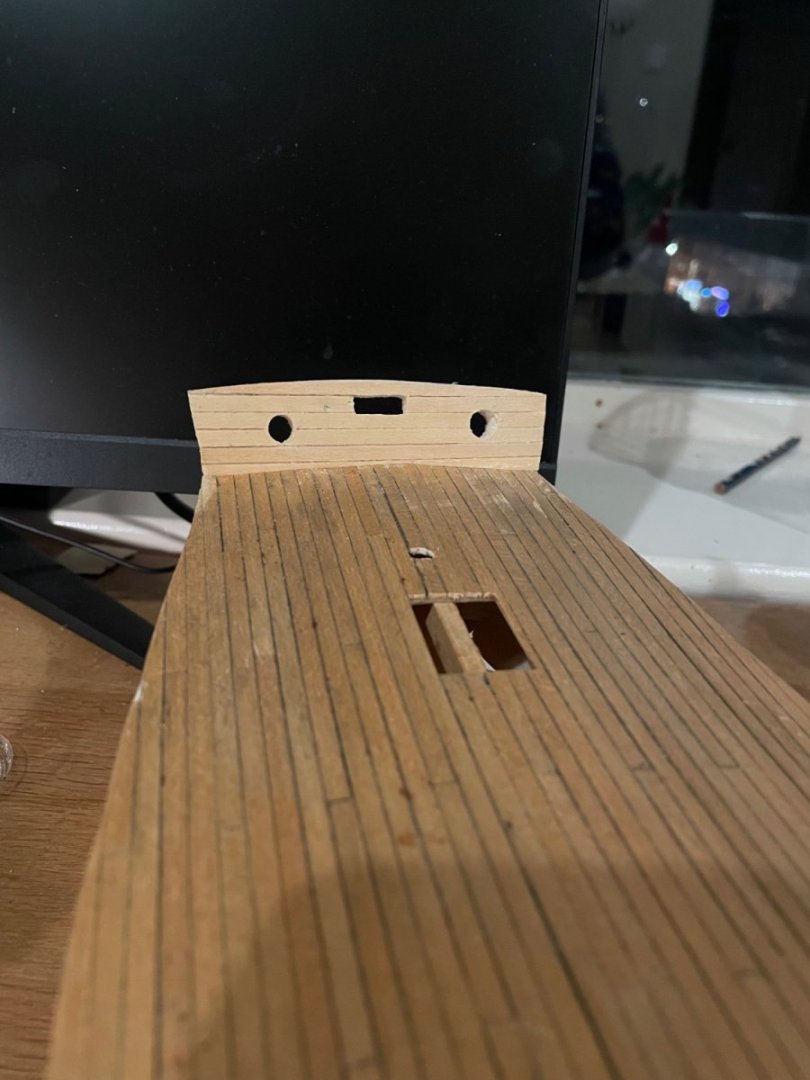
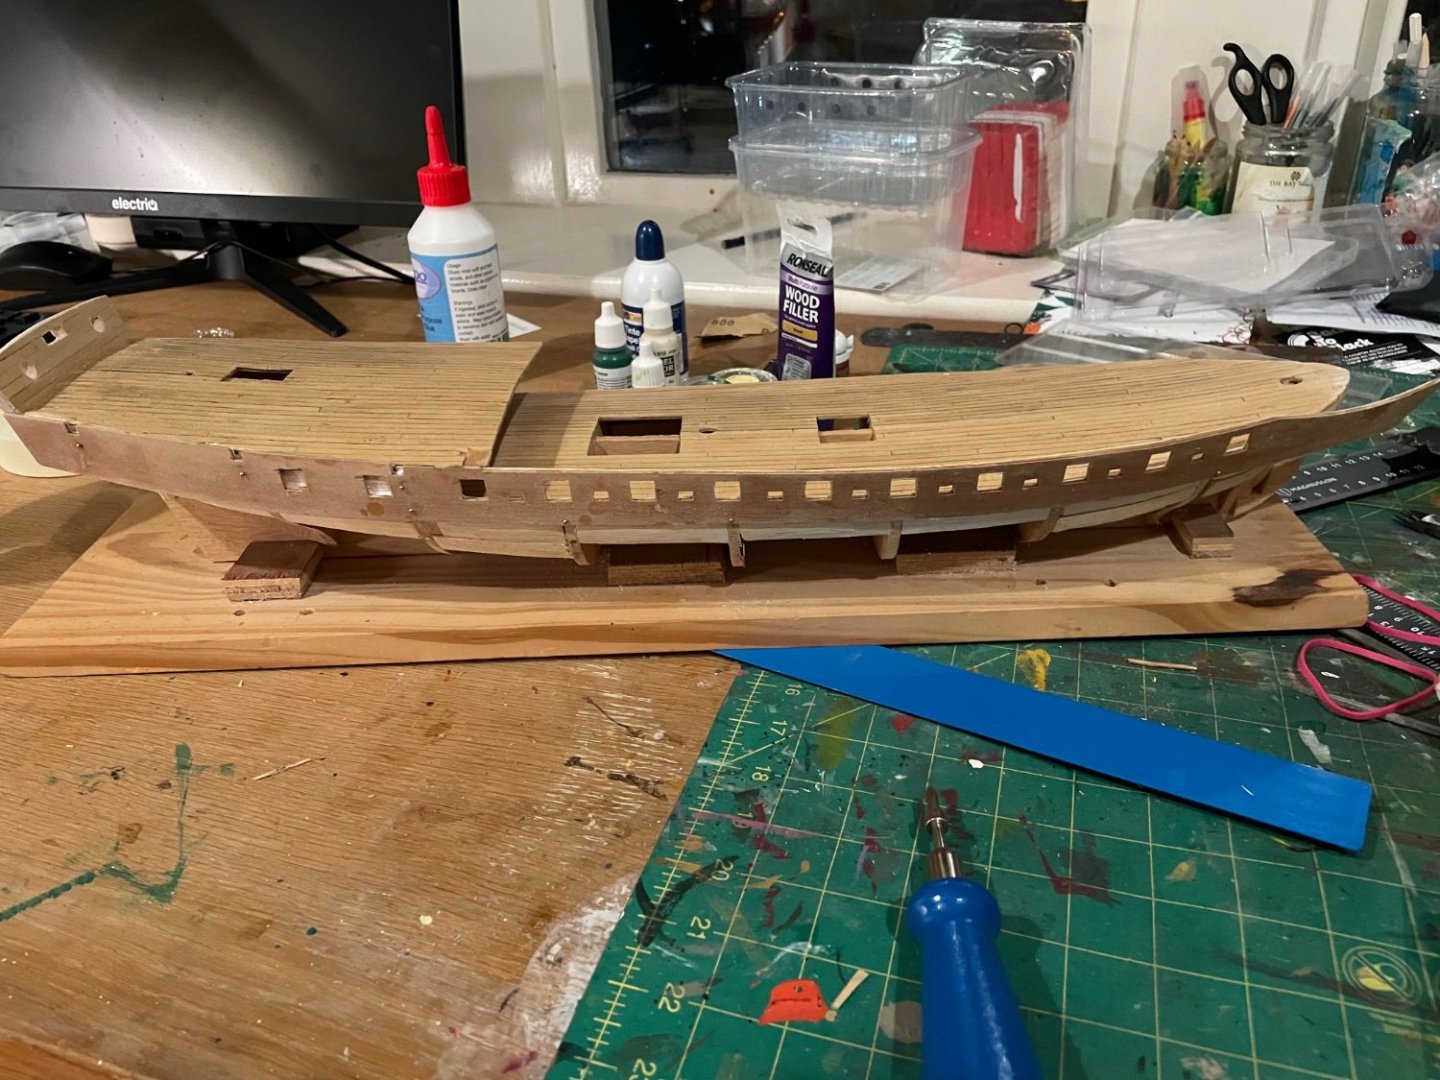
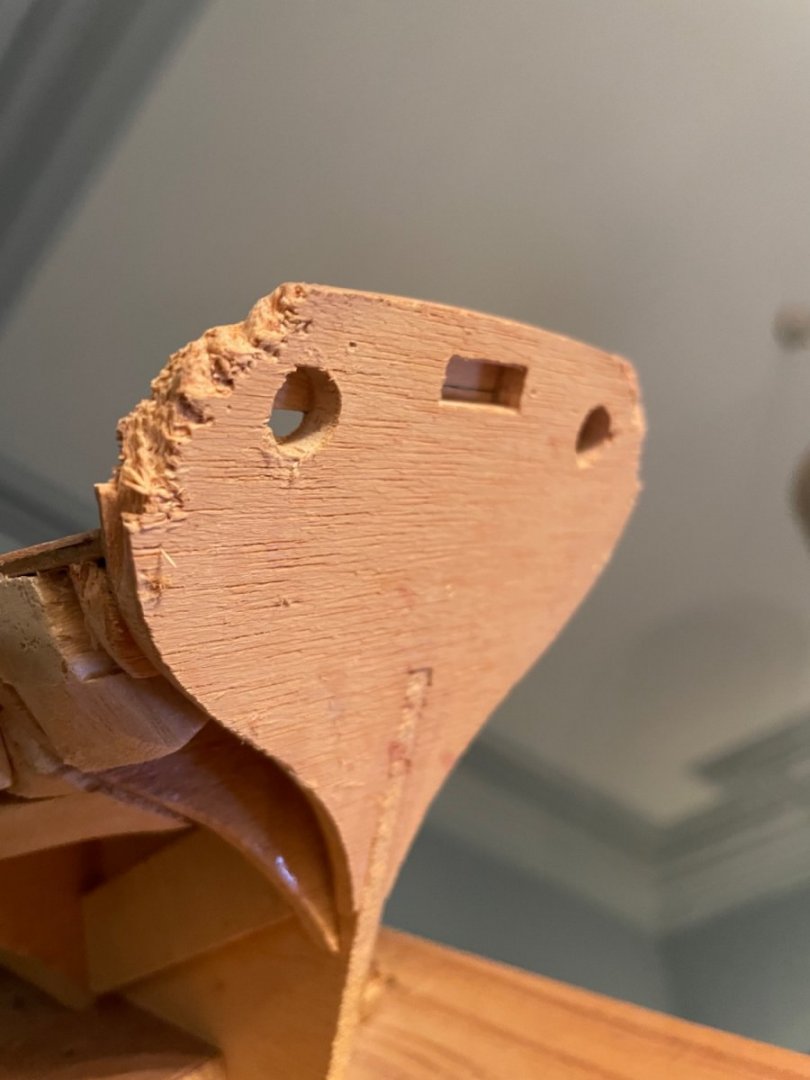
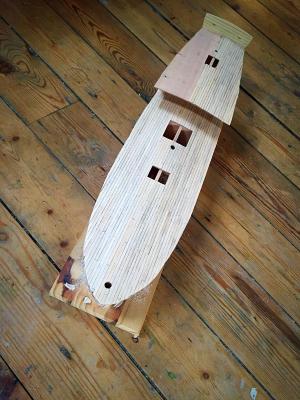
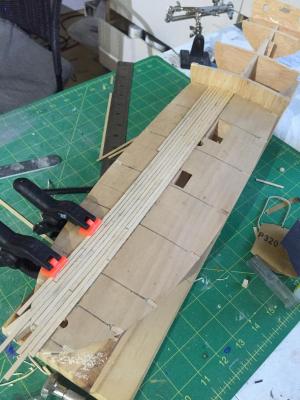
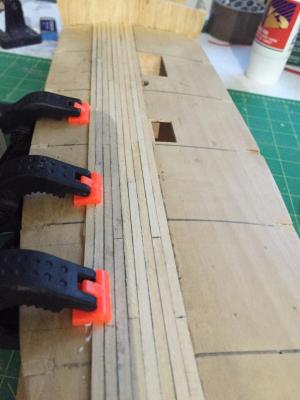
In the end I did replace the whole frame. I used the chewed transom as a template to create another, drawing up the missing angled part in freehand as best I could. Here is a pic with the new transom planked: Now I’m starting to glue the bulwarks to the ship having soaked it a bit and used my electric plank bender for the first time! I’m using ca glue in areas and pva. You can see another nibbled bit by my cat above the third gun port from the back which I’ve repaired and need to re-plank. That bulkhead was planked along the inner wall six years ago and has been waiting patiently to be added to the ship ever since 😂
-
Berlin Tram by Etcher - OcCre - 1:24
Etcher replied to Etcher's topic in Non-ship/categorised builds
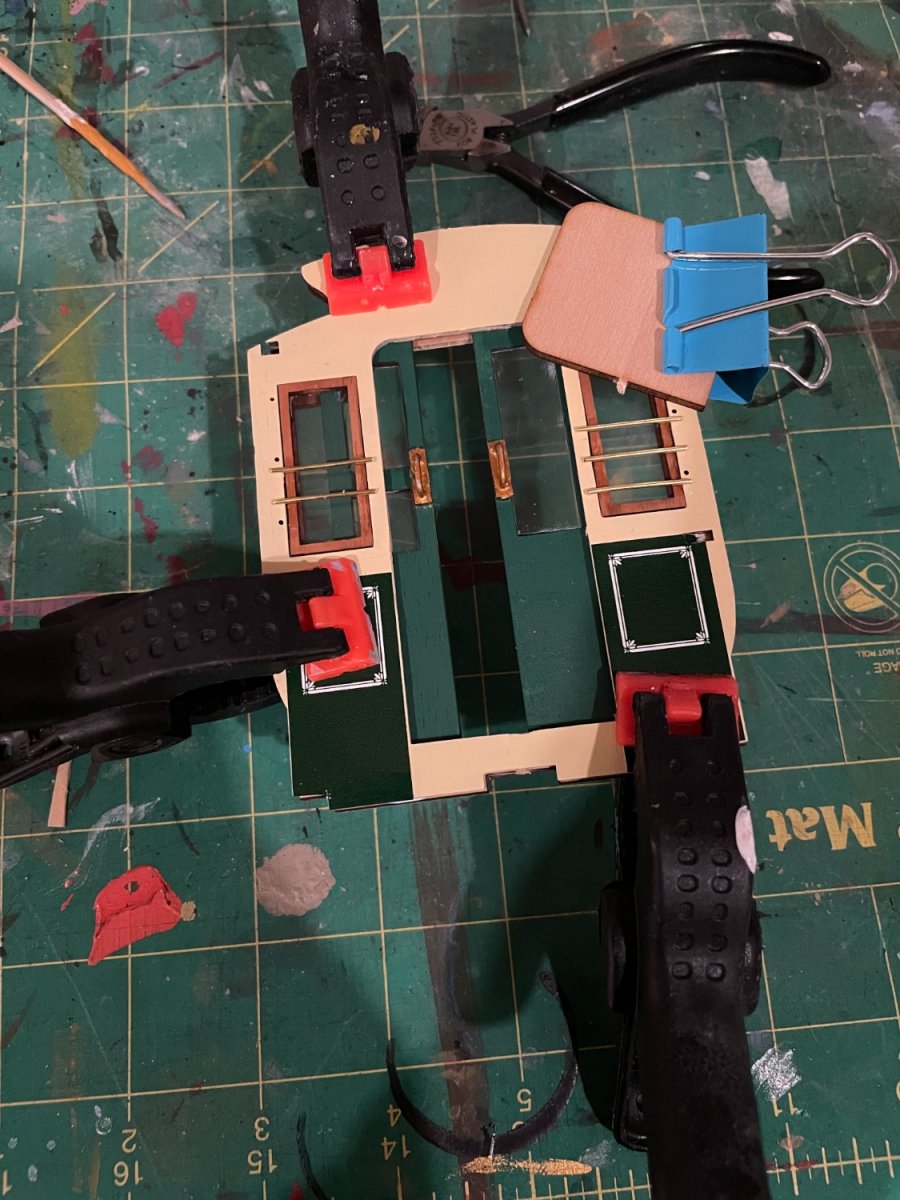
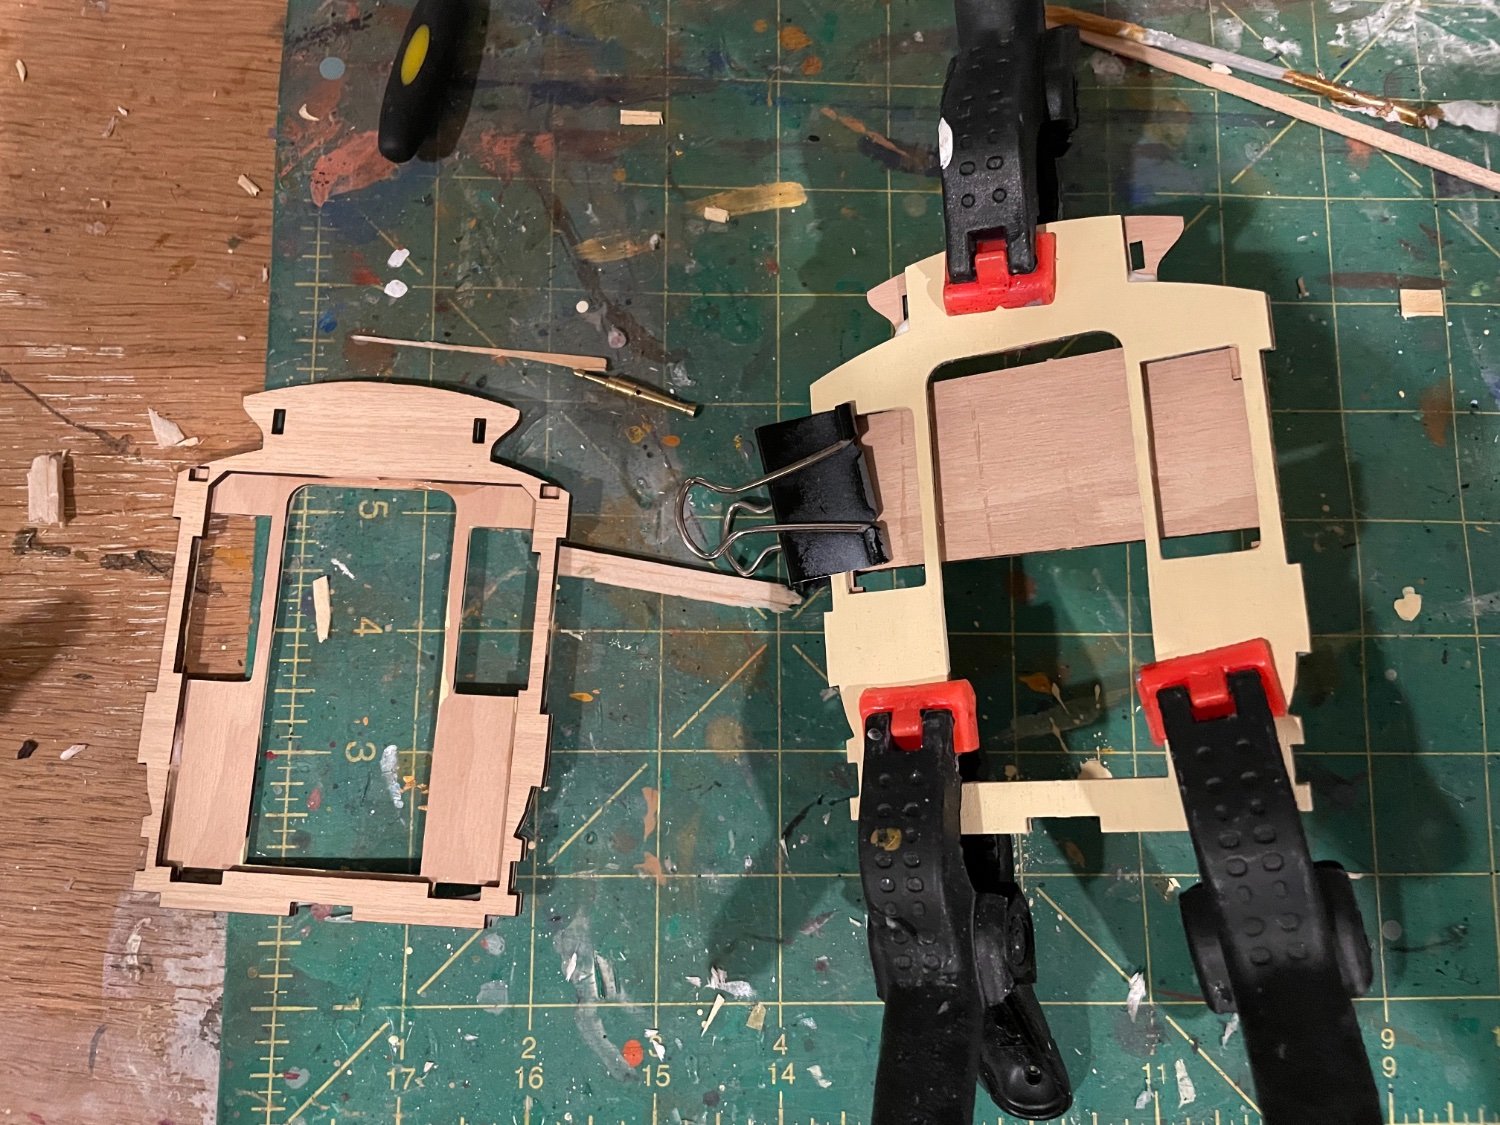
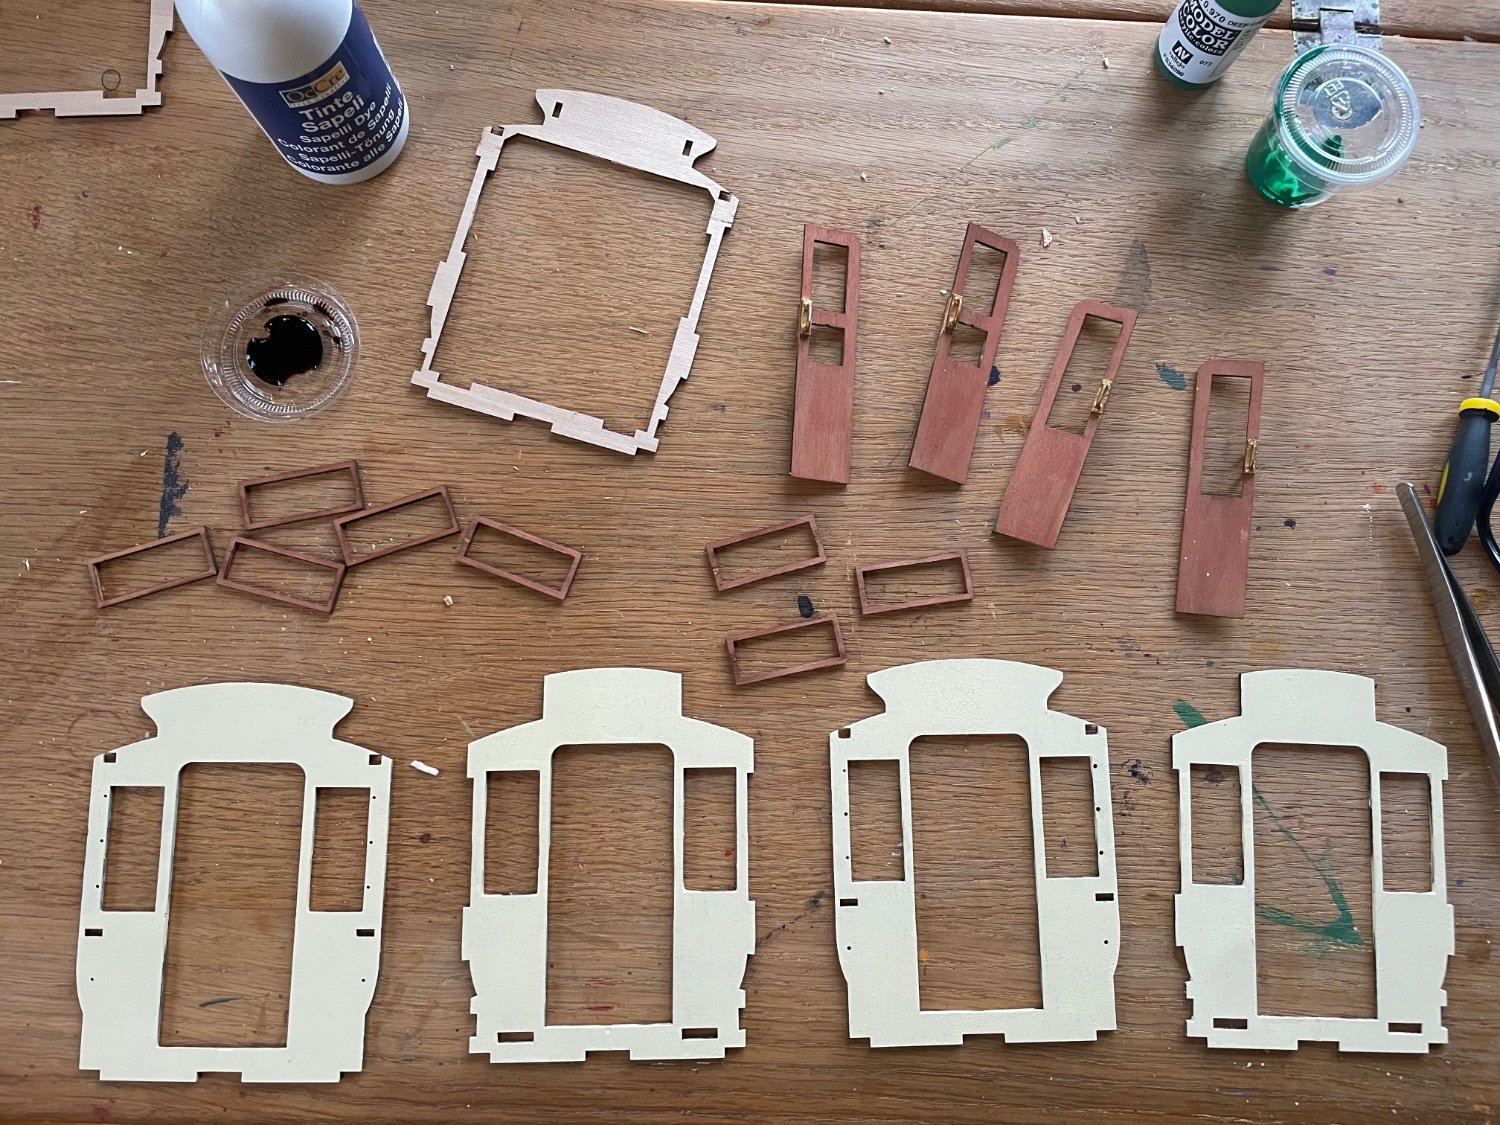
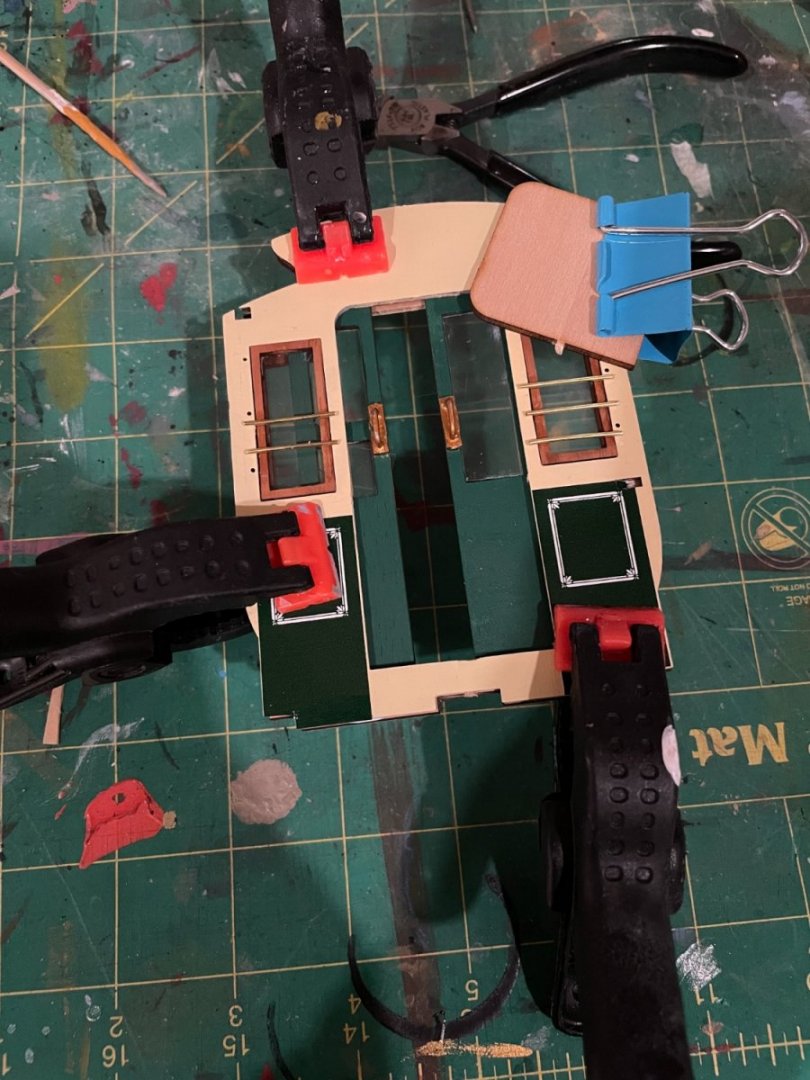
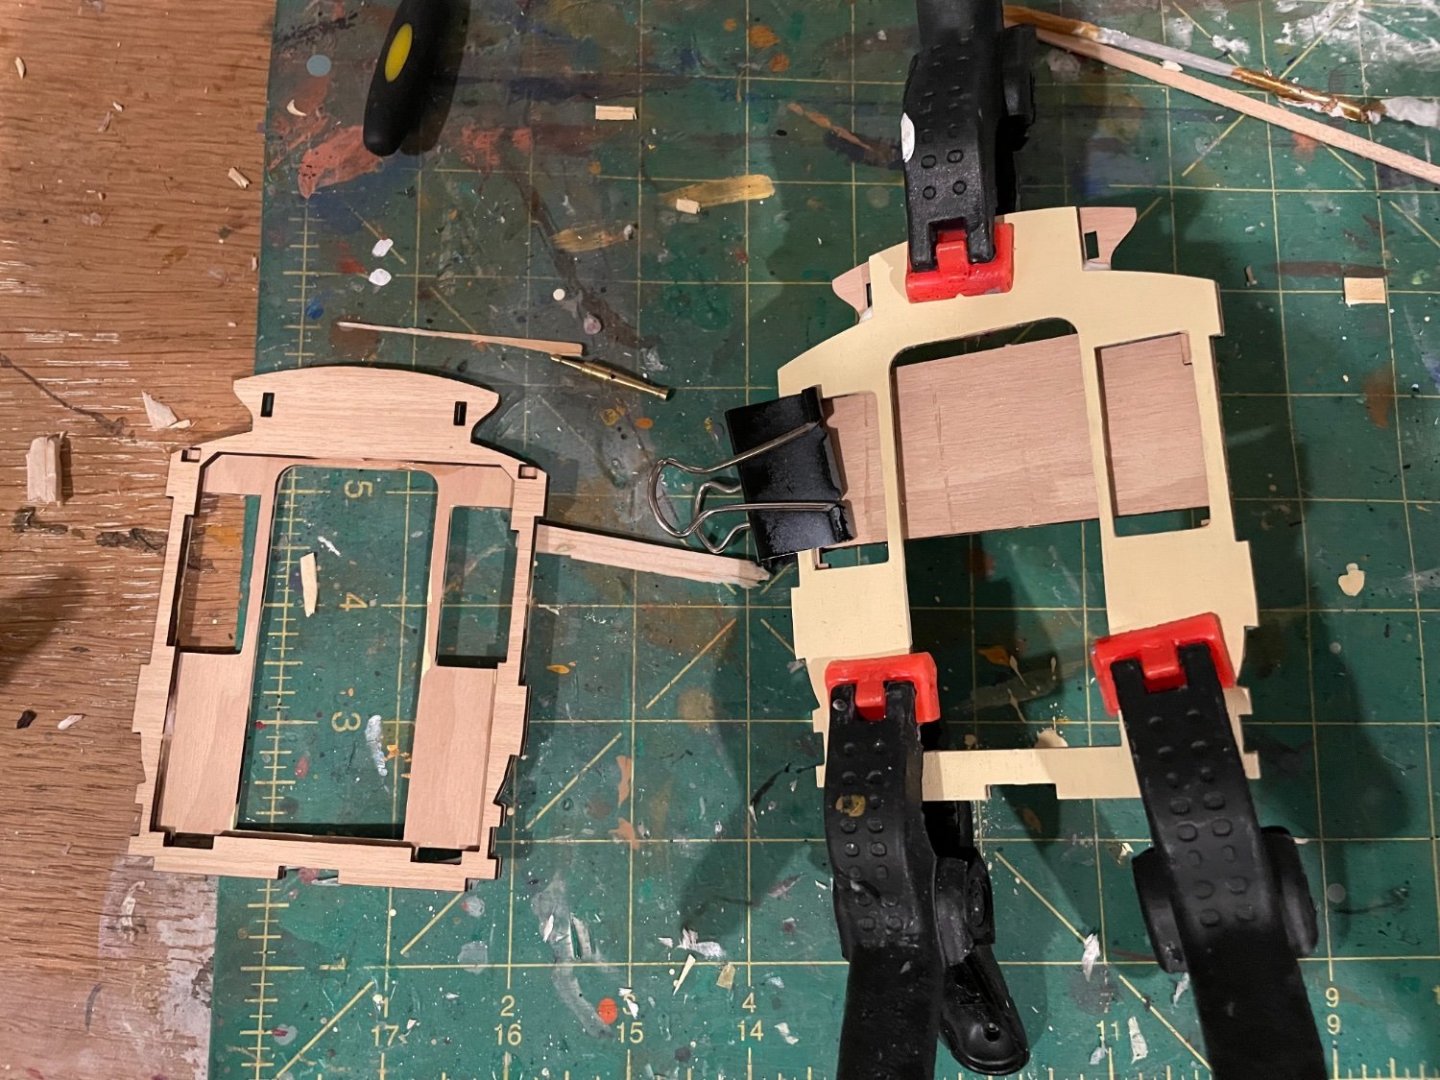
I’ve assembled one of the carriage ends. Here it is beforehand and then the three parts clamped together. Of course one of the pieces of wire that represent the window bars fell off during the procedure and will need fixing back on. I used ca glue trying not to use too much but enough to keep it intact! I’ve also cut out and cleaned up the preformed tram sides. I think the best way to fix it all together is to glue one end to the carriage interior and then both sides before adding the other end. For some reason the forum is insisting on loading this image upside down. So, crane your head! Here’s the end dry fit to the interior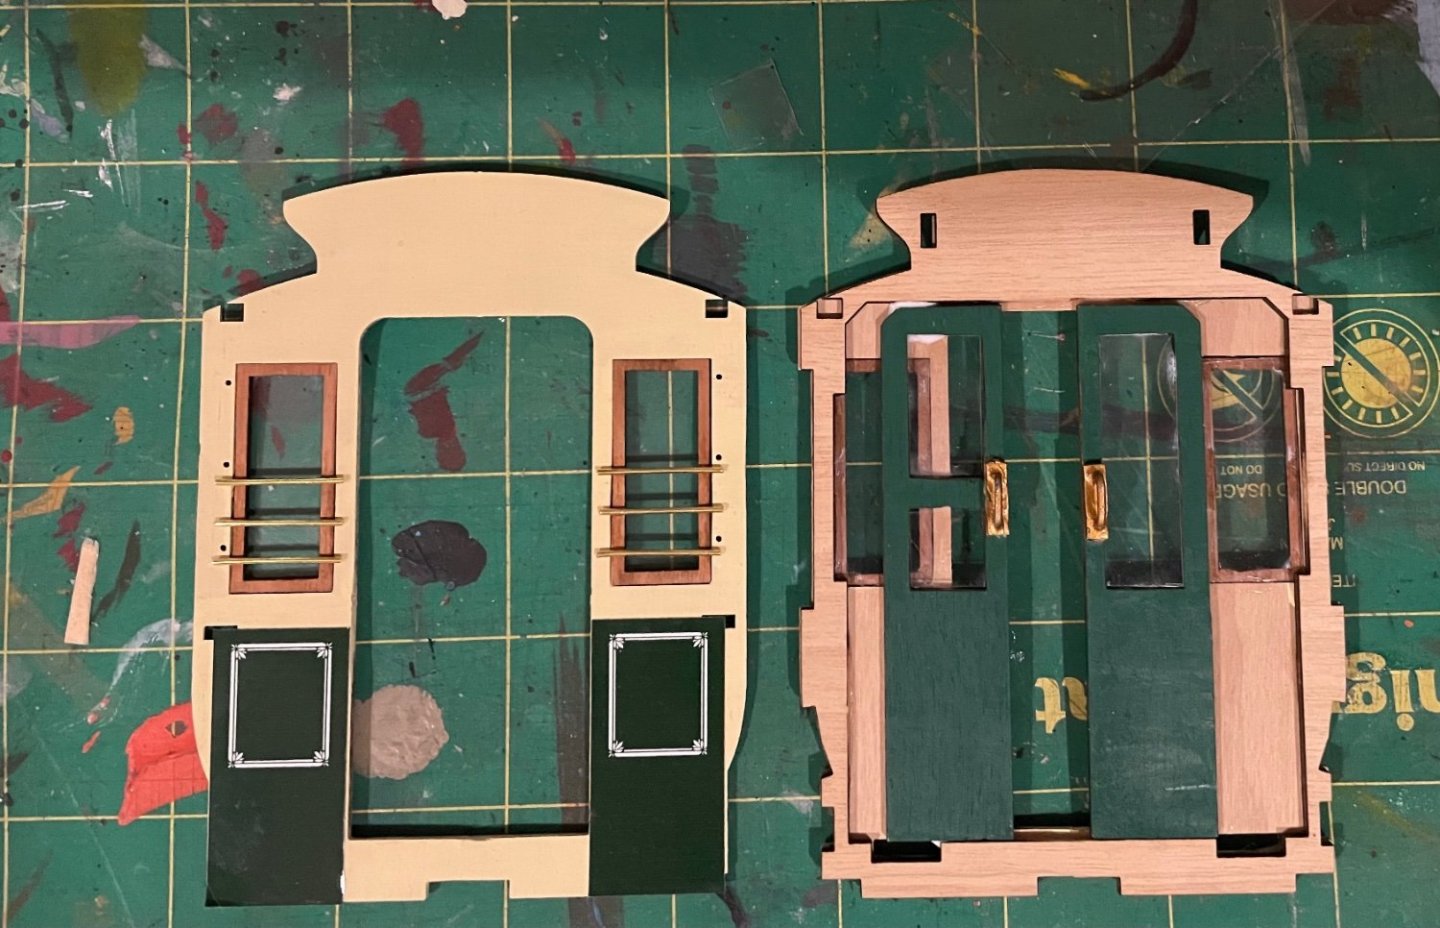

-
Berlin Tram by Etcher - OcCre - 1:24
Etcher replied to Etcher's topic in Non-ship/categorised builds
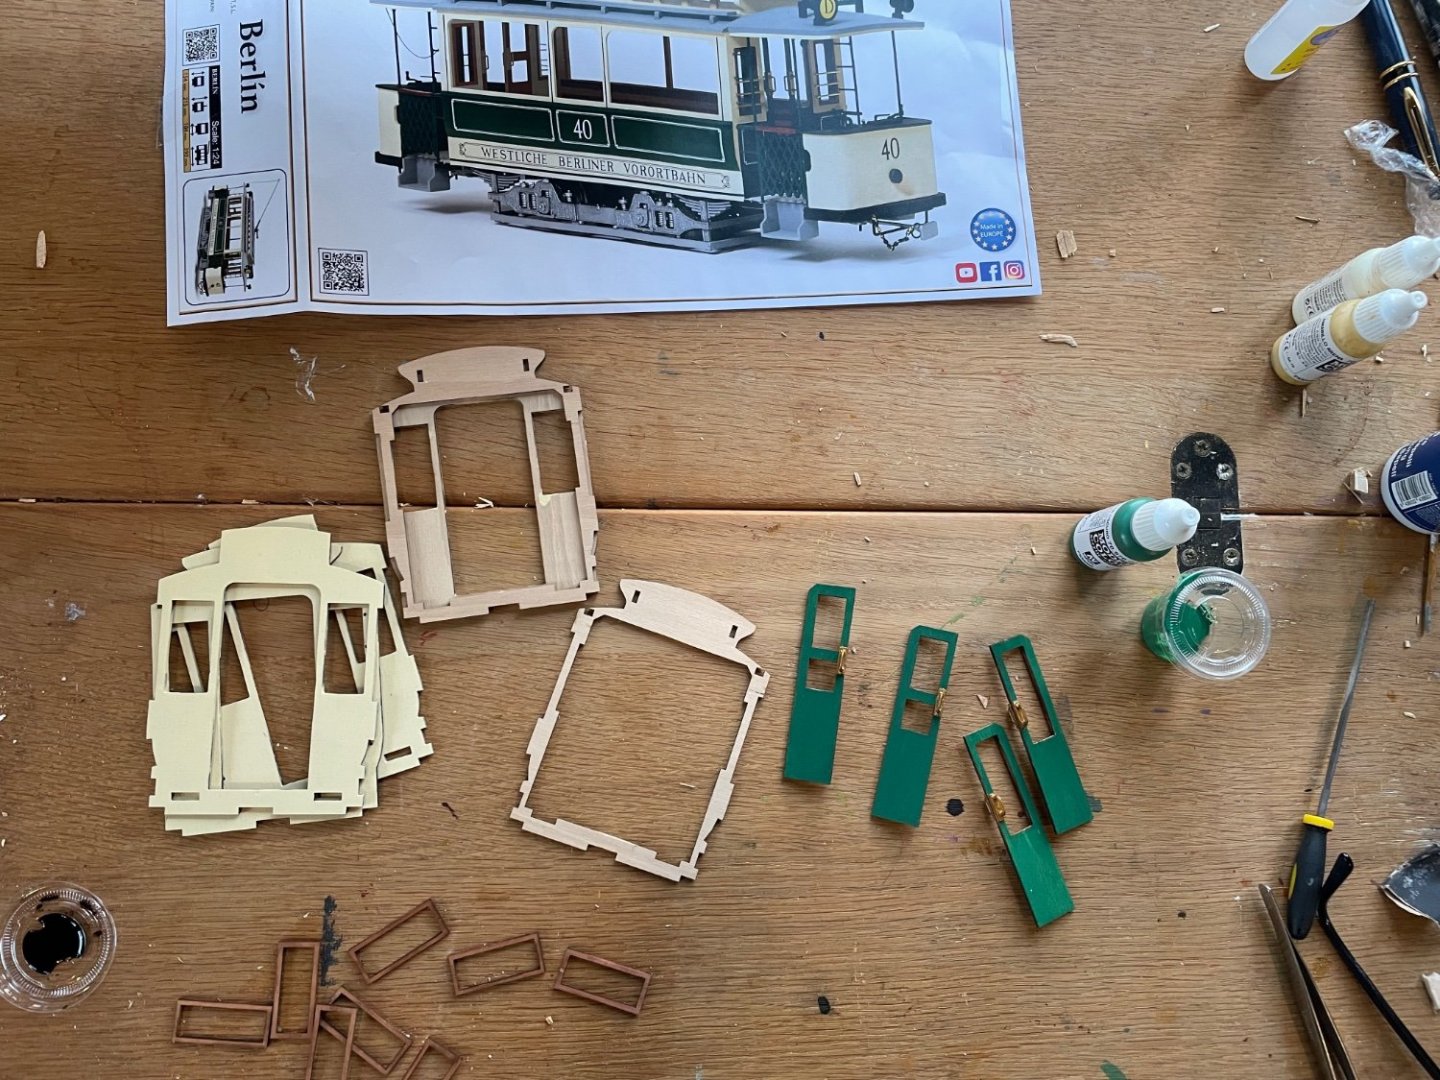
I’m having difficulty cutting clear plastic accurately and placing it inside window openings on the doors. I tried using the actual door as a guide marking inside the frame along the plastic and I’ve also tried measuring but it’s never completely accurate and I shave off a bit here a bit there and end up with tiny gaps when it’s buckling elsewhere. See pic: You can see the top right is buckling slightly and it’s now too short at the bottom. I’m not sure if I’m missing a trick or just clumsy! I think perhaps I need more cutting tools. I rely too much on my craft knife when it’s not always the best tool for the job.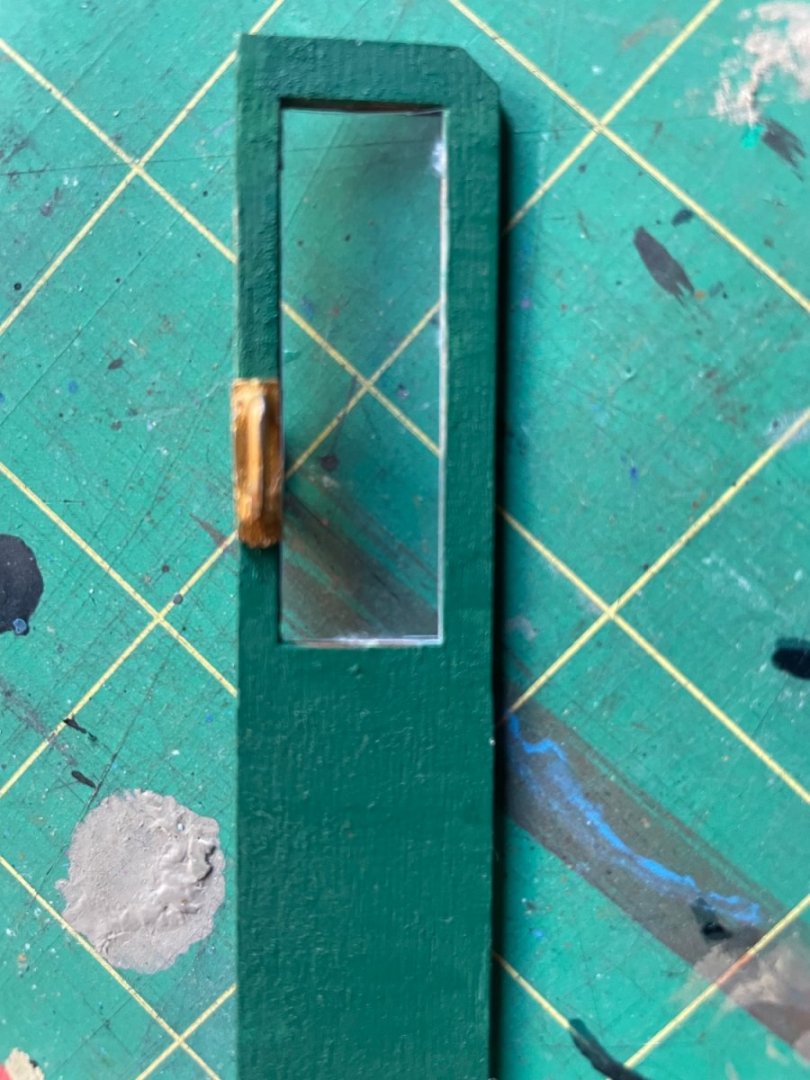
-
Berlin Tram by Etcher - OcCre - 1:24
Etcher replied to Etcher's topic in Non-ship/categorised builds
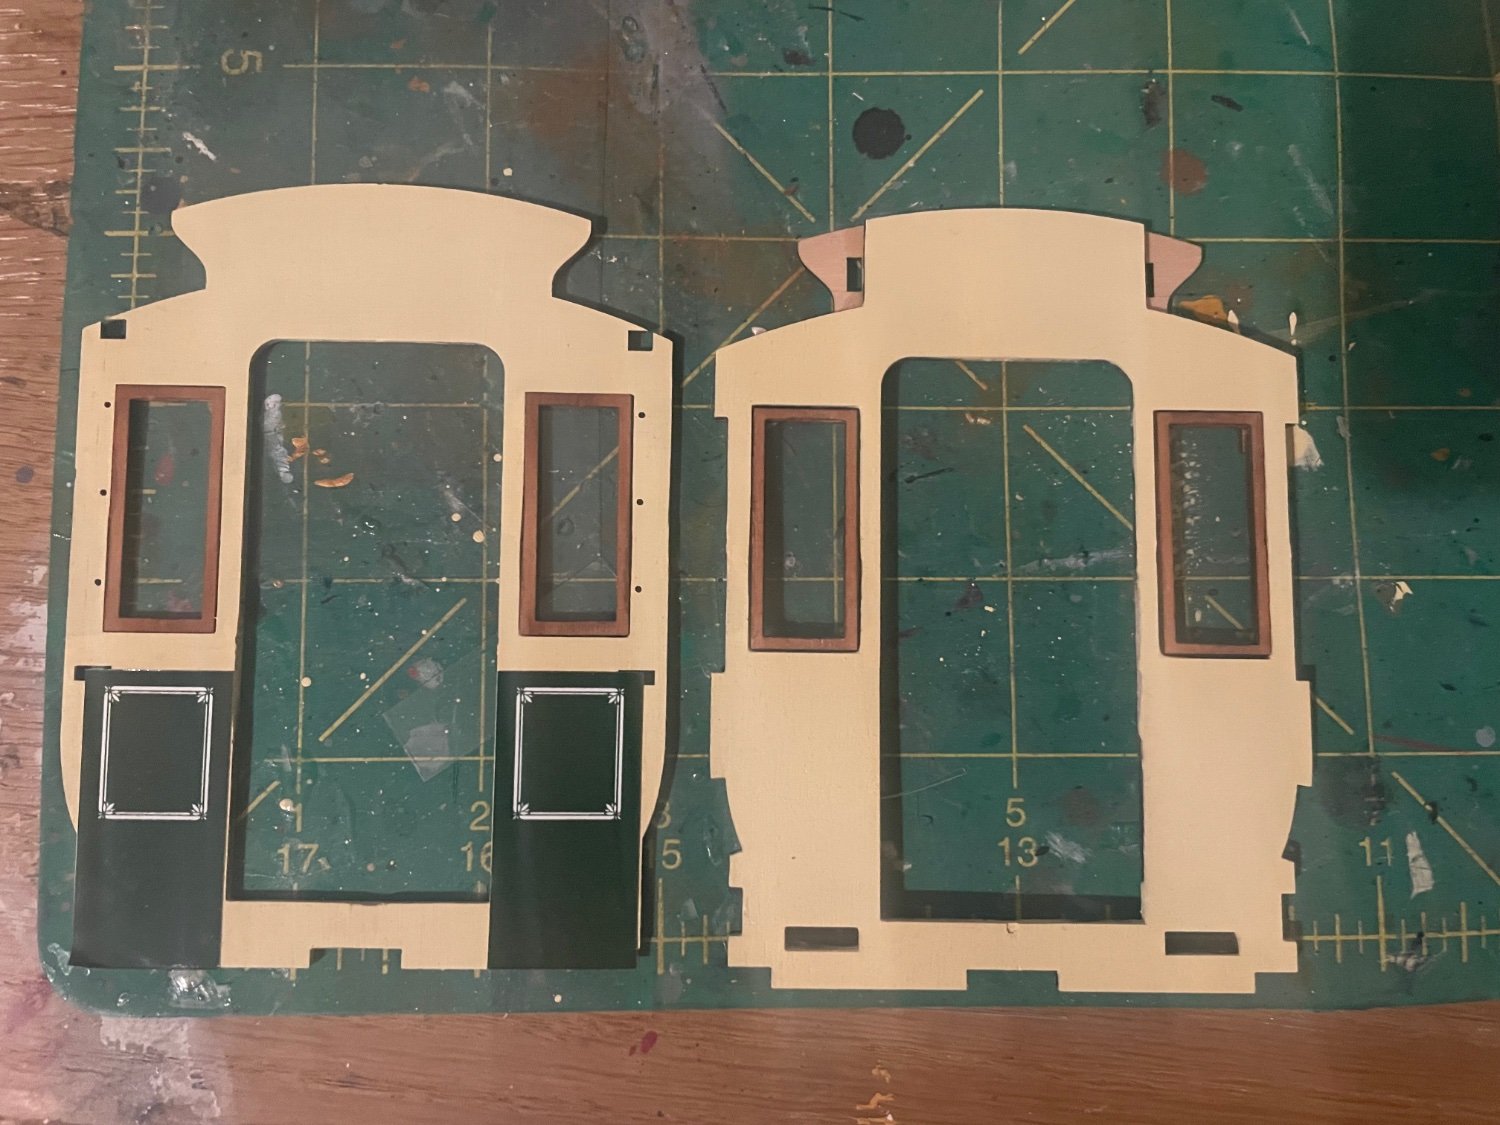
These are both sides of one carriage end ready to be glued together and then the doors inserting. Once I’ve put the windows into the doors. Oh and metal bars go across the windows where the tiny holes are. Addendum: actually those holes aren’t for the metal/wire bars. They are just glued onto the windows.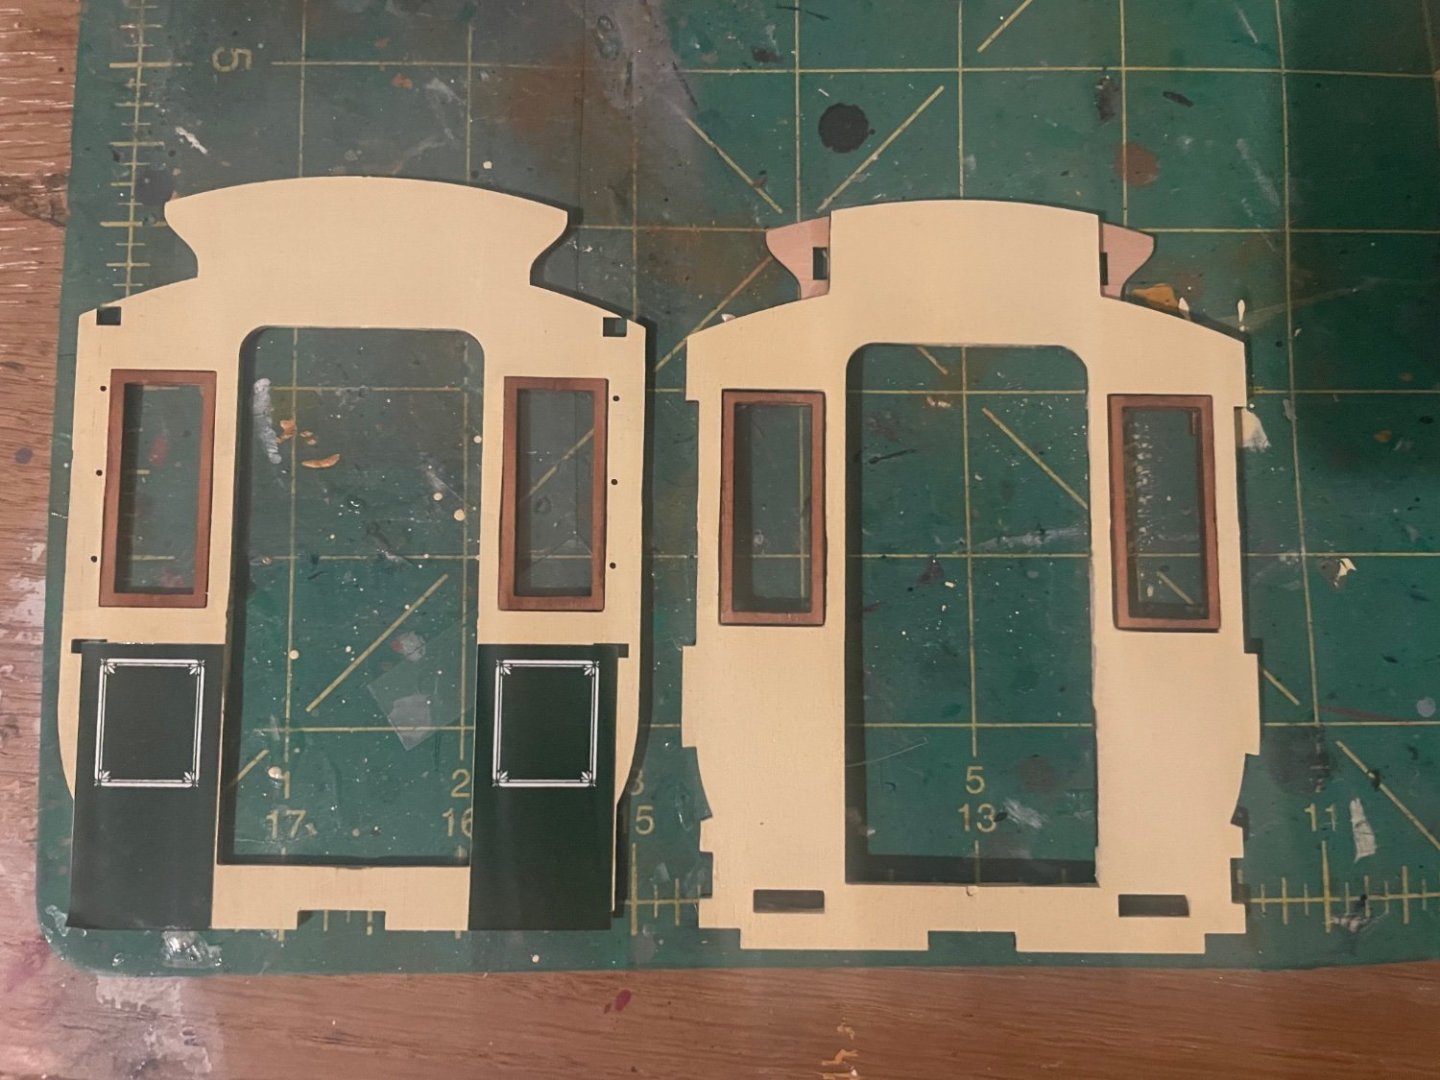
-
How many kits do you have on the go at the moment?
Etcher replied to CaptnBirdseye's topic in Wood ship model kits
I have an OcCre model tram that I started on Boxing Day. And a OcCre Xebec ship I started 7 years ago! 😂 The latter has been in storage much of that time though, having been rescued last week. I also have the Dusek Maria yet to start. As the Maria is substantially smaller than the Xebec I have pondered starting that before continuing with the Xebec, but I suspect it’s just an excuse to start another. -
Berlin Tram by Etcher - OcCre - 1:24
Etcher replied to Etcher's topic in Non-ship/categorised builds
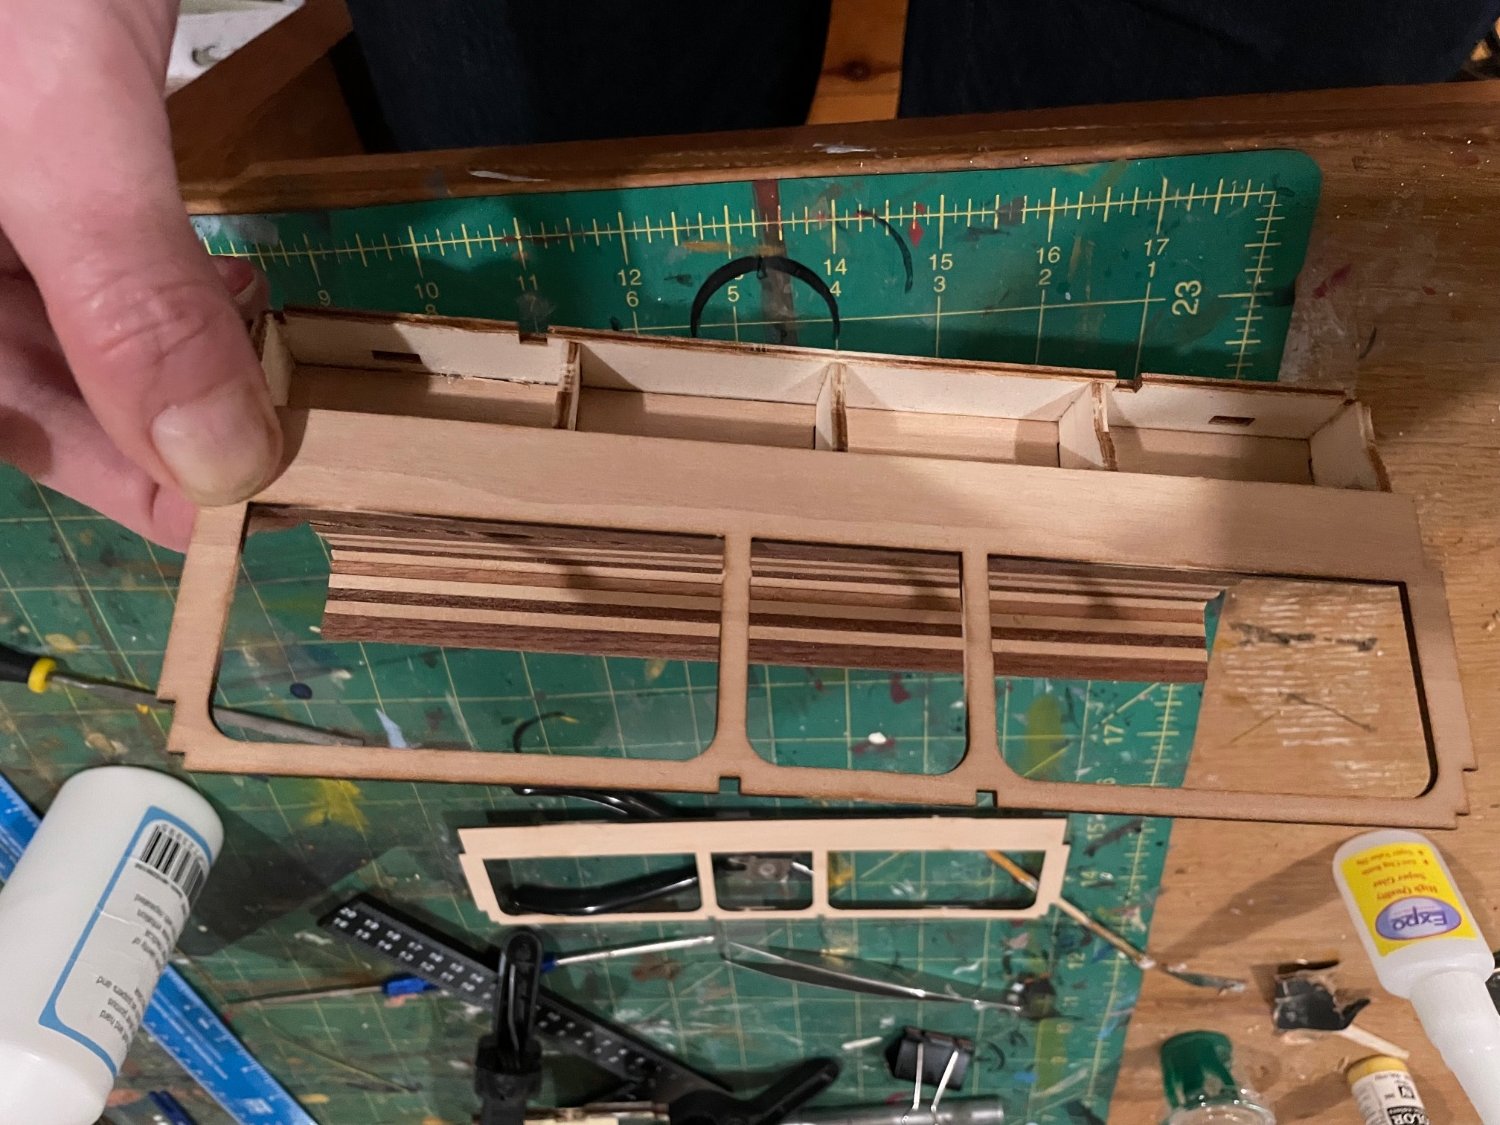
I’ve been gluing some of the clear plastic to the window frames. The ones pictured below are okay as I can glue oversize sheet to the back of the frame as that side will be glued to another compartment end piece and therefore not visible. However, the doors will be visible from both sides, albeit one will be inside the tram and not clearly visible. So I think I will have to cut the sheet to fit inside the frame and glue in place carefully. Seems a bit daunting. These are the easy ones. A few dabs of ca glue held these in place. I’ve also started glueing the carriage ends together. There are three layers at each end to be sandwiched together. Then the doors fitted into them. I’m also fixing the transfers onto the carriage ends. The slot at the top right of the transfer is for a rail to fix into. For some reason it’s not there in the photo showing you where to put it! That confused me for a moment. But the placement has to be correct as far as I can see.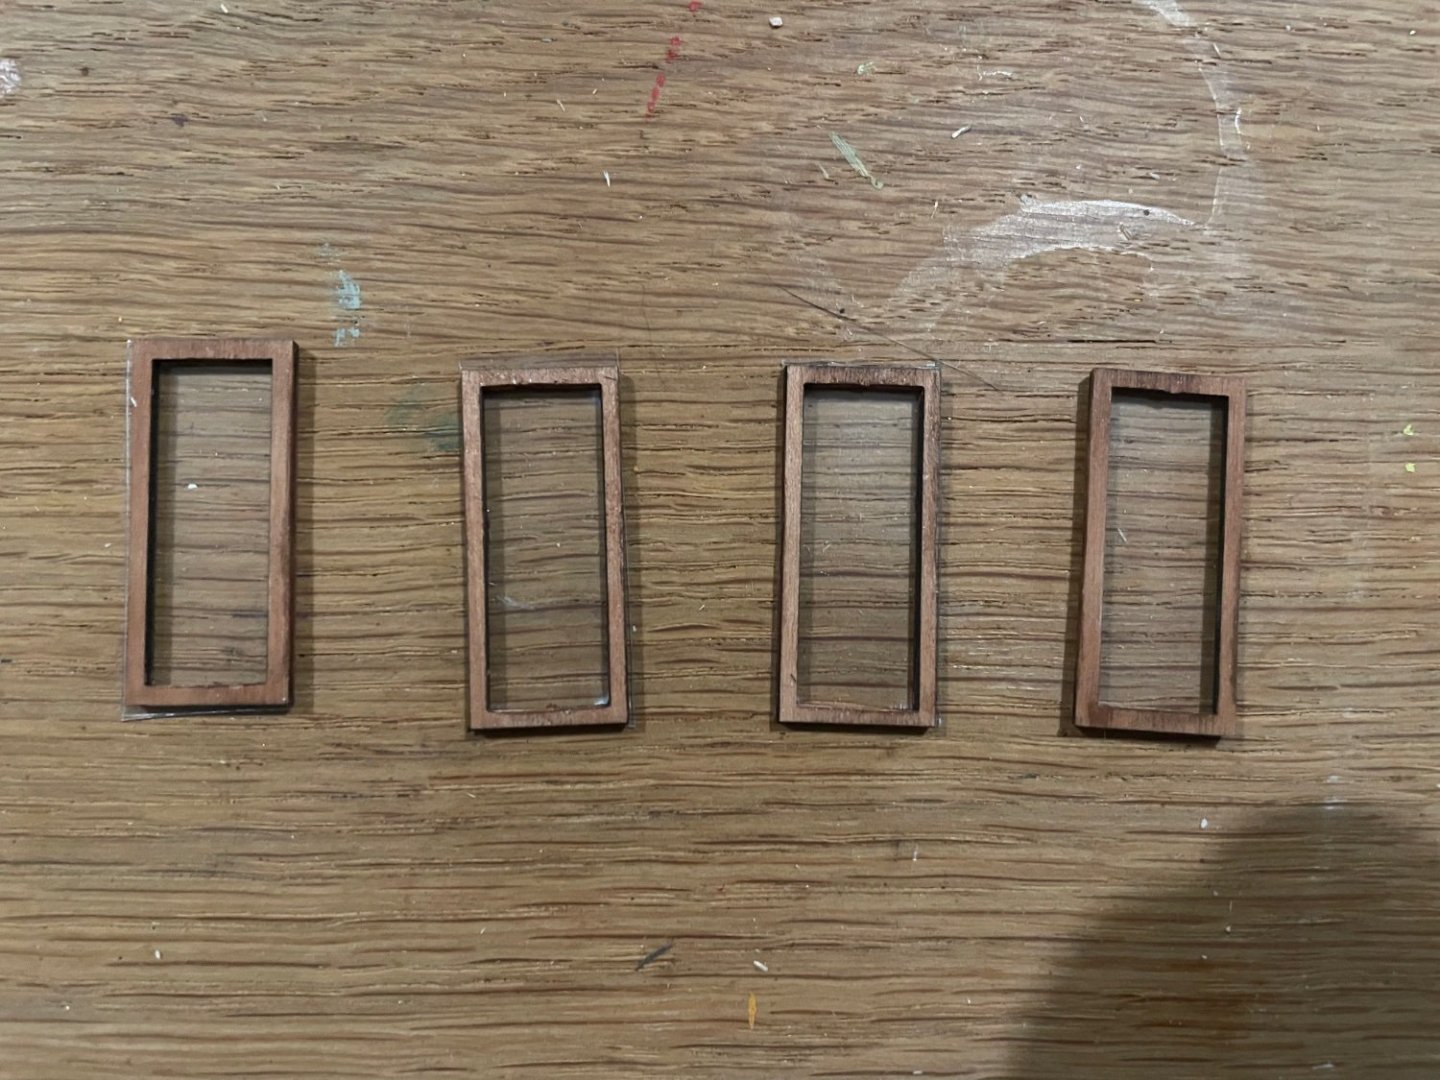

-
Air brush vs paint & brush
Etcher replied to jefferyt's topic in Painting, finishing and weathering products and techniques
I just don’t really enjoy the experience of painting with an airbrush. From wearing a mask to getting the correct airflow and the cleaning up etc. And they’re just too… detached(?) Not tactile enough maybe. I’ve tried them mainly on plastic kits and I think it actually put me off plastic kits because it almost seems like you need to use them or you’re handicapping yourself! -
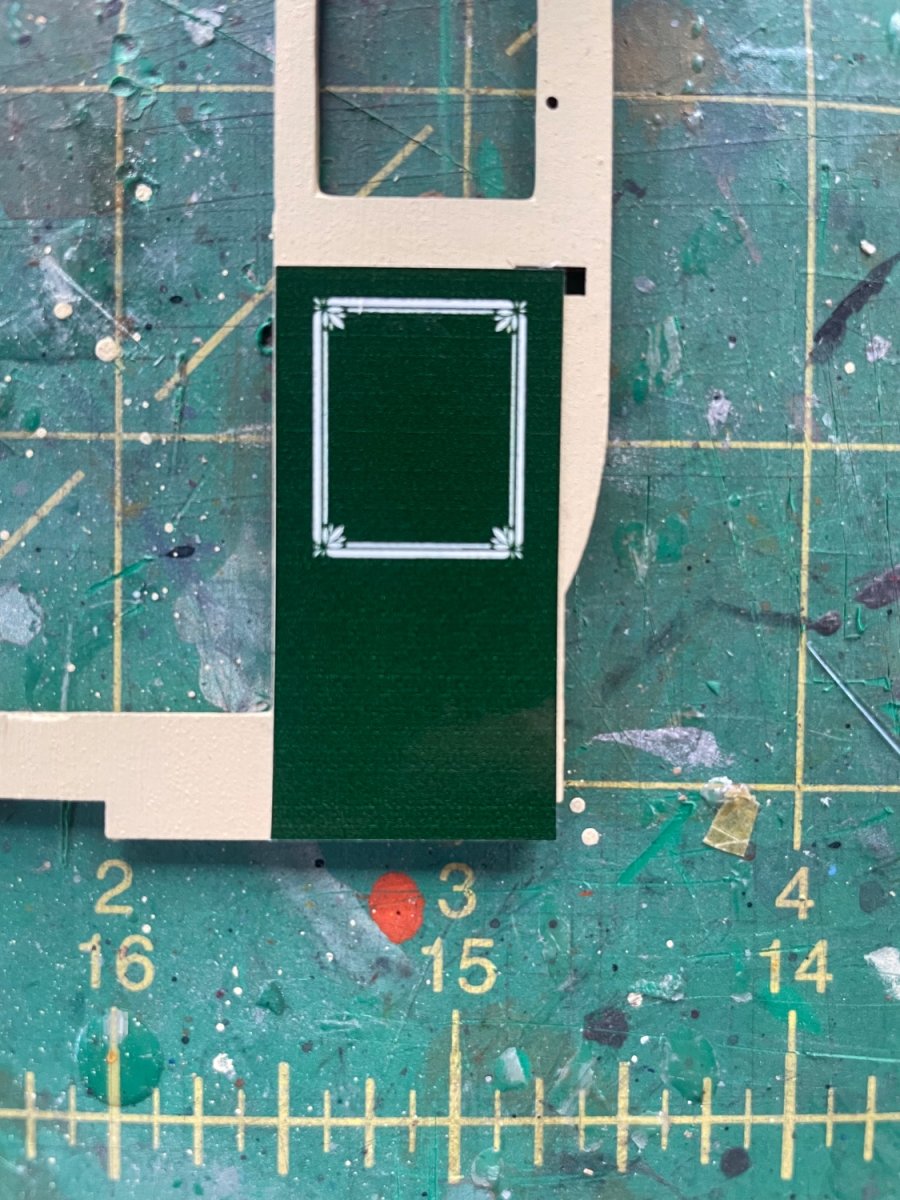
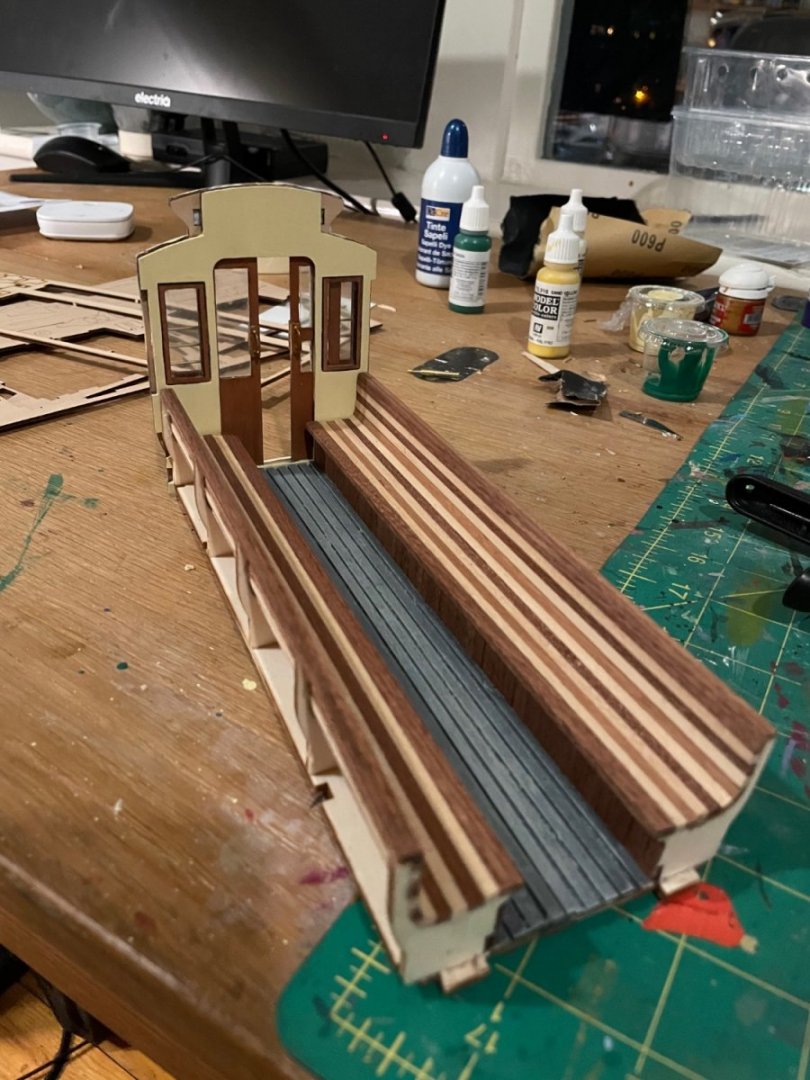
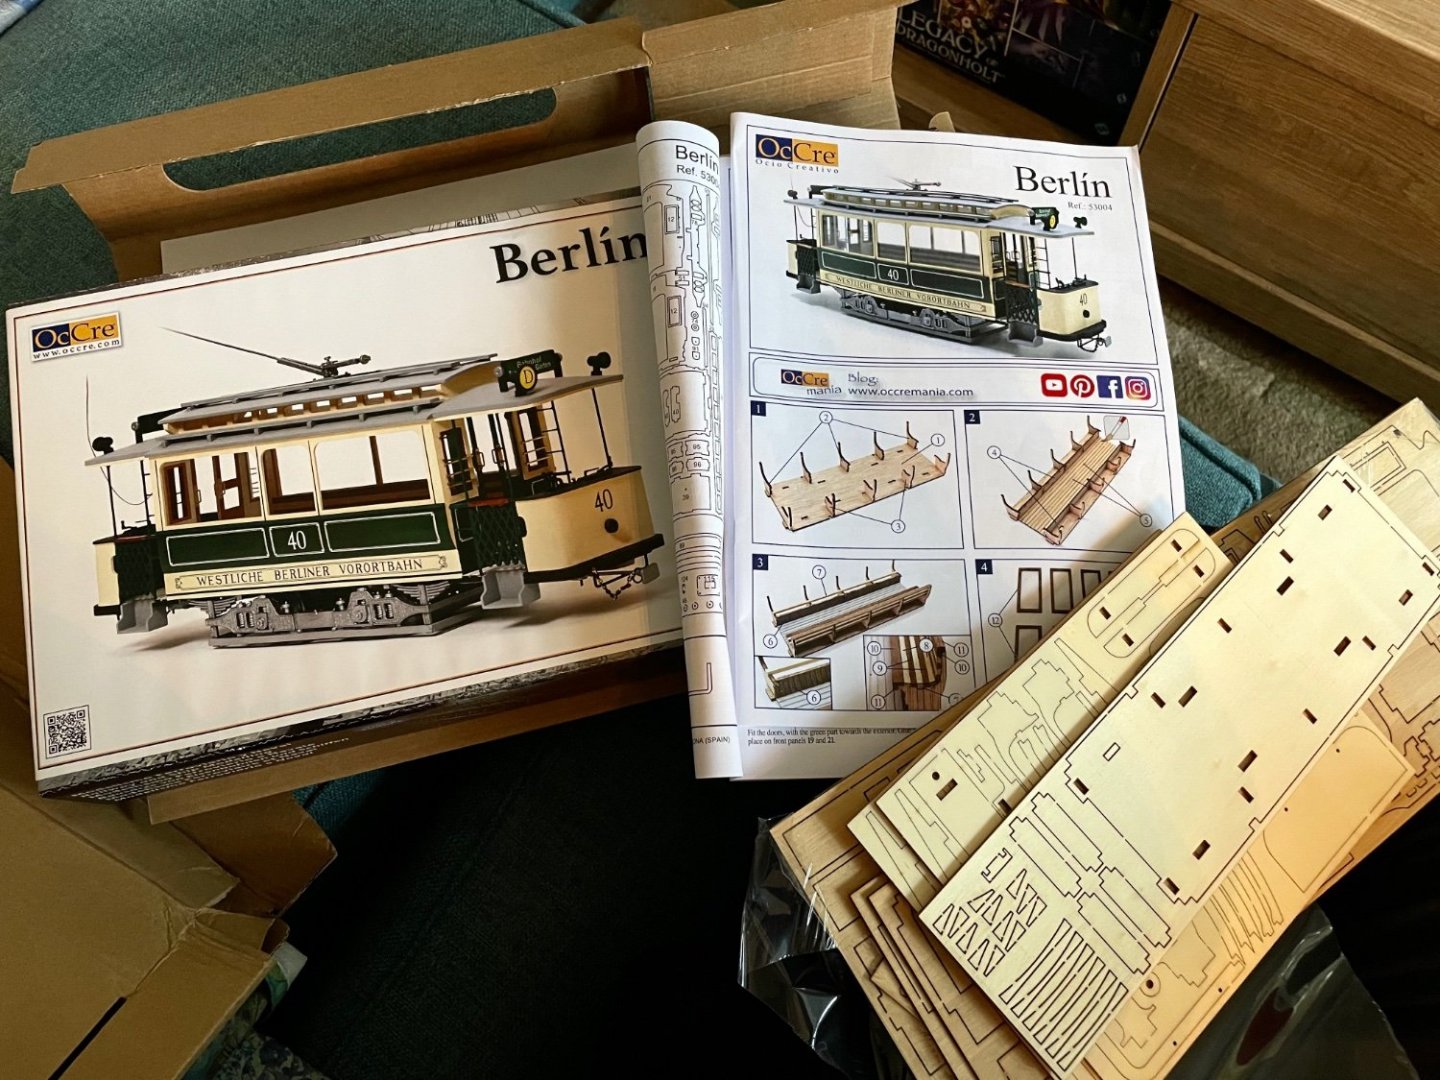
I’ve had my eye on these tram kits from OcCre for some time, having and being impressed by their Xebec Casador kit and finding the trams very appealing to look at. So on my Xmas wish list I put the Cornwall Models website page of all the team kits available and let my partner choose one. So it would still be a surprise. She got me the Berlin one. So far I have completed the interior, gluing the bench frames to the carriage base and planking the floor and benches. The benches have been varnished and the floor painted what should be light grey, but I’m not sure if it’s currently a touch too dark. Next I have prepared the window frames by staining them, painting one side of the doors green and staining the other and painting one side of the carriage ends a cream colour. For the green I used Model Color Deep Green and for the cream I mixed around two parts Model Color Ivory with one part Sand Yellow. And that’s where I am currently. I’m enjoying the build so far, the parts are good quality, the instructions have photos as usual with OcCre, although some things aren’t too clearly explained. And it’s brought me back to model ships again, playing with wood!


- 8 replies
-
- 14
-

-
Cutting out gunports
Etcher replied to Etcher's topic in Building, Framing, Planking and plating a ships hull and deck
Thanks everyone! I’ve ordered some saw blades for my craft knife. I obviously wasn’t using the correct tools. Darren -
Thanks. Yes I’ll start be removing the planks. Then I suppose I can glue an oversize piece to replace the bit I cut away and then cut that to size. If I can find a template. Darren
-
What do you use to cut gunports out of plywood and planks? Or do you cut the planks before gluing them in place so they don’t have to be cut out of the gap? Was it a mistake to plank across the gunports in the first place. I’m not happy with the results I’m getting using a craft knife as it has a tendency to splinter the planks. I’ve put a new blade in the knife so it can’t be because it’s blunted. Hope I’ve explained that clearly 🧐 thanks Darren
-
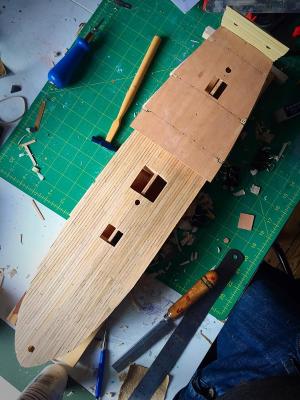
Am I allowed to resurrect this thread from neglected oblivion? How long is it now - over six years since my last post? The model has been rescued from storage and is pretty much where I left it here. Except for a few nibbles from my cat (little bugger). Which bring me to the reason for the post. My model making skills and experience are limited and I’ve never scratch built anything. So I’m wondering if you could advise me on this: it’s where the cat did most of the damage. How would you go about fixing it? Is it possible without replacing the whole frame if I can find some suitable plywood? What would you more experienced fellows do? thanks Darren oh, the culprit


-
I have been scraping the deck with a blade and it has come up okay. The upper deck is half planked now too. it seems as though decks generally weren't varnished. I'm not sure if that means I shouldn't seal the deck at all? Or should I use something to give a more weathered appearance?
-
Yes I'd like to know how to get hold of these kits too. Your build is a very good advertisement for them!
- 51 replies
-
- 3
-
-
- wasen
- thermal studio
- (and 1 more)
-
Thanks Paul and S.Coleman. Main deck planked and quarter deck support installed. I need to varnish the deck and add tree nails. For treenails I was thinking about drilling small holes, whatever is scale size. Not sure what to varnish with. Also, I was going to sand the deck with fine wet and dry but have been reading scraping with a blade is better. I used pencil for caulking. I've also been adding balsa fillers between bulkheads and sanding to shape.

-
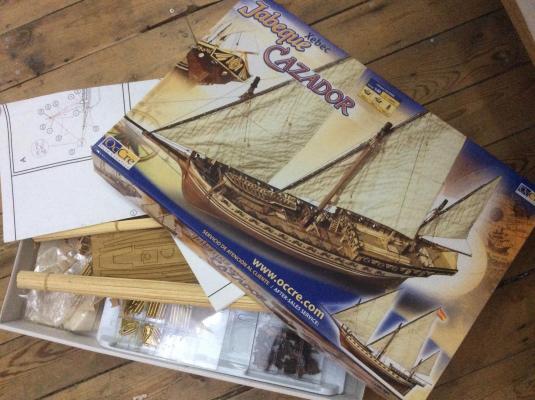
I decided to do a build log as I'm getting on with it and will continue even if I start the other kit. http://modelshipworld.com/index.php/topic/12385-xebec-cazador-by-etcher-occre-scale-160/
-
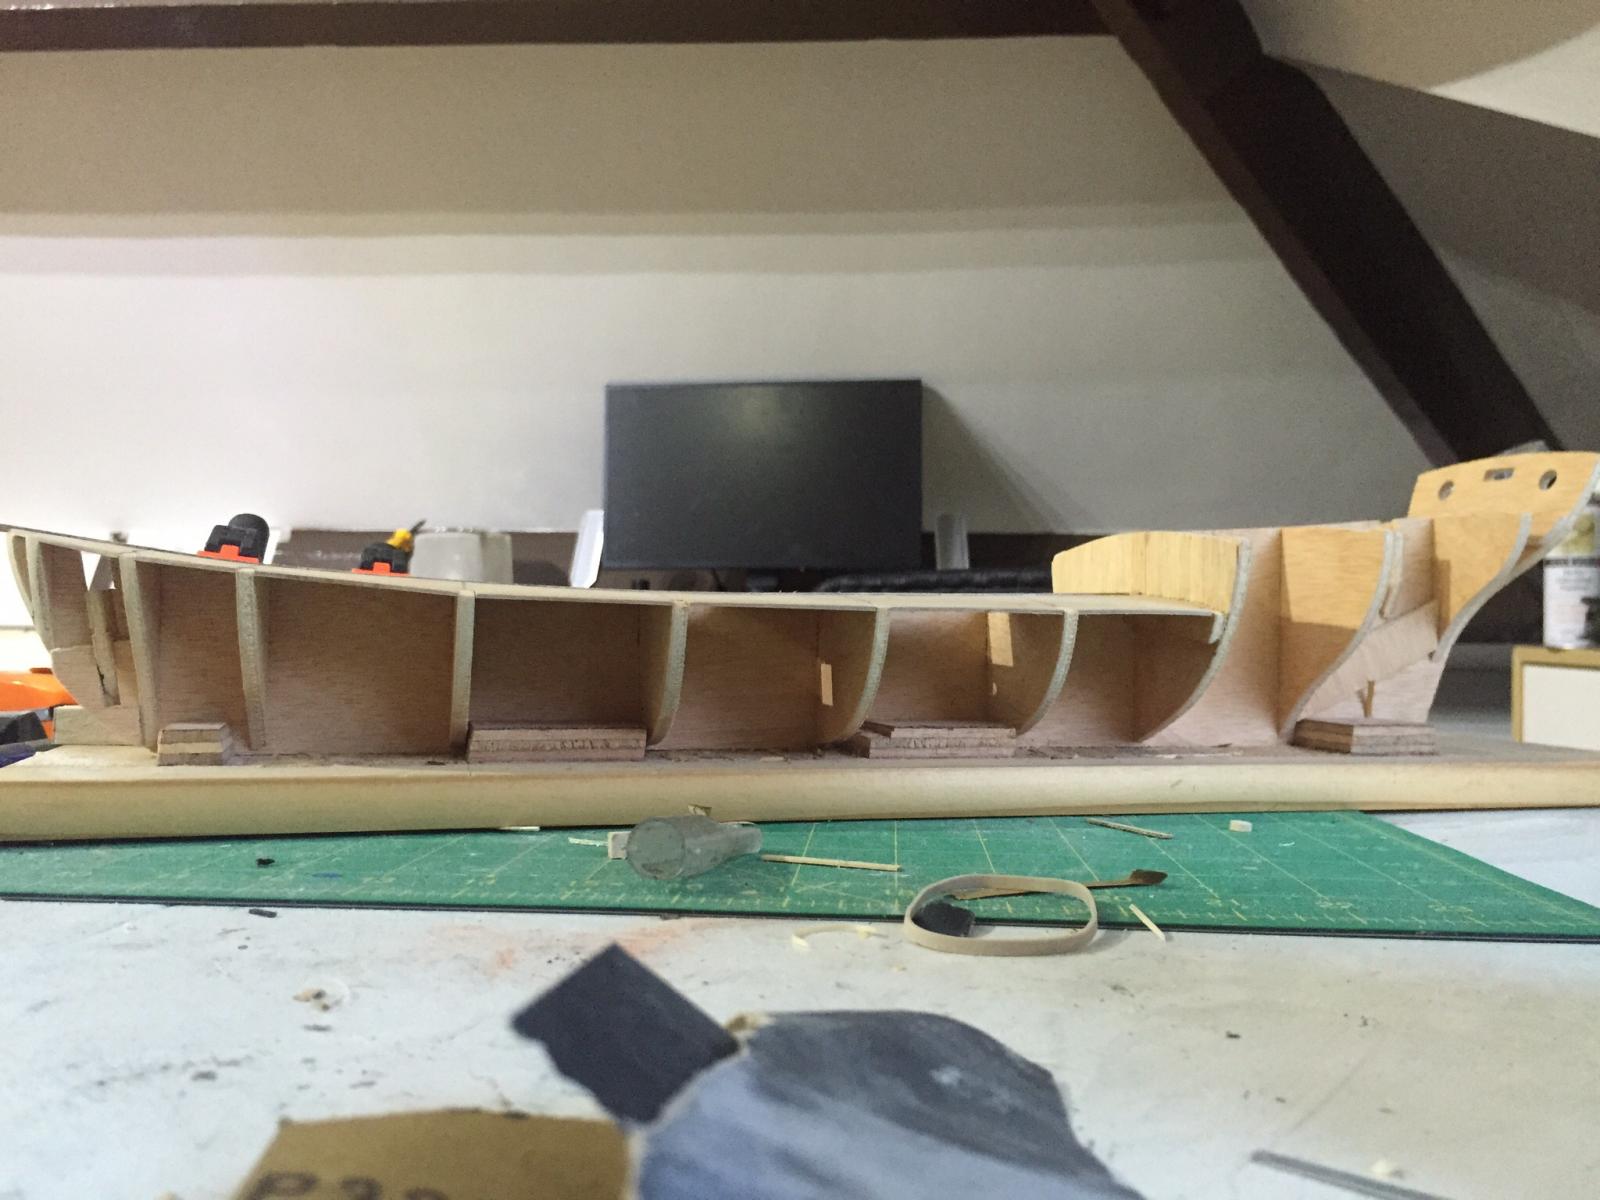
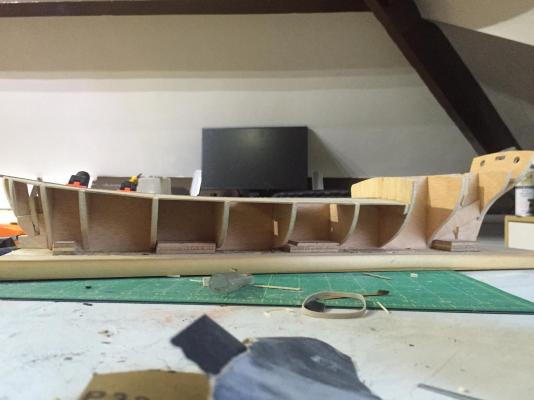
There seems to be little information on this ship, with OcCre themselves having nothing useful to tell us. Apparently xebecs played a big part in the second siege of Gibraltor, but that happened four centuries before this ship would have been built! Okay, thanks OcCre. Now to the model, It's actually quite an exciting kit to open with lots of little compartments full of goodies. Not sure of the quality as yet but to a relative newcomer like me it seemed impressive. My only previous build being a Caldercraft Sherbourne. This is the keel with bulwarks attached upon my primitive keel base. Even at this early stage I like the shape of the ship. I'm not a big fan of massive, bulky ships and I find the Cazador quite elegant. At the moment I'm laying the deck planks using 1x4mm maple strip I bought separate from the kit.
- 13 replies
-
- 11
-
-
Apostol San Felipe by costeo - OcCre
Etcher replied to costeo's topic in - Kit build logs for subjects built from 1501 - 1750
Very nice! The wood has a really authentic appearance. Love the deck. Is it out of the box? Look forward to seeing more. -
Not as yet. It might be on the back burner. I have two smaller kits on the way (well, one in the post and one on my Xmas wishlist). So they may take precedence. Having said that I've started laying the deck on the Cazador now so will finish that. Maybe I'll work on them in tandem.
-
Okay, I decided 6 inch planks (30 feet in scale) would be a safe bet. I'm thinking maybe continental 3 plank shift.
-
Nice build of an interesting subject.
-
Primer
Etcher replied to Etcher's topic in Painting, finishing and weathering products and techniques
Great! Thanks for the quick reply.