mhkash
-
Posts
158 -
Joined
-
Last visited
Content Type
Profiles
Forums
Gallery
Events
Everything posted by mhkash
-

Prins Willem 1650 by mhkash
mhkash replied to mhkash's topic in - Build logs for subjects built 1501 - 1750
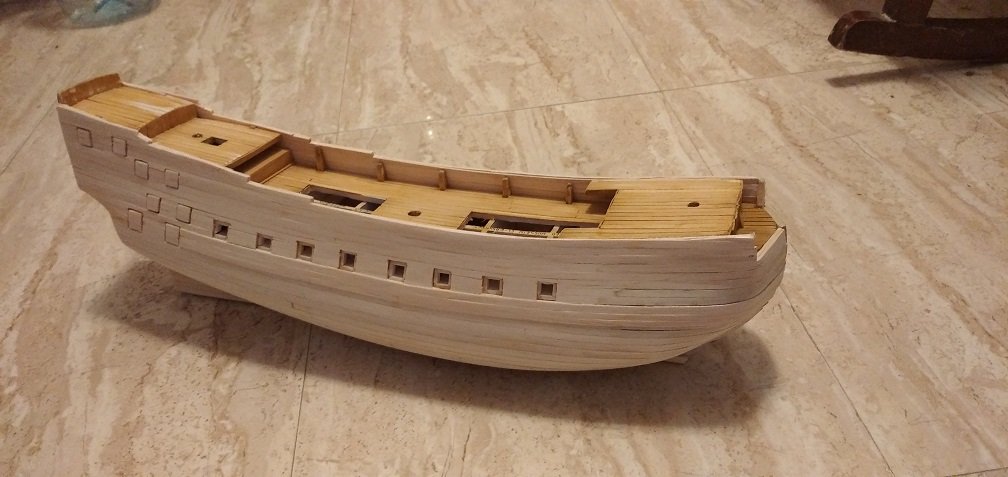
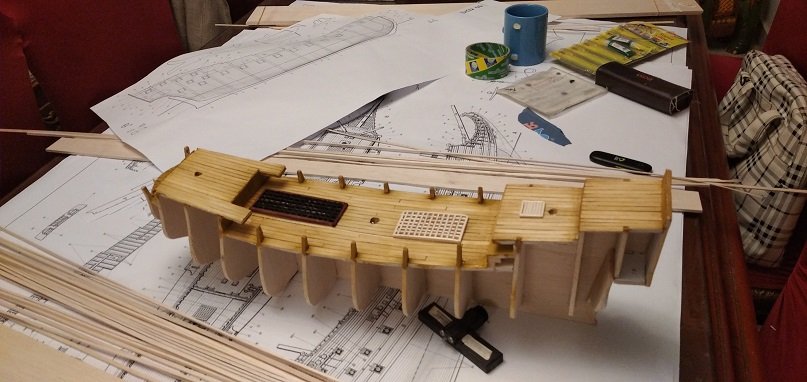
Hello, I have done some work on the Model and here are the snapshots , please let me know what do you think of the build so far thanks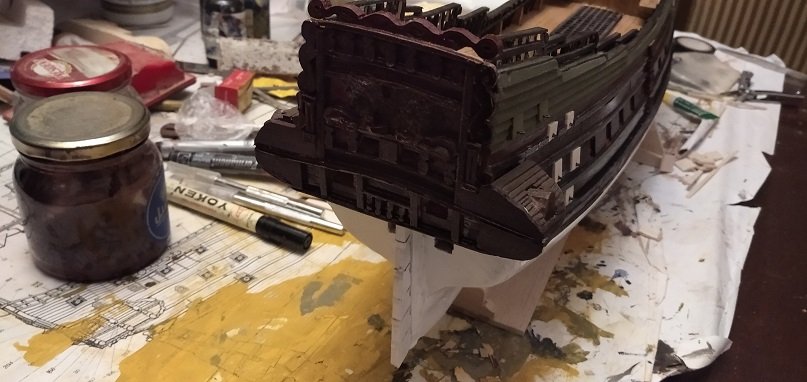
-
Prins Willem 1650 by mhkash
mhkash replied to mhkash's topic in - Build logs for subjects built 1501 - 1750
Hello, I resumed working on my prins willem after 2 months , I lost some photos of the last build, will take care from now on thanks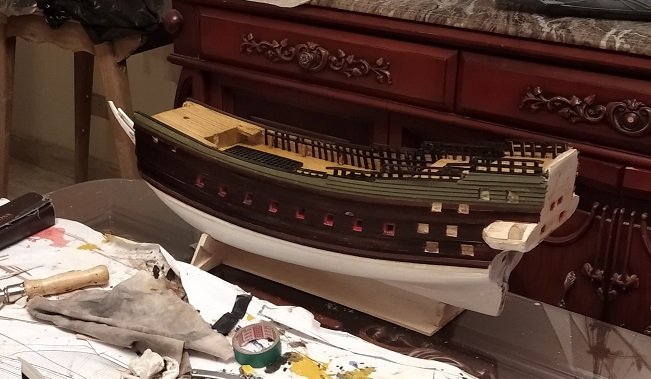

-
Hi Radek , Excellent work and great shots, I really find what you are doing is amazing , the Guns part is splendid .. will do the same with my current build thank you for sharing regards
-
Prins Willem 1650 by mhkash
mhkash replied to mhkash's topic in - Build logs for subjects built 1501 - 1750
Thank you Jan .. do you mean i should keep it that way .. I actually planned to replace it -
Hello Radek Really Excellent build , and the grating is Super .. When will you start your next model .. do you have any idea yet
-
Prins Willem 1650 by mhkash
mhkash replied to mhkash's topic in - Build logs for subjects built 1501 - 1750
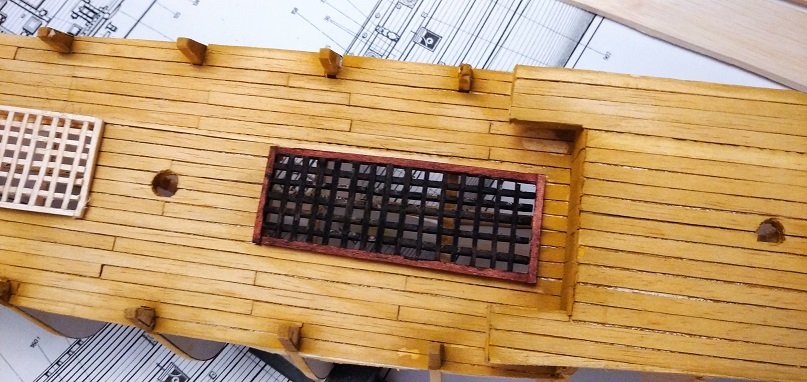
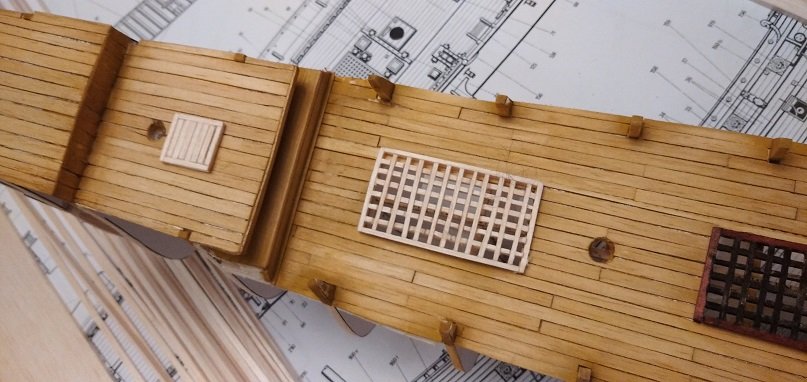
Hello Radek Thank you for your comments, yes you are right about the grating it seams big.. I enjoyed your Mayflower thread very much .. indeed , the build is great and the first impression it looks like pure wood to me and the color, look and feel of real wood grains is impressing.. The Clay deadeye is a smart trick , I love it .. I admit i will keep this log in front of my during the build.. And regarding the Deck color , it is an acrylic yellow paint , and after it dried , I used very light brown + an acrylic matt polish (one drop of brown : 10 drops of polish) and spread it with a sponge .. -
Prins Willem 1650 by mhkash
mhkash replied to mhkash's topic in - Build logs for subjects built 1501 - 1750
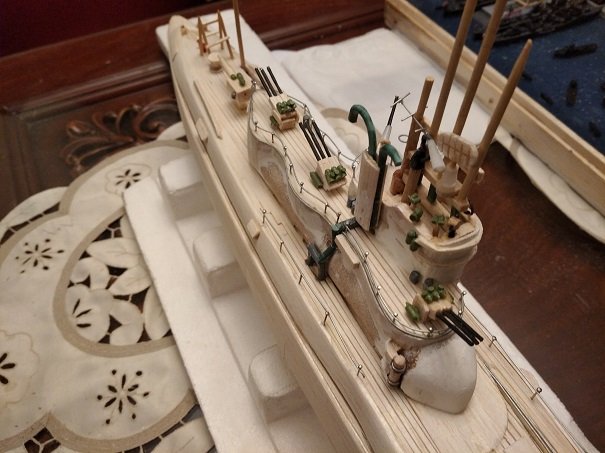
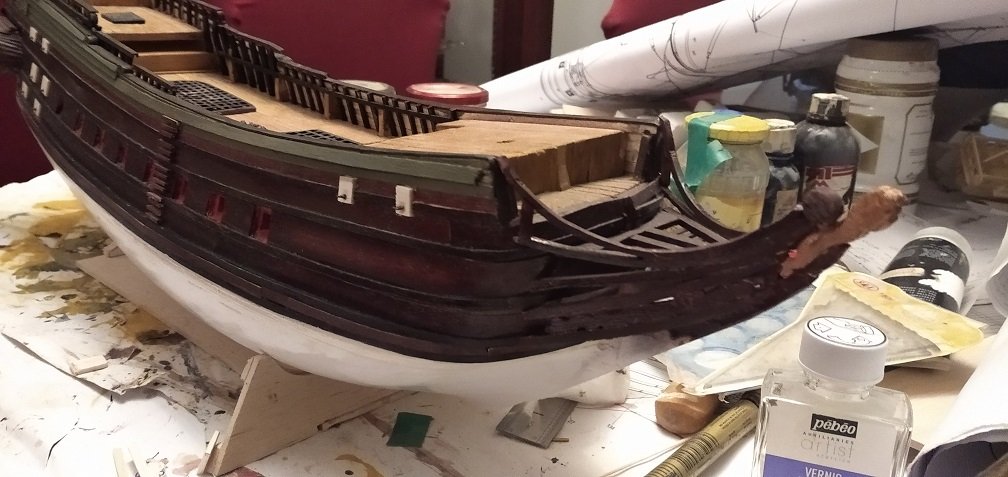
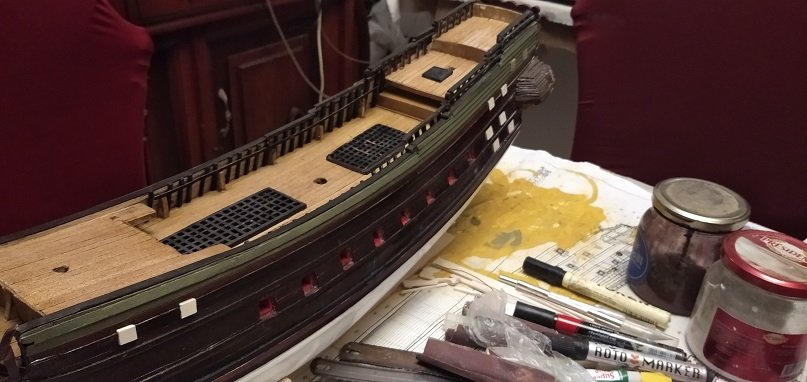
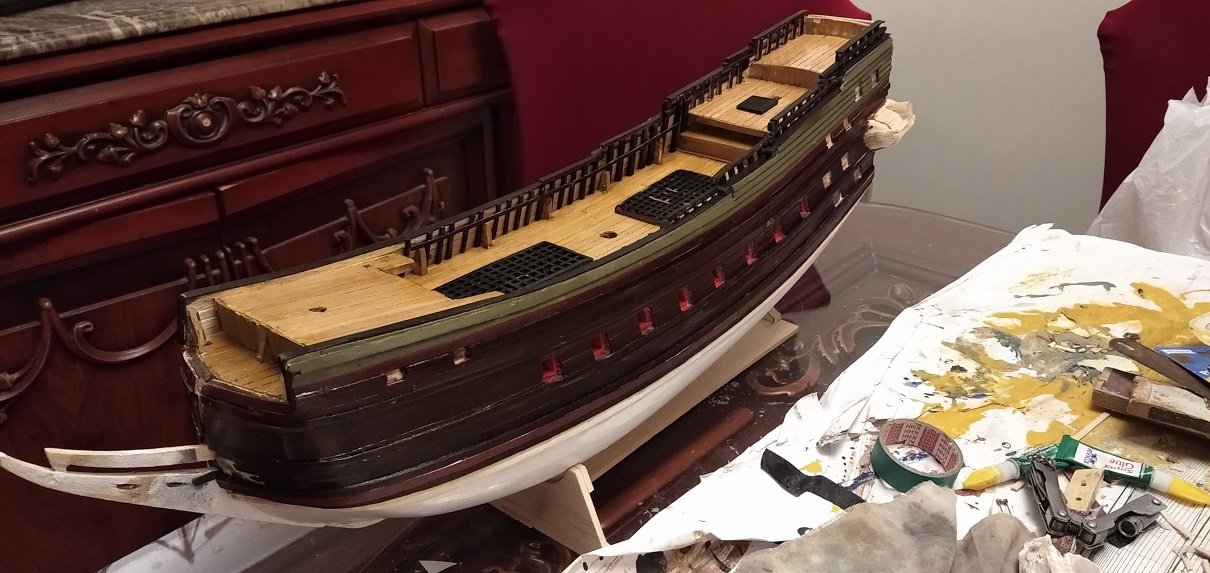
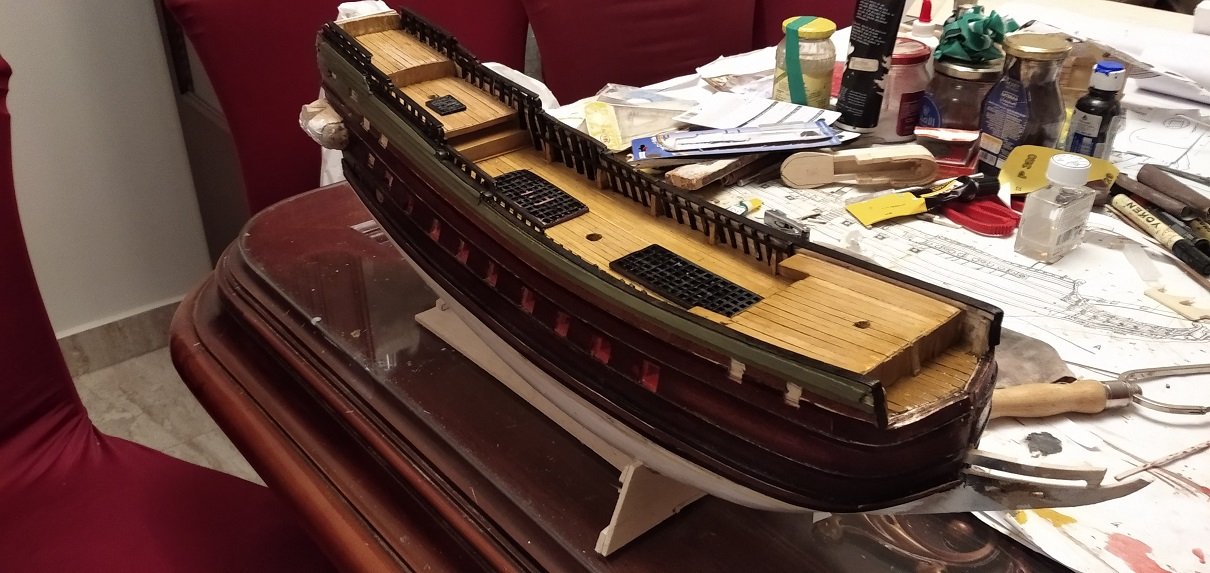
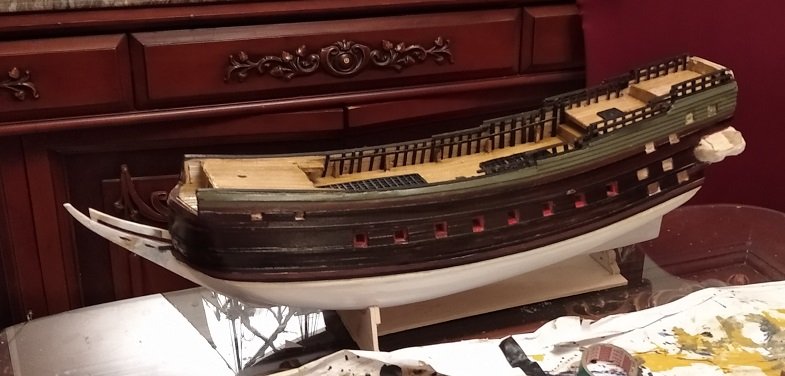
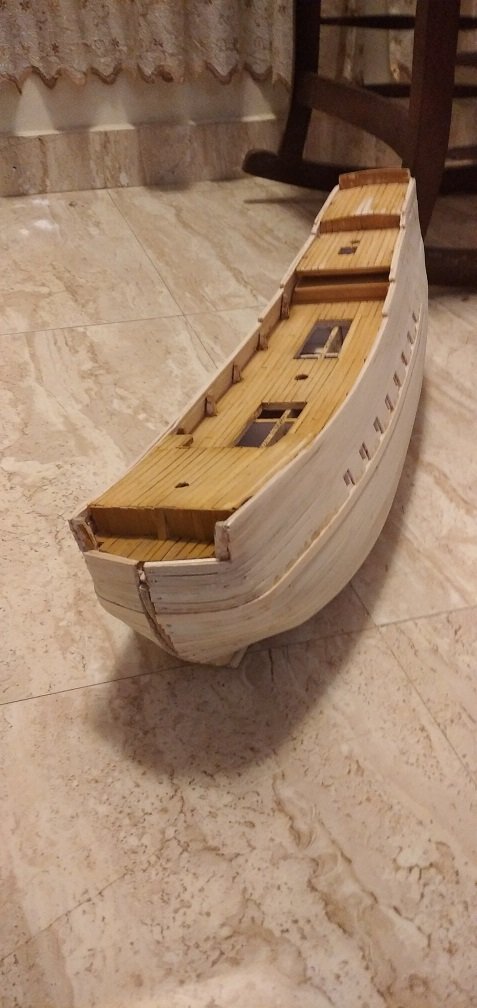
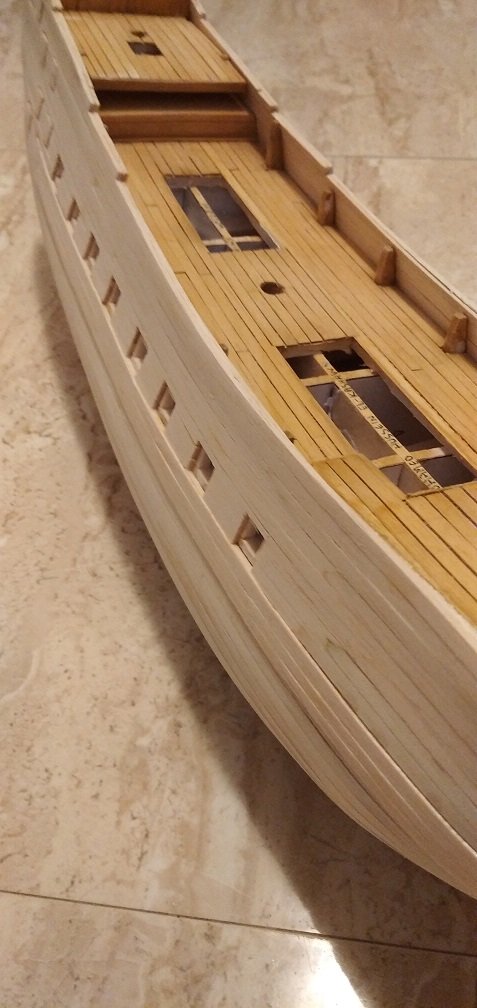
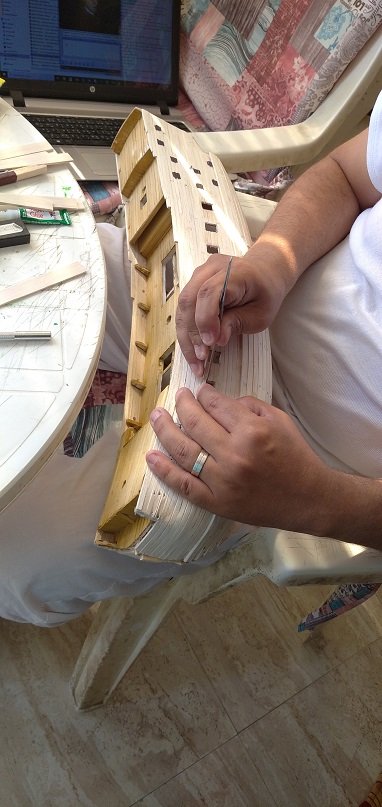
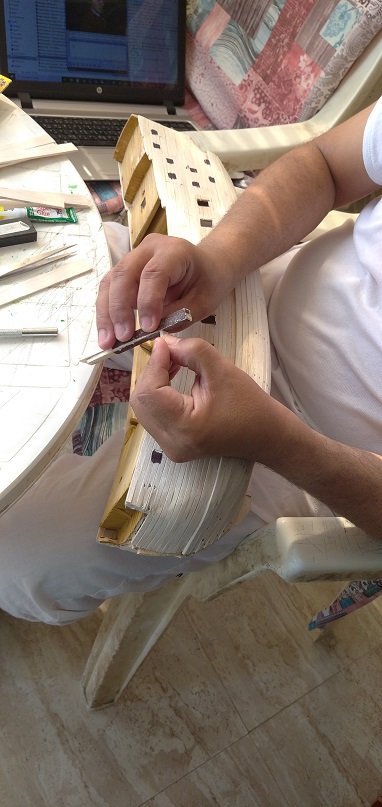
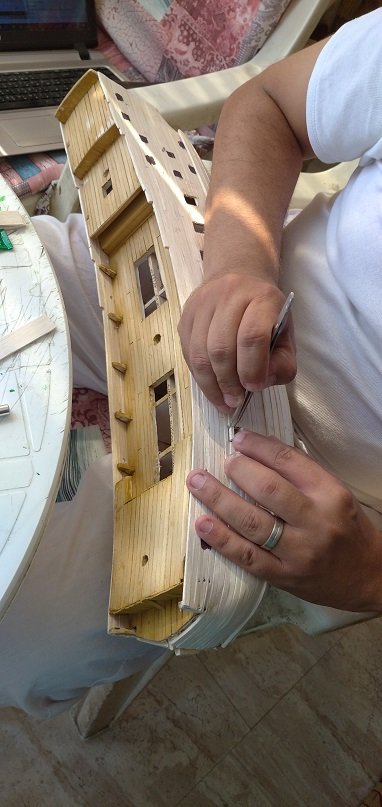
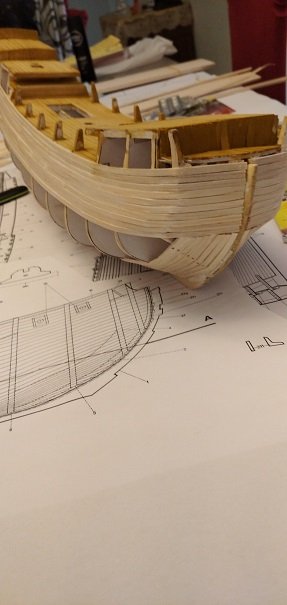
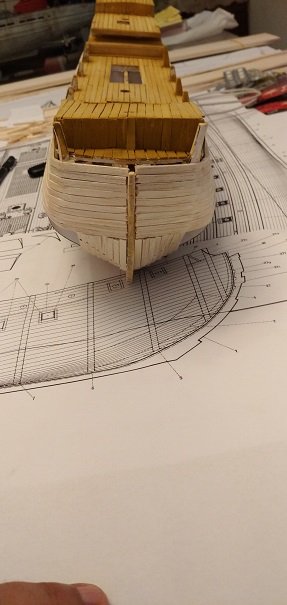
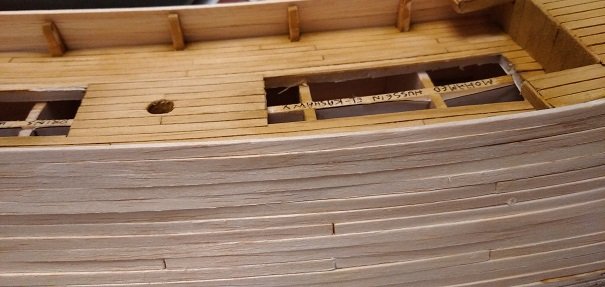
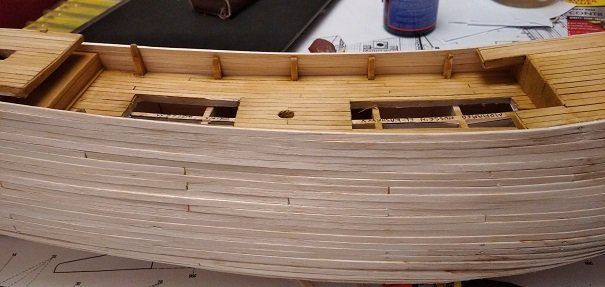
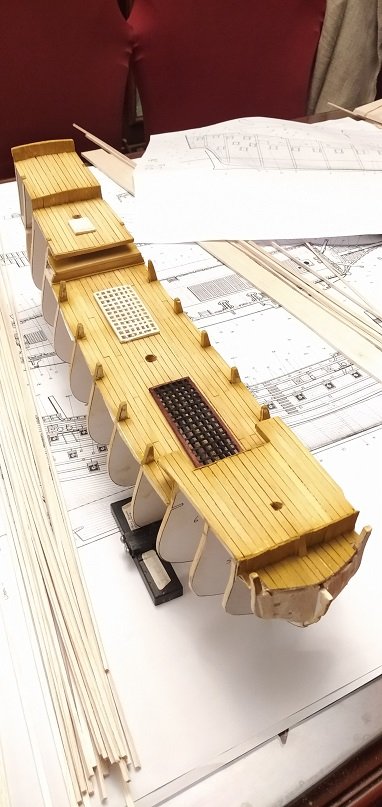
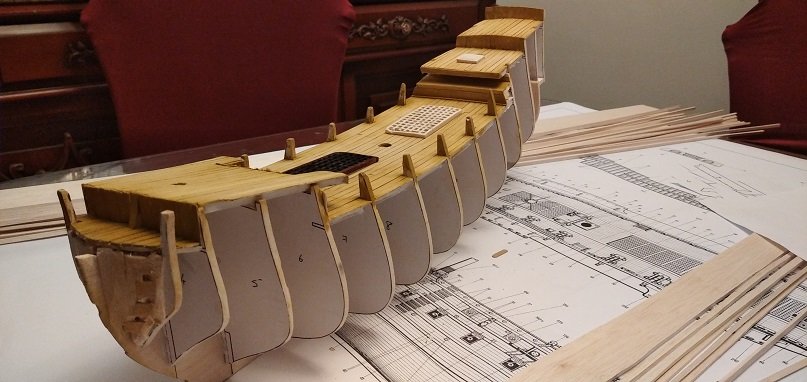
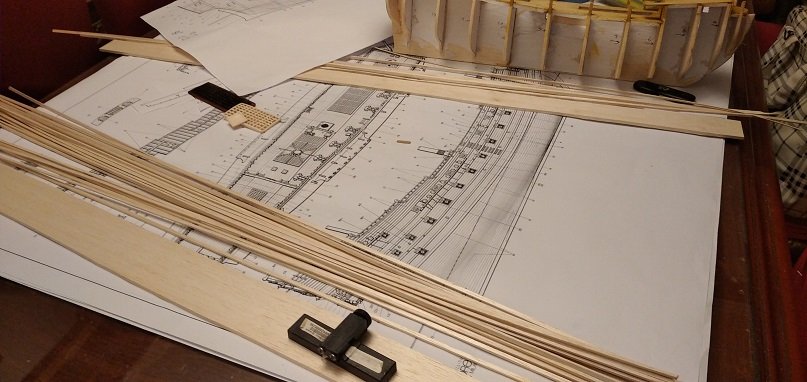
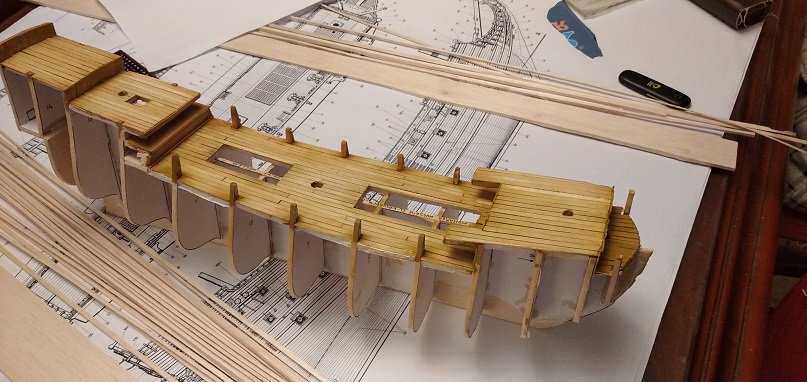
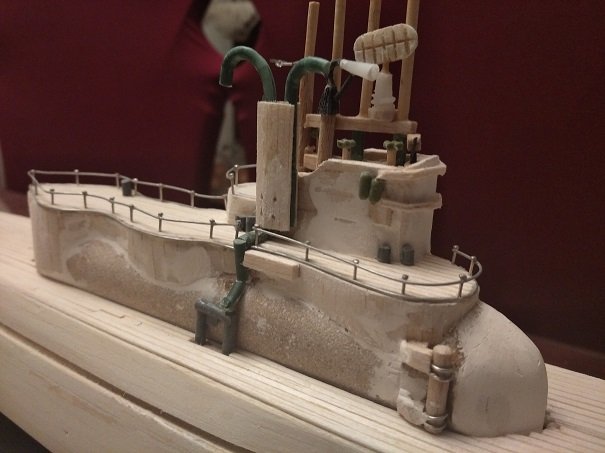
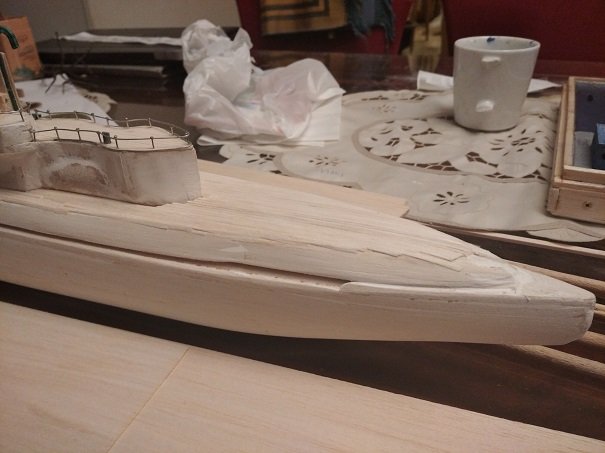
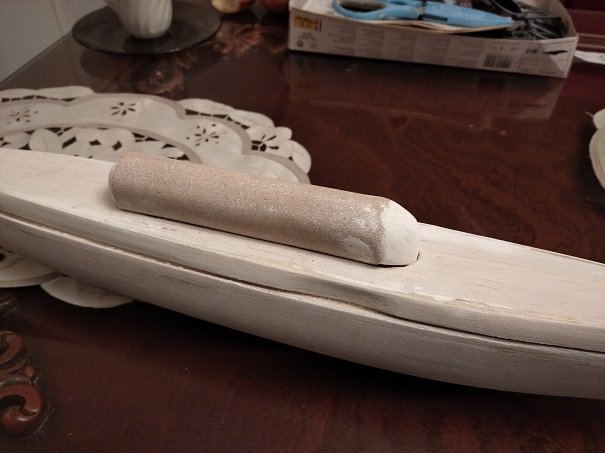
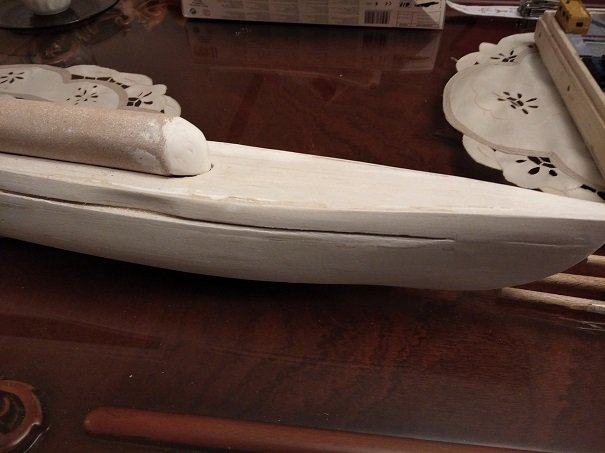
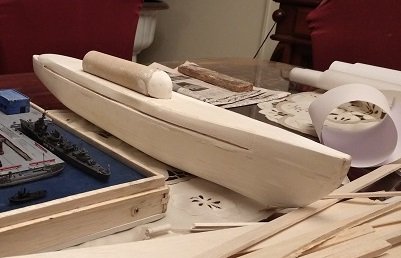
Hello All, I've completed the 3rd layer of planking 1.5 mm Balsawood sheets, also I did some sanding as well. thank you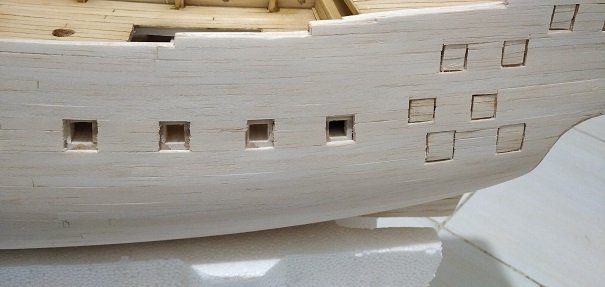


-
Prins Willem 1650 by mhkash
mhkash replied to mhkash's topic in - Build logs for subjects built 1501 - 1750
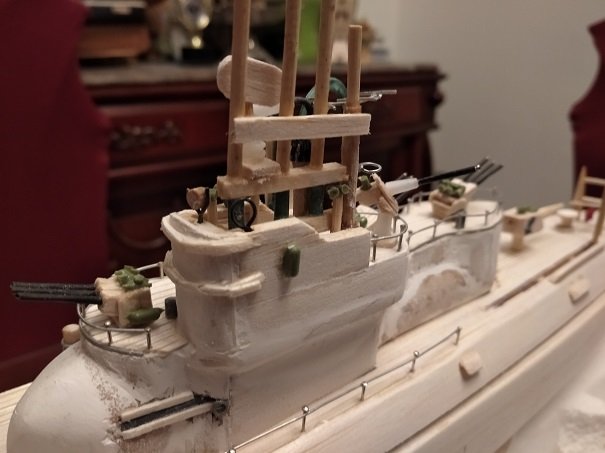
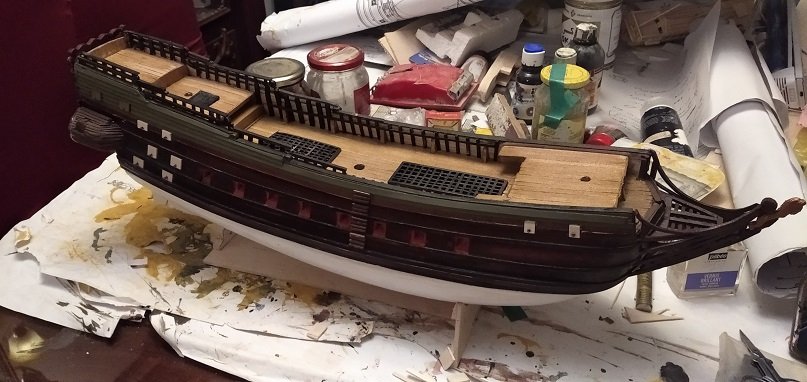
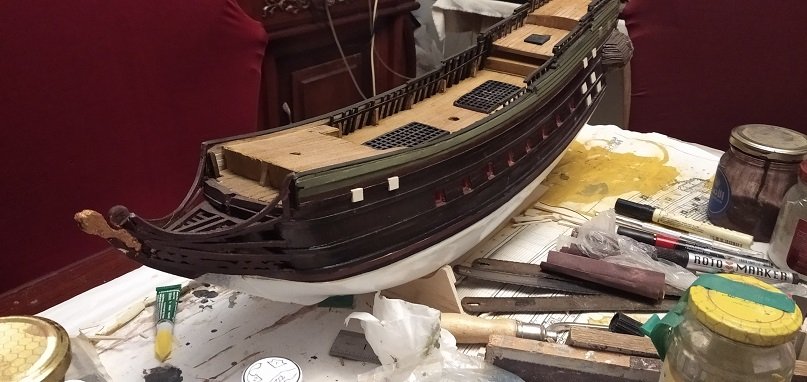
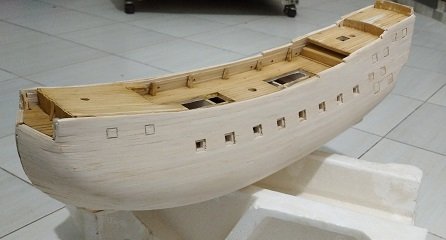
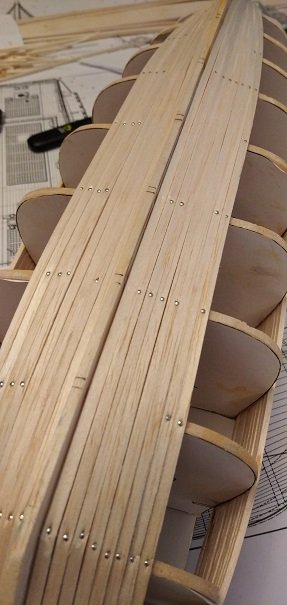
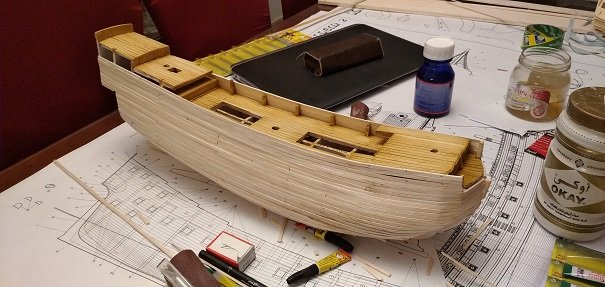
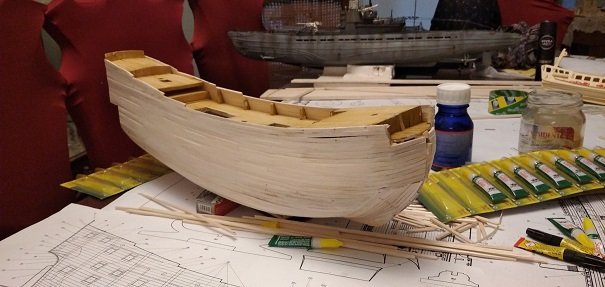
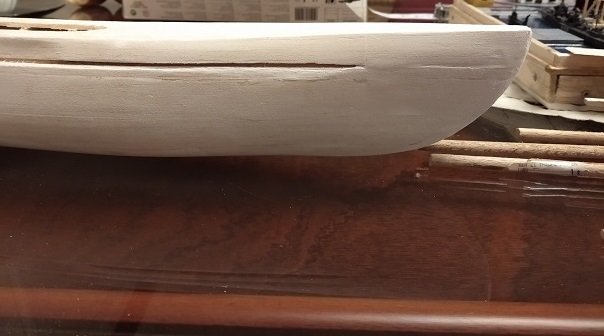
Hello All I resumed working on my Prins Willem. the work I did is completing the 2nd Layer planking and closed some gun hatches , Now i intend to start on the 3rd layer of planks , Balsa wood 1.5 mm thick.. Here is the photos , Thanks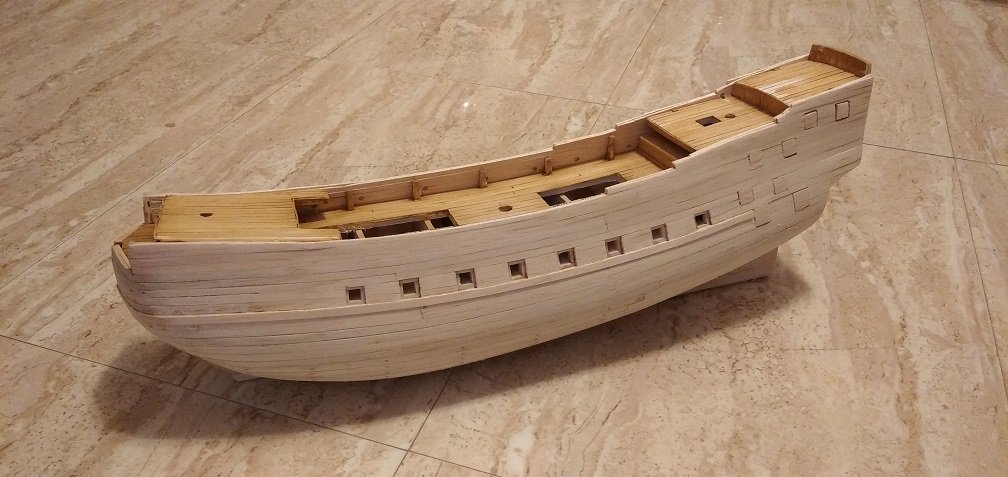

-
Prins Willem 1650 by mhkash
mhkash replied to mhkash's topic in - Build logs for subjects built 1501 - 1750
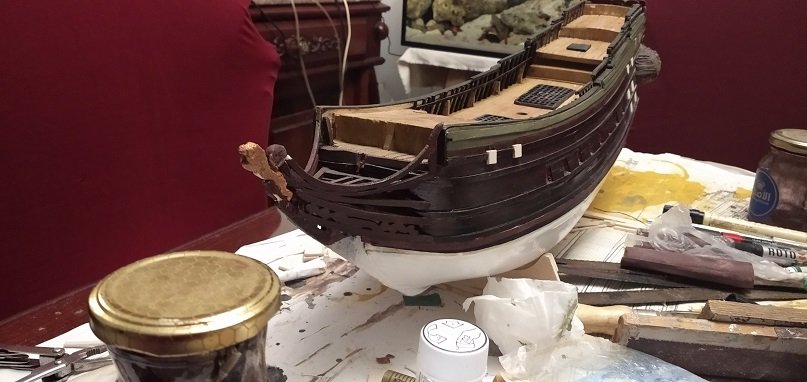
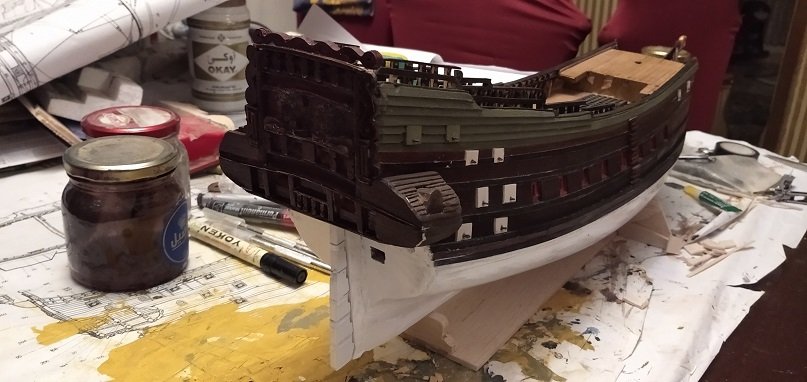
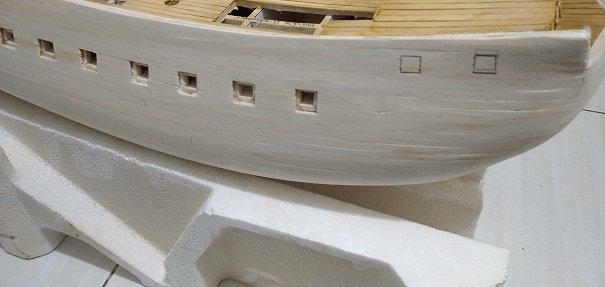
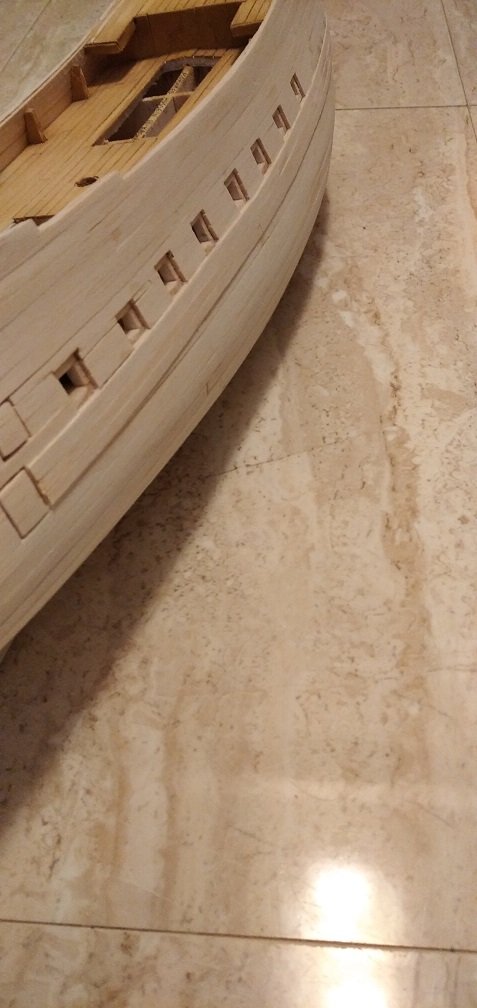
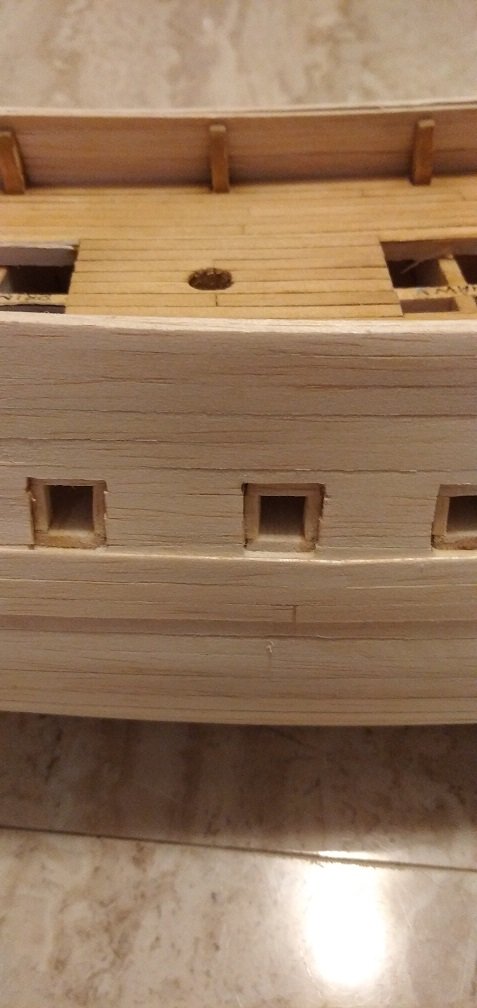
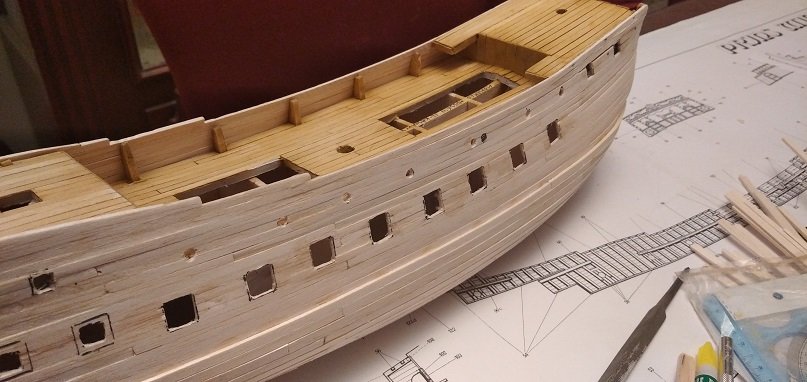
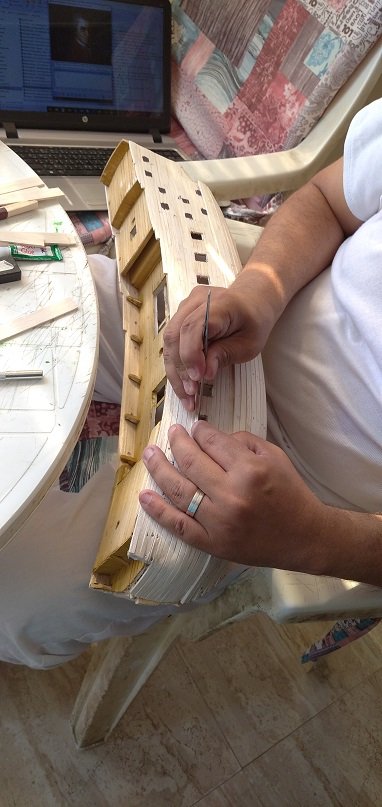
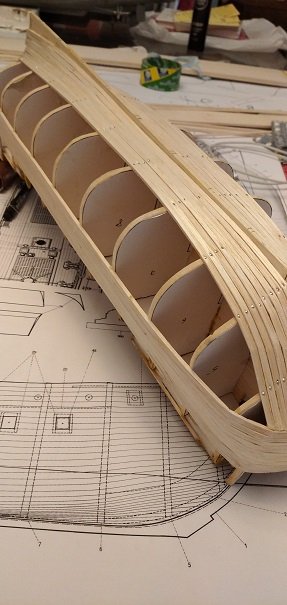
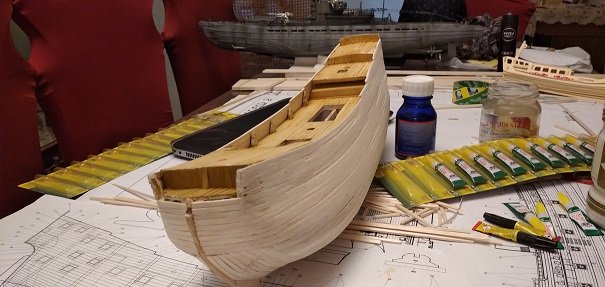
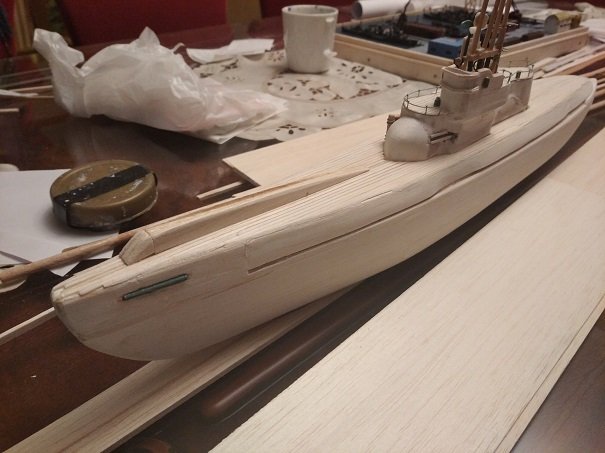
Good day all I resumed working on my Prins Willem Planking and Gun hatches .. I've completed the first layer of the planks, and started on the second one.. your comments are highly appreciated .. Here are the photos of the first and a little bit of the second Then .. Started working on the Gun hatches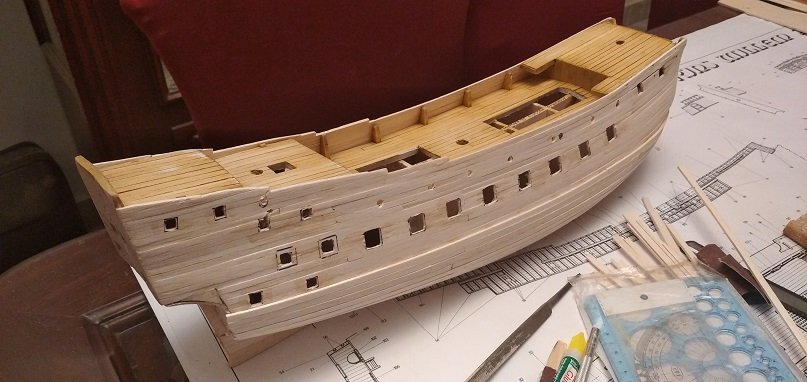
-
Prins Willem 1650 by mhkash
mhkash replied to mhkash's topic in - Build logs for subjects built 1501 - 1750
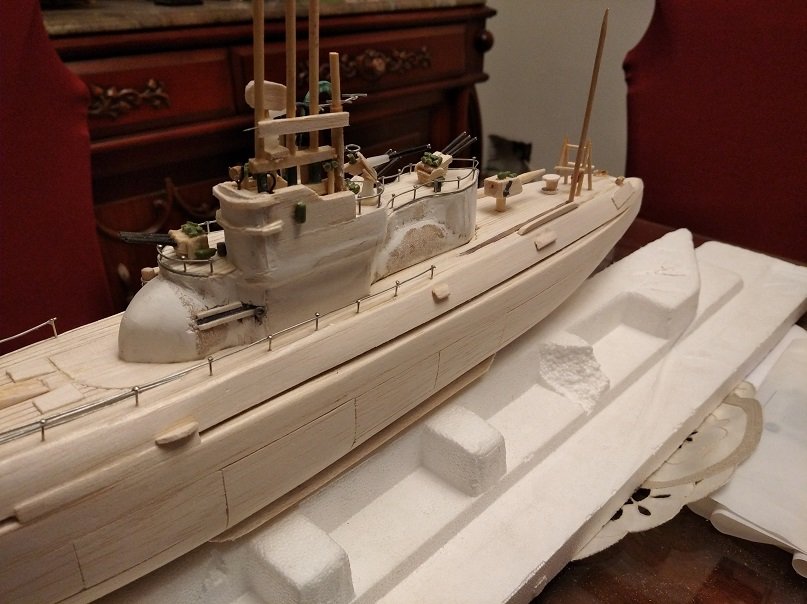
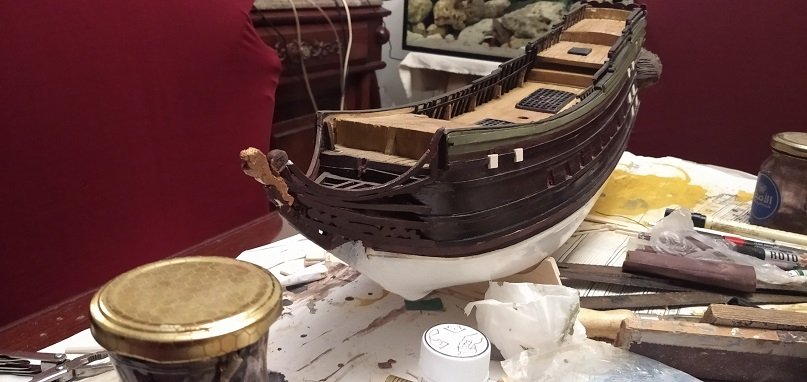
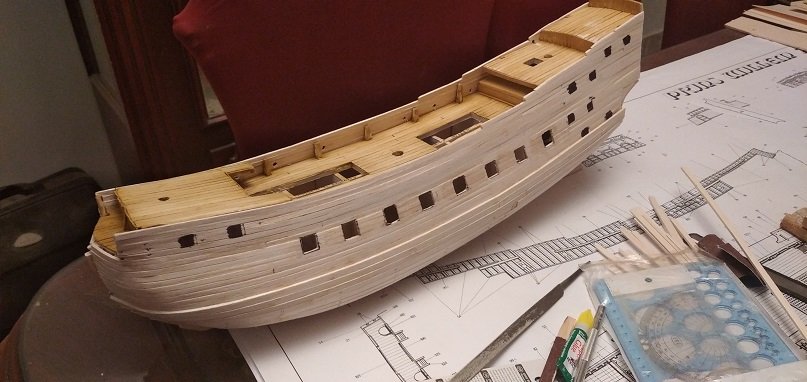
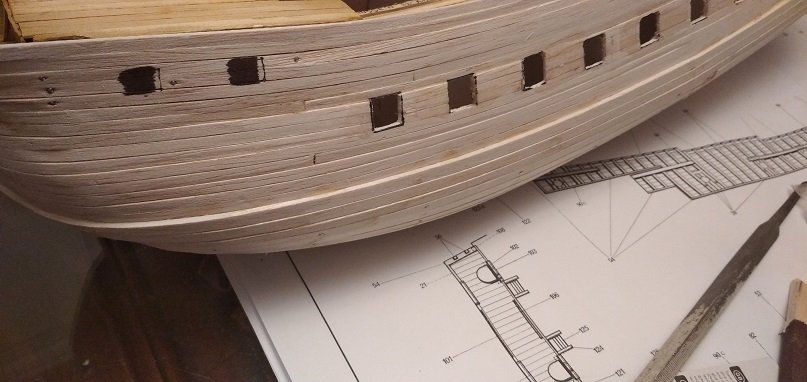
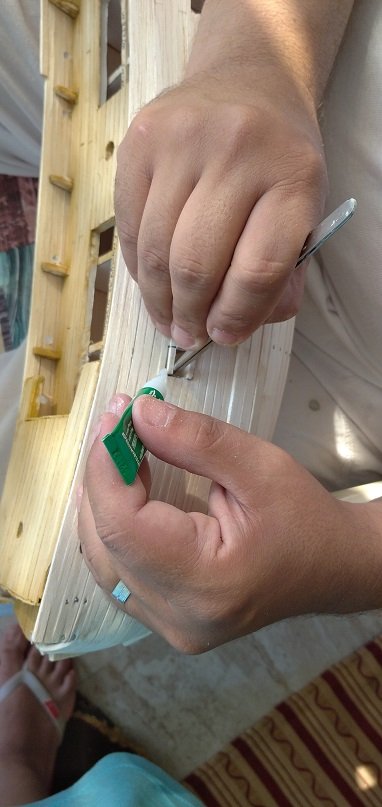
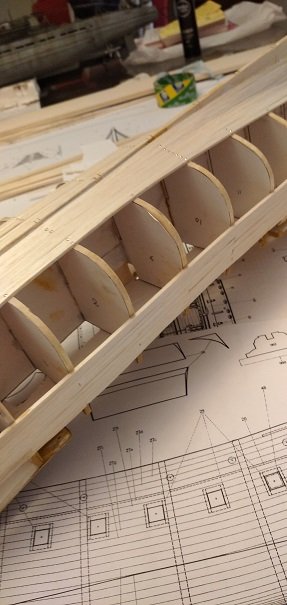
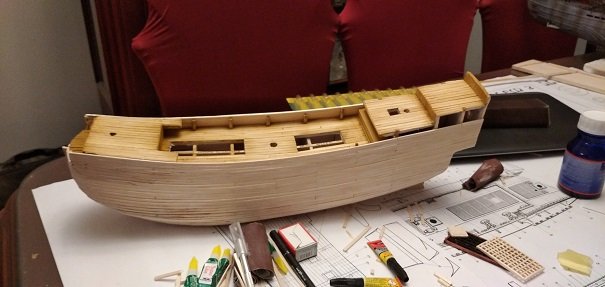
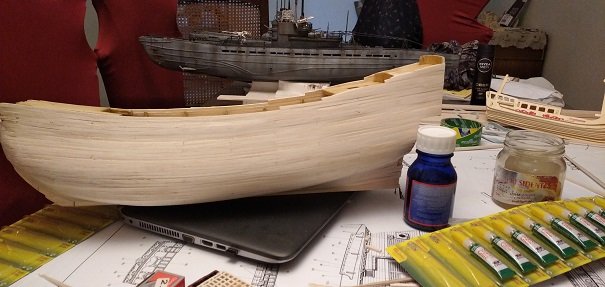
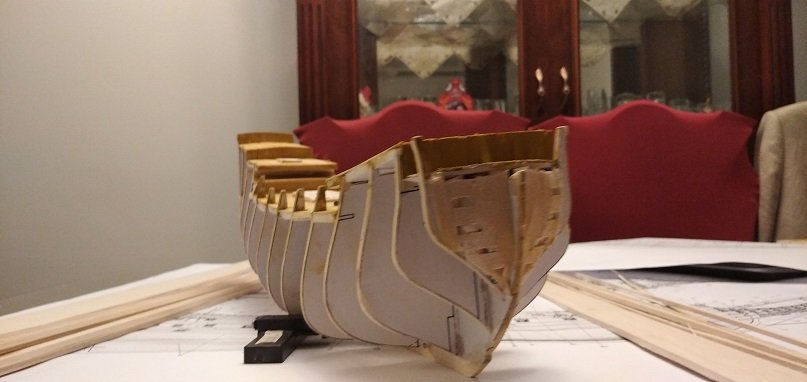
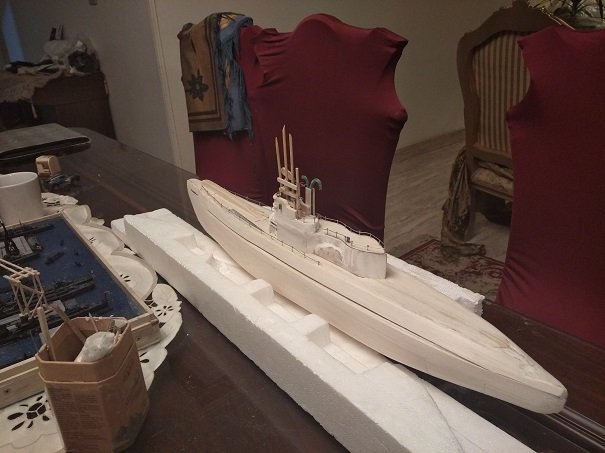
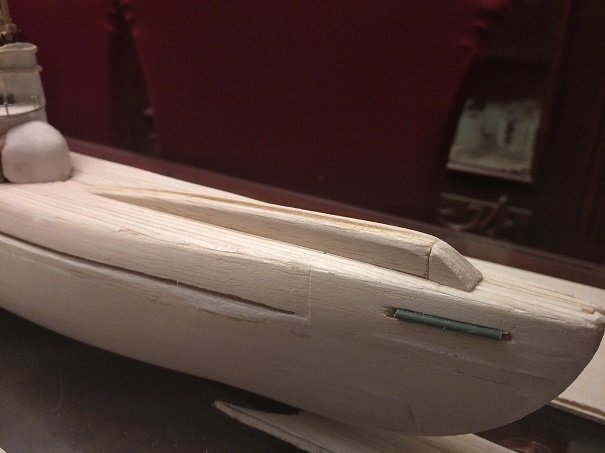
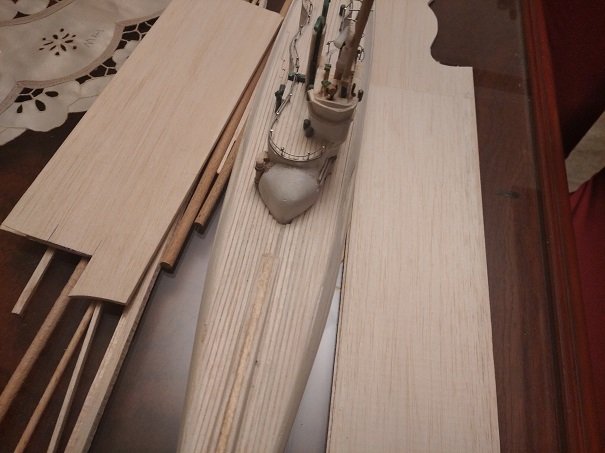
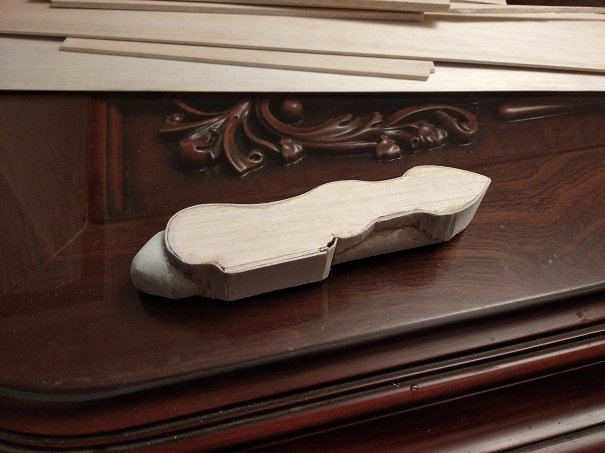
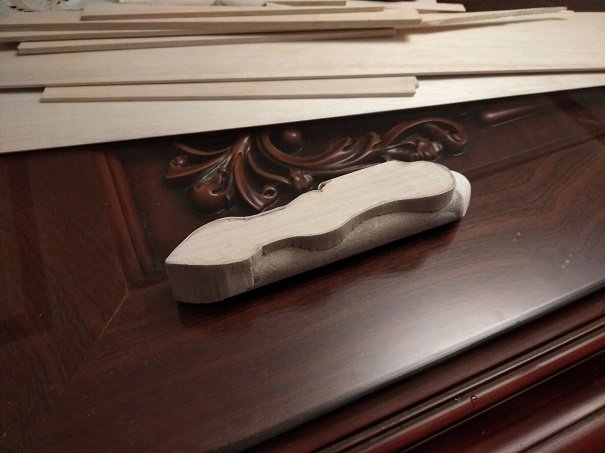
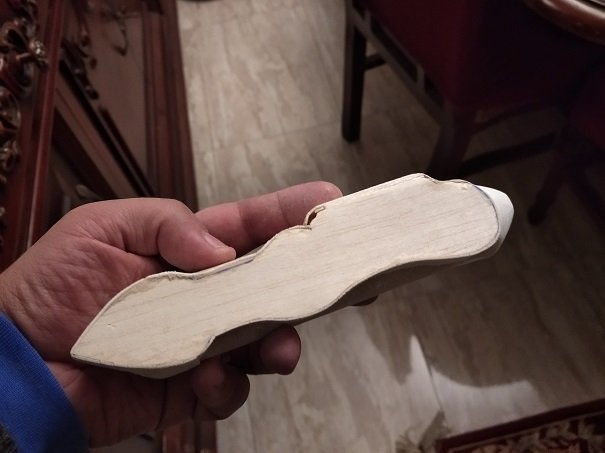
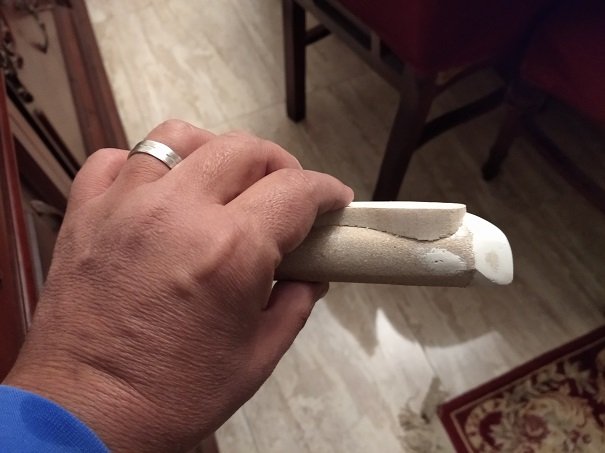
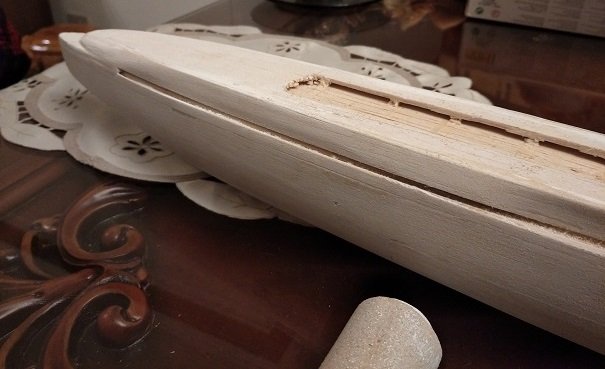
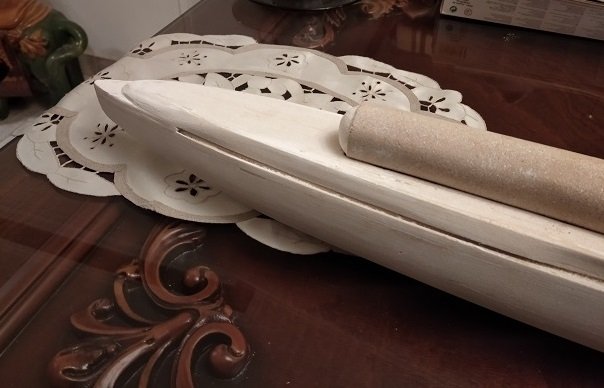
Hello All I started to work on the planking for this model, I intend to do 2 layers of planks as I have been doing with all my models. I use balsa wood and here is the firs layer of planks. I've completed the first layer and started to open the gun hatches, I guess it will look much better to keep them closed instead of putting the guns on the lower deck or do you think it will look better that way. Thank you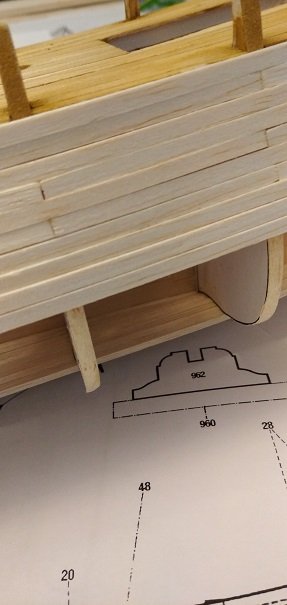

-
Prins Willem 1650 by mhkash
mhkash replied to mhkash's topic in - Build logs for subjects built 1501 - 1750
This is fabulous .. Thank you very much ... These are great shots of the rigging details 👌👏 -
Prins Willem 1650 by mhkash
mhkash replied to mhkash's topic in - Build logs for subjects built 1501 - 1750
Thank you Jan, No i didn't know that .. I'll search the photos of this model in amsterdam Rijksmuseum website .. I'm sure it will be a great help. -
Prins Willem 1650 by mhkash
mhkash replied to mhkash's topic in - Build logs for subjects built 1501 - 1750
Hello Jan, Yes I work from the drawing and this is totally Scratch. -
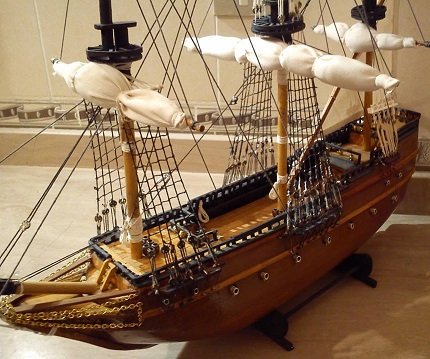
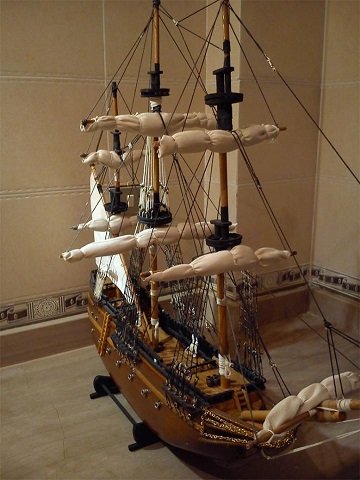
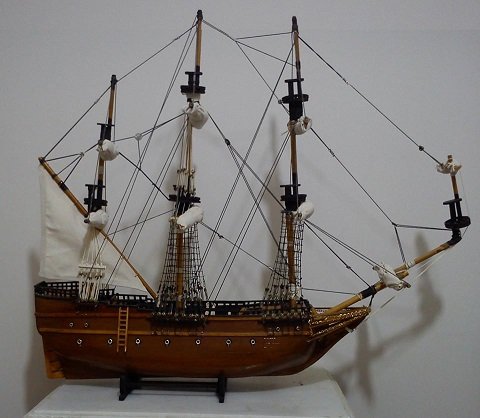
Hello All When I started the hobby of building model ships, I didn't have neither the knowledge nor the necessary tools to build the Models... and that led to some ugly ones 🤪😀.. However I didn't give up and kept reading and watching Videos.. I believe the Models I build after several trials became better then the old ones☺️☺️ ... One of the Ships I was (and am still) fond of is the Prins Willem 1650 .. a model which was built by many Modelers as it is a source of inspiration I guess .. I built it long years ago and here are the photos of that build 🙄 I know It is not so nice and it is not close to the Prins Willem either ,and the scale of the rigging components is not accurate. Please Notice the furled sails , they are not so professional .. not rolled as it should be 😏 So I decided to build it again after I gained some experience and intend to share the building log with you this time. It will always be very nice to receive your comments Thank you


-
Thank you very much Mark
-
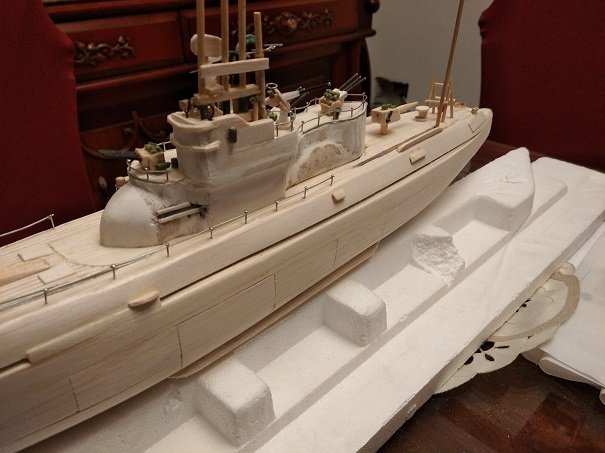
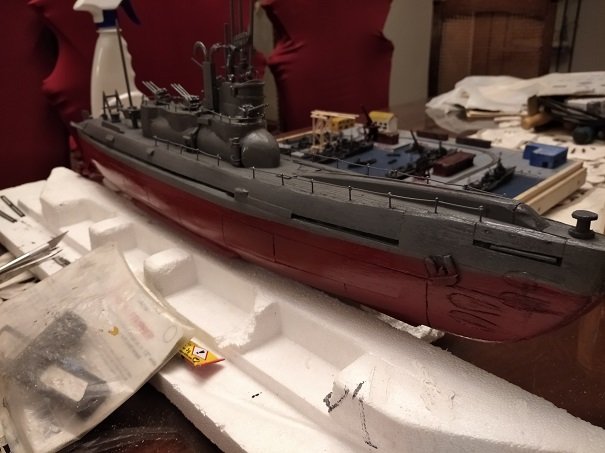
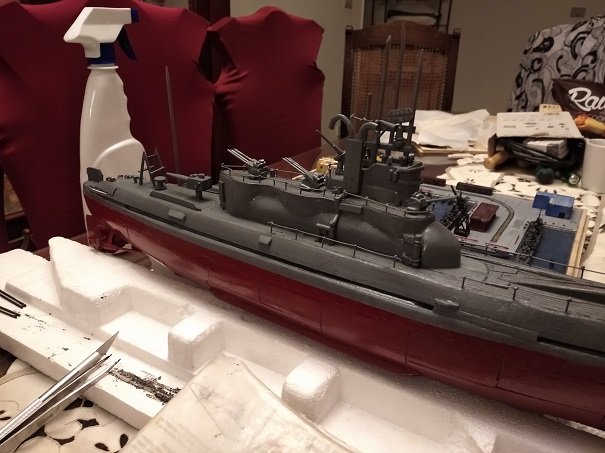
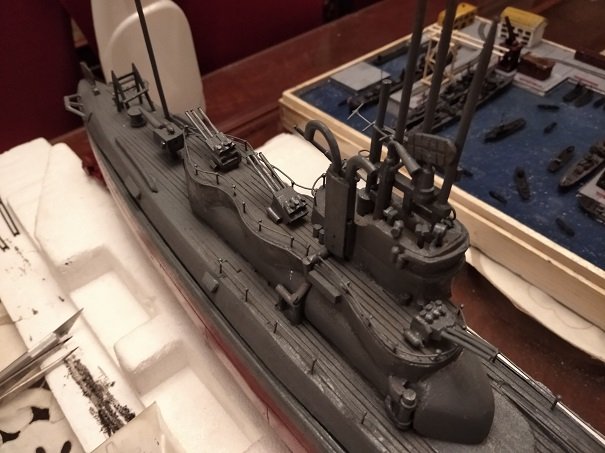
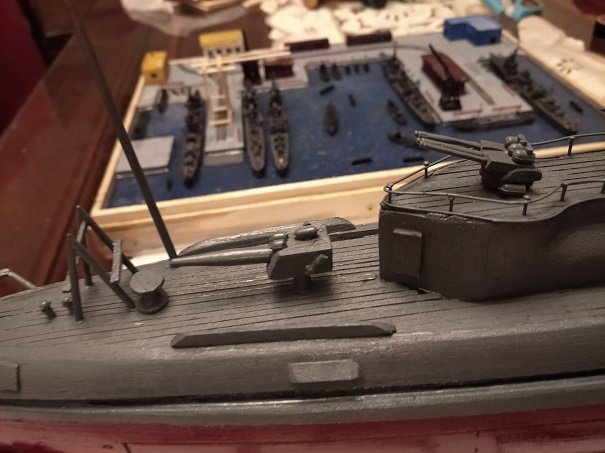
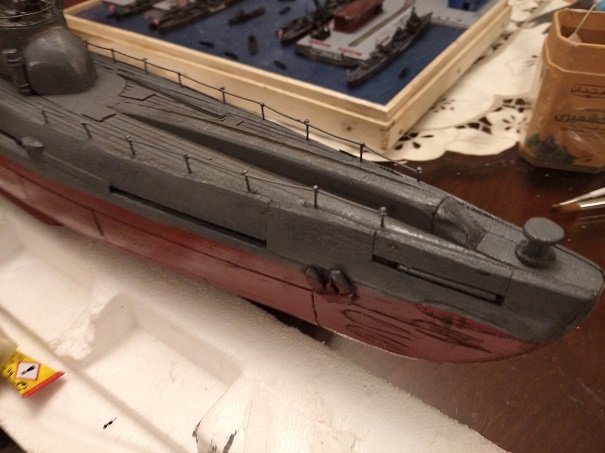
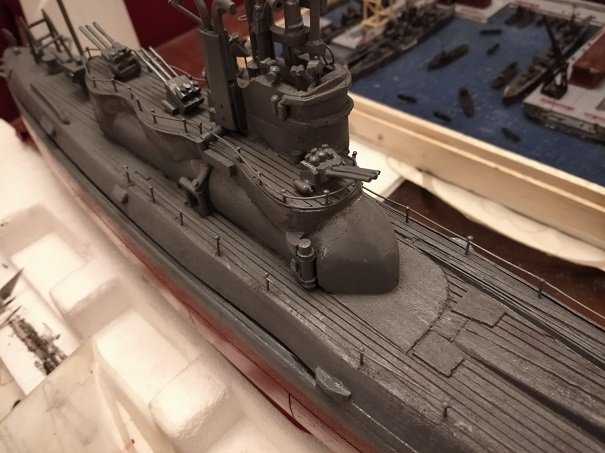
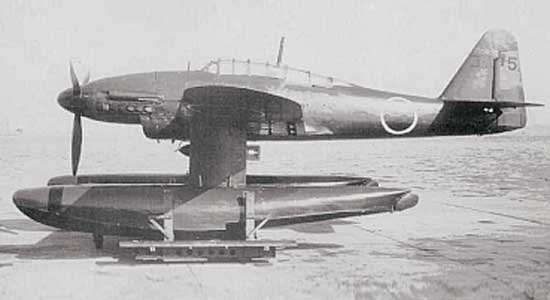
Good Morning All Here is the I400 painted , hope you see it is close to the Original 😃. Thank you
-
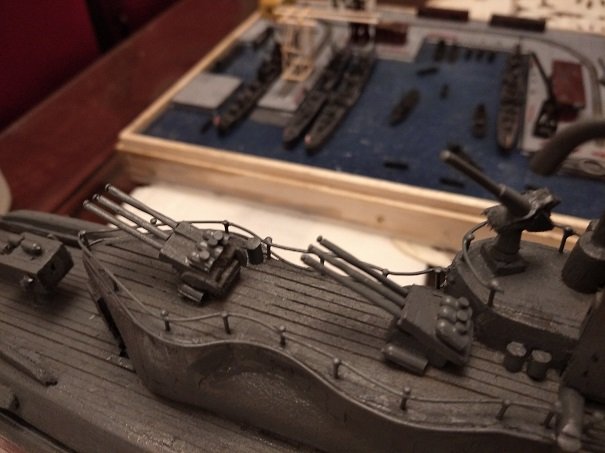
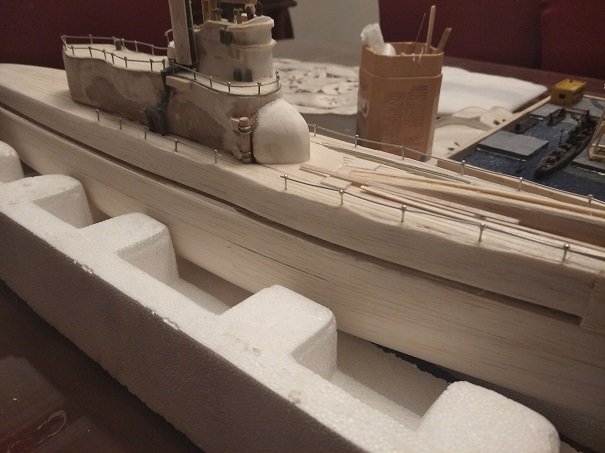
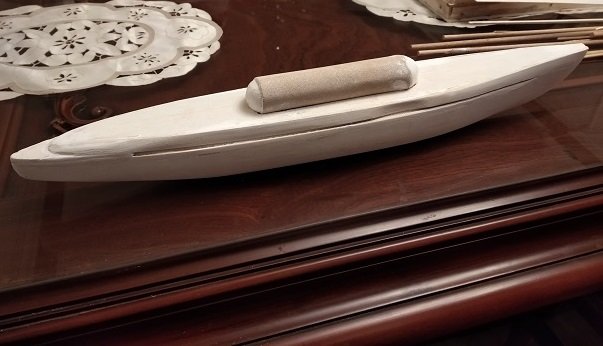
Good Morning All I've completed the 3rd layer of planks using 2mm thickness balsa wood and the deck fence as well. The planks of this layer are not as normal planks, they have rectangle shape , 1.5cm x 3cm and I maintained 1 mm in between this 1mm space will be more visible after the weathering process. I also glued the Hanger on top and here are some shots. Thank you


-
Good Morning Mark / Good Morning All Thank you Mark, this is very interesting indeed, I'm very fond of this piece, and am not surprised to know that US went on haunting it after the WWII and during the cold war. I'll read this article tonight. Here is the work progress. Thank you


-
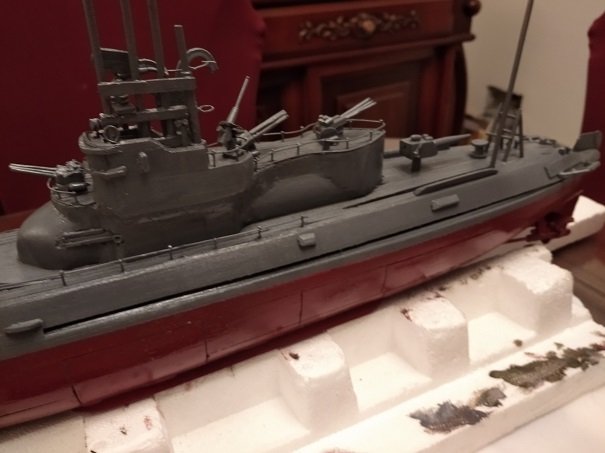
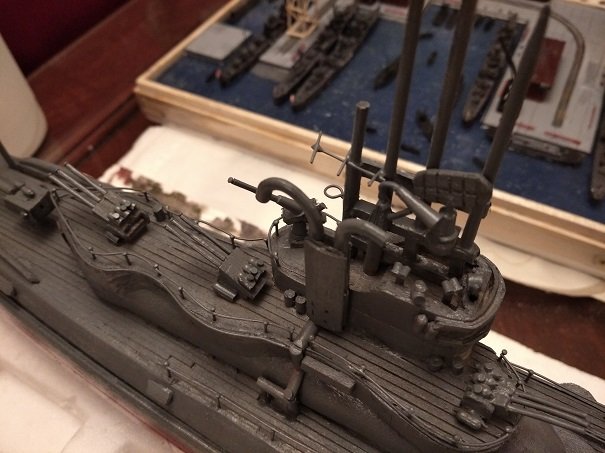
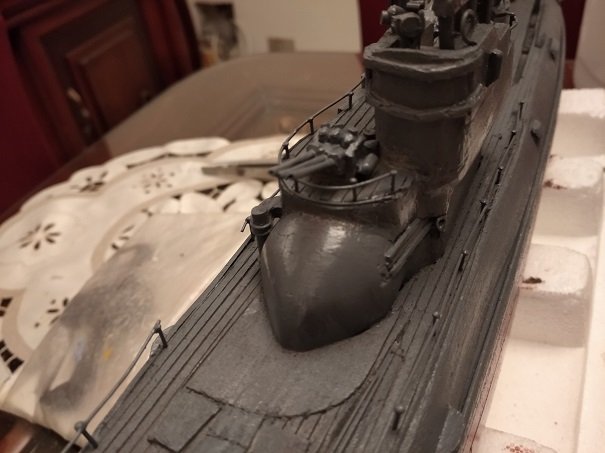
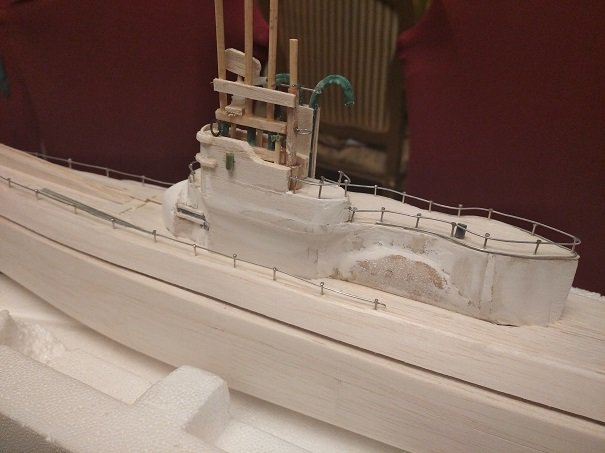
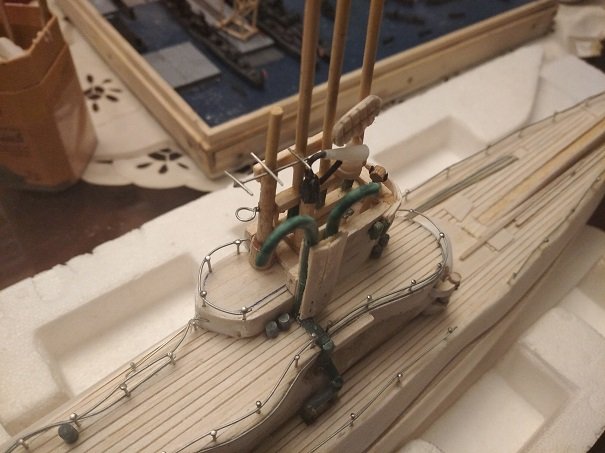
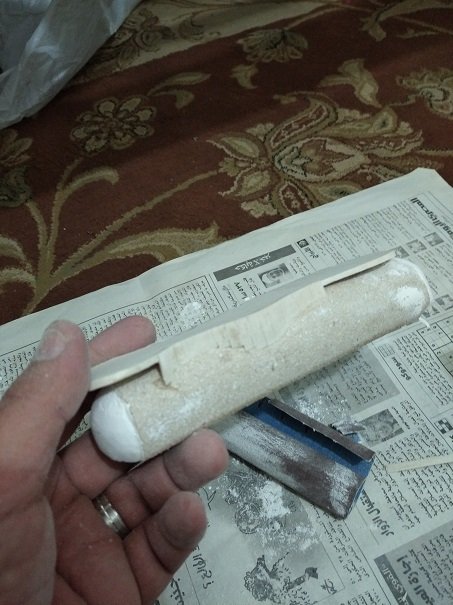
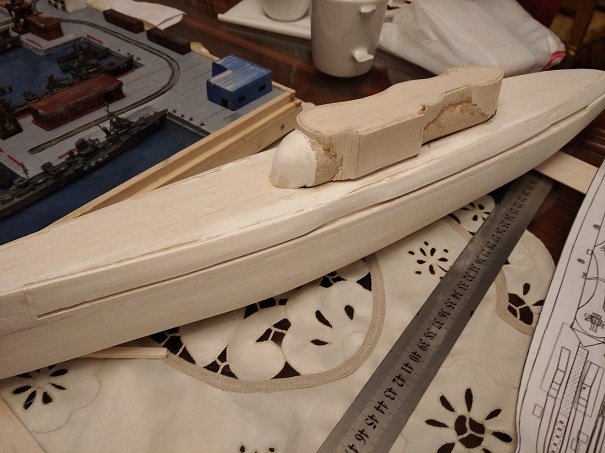
Hello All I've continued work on the I-400.Here is some shots for the work on the Hanger. Thank you


-
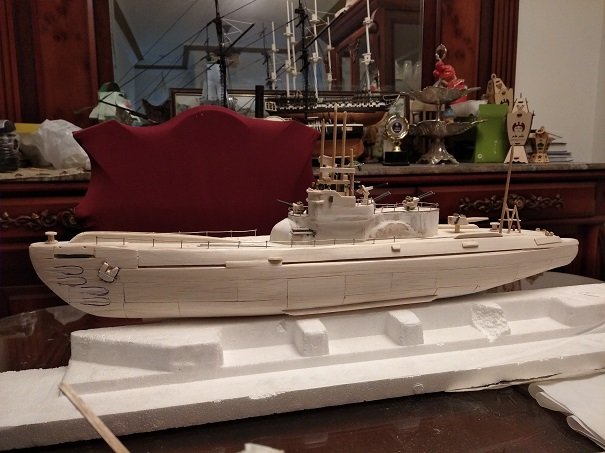
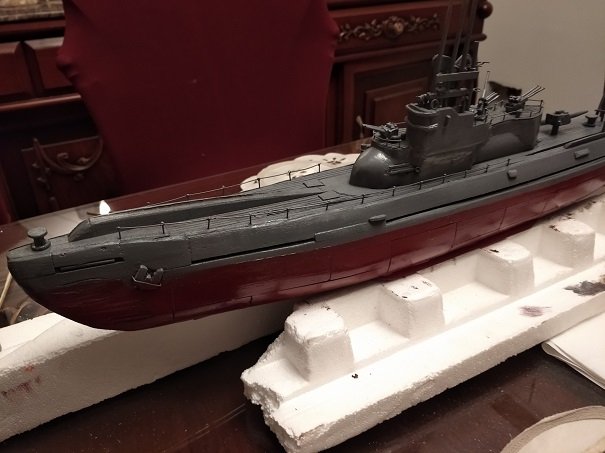
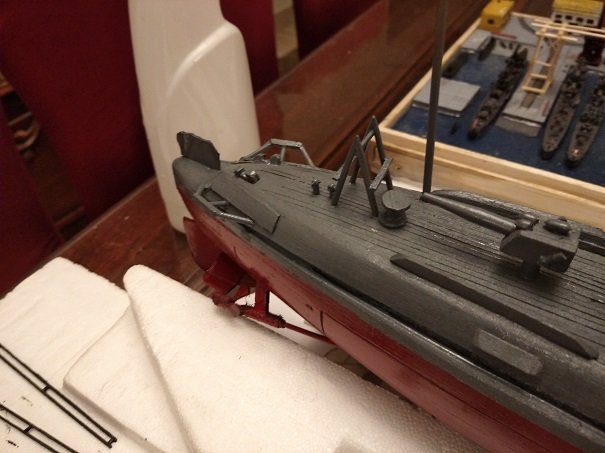
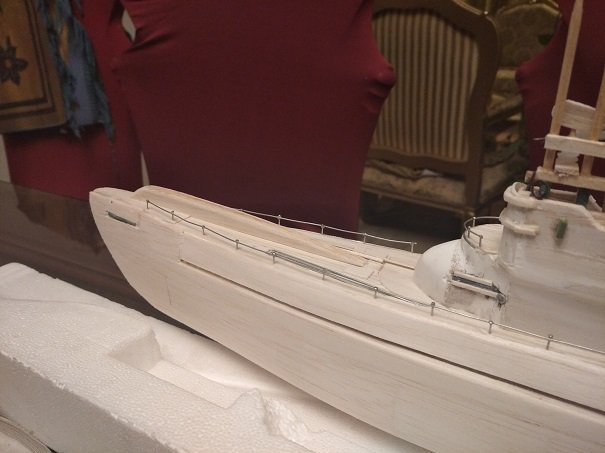
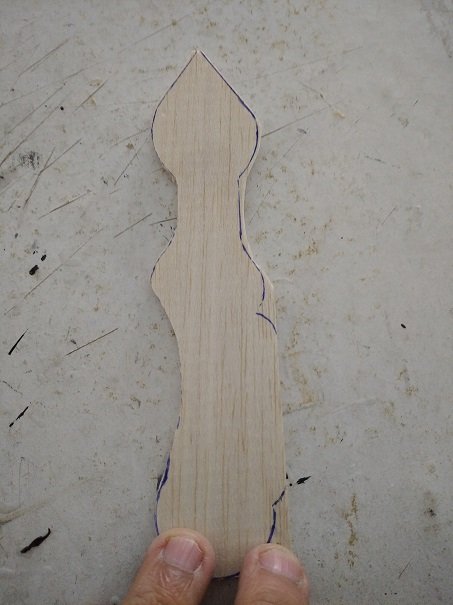
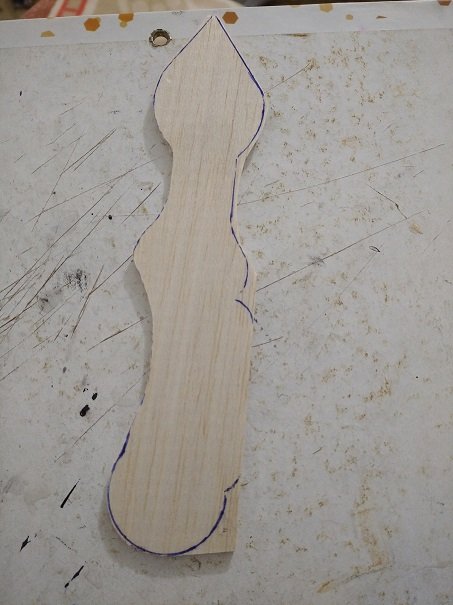
Hello All I've continued work on the I-400. I've completed the planking (3 Layers as I intended) , Then, after using sandpaper , I applied a layer of Latex Putty to adjust the shape, then I started working on the Hanger as in the images.
-
Good Morning Mark / Good Morning all I was curious about this too and I found the answer here . The answer lies in the image , however it is about discussing the engine warming method used to avoid suffocation. In this video , minute 16:55, is the answer.Since the Hanger is 11 feet diameter , the Seiran wings were designed to rotate 90 degrees, clockwise and anti-clockwise to fit in. If you could spare an hour of your time , you may find this video very interesting. Thank you

-
Yes, indeed it was huge, imagine a hanger that could stow up to three float planes , the Aichi M6A Seiran. Thank you
-
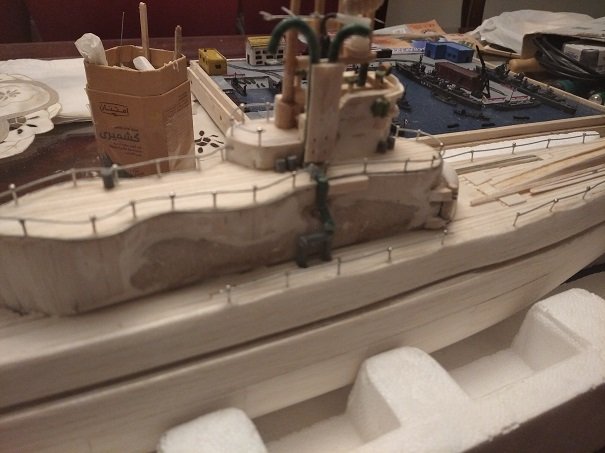
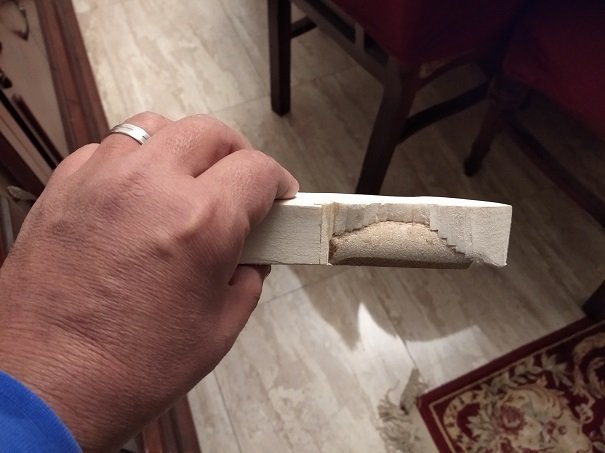
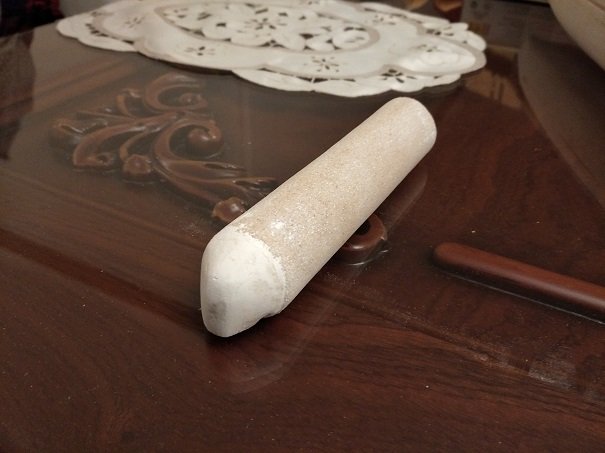
Thank you very much Chris for your encouragement, I think the Hanger will be a challenge. It has a cylindrical shape, however, it appears as not fully cylindrical, since it is implanted in the Hull, please notice the lower part in the image below. Thank you