HOLIDAY DONATION DRIVE - SUPPORT MSW - DO YOUR PART TO KEEP THIS GREAT FORUM GOING! (Only 20 donations so far - C'mon guys!)
×


6ohiocav
-
Posts
543 -
Joined
-
Last visited
Content Type
Profiles
Forums
Gallery
Events
Everything posted by 6ohiocav
-
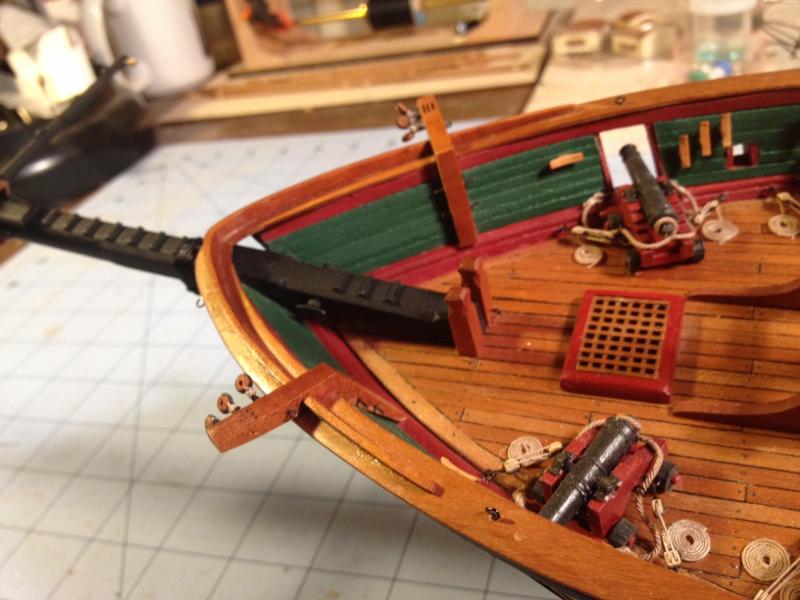
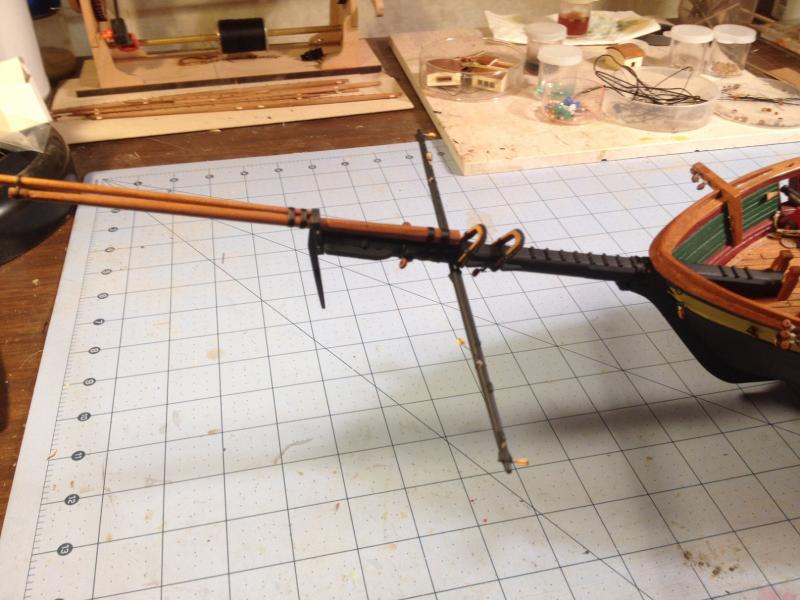
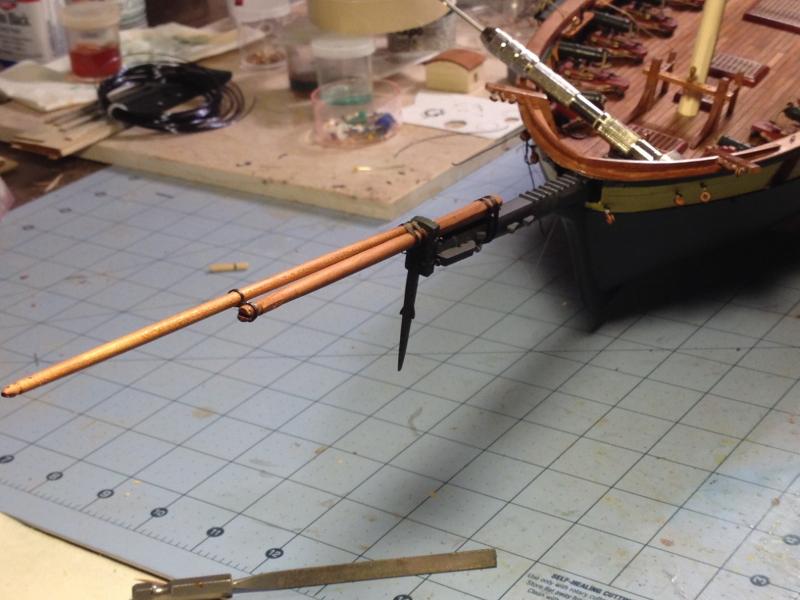
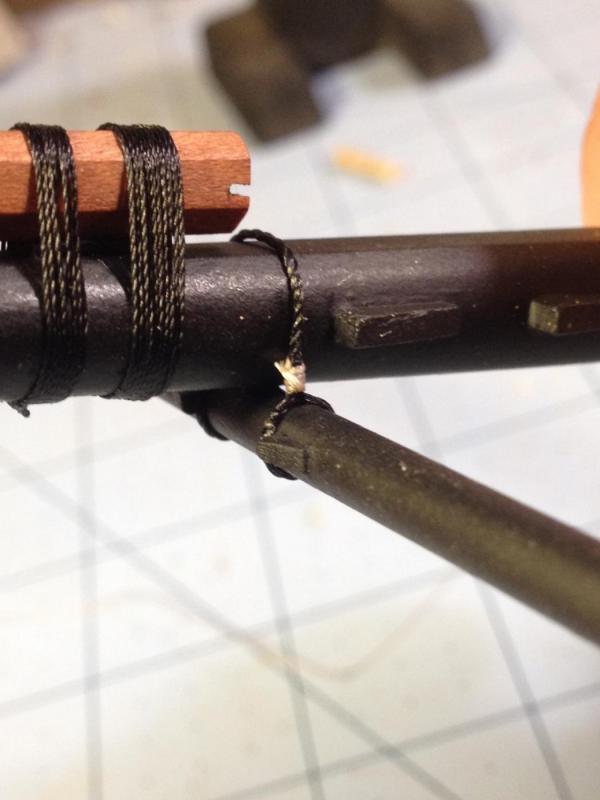
 Further work on Bowsprit I spent the last few days rigging bullseyes and hearts to the bowsprit and jib boom. I tied on the brace and spritsail yard lift blocks. I tied on the bobstay bullseye. I also created the bowsprit shroud collar with bullseyes and attached that. I would suggest that you do that BEFORE you attach the jib boom to the bowsprit. I also prepared the open hearts for the forestay and fore preventer stays. I created the grove with a micro-file and stained the laser cut plart with some cherry stain. After seeing photos, I decided to serve the rope for the collars. This gave me a chance to try out my Syren Serving Machine. I'll be darned but the simple machine works great. Making the rope was one thing, but wrapping it around the bowsprit and lashing it together was a test in patience and dexterity- something that I don't have enough of. I am getting better though. Once done, a came across a signature part of the build- installing the bowsprit assembly. I think I did everything I could do before attaching it, and if not, at least it is now secured to the ship instead of a vice. I then lashed the timber to the bow. Another tedious job. And yes, mywork table is big enough. I will be working on the lower fore mast next to get it prepared for stepping and begin the rigging process in earnest.
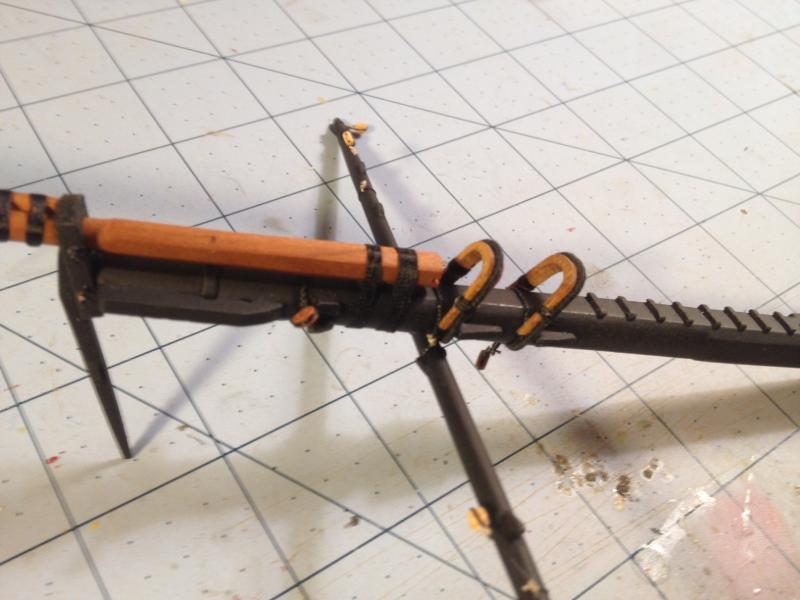

- 648 replies
-
- 6
-

-
- niagara
- model shipways
- (and 1 more)
-
Hey Mike, It is amazing how we are facing the very same challenges. My bowsprit with the cleats JUST fits in that opening. I have to contort it in an exact way to get it to pass. I had to open the hole a little to even up the angle from port to starboard. I also painted the inside with flat black. My choice of order was based on the ad hoc survey I sent out. the majority said to rig from front to back - bottom to top. It makes sense. seems like most Niagara builders chose this method. By the way, does anyone know the best way to tie off lanyards for bullseyes. I have seen them lashed to themselves or sometimes frapped.
- 648 replies
-
- 3
-
-
- niagara
- model shipways
- (and 1 more)
-
Scott, Thanks for stopping in. For my hatches, I cut blocks of balsa wood to the proper size of each, and used strip wood cut with 45 degree angles to wrap around the blocks. This maintained proper size and kept them square. It also provided a solid base for assembly. As long as you don't glue the strip wood to the balsa block, it works. Once done, I glued a thin strip ledge for the grating. Hope this helps.
- 648 replies
-
- 3
-
-
- niagara
- model shipways
- (and 1 more)
-
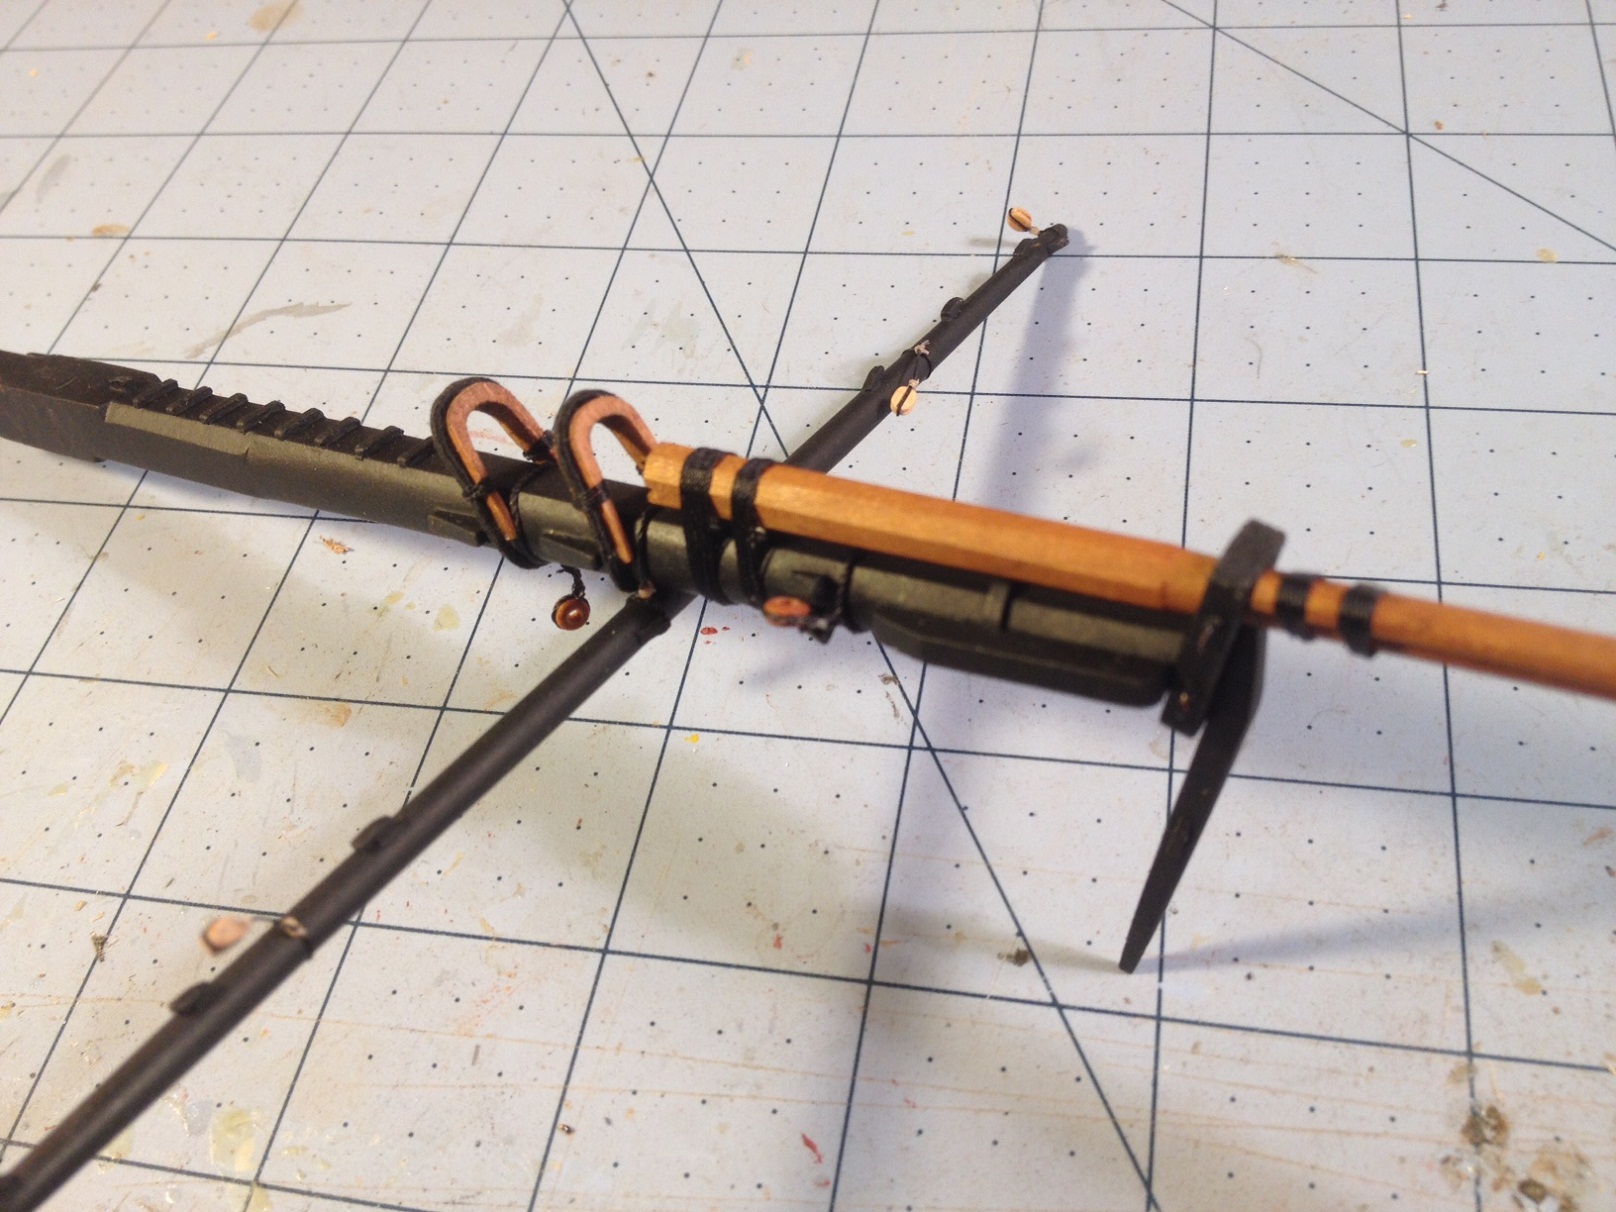
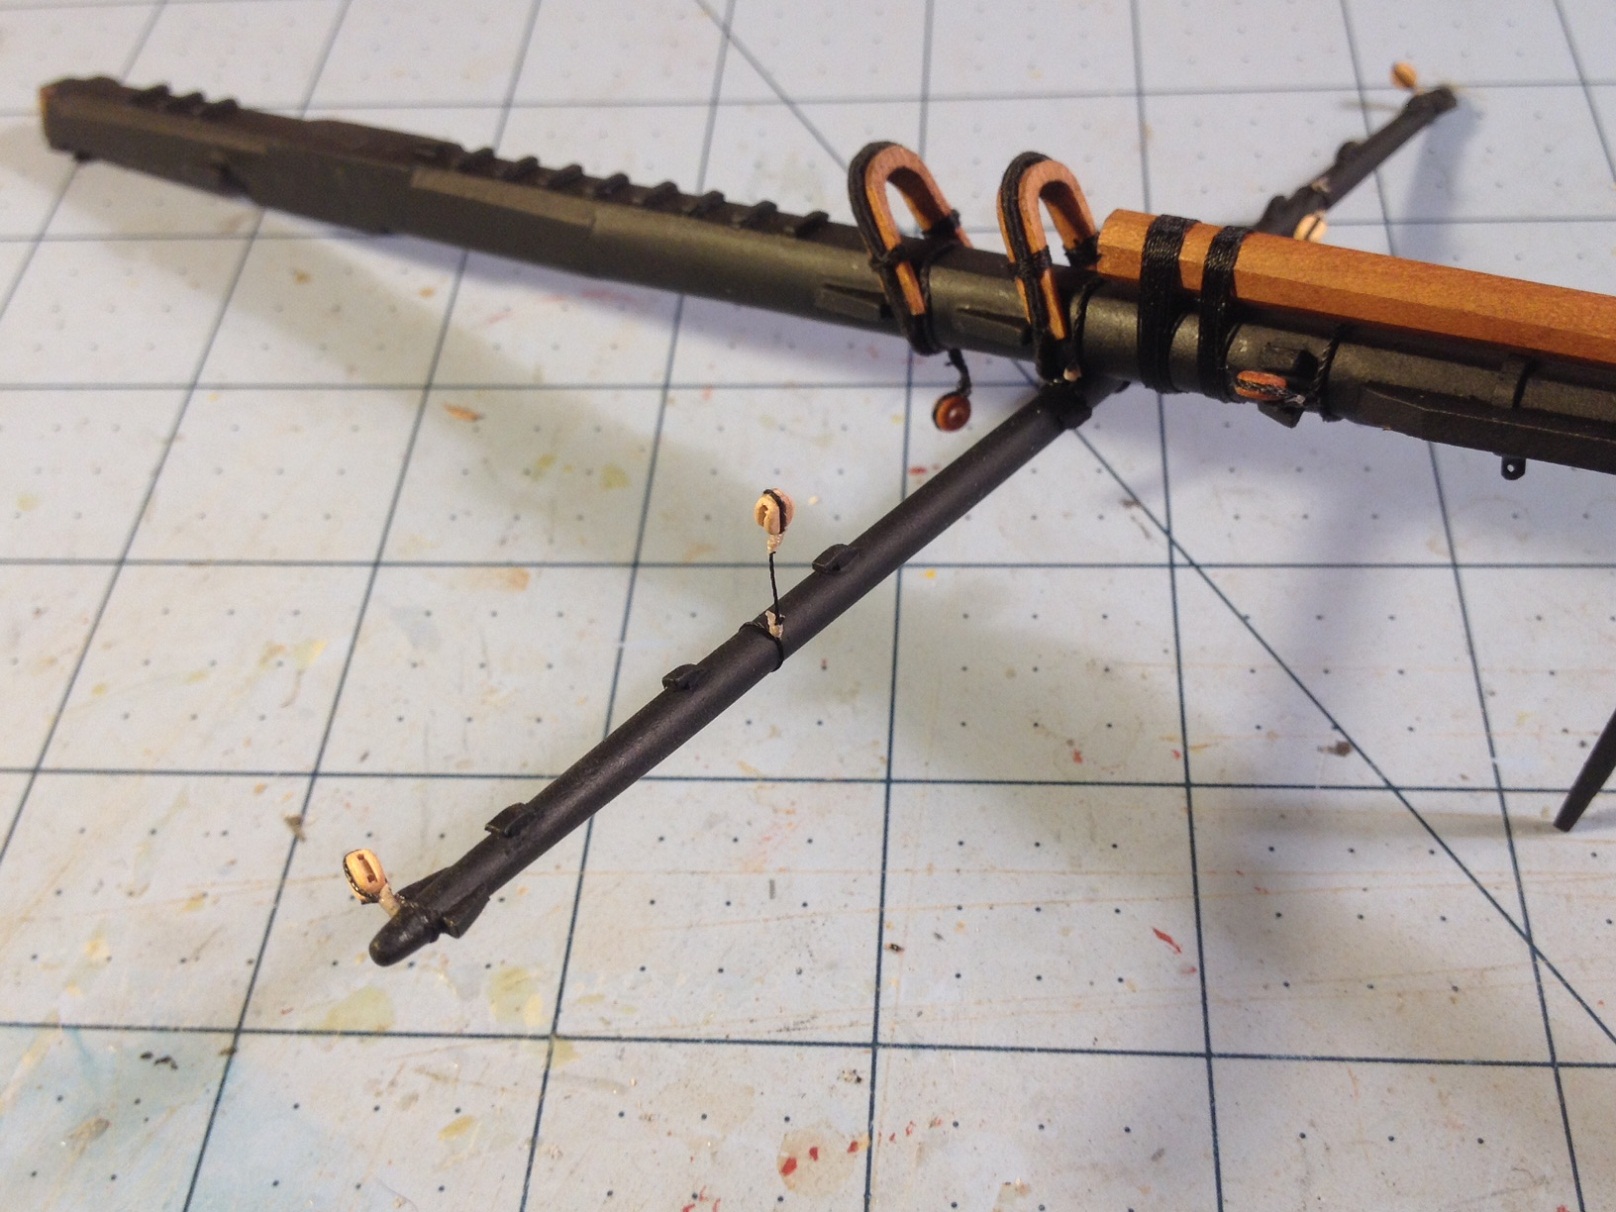
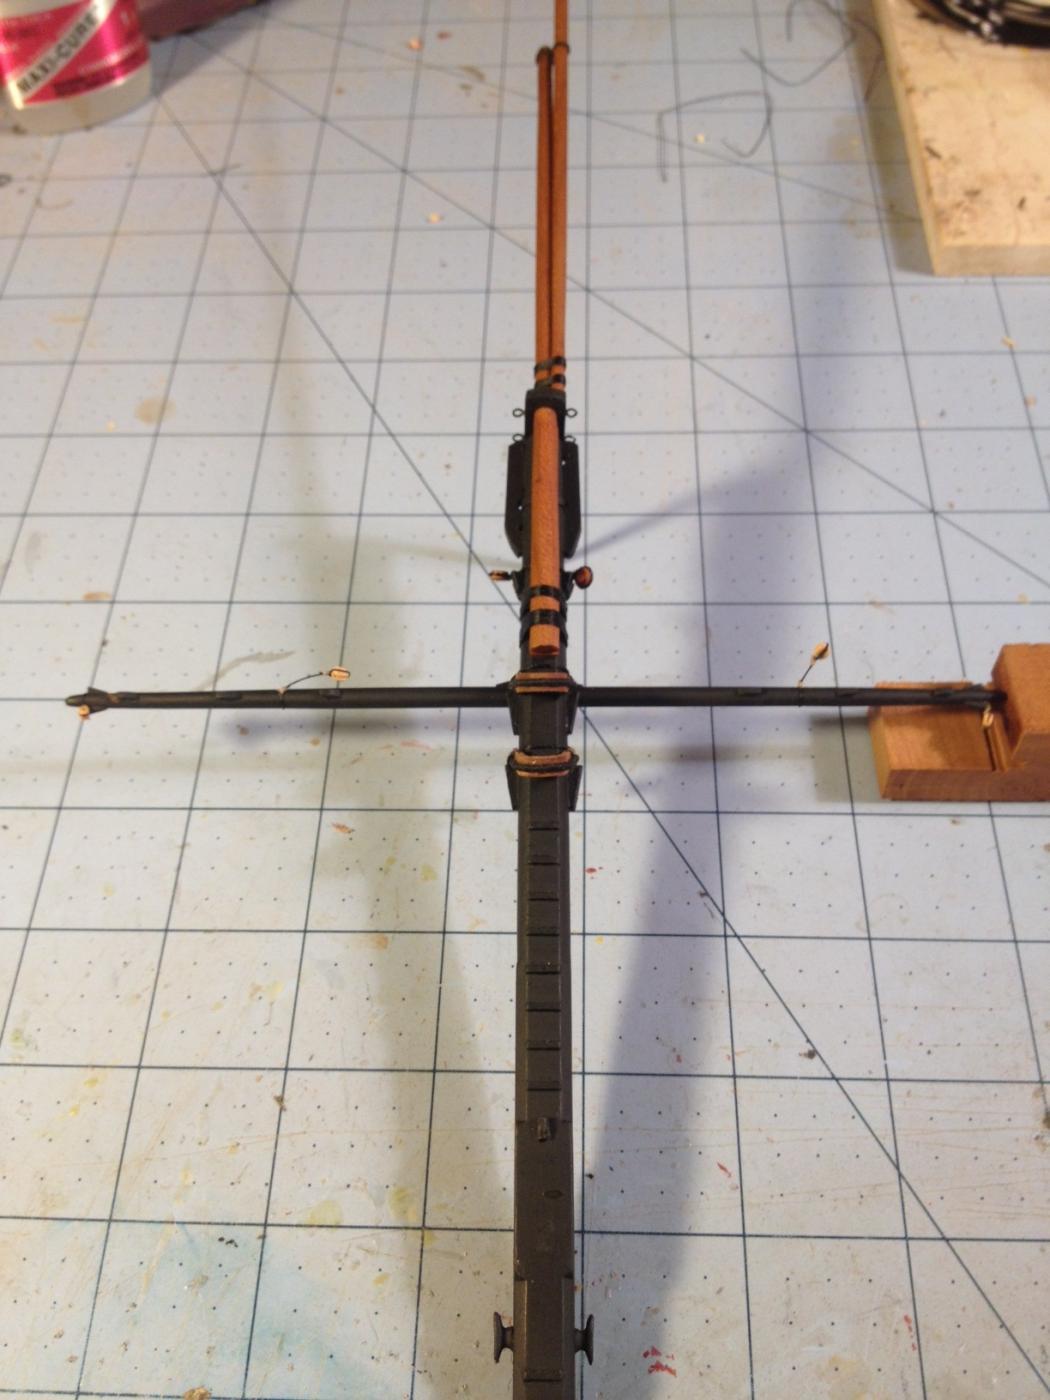
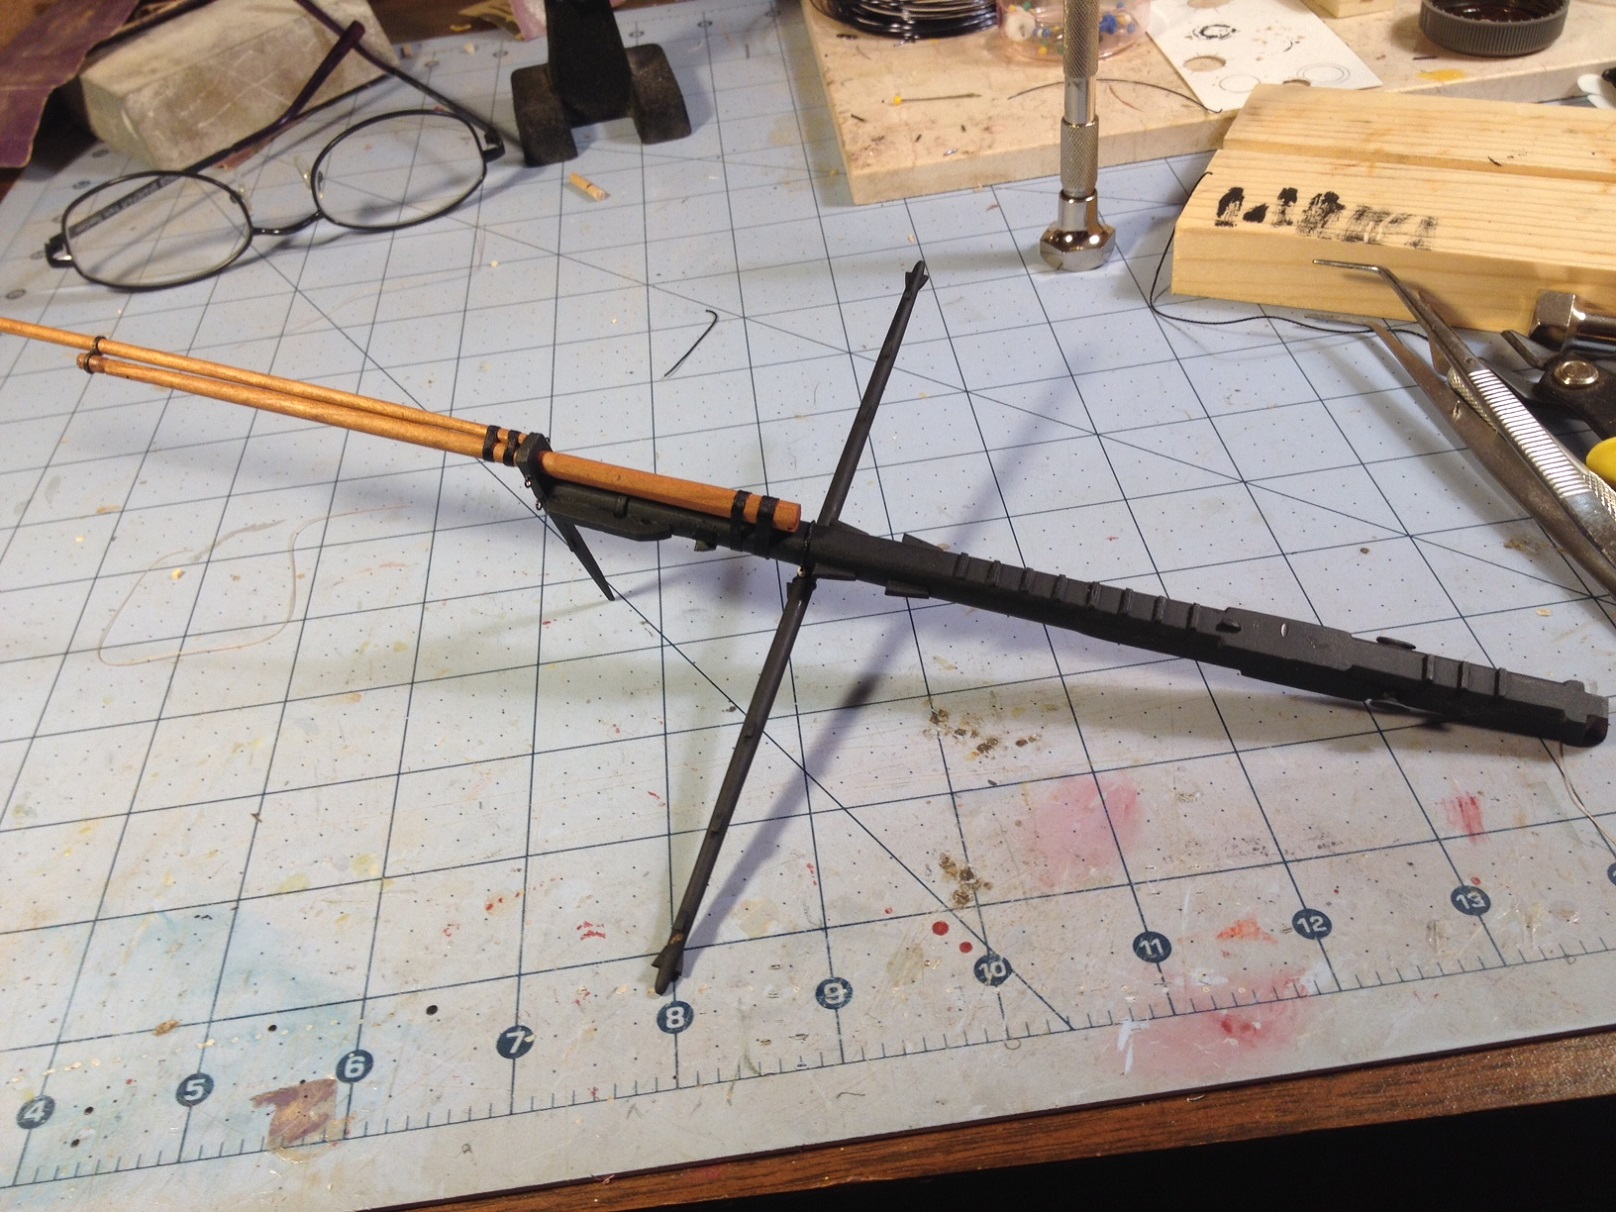
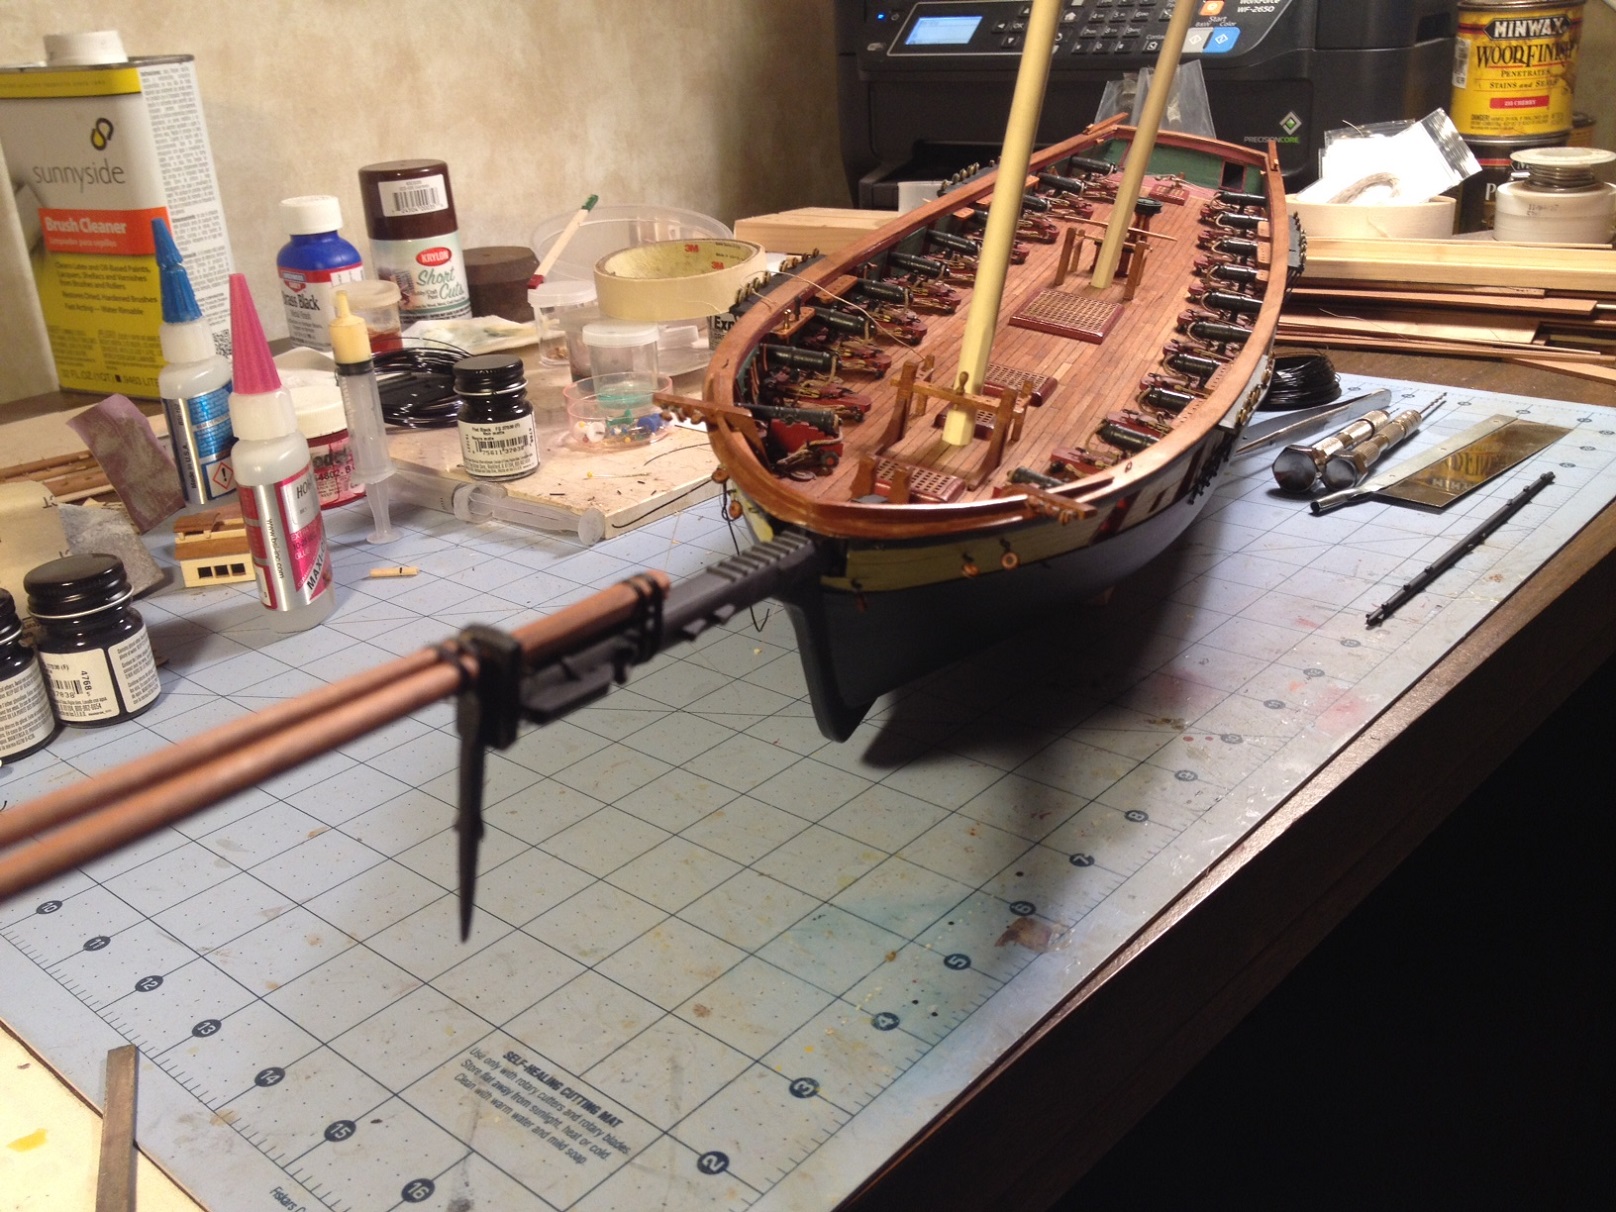
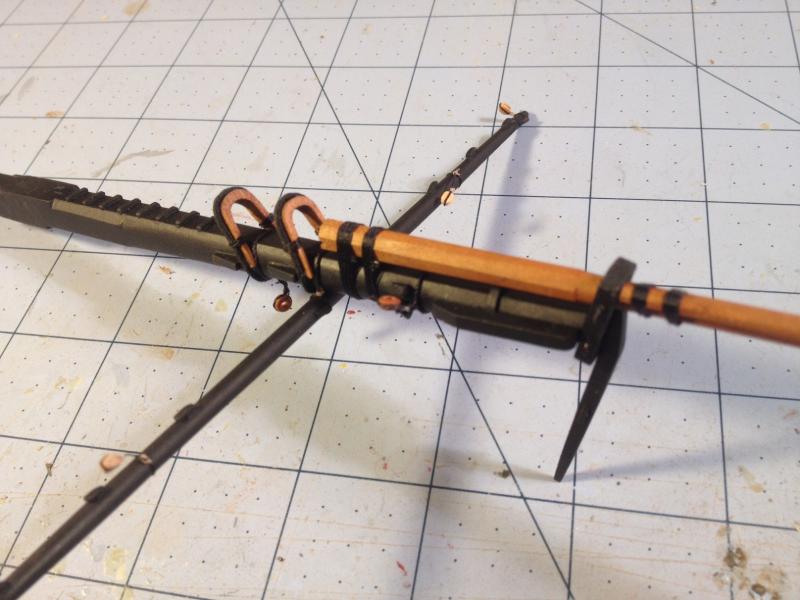
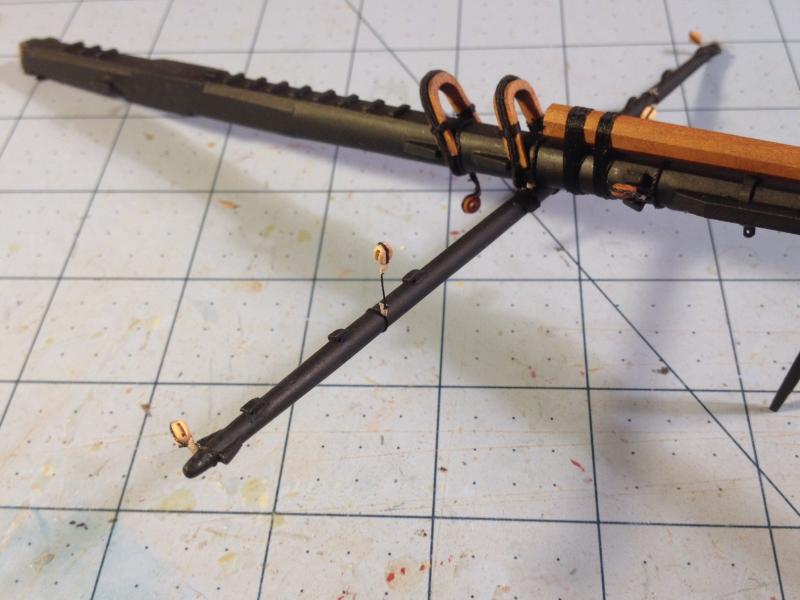
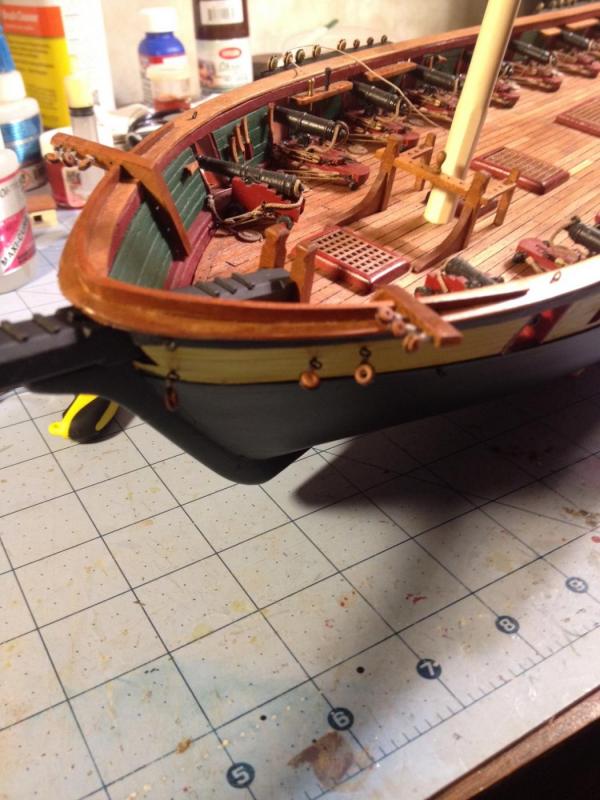
Bowsprit and Bowsprit Yard Assembly, Lashings and Preliminary Rigging. Now that I have some bullseyes, I was able to prepare the Bowsprit, Jib and Bowsprit Yard for assembly and rigging. I seized my bullseyes onto eyebolts and inserted them into the bow. I created the brass collar for the jib and assembled the bowsprit. I lashed the assembly with kit supplied rope. I created the sling for the bowsprit yard and secured it to the bowsprit. This weekend, I will continue to hang the remaining bullseyes and hearts to the bowsprit assembly and once complete, attach it to the hull. The pictures I show only have it set in place. Very tedious and time consuming. However, set in place makes this actually look like a real ship.


- 648 replies
-
- 6
-
-
- niagara
- model shipways
- (and 1 more)
-
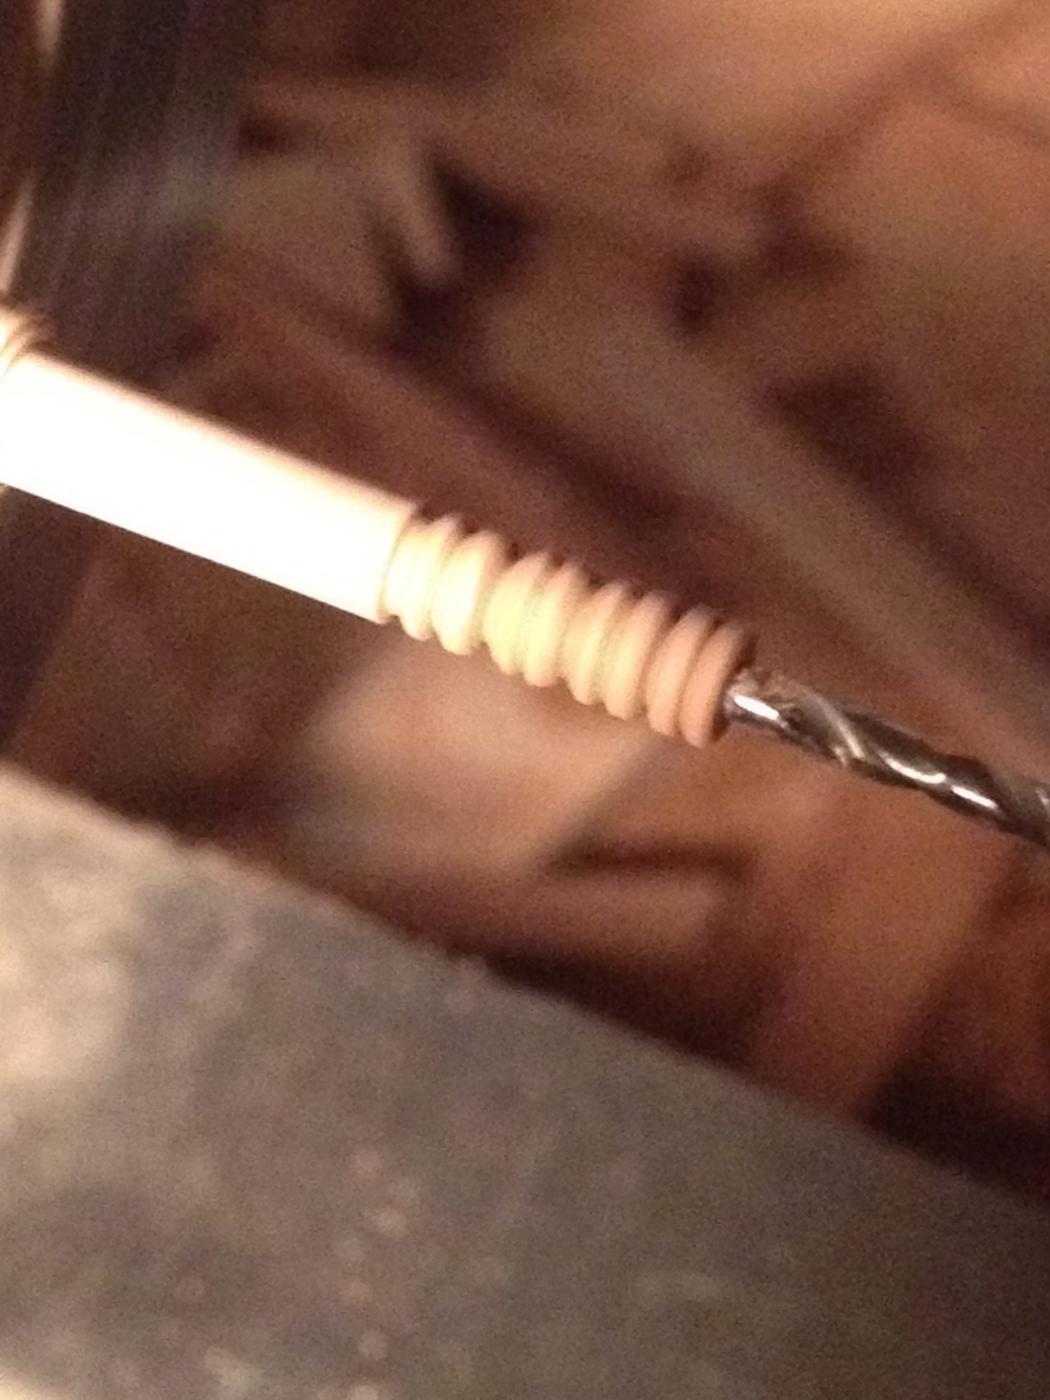
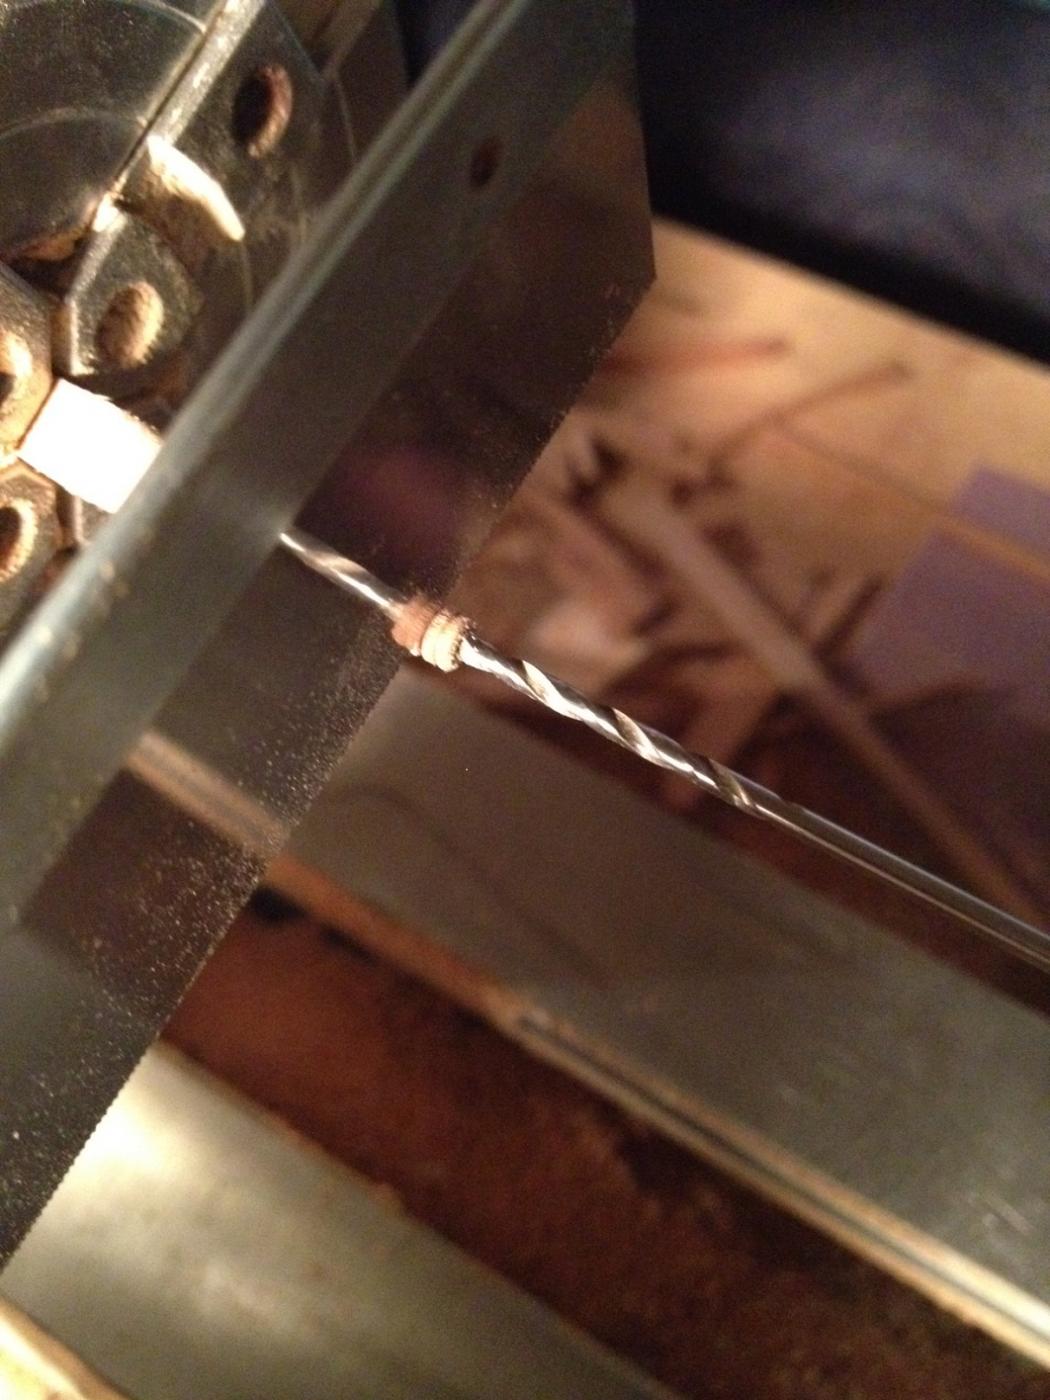
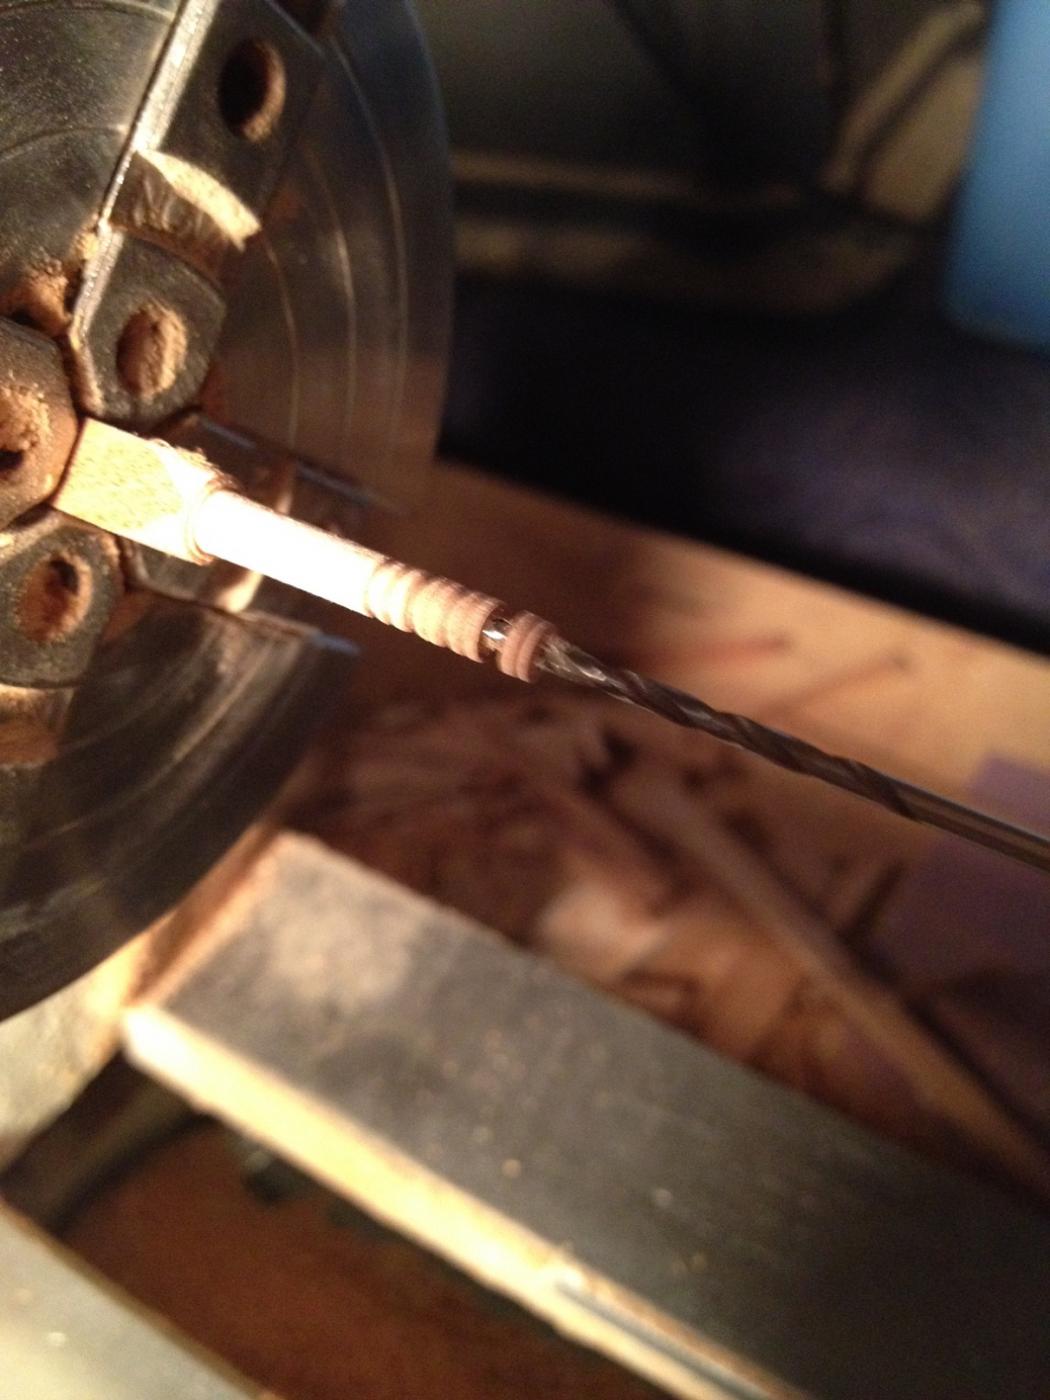
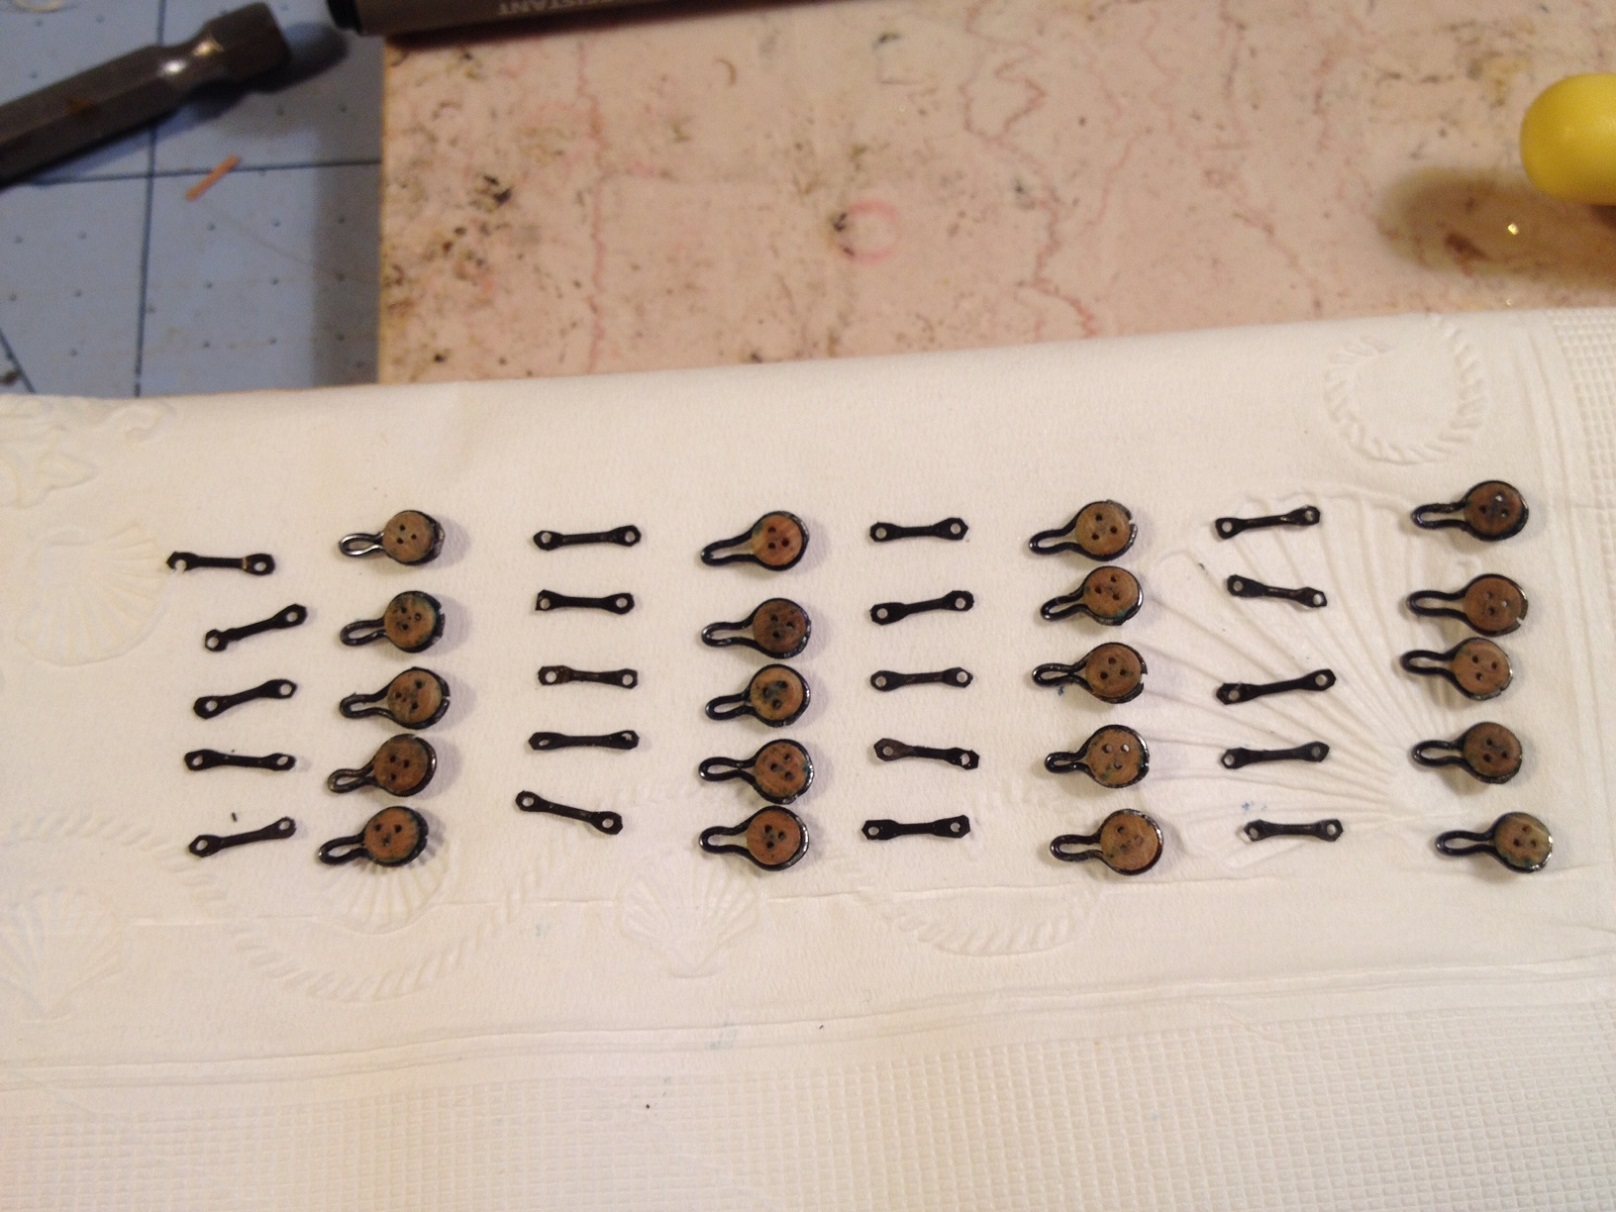
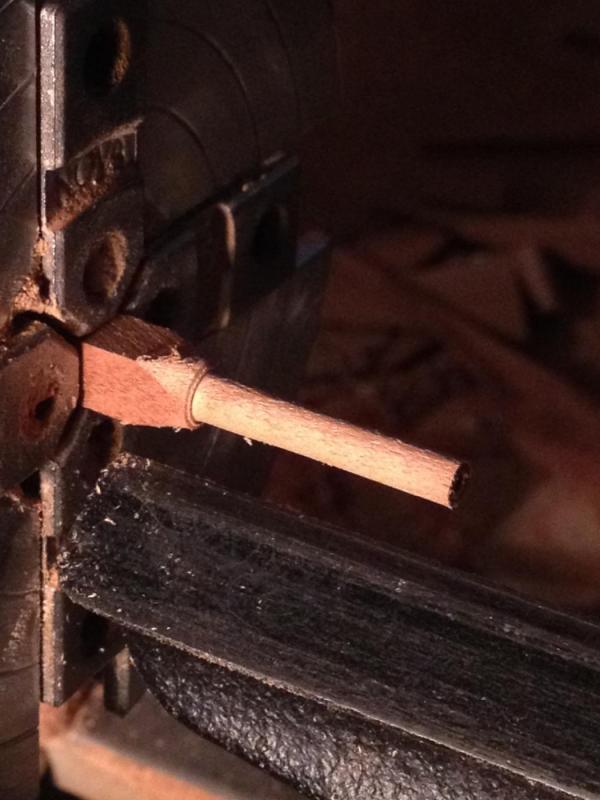
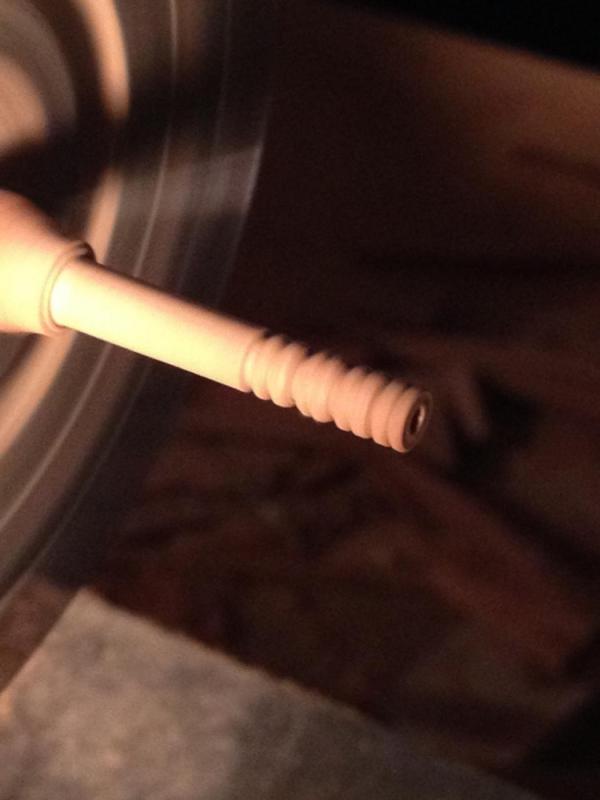
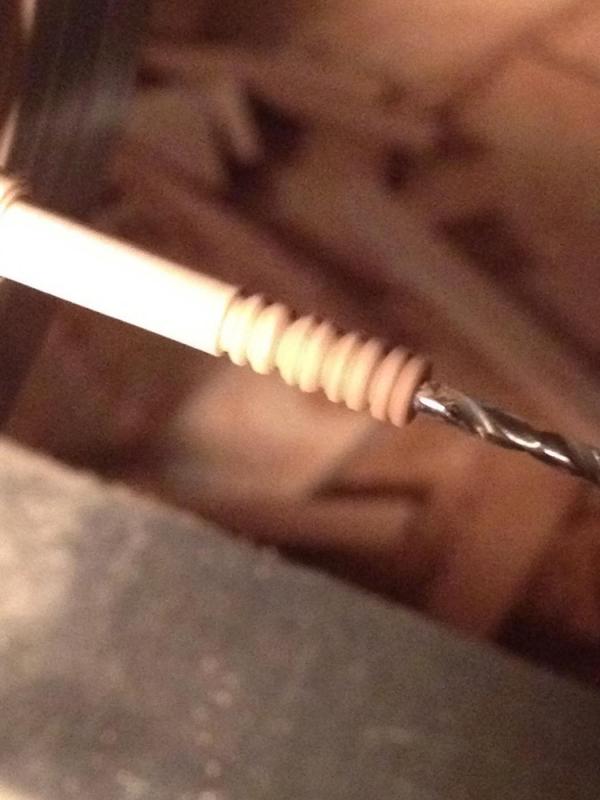
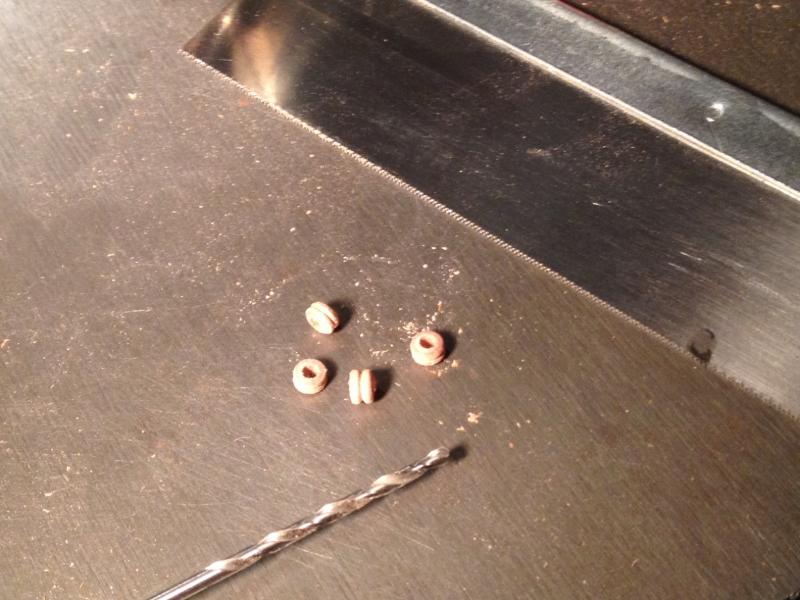
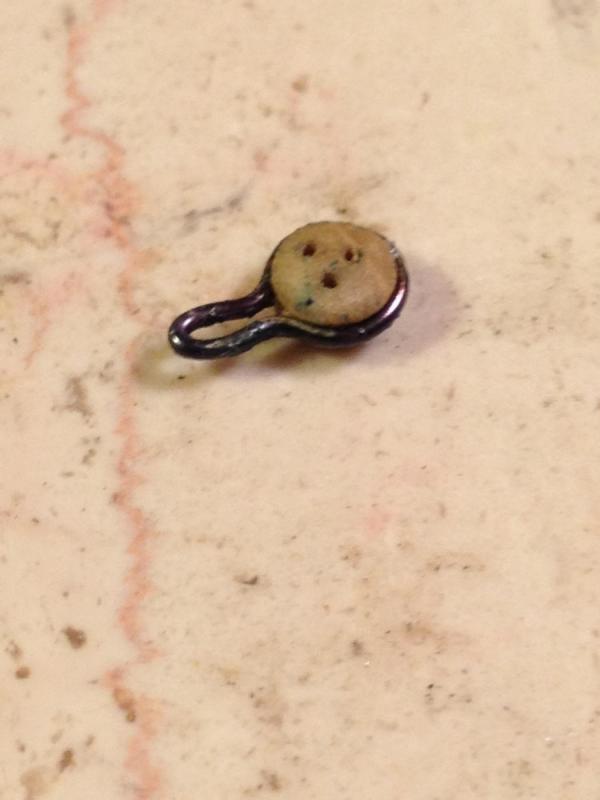
Bullseyes So here is the story of my trials and tribulations on creating 1/16 bullseyes. Drilling out the centers of the kit supplied deadeyes, as suggested by the instructions was unacceptable and frustrating. So with some thought and some practice, I came up with an acceptable procedure, using my mini lathe. I turned some cherry stock down to the correct diameter, and carved out the shapes of the bulleyes with a parting tool. I then set the center with my spindle, and using a pin vice, with the lathe turning slow, drilled a hole down the center. I drilled only through the first bullseye, and partly into the second one. That kept the stock from splitting, and maintained my center for the next bullseye. Then, leaving the pin vice drill bit in the hole, I carefully cut off the bullseye with my jewelers saw. I cranked down the RPM to as slow as possible. Keeping the bit in the hole allowed me to collect the finished bulleye when the saw cut through. It acutally worked. Here are some photos.


- 648 replies
-
- 4
-
-
- niagara
- model shipways
- (and 1 more)
-
Fellow Niagara builder, Mikiek and I were puttzing around the internet looking for rigging plans for our builds and we came across the Niagara Crew Handbook. This 175 page document has some interesting stuff. At the back are some diagrams including a detailed look at the Martingale Rigging, Pinrail Diagram, Deck Arrangement, and Spar Plan. Here is the link to the handbook. https://brigniagara.files.wordpress.com/2015/05/niagara-crew-handbook.pdf I copied and scanned the diagrams if you just want those. This is of course of the modern ship, and would not be representative of the historic version. Niagara ship plans.pdf
- 648 replies
-
- 4
-
-
- niagara
- model shipways
- (and 1 more)
-
Mike , That is a great looking light. I bet it is a lot easier to see your intricate rope work. All looks very fine.
- 843 replies
-
- 2
-
-
- niagara
- model shipways
- (and 2 more)
-
Mark, Mike, Elijah. Mike and Joel, Thanks for the heads up on the rigging plan. Thanks for all the likes as well. I feel like I should install the hammock rails first. Thoughts?
- 648 replies
-
- 3
-
-
- niagara
- model shipways
- (and 1 more)
-
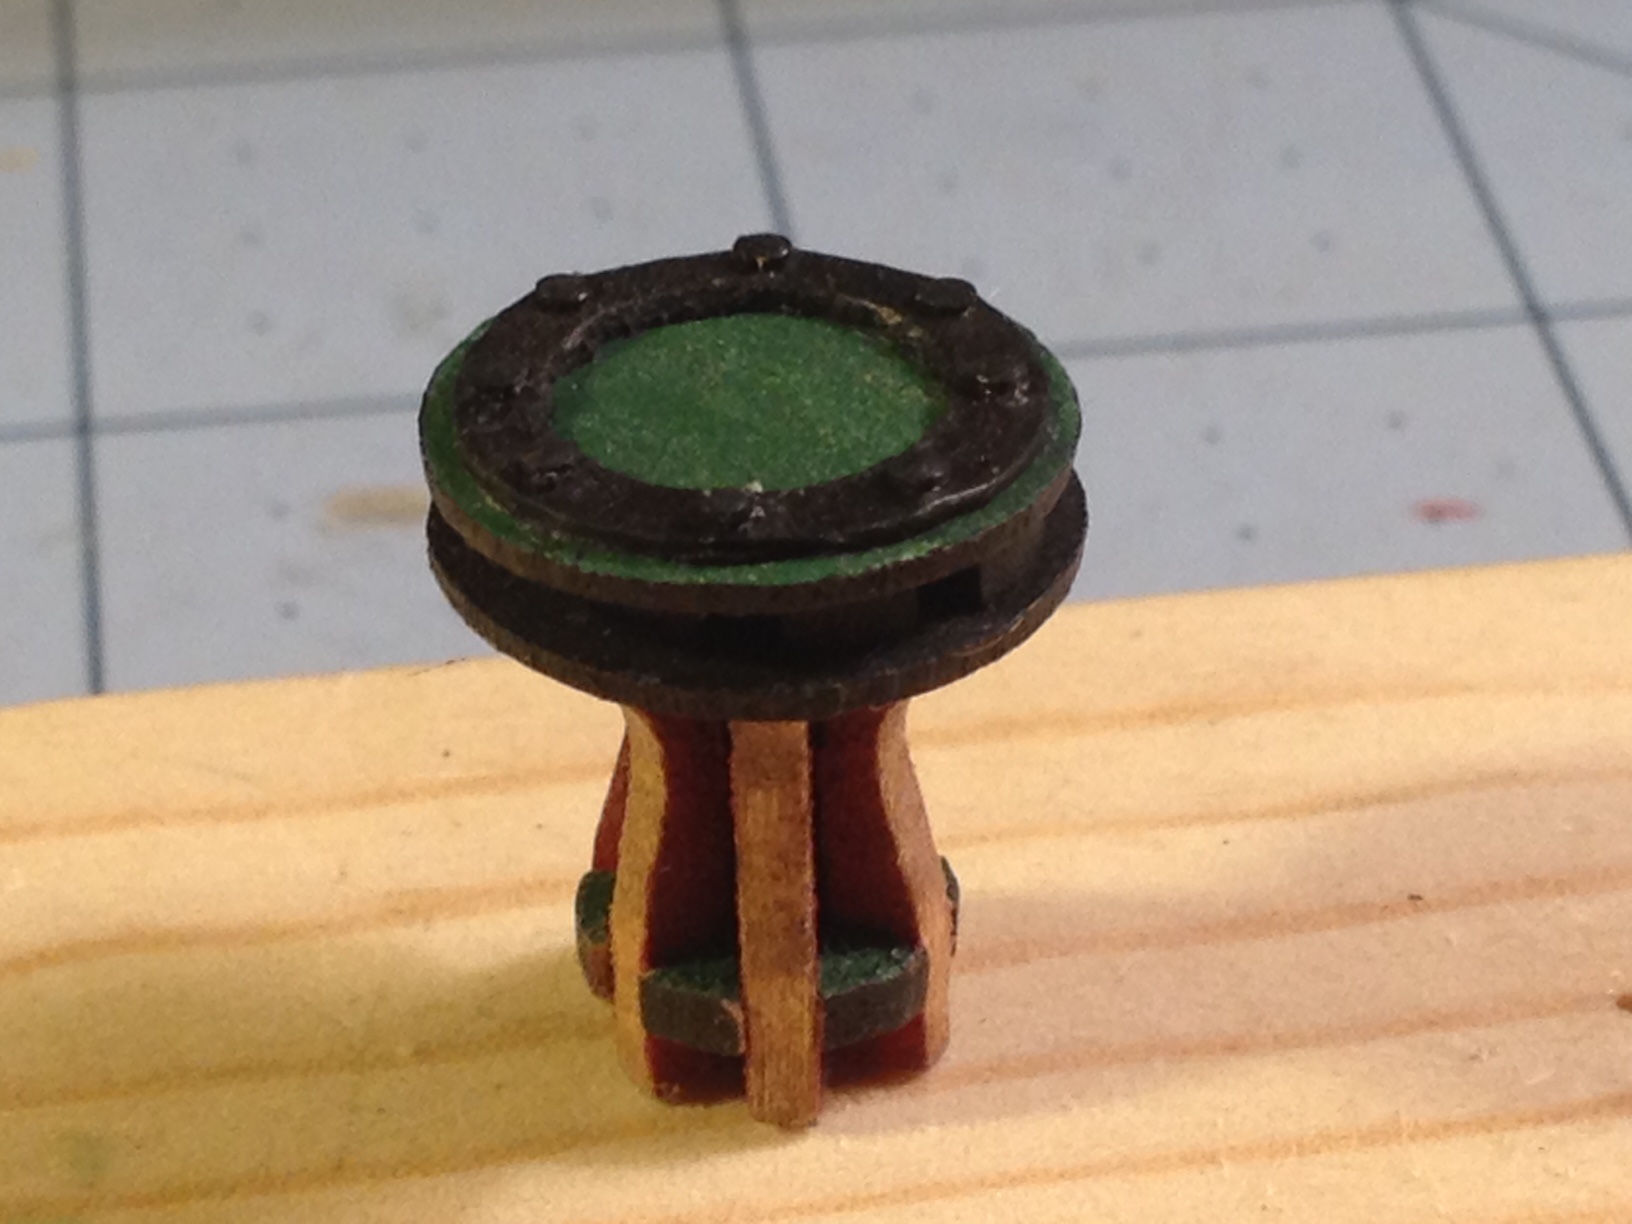
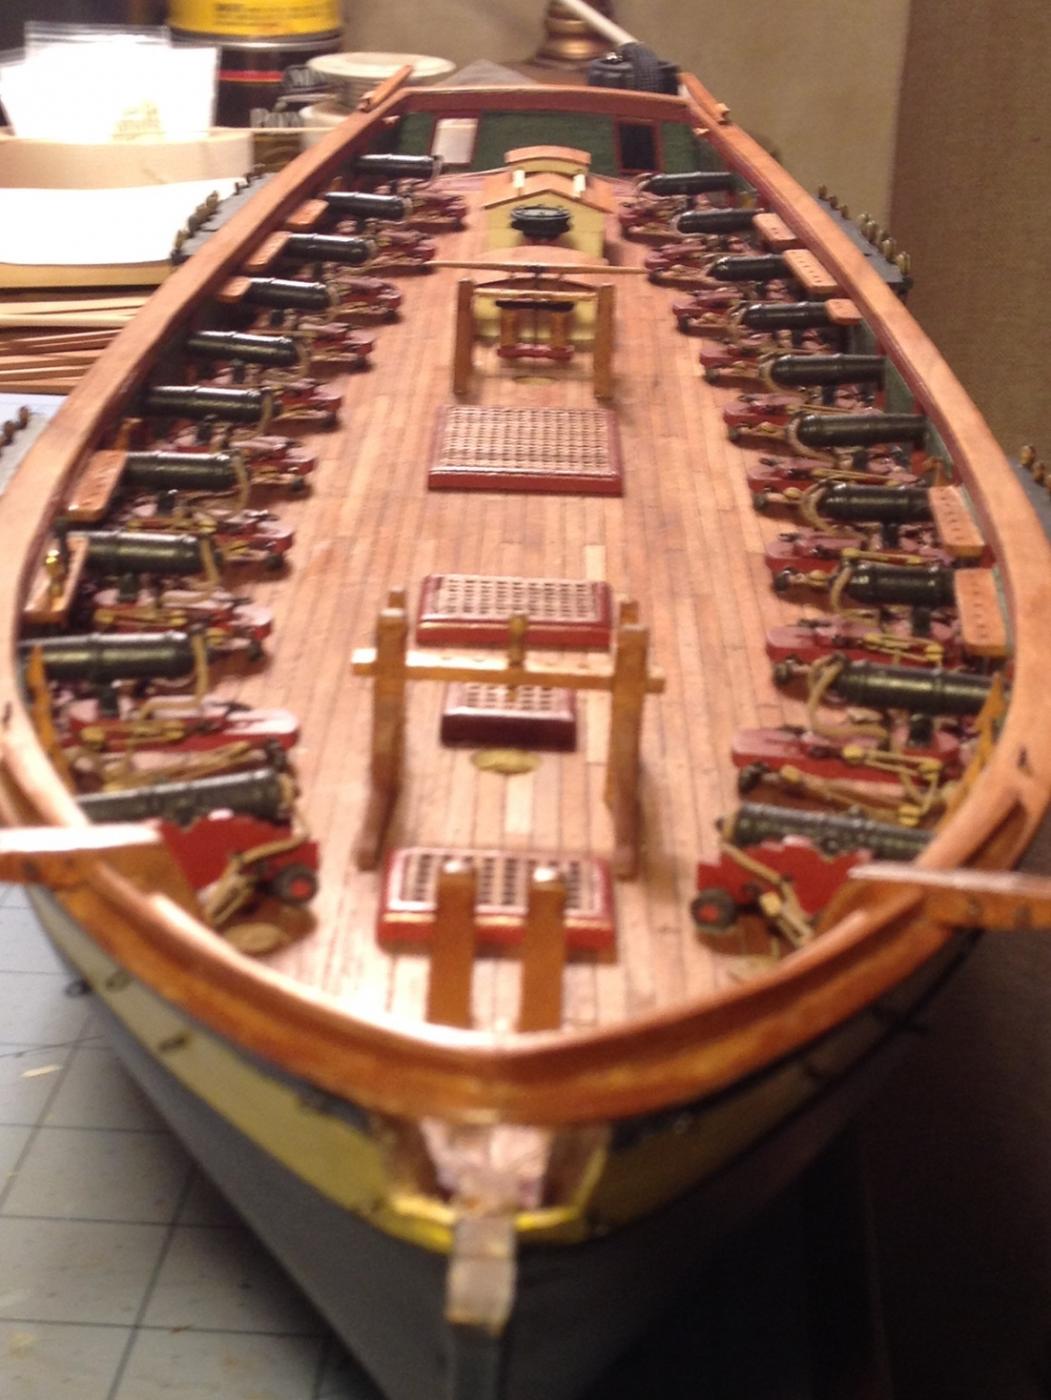
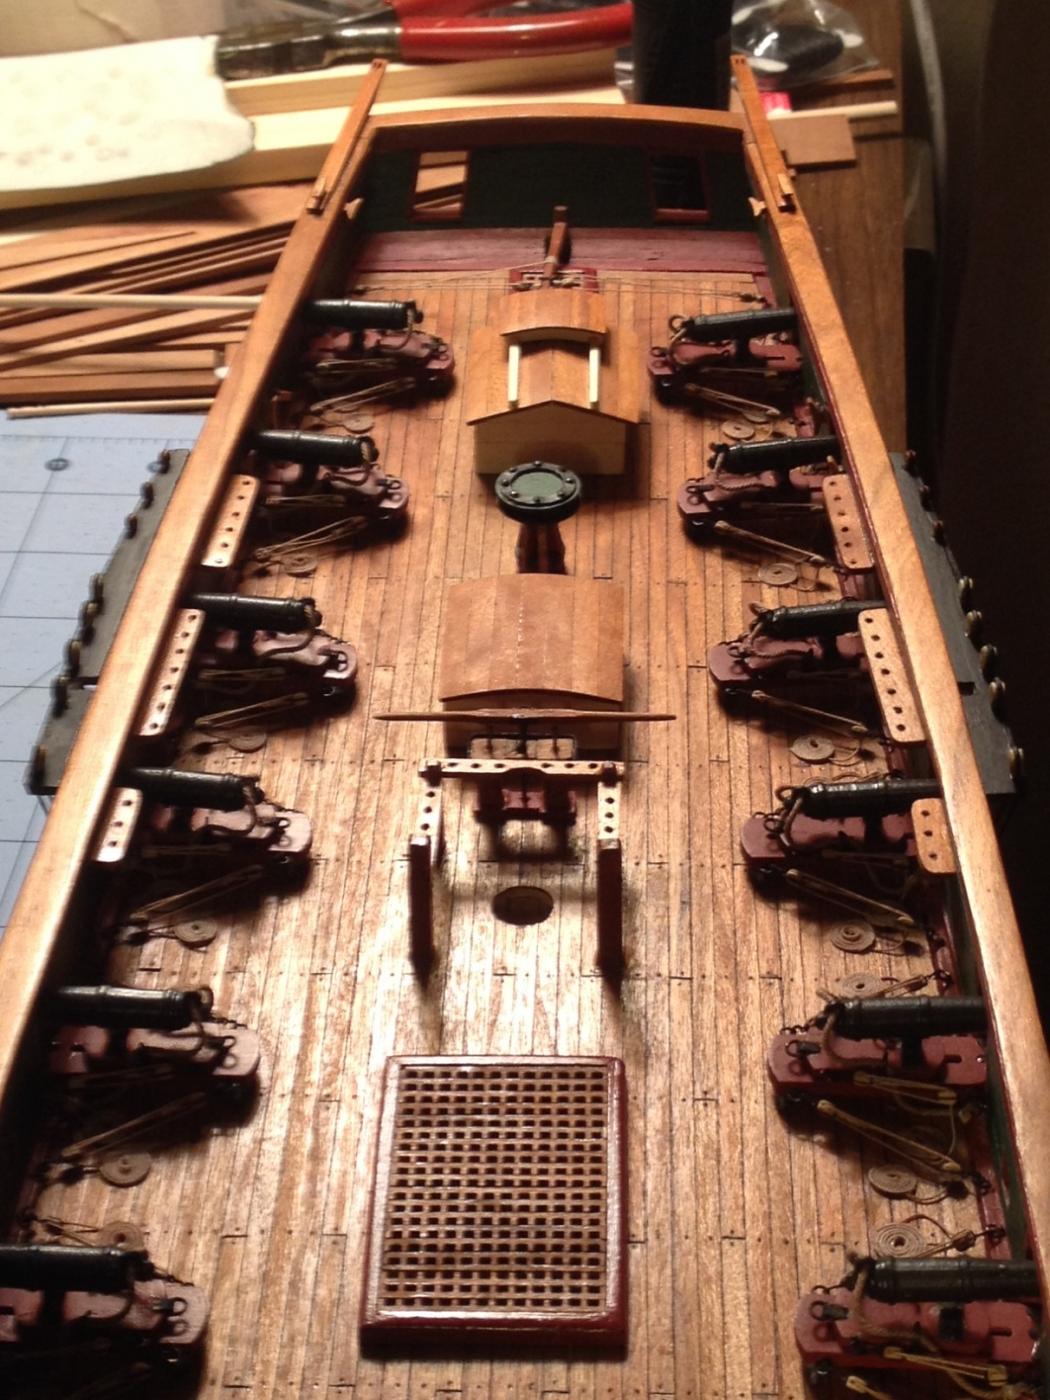
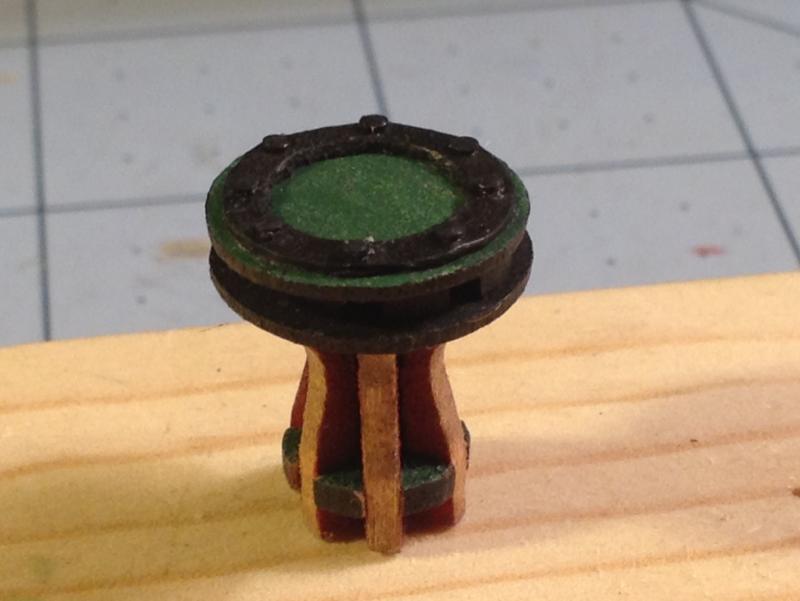
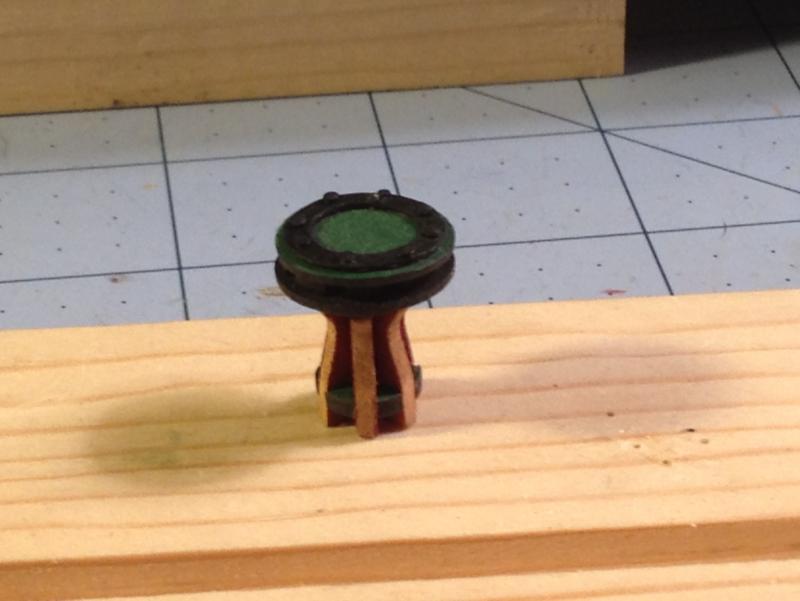
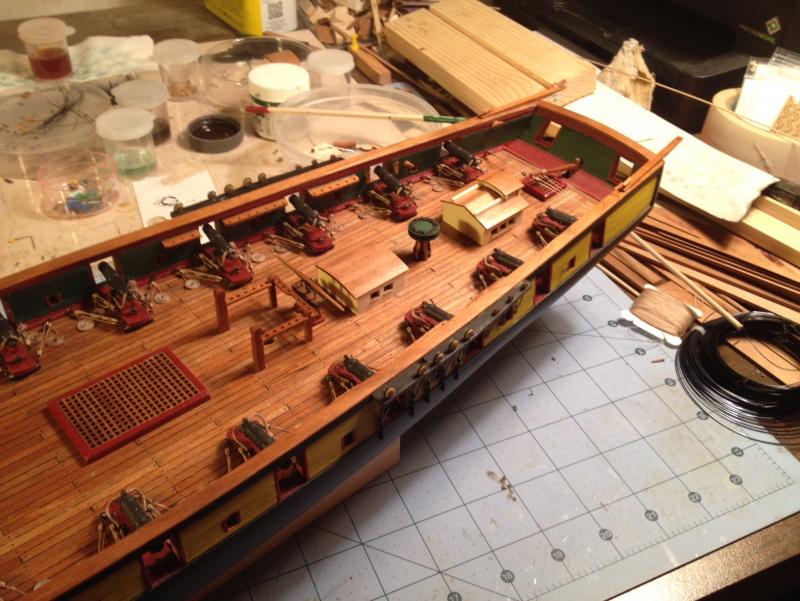
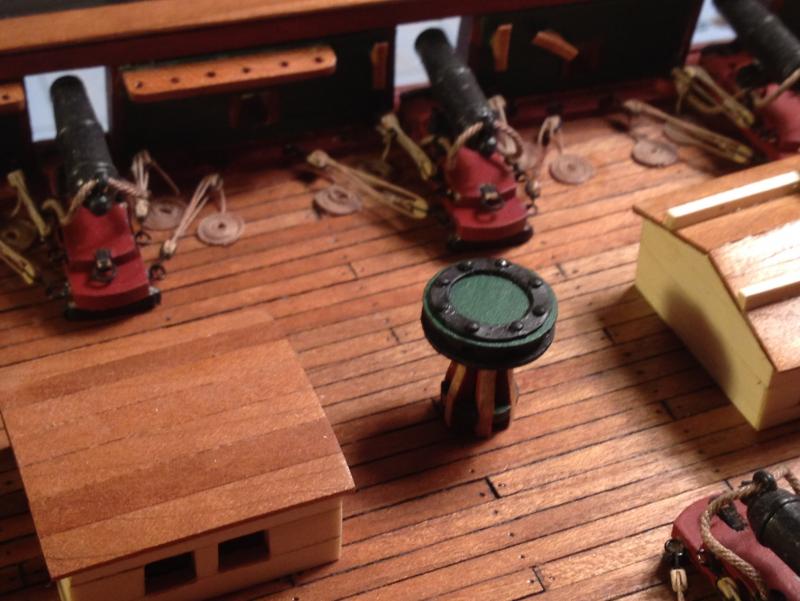
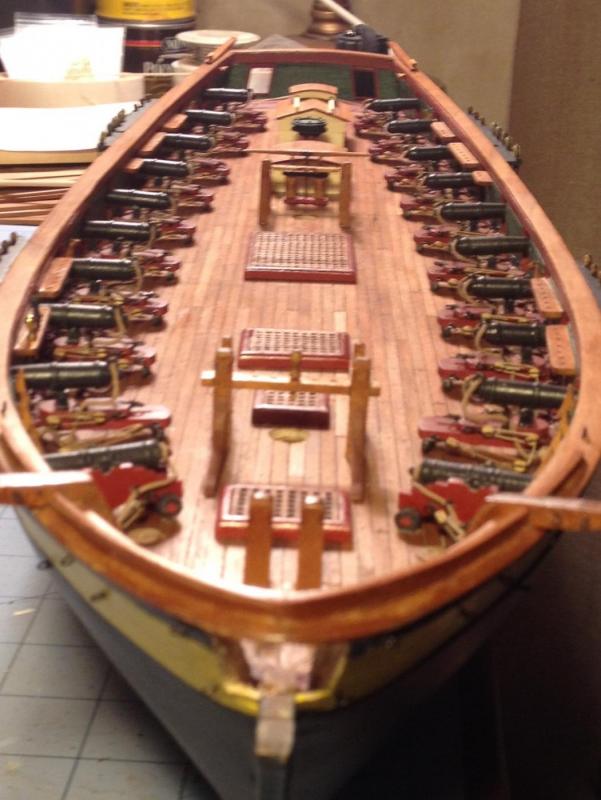
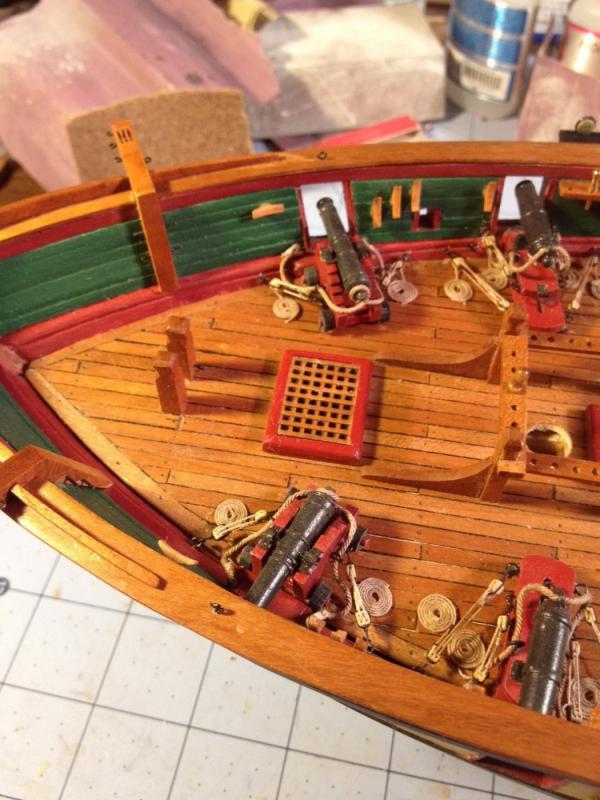
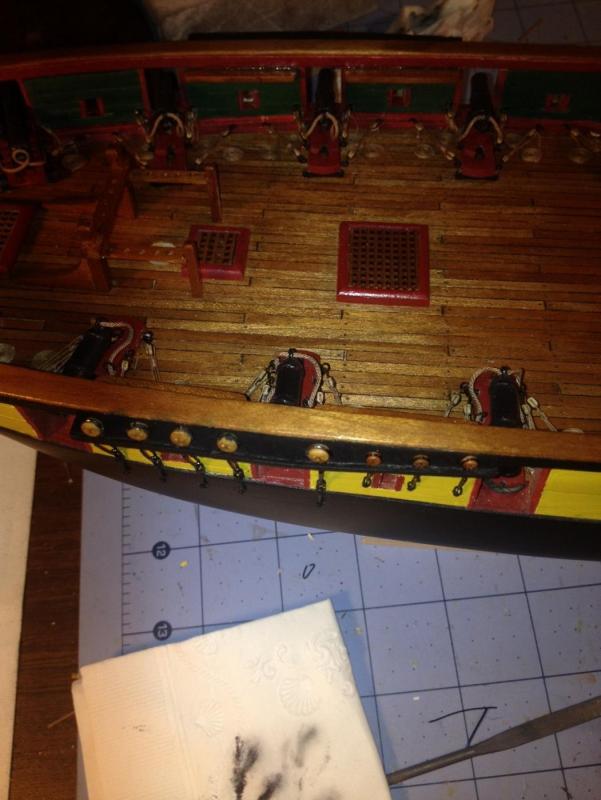
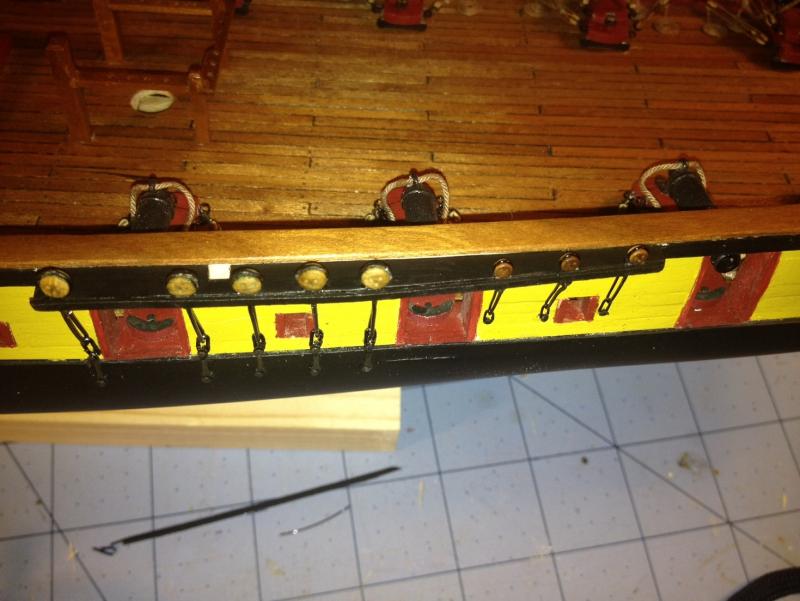
Deck Furniture, Cleats and Eyebolts, I am working hard to complete sheet 3 from the plans which should clear the way to begin rigging the ship. My “odds and ends” have taken over a week, and I am still not finished. I decided to finally glue down all of the deck furniture that I built. I had to construct the capstan. It was an intricate piece (of course what isn’t). Small parts, fine painting with red, green and black, and a brass ring on top with blackened pin heads for carriage bolts. The ring was a challenge. After trying to cut it out by hand (could not get the inside diameter round enough), I decided to wedge the brass sheet between two pieces of hard maple and drilled a hole with a sharp ½ inch drill bit. I then cut the outside diameter with some tin snips. After about 4 tries, I got one that passed inspection. I then glued down the pump, capstan, skylights and companionway. I had to deal with the deck crowding. Joel brought to my attention how the plans have the capstan wedged between the main skylight and companionway such that you could never have room to operate it. He is also of the opinion that the original ship did not have the deck buildings. To compromise, I decided to mount just the main skylight and companionway and such that there is more room around the capstan. I left the captain’s skylight out. I gave my captain his own companionway instead. I also mounted all of the cleats and eyebolts on the inside bulwarks. I used boxwood cleats from Syren. I had to sand all of the laser burn marks and soaked them in some cherry stain. I pinned them and attached them. I also attached all of the eyebolts on the outside hull, most of which go to the bow. Still working on the smoke stack. I am now faced with the Hammock rails. I have surmised that I should install this before I rig the fore and main masts. That means 44 metal rails, and a lot of mental work figuring out how to construct adequate looking hammocks and canvas covers. I don’t have the material, so I will be making a trip to the craft store. Any suggestions on the canvas material????? Here are some photos of the work as of today. I just realized that I have not included full size photos of the ship lately. The deck is starting to look like a real “busy” structure. I like how it has turned out so far.


- 648 replies
-
- 5
-
-
- niagara
- model shipways
- (and 1 more)
-
Elijah That actually does help -alot. It is also somewhat consistent with what I thought. Still have some odds and ends to finish before getting to it, so I will continue to give this some thought. Mike, I have 2 rigging sheets. Sheet 5 entitled "Rigging Profile" has a starboard view ship profile. Very busy and a beast to decipher. I also have Sheet 6 entitled "Rigging Sections and Details" It has a diagram of the main mast looking aft, the belaying plan, some close ups of various course and yard slings, and a diagram of yard brace rigging. Do you have these?
- 648 replies
-
- 3
-
-
- niagara
- model shipways
- (and 1 more)
-
Mike and Friends, Perhaps this is a good time to reach out to the masses for a life raft and some advice on the "Order of Things in Rigging a model ship" I have surfed many a log looking for advice on when to do what, when to actually step the masts, attach the bowsprit, how much rigging should we do before hand, etc. Obviously, I need to focus first on the standing rigging. Before I start piecing together the cryptic instructions on the two sheets of rigging plans, and begin planning on what to do first, I was hoping for some solid advice on where to start. I think I can handle HOW to do certain things (tie the shrouds, stays and such) I am searching for WHEN to do them in relation to each other. Each layer that is added has to restrict the work area of the next layer I would think. I get the impression that some things are obvious. I am now working on seizing the required blocks on the trees and masts while they are off the ship, which by the way is a challenge in and of itself since there is no good diagram in any of the plans, or a list of simple instructions that definitively lists what is needed. I am finding that I have to go through both rigging plans and even some of the previous sheets to pick up a "full picture" of what is required. If I ever get all of the blocks tied on, what do I do next? Am I making any sense?
- 648 replies
-
- 3
-
-
- niagara
- model shipways
- (and 1 more)
-
Mike, Looking great. Keep up the "stropping" From experience, when you are done, your deck will look real awesome and you will feel a great sense of accomplishment... only to be thrust into another tedious task, but I am sure you know that. As long as it is still fun, it is all good. Your work and advice keep inspiring me to move ahead, I thank you for that.
- 843 replies
-
- 2
-
-
- niagara
- model shipways
- (and 2 more)
-
Mike and Mike, Good advice. Your thoughts have given me an idea. I am going to work on this tonight and let you know if it works out. Finished the starboard chainplates. Another tedious job to check off the list. I am getting dangerously close to the rigging stage. Oh my....
- 648 replies
-
- 3
-
-
- niagara
- model shipways
- (and 1 more)
-
Thanks guys. Tried both and nada. The problem is getting a drill bit to seat in the center and not migrate into one of the adjoining deadeye holes. It would be better off to give me a solid disc with no holes. I can't scribe a starter hole into the hardwood deadeye without breaking it. Veryfrustrating. I will go ahead and just acquire some. Worked on the starboard chainplates. Mainmast done, working on foremast.
- 648 replies
-
- 3
-
-
- niagara
- model shipways
- (and 1 more)
-
Very good advice. I use a fly tying bobbin to keep tension on my seizing lines. The fly tying tools are great, but the fly tying threads are also good. Great products for seizing lines.
-
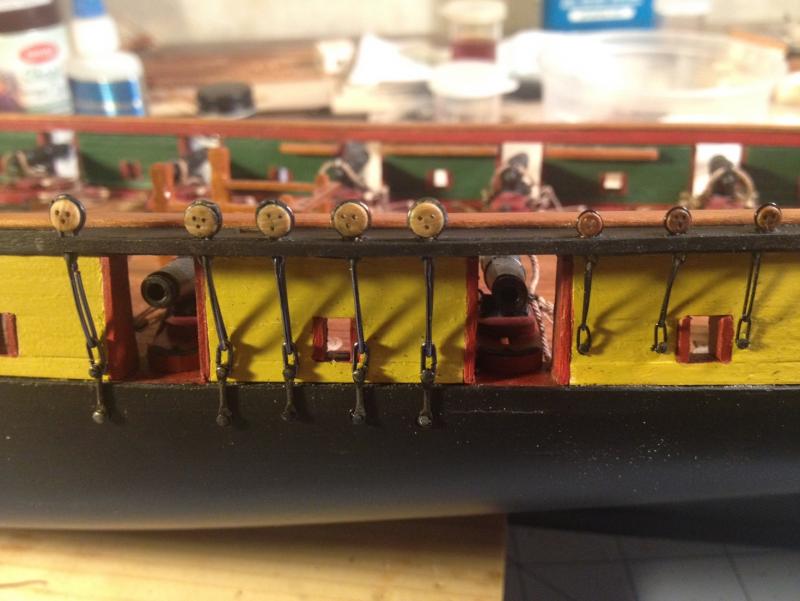
CHANNELS AND CHAINS I fabricated the channels, cut the chain notches, and for the main mast channels, cut out the boat davit notch. Sanded, primed and painted flat black with the air brush. I then made the final long link for the shroud chains, after many trials and errors to get the right length, and wired up the small deadeyes for the stay chains. I then attached them to the channels, and pinned the chains with a blackened head of a straight pin. I will adjust the angles if necessary when I rig the shrouds. And then I ran into some frustrations. I very much like this kit, and have complimented Model Expo continuously throughout this process. However, I have to question something. The plans call for “7/64 deadeyes for the topmast backstays” and “9/64 deadeyes for the lower shrouds.” Fair enough. Then why does the kit only supply “3/32 and 1/8 deadeyes”? I realize we are dealing with very small differences that are lost to the naked eye, but there are many examples where the plans call for items and sizes that do not match the kit supplied implements. I realize that cost is an issue, and as I have said this is a GREAT KIT. But really guys… Also, the kit does not provide bullseyes. The plans call for you to drill out the center of the supplied deadeyes. Can someone teach me how to drill out the center of a 3/32 deadeye with three holes to make a bullseye. Way to small and brittle, and no way to center a small drill bit. They are made of hardwood, and to score a center hole with a pin, you have to press so hard that the deadeye breaks before you make a mark. It would be appreciated if the kit simply supplied them. I gave up after an hour after realizing the best way to open up the center was to chisel it out with an exacto knife. They looked pretty bad, and forget trying to hone out the middle with a drill bit, they only break apart. Therefore, my top gallant backstays will be rigged to a deadeye instead of a bullseye. There are going to be many other uses of bullseyes, so any suggestions are welcome.
- 648 replies
-
- 7
-
-
- niagara
- model shipways
- (and 1 more)
-
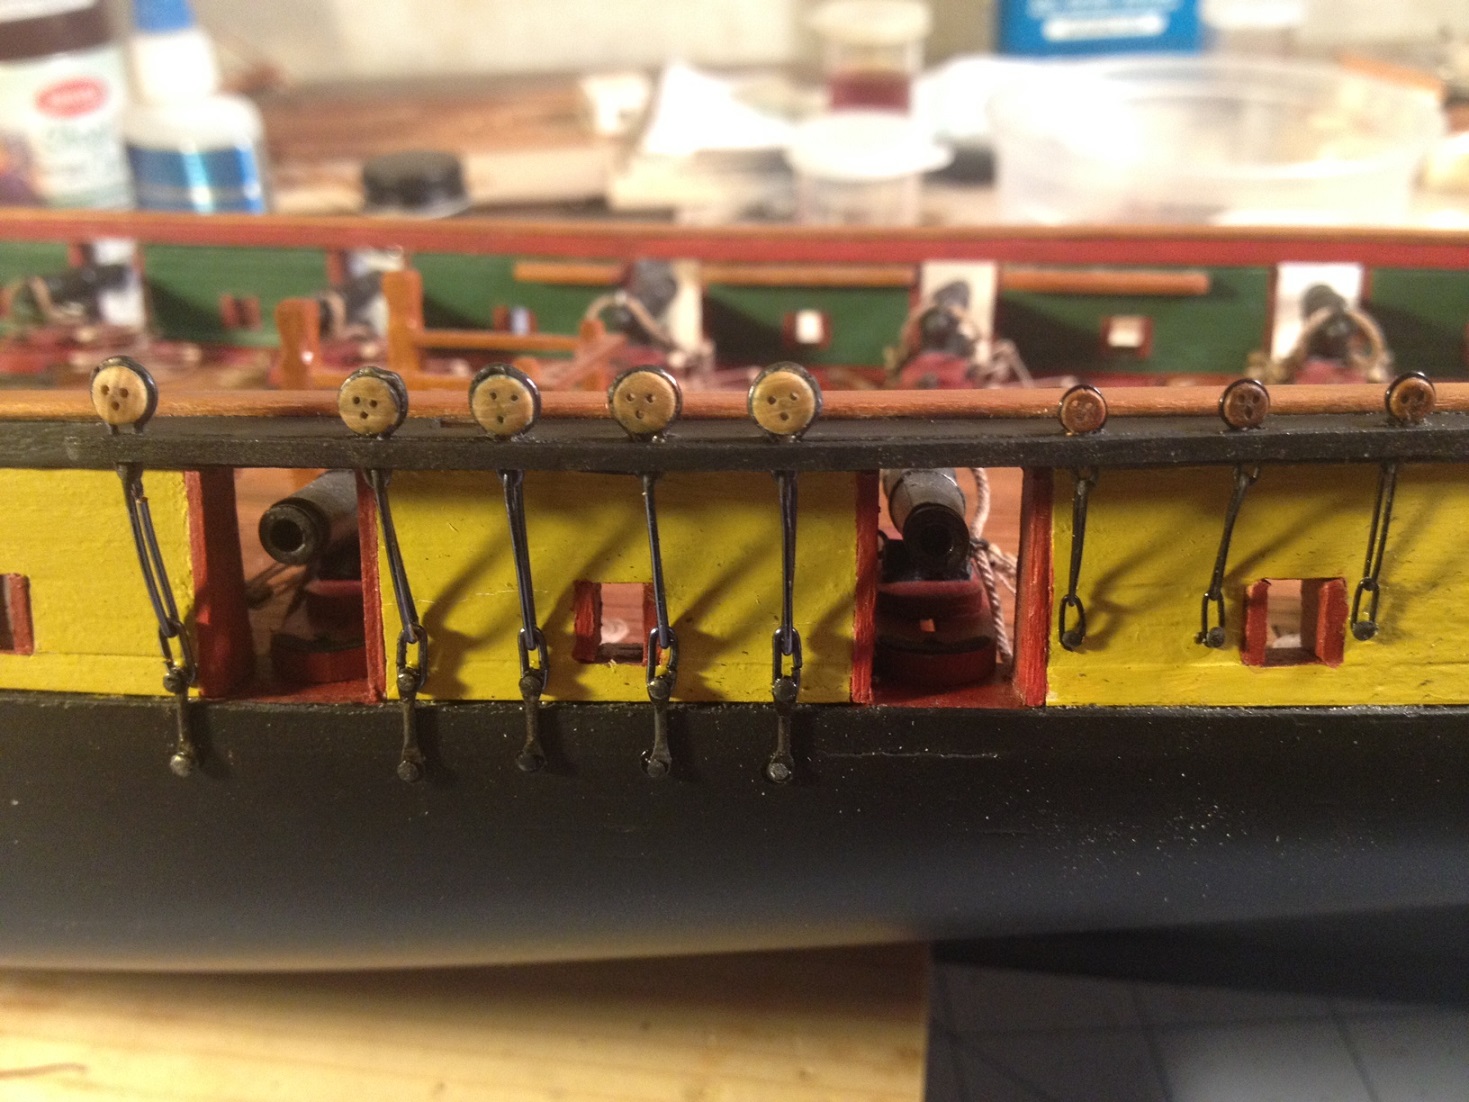
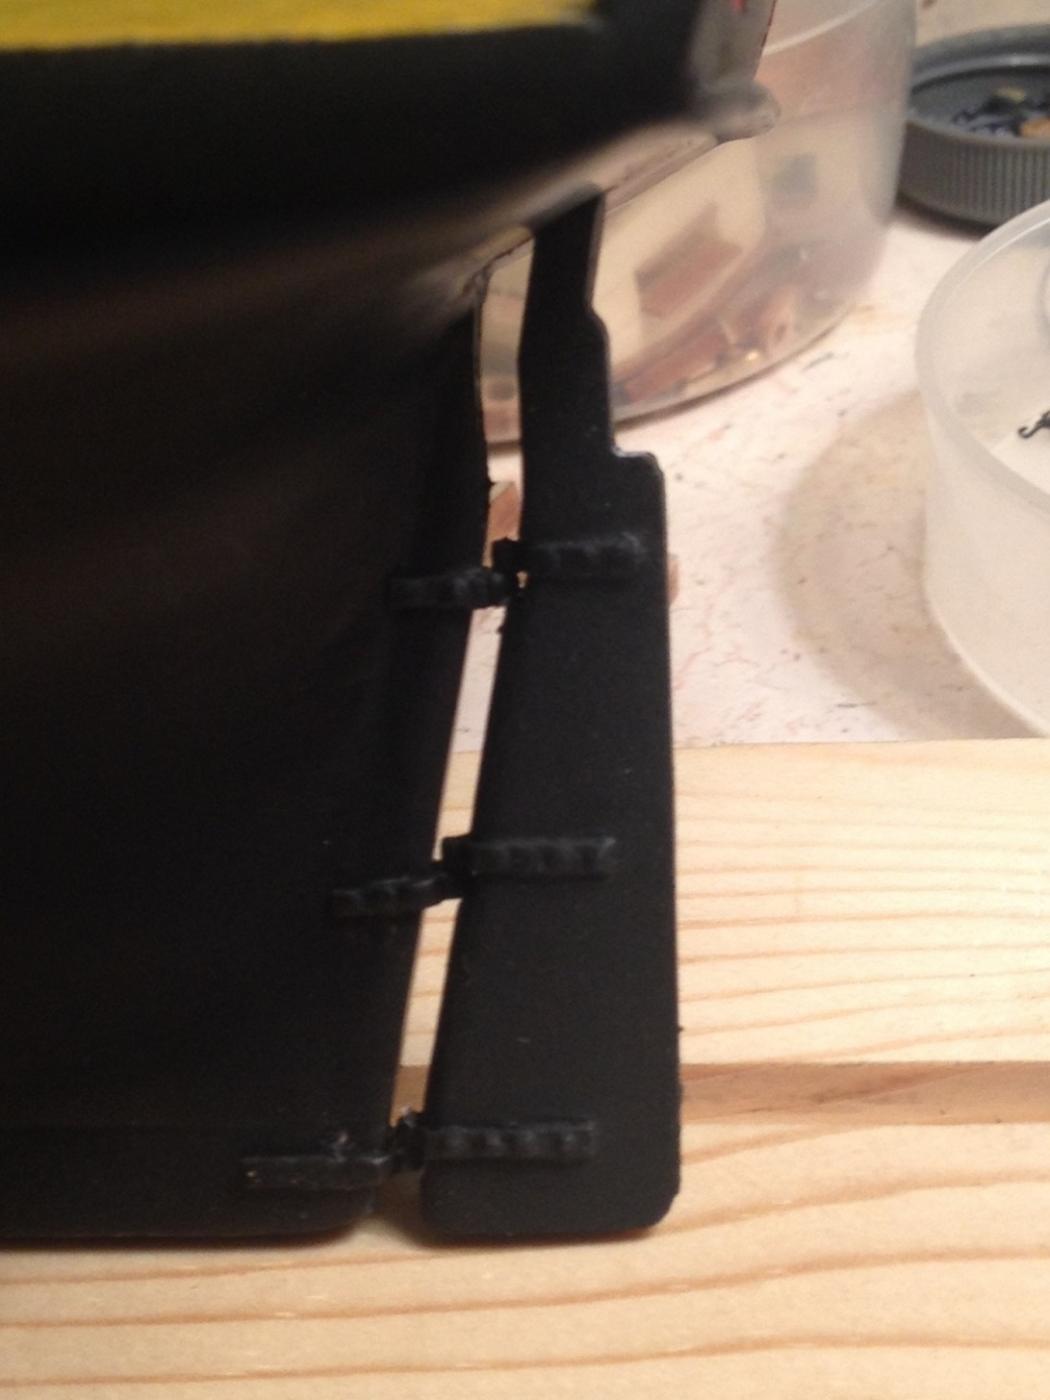
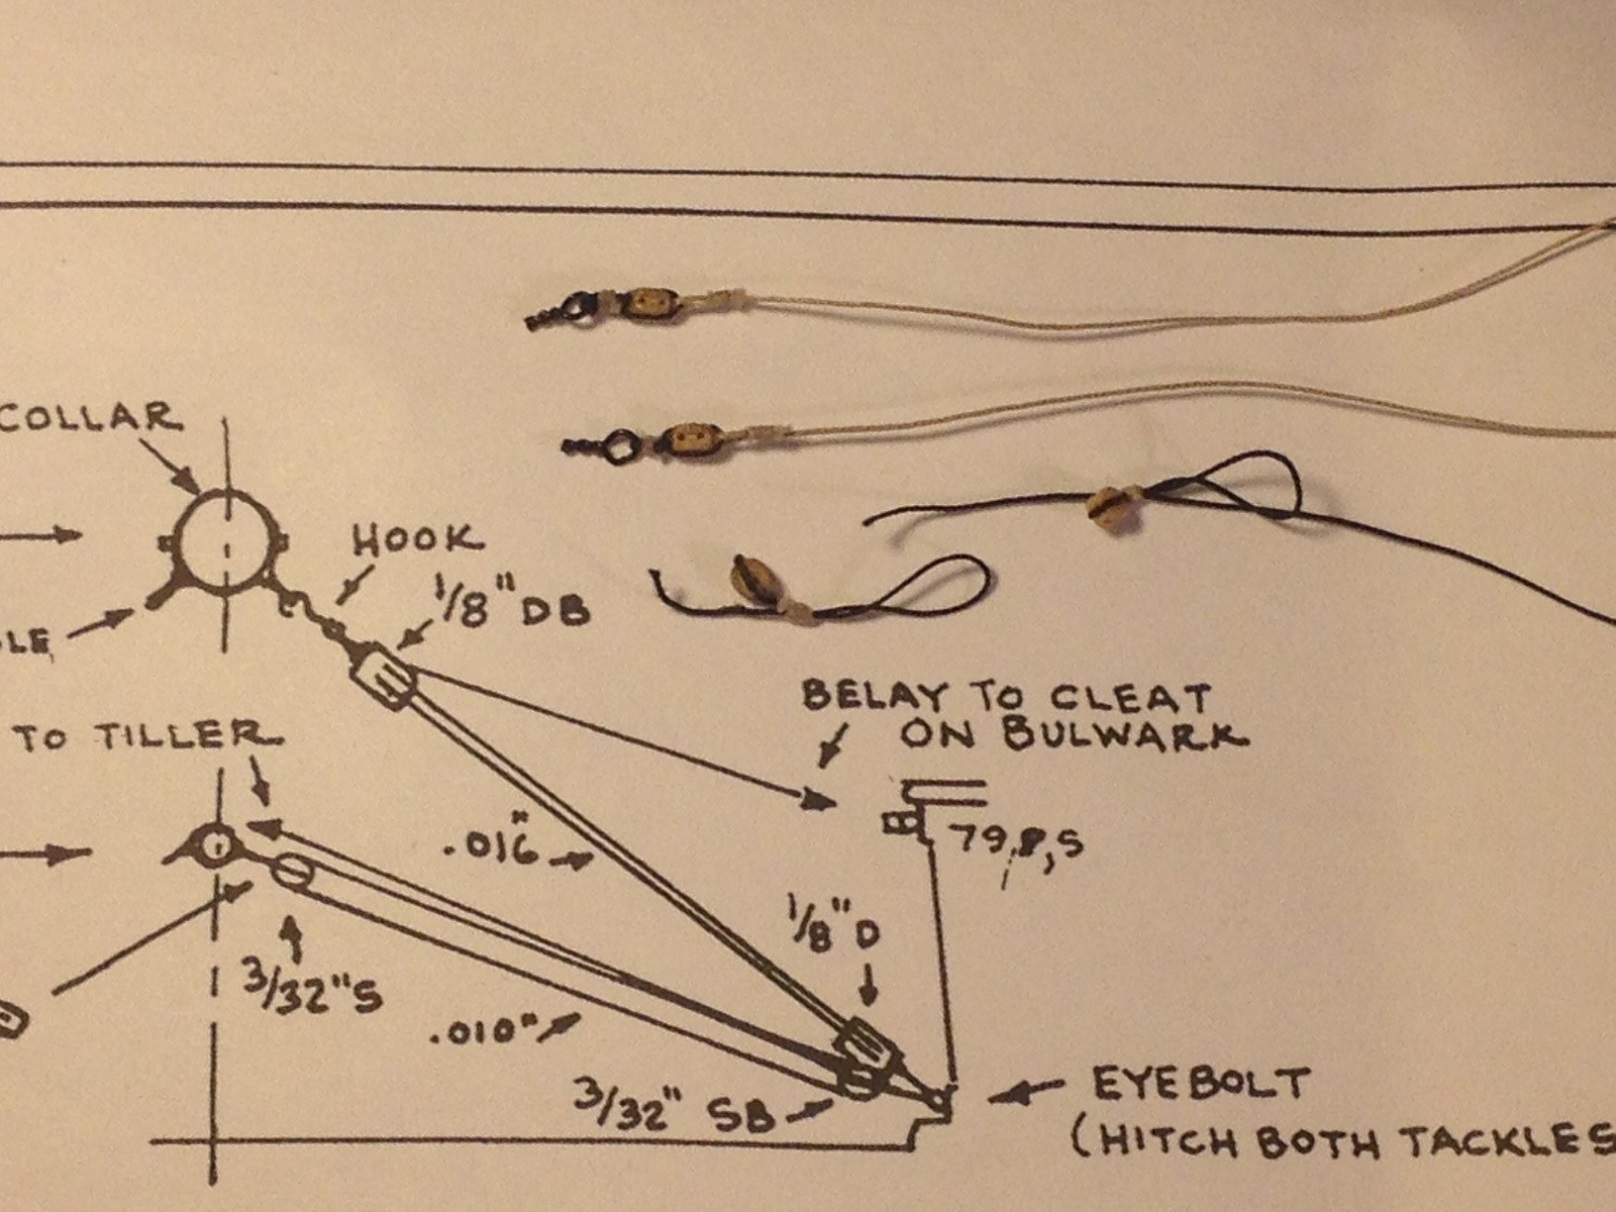
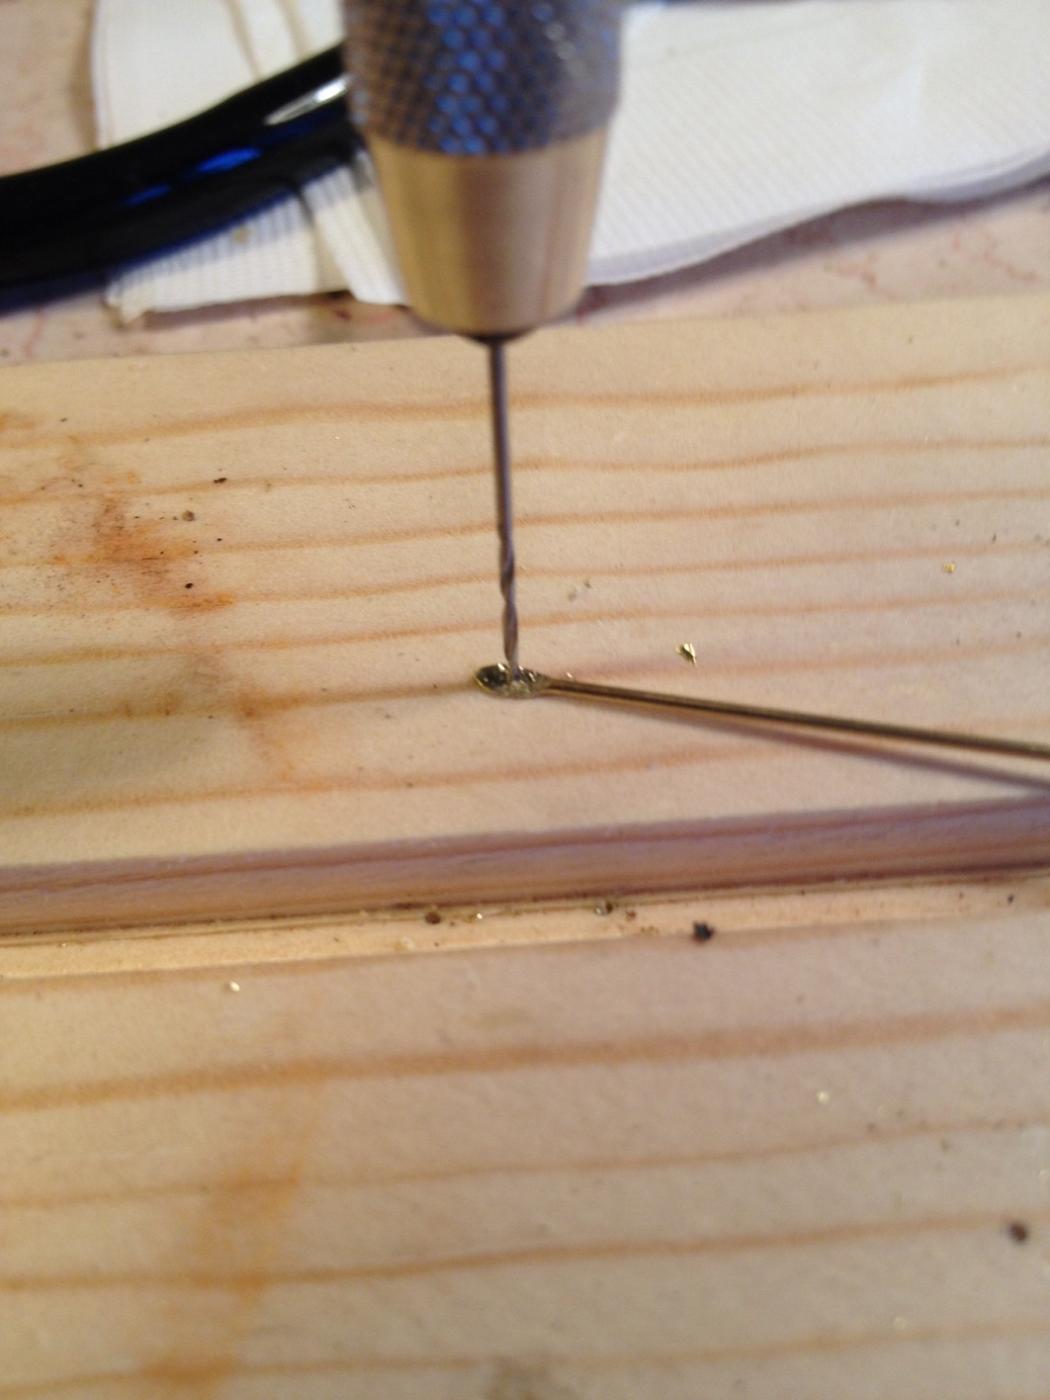
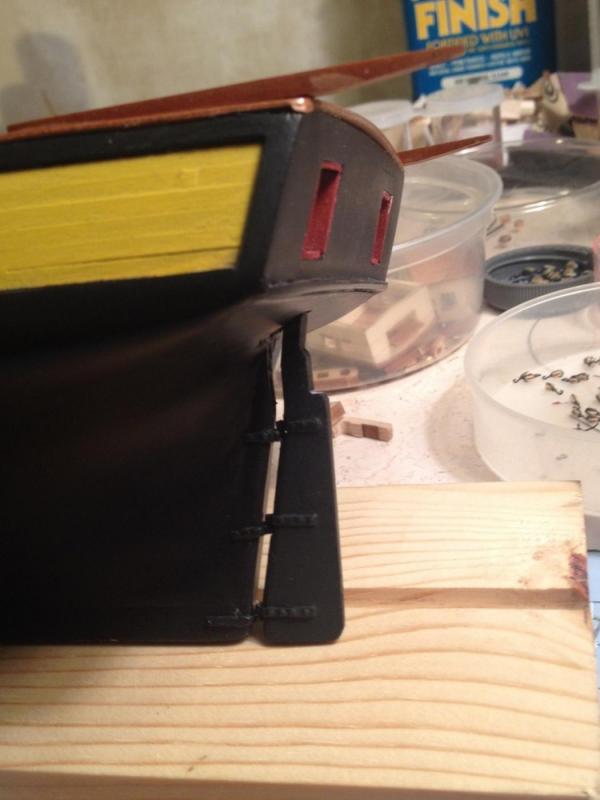
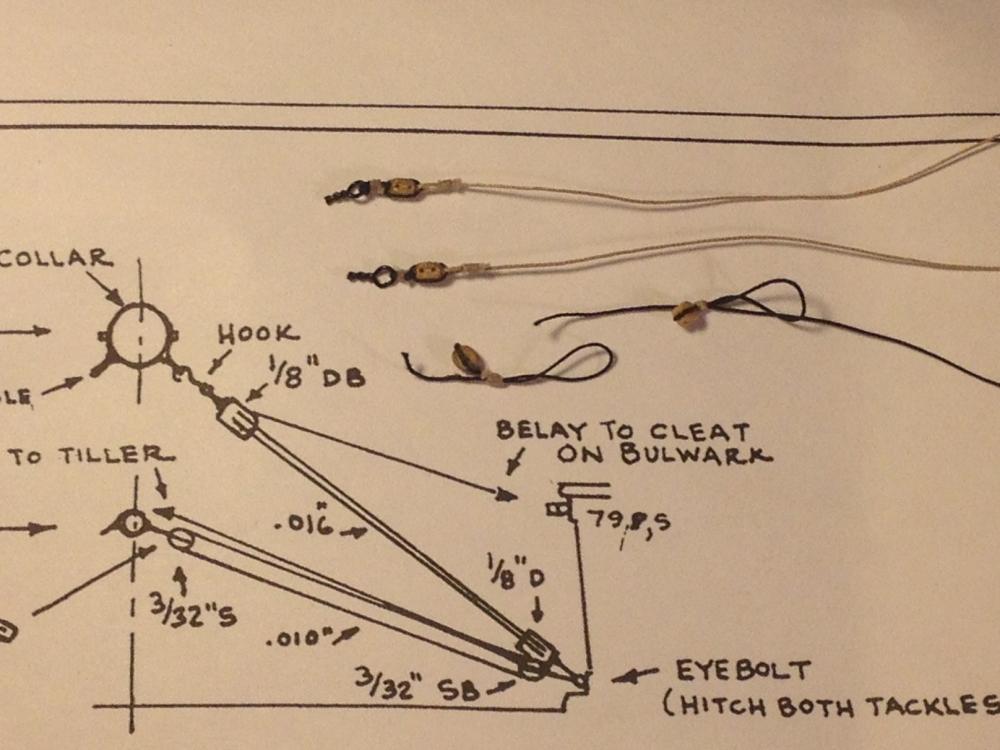
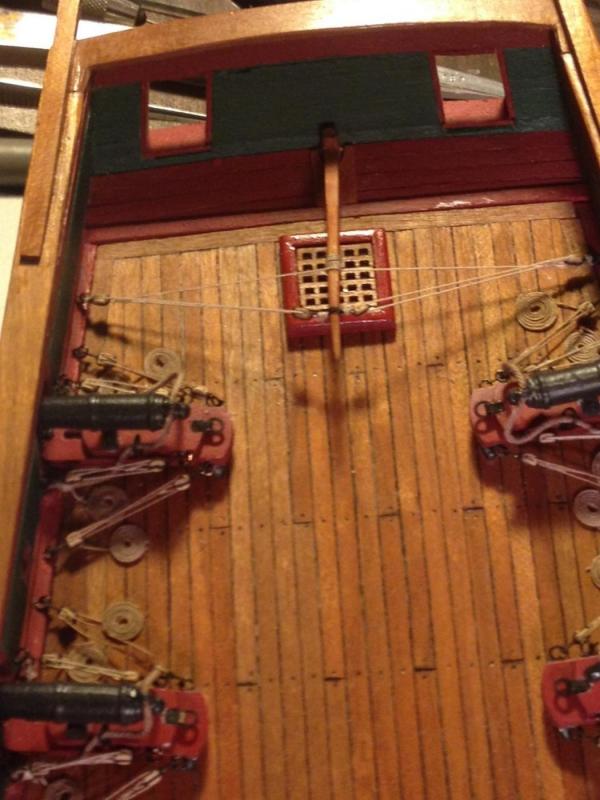
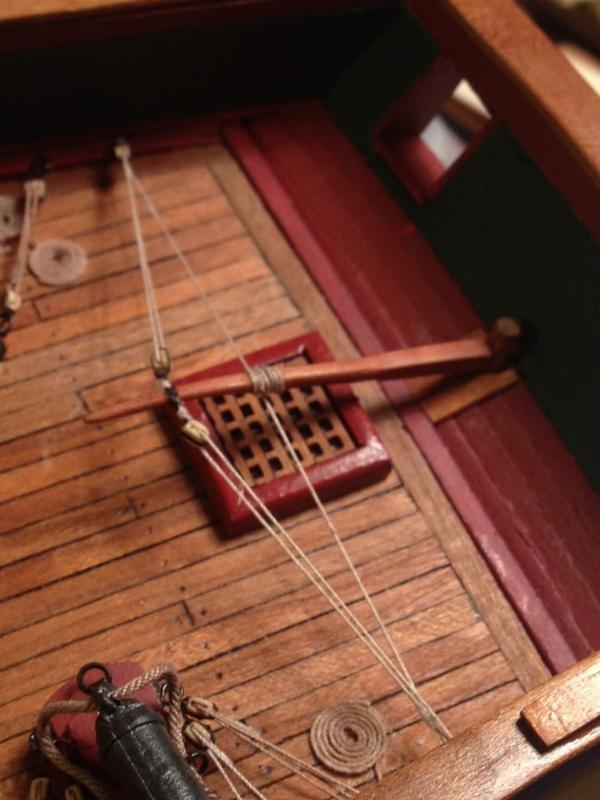
Rudder and Tiller Assemble Spent some time in the paint booth, putting on a layer of primer and flat black on my rudder, gudgeons and pin assemblies. I also painted my channels. I used an aerosol primer and first coat of black paint. My final coat of paint was put on with the airbrush. I stained the top of the rudder that rose above the deck with a cherry stain. Overall, a good finish for all. I then attached the rudder to the hull. I scratched off the paint on the hull, measured and re-measured and glued the pins in place. I attached the tiller and then proceeded to work on the tackle ropes. The plans call for set of single 3/32 blocks that are seized to an eyebolt in the waterway on one end and belayed to the tiller on the other. Going back to my gun tackle experience, I went ahead and created two loops with pre-made seizings and stropped them to a block. I also placed an additional piece of .008 black rope on top that I used to seize to a hand made eyebolt. For the block at the tiller end, I first molded a single strand of .008 black rope into a circle eight and through a series of vices and tape, was able to position it such to seize the intersection point, leaving two tales that could tighten each loop. With one loop, I placed a block inside and tightened it down. I then placed the other loop over the tiller handle and tightened it down. I then applied a small drop of medium CA to freeze the knot and trimmed of the tales. I then rigged the lines, and tied the tails off on the tiller handle as per the plans. This “little” project took all evening. Here are some photos.


- 648 replies
-
- 7
-
-
- niagara
- model shipways
- (and 1 more)
-
Hervie, Your modeling skills are second to none, and your Syren looks exquisite, but I have to comment on the technical quality of your build log. Your illustrated pictures and narrative are incredible. Your use of light for the photos, and the back drop are obviously by design. Heck, I can't get a photo to focus half the time. I know just enough about technology to realize that you have to be spending quite a bit of time in the planning process, and for that, I am thankful. You are giving all of our eyes a real treat. I would enjoy your log even if I did not like building ships. You are obviously bringing some of your professional skills into your retirement - BRAVO!
-
Hervie, Thanks for stopping in. I love the Syren. I will be following along. I am always trying to pick up techniques from the experts on this forum.
- 648 replies
-
- 2
-
-
- niagara
- model shipways
- (and 1 more)
-
Ken, Great looking coils! I turned mine on a sheet of glass. I also used spring loaded pointed tweezers, but was able to use .012 rope so not as tedious. Keeping the .008 from bunching up in the middle had to be a chore. The incredible detail and scale of the rigged guns is superb - and inspiring.
-
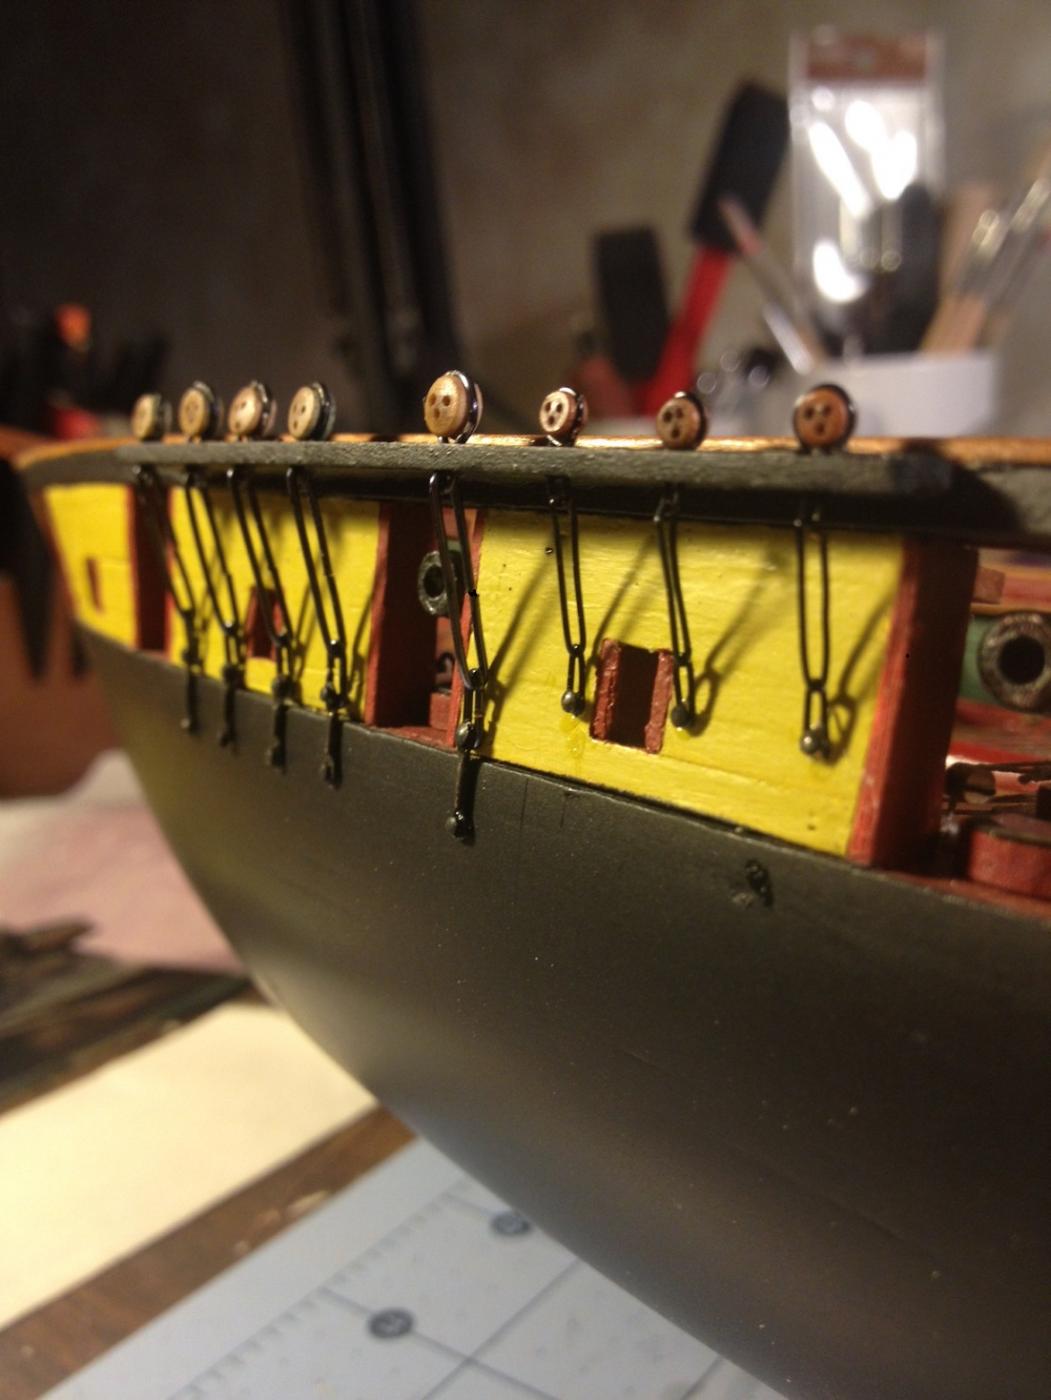
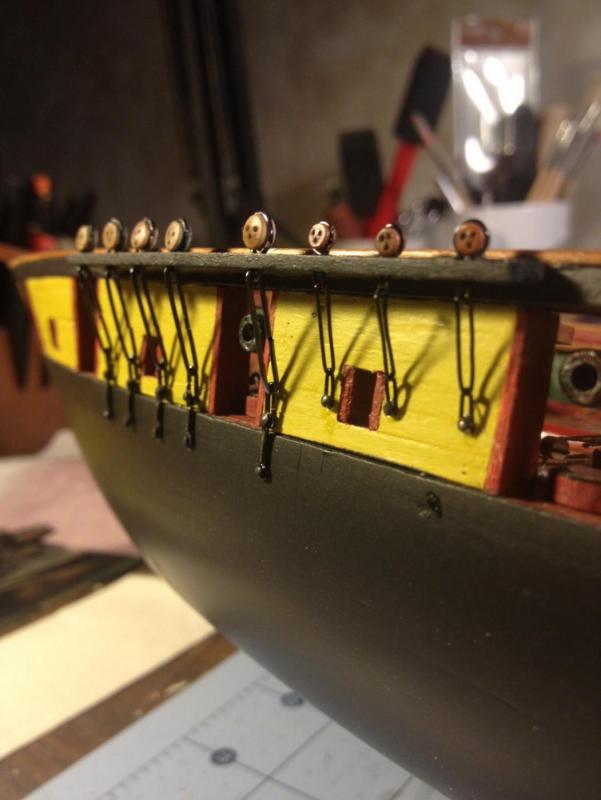
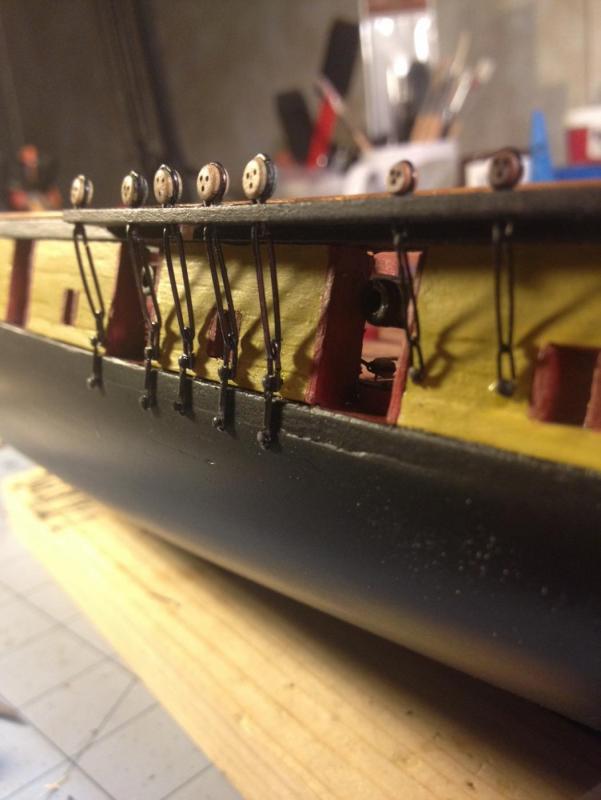
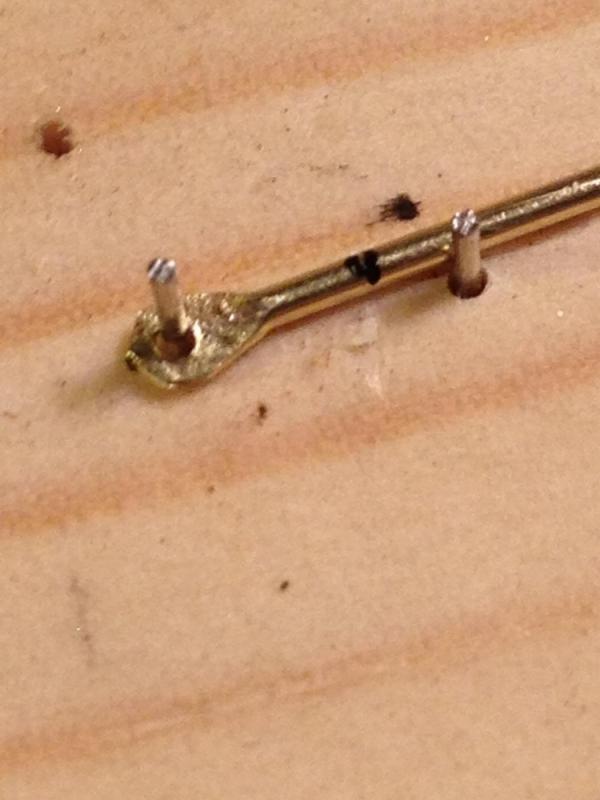
And here are some photos of the lower chainplate assembly

- 648 replies
-
- 5
-
-
- niagara
- model shipways
- (and 1 more)
-
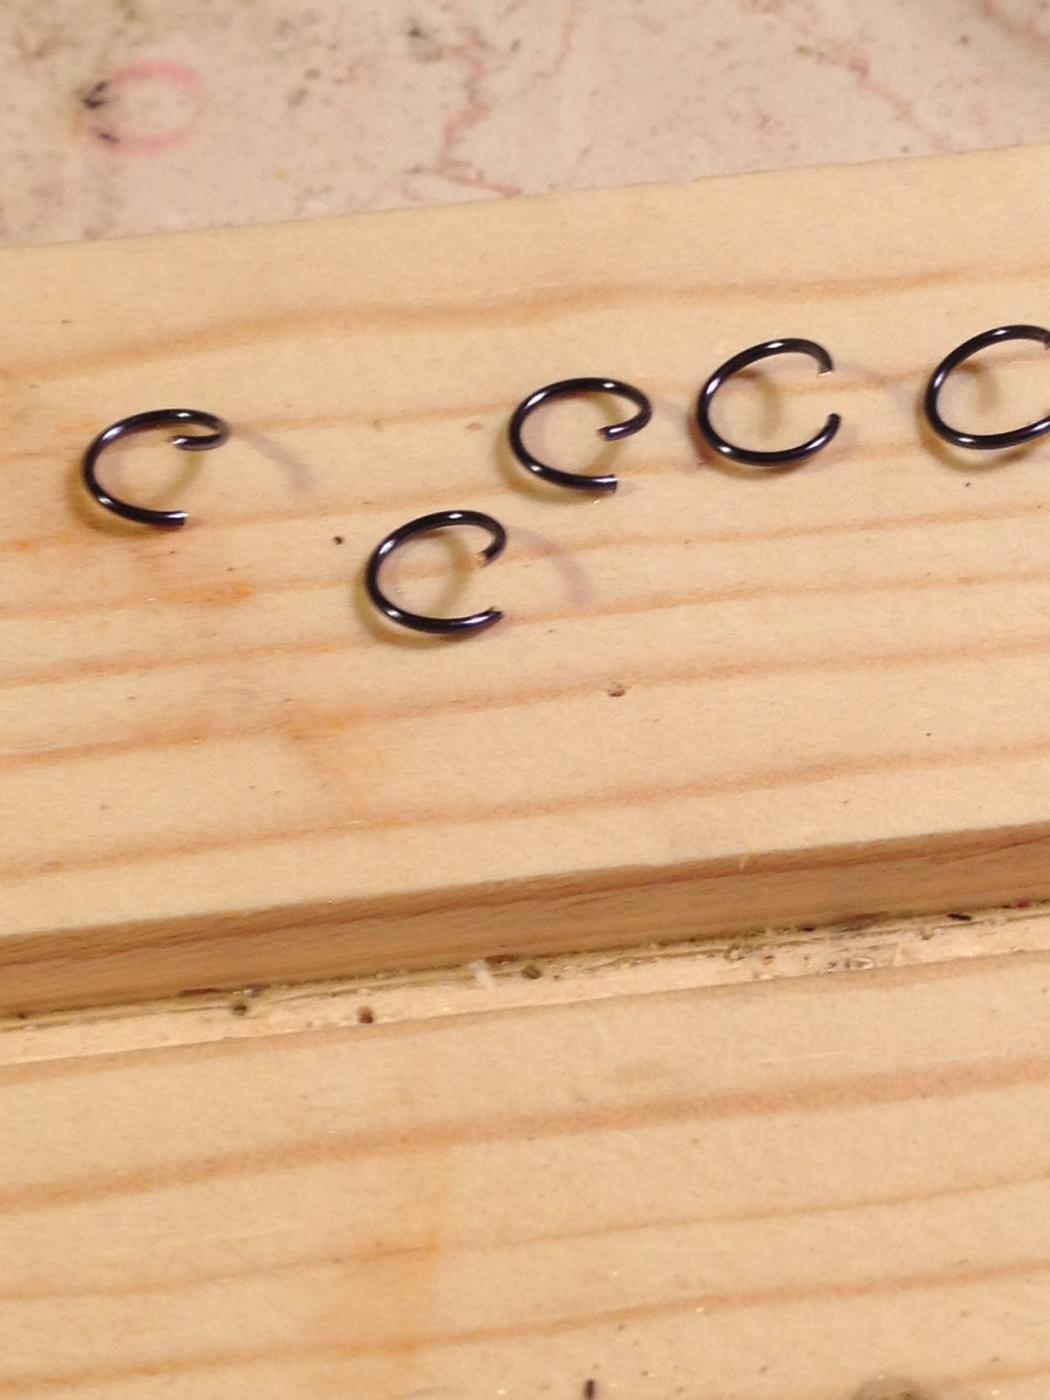
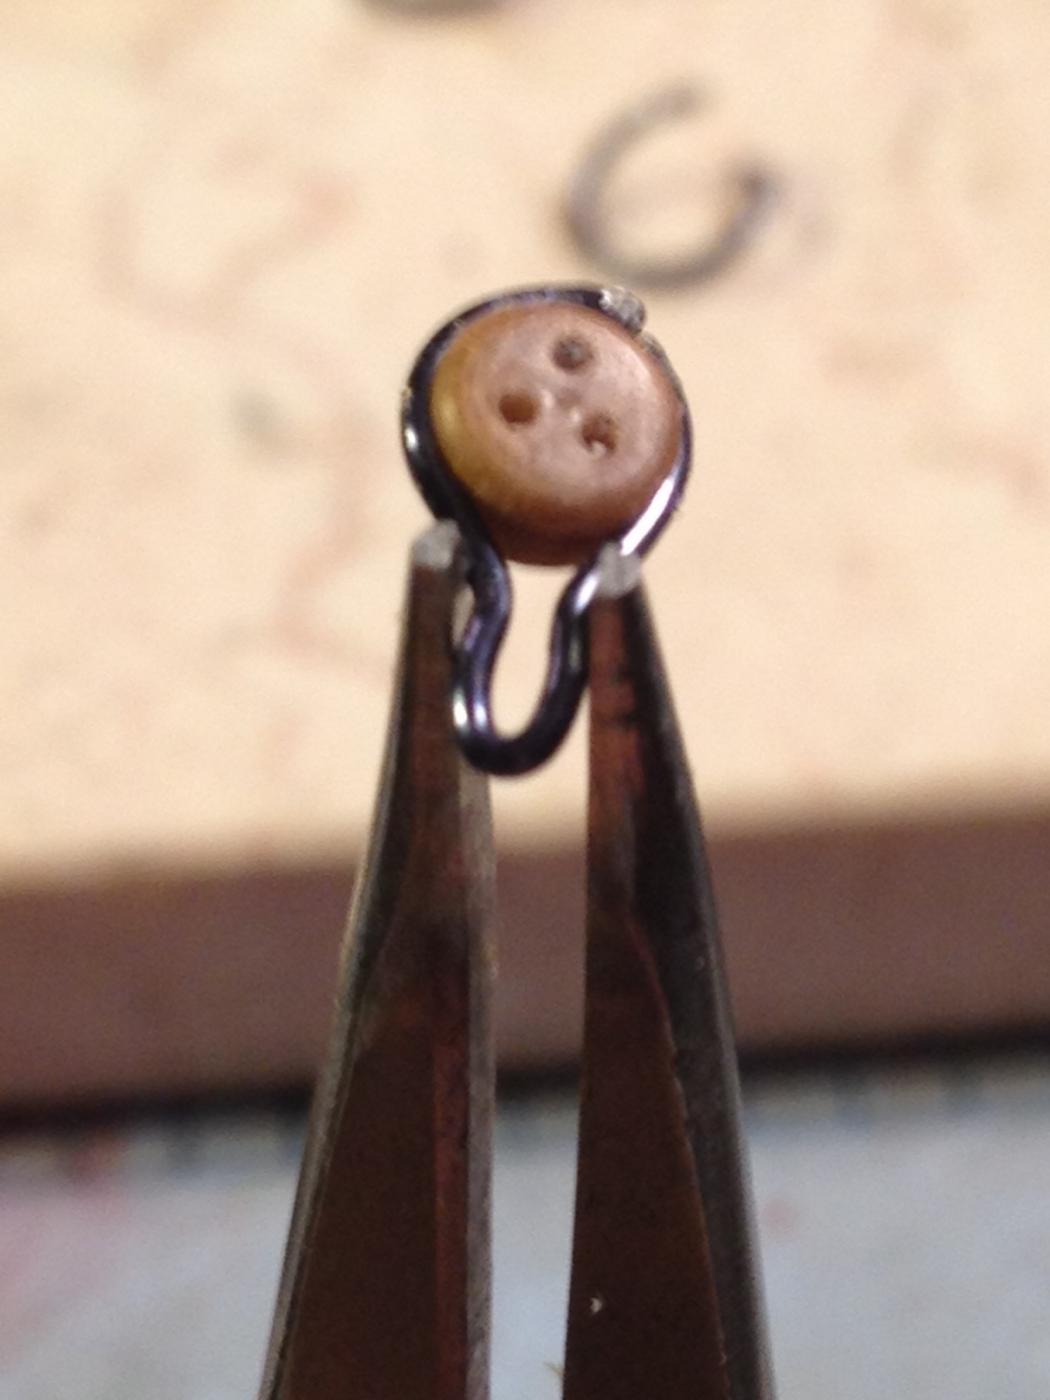
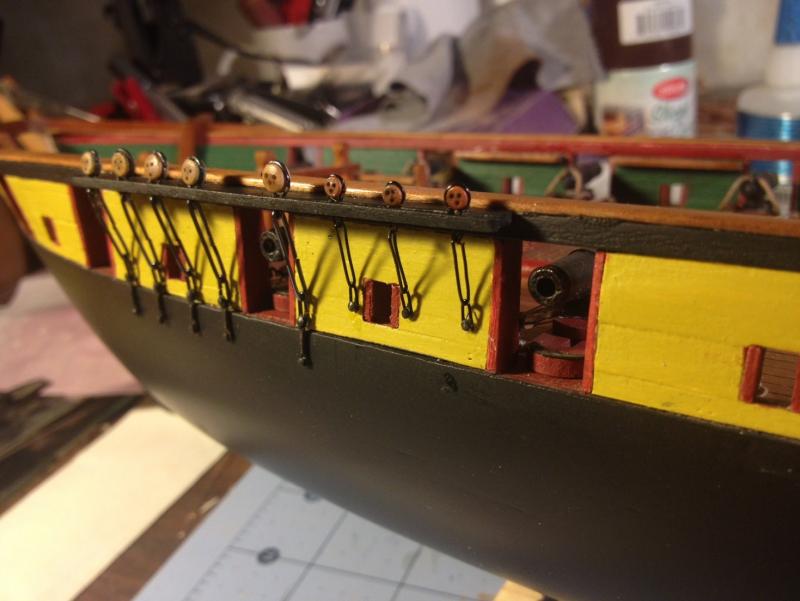
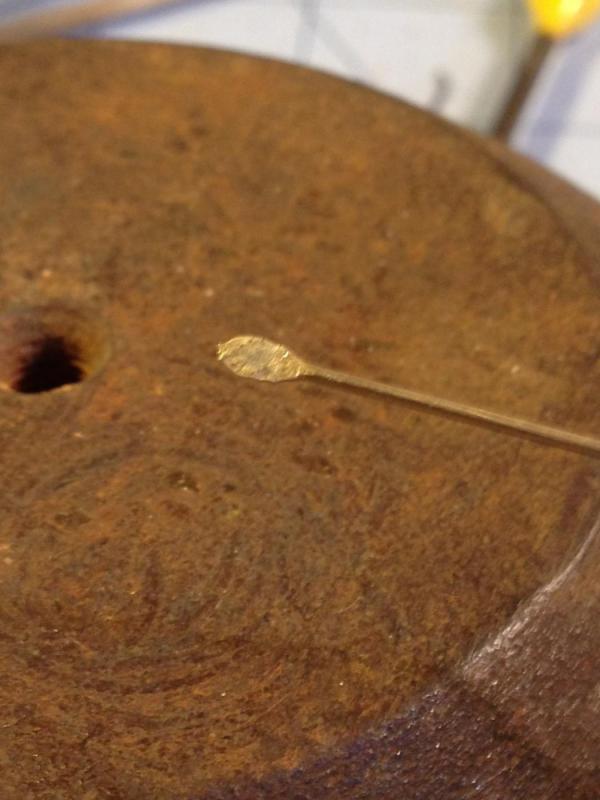
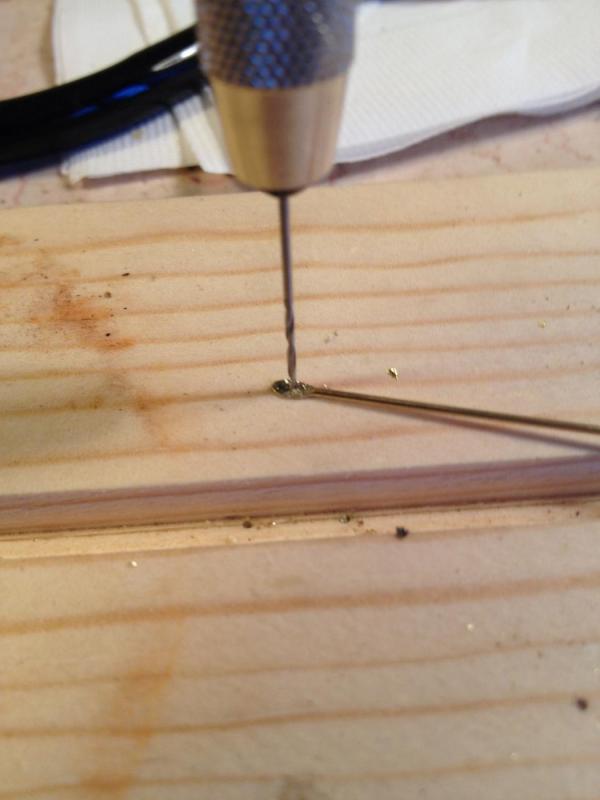
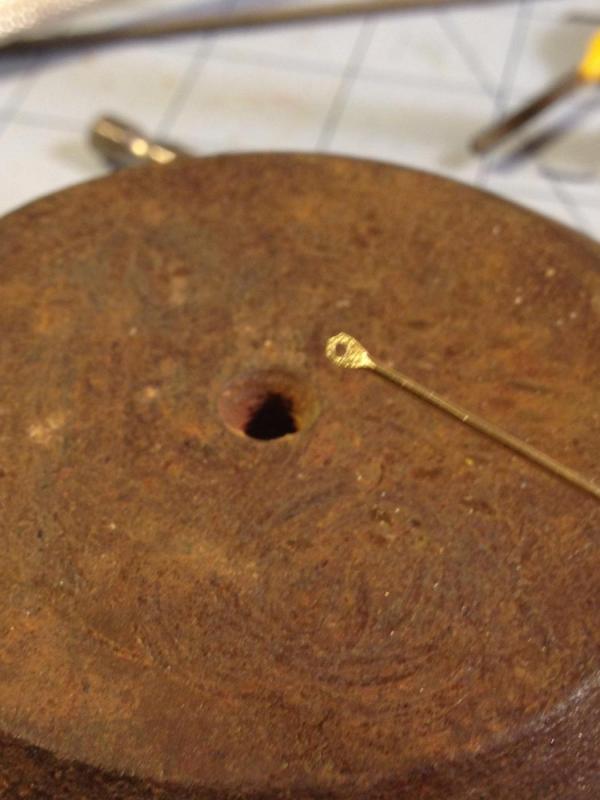
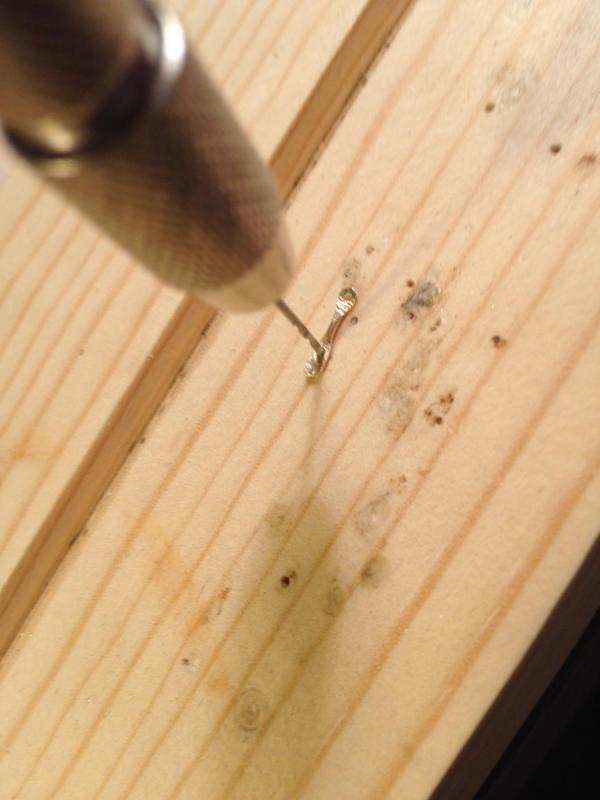
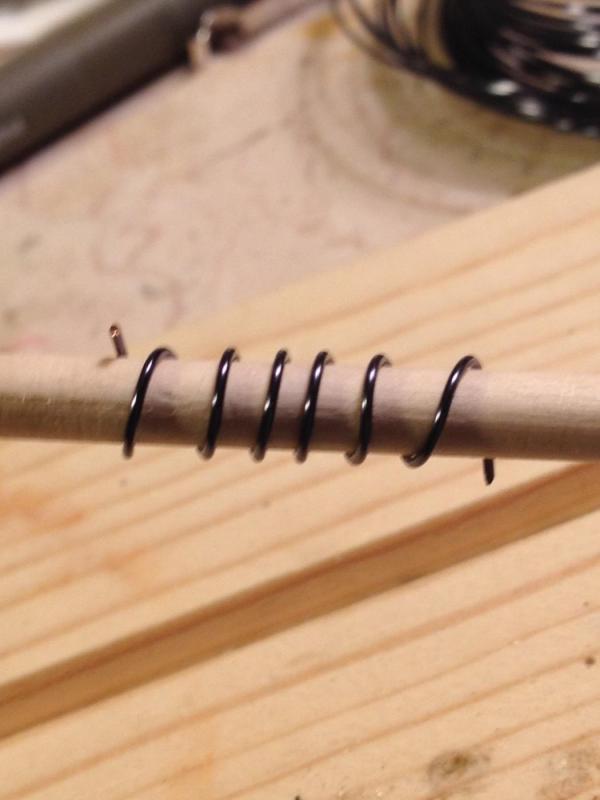
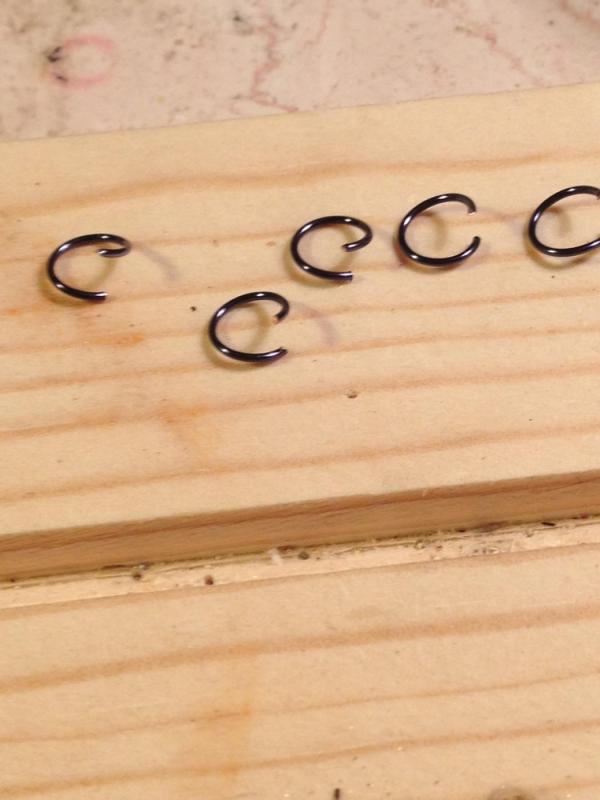
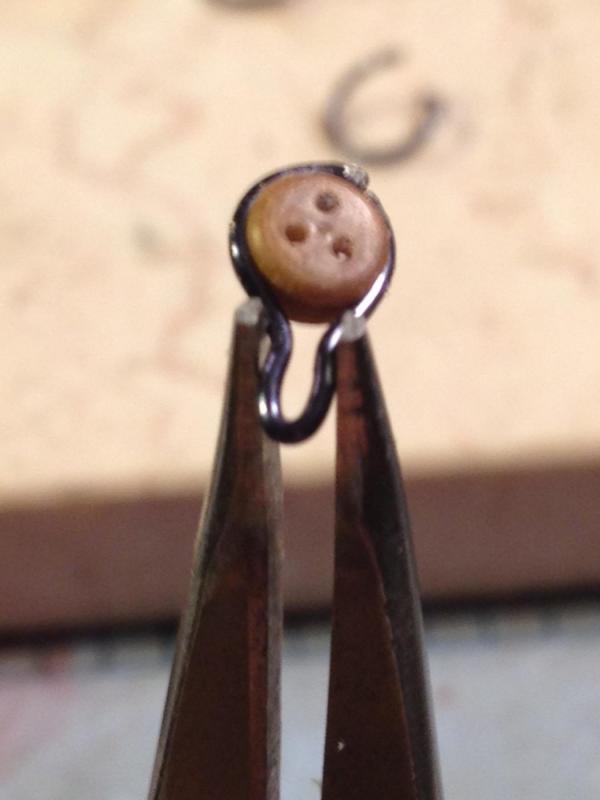
Chainplates and Deadeyes. I am getting things in order to install the channels. That means stropping (?) the deadeyes. I am not sure if that is the right term. I used a 24 gauge black wire. Picking up a tip on this forum, I experimented with different sized wire rings which when crimped, created the proper shape of the wired deadeyes. I ended up using a ¼ inch dowel rod to wrap the wire around to get my circles. I cut them, then soldered the ends, and carefully crimped the middle. I broke the solder joint on about 1/3 of them, but was able to crank out the required 20. I also worked on the bottom chainplate that attaches to the hull with carriage bolts (pins). I tried different ideas. I started making them out of the same 24 gauge black wire by wrapping it around a pin jig, then soldering the middle, leaving the holes at each end. I did not like how it looked, and it took way to long. This is a very small piece. I then decided to take a different approach. Starting with a 1mm brass rod, I flattened the end with a metal punch, and drilled a small hole with the pin vice. I then cut the rod to size using a jig to measure, and flattened and drilled the other end. I then blackened the piece. This worked reasonably well and look like the chainplates in the plans. I turned out 20 of these. I still have to make the wire parts, but believe that will go smoother, since it is a simple wire wrap. I have to work on the deadeyes for the stays, and based on suggestions from this forum, will mount the completed deadeyes on the channels that I have created (still need painted) before attaching the assemblies to the hull. Here are some photos showing the deadeye work.

- 648 replies
-
- 3
-
-
- niagara
- model shipways
- (and 1 more)
-
Ken, thanks for stopping in and "shining some light" on the topic. I love your grist mill. I was hoping to order some good NC corn meal when it is done!
- 648 replies
-
- 3
-
-
- niagara
- model shipways
- (and 1 more)
-
whats an easier build for a first kit
6ohiocav replied to rdestefano01's topic in Wood ship model kits
Rob, Forgive me, but I did not realize you were from Charlestown. By all means, let it be The Constitution. Technically, it is not necessarily more complicated than smaller ships. The basic skills are about the same. It is the volume that gets you. The Conny has a lot more "stuff" Tony's points are well said. Determination will get you there.