EdatWycliffe
-
Posts
119 -
Joined
-
Last visited
Content Type
Profiles
Forums
Gallery
Events
Everything posted by EdatWycliffe
-
Looks great, Gundorph. Q: at what point in the build did you find that it was best to fair the bulkheads? Thanks, Ed P.S. Visited Copenhagen and Bornholm not too long ago. Loved them both. Do you live near either?
-
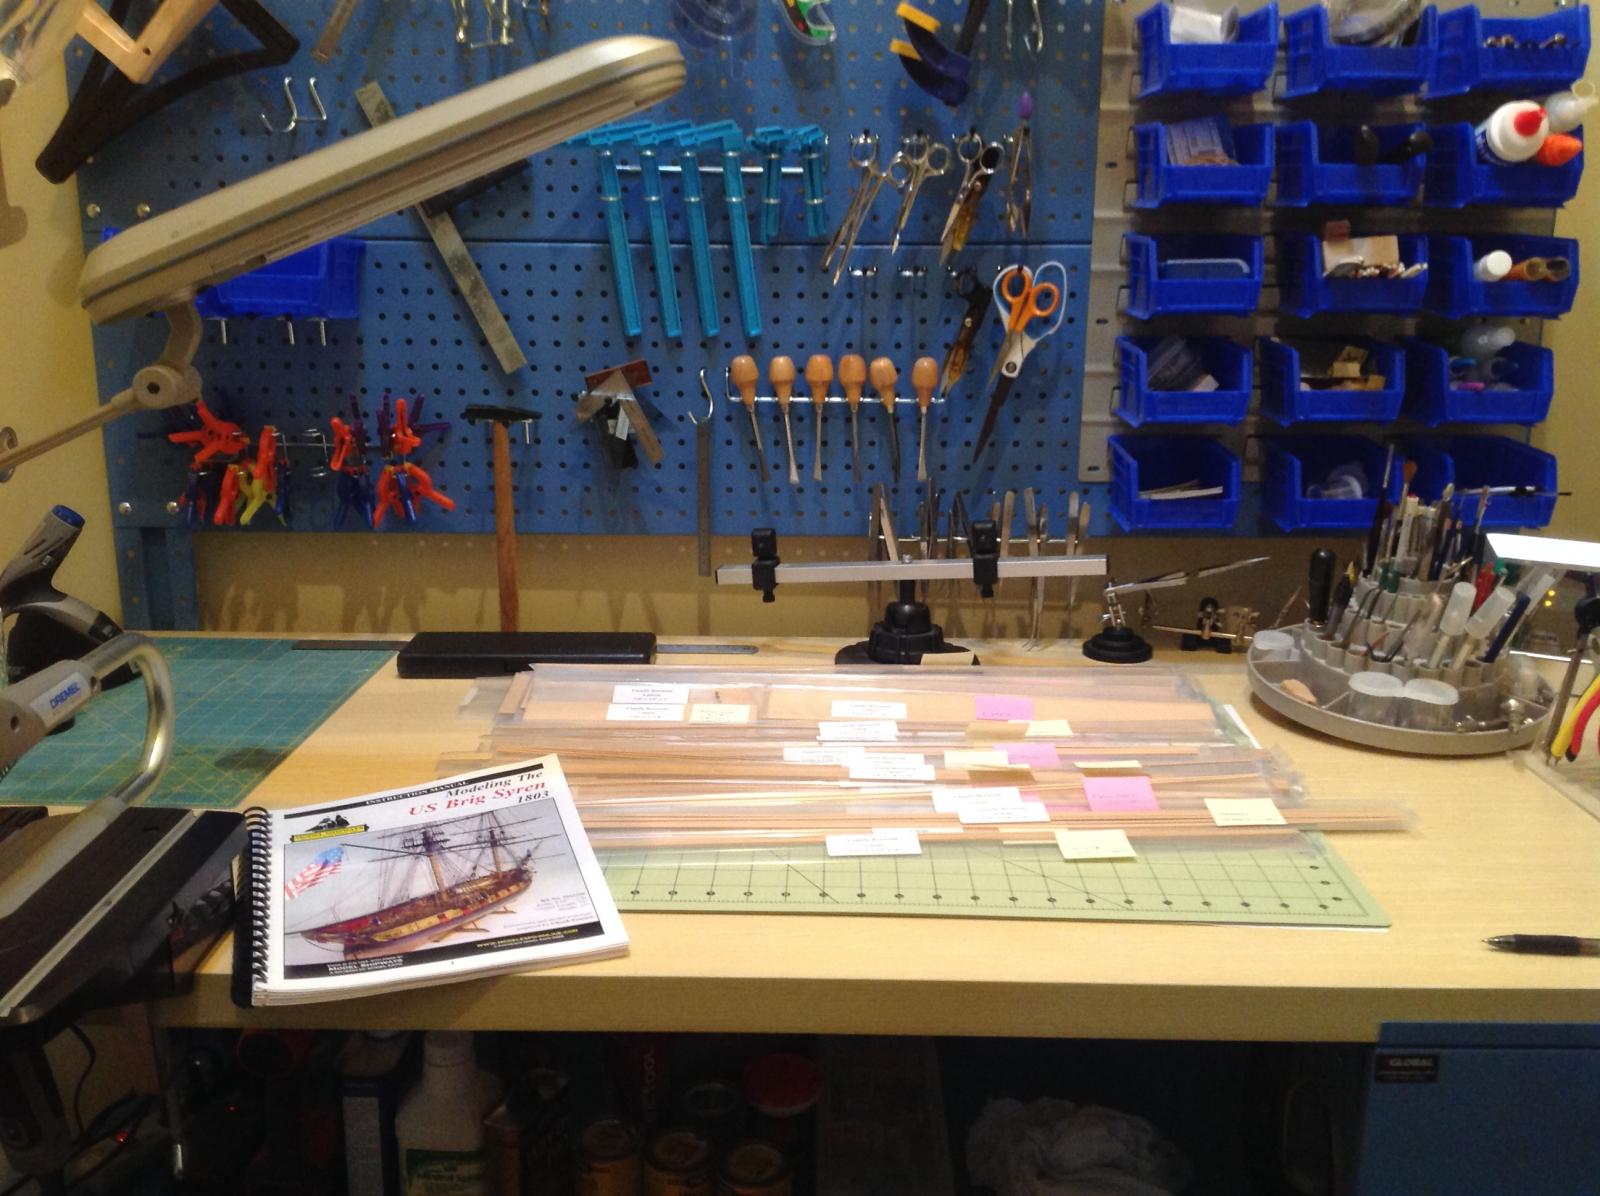
Preliminary work is done--skimmed Chuck's prototype document (a lot of skimming) downloaded from NRG, and read the instruction book a couple of times. The shippyard is clean and all tools are in place to start Syren's hull. (The rigging tools and material used for Fair American are put away and ready for Syren many, many months from now.) Plan to start the build next week. Since I hope to build most of the parts from scratch, I invested in the Dremel Moto-Saw (very good price from Amazon). I took it for a test drive and it cut smoothly and accurately. The pic is my shipyard. I just got my replacement wood package from Crown Timberyard. Each size strip and sheet is clean, milled beautifully and labeled/packaged separately. Excellent lumber source and real easy to work with. Regards to all, Ed

-
Great gift! Spend more time with the girlfriend and less time with Syren. Ed
-
Thanks, Gundorph. I'm still impressed. Recently ordered some balsa. Will try to emulate when it's time for filler blocks. Ed
-
The gun ports look terrific, Gundorph. Very smooth. I'm also impressed with the contours of the filler blocks. How did you get them to flow so well with the shape of the hull? Ed
-
Thanks, Augie. Your mentorship will be very much appreciated. Ed
-
Thanks Gundorph. Look forward to following your build.
-
Doing some initial planning for this build. Reading through the entire instruction book to get a feel for the overall model and checking out the build of some pros like Dubz, Augie and Thomas. Should be able to start the actual build in a few weeks. Just finished MS kit Fair American (Kitbashed per Lauk Street Shipyard practicum). Fair American was my first plank-on-bulkhead build after completing the solid hull MS Phantom starter kit. For Syren I ordered lumber from Crown Timberyard--holly for the deck and waterway and boxwood for deck furniture and hull planks above the copper. I must say that Jason at Crown Timberyard was extremely helpful In selecting woods and helping to determine what lumber I needed to build parts from scratch. I highly recommend the company. I'll order rope and Gratings from Chuck Passaro at Syren. I'm very excited for this build!
-
Thanks, Ken. High praise very much appreciated. Ed
-
Thanks, Bob. You are very kind.
-
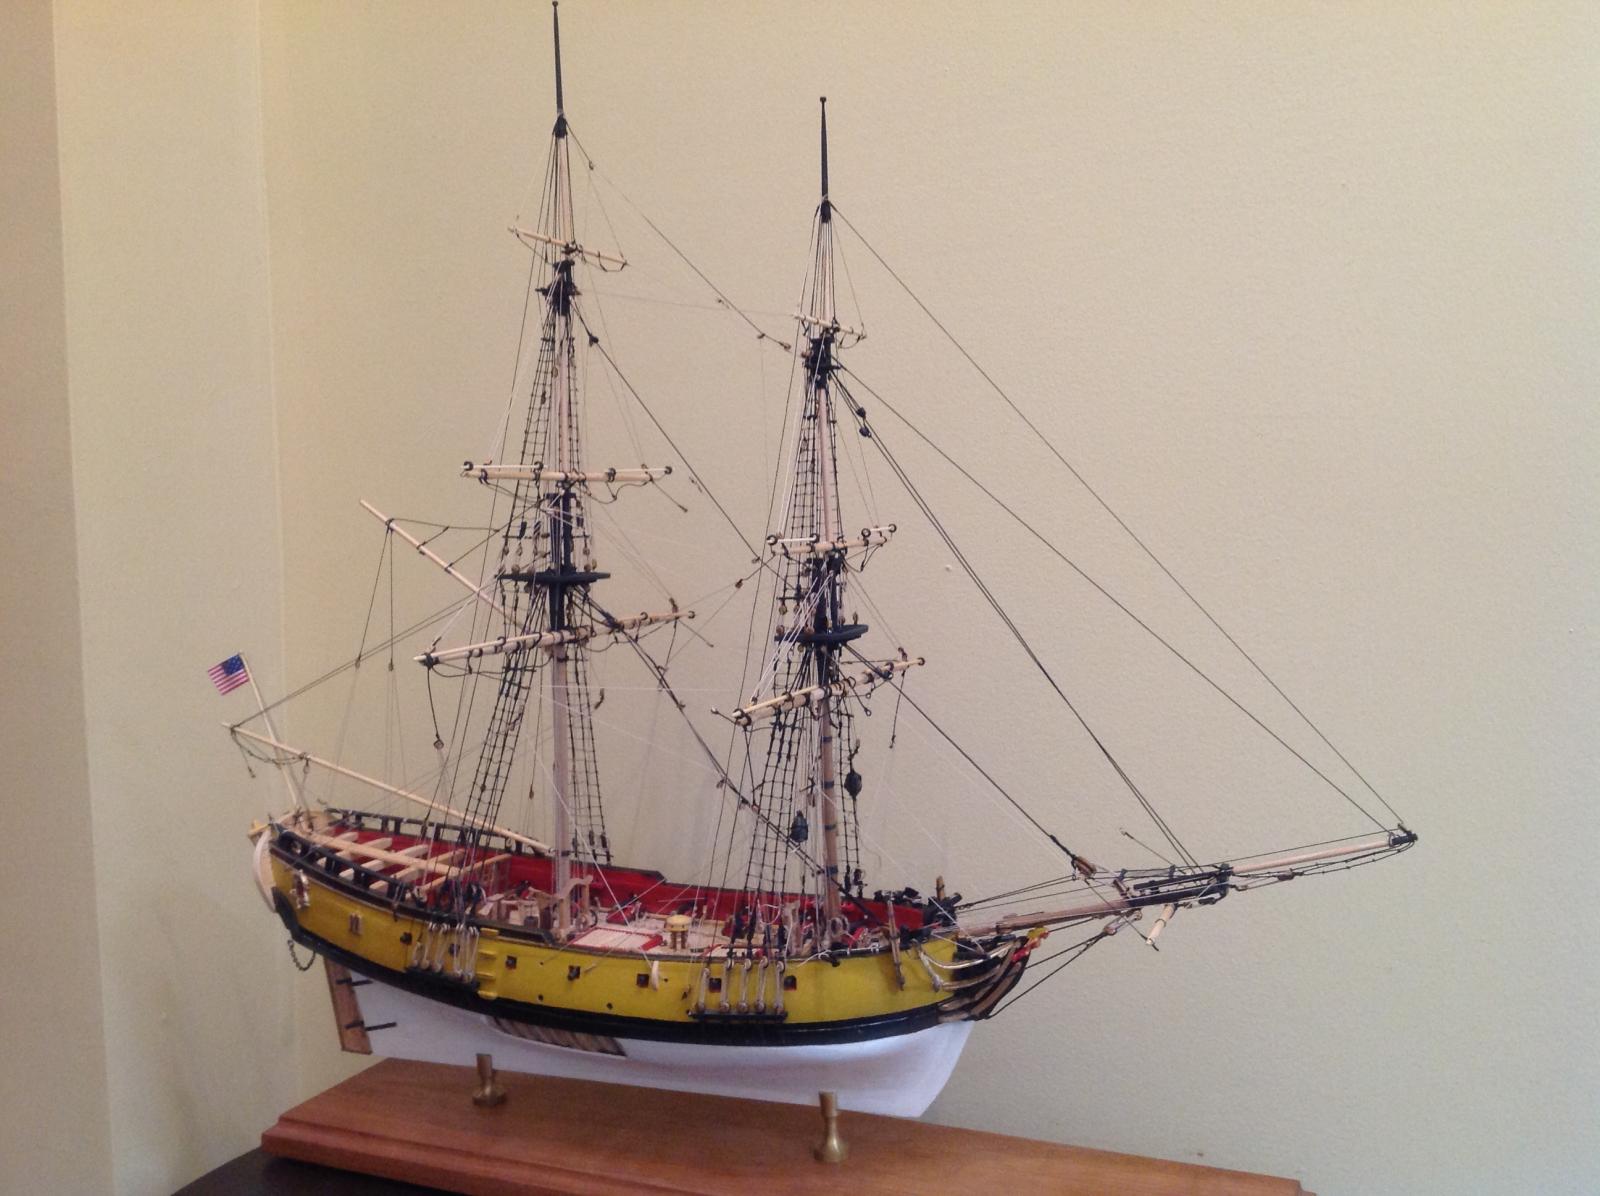
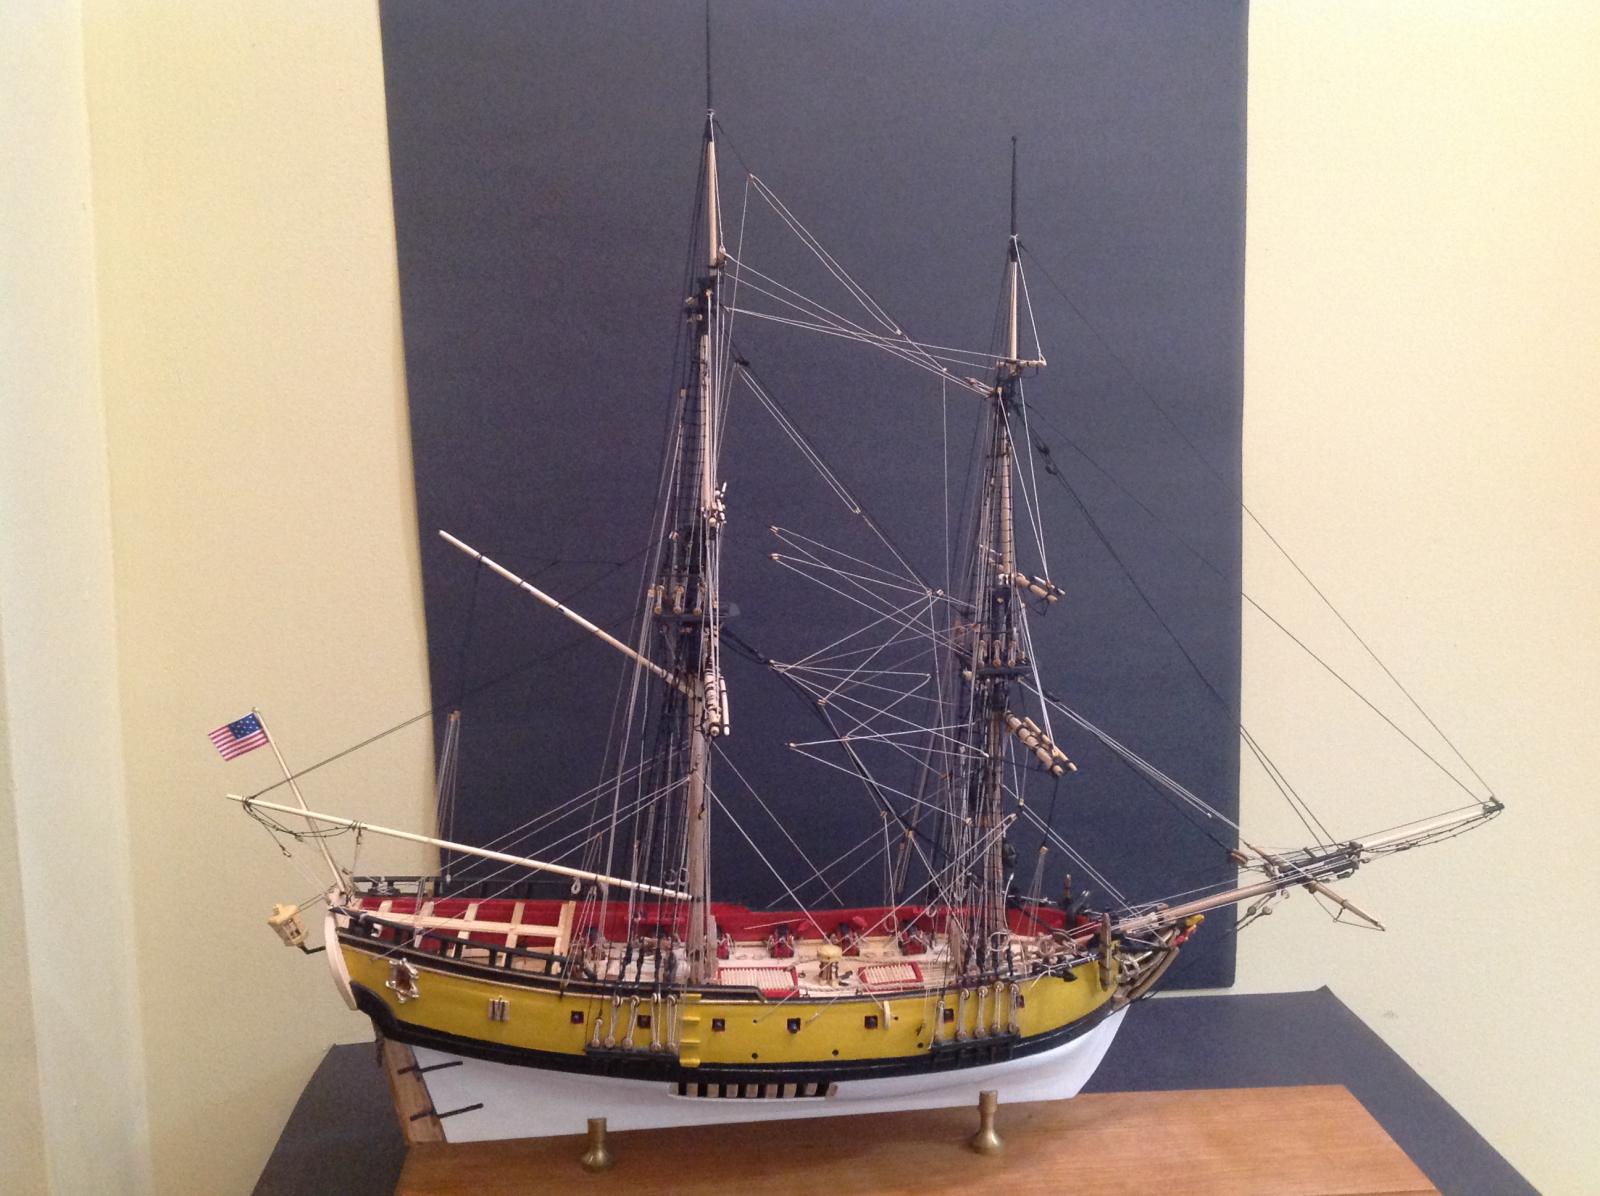
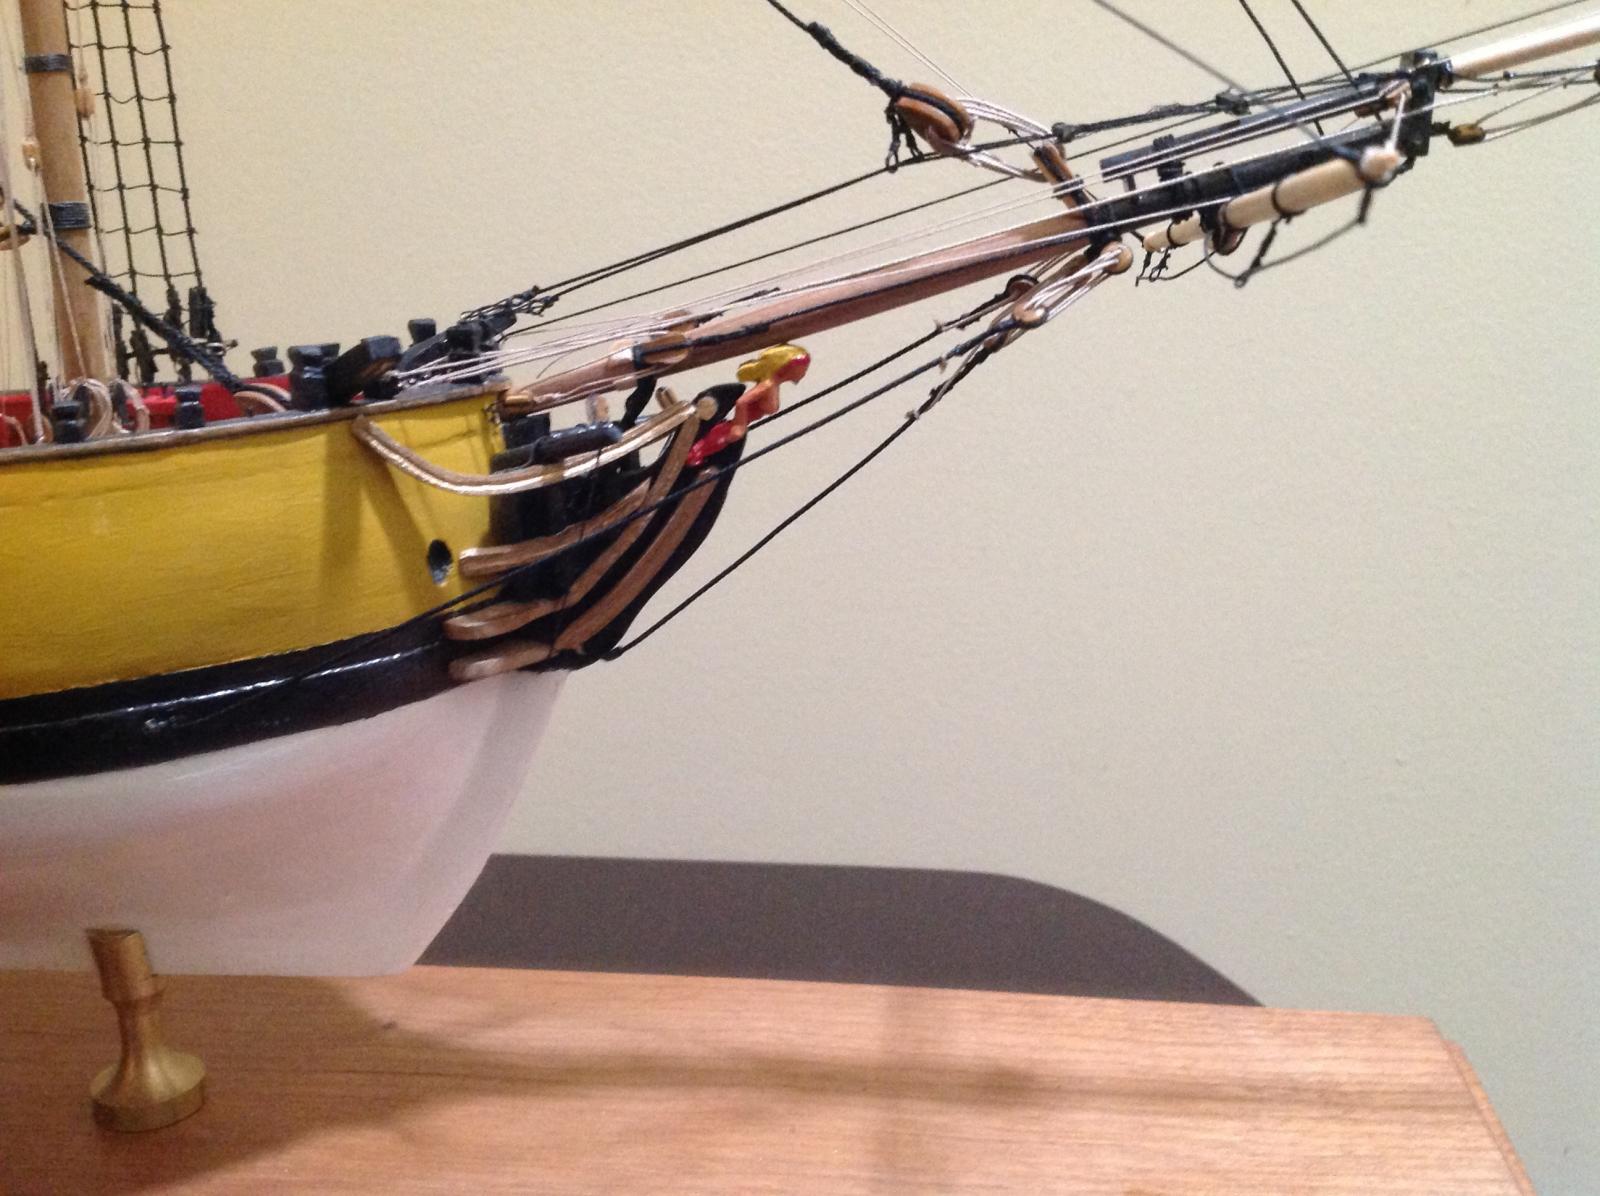
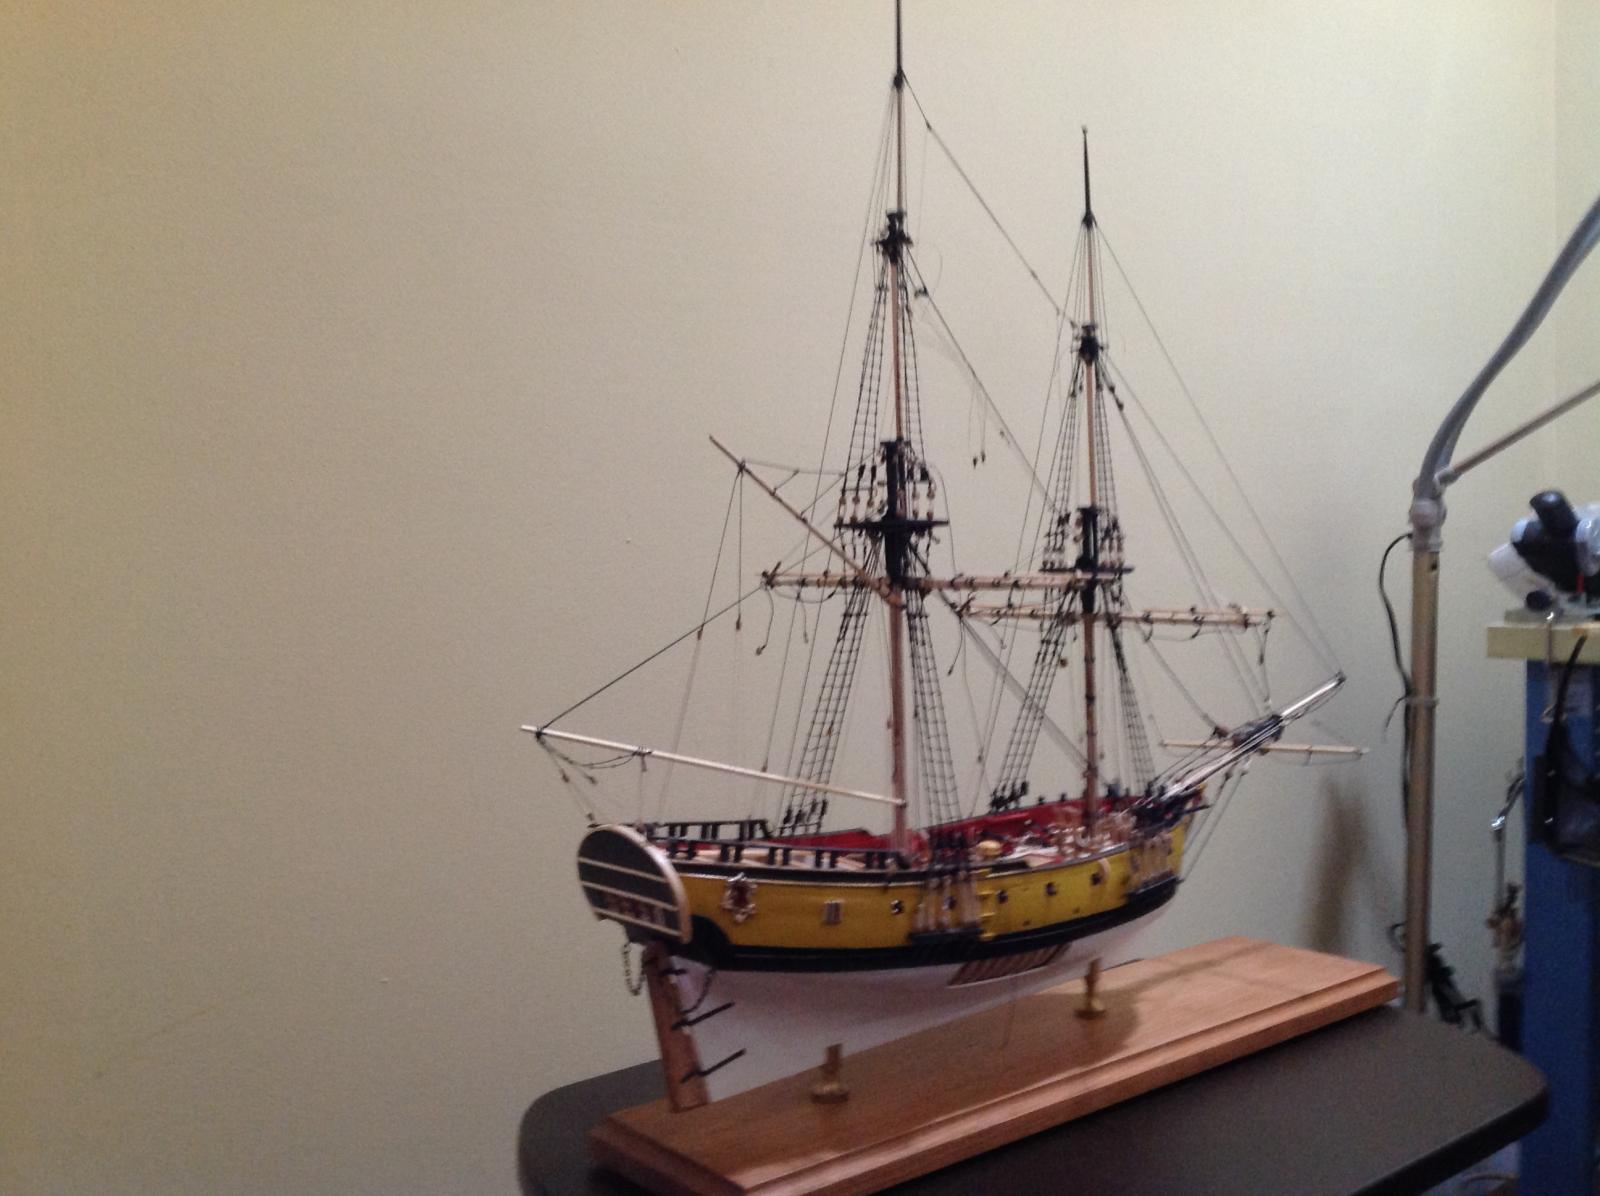
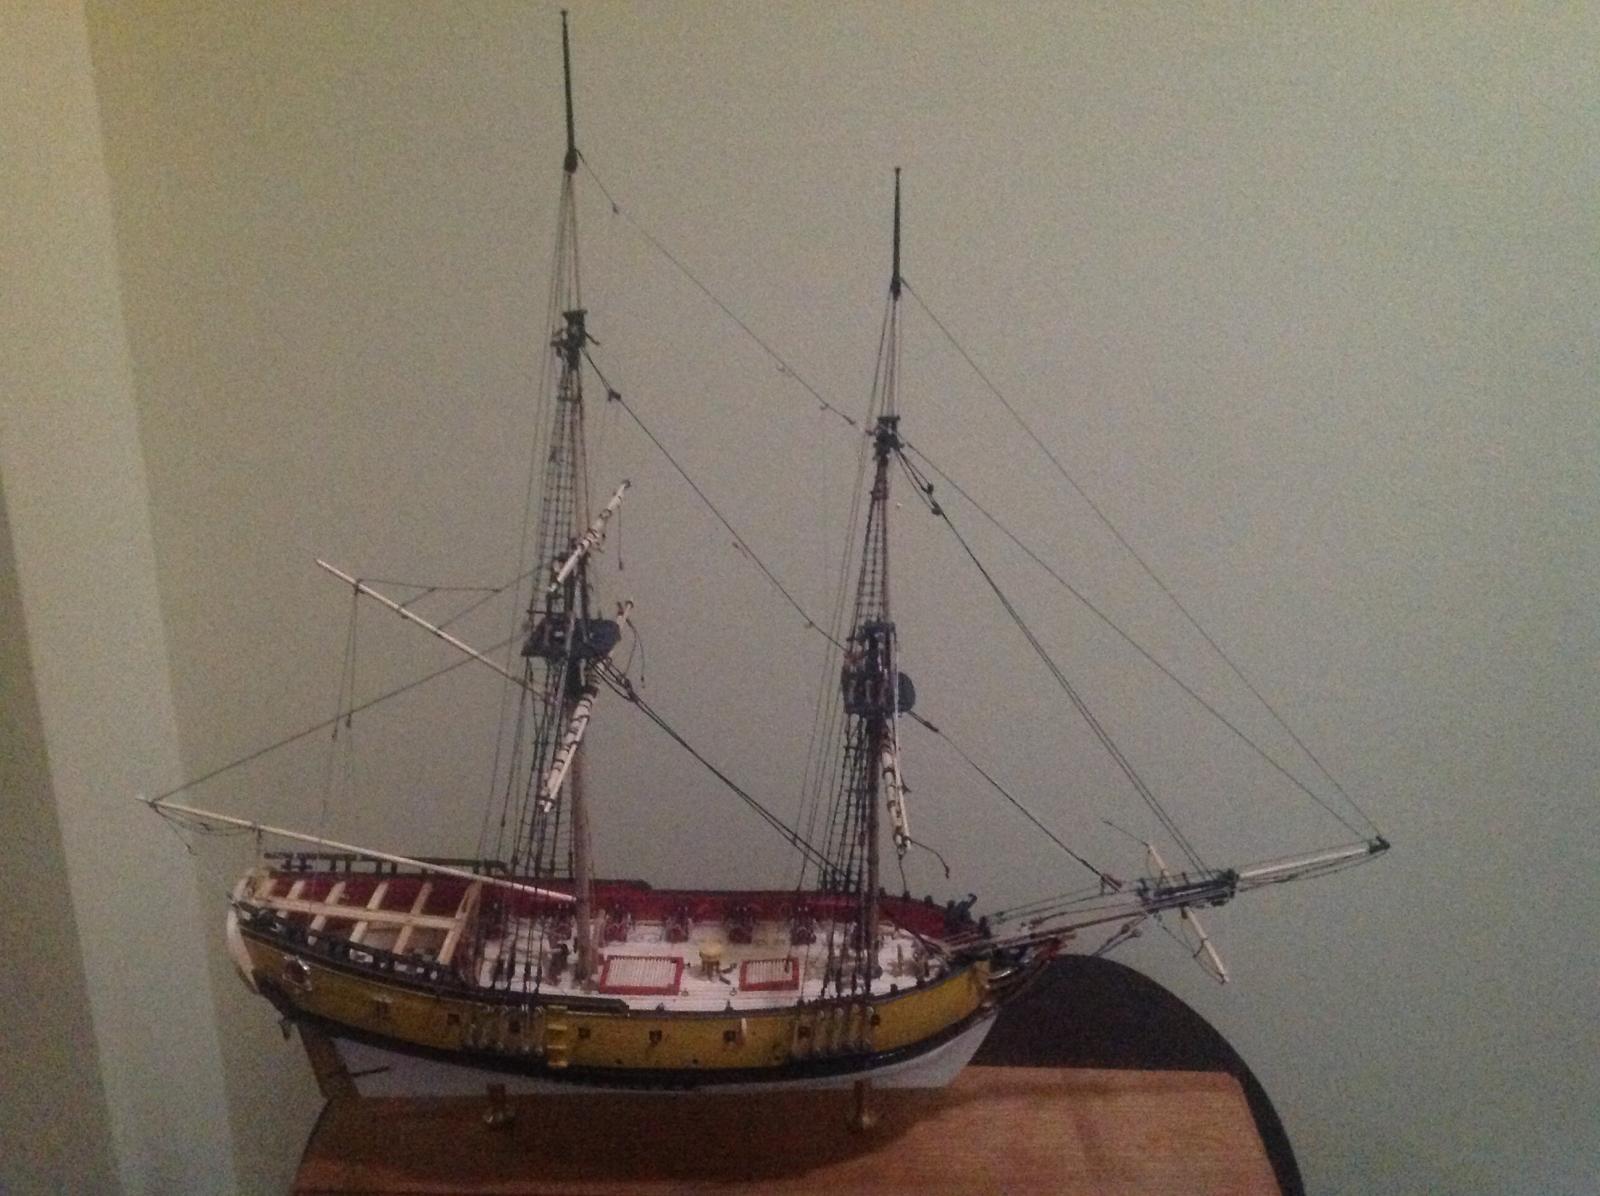
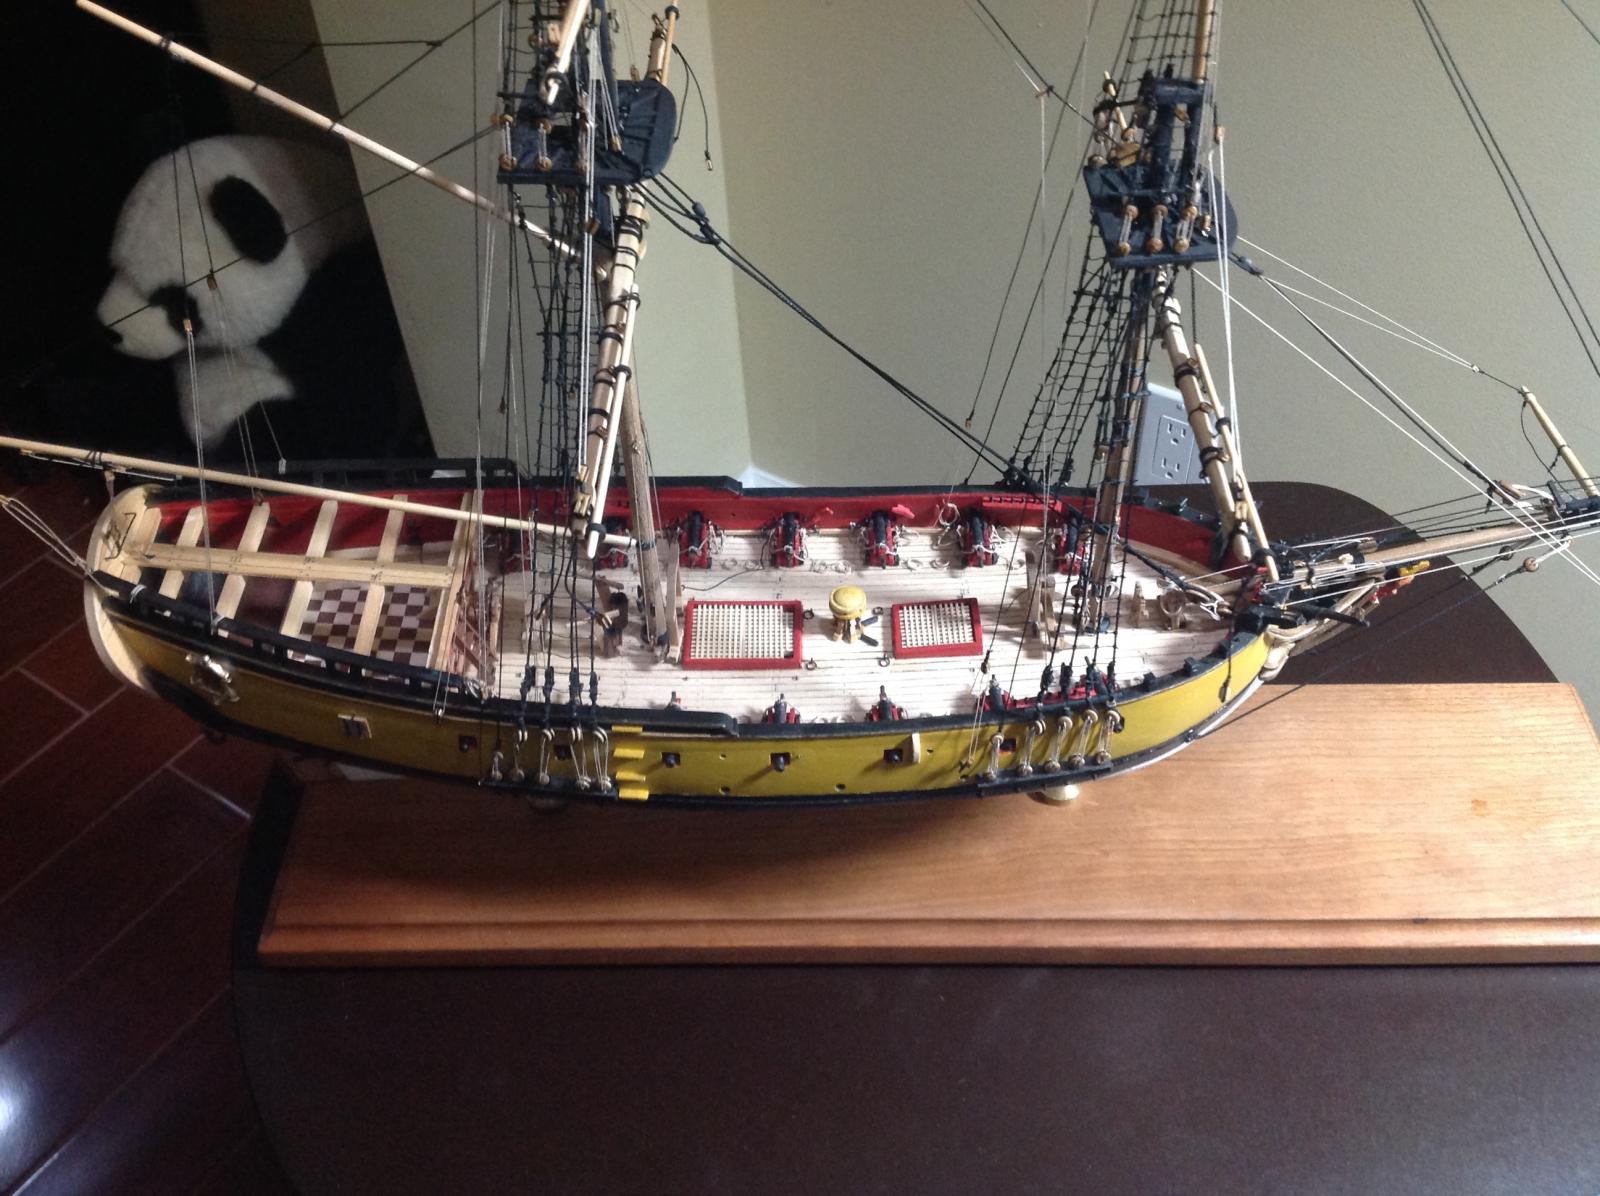
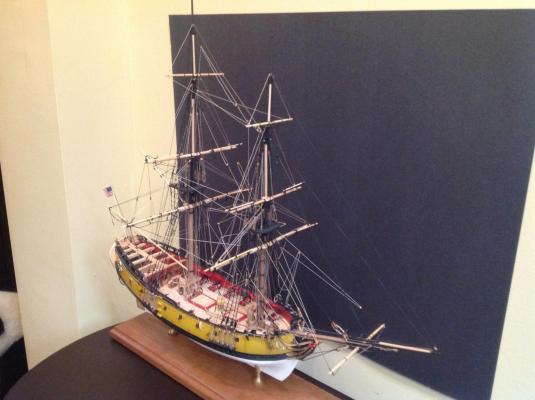
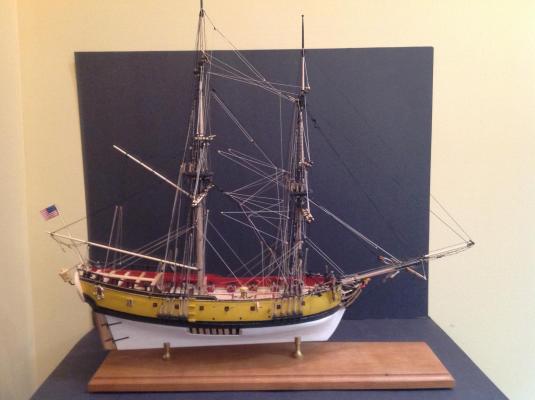
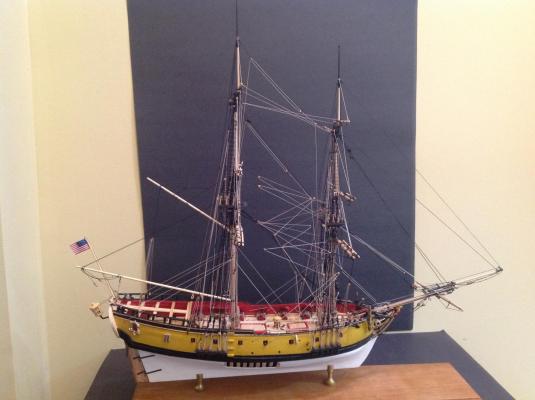
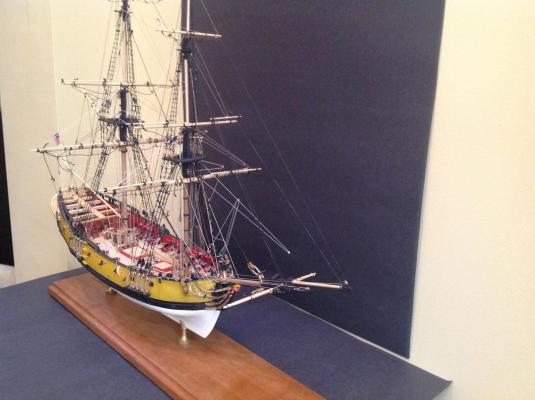
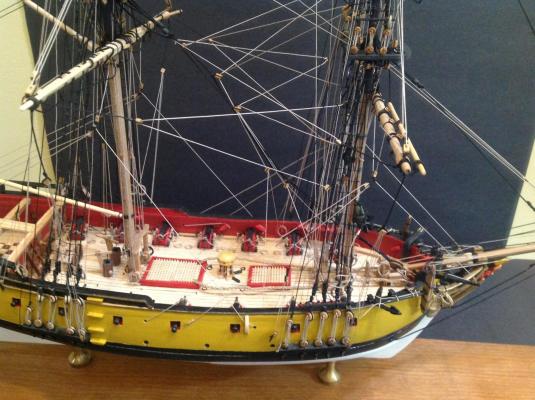
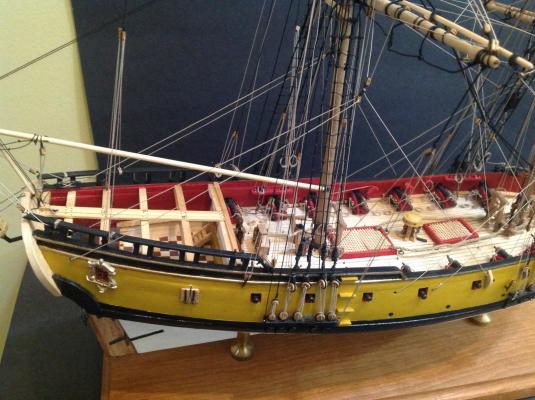
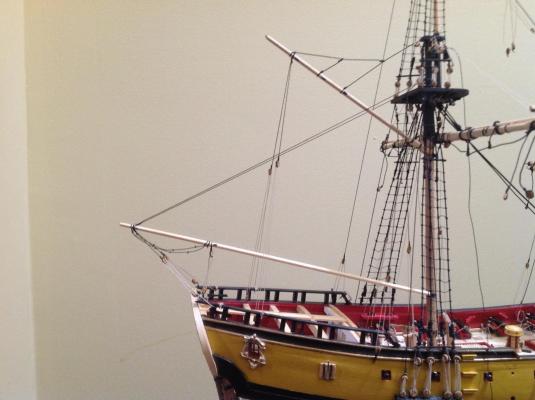
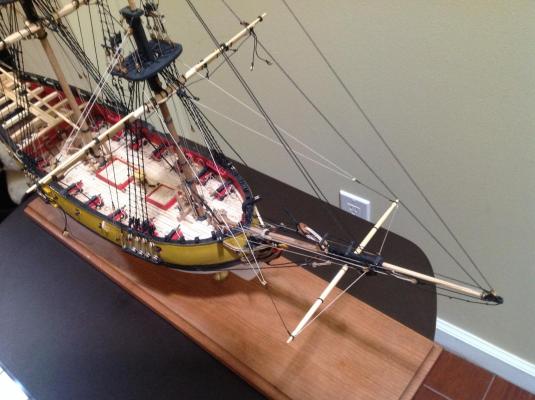
Fair American has launched two years and two months after the keel was laid. Some pictures of completed the ship are attached. Most important, thanks to all of you who helped me through this first ship after the Phantom starter kit, especially Bob (Rafine) and Ken (KenW). In a couple of weeks, I'll start Syren with new wood to be ordered from Timberyard Crown (Jason is great to work with) and rope and blocks from Chuck at Syren. Thanks, much, everyone!


- 42 replies
-
- 2
-

-
- fair american
- model shipways
- (and 1 more)
-
Thank you Vince and Gunther. Much appreciated. Good tip on the coils, Vince. I made a jig using a small piece (1 1/2 ") of a 1/4" dowel. Made a slit in either end of the dowel and laid down a piece of sewing thread along the dowel, catching the ends of the thread in the slits to keep the thread in place. Then wrapped the rope to be coiled around the dowel, over the thread, 3 or 4 times, put my thumb over the coiled line to keep it I place, released the ends of the thread and tied them in a knot around the coiled rope.
-
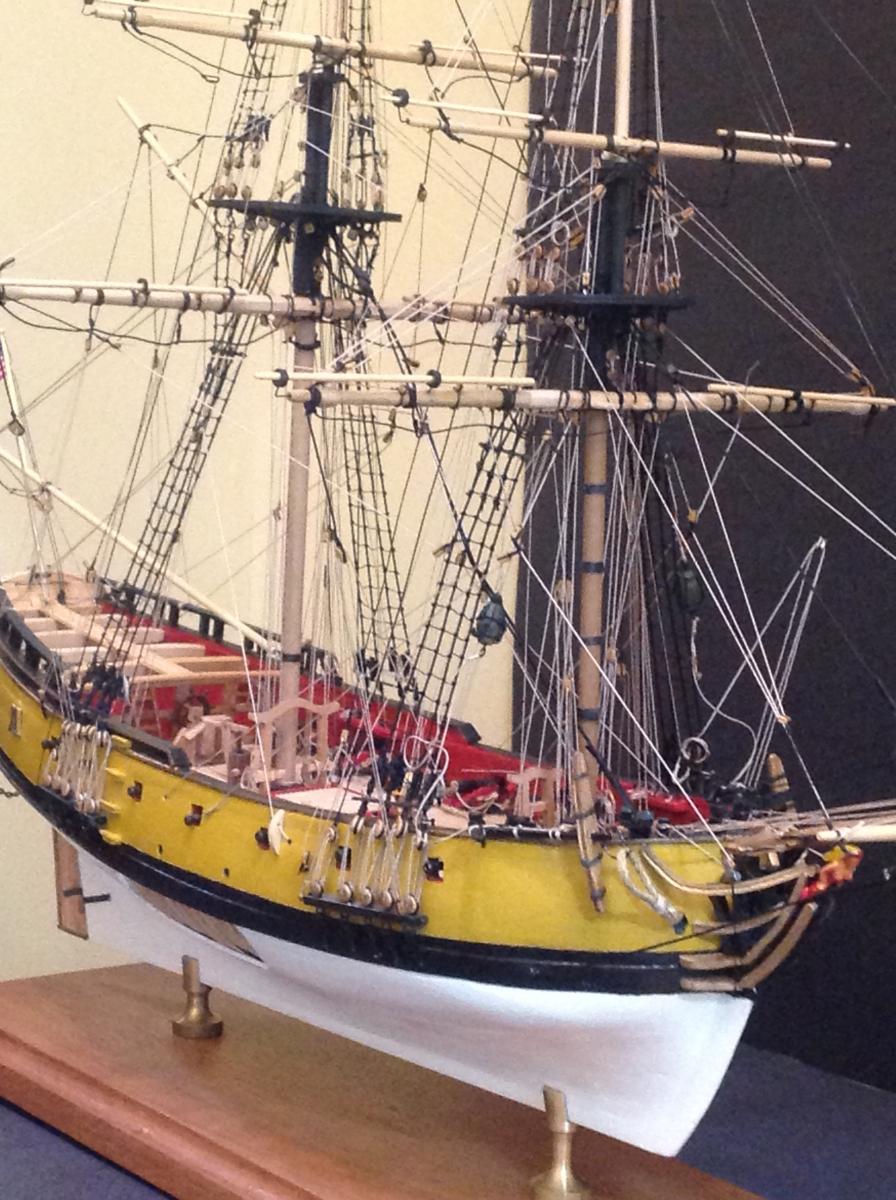
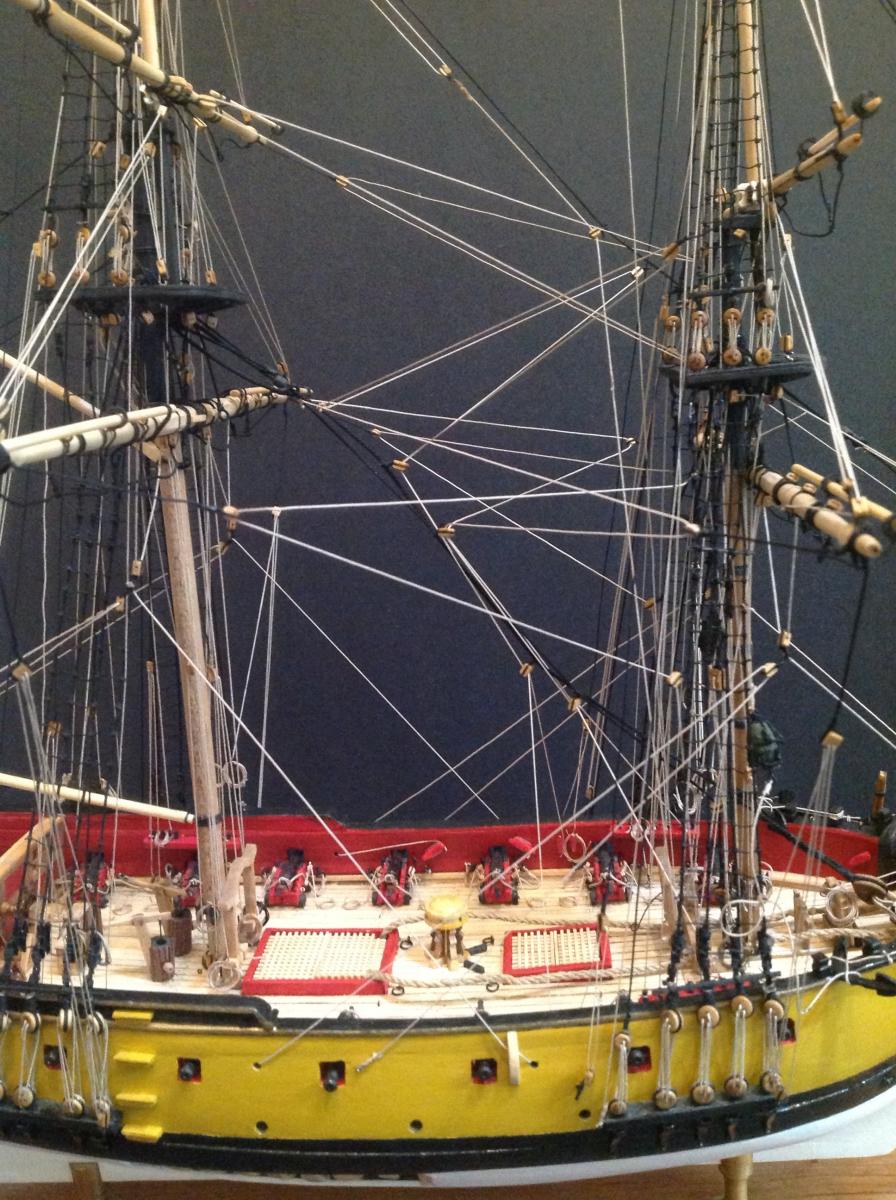
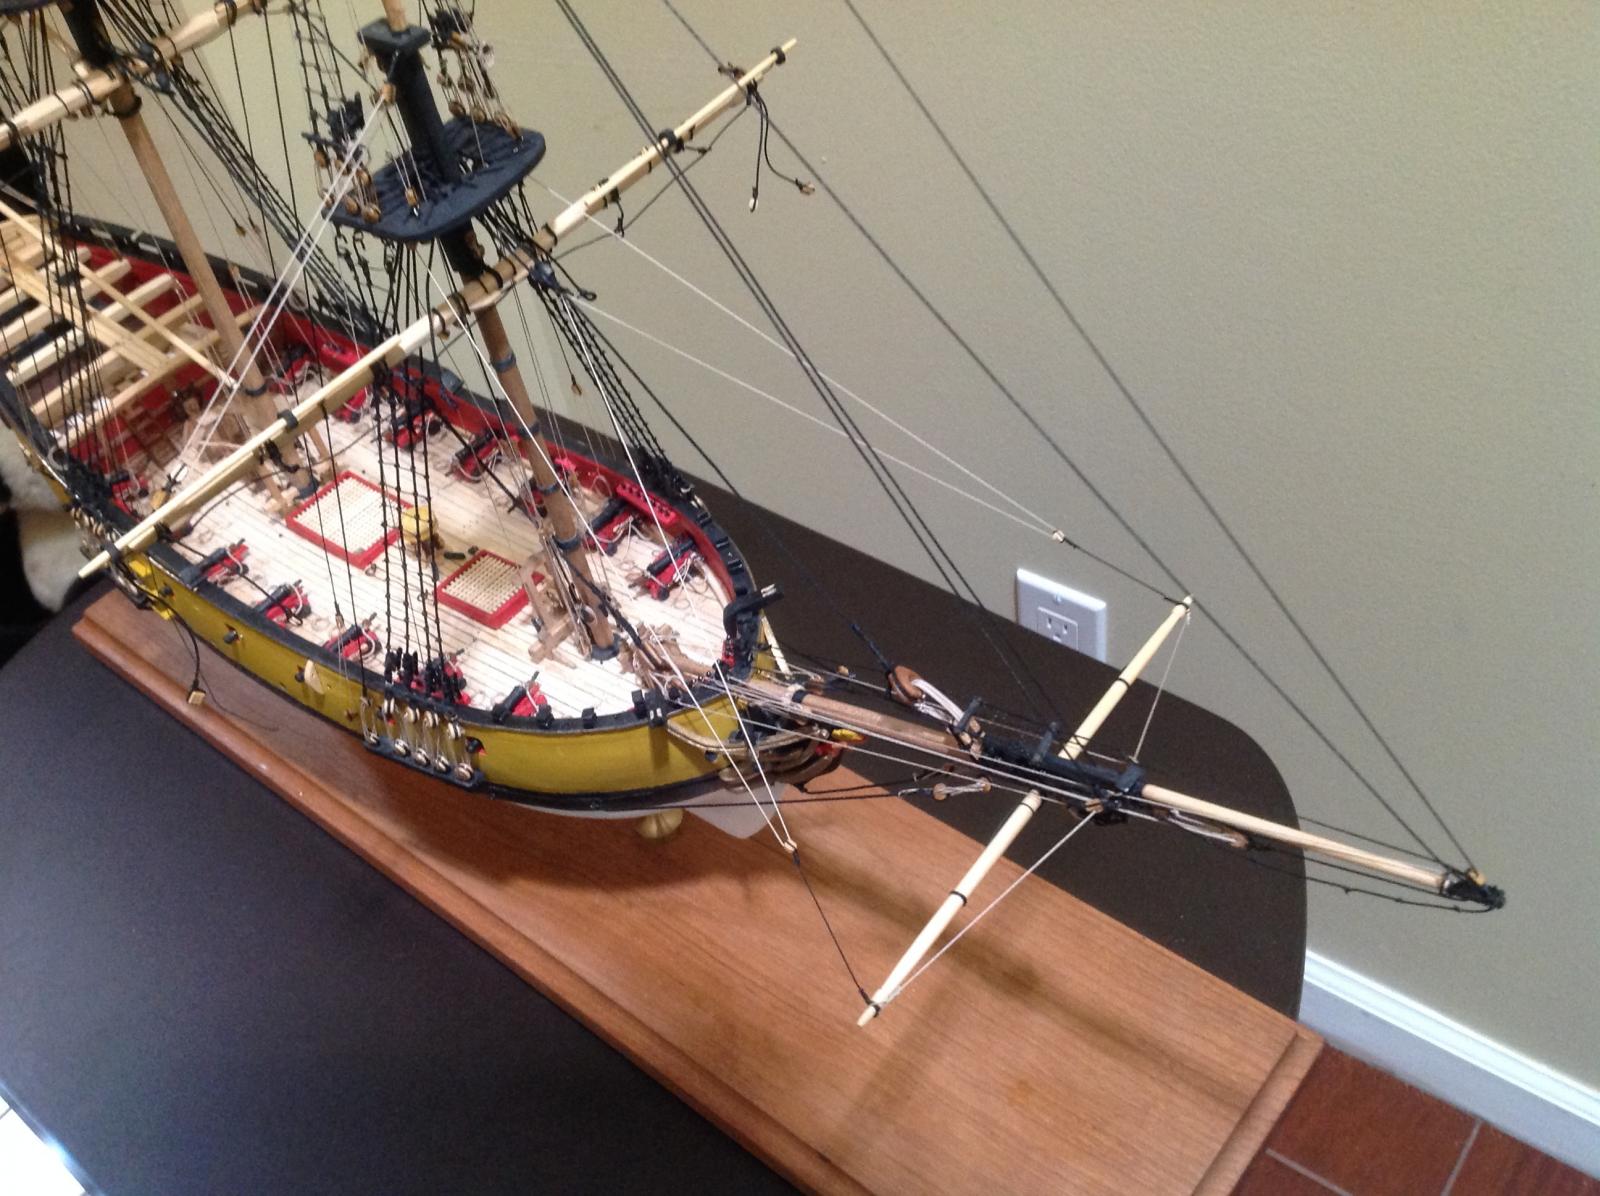
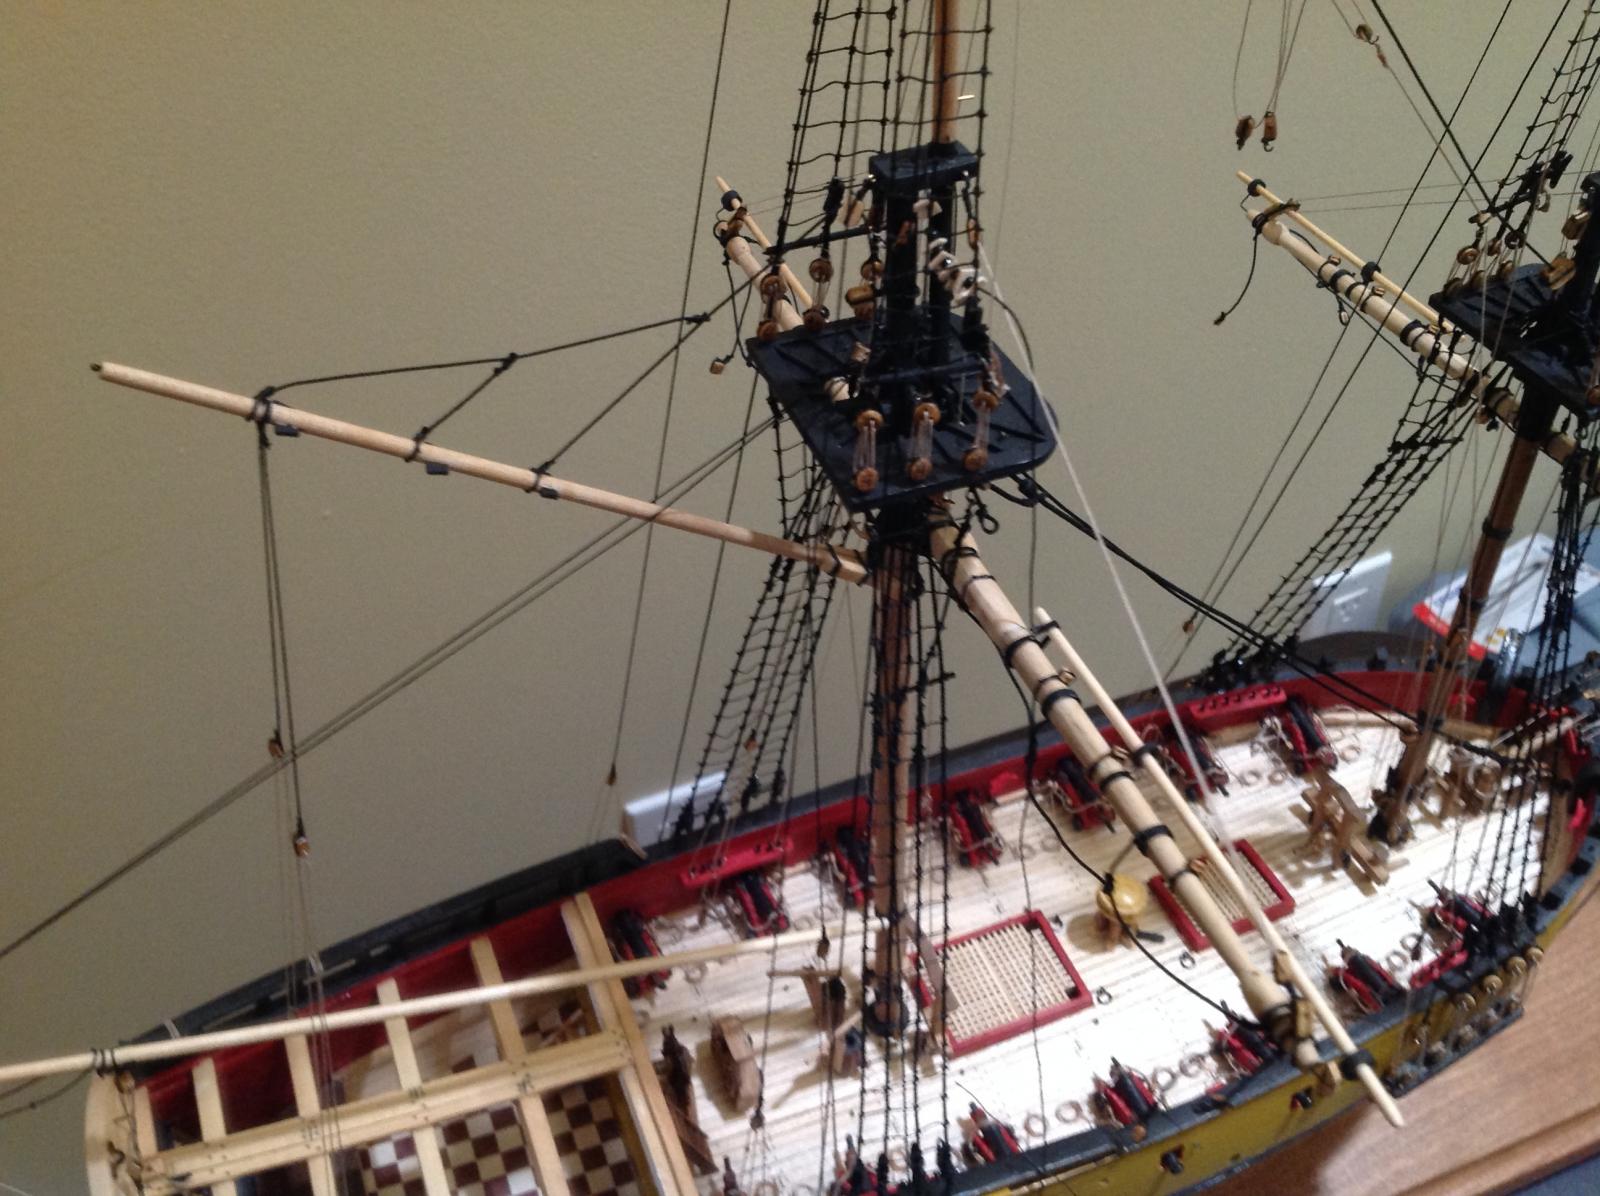
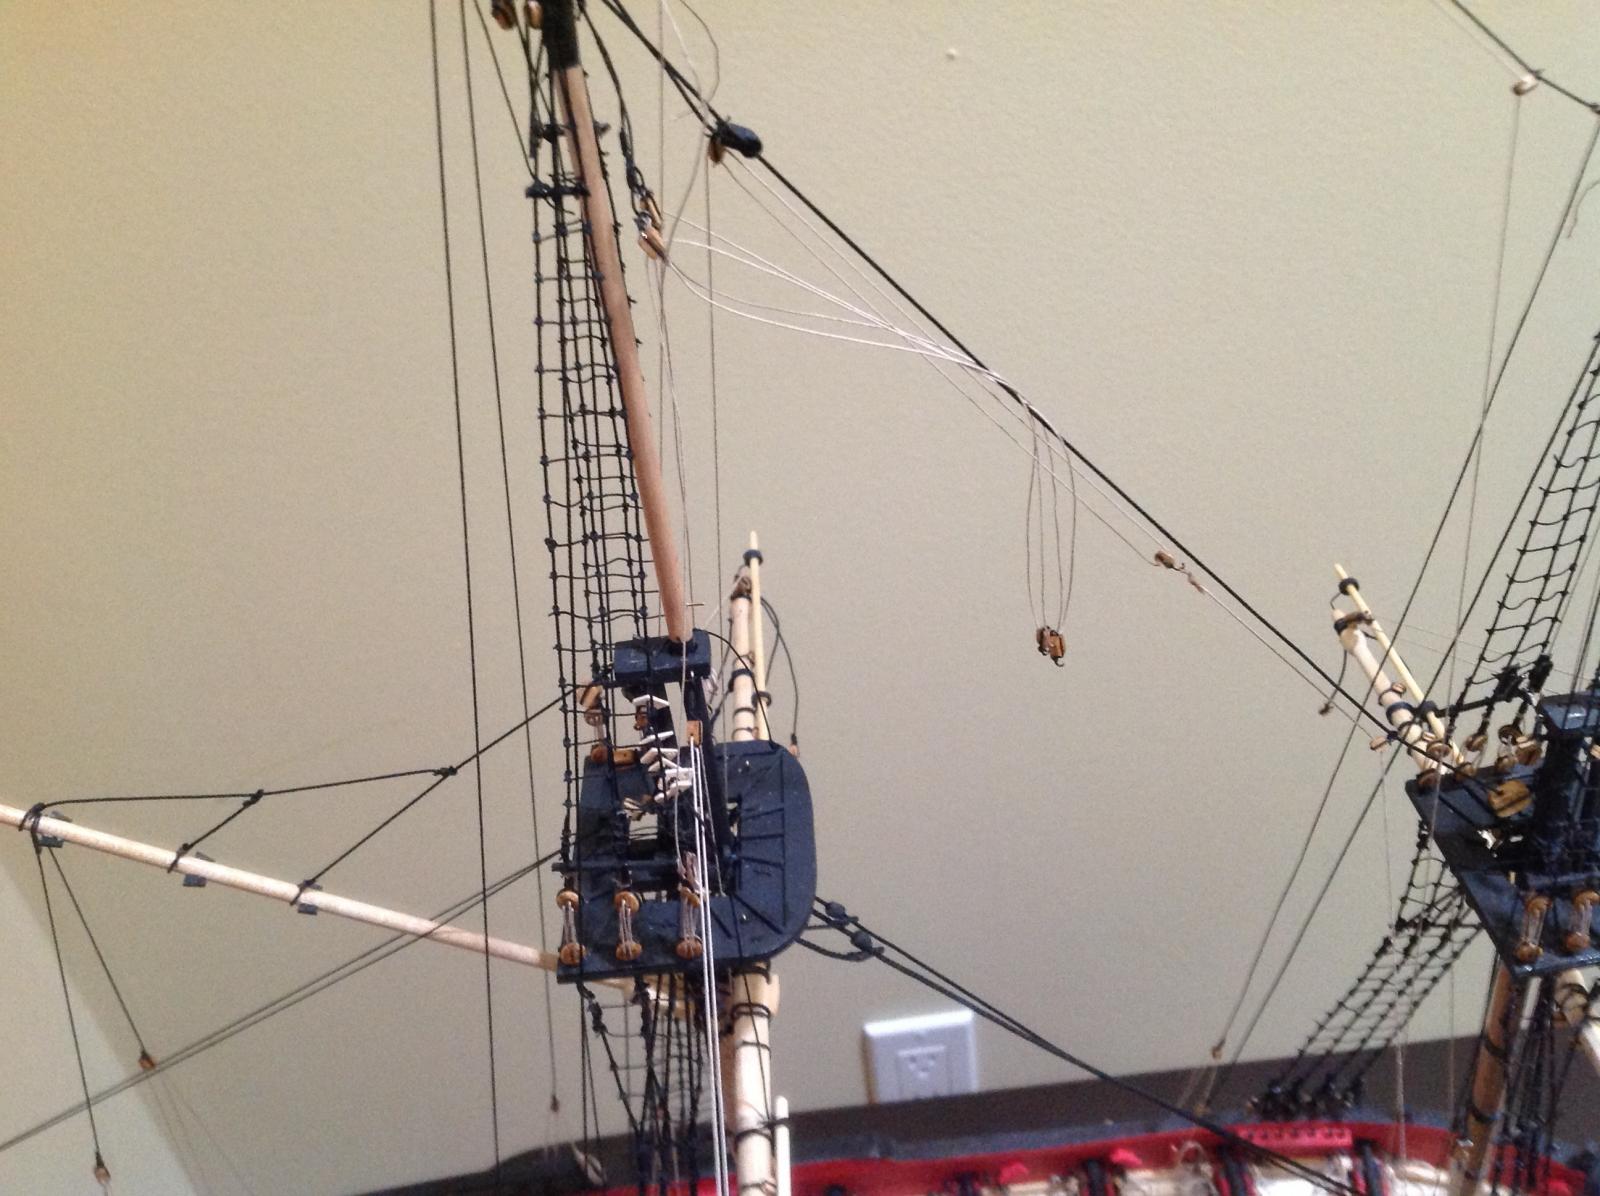
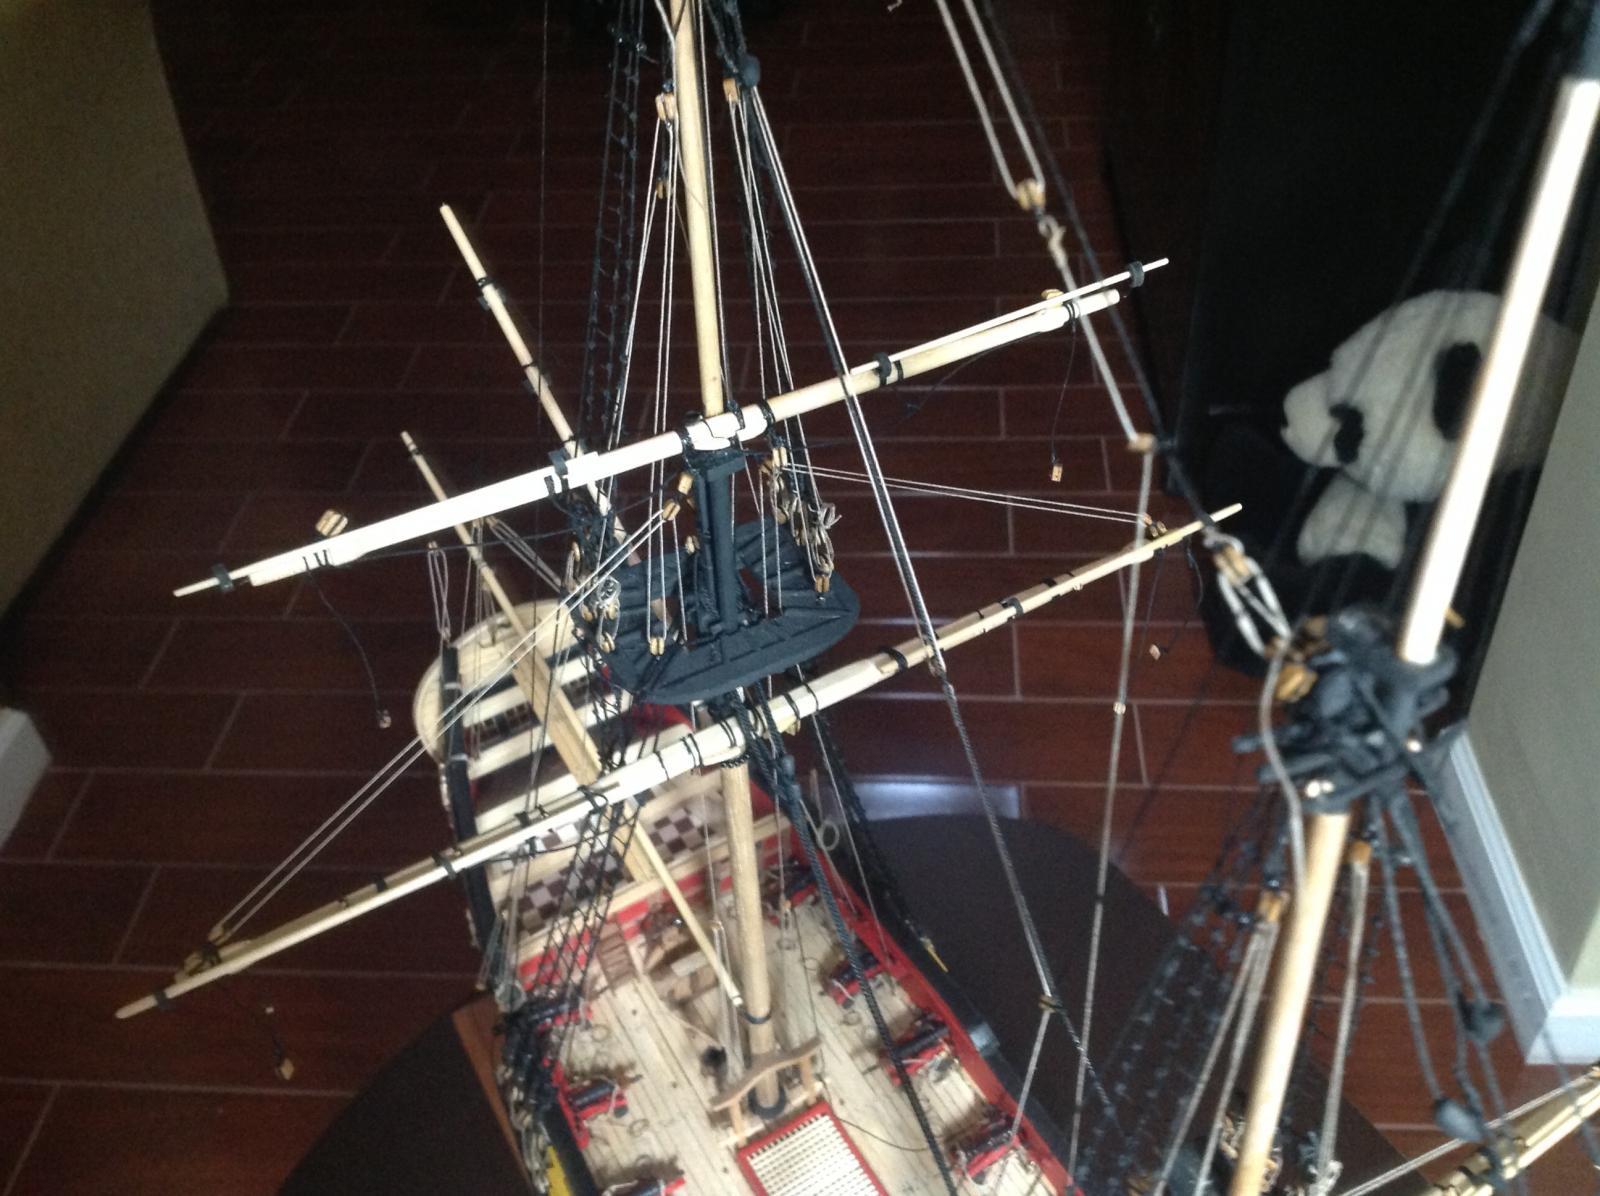
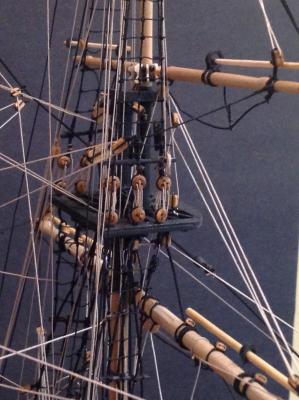
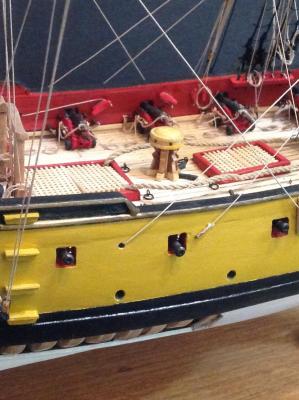
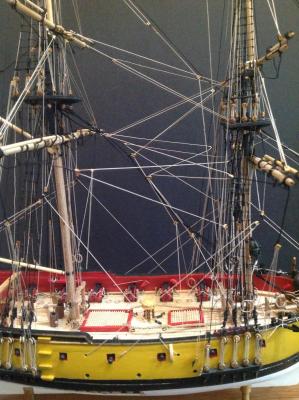
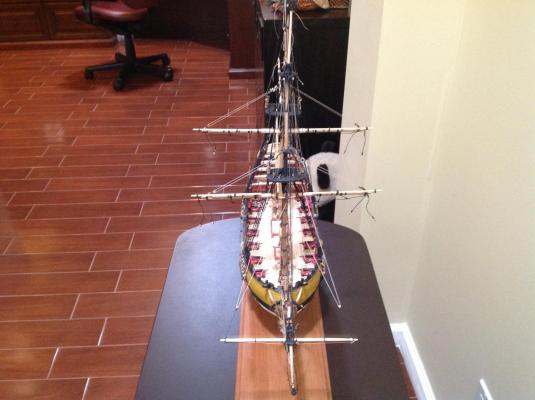
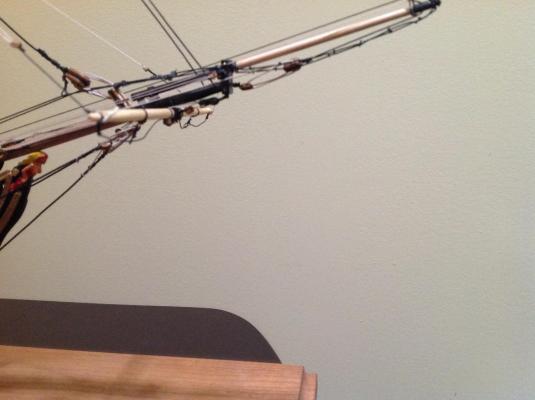
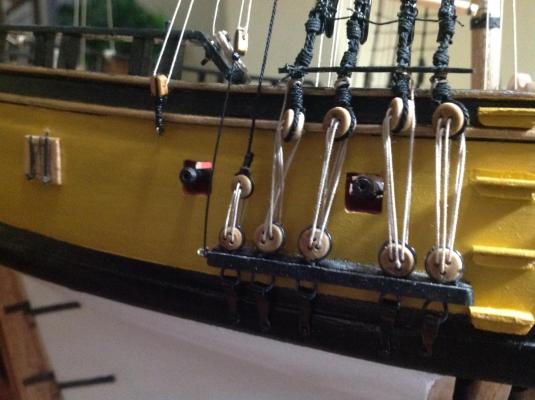
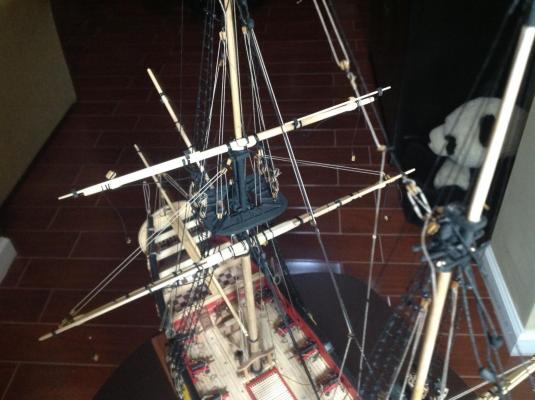
Finally some Fair American buildlog photos. Overall, the work is progressing. The spritsail yardarm, gaff, spanker boom, lower yard arms and lower yard arms have all been hoisted and pinned. (I also rigged the main topmast staysail downhaul and halyard, the main topgallant staysail downhaul and halyard and the Burton tackles.) I'm using the rigging order described in the Syren instructions. The gaff, boom and spritsail are fully rigged. I also added boom guys since I thought that made sense to help guide the boom to the port and starboard. The slings and lifts have been added to the lower yardarms. Braces, clues, sheets and tacks for the lower yard arms will wait until the topsail and topgallant yard arms are mounted and rigged. The main topsail has its yard parrels installed, as well as the tye, halyard, halyard runner and halyard tackle. (I'm very grateful for help from KenW and Rafine). (I tried to conform to Petersson and Lees as much as I could, but given the limited belaying points and belaying plan in the FA kit, I added a pinch of imagination.) The topgallant yard arm needs to be installed before I can rig the main topsail lifts (per Lees). The photos: Boom, Gaff and Guys Sprit sail lower yard arms and spritsail overview main top with parrels not yet rigged main top with Burton tackles waiting to be belayed spritsail rigging yard arm overview with main topsail pinned main topsail halyard runner (port) and tackle (starboard) fore topsail yard arm with Burton tackles belayed to main top fore lower yard arm and spritsail yard arm view down from onto the main and fore tops As far a workmanship and skill sets--that too is a work in progress (from a D when I started to a C+/B- today. I made a lot of errors. Some are visible; some not, but I've learned from them all. Still great fun and wonderful learning experience. (I look forward to Syren as my next build.) Ed (EdatWycliffe)


- 42 replies
-
- 5
-
-
- fair american
- model shipways
- (and 1 more)
-
I'm now in the midst of the standing rigging on Fair American. Because the rigging plan, instructions and belaying plan leave a lot to be desired, I've done a lot of reading, particularly Lee's and Petersson. Those sources, together with the Syren instruction manual, Ken' log and Rafine's log, have taught me much and made me a much better ship builder. I've chosen Syren as my next build (although Rattlesnake sits in its box under my workbench). I think that with Chuck's instructions and my Fair American learning experience I'll be able to build a first-class ship. If you believe in jumping into the pool and thrashing about as a good way to learn to swim, I'd build Fair American before Syren. Good luck. Either choice will be a great experience. EdatWycliffe
- 455 replies
-
- 2
-
-
- fair american
- model shipways
- (and 1 more)
-
Ken, I've been away from the shipyard (and the net) for a bit. What a wonderful treat to see your build complete. It is magnificent. I clearly remember the start 19 month ago--what a great finish. I hope that you will let us know what you next project will be so I can continue to enjoy your work. Kind regards, Ed.
-
Great pix, Ken. Not much time in the shipyard lately--sleeping 7 extra for the holidays. But I did get a little time doing off-ship rigging of the main lower yard. Will try to get a picture attached soon. I've decided to leave all yards bright. Hope it looks OK. Best for the New Year to all! Ed
-
Thanks, Ken. Your suggestion regarding lines and blocks is precisely the plan I've adopted. (Actually, it was essentially your advice months ago.) Gary, I also made a copy of sheet 2 and use it for notes. Today I took a grandson (age 6) on Space Mountain and Thunder Mountain--he was fearless; I was wondering whether I'd ever see the shipyard again! Best regards. Ed
-
That helps a lot, Ken. I keep forgetting--when in doubt, revert to the instructions. Thanks as always. Enjoy the holidays! I'm in Orlando now with the GC. So, the shipyard is closed until just after the holiday. Still, it's a lot of fun just thinking through the next steps.
-
Ken, I'm rigging the yards as much as possible while they are off the ship. I'd like to add the truss now so long as it is a simplified truss like the one used for Syren. Did you use a simplified truss (that just wraps around the mast) for FA? Also, did you run a tye from the lower yards in addition to the sling? Finally, I notice in Lee's that there are two double blocks stropped to the lower main yards above the sling cleats. Do you know for what purpose those might be used? Did you add them? Thanks much! Ed
-
Ken, the ship looks absolutely great. What a wonderful gift to your son. Happy holidays to you and all of our shipmates following your log. Ed
-
Thanks, Ken. I think that I've got it, but I'll never know until I get there! In the meanwhile, I'm now rigging the yards off ship; then I'll start on the standing rigging. I'm sure that I'll need advice as I proceed. Your ship is looking great! Ed
-
Ken, I studied all sources. A general Internet search also was helpful. Bottom line: Your explanation is excellent. One lingering question--where did you (or will you) tie off your sheets and tacks for the lower yards? Thanks as always. Ed
-
Thanks, Ken. You are kind to take the time to answer in such detail. I'll need to think through your description while looking at the sources you mention. Much appreciated. Ed
-
Ken, there are 4 blocks centered under the main and fore lower yards. After reading Petersson's and Lee's treatises, I've concluded that the outer two blocks are for clew lines and the inner two blocks are for sheets. (1) Is that correct? (2) If I do not attempt to furl sails, where do I tie off the end of the clew line that would normally attach to the clew of the sail? Petersson at p.247 is a bit confusing. (3) Similarly, if I add blocks for the bunt lines and leech lines, where do I tie off the end of the bunt and leech lines that would normally attach to the sail? Thanks much! Ed
-
The seven yard arms have ben shaped and are ready to be rigged with as many blocks and slings as possible while they are off the masts/bowsprit. I haven't yet added the stuns'l booms. I found some plastic tubing that may work well for the stuns'l irons. I may keep the yardarms natural color rather than painting them black. When the off-ship rigging is done, I'll start the standing rigging with the bowsprit and working my way aft. I find myself doing as much reading/research as modeling at this point and that adds a new and interesting aspect to the hobby.

- 42 replies
-
- 4
-
-
- fair american
- model shipways
- (and 1 more)