EdatWycliffe
-
Posts
119 -
Joined
-
Last visited
Content Type
Profiles
Forums
Gallery
Events
Everything posted by EdatWycliffe
-
Ken, your cannons look great. I'm still waiting for the delivery from Syren of proper size blocks to complete my rigging. What's your general plan for attacking masts and spars? Also, I see from the kit parts list that the bowsprit is labeled as a 1/4" dowel and a 1/4" square, 6" long. The square is too short according to sheet 2 of the plans, so I guess I'll use the dowel. What do you think? Keep up the fine work. I enjoy following your build. Ed
-
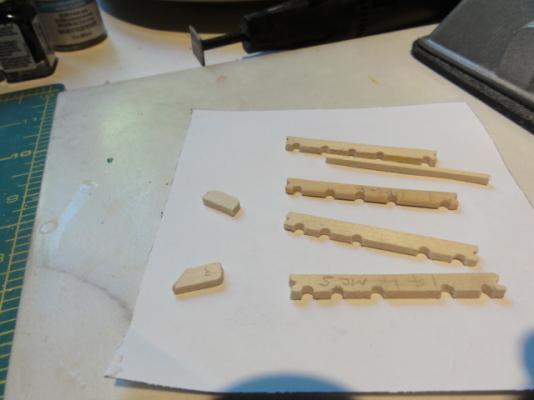
Hi Bob. I'm busy rigging cannon breech lines and waiting for blocks from Syren to rig the inhaul tackles. All the deck furniture is done and pinned. I'll probably add furniture as I place cannon. Question: I placed the rings for the breech lines on the bulkhead lower than and outside of the holes for the inhaul eye bolts. The plans show the breech lines higher than and inside the inhaul tackles. Is there some "authentic" rationale for the tack I've taken? Thanks Ed
-
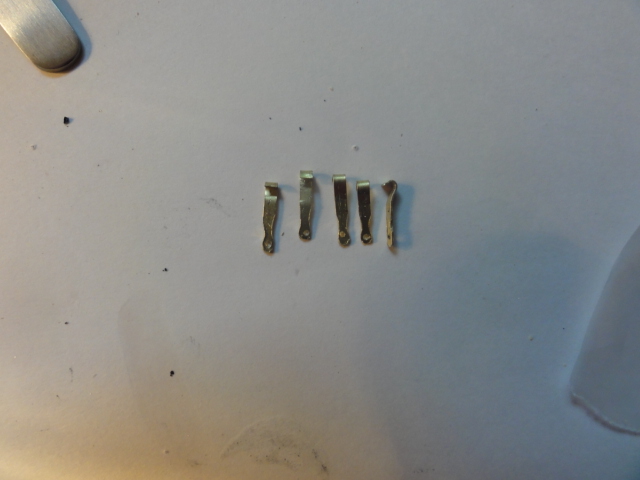
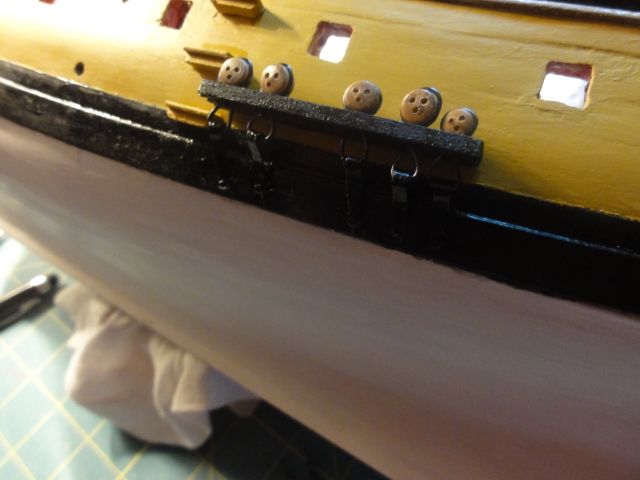
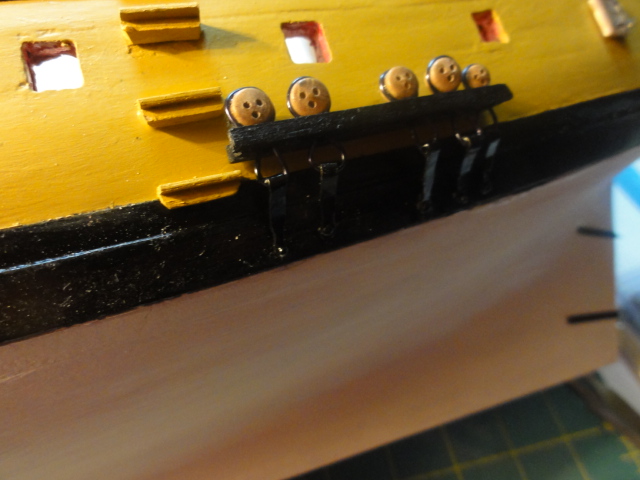
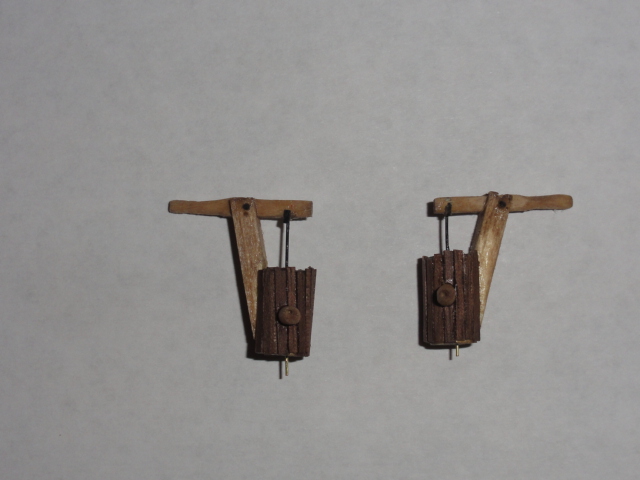
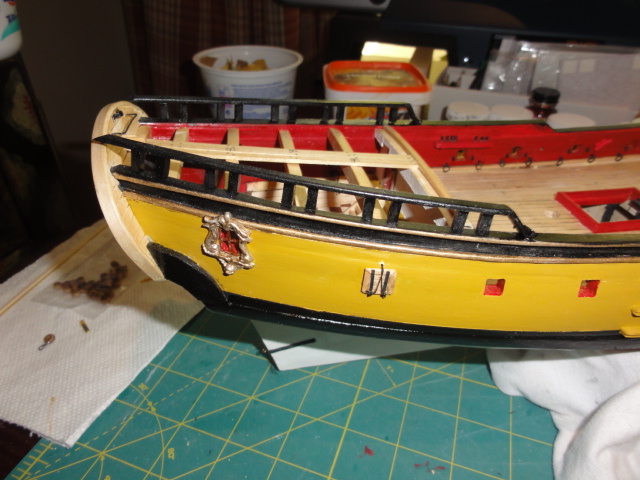
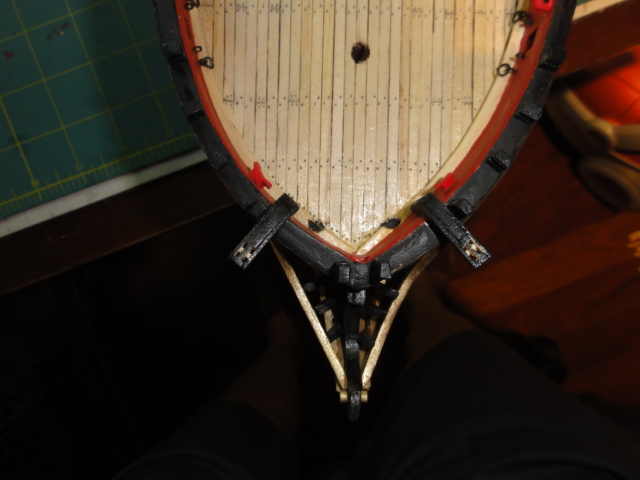
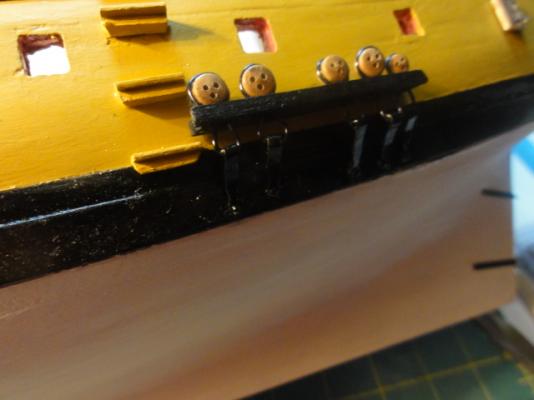
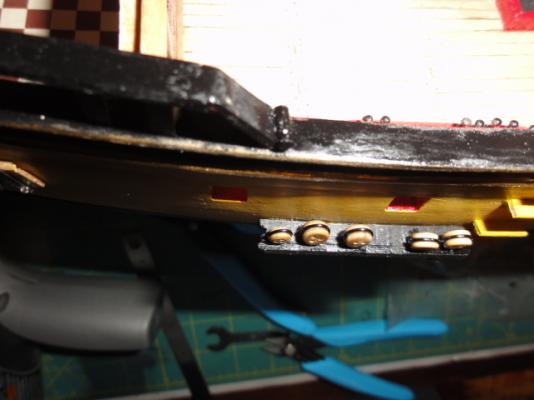
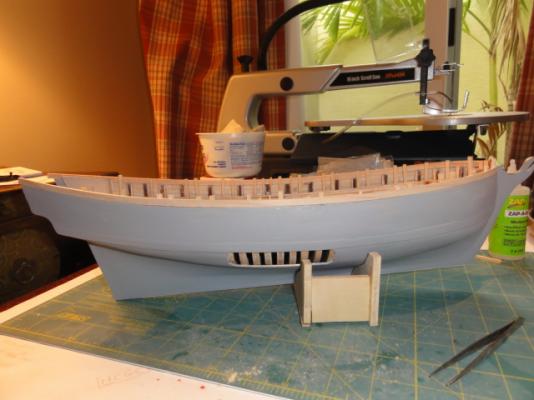
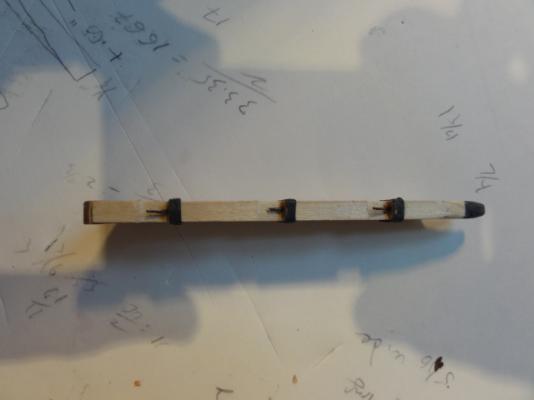
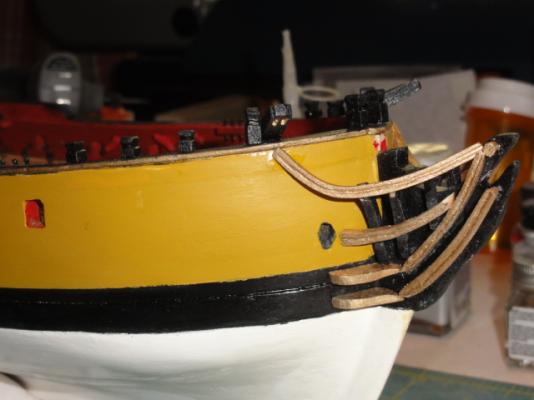
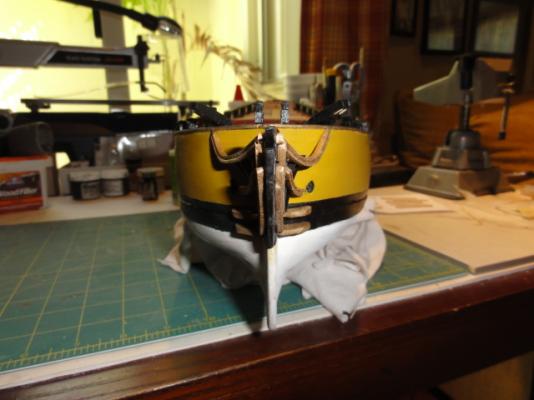
I've been on the high seas for the past few weeks with erratic email and no internet reception. I'm just catching up with the discussion regarding the rigging of the gun carriage. I'll be there soon and much appreciate the inputs. First I need to finish the dead eyes and chain plates (see pics attached). I stepped a faux mast so that the angle of the chainplates was not completely off. After the channels and chainplates, I'll fine tune the deck furniture. Then, finally, I'll start from the aft and place cannon carriages and deck furniture in that order. It's very nice to be back in the chip yard. Yep, better than being on a real (modern) ship. Ed

- 42 replies
-
- 3
-

-
- fair american
- model shipways
- (and 1 more)
-
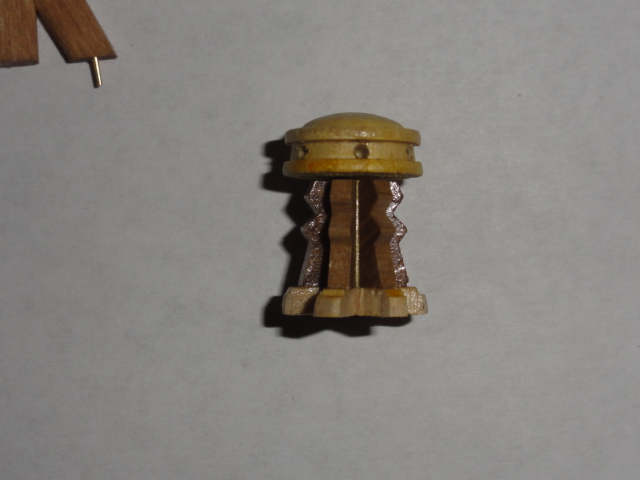
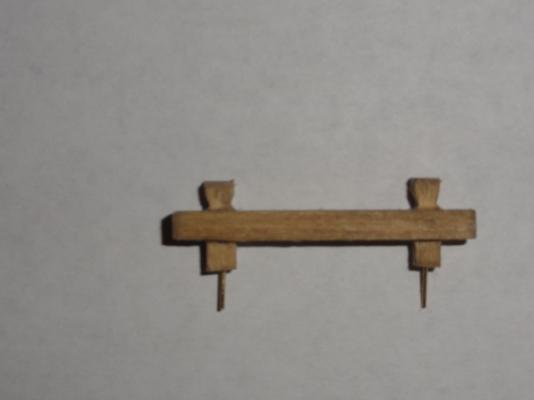
Thanks, Ken. Hope you are fully recovered. I added the grooves and will add a " catch plate" on the deck, the end of which will fit into a groove. I thought that there should be a mechanism that would prevent the capstan from slipping back after it is rotated. I got the idea from Rafine's build. Alde, thanks for the kind words. Ken built the AVS, I believe, and I went to FA as my second build. I think that Ken is doing real well and so you might want to follow his lead and try the AVS. When I complete FA, I think I'll try Rattlesnake. Amazing! I just looked at my build log and saw that I started FA in the summer of 2013-nearly a year. If you divide 365 by the cost of this hobby, I can't imagine that there are not too many things in this world that can give so much pleasure for so little cost. And when you add the comraderie of MSW into the equation, this hobby is the best deal in town! Thanks all.
-
Nice work, Ken. I really admire the planking. The build really looks good! I just added the starboard fore channel--two to go. But, I've got to put my ship aside for a bit. The kids and grand kids are all visiting for a week or so. Happy holidays to all. Ed
-
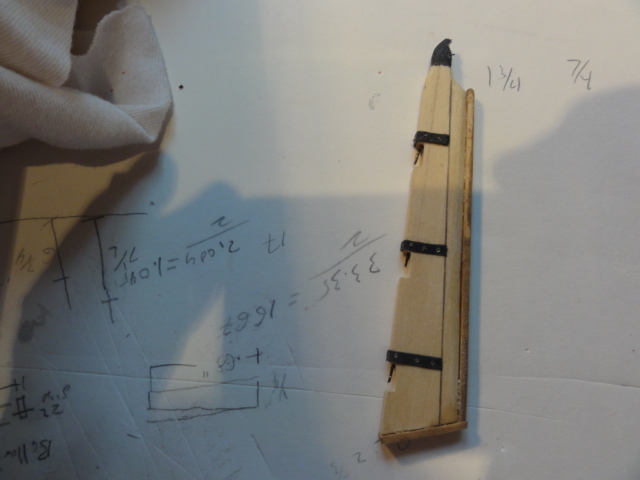
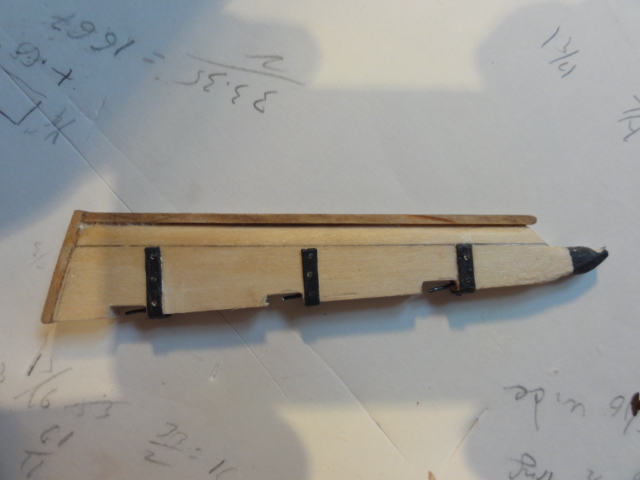
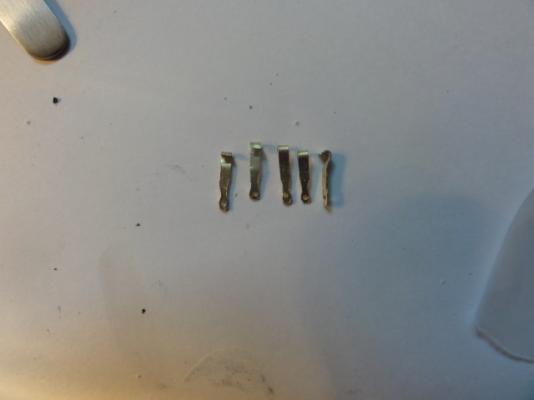
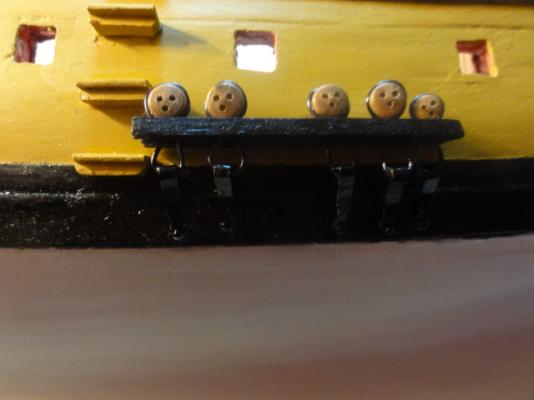
Thanks, Bob, Ken and Gary--appreciate the kind words. Gary, my understanding is that rudder vibration was lessened by tapering the rudder and adding a groove along the aft end. Just completed the starboard main channel and I'm starting to fashion the chain plates. I used Bob's technique to attach the dead eyes to the channel leaving a loop under the channel on which to attach the hook of the chain plate.

- 42 replies
-
- 2
-
-
- fair american
- model shipways
- (and 1 more)
-
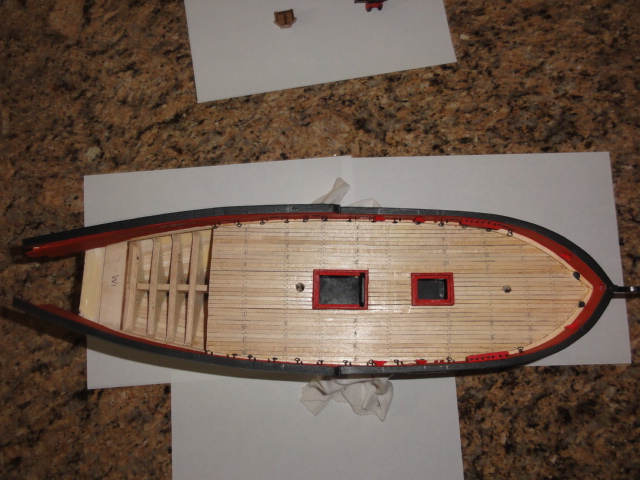
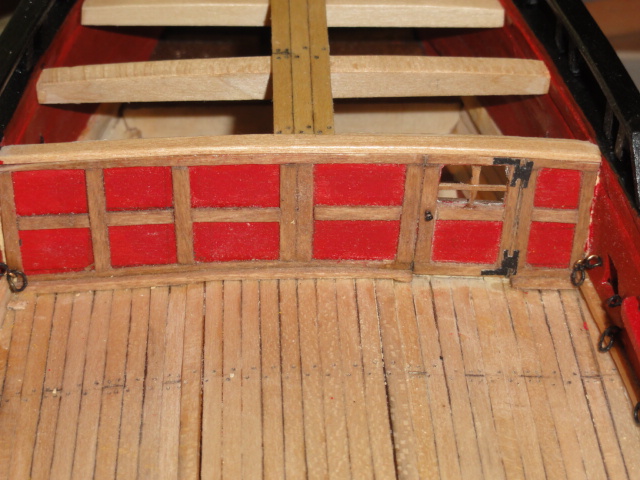
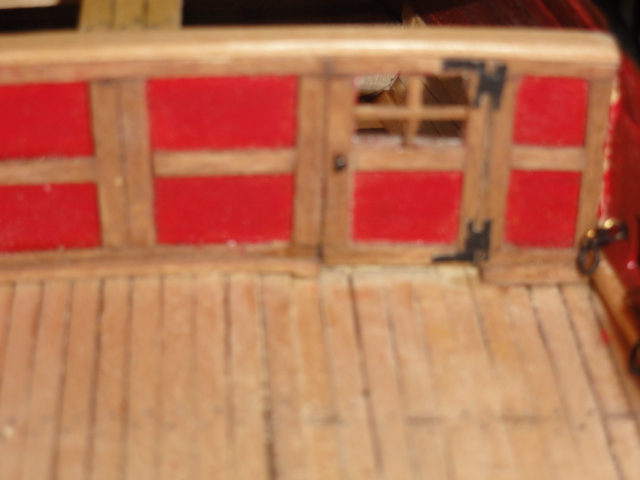
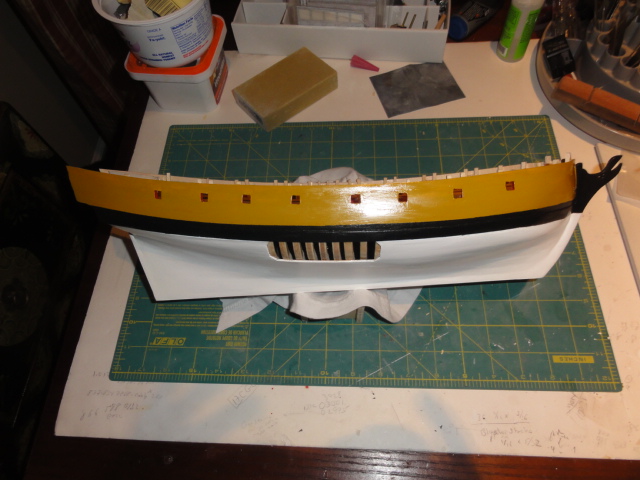
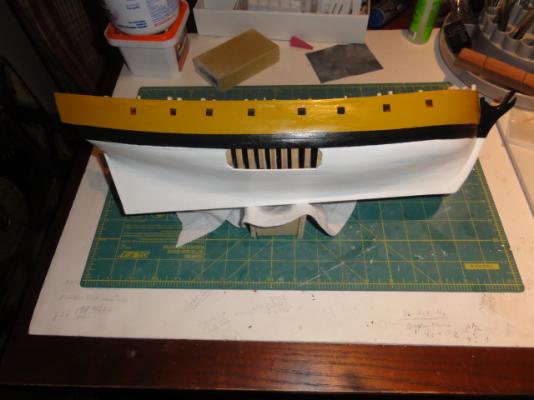
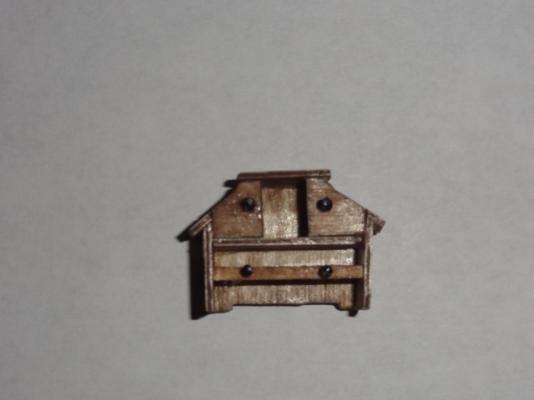
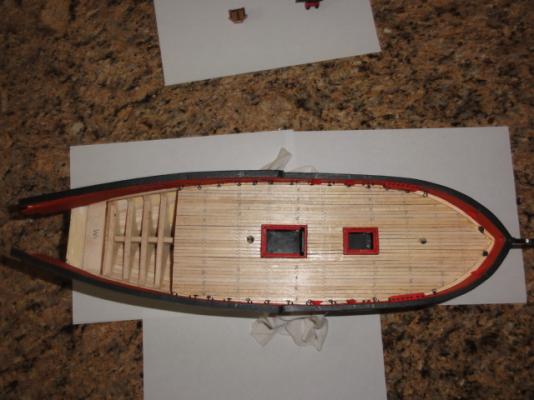
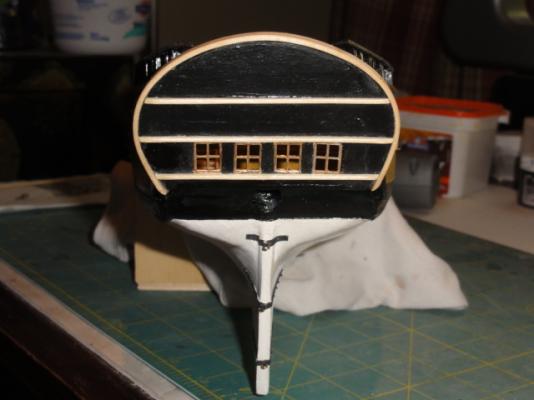
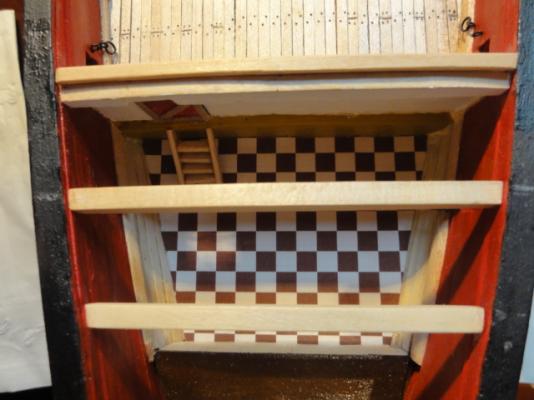
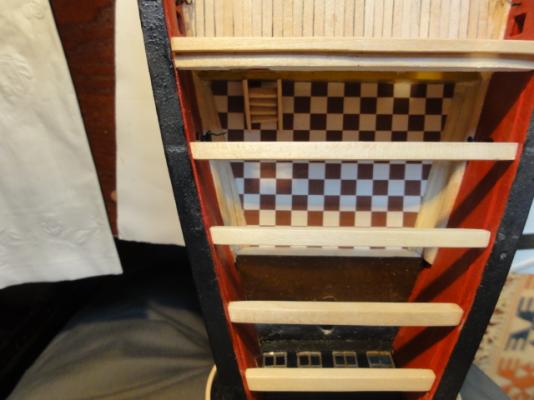
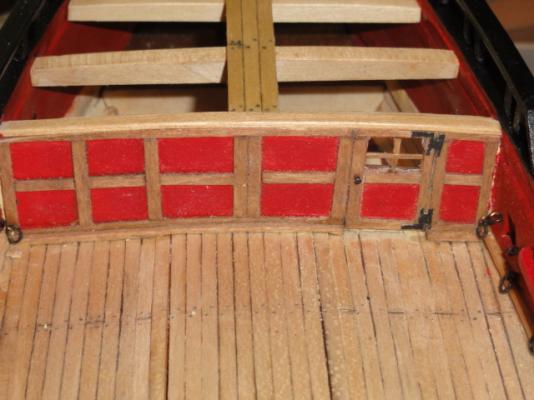
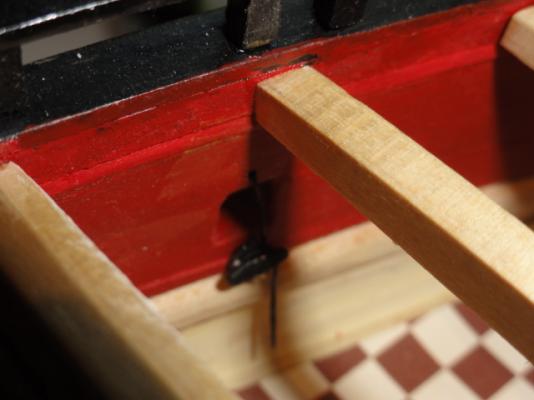
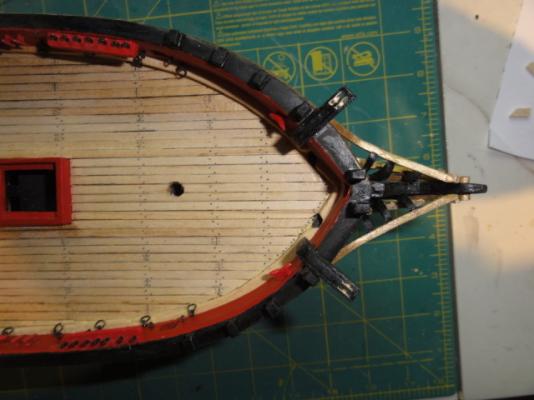
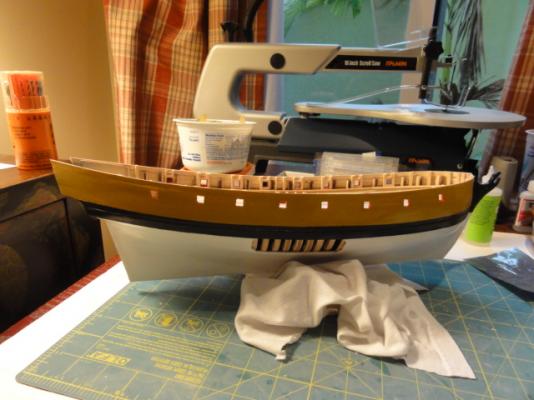
With apologies, I have not posted for too long a time, so this post is overly long. I'll try to do better in the future. Deck: I first added the raised portion of the deck and then finished the starboard and port sides simultaneously. Tree nails were simulated with small drilled holes colored with a sharp pencil lead. Plank lengths were simulated by Xacto knife scoring traced with a sharp pencil point. I primed the hull with spray gray auto primer and applied a first coat of Pollyscale acrylic paint according the plan paint scheme. I took several breaks while planking the hull and the deck to fashion a binnacle, tree pumps, capstan bitts, cannon (14) and rudder. I followed Bob's lead and made the grudgeon and pintle from folder stock. The main rail came next. I then added the ringbolts for the cannon carriage rigging, cleats and pin rails. (I still have the two bow pin rails to add.) I drilled scuppers and the fairleads into the hull and added the gangway stairs and chess tree. The transom was a bit of an engineering challenge because I built it too narrow. It resulted in just four windows rather than the six in the plan (or five if you did not want windows beyond the width of the great cabin.) Still, once the transom was painted, it looked OK, even if it lacked authenticity. I fitted the rudder to the stern post and then put it aside until the ship is mounted. (I knocked the rudder off the stern post twice before I got the brilliant idea, to put it aside until later.) As the photos indicate, I kept the quarterdeck open so that the great cabin could be "finished" per the Lauck Street Shipyard plans. I had a good time modeling the great cabin and adding details such as the checkered floor and a cleat used to tie off the rope that opens the gun port cover. The door to the great cabin is probably too small at the ship's scale, but in order to build it to five feet, it would have had to be 1 1/4" high and I simply did not know how to do that. So, I'll assume that my captain was very short. The "HL" door hinges were also made from folder stock painted black. I then planked the inside of the transom and added the flagstaff chock and socket and the main sheet horse. The fancy rail, quarter badge and fashion piece came next. I made my own gun port cover and hinge assembly, copying Bob's ("Rafine's") work and the plans. Then the beak head--wow! That's as close as my hobby ever came to work. Nothing measured right and I ended up relying on the seat of my pants as much as the plans. I hope it looks half decent. (I do not have Bob's bending and laminating talent, or any other of his great ship-building skills, so I cut the rails from a solid piece of birch plywood.) Next came the timber heads, knight heads and catheads. I did manage to fashion the sheaves in the catheads by filing, drilling, adding the skinny part of a toothpick and laminating the sides. The channels and chain plates are in progress and I still need to add the steering wheel standard assembly. I anticipate another month or so to complete the hull and place the cannons, rigging and deck furniture. I'm looking forward to starting the masts, spars and rigging. Great thanks to Bob and Ken for the invaluable guidance in their Fair American posts.


- 42 replies
-
- 6
-
-
- fair american
- model shipways
- (and 1 more)
-
Perfect! Thanks much, Bob. Pictures this weekend.
-
Bob, Fair American is progressing nicely. I'll post pictures soon. Quick question re channels. How did you achieve the look of a continuous loop of wire around the deadeye, through the channel and around the chainplate hook? Did you just hide the ends of the wire loop in the the channel slot? Solder? Slight of hand? Thanks, Ed
-
Ken, I soak the plank in water for at least 24 hours. However, with basswood the surface fibers become rough after drying and sanding does not completely cure the roughness. I'm not sure that the same problem would occur with better woods. My FA is progressing. I made almost all of the deck furniture from scratch and I'm pretty pleased with the result. I'll post some pictures tomorrow. Good to have you back.
-
Thanks, Bob. Never a hurry. Enjoy Chicago. Still the best pizza outside of Little Italy.
-
Bob, do you recall the size of the eye bolts and padeye you used on the deck?
-
Thanks for the help, Bob. Your log and advice are super valuable. Ed
-
Bob, (1) where do you purchase fittings such as split rings, eyebolts and chains? (2) Is there any place you know that supplies black (on brass) split rings and chains? (3) Is there a trick to painting brass? I have a dickens of a time painting the brass black. It seems to peel off at the slightest touch. Thanks, as always. Ed
-
Ken, I came across the following info for Cornwall: Model Boat & Ship Fittings - Cornwall Model Boats www.cornwallmodelboats.co.uk/acatalog/ship_fittings.html A wide range of Model Boat Fittings and Model Ship Fittings. We stock various model ranges including Mantua, Caldercraft, Billings, Graupner and Krick fittings. Regards, Ed
-
Hi Bob, I'm ready to rig cannon tackle and want to emulate your build. Is the breach rope threaded through the eyelet on the cheek that does not have the ring? Is the recoil tackle connected to the eyelet with the ring? Did you use two single blocks for the recoil rigging or a single and a double block? Thanks again for the help. Ed
-
Thanks, Ken. That's very helpful. I also check Bob's build log, as well as yours, daily. But, since I'm following the LSS kitbash build, I do not use the same build sequence as you and Bob. Also my build varies considerably aft of BH 16. Still, your log is quite helpful and I appreciate your responses to my Qs. Regards, Ed.
-
Ken, what dimension wood strip did you use for the fancy rail? The plans call for a 3/16 x 5/32 strip but the parts do not include, and the parts list does not mention, a strip with those dimensions. In fact, the list does not mention a fancy rail at all. The strip included with the kit that is closest to the fancy rail is 3/16 square. Also, did you use a filler aft of BH 16. Sheet 5 of the plans mention a filler strip under the fancy rail, but I can't visualize that it would be needed. Thanks, Ed.
- 455 replies
-
- 1
-
-
- fair american
- model shipways
- (and 1 more)
-
Looking fine, Ken. I see the QD supports, but don' t know what fair caps are. Also, did you add the fancy rail at this point?
-
Happy birthday. Retired now but I do remember when work would get crazy. Look forward to your future posts. Ed.
-
Thanks for the clamp info, Ken. I like the sequence of your build--framing before planking. The practicum I'm using takes a very different approach. Problems are harder to fix. Nice work.
-
Looks very good, Ken. I may follow your lead and increase my gun ports by 1/16 inch on all sides. Moving the housing front aft at this point will be more difficult since the deck is already laid. Ken, what are the brand of clips you use and do you recall where you got them? There seem to be two kinds--a blue 90 degree clamp and standard (multicolored) clamps.
-
Thanks, Wayne. Appreciate.
-
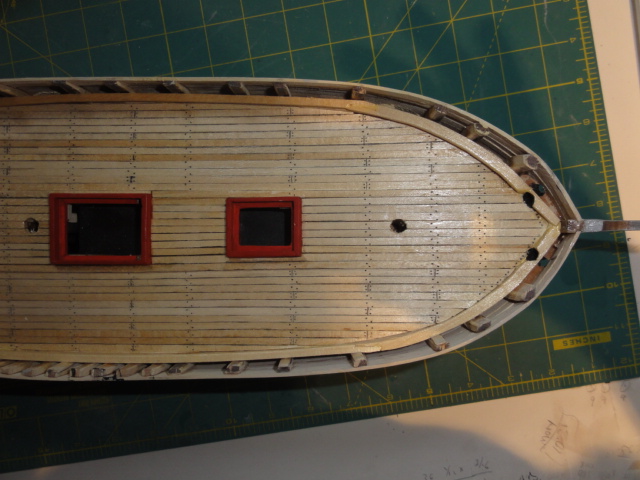
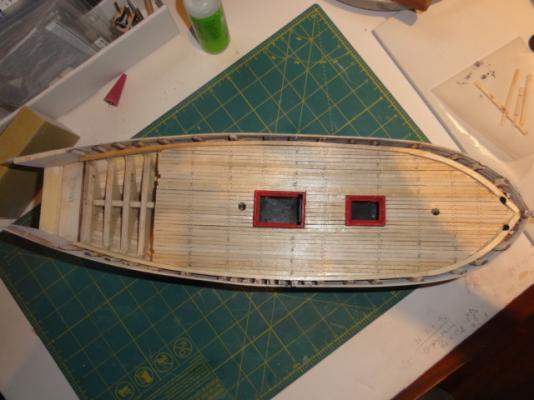
I just wasn't happy with the spacing of the gun ports on the starboard side. So, remembering, after all, that the model is wood, I spend a couple of hours (or so) moving gun port five about 5/16" aft. I think that it came out OK. (Photo attached) Onward to the inboard planking.
- 42 replies
-
- 1
-
-
- fair american
- model shipways
- (and 1 more)
-
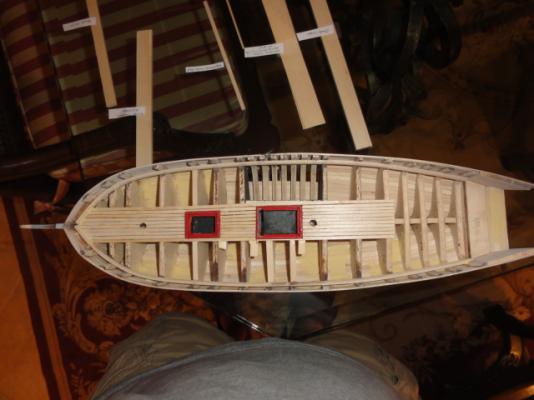
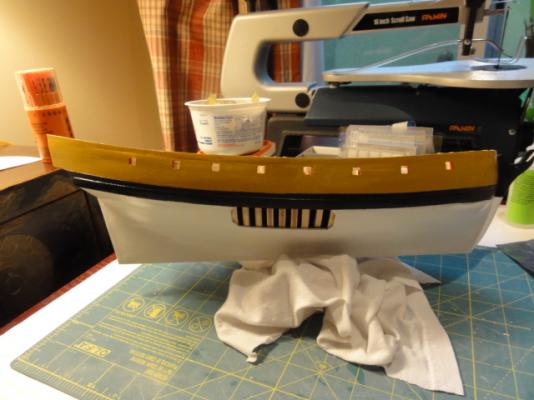
This photo shows the gun ports framed and cut out and the hull painted. I also trimmed the deck planks just aft of BH 12 and cut the gammon hole (I don't know what it is for and my naval-terms glossary didn't help) in the stem. As you will see, the ghost of not doing a good job squaring and fairing the bulkheads at the start of the build has reared its ugly head once more. The space between gun ports 4 and 5 is not consistent with the plans (too wide) on the starboard side. Its OK on the port side. Overall, though, I'm not unhappy about the progress and will proceed now with the interior planking.