EdatWycliffe
-
Posts
119 -
Joined
-
Last visited
Content Type
Profiles
Forums
Gallery
Events
Everything posted by EdatWycliffe
-
Beautiful work, Ken.
-
Understand. I probably will not attempt bunt and leech lines at this stage of my experience. BTW, you're lucky. I have an admiral telling me where to stow things. Ed
-
Ken, I wonder if the following is a solution to the Yard Tackle Pendant issue: seize a small double block at the front of the channels (P&S); at the end of the pendant is a double block-- create a tackle between that double block and the double block on the channels; and use the first belaying pin on the fore and aft channels (for the main and fore lower YAs P&S) to establish a purchase for the tackles. See reference #s 23 and 49 on the rigging plan.
-
Very nice work, Ken. Appreciate the advice from you and Bob regarding the yard tackle pendants. Actually I haven't even started the standing rigging. I thought I would construct all of the spars first. In doing so, I wanted to rig the YAs, etc as much as possible while they were off the the ship. That plunged me directly into how I would approach the running rigging. (It's a real game of dominoes.) I find the running rigging puzzle to be fascinating and frustrating, but your log, Bob's log, the Syren docs and Petersson's and Lee's books are very helpful. I'm stil finishing the spars, but at the same time I'm trying to figure out the slings, trusses and pendants. I'm sure I'll have questions. The only thing I think I've figured out is that the FA does not have jeers. After I've completed the spars, I'll attatch and rig the bowsprit and start the standing rigging on the masts. Lots to do. Ship building is truly a wonderful hobby. Ed
- 455 replies
-
- 1
-

-
- fair american
- model shipways
- (and 1 more)
-
Hi Bob, quick question if I may: Did you initially rig both brace pendants and yard tackle pendants to the main and fore lower yardarms P & S? The FA instructions and rigging plan appear to call for them, but I didn't see them both rigged initially to the yardarms on your log. Was either the brace pendant or yard tackle pendant added later? Thanks much.
-
Thanks, Bob. That wil work perfectly.
-
Hi Bob, hope that all is well in your shipyard. On the FA Instruction sheets, I notice that there are no lift blocks for the fore and aft yardarms on the lower masts. I'd like to add them as you did, but I can't figure out how you attached them to the mast caps. Are the blocks seized around the cap? If so, how is that done after the masts are installed? Or, are the lift blocks seized onto an eye in the bottom base of the mast cap? Thanks. Ed
-
Ken, the build looks absolutely great. The furling looks especially good! Love to watch your log.
- 455 replies
-
- 1
-
-
- fair american
- model shipways
- (and 1 more)
-
Thanks much, Ken. This is very helpful. I very much appreciate the time you spend answering questions. I'm going to start on the yards tomorrow. Once they are completed off the model, I'll start the standing rigging as Bob suggests in his log. I really can't imaging a more enjoyable hobby.
-
Ken, thanks very much for your answers in post 344. They were very helpful. Ed
-
Hi Ken. I'm making the yards for FA and I need some help. Sheet 2 of the plans don't show any stuns'l booms. Questions: (1) Looking at Syren, I'd guess that only the lower yards and the topsail yards had stuns'l booms. Is that right? (2) did you create the boom irons using 1/8 brass tubing? (3) What size dowel did you use for the stuns'l booms? (4) are the stuns'l booms attached to the fore section of the yards or directly above the yards? (5) Will you pin the yards to the masts and, in addition, use parrel beads to secure the topsail yards? Thanks very much for any help you can give. Ed
-
Thanks, Ken. I would not have thought about the sling at this point.
-
Thanks, Bob, Ken and Pine Tar. Very much appreciate. Onward and upward!
-
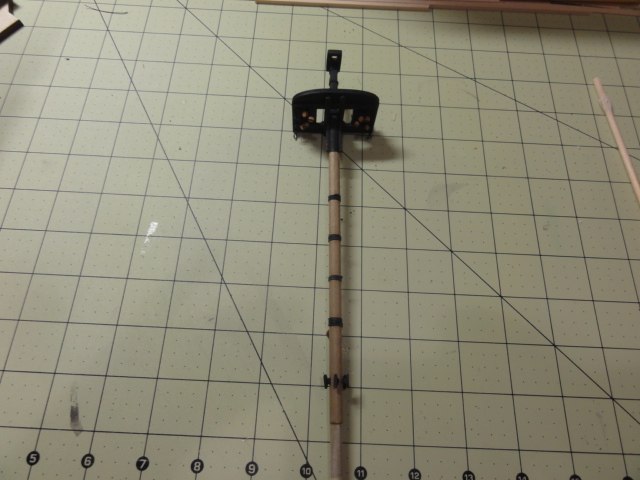
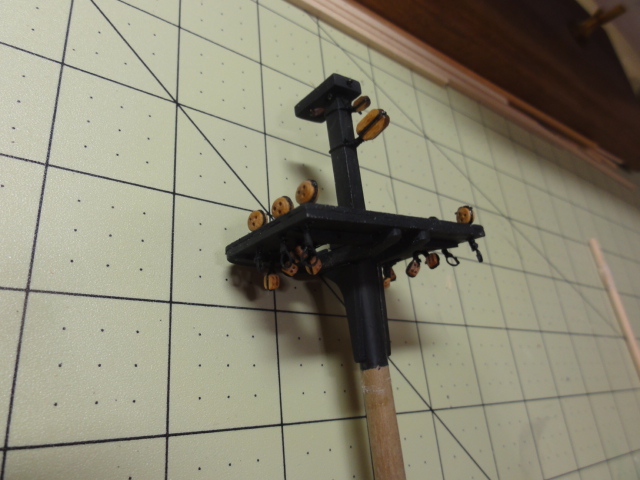
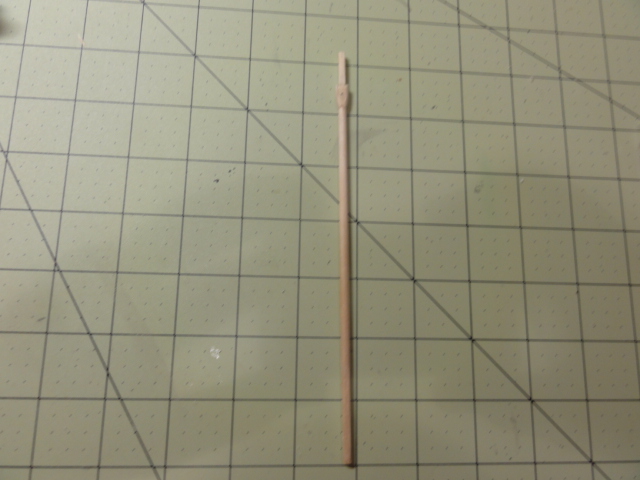
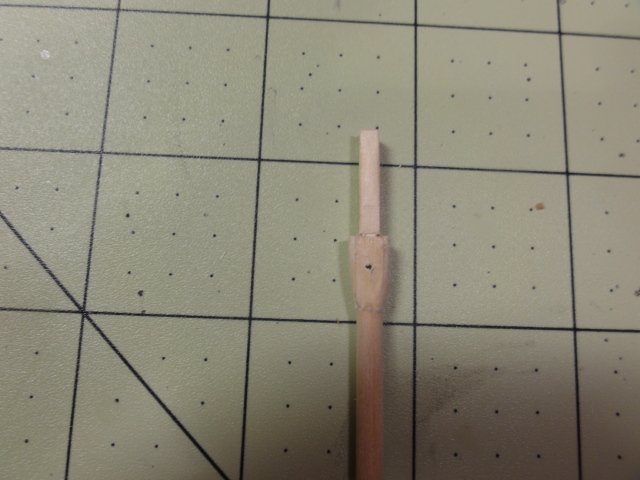
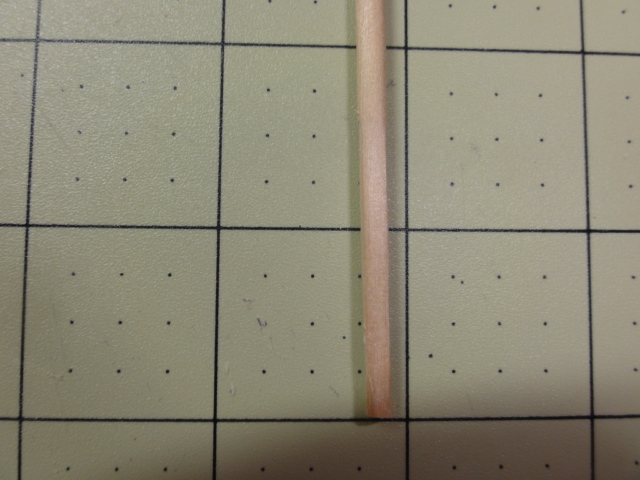
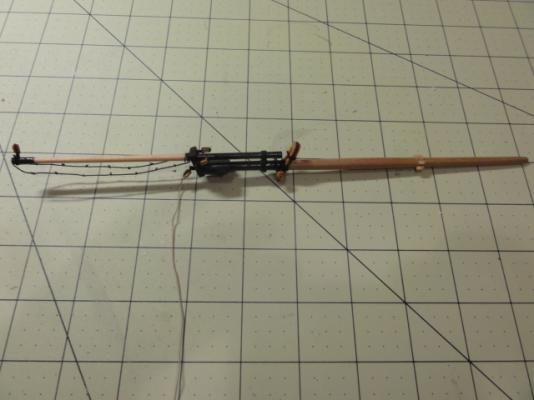
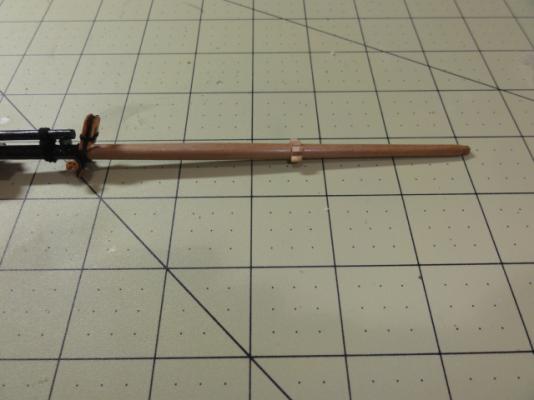
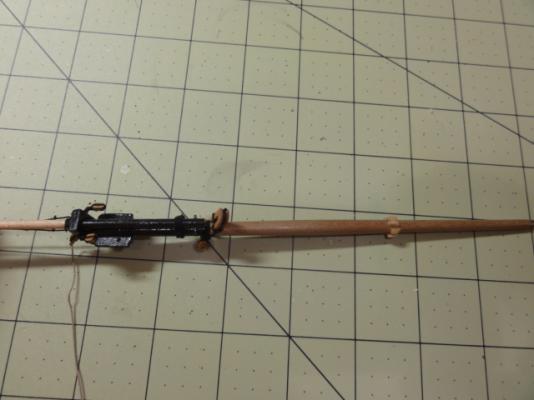
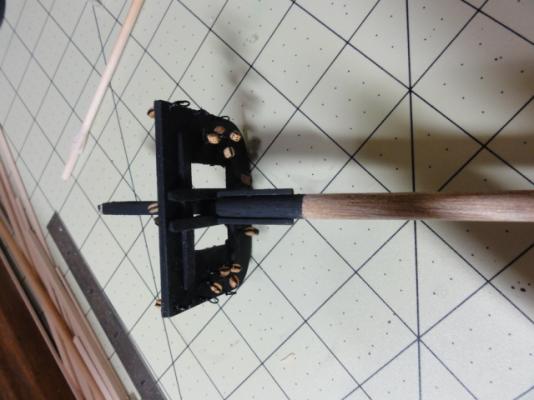
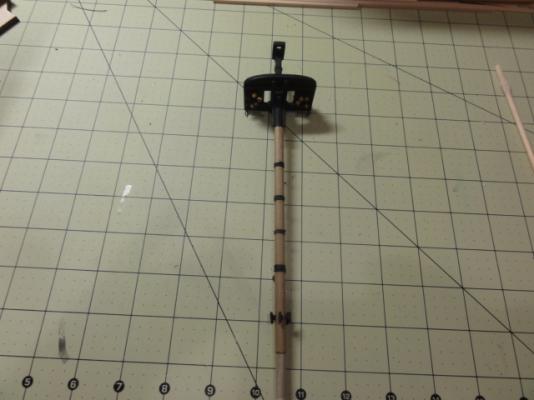
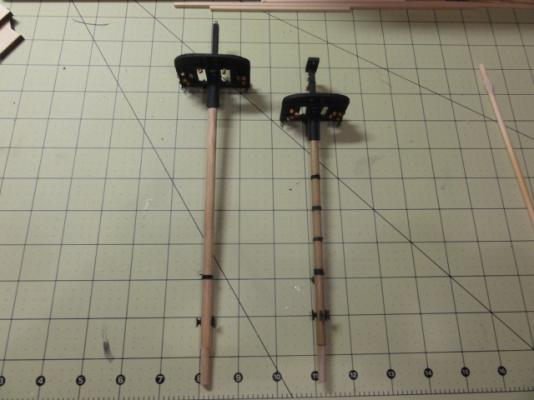
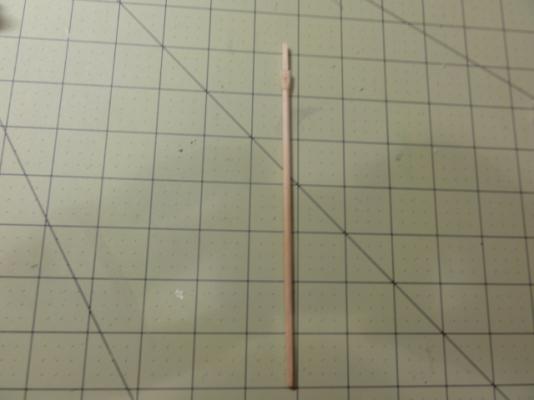
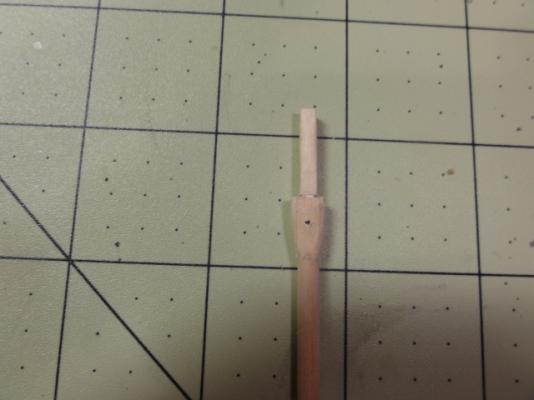
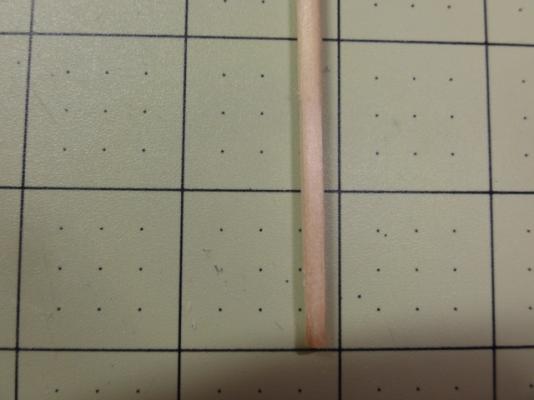
I apologize for the gap between postings. By way of explanation, last March I was elected president of our country club, and it's a real time sync. Nonetheless, it has made working on Fair American that much more important to my down time. I've completed the bowsprit and jib boom and the lower fore and main masts and I've started the main top mast. As the pictures below show, the bowsprit and jib boom were constructed (as best I could) using Bob's (Rafine) build log. I adopted KenW's wooldings on the lower foremast. The rationale for including them seemed quite acceptable and I think that they look good.I hung eight double blocks under the mast top using the wire (alternative) method suggested by Chuck Passaro in the Syren instructions and made the deadeye plates from .012 rope (from Syren) shaped with an awl and a heavy application of CA. The blocks on the mast were hung using a double loop seizing method taught by Bob Hunt (Lauck Street Shipyard). I glued the mast cap in place but should have waited until I complete the topmast. (I'll have to put the fid in place after sliding the top mast through the cap.) The lower main mast was built the same way as the fore mast, less wooldings. I've added a hook for the main boom. The main top mast is well under way. The hounds were difficult to make and I did use the build-up method shown in Fig. 22C of the instruction manual. I'm having a few conceptual problems with construction of the trestle and cross trees and asked KenW a few questions since he has completed that part and it looks real good. So, I've got to finish the topmasts, make the top gallant masts and attach the bowsprit. And then I can finally start the standing rigging.


- 42 replies
-
- 5
-
-
- fair american
- model shipways
- (and 1 more)
-
Hi Ken, I'm watching your build with admiration. My progress is slow, but sure. I'm now making the top gallant trestle trees and cross trees and have some questions if you'd be kind enough to help with. 1. What size strip wood did you use? (Lauck Street suggests 1/16 square for the trestle trees and 1/8 x 1/32 for cross trees, but that has been hard to manipulate well.) 2. Did you attach bees at the top of either top gallant mast? 3. It looks like you hung four blocks from the trees-- which trees did you hang them from and what was the method you used to attach them? As usual, thanks much for your help. Ed.
-
That's great work, Ken. I'm using your build and Bob's as my principal references. I'm going slowly--finished bowsprit and lower fore mast and am now hanging blocks under the lower main mast top. I really like the way that your furled sails look and I'm hanging enough blocks so that I can attempt to emulate your work. FA is just my second ship so progress is not fast. I'm learning the basics as I go. Pictures will follow soon. Thanks again for your lead on this build. Ed
-
She's coming along very nicely, Ken. I just finished the bowsprit and rigged the blocks and dead eyes. Your build is very helpful. I've been following your log, the Syren Practicum and Bob's log as my major guidance. Also NRG's rigging document has been helpful. (By the way, I just joined NRG and would urge all of our colleagues to consider supporting the organization.) Again, thanks for the guidance. Ed
-
Nice work, Ken. I've had to take a little break from modeling so I could finish a small addition for a new shipyard. The admiral thought it was time that I moved the shipyard out of the living room. Soon I'll start rigging and your work will be a great help. Ed.
-
Thanks Ken I will check out the Passaro document. I mounted the model yesterday. I held the model tilted back on its stern on a pad of soft cotton cloth and drilled pilot holes in two pre- marked spots on the keel. I used a #74 drill bit followers by a 1/16" drill bit in a Dremel. I then took one of the screws that came with the brass pedistals and slowly nudged it into the pilot holes about 3/4 inch. Even with the pilot holes, the keel started to split slightly so I placed a small C clamp around the pilot hole and continued nudging in the screw. I backed out the screw then attached the ship to its cherry plank using the brass pedistals. I'll add a picture to my build log. Again, thanks for the help. Ed
-
Ken, two questions, please: (1) how did you determine which of the three standing rigging rope diameters (.018", .028" and .040") that came with the kit should be use in a particular instance? (2) how can you tell from the rigging plan (which is black and white; not black and red as indicated in the instruction book) which is standing rigging and which is running rigging? As you can tell, I'm still a neophyte. Thanks for all your help. Ed
-
Appreciate Ken. I'll do some experimenting as well. I think that I'll mount the ship on its permanent base soon before I start the spars,masts and rigging. I only wish that I drilled some pilot holes in the keel before adding cannons and deck furniture. Or, even better, when the ship was bottom up during planking. Live and learn! Ed
-
Thanks, Ken. That's helpful. Can we access the David Antscherl workshop on MSW? Ed
-
Ken, the fore track boomkin has a guy running from one end to an eye on the hull. Does the guy attach to the boomkin (1) throught a sheeve, (2) tied , or (3) somehow attached to the single block also at the end go the boomkin? Thanks.
-
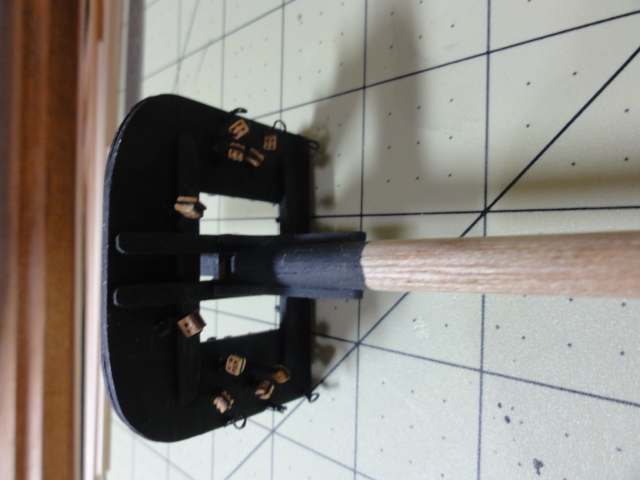
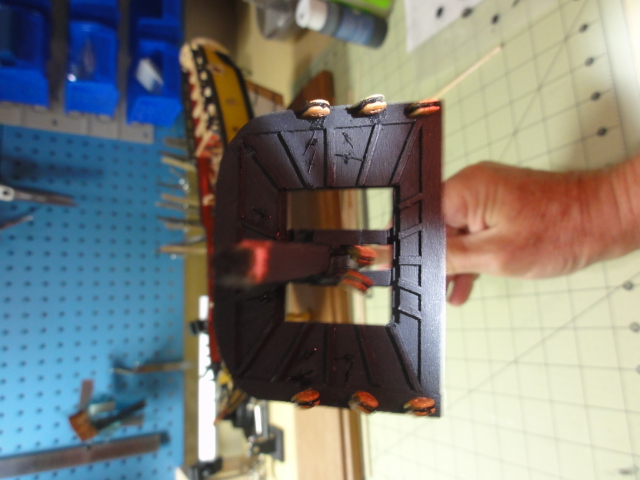
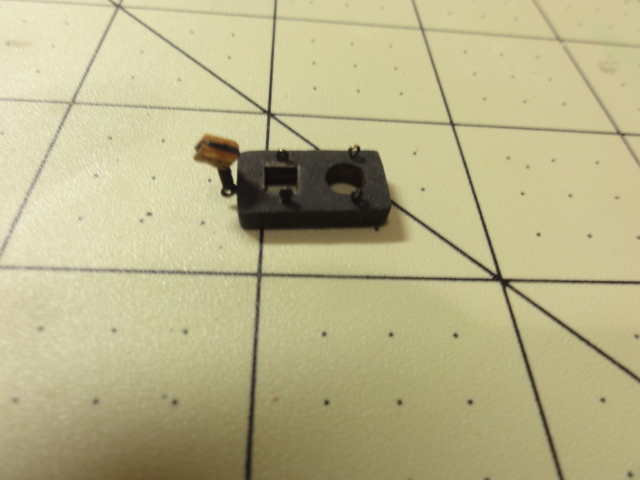
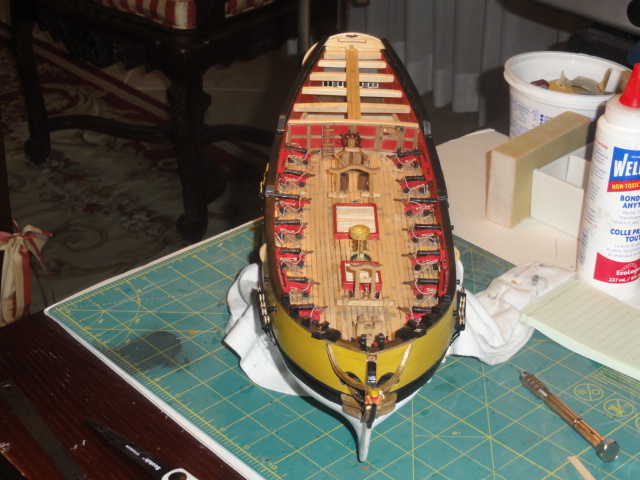
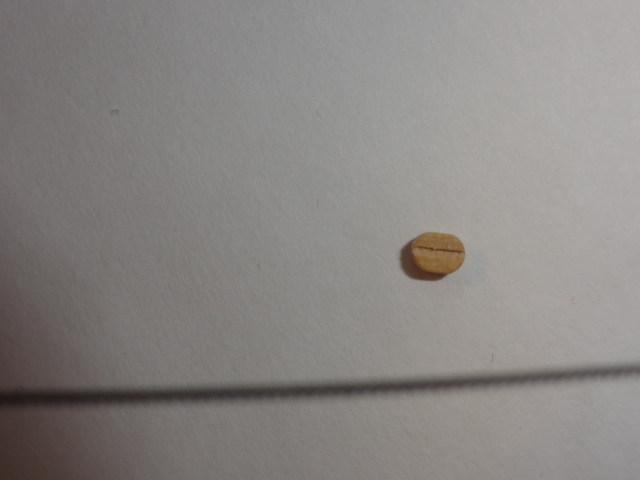
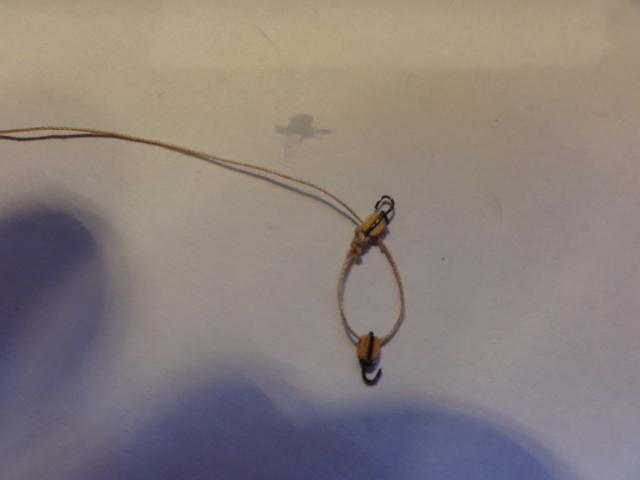
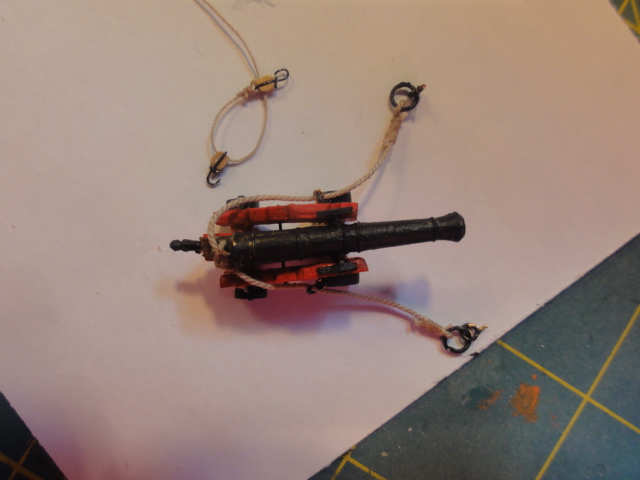
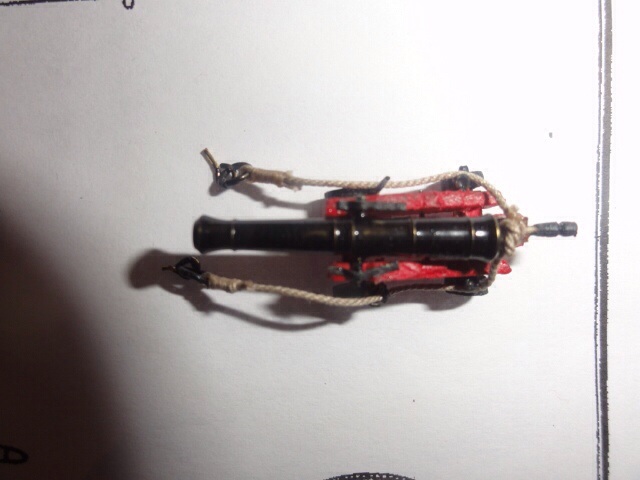
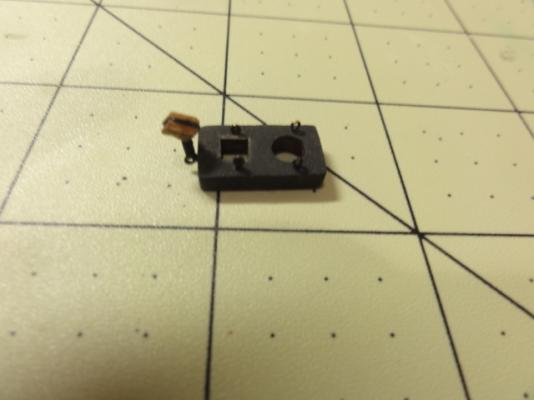
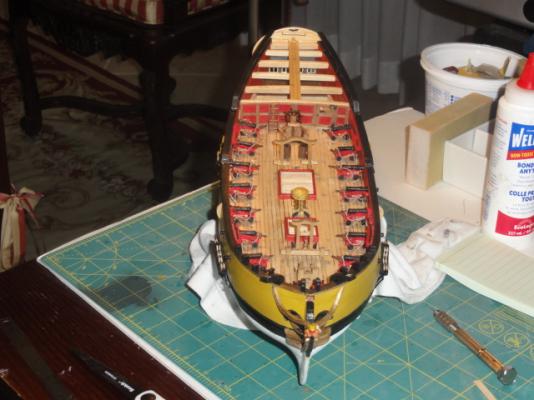
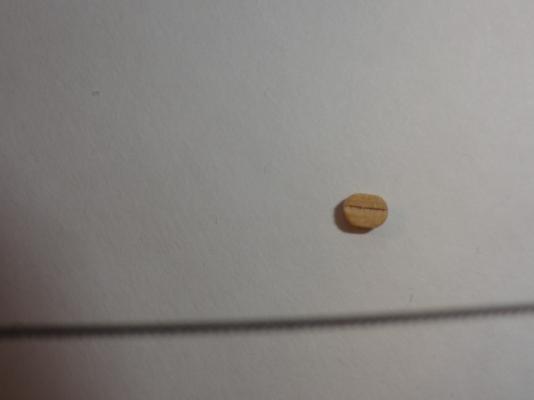
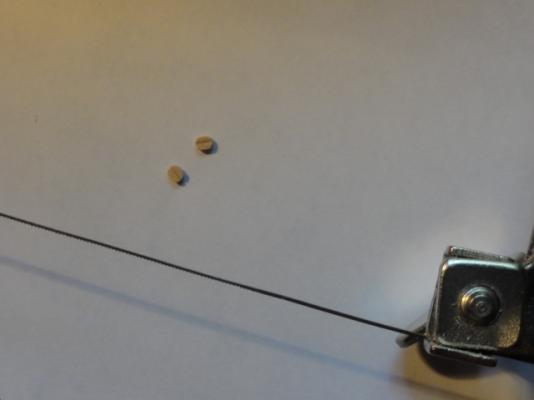
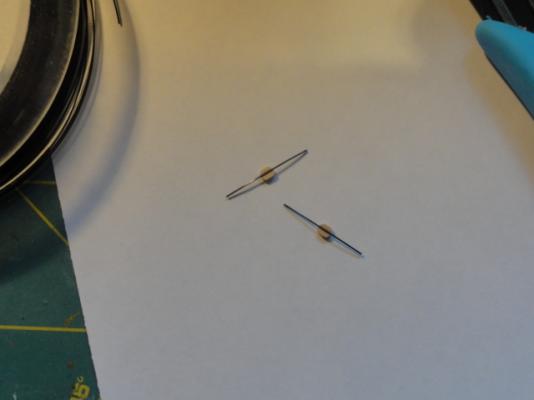
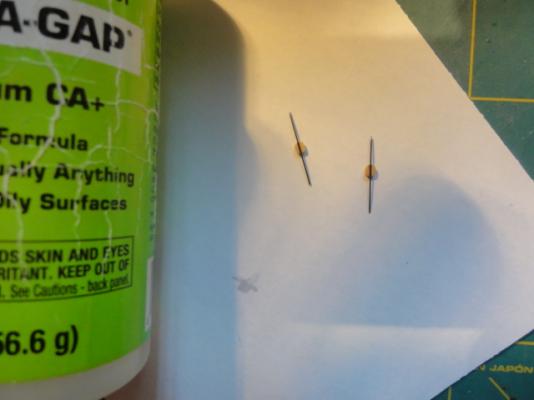
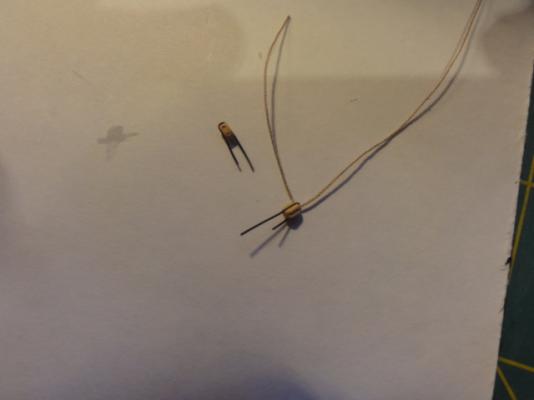
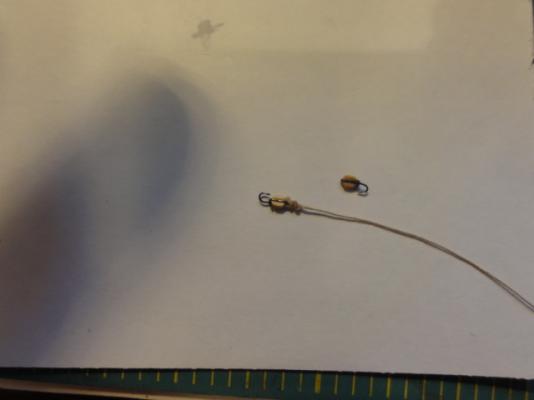
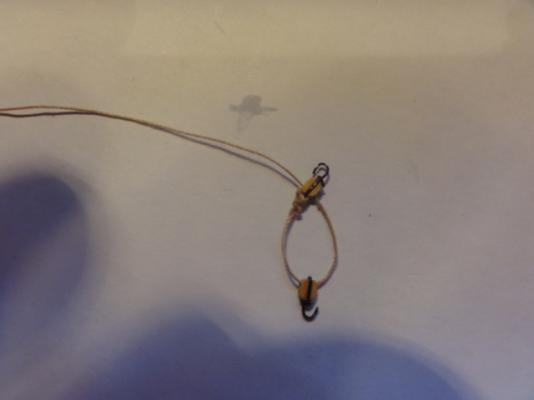
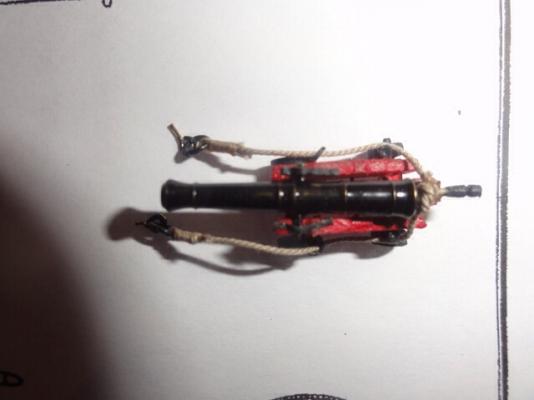
The cannons and cannon rigging are done and the deck furniture added. The eyes, padeyes and rings need to be added to the deck, but I see a start to masts and rigging soon. Rigging the cannons was difficult, but through the trial and error process, I learned a technique for wrapping the blocks and preparing the pulley rigging that I'd like to share. The pictures below reflect the following steps: 1. I purchased 3/32 single boxwood blocks from Syren. Using a jeweler's saw with a very fine blade, I scored the groves a little deeper on both sides of the block. 2. Cut two pieces of 28 gauge wire each about 1" long. I used black colored Artistic Wire purchased at Michael's. Its has both strength and flexibility. 3. Lay each wire on the block and add a small drop of CA on top of the wire where it lays on the block. (I use Zap medium+ gap-filling formula). 4. By hand, bend the wire around each block. At the end of one of the blocks, lay a piece of rigging rope about 5" or 6" long between the wire and the block. ( I used .20mm tan rope I purchased from Syren and was very pleased with the quality.) Leave about 1 1/2 " of rope at one side of the wire and the remaining length on the other side. I first prepared the rope by passing it through a block of bee's wax I purchased at Jo-Ann Fabrics. Add another drop of CA on top of the wire on this side of the block. 5. Bend the wire around the block until it goes entirely around the block. Add a small drop of CA on top of the wire where it lays on the end of the block and press down on the wire with the flat end of a needle nose plier (or other tool) so that the wire lays flat against the end of the block. 6. I then used a #76 drill bit to ream out one of the holes in the block (I chose the hole closest to the wire bend that is furthest away from the end of the wire where the hook will be formed) to make reeving the rope easier. This step may not be necessary. 7. Seize the rope on one of the blocks. This block will eventually attach to the bulkhead and the other block will eventually attach to the eyelet on the cannon. 8. For, a hook at each at the end of each block. I used a needle nose plier with round ends. 9. Reeve the rope through the blocks and add the finished block and tackle assembly to the cannon. I found reeving so much easier of I dipped the end of the rope through a small amount of CA to make the rope stiff.


- 42 replies
-
- 5
-
-
- fair american
- model shipways
- (and 1 more)
-
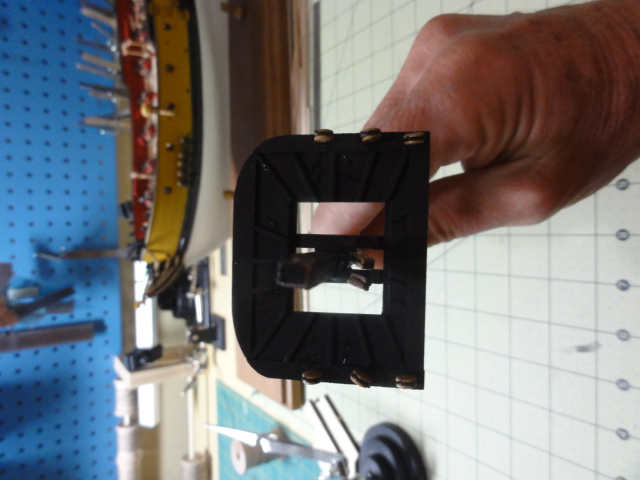
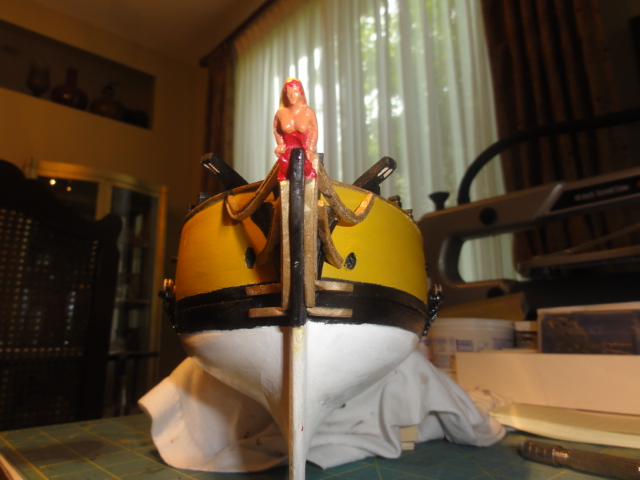
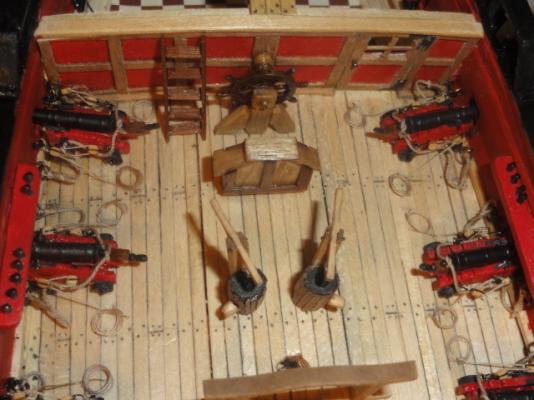
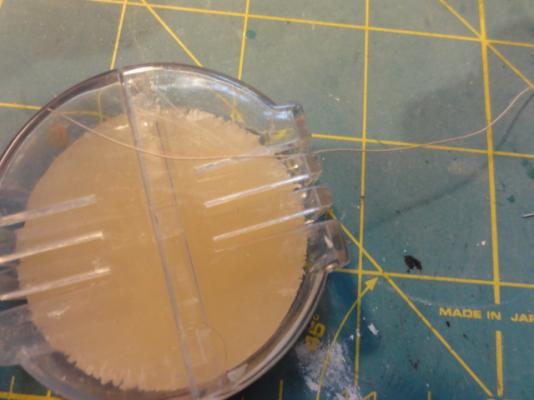
I'ver worked lately to get better at seizing lines for the cannons. While waiting for Syren blocks to arrive, I pulled all the breech line eye bolts and rings I installed in the bulkhead. I should have installed them off deck when I rig the cannons. So now I've complete the breech lines for all 14 cannon. See picture. I will soon face the task of finishing the cannon rigging and from Ken's description, my hands are already shaking. Perhaps I'll take a cannon break and work on the bowsprit and jib boom. Ken's turned out nicely.
- 42 replies
-
- 1
-
-
- fair american
- model shipways
- (and 1 more)