HOLIDAY DONATION DRIVE - SUPPORT MSW - DO YOUR PART TO KEEP THIS GREAT FORUM GOING! (Only 68 donations so far out of 49,000 members - Can we at least get 100? C'mon guys!)
×


Telp
-
Posts
124 -
Joined
-
Last visited
Content Type
Profiles
Forums
Gallery
Events
Everything posted by Telp
-
Thanks all, I tried to access the Australian museum Steve but I can only ever see one side on picture. Windows seem to be a nightmare here, I have been looking around dolls house shops and model train shops and they offer very little in the way of Windows at a good size to fit. It's a shame that Caldercraft never produced the model with the rear window sections as part of the kit, I'll try and have another look around and see what is available, anything will be better than having the name "supply" literally covering the whole stern surface area. I may black the brass hinges though as it does give it a "toyish" feel rather than a little bit of authenticity. Terry
-
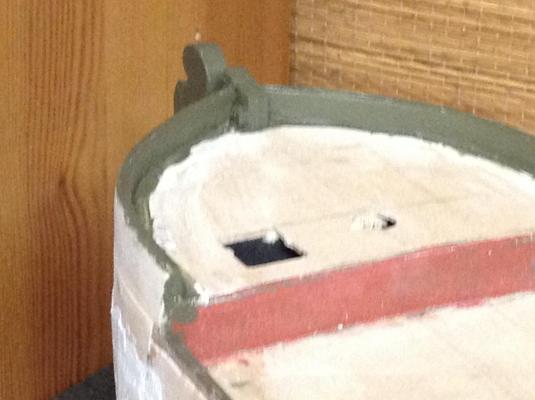
Am also after some feedback please, I like the builds on here where Windows are added to the stern area, so I have done a mock up of what I fancy doing but would welcome any feedback to if it looks stupid. I was also looking at just two Windows at either side of the section, I'd like to keep the area black if I can and the name "supply" will be added to the top curve section using letraset. Thanks foe comments.
-
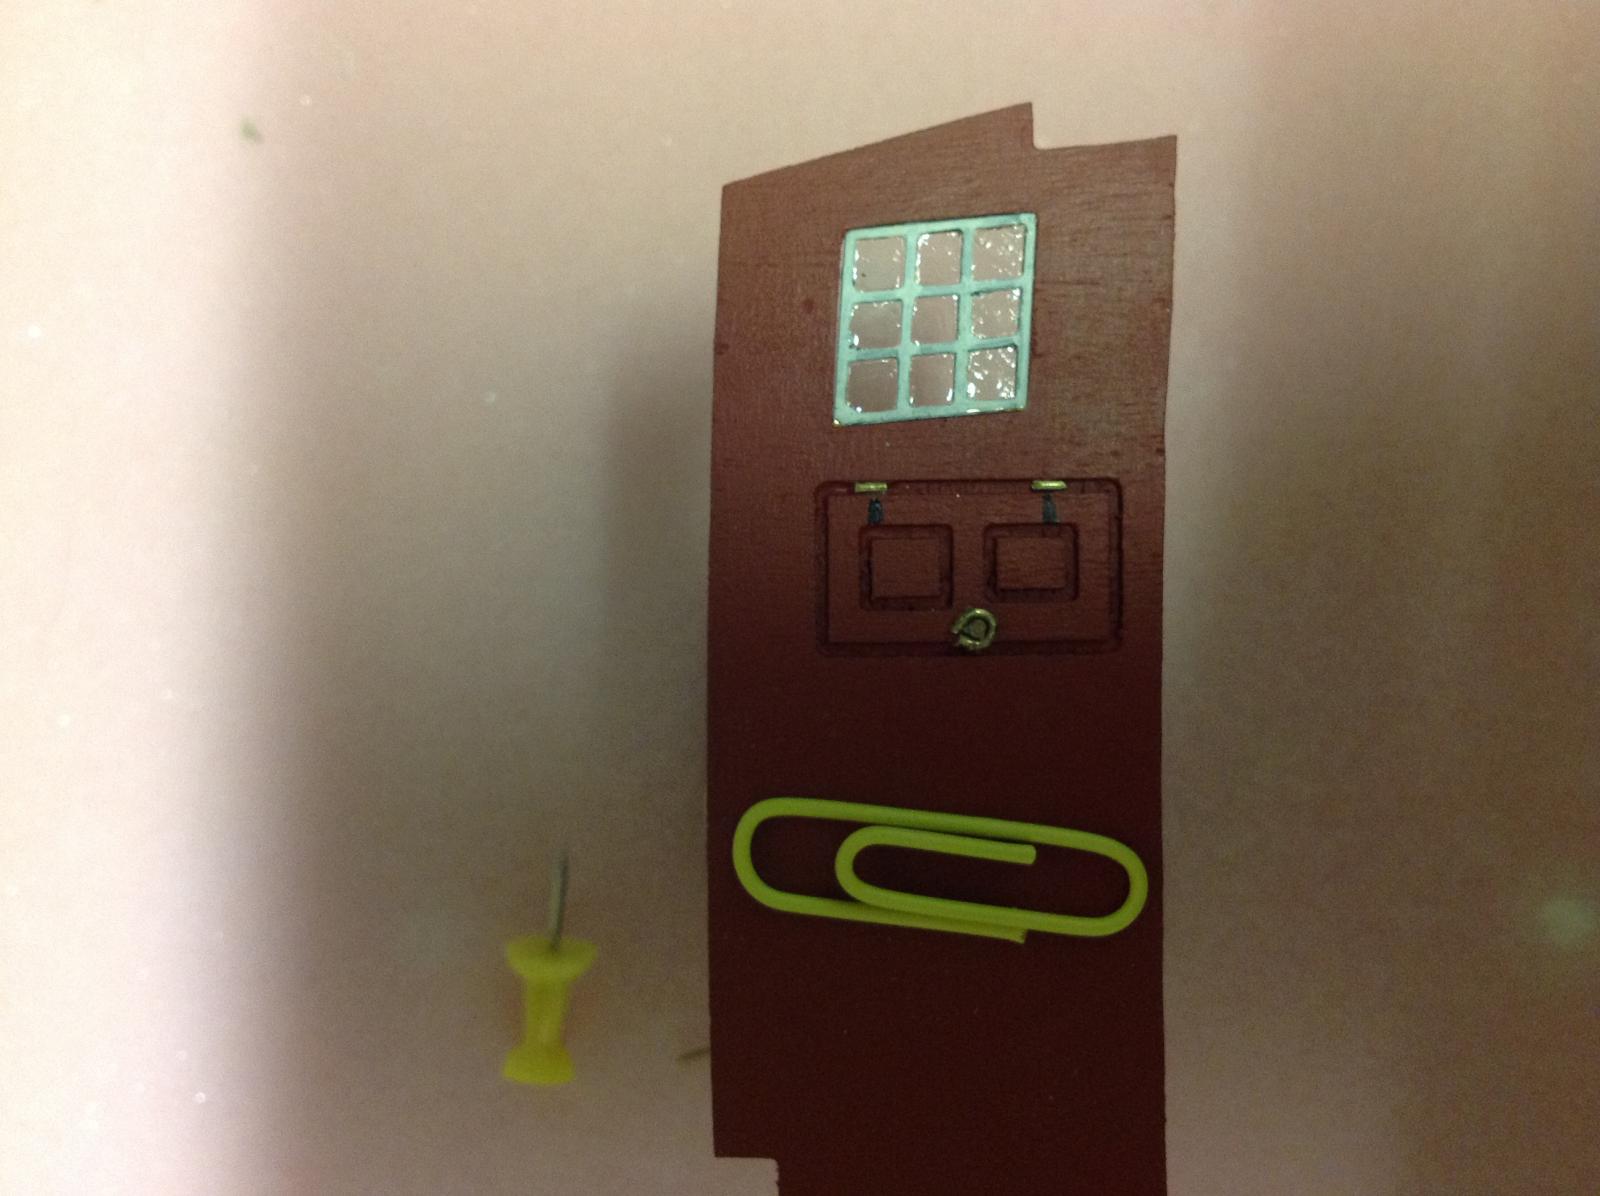
Decided to give my brig supply captains door a bit of an uplift by adding brass hinges and a brass door handle, with the glazed Windows it's not too bad and I now realise I have more patience than I thought.

-
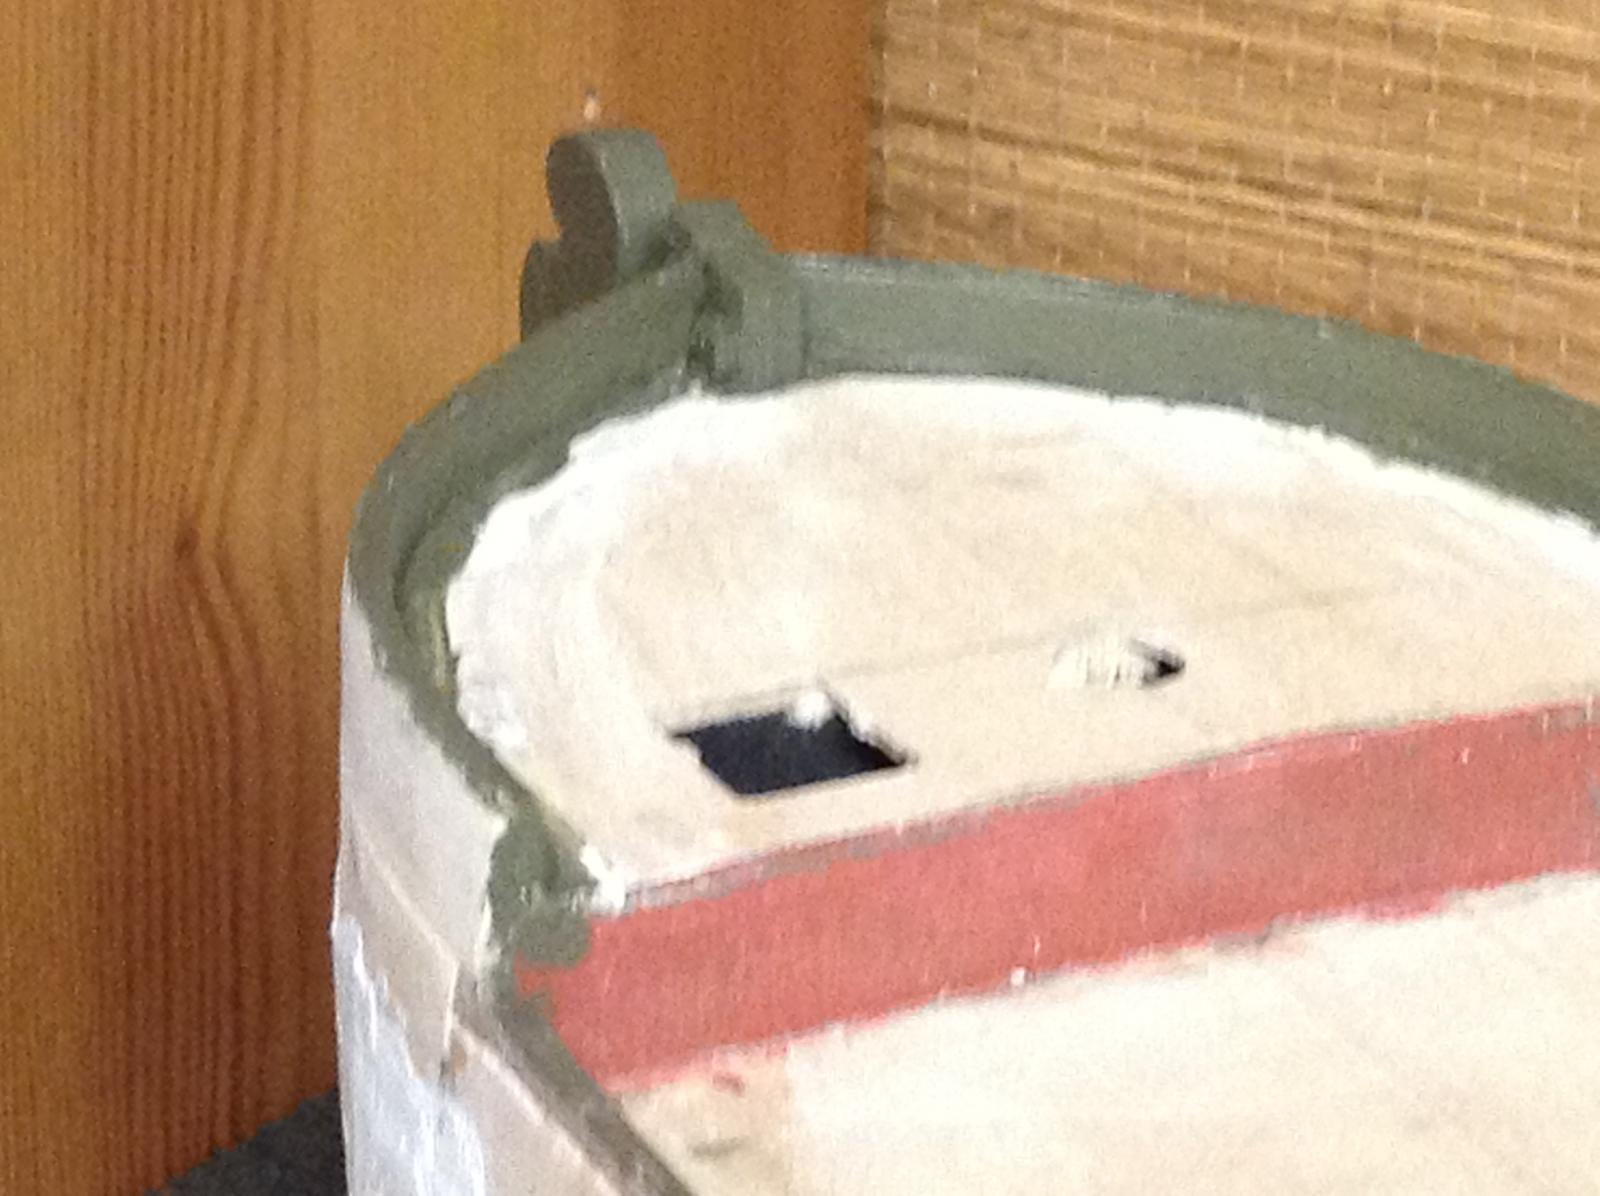
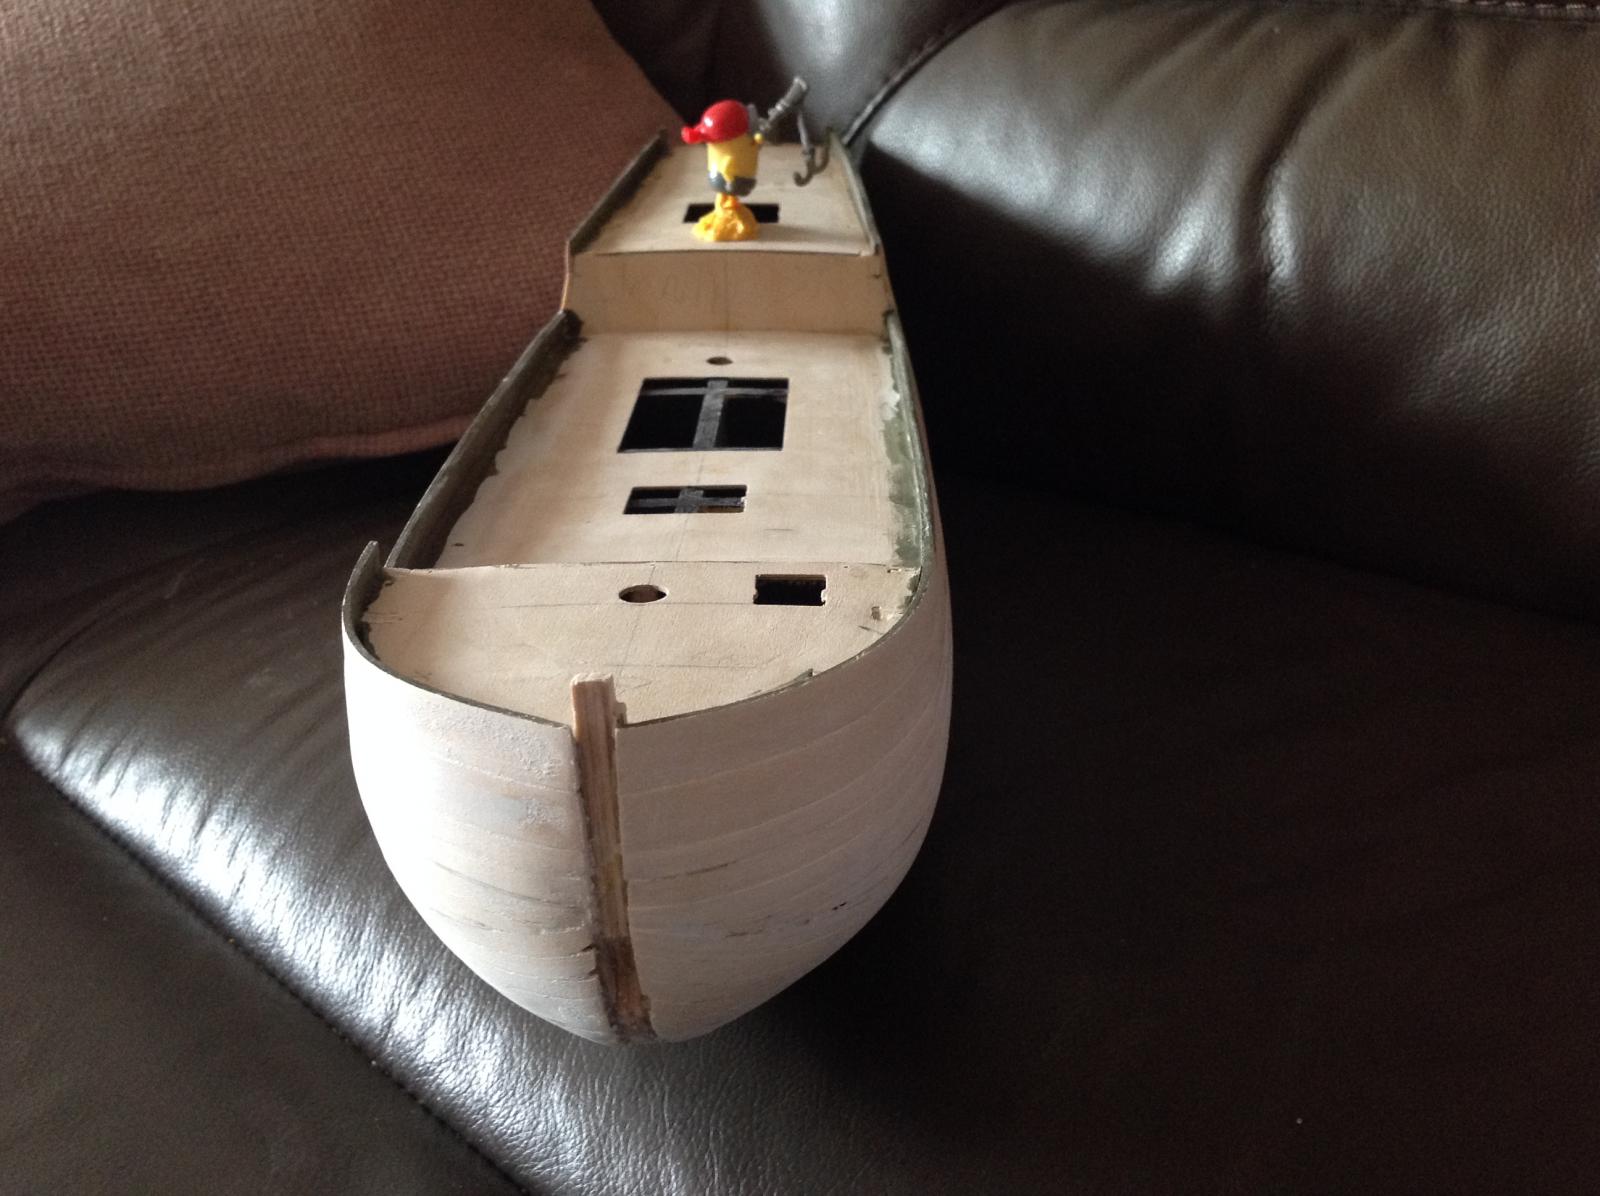
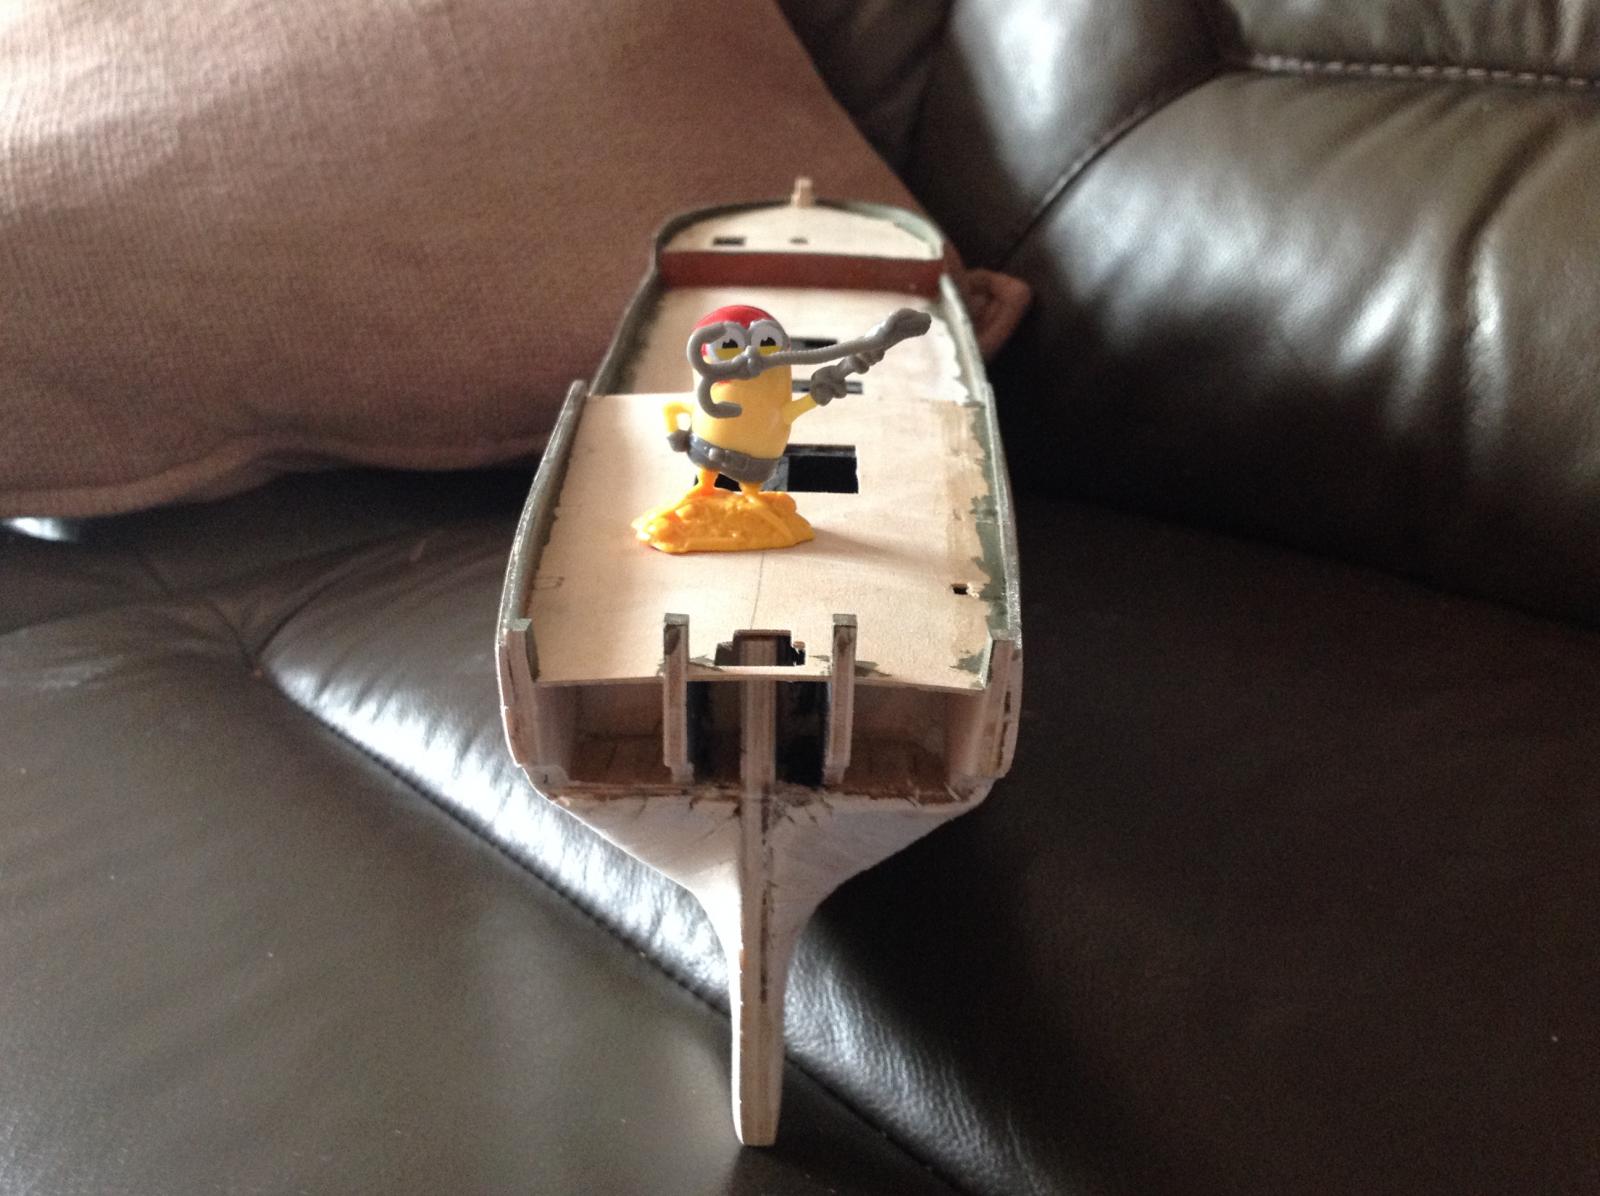
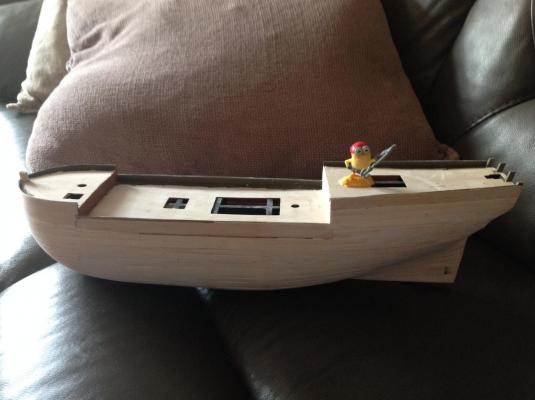
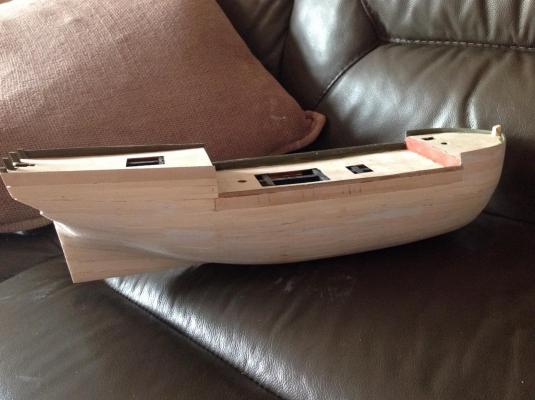
Have now finished raising the bow bulwarks so they are correct as per the plans and Stevens pictures, they came out reasonably well in the end, have put on sone acrylic primer so once I have finished rubbing down the first planking I can put a finish on prior to starting the second planking. Have also started on the rear cabin panels adding the Windows after glazing them so they look like a glass effect, just wish I'd put a couple of small bulbs in the rear so it looked as if the lights were on, might still look into that :-) then again, I think there is enough to do. Will post again once I start the second planking.
-
As per Steves advice to raise the bow bulwark, I have contoured a line from the inside of the original shallow bulwark with a couple of pieces of 5mm to give me the line I need and will finish that off with a couple of bits of 2mm on the outside to give it sghape and some strength. As I had not yet placed any finish second planking on the inside of the original bulwark it has allowed me some tolerance in thickness and made it easier to sand down as there will be less friction on a more solid part. I'll photo the finished part when it's done, going to give the glue a few hours to set. May adopt this approach to give the back bulwarks a more straight defined line as well, this will help make the decks look less warped.bthanks again Steve.


-
Ahh thanks Steve, I can see what you mean when I look at the plans as well. I made a classic mistake of thinking the decks were correct when I began planking to then realise they were not quite square, I will have a look at maybe raising the front edge planking somehow, probably be easier to add a 5mm section to the top edges then rub the wood back Down to create a level section, much obliged for the heads up indeed. I had already fitted the bow front piece prior to reading this but that may allow me something to square up to. Many thanks and thanks all. Terry
-
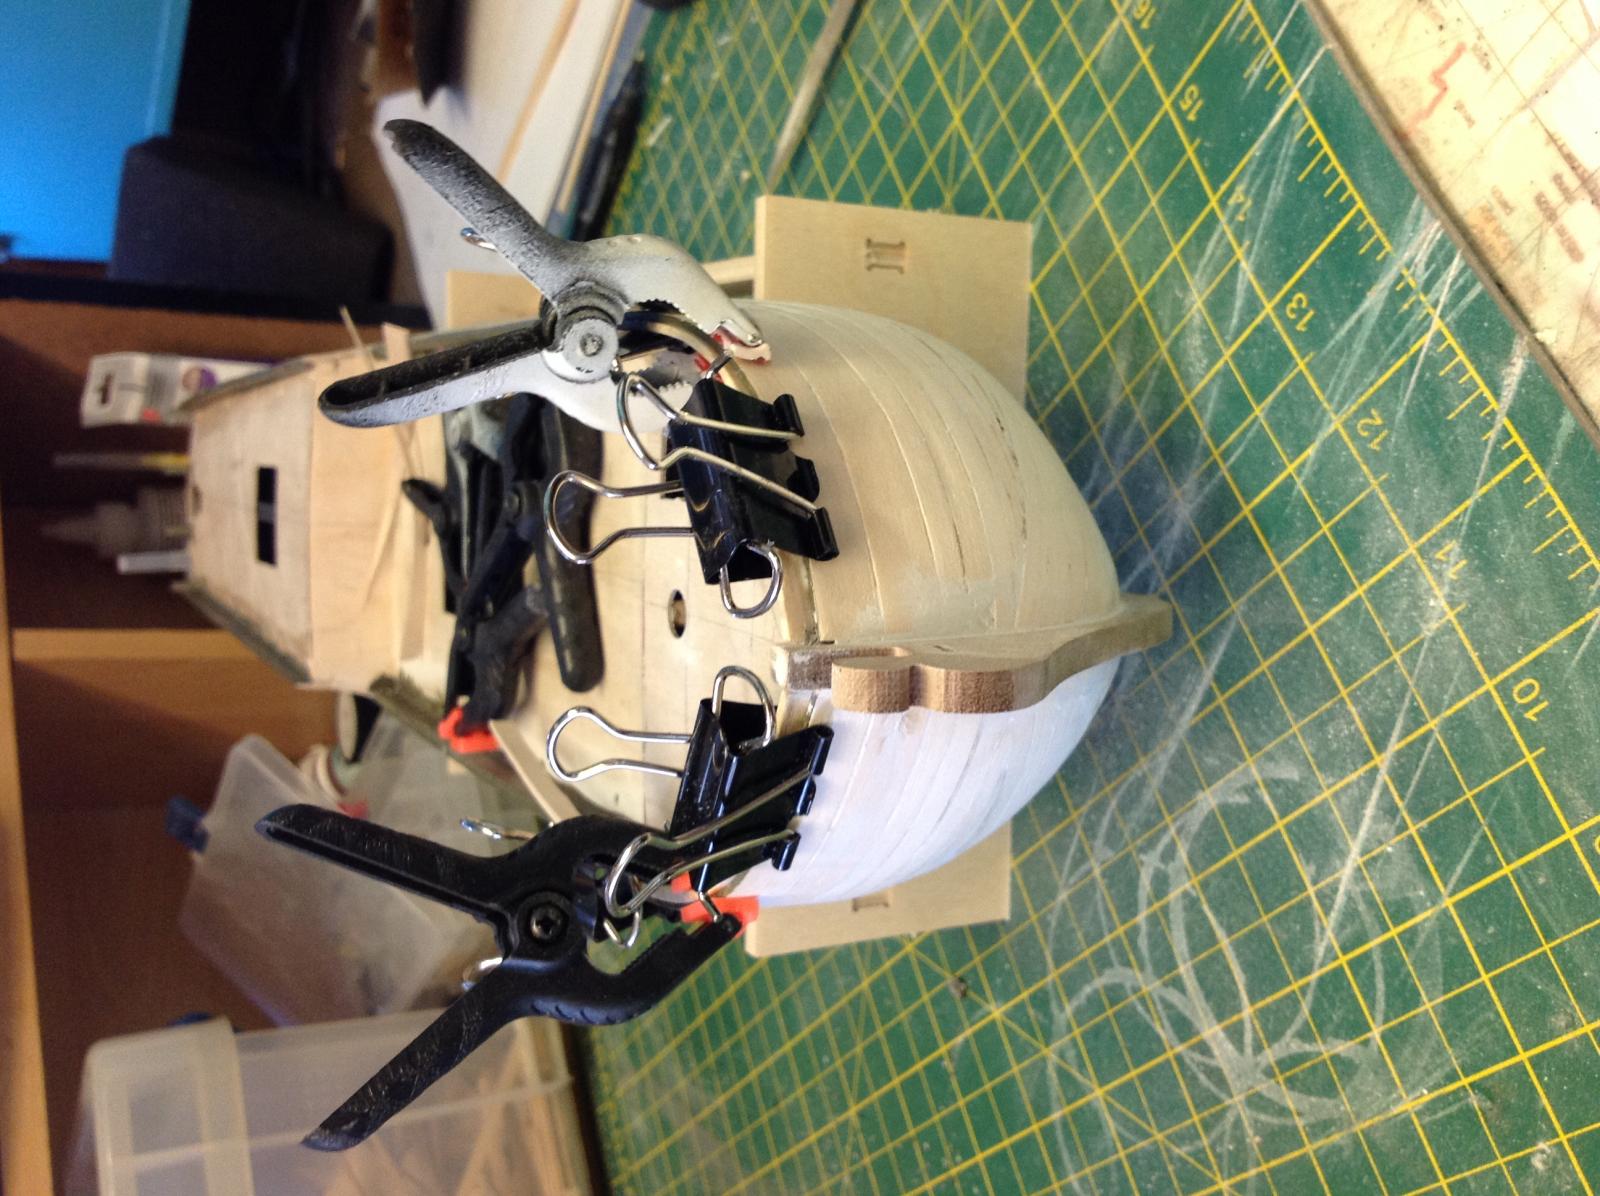
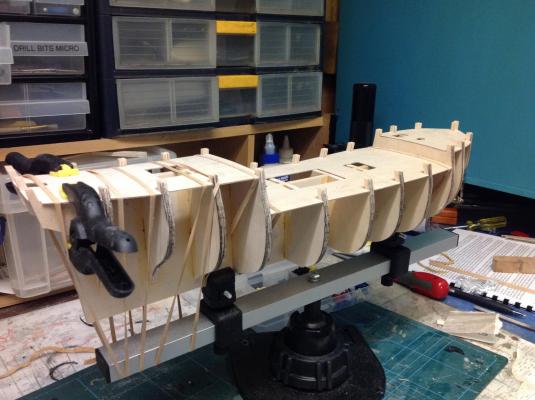
A few pics of my first planking, I am now taking time to get a shape, a bit of filler is helping with my mess ups. I decided to use 10mm bits for the deck edges as I made a mess up removing all the pegs that help with the planking run, the 10mm are also helping me re align the deck as I think the actual ship was slightly warped at the start, but I am happy with the fist planking so far, I just need to refrain from too much rubbing down as the wood is thin in parts, I have to say, I was not impressed with the wood itself, very sub standard. Will now take photos as I move on. Captain minion is my kit boss for now :-)


-
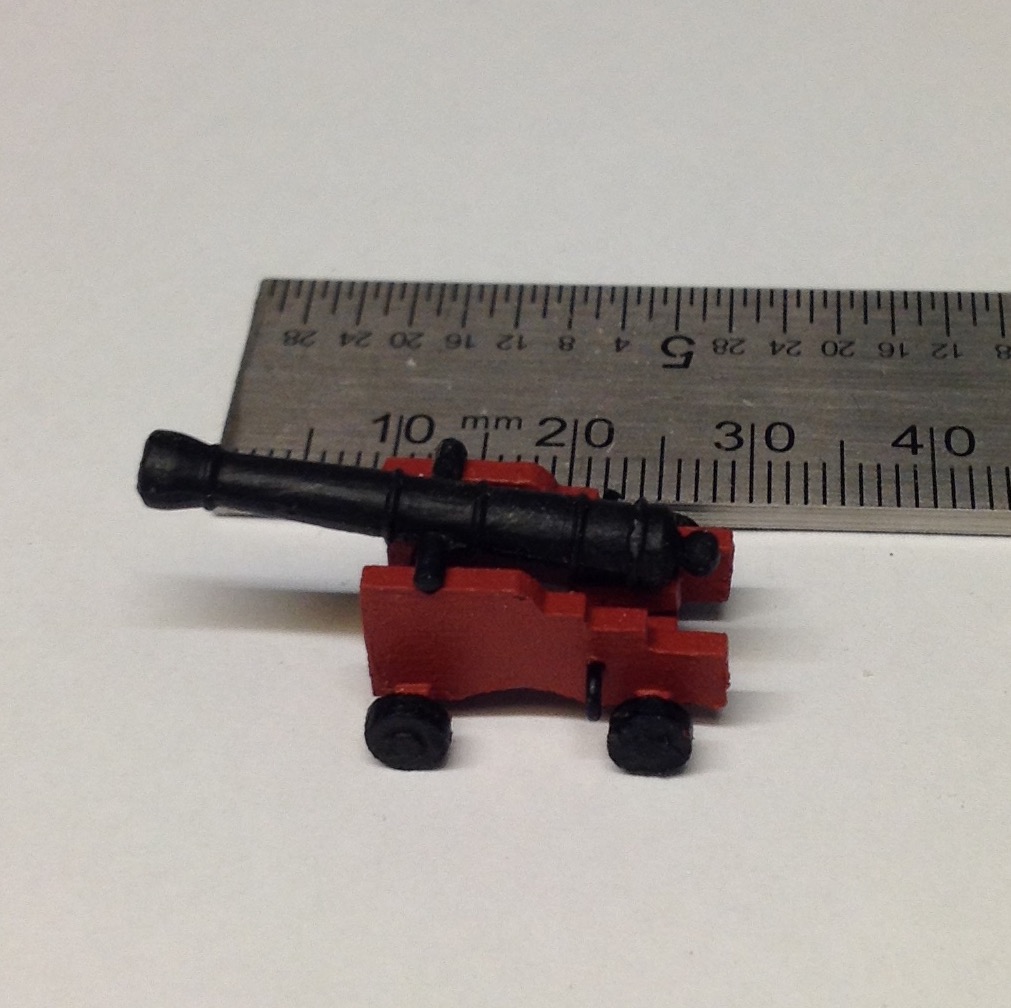
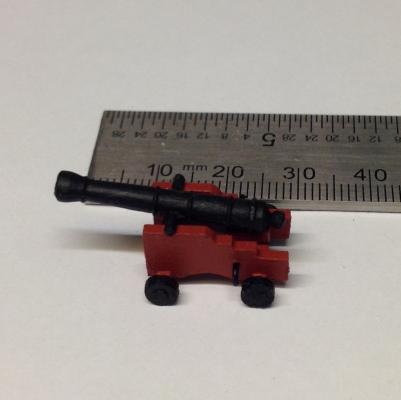
Been a few weeks since my last post, I have finally placed the first planking and will post some pics soon, never went fuss free but I have the initial shape and am in the process of sanding down. I wanted to give my head a rest so spent today putting one of the 4 pound cannons together, what a great way of chilling out as well. Thanks to some photos from other builds in here I am adopting a few changes from the plans of the ship such as installing eyelets for rigging the cannons later. Will post some first planking shots in a couple of days. Terry
-
There is a programme shown on Sundays in the UK called "The antiques roadshow" on last nights episode they had a model of the William which was hand built by a guy, it took him 30 years to make the hull and all the fittings including all the furniture etc. Sadly before he had time to do any rigging he died. They quoted a selling price of around £4,000 pounds, it was a stunning bit of work and to think every single part was hand made, it really was a lifetimes work, it was in 1/48 scale.
-
Nice idea but glass fine splinters can cause more of a headache. Think I will try the razor blade approach, I normally only use blades to scrape algae from the inside of my fish tank. Will have to ask the wife to borrow me one of hers.
-
Thanks Steve, must admit,others photos help no end. I am doing battens as I move around with the fairing and so far things are touching where they should. Some photos can be very deceiving in sight as such, when I looked at the planking for just above the deck it looked huge in photos, then when I placed a piece to measure against I found the total bulwark section is 5mm ( 1 plank height ) from the deck edge upwards, it is teaching me to be 5 steps in front sometimes and to measure everything.
-
Thanks frank and Ron I have been following some of the pictures from your build frank and thank heavens they are there as I'd never have worked out some of the things from the prints, I have only just worked out the prints are a full size copy of the ship itself. I will take on board what you both have said and continue with making sure the bulkheads and other things are as good as possible before moving on. Many thanks
-
A couple of questions for anyone who has made the HM supply please: I read that after planking that the Bulwarks need to be twisted and removed from the deck, then after rubbing down the deck area to clear any messy bulwark bits that you then line the inside of the bulwark with finish planking. The problem I have is that looking at other peoples models, the gun port cut outs look way thicker, can someone confirm if this is correct. Also, can anyone advise if the bulkhead at position 10 has an issue..... I am about to start my first planking but when I dry fit planks near bulkhead 10 it seems a little short, I can fair bulkhead 9 to maybe match into the 10, but I am a little concerned that I may take off wood on bulkhead 9 that I don't need too. Many thanks and happy easter terry
-
There is a great tutorial on youtube which shows how to seize a block which creates loops either side so they can be wrapped to a mast and pulled tight. I got the hang of it but with my lack of knowledge on doing it correctly I was using pre waxed cottons so when I pulled the loops in the wax was pulling as well, even though it did the job close up the rigging was not very nice. The looping system is great but i'd love to see some example in here on how people do their blocks ect because some of them are superb looking. Great questions indeed.
-
Although many people use enamel paints due to their consistency you can get as good a finish using acrylics and if you can spray the acrylics then more the better. I have painted aircraft (not models) in acrylics and the finish when built up gently can be superb. When painting anything always put some of the paint you are going to use on a spare piece so that you can monitor the drying ect outside of the main work. Although you say tthe finish was applied to a fully dried surface you have to remember that deep within the paint it may still not be fully cured, many paints can still react with an undercoat and if that undercoat is not fully dry any rubbing down can force it to re react itself. Even a simple thing like stirring can be a big issue, never stir paint round and round, always stir it round and upwards to bring the pigments all together and always turn your paint tins over at least once a week to prevent them forming too much oil as this never gets stirred in correctly when people give the paint a quick stir. One other thing, if you store paints in rooms with low temperatures you will after a while kill the pigments, I always keep mine in a little box in a room somewhere. Hope it all sorts, if not, try rubbing the finish with a gentle green dish scour pad, that will help it dry some and get some air into it although you may need to overcoat with a thin finish.
- 7 replies
-
- 3
-

-
- paint
- drying time
- (and 1 more)
-
Thanks guys and thanks Uilses for the primer. ;-)
-
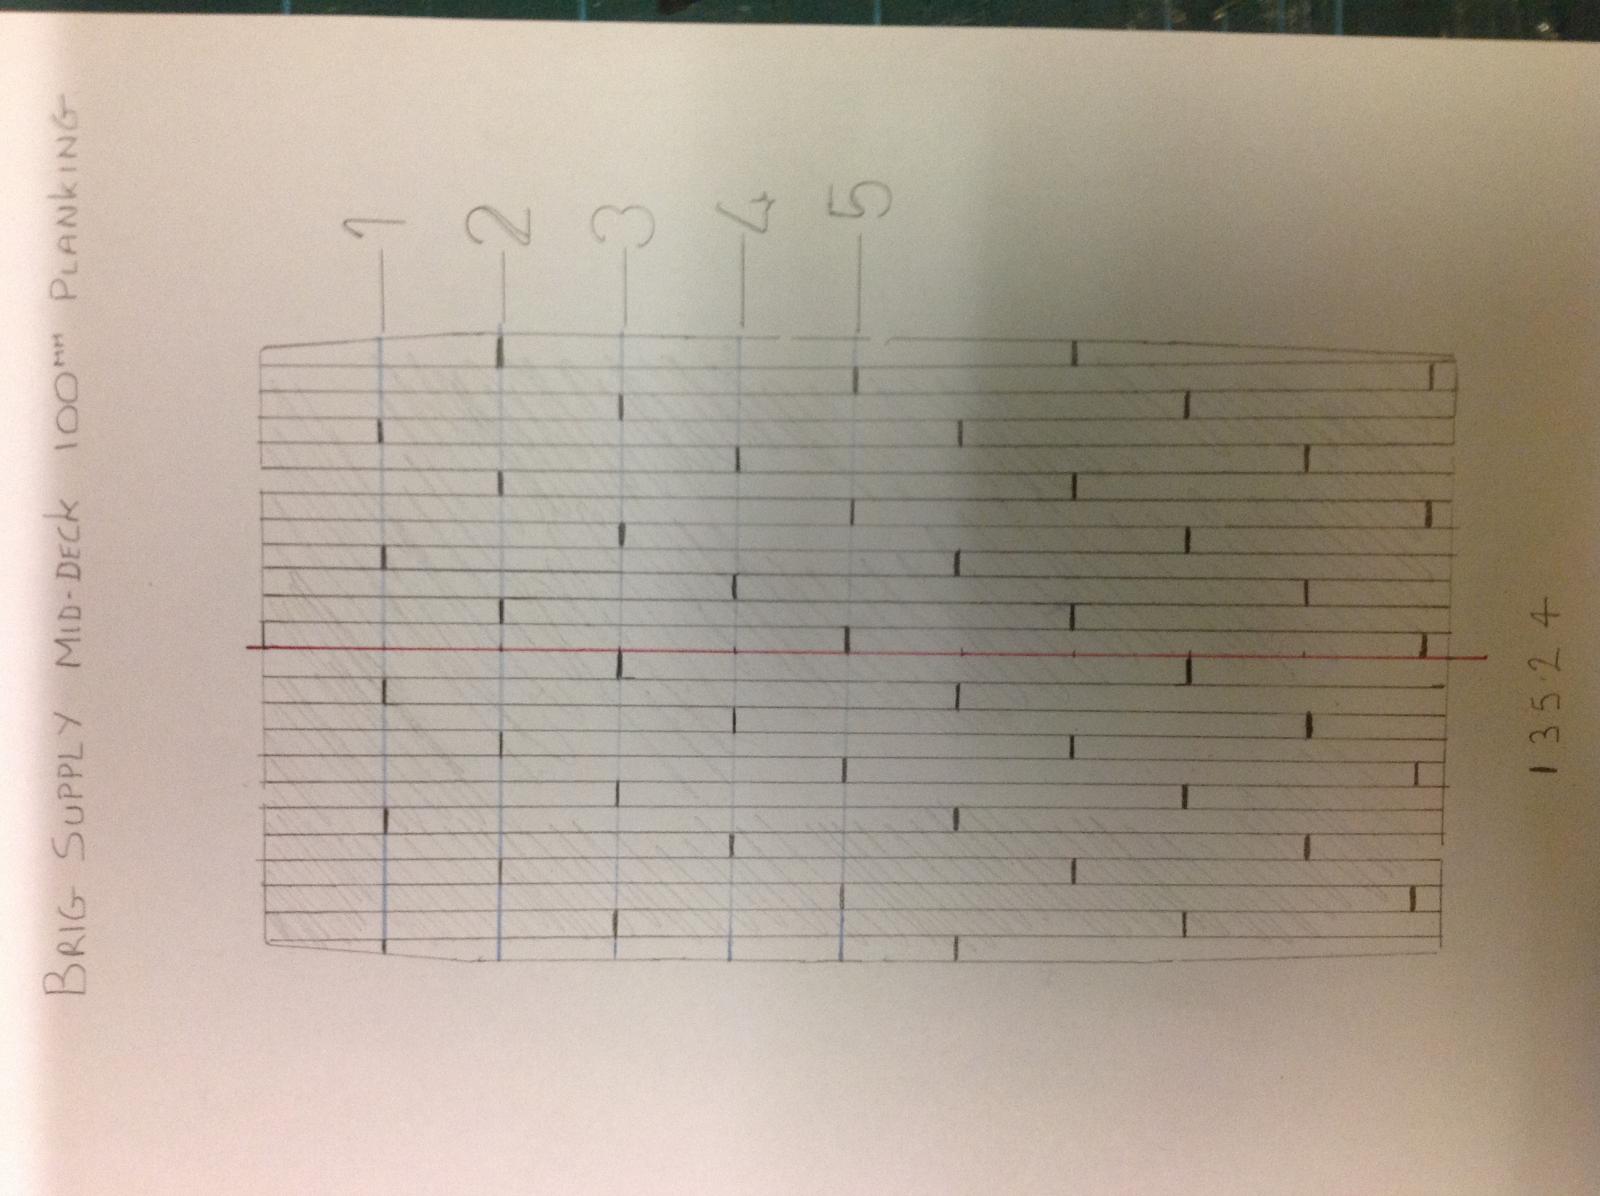
Hi all I have spent a couple of days messing with deck planking plans for my brig supply. I decided to look at the primer tutorial in here and went for the 13524 plan at planks 100mm, I have attached my drawing plan and would also like to ask if deck plans are done from the tip of the bow to the back of the stern as this ship has three decks at different heights, or can each deck be planned individually. Will be a while before my deck is laid but I can use any spare time to prepare wood ect. Would a larger plank size be better, I want a staggered deck and will be caulking using grey pencil with a light oak varnish. Thank you.

-
Interesting website - naval war-gaming site with historical data
Telp replied to mikeaidanh's topic in Nautical/Naval History
Use http://www.threedecks.org the original link is being redirected back to this site, it needed the whole address protocol. -
What lays first?
Telp replied to Telp's topic in Building, Framing, Planking and plating a ships hull and deck
Thanks Wayne, pretty intricate for sure. In the model sense I did wonder if hatches ect had a grounding first on a deck plate rather than on the actual planks to give stability. Great drawings. -
Hi all I am reading up on deck laying and ways to do it, what I'd like to know is..... Is the deck laid and then deck furniture added, or does the deck come to a halt at the edges of any deck furniture like hatches etc. Thanks
-
After a couple of days gently getting the deck to sit I have now glued down the bow and stern deck sections and will hopefully glue down the mid section before having a weekend in London then spending as long as it takes to do all the fairing required to begin the first planking. Thankfully the beauty of having as much time as I want is teaching me to check and double check everything. Have a good weekend all.
-
Hi rob/Steve Many thanks indeed, I did wonder if the kit was slightly wider as a way of allowing any small mistakes to be overcome. I was after placing the center deck so I could batten bulkheads 8 and 3 for that deck to sit on. Thanks for the heads up on the hatch Steve, I will have a look at that. I will use the mast centring as a bit part to make sure he deck is central. Thanks guys.
-
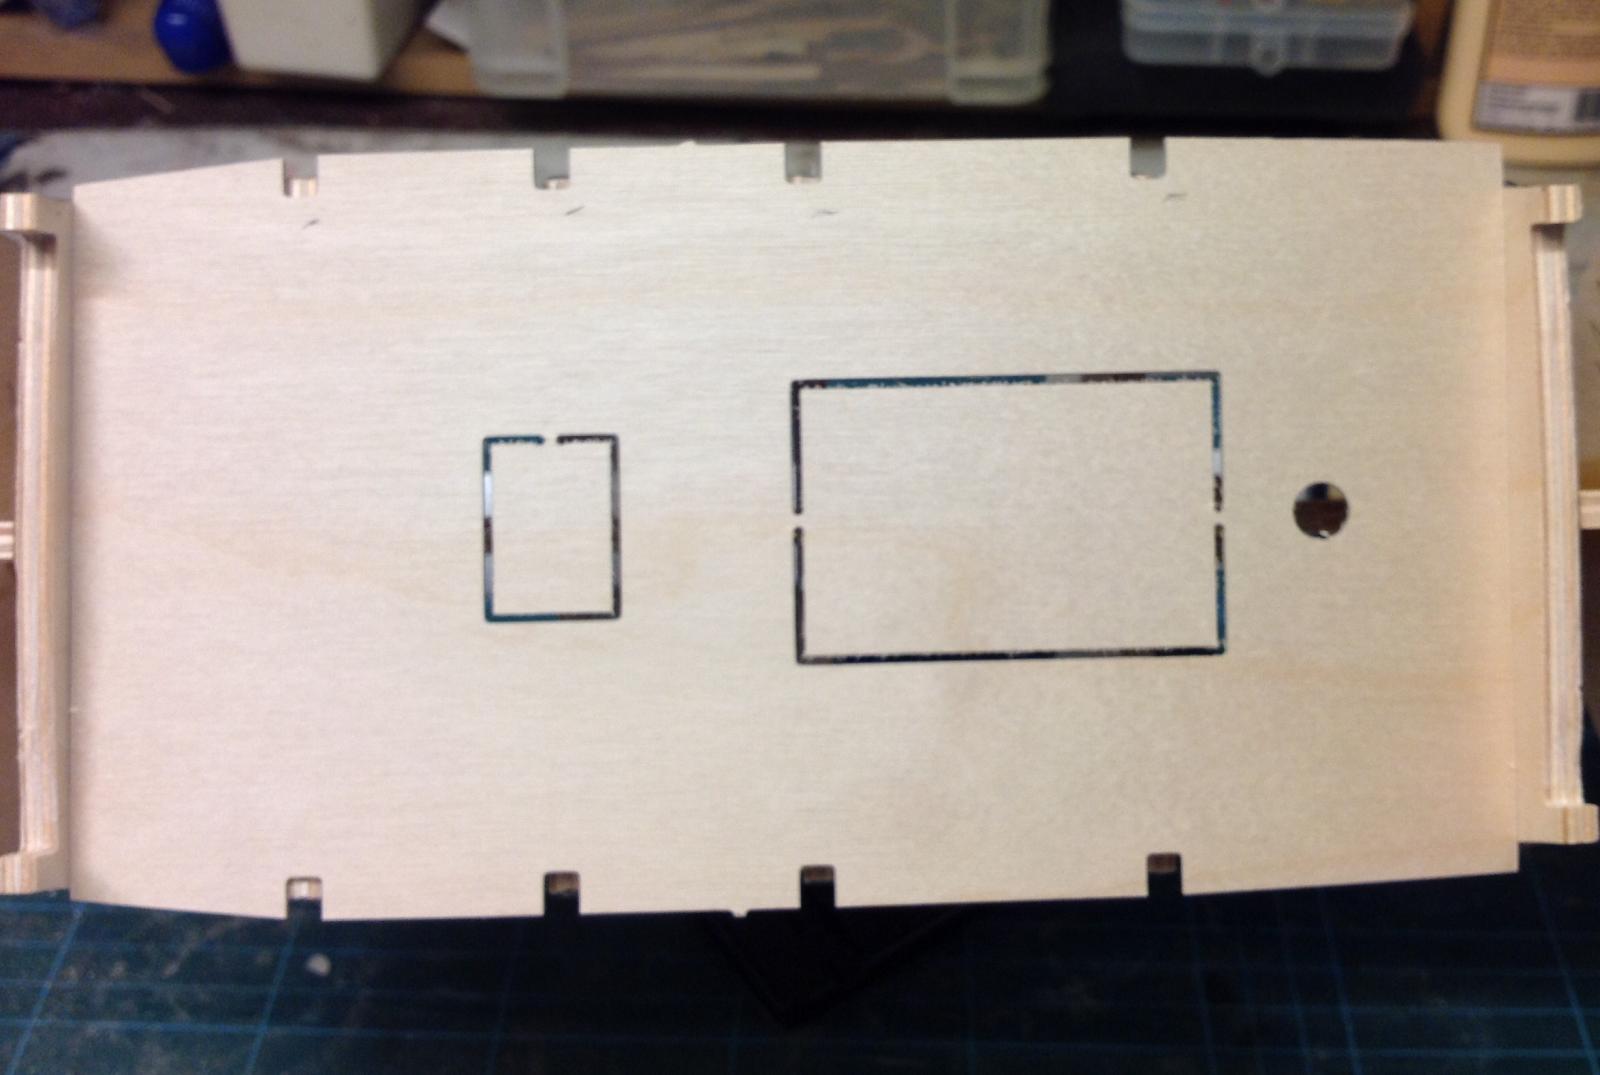
This is a better photo showing the fitting at the bottom against the over fit at the top.
-
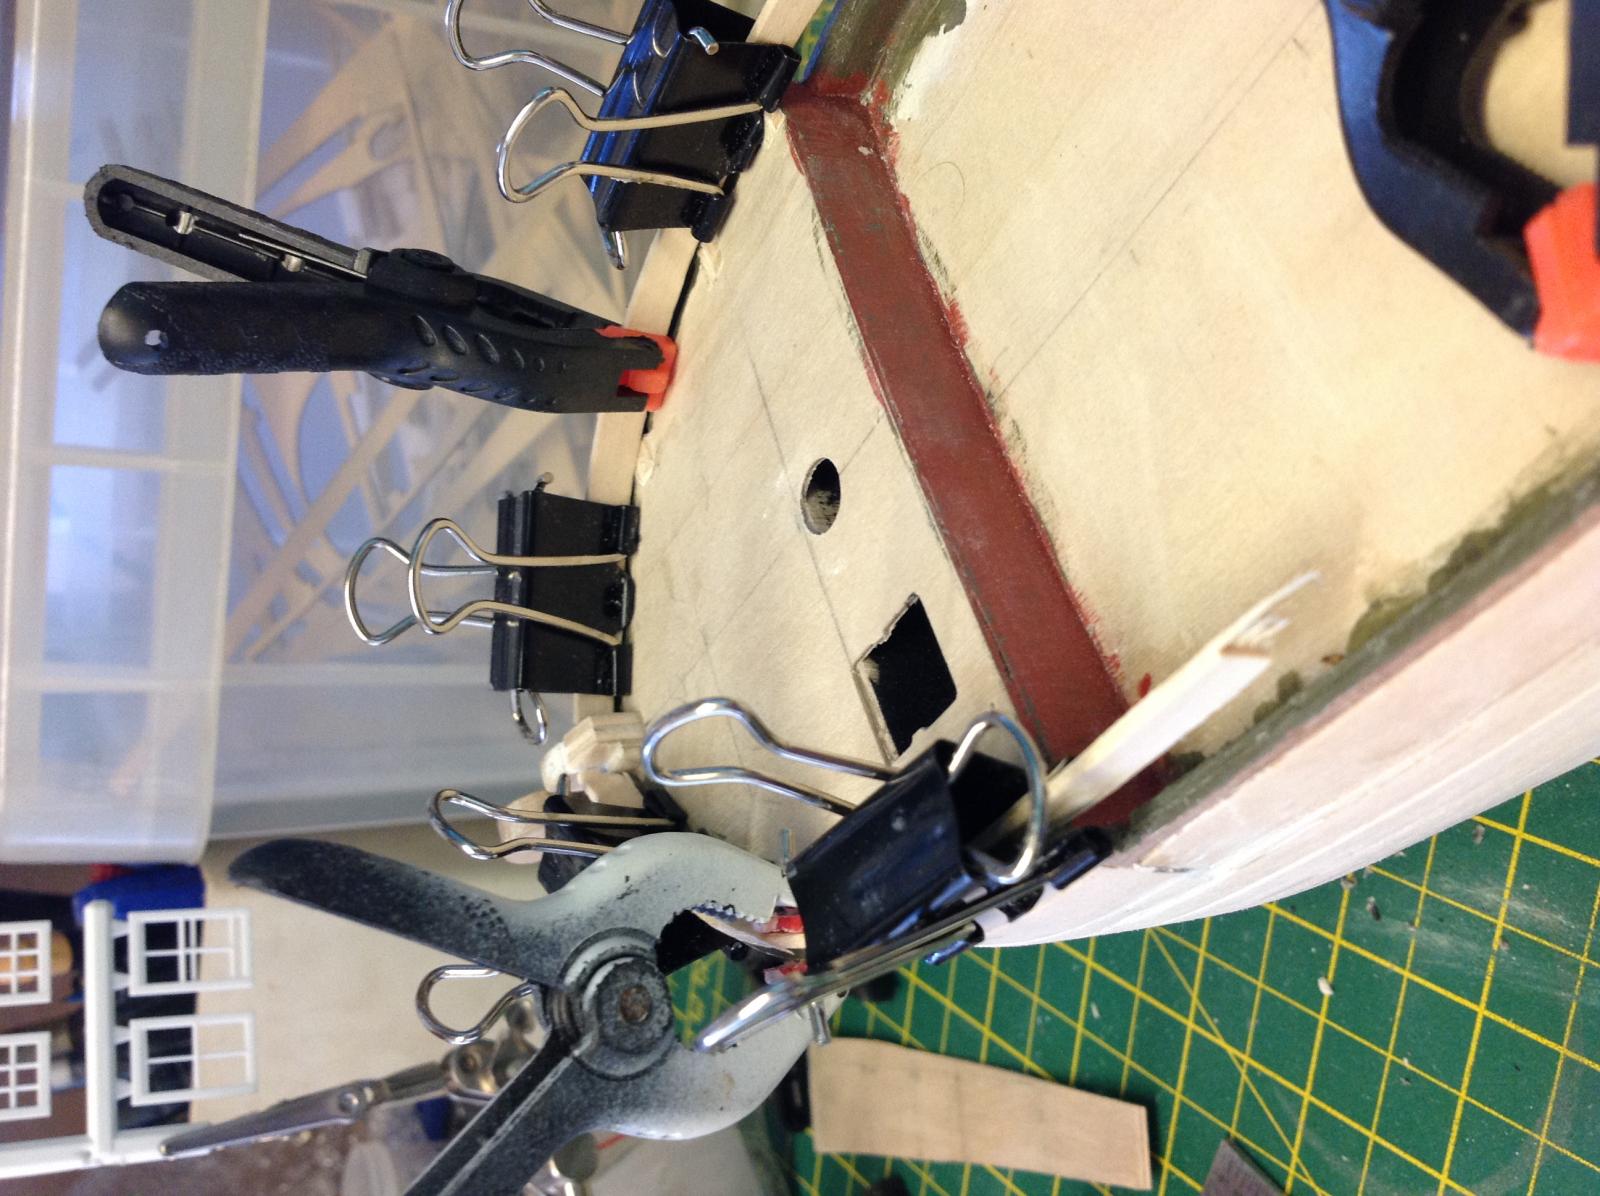
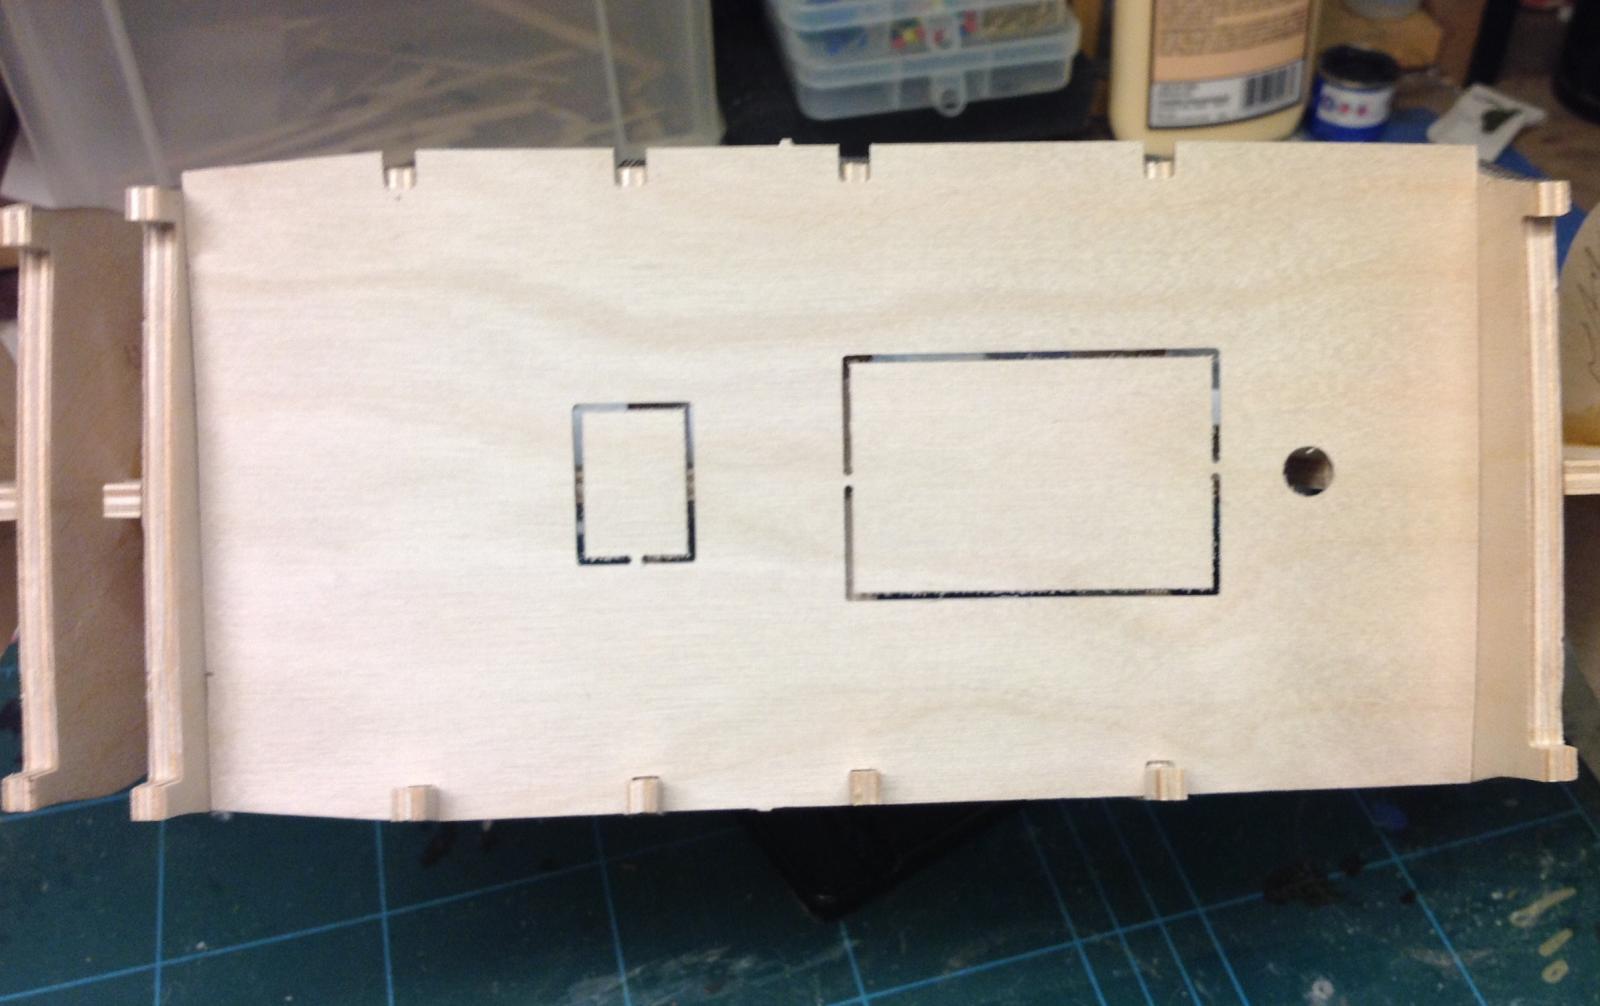
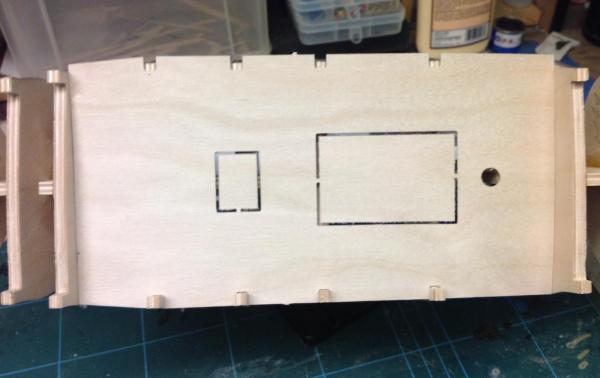
Hi all, am after some help please. I have finished placing the bulkheads and decided to lay the deck templates to see how they'd fit, the pic shows the center deck section and as you can see, the deck is 5mm wider than the bulkhead end fittings. I must admit I have had issues with the fit of this kit and you can see where I have drawn thin lines with pencil how much needs removing for a decent fit. Should I sand a bit from each side of the deck to make those gaps fit or should I just sand one side. I read also that at some point on the supply some parts are twisted off, are these the end bits of the bulkheads that protrude upwards? Would welcome any help as it may be the deck this size was normal and a bit of work is needed to get the fit. All the bulkheads are square and sited correctly. Thanks

-
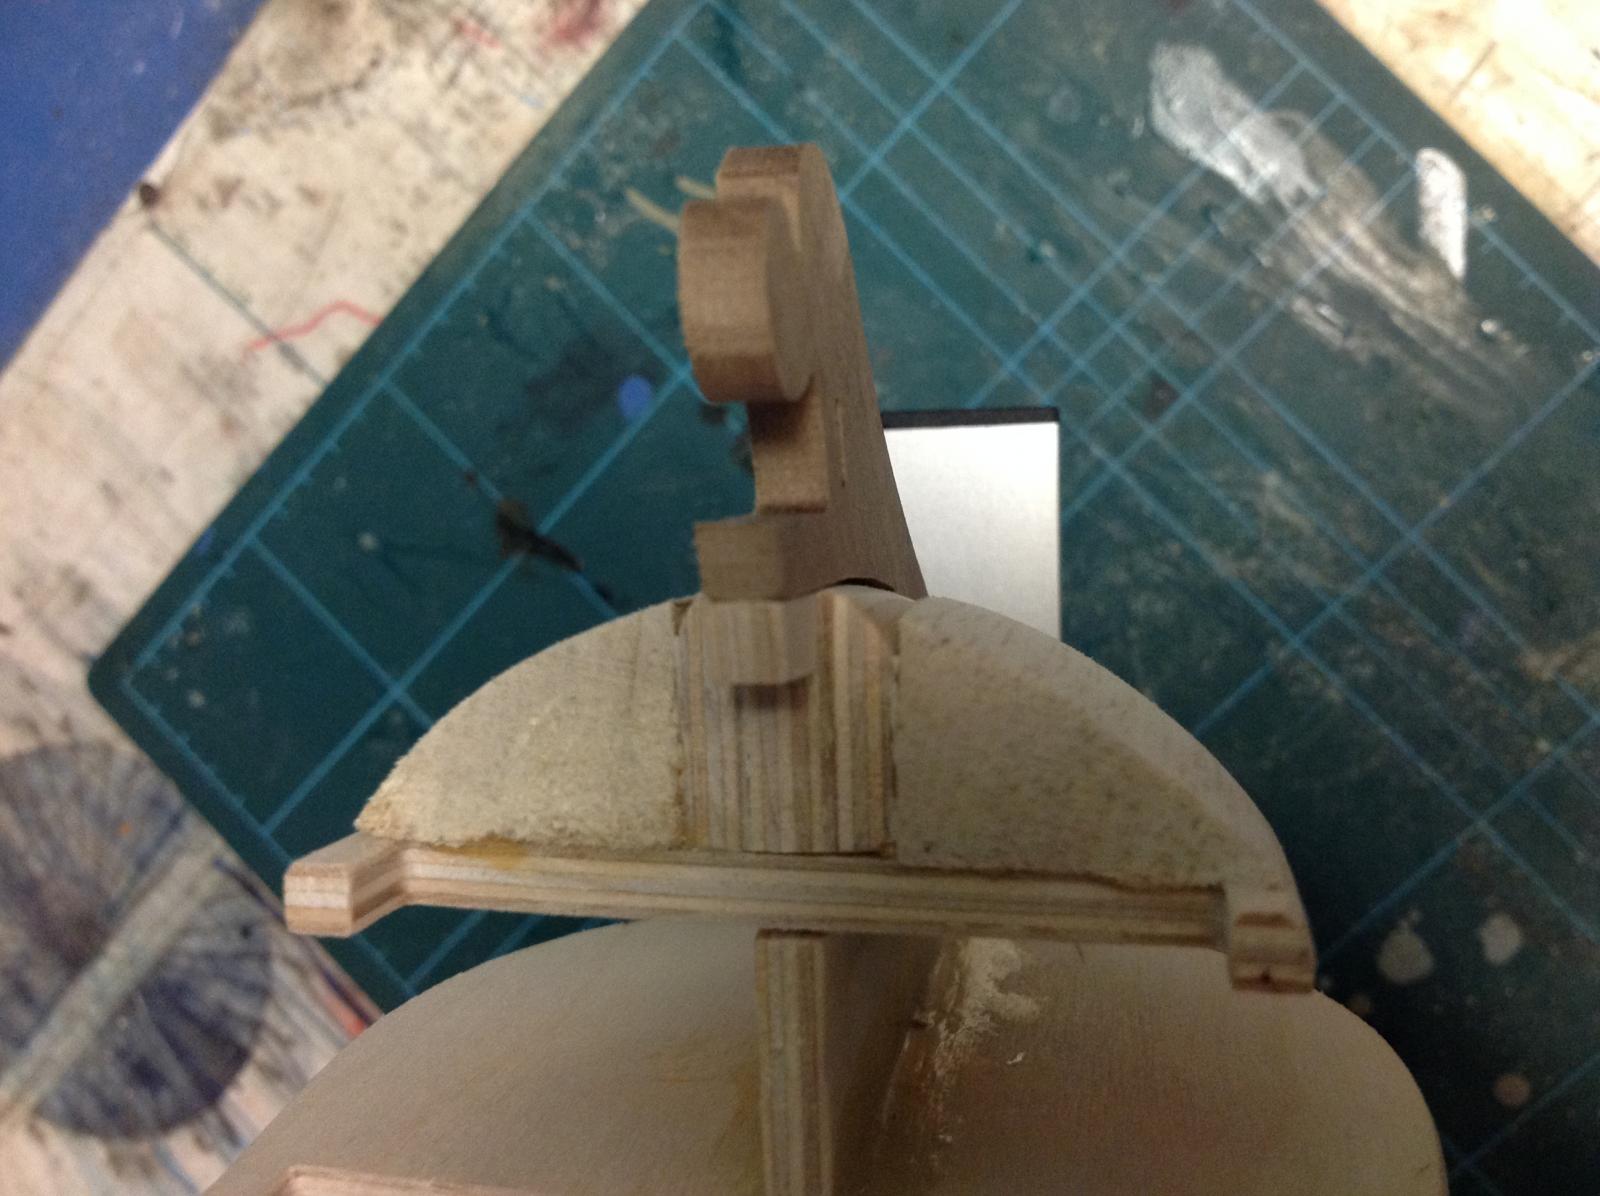
Hi Steve, not yet, I was going to start fairing the 2nd and 3rd bulkheads once I had a reasonable fitting at the bow blocks so I had something to work against backwards as such. I've added a pic of the bow with the loose fitting bow piece to show the line as such. I will do some wood as you advise and follow the batten lesson in the primer.