

etubino
-
Posts
128 -
Joined
-
Last visited
Reputation Activity
-

 etubino reacted to TBlack in HMS Sophie by TBlack - kit-bashing Jack Aubrey's first command from the Vanguard Models HMS Speedy
Pear put on. this perspective shows my attempt to follow the arc:
The molding along the bottom, below the windows, is 2 mm wide. I don't have small enough tools to give it some character, so it gets to be a 1/2 round. There is molding around the sides and upper edge that will be wider and maybe a chance to do something more interesting.
-
etubino reacted to TBlack in HMS Sophie by TBlack - kit-bashing Jack Aubrey's first command from the Vanguard Models HMS Speedy
I think this is the 4th attempt at these windows, certainly the best of the lot. Don't pay any attention to the black paint. A slight misunderstanding between me and the painting contractor. It all gets covered up with pear veneer.
-
etubino reacted to TBlack in HMS Sophie by TBlack - kit-bashing Jack Aubrey's first command from the Vanguard Models HMS Speedy
Holidays over, back to the shop. Making some progress, albeit slowly. I'm trying to get the stern section together and flowing smoothly. I've added the gun port patterns and one hull plank:
Now I'm working on fabricating two of these:
Happy new year to all!
Tom
-
etubino reacted to Alex jM in ROYAL CAROLINE 1749 by Alex jM - scale 1:48 - royal yacht
A little offtopic. For those who want to use white color without resorting to coloring, I recommend elforin. An artificial substitute for ivory and mammoth tusk. In processing it is almost like wood, but if with wood, especially when working with small parts, it is necessary to take into account the direction of the fibers so as not to break the part, then elforin is equally good when cutting in different directions. Pay attention to the fingers of the left hand. (Brittany, 1855, height 50 mm.) I would have to work very delicately with wood to get such fingers.
-
etubino reacted to Ponto in Le Renommee by Ponto - EuroModel - Scale 1:70
Le Renommee update,... slow but steady progress. I'm more or less happy with the build as a whole but unhappy if I focus on specifics (if you know what I mean....). For example, I constantly struggle to maintain perfect symmetry when port and starboard are compared. The minor differences tend to disappear as I step back and appreciate my efforts......
JP
-
etubino reacted to Sjors in HMS Agamemnon by Sjors - FINISHED - Caldercraft/Jotika - 1:64
On the starboard side the gun ports are cut out and placed the sills and painted them.
Now I can go to the port side.......
The same process is going on then.
After that I can start the stern and quarter gallery's and second planking....
The weather is great so I can sit outside and do the drilling ......
-
etubino reacted to kentyler in Allege d'Arles by kentyler - WAK - CARD
more braces in the bows, next i think is the elaborate frame on both sides of the bowsprit
-
etubino reacted to kentyler in Allege d'Arles by kentyler - WAK - CARD
so on to the braces in the bow
the critical pieces where the 2 knees that are each side of the front hatch
so i put them on
had to make them 3 times... i have much better luck on thick pieces these days laminating them of a couple of thinner pieces
built them on a copy of the front deck and when they were glued and painted cut them of to mount on the ship
-
etubino reacted to MrBlueJacket in Mary Taylor 1850 by MrBlueJacket - FINISHED - BlueJacket Shipcrafters - Scale 3/16" = 1' (1:64) - NY Pilot boat
Chris, I agree. But my customer likes it.
So here's the template for the pounce wheel. 1" spacing, equal to about 5 1/3 feet (model is 3/16" = 1' scale) Note the bow is already pounced.
After pouncing the stern deck, I did a brown wash into the holes, quickly wiping the thinned paint off right away. A bit of overkill, but....
-
etubino reacted to MrBlueJacket in Mary Taylor 1850 by MrBlueJacket - FINISHED - BlueJacket Shipcrafters - Scale 3/16" = 1' (1:64) - NY Pilot boat
Got the deck on last night and trimmed it to fit this morning. Cockpit well was opened up with a dremel cylindrical sanding attachment.
-
etubino reacted to MrBlueJacket in Mary Taylor 1850 by MrBlueJacket - FINISHED - BlueJacket Shipcrafters - Scale 3/16" = 1' (1:64) - NY Pilot boat
Then to cut the plywood to the same shape. Needless to say, it took a bit of trial and error. But in the end, it is a good fit as you can see in the second picture. But before I glue it on, I need to put down the deck planking. Easier to trim first, rather than try to fit the deck on with the bulwarks in place.
-
etubino reacted to MrBlueJacket in Mary Taylor 1850 by MrBlueJacket - FINISHED - BlueJacket Shipcrafters - Scale 3/16" = 1' (1:64) - NY Pilot boat
So I had a little time to work on the MT again. here's a picture of paper taped onto the hull so I can trace the bottom line of the rabbet for the bulwarks.
-
etubino reacted to MrBlueJacket in Mary Taylor 1850 by MrBlueJacket - FINISHED - BlueJacket Shipcrafters - Scale 3/16" = 1' (1:64) - NY Pilot boat
So to attach the bulwarks, you have to cut in a rabbet around the top of the hull. I started with a piece of masking tape, which I then outlined with a pencil. That gave me a good reference to cut a 1/32" groove.
Next is to chisel down from the deck to the groove, forming the rabbet for the bulkhead to attach to. You don't have to be super neat, the inside edge will be covered by the bulwark and the decking. I used a sharp (new) #17 chisel blade.
-
etubino reacted to MrBlueJacket in Mary Taylor 1850 by MrBlueJacket - FINISHED - BlueJacket Shipcrafters - Scale 3/16" = 1' (1:64) - NY Pilot boat
Time to drill out for the mounting pedestals and test fit onto a building board. The mary Taylor has a raked keel, so two different height pedestals are needed.
And looking down the bow, it looks pretty straight up and down (Thank God, I hate shimming pedestals)
-
etubino reacted to javajohn in Rattlesnake by javajohn - Model Shipways - 1:64
I finally had a few hours to spare and finished the gratings. I used the technique that @allanyed mentioned above, and the results are much better than my previous attempt. The new gratings are to scale too, so look much better. I didn't put in the camber on the ledges; I will attempt that on my next model.
I have the sliding table for the saw, so I built a jig to fit it. This made the cuts more precise. No worries about yawing!
Old vs. New: Gratings 2.0 now with squarer holes!
And here is the final set of hatches and gratings. Maple may not have been the best wood to use because the grain really shows up, but it is still much nicer than the burned up cherry that came with the kit! I am very pleased with the results, and I learned a lot making them!
-
etubino reacted to javajohn in Rattlesnake by javajohn - Model Shipways - 1:64
I used my Jim Byrnes saw to create the grating pieces. I have the micrometer accessory for the Byrnes saw which was put to good use adjusting the fence for each cut. I must say the Jim Byrnes saw is just incredible for this type of work. I've never done it before and found it was pretty easy to do.
The only real issue I had is the saw blade I bought is probably too fine both in kerf and number of teeth. The blade I used to cut the pieces out is a 3" 280 tooth blade. The maple burned slightly which means I should have used a blade with a lower tooth count. I went ahead and completed them, though, since the burning is very minor. The blades I bought are 0.025" kerf, so this would translate to about 1.6" square holes for the grate at scale. I'm wondering if that is too small?
Next step is to cut the 0.025"x0.025" strips that lay in the grooves. That will be a challenge since my stock is 1/16' thick. I need to get that down to 0.025" and don't have a thickness sander.
-
etubino reacted to javajohn in Rattlesnake by javajohn - Model Shipways - 1:64
In @Dave_E's build, he mentioned his issue with the Syren cannon carriages being too large for the model. Syren's are correct, and others mentioned that the kit's carriages are too small.
So, I figured I'd better build a test cannon to see how it fits. I'm glad I bought extra cannon kits!
Sure enough, most of the gun ports are too low on my model to center the gun. Fortunately, they all poke through. The photos show the worst one. However, I'm not sure how best to fix the issue. I can think of two things: cut the axle grooves deeper to lower the carriage and turn the canon upside-down (the trunnion is offset from center).
John
-
etubino reacted to javajohn in Rattlesnake by javajohn - Model Shipways - 1:64
At long last, I finished the hull planking. I took several breaks to work on other projects, but I'm glad I made it to this milestone.
I still have one side to sand and there are still finishing touches to be done. I decided to show photos with one side sanded and the other not. I saw a few build logs of users lamenting on how bad their planking looked, but once it is sanded and smoothed, most of those flaws disappear.
The un-sanded side:
After sanding:
A side-by-side comparison at the bow. The curve of the planks is pretty severe.
And Stern. I'll do more touchup of the planks as they meet the transom planks.
I'm very happy with how it all turned out, considering my skills.
I think I'll work on some hull details, such as finishing the windows and start considering the deck planking.
I'm thinking about ordering better wood for the decks. The basswood flakes and compresses easily, so there are a lot of dents in the hull that were difficult to sand out. Maybe I'll follow @Dave_E's lead and build me some cannons!
Cheers!
John
-
etubino reacted to javajohn in Rattlesnake by javajohn - Model Shipways - 1:64
I've been able to take some time off work during the holidays. I used some of this time to work on the hull and complete the upper two belts. One more belt to go!
The lines at the bow are a bit wavy and I see where I did a not-so-great job of getting the battens correct. You can see some clinkering at the bow too, which I've learned is a common problem if the planks aren't edge bent very well. I also did not get the lines correct at the stern and ended up butting 7 planks instead of 6 against the transom on each side. I think it will be okay in the end once everything is sanded and painted.
I'm going to plank the garboard strake next followed by the rest of Belt C. Then it is trim, fill, sand, sand, sand... 🙂
To everyone, have a Happy New Year!
John
-
etubino reacted to javajohn in Rattlesnake by javajohn - Model Shipways - 1:64
Thanks @Dave_E! I'm following the instructions and plans using the butt-shift method explained in the manual. However, I cheat a bit and try to lay down a long plank across 10 bulkheads where I can instead of 5, when the plank would curve a lot. When there's a lot of bending involved, it makes it easier to keep the run of the planks smooth. I'm not sure I'm explaining this very well, but here's a picture.
The start of the whale (the top-most unpainted strip) is a single strip going from the keel to bulkhead F (outside the picture). I scored a line at bulkhead C to suggest two planks meeting. You can see the same thing on the middle plank at bulkhead B. I'm not sure any of this will show up once everything is sanded and painted, but we'll see.
If I was doing natural wood, I'd probably lay down each plank individually.
This close-up really shows my lack of skill sanding/painting on the bulwarks!
-
etubino reacted to javajohn in Rattlesnake by javajohn - Model Shipways - 1:64
I'm making slow progress on the hull planking. I've finished 1/2 of the first of three belts. As I started planking toward the stern counterblock, I came to the realization that the shape is a bit off. I think the planks are supposed to lay a bit more vertically. There was a lot of twisting involved to get them stay put! I think it will turn out OK, I'm just a bit worried about how the next three planks will lay.
My method if shaping the planks is to use a proportional divider and ships curve to cut the shape. I then use my soldering iron to steam the planks into submission.
That lower plank on the starboard side will probably need a do-over. It doesn't lay flat against the counter planks. I might try wood filler first, not sure. Opinions? I think I'm going to need some stealers too.
-
etubino reacted to javajohn in Rattlesnake by javajohn - Model Shipways - 1:64
Well, I managed to eke out a few more hours to work on the Rattlesnake.
Anyway, I salvaged the inner bulwark painting by sanding with 400 grit. I repainted with Liquitex Red Oxide. I thinned it this time with plain water and the results were much better. I also finished the covering boards and even did a small bit of carving on the step that you can see in the photo (although it's a bit hard to see).
I painted the outer bulwarks as well and noticed a few problems, but I think I can live with them. When I used shellac to seal and prep for sanding, I did some research and found that you have to sand the surface after the shellac dries, otherwise acrylic paint won't stick to it. You can see that in the covering boards where I missed a few spots and the paint chipped off.
The paint really shows all the areas I didn't sand very well.
I still need a few more coats of paint and lots of touchup, but all in all, I'm satisfied considering I'm working with basswood and I'm not a good painter!
Next up is to plank the hull.
-
etubino reacted to javajohn in Rattlesnake by javajohn - Model Shipways - 1:64
A little progress...
I finished the outer bulwarks (except for the outer covering board trim and molding strips) and sanded them. I'm pretty happy with the result. I'm building things a bit out of order from the instructions, which say to add the covering boards before planking the bulwarks, but I am going to do all of the outer and inner planking first. My logic is it will give better purchase for gluing the covering boards and I figure it is easier to do it that way rather than try to trim the topmost bulwark plank to fit between the plank below and the covering board. I'm discovering that the softness of basswood means I have to be very careful. There are still lots of dings even after sanding. Fingernails can leave permanent marks!
I'm also contemplating removing the beams of the forecastle deck to make it easier to plank the inner bulwarks and deck below. I am curious why Model Shipways designed the kit with the beams and bulkheads as one piece?
Cheers!
John
-
etubino reacted to Johncclark in HMS Ajax by Cabrillo - Euromodel
These photos were attached before under the discussion about this kit maker. Generally the figure head has been turned from a rooster into a hen with the addition of a skirt made from a wine bottle foil wrapper . Also carronades on the main deck. Other changes have included modifying the mizzen to carry a top sail and top gallant, ships stove, boats from Calder Craft, anchors from Calder Craft. Copper bottom again from Calder Craft. Sails were made from material supplied in the kit. This week I have stated to rig the mizzen. Quite a busy spot!
-
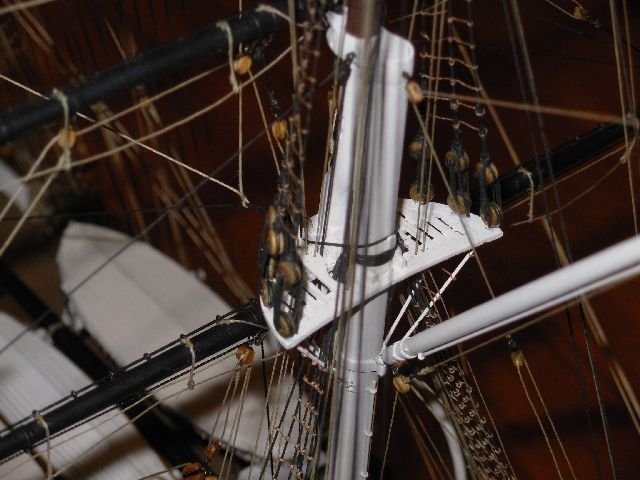
etubino reacted to Rob S in HMS Victory by Rob S - Mamoli - 1/90th scale - first build
Thank you Allan; I will endeavor to address your comments in future activities. Here is how we stand as of now:)