


hopeful
-
Posts
278 -
Joined
-
Last visited
Content Type
Profiles
Forums
Gallery
Events
Posts posted by hopeful
-
-
HI mates,
Am pleased my initial post has developed into providing all kinds of info relating to milling wood using small machines.
Since the machines are small we might be lulled into thinking they are not dangerous. On the contrary, we need to be very careful when using these wonderful machines. Alwayswear safty glassses and keep the fingers away from the blades. As boat biuilders we need all our digits.
Good day!
BFN
Cheers,
Hopeful aka David
“there is wisdom in many voices”
Completed: Sharpie Schooner (Midwest) Posted in kit build section of forum
Current: Sultana (MSW) Updating the build log and continuing on with the build
Next: Lady Nelson (Amati Victory)
-
Post 24 of my Sultana Build Log
Task is to add the wales.
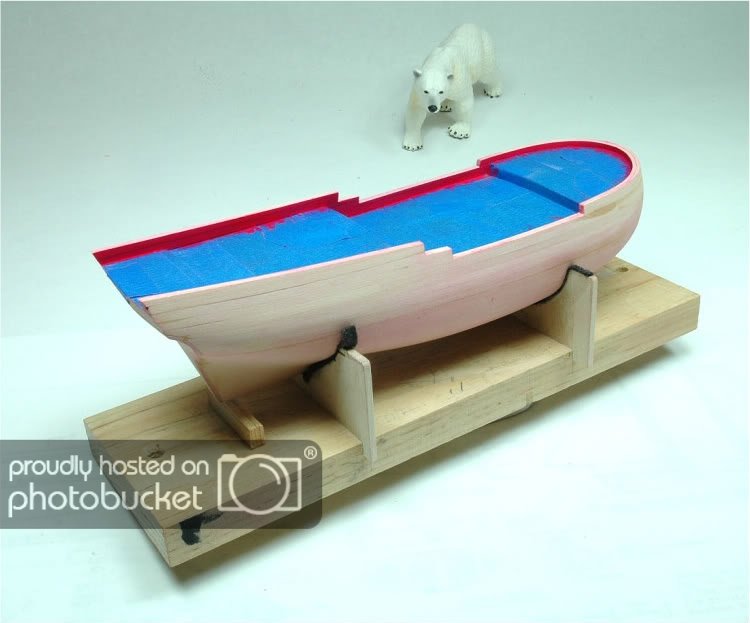
First step is to paint the hull an off white from the bottom of the first applied strake consistent with the practicum.
Photo 103
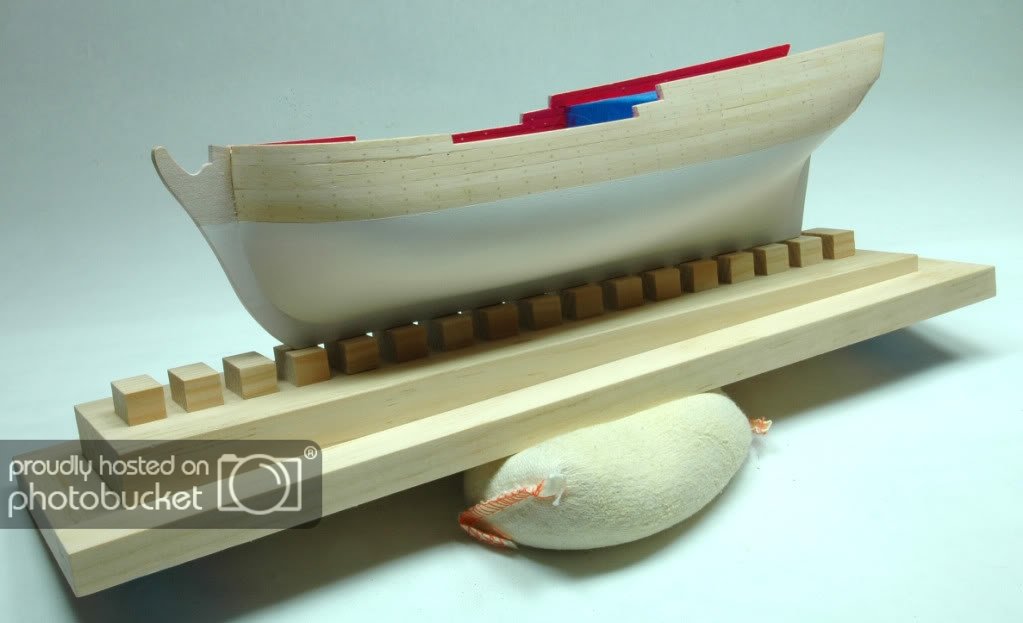
Photo 104
To afix the wales I first applied blue tape at the bottom and Timiya tape at the top of where the wale is to be glued in position. The method prevents the glue from sloshing around. End result is a prepainted wale glued to the hull without any hassel what-so-ever. I followed my presious practice of applying a one inch strip of PVA followed by a dot of CA to help the wales stick fast to the hull.
The pins hold the wales is place when guled to the hull.
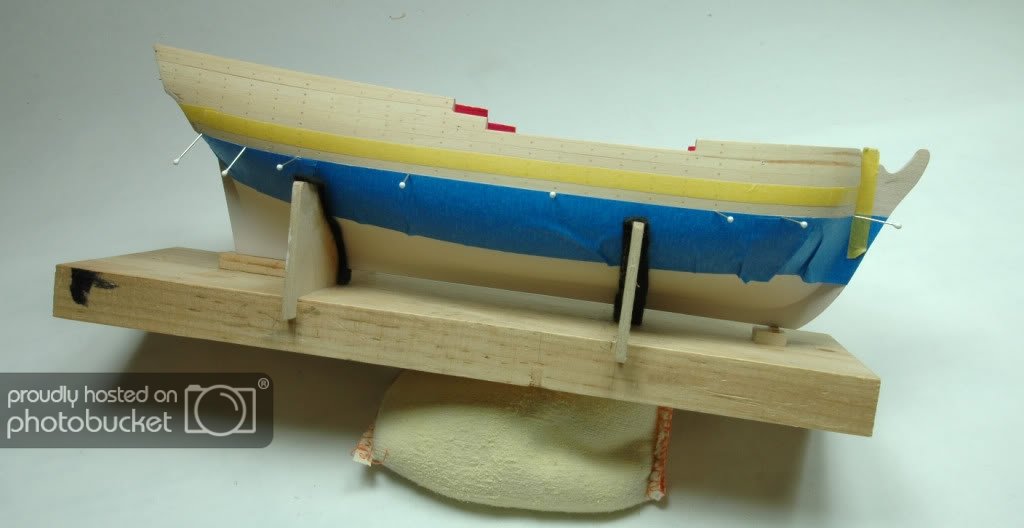
Photo 105
BFN
Cheers,
Hopeful aka David
“there is wisdom in many voices”
Completed: Sharpie Schooner (Midwest) Posted in kit build section of forum
Current: Sultana (MSW) Updating the build log and continuing on with the build
Next: Lady Nelson (Amati Victory)
-
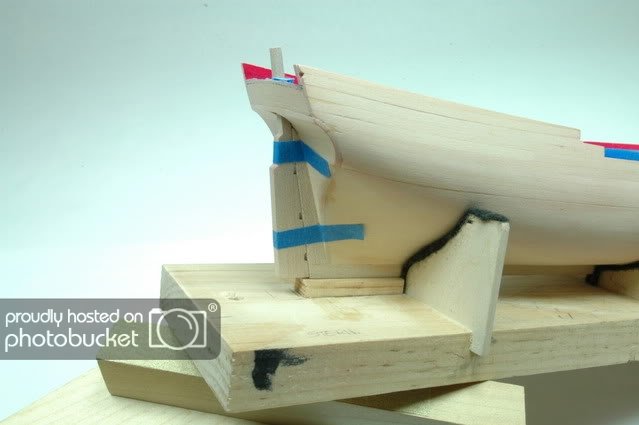
Post 23 of my Sultana Build
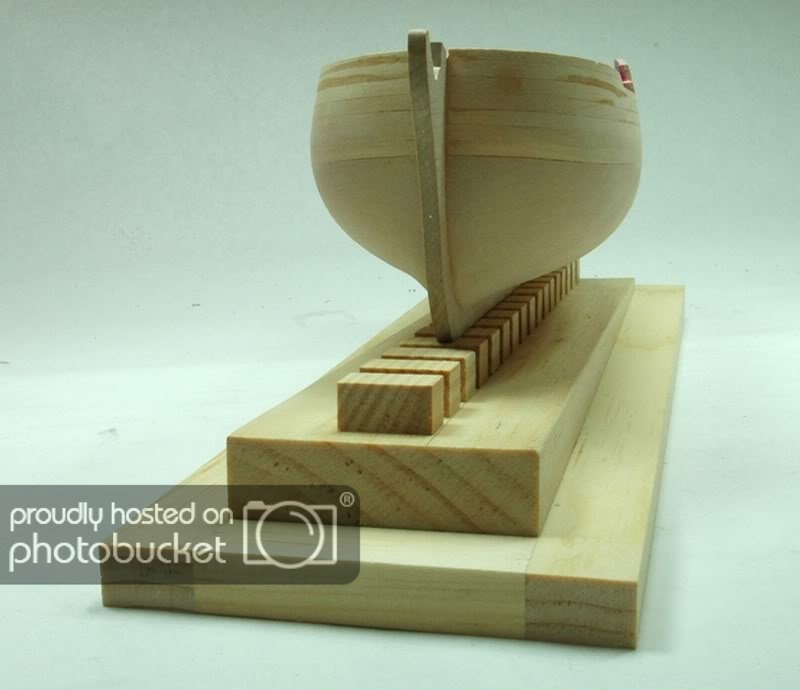
At this point in the build I made a pine display base for the vessel. I used a base of a model featured in the National Maritime Museum (NMM) as inspiration. This was a fun project.
First I drilled three (3) holes through the keel and one inch into the hull 1/16” in diameter using my drill press. The holes will be fitted with 1/16” diameter brass pins 2” long. No need to glue-in the pins, they are to be friction fit only. Do not use tube for the pins as they will break off if you need to make hand adjustment to the hullk to make it straight once mounted.
Photo 96
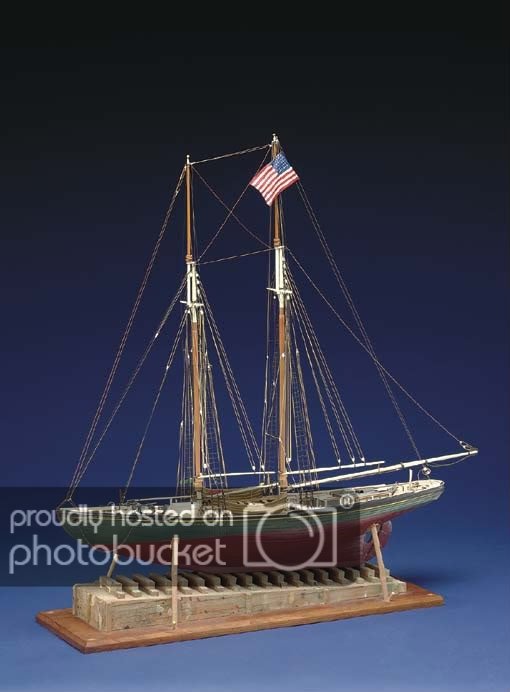
Photo 97
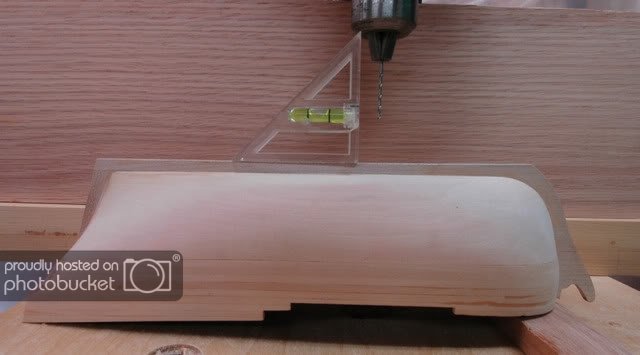
Photo 98
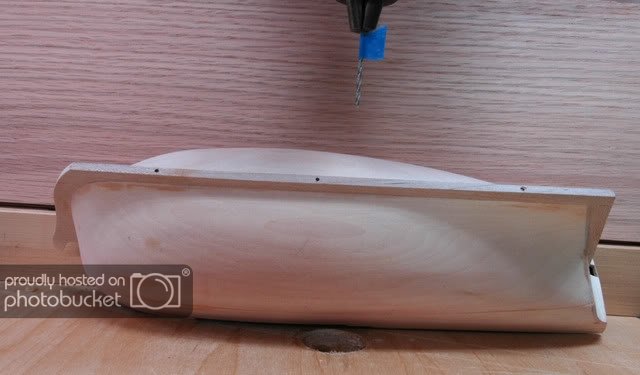
Photo 99
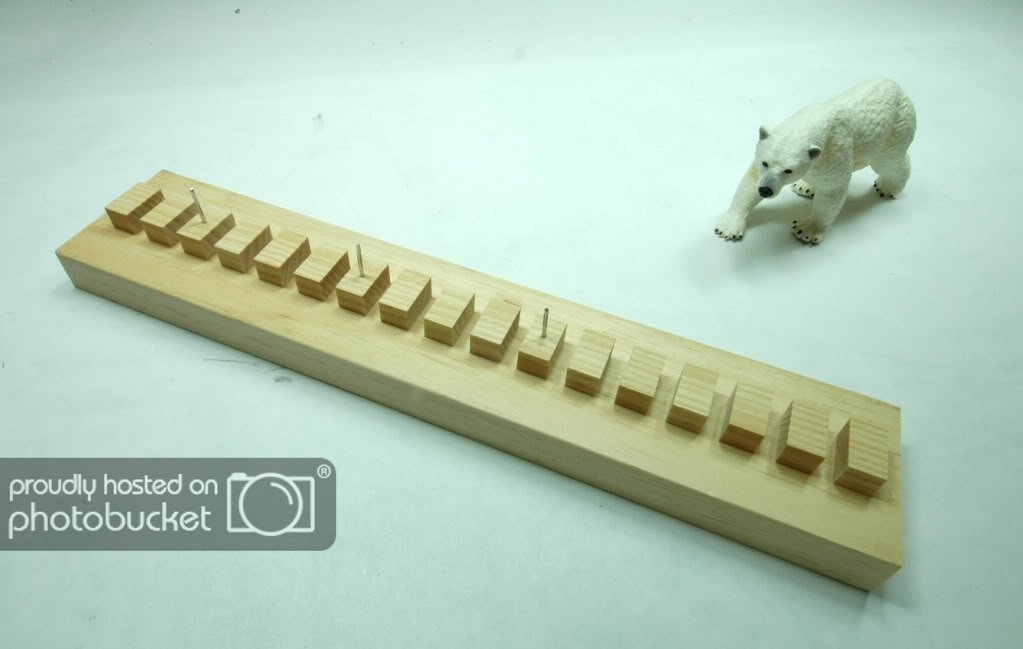
Photo 100
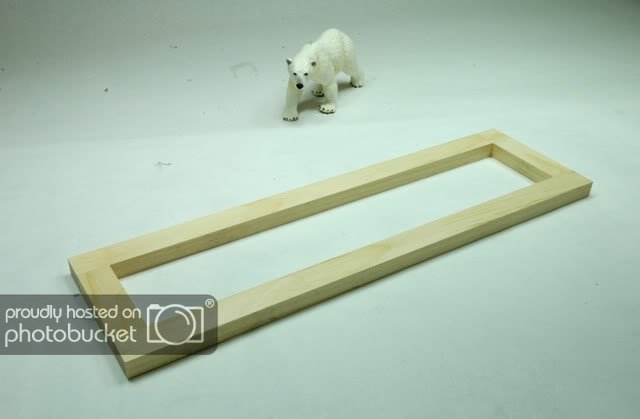
Photo 101
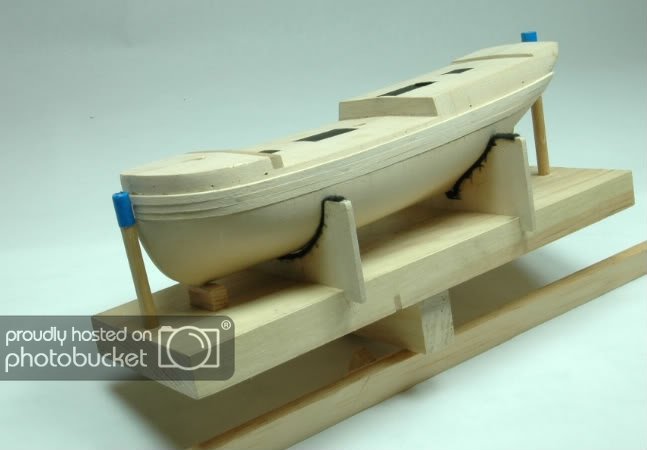
Inorder to get the slope of the base parallel to the water line, I placed a block of wood to the underside of the bow end of the mounting board.
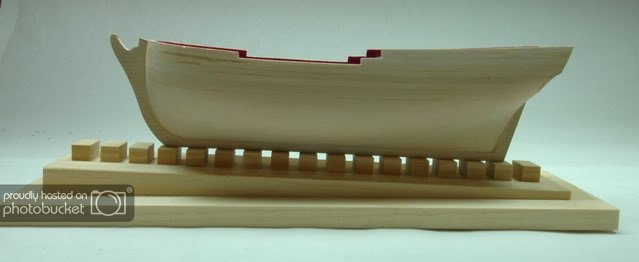
Photo 102
When I finish painting the monting board later in the build, I will return to this post and show photos how it was done.
BFN
Cheers,
Hopeful aka David
“there is wisdom in many voices”
Completed: Sharpie Schooner (Midwest) Posted in kit build section of forum
Current: Sultana (MSW) Updating the build log and continuing on with the build
Next: Lady Nelson (Amati Victory)
-
Post 22 of my Sultan Build Log
First, Thanks Randy for stopping by. Note you have finiished planking your SF II, nicely done!
Repost continued.....
Next......Making & fitting the rudder before adding the transom.
Photo 93
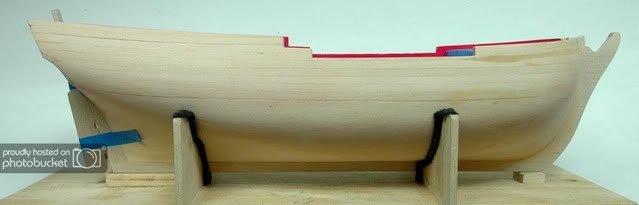
Photo 94
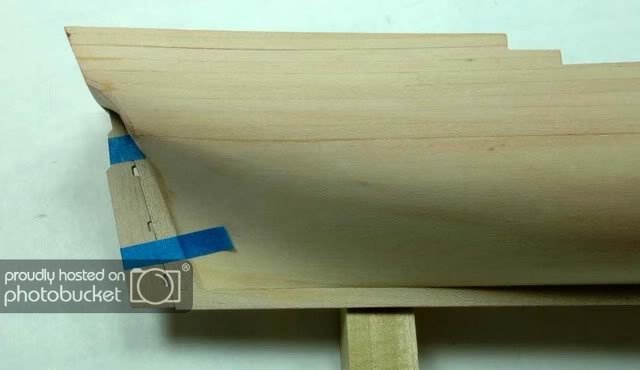
Photo 95
Must taper the rudder from front to back. Test to see positiong through the deck at this point.
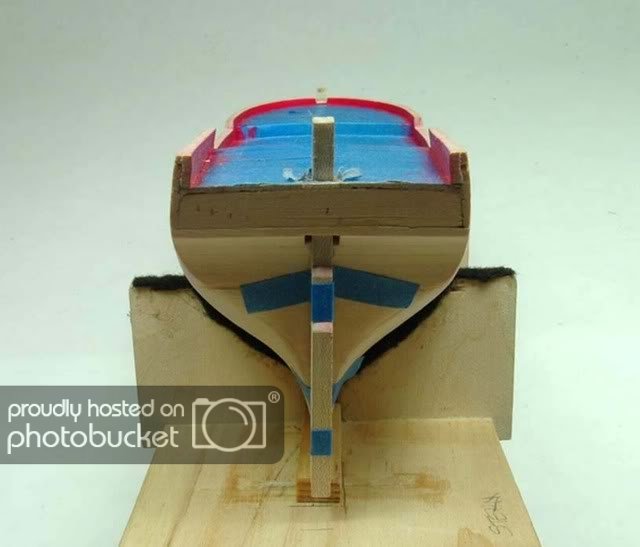
Photo 96
BFN
Cheers,
Hopeful aka David
“there is wisdom in many voices”
Completed: Sharpie Schooner (Midwest) Posted in kit build section of forum
Current: Sultana (MSW) Updating the build log and continuing on with the build
Next: Lady Nelson (Amati Victory)
-
Hey Randy,
Your hull looks great from here. Tung oil was a good choice..the more coats you put on the more mellow the look. Looking forward to more!
Take your time. There is no rush.......is there?
BFN
Cheers,
Hopeful aka David
“there is wisdom in many voices”
Completed: Sharpie Schooner (Midwest) Posted in kit build section of forum
Current: Sultana (MSW) Updating the build log and continuing on with the build
Next: Lady Nelson (Amati Victory)
-
Post 21 of my Sultana Build Log
Task is to make and assemble the stem, keel and stern post to the vessel. Parts are of soft maple. Will post photos and follow with dialog later.
The stem, keel, and stern post were made of soft maple. In my first build the those parts took a real beating while I was building the vessel. I wanted tough wood for those parts on my Sultana.
I decided to make the stem in one piece rather than multiple parts. I took my time to make an almost perfect bow template before cutting wood. I cut the inner part of the stem piece first, and then placed a wider line than required to represent the outer portion of the stem. On the first pass the stem fit the hull almost perfectly. A bit of planning and patience really pays off.
I also made part of the bowsprit in order to determine if the stem was high enough for it to rest of the stem This turned out to be a good idea as I had to add a 4mm piece to the inner part of the stem to get it to the right height. You can see the addition in Photo 89
Photo 86
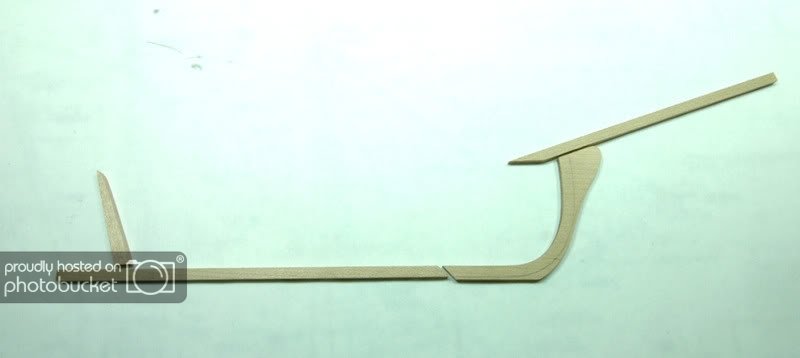
Photo 87
Please notice that the stem was thicker than the keel by a few mm's. I did this on purpose because I new I would never be able to get the two piece to mate perfectly when gluing them together. Once the two parts were glued together I had only a small bit of sanding to do in order make them the same height.
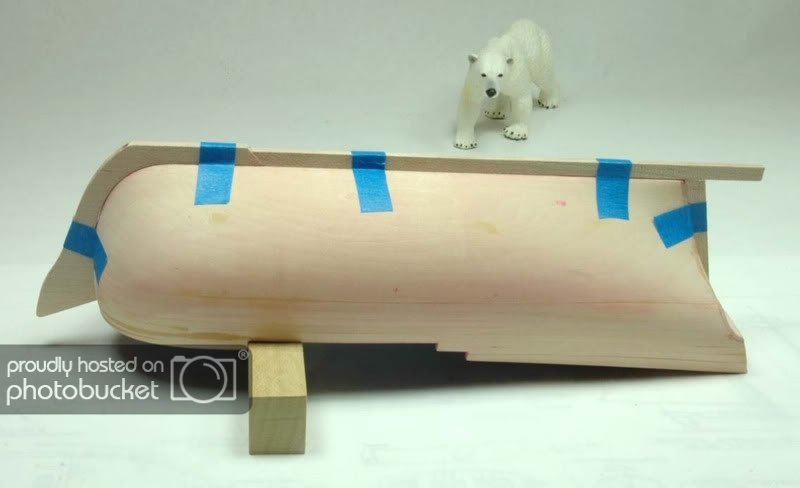
Photo 88
Make certain the bowsprit is at the correct angle per the drawings before adjusting the stem.
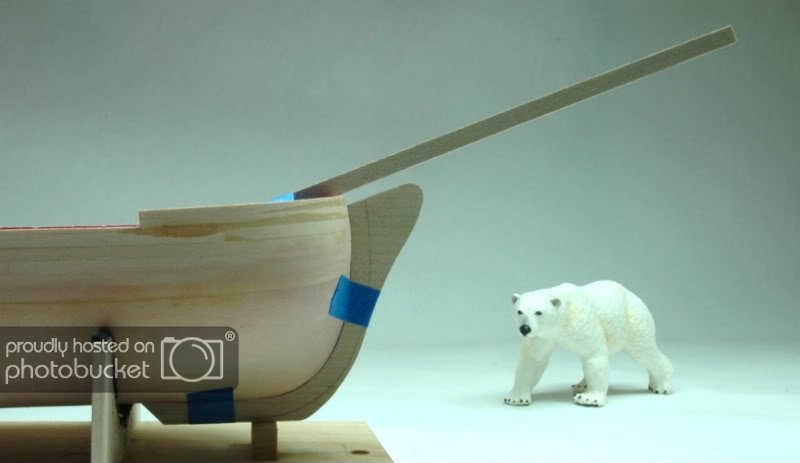
Photo 89
Note an additional piece was added as a place to rest the bowsprit on the stem. Final fit of the stem to the bow.
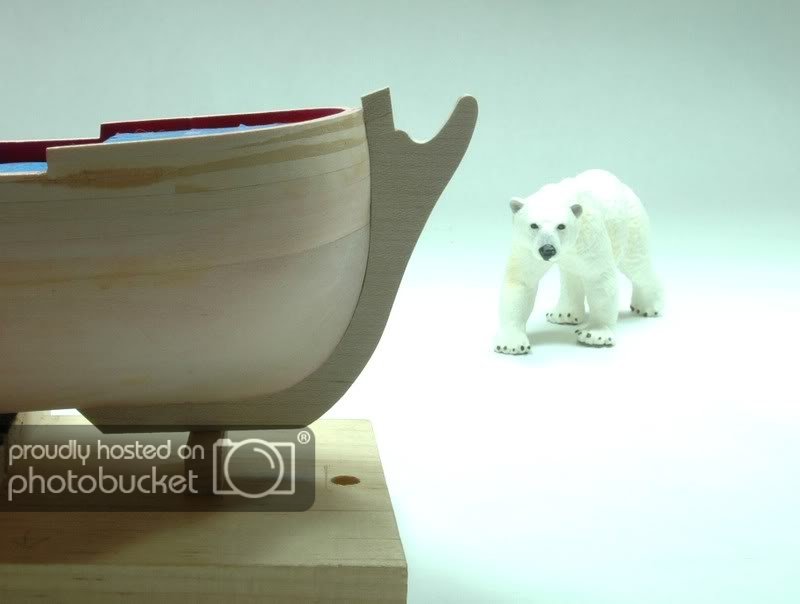
Photo 90
To glue the stem and keel together perfectly flat and true I placed them on a sheet piece of glass. Once the glued dried I only had to sand the joint lightly with 200 grit paper on a wood block. I learned this and many other building techniques from Danny.
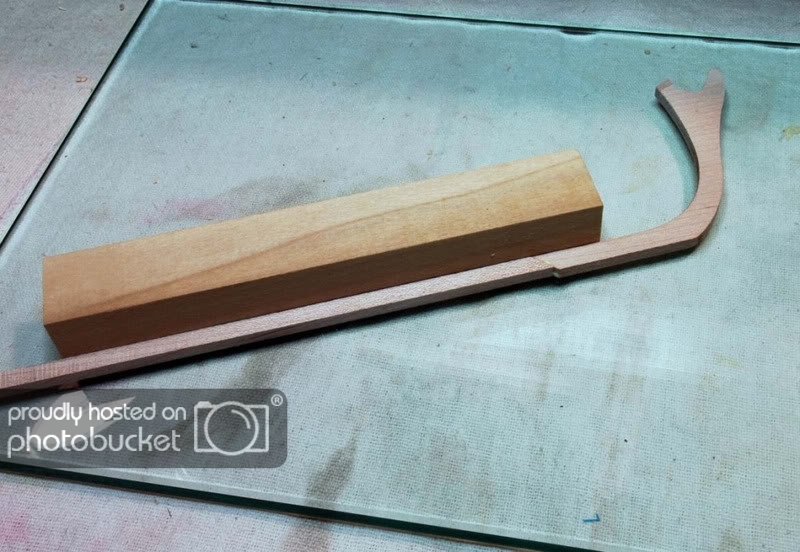
Photo 91
When fitting the keel and the stem to the vessel I noted that a little putty needed to be added in several places as well a some sanding. With this in mind, I covered the keel and stem with blue tape to protect the parts. Here the keel and stem are glued to the vessel. Pins keep the components centered.

Photo 92

Words to follow.......
BFN
Cheers,
Hopeful aka David
“there is wisdom in many voices”
Completed: Sharpie Schooner (Midwest) Posted in kit build section of forum
Current: Sultana (MSW) Updating the build log and continuing on with the build
Next: Lady Nelson (Amati Victory)
-
Post 21 of my Sultana Build Log
Task is to plank and paint the inner bulwarks. Bulwark stanchions are not required with this build.
Photo 84
I used the bending plank to prepare the wood for the bow portion of the bulwarks. The planks were painted with a gouache paint. It is water base and dries dead flat....no sheen. One can overpaint easily if touch-ups are required. I went for the paint because of its dead flat character.
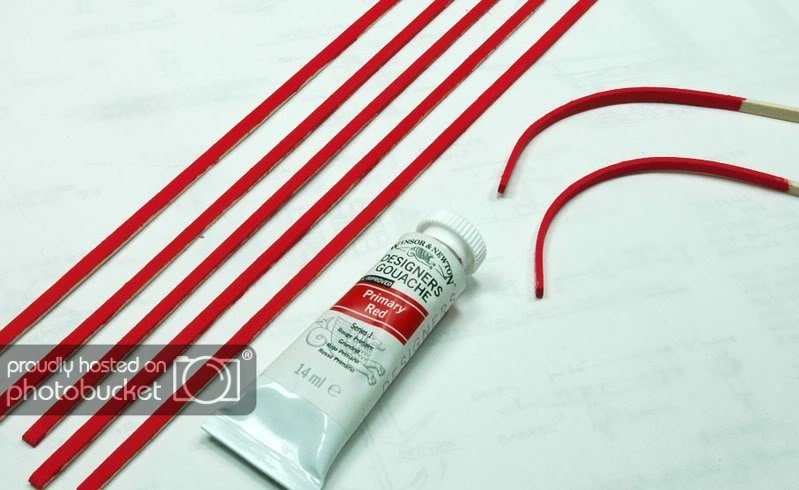
Photo 85
Am continuing to protect the deck with low tack painters blue tape. The paint work is done with the exception of the interior transom which comes later in the build.
Will add the verbage as an edit.
BFN
Cheers,
Hopeful aka David
“there is wisdom in many voices”
Completed: Sharpie Schooner (Midwest) Posted in kit build section of forum
Current: Sultana (MSW) Updating the build log and continuing on with the build
Next: Lady Nelson (Amati Victory Kit)
-
Hey Mario,
Your flattie build is a marvel, beautifully executed. Thanks for bringing'er back.
BFN
Cheers,
Hopeful aka David
“there is wisdom in many voices”
Completed: Sharpie Schooner (Midwest) Posted in kit build section of forum
Current: Sultana (MSW) Updating the build log and continuing on with the build
Next: Lady Nelson (Amati Victory)
-
Post 20 Of my Sultana Build Log
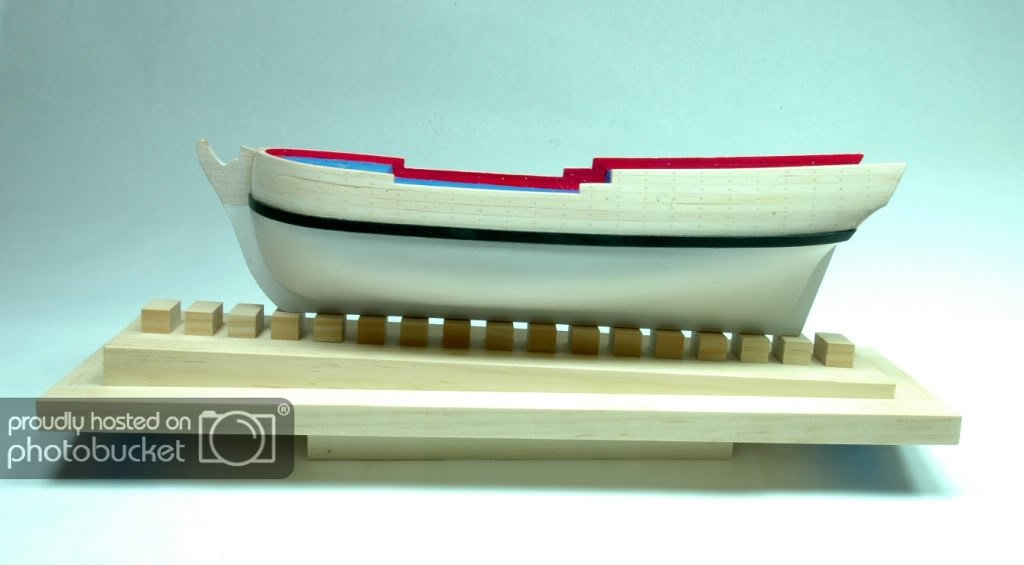
Next step was to add the remaining strakes above the wales and fair the hull.
Photo 82
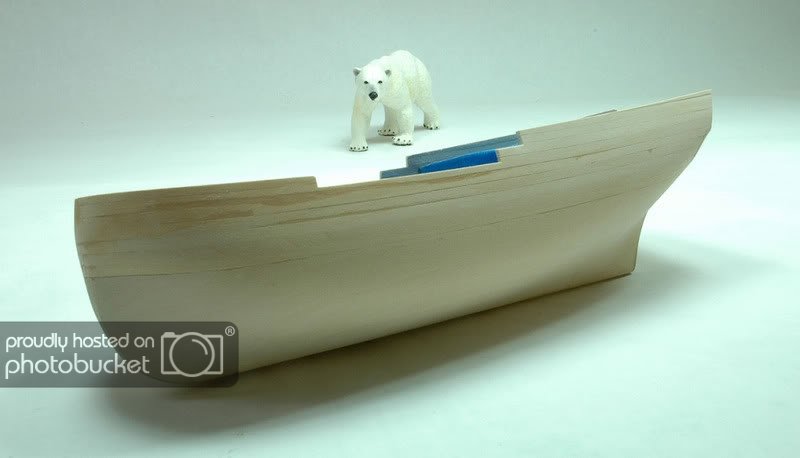
Photo 83
Planked the counter.

BFN
Cheers,
Hopeful aka David
“there is wisdom in many voices”
Completed: Sharpie Schooner (Midwest) Posted in kit build section of forum
Current: Sultana (MSW) Updating the build log and continuing on with the build
Next: Lady Nelson (Amati Victory)
-
Note to the forum:
Russ & DavidB: Thanks for the update regarding cherry. Did not realize it was so broadly used in boat building. I have a real good wood store close by and will go there and buy some cherry for my wood bin. Good to know, Russ, it has application for making blocks.
Have a great weekeng guys
BFN
Cheers,
Hopeful aka David
“there is wisdom in many voices”
Completed: Sharpie Schooner (Midwest) Posted in kit build section of forum
Current: Sultana (MSW) Updating the build log and continuing on with the build
Next: Lady Nelson (Amati Victory)
.
-
Note to the forum.....
David B: I have used cherry but not for boatbuilding. You have encouraged me to take another look. You are right it machines and sands well. What are the best uses for cherry?
Bob (hexnut): Thanks for stopping by. Thanks for your kind comments. One of the challenges with the Sultana is that it is in 1:64 scale and very detailed when using Chuck's practicum, priceless. I will start putting something in the photo to give one a better sense of scale. Hull is 10" between the perps, if memory serves.
I looked at your "smack" build....nice work, Bob. You must be an illustrator as your drawing is very professional. Wish you well as you move along.
Patrick: Thanks for your kind words about my build. I'm building the Sultana to get solid hull experience. Some aspects of the kit have given me problems but that is how we learn.
I have and continue to follow your Niagara build, just terrific. Two vessel I really like are the Niagara and the Syren. Ready to enjoy the rigging part of your build!
BFN
Cheers,
Hopeful aka David
“there is wisdom in many voices”
Completed: Sharpie Schooner (Midwest) Posted in kit build section of forum
Current: Sultana (MSW) Updating the build log and continuing on with the build
Next: Lady Nelson (Amati Victory)
-
I remember this build well. Glad you are taking the time to repost. Thank you!!! Hopefully it will encourage others to build a few small boats. Its a Midwest kit is it not? No,I guess an MSW kit? Clarify please.
BFN
Cheers,
Hopeful aka David
“there is wisdom in many voices”
Completed: Sharpie Schooner (Midwest) Posted in kit build section of forum
Current: Sultana (MSW) Updating the build log and continuing on with the build
Next: Lady Nelson (Amati Victory)
-
Post 19 of my Sultana Build
Task is to treenail the deck. Used an awl to mark the location of the treenails.
Photo 79
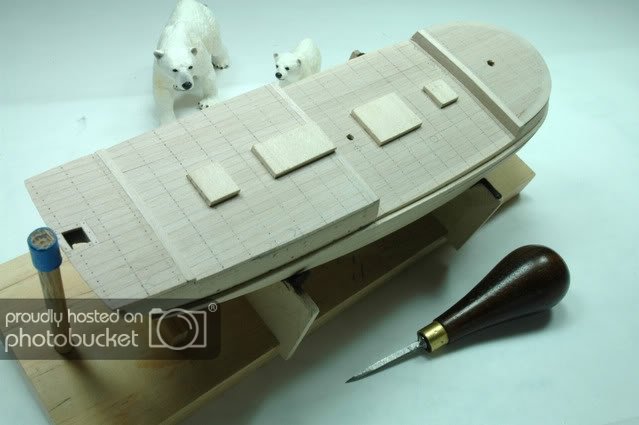
Photo 80
Used a size 73 drill for the treenails holes.
Photo 81
Finished deck with treemails.
BFN
Cheers,
Hopeful aka David
“there is wisdom in many voices”
Completed: Sharpie Schooner (Midwest) Posted in kit build section of forum
Current: Sultana (MSW) Updating the build log and continuing on with the build
Next: Lady Nelson (Amati Victory)
-
Sultana Post 18 begin photo 73
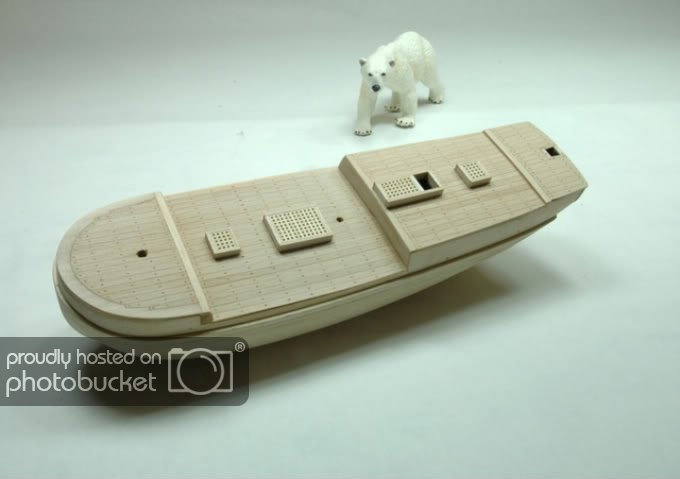
Task is to lay the deck and margin plank.
I milled the deck boards out of soft maple. In the future I’ll use bass wood or Swiss pear because soft maple is hard to work.The margin plank was made of 2 plybirch plywood.
Photo 73
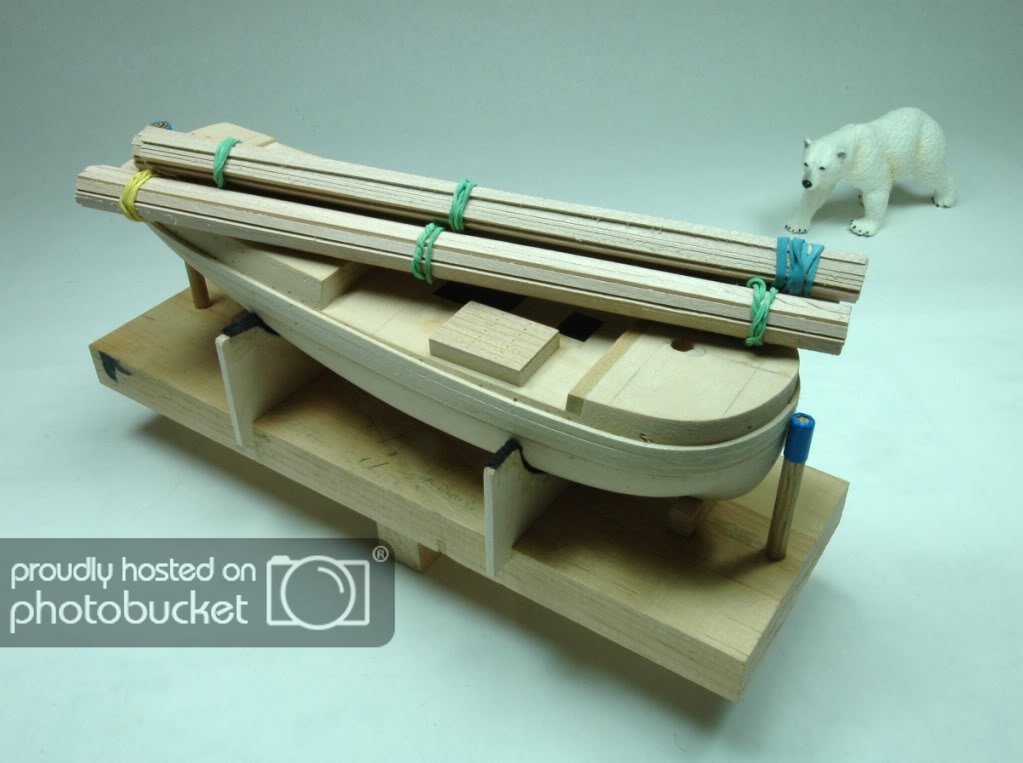
Photo 74
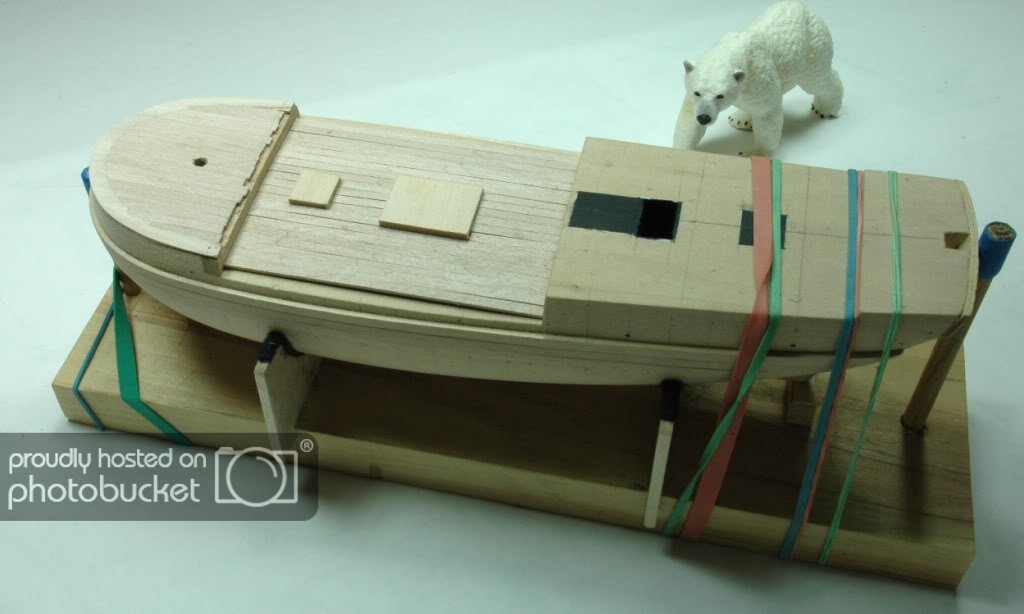
Photo 75

Photo 76
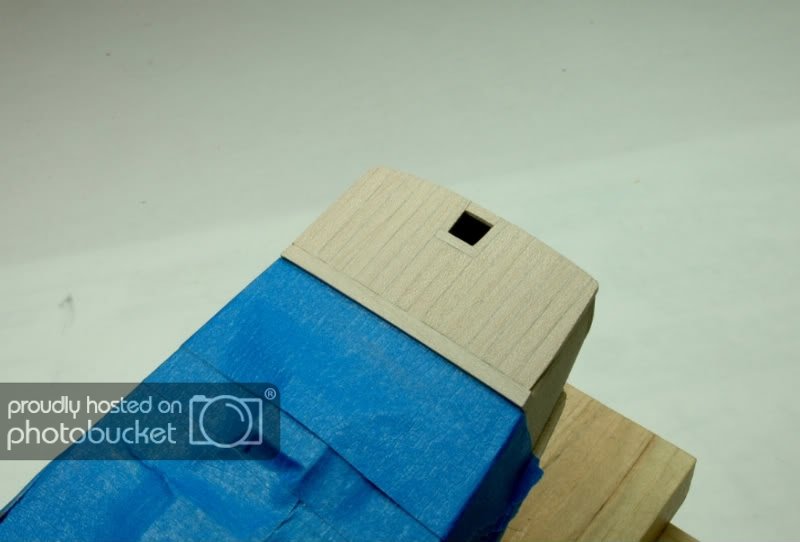
Photo 78
Deck prior to adding treenails
BFN
Cheers,
Hopeful aka David
“there is wisdom in many voices”
Completed: Sharpie Schooner (Midwest) Posted in kit build section of forum
Current: Sultana (MSW) Updating the build log and continuing on with the build
Next: Lady Nelson (Amati Victory)
-
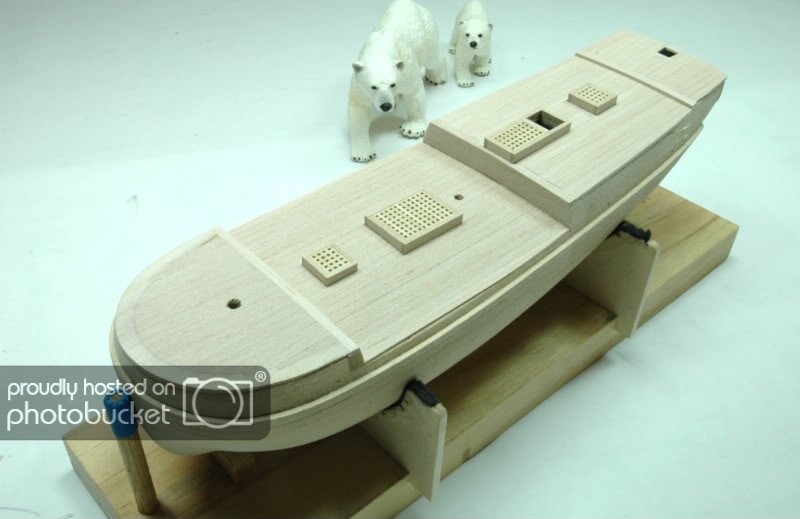
Hi Mates,
Post 17 of my Sultana Build Log
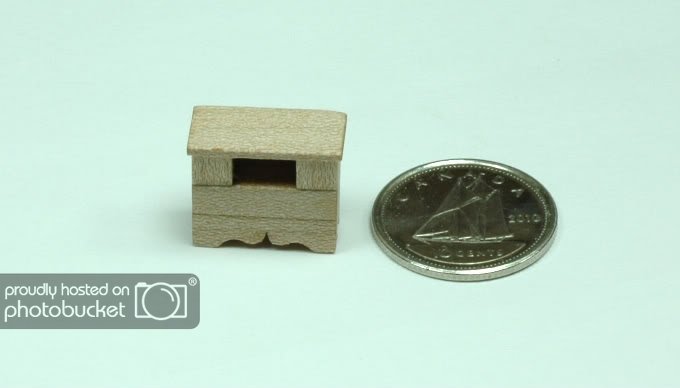
As a diversion, I decided to do a few deck projects making the deck grates and the binnacle.
Photo 70
Beech wood grate material from Amati
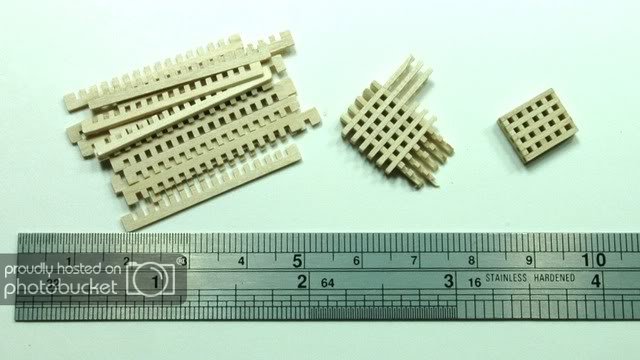
Photo 71
Grates without frames
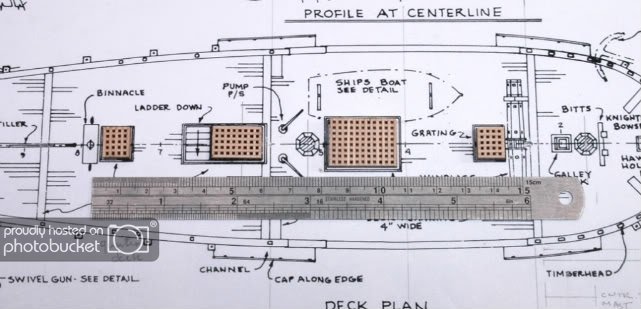
Photo 72
Grates with outer frames
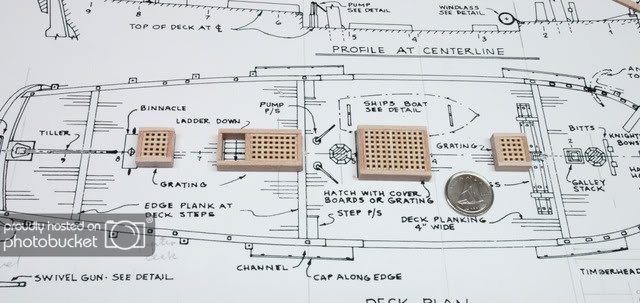
Photo 73
Binnacle
BFN
Cheers,
Hopeful aka David
“there is wisdom in many voices”
Completed: Sharpie Schooner (Midwest) Posted in kit build section of forum
Current: Sultana (MSW) Updating the build log and continuing on with the build
Next: Lady Nelson (Amati Victory)
-
Hi Randy,
Thanks for checking my build.
Some builders prefer solid hull to POF builds. Actually the hull templates do a good job of helping one get the hull right. No need for calipers. Fairing the hull is time comsuming but rewarding in the end. Lot and lots of sanding.
Good luck with you Sanfancisco II. your planking looked real good!
BFN
Cheers,
Hopeful aka David
“there is wisdom in many voices”
Completed: Sharpie Schooner (Midwest) Posted in kit build section of forum
Current: Sultana (MSW) Updating the build log and continuing on with the build
Next: Lady Nelson (Amati Victory)
-
You made the planking step look easy. It is nice to have other Sanfan II builders working with you, makes life so much better!
BFN
Cheers,
Hopeful aka David
“there is wisdom in many voices”
Completed: Sharpie Schooner (Midwest) Posted in kit build section of forum
Current: Sultana (MSW) Updating the build log and continuing on with the build
Next: Lady Nelson (Amati Victory)
-
Post 16 of my Sultana Build Log
For a bit of relief from deck work I went ahead and attached three strakes to the hull using a combination of PVA and CA glues.
I applied an inch of PVA followed by drop of CA repeating the use of CVA and CA the length of the strake. This method enables a quick bond of the strake to the hull. I always use CA strategically applying it carefully. CA has its place. I strive to be very neat with glue to help create a clean build…..easier said than done!
The process went smoothly.
(Note the strakes look as if they are clinkered at the bow. Clinkering is when strakes overlap one another. That is not the case here. The strakes bump out every so slightly at their low edge casting a shadow due to the compound curve of the hull. Light sanding will eliminate the high points in the strakes when the hull is faired above the wales.)
Photo 68
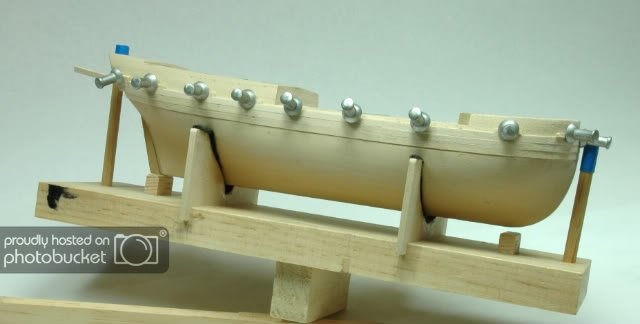
Photo 69
Will add the remainder of the strakes after planking the deck.
BFN
Cheers,
Hopeful aka David
“there is wisdom in many voices”
Completed: Sharpie Schooner (Midwest) Posted in kit build section of forum
Current: Sultana (MSW) Updating the build log and continuing on with the build
Next: Lady Nelson (Amati Victory)
-
Hi Mates,
Post 15 of my Sultana Build Log
As it so happened…….
At this point Kip (Sawdust) noted it would be easier to cut the hole in the deck for the rudder post now, not later when the deck has been planked. It is fortunate that Kip’s build is at the rigging stage so I am able to benefit from his building experience to that point.
One thing leads to another….
First step was to make and pin a temporary stern post in place to facilitate drilling a pilot hole up through the counter and through the deck at the right location.
Photo 62
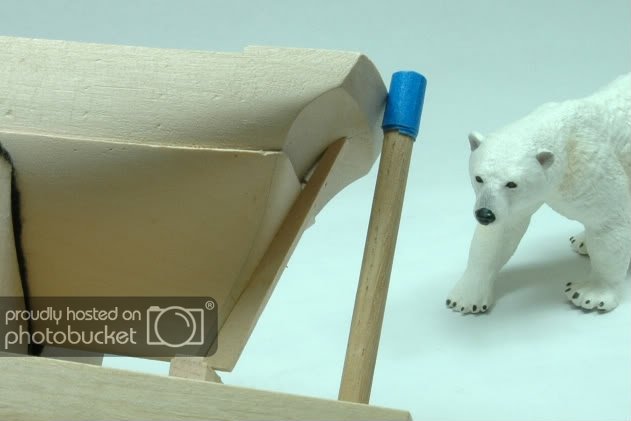
Photo 63
How to add lenght to a short drill.
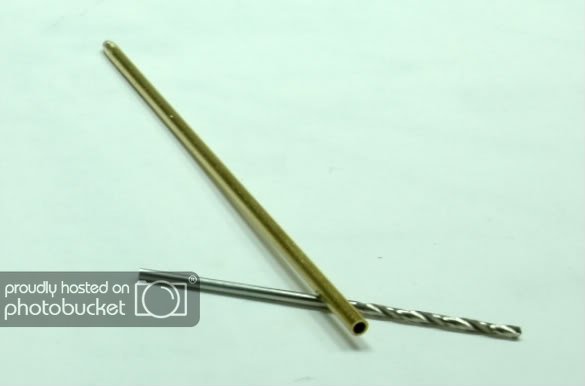
Photo 64
Glued with a touch of CA glue.
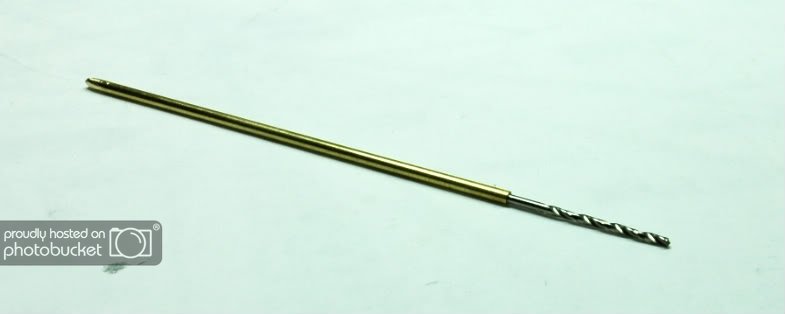
Photo 65
Be oh so careful here.
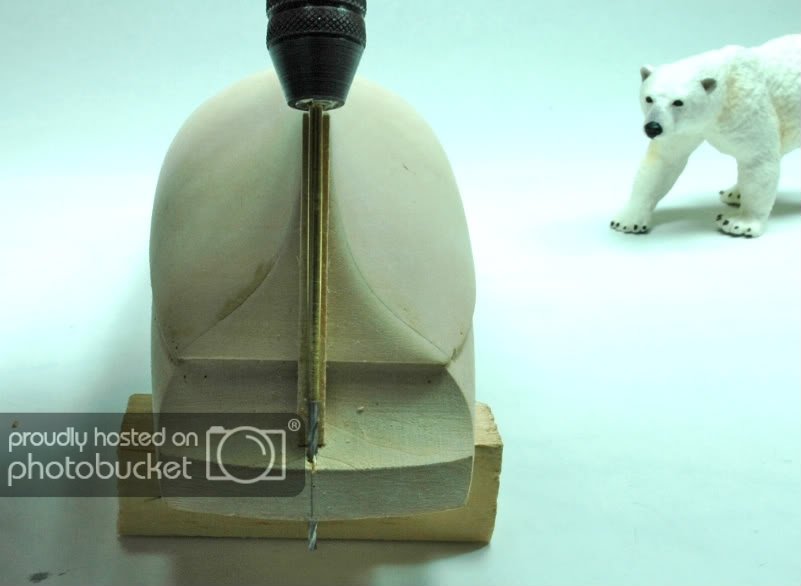
Photo 66
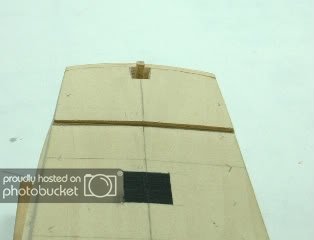
Sometimes we get lucky!
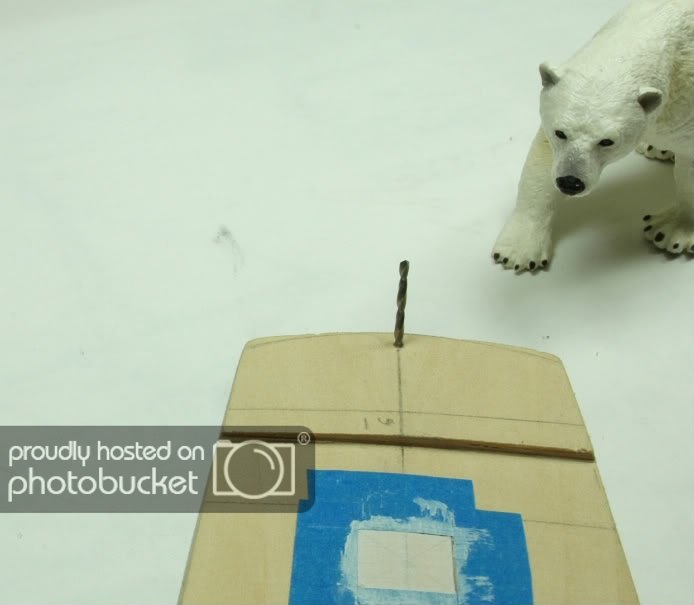
Photo 67
Rudder post through the deck opening.
BFN
Cheers,
Hopeful aka David
“there is wisdom in many voices”
Completed: Sharpie Schooner (Midwest) Posted in kit build section of forum)
Current: Sultana (MSW) Updating the build log and continuing on with the build)
Next: Lady Nelson (Amati Victory)
-
Response to the forum....
Kip: Thanks for checking in on my repost progress. Your finger prints all all over my Sultana. Feels and looks like a joint build! Thanks for you insight and encouragement, my friend.
DavidB: Thanks for stopping by the build. Your comments about cuttiing in the notches for stanchions is a good idea and I will remember your advice in a future build. The Sultana build does not call for stanchions based on Chucks practicum. Rather the hull planking above the wales form the outside of the bulwarks followed by inner planking.
ChuckS: Appreciate your checking out my build. Glad to learn you are building a scratch model of the Sultana. Would urge you to start a build log. You can just start from where your are with the build. BTW what is the scale of your build? Suggest you check out Chucks practicum of the Sultana, very informative.There is probably something there for you.
Bye guys & have a nice day.
Cheers,
Hopeful aka David
“there is wisdom in many voices”
Completed: Sharpie Schooner (Midwest) Posted on kit build log.
Current: Sultana (MSW) Updating the build log and continuing on with the build
Next: Lady Nelson (Amati Victory)
-
Wonderful build log, beautiful model. Anyone building the Pickle will be very fortunate to have and refer to your build. Congrats!
BFN
Cheers,
Hopeful aka David
“there is wisdom in many voices”
Completed: Sharpie Schooner (Midwest) Posted on kit build log.
Current: Sultana (MSW) Updating the build log and continuing on with the build
Next: Lady Nelson (Amati Victory)
-
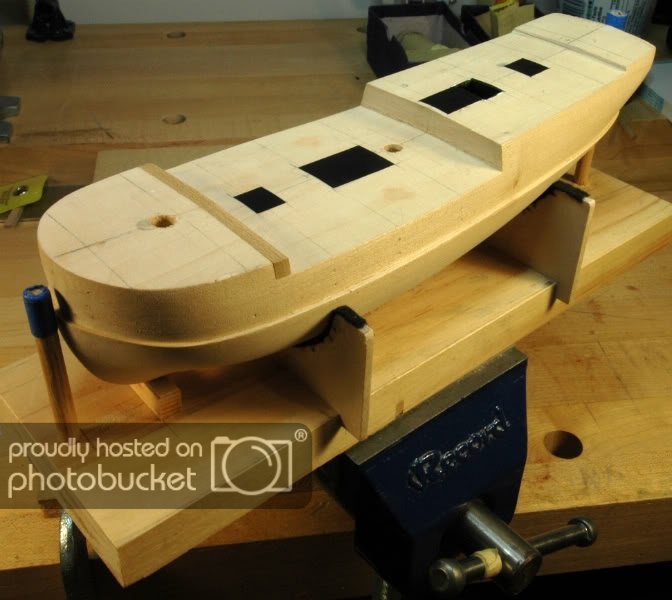
Post 14 of my Sultana Build Log
At this point I am deviating from the practicum and following Kip’s idea of working on the deck prior to adding the strakes to the hull. This will allow easy access to the deck for adding the margin plank, etc., because the bulwarks will be added later.
Photo 60
When following the drawing to lay out the hatch positions I found the fore deck was to short versus the drawing. To fix the problem I added the later darker board you see at the stern end of the fore deck. Stupid mistake in reading the drawings way back when. I also had to redrill the fore mast hole.
Here is when I also drilled and cut out the location for the ladder. The blue tape indicates where the hatches will be placed.

Photo 61
Prior to removing the blue tape I painted the hatch locations black.
BFN
Cheers,
Hopeful aka David
“there is wisdom in many voices”
Completed: Sharpie Schooner (Midwest) Posted on kit build log.
Current: Sultana (MSW) Updating the build log and continuing on with the build
Next: Lady Nelson (Amati Victory)
-
Hi Russ,
Thanks for looking in on the build. The bending board was a modification to one I saw in another Sultana Build log. Life was good using the jig. As you said, "makes the build much more enjoyable".
Hope you have time to work on your Biloxi Schooner. I really enjoy following your build logs.
Cheers,
Hopeful aka David
“there is wisdom in many voices”
Completed: Sharpie Schooner (Midwest) Posted on kit build log.
Current: Sultana (MSW) Updating the build log and continuing on with the build
Next: Lady Nelson (Amati Victory)
-
Post 12 of my Sultana Build Log
Photo 57
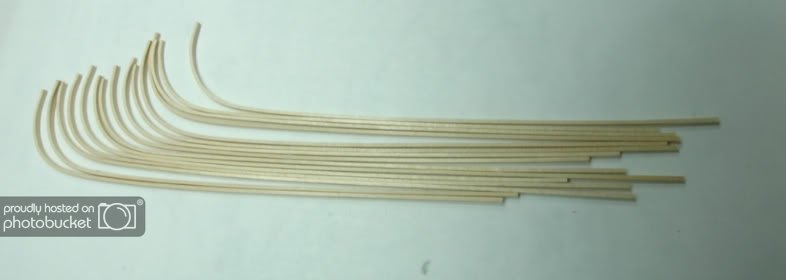
Strake bending boards made of pine scrap. To make the bending boards I placed the hull deck down on the pine boards and ran a pencil around the edges and cut them out. Made two in order to bend twice the number of strakes at a time. Soaked the bass wood in hot water for 10 minutes then bent and clamped the strakes to fit the jig. I made sure the wood was clapmed 1" beyond the center line on the bending board.
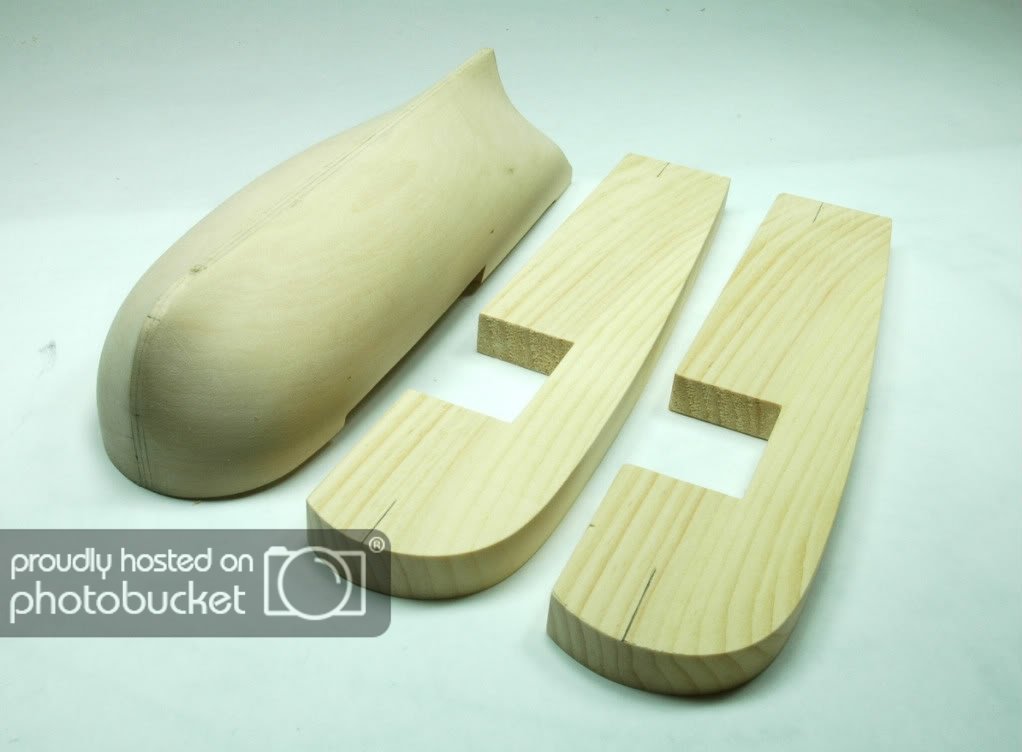
Photo 58
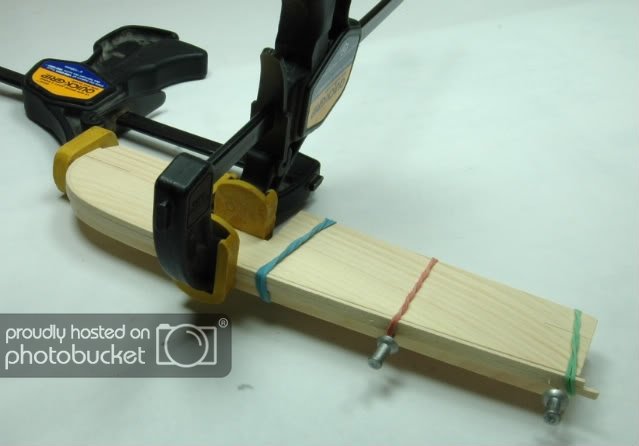
Photo 59
BFN
Cheers,
Hopeful aka David
“there is wisdom in many voices”
Completed: Sharpie Schooner (Midwest) Posted on kit build log.
Current: Sultana (MSW) Updating the build log and continuing on with the build
Next: Lady Nelson (Amati Victory)

Sharpie Schooner by Scull3y - Midwest Products
in - Kit build logs for subjects built from 1851 - 1900
Posted
Hi,
Wish you well as you build your Sharpie Schooner. I too like Midwest kitds as one can go with the instructions or bash the kit along the way.
Am going to follow along as you build.
BFN
Cheers,
Hopeful aka David
“there is wisdom in many voices”
Completed: Sharpie Schooner (Midwest) Posted in kit build section of forum
Current: Sultana (MSW) Updating the build log and continuing on with the build
Next: Lady Nelson (Amati Victory)