


hopeful
-
Posts
278 -
Joined
-
Last visited
Content Type
Profiles
Forums
Gallery
Events
Posts posted by hopeful
-
-
Hi Mates,
Post 4 of my Sultana build.
Nest step is to make certain that the hull is the correct length per the drawings.
Photo 14
Hull termplates used to determine when the hull is the right length. Length is correct when the number 4 hash marks overlap. My hull
was approximately 3/8 inch too long.
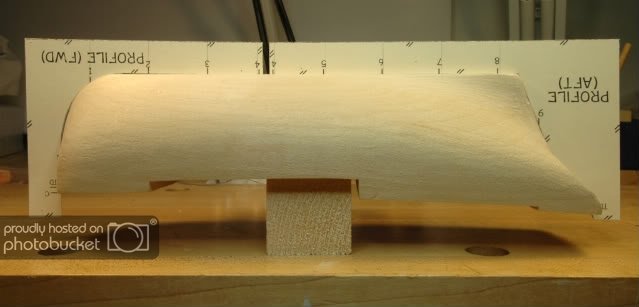
Photo 15
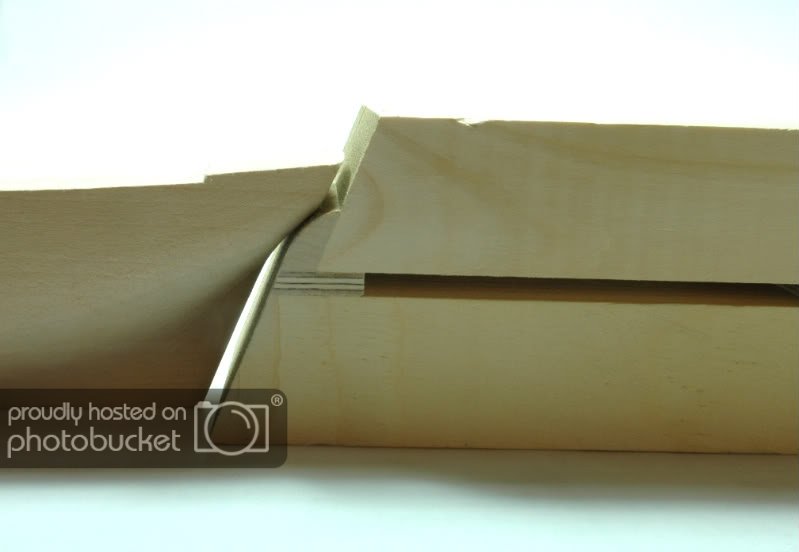
Removed mass at the bow until the template fit perfecty.
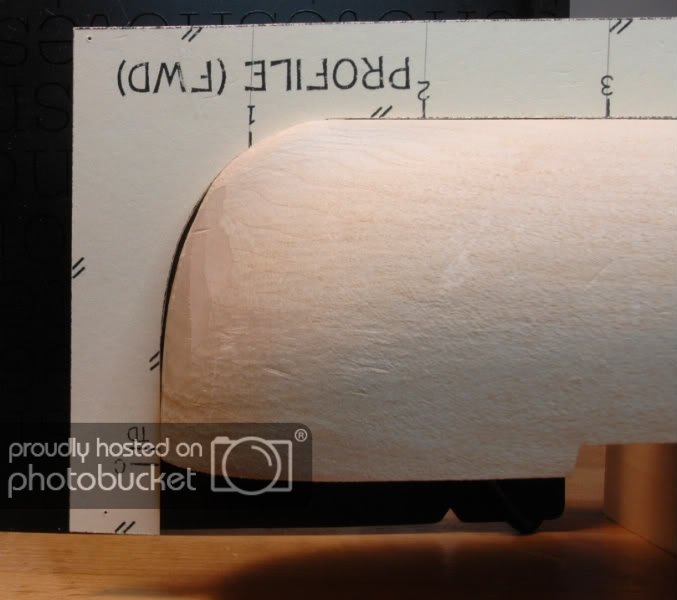
Photo 16
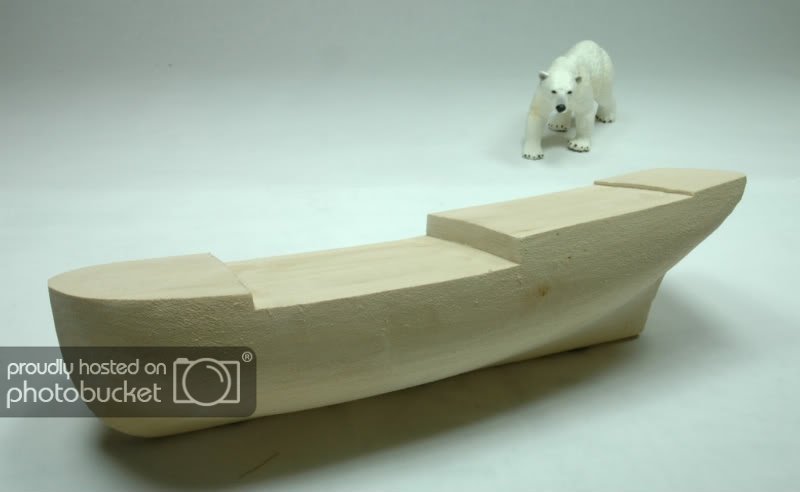
Photo 17
Removed mass at the stern of the vessel until the number 4 hashmarks overlapped.
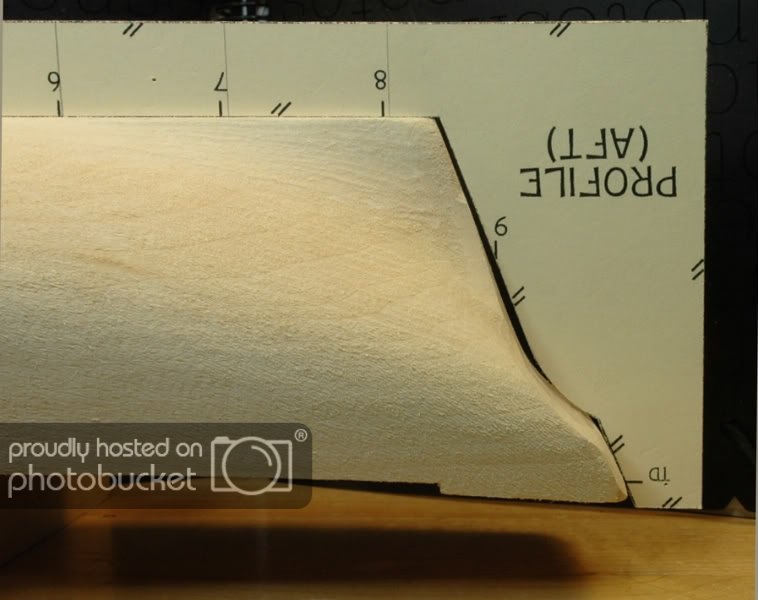
Photo 18
Jig I made to remove mass at the stern wihile insuring the stern was square with the center line of the vessel.
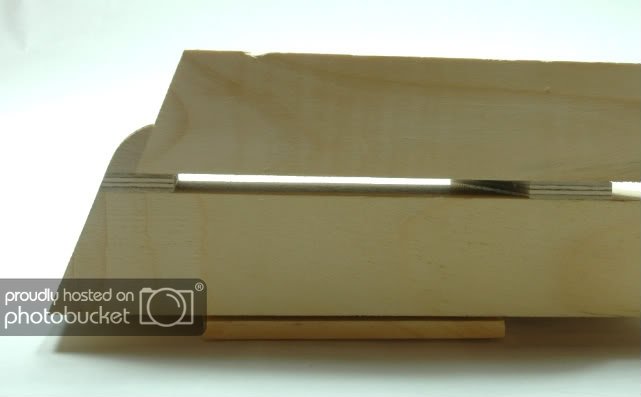
Photo 19
BFN.
Cheers,
Hopeful aka David
“there is wisdom in many voices”
Completed: Sharpie Schooner (Midwest) Posted on kit build log.
Current: Sultana (MSW) Reposting log and continuing on with the build)
-
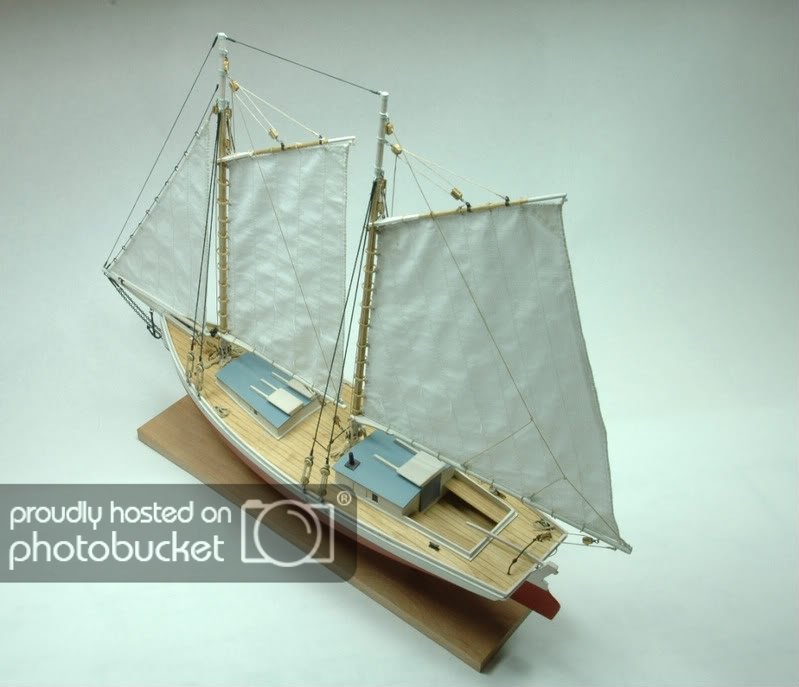
Hi mates,
Post 3 of my Sultana Build log.
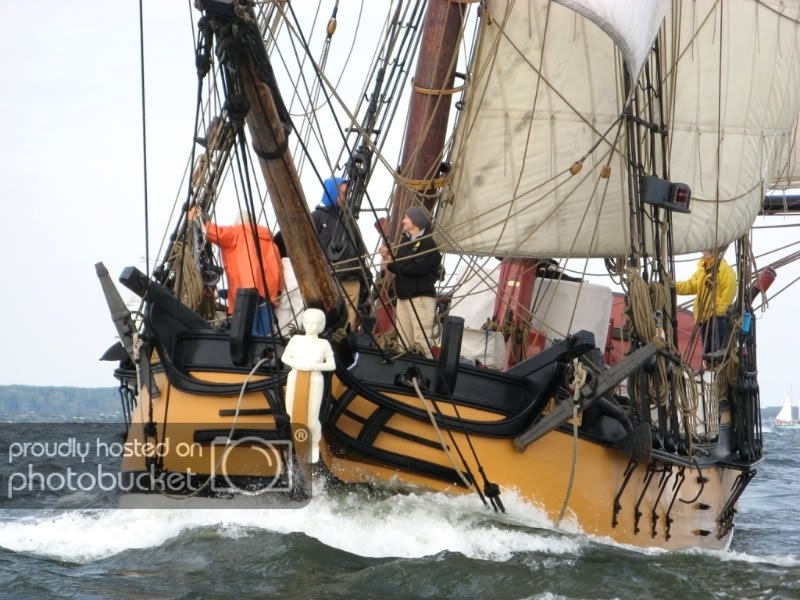
Photo 13
Shot of The Sultana replica sailing on the Chesapeake Bay located in the north east part of the USA.
-
Hi Michael,
Oh me, oh my, what a wonderful build. Who says a solid hull vessel cannot be elegant whatever the size.
Looking forward to more!
Cheers,
Hopeful aka David
“there is wisdom in many voices”
Completed: Sharpie Schooner (Midwest) Reposting the build log at present
On the bench: Sultana (MSW) Reposting the log and keeping on with the build
Next: Lady Nelson (Amati Victory)
-
HI All,
Post 19 of my Sharpie Build Log
This is the last post of my build. If this build helps but one future builder of Midwest's Sharpie Schooner it was worth taking the time to repost the log.
At this time I want to thank the members of the forum, you know who you are, whp helped me through my first build. Without your kind assistance along the way the build would have turned out very different.
To everyone on the present forum I say take heart. It will take some time to get back to where the forum was in terms of build logs and other information. The work has begun, and we will get there because of the dedication of the Admirals, moderators and current builders on the site. I wish you all well. Ps.....show as much technique as possible when constructing build logs to help ofther builders grow and enjoy the forum.
Photo 103
From here the photos are shots of the completed vessel.
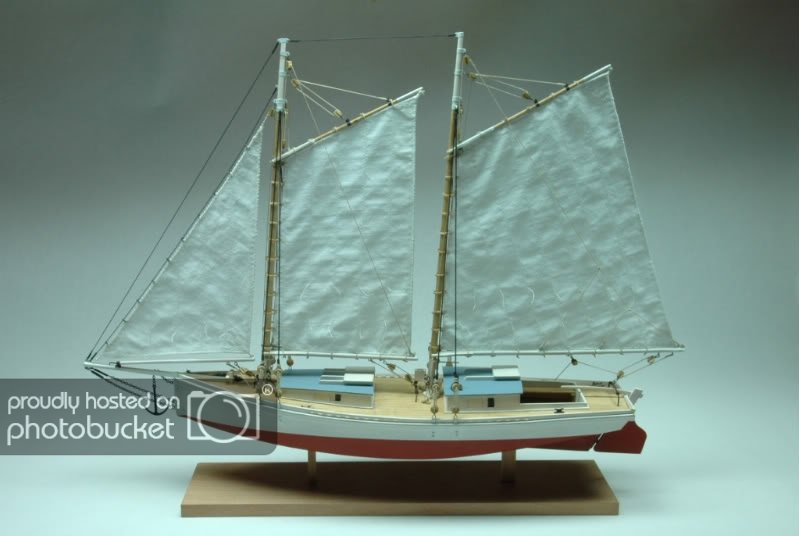
Photo 104

Photo 105
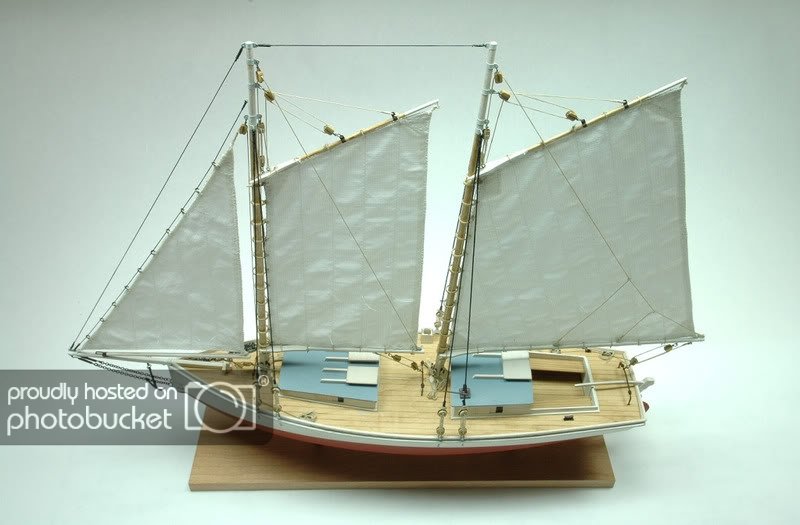
Photo 106
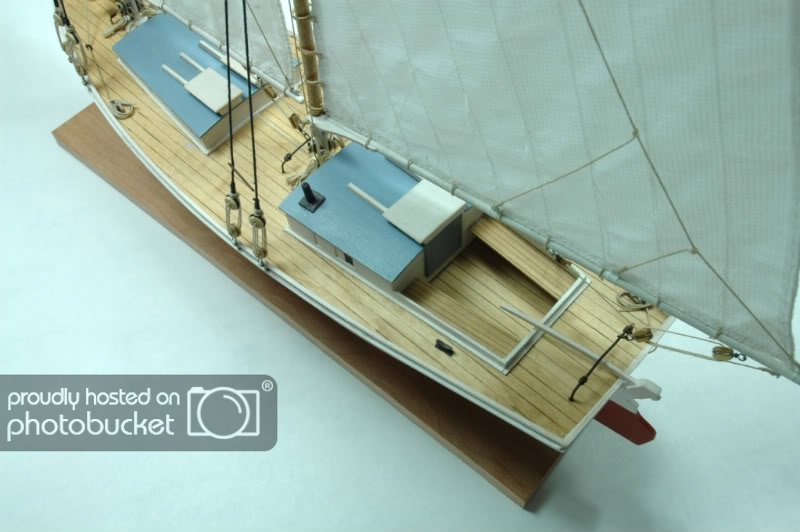
Photo 107

Photo 108
This ends the repost.
Do not ever be ashamed to construct any type vessel. They all, in the end, can be quite wonderful!
Thanks for looking in on the log, much appreciated.
BFN!
Cheers,
Hopeful aka David
“there is wisdom in many voices”
Completed: Sharpie Schooner (Midwest) Reposting the build log at present
On the bench: Sultana (MSW) Reposting the log and keeping on with the build
Next: Lady Nelson (Amati Victory)
-
Hi,
Getting to the end of the repost.
Post 18 of my Sharpie Schooner Build Log
Rigging continues from post 17.
Photo 96
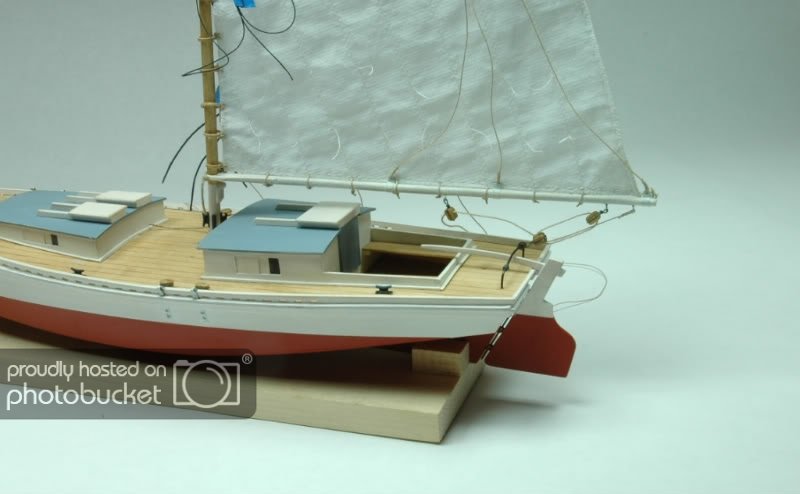
Photo 97
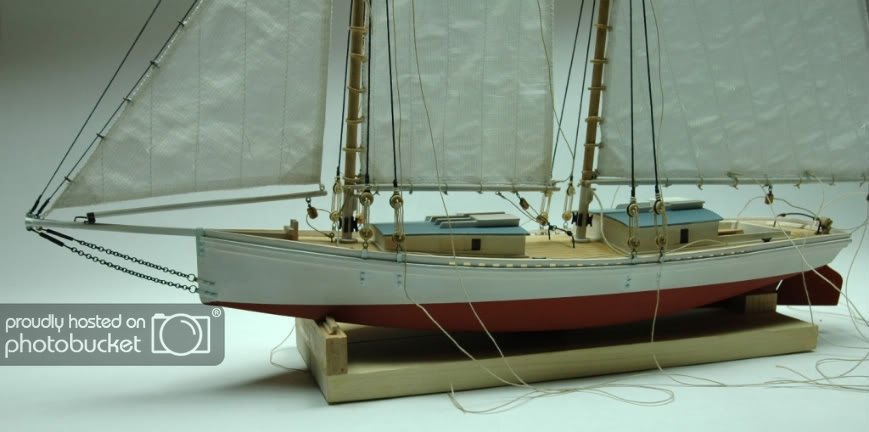
Photo 98
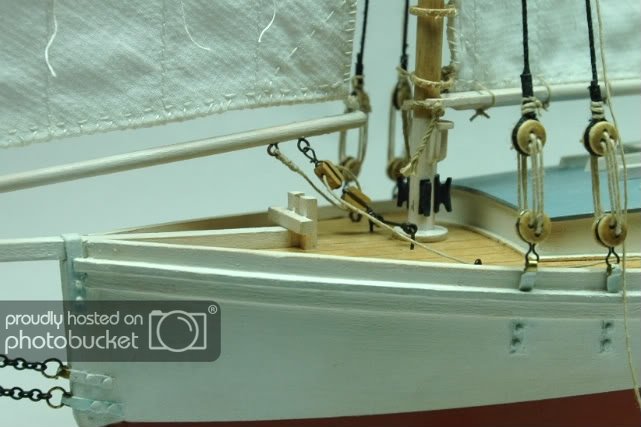
Photo 99
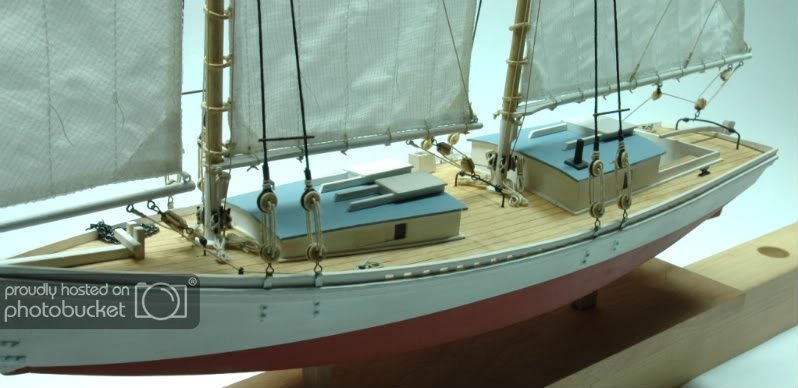
Photo 100
Photo 101
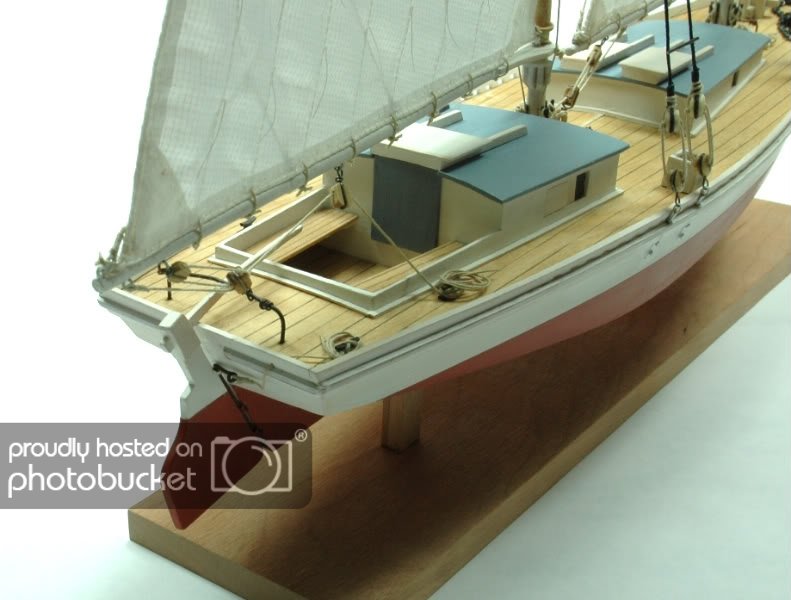
Photo 102
More to come........
Cheers,
Hopeful aka David
“there is wisdom in many voices”
Completed: Sharpie Schooner (Midwest) Reposting the build log at present
On the bench: Sultana (MSW) Reposting the log and keeping on with the build
Next: Lady Nelson (Amati Victory)
-
HI Michael,
Thank you for taking the time to look at my build, much appreciated.
Am following your Bristol Pilot Cutter buid........wow! Much to learn from you and your build log.
BFN
Cheers,
Hopeful aka David
“there is wisdom in many voices”
Completed: Sharpie Schooner (Midwest) Reposting the build log at present
On the bench: Sultana (MSW) Reposting the log and keeping on with the build
Next: Lady Nelson (Amati Victory)
-
Hi All,
Continuing the repost...
Post 17 of my Sharpie Schpooner Build Log
Making masts etc. I have no photos of how I made the masts, booms, and gaffs. (Go ahead and follow the instructions for that phase of the build.)
Next Steps......Rigging and stepping the masts.
Photo 88
First step is to connect the mast hoops to the sail with threaded knots.
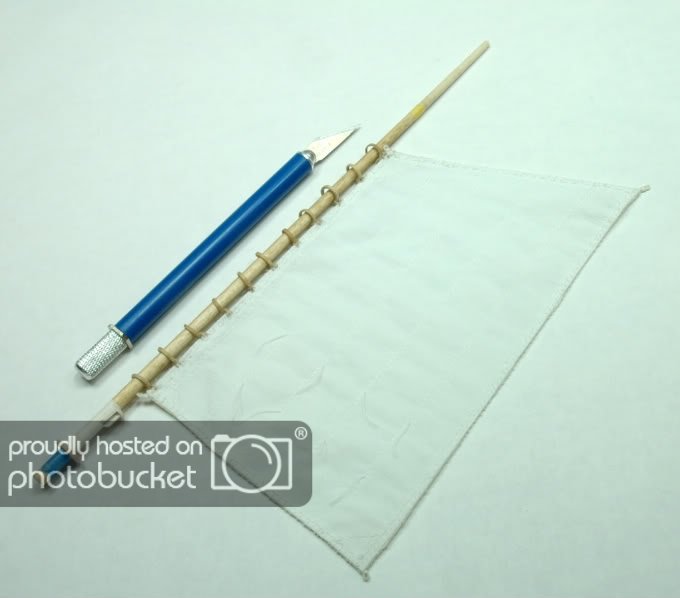
Photo 89
Attaching the sail to the boom and gaff using robands. Do as much rigging work as possible before stepping the masts.
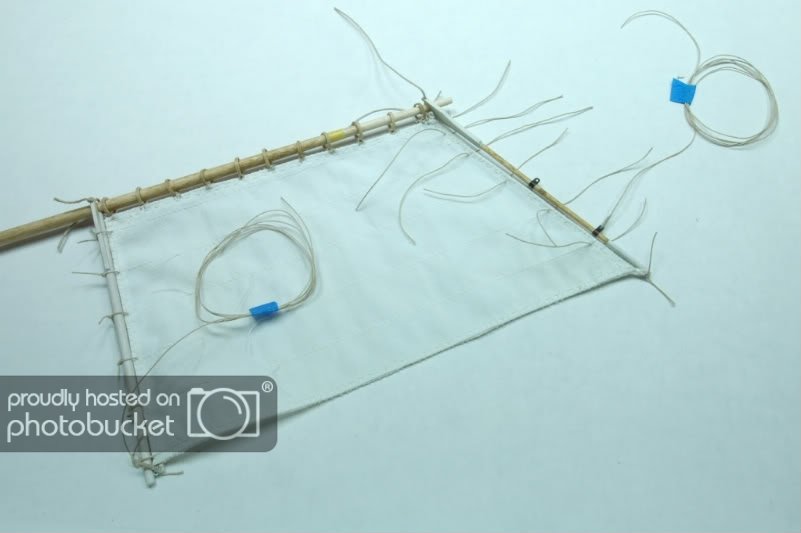
Photo 90

Photo 91
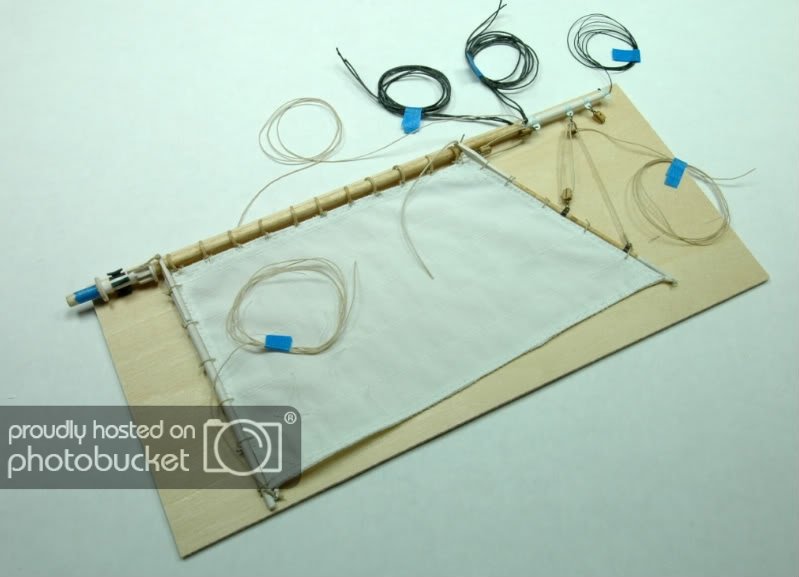
Photo 92
Stepping the main mast.
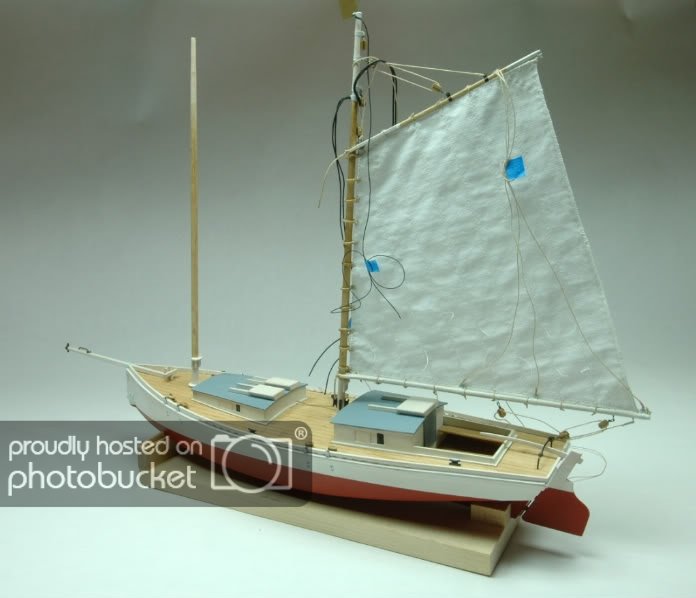
Photo 93
Stepping the foremast.
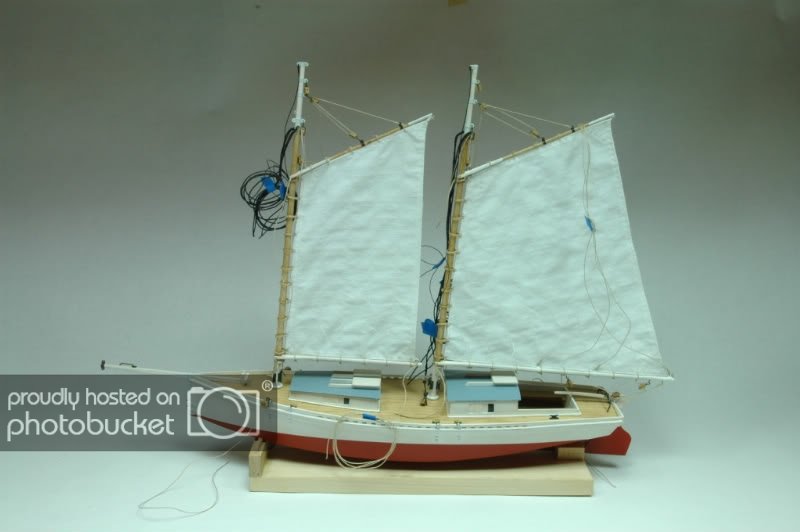
Photo 94
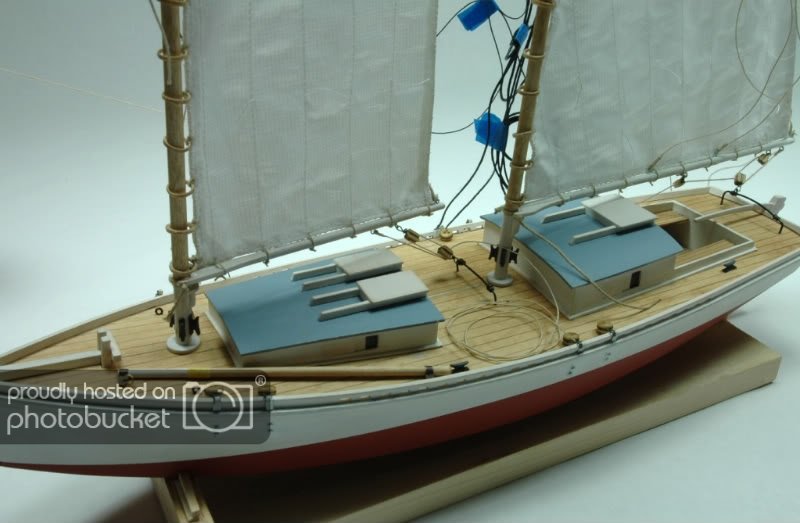
Photo 95
Adding the staysail and staysail horse.
More photos to come in this sequence in my next post................
Cheers,
Hopeful aka David
“there is wisdom in many voices”
Completed: Sharpie Schooner (Midwest) Reposting the build log at present
On the bench: Sultana (MSW) Reposting the log and keeping on with the build
Next: Lady Nelson (Amati Victory)
-
Hi Jeff,
Thanks for responding and adding additional important milling info to my post. The knowledge you shared is valuable to anyone who wants to mill their own materials.
I too use slit cutters but only on soft woods.e.g. polar and below on the hardness scale. When cutting hard woods I use carbide blades. I was cutting wood sheet material from a limb of boxwood the other day. As you know Jeff that stuff is hard as a brick. Had to use care even with my carbide blade.
If I lived in the USA I would save the equipment money and buy milled lumber from Hobby Mill!
Take care Jeff.
Cheers,
Hopeful aka David
“there is wisdom in many voices”
Completed: Sharpie Schooner (Midwest) Reposting the build log at present
On the bench: Sultana (MSW) Reposting the log and keeping on with the build
Next: Lady Nelson (Amati Victory)
-
HI Mates,
Post 16 of my Sharpie Schooner Build Log
Sailmaking continued from post 15.........
Photo 79
Need material to make sails. The best material is Egyptian cotton which has a very fine weave and is light as a feather. Boatbiuildesr who make sails prefer Egyptian cotton. I cut up an off white old shirt made of rip stop nylon. the weave was perfect for the scale of my vessel.
Photo 80
Placed the material over my pattern.
Photo 81
Used disappearing ink to trace the pattern. As soon as heat passes over the ink to disappears.......very clever product availabale at good sewing storess
Photo 82
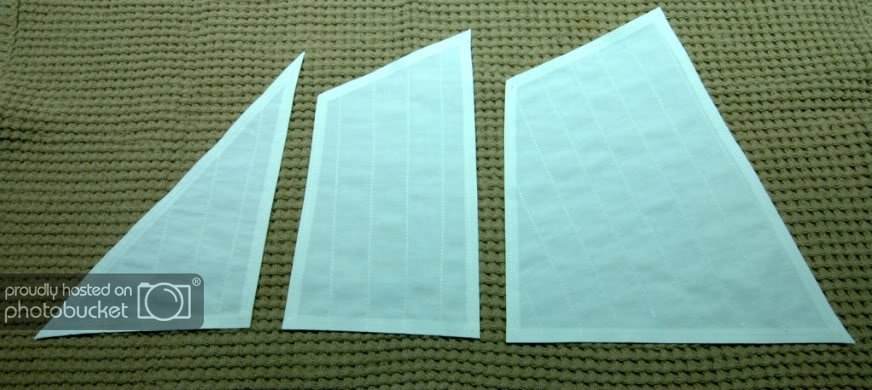
Making the sail.
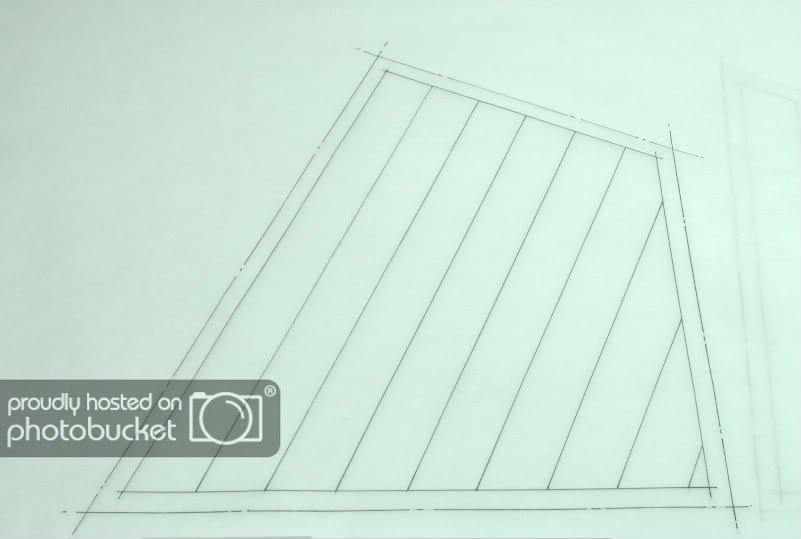
As stated, the rip stop nylon was placed over the ship’s sail plan and traced using disappearing ink. Photo 91 shows the completed sail plan for the main sail.
Please note the following:
- There is an outer and inner line around the pattern
- The inner line represents the size of the finished sail.
- The 8 inner angled lines represent where the faux sail material is to be stitched together. In the age of sail the width of sail material was about 2’ wide or less. Material of 18” widths was common. So when making a sail one wants to show the stitching.
Follow these steps to turn the pattern into sail that can be applied to the model.
- Stich by hand or sewing machine the 8 lines simulating where the sail material is joined together.
- Remove the material outside the outer line all around cutting slowly and carefully. Do not be in a hurry. When finished, you will have a sail just prior to creating the border.
- At this point turn the sail over and pin it to a piece of board to keep it from moving around. I placed pins through the inner outside boarder line in order to hide the pin holes after the fold over edge is formed.
- Fold the material along the inner line of the sail. Stich the folded edge of the material to the main body of the sail. I used an iron to press the edge of the fold which made it much easier to stich the fold.
Suggested you practice folding the edge and fitting the corners using a piece of copy paper.
Photo 83
Sewn seams.
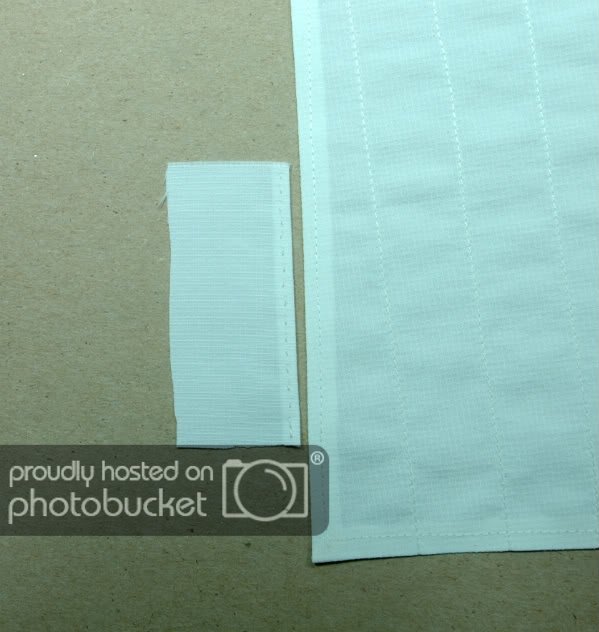
Photo 84
Fold made and sail finished to correct size per drawing.
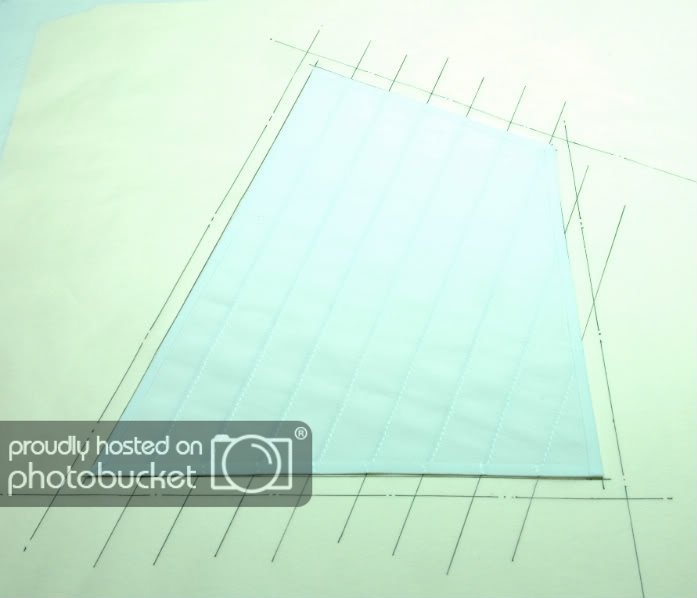
Photo 85
Adding the bolt rope.
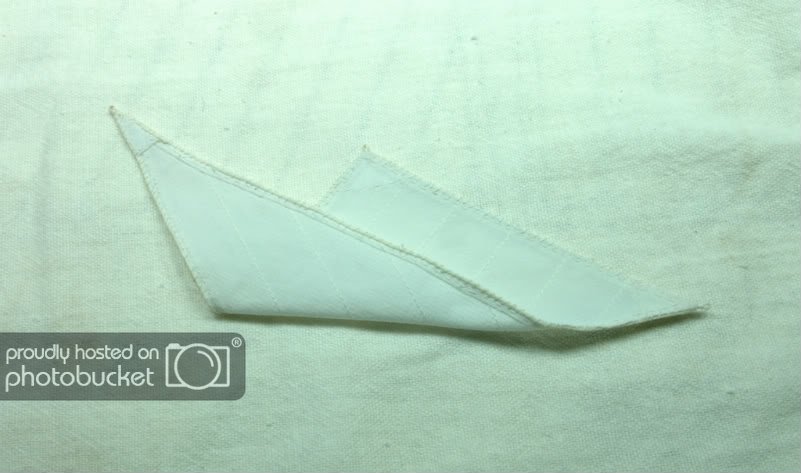
Photo 86
Completed sail set.
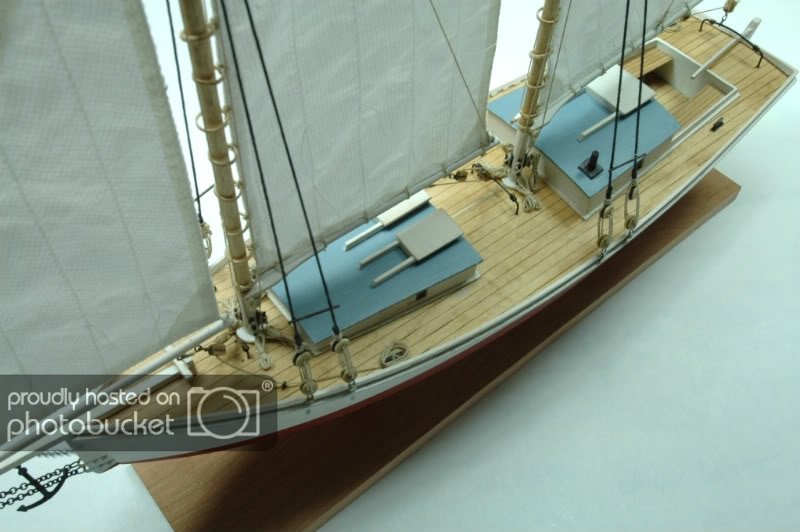
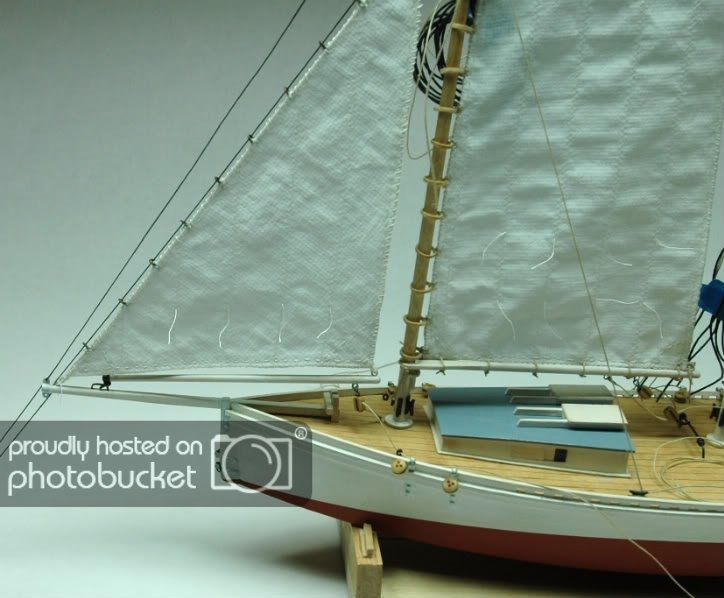
This is the first sail set I made. The folded edge was not to scale so I made a second set which is shown on the completed vessel.
Photo 87
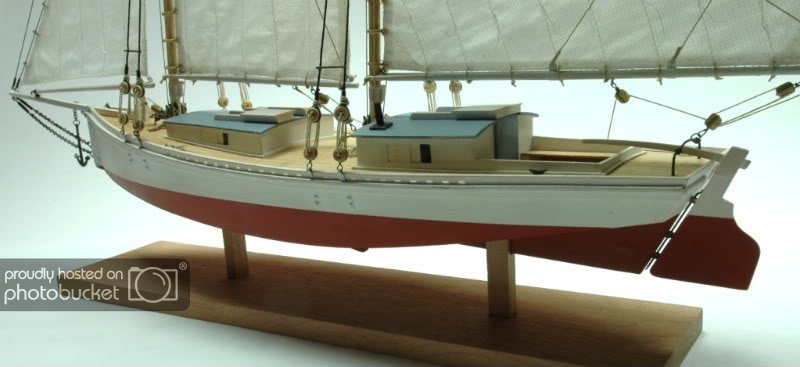
Close up of sails on completed vessel.
Happy sailmaking.
BFN.
Cheers,
Hopeful aka David
“there is wisdom in many voices”
Completed: Sharpie Schooner (Midwest) Reposting the build log at present
On the bench: Sultana (MSW) Reposting the log and keeping on with the build
Next: Lady Nelson (Amati Victory)
-
Hey Bob,
Sweet work. Really enjoy your detailed "how to" posts. To me its the heart and soul of the forum. Builders helping builders by sharing the tricks and techniques of a build. Sad to lose your original log....it was just super. I always enjoy visiting your site.
As for me I am slogging along reposting my Sharpie and Sultana logs.
Stay well!
Cheers,
Hopeful aka David
“there is wisdom in many voices”
Completed: Sharpie Schooner (Midwest) Reposting the build log at present
On the bench: Sultana (MSW) Reposting the log and keeping on with the build
Next: Lady Nelson (Amati Victory
-
He Buck,
Am learning bunches form you build log. Man are you clever with the small details that make a vessel unique. Love the oar lock!!!
Keep on.......
Cheers,
Hopeful aka David
“there is wisdom in many voices”
Completed: Sharpie Schooner (Midwest) Reposting the build log at present
On the bench: Sultana (MSW) Reposting the log and keeping on with the build
Next: Lady Nelson (Amati Victory)
-
Hey Buck,
Sorry to say I mixed the grey color myself using white and black. I placed a big blob of white on a 1/4" sheet of plate glass (10"X 12") I have, and mixed in a bit of black until I saw the shade I was looking for. Made enough of the color to fill a small plastic tube. As you can tell from the build I did not use much of medium grey.
Try a mix and see what you come up with. Be sure to think about how much paint you will need and how it will be stored.
Keep on with the build.
Cheers,
Hopeful aka David
“there is wisdom in many voices”
Completed: Sharpie Schooner (Midwest) Reposting the build log at present
On the bench: Sultana (MSW) Reposting the log and keeping on with the build
Next: Lady Nelson (Amati Victory)
-
HI Mates,
Post 15 of my Sharpie Schooner Build
This is the 3rd time on this post by getting caught in miserable time outs on the post, blah!!! So now I am creating all posts in word with a transfer to the forum.
Thanks to Gerty, Keith, BobB, and Russ for checking in on the repost of my Sharpie Schooner. Keith: Will get back re making mast hoops.
This post is about making sails for my vessel. As I was building and thinking ahead to the finish line I was concerned the Sharpie would look a bit blank without sails. My favorite “how to” book, Ship Building from Stem to Stern by Milton Roth has a chapter devoted to sails and sail making. Russ helped me along the way giving great advice. as usual. Thanks Russ!
Before moving on there are 4 terms I will be using from time to time. The luff is the part of the sail adjacent to the mast. Leech is the portion of the sail opposite the luff. The top of the sail is the head and the bottom the foot. Oh, there is no leech on a sib or staysail as they are triangles.
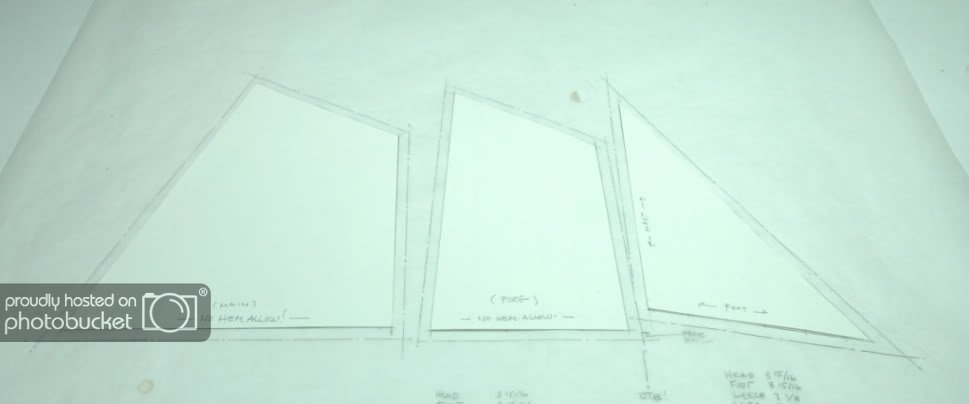
Take a look at the sail plan for the Sharpie. Some build kits will not have a sail plan but one can figure out their dimensions with a little help from, Roth’s book.
Photo 76
To make sails you need a sail plan drawing. Mine came with the kit.
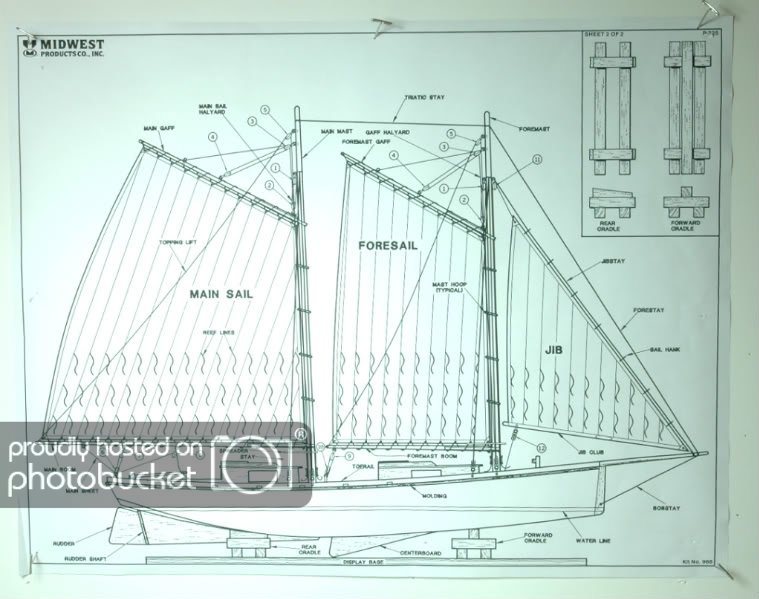
Photo 77
I traced the original drawing to to make a sail pattern.

Photo 78
Made a card copy of each sail and place them agaist the masts and booms to make sure they fit as in not to large or small, very very important. A tip Russ gave to me way back.
More to come..........
Cheers,
Hopeful aka David
“there is wisdom in many voices”
Completed: Sharpie Schooner (Midwest) Reposting the build log at present
On the bench: Sultana (MSW) Reposting the log and keeping on with the build
Next: Lady Nelson (Amati Victory)
-
Hi Wayne,
Thanks for your post. Let me know if I can help out in any way.
BFN
Hopeful aka David
“there is wisdom in many voices”
Completed: Sharpie Schooner (Midwest) Reposting the build log at present
On the bench: Sultana (MSW) Reposting the log and keeping on with the build
Next: Lady Nelson (Amati Victory)
-
Hi mates,
Living in Canada one has little access to boat building materials in country and, anything bought from the USA is expensive in terms of duty and freight charges. That's the reason I went to the Brynes machines......self sufficiency in terms or sizing wood material in my species of choice.
Geoff: Thanks for your post.
Dan: The Jim Brynes thickness sander used sandpaper attached to a drum. Easy to use and works like a charm. I took wood down to .05mm in thickness with no problem.
Cheers,
Hopeful aka David
“there is wisdom in many voices”
Completed: Sharpie Schooner (Midwest) Reposting the build log at present
On the bench: Sultana (MSW) Reposting the log and keeping on with the build
Next: Lady Nelson (Amati Victory)
-
Hi Mates
Here are some photos indicating how I mill wood. Used a band saw, JB table saw, and a JB thickness sander.
Shows progression of lumber sizes starting with a milling blank through finished planks. Wood is Sugar Maple (soft maple).
Photo 1
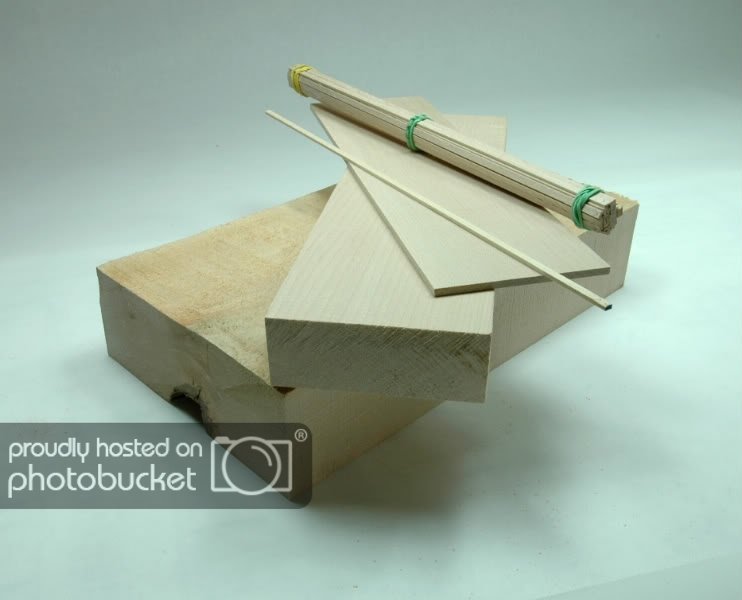
Photo 2
Step 1 was to run my maple blank through the thicness sander to make it perfectly flat on both sides. The blank is 1 3/4" thick and approximately 14" long.
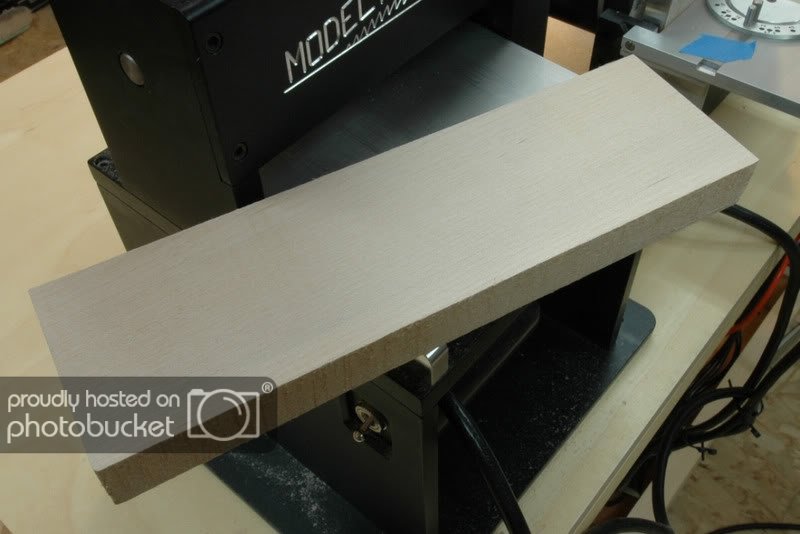
Photo 3
Ran the material through bandsaw to desired thichness. Note that blanks are cut from face grain, not edge grain.
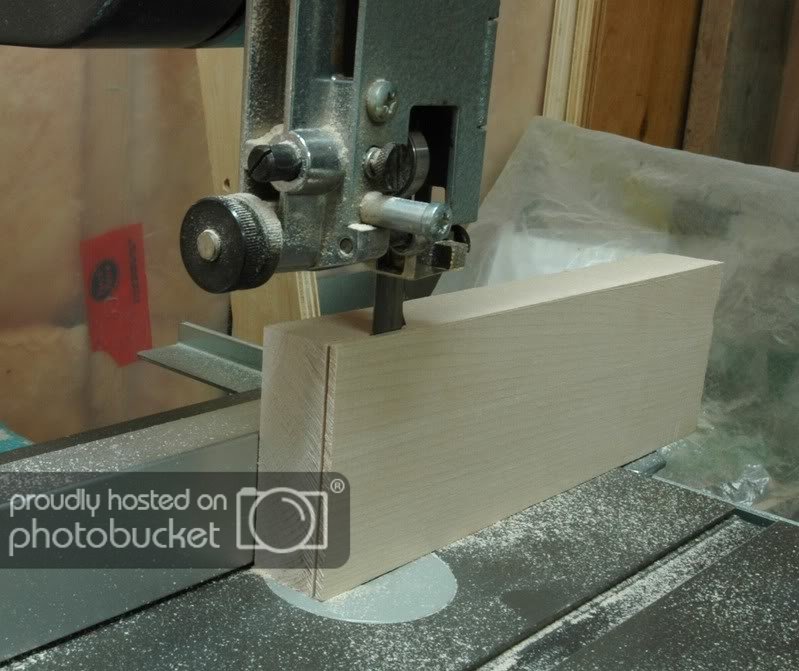
Photo 4
Plank blank is rough on one side. Saw marks will be removed by running blank though the the thicknes sander.
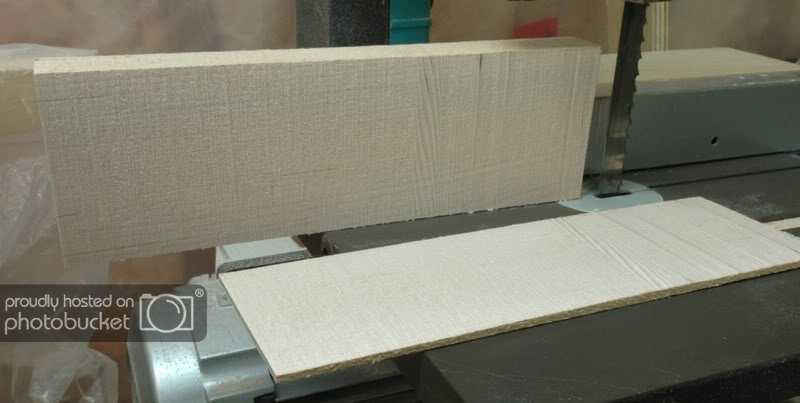
Photo 5
Wodd splitter placed on table just behind blade. The splitter avoids chatter as the wood is passed away from the blade.
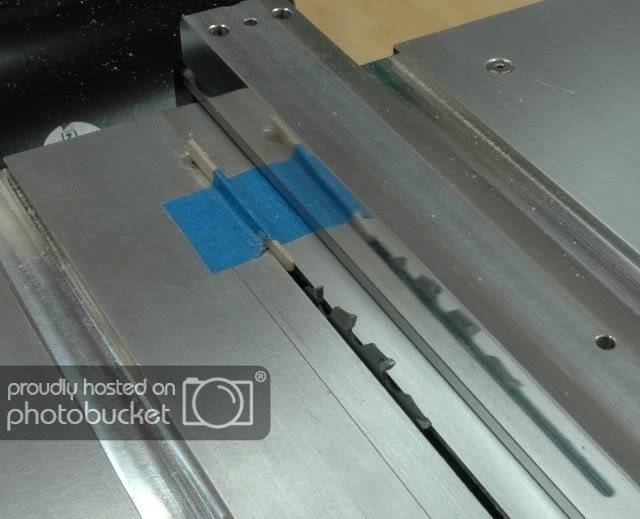
Photo 6
Feed the plank blank through the saw.
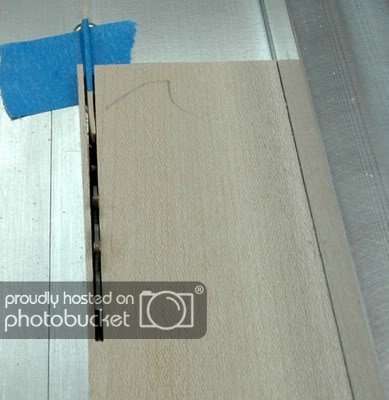
Photo 7
Finished plank.
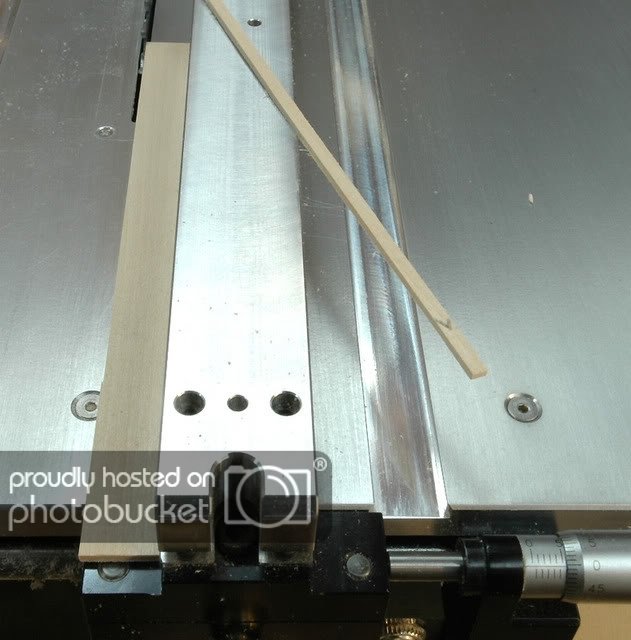
Photo 8
Shows finished planks and the micrometer adjustment at the lower right edge of the photo. Microadjust helps to get all [lanks the same width each and every time.
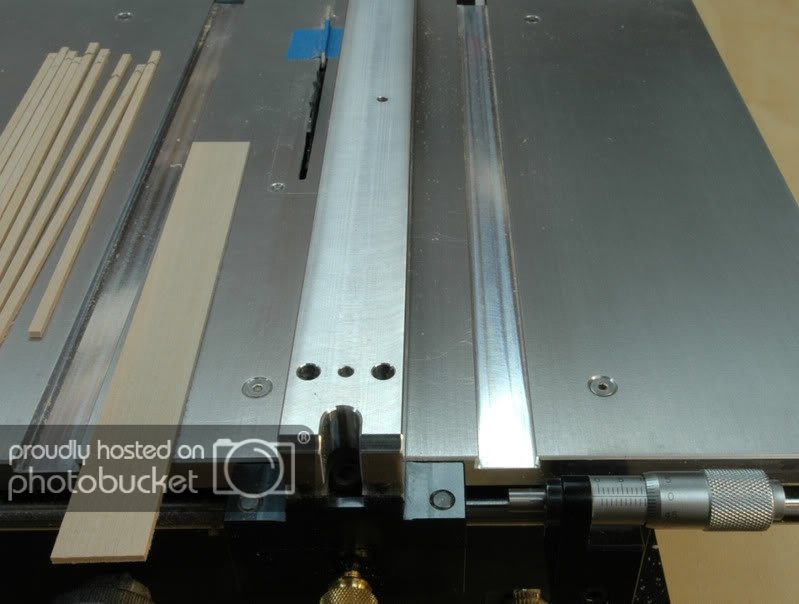
In closing, Brynes tools deserve the high praise received from its owners. His tools are amazingly accurate, easy to use, and great fun.
BFN
Hopeful aka David
“there is wisdom in many voices”
Completed: Sharpie Schooner (Midwest) Reposting the build log at present
On the bench: Sultana (MSW) Reposting the log and keeping on with the build
Next: Lady Nelson (Amati Victory)
-
Sakcha,
Thanks for reposting your log. I hope MSW will have hundreds by year's end. Just takes time.
Great photos of a sweet build. Congrats!!!
BFN
Hopeful aka David
“there is wisdom in many voices”
Completed: Sharpie Schooner (Midwest) Reposting the build log at present
On the bench: Sultana (MSW) Reposting the log and keeping on with the build
Next: Lady Nelson (Amati Victory)
-
HI Michael,
Glad you are back. Really enjoy your workmanship and detailed log. She sure is a big gal!
Will enjoy following your build from here.
Cheers,
Hopeful aka David
-
Hi Richard,
Beautiful build u have there. Your terrific photos are appreciated. Will enjoy following your build.
Cheers,
Hopeful aka David
“there is wisdom in many voices”
Completed: Sharpie Schooner (Midwest) Reposting the build log at present
On the bench: Sultana (MSW) Reposting the log and keeping on with the build
Next: Lady Nelson (Amati Victory)
-
Hi Mates,
Post 2 of my Sultana repost
Post relates to removing bulwarks.
Photo 10
Bulwarks present
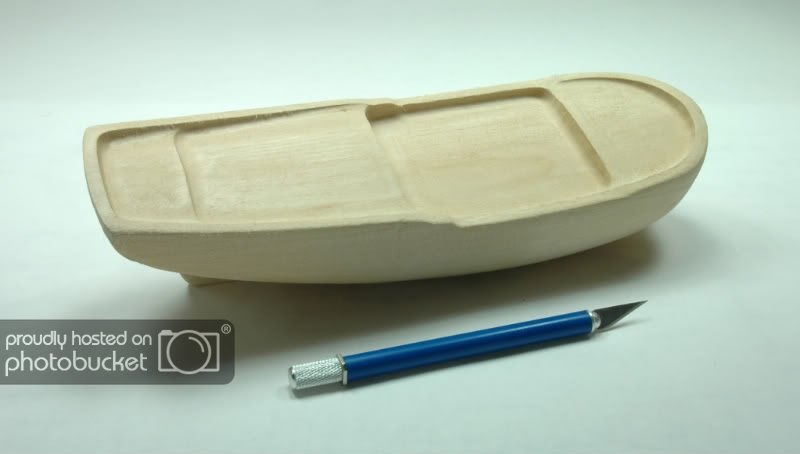
Photo 11
Tools used to remove bulwarks
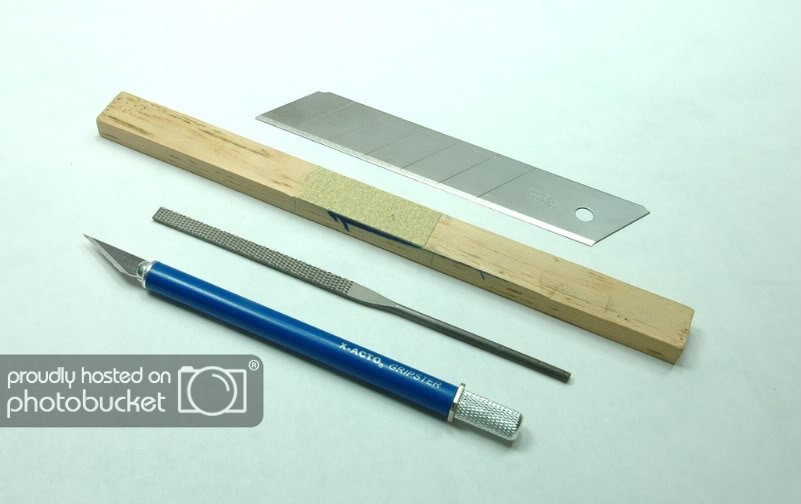
Photo 12
Bulwarks removed.
Try not to alter the camber (curve fromn center to edges) when removing the bullwarks.
Next step is to true the length of the hull to the drawing dimensions.
Cheers,
Hopeful aka David
“ there is wisdom in many voices”
Completed: Midwest Sharpie Schooner (Reposting the build log at present)
On the bench: MSW Sultana (Reposting the log and keeping on with the build)
Next: Amati Victory Lady Nelson
-
Hi Pete,
It nice to make contact with you again. Trust all is well with you and yours!
Thanks for looking in on the log. Please repost you Sultana build log. Lots of good stuff in the log.
Stay well and happy building.
Cheers,
Hopeful aka David
“ there is wisdom in many voices”
Completed: Midwest Sharpie Schooner (Status: Reposting the build log at present)
Current: MSW Sultana (Status: Reposting the log and keeping on with the build)
Next: Amati Victory Lady Nelson
-
-
Hey Popeye,
Am enjoying the build!
Your build logs are just fantastic and appreciated. Thanks for taking the time to go into the smallest of detail. We all are learning from your builds.
Keep on my friend!
BFN,
Hopeful aka David

Sultana by Hopeful - Model Shipways - Scale 1:64 - Bashed Kit
in - Kit build logs for subjects built from 1751 - 1800
Posted · Edited by hopeful
Hi Mates,
Post 5 of my Sultana Build Log
Photo 20
BFN.
Cheers,
Hopeful aka David
“there is wisdom in many voices”
Completed: Sharpie Schooner (Midwest) Posted on kit build log.
Current: Sultana (MSW) Reposting log and continuing on with the build)