


hopeful
-
Posts
278 -
Joined
-
Last visited
Content Type
Profiles
Forums
Gallery
Events
Posts posted by hopeful
-
-
Hi Mates,
Post #1 of my Sultana Build
The Sultana is my second build and is in progress....not quite 50 percent completed. I Will repost my build log up to this point and continue posting as I continue building the vessel.
For the repost, I will provide photos and return and add some dialog later. Each post will be numbered as well as each photo so future builders can communicate with me efficiently if they any questions as they build their own Sultana.
Please note I am building the vessel following MSW's directions as well as Chucks excellent tutorial. I jump around the instructions a bit when building. My recommendation is that you follow along using Chuck's practicum.
As Shortgrass indicated there were a number of Sultana builds that we builders could refer to when building our own Sultana's. Some of the builds were completed and others not. All of the builds were lost so it is important we get a few Sultana builds back on the forum. Hopefully other Sultana builders will repost their logs as well.
Photo 1
Box art
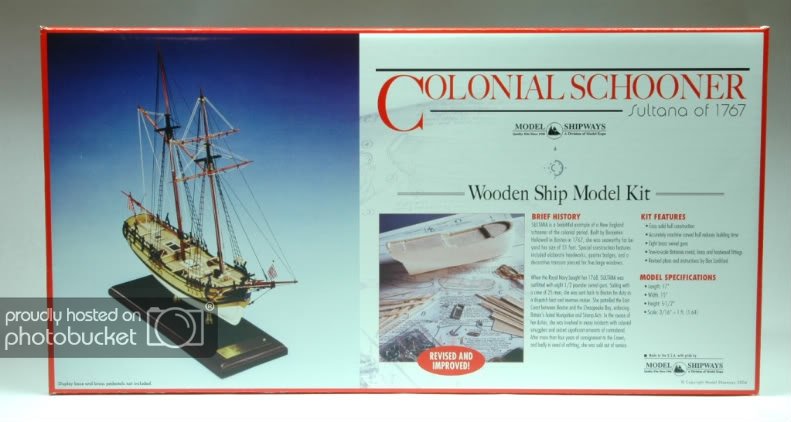
Photo 2
Solid hull
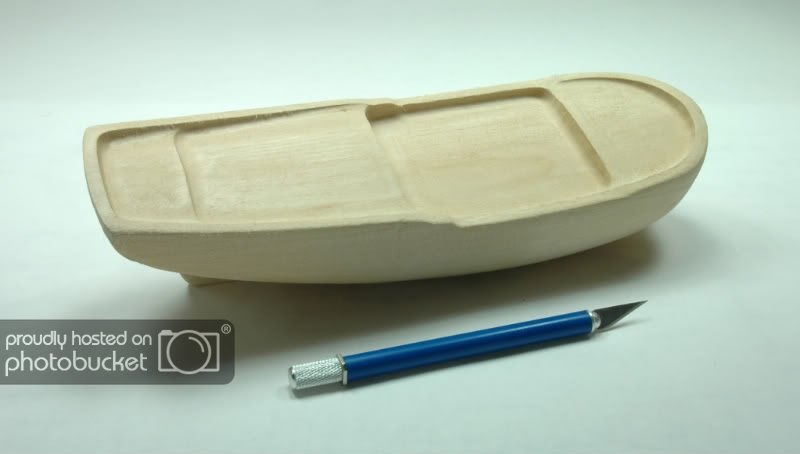
Photo 3
Wood build materials
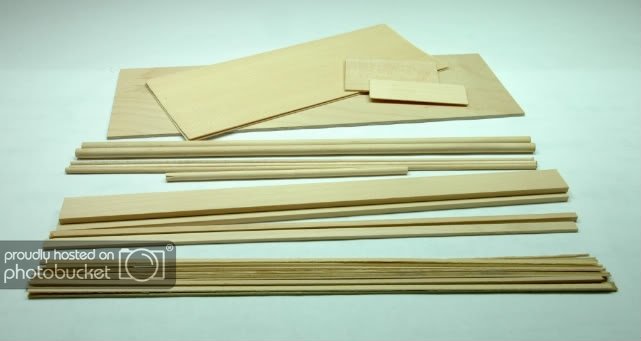
Photo 4
Ships boat
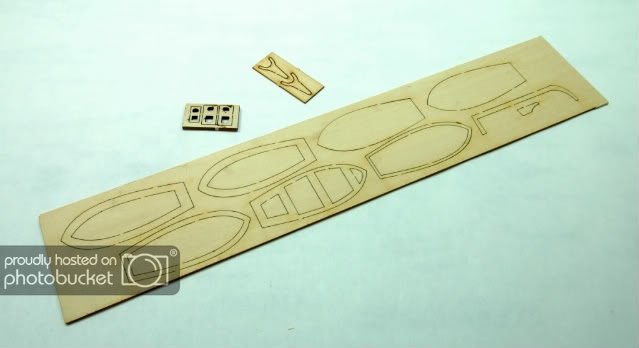
Photo 5
Bits and pieces along with rigging cord
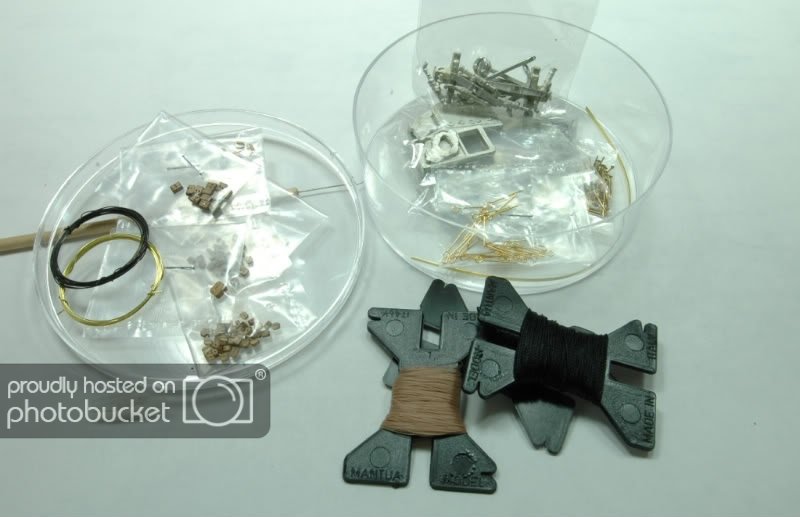
Photo 6
Flags
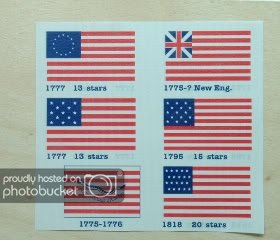
Photo 7
Hull templates

Photo 9
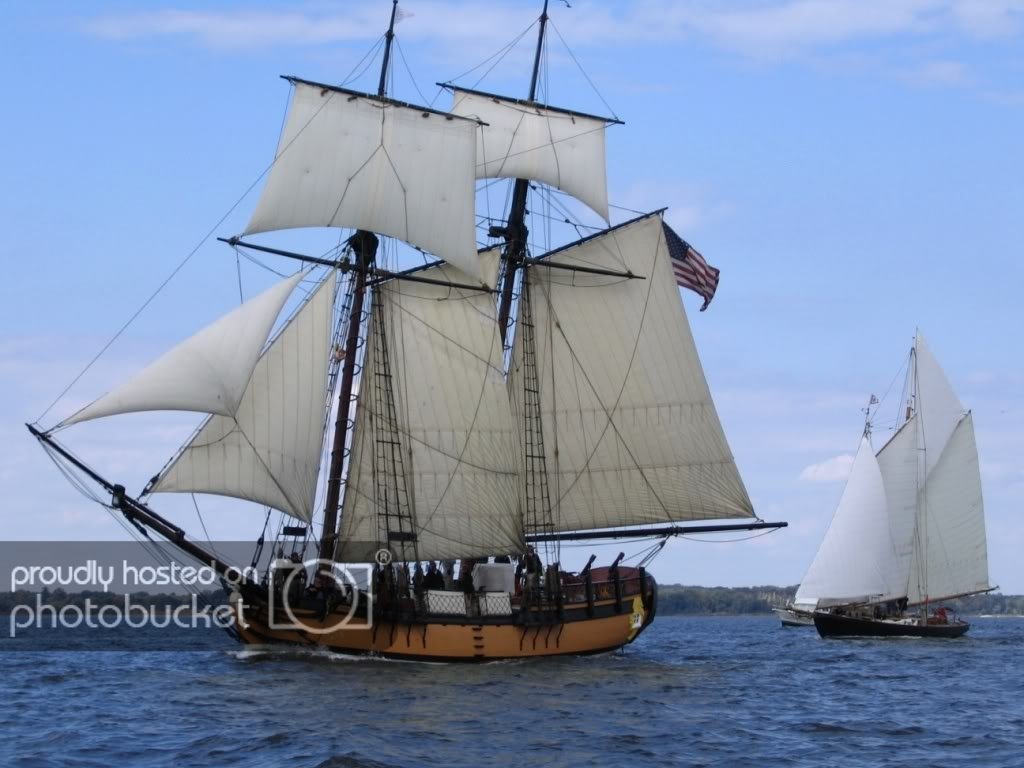
I created a note book for my Sultana build incorporating both the MSW plans and Chucks Practicum.

This replica show the beauty of the Sultana on the water.
The build begins. More later.......
BFN,
Hopeful aka David
-
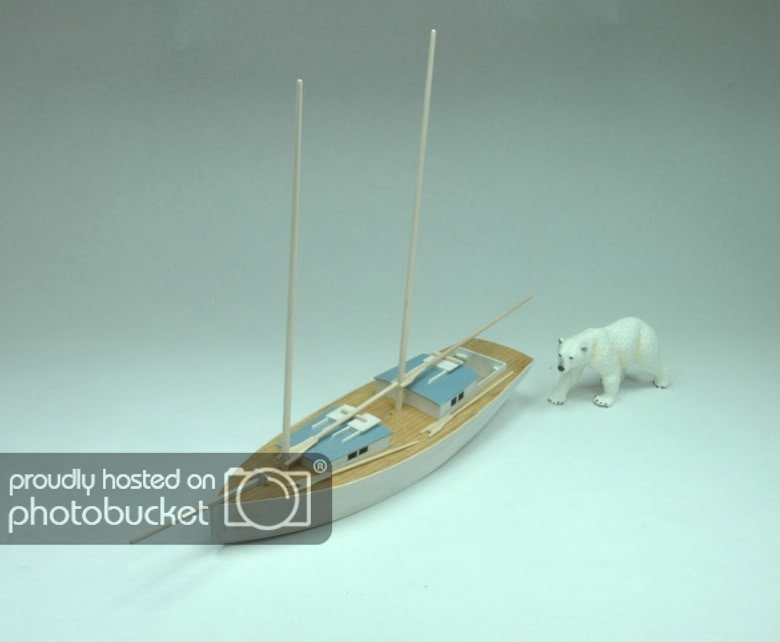
Hi Mates,
Post #14 of my Sharpie Build Log
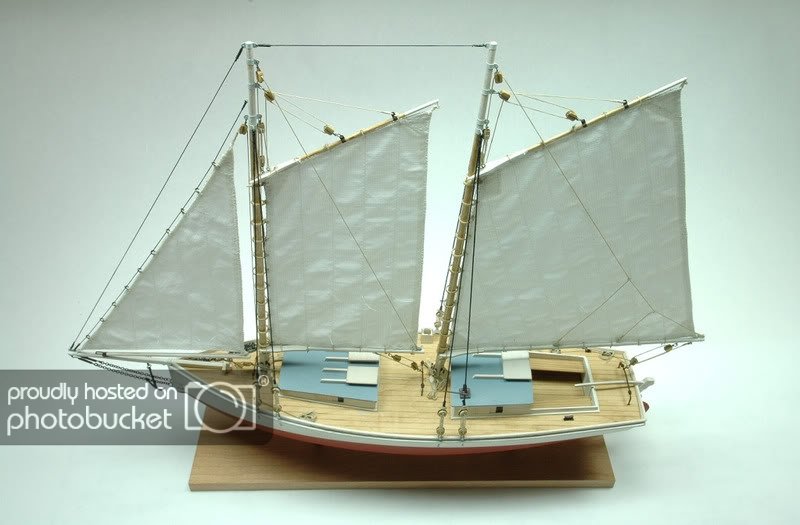
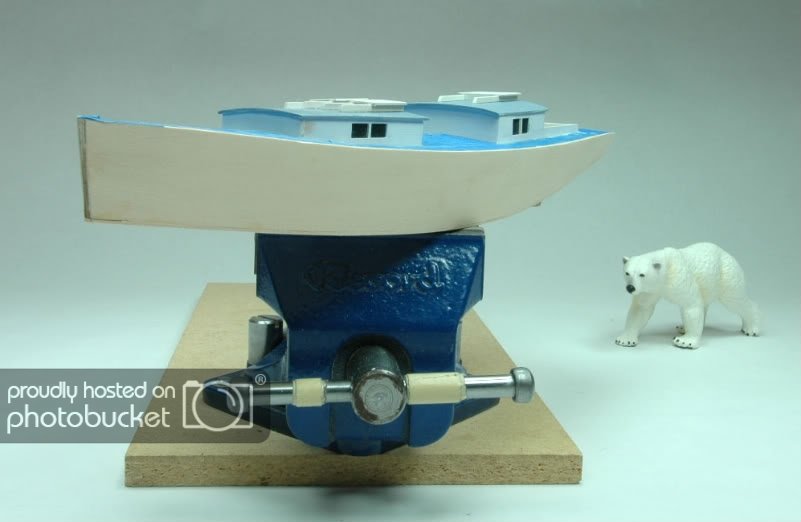
This post is about making sails for my Sharpie Schooner. Here is a beauty shot of my completed vessel highlighting the sails.
Photo 76
More to come.
BFN,
Hopeful AKA David
-
Hi,
Post #13 of my Sharpie Schooner Build Log
Photo 70
Added chainplates and bob stays.....brass parts primed and painted!
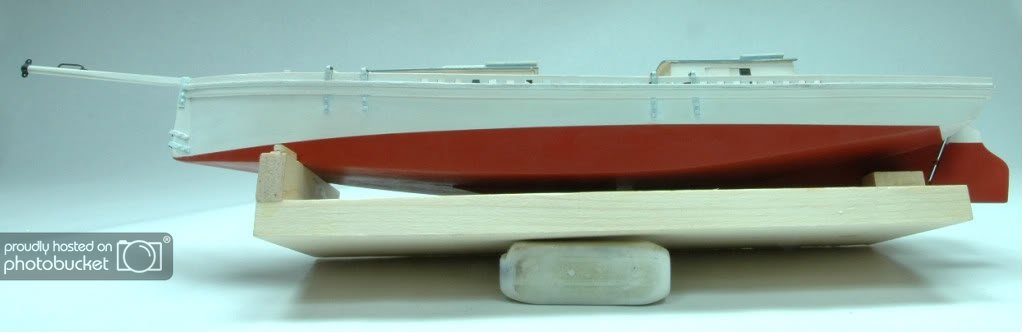
Photo 71
Deck compoments added including eye bolts, cleats, and main and fore mast boom horses (travelers).
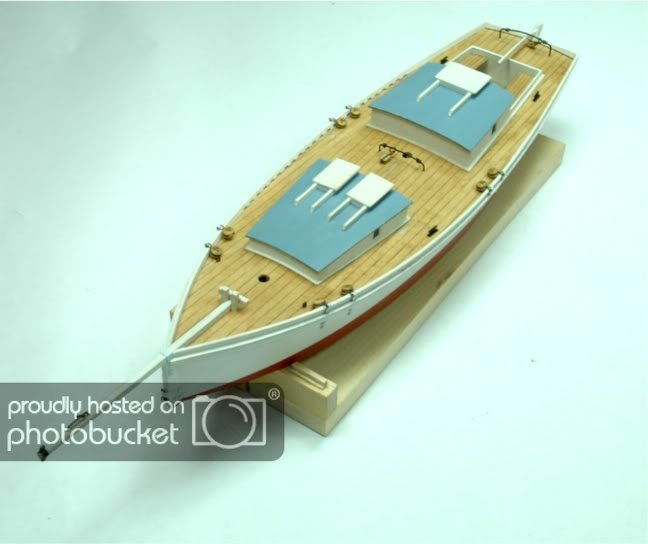
Photo 72
Two methods of making rings to connect the deadeyes to the chain plates.
First twisted wire
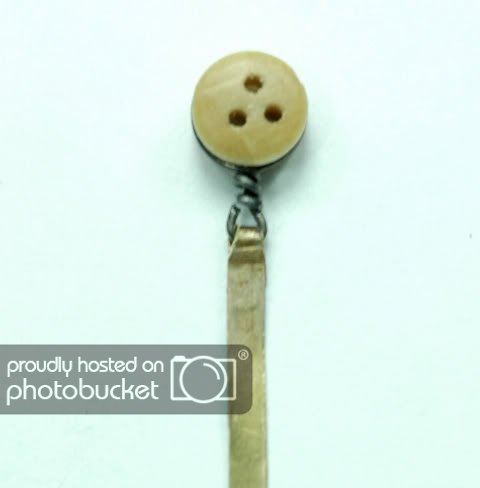
Photo 73
Second was making a ring with solver soldered joint crimped around deadeye. I used this method. Bright piece is a dime to show scale.
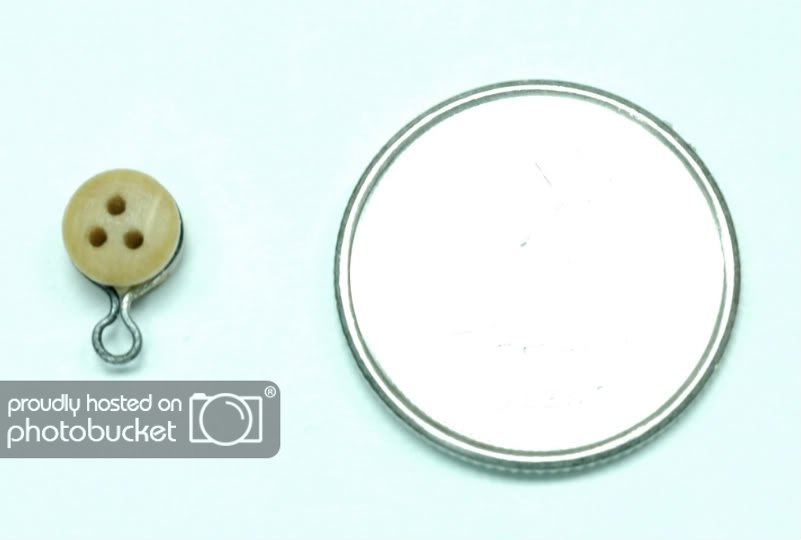
Photo 74
Made mast hoops and mast coats. The mast hoops were mde of edge grain pine, the mast hoops of basswood. Mast hoops can also be made of card with wonderful results.
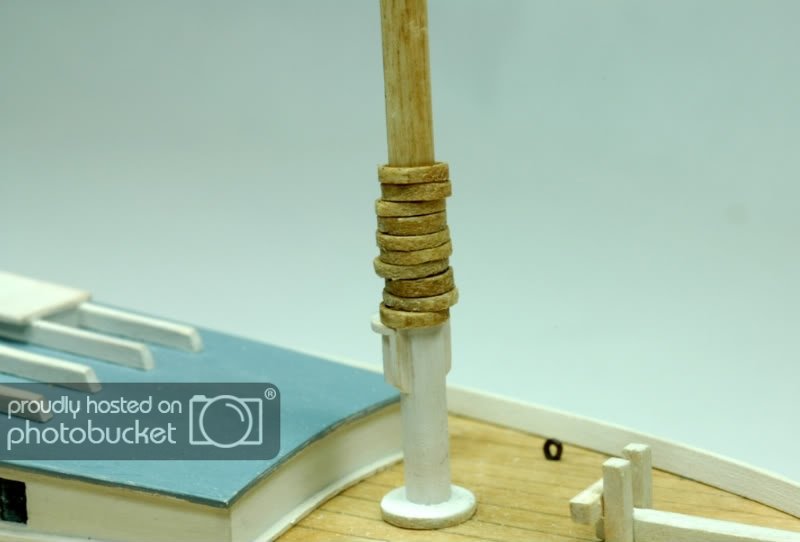
Photo 75
To show scale of mast hoops!

Sails are next.
BFN,
Hoperful aka David
-
Hi,
Post #12 of my Sharpie Build Log
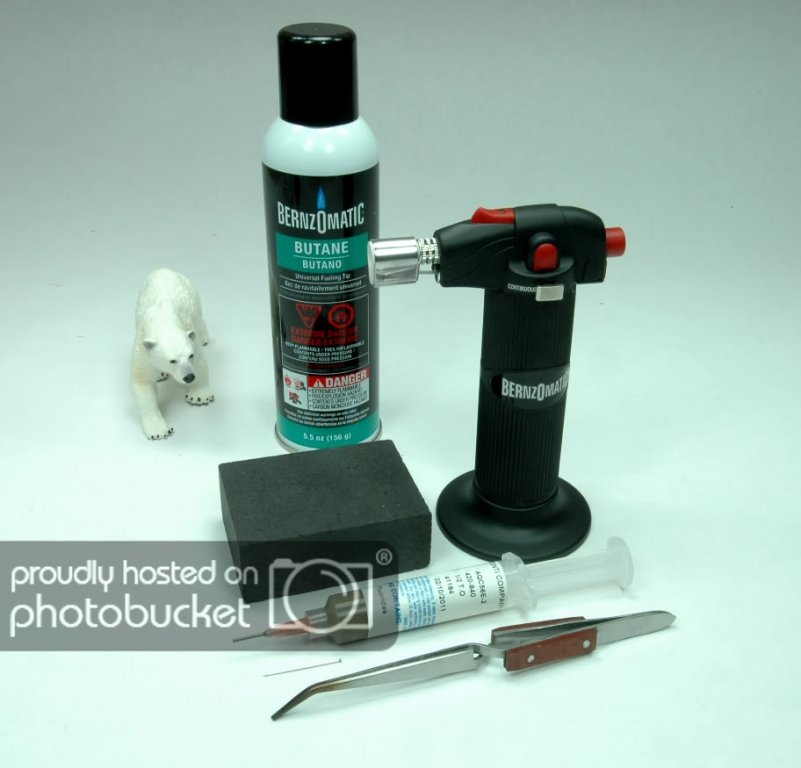
Photo 63
At this pont I began to make metal parts. Photo shows my equipment all of which was bought for under $75USD. Do not be afraid to learn to silver solder. All it takes is some practice. Check out Russ's practicum on the subject and get started.
Here are the steps I took to make the ring for the end of the bow sprit. Most other metal parts were made using the same approach.
Photo 64
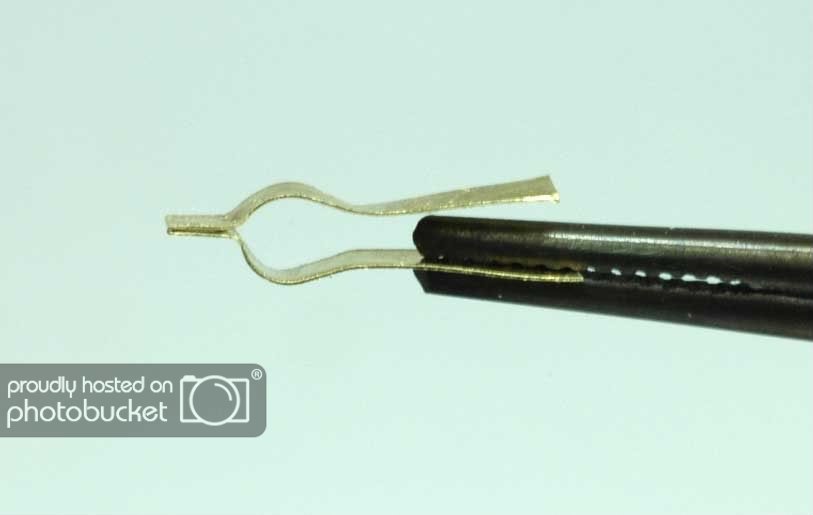
Photo 65
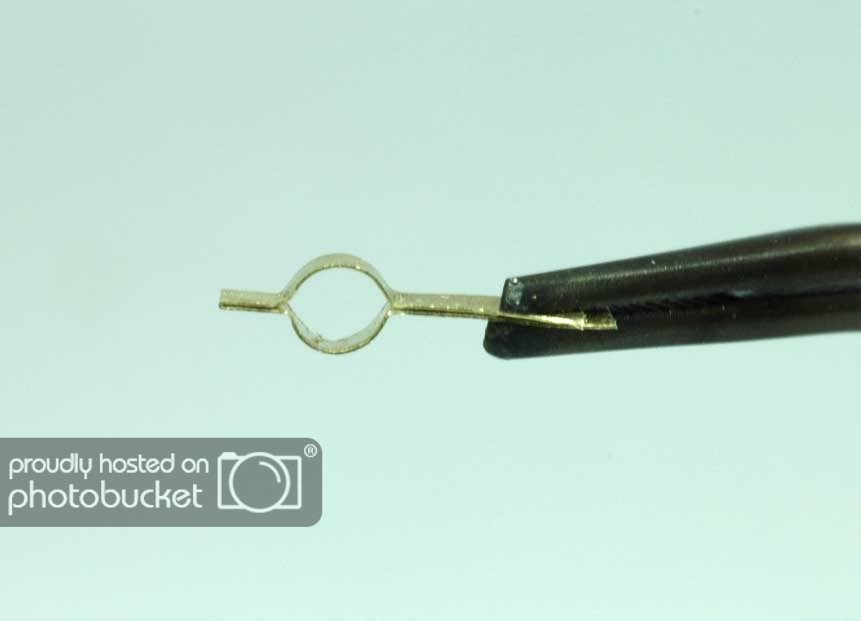
Photo 66
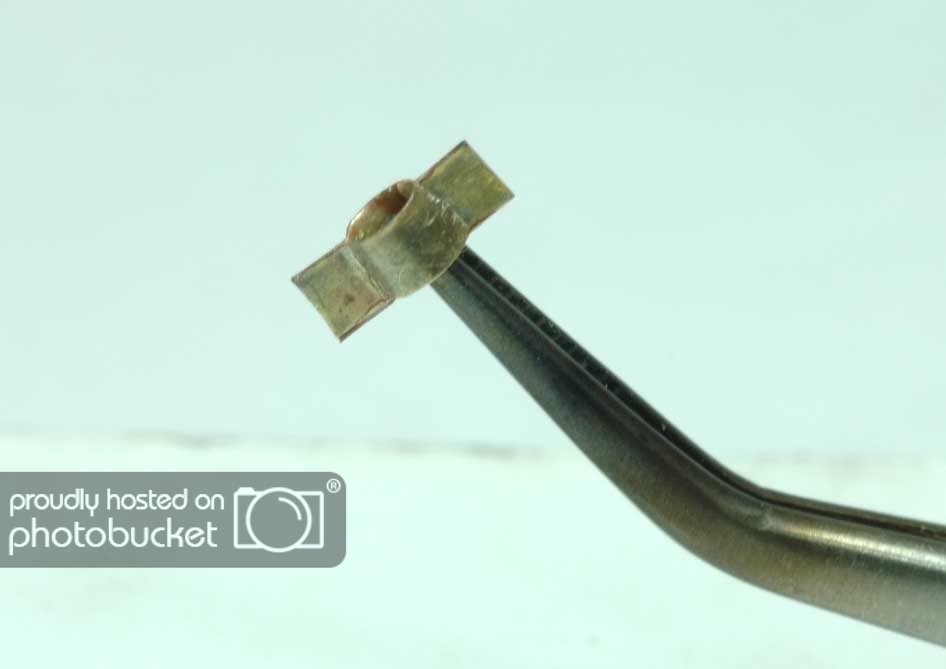
Photo 67
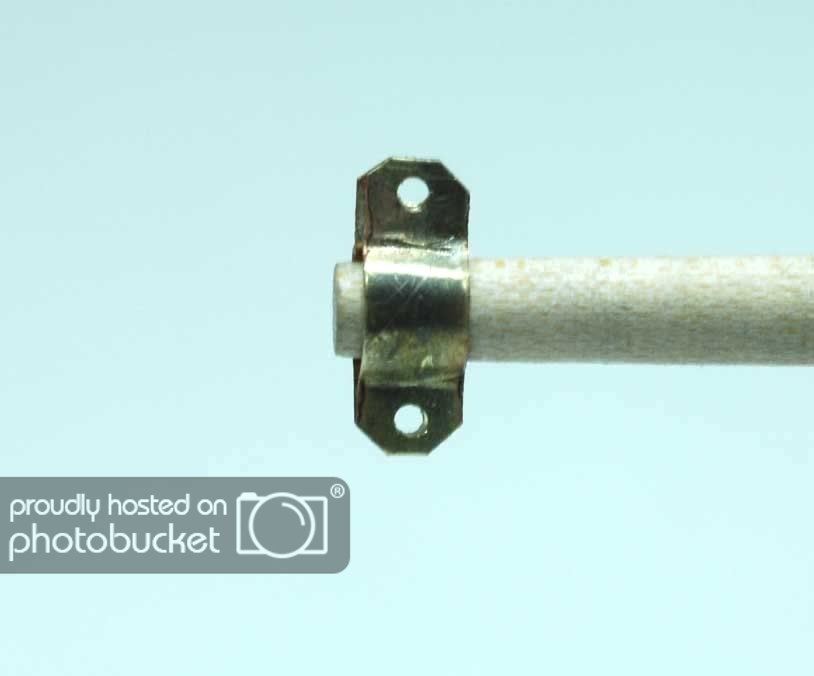
Photo 68
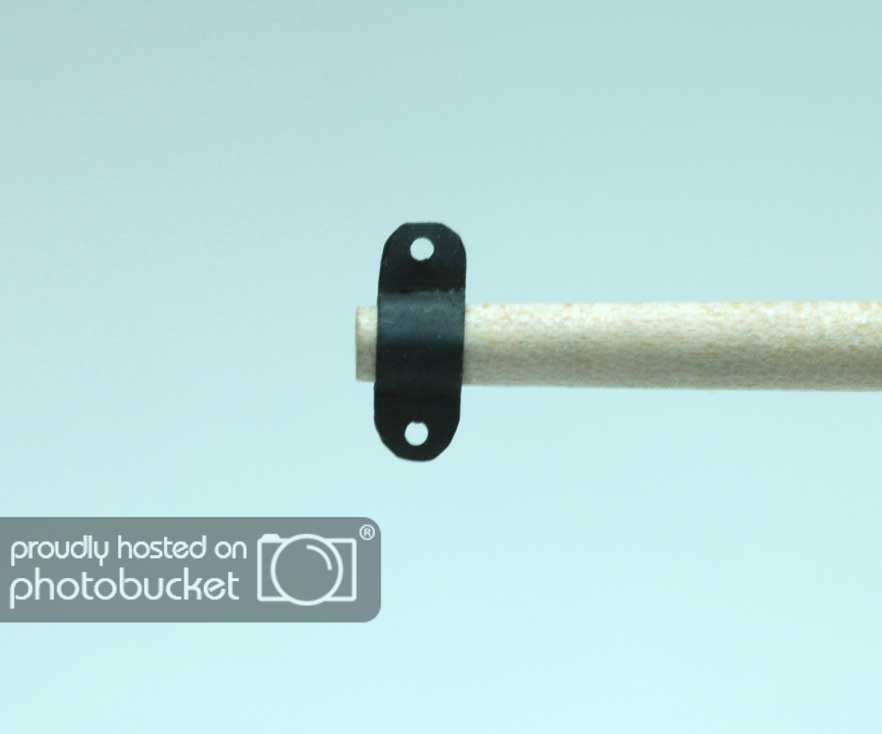
Photo 68A
Metal parts for masts.
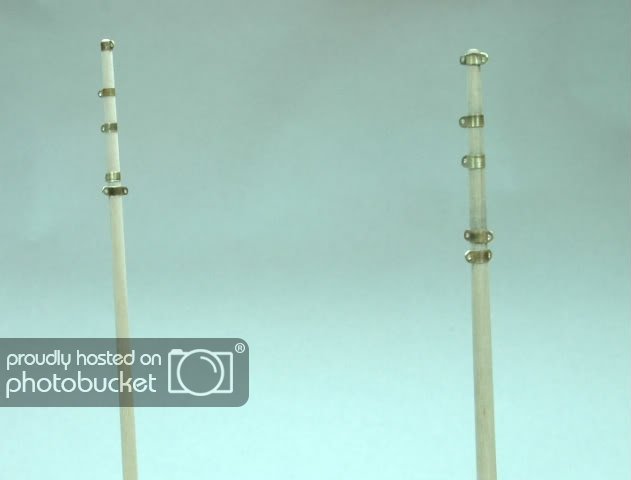
Photo 69
More to come......
BFN,
Hopeful aka David
-
Hi Mates,
Post #11 of my Sharpie schooner Build Log
Hull painting continues.....
Photo 59
Please note that I laid Timiya tape, comes in many different widths, to keep the paint below the water line. To avoid the paint from bleeding under the tape, I first applied a very light coat of clear acrylic at the lower edge of the tape.....keep it a thin coat!!!!

Photo 60
First of 3 coats of red oxide acrylic paint. Each coat was sanded to 400 grit before poceeding with the following coat. In the end the paint was as smooth as glass without any imperfections. Haste makes wast when not taking time to get it right.
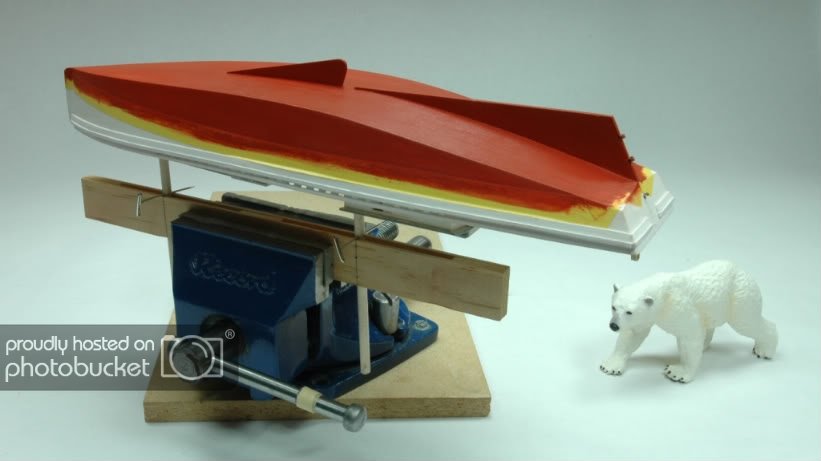
Photo 61
Hull and rudder paintwork completed.
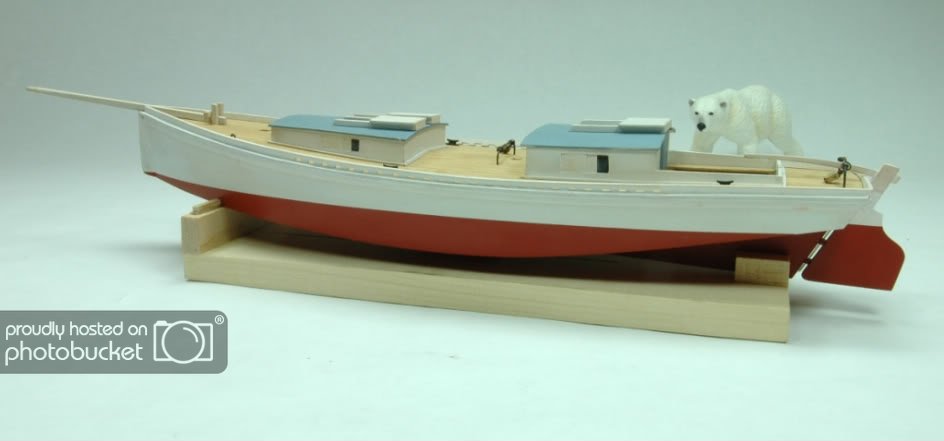
Photo 62
One must be very patient with paint work. Some of the builders on the site are masters at brush painting; so good their paintwork looks like air brush work.
More to come......
Cheers,
Hopeful aka David
-
Hi Mates,
Post #10 of my Sharpie Schooner Build Log
Photo 54
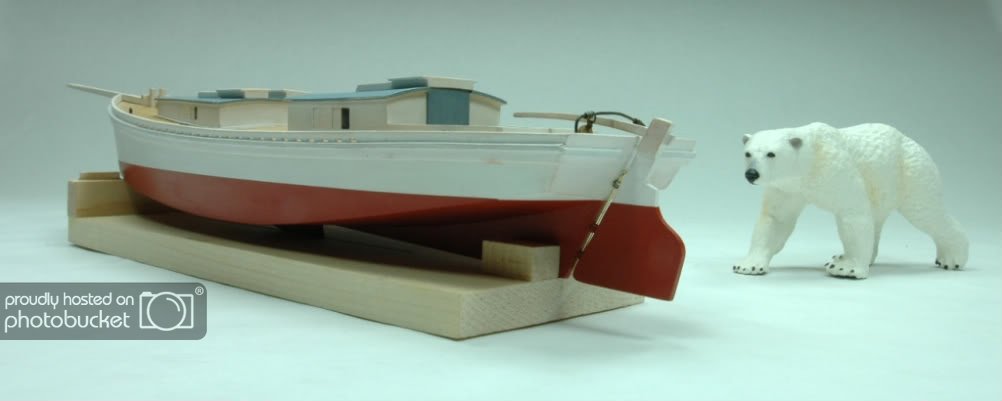
Adding the rub rail, combing, and gammoning iron.
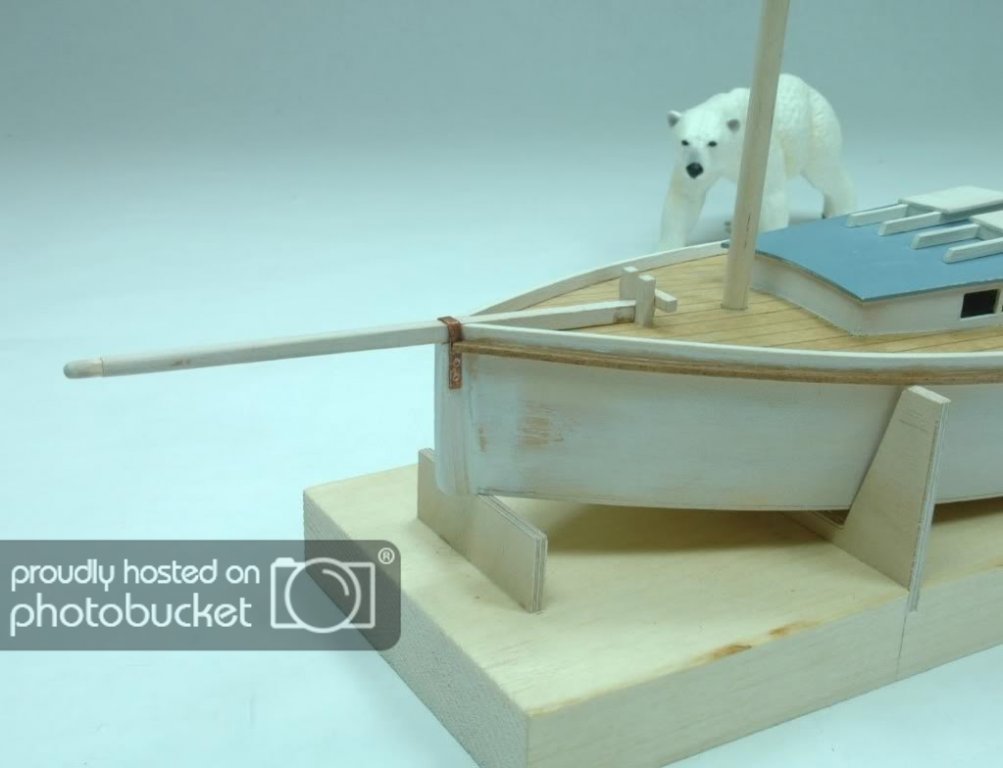
Photo 55
Making the gammoning iron from a piece of copper tube. A great exercise. I now make metal parts from sheet brass, much easier.
Photo 56
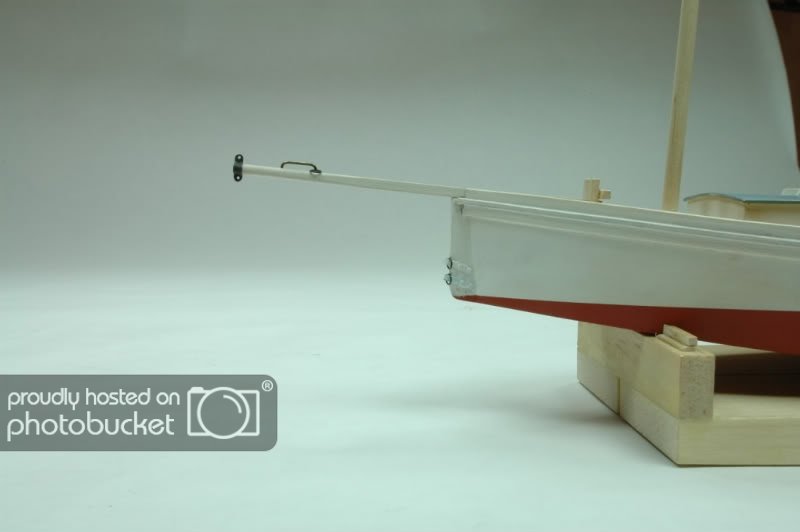
I changed the design of the tiller and rudder from an inboard to outboard design. After a few tries this photo shows the final design.
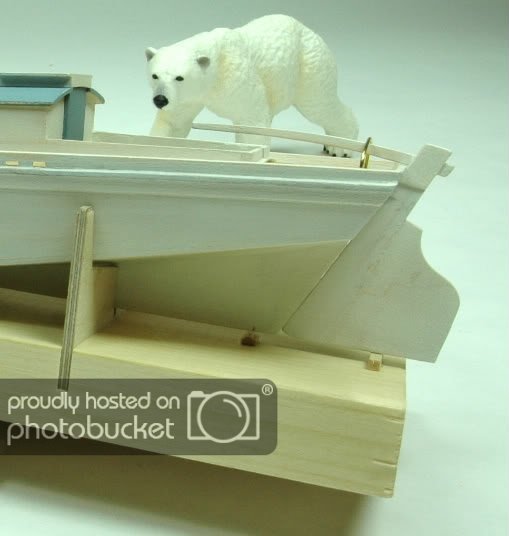
Photo 57
Time to add the water line.
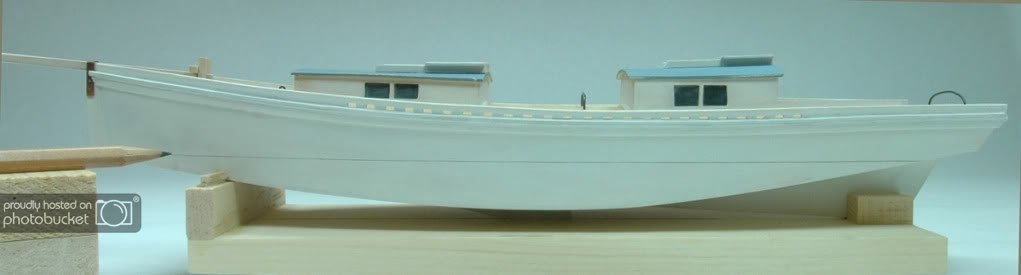
Photo 58
Add the functional rudder and waterline. The main boom horse is also finished. Note I added sliders to the window openings and combing around the forward storage locker and the main cabin.
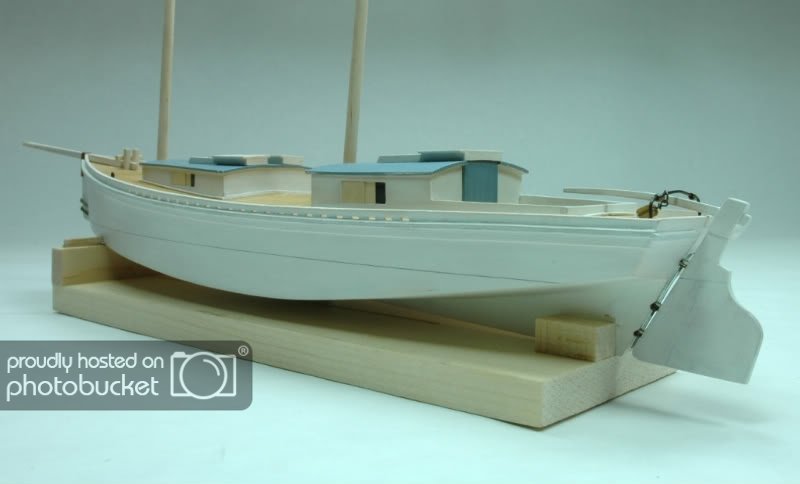
Next comes paint, me thinks!
BFN
Hopeful aka David
-
Hi Dave,
Thanks for the kind comments. At the time of the build it was anything but easy for me to build but I muddled through with a lot of help from the forum.
Thanks fo following the build.
BFN,
David
-
Hi Gerald,
The Phantom makes a good looking vessel when finished. You are off to a great start! Wish you well and will follow the build.
BFN
Hopeful aka David
-
HI,
The repost saga continues and I thank all builders who have taken the time to repost their logs!!!
Post #9 of my Sharpie Schooner Build
Time to build a simple cradle to work the vessel from here.
Photo 47
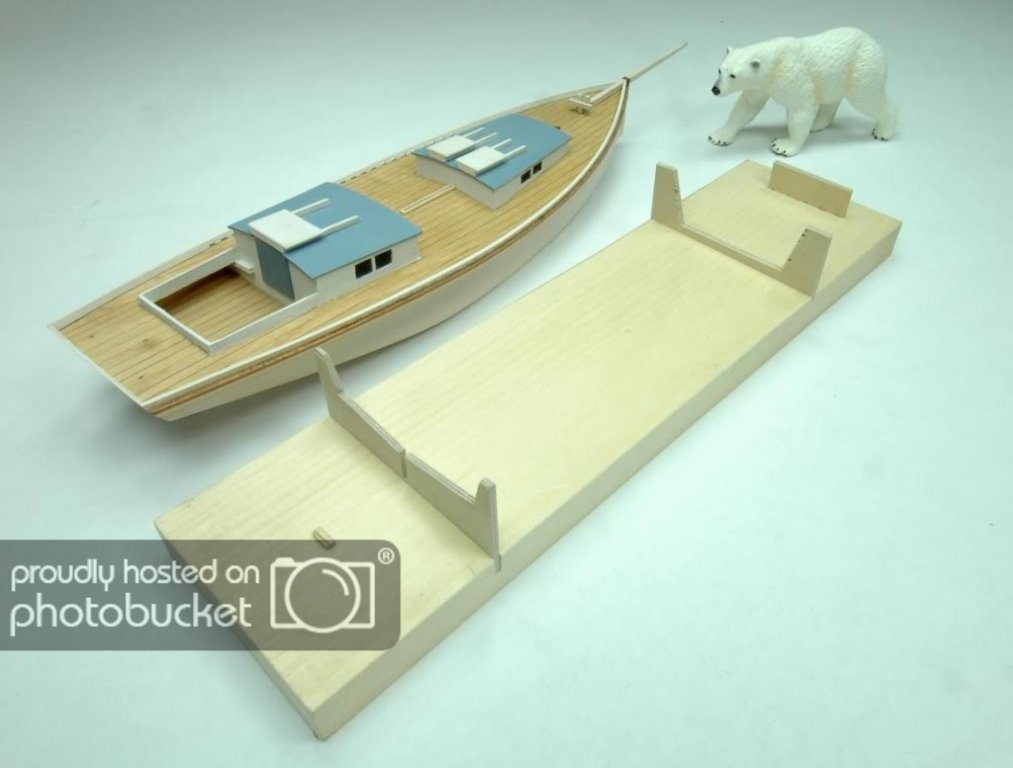
Photo 48
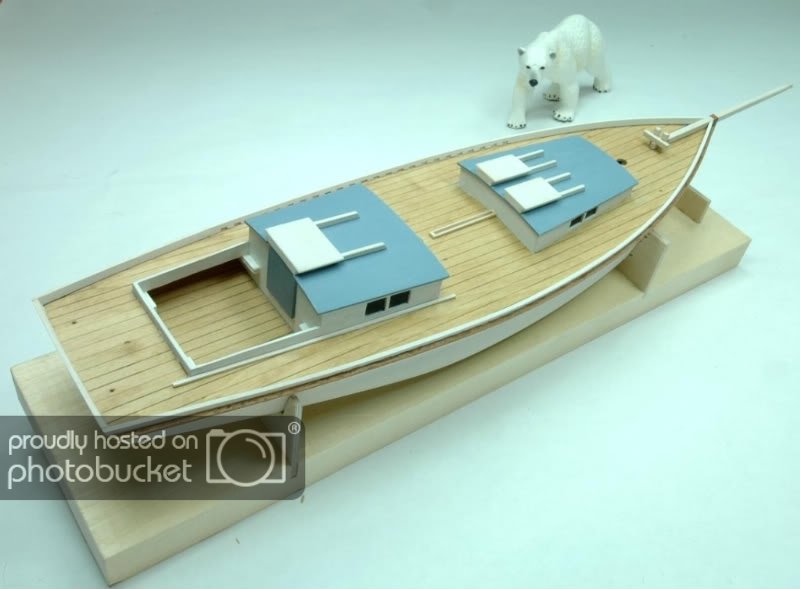
Now to make the toe rail. Take a look at steps 89-92 of the instructions as to how to make the toe rail per kit instructions. The toe rail I made is different from the one in the instructions as it employs many more scuppers similiar a real vessel.
Photo 49
Toe rail prior to be added to the vessel.
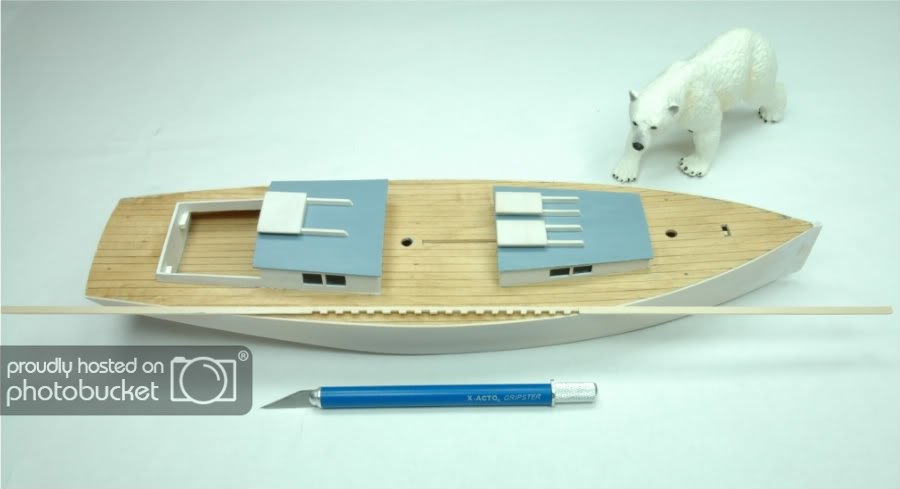
Photo 50
Jig made to make the toe rail.
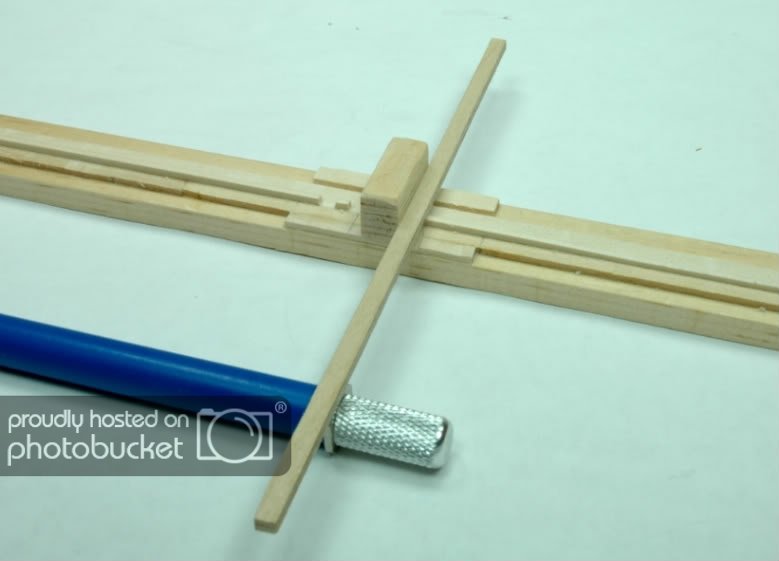
Photo 51
Bending the toe rail.
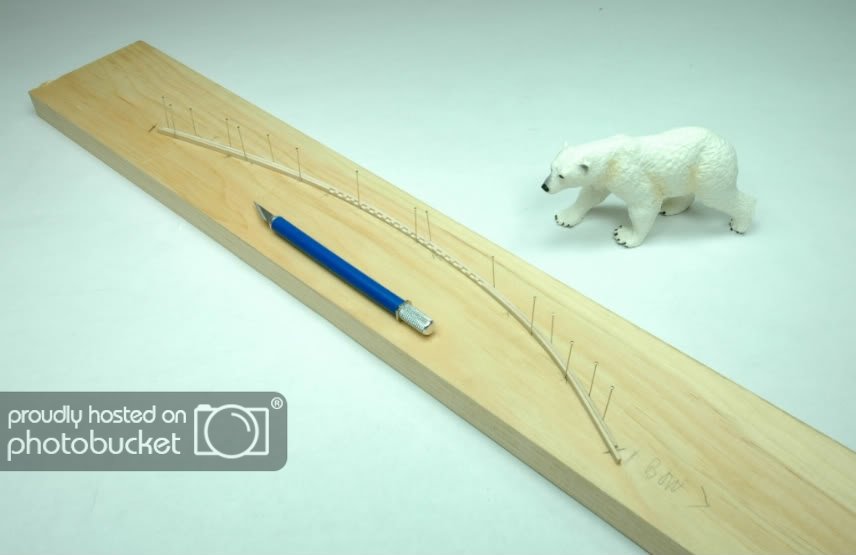
Photo 52
Gluing toe rail to vessel.

Photo 53
Finished!
More to follow......................
Cheers,
Hopeful aka David
-
Hi Robbyn,
Your build is coming along nicely. Every moment you spend perfecting your skill will pay huge dividends in the quality of your build. A martini here and there along the way might help relieve the tedium.
Keep on you are almost there.......
Cheers,
Hopeful aka David
-
Hi Mates,
Post #8 of my Sharpie Build Log
Photo shows the additon of the starboard side strake followed by the port side strake, see step 52-56.
Photo 43
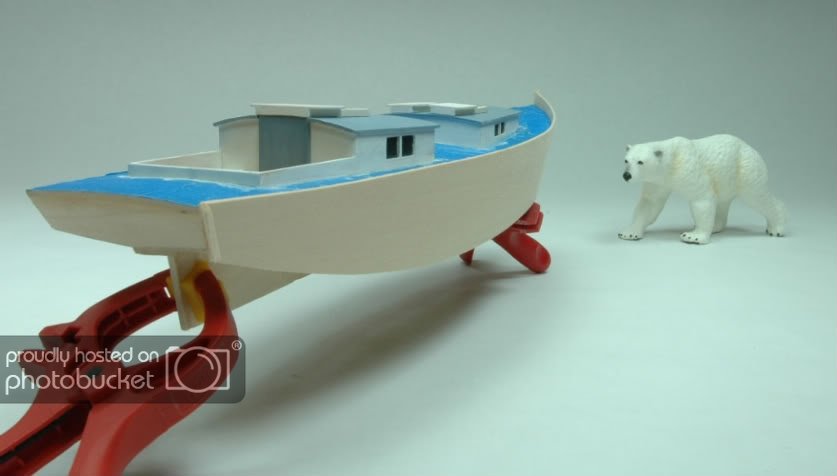
Photo 44
Next Step was to add the two bottom planks, see steps 57 & 58.
Photo 45
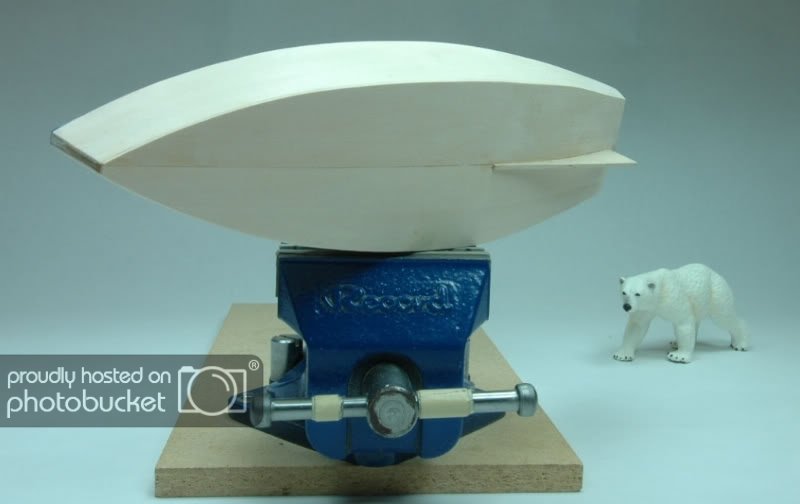
Photo 46
At this point I was getting a bit impatient so I went ahead a worked on the masts, booms, gaffs, bowsprit,and sampson post. I just wanted to see the build looking like a vessel. All the components were dry amd removed prior to continuing on.
More to come.
BFN,
Hopeful aka David
-
HI All,
POST #7 of my Sharpie Build Log
The blue tape has been readded to the deck for protection.
Next, the hatch covers were added, see steps 66-69 and 135-137.The hatch slides and covers are painted with gesso followed by egg shell white before being glued to vessel. I painted the companioway door medium grey as well. Again follow instructions colors as you prefer.
Photo 42

Short post.
BFN,
Hopeful aka David
.
-
HI Mates,
Thia continues my repost.
Post # 6 of my Sharpie Schooner Build Log
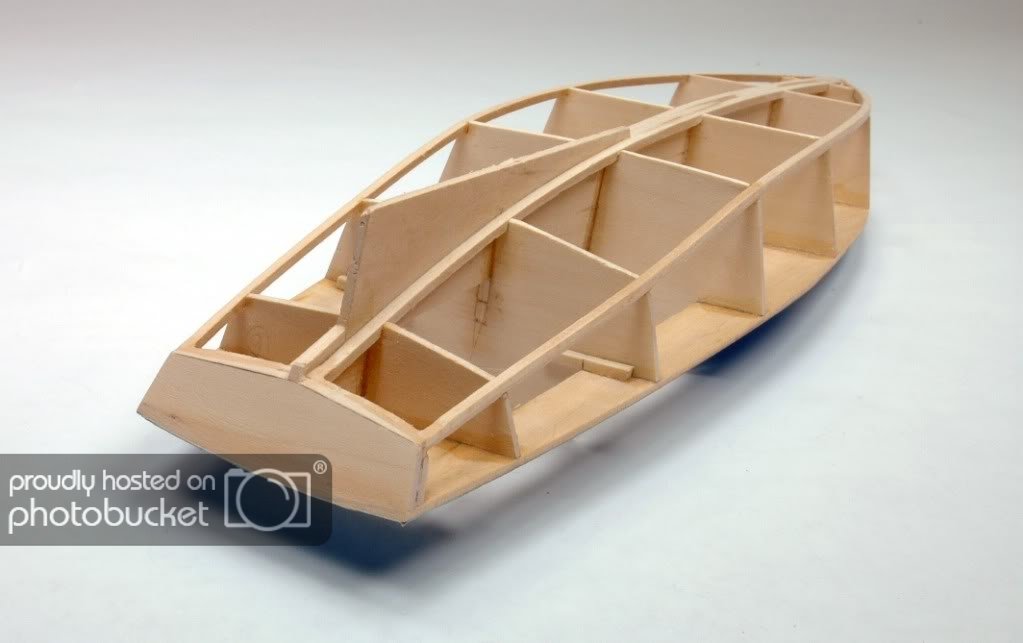
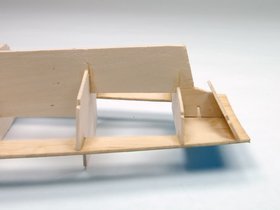
Returned to complete steps 24-32 of the instructions to build the cargo hold and the cabin.
Photo 37
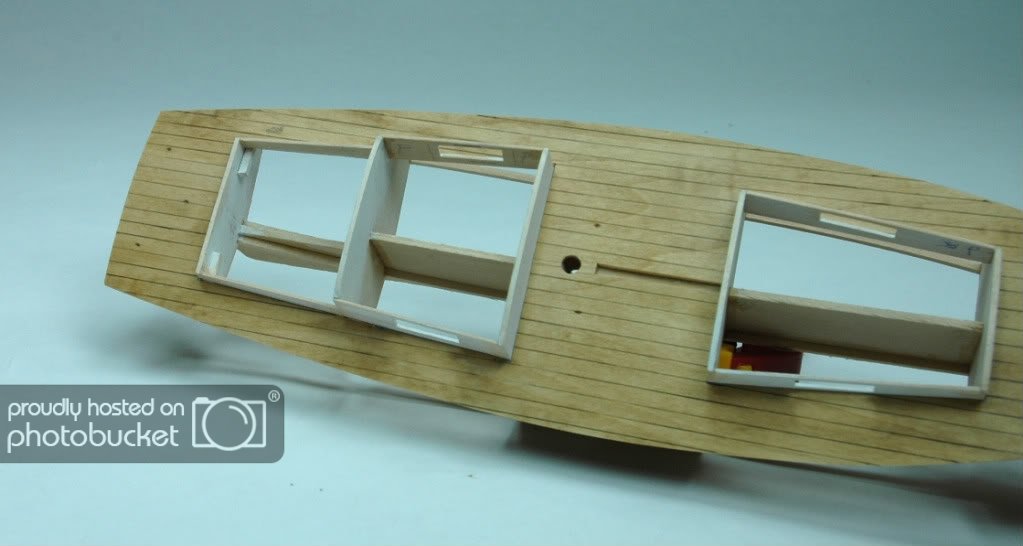
Photo 38
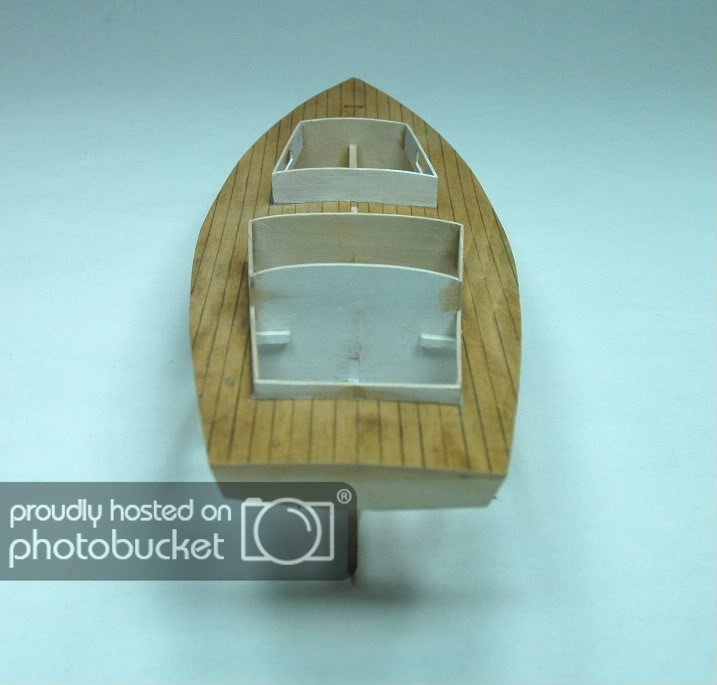
Photo 39
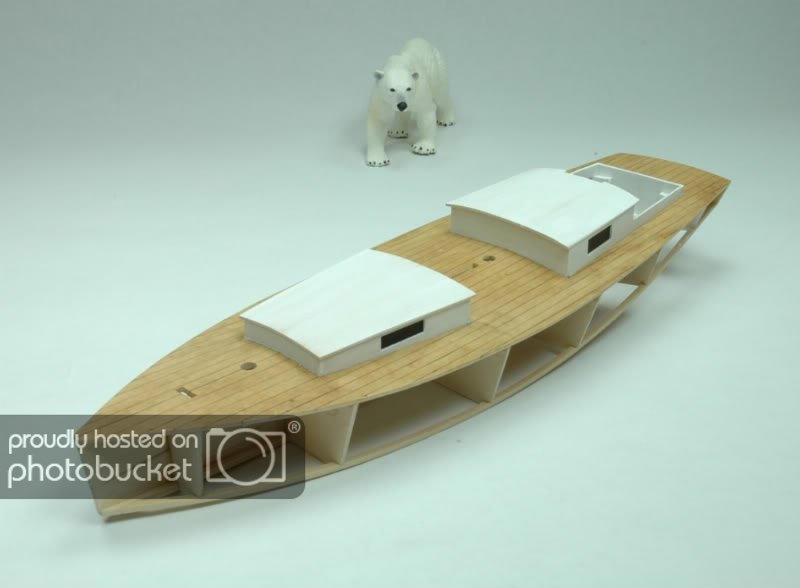
A Nanook shows up at the building site for the first time intent to follow the build. Looks to be a 1500 pound male.
To make the black window openings for the interior of the cabin and storage areas I painted strips of wood black and glued them in place before gluing on the hatch covers. Used white gesso as primer followed by egg shell white (white with a hint of grey) acrylic paint. Used gesso followed by black acrylic paint fot the black srips.
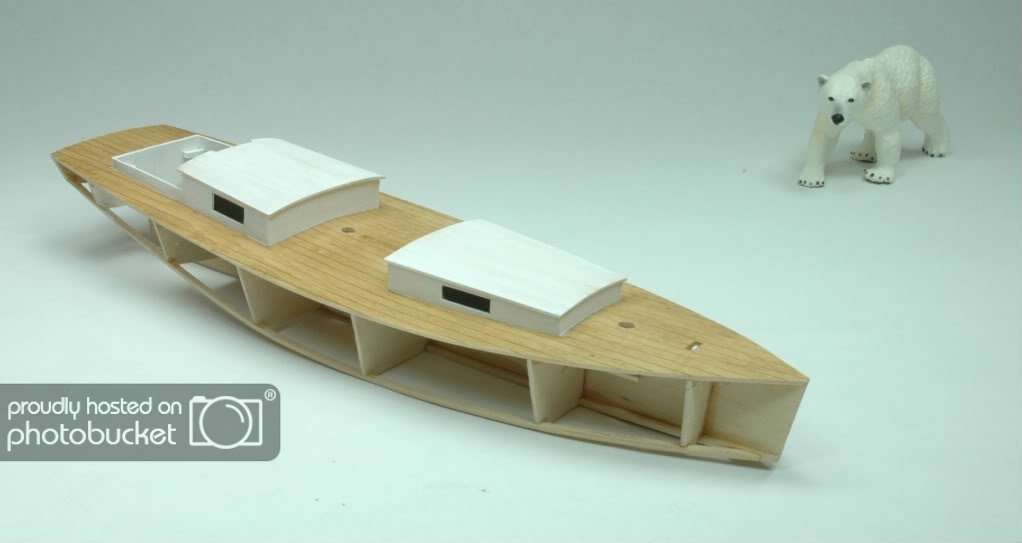
Photo 40
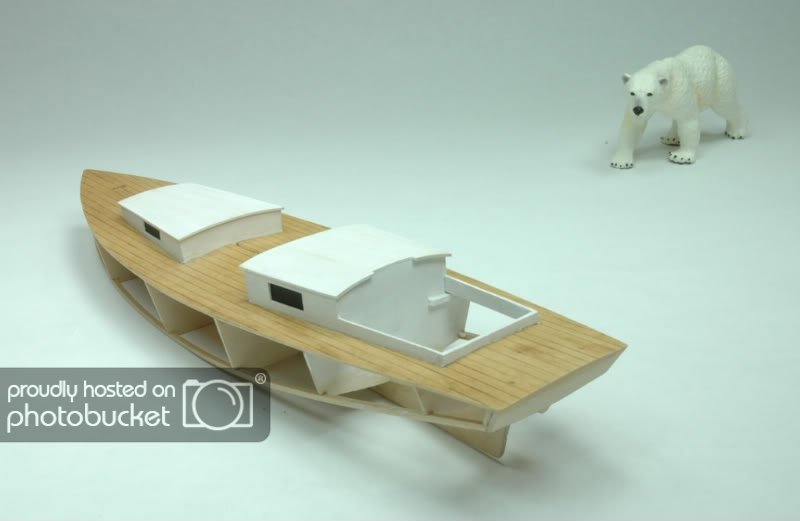
Photo 41
Repost of build will continue shortly.
Cheers,
Hopeful aka David
-
Hi Mates,
Post #6 of my Sharpie Schooner Build
Next Step is to add the keel strips and the chines. See steps 37-48 of the instructions.
Photo 30
Dry fitting the components.
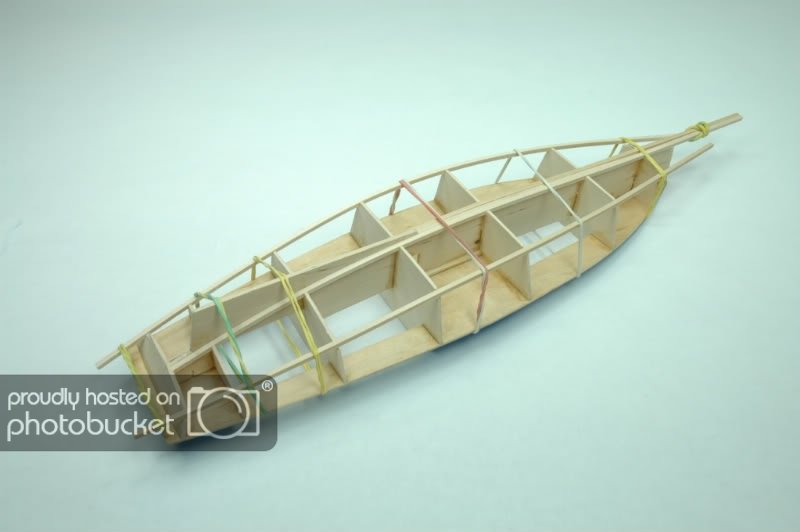
Photo 31
Nice smooth run of the chine from bow to stern.
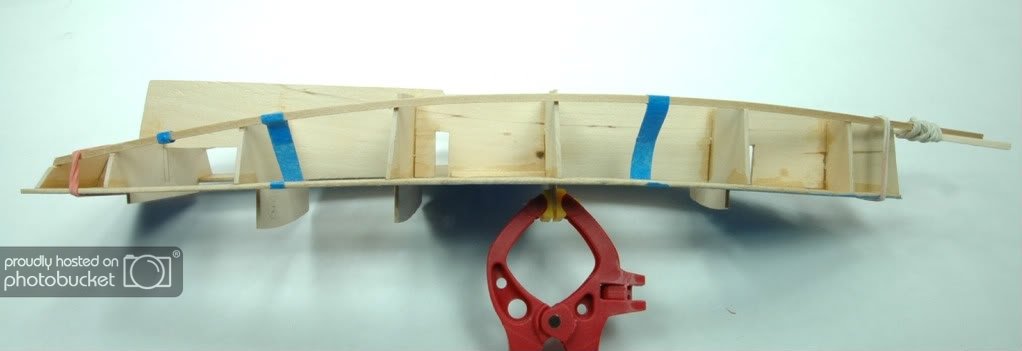
photo 32
Keel stirps and chines glued in place and trimed to length. I also faired the outer edge of the bulkheads and chines at this time (see page 18 regarding fairing).
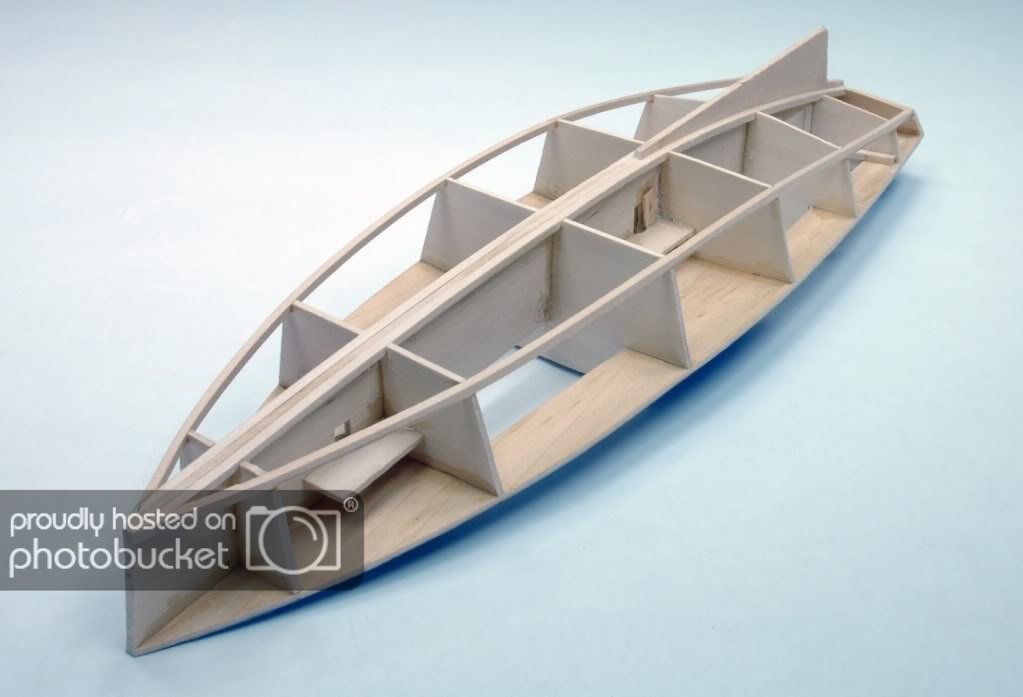
Photo 33
Transom cap (step 49 instructions) set in place and glued. Trim the stern end of the deck flush with the transom cap at this time.
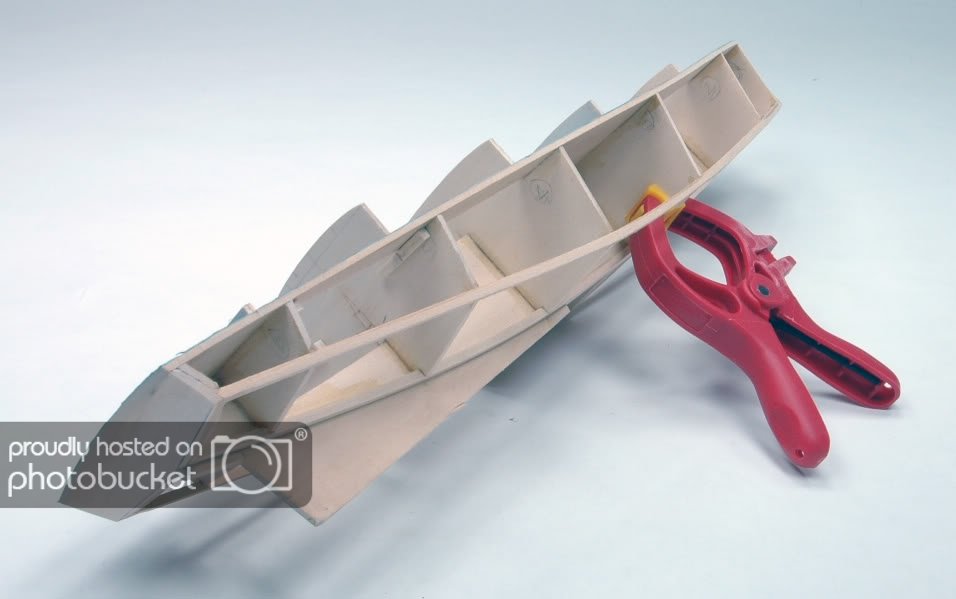
Photo 34
Time to add the stem piece (see steps 62 & 63 page 20).
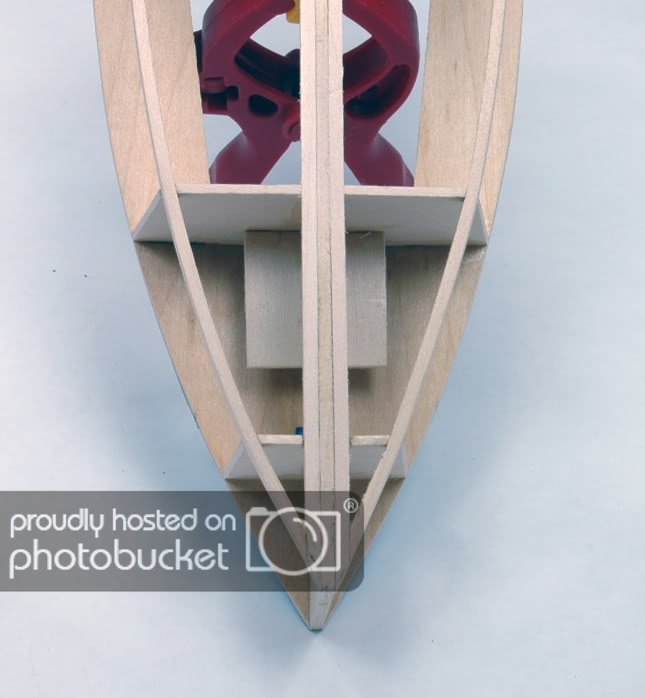
Photo 35
Stem added.
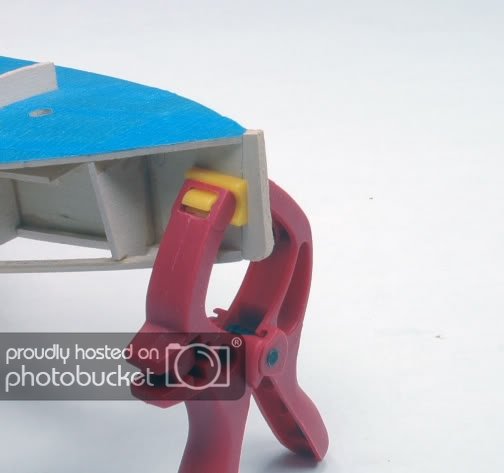
Photo 36
Before I forget, add a short piece of wood to build up the false keel just behind the botton of the skeg and running to the top center of the transon. Otherwise you will have trouble installing the bottom boards later. This piece of wood is not on the plans.
See you later with the next post.
BFN,
Hopeful aka David
-
Hey Gerty,
Thanks for looking in. Agree that the larger photos are better for helping other builders. Just had to figure out how to make them larger but not too large. I guess they are about the same size as yours.....800 X 600 is what I am using which is the same as the old site.
Thanks for the compliments of my finished build.
BFN
Cheers,
Hopeful aka David
-
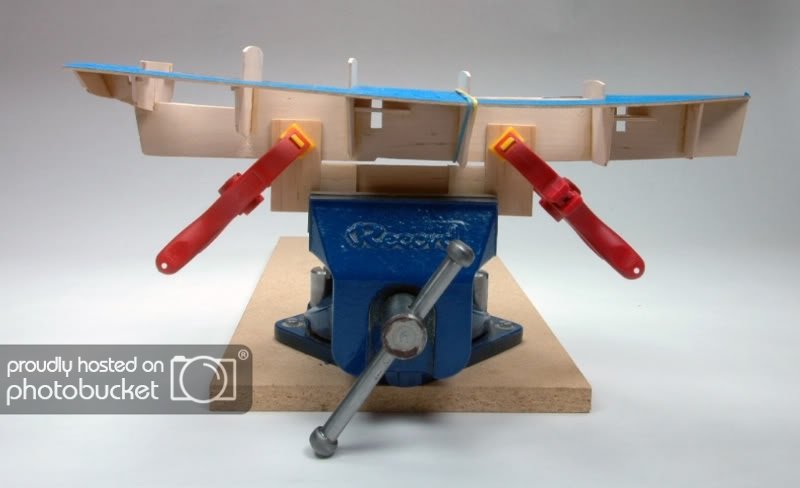
Hi Mates,
Post #6 of my Sharpie Schooner Build Log
My second jig allowed me to work hands free on the bottom up side of the vessel.
The jig was made from scrap. The dowels are the same diameter as the masts. Note the pin holes high on the dowels and well as those located lower down.
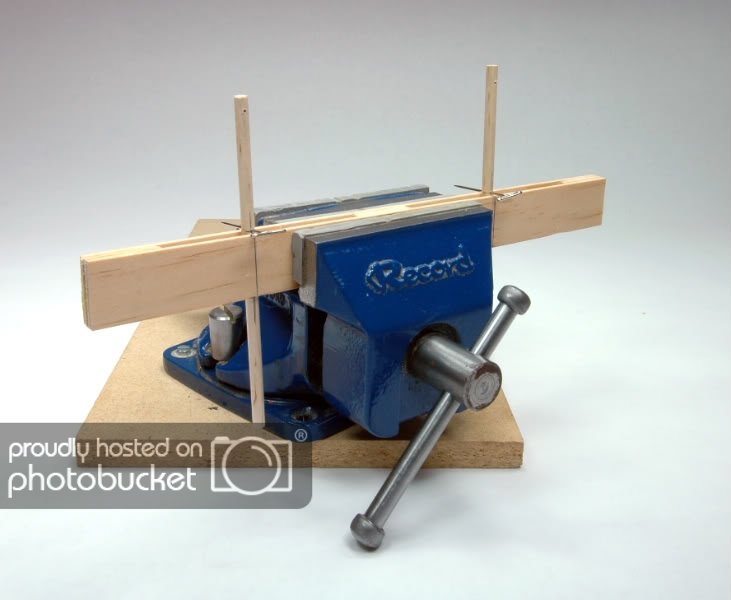
Photo 26
The pins prevent the dowels from moving downward as I work on the vessel. The distance betwees the dowels is the same as the distance between the mast holes. See the ships plans. Note I marked a line on both the base and dowels to locate the dowels properly if I ever want to remove the pins.
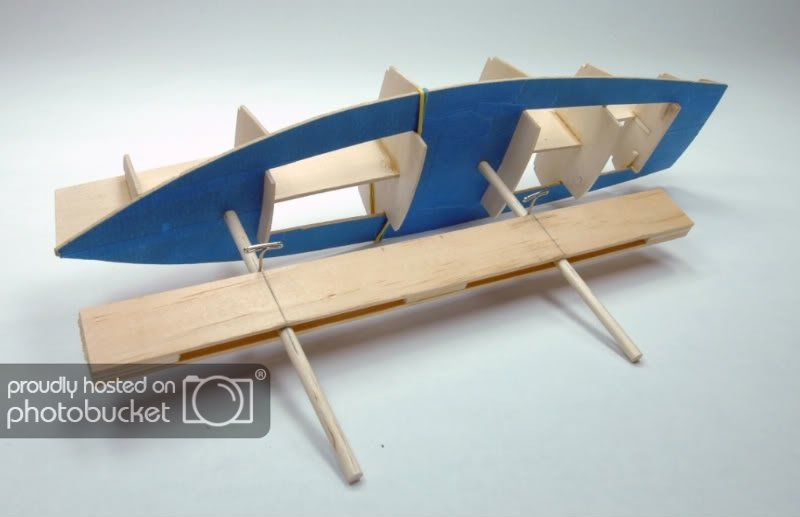
Photo 28
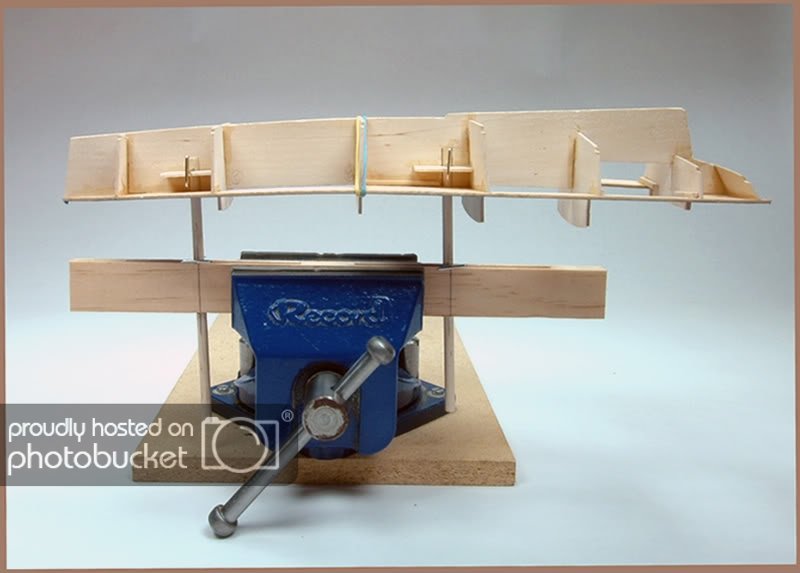
Photo 29
The top of the dowels pass through the mast steps and stop as the base of the mast holes.
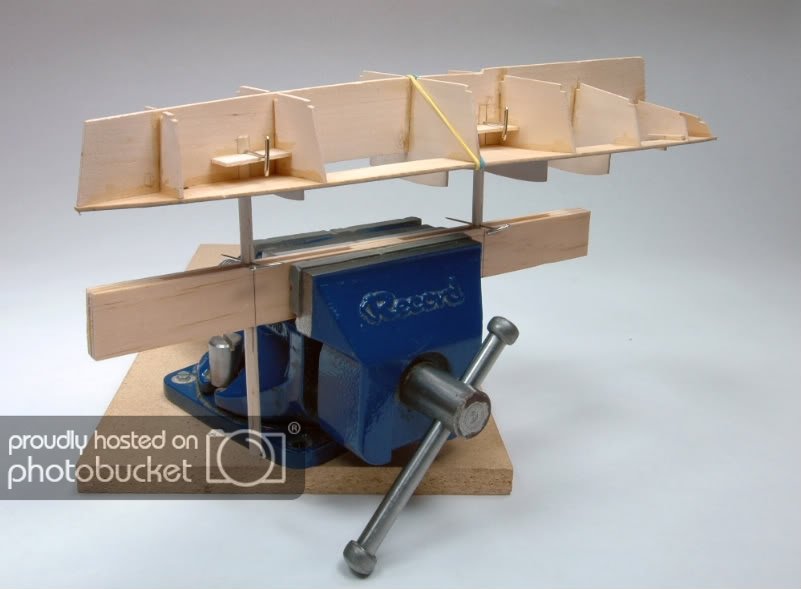
Let me know if you have any questions.
BFN!
Cheers,
Hopeful aka David
"there is wisdom in many voices"
-
To the staff Admirals and Moderators,
After working with the new site for a few days I really like it alot, well done! Many improvements over the old site for sure.
I save my photos to Photobucket (free hosting site) and then upload them to my build log. Have not yet figured how to get the photos from Photobucket into the gallery at this point but will keep on trying.
Keep on, you are appreciated!
Hopeful aka David
-
Hi Mates,
Post #5 of my Sharpie Schooner Build Log
This is where I began to deviate from the kit instructions regarding the order of assembly. I intend to bash the kit to build a Sharpie vessel with more details to reflect and ocean going sharpie as stated previously.
Here goes....
Build next step: Add the main and foremast steps per instructions 33-36 located on pages 14 and 15. See them installed in photo 23 below.
At this point I made a jig to hold the vessl to help with the build. The jig when fitted to a 360 degree revolving vise is excellent for topside work. The vise shown is about 10 lbs. and stays put. The vise is mounted to a board that can be clamped to my work bench, or, be moved out of the way when not clamped.
Photo 20
Jig made from scrap wood pieces from the kit. Check out photos 23 & 24 below for a good visual reference to help dimension the jig. The slot is the exact width of the false keel.
Photo 21
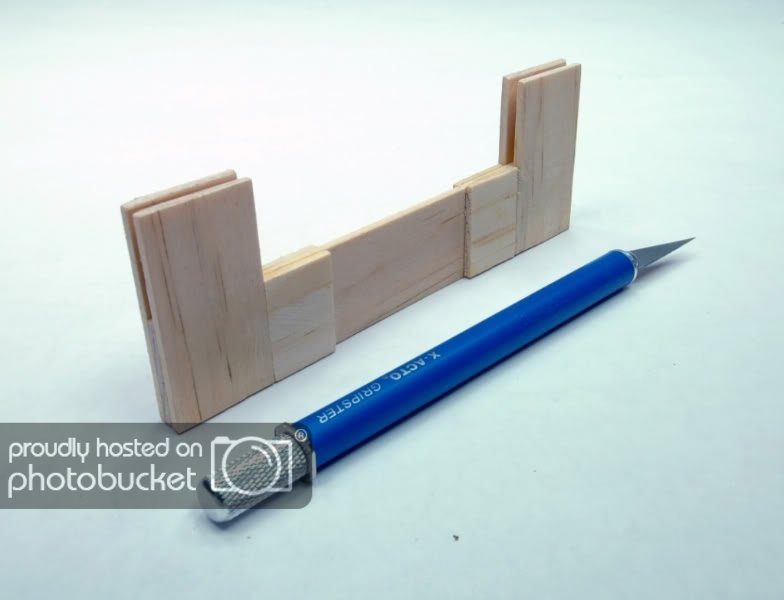
Photo 22
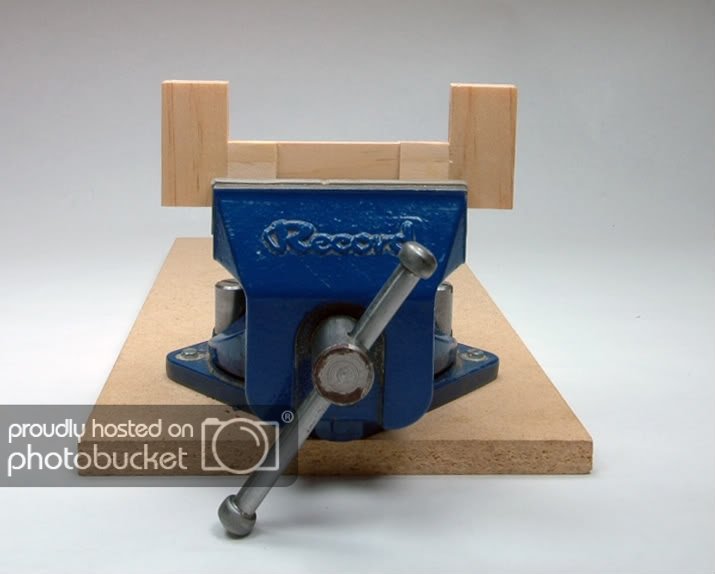
Photo 23
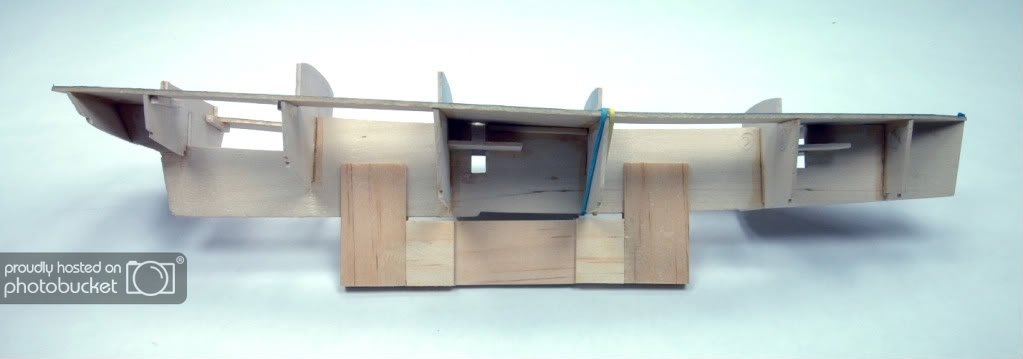
Photo 24 Red clips tension the jig against the false keel.
Let me know if you have any questions about the jig.
BFN,
Hopeful aka David
-
Hi mates,
I'm a bookaholic so have most of the books mentioned in this forum. The best general overall building book I have is Model Shipbuilding from Stem to Stern by Milton Roth ISBN-13: 978-0-8306-2844-5......$20USD from amazon.com. The book contains 288 pages of great stuff and many illustrations. If I had to get rid of all my books but one, I would be happy with Roth's "how to" book.
Cheers,
Hopeful aka David
-
Hi Mates,
This is to introduce my Nanook friends feasting on washed up sea critters!
Come visit Canada....we have lots of critters big and small.
BFN
Hopeful aka David -
Hi Mates,
Post #4 of my Sharpie Schooner Build Log
Gerty: Thanks for you kind comments....too bad my thumbnails will not enlarge to anything worth viewing, sad. Am following your Willie L Bennett Skipjack build.....nice work!
Pete: Thanks for your visit. Regarding sails, the best all around modeling book I have come accross is Ship Modeling from Stem to Stern by Milton Roth ISBN 978-0-8306-2844--5. Book is available from Amazon.com at about $20USD. Best book investment I have made on the subject of boat building. Chapter 15 is all about sail making. Highly recommend the book.
This post is about adding the transom to the vessel.
The builder is faced with several challenges when attaching the transom properly. Took me two trys. I had to make second transom out of scrap stock!.
Steps....
1. carefuly remove the transom from the diecast sheet.
2. Dry fit and sand the top surface of the transom until it fits the curvature of the deck as perfectly as you can make it. See photos 17 & 18. Fitting the tansom correctly to the underside of the deck will prevent many problems later.
3. Carefully attach the transome to the false keel and to the underside of the deck making sure it is square. I used Super Glue which was a mistake. Better to user PVA yellow carpenters glue which sets quickly but can be removed if necessary with water. Tip..... add a block to each side of the false keel following its angle. By doing so,you will have creaded a broader surface to provide stability when attaching the transom and bending the deck at the same time.
4. Do not sand the edge deck surface to meet the transom at this time.
Photo 16
Shows proper angle of the transom when installed. Note how far the deck extends beyond the transom on my model.
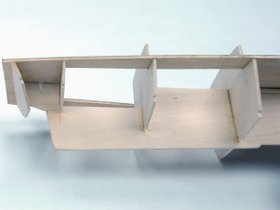
Photo 17
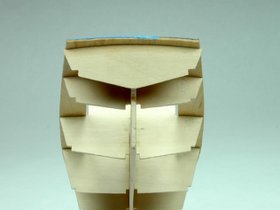
Photo 18
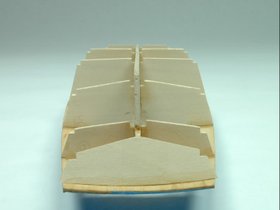
Photo19
Good luck installying the transom. Take time and get it as perfect as you can to avoid problems when adding the chines.
Next step 21 on page 11 on the instructions.........Cockpit floor.
BFN!
Cheers,
Hopeful AKA David
“there is wisdom in many voices”
Completed: Midwest Sharpie Schooner (Reposting the build log at present)[/size]
In progress: MSW Sultana (Need to repost the log and keep on with the build)[/size]
-
Hi Brian,
Glad you are building Niagara and that we are lucky to catch the build from the begining. Your thoughtful approach and great photos as well as the techniques you employ will serve the forum well.
Enjoy the build!
Cheers
Hopefu aka David
Completed: Midwest Sharpie Schooner (Reposting the build log at present)
In progress: MSW Sultana (Need to repost and keep on with the build)
-
Popeye,
I just luv's your work. Thanks for the detailed log, Very useful. Twins, what were you thinking, hahahah!
BFN
Hopeful aka David
-
Hi John,
Thanks for looking in and the encouragement. I remember way back when you were helping with the biuid of the vessel.Your guiding hand and advice was much appreciated. Though time consuming it is important to repopulate the site with as many build logs as possible.
After posting the Sharpie Schooner I will post my Sultana Build log.
Bye for now!
Cheers,
Hopeful aka David

Sultana by Prophotog - Model Shipways - scale 1/64"
in - Kit build logs for subjects built from 1751 - 1800
Posted
Hi Prophotog,
I am building the Sultana too and am about halfway through the build. Started my repost today. Search..... Sultana by Hopeful. One of these days I will add a tag to my signature to get you there quicker.
The Sultana build is not as easy as some make it out to be. I find it challenging all the way which is fine by me. I had all the challenges you are having. Go slow and you will be fine......its not a race.
Will follow your build from here and wish you well.
By the way, I agree with comments made by Russ and Hamilton.....they are right on!
Cheers,
Hopeful aka David