MORE HANDBOOKS ARE ON THEIR WAY! We will let you know when they get here.
×


mtbediz
-
Posts
1,259 -
Joined
-
Last visited
Content Type
Profiles
Forums
Gallery
Events
Everything posted by mtbediz
-
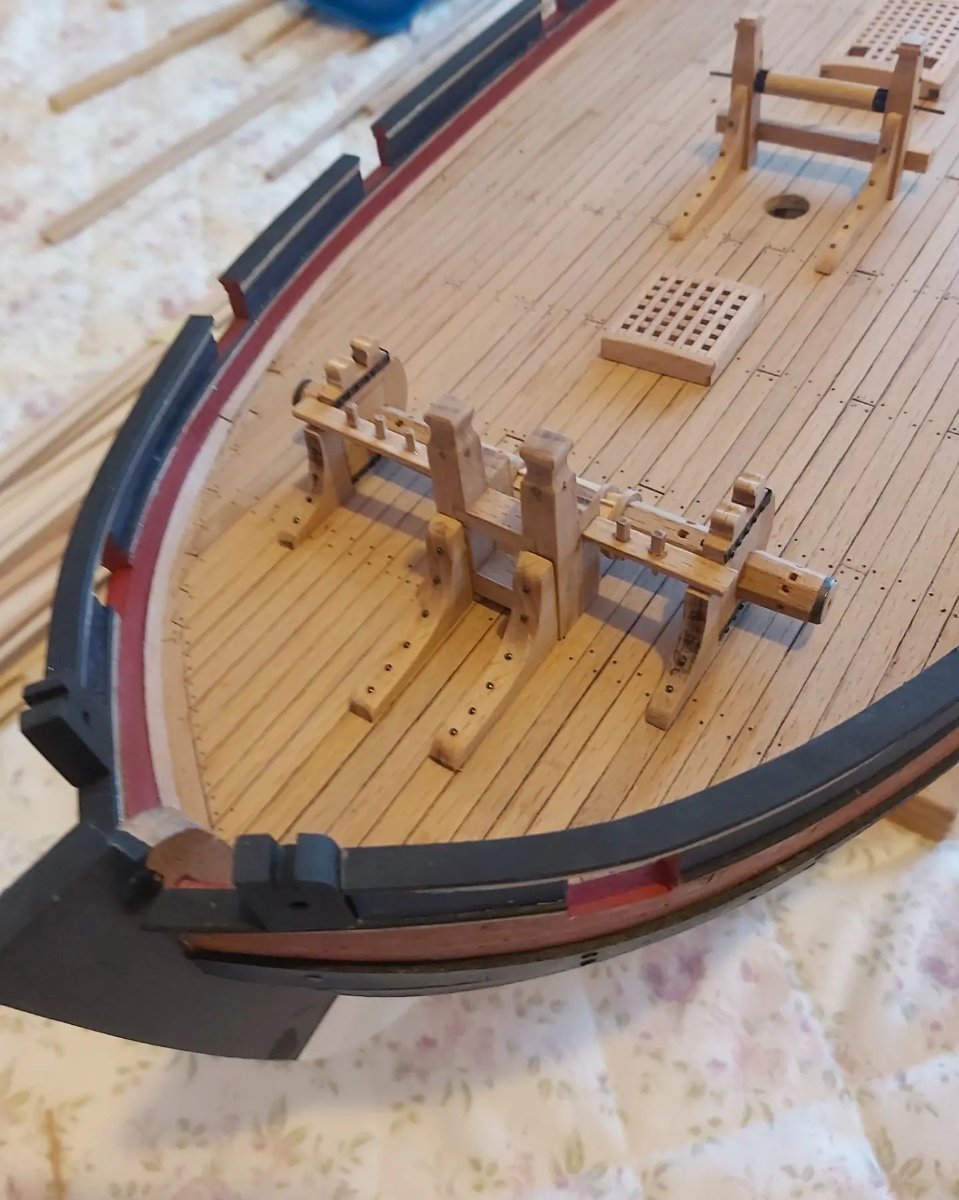
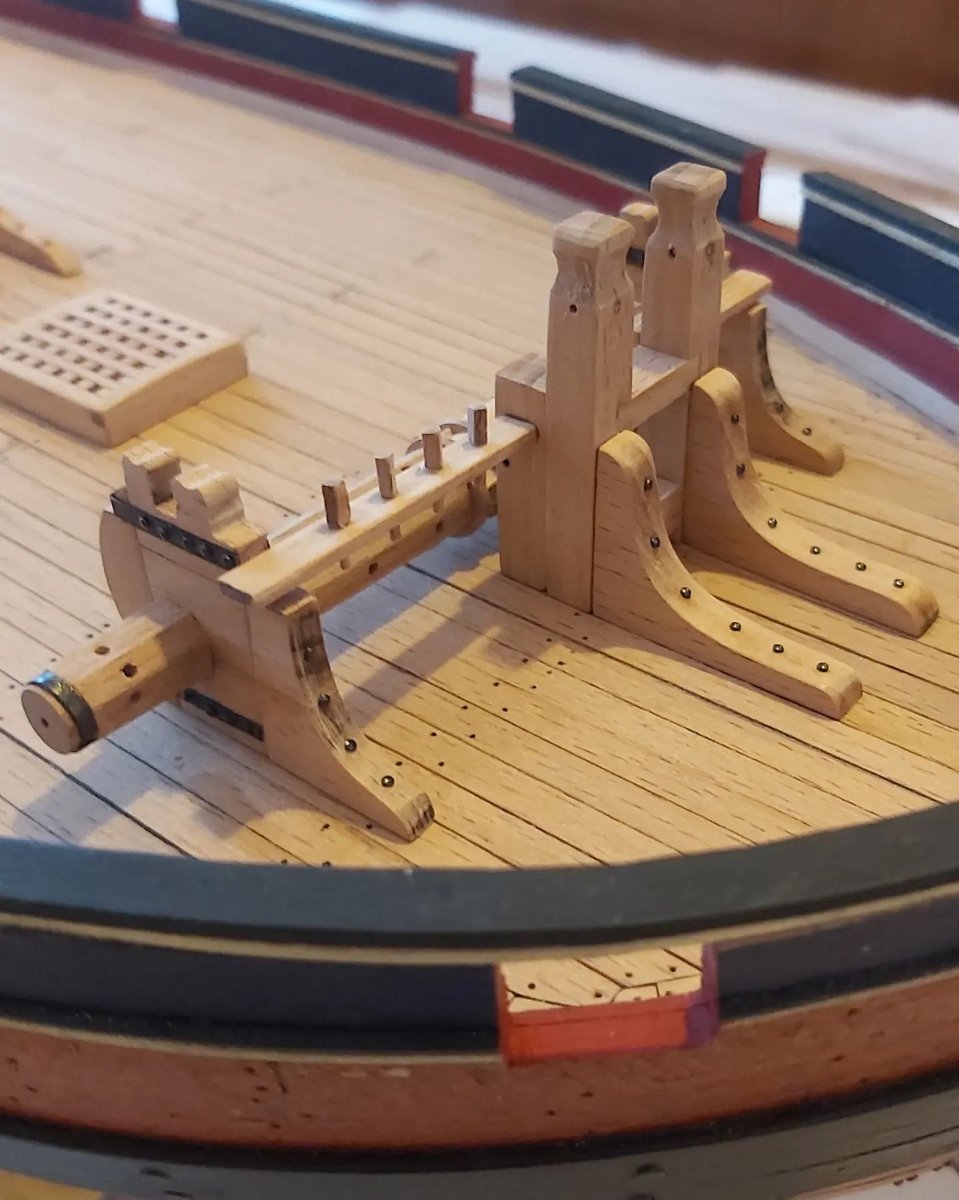
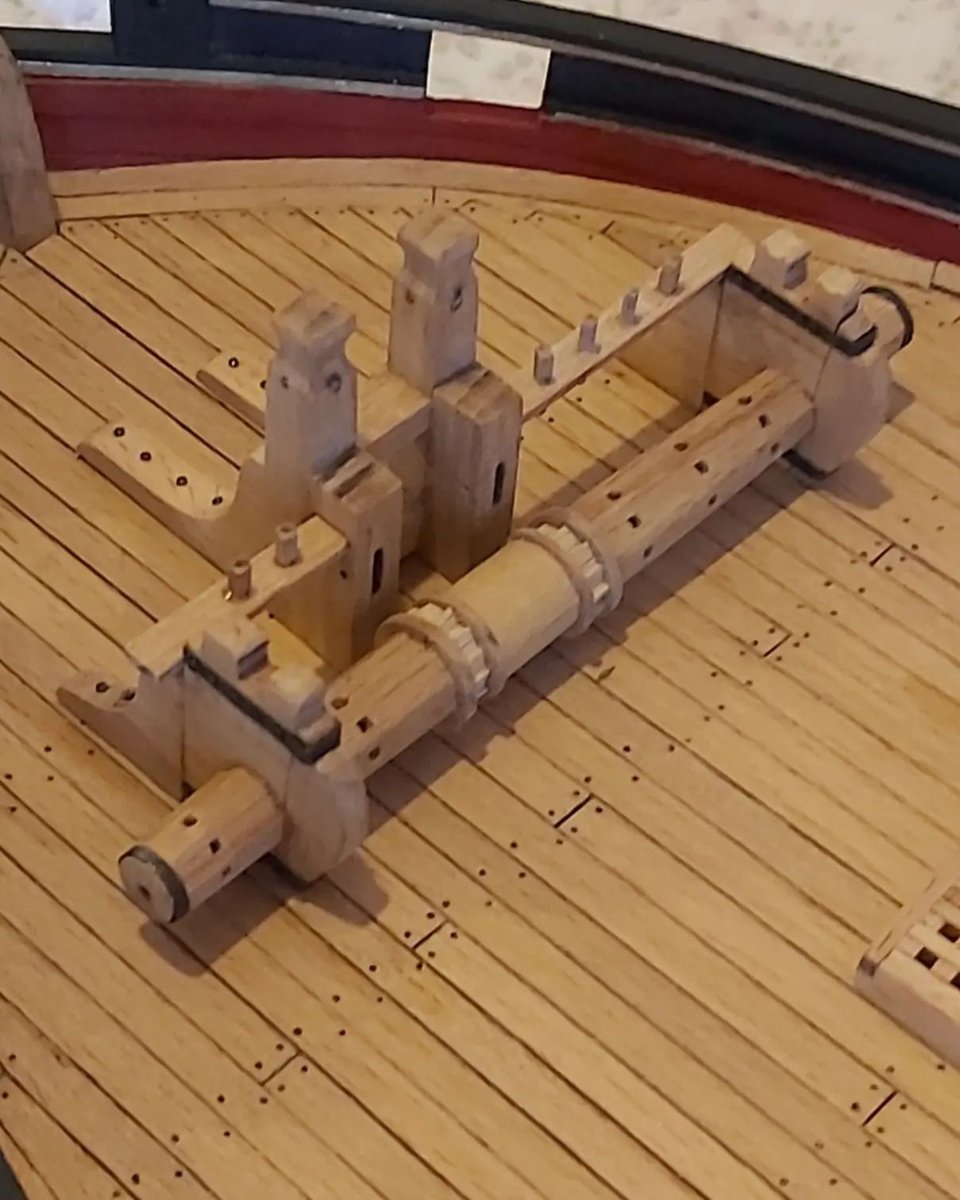
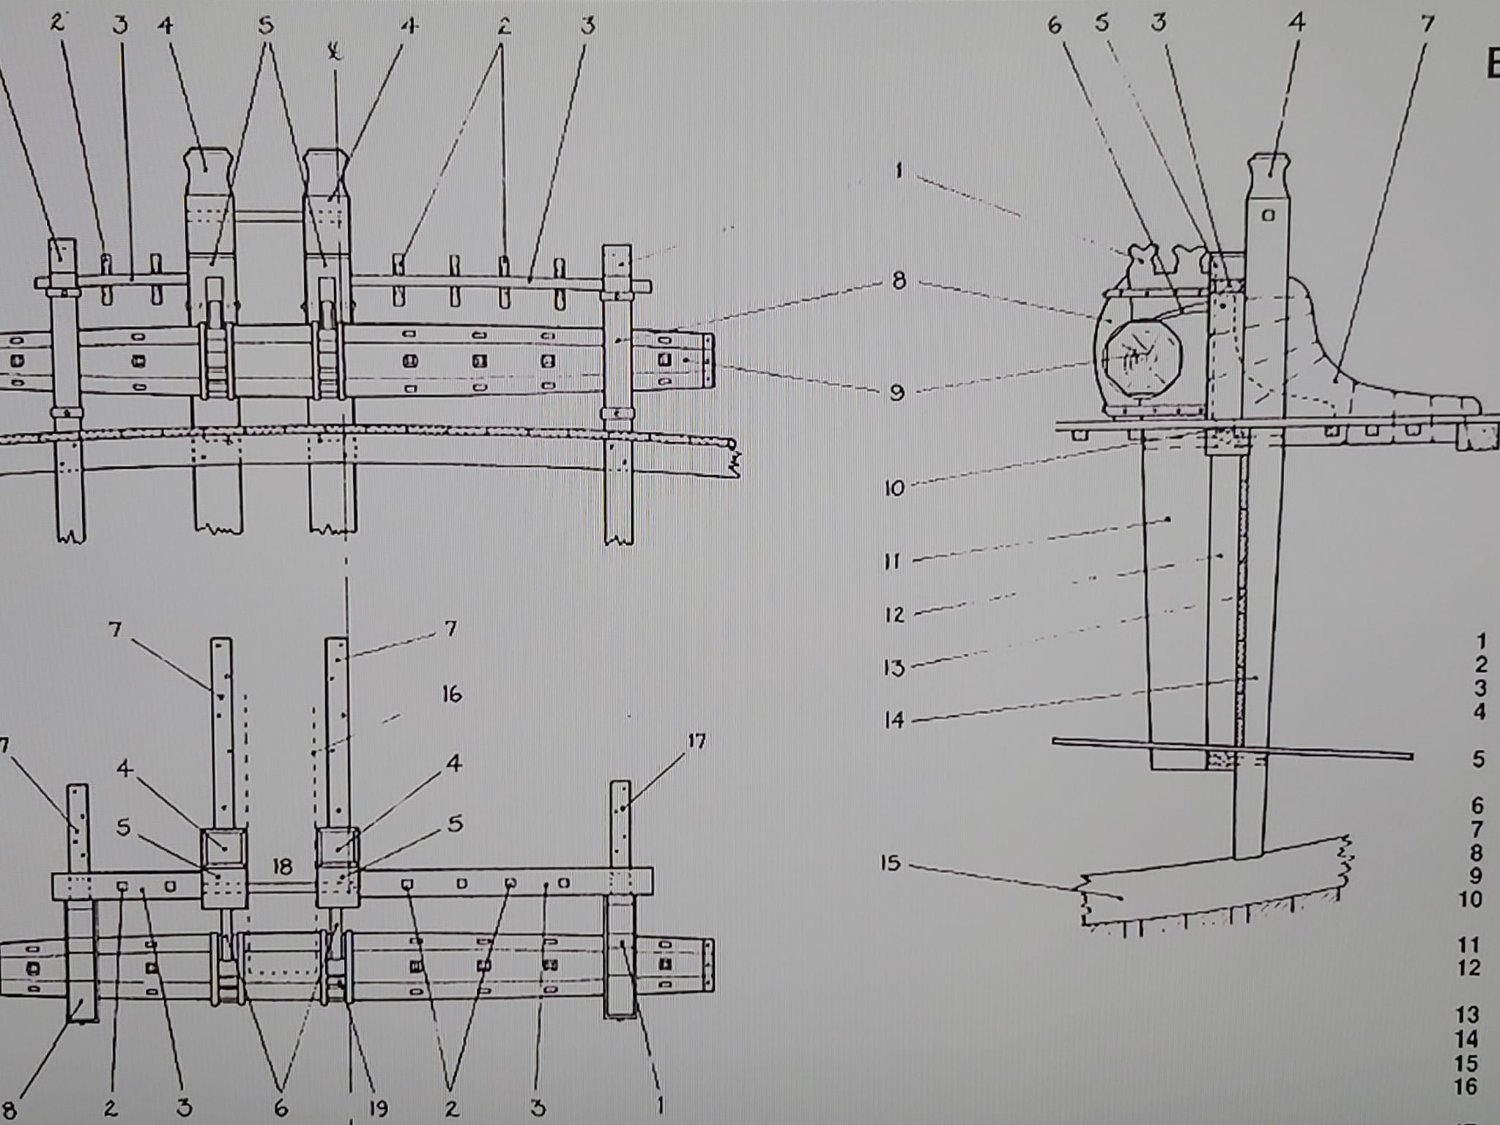
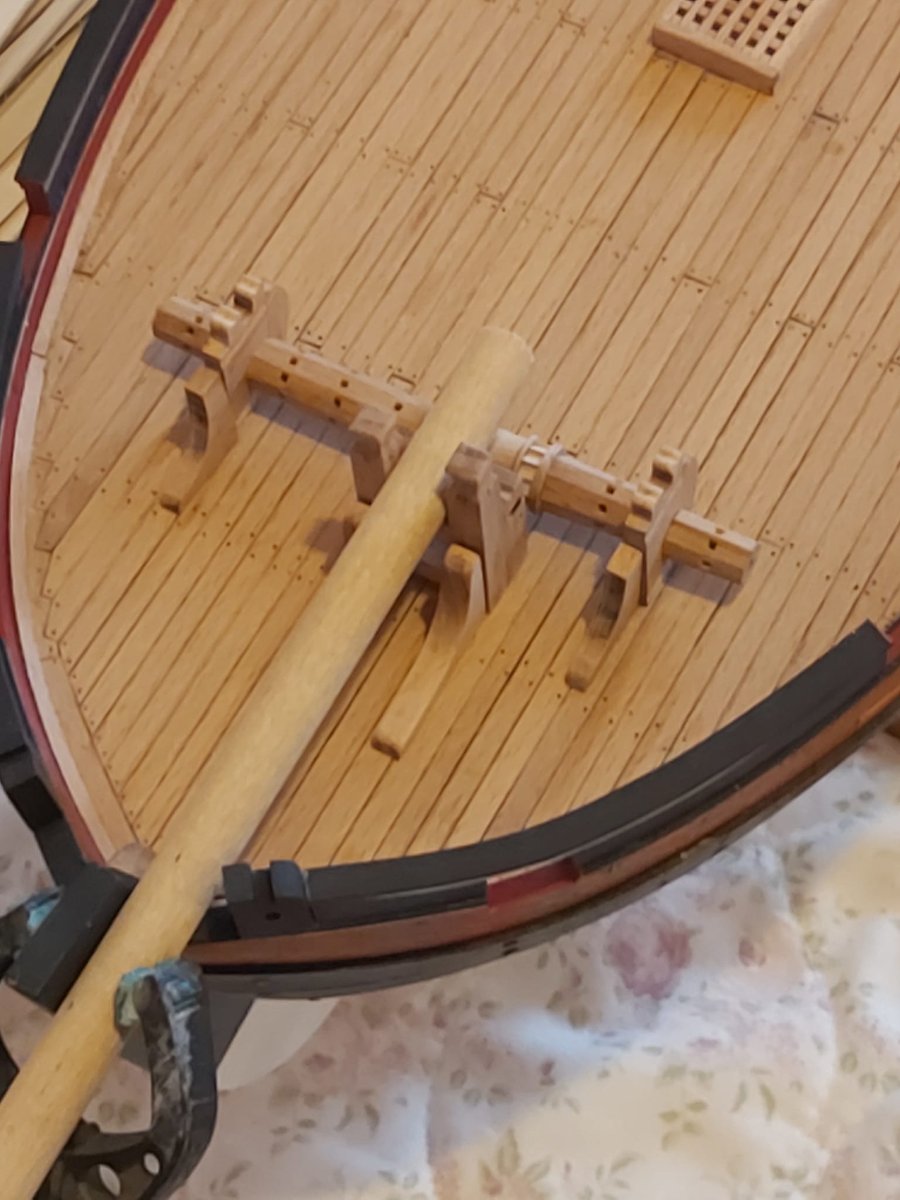
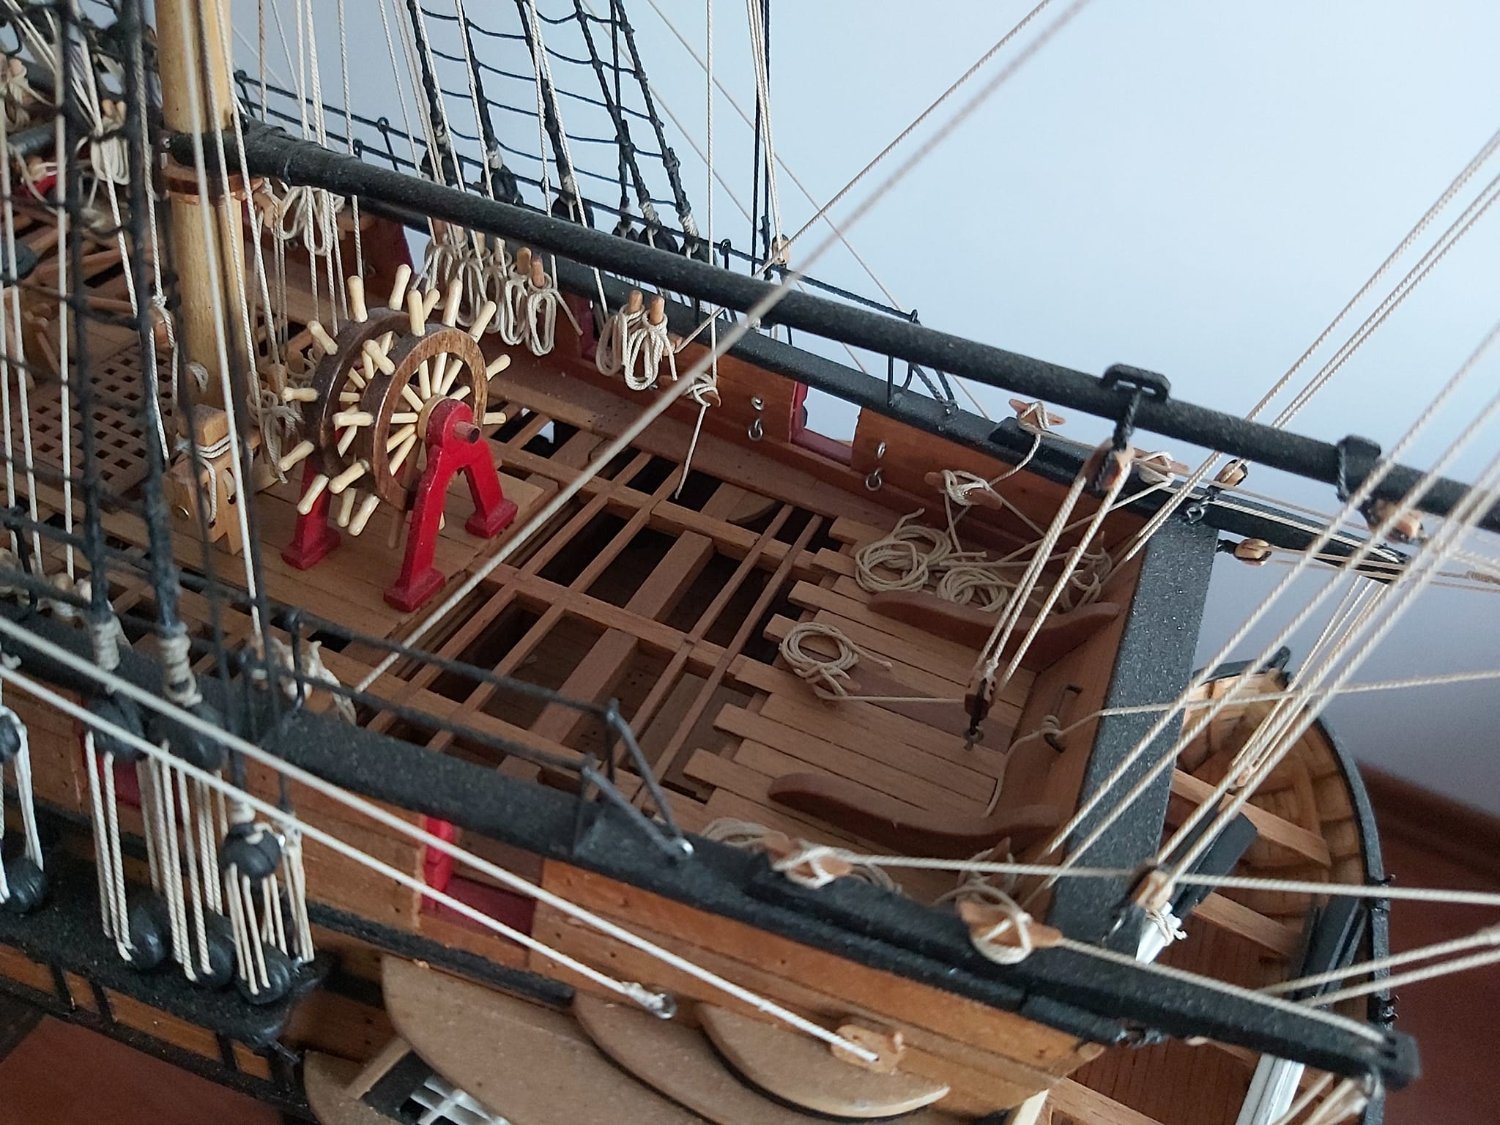
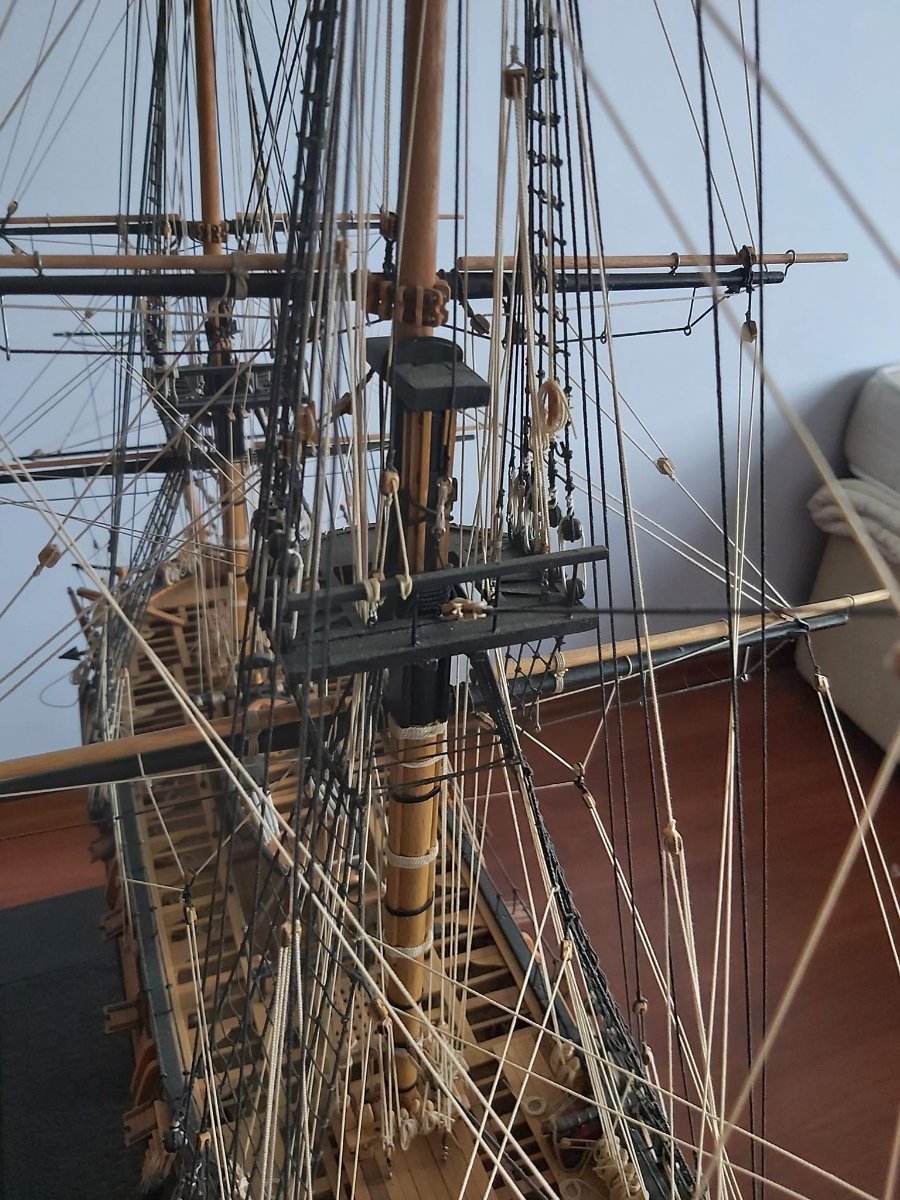
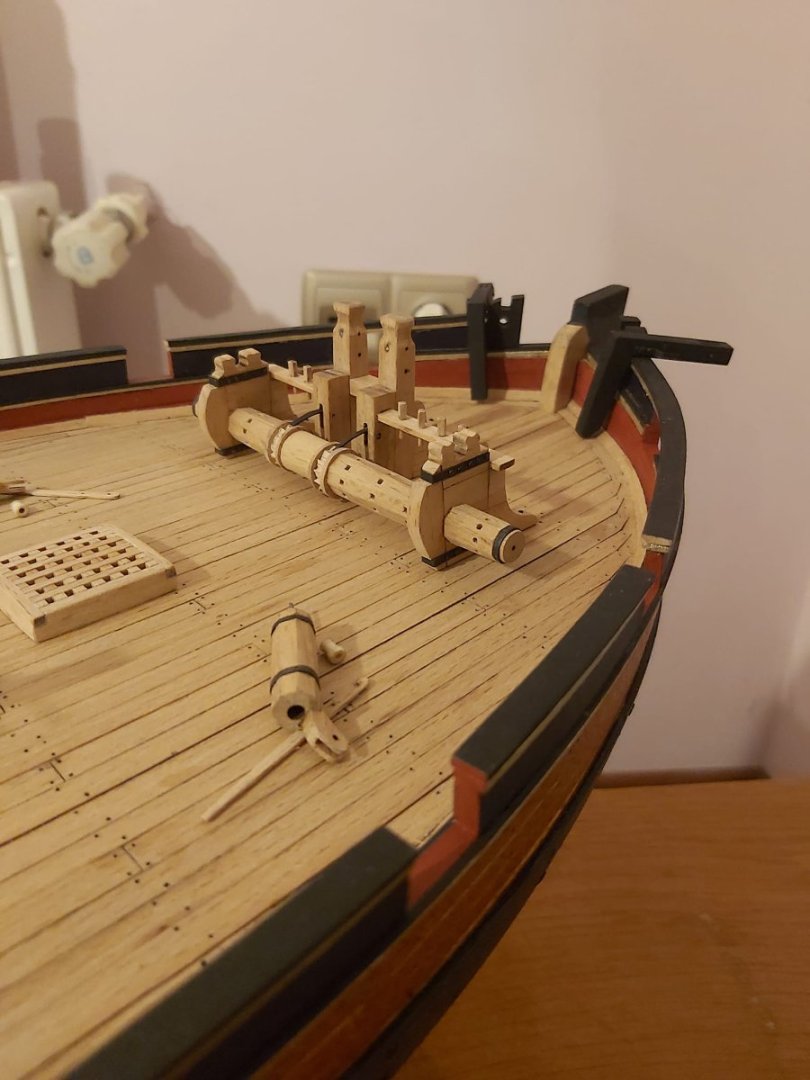
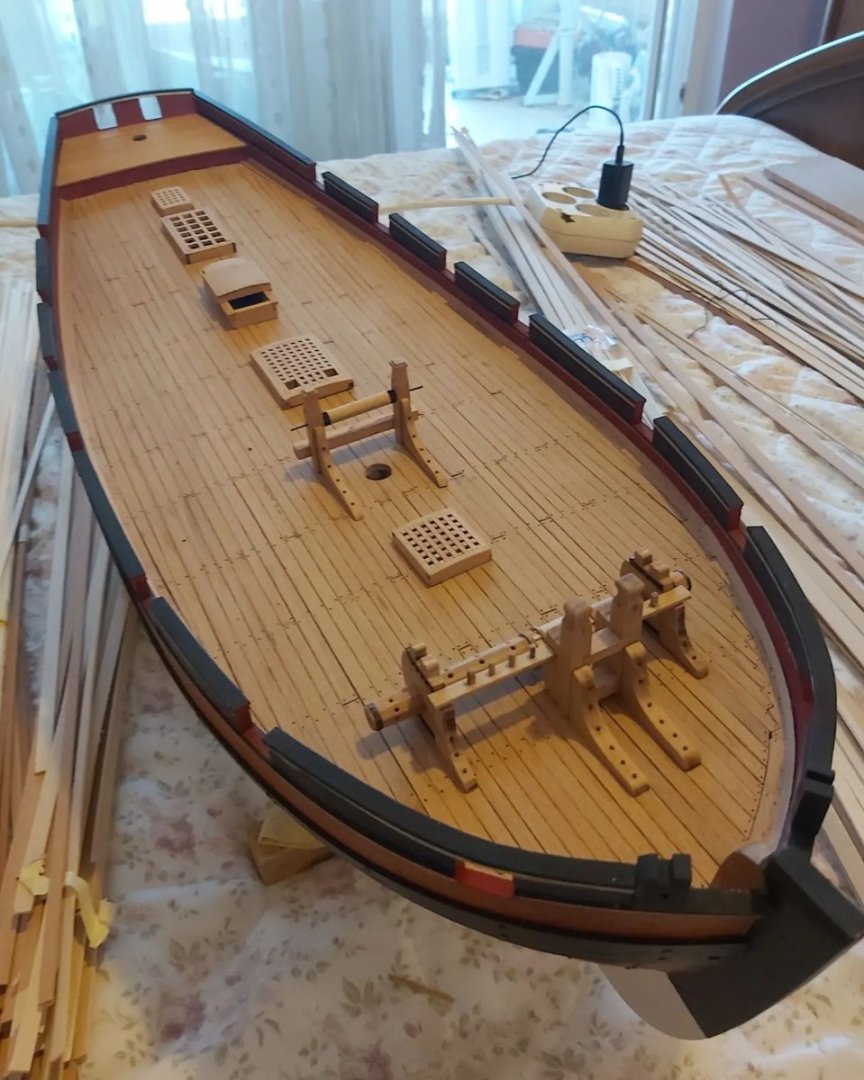
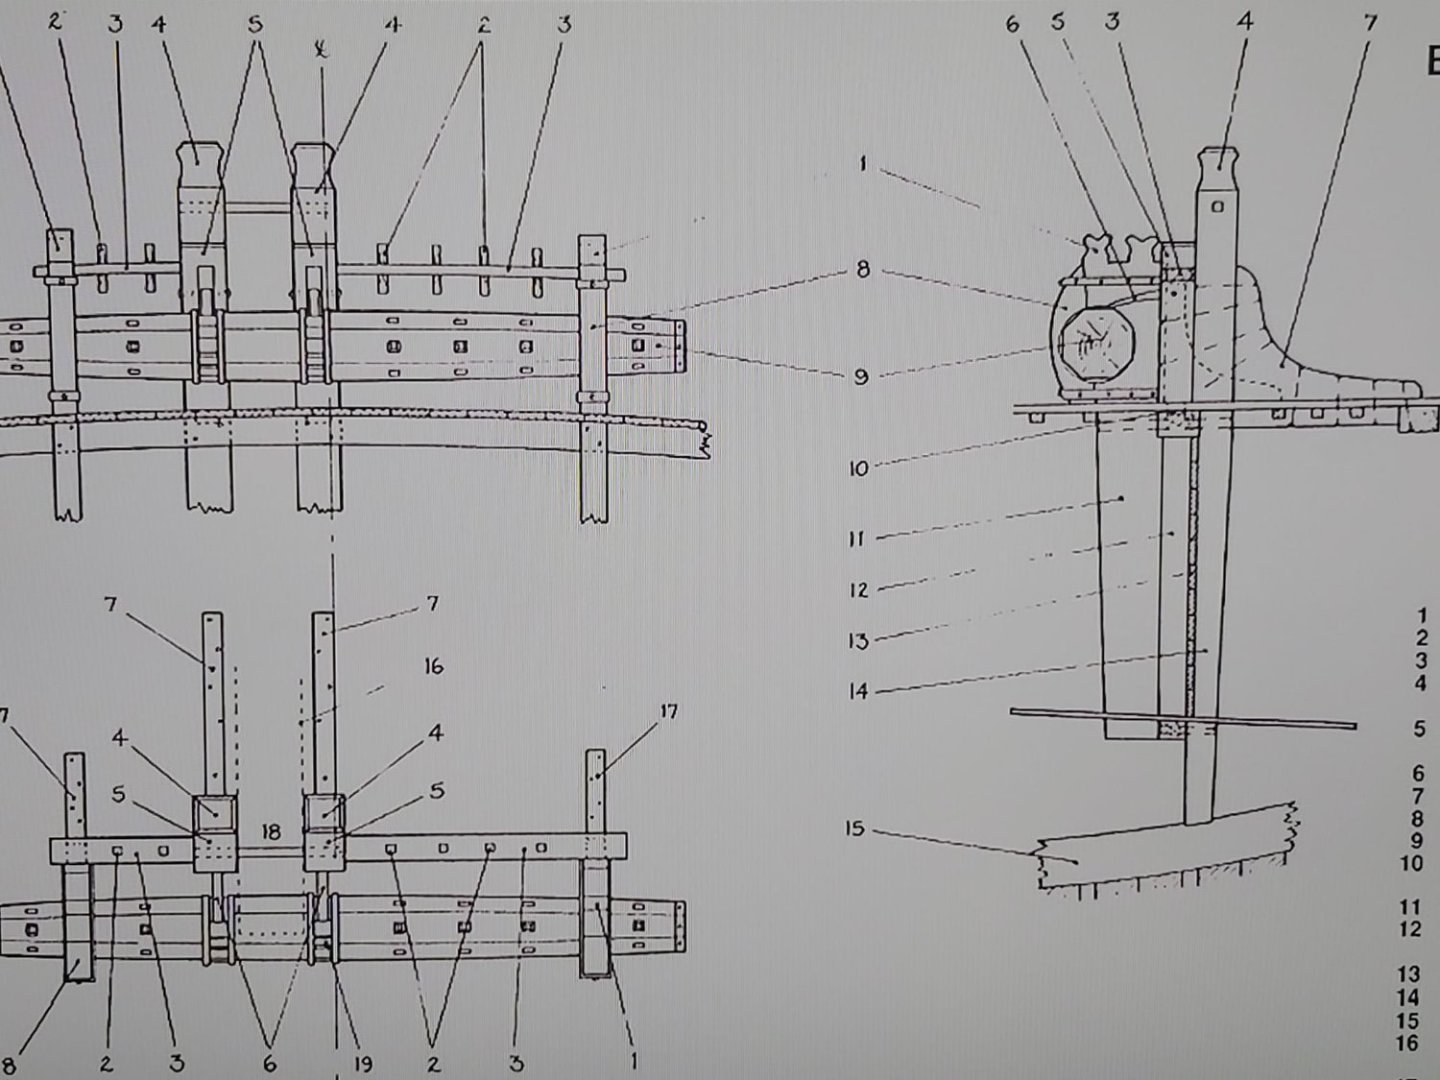
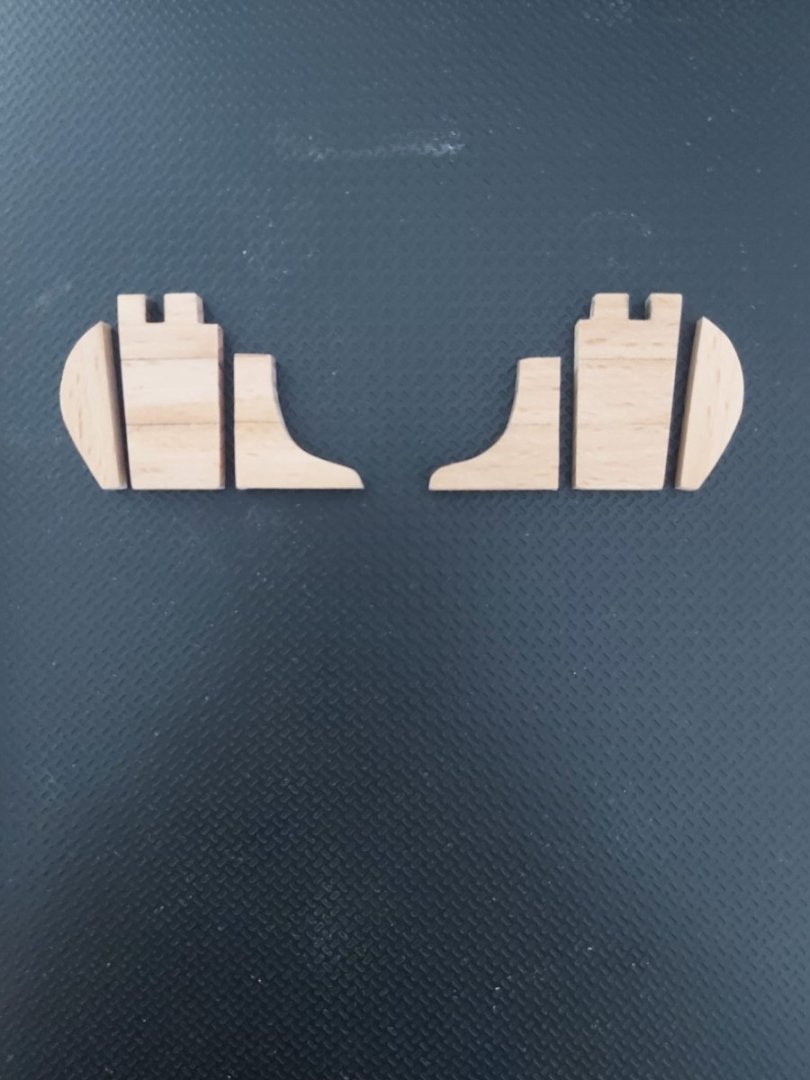
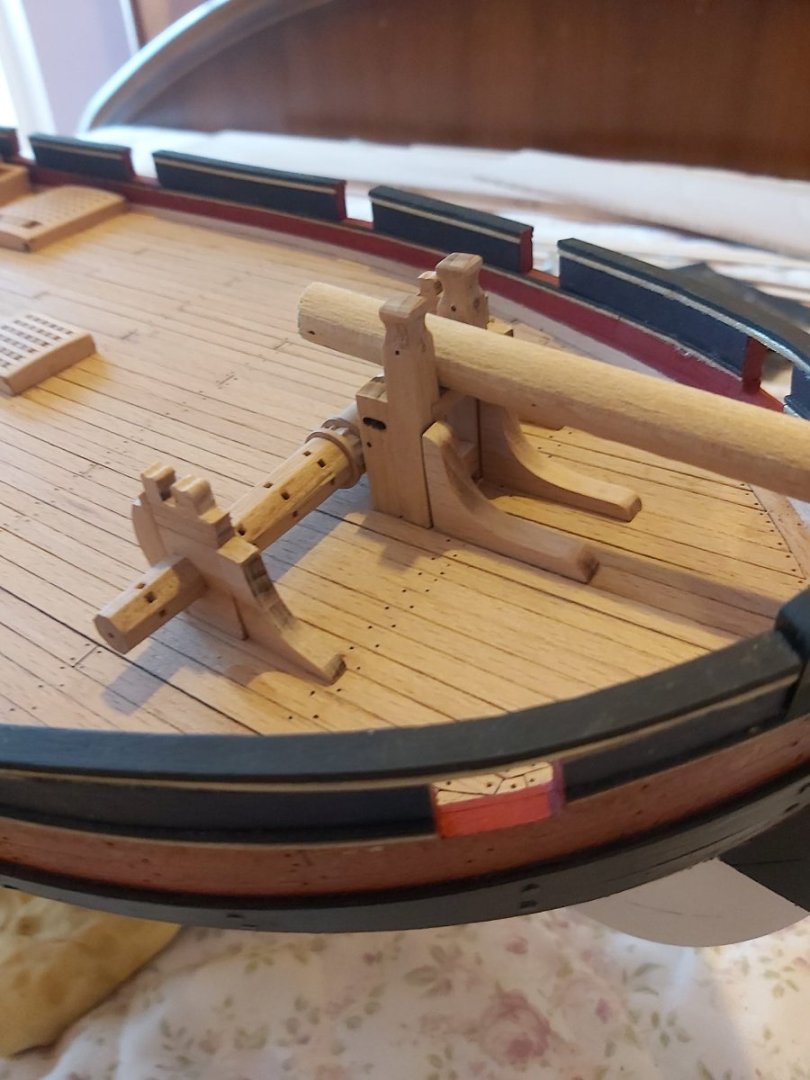
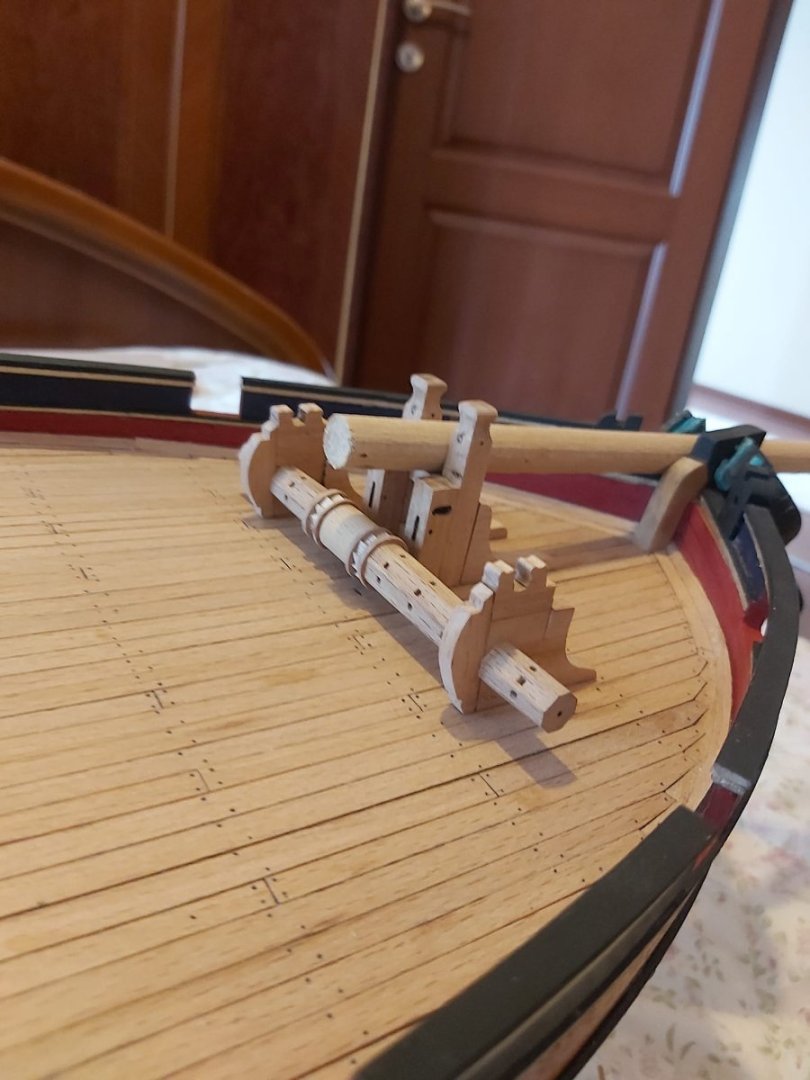
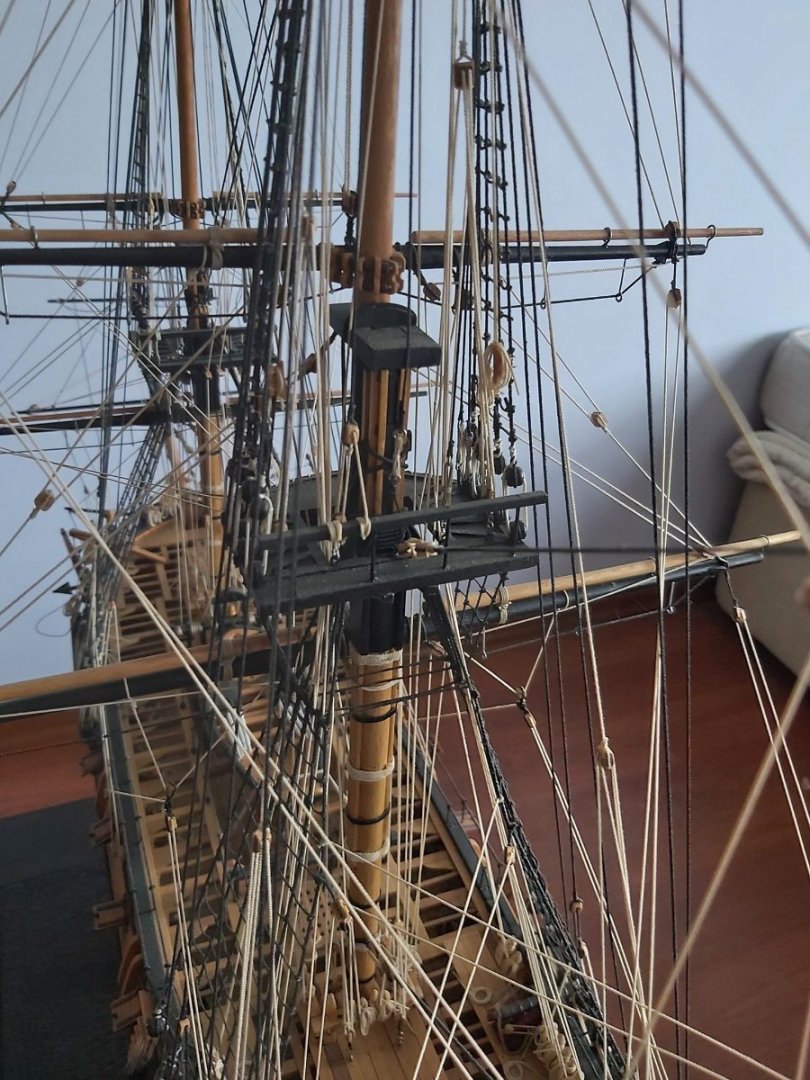
 Windlass is complete.
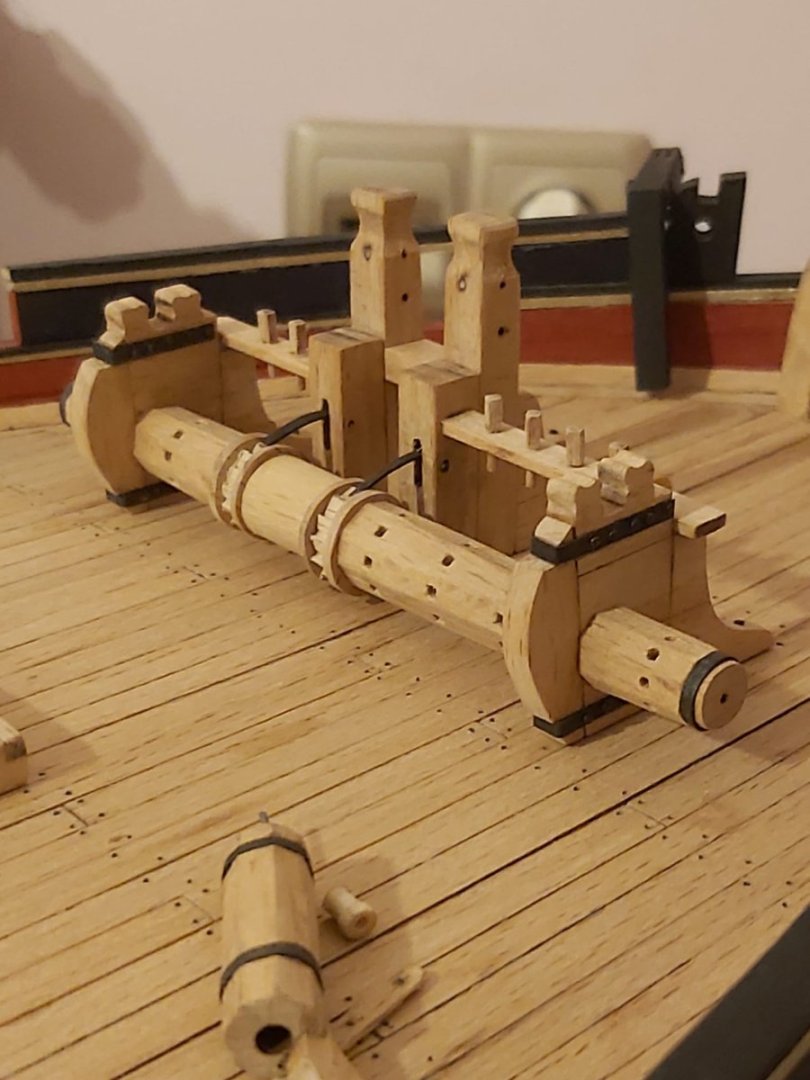


-
I have started working on the windlass. Some parts in the photos have not been glued and fixed yet. Just dry fitting.


-
Thank you Bruce. Be careful, don't let the admiral realize you stole her pot
-
Thank you Allan. No, I don't think you can use my method at your model scale. I use 1,8 mm of cutter.
-
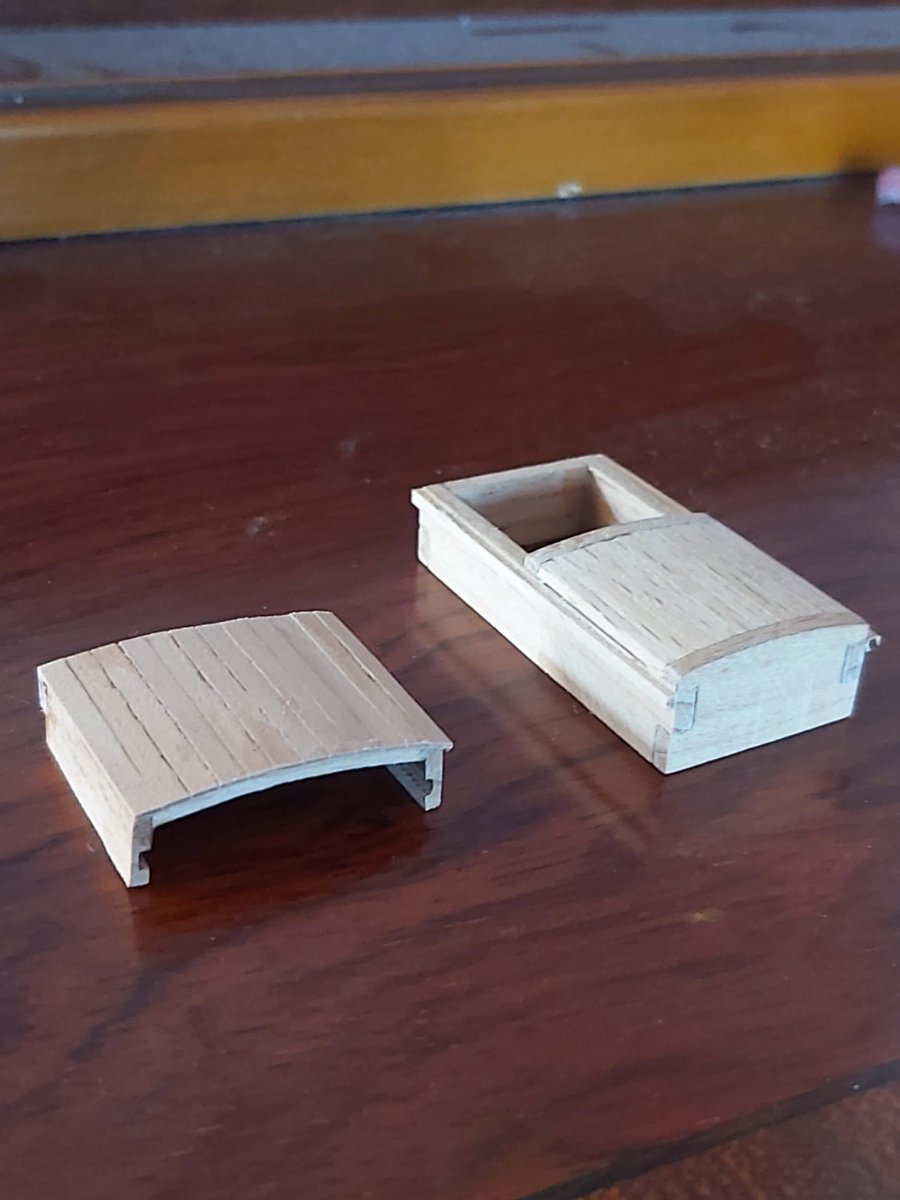
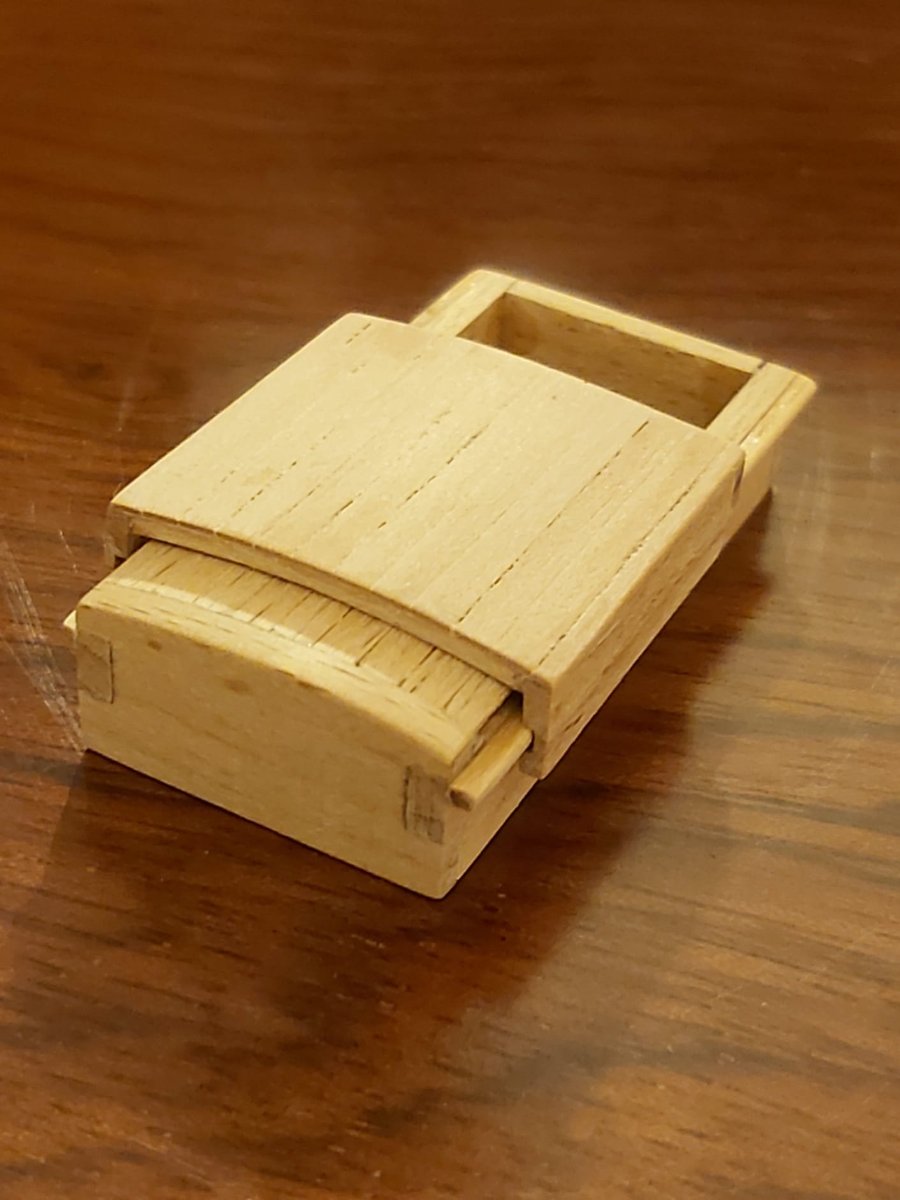
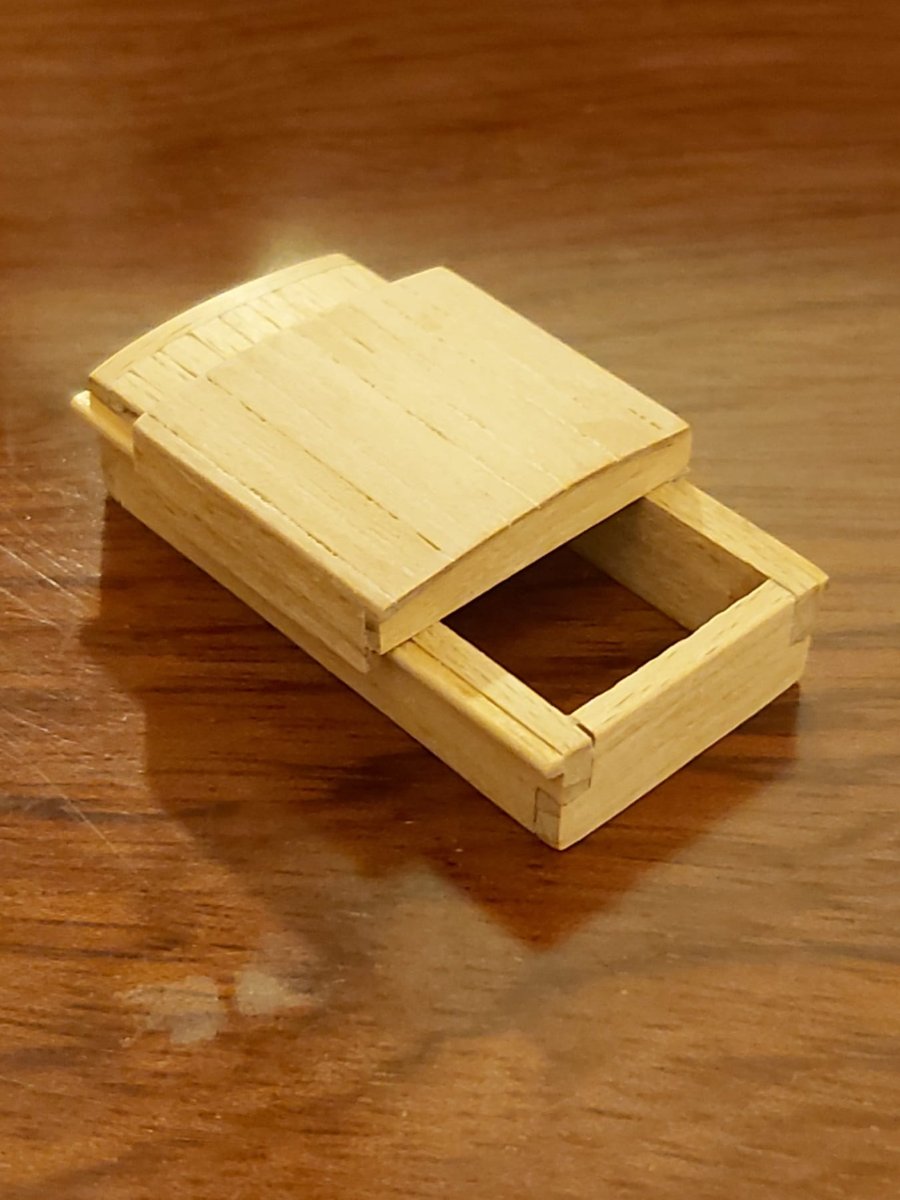
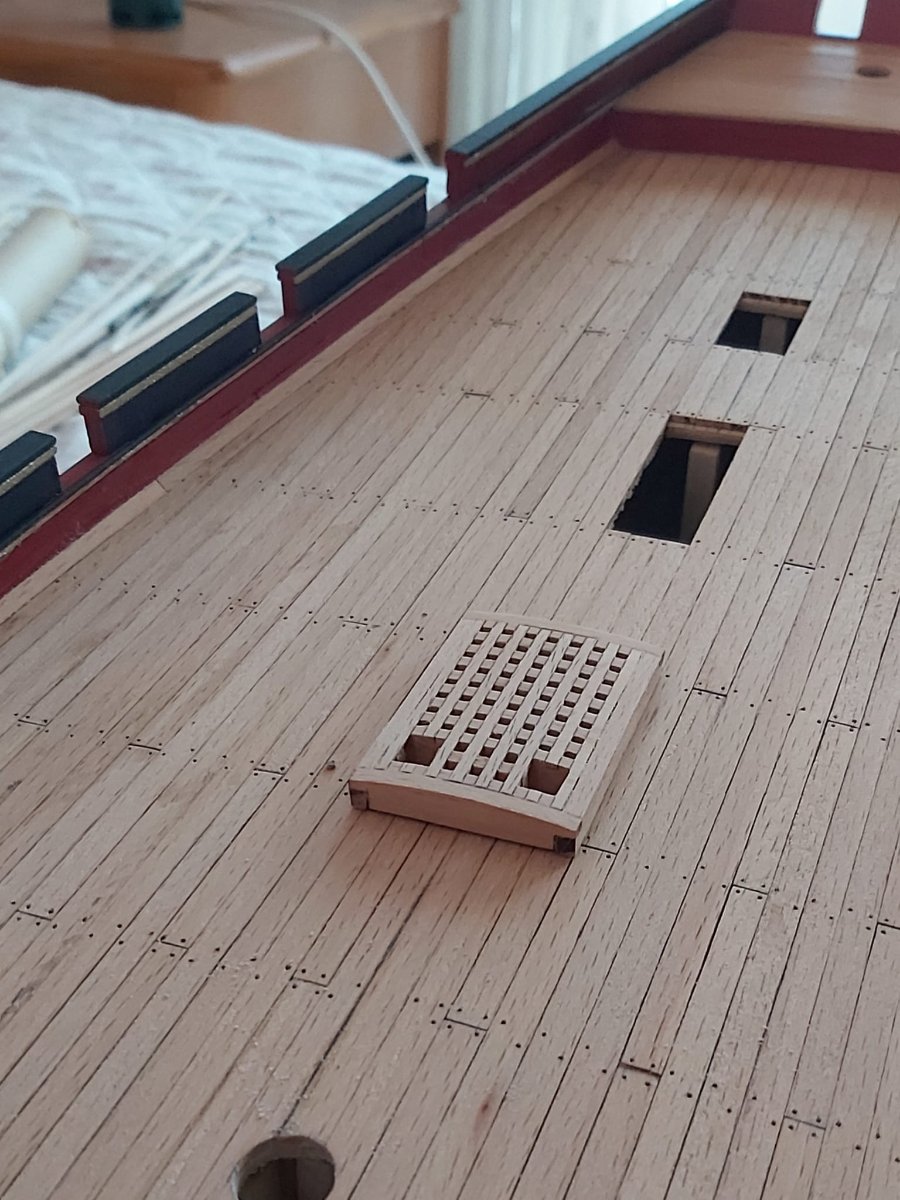
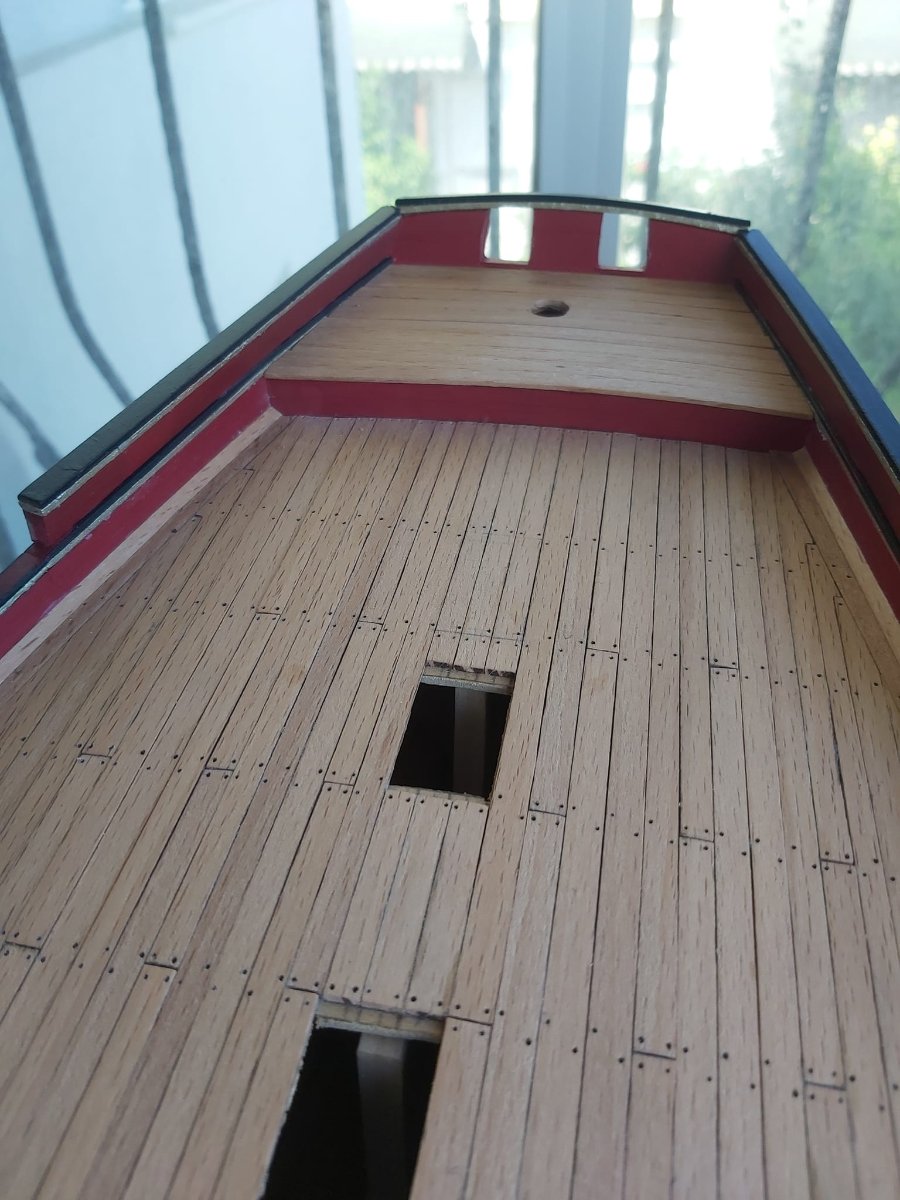
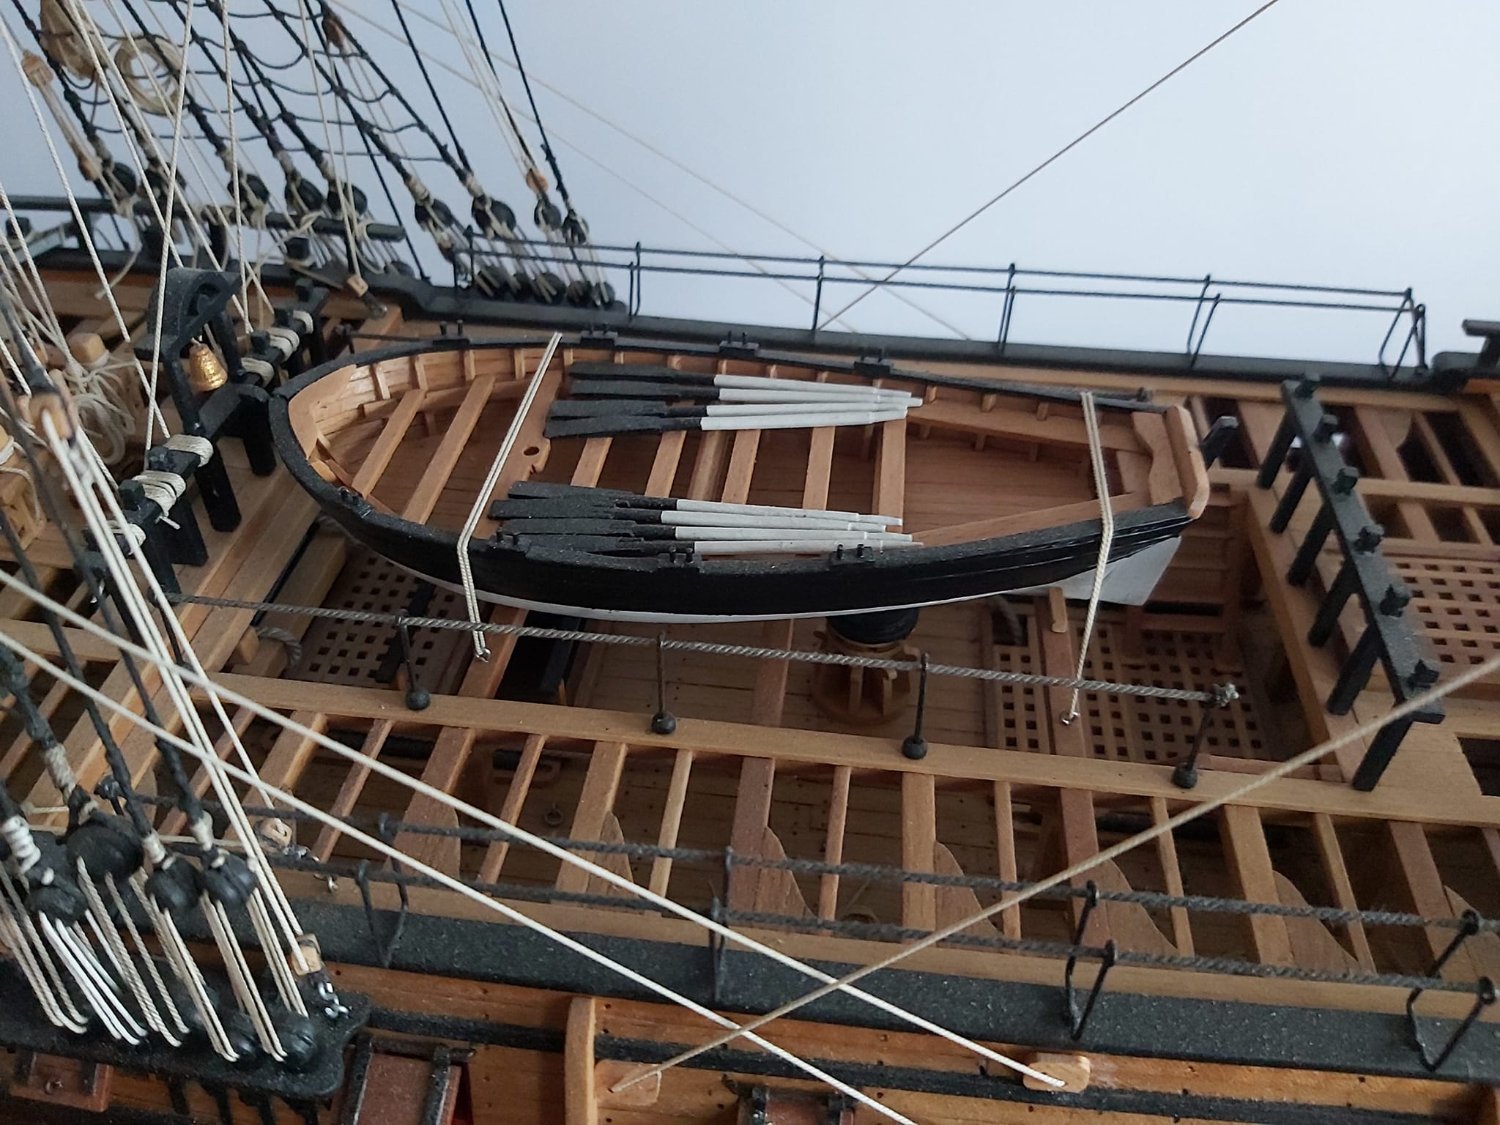
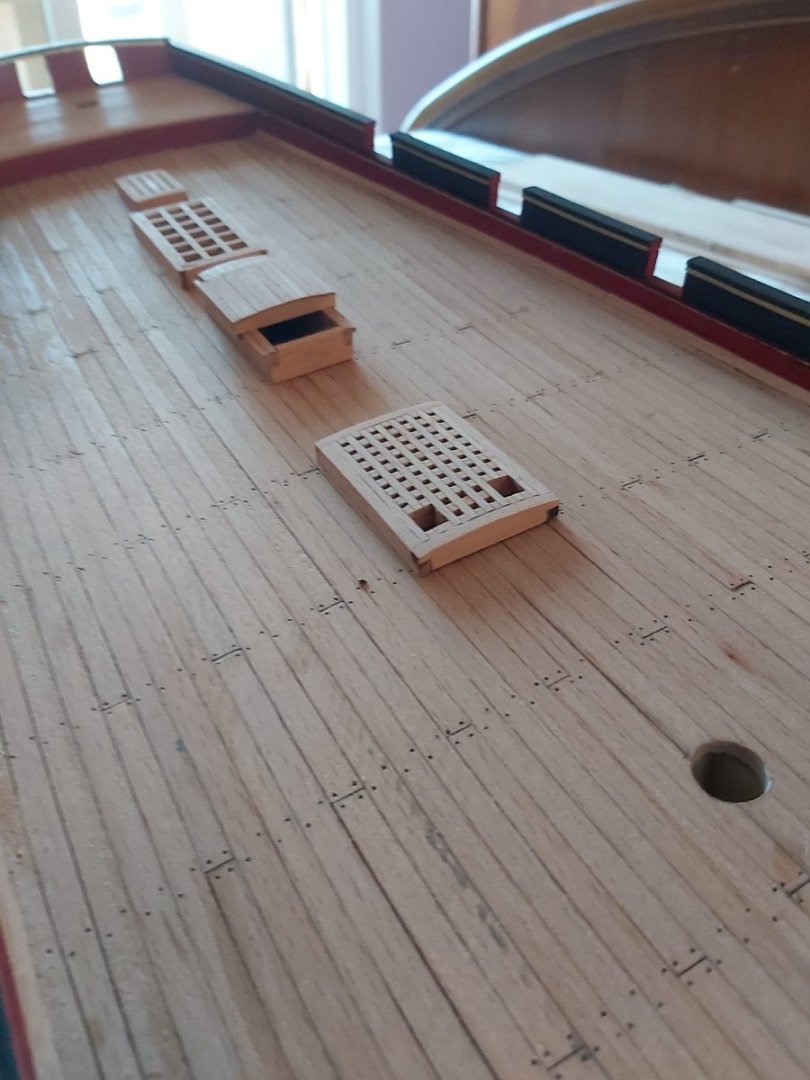
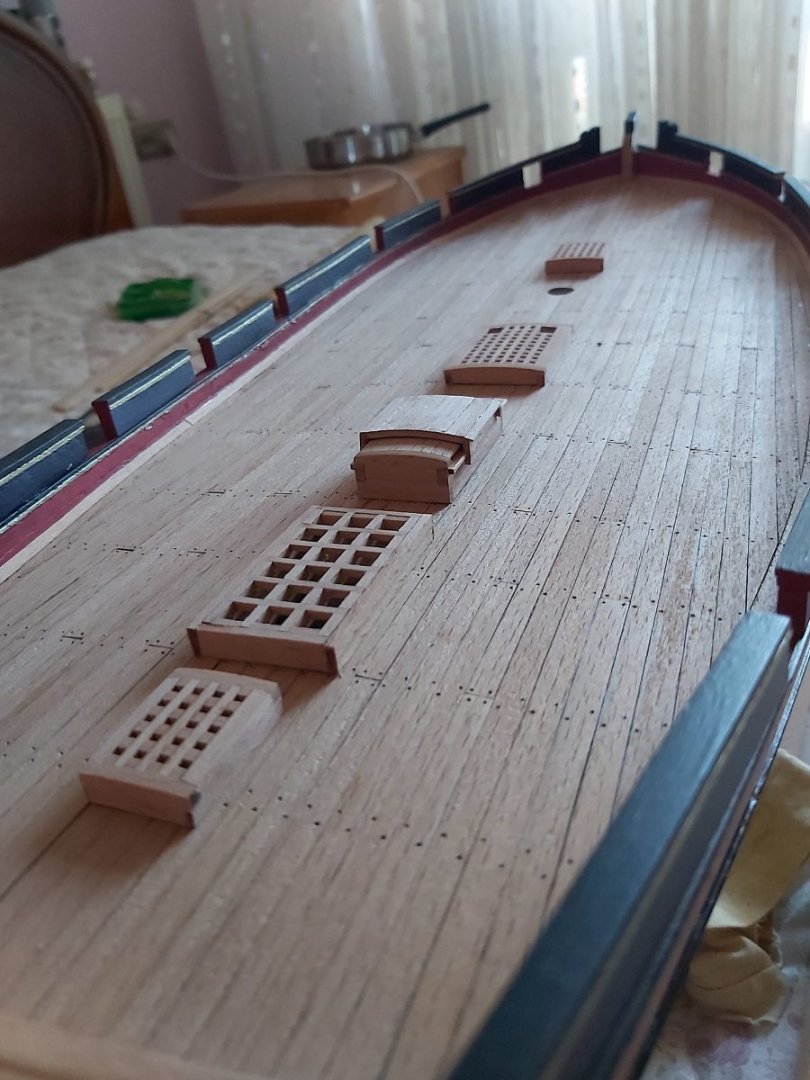
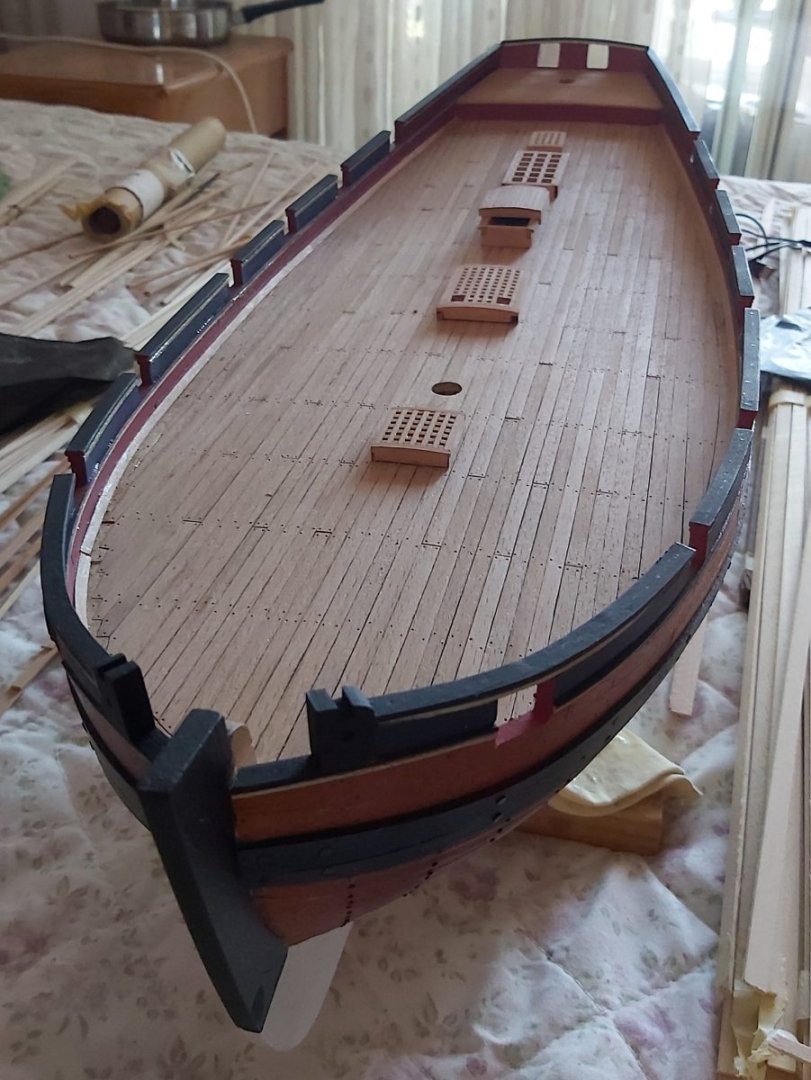
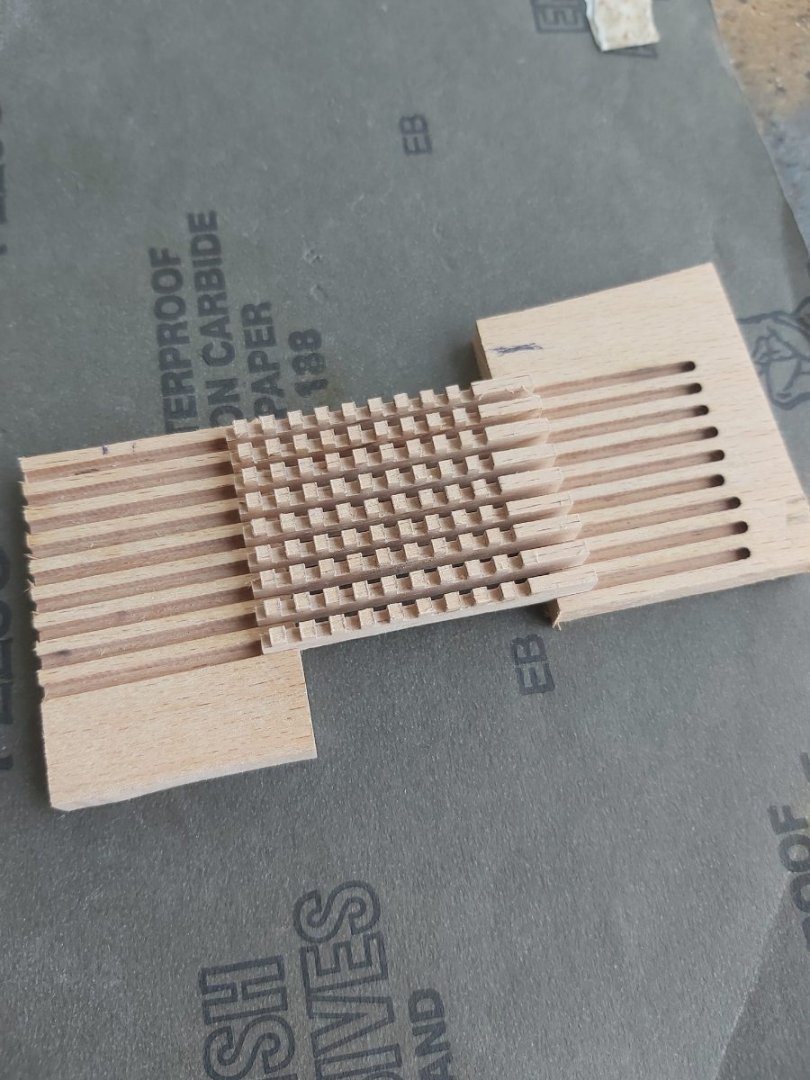
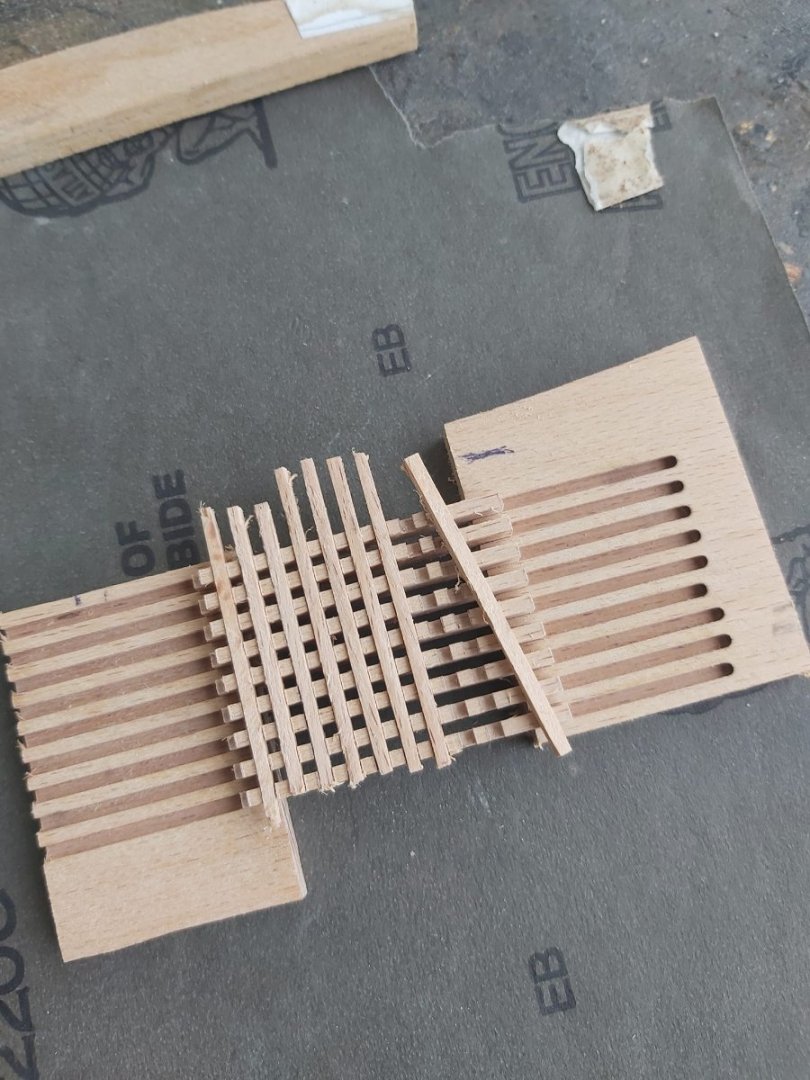
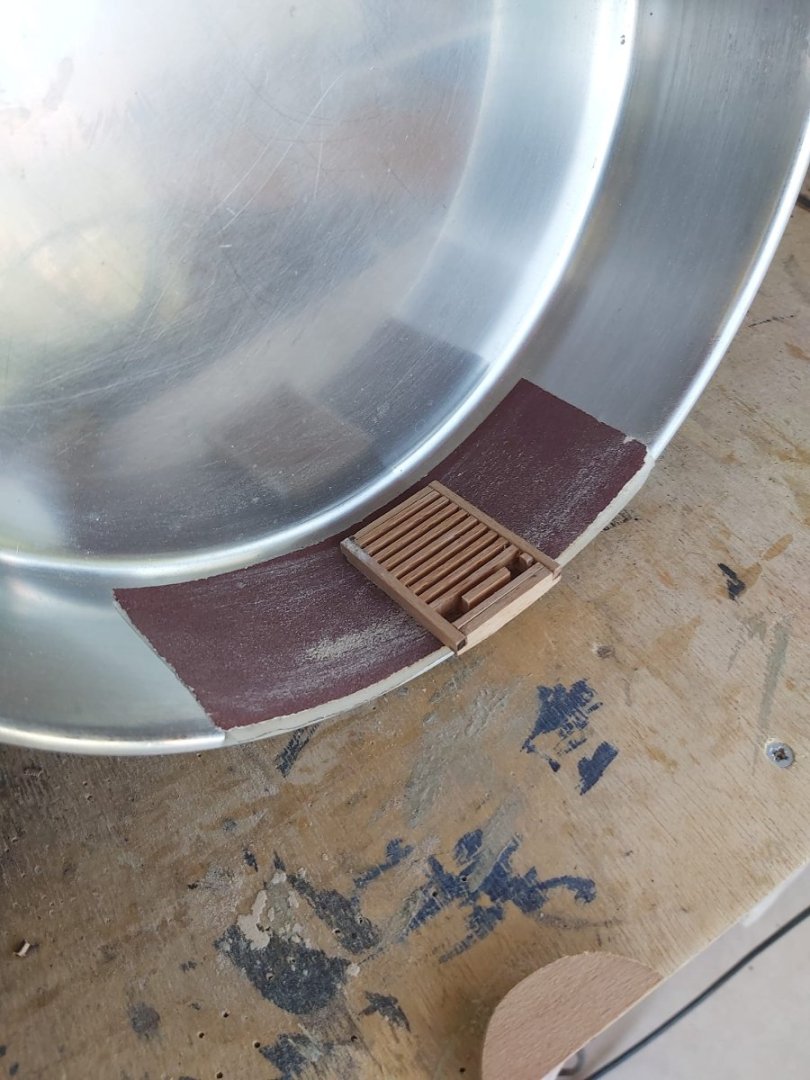
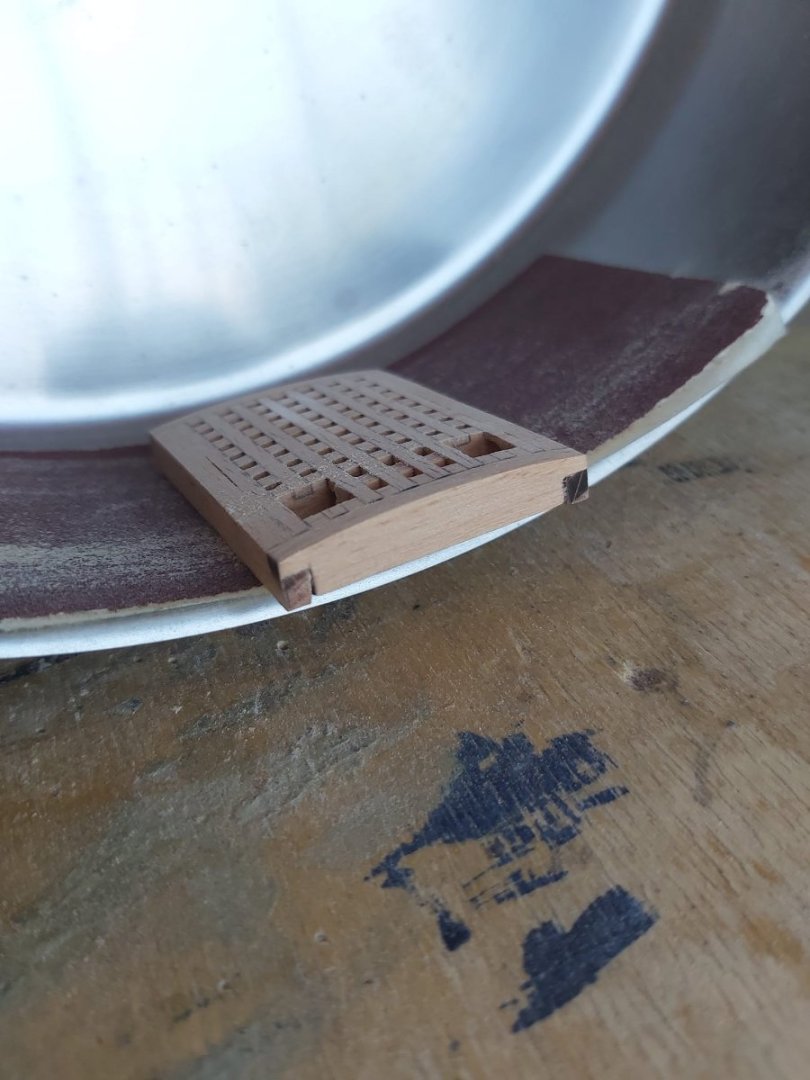
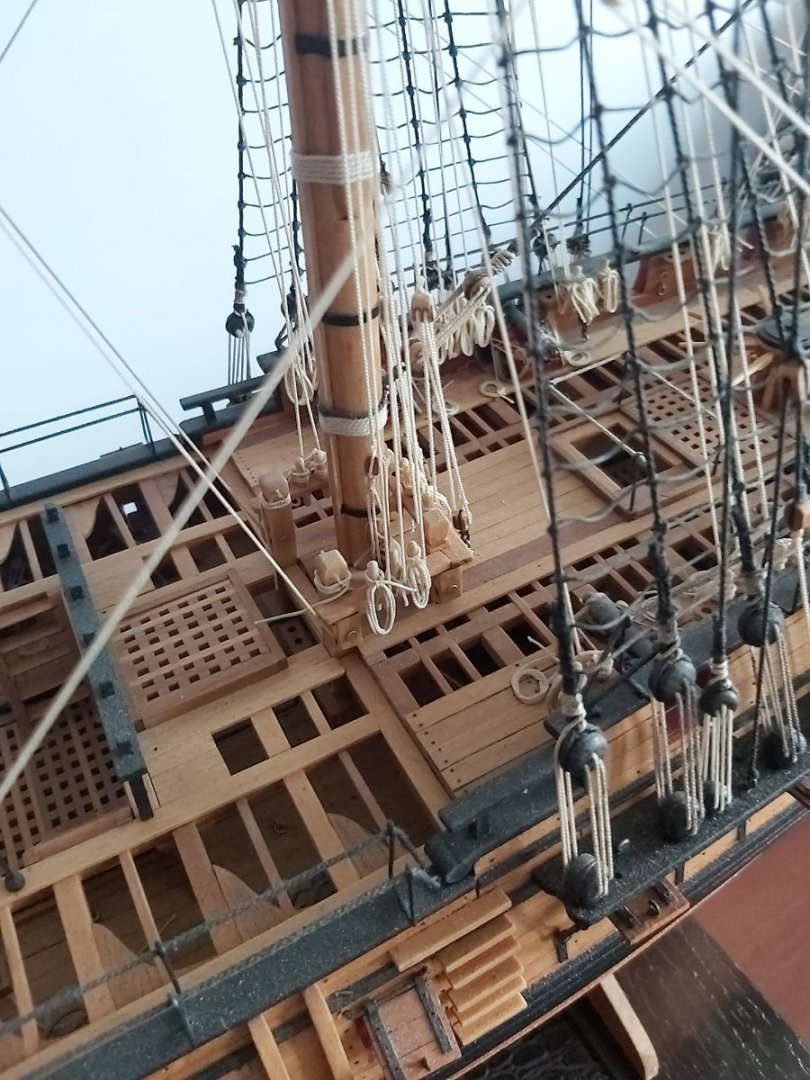
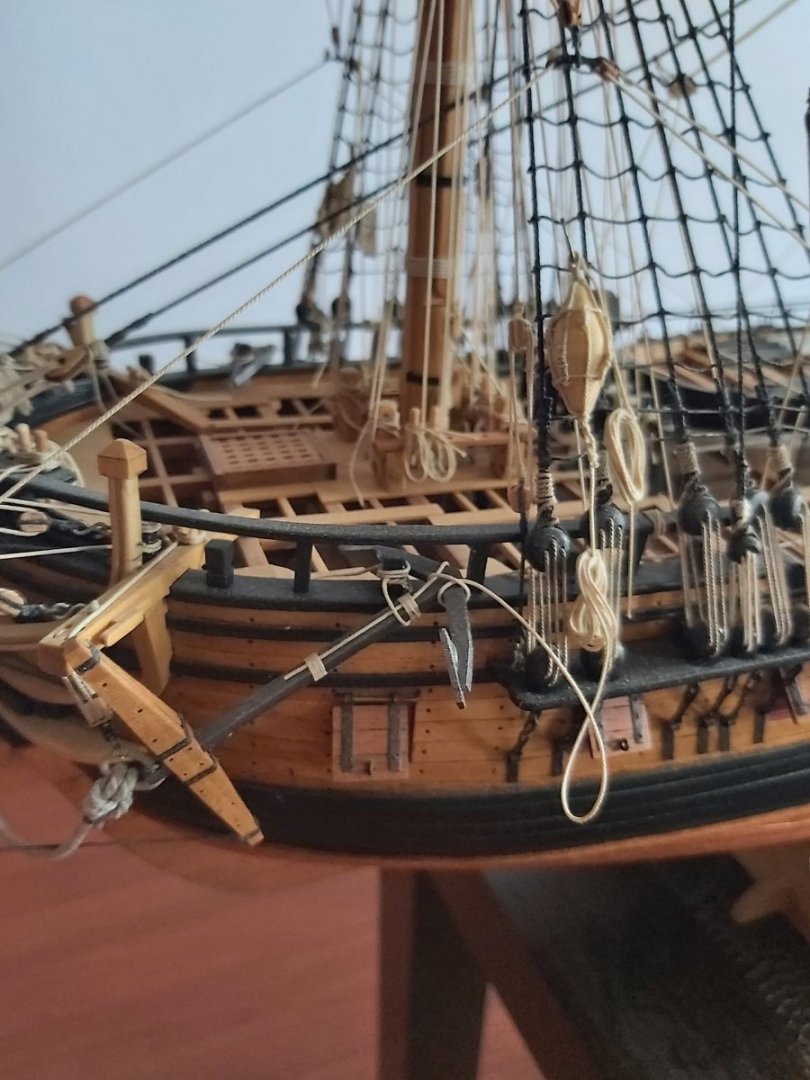
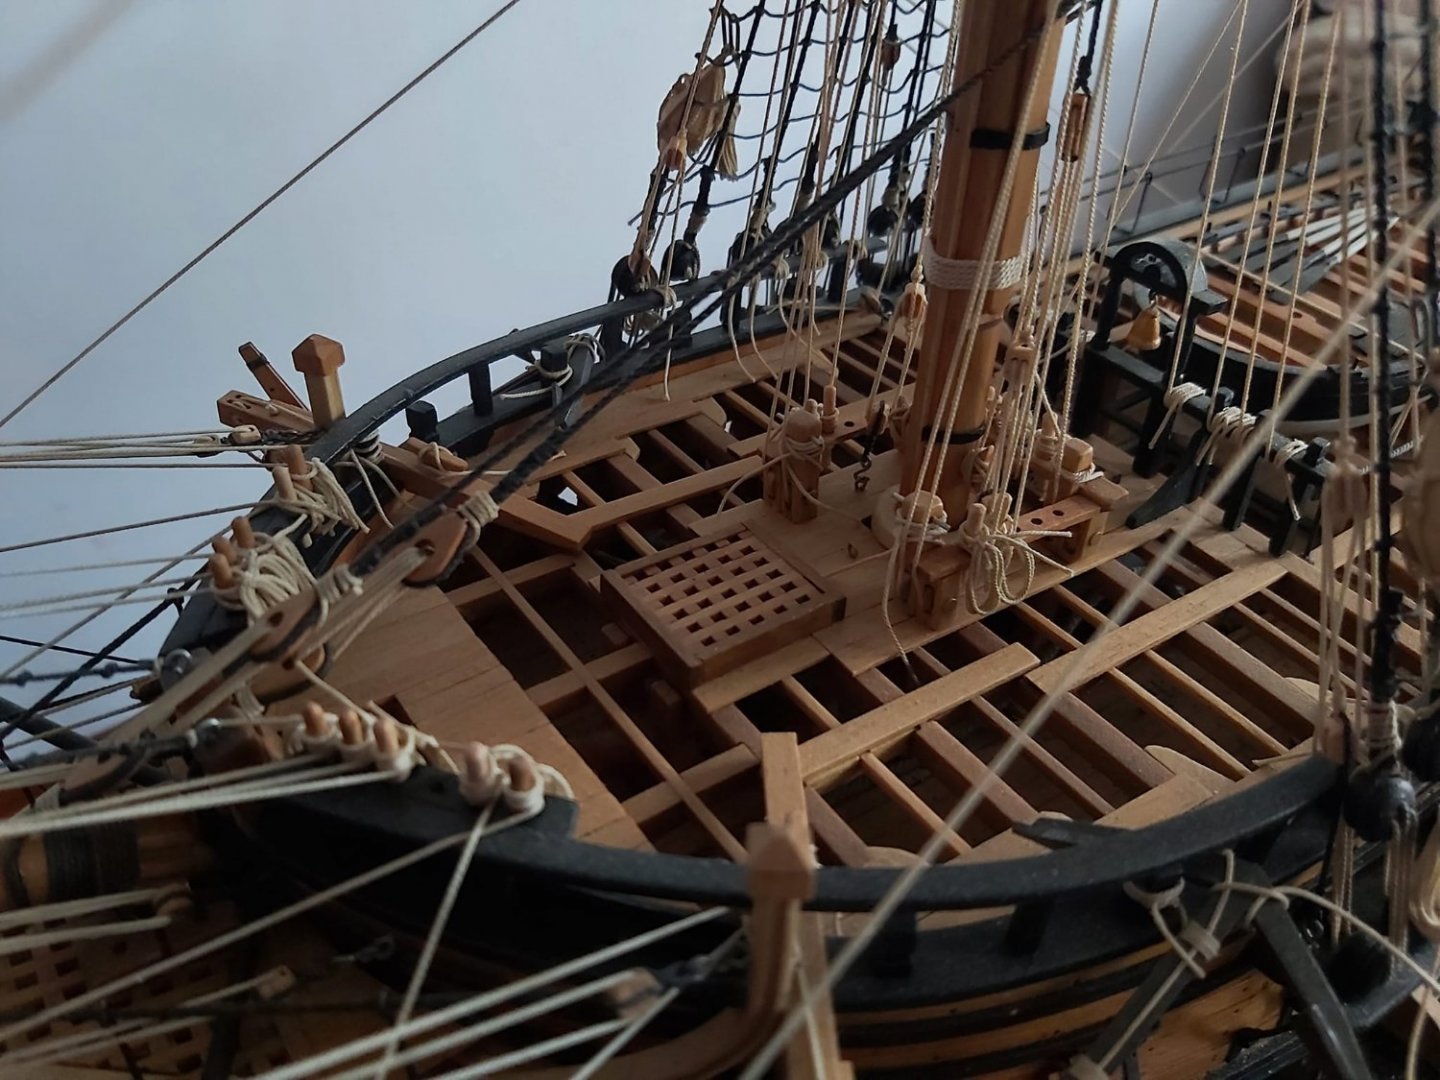
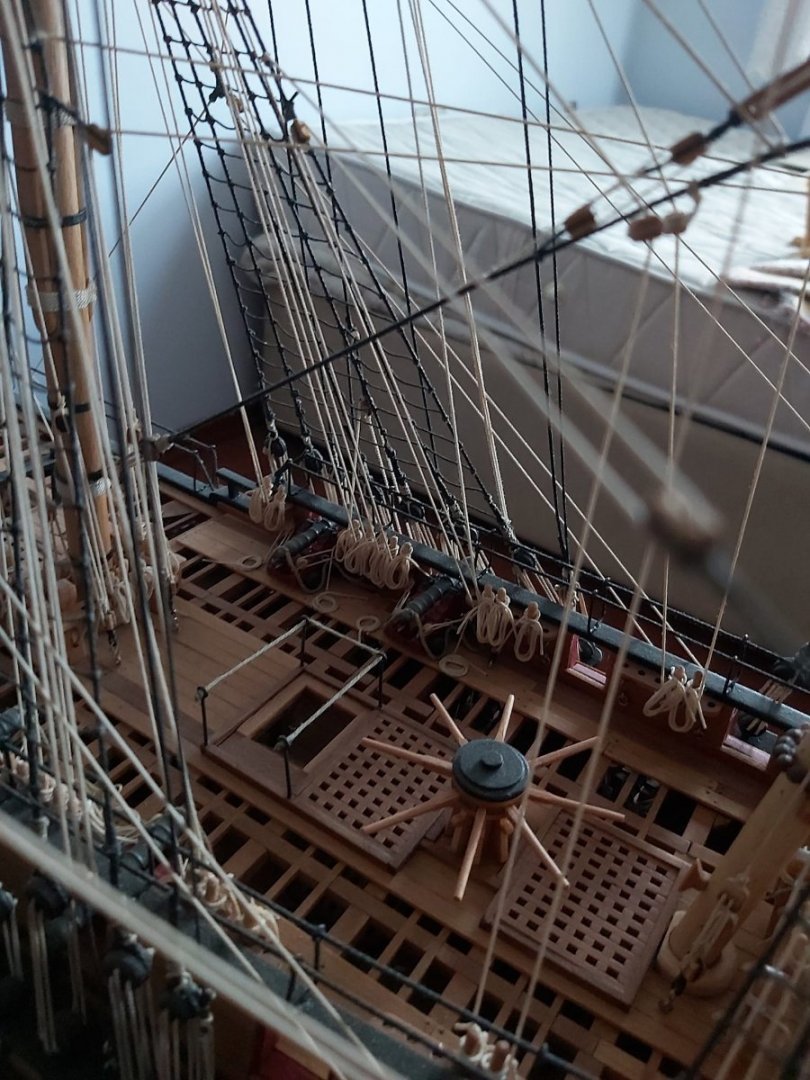
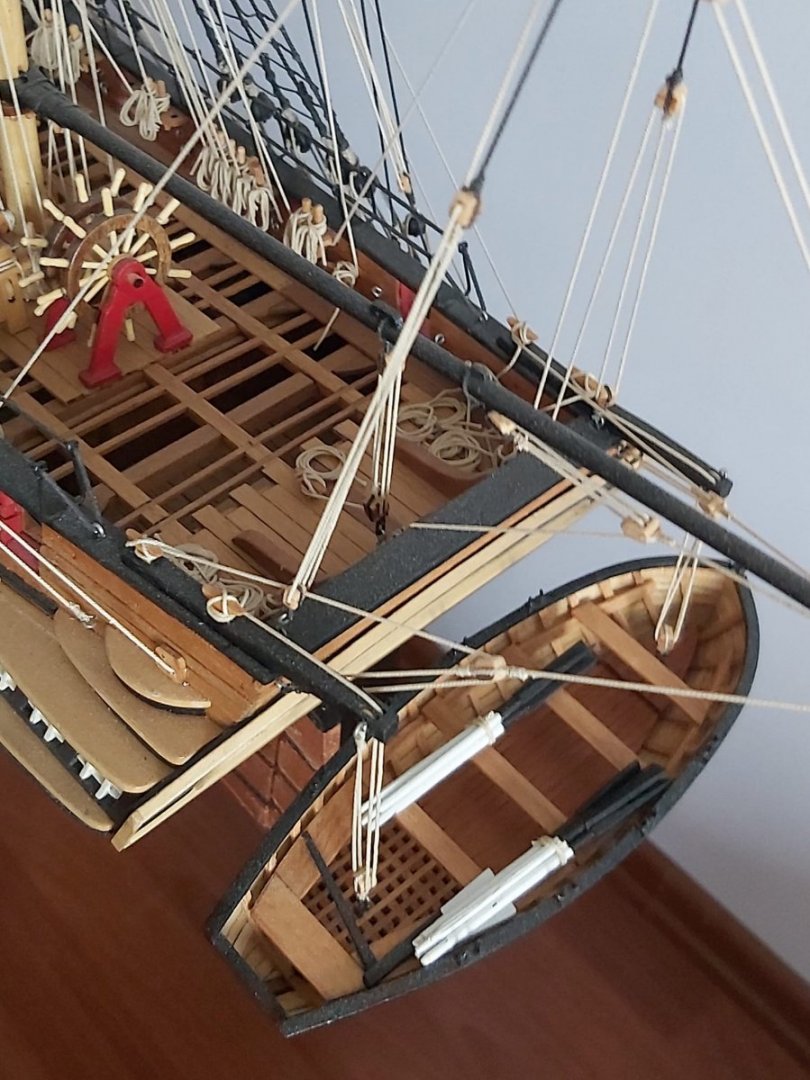
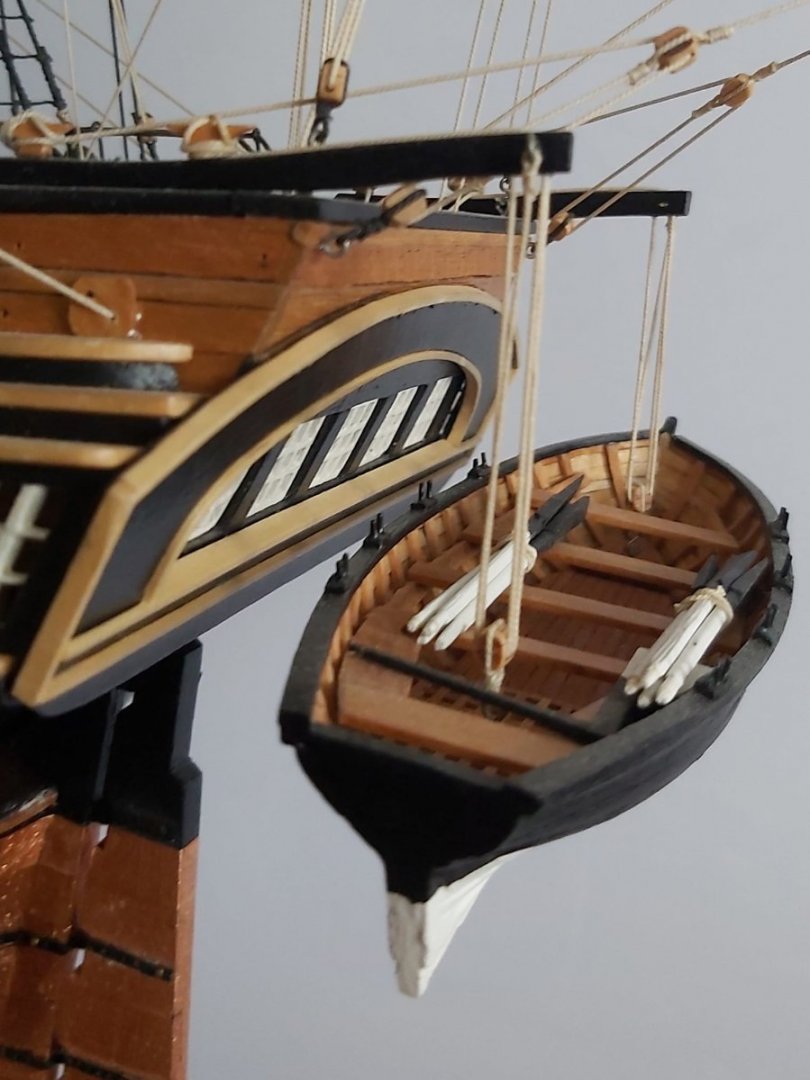
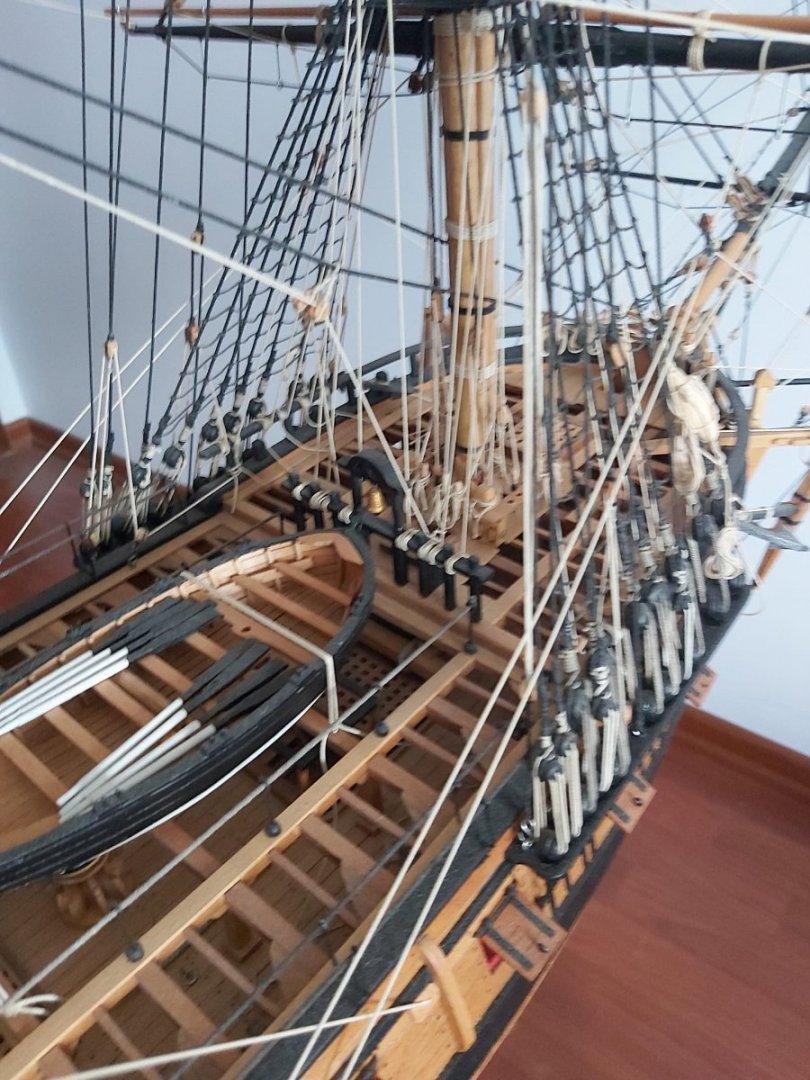
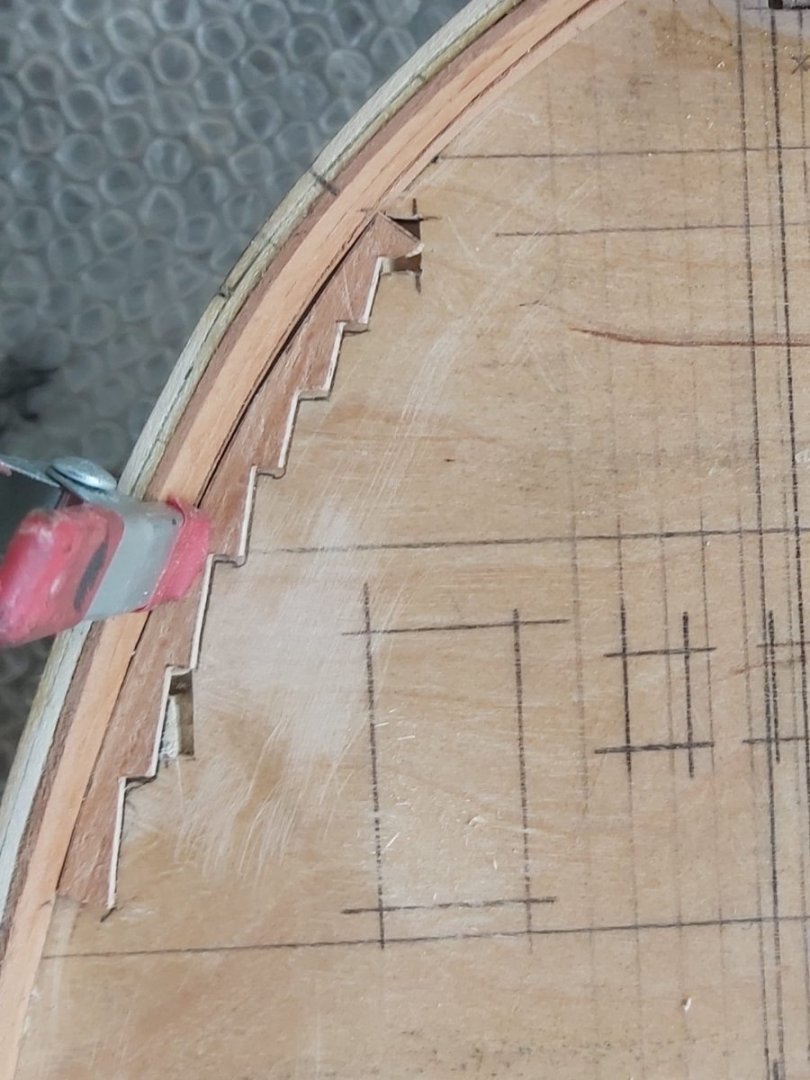
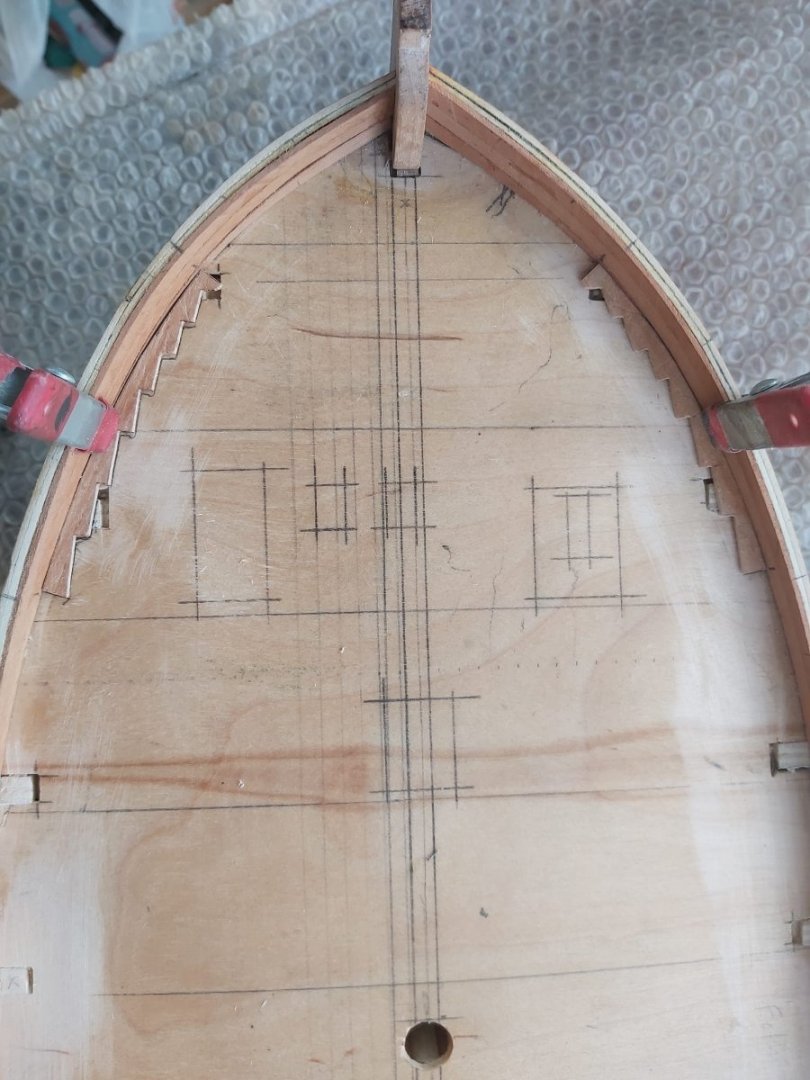
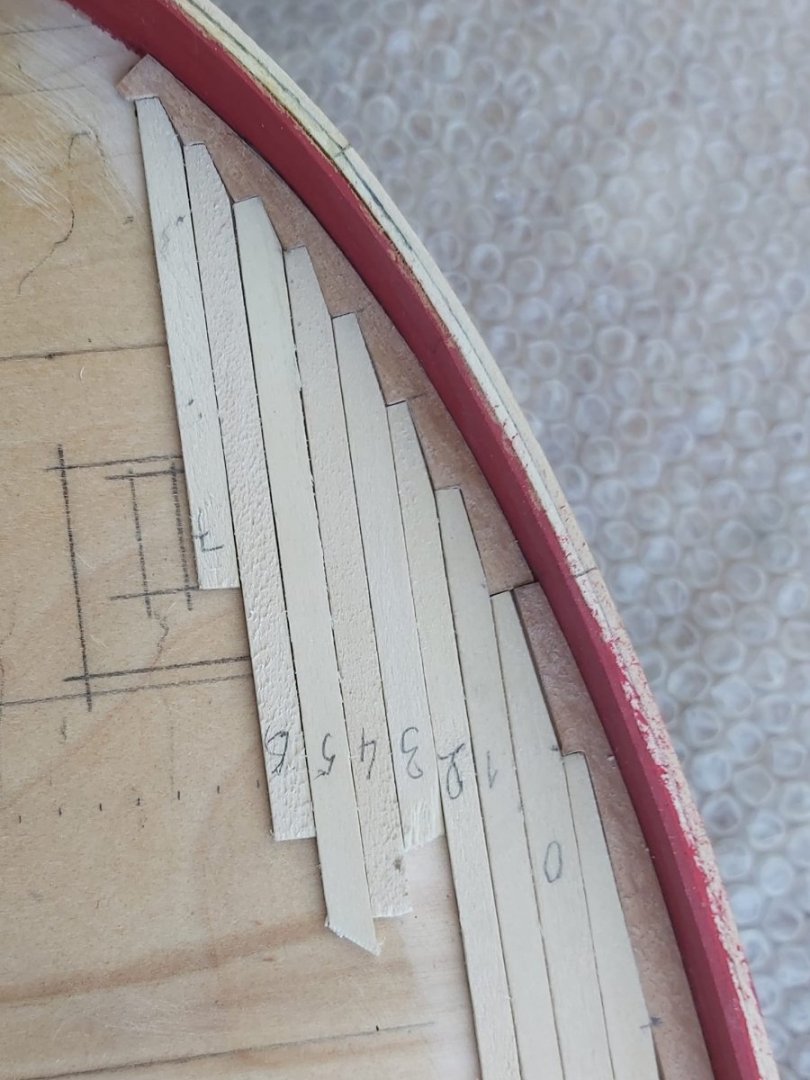
I made the companionway, hatches, gratings and skylight according to the drawings in the Alert book.


-
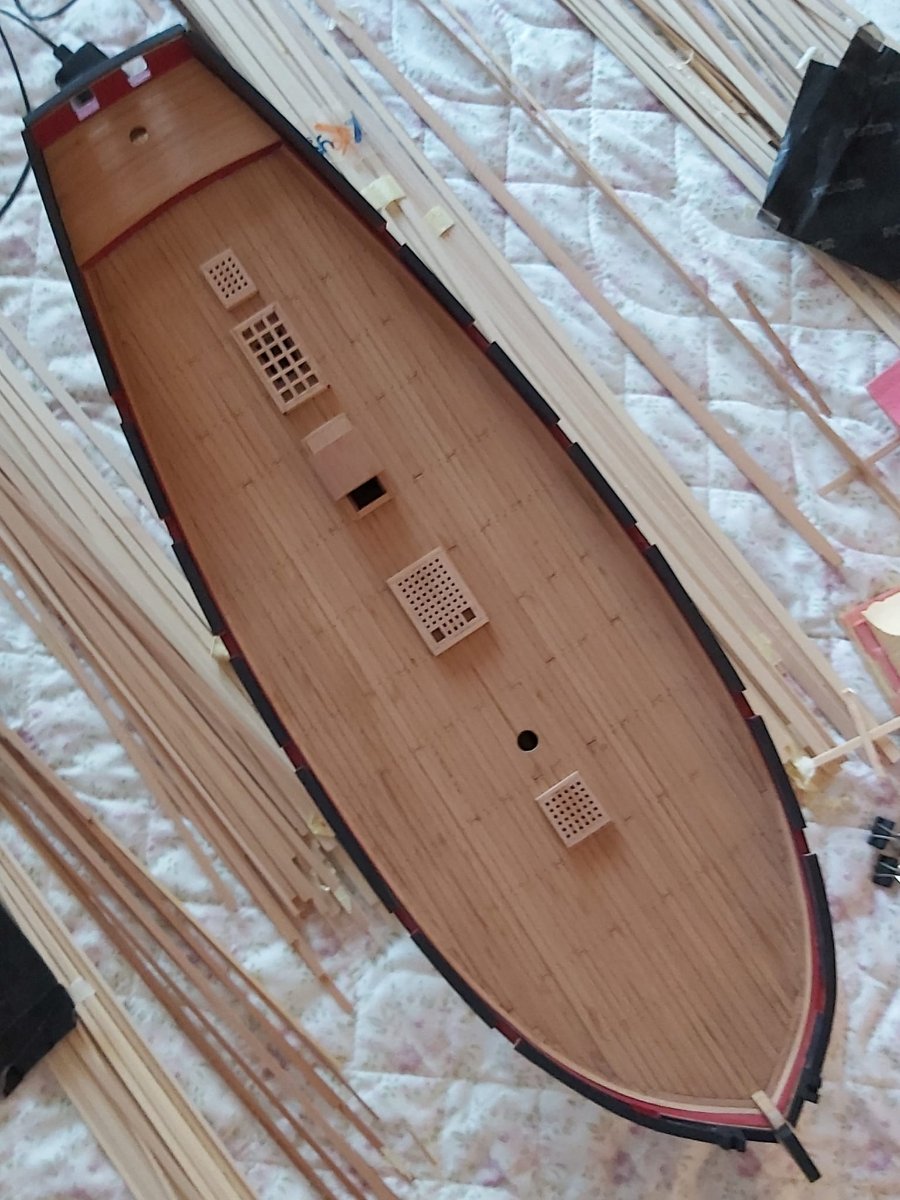
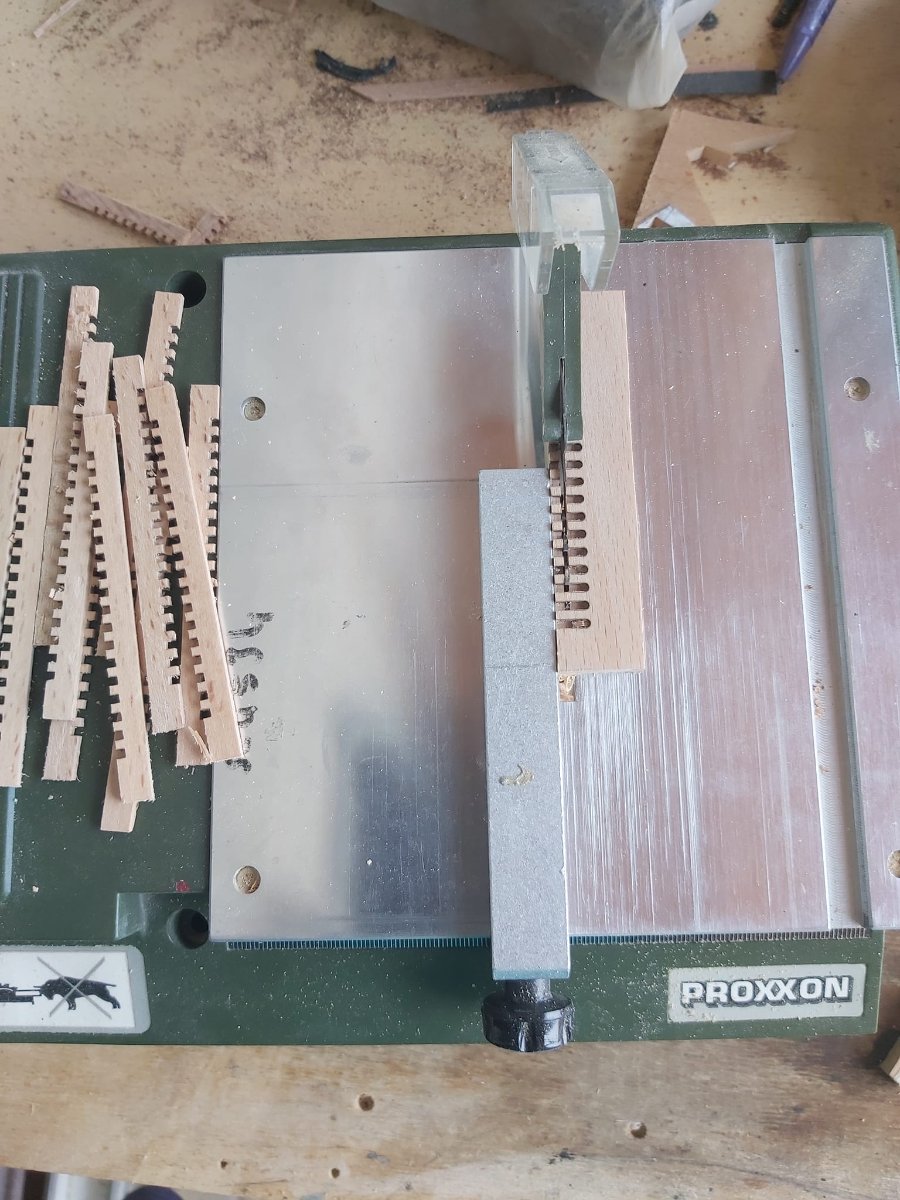
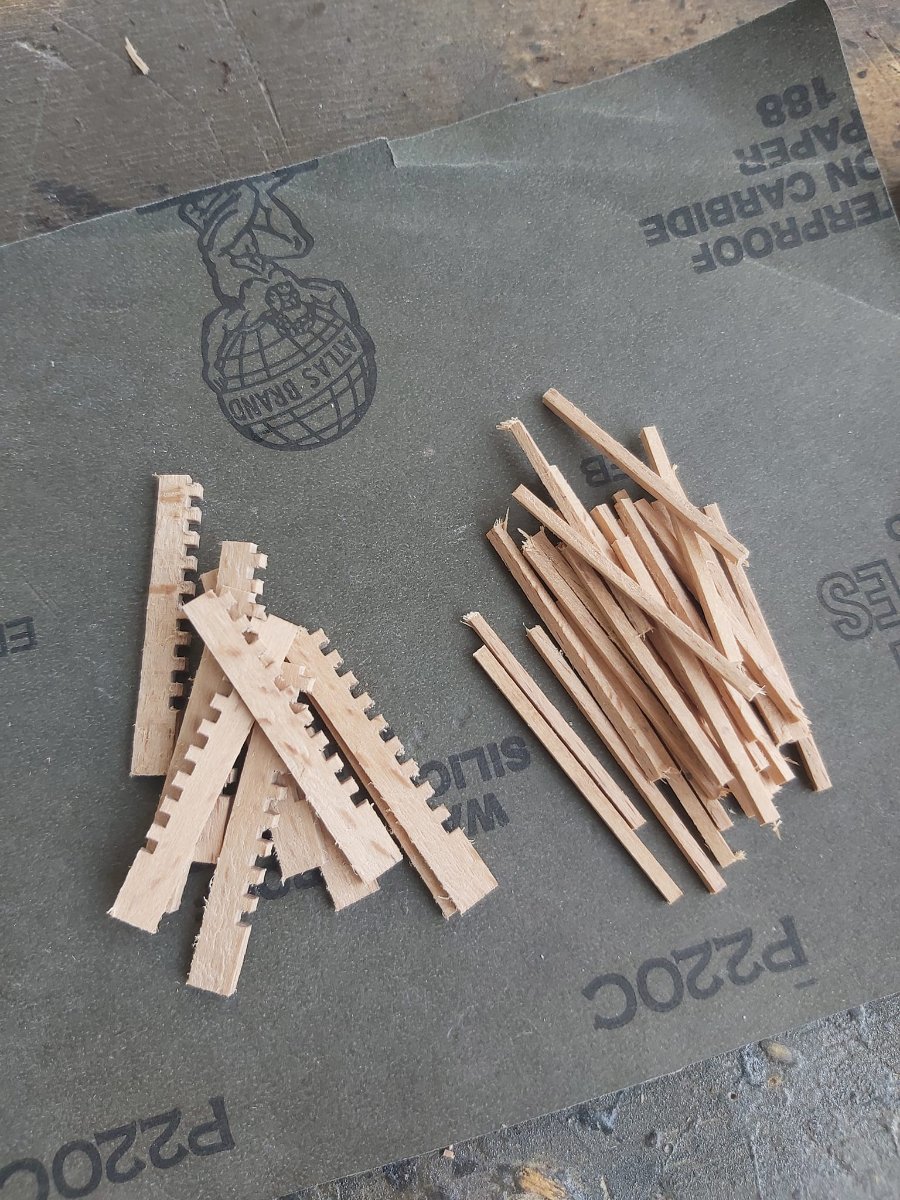
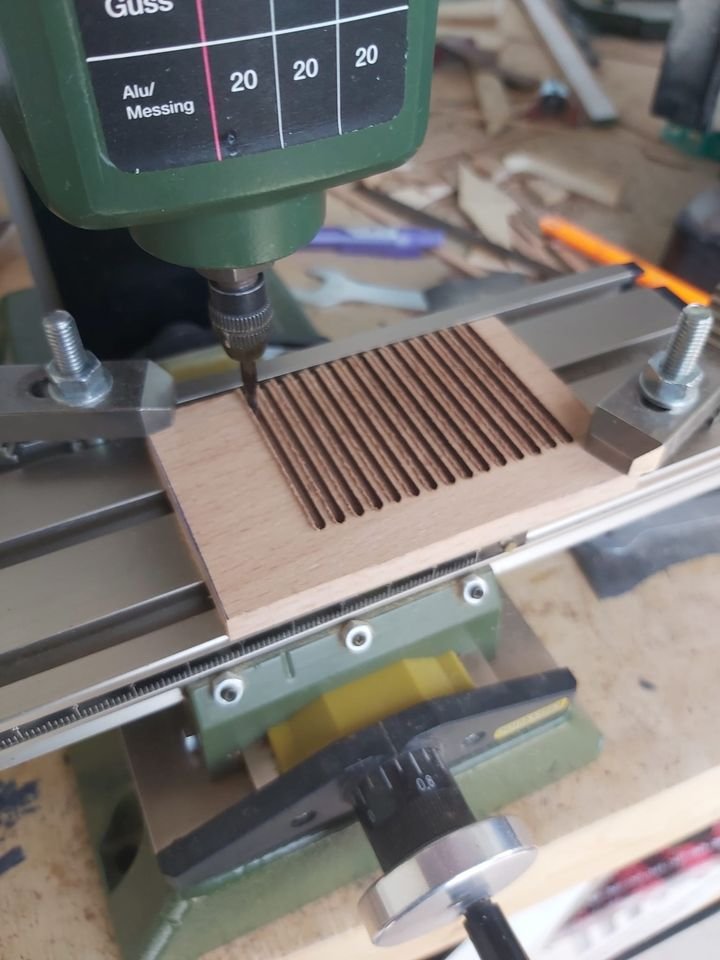
I am back at my shipyard after a long summer break. I started with the main hatchway to make the deck fittings. As always, I use milling machine when making the grating elements. I used a sandpaper that I attached to a pot to make the camber on the grating. (for those looking for a practical way to create this camber)


-
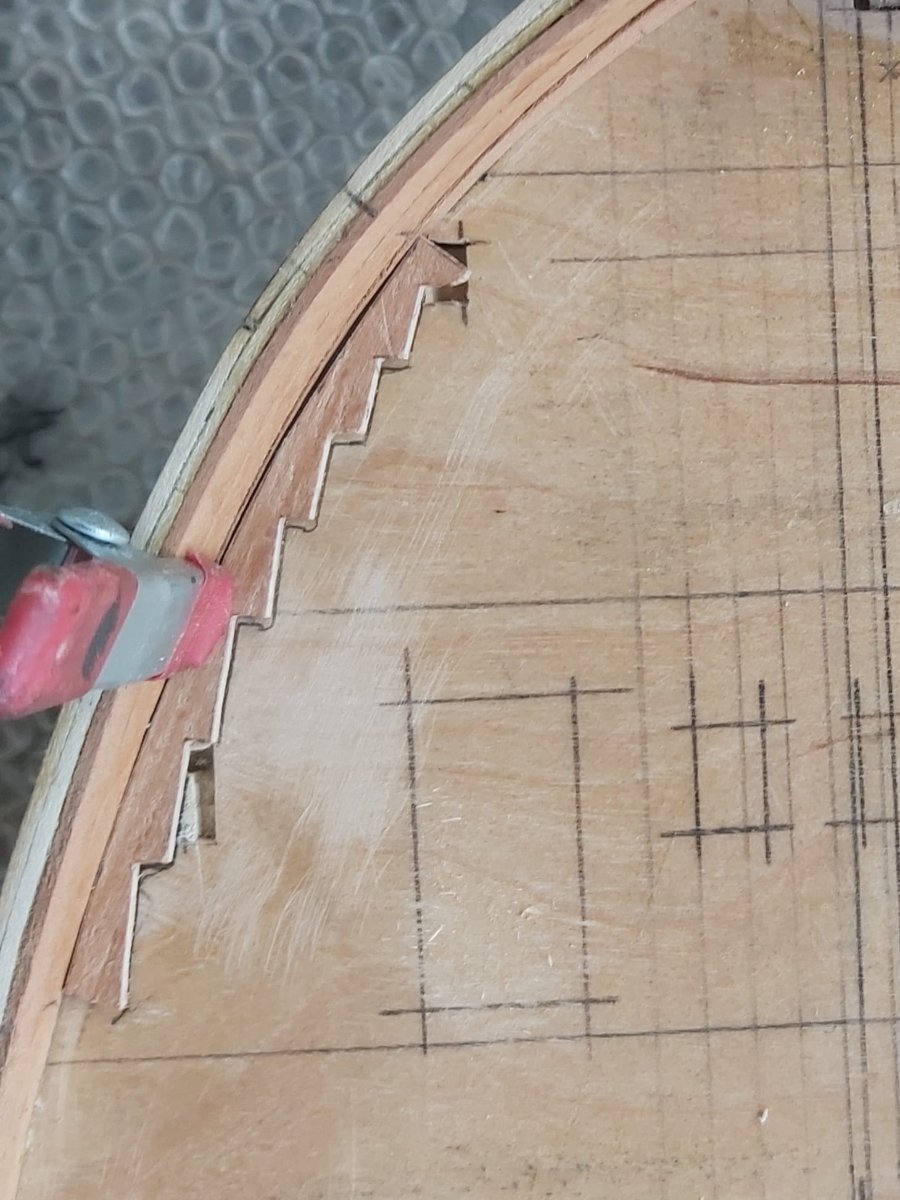
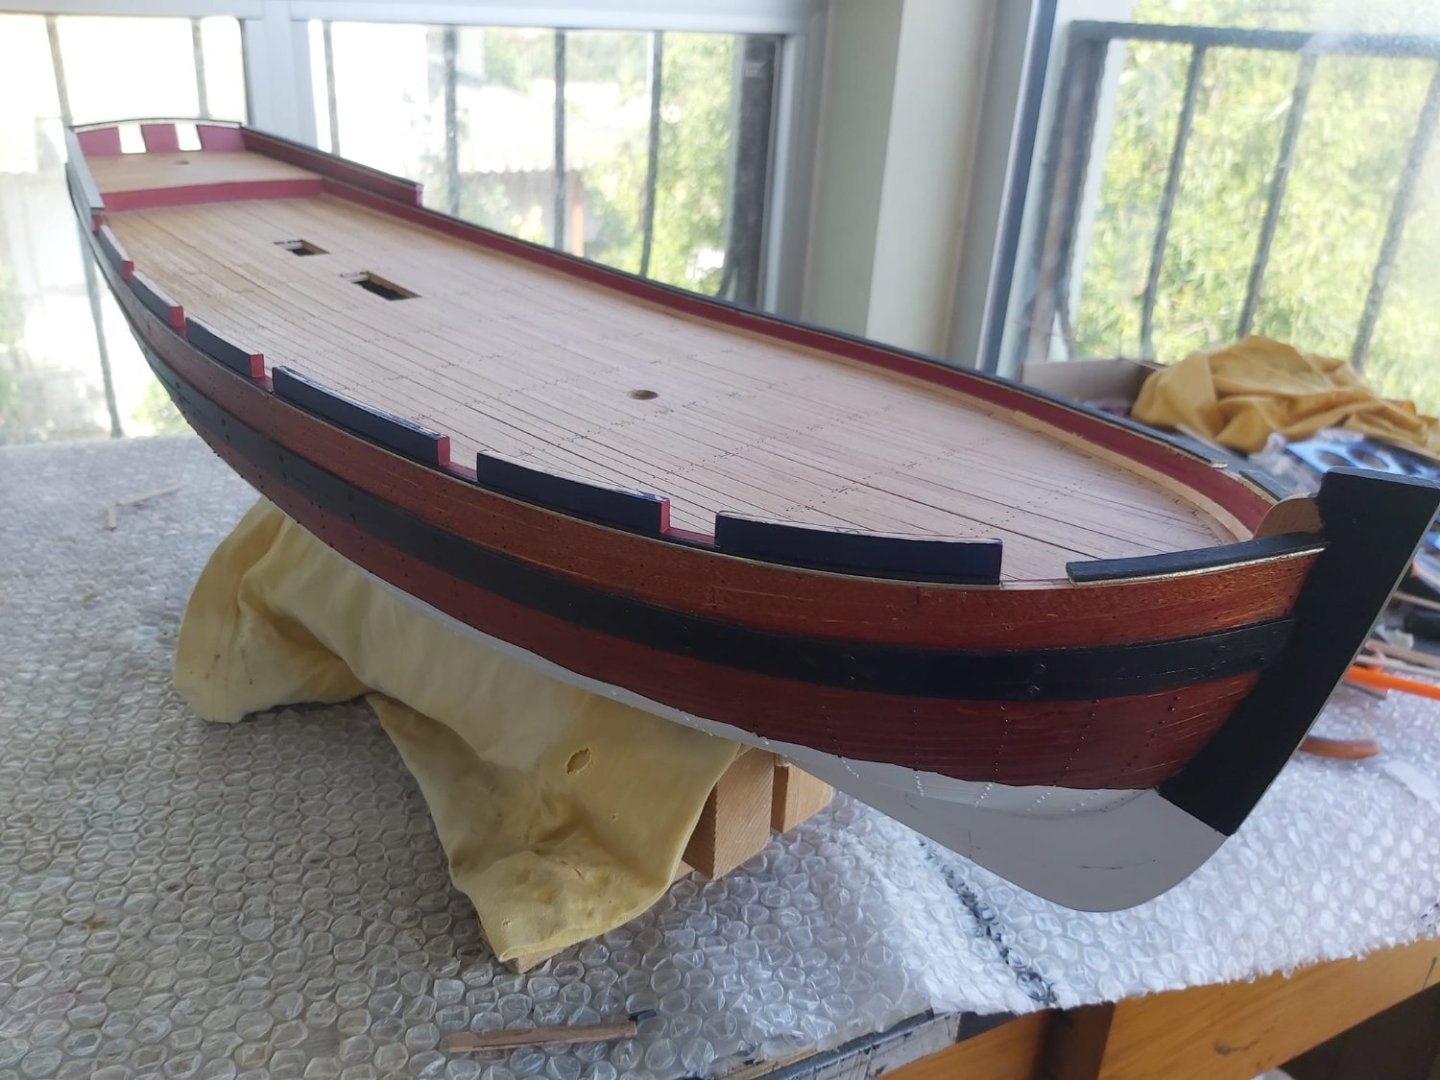
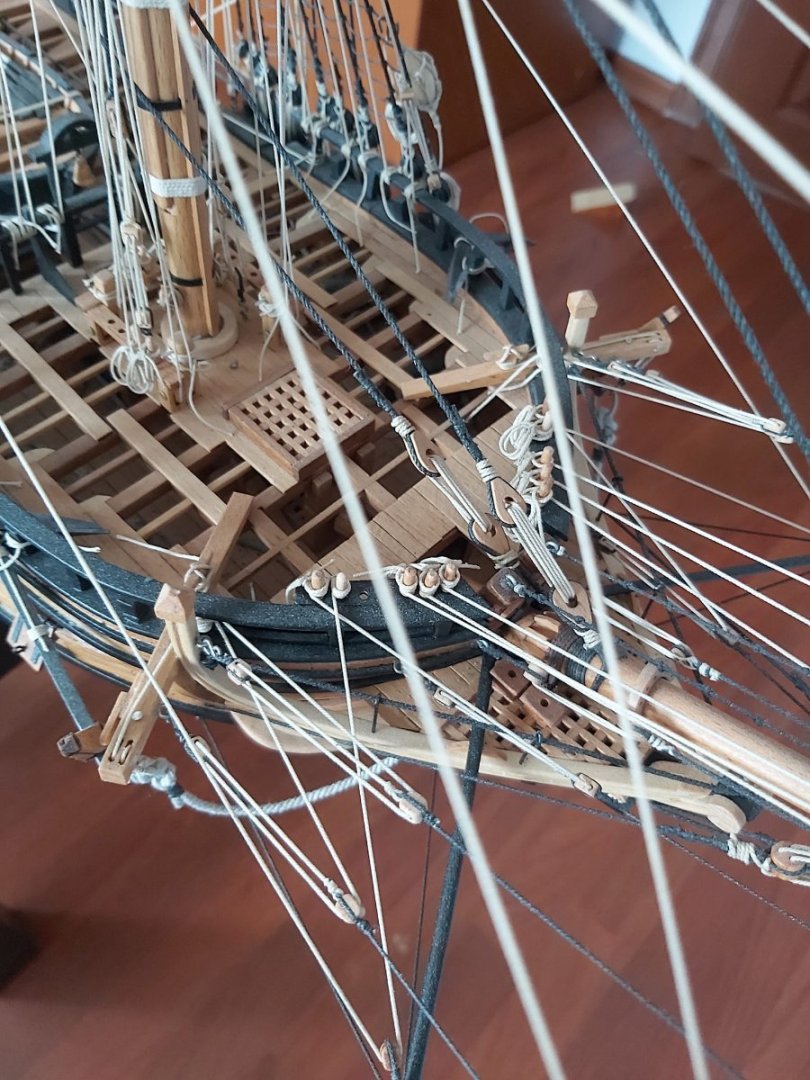
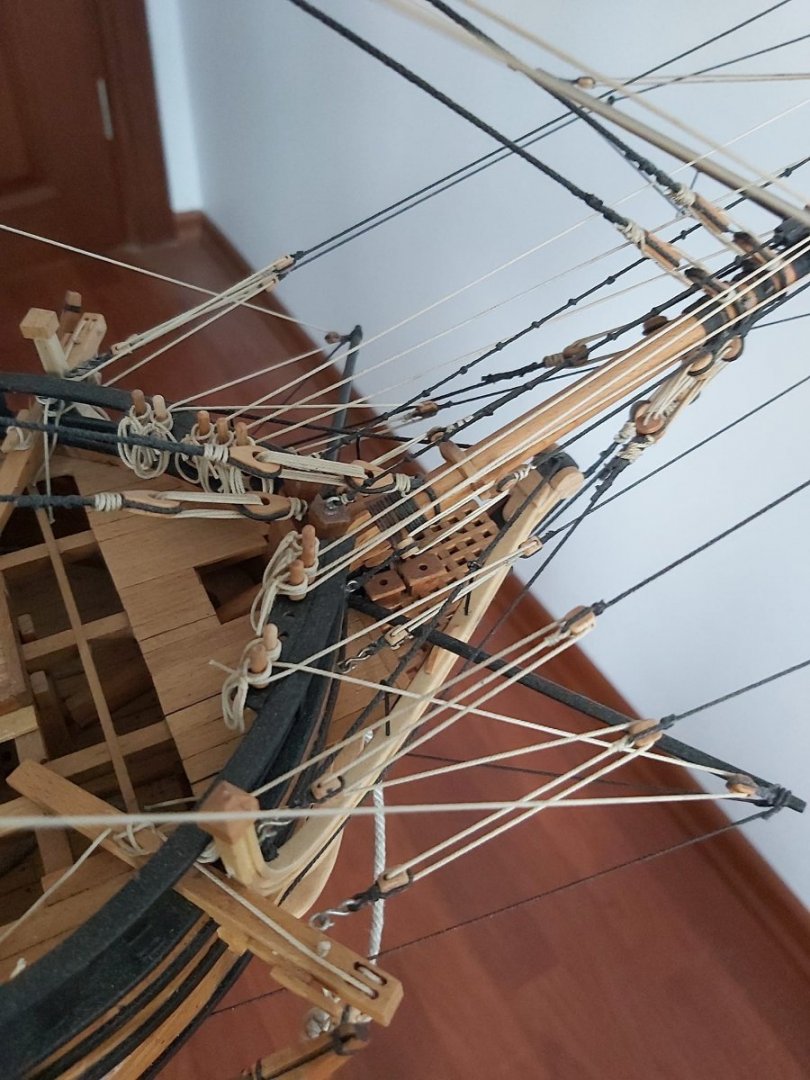
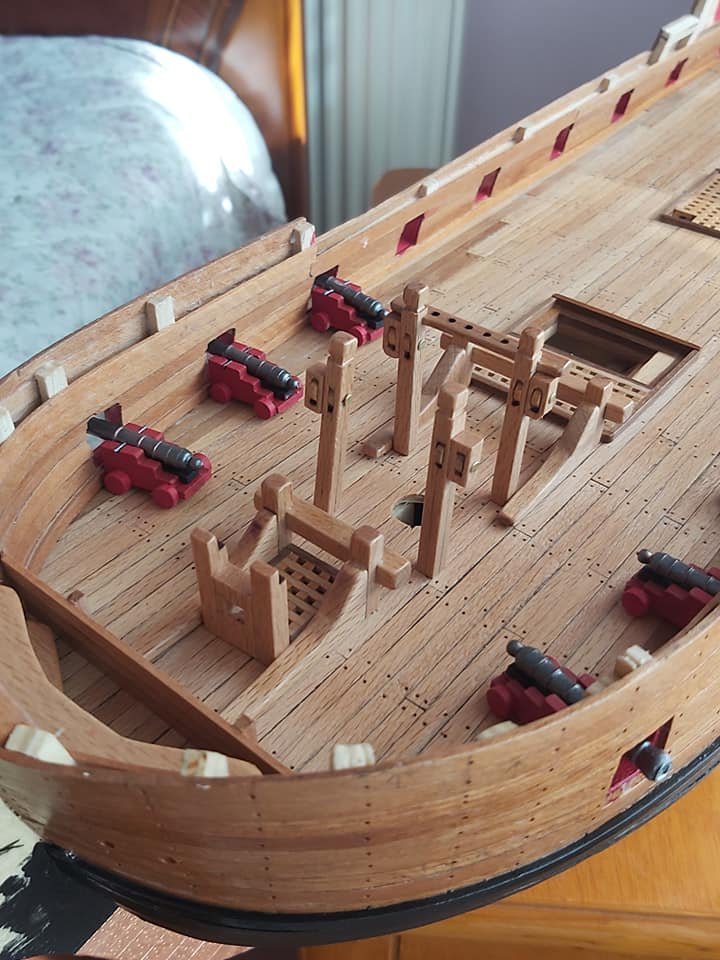
i create the half gun ports with the upper bulwark sections.


-
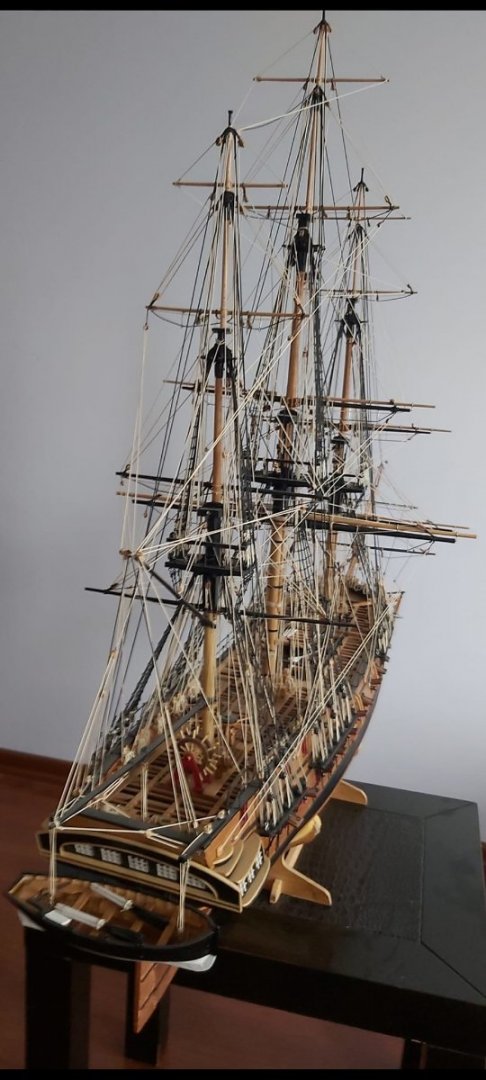
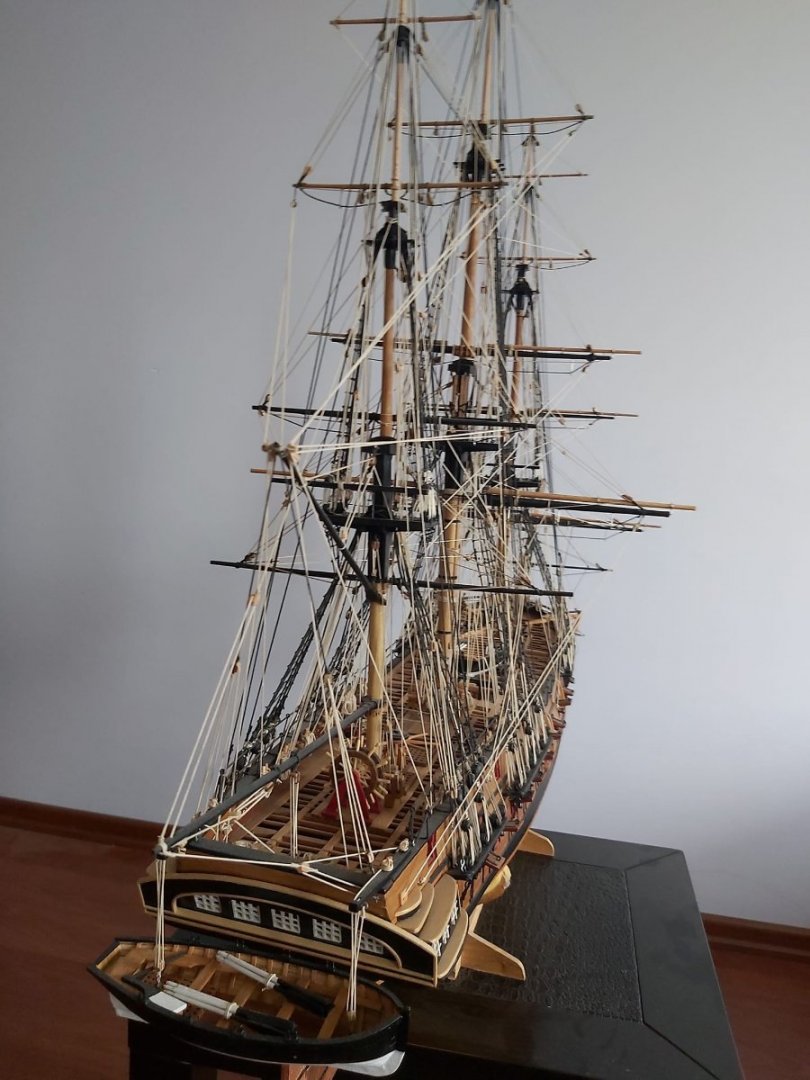
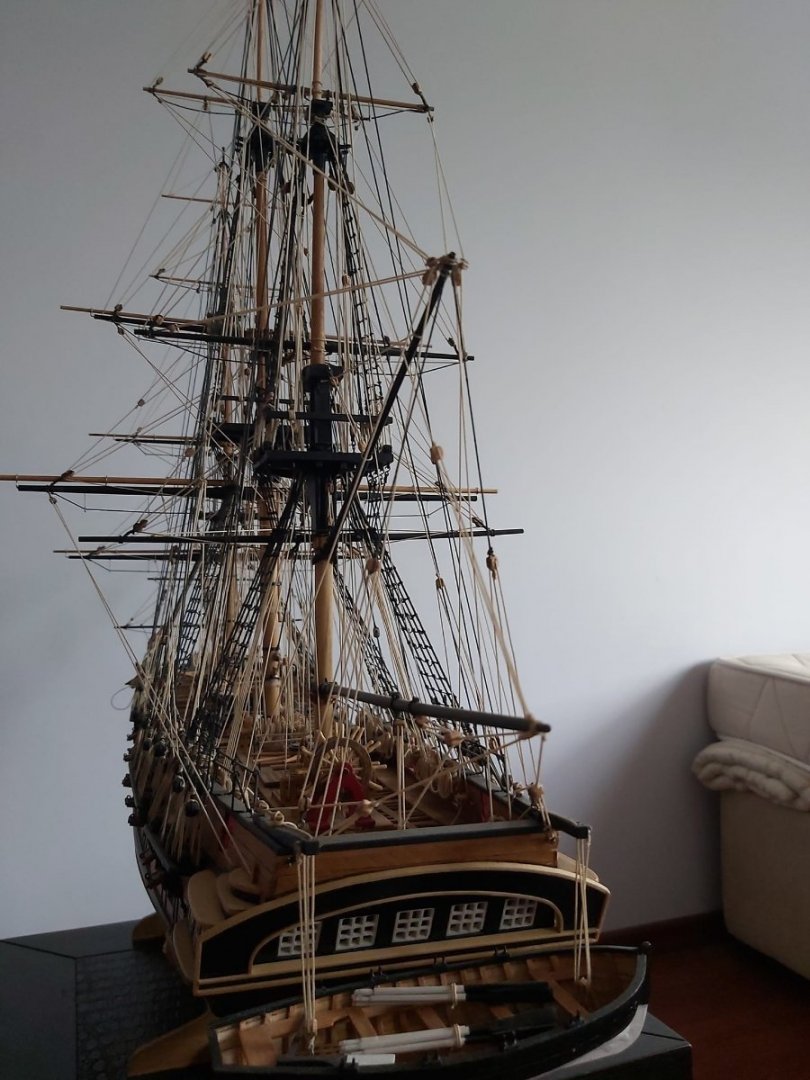
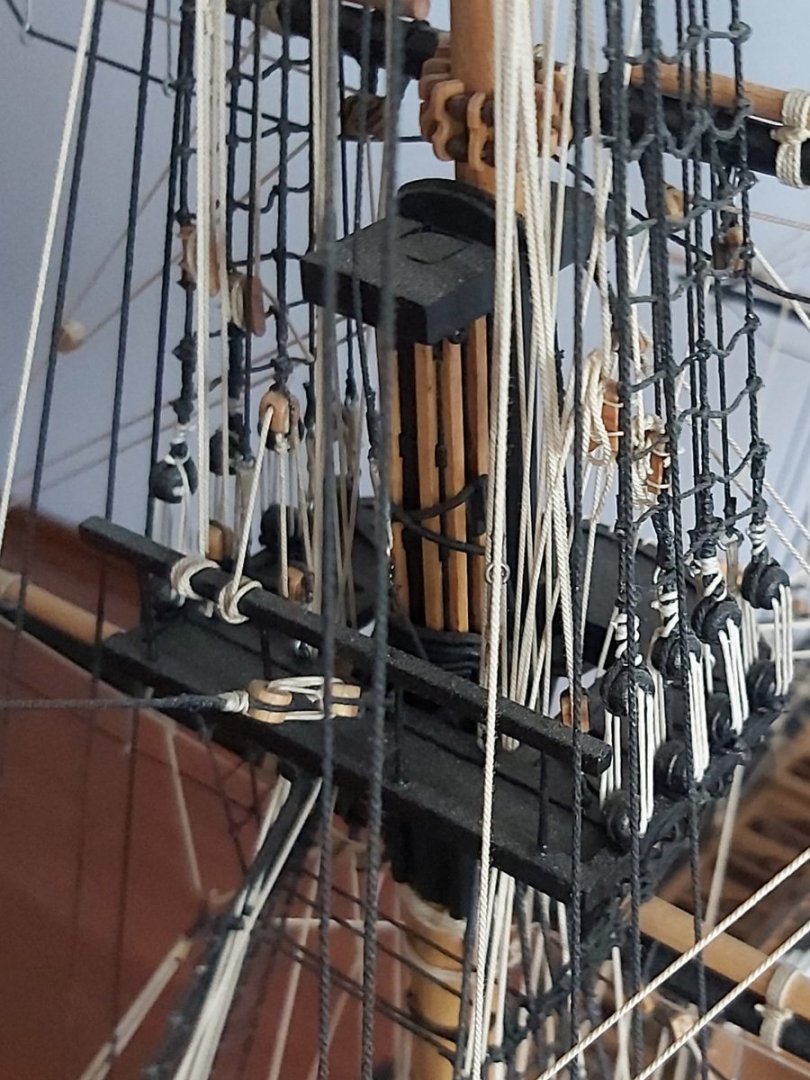
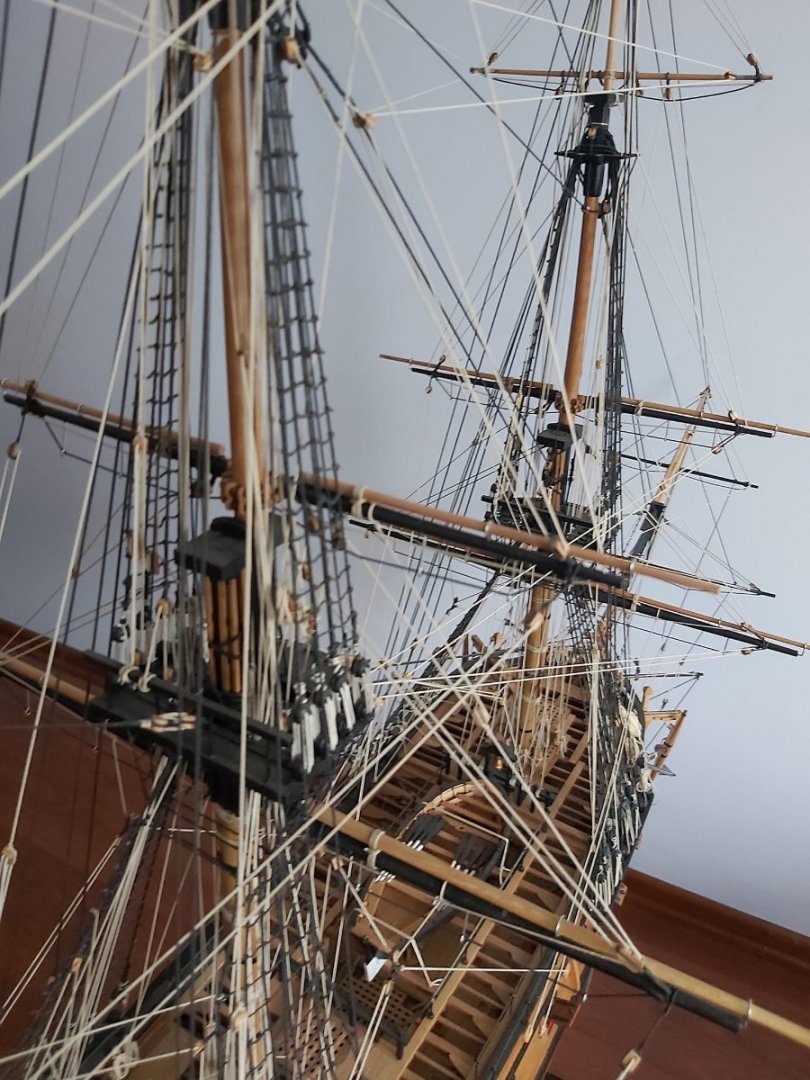
USF Essex by mtbediz - FINISHED - 1:50
mtbediz replied to mtbediz's topic in - Build logs for subjects built 1801 - 1850
Thank you so much Daniel. -
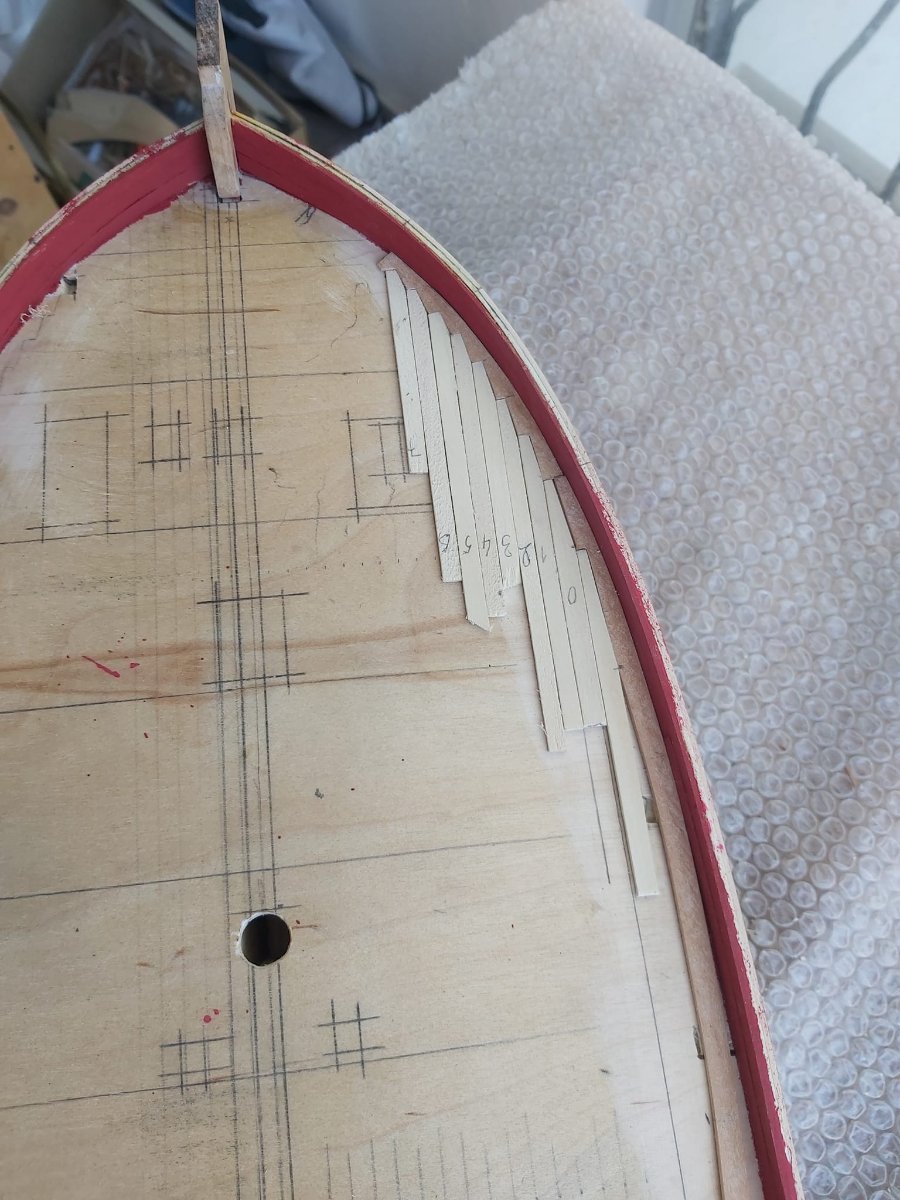
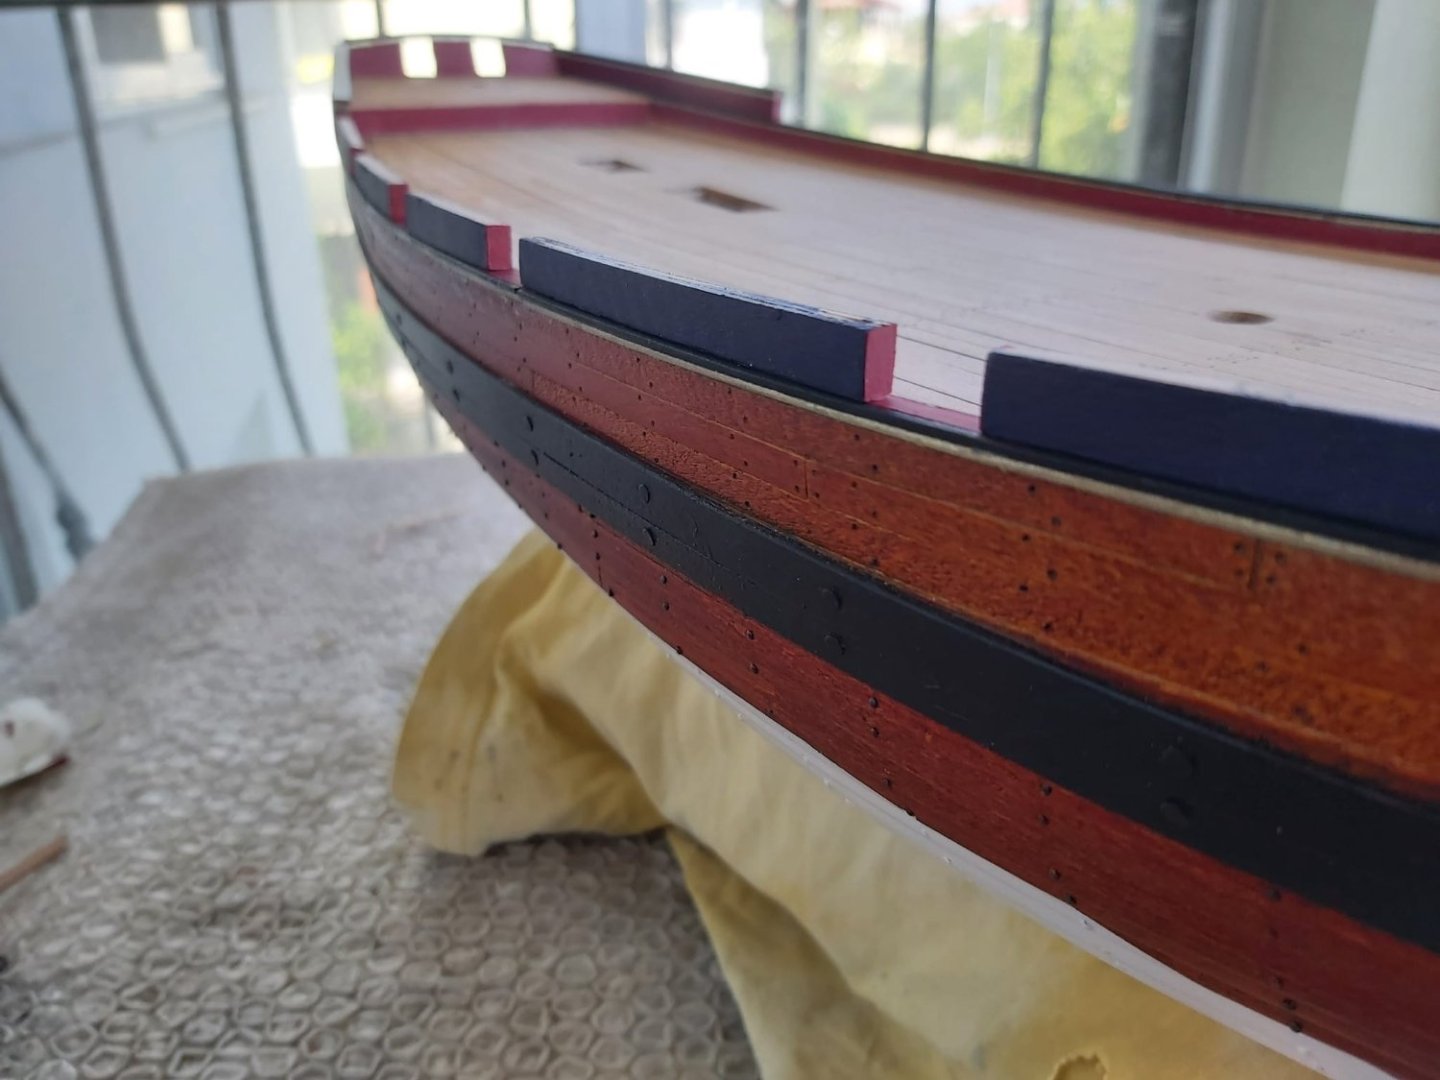
I made the nail effects with pencil and added waterways. I started working on the bulwarks and transom.


-
Thank you Yves.
-
Thanks so much Tobias.
-
USF Essex by mtbediz - FINISHED - 1:50
mtbediz replied to mtbediz's topic in - Build logs for subjects built 1801 - 1850
Thank you friends for your compliments and encouraging words. -
USF Essex by mtbediz - FINISHED - 1:50
mtbediz replied to mtbediz's topic in - Build logs for subjects built 1801 - 1850
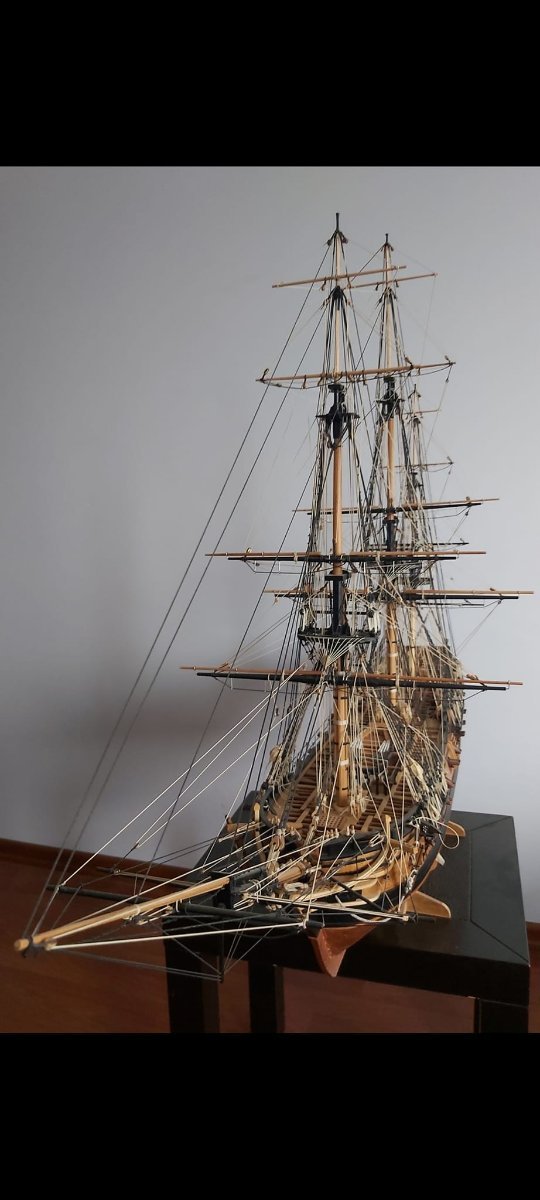
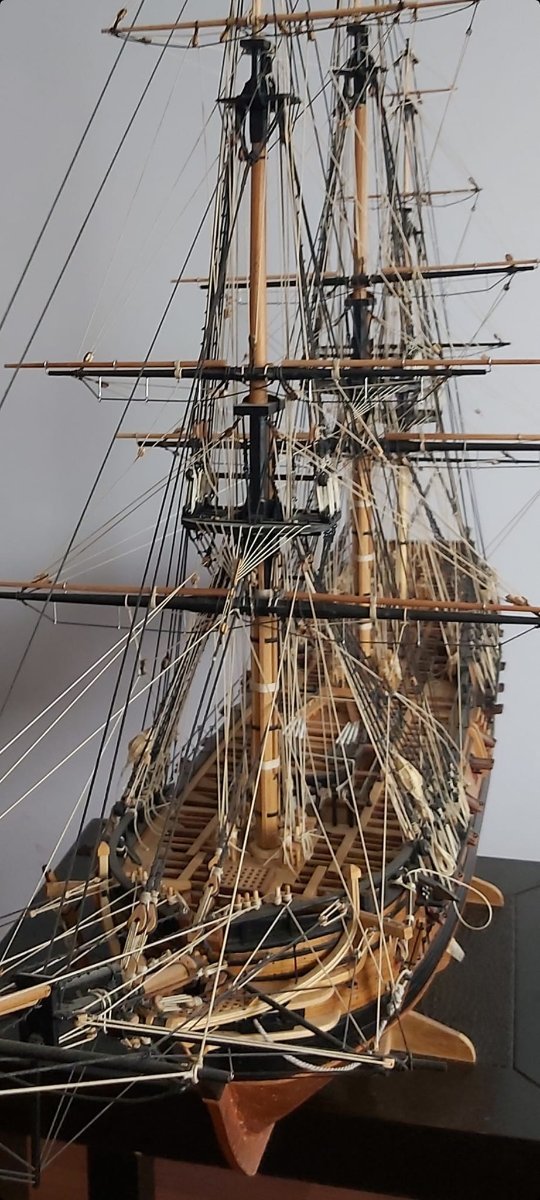
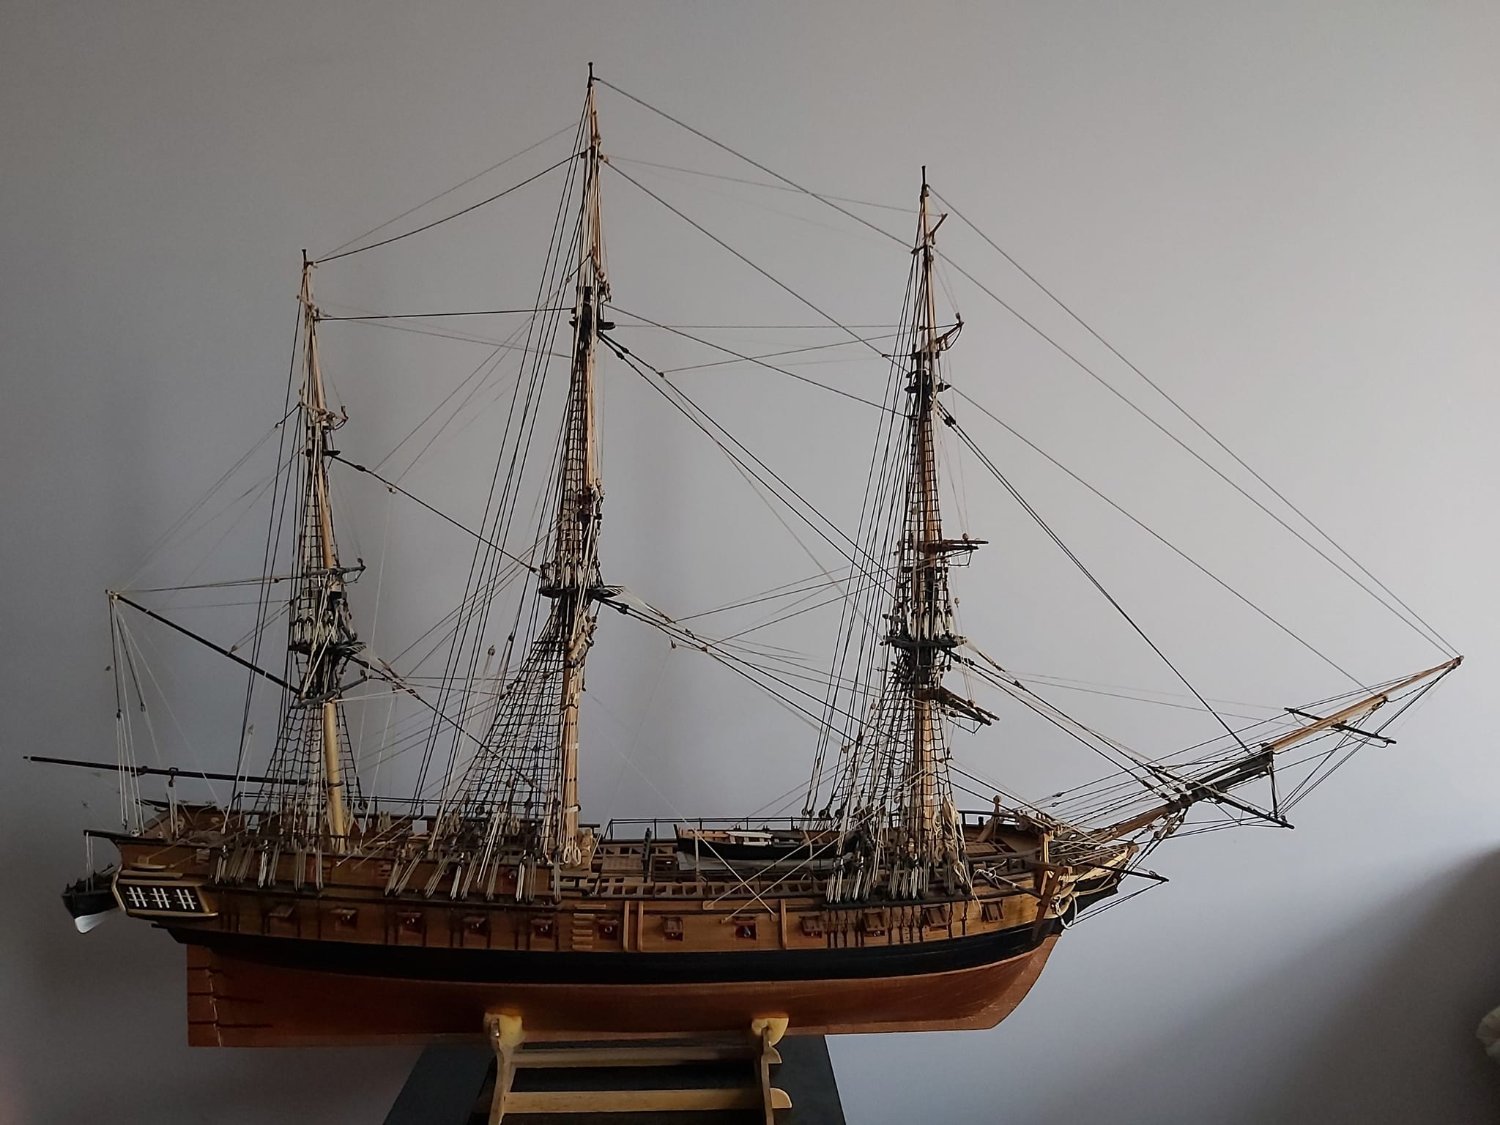
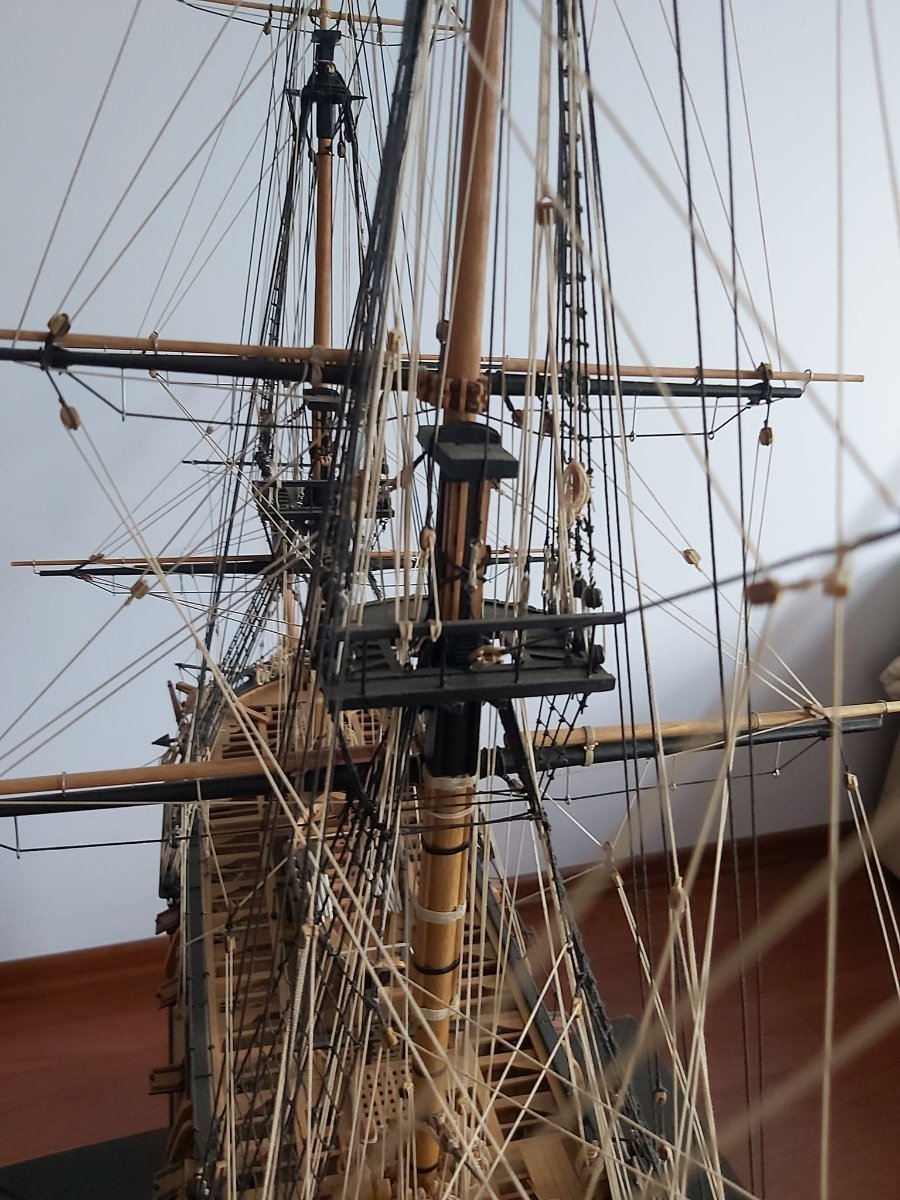
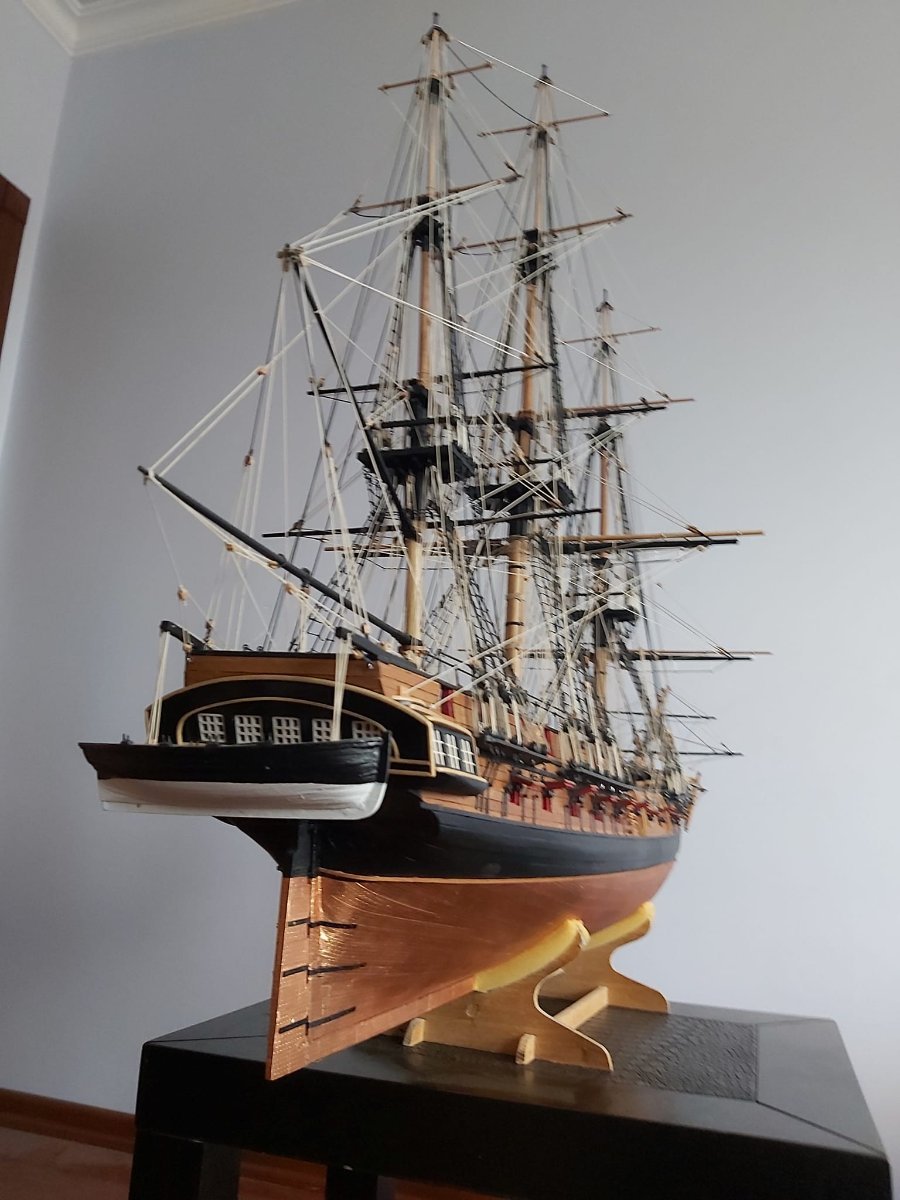
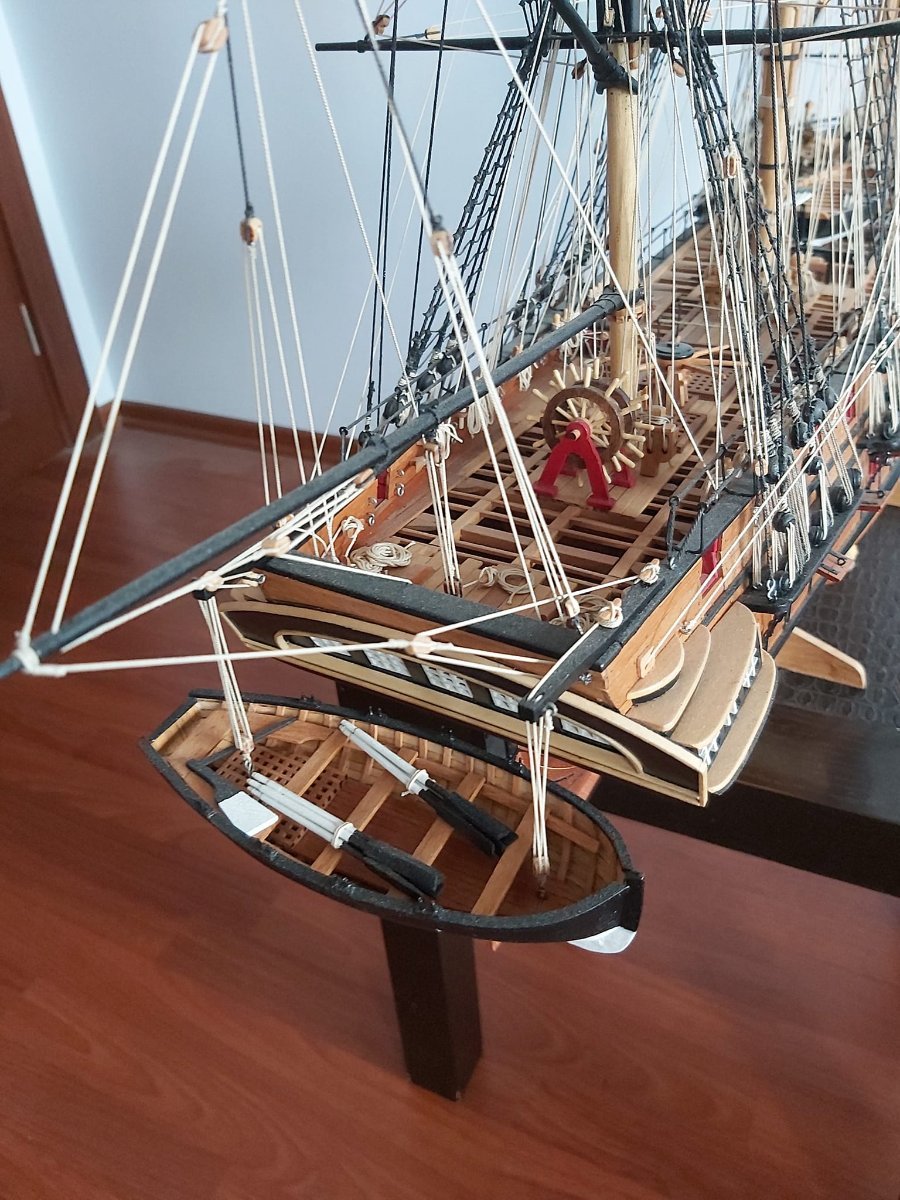
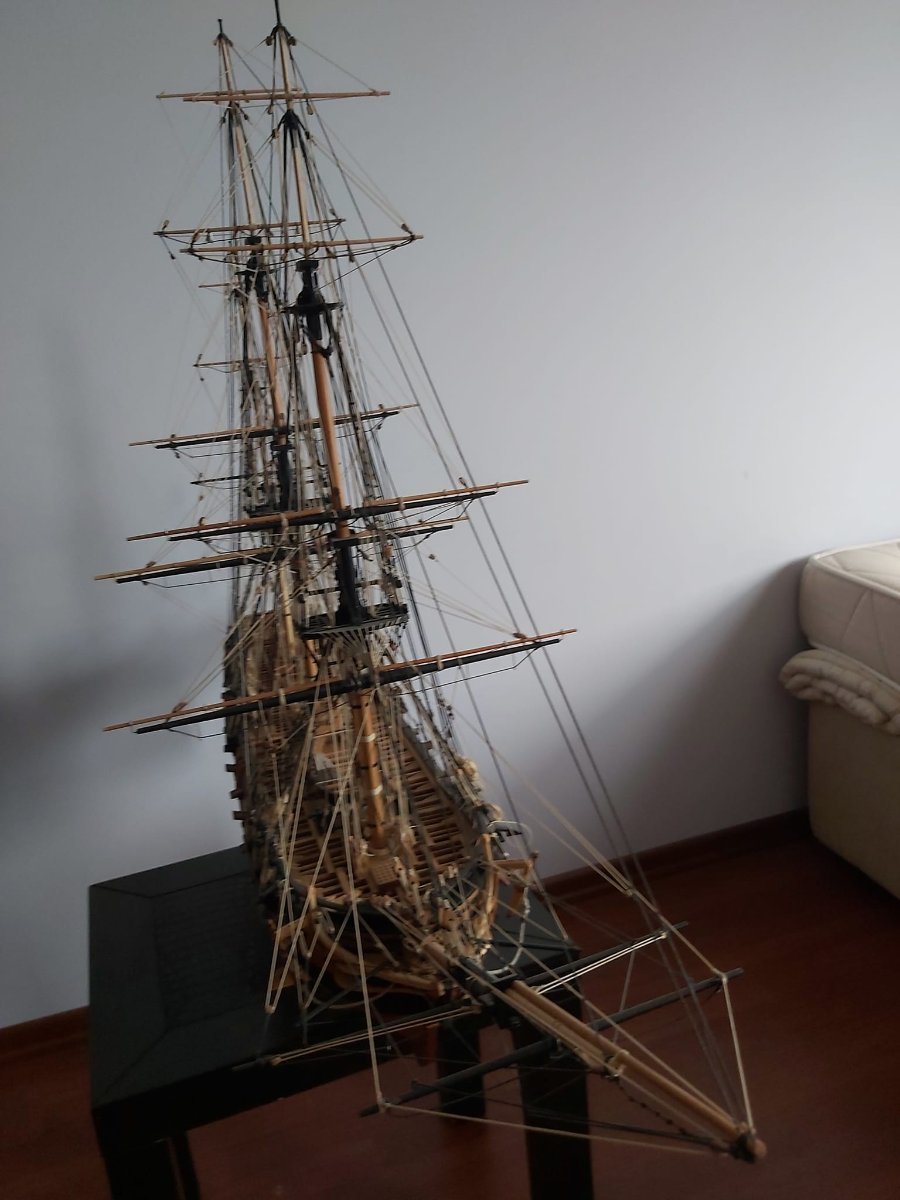
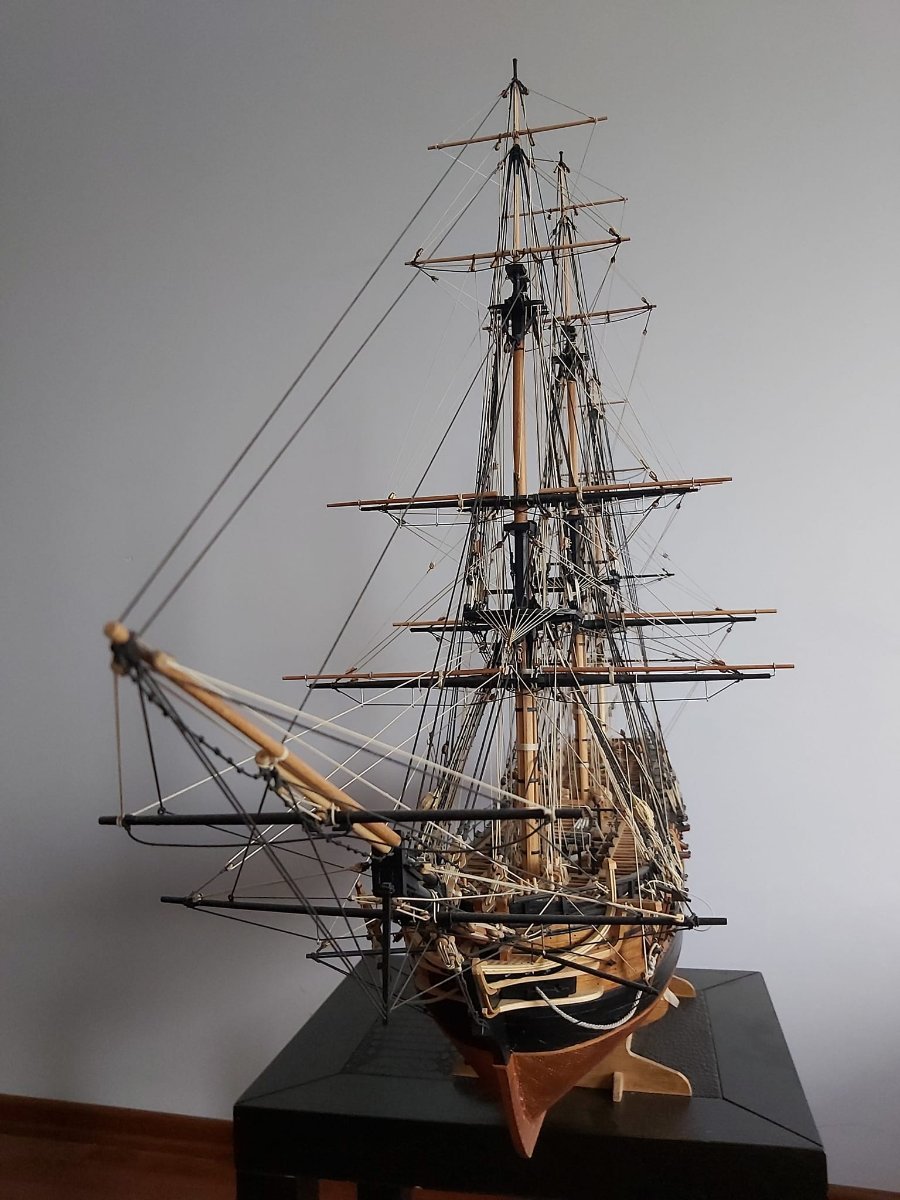
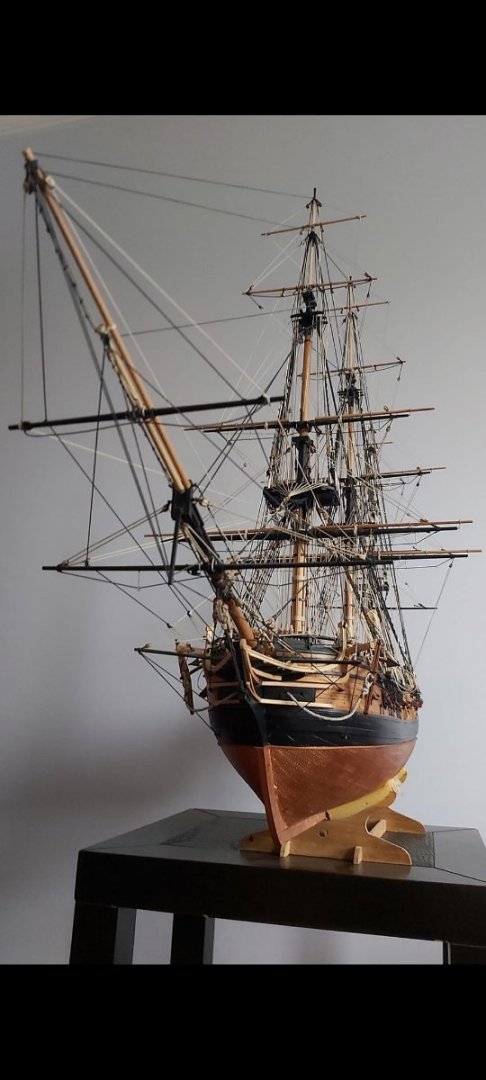
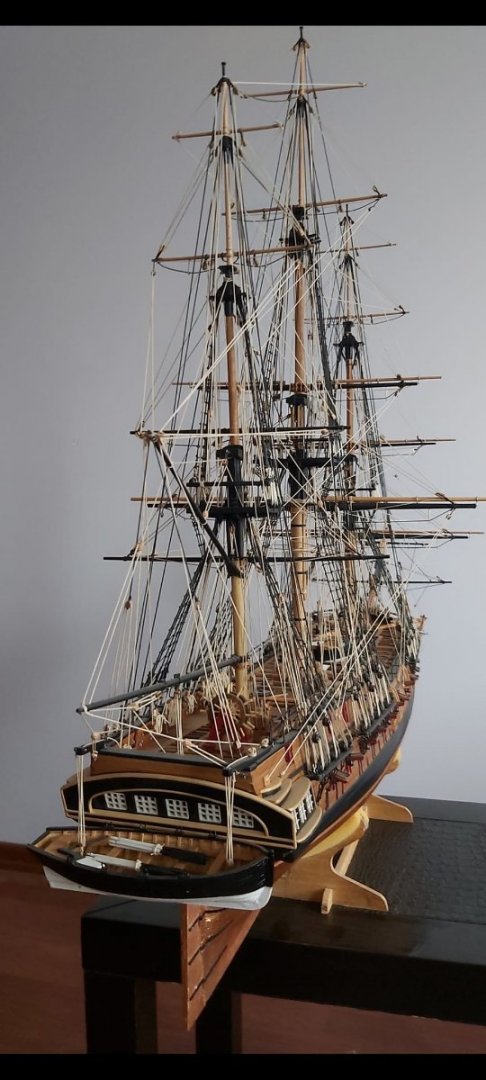
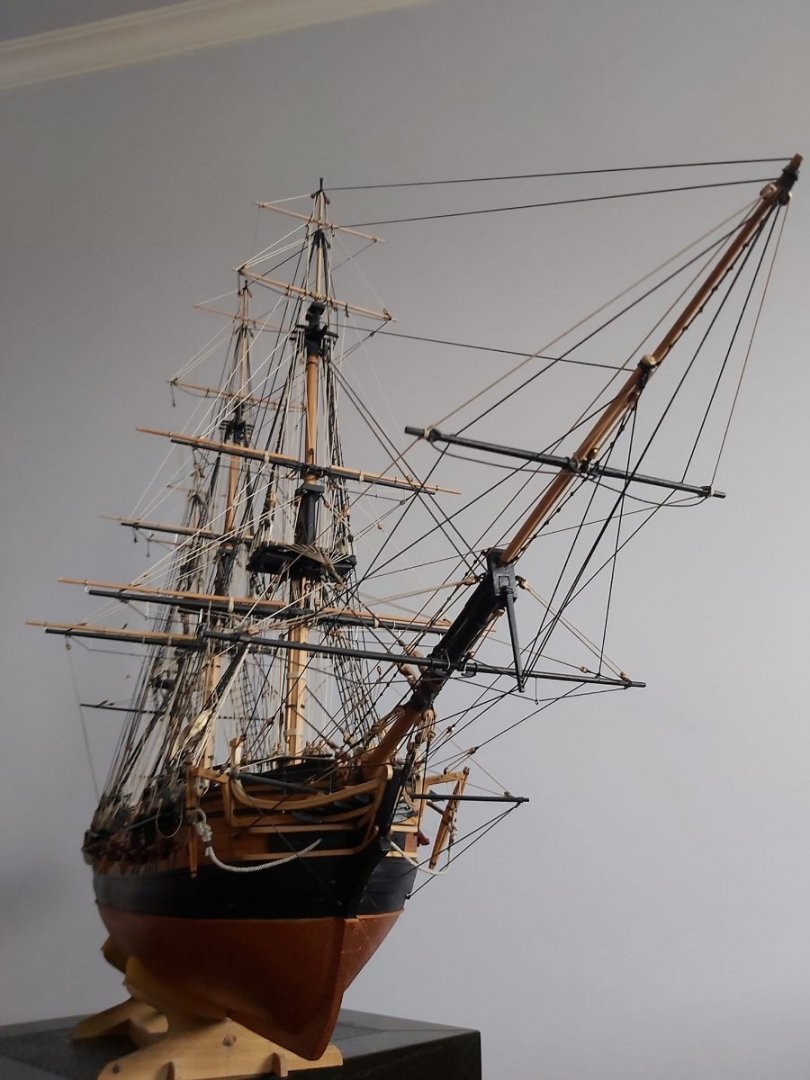
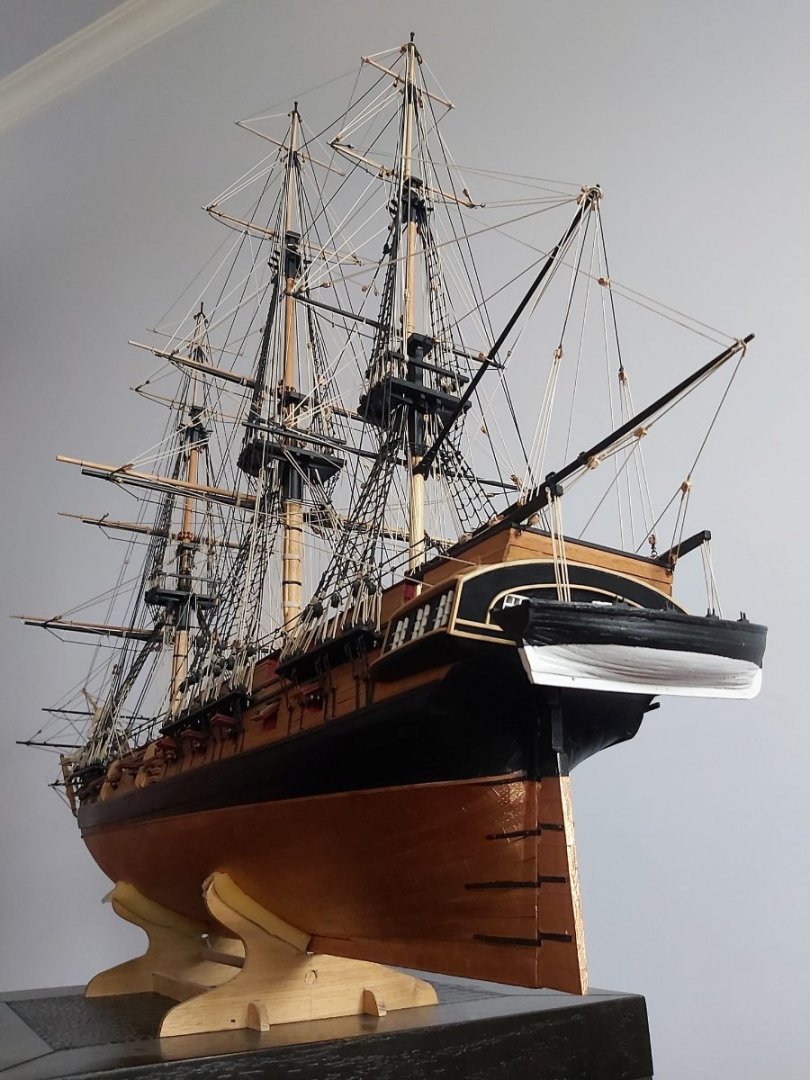
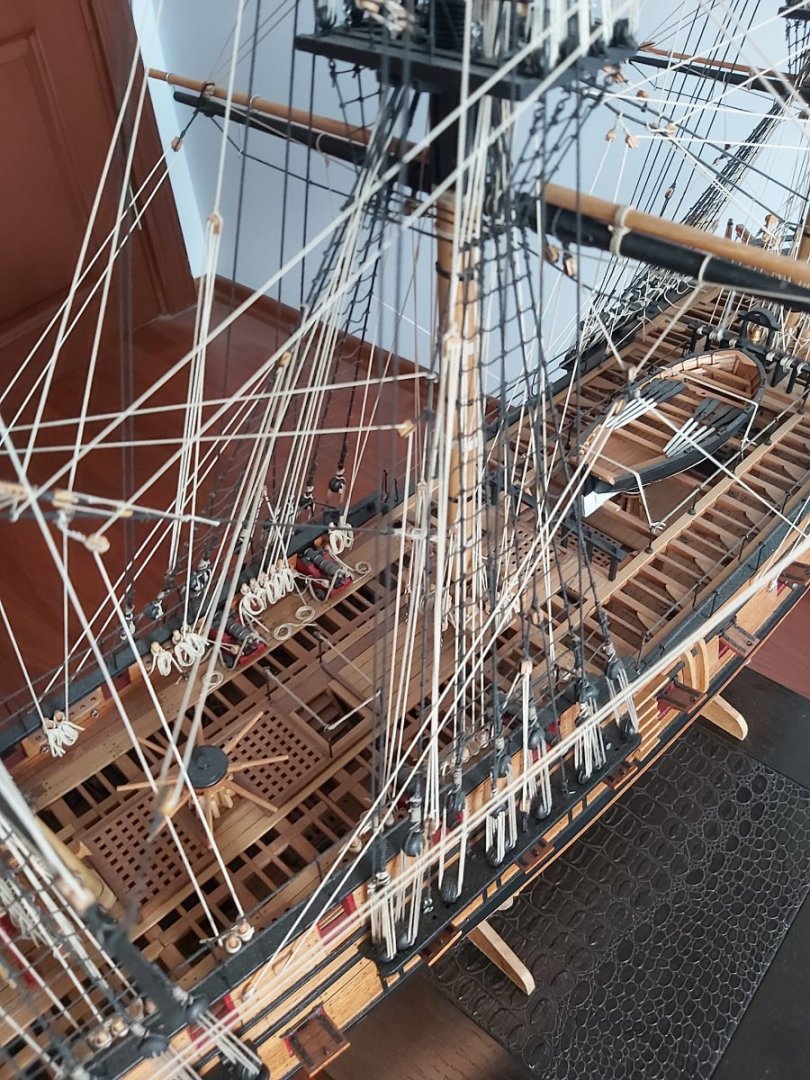
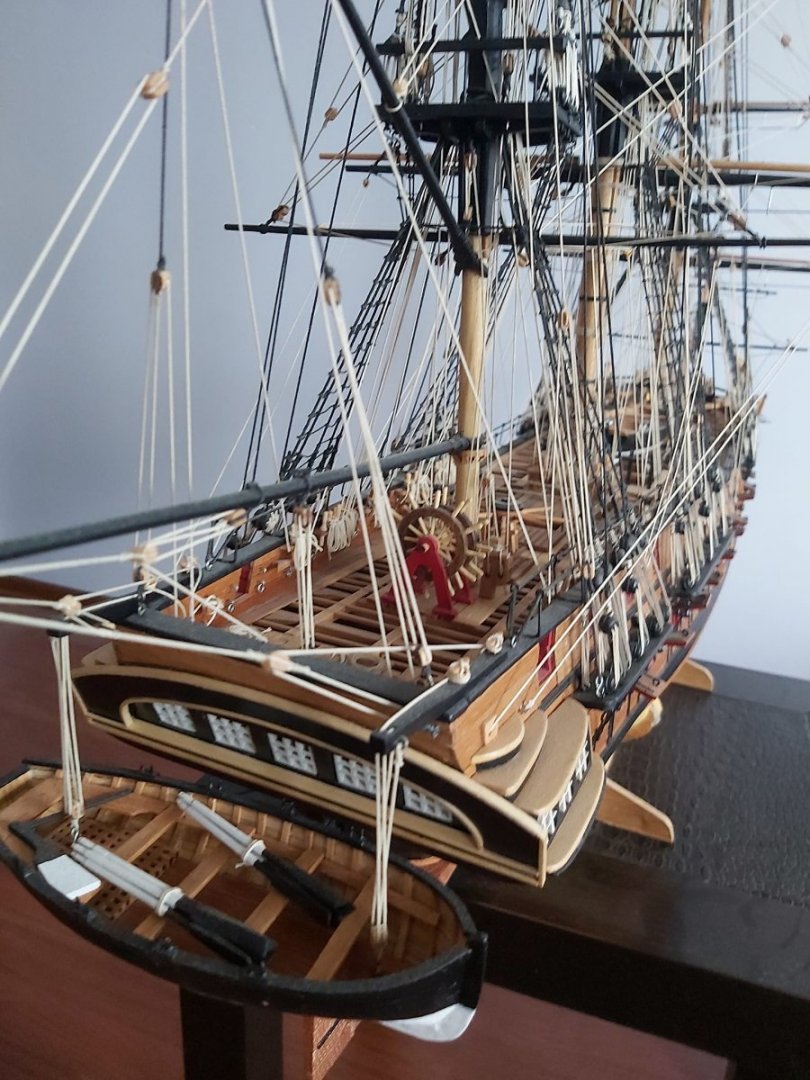
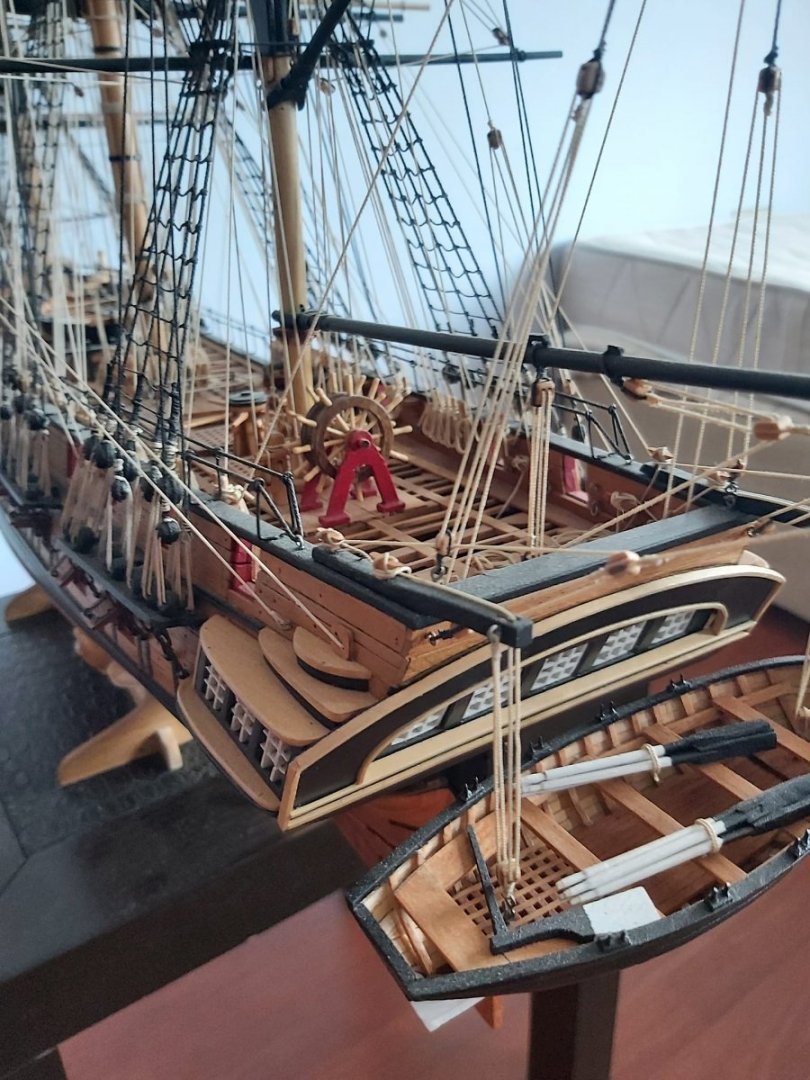
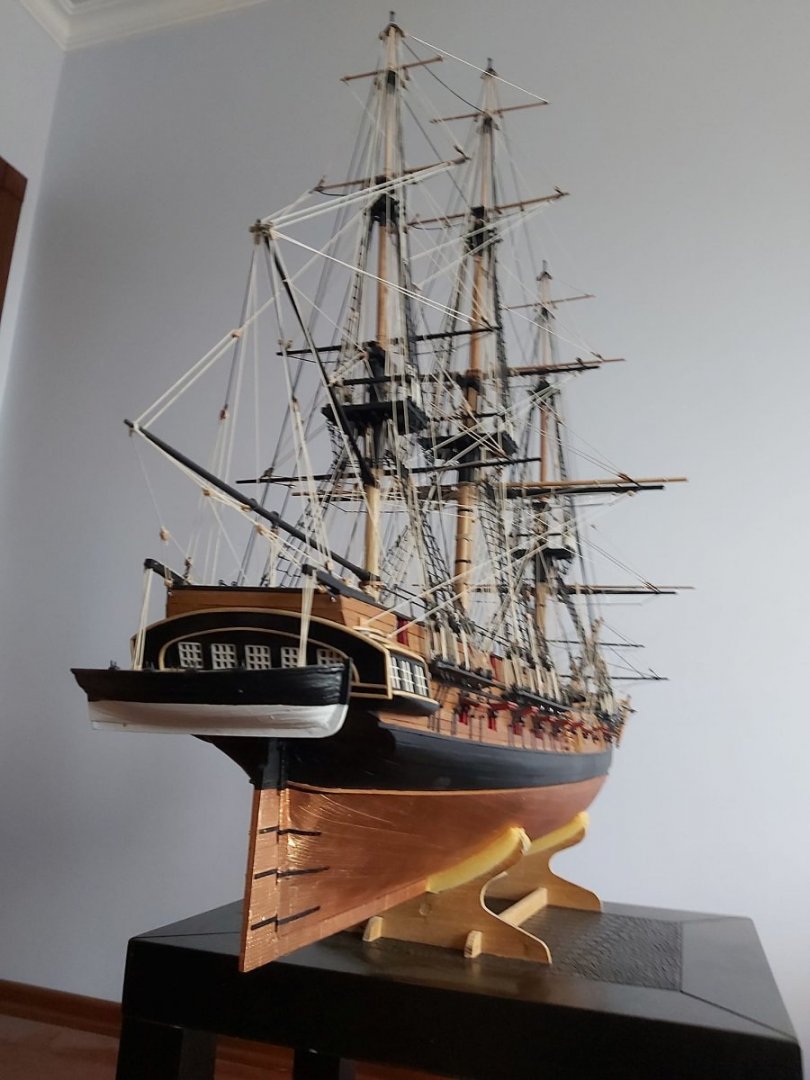
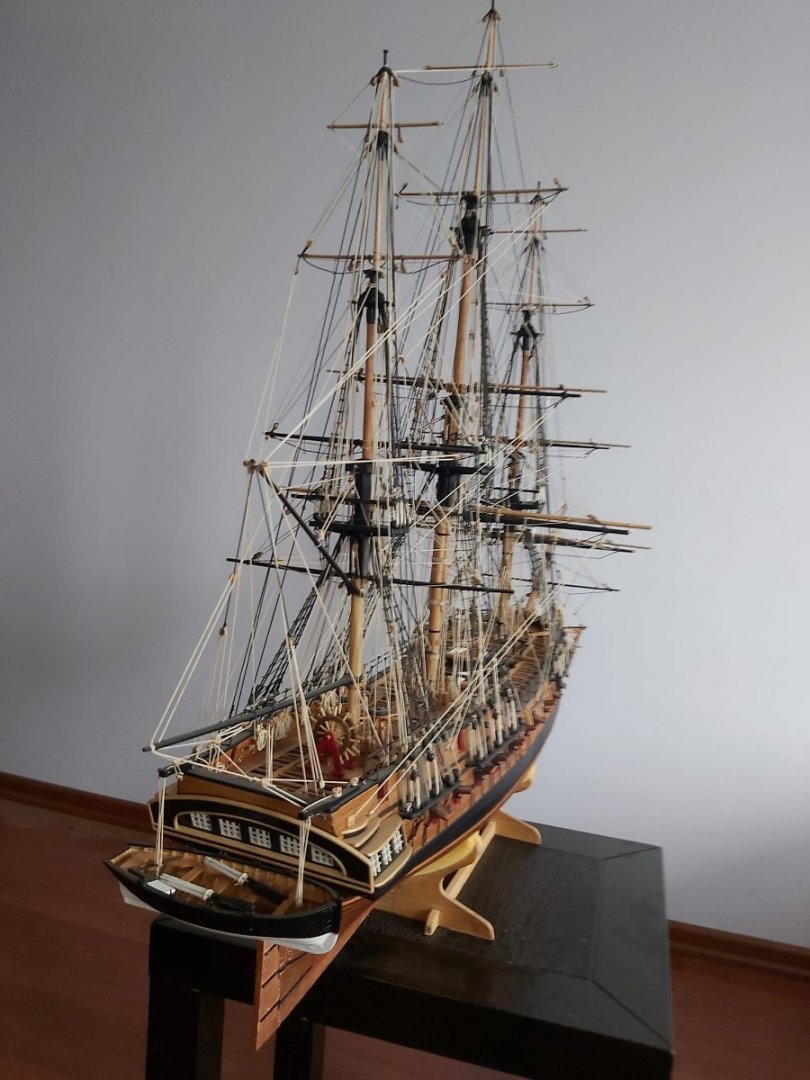
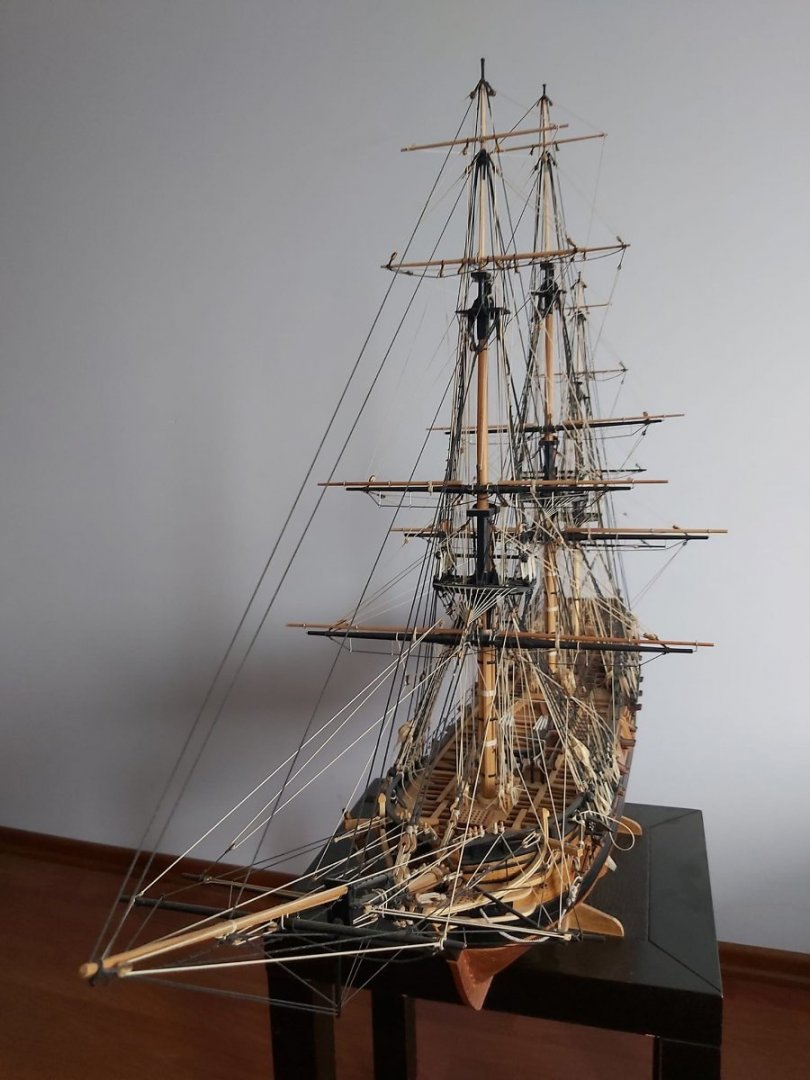
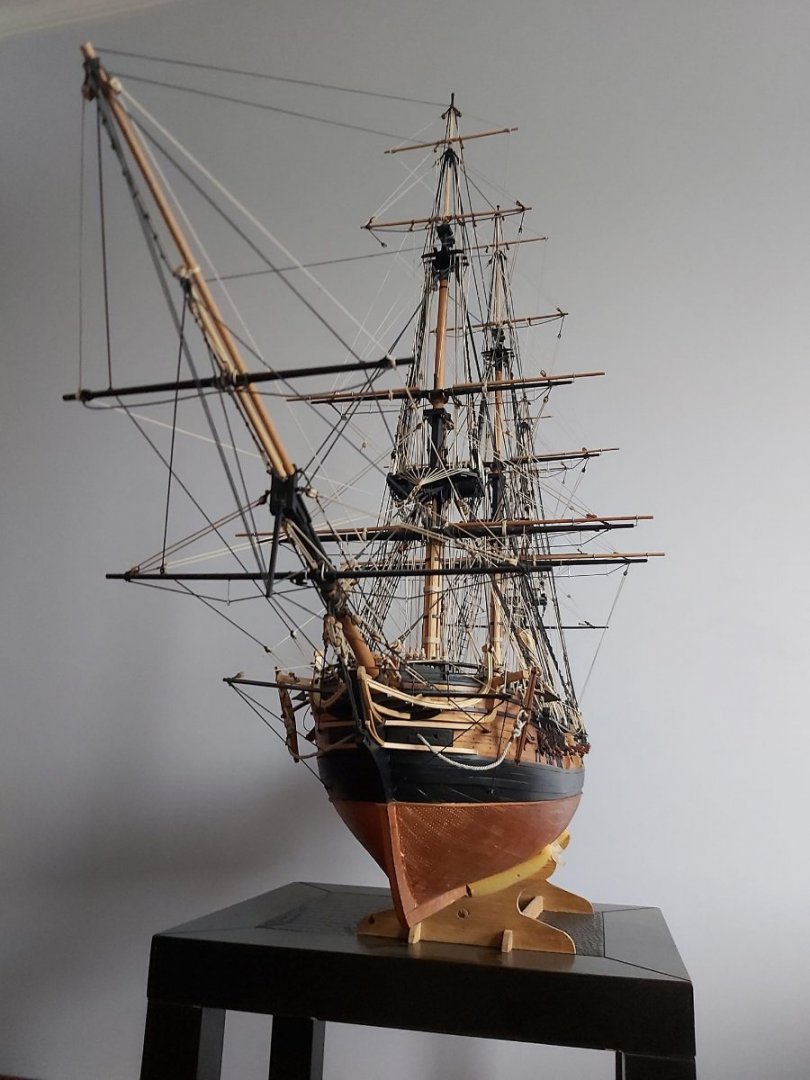
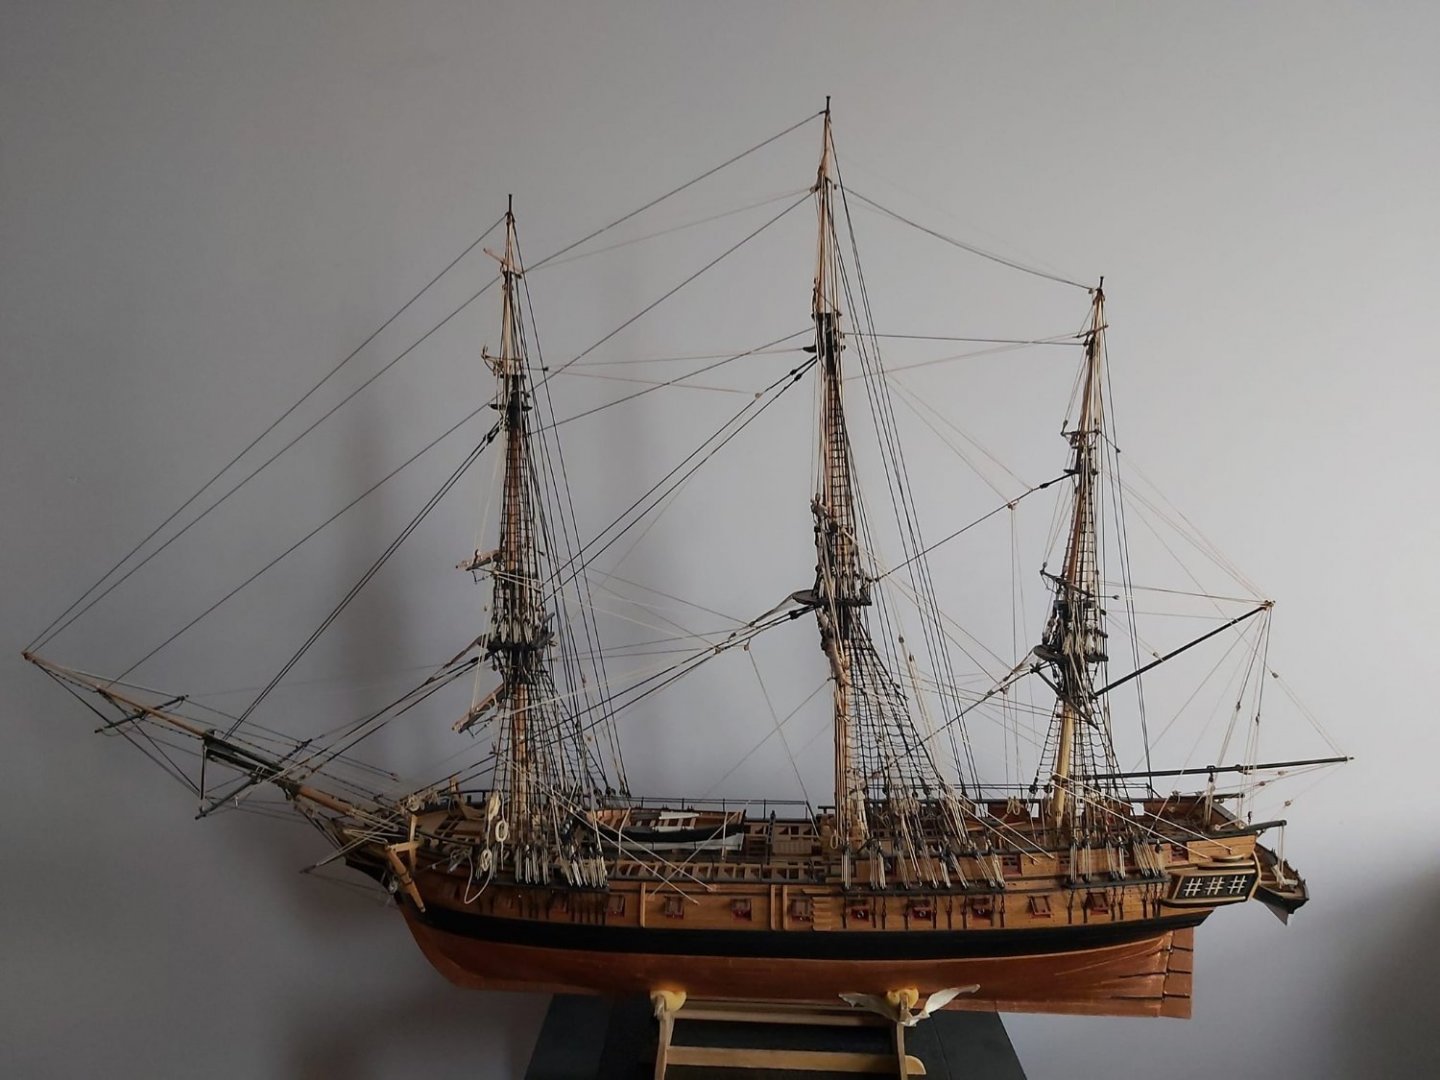
Hello friends. I photographed Essex, completing a few minor details. Its construction took approximately 2500 hours in 2 years. Enjoy watching.


-
I will only apply matte varnish. I got the look in the photo on my USF Essex model I built before and I like it.
-
Thank you so much Dave.
-
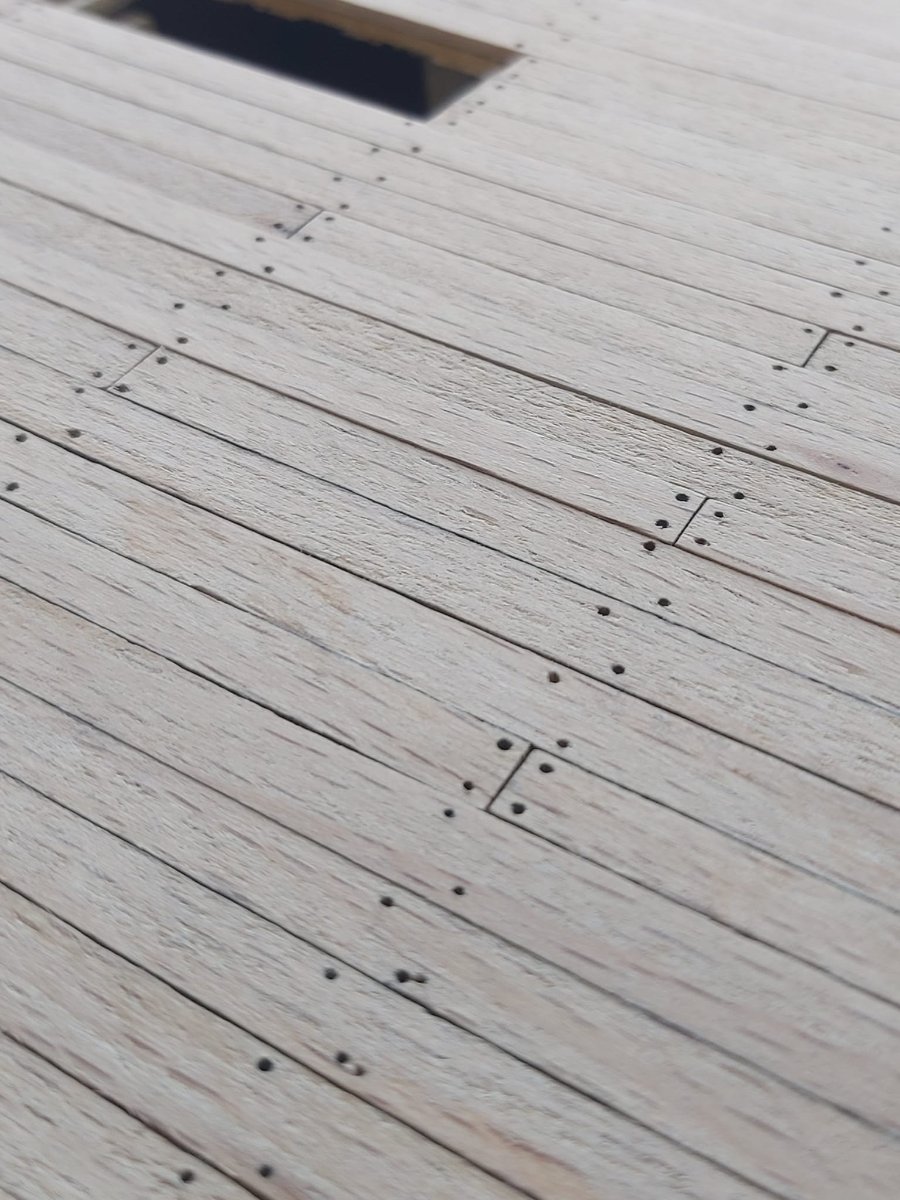
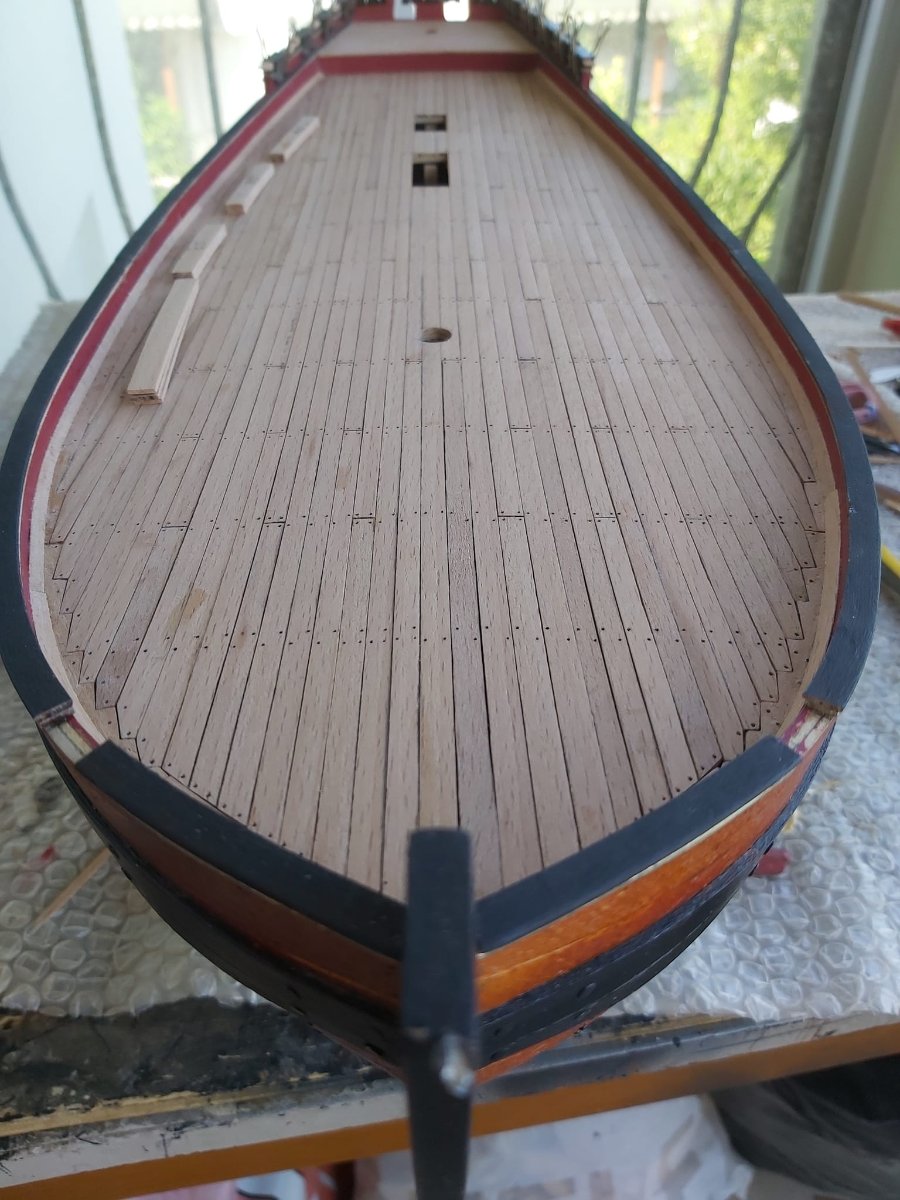
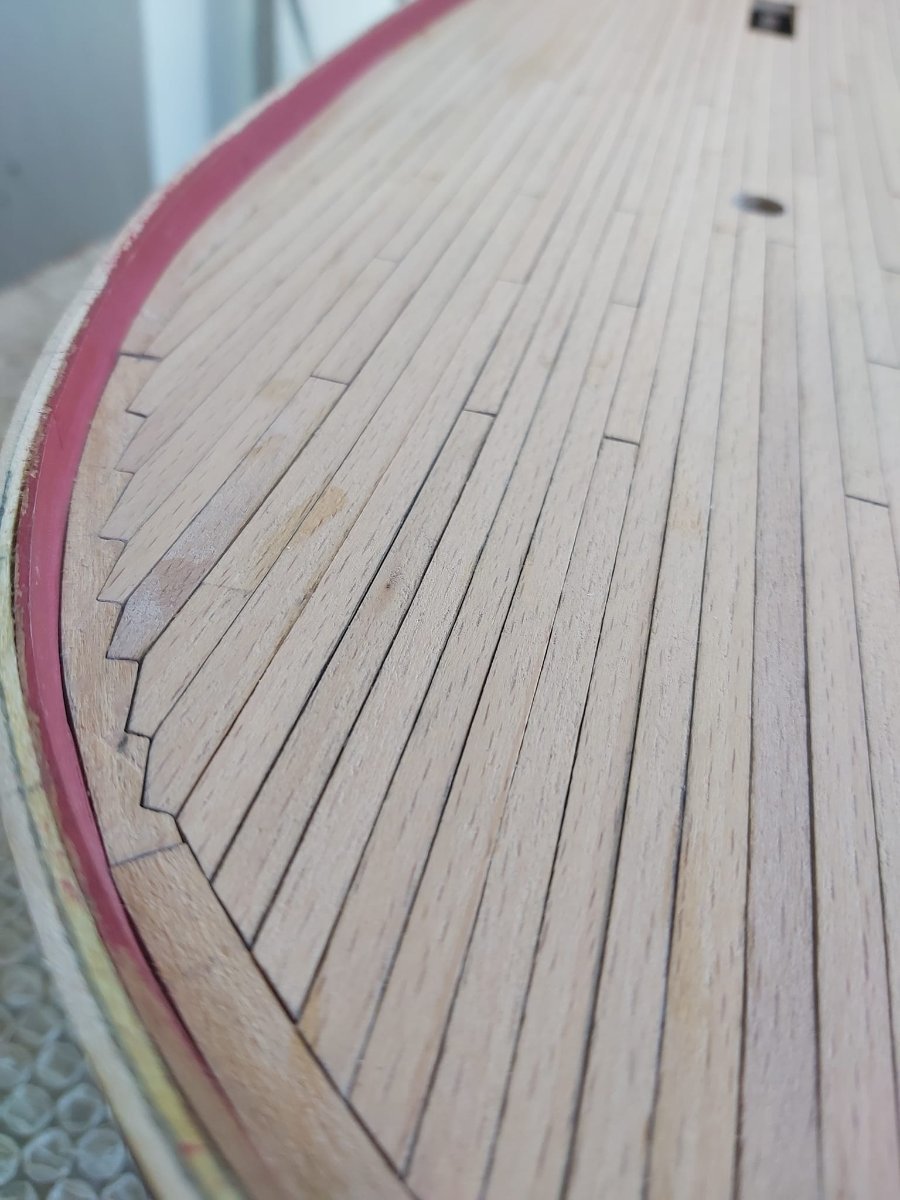
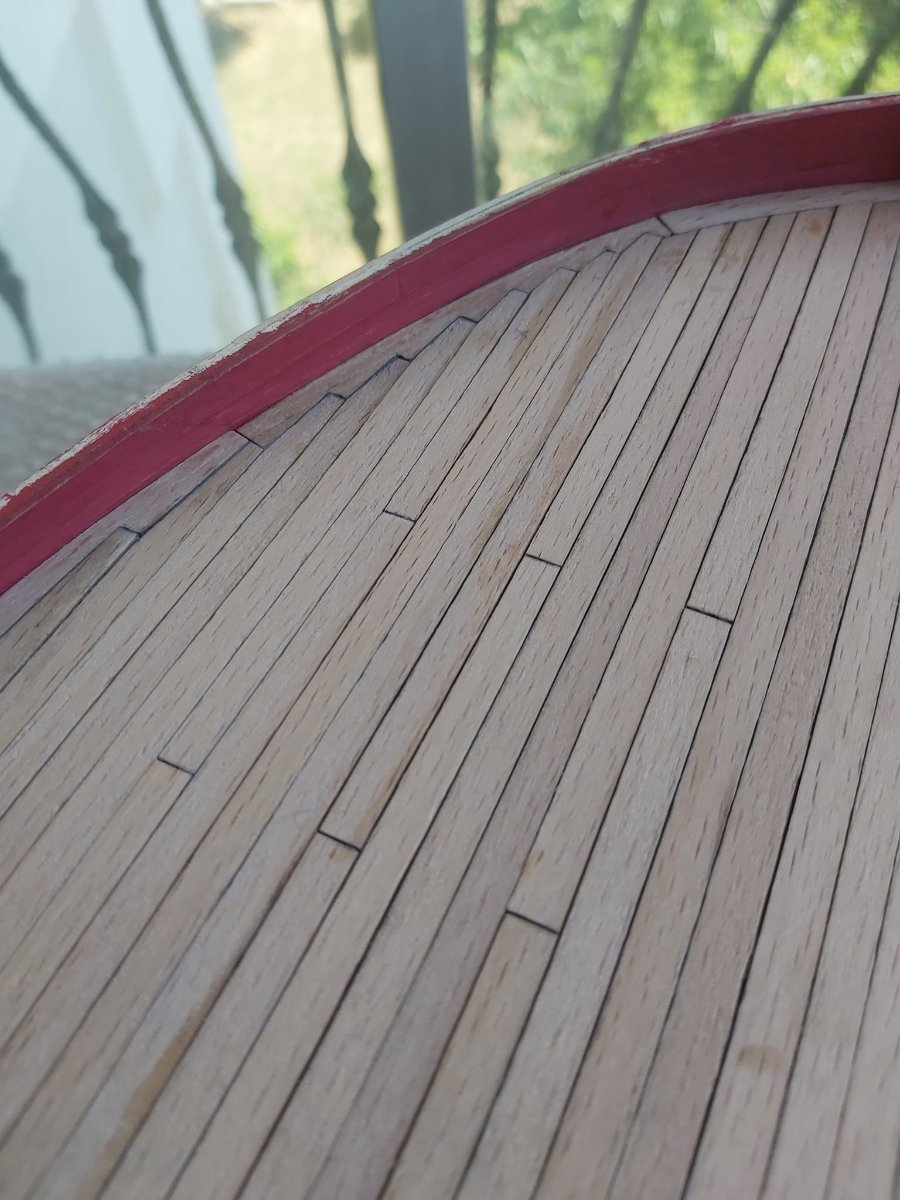
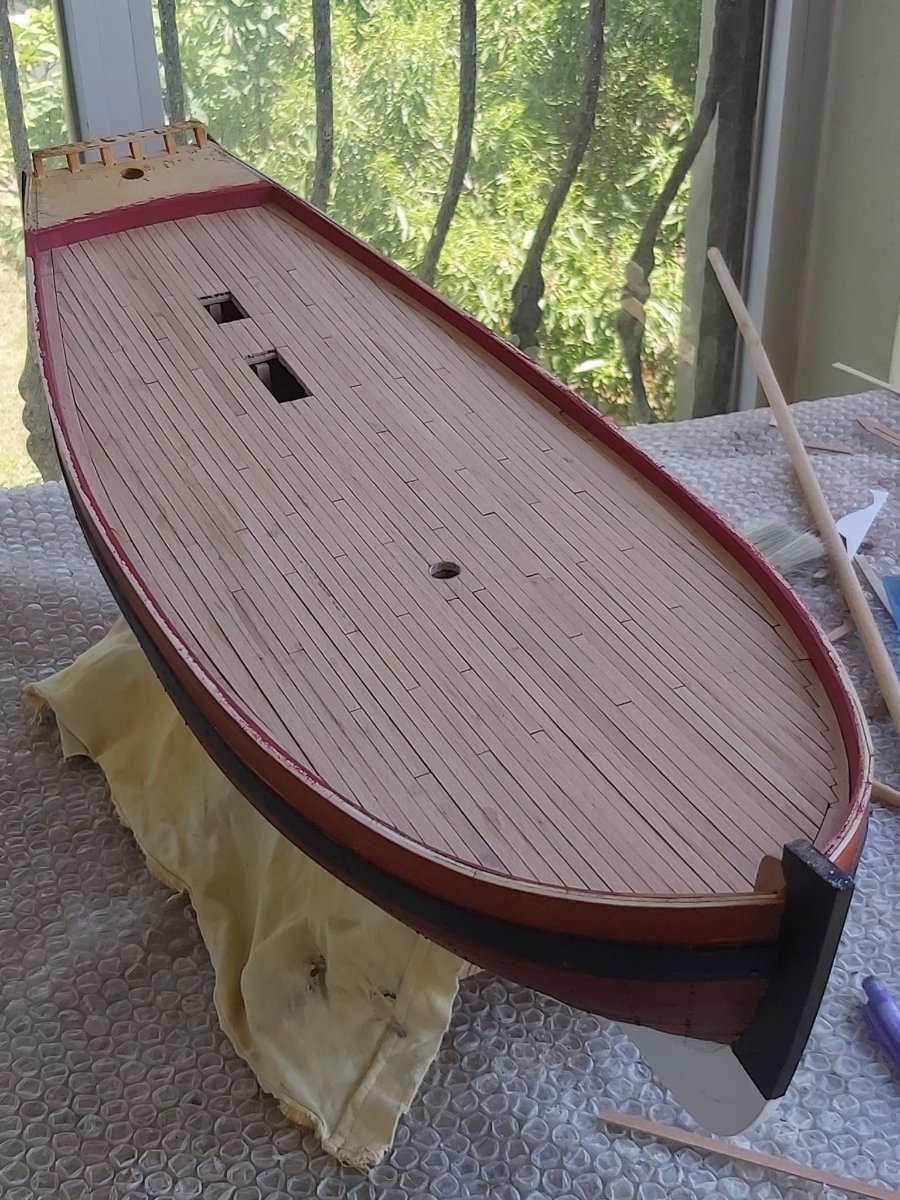
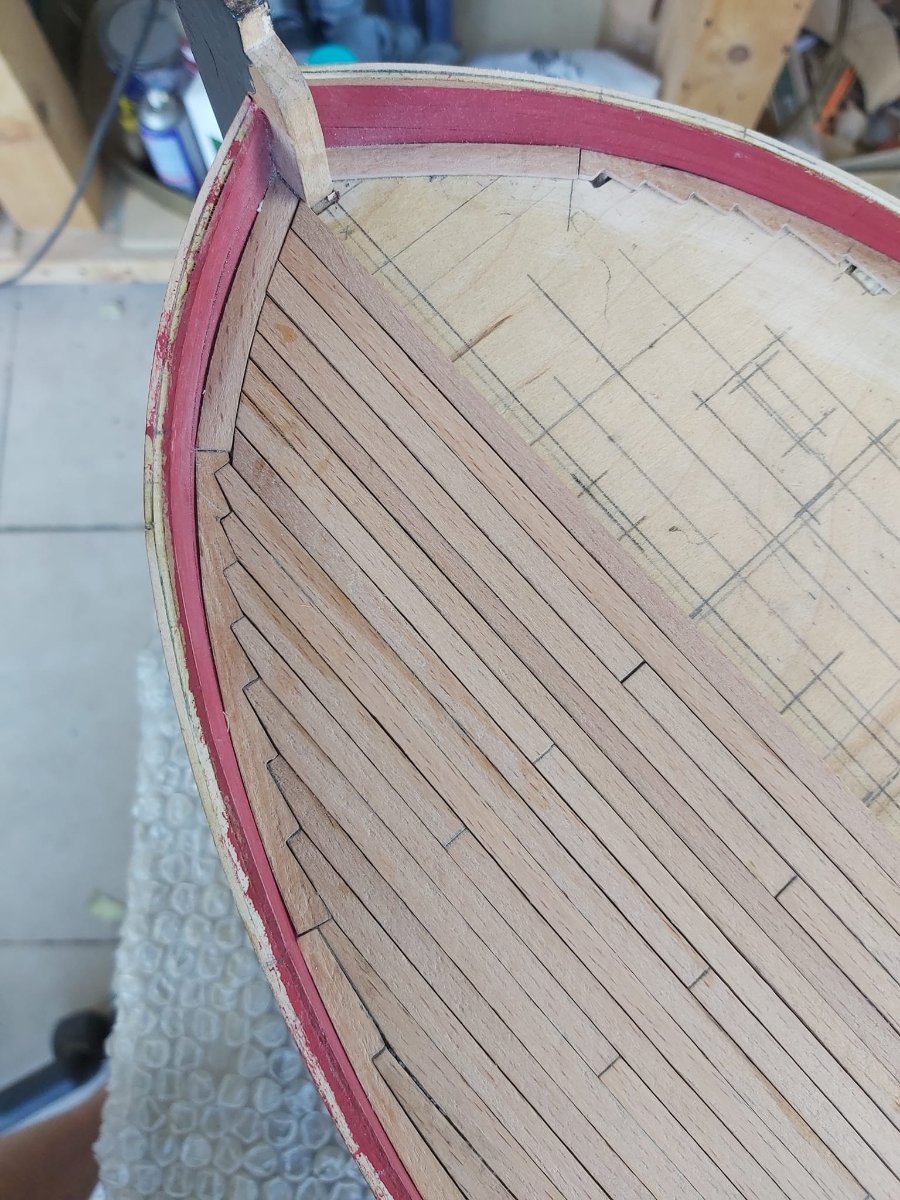
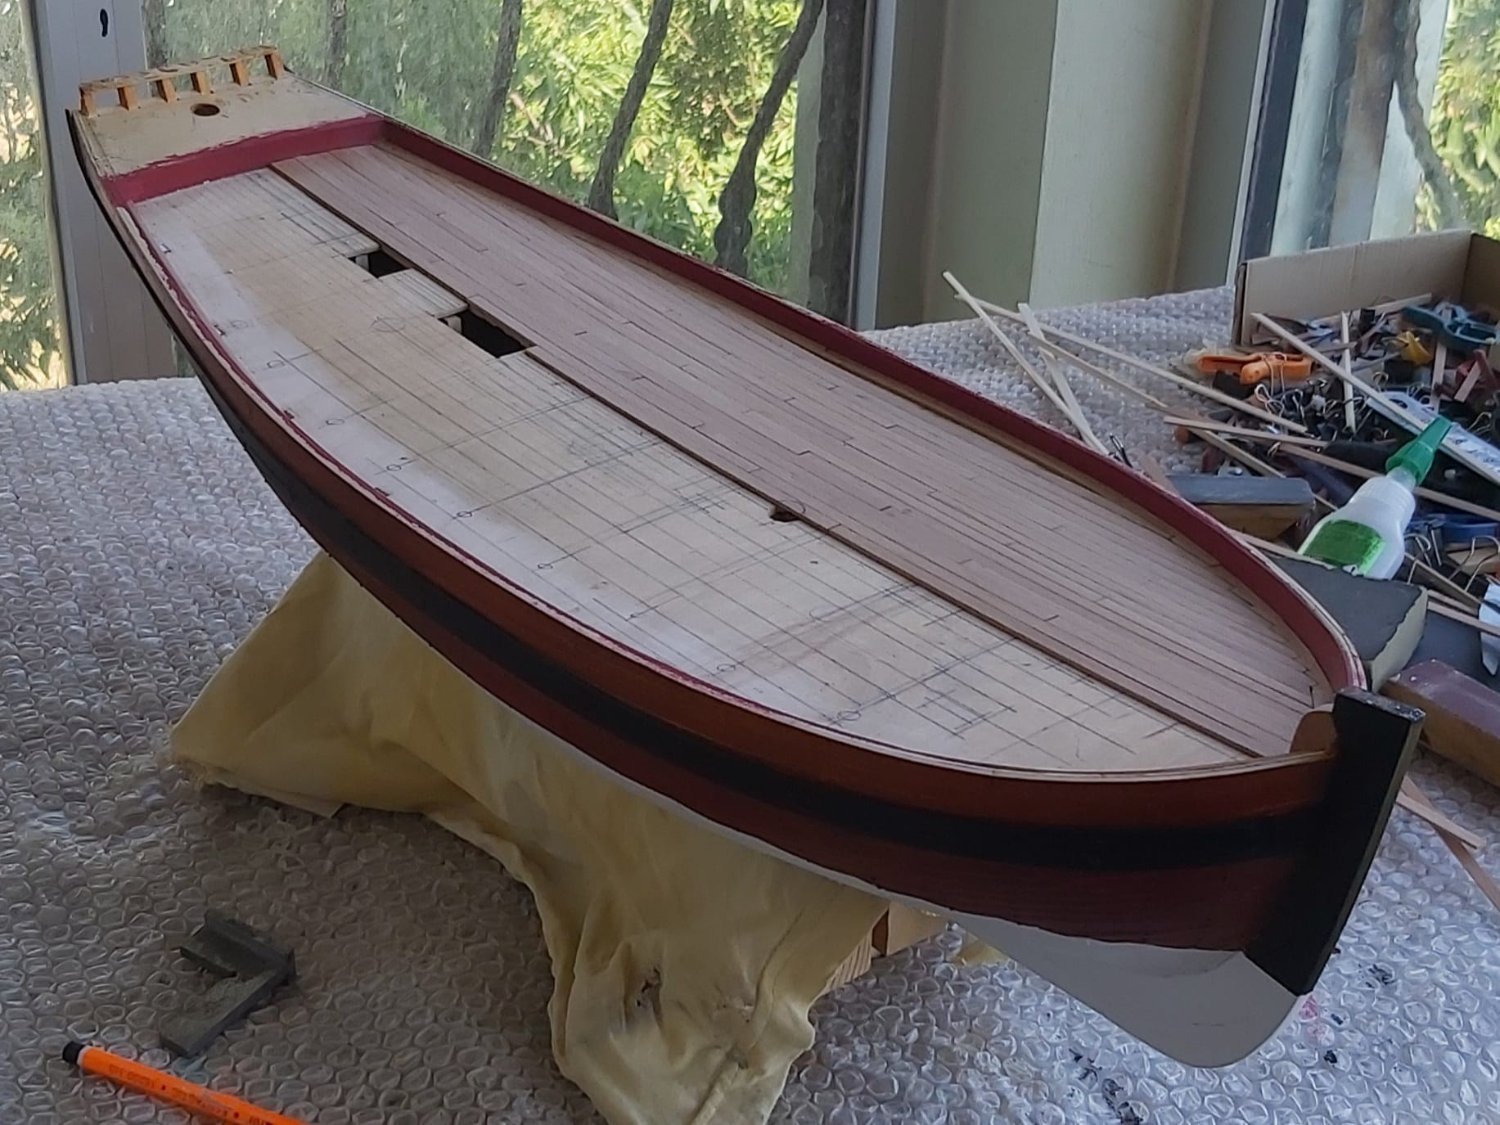
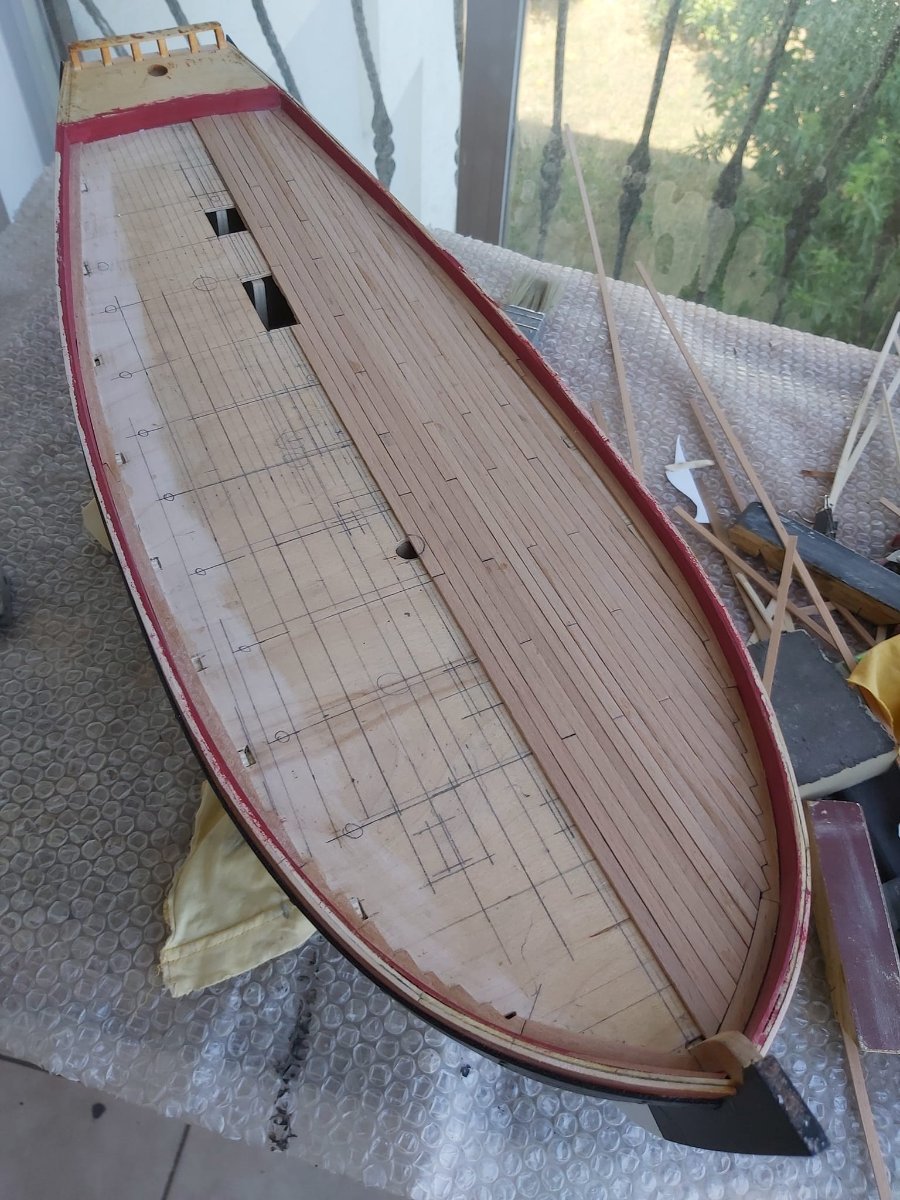
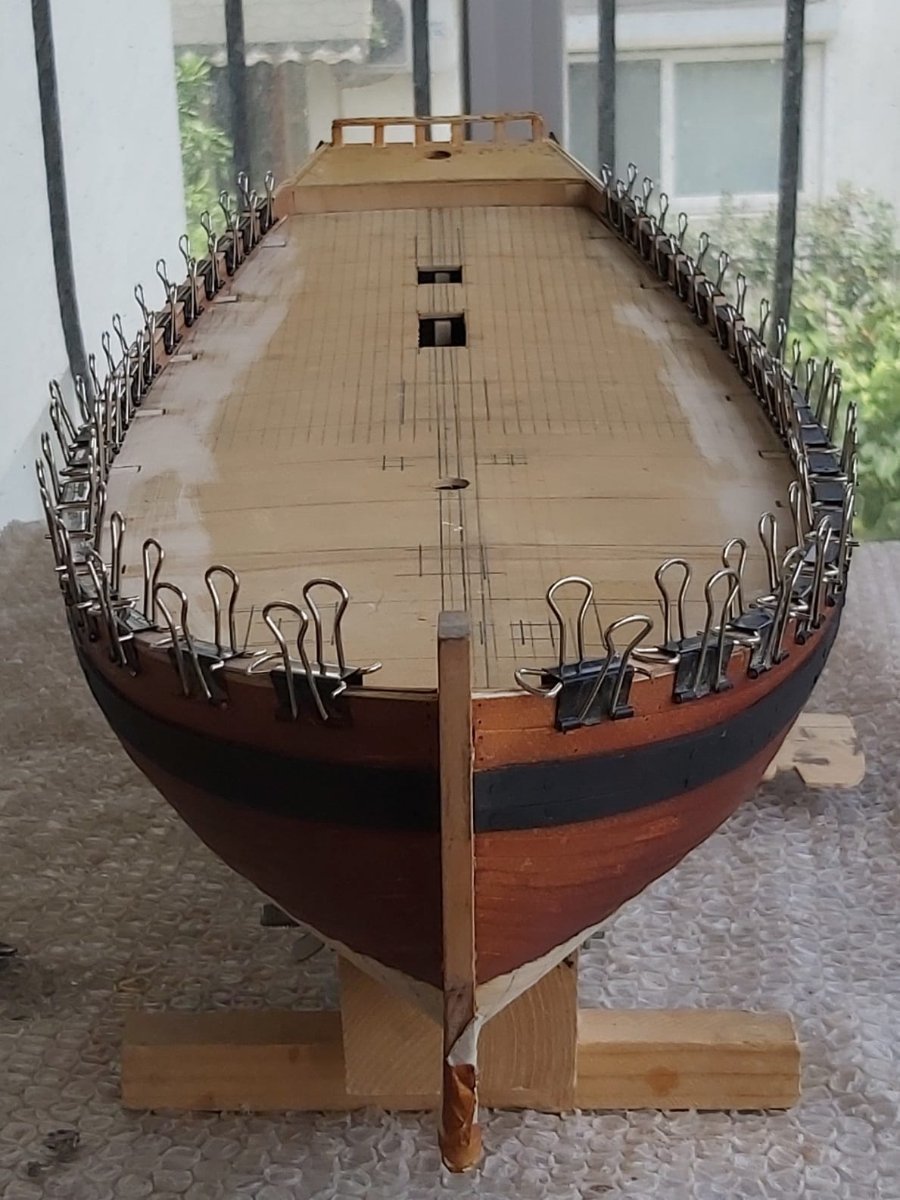
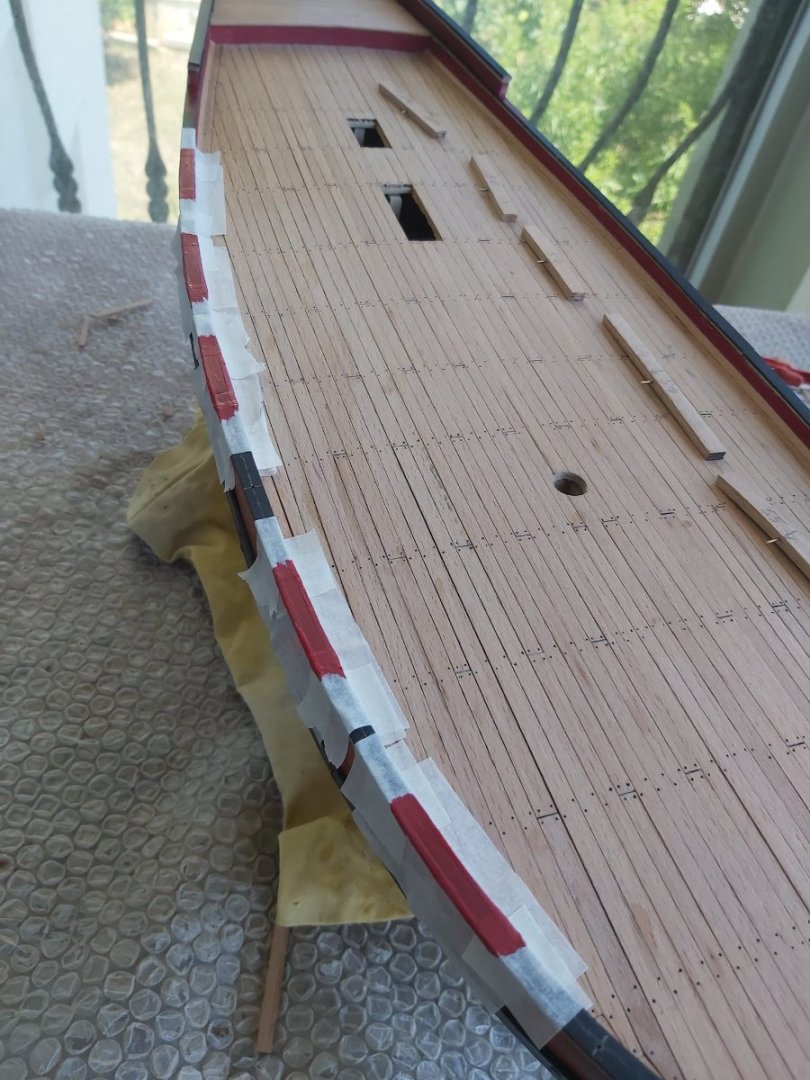
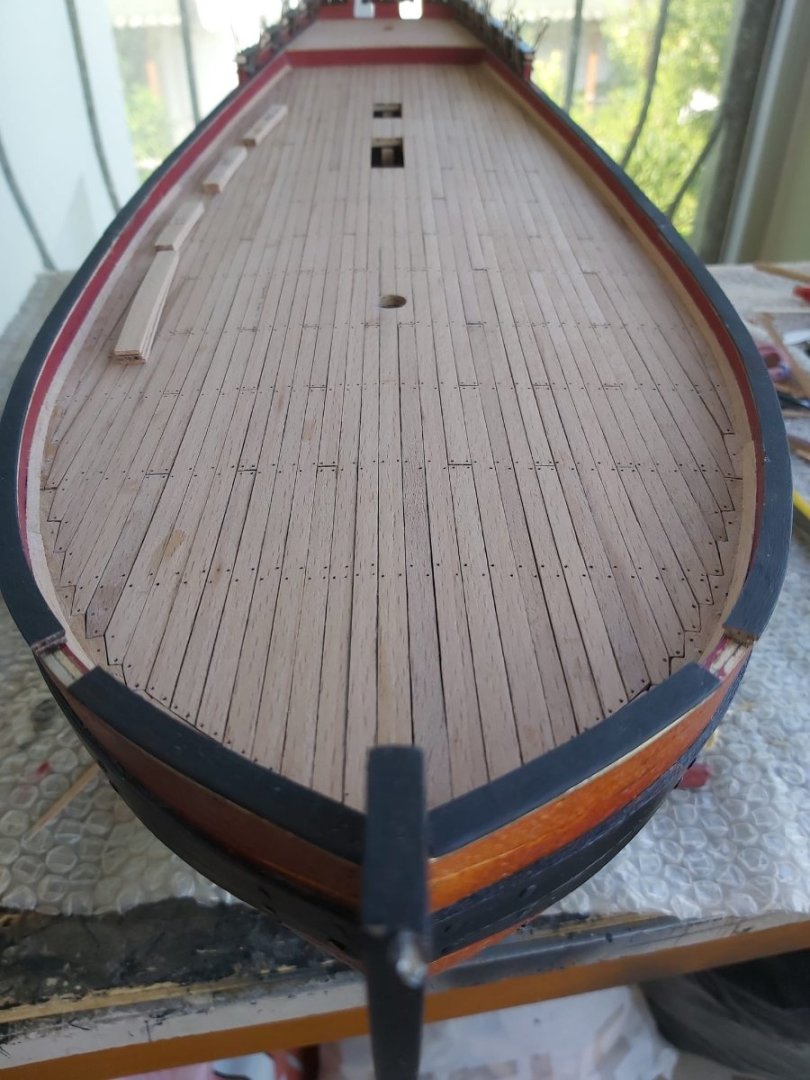
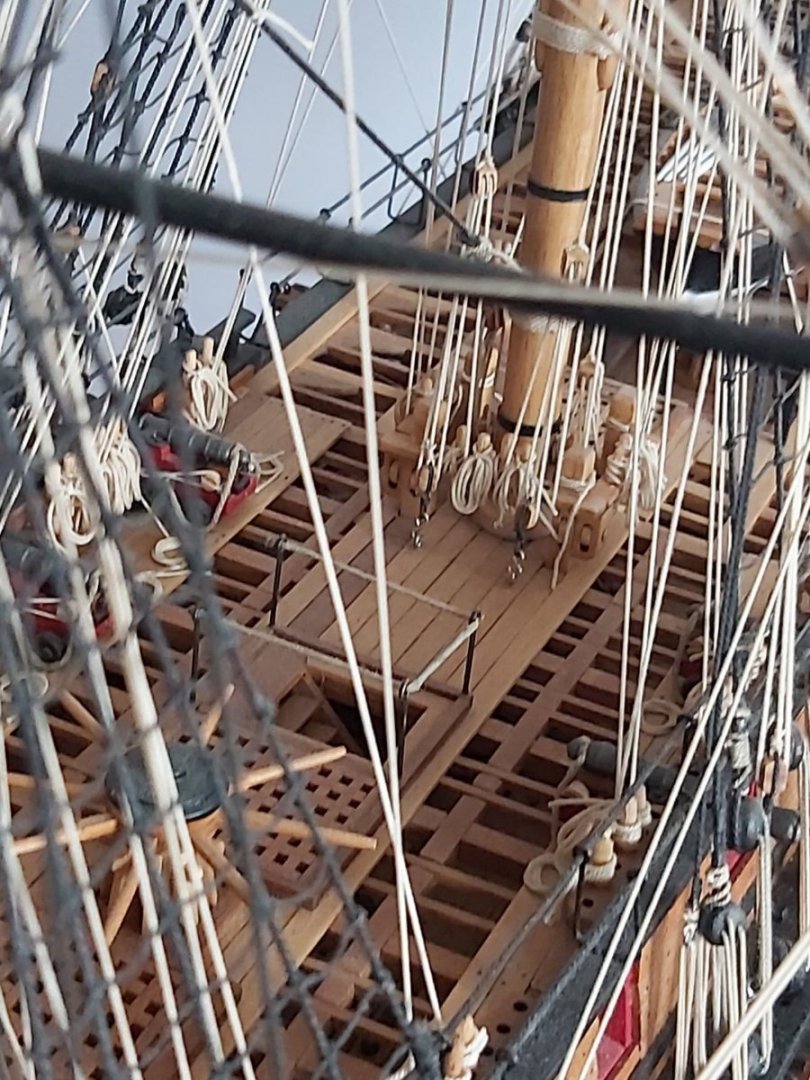
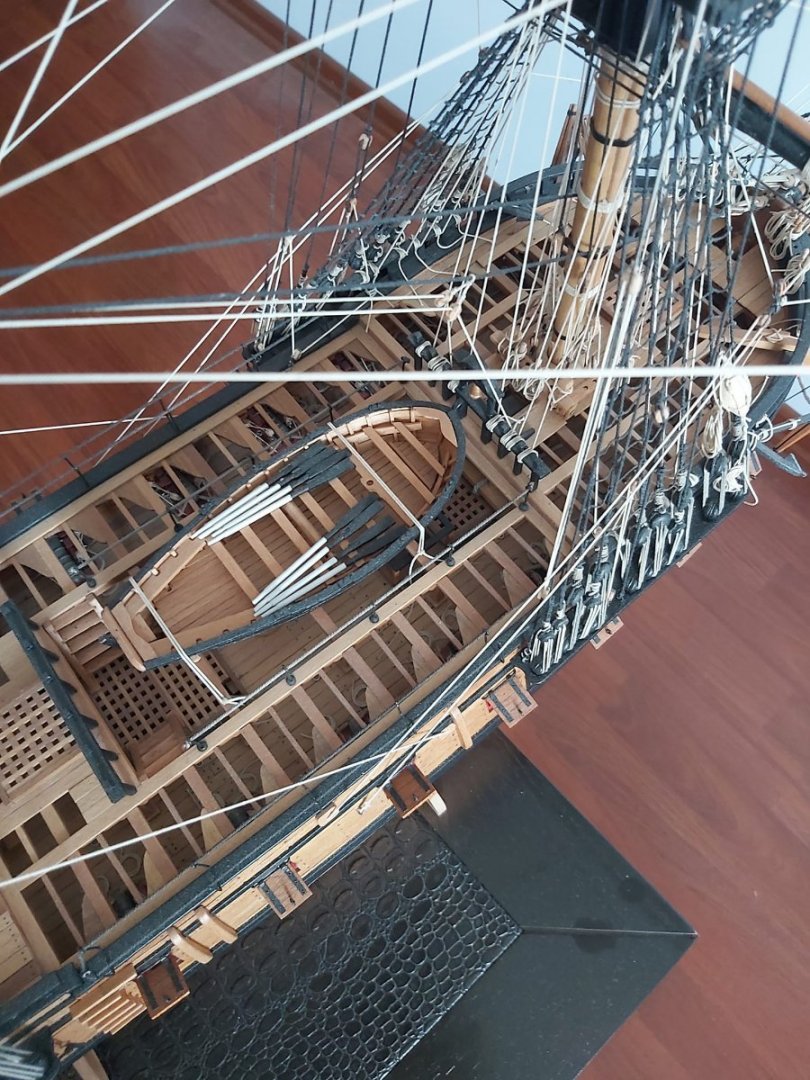
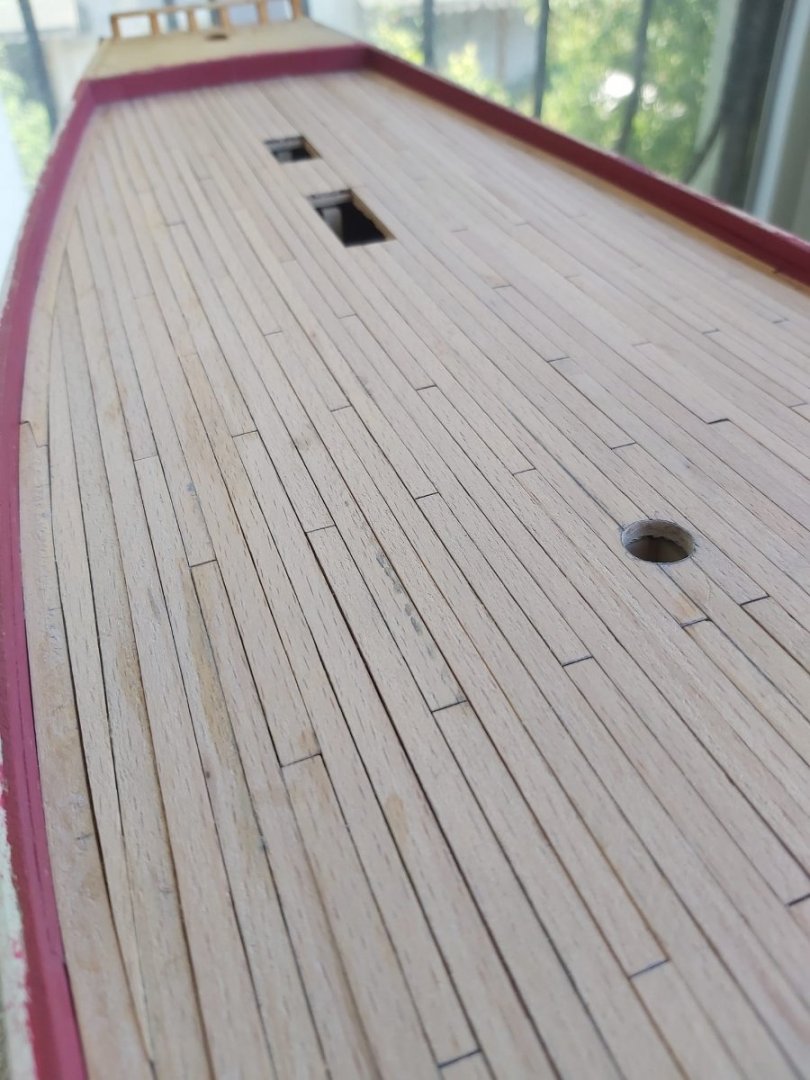
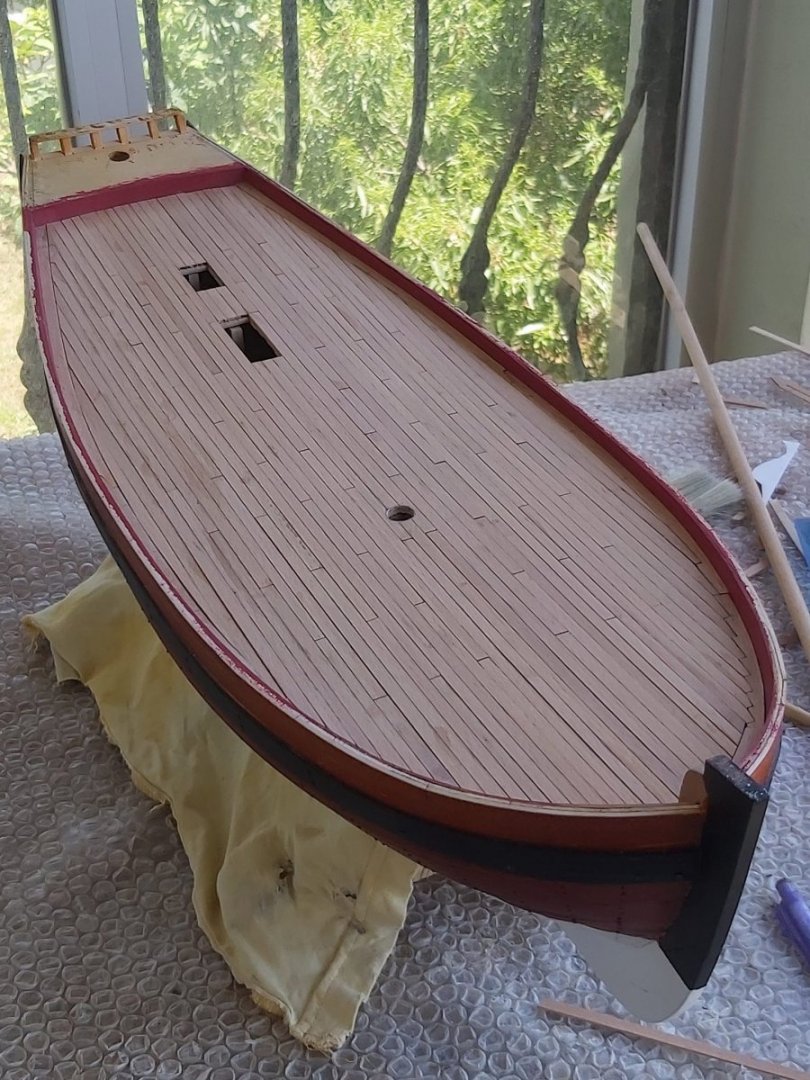
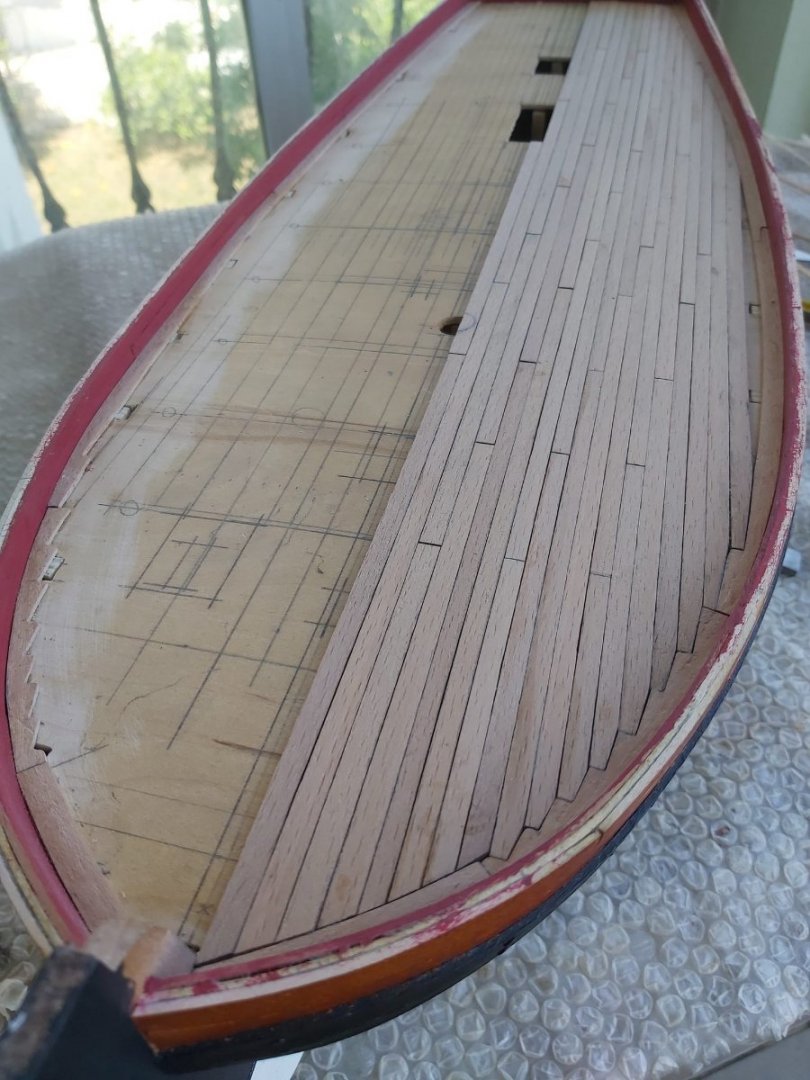
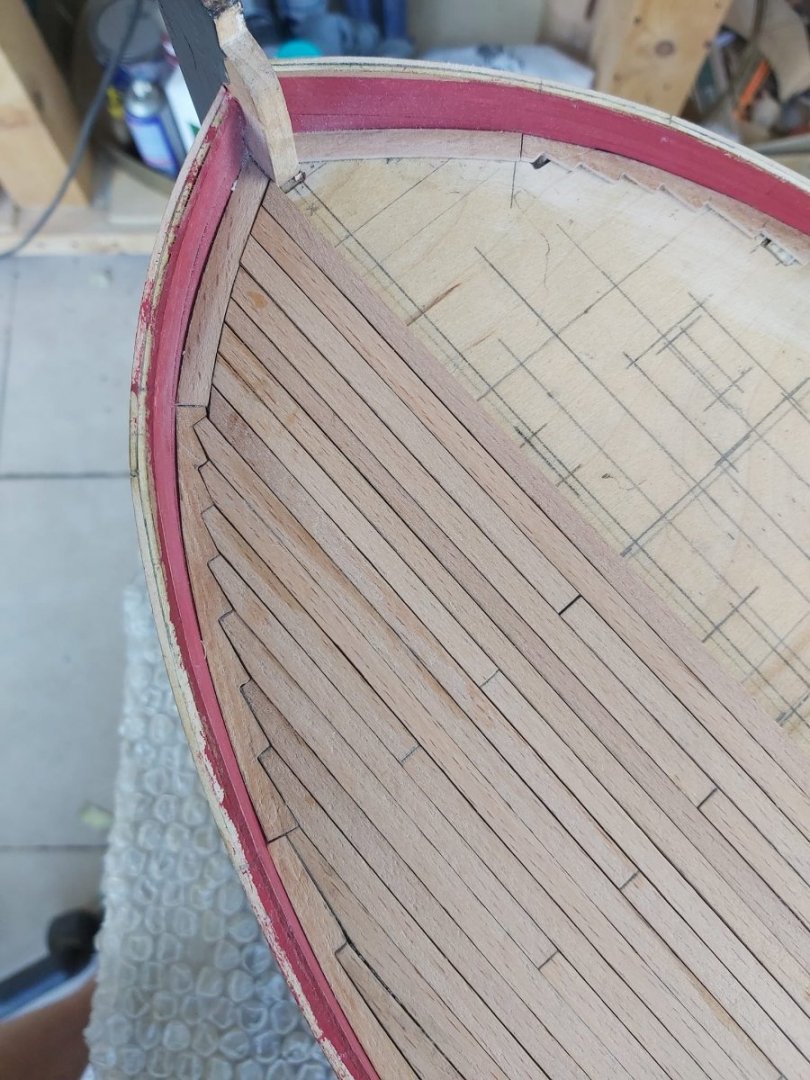
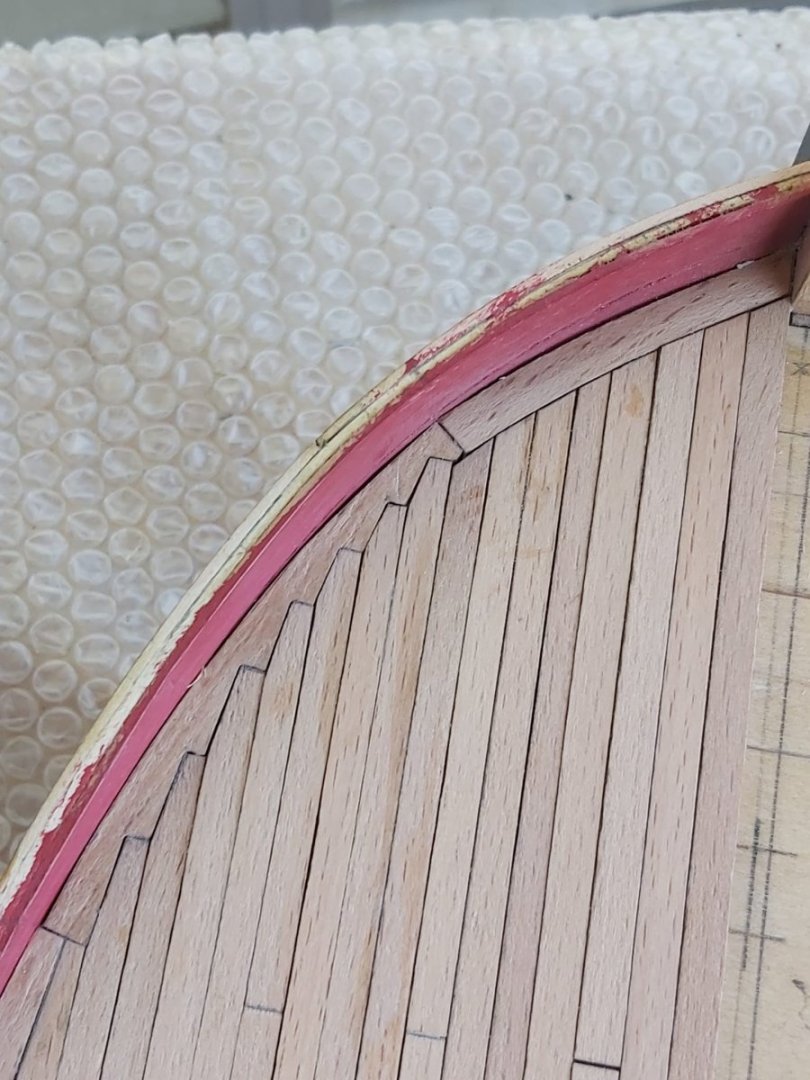
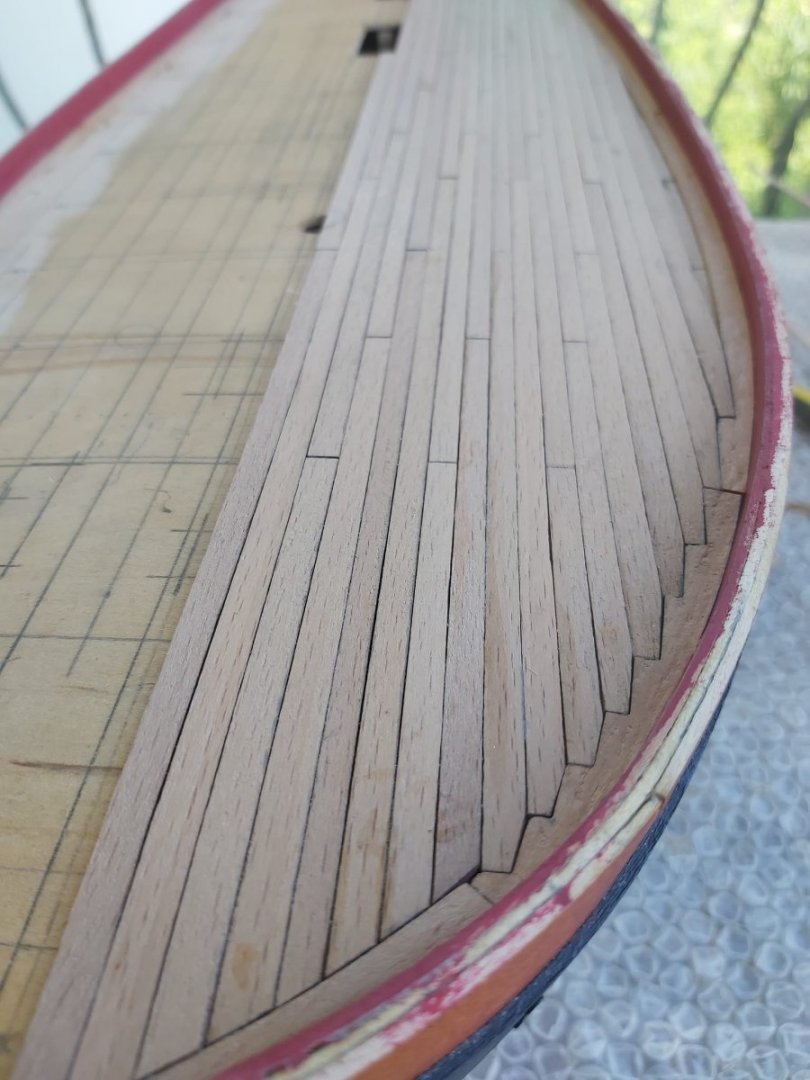
Deck planking is copmplete but has not been sanded yet.


-
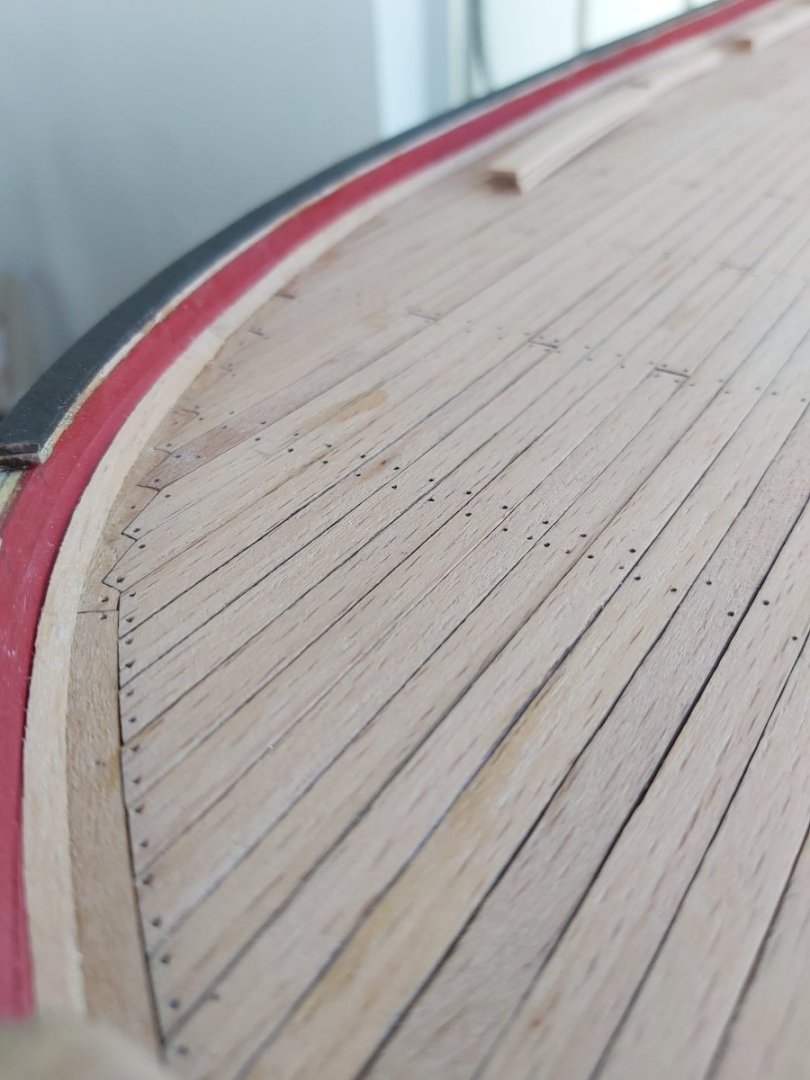
Thank you Oldsalt. I will make nail effects with pencil.
-
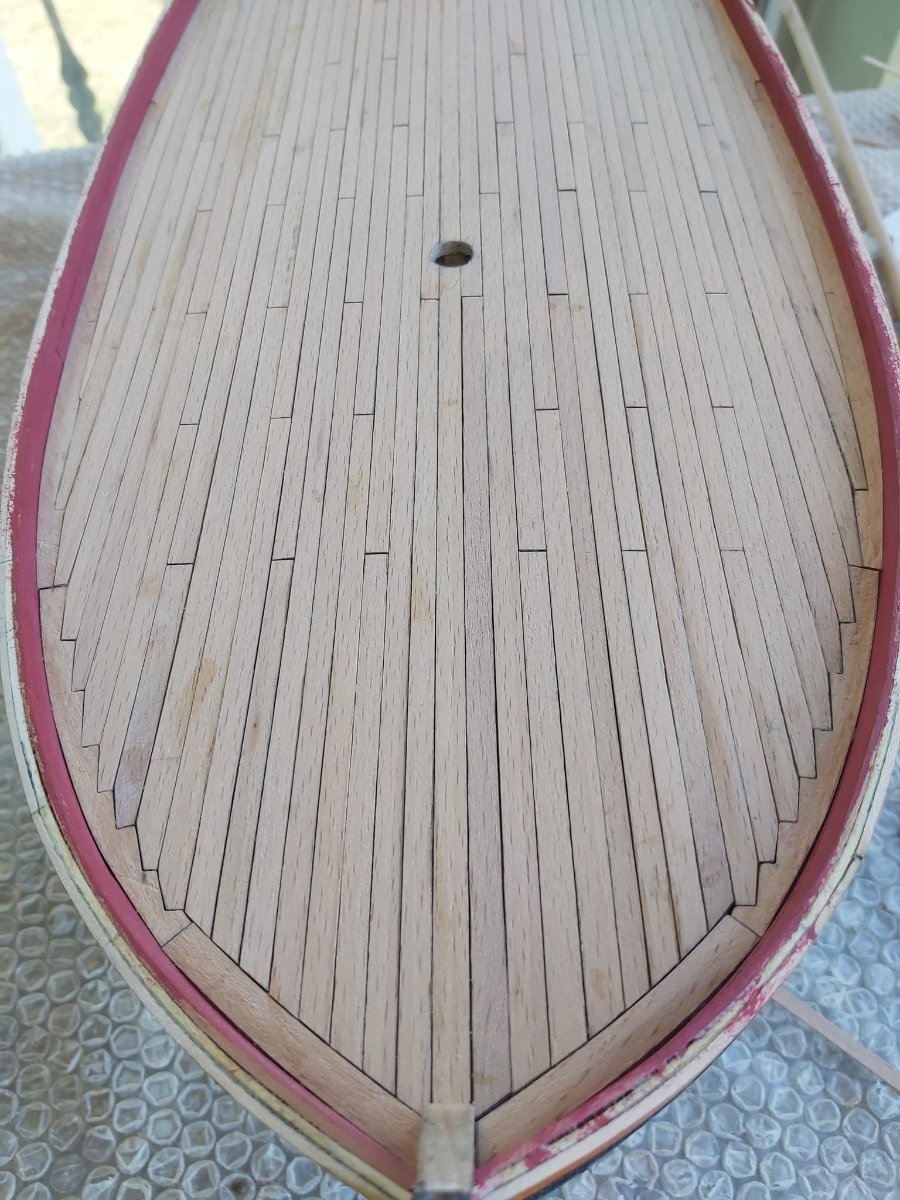
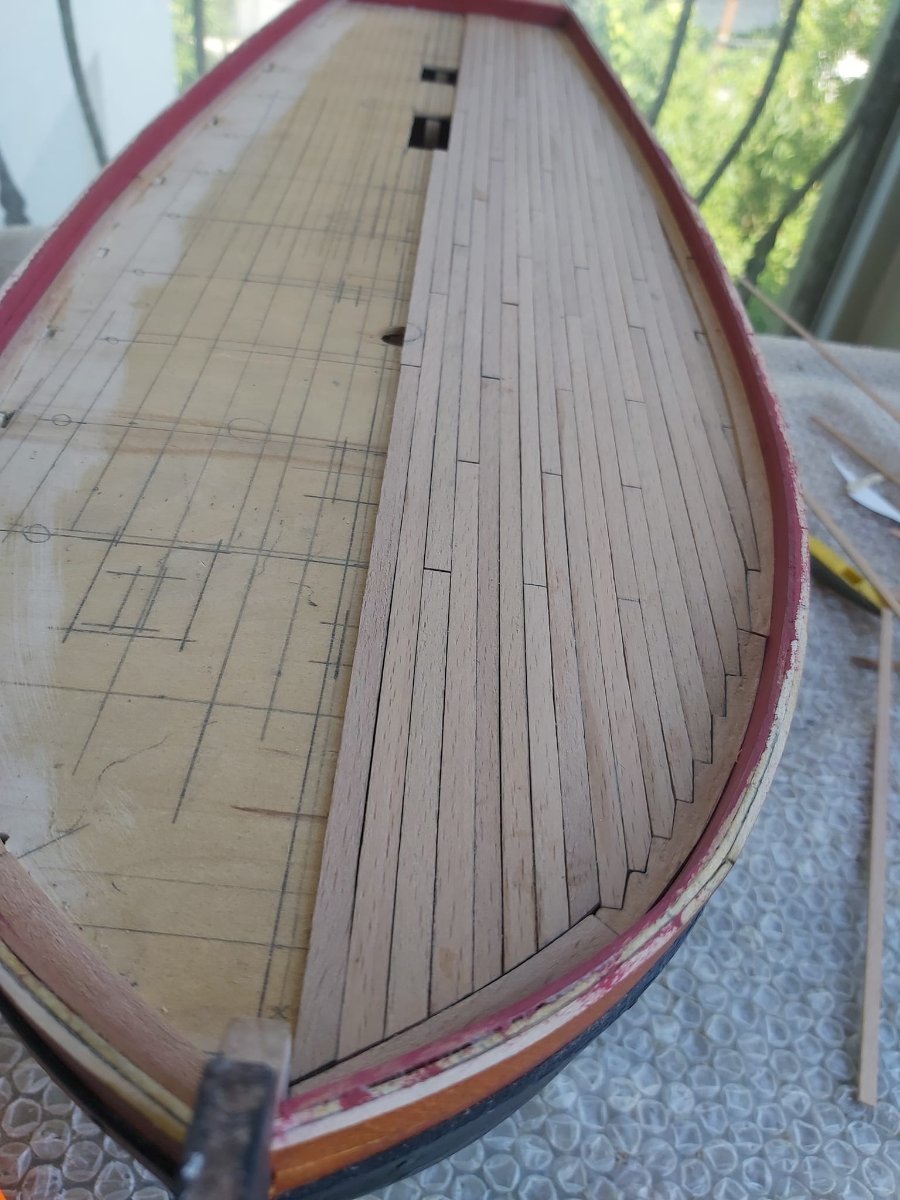
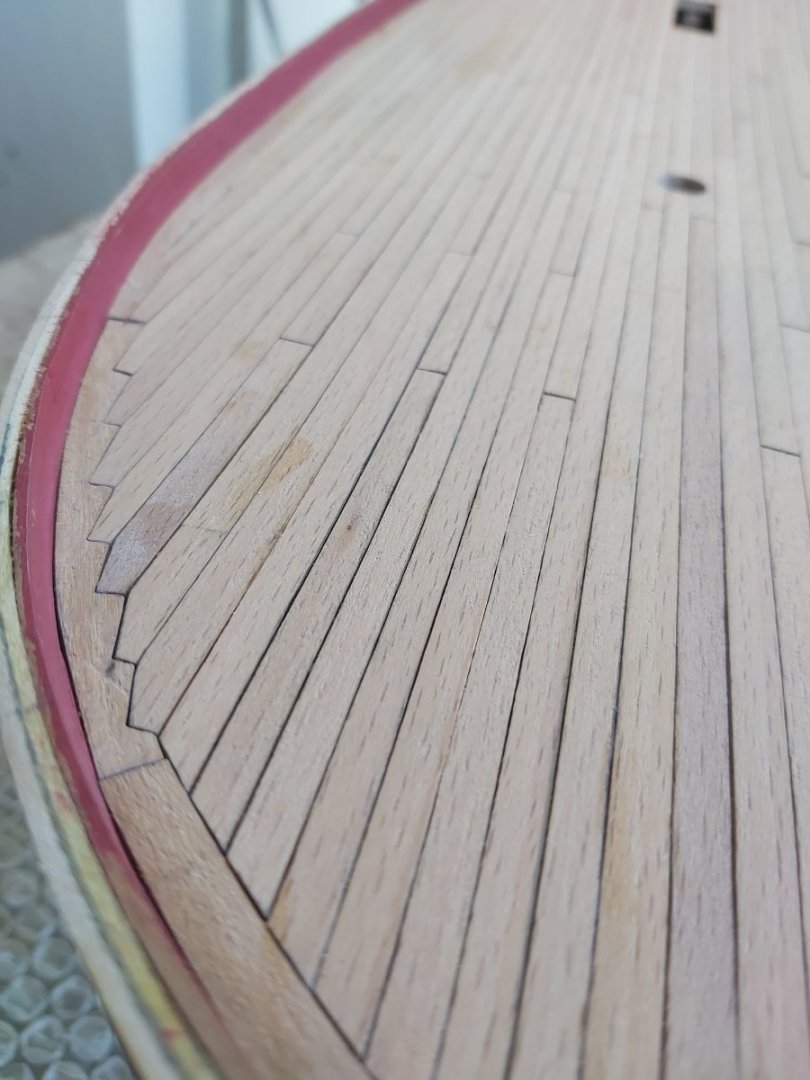
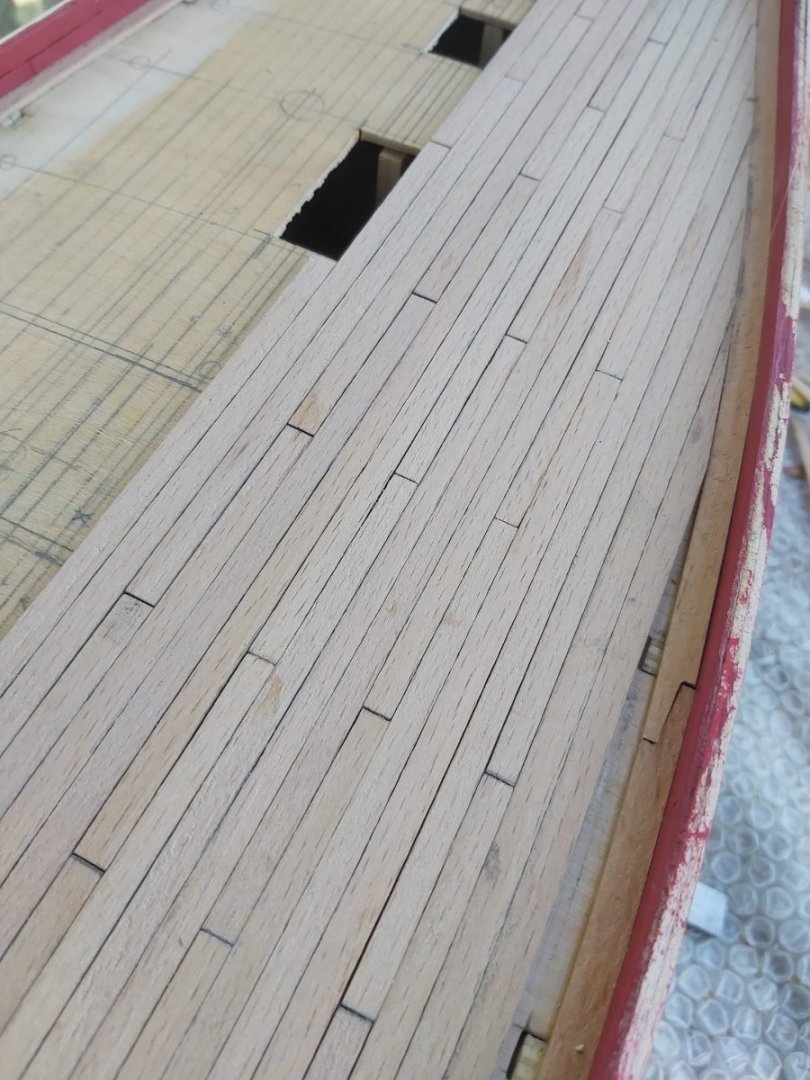
I started deck planking. I am implementing 3 butt shift method as shown in the Alert book


-
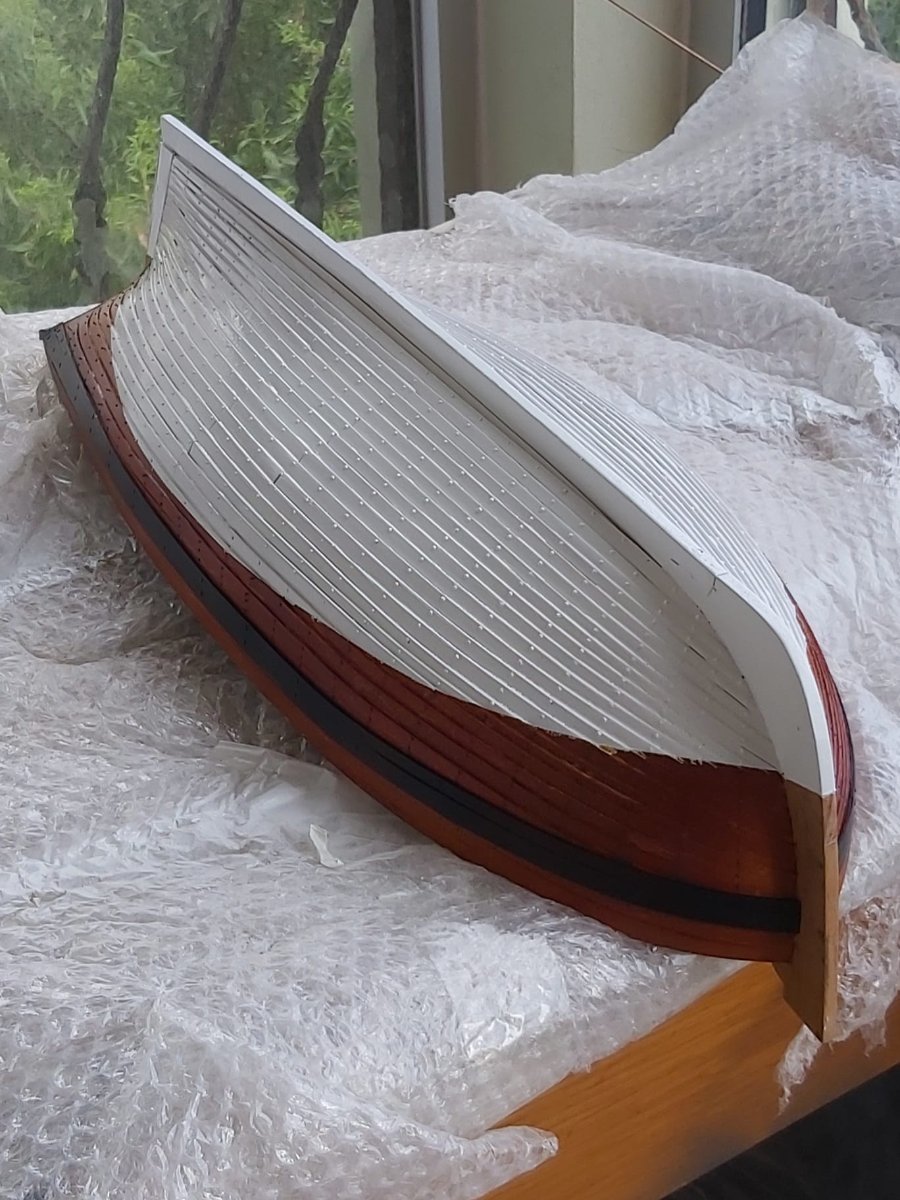
Thank you so much for stopping by and your encouraging words Yves. This is my first clinker built hull attempt and I am happy with the result too.
-
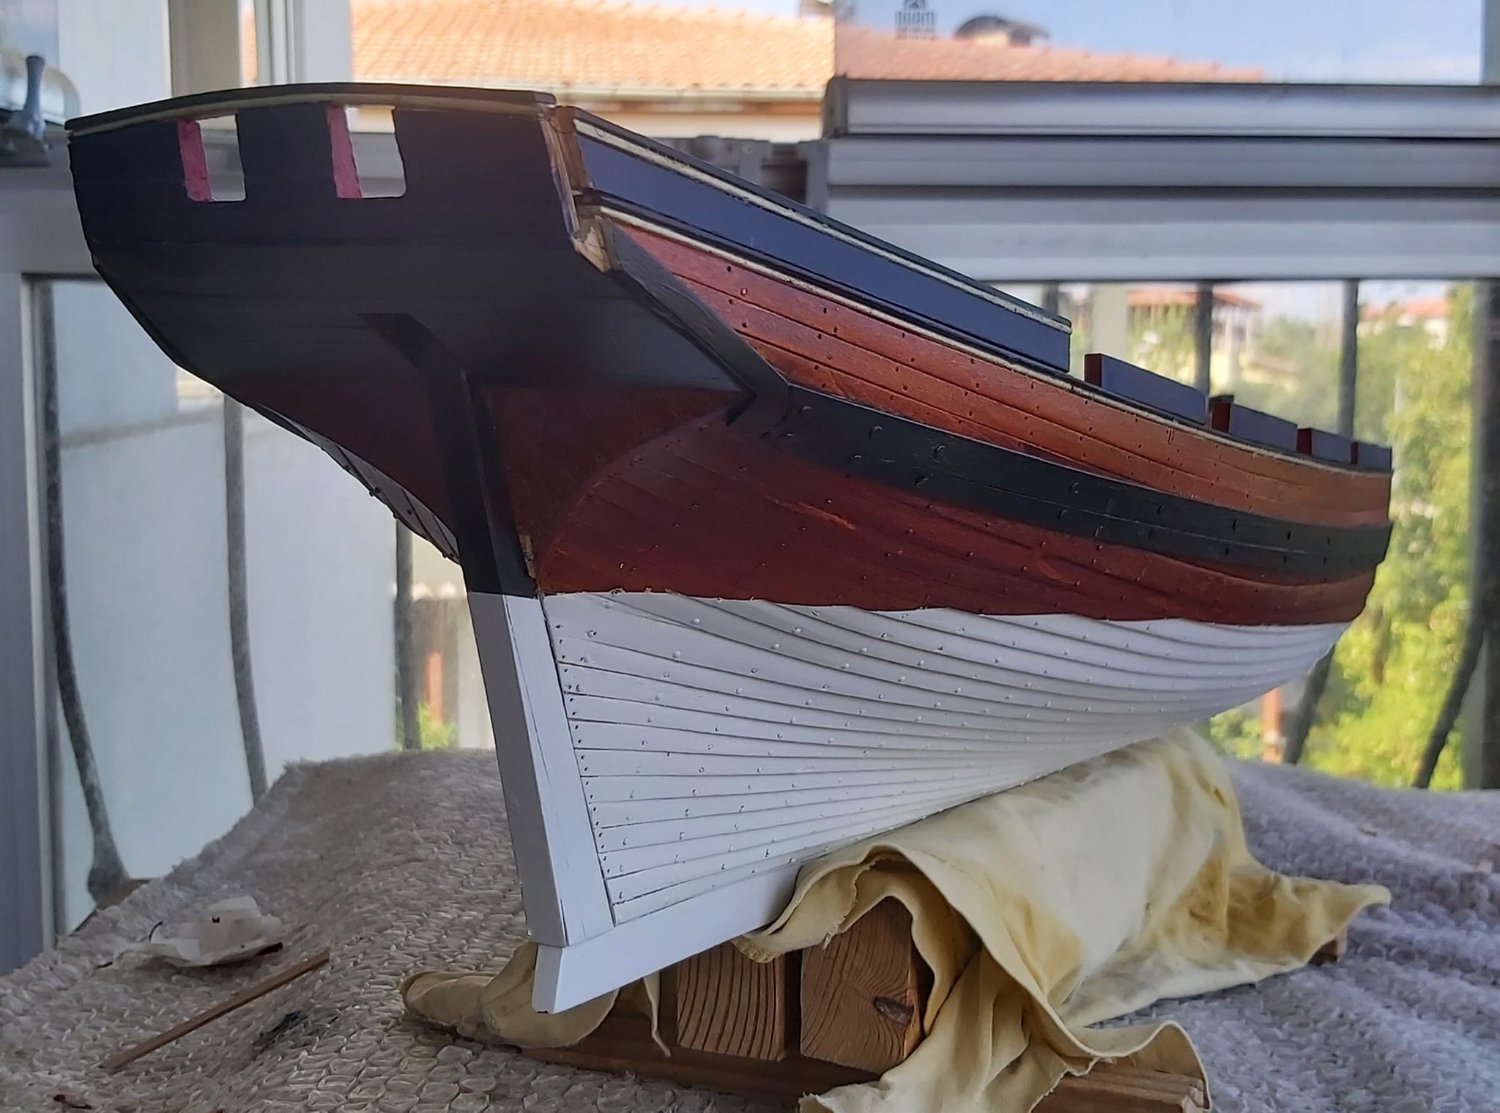
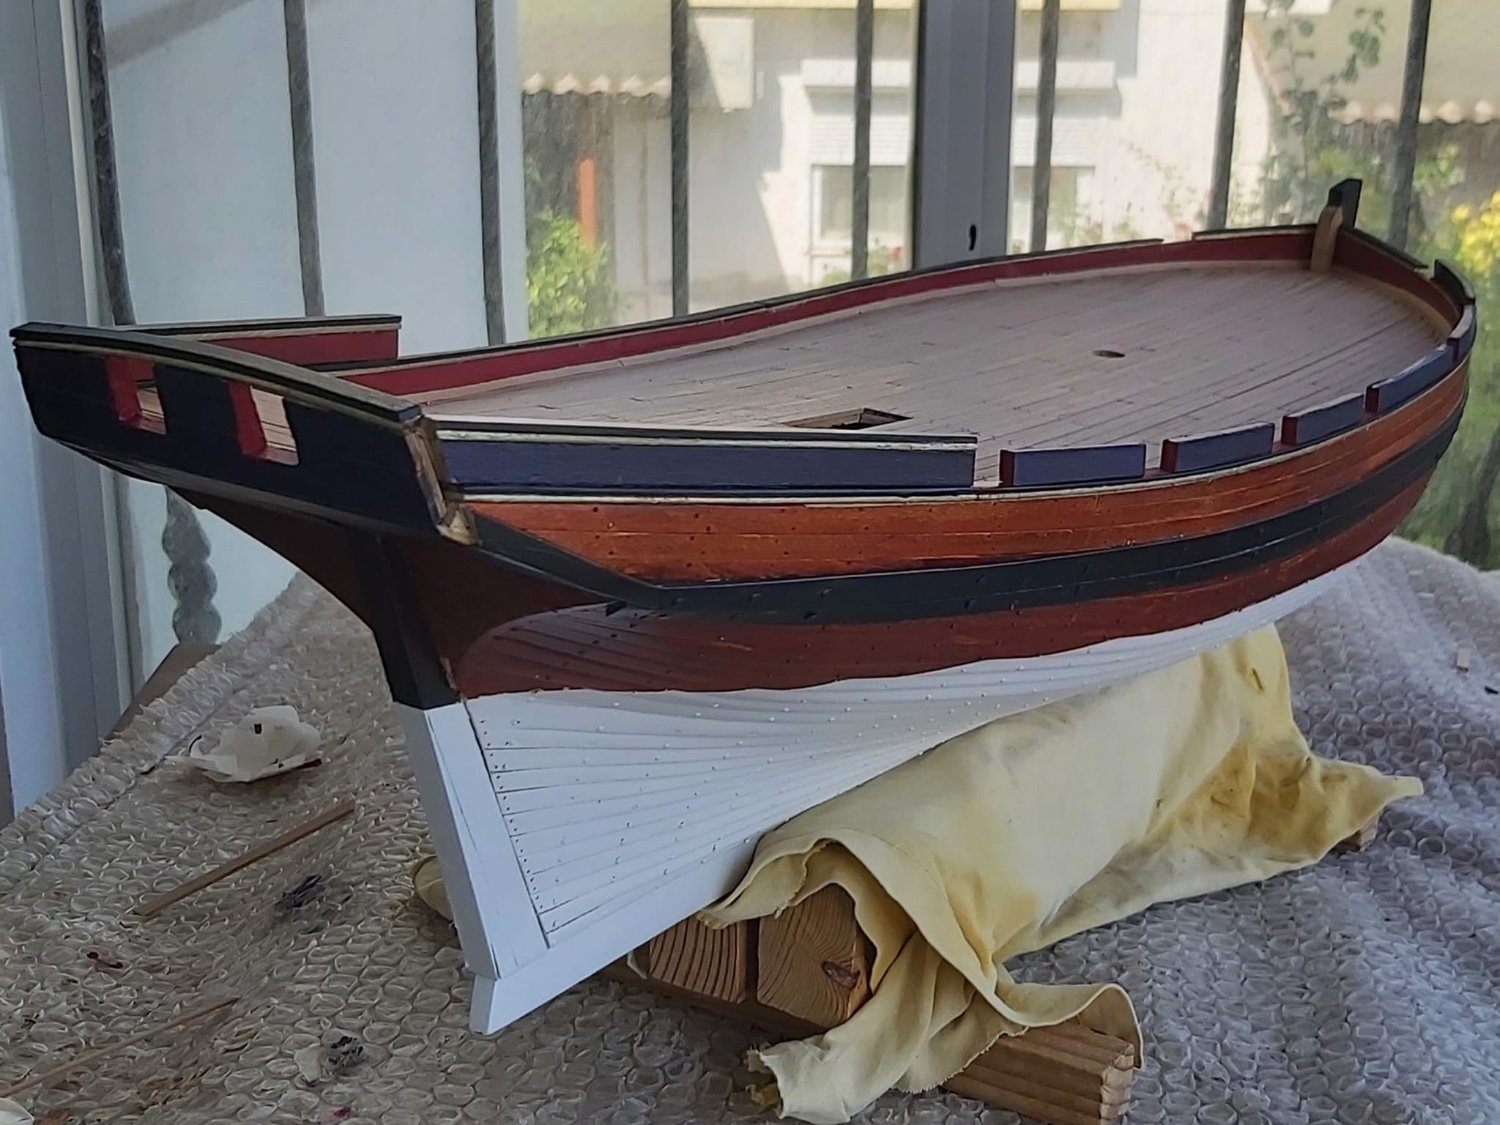
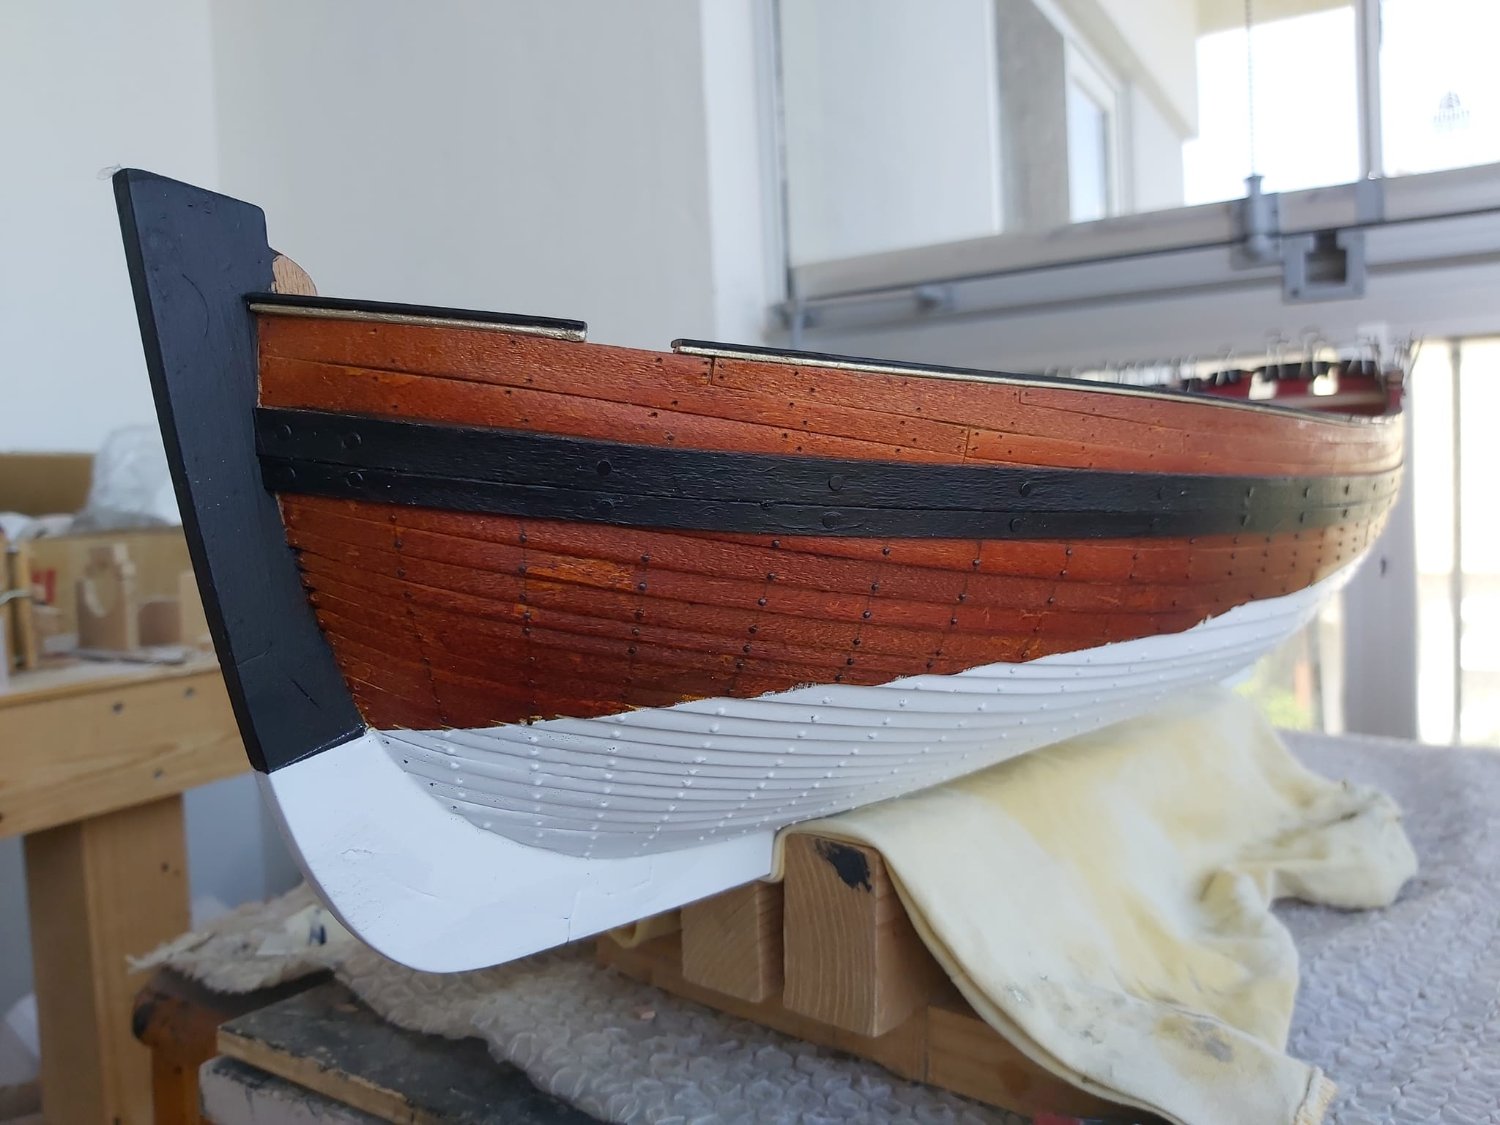
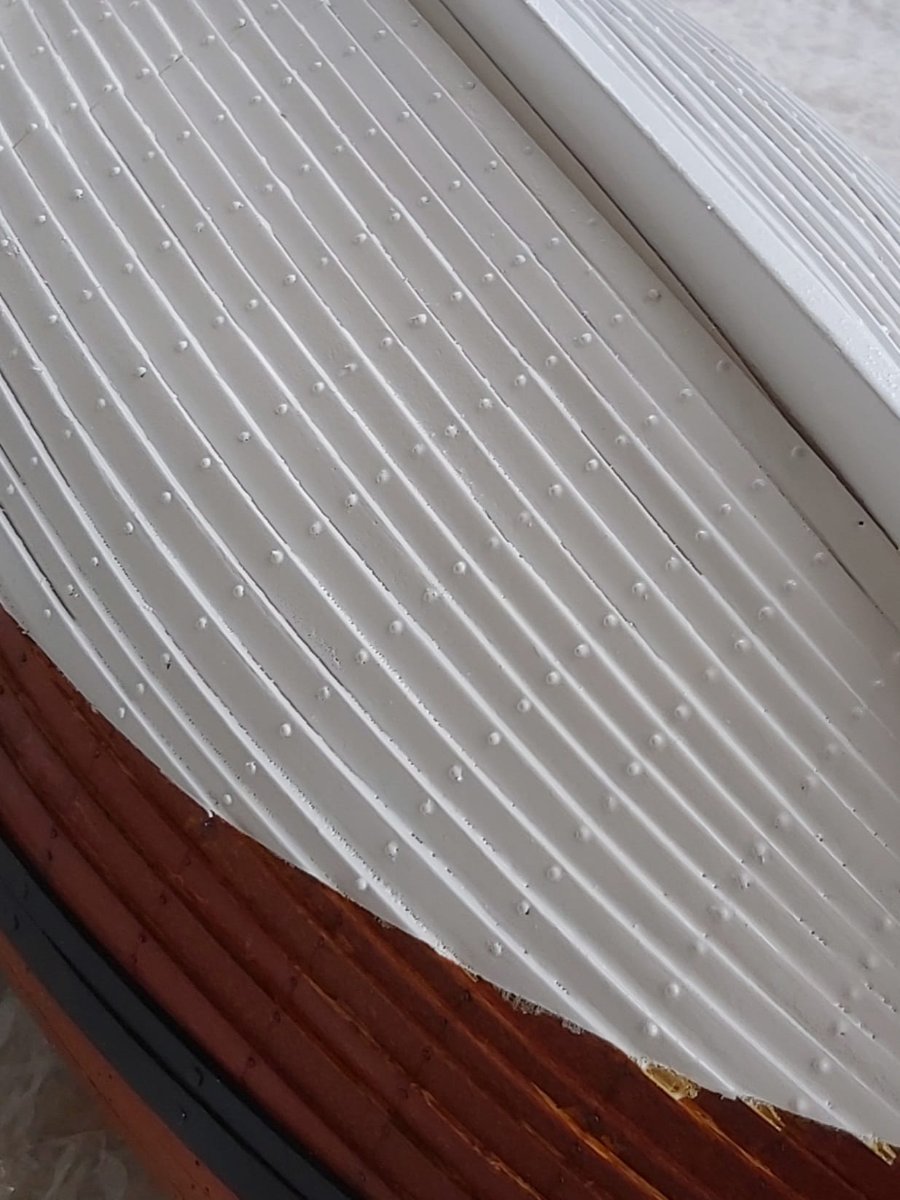
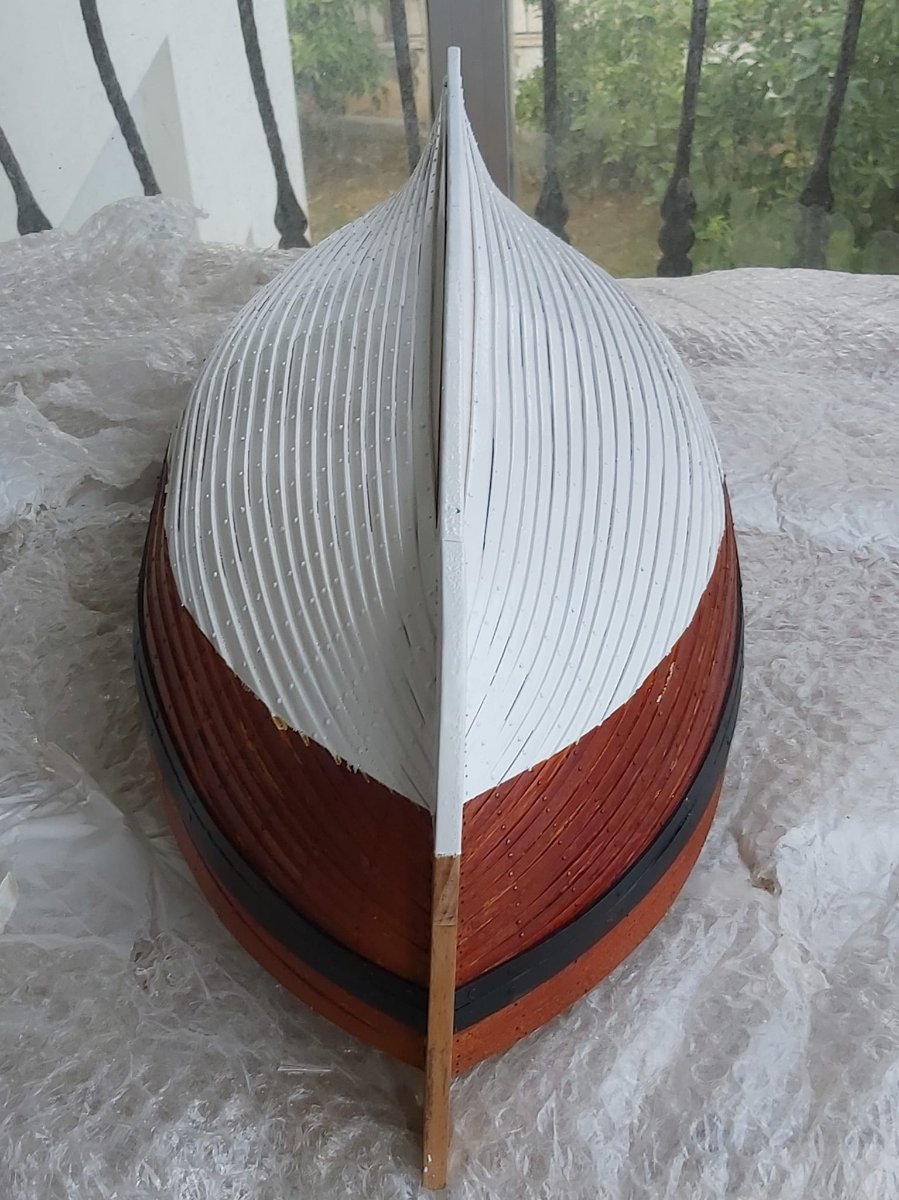
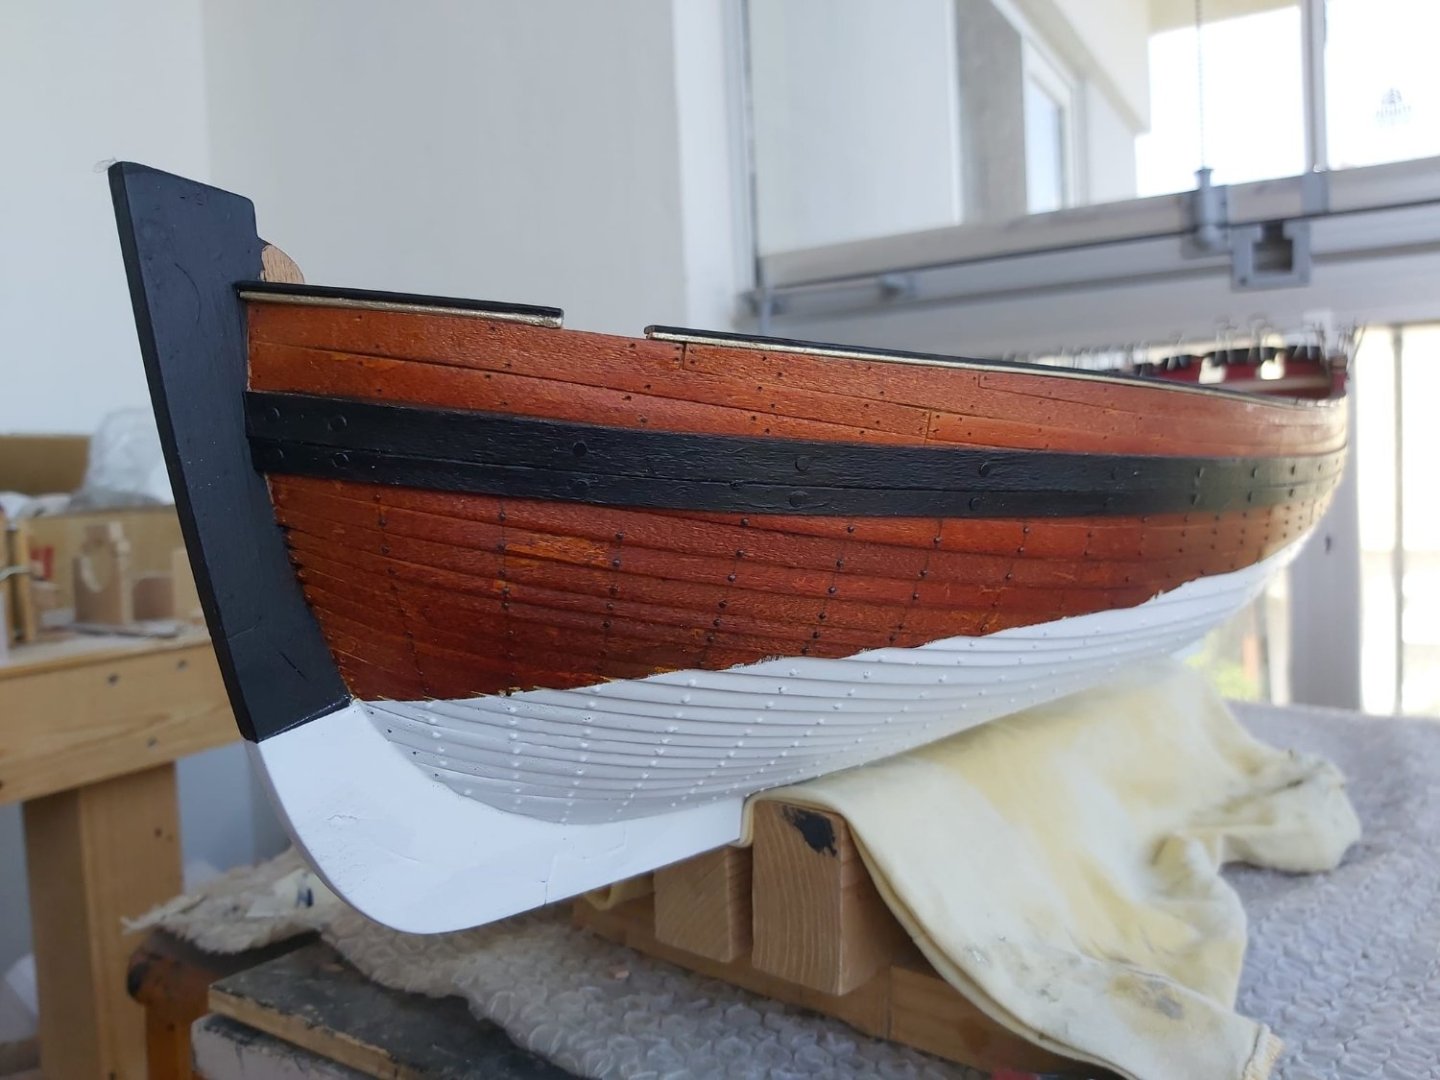
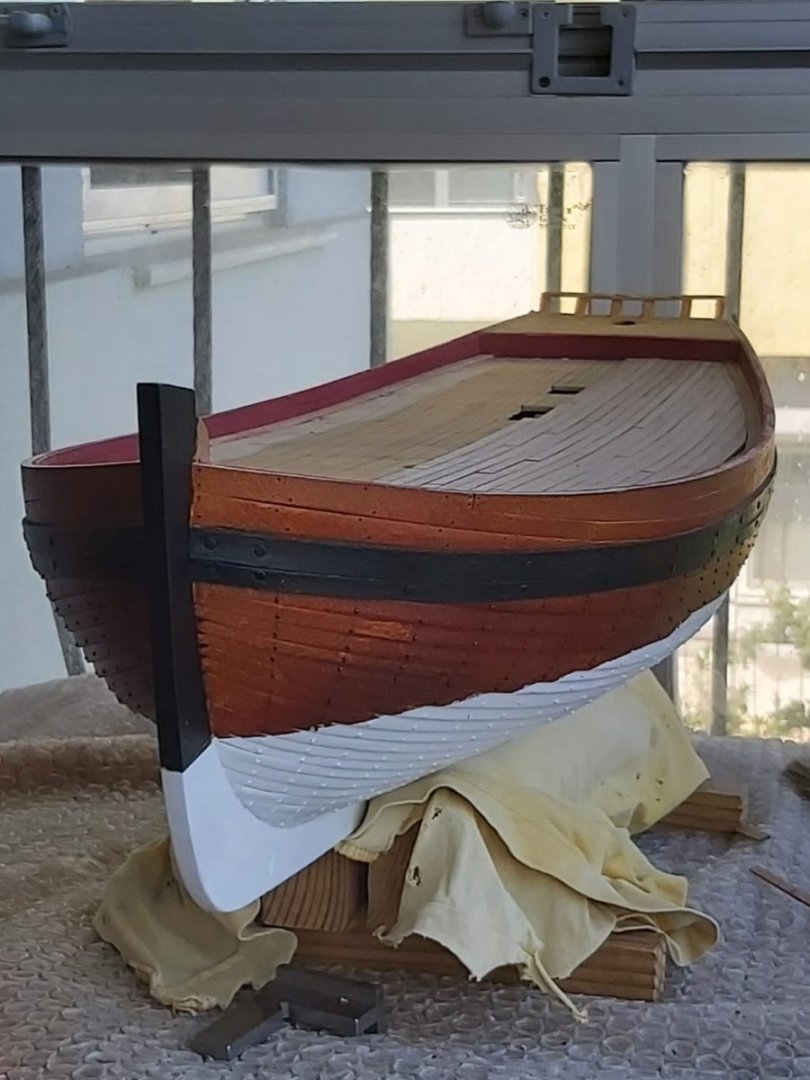
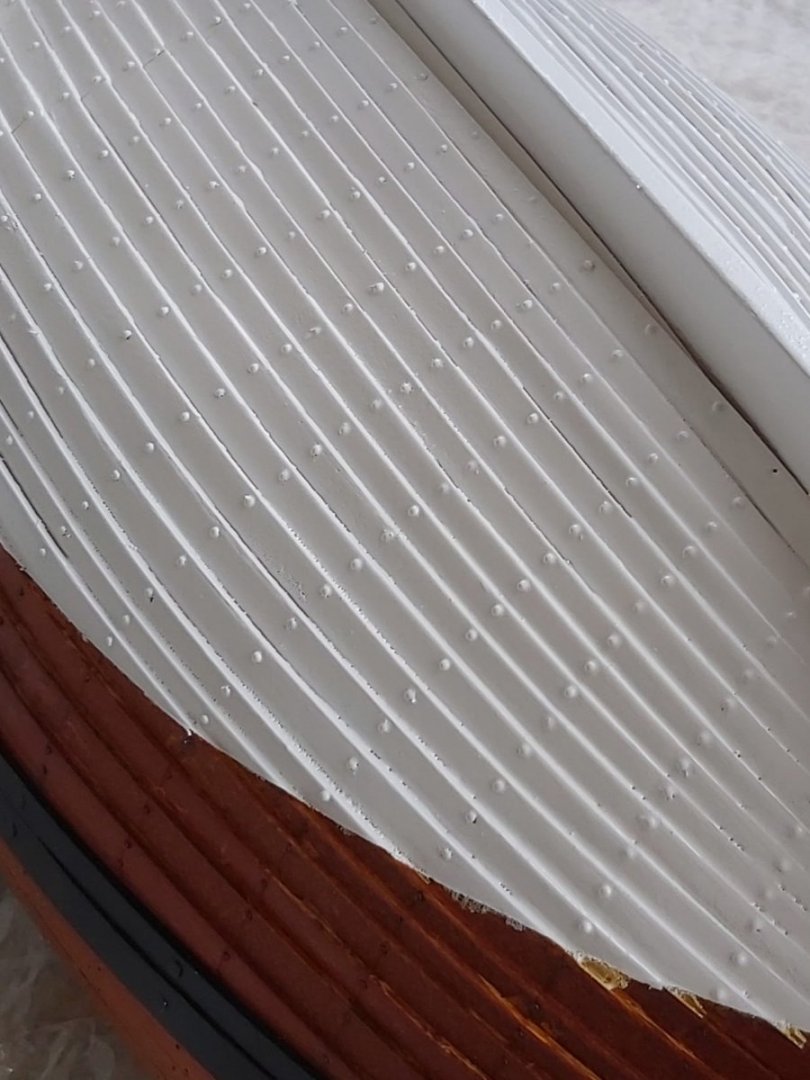
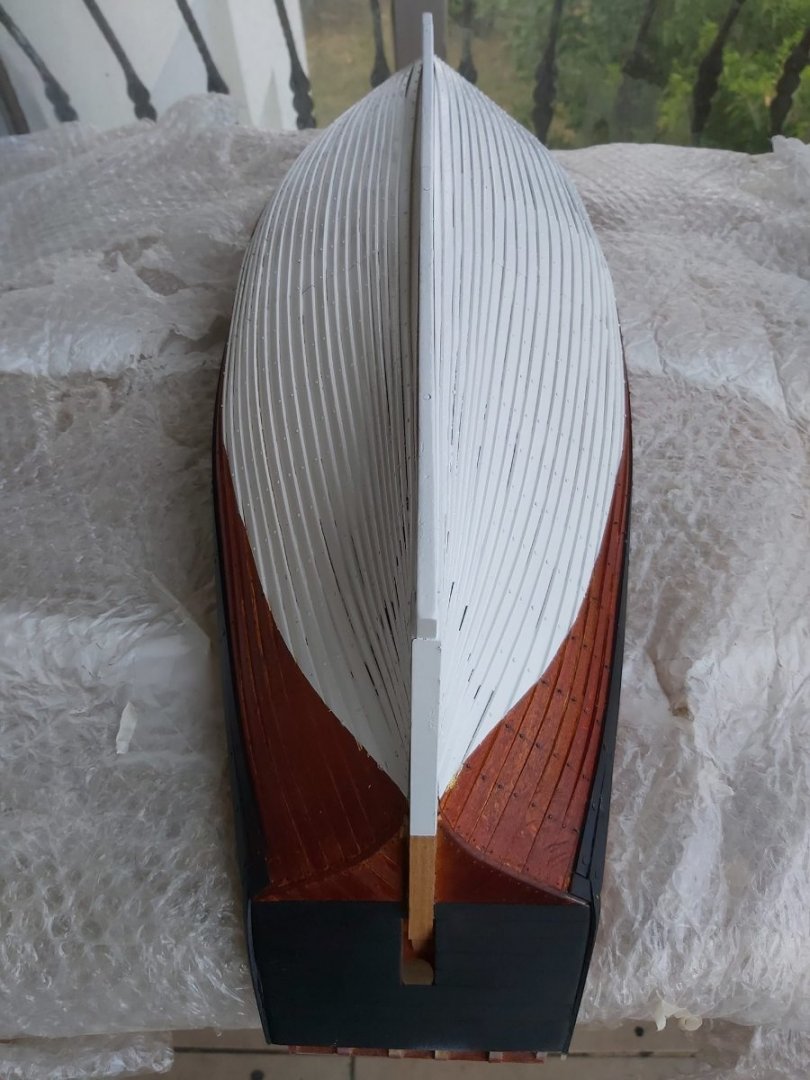
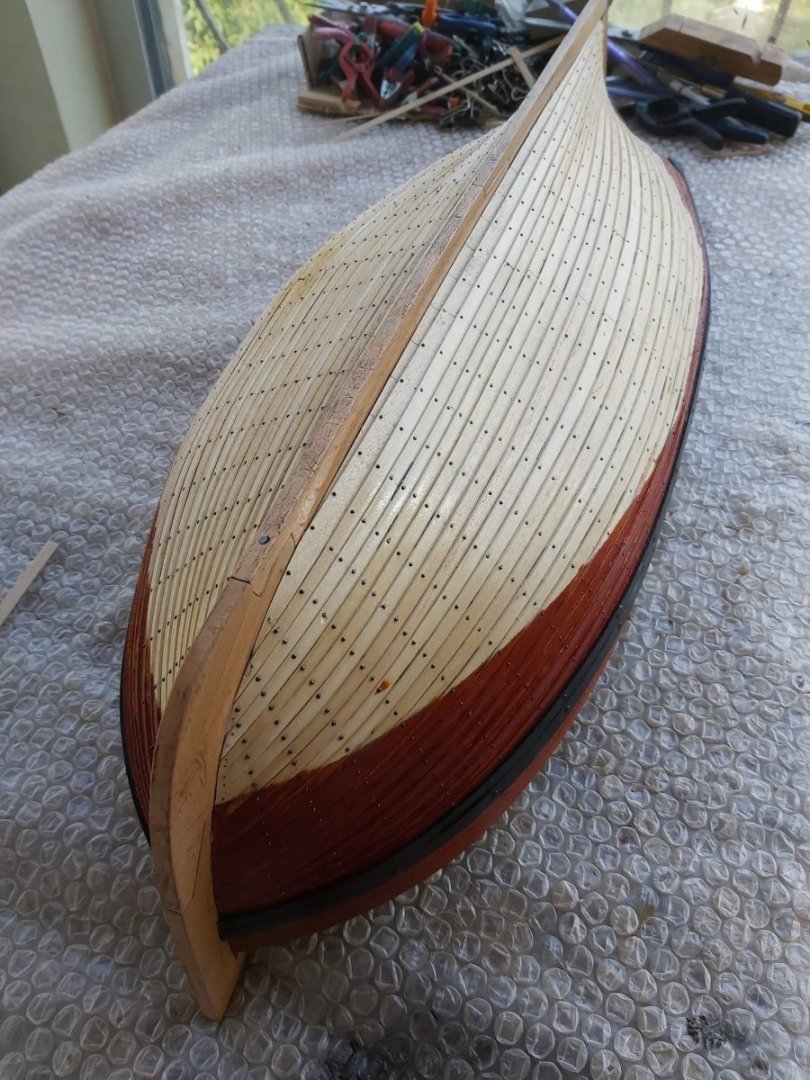
While I was waiting for the hornbeam strips I ordered for the deck planking I painted below the waterline white. I am not very knowledgeable in painting, nor I am good at it. I don't like putty and sandpaper job at all, so I always chose unpainted models before. There are a few points that I need to touch up.

-
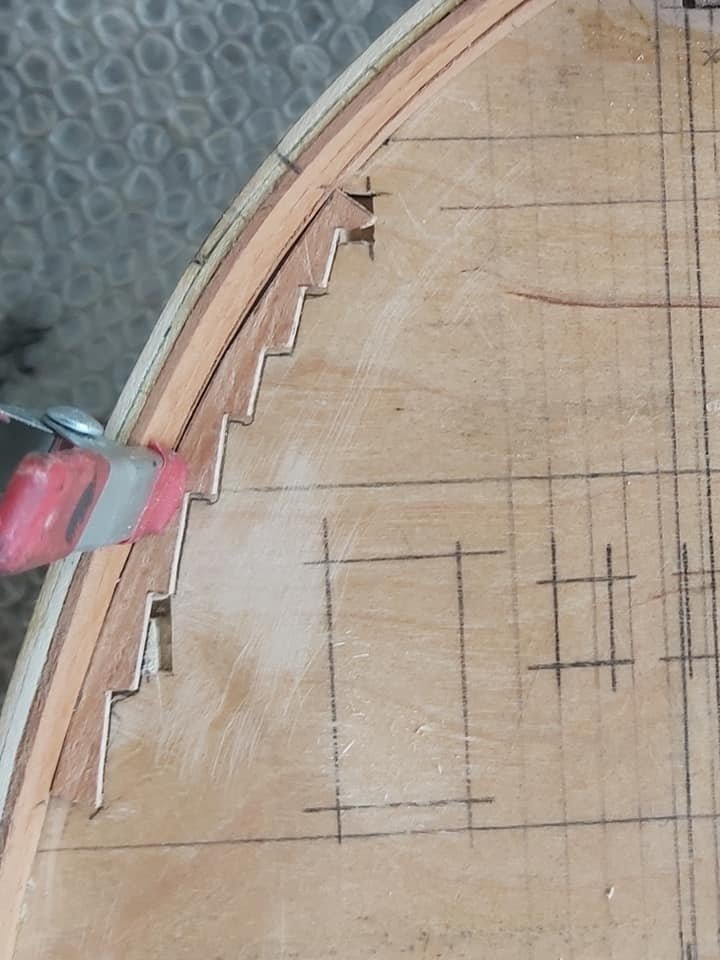
Thank you so much Oldsalt. I have begun the deck planking. Basswood planks in the photos are temporary, I am using them as templates for preparing the margin planks.

-
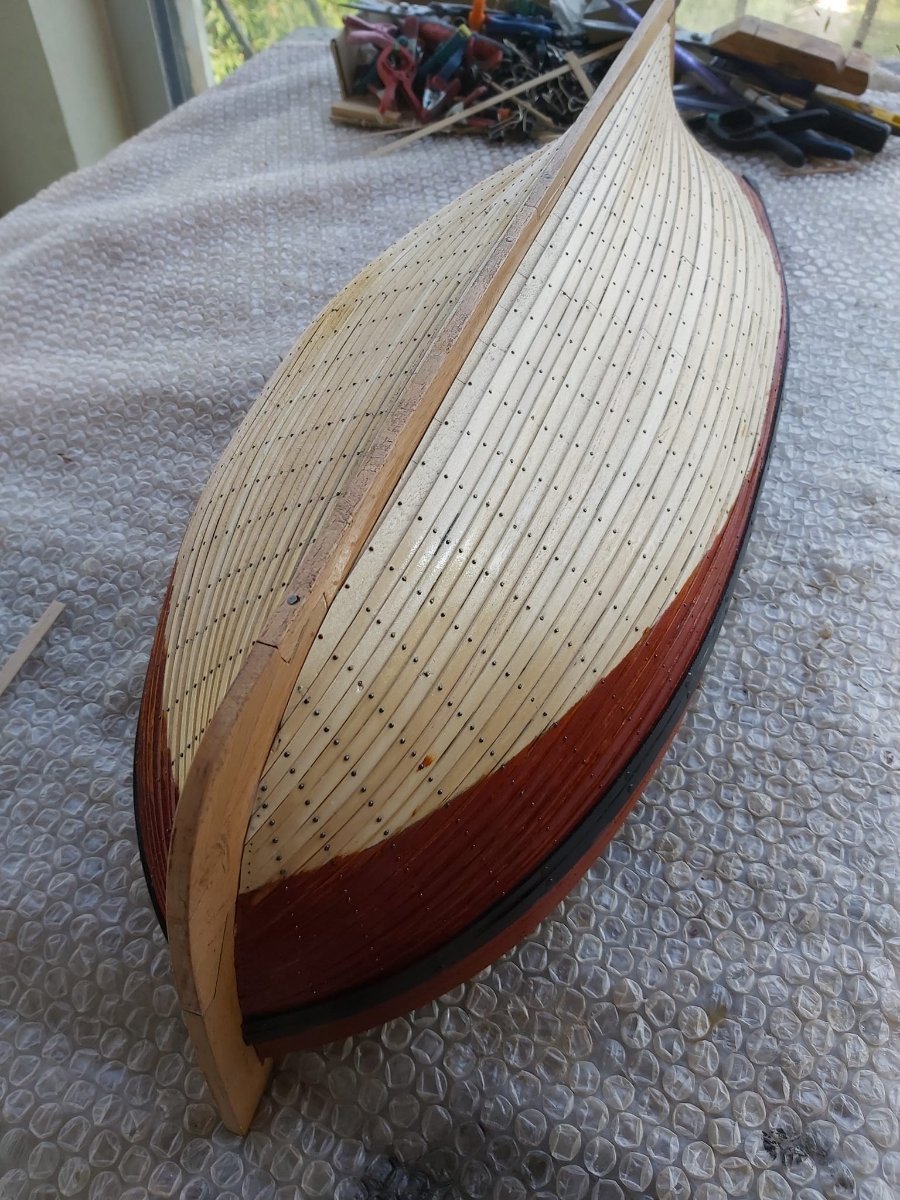
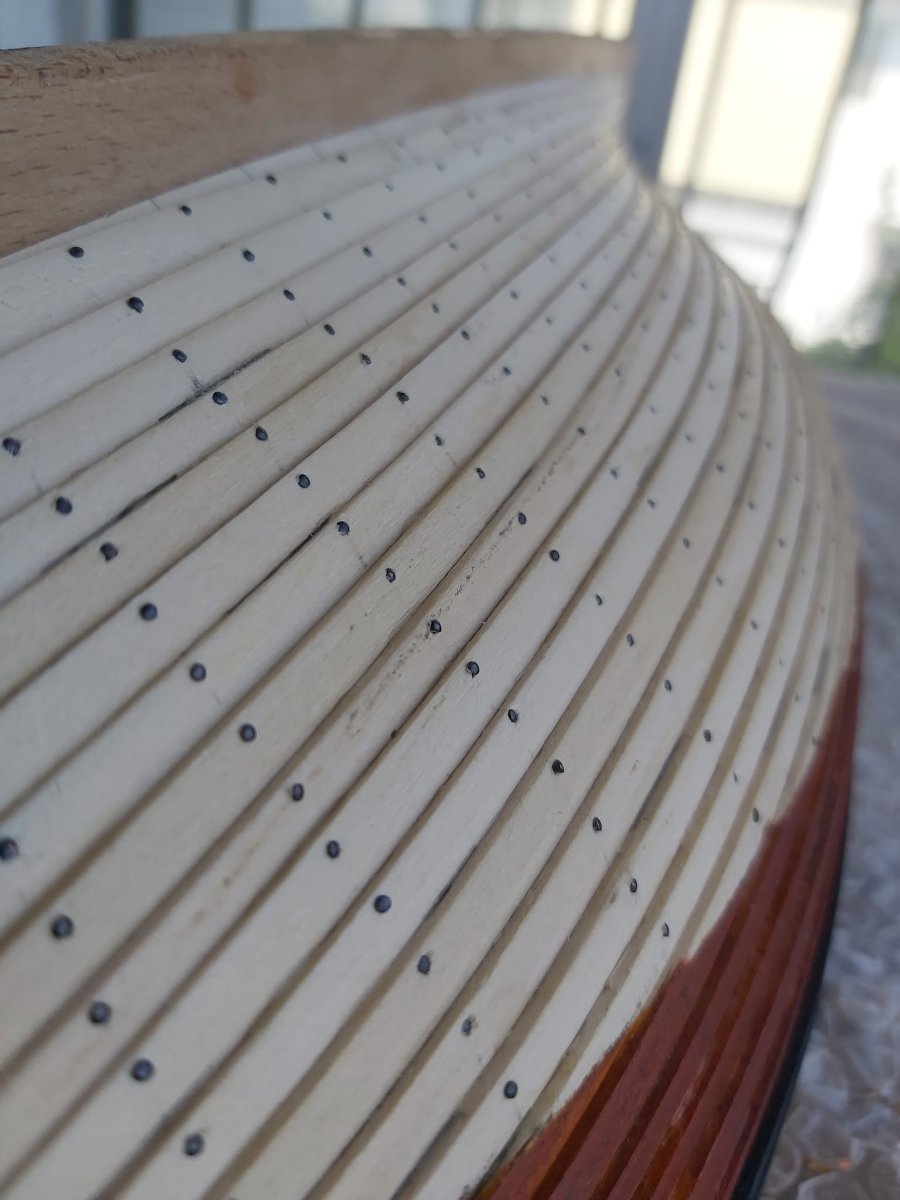
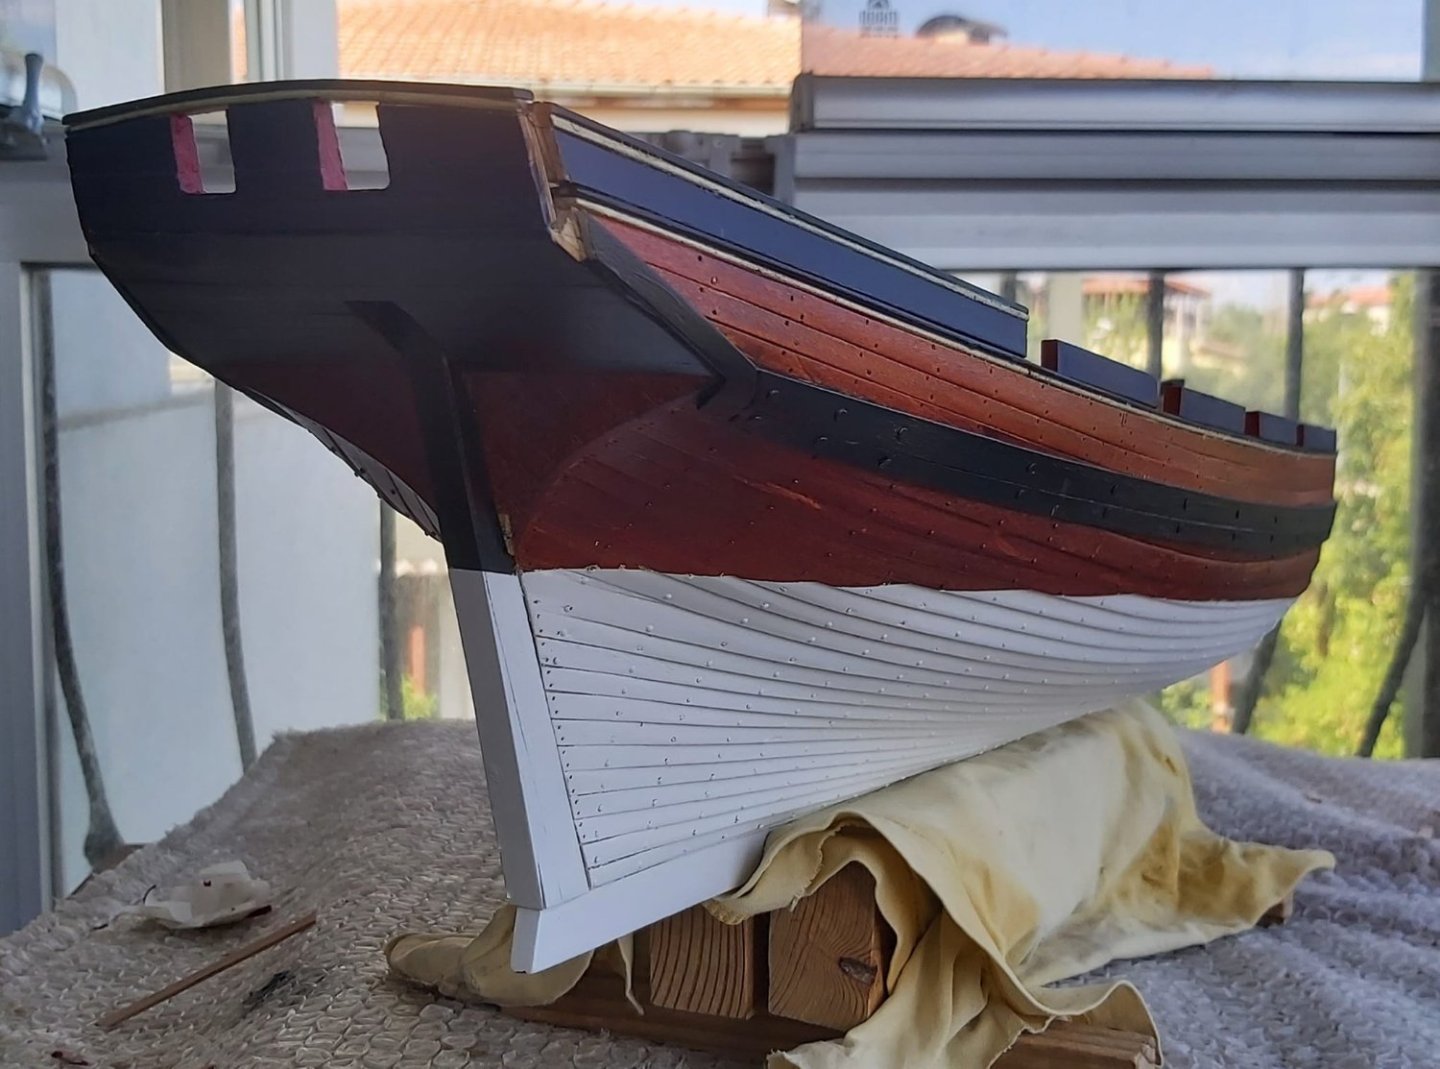
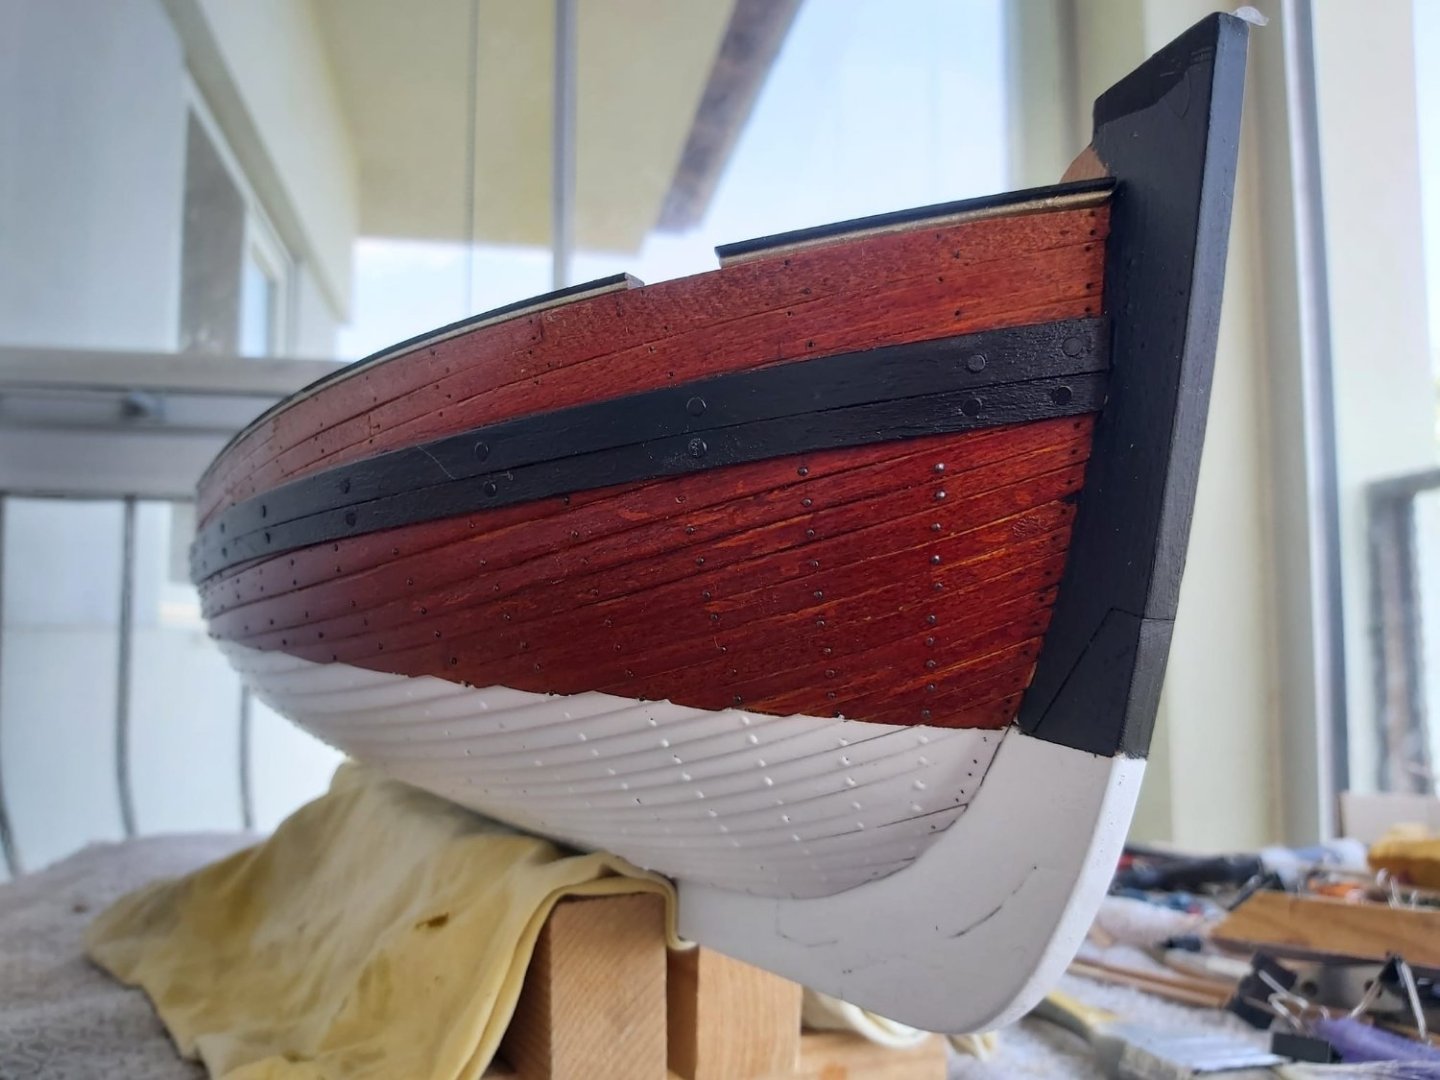
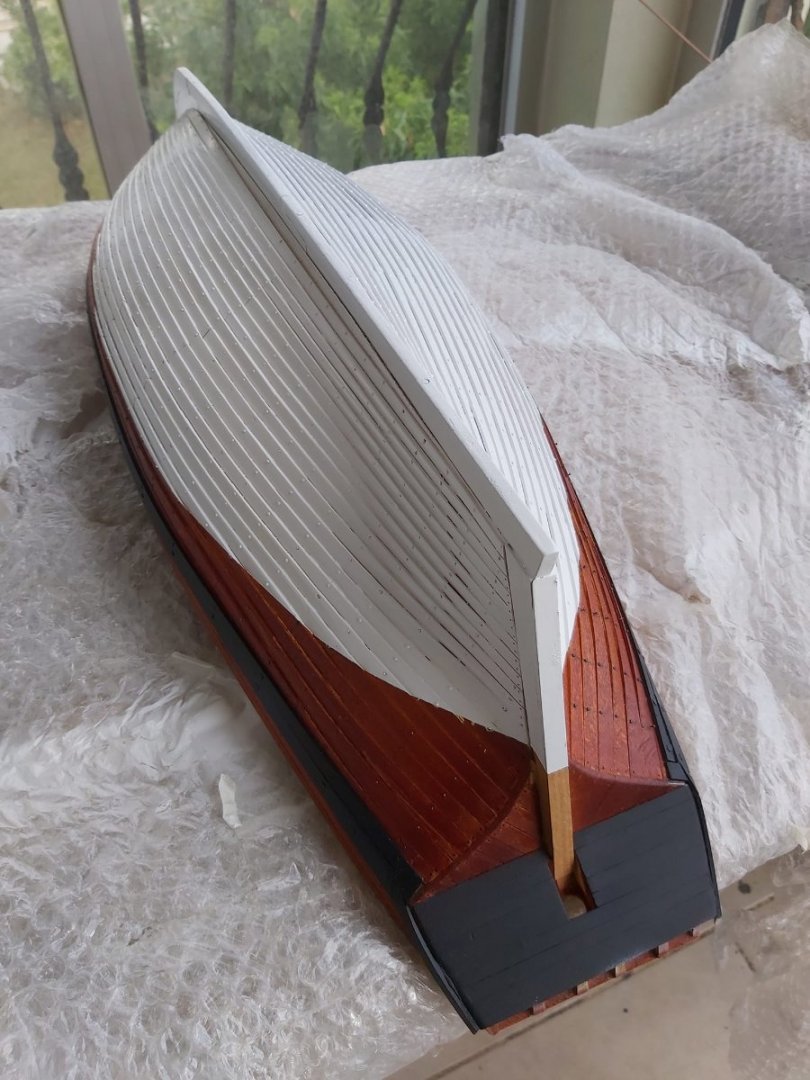
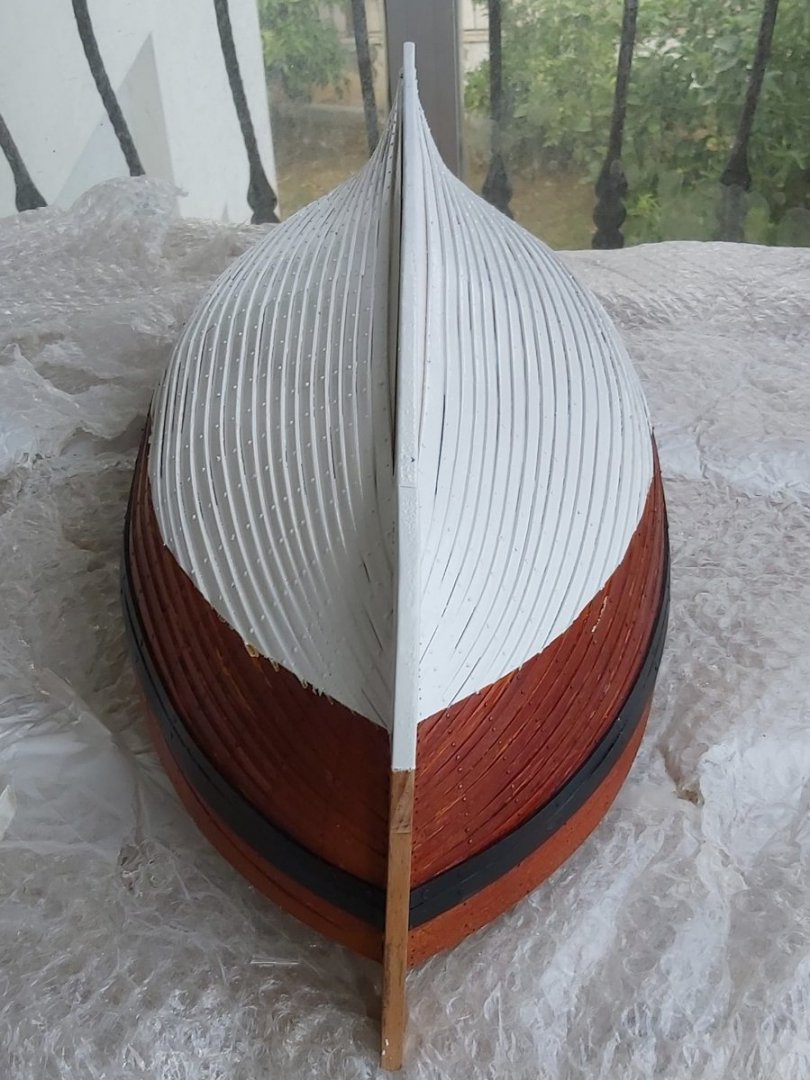
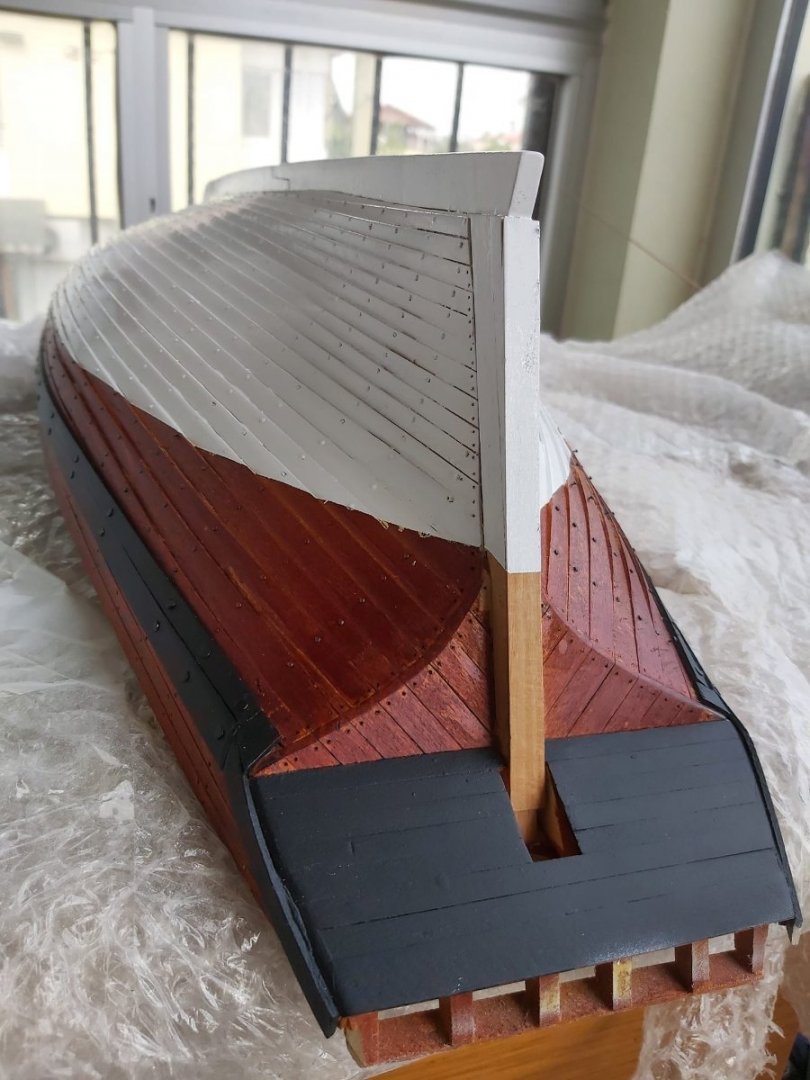
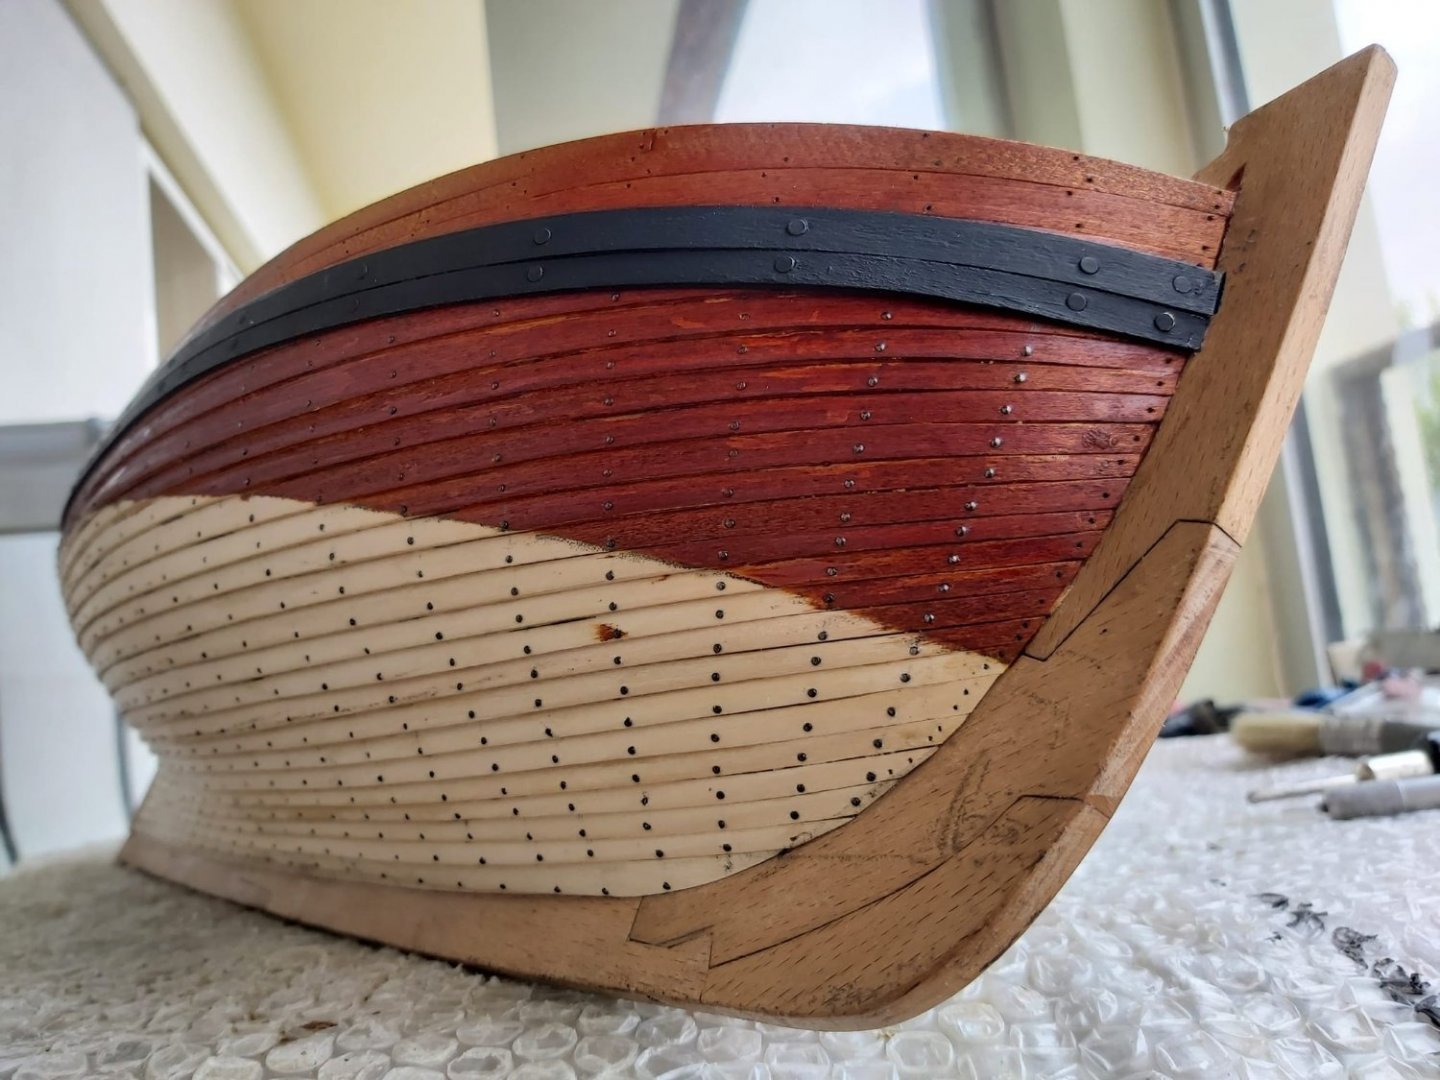
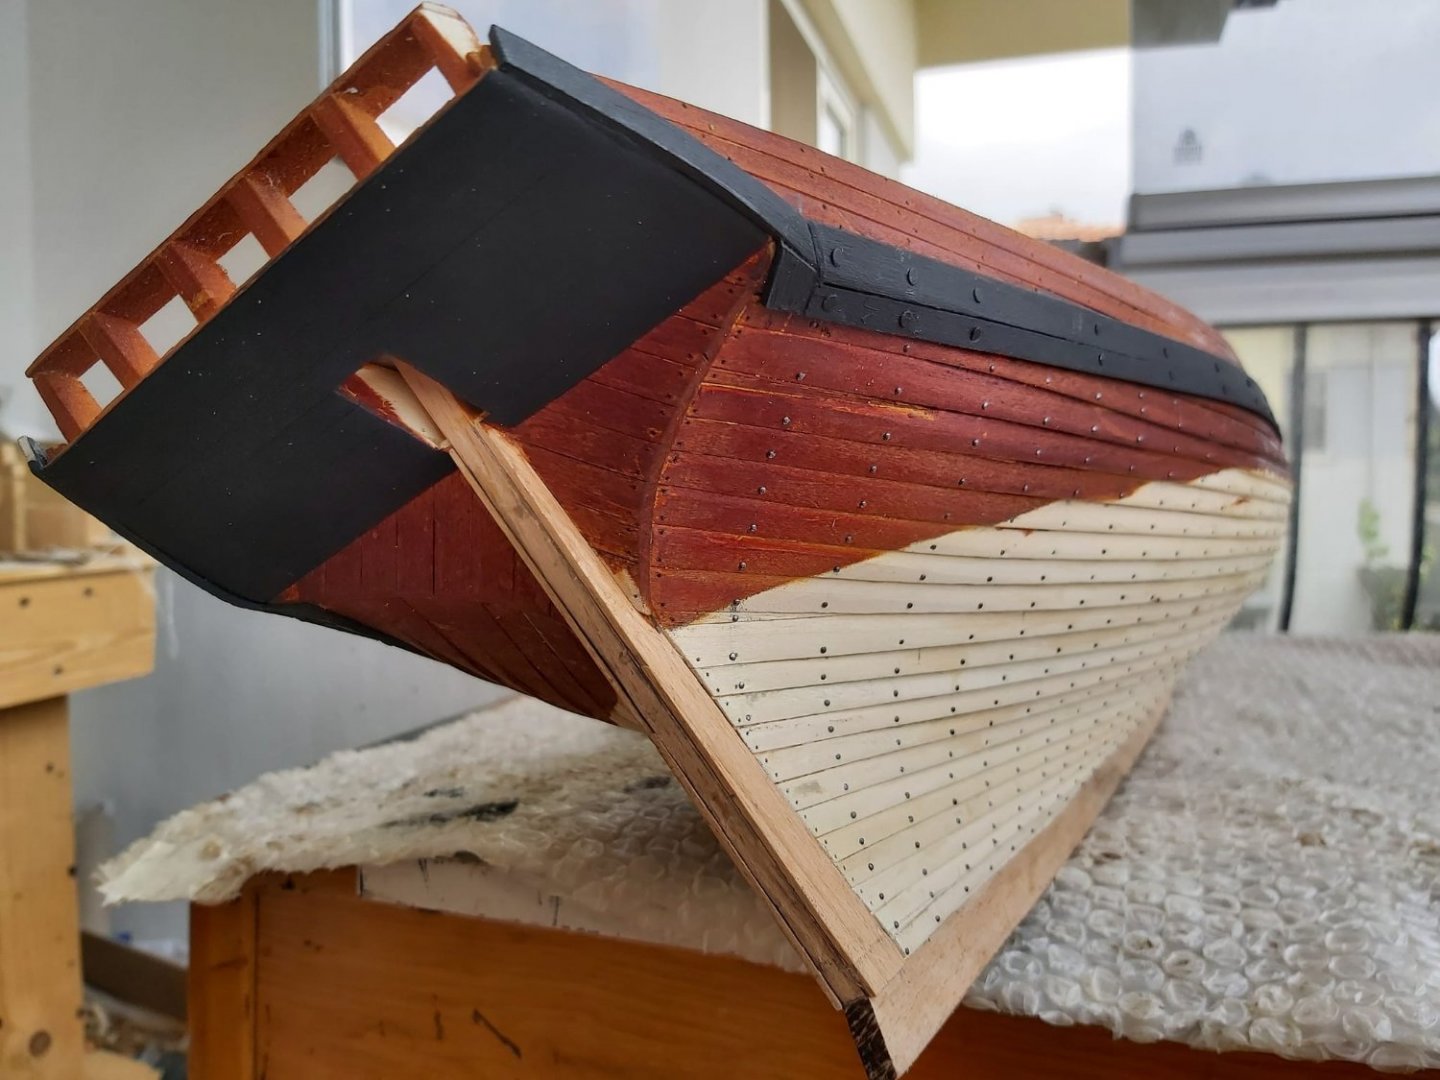
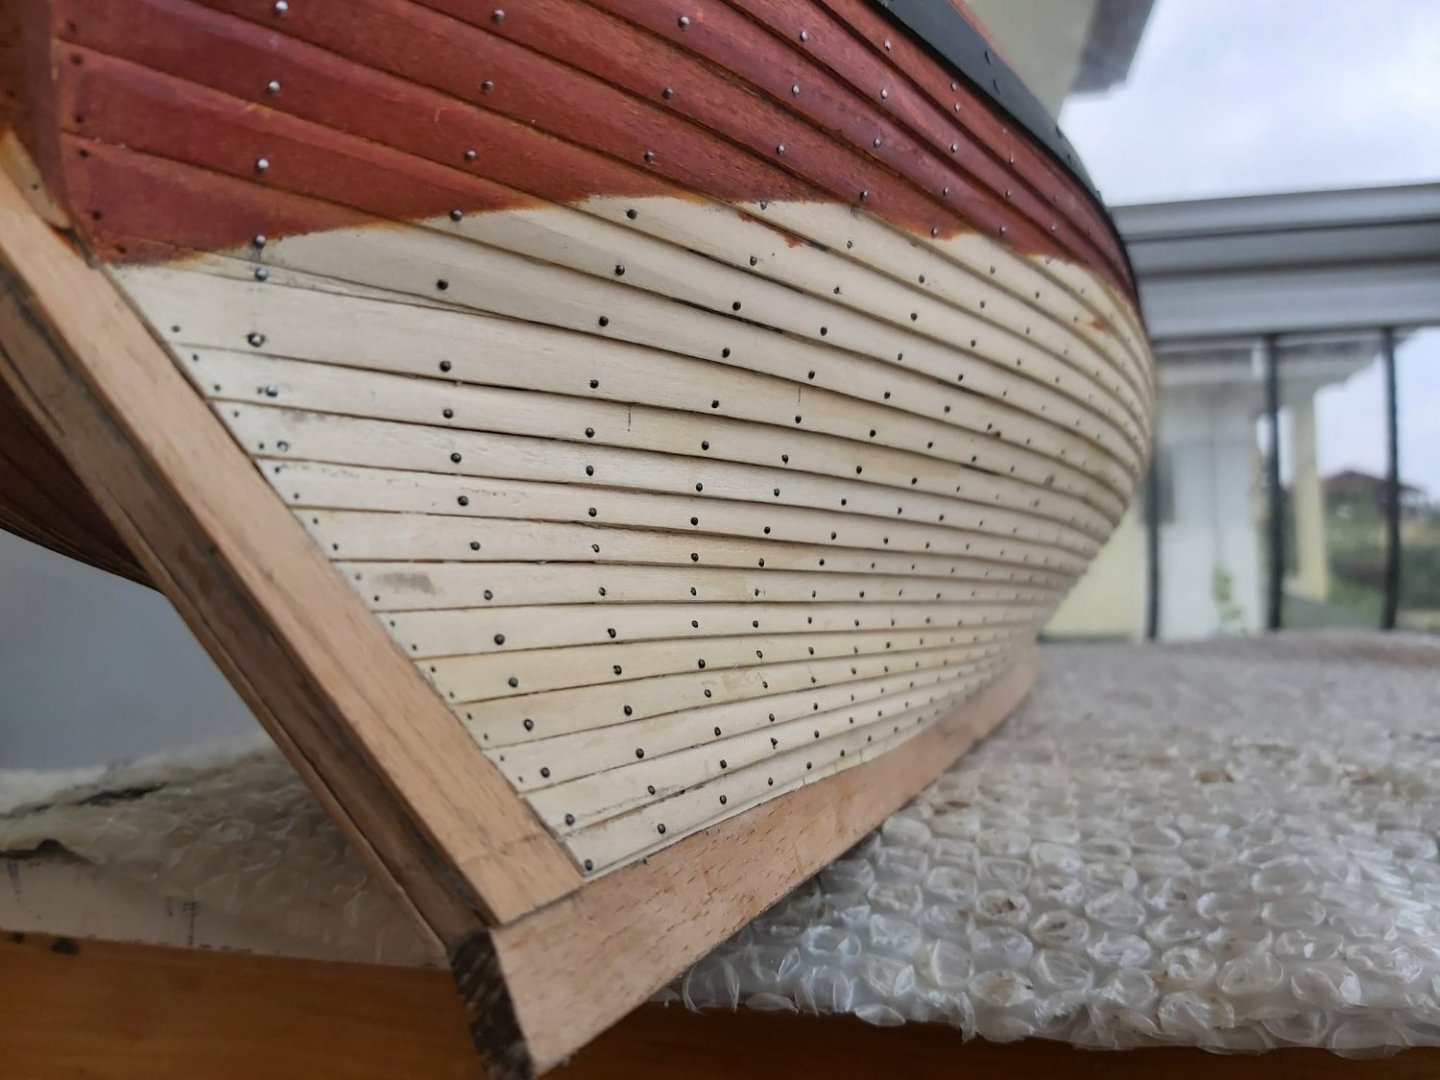
The nailing of the hull has been completed.
-
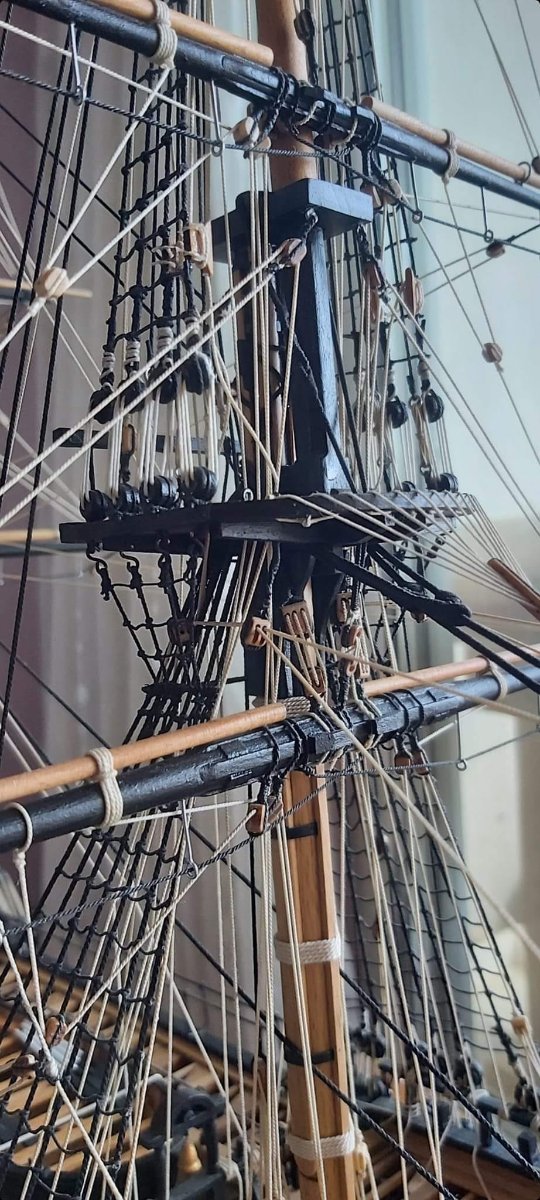
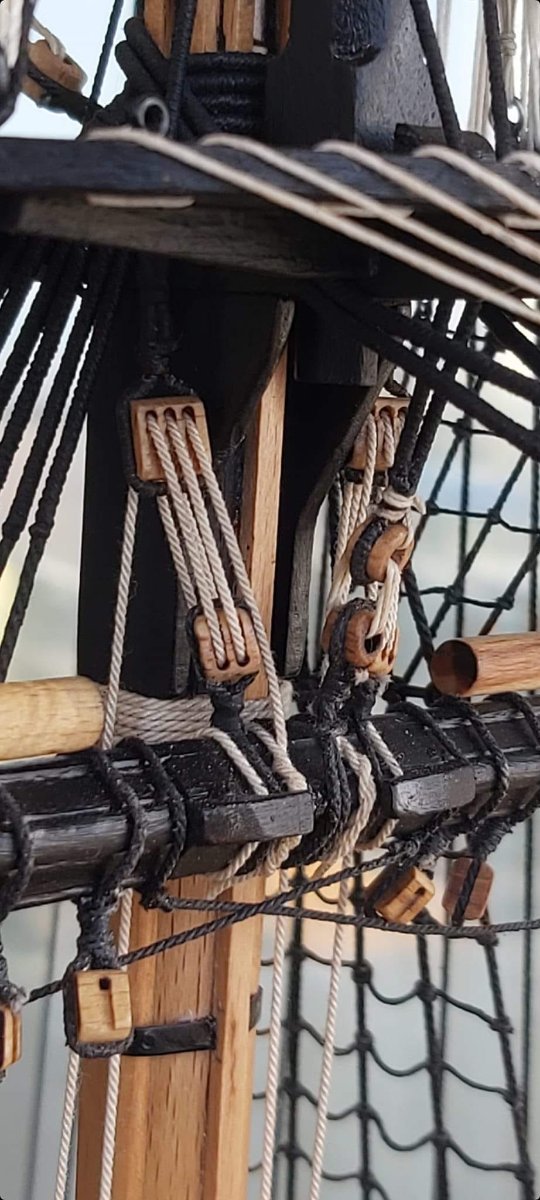
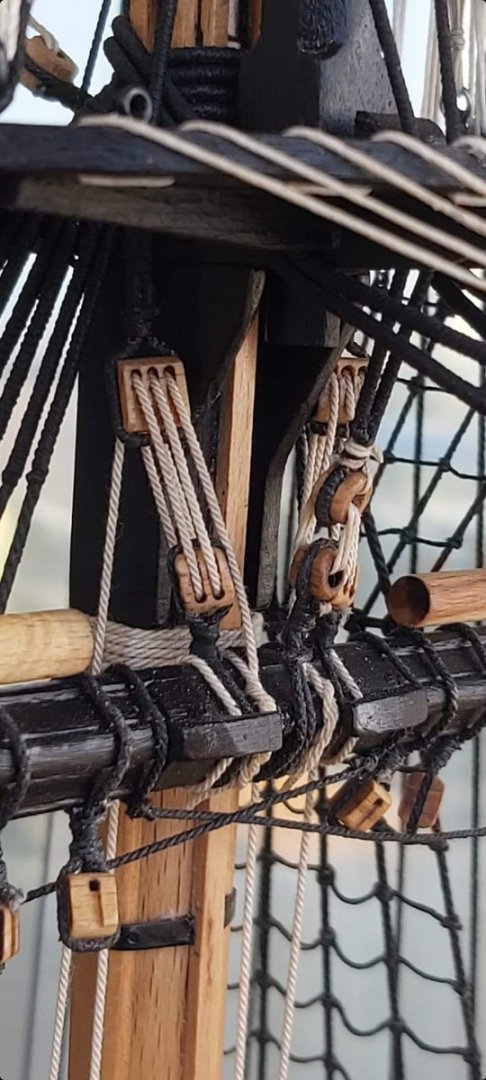
I making the bolt effects with 0.7mm diameter black nails. The visible bolt head is spherical and approximately 1.25 mm in diameter. (When we move it to 1:1 scale, the bolt nut size becomes approximately 45 mm, which I think is not too inappropriate in terms of scale). It looks more like a rivet than a bolt nut, but I couldn't find a more suitable material. In the original, the bolts are closer together. I bought all the nails in the store and for now I am doing them widely spaced as the number is limited. Depending on the remaining number of nails, I can make one more row in between.


-
Thank you so much.
-
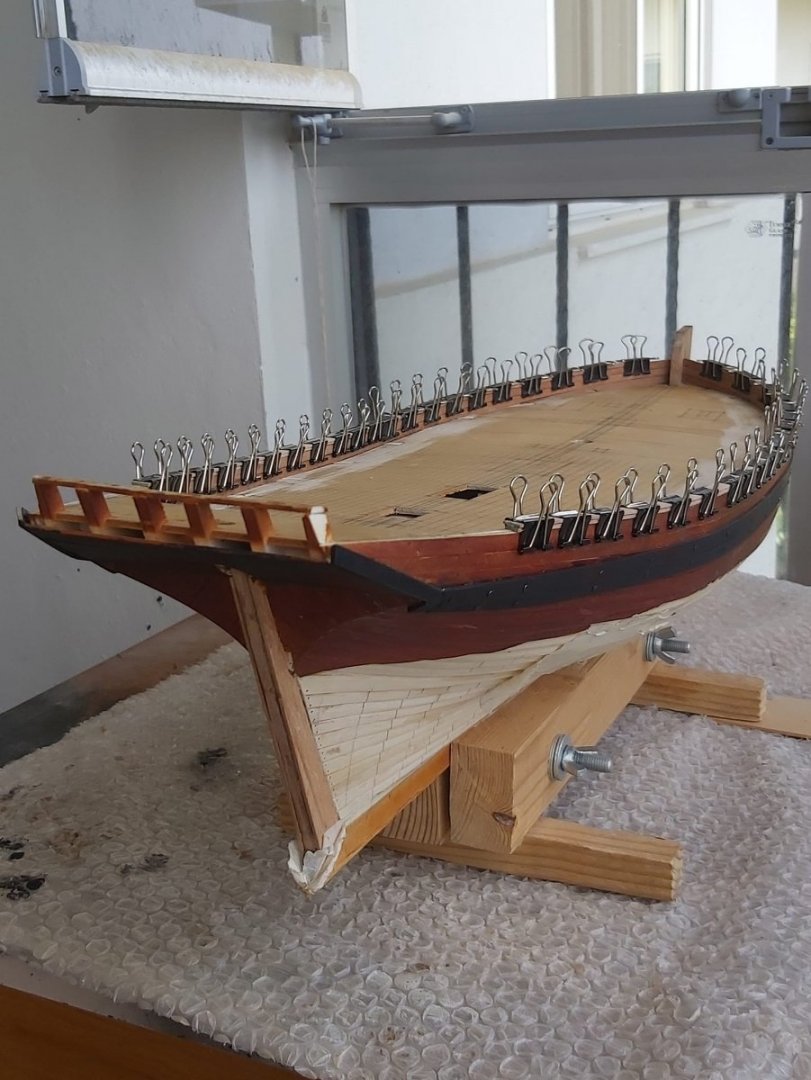
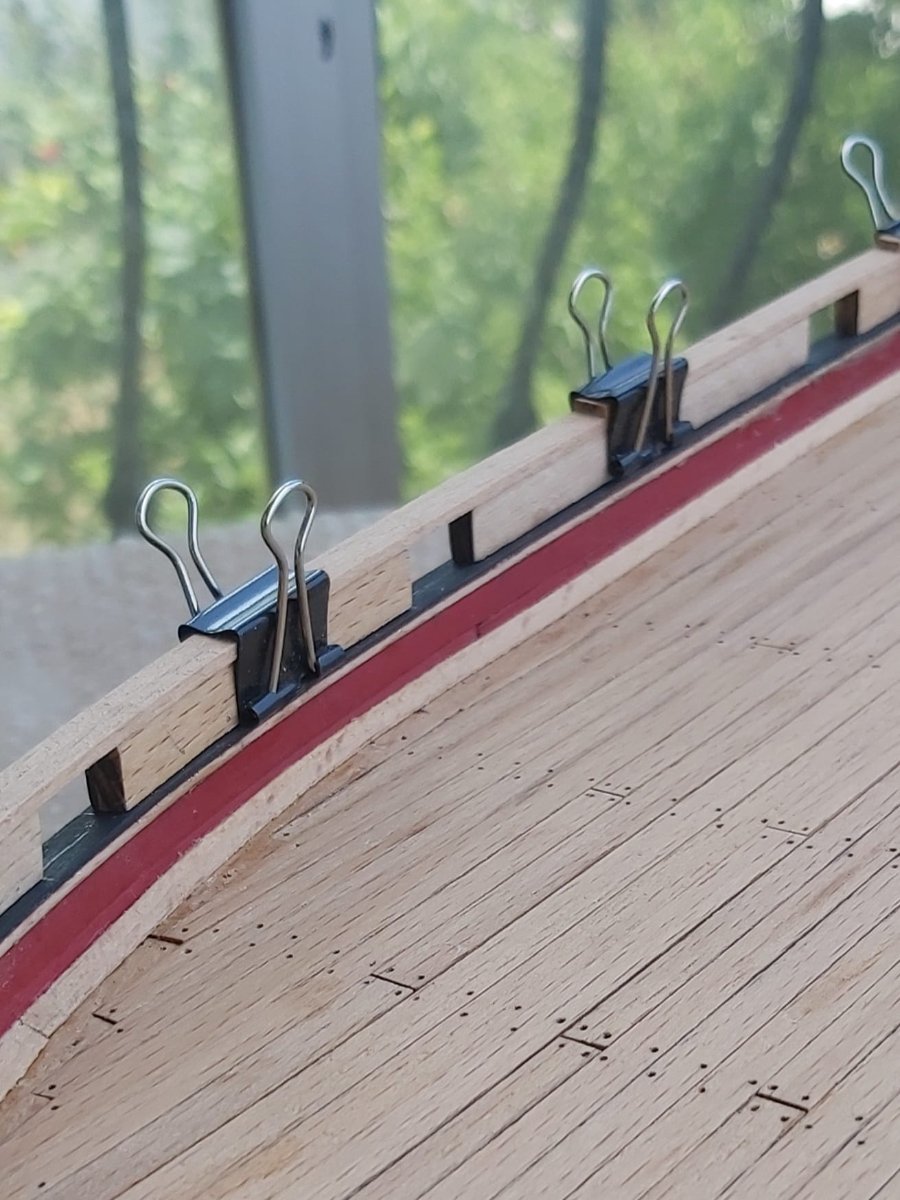
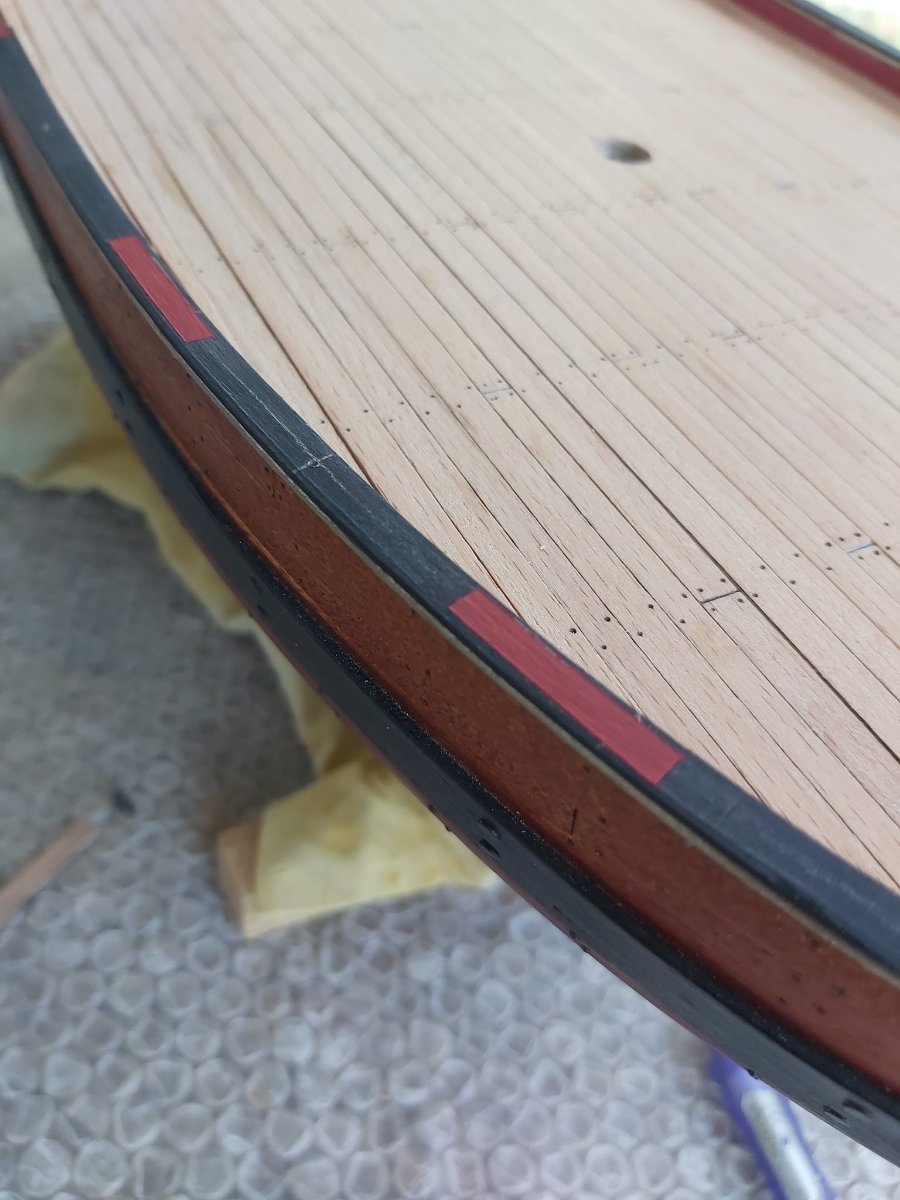
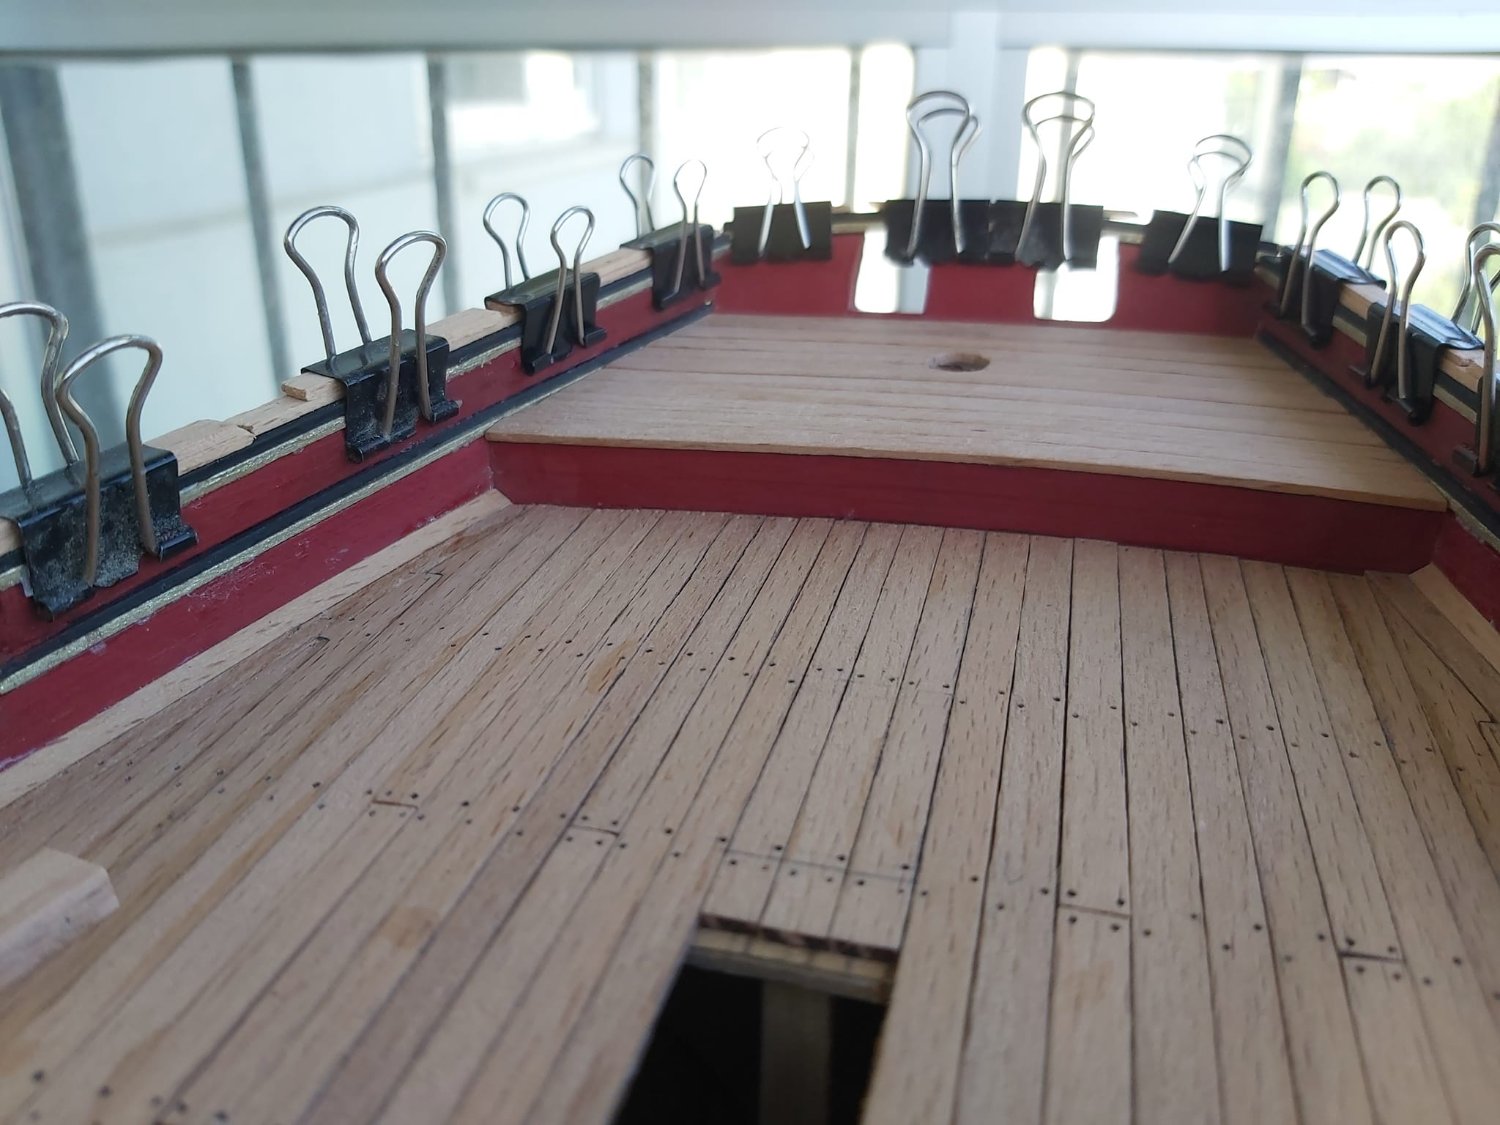
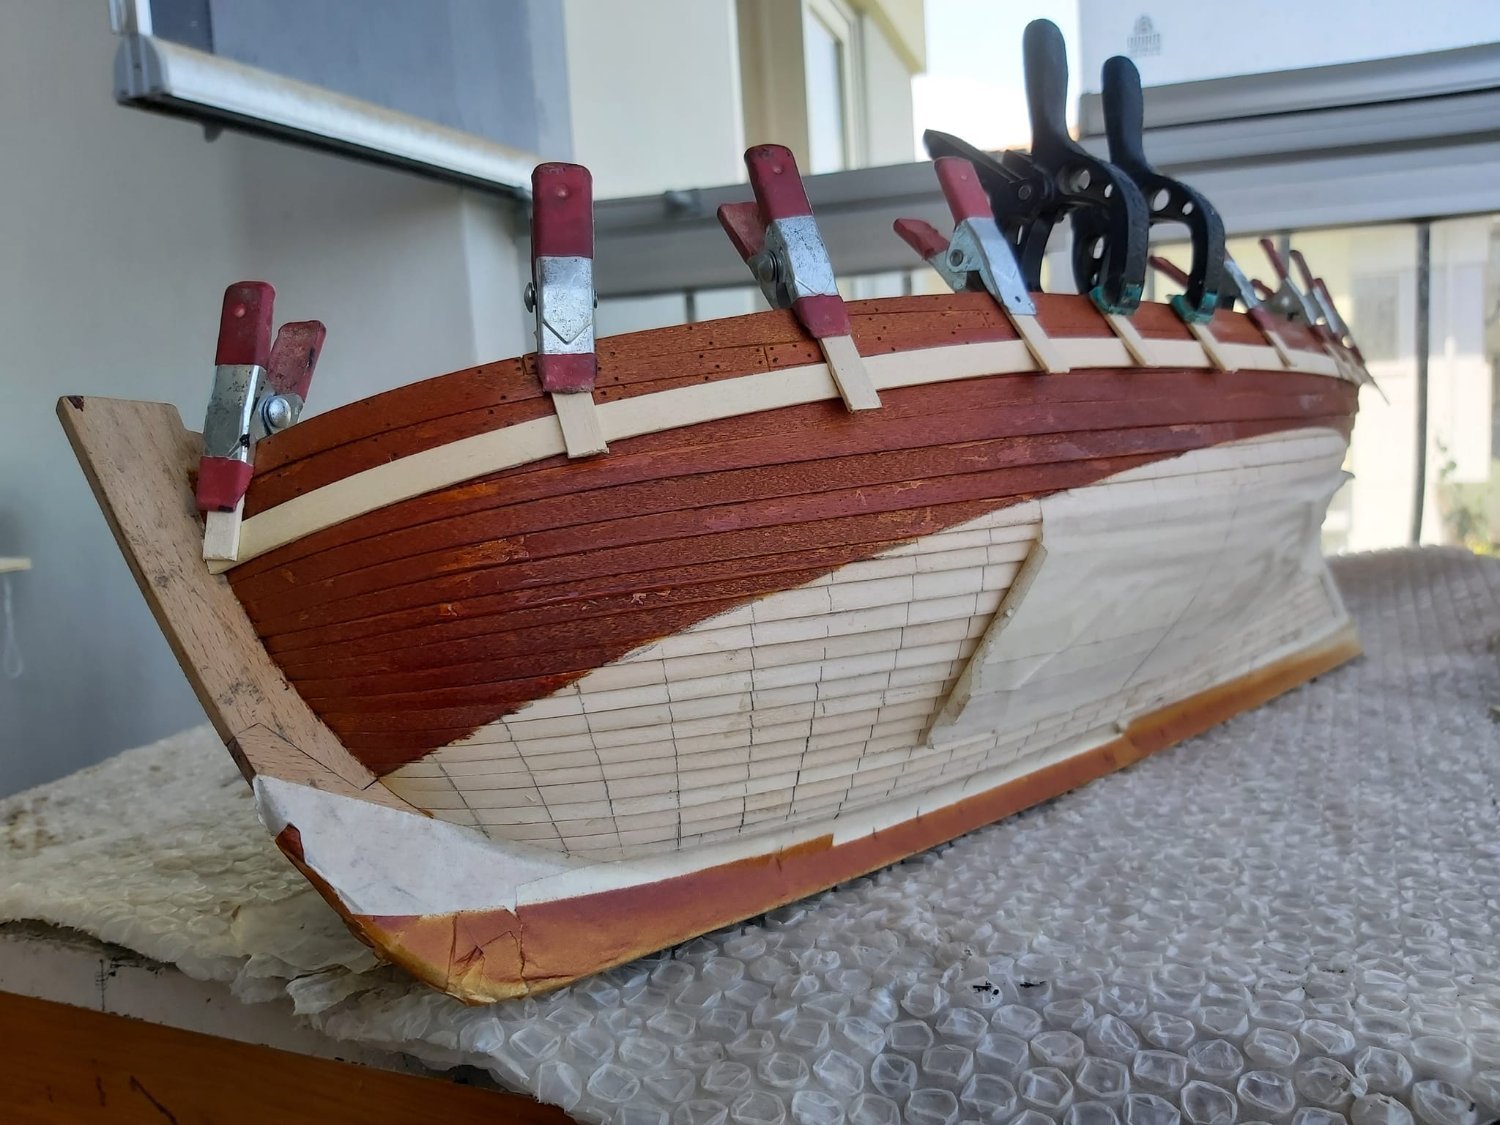
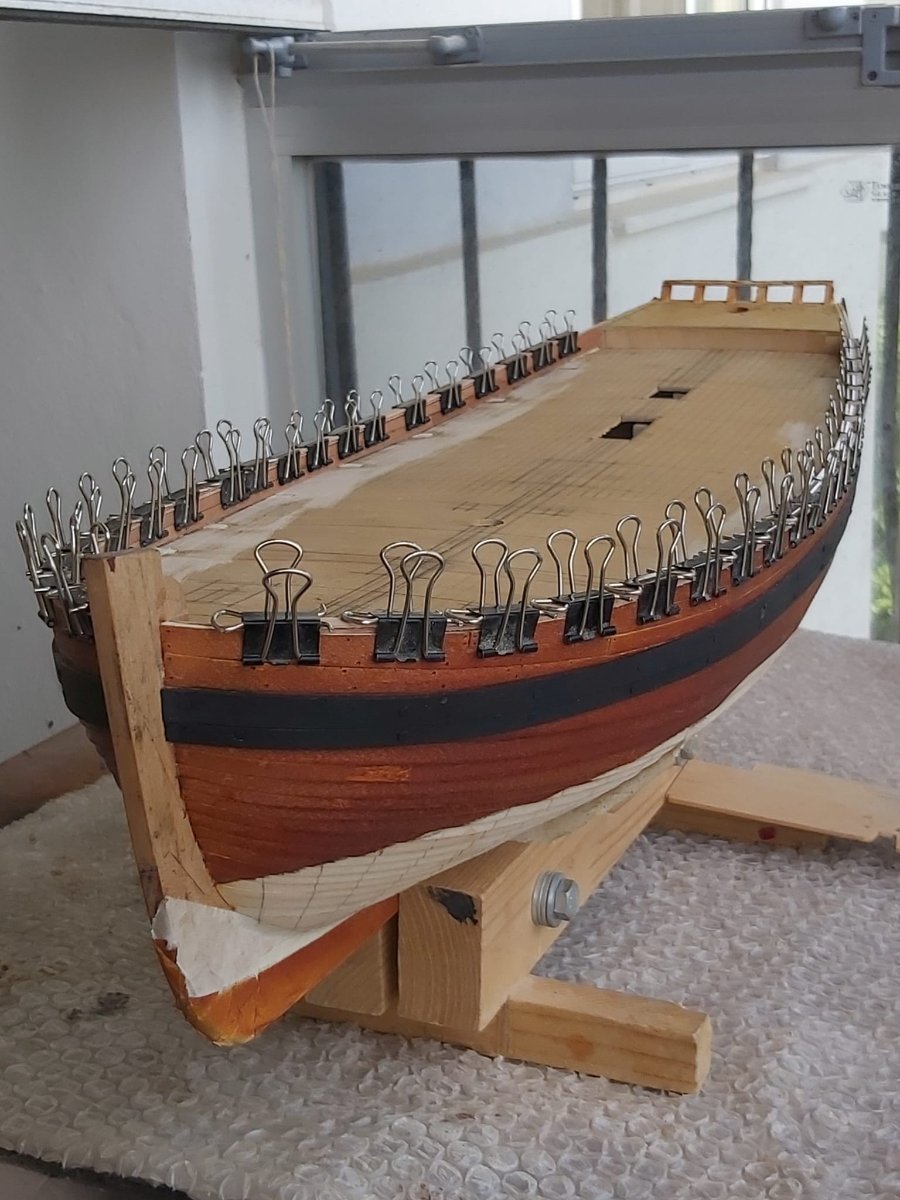
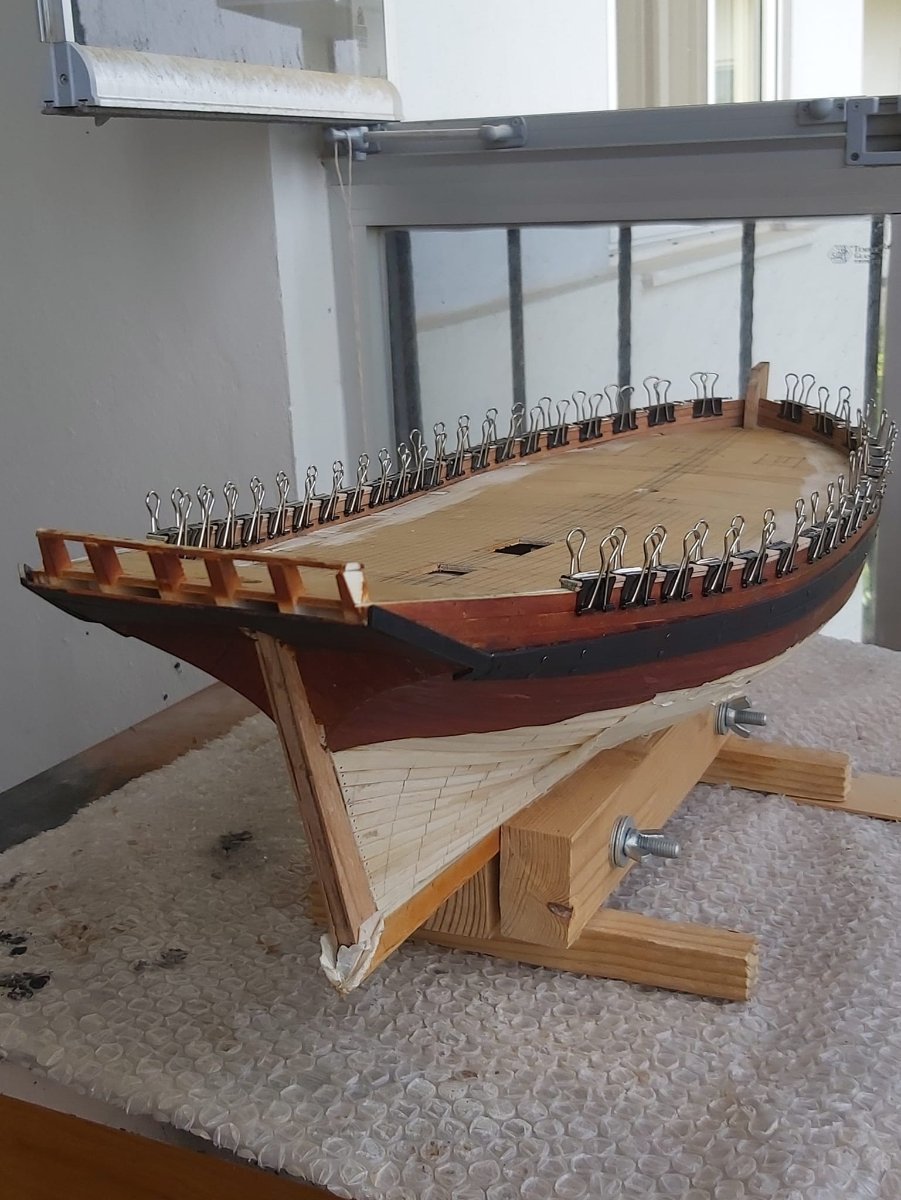
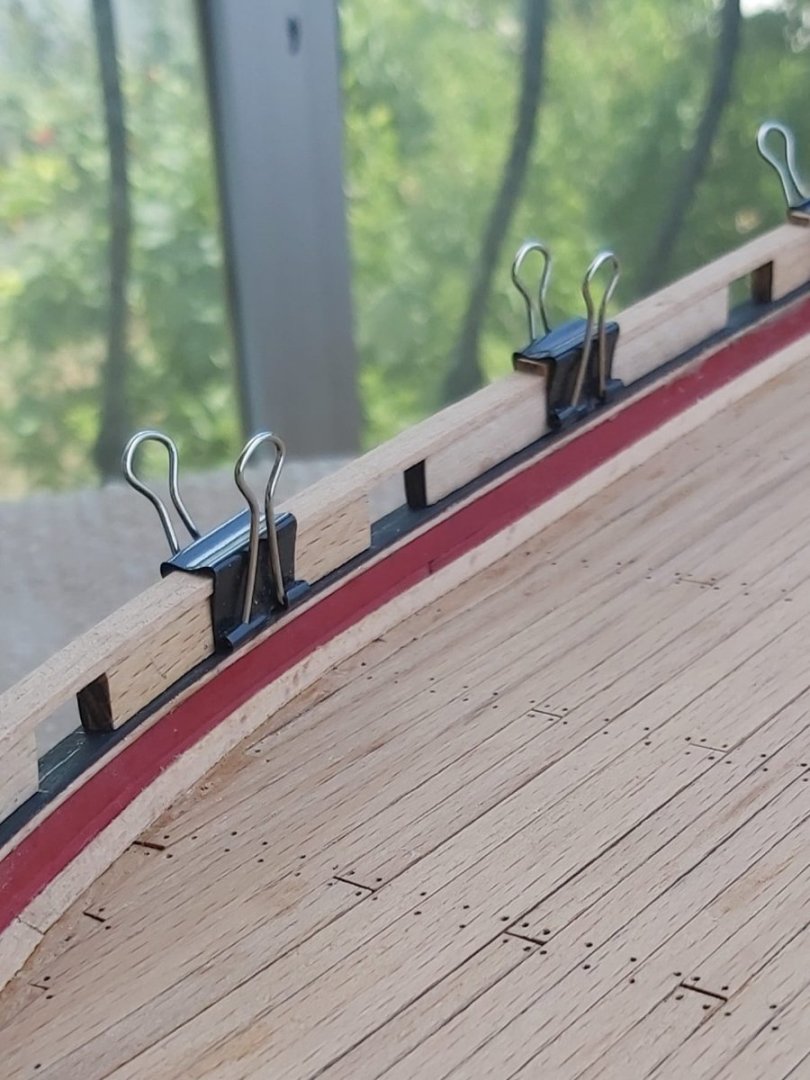
I stained above the waterline and mounted the wales. Below the waterline will be painted white later. I kept the bulwark caprails in hot water for a while and fixed them in place with clips. I'll glue them when they dry.