HOLIDAY DONATION DRIVE - SUPPORT MSW - DO YOUR PART TO KEEP THIS GREAT FORUM GOING! (Only 36 donations so far out of 49,000 members - C'mon guys!)
×


Gregor
-
Posts
225 -
Joined
-
Last visited
Content Type
Profiles
Forums
Gallery
Events
Everything posted by Gregor
-
You might be right there, Tony. I have no idea how the crew would lower the small boat over the side. On a square-rigged ship it must have been a complex manoeuvre (I only know that from O’Brians novels, quite impressively described), but on a cutter? Gregor
-
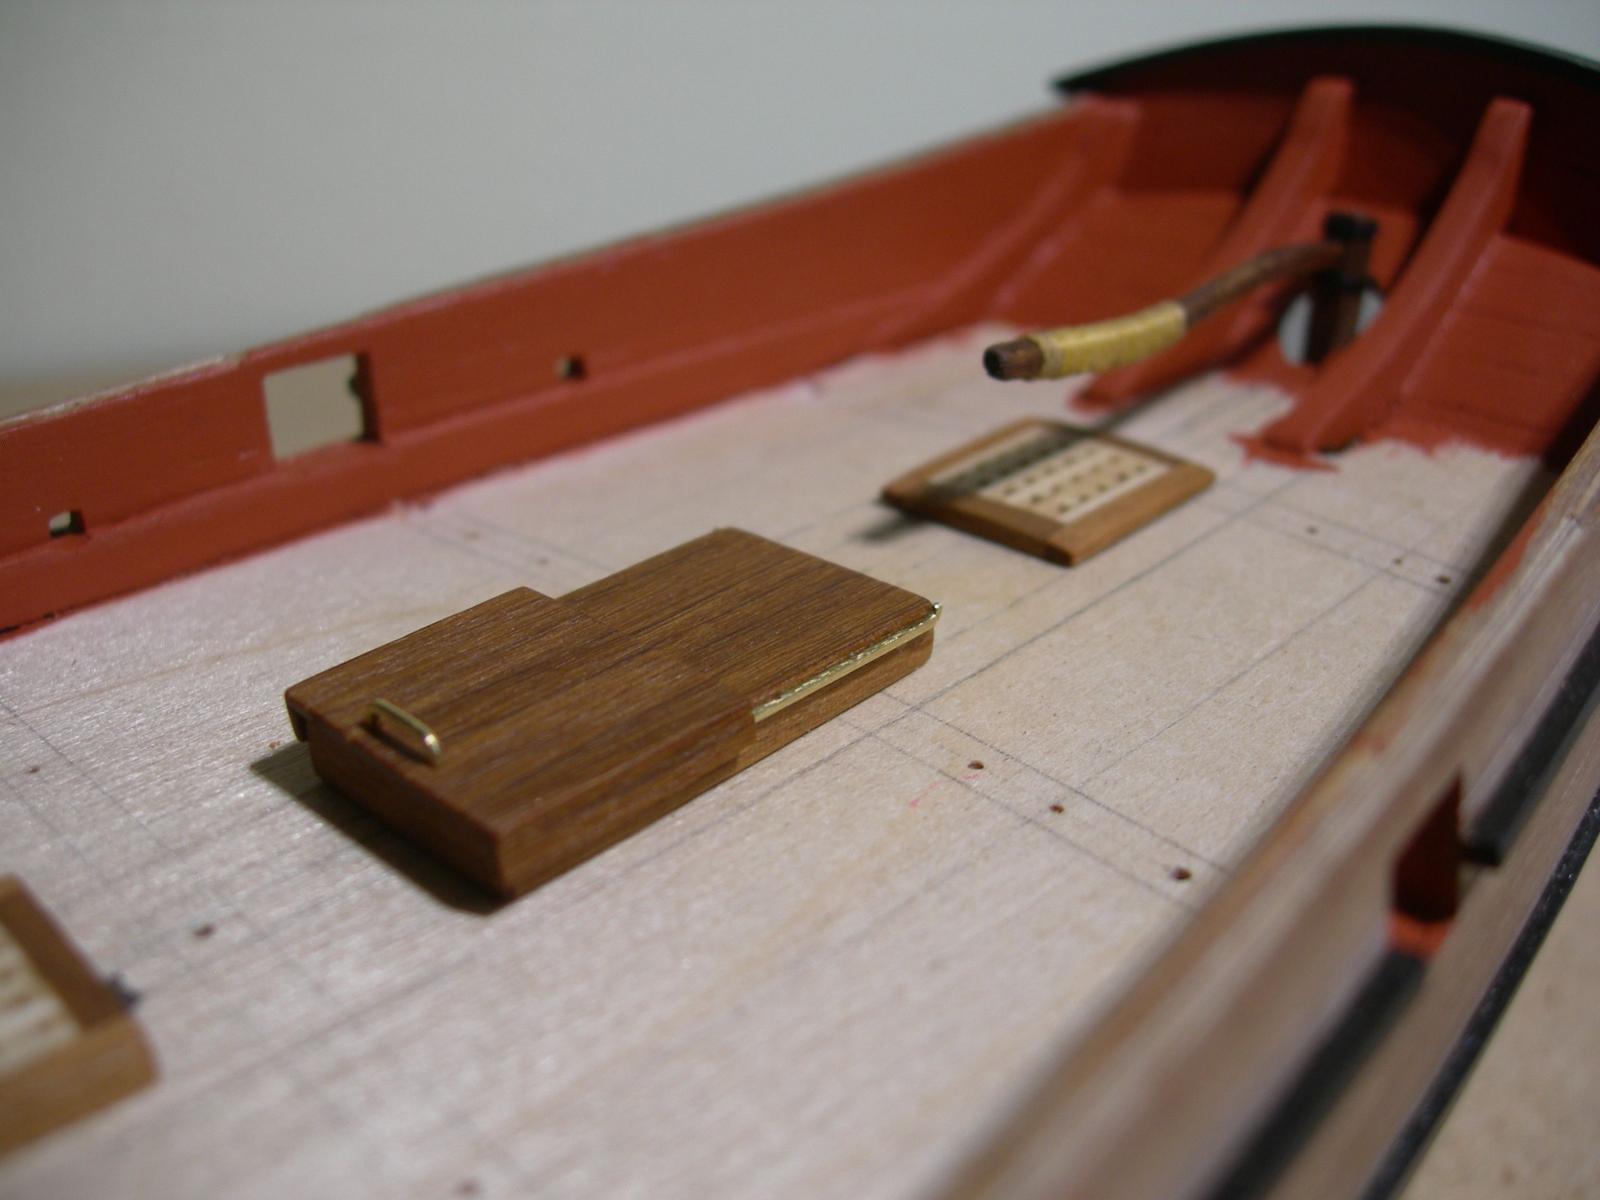
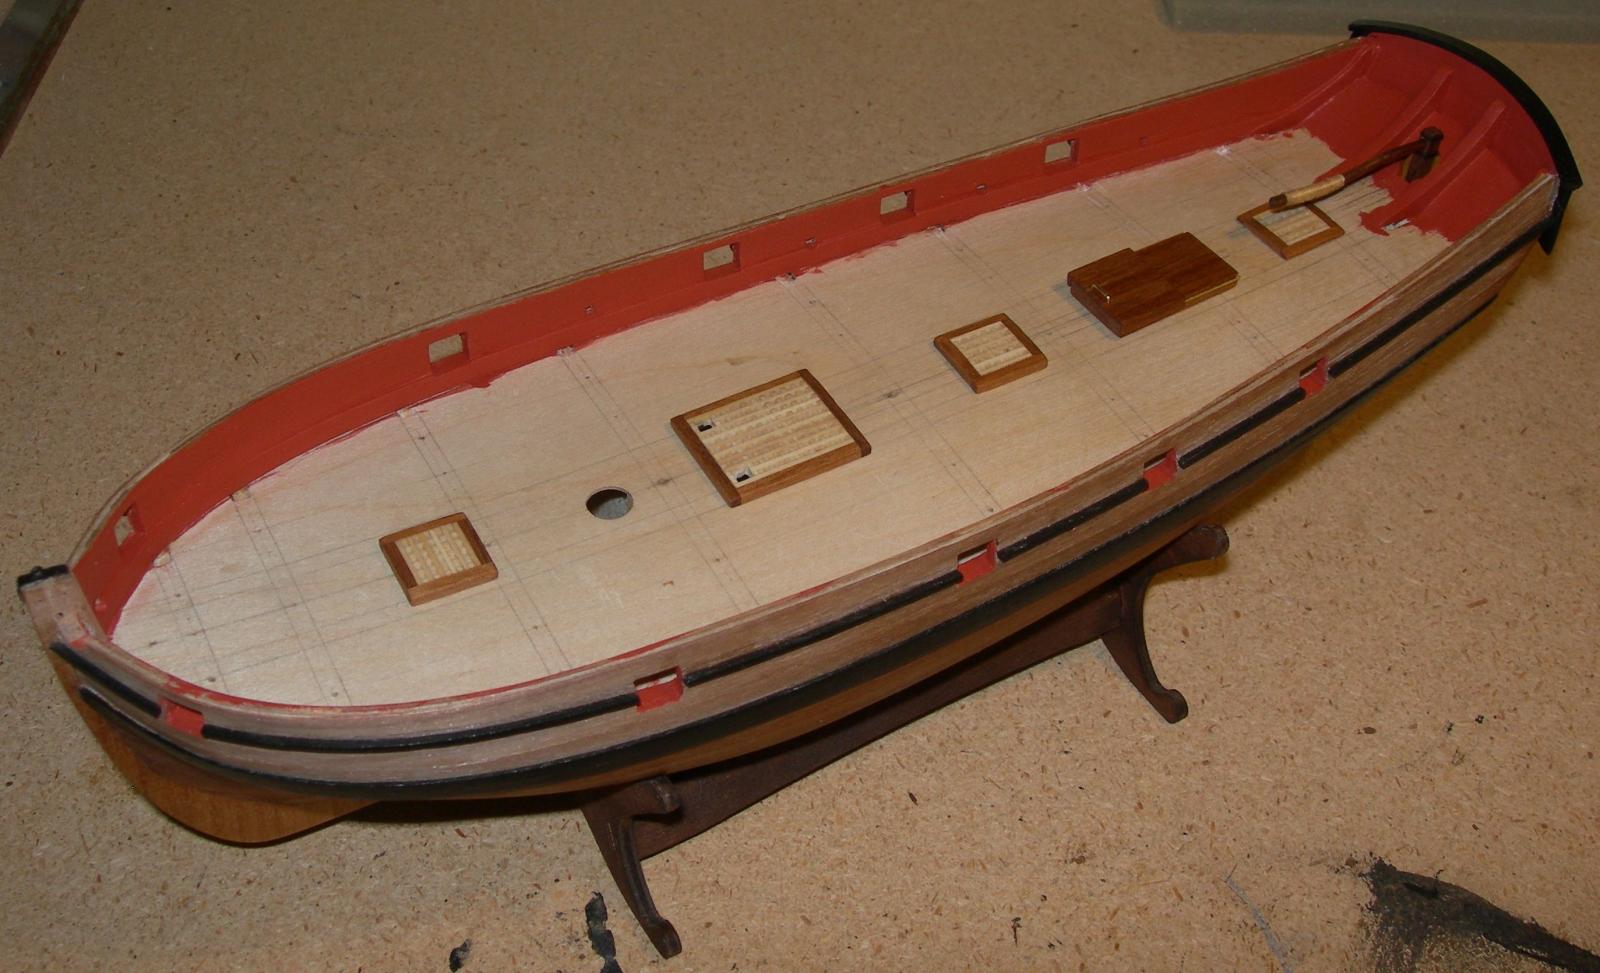
Thank you for finding it. I wonder whether it’s doable (for me, anyway). A companionway: easy to see where the inspiration has come from (thanks again, Tony). The only changes I made are the proportions of the sliding hatch (not voluntarily) and the replacement of the walnut rail with 0.5 mm brass wire, filed square and bent upwards, so the hatch cannot slide off (pure speculation). Now my crew has something to polish. The deck plan now looks like inspired also by Dirk, there is an additional lower hatch/skylight. But nothing is glued to the deck yet. But now I wonder, where I should place the stands for the Jolly boat. There is room between the main hatch and the companionway, covering the little hatch between them. But people running up the companionway ladder might hurt their heads. I’m thinking about turning the companionway 180 degrees… Gregor


- 210 replies
-
- 3
-

-
- Sherbourne
- Cutter
- (and 5 more)
-
Oh yes, I stumbled once over a picture of such a leather cover (on MSW 2.0), but I can’t find it now (my vocabulary is somewhat limited, I ran out of searching terms). I would be very interested in adding this detail (I never planned to go this far when I started this build ) Gregor
-
Thanks, Tony - but I liked your little knob at the end of your tiller (and failed to carve one myself). So the ideal tiller according to Tony and Gregor should be curved (not pointing upwards like mine, but "more parallel" to the deck), protected with thread and have an elegant knob at the end? No rudder pendants on cutters? What did they do when the rudder got unhinged? Well, too late now, my Sherbourne is ready for all storms! (The historian in me sighs).
- 210 replies
-
- 1
-
-
- Sherbourne
- Cutter
- (and 5 more)
-
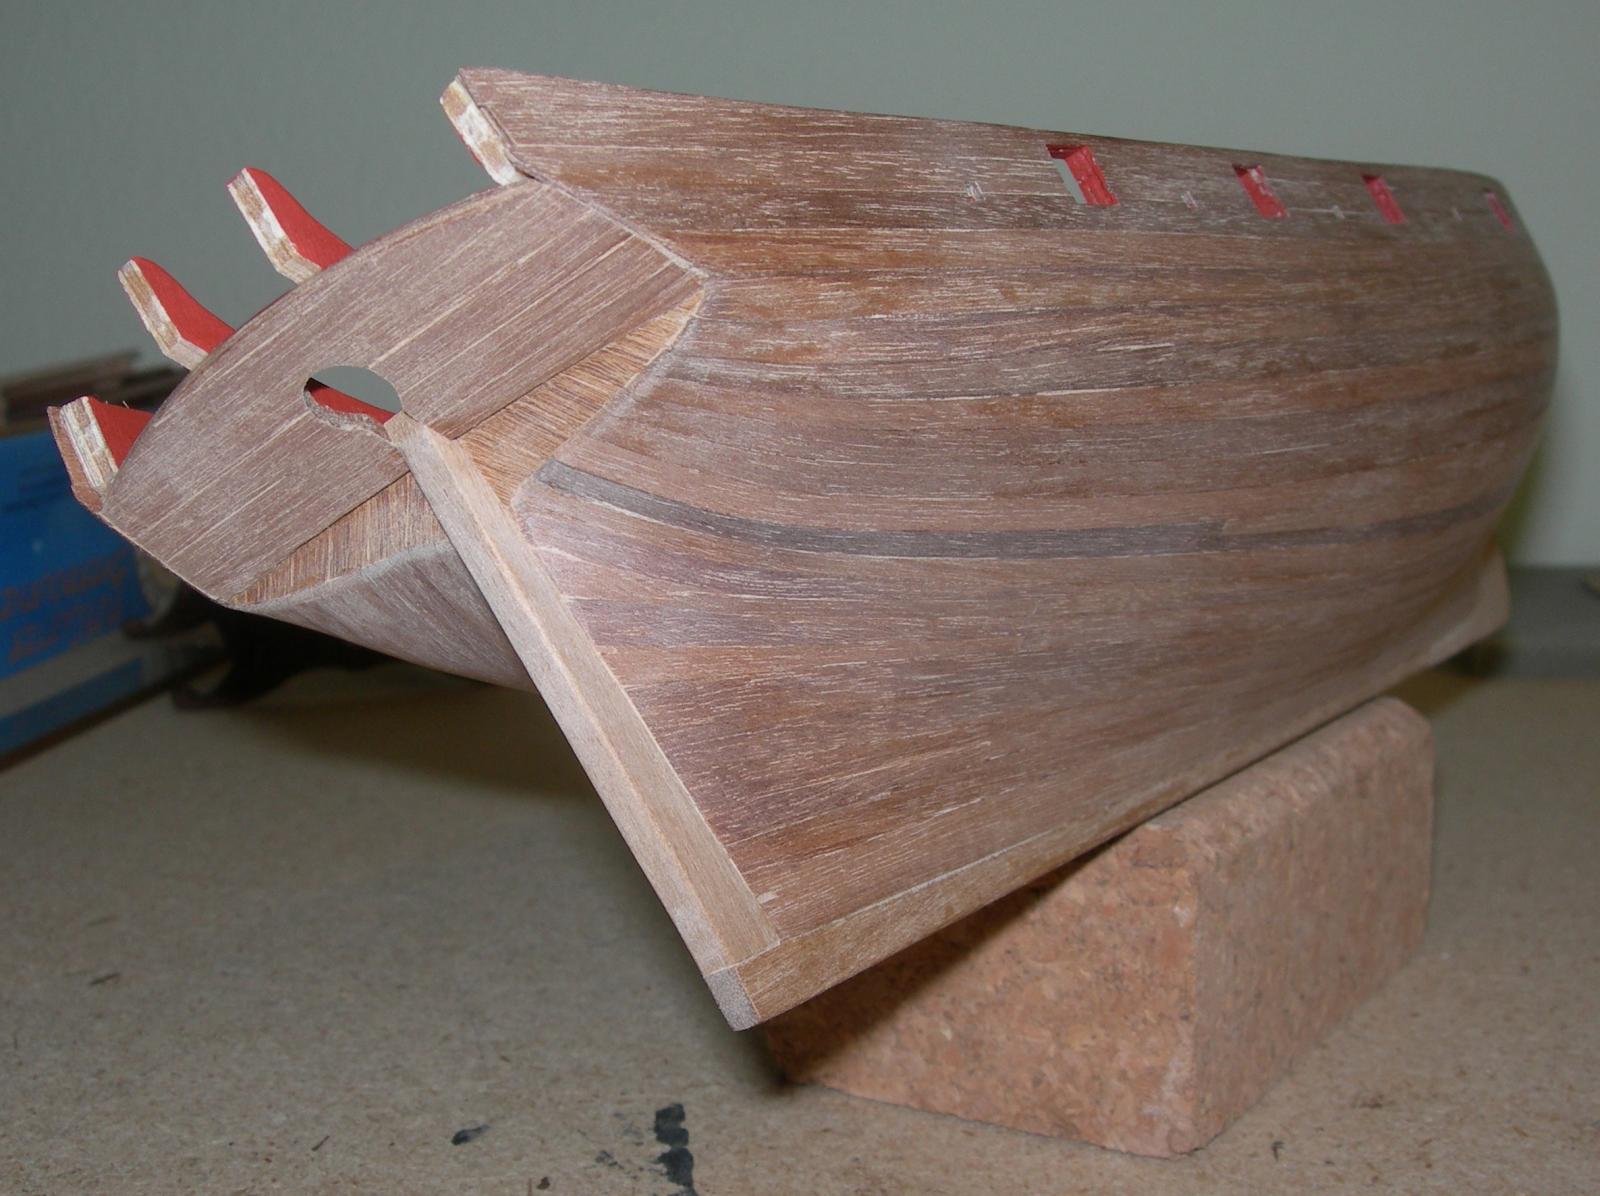
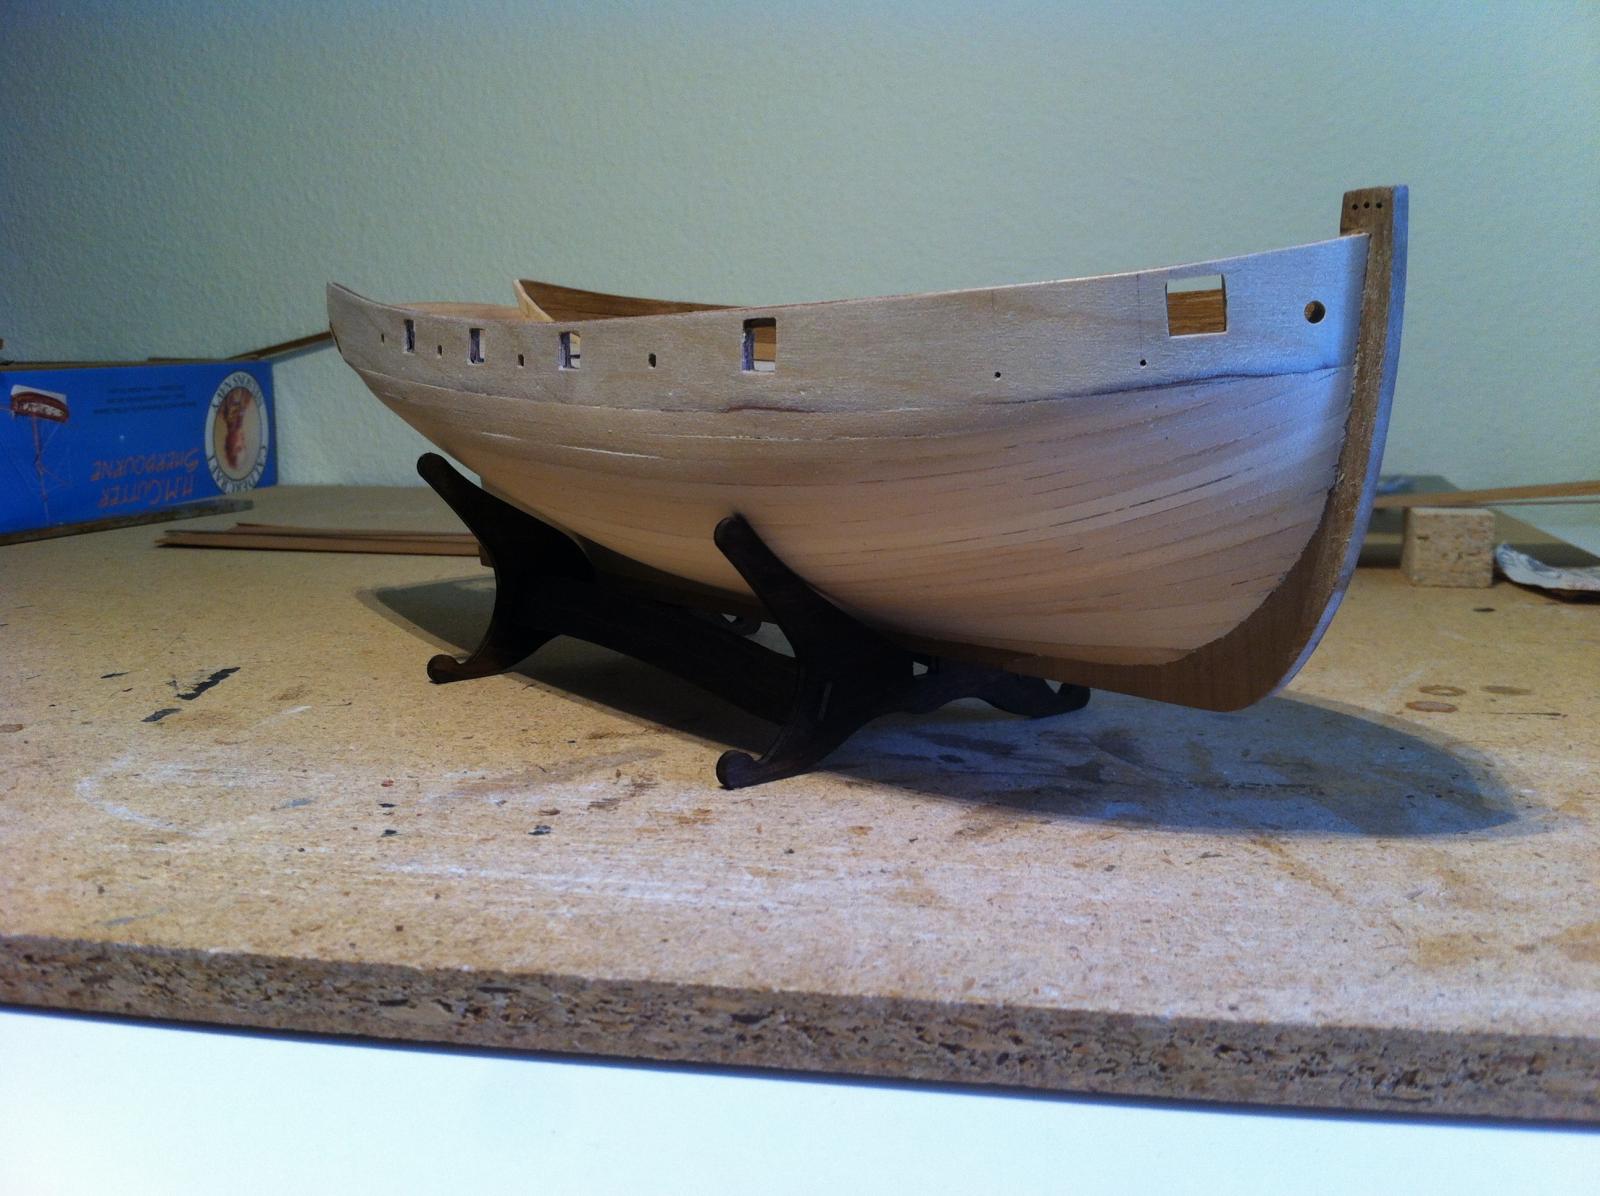
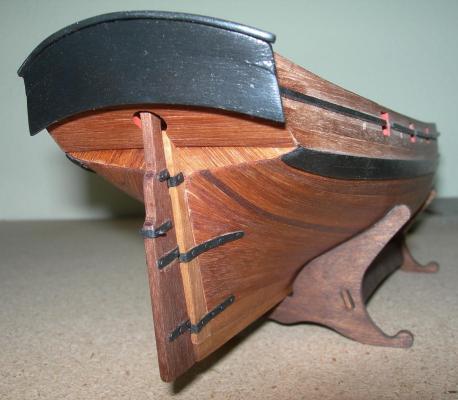
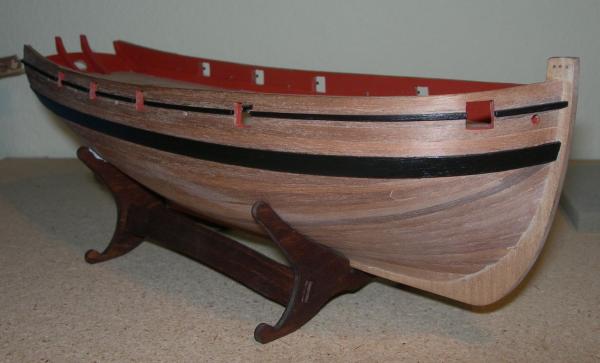
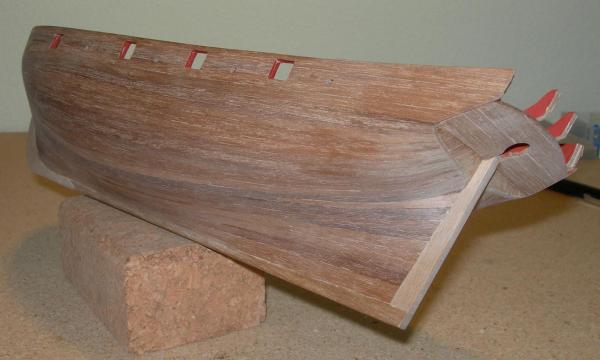
I found pictures of rudder pendants in several build logs (http://modelshipworld.com/index.php?/topic/124-hmb-endeavour-by-captain-slog-caldercraft-164/page-2?hl=%2Brudder+%2Bpendants#entry56033) and also a reference in Wolfram zu Mondfeld’s book. According to him, a stout tarred rope instead of a chain should do the job here, but I’ve still no clue as to where to fix these ropes yet. One idea is to fix them to Eyelets on the outside of the inner stern counter frames, with a small hole through the stern counter. Because I didn’t want to paint the hull below the waterline anyway I didn’t pay enough attention, so the rudder pendants are sitting too low! The lower part of the hull was treated with linseed oil, it brings the colour of the wood to life wonderfully, I think. Gregor
-
I made the stern fascia and its capping rail according to Tony’s log (except I didn’t user the pins when I glued the additional plank and paid for this with separated pieces after soaking and bending). Rubber bands (from the asparagus season in spring) came very handy for bending the fascia. I let it dry there for a week. This idea was half-good: The pressure of the rubber bands was not exactly distributed, and the fascia is slightly deformed now. The tiller was formed from a wood skewer I found in our kitchen, varnished and completed with thread. Gudgeons and pintles were made in a simplified version. They are 2 mm wide and therefore a little out of scale – but that’s what I was able to do. Gregor
- 210 replies
-
- 2
-
-
- Sherbourne
- Cutter
- (and 5 more)
-
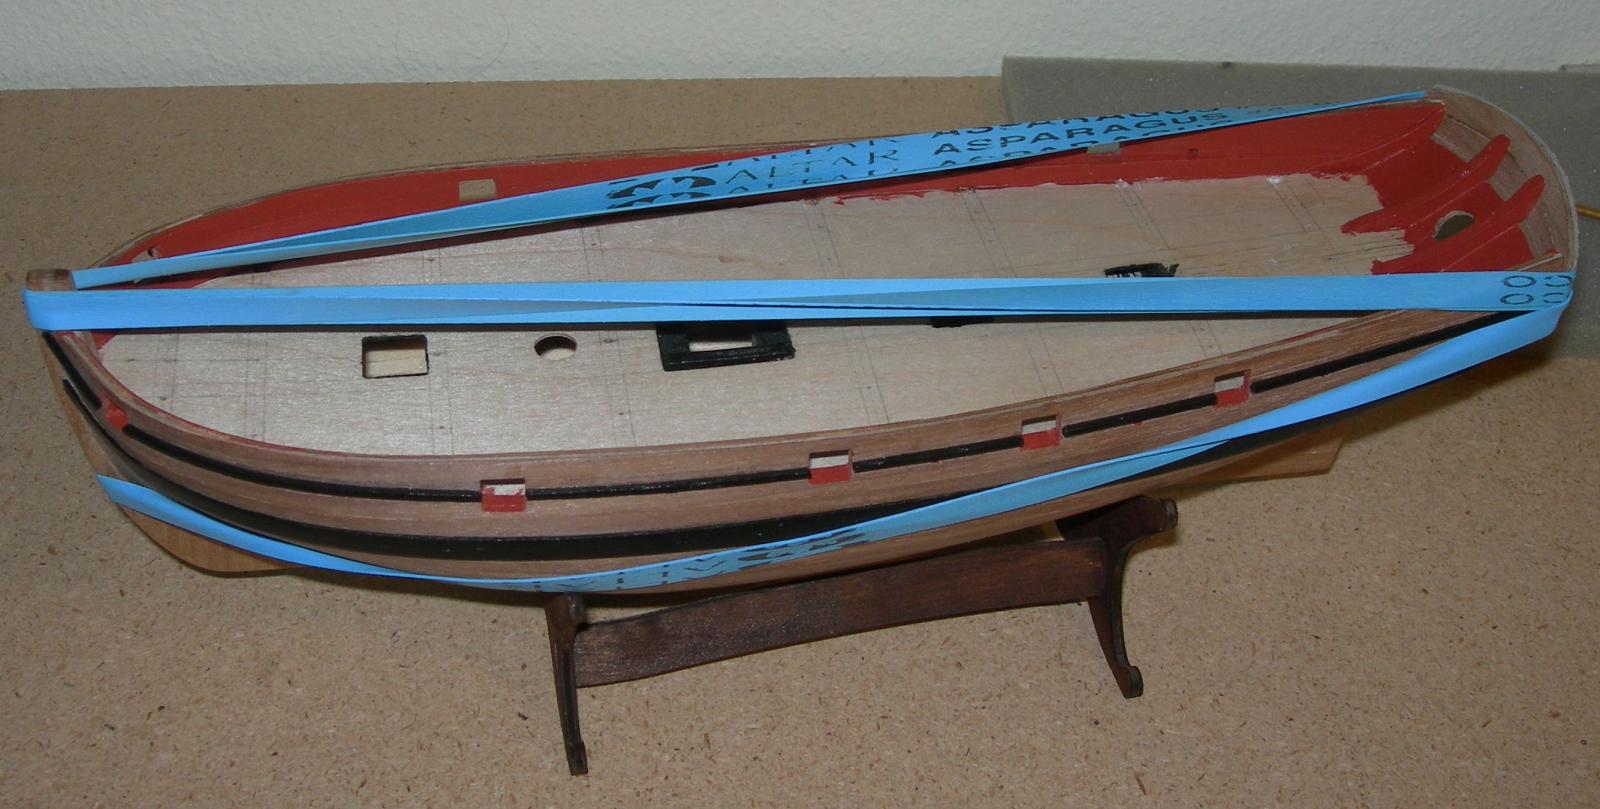
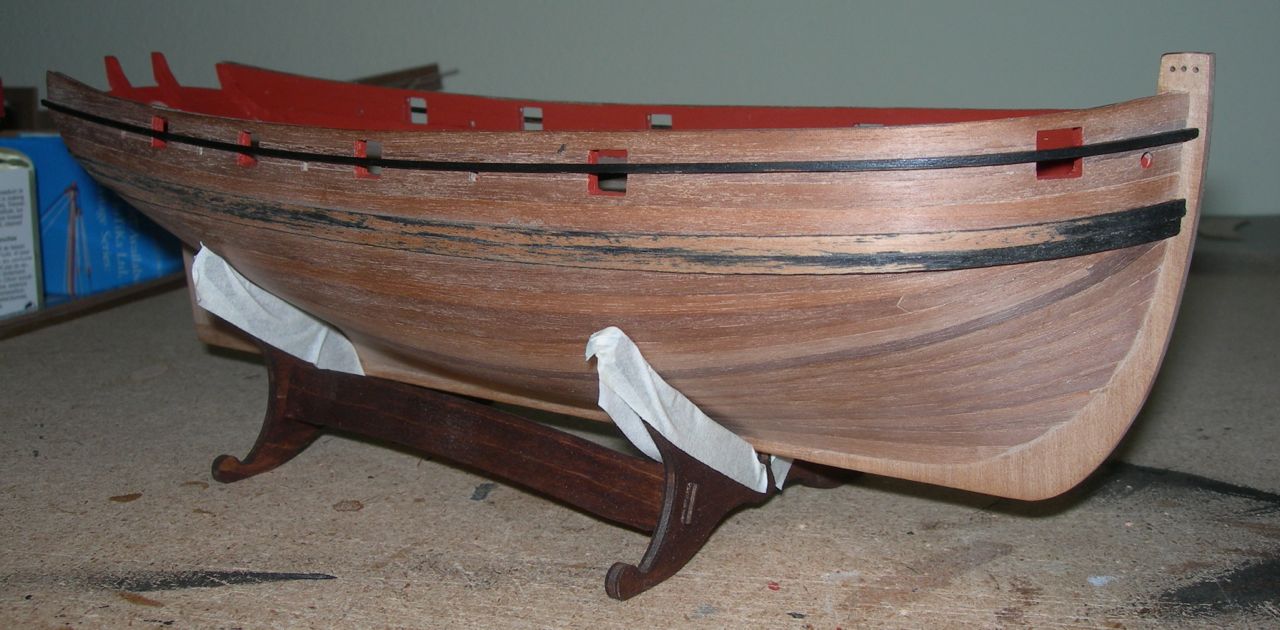
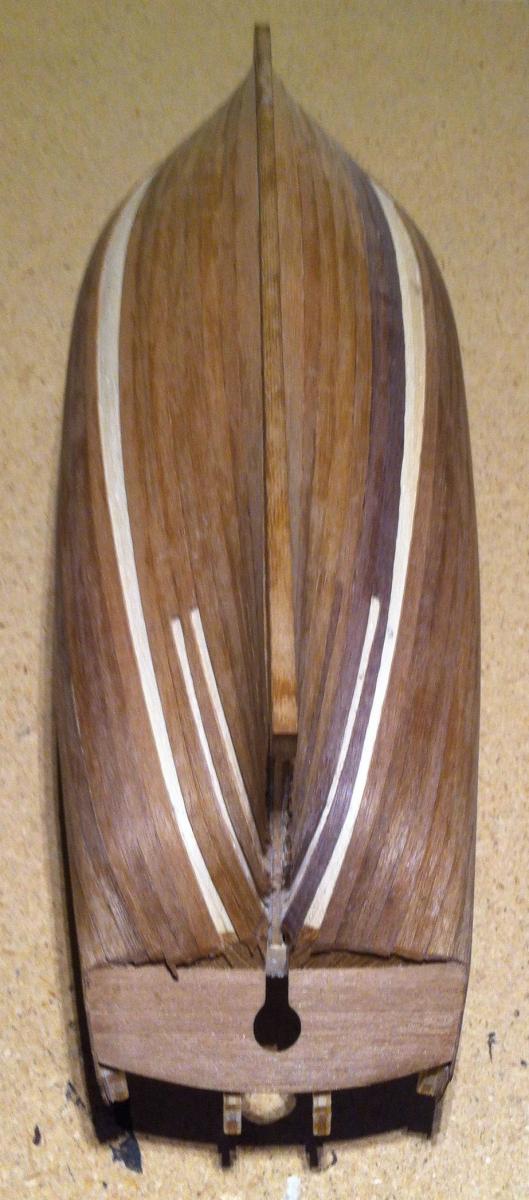
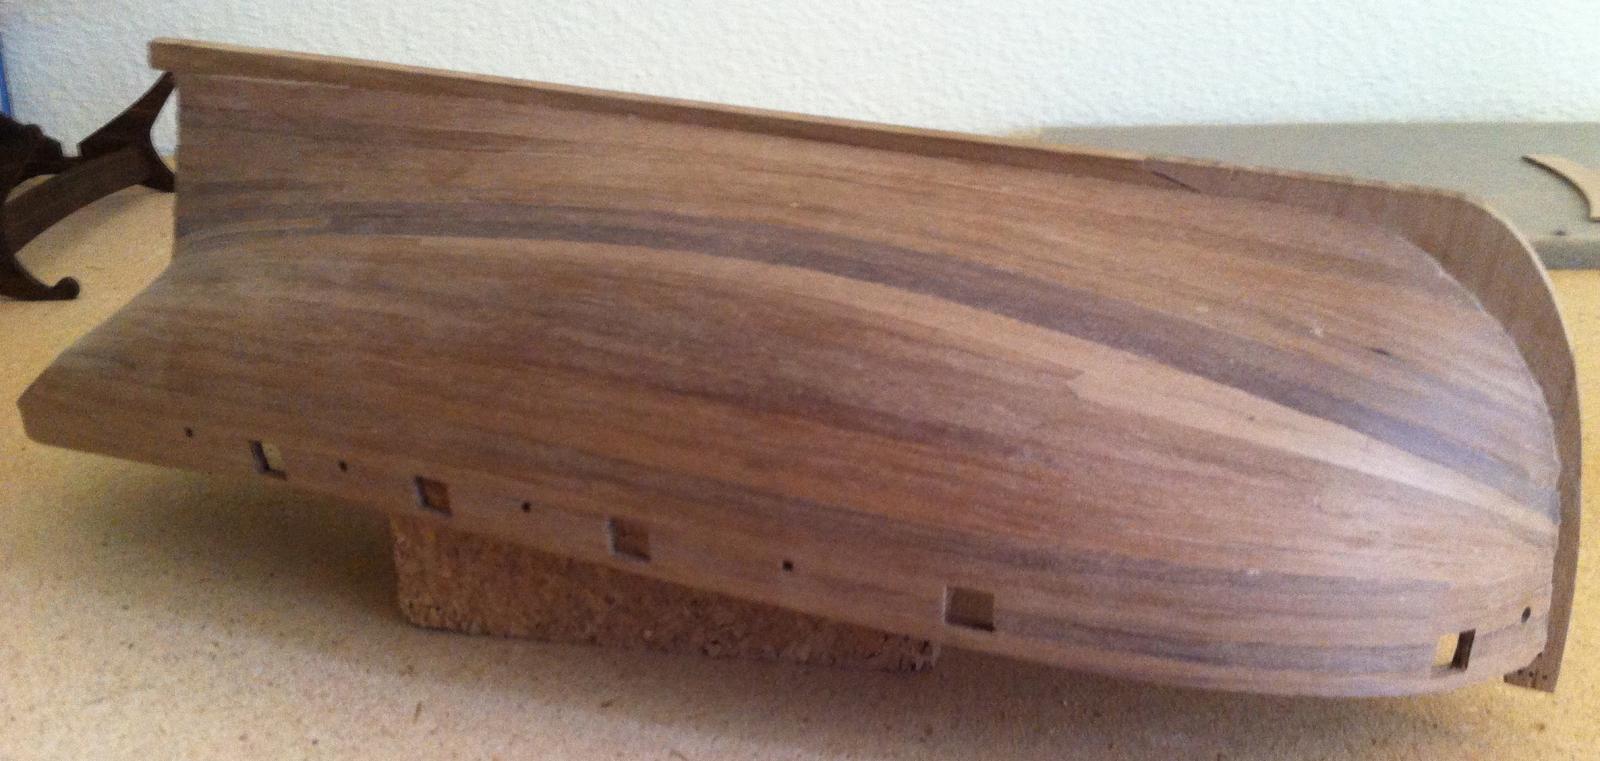
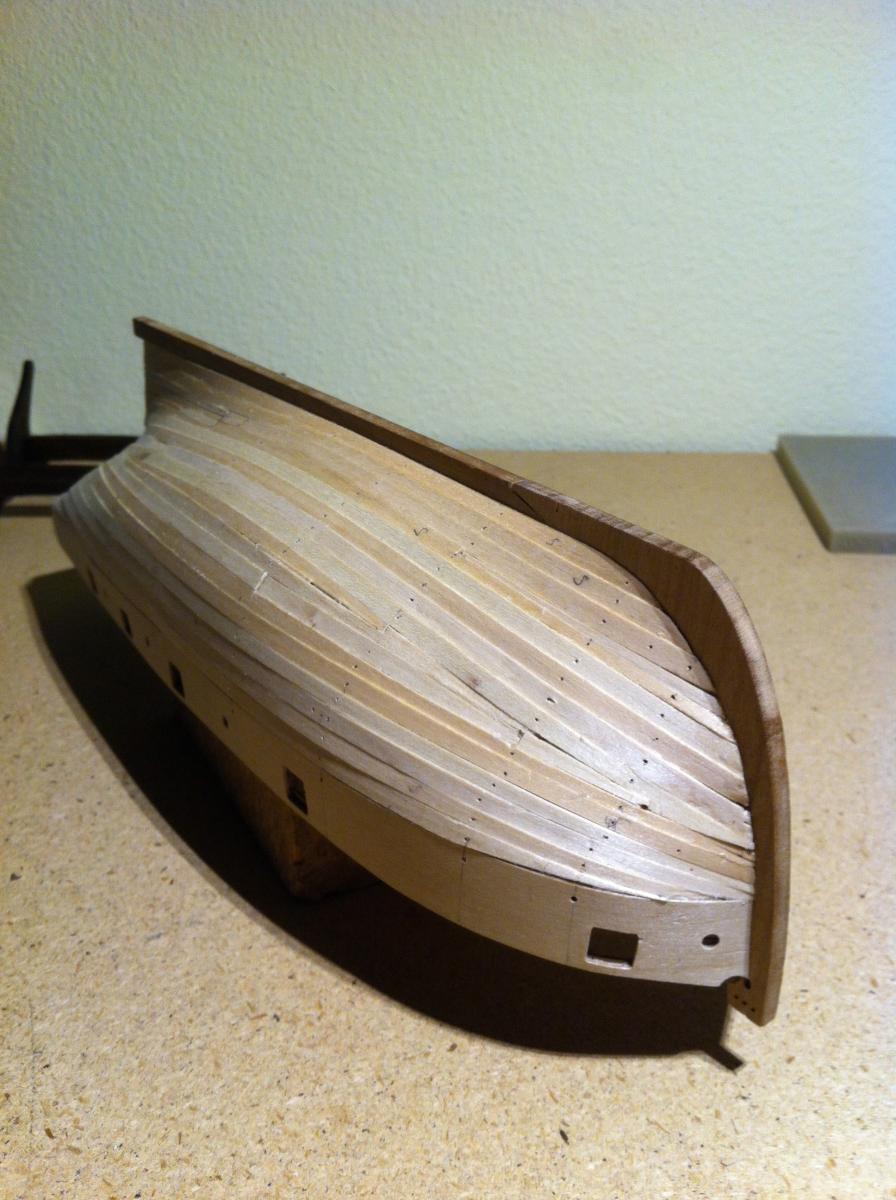
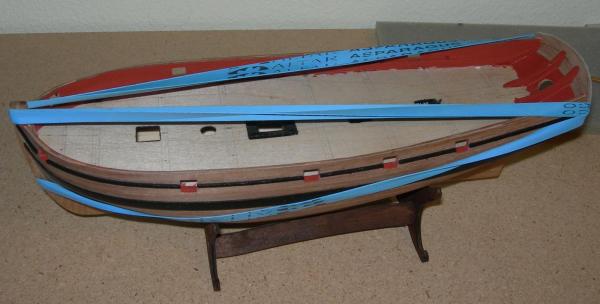
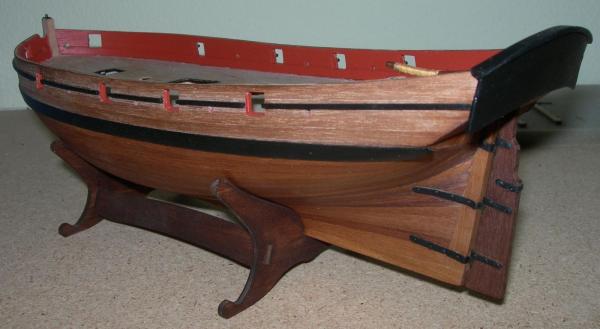
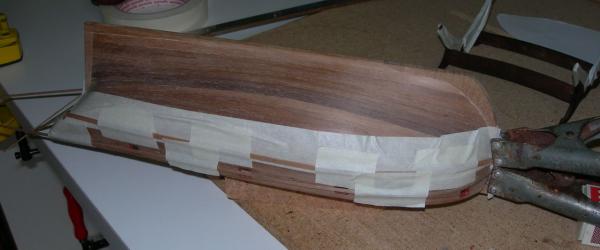
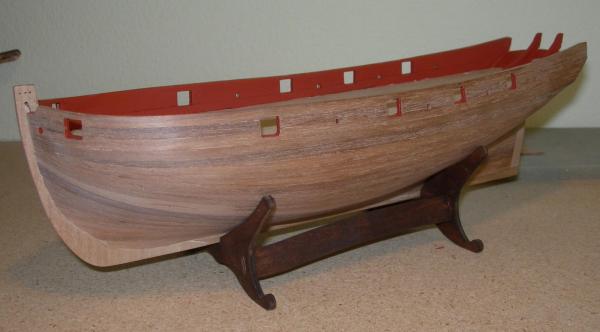
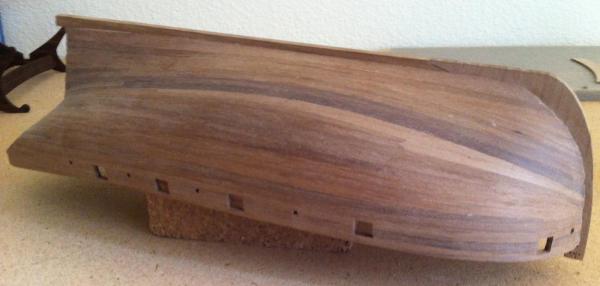
I added the wales last week. After soaking I let the strips for the whales dry near their final place. I protected the hull with tape. Glued to the hull, I had to sand the pre-painted strips to create the illusion of a one-plank-whale (I know it should be many planks in a special pattern). I think it would have been easier to cut out the whale from a wider plank with the help of a paper model (as described in the planking tutorials in the download section). There was a lot of lateral bending, brute force and a little cheating with a knife involved. Having the planks painted before gluing helped with the final painting afterwards, as the paint did not spill to the hull planks. I let the planks of the gunwale flow to the stern, as it was not clear to me on the plans where they should end. On the forum and in the gallery I found a lot of different interpretations, so I did decide “by eye”. Gregor

- 210 replies
-
- 1
-
-
- Sherbourne
- Cutter
- (and 5 more)
-
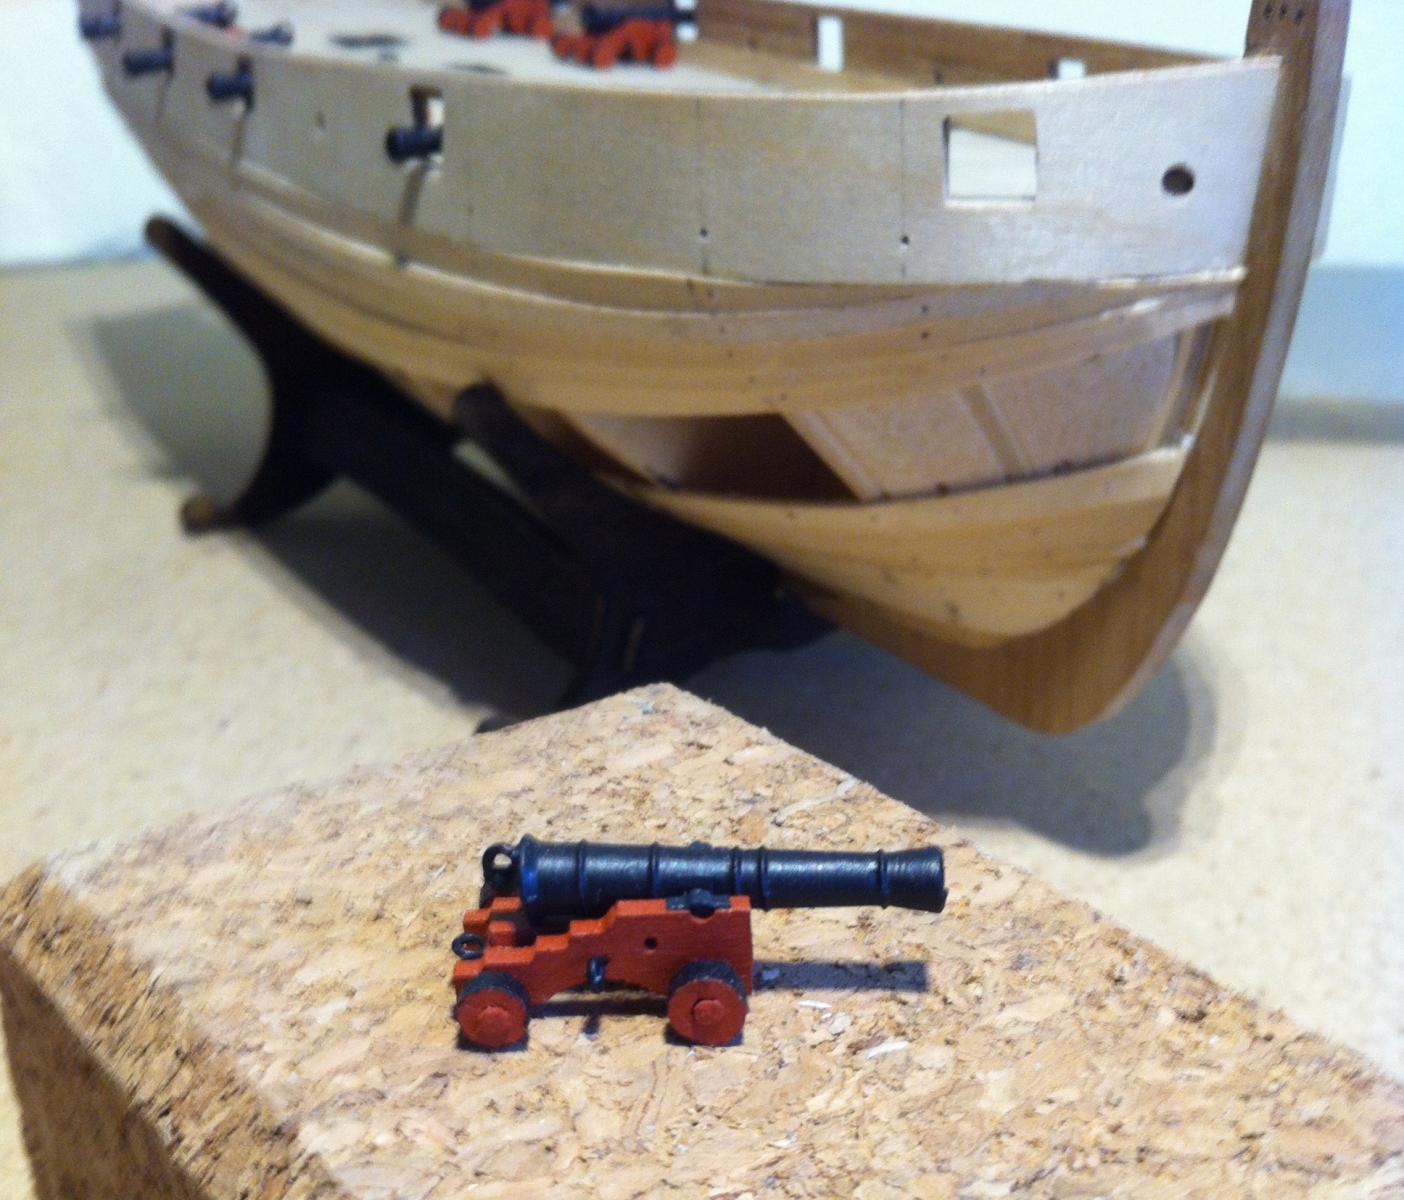
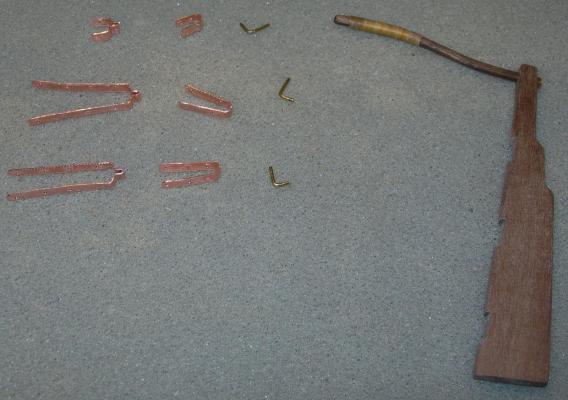
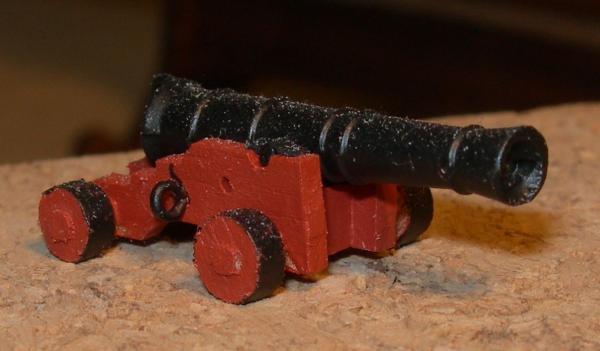
Thank you, Skippy and Tony. The guns were the first things I made last summer after opening the box. Now they are gathering dust, and are waiting to be improved. You can clearly see the “muzzle problem”. If I keep the barrels, I will repair them with epoxy, as Tony did (he is right, I will not shorten them). If not, the ones from RB Model are certainly a beautiful option (I can live with the difference of 1.4 mm to an ideal 3-punder – a little bit too short looks better than too long, I think). And the carriage will deserve al little improving too, I will try to follow you there. I was thinking out loud when I mentioned 3D printing. I love building the Sherbourne for the contrast to my long hours in front of a computer, among other reasons. There is free (for personal use) Software (http://www.sketchup.com, you can even download models to refine), but after tinkering with it I decided not to do it this way, it being another project in front of a screen. Gregor
-
@ Tony I'm still thinking about ordering brass barrels as Dirk did, but Caldercraft's 4lb barrels are 25 mm long - that's also something in between … But they look beautiful, not like the badly cast tin barrels in the kit (the carriages are the same). I wonder how you managed to drill the barrels for proper trunnions - I tried to open the muzzle with an electric drill, but had to stop because the tin started to melt. Some muzzles now look like a blunderbuss. If I keep them, I will file off a Millimetre or two. But after your research I will have to repaint the wheels (brown instead of black for the hoops, which I very much admired in your log). Another solution for barrels with an exact measurement would be a CAD drawing and 3D printing - this is what I found: http://www.shapeways.com/model/1035348/2-ship-s-cannons-1-72-scale.html?li=moreFromShop&material=6 (I wouldn't know how to do it, alas). In Sherbourne's time the Industrial Revolution was (at least in your England) in full swing, so we should not be afraid of a little outsourcing - it's not anachronistic to use modern logistics and techniques, as the dockyard surely did when Sherbourne was built. Gregor Update: http://modelshipworld.com/index.php?/topic/2164-experiences-with-3d-printing-for-ship-models/
-
Thanks, Tony, I hugely admire your boatbuilding project and (a little ashamed) admit to having ordered a small kit from Caldercraft. The gun barrels are not the strongest point of this kit (imperfect casting, the trunnions, the size), but I remember David who also upgraded his guns to a very pleasing effect and had a systematic approach to hull planking (he even made paper templates for the garboard plank and the whales). I'm glad Dirk is here again. I will try to bring the best out of my hull with linseed oil, even if I will not match his level of perfection in every detail (and beautifully photographed, too). But his build is a great source of inspiration. Good luck with your blocks, Gregor
-
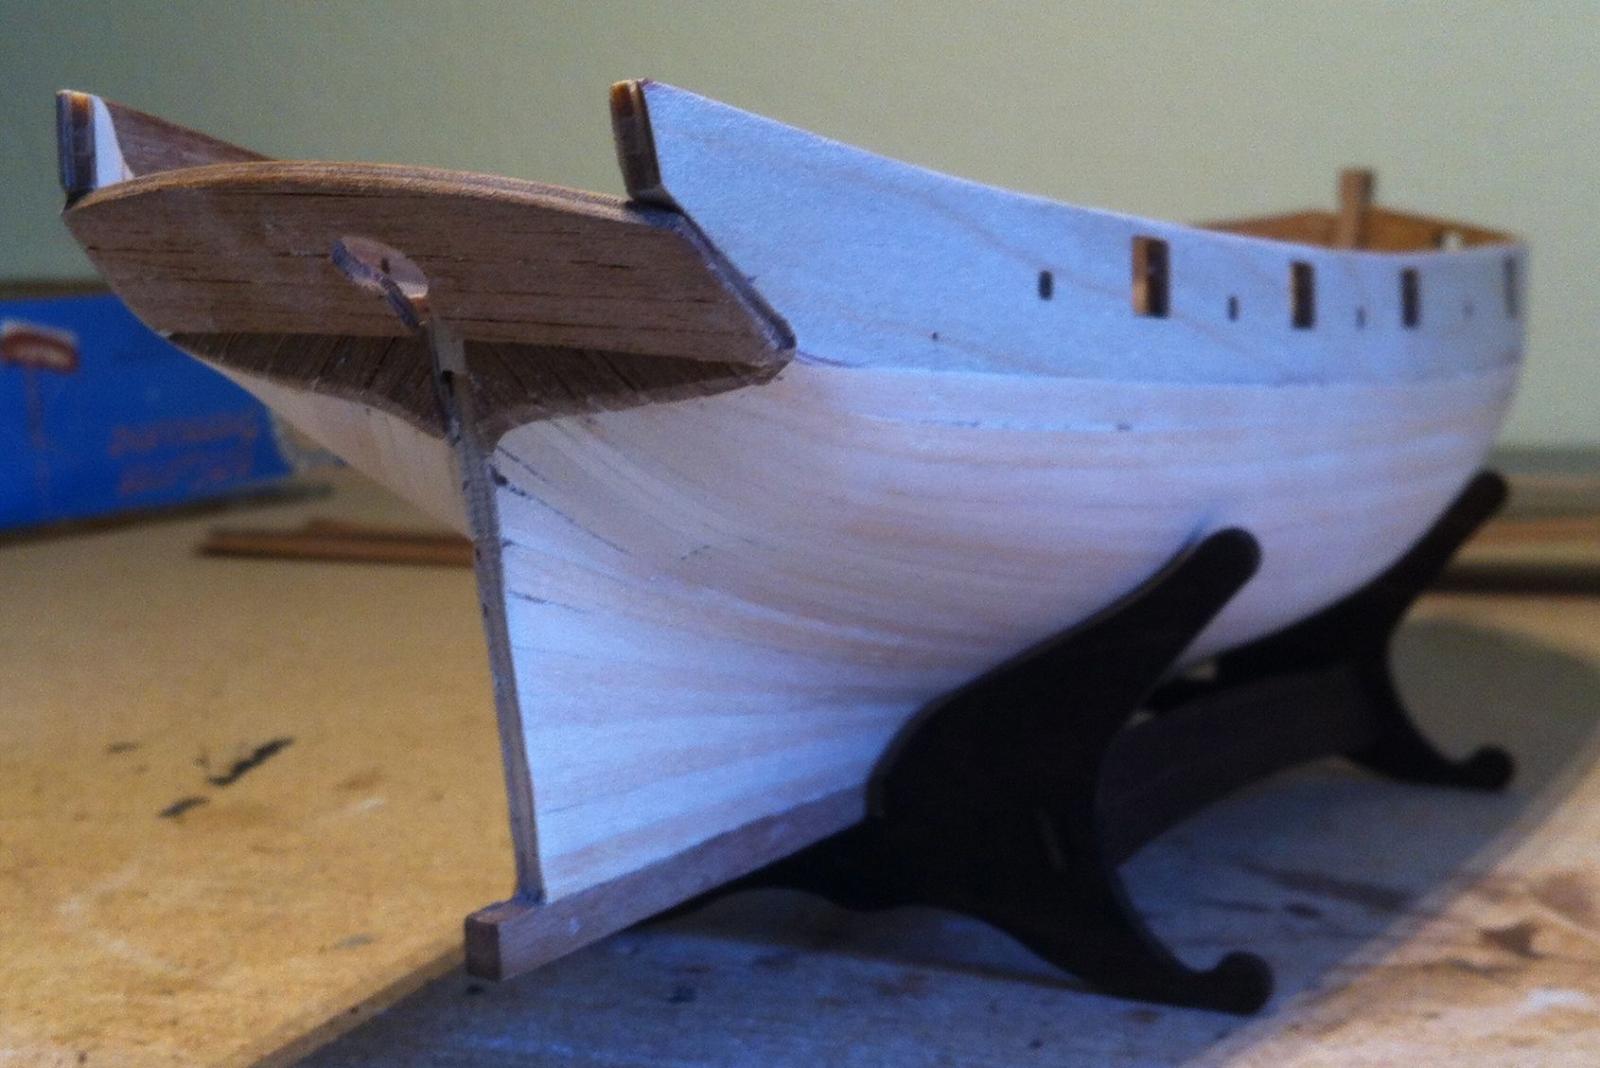
Before painting the inner bulwarks I had to fill many small gaps, this being the first planks I ever glued in a model. I added spirketting (simply a thicker plank) because I liked what I saw in other logs. I’m not sure about painting the hull yet. On some days I quite like the uneven colouring of the walnut strips – on others I regret I did not choose the planks more carefully for colour. That’s where I am now. Next will be the whales and deck (where I will try to follow Tony’s example).
- 210 replies
-
- 3
-
-
- Sherbourne
- Cutter
- (and 5 more)
-
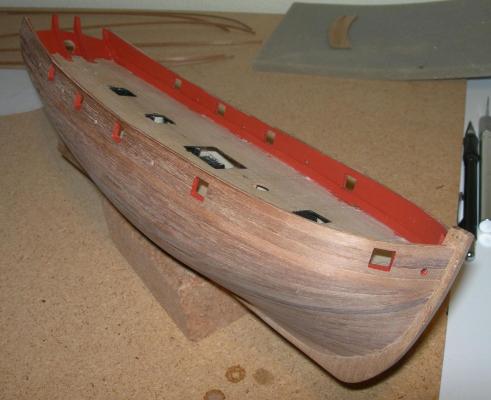
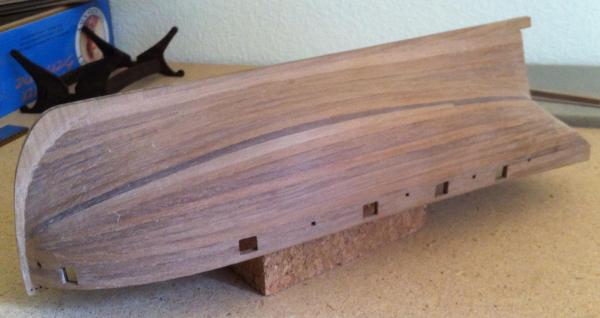
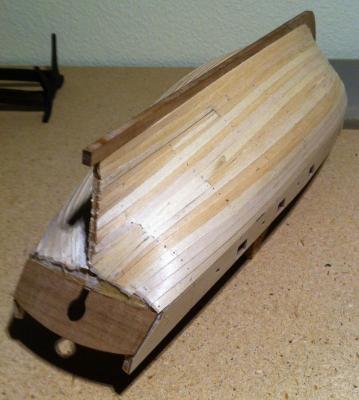
For the second planking I used 0.5 mm walnut strips (instead of the original 1 mm in the kit) and found them very easy to shape and bend. Sanding has to be done very carefully tough, as there is not too much material to take off. It went quite well too, considering I completely ignored all the good advice on this forum and in the download section. I will never do that again, but obviously one has to make all the mistakes possible (and pay for them dearly) to fully understand and appreciate the method of tapering planks by prior measurement. One result of “planking by beginner’s eye” is a geometrically complex form to be filled with “special” planks. On the bright side: I’ve learnt to make drop planks and stealers. To fill the small gaps I used Dan Vadas method: sanded down walnut strip and diluted PVA glue. This will not be enough to repair the bulwark on the bow, though.


- 210 replies
-
- 3
-
-
- Sherbourne
- Cutter
- (and 5 more)
-
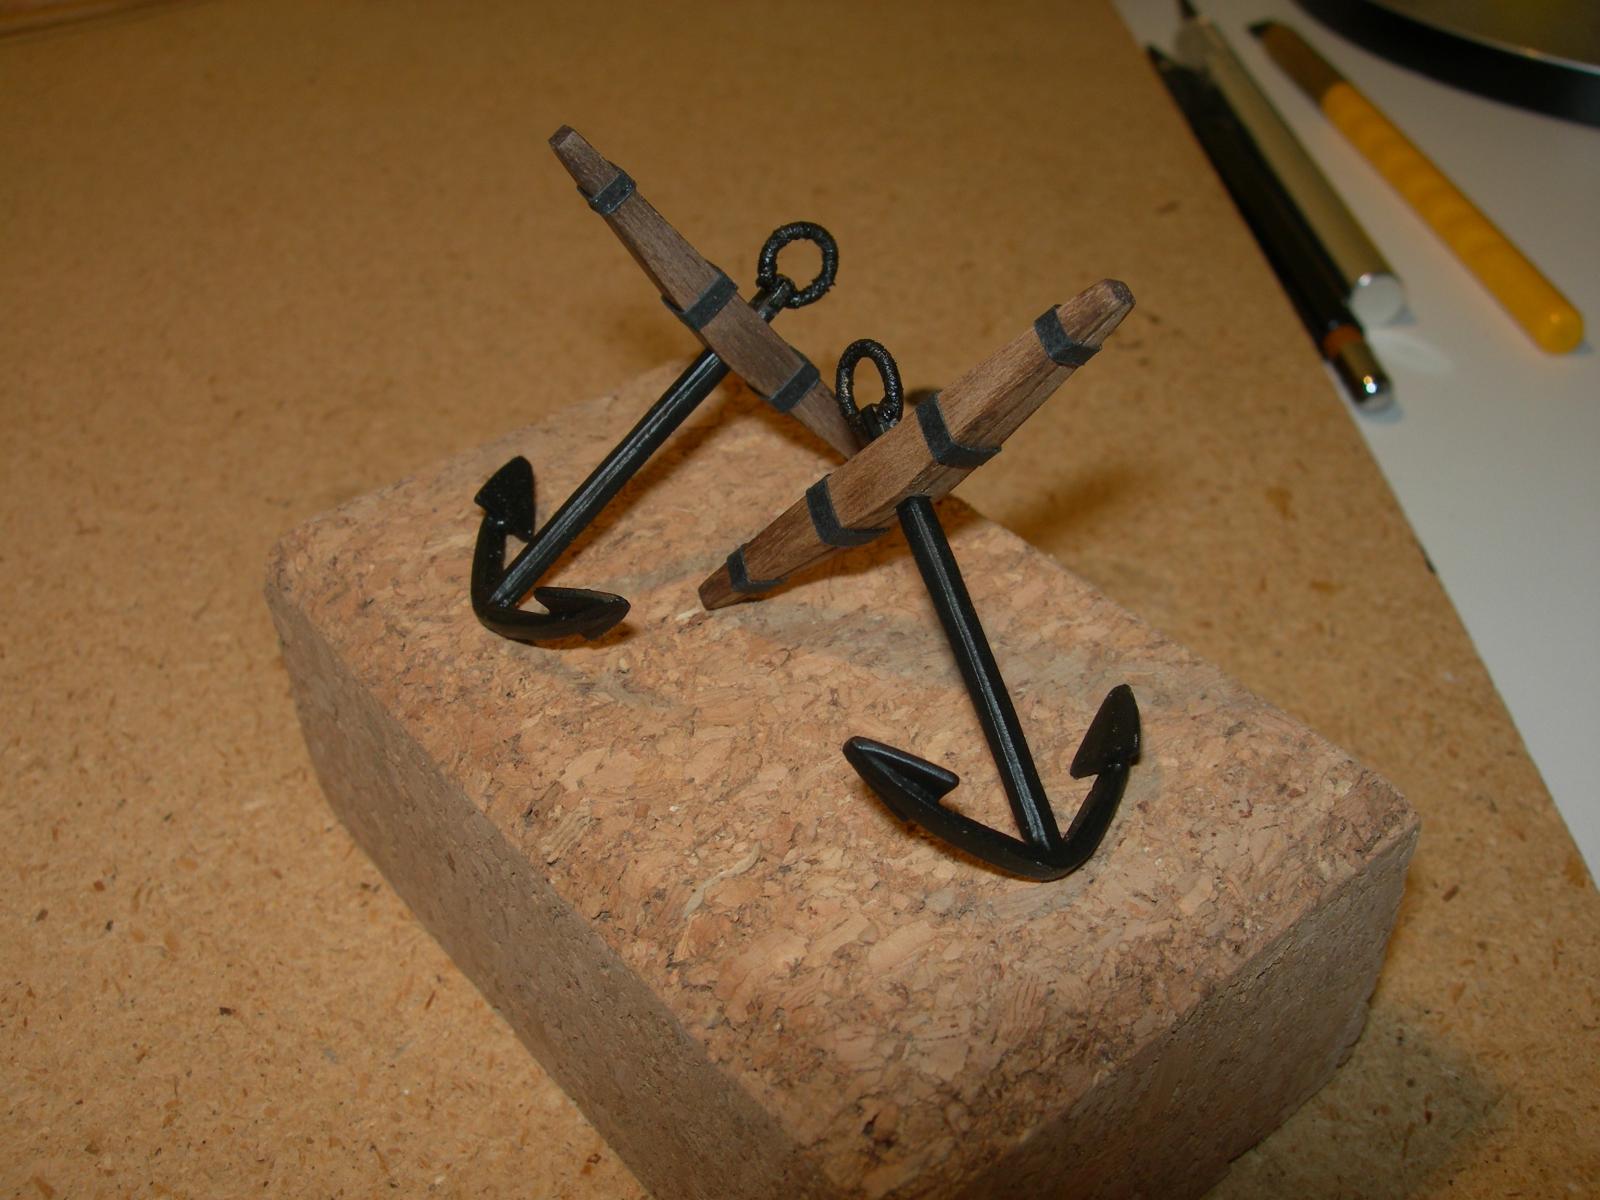
Meanwhile George Bandurek’s guide helped me to shape and taper the anchor stocks, and with the puddening of the ring. My iron bands (black paper) are a little too wide; I will have to change them eventually.

-
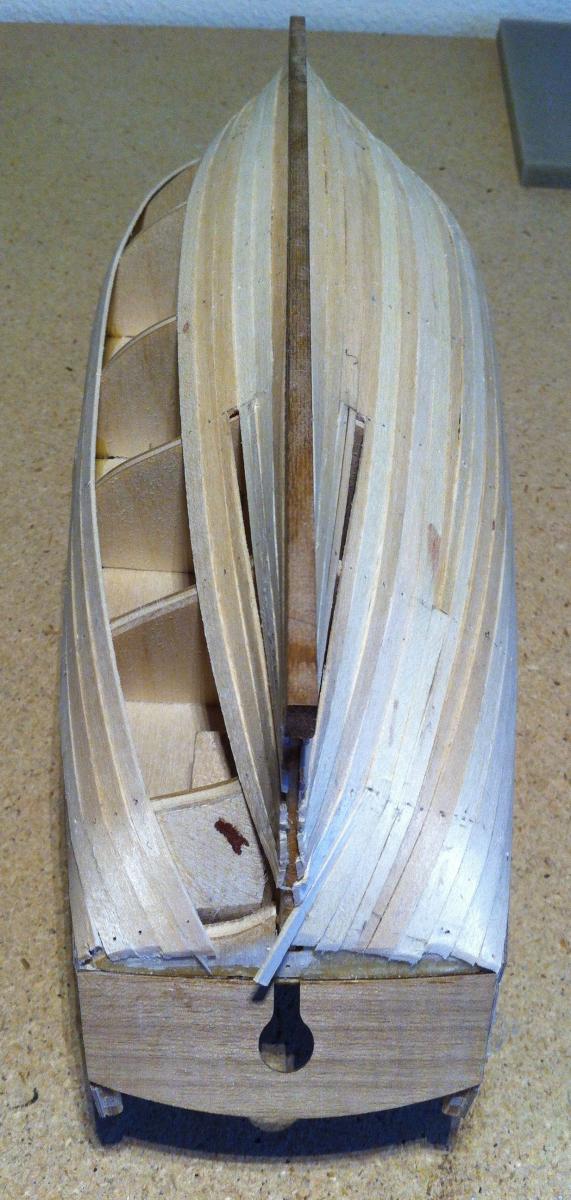
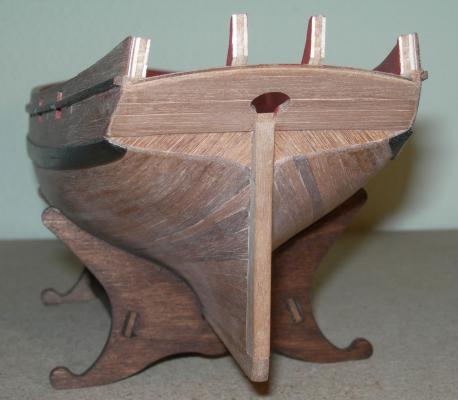
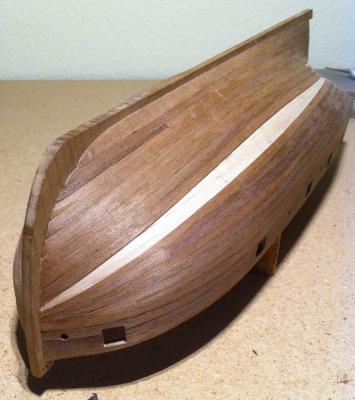
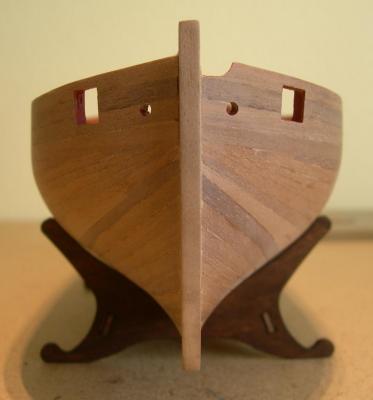
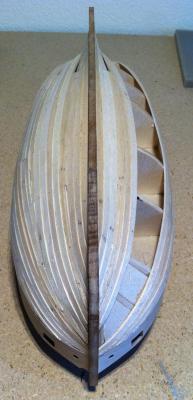
First planking went quite well: I built my first clinker hull. After a lot of sanding the first planking was paper-thin in some places, and I fear I might have altered the shape and destroyed the symmetry of the hull. As a side project I made the guns out of the box (Badgers brass cannons would have been nice). For trunnion caps I used the black paper that came with the kit. On the barrel I added a ring for the breeching rope (as an alternative to the proposed simple but maybe more historically correct loop around the cascabel – I found a drawing in Wolfram zu Mondfelds book and liked it better this way; and it offered me a first opportunity to add something to the kit by myself). In an early stage some bulkhead stubs broke off (excessive sanding in the bow, they were very thin afterwards), so I decided to plank the inner side of the bulwark before second planking to give it more stability. I remembered discussions on MWS 1.0 and took the opportunity to correct the gun ports so they have all the same position over deck and the guns will fit.


- 210 replies
-
- 1
-
-
- Sherbourne
- Cutter
- (and 5 more)
-
I started this project in summer 2012. I choose this kit after browsing and reading many of the build logs in MSW 1.0, and because it has only one mast (I’m not much of a seaman except in the rather romantic way of reading Patrick O’Brian’s novels for the second time). The box contained all the promised parts in an orderly fashion, and a very short/thin instruction booklet. But there is help: Watch and learn on MSW 2.0 (in my case especially from Tony’s Sherbourne at http://modelshipworld.com/index.php?/topic/335-hmc-sherbourne-by-tkay11-–-caldercraft-–-scale-164-1763-a-novice’s-caldercraft-sherbourne/) Download the construction manual of Caldercraft’s Brig Badger, it explains and illustrates a lot of the details (i.e. principle of hull construction, guns …) which are very similar to the Sherbourne (http://www.jotika-ltd.com/Pages/1024768/Manuals_Badger.htm) Buy George Bandurek’s book “Super-detailing the cutter Sherbourne” (http://www.grbsolutions.co.uk/5.html), an inspiring guide to make much more out of a beginners kit Keel, bulkheads and deck came first, then balsa fillers fore and aft. Then I soaked the plywood bulwarks before bending them with the help of tea mugs and a good bottle.