portchieboy
-
Posts
53 -
Joined
-
Last visited
Recent Profile Visitors
1,398 profile views


-
 mtaylor reacted to a post in a topic:
Completed Caldercraft HMS Victory
mtaylor reacted to a post in a topic:
Completed Caldercraft HMS Victory
-
paul ron reacted to a post in a topic:
Completed Caldercraft HMS Victory
-
GrandpaPhil reacted to a post in a topic:
Completed Caldercraft HMS Victory
-
Thanks everyone for your help. Plenty to think about. It will be a wrench, so I will not rush into it. Many good points raised, especially about a case. No, it is under plastic wraps at the moment, because of cost, and also weight. A local manufacturer has told me it would weigh over 15 stone to build a case, and have safe glass or perspex. Btw Thunder, yes, I am in UK. Cheers all.
-
portchieboy reacted to a post in a topic:
Completed Caldercraft HMS Victory
-
portchieboy reacted to a post in a topic:
Completed Caldercraft HMS Victory
-
portchieboy reacted to a post in a topic:
Completed Caldercraft HMS Victory
-
portchieboy reacted to a post in a topic:
Completed Caldercraft HMS Victory
-
portchieboy reacted to a post in a topic:
Completed Caldercraft HMS Victory
-
portchieboy reacted to a post in a topic:
Completed Caldercraft HMS Victory
-
This is just an initial foray, as it were, into what I can do with a completed project. I spent a very enjoyable 15 years building Victory, but all good things come to an end! Personal circumstances are changing, and I am beginning to think about the ultimate fate of the model. At present, I am lucky enough to have a 4th bedroom, now the Boatroom, but we are thinking about downsizing. That would mean that without doubt that there would be no room for such a massive model, and none of the family has room to take it. I know from working there that places such as Portsmouth Naval Museum are not interested, indeed they are offered numerous models every year, So, whilst it would be nice to sell the boat and get something back, I will probably just have to move it on. Remember, this is the biggest model, it is very heavy, and very fragile, so expensive to transport anywhere. Just wondering if anyone has any thoughts on what to do, how to usefully move the boat on. Plenty of time yet, so ideas please!!!
-
GrandpaPhil reacted to a post in a topic:
Fokker Dr.I by portchieboy - Artesania Latina - 1:16
-
GrandpaPhil reacted to a post in a topic:
Fokker Dr.I by portchieboy - Artesania Latina - 1:16
-
GrandpaPhil reacted to a post in a topic:
Fokker Dr.I by portchieboy - Artesania Latina - 1:16
-
PvG Aussie reacted to a post in a topic:
Fokker Dr.I by portchieboy - Artesania Latina - 1:16
-
mtaylor reacted to a post in a topic:
Fokker Dr.I by portchieboy - Artesania Latina - 1:16
-
mtaylor reacted to a post in a topic:
Fokker Dr.I by portchieboy - Artesania Latina - 1:16
-
mtaylor reacted to a post in a topic:
Fokker Dr.I by portchieboy - Artesania Latina - 1:16
-
 portchieboy reacted to a post in a topic:
Fokker Dr.I by portchieboy - Artesania Latina - 1:16
portchieboy reacted to a post in a topic:
Fokker Dr.I by portchieboy - Artesania Latina - 1:16
-
 portchieboy reacted to a post in a topic:
Fokker Dr.I by portchieboy - Artesania Latina - 1:16
portchieboy reacted to a post in a topic:
Fokker Dr.I by portchieboy - Artesania Latina - 1:16
-
Cheers Mike, but if you recall, the Fokker does not have working controls. Appreciate your feedback though.
-
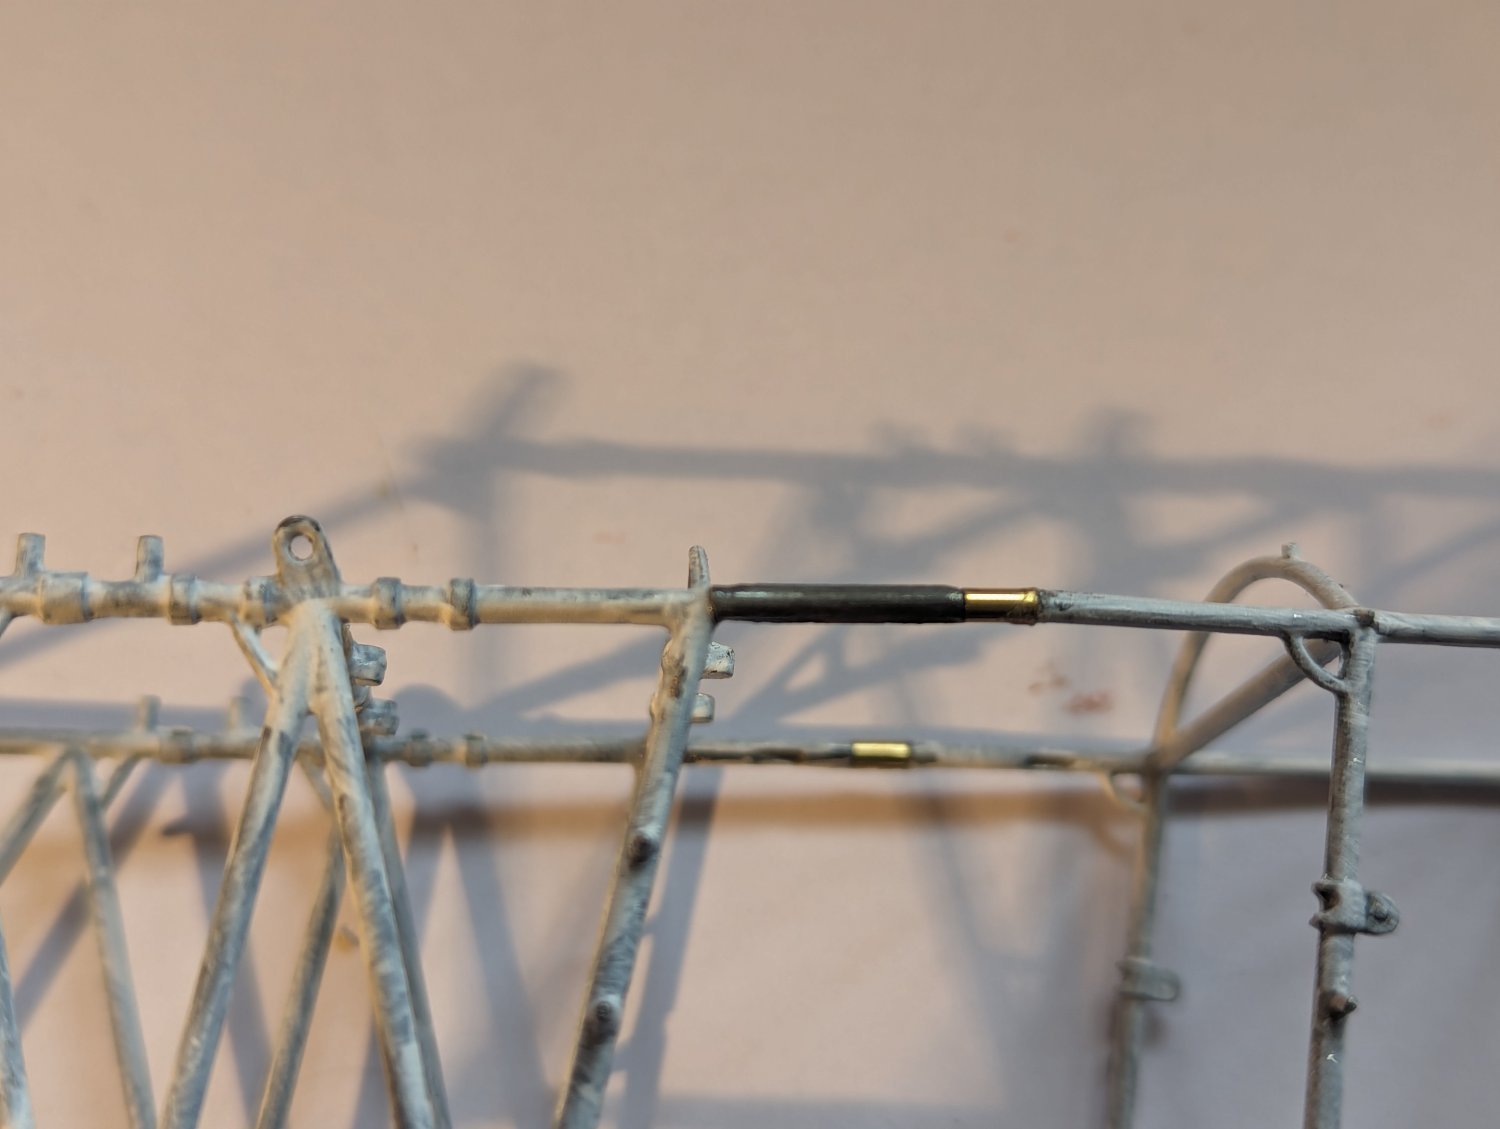
Thanks Mike, is that the tensors?
-
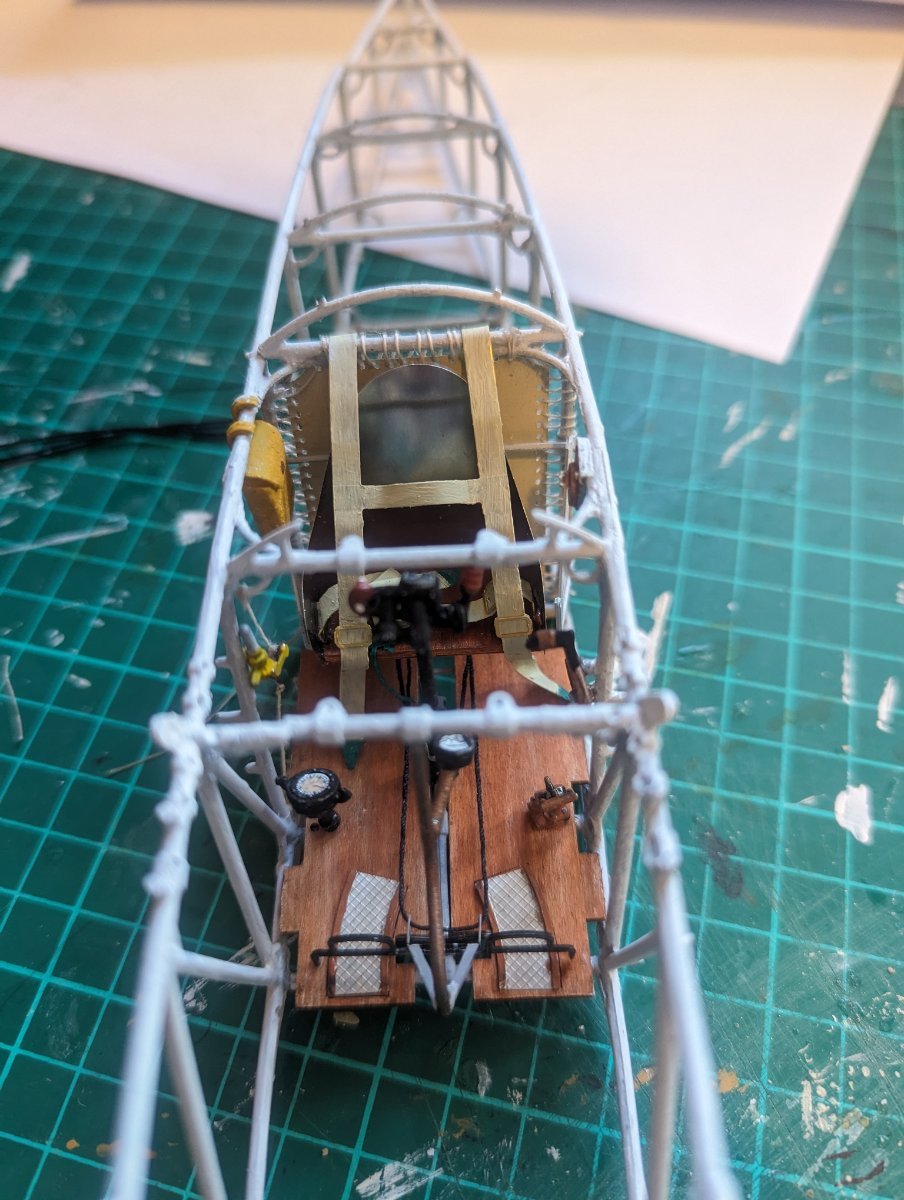
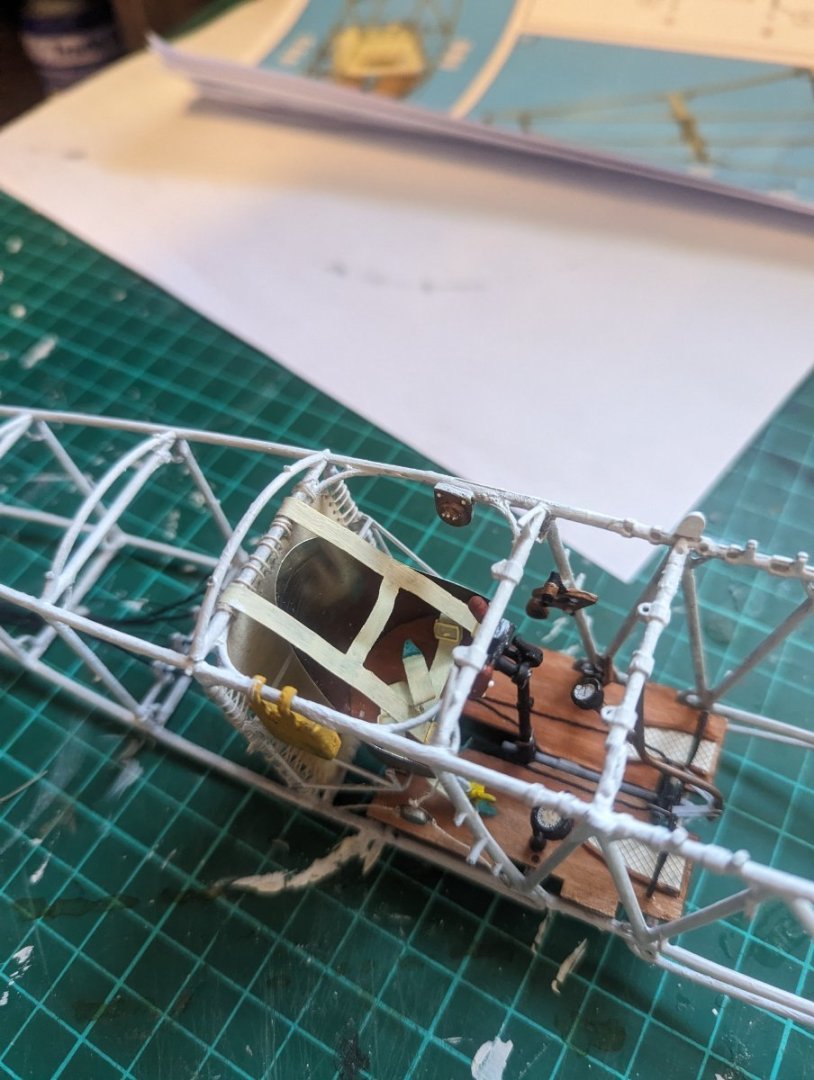
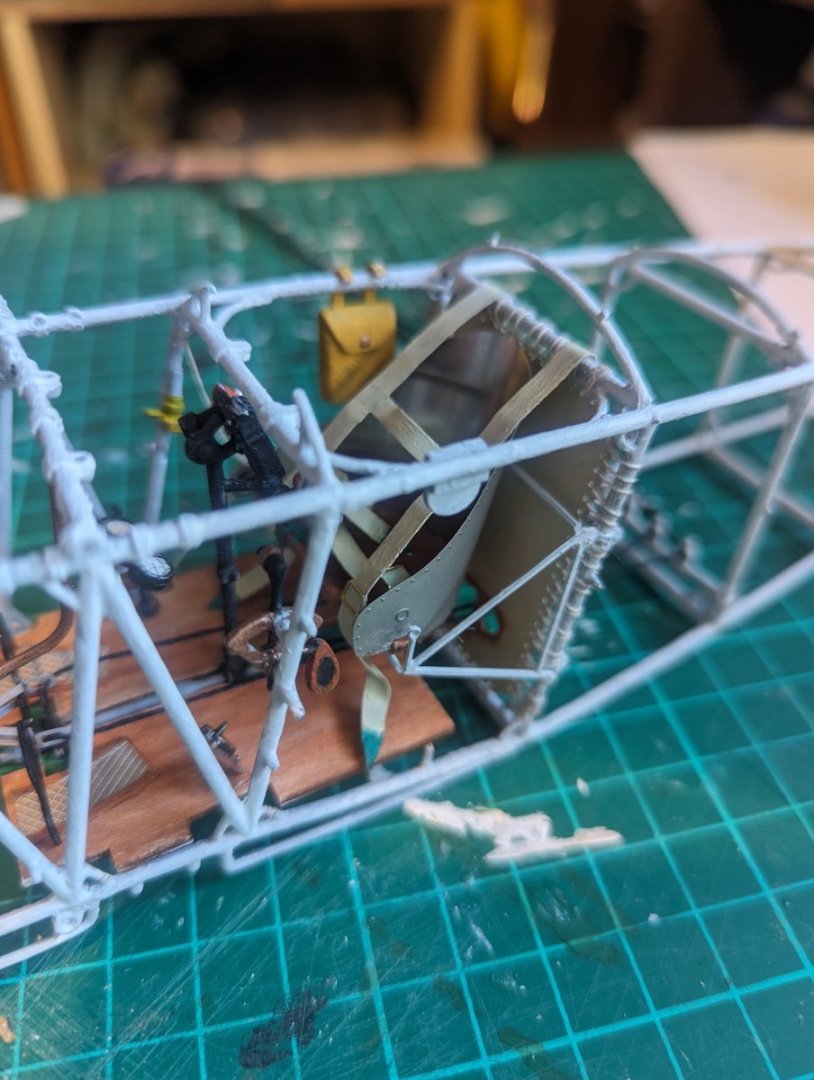
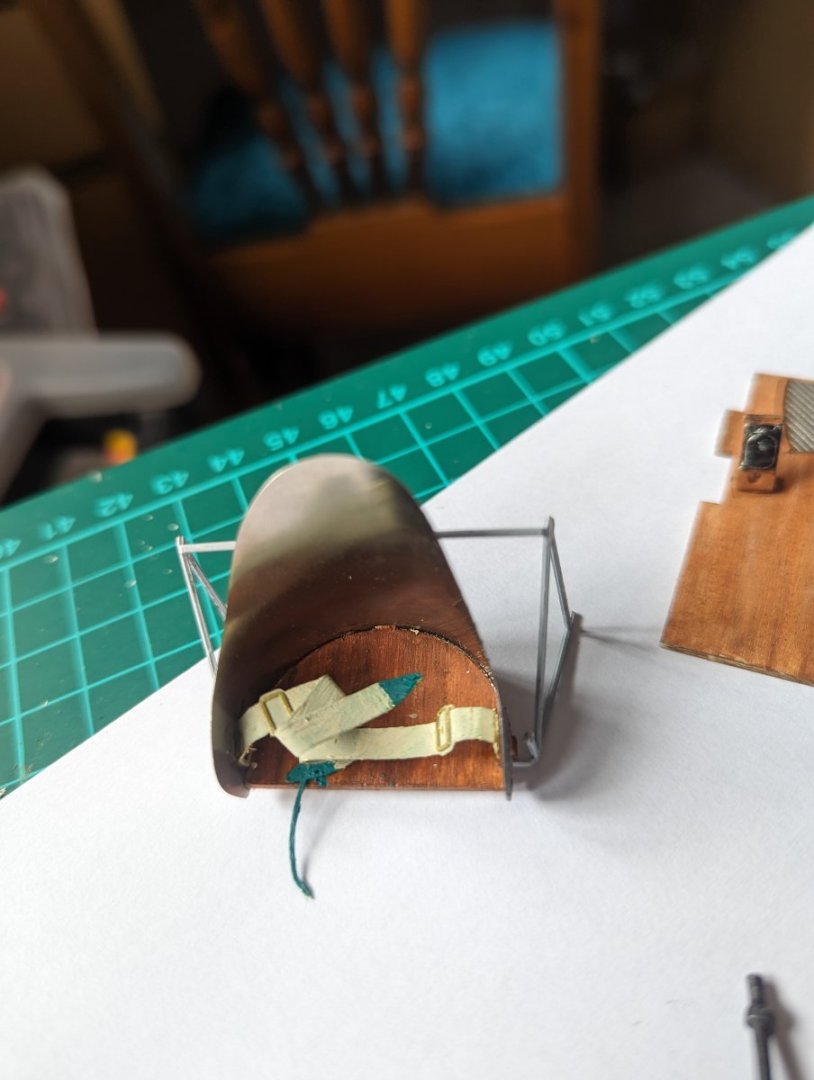
Cockpit complete, with control lines fitted. Have also repainted the fuselage, ready for the tensars.

- 17 replies
-
- 10
-
-
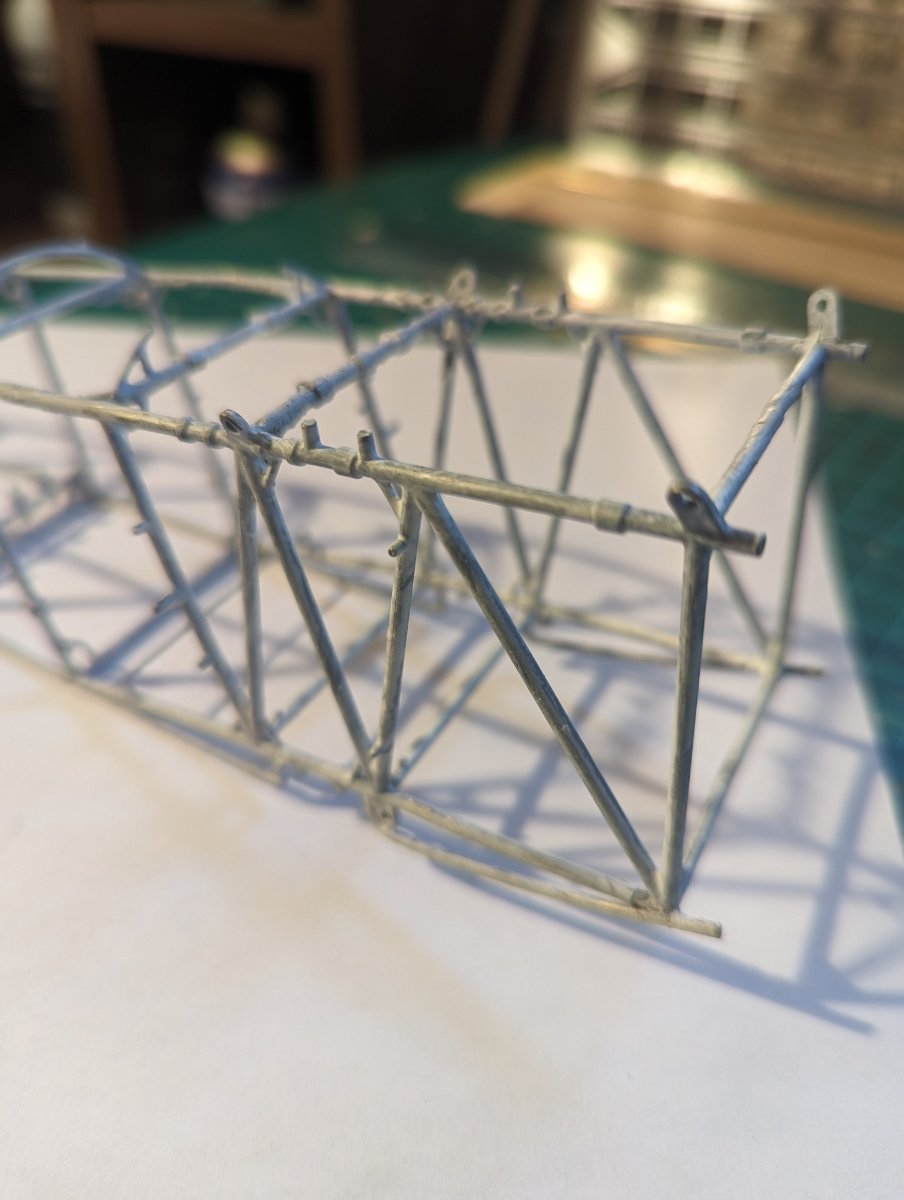
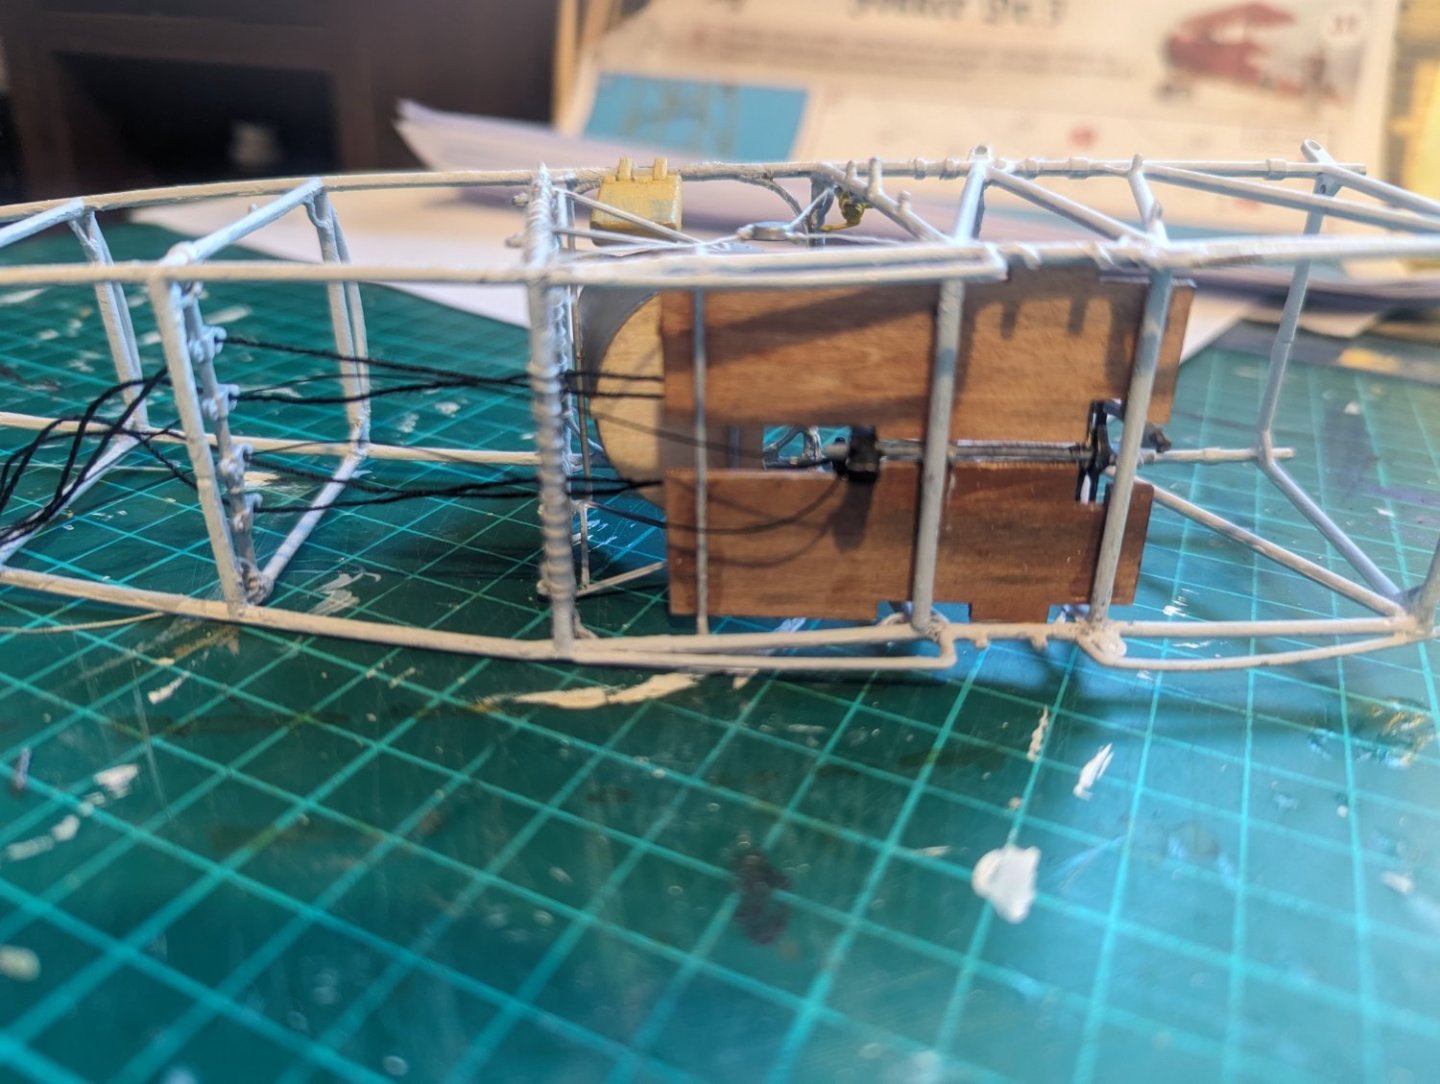
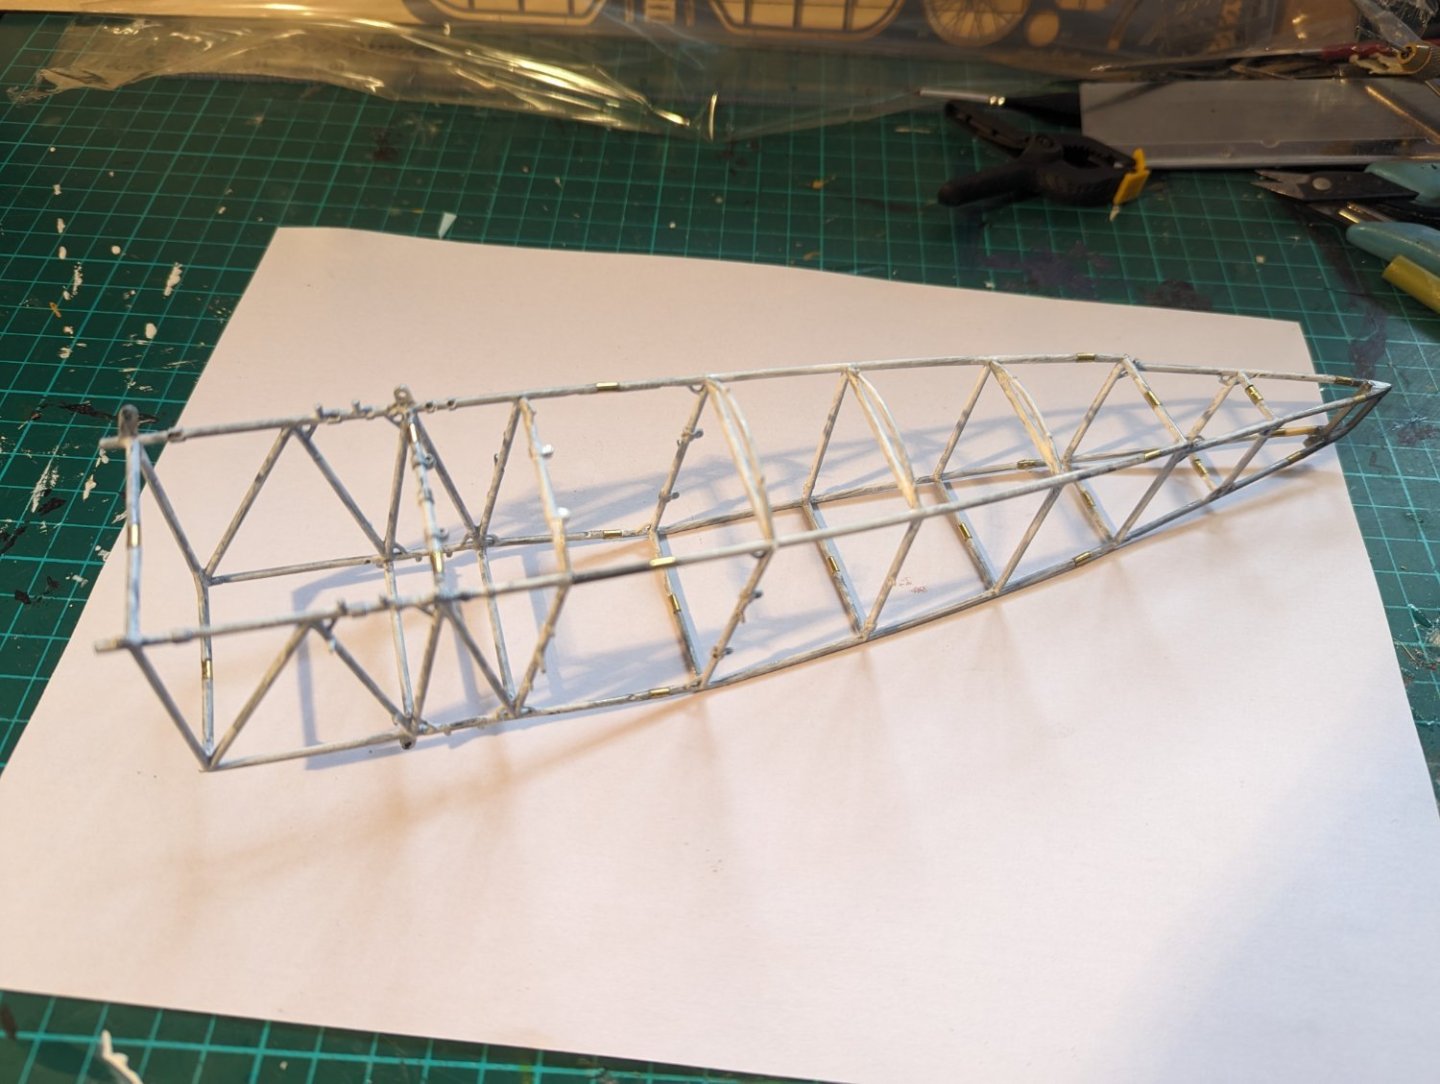
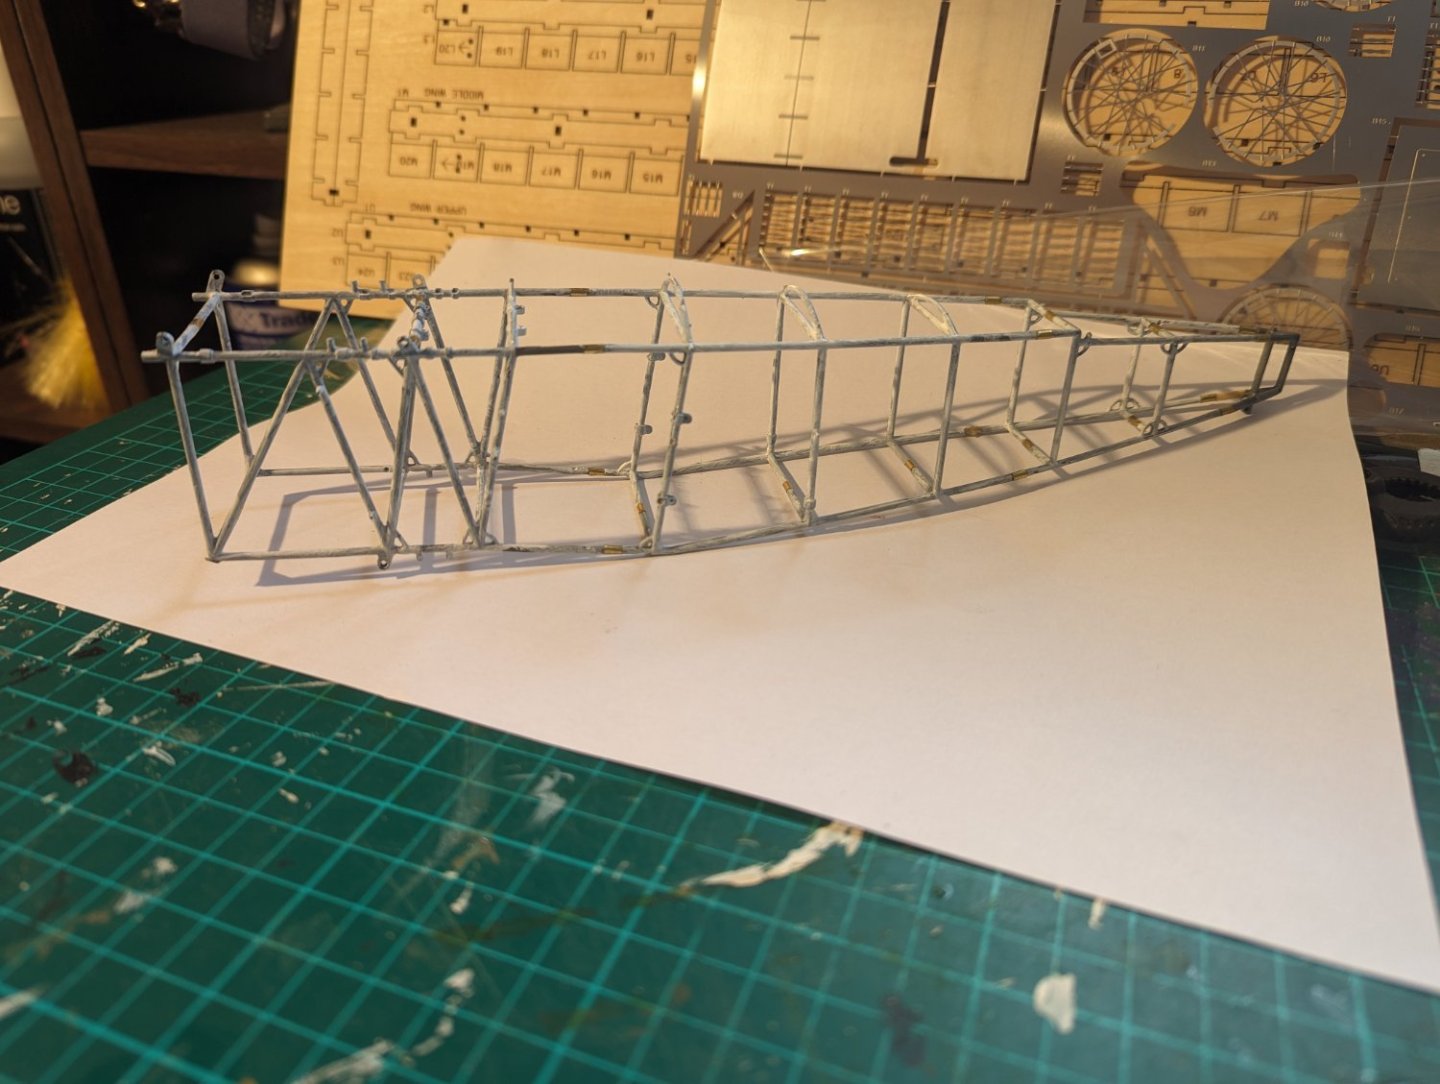
So, at last we moved on to the next stage. I must admit to some difficulties getting here. Firstly, the little 3mm brackets that go in the corners. What a nightmare. There are 28 of them, and talk about fiddly. It took me a few days to work out a method. Problem is they are so small, have to be glued into a restricted area, and held whilst the glue dries. Even the best CA takes a while. Eventually I came up with using a tiny dot of Blue tack on the frame, sticking one end of the bracket in, then leaning the other end to touch the frame. Glue that on, leave 24 hours, then remove Blue tack and glue the 2nd end. Once that was done, a few more spars to add, but again, I managed to break a couple in fitting. I must learn that cast pieces have absolutely no play in them whatever. Never mind, all now fixed, and next job will be the seat bulkhead.

- 17 replies
-
- 13
-
-
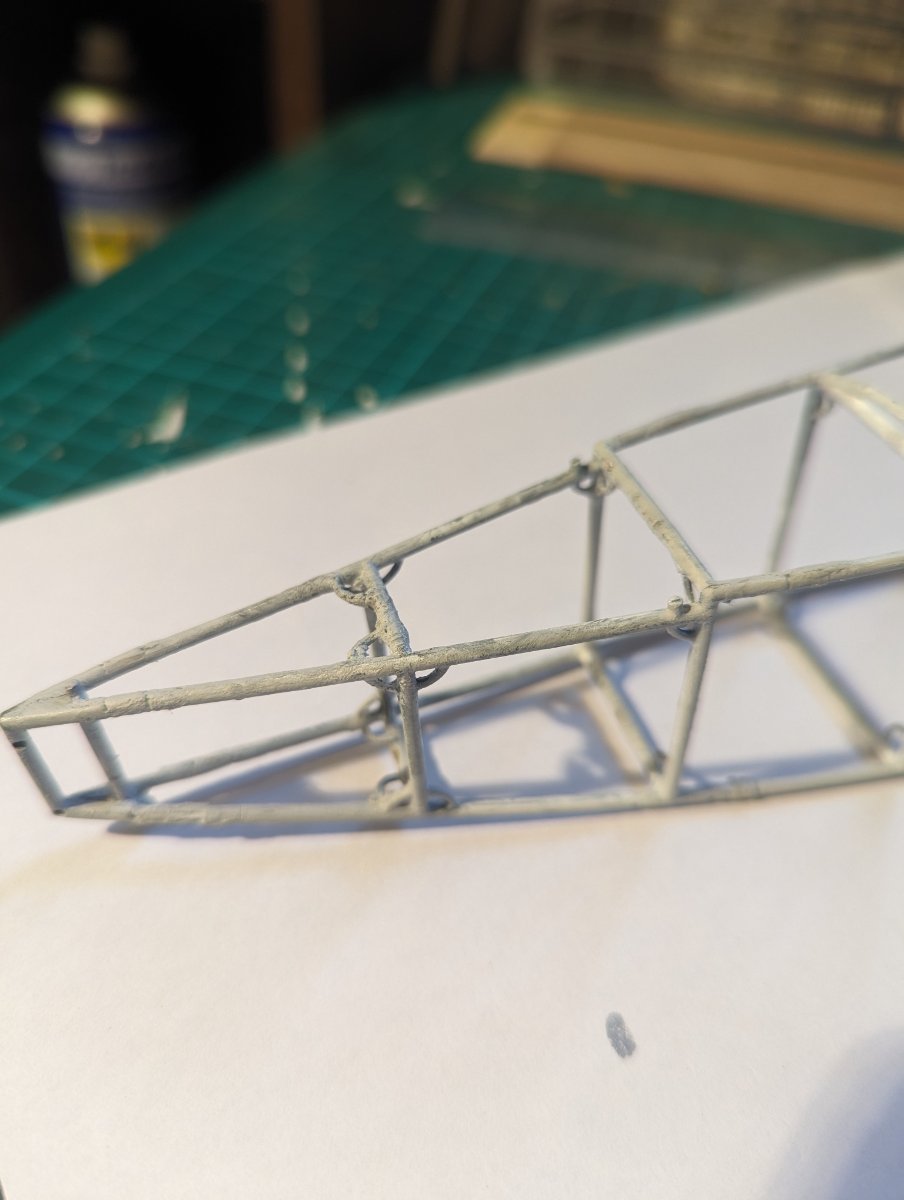
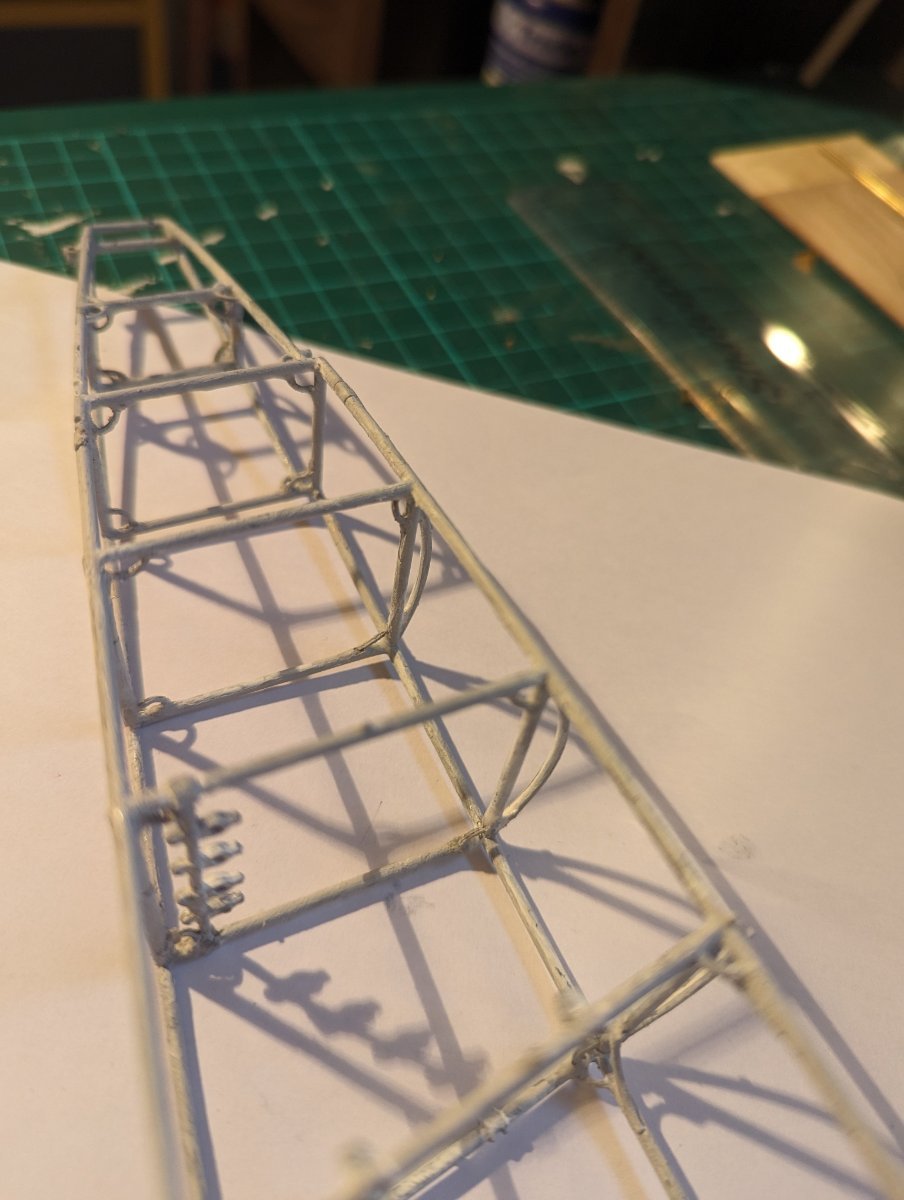
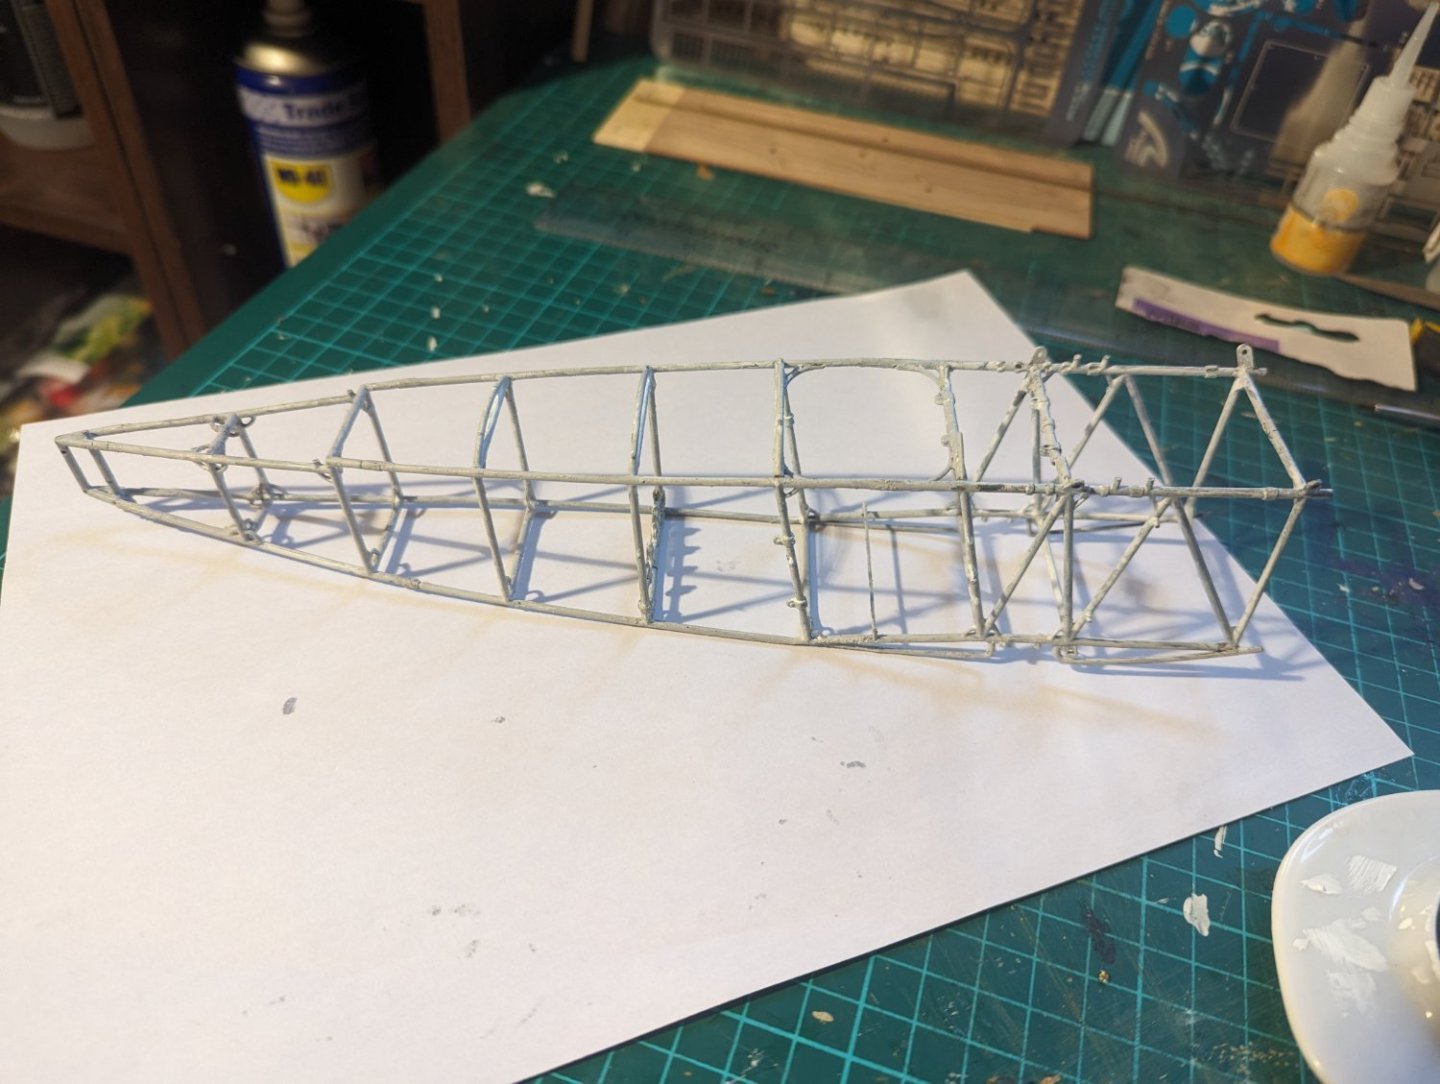
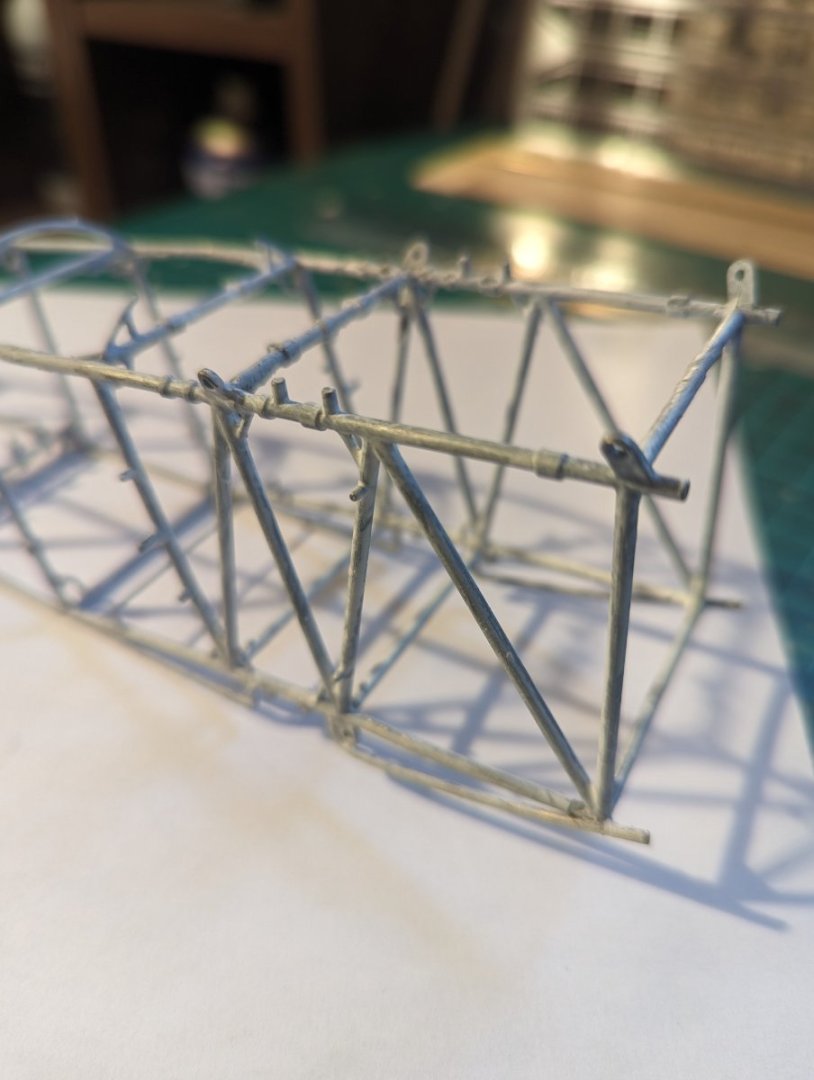
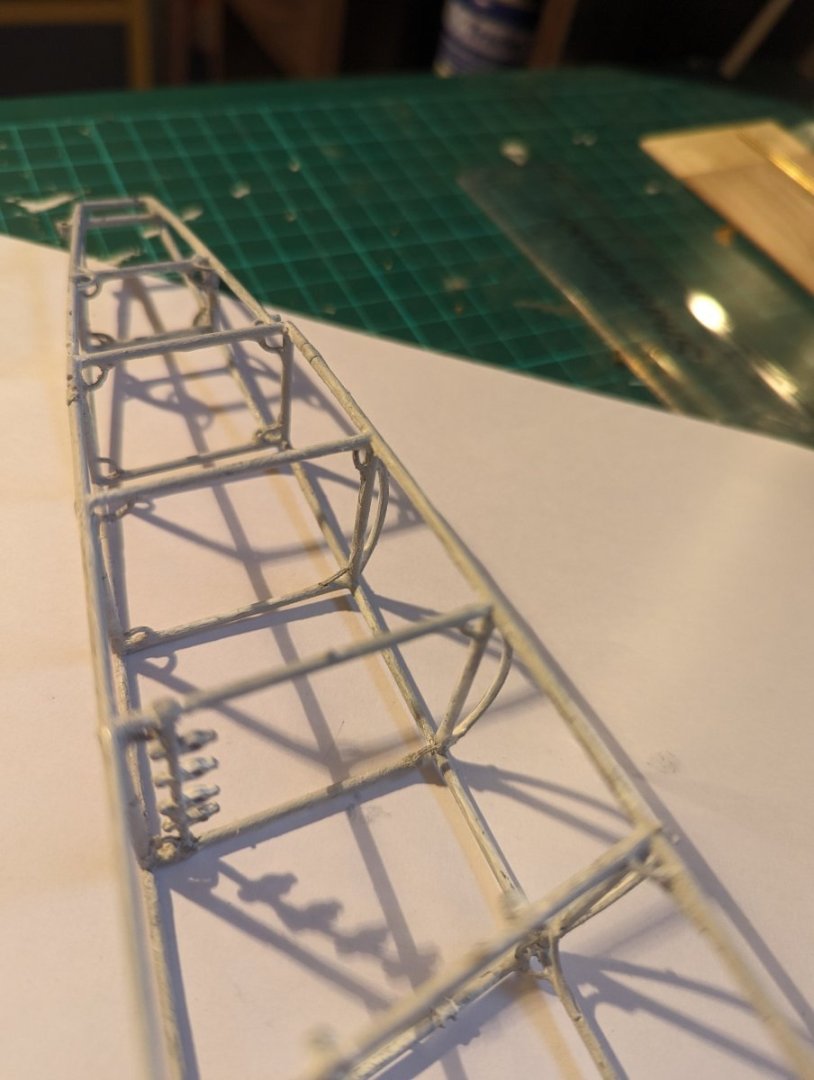
The fuselage is now largely together. It has, I must admit been taxing. Having spent several hours filing the moulding lines off, I then find that the lugs to which one affixes the brass joiners are mostly too large, and again need further, quite difficult shaping. When it came to joining it all together, I am afraid I found that some of the shaping was 'off', and the frame needed very slight pressure on the joins. That is when I realised how brittle was the metal, and I am afraid some pieces snapped off. All I can say is thank heavens for CA glue, I really do not know how else it would have worked. The other little tip is that the width of the frame is approximately the same as a wooden toothpick, which proved invaluable to mend a strut on the tail! So, down to page 17 now, wish me luck.


- 17 replies
-
- 16
-
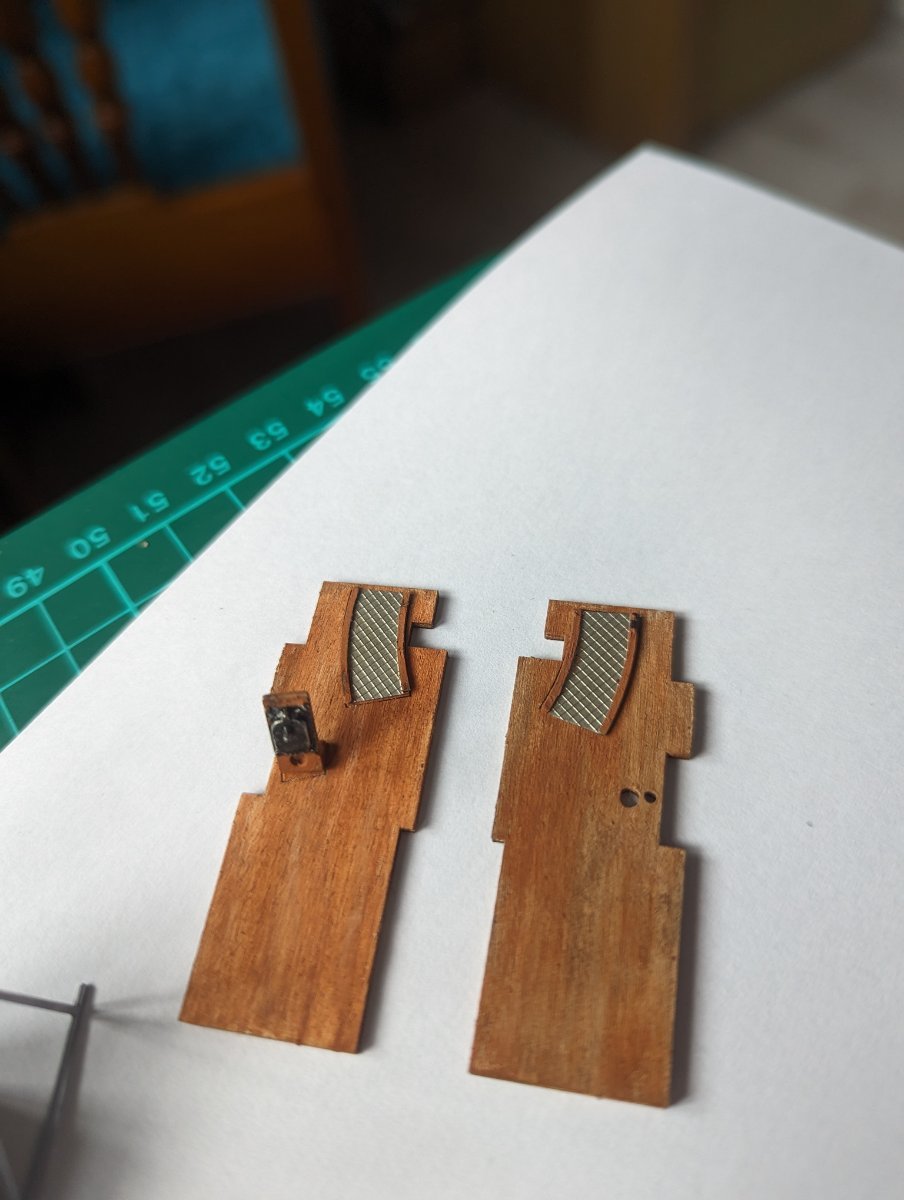
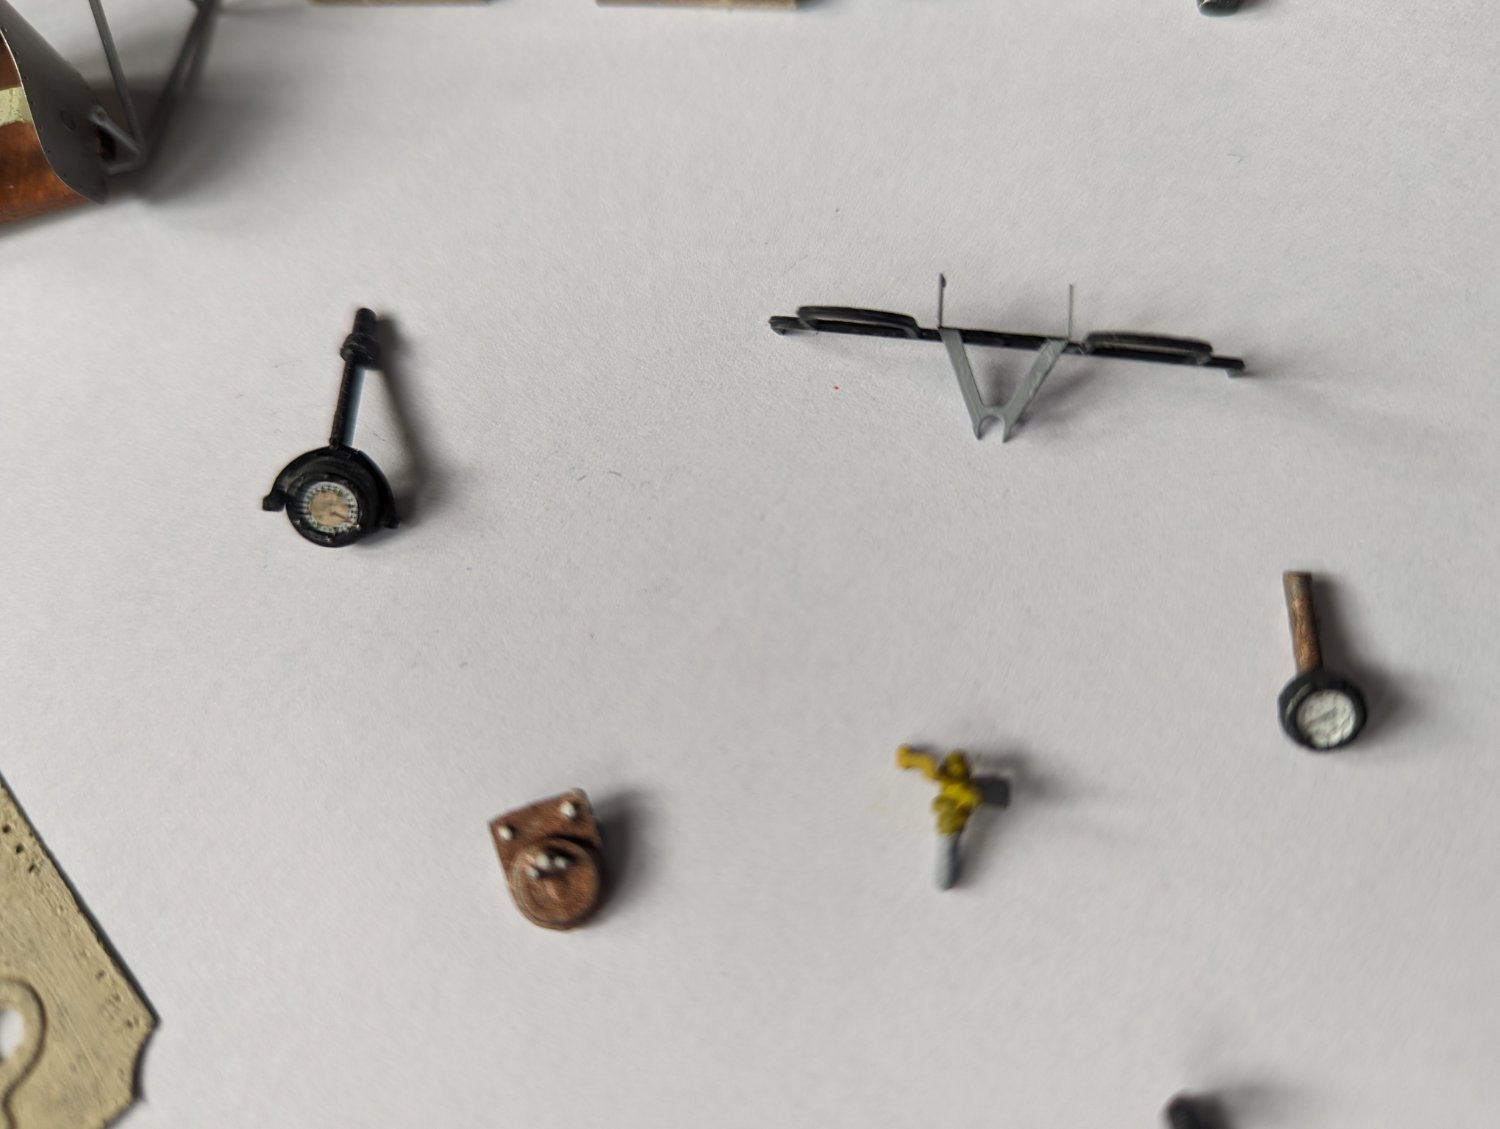
-
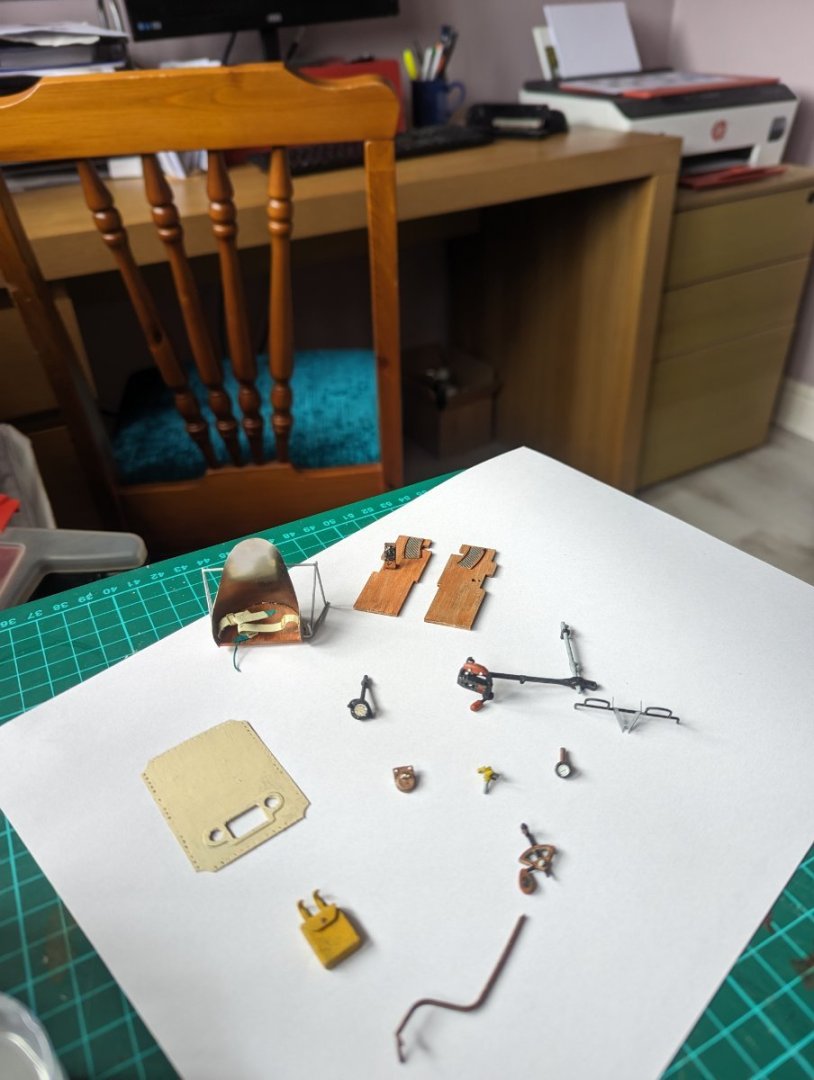
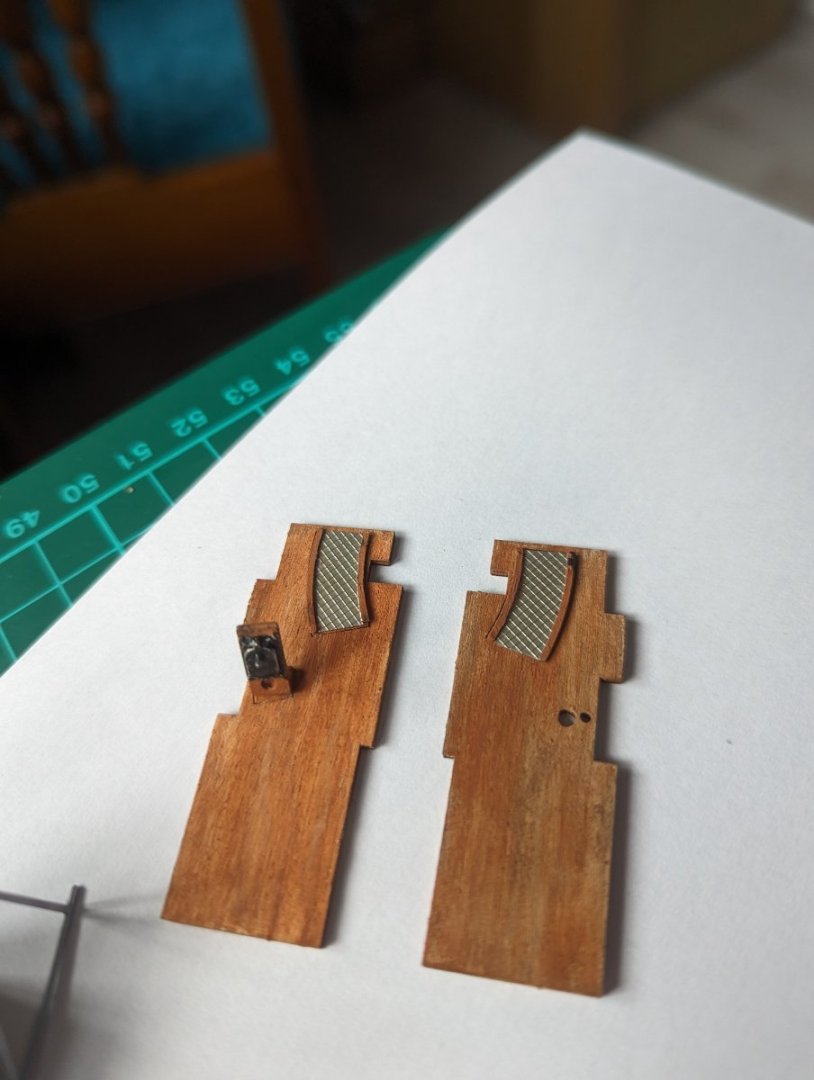
Progress so far. The painting is certainly fine, but very enjoyable. These parts are now set aside, whilst I file, and assemble the fuselage. I have noticed that instead of supplying parts M23 and M24, they have given me 2 x M23. No matter, the cockpit assembly sits on these spars, and instead of pinning the cockpit in, I will glue it to the spar instead. Hope that makes sense!

- 17 replies
-
- 11
-
-
portchieboy reacted to a post in a topic:
Fokker Dr.I by portchieboy - Artesania Latina - 1:16
-
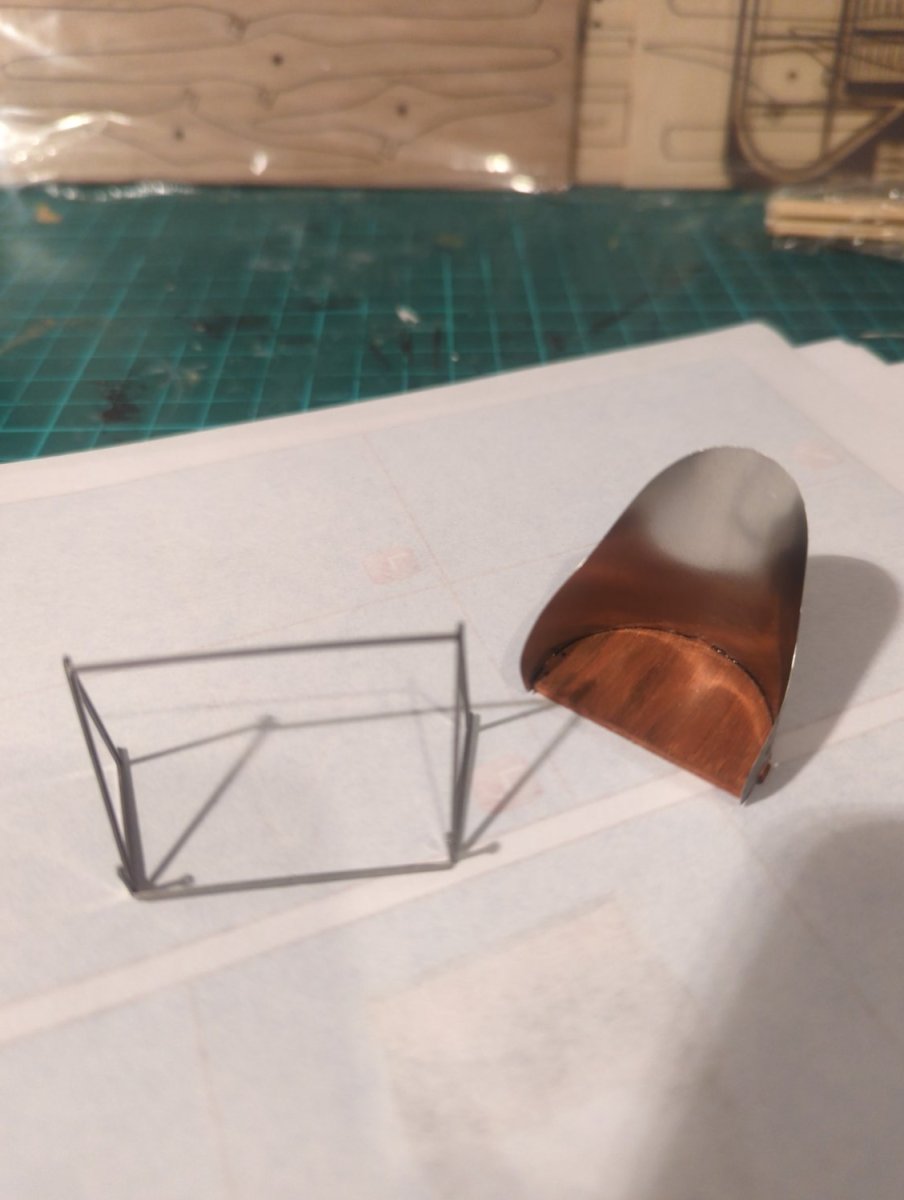
Well, that's the first 2 hours or so! I love the comment on the box, easy to build. Hate to get a difficult one. Never mind, we all like a challenge, that's what makes it fun. Very interesting the transition between wooden models, and metal. I am finding each bend a 'heart in the mouth ' moment. At least with wood, you can craft another piece. Let's just hope there aren't too many accidents.

- 17 replies
-
- 11
-
-
Thanks guys, hope I don't let you down! I think the model will be generic., though the Red Baron will always be in the back of my mind. Re the wood grain, I will have to search YouTube, and practice first!
-
Having completed all projects, I am now to unbox and start on the Fokker. Not done an aeroplane since I was a boy in the ATC, so very different. Also, this is largely a metal kit, so new skills required. I am not generally good at keeping up with blogs, so I promise I will try and keep things up to date. So wish me luck, and speak soon!
-
portchieboy reacted to a post in a topic:
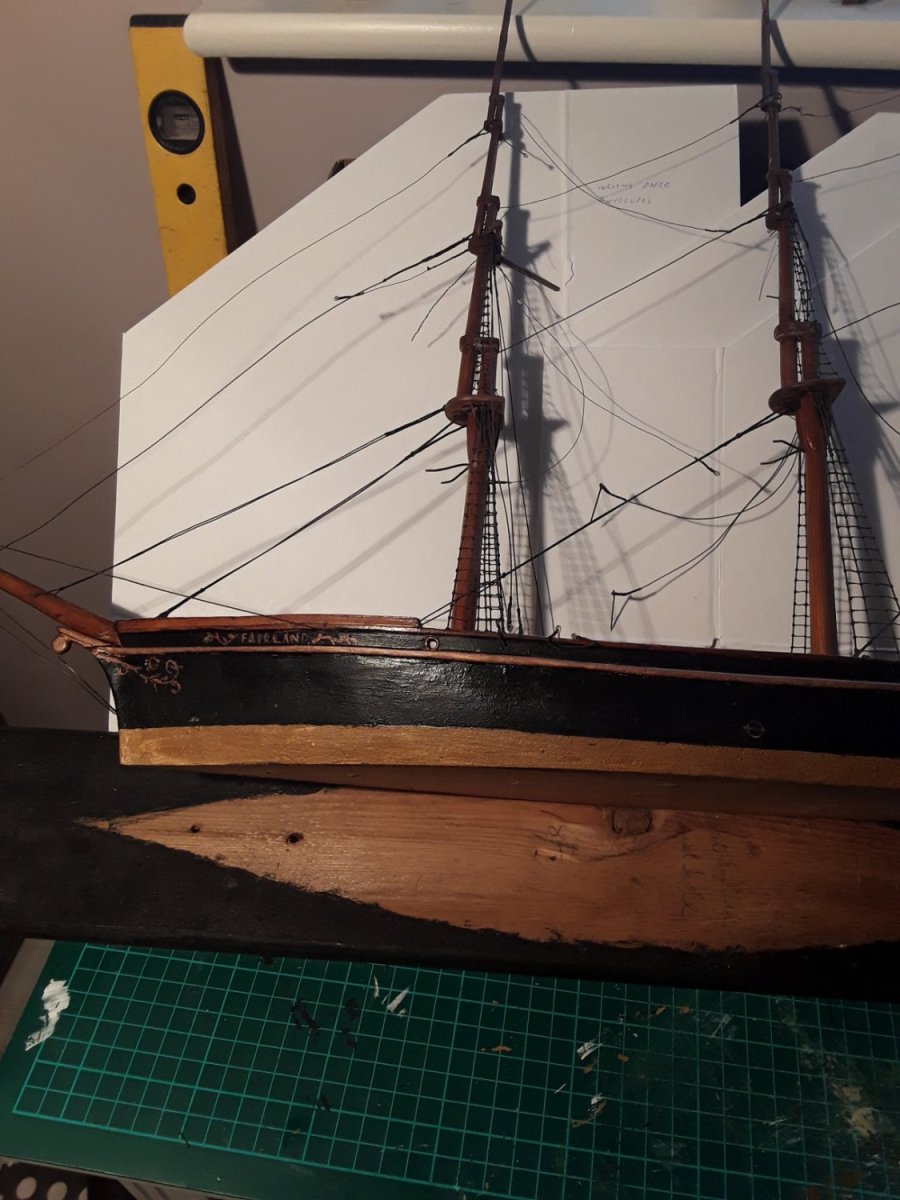
Fairland by portchieboy - RESTORATION - old wooden model presumed to be Clipper from late 19thC
-
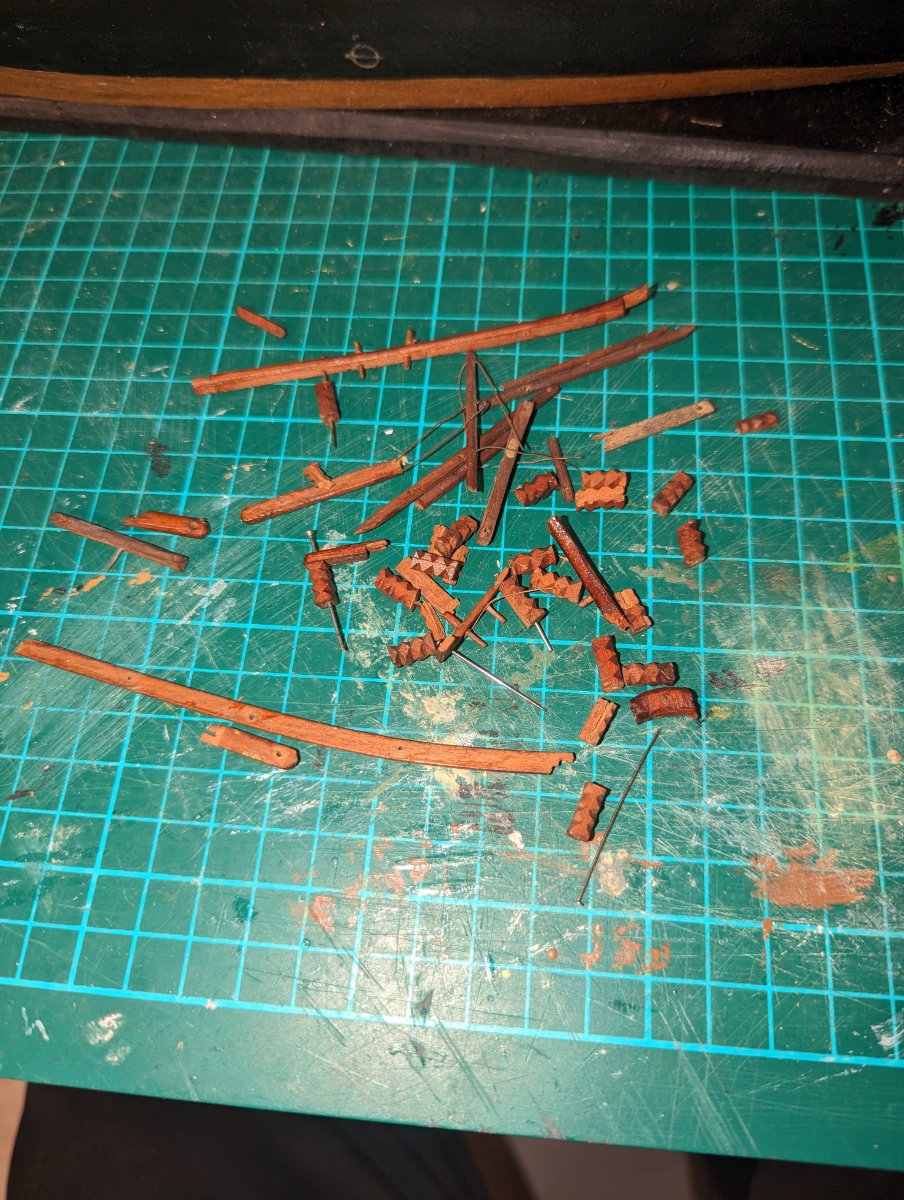
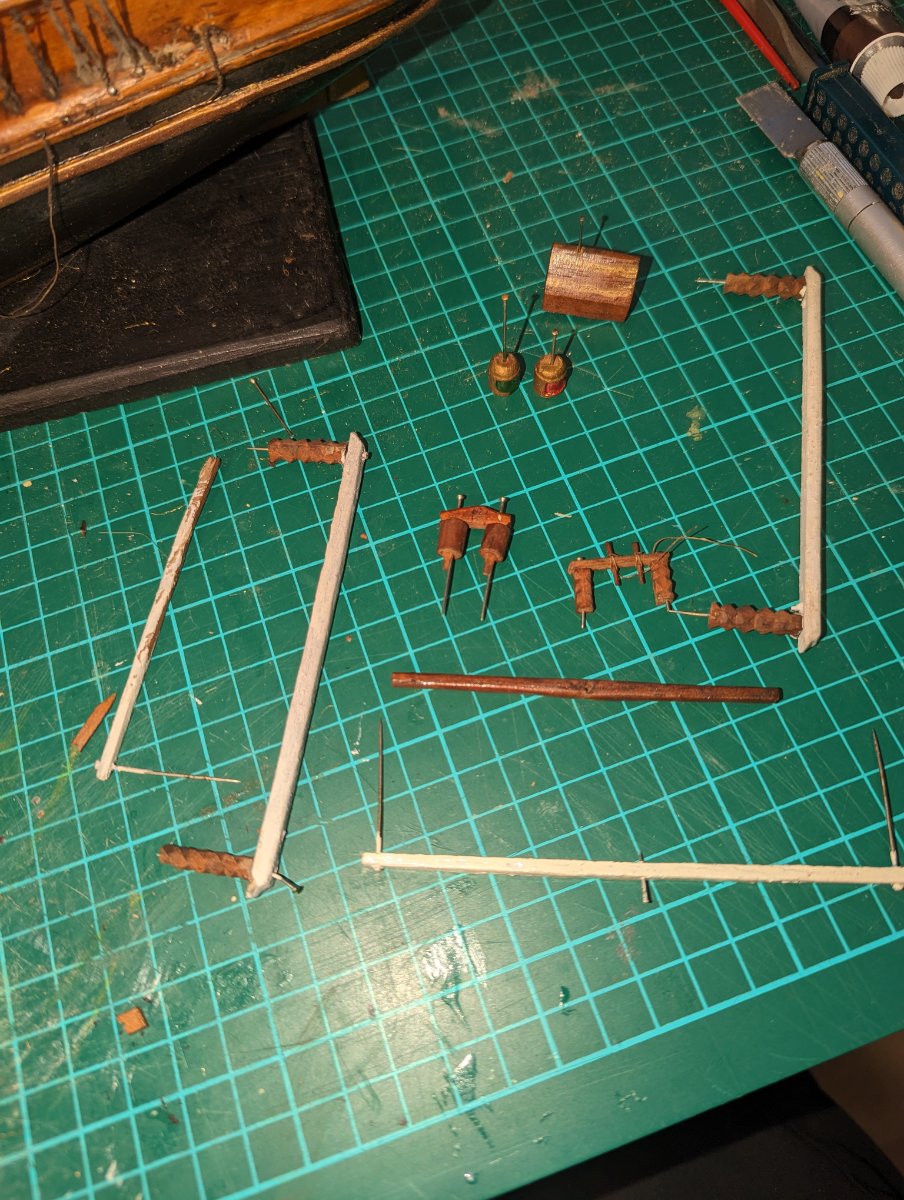
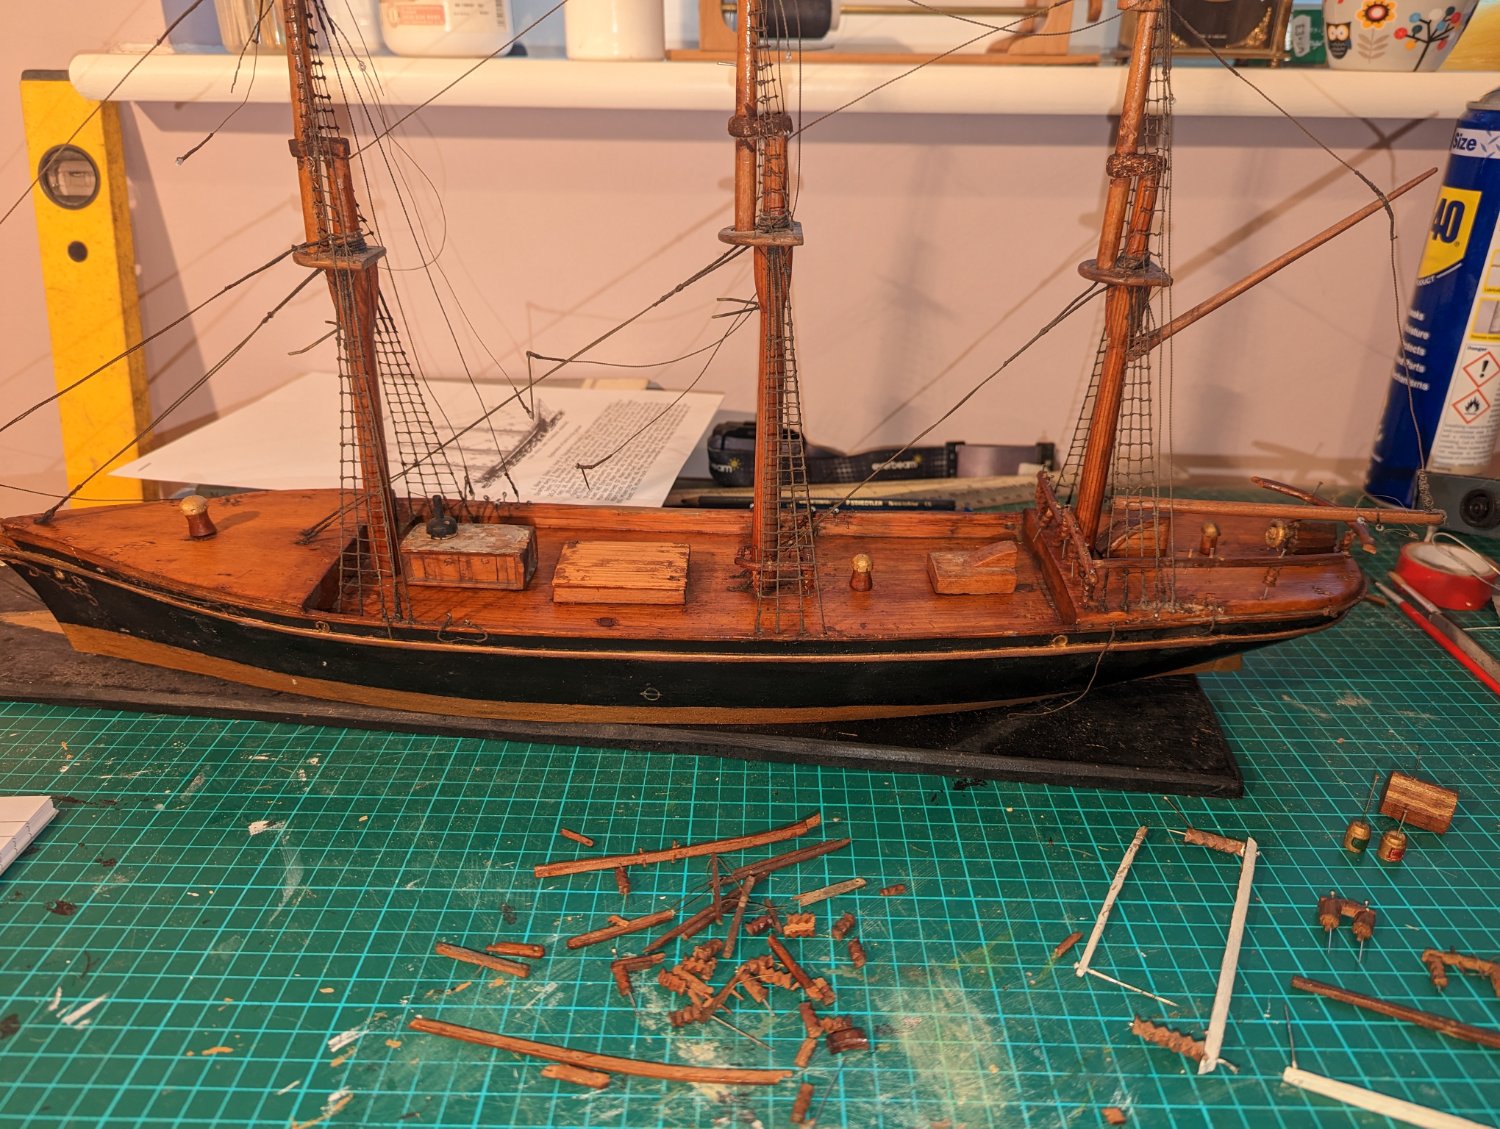
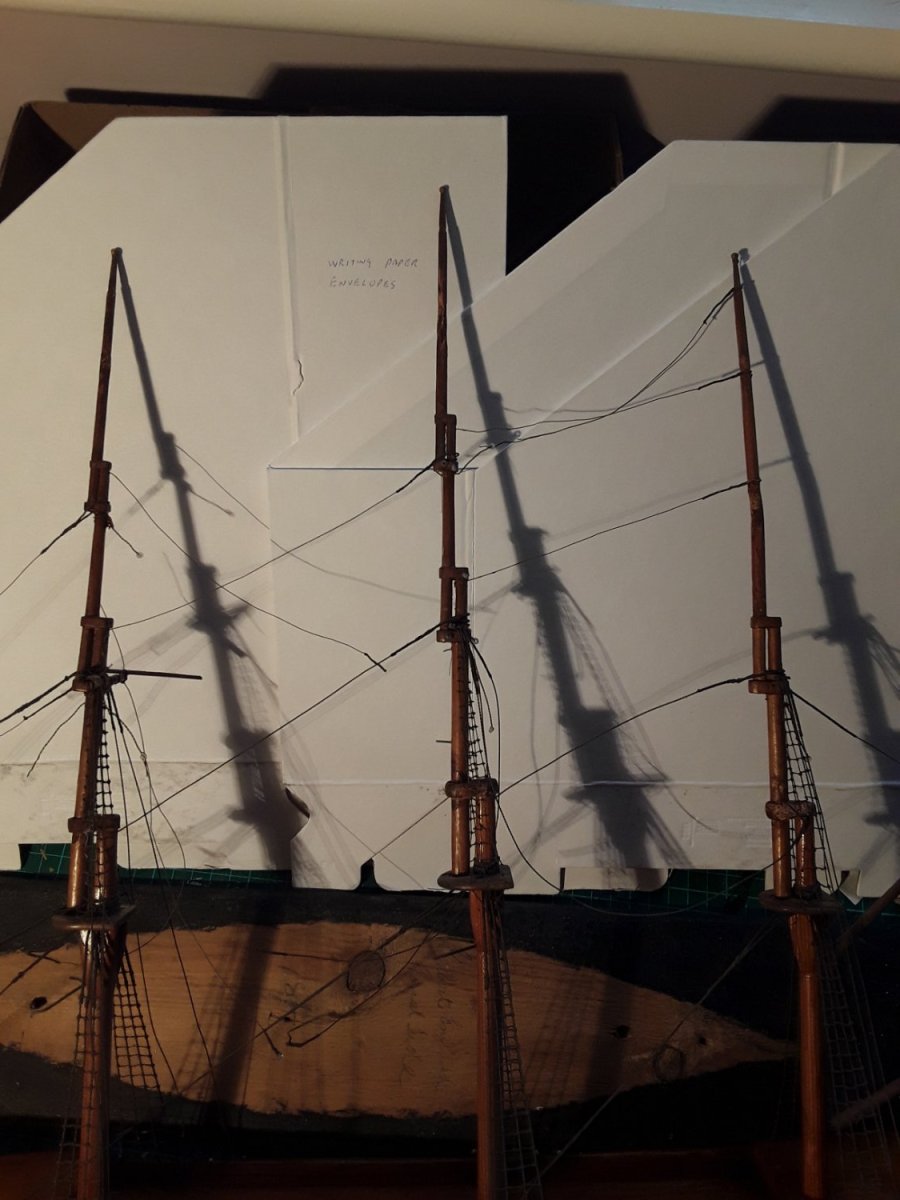
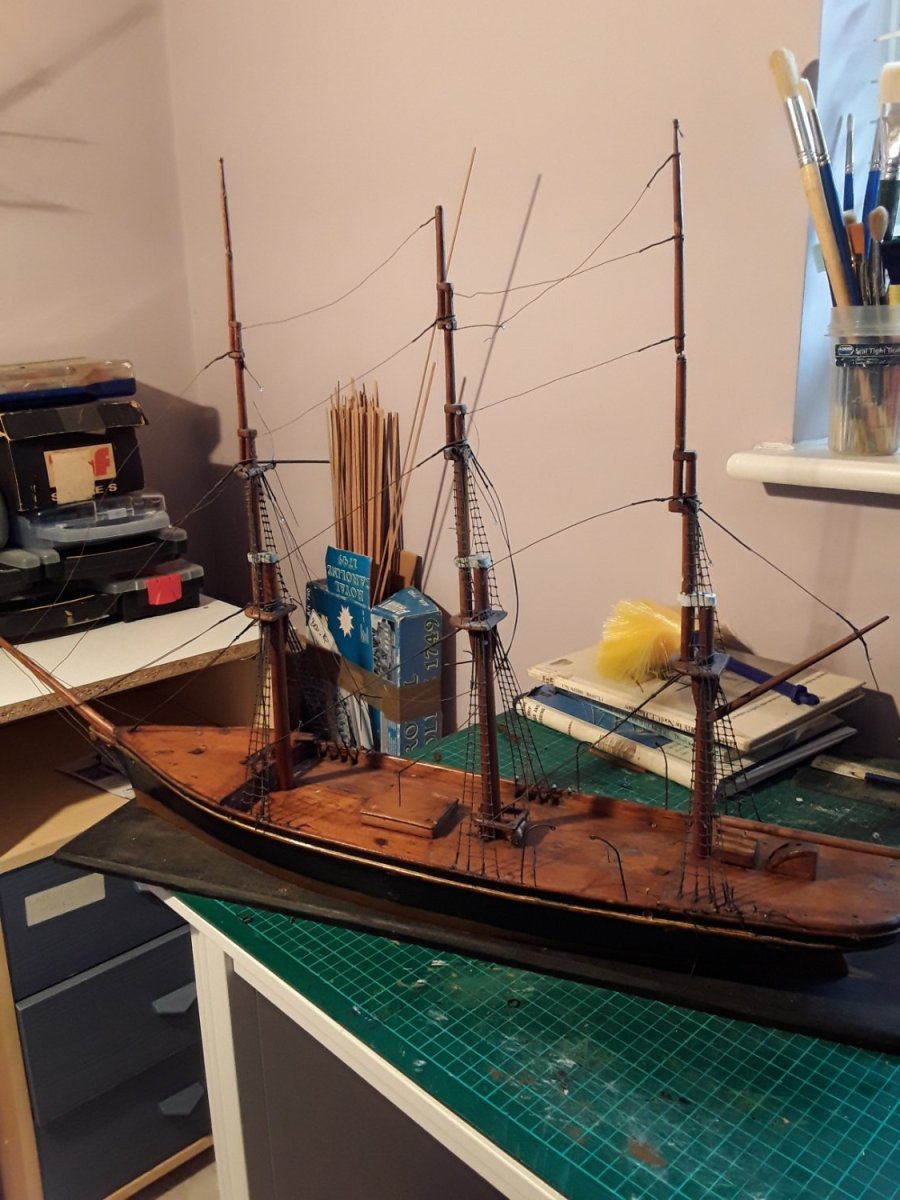
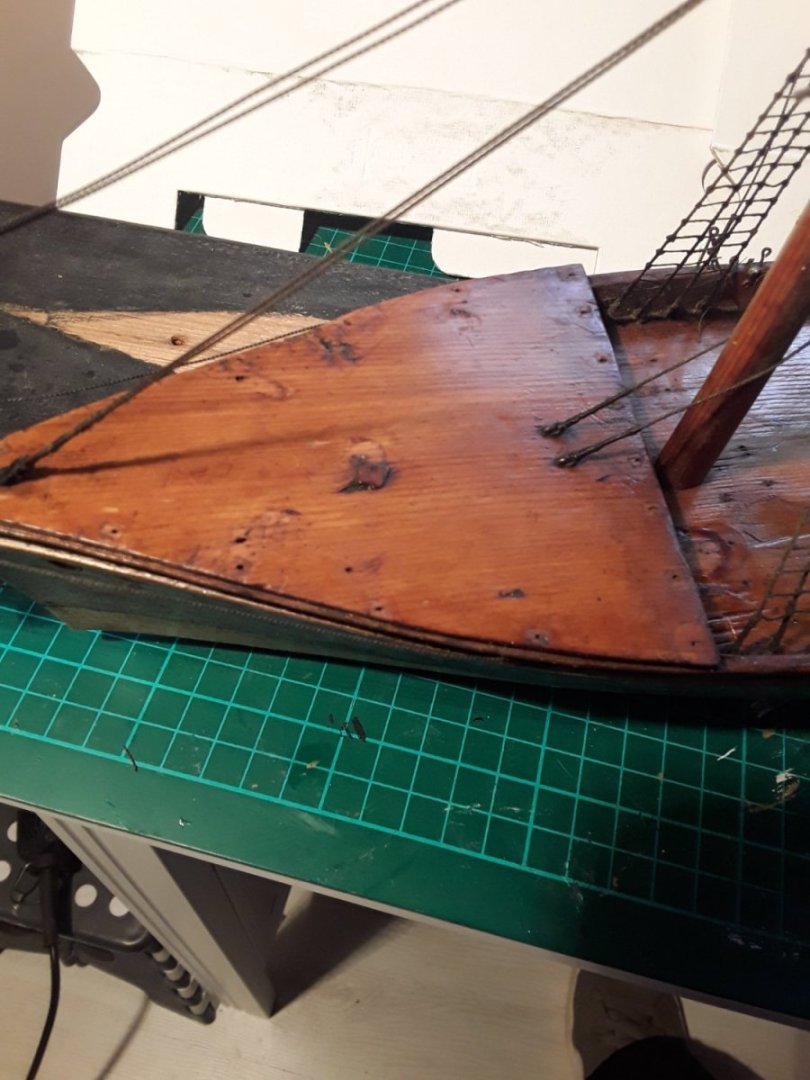
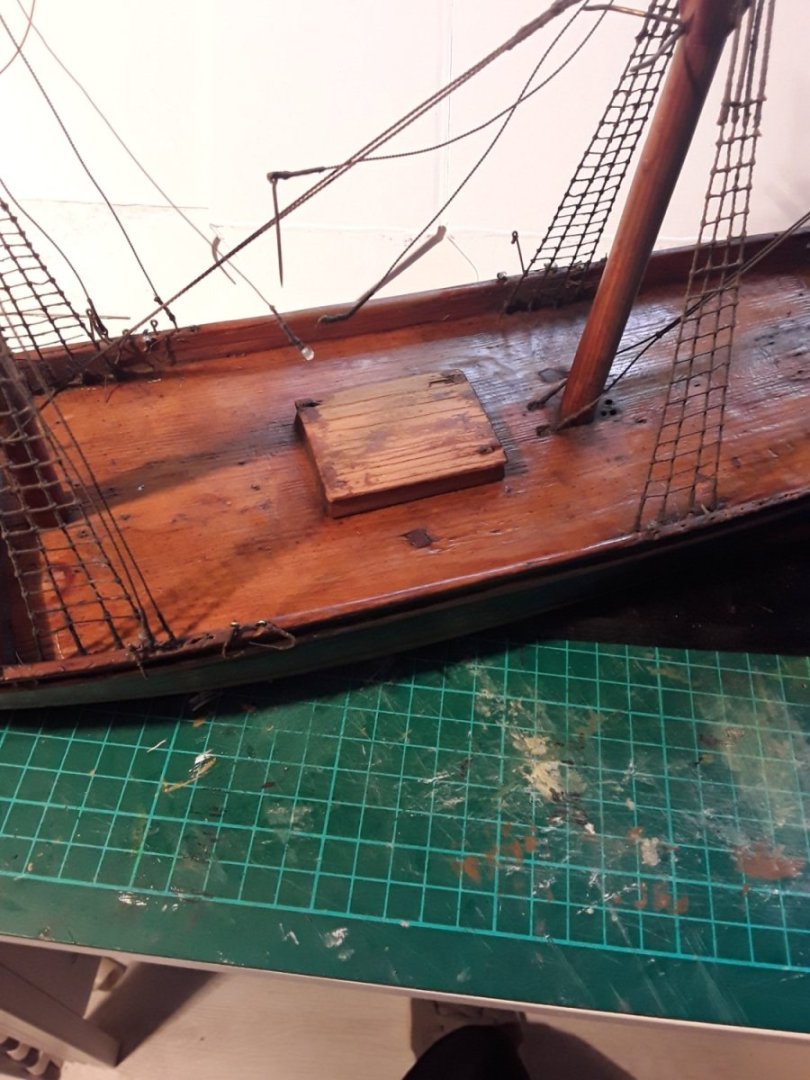
Getting on, now looking for the correct placement of the deck. I have placed the parts I would think to be correct, and in pic 3 have those left over. On top of that, there are both the remaining rails, a lot of which will need re making. I now would like please confirmation or otherwise of my thoughts, and any other comments.


-
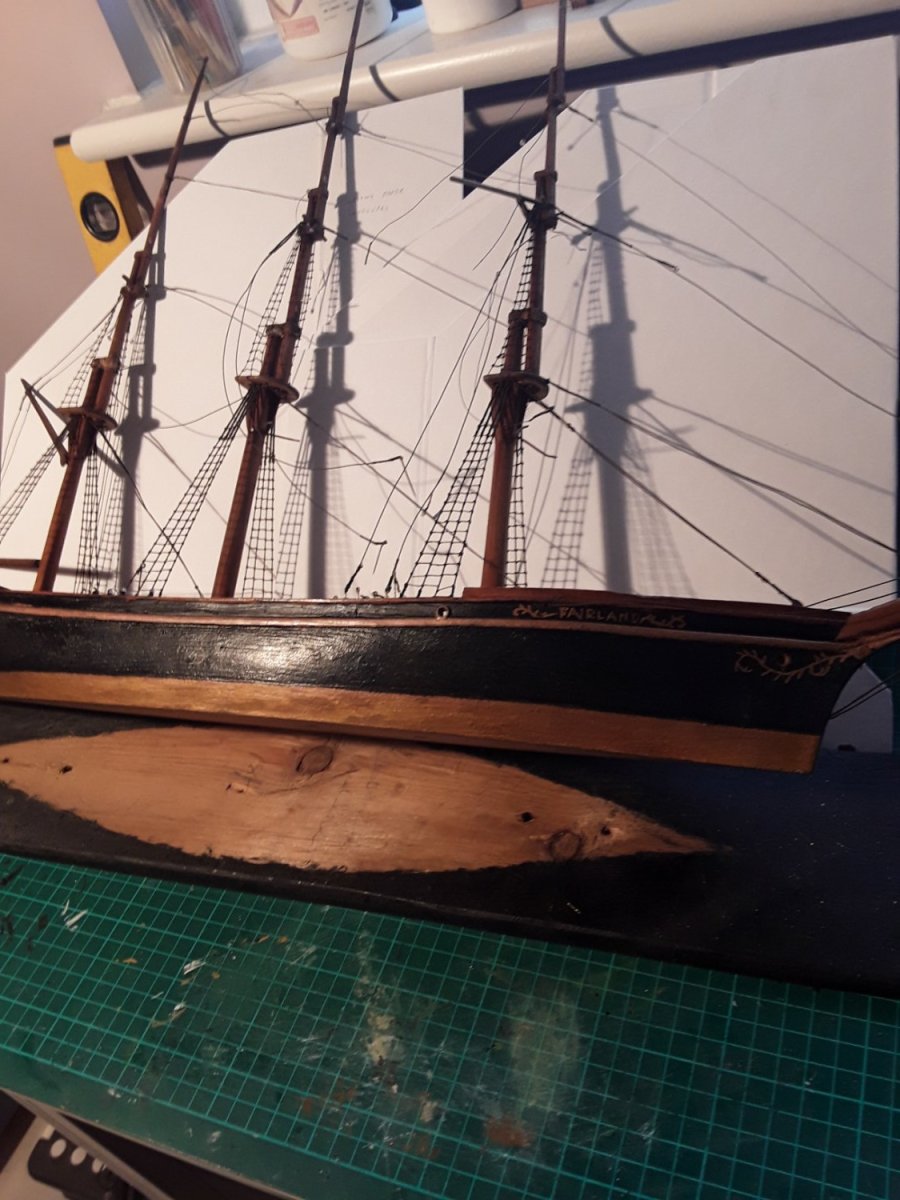
Some more work finished. I have tidied up the hull painting, I have filled and mended all 3 masts, though the mizzen mast has a slight kink. Nothing to be done, it will be hidden in due course by the 7 spars! Have cleaned up and re oiled the decks, again have not sanded right down so as to keep the spirit of the original. I must now look at the deck furniture, rails and general bits and Bob's.


-
Thanks Keith. Totally appreciate what you say, and why. However, I am doing this on behalf of a friend of mine. We had a chat much along these lines, ie based on whether this was purely a restoration with minimal interference, or a rebuild. The ship has deep family and sentimental roots to him. If it were to be dismantled and completely rebuilt, he feels it would not hold the same memories. Also, I know from the general condition that by dismantling, the masts would not survive complete, neither for example the ratlines. Hence why I am generally cleaning rather than sanding and repainting, and putting back the jigsaw puzzle 'along the lines' of a contemporary ship, but still with 21 spars for example, as supplied to me. Thanks again, everyones comments and suggestions are valued.
-
After a few months, I have now completed the Victory, so am ready to move on to the Fairland. I intend to clean up the decks and masts, tighten up the rigging and then restore the deck areas. I can then move up, add to the standing rigging and start the spars etc. Any ongoing help and comments much appreciated.