MORE HANDBOOKS ARE ON THEIR WAY! We will let you know when they get here.
×

Mike_In_RI
-
Posts
276 -
Joined
-
Last visited
Content Type
Profiles
Forums
Gallery
Events
Everything posted by Mike_In_RI
-
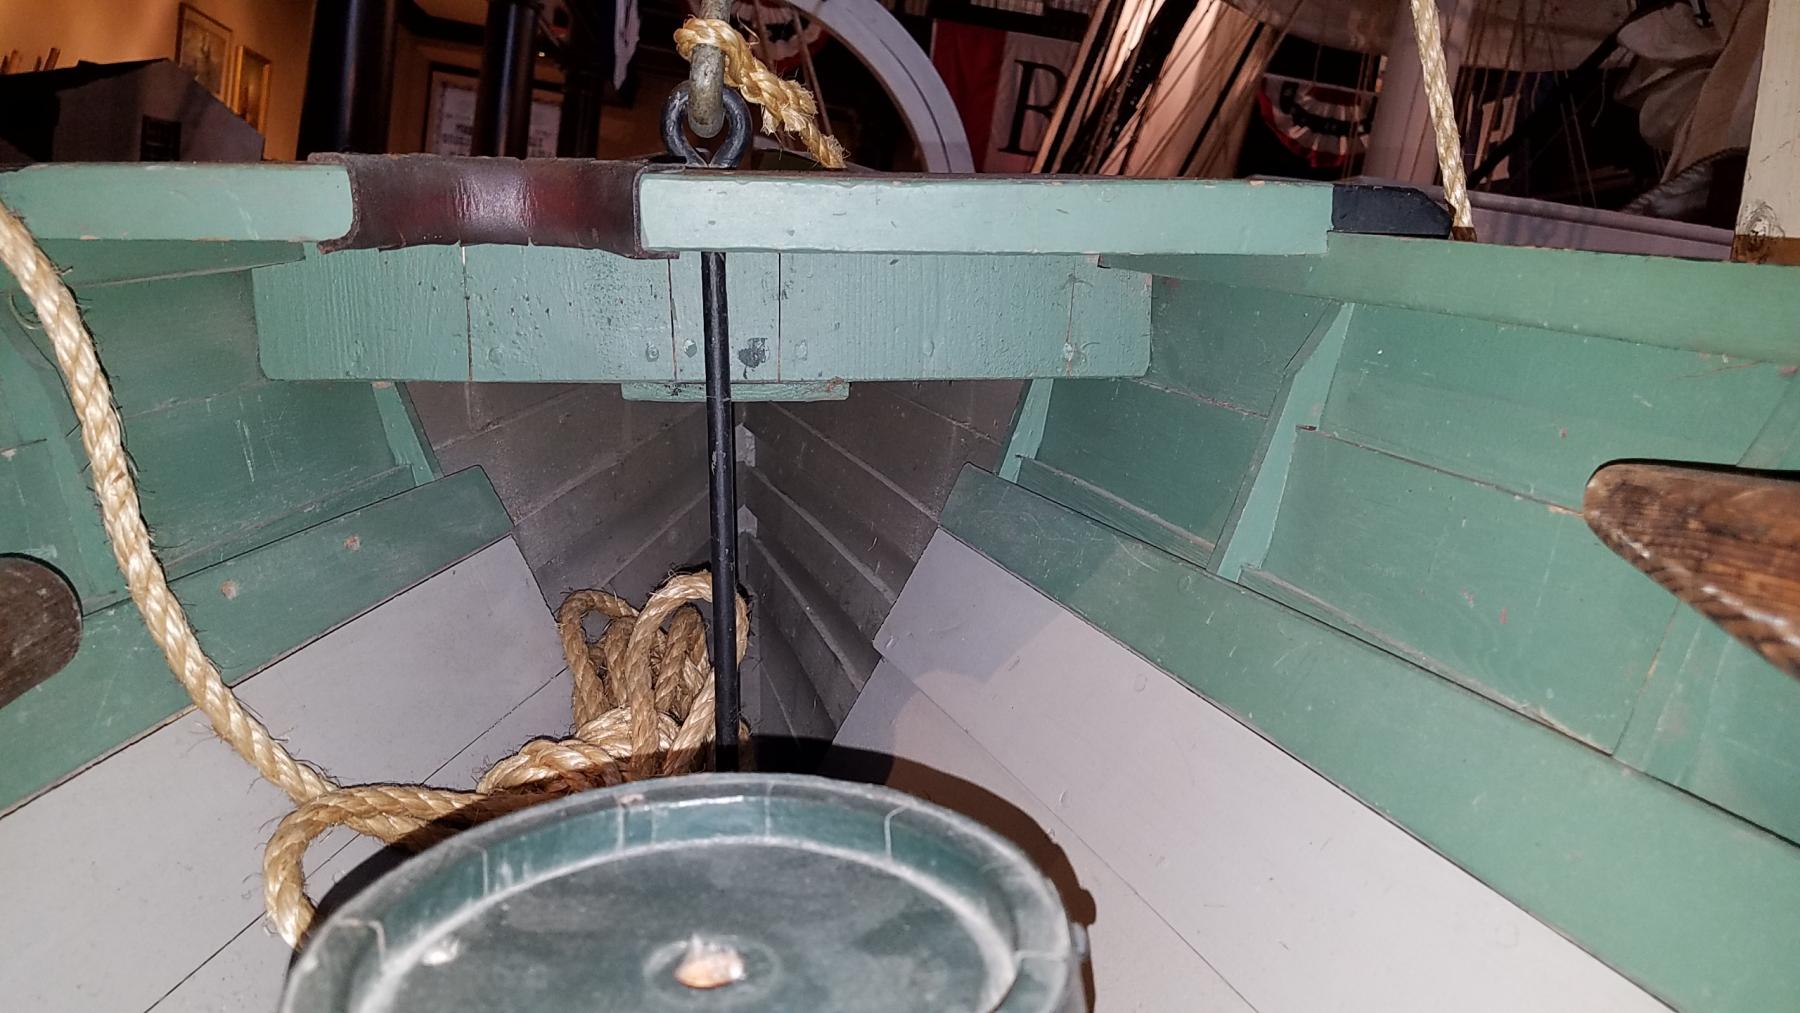
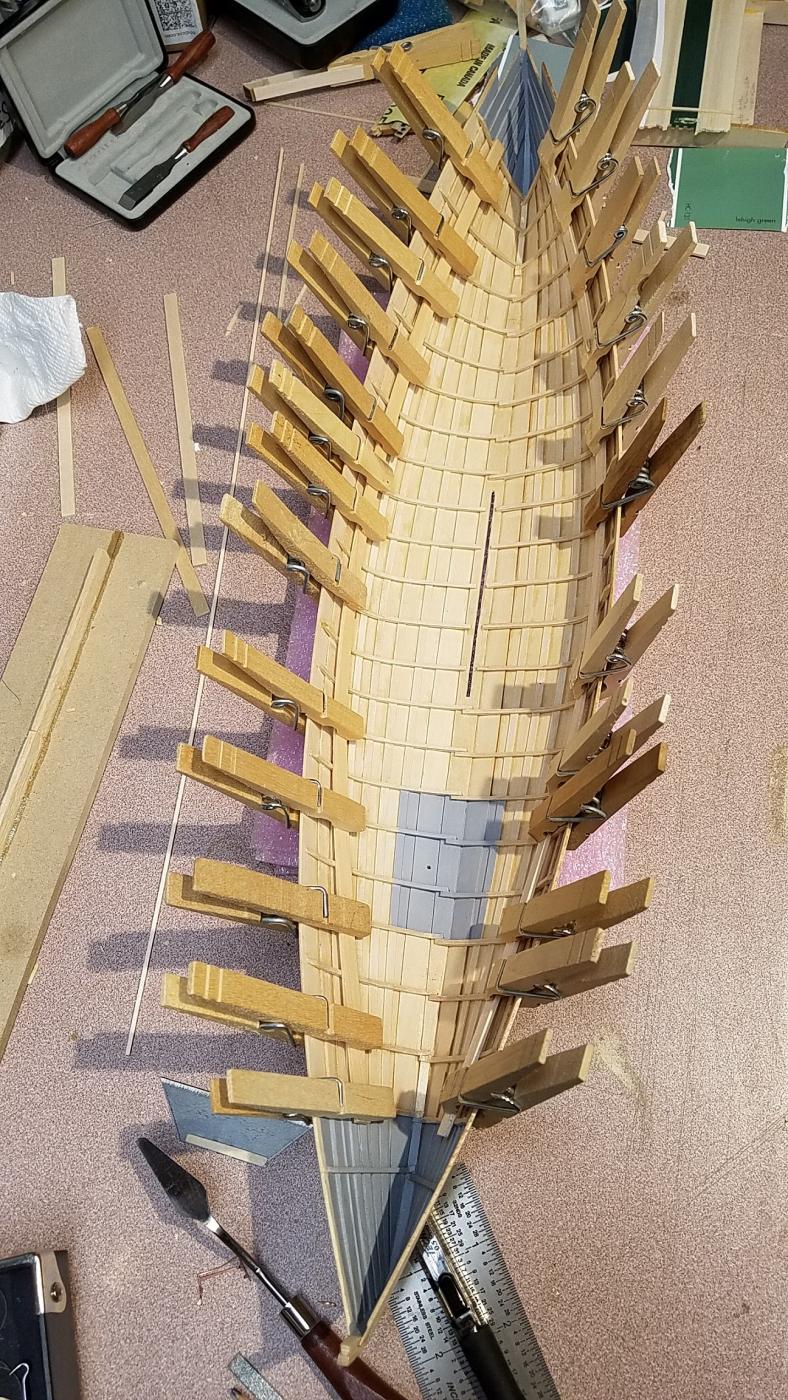
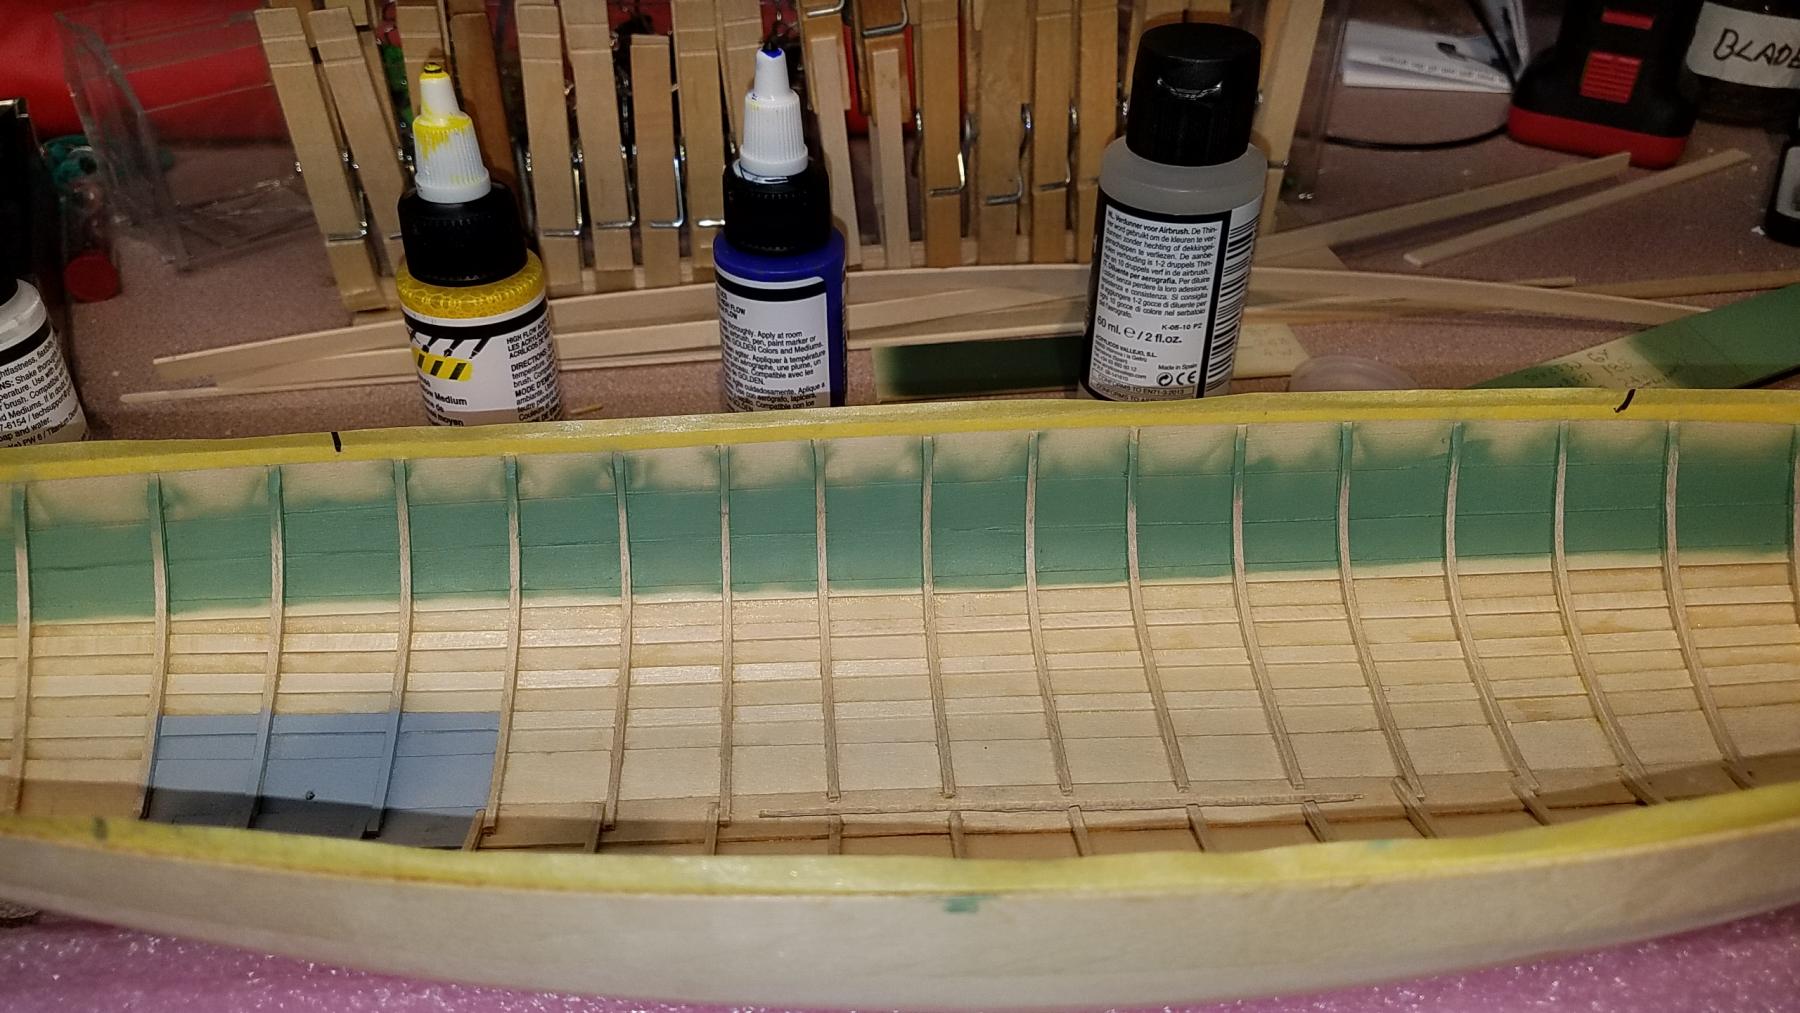
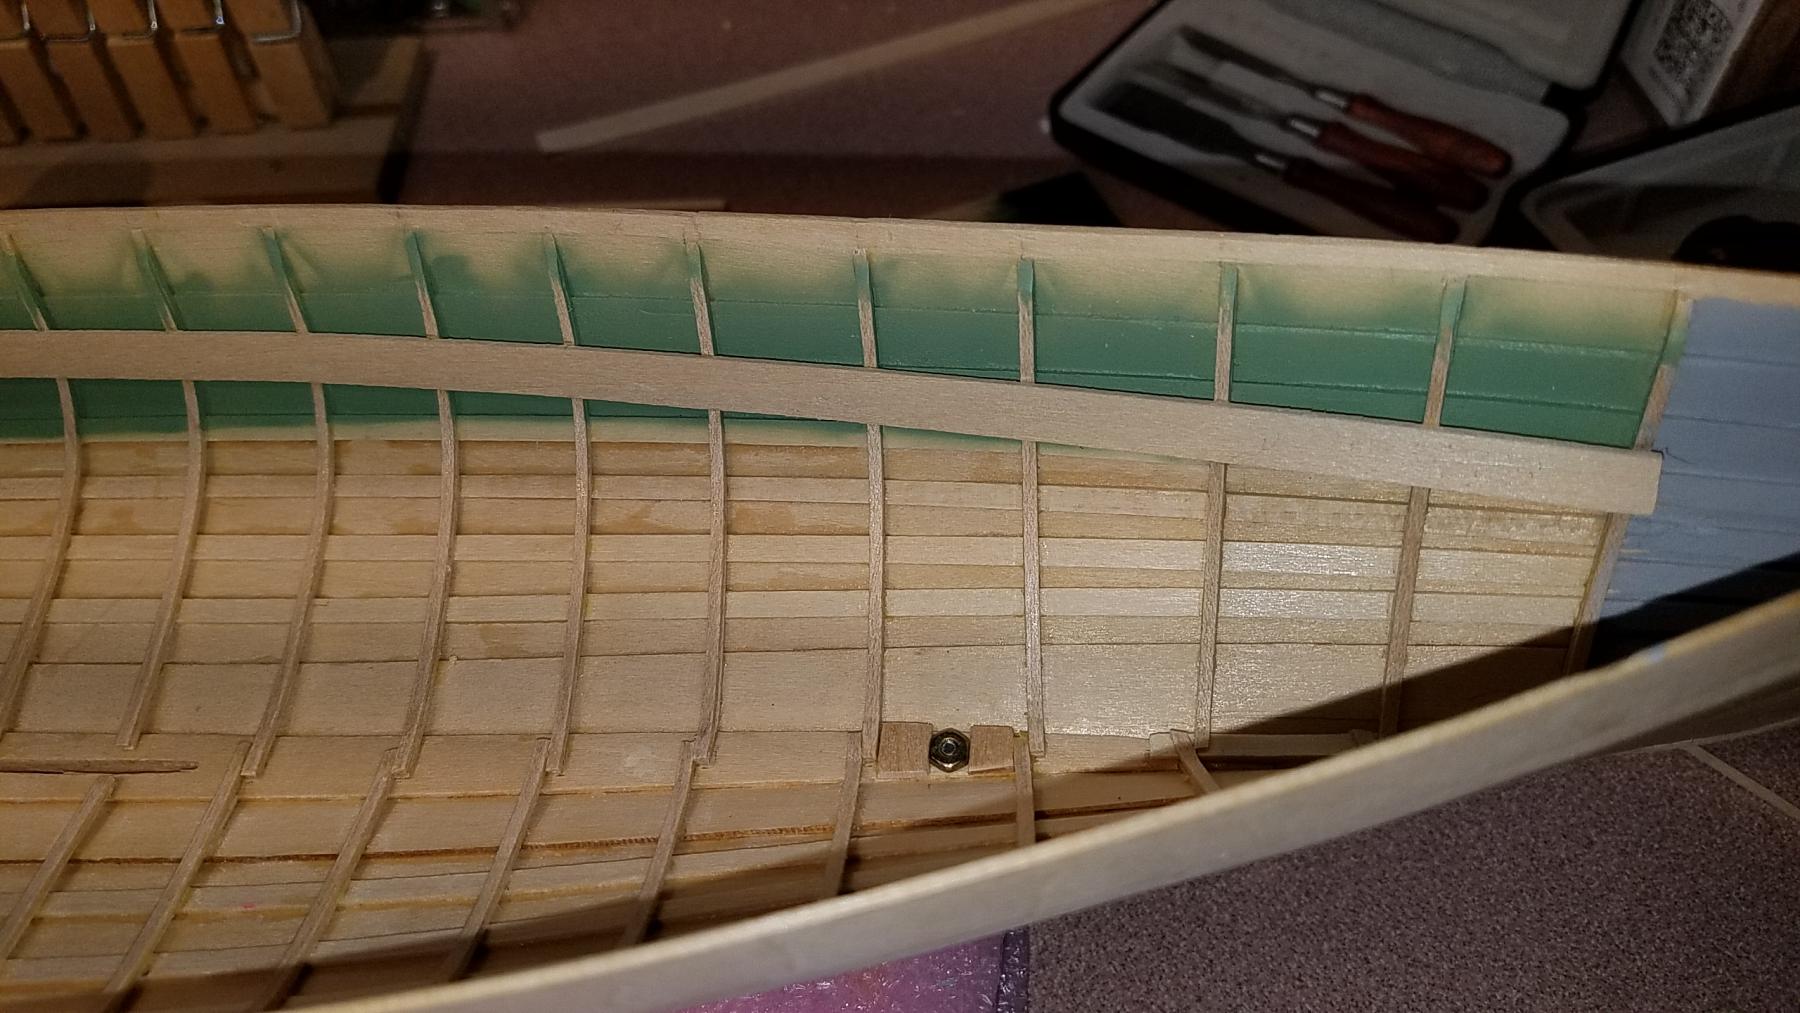
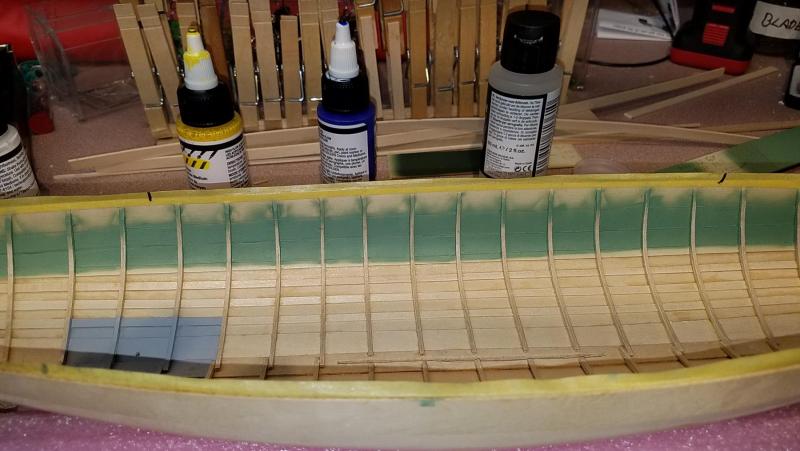
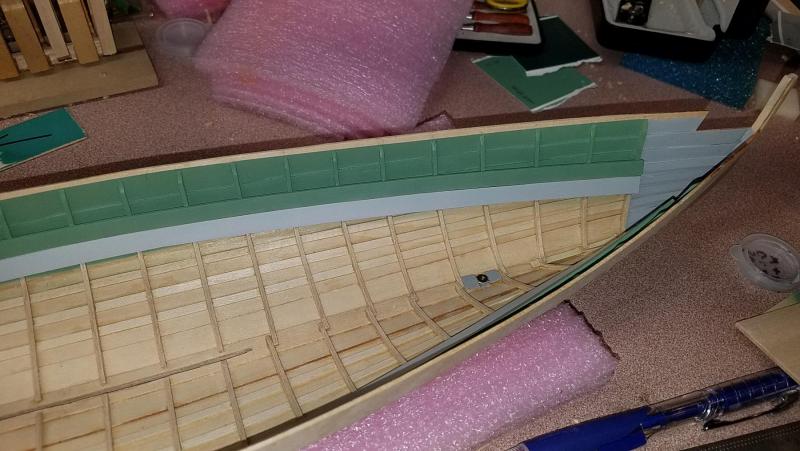
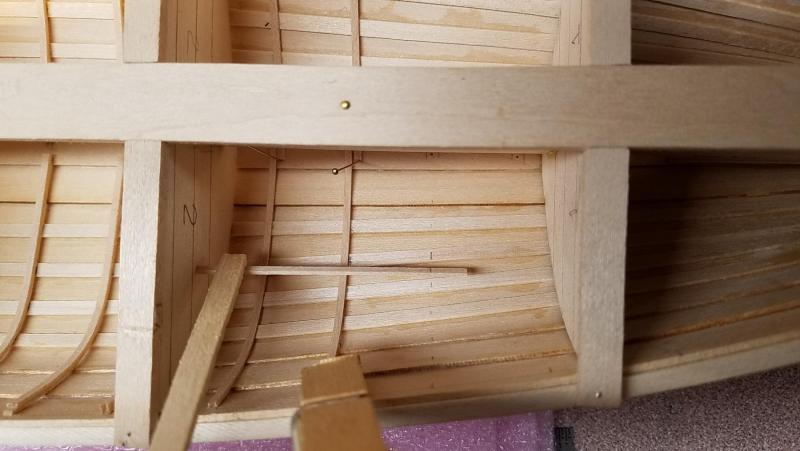
 John and Steve, I decided to airbrush as much as possible as I need the practice. Most of the time was spent on mixing paints to get the right color... or at least as close as possible.... counting drops of paint! Sanding was difficult in the hull interior in the tight stem and stern areas. That's the area that had most of the glue squeeze out. Here are the latest log shots. The thwart risers were too stiff to clamp and holds while maintaining the required position for the height of the thwarts so they were soaked in water for 10 minutes and clamped while drying. This is and interior shot of the subject whaleboat at the New Bedford Museum: This shot shows light green airbrushed in the area behind the not yet attached thwart risers. I tried a few different ways to mask the individual frames for the gluing process. It was taking too much time so I end up airbrushing over them and scraped the paint off afterward. Thwart risers attached: Here, the thwart risers were airbrushed in place. The ceiling planks were airbrushed first then attached. .... on to the centerboard.....


- 128 replies
-
- 4
-

-
- model shipways
- new bedford whaleboat
- (and 1 more)
-
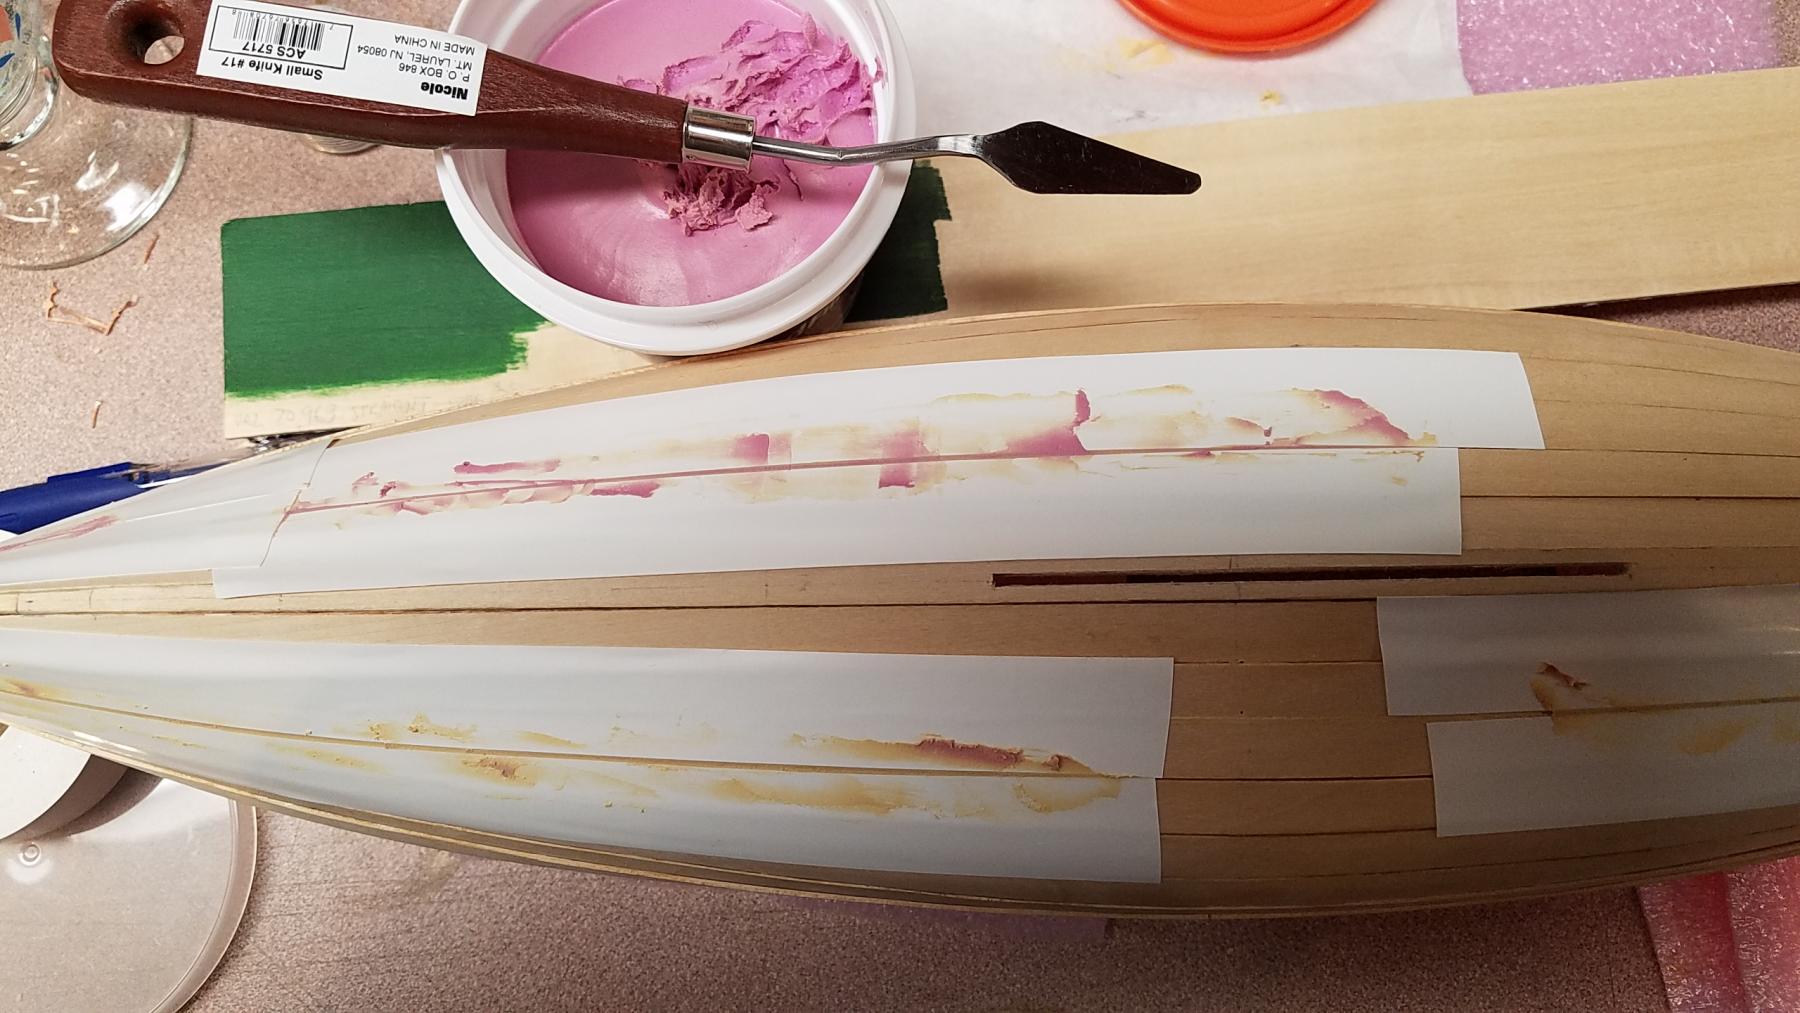
The hull is sanded inside and out. Sanding inside the hull was torture as I was reluctant to use the sanding/sealer before the frames were installed.... worrying the adhesive would not bond as strongly. So, with the frames in, I then used the sanding sealer and sanded in between all those little sections. In any case, that's behind me now. I like the look of the plank lines in the hull rather than having a totally smooth surface but in some cases the gaps were a larger than wanted. I used straight Elmer's Wood Filler to fill the gaps along with vinyl electric tape for masking and a clay knife to work in the filler. The knife is run perpendicular to the tape. The tape provides a little edge to scrape the filler across like scrapping something off the bottom of your shoe . Also, the vinyl tape can take the curves without wrinkling. A small scraper smooths out the excess nicely. The thwart riser height should be measured carefully as per the plans and guide. Thwarts 4 & 5 need to land right on top of the centerboard case. I'm still waiting for the exterior and interior hull paints to arrive for mixing colors to match the chips. In the meantime, the stem, stern and bailing well area was hand painted grey. At this point, I'm unsure if I should airbrush or hand paint the inwales area. Mike


- 128 replies
-
- 3
-
-
- model shipways
- new bedford whaleboat
- (and 1 more)
-
Thanks Pat & Steve. Don't forget.... all comments welcome. I'm just getting back into this and "don't know what I don't know" yet. Just yesterday, I dragged my (very patient) wife to the New Bedford Whaling museum with a pocket full of paint samples to get as close as I can to the inside and outside hull colors I need. Today, I'll do some mixing but am still waiting for some Vallejo paints to arrive in the mail. In the meantime I'm going to test some of the copper etched nails that came with the kit. They look a little out of scale and there were only 100 pieces that came with the kit. So, I might just skip them on this model and save nailing for the next model. Maybe there are better ways to simulate the nails ... a little more homework to do.... Mike
-
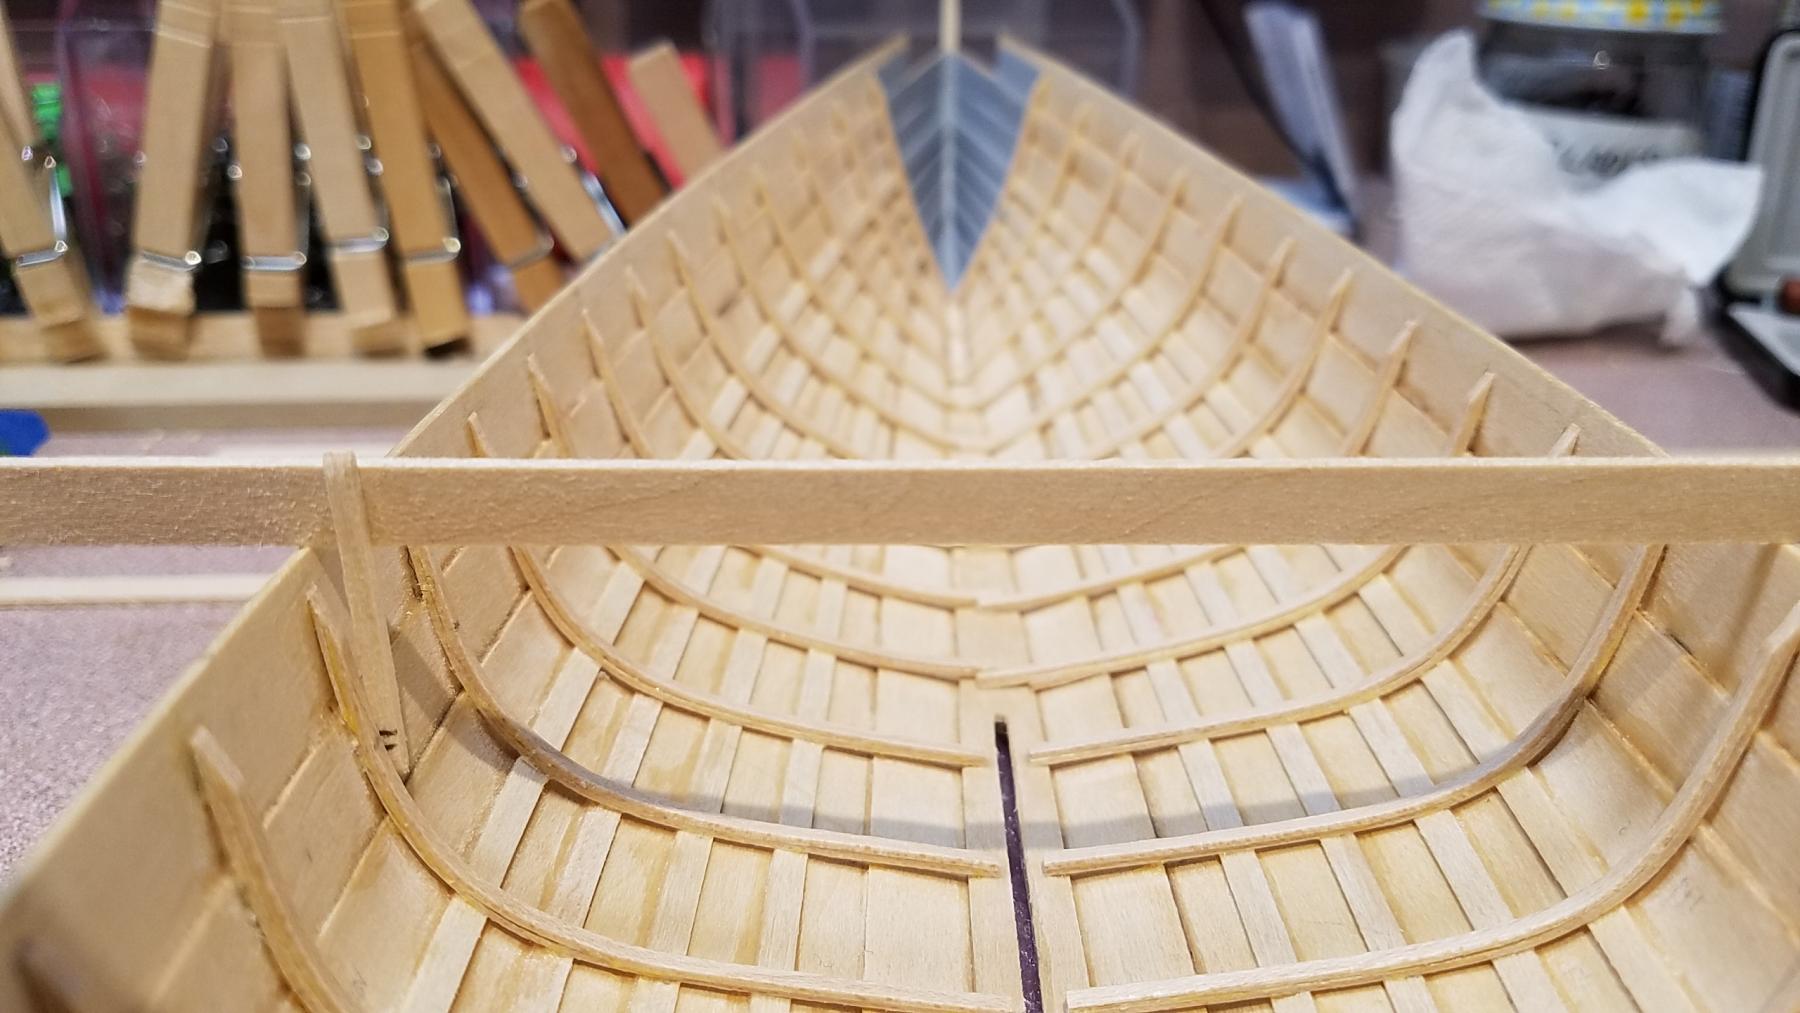
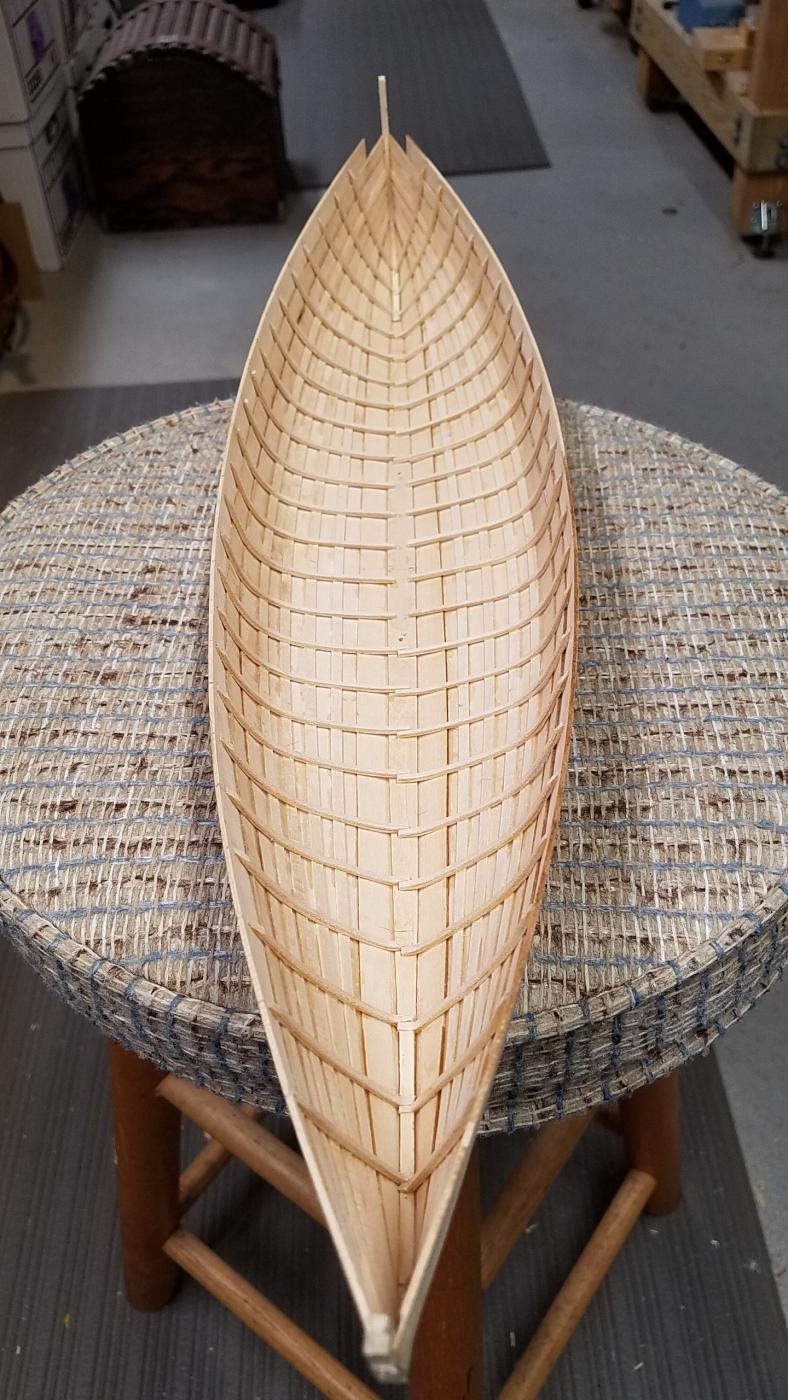
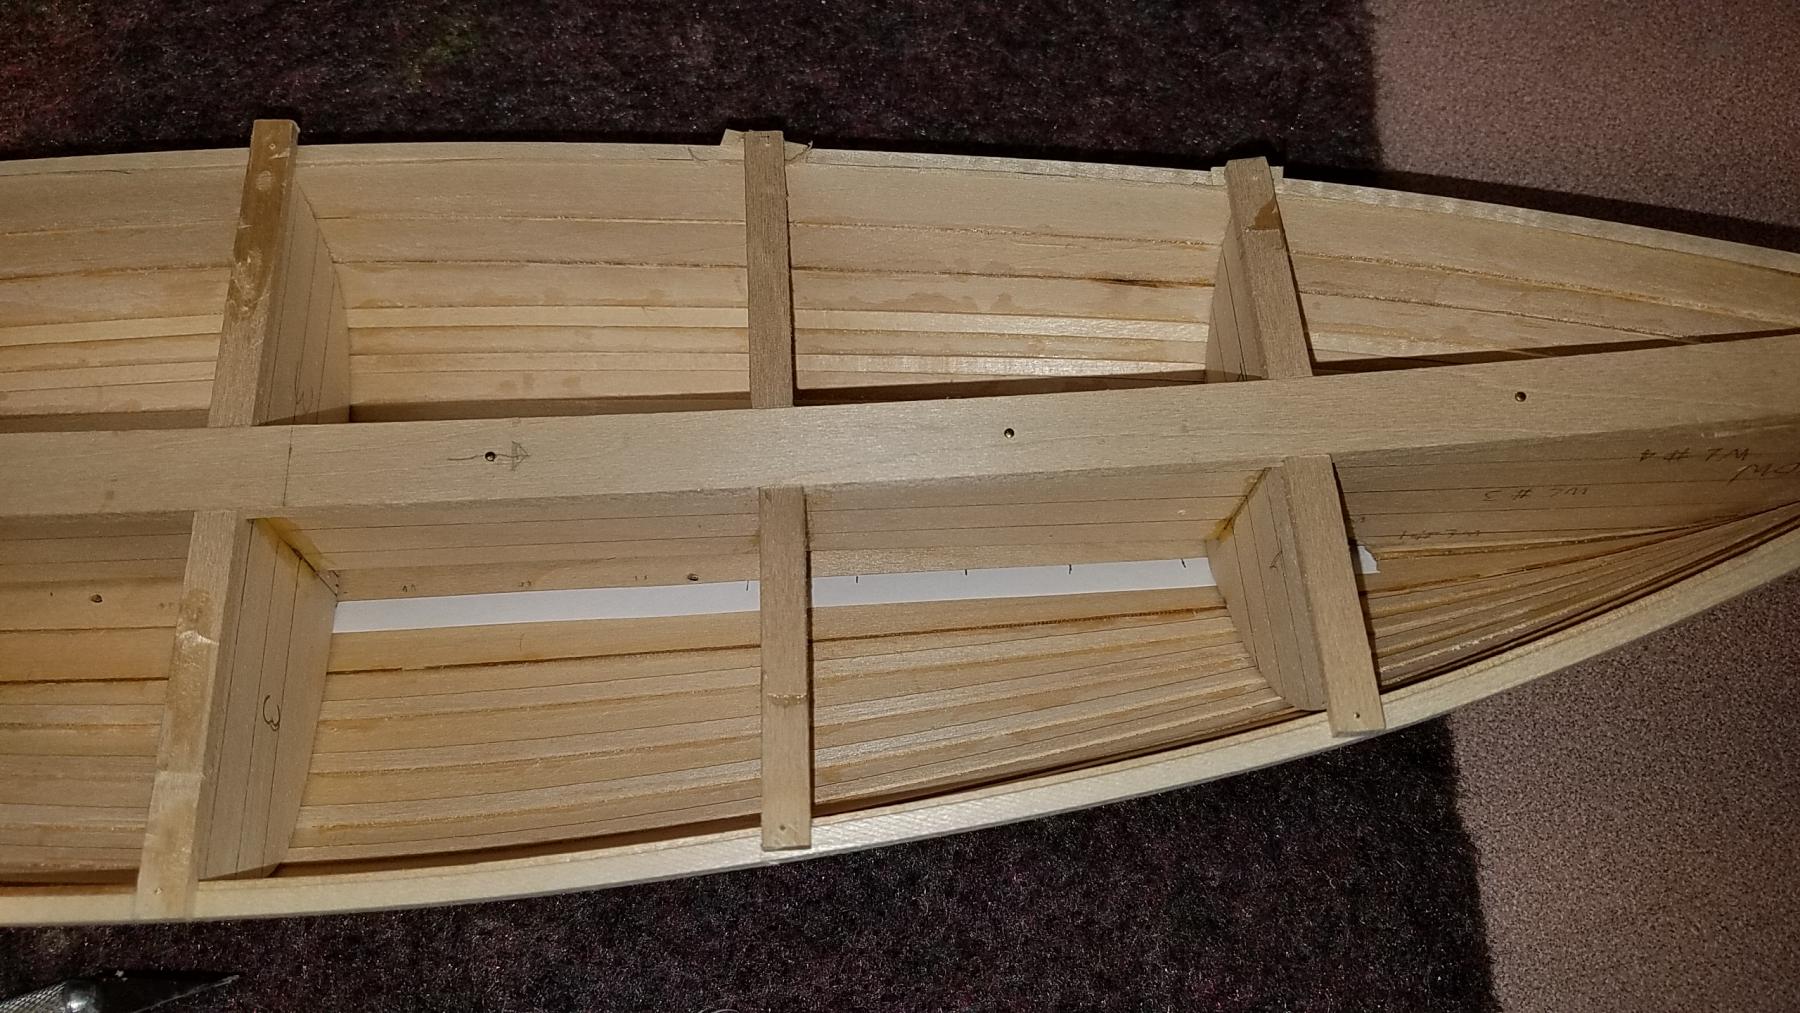
This site has been a great resource for narrowing down paint products and methods. The last time I airbrushed had to have been 15 years ago and I was way behind the times regarding the use of acrylic paints. thinners, etc. I've settled on this sequence for the whaler paint job. Comments are welcome .. I need all the help I can get: Interior hull ... Two brush coats of Minwax water based sander sealer with sanding in between. Then airbrush the interior hull color as much as I can reach. Paints ... I can easily get Golden Artistic paints for both airbrushing and brushing. There is a good color match to the exterior hull green but the other colors would need to be mixed. I can get just a few Vallejo Model Air and Model Color colors locally and more online but it looks like I'll need to mix them as well. It may simply come down to how easily one or the other will airbrush. Same prep for the exterior hull, then airbrushing the dark green planking and hand brushing the sheer and gunwales. Topcoat... flat varnish(?). Here is the hull when first popped out of the mold. It was stuck at first from a spot of glue between the hull and one of the molds. It finally came out with a scary POP but all was well. Instead of the recommended pins, I tack glued a piece of basswood to simulate the centerboard. It was easier then pinning and the subsequent trimming of the frames to fit. Pins were used for the rest of the job. If I were to do it over again, I would have pre-drilled the keel for the pins. Retro note here from 2/12/17: To make things a little easier later while positioning the thwart #4, note that the aft of the centerboard slot will determine the position of the aft of the centerboard case. The aft of the #4 thwart should line up (see plans) with the aft of the centerboard case. That all being done should place the ends of the thwart between two frame timbers, avoiding extra carving of the thwart. I tried several ways to mark out the frame positions before gluing. The center sections are not difficult to mark accurately but the outer sections are curved too much in my opinion to use a divider or spacer held against the hull. This little spacer is held perpendicular to a mold for each measurement and made it easier to mark with a pencil. The frames are in and beveled at the top near the inwales. I used 1/32" x 1/16" MAPLE laminations instead of the provided basswood. The kit provides basswood but the build manual suggested holly or maple and I was curious about using other woods. I was pleasantly surprised how nice the maple worked for the frames in that they bent very easily and did not get as "fuzzy" as basswood when wet and worked into the bend.


- 128 replies
-
- 6
-
-
- model shipways
- new bedford whaleboat
- (and 1 more)
-
Thanks Steve. Those white circles will drive me crazy. It's not mentioned in the build guide although I'll re-read it to make sure I didn't miss it. I'm taking a break from building anything into the inner hull until I research more on the sequencing of sealing/painting/etc. Mike
-
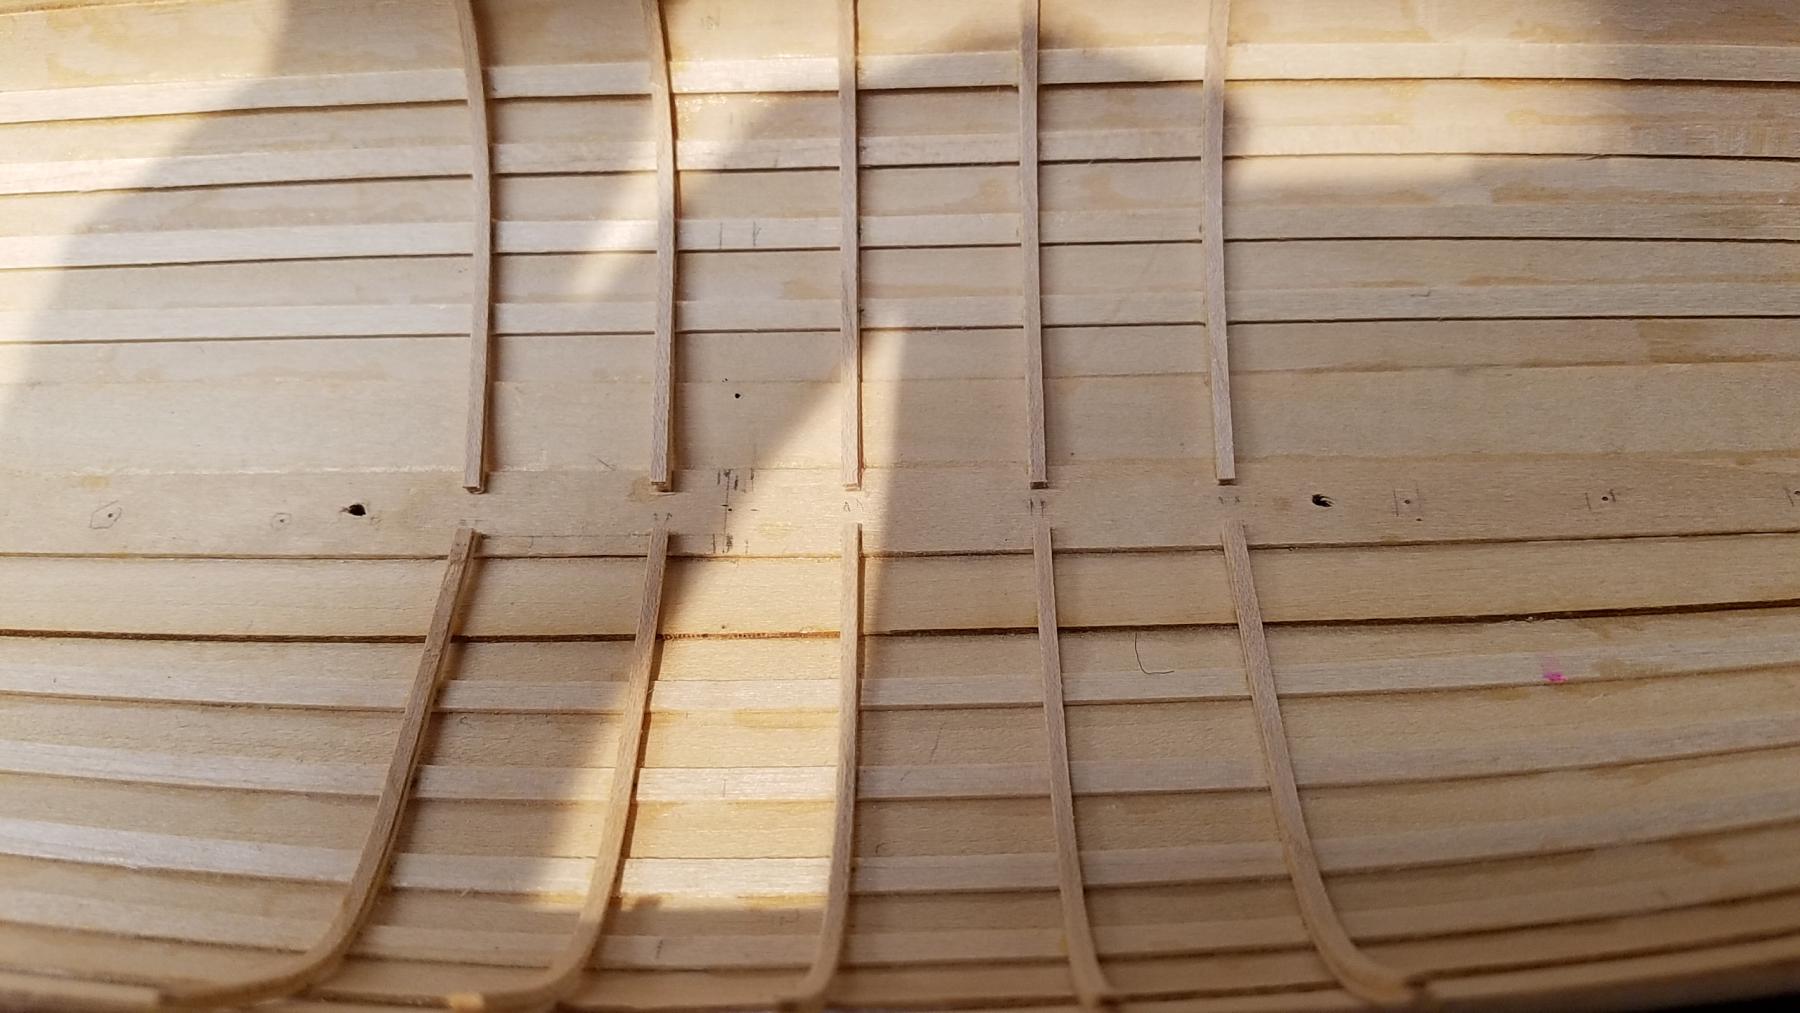
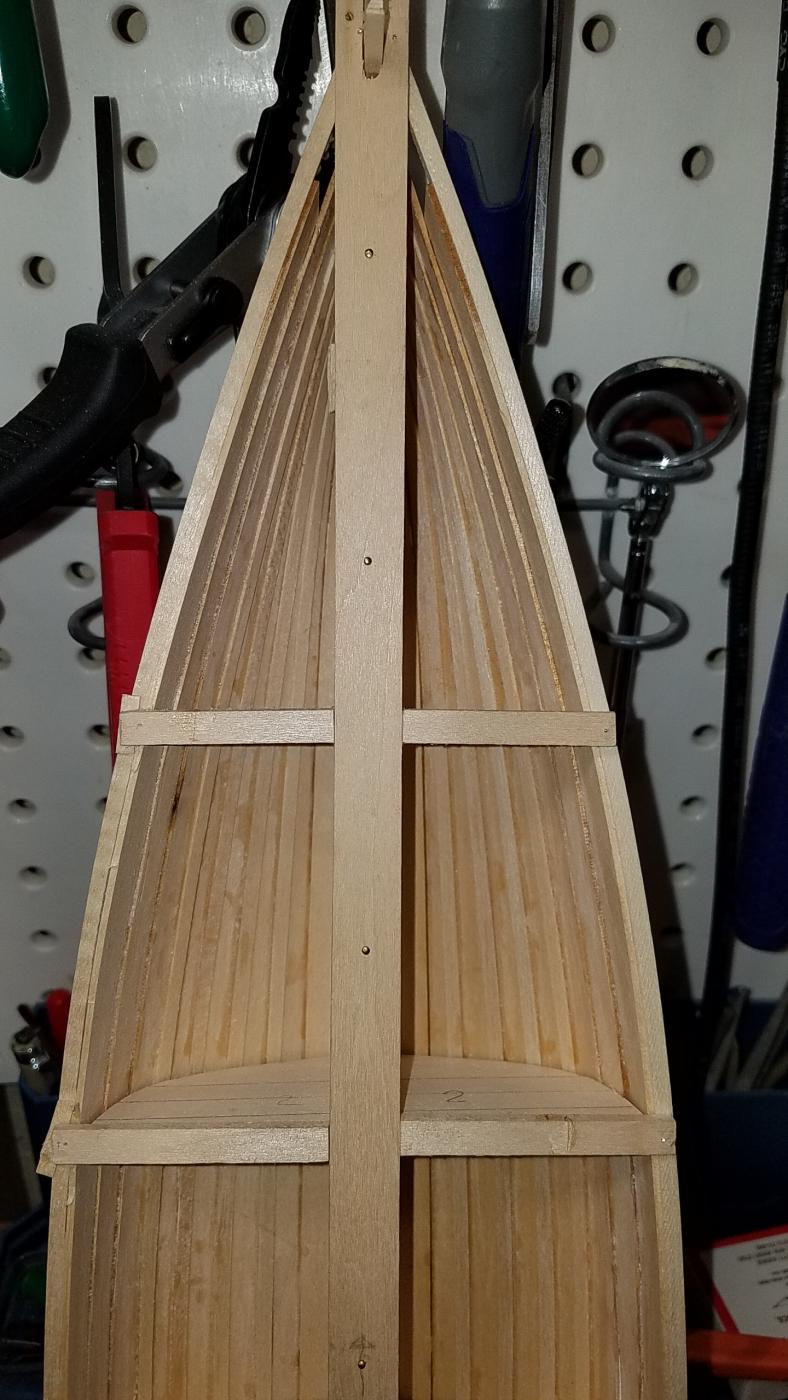
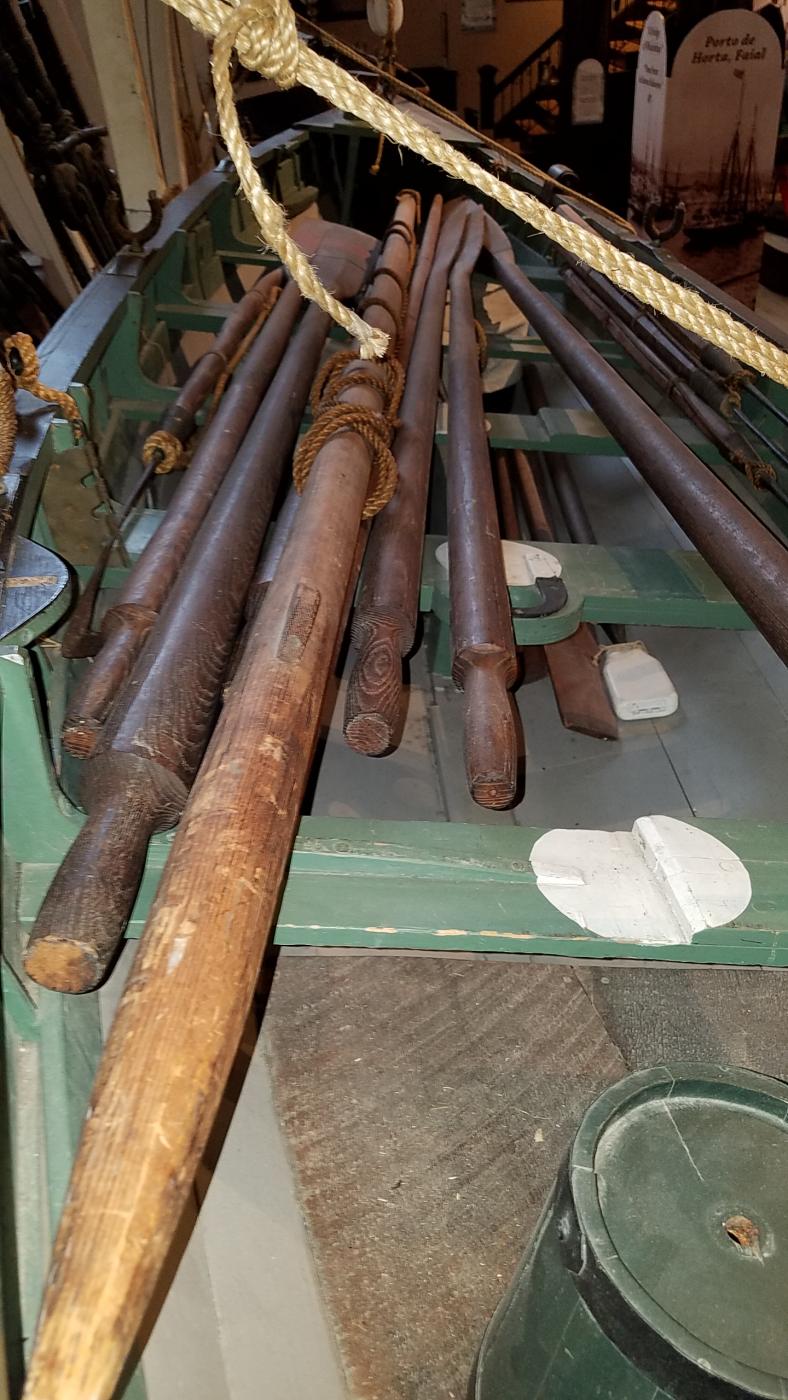
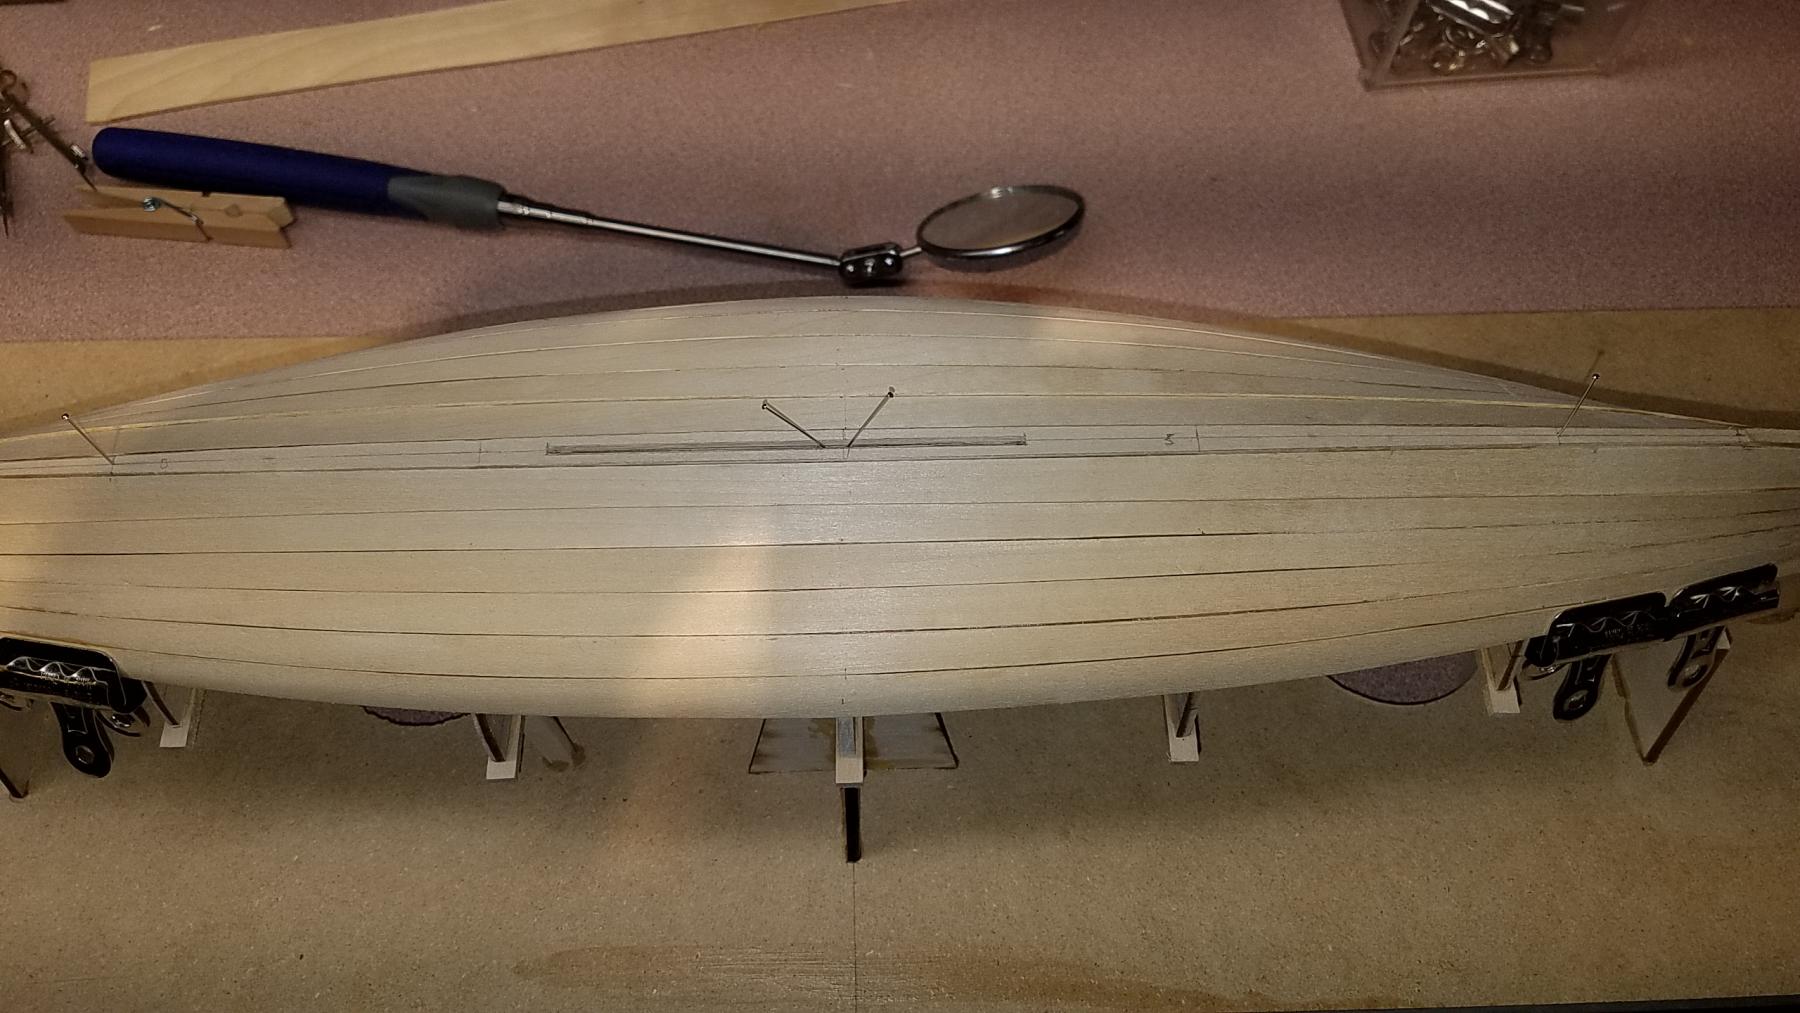
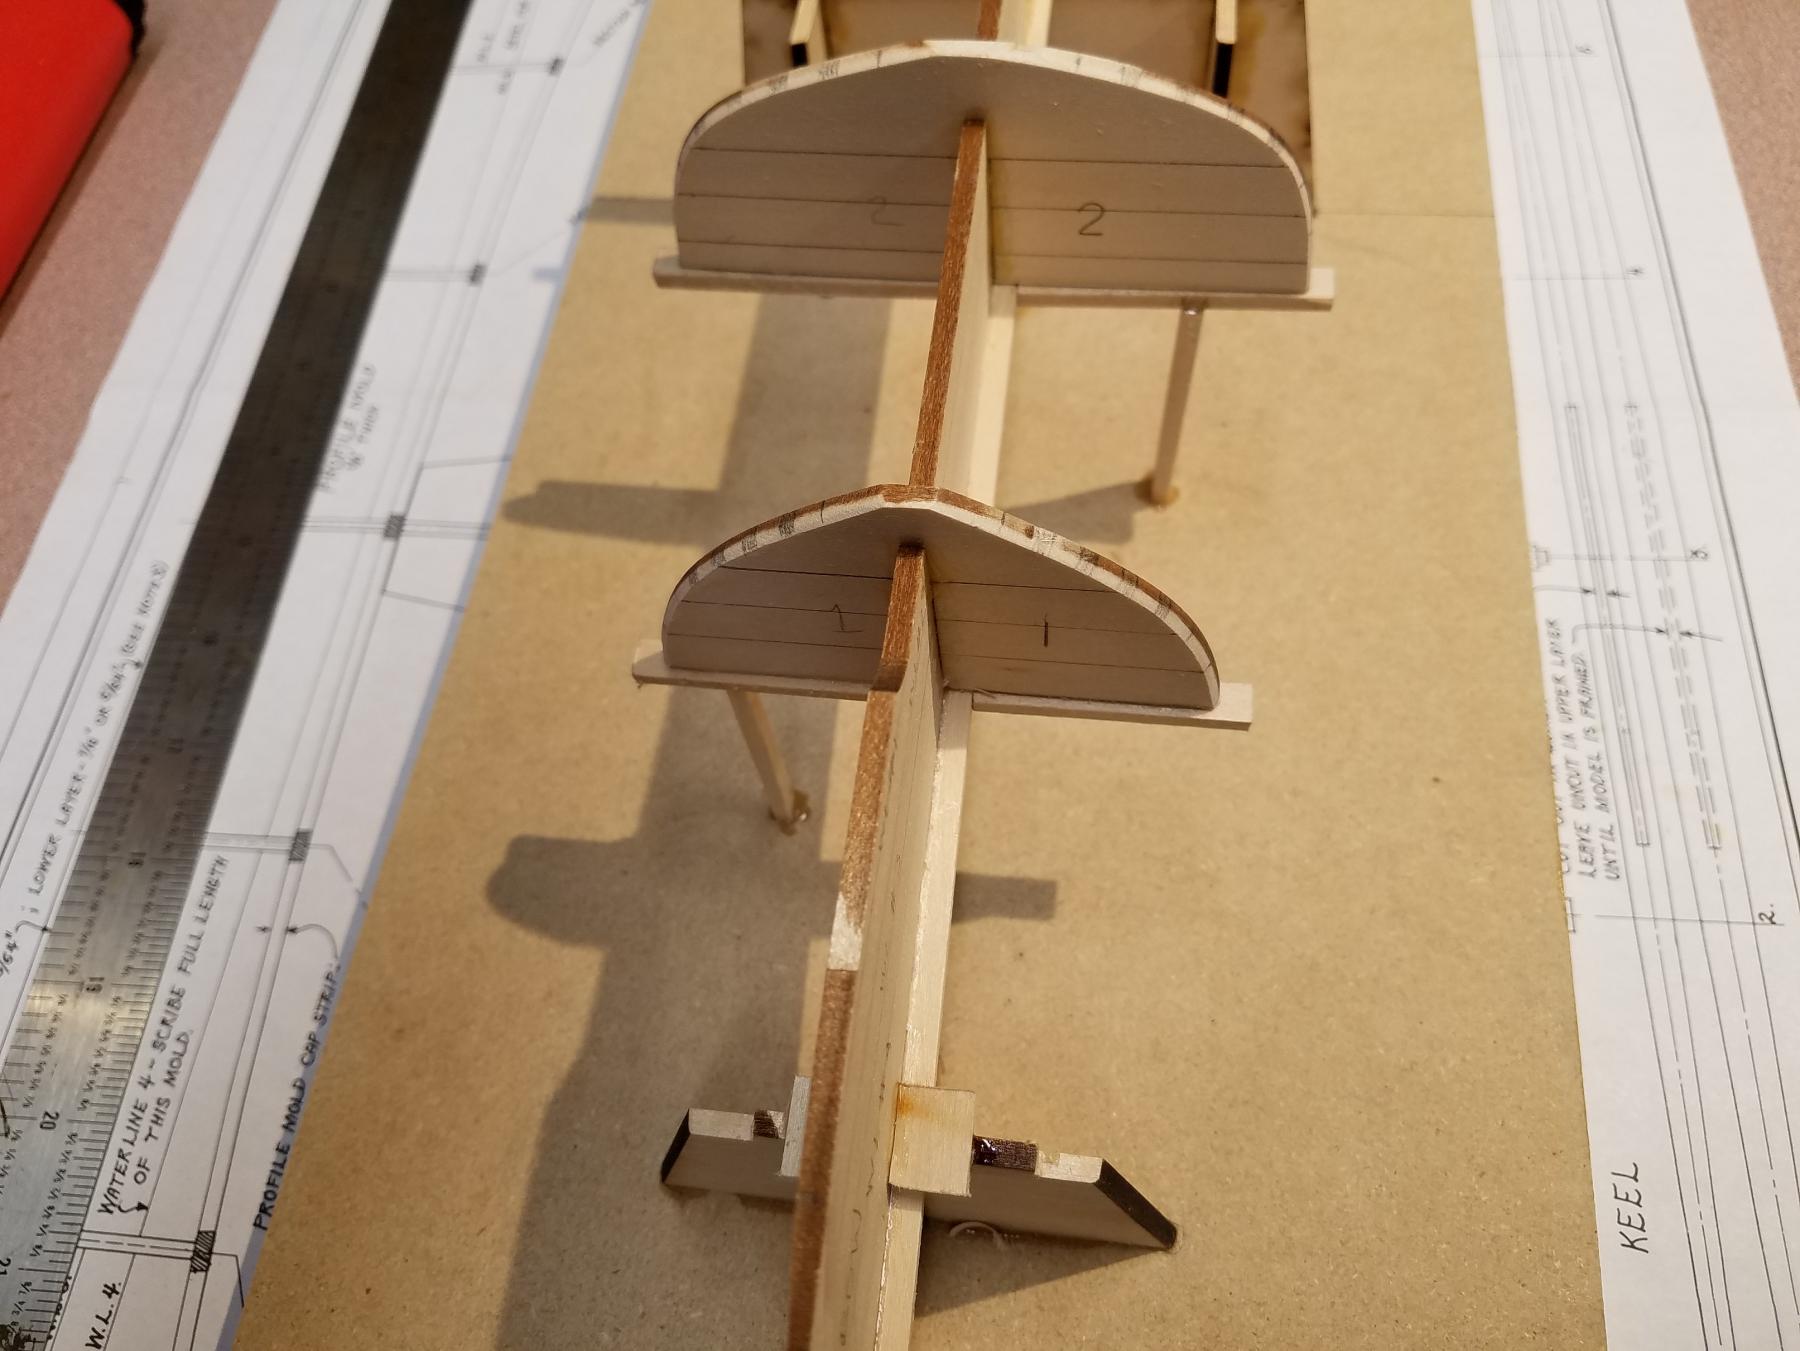
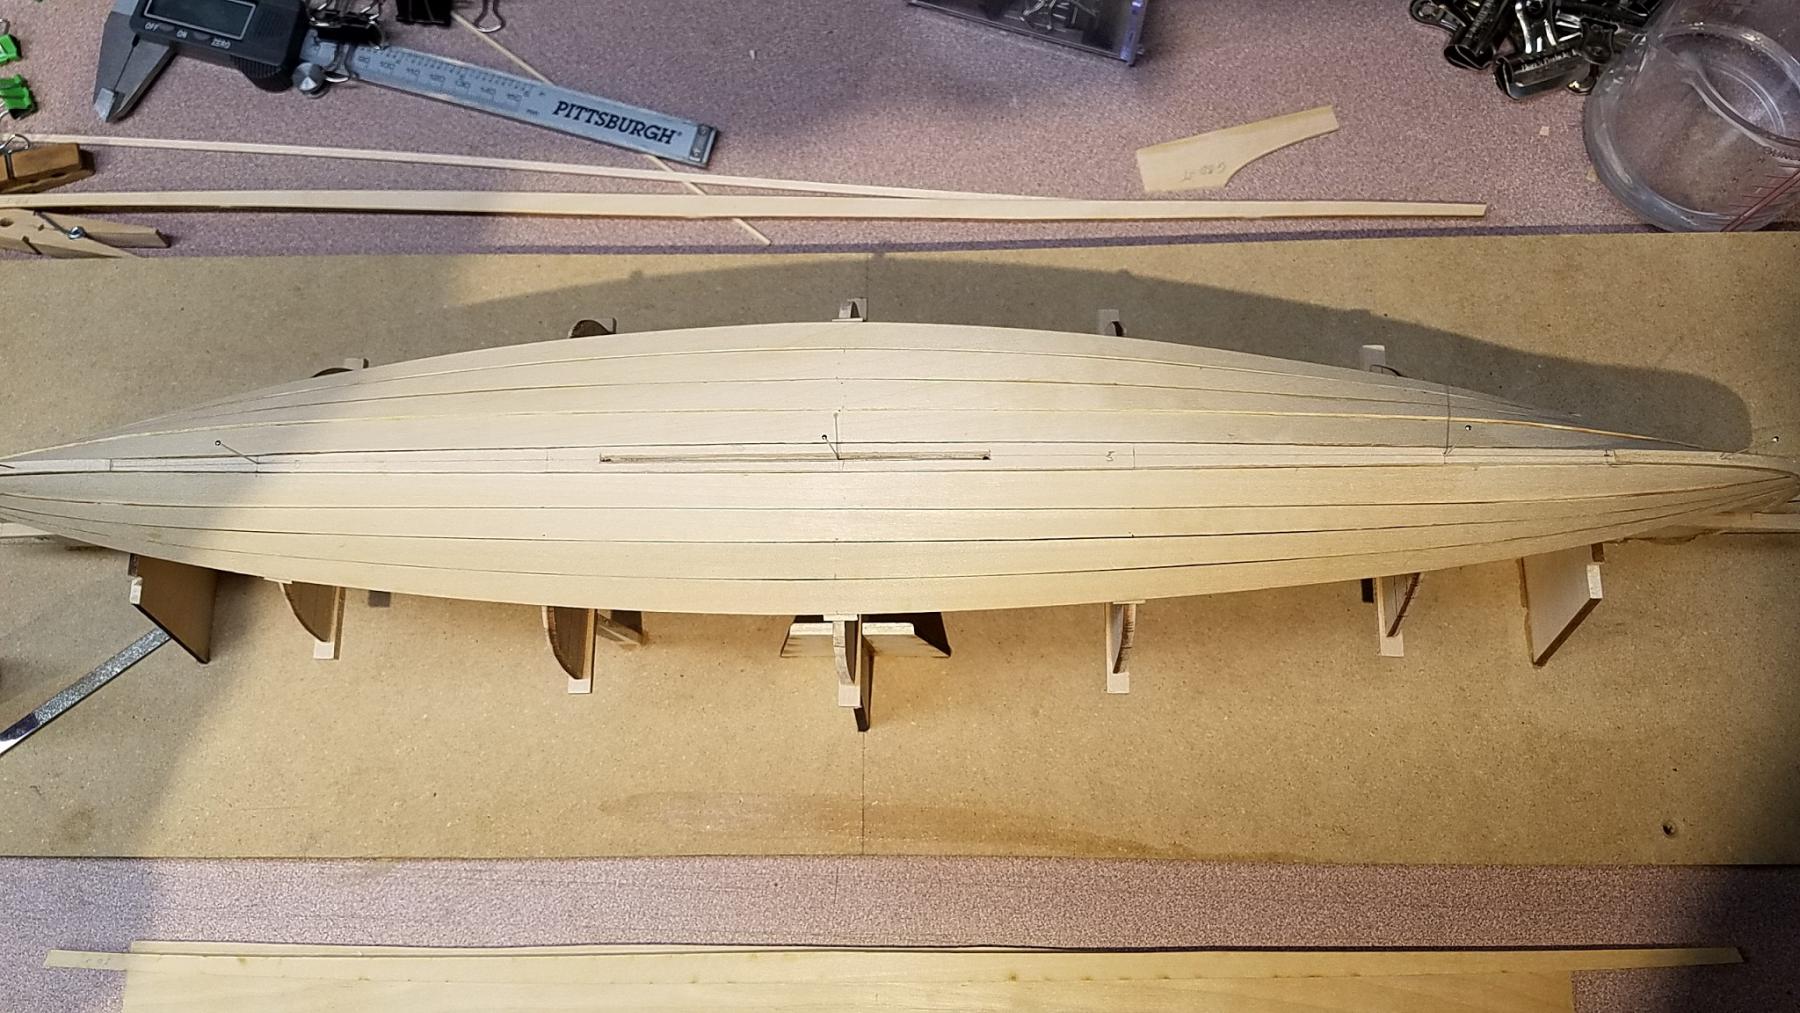
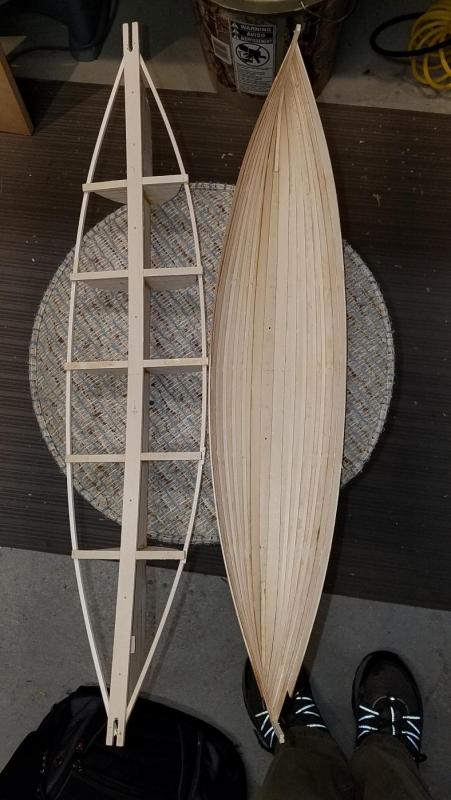
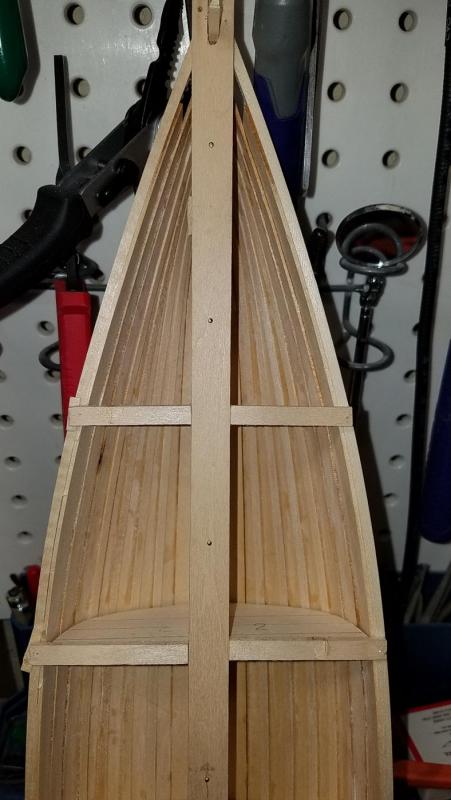
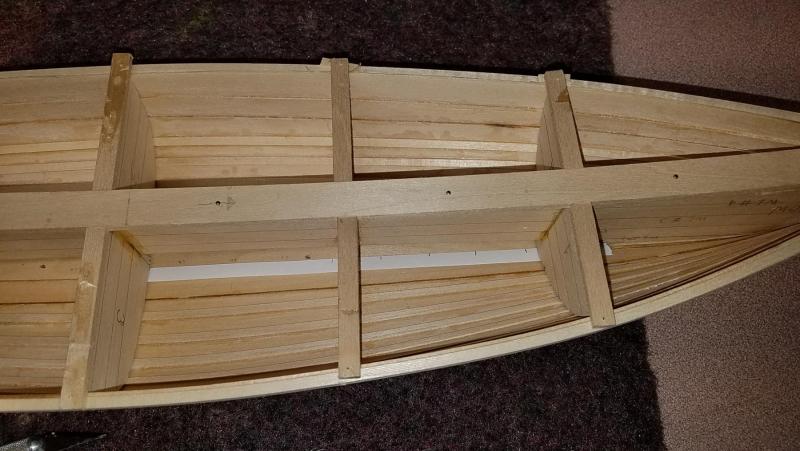
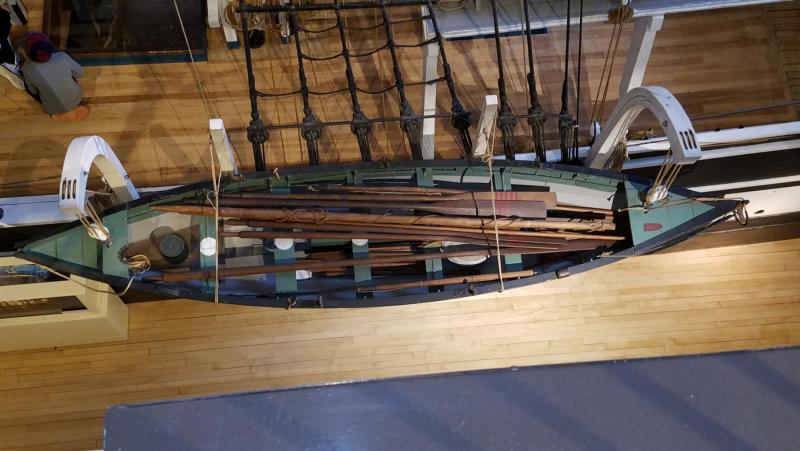
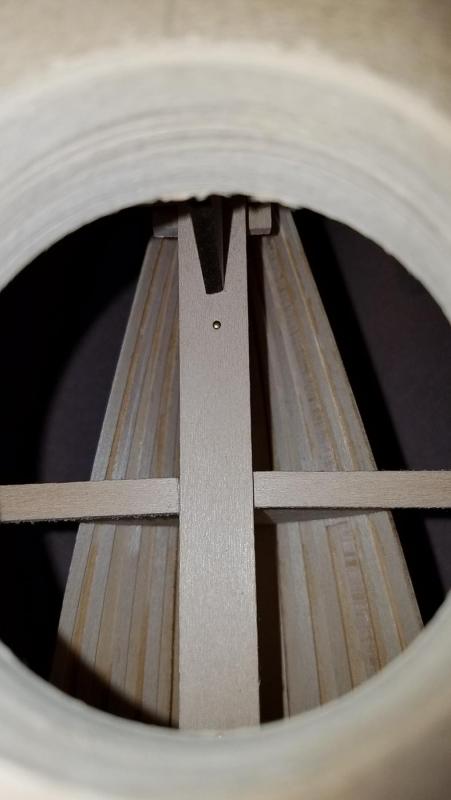
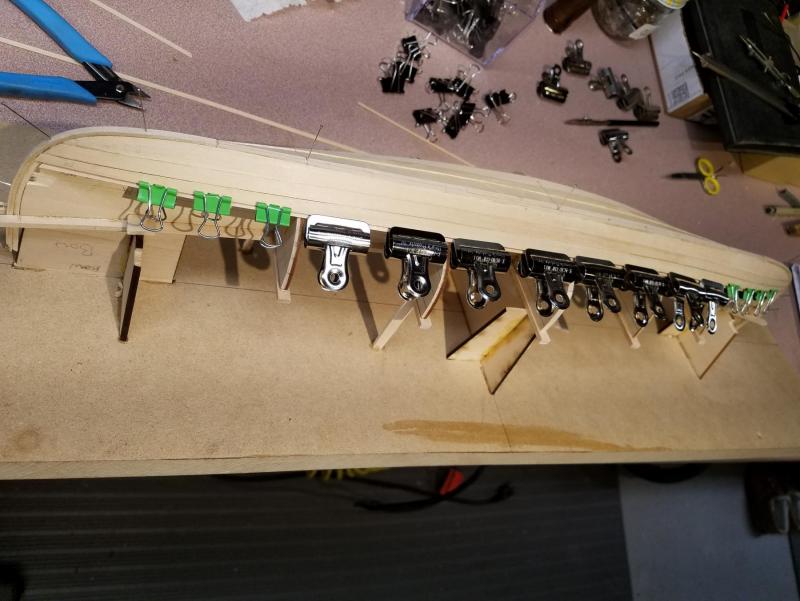
The last strake is in along with the 1/8" x 1/8" ribband which keeps the hull shape intact. On inspection, the outer edges of both #1 and #5 molds show a slight creep towards the center. This seems to agree with the manual which states that the hull tries to flatten out in these areas when the molds are removed: Two shots of the build as of today. This shot shows the marking out the frame positions on the keel. It's just a paper template matching the frame positions relative to mold #3. There is a slight gap between the bottom of the mold and the keel for the paper to fit. The method recommended in the manual was a little awkward for me. I have decided to paint the model to match the port bow boat on the Lagoda at the New Bedford Whaling Museum: Hull- Dark Green Sheer Strake - White Gunwale Strake - Black Interior - Light Green Ceiling - Grey Extra credit question: Anyone know the purpose of the white circles on the thwarts? (I don't know the answer.)

- 128 replies
-
- 3
-
-
- model shipways
- new bedford whaleboat
- (and 1 more)
-
Would anyone know the purpose of the white circle in the center of the the thwarts on the Model Shipways New Bedford Whaler? The photo is one of the actual 1:2 scale whaleboats at the museum. Thank you for any help. Mike

- 1 reply
-
- 1
-
-
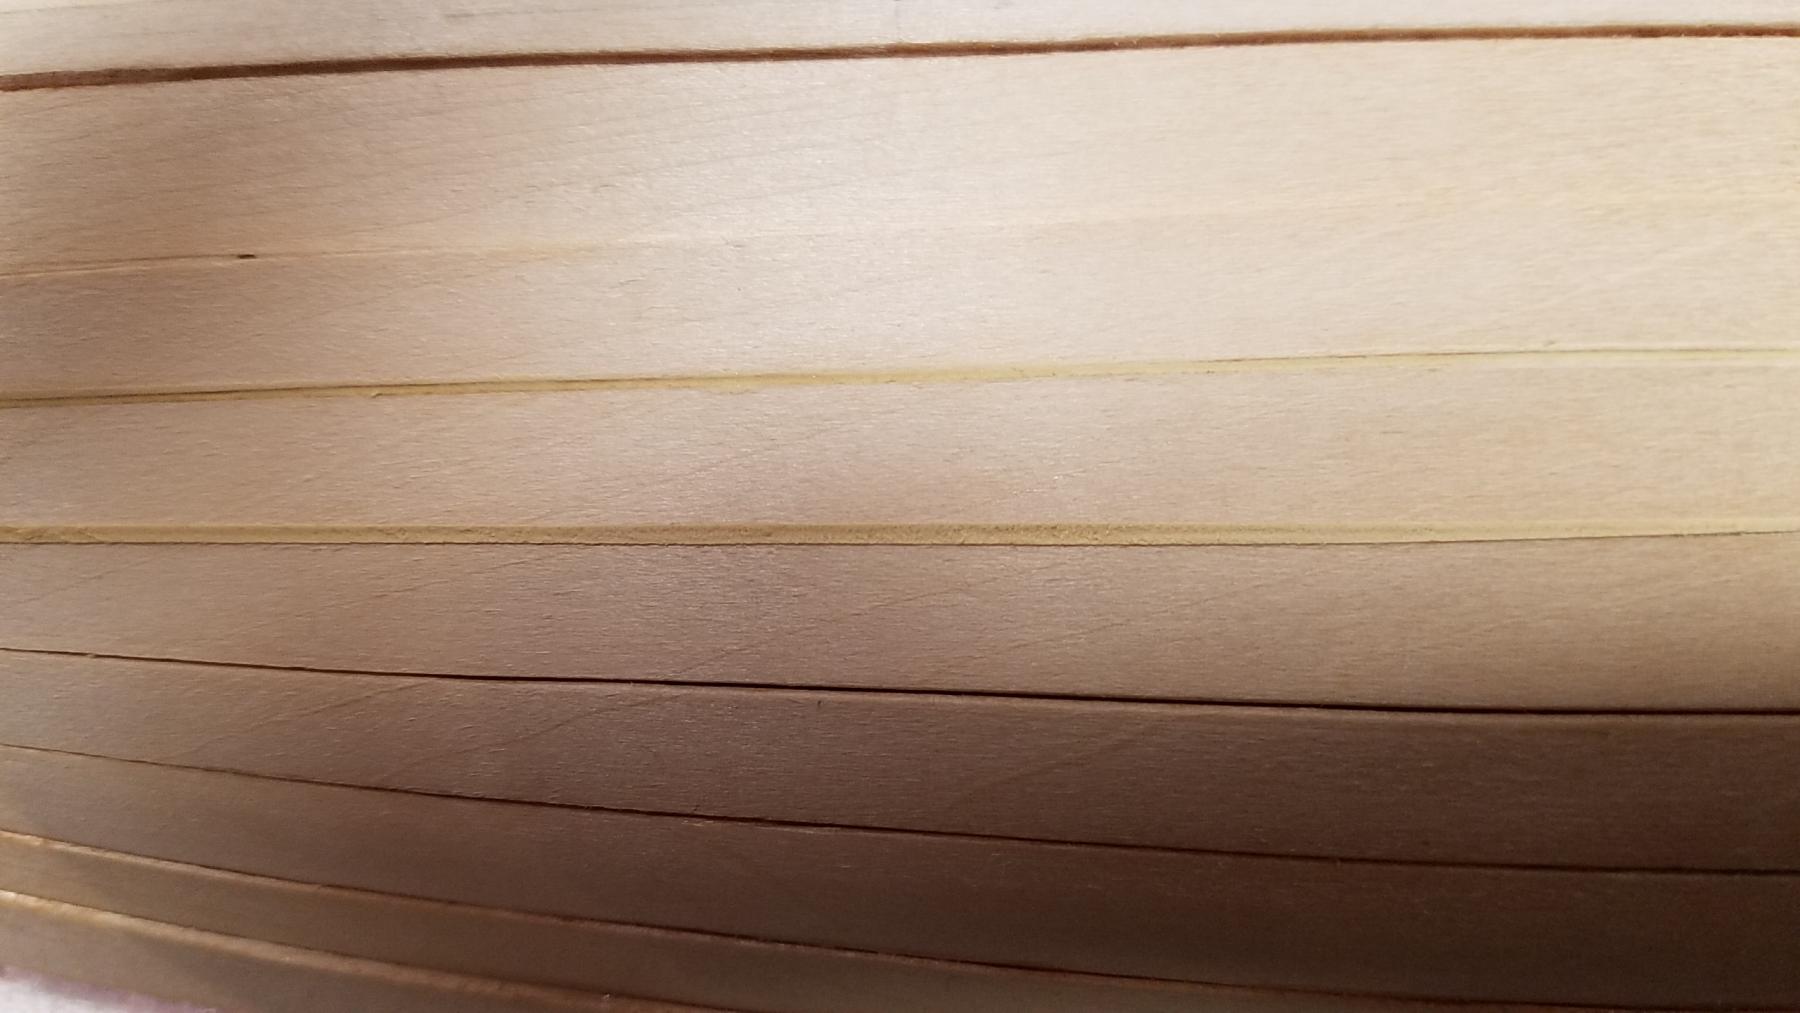
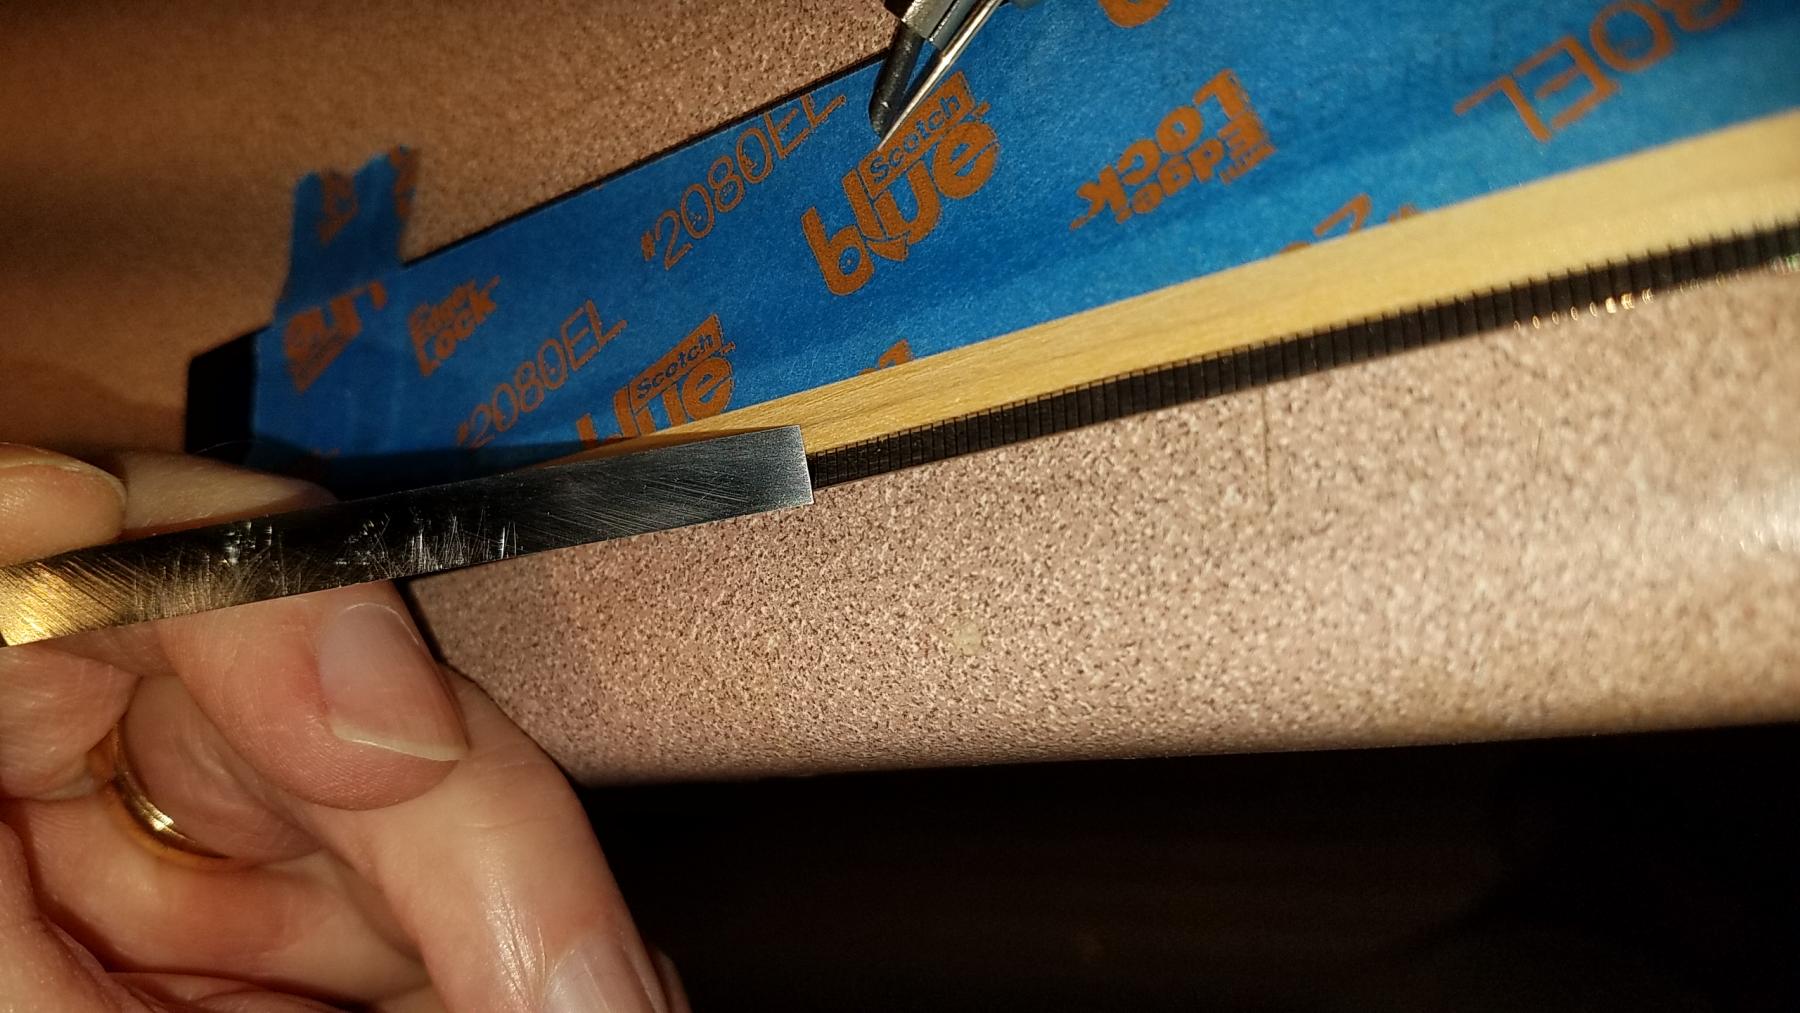
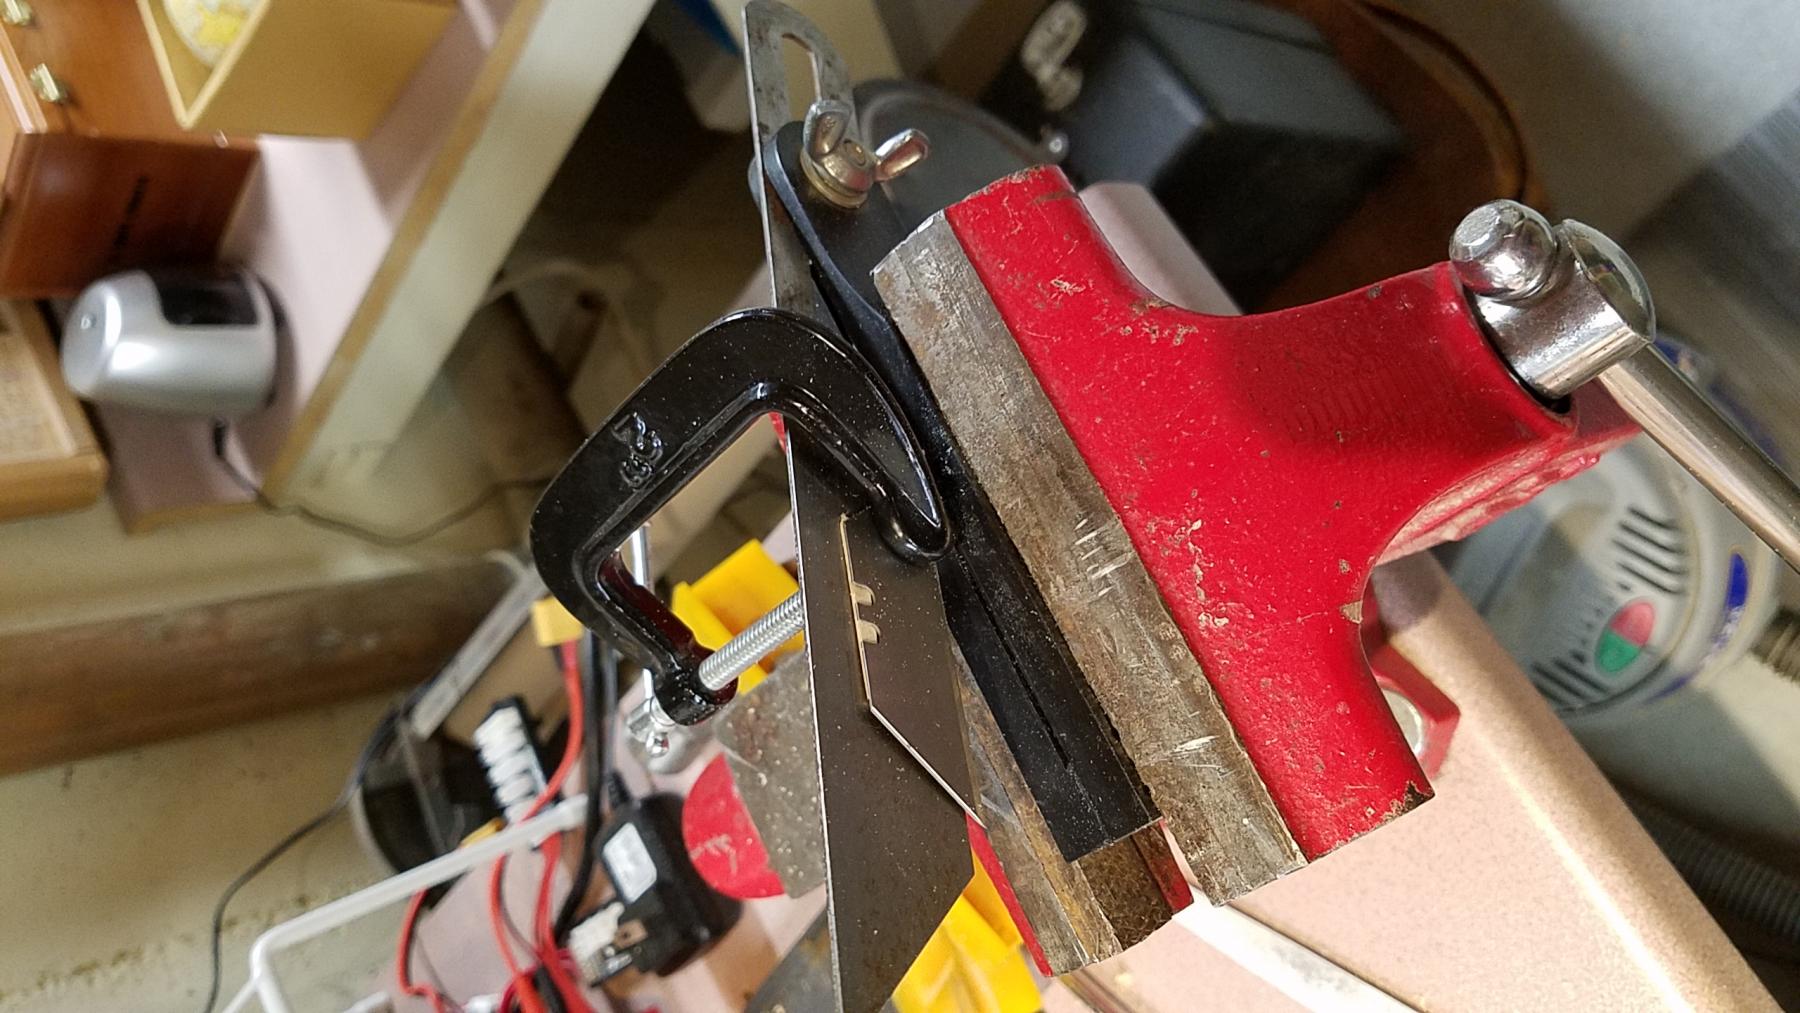
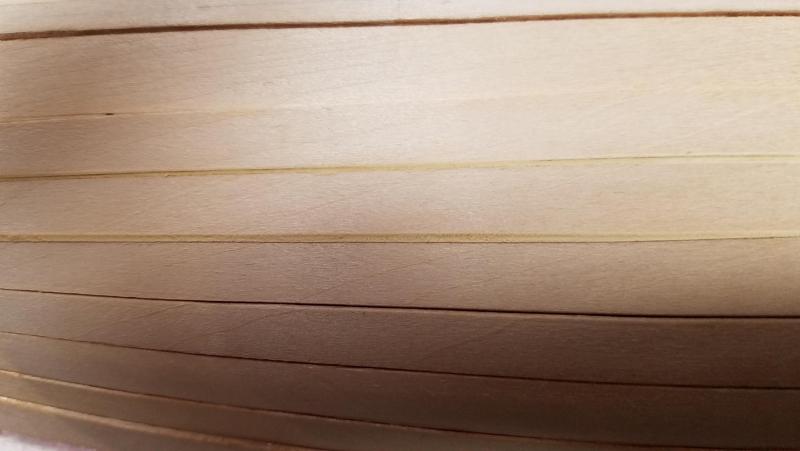
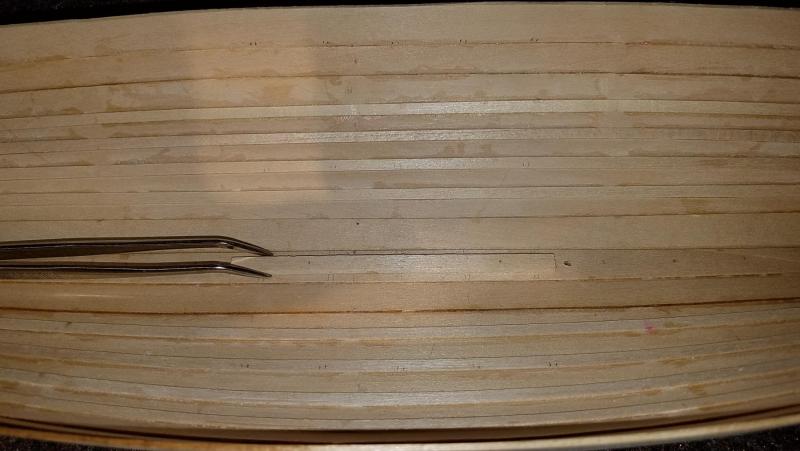
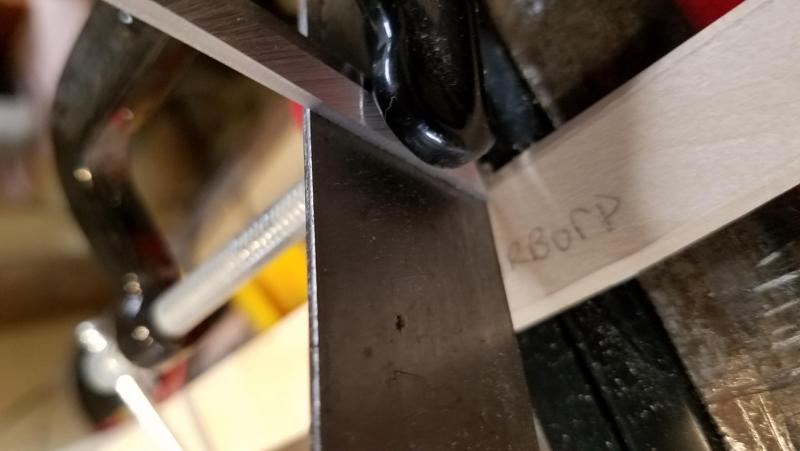
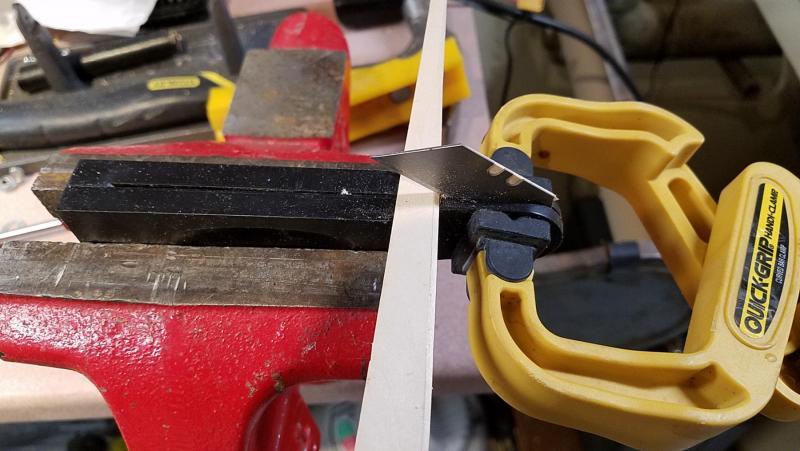
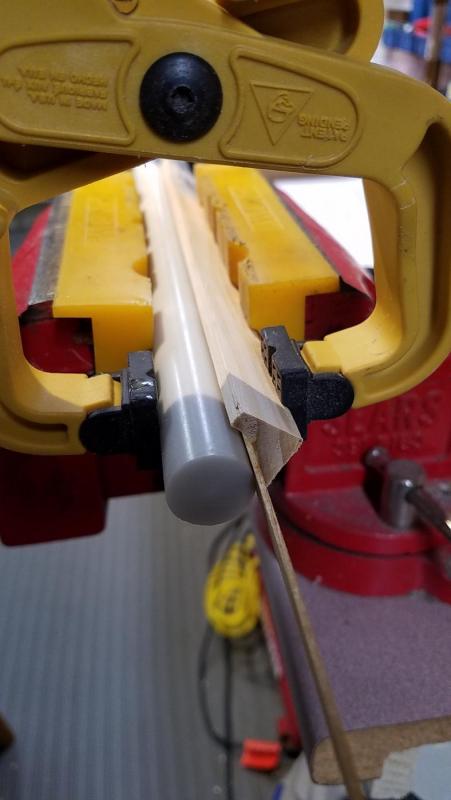
A little too late.... almost. The whaleboat requires beveling the entire length of two planks near the keel and three planks near the sheer line to provide the clinker overlap. Near the keel, I cut the bevel in by hand using a very sharp 1/4" chisel. It worked ok but any high points will create small gaps. Filling/sanding the high points rounds over the joint. I tried a few different ways to improve contact between the two planks.... Regular chisel/file method. It leaves some small gaps and round overs. The chisel is clamped to a carpenter angle finder. The cut is now flat. It acts more like a draw plate then a scraper. Here's a standard Stanley blade in place of the chisel. It chattered a little but still cut flat. The almost final version. The angle finder plate is removed from the handle and the blade is clamped in the handle slot. The cut is flat and controllable when drawn through lightly. It will dig in a little where the grain direction reverses. Zooming in on the basswood will show the cut. I haven't tried any other woods. Maybe someone knows of something that already exits that will serve the same purpose?


- 128 replies
-
- 3
-
-
- model shipways
- new bedford whaleboat
- (and 1 more)
-
Hi Al. I checked out your schooner project. That one has really nice lines. I noticed you have the rabbet cut in already and it looks good. What tools did you use to cut it in?
-
Hi John, thank you for the offer to help. Actually this is a coincidence, I just finished pouring over your site this morning! No kidding. You sir, have put a lot of time into this hobby. I know I will need some input in a few days. At least for now, I plan on painting this one in whatever colors are used at the New Bedford Museum. So, I really need to find the most appropriate paint, brush/spray, prep coats, etc. to get a nice job. 1. How did you apply the yellow? It looks sprayed. 2. What adhesive did you use for the ceiling planks to the inner hull. i.e. What sticks to the paint? 3. What type of paint(s)? I'm familiar with scale WWII aircraft colors where Humbrol provided official Army/Navy color matched paints. Is there anything like that for model shipbuilding? Thanks for any input & happy RV-ing. Mike
-
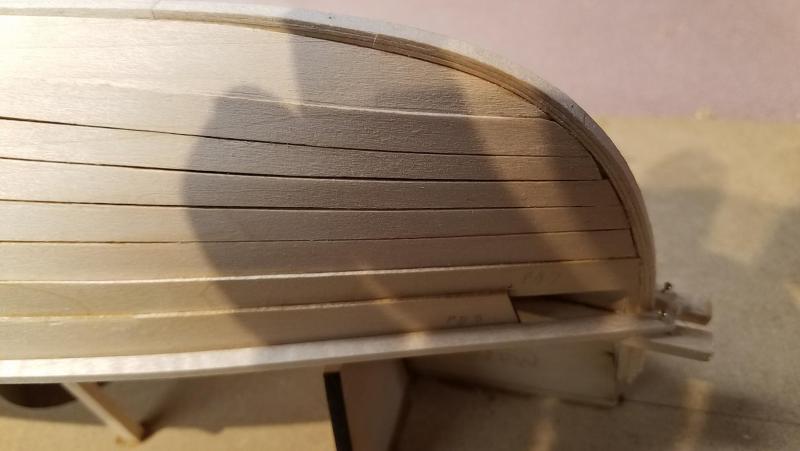
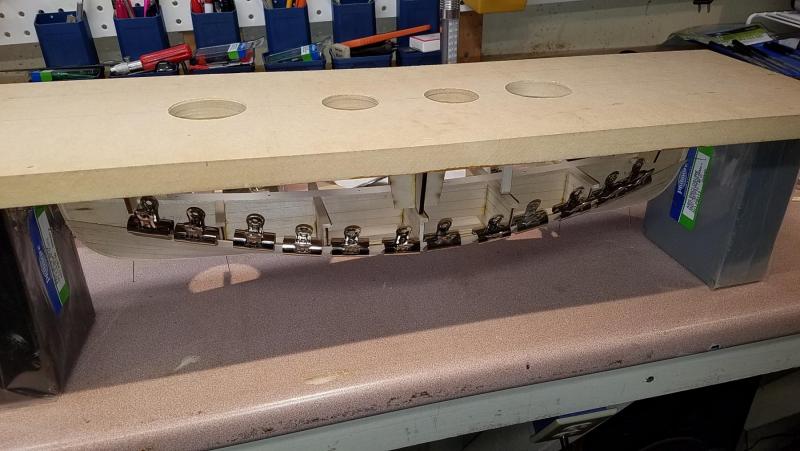
Thanks Steve. Please jump in if you see anything out of line. Planks #5 and #6 are in. These are the two that are rounded at the hard turn of mold 3 and lesser turns at molds 2 & 4. I'm still trying to wick CA (Loctight Professional) into the batten/plank joints on the inner hull to avoid the glue cleanup on the outer hull. Prior to that, I tested several CA wicked batten/plank joints and they all looked tight and strong...so far. It's pretty easy to do that up to plank 4 but as the planks become more vertical, the CA application is difficult to see... even with a mirror. So, I (carefully) drilled 4 holes with a Forstner bit into the base which made things easier to see. I'm really having fun with this kit. Current To Date:

- 128 replies
-
- 3
-
-
- model shipways
- new bedford whaleboat
- (and 1 more)
-
Ok, I'll do that and I appreciate the help.
-
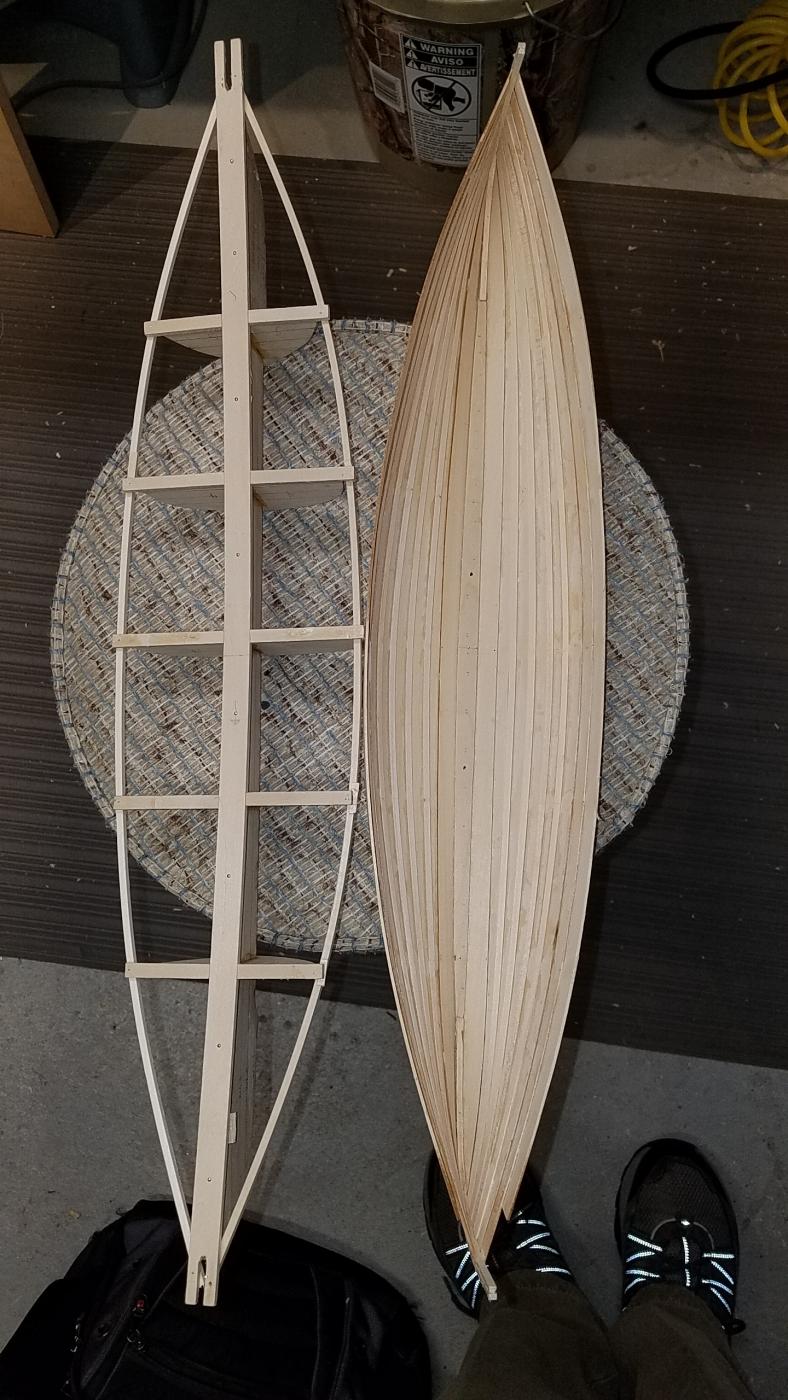
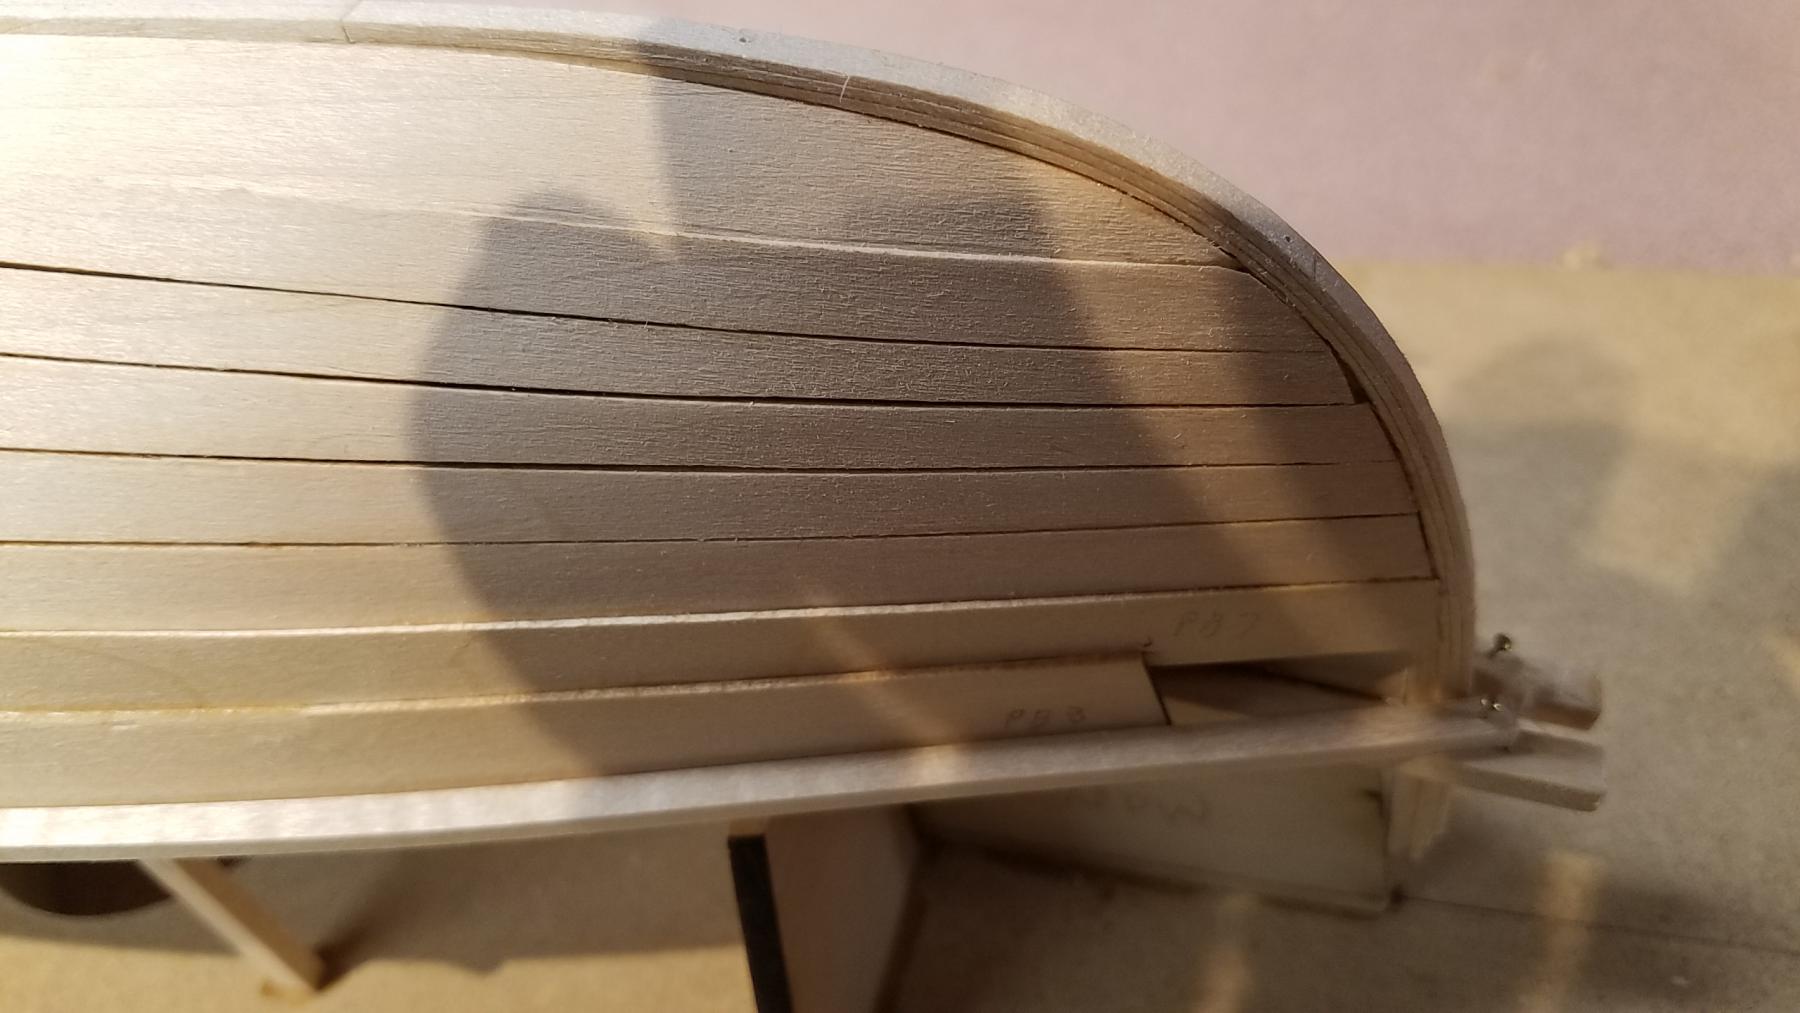
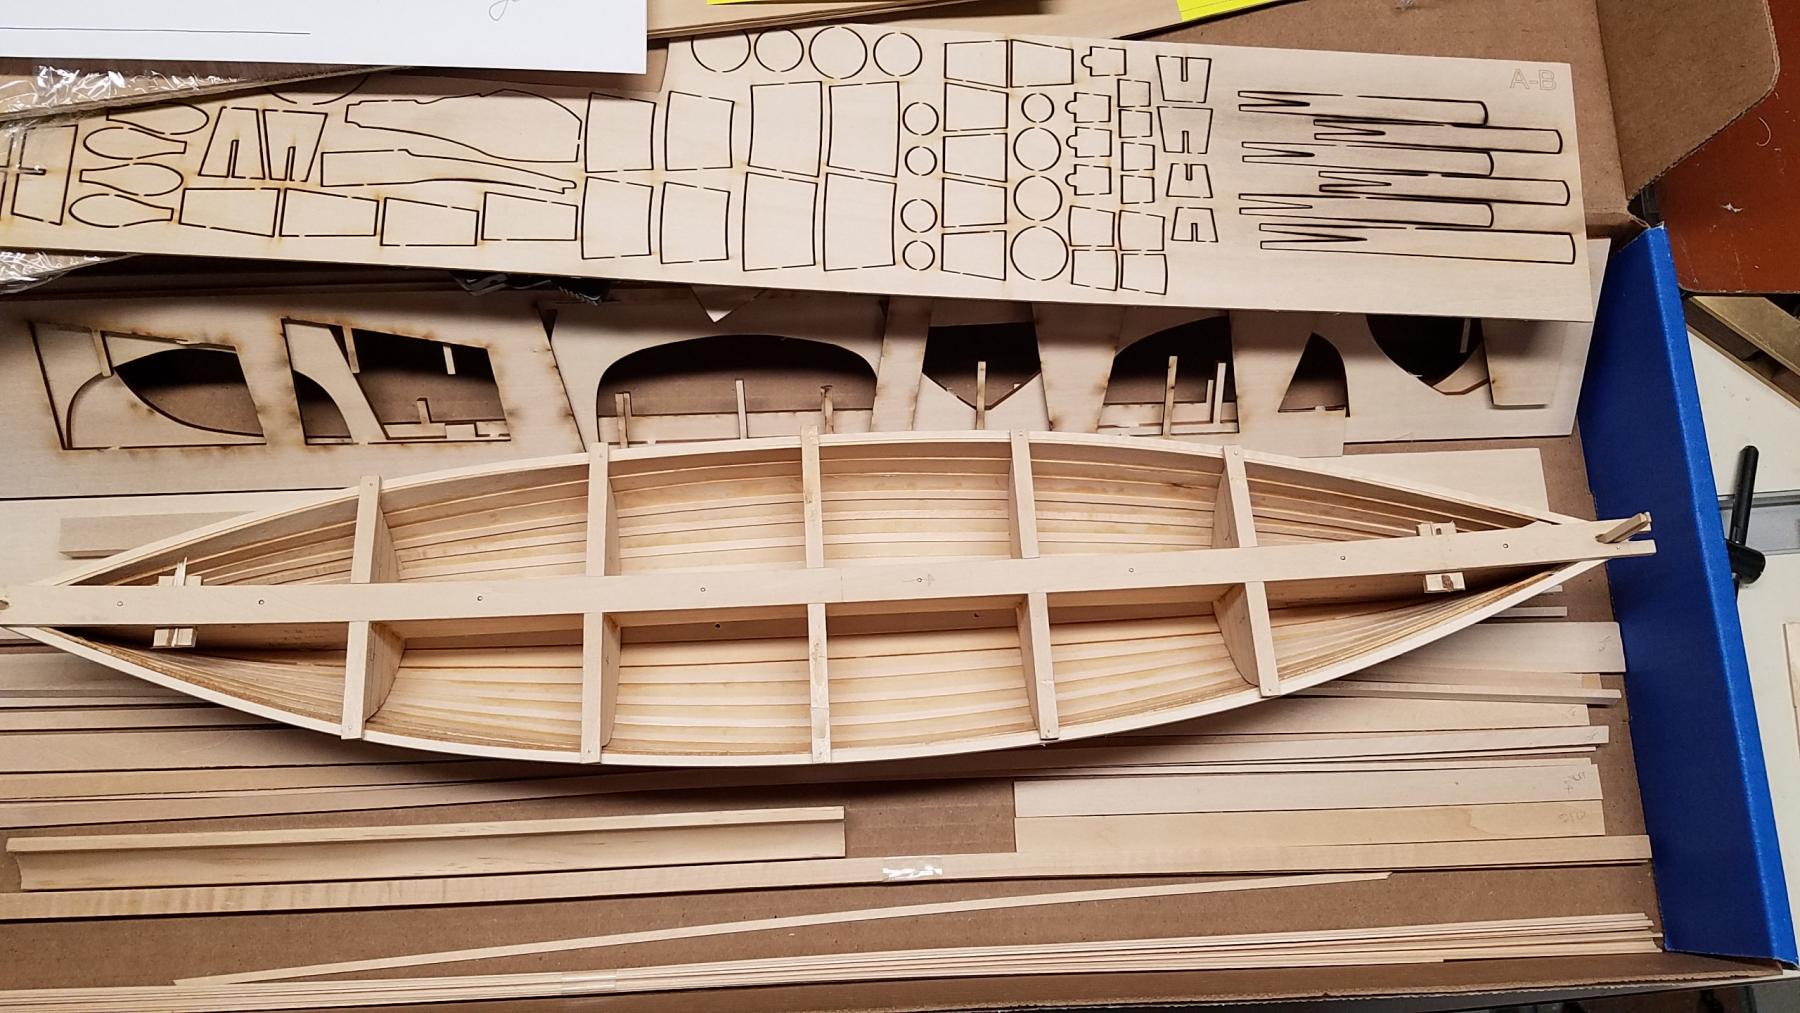
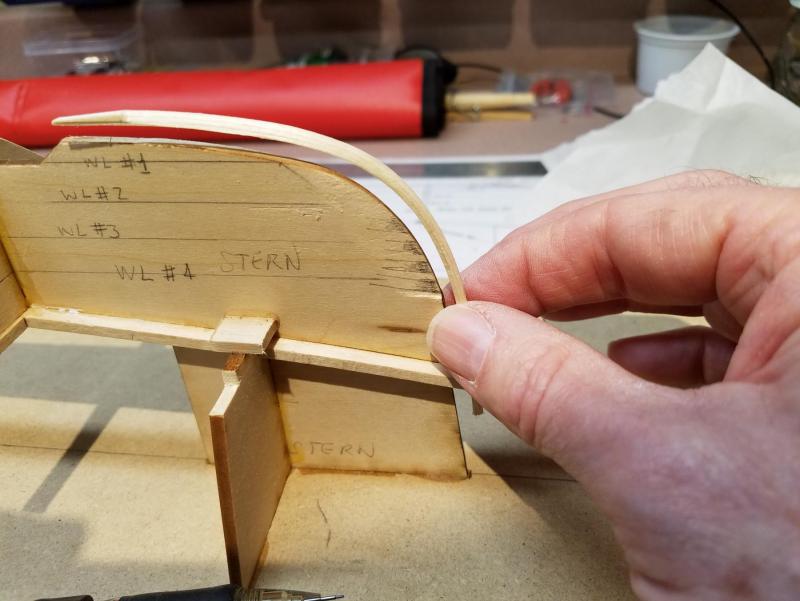
The project was started just after Christmas with becoming familiar with all of the included wood and support pieces. The laser cut planking is excellent and actually feels a little more hard than the strip cut wood. Also, it seems to hold a better egde. The BOM states "Basswood or Limewood(European Basswood)" so I'm wondering if that explains the difference. One of the laser cut parts, the profile mold, did not match the plan around all of the the perimeter ( sheet 1A) but was satisfactory in the critical areas. (Edit:) Also, the horse support notches as well as the hull mold notches are not to be trusted. For me, all alignment was referenced from the waterlines, especially WL#4. i.e. Mold alignment from WL4 and plank alignment from WL1 to WL4. The supplied manual/guide is a treasure of information and the plans (save for above) are very well done i.e. thin lines and they all tie back to each other(so far). I'll try to keep up with the web resources I have gratefully used: Senior Old Salt John Flemming Lester Palifka Raymond Diaz 3 ply lamination making up the stern rabbet and keel skarf. It held the curve nicely. All the hull molds and profile mold were square and straight at this point except #1hull mold. It was rocked a little down to the left at this point. Here it's de-glued and straightened up with a little post. All the battens so far are attached use a medium CA glue by wicking it into the joints. I'm trying to avoid cleaning up the excess glue later on. Retro note here from 2/12/17: To make things a little easier later while positioning the thwart #4, note that the aft of the centerboard slot will determine the position of the aft of the centerboard case. The aft of the #4 thwart should line up (see plans) with the aft of the centerboard case. That all being done should place the ends of the thwart between two frame timbers, avoiding extra carving of the thwart. I’ll copy this edit into the appropriate frame layout post. Four flat planks are attached. Planks #5 & #6 need to be curved around the molds. A nice piece of cove molding is supplied with the kit.


- 128 replies
-
- 3
-
-
- model shipways
- new bedford whaleboat
- (and 1 more)
-
Well my little electronics lab is now converted and renamed the "shipyard". The work on the whale boat has begun and the Model Shipways kit is very nice. Fortunately, I save most of my small tools over the years so no new expenses there. Regarding a build log: Should I assume the build log is mostly for progress updates while any help requests should be in topic specific posts? Thank you for your very nice greetings! Best, Mike
-
Why is it that every 15 years or so I return to ship modelling? Of all my (many) hobbies, this is the only one I come back to! ‘Just a rhetorical thought. In any case, here I am back again and I must say this forum really fills a gap in the ship modelling world. My last kit model from 25 years ago (attachment) was great fun and I was fairly happy with it but the access to practical knowledge and research for personal improvement was nowhere near as easy find as this forum seems to provide. I’ve been skimming all over the forum for about two weeks now and am very happy to have found it. I’ve chosen a POB kit from Model Expo, the New Bedford Whaleboat, to sharpen my skills for now and figure out what I don’t know … which will take a while. There are already some very nice builds and discussions of that whaleboat in the forum and I am less than an hour away from the New Bedford Whaling Museum. I dusted off my last project (attachment) from the 90's but can’t remember the name of the kit. The stand is from Aeropiccola so maybe the kit was also made by them. IIRC it had three layers of planks. A balsa or basswood layer over molds. Then an outer and inner layer of (I think) walnut. One side of the hull is painted and the other side is natural with a thin varnish. The grating is removable. Many parts are missing. So, I am really looking forward to participating in the forum. And by the way, Happy New Year! Mike