Jim T
-
Posts
60 -
Joined
-
Last visited
Content Type
Profiles
Forums
Gallery
Events
Everything posted by Jim T
-
What is the diameter and length of the thole pins Chuck? I'd like to see if I can turn them on my Sherline lathe as an educational exercise. Thanks, Jim
- 421 replies
-
- 3
-

-
- medway longboat
- Syren Ship Model Company
- (and 1 more)
-
Need Advice
Jim T replied to GeorgeJure's topic in Painting, finishing and weathering products and techniques
Hi George, Welcome to the forum. I'm new here myself, but it seems to be a great place to hang out and get input from a lot of very knowledgable folks. As you explore the forum, you'll notice that there is a sub forum for "WOOD" where I bet you can find the answer to your question. Jim -
I can see an advantage to a group build like this. Hopefully, more experienced builders will respond with ways that you can successfully fit the lap joint. I'm new at this model boat building, but if I was doing it, I'd mill the joint to a good fit with my Sherline Mill............not an option for most folks. If you have some material 1/2 the thickness of the keel, you could put that on each side of the lap, to support a sanding stick, and sand down to that. That would keep the edges from rounding over. I bet there's lot's of other ways that neither of us know about. Jim
-
Sharpie by Jim T - Scale 1:16 - SMALL
Jim T replied to Jim T's topic in - Build logs for subjects built 1851 - 1900
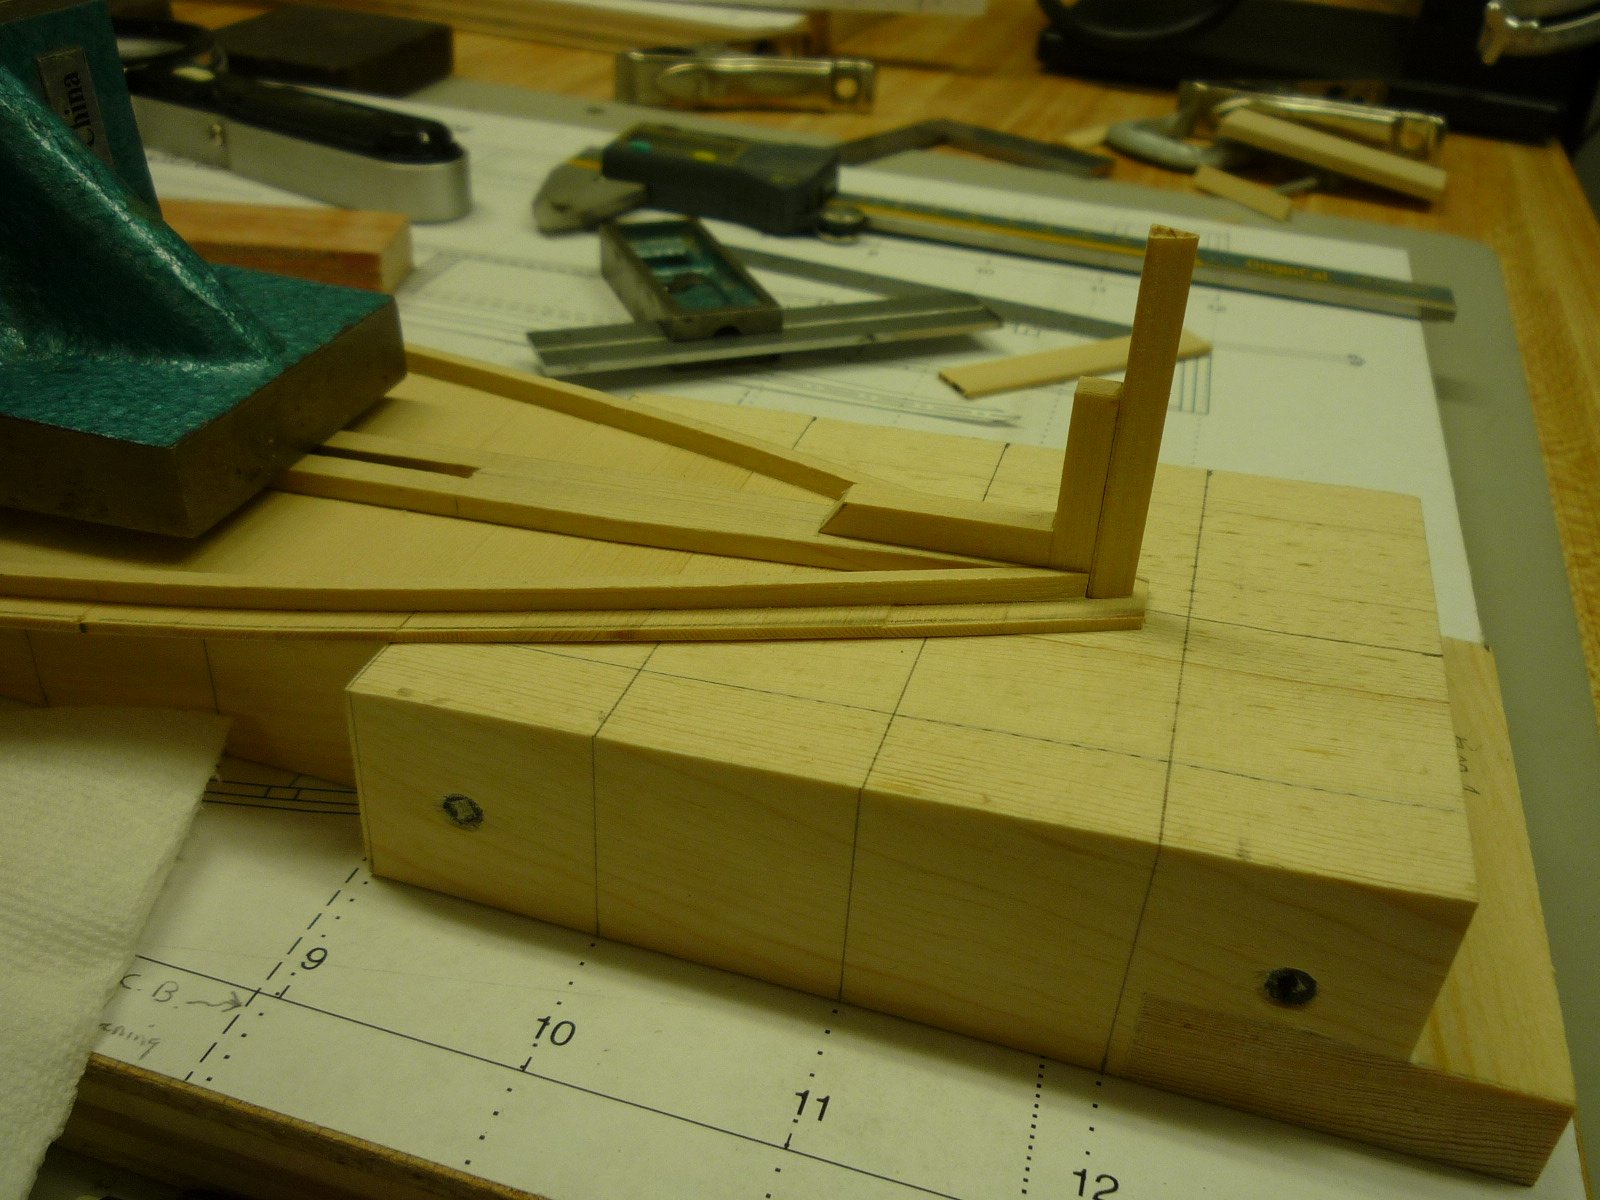
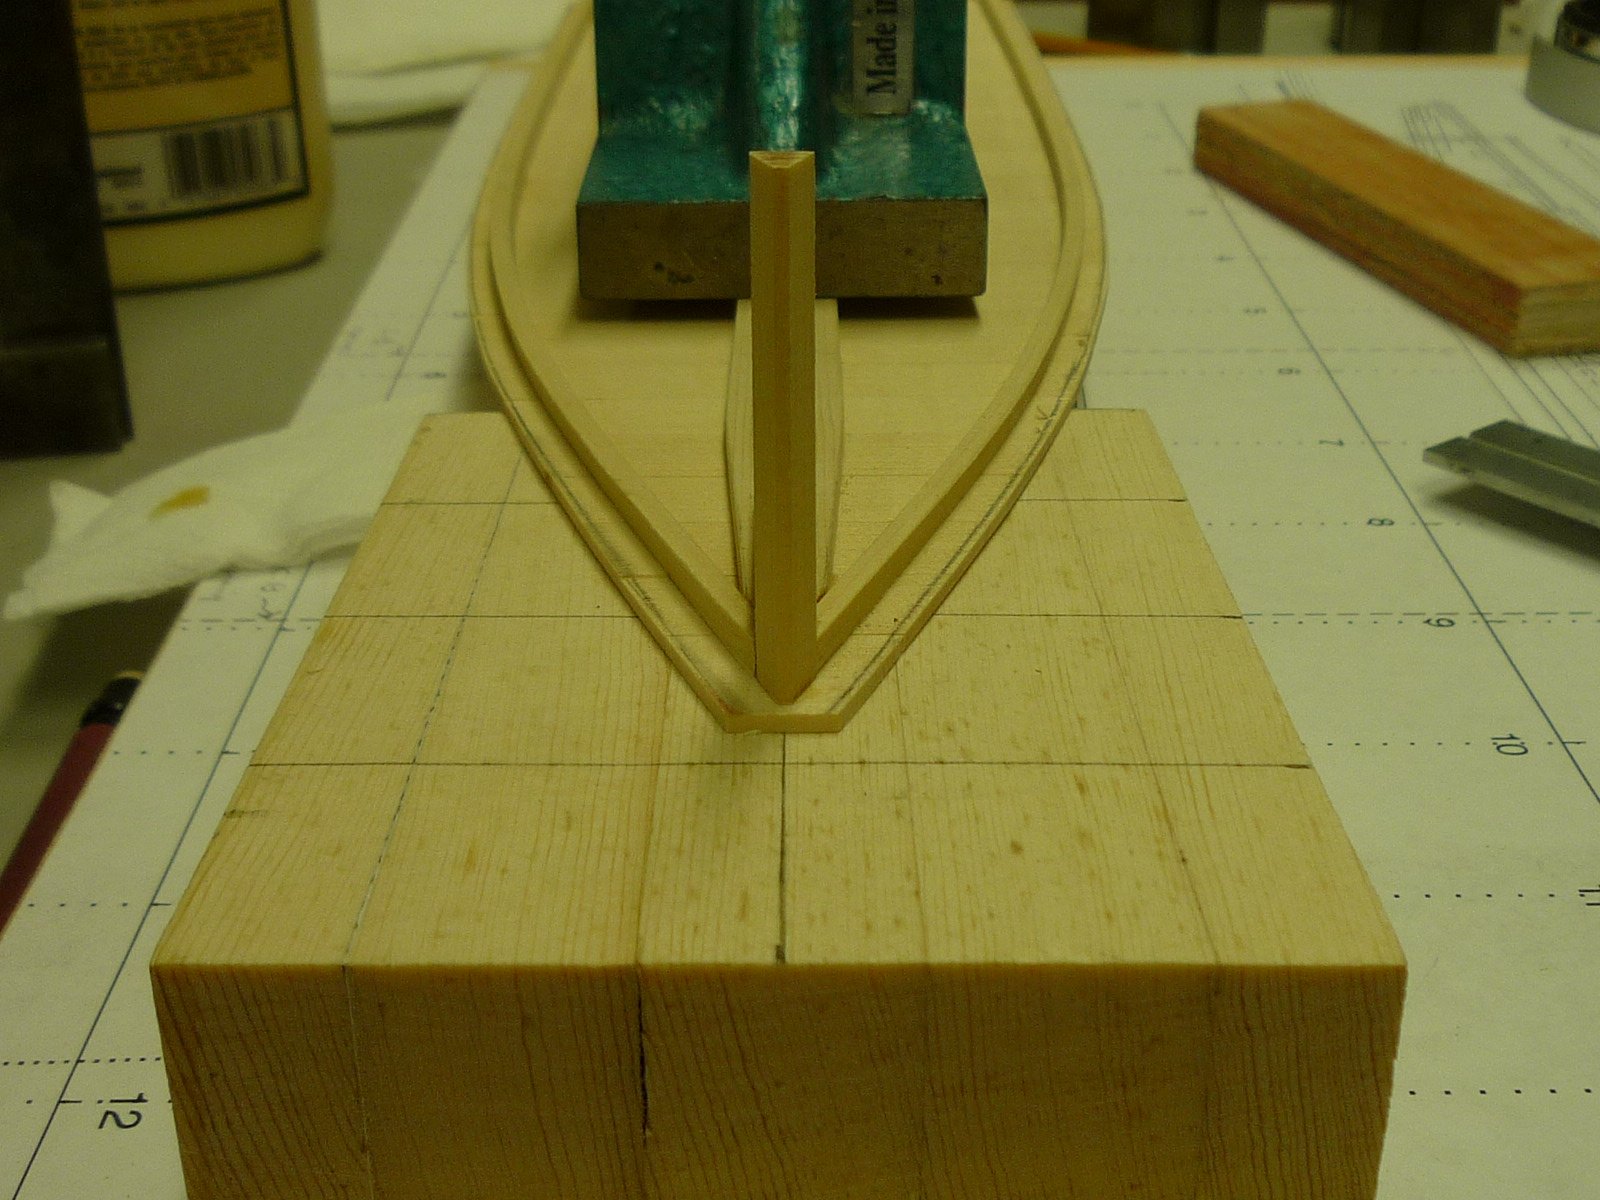
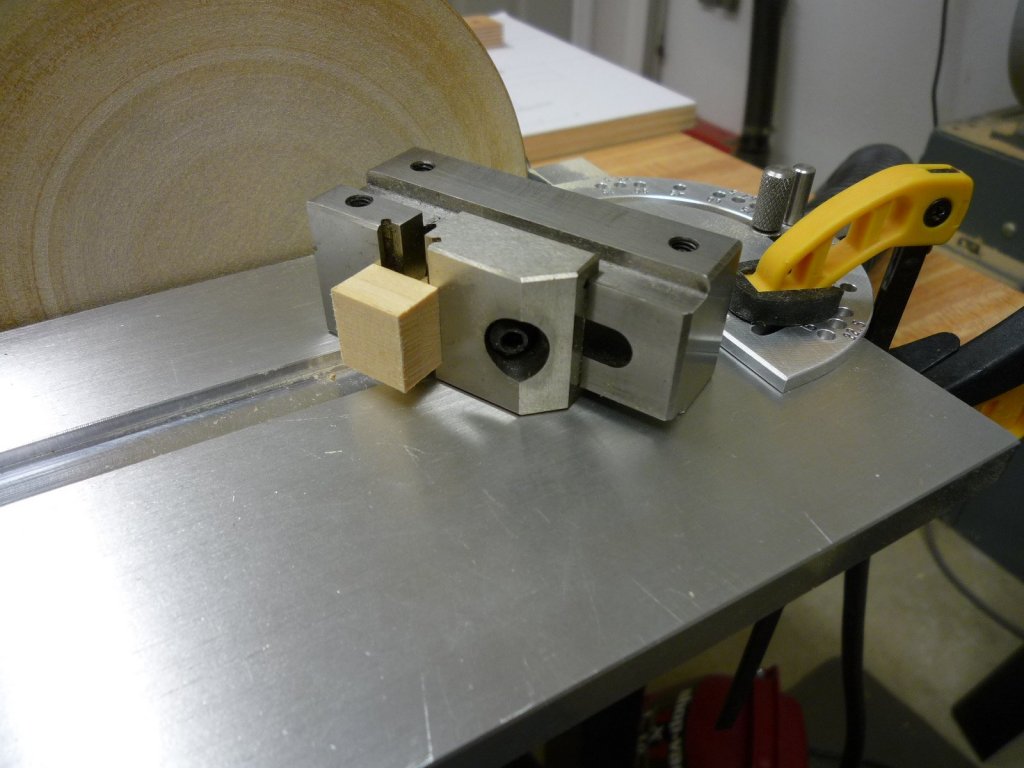
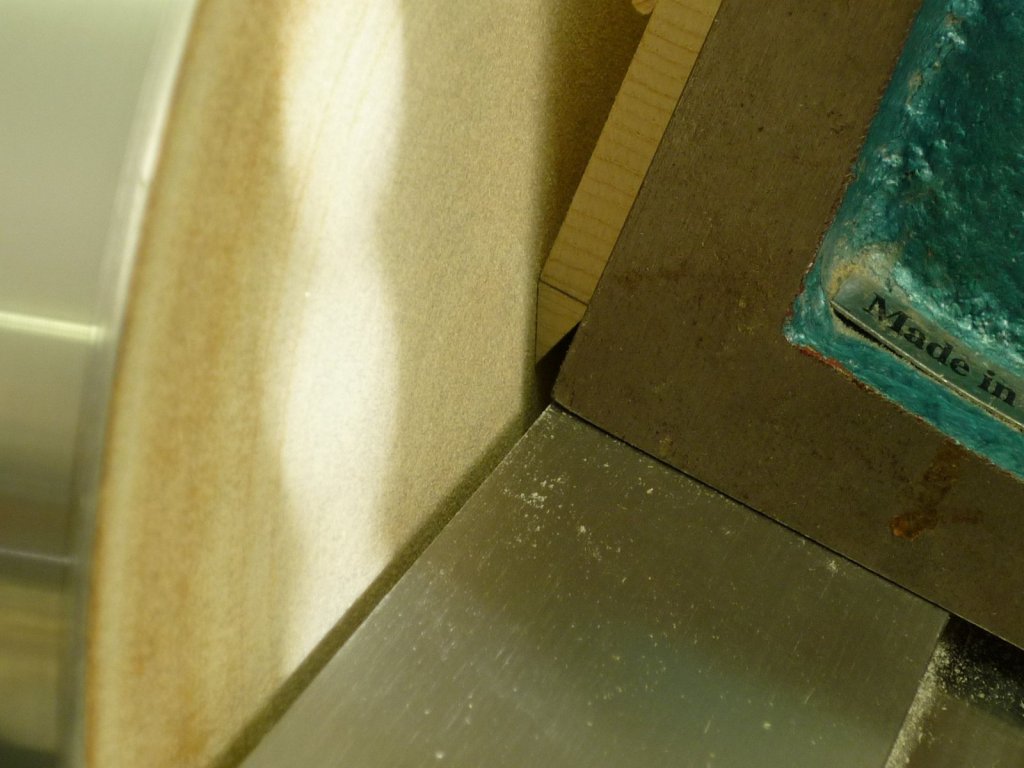
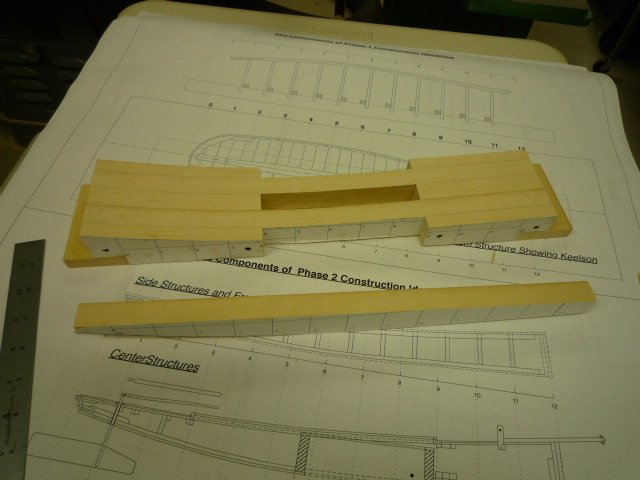
Over the last couple of days I managed to get the Mast Step Locks and Mast Box Log built and fitted. The Mast Step Locks are those little angled pieces between the Mast Box Log and the chines. The only thing, of note, about them is that they needed to be beveled at 9 degrees to fit the angle of the chine. The Mast Box Log needed an angle sanded on the bottom which I'll address below. The Monograph said that the bottom of the Mast Box Log needed to be sanded at a 4 degree angle to account for the rise in the keelson. However, I measured it to be a 1 1/2 degree angle. It IS 4 degrees as it related to the horizontal level line, but as it relates to the uprising keelson it measures 1 1/2 degrees. More on that in a bit. Anyway I clamped a piece of 3/16" sq stock in a tiny vise and slid the Log over that. Set the table on my (new favorite tool) Byrnes disc sander, angled the table to 1 1/2 degrees, and using the miter gauge as a fence sanded the bottom of the log. Set the Box Log in place and stuck a piece of 3/16" sq into the hole to simulate a mast and this is what it looks like. A 4 degree angle would of had the mast leaning forward quite a bit. The plan sheet, that shows the mast, seems to show the mast leaning even more to the rear. I think I'm not going to glue the Mast Box in place at this time In case it needs further adjustment. Jim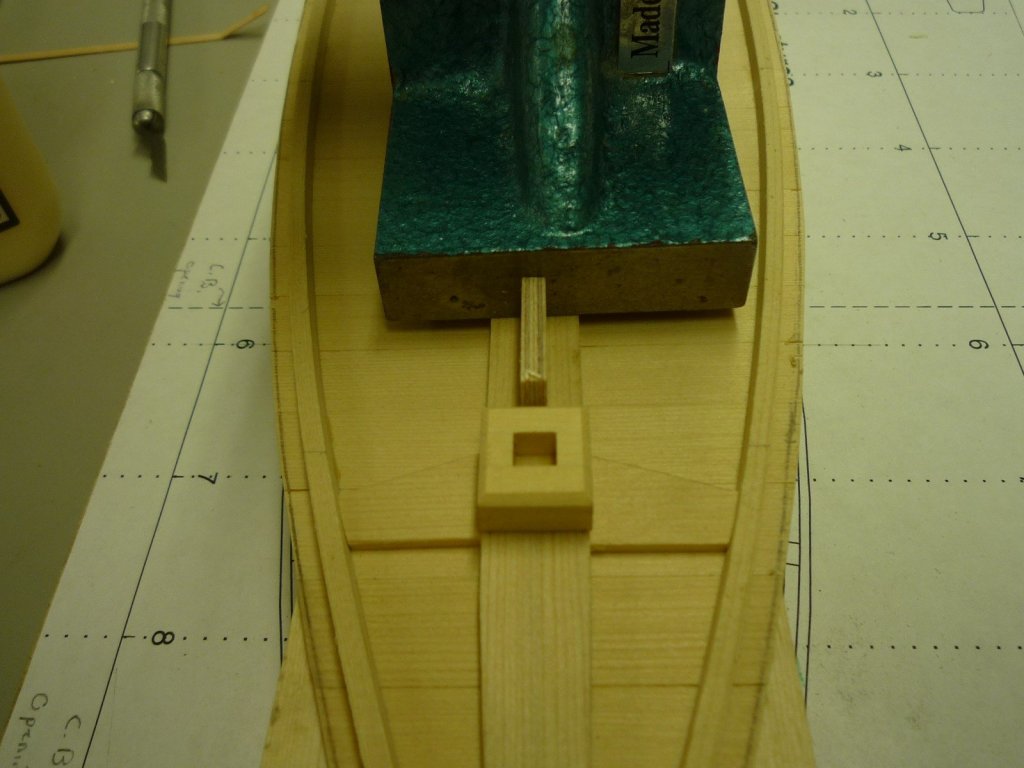

-
Sharpie by Jim T - Scale 1:16 - SMALL
Jim T replied to Jim T's topic in - Build logs for subjects built 1851 - 1900
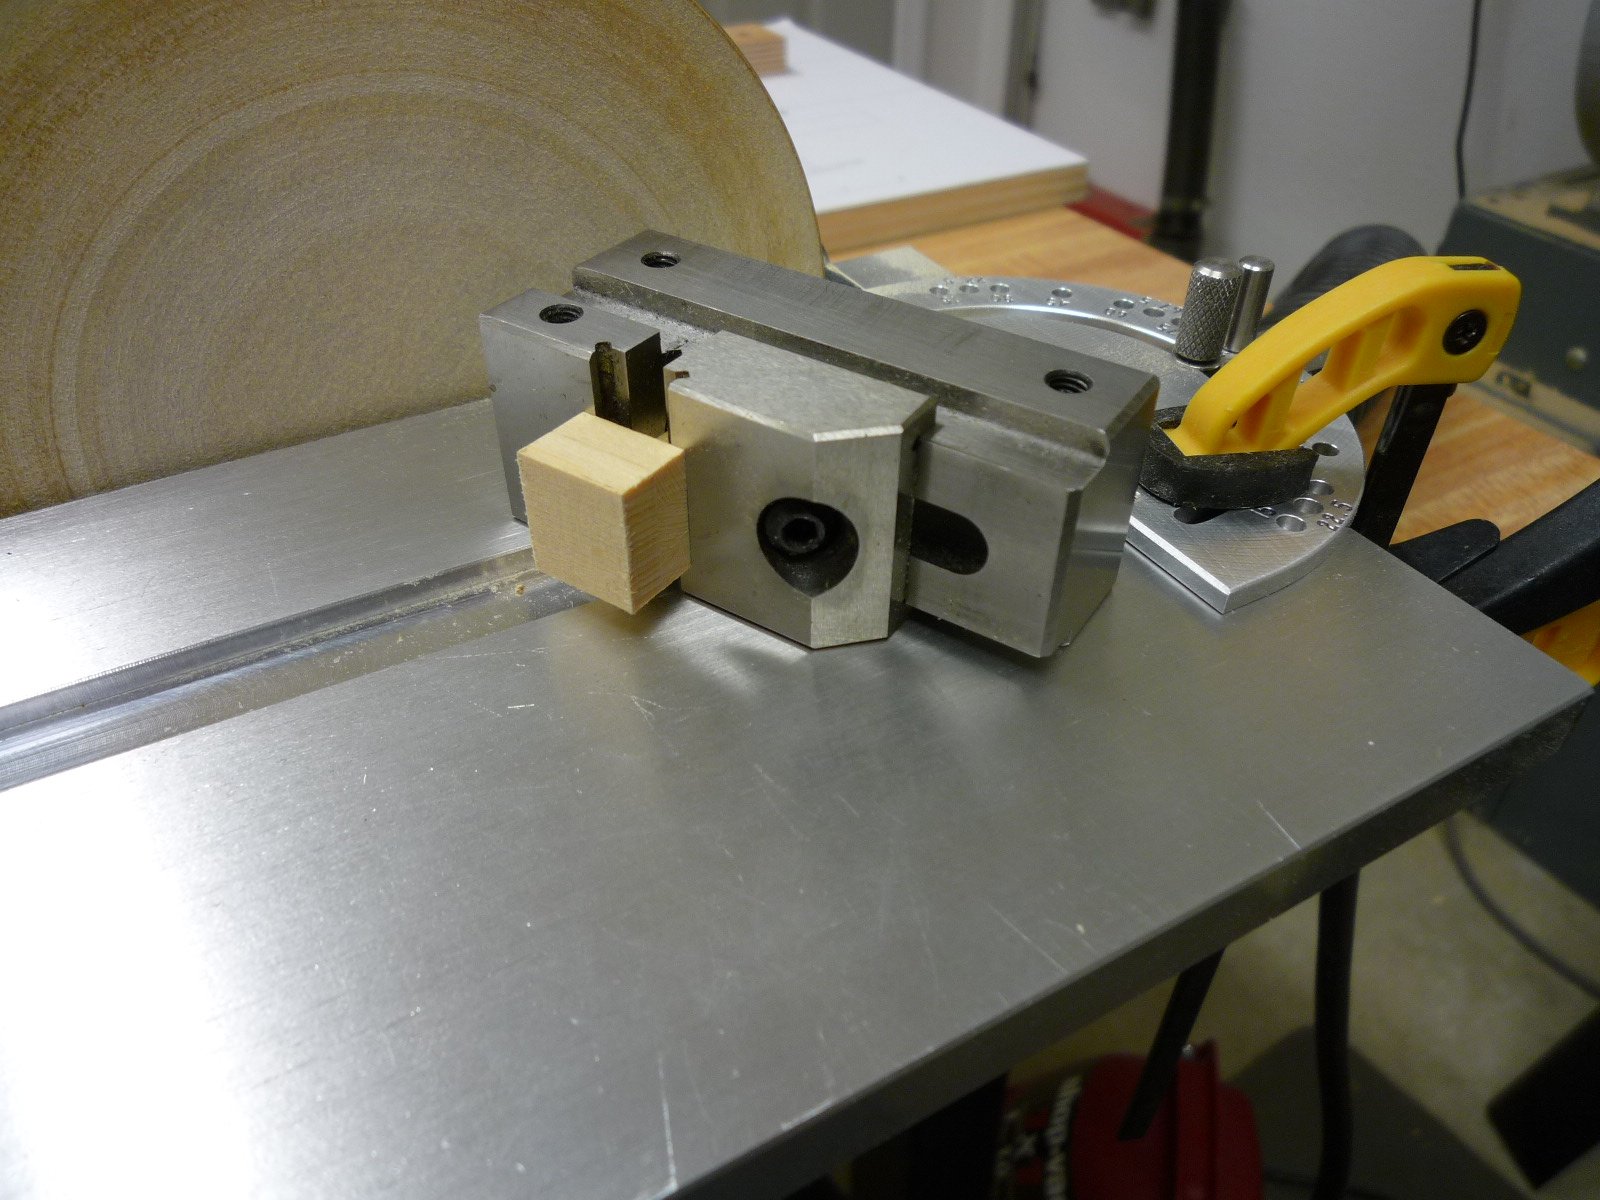
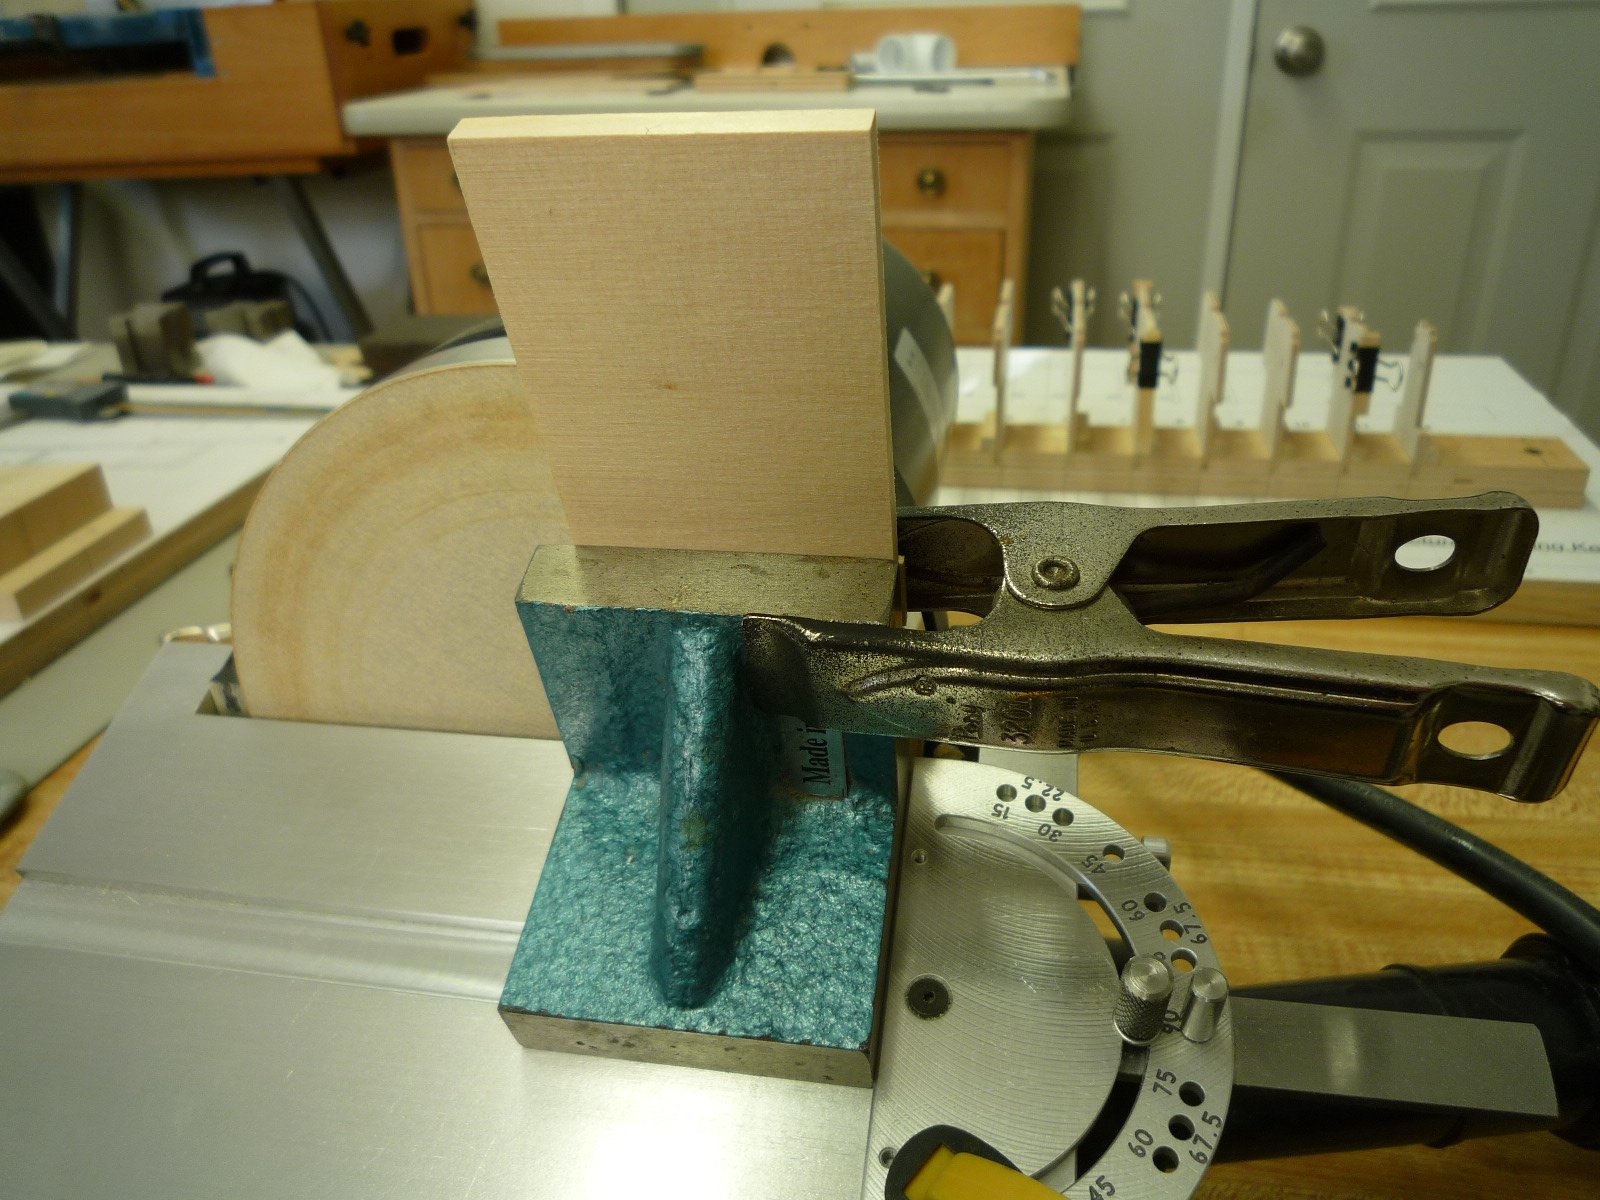
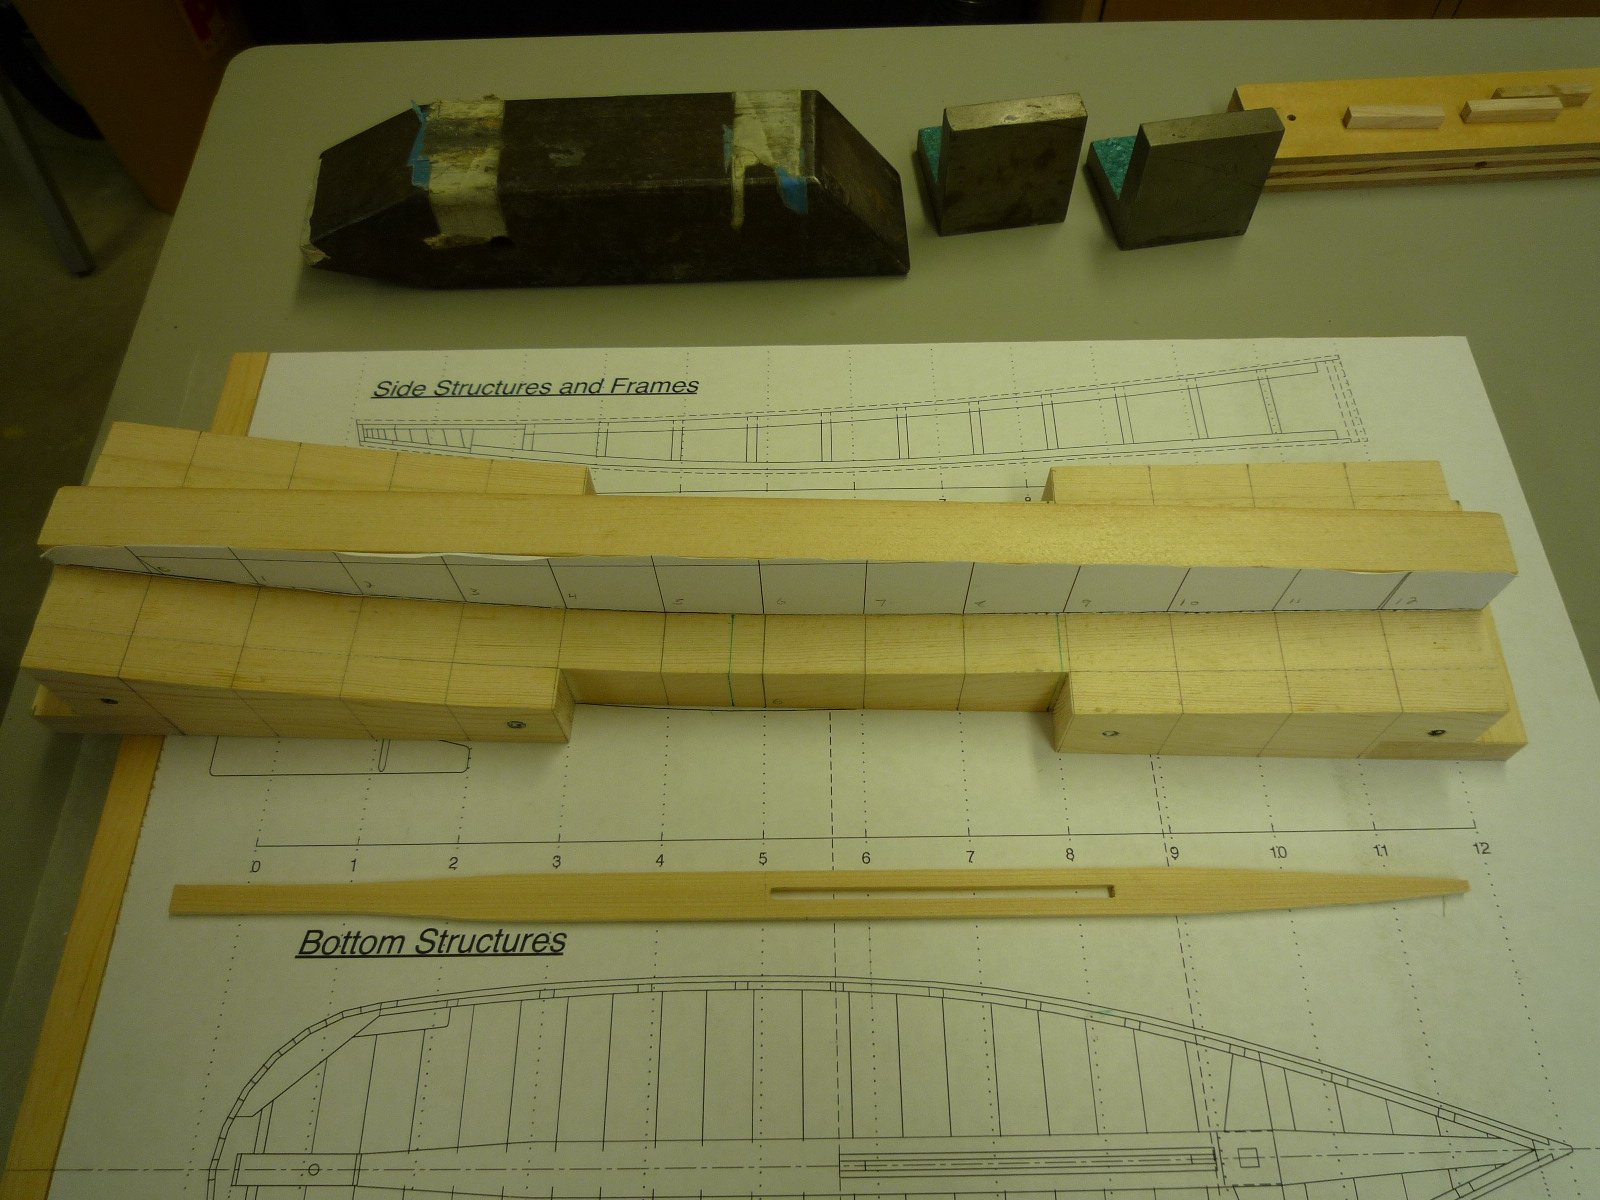
Got started on the bow stem assembly today. The tricky part was milling the inner and outer pieces for the bow stem. The object of an inner and outer stem is that the rabbet for the side planks can be made without having to actually cut a rabbet. It sounds like this was an actual practice for these Sharpies (back in the day). I cut 1 3/4" off of the end of a 3/16" sheet and made sure it was a true rectangle. That piece was clamped to an angle block and ran along the miter gauge of my sander........set to 90 degrees. I was then able to sand a 20 degree bevel on one side. Turned it around and then sanded the other bevel. After sanding a flat on the edge of the beveled piece I went back to the cross cut table and sliced off the inner stem. Made the outer stem in the same manner. Got the Horizontal Support Log and Inner Stem glued up. May wait a bit before gluing the outer stem in place. I don't know if this is too much detail to post or not. My thinking was that it might be useful information it this should ever evolve into a group build? Jim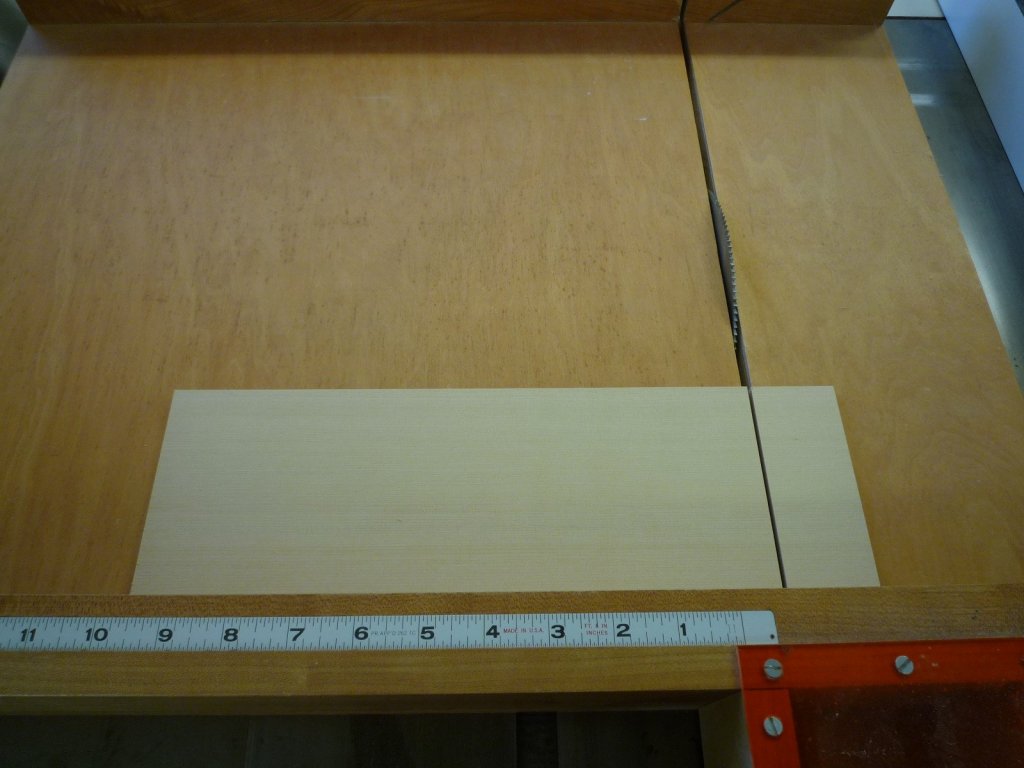


-
Sharpie by Jim T - Scale 1:16 - SMALL
Jim T replied to Jim T's topic in - Build logs for subjects built 1851 - 1900
Thanks Doc and Michael...........and others for the "Likes". Doc........My notches were too deep as well (vertically). Didn't turn out to be a problem. The two important things were to get the keel perfectly fitted into it's notches (with a fair run) and to get the chine notches cut so the chine lined up with the chine line on the bottom view. I had to cut my notches a fair amount (toward the keel) to accomplish this. Then when planking the bottom I just raised the chine up in it's notches so the plank laid flat across the keel and chines. This left a gap under the chine, but wasn't a problem. I hope all that makes sense. Michael.......the bottom planks were just butt jointed and edge glued. I like the idea of lapping them.........wish I'd thought of that. They're 1/16" thick so it'd of been easy enough to do. I'll do a little research and see how it was done in the 1:1 world. Jim -
Chuck, I grabbed this snippet out of your post. If a person applies a coat of wipe on poly to parts..........can those pieces still be glued with Titebond? I like the sounds of being able to wipe on a coat of poly. Jim
-
Sharpie by Jim T - Scale 1:16 - SMALL
Jim T replied to Jim T's topic in - Build logs for subjects built 1851 - 1900
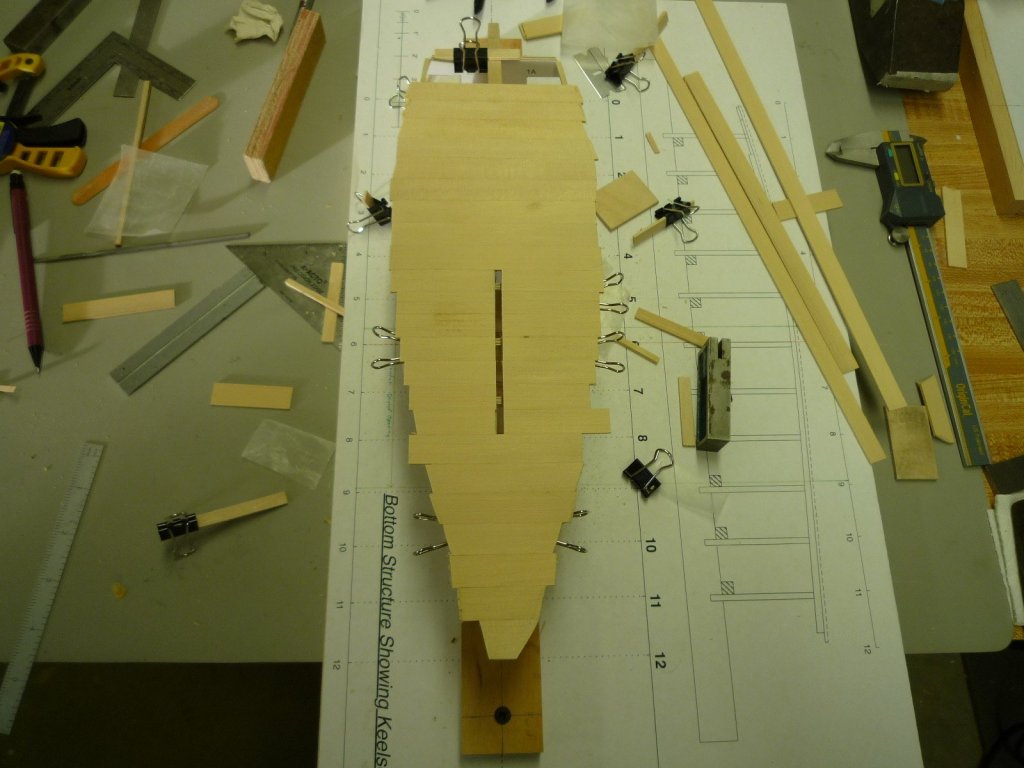
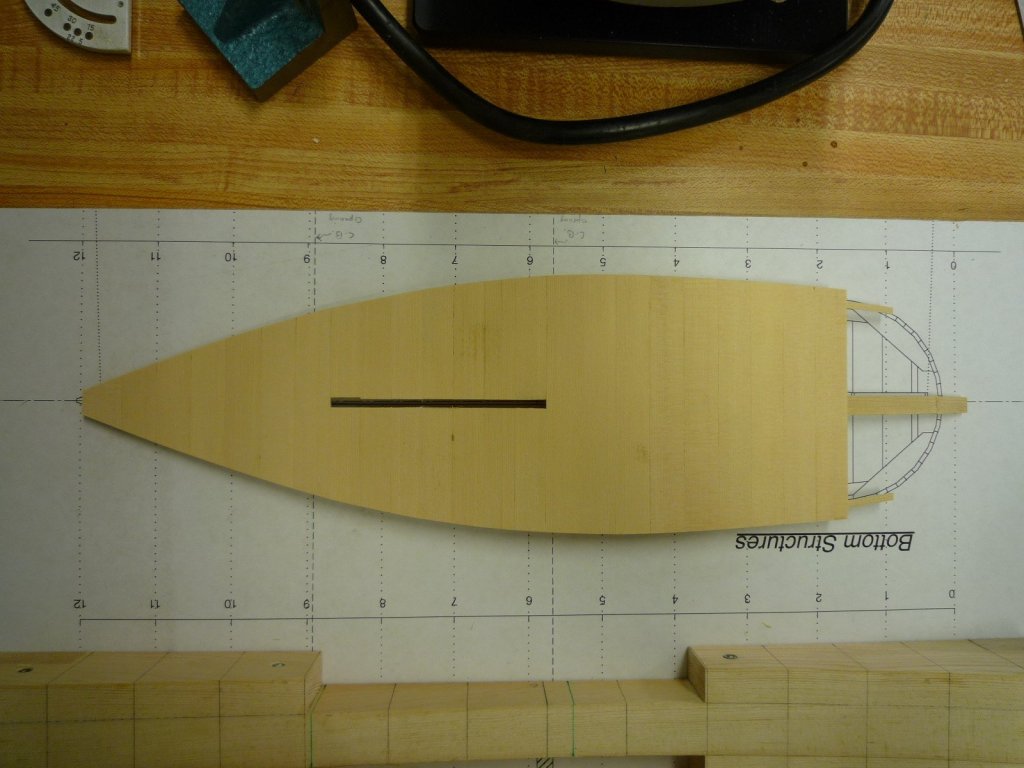
In between bouts of being outside getting fall yard work done, I managed to get the bottom planked (at least as far as it's going for now). Next up is to start working on the bow stem area.
-
This looks like the start of a great build thread. Good work! 👍 Jim
- 263 replies
-
- 2
-
-
- Medway Longboat
- Syren Ship Model Company
- (and 1 more)
-
Tools, tools and more tools....
Jim T replied to CPDDET's topic in Modeling tools and Workshop Equipment
Thanks. I've been waiting for Lee Valley to get these back in stock. Jim -
Tools, tools and more tools....
Jim T replied to CPDDET's topic in Modeling tools and Workshop Equipment
Nice! Is that a Veritas Mini Block Plane? Jim -
I would definitely like to see more about your railway. Looks like you know your way around landscaping and gardening as well. Jim
-
Sharpie by Jim T - Scale 1:16 - SMALL
Jim T replied to Jim T's topic in - Build logs for subjects built 1851 - 1900
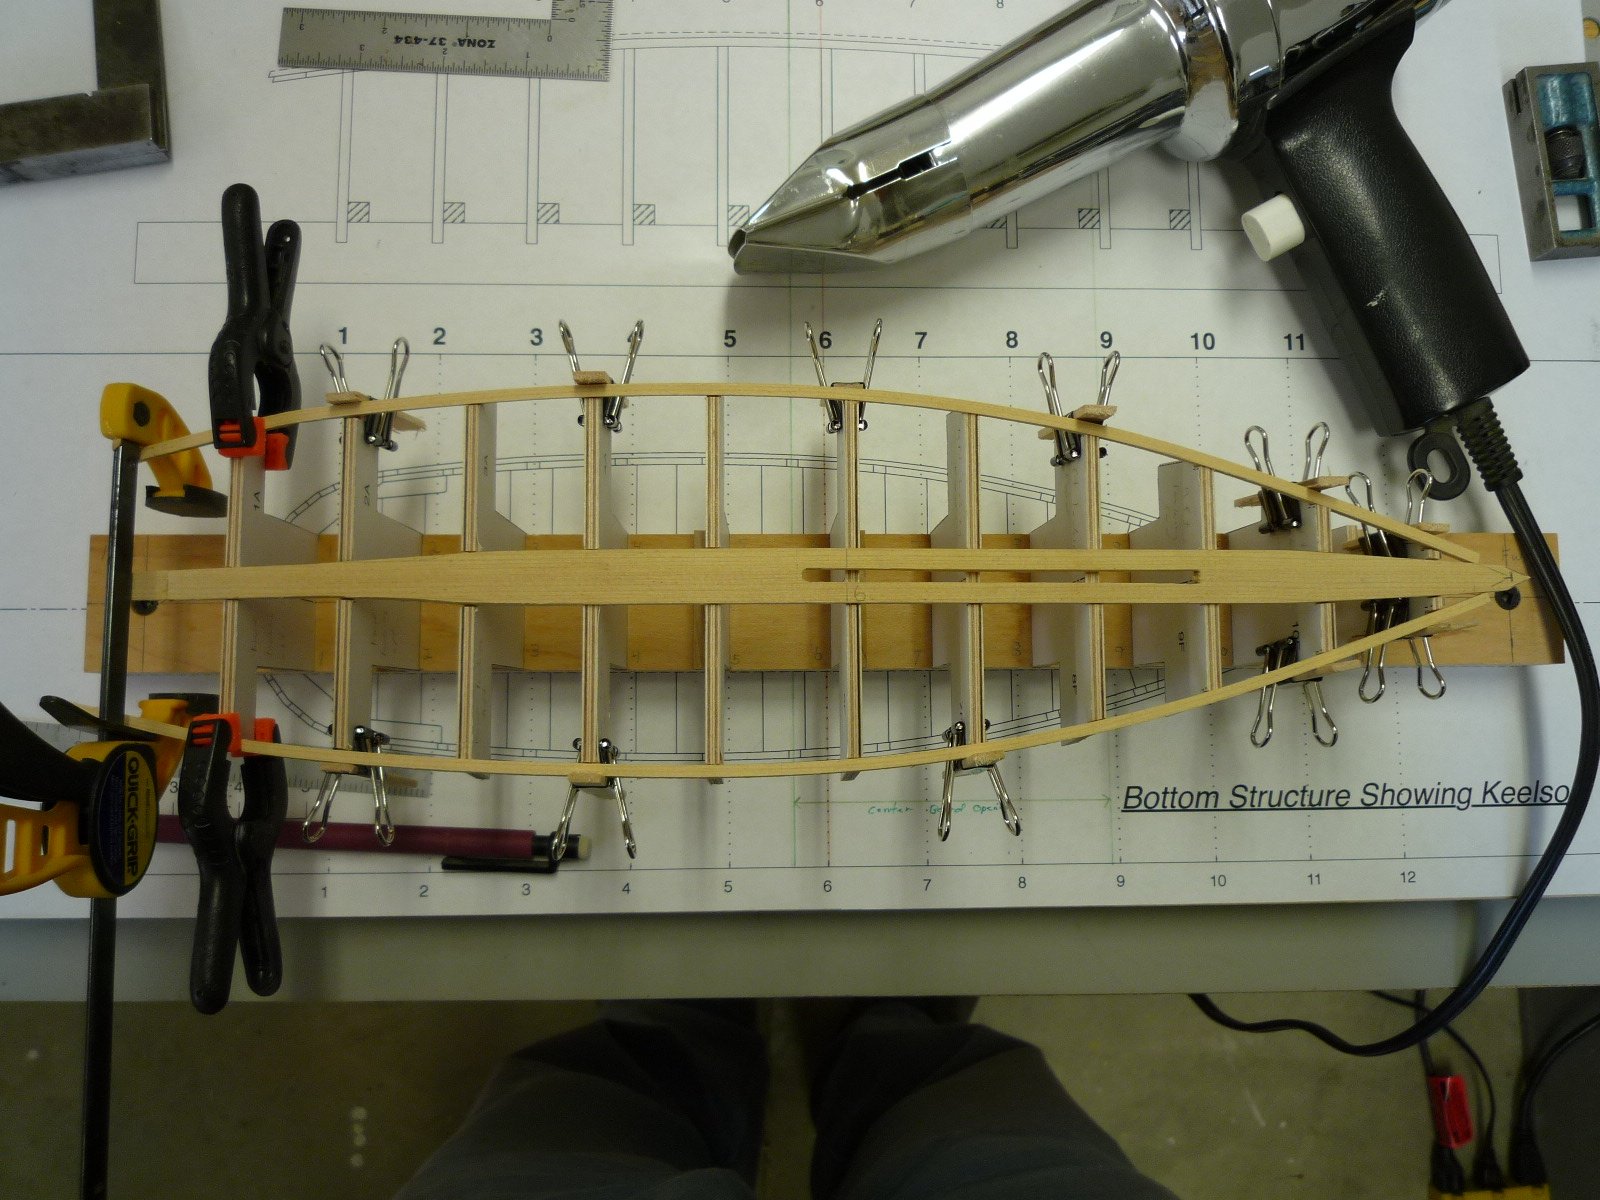
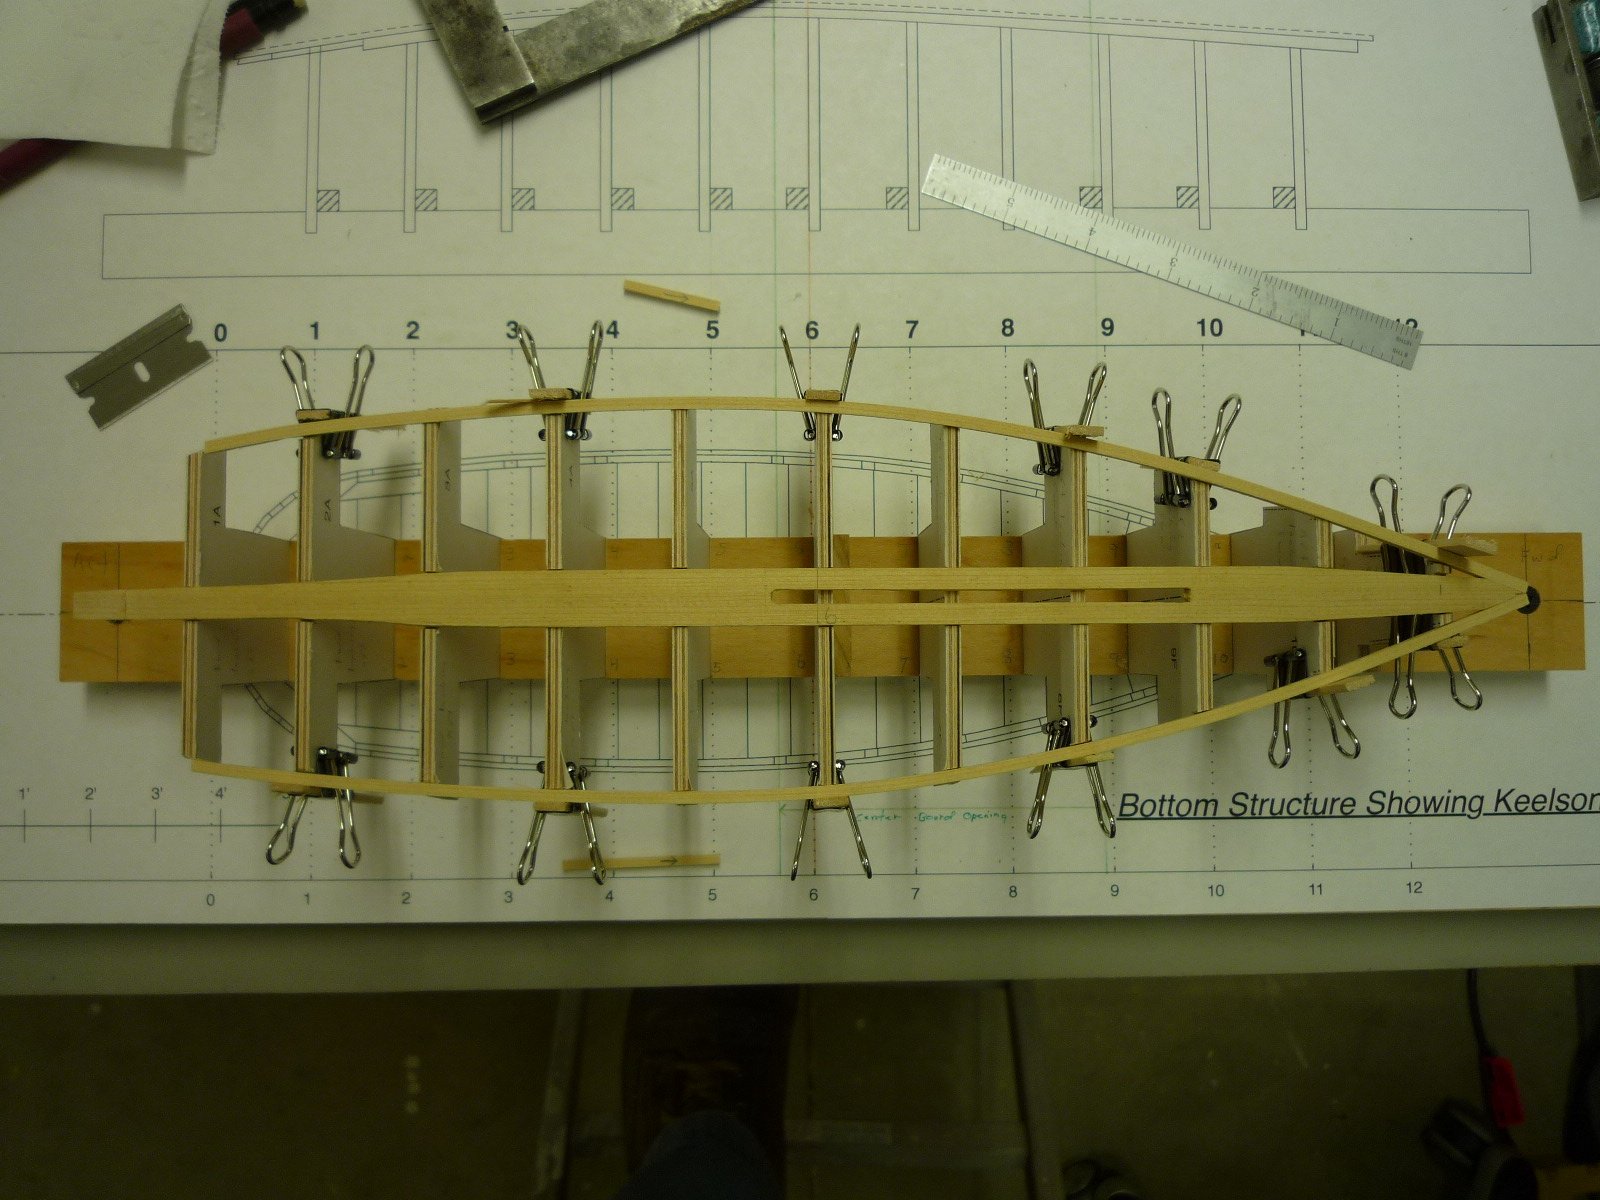
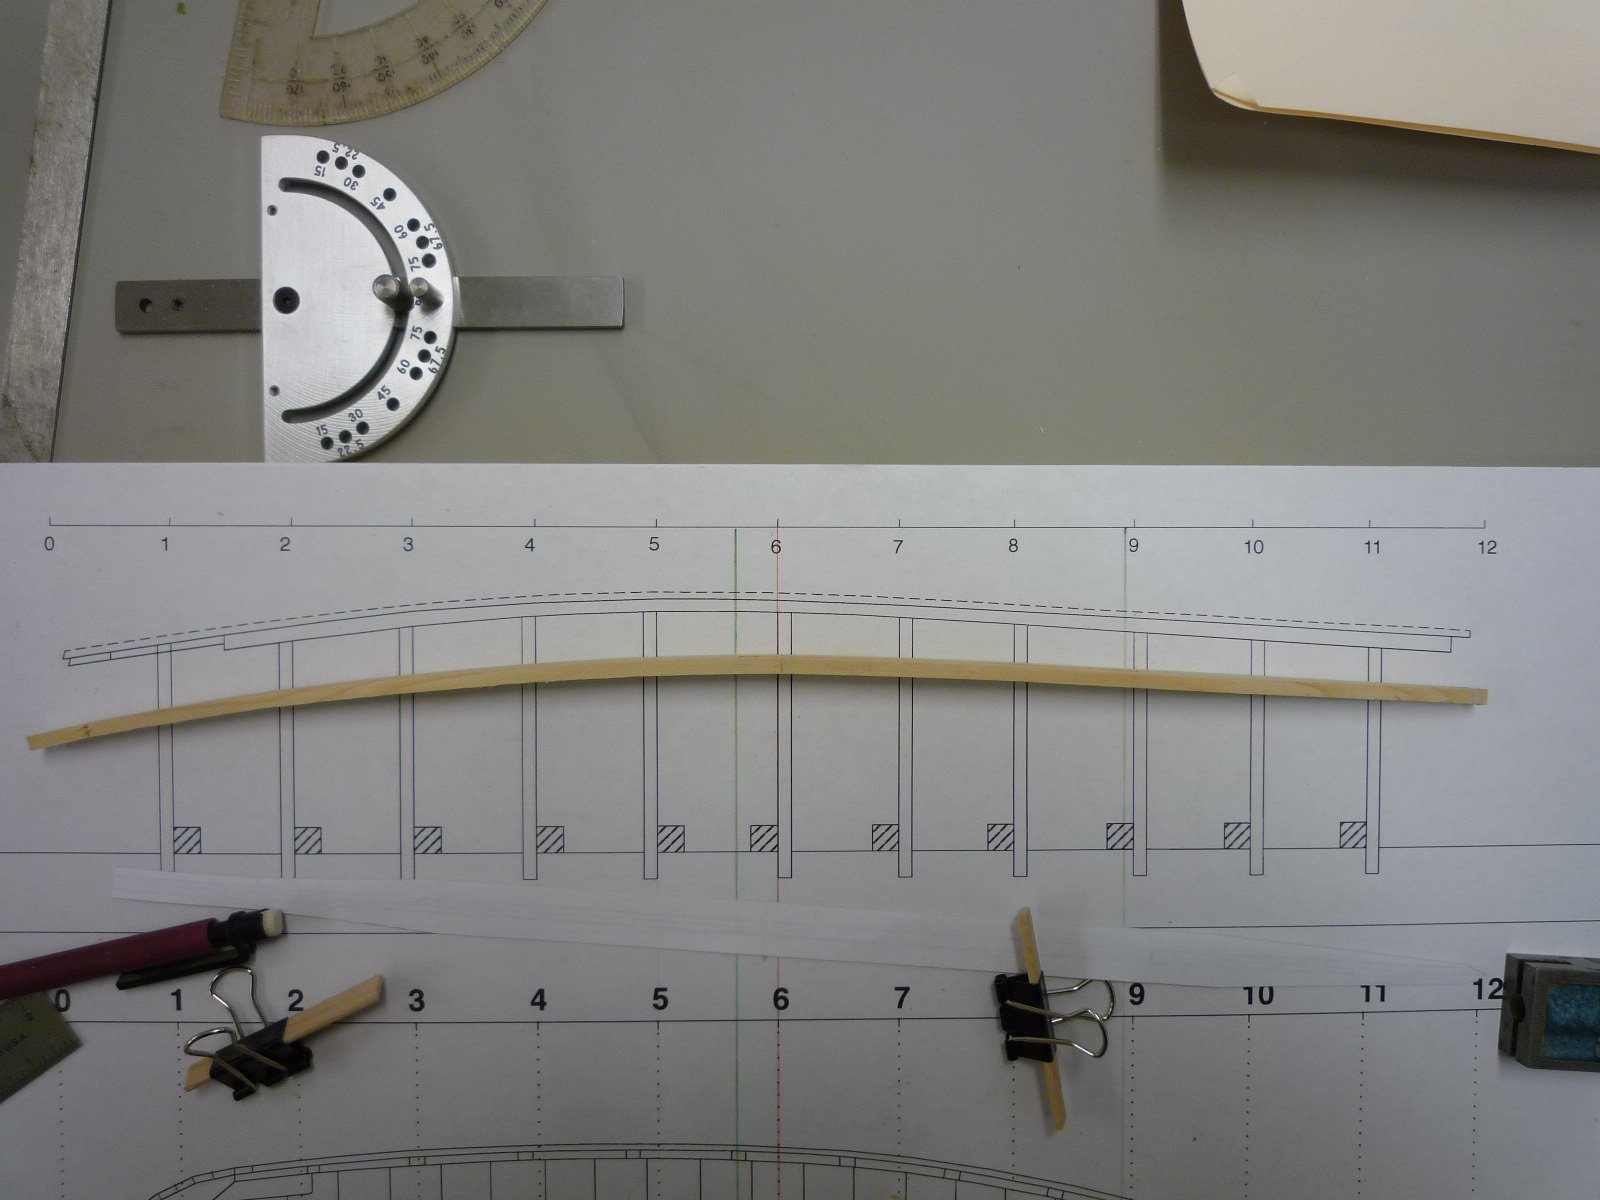
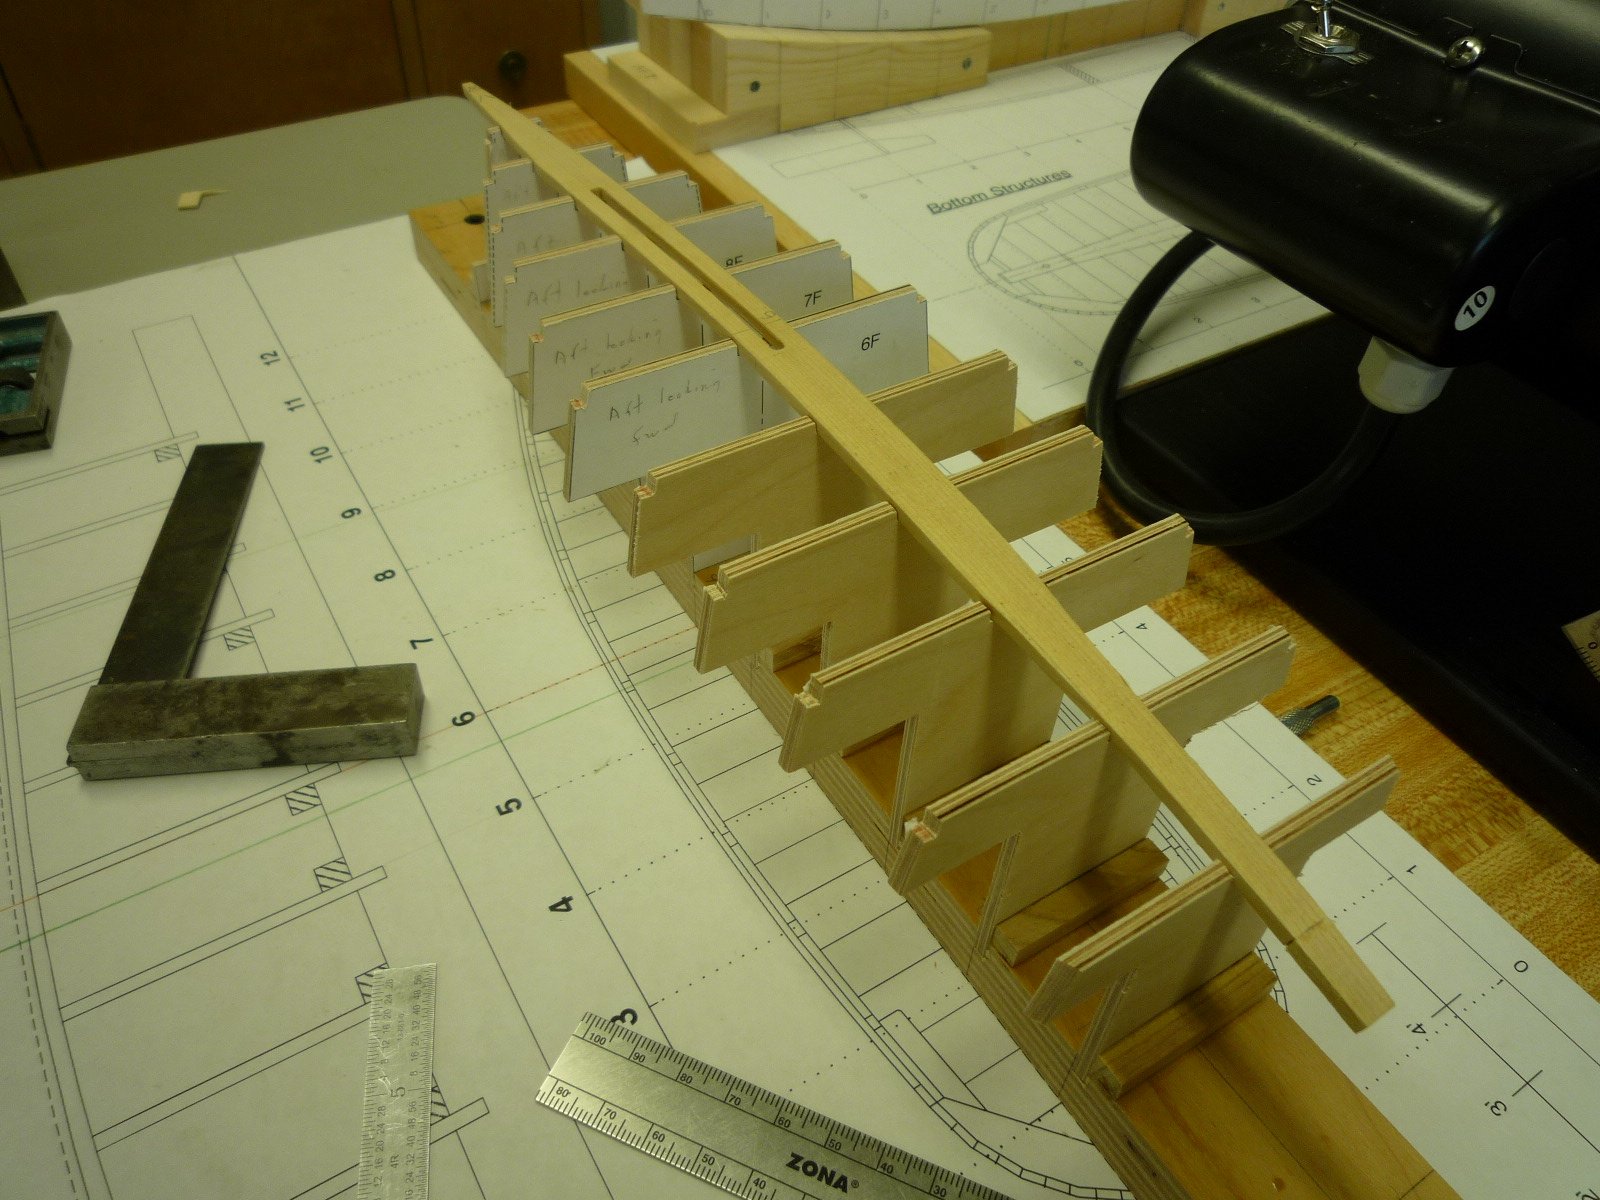
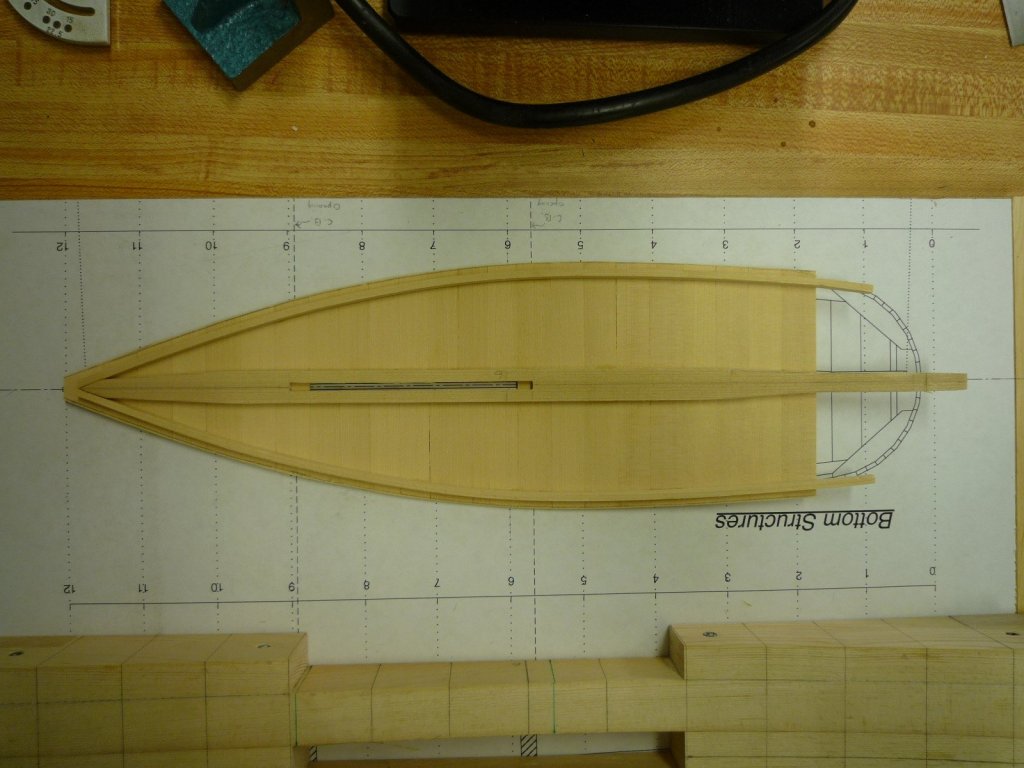
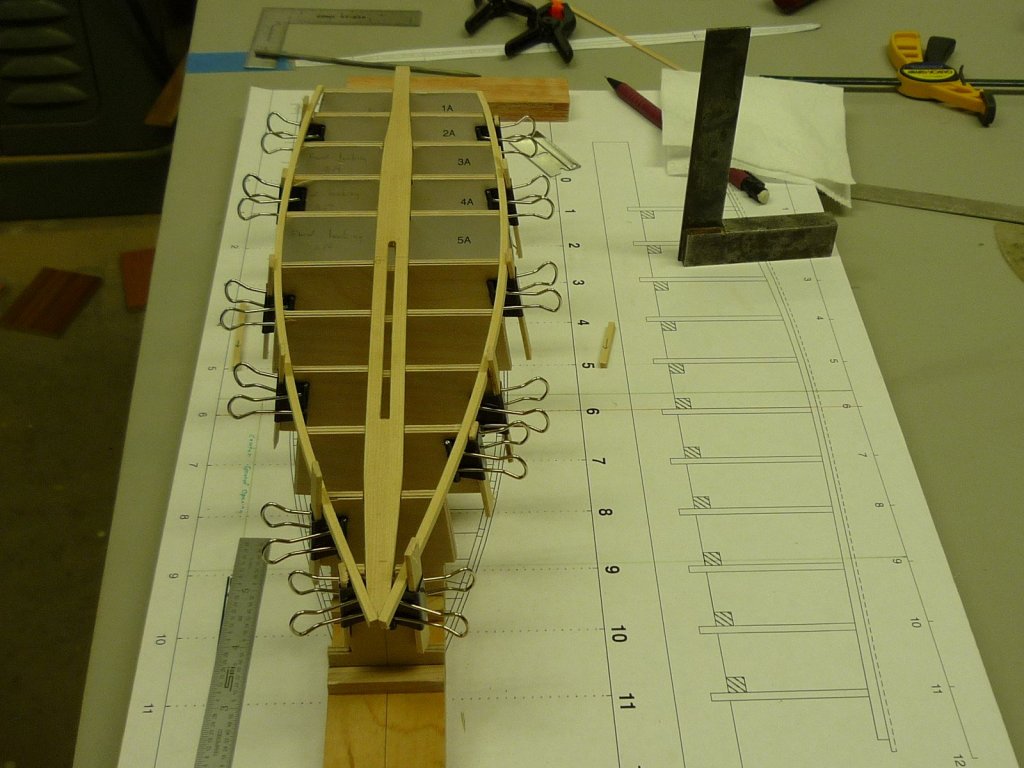
I gave my newly cut Chine lumber a good soak and then bent it into place on Building Jig #1. While it was still wet I hit it with the heat gun that I've used, in the past, for shrinking monocote on my RC airplane builds. I wanted to see if that would help then chines assume the proper bend. It worked great! Plus it dried the chines so I could continue work on them. That done, after getting back from the pool, I spent the afternoon fitting the chines to the keelson at the bow. Then moved on to adjusting the notches in the station bulkheads to get the proper fit to the bottom structure drawing. I thinking I'm getting closer to being able to glue something to something. 🙂 Jim

-
Sharpie by Jim T - Scale 1:16 - SMALL
Jim T replied to Jim T's topic in - Build logs for subjects built 1851 - 1900
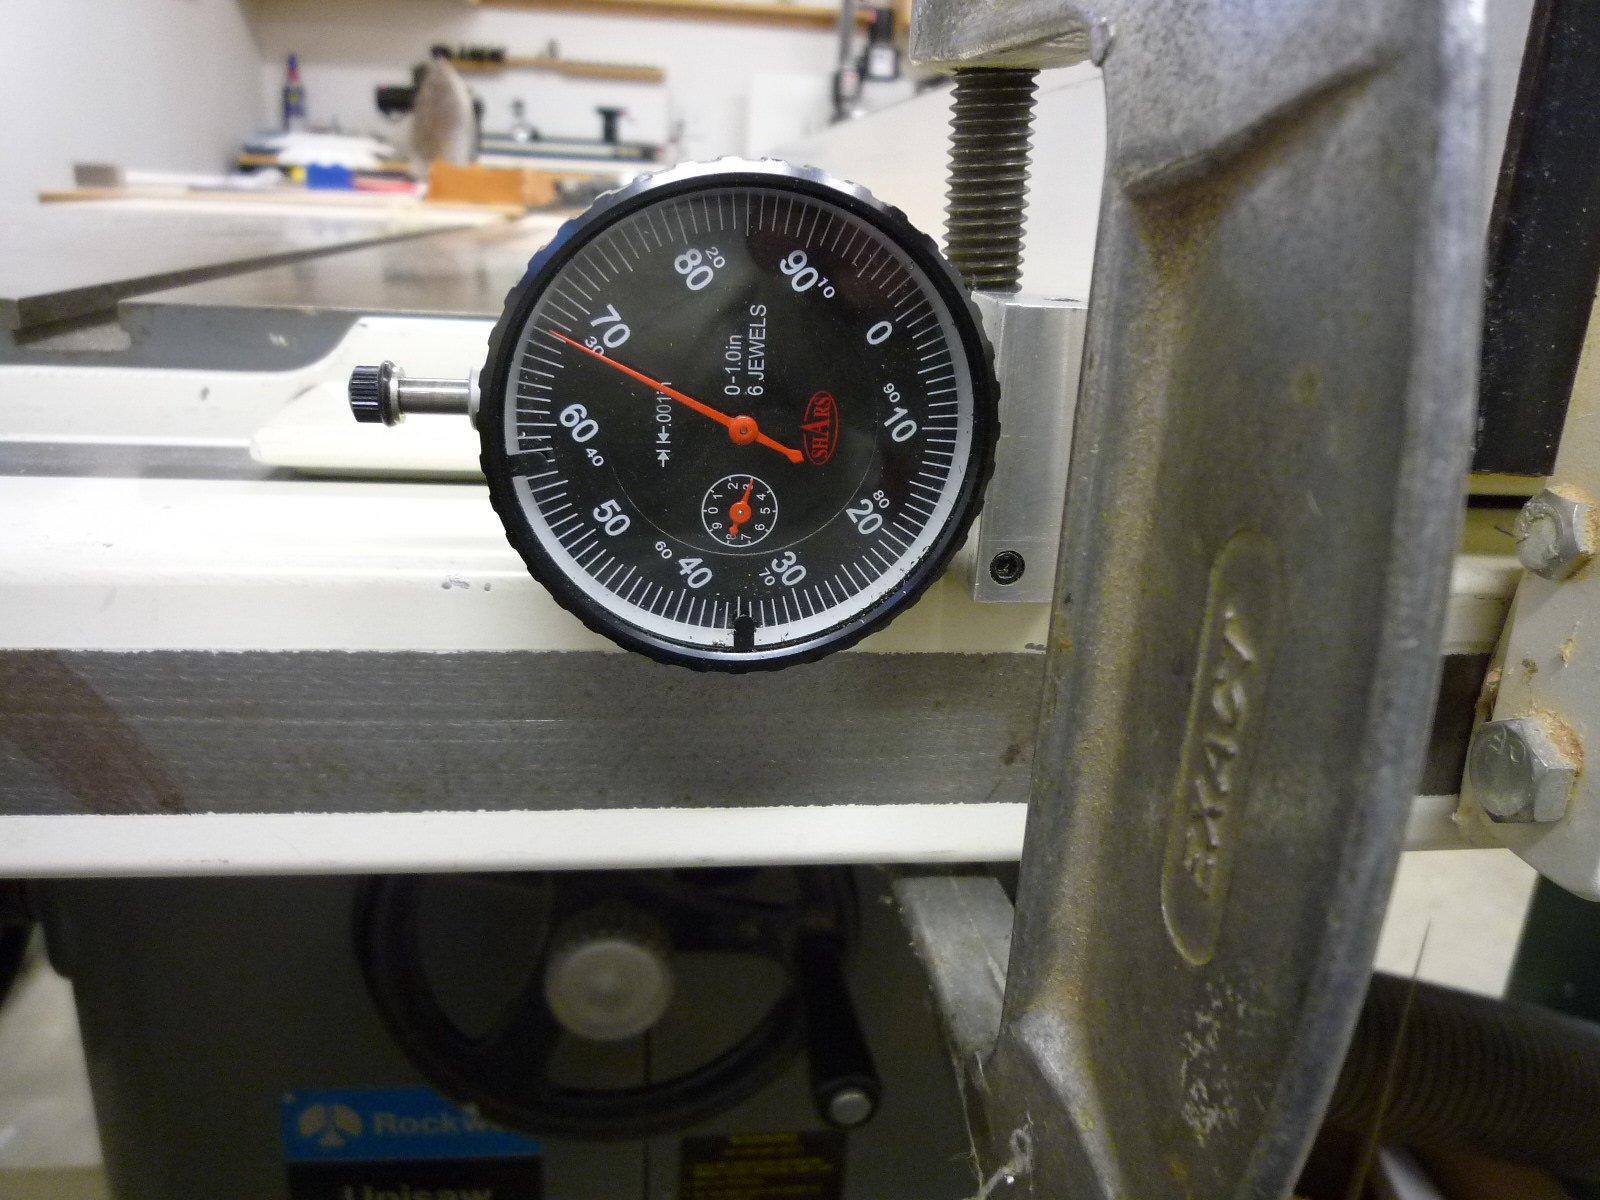
Thanks for the info Michael. I read the whole thread you linked to. Lot's of great info. Our Unisaw's might be twins. I think that's about when I got mine. Came with a 1 1/2 hp 230 volt motor that's still in use. I added a Biesemeyer to it about 30 years ago. Anyway, after reading your linked thread, I was at Home Depot today, so I bought a 7 1/4" 140 tooth plywood blade (nothing special....$8.97) to try out. I needed two chines for my Sharpie build and one option was to mill them out. They needed to be 1/8" by 3/32 wide and cut at a 9 degree angle. I measured the kerf of my new blade to be .073" and 3/32" material width is .094. So here's what I did: I set the blade to a 9 degree angle and ripped the edge of my 1/8" plank. Then I clamped my dial indicator that I use for setting up the 4 jaw chuck on my Sherline lathe to the rail for my saw fence and zeroed the dial. Ok......... then I moved the fence over .167 ( .073 for the saw kerf and .094 for the 3/32" width.............0.167"). And cut my chine. Then repeated the process. It worked out great! The two chine pieces came out within .002" of each other. I know I'm preaching to the choir here, but just wanted to brag a little and thank you for giving me a little input to think outside of the box. Next up is to fabricate a better setup for the dial indicator. Jim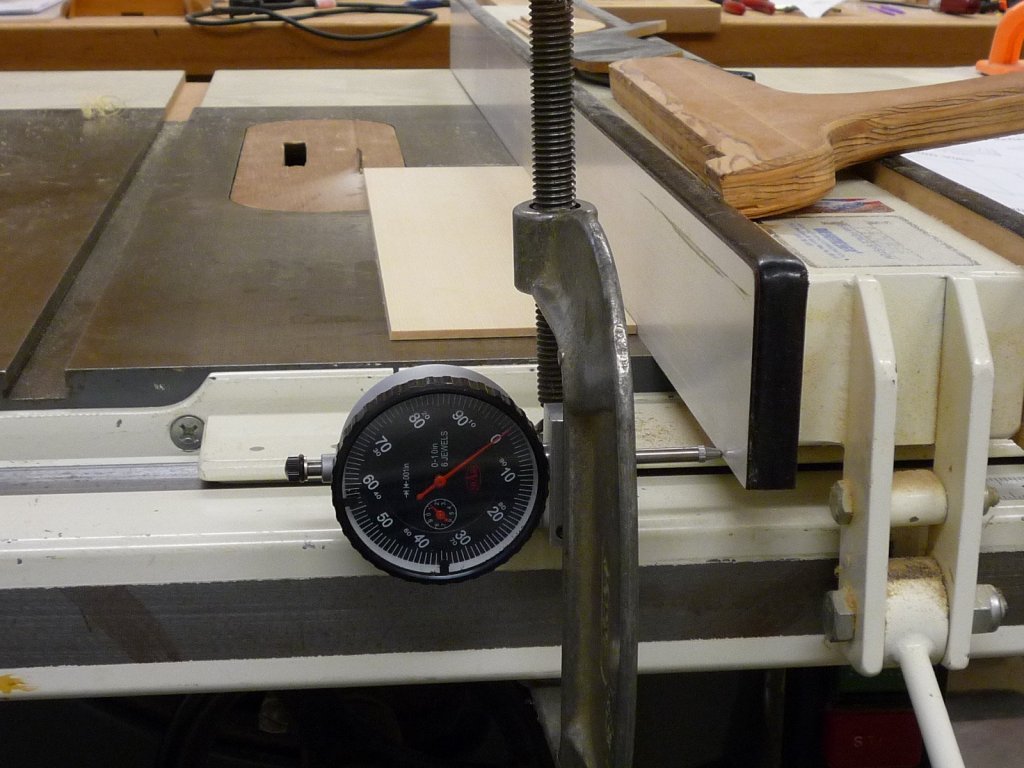


-
Sharpie by Jim T - Scale 1:16 - SMALL
Jim T replied to Jim T's topic in - Build logs for subjects built 1851 - 1900
Thanks Michael. Correct............... I ordered enough strip wood for this project, plus some sheet stock. I have a 10" Delta Unisaw, but wasn't sure how well it would work on smaller strips and a Byrnes table saw (definitely on the radar after seeing the quality of my disc sander) would be about 4 weeks out after ordered. It's been enjoyable to think in terms of doing this build like a full size build.............only doing it scaled down. I still haven't been able to figure out how to scale myself down like you did though....................gotta work on that! 🤔 Jim -
Sharpie by Jim T - Scale 1:16 - SMALL
Jim T replied to Jim T's topic in - Build logs for subjects built 1851 - 1900
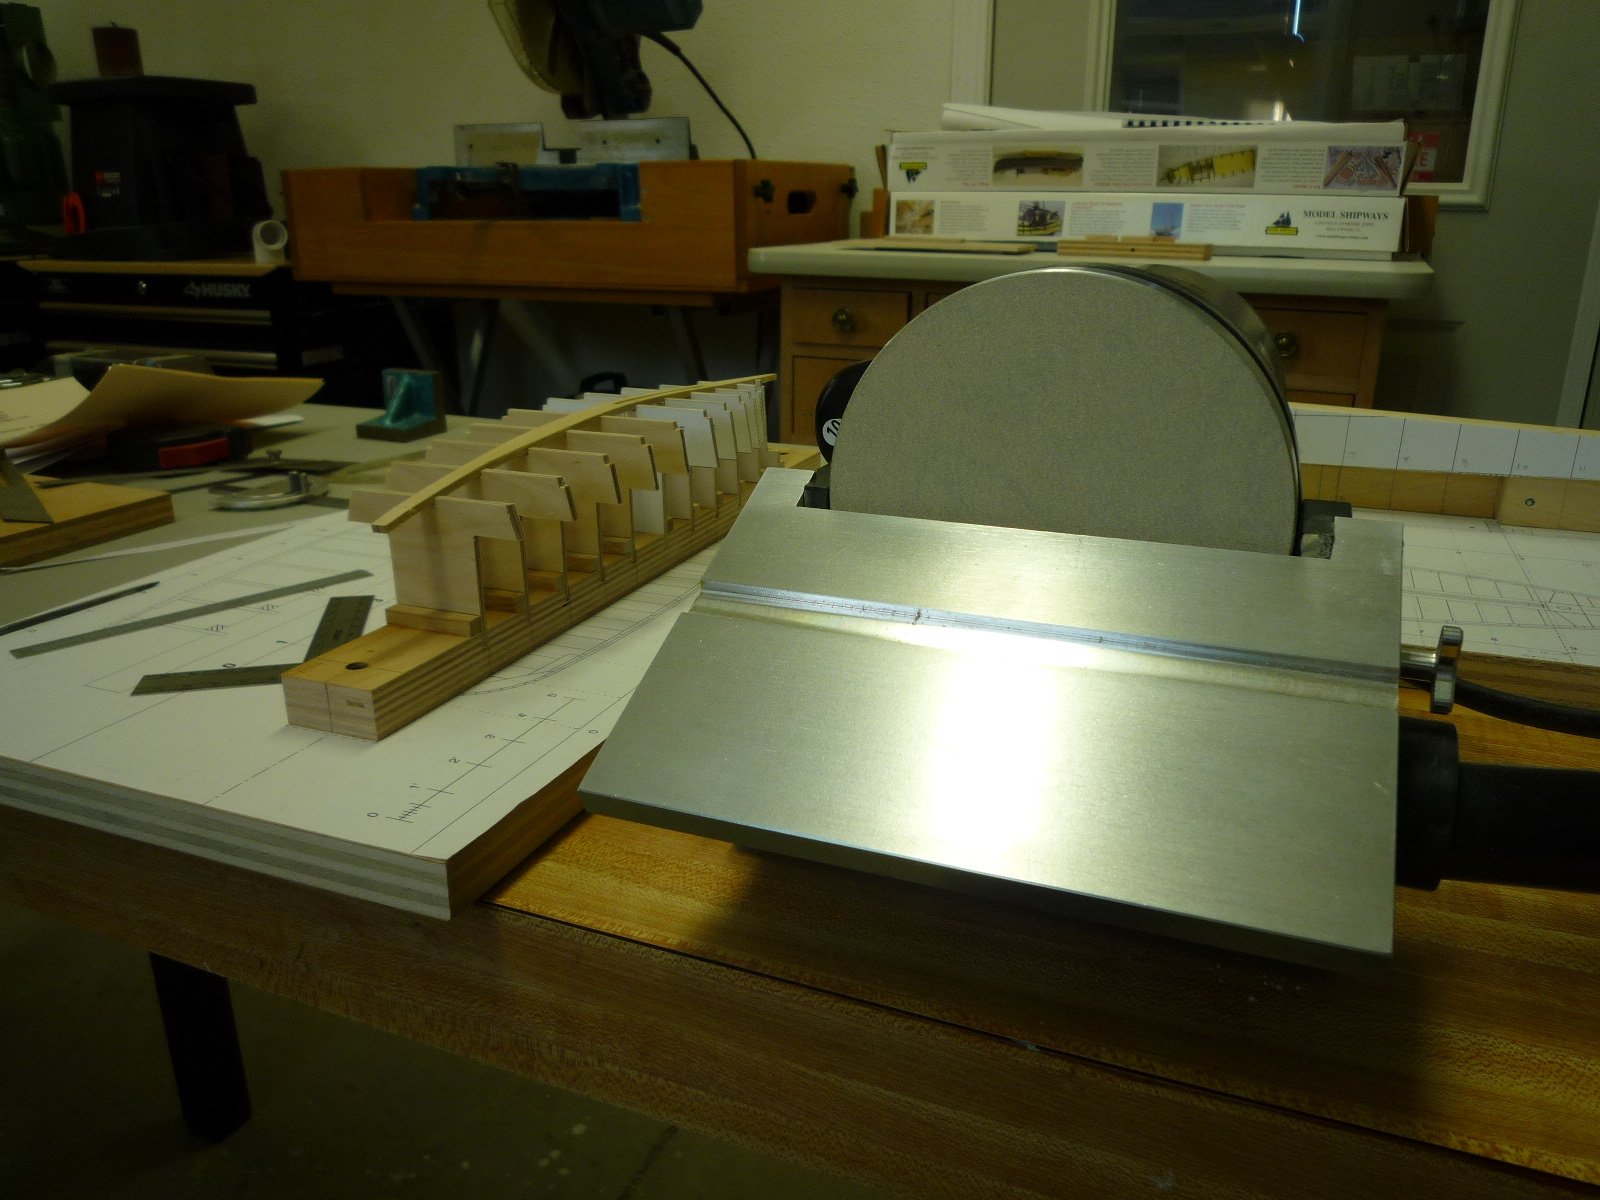
Well after my overnight soak of the Keelson I put it in the keelson press overnight. Next day it had only bent about half of what I needed. So next I put the end with the bend in it in boiling water for a few minutes and then wrapped a wet paper towel around it and steamed it with an old iron. Then into the press overnight. Success! I received my new Byrnes disc sander yesterday so spent part of the day bonding with it. What a nice tool! I've found some discrepancies in the plans between the station templates and the bottom view that the building jigs are set up on. Anyway, I took the bottom views to be accurate so spent part of the day resizing the station templates and gluing them in place. All seems good and will start fitting the chines tomorrow.


-
That's a great tutorial Michael.........thanks. Makes a nice looking screw. I have a Sherline lathe with a collet chuck that would work great for this kind of operation. I think that's what I like about this 1/8 scale..........making parts like this is feasible. Jim
-
Nice work Michael. Would it be possible for you to elaborate on how you converted #1 RH screws to Oval Head? Jim
-
Sharpie by Jim T - Scale 1:16 - SMALL
Jim T replied to Jim T's topic in - Build logs for subjects built 1851 - 1900
Thanks Duff and Steve. I've really been enjoying this project. I like this 1:16 scale. Makes me wonder what 1:8 scale would be like. I've been reading through Michael Motts "Bristol Pilot Cutter" 1:8 thread. Jim -
Sharpie by Jim T - Scale 1:16 - SMALL
Jim T replied to Jim T's topic in - Build logs for subjects built 1851 - 1900
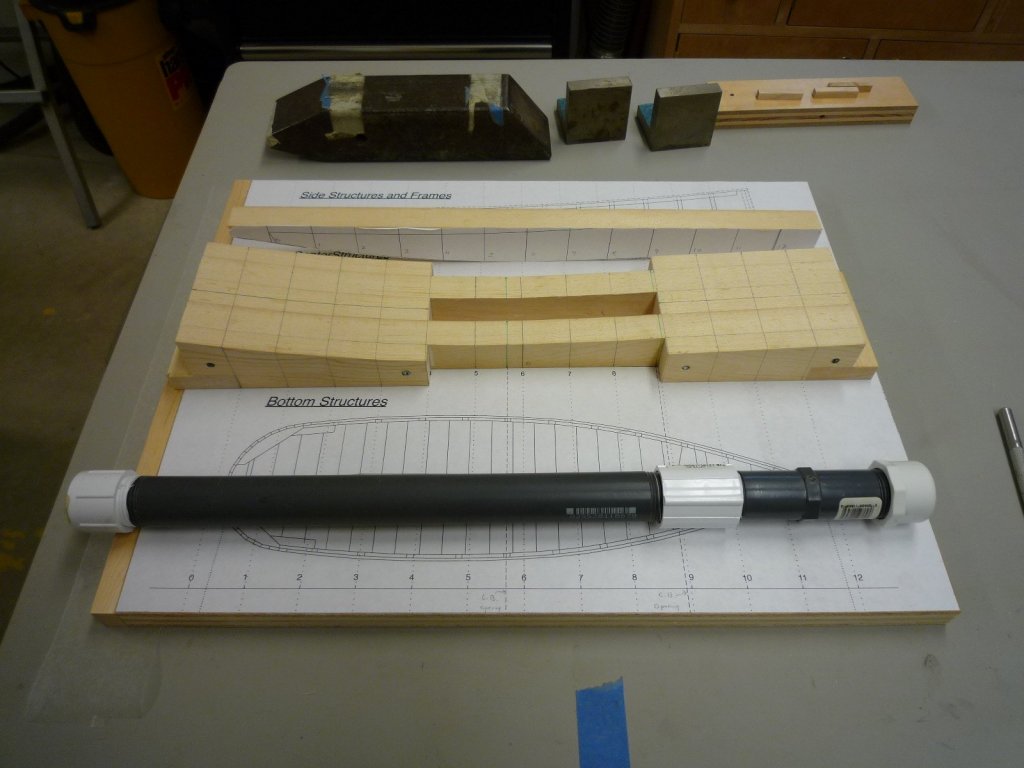
Finished up the Keelson and it's now sleeping overnight in it's little water filled time capsule.
-
Sharpie by Jim T - Scale 1:16 - SMALL
Jim T replied to Jim T's topic in - Build logs for subjects built 1851 - 1900
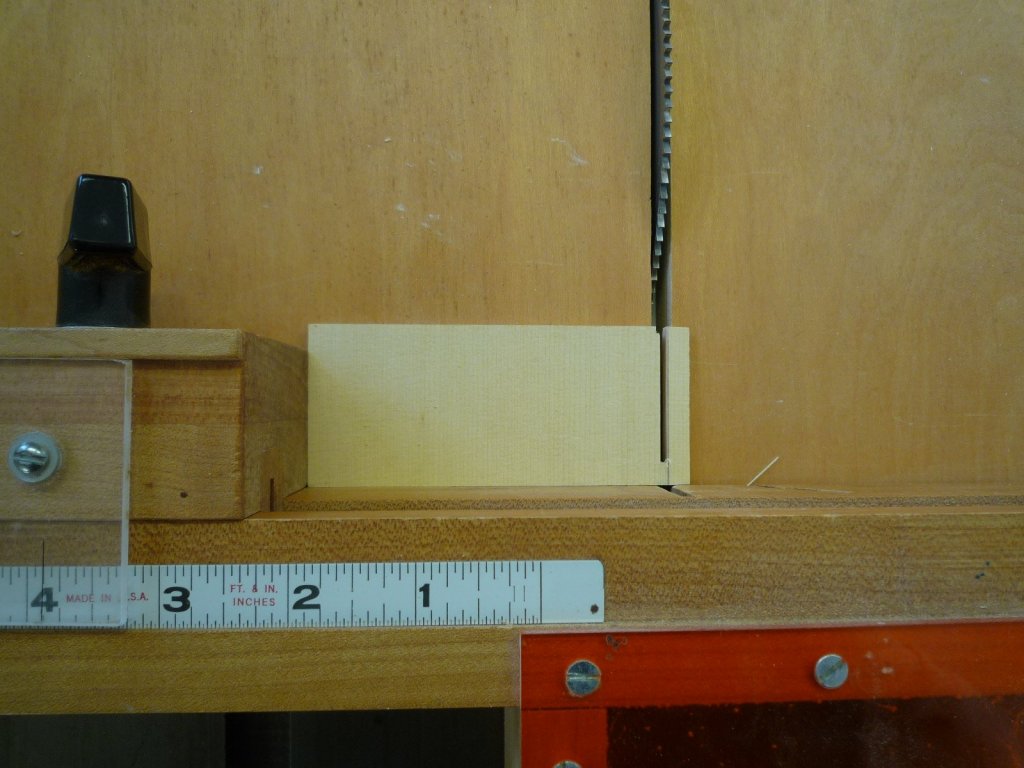
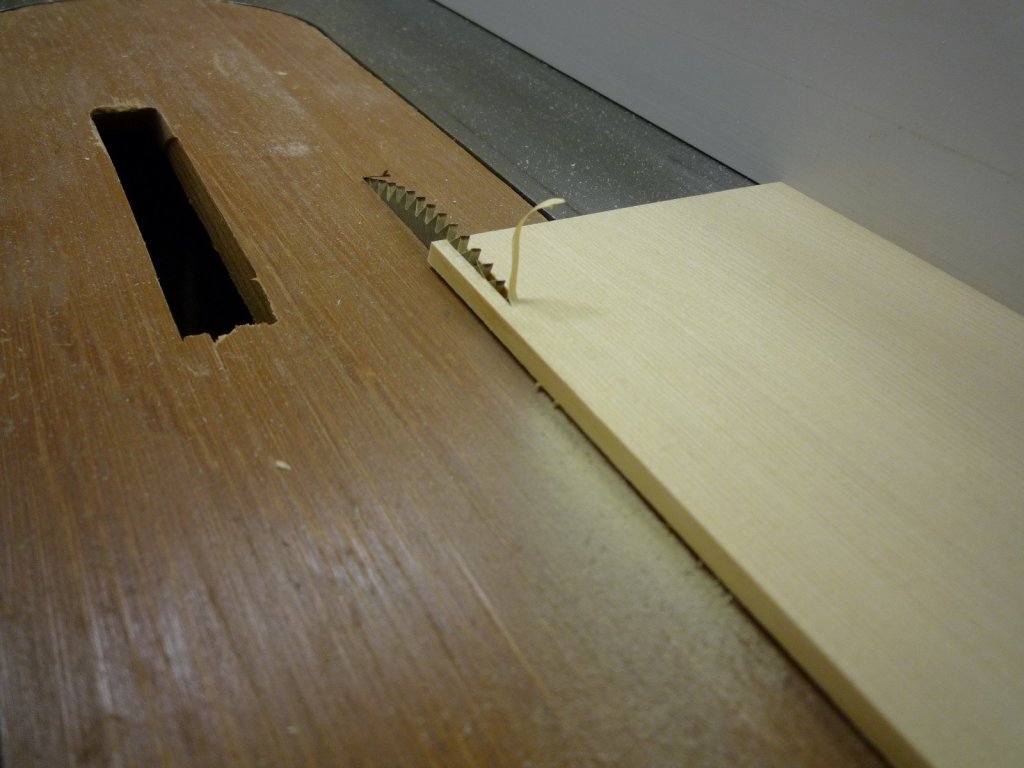
Cut my keelson stock today and milled the centerboard slot. The monograph does this keelson by laminating 4 pieces together. Decided I'd try and do it with a single piece. So far so good. It's nice to be working on an actual boat part...............however................ I'm really enjoying getting these building jigs set up.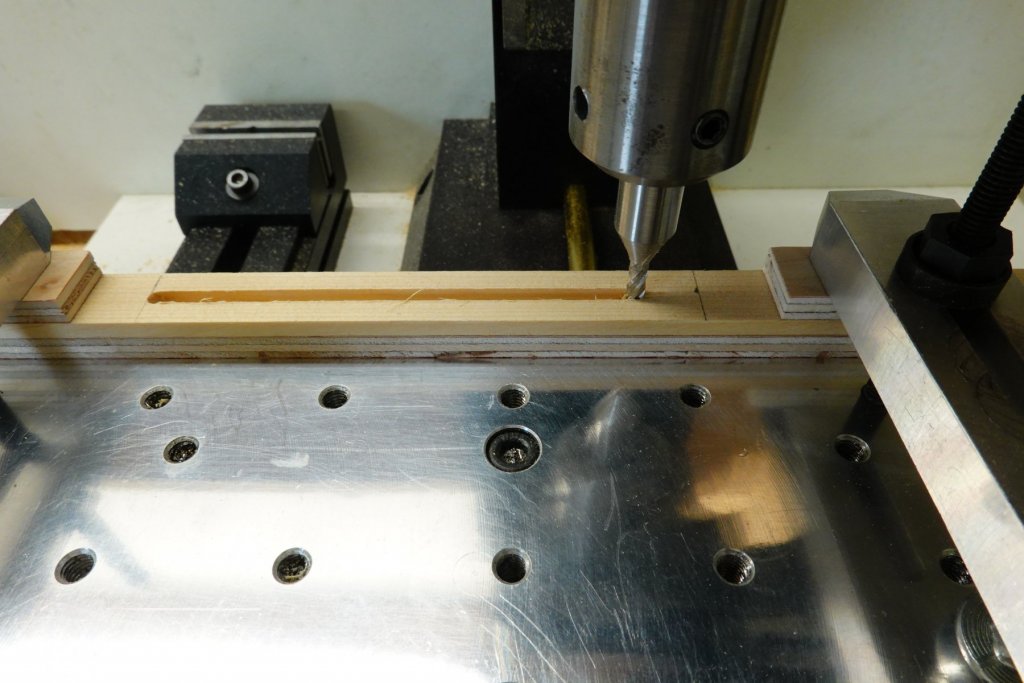
-
Sharpie by Jim T - Scale 1:16 - SMALL
Jim T replied to Jim T's topic in - Build logs for subjects built 1851 - 1900
The truck from the Syren Ship Model Co. showed up at my house today with my lumber order. Alaska yellow cedar. I'm really impressed. Beautiful wood, nicely packed, along with a few bonus pieces. Chuck said that the lumber is as it comes off of his Byrnes table saw. I can see one of these saws in my future! Guess I'm going to have to take time now to build a scale model shipyard lumber storage building. 😉 Back in my commercial fishing days I remember one time, when I had my boat hauled out at the Bumble Bee Shipyard in Astoria, Oregon, I discovered the building where they stored their boat building lumber............impressive.! I also remember that they had a machine shop that was still run off of overhead belts.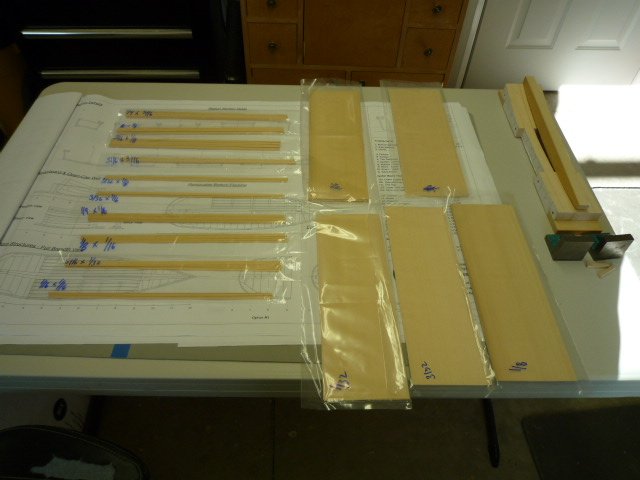
-
Tools, tools and more tools....
Jim T replied to CPDDET's topic in Modeling tools and Workshop Equipment
I'm sure he was. That's certainly how I took it. In fact I'm anxiously waiting until later this month when Lee Valley get's the Veritas Mini Block Plane back in stock. Jim -
Sharpie by Jim T - Scale 1:16 - SMALL
Jim T replied to Jim T's topic in - Build logs for subjects built 1851 - 1900
Got Building Jig #2 completed. Once my lumber order arrives from Syren, I'll be ready to fabricate the keelson.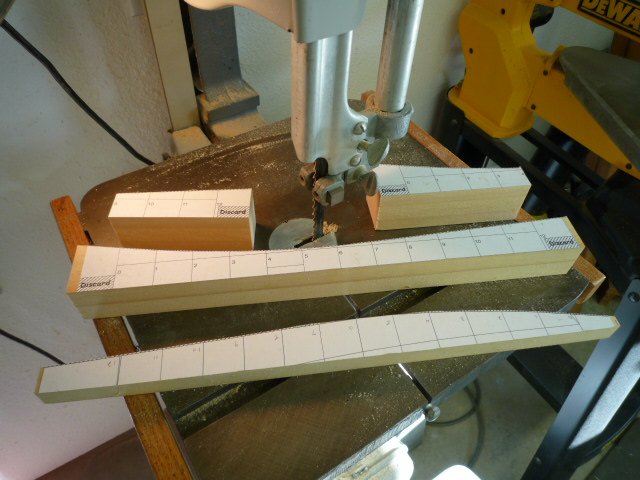
-
Nice work. I'm curious about the piece that the bands were silver soldered to. Was that piece machined as a single piece? You may have covered that earlier. I'm starting through your build thread, but am only up to about page 4. Jim